Embed Size (px)
Citation preview
Tutorial
Picmonkey

Hi! Here is my tutorial lesson
on how to use
First,
What is ? ?
… is essentially an online tool that allows you to do
basic photo editing
… it is used to create Logos, Edit Images
& Social Media Graphics

...this online app is free to use but you have to pay for the premium version to maximize its functions.

Let’s Get Started
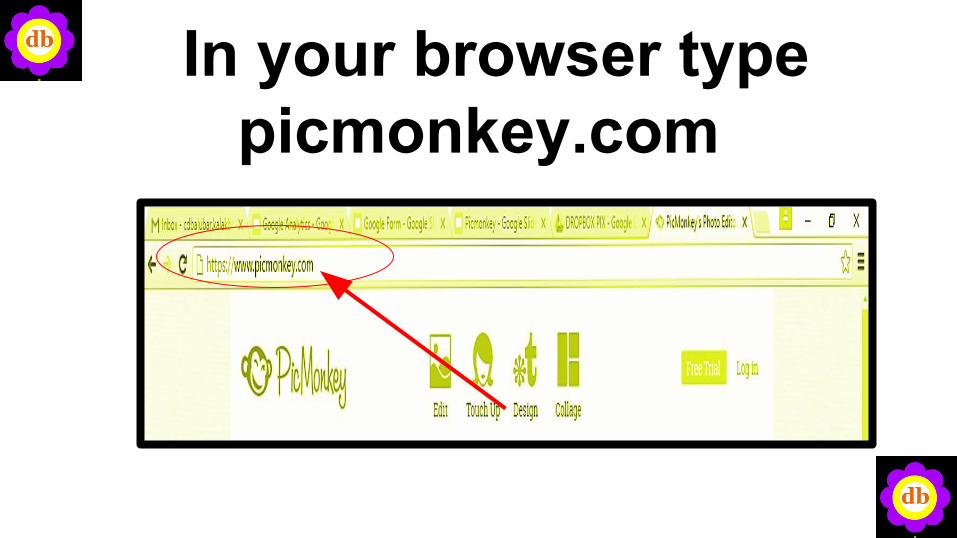
In your browser type picmonkey.com
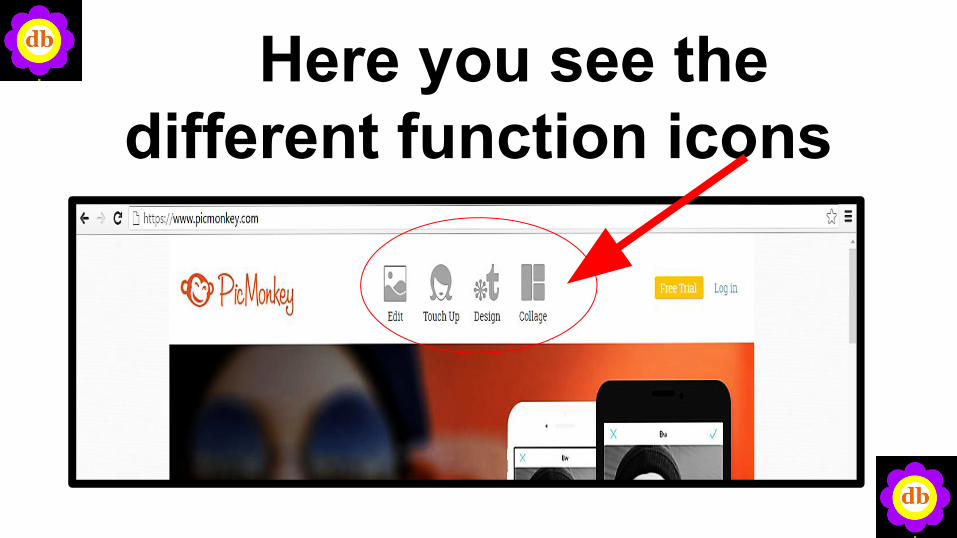
Here you see the different function icons
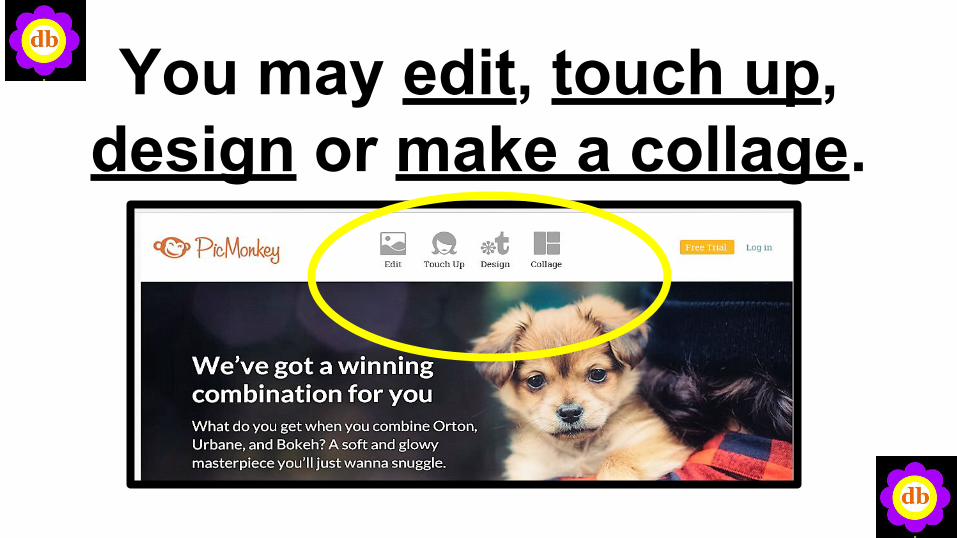
You may edit, touch up, design or make a collage.
Edit and Touch Up ...these two menus go
together in manipulating your photo.
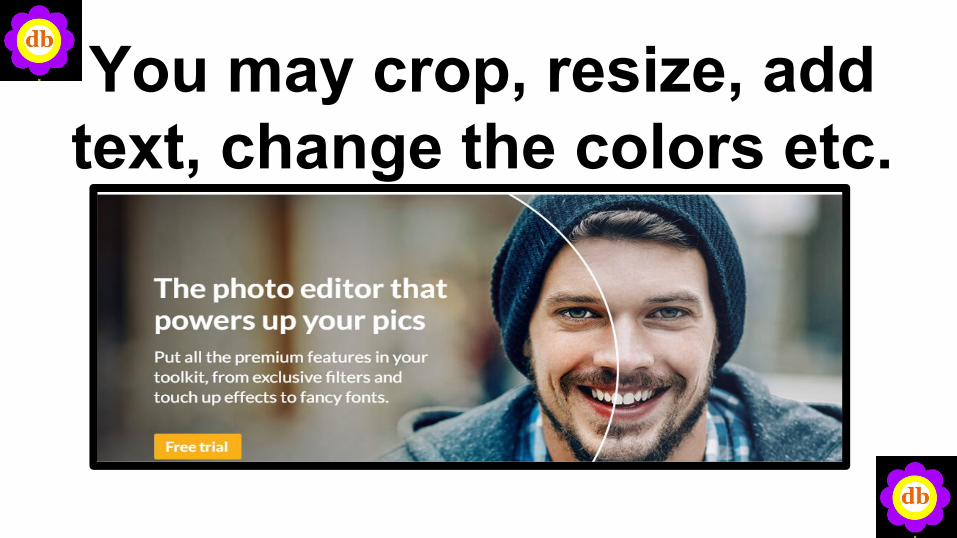
You may crop, resize, add text, change the colors etc.
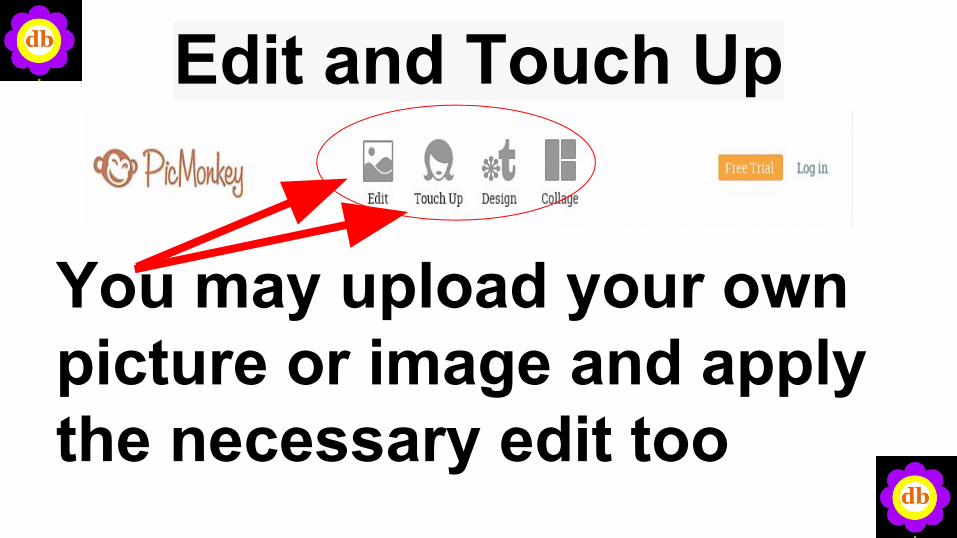
Edit and Touch Up
You may upload your own picture or image and apply the necessary edit too
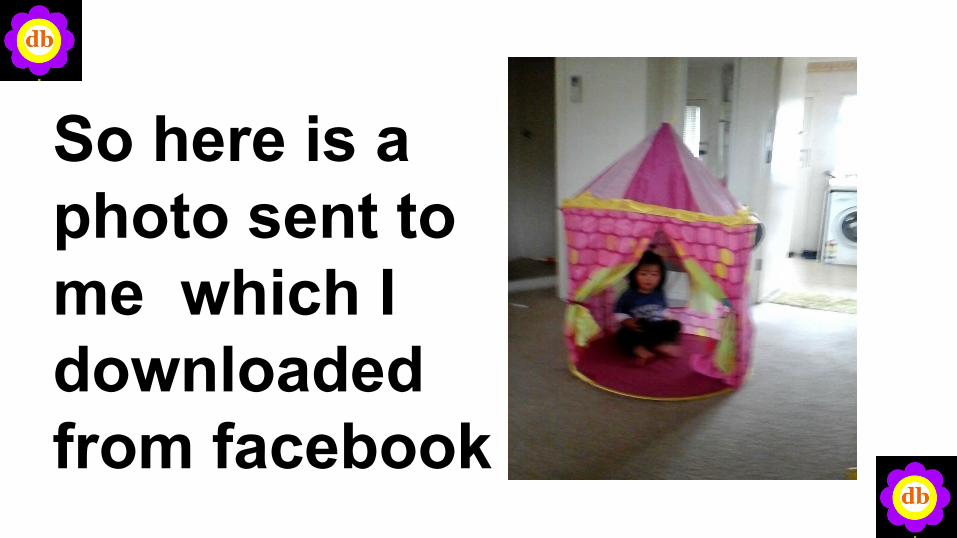
So here is aphoto sent to me me which I downloaded from facebook
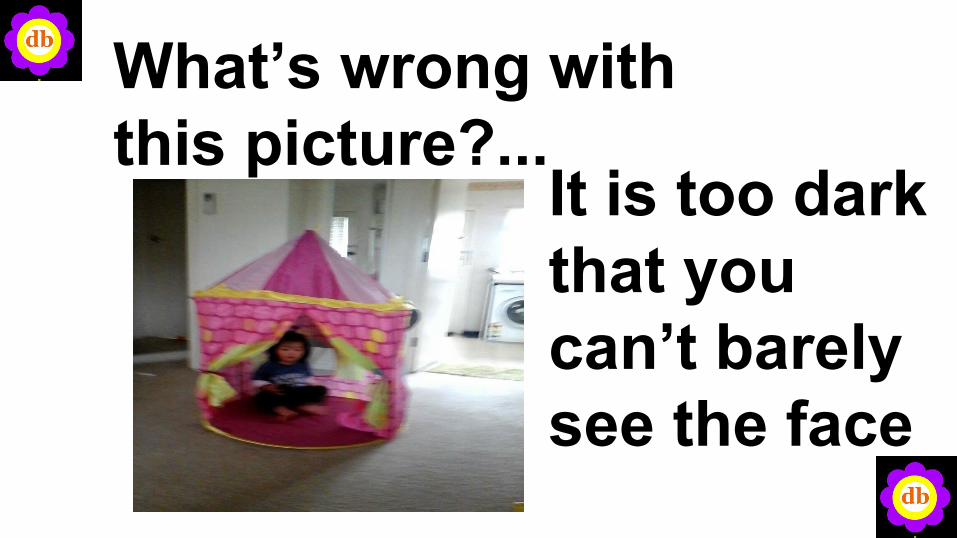
What’s wrong with this picture?...
It is too dark that you can’t barely see the face
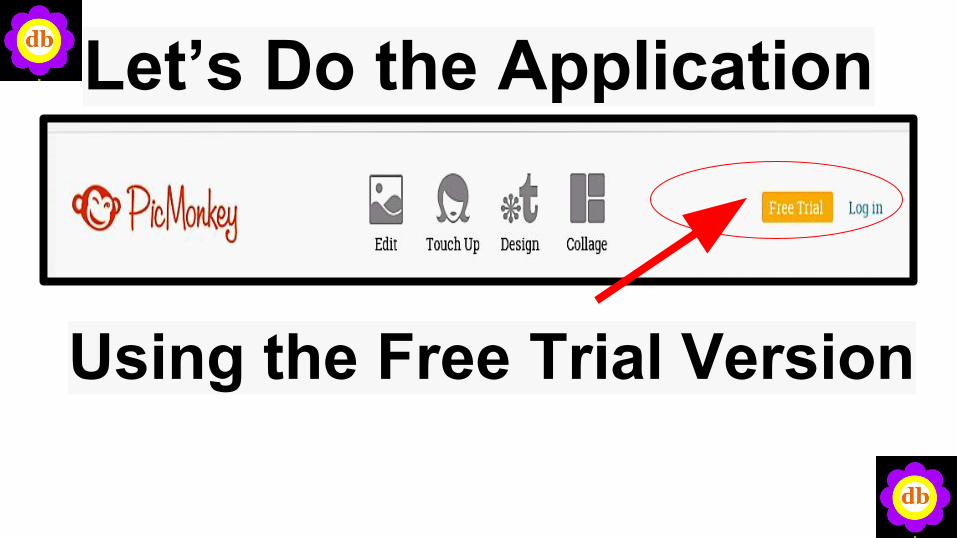
Let’s Do the Application
Using the Free Trial Version
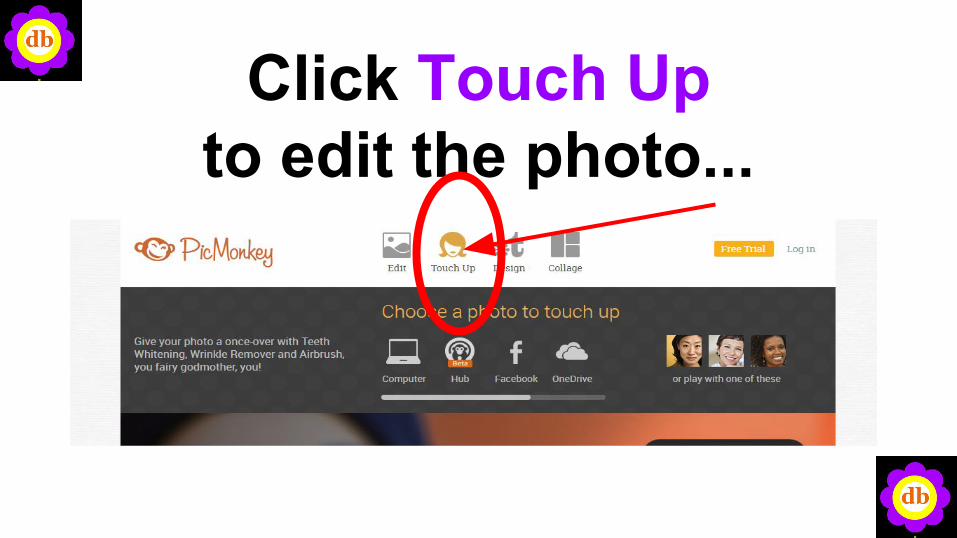
Click Touch Up to edit the photo...
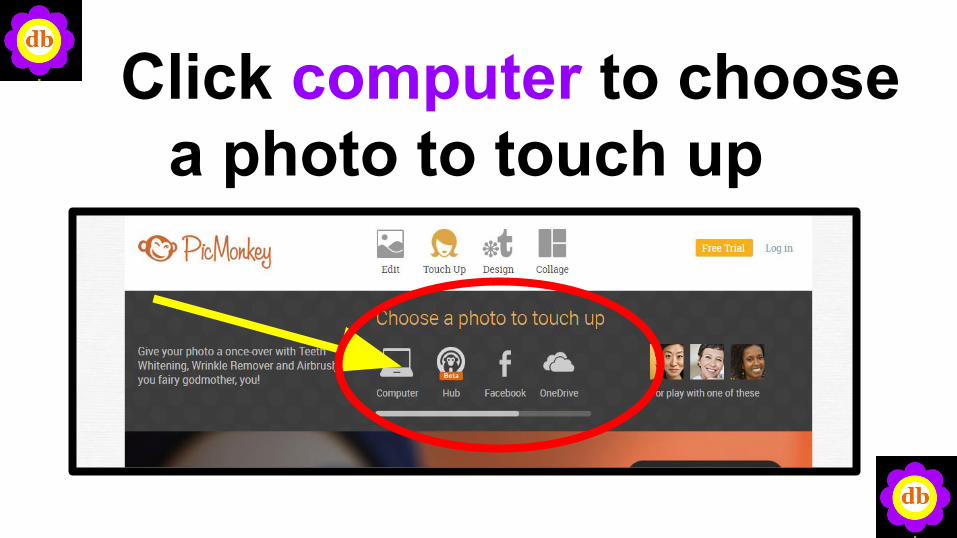
Click computer to choose a photo to touch up
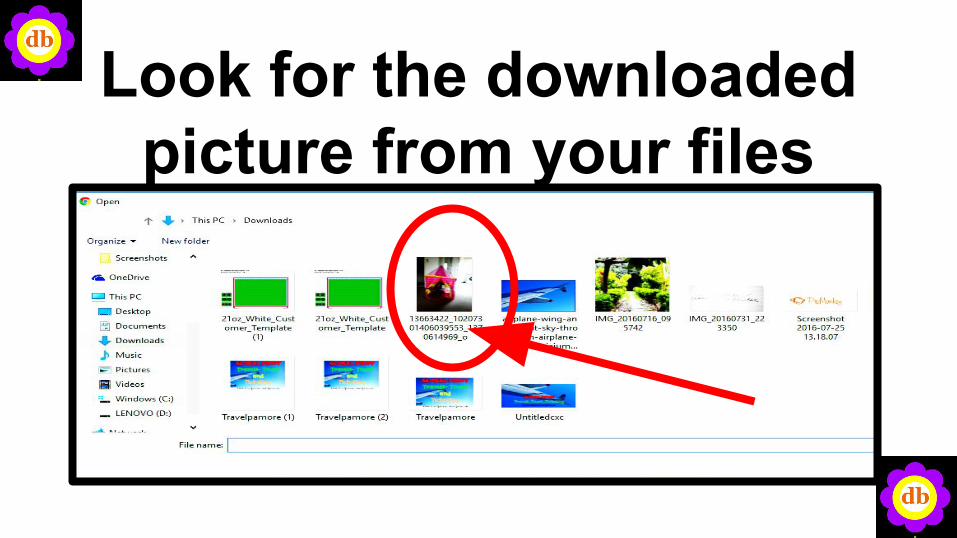
Look for the downloaded picture from your files
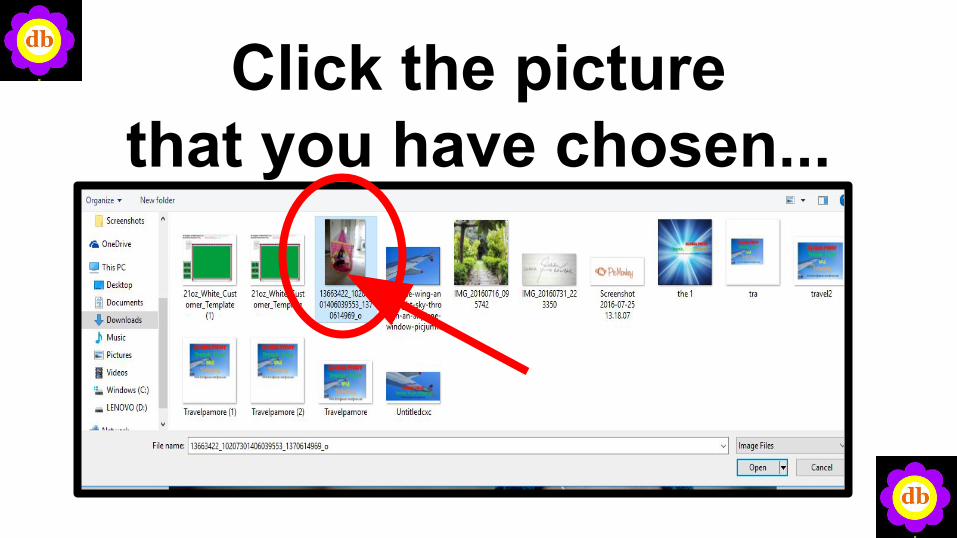
Click the picture that you have chosen...
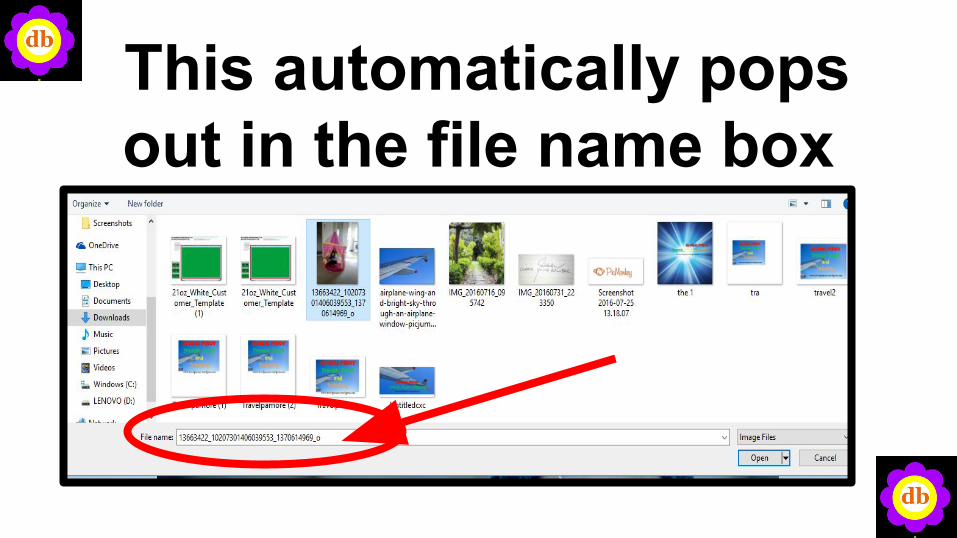
This automatically pops out in the file name box
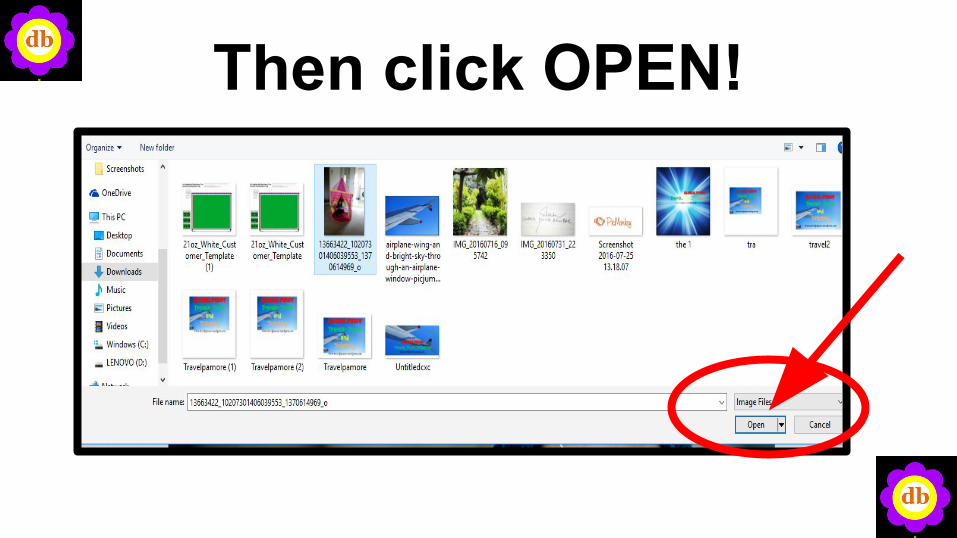
Then click OPEN!
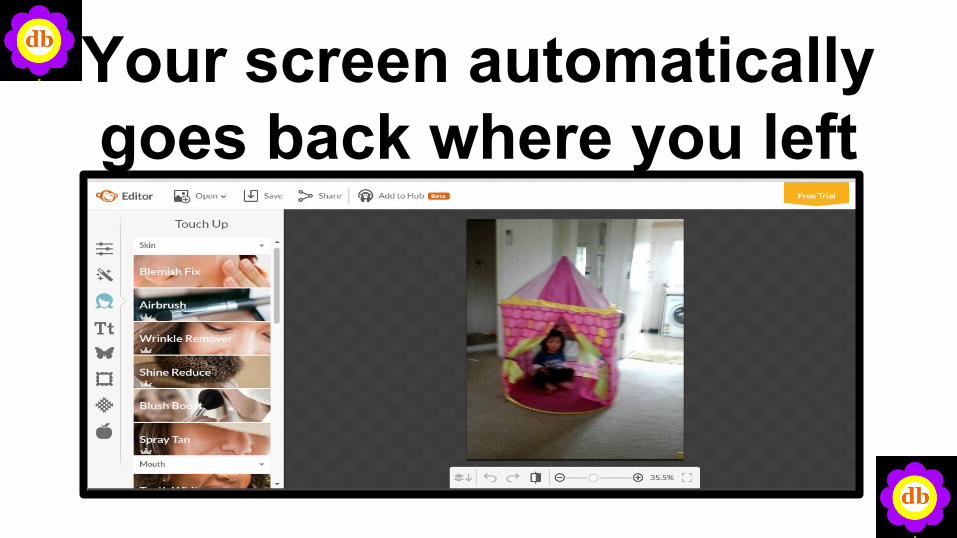
Your screen automatically goes back where you left
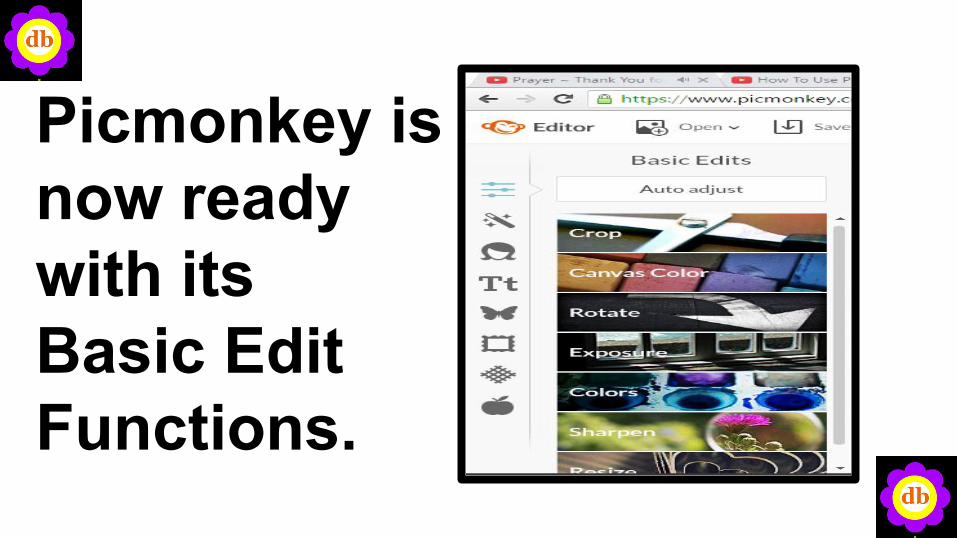
Picmonkey is now ready with its Basic Edit Functions.
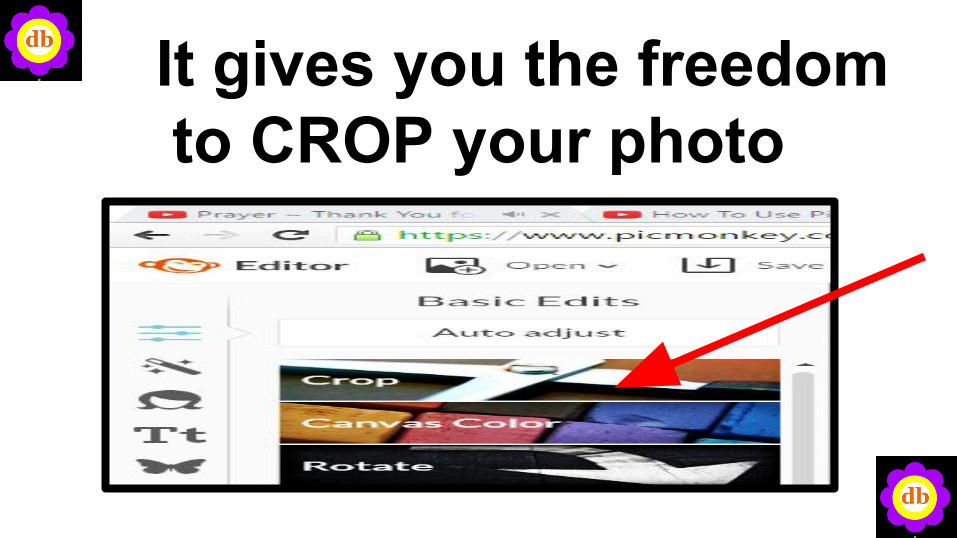
It gives you the freedom to CROP your photo
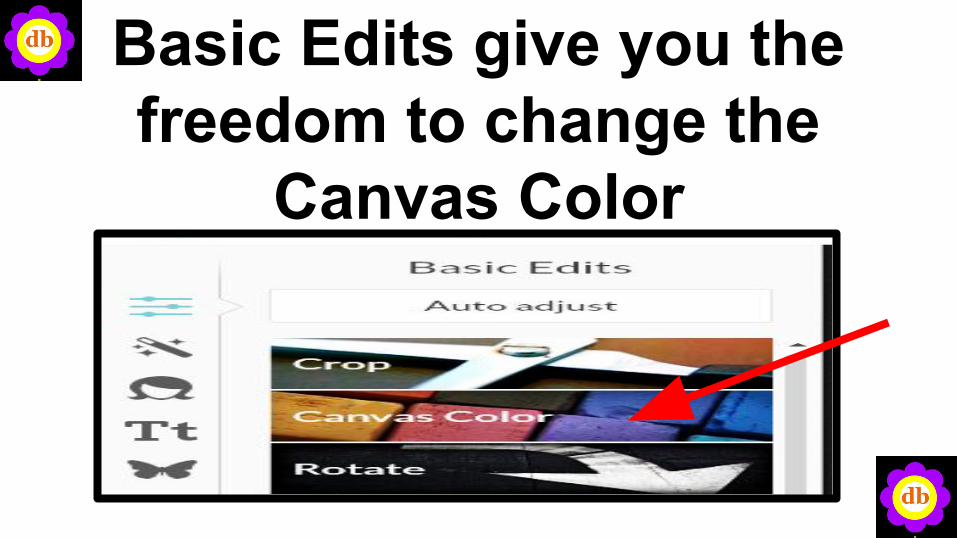
Basic Edits give you the freedom to change the
Canvas Color
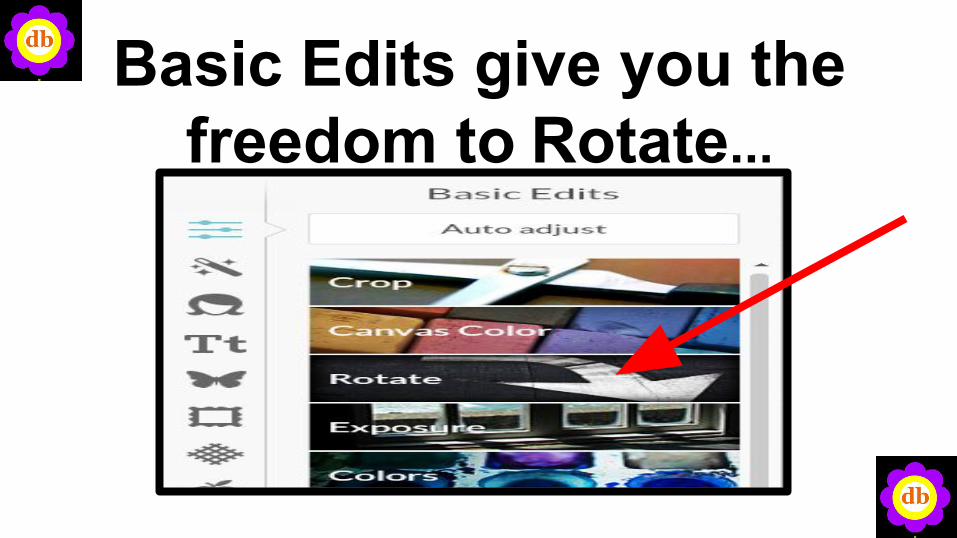
Basic Edits give you the freedom to Rotate...
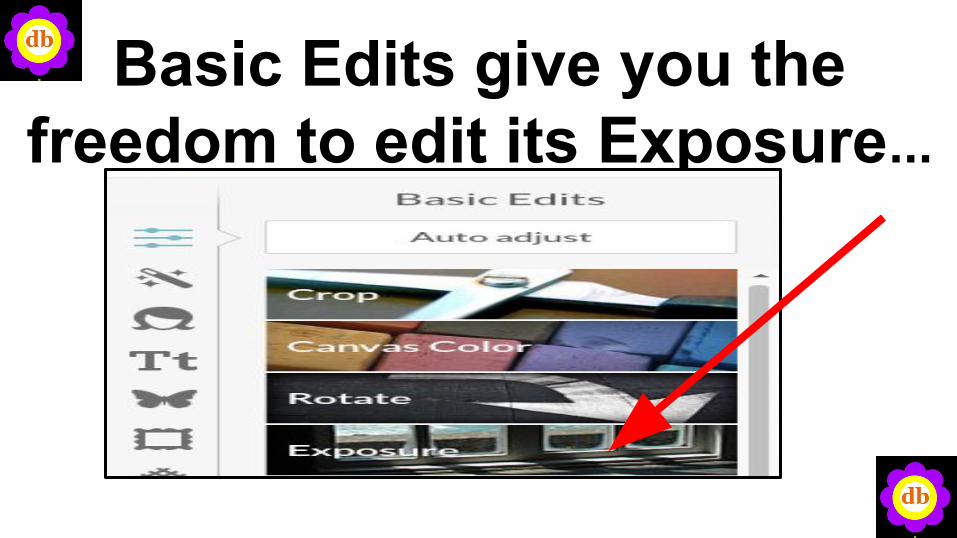
Basic Edits give you the freedom to edit its Exposure...
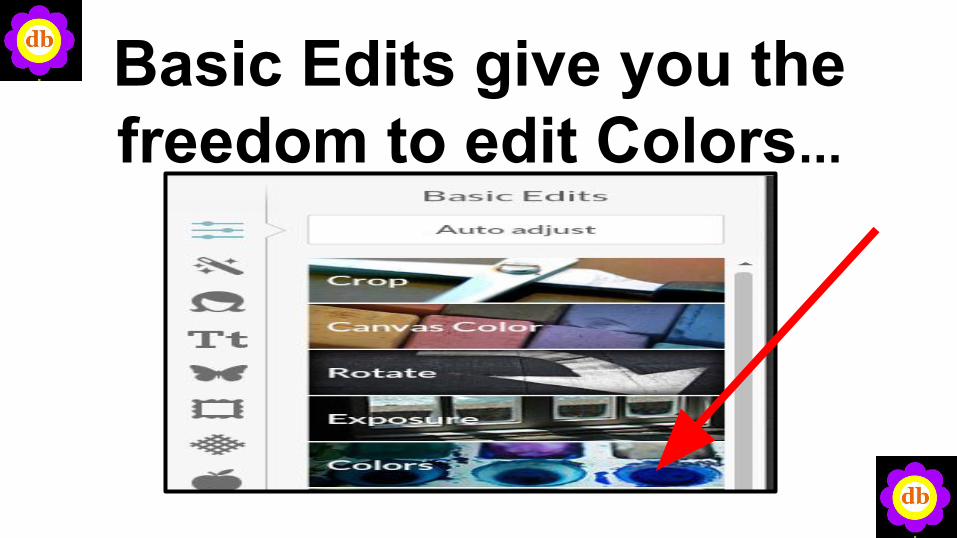
Basic Edits give you the freedom to edit Colors...
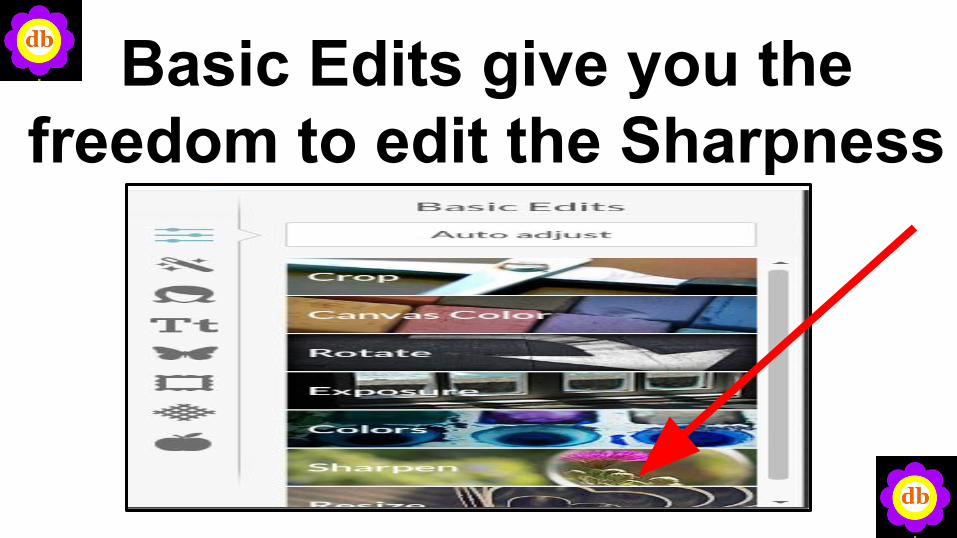
Basic Edits give you the freedom to edit the Sharpness
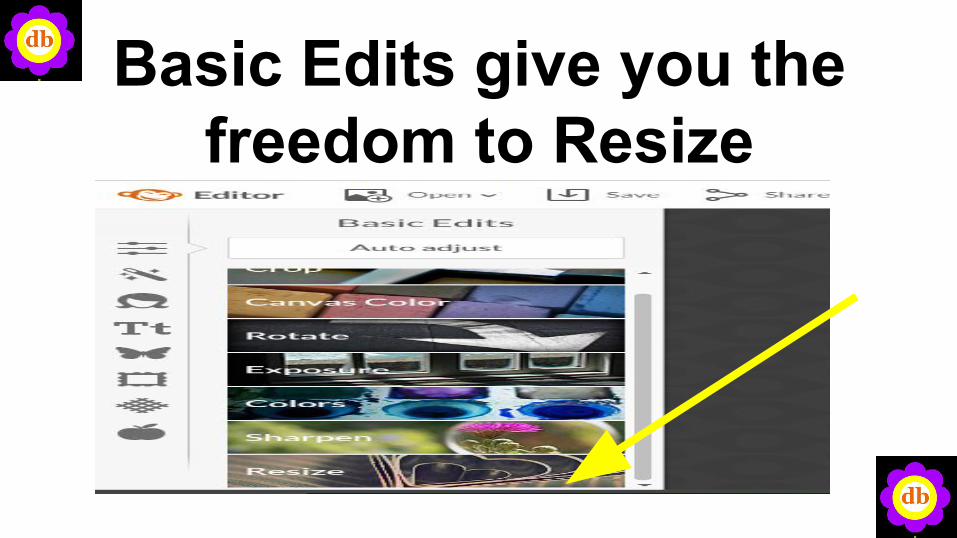
Basic Edits give you the freedom to Resize
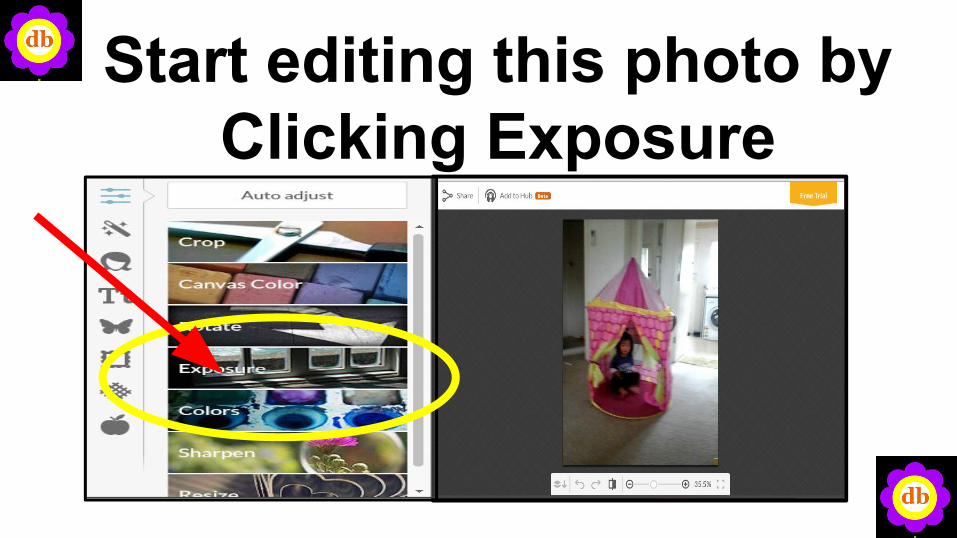
Start editing this photo by Clicking Exposure
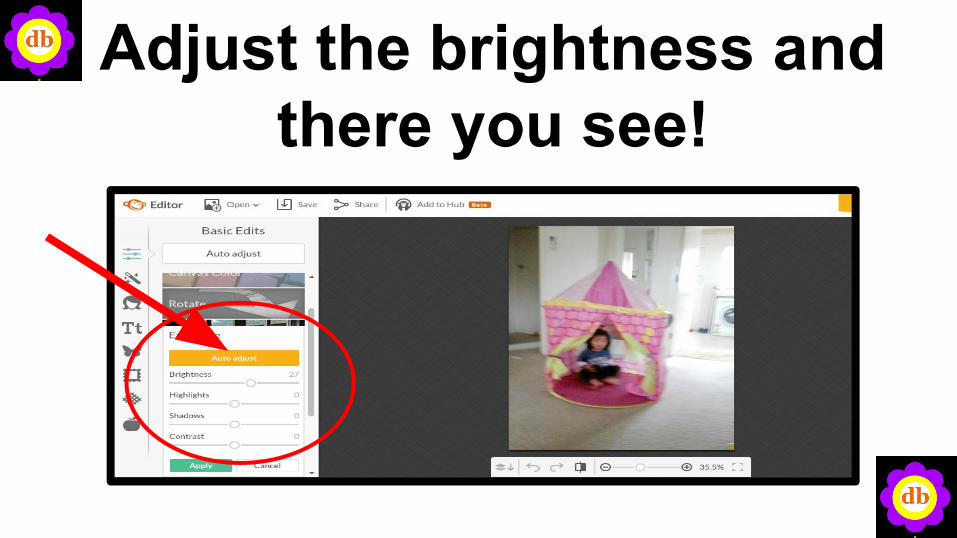
Adjust the brightness and there you see!
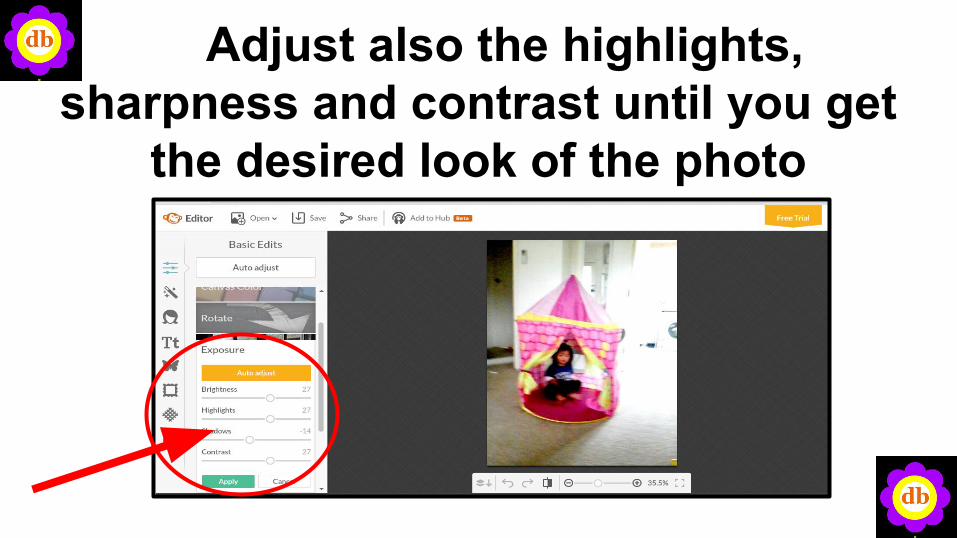
Adjust also the highlights, sharpness and contrast until you get
the desired look of the photo
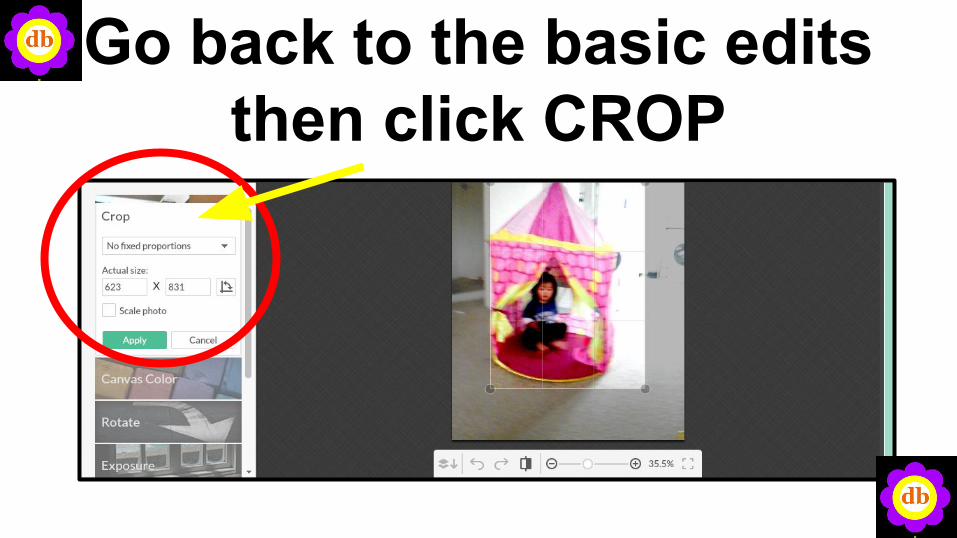
Go back to the basic edits then click CROP
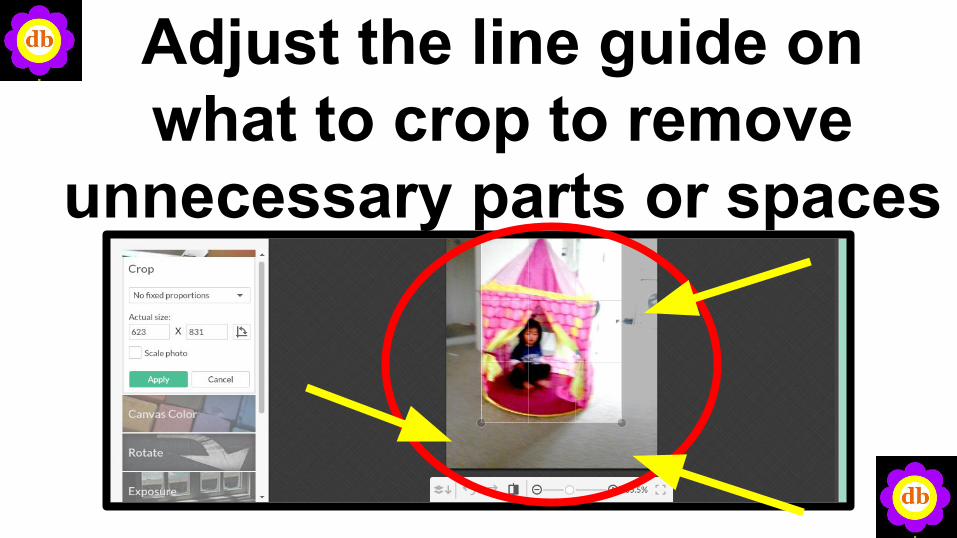
Adjust the line guide on what to crop to remove
unnecessary parts or spaces

Drag the line guide then Click Apply when done
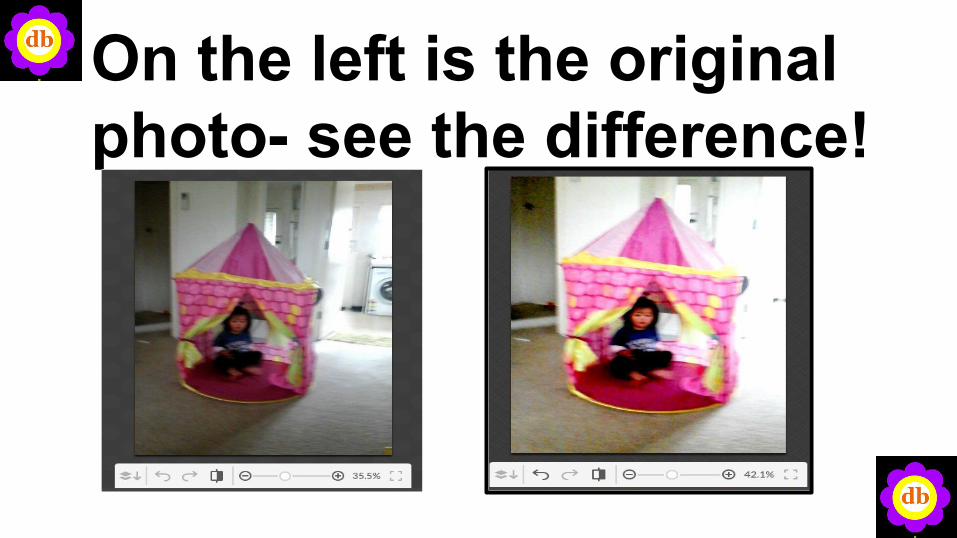
On the left is the original photo- see the difference!
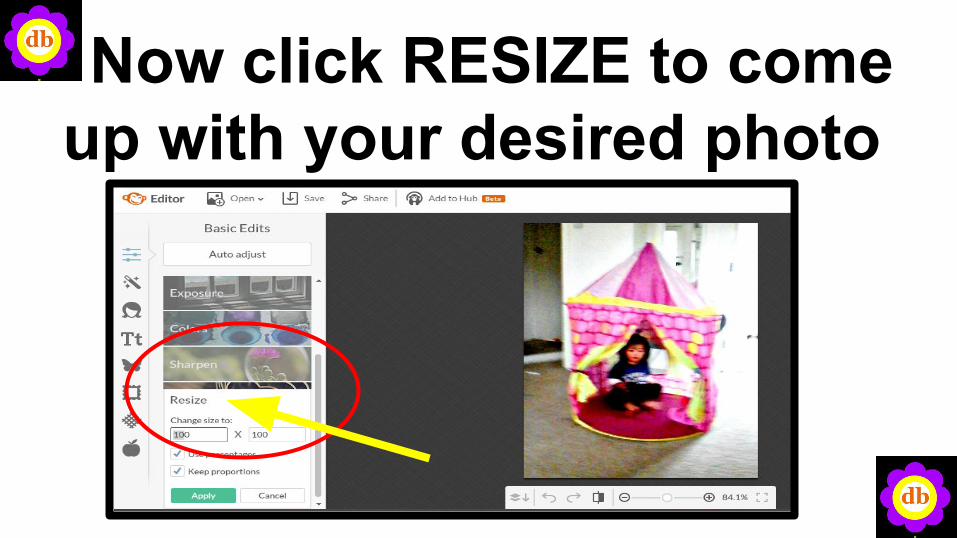
Now click RESIZE to come up with your desired photo
size
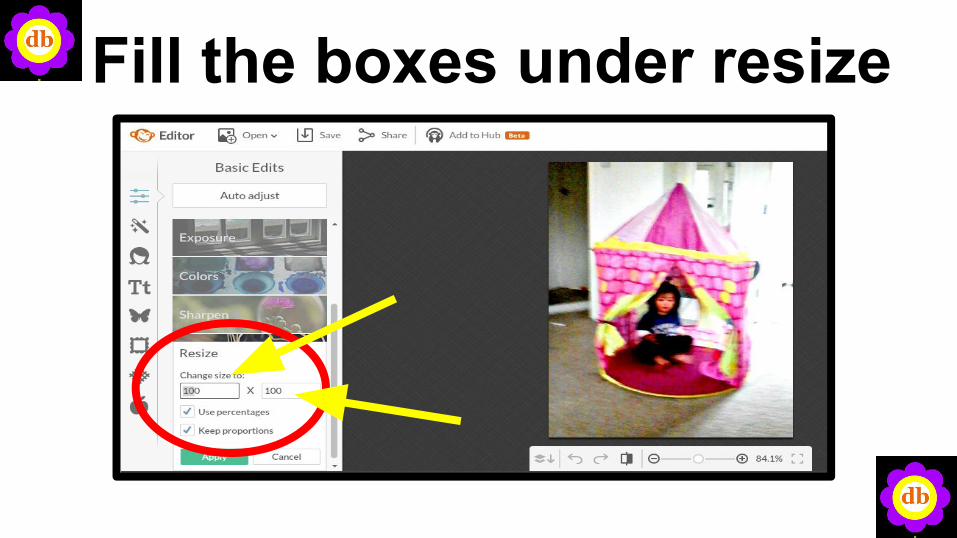
Fill the boxes under resize
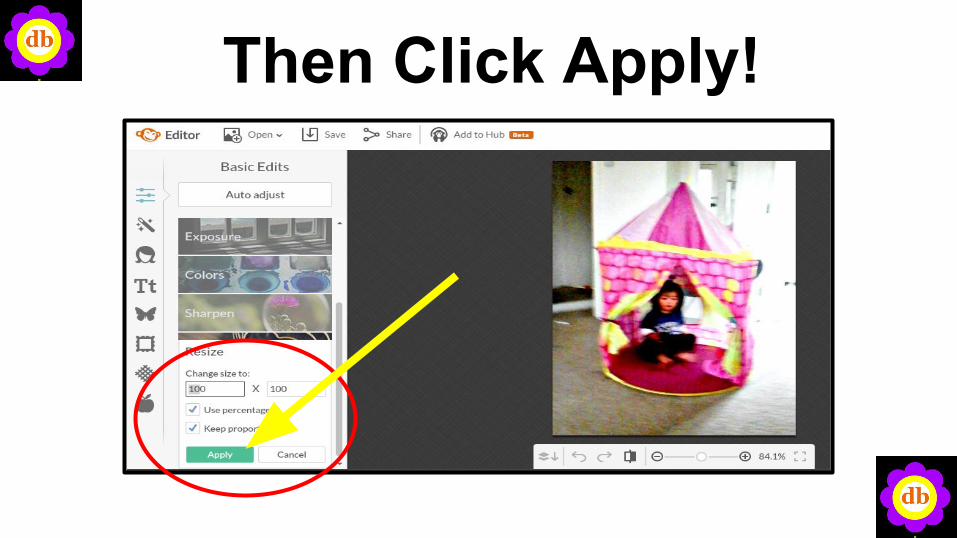
Then Click Apply!

Now Save your RESIZED photo
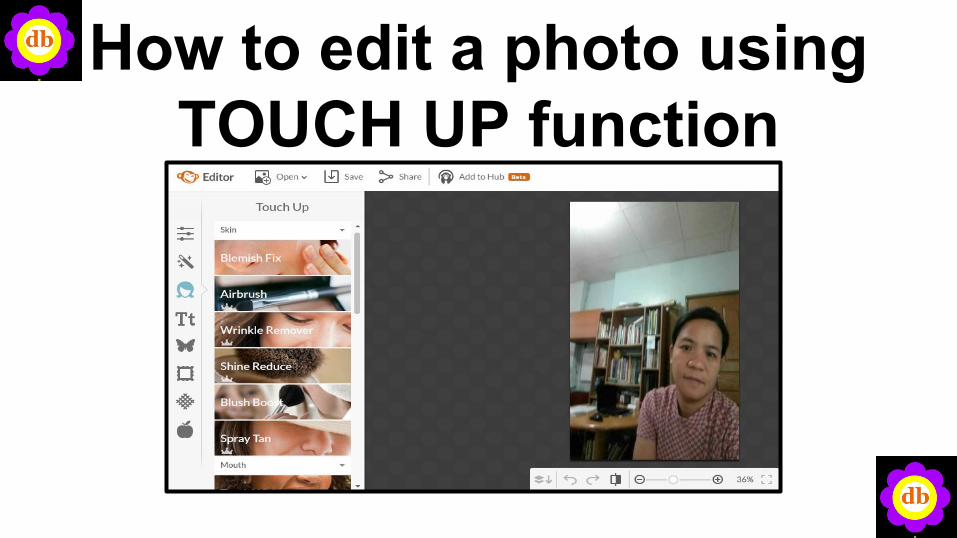
How to edit a photo using TOUCH UP function
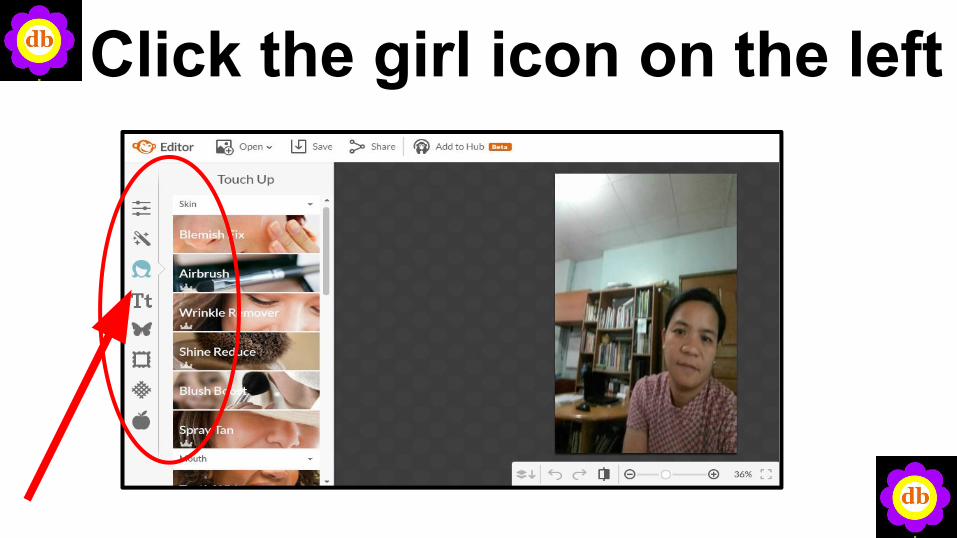
Click the girl icon on the left
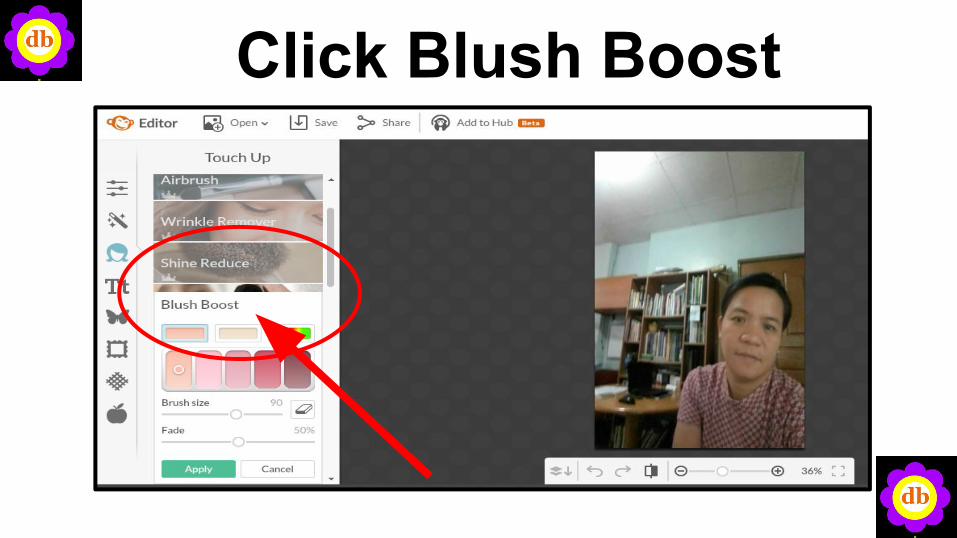
Click Blush Boost
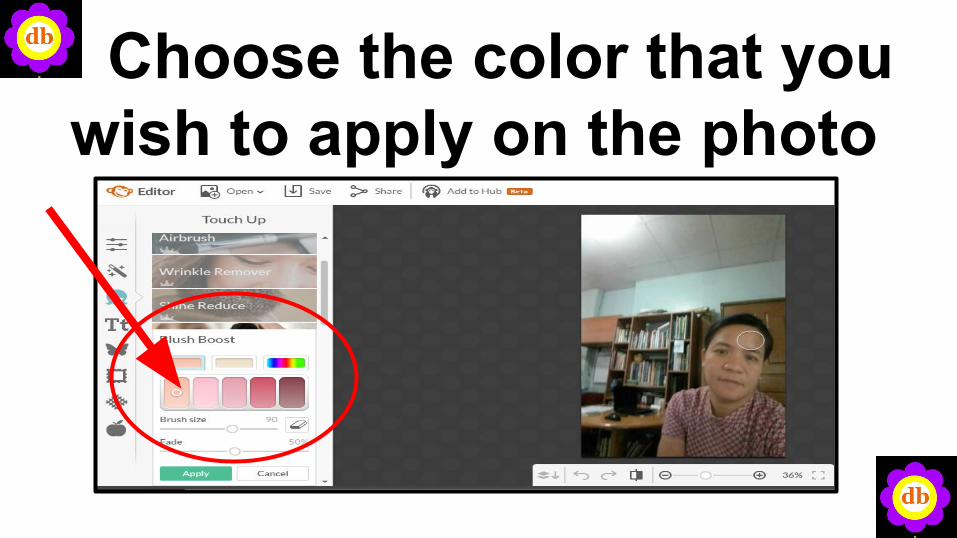
Choose the color that you wish to apply on the photo
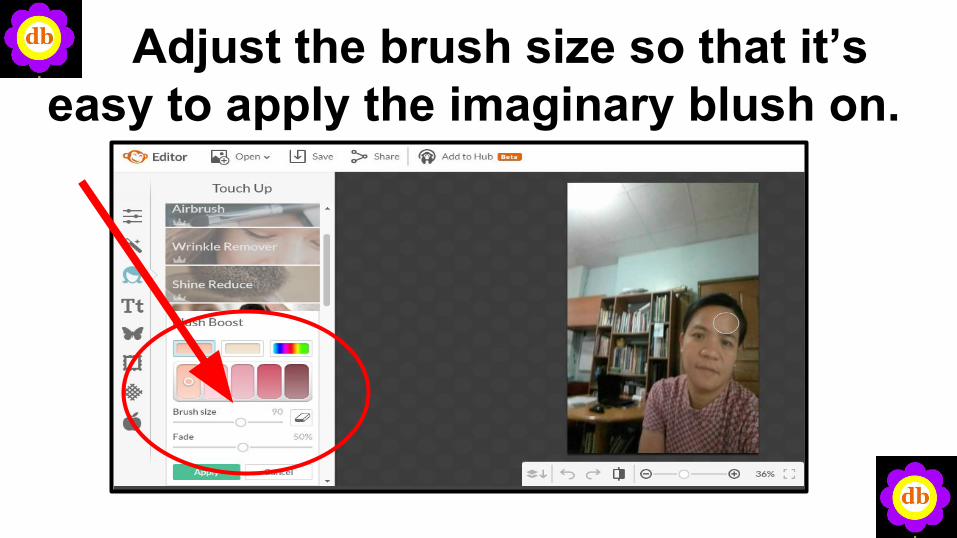
Adjust the brush size so that it’s easy to apply the imaginary blush on.
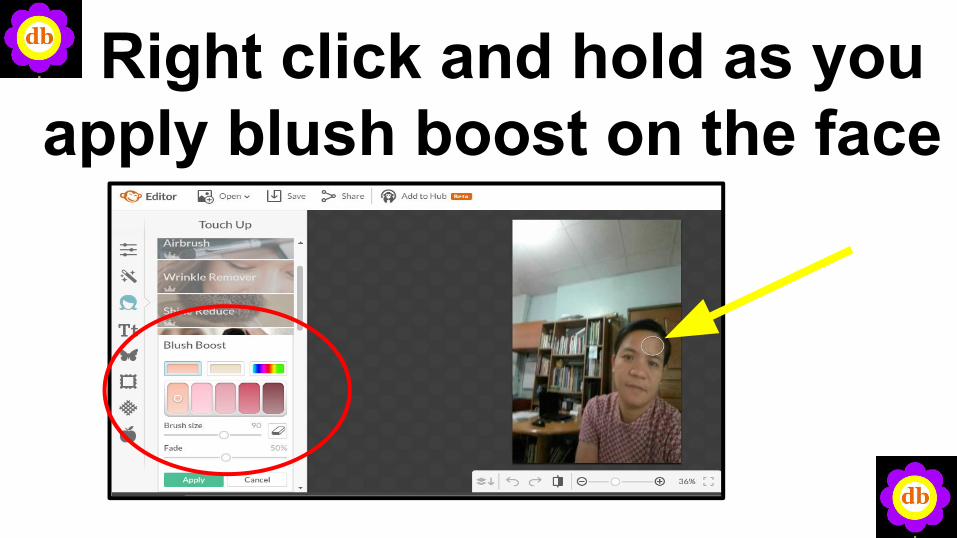
Right click and hold as you apply blush boost on the face
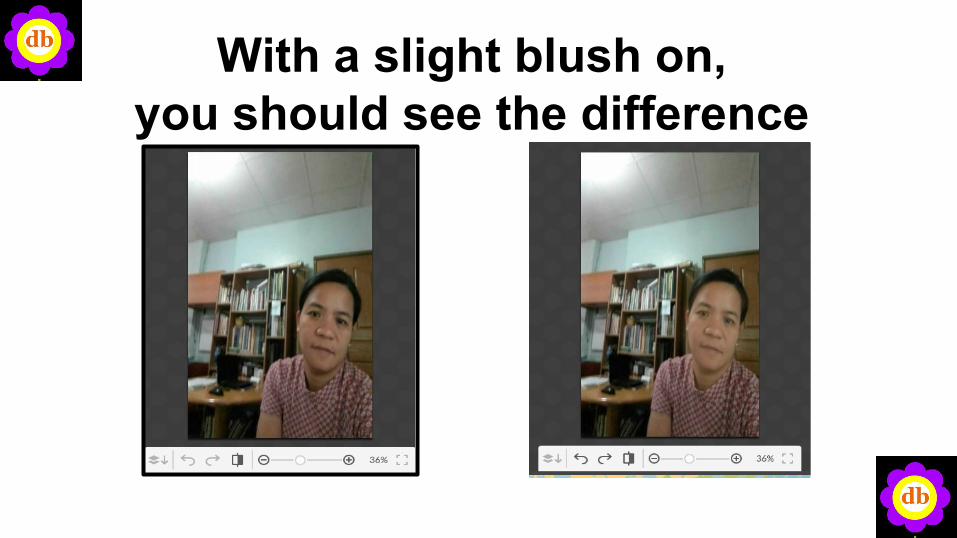
With a slight blush on, you should see the difference
How to add text to a photo or image using
picMonkey?
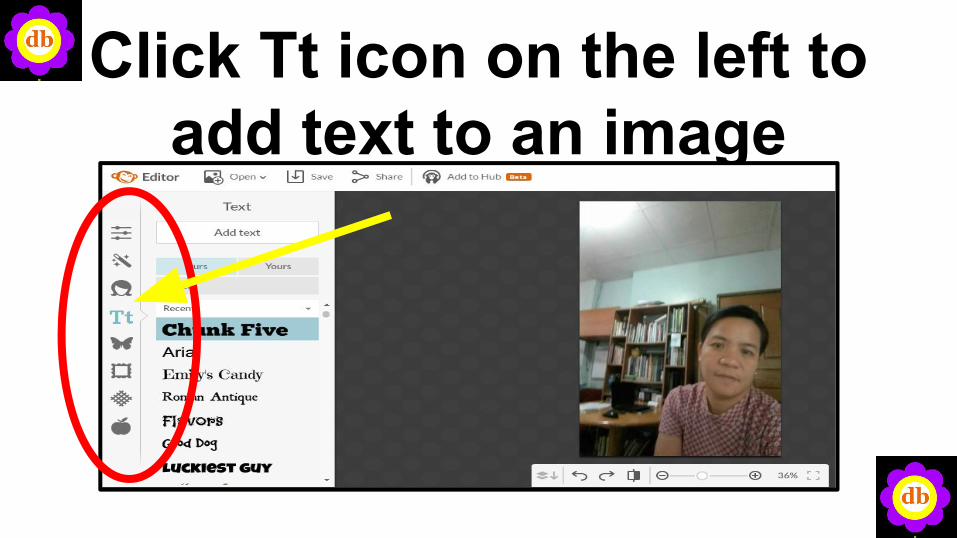
Click Tt icon on the left to add text to an image
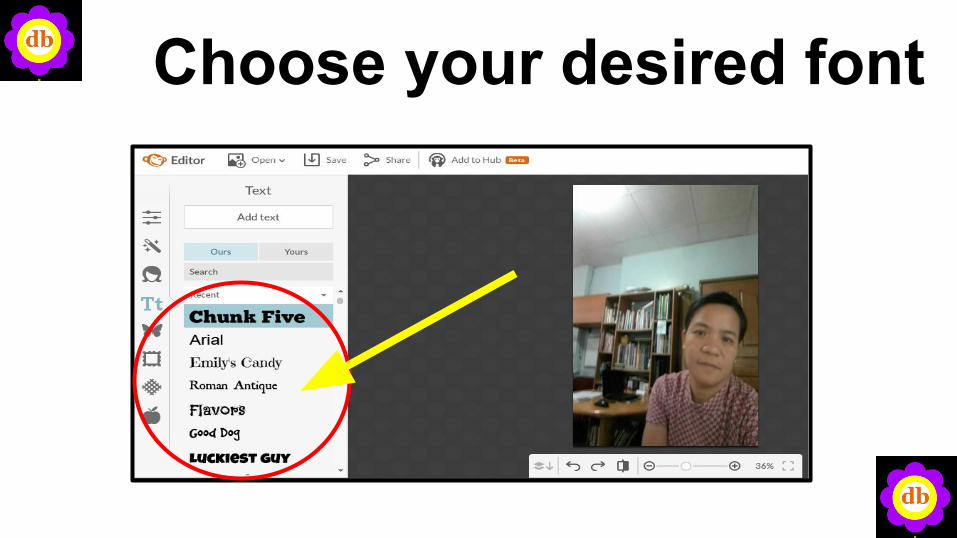
Choose your desired font
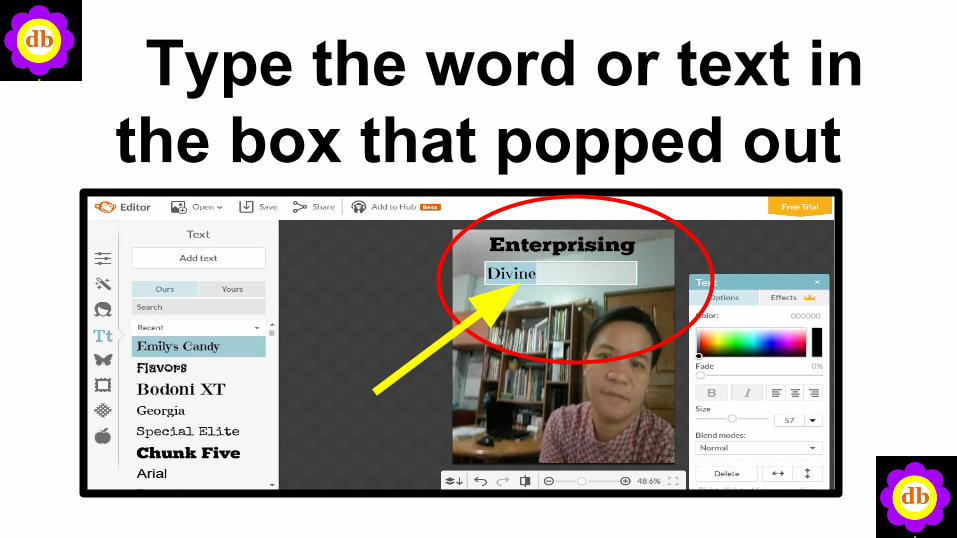
Type the word or text in the box that popped out
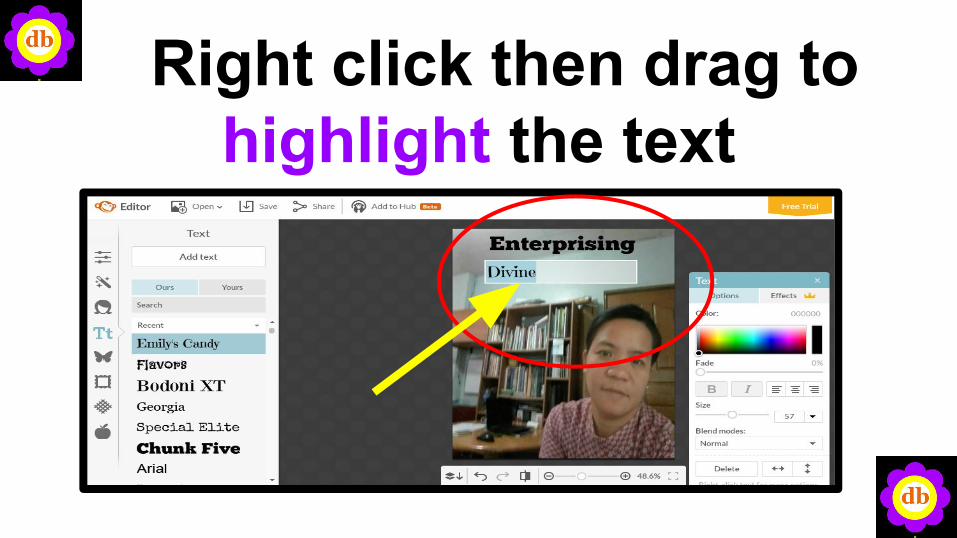
Right click then drag to highlight the text
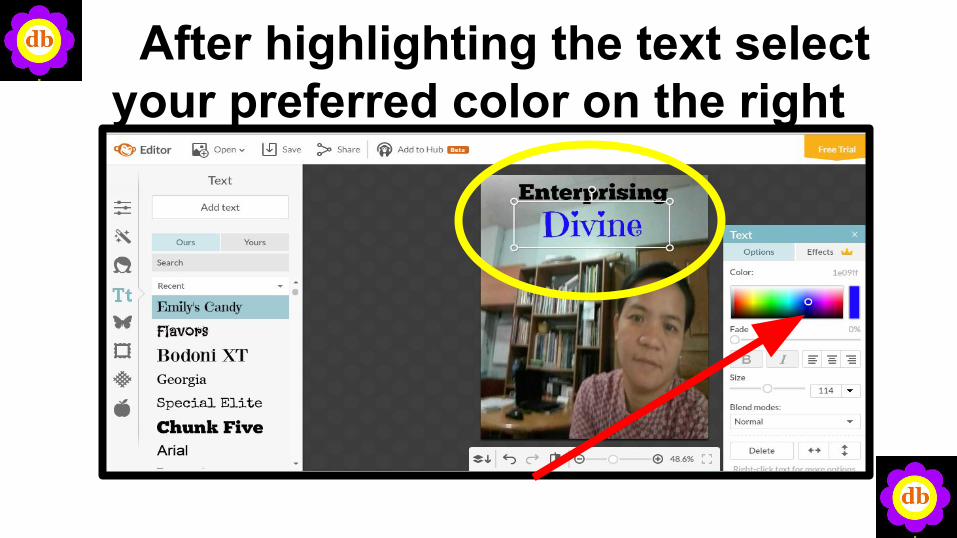
After highlighting the text select your preferred color on the right
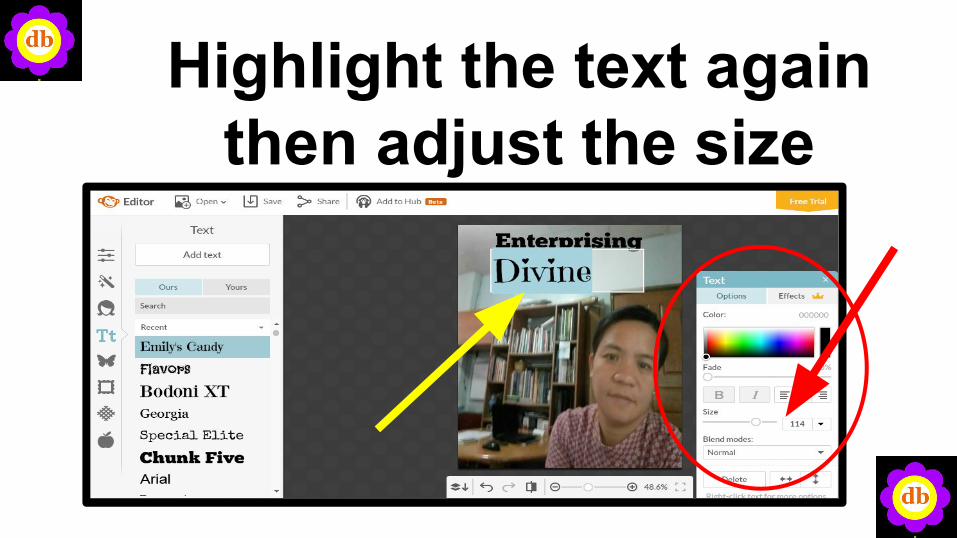
Highlight the text again then adjust the size
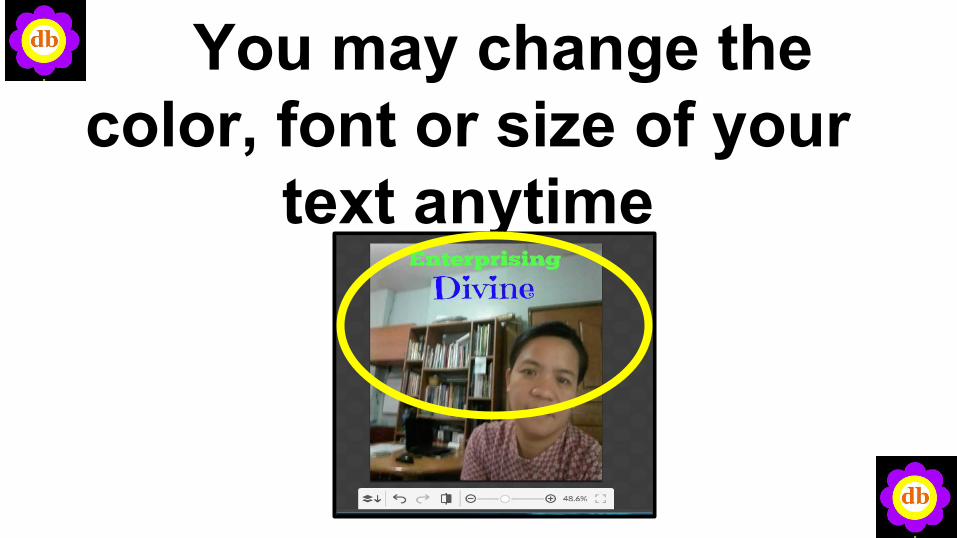
You may change the color, font or size of your
text anytime
How to add FRAME to your Photo or Image?
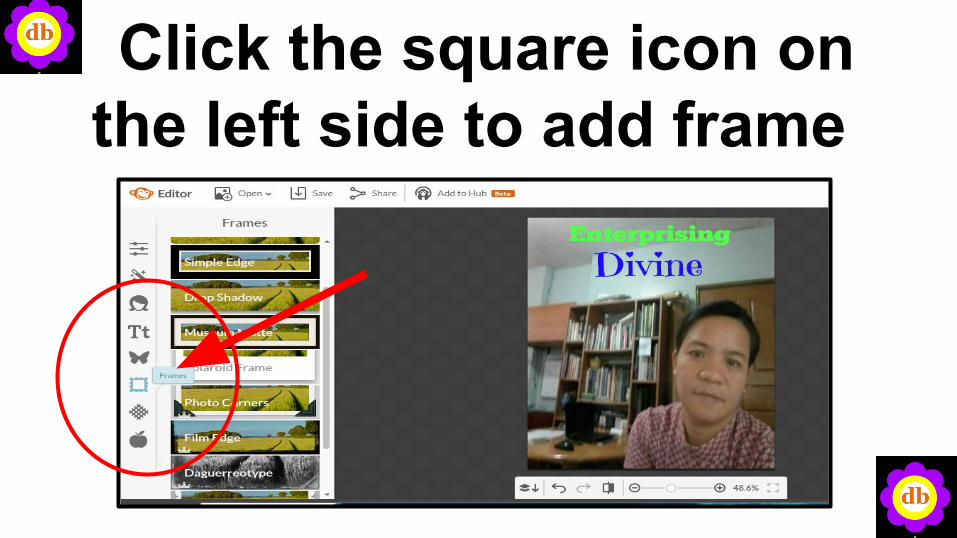
Click the square icon on the left side to add frame
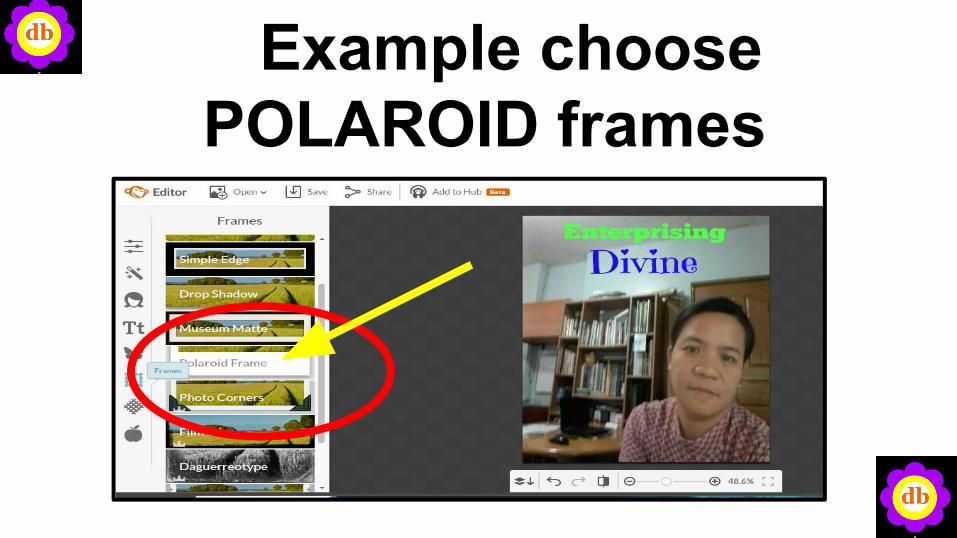
Example choose POLAROID frames
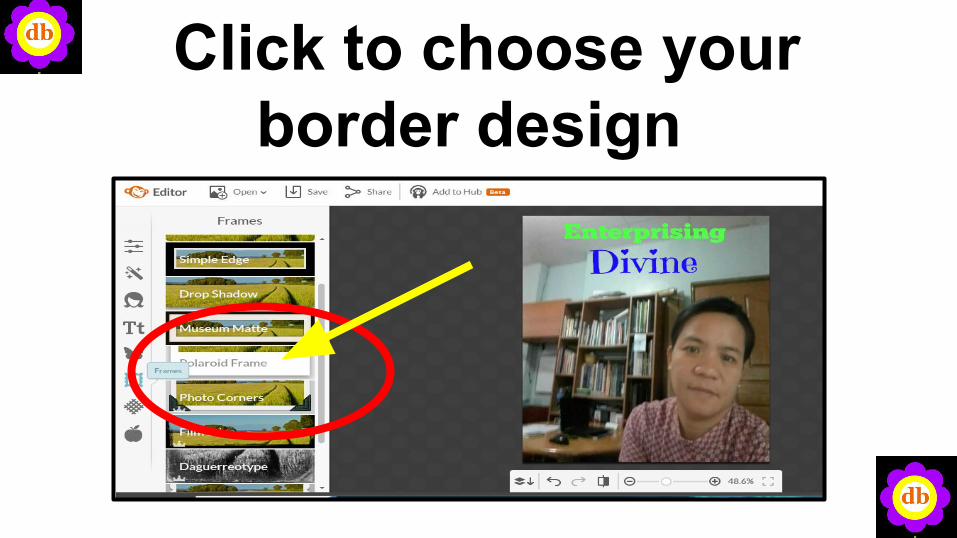
Click to choose your border design
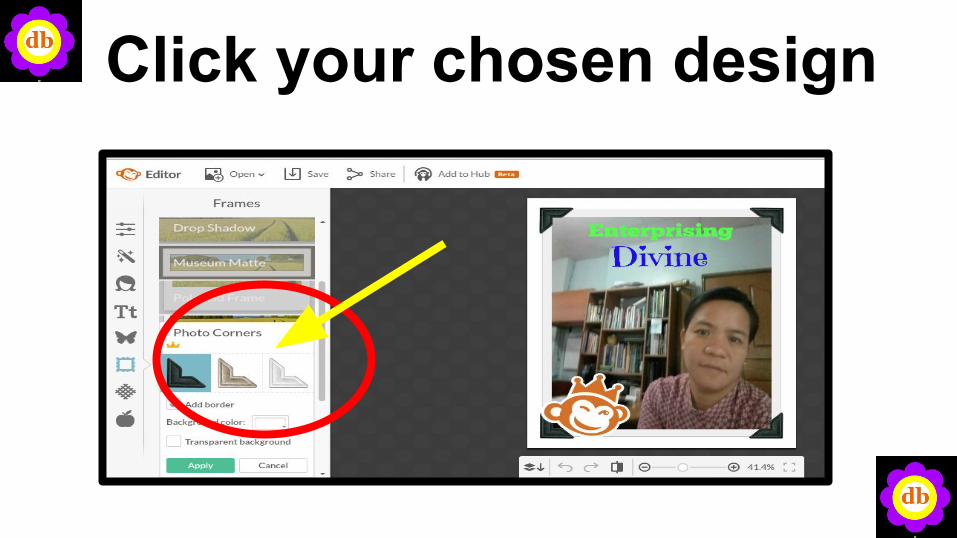
Click your chosen design
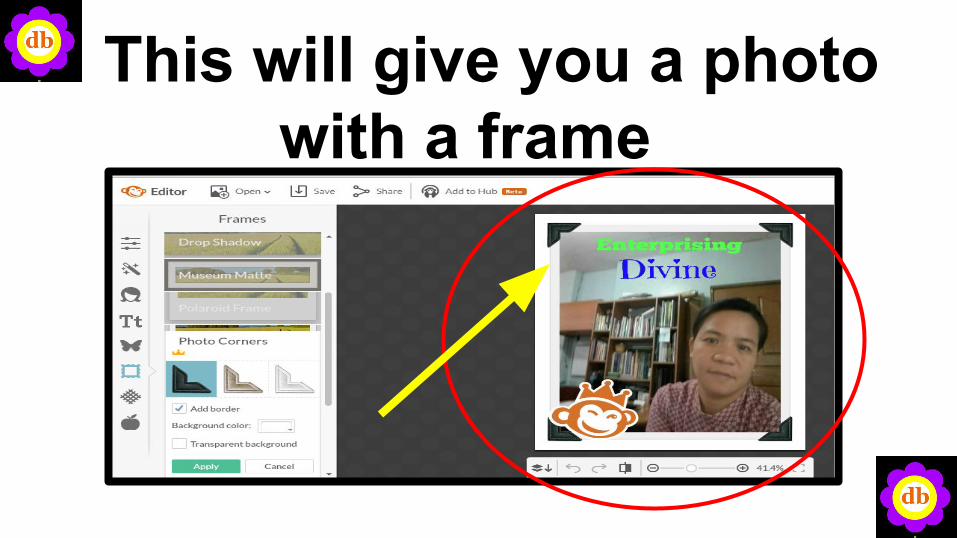
This will give you a photo with a frame
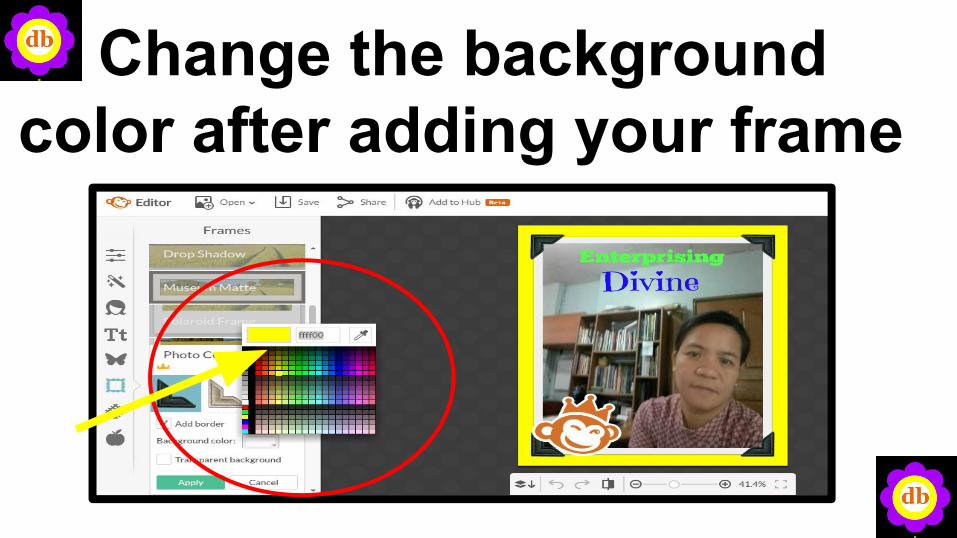
Change the background color after adding your frame
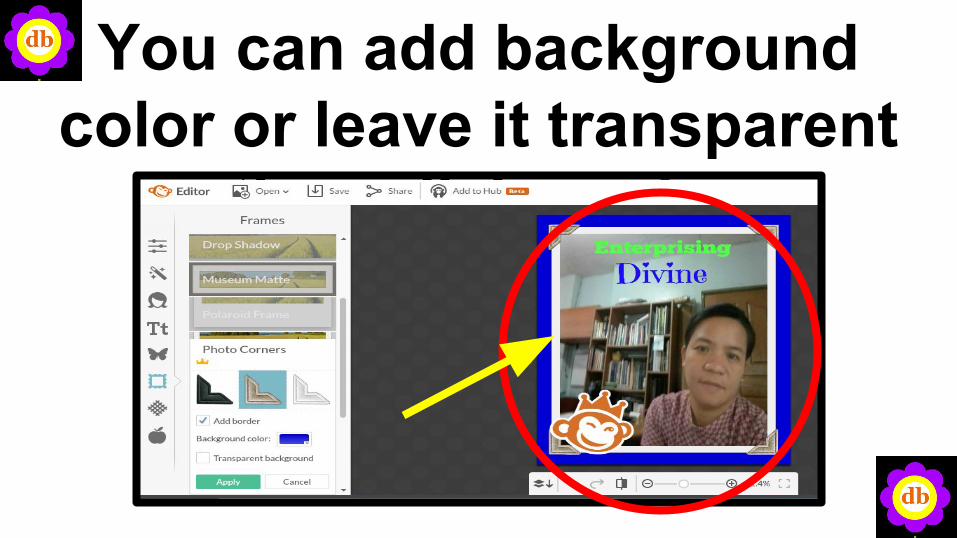
You can add background color or leave it transparent
then click apply.
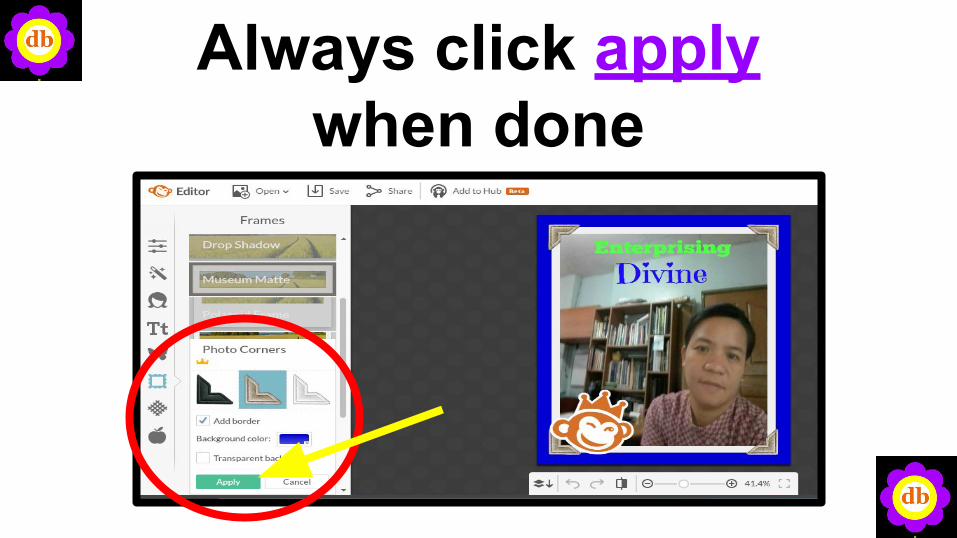
Always click apply when done
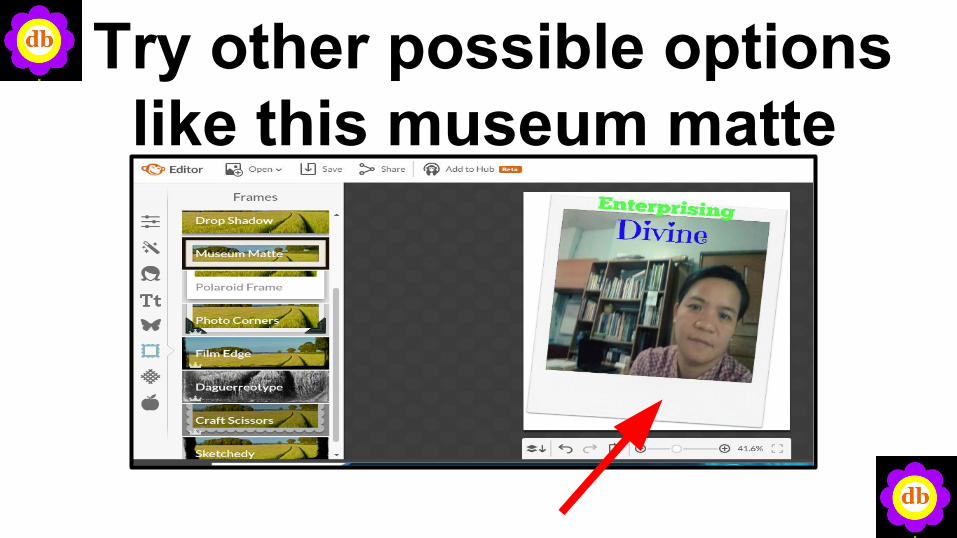
Try other possible options like this museum matte
design
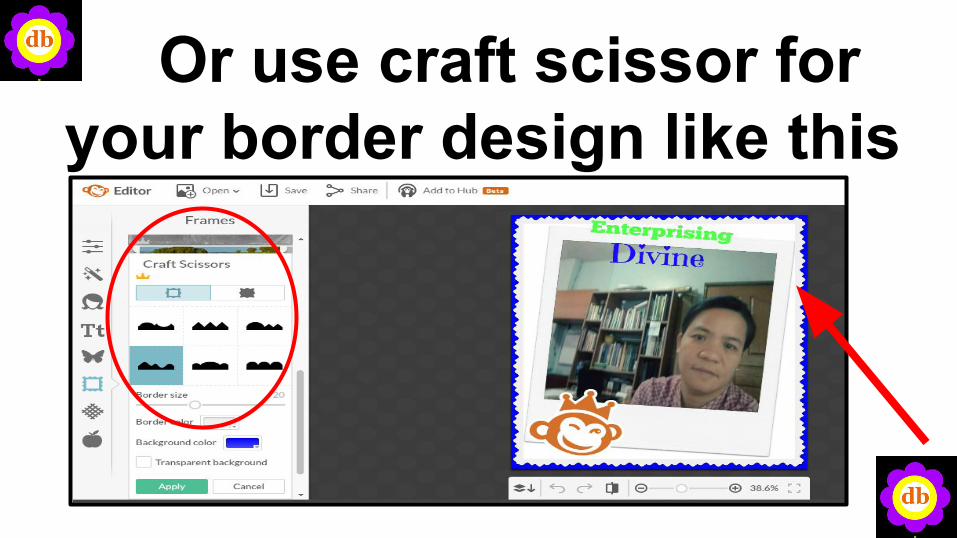
Or use craft scissor for your border design like this
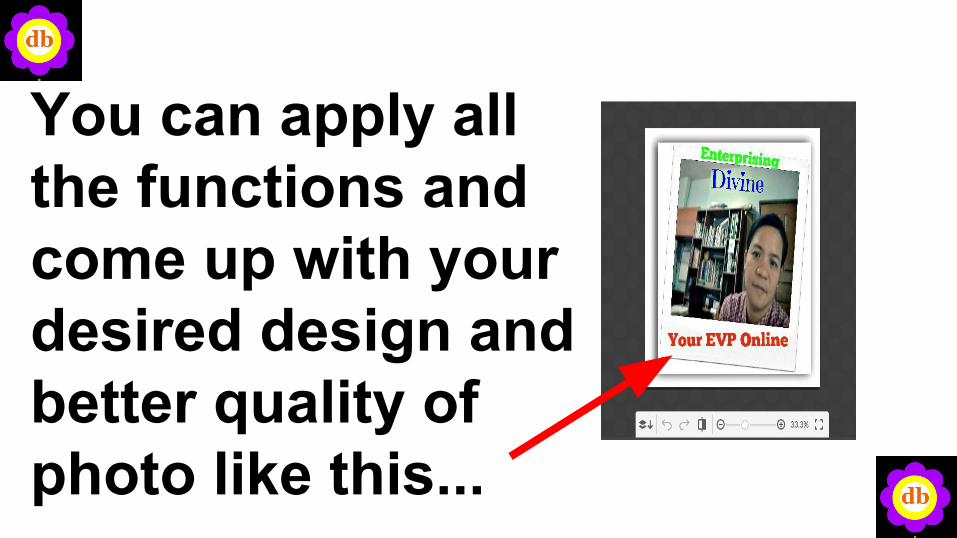
You can apply all the functions and come up with your desired design and better quality of photo like this...
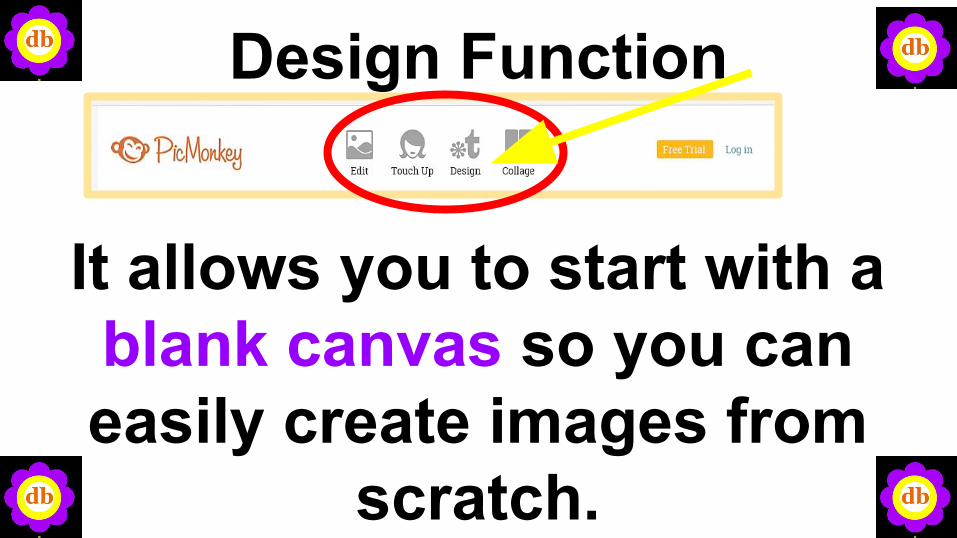
Design Function
It allows you to start with a blank canvas so you can easily create images from
scratch.

How to use design function in making a
Website header ?
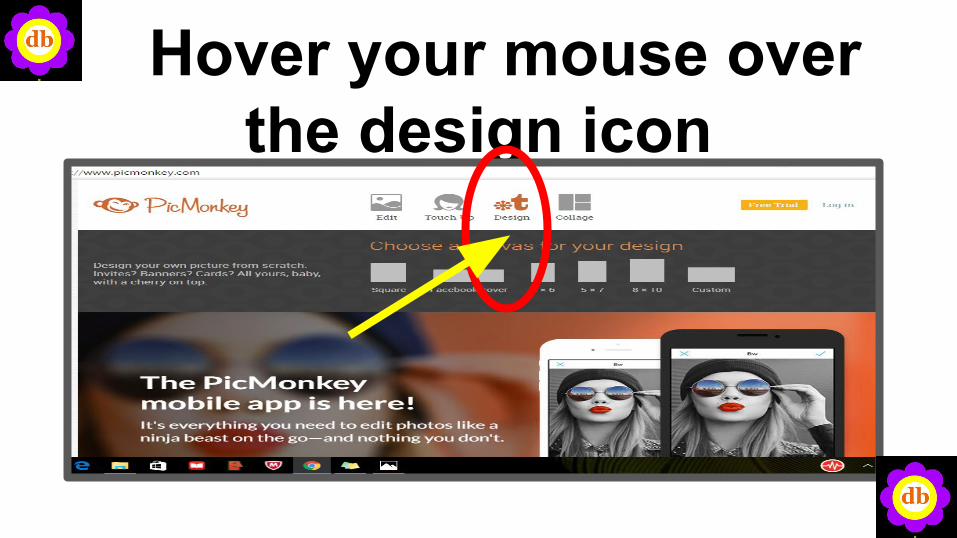
Hover your mouse over the design icon
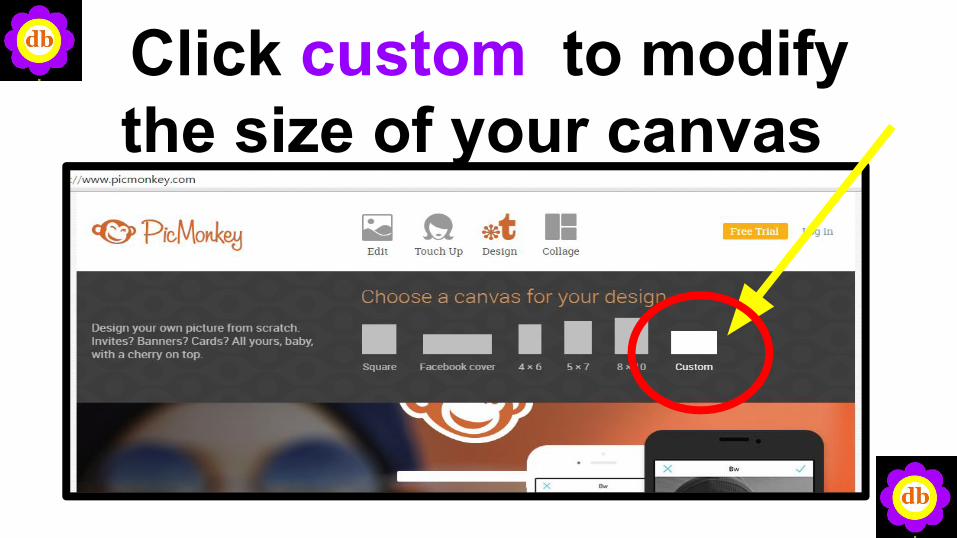
Click custom to modify the size of your canvas
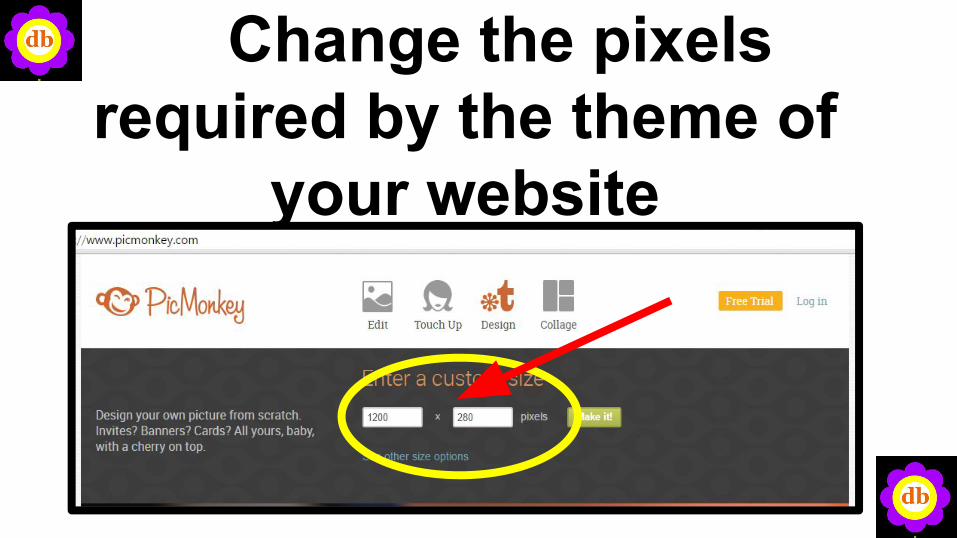
Change the pixels required by the theme of
your website
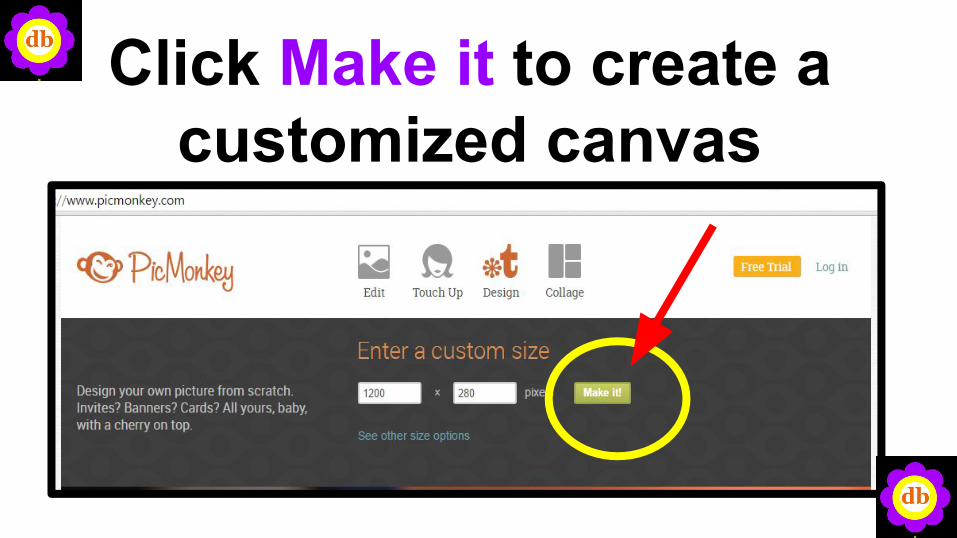
Click Make it to create a customized canvas
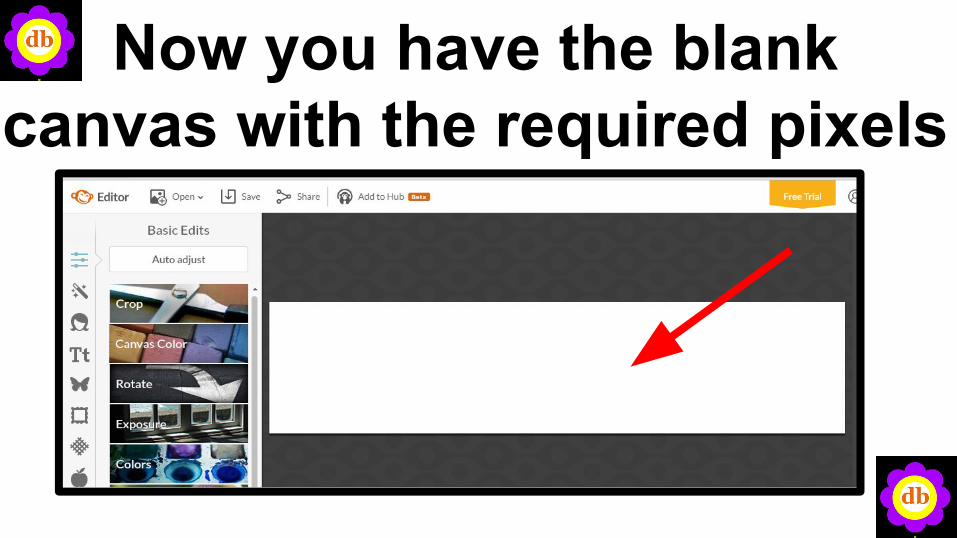
Now you have the blank canvas with the required pixels
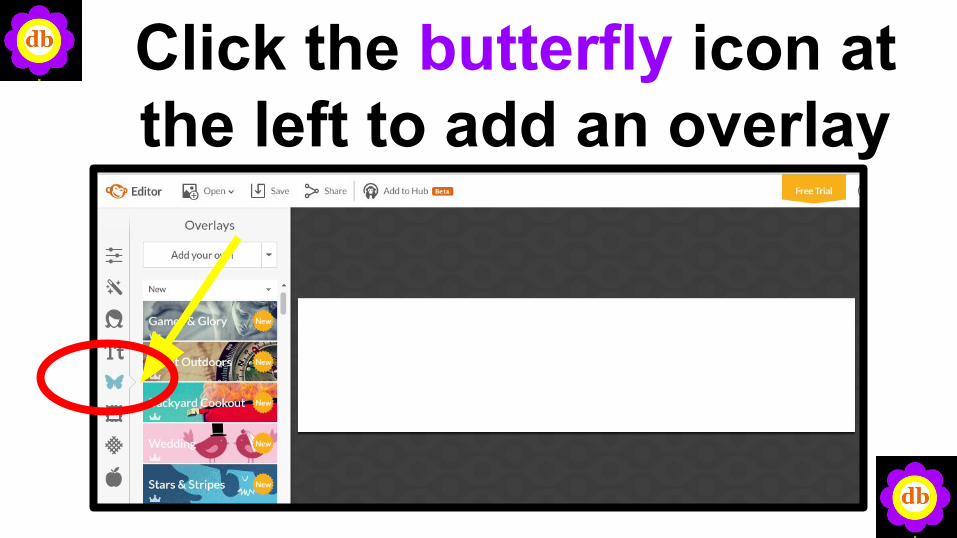
Click the butterfly icon at the left to add an overlay
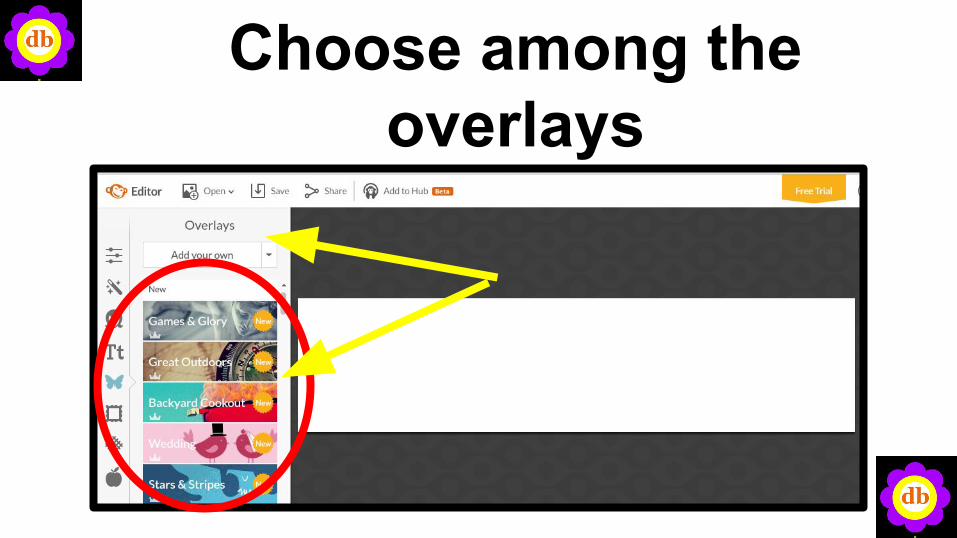
Choose among the overlays
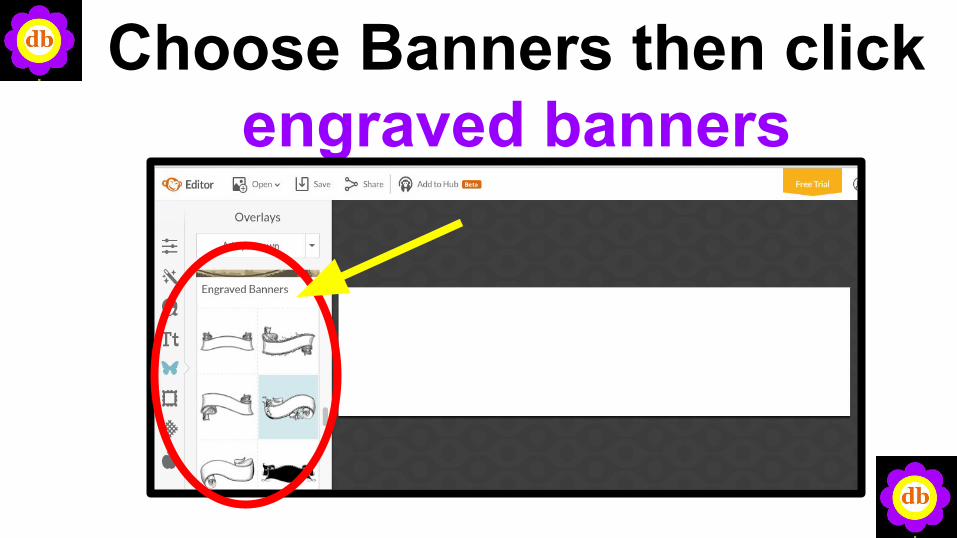
Choose Banners then click engraved banners
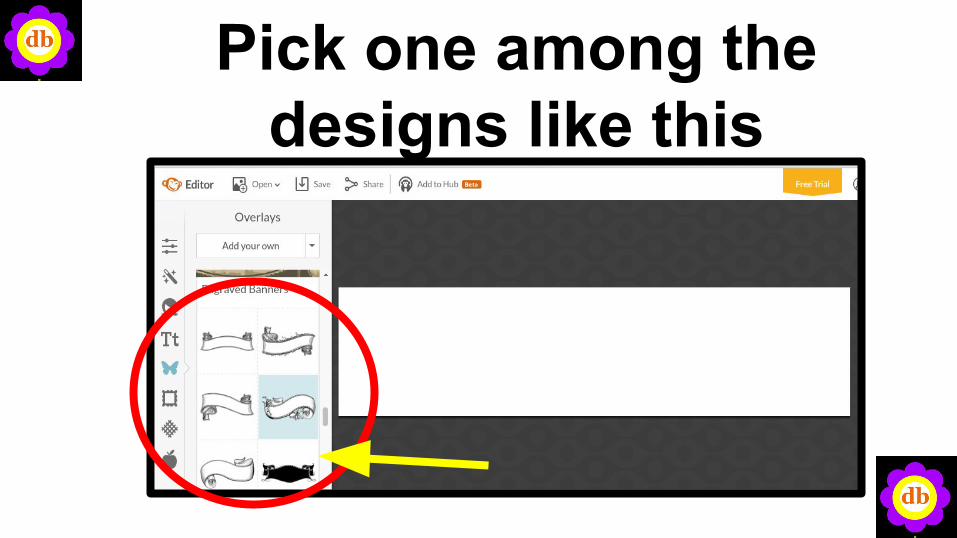
Pick one among the designs like this
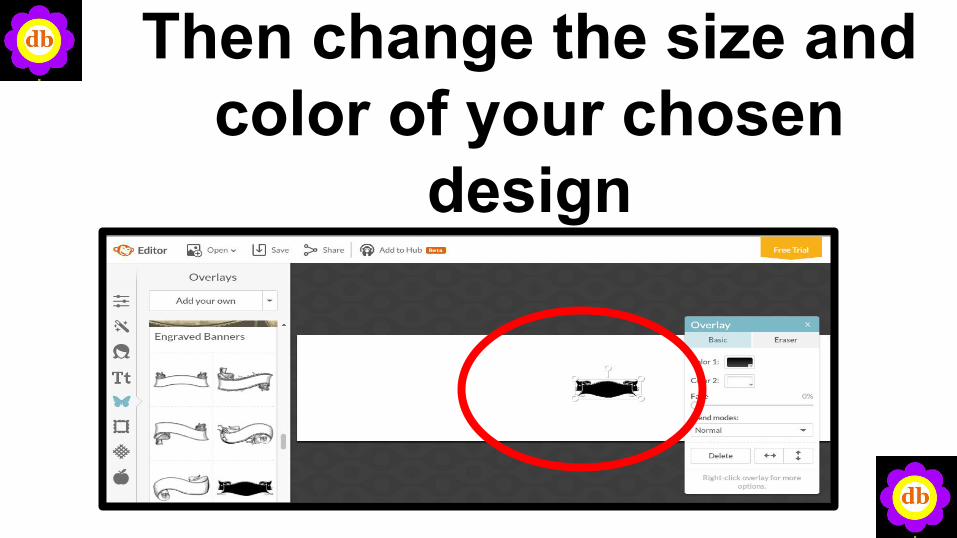
Then change the size and color of your chosen
design
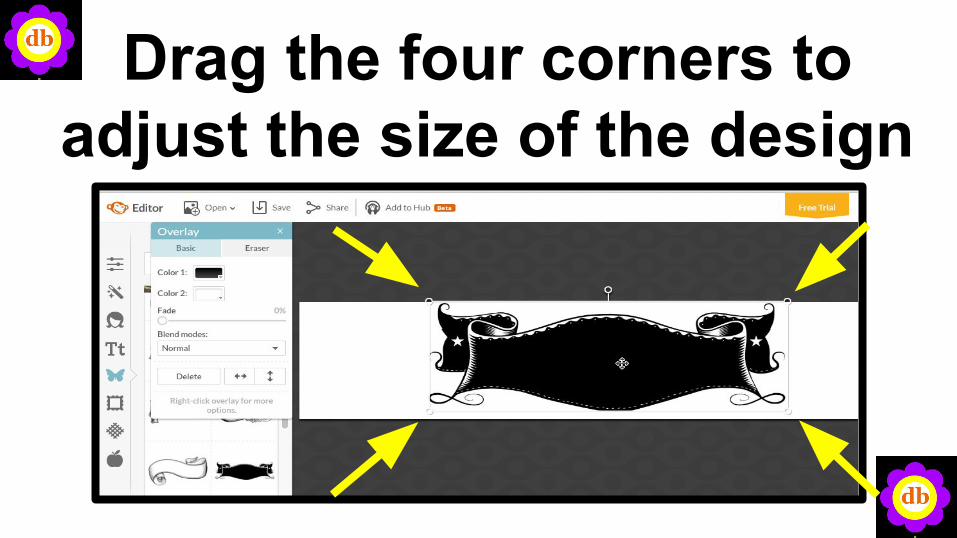
Drag the four corners to adjust the size of the design
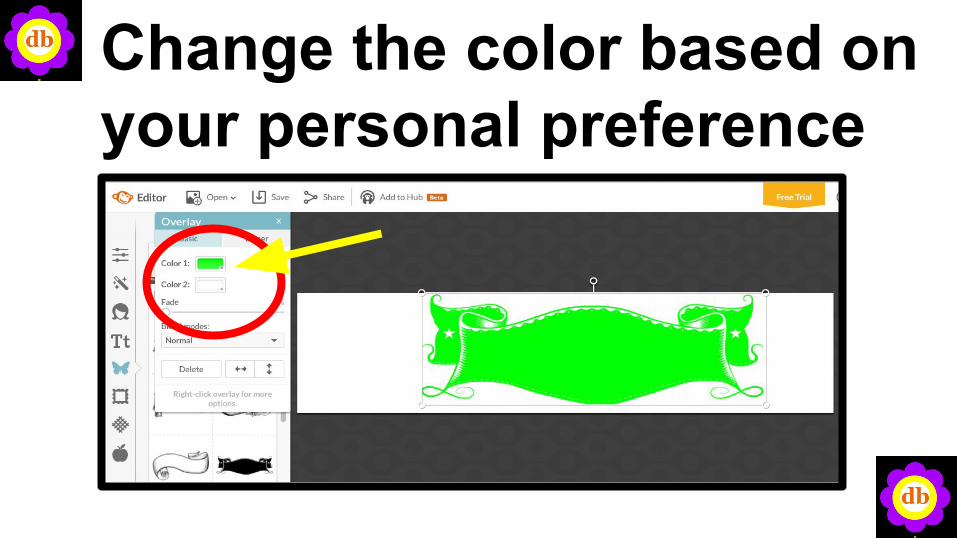
Change the color based on your personal preference
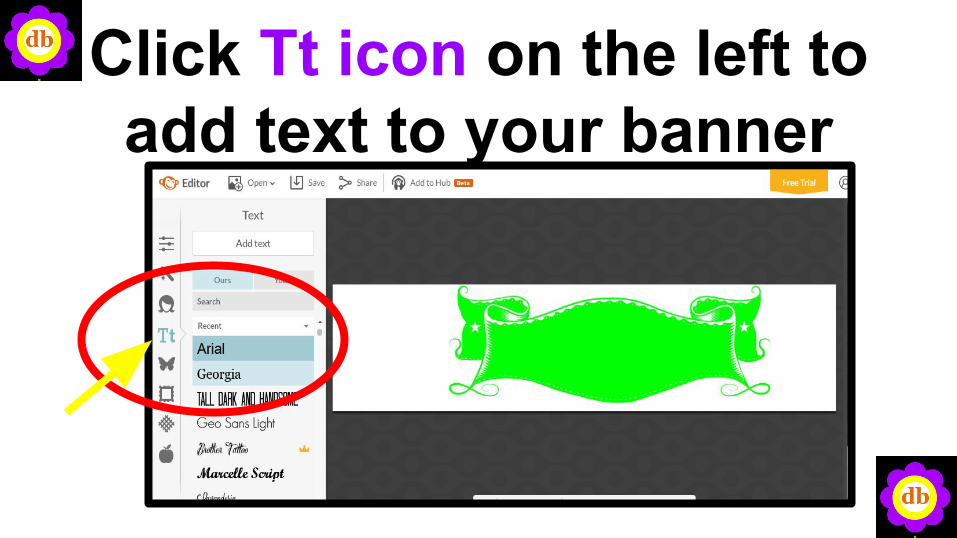
Click Tt icon on the left to add text to your banner
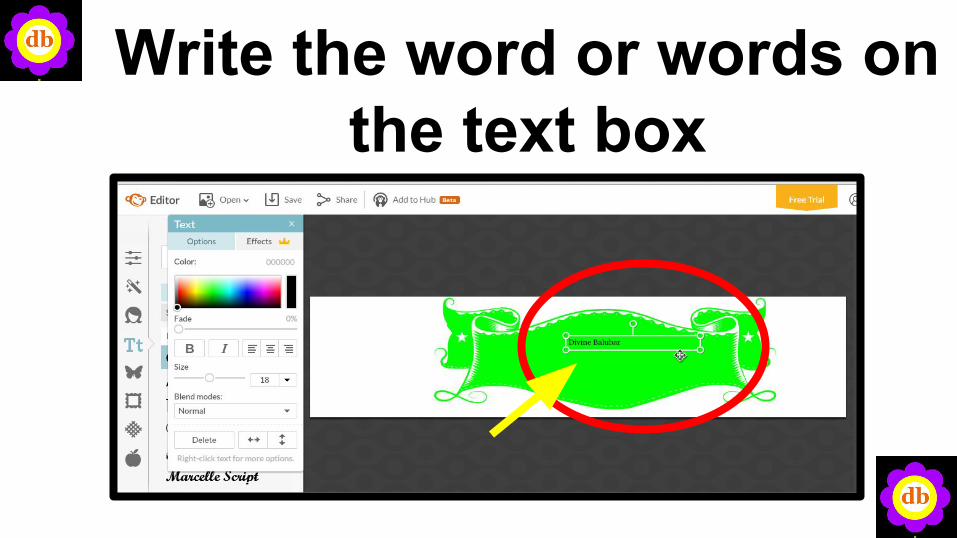
Write the word or words on the text box
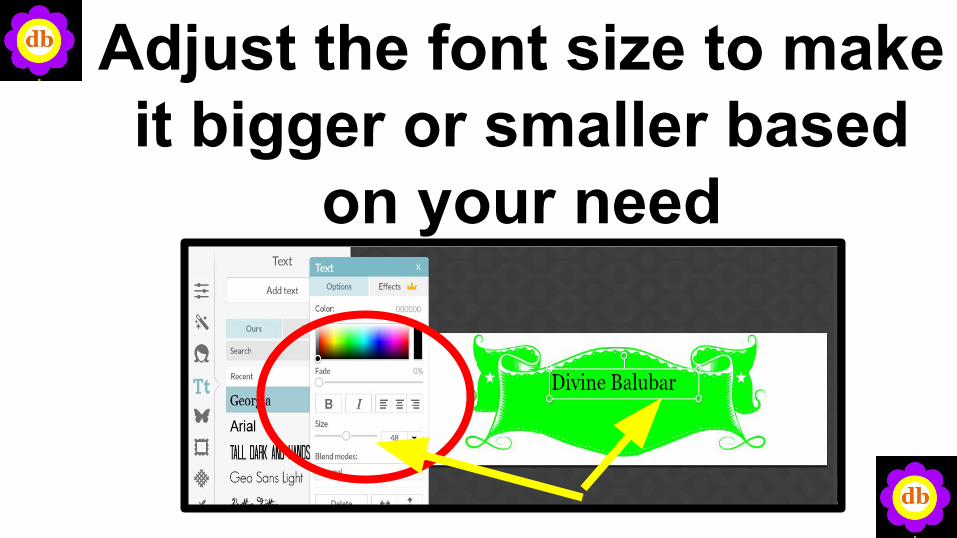
Adjust the font size to make it bigger or smaller based
on your need
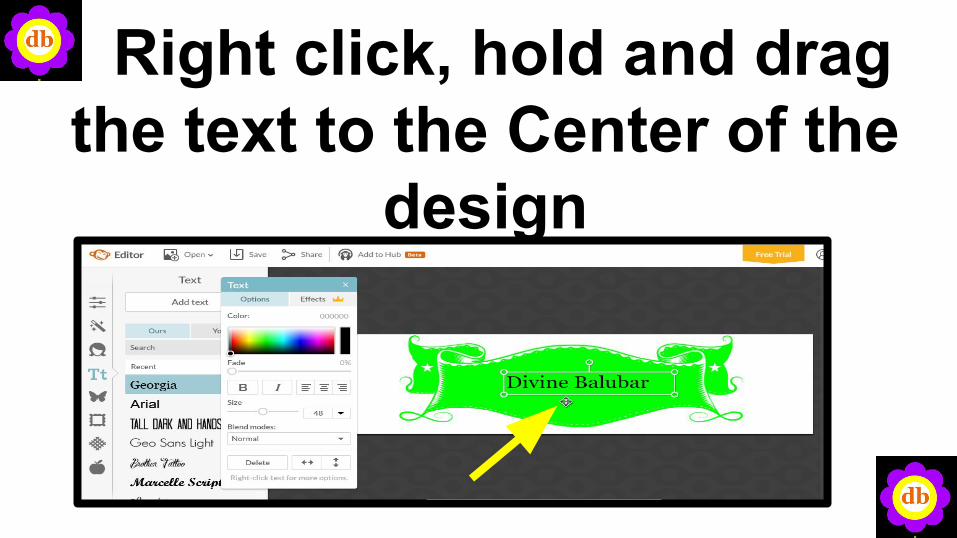
Right click, hold and drag the text to the Center of the
design

Highlight the text then change color
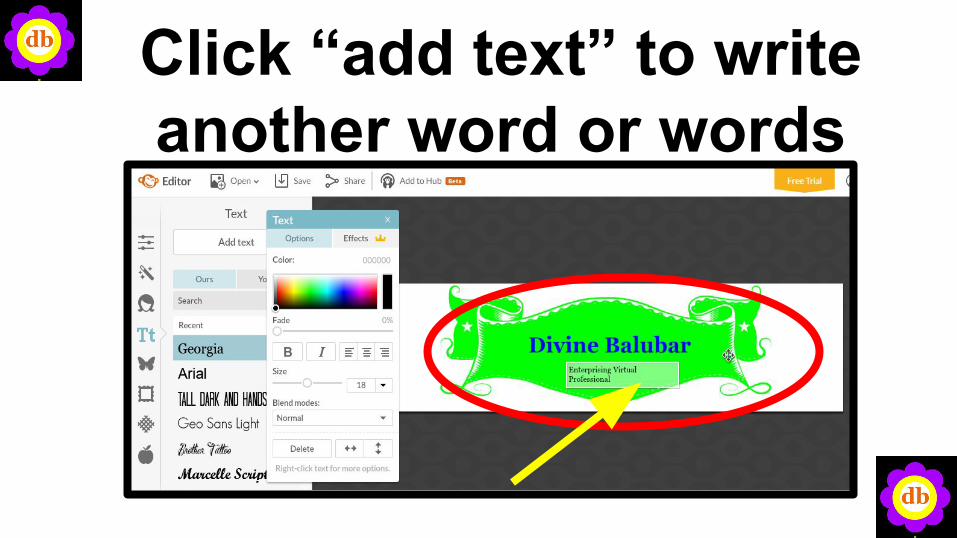
Click “add text” to write another word or words
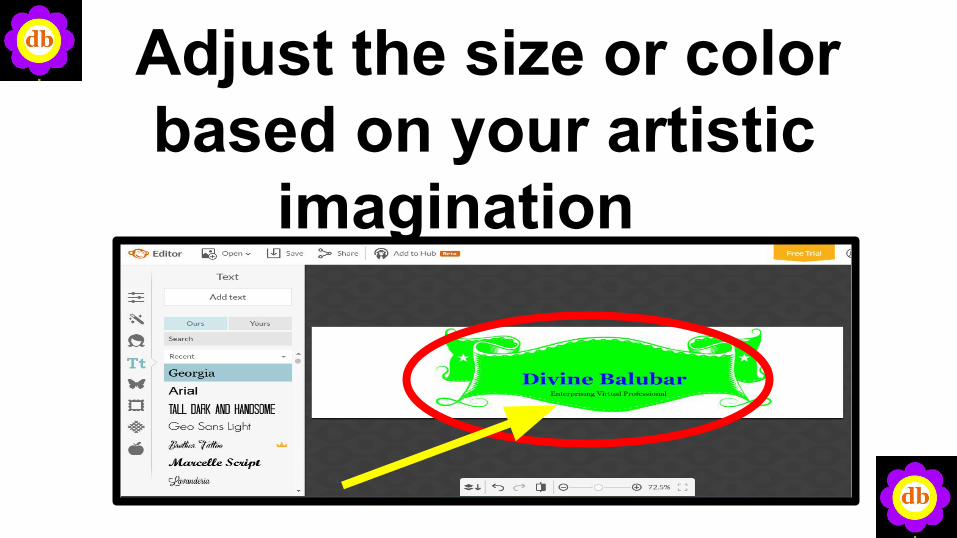
Adjust the size or color based on your artistic imagination
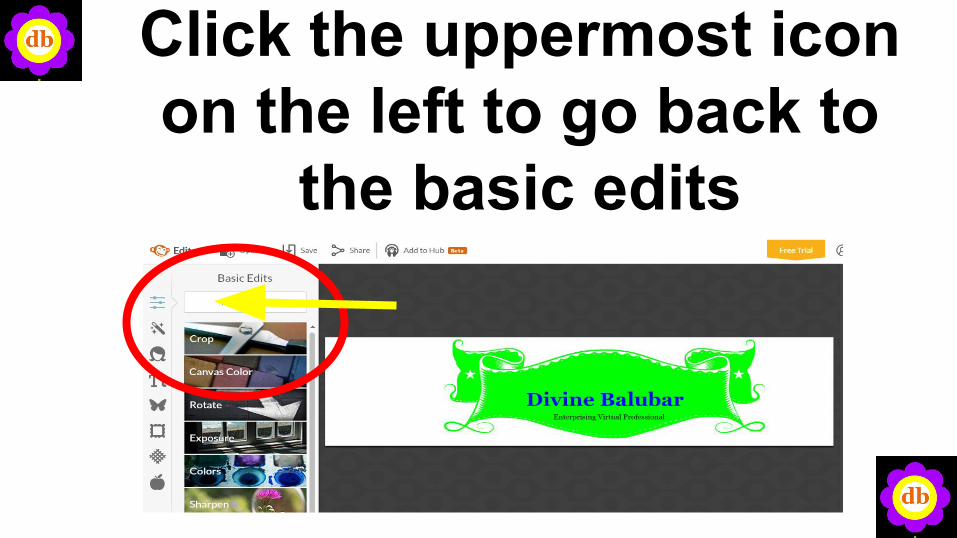
Click the uppermost icon on the left to go back to
the basic edits
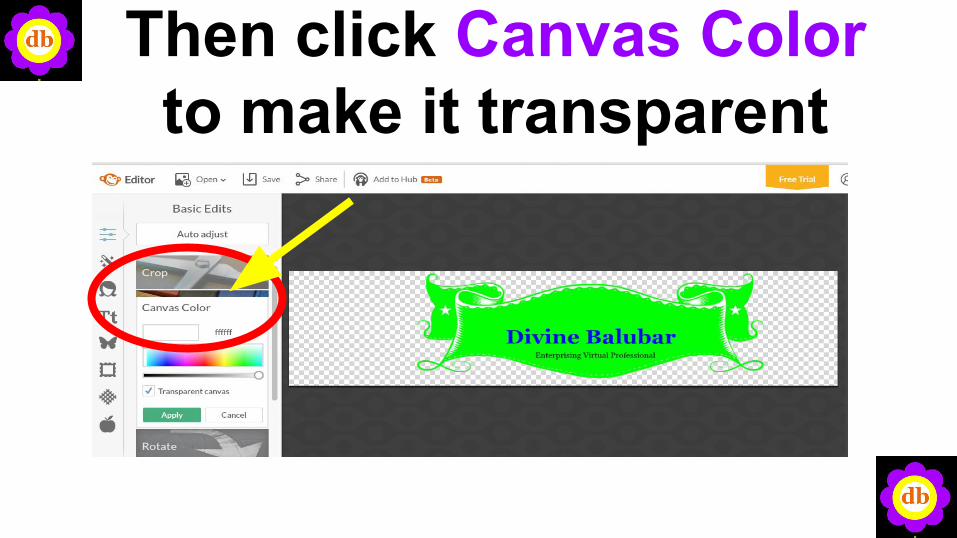
Then click Canvas Color to make it transparent
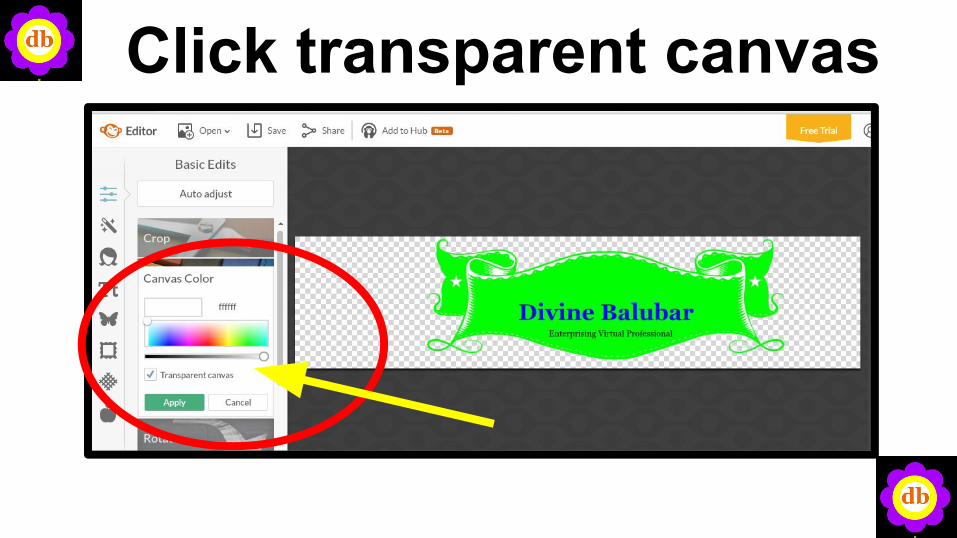
Click transparent canvas
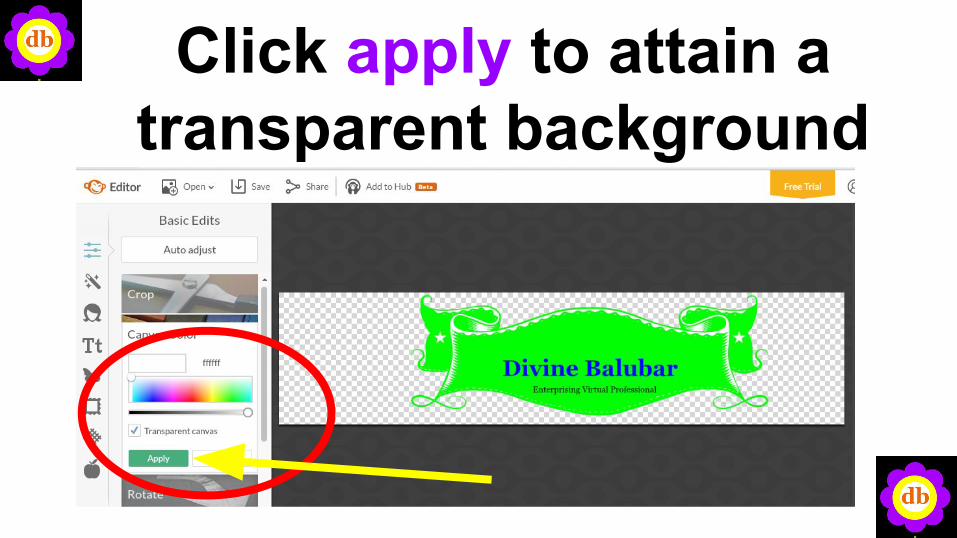
Click apply to attain a transparent background
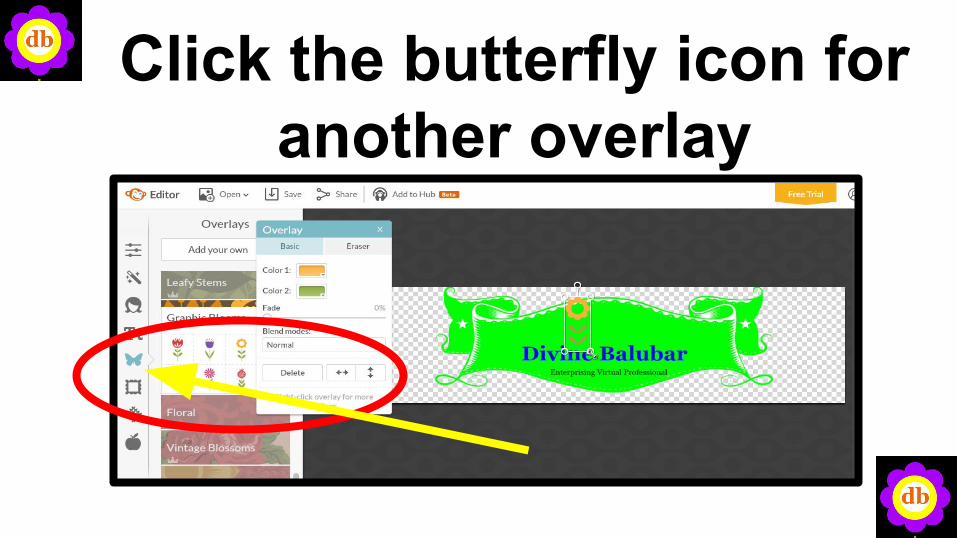
Click the butterfly icon for another overlay
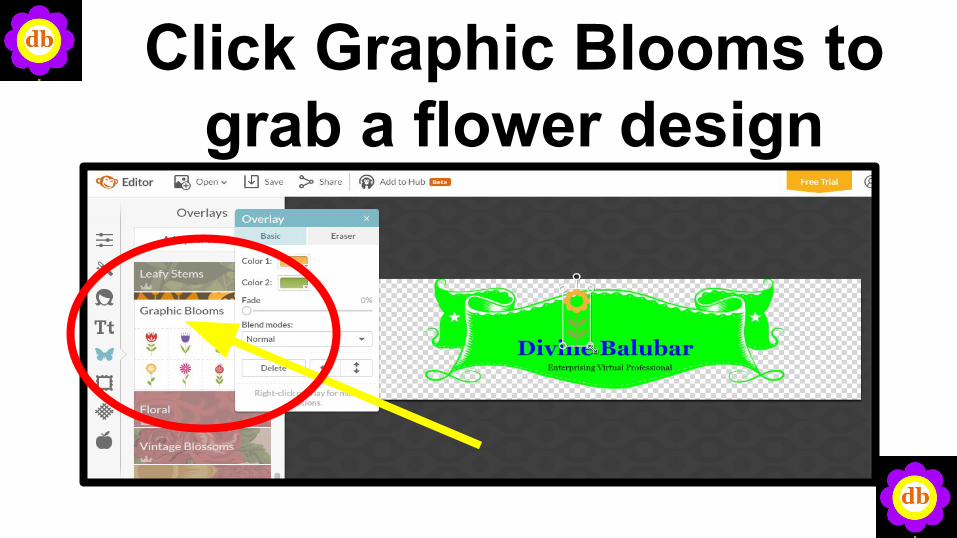
Click Graphic Blooms to grab a flower design
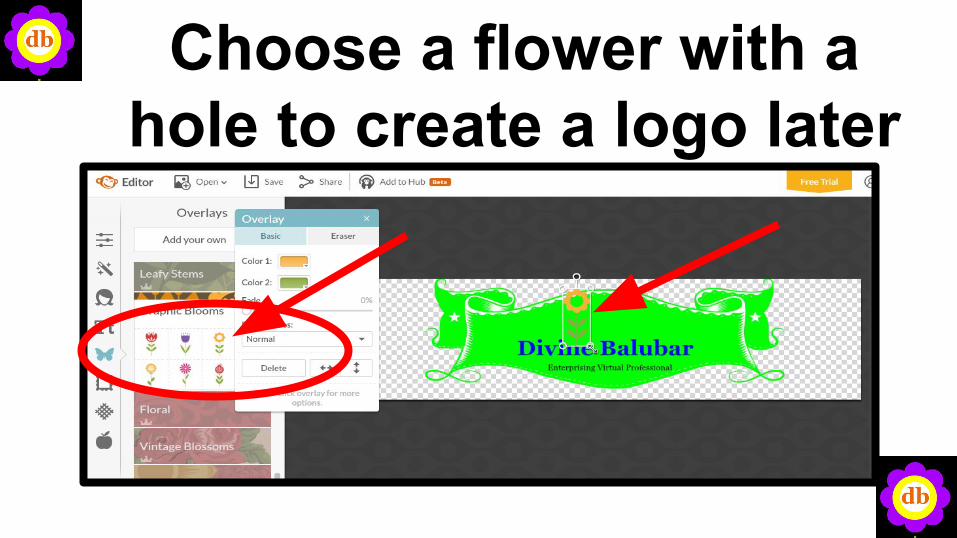
Choose a flower with a hole to create a logo later
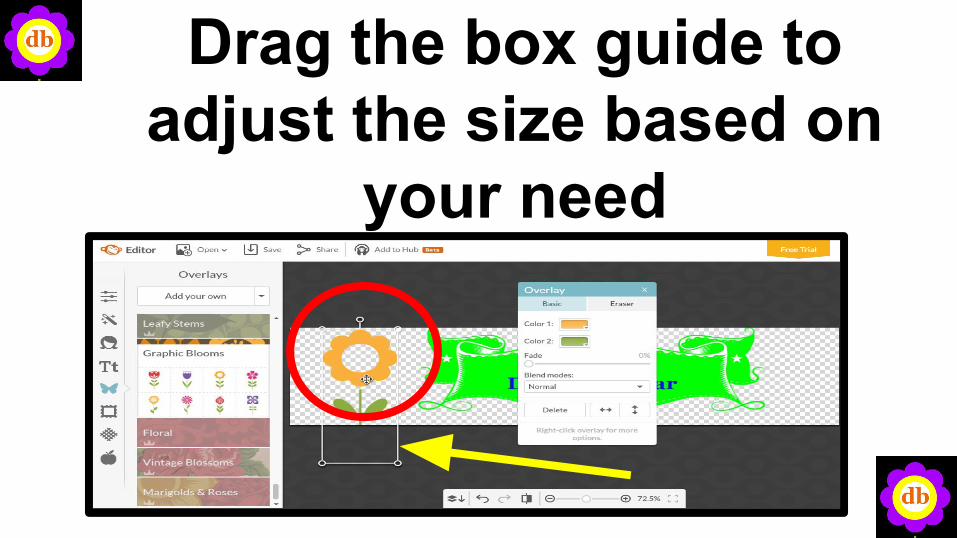
Drag the box guide to adjust the size based on
your need
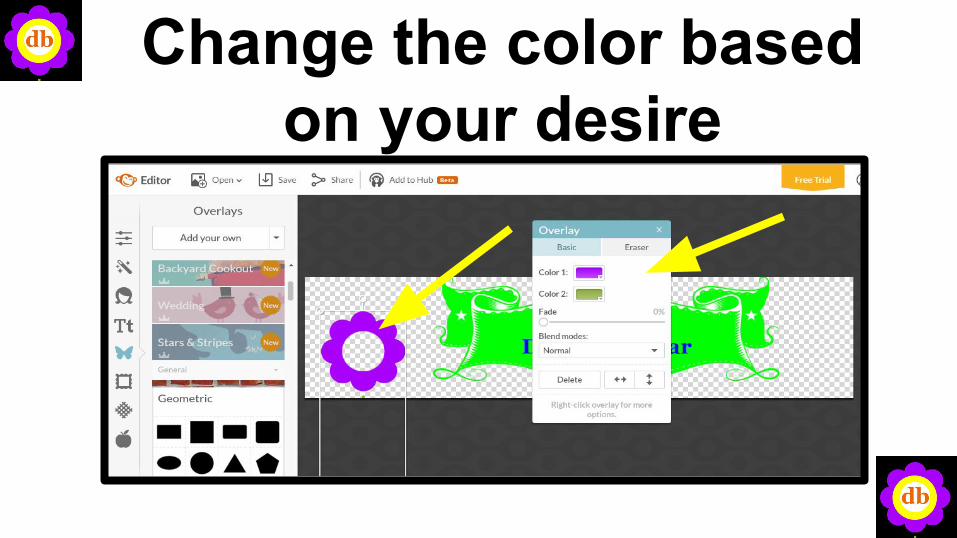
Change the color based on your desire
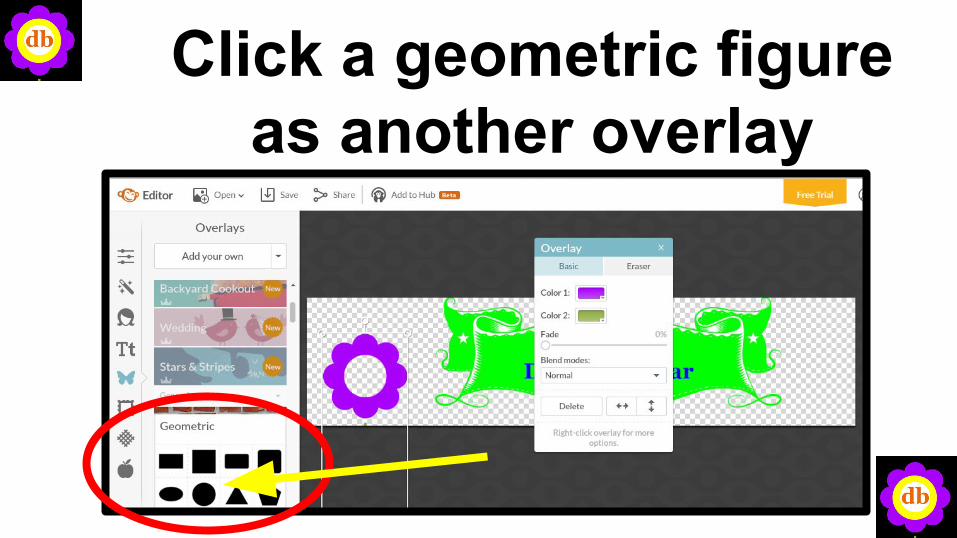
Click a geometric figure as another overlay
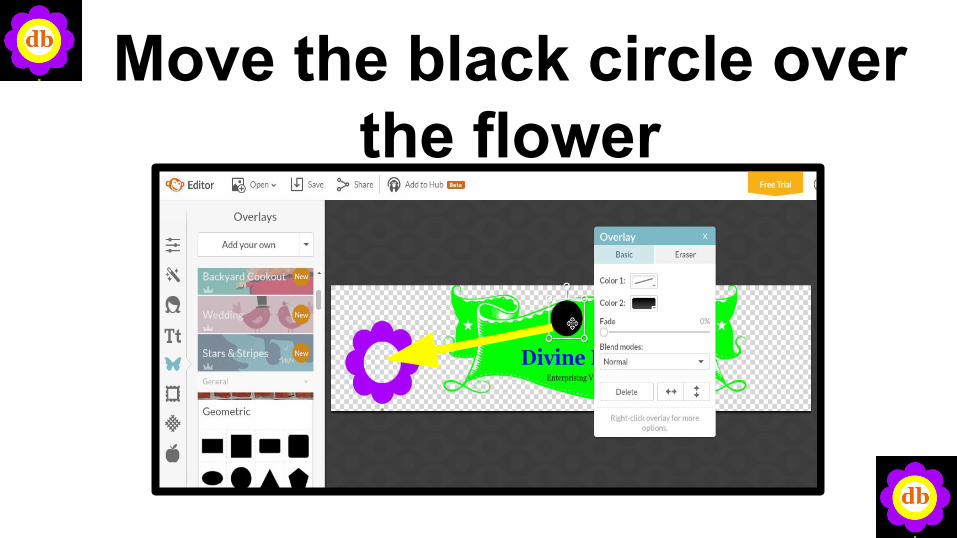
Move the black circle over the flower
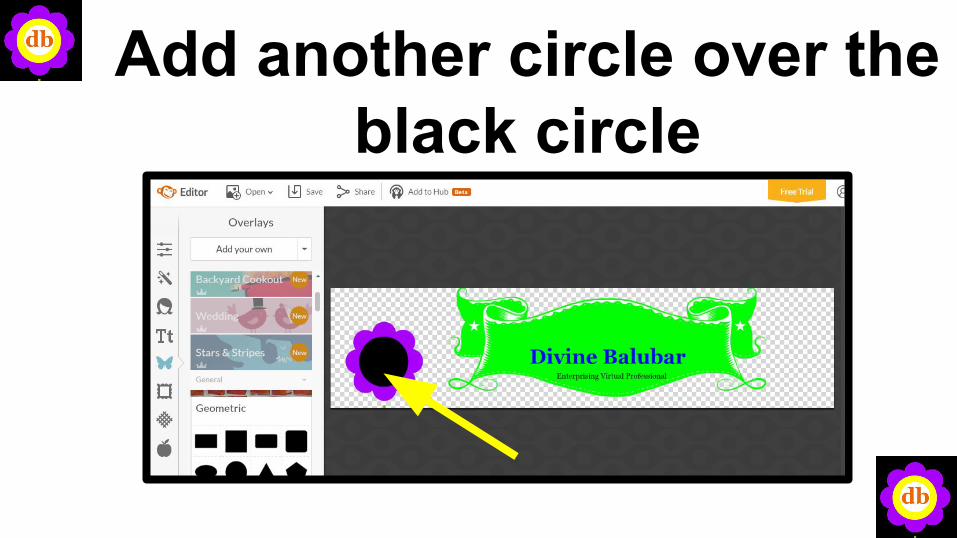
Add another circle over the black circle
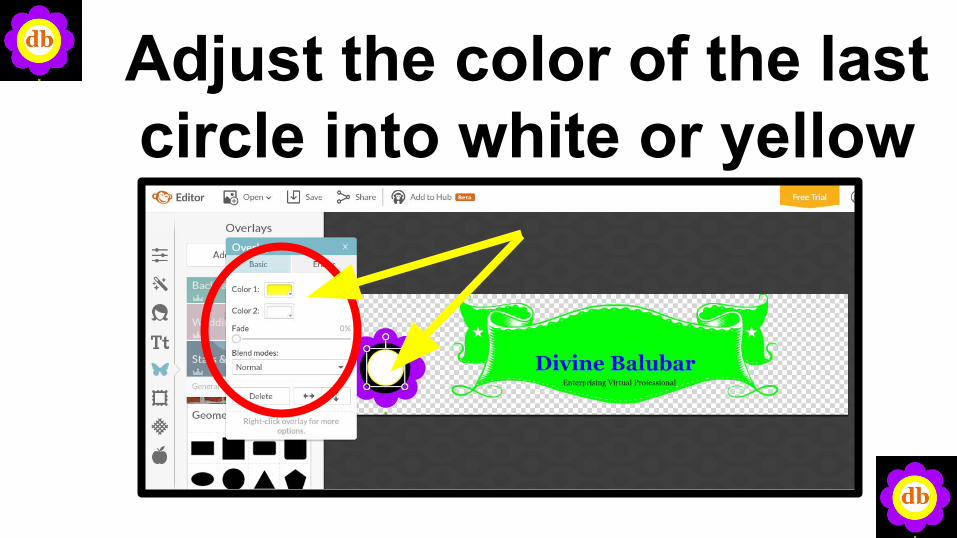
Adjust the color of the last circle into white or yellow
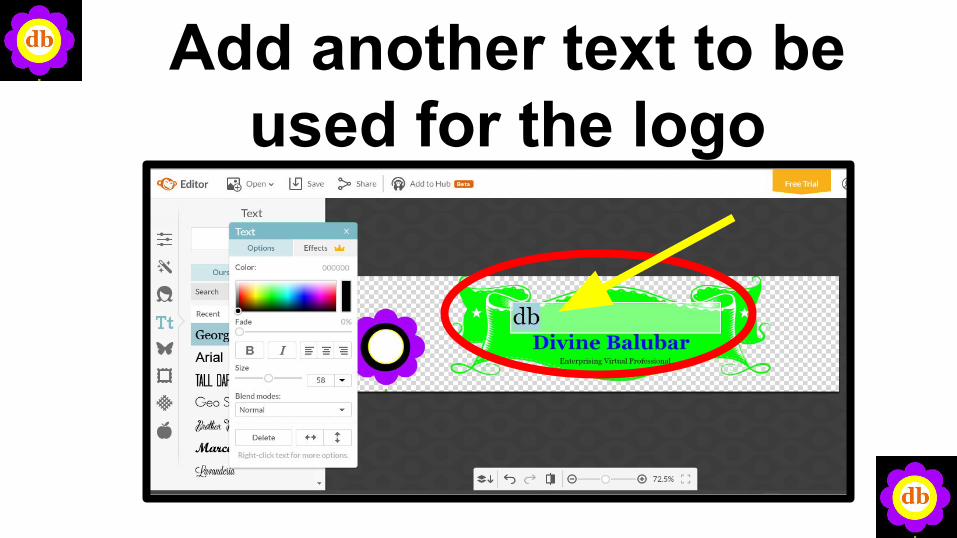
Add another text to be used for the logo
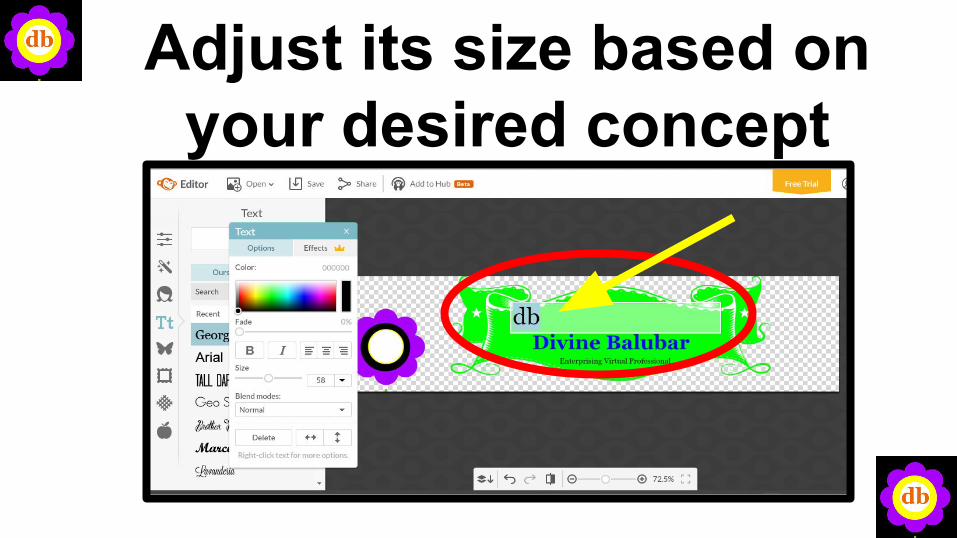
Adjust its size based on your desired concept
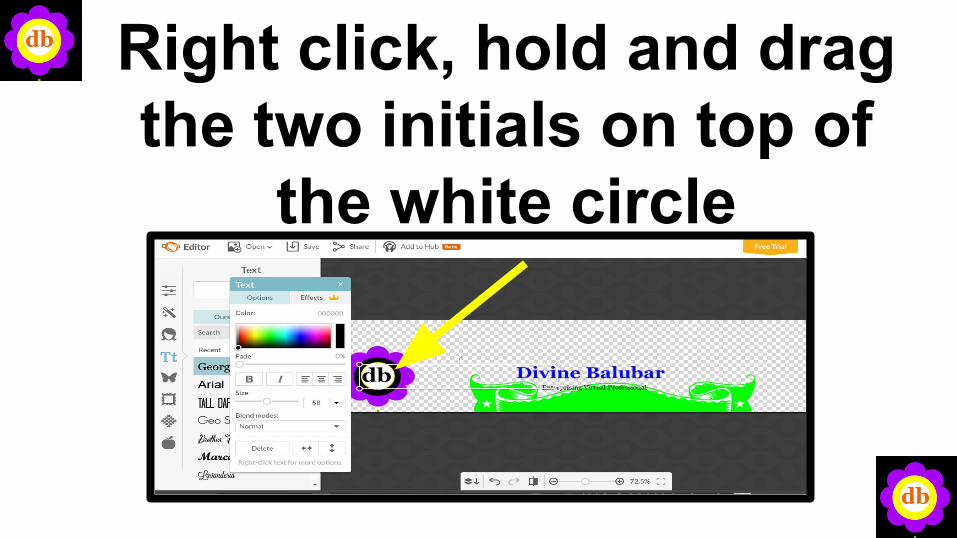
Right click, hold and drag the two initials on top of
the white circle
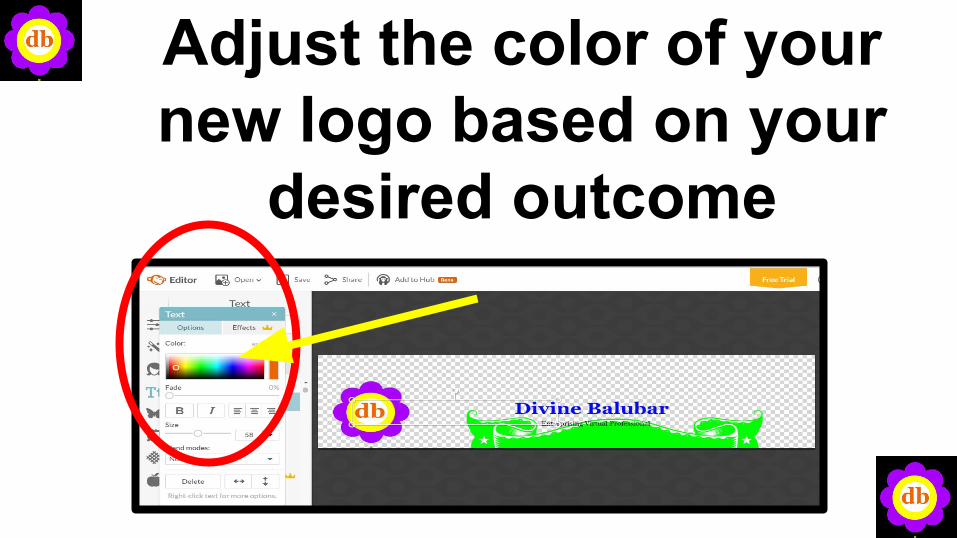
Adjust the color of your new logo based on your
desired outcome
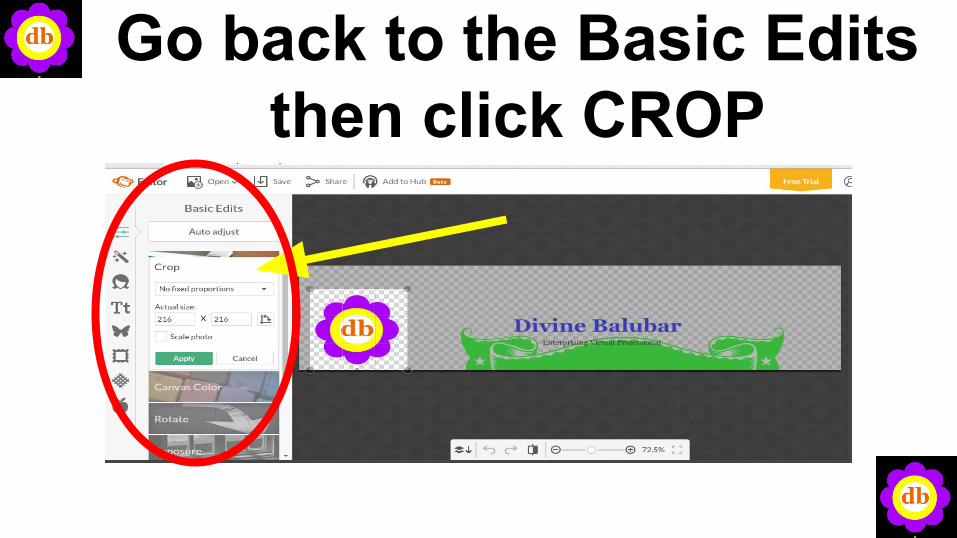
Go back to the Basic Edits then click CROP
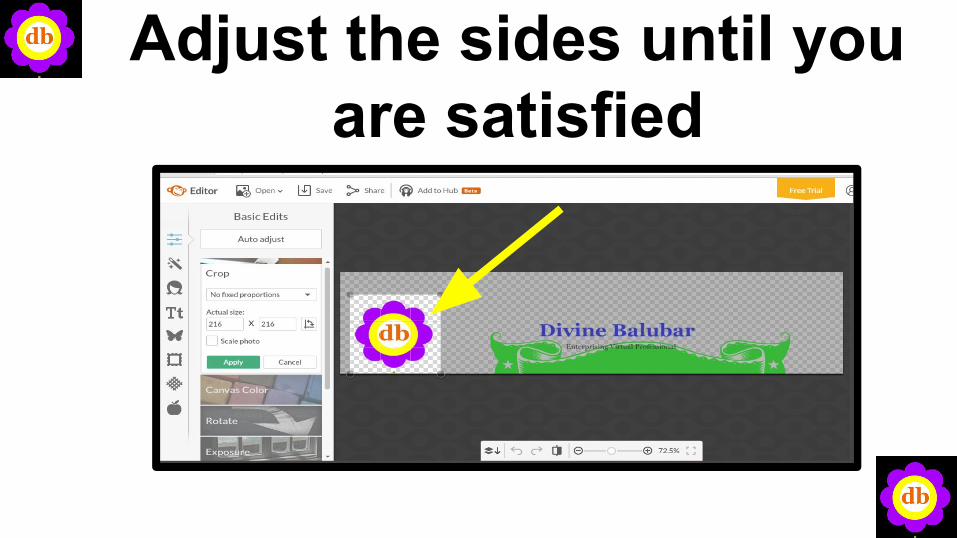
Adjust the sides until you are satisfied
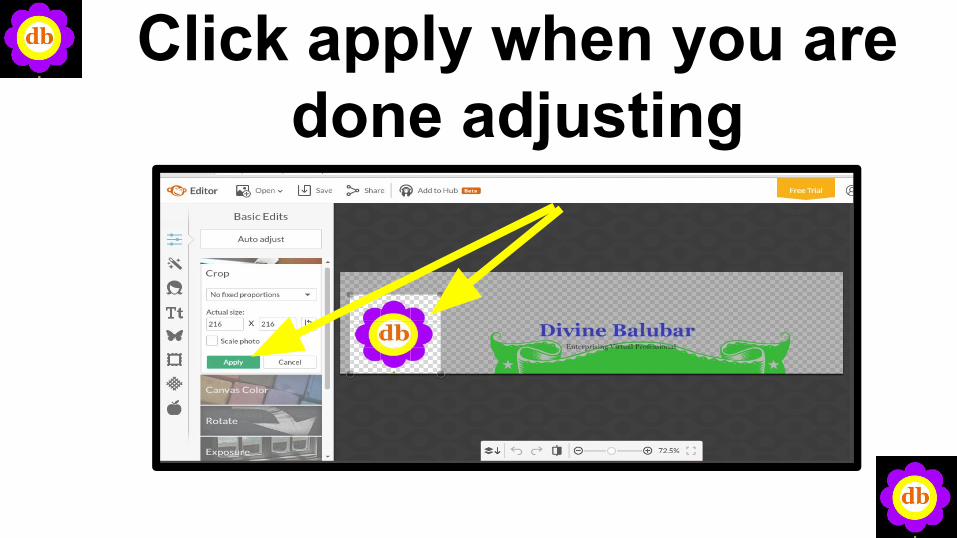
Click apply when you are done adjusting
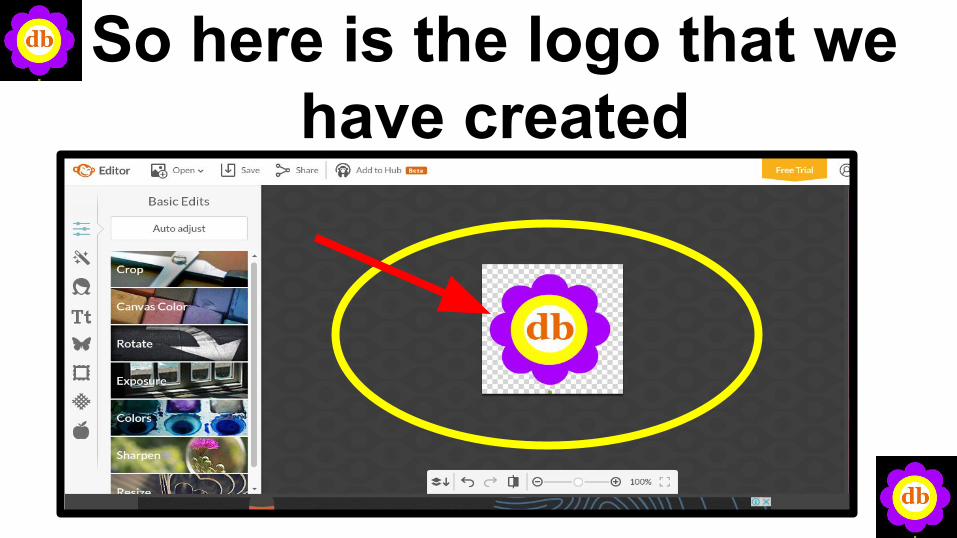
So here is the logo that we have created
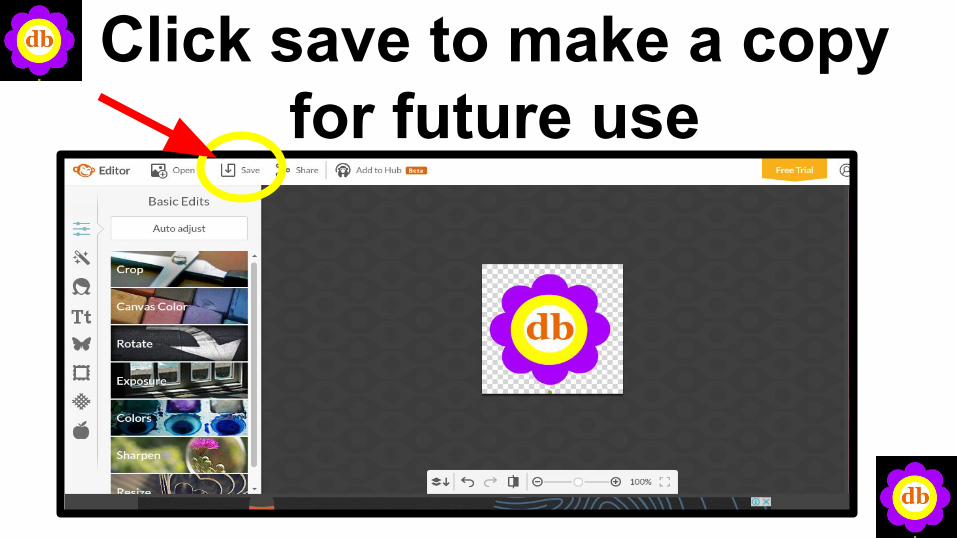
Click save to make a copy for future use
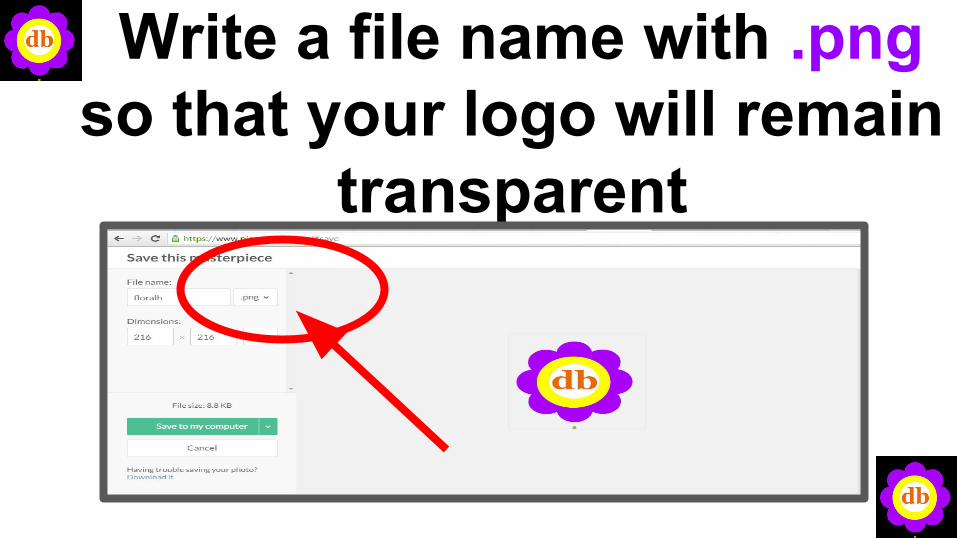
Write a file name with .png so that your logo will remain
transparent
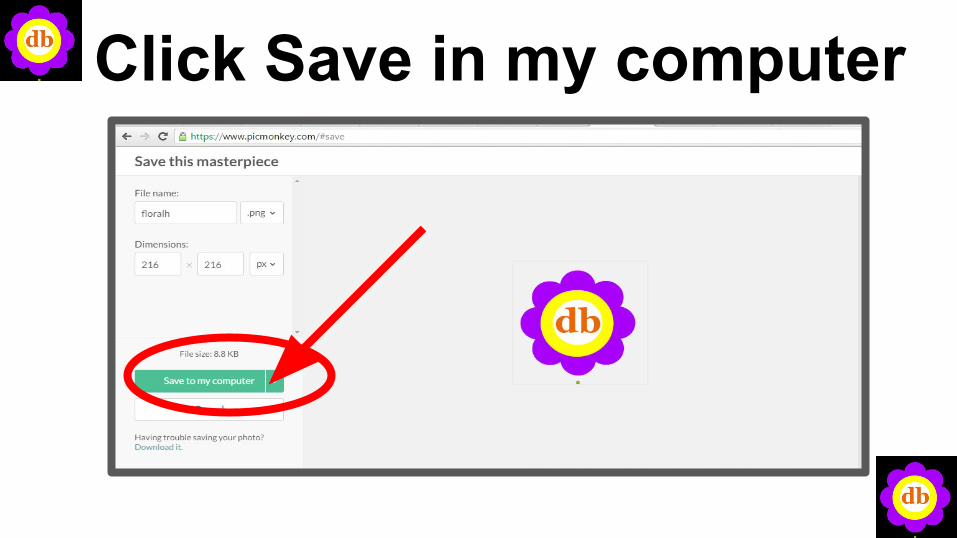
Click Save in my computer
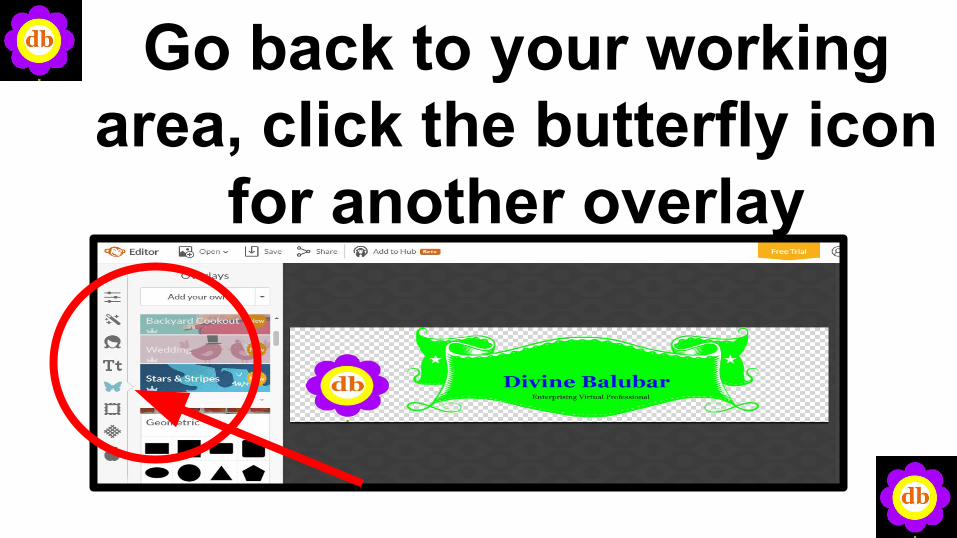
Go back to your working area, click the butterfly icon
for another overlay
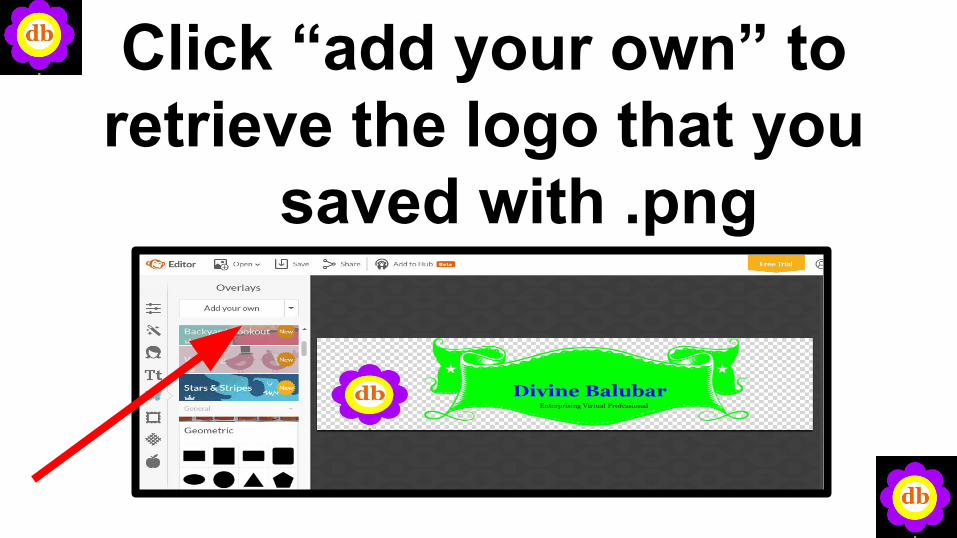
Click “add your own” to retrieve the logo that you saved with .png
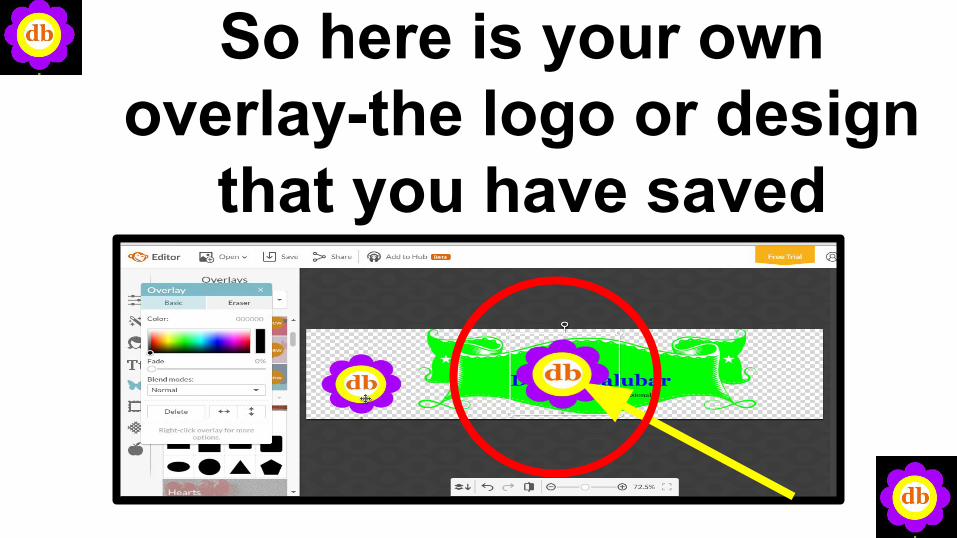
So here is your own overlay-the logo or design
that you have saved
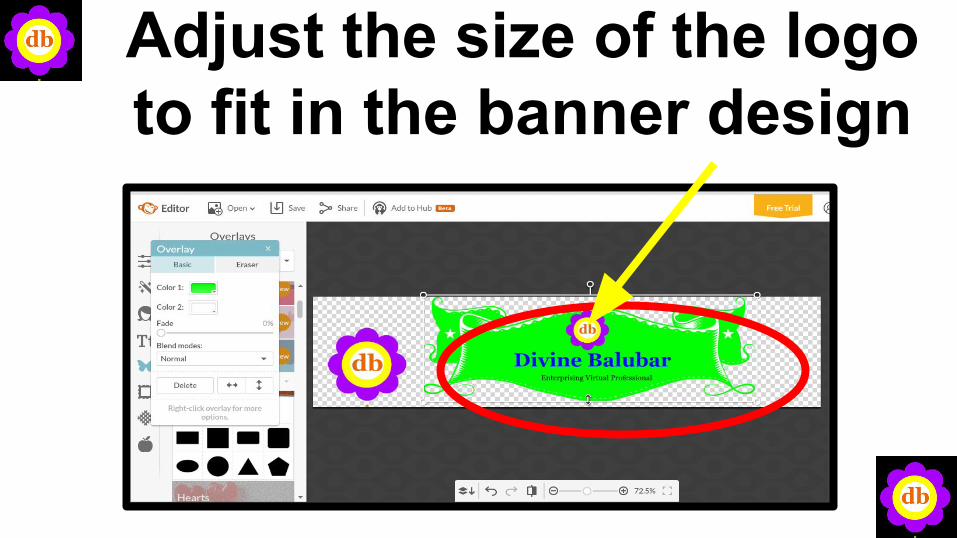
Adjust the size of the logo to fit in the banner design
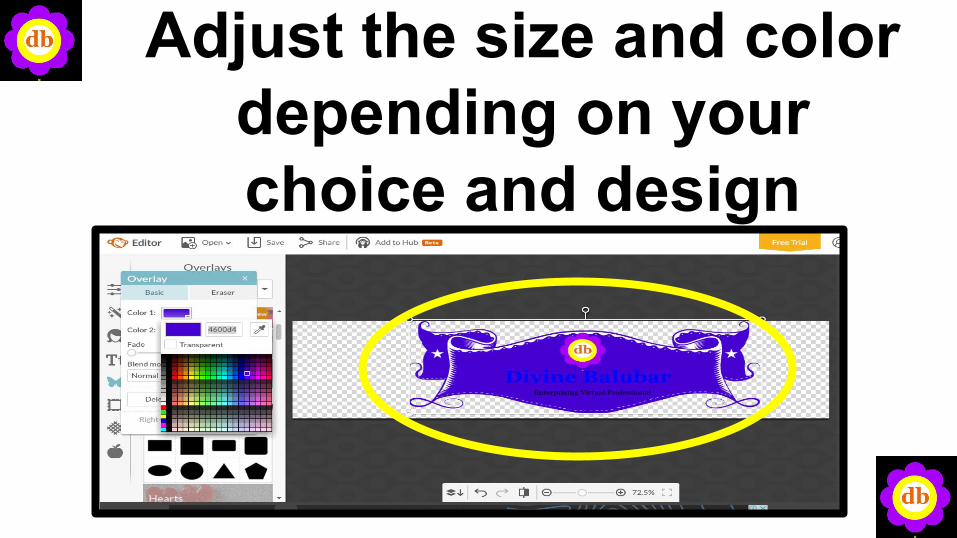
Adjust the size and color depending on your choice and design
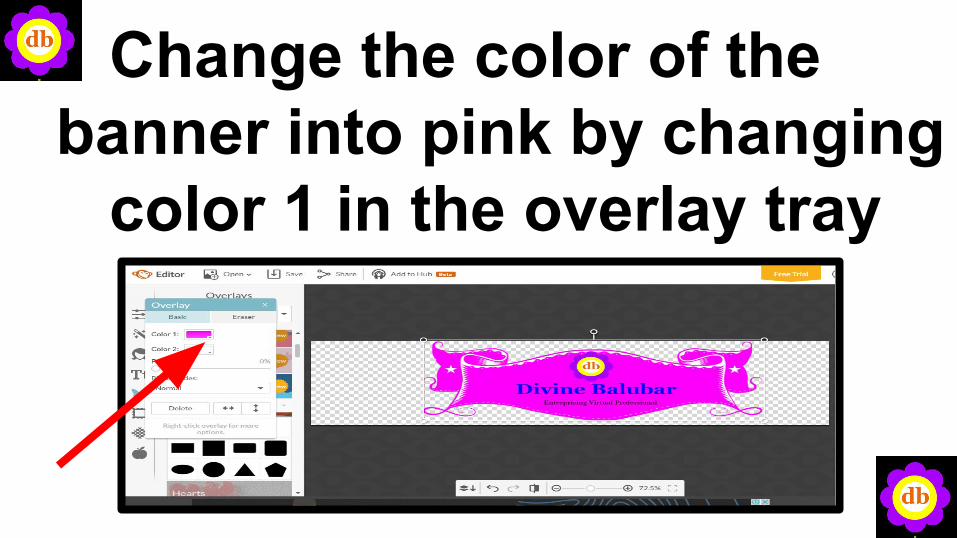
Change the color of the banner into pink by changing color 1 in the overlay tray
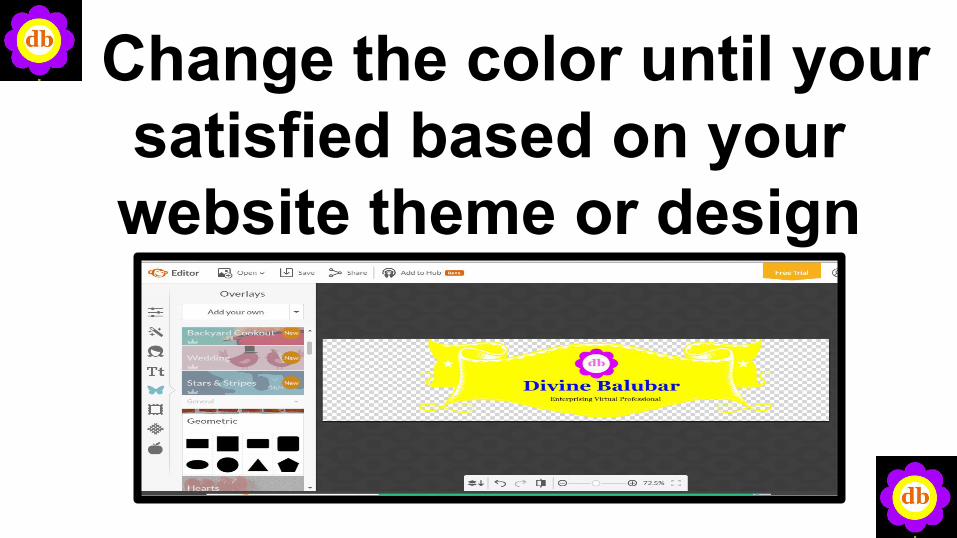
Change the color until your satisfied based on your website theme or design

Save your work again in dot PNG ( .png)
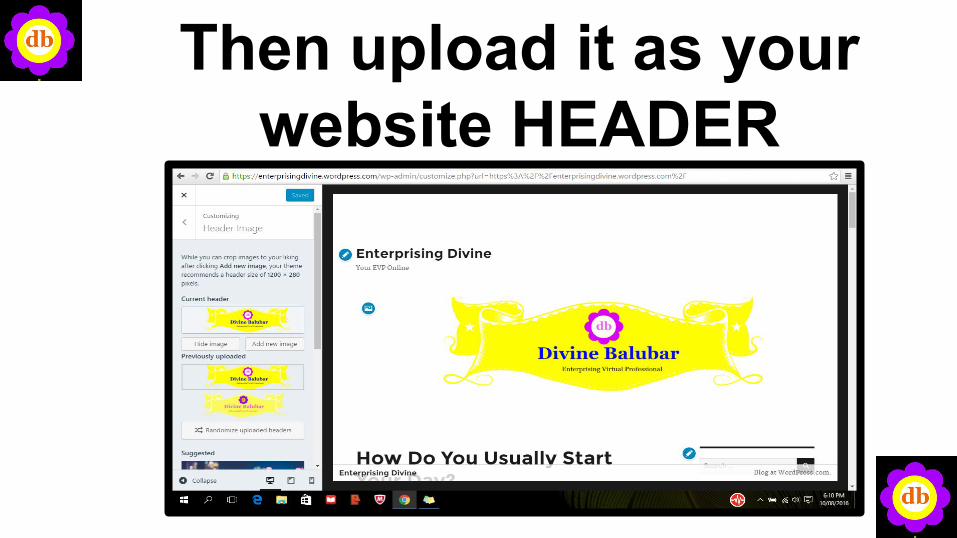
Then upload it as your website HEADER
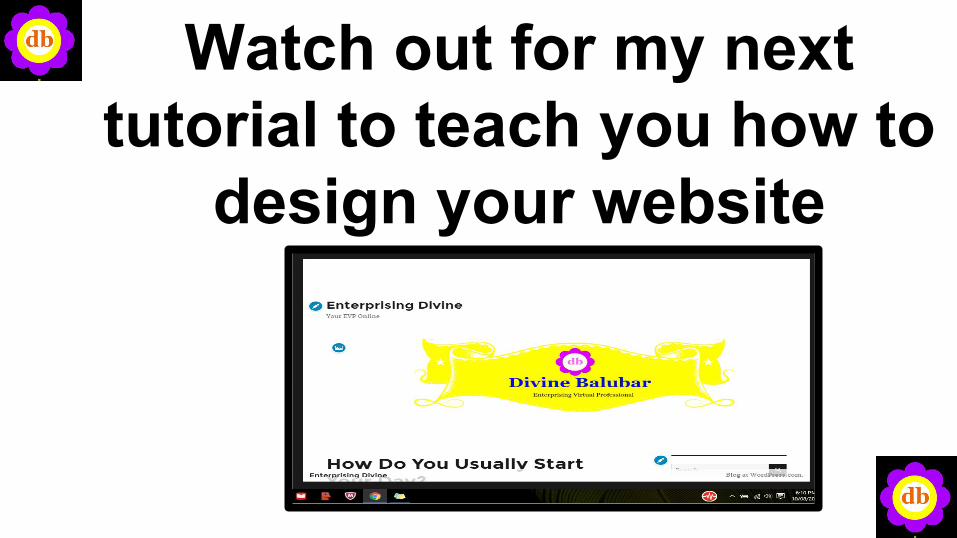
Watch out for my next tutorial to teach you how to
design your website
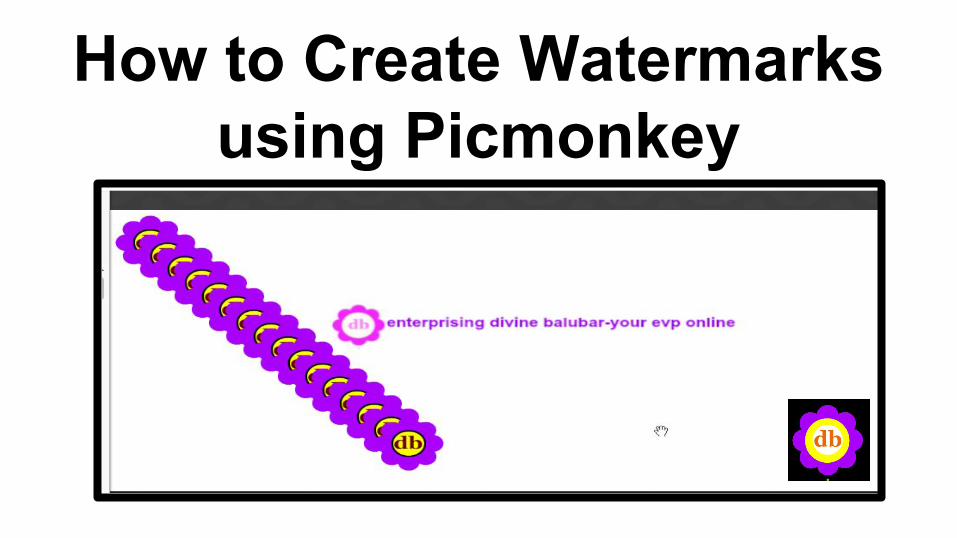
How to Create Watermarks using Picmonkey
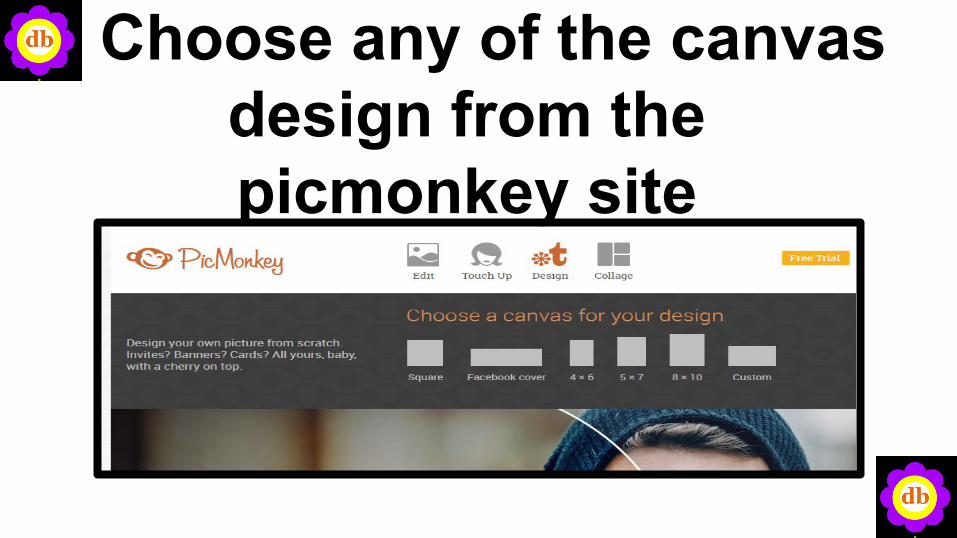
Choose any of the canvas design from the picmonkey site
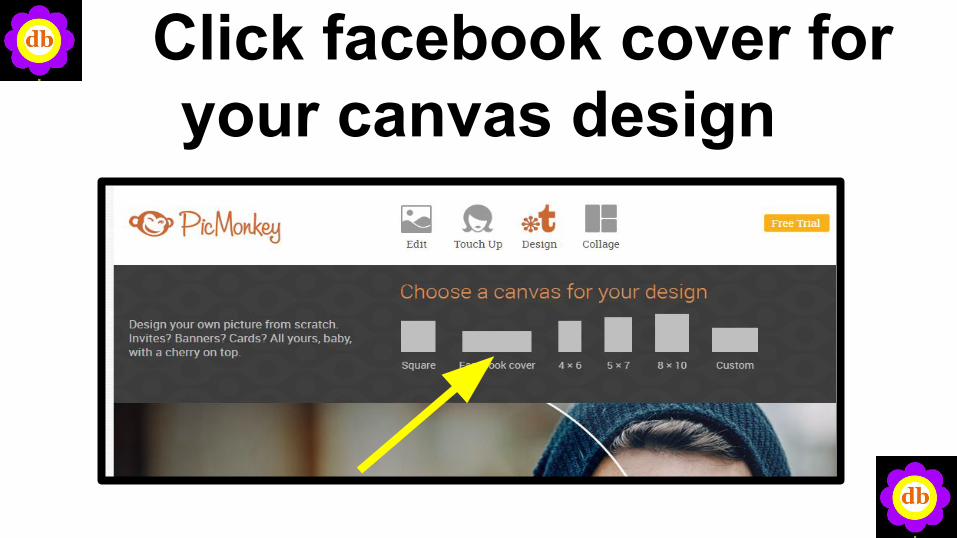
Click facebook cover for your canvas design
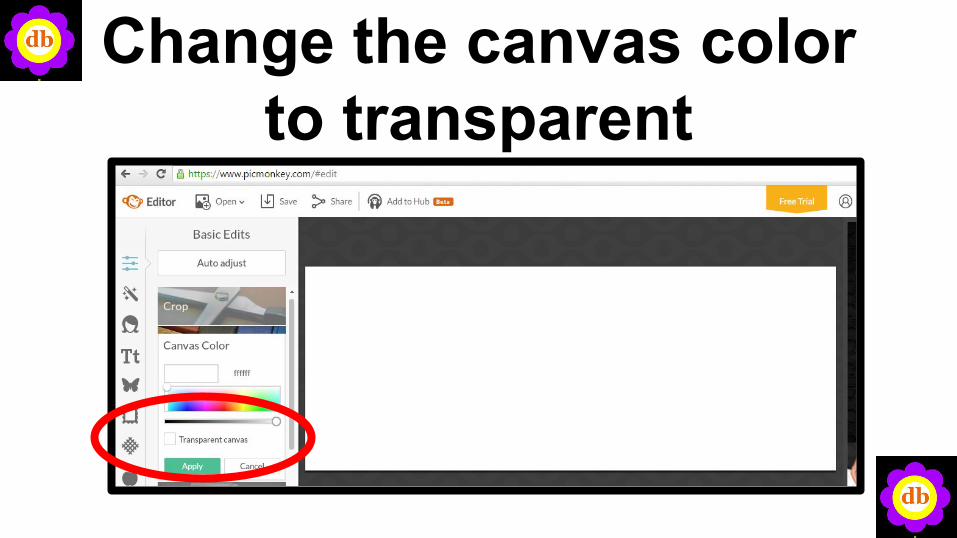
Change the canvas color to transparent
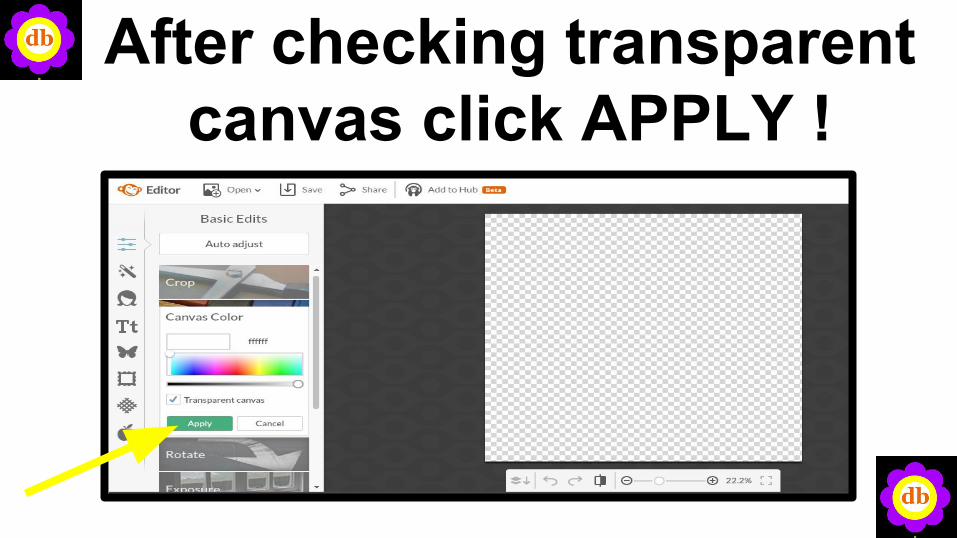
After checking transparent canvas click APPLY !
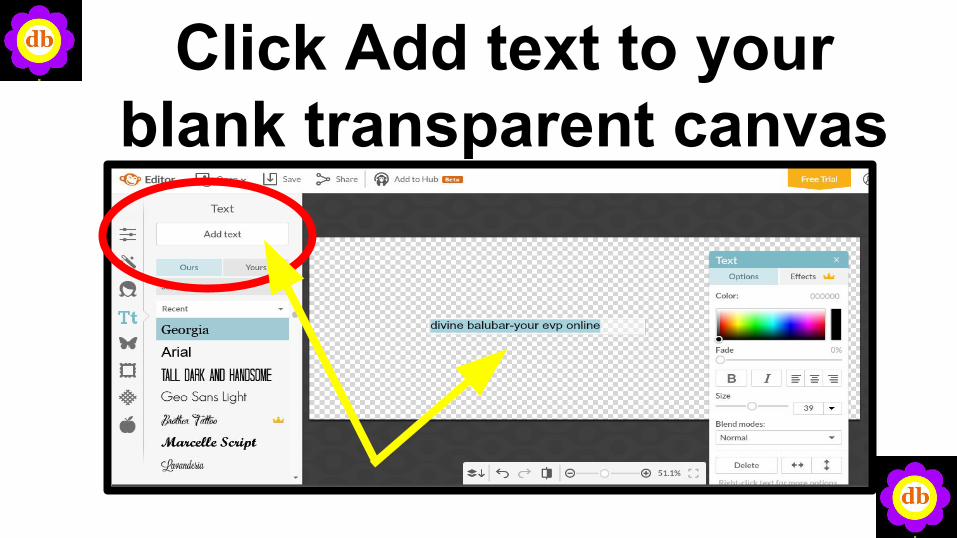
Click Add text to your blank transparent canvas

Write your text in the box
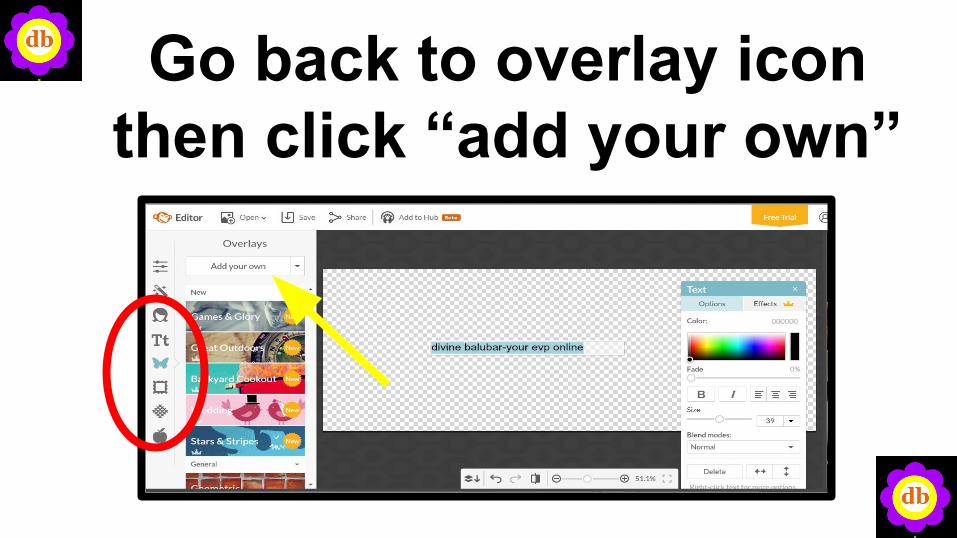
Go back to overlay icon then click “add your own”
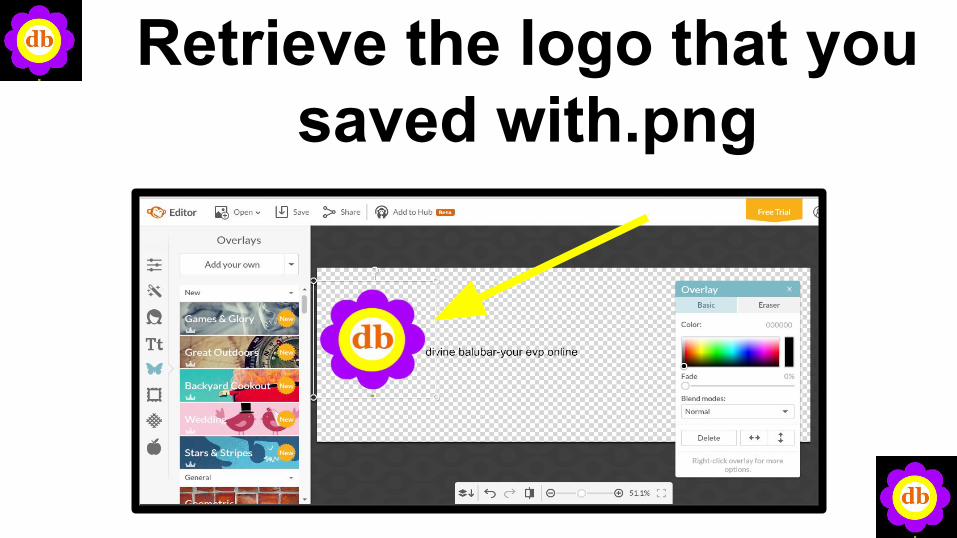
Retrieve the logo that you saved with.png
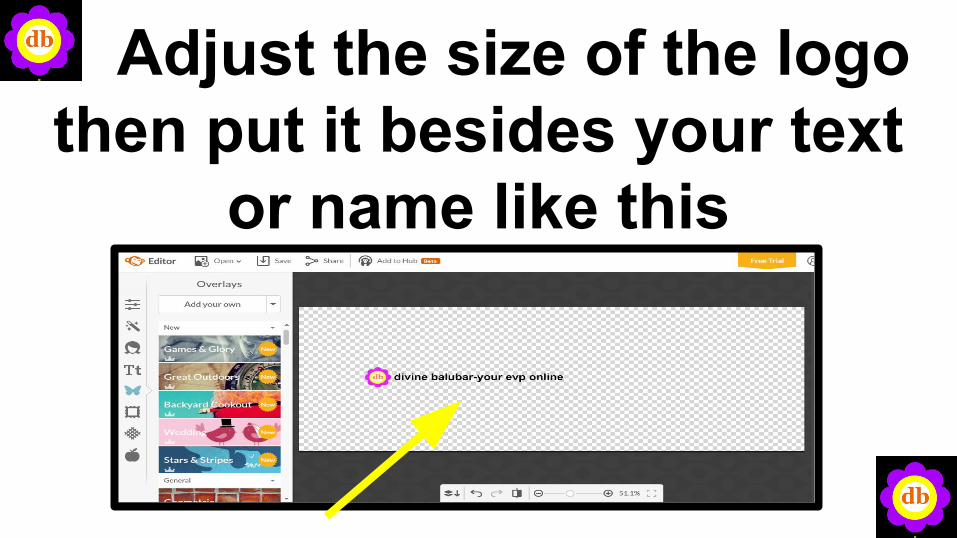
Adjust the size of the logo then put it besides your text
or name like this
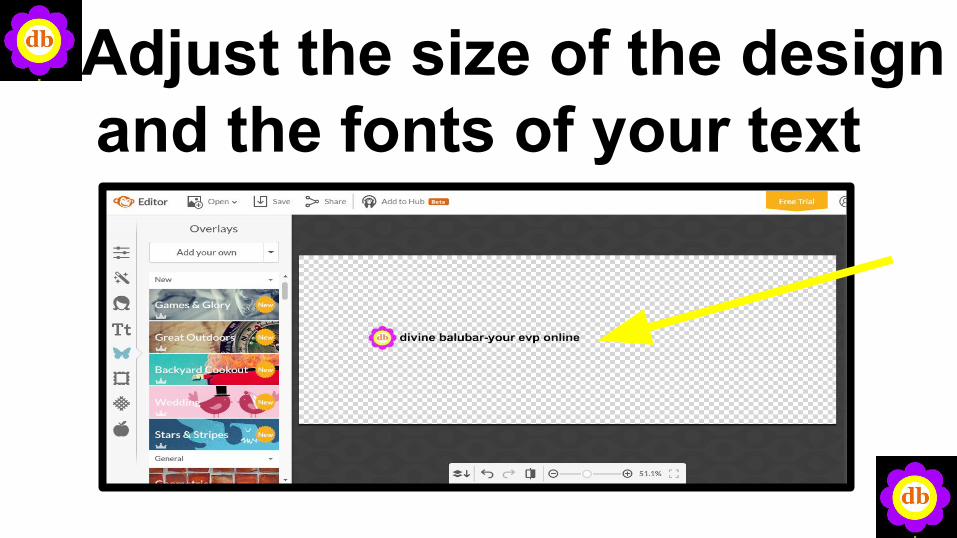
Adjust the size of the design and the fonts of your text
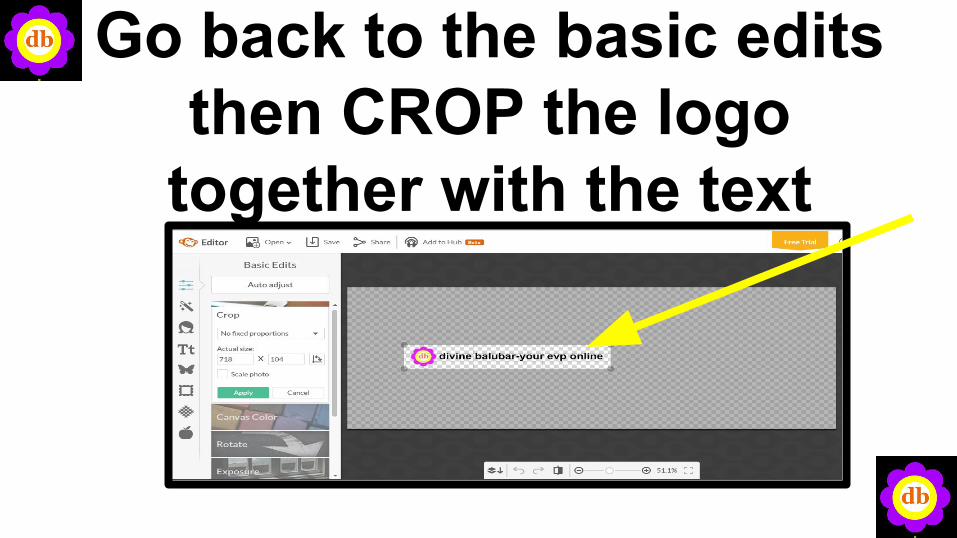
Go back to the basic edits then CROP the logo
together with the text
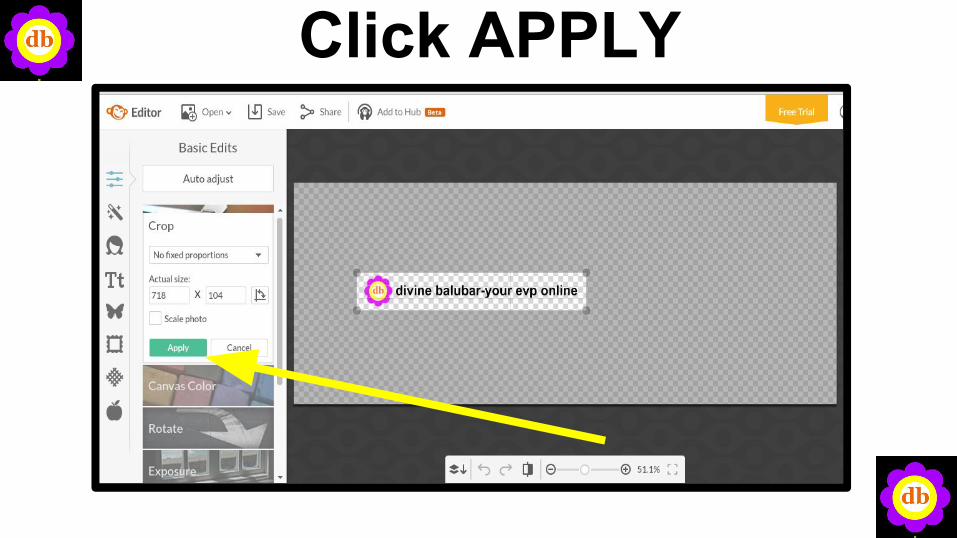
Click APPLY
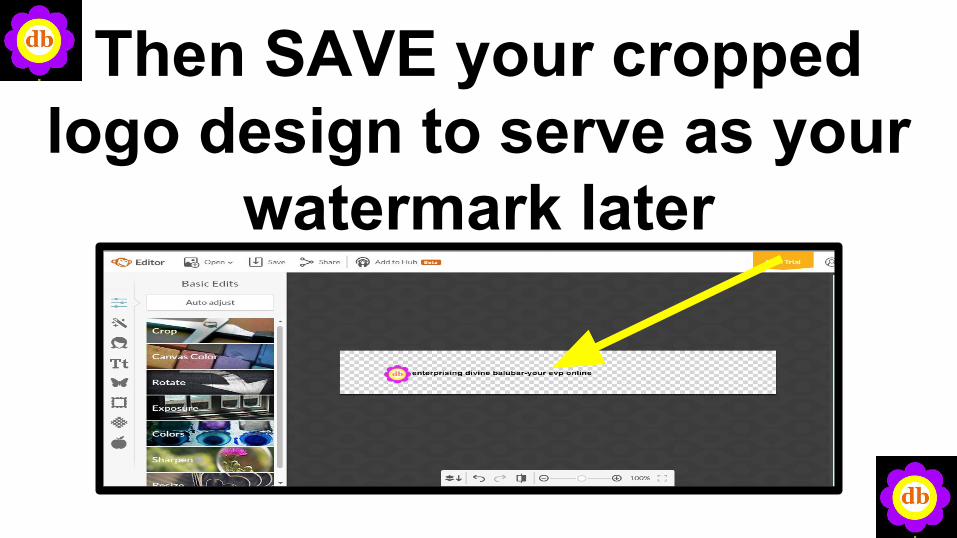
Then SAVE your cropped logo design to serve as your
watermark later
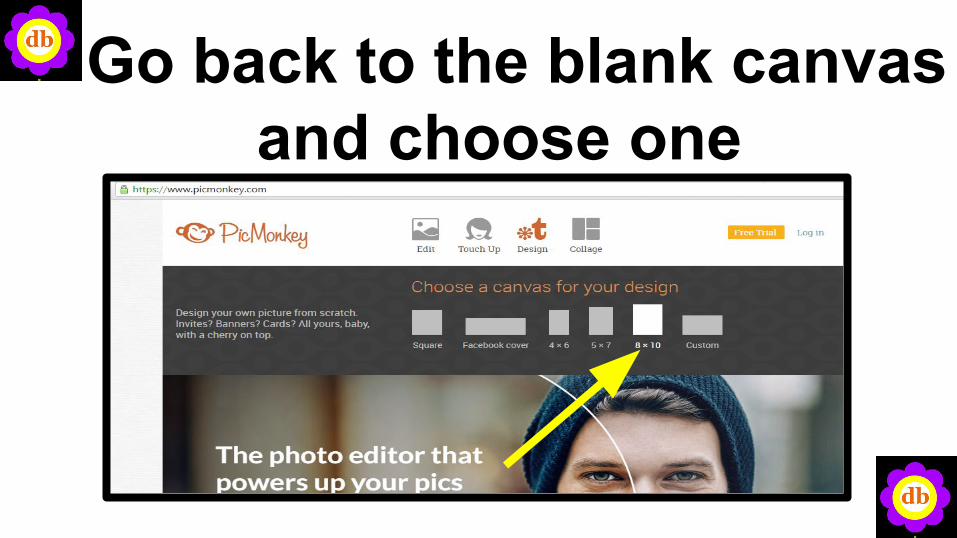
Go back to the blank canvas and choose one
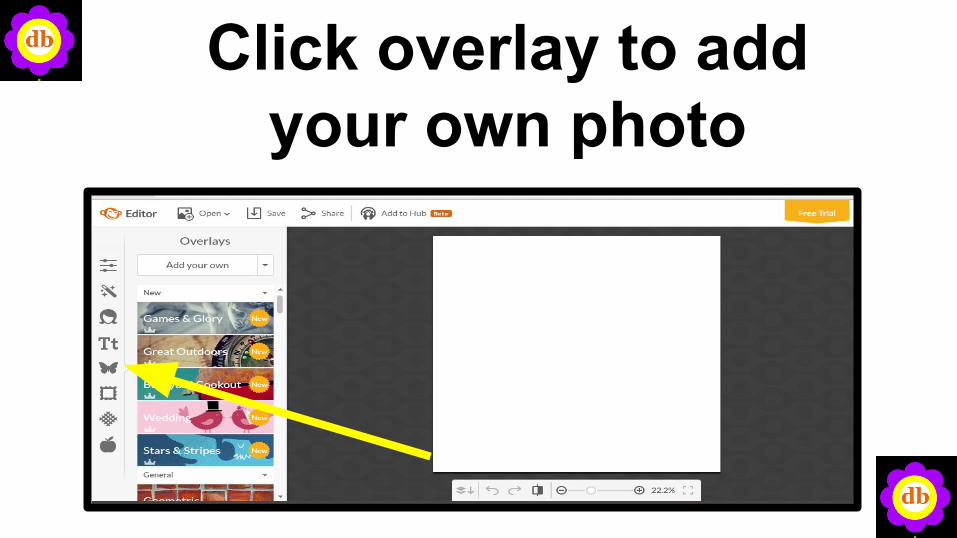
Click overlay to add your own photo
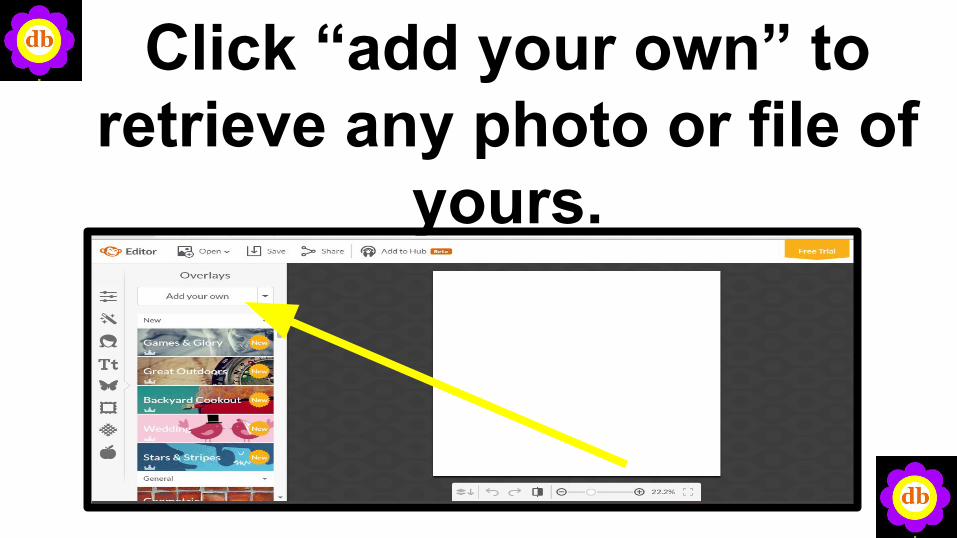
Click “add your own” to retrieve any photo or file of
yours.
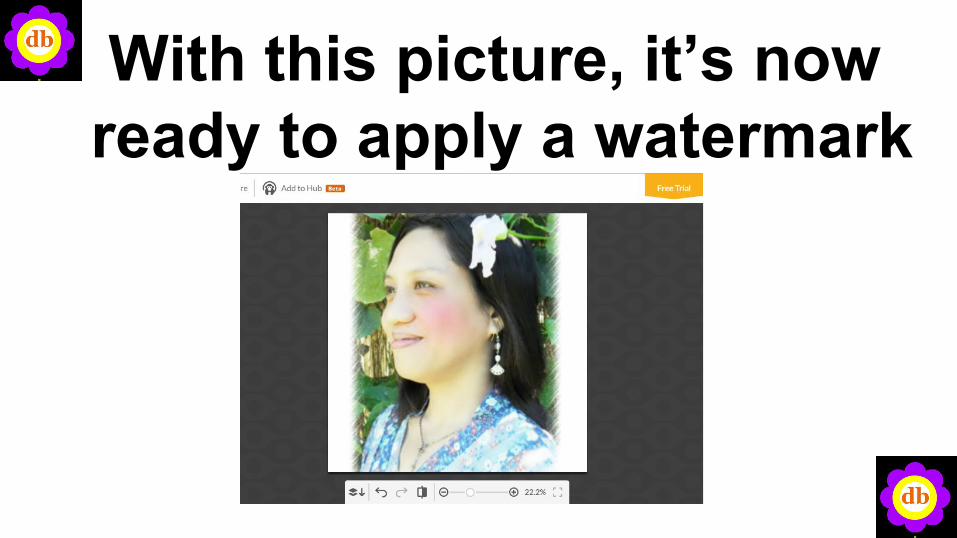
With this picture, it’s now ready to apply a watermark
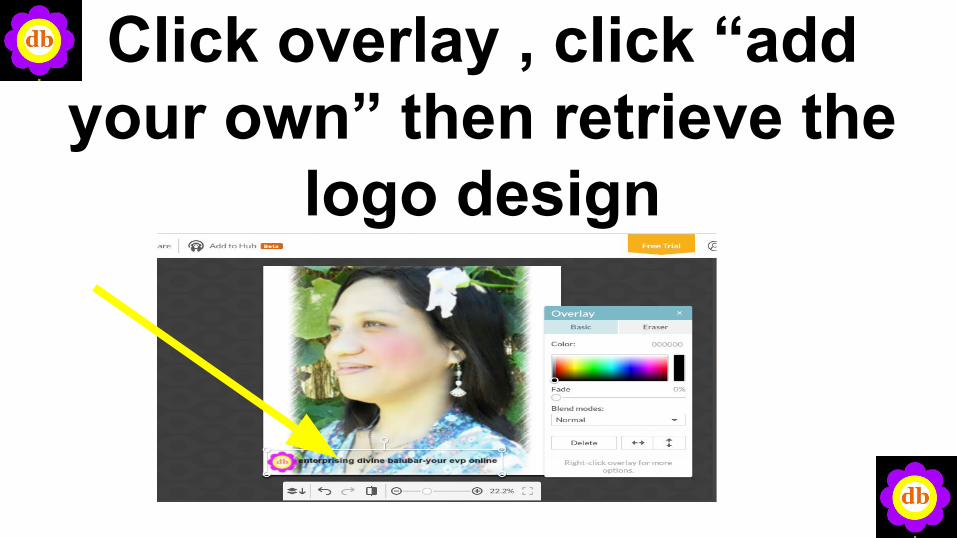
Click overlay , click “add your own” then retrieve the
logo design
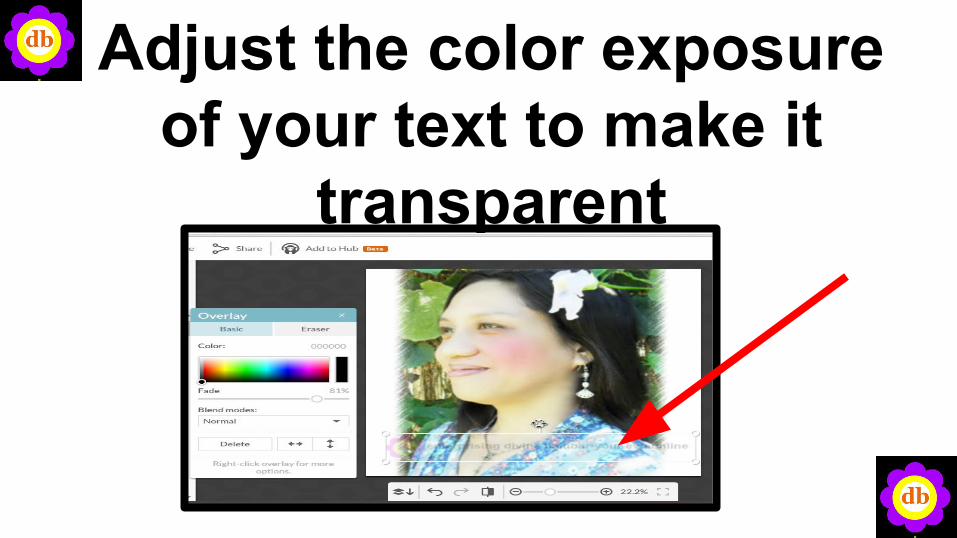
Adjust the color exposure of your text to make it
transparent
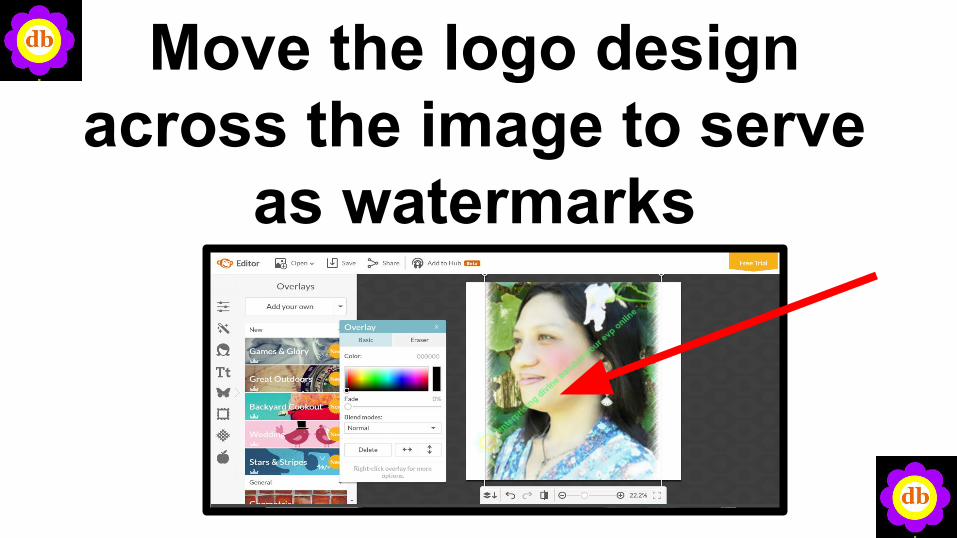
Move the logo design across the image to serve
as watermarks

These are just some of the things you can make with
PICMONKEY Hope you learned something
from me Thank You!
That’s the awesome PICMONKEY,
That is free to use for you and me.
Thanks to the creators of picmonkey,
Because Our job is now easy.
Pictures, logos, or graphic designs are now happy,
We are already able to enhance their beauty.
Thank you for reaching this far…
I hope my effort, time and sacrifice are worthy so far!
Always remember my name divine-your enterprising virtual professional online!