Embed Size (px)
Citation preview
1
Fulcrum
Kapil Kant KamalStaff ScientistCDAC Mumbai
Agenda
What is Fulcrum Key Features available Working with Fulcrum Steps for creating a Form Demo
2
3
What is Fulcrum? Generic form development tool dynamically with prescribed Meta
Data standards of DIT. Web based product developed in Java/ J2EE and deployed in
Jboss. Forms generated are in html and java script and run in all browsers
without any plug-in. Platform independent and can be deployed in Linux/Windows. The forms generated by fulcrum are supported by all popular
browsers. Online forms will be created by fulcrum and will be deployed in SAP
application via SSDG to back office or Govt office (service provider). It’s a very user friendly tool. DIT is the owner of the Fulcrum toolkit.
4
Key Features Available
Create a new form. Modify an existing form. Copy/Import forms from central Repository. Delete a form from a repository. Move forms from one folder to another. Create a copy of existing form. Exporting form to html format. Addition of sub-form. Creation of schema.
5
Starting with Fulcrum
User Login How will user log in
Fulcrum IDE overview IDE will represent a central repository which will
consist of e-forms for 40 Services and 1 Registration Form which will be available to all users.
User may customize these forms as per their requirements and add them to their repository.
Menu overview Detail understanding of the tool
6
Work with Fulcrum-User Login
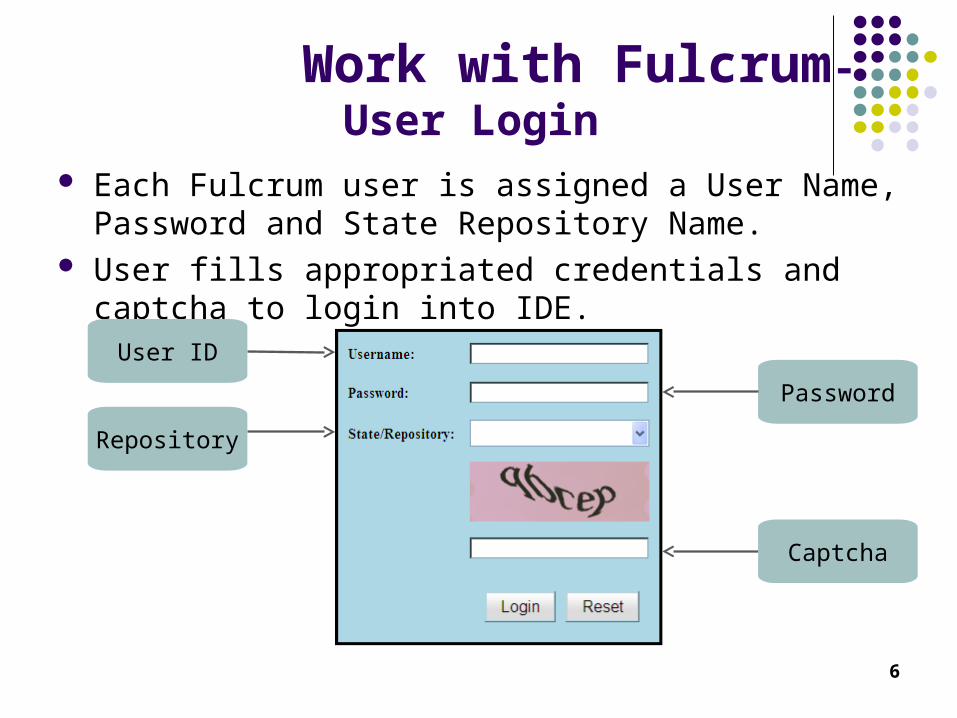
Each Fulcrum user is assigned a User Name, Password and State Repository Name.
User fills appropriated credentials and captcha to login into IDE.
User ID
Password
Repository
Captcha
7
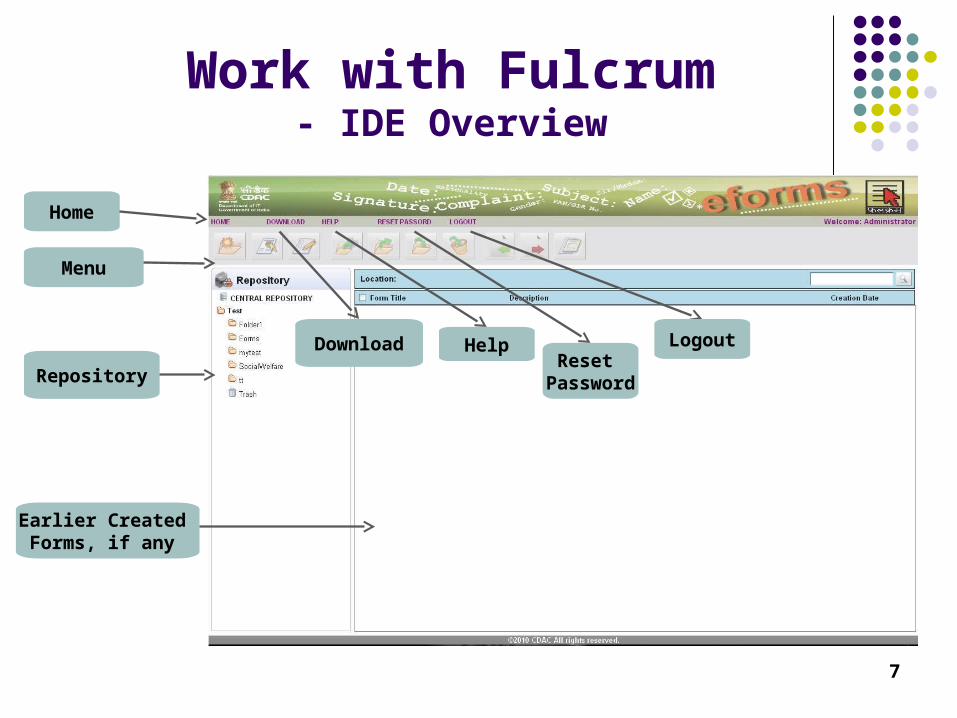
Work with Fulcrum- IDE Overview
Menu
Repository
Earlier Created Forms, if any
Download Help
Home
Reset Password
Logout
8
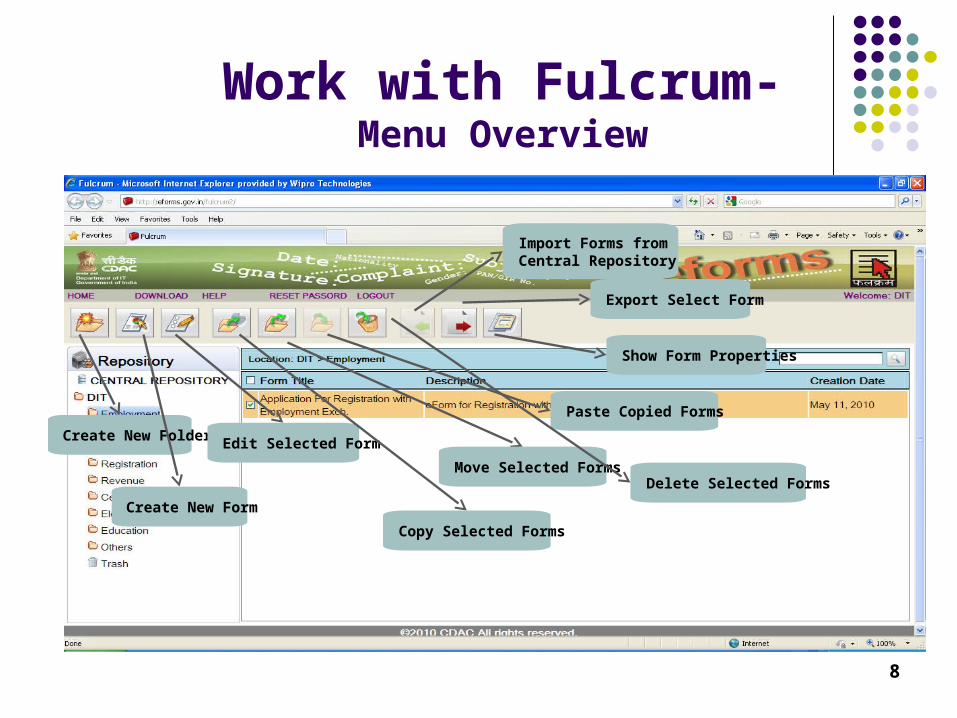
Work with Fulcrum-Menu Overview
Create New Folder
Create New Form
Edit Selected Form
Copy Selected Forms
Move Selected Forms
Paste Copied Forms
Delete Selected Forms
Import Forms fromCentral Repository
Export Select Form
Show Form Properties
9
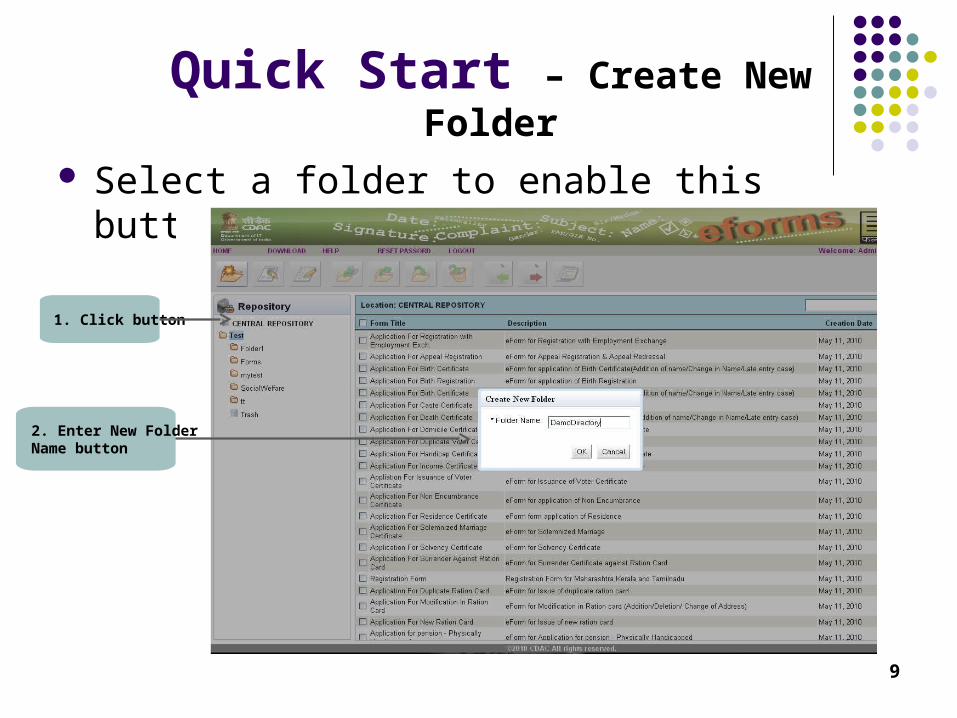
Quick Start – Create New Folder
Select a folder to enable this button
1. Click button
2. Enter New Folder Name button
10
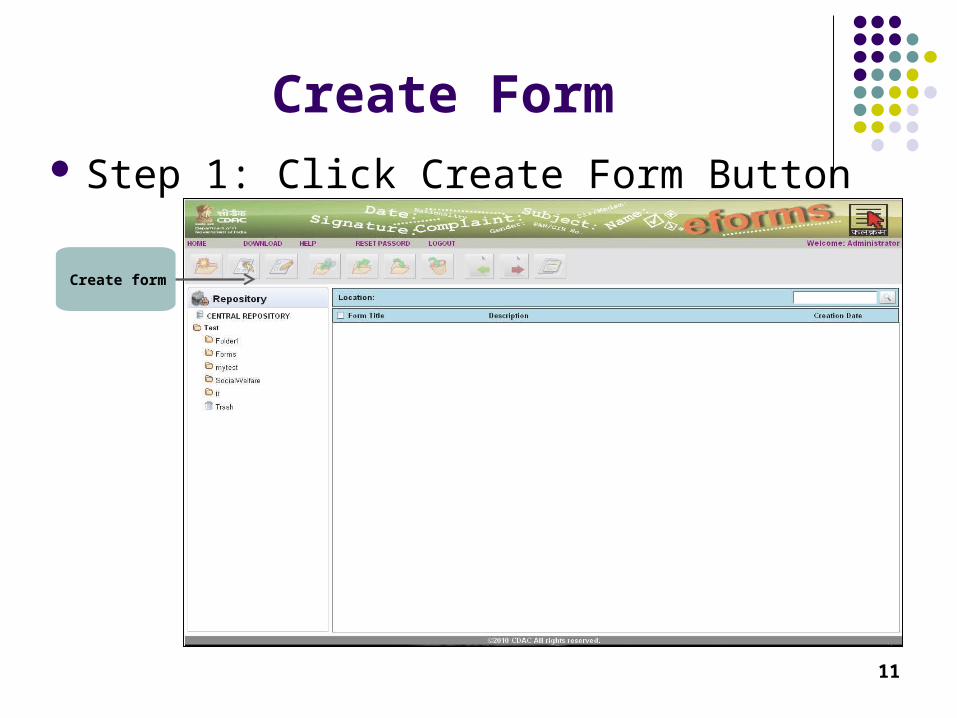
Create Form
After logging to fulcrum select a directory to enable the create form button.
Following steps are followed to create a new form. Click Create Form Button Fill Form Details Fill Field Details Fill Additional Details Preview
11
Create Form Step 1: Click Create Form Button
Create form
12
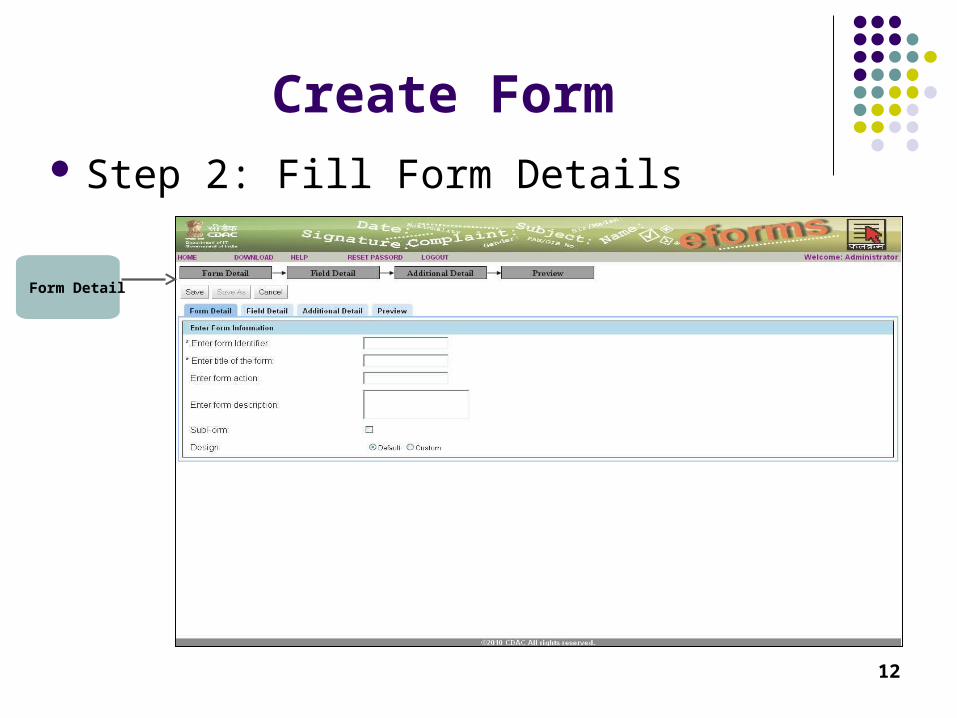
Create Form Step 2: Fill Form Details
Form Detail
13
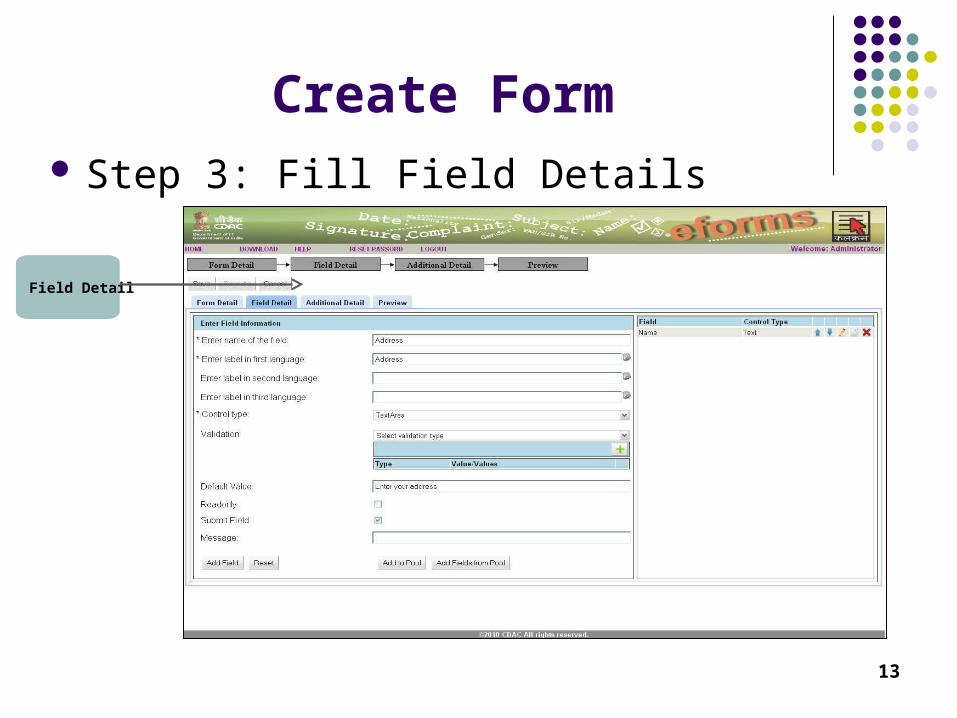
Create Form Step 3: Fill Field Details
Field Detail
14
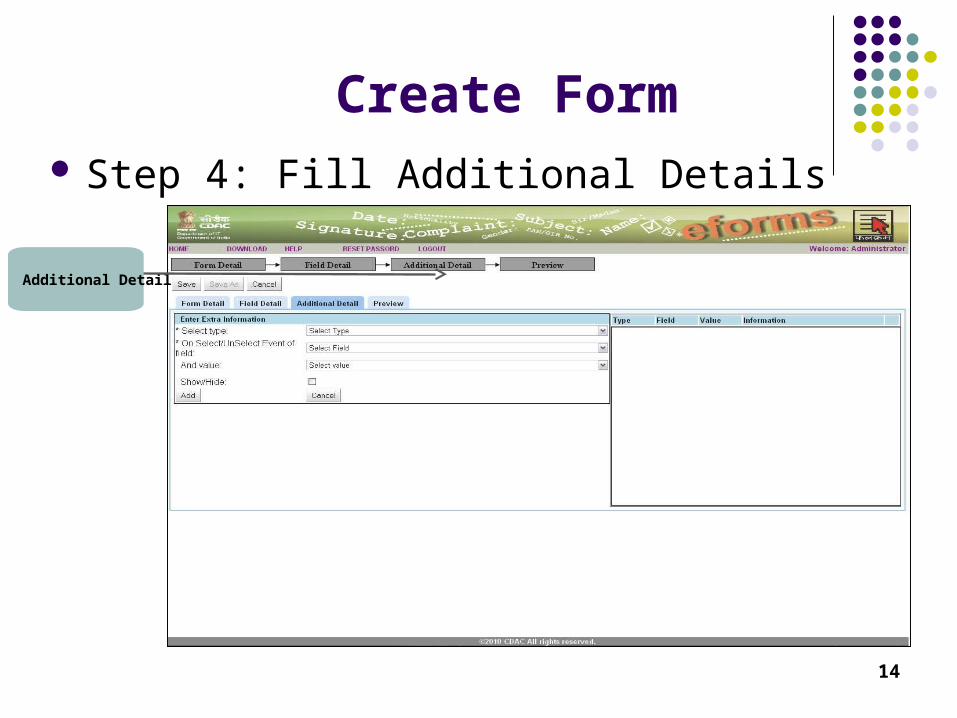
Create Form Step 4: Fill Additional Details
Additional Detail

15
Create Form Step 5: Preview Form
Preview Form
16
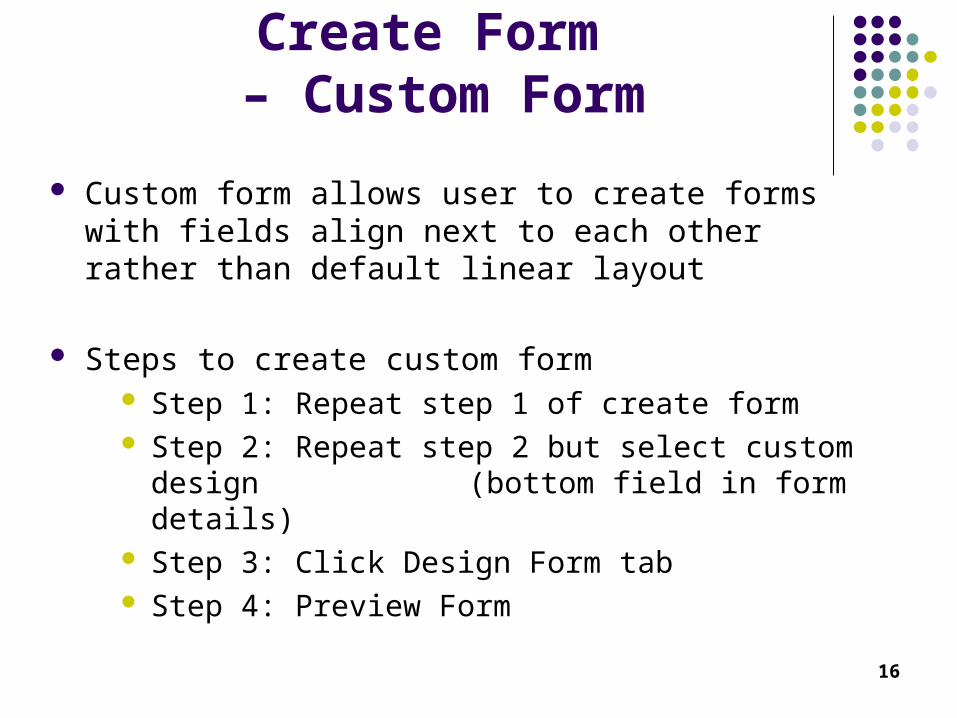
Create Form – Custom Form
Custom form allows user to create forms with fields align next to each other rather than default linear layout
Steps to create custom form Step 1: Repeat step 1 of create form Step 2: Repeat step 2 but select custom design
(bottom field in form details) Step 3: Click Design Form tab Step 4: Preview Form
17
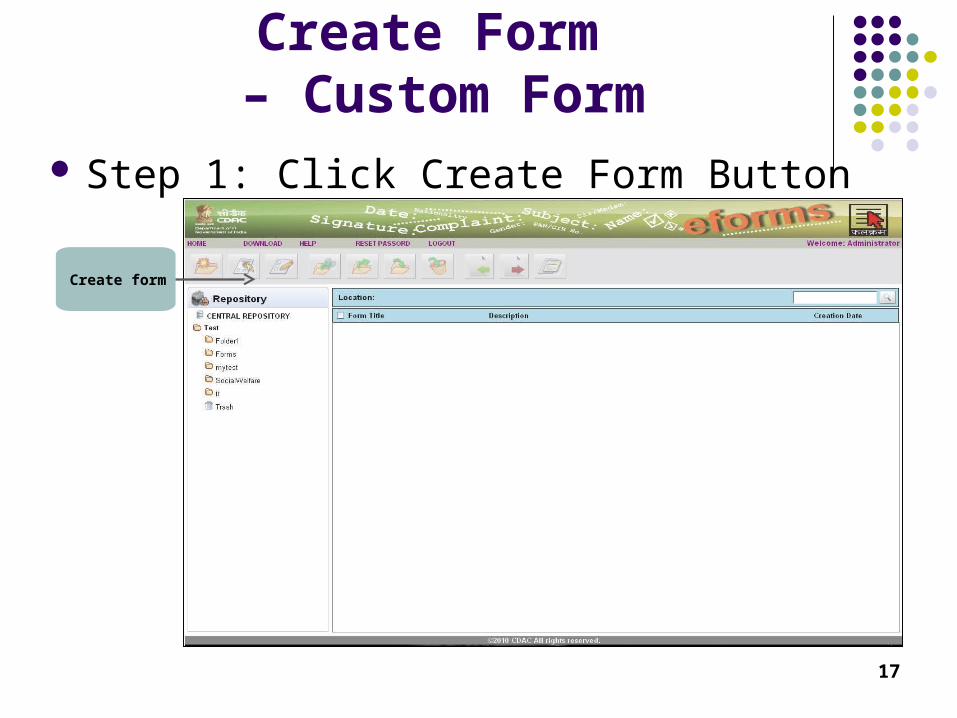
Create Form – Custom Form
Step 1: Click Create Form Button
Create form
18
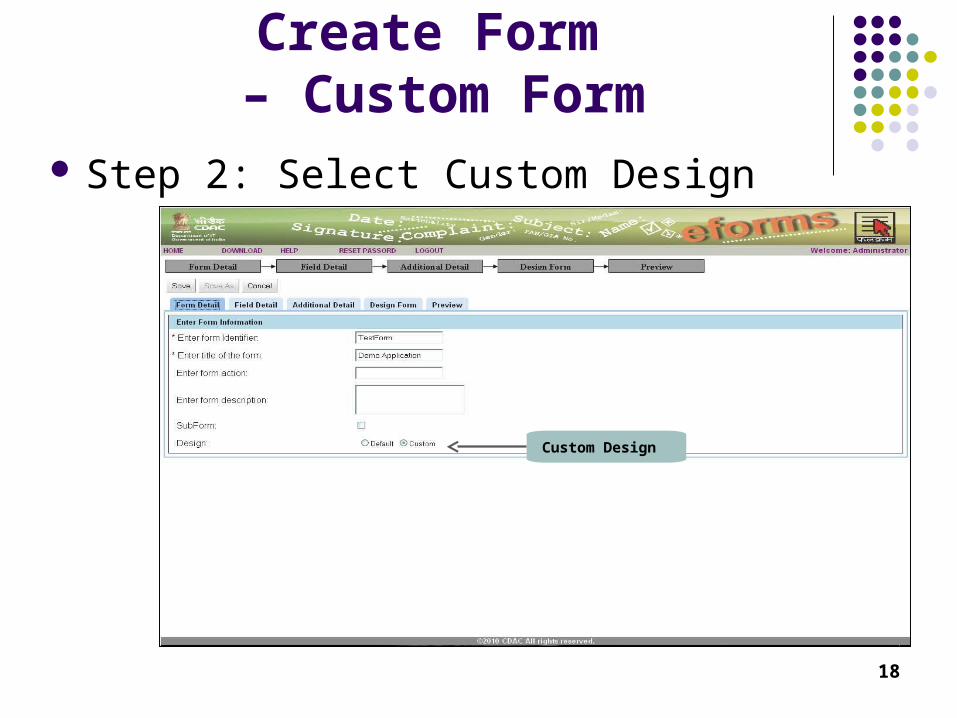
Create Form – Custom Form
Step 2: Select Custom Design
Custom Design
19
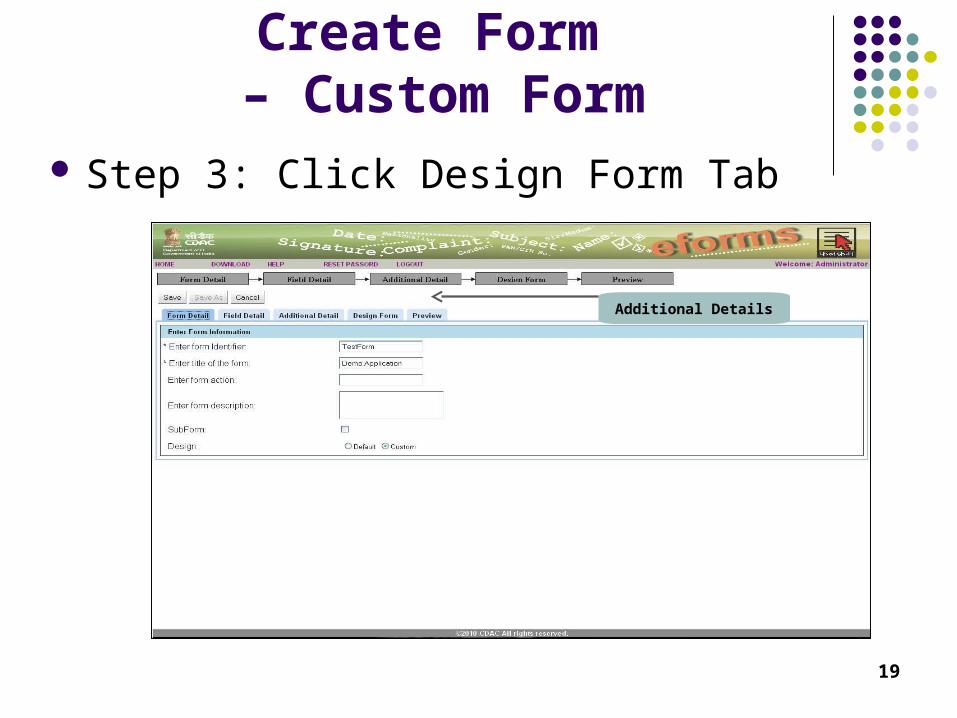
Create Form – Custom Form
Step 3: Click Design Form Tab
Additional Details
20
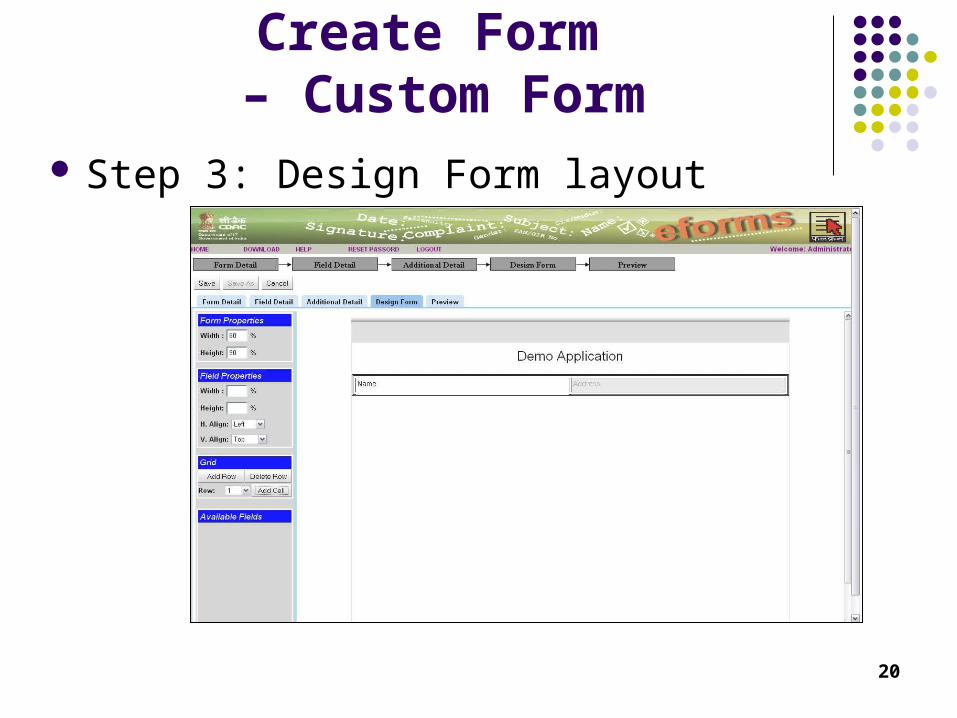
Create Form – Custom Form
Step 3: Design Form layout
21
Create Form – Custom Form
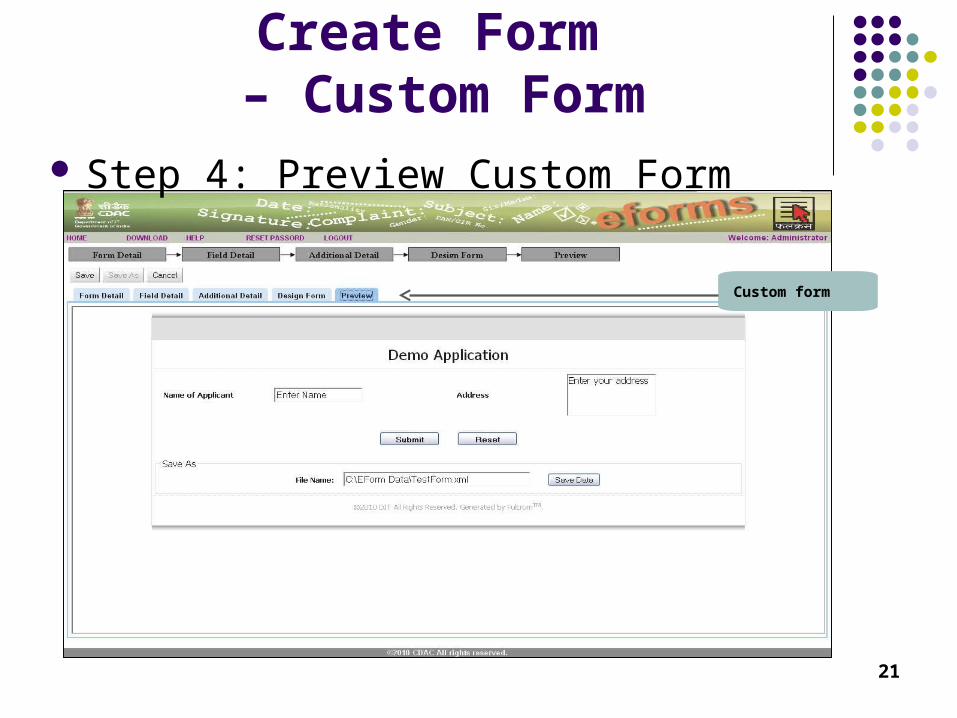
Step 4: Preview Custom Form
Custom form
22
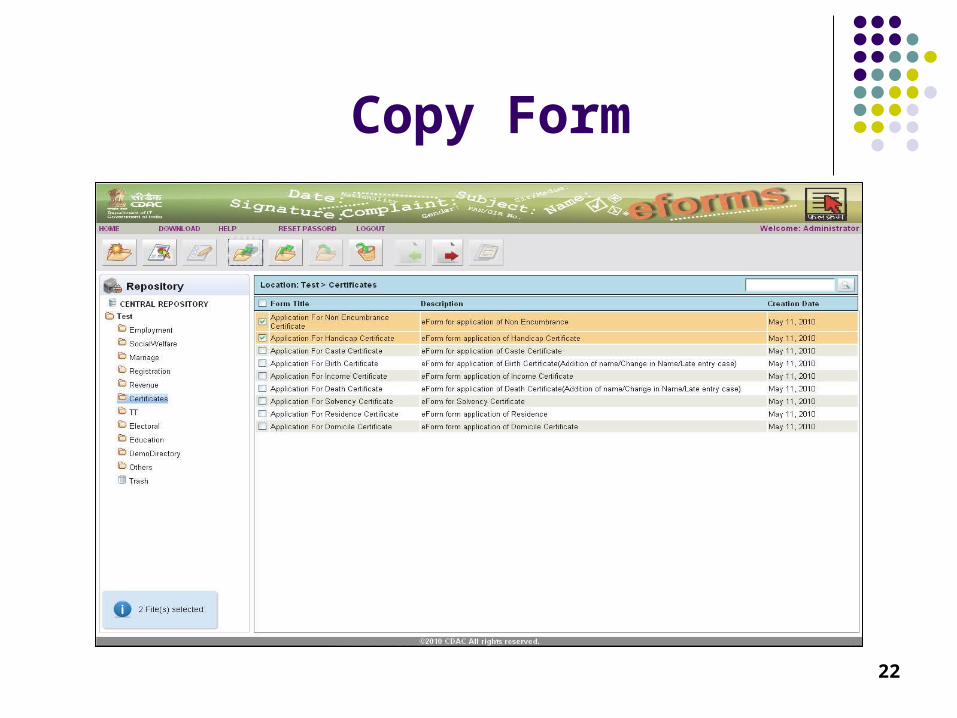
Copy Form
23
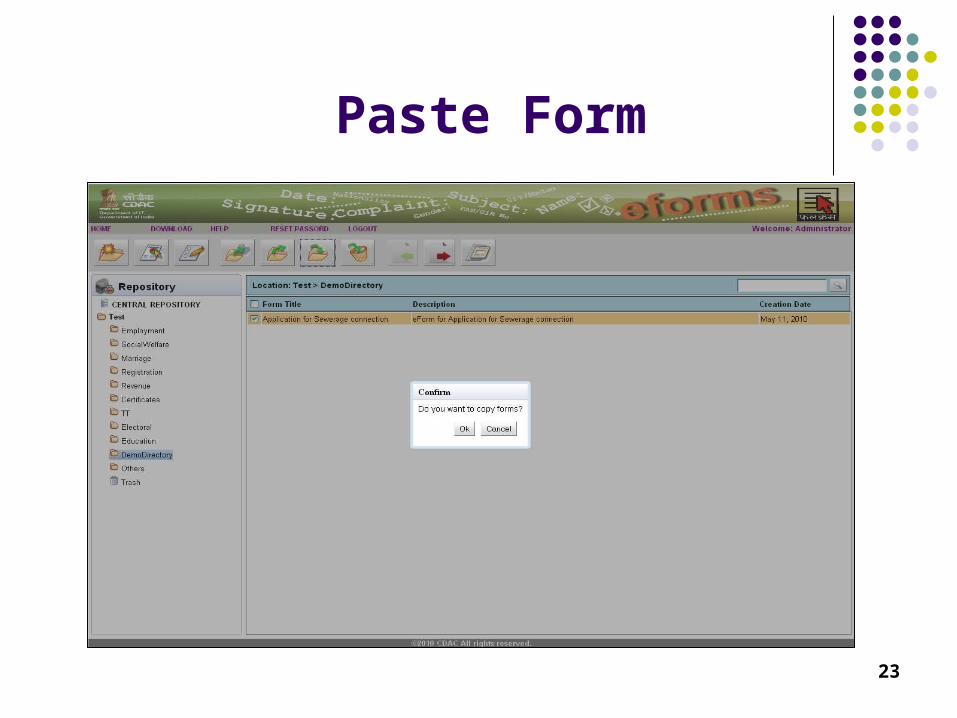
Paste Form
24
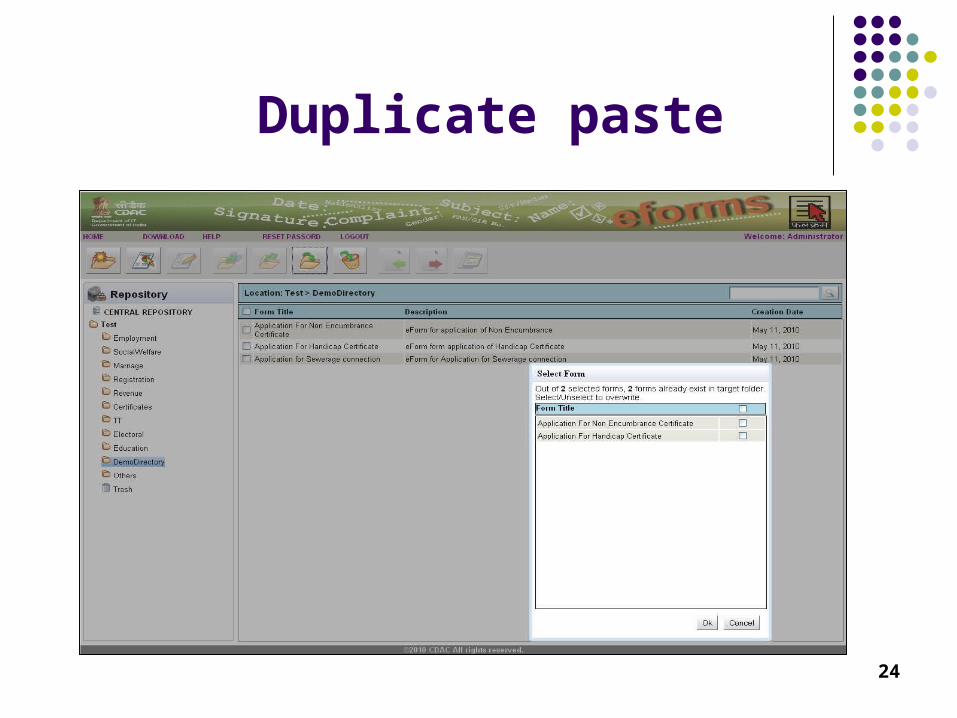
Duplicate paste
25
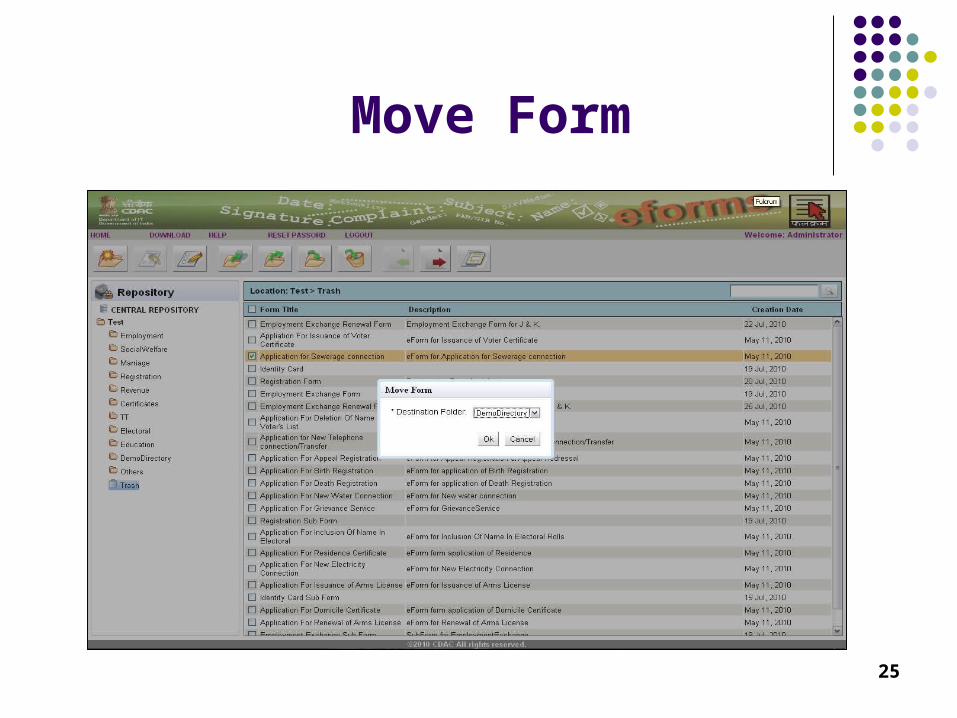
Move Form
26
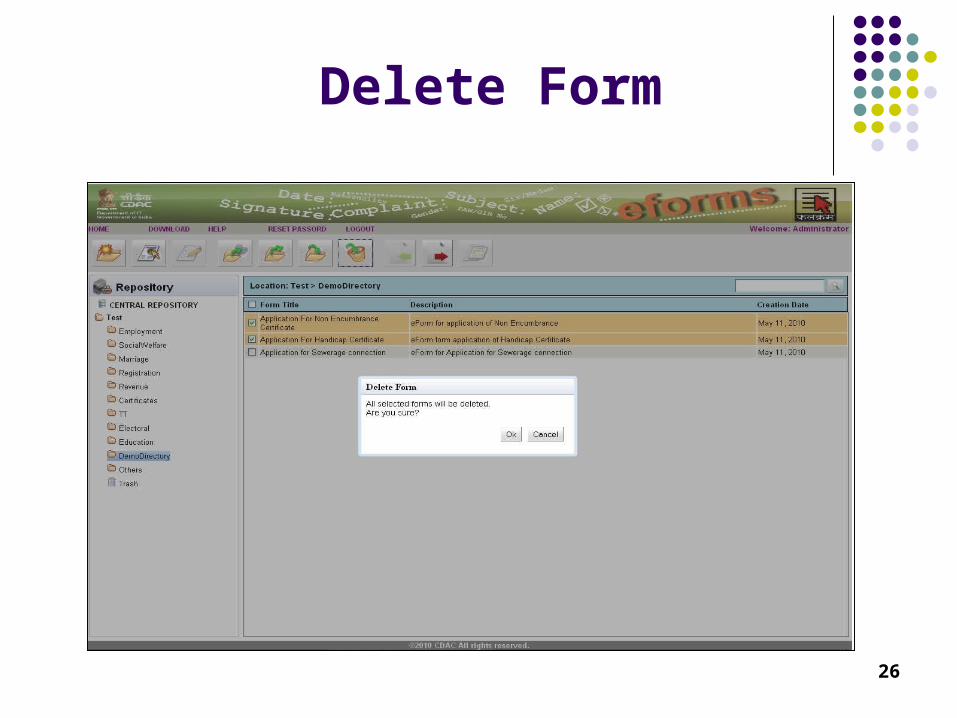
Delete Form

27
Form Properties
28
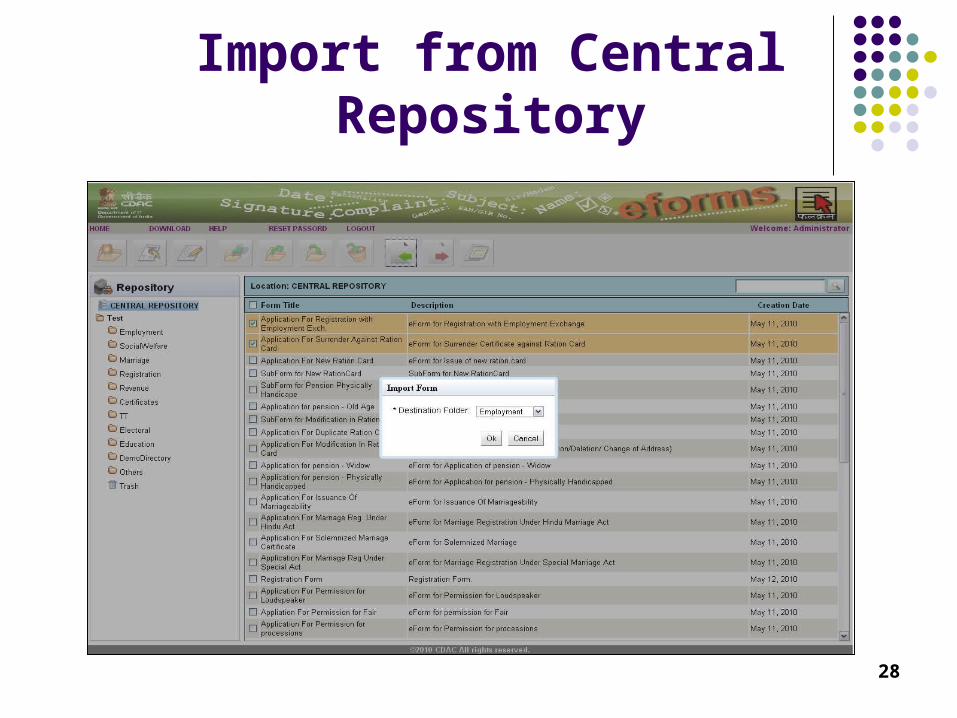
Import from Central Repository
29
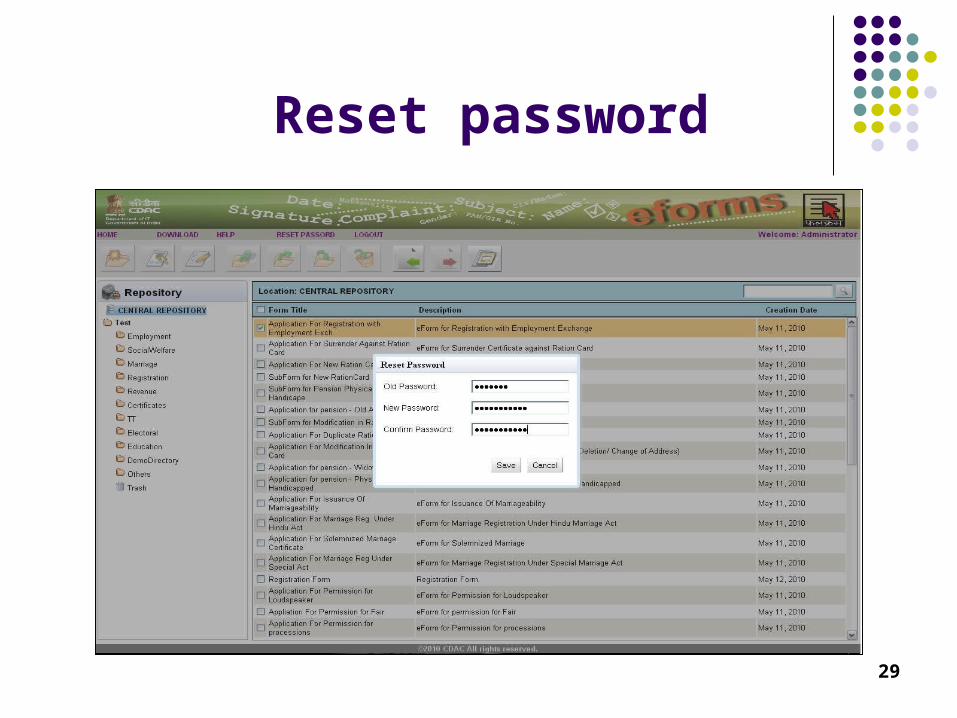
Reset password
30
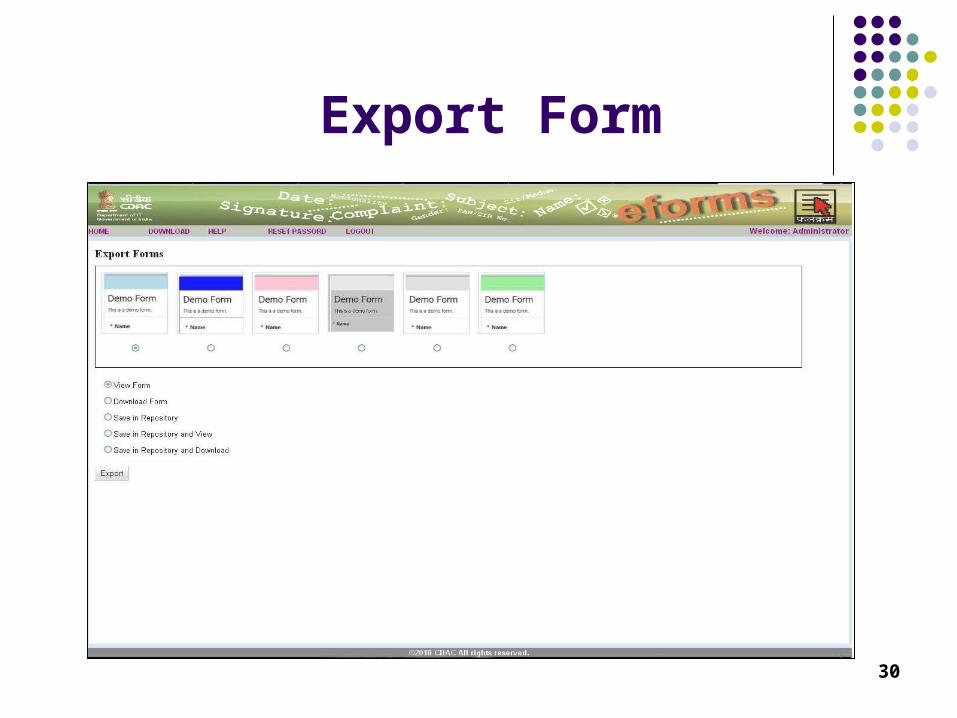
Export Form
31
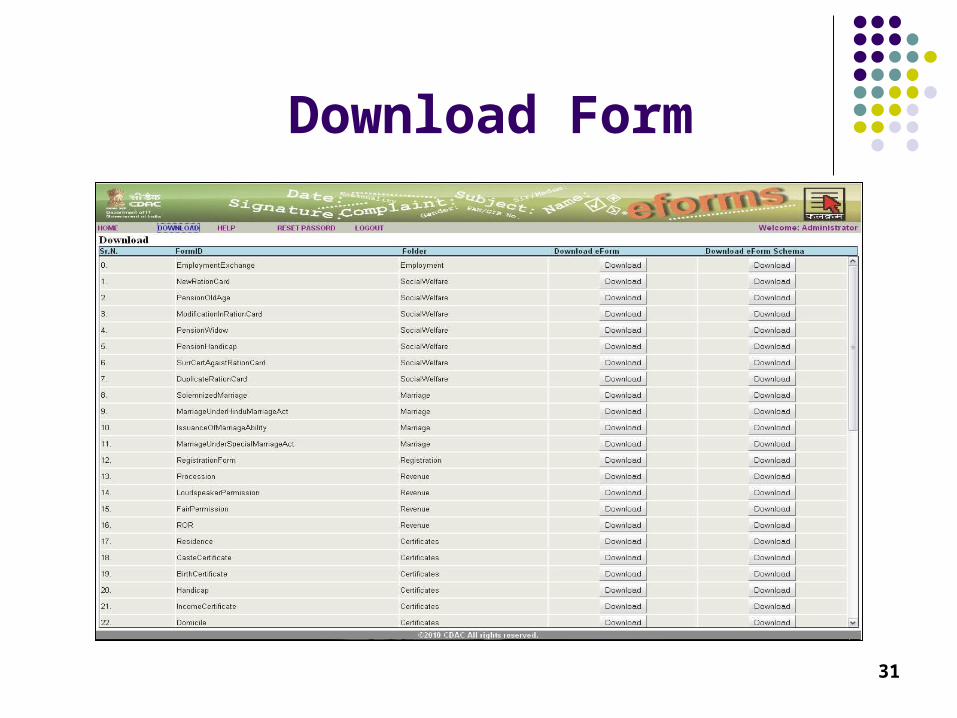
Download Form

QUESTIONS?
32