Embed Size (px)
Citation preview
Astronomy and
Image ProcessingMany thanks to Professor Kate Whitaker in the physics department for her help
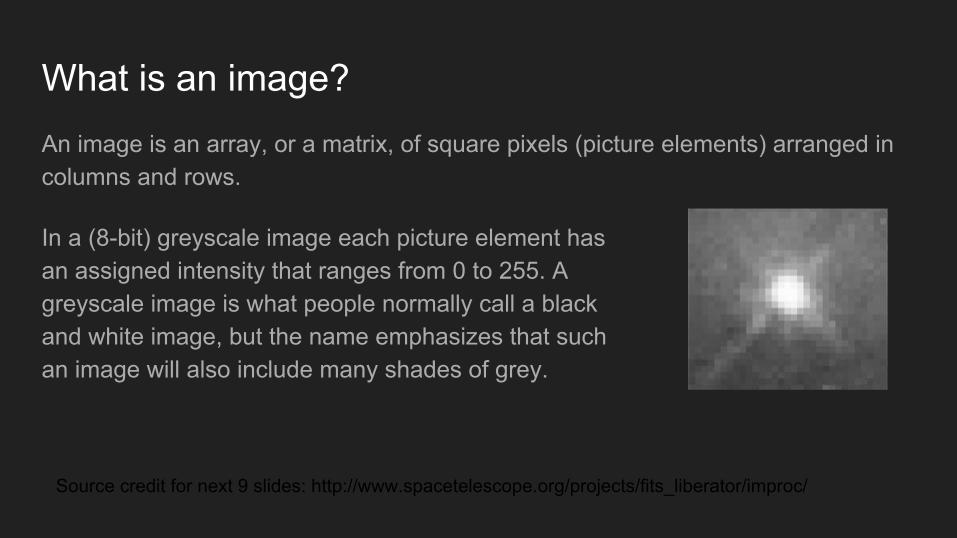
What is an image?An image is an array, or a matrix, of square pixels (picture elements) arranged in columns and rows.
In a (8-bit) greyscale image each picture element has an assigned intensity that ranges from 0 to 255. A greyscale image is what people normally call a black and white image, but the name emphasizes that such an image will also include many shades of grey.
Source credit for next 9 slides: http://www.spacetelescope.org/projects/fits_liberator/improc/

Images and File FormatsThere are two general groups of 'images': vector graphics (or line art) and bitmaps (pixel-based or 'images'). Some of the most common file formats are:
● GIF - an 8-bit (256 color), non-destructively compressed bitmap format. Has several sub-standards one of which is the animated GIF.
● JPEG - a very efficient (i.e. much information per byte) destructively compressed 24 bit (16 million colours) bitmap format. Widely used, especially for web and Internet (which are bandwidth-limited).
● TIFF - the standard 24 bit publication bitmap format. Compresses non-destructively with, for instance, Lempel-Ziv-Welch (LZW) compression.
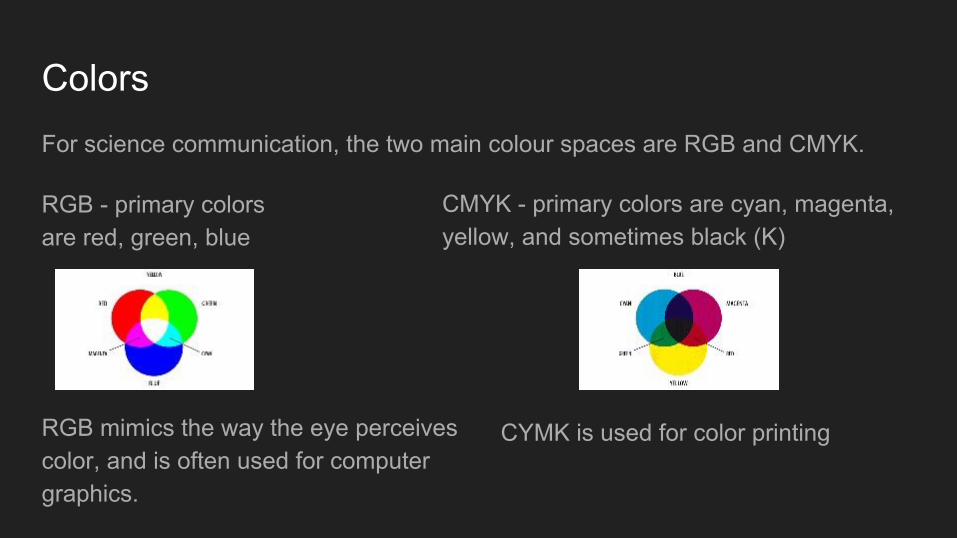
ColorsFor science communication, the two main colour spaces are RGB and CMYK.
RGB - primary colors are red, green, blue
CMYK - primary colors are cyan, magenta, yellow, and sometimes black (K)
CYMK is used for color printingRGB mimics the way the eye perceives color, and is often used for computer graphics.
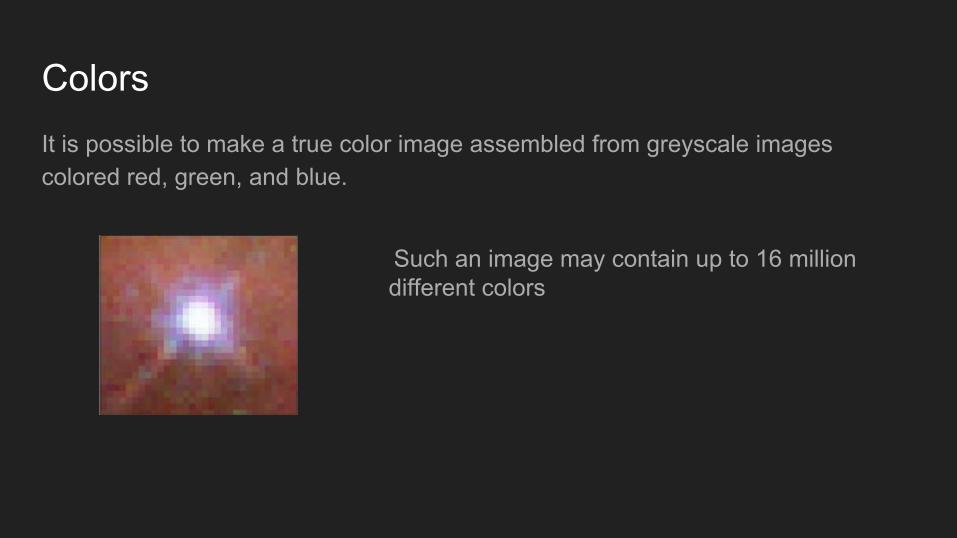
ColorsIt is possible to make a true color image assembled from greyscale images colored red, green, and blue.
Such an image may contain up to 16 million different colors
Astronomical ImagesImages of astronomical objects are usually taken with electronic detectors such as a CCD (Charge Coupled Device).
Similar detectors are found in normal digital cameras.
Telescope images are nearly always greyscale, but nevertheless contain some colour information. An astronomical image may be taken through a colour filter. Different detectors and telescopes also usually have different sensitivities to different colours (wavelengths).
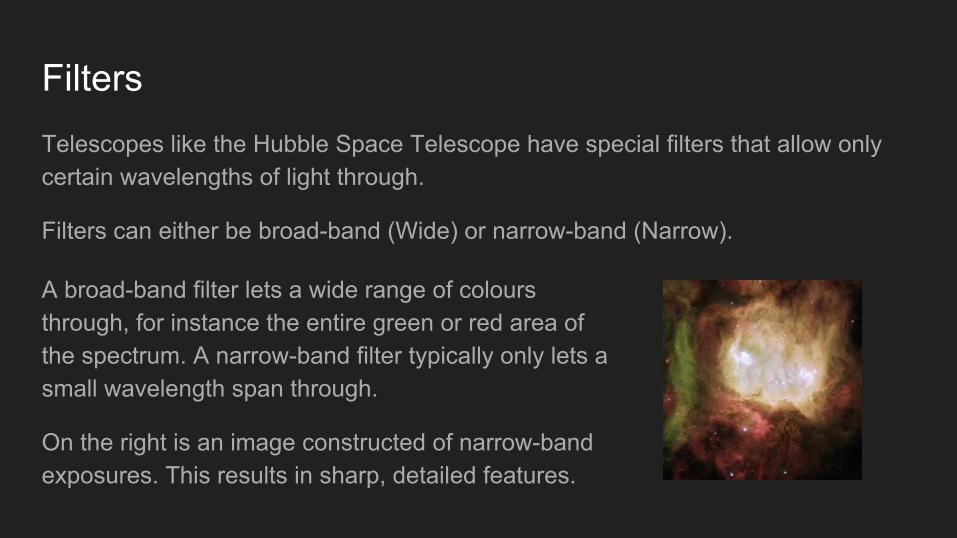
FiltersTelescopes like the Hubble Space Telescope have special filters that allow only certain wavelengths of light through.
Filters can either be broad-band (Wide) or narrow-band (Narrow).
A broad-band filter lets a wide range of colours through, for instance the entire green or red area of the spectrum. A narrow-band filter typically only lets a small wavelength span through.
On the right is an image constructed of narrow-band exposures. This results in sharp, detailed features.
Filters
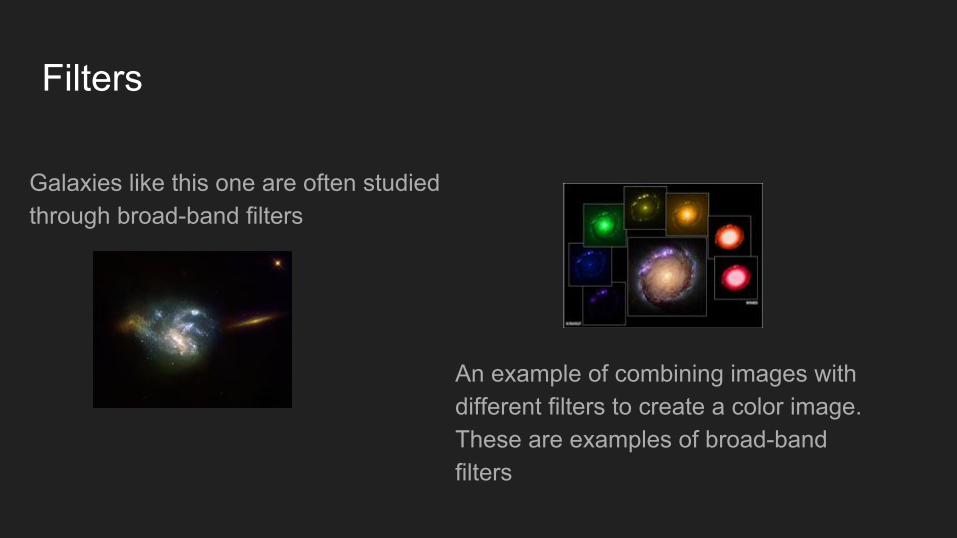
Galaxies like this one are often studied through broad-band filters
An example of combining images with different filters to create a color image. These are examples of broad-band filters
Stretch FunctionSince raw astronomical data often has a very wide range of brightnesses, this can’t always be well-represented by the 256 greyscales offered by the computer.
One particularly important aspect of image processing is the choice of the best stretch function. You choose the best stretch function in the image processor.
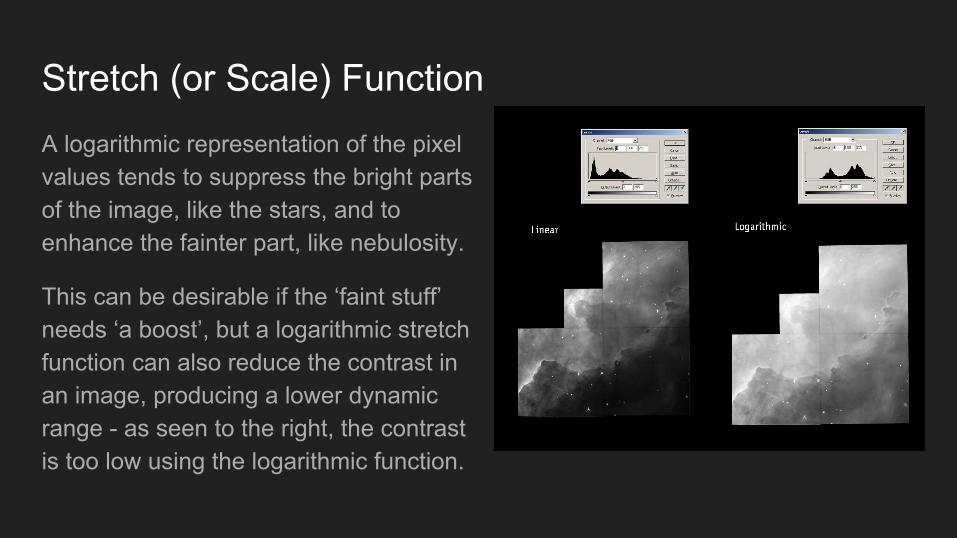
Stretch (or Scale) FunctionA logarithmic representation of the pixel values tends to suppress the bright parts of the image, like the stars, and to enhance the fainter part, like nebulosity.
This can be desirable if the ‘faint stuff’ needs ‘a boost’, but a logarithmic stretch function can also reduce the contrast in an image, producing a lower dynamic range - as seen to the right, the contrast is too low using the logarithmic function.

Making your own imagesGo to this link to access data files for the Eagle Nebula, also known as the Pillars of Creation:
https://archive.stsci.edu/prepds/heritage/m16/
These images were taken using the Hubble Space Telescope. All the data taken by Hubble can be found in archives like this one, where it’s freely accessible to the public!
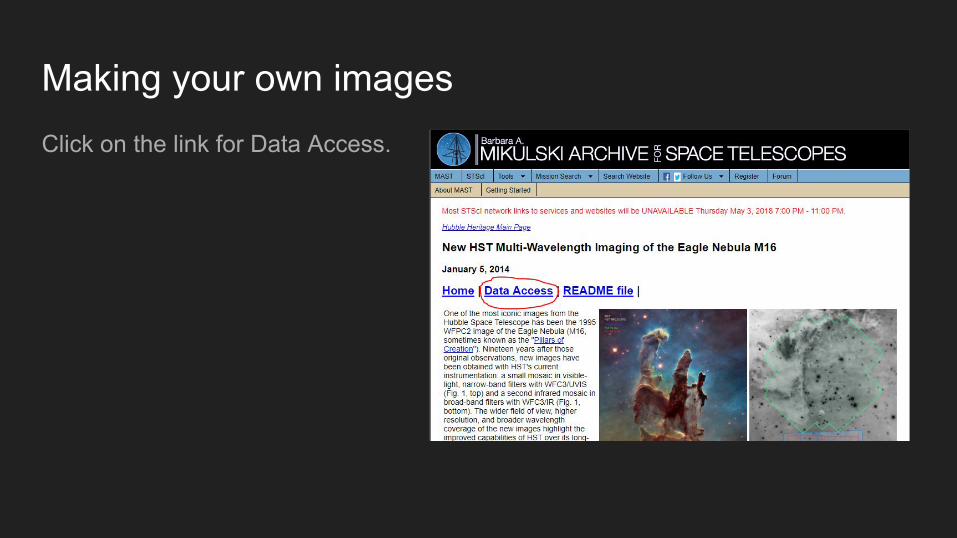
Making your own imagesClick on the link for Data Access.
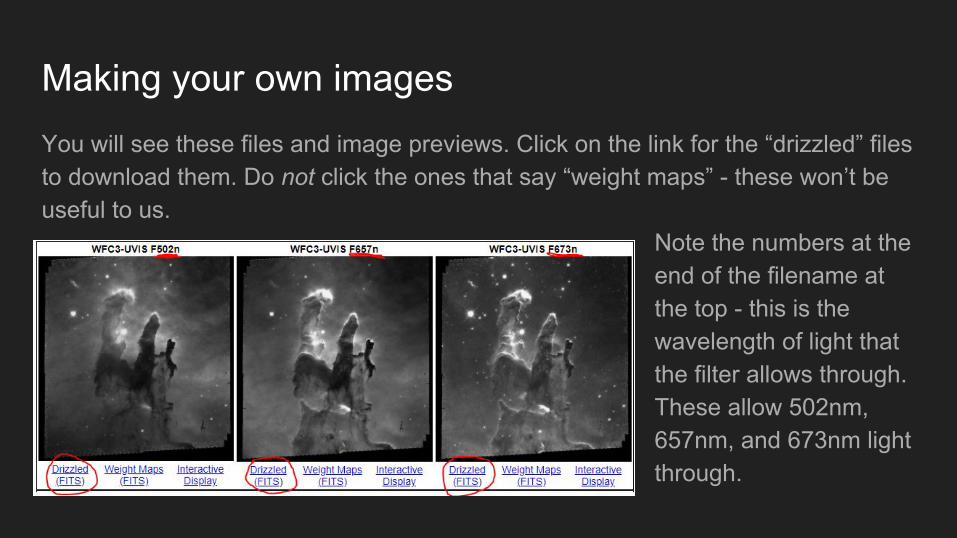
Making your own imagesYou will see these files and image previews. Click on the link for the “drizzled” files to download them. Do not click the ones that say “weight maps” - these won’t be useful to us.
Note the numbers at the end of the filename at the top - this is the wavelength of light that the filter allows through. These allow 502nm, 657nm, and 673nm light through.

Making your own imagesNow we’re going to download and install SAOImageDS9, a program astronomers use to process astronomical data images. Go to this link:
http://ds9.si.edu/site/Download.html
Click on Windows 64 bitWhen the .exe file finishes downloading, click it to run the installation wizard.
Click through the installation wizard to complete the setup - just keep clicking next.
Making your own imagesNow open SAOImageDS9
You should be able to find it in the start menu, or if you can’t find it use the search bar in the lower left-hand corner
You’re ready to start working with the images!
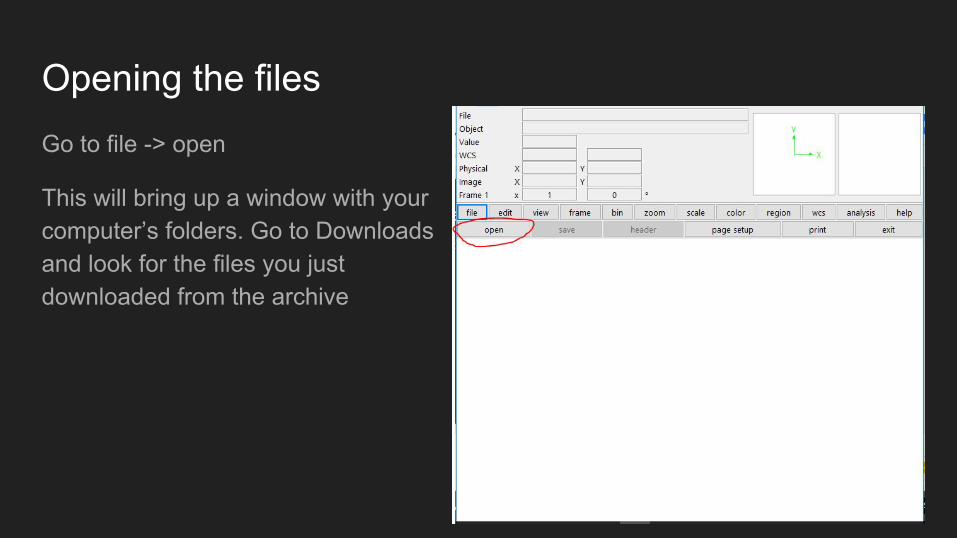
Opening the filesGo to file -> open
This will bring up a window with your computer’s folders. Go to Downloads and look for the files you just downloaded from the archive
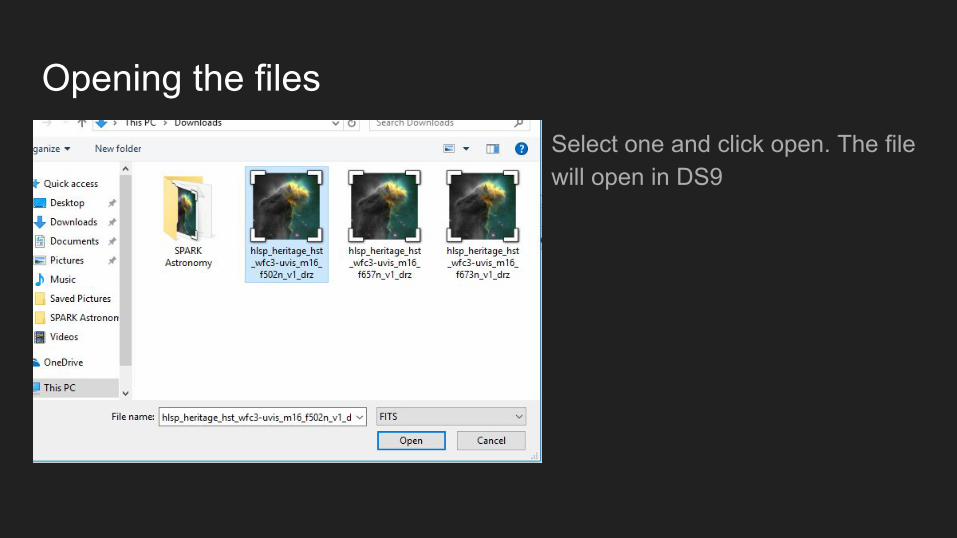
Opening the filesSelect one and click open. The file will open in DS9
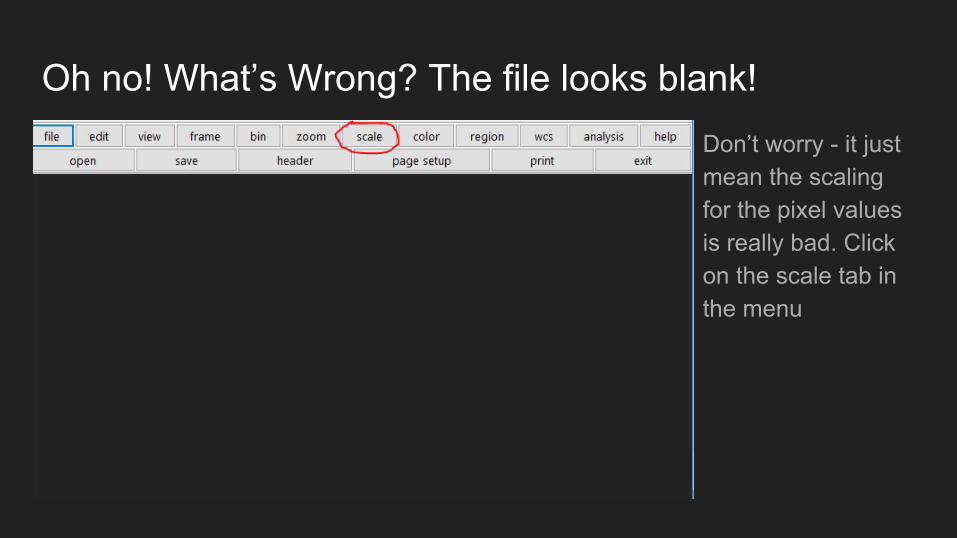
Oh no! What’s Wrong? The file looks blank!Don’t worry - it just mean the scaling for the pixel values is really bad. Click on the scale tab in the menu
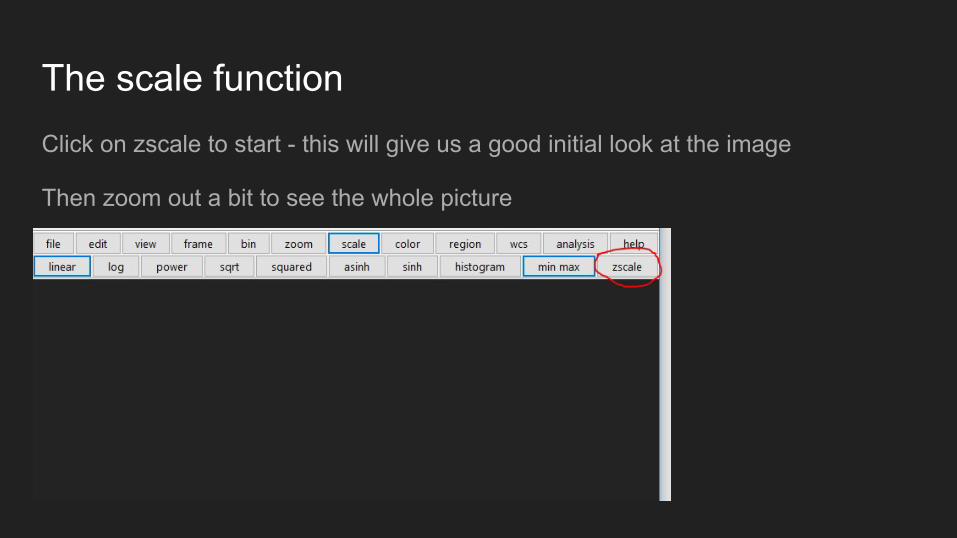
The scale functionClick on zscale to start - this will give us a good initial look at the image
Then zoom out a bit to see the whole picture
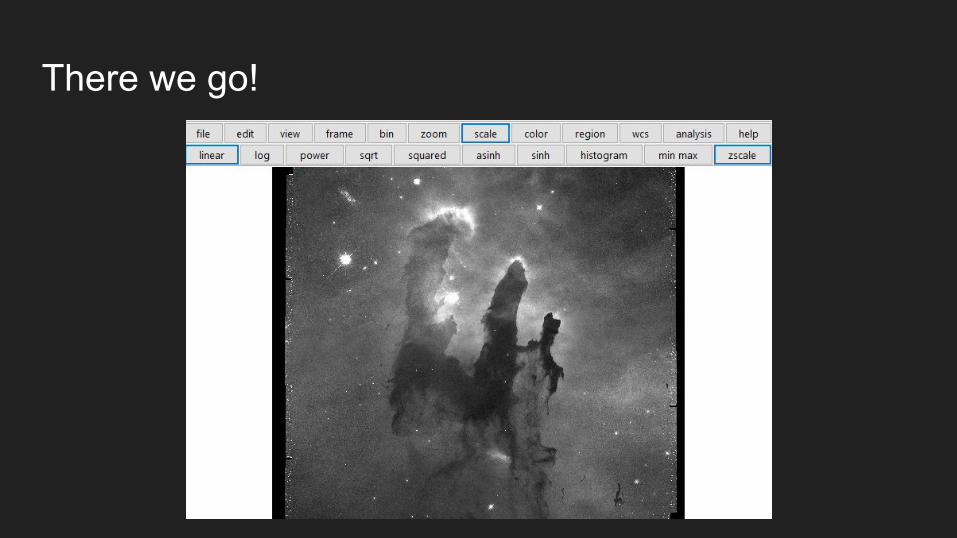
There we go!
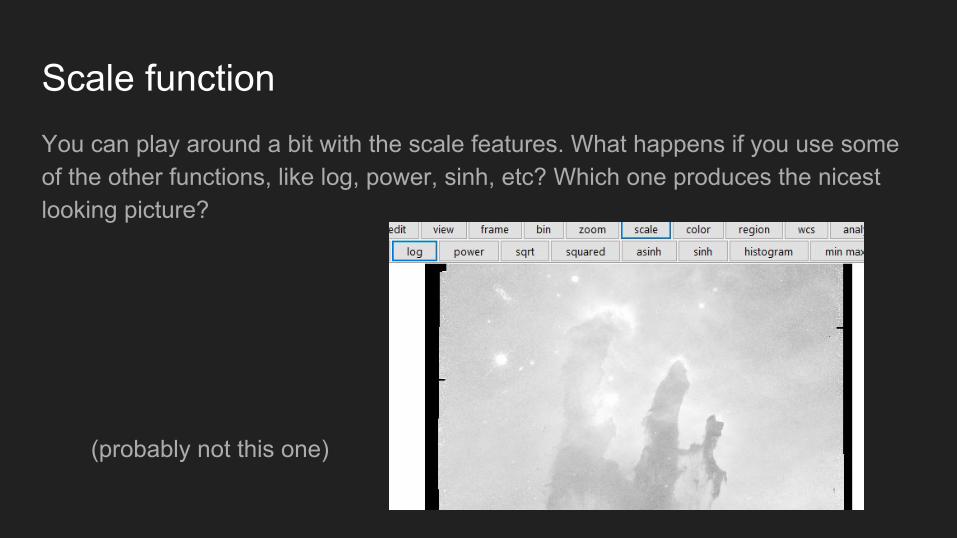
Scale functionYou can play around a bit with the scale features. What happens if you use some of the other functions, like log, power, sinh, etc? Which one produces the nicest looking picture?
(probably not this one)
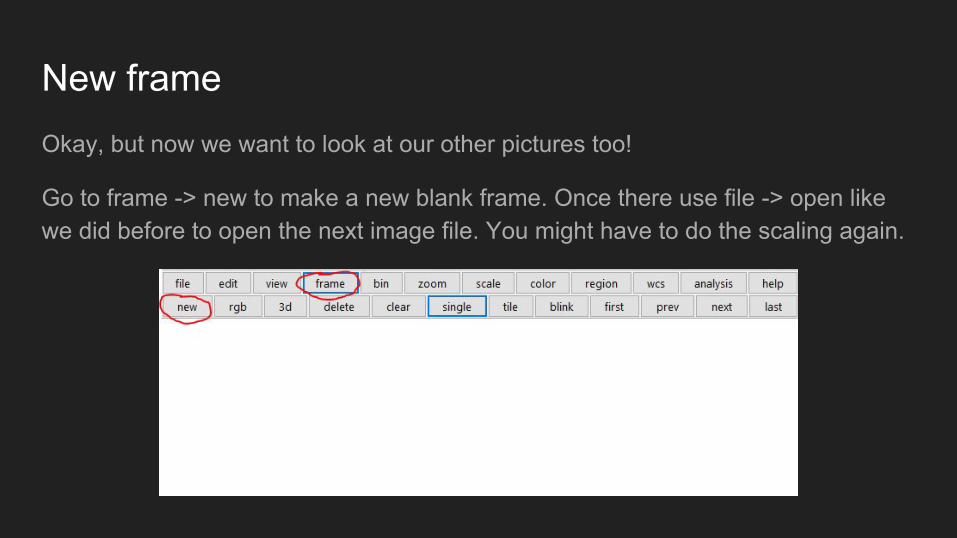
New frameOkay, but now we want to look at our other pictures too!
Go to frame -> new to make a new blank frame. Once there use file -> open like we did before to open the next image file. You might have to do the scaling again.
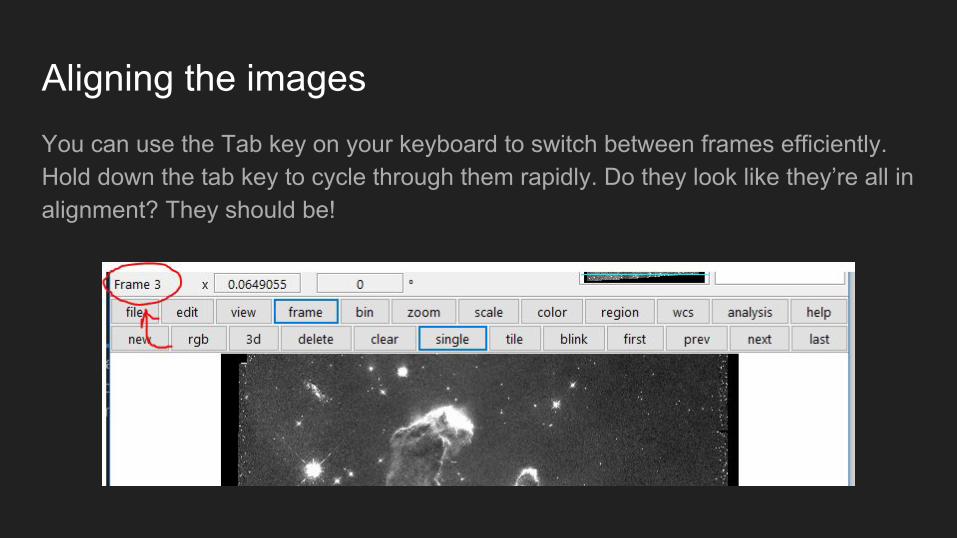
Aligning the imagesYou can use the Tab key on your keyboard to switch between frames efficiently. Hold down the tab key to cycle through them rapidly. Do they look like they’re all in alignment? They should be!
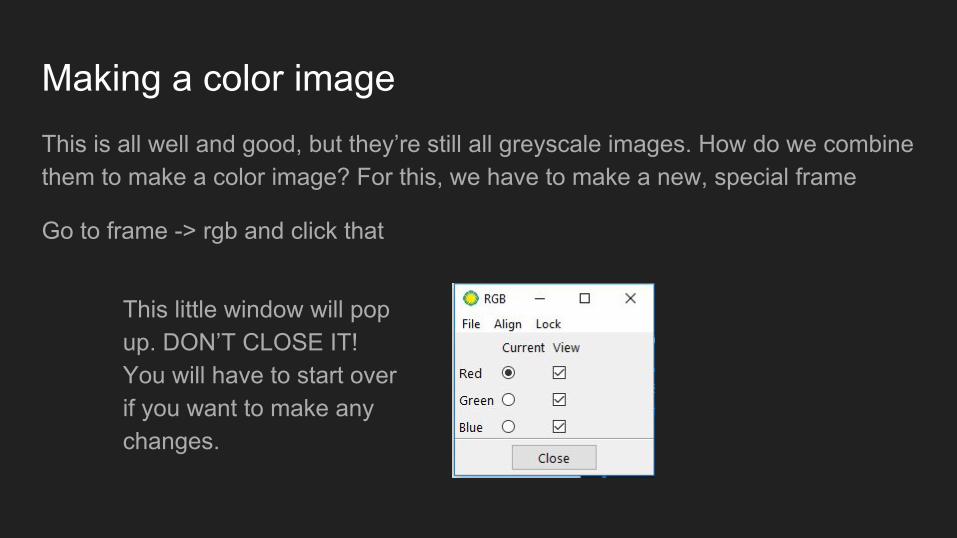
Making a color imageThis is all well and good, but they’re still all greyscale images. How do we combine them to make a color image? For this, we have to make a new, special frame
Go to frame -> rgb and click that
This little window will pop up. DON’T CLOSE IT! You will have to start over if you want to make any changes.
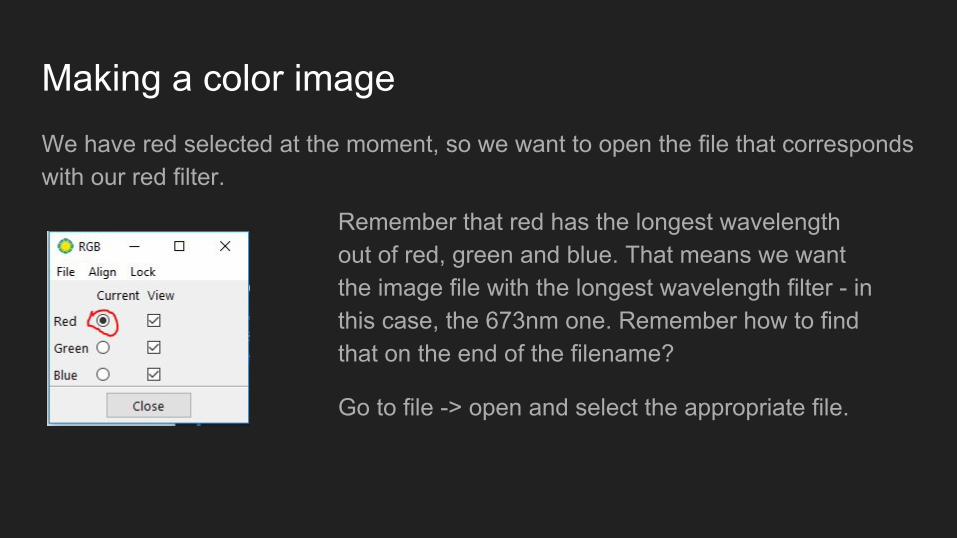
Making a color imageWe have red selected at the moment, so we want to open the file that corresponds with our red filter.
Remember that red has the longest wavelength out of red, green and blue. That means we want the image file with the longest wavelength filter - in this case, the 673nm one. Remember how to find that on the end of the filename?
Go to file -> open and select the appropriate file.
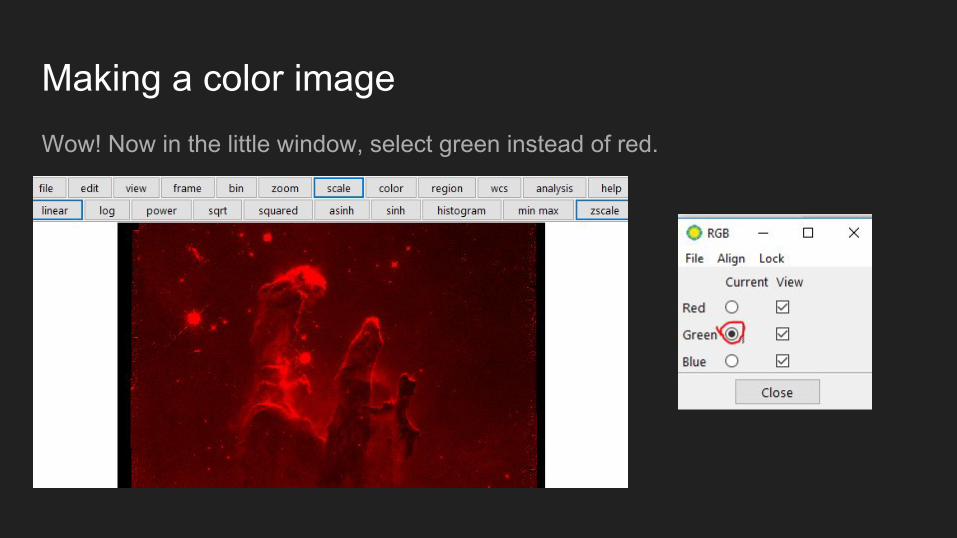
Making a color imageWow! Now in the little window, select green instead of red.
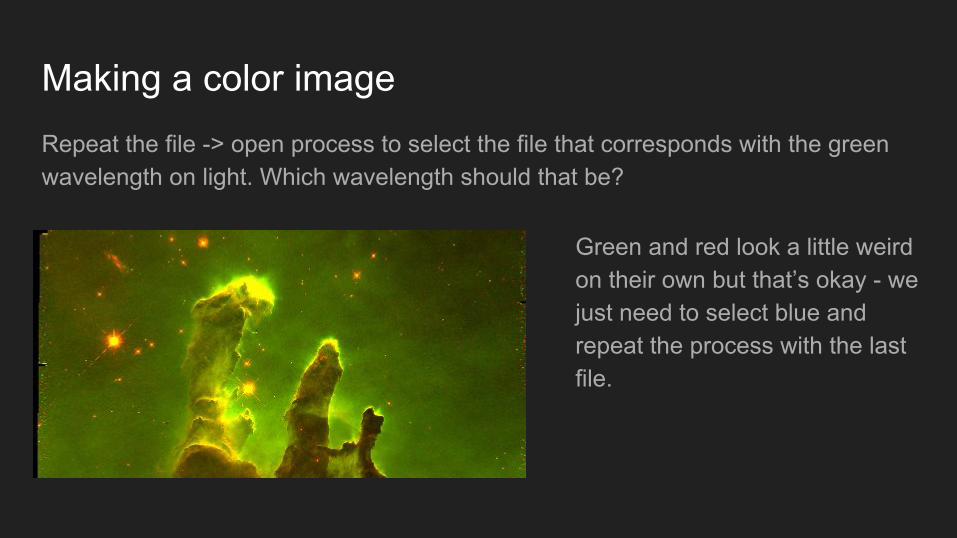
Making a color imageRepeat the file -> open process to select the file that corresponds with the green wavelength on light. Which wavelength should that be?
Green and red look a little weird on their own but that’s okay - we just need to select blue and repeat the process with the last file.
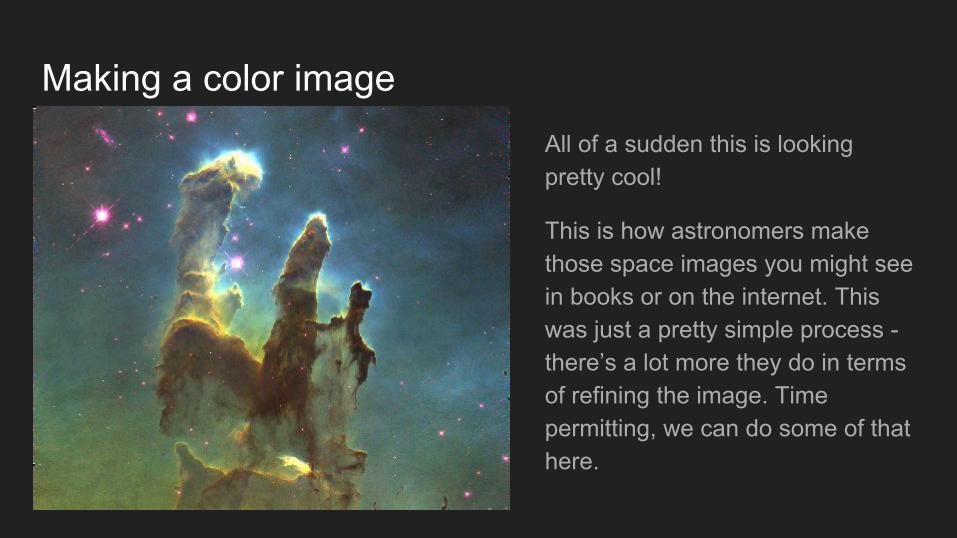
Making a color imageAll of a sudden this is looking pretty cool!
This is how astronomers make those space images you might see in books or on the internet. This was just a pretty simple process - there’s a lot more they do in terms of refining the image. Time permitting, we can do some of that here.
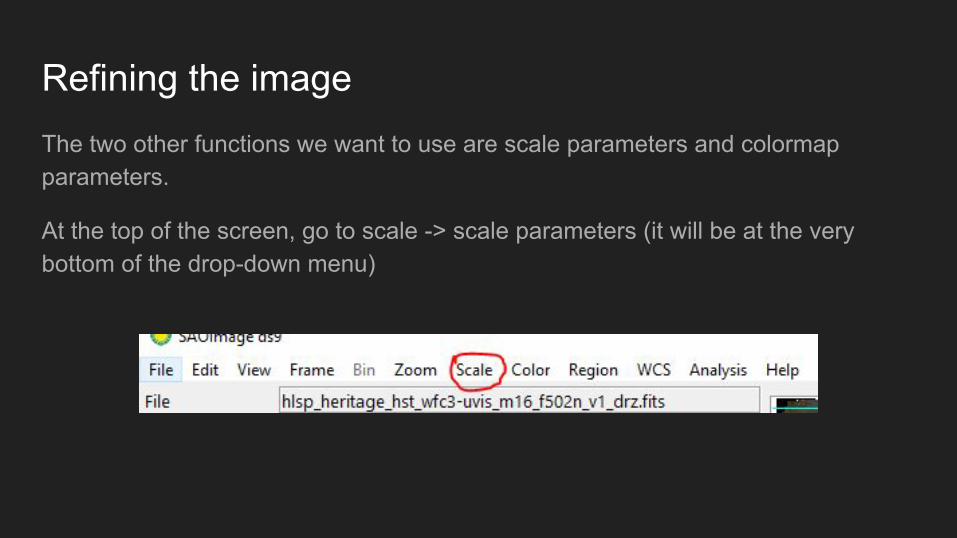
Refining the imageThe two other functions we want to use are scale parameters and colormap parameters.
At the top of the screen, go to scale -> scale parameters (it will be at the very bottom of the drop-down menu)
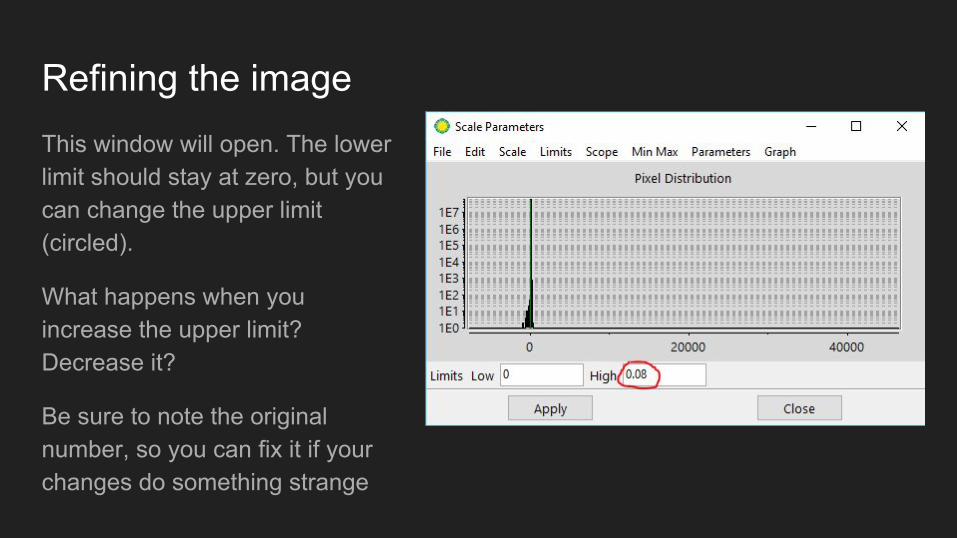
Refining the imageThis window will open. The lower limit should stay at zero, but you can change the upper limit (circled).
What happens when you increase the upper limit? Decrease it?
Be sure to note the original number, so you can fix it if your changes do something strange
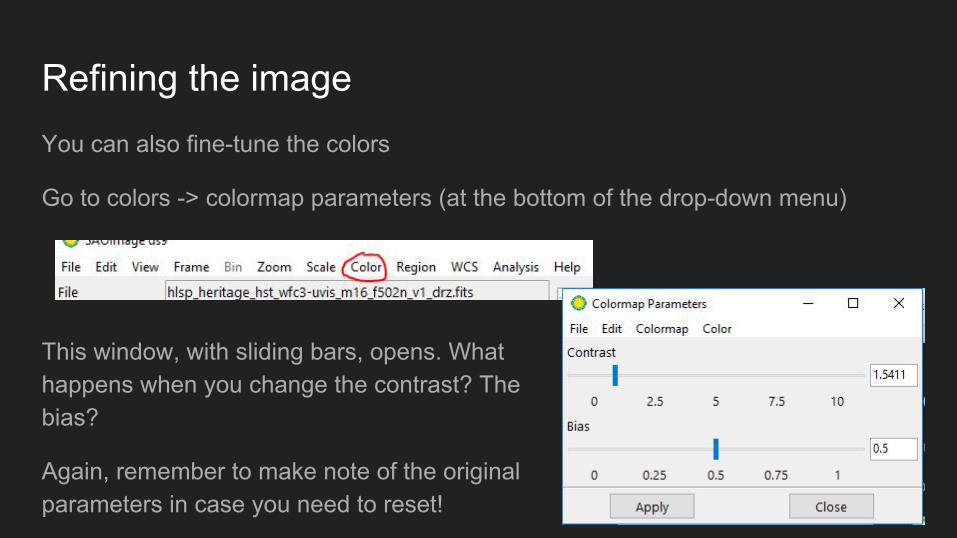
Refining the imageYou can also fine-tune the colors
Go to colors -> colormap parameters (at the bottom of the drop-down menu)
This window, with sliding bars, opens. What happens when you change the contrast? The bias?
Again, remember to make note of the original parameters in case you need to reset!
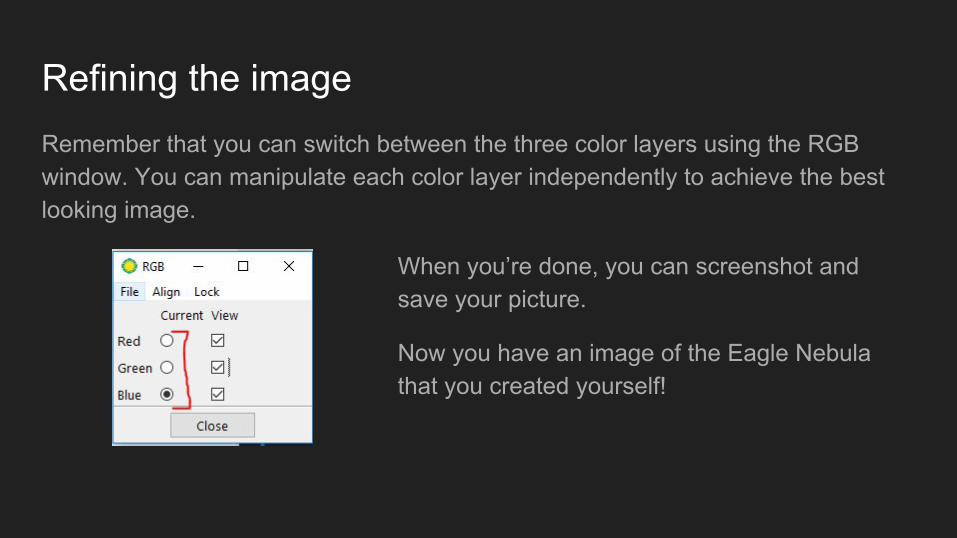
Refining the imageRemember that you can switch between the three color layers using the RGB window. You can manipulate each color layer independently to achieve the best looking image.
When you’re done, you can screenshot and save your picture.
Now you have an image of the Eagle Nebula that you created yourself!
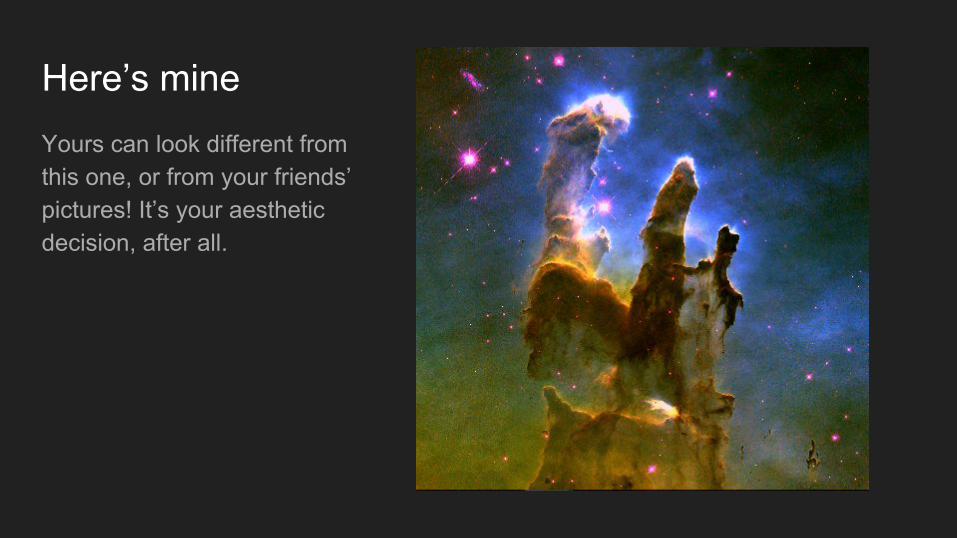
Here’s mineYours can look different from this one, or from your friends’ pictures! It’s your aesthetic decision, after all.


