Embed Size (px)
Citation preview

V32 05/2022
COMmander 6000/R/RXAdvanced Information

Table of Contents
COMmander 6000/R/RX - Firmware V8.4 - Advanced Information V32 05/2022- 2 -
Table of Contents
Information on Release 8.4...............................................................................31
About these instructions....................................................................................33
Gender note................................................................................................... 34
Copyright........................................................................................................ 35
Trademarks.................................................................................................... 36
The latest information.................................................................................... 37
Functions, Uses, Concepts............................................................................... 38
Action URL (HTTP Request)......................................................................... 41
Activation........................................................................................................42
Address Books............................................................................................... 46
Alarm.............................................................................................................. 48
Alarm Device..................................................................................................51
Announcement before Answering..................................................................52
Automatic Reception...................................................................................... 54
Baby Call........................................................................................................57
Backing Up and Recovering Configuration Data........................................... 58
Information on the Chapter.........................................................................59
Boss/Secretary Function................................................................................ 61
Busy-on-Busy................................................................................................. 62
Calendar.........................................................................................................63
Call Allowance Account................................................................................. 64
Call Channel Reservation.............................................................................. 65
Call Charge Information.................................................................................66
Call Data........................................................................................................ 67
Overview of Settings Options..................................................................... 68
Contents of the Call Data Record.............................................................. 69
Opening the Call Data List......................................................................... 70

Table of Contents
COMmander 6000/R/RX - Firmware V8.4 - Advanced Information V32 05/2022- 3 -
Call Distribution.............................................................................................. 71
Call Forwarding.............................................................................................. 73
Call Forwarding Types................................................................................74
Call Forwarding for Subscribers................................................................. 75
Call Forwarding for Groups........................................................................ 77
Call Forwarding for External Numbers....................................................... 79
Call Parking....................................................................................................81
Call Through...................................................................................................82
Call waiting.....................................................................................................84
Central Caller List.......................................................................................... 85
CLIP Texts..................................................................................................... 86
Configuration Switchover............................................................................... 87
DECT Phones................................................................................................ 91
COMfortel DECT 900................................................................................. 92
COMfortel DECT IP1040............................................................................ 93
COMfortel WS-400 IP / WS-650 IP............................................................ 94
COMfortel WS-500S / WS-500M................................................................ 95
Do-not-disturb, Call Deblocker and Call Restrictor...................................... 100
Door Functions.............................................................................................102
E-mail........................................................................................................... 103
Emergency Calls.......................................................................................... 105
Exchange Line Authorisation, Call Deblocker and Call Restrictor............... 108
Explanations and Setting Options............................................................ 109
Phone Book Authorisation........................................................................ 111
Exchange Line Request...............................................................................113
Exchange Line Transfer...............................................................................115
External Outgoing Call.................................................................................117
Firmware Update..........................................................................................119
Information and Options........................................................................... 120

Table of Contents
COMmander 6000/R/RX - Firmware V8.4 - Advanced Information V32 05/2022- 4 -
Distributing Firmware................................................................................ 122
Fixed Mobile Convergence (FMC)...............................................................123
Follow-me..................................................................................................... 126
Groups..........................................................................................................128
GSM Gateway..............................................................................................131
Hardware...................................................................................................... 132
Hotel Function.............................................................................................. 133
InterCom Announcement/Hands-Free Operation........................................ 137
Internal Numbers..........................................................................................139
ISDN Connection......................................................................................... 141
LAN-TAPI..................................................................................................... 143
Explanations and Setting Options............................................................ 144
Installing TAPI driver (TSP)......................................................................146
Checking the Function of the LAN-TAPI.................................................. 148
LCR.............................................................................................................. 150
Loudspeaker Announcement....................................................................... 152
Macro numbers............................................................................................ 153
Multi-path Call Forwarding........................................................................... 154
Music on Hold and Announcement..............................................................155
MWI.............................................................................................................. 156
Number presentation....................................................................................158
Online Name Search................................................................................... 160
PBX Time.....................................................................................................162
Phone Number Display (CLIP).................................................................... 163
Pick-up and Call Take-over......................................................................... 164
Pick-up of All Calls to Group Members....................................................... 165
Powering Down and Switching Off.............................................................. 166
Preferred Exchange Line............................................................................. 167
Preliminary Pickup Query and Monitoring................................................... 168
Table of Contents
COMmander 6000/R/RX - Firmware V8.4 - Advanced Information V32 05/2022- 5 -
Private (Personalised) Exchange Line Access............................................ 170
Profiles..........................................................................................................171
Project Assignment...................................................................................... 172
Protection from Unauthorised Access......................................................... 173
Provisioning for IP Phones.......................................................................... 176
Device Configurability and Characteristics and Setting Options...............177
Provisioning files....................................................................................... 181
Creating a New Provisioning File............................................................. 183
Provisioning COMfortel D-series / 3600 IP...............................................185
Relays (Actuators)........................................................................................186
Expalanations and Setting Options.......................................................... 187
Relay operating modes.............................................................................189
Remote Configuration and Alternative Connection Options.........................193
Configuration Options............................................................................... 194
Configuring the PBX remotely via the Internet with (Auerswald) RemoteAccess Server...........................................................................................196
Configuring ISDN System Phones via the PBX (Internal)........................ 198
Configuring ISDN System Phones Remotely via the External S0 Port on thePBX (Externally)........................................................................................200
Restart..........................................................................................................202
Ringer tones.................................................................................................204
Ringing Sequence........................................................................................207
Explanations of the Ringing Sequence.................................................... 208
Examples...................................................................................................211
Service Data.................................................................................................218
Setting Options......................................................................................... 219
Recording the D-Channel Protocol...........................................................220
Sound........................................................................................................... 222
Subscribers...................................................................................................225

Table of Contents
COMmander 6000/R/RX - Firmware V8.4 - Advanced Information V32 05/2022- 6 -
Sub-System Operation.................................................................................227
Setting Options......................................................................................... 228
Transferring a Caller of the Main PBX to Another Subscriber on the MainPBX from the Sub-System PBX............................................................... 232
Switch Input..................................................................................................233
System Messages........................................................................................234
Text Messages (Instant Messaging)............................................................236
Transfer and Callback..................................................................................237
Transmission of the Display Name..............................................................238
Voice mail and fax boxes............................................................................ 239
Setting Options......................................................................................... 240
Voice Mail/Fax Function and Memory Management................................ 241
Voice Mailbox............................................................................................243
Operating and Querying a Voice Mailbox.................................................245
Information, Notes and Method.............................................................246
Using an Internal or External Phone (Remote Access) to Operate andQuery a Voice Mailbox.......................................................................... 247
Fax Box.....................................................................................................251
Fax Transfer..............................................................................................253
Information............................................................................................. 254
Installing Printer Driver COMpact/COMmander Fax on PC...................255
Configuring the Printer Driver COMpact/COMmander Fax................... 256
Sending a fax to a recipient.................................................................. 258
Send a fax to multiple recipients (Broadcasting file)............................. 260
VoIP..............................................................................................................262
Note...........................................................................................................263
Configuring External Internet Telephony.................................................. 264
Configuring Internal IP Telephony............................................................ 266
External Private Branch Exchanges......................................................... 268

Table of Contents
COMmander 6000/R/RX - Firmware V8.4 - Advanced Information V32 05/2022- 7 -
VoIP/GSM Routing.......................................................................................270
Waiting Field Function................................................................................. 273
Wake-up Functions...................................................................................... 277
Phoning............................................................................................................278
Using Different Phone Types.......................................................................279
Incoming Calls..............................................................................................281
Accepting Incoming Calls......................................................................... 282
Taking over a Call (Pick-up).....................................................................283
Taking over a Call (Call Take-over)......................................................... 284
Accepting Door Call and Opening the Door............................................. 286
Accepting an Alarm Call and Confirming the Alarm................................. 287
Call Waiting Calls.........................................................................................288
Rejecting a Call Waiting Call....................................................................289
Accepting the Call Waiting Call................................................................ 290
Disconnecting the Current Call and Accepting the Call Waiting Call........ 291
Outgoing Calls..............................................................................................292
Initiating an Internal Call...........................................................................293
Initiating an External Call..........................................................................294
Initiating an External Call with Calling Line Identity Restriction................ 295
Initiating Private Exchange Line Access...................................................297
Initiating Private Exchange Line Access without a PIN............................ 298
Initiating Targeted Exchange Line Access............................................... 299
Force Public Exchange Call for Automatic Exchange Line Request.........300
Initiating Targeted VoIP Access............................................................... 301
Initiating Calls with Project Assignment....................................................303
Calling a Door and Opening the Door......................................................304
Initiating InterCom Announcement/Hands-Free........................................306
Initiating Loudspeaker Announcement..................................................... 307
Unsuccessful Outgoing Calls....................................................................... 308

Table of Contents
COMmander 6000/R/RX - Firmware V8.4 - Advanced Information V32 05/2022- 8 -
Initiating Internal Callback on Busy.......................................................... 309
Initiating External Callback on Busy......................................................... 310
Deleting Callback on Busy....................................................................... 312
Initiating Reservation of Exchange Line on Busy..................................... 313
Initiating Internal Callback on No Response............................................ 314
Initiating External Callback on No Response........................................... 315
Initiating Priority Call for Do-Not-Disturb...................................................316
Query Calls.................................................................................................. 317
Information on the Chapter.......................................................................318
Initiating a Query Call............................................................................... 319
Ending a Query Call................................................................................. 321
Toggling between Conversations............................................................. 322
Ending One of the Two Calls................................................................... 323
Connecting Both Communication Partners...............................................324
Initiating Query Call to Third Subscriber...................................................325
Transferring.................................................................................................. 327
Transferring with Announcement..............................................................328
Blind Transfer (Transferring without Announcement)............................... 330
Placing Communication Partner in Waiting Loop..................................... 331
Calling a Third Subscriber and Transferring to an Active CommunicationPartner.......................................................................................................333
Parking the Call Internally (Call Parking)..................................................335
Unparking the Call (Call Parking)............................................................. 336
Conference Calls..........................................................................................337
Initiating Conference Calls........................................................................338
Initiating Toggling between Conversations during a Conference Call.......339
Connecting Both Conference Call Partners..............................................340
Ending Conference Call............................................................................341
Short Reference.............................................................................................. 342

Table of Contents
COMmander 6000/R/RX - Firmware V8.4 - Advanced Information V32 05/2022- 9 -
Information about the section...................................................................... 344
Alarm............................................................................................................ 345
Reservation of Exchange Line on Busy.......................................................349
Force Public Exchange Call for Automatic Exchange Line Request............350
Call Waiting.................................................................................................. 351
Time and Date (of the PBX)........................................................................352
Do-not-Disturb.............................................................................................. 353
Automatic Reception.................................................................................... 354
Baby Call/Hotline..........................................................................................355
Call Through.................................................................................................356
Remote Configuration (Activation)............................................................... 357
FMC..............................................................................................................358
Hook Flash Timing.......................................................................................361
follow-me...................................................................................................... 362
Call Deblocker (Incoming)............................................................................366
Call Allowance Account............................................................................... 367
Outgoing Calls..............................................................................................368
Call Data (Single Call Record).................................................................... 370
Targeted Exchange Line Access................................................................. 371
Targeted VoIP Access................................................................................. 372
Groups..........................................................................................................373
Hotel Functions............................................................................................ 376
Identification (IPv4 Address, Subnet Mask, Gateway, DHCP Client)...........377
InterCom Announcement/Handsfree Speaking............................................380
Conference...................................................................................................381
Configuration Switchover............................................................................. 383
Loudspeaker Announcement....................................................................... 384
Emergency Call Announcement.................................................................. 385
Call parking.................................................................................................. 386

Table of Contents
COMmander 6000/R/RX - Firmware V8.4 - Advanced Information V32 05/2022- 10 -
Multi-path Call Forwarding........................................................................... 388
Pick-up and Call Take-over......................................................................... 391
PIN................................................................................................................392
Private (Personalised) Exchange Line Access............................................ 393
Project Assignment...................................................................................... 395
Relays...........................................................................................................396
Query and 3rd Call...................................................................................... 399
Query and Transfer......................................................................................401
Callback on Busy......................................................................................... 403
Callback on No Reply.................................................................................. 404
Call Forwarding for External Numbers........................................................ 405
Call Forwarding for Groups......................................................................... 411
Call Forwarding for Subscribers.................................................................. 416
Call Restrictor (Incoming)............................................................................ 419
Announcement before Answering................................................................420
Door Functions.............................................................................................421
Voice Mailbox...............................................................................................423
Music on Hold and Announcement..............................................................433
Wake-up Functions...................................................................................... 435
Using the Configuration Manager................................................................... 438
Introduction...................................................................................................439
Requirements and Notes..........................................................................440
Opening the Configuration Manager........................................................ 441
Open the Configuration Manager as an Administrator.......................... 442
Opening the Configuration Manager as Sub-Administrator................... 443
Opening the Configuration Manager as User........................................444
Operating Instructions for the Configuration Manager..............................445
Configuration Manager Navigation........................................................ 446
Logging Out........................................................................................... 447

Table of Contents
COMmander 6000/R/RX - Firmware V8.4 - Advanced Information V32 05/2022- 11 -
Entry and Selection Fields.................................................................... 448
Creating, Deleting, Searching for, and Sorting Table Entries................449
Information on the PBX............................................................................ 451
Overviews.....................................................................................................452
Identification Number Table......................................................................453
Call distribution......................................................................................... 454
Call Forwarding Status............................................................................. 455
Groups.......................................................................................................456
Additional Subscriber Passwords............................................................. 457
Automatic Receptions............................................................................... 458
Voice Mail/Fax Function........................................................................... 459
Wake-up Times.........................................................................................460
Switching times......................................................................................... 461
Ports..........................................................................................................462
Dial Plan....................................................................................................463
Monitoring.....................................................................................................465
Network Diagnosis.................................................................................... 466
External Call Channel Assignment........................................................... 467
Status VoIP accounts............................................................................... 468
Status internal subscriber......................................................................... 471
Status IP relay.......................................................................................... 475
System messages.....................................................................................476
Network data stream................................................................................ 477
Status Messages...................................................................................... 479
Hardware...................................................................................................... 480
Selection of modules................................................................................ 481
Settings of the Modules.........................................................................482
Port configuration......................................................................................483
Settings of the Ports..............................................................................484
Table of Contents
COMmander 6000/R/RX - Firmware V8.4 - Advanced Information V32 05/2022- 12 -
S0 Ports..............................................................................................485
UP0 Ports........................................................................................... 487
S2M Ports...........................................................................................488
Public switched tel. networks.......................................................................490
Exchange line request.............................................................................. 491
Settings of the Exchange Line Request................................................492
Exchange Line Request/Exchange Line Access Number.................. 493
Prefixes...............................................................................................495
Signalling Tones.................................................................................498
Emergency calls........................................................................................499
Settings of the Emergency Calls...........................................................500
Emergency Call has Priority...............................................................501
Emergency Numbers..........................................................................503
Service Numbers................................................................................505
ISDN..........................................................................................................507
Settings of the PTMP Connection.........................................................508
Network Provider................................................................................509
Miscellaneous..................................................................................... 510
Multiple Subscriber Numbers............................................................. 512
Expert Configuration of the PTMP Connection..................................... 514
PTMP Connection.............................................................................. 515
General Info........................................................................................517
Routing............................................................................................... 520
Call Forwarding.................................................................................. 522
Number Presentation..........................................................................529
Settings PBX Base Number/Bundle...................................................... 534
Expert Configuration for the PTP Connection....................................... 538
PTP Connection................................................................................. 539
General Info........................................................................................542

Table of Contents
COMmander 6000/R/RX - Firmware V8.4 - Advanced Information V32 05/2022- 13 -
Routing............................................................................................... 545
Call Forwarding.................................................................................. 547
Number Presentation..........................................................................553
Settings of the Extension...................................................................... 557
Settings Additional Numbers ISDN....................................................... 559
VoIP...........................................................................................................561
Management of the VoIP Provider........................................................ 562
Settings of the VoIP Provider................................................................564
SIP...................................................................................................... 565
RTP.....................................................................................................574
Preferences........................................................................................ 580
Number Presentation (outgoing)........................................................ 586
Evaluation of Incoming SIP Messages.............................................. 591
Management VoIP Account...................................................................594
Settings for the VoIP Accounts............................................................. 596
Network Provider................................................................................597
Location/Access Data.........................................................................598
Miscellaneous..................................................................................... 601
Phone Numbers for PTP Connection.................................................602
Phone Numbers for PTMP connection.............................................. 607
Expert Settings of the PTMP Connection..............................................612
VoIP Account......................................................................................613
General Info........................................................................................614
Routing............................................................................................... 615
Call Forwarding.................................................................................. 617
Expert Settings of the PTP Connection................................................ 622
VoIP Account......................................................................................623
General Info........................................................................................624
Routing............................................................................................... 625

Table of Contents
COMmander 6000/R/RX - Firmware V8.4 - Advanced Information V32 05/2022- 14 -
Call Forwarding.................................................................................. 627
Settings Additional Numbers VoIP........................................................ 631
Call Distribution.........................................................................................633
Management for the Call Distribution....................................................634
Call distribution for............................................................................. 635
Settings for Call Distribution..................................................................639
Call Distribution for.............................................................................640
Call Forwarding.........................................................................................643
Settings for the Call Forwarding............................................................644
Call Forwarding for ............................................................................645
Subscriber (scr.)...........................................................................................647
Phone numbers.........................................................................................648
Management Subscriber........................................................................649
Add Subscriber...................................................................................... 653
IP provisioning.......................................................................................... 659
Settings.................................................................................................. 660
File management...................................................................................662
Profiles...................................................................................................... 666
Management Profile...............................................................................667
Settings of the Subscriber Profiles........................................................ 668
Exchange Line Settings..................................................................... 669
Reachability........................................................................................ 676
Authorisations..................................................................................... 680
Voicemail/ Fax Box............................................................................ 683
Settings...............................................................................................685
Settings Profile Assignment...................................................................687
COMfortel DECT.......................................................................................688
Using the Configuration Manager to Switch On the Login Mode of aCOMfortel DECT 900 Base...................................................................689

Table of Contents
COMmander 6000/R/RX - Firmware V8.4 - Advanced Information V32 05/2022- 15 -
Assigning Internal Phone Numbers to COMfortel DECT 900/900CHandsets................................................................................................691
Using the Configuration Manager to Log Out COMfortel DECT 900/900CHandsets................................................................................................693
Using the Configuration Manager to Configure a Function Key for PBXFunctions............................................................................................... 694
Copying a Function Key Assignment into Other COMfortel DECT900/900C Handsets...............................................................................697
Restoring a Phone Book from the PBX.................................................699
COMfortel WS-500X................................................................................. 701
Management COMfortel WS-500.......................................................... 702
Settings COMfortel WS-500.................................................................. 705
COMfortel WS-500X Handsets..............................................................709
Subscriber...........................................................................................710
free IPUI............................................................................................. 712
Properties / Function overview................................................................. 713
Settings of the Subscriber Properties....................................................714
Basic Network Settings...................................................................... 715
Exchange Line Settings..................................................................... 722
Reachability........................................................................................ 729
Authorisations..................................................................................... 733
Analogue Settings.............................................................................. 738
VoIP settings...................................................................................... 742
Voicemail /Fax Box.............................................................................748
Settings...............................................................................................751
Unassigned phones.................................................................................. 757
Managing Unassigned Phones..............................................................758
All subscribers...........................................................................................759
Settings all Subscribers.........................................................................760
Groups..........................................................................................................762

Table of Contents
COMmander 6000/R/RX - Firmware V8.4 - Advanced Information V32 05/2022- 16 -
Phone numbers.........................................................................................763
Management Groups............................................................................. 764
Profiles...................................................................................................... 766
Management Profile...............................................................................767
Settings of the Group Profiles............................................................... 768
Basic Network Settings...................................................................... 769
Exchange Line Settings..................................................................... 774
Reachability........................................................................................ 779
Voicemail-/Fax Box.............................................................................785
Settings...............................................................................................787
Settings Profile Assignment...................................................................789
Properties..................................................................................................790
Settings of the Group Properties...........................................................791
Basic Network Settings...................................................................... 792
Exchange Line Settings..................................................................... 799
Reachability........................................................................................ 804
Voicemail/Fax Box..............................................................................811
Settings...............................................................................................814
Devices.........................................................................................................816
Voice mail and fax boxes......................................................................... 817
Management Voice mail and fax boxes................................................ 818
Management Profile...............................................................................825
Settings Profile Assignment...................................................................826
Settings of the Voice Mail/Fax Function................................................827
System Information.............................................................................828
Automatic Clean-Up........................................................................... 829
Memory...............................................................................................830
Automatic Memory Check.................................................................. 832
Channels Simultaneously for Outgoing Calls.....................................834

Table of Contents
COMmander 6000/R/RX - Firmware V8.4 - Advanced Information V32 05/2022- 17 -
Language Files...................................................................................835
Settings of the Voice Mailbox................................................................836
Box Settings....................................................................................... 837
Users/Authorisations...........................................................................844
Announcements..................................................................................846
Call Acceptance/Announcements.......................................................848
Settings for the Fax Box....................................................................... 854
Box Settings....................................................................................... 855
Users/Authorisations...........................................................................861
Call Acceptance................................................................................. 863
Device Wizard...........................................................................................865
Management of the Device Wizard....................................................... 866
Device Wizard.................................................................................... 867
2TSM Module..................................................................................... 869
Door Terminals...................................................................................872
Configuring Analogue Door Terminals............................................... 874
Configuring VoIP Door Terminal........................................................ 876
Configurig IP Switch Relays...............................................................879
Configuring Loudspeaker Announcements........................................ 881
Online Configuration...........................................................................883
Door Terminals......................................................................................... 884
Management of the Door Terminal....................................................... 885
Door Calls+Relays..............................................................................886
Settings of the Door Terminal............................................................... 891
Configuration of the Door Terminal....................................................892
Settings Door Call................................................................................. 894
Announcement Outputs............................................................................ 898
Management Announcement Output.....................................................899
Settings Announcement Output.............................................................902
Table of Contents
COMmander 6000/R/RX - Firmware V8.4 - Advanced Information V32 05/2022- 18 -
Alarms....................................................................................................... 904
Management of the Alarms................................................................... 905
Switch input+Relay.............................................................................907
Settings Alarm....................................................................................... 910
Settings of the Switch Inputs.................................................................913
Switch Input+Relay.............................................................................914
Relays (Actuators).................................................................................... 916
Management Relays (Actuators)........................................................... 917
Settings of the Relays (Actuators).........................................................919
2TSM Module..................................................................................... 920
Analogue Door Terminal.................................................................... 921
VoIP Door Terminal............................................................................923
IP Switch Relay..................................................................................926
Loudspeaker Announcements............................................................929
Action URLs..............................................................................................932
Management of the Action URLs (HTTP Request)............................... 933
Action URLs (incoming)..................................................................... 934
Action URLs (outgoing)...................................................................... 936
Event type.......................................................................................... 937
Settings Action URL (HTTP Request)...................................................940
Time control................................................................................................. 942
Configurations........................................................................................... 943
Management Configuration................................................................... 944
Switching Times........................................................................................946
Management Switching Times.............................................................. 947
Routing......................................................................................................... 949
Soft-LCR 4.0............................................................................................. 950
Management LCR Subscribers............................................................. 951
Management LCR Providers................................................................. 952

Table of Contents
COMmander 6000/R/RX - Firmware V8.4 - Advanced Information V32 05/2022- 19 -
Management Networks and LCR import............................................... 953
Management Area Codes/Area Code Ranges......................................955
Management LCR Tables......................................................................956
VoIP and GSM Routing............................................................................ 959
Settings for VoIP/GSM Routing.............................................................960
Exception Numbers............................................................................ 961
Routing Configuration-Dependent...................................................... 964
Functions......................................................................................................965
Exchange Line Transfer............................................................................966
Settings for Exchange Line Transfer.....................................................967
Automatic Receptions............................................................................... 969
Management Automatic Reception....................................................... 970
Settings for Automatic Receptions........................................................ 972
Settings...............................................................................................973
Destination Number............................................................................977
Call Through............................................................................................. 979
Settings for Call Through...................................................................... 980
Exchange Line Settings..................................................................... 981
Call Assignment................................................................................. 983
Call Through User.............................................................................. 984
CLIP Texts................................................................................................ 985
Settings CLIP Texts...............................................................................986
Short-Code Macros...................................................................................988
Management Macro Short-Code Number............................................. 989
Call Allowance Accounts.......................................................................... 991
Settings of the Call Allowance Account.................................................992
Charges.............................................................................................. 993
Account Debit..................................................................................... 995
Call Allowance Accounts....................................................................996

Table of Contents
COMmander 6000/R/RX - Firmware V8.4 - Advanced Information V32 05/2022- 20 -
Hotel Function...........................................................................................998
Settings of the Hotel Function...............................................................999
Printer Settings.................................................................................1000
Print Options.....................................................................................1002
Management of the Hotel Function..................................................... 1004
Hotel Reception Subscribers............................................................1005
Room Subscribers............................................................................1006
Calendar..................................................................................................1007
Management Calendars...................................................................... 1008
LAN TAPI................................................................................................1010
Settings for LAN TAPI......................................................................... 1011
Settings.............................................................................................1012
Subscribers.......................................................................................1015
Call Parking.............................................................................................1016
Settings Call Parking........................................................................... 1017
Online Name Search.............................................................................. 1019
Management Provider Online Name Search.......................................1020
Management Online Name Search Group Filters............................... 1023
Settings Online Name Search Group Filters....................................... 1025
Settings Online Name Search Text Converter.................................... 1027
Waiting Field........................................................................................... 1029
Settings Waiting Field..........................................................................1030
Music on Hold and Announcements.......................................................1031
Management of the Music On Hold and Announcements................... 1032
Own Files......................................................................................... 1033
System Files.....................................................................................1035
Settings for Music On Hold and Announcements................................1036
Source for music on hold.................................................................1037
Music on hold with announcement...................................................1038

Table of Contents
COMmander 6000/R/RX - Firmware V8.4 - Advanced Information V32 05/2022- 21 -
music on Hold during the ringing period.......................................... 1039
Music on hold...................................................................................1040
Alarm................................................................................................ 1041
announcement before answering..................................................... 1042
Wake-Up Announcements................................................................1043
Automatic receptions........................................................................1044
Emergency call.................................................................................1045
Wake-Up Times...................................................................................... 1046
Settings for Wake-Up Functions..........................................................1047
Settings.............................................................................................1048
Wake-up Times for Subscribers.......................................................1050
User data....................................................................................................1052
Call Data................................................................................................. 1053
Management Call Data........................................................................1054
Call Data Column Settings.................................................................. 1061
Settings Filter.......................................................................................1068
Filter Criteria.....................................................................................1069
Configure.......................................................................................... 1070
Settings Call Data................................................................................1072
Call data management..................................................................... 1073
SFTP transfer................................................................................... 1075
Address Books........................................................................................1077
Management Contacts and assignment..............................................1078
Contacts............................................................................................1079
Contact Groups and Assignment..................................................... 1084
Google Contact Groups................................................................... 1086
CSV Import Group............................................................................1088
Settings of the Contacts...................................................................... 1090
Settings of the Contact Groups...........................................................1092

Table of Contents
COMmander 6000/R/RX - Firmware V8.4 - Advanced Information V32 05/2022- 22 -
Settings of the Contact Group Authorisations..................................... 1097
Authorizations................................................................................... 1098
Contact group filter...........................................................................1099
Settings Standard Contact Groups......................................................1100
Information........................................................................................1101
Logged-in Subscriber....................................................................... 1102
Subscriber with Write Authorisation................................................. 1103
Settings of the Address Books............................................................1104
LDAP server..................................................................................... 1105
Conversion........................................................................................1109
Password for the Access via COMfortel DECT IP1040....................1110
Settings Address Book Transmission for DECT Handsets..................1112
Information about Transfer via LDAP Server...................................... 1115
Special Numbers.....................................................................................1117
Management........................................................................................ 1118
Configuration........................................................................................1119
Messages................................................................................................1120
Management........................................................................................ 1121
Administration.............................................................................................1124
Dealer and Operator Data...................................................................... 1125
Management of the PBX, Dealer and Operator Data..........................1126
Administrator Access........................................................................1127
PBX Data..........................................................................................1129
Dealer Data...................................................................................... 1130
Operator and Location of the PBX...................................................1131
Activation.................................................................................................1132
Management Activation....................................................................... 1133
Access Authorisations.............................................................................1135
Configuring Access Authorisation........................................................1136

Table of Contents
COMmander 6000/R/RX - Firmware V8.4 - Advanced Information V32 05/2022- 23 -
Data Backup........................................................................................... 1137
Management of the Configuration Data.............................................. 1138
Store Configuration Data in the PBX............................................... 1139
Read Configuration Data from the PBX........................................... 1140
Reset Configuration..........................................................................1142
Regenerate Configuration................................................................ 1143
Restore old Configuration Data........................................................1144
Insert Restoration Point....................................................................1146
Firmware update and restart.................................................................. 1147
Management of the Firmware Updates...............................................1148
Store the firmware in the PBX (manual firmware update)................ 1149
Firmware Update via Update Server................................................1150
Firmware Update for VoIP System Phones..................................... 1153
Restore firmware (reboot)................................................................ 1154
Reset of the PBX (Restart).............................................................. 1155
Power down of the PBX...................................................................1156
Date and time of the PBX...................................................................... 1157
Settings of Date and time of the PBX................................................. 1158
One-Time Configuration of Date and time....................................... 1159
Automatic Synchronisation of the PBX Time/Date...........................1161
Automatic Distribution of the PBX Time/Date.................................. 1163
IP Configuration...................................................................................... 1164
Settings of the IP Configuration.......................................................... 1165
Server Configuration.........................................................................1166
Ethernet Configuration......................................................................1169
VMF Slot X/XVoIP Slot X.................................................................1172
DNS Configuration............................................................................1175
HTTP Proxy Configuration............................................................... 1177
SFTP Server.....................................................................................1179

Table of Contents
COMmander 6000/R/RX - Firmware V8.4 - Advanced Information V32 05/2022- 24 -
VoIP Configuration..................................................................................1181
Settings for VoIP................................................................................. 1182
Distribution of the VoIP Channels.................................................... 1183
Notification........................................................................................ 1184
SIP.................................................................................................... 1185
RTP...................................................................................................1186
Quality of Service............................................................................. 1187
STUN Server for the Connection of External VoIP Subscribers....... 1188
Remote Configuration............................................................................. 1190
Settings for the Remote Configuration................................................ 1191
Remote Programming...................................................................... 1192
Authorisation for Remote Configuration........................................... 1194
Remote Configuration of the System Telephones............................1195
Remote configuration via Remote Access Server in the Internet..... 1196
SIPS/SRTP Internal (VoIP).....................................................................1197
Settings SIPS/SRTP............................................................................ 1198
SIPS/SRTP....................................................................................... 1199
Root Certificate.................................................................................1200
PBX Certificate................................................................................. 1202
IP Block- and Allowlist............................................................................ 1205
Settings of the IP Block- and Allowlist.................................................1206
IP Block- and Allowlist......................................................................1207
Certificates.............................................................................................. 1210
Management of the Certificates.......................................................... 1211
Information........................................................................................1212
Not trustworthy................................................................................. 1213
Trustworthy....................................................................................... 1214
Certificate Authorities....................................................................... 1215
Webserver........................................................................................ 1217
Table of Contents
COMmander 6000/R/RX - Firmware V8.4 - Advanced Information V32 05/2022- 25 -
SIPS/SRTP internal (VoIP)...............................................................1218
View.................................................................................................. 1220
E-Mail...................................................................................................... 1222
Settings Outgoing Mail Server.............................................................1223
Management Logo...............................................................................1227
Management Internationalisation.........................................................1228
Settings Internationalisation.................................................................1230
System Messages...................................................................................1232
Settings of the System Message.........................................................1233
Transfer of System E-Mails..............................................................1234
Logs to be Sent as E-Mails..............................................................1237
Events for System Logs................................................................... 1239
Status Messages and Notes............................................................ 1240
Logging....................................................................................................1241
Settings of the Logging....................................................................... 1242
Logging............................................................................................. 1243
Service Data........................................................................................... 1246
Exporting Service Data........................................................................1247
Appendix Hardware.......................................................................................1249
Status Displays on the LEDs.....................................................................1250
Buttons....................................................................................................... 1255
Information.............................................................................................. 1256
Performing a Restart Immediately by Pressing a Button........................1257
Restoring Firmware at the Touch of a Button........................................ 1258
Restore Factory Settings at the Touch of a Button................................ 1260
Shutting the PBX Down by Pressing a Button....................................... 1262
Printers and Data Storage Devices at the USB Host................................ 1263
Connecting Devices to the 2TSM (R) Module........................................... 1264

Table of Contents
COMmander 6000/R/RX - Firmware V8.4 - Advanced Information V32 05/2022- 26 -
Connecting a Door Terminal System in Accordance with FTZ 123D12-0.......................................................................................................1266
Connecting a Door Bell Button...............................................................1269
Connecting a Door Bell Button and a Door Bell..................................... 1272
Connecting a Door Opener (or Other Devices) to a Relay..................... 1275
Connecting a Second Ringer..................................................................1278
Connecting a Device for Alarm Functions.............................................. 1280
Connecting an External Input Device for Music on Hold........................ 1283
Connecting a Loudspeaker for Announcements.....................................1286
Glossary.........................................................................................................1289
Technical Terms and Functions.................................................................1290
A..............................................................................................................1291
Account................................................................................................ 1292
Exchange Line.....................................................................................1293
APIPA.................................................................................................. 1294
(Auerswald) Remote Access Server................................................... 1295
Remote Extension............................................................................... 1296
B..............................................................................................................1297
B-Channel............................................................................................ 1298
C..............................................................................................................1299
Dial-around.......................................................................................... 1300
CD........................................................................................................1301
Client....................................................................................................1302
CLIP No Screening..............................................................................1303
Codec...................................................................................................1304
D..............................................................................................................1305
DDI.......................................................................................................1306
DECT................................................................................................... 1307
DHCP...................................................................................................1308

Table of Contents
COMmander 6000/R/RX - Firmware V8.4 - Advanced Information V32 05/2022- 27 -
DiffServ................................................................................................ 1309
D-Channel............................................................................................1310
DNS..................................................................................................... 1311
Domain.................................................................................................1312
DSL...................................................................................................... 1313
DynDNS............................................................................................... 1314
E..............................................................................................................1315
Echo Cancellation................................................................................1316
End Device.......................................................................................... 1317
Ethernet............................................................................................... 1318
F.............................................................................................................. 1319
Firewall.................................................................................................1320
Firmware.............................................................................................. 1321
Flash.................................................................................................... 1322
G..............................................................................................................1323
GAP..................................................................................................... 1324
Prefix....................................................................................................1325
Gateway...............................................................................................1326
H..............................................................................................................1327
Host......................................................................................................1328
HTTP Proxy......................................................................................... 1329
HTTPS................................................................................................. 1330
Hyperlink.............................................................................................. 1331
I............................................................................................................... 1332
IAD....................................................................................................... 1333
IP Address........................................................................................... 1334
IPv4 Address....................................................................................... 1335
IPv6 Address....................................................................................... 1336
ISDN.................................................................................................... 1337

Table of Contents
COMmander 6000/R/RX - Firmware V8.4 - Advanced Information V32 05/2022- 28 -
PD........................................................................................................ 1338
J...............................................................................................................1339
Jitter Buffer.......................................................................................... 1340
L.............................................................................................................. 1341
LAN...................................................................................................... 1342
LDAP....................................................................................................1343
LED...................................................................................................... 1344
M............................................................................................................. 1345
MAC Address.......................................................................................1346
PTMP................................................................................................... 1347
DTMF................................................................................................... 1348
MSN..................................................................................................... 1349
N..............................................................................................................1350
NAT......................................................................................................1351
Extension............................................................................................. 1352
Network................................................................................................1353
NTP......................................................................................................1354
O..............................................................................................................1355
Outbound Proxy...................................................................................1356
P..............................................................................................................1357
PIN....................................................................................................... 1358
PoE...................................................................................................... 1359
Port...................................................................................................... 1360
Proxy Server........................................................................................1361
Q..............................................................................................................1362
QoS......................................................................................................1363
QR Code..............................................................................................1364
R..............................................................................................................1365
Registrar.............................................................................................. 1366

Table of Contents
COMmander 6000/R/RX - Firmware V8.4 - Advanced Information V32 05/2022- 29 -
Router.................................................................................................. 1367
Routing.................................................................................................1368
S..............................................................................................................1369
S0 Basic Access..................................................................................1370
S0 Port.................................................................................................1371
S2M Primary Rate Multiplex Access................................................... 1372
SD/SDHC/SD-XC Card........................................................................1373
Server.................................................................................................. 1374
SIP....................................................................................................... 1375
SIP-DDI (SIP Trunking)....................................................................... 1376
SIP Port............................................................................................... 1377
SMTP................................................................................................... 1378
Soft Call............................................................................................... 1379
Softphone.............................................................................................1380
Structured Cabling...............................................................................1381
STUN................................................................................................... 1382
Subnet mask........................................................................................1383
Switch.................................................................................................. 1384
Syslog Server...................................................................................... 1385
System Phone..................................................................................... 1386
T.............................................................................................................. 1387
TAPI..................................................................................................... 1388
TCP......................................................................................................1389
Template.............................................................................................. 1390
PTP...................................................................................................... 1391
T-Net Functions................................................................................... 1392
Driver................................................................................................... 1393
U..............................................................................................................1394
UDP..................................................................................................... 1395

Table of Contents
COMmander 6000/R/RX - Firmware V8.4 - Advanced Information V32 05/2022- 30 -
UP0...................................................................................................... 1396
URL......................................................................................................1397
V..............................................................................................................1398
Public Exchange..................................................................................1399
VoIP Account.......................................................................................1400
VoIP Provider.......................................................................................1401
Voucher................................................................................................1402
VPN......................................................................................................1403
W.............................................................................................................1404
WAN.....................................................................................................1405
Z.............................................................................................................. 1406
Certificate.............................................................................................1407
Abbreviations..............................................................................................1408

Information on Release 8.4
COMmander 6000/R/RX - Firmware V8.4 - Advanced Information V32 05/2022- 31 -
Information on Release 8.4New or revised features published with this release are listed here.
You will find further information about new features in the firmwareand the associated documentation on the Internet underAuerswaldSupport/FONtevo Support.
LDAP password
For security reasons, a separate password has been implemented forLDAP queries.
Description of operation under Basic Network Settings
Call forwarding via group profile
The call forwarding destination number can be displayed to the caller.
Description of operation under Reachability
CSV import for subscribers
Wrong description revised, because CSV import is not possible forsubscribers.
Description of operation under Contacts
SIP options for NAT keep-alive interval
New option to re-register with the provider.
Description of operation under SIP

Information on Release 8.4
COMmander 6000/R/RX - Firmware V8.4 - Advanced Information V32 05/2022- 32 -
TSP client
New LAN-TAPI function TSP client.
Description of operation under Settings
Editing VMB announcements remotely
Editing VMB announcements remotely is only possible under certainconditions.
Description of operation under Using an Internal or External Phone(Remote Access) to Operate and Query a Voice Mailbox
Security warning on admin login and challenge response
If the outgoing mail server is set up, a security warning is sent to theadmin account for an admin login or a challenge response.
Further help under Requirements and Notes
Regular update for ISDN system phones
Note added. Regular updates with specified time intervals are onlypossible for ISDN system phones.
Description of operation under Firmware Update via Update Server

About these instructions
COMmander 6000/R/RX - Firmware V8.4 - Advanced Information V32 05/2022- 33 -
About these instructionsGender noteCopyrightTrademarksThe latest information Gender noteCopyrightTrademarksThe latest information

Gender note
COMmander 6000/R/RX - Firmware V8.4 - Advanced Information V32 05/2022- 34 -
Gender note
For the sake of better readability, the simultaneous use of the languageforms masculine, female and diverse (m/f/d) is waived.
All personal designations apply equally to all genders.

Copyright
COMmander 6000/R/RX - Firmware V8.4 - Advanced Information V32 05/2022- 35 -
Copyright
Auerswald GmbH & Co. KG, Vor den Grashöfen 1, 38162 Cremlingen,Germany, 2022

Trademarks
COMmander 6000/R/RX - Firmware V8.4 - Advanced Information V32 05/2022- 36 -
Trademarks
Disseminating and reproducing these instructions, or using and disclosingthe contents, even in part, is permitted only with our express permission.Compensation will be demanded for any violations. All rights reserved.
Microsoft and Windows are trademarks of the Microsoft Corporationregistered in the United States and/or other countries
All other trademarks mentioned are the property of the relevantmanufacturer.

The latest information
COMmander 6000/R/RX - Firmware V8.4 - Advanced Information V32 05/2022- 37 -
The latest information
After a firmware update, you usually require a new version of theinstructions.
You will find the up-to-date instructions on the Internet underAuerswald Support/FONtevo Support.

Functions, Uses, Concepts
COMmander 6000/R/RX - Firmware V8.4 - Advanced Information V32 05/2022- 38 -
Functions, Uses, ConceptsAction URL (HTTP Request)ActivationAddress BooksAlarmAlarm DeviceAnnouncement before AnsweringAutomatic ReceptionBaby CallBacking Up and Recovering Configuration DataBoss/Secretary FunctionBusy-on-BusyCalendarCall Allowance AccountCall Channel ReservationCall Charge InformationCall DataCall DistributionCall ForwardingCall ParkingCall ThroughCall waitingCentral Caller ListCLIP TextsConfiguration SwitchoverDECT PhonesDo-not-disturb, Call Deblocker and Call RestrictorDoor FunctionsE-mail

Functions, Uses, Concepts
COMmander 6000/R/RX - Firmware V8.4 - Advanced Information V32 05/2022- 39 -
Emergency CallsExchange Line Authorisation, Call Deblocker and Call RestrictorExchange Line RequestExchange Line TransferExternal Outgoing CallFirmware UpdateFixed Mobile Convergence (FMC)Follow-meGroupsGSM GatewayHardwareHotel FunctionInterCom Announcement/Hands-Free OperationInternal NumbersISDN ConnectionLAN-TAPILCRLoudspeaker AnnouncementMacro numbersMulti-path Call ForwardingMusic on Hold and AnnouncementMWINumber presentationOnline Name SearchPBX TimePhone Number Display (CLIP)Pick-up and Call Take-overPick-up of All Calls to Group MembersPowering Down and Switching OffPreferred Exchange Line

Functions, Uses, Concepts
COMmander 6000/R/RX - Firmware V8.4 - Advanced Information V32 05/2022- 40 -
Preliminary Pickup Query and MonitoringPrivate (Personalised) Exchange Line AccessProfilesProject AssignmentProtection from Unauthorised AccessProvisioning for IP PhonesRelays (Actuators)Remote Configuration and Alternative Connection OptionsRestartRinger tonesRinging SequenceService DataSoundSubscribersSub-System OperationSwitch InputSystem MessagesText Messages (Instant Messaging)Transfer and CallbackTransmission of the Display NameVoice mail and fax boxesVoIPVoIP/GSM RoutingWaiting Field FunctionWake-up Functions Action URL (HTTP Request)ActivationAddress BooksAlarmAlarm DeviceAnnouncement before AnsweringAutomatic ReceptionBaby CallBacking Up and Recovering Configuration DataBoss/Secretary FunctionBusy-on-BusyCalendarCall Allowance AccountCall Channel ReservationCall Charge InformationCall DataCall DistributionCall ForwardingCall ParkingCall ThroughCall waitingCentral Caller ListCLIP TextsConfiguration SwitchoverDECT PhonesDo-not-disturb, Call Deblocker and Call RestrictorDoor FunctionsE-mailEmergency CallsExchange Line Authorisation, Call Deblocker and Call RestrictorExchange Line RequestExchange Line TransferExternal Outgoing CallFirmware UpdateFixed Mobile Convergence (FMC)Follow-meGroupsGSM GatewayHardwareHotel FunctionInterCom Announcement/Hands-Free OperationInternal NumbersISDN ConnectionLAN-TAPILCRLoudspeaker AnnouncementMacro numbersMulti-path Call ForwardingMusic on Hold and AnnouncementMWINumber presentationOnline Name SearchPBX TimePhone Number Display (CLIP)Pick-up and Call Take-overPick-up of All Calls to Group MembersPowering Down and Switching OffPreferred Exchange LinePreliminary Pickup Query and MonitoringPrivate (Personalised) Exchange Line AccessProfilesProject AssignmentProtection from Unauthorised AccessProvisioning for IP PhonesRelays (Actuators)Remote Configuration and Alternative Connection OptionsRestartRinger tonesRinging SequenceService DataSoundSubscribersSub-System OperationSwitch InputSystem MessagesText Messages (Instant Messaging)Transfer and CallbackTransmission of the Display NameVoice mail and fax boxesVoIPVoIP/GSM RoutingWaiting Field FunctionWake-up Functions

Action URL (HTTP Request)
COMmander 6000/R/RX - Firmware V8.4 - Advanced Information V32 05/2022- 41 -
Action URL (HTTP Request)
An Action URL is a function that can send requests via a link to a certaindevice. The device that receives the Action URL subsequently performsthis request. The request and the IP address/URL of the Action URLreceiving device is entered directly into the Action URL.
Note: Currently, Action URLs in the PBX can only be sent if an alarmwas configured and is triggered. However, in this way, all requests canbe sent that the Action URL receiving device recognizes.
Note: A maximum of 32 Action URLs can be configured.
The sequence can be as follows:
• Alarm detection via a switch input or a call to the alarm phone number.
• The set alarm delay time is running (0-99 seconds).
• The first alarm call run starts with the call of the first alarm subscriber.At the same time, the Action URL is sent (Alarm type start). If an alarmsubscriber acknowledges the alarm, the alarm will be ended. At thesame time, an Action URL is sent (Alarm type acknowlegded). If thealarm is not acknowlegded, it ends after all alarm loops. At the sametime, an Action URL is send (Alarm type timeout).
Proceed as follows for configuration:
• Configuring Action URLs for a device.
− Using the Configuration Manager (Devices > Action URLs)
• Linking an Action URL with an alarm.
− Using the Configuration Manager (Devices > Action URLs)

Activation
COMmander 6000/R/RX - Firmware V8.4 - Advanced Information V32 05/2022- 42 -
Activation
Basic equipment
The following functions/resources that can be activated are alreadyavailable in the PBX:
• 2 VoIP channels for internal IP and Internet telephony (SIP-compliantin accordance with RFC 3261)
• Support of VoIP Codecs G.711, iLBC
• 2 voice mail channels for voice mail functions with 4 voice mailboxes
• 10 Configurations
• 6000 Call data records
• Call Through calls (Call Through for 4 lines)
• LAN-TAPI for 8 subscribers
• LCR for 8 subscribers
Important: Operating the PBX without system activation is notpossible.
Important: There is a maximun of three VoIP and voice mail channelsavailable. Using the second voice mail channel results in the loss of aVoIP channel.
Important: It is not possible to use the voice mail channels withoutinserted USB memory stick (not included in the scope of delivery).

Activation
COMmander 6000/R/RX - Firmware V8.4 - Advanced Information V32 05/2022- 43 -
Important: The fax function is not included in the basic assembly.
Extension by activation
By chargeable activation in the Auerswald/FONtevo Online Shop, the PBXcan be extended by the following functions/resources:
• System activation
• Call Through calls (Call Through for all lines)
• Project-related calls (project numbers)
• Automatic receptions
• 8 additional VoIP channels for each existing COMmander 8VoIP (R)module
• Phonebook Gigaset
• 40 additional voice mailboxes and 40 additional fax boxes for anexisting COMmander VMF (R) module
• Support PBX Call Assist
• SIP convenience package/SIP convenience package brandplus(e. g. BLF, MWI) for VoIP end devices
• Convenience package D-series
• Call recording*
• Extended park positions*

Activation
COMmander 6000/R/RX - Firmware V8.4 - Advanced Information V32 05/2022- 44 -
* Not available in all countries
COMmander 6000/6000R COMmander 6000R with Xtension/6000RX
• Soft-LCR for 56 additionalsubscribers
• Soft-LCR for 104 additionalsubscribers
• LAN-TAPI for 56 additionalsubscribers
• LAN-TAPI for 104 additionalsubscribers
• Hotel function for 48subscribers
• Hotel function for 112 subscribers
• 12.000 additional call data records
Important: The system activation is mandatory for the operation ofthe PBX.
Important: The extension of the VoIP channels requires thatCOMmander 8VoIP(-R) modules are available. With four 8VoIP(-R)modules, the 64 maximum possible channles can be reached.
Important: The addition of voice mail and fax boxes requires aCOMmander VMF (R) module. The extension also gives you eightmore voice mail channels.
Important: The Phonebook Gigaset is available only in connectionwith a COMfortel DECT IP1040 Base.
Note: The PBX Dongle required for the extension is part of the basicdevice.
Configuration procedure:
• Activate further functions.

Activation
COMmander 6000/R/RX - Firmware V8.4 - Advanced Information V32 05/2022- 45 -
− Using the Configuration Manager (Administration > Activation)

Address Books
COMmander 6000/R/RX - Firmware V8.4 - Advanced Information V32 05/2022- 46 -
Address Books
The address books serve to manage contact data (phone numbers,names, contact pictures, addresses and e-mail / Internet addresses). Thecontact data can be used by the connected phones (if supported) to dialand to display on incoming calls.
For example, to organize large address books by department, the contactscan be assigned to different contact groups. In addition, contact groupscan be used to distinguish between different types of phone.
With connected system phones, existing contacts are automaticallyoffered according to the system phone type and their contact groupmembership.
Note: If a large number of phones are connected to the PBX, orlarge volumes of contact details are to be uploaded, it may in certaincases take several hours before the contact data is available to all thephones after the PBX has been commissioned.
Configuration procedure:
• Create and assign contacts.
− Using the Configuration Manager (User data > Address Books >Contacts and assignment)
• Create contact groups.
− Using the Configuration Manager (User data > Address Books >Contact Groups)
• Set contact group authorisations.
− Using the Configuration Manager (User data > Address Books >Contact group authorisations)

Address Books
COMmander 6000/R/RX - Firmware V8.4 - Advanced Information V32 05/2022- 47 -
• Set Standard contact group for write-access users.
− User data > Address Books > Standard contact groups

Alarm
COMmander 6000/R/RX - Firmware V8.4 - Advanced Information V32 05/2022- 48 -
Alarm
If the PBX function alarm is used in case of an alarm, internal and externalphones can be called and sirens can be switched on.
The alarm sequence can be as follows:
• Alarm detection via a switch input (optional, see Technical Data in theInstructions) or via an internal call.
• The set alarm delay time is running (0-99 seconds).
• Non-recurring start of for example a siren via a relay/actuator (optional,see Technical Data in the Instructions).
• At the same time, the first alarm call run starts (alarm calls to thealarm subscribers) by calling the first alarm subscriber for approx. 60seconds. Internal alarm subscribers are called with a special ringtone(phone-dependent). After picking up the receiver, you repeatedly hearan alarm announcement stored in the PBX. The called party mustacknowledge the alarm call within 60 seconds by sending the DTMFnumber 0.
• If the called party does not acknowledge the alarm call, the next alarmsubscriber is called a few seconds after the first call is finished and soon....
• If all the alarm subscribers have been called without receiving anacknowledgement, the alarm loop is repeated after a configurablealarm waiting period (0-99 seconds) has elapsed (up to 9 times).
• The alarm is terminated (and relays assigned to the alarm areswitched off) as soon as one of the alarm subscriber acknowledgesthe alarm. If the alarm input has been configured to Once, it isdisabled afterwards. If the alarm input has been configured to Always,it is enabled again and a new alarm can be triggered.

Alarm
COMmander 6000/R/RX - Firmware V8.4 - Advanced Information V32 05/2022- 49 -
Configuration procedure:
• Creating an alarm with an internal number.
− Using the Configuration Manager (Devices > Alarms page)
Note: An authorisation for triggering an alarm is required forthe corresponding subscriber (Subscriber (scr.) > Phonenumbers > Configure > Authorisations > Switching ofrelays and alarms).
• Creating a switch input and assigning it to the alarm.
− Using the Configuration Manager (Devices > Alarms page)
• Creating a relais and assigning it to the alarm.
− Using the Configuration Manager (Devices > Alarms page)
• Manage and assign audio files for announcements.
− Using the Configuration Manager (on the pages that follow)
− Functions > Music on Hold and Announcements > Filemanagement
− Functions > Music on Hold/announcements > File assignment> Alarm
− Using a character string on the internal phone (see Alarm page)
• Configuring alarms.
− Using the Configuration Manager (Devices > Alarms > Configurepage)
• Activating alarms.
− Using the Configuration Manager (Devices > Alarms page)

Alarm
COMmander 6000/R/RX - Firmware V8.4 - Advanced Information V32 05/2022- 50 -
− Using a character string on the internal or external phone (seeAlarm page)

Alarm Device
COMmander 6000/R/RX - Firmware V8.4 - Advanced Information V32 05/2022- 51 -
Alarm Device
The alarm device function permits calls from internal subscribers tobe signalled as alarm calls on system phones. Such alarm calls areacknowledged by a confirmation tone and subsequently ended.
Proceed as follows for configuration:
• Switching alarm device function on.
− Using the Configuration Manager (on the following pages)
− For admin: Subscriber (scr.) > Properties > Settings)
− For user: Subscriber Properties > Settings)
Note: It makes sense to use the alarm device function incombination with special calling systems such as the GIRA callingsystem 834 plus, for example. Combined with the transmissionof the display name, text messages can be sent and signallisedaccordingly.
• If necessary, switching transmission of the display name on.
− Using the Configuration Manager (on the following pages)
− For admin: Subscriber (scr.) > Properties > Settings)
− For user: Subscriber Properties > Settings)

Announcement before Answering
COMmander 6000/R/RX - Firmware V8.4 - Advanced Information V32 05/2022- 52 -
Announcement before Answering
This function allows a greeting message to be played to the caller beforeaccepting the call and/or if all group members are busy.
The call is first accepted by the PBX (the external caller is charged fromnow on). The caller hears the announcement before answering (e.g., withinformation about the company). Afterwards, the caller hears Music onHold or the call tone again (if the line is busy, he is put into the waitingloop after the announcement before answering). As soon as one of thecalled phones accepts the call (or if busy, finishes the call before that), heis connected to the caller.
After the announcement before answering, the caller is put on hold by thePBX for max. 8 minutes. If the call is not taken within these 8 minutes, itis disconnected. The on hold time is reduced if internal subscribers areringing but not taking the call. Then the caller is rejected after less than 8minutes.
Note: If the announcement before answering is enabled, it may benecessary to use the Busy-on-Busy function to limit the number ofcallers that are automatically put on hold in the waiting loop. Thisprevents more callers being on hold than can be accepted withina reasonable time. If, for example, two phones are logged into thecorresponding group and both are in a call, a maximum of four callerswill be put into the waiting loop if the limit is six. Callers not put onhold in the waiting loop due to the restriction will directly hear the busysignal instead of the announcement before answering.
Proceed as follows for configuration:
• Managing and assigning audio files for announcements.
− Using the Configuration Manager (on the following pages)

Announcement before Answering
COMmander 6000/R/RX - Firmware V8.4 - Advanced Information V32 05/2022- 53 -
− Functions > Music on Hold and Announcements > Filemanagement
− Functions > Music on Hold/announcements > File assignment> Ann. before answering
− Using a character string on the internal phone (see Announcementbefore Answering)
• Configuring announcement before answering.
− Using the Configuration Manager (Groups > Properties >Reachability)
• Switching announcement before answering on.
− Using the Configuration Manager (Groups > Properties >Reachability)
− Using the menu/function key on a system phone (optional, see thephone manual)
• Switching announcement before answering for fallback on.
− Using the Configuration Manager (Public switched tel. networks> Call distribution)
• If necessary, switching Busy-on-Busy on.
− Using the Configuration Manager (Groups > Properties >Reachability)

Automatic Reception
COMmander 6000/R/RX - Firmware V8.4 - Advanced Information V32 05/2022- 54 -
Automatic Reception
This function automatically connects an external caller with the personthey want to contact. The caller hears an announcement (e.g. "... If youwould like to talk to the Sales team, press 1 ..."). If they then redial, theycan call a specific internal subscriber, a group, a voice mailbox, a differentautomatic reception, or a subscriber whose number has been divertedto an external number. Depending on the configuration, the caller eitherredials using a DTMF suffix dialling digit of between 0 and 9 or by diallingthe entire internal number.
A total of ten receptions can be set up. These can either be switchedin parallel or in series. As a result, several automatic receptions can beoperated in parallel, for example in multi-company operation or, if required,one main reception with a number of sub-receptions can be set up.
Calls are accepted in the automatic reception in the following way:
• A caller reaches the automatic reception (e.g. via the external calldistribution function).
• The caller hears a greeting, which might also be repeated. They thenhave the option of selecting a call destination by dialling a DTMF suffixdialling digit. They can also redial during the announcement.
Note: The announcement is always played to the caller whentheir call is received. For this reason, the caller might hear the calltone for a few seconds before their call is accepted, for example, ifseveral callers are listening to announcements at the same time.
Note: Incoming VoIP calls can only be transferred over theautomatic reception if the VoIP provider does not block DTMF codepresentation.
Note: If an external caller is transferred to the automatic receptionby a query call from an internal phone, the person transferring

Automatic Reception
COMmander 6000/R/RX - Firmware V8.4 - Advanced Information V32 05/2022- 55 -
them hears the announcement and can then select the destinationthemselves. After that, the caller is connected with the selecteddestination. If the person transferring the calls hangs up beforeselecting a destination, the caller hears the announcement and canselect a destination themselves.
• If the caller enters a valid number, the call destination will be called fora maximum of 120 seconds. The destination subscriber can answerthe call during this time.
Note: When a call is transmitted via the automatic reception, it isthe caller's phone number that is transferred (not the reception'snumber).
Note: If the call is not answered within 120 seconds, theannouncement if the destination is busy/does not reply is played.In this case, the call is then either ended, the default destinationis called, or the caller is reconnected to the automatic receptionthey previously called (depending on the setting for the system"Reaction if the destination is busy or does not reply").
Note: If the destination number is busy, the call waiting function isenabled if this function is enabled for the destination subscriber.If the destination subscriber rejects call waiting, or if they havenot enabled this function, the announcement if the destination isbusy/does not reply is played. In this case, the call is then eitherended, the default destination is called, or the caller is reconnectedto the automatic reception they previously called (depending on thesetting for the system "Reaction if the destination is busy or doesnot reply").
Note: If the caller dials an invalid number, the announcement ifthe destination is busy/does not reply is played. In this case, thecall is then either ended, the default destination is called, or thecaller is reconnected to the automatic reception they previously
Automatic Reception
COMmander 6000/R/RX - Firmware V8.4 - Advanced Information V32 05/2022- 56 -
called (depending on the setting for the system "Reaction if thedestination is busy or does not reply").
Note: If the caller does not dial a number, they are transferred tothe announcements set for the default destination number.
Note: The exchange line authorisations, call restrictors, calldeblockers and do-not-disturb settings that apply to in-house calldestinations are taken into account when the call is transferred.
Proceed as follows to set up automatic reception:
• Manage and assign audio files for announcements.
− Using the Configuration Manager (on the pages that follow)
− Functions > Music on Hold and Announcements > Filemanagement
− Functions > Music on Hold and Announcements > Fileassignment > Automatic Receptions
− Using a character string on the internal phone (see AutomaticReception)
Note: Alternatively, you can use an announcement beforeanswering file (longer).
• Creating and configuring automatic receptions.
− Using the Configuration Manager (Functions > AutomaticReceptions)
• Setting up call distribution for automatic receptions.
− Using the Configuration Manager (Public switched tel. networks> Call distribution)

Baby Call
COMmander 6000/R/RX - Firmware V8.4 - Advanced Information V32 05/2022- 57 -
Baby Call
The baby call function provides a service in which after a configured delaytime after picking up the receiver, a phone number is automatically dialledto call an internal or external subscriber. This means, no key needs to bepressed. However, if a phone is dialled manually within the configureddelay time, it has priority. It must be noted that on some phones, thenumbers dialled are not sent immediately when the keys are pressed(often there is approx. a half second delay).
Note: The baby call function is not available for VoIP phones.
Proceed as follows for configuration:
• Switching the baby call function on.
− Using the Configuration Manager (Subscriber (scr.) > Properties> Settings)
− Using a character string on the internal phone (see Baby Call/Hotline)
• Configuring the baby call function configuration dependent.
− Using the Configuration Manager (Subscriber (scr.) > Profiles> ... > Settings)
• If necessary, configuring special dial tone for baby call.
− Using the Configuration Manager (Subscriber (scr.) > Properties> Settings)
• Configuring delay time for baby call.
− Using the Configuration Manager (Subscriber (scr.) > Allsubscribers)

Backing Up and Recovering Configuration Data
COMmander 6000/R/RX - Firmware V8.4 - Advanced Information V32 05/2022- 58 -
Backing Up and Recovering Configuration Data
Information on the Chapter Information on the Chapter

Information on the Chapter
COMmander 6000/R/RX - Firmware V8.4 - Advanced Information V32 05/2022- 59 -
Information on the Chapter
The current configuration data on the PBX can be backed up in aconfiguration file on the PC or on a data storage device. If necessary,this configuration file can be saved in the PBX again in order to restoreprevious configuration data.
In addition to the configuration, the configuration data also includethe network settings, PBX data, the tool COMfortel IP Editor as wellas the music on hold and all annoucements saved in the PBX. Whenthe configuration file is created, there is the option of saving theconfiguration data without any network settings, PBX data or music onhold/announcements so that the configuration file can also be saved inother PBXs.
The network settings include the following data:
• Ethernet configuration (DHCP client setting, IP address, Sub-networkmask, Gateway)
• DNS configuration (First DNS server, Second DNS server)
• HTTP proxy configuration (HTTP proxy settings)
• PPP configuration (Local IP address, Remote IP address)
• Port of the web server
The PBX data include the following data:
• PBX name
• Admin user name
• Admin PIN
• Admin passwort
• Dealer data

Information on the Chapter
COMmander 6000/R/RX - Firmware V8.4 - Advanced Information V32 05/2022- 60 -
• Operator data
• Country
Variants for backing up and recovering:
• Saving and reading out the configuration data
− Using the Configuration Manager (Administration > Databackup)
• Resetting the configuration
− Using the Configuration Manager (Administration > Databackup)
• Regenerating the configuration
− Using the Configuration Manager (Administration > Databackup)
• Inserting and restoring from restoration points
− Using the Configuration Manager (Administration > Databackup)
• Automatic upload
− Using the PBX

Boss/Secretary Function
COMmander 6000/R/RX - Firmware V8.4 - Advanced Information V32 05/2022- 61 -
Boss/Secretary Function
The boss/secretary function protects the boss phone from direct calls byrerouting them to the secretary. The most important difference from callforwarding is that the boss phone can still be called from the secretaryphone and the secretary can still transfer important calls to the bossphone.
Requirements:
• At least two System phones, which support function keys for the boss/secretary function (optional, see the phone manual)
Note: The boss/secretary function is configured on the systemphones in question. The configuration and operation of the function isdescribed in detail in the manual for the system phone.
Proceed as follows for configuration:
• Configure a function key as a secretary key on the manager's phone(optional, see the phone manual).
• Configure a function key as a boss key on the secretary's phone(optional, see the phone manual).

Busy-on-Busy
COMmander 6000/R/RX - Firmware V8.4 - Advanced Information V32 05/2022- 62 -
Busy-on-Busy
Busy-on-Busy limits the calls to a group. The caller then hears the busytone.
A maximum number of connection can be configured from which thegroup members can no longer be reached. Call forwardings (CFU) andmulti-path call forwardings are still possible.
The maximum number of connections can also be configured dynamically.This ensures that the number of maximum connections is automaticallyadjusted to the number of registered group members so that the call is notput on hold.
Proceed as follows for configuration:
• Assigning a maximum number of connections to a group or switchingBusy-on-Busy off.
− Using the Configuration Manager (Groups > Properties >Reachability > Busy-on-Busy)

Calendar
COMmander 6000/R/RX - Firmware V8.4 - Advanced Information V32 05/2022- 63 -
Calendar
Holidays and other days with special uses (e. g., vacation times) aremanaged in the PBX calendar. These days are taken into account by thePBX during automatic configuration switchovers and, if desired, duringLeast Cost Routing (LCR) and when executing wake-up calls.
Proceed as follows for configuration:
• Creating holidays.
− Using the Configuration Manager (Functions > Calendar)

Call Allowance Account
COMmander 6000/R/RX - Firmware V8.4 - Advanced Information V32 05/2022- 64 -
Call Allowance Account
A call allowance account is a restricted amount of currency units (credit)that is configured for each phone. As soon as the configured credit is usedup, it is no longer possible to make external calls on the correspondingphone until the credit has been increased or reset.
If the remaining amount is used up during a call, the subscriber hears ashort attention tone repeatedly. Afterwards, the call is disconnected.
Note: For providers who do not provide billing information, aconfigured billing account will not work.
Note: If the LCR procedure Soft-LCR 4.0 is used, the charges arecalculated based on the length of the call and the tariff table set upseparately. For this purpose, you need to specify a price per minute aswell as the length of the charge pulse per switching time and provider.
Proceed as follows for configuration:
• Configuring LCR.
− Using the Configuration Manager (Routing > Soft-LCR 4.0)
• Making settings for call allowance accounts.
− Using the Configuration Manager (Functions > Call allowanceaccounts)
• Setting a credit.
− Using the Configuration Manager (Functions > Call allowanceaccounts)
− Using a character string on the internal phone (see Call AllowanceAccount)

Call Channel Reservation
COMmander 6000/R/RX - Firmware V8.4 - Advanced Information V32 05/2022- 65 -
Call Channel Reservation
If a group of subscribers should have the option of making an external callat any time, the call channels on an external ISDN connection or a VoIPaccount can be reserved for the group. This call channel is only availablefor subscribers who are logged in this group outgoing.
Proceed as follows for configuration:
• Switching call channel reservation on.
− Using the Configuration Manager (Groups > Properties >Reachability)
• Configuring call channel reservation configuration dependent.
− Using the Configuration Manager (Groups > Profiles > ... >Reachability)

Call Charge Information
COMmander 6000/R/RX - Firmware V8.4 - Advanced Information V32 05/2022- 66 -
Call Charge Information
To monitor the charges accrued on the connection and also on theinternal phones, the charges are recorded by the PBX for each subscriberseparately. From time to time, the total charge may be reviewed on thecorresponding phone and deleted, if necessary. The deletion has noinfluence on the call charges recorded in the call data memory of the PBX.
To check the charges during a call or directly afterwards, the charges aretransmitted to ISDN phones unchanged at the moment they are accruedeven if the receiver is on-hook. For an analogue phone with a chargemeter, you can define how to convert the charges transmitted via ISDNinto charge pulses.
Proceed as follows for configuration:
• Switching charge information at the external connection on.
− Using the Configuration Manager (on the following pages)
− Public switched tel. networks > ISDN > PTMP connection >Configure
− Public switched tel. networks > ISDN > PBX base numbers/trunk bundles > Configure
• Configuring the charge pulse frequency.
− Using the Configuration Manager (Subscriber (scr.) > Allsubscribers)
• Setting charge pulses for analogue subscribers.
− Using the Configuration Manager (Subscriber (scr.) > Properties> Analogue settings)

Call Data
COMmander 6000/R/RX - Firmware V8.4 - Advanced Information V32 05/2022- 67 -
Call Data
Overview of Settings OptionsContents of the Call Data RecordOpening the Call Data List Overview of Settings OptionsContents of the Call Data RecordOpening the Call Data List

Overview of Settings Options
COMmander 6000/R/RX - Firmware V8.4 - Advanced Information V32 05/2022- 68 -
Overview of Settings Options
The call data memory of the PBX, can store up to 18,000 call datarecords. The call data memory is secured against power failures.
Proceed as follows for configuration:
• Set call data management and SFTP transfer.
− Using the Configuration Manager (User data > Call data >Settings)
• Currency name and set the cost per call unit.
− Using the Configuration Manager (Functions > Call allowanceaccounts)
• Set billing factor.
− Using the Configuration Manager (Subscriber (scr.) > Properties> Settings)
• Configure the columns of the call data list.
− Using the Configuration Manager (User data > Call data > Printoptions)
• Configure filter.
− Using the Configuration Manager (User data > Call data > Filter)
• Management call data.
− Using the Configuration Manager (User data > Call data > Calldata list)
• Delete call data records.
− Using a character string on the internal phone (see Call Data(Single Call Record))

Contents of the Call Data Record
COMmander 6000/R/RX - Firmware V8.4 - Advanced Information V32 05/2022- 69 -
Contents of the Call Data Record
A call data record contains the following information:
• Date at the beginning of the call
• Time at the beginning of the call
• Duration of the call
• Prefix number of the LCR provider – if used
• Number of the external call partner – if known
• Name of the external call partner – if known
• Number of the internal phone (billing + real)
• Name of the internal phone (billing + real)
• Your own external number
• Call charges
• Billing factor
• Call direction
• Billing type
• Call type
• Project number
• Billing number for room phones

Opening the Call Data List
COMmander 6000/R/RX - Firmware V8.4 - Advanced Information V32 05/2022- 70 -
Opening the Call Data List
The call data list shows the call data records recorded in the call datamemory.
Proceed as follows:
• Using the Configuration Manager
− As admin: User data > Call data > Call data list
− As user: Call data list.
Note: Sorting criteria (max. 3) and sequence can be changed viathe column headlines. Main sorting criteria is the last one selected.

Call Distribution
COMmander 6000/R/RX - Firmware V8.4 - Advanced Information V32 05/2022- 71 -
Call Distribution
In call distribution, you specify which internal subscribers should be giventhe signal for an incoming external call. This means that in call distribution,you specify, e.g., permanently, which internal phones should ring whenyou are called. Call distribution for each phone number is configuredindividually on a connection with multiple external numbers (e.g., ISDNconnection).
You can configure both one phone for multiple phone numbers andmultiple phones (group) for one phone number to ring.
Requirements:
• Configured external numbers:
− Using the Configuration Manager (on the following pages)
− Public switched tel. networks > ISDN
− Public switched tel. networks > VoIP
• Configured internal numbers:
− Using the Configuration Manager (on the following pages)
− Subscriber (scr.) > Phone numbers
− Groups > Phone numbers
Proceed as follows for configuration:
• Creating the call distribution.
− Using the Configuration Manager (Public switched tel. networks> Call distribution)
• Setting the fallback.

Call Distribution
COMmander 6000/R/RX - Firmware V8.4 - Advanced Information V32 05/2022- 72 -
− Using the Configuration Manager (Public switched tel. networks> Call distribution)

Call Forwarding
COMmander 6000/R/RX - Firmware V8.4 - Advanced Information V32 05/2022- 73 -
Call Forwarding
Call Forwarding TypesCall Forwarding for SubscribersCall Forwarding for GroupsCall Forwarding for External Numbers Call Forwarding TypesCall Forwarding for SubscribersCall Forwarding for GroupsCall Forwarding for External Numbers

Call Forwarding Types
COMmander 6000/R/RX - Firmware V8.4 - Advanced Information V32 05/2022- 74 -
Call Forwarding Types
Call forwarding allows calls to be forwarded, e.g., to a mobile phone.
The PBX support three different call forwarding types:
• Call forwarding for subscribers
• Call forwarding for groups
• Call forwarding for external numbers
As there can be many different reasons for not accepting a call, forexample, the subscriber in question is not present or is on another line,three call forwarding types are provided:
CF unconditional: The phone being called does not ring. The call isforwarded immediately.
CF on busy: The call is forwarded immediately but only if the phone beingcalled is busy.
CF on no reply: The phone being called rings for a certain amount oftime. If the call is not accepted, it is forwarded.
Note: A different destination can be configured for each of the threecall forwarding types.
Note: If CF on busy and CF on no reply are enabled at the sametime, both types apply. Depending on which case occurs – the phoneis busy or nobody answers it – the call is forwarded to their respectivephone numbers.
Note: If CF unconditional is enabled in addition to the CF on busyand/or CF on no reply, all of the calls are forwarded immediately. Inthis case, the other call forwarding types are overridden, but remainenabled. As soon as CF unconditional is disabled, the other typesthat are still enabled are again applicable.

Call Forwarding for Subscribers
COMmander 6000/R/RX - Firmware V8.4 - Advanced Information V32 05/2022- 75 -
Call Forwarding for Subscribers
When call forwarding (CF) for subscribers is used, internal and externalcalls to a single phone can be rerouted to other internal phones or externalconnections. In this way, the subscriber in question or his replacement cantake these calls on another phone.
Call forwarding for subscribers makes sure that the subscriber in questionor his replacement is always available at his own phone number, even ifthe subscriber cannot take a call on his own phone.
Note: To avoid having to use a second call channel in the case of callforwarding to an external destination, the PBX tries to reroute the calldirectly at the network provider using call deflection. The followingrequirements must be fulfilled for this purpose: 1. The incoming callwas made via an ISDN or a VoIP network provider supporting calldeflection. 2. The rerouted phone number is neither called as a groupmember, nor is it required to consider parallel calling or fallback onbusy.
Proceed as follows for configuration:
• Switching authorisations for the involved internal subscribers on.
− Using the Configuration Manager (Subscriber (scr.) > Properties> Authorisations)
Note: The forwarding subscriber needs an authorisation e.g. forexternal destinations. For configuring using a character stringon an internal phone the subscriber needs an authorisation forcontrolling of the PBX.
• Configuring sufficient exchange line authorisations for the involvedinternal subscribers.

Call Forwarding for Subscribers
COMmander 6000/R/RX - Firmware V8.4 - Advanced Information V32 05/2022- 76 -
− Using the Configuration Manager (Subscriber (scr.) > Properties> Exchange line settings)
Note: The destination subscriber needs a sufficient exchange lineauthorisation for taking external calls.
• Switching call forwarding on.
− Using the Configuration Manager (Subscriber (scr.) > Properties> Reachability)
− Using a character string on the internal phone (see CallForwarding for Subscribers)
− Using the menu/function key on a system phone (optional, see thephone manual)
− Using the menu/T-Net function key on an analogue T-Net phone(optional, see the phone manual)
• Making additional settings for call forwarding.
− Using the Configuration Manager (Subscriber (scr.) > Properties> Reachability)
• Configuring the call forwarding configuration dependent.
− Using the Configuration Manager (Subscriber (scr.) >Profiles > ...> Reachability)

Call Forwarding for Groups
COMmander 6000/R/RX - Firmware V8.4 - Advanced Information V32 05/2022- 77 -
Call Forwarding for Groups
When call forwarding for groups is used, internal and external calls to agroup can be rerouted to other internal phones or external connections. Inthis way, a person that is not a member of this group and therefore cannotlog in, can receive these calls.
Call forwarding for groups makes sure that someone is always availableon the group number, even if the calls cannot be taken by a member of thegroup.
Note: LCR will be used for call forwarding for groups to an externaldestination (e.g., mobile phone) if at least one member of the grouphas LCR enabled. It does not matter if the corresponding subscriber islogged in or not.
Note: When forwarding a group the option As subscriber in theexchange line settings of the group is not considered. For callforwarding instead exchange line authorisation is not restricted and nocall restrictors and call deblockers are used.
Note: Preferred exchange line/Number Presentation: The number ofthe group is always presented.
Note: To avoid having to use a second call channel in the case of callforwarding to an external destination, the PBX tries to reroute the calldirectly at the network provider using call deflection. The followingrequirements must be fulfilled for this purpose: 1. The incoming callwas made via an ISDN or a VoIP network provider supporting calldeflection. 2. The rerouted phone number is neither called as a groupmember, nor is it required to consider parallel calling or fallback onbusy.

Call Forwarding for Groups
COMmander 6000/R/RX - Firmware V8.4 - Advanced Information V32 05/2022- 78 -
Proceed as follows for configuration:
• Switching authorisations for the involved internal subscribers on.
− Using the Configuration Manager (Subscriber (scr.) > Properties> Authorisations)
Note: The forwarding subscriber needs an authorisation e.g. forgroup call forwardings. For configuring using a character stringon an internal phone the subscriber needs an authorisation forcontrolling of the PBX.
• Configuring sufficient exchange line authorisations for the involvedinternal subscribers.
− Using the Configuration Manager (Subscriber (scr.) > Properties> Exchange line settings)
Note: The destination subscriber needs a sufficient exchange lineauthorisation for taking external calls.
• Switching call forwarding on.
− Using the Configuration Manager (Groups > Properties >Reachability)
− Using a character string on the internal phone (see CallForwarding for Groups)
• Making additional settings for call forwarding.
− Using the Configuration Manager (Groups > Properties >Reachability)
• Configuring the call forwarding configuration dependent.
− Using the Configuration Manager (Groups >Profiles > ... >Reachability)

Call Forwarding for External Numbers
COMmander 6000/R/RX - Firmware V8.4 - Advanced Information V32 05/2022- 79 -
Call Forwarding for External Numbers
When call forwarding for external numbers is used, calls made to anexternal number (dialled by an external caller) are rerouted to otherexternal connections. In this way, these calls can be taken on anotherphone, for example, on a mobile phone if no one can take the callinternally.
Call forwarding for external numbers can be configured for the currentconfiguration or for the permanent configuration.
Note: If you want to also forward internal calls, use call forwardingfor subscribers or for groups instead of call forwarding for externalnumbers. This also allows forwarding to internal phones.
Note: The function can be configured with a voip exchange line viakeypad codes (depending on the provider) via the keypad of thephone. To do this, you must first switch to internal if you have directexchange access.
Proceed as follows for configuration:
• Switching authorisation for configuring features configured by thenetwork provider for the involved internal phones on.
− Using the Configuration Manager (Subscriber (scr.) > Properties> Authorisations)
• Switching call forwarding on.
− Using the Configuration Manager (Public switched tel. networks> Call forwarding)
− Using a character string on the internal phone (see CallForwarding for External Numbers)

Call Forwarding for External Numbers
COMmander 6000/R/RX - Firmware V8.4 - Advanced Information V32 05/2022- 80 -
− Using the menu/function key on a system phone (optional, see thephone manual)
• Configuring the call forwarding configuration dependent.
− Using the Configuration Manager (Public switched tel. networks> Call forwarding)
• Making additional settings for call forwarding.
− Using the Configuration Manager (on the following pages)
− Public switched tel. networks > ISDN > PTMP connection
− Public switched tel. networks > ISDN > PBX base numbers/trunk bundles > Configure
− Public switched tel. networks > VoIP > Accounts > Configure

Call Parking
COMmander 6000/R/RX - Firmware V8.4 - Advanced Information V32 05/2022- 81 -
Call Parking
Call parking lets a caller in a waiting position be transferred so that thedesired communication partner can accept the call on another internalphone.
Call parking is carried out as follows:
• The call is first transferred to a phone number that has been previouslyspecified for this function and then parked.
• The caller is kept on hold in the PBX and listens to hold music.
• The desired communication partner is then notified of the waitingcaller. He can then take the call by dialling the phone number that hadpreviously been transferred.
Proceed as follows for configuration:
• Making settings for call parking.
− Using the Configuration Manager (Functions > Call parking)
• Switching the authorisation for call parking for the involved internalphones on.
− Using the Configuration Manager (Subscriber (scr.) > Properties> Authorisations)

Call Through
COMmander 6000/R/RX - Firmware V8.4 - Advanced Information V32 05/2022- 82 -
Call Through
Call Throughto avoid high telephoning costs allows the use of LCRand VoIP/GSM routing of the PBX even when phoning over e. g. asmartphone. First, call the PBX and get connected to the desiredconnection. Call Through allows the direct redial of any phone number.
The called person does not receive the mobile number but the companynumber.
The caller receives the phone number set in the normal exchange linefor this transmission. As default setting, the first defined number at thisexchange line is used.
Requirements:
• The transmitted subscriber number must be registered as CallThrough subscriber
• The transmitted subscriber number must not be in the MSN blocklist
• Configured 6-digit Call Through PIN
Procedure:
• Dialling the predefined external number of the PBX for Call Through.
• The PBX accepts the call and signals this with a special tone.
• Enter the 6-digit PIN and *. The exchange line dial tone is heard.
• Based on the transmitted phone number and PIN, the PBX checkswhether the caller has the authorisation for this function.
• Dialling the desired phone number (internal or external with prefix).
• After checking (exception number table, and if necessary LCR table),the connection is established.

Call Through
COMmander 6000/R/RX - Firmware V8.4 - Advanced Information V32 05/2022- 83 -
Note: If possible, have the mobile phone operator enter the PBKnumber as special number (higher cost savings).
Proceed as follows for configuration:
• Creating a contact for the Call Through user.
− Using the Configuration Manager (User data > Address books >Contacts and assignment)
• Making settings for Call Through.
− Using the Configuration Manager (Functions > Call Through)
• If necessary, configuring LCR.
− Using the Configuration Manager (Routing > Soft-LCR 4.0)

Call waiting
COMmander 6000/R/RX - Firmware V8.4 - Advanced Information V32 05/2022- 84 -
Call waiting
If you are already in a call, the call waiting function plays the call waitingtone to notify you that another call partner is calling.
Configuration procedure:
Switching on call waiting
• Using the Configuration Manager (Subscriber (scr.) > Properties >Reachability page)
• Using the menu/function key on a system phone (optional, see thephone manual)
Note: As of firmware 6.6 (PBX) and 2.4 (VoIP phone) a comparisonbetween phone and PBX will be implemented. This function can thenbe switched on or off in the phone or the PBX.

Central Caller List
COMmander 6000/R/RX - Firmware V8.4 - Advanced Information V32 05/2022- 85 -
Central Caller List
The phone numbers of unaccepted calls are stored in the caller list on thesystem phone (optional, see phone manual). As soon as a connection(incoming or outgoing) has been made to a caller, the correspondingphone number is automatically deleted from the caller list.
If a group call occurred and if the central caller list for groups is enabled,the phone number is also deleted from the caller lists of the othermembers of the group.
Note: Group-wide deletion does not occur if the person calling backhas already deleted his caller list or has been called again by the samecaller on his subscriber number.
Requirements:
• All group members are system phones, that support the central callerlist (optional, see the phone manual)
Proceed as follows for configuration:
• Switching the central caller list for the involved groups on.
− Using the Configuration Manager (Groups > Properties >Settings)

CLIP Texts
COMmander 6000/R/RX - Firmware V8.4 - Advanced Information V32 05/2022- 86 -
CLIP Texts
CLIP texts are displayed on the system phones and/or the CLIP-capableanalogue phones for specific calls (e. g. for wake-up calls).
Proceed as follows for configuration:
• Enter CLIP texts for specific calls (e .g. wake-up calls) and functions.
− Using the Configuration Manager (Functions > CLIP texts)

Configuration Switchover
COMmander 6000/R/RX - Firmware V8.4 - Advanced Information V32 05/2022- 87 -
Configuration Switchover
Some functions can, e.g., be configured differently according to the day,night, weekend, vacation or holidays. They are also assigned to differentconfigurations and switched depending on the configuration.
The following functions are configuration-dependent:
• Profile assignment for subscriber (and with it e.g.: exchange lineauthorisation, phone number presentation and subscriber callforwarding)
• Profile assignment for groups (and with it e.g.: announcement beforeanswering, exchange line authorisation, phone number presentationand group call forwarding)
• Profile assignment for Voice mail and fax boxes (and with it e.g.:readiness)
• Fallback options of the external ports (Fallback number and delayedfallback)
• Call distribution and door terminal distribution
• Relay settings in the configuration dependent mode
• VoIP and GSM Routing
• Call Forwarding for own connections
• Power save mode of the system phones (optional, see the phonemanual)
Switching over from one configuration to another can be carried out in twodifferent manners:
• manually
• time controlled (automatic configuration switchover)

Configuration Switchover
COMmander 6000/R/RX - Firmware V8.4 - Advanced Information V32 05/2022- 88 -
For situations where your settings are supposed to apply even afterconfiguration switchovers, you can use the so-called permanentconfiguration. If permanent configuration is enabled, the configuration-dependent settings will be overridden by the permanent configurationsettings.
The following functions can use the permanent configuration:
• Call forwarding of one's own external number (CF for MSNs, DDInumbers, or additional numbers)
• Readiness of the Voice mail and fax boxes
Proceed as follows for configuration:
• Creating sonfigurations.
− Using the Configuration Manager (Time control >Configurations)
• Making settings configuration dependent.
− Using the Configuration Manager (on the following pages)
− Public switched tel. networks > Call distribution
− Public switched tel. networks > Call forwarding
− Subscriber (scr) > Profiles
− Devices > Voice mail and fax boxes > Profiles
− Devices > Door terminals
− Devices > Relays (Actuators)
− Routing > VoIP and GSM Routing > Routing is configurationdependent

Configuration Switchover
COMmander 6000/R/RX - Firmware V8.4 - Advanced Information V32 05/2022- 89 -
• Switching the authorisation for configuration switching for the involvedinternal phones on.
− Using the Configuration Manager (Subscriber (scr) > Properties> Authorisations)
• Switching configuration on.
− Using the Configuration Manager (Time control >Configurations)
− Using a character string on the internal or external phone (seeConfiguration Switchover)
− Using the menu/function key on a system phone (optional, see thephone manual)
Proceed as follows for additional configuration of the automaticconfiguration switchover:
• Switching automatic configuration switchover on/off.
− Using the Configuration Manager (Time control >Configurations)
− Using a character string on the internal or external phone (see )
− Using the menu/function key on a system phone (optional, see thephone manual under Relay)
Note: Using a phone switch the system relay with operationmode automatic configuration switchover and the Identificationnumber 900 (factory settings).
• Creating switching times for automatic configuration switchover.
− Using the Configuration Manager (Time control > Switchingtimes)

Configuration Switchover
COMmander 6000/R/RX - Firmware V8.4 - Advanced Information V32 05/2022- 90 -
Proceed as follows for additional configuration of the permanentconfiguration:
• Configuring the permanent configuration.
− Using the Configuration Manager (on the following pages)
− Public switched tel. networks > Call forwarding
− Devices > Voice mail and fax boxes > Properties > Callacceptance/Announcement
Note: The permanent configuration for CF and the voicemailboxes/fax boxes are set independent of each other and do notdepend on each other.

DECT Phones
COMmander 6000/R/RX - Firmware V8.4 - Advanced Information V32 05/2022- 91 -
DECT Phones
COMfortel DECT 900COMfortel DECT IP1040COMfortel WS-400 IP / WS-650 IPCOMfortel WS-500S / WS-500M COMfortel DECT 900COMfortel DECT IP1040COMfortel WS-400 IP / WS-650 IPCOMfortel WS-500S / WS-500M

COMfortel DECT 900
COMmander 6000/R/RX - Firmware V8.4 - Advanced Information V32 05/2022- 92 -
COMfortel DECT 900
This PBX supports the operation of the base station COMfortel DECT 900.
The following handsets can be operated in connection with these devicesas IP DECT phones on the PBX:
• COMfortel DECT 900
• COMfortel DECT 900C
Connection and operation of the base station to the PBX is via an internalS0 port (optional, see Technical Data in the Instructions).
COMfortel DECT 900/900C handsets are operated in connection with theCOMfortel DECT 900 base station as DECT system phones on the PBX.
You find the description for the creation of internal phones numbers forthese handsets here COMfortel DECT.
Note: If a COMfortel DECT 900 base station is located on the internalS0 port, no further device can be operated on this port due to thepower limitation.
Note: For the handsets of a COMfortel DECT 900 base stationa maximum of five internal numbers can be assigned (three arerecommended).
How to make the further settings for the COMfortel DECT 900/900Chandsets is described below.

COMfortel DECT IP1040
COMmander 6000/R/RX - Firmware V8.4 - Advanced Information V32 05/2022- 93 -
COMfortel DECT IP1040
This PBX supports the operation of the base station COMfortel DECTIP1040.
The following handsets can be operated in connection with these devicesas IP DECT phones on the PBX:
• COMfortel DECT 900
• COMfortel DECT 900C
• non-OEM GAP-capable DECT phones
Connection and operation of the base station to the PBXis via the Ethernetport and internal VoIP channels (optional, see Technical Data in theInstructions).
COMfortel DECT 900/900C handsets are operated in connection with theCOMfortel DECT IP1040 base station as IP DECT system phones on thePBX, non-OEM GAP-capable as IP DECT phones.
You find the description for the creation of internal phones numbersfor these handsets on the page Settings - Configuration Manager >Subscriber (scr.) > Phone numbers > Management Subscriber.
How to register the COMfortel DECT 900/900C handsets with the basestation is described in the Instruction of the base station.
How to transfer phonebook entries for the COMfortel DECT 900/900Chandsets is described here: Settings Address Book Transmission forDECT Handsets.

COMfortel WS-400 IP / WS-650 IP
COMmander 6000/R/RX - Firmware V8.4 - Advanced Information V32 05/2022- 94 -
COMfortel WS-400 IP / WS-650 IP
This PBX supports the operation of the IP DECT servers or base stationsCOMfortel WS-400 IP and WS-650 IP.
The following handsets can be operated in connection with these devicesas IP DECT phones on the PBX:
• COMfortel M-100
• COMfortel M-200
• COMfortel M-210
• COMfortel M-300
• COMfortel M-310
Connection and operation of the base station to the PBX is via theEthernet port and internal VoIP channels (optional, see Technical Data inthe Instructions).
The handsets are operated in connectin with COMfortel WS-400 IP orCOMfortel WS-650 IP as IP DECT phones on the PBX.
The description for the creation of internal phone numbers for thesehandsets in the PBX can be found on the page Settings - ConfigurationManager > Subscriber (scr.) > Phone numbers > ManagementSubscriber.
The description for registering the handsets at the IP DECT server can befound in the Instructions of th IP DECT server.
How to transfer phonebook netries for the handsets is described here:Information about Transfer via LDAP Server.
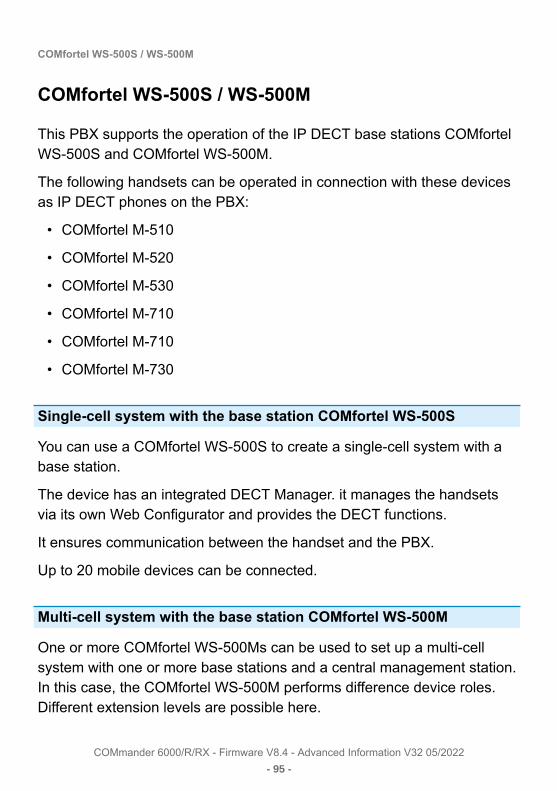
COMfortel WS-500S / WS-500M
COMmander 6000/R/RX - Firmware V8.4 - Advanced Information V32 05/2022- 95 -
COMfortel WS-500S / WS-500M
This PBX supports the operation of the IP DECT base stations COMfortelWS-500S and COMfortel WS-500M.
The following handsets can be operated in connection with these devicesas IP DECT phones on the PBX:
• COMfortel M-510
• COMfortel M-520
• COMfortel M-530
• COMfortel M-710
• COMfortel M-710
• COMfortel M-730
Single-cell system with the base station COMfortel WS-500S
You can use a COMfortel WS-500S to create a single-cell system with abase station.
The device has an integrated DECT Manager. it manages the handsetsvia its own Web Configurator and provides the DECT functions.
It ensures communication between the handset and the PBX.
Up to 20 mobile devices can be connected.
Multi-cell system with the base station COMfortel WS-500M
One or more COMfortel WS-500Ms can be used to set up a multi-cellsystem with one or more base stations and a central management station.In this case, the COMfortel WS-500M performs difference device roles.Different extension levels are possible here.

COMfortel WS-500S / WS-500M
COMmander 6000/R/RX - Firmware V8.4 - Advanced Information V32 05/2022- 96 -
With the "Integrator" device role, the device manages the handsets via itsown Web Configurator.
With the "DECT Manger" device role, it manages the synchronisation ofthe base stations and ensures the communication from the PBX to therespective base stations.
Dependent on the extension level, up to 112 mobile devices can beconnected (limited by the maximum number of subscribers on the PBX).
Further information can be found in the Instructions of the base station.
General information about the configuration
Connection and operation of the IP DECT base stations COMfortelWS-500S and COMfortel WS-500M to the PBX is via the Ethernet portand correspondingly assigned VoIP channels.
Depending on the individual procedure (e. g. use of provisioning ormanual configuration), the base stations and handsets are configuredand maintained in the Configuration Manager of the PBX and in the WebConfigurator of the base station. See the description below.
The description for the creation of internal phone numbers forthese handsets in the PBX can be found on the page Settings -Configuration Manager > Subscriber (scr.) > Phone numbers >Management Subscriber.
Only the base stations for which the device role "DECT Manager andIntergrator“ is activated are configured at the PBX. Base stations withthe role "Base station" are not configured in the PBX but for the mutli-celloperation at a previously determined base station with the role "DECTManager and Integrator".
The handsets are operated in connection with the base station as IPDECT phones on the PBX.

COMfortel WS-500S / WS-500M
COMmander 6000/R/RX - Firmware V8.4 - Advanced Information V32 05/2022- 97 -
Requirements for first commissioning
For information about planning the DECT network, local area (LAN)configuration, and more, refer to the Instructions of the base station.
First commissioning via provisioning
Important: Do not connect the base station to the local network (LAN)until you have completed Step 4. Provisioning cannot be initiatedautomatically if the base station is connected before then.
1. Configure a base station in the PBX for the COMfortel WS-500S or theCOMfortel WS-500M with the future device role "DECT Manager andIntegrator" using the MAC address (label on the back of the device)(Subscriber (scr.) > COMfortel WS-500X).
2. Configure a subscriber with the device type COMfortel WS-500XHandset for each handset in the PBX and with knowledge of the IPUI(Subscriber (scr.) > Phone numbers). You can obtain the IPUI byreading it from the handset (pressing the control button and entering*#06#) or by reading the packaging label.
3. Assign the corresponding base station to each subscriber (Subscriber(scr.) > COMfortel WS-500X > COMfortel WS-500X Handsets).
4. Create a provisioning file for the device type COMfortel WS-500 in thePBX and assign a base station to this file. If the provisioning file hasalready been created, assign a base station if necessary (Subscriber(scr.) > IP provisioning > File Management.
5. Connect the base station via LAN cable to the network and wait for theboot process.

COMfortel WS-500S / WS-500M
COMmander 6000/R/RX - Firmware V8.4 - Advanced Information V32 05/2022- 98 -
6. Only COMfortel WS-500M: To set up a multi-cell system with morethan one base station, set the "DECT Manager and Integrator" devicerole for a base station directly on the device.
7. The base station restarts and the provisioning file is automaticallytransmitted from the PBX to the base station and the device isconfigured.
8. After successful provisioning, the base stations remains in login modefor one hour. During this time, register the handset to the base station(on the handset under Settings > Registration > Register handset).
Note: Using provisioning, the existing template supplies all handsetswith the PBX phone book when LDAP is configured and activated.
For information about connecting the base station, booting, setting thedevice role, and the LED display on the device, refer to the Instructionsof the base station.
Manual first commissioning
1. Configure a subscriber with the device type COMfortel WS-500XHandset for each handset in the PBX (Subscriber (scr.) > Phonenumbers). Make a note of the internal number, the name and thepassword for each subscriber.
2. Log into the Web configurator of the base station and carry out thefurther steps for the configuration of the PBX, the base station and thehandsets there.
The description can be found in the Instructions of the base station inInitial Commissioning > Configure them Manually Using the WebConfigurator on the Base Unit.

COMfortel WS-500S / WS-500M
COMmander 6000/R/RX - Firmware V8.4 - Advanced Information V32 05/2022- 99 -
Checking for firmware update
After the configuration of the base station, it should be checked via theWeb Configurator whether a firmware update is available for the device.

Do-not-disturb, Call Deblocker and Call Restrictor
COMmander 6000/R/RX - Firmware V8.4 - Advanced Information V32 05/2022- 100 -
Do-not-disturb, Call Deblocker and Call Restrictor
Do-not-disturb offers the option of blocking internal and external calls aswell as blocking group calls on a specific phone. A caller hears the busysignal. An internal subscriber can reach a phone with call protection in anemergency using a priority call.
The do-not-disturb function has no influence on outgoing calls, callbacks,wake-up calls or InterCom calls.
If you would still like to allow specific people to call you despite enablingthe do-not-disturb function, the external numbers of these people can beassigned a call deblocker for incoming calls in the PBX (VIP numbers).The call deblocker which applies to all subscribers can be enabled on yourown phone as needed.
If there are certain persons who you absolutely do not want to call youor if you do not want callers to call an extension, their external numbersand/or all anonymous callers can be assigned to a call restrictor forincoming calls (Robinson numbers). The call restrictor which applies to allsubscribers can be enabled on your own phone as needed.
Proceed as follows for configuration:
• Creating the call deblocker and restrictor (incoming).
− Using the Configuration Manager (User data > Special numbers)
• Switching the do-not-disturb function, the call deblocker and restrictor(incoming) on.
− Using the Configuration Manager (on the following pages)
− For subscriber: Subscriber (scr.) > Properties > Reachability
− For groups (only call restrictor): Groups > Properties >Reachability

Do-not-disturb, Call Deblocker and Call Restrictor
COMmander 6000/R/RX - Firmware V8.4 - Advanced Information V32 05/2022- 101 -
− Using a character string on the internal phone (see Do-not-Disturb,Call Deblocker (Incoming)Call Restrictor (Incoming))
− Using the menu/function key on a system phone (optional, see thephone manual)
Note: As of firmware 6.6 (PBX) and 2.4 (VoIP phone) acomparison between phone and PBX will be implemented. Thisfunction can then be switched on or off in the phone or the PBX.
• Configuring the call deblocker and restrictor (incoming) configurationdependent.
− Using the Configuration Manager (on the following pages)
− For subscribers: Subscriber (scr.) >Profiles > ... > Reachability
− For groups: Groups > Profiles > ... > Reachability

Door Functions
COMmander 6000/R/RX - Firmware V8.4 - Advanced Information V32 05/2022- 102 -
Door Functions
The PBX supports the connection and control of various types of doorterminals. In addition to a door bell, ringing at the door can in this wayalso be indicated by internal or external phones or groups. Each door bellbutton can be assigned an individual target number. You can also carryout various door functions such as speech connection with the door andactuation of the door opener from internal phones.
Proceed as follows for configuration:
• Creating a door terminal.
− Using the Configuration Manager (Devices > Device wizard)
• Configuring door terminals.
− Using the Configuration Manager (Devices > Door terminals >Configure)
• Creating a door call and assigning it to the door terminal.
− Using the Configuration Manager (Devices > Door terminals)
• Configuring door calls.
− Using the Configuration Manager (Devices > Door terminals
> )
• Creating a relais and assigning it to the door terminal.
− Using the Configuration Manager (Devices > Door terminals)
• Switching the authorisation for opening the door for the involvedinternal phones on.
− Using the Configuration Manager (Subscriber (scr) > Properties> Authorisations)

COMmander 6000/R/RX - Firmware V8.4 - Advanced Information V32 05/2022- 103 -
The PBX supports the following e-mail functions:
• System e-mails
• Forwarding of voicemail and fax messages
The settings described here must be made centrally in the PBX and canthen be freely assigned to the individual e-mail functions of the PBX.
You can configure up to four outgoing mail servers in the PBX. They canbe freely assigned to the individual e-mail functions of the PBX (system e-mails, forwarding of voicemail and fax messages).
An outgoing mail server is responsible for the transfer of e-mails. You willreceive the access data for the outgoing mail server to be used from yourInternet service provider, for example.
The PBX supports a large number of logos (limited by the total memoryavailable). These logos can be freely assigned to the individual e-mailfunctions of the PBX (system e-mails, forwarding of voicemail and faxmessages).
For the e-mails to be sent by the PBX, several language files are includedin the scope of supply. The PBX supports additional user-defined whichcan be generated on the basis of the existing language files.
The language files contain several text modules which are used togenerate e-mails. The language files are in *.xml format.
Proceed as follows for configuration:
• Configuring an outgoing mail server.
− Using the Configuration Manager (Administration > E-mail >Outgoing mail server)

COMmander 6000/R/RX - Firmware V8.4 - Advanced Information V32 05/2022- 104 -
• Assigning an outgoing mail server to a voice mail/fax box.
− Using the Configuration Manager (Devices > Voice mail and faxboxes > Properties > Box settings)
• Assigning an outgoing mail server to the system e-mails.
− Using the Configuration Manager (Administration > Systemmessages)
• Managing logos.
− Using the Configuration Manager (Administration > E-mail >Logo management)
• Assigning a logo to a voice mail/fax box.
− Using the Configuration Manager (Devices > Voice mail and faxboxes > Properties > Box settings)
• Assigning a logo to the system e-mails.
− Using the Configuration Manager (Administration > Systemmessages)
• Managing language files.
− Using the Configuration Manager (Administration > E-mail >Internationalisation)
• Assigning a language file to a voice mail/fax box.
− Using the Configuration Manager (Devices > Voice mail and faxboxes > Properties > Box settings)
• Assigning a language file to the system e-mails.
− Using the Configuration Manager (Administration > Systemmessages)

Emergency Calls
COMmander 6000/R/RX - Firmware V8.4 - Advanced Information V32 05/2022- 105 -
Emergency Calls
The emergency numbers set up on the PBX are used for emergency calls.These calls are handled in a special way.
Depending on the configuration, emergency calls can be made eitherwith or without dialling the exchange line access number. This has thebenefit that even people who don't know how to use exchange line accessnumbers can make emergency calls.
A system phone can also be used to make emergency calls if the screenlock is switched on (optional, see phone's instructions).
Users who cannot usually make external calls can make emergency callsif the appropriate exchange line authorisation is enabled.
Note: If you want to prevent emergency numbers from being dialled(e.g. to an external subscriber on the same PBX), set up a callrestrictor for each individual emergency number.
Emergency calls are then only transmitted via external connections/providers/accounts on which emergency call ability is enabled. If thetelephone cannot make an emergency call, the subscriber is informed byan announcement.
Emergency calls can be configured to take priority over other calls. Ifnecessary, a call can be interrupted to enable an emergency call to bemade.
The phone number is always sent along with an emergency call. If numberpresentation suppression is switched on, it is disabled automatically whenthe emergency call is made.
Note: Local service numbers, such as numbers for doctors or localauthorities are also increasingly being added to the emergencynumbers. These service numbers can also be set up in the PBX and,like emergency numbers, dialled either with or without the exchange

Emergency Calls
COMmander 6000/R/RX - Firmware V8.4 - Advanced Information V32 05/2022- 106 -
line access number, depending on the configuration. However,calls to service numbers are not handled like emergency calls. Ifyou want to prevent service numbers from being dialled (e.g. to anexternal subscriber on the same PBX), set up a call restrictor for eachindividual service number.
Configuration procedure:
• switch emergency call ability for external connections, providers andaccounts on/off.
− Using the Configuration Manager (on the following pages)
− Public switched tel. networks > ISDN > PTMP connection
− Public switched tel. networks > ISDN > PBX base numbers/trunk bundles > Configure
− Public switched tel. networks > VoIP > provider > Configure
− Public switched tel. networks > VoIP > Accounts > Configure
• Set up emergency calls.
− Using the Configuration Manager (Public switched tel. networks> Emergency Calls)
Note: Public emergency numbers are set as default settingswhen you select the country settings, when commissioningthe PBX. These numbers cannot be deleted. You can onlyenter different public emergency numbers as default settingsby changing the country settings at a later point in time. Beaware of any possible conflicts between the country-specificemergency numbers and the existing internal dial plan. Ifnecessary, assign new "Internal numbers".
• If necessary, configuring the country in which the PBX is operated.

Emergency Calls
COMmander 6000/R/RX - Firmware V8.4 - Advanced Information V32 05/2022- 107 -
− Using the Configuration Manager (Administration > Dealer andoperator data)
• Input your own emergency numbers.
− Using the Configuration Manager (Public switched tel. networks> Emergency Calls)
• If necessary, entering service numbers.
− Using the Configuration Manager (Public switched tel. networks> Emergency Calls > Service numbers)
• Configure exchange line authorisations.
− Using the Configuration Manager (on the following pages)
− Subscriber (scr.) > Features > Exchange line settings
− Groups > Features > Exchange line settings
• If necessary, enabling the function "Prevention of emergency calls".
− Using the Configuration Manager (Subscriber > Features >Exchange line settings)
• Manage and assign audio files for announcements.
− Using the Configuration Manager (on the following pages)
− Functions > Music on Hold/announcements > Filemanagement
− Functions > Music on Hold/announcements > File assignment> Emergency call
− Using a character string on the internal phone (see )
Note: The PBX is supplied with announcements in Englishand German. You can create other announcements in the locallanguage at a later point in time.
Exchange Line Authorisation, Call Deblocker and Call Restrictor
COMmander 6000/R/RX - Firmware V8.4 - Advanced Information V32 05/2022- 108 -
Exchange Line Authorisation, Call Deblocker and CallRestrictor
Explanations and Setting OptionsPhone Book Authorisation Explanations and Setting OptionsPhone Book Authorisation

Explanations and Setting Options
COMmander 6000/R/RX - Firmware V8.4 - Advanced Information V32 05/2022- 109 -
Explanations and Setting Options
The exchange line authorisation determines which phone number typescan be dialled by a subscriber (e.g., phone numbers in the local phonenetwork).
Call deblockers can be added to the exchange line authorisations toexpand dialling options with additions of a certain supply of numbers(phone numbers for specific connections or specific prefixes, releasednumbers). Since call deblockers have a higher priority than call restrictors,they can be used to release restricted numbers or parts of them.
In order to restrict exchange line authorisation, the phone numbersthat should not to be dialled can be put in call restrictors (restrictednumbers). There are several ways to do this. In general, phone numbersare restricted that begin with a certain digit sequence and that should notbe accessible to every subscriber due to its higher charge tariffs, e.g.,0900 phone numbers. Normally, the first 4 to 5 digits indicate the phoneservice that cause such high charges.
If an attempt is made to dial a restricted phone number, only a busysignal is heard. If the restricted numbers are not enabled (meaning "notrestricted"), restriction via the configured exchange line authorisation isstill possible.
Proceed as follows for configuration:
• Creating the call deblocker and restrictor (outgoing).
− Using the Configuration Manager (User data > Special numbers)
• Configuring the exchange line authorisation and switching the calldeblocker and restrictor (outgoing) on.
− Using the Configuration Manager (on the following pages)

Explanations and Setting Options
COMmander 6000/R/RX - Firmware V8.4 - Advanced Information V32 05/2022- 110 -
− For subscriber Subscriber (scr.) > Properties > Exchange linesettings
− For groups Groups > Properties > Exchange line settings
− For the exchange line transfer function Functions > Exchangeline transfer
− For the Call Through function Functions > Call Through
• Configuring the exchange line authorisation, call deblocker andrestrictor (outgoing) configuration dependent.
− Using the Configuration Manager (on the following pages)
− For subscribers: Subscriber (scr.) >Profiles > ... > Exchange linesettings
− For groups: Groups > Profiles > ... > Exchange line settings

Phone Book Authorisation
COMmander 6000/R/RX - Firmware V8.4 - Advanced Information V32 05/2022- 111 -
Phone Book Authorisation
You can add phone book authorisation to the exchange line authorisationsto add options for dialling specific phone numbers if restricted exchangeline authorisation is in place.
This then enables you to approve specific phone numbers for a dialattempt. With phone book authorisation you are permitted to dial all thephone numbers entered in the Phone book version 1 contact group ofthe address books.
Important: The phone book authorisation only becomes effective ifno corresponding exchange line authorisation is present on any of theexternal connections.
Important: If only the Internal only, no emergency calls exchangeline authorisation is present, you cannot make an external call even ifyou have phone book authorisation.
Proceed as follows for configuration:
• Switching the phone book authorisation on.
− Using the Configuration Manager (on the following pages)
− For subscriber Subscriber (scr.) > Properties > Exchange linesettings
− For groups Groups > Properties > Exchange line settings
− For the exchange line transfer function Functions > Exchangeline transfer
− For the Call Through function Functions > Call Through
• Configuring the phone book authorisation configuration dependent.
− Using the Configuration Manager (on the following pages)

Phone Book Authorisation
COMmander 6000/R/RX - Firmware V8.4 - Advanced Information V32 05/2022- 112 -
− For subscribers: Subscriber (scr.) >Profiles > ... > Exchange linesettings
− For groups: Groups > Profiles > ... > Exchange line settings
• Creating contacts and assiging the contacts to the Phone bookversion 1 contact group.
− Using the Configuration Manager (User data > Address books >Contacts and assignment)

Exchange Line Request
COMmander 6000/R/RX - Firmware V8.4 - Advanced Information V32 05/2022- 113 -
Exchange Line Request
The PBX distinguishes three types of exchange line requests:
Internal phone: The user has to dial an external number with precedingExchange line access number.
Direct exchange device: For an external number no prefix is required.However, the user has to dial an internal number with preceding **.
Automatic exchange line request (factory setting): Neither for theinternal nor for the external number a prefix is required (exception: ** fortargeted VoIP access). The PBX automatically distinguishes betweeninternal and external numbers with the adjustment of the dialled phonenumber and the internal dial plan:
• If the phone number is contained in the dial plan, the PBX establishesan internal connection.
• If the phone number is not contained in the dial plan, the PBXestablishes an external connection.
Note: The short code number is a part of the internal dial plan andis therefore an internal number. However it leads to an externalconnection.
Note: In order that the distinction between internal numbers andphone numbers in the local area network functions, the internal dialplan must not contain phone numbers that also occur within the localarea network. To avoid conflicts, phone numbers of the local areanetwork should always be dialled with local area code.
Note: Also when the entered phone number correspond with theinternal dial plan, the PBX waits up to 4 seconds for whether additionaldigits for an external number are being entered, before it dials theinternal phone number. To avoid waiting time, you can subsequently

Exchange Line Request
COMmander 6000/R/RX - Firmware V8.4 - Advanced Information V32 05/2022- 114 -
enter #. The PBX therefore recognises the input as finished andinstantly starts dialling.
Note: In factory settings, the system-wide automatic exchange linerequest (for all subscribers) is switched on. Alternatively, the exchangeline request type can be set separately for each subscriber. In thiscase, the automatic exchange line request can only be selected for IPDECT phones, COMfortel 1200 IP and COMfortel C-400. For all othersubscribers, only direct exchange line phone and internal phone canbe selected.
Configuration procedure:
• Making settings for exchange line request.
− Using the Configuration Manager (Public switched tel. networks> Exchange line request)
• Making settings for exchange line request separately for subscribers.
− Using the Configuration Manager (Subscriber (scr.) > Properties> Settings > Special functions)
Note: This setting is only visible, if System-wide automaticexchange line request is disabled

Exchange Line Transfer
COMmander 6000/R/RX - Firmware V8.4 - Advanced Information V32 05/2022- 115 -
Exchange Line Transfer
A suitably authorised system phone, for example, the phone exchange,can transfer the exchange line access required for an outgoing call toanother internal phone for a short period of time. This is meaningful, forexample, when this phone is located in a publicly accessible room and isonly occasionally used for external calls by an employee.
The exchange line transfer proceeds as follows:
• The requesting phone must initiate an internal call using the systemphone authorised to make the exchange in order to request exchangeline access.
• After the function key assigned to exchange line transfer has beenpressed on the system phone authorised for making exchanges, aconfirmation tone is issued to both internal subscribers and the internalcall must be ended.
• The requesting phone now has access to the exchange line settingsconfigured for this purpose. These exchange line settings remain untilthe first successful, outgoing external call or until the time limitationhas elapsed for initiating the external call.
Proceed as follows for configuration:
• Making settings for exchange line transfer.
− Using the Configuration Manager (Functions > Exchange linetransfer)
• Switching the authorisation for transferring external calls externally forthe transferred phone on.
− Using the Configuration Manager (Subscriber (scr.) > Properties> Authorisations)

Exchange Line Transfer
COMmander 6000/R/RX - Firmware V8.4 - Advanced Information V32 05/2022- 116 -
• At minimum, configuring a business exchange line authorisation forincoming calls for the requesting phone.
− Using the Configuration Manager (Subscriber (scr.) > Properties> Exchange line settings)
• Configuring a function key for the exchange line transfer on the systemphone (optional, see the phone manual).
External Outgoing Call
COMmander 6000/R/RX - Firmware V8.4 - Advanced Information V32 05/2022- 117 -
External Outgoing Call
An outgoing external call is made as follows:
• A user dials an external number.
• The PBX checks whether the phone number or the phone numberrange is specified in the exception numbers (VoIP/GSM routing) andswitched on for the current configuration.
• If the phone number is found, the PBX automatically forwards the dialattempt to the connections set up there, while taking into account thedialling operations.
• If the phone number is not in the list of exception numbers (VoIP/GSM routing), or it is not enabled for the currently valid configuration,the system checks whether a preferred exchange line has beenconfigured.
• If no preferred exchange line has been configured, or the preferredexchange line is a land line connection, the system checks the phonenumber, on the basis of the LCR networks (if LCR is configured andenabled), and then dials it on a land line connection.
Note: The VoIP/GSM routing is performed depending on thedestination number, if the exchange line settings (subscriber, group)do not prevent this (e.g. exchange line authorisation only for selectedconnections, preferred exchange line, call restrictor).
Note: If a call is initiated over a targeted VoIP access point, VoIP/GSMrouting is not carried out.
Note: The special numbers provided by the VoIP provider, forchecking one's account status or dialling, for example, usually donot include a local code. It is not possible to route numbers via theexception table. In order to correctly dial these phone numbers, use
External Outgoing Call
COMmander 6000/R/RX - Firmware V8.4 - Advanced Information V32 05/2022- 118 -
targeted exchange line assignment with the account number (targetedVoIP access point).
Note: When you dial one of the local numbers (phone number withouta prefix) listed in the exception number table over a VoIP access point,the PBX automatically converts the phone number as specified underNumber presentation (outgoing) for the VoIP provider.
Note: For all DSL connections that are not made over a dedicated line,some VoIP provider reset the DSL line at least once within 24 hours.This terminates calls currently in progress.

Firmware Update
COMmander 6000/R/RX - Firmware V8.4 - Advanced Information V32 05/2022- 119 -
Firmware Update
Information and OptionsDistributing Firmware Information and OptionsDistributing Firmware

Information and Options
COMmander 6000/R/RX - Firmware V8.4 - Advanced Information V32 05/2022- 120 -
Information and Options
When firmware is updated, errors are corrected or new features areinstalled. To do this, the device establishes a connection to a server inorder to download the most current firmware (the device settings remainintact). The update is free of charge.
Note: If you have just performed a firmware update and an errormessage appears when you log into the Configuration Manager,please empty your web browser's cache or wait for about five minutesbefore logging in again.
Note: Some of the functional upgrades provided as part of a firmwareupdate require additional configuration parameters. Sometimes not allthese parameters can be determined automatically from the previousfirmware version. This is why you need to edit some parts of theconfiguration manually in this type of update.
Note: If the regular firmware update option has been enabled, thestatus messages tell you whether you need to edit the current updatemanually. Click update to download an update for the device firmwarefrom the update server.
Note: After a firmware update you usually require a newversion of the instructions. This is available on the Internet (seeAuerswald:Auerswald Service Portal, FONtevo: FONtevo Support).
Firmware update options:
• Manual firmware update of the PBX.
− Using the Configuration Manager (Administration > Firmwareupdate and restart)
• Firmware update of the PBX via update server.
Information and Options
COMmander 6000/R/RX - Firmware V8.4 - Advanced Information V32 05/2022- 121 -
− Using the Configuration Manager (Administration > Firmwareupdate and restart)
• Firmware update for system phones.
− Using the Configuration Manager (Administration > Firmwareupdate and restart)
• Restoring the firmware of the PBX.
− Using the Configuration Manager (Administration > Firmwareupdate and restart)
− by clicking a button on the PBX
Distributing Firmware
COMmander 6000/R/RX - Firmware V8.4 - Advanced Information V32 05/2022- 122 -
Distributing Firmware
A new version of the firmware can be distributed from one system phoneto other system phones connected to the PBX. To configure an IP systemphone as firmware distributing phone, see Advanced Information of thephone. Under Administration > Firmware update and restart, you cansee under Firmware update for VoIP system phones the current status.
Note: The PBX must have a firmware version as of 6.6.
Note: The phone that receives the firmware must have a firmwareversion as of 2.4.
Note: Distributing the firmware is possible from one COMfortel 3600IP to other COMfortel 3600 IP and from COMfortel 1400 IP/2600 IP toother COMfortel 1400 IP/2600 IP.
Proceed as follows:
• Using the phone and automatically via the PBX

Fixed Mobile Convergence (FMC)
COMmander 6000/R/RX - Firmware V8.4 - Advanced Information V32 05/2022- 123 -
Fixed Mobile Convergence (FMC)
FMC connects mobile and landline networks. The user enables theFMC behaviour of the PBX for a subscriber via a smartphone app and issupported by it when initiating calls.
For incoming calls, the user at the smartphone receives the correctphone number of the callers. Outgoing calls via the smartphone app to anexternal number are analogous to Call Through calls with the differencethat the called party receives the number that the callers also transmitfrom their office phones and not the Call Through MSN or the number ofthe mobile phone. When using CLIP no screening, a phone number youdefine can be transmitted.
An FMC call is shown as such under Call data list > Call type.
Requirements
Note: An outgoing dialling is only possible when FMC behaviour isenabled. Furthermore, the accessibility ob the smartphone via the callto the extension is given.
Note: The phone number of a smartphone can be entered andenabled only for an extension.
• Installed app on the smartphone COMfortel Mobile Business
• Provider supporting CLIP no screening (possibly with costs)
• CLIP no screening configured at the provider
• Enabled FMC behaviour (Subscriber (scr.) > Features > availability)
Procedure for outgoing calls
1. Dialling the Call Through MSN of the PBX.

Fixed Mobile Convergence (FMC)
COMmander 6000/R/RX - Firmware V8.4 - Advanced Information V32 05/2022- 124 -
2. Dialling the user PIN 6-digit PIN + * + Destination number (internal orexternal without exchange line access number). This is unambiguouslyand makes it clear that this is an FMC call.
3. The caller is identified by the number for the Multi-Path call forwarding.
4. The required data (PIN, phone number of the caller) is checked.
5. When all data match, the caller can initiate a call (e. g. via thesmartphone app).
Configuration
• Switching on CF (groups) / Follow-me.
− Subscriber (scr.) > Features > Authorizations > CF CF(groups) / Follow-me
• Enabling FMC behaviour and entering destination number.
− Subscriber (scr.) > Features > availability > Multi-path callforwarding / FMC
Note: When the option Call signalling ... (multi-path callforwarding) (setting in the app) is selected, this setting at thePBX is automatically enabled and disabled and compared with thephone number of the smartphone stored in the app.
• Enabling CLIP no screening for the account/connection.
− Public switched tel. networks > Expert configuration ofthe corresponding Account/connection > Configure > Callforwarding > Use Clip no screening for call forwarding
− Public switched tel. networks > Expert configuration of thecorresponding Account/connection > Configure > Numberpresentation > Clip no screening
• Configuring settings for FMC.

Fixed Mobile Convergence (FMC)
COMmander 6000/R/RX - Firmware V8.4 - Advanced Information V32 05/2022- 125 -
− Functions > Call Trough
Note: The Call Through settings (call duration, number of calls)apply to FMC.

Follow-me
COMmander 6000/R/RX - Firmware V8.4 - Advanced Information V32 05/2022- 126 -
Follow-me
Follow-me is like a call forwarding unconditional for subscribers or groupsthat can be configured on any phone (instead of on the forwarding phone).This gives you the option of moving from room to room and taking thecalls with you.
Follow me can be configured from different phones:
Configure Follow-me to an internal destination phone: With the helpof this function you can go from room to room and take your calls withyou. You can configure the call forwarding of your calls from the phone(destination phone) where you currently are. But you can also take thecalls of several subscribers/groups at your phone.
Configure Follow-me from any available internal phone: If you havealready left your desk, you can forward your calls to another phone. Thisway it is possible to forward the calls to your mobile phone or forward it toan internal representative.
Configure Follow-me from external: If you have already left the desk,you can forward your calls to another phone. This way it is possibleto forward the calls to your mobile phone or to forward it to an internalrepresentative.
Note: In the case of an external call for switching, the PIN of thediverting subscriber is required.
Proceed as follows for configuration:
• Switching authorisations for the involved internal subscribers on.
− Using the Configuration Manager (Subscriber (scr.) > Properties> Authorisations)

Follow-me
COMmander 6000/R/RX - Firmware V8.4 - Advanced Information V32 05/2022- 127 -
Note: The forwarding subscriber needs an authorisation e.g. forexternal destinations. For configuring using a character stringon an internal phone the subscriber needs an authorisation forcontrolling of the PBX.
• Configuring sufficient exchange line authorisations for the involvedinternal subscribers.
− Using the Configuration Manager (Subscriber (scr.) > Properties> Exchange line settings)
Note: The destination subscriber needs a sufficient exchange lineauthorisation for taking external calls.
• Switching Follow-me on.
− Using the Configuration Manager (on the following pages)
− For subscribers: Subscriber (scr.) >Properties > Reachability
− For groups: Groups > Properties > Reachability
− Using a character string on the internal or external phone (see )

Groups
COMmander 6000/R/RX - Firmware V8.4 - Advanced Information V32 05/2022- 128 -
Groups
Membership in a group does not necessarily mean that a subscriberreceives calls sent to the group. A subscriber that is logged out takes onno group functions. This can be especially important for employees of asupport department, who should not be available to customers around theclock, but rather rotate in and out of the hotline.
Note: If a group (subgroup) has been configured in the PBX asmember of a group (main group) and a subscriber is at the same timemember of these two groups, he will only be considered as a memberof the main group when a call comes in.
Note: Subgroups (i.e. groups that have been configured as membersof other groups) are permanently logged in as incoming andpermanently logged out as outgoing.
Note: Phones permanently logged in cannot log out of a group.
Note: Group calls can also be placed in the waiting loop, alwaysprovided that at least one subscriber is logged in as incoming.The group will be called as soon as a subcriber who is logged in asincoming is free.
There are three different ways to log in:
Only incoming
When logging into a group as incoming, the subscriber then finds himselfin the call distribution of the group in question for internal, exchange lineand door calls.

Groups
COMmander 6000/R/RX - Firmware V8.4 - Advanced Information V32 05/2022- 129 -
Only outgoing
When logging into a group as outgoing, the subscriber acquires a numberof characteristics/access rights from the group. These replace his owncharacteristics/access rights as an individual subscriber for outgoing work-related calls. A subscriber can only be logged on in a single group asoutgoing even if he is a member of more than one group.
Note: If a subscriber logs into different groups as outgoing one afterthe other, he will only remain logged in as outgoing in the group thathe logged into last.
Incoming and outgoing
When logging into a group as incoming and outgoing, the subscriberthen finds himself in the call distribution of the group in question forinternal, exchange line and door calls and also acquires a number ofadditional characteristics/access rights from the group. These replace hisown characteristics/permissions as an individual subscriber for outgoingwork-related calls.
Note: If a subscriber logs into more than one group as incoming andoutgoing, he will only remain logged in as incoming and outgoingin the group that he logged into last. And in all other groups, he is thenonly incoming and outgoing.
Proceed as follows for configuration:
• Creating groups.
− Using the Configuration Manager (on the following pages)
− Groups > Phone numbers
− Groups > Properties

Groups
COMmander 6000/R/RX - Firmware V8.4 - Advanced Information V32 05/2022- 130 -
• Logging Subscribers in/out.
− Using the Configuration Manager (Groups > Properties > Basicsettings)
− Using a character string on the internal phone (see Groups)
− Using the menu/function key on a system phone (optional, see thephone manual)

GSM Gateway
COMmander 6000/R/RX - Firmware V8.4 - Advanced Information V32 05/2022- 131 -
GSM Gateway
A GSM gateway can be connected to an external port on the PBX. Thisallows direct access to be configured on the world-wide GSM network(Global System for Mobile Communications).
Note: GSM gateways take external calls automatically. When this isdone, costs may be charged to the caller, even if nobody takes the callon the internal destination side.
Note: LCR ist not available for an external port connected to a GSMgateway.
Note: If the PBX has no connection to the fixed network, outgoingexternal calls can only be initiated via a targeted exchange line accessusing the phone numbers (and the corresponding configured access)entered on the page Routing > VoIP/GSM routing > Exceptionnumbers or via a configured preferred exchange line (Exchange linesettings for subscribers or groups).
Proceed as follows for configuration:
• Switching GSM at the external connection on and entering the freelyselectable phone number.
− Using the Configuration Manager (on the following pages)
− Public switched tel. networks > ISDN > PTMP connection
− Public switched tel. networks > ISDN > PBX base numbers/trunk bundles > Configure
• Entering the connection type on the ISDN connection and the phonenumber.
− In the GSM gateway configuration (see manual of the GSMgateway)

Hardware
COMmander 6000/R/RX - Firmware V8.4 - Advanced Information V32 05/2022- 132 -
Hardware
After the first initialisation or the insertion of new modules, these moduleshave to be configured using the Configuration Manager. Assign theexisting modules to the used expansion slots and perform the portconfiguration.
Port configuration is the basic set-up for the inserted modules. Theconnection assignments for the ports must be set depending on the properuse and must be adapted to the actual connection options on site.
Note: Please find the basic information for the use of the modules inthe Installation and Commissioning Instructions.
Proceed as follows for configuration:
• Selecting modules.
− Using the Configuration Manager (Hardware > Selection ofmodules)
• Setting port configurations.
− Using the Configuration Manager (Hardware > Portconfiguration)

Hotel Function
COMmander 6000/R/RX - Firmware V8.4 - Advanced Information V32 05/2022- 133 -
Hotel Function
The hotel function offers room and call data management with thefollowing functions:
Hotel reception phones
The hotel reception phone supports various control and query functionsvia the display and the LEDs of the function keys. For each room, afunction key is set up on the reception desk, via which various functionscan be performed.
Before check-in, the room status (cleaned, unclean, blocked) can bechecked and changed.
As soon as check-in is complete, the following configuration and queryfunctions can be used.
• Call charge queries including check-in date
• Interim call charge calculation printout
• Wake-up time configuration
• External access block
• Check-out
Hotel room phones
When used as a hotel room phone, the programming and transferringfunctions as well as spezific call initiation types are blocked on thedevices. The guest can initiate and accept calls and configure a wake-uptime. The cleaning staff can also indicate the room status.

Hotel Function
COMmander 6000/R/RX - Firmware V8.4 - Advanced Information V32 05/2022- 134 -
In addition, the administrator can prevent the initiation of calls betweenroom phones (Room2Room).
The function of the hotel room phone are operated the same way asdescribed for normal phones. Exception: A function key assigned withHotel room allows the configuration of a wake-up time as well as theinquiry of the call costs and the check-in time.
The following functions are still possible:
• Making and excepting internal and external calls
• Deleting data and call charges (this does not affect the call chargecounter on the PBX)
• The use of the caller/call/redial list as well as of the phone book (partsof the phone book can be blocked in the phone)
• Scheduled call/reminders and power dialling
• Call charge query and wake-up time configuration using a function key
Print function
Via the hotel reception phone the incurred call costs of a guest can beprinted out as an invoice or interim bill with itemized bill of identification.
Requirements:
• Hotel function enabled (optional, see Activation)
• ISDN System phone, that supports function keys for reception phones(optional, see the phone manual)
Proceed as follows for configuration:
• Selecting reception and room phones.
− Using the Configuration Manager (on the following pages)

Hotel Function
COMmander 6000/R/RX - Firmware V8.4 - Advanced Information V32 05/2022- 135 -
− Functions > Hotel function > Hotel reception subscribers
− Functions > Hotel function > Room subscribers
Note: The system phone cannot be used at the same time aswaiting field reception phone and as hotel reception phone.
Note: To ensure that the costs are fully charged to the hotel guestin the case he wants his call to be transferred, the function Callcharge recording changes with scr (Functions > Call allowanceaccounts) for the hotel reception phone function must be enabled.
Note: To ensure that the hotel always remains available by phone,the hotel reception phones can be grouped together and oneor more call channels can be reserved for them. Alternatively,exchange line authorisations for only a part of the availableexternal ports can be assigned to the hotel room phones.
• Configuring the printing function.
− Using the Configuration Manager (Functions > Hotel function >Create print form)
• Configuring a hotel room function key for each hotel room phone(optional, see the phone manual).
Note: During the check-in or check-out process, the hotelreception phone is not available for incoming calls. Fir such cases,Call forwarding on busy should be configured.
Note: If unsuccessful calls are to be documented in the hotelreception phone, the recording of the internal calls in the caller listmust be enabled.
• Assigning a room key on each hotel room phone for call chargequeries and for setting up wake-up times (optional, see the phone‘smanual).
Hotel Function
COMmander 6000/R/RX - Firmware V8.4 - Advanced Information V32 05/2022- 136 -
Note: The value configured in the system phone for cost per callunit (optional, see the phone‘s manual) should match that in theConfiguration Manager.
• Configuring the SFTP transfer and switch on the SFTP server if anevaluation programme shall have access to the provided data (e. g.call data list).
− Using the Configuration Manager (Administration > IPconfiguration > SFTP server)

InterCom Announcement/Hands-Free Operation
COMmander 6000/R/RX - Firmware V8.4 - Advanced Information V32 05/2022- 137 -
InterCom Announcement/Hands-Free Operation
The InterCom function enables an audio connection to a system telephonefrom one or more telephones without someone having to actively receive acall (for example, in a medical practice).
The callers can also request a system phone to switch on the microphonein addition to the loudspeaker (hands-free operation) so that a personnearby can speak to the caller using this intercom system.
Requirements:
• System phone that supports InterCom (optional, see phone manual)
• COMfortel D-series: enabled Convenience package D-series
• Stnadard VoIP phone: SIP convenience package brand plus
InterCom announcement and InterCom hands-free are carried out asfollows:
• A single system phone or a group is called using the InterComfunction.
The following rules / restrictions apply:
− If a single D-series phone or Standard VoIP phone is called, itautomatically switches to hands-free operation. An announcementis not possible.
− If a group is called using the InterCom function, all system phonesof the group that have given the InterCom permission and areready to take calls will be called.
− The group status (logged in, logged out) will not be taken intoaccount.
− Hands-free operation is not possible in the case of an InterComcall to a group.

InterCom Announcement/Hands-Free Operation
COMmander 6000/R/RX - Firmware V8.4 - Advanced Information V32 05/2022- 138 -
• After a few rings, the system phone/system phones of the groupmembers automatically pick up the call.
• Announcement or hands-free calling is executed.
The following rules / restrictions apply:
− Announcement or hands-free calling is limited to 120 secondsdue to security reasons in order to prevent possible misuse of thisfunction (for example, eavesdropping from remote rooms).
• After 120 seconds has elapsed, the connection is automaticallyinterrupted unless the system telephone receiver is picked up duringthis time.
Configuration procedure:
• Switching the InterCom permission for the involved internal phones on.
− Using the Configuration Manager (Subscriber (scr.) > Properties> Settings)
• If necessary, assigning a function key for InterCom on the systemphone (optional, see the phone manual).
Internal Numbers
COMmander 6000/R/RX - Firmware V8.4 - Advanced Information V32 05/2022- 139 -
Internal Numbers
Internal numbers must be configured for the internal ports so that theconnected end devices are accessible. Each connected end devicereceives a subscriber number.
If multiple internal end devices need to be accessible via a phone number,a common group for the internal subscribers must first be configured.
Internal phone are also needed to make e.g. connections to devices, voipaccounts or functions.
Note: It is a good idea to create a dial plan for the internal numbersbefore allocation and then use the following steps to transmit this tothe PBX.
Configuration procedure:
• Create internal phone numbers for subscribers.
− Using the Configuration Manager (Subscriber (scr.) > Phonenumbers)
• Create internal phone numbers for groups.
− Using the Configuration Manager (Groups > Phone numbers)
• Create internal phone numbers for Voice mail and fax boxes.
− Using the Configuration Manager (Devices > Voice mail and faxboxes > Phone numbers)
• Create internal phone numbers for Voice mail and fax boxes.
− Using the Configuration Manager (Devices > Voice mail and faxboxes > Phone numbers)
• Create internal numbers for alarms.

Internal Numbers
COMmander 6000/R/RX - Firmware V8.4 - Advanced Information V32 05/2022- 140 -
− Using the Configuration Manager (Devices > Alarms)
• Create internal phone numbers for automatic receptions.
− Using the Configuration Manager (Functions > AutomaticReceptions)
• Create internal numbers for short-code dialling numbers as part ofcontacts.
− Using the Configuration Manager (User data > Address books >
Contacts and assignment > )

ISDN Connection
COMmander 6000/R/RX - Firmware V8.4 - Advanced Information V32 05/2022- 141 -
ISDN Connection
The existing ISDN can be connected to the external S0 ports of the PBX(optional, see Technical Data in the Instructions).
Proceed as follows for configuration:
• Configuring the connection type for the ISDN connection.
− Using the Configuration Manager (Hardware > Portconfiguration)
• Configuring the PTMP connection and entering phone numbers.
− Using the Configuration Manager (on the following pages)
− Public switched tel. networks > ISDN > PTMP connection
− Public switched tel. networks > ISDN > PTMP connection >Configure
• Configuring the PTP connection and entering phone numbers.
− Using the Configuration Manager (on the following pages)
− Public switched tel. networks > ISDN > PBX base numbers/trunk bundles
− Public switched tel. networks > ISDN > PBX base numbers/trunk bundles > Configure
− Public switched tel. networks > ISDN > Extension numbersPTP connection
• Creating a call distribution for the ISDN connection.
− Using the Configuration Manager (Public switched tel. networks> Call Distribution)

ISDN Connection
COMmander 6000/R/RX - Firmware V8.4 - Advanced Information V32 05/2022- 142 -
• If necessary, entering additional numbers for the PTP connection.
− Using the Configuration Manager (Public switched tel. networks> ISDN > Additional PBX base numbers)

LAN-TAPI
COMmander 6000/R/RX - Firmware V8.4 - Advanced Information V32 05/2022- 143 -
LAN-TAPI
Explanations and Setting OptionsInstalling TAPI driver (TSP)Checking the Function of the LAN-TAPI Explanations and Setting OptionsInstalling TAPI driver (TSP)Checking the Function of the LAN-TAPI
Explanations and Setting Options
COMmander 6000/R/RX - Firmware V8.4 - Advanced Information V32 05/2022- 144 -
Explanations and Setting Options
For a CTI solution, the PBX can be connected to a local network (CTIserver and CTI clients). This requires CTI software, e. g. PBX Call Assist /2. Alternatively, we recommend the following software manufacturers:
• ESTOS (estos page)
• ilink (ilink page)
The LAN-TAPI provides the TAPI 2.1 interface over the Ethernet port onthe PBX.
A Microsoft server then distributes the functionality throughout thenetwork (third party network connection) onto the separate Microsoftcomputers so that telephony software, e.g., PBX Call Assist / 2 or otherTAPI applications can use the TAPI functions. The PBX is addressed bythe server over the Ethernet interface. When a user wants to dial from theclient PC, the command is forwarded to the server. The server signals thisto the PBX which then establishes the connection.
LAN-TAPI supports the following phones connected to the PBX:
• IP and ISDN system phones
• ISDN Telephones
• Analogue phones
• Standard VoIP phones (SIP)
LAN-TAPI supports the following functions:
• Display of the called MSN (multi-company operation)
• Call forwarding (CFU, CFB, CFNR)
• Call deflection (forwarding before call acceptance)
• Transferring calls

Explanations and Setting Options
COMmander 6000/R/RX - Firmware V8.4 - Advanced Information V32 05/2022- 145 -
• Conference call
• Splitting a call
• Monitoring (status display of the extensions)
• Pick-Up
• Do not disturb
• Blind transfer using ESTOS
Important: The possible functions are dependent on the end devices/applications used.
Note: For controlling a phone of the COMfortel D-series via LAN TAPI,the CTI authorization code is necessary (from firmware version 1.4of the phone). The code set for each subscriber in the PBX can beadjusted individually.
Configuration procedure:
• Making settings for LAN-TAPI.
− Using the Configuration Manager (Functions > LAN TAPI page)
• Installing TAPI driver (TSP).
• If necessary, change the CTI authorization code for a phone of theCOMfortel D-series.
− Using the Configuration Manager (Subscriber (scr.) > Functionoverview > Basic settings page)

Installing TAPI driver (TSP)
COMmander 6000/R/RX - Firmware V8.4 - Advanced Information V32 05/2022- 146 -
Installing TAPI driver (TSP)
The PBX must be connected with a server PC via a TCP/IP network. TheTAPI driver (TSP) that belongs to the PBX must be installed on this serverPC from the Auerswald Mega Disk.
Important: If you want to integrate the LAN-TAPI into an existingnetwork, please contact the system administrator responsible forthis. Making changes to an existing network may cause considerablefunctional disturbances.
Note: You can find the current version of the driver on the Internet (seeAuerswald: Auerswald Service Portal, FONtevo: FONtevo Support).
Requirements:
• A driver file (*.exe) in its current version saved on a data storagedevice (PC)
• Server PC that fulfils one of the following minimum requirements:
- Windows 7 (32-/64-Bit)
- Windows Server 2008 und Windows Server 2008 R2
- Windows 8/8.1 (32-/64-Bit)
- Windows 10 (32-/64-Bit)
- Windows Server 2012 und Windows Server 2012 R2
- Windows Server 2016

Installing TAPI driver (TSP)
COMmander 6000/R/RX - Firmware V8.4 - Advanced Information V32 05/2022- 147 -
1. Start driver file (*.exe) on the server PC.
The TAPI driver installation is started.
2. Follow the installation by clicking Next.
3. Depending on the driver version, the driver may need to be activatedat this point. If you do not want to activate it yet, click the Activatelater button.
4. In the IP address of the PBX entry field, enter the IP address of thePBX. Enter the network port of the TAPI server in the Port entry field.Enter the password for the network connection of the TAPI server inthe Password and Repeat password entry fields. Click OK.
5. Click Close.
6. Restart the PC.

Checking the Function of the LAN-TAPI
COMmander 6000/R/RX - Firmware V8.4 - Advanced Information V32 05/2022- 148 -
Checking the Function of the LAN-TAPI
To perform a simple function check of the TAPI driver (TSP) as well as thesettings configured in the PBX, use the dialling help on Windows on theserver PC.
Proceed as follows:
• Using the server PC
Requirements:
• A completed TAPI drive installation on the server PC
• Operating system: Windows 10
1. Start Windows dialling help. To do this, click Start, enter dialer.exe inthe entry field and press Enter.
2. Click Extras > Connect with....
In the Line list field, select one of the phones offered for controlling.
Click OK.

Checking the Function of the LAN-TAPI
COMmander 6000/R/RX - Firmware V8.4 - Advanced Information V32 05/2022- 149 -
3. In the Phone number entry field, entry an internal or external number.Enter the phone number exactly as you would dial it and click Dial.
The controlled phone is called. As soon as you pick up the receiver,the destination number dialled (in this example: 422) is called.
LCR
COMmander 6000/R/RX - Firmware V8.4 - Advanced Information V32 05/2022- 150 -
LCR
LCR (Least Cost Routing) is a function of the PBX that enables thesubscriber to automatically make calls using the most cost-effective phoneservice provider. The PBX determines the phone service provider to beused by the dialled phone number and the configured tariff tables.
Note: Automatic LCR is not carried out for the entered emergencynumbers (Public switched tel. networks > Emergency calls).
Note: If a call is initiated via a targeted exchange line access,automatic LCR is not carried out.
Requirements:
• Support of dial-around service by the network provider
Proceed as follows for configuration:
• Switching LCR at the external connection on.
− Using the Configuration Manager (on the following pages)
− Public switched tel. networks > ISDN > PTMP connection
− Public switched tel. networks > ISDN > PBX base numbers/trunk bundles > Configure
− Public switched tel. networks > VoIP > Accounts > Configure
• Selecting the subscribers on which automatic LCR should be carriedout.
− Using the Configuration Manager (Routing > Soft-LCR 4.0 > LCRsubscriber)
• If necessary, switching LCR for Call Through calls on.
− Using the Configuration Manager (Functions > Call Through)

LCR
COMmander 6000/R/RX - Firmware V8.4 - Advanced Information V32 05/2022- 151 -
• Creating LCR data and keeping them up to date.
− Using the Configuration Manager (on the following pages)
− Routing > Soft-LCR 4.0 > Provider
− Routing > Soft-LCR 4.0 > Networks and LCR import
− Routing > Soft-LCR 4.0 > LCR tables
• Creating the holidays in the calendar of the PBX and switching themon for LCR.
− Using the Configuration Manager (Functions > Calendar)

Loudspeaker Announcement
COMmander 6000/R/RX - Firmware V8.4 - Advanced Information V32 05/2022- 152 -
Loudspeaker Announcement
This function enables loudspeaker announcements over an activeloudspeaker (for example, a loudspeaker system in a waiting room). Inaddition, a previously specified phone number is called by an internalphone. The call connection is immediately established after dialling thephone number.
In order to make loudspeaker announcements, a device that can be usedas announcement output (e. g. an a/b-Audiobox at a loudspeaker system)must be connected to the PBX. This announcement output must becreated in the configuration of the PBX and assigned an internal numberto call it.
Proceed as follows for configuration:
• Creating an announcement output with internal number.
− Using the Configuration Manager (Devices > Device wizard)
• Creating a relais and assigning it to an announcement output.
− Using the Configuration Manager (Devices > Announcementoutputs)
• If necessary, making additional settings for the announcement output.
− Using the Configuration Manager (Devices > Announcementoutputs)
• Switching the authorisation for speaker announcements for theinvolved internal phones on.
− Using the Configuration Manager (Subscriber (scr.) > Properties> Authorisations)
Macro numbers
COMmander 6000/R/RX - Firmware V8.4 - Advanced Information V32 05/2022- 153 -
Macro numbers
With the aid of macro numbers, longer digit sequences and macrocommands can be dialled more easily.
The macro short-code numbers are part of the internal dial plan andtherefore must at least have 2 digits.
Configuration procedure:
• Configuring short-code macros.
− Using the Configuration Manager (on the following pages)
− Functions > Macro short-code number

Multi-path Call Forwarding
COMmander 6000/R/RX - Firmware V8.4 - Advanced Information V32 05/2022- 154 -
Multi-path Call Forwarding
Multi-path call forwarding is used to signal internal and external calls,in addition to call distribution for an internal or an external number, e.g.,on a mobile phone. Multi-path call forwarding is also executed if the"main phone number" is, for example, busy. If call forwarding for externalnumbers is additionally enabled, multi-path call forwarding might work onlylimited.
Proceed as follows for configuration:
• Switching multi-path call forwarding on.
− Using the Configuration Manager (on the following pages)
− For subscribers: Subscriber (scr.) > Properties > Reachability
− For groups: Groups > Properties > Reachability
− Using a character string on the internal or external phone (see )
• Configuring multi-path call forwarding configuration dependent.
− Using the Configuration Manager (on the following pages)
− For subscribers: Subscriber (scr.) > Profiles > ... > Reachability
− For groups: Groups > Profiles > ... > Reachability

Music on Hold and Announcement
COMmander 6000/R/RX - Firmware V8.4 - Advanced Information V32 05/2022- 155 -
Music on Hold and Announcement
When transferring a call or in the case of a query call, a communicationpartner waiting in the background hears music on hold from the PBX,perhaps with an announcement played over the music.
Configuration procedure:
• Configuring the source of the music on hold and the use of theannouncement during the music on hold.
− Using the Configuration Manager (Functions > Music on Hold/announcements > File assignment > Music on Hold page)
− Using a character string on the internal phone (see page)
• Managing and assigning audio files for announcement and music onhold.
− Using the Configuration Manager (on the pages that follow)
− Functions > Music on Hold and Announcements > Filemanagement
− Functions > Music on Hold/announcements > File assignment> Music on Hold
− Using a character string on the internal phone (see page)
• Switching music on hold during the ringing period on/off.
− Using the Configuration Manager (on the pages that follow)
− Functions > Music on Hold/announcements > File assignment> Music on Hold
− Functions > Automatic Receptions > Configure

MWI
COMmander 6000/R/RX - Firmware V8.4 - Advanced Information V32 05/2022- 156 -
MWI
MWI (Message Waiting Indication) is a SIP function which allows tosignal the presence of new voice and fax messages on internal VoIP enddevices. Signalling is possible for all voice mail and fax boxes for whichthe subscriber in question is entered as user.
You can use this function with the following VoIP end devices:
Auerswald VoIP system phones and standard VoIP phones
On standard VoIP phones, the LED of a function key assigned to MWI isused for signalling (optional, see the phone manual).
If operated as a system phone, the LED of the message key is used forsignalling (optional, see the phone manual).
Auerswald IP DECT phones
The symbol on the display is used for signalling on COMfortel M-100,M-200, M-210, M-300 and M-310 handsets.
The function can be configured using the Configuration Manager of theIP DECT servers COMfortel WS-400 IP or COMfortel WS-650 IP, on thpage Configuration > SIP under Message waiting indication (see the IPDECT server manual).
Standard VoIP end decives of other manufacturers
Requirement for the support of the MWI function is the activated SIPconvenience package / SIP convenience package brand plus enabled(optional, see Activation).

MWI
COMmander 6000/R/RX - Firmware V8.4 - Advanced Information V32 05/2022- 157 -
Signalling and configuration depend on the end device (see the enddevice manual).

Number presentation
COMmander 6000/R/RX - Firmware V8.4 - Advanced Information V32 05/2022- 158 -
Number presentation
With the number presentation (outgoing), it is possible to select thenumber presented to the partner called. A different number may bepresented for a business or a private call or for a call as a member of agroup (logged into the group as outgoing).
The suppression of the number presentation (outgoing) can prevent thepresentation of your own number to the partner called (anonymous call).This feature allows you to decide before starting a call if the numbershould be presented to the partner called or not. The number from yourown connection can still be transmitted to the network provider so that thecharges can be calculated correctly.
The number presentation (incoming) lets you present the actual numberreached to the incoming caller. The number presented back to you maybe one of the numbers from the exchange line connection reached. Thisnumber may be different than the number actually dialled by the caller.This is useful if, for example, another subscriber takes the call via pick-upor call forwarding is active. The number to be presented back may also besuppressed (COLR).
For outgoing calls from a call list of a system telephone COMfortel 1400IP/2600 IP/3600 IP or COMfortel 1200/1400/1600/2600 (ISDN) the phonenumber that originally received the incoming call is always transmitted. Itis therefore not the phone number of the subscriber who received this callthrough active call forwarding that is transmitted.
With the number presentation (internal) for group calls, it is possibleto select the number which is presented when a subscriber makes aninternal call as a group member.
Note: The function can be configured via keypad codes (depending onthe provider) via the keypad of the phone.

Number presentation
COMmander 6000/R/RX - Firmware V8.4 - Advanced Information V32 05/2022- 159 -
Configuration procedure:
• Configuring the number presentation (outgoing) and (incoming) andnumber suppression.
− Using the Configuration Manager (on the pages that follow)
− For subscriber: Subscriber (scr.) > Properties > Exchange linesettings
− For groups: Groups > Properties > Exchange line settings
− For the exchange line transfer function: Functions > Exchangeline transfer
− For the Call Through function: Functions > Call Through
• Configuring the number presentation (outgoing) and (incoming) andnumber suppression configuration dependent.
− Using the Configuration Manager (on the pages that follow)
− For subscriber: Subscriber (scr.) > Profiles > ... > Exchange linesettings
− For groups: Groups > Profiles > ... > Exchange line settings
• Configuring the number presentation (internal) for group calls.
− Using the Configuration Manager (Groups > Properties >Settings page)
• Configuring the number presentation (internal) for group callsconfiguration dependent.
− Using the Configuration Manager (Groups > Profiles > ... >Settings page)

Online Name Search
COMmander 6000/R/RX - Firmware V8.4 - Advanced Information V32 05/2022- 160 -
Online Name Search
The online name search lets you accept names to put with existing phonenumbers via a service provider on the Internet.
If a phone number is transmitted during an incoming call, the entries inthe phone books (PBX, system phone) are checked and, if necessary, anassociated name is displayed and saved in the call data list.
If the phone number transmitted is not found in the phone books, thefunction attempts an online name search of the name for the phonenumber on a server on the Internet that offers a search service. If theserver is accessible and the desired data is stored there, this informationis transferred to the phone. The name is shown on the display of a systemphone (optional, see phone manual) and saved in the External partnercolumn of the call data list.
Clicking in the External partner column of the call data list adds thename to the call data record after the fact using the online name searchfunction. The name can also be verified and updated.
Clicking in the External name column of the call data list transfersthe phone number and name of the external calling partner into the PBXphone book.
Proceed as follows for configuration:
• Creating service providers.
− Using the Configuration Manager (Functions > Online namesearch > Basic settings)
• Creating group filters for service providers.
− Using the Configuration Manager (Functions > Online namesearch > Basic settings > Configure)

Online Name Search
COMmander 6000/R/RX - Firmware V8.4 - Advanced Information V32 05/2022- 161 -
• Configuring the text converter.
− Using the Configuration Manager (Functions > Online namesearch > Text converter)
• Switching online name search on.
− Using the Configuration Manager (Functions > Online namesearch > Basic settings)

PBX Time
COMmander 6000/R/RX - Firmware V8.4 - Advanced Information V32 05/2022- 162 -
PBX Time
The PBX has an internal clock that returns the PBX time (time and date)on the connected end devices. If the end device is so equipped, the PBXtime will be displayed on the end device.
Furthermore, the PBX time is required to carry out functions such asswitching configurations as well as wake-ups.
During a power failure or PBX reset, the PBX time is lost. There areseveral ways to update it:
• Manually
• Take from PC
• Via the network
• Using the buffered real-time clock – saves the time for approx. twohours in the case of a power outage.
• Via ISDN/external S0 port (optional, see Technical Data in Manual)
Note: The switch to/from daylight savings is done automatically for thePBX time.
Proceed as follows for configuration:
− Using the Configuration Manager (Administration > Date andtime of the PBX)

Phone Number Display (CLIP)
COMmander 6000/R/RX - Firmware V8.4 - Advanced Information V32 05/2022- 163 -
Phone Number Display (CLIP)
The phone number display (CLIP) enables the phone number of the callerto be shown on the display of a system phone, an ISDN phone or on aCLIP-capable analogue phone. The prerequisite is that the caller transmitsa phone number.
A few CLIP-capable analogue phones support the recording of the dateand time in conjunction with the caller list. On some, it is also possible todisplay the name instead of or in addition to the phone number.
Proceed as follows for configuration:
• Switching CLIP information for the internal analogue phones on.
− Using the Configuration Manager (Subscriber (scr.) > Properties> Analogue settings)

Pick-up and Call Take-over
COMmander 6000/R/RX - Firmware V8.4 - Advanced Information V32 05/2022- 164 -
Pick-up and Call Take-over
Using Pick-up, you can take a call on your own phone that was originallysent to another internal phone.
If the call has already been taken, the call can be taken using sameprocedure if the call take-over has been allowed by the subscriber beingcalled. This function is useful, for example, in the case of answeringmachines.
Proceed as follows for configuration:
• Switching authorisation for pick-up for the involved internal phones on.
− Using the Configuration Manager (Subscriber (scr.) > Properties> Authorisations)
• Switching call take-over for the involved internal phones on.
− Using the Configuration Manager (Subscriber (scr.) > Properties> Settings)

Pick-up of All Calls to Group Members
COMmander 6000/R/RX - Firmware V8.4 - Advanced Information V32 05/2022- 165 -
Pick-up of All Calls to Group Members
If a subscriber has assigned a speed-dialling key to a group, the speed-dialling key blinks red to signalise an incoming call to the phone number ofthe group so that he can take over the call.
If the function Pick-up of all calls to group members is enabled, not onlycalls to the phone number to the group, but also calls directly to the phonenumber of a group member will be signalised.
Proceed as follows for configuration:
• Switching pick-up of all calls to group members on.
− Using the Configuration Manager (Groups > Properties >Settings)
• Configuring pick-up of all calls to group members configurationdependent.
− Using the Configuration Manager (Groups > Profiles > ... >Settings)

Powering Down and Switching Off
COMmander 6000/R/RX - Firmware V8.4 - Advanced Information V32 05/2022- 166 -
Powering Down and Switching Off
If it is necessary to separate the PBX from the electric current (pullthe power plug of the PBX out of the socket and also of the accessoryequipment where required), the PBX will first have to be powered downproperly.
The COMmander 6000R/6000RX (19“ casing) can be switched offby pressing the Power button at the front side of the casing. It is de-energised after switching off and therefore it is not necessary to unplug thepower plug from the wall socket.
The COMmander 6000 (casing variant for wall mounting) has no button forswitching off. Pull the power plug from the wall socket to de-energise thedevice (e.g. to insert modules).
Proceed as follows for powering down and switching off the PBX:
• Immediate powering down.
− Using the Configuration Manager (Administration >Firmwareupdate/restart page)
− by clicking a button on the PBX
Important: When shutting down the PBX, all of the connections to theweb server, all calls and all data services are terminated. Unsaveddata is lost.

Preferred Exchange Line
COMmander 6000/R/RX - Firmware V8.4 - Advanced Information V32 05/2022- 167 -
Preferred Exchange Line
If a phone should use primarily specific external connections, severalpreferred exchange lines for business and/or private calls may beconfigured for the corresponding group or subscriber.
Proceed as follows for configuration:
• Configuring the preferred exchange line.
− Using the Configuration Manager (on the following pages)
− For subscriber Subscriber (scr.) > Properties > Exchange linesettings
− For groups Groups > Properties > Exchange line settings
− For the exchange line transfer function Functions > Exchangeline transfer
− For the Call Through function Functions > Call Through
• Configuring the preferred exchange line configuration dependent.
− Using the Configuration Manager (on the following pages)
− For subscribers: Subscriber (scr.) > Profiles > ... > Exchangeline settings
− For groups: Groups > Profiles > ... > Exchange line settings

Preliminary Pickup Query and Monitoring
COMmander 6000/R/RX - Firmware V8.4 - Advanced Information V32 05/2022- 168 -
Preliminary Pickup Query and Monitoring
The PBX supports the SIP function BLF (in accordance with RFC 4235).BLF allows VoIP end devices to monitor other subscribers and receiveinformation about their calls.
Support of the SIP function BLF provides the following functions:
• Preliminary pick-up query: A preliminary pick-up query allows asubscriber, even before a pick-up, to see which caller he would bepicking up. Based upon the phone number of the caller, the subscribercan then decide whether to pick up the call or not. As precondition,the called subscriber or group must have enabled "preliminary pick-upquery and monitoring“.
• Monitoring or BLF (Busy Lamp Field): BLF allows VoIP end devicesto monitor other internal subscribers, groups, waiting positions ofcall parking, voice mail/ fax boxes or door terminals and receiveinformation about their calls. As precondition for the display of phonenumbers, the monitored subscriber or group must have enabled"preliminary pick-up query and monitoring". Whether voice mail andfax boxes can be monitored in this way depends on the subscribersand groups who own the boxes or have redirected their calls to them.
You can use this functions with the following VoIP end devices:
• Auerswald/FONtevo VoIP system phones and standard VoIPphones (except COMfortel VoIP 2500 AB): Other subscribers aremonitored with the help of the LEDs of those function keys which areassigned to speed dialling (optional, see manual for the phone).
• Standard VoIP end devices of other vendors: As preconditionto support the SIP function BLF, the SIP convenience package /SIP convenience package brand plus must have been unlocked(optional, see Activation).

Preliminary Pickup Query and Monitoring
COMmander 6000/R/RX - Firmware V8.4 - Advanced Information V32 05/2022- 169 -
Monitoring of other subscribers on the same PBX depends on the enddevice (see manual for the end device).
Proceed as follows for configuration:
• Switching preliminary pick-up query and monitoring on.
− Using the Configuration Manager (on the following pages)
− For subscribers: Subscriber (scr.) >Properties > Settings
− For groups: Groups > Properties > Settings
• Configuring preliminary pick-up query and monitoring configurationdependent.
− Using the Configuration Manager (on the following pages)
− For subscribers: Subscriber (scr.) >Profiles > ... > Settings
− For groups: Groups > Profiles > ... > Settings

Private (Personalised) Exchange Line Access
COMmander 6000/R/RX - Firmware V8.4 - Advanced Information V32 05/2022- 170 -
Private (Personalised) Exchange Line Access
Private (personalised) exchange line access enables separate billingfor business and personal calls for individual employees. Using privateexchange line access, calls initiated are given a special identification whilethe call data is being recorded. This allows the charges to be billed to theemployee.
Proceed as follows for configuration:
• Switching differently configurable functions for private and businesscalls on.
− Using the Configuration Manager (Subscriber (scr.) > Allsubscribers)
• If necessary, switching private exchange line access without PIN entryfor the involved internal phones on.
− Using the Configuration Manager (Subscriber (scr.) > Properties> Settings)
Profiles
COMmander 6000/R/RX - Firmware V8.4 - Advanced Information V32 05/2022- 171 -
Profiles
Profiles can be created for subscribers, groups, and Voice mail and faxboxes. These profiles control the behaviour by determining the properties.In this way, analogue behaviour can be reached via the configuration-dependent assignment of profiles. When creating the profiles, it canbe determined whether the individual settings from the profile can bechanged via the properties of the subscriber, group, or the boxes or not.
Proceed as follows for configuration:
• Create profiles for subscribers and assign them depending on theconfiguration.
− Using the Configuration Manager (on the following pages)
− Subscriber (scr.) > Profiles > Configuration
− Subscriber (scr.) > Profiles > Profile assignment
• Create profiles for groups and assign them depending on theconfiguration.
− Using the Configuration Manager (on the following pages)
− Groups > Profiles > Configuration
− Groups > Profiles > Profile assignment
• Create profiles for voicemail and fax boxes and assign themdepending on the configuration.
− Using the Configuration Manager (on the following pages)
− Devices > Voice mail and fax boxes > Profiles > Configuration
− Devices > Voice mail and fax boxes > Profiles > Profileassignment

Project Assignment
COMmander 6000/R/RX - Firmware V8.4 - Advanced Information V32 05/2022- 172 -
Project Assignment
The exchange line access with project assignment allows the sorting ofexternal calls to a specific project/customer/client (e.g., within a law firm).With call data management, the charges and the time expenditures maybe assigned to different projects/customers/clients.
Note: On a system phone the project number can be selected notonly before the call but also during a call (optional, see the phonemanual). This makes the assignment of incoming calls (for billing thetime expenditure) possible.
Requirements:
• Assigning of project numbers function enabled (optional, seeActivation)
Proceed as follows for configuration:
• If necessary, configuring a project list on a system phone (optional,see the phone manual).
• If necessary, configuring a function key for project assignment on thesystem phone (optional, see the phone manual).

Protection from Unauthorised Access
COMmander 6000/R/RX - Firmware V8.4 - Advanced Information V32 05/2022- 173 -
Protection from Unauthorised Access
The following authorisation levels are available:
• Administrator (access with the admin username and admin password)
• Sub-administrator (access with the username sub-admin andassigned sub-admin password)
• User (access with the internal subscriber number and with theassigned user password)
In order to prevent important settings from being changed accidentallyor by unauthorised people, the PBX can be protected from unauthorisedaccess.
Administrator
The administrator has unrestricted access to the Configuration Manager.The PBX can be configured completely and the PINS of the other users(internal subscribers) can be changed with this access.
Sub-administrator
A maximum of four sub-administrators can be configured. Theaccess authorisations to the Web interface are assigned to the sub-administrators by the administrator according to the local requirements.With the exception of some pages (e.g. Administration > AccessAuthorisations) the whole Configuration Manager or alternatively onlysome individual pages can be released to the sub-administrators.
Each sub-administrator has the same access and modificationauthorisations.

Protection from Unauthorised Access
COMmander 6000/R/RX - Firmware V8.4 - Advanced Information V32 05/2022- 174 -
Note: If the sub-administrator enters his internal number as username, this registration is recognised as an user login and the Webinterface is presented in user-mode.
Users (internal subscribers)
The user is any internal subscriber of the PBX. For each user, a user PINis generated. The access authorisations to the Web interface are assignedto the user by the administrator according to local requirements. Thepossible range of page releases is limited to a very small number of ownsubscriber and group settings.
Each user has the same access authorisations. There modification rightsmay differ depending on the profiles.
Additional app passwords for subscribers
The subscriber password is used for SIP registration and the access tothe Configuration Manager and API. Therefore, PBX access data mustfrequently be saved in external systems. This will lead to security risks, ifthese systems are insufficiently secured.
Therefore, additional subscriber passwords for accessing theConfiguration Manager or API or for accessing Action URLs can begenerated.
If an app password has been generated for the subscriber and thecorresponding access authorisation has been enabled, the previoussubscriber password loses the access authorisation for the correspondigapplication.
All generated passwords are listed in the table under Overviews >Additional subscriber passwords. The passwords can be generatedsystem-wide or for subscribers, although system-wide passwords can only

Protection from Unauthorised Access
COMmander 6000/R/RX - Firmware V8.4 - Advanced Information V32 05/2022- 175 -
be generated for Action URLs. Subscriber passwords can be generatedfor the Configuration Manager, API and for Action URLs.
Proceed as follows for configuration:
• Configuring protection from unauthorized access.
− Using the Configuration Manager (Administration > Accessauthorisations)
• Configuring administrator access.
− Using the Configuration Manager (Administration > Dealer andoperator data)
• Configuring sub-administrator access.
− Using the Configuration Manager (Subscriber (scr.) > Properties> Authorisations)
• PINs and passwords for sub-administrators and users.
− Using the Configuration Manager (Subscriber (scr.) > Phonenumbers > Configure)
• Generating additional app passwords (Configuration Manager/API) fora subscriber.
− Using the Configuration Manager (Subscriber (scr.) > Phonenumbers > Configure)
• Generating passwords for accessing Action URLs.
− Using the Configuration Manager (Devices > Action URLs)
• Configuring authorization for controlling of the pbx via phone.
− Using the Configuration Manager (Subscriber (scr.) > Properties> Authorisations)

Provisioning for IP Phones
COMmander 6000/R/RX - Firmware V8.4 - Advanced Information V32 05/2022- 176 -
Provisioning for IP Phones
Device Configurability and Characteristics and Setting OptionsProvisioning filesCreating a New Provisioning FileProvisioning COMfortel D-series / 3600 IP Device Configurability and Characteristics and Setting OptionsProvisioning filesCreating a New Provisioning FileProvisioning COMfortel D-series / 3600 IP
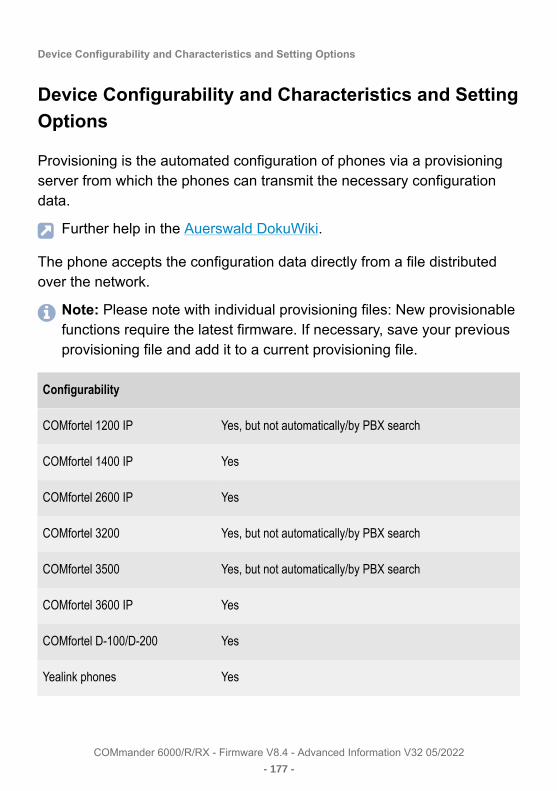
Device Configurability and Characteristics and Setting Options
COMmander 6000/R/RX - Firmware V8.4 - Advanced Information V32 05/2022- 177 -
Device Configurability and Characteristics and SettingOptions
Provisioning is the automated configuration of phones via a provisioningserver from which the phones can transmit the necessary configurationdata.
Further help in the Auerswald DokuWiki.
The phone accepts the configuration data directly from a file distributedover the network.
Note: Please note with individual provisioning files: New provisionablefunctions require the latest firmware. If necessary, save your previousprovisioning file and add it to a current provisioning file.
Configurability
COMfortel 1200 IP Yes, but not automatically/by PBX search
COMfortel 1400 IP Yes
COMfortel 2600 IP Yes
COMfortel 3200 Yes, but not automatically/by PBX search
COMfortel 3500 Yes, but not automatically/by PBX search
COMfortel 3600 IP Yes
COMfortel D-100/D-200 Yes
Yealink phones Yes

Device Configurability and Characteristics and Setting Options
COMmander 6000/R/RX - Firmware V8.4 - Advanced Information V32 05/2022- 178 -
Configurability
Snom phones Yes
Provisioning via the provisioning server can be done regularly (e.g.weekly) automatically. You can set the weekday, time and the address ofthe provisioning server on the phone.
Possibilities of automatic provisioning:
• Provisioning with the help of DHCP data
• Provisioning via the redirect server
• Provisioning from PBX search
• Provisioning via a set provisioning server
Note: For further information refer to the Advanced Information of theIP phones.
Specific characteristics COMfortel 1200 IP
The COMfortel 1200 IP is no system phone and cannot be configuredautomatically by PBX search, therefore, further settings on the phone arerequired (see Advanced Information of the phone). However, the phonecan be identified by its MAC address.
Specific characteristics COMfortel 1400 IP/2600 IP/3600 IP
If configured as system phones, these phones will find the provisioningserver automatically in factory settings state – as of firmware version2.4 – and will automatically carry out a provisioning process in case ofmodifications.
Provisioning-capable PBX systems:

Device Configurability and Characteristics and Setting Options
COMmander 6000/R/RX - Firmware V8.4 - Advanced Information V32 05/2022- 179 -
• COMpact 4000
• COMpact 5000/R
• COMpact 5200/5500/R
• COMmander 6000/R/RX
Specific characteristics COMfortel 3200/3500
Provisioning is only possible cyclically, in accordance with a schedule. Theaddress of the provisioning server must be communicated via DHCP orentered manually on the phone.
Particularities COMfortel D-100/D-200
These devices are not system phones, but provisioning is possible. Thedevices automatically find the provisioning server in the as-delivered stateand automatically carry out a new provisioning if changes are made.
You can use the templates in a provisioning file to extend the range offunctions on the phone. These additional functions can be assigned tofunction keys (see Advanced Information of the phone).
Further help in the Auerswald DokuWiki.
Configuration procedure:
• Assigning a MAC address (Subscriber (scr.) > Features > VoIPsettings)
• Creating a file as header file (Subscriber (scr.) > IP provisioning >File management)
• If required, selecting a provisioning file as template (Subscriber (scr.)> IP provisioning > File management)
Device Configurability and Characteristics and Setting Options
COMmander 6000/R/RX - Firmware V8.4 - Advanced Information V32 05/2022- 180 -
• Creating provisioning files (see Auerswald DokuWiki)
• Making provisioning settings on the phone:
− Setting the provisioning type (see manual of the phone)
− If necessary, entering the address of the provisioning server,starting with https://, (see manual of the phone)
Note: For COMfortel 3200/3500 you have to enter:https://IP-Anlage:4433/provdata?mac=<MACADR> under Settings> Update and Provisioning > Automatic Provisioning >Provisioning Server.
• Proceed as follows for configuration (Subscriber (scr.) > IPprovisioning > Settings):
− Switching provisioning on/off
− Switching access without client certificate on/off
− Switching provisioning only with local network on/off
− Setting the language of the phone after configuration
• If necessary, remove unassigned phones (Subscriber (scr.) >Unassigned phones)

Provisioning files
COMmander 6000/R/RX - Firmware V8.4 - Advanced Information V32 05/2022- 181 -
Provisioning files
Provisioning files contain configurations for phones. For Auerswald/FONtevo IP phones, these provisioning files are *.xml files, built aftera defined scheme. They contain e.g. account, provider or function keyinformation in an *.xml file.
A provisioning file that was not generated in the PBX (e.g. via a backup),is typically applicable for only one subscriber, as the file contains personaldata such as account information. Provisioning data is user-specific if theycontain at least username and password of the subscriber at the VoIPaccount.
A provisioning file can also be generated from a standard provisioning fileby saving it under a different file name.
Further help in the Auerswald DokuWiki.
Provisioning templates
Provisioning templates are a specific form of provisioning files. Aprovisioning file can be saved and selected in the PBX. If an IP phonerequests a provisioning, the PBX replaces the user-specific data of theprovisioning file or rather the template with suitable data content for thecurrent subscriber. A provisioning template can be assigned to severalsubscribers.
Standard Provisioning Files
The standard provisioning file is a specific provisioning template type andonly contains the basic structure of a provisioning file. The file cannot bedeleted or exported.

Provisioning files
COMmander 6000/R/RX - Firmware V8.4 - Advanced Information V32 05/2022- 182 -
Header Files
Header files do not contain configuration data but refer to one or moreprovisioning files which contain configuration data. Header files contain alist of URLs which are processed in order. Provisioning files can neitherbe provided by the PBX or by an external server. A combination of bothvariants is permitted. The header file is the file that the phone must readfirst. It can contain references to sub files. Any files can be imported,however, Auerswald/FONtevo IP phones only support *.xml files.
Further help in the Auerswald DokuWiki.
Note: For the COMfortel WS-500 device type, the use of a header fileis not possible.
Variables as placeholder
Variables for the parameters to be provisioned are created asplaceholders in the configuration files provided by the manufacturer.
Provisioning examines a file to be delivered to the phone. The recognisedvariable names are replaced by the values from the PBX configuration.The changed file is then sent to the device to be provisioned.

Creating a New Provisioning File
COMmander 6000/R/RX - Firmware V8.4 - Advanced Information V32 05/2022- 183 -
Creating a New Provisioning File
Via the Configuration Manager of a COMfortel 1400IP/2600IP/3600IP youcan create a phone configuration and then select the configuration datawhich are to be distributed to other phones.
Proceed as follows:
• Using the Configuration Manager
Note: The account IDs used in the PBX and for the exchangelines can be found in the File Editor under Subscriber (scr.) > IPprovisioning > File management > Edit > Account IDs
Note: We recommend to contact the system administrator orspecialised dealer for editing provisioning files.
1. Open the Configuration Manager of the IP phone.
2. Open the page Settings > Personal > Backup and reset.
3. Click in the line Phone configuration on Export.
4. Accept the legal notes by entering Ok in the entry field.
5. Click Export.
6. Save the created *.xml file created on your PC.
7. Open the *xml file with a text editor, e.g. Notepad++.
8. Press Alt 0 in Notepad++ to close the sub-levels to get a betteroverview.
9. Select the level which you want to distribute to other phones bydeleting the levels that are not required.
Note: In the case that the file shall be used as Template, thesection <providersAndAccounts> </providersAndAccounts> must

Creating a New Provisioning File
COMmander 6000/R/RX - Firmware V8.4 - Advanced Information V32 05/2022- 184 -
not be deleted as it is replaced by the subscriber-specific data bythe PBX.
10. If required, open the level by clicking in order to modify the settingsmade there.

Provisioning COMfortel D-series / 3600 IP
COMmander 6000/R/RX - Firmware V8.4 - Advanced Information V32 05/2022- 185 -
Provisioning COMfortel D-series / 3600 IP
Following described is the provisioning in the "zero touch" mode of aCOMfortel D Series and a COMfortel 3600 IP telephone in connectionwith an Auerswald/FONtevo PBX. The device is in this mode
• before the initial commissioning
• after resetting the device to factory settings
Proceed as follows:
• Via the configuration manager of the PBX
Proceed as described in the following.
1. Determine the MAC address. It can be found on the package as wellas on the back of the telephone.
2. Create a VoIP subscriber for the following device type (Subscriber(scr.) > Telephone number > New):
a. for COMfortel D-series: Standard VoIP Telephone or
b. for COMfortel 3600 IP: COMfortel IP
3. Assign or enter the corresponding MAC address.
4. Create a provisioning file for the following device type (Subscriber(scr.) > IP provisioning > File management):
a. for COMfortel D-series: Standard VoIP Telephone or
b. for COMfortel 3600 IP: COMfortel IP
5. Grant access to the subscriber.
6. Connect the device.
It now receives the corresponding settings from the assignedprovisioning file and is afterwards ready for operation.

Relays (Actuators)
COMmander 6000/R/RX - Firmware V8.4 - Advanced Information V32 05/2022- 186 -
Relays (Actuators)
Expalanations and Setting OptionsRelay operating modes Expalanations and Setting OptionsRelay operating modes

Expalanations and Setting Options
COMmander 6000/R/RX - Firmware V8.4 - Advanced Information V32 05/2022- 187 -
Expalanations and Setting Options
The PBX supports the connection and control of various types of relays.A relay can be part of a connected door terminal or another connecteddevice (e. g. an IP switch relay). Relays can have various functions onthe PBX. For a detailed description of the operating modes, refer to thechapter .
Note: The internal system relay with the identification number 900(factory setting) has a special position. It can only be used in theoperating type automatic configuration switchover to switch it viaphone on or off. For this purpose, the relay is being switched on oroff. For the operation of standard phones see , for system phones seemanual of the phone.
Proceed as follows for configuration:
• Creating an IP switch relay.
− Using the Configuration Manager (Devices > Device wizard)
• Creating a relay.
− Using the Configuration Manager (Devices > Relays (Actuators))
• Configuring the operating mode for the relays.
− Using the Configuration Manager (Devices > Relays (Actuators))
• Configuring relays.
− Using the Configuration Manager (Devices > Relays (Actuators)> Configure)
• Switching authorisation for switching of relays and alarms for theinvolved internal phones on.

Expalanations and Setting Options
COMmander 6000/R/RX - Firmware V8.4 - Advanced Information V32 05/2022- 188 -
− Using the Configuration Manager (Subscriber (scr.) > Properties> Authorisations)
• Switching relays.
− Using a character string on the internal or external phone (see )
− Using the menu/function key on a system phone (optional, see thephone manual)

Relay operating modes
COMmander 6000/R/RX - Firmware V8.4 - Advanced Information V32 05/2022- 189 -
Relay operating modes
Relays can have various functions on the PBX.
You can configure the following operation modes:
Speaking
The relay is assigned to a door terminal or an announcement output.
The PBX switches on the relay as soon as an audio connection hasbeen established between the PBX and the assigned device (e.g. an a/b-Audiobox).
The PBX switches the relay off as soon as the audio connection isterminated.
Possible use:
• Switching an LED of the door terminal
• Switching the loudspeaker area of the loudspeaker system for theannouncement output
Door opener
The relay is assigned to a door terminal.
The PBX switches on the relay as soon as an internal subscriber triggersdoor opening for the assigned door terminal.
Alternatively, switching can be triggered manually by phone.
The PBX switches off the relay after the defined switching duration.
Possible use:
• Switching a door opener

Relay operating modes
COMmander 6000/R/RX - Firmware V8.4 - Advanced Information V32 05/2022- 190 -
Light
The relay is assigned to a door terminal.
The PBX switches on the relay as soon as an internal subscriber triggerslight switching for the assigned door terminal.
Alternatively, switching can be triggered manually by phone.
The PBX switches off the relay after the defined switching duration.
Possible use:
• Switching a staircase light
Alarm
The relay is assigned to an alarm.
The PBX switches on the relay as soon as the assigned alarm is triggered.
Alternatively, switching can be triggered manually by phone.
The PBX switches off the relay after the defined switching duration.
Alternatively, switching off can be triggered by phone after the alarm hasbeen acknowledged.
Possible use:
• Switching a siren or an indicator light
Music on hold
The relay is assigned to music on hold.
The PBX switches on the relay when a call is to be transferred or inthe case of a query call, when a communication partner waiting in thebackground is to hear music on hold.

Relay operating modes
COMmander 6000/R/RX - Firmware V8.4 - Advanced Information V32 05/2022- 191 -
The PBX switches off the relay after the defined switching duration.
Possible use:
• Playback of music on hold during a transfer or a query.
PC relay
The relay is assigned to a subscriber.
The PBX switches on the relay as soon as the assigned subscriber isbeing called.
Alternatively, switching can be triggered manually by phone.
The PBX switches off the relay after the defined switching duration.
Possible use:
• Switching a PC
Second ringer
The relay is assigned to a subscriber, a group or a door call.
The PBX switches on the relay as soon as the assigned subscriber orgroup is being called, or at the start of a door call.
The PBX switches off the relay at the end of the call.
Possible use:
• Switching a second ringer
Depending on configuration
The relay is assigned to one or more configuration/s (day, night, etc.).

Relay operating modes
COMmander 6000/R/RX - Firmware V8.4 - Advanced Information V32 05/2022- 192 -
The PBX switches on the relay as soon as an assigned configuration isswitched on.
The PBX switches off the relay as soon as a configuration to which it is notassigned is switched on.
Alternatively, switching on/off can be triggered manually by phone.
Auxiliary relay (secondary)
The secondary relay is assigned to a primary relay.
The PBX switches the secondary relay together with the assigned relay.
Manual relay
The PBX does not automatically switch the relay on and off.
Switching on/off can only be triggered manually by phone.

Remote Configuration and Alternative Connection Options
COMmander 6000/R/RX - Firmware V8.4 - Advanced Information V32 05/2022- 193 -
Remote Configuration and Alternative ConnectionOptions
Configuration OptionsConfiguring the PBX remotely via the Internet with (Auerswald)Remote Access ServerConfiguring ISDN System Phones via the PBX (Internal)Configuring ISDN System Phones Remotely via the External S0 Porton the PBX (Externally) Configuration OptionsConfiguring the PBX remotely via the Internet with (Auerswald) Remote Access ServerConfiguring ISDN System Phones via the PBX (Internal)Configuring ISDN System Phones Remotely via the External S0 Port on the PBX (Externally)

Configuration Options
COMmander 6000/R/RX - Firmware V8.4 - Advanced Information V32 05/2022- 194 -
Configuration Options
Aside from configuration over the internal network, there is also theoption of remote configuration under certain conditions via alternativeconnections.
The connected system phones can also be configured over the PBX undercertain conditions.
You can use the following connection options to configure (either remotelyor directly) the PBX and the ISDN system telephones connected to it:
Important: If the Configuration Manager of the PBX can be reachedfrom the Internet via port forwarding, we strongly recommend forsecurity reasons, to deactivate port forwarding and only use VPN orthe (Auerswald) Remote Access Server.
Configuring the PBX via the In-house Network
The PBX is usually configured via an internal network connection. The PCyou use to do this must be connected to the same network as the PBX.
Configuring the PBX Remotely via the Internet with (Auerswald)Remote Access Server
Remote configuration of the PBX can be accessed via the page(Auerswald) Remote Access on the Internet. This requires a dealer accessvia the Internet and enabling of the (Auerswald) Remote Access.
Using the PBX (Internal) to Configure internal ISDN System Phones
You can configure internal ISDN system phones via an indirect connectionusing the PBX. Before you can do this, you must install the ISDN system

Configuration Options
COMmander 6000/R/RX - Firmware V8.4 - Advanced Information V32 05/2022- 195 -
phone's COMfortel Set configuration software on the PC you are going touse.
Configuring internal ISDN System Phones Remotely via a PBX'sexternal S0 port
You can remotely configure the ISDN system phone indirectly via anexternal ISDN connection using the PBX and a device which is connectedto both the external S0 port on the PBX and to the PC (for example ISDNPC controller). The PBX must be configured accordingly. Before you cando this, you must install the ISDN system phone's configuration softwareon the PC you are going to use.

Configuring the PBX remotely via the Internet with (Auerswald) Remote Access Server
COMmander 6000/R/RX - Firmware V8.4 - Advanced Information V32 05/2022- 196 -
Configuring the PBX remotely via the Internet with(Auerswald) Remote Access Server
Requirements:
• PBX with existing connection to the Internet (DSL)
• In the PBX configured ARA PIN and remote switching number andalso enabled dealer access over the Internet
− Using the Configuration Manager (Administration > Remoteconfiguration)
• Computer with existing connection to the Internet (DSL)
• DTMF-capable phone or DTMF dialler
• Access data for registration at protected Auerswald services
• Knowledge of the serial number of the PBX
• Knowledge of user name and password for the Configuration Manager
1. Start a browser.
2. Open (Auerswald) Remote Access.
3. Enter filter criteria for the search of contacts into the entry fields Username/Customer number and Password/PIN input fields, and clickRegister.
The user interface of the (Auerswald) Remote Access Server opens.
4. Register the PBX if this has not been done yet.
• Click .
• In the entry field Serial number entry field, enter the serial numberof the PBX.

Configuring the PBX remotely via the Internet with (Auerswald) Remote Access Server
COMmander 6000/R/RX - Firmware V8.4 - Advanced Information V32 05/2022- 197 -
• Make further entries for the data record and click Save.
5. Call the remote switching number.
The PBX automatically accepts the call. You will hear the externalconfirmation tone (1 second).
6. Dial with DTMF ##8 ARA PIN *91#.
You will hear again the external confirmation tone (1 second).
In the user interface of the (Auerswald) Remote Access Server withina few seconds the connection symbol .
7. Click .
The login window of the Configuration Manager opens.
8. Log in to the Configuration manager.
9. Make the desired changes.
10. Log out from the configuration manager.
11. On the user interface of the (Auerswald) Remote Access Server clickon .

Configuring ISDN System Phones via the PBX (Internal)
COMmander 6000/R/RX - Firmware V8.4 - Advanced Information V32 05/2022- 198 -
Configuring ISDN System Phones via the PBX(Internal)
Requirements:
• PBX with internal ISDN system phones
• Configuration port configured in the PBX for system phones(Administration > IP configuration)
• Internet connection
• Installed COMfortel Set configuration software version 3.0, or later
• Knowledge of the user, sub-admin or admin PIN
1. Start COMfortel Set.
2. Click Options > Interface....
3. Dial Interface > IP network, enter the IP address of the PBX andunder IP port (Default: 7002) the configuration port for system phoneson the PBX.
4. Click OK.
5. Click File > Open > Telephone.
6. Double-click the PBX symbol to display all connected system phones.Select the phone whose configuration you want to open and click OK.
7. Select the desired authority level.
8. Enter the associated PIN and click OK.
9. Make the desired changes.
10. Click File > Save > File.
11. Select a memory location in the directory.

Configuring ISDN System Phones via the PBX (Internal)
COMmander 6000/R/RX - Firmware V8.4 - Advanced Information V32 05/2022- 199 -
12. Enter a name for the *.cf2 file and click Save.
13. Click File > Save > Telephone.
14. Select desired phone and click OK.
15. Enter the associated PIN and click OK.

Configuring ISDN System Phones Remotely via the External S0 Port on the PBX (Externally)
COMmander 6000/R/RX - Firmware V8.4 - Advanced Information V32 05/2022- 200 -
Configuring ISDN System Phones Remotely via theExternal S0 Port on the PBX (Externally)
Requirements:
• PBX with internal ISDN system phones
• In the PBX configured remote switching number for system phonesand dealer access number (Administration > Remote configuration
Note: If no dealer access number has been configured orthe phone number transmitted does not correspond with theconfigured phone numbers, the PBX must be enabled via aninternal phone using a digit sequence for remote configuration.
• An existing external ISDN connection between the PC and the PBXincluding the drivers
• Installed COMfortel Set configuration software version 3.0, or later
• Knowledge of the user, sub-admin or admin PIN
• Activation of the PBX immediately before remote configuration (seesection Short Reference) if no dealer access number has beenconfigured or the transmission of the configured numbers is notpossible on the computer being used
1. Start COMfortel Set.
2. Click Options > Interface....
3. Select under Interface or ISDN controller (CAPI 2.0).
4. Click OK.
5. Click File > Open > Telephone.

Configuring ISDN System Phones Remotely via the External S0 Port on the PBX (Externally)
COMmander 6000/R/RX - Firmware V8.4 - Advanced Information V32 05/2022- 201 -
6. Enter the remote switching number for system phones (including localcity code and exchange line access number), and click OK.
7. Double-click the PBX symbol to display all connected system phones.Select desired phone and click OK.
8. Select the desired authority level.
9. Enter the associated PIN and click OK.
10. Make the desired changes.
11. Open the Configuration Manager of the IP phone.File > Save > File.
12. Select a memory location in the directory.
13. Enter a name for the *.cf2 file and click Save.
14. Click File > Save > Telephone.
15. Select desired phone and click OK.
16. Enter the associated PIN and click OK.

Restart
COMmander 6000/R/RX - Firmware V8.4 - Advanced Information V32 05/2022- 202 -
Restart
A restart (reboot) is when you cause the PBX to reboot while it is alreadyfunctioning. The configuration of the PBX is not deleted.
A restart is required, for example, in the following situations:
• After the operating software on the PBX has been updated (firmwareupdate)
• After the operating software on the PBX crashes
• After a change to the configuration that cannot be applied when thePBX is in operation
An automatic restart is executed after the following functions have beencarried out:
• An instant firmware update
• Restoring firmware (reboot)
• A factory settings restoration
• Restoring Configuration Data from a Restoration Point
• A configuration reset
Note: Resetting the configuration requires only a limited restart.Only some of the PBX functions are restarted. All calls areended, and all data services are closed. The web server remainsunaffected by this.
There are also various options for performing a restart yourself whennecessary.
Proceed as follows for a manual restart:
Note: All connections to the web server, all calls and data services willbe disconnected this way. All unstored information will be lost!

Restart
COMmander 6000/R/RX - Firmware V8.4 - Advanced Information V32 05/2022- 203 -
• Immediate restart.
− Using the Configuration Manager (Administration > Firmwareupdate and restart)
− By pressing a button on the PBX
Note: During an immediate restart, no consideration is made ofexisting calls. This means that all connections to the web server,all calls and all data services closed immediately. Unsaved data islost.
• Delayed restart.
− Using the Configuration Manager (Administration > Firmwareupdate and restart)
Note: A delayed restart runs just like an immediate restart, exceptthat current calls are taken into consideration. As soon as all of theexisting calls have ended (also before the expiration of the timespecified), the PBX restarts. During the delay, the PBX preventsnew calls from being established. If a call is still active when thetimeout occurs, the call is interrupted in order to carry out therestart.

Ringer tones
COMmander 6000/R/RX - Firmware V8.4 - Advanced Information V32 05/2022- 204 -
Ringer tones
The PBX supports different ringtones for signalling calls on the internalsubscribers. They can be used for example to differentiate internal calls,external calls via different external numbers, door calls and alarm callsusing the ringtone.
Note: Signalling is carried out by analogue devices as described(depending on the end device used).
Note: Some end devices (e.g., ISDN phones and wireless, analoguephones) generate their own call tone/ringtone. For more information,refer to the description of your end device.
Note: On some system phones the ringtones can be configured basedon the call type or the phone numbers (optional, see phone manual).
Ringtones are displayed on analogue phones as follows:
876543210 9
A
B
C
D
E
H
I
F
G
A. 1 x long
B. 3 x short
Ringer tones
COMmander 6000/R/RX - Firmware V8.4 - Advanced Information V32 05/2022- 205 -
C. 1st special tone
D. 2nd special tone
E. 3rd special tone
F. 4th special tone
G. 5th special tone
H. 6th special tone
I. Alarm
Configuration procedure:
• Configuring the ringing tone for external calls.
− Using the Configuration Manager (on the pages that follow)
− Public switched tel. networks > ISDN > PTMP connection
− Public switched tel. networks > ISDN > PBX base numbers/trunk bundles > Configure
− Public switched tel. networks > ISDN > Extension numbersPTP connection
− Public switched tel. networks > ISDN > Additional PTPconnection numbers
− Public switched tel. networks > VoIP > Accounts > Configure
• Configuring the ringing tone for internal calls.
− Using the Configuration Manager (Subscriber (scr.) > Properties> Analogue settings page)
• Configuring the ringing tone for door calls.
− Using the Configuration Manager (Devices > Door terminalspage)

Ringer tones
COMmander 6000/R/RX - Firmware V8.4 - Advanced Information V32 05/2022- 206 -
• Configuring the ringer frequency.
− Using the Configuration Manager (Subscriber (scr.) > Allsubscribers page)
Note: For alarm calls the ringing tone is permanently set as Alarm.

Ringing Sequence
COMmander 6000/R/RX - Firmware V8.4 - Advanced Information V32 05/2022- 207 -
Ringing Sequence
Explanations of the Ringing SequenceExamples Explanations of the Ringing SequenceExamples

Explanations of the Ringing Sequence
COMmander 6000/R/RX - Firmware V8.4 - Advanced Information V32 05/2022- 208 -
Explanations of the Ringing Sequence
Different ringing sequences can be set, as it does not always make sensethat all phones logged in a group (e. g. in hotline mode) ring at the sametime.
The following ringing sequences are possible:
All • All subscribers logged into the group ringsimultaneously (except fixed phones)
• Call waiting is applied to all logged-in phones whenthey are busy
• The call is ended by the network provider (afterapprox. 2 minutes)
• In the case of call forwarding on no reply, the groupcall is forwarded to the destination already after theconfigured delay time
Linear • All phones logged into a group ring directly one afterthe other
• Only one phone rings at a time
• Busy subscribers are skipped
• In the case of call forwarding on no reply, the groupcall is forwarded to the destination already after theconfigured delay time
Adding • All subscribers logged into a group ring one after theother delayed by the specified time
• Busy subscribers are skipped

Explanations of the Ringing Sequence
COMmander 6000/R/RX - Firmware V8.4 - Advanced Information V32 05/2022- 209 -
• In the case of call forwarding on no reply, the groupcall is forwarded to the destination already after theconfigured delay time
The following properties can additionally be selected for the ringingsequence, whereby the ringing sequence All restricts the selection forfurther properties.
fixed The order phones are called depends on the assigned priority.
balancing The order of the called phones depends on a dynamic priority list. After
each call, the phone involved is placed last.
rotating After the first loop, another one starts. In the second loop, call waiting is
applied to the busy subscribers. The call is ended by the network provider
(after approx. 2 minutes).
without rotating After the first loop, the call is disconnected.
Split Group During the ringing pahse, the group must be available for other callers. The
group is split up so that as many subscribers as possible are available for
each call.
without SplitGroup
A second caller hears the busy signal while the first caller has not been
accepted yet (only possible for All).
Proceed as follows for configuration:
• Configuring ringing sequence, priority and ringing delay for the existinggroups.

Explanations of the Ringing Sequence
COMmander 6000/R/RX - Firmware V8.4 - Advanced Information V32 05/2022- 210 -
− Using the Configuration Manager (Groups > Properties > Basicsettings)
• If necessary, configuring rework time for the existing groups.
− Using the Configuration Manager (Groups > Properties >Reachability)

Examples
COMmander 6000/R/RX - Firmware V8.4 - Advanced Information V32 05/2022- 211 -
Examples
Below are example of calls illustrating the possible options. The followingparameters are common to all examples:
• Number of phones logged in: 4
• Configured time: 20 seconds
• Priority order: , , ,
• Ringing delay for ringing sequence All: enabled for
• CF delay time for CF on no Reply: 20 seconds
All
Like All - Split Group, but a second caller hears the busy signal while thefirst caller has not been accepted yet.
All - Split Group
One call:
A call (call forwarding on no reply active on destination phone ):

Examples
COMmander 6000/R/RX - Firmware V8.4 - Advanced Information V32 05/2022- 212 -
Two calls A and B (call B begins 30 seconds later):
0 20 40 60 80 100 120
Linear - fixed - split group
One call:
0 20 40 60 80 100 120
A call (call forwarding on no reply active on destination phone ):

Examples
COMmander 6000/R/RX - Firmware V8.4 - Advanced Information V32 05/2022- 213 -
Two calls A and B (call B begins 30 seconds later):
Linear - balancing - split group
(This is different than Linear - fixed - split group due to the changingpriorities only.)
Linear - fixed - rotating - split group
One call:

Examples
COMmander 6000/R/RX - Firmware V8.4 - Advanced Information V32 05/2022- 214 -
A call (call forwarding on no reply active on destination phone ):
Two calls A and B (call B begins 30 seconds later):
Linear - balancing - rotating - split group
(This is different than Linear - fixed - rotating - split group due to thechanging priorities only.)

Examples
COMmander 6000/R/RX - Firmware V8.4 - Advanced Information V32 05/2022- 215 -
Adding - fixed - Split Group
One call:
A call (call forwarding on no reply active on destination phone ):
Two calls A and B (call B begins 30 seconds later):

Examples
COMmander 6000/R/RX - Firmware V8.4 - Advanced Information V32 05/2022- 216 -
Adding - balancing - Split Group
(This is different than Adding - fixed - Split Group due to the changingpriorities only.)
Adding - fixed - rotating - Split Group
One call:
A call (call forwarding on no reply active on destination phone ):

Examples
COMmander 6000/R/RX - Firmware V8.4 - Advanced Information V32 05/2022- 217 -
Two calls A and B (call B begins 30 seconds later):
Adding - balancing - rotating - Split Group
(This is different than Adding - fixed - rotating - Split Group due to thechanging priorities only.)

Service Data
COMmander 6000/R/RX - Firmware V8.4 - Advanced Information V32 05/2022- 218 -
Service Data
Setting OptionsRecording the D-Channel Protocol Setting OptionsRecording the D-Channel Protocol

Setting Options
COMmander 6000/R/RX - Firmware V8.4 - Advanced Information V32 05/2022- 219 -
Setting Options
In case of a malfunction of the PBX, a log can be recorded. This can thenbe forwarded to the specialist departments (Serice, Development) fortroubleshooting.
Proceed as follows for configuration:
• Make settings for logging.
− Using the Configuration Manager (Administration > Logging)
• Log network data stream.
− Using the Configuration Manager (Monitoring > Network datastream)

Recording the D-Channel Protocol
COMmander 6000/R/RX - Firmware V8.4 - Advanced Information V32 05/2022- 220 -
Recording the D-Channel Protocol
A D-channel protocol can be started to record and display control andmanagement information about the connections to the PBX e.g. to displayerrors. You will thus be able to see the error type, and maybe even itscause, from the list of transferred information.
Proceed as follows:
• Using the D-channel decoder PC programme
Requirements:
• D-channel decoder PC programme installed (see Auerswald:Auerswald Service Portal, FONtevo: FONtevo)
• Logging enabled function switched on in the PBX
• D-channel option selected in the PBX
1. Start the D-channel decoder computer programme.
2. Click Start.
3. In the Interface list field, select the IP option.
4. Enter the IPv4 address or, as of decoder version 2.6.7, the IPv6address of the PBX in the IP Address entry field.
Note: If a port is present, omit it when you enter the IP address.
5. Click OK.
The protocol log is displayed.

Recording the D-Channel Protocol
COMmander 6000/R/RX - Firmware V8.4 - Advanced Information V32 05/2022- 221 -
6. Click Pause to stop the protocol being recording.
Further steps:
• The technical departments (Service and Development) can use this fileto perform troubleshooting. If the cause of the error cannot be found inthe protocol, your specialised dealer or the Service Department (seeAuerswald Service Portal) will set additional categories and record anextended protocol.

Sound
COMmander 6000/R/RX - Firmware V8.4 - Advanced Information V32 05/2022- 222 -
Sound
Signaling scenarios
The PBX supports different tones on the receiver in order to signal thevarious operating states on the PBX:
• External dial tone (long dial tone):
− After dialing the exchange line access number, when a freeexternal line is available – dialing a telephone number is possible
• Internal dial tone (private branch exchange dial tone):
− After picking up the receiver or after pressing the Flash or Querykey, when a free line is available – dialing a telephone number ispossible
Note: On standard VoIP phones, a dial tone is generated by thephone itself, even when no free line is available.
• Confirmation tone:
− At the completion of programming, when the programming hasbeen successfully executed
• Busy tone:
− After picking up the receiver, when no free line is available or anauthorization is missing
− After dialling a phone number, when the desired connection is busyor the network is overloaded or an authorisation is missing
− At end of call
− During programming, when the programming was unsuccessful oran authorization is missing

Sound
COMmander 6000/R/RX - Firmware V8.4 - Advanced Information V32 05/2022- 223 -
− During a Call Through call, when the telephone number transferredfrom the mobile phone is not permitted to use Call Through
• Call tone:
− during the call phase
• Special tone 1 and special tone 2:
− After picking up the receiver (when a special tone has beenconfigured as notification that call forwarding, do-no-disturb orbaby call has been switched on)
− After picking up the receiver (when a special dial tone has beenenabled), when the call data memory is full
• Call waiting tone:
− During a call (when call waiting has been enabled ), when anothercall comes in – it is possible to accept or reject the additional call
• Changing tone:
− During a Call Through call, when the telephone number transferredfrom the mobile phone is permitted to use Call Through - dialing atelephone number is possible
− During a remote programming call, when the connection for remoteprogramming is available – programming is possible
Display of signaling types
The tones are signaled as follows:

Sound
COMmander 6000/R/RX - Firmware V8.4 - Advanced Information V32 05/2022- 224 -
876543210 9
A
B
C
D
E
H
I
F
G
A. Permanent dial tone (425 Hz)
B. Private branch exchange dial tone (425 Hz)
C. Confirmation tone (425 Hz)
D. Busy tone (425 Hz)
E. Call tone (425 Hz)
F. Special tone 1 (425 Hz)
G. Special tone 2 (425 Hz)
H. Call waiting tone (425 Hz)
I. Changing tone (697/1633 Hz)
Configuration procedure:
• Making settings for tones.
− Using the Configuration Manager (Subscriber (scr.) > Properties> Settings page)

Subscribers
COMmander 6000/R/RX - Firmware V8.4 - Advanced Information V32 05/2022- 225 -
Subscribers
All connected end devices with telephony functions (phones, answeringmachines, fax machines etc.) are set in the pbx as subscribers. To thesubscriber, a phone number and a series of properties are assigned.Depending on the existing end devices there are analogue, ISDN andVoIP subscribers.
Proceed as follows for configuration:
• Creating a subscriber with an internal number.
− Using the Configuration Manager (Subscriber (scr.) > Phonenumbers)
• Assigning properties to the subscribers.
− Using the Configuration Manager (on the following pages)
− Subscriber (scr.) > Profiles > ...
− Subscriber (scr.) > Function overview
− Subscriber (scr.) > Properties
• Configuring provisioning for IP phones.
− Using the Configuration Manager (on the following pages)
− Subscriber (scr.) > IP provisioning > Settings
− Subscriber (scr.) > IP provisioning > File management
• Making common settings for all subscribers.
− Using the Configuration Manager (Subscriber (scr.) > Allsubscribers)
• Assigning unassigned phones to a subscriber or deleting them.

Subscribers
COMmander 6000/R/RX - Firmware V8.4 - Advanced Information V32 05/2022- 226 -
− Using the Configuration Manager (Subscriber (scr.) >Unassigned phones)

Sub-System Operation
COMmander 6000/R/RX - Firmware V8.4 - Advanced Information V32 05/2022- 227 -
Sub-System Operation
Setting OptionsTransferring a Caller of the Main PBX to Another Subscriber on theMain PBX from the Sub-System PBX Setting OptionsTransferring a Caller of the Main PBX to Another Subscriber on the Main PBX from the Sub-System PBX

Setting Options
COMmander 6000/R/RX - Firmware V8.4 - Advanced Information V32 05/2022- 228 -
Setting Options
The PBX supports sub-system operation on a higher-level PBX, forexample to connect an external office to headquarters.
Requirements:
• At least one free internal VoIP channel for the main PBX
• At least one free external VoIP channel for the subordinate PBX
Proceed as follows to configure the main PBX:
• Creating VoIP subscribers in the main PBX.
− Using the Configuration Manager (Subscriber (scr.) > Phonenumbers > New)
Note: The corresponding subscribers in main and subordinatePBX must have the same internal phone number.
− Module/Port: VoIP
− Device type: Standard VoIP phone
• Switching internal phone on for each subscriber.
− Using the Configuration Manager (Subscriber (scr.) > Phonenumbers > Configure > Settings)
− Exchange line request: Internal phone
Proceed as follows to configure the subordinate PBX:
• Creating subscribers in the subordinate PBX.
− Using the Configuration Manager (Subscriber (scr.) > Phonenumbers > New)
Setting Options
COMmander 6000/R/RX - Firmware V8.4 - Advanced Information V32 05/2022- 229 -
Note: The corresponding subscribers in main and subordinatePBX must have the same internal phone number.
• Switching direct exchange line phone on for each subscriber.
− Using the Configuration Manager (Subscriber (scr.) > Phonenumbers > Configure > Settings)
− Exchange line request : Direct exchange line phone
Note: If the PBs are to be linked via a STUN server, set STUNserver for the connection of external VoIP subscribers(Administration > VoIP configuration.
• Make the following settings for the provider „Auerswald“.
− Using the Configuration Manager (Public switched tel. networks> VoIP > Provider > Configure)
− Domain : IP address of main PBX
− Registrar : IP address of main PBX
− Sub-system operation
− Format of called phone number: Send as dialled
− Format of own phone number: Without country code (e. g.05306...)
− Number presentation type: In the display text
− Method of number presentation suppression: Anonymous
• Configure a VoIP account for each subscriber.
− Using the Configuration Manager (Public switched tel. networks> VoIP > Accounts > New)
− Provider name: Auerswald

Setting Options
COMmander 6000/R/RX - Firmware V8.4 - Advanced Information V32 05/2022- 230 -
− Account name : Freely selectable name for identification of theaccount
− Connection type: PTMP connection
− Use
• Entering access data for each VoIP account subscriber.
− Using the Configuration Manager (Public switched tel. networks> VoIP > Accounts > Configure)
− Exchange line access number (account number): 2- to 4-digitnumber
− User name: Internal phone number of the VoIP subscriber of themain PBX
− Password: PIN of the VoIP subscriber of the main PBX
Note: We recommend to use a password for remoteextensions.
− Account has emergency call ability disabled:
• Assigning each subscriber to the corresponding account.
− Using the Configuration Manager (Public switched tel. networks> VoIP > Accounts > Configure > New)
− Multiple subscriber number (MSN): Subscriber‘s phone number
• Switching on automatic assignment of the preferred exchange lines.
− Using the Configuration Manager (Subscriber (scr.) > Phonenumbers > Configure > Exchange line settings > Preferredexchange line business: Automatica assignment)
• Creating call distribution.
Setting Options
COMmander 6000/R/RX - Firmware V8.4 - Advanced Information V32 05/2022- 231 -
− Using the Configuration Manager (Public switched tel. networks> Call distribution)
− Call distribution for: VoIP PTMP connections and account name
− Internal no. | name: Assign internal phone numbers one-to-one toMSNs

Transferring a Caller of the Main PBX to Another Subscriber on the Main PBX from the Sub-
System PBX
COMmander 6000/R/RX - Firmware V8.4 - Advanced Information V32 05/2022- 232 -
Transferring a Caller of the Main PBX to AnotherSubscriber on the Main PBX from the Sub-SystemPBX
Requirements:
• Two free external VoIP channels for the subordinate PBX
• Authorisation Transfer of external calls to external assigned to thesubscriber of the subordinate PBX (Subscriber (scr.) > Properties >Authorisations)
Note: Set the maximum duration of the transferred call(Subscriber (scr.) > All subscribers) to limit the time the twoexternal VoIP channels are occupied.
1. Initiate a query call to the other subscriber on the main PBX.
2. Hang up the receiver while the other phone is still ringing (blindtransfer) or during the query call.
Both communication partners are connected to each other.

Switch Input
COMmander 6000/R/RX - Firmware V8.4 - Advanced Information V32 05/2022- 233 -
Switch Input
If a device that is suitable as switch input (e. g. a door terminal with doorbell buttons) is connected to the PBX, it can then be used to trigger a doorcall or an alarm.
Proceed as follows for configuration:
• Creating a switch input for an alarm.
− Using the Configuration Manager (Devices > Alarms)
• Creating a switch input for a door call.
− Using the Configuration Manager (Devices > Door terminals)
• Configuring switch inputs.
− Using the Configuration Manager (on the following pages)
− Devices > Alarms > Switch input > )
− Devices > Door terminals > Door terminal calls > )

System Messages
COMmander 6000/R/RX - Firmware V8.4 - Advanced Information V32 05/2022- 234 -
System Messages
System messages are used to inform administration and users aboutsystem events such as operating errors. All system events that occur arelogged. In addition, e-mails can be sent informing about the events.
A distinction is made between the following system events:
• system information, e.g. automatic memory clean-up and memorycheck (Voice Mail/Fax function), switch between configurations, switchrelays on/off, send system e-mails, register in Configuration Manager
• simple malfunctions, e.g. automatic memory clean-up and memorycheck (Voice Mail/Fax function) errors, exceeding the possible VoIPcall channels
• serious malfunctions, e.g. fan fault (only COMmander 6000R/RX:),alarm temperature exceeded (only COMmander 6000R/RX)
• security warnings, e.g. failed login attempts, entries in the IP blocklist,Admin password change, Admin login and challenge response at thePBX
Configuration procedure:
• Configuring the DNS server.
− Using the Configuration Manager (Administration > IPconfiguration)
• Configuring the outgoing mail server.
− Using the Configuration Manager (Administration > E-mail >outgoing mail server)
• If necessary, setting up the language file.

System Messages
COMmander 6000/R/RX - Firmware V8.4 - Advanced Information V32 05/2022- 235 -
− Using the Configuration Manager (Administration > E-mail >Internationalisation)
• If necessary, setting up the logo.
− Using the Configuration Manager (Administration > E-mail >Logo management)
• Setting up the sending of system e-mails and event logging.
− Using the Configuration Manager (on the following pages)
− Administration > System Messages
− Boxes > Voice mail and fax boxes > Basic Network Settings
− Boxes > Voice mail and fax boxes > Features > Box settings

Text Messages (Instant Messaging)
COMmander 6000/R/RX - Firmware V8.4 - Advanced Information V32 05/2022- 236 -
Text Messages (Instant Messaging)
Note: You can use the transmission of the display name to send textmessages during an internal call (see Transmission of the DisplayName).
The PBX supports the sending and receiving of text messages via SIP(according to RFC 3428).
You can use this function on the following VoIP end devices:
VoIP system phones and standard VoIP phones from Auerswald/FONtevo
The sending and receiving of text messages takes place via SIP via theinstant messaging app (optional, see manual of the phone).
IP DECT phones from Auerswald
The handsets COMfortel M-100, M-200, M-210, M-300 and M-310 onlysupport the receiving of text messages via.
Standard VoIP end decives of other manufacturers
Prerequisire for the support of the text message function via SIP is theactivated SIP convenience package / SIP convenience package brandplus (optional, see Activation).
The sending and receiving of text messages vis SIP depends on the enddevice (see manual of the end device).

Transfer and Callback
COMmander 6000/R/RX - Firmware V8.4 - Advanced Information V32 05/2022- 237 -
Transfer and Callback
The PBX requires specifications for the transfer and the callback option forexternal callers to be executed as desired.
Proceed as follows for configuration:
• Configuring hook flash timing.
− Using the Configuration Manager (Subscriber (scr.) > Properties> Analogue settings)
• If necessary, switching the authorisation for external call transferexternally on.
− Using the Configuration Manager (Subscriber (scr.) > Properties> Authorisations)
• Configuring sufficient exchange line authorisations for the involvedinternal subscribers.
− Using the Configuration Manager (Subscriber (scr.) > Properties> Exchange line settings)
Note: The transferring subscriber needs a sufficient exchange lineauthorisation for making external calls.
• Configuring the maximum duration of transferred calls (external toexternal).
− Using the Configuration Manager (Subscriber (scr.) > Allsubscribers)
• Switching the CCBS and CCNR option for external callers on.
− Using the Configuration Manager (Public switched tel. networks> ISDN > PBX base numbers/trunk bundles > Configure)
Transmission of the Display Name
COMmander 6000/R/RX - Firmware V8.4 - Advanced Information V32 05/2022- 238 -
Transmission of the Display Name
Transmission of the display name forces the internally called phone todisplay the name entered in the phone itself instead of the name enteredin the PBX. It makes sense to use this function in combination with specialcalling systems such as the GIRA calling system 834 plus, for example.It permits the transmission of text messages (entered as display name)during an internal call.
Note: In combination with the alarm device function (see AlarmDevice), text messages can be sent and signallised accordingly.
Note: For text messages without a simultaneous call, you can sendtext messages via SIP (RFC 3428) (see Text Messages (InstantMessaging)).
Proceed as follows for configuration:
• Switching the transmission of the display name on.
− Using the Configuration Manager (Subscriber (scr.) > Properties> Settings)

Voice mail and fax boxes
COMmander 6000/R/RX - Firmware V8.4 - Advanced Information V32 05/2022- 239 -
Voice mail and fax boxes
Setting OptionsVoice Mail/Fax Function and Memory ManagementVoice MailboxOperating and Querying a Voice MailboxFax BoxFax Transfer Setting OptionsVoice Mail/Fax Function and Memory ManagementVoice MailboxOperating and Querying a Voice MailboxFax BoxFax Transfer

Setting Options
COMmander 6000/R/RX - Firmware V8.4 - Advanced Information V32 05/2022- 240 -
Setting Options
Voice mailboxes and fax boxes have partially the same and partiallydifferent functions. Nevertheless, they are configured in the same way.
When configuring the box, a Phone number and a Name are assignedand if required an owner. Further configuration options are to be foundunder Configure.
Proceed as follows for configuration:
• Creating and managing a box.
− Using the Configuration Manager (Devices > Voice mail and faxboxes > Phone numbers).
• Switching a box for a subscriber/group on/off.
− Using the Configuration Manager (Subscriber (scr.) > Phonenumbers > Configure > Voice mail and fax boxes)
• Switching the info call for a voice mailbox on/off.
− Using the Configuration Manager (Subscriber (scr.) > Phonenumbers > Configure > Voice mail and fax boxes)

Voice Mail/Fax Function and Memory Management
COMmander 6000/R/RX - Firmware V8.4 - Advanced Information V32 05/2022- 241 -
Voice Mail/Fax Function and Memory Management
If the voice mail function is used without the COMmander VMF(-R)module, announcements for the voice mailboxes, language files, andincoming voice messages, are stored on the necessary USB data storagedevice.
After the COMmander VMF(-R) module has been inserted, theannouncements for the voice mailboxes, language files, and alsoincoming faxes and voice messages, are saved to the memory card in theCOMmander VMF(-R) module.
Caution:Do not remove the USB data storage device from the PBXwhile the system is running.
• Switch off the PBX before removing the data storage device.
Important: For technical reasons, the mainboard's voice mailchannels are switched off when the COMmander VMF(-R) module isinserted. Any voice mailboxes that have been previously configuredare switched off. Existing announcements/recordings can no longerbe accessed (the COMmander VMF(-R) module uses its own SDcard instead of the USB data storage device). If you want to keep anannouncement/recording, save it to the hard disk before inserting thismodule.
• Announcements: Using the Configuration Manager (Devices >Voice mail and fax boxes > Properties > Announcements)
• Recordings: Using the Configuration Manager (User data > Calldata > Messages)
Note: A directory structure is created on the data storage device; youmay not change this structure.
Note: The data storage device must have at least 50 MB free memory.
Voice Mail/Fax Function and Memory Management
COMmander 6000/R/RX - Firmware V8.4 - Advanced Information V32 05/2022- 242 -
Note: We recommend you replace the COMmander VMF(-R) module'smemory card every two years. Only use recommended memory cards.
You will find suitable recommendations on the Internet (see Auerswald:Auerswald Service Portal, FONtevo: FONtevo Support).

Voice Mailbox
COMmander 6000/R/RX - Firmware V8.4 - Advanced Information V32 05/2022- 243 -
Voice Mailbox
As an answering machine the voice mailbox accepts incoming calls andstores recorded messages as audio files (*.wav). Announcement texts canbe assigned for each box.
The configuration of the box can be as follows:
• Configuring the maximum recording capacity (MB).
• Enabling the automatic clean-up.
• Configuring additional properties (Message forwarding, Automaticreplay of new messages, Remote access, Language of theannouncements, E-mail transfer on incoming message, if memory isfull or in case of failure of automatic clean-up).
• Enabling Call pick-up for the voice mailbox and the Groups(s)/Voice mailbox(es) authorisation for the owners/users under Pick-up(Subscriber (scr.) > Properties > Authorisations).
• Selecting further users and enabling or disabling their authorisations(Administrate announcements and settings).
• Recording box own announcements or saving existing announcementsin the PBX.
• Assigning a profile.
• Configuring Call acceptance/announcement, provided that no profilewas assigned or settings have been made in the profile that can beswitched by the user.
• Switching the readiness permanently on.
• Creating the external call distribution (Public switched tel. networks> Call distribution).

Voice Mailbox
COMmander 6000/R/RX - Firmware V8.4 - Advanced Information V32 05/2022- 244 -
• To forward calls for the owner/user (subscriber/group) to the voicemailbox, the voice mailbox has to be switched on for a subscriber/a group and the time/requirements for an additional call have to beconfigured.
Proceed as follows for configuration:
• Configuration of a voice mailbox.
− Using the Configuration Manager (Devices > Voice mail and faxboxes > Properties)
• Switching voice mailbox for a subscriber/group on/off.
− Using the Configuration Manager (Subscriber (scr.) > Configure> Voice mail and fax boxes)
• Switching info call on/off.
− Using the Configuration Manager (Subscriber (scr.) > Phonenumbers > Configure > Voice mail and fax boxes)

Operating and Querying a Voice Mailbox
COMmander 6000/R/RX - Firmware V8.4 - Advanced Information V32 05/2022- 245 -
Operating and Querying a Voice Mailbox
Information, Notes and MethodUsing an Internal or External Phone (Remote Access) to Operate andQuery a Voice Mailbox Information, Notes and MethodUsing an Internal or External Phone (Remote Access) to Operate and Query a Voice Mailbox

Information, Notes and Method
COMmander 6000/R/RX - Firmware V8.4 - Advanced Information V32 05/2022- 246 -
Information, Notes and Method
All voice messages are stored as audio files (*.wav). Up to 999 messagesper box can be administrated.
Note: On system phones, new voice messages are signalled by theLED on the message key (optional, see phone manual)
Note: On standard phones and COMfortel 1100 system phones,recently received voice messages can also be signalled as info calls.
Note: In addition, the users of a voice mailbox can be informed aboutnew voice messages by e-mail or by SIP MWI (optional).
Proceed as follows:
• Using the Configuration Manager
• Using a character string on an internal phone
• Using remote access on an external phone
• On a system phone using the menu/function key (optional, see thephone manual)

Using an Internal or External Phone (Remote Access) to Operate and Query a Voice Mailbox
COMmander 6000/R/RX - Firmware V8.4 - Advanced Information V32 05/2022- 247 -
Using an Internal or External Phone (Remote Access)to Operate and Query a Voice Mailbox
The voice messages of a voice mailbox can be queried by meansof an internal or external phone (remote access). Using variousannouncements, the caller is guided through the query menu. Besidesaccessing the messages, it is also possible to operate (e.g. switch on andoff) the voice mailbox via phone.
Requirements:
• Imported voice file (*.fs)
• Knowledge of the PIN for accessing the corresponding voice mailboxremotely
• DTMF dialing support on the external telephone
1. Call the voice mailbox.
Note: Remote access is also possible with disabled readiness ofa voice mailbox. External calls will be accepted after a waiting timeof at least 50 seconds (50 seconds or Delay time for CF on noreply + 10 seconds if longer than 50 seconds).
2. Dial * and then the user PIN or the PIN for remote access and #.
Note: If the internal phone used for the query is the owner of thevoice mailbox, it is not necessary to enter a user PIN or remoteaccess PIN.
Various announcements lead you through the remote access menu.

Using an Internal or External Phone (Remote Access) to Operate and Query a Voice Mailbox
COMmander 6000/R/RX - Firmware V8.4 - Advanced Information V32 05/2022- 248 -
0 Help menu
1 main menu
2 Plays new messages
3 Plays all messages
4 Goes to previous page
5 Repeats currently played message
6 Goes to next page
7 Deletes currently played message
8 Ends playback
*10 Disables voice mailbox
*11 Enables voice mailbox
*20 Recording and changing of announcements
The following rules / restrictions apply:
• Internal owners or users of a box automatically have the rightsto administrate the announcements and do not need a PIN forthis menu.
• Internal callers who are not users of this box must dial the PINof a box user with administration rights in order to gain accessto the menu.

Using an Internal or External Phone (Remote Access) to Operate and Query a Voice Mailbox
COMmander 6000/R/RX - Firmware V8.4 - Advanced Information V32 05/2022- 249 -
• External callers who transmit the remote inquiry PIN haveno rights to administer the announcements and receive theannouncement "No authorisation".
• External callers who transmit the user PIN of a user (withadministration rights) to the box receive the rights toadministrate the announcements and gain access to thismenu.
Note: The default announcement and own announcements areplayed back. Meanwhile, the following functions are available:
# Selects the currently heard announcement as active
4 Goes to previous announcement
5 Repeats current announcement
6 Goes to next announcement
7 Selects the current or free announcement for changing or recording. (# save announcement
or * cancel)
*30 Disables message forwarding
*31 Enables message forwarding
*70 Deletes messages and voice memos
*99 Records voice memos
Hanging up ends remote access
Additional function while a message is being replayed:

Using an Internal or External Phone (Remote Access) to Operate and Query a Voice Mailbox
COMmander 6000/R/RX - Firmware V8.4 - Advanced Information V32 05/2022- 250 -
9 Plays back the phone number of the caller provided it has been transferred.
Further options after announcement of the phone number:
# Initiates call back
* Possible call back is cancelled

Fax Box
COMmander 6000/R/RX - Firmware V8.4 - Advanced Information V32 05/2022- 251 -
Fax Box
A fax box accepts incoming faxes and saves them as *.pdf files. Themaximum length of a fax is 50 pages.
The fax receiving function is supported with maximally 9.6 kbps (V.29).
The configuration of the fax box can be as follows:
• Configuring the maximum recording capacity (MB).
• Enabling the automatic clean-up).
• Configuration of further properties (E-mail transfer on incoming fax,in the case of full memory, in case of failure of automatic clean-up, orafter fax transfer, Fax ID for the fax transfer).
• Selecting further users for the fax box and enable or disable theirauthorisations (Administrate settings).
• Assigning a profile.
• Configuration of Call acceptance (Reject anonymous calls),provided that no profile has been assigned or settings have beenmade in the profile which can be switched by the user.
• Switching the readiness permanently on.
• Creating the external call distribution (Public switched tel. networks> Call distribution).
• For the fax box to accept incoming calls, the fax box has to beswitched on for a subscriber/a group.
Proceed as follows for configuration:
• Switching fax box for a group on/off.

Fax Box
COMmander 6000/R/RX - Firmware V8.4 - Advanced Information V32 05/2022- 252 -
− Using the Configuration Manager (Subscriber (scr.) > Phonenumbers > Configure > Voice mail and fax boxes)
• Configuration of a fax box
− Using the Configuration Manager (Devices > Voice mail and faxboxes > Properties)

Fax Transfer
COMmander 6000/R/RX - Firmware V8.4 - Advanced Information V32 05/2022- 253 -
Fax Transfer
InformationInstalling Printer Driver COMpact/COMmander Fax on PCConfiguring the Printer Driver COMpact/COMmander FaxSending a fax to a recipientSend a fax to multiple recipients (Broadcasting file) InformationInstalling Printer Driver COMpact/COMmander Fax on PCConfiguring the Printer Driver COMpact/COMmander FaxSending a fax to a recipientSend a fax to multiple recipients (Broadcasting file)

Information
COMmander 6000/R/RX - Firmware V8.4 - Advanced Information V32 05/2022- 254 -
Information
The fax function of the PBX supports fax transfer in combination with acorresponding PC application. The required COMpact/COMmander Faxprinter driver has to be installed on the PC used.
The COMpact/COMmander Fax printer driver transfers the documentto be faxed to the PBX that subsequently saves the document for thefax box used and sends it in the background using the correspondingfax identification. If the destination of the fax is not available (busy or noreply), two further dial-up attempts will automatically be made by the PBX.

Installing Printer Driver COMpact/COMmander Fax on PC
COMmander 6000/R/RX - Firmware V8.4 - Advanced Information V32 05/2022- 255 -
Installing Printer Driver COMpact/COMmander Fax onPC
You the fax printer driver in the Internet (see Auerswald: AuerswaldService Portal, FONtevo: FONtevo Support).
1. Download the printer driver and start the driver installation.
2. Select the desired language and click OK and Next.
3. Read the license agreement and subsequently click I accept theterms of the license agreement. Click Next.
4. Click Continue installation.
5. Click Finish.

Configuring the Printer Driver COMpact/COMmander Fax
COMmander 6000/R/RX - Firmware V8.4 - Advanced Information V32 05/2022- 256 -
Configuring the Printer Driver COMpact/COMmanderFax
Before transferring the first fax using the COMpact/COMmander Faxprinter driver, at least one fax box of the PBX has to be configured in theprinter driver.
Requirements:
• Installed printer driver COMpact/COMmander Fax
1. To open the printer driver, print a test document, e. g. a Worddocument, using the print function of the PC programme. Via theprinter selection, select the printer driver COMpact/COMmander Fax.
2. If necessary, enter a name for your identification in the entry fieldName of the fax box.
Note: It is appropriate to use the same name that has beenassigned for the fax box in the Configuration Manager of the PBX.
3. In the Subscriber / Group number entry field, enter the internalnumber of the owner of the fax box in question.
4. In the User Password entry field, enter the password of the subscriberor of the group member in question.
Important: By enabling the check box Display PIN, the enteredpassword will be displayed uncoded. In order to ensure that apassword cannot be viewed by unauthorised persons, a usershould always lock the access to his/her PC or completely log offhis/her PC when leaving the room.
5. In the Network address entry field, enter the IP address of the PBX.

Configuring the Printer Driver COMpact/COMmander Fax
COMmander 6000/R/RX - Firmware V8.4 - Advanced Information V32 05/2022- 257 -
Note: By clicking Check the login data are checked. A windowopens displaying the check result. Click OK to close this window.
6. Select or clear the check box Prefix automatically for the exchangeline access number of the fax number of the recipient.
7. In the Exchange line access number entry field, enter the exchangeline access number of the PBX.
8. If necessary, click New and repeat steps 2 to 7 in order to configureanother fax box of the PBX in the printer driver.
9. Click OK.
10. Click Close.

Sending a fax to a recipient
COMmander 6000/R/RX - Firmware V8.4 - Advanced Information V32 05/2022- 258 -
Sending a fax to a recipient
Requirements:
• At least one channel set for outgoing calls of the voice mail/faxfunction (Channels used simultaneously for outgoing calls)
• Created fax box
• Installed and configured COMpact/COMmander Fax printer driver
1. Open the document you want to send as a fax.
2. Print the file and therefor select COMpact/COMmander Fax in theprinter selection dialogue.
3. Under Fax number of the recipient, enter the corresponding phonenumber (special characters: +, (, ), _, -).
Important: Depending on the configuration of the fax box inthe printer driver, the exchange line access number of the PBXautomatically precedes the fax number or has to be entered infront of the Fax number of the recipient.
Note: The entered phone number is automatically converted into apure digit string before sending.
Note: If a phone number is stored in the clipboard, it isautomatically transferred to the entry field.
4. Under Fax box for transfer select the desired fax box.
5. Click Send.
6. Click Close.

Sending a fax to a recipient
COMmander 6000/R/RX - Firmware V8.4 - Advanced Information V32 05/2022- 259 -
Note: To cancel the fax transfer, delete the fax message underUser data > Messages (administrator) or Messages (Voice mailand fax boxes) (user) in the Configuration Manager.

Send a fax to multiple recipients (Broadcasting file)
COMmander 6000/R/RX - Firmware V8.4 - Advanced Information V32 05/2022- 260 -
Send a fax to multiple recipients (Broadcasting file)
Requirements:
• At least one channel set for outgoing calls of the voice mail/faxfunction (Channels used simultaneously for outgoing calls)
• Created fax box
• Installed and configured COMpact/COMmander Fax printer driver
1. Create the text file (*.csv, *.txt) with the fax recipient‘s phone number(max. 18 digits per phone number (special characters: +, (, ), /, , , -, :))
Important: Depending on the configuration of the fax box inthe printer driver, the exchange line access number of the PBXautomatically precedes the fax number or has to be entered infront of the fax number of the recipient.
2. Open the document you want to send as a fax.
3. Print the file and therefor select COMpact/COMmander Fax in theprinter selection dialogue.
Note: Entries under Fax number of the recipient are notconsidered in case of a broadcasting file.
4. Under Fax box for transfer, select the desired fax box.
5. Click Broadcasting file.
6. Select the text file (*.csv, *.txt) created in step 1 and click Open.
Note: If the error message is 507, fax sending is interrupted for 3minutes and then restarted. After 10 unsuccessful attempts, thetransmission is stopped.
7. Click Close.

Send a fax to multiple recipients (Broadcasting file)
COMmander 6000/R/RX - Firmware V8.4 - Advanced Information V32 05/2022- 261 -
Note: To cancel the fax transfer, delete the fax message underUser data > Messages (administrator) or Messages (Voice mailand fax boxes) (user) in the Configuration Manager.

VoIP
COMmander 6000/R/RX - Firmware V8.4 - Advanced Information V32 05/2022- 262 -
VoIP
NoteConfiguring External Internet TelephonyConfiguring Internal IP TelephonyExternal Private Branch Exchanges NoteConfiguring External Internet TelephonyConfiguring Internal IP TelephonyExternal Private Branch Exchanges

Note
COMmander 6000/R/RX - Firmware V8.4 - Advanced Information V32 05/2022- 263 -
Note
The transmission quality and the reliability of Voice over IP depends to agreat extent on the quality of the Internet connection used.

Configuring External Internet Telephony
COMmander 6000/R/RX - Firmware V8.4 - Advanced Information V32 05/2022- 264 -
Configuring External Internet Telephony
Requirements:
• External VoIP channel (optoptional, see Technical Data in theInstructions)
• An account with a VoIP provider
• Configured internal subscribers
Configure the PBX as follows:
1. Configure at least one VoIP channel as an external VoIP channel.
2. Make sure you have current VoIP provider data:
• Check previously configured provider data.
• Download and import provider data from the Internet.
• Enter provider data manually.
3. Configure the DNS server.
4. Create at least one VoIP account in the PBX and enter the accountand access data.
5. Enter your own VoIP phone numbers.
6. Set up call distribution (for incoming calls).
7. If necessary, enable DiffServ to preferably treat the voice data overother data by menas of the router and to increase the VoIP call quality.
8. Check if the registration of the VoIP account was successful(Monitoring > Status VoIP accounts).
Note: If no calls are possible via VoIP, although accountregistration and perhaps even an initial call were successful, thismight have something to do with a very short timeout configured inthe firewall. Reduce the Interval for NAT Keep Alive for all of the

Configuring External Internet Telephony
COMmander 6000/R/RX - Firmware V8.4 - Advanced Information V32 05/2022- 265 -
providers used (Public switched tel. networks > VoIP > Provider> Configure).

Configuring Internal IP Telephony
COMmander 6000/R/RX - Firmware V8.4 - Advanced Information V32 05/2022- 266 -
Configuring Internal IP Telephony
Requirements:
• Internal VoIP channel (optional, see Technical Data in the Instructions)
Proceed as follows:
1. Configure a VoIP channel as an internal VoIP channel for eachplanned internal VoIP subscriber.
2. If necessary, configure the SIP port of the internal VoIP registrar.
3. Create internal numbers for the VoIP subscribers.
4. If required, change the automatically generated PINs and passwords.
Note: The user passwords are needed to authenticate the VoIPphones when they are registered with the PBX.
5. Configure the VoIP end devices. To do this, you need the followinginformation:
IP address or URL of the PBX
SIP port of the internal VoIP registrar
Internal number of the VoIP subscriber
User password of the VoIP subscriber
Note: You will find notes about how to configure different VoIP enddevices on the Internet (see Auerswald Service Portal).
6. Check whether the VoIP subscriber was successfully registered on thePBX (Monitoring > Status int. VoIP subscribers).
7. If necessary, enable DiffServ, to increase VoIP call quality (Quality ofService (QoS)).

Configuring Internal IP Telephony
COMmander 6000/R/RX - Firmware V8.4 - Advanced Information V32 05/2022- 267 -
8. If necessary, make the VoIP settings (Jitter buffer, Echo cancellation)for the VoIP subscribers to improve the call quality.

External Private Branch Exchanges
COMmander 6000/R/RX - Firmware V8.4 - Advanced Information V32 05/2022- 268 -
External Private Branch Exchanges
External private branch exchanges are treated as internal VoIP phonesin the PBX (seeConfiguring Internal IP Telephony). The VoIP phones areconnected to the PBX network via a VPN tunnel.
Note: If necessary, refer to your network administrator for VPNsettings.
Important: Note that when using an external private branch exchange,emergency calls can only be traced back to the location (localization).Localization is necessary if the caller is no longer able to specify hisname and address. Therefore, for emergency calls from a remoteextension, a mobile phone or a phone connected to the local VoIP orpublic switched network is required.
Configuration procedure:
• Configuring a VoIP channel as an internal VoIP channel for eachexternal private branch exchange planned.
− Administration > VoIP configuration > Distribution of the VoIPchannels
• Switching on Prevention of emergency calls.
− Subscriber (scr.) > Features > Exchange line settings
• If necessary, SIP port of the internal VoIP registrar.
− Administration > VoIP configuration > SIP
• If necessary, switching on the DiffServ to increase the VoIP call quality.
− Administration > VoIP configuration > Quality of Service (QoS)
• If necessary, changing the jitterbuffer value to increase the VoIP callquality.

External Private Branch Exchanges
COMmander 6000/R/RX - Firmware V8.4 - Advanced Information V32 05/2022- 269 -
− Subscriber (scr.) > Features > VoIP settings

VoIP/GSM Routing
COMmander 6000/R/RX - Firmware V8.4 - Advanced Information V32 05/2022- 270 -
VoIP/GSM Routing
VoIP/GSM routing precedes Least Cost Routing (LCR) and can be usedto specify an order for exchange line assignment to certain prefixesor complete phone numbers. The LCR provider will then be dialled inadvance at the selected exchange lines (except for GSM gateways). Atable with exception numbers must be set up for this and saved in thePBX.
VoIP/GSM routing proceeds as follows:
• A user dials an external number.
• The PBX checks whether the phone number or the phone numberrange is specified in the exception numbers and switched on for thecurrent configuration.
• If the phone number is found, the PBX automatically forwards the dialattempt to the first selected connection.
• If the selected connection is busy when dialled, the next connectionselected is attempted (up to three are possible).
• After a dial attempt with the third connection, if no connection isestablished, you hear the busy signal.
Note: If a call is initiated over a targeted exchange line access point orVoIP access point, VoIP/GSM routing is not performed.
Note: The VoIP/GSM routing is performed depending on thedestination number, if the exchange line settings (subscriber, group)do not prevent this (e.g. exchange line authorisation only for selectedconnections, preferred exchange line, call restrictor).
Note: The PBX uses fixed network connections to handle emergencycalls as a priority (i.e. calls made to the phone numbers specified in

VoIP/GSM Routing
COMmander 6000/R/RX - Firmware V8.4 - Advanced Information V32 05/2022- 271 -
Public switched tel. networks > Emergency calls as well as theautomatic alarm calls made by the PBX.
Note: The special numbers provided by the VoIP provider, forchecking one's account status or mailbox, for example, usually donot include a local code. It is not possible to route numbers via theexception table. In order to correctly dial these phone numbers, usetargeted exchange line assignment with the account number (targetedVoIP access point). Alternatively, you can enter such numbers asservice numbers under Public swichted tel. networks > Emergencycalls > Service numbers.
Note: If no particular connection has been selected for door-to-external calls the routing is performed depending on the destinationnumber.
Note: For Call Through calls, the routing performed is dependenton the destination number, if the special exchange line settings donot prevent this (e.g. exchange line authorisation only to selectedconnections, preferred exchange line, call restrictor).
Note: If routing has been enabled for call forwarding for externalnumbers, the routing performed is dependent on the destinationnumber.
Note: For call forwarding for subscribers and groups, the routingperformed is dependent on the destination number.
Note: When you dial one of the local numbers (phone number withouta prefix) listed in the exception number table over a VoIP access point,the PBX automatically converts the phone number as specified underNumber presentation (outgoing) for the VoIP provider.
Note: When you dial one of the local numbers (phone number withouta prefix) listed in the exception number table over a GSM connection,

VoIP/GSM Routing
COMmander 6000/R/RX - Firmware V8.4 - Advanced Information V32 05/2022- 272 -
the phone number is automatically prefixed with the area codespecified under Administration > Exchange line request.
Proceed as follows for configuration:
• Creating exception numbers.
− Using the Configuration Manager (Routing > VoIP and GSMrouting > Exception numbers)
• Configuring the VoIP/GSM routing configuration dependent.
− Using the Configuration Manager (Routing > VoIP and GSMRouting > Routing configuration dependent)

Waiting Field Function
COMmander 6000/R/RX - Firmware V8.4 - Advanced Information V32 05/2022- 273 -
Waiting Field Function
Callers can be parked in the waiting field either automatically or bypressing a key and then be retrieved again or transferred. The waiting fieldis operated using one or more waiting field receptions.
Call acceptance in the waiting field is carried out as follows:
• If all of the waiting field receptions have been switched off, the phonesring according to normal call distribution.
• After switching on one or more waiting field receptions, the calls in therespective waiting field are signalled on the waiting field keys of theenabled waiting field receptions.
Important: After switching on the waiting field reception, any callforwarding for subscribers configured for the phone, parallel callsas well as the do-not-disturb function are switched off. A reworktime configured for the group does not work. Not until the waitingfield reception is switched off (on the phone) will these functions(for example, call forwarding on an answering machine) becomeavailable again. The function in question (except parallel calling,rework time) must be switched on again.
Important: For existing calls, incoming exchange line callsare signalled by blinking LEDs and also by an attention tone,if enabled. For multiple active waiting field receptions, a callerplaced in the waiting field is also signalled in the other waiting fieldreceptions by the attention tone.
• The caller can be accepted normally by picking up the receiver orplaced in the waiting field by pressing the associated waiting field key.If the automatic call acceptance is set to on busy or according to atime, callers are also automatically placed in the waiting field.

Waiting Field Function
COMmander 6000/R/RX - Firmware V8.4 - Advanced Information V32 05/2022- 274 -
• A caller who has been placed in the waiting field, hears hold music.If a group is configured as waiting field reception and announcementbefore answering is enabled, the caller hears the announcementbefore answering first.
• A caller is kept a max. of 16 minutes without interruption in the waitingfield. If the waiting time is not interrupted by a call to the waiting calleror the call is forwarded, the connection is disconnected.
• You are reminded that the subscriber is still waiting by a short toneonce per minute.
• Press the corresponding waiting field key to initiate a call with a callerin the waiting field.
• An external caller in the waiting field can be rerouted internally asnormal. If the line of the person being called is busy, the externalsubscriber can be placed in that person's queue. If the person beingcalled does not accept the call, the external caller is put back in thewaiting field. This is signalled by an attention tone, if enabled.
• If there is no one in the waiting field, you can make calls as normal anduse the keys on the phone without limitations.
• As long as information about a call in the queue is showing on thedisplay (LED lights up in yellow), several of the keys are withoutfunction and as soon as you picked up the receiver, you are connectedto the call in the queue. You can prevent this by pressing the Exit key.After this, the LED lights up in red and the display is in the idle state.Now you can make a call as normal, for instance, by selecting a phonenumber from the phone book.
Note: If the waiting field function has been enabled, the LAN TAPIfunction will not be available for the enabled extensions.
Requirements:

Waiting Field Function
COMmander 6000/R/RX - Firmware V8.4 - Advanced Information V32 05/2022- 275 -
• System phone, that supports function keys for reception phones(optional, see the phone manual)
Proceed as follows for configuration:
• Creating a group for the waiting field.
− Using the Configuration Manager (on the following pages)
− Groups > Phone numbers
− Groups > Properties > Basic settings
Note: To avoid user errors, all subscribers should bePermanently logged in.
• Managing and assigning audio files for announcements.
− Using the Configuration Manager (on the following pages)
− Functions > Music on Hold and Announcements > Filemanagement
− Functions > Music on Hold/announcements > File assignment> Ann. before answering
− Using a character string on the internal phone (see Announcementbefore Answering)
• Configuring announcement before answering for the group.
− Using the Configuration Manager (Groups > Properties >Reachability)
• Configuring call distribution for the group.
− Using the Configuration Manager (Public switched tel. networks> Call distribution)
Waiting Field Function
COMmander 6000/R/RX - Firmware V8.4 - Advanced Information V32 05/2022- 276 -
• Selecting the group for the waiting field and making settings for thewaiting field.
− Using the Configuration Manager (Functions > Waiting field)
• On each waiting field reception, assigning one or more waiting fieldkeys and one internal waiting field key (optional, see manual for thephone).
Wake-up Functions
COMmander 6000/R/RX - Firmware V8.4 - Advanced Information V32 05/2022- 277 -
Wake-up Functions
To be reminded of one-time or recurring appointments, every user canconfigure different wake-up times for his phone.
Proceed as follows for configuration:
• Making settings for wake-up calls.
− Using the Configuration Manager (Functions > Wake-up times)
• Configuring wake-up times and switching wake-up on/off.
− Using the Configuration Manager (Functions > Wake-up times)
− Using a character string on the internal phone (see Wake-upFunctions)
• Managing and assigning audio files for announcements.
− Using the Configuration Manager (on the following pages)
− Functions > Music on Hold and Announcements > Filemanagement
− Functions > Music on Hold/announcements > File assignment> wake-up announcements
− Using a character string on the internal phone (see Wake-upFunctions)
• Creating switching times for switching the wake-up announcement.
− Using the Configuration Manager (Time control > Switchingtimes)

Phoning
COMmander 6000/R/RX - Firmware V8.4 - Advanced Information V32 05/2022- 278 -
PhoningUsing Different Phone TypesIncoming CallsCall Waiting CallsOutgoing CallsUnsuccessful Outgoing CallsQuery CallsTransferringConference Calls Using Different Phone TypesIncoming CallsCall Waiting CallsOutgoing CallsUnsuccessful Outgoing CallsQuery CallsTransferringConference Calls

Using Different Phone Types
COMmander 6000/R/RX - Firmware V8.4 - Advanced Information V32 05/2022- 279 -
Using Different Phone Types
Depending on the used phone type, there are differences in the operationand programming of the PBX. The following phones can be operated atthe PBX:
Analogue Phones (PD and DTMF)
If you are already in a call state with another subscriber (internal orexternal), you have to press the Flash key (signal key, R key) first on aDTMF phone before dialling a digit, e.g. for a call transfer.
Due to the difficulties concerning the transferring with PD phones, thisfunction is not available for this kind of phones. If your phone offers bothdialling modes, you should therefore set it to DTMF.
Analogue T-Net Phones
On some analogue DTMF phones, specific T-Net functions can beperformed in the analogue T-Net via the menu or via specific functionkeys. If you are operating such a phone as an internal subscriber, youcan also use these comfortable operating modes for some functions ofthe PBX. Please note that the T-Net functions of the phone are limitedbecause the PBX doesn‘t support some functions. If you want to use theT-Net functions of your phone, read the manual for the phone. Whenentering phone numbers, take care to enter the leading exchange lineaccess number. Instead of an "announcement of the public exchange",you will hear the confirmation tone for successful programming.
ISDN Phones
To be able to operate your ISDN phone, you have to make yourselfacquainted with its functions. To do this, read the manual for the phone.

Using Different Phone Types
COMmander 6000/R/RX - Firmware V8.4 - Advanced Information V32 05/2022- 280 -
It is vital to know which key (e.g. hold or R key or menu you have to useto initiate a query call. To use some functions, you have to rely completelyon the menus/keys of the phone (see notes). The digits to be dialled foranalogue phones are not required here.
System Phones
As described in this manual, you can use the major part of the PBXfunctions with all connected phones. With the system phones, theoperation is more comfortable, since the most important functions can becontrolled via a menu/function key (optional). In this case, the operation isdescribed in the manual. Some of the PBX functions described can onlybe used on the system phones specified in the description.
Standard VoIP Phones
On some standard VoIP phones, functions such as Call waiting,Conference, Query calling, and Hold are not carried out via the PBX,but rather on the phone itself. Therefore, the instructions for operatingthese functions may deviate from the descriptions in this guide. For moreinformation on this, read the manual for the phone.
Normally, pressing the pound key # on a standard VoIP phone initiatesa dialling procedure. Since this key is required for numerous functions,as well as for all settings (programming), using the pound key forthese actions is not possible on most standard VoIP phones. For moreinformation on this, read the manual for the phone.

Incoming Calls
COMmander 6000/R/RX - Firmware V8.4 - Advanced Information V32 05/2022- 281 -
Incoming Calls
Accepting Incoming CallsTaking over a Call (Pick-up)Taking over a Call (Call Take-over)Accepting Door Call and Opening the DoorAccepting an Alarm Call and Confirming the Alarm Accepting Incoming CallsTaking over a Call (Pick-up)Taking over a Call (Call Take-over)Accepting Door Call and Opening the DoorAccepting an Alarm Call and Confirming the Alarm

Accepting Incoming Calls
COMmander 6000/R/RX - Firmware V8.4 - Advanced Information V32 05/2022- 282 -
Accepting Incoming Calls
When you receive a call, proceed as follows:
• Pick up the receiver.
You are connected with the caller.

Taking over a Call (Pick-up)
COMmander 6000/R/RX - Firmware V8.4 - Advanced Information V32 05/2022- 283 -
Taking over a Call (Pick-up)
Using Pick-up, you can take a call on your own phone that was originallysent to another internal phone.
Proceed as follows:
• Using a character string on the internal phone
• Using the menu/function key on a system phone (optional, see thephone manual)
Requirements:
• Authorisation Pick-up assigned to the subscriber
• To pick up an external call: Exchange line authorisation assigned tothe subscriber for incoming calls (International, National, City or onlyincoming, with emergency call)
If an internal phone rings, proceed as follows:
1. Pick up the receiver of your phone.
Note: During an existing call press the Flash key or the Querykey.
2. Dial ##06.
3. Enter the internal number of the phone that is ringing. Possible entries:
Internal number of the individual phone (for exchange line requesttype Direct exchange line phone: with preceding **)
Internal number of the group (for exchange line request type Directexchange line phone: with preceding **)

Taking over a Call (Call Take-over)
COMmander 6000/R/RX - Firmware V8.4 - Advanced Information V32 05/2022- 284 -
Taking over a Call (Call Take-over)
If the answering machine has already taken the call, you can perform acall take-over to take the call on your own phone.
Proceed as follows:
• Using a character string on the internal phone
• Using the menu/function key on a system phone (optional, see thephone manual)
Requirements:
• Call take-over enabled for the subscriber
• To perform call take-over of an external call: Exchange lineauthorisation assigned to the subscriber for incoming calls(International, National, City or only incoming, with emergencycall)
If the answering machine has already taken the call, proceed as follows:
1. Pick up the receiver.
Note: During an existing call press the Flash key or the Querykey.
2. Dial ##06.
3. Enter the internal number of the answering machine that is conductingthe call to be picked up. Possible entries:
Internal number of the individual answering machine (forexchange line request type Direct exchange line phone: with preceding**)

Taking over a Call (Call Take-over)
COMmander 6000/R/RX - Firmware V8.4 - Advanced Information V32 05/2022- 285 -
Internal number of the group (for exchange line request type Directexchange line phone: with preceding **)

Accepting Door Call and Opening the Door
COMmander 6000/R/RX - Firmware V8.4 - Advanced Information V32 05/2022- 286 -
Accepting Door Call and Opening the Door
The PBX supports the connection and control of various types of doorterminals. In addition to a door bell, ringing at the door can in this wayalso be indicated by internal or external phones or groups. Each door bellbutton can be assigned an individual target number. You can also carryout various door functions such as speech connection with the door andactuation of the door opener from internal phones.
Proceed as follows:
• Using an internal phone
• Using the menu/function key on a system phone (optional, see thephone manual)
Requirements:
• Configured door terminal
• Configured door call
• Configured relay with operating mode Door opener
• Authorisation Open door assigned to subscriber or group
1. Pick up the receiver.
Note: During an existing call press the Flash key or the Querykey and dial 2.
You are connected with the door terminal.
2. Press the Flash key or the Query key.
3. Dial #.

Accepting an Alarm Call and Confirming the Alarm
COMmander 6000/R/RX - Firmware V8.4 - Advanced Information V32 05/2022- 287 -
Accepting an Alarm Call and Confirming the Alarm
An alarm can be signalled by the ringing of an internal or external phone.To terminate the alarm loop and to switch off assigned relays, the alarmcan be confirmed.
Proceed as follows:
• Using an internal or external phone
Requirements:
• DTMF-capable phone or DTMF dialler
If an alarm is signaled at an internal or external phone, proceed as follows:
1. Pick-up the receiver.
You will hear the announcement.
2. Within the next 60 seconds dial 0.
You will hear the confirmation tone.
Note: You can confirm the alarm already during theannouncement. If you do not confirm the alarm (or dial awrong digit), you will hear the busy signal and the call will beautomatically terminated by the PBX. A further alarm call maybe initiated after some time if the other alarm subscribers do notconfirm the alarm.

Call Waiting Calls
COMmander 6000/R/RX - Firmware V8.4 - Advanced Information V32 05/2022- 288 -
Call Waiting Calls
Rejecting a Call Waiting CallAccepting the Call Waiting CallDisconnecting the Current Call and Accepting the Call Waiting Call Rejecting a Call Waiting CallAccepting the Call Waiting CallDisconnecting the Current Call and Accepting the Call Waiting Call

Rejecting a Call Waiting Call
COMmander 6000/R/RX - Firmware V8.4 - Advanced Information V32 05/2022- 289 -
Rejecting a Call Waiting Call
If you receive another call while you are already making a call and you donot want to speak with the second caller, or you do not want to interruptthe first call, you can reject the call waiting call. The caller receives a busysignal as long as no other phones are called.
If a call waiting call is signalled, proceed as follows:
1. Press the Flash key or the Query key.
2. Dial 0.
Note: You can also use this function on analogue phones, where it canbe performed via the T-Net function key/menu (optional, see manualfor the phone).
Note: On ISDN and system phones, this function is performed via anexisting function key or via the menu (optional, see manual for thephone).

Accepting the Call Waiting Call
COMmander 6000/R/RX - Firmware V8.4 - Advanced Information V32 05/2022- 290 -
Accepting the Call Waiting Call
If you receive another call while you are already making a call and youwant to speak to the second caller, or you want to end the current call,you can accept the call waiting call. After accepting, you are connectedwith the other caller. Your previous communication partner hears the holdmusic.
If a call waiting call is signaled, proceed as follows:
1. Press the Flash key or the Query key.
2. Dial 2.
Note: You can also use this function on analogue phones, where it canbe performed via the T-Net function key/menu (optional, see manualfor the phone).
Note: On ISDN and system phones, this function is performed via anexisting function key or via the menu (optional, see manual for thephone).
Note: If the waiting call is an alarm call, the currently existing call willbe terminated when accepting the waiting alarm call.

Disconnecting the Current Call and Accepting the Call Waiting Call
COMmander 6000/R/RX - Firmware V8.4 - Advanced Information V32 05/2022- 291 -
Disconnecting the Current Call and Accepting the CallWaiting Call
A call received during a call can be accepted. At the same time, theongoing call is ended.
If a call waiting call is signalled, proceed as follows:
1. Press the Flash key or the Query key.
2. Dial 1.
Note: You can also use this function on analogue phones, whereit can be performed via the T-Net function key/menu (optional, seemanual for the phone).
Note: Note. On ISDN and system phones, this function isperformed via an existing function key or via the menu (optional,see manual for the phone).

Outgoing Calls
COMmander 6000/R/RX - Firmware V8.4 - Advanced Information V32 05/2022- 292 -
Outgoing Calls
Initiating an Internal CallInitiating an External CallInitiating an External Call with Calling Line Identity RestrictionInitiating Private Exchange Line AccessInitiating Private Exchange Line Access without a PINInitiating Targeted Exchange Line AccessForce Public Exchange Call for Automatic Exchange Line RequestInitiating Targeted VoIP AccessInitiating Calls with Project AssignmentCalling a Door and Opening the DoorInitiating InterCom Announcement/Hands-FreeInitiating Loudspeaker Announcement Initiating an Internal CallInitiating an External CallInitiating an External Call with Calling Line Identity RestrictionInitiating Private Exchange Line AccessInitiating Private Exchange Line Access without a PINInitiating Targeted Exchange Line AccessForce Public Exchange Call for Automatic Exchange Line RequestInitiating Targeted VoIP AccessInitiating Calls with Project AssignmentCalling a Door and Opening the DoorInitiating InterCom Announcement/Hands-FreeInitiating Loudspeaker Announcement

Initiating an Internal Call
COMmander 6000/R/RX - Firmware V8.4 - Advanced Information V32 05/2022- 293 -
Initiating an Internal Call
Internal calls are free of charge.
1. Pick up the receiver.
2. Enter an internal number. Possible entries:
Internal number of the individual phone (for exchange line requesttype Direct exchange line phone: with preceding **)
Internal number of the group (for exchange line request type Directexchange line phone: with preceding **)
Once you have finished dialling the phone number, the subscriber willbe called.
Note: If the internally called subscriber is busy, you can knockon his phone after a short waiting (if call waiting is allowed on hisphone).

Initiating an External Call
COMmander 6000/R/RX - Firmware V8.4 - Advanced Information V32 05/2022- 294 -
Initiating an External Call
1. Pick up the receiver.
2. Enter an external number. Possible entries:
External number (for exchange line request type Internal phone: withpreceding exchange line access number)
Short code number (for exchange line request type Direct exchangeline phone: with preceding **)
Once you have finished dialling the phone number, the subscriber willbe called.
Initiating an External Call with Calling Line Identity Restriction
COMmander 6000/R/RX - Firmware V8.4 - Advanced Information V32 05/2022- 295 -
Initiating an External Call with Calling Line IdentityRestriction
If you want to prevent your next communication partner from seeing yourphone number on his phone display, you can suppress the phone numberdisplay to your communication partner.
Proceed as follows:
• Using a character string on the internal phone
• Using the menu/function key on a system phone (optional, see thephone manual)
Requirements:
• The CLIR (calling line identity restriction) service feature has beenenabled by the network operator.
1. Pick up the receiver.
2. Dial *31#.
3. Enter an external number. Possible entries:
External number (for exchange line request type Internal phone: withpreceding exchange line access number)
Short code number (for exchange line request type Direct exchangeline phone: with preceding **)
Once you have finished dialling the phone number, the subscriber willbe called.
The phone number display suppression has been enabled for this call.
Initiating an External Call with Calling Line Identity Restriction
COMmander 6000/R/RX - Firmware V8.4 - Advanced Information V32 05/2022- 296 -
Note: You can also use this function on analogue phones, whereit can be performed via the T-Net function key/menu (optional, seemanual for the phone).
Note: On some ISDN phones and system phones, this functioncan also be called via an existing function key or via the menu(optional, see manual for the phone).
Note: If an emergency number is called while calling line identityrestriction is enabled, calling line identity restriction is disabled sothat the emergency service can identify the caller.

Initiating Private Exchange Line Access
COMmander 6000/R/RX - Firmware V8.4 - Advanced Information V32 05/2022- 297 -
Initiating Private Exchange Line Access
Private (personalised) exchange line access enables separate billing forbusiness and personal calls for individual employees. The subscriber thatwant to make personal calls can initiate private exchange line access onany internal phone by entering the user PIN. Personal calls are assignedto the subscriber in question in the call data record based on the user PIN.
Requirements:
• User PIN configured for the subscriber
1. Pick up the receiver of any internal phone.
2. Dial ##92.
3. Enter the user PIN.
4. Dial *.
5. Enter the external number. Possible entries:
External number (for exchange line request type Internal phone: withpreceding exchange line access number)
Short code number (for exchange line request type Direct exchangeline phone: with preceding **)
You are making a personal call.

Initiating Private Exchange Line Access without a PIN
COMmander 6000/R/RX - Firmware V8.4 - Advanced Information V32 05/2022- 298 -
Initiating Private Exchange Line Access without a PIN
Private (personalised) exchange line access enables separate billingfor business and personal calls for individual employees. Authorisationgranted specifically to the subscriber allows private exchange line accesswithout requiring a user PIN to be initiated on the subscriber's own phone.The charges are billed to the phone used.
Requirements:
• Authorisation Private exchange line access without PIN assigned tothe subscriber
1. Pick up the receiver.
2. Dial ##91.
3. Enter the external number. Possible entries:
External number (for exchange line request type Internal phone: withpreceding exchange line access number)
Short code number (for exchange line request type Direct exchangeline phone: with preceding **)
You are making a personal call.
Initiating Targeted Exchange Line Access
COMmander 6000/R/RX - Firmware V8.4 - Advanced Information V32 05/2022- 299 -
Initiating Targeted Exchange Line Access
Using targeted exchange line access, you can define which externalexchange line and own external number is transmitted for an external call.
Proceed as follows:
• Using a character string on the internal phone
• Using the menu/function key on a system phone (optional, see thephone manual)
Requirements:
• External S0 port, external analogue port (optional, see Technical Datain the Instructions)
1. Pick up the receiver.
2. Dial ##96.
3. Enter the separate external number to be transmitted. Possible entries:
External numbers
4. Dial *.
5. Enter an external number. Possible entries:
External number (for exchange line request type Internal phone: withpreceding exchange line access number)
Short code number (for exchange line request type Direct exchangeline phone: with preceding **)
The subscriber is called.

Force Public Exchange Call for Automatic Exchange Line Request
COMmander 6000/R/RX - Firmware V8.4 - Advanced Information V32 05/2022- 300 -
Force Public Exchange Call for Automatic ExchangeLine Request
1. Pick up the receiver.
2. Select ##94.
3. Enter an external number. Possible entries:
External number
Once you have finished dialling the phone number, the subscriber willbe called.

Initiating Targeted VoIP Access
COMmander 6000/R/RX - Firmware V8.4 - Advanced Information V32 05/2022- 301 -
Initiating Targeted VoIP Access
An external call can be initiated via a specific VoIP account using targetedVoIP access point.
The Internet service provider's network can only be accessed via targetedVoIP access, e.g., when querying the mailbox.
Proceed as follows:
• Using a character string on the internal phone
• Using the menu/function key on a system phone (optional, see thephone manual)
1. Pick up the receiver.
2. Enter the account number. Possible entries:
Internal number of the VoIP account (for exchange line requesttypes Direct exchange line phone and Automatic exchange linerequest: with preceding **)
3. Enter an external number. Possible entries:
External number (for exchange line request type Internal phone: withpreceding exchange line access number)
Note: In any case, the external number must be dialled with thecorresponding local area code, even if it is your own local areacode. The special numbers provided by the VoIP provider forchecking one's account status or dialling usually do not include alocal area code.
The subscriber is called.

Initiating Targeted VoIP Access
COMmander 6000/R/RX - Firmware V8.4 - Advanced Information V32 05/2022- 302 -
Note: No callback is possible (CCBS or CCNR) for outgoing callsover VoIP.

Initiating Calls with Project Assignment
COMmander 6000/R/RX - Firmware V8.4 - Advanced Information V32 05/2022- 303 -
Initiating Calls with Project Assignment
The exchange line access with project assignment allows the sortingof external calls to a specific project/customer/client. With call datamanagement, the charges and the time expenditures may be assigned todifferent projects/customers/clients.
Proceed as follows:
• Using a character string on the internal phone
• Using the menu/function key on a system phone (optional, see thephone manual)
Requirements:
• Assigning of project numbers function enabled (optional, seeActivation)
1. Pick up the receiver.
2. Dial ##93.
3. Enter the 2- to 6-digit project number.
4. Dial *.
5. Enter an external number. Possible entries:
External number (for exchange line request type Internal phone: withpreceding exchange line access number)
Short code number (for exchange line request type Direct exchangeline phone: with preceding **)

Calling a Door and Opening the Door
COMmander 6000/R/RX - Firmware V8.4 - Advanced Information V32 05/2022- 304 -
Calling a Door and Opening the Door
The PBX supports the connection and control of various types of doorterminals. In addition to a door bell, ringing at the door can in this wayalso be indicated by internal or external phones or groups. Each door bellbutton can be assigned an individual destination number. You can alsocarry out various door functions such as speech connection with the doorand actuation of the door opener from internal phones.
Proceed as follows:
• Using an internal phone
• Using the menu/function key on a system phone (optional, see thephone manual)
Requirements:
• Configured door terminal
• Configured relay with operating mode Door opener
• Authorisation Open door assigned to subscriber or group
1. Pick up the receiver.
Note: During a call, press the Flash key or the Query key.
2. Enter the internal number of the door terminal. Possible entries:
Internal number of the door terminal (for exchange line request typeDirect exchange line phone: with preceding **)
The call connection is immediately established after dialling the phonenumber.

Calling a Door and Opening the Door
COMmander 6000/R/RX - Firmware V8.4 - Advanced Information V32 05/2022- 305 -
3. Press the Flash key or the Query key.
4. Dial #.

Initiating InterCom Announcement/Hands-Free
COMmander 6000/R/RX - Firmware V8.4 - Advanced Information V32 05/2022- 306 -
Initiating InterCom Announcement/Hands-Free
The InterCom function enables an announcement to system phones (onephone or group) from any internal phone without someone having toactively receive a call (for example, in a doctor's office).
Furthermore, the caller's system phone can be programmed to switchon the microphone in addition to the loudspeaker (hands-free) so that aperson nearby can speak with the caller using this intercom system.
Proceed as follows:
• Using a character string on the internal phone
• Using the menu/function key on a system phone (optional, see thephone manual)
Requirements:
• Enabled InterCom authorisation at the InterCom destination
1. Pick up the receiver.
2. Dial one of the following character strings:
##011: Initiates an InterCom announcement.
##012: Initiates InterCom hands-free.
3. Enter the internal number of the system phone. Possible entries:
Internal number of the individual system phone (for exchange linerequest type Direct exchange line phone: with preceding **)
The system phone automatically takes the call after a single ring.
Initiating Loudspeaker Announcement
COMmander 6000/R/RX - Firmware V8.4 - Advanced Information V32 05/2022- 307 -
Initiating Loudspeaker Announcement
This function enables loudspeaker announcements over an activeloudspeaker.
Proceed as follows:
• Using a character string on the internal phone
• Using the menu/function key on a system phone (optional, see thephone manual)
Requirements:
• Created announcement output
• Authorisation Loudspeaker announcement assigned to thesubscriber
1. Pick up the receiver.
2. Enter the internal number of the announcement output (for exchangeline request type Direct exchange line phone with preceding **). Theconnection is immediatley established.
Unsuccessful Outgoing Calls
COMmander 6000/R/RX - Firmware V8.4 - Advanced Information V32 05/2022- 308 -
Unsuccessful Outgoing Calls
Initiating Internal Callback on BusyInitiating External Callback on BusyDeleting Callback on BusyInitiating Reservation of Exchange Line on BusyInitiating Internal Callback on No ResponseInitiating External Callback on No ResponseInitiating Priority Call for Do-Not-Disturb Initiating Internal Callback on BusyInitiating External Callback on BusyDeleting Callback on BusyInitiating Reservation of Exchange Line on BusyInitiating Internal Callback on No ResponseInitiating External Callback on No ResponseInitiating Priority Call for Do-Not-Disturb

Initiating Internal Callback on Busy
COMmander 6000/R/RX - Firmware V8.4 - Advanced Information V32 05/2022- 309 -
Initiating Internal Callback on Busy
If you have initiated a callback, as soon as the other subscriber has hungup the receiver to end the call, the PBX calls you. If you then pick up thereceiver, the other subscriber will be called. If the other subscriber picksup the receiver, the connection for the call will be established. This deletesthe callback procedure in the PBX.
Important: On system phones, this function is called via the menu/phone app (optional, see manual for the phone).
Important: To use this function at ISDN phones or to delete it again,this function must be supported via a function key or via the menu bythe respective phone (optional, see manual for the phone).
Note: You can also use this function on analogue phones, where it canbe performed via the T-Net function key/menu (optional, see manualfor the phone).
If the connection you are calling is busy, proceed as follows:
1. Press the Flash key or the Query key.
2. Dial *37#.
You will hear the confirmation tone.
3. Hang up the receiver.
As soon as the connection is no longer busy, you are called by thepublic exchange for a period of 20 seconds.
4. Pick up the receiver to the make the callback.
Note: If you do not pick up the receiver within the 20 secondsduring which the PBX calls you, the callback request will bedeleted.
If you pick up the receiver, the subscriber will be called.

Initiating External Callback on Busy
COMmander 6000/R/RX - Firmware V8.4 - Advanced Information V32 05/2022- 310 -
Initiating External Callback on Busy
If you have initiated a callback, as soon as the other subscriber hashung up the receiver to end the call, the public exchange calls you. Ifyou then pick up the receiver, the other subscriber will be called. If theother subscriber picks up the receiver, the connection for the call will beestablished. This deletes the callback procedure in the public exchange.
Requirements:
• Fulfilling the technical requirements for a callback on busy (forinstance, not all network providers provide callback on a PTPconnection)
• Service feature CCBS (callback on busy) is enabled by the networkprovider.
Important: On system phones, this function is called via the menu/phone app (optional, see manual for the phone).
Note: To use this function at ISDN phones or to delete it again, thisfunction must be supported via a function key or via the menu by therespective phone (optional, see manual for the phone).
Note: You can also use this function on analogue phones, where it canbe performed via the T-Net function key/menu (optional, see manualfor the phone). Instead of the announcement by the public exchange,you will hear the confirmation tone.
If the connection you are calling is busy, proceed as follows:
1. Press the Flash key or the Query key.
2. Dial *37#.
You will hear the confirmation tone.

Initiating External Callback on Busy
COMmander 6000/R/RX - Firmware V8.4 - Advanced Information V32 05/2022- 311 -
Note: If you do not hear a confirmation tone, the callback requesthas been rejected by the public exchange.
3. Hang up the receiver.
As soon as the connection is no longer busy, you will be called by thepublic exchange for a period of 20 seconds.
Note: A callback will be stored in the public exchange for aduration of up to 45 minutes. If the called subscriber has notterminated his call until then, the callback will automatically bedeleted.
4. Pick up the receiver to the make the callback.
Note: If you do not pick up the receiver within the 20 secondsduring which the public exchange calls you, the callback requestwill be deleted.
If you pick up the receiver, the subscriber will be called.
Note: You also have the option of letting the public exchange callyou as soon as one of the B channels on the previously calledISDN connection is available. If the subscriber for which you haveset up the callback is phoning on the other B channel, this callbackwill remain unsuccessful.

Deleting Callback on Busy
COMmander 6000/R/RX - Firmware V8.4 - Advanced Information V32 05/2022- 312 -
Deleting Callback on Busy
If you want to delete the initiated callback on busy ahead of time, proceedas follows:
1. Pick up the receiver.
2. Dial #37#.
3. Hang up the receiver.

Initiating Reservation of Exchange Line on Busy
COMmander 6000/R/RX - Firmware V8.4 - Advanced Information V32 05/2022- 313 -
Initiating Reservation of Exchange Line on Busy
If you hear a busy signal before you have continued dialling the phonenumber, all exchange lines (first and second B channel of the availableexternal S0 ports) are currently busy. You can initiate the reservation of anexchange line if you want your PBX to call you back as soon as a free lineis available.
If you hear the busy signal before finishing the dialling process, proceedas follows:
1. Press the Flash key or the Query key.
2. Dial *37#.
You will hear the confirmation tone.
3. Hang up the receiver.
As soon as a line is available, you will be called back by the PBX.
4. Pick up the receiver.
You will hear the external dial tone.
5. Dial an external number without an exchange line access number.
Note: When using ISDN phones, you cannot dial directly afterpicking up the receiver of the ringing phone (callback of the PBX).After picking up the receiver when the phone rings, you will hearthe confirmation tone instead of the external dial tone. Put downthe receiver and pick it up again immediately. You can now dial asusual.

Initiating Internal Callback on No Response
COMmander 6000/R/RX - Firmware V8.4 - Advanced Information V32 05/2022- 314 -
Initiating Internal Callback on No Response
If you initiated a callback, you call the subscriber you did not reachpreviously as soon as he is available again.
Important: On the system phones, this function is called via the menu/phone app (optional, see manual for the phone).
Important: To use this function at ISDN phones or to delete it again,this function must be supported via a function key or via the menu bythe respective phone (optional, see manual for the phone).
Note: Some analogue phones permit this function via the T-Netfunction key/menu (optional, see manual for the phone).
If the subscriber does not answer your call proceed as follows:
1. Press the Flash key or the Query key.
2. Dial *37#.
3. Hang up the receiver. You are called as soon as the subscriber isavailable.
4. Pick up the receiver to the make the callback. If you do not pick upwithin 20 seconds, the callback is deleted.

Initiating External Callback on No Response
COMmander 6000/R/RX - Firmware V8.4 - Advanced Information V32 05/2022- 315 -
Initiating External Callback on No Response
If you initiated a callback, you call the subscriber you did not reachpreviously as soon as he is available again.
Requirements:
• Service feature CCNR (callback on no response) is enabled by thenetwork provider.
• Use of an external S0 port for the call (optional, see Technical Data inthe Instructions)
Important: On system phones, this function is called via the menu/phone app (optional, see manual for the phone).
Note: To use this function at ISDN phones or to delete it again, thisfunction must be supported via a function key or via the menu by therespective phone (optional, see manual for the phone).
Note: Some analogue phones permit this function via the T-Netfunction key/menu (optional, see manual for the phone).
If the subscriber does not answer your call proceed as follows:
1. Press the Flash key or the Query key.
2. Dial *37#.
Note: If you do not hear a confirmation tone, the callback requestwas not successful.
3. Hang up the receiver. You are called as soon as the subscriber isavailable.
Note: A callback will be stored for up to 45 minutes.
4. Pick up the receiver to the make the callback. If you do not pick upwithin 20 seconds, the callback is deleted.

Initiating Priority Call for Do-Not-Disturb
COMmander 6000/R/RX - Firmware V8.4 - Advanced Information V32 05/2022- 316 -
Initiating Priority Call for Do-Not-Disturb
If, for example, a person must absolutely be reached in an emergencydespite the do-not-disturb function, the do-not-disturb function can becircumvented by a priority call from an internal phone.
If the internal phone you are trying to call is busy because it is set to do-not-disturb, proceed as follows:
• Wait ten seconds.
The subscriber is now called.

Query Calls
COMmander 6000/R/RX - Firmware V8.4 - Advanced Information V32 05/2022- 317 -
Query Calls
Information on the ChapterInitiating a Query CallEnding a Query CallToggling between ConversationsEnding One of the Two CallsConnecting Both Communication PartnersInitiating Query Call to Third Subscriber Information on the ChapterInitiating a Query CallEnding a Query CallToggling between ConversationsEnding One of the Two CallsConnecting Both Communication PartnersInitiating Query Call to Third Subscriber

Information on the Chapter
COMmander 6000/R/RX - Firmware V8.4 - Advanced Information V32 05/2022- 318 -
Information on the Chapter
During a query call, you are talking with one subscriber while yourprevious communication partner is on hold on the PBX in the backgroundlistening to hold music.

Initiating a Query Call
COMmander 6000/R/RX - Firmware V8.4 - Advanced Information V32 05/2022- 319 -
Initiating a Query Call
Requirements:
• For a query call with two external communication partners: at least twoexternal call channels
During a call, proceed as follows:
1. Press the Flash key or the Query key.
2. Enter a phone number. Possible entries:
Internal number of the individual phone (for exchange line requesttype Direct exchange line phone: with preceding **)
Internal number of the group (for exchange line request type Directexchange line phone: with preceding **)
Internal number of the door (for exchange line request type Directexchange line phone: with preceding **)
External number (for exchange line request type Internal phone: withpreceding exchange line access number)
Short code number (for exchange line request type Direct exchangeline phone: with preceding **)
The subscriber is called.
Note: After pressing the Flash key or the Query key, you canalso initiate other call types (e. g. private calls), an InterComannouncement, or a pick-up. Exception: During a door call only thedialling of one phone number is possible.

Initiating a Query Call
COMmander 6000/R/RX - Firmware V8.4 - Advanced Information V32 05/2022- 320 -
Note: Note. You can also use this function on analogue phones,where it can be performed via the T-Net function key/menu(optional, see manual for the phone).
Note: On ISDN and system phones, this function is performed viaan existing function key or via the menu (optional, see manual forthe phone).

Ending a Query Call
COMmander 6000/R/RX - Firmware V8.4 - Advanced Information V32 05/2022- 321 -
Ending a Query Call
If you make a query call and the number is busy but there is no response,proceed as described in one of the following steps.
• The subscriber called for the query call does not respond: Press theFlash key or the Query key and dial 1.
You are now reconnected with the person waiting on the other line.
• The subscriber called for the query call is busy. Wait.
You will automatically be reconnected with the communication partnerwaiting on the other line.
Note: On ISDN and system phones, this function is performedvia a function key or via the menu (optional, see manual for thephone).

Toggling between Conversations
COMmander 6000/R/RX - Firmware V8.4 - Advanced Information V32 05/2022- 322 -
Toggling between Conversations
You can toggle between your two communication partners.
During a query call, proceed as follows:
1. Press the Flash key or the Query key.
2. Dial 2.
You continue to conduct a query call. The other communication partneris now active.
Note: You can also use this function on analogue phones, whereit can be performed via the T-Net function key/menu (optional, seemanual for the phone).
Note: On ISDN and system phones, this function is performed viaan existing function key or via the menu (optional, see manual forthe phone).

Ending One of the Two Calls
COMmander 6000/R/RX - Firmware V8.4 - Advanced Information V32 05/2022- 323 -
Ending One of the Two Calls
When you end a query call and want to continue talking with one of thecommunication partners, you can specifically end the call with the othercommunication partner separately.
If one of your two communication partners hangs up the receiver, you willremain connected with the other one.
Alternatively, during a query call, proceed as described in one of thefollowing steps.
• Press the Flash key or the Query key and dial 1.
The current call is disconnected.
You will then make an one-to-one call with the communication partnerwho had previously been on hold.
• Press the Flash key or the Query key and dial 0.
The call in the background will be disconnected.
You will then make an one-to-one call with the communication partnerwho had previously been active.
Note: Note. You can also use this function on analogue phones,where it can be performed via the T-Net function key/menu(optional, see manual for the phone).
Note: On ISDN and system phones, this function is performed viaan existing function key or via the menu (optional, see manual forthe phone).

Connecting Both Communication Partners
COMmander 6000/R/RX - Firmware V8.4 - Advanced Information V32 05/2022- 324 -
Connecting Both Communication Partners
If you want to let your communication partners speak with each other, youcan connect them.
Requirements:
• To connect two external communication partners, the followingis required: Authorisation Transfer of external calls to externalassigned to the subscriber
During a query call, proceed as follows:
• Hang up the receiver.
Both communication partners are connected with each other.

Initiating Query Call to Third Subscriber
COMmander 6000/R/RX - Firmware V8.4 - Advanced Information V32 05/2022- 325 -
Initiating Query Call to Third Subscriber
If you want to connect a further communication partner during a querycall, you can initiate a third call for this purpose. Both the first and secondcommunication partner will be on hold in the background during this time.
Requirements:
• Initiated query call
During a query call, proceed as follows:
1. Press the Flash key or the Query key.
2. Dial 5.
3. Enter a phone number. Possible entries:
Internal number of the individual phone (for exchange line requesttype Direct exchange line phone: with preceding **)
Internal number of the group (for exchange line request type Directexchange line phone: with preceding **)
External number (for exchange line request type Internal phone: withpreceding exchange line access number)
Short code number (for exchange line request type Direct exchangeline phone: with preceding **)
As soon as to the subscriber being called picks up the receiver, youwill make a third call.
Important: To use this function on ISDN and system phones, thefunction must be supported via a function key or via the menu bythe respective phone (optional, see manual for the phone).
4. Proceed as required.

Initiating Query Call to Third Subscriber
COMmander 6000/R/RX - Firmware V8.4 - Advanced Information V32 05/2022- 326 -
• To disconnect the third call and go back to the query call with thepreviously active communication partner, press the Flash key orthe Query key and dial 1.
You then make a query call with the communication partner whohad previously been active. The call with the third communicationpartner is disconnected.
• To disconnect the third call and go back to the query call with thecommunication partner who had previously been on hold, pressthe Flash key or the Query key and dial 2.
You will then make a query call with the communication partnerwho had previously been on hold. The call with the thirdcommunication partner is disconnected.
• To disconnect the previous calls and make an one-on-one call withthe third communication partner, press the Flash key or the Querykey and dial 0.
You are making an one-on-one call with the third communicationpartner. The previous calls have been disconnected.
• To connect the third communication partner to the secondcommunication partner, press the Flash key or the Query key anddial 4.
The second and the third communication partner are nowconnected with each other. They are making an one-on-one callwith the first communication partner.
Note: If the third communication partner goes off-hookbeforehand, you will get back to the previously activecommunication partner. Subsequently press the Flash key orthe Query key and dial 1. Also use this function to terminatethe call to this communication partner.

Transferring
COMmander 6000/R/RX - Firmware V8.4 - Advanced Information V32 05/2022- 327 -
Transferring
Transferring with AnnouncementBlind Transfer (Transferring without Announcement)Placing Communication Partner in Waiting LoopCalling a Third Subscriber and Transferring to an ActiveCommunication PartnerParking the Call Internally (Call Parking)Unparking the Call (Call Parking) Transferring with AnnouncementBlind Transfer (Transferring without Announcement)Placing Communication Partner in Waiting LoopCalling a Third Subscriber and Transferring to an Active Communication PartnerParking the Call Internally (Call Parking)Unparking the Call (Call Parking)

Transferring with Announcement
COMmander 6000/R/RX - Firmware V8.4 - Advanced Information V32 05/2022- 328 -
Transferring with Announcement
In order to transfer a call, first initiate a query call, announce the call andthen connect both communication partners.
Requirements:
• Initiated query call
• To connect two external communication partners, the followingis required: Authorisation Transfer of external calls to externalassigned to the subscriber
• Hang up the receiver during a query call.
Both communication partners are connected with each other.
Note: Some ISDN phones may ring after hanging up the receiverand you may then be reconnected with your first communicationpartner after picking up the receiver. Use the manual for thephone to check whether the Transfer at a PBX function has beenenabled. If this has not been done, do this subsequently.
• If you want to initiate a new call immediately after the transfer, proceedduring the query call as follows.
1. Press the Flash key or the Query key.
2. Dial 4.
Both communication partners are connected with each other.
You will hear the internal dial tone.
3. Initiate a new call.
Important: A call transferred between two externalcommunication partners is limited to a defined period of

Transferring with Announcement
COMmander 6000/R/RX - Firmware V8.4 - Advanced Information V32 05/2022- 329 -
time. This is a security feature, since the transfer of the timeannouncement or of the weather forecast made by mistake, forinstance, would lead to a very long call.
Note: You will be charged the fees for a transferred call by yournetwork provider.
Note: You can also use this function on analogue phones,where it can be performed via the T-Net function key/menu(optional, see manual for the phone).
Note: On some ISDN phones, this function can be called viaan existing function key or via the menu (optional, see manualfor the phone).

Blind Transfer (Transferring without Announcement)
COMmander 6000/R/RX - Firmware V8.4 - Advanced Information V32 05/2022- 330 -
Blind Transfer (Transferring without Announcement)
If you want to transfer an external communication partner to anotherinternal subscriber, you do not have to wait until the subscriber beingcalled via the query call accepts the call; you can hang up the receiverwhile this call is being made. The internal subscriber will continue to becalled.
Requirements:
• Internal transfer destination
During a call, proceed as follows.
1. Press the Flash key or the Query key.
2. Enter the internal number. Possible entries:
Internal number of the individual phone (for exchange line requesttype Direct exchange line phone: with preceding **)
Internal number of the group (for exchange line request type Directexchange line phone: with preceding **)
3. Wait until you hear the ringtone.
4. Hang up the receiver.
Once the called subscriber accepts the call, he is connected to theexternal subscriber.
Note: If the subscriber being called does not accept the call, thecall will be transferred back to your phone 60 seconds later (yourphone rings). If you do not accept the call within 60 seconds thecall will be disconnected. If your own phone has become busy inthe meantime, the procedure will already be cancelled after thefirst 60 seconds and the external call will be disconnected.

Placing Communication Partner in Waiting Loop
COMmander 6000/R/RX - Firmware V8.4 - Advanced Information V32 05/2022- 331 -
Placing Communication Partner in Waiting Loop
If the internal subscriber to which you want to transfer an communicationpartner is busy, you can place the communication partner in the waitingloop of this subscriber.
Requirements:
• Internal transfer destination is a group (at least one subscriber loggedin as incoming) or a subscriber
If the internal phone to which you are trying to transfer a call is busy,proceed as follows:
1. Wait.
You will automatically be reconnected with the waiting communicationpartner.
Note: On many ISDN phones, the termination of a query call onbusy is not performed automatically, but via a function key or viathe menu (optional, see manual for the phone).
2. Press the Flash key or the Query key.
3. Dial ##07.
You will hear the confirmation tone.
4. Hang up the receiver.
The communication partner continues to listen to hold music.
As soon as the internal subscriber hangs up the receiver orone subscriber logged in to the group becomes available, thiscommunication partner is called. Once he accepts the call, he isconnected with the subscriber in the waiting loop.
Placing Communication Partner in Waiting Loop
COMmander 6000/R/RX - Firmware V8.4 - Advanced Information V32 05/2022- 332 -
Note: If the internal subscriber does not answer the call within 2minutes or the line remains busy during the 15-minute waiting time,the call will be transferred back to you. If you pick up the receiver,you will be reconnected with the communication partner. You canthen place him in the waiting loop again. If you do not pick up thecall within 2 minutes, the connection is disconnected completely(for example, if your line was busy even for a short time).

Calling a Third Subscriber and Transferring to an Active Communication Partner
COMmander 6000/R/RX - Firmware V8.4 - Advanced Information V32 05/2022- 333 -
Calling a Third Subscriber and Transferring to anActive Communication Partner
Assuming that you have gained an additional communication partnerfrom a call, e. g. from accepting a call signaled by call waiting, and thissecond communication partner want to be transferred now to somebodyelse. You can now initiate a third call that connects the second and thirdcommunication partners with each other and then continue phoning withyour first communication partner.
During a query call, proceed as follows:
1. Press the Flash key or the Query key.
2. Dial 5.
3. Enter a phone number. Possible entries:
External number (for exchange line request type Internal phone: withpreceding exchange line access number)
Short code number (for exchange line request type Direct exchangeline phone: with preceding **)
Internal number of the individual phone (for exchange line requesttype Direct exchange line phone: with preceding **)
Internal number of the group (for exchange line request type Directexchange line phone: with preceding **)
As soon as the subscriber being called picks up the receiver, you willmake a third call.
Important: To use this function on ISDN and system phones, thefunction must be supported via a function key or via the menu bythe respective phone (optional, see manual for the phone).
4. Proceed as required.

Calling a Third Subscriber and Transferring to an Active Communication Partner
COMmander 6000/R/RX - Firmware V8.4 - Advanced Information V32 05/2022- 334 -
• To connect the second and third communication partner and toperform a one-to-one call with the first communication partner,press the Flash key or the Query key and dial 4.
The second and the third communication partner are nowconnected with each other.
Then return to conducting an individual call with your firstcommunication partner.
• To connect the second and third communication partner and toterminate the call with the first communication partner, hang up thereceiver.
The second and the third communication partner are nowconnected with each other.
The first call will be signaled by the PBX if it was an external call.The internal call is disconnected.
Note: If the third communication partner is not ready to betransferred to the second communication partner, press theFlash key or the Query key and dial 1. You will then get backto the normal query call.

Parking the Call Internally (Call Parking)
COMmander 6000/R/RX - Firmware V8.4 - Advanced Information V32 05/2022- 335 -
Parking the Call Internally (Call Parking)
Call parking lets a caller in a waiting position be transferred so that thedesired communication partner can accept the call on another internalphone.
Requirements:
• Authorisation Call Parking assigned to the subscriber
• Configured base number
During an external call, proceed as follows:
1. Press the Flash key or the Query key.
2. Enter the internal base number. Possible entries:
Internal base number for the parking zone (for exchange linerequest type Direct exchange line phone: with preceding **)
3. Dial the number of the park position. Possible entries:
0 to 9
Note: If you hear a busy signal when you dial the park position,this position is already in use. Pressing the Flash key or theQuery key takes you back where you can redial the internal basenumber with another park position.
4. Wait until you hear the ringtone.
5. Hang up the receiver.
6. Notify the desired communication partner of the waiting caller (e.g., bymaking an announcement over the loudspeaker).

Unparking the Call (Call Parking)
COMmander 6000/R/RX - Firmware V8.4 - Advanced Information V32 05/2022- 336 -
Unparking the Call (Call Parking)
Call parking lets a caller in a waiting position be transferred so that thedesired communication partner can accept the call on another internalphone.
Requirements:
• Authorisation Call Parking assigned to the subscriber
• Parked call
1. Pick up the receiver.
Note: During an existing call press the Flash key or the Querykey and dial ##06.
2. Enter the internal base number. Possible entries:
Internal base number for the parking zone (for exchange linerequest type Direct exchange line phone: with preceding **)
3. Dial the number of the park position. Possible entries:
0 to 9
You are talking with the waiting caller.

Conference Calls
COMmander 6000/R/RX - Firmware V8.4 - Advanced Information V32 05/2022- 337 -
Conference Calls
Initiating Conference CallsInitiating Toggling between Conversations during a Conference CallConnecting Both Conference Call PartnersEnding Conference Call Initiating Conference CallsInitiating Toggling between Conversations during a Conference CallConnecting Both Conference Call PartnersEnding Conference Call

Initiating Conference Calls
COMmander 6000/R/RX - Firmware V8.4 - Advanced Information V32 05/2022- 338 -
Initiating Conference Calls
Requirements:
• A query call you initiated yourself
During a query call, proceed as follows:
1. Press the Flash key or the Query key.
2. Dial 3.
You are making a conference call.
Note: If a hands-free phone is involved in a conference with 3internal subscribers, echo or singing effects may occur.
Note: You can also use this function on analogue phones, whereit can be performed via the T-Net function key/menu (optional, seemanual for the phone).
Note: On ISDN and system phones, this function is performed viaan existing function key or via the menu (optional, see manual forthe phone).
Note: A conference is not possible with a door terminal.

Initiating Toggling between Conversations during a Conference Call
COMmander 6000/R/RX - Firmware V8.4 - Advanced Information V32 05/2022- 339 -
Initiating Toggling between Conversations during aConference Call
When you end a conference call and want to talk to each of theconference call partners separately one after the other, you canspecifically put one of the conference call partners on hold in thebackground.
Requirements:
• A conference call that you initiated yourself
During a conference call, proceed as follows:
• Press the Flash key (when using a phone with DTMF dialling) or theQuery key (when using an ISDN phone) and dial 2.
You then make an individual call with the communication partner whohad previously been active. The other subscriber of the conferencehears the hold music.
• Press the Flash key or the Query key and dial 1.
You then make a call with the communication partner who hadpreviously been on hold in the background. The other subscriber of theconference hears the hold music.
Important: To use this function on ISDN and system phones, thefunction must be supported via a function key or via the menu bythe respective phone (optional, see manual for the phone).
Note: You also can use this function this function on analoguephones, where it can be performed via the T-Net function key/menu (optional, see manual for the phone).
Connecting Both Conference Call Partners
COMmander 6000/R/RX - Firmware V8.4 - Advanced Information V32 05/2022- 340 -
Connecting Both Conference Call Partners
If you want to leave a conference call that you initiated yourself and yourconference call partners want to continue talking with each other, you canconnect both parties.
Requirements:
• A conference call that you initiated yourself
• To connect two external communication partners, the followingis required: Authorisation Transfer of external calls to externalassigned to the subscriber
During a conference call, proceed as follows:
1. Press the Flash key or the Query key.
2. Dial 4.
3. Hang up the receiver.
Both conference call partners are connected with each other.
Important: To use this function at ISDN phones and systemphones, the function must be supported via a function key or viathe menu by the respective phone (optional, see manual for thephone).

Ending Conference Call
COMmander 6000/R/RX - Firmware V8.4 - Advanced Information V32 05/2022- 341 -
Ending Conference Call
If you initiated the conference call yourself, you can end the conferencecall completely.
Requirements:
• A conference call that you initiated yourself
During a conference call, proceed as follows:
• Hang up the receiver.
The conference call is disconnected completely.

Short Reference
COMmander 6000/R/RX - Firmware V8.4 - Advanced Information V32 05/2022- 342 -
Short ReferenceInformation about the sectionAlarmReservation of Exchange Line on BusyForce Public Exchange Call for Automatic Exchange Line RequestCall WaitingTime and Date (of the PBX)Do-not-DisturbAutomatic ReceptionBaby Call/HotlineCall ThroughRemote Configuration (Activation)FMCHook Flash Timingfollow-meCall Deblocker (Incoming)Call Allowance AccountOutgoing CallsCall Data (Single Call Record)Targeted Exchange Line AccessTargeted VoIP AccessGroupsHotel FunctionsIdentification (IPv4 Address, Subnet Mask, Gateway, DHCP Client)InterCom Announcement/Handsfree SpeakingConferenceConfiguration SwitchoverLoudspeaker AnnouncementEmergency Call Announcement

Short Reference
COMmander 6000/R/RX - Firmware V8.4 - Advanced Information V32 05/2022- 343 -
Call parkingMulti-path Call ForwardingPick-up and Call Take-overPINPrivate (Personalised) Exchange Line AccessProject AssignmentRelaysQuery and 3rd CallQuery and TransferCallback on BusyCallback on No ReplyCall Forwarding for External NumbersCall Forwarding for GroupsCall Forwarding for SubscribersCall Restrictor (Incoming)Announcement before AnsweringDoor FunctionsVoice MailboxMusic on Hold and AnnouncementWake-up Functions Information about the sectionAlarmReservation of Exchange Line on BusyForce Public Exchange Call for Automatic Exchange Line RequestCall WaitingTime and Date (of the PBX)Do-not-DisturbAutomatic ReceptionBaby Call/HotlineCall ThroughRemote Configuration (Activation)FMCHook Flash Timingfollow-meCall Deblocker (Incoming)Call Allowance AccountOutgoing CallsCall Data (Single Call Record)Targeted Exchange Line AccessTargeted VoIP AccessGroupsHotel FunctionsIdentification (IPv4 Address, Subnet Mask, Gateway, DHCP Client)InterCom Announcement/Handsfree SpeakingConferenceConfiguration SwitchoverLoudspeaker AnnouncementEmergency Call AnnouncementCall parkingMulti-path Call ForwardingPick-up and Call Take-overPINPrivate (Personalised) Exchange Line AccessProject AssignmentRelaysQuery and 3rd CallQuery and TransferCallback on BusyCallback on No ReplyCall Forwarding for External NumbersCall Forwarding for GroupsCall Forwarding for SubscribersCall Restrictor (Incoming)Announcement before AnsweringDoor FunctionsVoice MailboxMusic on Hold and AnnouncementWake-up Functions

Information about the section
COMmander 6000/R/RX - Firmware V8.4 - Advanced Information V32 05/2022- 344 -
Information about the section
This section includes an alphabetical list of functions and settings of thePBX you can configure using an internal or, in some cases, an externalphone. The functions available in the menu of the system phones as wellas the menu functions or keys used by individual ISDN phones are notlisted (see manual for the phone).
The headlines explain which device may be used for the named characterstring. If the column is limiting the character string (e.g. for starting aconference) to analogue phones only it may be available to ISDN phonesvia menu (see manual of the phone).
Is the function also available to external devices a remote switchingnumber configured in the PBX has to be dialled first.

Alarm
COMmander 6000/R/RX - Firmware V8.4 - Advanced Information V32 05/2022- 345 -
Alarm
Confirming an Alarm within 60 sec (on an Internal or External Phone)
0
Additional information Alarm enabled once: Alarm input is disabled after triggering and alarm
must be enabled again.
Alarm enabled always: Alarm input remains enabled after triggering and
another alarm can be triggered.
Activating an Alarm Once (on an Internal Phone)
## 8 PIN * 24 Alarm number * 1 #
PIN Admin or sub-admin PIN
Alarm number Alarm number (for exchange line request type Direct exchange line
phone: with preceding **)
Additional information Alarm input is disabled after triggering.
Activating an Alarm Once (on an External Phone)
Remote switching number ## 8 PIN * 24 Alarm number * 1 #
Remote switching
number
Remote switching number for remote programming
PIN user PIN

Alarm
COMmander 6000/R/RX - Firmware V8.4 - Advanced Information V32 05/2022- 346 -
Alarm number Alarm number
Additional information Alarm input is disabled after triggering.
Activating an Alarm Always (on an Internal Phone)
## 8 PIN * 24 Alarm number * 2 #
PIN Admin or sub-admin PIN
Alarm number Alarm number (for exchange line request type Direct exchange line
phone: with preceding **)
Additional information Alarm input stays enabled even after triggering.
Activating an Alarm Always (on an External Phone)
Remote switching number ## 8 PIN * 24 Alarm number * 2 #
Remote switching
number
Remote switching number for remote programming
PIN user PIN
Alarm number Alarm number
Additional information Alarm input stays enabled even after triggering.
Deactivating an Alarm (on an Internal Phone)
## 8 PIN * 24 Alarm number * 0 #

Alarm
COMmander 6000/R/RX - Firmware V8.4 - Advanced Information V32 05/2022- 347 -
PIN Admin or sub-admin PIN
Alarm number Alarm number (for exchange line request type Direct exchange line
phone: with preceding **)
Additional information Alarm input is disabled and will not react to triggering.
Deactivating an Alarm (on an External Phone)
Remote switching number ## 8 PIN * 24 Alarm number * 0 #
Remote switching
number
Remote switching number for remote programming
PIN user PIN
Alarm number Alarm number
Additional information Alarm input is disabled and will not react to triggering.
Recording an Announcement (on an Internal Phone)
## 8 PIN * 56 A * * #
PIN Admin or sub-admin PIN
A 36...39 (no. 1-4 of the announcement)
71...86 (no. 1-16 of the announcement)
Additional information Wait for trilling tone after 2nd *.
Start recording with 3rd *.

Alarm
COMmander 6000/R/RX - Firmware V8.4 - Advanced Information V32 05/2022- 348 -
Stop recording with #.
Afterwards the recording is played back for checking.
Both number ranges can be used for A (also at the same time) but a
maximum of 16 announcements is configurable.
Deleting the Announcement (on an Internal Phone)
## 8 PIN * 55 A #
PIN Admin or sub-admin PIN
A 36...39 (no. 1-4 of the announcement)
71...86 (no. 1-16 of the announcement)
Additional information Both number ranges can be used for A (also at the same time) but a
maximum of 16 announcements is configurable.
Listening to the Announcement (on an Internal Phone)
## 8 PIN * 57 A #
PIN Admin or sub-admin PIN
A 36...39 (no. 1-4 of the announcement)
71...86 (no. 1-16 of the announcement)
Additional information Both number ranges can be used for A (also at the same time) but a
maximum of 16 announcements is configurable.

Reservation of Exchange Line on Busy
COMmander 6000/R/RX - Firmware V8.4 - Advanced Information V32 05/2022- 349 -
Reservation of Exchange Line on Busy
Initiating the Reservation of an Exchange Line on Busy (on anInternal Phone)
R * 37 #
R Flash key or Query key
Additional information You will hear a confirmation tone.
Hang up the receiver.
As soon as a line is available, you will be called back by the PBX.
Pick up the receiver. You will hear the external dial tone.
Dial an external number without an exchange line access number.
Force Public Exchange Call for Automatic Exchange Line Request
COMmander 6000/R/RX - Firmware V8.4 - Advanced Information V32 05/2022- 350 -
Force Public Exchange Call for Automatic ExchangeLine Request
Force Public Exchange Call for Automatic Exchange Line Request
## 94
Additional information Pick up the receiver.
Enter an external number.
Once you have finished dialling the phone number, the subscriber will be
called.

Call Waiting
COMmander 6000/R/RX - Firmware V8.4 - Advanced Information V32 05/2022- 351 -
Call Waiting
Rejecting a Knocking Caller (on an Analogue Internal Phone)
R 0
R Query key or Flash key)
Accepting a Knocking Caller and Disconnecting the Active Call (onan Analogue Internal Phone)
R 1
R Query key or Flash key
Accepting a Knocking Caller and Putting the Active Call on Hold (onan Analogue Internal Phone)
R 2
R Query key or Flash key

Time and Date (of the PBX)
COMmander 6000/R/RX - Firmware V8.4 - Advanced Information V32 05/2022- 352 -
Time and Date (of the PBX)
Setting the Time (on an Internal Phone)
## 8 PIN * 300 hh mm ss #
PIN Admin or sub-admin PIN
hh 00...23 (hour)
mm 00...59 (minute)
ss 00...59 (second)
Setting the Date (on an Internal Phone)
## 8 PIN * 301 dd mm yy #
PIN Admin or sub-admin PIN
dd 01...31 (day)
mm 01...12 (month)
yy 00...99 (year)
Do-not-Disturb
COMmander 6000/R/RX - Firmware V8.4 - Advanced Information V32 05/2022- 353 -
Do-not-Disturb
Enabling Do-not-Disturb (on an Internal Phone)
## 8 * 21 1 #
Disabling Do-not-Disturb (on an Internal Phone)
## 8 * 21 0 #

Automatic Reception
COMmander 6000/R/RX - Firmware V8.4 - Advanced Information V32 05/2022- 354 -
Automatic Reception
Recording an Announcement (on an Internal Phone)
## 8 PIN * 564 A * * #
PIN Admin or sub-admin PIN
A 1...9, 0 (no. 1-10 of the announcement)
Additional information Wait for trilling tone after 2nd *.
Start recording with 3rd *.
Stop recording with #.
Afterwards the recording is played back for checking.
Deleting an Announcement (on an Internal Phone)
## 8 PIN * 554 A #
PIN Admin or sub-admin PIN
A 1...9, 0 (no. 1-10 of the announcement)
Listening to an Annoucement (on an Internal Phone)
## 8 PIN * 574 A #
PIN Admin or sub-admin PIN
A 1...9, 0 (no. 1-10 of the announcement)

Baby Call/Hotline
COMmander 6000/R/RX - Firmware V8.4 - Advanced Information V32 05/2022- 355 -
Baby Call/Hotline
Configuring Baby Call/Hotline (on an Internal Phone)
* 53 * Destination number #
Destination number Internal or external phone to be called
Internal number of the group or subscriber (for exchange line request
type Direct exchange line phone: with preceding **)
or
External number (for exchange line request type Internal phone: with
preceding exchange line access number)
Enabling Baby Call/Hotline without Re-entering the Number (on anInternal Phone)
* 53 #
Disabling Baby Call/Hotline (on an Internal Phone)
# 53 #
Checking Activation (on an Internal Phone)
* # 53 #
Additional information Busy tone = baby call/hotline is disabled

Call Through
COMmander 6000/R/RX - Firmware V8.4 - Advanced Information V32 05/2022- 356 -
Call Through
Initiating a Call (on an External Phone)
Call Through number > PIN > * > Destination number
Call Through number External number defined for Call Through on the PBX
PIN Call Through PIN configured in the PBX
Destination number Internal or external phone to be called
Internal number of the group or subscriber
External number
or
Short-code number
Additional information # after the destination number accelerates the dialling

Remote Configuration (Activation)
COMmander 6000/R/RX - Firmware V8.4 - Advanced Information V32 05/2022- 357 -
Remote Configuration (Activation)
Initiating/Releasing Remote Configuration (on an Internal Phone)
## 8 PIN * 91 #
PIN Admin, sub-admin or user PIN
Initiating/Releasing Remote Configuration (on an External Phone)
Remote switching number ## 8 PIN * 91 #
Remote switching
number
Remote switching number for remote programming
PIN ARA PIN

FMC
COMmander 6000/R/RX - Firmware V8.4 - Advanced Information V32 05/2022- 358 -
FMC
Enabling Multi-Path Call Forwarding Behaviour for Subscribers (onan Internal Phone)
Requirements:
• DTMF signalling configured for the provider: Inband
## 8 * 18 1 #
Enabling Multi-Path Call Forwarding Behaviour for Subscribers (onan External Phone)
Remote switching number > ## 8 > PIN > * 18 1 #
PIN user PIN
Remote switching
number
Remote switching number for remote programming
Additional information After entering the remote switching number, wait for external
confirmation signal (1 second). Continue with DTMF entry.
Enabling FMC Behaviour for Subscribers (on an Internal Phone)
## 8 * 18 2 #
Enabling FMC Behaviour for Subscribers (on an External Phone)
Remote switching number > ## 8 > PIN > * 18 2 #
PIN user PIN

FMC
COMmander 6000/R/RX - Firmware V8.4 - Advanced Information V32 05/2022- 359 -
Remote switching
number
Remote switching number for remote programming
Additional information After entering the remote switching number, wait for external
confirmation signal (1 second). Continue with DTMF entry.
Switching Off Multi-Path Call Forwarding / FMC Behaviour (on anInternal Phone)
## 8 * 18 0 #
Switching Off Multi-Path Call Forwarding / FMC Behaviour (on anExternal Phone)
Remote switching number > ## 8 > PIN > * 18 0 #
PIN user PIN
Remote switching
number
Remote switching number for remote programming
Initiating a Call (on an External Phone)
Call Through number > PIN > * > Destination number
Call Through number External number defined for Call Through on the PBX
PIN user PIN
Destination number Internal or external phone to be called
Internal number of the group or subscriber

FMC
COMmander 6000/R/RX - Firmware V8.4 - Advanced Information V32 05/2022- 360 -
or
Short-code number
Additional information # after the destination number accelerates the dialling
Enabled FMC behaviour of the subscriber required

Hook Flash Timing
COMmander 6000/R/RX - Firmware V8.4 - Advanced Information V32 05/2022- 361 -
Hook Flash Timing
Learning the Flash Timing (on an Analogue Internal Phone)
## 8 * 98 * R R #
R Query key or Flash key

follow-me
COMmander 6000/R/RX - Firmware V8.4 - Advanced Information V32 05/2022- 362 -
follow-me
Requirements:
• Authorisation for CF CF (groups) / Follow-me
• Authorisation for Controlling of the PBX via phone
• For internal destination: minimum requirement - exchange lineauthorisation Only incoming, with emergency call to acceptforwarded external calls
• For call forwarding to an external number: granted authorisation forConfiguring CF (sub) to ext. number
• For call forwarding to an external number: The external destinationmust be reachable for the subscriber (minimum requirement:Exchange line authorisation National, selected call restrictor underExchange line settings Call restrictor (outgoing) - officialdoes notrestrict the selection of the external destination)
• For configuring Follow-me externally: knowledge of the remoteswitching number for remote programming and PIN (user PIN)
• For configuring Follow-me externally: DTMF dialling on the setting updevice
Enabling Follow-me (on the Internal Destination Phone)
## 8 * 19 1 Subscriber/group number #
Subscriber/group
number
Phone/group to be redirected
Internal number of the group or subscriber (for exchange line request
type Direct exchange line phone: with preceding **)

follow-me
COMmander 6000/R/RX - Firmware V8.4 - Advanced Information V32 05/2022- 363 -
Disabling Follow-me (on the Internal Destination Phone)
Deletes all redirections via Follow-me with this phone as destination.
## 8 * 19 0 #
Enabling Follow-me (on Any Internal Phone)
## 8 * 19 1 Subscriber/group number * Destination number #
Subscriber/group
number
Phone/group to be redirected
Internal number of the group or subscriber (for exchange line request
type Direct exchange line phone: with preceding **)
Destination number Internal or external phone to be called
Internal number of the group or subscriber (for exchange line request
type Direct exchange line phone: with preceding **)
or
External number (for exchange line request type Internal phone: with
preceding exchange line access number)
Disabling Follow-me (on Any Internal Phone)
## 8 * 19 0 Subscriber/group number #
Subscriber/group
number
Redirected phone/group
Internal number of the group or subscriber (for exchange line request
type Direct exchange line phone: with preceding **)

follow-me
COMmander 6000/R/RX - Firmware V8.4 - Advanced Information V32 05/2022- 364 -
Enabling Follow-me (on an External Phone)
Remote switching number ## 8 PIN * 19 1 Subscriber/group number *Destination number #
PIN user PIN
Remote switching
number
Remote switching number for remote programming
Subscriber/group
number
Phone/group to be redirected
Internal number of the group or subscriber
Destination number Internal or external phone to be called
Internal number of the group or subscriber
or
External number
Additional information After entering the remote switching number, wait for external
confirmation signal (1 second). Continue with DTMF entry.
Disabling Follow-me (on an External Phone)
Remote switching number ## 8 PIN * 19 0 Subscriber/group number #
PIN user PIN
Remote switching
number
Remote switching number for remote programming
follow-me
COMmander 6000/R/RX - Firmware V8.4 - Advanced Information V32 05/2022- 365 -
Subscriber/group
number
Phone/group to be redirected
Internal number of the group or subscriber
Additional information After entering the remote switching number, wait for external
confirmation signal (1 second). Continue with DTMF entry.

Call Deblocker (Incoming)
COMmander 6000/R/RX - Firmware V8.4 - Advanced Information V32 05/2022- 366 -
Call Deblocker (Incoming)
Enabling Call Deblocker (Incoming) for Subscribers (on an InternalPhone)
## 8 PIN * 22 1 #
PIN User PIN
Disabling Call Deblocker (Incoming) for Subscribers (on an InternalPhone)
## 8 PIN * 22 0 #
PIN User PIN

Call Allowance Account
COMmander 6000/R/RX - Firmware V8.4 - Advanced Information V32 05/2022- 367 -
Call Allowance Account
Configuring the Call Allowance Account of a Subscriber (on anInternal Phone)
## 8 PIN * 74 Subscriber number * E #
PIN Admin or sub-admin PIN
Subscriber number Internal number of the individual phone (for exchange line request type
Direct exchange line phone: with preceding **)
E 0...99998 (setting the account to a specific amount: 200, for example,
equals EUR 2.20.)
or
99999 (unlimited account)

Outgoing Calls
COMmander 6000/R/RX - Firmware V8.4 - Advanced Information V32 05/2022- 368 -
Outgoing Calls
Initiating an Internal Call (on an Internal Phone)
Destination number
Destination number Internal phone to be called
Internal number of the group or subscriber (for exchange line request
type Direct exchange line phone: with preceding **)
Initiating an External Call (on an Internal Phone)
Destination number
Destination number Internal phone to be called
External number (for exchange line request type Internal phone: with
preceding exchange line access number)
or
Short-code dialling number (for exchange line request type Direct
exchange line phone: with preceding **)
Initiating an External Call with Suppressed Number Presentation (onan Internal Phone)
* 31 # Destination number
Destination number External phone to be called
External number (for exchange line request type Internal phone: with
preceding exchange line access number)

Outgoing Calls
COMmander 6000/R/RX - Firmware V8.4 - Advanced Information V32 05/2022- 369 -
or
Short-code dialling number (for exchange line request type Direct
exchange line phone: with preceding **)

Call Data (Single Call Record)
COMmander 6000/R/RX - Firmware V8.4 - Advanced Information V32 05/2022- 370 -
Call Data (Single Call Record)
Deleting Own Call Data Records (Works Council Function - on anInternal Phone)
## 8 PIN * 51 #
PIN User PIN
Additional information Authorisation required

Targeted Exchange Line Access
COMmander 6000/R/RX - Firmware V8.4 - Advanced Information V32 05/2022- 371 -
Targeted Exchange Line Access
Initiating a Call with a Specific MSN (on an Internal Phone)
## 96 MSN * Destination number
MSN MSN to be sent
Own phone number (number without exchange line access number
(unaffected by a direct exchange line phone) or, for a PTP connection,
PBX base number and extnsion number)
Destination number External phone to be called
External number (for exchange line request type internal phone: with
preceding exchange line access number)
or
Short-code dialling number (for exchange line request type direct
exchange line phone: with preceding **)

Targeted VoIP Access
COMmander 6000/R/RX - Firmware V8.4 - Advanced Information V32 05/2022- 372 -
Targeted VoIP Access
Initiating an External Call Using Targeted VoIP Access (on an InternalPhone)
Account number Destination number
Account number Used VoIP account
VoIP Account number (for exchange line request types Direct exchange
line phone and Automatic exchange line request: with preceding **)
Destination number External phone to be called
External number (for exchange line request type Internal phone: with
preceding exchange line access number)

Groups
COMmander 6000/R/RX - Firmware V8.4 - Advanced Information V32 05/2022- 373 -
Groups
Logging in to a Group (Incoming and Outgoing - on an InternalPhone)
## 8 * 40 1 Group number #
Group number Internal number of the group (for exchange line request type Direct
exchange line phone: with preceding **)
Logging out of a Group (Incoming and Outgoing - on an InternalPhone)
## 8 * 40 0 Group number #
Group number Internal number of the group (for exchange line request type Direct
exchange line phone: with preceding **)
Logging out of All Groups (Incoming and Outgoing - on an InternalPhone)
## 8 * 40 0 #
Logging in to a Group (Only Incoming - on an Internal Phone)
## 8 * 41 1 Group number #
Group number Internal number of the group (for exchange line request type Direct
exchange line phone: with preceding **)

Groups
COMmander 6000/R/RX - Firmware V8.4 - Advanced Information V32 05/2022- 374 -
Logging in to All Groups (Only Incoming - on an Internal Phone)
## 8 * 41 1 #
Logging out of a Group (Only Incoming - on an Internal Phone)
## 8 * 41 0 Group number #
Group number Internal number of the group (for exchange line request type Direct
exchange line phone: with preceding **)
Logging out of All Groups (Only Incoming - on an Internal Phone)
## 8 * 41 0 #
Logging in to a Group (Only Outgoing - on an Internal Phone)
## 8 * 42 1 Group number #
Group number Internal number of the group (for exchange line request type Direct
exchange line phone: with preceding **)
Logging out of the Group (Only Outgoing - on an Internal Phone)
## 8 * 42 0 #
Logging All Subscribers out of a Group (Incoming and Outgoing - onan Internal Phone)
## 8 * 48 0 Group number #

Groups
COMmander 6000/R/RX - Firmware V8.4 - Advanced Information V32 05/2022- 375 -
Group number Internal number of the group (for exchange line request type Direct
exchange line phone: with preceding **)
Additional information Membership of the group required

Hotel Functions
COMmander 6000/R/RX - Firmware V8.4 - Advanced Information V32 05/2022- 376 -
Hotel Functions
Entering the wake-up Time for One-time wake-up (internal phone)
* hh mm #
hh 00...23 (hour)
mm 00...59 (minute)
Deleting the Wake-up Time (internal phone)
* #
Setting the Room Status (internal phone)
* 99 Z #
Z 1 (room cleaned)
2 (room not cleaned)
3 (room blocked)

Identification (IPv4 Address, Subnet Mask, Gateway, DHCP Client)
COMmander 6000/R/RX - Firmware V8.4 - Advanced Information V32 05/2022- 377 -
Identification (IPv4 Address, Subnet Mask, Gateway,DHCP Client)
Note: Only IPv4 addresses can be entered using a character string onthe phone. IPv6 addresses must be entered using the ConfigurationManager of the PBX.
Configuring the IPv4 Address of the PBX (on an Internal Phone)
## 8 PIN * 931 * E #
PIN Admin or sub-admin PIN
E IPv4 address of the PBX (12 digits)
Querying the IPv4 Address of the PBX (on an Internal Phone)
## 8 * 941 #
Additional information Display of the IPv4 address of the PBX on the phone display after
callback by the PBX
Configuring the Subnet Mask of the PBX (on an Internal Phone)
## 8 PIN * 932 * E #
PIN Admin or sub-admin PIN
E Subnet mask (12 digits)

Identification (IPv4 Address, Subnet Mask, Gateway, DHCP Client)
COMmander 6000/R/RX - Firmware V8.4 - Advanced Information V32 05/2022- 378 -
Querying the Subnet Mask of the PBX (on an Internal Phone)
## 8 * 942 #
Additional information Display of the subnet mask on the phone display after callback by the
PBX
Configuring the Gateway of the PBX (on an Internal Phone)
## 8 PIN * 933 * E #
PIN Admin or sub-admin PIN
E IPv4 address of the gateway (12 digits)
Querying the Gateway of the PBX (on an Internal Phone)
## 8 * 943 #
Additional information Display of the IPv4 address of the gateway on the phone display after
callback by the PBX
Switching the DHCP Client of the PBX on (on an Internal Phone)
## 8 PIN * 930 * 1 #
PIN Admin or sub-admin PIN

Identification (IPv4 Address, Subnet Mask, Gateway, DHCP Client)
COMmander 6000/R/RX - Firmware V8.4 - Advanced Information V32 05/2022- 379 -
Switching the DHCP Client of the PBX off (on an Internal Phone)
## 8 PIN * 930 * 0 #
PIN Admin or sub-admin PIN
Querying the DHCP Client Status of the PBX (on an Internal Phone)
## 8 * 940 #
Additional information Display of the DHCP client status of the PBX on the phone display after
callback by the PBX
0 = off
1 = on

InterCom Announcement/Handsfree Speaking
COMmander 6000/R/RX - Firmware V8.4 - Advanced Information V32 05/2022- 380 -
InterCom Announcement/Handsfree Speaking
Announcement to a System Phone (on an Internal Phone)
## 011 Subscriber/group number
Subscriber/group
number
Internal number of the group or subscriber (for exchange line request
type Direct exchange line phone: with preceding **)
Handsfree Speaking to a System Phone (on an Internal Phone)
## 012 Subscriber/group number
Subscriber/group
number
Internal number of the group or subscriber (for exchange line request
type Direct exchange line phone: with preceding **)

Conference
COMmander 6000/R/RX - Firmware V8.4 - Advanced Information V32 05/2022- 381 -
Conference
Initiating a Conference from a Query (on an Analogue Internal Phone)
R 3
R Query key or Flash key
Back to Toggling Between Conversations, as before Conference (onan Analogue Internal Phone)
R 2
R Query key or Flash key
Additional information You are talking to the previously active call partner. The other conference
partner is hearing music on hold.
Back to Toggling Between Conversations (on an Analogue InternalPhone)
R 1
R Query key or Flash key
Additional information You are talking to the call partner previously held in the background. The
other conference partner is hearing music on hold.
Connecting Call Partners (on an Analogue Internal Phone)
R 4

Conference
COMmander 6000/R/RX - Firmware V8.4 - Advanced Information V32 05/2022- 382 -
R Query key or Flash key

Configuration Switchover
COMmander 6000/R/RX - Firmware V8.4 - Advanced Information V32 05/2022- 383 -
Configuration Switchover
Switching the Configuration (on an Internal Phone)
## 8 * 81 K #
K 2- to 4-digit ID no. of the configuration
Additional information Authorisation required
Switching the Configuration (on an External Phone)
Remote switching number ## 8 PIN * 81 K #
Remote switching
number
Remote switching number for remote programming
PIN user PIN
K 2- to 4-digit ID no. of the configuration
Additional information Authorisation required

Loudspeaker Announcement
COMmander 6000/R/RX - Firmware V8.4 - Advanced Information V32 05/2022- 384 -
Loudspeaker Announcement
Announcement to Announcement Output (on an Internal Phone)
Number of the announcement output
Number of the
announcement output
Internal number of the announcement output (for exchange line request
type Direct exchange line phone: with preceding **)

Emergency Call Announcement
COMmander 6000/R/RX - Firmware V8.4 - Advanced Information V32 05/2022- 385 -
Emergency Call Announcement
Recording an Announcement (on an Internal Phone)
## 8 PIN * 5650 * * #
PIN Admin or sub-admin PIN
Additional information Wait for trilling tone after 2nd *.
Start recording with 3rd *.
Stop recording with #.
Afterwards the recording is played back for checking.
Listening to the Announcement (on an Internal Phone)
## 8 PIN * 5750 #
PIN Admin or sub-admin PIN
Deleting the Announcement (on an Internal Phone)
## 8 PIN * 5550 #
PIN Admin or sub-admin PIN

Call parking
COMmander 6000/R/RX - Firmware V8.4 - Advanced Information V32 05/2022- 386 -
Call parking
Place a Call in the Parking Zone (on an Internal Phone)
R parking number
R Flash key or Query key
Parking number 3- to 4-digit internal number of the parking zone for call parking (for
exchange line request type Direct exchange line phone: with preceding
**)
Additional information Authorisation required
Taking over a Call/Conversation (on an Internal Phone)
Parking number
Parking number 3- to 4-digit internal number of the parking zone for call parking (for
exchange line request type Direct exchange line phone: with preceding
**)
Additional information Authorisation required
Taking over a Call/Conversation in an Ongoing Call (on an InternalPhone)
R ## 06 Parking number
R Flash key or Query key

Call parking
COMmander 6000/R/RX - Firmware V8.4 - Advanced Information V32 05/2022- 387 -
Parking number 3- to 4-digit internal number of the parking zone for call parking (for
exchange line request type Direct exchange line phone: with preceding
**)
Additional information Authorisation required

Multi-path Call Forwarding
COMmander 6000/R/RX - Firmware V8.4 - Advanced Information V32 05/2022- 388 -
Multi-path Call Forwarding
Configuring Multi-Path Call Forwarding for Subscribers (on anInternal Phone)
* 481 * Destination number #
Destination number Internal or external phone to be called
Internal number of the group or subscriber (for exchange line request
type Direct exchange line phone: with preceding **)
or
External number (for exchange line request type Internal phone: with
preceding exchange line access number)
or
Short-code dialling number (for exchange line request type Direct
exchange line phone: with preceding **)
Enabling Multi-Path Call Forwarding for Subscribers (on an InternalPhone)
* 481 #
Disabling Multi-Path Call Forwarding for Subscribers (on an InternalPhone)
# 481 #
Checking Activation (Subscriber – on an Internal Phone)
* # 481 #

Multi-path Call Forwarding
COMmander 6000/R/RX - Firmware V8.4 - Advanced Information V32 05/2022- 389 -
Additional information Busy signal = multi-path call forwarding is disabled
Configuring Multi-Path Call Forwarding for Groups (on an InternalGroup Phone)
## 97 Group number # * 481 * Destination number #
Group number Internal number of the group (for exchange line request type Direct
exchange line phone: with preceding **)
Destination number Internal or external phone to be called
Internal number of the group or subscriber (for exchange line request
type Direct exchange line phone: with preceding **)
or
External number (for exchange line request type Internal phone: with
preceding exchange line access number)
or
Short-code dialling number (for exchange line request type Direct
exchange line phone: with preceding **)
Additional information Membership of the group required
Enabling Multi-Path Call Forwarding for Groups (on an InternalGroup Phone)
## 97 Group number # * 481 #
Group number Internal number of the group (for exchange line request type Direct
exchange line phone: with preceding **)

Multi-path Call Forwarding
COMmander 6000/R/RX - Firmware V8.4 - Advanced Information V32 05/2022- 390 -
Additional information Membership of the group required
Disabling Multi-Path Call Forwarding for Groups (on an InternalGroup Phone)
## 97 Group number ## 481 #
Group number Internal number of the group (for exchange line request type Direct
exchange line phone: with preceding **)
Additional information Membership of the group required
Checking Activation (Group – on an Internal Phone)
## 97 Group number # * # 481 #
Group number Internal number of the group (for exchange line request type Direct
exchange line phone: with preceding **)
Additional information Busy signal = multi-path call forwarding is disabled

Pick-up and Call Take-over
COMmander 6000/R/RX - Firmware V8.4 - Advanced Information V32 05/2022- 391 -
Pick-up and Call Take-over
Taking over a Call/Conversation (on an Internal Phone)
## 06 Subscriber/group number
Subscriber/group
number
Internal number of the group or subscriber (for exchange line request
type Direct exchange line phone: with preceding **)
Additional information Authorisation required

PIN
COMmander 6000/R/RX - Firmware V8.4 - Advanced Information V32 05/2022- 392 -
PIN
Changing the PIN (on an Internal Phone)
* 99 * PIN * PIN * PIN #
1st PIN Old PIN to be changed = Admin, sub-admin, user or ARA PIN
2nd PIN New PIN = Admin, sub-admin, user or ARA PIN
3rd PIN New PIN = Admin, sub-admin, user or ARA PIN
Note: If, at the end, you hear a busy signal instead of a confirmationtone, the new PIN may already be in use in the PBX and no changetakes place. Re-attempt with another digit sequence.

Private (Personalised) Exchange Line Access
COMmander 6000/R/RX - Firmware V8.4 - Advanced Information V32 05/2022- 393 -
Private (Personalised) Exchange Line Access
Initiating an External Call with Private Exchange Line Access (on anInternal Phone)
## 92 PIN * Destination number
PIN User PIN
Destination number External phone to be called
External number (for exchange line request type Internal phone: with
preceding exchange line access number)
or
Short-code dialling number (for exchange line request type Direct
exchange line phone: with preceding **)
Initiating an External Call with Private Exchange Line Access withoutPIN (on Own Internal Phone)
## 91 Destination number
Destination number External phone to be called
External number (for exchange line request type Internal phone: with
preceding exchange line access number)
or
Short-code dialling number (for exchange line request type Direct
exchange line phone: with preceding **)
Additional information Only on own phone

Private (Personalised) Exchange Line Access
COMmander 6000/R/RX - Firmware V8.4 - Advanced Information V32 05/2022- 394 -
Authorisation required

Project Assignment
COMmander 6000/R/RX - Firmware V8.4 - Advanced Information V32 05/2022- 395 -
Project Assignment
Initiating an External Call with Assigned Project (on an InternalPhone)
## 93 P * Destination number
P 2- to 6-digit project no.
Destination number External phone to be called
External number (for exchange line request type Internal phone: with
preceding exchange line access number)
or
Short-code dialling number (for exchange line request type Direct
exchange line phone: with preceding **)

Relays
COMmander 6000/R/RX - Firmware V8.4 - Advanced Information V32 05/2022- 396 -
Relays
Switching a Relay on – Switches off Automatically after ConfiguredSwitching Duration (on an Internal Phone)
## 8 * 26 R #
R 2- to 4-digit ID no. of the relay
Additional information For relays with the operating modes light, door opener, alarm and PC
relay
Authorisation required
Switching a Relay on – Switches off Automatically after ConfiguredSwitching Duration (on an External Phone)
Remote switching number ## 8 PIN * 26 R #
Remote switching
number
Remote switching number for remote programming
PIN user PIN
R 2- to 4-digit ID no. of the relay
Additional information For relays with the operating modes light, door opener, alarm and PC
relay
Authorisation required

Relays
COMmander 6000/R/RX - Firmware V8.4 - Advanced Information V32 05/2022- 397 -
Switching a Relay on (on an Internal Phone)
## 8 * 26 R * 1 #
R 2- to 4-digit ID no. of the relay
Additional information For relays with the operating modes manual relay, configuration-
dependent and automatic configuration switchover
Authorisation required
Switching a Relay on (on an External Phone)
Remote switching number ## 8 PIN * 26 R * 1 #
Remote switching
number
Remote switching number for remote programming
PIN user PIN
R 2- to 4-digit ID no. of the relay
Additional information For relays with the operating modes manual relay, configuration-
dependent and automatic configuration switchover
Authorisation required
Switching a Relay off (on an Internal Phone)
## 8 * 26 R * 0 #
R 2- to 4-digit ID no. of the relay

Relays
COMmander 6000/R/RX - Firmware V8.4 - Advanced Information V32 05/2022- 398 -
Additional information For relays with the operating modes manual relay, configuration-
dependent and automatic configuration switchover
Authorisation required
Switching a Relay off (on an External Phone)
Remote switching number ## 8 PIN * 26 R * 0 #
Remote switching
number
Remote switching number for remote programming
PIN user PIN
R 2- to 4-digit ID no. of the relay
Additional information For relays with the operating modes manual relay, configuration-
dependent and automatic configuration switchover
Authorisation required

Query and 3rd Call
COMmander 6000/R/RX - Firmware V8.4 - Advanced Information V32 05/2022- 399 -
Query and 3rd Call
Initiating a 3rd Call (on an Analogue Internal Phone)
R 5 Destination number
R Query key or Flash key
Destination number Internal or external phone to be called
Internal number of the group or subscriber (for exchange line request
type Direct exchange line phone: with preceding **)
or
External number (for exchange line request type Internal phone: with
preceding exchange line access number)
or
Short-code dialling number (for exchange line request type Direct
exchange line phone: with preceding **)
Disconnecting the 3rd Call and Returning to the Last Active Call (onan Analogue Internal Phone)
R 1
R Query key or Flash key
Disconnecting the 3rd Call and Returning to the Last Call on Hold (onan Analogue Internal Phone)
R 2

Query and 3rd Call
COMmander 6000/R/RX - Firmware V8.4 - Advanced Information V32 05/2022- 400 -
R Query key or Flash key
Connecting 2nd and 3rd Call Partner and Continuing to Talk to the1st Call Partner (on an Analogue Internal Phone)
R 4
R Query key or Flash key
Continuing the 3rd Call and Disconnecting the Other Calls (on anAnalogue Internal Phone)
R 0
R Query key or Flash key

Query and Transfer
COMmander 6000/R/RX - Firmware V8.4 - Advanced Information V32 05/2022- 401 -
Query and Transfer
Initiating a Query (on an Analogue Internal Phone)
R Destination number
R Query key or Flash key
Destination number Internal number of the group or subscriber (for exchange line request
type Direct exchange line phone: with preceding **)
or
External number (for exchange line request type Internal phone: with
preceding exchange line access number)
or
Short-code dialling number (for exchange line request type Direct
exchange line phone: with preceding **)
Cancelling a Ringing Call (on an Analogue Internal Phone)
R 1
R Query key or Flash key
Splitting (on an Analogue Internal Phone)
R 2
R Query key or Flash key

Query and Transfer
COMmander 6000/R/RX - Firmware V8.4 - Advanced Information V32 05/2022- 402 -
Disconnecting a Call on Hold in the Background (on an AnalogueInternal Phone)
R 0
R Query key or Flash key
Disconnecting the Active Call and Returning to the Call Partner onHold (on an Analogue Internal Phone)
R 1
R Query key or Flash key
Connecting Both Call Partners (on an Analogue Internal Phone)
R 4
R Query key or Flash key
Transferring a Call Partner into Waiting Loop on Busy (on anAnalogue Internal Phone)
R ## 07
R Query key or Flash key

Callback on Busy
COMmander 6000/R/RX - Firmware V8.4 - Advanced Information V32 05/2022- 403 -
Callback on Busy
Initiating Callback on Busy (on an Internal Phone)
R * 37 #
R Query key or Flash key
Cancelling Callback on Busy (on an Internal Phone)
# 37 #
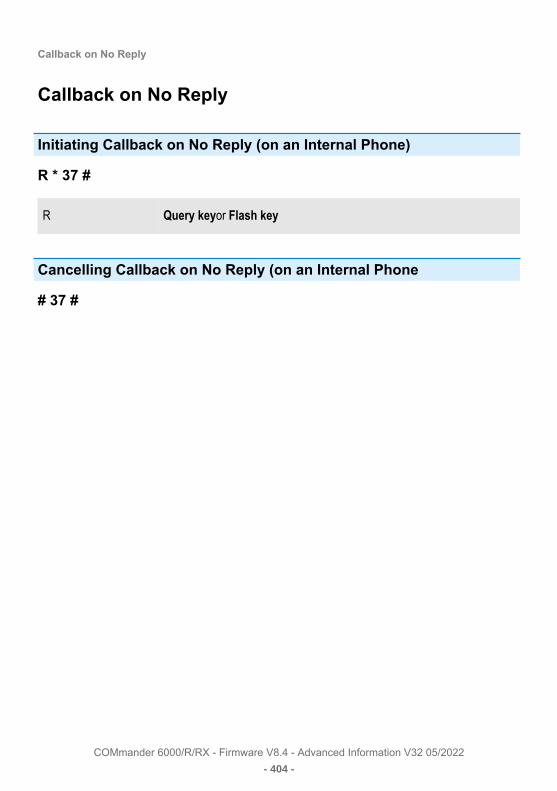
Callback on No Reply
COMmander 6000/R/RX - Firmware V8.4 - Advanced Information V32 05/2022- 404 -
Callback on No Reply
Initiating Callback on No Reply (on an Internal Phone)
R * 37 #
R Query keyor Flash key
Cancelling Callback on No Reply (on an Internal Phone
# 37 #

Call Forwarding for External Numbers
COMmander 6000/R/RX - Firmware V8.4 - Advanced Information V32 05/2022- 405 -
Call Forwarding for External Numbers
Configuring Unconditional Call Forwarding (on an Internal Phone)
## 96 Own number # * 21 * Destination number #
Own number Own phone number (number without exchange line access number
(unaffected by a direct exchange line phone)
The 1st number can be omitted if call forwarding is to be configured for
the number currently sent by the phone.
Destination number External phone to be called
External number (for exchange line request type Internal phone: with
preceding exchange line access number)
Additional information Authorisation required
Authorisation for external destination required
Permanent configuration is enabled.
Enabling Unconditional Call Forwarding without Re-entering theNumber (on an Internal Phone)
## 96 Own number # * 21 #
Own number Own phone number (number without exchange line access number
(unaffected by a direct exchange line phone))
The number can be omitted if call forwarding is to be configured for the
number currently sent by the phone.
Additional information Authorisation required

Call Forwarding for External Numbers
COMmander 6000/R/RX - Firmware V8.4 - Advanced Information V32 05/2022- 406 -
The destination number may only be an external number.
Permanent configuration is enabled.
Disabling Unconditional Call Forwarding (on an Internal Phone)
## 96 Own number ## 21 #
Own number Own phone number (number without exchange line access number
(unaffected by a direct exchange line phone))
The number can be omitted if call forwarding is to be configured for the
number currently sent by the phone.
Additional information Authorisation required
The destination number may only be an external number.
Permanent configuration is enabled.
Configuring Call Forwarding on Busy (on an Internal Phone)
## 96 Own number # * 67 * Destination number #
Own number Own phone number (number without exchange line access number
(unaffected by a direct exchange line phone))
The 1st number can be omitted if call forwarding is to be configured for
the number currently sent by the phone.
Destination number External number to be called
External number (for exchange line request type Internal phone: with
preceding exchange line access number)

Call Forwarding for External Numbers
COMmander 6000/R/RX - Firmware V8.4 - Advanced Information V32 05/2022- 407 -
Additional information Authorisation required
Authorisation for external destination required
Permanent configuration is enabled.
Enabling Call Forwarding on Busy without Re-entering the Number(on an Internal Phone)
## 96 Own number # * 67 #
Own number Own phone number (number without exchange line access number
(unaffected by a direct exchange line phone))
The number can be omitted if call forwarding is to be configured for the
number currently sent by the phone.
Additional information Authorisation required
The destination number may only be an external number.
Permanent configuration is enabled.
Disabling Call Forwarding on Busy (on an Internal Phone)
## 96 Own number ## 67 #
Own number Own phone number (number without exchange line access number
(unaffected by a direct exchange line phone))
The number can be omitted if call forwarding is to be configured for the
number currently sent by the phone.
Additional information Authorisation required
The destination number may only be an external number.

Call Forwarding for External Numbers
COMmander 6000/R/RX - Firmware V8.4 - Advanced Information V32 05/2022- 408 -
Permanent configuration is enabled.
Configuring Call Forwarding on No Reply (on an Internal Phone)
## 96 Own number # * 61 * Destination number #
Own number Own phone number (number without exchange line access number
(unaffected by a direct exchange line phone))
The 1st number can be omitted if call forwarding is to be configured for
the number currently sent by the phone.
Destination number External number to be called
External number (for exchange line request type Internal phone: with
preceding exchange line access number)
Additional information Authorisation required
Authorisation for external destination required
Permanent configuration is enabled.
Enabling Call Forwarding on No Reply without Re-entering theNumber (on an Internal Phone)
## 96 Own number # * 61 #
Own number Own phone number (number without exchange line access number
(unaffected by a direct exchange line phone))
The number can be omitted if call forwarding is to be configured for the
number currently sent by the phone.
Additional information Authorisation required

Call Forwarding for External Numbers
COMmander 6000/R/RX - Firmware V8.4 - Advanced Information V32 05/2022- 409 -
The destination number may only be an external number.
Permanent configuration is enabled.
Disabling Call Forwarding on No Reply (on an Internal Phone)
## 96 Own number ## 61 #
Own number Own phone number (number without exchange line access number
(unaffected by a direct exchange line phone))
The number can be omitted if call forwarding is to be configured for the
number currently sent by the phone.
Additional information Authorisation required
The destination number may only be an external number.
Permanent configuration is enabled.
Enabling Time Control for the External Number (MSN) of the DiallingPhone (on an Internal Phone))
## 96 # * 69 #
Additional information Permanent configuration is disabled.
Enabling Time Control for a Special Phone Number (on an InternalPhone)
## 96 Own number # * 69 #
Own number Own phone number (number without exchange line access number
(unaffected by a direct exchange line phone))

Call Forwarding for External Numbers
COMmander 6000/R/RX - Firmware V8.4 - Advanced Information V32 05/2022- 410 -
Additional information Permanent configuration is disabled.
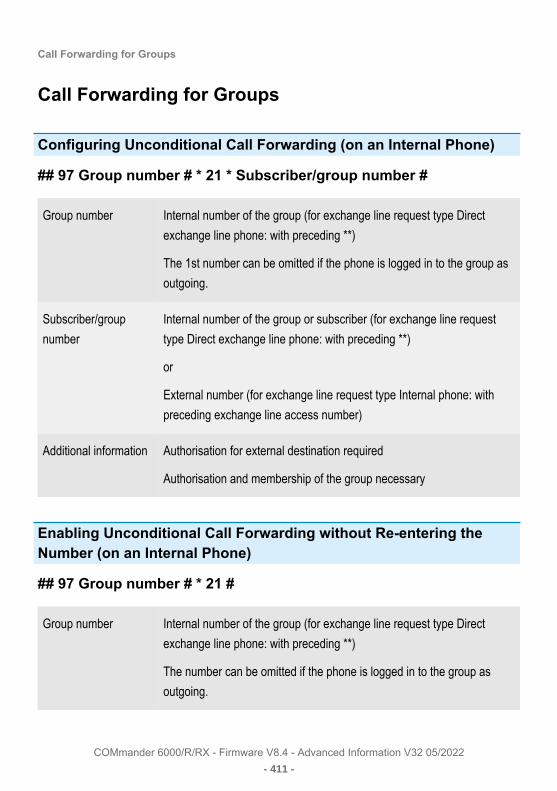
Call Forwarding for Groups
COMmander 6000/R/RX - Firmware V8.4 - Advanced Information V32 05/2022- 411 -
Call Forwarding for Groups
Configuring Unconditional Call Forwarding (on an Internal Phone)
## 97 Group number # * 21 * Subscriber/group number #
Group number Internal number of the group (for exchange line request type Direct
exchange line phone: with preceding **)
The 1st number can be omitted if the phone is logged in to the group as
outgoing.
Subscriber/group
number
Internal number of the group or subscriber (for exchange line request
type Direct exchange line phone: with preceding **)
or
External number (for exchange line request type Internal phone: with
preceding exchange line access number)
Additional information Authorisation for external destination required
Authorisation and membership of the group necessary
Enabling Unconditional Call Forwarding without Re-entering theNumber (on an Internal Phone)
## 97 Group number # * 21 #
Group number Internal number of the group (for exchange line request type Direct
exchange line phone: with preceding **)
The number can be omitted if the phone is logged in to the group as
outgoing.

Call Forwarding for Groups
COMmander 6000/R/RX - Firmware V8.4 - Advanced Information V32 05/2022- 412 -
Additional information Authorisation and membership of the group required
Disabling Unconditional Call Forwarding (on an Internal Phone)
## 97 Group number ## 21 #
Group number Internal number of the group (for exchange line request type Direct
exchange line phone: with preceding **)
The number can be omitted if the phone is logged in to the group as
outgoing.
Additional information Authorisation and membership of the group required
Configuring Call Forwarding on Busy (on an Internal Phone)
## 97 Group number # * 67 * Subscriber/group number #
Group number Internal number of the group (for exchange line request type Direct
exchange line phone: with preceding **)
The 1st number can be omitted if the phone is logged in to the group as
outgoing.
Subscriber/group
number
Internal number of the group or subscriber (for exchange line request
type Direct exchange line phone: with preceding **)
or
External number (for exchange line request type Internal phone: with
preceding exchange line access number)
Additional information Authorisation for external destination required
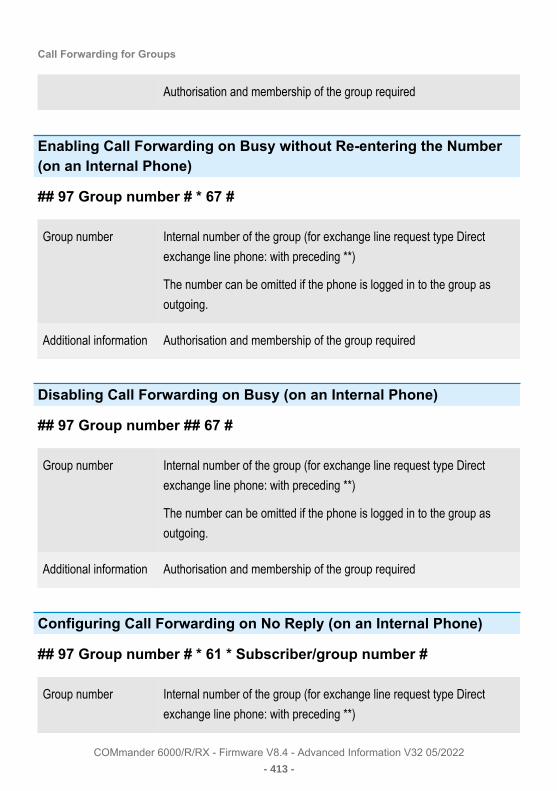
Call Forwarding for Groups
COMmander 6000/R/RX - Firmware V8.4 - Advanced Information V32 05/2022- 413 -
Authorisation and membership of the group required
Enabling Call Forwarding on Busy without Re-entering the Number(on an Internal Phone)
## 97 Group number # * 67 #
Group number Internal number of the group (for exchange line request type Direct
exchange line phone: with preceding **)
The number can be omitted if the phone is logged in to the group as
outgoing.
Additional information Authorisation and membership of the group required
Disabling Call Forwarding on Busy (on an Internal Phone)
## 97 Group number ## 67 #
Group number Internal number of the group (for exchange line request type Direct
exchange line phone: with preceding **)
The number can be omitted if the phone is logged in to the group as
outgoing.
Additional information Authorisation and membership of the group required
Configuring Call Forwarding on No Reply (on an Internal Phone)
## 97 Group number # * 61 * Subscriber/group number #
Group number Internal number of the group (for exchange line request type Direct
exchange line phone: with preceding **)

Call Forwarding for Groups
COMmander 6000/R/RX - Firmware V8.4 - Advanced Information V32 05/2022- 414 -
The 1st number can be omitted if the phone is logged in to the group as
outgoing.
Subscriber/group
number
Internal number of the group or subscriber (for exchange line request
type Direct exchange line phone: with preceding **)
or
External number (for exchange line request type Internal phone: with
preceding exchange line access number)
Additional information Authorisation for external destination required
Authorisation and membership of the group required
Enabling Call Forwarding on No Reply without Re-entering theNumber (on an Internal Phone)
## 97 Group number # * 61 #
Group number Internal number of the group (for exchange line request type Direct
exchange line phone: with preceding **)
The number can be omitted if the phone is logged in to the group as
outgoing.
Additional information Authorisation and membership of the group required
Disabling Call Forwarding on No Reply (on an Internal Phone)
## 97 Group number ## 61 #
Group number Internal number of the group (for exchange line request type Direct
exchange line phone: with preceding **)
Call Forwarding for Groups
COMmander 6000/R/RX - Firmware V8.4 - Advanced Information V32 05/2022- 415 -
The number can be omitted if the phone is logged in to the group as
outgoing.
Additional information Authorisation and membership of the group required

Call Forwarding for Subscribers
COMmander 6000/R/RX - Firmware V8.4 - Advanced Information V32 05/2022- 416 -
Call Forwarding for Subscribers
Configuring Unconditional Call Forwarding (on an Internal Phone)
* 21 * Destination number #
Destination number Internal or external phone to be called
Internal number of the group or subscriber (for exchange line request
type Direct exchange line phone: with preceding **)
or
External number (for exchange line request type Internal phone: with
preceding exchange line access number)
Additional information Authorisation for external destination required
Enabling Unconditional Call Forwarding without Re-entering theNumber (on an Internal Phone)
* 21 #
Disabling Unconditional Call Forwarding (on an Internal Phone)
# 21 #
Configuring Call Forwarding on Busy (on an Internal Phone)
* 67 * Destination number #
Destination number Internal or external phone to be called

Call Forwarding for Subscribers
COMmander 6000/R/RX - Firmware V8.4 - Advanced Information V32 05/2022- 417 -
Internal number of the group or subscriber (for exchange line request
type Direct exchange line phone: with preceding **)
or
External number (for exchange line request type Internal phone: with
preceding exchange line access number)
Additional information Authorisation for external destination required
Enabling Call Forwarding on Busy without Re-entering the Number(on an Internal Phone)
* 67 #
Disabling Call Forwarding on Busy (on an Internal Phone)
# 67 #
Configuring Call Forwarding on No Reply (on an Internal Phone)
* 61 * Destination number #
Number Internal number of the group or subscriber (for exchange line request
type Direct exchange line phone: with preceding **)
or
External number (for exchange line request type Internal phone: with
preceding exchange line access number)
Additional information Authorisation for external destination required

Call Forwarding for Subscribers
COMmander 6000/R/RX - Firmware V8.4 - Advanced Information V32 05/2022- 418 -
Enabling Call Forwarding on No Reply without Re-entering theNumber (on an Internal Phone)
* 61 #
Disabling Call Forwarding on No Reply (on an Internal Phone)
# 61 #

Call Restrictor (Incoming)
COMmander 6000/R/RX - Firmware V8.4 - Advanced Information V32 05/2022- 419 -
Call Restrictor (Incoming)
Enabling the Call Restrictor (Incoming) for Subscribers (on anInternal Phone)
## 8 PIN * 23 1 #
PIN User PIN
Disabling the Call Restrictor (Incoming) for Subscribers (on anInternal Phone)
## 8 PIN * 23 0 #
PIN User PIN

Announcement before Answering
COMmander 6000/R/RX - Firmware V8.4 - Advanced Information V32 05/2022- 420 -
Announcement before Answering
Recording an Announcement (on an Internal Phone)
## 8 PIN * 56 AA * * #
PIN Admin or sub-admin PIN
AA 01...10 (no. 1-10 of the announcment)
Zusatzinformationen Wait for trilling tone after 2nd *.
Start recording with 3rd *.
Stop recording with #.
Afterwards the recording is played back for checking.
Deleting an Announcement (on an Internal Phone)
## 8 PIN * 55 AA #
PIN Admin or sub-admin PIN
AA 01...10 (no. 1-10 of the announcment)
Listening to an Announcement (on an Internal Phone)
## 8 PIN * 57 AA #
PIN Admin or sub-admin PIN
AA 01...10 (no. 1-10 of the announcment)

Door Functions
COMmander 6000/R/RX - Firmware V8.4 - Advanced Information V32 05/2022- 421 -
Door Functions
Initiating a Door Call (on an Internal Phone)
Door number
Door number Internal number of the door (for exchange line request type Direct
exchange line phone: with preceding **)
Opening a Door (on an Internal Phone)
R #
R Query key or Flash key
Additional information Authorisation required
Initiating a Query Call from a Door Call (on an Analogue InternalPhone)
R Door number
R Query key or Flash key
Door number Internal number of the group or subscriber (for exchange line request
type Direct exchange line phone: with preceding **)
or
External number (for exchange line request type Internal phone: with
preceding exchange line access number)
or

Door Functions
COMmander 6000/R/RX - Firmware V8.4 - Advanced Information V32 05/2022- 422 -
Short-code dialling number (for exchange line request type Direct
exchange line phone: with preceding **)

Voice Mailbox
COMmander 6000/R/RX - Firmware V8.4 - Advanced Information V32 05/2022- 423 -
Voice Mailbox
Disabling the Readiness (on an Internal Phone If the Internal PhoneIs the Owner of the Voice Mailbox)
## 8 * 28 * 0 #
Enabling the Readiness (on an Internal Phone If the Internal Phone Isthe Owner of the Voice Mailbox)
## 8 * 28 * 1 #
Enabling the Time Control for Readiness (on an Internal Phone If theInternal Phone Is the Owner of the Voice Mailbox)
## 8 * 28 * 9 #
Recording an Announcement for a Voice Mailbox with a Phone (on anInternal Phone)
## 8 PIN * 566 A Voice mailbox number * * #
PIN Admin, sub-admin or user PIN
A 1...9, 0 (no. 1-10 of the announcement)
Voice mailbox number Internal number of the voice mailbox (for exchange line request type
Direct exchange line phone: with preceding **)
Additional information Wait for trilling tone after 2nd *.
Start recording with 3rd *.
Stop recording with #.

Voice Mailbox
COMmander 6000/R/RX - Firmware V8.4 - Advanced Information V32 05/2022- 424 -
Afterwards the recording is played back for checking.
Listening to the Announcement for a Voice Mailbox (on an InternalPhone)
## 8 PIN * 576 A Voice mailbox number #
PIN Admin, sub-admin or user PIN
A 1...9, 0 (no. 1-10 of the announcement)
Voice mailbox number Internal number of the voice mailbox (for exchange line request type
Direct exchange line phone: with preceding **)
Deleting the Announcement for a Voice Mailbox (on an InternalPhone)
## 8 PIN * 556 A Voice mailbox number #
PIN Admin, sub-admin or user PIN
A 1...9, 0 (no. 1-10 of the announcement)
Voice mailbox number Internal number of the voice mailbox (for exchange line request type
Direct exchange line phone: with preceding **)
Querying a Voice Mailbox (on an Internal Phone If the Internal PhoneIs the Owner of the Voice Mailbox)
Voice mailbox number F

Voice Mailbox
COMmander 6000/R/RX - Firmware V8.4 - Advanced Information V32 05/2022- 425 -
Voice mailbox number Internal number of the voice mailbox (for exchange line request type
Direct exchange line phone: with preceding **)
F 0 (Opens the Help menu.)
1 (Opens the main menu.)
2 (Plays back new messages.)
3 (Plays back all of the messages.)
4 Jumps back to the previous message.)
5 (Repeats the message currently being played back.)
6 (Jumps to the next message.)
7 (Deletes the message currently being played back.)
8 (Ends playback.)
* 10 (Disables the voice mailbox.)
* 11 (Enables the voice mailbox.)
* 20 (Enables recording and changing announcements.)
Note: The default announcement and your own announcements, if anyhave been recorded, will be played back. The following functions areavailable while your own announcements are being played back:
Note: # (Selects the currently heard announcement as activeannouncement.)
Note: 4 (Jumps to the previous announcement.)
Note: 5 (Repeats the announcement you have just heard.)
Note: 6 (Jumps to the next announcement.)

Voice Mailbox
COMmander 6000/R/RX - Firmware V8.4 - Advanced Information V32 05/2022- 426 -
Note: 7 (Selects the currently heard or free announcement forchanging or recording. Press # to save your announcement or * tocancel the function.)
F * 30 (Disables message forwarding.)
* 31 (Enables message forwarding.)
* 70 (Deletes all messages and voice memos.)
* 99 (Records a voice memo.)
Hang-up (Ends remote access.)
Additional function while a message is being replayed:
9 (Announces the phone number of the caller – provided it has been
transferred.)
Further options after announcement of the phone number:
# (Initiates a callback.)
* (Back to the message playback.)
Additional information After having dialled the internal number, wait until the announcement has
ended
Querying a Voice Mailbox (on an Internal Phone If the Internal PhoneIs not the Owner of the Voice Mailbox and Readiness of the VoiceMailbox Has Been Enabled)
Voice mailbox number * PIN # F
Voice maibox number Internal number of the voice mailbox (for exchange line request type
Direct exchange line phone: with preceding **)

Voice Mailbox
COMmander 6000/R/RX - Firmware V8.4 - Advanced Information V32 05/2022- 427 -
PIN User or remote access PIN
F 0 (Opens the Help menu.)
1 (Opens the main menu.)
2 (Plays back new messages.)
3 (Plays back all of the messages.)
4 Jumps back to the previous message.)
5 (Repeats the message currently being played back.)
6 (Jumps to the next message.)
7 (Deletes the message currently being played back.)
8 (Ends playback.)
* 10 (Disables the voice mailbox.)
* 11 (Enables the voice mailbox.)
* 20 (Enables recording and changing announcements.)
Note: The default announcement and your own announcements, if anyhave been recorded, will be played back. The following functions areavailable while your own announcements are being played back:
Note: # (Selects the currently heard announcement as activeannouncement.)
Note: 4 (Jumps to the previous announcement.)
Note: 5 (Repeats the announcement you have just heard.)
Note: 6 (Jumps to the next announcement.)

Voice Mailbox
COMmander 6000/R/RX - Firmware V8.4 - Advanced Information V32 05/2022- 428 -
Note: 7 (Selects the currently heard or free announcement forchanging or recording. Press # to save your announcement or * tocancel the function.)
F * 30 (Disables message forwarding.)
* 31 (Enables message forwarding.)
* 70 (Deletes all messages and voice memos.)
* 99 (Records a voice memo.)
Hang-up (Ends remote access.)
Additional function while a message is being replayed:
9 (Announces the phone number of the caller – provided it has been
transferred.)
Further options after announcement of the phone number:
# (Initiates a callback.)
* (Back to the message playback.)
Additional information After having dialled the internal number, press * while the announcement
is being played,
After having pressed #, wait until the announcement has ended
Remote Access (on an External Phone If Readiness of the VoiceMailbox Is Enabled)
Voice mailbox number * PIN # F
Voice mailbox number External number of the voice mailbox
or

Voice Mailbox
COMmander 6000/R/RX - Firmware V8.4 - Advanced Information V32 05/2022- 429 -
External number of the phone which is owner/user of the voice mailbox
PIN User or remote access PIN
F 0 (Opens the Help menu.)
1 (Opens the main menu.)
2 (Plays back new messages.)
3 (Plays back all of the messages.)
4 Jumps back to the previous message.)
5 (Repeats the message currently being played back.)
6 (Jumps to the next message.)
7 (Deletes the message currently being played back.)
8 (Ends playback.)
* 10 (Disables the voice mailbox.)
* 11 (Enables the voice mailbox.)
* 20 (Enables recording and changing announcements.)
Note: The default announcement and your own announcements, if anyhave been recorded, will be played back. The following functions areavailable while your own announcements are being played back:
Note: # (Selects the currently heard announcement as activeannouncement.)
Note: 4 (Jumps to the previous announcement.)
Note: 5 (Repeats the announcement you have just heard.)
Note: 6 (Jumps to the next announcement.)

Voice Mailbox
COMmander 6000/R/RX - Firmware V8.4 - Advanced Information V32 05/2022- 430 -
Note: 7 (Selects the currently heard or free announcement forchanging or recording. Press # to save your announcement or * tocancel the function.)
F * 30 (Disables message forwarding.)
* 31 (Enables message forwarding.)
* 70 (Deletes all messages and voice memos.)
* 99 (Records a voice memo.)
Hang-up (Ends remote access.)
Additional function while a message is being replayed:
9 (Announces the phone number of the caller – provided it has been
transferred.)
Further options after announcement of the phone number:
# (Initiates a callback.)
* (Back to the message playback.)
Additional information After having dialled the inter number, press * while the announcement is
being played,
After having pressed #, wait until the announcement has ended
Remote Access (on an External Phone If Readiness of the VoiceMailbox Is Disabled)
Voice mailbox number PIN # F
Voice mailbox number External number of the voice mailbox
or

Voice Mailbox
COMmander 6000/R/RX - Firmware V8.4 - Advanced Information V32 05/2022- 431 -
External number of the phone which is owner/user of the voice mailbox
PIN User or remote access PIN
F 0 (Opens the Help menu.)
1 (Opens the main menu.)
2 (Plays back new messages.)
3 (Plays back all of the messages.)
4 Jumps back to the previous message.)
5 (Repeats the message currently being played back.)
6 (Jumps to the next message.)
7 (Deletes the message currently being played back.)
8 (Ends playback.)
* 10 (Disables the voice mailbox.)
* 11 (Enables the voice mailbox.)
* 20 (Enables recording and changing announcements.)
Note: The default announcement and your own announcements, if anyhave been recorded, will be played back. The following functions areavailable while your own announcements are being played back:
Note: # (Selects the currently heard announcement as activeannouncement.)
Note: 4 (Jumps to the previous announcement.)
Note: 5 (Repeats the announcement you have just heard.)
Note: 6 (Jumps to the next announcement.)

Voice Mailbox
COMmander 6000/R/RX - Firmware V8.4 - Advanced Information V32 05/2022- 432 -
Note: 7 (Selects the currently heard or free announcement forchanging or recording. Press # to save your announcement or * tocancel the function.)
F * 30 (Disables message forwarding.)
* 31 (Enables message forwarding.)
* 70 (Deletes all messages and voice memos.)
* 99 (Records a voice memo.)
Hang-up (Ends remote access.)
Additional function while a message is being replayed:
9 (Announces the phone number of the caller – provided it has been
transferred.)
Further options after announcement of the phone number:
# (Initiates a callback.)
* (Back to the message playback.)
Additional information After having dialled the inter number, press * while the announcement is
being played, The voice mailbox accepts the call after up to 55 seconds.
After having pressed #, wait until the announcement has ended

Music on Hold and Announcement
COMmander 6000/R/RX - Firmware V8.4 - Advanced Information V32 05/2022- 433 -
Music on Hold and Announcement
Record Music on Hold at Music Input (on an Internal Phone)
##8 PIN * 5632 * * #
PIN Admin or sub-admin PIN
Additional information Wait for trilling tone after 2nd *.
Start recording with 3rd * and simultaneously switch on music
equipment.
Stop recording with #.
Deleting Music on Hold (on an Internal Phone)
##8 PIN * 5532 #
PIN Admin or sub-admin PIN
Recording an Announcement (on an Internal Phone)
##8 PIN * 5631 * * #
PIN Admin or sub-admin PIN
Additional information Wait for trilling tone after 2nd *.
Start recording with 3rd *.
Stop recording with #.

Music on Hold and Announcement
COMmander 6000/R/RX - Firmware V8.4 - Advanced Information V32 05/2022- 434 -
Deleting the Announcement (on an Internal Phone)
##8 PIN * 5531 #
PIN Admin or sub-admin PIN
Switching Music on Hold and Announcement on/off and Listen to It(on an Internal Phone)
##8 PIN * 573 Option #
PIN Admin or sub-admin PIN
Option 0 (no music on hold/announcement)
1 (announcement only)
2 (internal music on hold only)
3 (internal music on hold and announcement)
4 (external music on hold only)
5 (external music on hold and announcement)

Wake-up Functions
COMmander 6000/R/RX - Firmware V8.4 - Advanced Information V32 05/2022- 435 -
Wake-up Functions
Entering the wake-up Time and Activating One-time wake-up (on anInternal Phone)
## 8 PIN * 31 hh mm w #
PIN User PIN
hh 00...23 (hour)
mm 00...59 (minute)
w 1...7 (single weekday: Mon...Sun)
8 (weekend: Sat and Sun)
9 (working days: Mon to Fri)
0 (whole week: Mon to Sun)
Entering the wake-up Time and Activating Repetitive wake-up (on anInternal Phone)
## 8 PIN * 32 hh mm w #
PIN User PIN
hh 00...23 (hour)
mm 00...59 (minute)
w 1...7 (single weekday: Mon...Sun)
8 (weekend: Sat and Sun)

Wake-up Functions
COMmander 6000/R/RX - Firmware V8.4 - Advanced Information V32 05/2022- 436 -
9 (working days: Mon to Fri)
0 (whole week: Mon to Sun)
Deleting All Configured wake-up Times for the Phone (on an InternalPhone)
## 8 PIN * 33 #
PIN User PIN
Deleting the wake-up Times of All Subscribers (on an Internal Phone)
## 8 PIN * 34 #
PIN Admin or sub-admin PIN
Recording an Announcement (on an Internal Phone)
## 8 PIN * 562 A * * #
PIN Admin or sub-admin PIN
A 1...3 (no. 1-3 of the announcement)
Additional information Wait for trilling tone after 2nd *.
Start recording with 3rd *.
Stop recording with #.
Afterwards the recording is played back for checking.

Wake-up Functions
COMmander 6000/R/RX - Firmware V8.4 - Advanced Information V32 05/2022- 437 -
Deleting an Announcement (on an Internal Phone)
## 8 PIN * 552 A #
PIN Admin or sub-admin PIN
A 1...3 (no. 1-3 of the announcement)
Listening to an Announcement (on an Internal Phone)
##8 PIN * 572 A #
PIN Admin or sub-admin PIN
A 1...3 (no. 1-3 of the announcement)

Using the Configuration Manager
COMmander 6000/R/RX - Firmware V8.4 - Advanced Information V32 05/2022- 438 -
Using the Configuration ManagerIntroductionOverviewsMonitoringHardwarePublic switched tel. networksSubscriber (scr.)GroupsDevicesTime controlRoutingFunctionsUser dataAdministration IntroductionOverviewsMonitoringHardwarePublic switched tel. networksSubscriber (scr.)GroupsDevicesTime controlRoutingFunctionsUser dataAdministration

Introduction
COMmander 6000/R/RX - Firmware V8.4 - Advanced Information V32 05/2022- 439 -
Introduction
Requirements and NotesOpening the Configuration ManagerOperating Instructions for the Configuration ManagerInformation on the PBX Requirements and NotesOpening the Configuration ManagerOperating Instructions for the Configuration ManagerInformation on the PBX

Requirements and Notes
COMmander 6000/R/RX - Firmware V8.4 - Advanced Information V32 05/2022- 440 -
Requirements and Notes
The Configuration Manager of the PBX is opened with a browser andallows the subdivision into three permission levels:
• Administrator (admin)
• Sub-administrator (sub-admin)
• User
Requirements:
• Recommended browsers: Mozilla Firefox, Google Chrome (currentversion)
• Knowledge of the PBX's IP address
• Configured password
Note: Every login is logged (Monitoring > System Messages).Additionally this information can be sent as a system e-mail(Administration > System Messages).
Note: If the outgoing mail server is set up, a system message is sentto the admin account for an admin login and a challenge response.
Note: After the third failed login attempt, for a minute it is not possibleto log in. This blocking period will be increased after another threefailed login attempts.
Note: Since the administrator may block parts of the PBX, youmay not be able to configure all of the settings in the ConfigurationManager if you are logged in as a user or a sub-administrator (seeConfiguring Access Authorisation).

Opening the Configuration Manager
COMmander 6000/R/RX - Firmware V8.4 - Advanced Information V32 05/2022- 441 -
Opening the Configuration Manager
Open the Configuration Manager as an AdministratorOpening the Configuration Manager as Sub-AdministratorOpening the Configuration Manager as User Open the Configuration Manager as an AdministratorOpening the Configuration Manager as Sub-AdministratorOpening the Configuration Manager as User

Open the Configuration Manager as an Administrator
COMmander 6000/R/RX - Firmware V8.4 - Advanced Information V32 05/2022- 442 -
Open the Configuration Manager as an Administrator
1. Enter the IP address of the PBX (for example, 192.168.0.240).
2. Enter the admin user name and the corresponding password.

Opening the Configuration Manager as Sub-Administrator
COMmander 6000/R/RX - Firmware V8.4 - Advanced Information V32 05/2022- 443 -
Opening the Configuration Manager as Sub-Administrator
1. Enter the IP address of the PBX (for example, 192.168.0.240).
2. Enter the user name sub-admin and the corresponding password.
Note: If the sub-administrator enters his own internal number ashis user name, this login is recognised as a user login and the webinterface is displayed for the user.

Opening the Configuration Manager as User
COMmander 6000/R/RX - Firmware V8.4 - Advanced Information V32 05/2022- 444 -
Opening the Configuration Manager as User
1. Enter the IP address of the PBX (for example, 192.168.0.240).
2. Enter the internal number of the user (as user name) and thecorresponding password.
Operating Instructions for the Configuration Manager
COMmander 6000/R/RX - Firmware V8.4 - Advanced Information V32 05/2022- 445 -
Operating Instructions for the Configuration Manager
Configuration Manager NavigationLogging OutEntry and Selection FieldsCreating, Deleting, Searching for, and Sorting Table Entries Configuration Manager NavigationLogging OutEntry and Selection FieldsCreating, Deleting, Searching for, and Sorting Table Entries

Configuration Manager Navigation
COMmander 6000/R/RX - Firmware V8.4 - Advanced Information V32 05/2022- 446 -
Configuration Manager Navigation
Horizontal navigation bar
From here, you reach the pages Overviews and Monitoring.
The Search in the horizontal navigation bar searches for terms in theNavigation area. The term is searched in the tree and opened at thecorresponding location.
Area navigation
The available areas are displayed in a tree under Navigation. Most of thethemes have been summarised under a main theme ( ) and are listed inthe order in which to work. If you skip a theme, it may happen that the nextpage is not available (e.g. because no subscribers with internal numbershave been configured yet).
Area help topics
Below Navigation is the Help topics area that contains links to differenthelp topics. It offers help topics related to the opened configuration page.
Logging Out
COMmander 6000/R/RX - Firmware V8.4 - Advanced Information V32 05/2022- 447 -
Logging Out
Via the Logout link in the upper area of the Configuration Manager you goback directly to the login page.

Entry and Selection Fields
COMmander 6000/R/RX - Firmware V8.4 - Advanced Information V32 05/2022- 448 -
Entry and Selection Fields
Important: All settings configured on pages with the following fields,must saved before leaving the page.
An entry field normally indicates that a name or number must be entered.
Selection fields offer settings that are possible for this function.
Some functions offer radio buttons for adjustments. The activation of an
adjustement causes the simultaneous deactivation of all other selection
options.
A check box indicates the enabling or disabling of a function.
Slider for making a setting. Sometimes, the exact values are displayed in
front or behind the slider.

Creating, Deleting, Searching for, and Sorting Table Entries
COMmander 6000/R/RX - Firmware V8.4 - Advanced Information V32 05/2022- 449 -
Creating, Deleting, Searching for, and Sorting TableEntries
Creating Entries
1. Click New.
2. Fill in the empty entry fields.
3. Click Save.
4. Repeat steps 1 to 3 to create additional entries.
Note: If you want to create multiple entries simultaneously, enterthe required range in the From and To entry fields, and then click
Save.
Note: In extendible lists the lower toolbar displays informationabout the actual and maximum possible number of entries in thetable. Dongle functions (identified by ) have three numbers. Inthis case, the second number is the active number and the third isthe maximum number that can be enabled via the dongle.
Deleting entries
1. Mark the entry and click Delete.
Searching for entries
1. Click in the open field in the header of the column that you want tosearch, such as Number or Name and enter the search term.
Sorting entries
• Click a column header.

Creating, Deleting, Searching for, and Sorting Table Entries
COMmander 6000/R/RX - Firmware V8.4 - Advanced Information V32 05/2022- 450 -
Sorted in ascending order.
Sorted in descending order.
Note: If no arrow appears then the column cannot be used as asorting criteria.

Information on the PBX
COMmander 6000/R/RX - Firmware V8.4 - Advanced Information V32 05/2022- 451 -
Information on the PBX
Click the logo in the Configuration Manager for opening the informationabout the PBX (e. g. firmware version, serial number, dealer and operatordata).
Note: The dealer and operator data can be edited underAdministration > Dealer and operator data.
Prints the information about the PBX.

Overviews
COMmander 6000/R/RX - Firmware V8.4 - Advanced Information V32 05/2022- 452 -
Overviews
Identification Number TableCall distributionCall Forwarding StatusGroupsAdditional Subscriber PasswordsAutomatic ReceptionsVoice Mail/Fax FunctionWake-up TimesSwitching timesPortsDial Plan Identification Number TableCall distributionCall Forwarding StatusGroupsAdditional Subscriber PasswordsAutomatic ReceptionsVoice Mail/Fax FunctionWake-up TimesSwitching timesPortsDial Plan
Identification Number Table
COMmander 6000/R/RX - Firmware V8.4 - Advanced Information V32 05/2022- 453 -
Identification Number Table
Proceed as follows:
• Using the Configuration Manager ( Overviews > Identificationnumber table)
Displays all assigned identification numbers sorted by number, name ortype.
Prints a list of all assigned identification numbers.

Call distribution
COMmander 6000/R/RX - Firmware V8.4 - Advanced Information V32 05/2022- 454 -
Call distribution
Proceed as follows:
• Using the Configuration Manager ( Overviews > Call distribution)
Displays on which internal subscribers a call on a separate externalnumber is signalled.
Prints a list of the configured call distributions.
Call Forwarding Status
COMmander 6000/R/RX - Firmware V8.4 - Advanced Information V32 05/2022- 455 -
Call Forwarding Status
Proceed as follows:
• Using the Configuration Manager ( Overviews > Call ForwardingStatus)
Displays the configuration-dependent status of call forwardings for allconfigured subscribers and groups.
• Phone number | name: Displays all available subscribers and groups.
• Destination number: Displays the configuration-dependent phonenumbers of the configured (mutli-path) call forwardings.
Note: An activated (multi-path) call forwarding is highlighted in green.
Prints a list of the configured call forwardings.

Groups
COMmander 6000/R/RX - Firmware V8.4 - Advanced Information V32 05/2022- 456 -
Groups
Proceed as follows:
• Using the Configuration Manager ( Overviews > Groups)
Displays all created groups with corresponding phone numbers andnames as well as the subscriber status.
Prints a list of all configured groups.

Additional Subscriber Passwords
COMmander 6000/R/RX - Firmware V8.4 - Advanced Information V32 05/2022- 457 -
Additional Subscriber Passwords
Proceed as follows:
• Using the Configuration Manager ( Overviews > Additionalsubscriber passwords)
Displays all configured additional subscriber passwords for theConfiguration Manager, API and Action URLs.
Prints a list of the configured additional subscriber passwords.

Automatic Receptions
COMmander 6000/R/RX - Firmware V8.4 - Advanced Information V32 05/2022- 458 -
Automatic Receptions
Proceed as follows:
• Using the Configuration Manager ( Overviews > AutomaticReceptions)
Displays all configured automatic receptions and the correspondingdestination numbers.
Prints a list of all configures automatic receptions.

Voice Mail/Fax Function
COMmander 6000/R/RX - Firmware V8.4 - Advanced Information V32 05/2022- 459 -
Voice Mail/Fax Function
Proceed as follows:
• Using the Configuration Manager ( Overviews > Voice mail/faxfunction)
Displays all created voice mail and fax boxes.
• Type: Voice mail or fax box
• Phone number/Name: Number and name of the voice mail/fax box
• Number of messages: Number of the stored and the maximumpossible messages.
• Memory utilisation: Value of the actual occupied and maximunpossible storage space.
Prints a list of the configured voice mail and fax boxes.
Graphic
Displays the memory assignment in a diagram.

Wake-up Times
COMmander 6000/R/RX - Firmware V8.4 - Advanced Information V32 05/2022- 460 -
Wake-up Times
Proceed as follows:
• Using the Configuration Manager ( Overviews > Wake-up times)
Displays all configured wake-up times sorted by weekdays.
Prints a list of the configured wake-up times.

Switching times
COMmander 6000/R/RX - Firmware V8.4 - Advanced Information V32 05/2022- 461 -
Switching times
Proceed as follows:
• Using the Configuration Manager ( Overviews > Switching times)
Displays the time periods the configurations are valid (12 a.m.-11:59 p.m.)as well as manually enabled configurations.

Ports
COMmander 6000/R/RX - Firmware V8.4 - Advanced Information V32 05/2022- 462 -
Ports
Proceed as follows:
• Using the Configuration Manager ( Overviews > Ports)
Displays all configured and fixed ports of the PBX and the used transportprotocols.
Prints a list of the configured and fixed ports.

Dial Plan
COMmander 6000/R/RX - Firmware V8.4 - Advanced Information V32 05/2022- 463 -
Dial Plan
Proceed as follows:
• Using the Configuration Manager ( Overviews > Dial Plan)
The dial plan shows all of the internal numbers already created and anyadditional numbers that have been taken from the internal dial plan:
• Subscriber number
• Group numbers
• Voice mailbox numbers
• Fax box numbers
• Phone numbers for door terminals and audio outputs
• Short-code dialling numbers
• Emergency and service numbers
• Exchange line access numbers (account numbers) for VoIP accounts
• Exchange line access number of the PBX
• Automatic receptions
• Call parking
• Internal CAPI dial-in number
• Macro short-code number
The internal dial plan of the PBX permits the allocation of 2 to 4-digitphone numbers in the 10-9999 range. Double allocation of a number is notpossible.
Using numbers with few digits (two or three-digit numbers) inevitablyrestricts the possible supply of numbers requiring more digits. For

Dial Plan
COMmander 6000/R/RX - Firmware V8.4 - Advanced Information V32 05/2022- 464 -
example, if the number 12 is assigned, the numbers 120-129 and1200-1299 will no longer be available.
Note: For some functions a 3-digit maximum phone numbers can beassigned because the last position is needed for the function (e.g. doorterminal numbers, phone numbers for call parking).
Note: The exchange line access number on the PBX is 0 in thefactory settings; however, this can be changed (Public switchedtel. networks > Exchange Line Request). Note that changing theexchange line access number restricts the dial plan.
Note: The overview can be viewed and printed (Overviews > DialPlan) in the Configuration Manager by opening the page Printing.
Note: The phone numbers can be shown in the TotalovervieworGrouped by type.
Note: In the overview Grouped by type on

Monitoring
COMmander 6000/R/RX - Firmware V8.4 - Advanced Information V32 05/2022- 465 -
Monitoring
Network DiagnosisExternal Call Channel AssignmentStatus VoIP accountsStatus internal subscriberStatus IP relaySystem messagesNetwork data streamStatus Messages Network DiagnosisExternal Call Channel AssignmentStatus VoIP accountsStatus internal subscriberStatus IP relaySystem messagesNetwork data streamStatus Messages

Network Diagnosis
COMmander 6000/R/RX - Firmware V8.4 - Advanced Information V32 05/2022- 466 -
Network Diagnosis
Proceed as follows:
• Using the Configuration Manager ( Monitoring > Networkdiagnosis)
When sending a ping to a remote host (e. g. computer, PBX) in thenetwork, its reachability and the routing time is checked.

External Call Channel Assignment
COMmander 6000/R/RX - Firmware V8.4 - Advanced Information V32 05/2022- 467 -
External Call Channel Assignment
Proceed as follows:
• Using the Configuration Manager ( Monitoring > External callchannel assignment)
Displays the status of the external call channels and if a GSM gatewayhas been connected to the external port.
Note: When opening the page it first shows the status which isautomatically updated every 30 seconds.
available.
used.
not available.
emergency call ability.
no emergency call ability.

Status VoIP accounts
COMmander 6000/R/RX - Firmware V8.4 - Advanced Information V32 05/2022- 468 -
Status VoIP accounts
Proceed as follows:
• Using the Configuration Manager ( Monitoring > Status VoIPaccounts)
Requirements:
• Configured VoIP account (Public switched tel. networks > VoIP >Accounts)
It is displayed:
• STUN request
• Registration
• last outgoing call
Note: When opening the page it first shows the status which isautomatically updated every 30 seconds.
The first steps are the DNS request and an evaluation of the DNS serverresponse.
Registration in progress
Registration successful
Error, for example caused by:
• DSL modem defective
• Faulty network configuration of the PBX

Status VoIP accounts
COMmander 6000/R/RX - Firmware V8.4 - Advanced Information V32 05/2022- 469 -
If this is not effective, please check the status of the individual areas.

Status VoIP accounts
COMmander 6000/R/RX - Firmware V8.4 - Advanced Information V32 05/2022- 470 -
STUN request
Flawless STUN request. The firewall permits traffic with the SIP transport protocol.
No STUN server entered for the VoIP provider.
Error, for example caused by:
• STUN server offline
• Faulty STUN server IP address/URL
• Provider-specified port not specified
• STUN server reports faulty responses
• Firewall blocks SIP transport protocol or otherwise does notallow Voice over IP
Registration
REGISTER request successful
Faulty STUN request. Current status must be checked again.
Note: Some providers have STUN disbaled.
Error, for example caused by:
• Registrar offline. Outgoing calls might be possible (STUNrequest and outbound proxy successful). Incoming calls notpossbile (no phone number at the registrar of the provider).
• Faulty domian settings
• Faulty account data (check user name, password andauthentication ID)
• VoIP provider blocks multi registrations caused by multiplerestarts of the PBX in a too short time.
last outgoing call
INVITE request was answered by the VoIP provider
unclear, e. g. caused by:
• No call has been made via this account yet.
• Faulty STUN request. Current status must be checkedagain.
Error, for example caused by:
• Outbound proxy offline
• Faulty outbound proxy settings
• Faulty domain settings
• Faulty account data (check user name, password andauthentication ID)
• Outbound proxy currently inactive (e. g. maintenance work)
• Account blocked

Status internal subscriber
COMmander 6000/R/RX - Firmware V8.4 - Advanced Information V32 05/2022- 471 -
Status internal subscriber
Proceed as follows:
• Using the Configuration Manager ( Monitoring > Status internalsubscriber)
Display of registration (IP and ISDN phones), connection (analoguephones) and provisioning of subscribers, door terminals and (not yet)assigned devices by a coloured dot.
Note: When opening the page, it first shows the status which isautomatically updated every 30 seconds.
Note: Not all status information can be updated automatically (seefollowing sections).
Status analogue phones
Unknown analogue phone.
Connected analogue phone with date of last activity time.
Note: After connecting an analogue phone, the receiver must bepicked up for correctly displaying the phone status. The monitoringpage should then be updated.
Note: The PBX cannot automatically recognize the removal ofa device. It’s hardware status can be reset under Subscriber >Properties > Basic Settings > Reset hardware status.
Status ISDN phones
Unkown ISDN phone.

Status internal subscriber
COMmander 6000/R/RX - Firmware V8.4 - Advanced Information V32 05/2022- 472 -
Status ISDN phones
Connected ISDN system phone.
Connected standard ISDN phone with date of last activity time.
Note: After connecting a standard ISDN phone, the MSN must beconfigured and then the receiver must either be picked up or thephone must be called for correctly displaying the phone status. Themonitoring page should then be updated.
Note: The PBX cannot automatically recognize the removal ofa device. It’s hardware status can be reset under Subscriber >Properties > Basic Settings.Reset hardware status).
Registration VoIP phones
No registration.
Successful encrypted registration of the VoIP subscriber.
Successful unencrypted registration of the VoIP subscriber.
Registration error with error message.
Provisioning VoIP phones
No provisioning file assigned yet.
Provisioning file assigned, however, not yet requested by the device.
Provisioning file assigned and requested by the device.

Status internal subscriber
COMmander 6000/R/RX - Firmware V8.4 - Advanced Information V32 05/2022- 473 -
Provisioning VoIP phones
MAC address of the device has been determined.
Note: Provisioning without MAC address is not possible.
System-/standard phone VoIP and ISDN phones
The device was registered as system phone on the PBX.
Distributing firmware VoIP system phones
Distributing firmware is enabled in the phone, however, currently inactive. Either no
firmware file is saved in the phone or the PBX has determinded another phone of the
phone family as firmware distributing phone.
Firmware distributing phone.
Subscribers/Door terminals
Under Subscriber and Door stations, all known devices that areassigned to a subscriber or a door terminal are displayed. On the rightthere is additional information about the individual devices (IP/MACaddress, type name, firmware version, status).
Note: Not all information is available for each device.
Note: By double-clicking on the additional information, these can becopied to the clipboard for further processing.
Status internal subscriber
COMmander 6000/R/RX - Firmware V8.4 - Advanced Information V32 05/2022- 474 -
Not assigned
Under Not assigned the phones that are known to the PBX but notassigned to a subscriber or a door terminal are displayed.
Requirements for automatic assignment:
• Analogue phones: Slot and port of the device must correspond to thesubscriber.
• ISDN phones: MSN, slot and port of the device must correspond to thesubscriber.
• VoIP phones: The MAC address entered for the subscriber mustcorrespond to the MAC address sent by the device.
If these devices shall no longer be displayed, they can be deleted(Subscriber (scr.) > Unassigned phones).
Status IP relay
COMmander 6000/R/RX - Firmware V8.4 - Advanced Information V32 05/2022- 475 -
Status IP relay
Proceed as follows:
• Using the Configuration Manager ( Monitoring > Status IP relay)
Displays information about the switching status of the IP relays.
Note: When opening the page it first shows the status which isautomatically updated every 30 seconds. However, not all statusinformation can be automatically updated.

System messages
COMmander 6000/R/RX - Firmware V8.4 - Advanced Information V32 05/2022- 476 -
System messages
Proceed as follows:
• Using the Configuration Manager ( Monitoring > Systemmessages)
Each event (max. 2000 entries per category) is logged and displayed inchronological order with the date and time, category (SELECTED FILTER)and detailled information in English.
Note: The page is not updated automatically.
Note: When the maximum number of entries is exceeded, old entriesin the same category are automatically deleted.
Note: If you update your firmware from Version 6.4 to 6.6, old log filesare grouped to form a *.tar archive in the SFTP range.
Prints a list of the system events.

Network data stream
COMmander 6000/R/RX - Firmware V8.4 - Advanced Information V32 05/2022- 477 -
Network data stream
To log the network data stream, a network log (*.pcap) can be recorded.This log can be evaluated (e.g.,with Wireshark/Ethereal), for instance, todetermine the cause of malfunctions.
Important: Note the following legal notes prior to recording a networkdata stream.
The recorded network data stream may contain the followingcomponents:
• Data streams of other computers in the network
• Connection data sets with destination, source, and timeinformation of a telecommunication connection
• The spoken word of both ends of a telecommunication connection
• Configuration data of the PBX and connected phones, as well asthe corresponding PINs and passwords
Important: Before any recording, all participants in thetelecommunication connection must be informed that these contentswill be recorded and must also be informed who will use the recordeddata.
Important: If you want to make the recorded data available to yourspecialised dealer or to the manufacturer for error analysis, you mustmake sure that the legal requirements are fulfilled.
Proceed as follows:
• Using the Configuration Manager
Requirements:
Network data stream
COMmander 6000/R/RX - Firmware V8.4 - Advanced Information V32 05/2022- 478 -
• Disabled pop-up blocker in the browser or defined exception rule
1. Open the page Monitoring > Network data stream.
2. Accept the legal notes by entering ok in the entry field.
3. Click Start Trace.
4. If the error can be reproduced easily, try to repeat it now.
5. To stop the recording of the network log, click Stop Trace.
6. Save the file.

Status Messages
COMmander 6000/R/RX - Firmware V8.4 - Advanced Information V32 05/2022- 479 -
Status Messages
Proceed as follows:
• Using the Configuration Manager ( Monitoring > Statusmessages)
Displays and describes those errors in the PBX that can be corrected viathe Configuration Manager or in the hardware.
Note: If an error occurs, the status messages appear directly after youlog into the Configuration Manager.
Note: When opening the page it first shows the status which isautomatically updated every 30 seconds.

Hardware
COMmander 6000/R/RX - Firmware V8.4 - Advanced Information V32 05/2022- 480 -
Hardware
Selection of modulesPort configuration Selection of modulesPort configuration

Selection of modules
COMmander 6000/R/RX - Firmware V8.4 - Advanced Information V32 05/2022- 481 -
Selection of modules
Settings of the Modules Settings of the Modules

Settings of the Modules
COMmander 6000/R/RX - Firmware V8.4 - Advanced Information V32 05/2022- 482 -
Settings of the Modules
Proceed as follows:
• Using the Configuration Manager (Hardware > Selection of modules)
Note: The specifications here have to match the actual hard wareconfigurations of your PBX. If this is the case, the settings will bemarked in black. If it is not the case, the settings will be marked in red.
Note: If an inserted module should not be used, select the option notdefined in the corresponding list field.
Configuration
Select the modules that are inserted in the corresponding slot.
move
Moves a module to another slot. The settings already made for thismodule will not be lost by this action.

Port configuration
COMmander 6000/R/RX - Firmware V8.4 - Advanced Information V32 05/2022- 483 -
Port configuration
Settings of the Ports Settings of the Ports

Settings of the Ports
COMmander 6000/R/RX - Firmware V8.4 - Advanced Information V32 05/2022- 484 -
Settings of the Ports
S0 PortsUP0 PortsS2M Ports
SS0 PortsUUP0 PortsSS2M Ports

S0 Ports
COMmander 6000/R/RX - Firmware V8.4 - Advanced Information V32 05/2022- 485 -
S0 Ports
Proceed as follows:
• Using the Configuration Manager (Hardware > Port configuration)
Note: If the settings for the module are marked in red, the module isselected but not inserted.
Note: The numbers under Port correspond to the numbers used onthe board.
Use
free
Port is not used and port is not taken into account for the calculation of thetotal number of existing ports/call channels.
internal
Port is used as internal port.
external
Port is used as external port.
Connection type
The connection type for the ISDN connection that the network providerhas provided for the NT needs to be configured for the external S 0 port.
Note: No selection of the connection type is possible for internal S 0ports. They are fixed on PTMP connection.
PTMP connection
ISDN PTMP connection (Point-to-Multipoint) with up to 10 multiplesubscriber numbers (MSNs).

S0 Ports
COMmander 6000/R/RX - Firmware V8.4 - Advanced Information V32 05/2022- 486 -
PTP connection
ISDN PTP connection (Point-to-Point) with a PBX base number and DirectDial In numbers (DDI numbers).

UP0 Ports
COMmander 6000/R/RX - Firmware V8.4 - Advanced Information V32 05/2022- 487 -
UP0 Ports
Proceed as follows:
• Using the Configuration Manager (Hardware > Port configuration)
Note: If the settings for the module are marked in red, the module isselected but not inserted.
Note: The numbers under Port correspond to the numbers used onthe board.
Use
Note: The connection type is automatically configured as PTMPconnection.
free
Port is not used and port is not taken into account for the calculation of thetotal number of existing ports/call channels.
internal
Port is used as internal port.

S2M Ports
COMmander 6000/R/RX - Firmware V8.4 - Advanced Information V32 05/2022- 488 -
S2M Ports
Proceed as follows:
• Using the Configuration Manager (Hardware > Port configuration)
Note: If the settings for the module are marked in red, the module isselected but not inserted.
Note: The numbers under Port correspond to the numbers used onthe board.
B channel assignment type
Select the corresponding option ordered from the network provider andgiven in the order confirmation:
Global
The B channels are not permanently assigned.
Targeted
The B channels are assigned in selected mode.
Level adaption
In exceptional cases it may be necessary to switch level adaption on(if a very long connection line between the NTPM and the PBX causesproblems, e. g. interruption of calls).
first usable B channel
Select the first B channel that was provided by your network provider orthat was provided as the first one for the PBX due to restricted conditions.

S2M Ports
COMmander 6000/R/RX - Firmware V8.4 - Advanced Information V32 05/2022- 489 -
incoming channels
Select the number or B channels that are available for incoming calls.
outgoing channels
Select the number of B channels which are available for outgoing calls.
incoming/outgoing channels
Select the number of B channels which are available in both directions.

Public switched tel. networks
COMmander 6000/R/RX - Firmware V8.4 - Advanced Information V32 05/2022- 490 -
Public switched tel. networks
Exchange line requestEmergency callsISDNVoIPCall DistributionCall Forwarding Exchange line requestEmergency callsISDNVoIPCall DistributionCall Forwarding

Exchange line request
COMmander 6000/R/RX - Firmware V8.4 - Advanced Information V32 05/2022- 491 -
Exchange line request
Settings of the Exchange Line Request Settings of the Exchange Line Request

Settings of the Exchange Line Request
COMmander 6000/R/RX - Firmware V8.4 - Advanced Information V32 05/2022- 492 -
Settings of the Exchange Line Request
Exchange Line Request/Exchange Line Access NumberPrefixesSignalling Tones Exchange Line Request/Exchange Line Access NumberPrefixesSignalling Tones

Exchange Line Request/Exchange Line Access Number
COMmander 6000/R/RX - Firmware V8.4 - Advanced Information V32 05/2022- 493 -
Exchange Line Request/Exchange Line AccessNumber
Proceed as follows:
• Using the Configuration Manager (Public switched tel. networks >Exchange line request)
Note: Some of the following settings can also be configured seperatelyfor connections/accounts.
System-wide automatic exchange line request
Requirements:
• Emergency call only with disabled exchange line access number
− Using the Configuration Manager (on the following pages)
− Public switched tel. networks > Emergency calls
The PBX automatically distinguishes for each subscriber between internaland external numbers by analysing the digit sequence and the adjustmentof the dialled phone number with the internal dial plan.
Note: When switched off, the exchange line request type can be setindividually for each subscriber.
Important: After a firmware update from an older firmware versionto version 6.6, the system-wide automatic exchange line request is atfirst switched off. If the system-wide automatic exchange line requestis switched on, you must note the following for the conversion of theexisting phones:
Note: COMfortel 600: For all phone numbers that are entered inthe configuration of the phone (concerns speed dialling keys andphone book), possibly entered exchange line access numbers or **

Exchange Line Request/Exchange Line Access Number
COMmander 6000/R/RX - Firmware V8.4 - Advanced Information V32 05/2022- 494 -
(initiation of internal numbers in the direct exchange line phone) mustbe deleted.
Note: COMfortel 1100/1500/2500 /2500 AB/2500 VoIP AB: For thecall forwarding variation „for external numbers“ the exchange lineaccessnumber preceding the destination number must be deleted oromitted.
Exchange line access number
Requirements:
• Configured prefixes (country prefix and local area code)
• Automatic exchange line request disabled
Is required to request an external line (exception: direct exchange accessand automatic exchange line request).
Note: After you dial the exchange line access number, the externaldial tone indicates that an external line is free. The external telephonenumber can then be dialled.
Note: The factory setting for the exchange line access number on thePBX is 0, but this number is not effective at first because automaticexchange line request is active in the factory settings.
Note: Changing the exchange line access number is only meaningfulif another exchange line access number is normally used (e.g., inEngland).
Note: Note that changing the exchange line access number restrictsthe dial plan.

Prefixes
COMmander 6000/R/RX - Firmware V8.4 - Advanced Information V32 05/2022- 495 -
Prefixes
Proceed as follows:
• Using the Configuration Manager (Public switched tel. networks >Exchange line request)
Note: Some of the following settings can also be configured seperatelyfor connections/accounts.
PBX is used in the following country
When you configure the country the PBX is automatically assigned thedefault settings that are required in the selected country (e.g. settings foranalogue ports, and emergency numbers).
Note: Emergency numbers preset in this way cannot be deleted. Youcan only enter different public emergency numbers as default settingsby changing the country settings at a later point in time.
Note: Make sure that there are no conflicts between country-specificemergency numbers and your internal dial plan. If necessary, assignnew "Internal numbers".
Country Code
International phone prefix (e. g. 0044 for the UK). These are necessaryfor some functions of the PBX (e.g. Call Through, Call restrictors/Calldeblockers).

Prefixes
COMmander 6000/R/RX - Firmware V8.4 - Advanced Information V32 05/2022- 496 -
Area Code
Phone number prefix (e. g. 0208 for Greater London). These arenecessary for some functions of the PBX (e.g. Call Through, Callrestrictors/Call deblockers).
Note: Some countries (e.g. Denmark, Greece, Luxembourg) do nothave a fixed number sequence for their area codes. If this also appliesto the location at which the PBX is installed, you do not need to enteran area code.
Dial level
The selection of the dial level (Location, National, International) is country-specific. Depending on the country and the settings for the local areacode above, a dial level must be selected (example: In Belgium, local areacodes do not exist. Here, the dial level City must not be selected).
Global LCR provider digit-recognition, Digit number, Digits beginwith
Requirements:
• Disabled Adopt settings from PBX location (Germany)
The digits in the table below are the common LCR number prefixes inGermany. For other countries, more LCR number prefixes (a total of 10)can be entered.
Digit number Digits begin with
5 010

Prefixes
COMmander 6000/R/RX - Firmware V8.4 - Advanced Information V32 05/2022- 497 -
6 0100

Signalling Tones
COMmander 6000/R/RX - Firmware V8.4 - Advanced Information V32 05/2022- 498 -
Signalling Tones
Proceed as follows:
• Using the Configuration Manager (Public switched tel. networks >Exchange line request)
Note: Some of the following settings can also be configured seperatelyfor connections/accounts.
Dial tone
Ringer
Busy tone
Depending on the location of the PBX, the signalling tones arecorrespondingly preconfigured but they can also be changed. For thesetones, only the frequencies 400, 425, 440 and 450 Hz are possible. Tonesdiffering from these frequencies are rounded to the nearest frequency.
Note: Do not change the preconfigured values for dial tone, ringer andbusy tone unless you are told to do so by our support staff.

Emergency calls
COMmander 6000/R/RX - Firmware V8.4 - Advanced Information V32 05/2022- 499 -
Emergency calls
Settings of the Emergency Calls Settings of the Emergency Calls

Settings of the Emergency Calls
COMmander 6000/R/RX - Firmware V8.4 - Advanced Information V32 05/2022- 500 -
Settings of the Emergency Calls
Emergency Call has PriorityEmergency NumbersService Numbers Emergency Call has PriorityEmergency NumbersService Numbers

Emergency Call has Priority
COMmander 6000/R/RX - Firmware V8.4 - Advanced Information V32 05/2022- 501 -
Emergency Call has Priority
Proceed as follows:
• Using the Configuration Manager (Public switched tel. networks >Emergency calls)
Emergency Call Priority
An external line is definitely made available from the PBX when diallingthe emergency number or if an alarm is detected. If necessary, a call canbe interrupted to enable an emergency call to be made.
Important: If Emergency Call Priority is disabled and other calls arebeing made during an emergency, there is a risk that the emergencycall cannot be made immediately.
Note: The emergency call priority switch is enabled for the entire PBX.
Emergency Call Only with Exchange Line Access Number
Requirements:
• Automatic exchange line request (also for individual subscribers)disabled
− Using the Configuration Manager (on the following pages)
− Public switched tel. networks > Exchange line request
− Subscriber > Properties > Settings > Exchange line request
− Subscriber (scr.) > Function overview > Settings > Exchangeline request > Configure
The emergency number must be dialled with the exchange line accessnumber entered under Public switched tel. networks > Exchange line

Emergency Call has Priority
COMmander 6000/R/RX - Firmware V8.4 - Advanced Information V32 05/2022- 502 -
request (e. g. 0112 instead of only 112). In this way, numbers beginningwith 11... will remain available to be assigned as internal numbers.
Important: Since the exchange line access number must be dialledin advance if Emergency Call Only with Exchange Line AccessNumber is enabled, there is a risk that the exchange line accessnumber is forgotten in an emergency so that no emergency call can bemade.
Note: When switched off, an emergency number can be dialledwithout exchange line access number, but it is not possible to assigninternal numbers which begin with the first digits of an emergencynumber.
Note: If you try to disable Emergency Call Only with Exchange LineAccess Number after internal numbers beginning with the first digitsof an emergency number have been entered, an error message will bedisplayed. Solve the problem by assigning new phone numbers to theinternal subscribers in question.

Emergency Numbers
COMmander 6000/R/RX - Firmware V8.4 - Advanced Information V32 05/2022- 503 -
Emergency Numbers
Proceed as follows:
• Using the Configuration Manager (Public switched tel. networks >Emergency calls)
Emergency numbers
With the country settings for the location of the PBX (during firstcommissioning or on the page Administration > Dealer and operatordata the country-specific emergency number will be preset. Overall, youcan enter up to ten external numbers as emergency call or service phonenumbers.
Note: Public emergency numbers, e. g. beginning with 11..., areentered without an area code, which reduces the size of the internaldial plan. For example, if the emergency phone numbers are 110 and112 this means the internal numbers 110 and 112 and also 1100 to1109 and 1120 to 1129 are no longer available.
Note: All other emergency numbers are entered with area code.
Note: Some countries (e.g. Denmark, Greece, Luxembourg) do nothave a fixed number sequence for their area codes. If this also appliesto the location at which the PBX is installed, you do not need to enteran area code.
Name
The name is used for display purposes on the system phone. Thename along with the phone number also appears on some pages of theConfiguration Manager (e.g. Call data list).

Emergency Numbers
COMmander 6000/R/RX - Firmware V8.4 - Advanced Information V32 05/2022- 504 -
New
Adds a new emergency or service number.
Important: The exchange line access number is never entered whenentering emergency or service numbers.
Delete
Deletes the entries marked in the list.

Service Numbers
COMmander 6000/R/RX - Firmware V8.4 - Advanced Information V32 05/2022- 505 -
Service Numbers
Proceed as follows:
• Using the Configuration Manager (Public switched tel. networks >Emergency calls)
Service numbers
Overall, you can enter up to ten external numbers as emergency call orservice phone numbers.
Note: Public service phone numbers, e. g. beginning with 11..., areentered without an area code, which reduces the size of the internaldial plan. For example, if the service phone number is 115, this meansthe internal numbers 115 and 1150 to 1159 are no longer available.
Note: All other service phone numbers are entered with area code.
Note: Some countries (e.g. Denmark, Greece, Luxembourg) do nothave a fixed number sequence for their area codes. If this also appliesto the location at which the PBX is installed, you do not need to enteran area code.
Name
The name is used for display purposes on the system phone. Thename along with the phone number also appears on some pages of theConfiguration Manager (e.g. Call data list).
New
Adds a new emergency or service number.

Service Numbers
COMmander 6000/R/RX - Firmware V8.4 - Advanced Information V32 05/2022- 506 -
Important: The exchange line access number is never entered whenentering emergency or service numbers.
Delete
Deletes the entries marked in the list.

ISDN
COMmander 6000/R/RX - Firmware V8.4 - Advanced Information V32 05/2022- 507 -
ISDN
Settings of the PTMP ConnectionExpert Configuration of the PTMP ConnectionSettings PBX Base Number/BundleExpert Configuration for the PTP ConnectionSettings of the ExtensionSettings Additional Numbers ISDN Settings of the PTMP ConnectionExpert Configuration of the PTMP ConnectionSettings PBX Base Number/BundleExpert Configuration for the PTP ConnectionSettings of the ExtensionSettings Additional Numbers ISDN

Settings of the PTMP Connection
COMmander 6000/R/RX - Firmware V8.4 - Advanced Information V32 05/2022- 508 -
Settings of the PTMP Connection
Network ProviderMiscellaneousMultiple Subscriber Numbers Network ProviderMiscellaneousMultiple Subscriber Numbers

Network Provider
COMmander 6000/R/RX - Firmware V8.4 - Advanced Information V32 05/2022- 509 -
Network Provider
Proceed as follows:
• Separately for external S0 ports
• Using the Configuration Manager (Public switched tel. networks >ISDN > PTMP connection)
Requirements:
• External S0 port (optional, see Technical Data in the Instructions)
• Connection type PTMP connection on external S0 port
PTMP CONNECTION
Select the PTMP connection to be displayed/configured.
Exchange line has emergency call ability
Requirements:
• The corresponding connection must allow emergency calls
This exchange line can be used for emergency calls.
Note: When switched off, this exchange line cannot be used foremergency calls. When you attempt to dial an emergency number, youwill hear the announcement, "This phone does not allow emergencycalls. Please use an alternative."
Note: If you have updated your firmware from Version 6.4 to 6.6, thephone allows emergency calls by default.

Miscellaneous
COMmander 6000/R/RX - Firmware V8.4 - Advanced Information V32 05/2022- 510 -
Miscellaneous
Proceed as follows:
• Separately for external S0 ports
• Using the Configuration Manager (Public switched tel. networks >ISDN > PTMP connection)
Requirements:
• External S0 port (optional, see Technical Data in the Instructions)
• Connection type PTMP connection on external S0 port
PTMP CONNECTION
Select the PTMP connection to be displayed/configured.
Name of the PTMP connection
For identification of the connection within the PBX.
Expert configuration > Configure
Opens the expert configuration.
Further help under Expert Configuration of the PTMP Connection
GSM gateway
The S0 port supports the GSM gateway connected to it. Any phonenumbers can be used for the connection. They must be entered in thePBX and GSM gateway configurations.

Miscellaneous
COMmander 6000/R/RX - Firmware V8.4 - Advanced Information V32 05/2022- 511 -
Note: When you configure the GSM gateway, you must also input theconnection type of the ISDN connection.
Note: GSM gateways accept external phone calls automatically. Thismay cause call charges for the caller, even if no-one picks up thephone at the internal destination.
Note: If the PBX is not connected to the land line, outgoing externalcalls can only be accepted via a targeted exchange line accessusing the phone numbers entered on the page Routing > VoIP/GSMRouting > Exception numbers (and the corresponding accesses,also configured on this page) or via a configured preferred exchangeline (exchange line settings for subscribers or groups).

Multiple Subscriber Numbers
COMmander 6000/R/RX - Firmware V8.4 - Advanced Information V32 05/2022- 512 -
Multiple Subscriber Numbers
Proceed as follows:
• Separately for external S0 ports
• Using the Configuration Manager (Public switched tel. networks >ISDN > PTMP connection)
Requirements:
• External S0 port (optional, see Technical Data in the Instructions)
• Connection type PTMP connection on external S0 port
PTMP CONNECTION
Select the PTMP connection to be displayed/configured.
Multiple subscriber number (MSN)
The PTMP connection has up to 10 multiple subscriber numbers. Thenetwork provider assigns the phone numbers for the connection. (Select
New to enter.)
Phone number for CLIP no screening
Requirements:
• Set up phone number
• CLIP no screening switched on for the ISDN connection
Customer-specific phone number (e.g. a service phone number) that istransferred to the destination by the exchange line without its correctnessbeing checked.

Multiple Subscriber Numbers
COMmander 6000/R/RX - Firmware V8.4 - Advanced Information V32 05/2022- 513 -
Name
For display purposes on the system phone.
Ringtone
The ringtone specifies which sequence of sounds is used to signalexternal calls to internal subscribers on the PBX.
Note: See Ringer tones for information about exceptions to signallingand sound sequences.
New
Adds a new phone number.
Delete
Deletes the entries marked in the list.

Expert Configuration of the PTMP Connection
COMmander 6000/R/RX - Firmware V8.4 - Advanced Information V32 05/2022- 514 -
Expert Configuration of the PTMP Connection
PTMP ConnectionGeneral InfoRoutingCall ForwardingNumber Presentation PTMP ConnectionGeneral InfoRoutingCall ForwardingNumber Presentation

PTMP Connection
COMmander 6000/R/RX - Firmware V8.4 - Advanced Information V32 05/2022- 515 -
PTMP Connection
Important: The expert settings for the ISDN connection are settingsthat should only be changed if e. g. country or provider-specificparticularities make it absolutely necessary.
Proceed as follows:
• Using the Configuration Manager (Public switched tel. networks >ISDN > PTMP connection > Expert configuration > Configure)
Requirements:
• Configured PTMP connection
Country settings for this exchange line
At configuration and relocation of the PBX, the country-specific settingsare automatically set.
Country settings have been changed
If you make not country-specific expert settings, you must save themwhen leaving the page.
Copy settings to | Execute
The settings of this port can be copied an transferred for another port.
Charge information
Requirements:
• Charge information provided by the network provider
PTMP Connection
COMmander 6000/R/RX - Firmware V8.4 - Advanced Information V32 05/2022- 516 -
The PBX stores the charge information sent by the network provider anduses it to evaluate individual calls.
Important: Disabling this function is only advisable if it causesproblems on the external connection (this depends on the networkprovider/country).
Important: Some telephony providers do not send charge information.If this type of provider is being used, you cannot apply any charges toa particular call.
Important: You cannot check exactly how many PBXs should becharged for each call because, for example, you cannot uniquelyassign the charges to one of the two subscribers involved in a querycall from an external call.
Important: If you are using the Soft-LCR 4.0 LCR procedure, theduration of the call and your own table of tariffs are used to calculatethe charges.

General Info
COMmander 6000/R/RX - Firmware V8.4 - Advanced Information V32 05/2022- 517 -
General Info
Important: The expert settings for the ISDN connection are settingsthat should only be changed if e. g. country or provider-specificparticularities make it absolutely necessary.
Proceed as follows:
• Using the Configuration Manager (Public switched tel. networks >ISDN > PTMP connection > Expert configuration > Configure)
Requirements:
• Configured PTMP connection
Country code
International phone prefix (e. g. 0044 for the UK).
Local area code
Phone number prefix (e. g. 0208 for Greater London).
Note: If there is no fixed digit sequence as the area code at theinstallation location of the PBX, no entry is required here.
Dial level
The selection of the dial level (Location, National, International) is country-specific. Depending on the country and the settings for the local areacode above, a dial level must be selected (example: In Belgium, local areacodes do not exist. Here, the dial level Location must not be selected).
Note: After the port settings once have been made correctly, no furtherchanges should be made.

General Info
COMmander 6000/R/RX - Firmware V8.4 - Advanced Information V32 05/2022- 518 -
Source suitable for clock synchronisation
This port is used as source for the clock synchronisation and serves asclock master for the PBX. Thus, interfering noise during calls are avoided.
Note: Select a port a source that is synchronous to the ISDNexchange line.
Layer 1 permanently active
Requirements:
• External S0 port (optional, see Technical Data in the OperatingConstructions)
An activation of the layer 1 is requested from the PBX as soon as thelayer is put into the idle state by the network provider. Thus, for example,a delay time is avoided before the external dial tone indicates its actionreadiness.
Language delay at setup ack with inband info
Interfering noise during dialling phase are avoided.
Always send DTMF digit after inband info
Note: This is a country-specific setting (only relevant in Italy).
All outstanding digits are transferred via DTMF.
No T310 for Info boxes
Note: This is a country-specific setting (only relevant in Italy).

General Info
COMmander 6000/R/RX - Firmware V8.4 - Advanced Information V32 05/2022- 519 -
T310 is a timer for ISDN that disconnects a call connection after a certaintime.
The call is not disconnected after a certain time.

Routing
COMmander 6000/R/RX - Firmware V8.4 - Advanced Information V32 05/2022- 520 -
Routing
Important: The expert settings for the ISDN connection are settingsthat should only be changed if e. g. country or provider-specificparticularities make it absolutely necessary.
Proceed as follows:
• Using the Configuration Manager (Public switched tel. networks >ISDN > PTMP connection > Expert configuration > Configure)
Requirements:
• Configured PTMP connection
Use Soft LCR 4.0 for this connection
Requirements:
• Network provider must support the dial-around service
• Configured prefixes (country prefix and local area code)
• Configured LCR (see LCR)
The ISDN connection is used for LCR calls.
Note: LCR must be disabled if the network provider does not supportLCR.
Note: However, you can always perform LCR manually by diallinga provider area code prefix if the network provider supports the dial-around service.
LCR provider digit-recognition for this connection
Requirements:
• Disabled Adopt settings from PBX location (Germany)

Routing
COMmander 6000/R/RX - Firmware V8.4 - Advanced Information V32 05/2022- 521 -
The digits in the table below are the common LCR number prefixes inGermany. For other countries, more LCR number prefixes (a total of 10)can be entered.
Digit number Digits begin with
5 010
6 0100
New
A new digit is added to the table.
Delete
Deletes the entries marked in the list.

Call Forwarding
COMmander 6000/R/RX - Firmware V8.4 - Advanced Information V32 05/2022- 522 -
Call Forwarding
Important: The expert settings for the ISDN connection are settingsthat should only be changed if e. g. country or provider-specificparticularities make it absolutely necessary.
Proceed as follows:
• Using the Configuration Manager (Public switched tel. networks >ISDN > PTMP connection > Expert configuration > Configure)
Requirements:
• Configured PTMP connection
GENERAL SETTINGS FOR THE CALL FORWARDING
GENERAL SETTINGS FOR CALL FORWARDING
Call forwarding method
Call forwardings at the exchange line are configured and performed indifferent ways. The exchange line, router or the provider determines whichof the call forwardings listed below can be used.
CF facility
The call forwarding is controlled in the PTMP exchange line. Thestandardized message processings are not supported by all providers.
Registro
Special form of the Keypad call forwarding method in Spain.
CR facility
The call forwarding is controlled in the PTP connection. Not every providersupports this method.

Call Forwarding
COMmander 6000/R/RX - Firmware V8.4 - Advanced Information V32 05/2022- 523 -
Keypad
The call forwarding is controlled in the PTMP exchange line. The digitsequence depends on the provider or router.
CD facility
The call forwarding is controlled in the PTMP connection. Not everyprovider supports this method.
2. B channel
The call forwarding is performed by the PBX during a call. It is possible forall exchange line types but requires a free voice channel and the numberof the caller cannot be displayed unless CLIP no scrrening is used whichis not supported by many providers.
Note: The setting CF facility has priority to the setting 2. B channel.
For call forwarding via the PBX, use any available call channel
Requirements:
• Enabled call forwarding method 2. B channel
When an external phone number is forwarded, the call can be forwardedvia a call channel on any of the other ports.
Note: A call can only be redirected via a call channel on the sameport. The probability that the call cannot be forwarded because thechannels are busy is therefore higher.
Renew call forwarding at PBX reboot
When rebooting the PBX, the saved data of the call forwarding isrenewed.

Call Forwarding
COMmander 6000/R/RX - Firmware V8.4 - Advanced Information V32 05/2022- 524 -
Important: In Switzerland, the configuration of a call forwarding ischargeable. To avoid costs, the check box must be disabled.
Delay time for Call Forwarding on no reply in the PBX
This delay time for external numbers specifies the time (in seconds) afterwhich a call is forwarded if the called subscriber does not respond.
Note: When switched off, the waiting time applies only to callforwarding that was set up using the PBX. If the network provider hasconfigured the call forwarding function, the waiting time depends ontheir settings and cannot be configured in the PBX.
Routing via exception numbers (VoIP + GSM)
Requirements:
• Configured exception numbers (Routing > VoIP and GSM Routing >Exception numbers)
• Enabled call forwarding method 2. B channel
The device checks whether the destination number involved in callforwarding for external numbers has been set up as an exception number.If so, the call is sent along the configured path. If the destination numberhas not been entered in the routing table, the call to be forwarded is senteither via a free call channel that is assigned to the port or via any freecall channel (For call forwarding via the PBX, use any available callchannel).
Call Forwarding
COMmander 6000/R/RX - Firmware V8.4 - Advanced Information V32 05/2022- 525 -
SETTINGS FOR CALL FORWARDING METHODS CF/CR/CD FACILITY
SETTINGS FOR THE CALL FORWARDING METHODS CF-/CR-/CD-FACILITY
Service Indicator
ISDN voice connections can be performed via different services. TheService Indicator selects the service, The provider defines the availableservices, however, the usual services are not always supported by allproviders.
Service Indicator for the call forwarding query
Select the Service Indicator for the call forwarding query (Allservices,Speech only, Audio 3kHz, Speech & Audio & Telephony 3 kHz,Automatically, not available)
Service Indicator for the switching
Select the Service Indicator for the switching (All services,Speech only,Audio 3kHz, Speech & Audio & Telephony 3 kHz, Automatically, notavailable)
Destination number (CDPN) of type
Destination number (CDPN) in format
Note: The settings ‚of type‘ and ‚in format‘ build a group which meansboth settings must be made in dependency to each other.
Select the type (Unknown, Subscriber, National, International) how thephone number shall be transferred.
Select the phone number format dependent on the phone number type.
Destination number (CDPN) receives prefix

Call Forwarding
COMmander 6000/R/RX - Firmware V8.4 - Advanced Information V32 05/2022- 526 -
Enter a prefix (*, #, 0-9; max. 4 digits) to send possibly necessary controlcommands to the provider.
Destination number (CDPN) receives postfix
Enter a postfix (*, #, 0-9; max. 4 digits) to send possibly necessary controlcommands to the provider.
MSN/DDI fwd. Destination number uses Soft-LCR 4.0 and manualLCR
An LCR prefix is set in front of the phone number.
Own phone number (CGPN) of type
Own phone number (CGPN) of type
Note: The settings ‚of type‘ and ‚in format‘ build a group which meansboth settings must be made in dependency to each other.
Select the type (Unknown, Subscriber, National, International) how thephone number shall be transferred.
Select the phone number format dependent on the phone number type.
Use CLIP no screening for call forwarding
Requirements
• CLIP no screening switched on for the ISDN connection
If a call is forwarded via the external connection, the caller's phonenumber is sent to the destination of the forwarded call. If it is ananonymous call, the function behaves as if it was switched off.
Note: When switched off, the PBX's phone number is sent to thedestination of the forwarded call.

Call Forwarding
COMmander 6000/R/RX - Firmware V8.4 - Advanced Information V32 05/2022- 527 -
CALL FORWARDING UNDCONDITIONAL (CFU)
Call forwarding available in exchange line
If the exchange line has a CFU, this function can be enabled.
Note: If the exchange line does not have a CFU, this function must bedisabled.
Keypad-/Registro code: Enable CFU
Keypad-/Registro code: Disable CFU
The feature codes specify the character strings the ISDN network providerrequires to execute a service feature on the ISDN connection
Possible entries:
• Digits: 0 to 9
• The * and # characters
• n as a wildcard for the destination number (CDPN)
• s as a wildcard for the own phone number (MSN)
CALL FORWARDING IF BUSY (CFB)
Call forwarding available in exchange line
If the exchange line has a CFB, this function can be enabled.
Note: If the exchange line does not have a CFB, this function must bedisabled.
Keypad-/Registro code: Enable CFB

Call Forwarding
COMmander 6000/R/RX - Firmware V8.4 - Advanced Information V32 05/2022- 528 -
Keypad-/Registro code: Disable CFB
The feature codes specify the character strings the ISDN network providerrequires to execute a service feature on the ISDN connection
Possible entries:
• Digits: 0 to 9
• The * and # characters
• n as a wildcard for the destination number (CDPN)
• s as a wildcard for the own phone number (MSN)
CALL FORWARDING NO REPLY (CFNR)
Call forwarding available in exchange line
If the exchange line has a CFNR, this function can be enabled.
Note: If the exchange line does not have a CFNR, this function mustbe disabled.
Keypad-/Registro code: Enable CFNR
Keypad-/Registro code: Disable CFNR
The feature codes specify the character strings the ISDN network providerrequires to execute a service feature on the ISDN connection
Possible entries:
• Digits: 0 to 9
• The * and # characters
• n as a wildcard for the destination number (CDPN)
• s as a wildcard for the own phone number (MSN)

Number Presentation
COMmander 6000/R/RX - Firmware V8.4 - Advanced Information V32 05/2022- 529 -
Number Presentation
Important: The expert settings for the ISDN connection are settingsthat should only be changed if e. g. country or provider-specificparticularities make it absolutely necessary.
Proceed as follows:
• Using the Configuration Manager (Public switched tel. networks >ISDN > PTMP connection > Expert configuration > Configure)
Requirements:
• Configured PTMP connection
OUTGOING CALLS (CDPN)
OUTGOING CALLS (CDPN)
CDPN of type
CDPN in format
Note: The settings ‚of type‘ and ‚in format‘ build a group which meansboth settings must be made in dependency to each other.
Select the type (Unknown, Subscriber, National, International) how thephone number shall be transferred.
Select the phone number format dependent on the phone number type.
CDPN receives prefix
Enter a prefix (*, #, 0-9; max. 4 digits) to send possibly necessary controlcommands to the provider.

Number Presentation
COMmander 6000/R/RX - Firmware V8.4 - Advanced Information V32 05/2022- 530 -
CDPN receives postfix
Enter a postfix (*, #, 0-9; max. 4 digits) to send possibly necessary controlcommands to the provider.
CLIR
The selection of the available options for this function is provider-specific.
Info element
The called party number is sent as info element.
Dial prefix
The called party number is sent as keypad sequence. The dial prefix isprovider-specific (e. g. #31).
OUTGOING CALLS (CGPN)
OUTGOING CALLS (CGPN)
Own phone number of type
Own phone number in format
Note: The settings ‚of type‘ and ‚in format‘ build a group which meansboth settings must be made in dependency to each other.
Select the type (Unknown, Subscriber, National, International) how thephone number shall be transferred.
Select the phone number format dependent on the phone number type.

Number Presentation
COMmander 6000/R/RX - Firmware V8.4 - Advanced Information V32 05/2022- 531 -
Signalising LLC call types as
Audio 3kHz
Selection for fax devices and analogue modems (e. g. alarm systems andemergency devices).
Speech
The exchange line compresses the channel. The transferred amout ofdata is reduced, whereby the sound quality on the receive side could beslightly changed.
As from subscriber
The LLC call type is adopted from the subscriber.
Automatically
Audio 3kHz is preferably used. At problems with the destination, it isautomatically switched to Speech.
CLIP no screening
The called party sees a customer-defined phone number instead of aphone number assgined by the network provider. The customer-definednumber is not checked by the exchange line for correctness.
CLIP no screening from type
CLIP no screening in format
Requirements:
• Enabled CLIP no screening for incmong calls
Note: The settings ‚of type‘ and ‚in format‘ build a group which meansboth settings must be made in dependency to each other.

Number Presentation
COMmander 6000/R/RX - Firmware V8.4 - Advanced Information V32 05/2022- 532 -
Select the type (Unknown, Subscriber, National, International) how thephone number shall be transferred.
Select the phone number format dependent on the phone number type.
CONNECTED CALLS (COPN)
CONNECTED CALLS (COPN)
Connected phone number of type
Connected phone number in format
Note: The settings ‚of type‘ and ‚in format‘ build a group which meansboth settings must be made in dependency to each other.
Select the type (Unknown, Subscriber, National, International) how thephone number shall be transferred.
Select the phone number format dependent on the phone number type.
Special encoding of the connected phone number
Standard
Must be selected in all countries except for Spain.
Spain
Must be selected in Spain.
Note: Depending on the provider, in Spain the special encodingStandard might as well be selected.

Number Presentation
COMmander 6000/R/RX - Firmware V8.4 - Advanced Information V32 05/2022- 533 -
FOR INCOMING CALLS
FOR INCOMING CALLS
Waiting for direct dialling (4..8 sec)
Note: This is a country-specific setting (only relevant in Austria).
Enter a waiting time until the direct dialling (between 4 and 8 seconds).This is useful when the phone number is first transferred incompletely.

Settings PBX Base Number/Bundle
COMmander 6000/R/RX - Firmware V8.4 - Advanced Information V32 05/2022- 534 -
Settings PBX Base Number/Bundle
Proceed as follows:
• Using the Configuration Manager (Public switched tel. networks >ISDN > PBX base numbers/trunk bundle)
Requirements:
• External S0 port, external S2M port (optional, see Technical Data inManual)
• Connection type PTP connection at external S0 port
PBX base number
A PTP connection has a PBX base number (base number, header,base phone number) and (Direct Dial In - DDI) extension numbers. Thenetwork provider assigns the phone numbers for the connection. Thephone number to be dialled is formed from the PBX base number + (DDI)extension number.
Name
For identification of the connection within the PBX.
Extensions block (DDI numbers) | From | To
A PTP connection has a PBX base number (base number, header,base phone number) and (Direct Dial In - DDI) extension numbers. Thenetwork provider assigns the phone numbers for the connection. Thephone number to be dialled is formed from the PBX base number + (DDI)extension number.
Settings PBX Base Number/Bundle
COMmander 6000/R/RX - Firmware V8.4 - Advanced Information V32 05/2022- 535 -
Note: you can enter a zero both as a single number (e.g. 0 to 99,as is usually the case) and as a digit in the set number of places inextension numbers (e.g. 00 to 99).
Note: If linear call distribution for the PTP connection is enabled(Public switched tel. networks > Call distribution page), and if theinternal numbers match the external extension numbers, the systemautomatically performs a 1:1 assignment for the extension numbers inthe extensions block. If an extension cannot be assigned, the fallbackcall distribution function is enabled.
Note: If you want an extension number to be different from the onesused in linear call distribution, or if an extension number is neededfor a different function (e.g. remote configuration, CLIP no screening),you must also enter it in the phone number list (Public switched tel.networks > ISDN > Extension numbers PTP connection).
Note: For example, for extensions block 0 to 99: enter extension 0 asan extension and assign it in the call distribution.
Note: For example, for extensions block 00 to 99: enter the individualextension numbers 00 to 09 as an extension number and assignthem during call distribution. The PBX will then only react when thenumber of places is reached, for example, if the caller dials 00 as anextension number. In contrast, if the caller only dials 0, the fallbackcall distribution function is enabled as soon as the time for selecting asuffix dialling digit has passed.
Note: You must enter all the extension numbers for a PTP connectionthat is not running linear call distribution.

Settings PBX Base Number/Bundle
COMmander 6000/R/RX - Firmware V8.4 - Advanced Information V32 05/2022- 536 -
GSM gateway
The S0 port supports the GSM gateway connected to it. Any phonenumbers can be used for the connection. They must be entered in thePBX and GSM gateway configurations.
Note: When you configure the GSM gateway, you must also input theconnection type of the ISDN connection.
Note: GSM gateways accept external phone calls automatically. Thismay cause call charges for the caller, even if no-one picks up thephone at the internal destination.
Note: If the PBX is not connected to the land line, outgoing externalcalls can only be accepted via a targeted exchange line accessusing the phone numbers entered on the page Routing > VoIP/GSMRouting > Exception numbers (and the corresponding accesses,also configured on this page) or via a configured preferred exchangeline (exchange line settings for subscribers or groups).
Exchange line has emergency call ability
Requirements:
• The corresponding connection must allow emergency calls
This exchange line can be used for emergency calls.
Note: When switched off, this exchange line cannot be used foremergency calls. When you attempt to dial an emergency number, youwill hear the announcement, "This phone does not allow emergencycalls. Please use an alternative."

Settings PBX Base Number/Bundle
COMmander 6000/R/RX - Firmware V8.4 - Advanced Information V32 05/2022- 537 -
Expert configuration > Configure
Opens the expert configuration.
Further help under Expert Configuration for the PTP Connection
Port x
Assigns the PBX base number entered here to a port.
Note: If the network provider assigns the same PBX base numberto a number of PTP connections, these connections can be bundledtogether. A bundled PTP connection consists of all the ports assignedto the same line that have the same phone number and the sameextensions block. Additional settings can also be made for the bundle.
Note: A "primary multiplex interface" is the same as a bundle andcannot be combined with other connections.
New
Adds a new phone number.
Delete
Deletes the entries marked in the list.

Expert Configuration for the PTP Connection
COMmander 6000/R/RX - Firmware V8.4 - Advanced Information V32 05/2022- 538 -
Expert Configuration for the PTP Connection
PTP ConnectionGeneral InfoRoutingCall ForwardingNumber Presentation PTP ConnectionGeneral InfoRoutingCall ForwardingNumber Presentation

PTP Connection
COMmander 6000/R/RX - Firmware V8.4 - Advanced Information V32 05/2022- 539 -
PTP Connection
Important: The expert settings for the ISDN connection are settingsthat should only be changed if e. g. country or provider-specificparticularities make it absolutely necessary.
Proceed as follows:
• Separately for PBX base number
• Using the Configuration Manager (Public switched tel. networks >ISDN > PBX base numbers/trunk bundles > Configure)
Requirements:
• Configured PBX base number
Country settings for this exchange line
At configuration and relocation of the PBX, the country-specific settingsare automatically set.
Country settings have been changed
If you make not country-specific expert settings, you must save themwhen leaving the page.
Copy settings to | Execute
The settings of this port can be copied an transferred for another port.
Charge information
Requirements:
• Charge information provided by the network provider

PTP Connection
COMmander 6000/R/RX - Firmware V8.4 - Advanced Information V32 05/2022- 540 -
The PBX stores the charge information sent by the network provider anduses it to evaluate individual calls.
Important: Disabling this function is only advisable if it causesproblems on the external connection (this depends on the networkprovider/country).
Important: Some telephony providers do not send charge information.If this type of provider is being used, you cannot apply any charges toa particular call.
Important: You cannot check exactly how many PBXs should becharged for each call because, for example, you cannot uniquelyassign the charges to one of the two subscribers involved in a querycall from an external call.
Important: If you are using the Soft-LCR 4.0 LCR procedure, theduration of the call and your own table of tariffs are used to calculatethe charges.
CCBS
Requirements:
• Service feature CCNR (callback on no response) is enabled by thenetwork provider.
• Configured prefixes (country prefix and local area code)
The PBX offers the callback option to an external caller if the connectionthey dialled is busy.
Important: If this function is enabled, but the network provider doesnot support it (service feature not unlocked), it might still happen thatthe caller is given the option of a callback. In this case, the caller'sreply is not forwarded to the PBX and therefore the function cannot beperformed.

PTP Connection
COMmander 6000/R/RX - Firmware V8.4 - Advanced Information V32 05/2022- 541 -
Important: In addition, this function can often only be used if both callpartners are using the same network provider.
CCNR
Requirements:
• Service feature CCNR (callback on no response) is enabled by thenetwork provider.
• Configured prefixes (country prefix and local area code)
The PBX offers the callback option to an external caller if their call is notanswered.
Important: If this function is enabled, but the network provider doesnot support it (service feature not unlocked), it might still happen thatthe caller is given the option of a callback. In this case, the caller'sreply is not forwarded to the PBX and therefore the function cannot beperformed.
Ringtone for the PTP connection/bundle mentioned above
The ringtone specifies which sequence of sounds is used to signalexternal calls to the phone numbers of the PTP connection to internalsubscribers on the PBX.
Note: Individual ringtones can be assigned to extension numbers thatwere input in different ways.
Note: See Ringer tones for information about exceptions to signallingand sound sequences.

General Info
COMmander 6000/R/RX - Firmware V8.4 - Advanced Information V32 05/2022- 542 -
General Info
Important: The expert settings for the ISDN connection are settingsthat should only be changed if e. g. country or provider-specificparticularities make it absolutely necessary.
Proceed as follows:
• Separately for PBX base number
• Using the Configuration Manager (Public switched tel. networks >ISDN > PBX base numbers/trunk bundles > Configure)
Requirements:
• Configured PBX base number
Country code
International phone prefix (e. g. 0044 for the UK).
Local area code
Phone number prefix (e. g. 0208 for Greater London).
Note: If there is no fixed digit sequence as the area code at theinstallation location of the PBX, no entry is required here.
Dial level
The selection of the dial level (Location, National, International) is country-specific. Depending on the country and the settings for the local areacode above, a dial level must be selected (example: In Belgium, local areacodes do not exist. Here, the dial level Location must not be selected).

General Info
COMmander 6000/R/RX - Firmware V8.4 - Advanced Information V32 05/2022- 543 -
Note: After the port settings once have been made correctly, no furtherchanges should be made.
Source suitable for clock synchronisation
This port is used as source for the clock synchronisation and serves asclock master for the PBX. Thus, interfering noise during calls are avoided.
Note: Select a port a source that is synchronous to the ISDNexchange line.
Layer 1 permanently active
Requirements:
• External S0 port (optional, see Technical Data in the OperatingConstructions)
An activation of the layer 1 is requested from the PBX as soon as thelayer is put into the idle state by the network provider. Thus, for example,a delay time is avoided before the external dial tone indicates its actionreadiness.
Language delay at setup ack with inband info
Interfering noise during dialling phase are avoided.
Always send DTMF digit after inband info
Note: This is a country-specific setting (only relevant in Italy).
All outstanding digits are transferred via DTMF.

General Info
COMmander 6000/R/RX - Firmware V8.4 - Advanced Information V32 05/2022- 544 -
No T310 for Info boxes
Note: This is a country-specific setting (only relevant in Italy).
T310 is a timer for ISDN that disconnects a call connection after a certaintime.
The call is not disconnected after a certain time.

Routing
COMmander 6000/R/RX - Firmware V8.4 - Advanced Information V32 05/2022- 545 -
Routing
Important: The expert settings for the ISDN connection are settingsthat should only be changed if e. g. country or provider-specificparticularities make it absolutely necessary.
Proceed as follows:
• Separately for PBX base number
• Using the Configuration Manager (Public switched tel. networks >ISDN > PBX base numbers/trunk bundles > Configure)
Requirements:
• Configured PBX base number
Use Soft LCR 4.0 for this connection
Requirements:
• Network provider must support the dial-around service
• Configured prefixes (country prefix and local area code)
• Configured LCR (see LCR)
The ISDN connection is used for LCR calls.
Note: LCR must be disabled if the network provider does not supportLCR.
Note: However, you can always perform LCR manually by diallinga provider area code prefix if the network provider supports the dial-around service.
LCR provider digit-recognition for this connection
Requirements:

Routing
COMmander 6000/R/RX - Firmware V8.4 - Advanced Information V32 05/2022- 546 -
• Disabled Adopt settings from PBX location (Germany)
The digits in the table below are the common LCR number prefixes inGermany. For other countries, more LCR number prefixes (a total of 10)can be entered.
Digit number Digits begin with
5 010
6 0100
New
A new digit is added to the table.
Delete
Deletes the entries marked in the list.

Call Forwarding
COMmander 6000/R/RX - Firmware V8.4 - Advanced Information V32 05/2022- 547 -
Call Forwarding
Important: The expert settings for the ISDN connection are settingsthat should only be changed if e. g. country or provider-specificparticularities make it absolutely necessary.
Proceed as follows:
• Separately for PBX base number
• Using the Configuration Manager (Public switched tel. networks >ISDN > PBX base numbers/trunk bundles > Configure)
Requirements:
• Configured PBX base number
GENERAL SETTINGS FOR CALL FORWARDING
Call forwarding method
Call forwardings at the exchange line are configured and performed indifferent ways. The exchange line, router or the provider determines whichof the call forwardings listed below can be used.
CF facility
The call forwarding is controlled in the PTMP exchange line. Thestandardized message processings are not supported by all providers.
Registro
Special form of the Keypad call forwarding method in Spain.
CR facility
The call forwarding is controlled in the PTP connection. Not every providersupports this method.
Keypad

Call Forwarding
COMmander 6000/R/RX - Firmware V8.4 - Advanced Information V32 05/2022- 548 -
The call forwarding is controlled in the PTMP exchange line. The digitsequence depends on the provider or router.
CD facility
The call forwarding is controlled in the PTMP connection. Not everyprovider supports this method.
2. B channel
The call forwarding is performed by the PBX during a call. It is possible forall exchange line types but requires a free voice channel and the numberof the caller cannot be displayed unless CLIP no scrrening is used whichis not supported by many providers.
Note: The setting CF facility has priority to the setting 2. B channel.
For call forwarding via the PBX, use any available call channel
Requirements:
• Enabled call forwarding method 2. B channel
When an external phone number is forwarded, the call can be forwardedvia a call channel on any of the other ports.
Note: A call can only be redirected via a call channel on the sameport. The probability that the call cannot be forwarded because thechannels are busy is therefore higher.
Renew call forwarding at PBX reboot
When rebooting the PBX, the saved data of the call forwarding isrenewed.
Important: In Switzerland, the configuration of a call forwarding ischargeable. To avoid costs, the check box must be disabled.

Call Forwarding
COMmander 6000/R/RX - Firmware V8.4 - Advanced Information V32 05/2022- 549 -
Delay time for Call Forwarding on no reply in the PBX
This delay time for external numbers specifies the time (in seconds) afterwhich a call is forwarded if the called subscriber does not respond.
Note: When switched off, the waiting time applies only to callforwarding that was set up using the PBX. If the network provider hasconfigured the call forwarding function, the waiting time depends ontheir settings and cannot be configured in the PBX.
Routing via exception numbers (VoIP + GSM)
Requirements:
• Configured exception numbers (Routing > VoIP and GSM Routing >Exception numbers)
• Enabled call forwarding method 2. B channel
The device checks whether the destination number involved in callforwarding for external numbers has been set up as an exception number.If so, the call is sent along the configured path. If the destination numberhas not been entered in the routing table, the call to be forwarded is senteither via a free call channel that is assigned to the port or via any freecall channel (For call forwarding via the PBX, use any available callchannel).
SETTINGS FOR THE CALL FORWARDING METHODS CF-/CR-/CD-FACILITY
Service Indicator
ISDN voice connections can be performed via different services. TheService Indicator selects the service, The provider defines the available

Call Forwarding
COMmander 6000/R/RX - Firmware V8.4 - Advanced Information V32 05/2022- 550 -
services, however, the usual services are not always supported by allproviders.
Service Indicator for the call forwarding query
Select the Service Indicator for the call forwarding query (Allservices,Speech only, Audio 3kHz, Speech & Audio & Telephony 3 kHz,Automatically, not available)
Service Indicator for the switching
Select the Service Indicator for the switching (All services,Speech only,Audio 3kHz, Speech & Audio & Telephony 3 kHz, Automatically, notavailable)
Destination number (CDPN) of type
Destination number (CDPN) in format
Note: The settings ‚of type‘ and ‚in format‘ build a group which meansboth settings must be made in dependency to each other.
Select the type (Unknown, Subscriber, National, International) how thephone number shall be transferred.
Select the phone number format dependent on the phone number type.
Destination number (CDPN) receives prefix
Enter a prefix (*, #, 0-9; max. 4 digits) to send possibly necessary controlcommands to the provider.
Destination number (CDPN) receives postfix
Enter a postfix (*, #, 0-9; max. 4 digits) to send possibly necessary controlcommands to the provider.
MSN/DDI fwd. Destination number uses Soft-LCR 4.0 and manualLCR
An LCR prefix is set in front of the phone number.

Call Forwarding
COMmander 6000/R/RX - Firmware V8.4 - Advanced Information V32 05/2022- 551 -
Own phone number (CGPN) of type
Own phone number (CGPN) of type
Note: The settings ‚of type‘ and ‚in format‘ build a group which meansboth settings must be made in dependency to each other.
Select the type (Unknown, Subscriber, National, International) how thephone number shall be transferred.
Select the phone number format dependent on the phone number type.
Use CLIP no screening for call forwarding
Requirements
• CLIP no screening switched on for the ISDN connection
If a call is forwarded via the external connection, the caller's phonenumber is sent to the destination of the forwarded call. If it is ananonymous call, the function behaves as if it was switched off.
Note: When switched off, the PBX's phone number is sent to thedestination of the forwarded call.
CALL FORWARDING UNCONDITIONAL (CFU)
Call forwarding available in exchange line
If the exchange line has a CFU, this function can be enabled.
Note: If the exchange line does not have a CFU, this function must bedisabled.

Call Forwarding
COMmander 6000/R/RX - Firmware V8.4 - Advanced Information V32 05/2022- 552 -
CALL FORWARDING IF BUSY (CFB)
Call forwarding available in exchange line
If the exchange line has a CFB, this function can be enabled.
Note: If the exchange line does not have a CFB, this function must bedisabled.
CALL FORWARDING ON NO REPLY (CFNR)
Call forwarding available in exchange line
If the exchange line has a CFNR, this function can be enabled.
Note: If the exchange line does not have a CFNR, this function mustbe disabled.

Number Presentation
COMmander 6000/R/RX - Firmware V8.4 - Advanced Information V32 05/2022- 553 -
Number Presentation
Important: The expert settings for the ISDN connection are settingsthat should only be changed if e. g. country or provider-specificparticularities make it absolutely necessary.
Proceed as follows:
• Separately for PBX base number
• Using the Configuration Manager (Public switched tel. networks >ISDN > PBX base numbers/trunk bundles > Configure)
Requirements:
• Configured PBX base number
OUTGOING CALLS (CDPN)
CDPN of type
CDPN in format
Note: The settings ‚of type‘ and ‚in format‘ build a group which meansboth settings must be made in dependency to each other.
Select the type (Unknown, Subscriber, National, International) how thephone number shall be transferred.
Select the phone number format dependent on the phone number type.
CDPN receives prefix
Enter a prefix (*, #, 0-9; max. 4 digits) to send possibly necessary controlcommands to the provider.

Number Presentation
COMmander 6000/R/RX - Firmware V8.4 - Advanced Information V32 05/2022- 554 -
CDPN receives postfix
Enter a postfix (*, #, 0-9; max. 4 digits) to send possibly necessary controlcommands to the provider.
CLIR
The selection of the available options for this function is provider-specific.
Info element
The called party number is sent as info element.
Dial prefix
The called party number is sent as keypad sequence. The dial prefix isprovider-specific (e. g. #31).
OUTGOING CALLS (CGPN)
Own phone number of type
Own phone number in format
Note: The settings ‚of type‘ and ‚in format‘ build a group which meansboth settings must be made in dependency to each other.
Select the type (Unknown, Subscriber, National, International) how thephone number shall be transferred.
Select the phone number format dependent on the phone number type.
Signalising LLC call types as
Audio 3kHz

Number Presentation
COMmander 6000/R/RX - Firmware V8.4 - Advanced Information V32 05/2022- 555 -
Selection for fax devices and analogue modems (e. g. alarm systems andemergency devices).
Speech
The exchange line compresses the channel. The transferred amout ofdata is reduced, whereby the sound quality on the receive side could beslightly changed.
As from subscriber
The LLC call type is adopted from the subscriber.
Automatically
Audio 3kHz is preferably used. At problems with the destination, it isautomatically switched to Speech.
CLIP no screening
The called party sees a customer-defined phone number instead of aphone number assgined by the network provider. The customer-definednumber is not checked by the exchange line for correctness.
CLIP no screening from type
CLIP no screening in format
Requirements:
• Enabled CLIP no screening for incmong calls
Note: The settings ‚of type‘ and ‚in format‘ build a group which meansboth settings must be made in dependency to each other.
Select the type (Unknown, Subscriber, National, International) how thephone number shall be transferred.
Select the phone number format dependent on the phone number type.

Number Presentation
COMmander 6000/R/RX - Firmware V8.4 - Advanced Information V32 05/2022- 556 -
CONNECTED CALLS (COPN)
Connected phone number of type
Connected phone number in format
Note: The settings ‚of type‘ and ‚in format‘ build a group which meansboth settings must be made in dependency to each other.
Select the type (Unknown, Subscriber, National, International) how thephone number shall be transferred.
Select the phone number format dependent on the phone number type.
Special encoding of the connected phone number
Standard
Must be selected in all countries except for Spain.
Spain
Must be selected in Spain.
Note: Depending on the provider, in Spain the special encodingStandard might as well be selected.
FOR INCOMING CALLS
Waiting for direct dialling (4..8 sec)
Note: This is a country-specific setting (only relevant in Austria).
Enter a waiting time until the direct dialling (between 4 and 8 seconds).This is useful when the phone number is first transferred incompletely.

Settings of the Extension
COMmander 6000/R/RX - Firmware V8.4 - Advanced Information V32 05/2022- 557 -
Settings of the Extension
Proceed as follows:
• Separately for PBX base numbers
• Using the Configuration Manager (Public switched tel. networks >ISDN > Extension numbers PTP connection)
Requirements:
• Configured PBX base number
EXTENSION NUMBERS PTP CONNECTION/BUNDLING
Select the extension number/bundle for that the extensions are to bedisplayed/configured, provided that more then one PBX base number wasconfigured.
Extension (DDI number)
If you want an extension number to be different from the ones used inlinear call distribution, or if an extension number is needed for a differentfunction (e.g. remote configuration, CLIP no screening), you must alsoenter it in the phone number list (click on New). You must enter all theextension numbers for a PTP connection that is not running linear calldistribution.
Note: You can input up to 250 external numbers for land line and VoIPconnections in the PBX. In other words, the total maximum number ofMSNs, DDI numbers and additional numbers is 250.
Phone number for CLIP no screening
Requirements:

Settings of the Extension
COMmander 6000/R/RX - Firmware V8.4 - Advanced Information V32 05/2022- 558 -
• Set up phone number
• CLIP no screening switched on for the ISDN connection
Customer-specific phone number (e.g. a service phone number) that istransferred to the destination by the exchange line without its correctnessbeing checked.
Name
The name is used for display purposes on the system phone.
Ringtone
The ringtone specifies which sequence of sounds is used to signalexternal calls to internal subscribers on the PBX.
Note: See Ringer tones for information about exceptions to signallingand sound sequences.
New
Adds a new phone number.
Delete
Deletes the entries marked in the list.
Settings Additional Numbers ISDN
COMmander 6000/R/RX - Firmware V8.4 - Advanced Information V32 05/2022- 559 -
Settings Additional Numbers ISDN
Proceed as follows:
• Separately for PBX base numbers
• Using the Configuration Manager (Public switched tel. networks >ISDN > Additional PTP connection numbers)
Requirements:
• Configured PBX base number
ADDITIONAL NUMBERS PTP CONNECTION
Select the extension number/bundle for that the additional numbers are tobe displayed/configured, provided that more then one PBX base numberwas configured.
Additional number
Some countries provide additional numbers for a PTP connection, inaddition to the DDI numbers. The network provider can assign up to tenphone numbers for the connection.
The additional number specifies which character string a caller must dialfrom the local phone network to reach the ISDN PTP connection. Thesenumbers are not attached to the PBX base number.
Note: You can input up to 250 external numbers for land line and VoIPconnections in the PBX. In other words, the total maximum number ofMSNs, DDI numbers and additional numbers is 250.
Phone number for CLIP no screening
Requirements:

Settings Additional Numbers ISDN
COMmander 6000/R/RX - Firmware V8.4 - Advanced Information V32 05/2022- 560 -
• Set up phone number
• CLIP no screening switched on for the ISDN connection
• The exchange line must support CLIP no screening
Customer-specific phone number (e.g. a service phone number) that istransferred to the destination by the exchange line without its correctnessbeing checked.
Name
The name is used for display purposes on the system phone.
Ringtone
The ringtone specifies which sequence of sounds is used to signalexternal calls to internal subscribers on the PBX.
Note: See Ringer tones for information about exceptions to signallingand sound sequences.
New
Adds a new phone number.
Delete
Deletes the entries marked in the list.

VoIP
COMmander 6000/R/RX - Firmware V8.4 - Advanced Information V32 05/2022- 561 -
VoIP
Management of the VoIP ProviderSettings of the VoIP ProviderManagement VoIP AccountSettings for the VoIP AccountsExpert Settings of the PTMP ConnectionExpert Settings of the PTP ConnectionSettings Additional Numbers VoIP Management of the VoIP ProviderSettings of the VoIP ProviderManagement VoIP AccountSettings for the VoIP AccountsExpert Settings of the PTMP ConnectionExpert Settings of the PTP ConnectionSettings Additional Numbers VoIP

Management of the VoIP Provider
COMmander 6000/R/RX - Firmware V8.4 - Advanced Information V32 05/2022- 562 -
Management of the VoIP Provider
Proceed as follows:
• Using the Configuration Manager (Public switched tel. networks >VoIP > Provider)
Configure
Opens the configuration of the VoIP provider.
Further help under Settings of the VoIP Provider
New
Adds a new provider to the list of providers. You must then make thesettings for the VoIP provider.
Delete
Deletes the entries marked in the list.
Import
IMPORT PROVIDER
Requirements:
• PC or PBX with existing connection to the Internet
A file with individual provider access data (*.XML) will be downloaded fromthe update server. Depending on the Internet connection, this file is theneither saved to a data storage device (PC) or directly to the PBX.

Management of the VoIP Provider
COMmander 6000/R/RX - Firmware V8.4 - Advanced Information V32 05/2022- 563 -
Note: The file saved to a (PC) data storage device can then beimported.
Note: The access data provided for the download is for informationpurposes only, and is not mandatory.
Export
The list of providers is saved to the (PC) data storage device in a filecalled provider.tgz.
Copy
Selects an existing provider from the list of providers and uses thatprovider as the basis for creating a new VoIP provider.

Settings of the VoIP Provider
COMmander 6000/R/RX - Firmware V8.4 - Advanced Information V32 05/2022- 564 -
Settings of the VoIP Provider
SIPRTPPreferencesNumber Presentation (outgoing)Evaluation of Incoming SIP Messages SIPRTPPreferencesNumber Presentation (outgoing)Evaluation of Incoming SIP Messages

SIP
COMmander 6000/R/RX - Firmware V8.4 - Advanced Information V32 05/2022- 565 -
SIP
Proceed as follows:
• Separately for VoIP providers
• Using the Configuration Manager (Public switched tel. networks >Voice over IP (VoIP page) > Provider > Configure)
Note: You can obtain the data for the settings either directly from theVoIP provider or from suitable lists in the Internet.
Requirements:
• For entering a URL: configured DNS server
• For using a STUN server: IP operating mode IPv4
PROVIDER
Select the provider to be displayed/configured.
Domain
The domain (also known as a "realm", "SIP domain" or "SIP realm")is required for the VoIP address. The structure of a subscriber'sVoIP address is similar to an e-mail address. It is made up of theVoIP phone number and the domain, separated by the @ character:<subscriber>@domain.
Name resolution
There are both country-specific and provider-specific reasons why nameresolution is not always successful via the default gateway. In such cases,another way should be chosen here.
SIP
COMmander 6000/R/RX - Firmware V8.4 - Advanced Information V32 05/2022- 566 -
Name resolution via IP configuration
There are several accounts at this domain and the name resolution foranother account at this domain has alreday been configured.
Note: It is possible to set the name resolution differently for theaccounts of the same domain.
Via used Internet access
The name resolution takes place via the selected IAD under UsedInternet access. The DNS server provided by the provider is used.
Use own DNS (via IAD)
The DNS servers that are entered below are used via the selected IADunder Used Internet access.
First DNS server/Second DNS server
IPv4: 4 blocks with 3 digits separated by a dot (.).
IPv6: 8 blocks with 4 digits or letters separated by a colon (:).
Note: If an IPv6 address is entered as DNS server, then the IADselected under Used Internet access must also have an IPv6address.
Registrar | Port
REGISTER requests are sent to the specified registrar (also known as aSIP registrar, registry, SIP server, SIP registry server). Enter this data asan IP address or a URL.
Note: The page Overviews > Ports shows an overview of the PBXports (incoming and outgoing).
Note: You should only switch off the registrar if the VoIP providerrequires you to do so. No NAT Keep-Alive is performed if the registraris disabled. An internal network is usually protected from external

SIP
COMmander 6000/R/RX - Firmware V8.4 - Advanced Information V32 05/2022- 567 -
manipulation by, for example, a firewall integrated in the router.Without NAT Keep-Alive, the firewall's security functions will defendyou against attempted accesses from the Internet. For this reason, youmay need to implement port forwarding for incoming SIP packets onthe SIP port set up in the VoIP provider's configuration.
Caution: Each time a port is opened on the router, this creates apotential source of danger.
• It is essential you put additional protective measures in place.
Time limit for registration (1 to 60 min.)
The registration time specifies how many minutes the PBX waits beforereregistering itself with the VoIP provider.
Note: In the test phase, after configuring the VoIP provider, werecommend you enter a low value (e.g. three minutes). Aftercompleting the test phase, you can enter a much higher value, sincesome VoIP providers also reject calls if too many attempts are made toregister.
SIP registration in accordance with RFC 6140
The SIP protocol SIPconnect 1.1 is used by the PBX.
NAT traversal
NAT (Network Address Translation) enables you to convert a particularIP address that is used within a network (e.g. a local network) into adifferent IP address that can be used by a different network (e.g. the publicswitched phone network). If NAT traversal is switched on, and a query issent from a local IP address to the public network, the sending IP addressis swapped with the public IP address. This function is performed in thereverse direction for the reply.
Disabled (use local address

SIP
COMmander 6000/R/RX - Firmware V8.4 - Advanced Information V32 05/2022- 568 -
NAT traversal is not performed by the PBX. The router which connects thelocal area network with the Internet should be a properly functioning, SIP-aware router which performs NAT traversal.
Enabled with use of STUN
NAT traversal is performed by the PBX. To achieve this, a STUN servermust also be specified for the VoIP provider.
Enabled
NAT traversal is performed by the PBX. To achieve this, the registrar forthe VoIP provider must be switched on. The SIP request also containsan "rport" part in which the IP addresses used here (local, public) aretransported.
Note: If Enabled is selected: If problems occur with single-sided callconnections, use Enabled with use of STUN instead.
Caution: Each time a port is opened on the NAT router, this creates apotential source of danger.
• It is essential you put additional protective measures in place.
Use static public IP address
Requirements:
• Registered fixed IP address (see Preferences)
NAT traversal is performed by the PBX. The VoIP provider requires aconnection via a static public IP address.
If the VoIP provider still requires this static IP address in a header, selectthe appropriate option:
• Use static public ID address in VIA Header
• Use static public IP address in Contact Header

SIP
COMmander 6000/R/RX - Firmware V8.4 - Advanced Information V32 05/2022- 569 -
Interval for NAT Keep-Alive active
After the time specified here has passed, NAT Keep-Alive packets aresent to the firewall to maintain the NAT mapping.
Note: Some VoIP providers block accounts if the Interval for NATKeep-Alive is too short. As a rule, this is reported with error message503 during SIP registration. If you experience this problem, it isadvisable to increase the value (e.g. to 180).
Default
Default setting
SIP options
Use this setting for non-registered connections between the VoIP providerand the PBX for re-registration.
Outbound proxy
The outbound proxy is an intermediate server that processes all VoIPrequests and connections going to the provider (except for registration).
automatically
The PBX automatically determines an outbound proxy.
Manual Port
The outbound proxy is a fixed default setting. Enter this data as an IPaddress or a URL.
Note: The Overviews > Ports page shows an overview of the PBXports (incoming and outgoing).

SIP
COMmander 6000/R/RX - Firmware V8.4 - Advanced Information V32 05/2022- 570 -
SIP port (1 to 65535)
The SIP port on the PBX is used both as an incoming port and anoutgoing port (i.e. for communications with the VoIP provider).
Note: A different SIP port must be used for each VoIP provider.
Note: The SIP port for a VoIP provider cannot be the same as the SIPport of the internal VoIP registrar or the SIPS port of the internalVoIP registrar.
Note: The Overviews > Ports page shows an overview of the PBXports (incoming and outgoing).
SIP session timer (5 to 60 min.)
At the specified intervals, the SIP session timer checks whether theconnection is still present. (The PBX cannot detect whether a callconnection is disrupted due to problems on the provider side.)
Note: When the SIP session timer is switched on, this may result inthe call being interrupted more frequently after the specified interval, ifa VoIP provider has not implemented session renewal properly. In thiscase, you should adjust the interval of the SIP session timer or switchit off.
Deactivation of SIP Prack (RFC 3262)
The negotiation of SIP option „100rel“ is disabled. This might benecessary if the provider supports „SIP-Forking“.

SIP
COMmander 6000/R/RX - Firmware V8.4 - Advanced Information V32 05/2022- 571 -
Only en-bloc dialling | Delay time after last digit dialled (3 to 15 sec.)
A connection is not set up to transmit the digits dialled here to the provideruntil the delay time after the last digit is dialled has passed. All the digitsare then sent as a block. Time measurement restarts after the entry ofeach digit. After the selected time has passed, the PBX recognises themost recent digit as the final digit and will not allow any more numbers tobe entered.
Note: En-bloc dialling is a good idea, for example, when dialling singledigits causes problems in sub-system operation.
Note: Select as short a time as possible, because the PBX does notforward the entire phone number to the public exchange until thespecified time has passed.
Note: Approximately three seconds is the default value for manualinputs.
SIPS URL structure
Requirements:
• External VoIP channel that supports SIPS (optional, see TechnicalData in the Instructions)
• A certificate for the VoIP provider stored in the PBX
This provider encrypts external connections to prevent listening in. Theprocesses used to set up and shut down a connection, and signalling, areall encrypted by SIPS.
SIPS
Encryption of SIPS via TLS.
SIP/TLS

SIP
COMmander 6000/R/RX - Firmware V8.4 - Advanced Information V32 05/2022- 572 -
Encryption of SIP via TLS.
Note: SRTP is used to encrypt call data.
Disable host name check
No verification whether the certificate belongs to the domain/IP.
Manage certificates
Opens the certificates management.
SIP transport
Selection of the transport protocol.
IP protocol
IPv4
IPv4 operating mode is used for communications with the VoIP provider.
IPv6
IPv6 operating mode is used for communications with the VoIP provider.
automatically
The PBX first checks whether the VoIP provider supports IPv6. If so,operating mode IPv6 is used for communications with the VoIP provider.Otherwise, operating mode IPv4 is used.
Note: If the actual IP operating mode is IPv6, STUN cannot be usedas a NAT method either for SIP or RTP.

SIP
COMmander 6000/R/RX - Firmware V8.4 - Advanced Information V32 05/2022- 573 -
Increased security
The provider provides better levels of security to protect the PBX againstexternal attacks.

RTP
COMmander 6000/R/RX - Firmware V8.4 - Advanced Information V32 05/2022- 574 -
RTP
Proceed as follows:
• Separately for VoIP providers
• Using the Configuration Manager (Public switched tel. networks >Voice over IP (VoIP page) > Provider > Configure)
Note:You can obtain the data for the settings either directly from theVoIP provider or from suitable lists in the Internet.
Requirements:
• For entering a URL: configured DNS server
• For using a STUN server: IP operating mode IPv4
PROVIDER
Select the provider to be displayed/configured.
Maximum number of VoIP channels provided by the VoIP provider
Number of VoIP channels provided by the VoIP provider. If these channelsare occupied additional connections required are made using anotherprovider.
VoIP channels reserved for incoming calls
VoIP channels reserved for outgoing calls
Number of VoIP channels provided by the VoIP provider to be used onlyfor incoming/outgoing calls.

RTP
COMmander 6000/R/RX - Firmware V8.4 - Advanced Information V32 05/2022- 575 -
SRTP
Requirements:
• external VoIP channel that supports SRTP (optional, see TechnicalData in the Instructions)
Disabled
Forces disabling of call data encryption by SRTP. The connection is notestablished if the call partner (VoIP provider, other PBX in sub-systemoperation or external VoIP subscriber) requires call data to be encryptedusing SRTP.
preferred
Switches on negotiation for the encryption of call data by SRTP. When acall is made, the call partner will be asked if encryption is possible. If so,the call data will be encrypted and then transmitted, if not, the call data willnot be encrypted.
required
Forces enabling of call data encryption by SRTP. The connection is notestablished if the call partner (VoIP provider, other PBX in sub-systemoperation or external VoIP subscriber) does not require call data to beencrypted using SRTP.
Note: SIPS should also be enabled at the same time, otherwise thekey for SRTP encryption would be readable.
NAT traversal
NAT (Network Address Translation) enables you to convert a particularIP address that is used within a network (e.g. a local network) into adifferent IP address that can be used by a different network (e.g. the publicswitched phone network). If NAT traversal is switched on, and a query is

RTP
COMmander 6000/R/RX - Firmware V8.4 - Advanced Information V32 05/2022- 576 -
sent from a local IP address to the public network, the sending IP addressis swapped with the public IP address. This function is performed in thereverse direction for the reply.
Disabled (use local address): NAT traversal is not performed by thePBX. The router which connects the local area network with the Internetshould be a properly functioning, SIP-aware router which performs NATtraversal.
Enabled with use of STUN: NAT traversal is performed by the PBX. Toachieve this, a STUN server must also be specified for the VoIP provider.
Caution: Each time a port is opened on the NAT router, this creates apotential source of danger.
• It is essential you put additional protective measures in place.
Use static public IP address
Requirements:
• Registered fixed IP address (see Preferences)
NAT traversal is performed by the PBX. The VoIP provider requires aconnection via a static public IP address.
DTMF signalling
Requirements:
• Inband signalling: uncompressed codec (G.711)
Inband
The PBX uses the same channel to transfer the DTMF signals and thevoice data (DTMF tones).
Outband (RFC 2833)

RTP
COMmander 6000/R/RX - Firmware V8.4 - Advanced Information V32 05/2022- 577 -
The PBX uses different channels to transfer the DTMF signals and thevoice data. The DTMF tones are filtered out of the voice data.
Both procedures
The PBX transmits the DTMF signals on two channels (1st contains DTMFtones together with the voice data + 2nd contains the DTMF signal).
Echo Cancellation
This compensates for local echoes and reverberation effects.
Silence Suppression (Voice Activity Detection)
This function allows to add the header SilenceSupp: on/off to the SDPnegotiation of the SIP packets.
If Automatically was selected (factory settings), the header is not set.
The options On or Off should only tentatively be used for known problemswith silent suppression.
Otherwise always select Automatically.
Comfort Noise Support
This function allows to decide whether comfort noise is offered during theSDP media negotiation (On) or not (Off).
This function is only needed in case of compatibility problems withcomfort noise. In this case comfort noise support should be switched off.Otherwise always select Automatically (factory settings).

RTP
COMmander 6000/R/RX - Firmware V8.4 - Advanced Information V32 05/2022- 578 -
Jitter buffer (40 to 160)
The size of the jitter buffer specifies how many RTP packets can becached, to buffer disruptions or compensate for them.
maxptime
Specifies the maximum size of a received packet for RTP supported bythe PBX (30 ms recommended).
Suppressing
Suppresses the output of the maxptime header.
Automatically
The PBX attempts to determine the required value itself.
Use the exchange line replacement tone
The PBX generates the exchange line replacement tone in the case, forexample, of longer dialling phases during which the PBX has not yet senta call tone. If you find this disruptive or annoying, it can be switched off.
Automatically
The PBX generates the exchange line replacement tone in the case oflonger dialling phases during which there is no call tone.
Off
No exchange line replacement tone is generated. No acousticacknowledgement during longer dialling phases during which there is nocall tone.

RTP
COMmander 6000/R/RX - Firmware V8.4 - Advanced Information V32 05/2022- 579 -
Codec settings
Requirements:
• external VoIP channel that supports different codecs (optional, seeTechnical Data in the Instructions)
• VoIP provider who supports the different codecs
The PBX makes various codecs available. The selection of a codec affectsthe quality of a VoIP call. Different codecs can be configured, dependingon the available connection bandwidth, ranging from codecs with the bestpossible VoIP call quality down to codecs with high compression (lowbandwidth). The codec actually used for a call is not fixed until the codecis negotiated with the VoIP provider.
Best available quality
Selects a codec sequence with best possible VoIP call quality (highbandwidth) as highest priority.
Good compromise
Selects a compromise between VoIP call quality (high bandwidth) andcompression (lower bandwidth) for the codec sequence.
Best possible compression
Selects a codec sequence with stronger compression (lower bandwidth)as highest priority.
Note: The preset codec sequence can be changed manually ifnecessary.

Preferences
COMmander 6000/R/RX - Firmware V8.4 - Advanced Information V32 05/2022- 580 -
Preferences
Proceed as follows:
• Separately for VoIP providers
• Using the Configuration Manager (Public switched tel. networks >Voice over IP (VoIP page) > Provider > Configure)
Note:You can obtain the data for the settings either directly from theVoIP provider or from suitable lists in the Internet.
Requirements:
• For entering a URL: configured DNS server
• For using a STUN server: IP operating mode IPv4
PROVIDER
Select the provider to be displayed/configured.
STUN server
IP address or URL | Port
Interval for STUN server query
Requirements:
• IP operating mode IPv4
• NAT traversalEnabled with use of STUN
A STUN server provides information to subscribers on a private networkon request. This information includes the IP address and port outside theirprivate network that is viewed as the source of their data. This informationis entered in the requests, instead of the actual private IP address/port.

Preferences
COMmander 6000/R/RX - Firmware V8.4 - Advanced Information V32 05/2022- 581 -
Note: If you encounter problems with unilateral call connections,enabling the RTP port might help.
Note: The Overviews > Ports page shows an overview of the PBXports (incoming and outgoing).
Caution: Every time port forwarding is performed, there is a securityrisk.
• For this reason we recommend you use this functionality as little aspossible.
Sub-system operation
Like any other PBX for which the VoIP provider has been configured, thePBX can be used as a sub-system.
Note: During sub-system operation, single-digit dialling may causeproblems. In this case, en-bloc dialling is usually enabled.
Audio is switched through at call forwarding via 2nd B-channel
The connection between the caller and the PBX is always created whena call is forwarded externally. As a result, the caller will hear all replayedelements (tones, announcements) which are played by the VoIP providerwhen the connection with the call forwarding destination is established.
Note: If external call forwarding is configured over a VoIP provider, thecall tone may not be replayed for the caller (the connection to the callforwarding destination number will therefore be switched through in a"surprising" way).
Audio is switched through when call starts
Requirements:

Preferences
COMmander 6000/R/RX - Firmware V8.4 - Advanced Information V32 05/2022- 582 -
• The provider supports Early Media
Audio is switched through to the provider. This is useful if, for example, acallback request has to be conformed with "Yes".
EarlyMedia Support
During the call phase audio such as the dialling tone, signal sound,announcement or language can be transmitted (EarlyMedia). Thefollowing options define usage of EarlyMedia (RFC 3261) in general andthe usage of the SIP Header P-Early-Media (RFC 5009).
Whether EarlyMedia or the SIP Header P-Early-Media is supported,is at the provider's discretion. It is possible that the provider allows thenegotiation but prevents the transmission of audio.
The following options allow the adjustment of behaviour of the PBX to theone of the provider.
Switched off
During the call phase no audio is transmitted. But the status of the callis signalled, the end device of the caller then generates for example thedialling tone or the busy tone.
Announcements are as well suppressed. No tones are generated for thecaller on incoming calls.
Outgoing without P-Early-Media support
During the call phase audio is negotiated and transmitted for outgoingcalls.
The SIP Header P-Early-Media is not sent or evaluated.
Outgoing with P-Early-Media support (standard)
Audio is negotiated and transmitted for outgoing calls.

Preferences
COMmander 6000/R/RX - Firmware V8.4 - Advanced Information V32 05/2022- 583 -
The SIP Header P-Early-Media is sent and evaluated.
If no P-Early-Media Header is received, EarlyMedia is used in accordancewith RFC 3261.
Outgoing with P-Early-Media and incoming only if P-Early-Media isrequested
The SIP Header P-Early-Media is sent and evaluated for outgoing calls.
The SIP Header P-Early-Media is only sent and evaluated for incomingcalls, if it has been received. Accordingly, audio is transmitted.
This option is only reasonable for sub-system operation and specialaccounts.
Outgoing and incoming
There are no limitations regarding the negotiation of EarlyMedia foroutgoing and incoming calls, the corresponding headers are considered.
Use URI parameter (user)
Transfers the "User=Phone" parameter to the SIP header.
Note: You may need to switch off this function if there are problemsestablishing the connection with a particular provider.
Use Mediasec header in acc. with IETF Draft
Transfers the SIP header in accordance with IETF draft "draft-dawes-sipcore-mediasec-parameter".
Note: Some providers require this optional SIP header for establishingand running encrypted VoIP connections.

Preferences
COMmander 6000/R/RX - Firmware V8.4 - Advanced Information V32 05/2022- 584 -
The provider has emergency call ability
Requirements:
• the associated VoIP provider must allow emergency calls
It is possible to make an emergency call using this provider and theaccount assigned to it.
Note: When switched off, this provider does not support emergencycalls. When you attempt to dial an emergency number, you will hearthe announcement, "This phone does not allow emergency calls.Please use an alternative."
Deregister if there are NAT changes
The VoIP provider performs the deregistration and then the reregistration.
Some providers require this to take place every time a new public IPaddress has been assigned.
DNS query persists SIP session (RFC 3263)
Requirements:
• SIP stack type 2 selected
The SIP stack saves a resource record entry each for PTR, SRV andAAAA with that the preceded destination was reached. As long as theDNS server delivers this entry it will be prioritised.
SIP stack type
Type 1
Software module for the SIP log processing used previously.

Preferences
COMmander 6000/R/RX - Firmware V8.4 - Advanced Information V32 05/2022- 585 -
Type 2
New extensive software module for the SIP log processing. This softwaremodule allows the support of future features of the VoIP providers.
Static public IP address
Some providers provide static public IP addresses and require them forcall connection in the VIA header, the Contact header and in the SDP forthe audio stream. Enter the provided IP address in the adjacent field andenable the option for the transmission (see previous options).
Support T.38 for providers T.38 negotiation
Requirements:
• external VoIP channel that supports T.38 (optional, see Technical Datain the Instructions)
• VoIP provider support for T.38
• Configured internal fax subscribers
T.38 (procedures for real-time Group 3 facsimile communication over IPnetworks) enables smooth, extensive fax transmission to take place.
Note: If problems occur when T.38 is switched on, you can change thesetting used to negotiate the fax protocol (T.38 negotiation).
Compliant to RFC
Two separate media lines for disabling audio and negotiating the faxprotocol.
Variant 1
Only one media line for negotiating the fax protocol (the media line fordisabling audio is not used).

Number Presentation (outgoing)
COMmander 6000/R/RX - Firmware V8.4 - Advanced Information V32 05/2022- 586 -
Number Presentation (outgoing)
Proceed as follows:
• Separately for VoIP providers
• Using the Configuration Manager (Public switched tel. networks >Voice over IP (VoIP page) > Provider > Configure)
Note: You can obtain the data for the settings either directly from theVoIP provider or from suitable lists in the Internet.
Requirements:
• For entering a URL: configured DNS server
• For using a STUN server: IP operating mode IPv4
PROVIDER
Select the provider to be displayed/configured.
Format of called phone number
Format in which the VoIP provider requires the phone number of thedestination, to enable the VoIP provider to transfer the call.
Country code with leading zeroes
The destination phone number is transmitted from the PBX to the VoIPprovider with the entire country code (e.g. 0044).
Country code with leading + sign
The destination phone number is transmitted from the PBX to the VoIPprovider with the entire country code in mobile telephony format (e.g. +44).
Country code without leading zeroes

Number Presentation (outgoing)
COMmander 6000/R/RX - Firmware V8.4 - Advanced Information V32 05/2022- 587 -
The destination phone number is transmitted from the PBX to the VoIPprovider with a shortened country code, without the international prefix(digit), (e.g. 44).
Without country code
The destination phone number is transmitted from the PBX to the VoIPprovider without its own country code but with the local area code (e.g.05306).
Send as dialled
The PBX transmits the destination phone number to the VoIP provider, asdialled.
Note: The PBX automatically converts the phone numbers dialled intothis format for calls made via the VoIP provider.
Note: If prefixes are necessary for conversion, for dialling a numberwithout prefixes, the prefixes set for the account are used (Publicswitched tel. networks > Exchange line request).
Format of own phone number
Format in which the VoIP provider requires the phone number that is to betransmitted.
Country code with leading zeroes
Your own external phone number, that is to be transferred,is sent to theVoIP provider with the entire country code (e.g. 0044).
Country code with leading + sign
Your own external phone number, that is to be transferred, is sent to theVoIP provider with the entire country code in mobile telephony format (e.g.+44).
Country code without leading zeroes

Number Presentation (outgoing)
COMmander 6000/R/RX - Firmware V8.4 - Advanced Information V32 05/2022- 588 -
Your own external phone number, that is to be transferred, is sent to theVoIP provider with a shortened country code (without the internationalprefix (digit, e.g. 44).
Without country code
Your own external phone number, that is to be transferred, is sent to theVoIP provider without the country code, but with the local area code (e.g.05306).
Only MSN or main number and DDI number
Your own external phone number, that is to be transferred, is sent to theVoIP provider without prefixes (e.g. 920082 or 92008279).
Only DDI number (only possible for PTP connection)
Your own external phone number, that is to be transferred, is sent to theVoIP provider without prefixes or the PBX base number (e.g. 8279).
Area code without leading zero
Your own external phone number, that is to be transferred, is sent to theVoIP provider with the local area code, but without a leading zero (e.g.5306).
Note: The PBX checks whether any of the specified phone numbersare to be transferred, and if so which ones (Subscriber (scr.) >Properties > Exchange line settings).
Note: The transmitted phone number is automatically convertedinto the selected format. If prefixes are necessary for convertingyour own phone number, the prefixes set for the account are used(Public switched tel. networks > VoIP > Accounts > Configure).For outgoing dialling, the global settings under Public switched tel.networks > Exchange line request are used. For incoming calls, thelocal area code of the account may be added.

Number Presentation (outgoing)
COMmander 6000/R/RX - Firmware V8.4 - Advanced Information V32 05/2022- 589 -
Format of CLIP no screening Phone Number
Requirements:
• CLIP no screening for outgoing calls enabled (VoIP > Accounts> Configure > LOCATION/MISCELLANEOUS > NumberPresentation)
Format in which the VoIP provider needs the telephone number to betransferred.
Method of number presentation suppression
Requirements:
• The VoIP provider supports the number presentation suppressionservice attribute
• Number presentation suppression is enabled for the subscriber
Area of the From header in which the VoIP provider expects to receive thenumber presentation suppression.
No display text
If number presentation suppression is switched on, an empty display textis sent in the From header.
Anonymous
The sent display text in the From header is "anonymous" if numberpresentation suppression is switched on.
User Anonymous
If number presentation suppression is switched on, both the display textand the User name section in the From header contain "anonymous".

Number Presentation (outgoing)
COMmander 6000/R/RX - Firmware V8.4 - Advanced Information V32 05/2022- 590 -
Note: Number presentation suppression in accordance with RFC3325, by using a privacy header, is also used automatically.

Evaluation of Incoming SIP Messages
COMmander 6000/R/RX - Firmware V8.4 - Advanced Information V32 05/2022- 591 -
Evaluation of Incoming SIP Messages
Proceed as follows:
• Separately for VoIP providers
• Using the Configuration Manager (Public switched tel. networks >Voice over IP (VoIP page) > Provider > Configure)
Note: You can obtain the data for the settings either directly from theVoIP provider or from suitable lists in the Internet.
Requirements:
• For entering a URL: configured DNS server
• For using a STUN server: IP operating mode IPv4
PROVIDER
Select the provider to be displayed/configured.
The phone numbers of incoming VoIP calls listed in the call data listusually need to be converted before they can be used for callbacks.
Note: To check these settings, direct incoming exchange line calls viathis VoIP provider, e.g. using a mobile phone, and check the phonenumber sent along with the call in the call data list (in User Data > Calldata list).
Note: To identify the user-defined settings, select an incomingcall under Monitoring > Network Data Stream and view it in theWireshark programme. Select the options you require in the list fieldsunder Search prioritisation (Wireshark term). The names ("terms")used for the search fields match the names used in Wireshark.

Evaluation of Incoming SIP Messages
COMmander 6000/R/RX - Firmware V8.4 - Advanced Information V32 05/2022- 592 -
Note: The phone number to be evaluated should be as canonical aspossible (+445306.... or 00445306…). Otherwise it is not used forevaluation.
Internationalise unknown phone numbers
If phone numbers that are not in the standard canonical format arereceived: (e.g. +445306… or 00445306…), they are converted into thisformat.
Evaluate Connected Party Number (COPN)
Enabling this function prevents that a direct callback fails due to anincorrect depiction of the phone number when the call is answered.
Set prefix for the phone number
Sets a prefix for the country code before the phone number (maximum 10characters).
Source for called number
Default
Selects an evaluation method for phone numbers which will work for mostproviders.
Request Line
Forces the phone number to be evaluated using the Request Line.
To Header
Forces the phone number to be evaluated using the To Header.

Evaluation of Incoming SIP Messages
COMmander 6000/R/RX - Firmware V8.4 - Advanced Information V32 05/2022- 593 -
Analysis type
Default
Selects an evaluation method for phone numbers which will work for mostproviders.
Default (using the From Header as a Screened Number)
Selects an evaluation method for phone numbers which will work for mostproviders. The user provided number (unscreened number, correspondsto CLIP no screening) in the "From" header is transferred to the networkprovided number (screened number). The phone numbers can be used,for example, for Call Through via VoIP.
Caution: As soon as you have enabled this option, your phone andPBX are open to attacks such as the transfer of manipulated phonenumbers.

Management VoIP Account
COMmander 6000/R/RX - Firmware V8.4 - Advanced Information V32 05/2022- 594 -
Management VoIP Account
Proceed as follows:
• Using the Configuration Manager (Public switched tel. networks >Voice over IP (VoIP page) > Accounts)
Provider name
VoIP provider with whom the account was set up.
Account name
Freely selectable name. This name is used to identify the account withinthe PBX.
Connection type
Connection type to be used with the account.
PTMP connection
VoIP account with multiple subscriber numbers (MSNs)
PTP connection
VoIP account with a PBX base number and extension numbers (DDInumbers)
Use
The PBX uses the account for external calls.

Management VoIP Account
COMmander 6000/R/RX - Firmware V8.4 - Advanced Information V32 05/2022- 595 -
Configure
Opens the configuration of the VoIP account.
Further help under Settings for the VoIP Accounts
New
Adds a new account to the account list. You must then make the settingsfor the VoIP account.
Delete
Deletes the entries marked in the list.
Settings for the VoIP Accounts
COMmander 6000/R/RX - Firmware V8.4 - Advanced Information V32 05/2022- 596 -
Settings for the VoIP Accounts
Network ProviderLocation/Access DataMiscellaneousPhone Numbers for PTP ConnectionPhone Numbers for PTMP connection Network ProviderLocation/Access DataMiscellaneousPhone Numbers for PTP ConnectionPhone Numbers for PTMP connection

Network Provider
COMmander 6000/R/RX - Firmware V8.4 - Advanced Information V32 05/2022- 597 -
Network Provider
Proceed as follows:
• Separately for VoIP accounts
• Using the Configuration Manager (Public switched tel. networks >VoIP > Accounts > Configure)
Note: You will receive the settings data from the VoIP provider withwhom you have set up the account.
ACCOUNT
Select the account to be displayed/configured.
Account has emergency call ability
Requirements:
• VoIP provider has authorised and switched on emergency call ability.
This account allows emergency calls to be made.
Note: When switched off, this account cannot be used for emergencycalls. When you attempt to dial an emergency number, you will hearthe announcement, "This phone does not allow emergency calls.Please use an alternative."
Note: The phone allows emergency calls by default. Check you canactually use your account to make emergency calls. Not all networkproviders allow emergency calls.

Location/Access Data
COMmander 6000/R/RX - Firmware V8.4 - Advanced Information V32 05/2022- 598 -
Location/Access Data
Proceed as follows:
• Separately for VoIP accounts
• Using the Configuration Manager (Public switched tel. networks >VoIP > Accounts > Configure)
Note: You will receive the settings data from the VoIP provider withwhom you have set up the account.
ACCOUNT
Select the account to be displayed/configured.
Exchange line access number (account number)
This (exchange line access number) is an internal number. You can selectany of the numbers in the internal supply of phone numbers. This is thenused for the specific VoIP access point.
Note: Double allocation of a number is not possible.
Note: Using numbers with few digits (two or three-digit numbers)inevitably restricts the possible supply of numbers requiring moredigits. For example, if the number 12 is assigned, the numbers120-129 and 1200-1299 will no longer be available.
Note: The default exchange line access number on the PBX is 0 in thefactory settings. However, this can be changed. Note that changing theexchange line access number restricts the dial plan.

Location/Access Data
COMmander 6000/R/RX - Firmware V8.4 - Advanced Information V32 05/2022- 599 -
User name
User name assigned by the VoIP provider when the account was set up. Itis used to identify the user to the VoIP provider.
Note: Note that some providers allocate both login information for theweb page and separate login information for using the Voice over IPservice (e.g. a dial-in password). Find out what information is neededfor the dial-in and enter it accordingly.
Note: The user name is called different things by different providers.For example, the terms Username, Authorization User, SIP code/SIPpassword and SIP-ID are all used to describe a user name.
Note: If your provider (in Germany) is T-Online, you must also enterthe VoIP phone number you received from them under User nameand Display name.
Password
Password assigned by the VoIP provider when the account was set up. Itis used to verify the user name.
Note: To change an existing password, click on Show passwords.
Note: Note that some providers allocate both login information for theweb page and separate login information for using the Voice over IPservice (e.g. a dial-in password). Find out what information is neededfor the dial-in and enter it accordingly.
Note: The password is called different things by different providers.For example, it can also be called a customer password.
Caution: Visible passwords are a security risk.
• After you enter your password, click on Hide passwords.

Location/Access Data
COMmander 6000/R/RX - Firmware V8.4 - Advanced Information V32 05/2022- 600 -
Authorisation ID
Authorisation ID (authentication ID) assigned by the VoIP provider for theVoIP account.
Note: To change an existing password, click on Show passwords.
Note: You can only input an entry in this field if the VoIP provider hasassigned an authorisation ID.
Caution: Visible passwords are a security risk.
• After you enter your password, click on Hide passwords.

Miscellaneous
COMmander 6000/R/RX - Firmware V8.4 - Advanced Information V32 05/2022- 601 -
Miscellaneous
Proceed as follows:
• Separately for VoIP accounts
• Using the Configuration Manager (Public switched tel. networks >VoIP > Accounts > Configure)
Note: You will receive the settings data from the VoIP provider withwhom you have set up the account.
ACCOUNT
Select the account to be displayed/configured.
Expert configuration Configure
Opens the expert settings page.

Phone Numbers for PTP Connection
COMmander 6000/R/RX - Firmware V8.4 - Advanced Information V32 05/2022- 602 -
Phone Numbers for PTP Connection
Proceed as follows:
• Separately for VoIP accounts
• Using the Configuration Manager (Public switched tel. networks >VoIP > Accounts > Configure)
Note: You will receive the settings data from the VoIP provider withwhom you have set up the account.
ACCOUNT
Select the account to be displayed/configured.
PBX base number
Extensions block | from | to
Requirements:
• Prefixes (country and local area code) configured for the VoIP account
A PTP connection has a PBX base number (base number, header, basephone number) and (Direct Dial In - DDI) extension numbers. The VoIPprovider assigns the phone numbers for the connection. The phonenumber to be dialled is formed from the PBX base number + DDI number.
Note: You can enter a zero both as a single number (e.g. 0 to 99,as is usually the case) and as a digit in the set number of places inextension numbers (e.g. 00 to 99).
Note: If linear call distribution for the PTP connection is enabled(Public switched tel. networks > Call distribution), and if theinternal numbers match the external extension numbers, the systemautomatically performs a 1:1 assignment for the extension numbers in

Phone Numbers for PTP Connection
COMmander 6000/R/RX - Firmware V8.4 - Advanced Information V32 05/2022- 603 -
the extensions block. If an extension cannot be assigned, the fallbackcall distribution function is enabled.
Note: If you want an extension number to be different from the onesused in linear call distribution, or if an extension number is needed fora different function (e.g. remote configuration, CLIP no screening), youmust also enter it in the phone number list (click on New).
Note: For example, for extensions block 0 to 99: enter extension 0 asan extension and assign it in the call distribution.
Note: For example, for extensions block 00 to 99: Enter the individualextension numbers 00 to 09 as an extension number and assign themduring call distribution.
Note: You must enter all the extension numbers for a PTP connectionthat is not running linear call distribution.
Ringtone for the above-mentioned PTP connection
The ringtone specifies which sequence of sounds is used to signalexternal calls to the phone numbers of the PTP connection to internalsubscribers on the PBX.
Note: Individual ringtones can be assigned to extension numbers thatwere input in different ways.
Note: See Ringer tones for information about exceptions to signallingand sound sequences.
CLIP no screening
Requirements:
• CLIP no screening service feature supported and enabled by thenetwork provider

Phone Numbers for PTP Connection
COMmander 6000/R/RX - Firmware V8.4 - Advanced Information V32 05/2022- 604 -
• Type of number presentation configured for the VoIP providerIn accordance with RFC 3325 with P-Asserted-Identity or Inaccordance with RFC 3325 with P-Preferred-Identity
The exchange line transfers the customer-specific phone number (e.g. aservice phone number) entered in Phone number for CLIP no screeningto the call destination without checking that this number is correct.
Note: In Germany, some providers only offer this service featurefor PTP connections. The CLIP no screening function for VoIPconnections also depends on which provider is being used.
Note: When an emergency number is dialled, the phone numberreceived from the network provider is always transmitted, not thephone number you specified yourself.
Note: However, the correct phone number is also still transferred tothe exchange line, but this cannot be viewed by the person beingcalled.
Note: CLIP no screening must be enabled for every connection toensure that the phone number for CLIP no screening is transmittedinstead of the phone number received from the network provider.
Direct Dial In (DDI)
If you want an extension number to be different from the ones used inlinear call distribution, or if an extension number is needed for a differentfunction (e.g. remote configuration, CLIP no screening), you must alsoenter it in the phone number list. (Select New to enter.) You must enterall the extension numbers for a PTP connection that is not running linearcall distribution.

Phone Numbers for PTP Connection
COMmander 6000/R/RX - Firmware V8.4 - Advanced Information V32 05/2022- 605 -
Note: You can input up to 250 external numbers for land line and VoIPconnections in the PBX. In other words, the total maximum number ofMSNs, DDI numbers and additional numbers is 250.
Phone number for CLIP no screening
Requirements:
• set up phone number
• CLIP no screening switched on for the VoIP account
Customer-specific phone number (e.g. a service phone number) that istransferred to the destination by the exchange line without its correctnessbeing checked.
Note: The phone number must always be configured completely, thus,with the local area code or e. g. as 0800....
Display name
This name is used for display purposes on the system phone.
Note: If no display name has been entered, the account name isdisplayed.
Note: If your provider (in Germany) is T-Online, you must also enterthe VoIP phone number you received from them under Display name.
Ringtone
The ringtone specifies which sequence of sounds is used to signalexternal calls to internal subscribers on the PBX.
Note: See Ringer tones for information about exceptions to signallingand sound sequences.

Phone Numbers for PTP Connection
COMmander 6000/R/RX - Firmware V8.4 - Advanced Information V32 05/2022- 606 -
New
Adds a new phone number.
Delete
Deletes the entries marked in the list.

Phone Numbers for PTMP connection
COMmander 6000/R/RX - Firmware V8.4 - Advanced Information V32 05/2022- 607 -
Phone Numbers for PTMP connection
Proceed as follows:
• Separately for VoIP accounts
• Using the Configuration Manager (Public switched tel. networks >VoIP > Accounts > Configure)
Note: You will receive the settings data from the VoIP provider withwhom you have set up the account.
ACCOUNT
Select the account to be displayed/configured.
PBX base number
Extensions block | from | to
Requirements:
• Prefixes (country and local area code) configured for the VoIP account
A PTP connection has a PBX base number (base number, header, basephone number) and (Direct Dial In - DDI) extension numbers. The VoIPprovider assigns the phone numbers for the connection. The phonenumber to be dialled is formed from the PBX base number + DDI number.
Note: You can enter a zero both as a single number (e.g. 0 to 99,as is usually the case) and as a digit in the set number of places inextension numbers (e.g. 00 to 99).
Note: If linear call distribution for the PTP connection is enabled(Public switched tel. networks > Call distribution), and if theinternal numbers match the external extension numbers, the systemautomatically performs a 1:1 assignment for the extension numbers in

Phone Numbers for PTMP connection
COMmander 6000/R/RX - Firmware V8.4 - Advanced Information V32 05/2022- 608 -
the extensions block. If an extension cannot be assigned, the fallbackcall distribution function is enabled.
Note: If you want an extension number to be different from the onesused in linear call distribution, or if an extension number is needed fora different function (e.g. remote configuration, CLIP no screening), youmust also enter it in the phone number list (click on New).
Note: For example, for extensions block 0 to 99: enter extension 0 asan extension and assign it in the call distribution.
Note: For example, for extensions block 00 to 99: Enter the individualextension numbers 00 to 09 as an extension number and assign themduring call distribution.
Note: You must enter all the extension numbers for a PTP connectionthat is not running linear call distribution.
Ringtone for the above-mentioned PTP connection
The ringtone specifies which sequence of sounds is used to signalexternal calls to the phone numbers of the PTP connection to internalsubscribers on the PBX.
Note: Individual ringtones can be assigned to extension numbers thatwere input in different ways.
Note: See Ringer tones for information about exceptions to signallingand sound sequences.
CLIP no screening
Requirements:
• CLIP no screening service feature supported and enabled by thenetwork provider

Phone Numbers for PTMP connection
COMmander 6000/R/RX - Firmware V8.4 - Advanced Information V32 05/2022- 609 -
• Type of number presentation configured for the VoIP providerIn accordance with RFC 3325 with P-Asserted-Identity or Inaccordance with RFC 3325 with P-Preferred-Identity
The exchange line transfers the customer-specific phone number (e.g. aservice phone number) entered in Phone number for CLIP no screeningto the call destination without checking that this number is correct.
Note: In Germany, some providers only offer this service featurefor PTP connections. The CLIP no screening function for VoIPconnections also depends on which provider is being used.
Note: When an emergency number is dialled, the phone numberreceived from the network provider is always transmitted, not thephone number you specified yourself.
Note: However, the correct phone number is also still transferred tothe exchange line, but this cannot be viewed by the person beingcalled.
Note: CLIP no screening must be enabled for every connection toensure that the phone number for CLIP no screening is transmittedinstead of the phone number received from the network provider.
Direct Dial In (DDI)
If you want an extension number to be different from the ones used inlinear call distribution, or if an extension number is needed for a differentfunction (e.g. remote configuration, CLIP no screening), you must alsoenter it in the phone number list. (Select New to enter.) You must enterall the extension numbers for a PTP connection that is not running linearcall distribution.
Phone Numbers for PTMP connection
COMmander 6000/R/RX - Firmware V8.4 - Advanced Information V32 05/2022- 610 -
Note: You can input up to 250 external numbers for land line and VoIPconnections in the PBX. In other words, the total maximum number ofMSNs, DDI numbers and additional numbers is 250.
Phone number for CLIP no screening
Requirements:
• set up phone number
• CLIP no screening switched on for the VoIP account
Customer-specific phone number (e.g. a service phone number) that istransferred to the destination by the exchange line without its correctnessbeing checked.
Note: The phone number must always be configured completely, thus,with the local area code or e. g. as 0800....
Display name
This name is used for display purposes on the system phone.
Note: If no display name has been entered, the account name isdisplayed.
Note: If your provider (in Germany) is T-Online, you must also enterthe VoIP phone number you received from them under Display name.
Ringtone
The ringtone specifies which sequence of sounds is used to signalexternal calls to internal subscribers on the PBX.
Note: See Ringer tones for information about exceptions to signallingand sound sequences.

Phone Numbers for PTMP connection
COMmander 6000/R/RX - Firmware V8.4 - Advanced Information V32 05/2022- 611 -
New
Adds a new phone number.
Delete
Deletes the entries marked in the list.

Expert Settings of the PTMP Connection
COMmander 6000/R/RX - Firmware V8.4 - Advanced Information V32 05/2022- 612 -
Expert Settings of the PTMP Connection
VoIP AccountGeneral InfoRoutingCall Forwarding VoIP AccountGeneral InfoRoutingCall Forwarding

VoIP Account
COMmander 6000/R/RX - Firmware V8.4 - Advanced Information V32 05/2022- 613 -
VoIP Account
Country settings for this exchane line
At configuration and relocation of the PBX, the country-specific settingsare set automatically.
County settings for this exchange line
Requirements:
• Adopt settings from PBX location (Germany) disabled
Select the country for this exchange line.

General Info
COMmander 6000/R/RX - Firmware V8.4 - Advanced Information V32 05/2022- 614 -
General Info
Country code
International phone prefix (e. g. 0044 for the UK) for which the account'sVoIP provider has provided the phone numbers.
Note: Land line connection prefixes are configured separately (Publicswitched tel. networks > Exchange line request).
Area code
Phone number prefix (e. g. 0208 for Greater London) for which theaccount's VoIP provider has provided the phone numbers.
Note: If there is no fixed digit sequence as the area code at theinstallation location of the PBX, no entry is required here.
Dial level
The selection of the dial level (Location, National, International) is country-specific. Depending on the country and the settings for the local areacode above, a dial level must be selected (example: In Belgium, local areacodes do not exist. Here, the dial level Location must not be selected).

Routing
COMmander 6000/R/RX - Firmware V8.4 - Advanced Information V32 05/2022- 615 -
Routing
Use Soft LCR 4.0 for this connection
Requirements:
• Network provider must support the dial-around service
• Configured prefixes (country prefix and local area code)
• Configured LCR (see LCR)
The VoIP connection is used for LCR calls.
Note: LCR must be disabled if the network provider does not supportLCR.
Note: However, you can always perform LCR manually by diallinga provider area code prefix if the network provider supports the dial-around service.
LCR provider digit-recognition for this connection
Requirements:
• Disabled Adopt settings from PBX location (Germany)
The digits in the table below are the common LCR number prefixes inGermany. For other countries, more LCR number prefixes (a total of 10)can be entered.
Digit number Digits begin with
5 010
6 0100

Routing
COMmander 6000/R/RX - Firmware V8.4 - Advanced Information V32 05/2022- 616 -
New
A new digit is added to the table.
Delete
Deletes the entries marked in the list.

Call Forwarding
COMmander 6000/R/RX - Firmware V8.4 - Advanced Information V32 05/2022- 617 -
Call Forwarding
GENERAL SETTINGS FOR CALL FORWARDING
Call forwarding method
Call forwardings at the exchange line are configured and performed indifferent ways. The exchange line, router or the provider determines whichof the call forwardings listed below can be used.
Keypad
The call forwarding is controlled in the PTMP exchange line. The digitsequence depends on the provider or router.
Call Deflection
Call forwarding shall be executed directly by the exchange line. The PBXsends a corresponding message with new destination number to theexchange line. Accordingly, the call is forwarded to the new destination bythe provider/exchange line.
Note: Currently, providers support Call Deflection only at the SIPTrunk.
2. B channel
The call forwarding is performed by the PBX during a call. It is possible forall exchange line types but requires a free voice channel and the numberof the caller cannot be displayed unless CLIP no scrrening is used whichis not supported by many providers.
For call forwarding via the PBX, use any available call channel
Requirements:
• Enabled call forwarding method 2. B channel

Call Forwarding
COMmander 6000/R/RX - Firmware V8.4 - Advanced Information V32 05/2022- 618 -
When an external phone number is forwarded, the call can be forwardedvia a call channel on any of the other ports.
Note: A call can only be redirected via a call channel on the sameport. The probability that the call cannot be forwarded because thechannels are busy is therefore higher.
Renew call forwarding at PBX reboot
When rebooting the PBX, the saved data of the call forwarding isrenewed.
Important: In Switzerland, the configuration of a call forwarding ischargeable. To avoid costs, the check box must be disabled.
Delay time for Call Forwarding on no reply in the PBX
This delay time for external numbers specifies the time (in seconds) afterwhich a call is forwarded if the called subscriber does not respond.
Note: The waiting time applies only to call forwarding that was setup using the PBX. If the network provider has configured the callforwarding function, the waiting time depends on their settings andcannot be configured in the PBX.
Routing via exception numbers (VoIP + GSM)
Requirements:
• Configured exception numbers (Routing > VoIP and GSM Routing >Exception numbers)
• Enabled call forwarding method 2. B channel
The device checks whether the destination number involved in callforwarding for external numbers has been set up as an exception number.If so, the call is sent along the configured path. If the destination numberhas not been entered in the routing table, the call to be forwarded is senteither via a free call channel that is assigned to the port or via any free

Call Forwarding
COMmander 6000/R/RX - Firmware V8.4 - Advanced Information V32 05/2022- 619 -
call channel (For call forwarding via the PBX, use any available callchannel).
Use CLIP no screening for call forwarding
Requirements:
• CLIP no screening enabled for this VoIP account
In the case of call forwarding via the external connection, the phonenumber of the caller is transmitted to the destination of the call forwarding.In the case of an anonymous call, the function acts as if not enabled.
Note: When switched off, the phone number in the PBX is transmittedto the call forwarding destination.
CALL FORWARDING UNCONDITIONAL (CFU)
Call forwarding available in exchange line
If the exchange line has a CFU, this function can be enabled.
Note: If the exchange line does not have a CFU, this function must bedisabled.
Keypad-/Registro code: Enable CFU
Keypad-/Registro code: Disable CFU
The feature codes specify the character strings the VoIP network providerrequires to execute a service feature on the VoIP connection
Possible entries:
• Digits: 0 to 9
• The * and # characters
• , (comma) for a 0,5 second pause
• n as a wildcard for the destination number (CDPN)

Call Forwarding
COMmander 6000/R/RX - Firmware V8.4 - Advanced Information V32 05/2022- 620 -
• m as a wildcard for the own phone number (MSN)
CALL FORWARDING IF BUSY (CFB)
Call forwarding available in exchange line
If the exchange line has a CFB, this function can be enabled.
Note: If the exchange line does not have a CFB, this function must bedisabled.
Keypad-/Registro code: Enable CFB
Keypad-/Registro code: Disable CFB
The feature codes specify the character strings the VoIP network providerrequires to execute a service feature on the VoIP connection
Possible entries:
• Digits: 0 to 9
• The * and # characters
• , (comma) for a 0,5 second pause
• n as a wildcard for the destination number (CDPN)
• m as a wildcard for the own phone number (MSN)
CALL FORWARDING NO REPLY (CFNR)
Call forwarding available in exchange line
If the exchange line has a CFNR, this function can be enabled.
Note: If the exchange line does not have a CFNR, this function mustbe disabled.
Keypad-/Registro code: Enable CFNR

Call Forwarding
COMmander 6000/R/RX - Firmware V8.4 - Advanced Information V32 05/2022- 621 -
Keypad-/Registro code: Disable CFNR
The feature codes specify the character strings the VoIP network providerrequires to execute a service feature on the VoIP connection
Possible entries:
• Digits: 0 to 9
• The * and # characters
• , (comma) for a 0,5 second pause
• n as a wildcard for the destination number (CDPN)
• m as a wildcard for the own phone number (MSN)

Expert Settings of the PTP Connection
COMmander 6000/R/RX - Firmware V8.4 - Advanced Information V32 05/2022- 622 -
Expert Settings of the PTP Connection
VoIP AccountGeneral InfoRoutingCall Forwarding VoIP AccountGeneral InfoRoutingCall Forwarding

VoIP Account
COMmander 6000/R/RX - Firmware V8.4 - Advanced Information V32 05/2022- 623 -
VoIP Account
Country settings for this exchane line
At configuration and relocation of the PBX, the country-specific settingsare set automatically.
County settings for this exchange line
Requirements:
• Adopt settings from PBX location (Germany) disabled
Select the country for this exchange line.

General Info
COMmander 6000/R/RX - Firmware V8.4 - Advanced Information V32 05/2022- 624 -
General Info
Country code
International phone prefix (e. g. 0044 for the UK) for which the account'sVoIP provider has provided the phone numbers.
Note: Land line connection prefixes are configured separately (Publicswitched tel. networks > Exchange line request).
Area code
Phone number prefix (e. g. 0208 for Greater London) for which theaccount's VoIP provider has provided the phone numbers.
Note: If there is no fixed digit sequence as the area code at theinstallation location of the PBX, no entry is required here.
Dial level
The selection of the dial level (Location, National, International) is country-specific. Depending on the country and the settings for the local areacode above, a dial level must be selected (example: In Belgium, local areacodes do not exist. Here, the dial level Location must not be selected).

Routing
COMmander 6000/R/RX - Firmware V8.4 - Advanced Information V32 05/2022- 625 -
Routing
Use Soft LCR 4.0 for this connection
Requirements:
• Network provider must support the dial-around service
• Configured prefixes (country prefix and local area code)
• Configured LCR (see LCR)
The VoIP connection is used for LCR calls.
Note: LCR must be disabled if the network provider does not supportLCR.
Note: However, you can always perform LCR manually by diallinga provider area code prefix if the network provider supports the dial-around service.
LCR provider digit-recognition for this connection
Requirements:
• Disabled Adopt settings from PBX location (Germany)
The digits in the table below are the common LCR number prefixes inGermany. For other countries, more LCR number prefixes (a total of 10)can be entered.
Digit number Digits begin with
5 010
6 0100

Routing
COMmander 6000/R/RX - Firmware V8.4 - Advanced Information V32 05/2022- 626 -
New
A new digit is added to the table.
Delete
Deletes the entries marked in the list.

Call Forwarding
COMmander 6000/R/RX - Firmware V8.4 - Advanced Information V32 05/2022- 627 -
Call Forwarding
GENERAL SETTINGS FOR CALL FORWARDING
Call forwarding method
Call forwardings at the exchange line are configured and performed indifferent ways. The exchange line, router or the provider determines whichof the call forwardings listed below can be used.
Keypad
The call forwarding is controlled in the PTMP exchange line. The digitsequence depends on the provider or router.
Call Deflection
Call forwarding shall be executed directly by the exchange line. The PBXsends a corresponding message with new destination number to theexchange line. Accordingly, the call is forwarded to the new destination bythe provider/exchange line.
Note: Currently, providers support Call Deflection only at the SIPTrunk.
2. B channel
The call forwarding is performed by the PBX during a call. It is possible forall exchange line types but requires a free voice channel and the numberof the caller cannot be displayed unless CLIP no scrrening is used whichis not supported by many providers.
For call forwarding via the PBX, use any available call channel
Requirements:
• Enabled call forwarding method 2. B channel

Call Forwarding
COMmander 6000/R/RX - Firmware V8.4 - Advanced Information V32 05/2022- 628 -
When an external phone number is forwarded, the call can be forwardedvia a call channel on any of the other ports.
Note: A call can only be redirected via a call channel on the sameport. The probability that the call cannot be forwarded because thechannels are busy is therefore higher.
Renew call forwarding at PBX reboot
When rebooting the PBX, the saved data of the call forwarding isrenewed.
Important: In Switzerland, the configuration of a call forwarding ischargeable. To avoid costs, the check box must be disabled.
Delay time for Call Forwarding on no reply in the PBX
This delay time for external numbers specifies the time (in seconds) afterwhich a call is forwarded if the called subscriber does not respond.
Note: The waiting time applies only to call forwarding that was setup using the PBX. If the network provider has configured the callforwarding function, the waiting time depends on their settings andcannot be configured in the PBX.
Routing via exception numbers (VoIP + GSM)
Requirements:
• Configured exception numbers (Routing > VoIP and GSM Routing >Exception numbers)
• Enabled call forwarding method 2. B channel
The device checks whether the destination number involved in callforwarding for external numbers has been set up as an exception number.If so, the call is sent along the configured path. If the destination numberhas not been entered in the routing table, the call to be forwarded is senteither via a free call channel that is assigned to the port or via any free

Call Forwarding
COMmander 6000/R/RX - Firmware V8.4 - Advanced Information V32 05/2022- 629 -
call channel (For call forwarding via the PBX, use any available callchannel).
Use CLIP no screening for call forwarding
Requirements:
• CLIP no screening enabled for this VoIP account
In the case of call forwarding via the external connection, the phonenumber of the caller is transmitted to the destination of the call forwarding.In the case of an anonymous call, the function acts as if not enabled.
Note: When switched off, the phone number in the PBX is transmittedto the call forwarding destination.
CALL FORWARDING UNCONDITIONAL (CFU)
Call forwarding available in exchange line
If the exchange line has a CFU, this function can be enabled.
Note: If the exchange line does not have a CFU, this function must bedisabled.
CALL FORWARDING IF BUSY (CFB)
Call forwarding available in exchange line
If the exchange line has a CFB, this function can be enabled.
Note: If the exchange line does not have a CFB, this function must bedisabled.

Call Forwarding
COMmander 6000/R/RX - Firmware V8.4 - Advanced Information V32 05/2022- 630 -
CALL FORWARDING NO REPLY (CFNR)
Call forwarding available in exchange line
If the exchange line has a CFNR, this function can be enabled.
Note: If the exchange line does not have a CFNR, this function mustbe disabled.

Settings Additional Numbers VoIP
COMmander 6000/R/RX - Firmware V8.4 - Advanced Information V32 05/2022- 631 -
Settings Additional Numbers VoIP
Proceed as follows:
• Using the Configuration Manager (Public switched tel. networks >VoIP > Additional numbers PTP connection)
Requirements:
• Configured PTP connection
ADDITIONAL NUMBERS PTP CONNECTION
Select the extension number/bundle for that the additional numbers are tobe displayed/configured, provided that more then one PBX base numberwas configured.
Phone number for CLIP no screening
Requirements:
• Set up phone number
• CLIP no screening switched on for the VoIP connection
• The exchange line must support CLIP no screening
Customer-specific phone number (e.g. a service phone number) that istransferred to the destination by the exchange line without its correctnessbeing checked.
Note: The phone number must always be configured completely, thus,with the local area code or e. g. as 0800....
Settings Additional Numbers VoIP
COMmander 6000/R/RX - Firmware V8.4 - Advanced Information V32 05/2022- 632 -
Name
The name is used for display purposes on the system phone.
Ringtone
The ringtone specifies which sequence of sounds is used to signalexternal calls to internal subscribers on the PBX.
Note: See Ringer tones for information about exceptions to signallingand sound sequences.
New
Adds a new phone number.
Delete
Deletes the entries marked in the list.

Call Distribution
COMmander 6000/R/RX - Firmware V8.4 - Advanced Information V32 05/2022- 633 -
Call Distribution
Management for the Call DistributionSettings for Call Distribution Management for the Call DistributionSettings for Call Distribution

Management for the Call Distribution
COMmander 6000/R/RX - Firmware V8.4 - Advanced Information V32 05/2022- 634 -
Management for the Call Distribution
Call distribution for Call distribution for

Call distribution for
COMmander 6000/R/RX - Firmware V8.4 - Advanced Information V32 05/2022- 635 -
Call distribution for
Proceed as follows:
• Separately for configurations
• Separately for external connections
• Using the Configuration Manager (Public Switched TelephoneNetworks > Call distribution page)
Note: External numbers that are required as Call Through number(Functions > Call Through) are not allowed to be used in calldistribution.
Note: In order for a subscriber to signal incoming external calls,it needs at least Exchange line authorisation (business) Onlyincoming, with emergency call (Subscriber (scr.) > Properties >Exchange line settings).
Note: An internal destination can be assigned to an external number.Internal destinations can be subscribers, groups, Voice mail and faxboxes or the automatic reception functions.
Note: If several subscribers ring simultaneously, they are grouped.
CALL DISTRIBUTION FOR
Select the connections to be displayed/configured.
A separate call distribution is set for each external connection. A singleconnection as is defined here as:
• A PTMP connection (fixed network or GSM)
• A single PTP connection (fixed network or GSM)
• A bundled PTP connection made up of several S0 connections withthe same PBX base numbers and the same extensions block

Call distribution for
COMmander 6000/R/RX - Firmware V8.4 - Advanced Information V32 05/2022- 636 -
• The S2MConnection
• An analogue connection
• A VoIP account
...ISDN PTMP connections
...VoIP PTMP connections
Internal no. | name
Fallback
The caller is transferred to the fallback function.
Internal number: The caller will be transferred to the selected internalnumber (subscriber, group, voice mail/fax box or automatic reception).
Note: External numbers, e.g., those used as remote switching/programming numbers or call through numbers, may not be used inthe call distribution.
...ISDN PTP connections / ...VoIP PTP connections
Internal no. | name
For a PTP connection without linear call distribution or for extensionsdiffering from linear call distribution, the internal destinations must beselected.
Linear/fallback

Call distribution for
COMmander 6000/R/RX - Firmware V8.4 - Advanced Information V32 05/2022- 637 -
The caller will be transferred to the internal number similar to the DDI. Ifthis phone number is not configured in the PBX, the fallback function willbe used.
Rejecting a call
The caller will hear the busy signal.
Internal phone number: The caller will be transferred to the selectedinternal number (subscriber, group, voice mail/fax box or automaticreception).
Note: External numbers, e.g., those used as remote switching/programming numbers or call through numbers, may not be used inthe call distribution.
...VoIP PTP connections / ...VoIP PTMP connections
SIP status on fallback
If an unassigned phone number in the PBX is required on an incomingexternal call, the caller will be transferred to the fallback function.
In this case, there are the following SIP status codes available for thetransfer to the exchange line for a DDI (VoIP PTP connection) or an MSN(VoIP PTMP connection):
SIP status onfallback
Transmittedmessage
Meaning
Invalid number(404)
Not Found The destination phone number has not been found
or does not exist.
Temporarily notavailable (480)
Temporarily
Unavailable
The called subscriber is temporarily not available.

Call distribution for
COMmander 6000/R/RX - Firmware V8.4 - Advanced Information V32 05/2022- 638 -
SIP status onfallback
Transmittedmessage
Meaning
busy Busy Here The called subscriber is busy

Settings for Call Distribution
COMmander 6000/R/RX - Firmware V8.4 - Advanced Information V32 05/2022- 639 -
Settings for Call Distribution
Call Distribution for Call Distribution for

Call Distribution for
COMmander 6000/R/RX - Firmware V8.4 - Advanced Information V32 05/2022- 640 -
Call Distribution for
Proceed as follows:
• Separately for configurations
• Separately for external connections
• Using the Configuration Manager (Public switched tel. networks >Call distribution)
CALL DISTRIBUTION FOR
Select the connections to be displayed/configured.
fallback
The fallback function indicates how the PBX deals with calls which couldnot be transferred or rejected via call distribution.
Rejecting a call
The caller will hear the busy signal.
If an unassigned phone number in the PBX is required on an incomingexternal call, the caller will be transferred to the fallback function, thefollowing SIP status codes available for the transfer to the exchange line:
SIP status onfallback
Transmittedmessage
Meaning
Invalid number(404)
Not Found The destination phone number has not been found
or does not exist.
Temporarily notavailable (480)
Temporarily
Unavailable
The called subscriber is temporarily not available.

Call Distribution for
COMmander 6000/R/RX - Firmware V8.4 - Advanced Information V32 05/2022- 641 -
SIP status onfallback
Transmittedmessage
Meaning
busy Busy Here The called subscriber is busy
Note: If a configured DDI (VoIP PTP connection) or an MSN (VoIPMPTP connection) is listet below, you can assign an individual SIPstatus code via SIP status on fallback .
Fallback settings: The caller will be transferred according to the settings.
• Only Announcement before Answering: The caller hears theAnnouncement before Answering and then, the connection isinterrupted.
• Fallback phone number and no Announcement before Answering: Thecall is immediately signaled at the internal number for the fallback.
• Fallback phone number and Announcement before Answering:
− immediately: The callIt is immediately signaled on the internalphone number for fallback and parallel to the announcementbefore answering.
− after Announcement before AnsweringThe call is signalled afterthe announcement before answering to the internal number forfallback and, thus, in parallel to the call phase.
Delayed fallback after
Requirements:
• Selected fallback number (see fallback)
All calls which have not been answered will be redirected after theconfigured time.

Call Distribution for
COMmander 6000/R/RX - Firmware V8.4 - Advanced Information V32 05/2022- 642 -
Note: The fallback time is the addition of the longest waiting time forthe Call Forwarding on no reply and the seconds configured in after:.The longest waiting time will be determined by a comparison of theDelay time for CF on no reply in the PBX and the Delay time for CFon no reply.
Linear call distribution (external = internal)
Requirements:
• Configured connection type PTP connection
A 1:1 assignment for the extensions is made automatically for internalnumbers and external extensions that are matching the extensions block.

Call Forwarding
COMmander 6000/R/RX - Firmware V8.4 - Advanced Information V32 05/2022- 643 -
Call Forwarding
Settings for the Call Forwarding Settings for the Call Forwarding

Settings for the Call Forwarding
COMmander 6000/R/RX - Firmware V8.4 - Advanced Information V32 05/2022- 644 -
Settings for the Call Forwarding
Call Forwarding for ... Call Forwarding for ...

Call Forwarding for ...
COMmander 6000/R/RX - Firmware V8.4 - Advanced Information V32 05/2022- 645 -
Call Forwarding for ...
Requirements:
• Configured external numbers
Proceed as follows:
• Separately for configurations
• Separately for external numbers
• Using the Configuration Manager (Public switched tel. networks >Call forwarding)
• Using a character string on the internal phone (see Call Forwarding forExternal Numbers)
• Using the menu/function key on a system phone (optional, see thephone manual)
CALL FORWARDING FOR
Select the connections to be displayed/configured.
Permanent configuration
The configuration-dependent settings will be overridden by the permanentconfiguration settings.
Note: On a system phone, you can switch on/off/over the callforwarding of external numbers either for the current configuration orfor permanent configuration using the function key (see the manual forthe phone).

Call Forwarding for ...
COMmander 6000/R/RX - Firmware V8.4 - Advanced Information V32 05/2022- 646 -
Note: With a standard phone you can change call forwarding in thepermanent configuration and switch on the permanent configuration orthe current configuration using a digit sequence.
You can override the configuration-dependent call forwarding byactivating the permanent configuration option.
CF immediately
External calls to the external number are immediately forwarded to theentered external destination number.
CF on no reply
On no reply, external calls to the external number are forwarded to theentered external destination number.
CF on busy
On busy, external calls to the external number are forwarded to theentered external destination number.
Destination number
Destination number (external number or short-code number) to whichexternal calls to the external number are to be forwarded.
Delete
Deletes the entry fields of the entries marked in the list. The entriesthemselves remain.

Subscriber (scr.)
COMmander 6000/R/RX - Firmware V8.4 - Advanced Information V32 05/2022- 647 -
Subscriber (scr.)
Phone numbersIP provisioningProfilesCOMfortel DECTCOMfortel WS-500XProperties / Function overviewUnassigned phonesAll subscribers Phone numbersIP provisioningProfilesCOMfortel DECTCOMfortel WS-500XProperties / Function overviewUnassigned phonesAll subscribers

Phone numbers
COMmander 6000/R/RX - Firmware V8.4 - Advanced Information V32 05/2022- 648 -
Phone numbers
Management SubscriberAdd Subscriber Management SubscriberAdd Subscriber

Management Subscriber
COMmander 6000/R/RX - Firmware V8.4 - Advanced Information V32 05/2022- 649 -
Management Subscriber
Proceed as follows:
• Using the Configuration Manager (Subscriber (scr.) > Phonenumbers)
Phone Number
This (exchange line access number) is an internal number. You can selectany of the numbers in the internal supply of phone numbers. This numberis then used for distributing calls and can be called directly by anotherinternal subscriber.
Note: Double allocation of a number is not possible.
Note: Using numbers with few digits (two or three-digit numbers)inevitably restricts the possible supply of numbers requiring moredigits. For example, if the number 12 is assigned, the numbers120-129 and 1200-1299 will no longer be available.
Note: The default exchange line access number on the PBX is 0 in thefactory settings. However, this can be changed. Note that changing theexchange line access number restricts the dial plan.
Note: The internal number entered here needs to be entered in theISDN device or in the system phone as the (first) MSN. Also on anISDN device, make sure that the phone number is transmitted to thePBX.
Name
Freely selectable name. This name is used to identify the subscriberwithin the PBX and the connected system phones. The name can also betransferred to the VoIP end devices via LDAP server.

Management Subscriber
COMmander 6000/R/RX - Firmware V8.4 - Advanced Information V32 05/2022- 650 -
Module | Port
Module and port to which the end device (e. g. phone) is connected.
Device type
Device type depending on the end device connected.
Analogue end devices
Answering machine analogue answering machine
Fax machine analogue fax machine
Phone analogue phone, analogue modem
Door terminal analogue door terminal, selection deletes the subscriber and opens
Devices > Device wizard for configuration of a door terminal
Announcementoutput
analogue announcement output, selection deletes the subscriber and
opens Devices > Device wizard for configuration of an announcement
output
ISDN end devices
DECT systemphone
Handset on a COMfortel DECT 900 Base
Fax machine ISDN fax machine in compliance with the Euro ISDN Standard (DSS1)
ISDN PC contr. ISDN PC controller in compliance with the Euro ISDN Standard (DSS1)

Management Subscriber
COMmander 6000/R/RX - Firmware V8.4 - Advanced Information V32 05/2022- 651 -
ISDN end devices
ISDN system phone System phone COMfortel
1100/1200/1400/1500/1600/2500/2500 AB/2600
ISDN phone ISDN phone in compliance with the Euro ISDN Standard (DSS1)
VoIP end devices
COMfortel 1200 IP COMfortel 1200 IP
COMfortel C-400 Conference phone COMfortel C-400
COMfortel IP COMfortel 1400 IP, COMfortel 2600 IP, COMfortel 3200, COMfortel 3500,
COMfortel 3600 IP
COMfortel IP1040Handset
Handset (e.g. COMfortel DECT 900C) on a COMfortel DECT IP1040
Base
COMfortel VoIP2500 AB
COMfortel VoIP 2500 AB
COMfortel WS-500XHandset
Handset (e.g. COMfortel M-510/520/530/710/720/730) on a COMfortel
WS-500S or WS-500M
COMfortel WS-IPHandset
Handset (e.g. COMfortel M-100/200/210/300/310) on a COMfortel
WS-400 IP or COMfortel WS-650 IP
Standard VoIPphone
Standard VoIP end device (SIP) from another manufacturer, soft phone
(SIP)

Management Subscriber
COMmander 6000/R/RX - Firmware V8.4 - Advanced Information V32 05/2022- 652 -
Property | Configure
Opens the configuration of the subscriber.
Further help under Settings of the Subscriber Properties
Filter:
The list of subscribers is filtered according to the entered or selected valuefor Phone number, Name or Module.
New
Adds a new subscriber. You must then make the settings for this newsubscriber.
Further help under Add Subscriber
Delete
Deletes the entries marked in the list.
Note: If a handset of the device type COMfortel WS-500X Handsetis deleted as a subscriber, this is also removed in the base station inwhich it was configured.

Add Subscriber
COMmander 6000/R/RX - Firmware V8.4 - Advanced Information V32 05/2022- 653 -
Add Subscriber
Proceed as follows:
• Using the Configuration Manager (Subscriber (scr.) > Phonenumbers > New)
Note: PINs and passwords are automatically assigned to the newsubscriber by means of a random number generator (change via pageSubscriber (scr.) > Properties). The following passwords must beadapted:
Note: The device type Handset on COMfortel WS-IP requires up to32 characters (numbers and/or letters - no special characters!).
Add subscriber
This (exchange line access number) is an internal number. You can selectany of the numbers in the internal supply of phone numbers. This numberis then used for distributing calls and can be called directly by anotherinternal subscriber.
Several subscribers with a contiguous number range can be created in thefields of up to .
Note: Double allocation of a number is not possible.
Note: Using numbers with few digits (two or three-digit numbers)inevitably restricts the possible supply of numbers requiring moredigits. For example, if the number 12 is assigned, the numbers120-129 and 1200-1299 will no longer be available.
Note: The default exchange line access number on the PBX is 0 in thefactory settings. However, this can be changed. Note that changing theexchange line access number restricts the dial plan.

Add Subscriber
COMmander 6000/R/RX - Firmware V8.4 - Advanced Information V32 05/2022- 654 -
Note: The internal number entered here needs to be entered in theISDN device or in the system phone as the (first) MSN. Also on anISDN device, make sure that the phone number is transmitted to thePBX.
Name
Freely selectable name. This name is used to identify the subscriberwithin the PBX and the connected system phones. The name can also betransferred to the VoIP end devices via LDAP server.
Module / Port
Module and port to which the end device (e. g. phone) is to be connected.
Device type
Device type depending on the end device connected.
Analogue end devices
Answering machine analogue answering machine
Fax machine analogue fax machine
Phone analogue phone, analogue modem
Door terminal analogue door terminal, selection deletes the subscriber and opens
Devices > Device wizard for configuration of a door terminal
Announcementoutput
analogue announcement output, selection deletes the subscriber and
opens Devices > Device wizard for configuration of an announcement
output

Add Subscriber
COMmander 6000/R/RX - Firmware V8.4 - Advanced Information V32 05/2022- 655 -
ISDN end devices
DECT systemphone
Handset on a COMfortel DECT 900 Base
Fax machine ISDN fax machine in compliance with the Euro ISDN Standard (DSS1)
ISDN PC contr. ISDN PC controller in compliance with the Euro ISDN Standard (DSS1)
ISDN system phone System phone COMfortel
1100/1200/1400/1500/1600/2500/2500 AB/2600
ISDN phone ISDN phone in compliance with the Euro ISDN Standard (DSS1)
VoIP end devices
COMfortel 1200 IP COMfortel 1200 IP
COMfortel C-400 Conference phone COMfortel C-400
COMfortel IP COMfortel 1400 IP, COMfortel 2600 IP, COMfortel 3200, COMfortel 3500,
COMfortel 3600 IP
COMfortel IP1040Handset
Handset (e.g. COMfortel DECT 900C) on a COMfortel DECT IP1040
Base
COMfortel VoIP2500 AB
COMfortel VoIP 2500 AB

Add Subscriber
COMmander 6000/R/RX - Firmware V8.4 - Advanced Information V32 05/2022- 656 -
VoIP end devices
COMfortel WS-500XHandset
Handset (e.g. COMfortel M-510/520/530/710/720/730) on a COMfortel
WS-500S or WS-500M
COMfortel WS-IPHandset
Handset (e.g. COMfortel M-100/200/210/300/310) on a COMfortel
WS-400 IP or COMfortel WS-650 IP
Standard VoIPphone
Standard VoIP end device (SIP) from another manufacturer, soft phone
(SIP)
Assigning the MAC address of the device
The MAC address of a phone is needed to identify a phone that isassigned to a specific subscriber. For all transactions between phone andPBX the PBX must be able to identify the MAC address of the phone sothat the phone can be matched to a subscriber and his/her provisioningdata.
found devices
Select one of the existing MAC adresses.
assigned devices
MAC adresses already assigned to the subscribers.
manual assignement
Enter manually (only digits) or take over a MAC adress after reading witha bar code scanner.
The MAC address of a device can be found as follows:
• Retrieving from a client certificate sended by the phone
• Reading with a bar code scanner enabled and connected to thecomputer (e. g. via a USB interface)

Add Subscriber
COMmander 6000/R/RX - Firmware V8.4 - Advanced Information V32 05/2022- 657 -
• Reading e. g. on the menu oft the phone or on a label
Note: If a MAC address has been entered and assigned to asubscriber, the corresponding phone can already be provided withprovisioning data during its first boot process.
Provisioning file
The subscriber receives the required configuration via the provisioning fileselected here.
Note: A configuration can also be assigned to this and furtherssubscribers via the page Subscriber (scr.) > IP Provisioning > Filemanagement.
Note: If a required file is not yet available here, a file must firstbe created on the page Subscriber (scr.) > IP Provisioning >File management. There, the file can be assigned to one or moresubscribers.
Manufacturer name or product name
Provisioning file already assigned to the manufacturer name/productname.
Other
All other available files.
Files not used by other devices
List of files not yet assigend to a device.
Device IPUI (only COMfortel WS-500X Handsets)
To identify a handset, the IPUI of the handset is used. For all transactionsbetween the handset, base station and PBX, the PBX must be able to

Add Subscriber
COMmander 6000/R/RX - Firmware V8.4 - Advanced Information V32 05/2022- 658 -
determine the IPUI of the handset and use it to assign a handset and itsprovisioning data to the handset.
already used IPUI
IPUI already assigned to another subscriber.
free IPUI
Selection of an unassigned IPUI.
manual assignment
Manual input (digits or letters) or transfer of an IPUI. This can bedetermined as follows:
• Read out the barcode label on the package with a barcode readerconnected to the computer (e.g. via the USB interface)
• Reading from the handset: Press the control button and enter *#06#
• Reading from the package label
Note: If an IPUI is registered and assigned to a subscriber, thecorresponding handset can already be supplied with provisioning dataduring the first boot process.
COMfortel WS-500 base station (only COMfortel WS-500X Handsets)
The subscriber is assigned to a base station here.
Note: A base station can also be assigned to this and furthersubscribers via Subscriber (scr.) > COMfortel WS-500X > COMfortelWS-500X Handsets.
IP provisioning
COMmander 6000/R/RX - Firmware V8.4 - Advanced Information V32 05/2022- 659 -
IP provisioning
SettingsFile management SettingsFile management

Settings
COMmander 6000/R/RX - Firmware V8.4 - Advanced Information V32 05/2022- 660 -
Settings
Proceed as follows:
• Using the Configuration Manager (Subscriber (scr.) > IPprovisioning > Settings)
Requirements:
• Automatic provisioning via the provisioning server at the phone(s)switche on
Provisioning server active
IP phones can automactically be configured as provisioning server via thePBX.
Note: When switched off, no automatic configuration of the IP phonesis carried out.
Auto Provisioning active
Requirements:
• Activated SIP Komfortpaket brand plus (Administration >Activation > Open Shop)
The activation enables the provisioning of SIP end devices from othermanufacturers.
Access without client certificate (unsafe operation)
There are IP phones that have a client certificate. Thus, the identity ofa subscriber is bound to a unique digital certificate. This way, it can bedetermined who for example can access the subscriber data.

Settings
COMmander 6000/R/RX - Firmware V8.4 - Advanced Information V32 05/2022- 661 -
Note: Only enable this function if you operate phones on the PBX thatdo not have an own client certificate.
Client certificates are stored in the PBX for the following IP phones:
• COMfortel 1200 IP
• COMfortel 1400 IP/2600 IP/3600 IP
• Snom IP phones
• Yealink IP phones
Provisioning only within local network
Provisioning is only carried out within the local network.
Note: When switched off, provisioning can also be carried out on otherpossible networks (unsafe operation).
Phone language after provisioning
Phone language that is displayed on the phone after provisioning.

File management
COMmander 6000/R/RX - Firmware V8.4 - Advanced Information V32 05/2022- 662 -
File management
Proceed as follows:
• Using the Configuration Manager (Subscriber (scr.) > IPprovisioning > File Management)
DEVICE TYPES
Select the device to be configured.
If there is no file available for a device type which means that the list forthe provisioning files is still empty, a new provisioning file must be createdvia New.
If a template exists for a device type, it is copied to the new file.
Editor presetting
File editor
Via the file editor, settings (e. g. NTP or contacts) are directly made in theprovisioning file (*.xml, *.cfg).
Provisioning file (*.xml, *.cfg) > Edit
Variables for the parameters to be provisioned are inserted aspalceholders in the configuration files provided by the manufacturer.During provisioning, these are replaced by the corresponding values in thePBX configuration.
Changes in the settings are effective after saving.
COMfortel IP Editor

File management
COMmander 6000/R/RX - Firmware V8.4 - Advanced Information V32 05/2022- 663 -
The COMfortel IP Editor simplifies the provisioning settings (e. g. NTP orfunction keys) and is only available for the COMfortel xx00 IP devices.Thesettings are adopted to the provisioning file after saving.
Note: When opening the COMfortel IP Editor, it is automaticallychecked if a new version is available when the Internet access isavailable. An update will be carried put if necessary.
Note: If there is no Internet connection, please check the HTTP proxyof your PBX (Administration > IP configuration).
Note: The standard.xml cannot be changed. To edit the file, save itunder a different name and assign the devices accordingly.
Provisioning file (*.xml, *.cfg) > Edit
Changes in the setting in the COMfortel IP Editor are transferred to theprovisioning file after saving.
New
Creating a new provisioning file and selection of the device type for whichthis provisioning file is to be used.
Delete
Note: The default provisioning file Standard.xml cannot be deleted.
Import
Importable file types:
• *.xml
• *.cfg
• *.zip

File management
COMmander 6000/R/RX - Firmware V8.4 - Advanced Information V32 05/2022- 664 -
Export
A provisioning file stored in the PBX can be saved on the PC as backupcopy.
Note: It is possbile to save more than one provisioning file at thesame time. To do this, select the required provisioning files and click
Export. The provsioning files are generated in a provisioning.zipfolder.
Use for device type
Selection of the device type for which this provisioning file is to be used.
Provisioning file > Authorizations
Provisioning files can partly contain sensitive subscriber-specific data.To prevent unauthorised access, subscribers or base stations can bespecifically granted or denied access to provisioning files.
Granting access to Proceed as follows:
individual subscribers / base station Mark subscriber under available subscribers or base
station under available bases and click .
all subscribers / base stations Click .
all subscribers of a group Select group under Authorisation for all subscribersto the group .

File management
COMmander 6000/R/RX - Firmware V8.4 - Advanced Information V32 05/2022- 665 -
Header file
Use file as header file.
Note: Does not apply to device type COMfortel WS-500.
Standard.xml > View
An empty provisioning file (Standard.xml) is provided as default file. TheStandard.xml file cannot be deleted or edited in the integrated file editor,but it can be viewed.
Provisioning file > Edit
For editing provisioning files (*.xml, *.cfg) the file editor is available forprovisioning files from other manufacturers (e. g. Snom or Yealink) and forCOMfortel IP phones additionally the COMfortel IP Editor.
Note: The Standard.xml cannot be edited.
Note: We recommend to contact the system administrator orspecialised dealer for editing provisioning files.
Note: Under Account IDs you find the account IDs for the PBX andthe exchange lines.
Further help in the Auerswald DokuWiki.

Profiles
COMmander 6000/R/RX - Firmware V8.4 - Advanced Information V32 05/2022- 666 -
Profiles
Management ProfileSettings of the Subscriber ProfilesSettings Profile Assignment Management ProfileSettings of the Subscriber ProfilesSettings Profile Assignment

Management Profile
COMmander 6000/R/RX - Firmware V8.4 - Advanced Information V32 05/2022- 667 -
Management Profile
Proceed as follows:
• Using the Configuration Manager
Profile name
The available profiles (default profiles, user-defined profiles) aredisplayed.
View
The selected settings can be viewed (default profiles).
Configure
The user-defined profiles can be adapted to the correspondingrequirements (user-defined profiles).
New
Creation of a new profile.

Settings of the Subscriber Profiles
COMmander 6000/R/RX - Firmware V8.4 - Advanced Information V32 05/2022- 668 -
Settings of the Subscriber Profiles
Exchange Line SettingsReachabilityAuthorisationsVoicemail/ Fax BoxSettings Exchange Line SettingsReachabilityAuthorisationsVoicemail/ Fax BoxSettings

Exchange Line Settings
COMmander 6000/R/RX - Firmware V8.4 - Advanced Information V32 05/2022- 669 -
Exchange Line Settings
Proceed as follows:
• Separately for profiles
• Using the Configuration Manager
• Profile-related (Subscriber (scr.) > Profiles > Configuration >Configure)
PROFILE CONFIGURATION
Select the profile you want to display/configure.
• Function-related (Subscriber (scr.) > Profiles > Function overview)
Configure
Opens the configuration of the single function for all profiles.
Profile-controlled settings
The profile setting overrides the subscriber setting.
Note: When switched off, the setting under Subscriber (scr.) >Properties applies.
Requirements:
• For differently configurable functions for private and business calls:function activated
− Using the Configuration Manager (Subscriber (scr.) > Allsubscribers)

Exchange Line Settings
COMmander 6000/R/RX - Firmware V8.4 - Advanced Information V32 05/2022- 670 -
Exchange line authorisation - business | Expert / Exchange lineauthorisation - private calls | Expert
Defines which kind of phone numbers may be dialled with a subscriber.
International
All international and domestic telephone numbers can be dialled.
National
All domestic telephone numbers can be dialled.
City
All telephone numbers without a provider area code can be dialled.
Note: If GSM access is used for an outgoing call, the PBXautomatically dials the telephone number with the configured areacode (national destination code).
Only incoming
Incoming external calls can be accepted.
Only internal
No external calls can be made/answered.
exchange line dependent
The exchange line authorisation is configured separately for eachindividual external connection via Expert .
Preventing emergency calls
Emergency calls cannot be made. The subscriber hears a correspondingannouncement. This function is for example useful for remote extensions

Exchange Line Settings
COMmander 6000/R/RX - Firmware V8.4 - Advanced Information V32 05/2022- 671 -
as the emergency call is issued at the location of the PBX and not at thelocation of the remote extension.
Call restrictor - (outgoing) business calls
Call restrictor - (outgoing) private calls
Requirements:
• Configured call restrictor
− Using the Configuration Manager (User data > Special numberspage)
The subscriber can not dial the phone numbers entered in the callrestrictor irrespective of his exchange line authorisation. So it restricts theexchange line authorisation.
Call deblocker - (outgoing) business calls
Call deblocker - (outgoing) private calls
Requirements:
• Configured call deblocker
− Using the Configuration Manager (User data > Special numberspage)
The subscriber can dial the phone numbers entered in the call deblockerirrespective of his exchange line authorisation. So it extends the exchangeline authorisation.

Exchange Line Settings
COMmander 6000/R/RX - Firmware V8.4 - Advanced Information V32 05/2022- 672 -
Phone book authorisation - business calls
Phone book authorisation - private calls
Requirements:
• At least the exchange line authorisation Only internal, withemergency call
• Configured contact group Phone book version 1
− Using the Configuration Manager (User data > Address bookspage)
The subscriber can dial the phone numbers entered in the contact groupPhone book version 1 irrespective of his exchange line authorisation. Soit extends the exchange line authorisation.
Preferred exchange line - business calls | Expert / Preferredexchange line - private calls | Expert
Defines via which exchange line outgoing external calls will be routed.
Automatic occupation
For outgoing external calls, any available connection is used, whereby firstthe fixed network connections and then the VoIP connection and at lastthe GSM connections were taken into account.
Special preferred exchange lines
For outgoing external calls, the connections released under Expert areused depending on the selected priority. This makes the definition of apreferred exchange line (priority = 1) with overflow to other connections(priority > 1) possible. Exchange lines with priority No automaticoccupation are not used for outgoing calls.
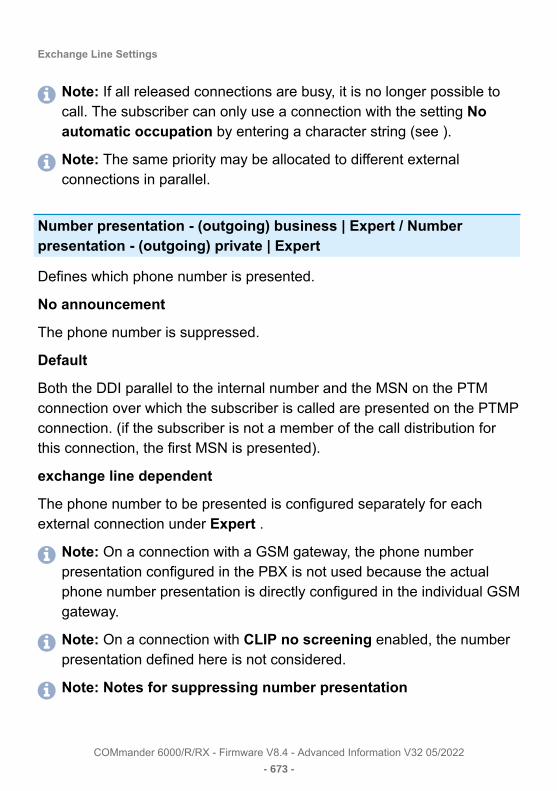
Exchange Line Settings
COMmander 6000/R/RX - Firmware V8.4 - Advanced Information V32 05/2022- 673 -
Note: If all released connections are busy, it is no longer possible tocall. The subscriber can only use a connection with the setting Noautomatic occupation by entering a character string (see ).
Note: The same priority may be allocated to different externalconnections in parallel.
Number presentation - (outgoing) business | Expert / Numberpresentation - (outgoing) private | Expert
Defines which phone number is presented.
No announcement
The phone number is suppressed.
Default
Both the DDI parallel to the internal number and the MSN on the PTMconnection over which the subscriber is called are presented on the PTMPconnection. (if the subscriber is not a member of the call distribution forthis connection, the first MSN is presented).
exchange line dependent
The phone number to be presented is configured separately for eachexternal connection under Expert .
Note: On a connection with a GSM gateway, the phone numberpresentation configured in the PBX is not used because the actualphone number presentation is directly configured in the individual GSMgateway.
Note: On a connection with CLIP no screening enabled, the numberpresentation defined here is not considered.
Note: Notes for suppressing number presentation

Exchange Line Settings
COMmander 6000/R/RX - Firmware V8.4 - Advanced Information V32 05/2022- 674 -
Note: Phone number suppression for VoIP calls is possible but it is notalways supported by the providers.
Note: If an emergency number is called while phone numbersuppression is enabled, phone number suppression is disabled onceso that the emergency service can identify the caller.
Note: If the number presentation only needs to be suppressed callby call, the Number presentation (outgoing) Default or exchangeline dependent . For the exchange line dependent option, eachexchange line can have an individual number presented to the networkprovider or to the caller separately. The number presentation to thecaller is suppressed by the phone before starting a call. The numberpresentation to the network provider is not suppressed by the phone.
Note: If the number presentation should always be suppressed,the Number presentation (outgoing) exchange line dependent .For each exchange line can a separate number be presented to thenetwork provider. To keep these numbers from being presented tothe caller, number presentation can be suppressed per exchange lineseparately.
Note: If number presentation needs to be suppressed between thePBX and the network provider, the Number presentation (outgoing)No announcement .
Note: For the option No announcement , the phone service CallingLine Identification Restriction (CLIR2) must be released by thenetwork provider.
Phone number presentation - incoming | Expert
Defines which phone number is presented back to the caller.
No announcement

Exchange Line Settings
COMmander 6000/R/RX - Firmware V8.4 - Advanced Information V32 05/2022- 675 -
The phone number is suppressed.
Default
Both the DDI parallel to the internal number and the MSN on the PTMconnection over which the subscriber is called are presented on the PTMPconnection.
exchange line dependent
The phone number to be presented is configured separately for eachexternal connection under Expert .
Note: For the option None , the phone service Connected LineIdentification Restriction (COLR2) must be released by the networkprovider.
Note: On a connection with a GSM gateway, the phone numberpresentation configured in the PBX is not used because the actualphone number presentation is directly configured in the individual GSMgateway.

Reachability
COMmander 6000/R/RX - Firmware V8.4 - Advanced Information V32 05/2022- 676 -
Reachability
Proceed as follows:
• Separately for profiles
• Using the Configuration Manager
• Profile-related (Subscriber (scr.) > Profiles > Configuration >Configure)
PROFILE CONFIGURATION
Select the profile you want to display/configure.
• Function-related (Subscriber (scr.) > Profiles > Function overview)
Configure
Opens the configuration of the single function for all profiles.
Profile-controlled settings
The profile setting overrides the subscriber setting.
Note: When switched off, the setting under Subscriber (scr.) >Properties applies.
Call deblocker (incoming)
Requirements:
• Configured call deblocker
− Using the Configuration Manager (User data > Special numbers)
The do-not-disturb function does not apply to callers who use one of thephone numbers entered in the selected call deblocker.

Reachability
COMmander 6000/R/RX - Firmware V8.4 - Advanced Information V32 05/2022- 677 -
Call restrictor (incoming)
Requirements:
• Configured call restrictor
− Using the Configuration Manager (User data > Special numbers)
A caller, who transmitted one of the phone numbers entered in theselected call restrictor or no number, is rejected.
Multi-path call forwarding / FMC
Multi-path call forwarding behaviour|Destination number
• Internal and external calls directed to the subscriber are also signalledat the entered destination number
• CFNR is executed
• Calls directed to a group are not considered
FMC behaviour|Destination number
• On a second call, the called subscriber is busy
• The multi-path call is not executed
• Call forwarding if Busy is executed
• an answering machine at the 2 nd B-channel (ISDN) ist not called
Call Forwarding | Settings | only external calls
External calls to the subscriber are forwarded. Internal calls are notforwarded.

Reachability
COMmander 6000/R/RX - Firmware V8.4 - Advanced Information V32 05/2022- 678 -
Call Forwarding | Settings | Cascading
If call forwarding has been configured for the internal destination of anexisting call forwarding, it is possible to reroute already forwarded calls(cascading).
Calls also will be rerouted to the new call forwarding destination. Duringcascading, the PBX memorises the subscribers who have already beencalled for this call. If the subscriber is the destination of a call forwardingagain, the call ends with the previous destination.
The caller hears the dial tone until the call is accepted. If the destinationis busy or the maximum call duration has been reached, a busy signal isissued.
Note: When switched off, cascading does not take place. Calls endwith the entered destination.
Call Forwarding | Settings | CF for group calls
Calls directed to a group in which the subscriber is logged in as incomingwill be forwarded to the CF destination of the subscriber.
Call Forwarding | CF immediately | Destination number:
Internal and external calls to the subscriber are forwarded immediately tothe entered destination number.
Call Forwarding | CF on busy | Destination number:
Internal and external calls to the subscriber are forwarded on busy to theentered destination number.

Reachability
COMmander 6000/R/RX - Firmware V8.4 - Advanced Information V32 05/2022- 679 -
Call Forwarding | CF on no reply | Destination number:
Internal and external calls to the subscriber are forwarded after theentered delay time to the entered destination number.
Delay time for CF on no reply
Call forwarding after the waiting time entered here in sec.

Authorisations
COMmander 6000/R/RX - Firmware V8.4 - Advanced Information V32 05/2022- 680 -
Authorisations
Proceed as follows:
• Separately for profiles
• Using the Configuration Manager
• Profile-related (Subscriber (scr.) > Profiles > Configuration >Configure)
PROFILE CONFIGURATION
Select the profile you want to display/configure.
• Function-related (Subscriber (scr.) > Profiles > Function overview)
Configure
Opens the configuration of the single function for all profiles.
Profile-controlled settings
The profile setting overrides the subscriber setting.
Note: When switched off, the setting under Subscriber (scr.) >Properties applies.
Switching of relays and alarms
The subscriber can switch relays and alarms manually.
Controlling of the PBX via phone
The subscriber may change settings of the PBX (e. g. do-not-disturb)using a menu/function key or a character string.

Authorisations
COMmander 6000/R/RX - Firmware V8.4 - Advanced Information V32 05/2022- 681 -
Open door
No
The subscriber may not open a door.
[Name]
The subscriber can phone with the selected door and open the door bypressing a key.
All doors
The subscriber can phone with all doors and open the doors by pressing akey.
Features to be configured by the network provider (CF, key pad)
The subscriber can
• forward the own external number via phone.
• switch the permanent configuration on/off using a character string.
• send keypad information to the network provider.
Configuration of Scr CF to external numbers
The subscriber can forward the associated external number to an externaldestination.
Transfer of external calls externally
The subscriber can transfer a call between two external subscribers.
Authorisations
COMmander 6000/R/RX - Firmware V8.4 - Advanced Information V32 05/2022- 682 -
CF (groups) / Follow me
The subscriber can
• switch group properties of groups which the subscriber is a member of.
• switch on Follow-me.

Voicemail/ Fax Box
COMmander 6000/R/RX - Firmware V8.4 - Advanced Information V32 05/2022- 683 -
Voicemail/ Fax Box
Proceed as follows:
• Separately for profiles
• Using the Configuration Manager
• Profile-related (Subscriber (scr.) > Profiles > Configuration >Configure)
PROFILE CONFIGURATION
Select the profile you want to display/configure.
• Function-related (Subscriber (scr.) > Profiles > Function overview)
Configure
Opens the configuration of the single function for all profiles.
Profile-controlled settings
The profile setting overrides the subscriber setting.
Note: When switched off, the setting under Subscriber (scr.) >Properties applies.
Voice mailbox | Call acceptance type
immediately
The voice mailbox will be called immediately.
on busy
The voice mailbox will be called if the internal number of the subscriberis busy and if no call forwarding on busy has been enabled for thesubscriber.

Voicemail/ Fax Box
COMmander 6000/R/RX - Firmware V8.4 - Advanced Information V32 05/2022- 684 -
on no reply
The voice mailbox will be called after expiration of the entered delay time.
on no reply + on busy
The voice mailbox will be called if the subscriber does not reply or if theinternal number of the subscriber is busy.
Delay time for CF on no reply
Call acceptance during the time entered here.
Info call (voice mail function)
The arrival of new voice messages immediately after completion ofthe recording will be signaled by a call from the voice mailbox to thesubscriber. When this is done, the phone number or name of the voicemailbox is shown on the phone display.
Note: COMfortel system phones (ISDN, VoIP) do not receive infocalls. New voice message are displayed on these phones via LEDsignalling (e. g. message button).

Settings
COMmander 6000/R/RX - Firmware V8.4 - Advanced Information V32 05/2022- 685 -
Settings
Proceed as follows:
• Separately for profiles
• Using the Configuration Manager
• Profile-related (Subscriber (scr.) > Profiles > Configuration >Configure)
PROFILE CONFIGURATION
Select the profile you want to display/configure.
• Function-related (Subscriber (scr.) > Profiles > Function overview)
Configure
Opens the configuration of the single function for all profiles.
Profile-controlled settings
The profile setting overrides the subscriber setting.
Note: When switched off, the setting under Subscriber (scr.) >Properties applies.
Voice mailbox | Call acceptance type
immediately
The voice mailbox will be called immediately.
on busy
The voice mailbox will be called if the internal number of the subscriberis busy and if no call forwarding on busy has been enabled for thesubscriber.

Settings
COMmander 6000/R/RX - Firmware V8.4 - Advanced Information V32 05/2022- 686 -
on no reply
The voice mailbox will be called after expiration of the entered delay time.
on no reply + on busy
The voice mailbox will be called if the subscriber does not reply or if theinternal number of the subscriber is busy.
Delay time for CF on no reply
Call acceptance during the time entered here.
Info call (voice mail function)
The arrival of new voice messages immediately after completion ofthe recording will be signaled by a call from the voice mailbox to thesubscriber. When this is done, the phone number or name of the voicemailbox is shown on the phone display.
Note: COMfortel system phones (ISDN, VoIP) do not receive infocalls. New voice message are displayed on these phones via LEDsignalling (e. g. message button).

Settings Profile Assignment
COMmander 6000/R/RX - Firmware V8.4 - Advanced Information V32 05/2022- 687 -
Settings Profile Assignment
Proceed as follows:
• Using the Configuration Manager
A configuration depending profile can be assigned to each subscriber,group or voice mail/fax box.
Assign profile to all
The same profile is assigned to all subcribers, groups or boxes for oneconfiguration.

COMfortel DECT
COMmander 6000/R/RX - Firmware V8.4 - Advanced Information V32 05/2022- 688 -
COMfortel DECT
Using the Configuration Manager to Switch On the Login Mode of aCOMfortel DECT 900 BaseAssigning Internal Phone Numbers to COMfortel DECT 900/900CHandsetsUsing the Configuration Manager to Log Out COMfortel DECT900/900C HandsetsUsing the Configuration Manager to Configure a Function Key forPBX FunctionsCopying a Function Key Assignment into Other COMfortel DECT900/900C HandsetsRestoring a Phone Book from the PBX Using the Configuration Manager to Switch On the Login Mode of a COMfortel DECT 900 BaseAssigning Internal Phone Numbers to COMfortel DECT 900/900C HandsetsUsing the Configuration Manager to Log Out COMfortel DECT 900/900C HandsetsUsing the Configuration Manager to Configure a Function Key for PBX FunctionsCopying a Function Key Assignment into Other COMfortel DECT 900/900C HandsetsRestoring a Phone Book from the PBX

Using the Configuration Manager to Switch On the Login Mode of a COMfortel DECT 900 Base
COMmander 6000/R/RX - Firmware V8.4 - Advanced Information V32 05/2022- 689 -
Using the Configuration Manager to Switch On theLogin Mode of a COMfortel DECT 900 Base
If the login mode of a COMfortel DECT 900 Base is enabled, up to fivemobile handsets can be logged in to the base station.
Note: A maximum of three mobile handsets are recommended for aCOMfortel DECT 900 Base because only three mobile phones can becalled at the same time.
Proceed as follows:
• Using the Configuration Manager
Requirements:
• COMfortel DECT 900 Base connected to the internal S0 port
• COMfortel DECT 900/900C Handsets
• Configured internal numbers for the COMfortel DECT 900/900CHandsets
1. Open the page Subscriber (scr.) > COMfortel DECT.
2. Select the DECT base in the list field under DECT base.
3. Select or clear the check box under Enable registration mode.
4. If you have enable the registration mode, click Save to enable theregistration mode.
The paging key on the COMfortel DECT 900 Base starts blinking.

Using the Configuration Manager to Switch On the Login Mode of a COMfortel DECT 900 Base
COMmander 6000/R/RX - Firmware V8.4 - Advanced Information V32 05/2022- 690 -
Note: With older firmware versions of COMfortel DECT 900/900CHandsets it might be necessary to put the handset close to theCOMfortel DECT 900 Base during registration.

Assigning Internal Phone Numbers to COMfortel DECT 900/900C Handsets
COMmander 6000/R/RX - Firmware V8.4 - Advanced Information V32 05/2022- 691 -
Assigning Internal Phone Numbers to COMfortelDECT 900/900C Handsets
The phone numbers assigned to a COMfortel DECT 900 Base must beassigned to the corresponding COMfortel DECT 900/900C Handsets.
Note: If you are setting up a COMfortel DECT IP1040 Base, you mustfirst assign phone numbers to the handsets under Subscriber (scr.) >Phone numbers before you log in the handsets to the base station.
Proceed as follows:
• Using the Configuration Manager
Requirements:
• COMfortel DECT 900 Base connected to the internal S0 port
• Configured internal numbers for the COMfortel DECT 900/900CHandsets
1. Open Subscriber (scr.) > COMfortel DECT.
2. Select the DECT base.
3. Select the phone number created for a DECT subscriber using thename/number under IPUI of the handset/serial number of thehandset.
4. Enter the identification number of the mobile handset under IPUI ofthe handset/serial number of the handset.
Note: Each IPUI may only be assigned one phone number.
Note: If the base station has already been connected to the PBXand mobile handsets have been logged into it, it is possible to view
Assigning Internal Phone Numbers to COMfortel DECT 900/900C Handsets
COMmander 6000/R/RX - Firmware V8.4 - Advanced Information V32 05/2022- 692 -
the list of ID numbers for these mobile handsets and to then selecta number.
5. Select the mobile handset type in question under IPUI of the handset/serial number of the handset.

Using the Configuration Manager to Log Out COMfortel DECT 900/900C Handsets
COMmander 6000/R/RX - Firmware V8.4 - Advanced Information V32 05/2022- 693 -
Using the Configuration Manager to Log OutCOMfortel DECT 900/900C Handsets
Proceed as follows:
• Using the Configuration Manager
Requirements:
• COMfortel DECT 900 Base connected to the internal S0 port
• COMfortel DECT 900/900C Handsets
• Configured and assigned internal numbers for the COMfortel DECT900/900C Handsets
1. Open the page Subscriber (scr.) > COMfortel DECT.
2. Select the DECT base in the list field under DECT base.
3. Enable the Logout check box for the corresponding subscriber.
4. Click Save.
Note: If the mobile handset is logged out, the unnecessary internalnumber can be deleted (Subscriber (scr.) > Phone numbers).

Using the Configuration Manager to Configure a Function Key for PBX Functions
COMmander 6000/R/RX - Firmware V8.4 - Advanced Information V32 05/2022- 694 -
Using the Configuration Manager to Configure aFunction Key for PBX Functions
The function key on a COMfortel DECT 900/900C Handset can beassigned to up to ten programming functions on the PBX.
Proceed as follows:
• Using the Configuration Manager
Requirements:
• COMfortel DECT 900 Base connected to the internal S0 port
• COMfortel DECT 900/900C Handsets
• Configured and assigned internal numbers for the COMfortel DECT900/900C Handsets
1. Open the page Subscriber (scr.) > COMfortel DECT.
2. Select the DECT base in the list field under DECT base.
3. Click Assign keys in the line of the corresponding mobile handset.
4. In the first Function list field select one of the following options:
---: Enables any function to be entered.
[Function]: Assigns the selected function to the key.
When selecting a function, the fields Name and Tmpl. for theprogramming function are pre-assigned accordingly.
5. In the Name entry field, enter a name for the key or, if necessary,change the predefined name.

Using the Configuration Manager to Configure a Function Key for PBX Functions
COMmander 6000/R/RX - Firmware V8.4 - Advanced Information V32 05/2022- 695 -
Note: The name is shown on the display after pressing thefunction key on a COMfortel DECT 900/900C Handset.
6. In the Tmpl. for the programming function entry field, enter aprogramming function on the PBX or replace the placeholder for thespecified programming function. Possible entries:
Digits and the characters * and #
UserPIN: Requires user PIN to be entered
IdentNumber: Requires the identification number to be entered
SC: Requires a short-code dialling number or external number to beentered
MSN, MSN/DDI: Requires your own external numbers to be entered
Phone number: Requires an external number to be entered
Subscriber: Requires an internal subscriber number to be entered
Subscriber/group: Requires an internal subscriber number/internalnumber of a line group to be entered
Note: The character strings for the programming functions arelisted in this manual under "Configuring and Operating Functions".
7. Repeat step 4 to 6 to assign the function key with additional PBXfunctions.
8. Click Save.
9. Repeat step 2 to 6 to configure the function key for an additionalmobile handset.
Note: The function key of a mobile handset can be copied intoother mobile handsets (Copy keys under Function keys).
Note: The PBX begins to distribute the data to the mobilehandsets in question. If a mobile handset is currently not ready for

Using the Configuration Manager to Configure a Function Key for PBX Functions
COMmander 6000/R/RX - Firmware V8.4 - Advanced Information V32 05/2022- 696 -
the data transfer (disabled, out of range or busy with a call), thePBX makes an attempt with the next mobile handset after a fewminutes until all of the data is distributed. During the data transfer(duration: up to two minutes), the mobile handset is not availableand "Copying from PBX" is shown on the display.

Copying a Function Key Assignment into Other COMfortel DECT 900/900C Handsets
COMmander 6000/R/RX - Firmware V8.4 - Advanced Information V32 05/2022- 697 -
Copying a Function Key Assignment into OtherCOMfortel DECT 900/900C Handsets
The assignment of the function key on a COMfortel DECT 900/900CHandset can be copied into another mobile handset.
Proceed as follows:
• Using the Configuration Manager
Requirements:
• COMfortel DECT 900 Base connected to the internal S0 port
• COMfortel DECT 900/900C Handsets
• Configured and assigned internal numbers for the COMfortel DECT900/900C Handsets
1. Open the page Subscriber (scr.) > COMfortel DECT.
2. In the list field DECT base select the DECT base.
3. In the line of the desired handset, click Copy keys.
A window for copying function keys opens.
4. In the list field Source (number of the COMfortel DECT handset),select the phone number of the source.
5. Select or clear the corresponding check boxes under Selection.
6. Select or clear the corresponding check boxes under dragging, selector clear the check box next to the internal numbers for the mobilehandsets into which the selected function key assignments should becopied.

Copying a Function Key Assignment into Other COMfortel DECT 900/900C Handsets
COMmander 6000/R/RX - Firmware V8.4 - Advanced Information V32 05/2022- 698 -
7. Click Save.
Note:The PBX begins to distribute the data to the mobile handsetsin question. If a handset is currently not ready for the data transfer(switched off, impossible to reach or in a call), the PBX will try thenext handset after a few minutes until all data has been distributed.The handset is not reachable during a data transfer (duration 2minutes max.) and there is "Copying from PBX" in the display.
8. Click Close.

Restoring a Phone Book from the PBX
COMmander 6000/R/RX - Firmware V8.4 - Advanced Information V32 05/2022- 699 -
Restoring a Phone Book from the PBX
If you have accidentally deleted one or more phone book entries on yourmobile handset, you can retrieve the contact data. This will restore yourcomplete phone book because all contact data of the DECT contact groupto which you are assigned are again copied into your mobile handset.
Proceed as follows:
• Using the Configuration Manager
Requirements:
• Internal S0 port (only provided on the COMmander 4/8S0 module orCOMmander 4/8S0-R module available as an option)
• Configured internal numbers for the base station
• Assigned internal numbers for the mobile handsets
1. Open the page Subscriber (scr.) > COMfortel DECT.
2. Select the DECT base in the list field under DECT base.
3. Click Copy keys in the line of the corresponding mobile handset.
A configuration window for copying function keys opens.
4. Select or clear the Transfer of phone numbers to the destinationphones check box.
5. Select the phone number of the source in the list field under Source(number of the COMfortel DECT handset).
6. Select or clear the required check boxes under Target.
7. Click Save.

Restoring a Phone Book from the PBX
COMmander 6000/R/RX - Firmware V8.4 - Advanced Information V32 05/2022- 700 -
Note: The PBX begins to distribute the data to the mobilehandsets in question. If a mobile handset is currently not ready forthe data transfer (disabled, out of range or busy with a call), thePBX makes an attempt with the next mobile handset after a fewminutes until all of the data is distributed. During the data transfer(duration: up to two minutes), the mobile handset is not availableand "Copying from PBX" is shown on the display.
8. Click Close.

COMfortel WS-500X
COMmander 6000/R/RX - Firmware V8.4 - Advanced Information V32 05/2022- 701 -
COMfortel WS-500X
Management COMfortel WS-500Settings COMfortel WS-500COMfortel WS-500X Handsets Management COMfortel WS-500Settings COMfortel WS-500COMfortel WS-500X Handsets

Management COMfortel WS-500
COMmander 6000/R/RX - Firmware V8.4 - Advanced Information V32 05/2022- 702 -
Management COMfortel WS-500
Proceed as follows:
• Using the Configuration Manager (Subscriber (scr.) > COMfortelWS-500X > COMfortel WS-500)
Requirements:
• Base station and the PBX are in the same local network (LAN)
• Knowledge of the MAC address of the base station (sticker on theback of the device)
• Base station is configured with the MAC address via the PBX(manually or via provisioning)
Note: At the PBX, only base stations are configured for whichthe device role "DECT Manager and Integrator" is enabled. Basestations with the role "Base station" are not configured in the PBXbut for multi-cell operation at a previously determined base stationwith the role "DECT Manager and Intergrator".
For more information about role distribution and base stationmanagement, see the Instructions of the base station.
MAC address
Required for all transactions between PBX, base station and handset andfor the assignment of provisioning data. The address is also required forbase station synchronisation in the Integrator/DECT manager.
Name of the base
Freely selectable name. This is used to identify the base station in thePBX and in the Integrator/DECT Manager.

Management COMfortel WS-500
COMmander 6000/R/RX - Firmware V8.4 - Advanced Information V32 05/2022- 703 -
Handsets (IPUI)
Registered handsets at this base station with the following information (leftto right):
• The mobile device's IPUI
• Handset phone number
• Name of the handset
Note: The name can be changed via the page Subscriber(scr.) > Phone numbers, the IPUI or the base station can bechanged via the page Subscriber (scr.) > COMfortel WS-500X >COMfortel WS-500X Handsets.
Provisioning file
The provisioning file displayed here gives the base station the requiredconfiguration.
Configurator of the base
Link to the Web Configurator of the base station for further configuration.
Properties | Configure
Opens the configuration of the base station.
Further help under Settings COMfortel WS-500
Note: For settings that are required but not offered here, you can openthe Web Configurator of the base station via the adjacent link underConfigurator of the base.

Management COMfortel WS-500
COMmander 6000/R/RX - Firmware V8.4 - Advanced Information V32 05/2022- 704 -
New
A new base station is added. The settings must then be made.
Further help under Settings COMfortel WS-500
Delete
Deletes the entries marked in the list.

Settings COMfortel WS-500
COMmander 6000/R/RX - Firmware V8.4 - Advanced Information V32 05/2022- 705 -
Settings COMfortel WS-500
Proceed as follows:
• Using the Configuration Manager (Subscriber (scr.) > COMfortelWS-500X > COMfortel WS-500 > New)
• Using the Configuration Manager (Subscriber (scr.) > COMfortelWS-500X > COMfortel WS-500 > Configure)
Important: When commissioning a base station for the first time viaprovisioning, the device may only be connected to the local networkafter setting up the base station, the handsets and the provisioningfile. Provisioning cannot be initiated automatically if the base station isconnected before then.
A detailed description of first commissioning (via provisioning ormanual) can be found under COMfortel WS-500S / WS-500M.
Requirements:
• See Management COMfortel WS-500
MAC address
Required for all transactions between PBX, base station and handset andfor the assignment of provisioning data. The address is also required forbase station synchronisation in the Integrator/DECT manager.
Name of the base
Freely selectable name. This is used to identify the base station in thePBX and in the Integrator/DECT Manager.

Settings COMfortel WS-500
COMmander 6000/R/RX - Firmware V8.4 - Advanced Information V32 05/2022- 706 -
Password of the base station
Freely selectable password consisting of
• at least 8, maximum 74 characters
• at least one capital letter
• at least one digit
• at least one specialo character
This password is later used for registration in the Web Configurator of thebase station.
When configuring the base station via provisioning, the password can onlybe used in the Web Configurator after provisioning has been completed.
Provisioning file
Selection of a provisioning file already created for this device type.
Note: This and other base stations can also be assigned aconfiguration via the page Subscriber (scr.) > IP Provisioning > Filemanagement.
Note: If a required file is not yet available here,a file must first becreated on the page Subscriber (scr.) > IP Provisioning > Filemanagement. There, the file can then be assigned to one or morebase stations.
Jitter buffer
Specifies the size of the jitter buffer in milliseconds (duration of the audiosignals). In this time period RTP packets are cached (lower values = lower

Settings COMfortel WS-500
COMmander 6000/R/RX - Firmware V8.4 - Advanced Information V32 05/2022- 707 -
number, greater values = greater number). Delays in the transmission andloss of packets can be compensated that way.
Echo cancellation
The system compensates for local echoes and reverberation effectsduring internal VoIP calls.
SIP alert info
Select the options for signalling call tones on end devices. For signalling,the Invite is sent to the end device to transfer the call types. Dependingon the device, the call types are either fully converted into call tones, orconverted in a simplified version. The following options are available here.
External and internal calls
Device uses this selection of call types to signal call tones.
External, internal, group, door and alarm calls
Device uses all the call types supported by the PBX to signal call tones.
This is the default setting when a subscriber is configured.
If problems occur with signalling on the end device, use one of the optionslisted above.
RTP encryption
Allows you to set an exception for this base station. The default is Adoptfrom Administration ->SIPS/SRTP internal (default).
Setting the exception is required if:
• This base station does not support the settings in the PBX. This canlead to problems, e. g. when establishing a call.

Settings COMfortel WS-500
COMmander 6000/R/RX - Firmware V8.4 - Advanced Information V32 05/2022- 708 -
• You must bypass the PBX settings for testing or troubleshootingpurposes.
Note: The settings for this base station here in the ConfigurationManager and the settings in the Web Configurator of the base stationmust match.
Adopt from Administration ->SIPS/SRTP internal (default)
The setting of the PBX applies for this base station.
Only encrypted
Example: SRTP is disabled in the PBX. The base station requires enabledSRTP.
Only unencrypted
Example: SRTP is enabled in the PBX. The base station does not supportSRTP.
Format of the transmitted phone number
The PBX supports several formats to display the the country code ofincoming calls on the display of the called handset, e. g. adapted to asmall display size.

COMfortel WS-500X Handsets
COMmander 6000/R/RX - Firmware V8.4 - Advanced Information V32 05/2022- 709 -
COMfortel WS-500X Handsets
Subscriberfree IPUI Subscriberfree IPUI

Subscriber
COMmander 6000/R/RX - Firmware V8.4 - Advanced Information V32 05/2022- 710 -
Subscriber
Proceed as follows:
• Using the Configuration Manager (Subscriber (scr.) > COMfortelWS-500X > COMfortel WS-500X Handsets > Subscriber)
Requirements:
• At least one subscriber is configured via Subscriber (scr.) > Phonenumbers
Phone number
Phone number configured for this handset.
Name
Free name for this handset.
IPUI
free IPUI
Selection of an unassigned IPUI.
manual assignment
Manual input (digits or letters) or transfer of an IPUI. This can bedetermined as follows:
• Read out the barcode label on the package with a barcode readerconnected to the computer (e. g. via the USB interface)
• Reading from the handset: Press the control button and enter *#06#
• Reading from the package label

Subscriber
COMmander 6000/R/RX - Firmware V8.4 - Advanced Information V32 05/2022- 711 -
current IPUI
The currently assigned IPUI for this handset.
WS-500x base
Select a base station to which this handset shall be assigned. With thefollwoing information:
• MAC address of the base station
• Name of the base station

free IPUI
COMmander 6000/R/RX - Firmware V8.4 - Advanced Information V32 05/2022- 712 -
free IPUI
Proceed as follows:
• Using the Configuration Manager (Subscriber (scr.) > COMfortelWS-500X > COMfortel WS-500X Handsets > free IPUI)
Requirements:
• An IPUI has been assigned to a Handset. This handset is laterdeleted, making its IPUI available again.
• One or more IPUI were e.g. created by reading with a barcode readerin advance and not yet assigned to a handset.
Phone number | Name
Selection of a subscriber to whom no IPUI has yet been assigned and whoshould receive the displayed IPUI.
IPUI
Displaying of a still available IPUI.
WS-500x base
Selection of a base station to which this IPUI is to be assigned.

Properties / Function overview
COMmander 6000/R/RX - Firmware V8.4 - Advanced Information V32 05/2022- 713 -
Properties / Function overview
Settings of the Subscriber Properties Settings of the Subscriber Properties
Settings of the Subscriber Properties
COMmander 6000/R/RX - Firmware V8.4 - Advanced Information V32 05/2022- 714 -
Settings of the Subscriber Properties
Basic Network SettingsExchange Line SettingsReachabilityAuthorisationsAnalogue SettingsVoIP settingsVoicemail /Fax BoxSettings Basic Network SettingsExchange Line SettingsReachabilityAuthorisationsAnalogue SettingsVoIP settingsVoicemail /Fax BoxSettings

Basic Network Settings
COMmander 6000/R/RX - Firmware V8.4 - Advanced Information V32 05/2022- 715 -
Basic Network Settings
Proceed as follows:
• Separately for subscribers
• Using the Configuration Manager
• Subscriber-related (Subscriber (scr.) > Features)
SUBSCRIBER
Select the subscriber you want to display/configure.
• Function-related (Subscriber (scr.) > Functional Overview)
Configure
Opens the configuration of the single function for all subscribers.
Important: The settings done are only valid on the condition that theyare not overridden by a profile. The simultaneous display takes placeonly on page Subscriber (scr.) > Features under Overridden byprofile in configuration.
Notices:
[Name configuration] ... In the displayed configuration, the function is overridden by the
displayed setting. Configuration via the Configuration Manager
(Subscriber (scr.) > Profiles> ...)
not overridden by a profile The function is currently not overridden by a profile.
(not profile-controlled) The function cannot be controlled with a profile.

Basic Network Settings
COMmander 6000/R/RX - Firmware V8.4 - Advanced Information V32 05/2022- 716 -
PIN
Freely selectable PIN that consists of 6 digits. The PIN is used e.g. foraccess to voice mailbox, fax box, COMfortel Set and a COMfortel VoIP2500 AB system phone.
Notices:
To change current PINs and passwords, select Edit PIN andpassword
All PINs in the PBX are unique, it is therefore not possible to assignthe same PIN twice.
Do not use dates of birth or dates as PINs. This makes it easy for anattacker to find out the correct PIN. Do not use PINs which are easy toguess, such as 111111 or 123456.
Caution: Visible PINs and passwords are a security risk.
• After entering, select Hide PIN and password.
Password
Freely selectable password that consists of 8 to 32 characters containingdigits, letters (upper and lower case, but no German umlauts and ß)and special characters - _ . ! ~ * ' ( ) & = + $ ,. The password is used forlogging-in to the Configuration Manager (associated user name is theinternal phone number) and for registering VoIP phones.
Notices:

Basic Network Settings
COMmander 6000/R/RX - Firmware V8.4 - Advanced Information V32 05/2022- 717 -
To change current PINs and passwords, click on Edit PIN andpassword.
A coloured bar under the entry field shows the security level of thepassword (red = low level, green = high level).
Passwords with a low security level cannot be saved.
Caution:
A high level does not automatically indicate a secure password. Thiscan also be achieved by name and date of birth in connection withspecial characters. However, names and dates of birth should not beused for passwords.
• To create a secure password you can consult, for example, theguidelines of the German Federal Office for Information Security(BSI, in German).
Visible PINs and passwords are a security risk.
• After entering, select Hide PIN and password.
LDAP password for subscriber-specific LDAP requests
For security reasons, the LDAP password should not be identical to thesubscriber password.
Additional passwords Configure
Requirements:
• Subscribers may create own passwords for accessing the webserver/API switched on (Subscriber (scr.) > All subscribers)

Basic Network Settings
COMmander 6000/R/RX - Firmware V8.4 - Advanced Information V32 05/2022- 718 -
• Subscribers may generate own passwords for accessing ActionURLs switched on (Boxes > Action URLs)
Notices:
If the above-mentioned settings in the Configuration Manager weremade as administrator, additional passwords for the ConfigurationManager/API and Action URLs can be configured when logging in assubscriber. If only one of the above-mentioned requirements has beenenabled, accordingly, the subscriber may only configure additionalpasswords for this option. The administrator may still configureadditional passwords for subscribers.
The last password for the use of the Configuration Manager/APIcannot be deleted.
After the subscriber has assigned another password, he cannot goback to the original password. Only the (sub-)administrator has thisauthorisation.
Edit passwords
New
Adds a new entry to the list.
Description
Enter a name for the entry.
Access to web server / API
The subscriber has access to the Configuration Manager / API.
Access to Action URLs
The subscriber has access to the Action URLs.

Basic Network Settings
COMmander 6000/R/RX - Firmware V8.4 - Advanced Information V32 05/2022- 719 -
Notices:
Additional entries for Action URLs can also be generated system-wide(Boxes > Action URLs).
The switching or triggering of relays (e.g. door opener) or alarms canalso be configured with this setting or excluded in individual cases(Boxes > Alarms > Configure or Boxes > Door stations > Door
opener > ).
Delete
Deletes the entries marked in the list.
Save
By saving a new added entry, the dialogue with the automaticallygenerated password opens.
NEW PASSWORD
Note: The password is only generated if accessing the PBX via asecure HTTPS connection.
The automatically generated subscriber password is displayed only once.Therefore, copy the subscriber password to the clipboard and then closethe dialogue.
CTI authorization code
Requirement:
• Subscriber is a phone of the COMfortel D-series

Basic Network Settings
COMmander 6000/R/RX - Firmware V8.4 - Advanced Information V32 05/2022- 720 -
Freely selectable authorization code that consists of 8 to 32 characterscontaining digits, letters (upper and lower case, but no German umlautsand ß) and special characters - _ . ! ~ * ' ( ) & = + $ ,. The authorizationcode is used for controlling a phone of the COMfortel D-series via TAPI.
Notices:
To change the existing authorisation code, select Edit CTIauthorization code.
A coloured bar under the entry field shows the security level of theauthorization code (red = low level, green = high level).
Authorization codes with a low security level cannot be saved.
Caution:
A high level does not necessarily indicate a secure authorization codeThis can also be achieved by name and date of birth in connectionwith special characters. However, names and dates of birth should notbe used for authorisation codes..
• To create a secure authorization code you can consult, forexample, the guidelines of the German Federal Office forInformation Security (BSI, in German).
Visible authorization codes are a security risk.
• After entering, select Hide CTI authorization code.
Logged-in to the Configuration Manager Logout
Requirements:
Basic Network Settings
COMmander 6000/R/RX - Firmware V8.4 - Advanced Information V32 05/2022- 721 -
• Administrator
Displays existing logging-in of the user/sub-administrator. By clicking theuser/sub-administrator is logged out of the Configuration Manager.
Reset hardware status Execute
Requirement:
• Subscriber is an analogue or standard ISDN phone
The PBX does not automatically detect the removal of an analogue orstandard ISDN phone. By selecting, the hardware status of the subscriberis reset under Monitoring > Status internal subscriber.

Exchange Line Settings
COMmander 6000/R/RX - Firmware V8.4 - Advanced Information V32 05/2022- 722 -
Exchange Line Settings
Proceed as follows:
• Separately for subscribers
• Using the Configuration Manager
• Subscriber-related (Subscriber (scr.) > Properties)
SUBSCRIBER
Select the subscriber you want to display/configure.
• Function-related (Subscriber (scr.) > Function overview)
Configure
Opens the configuration of the single function for all subscribers.
Important: The settings done are only valid on the condition that theyare not overridden by a profile. The simultaneous display takes placeonly on page Subscriber (scr.) > Properties under Overridden byprofile in configuration.
Note: [Name configuration] ...: In the displayed configuration, thefunction is overridden by the displayed setting. Configuration using theConfiguration Manager (Subscriber (scr.) > Profiles > ...)
Note: not overridden by a profile: The function is currently notoverridden by a profile.
Note: (not profile-controlled): The function can not be overridden bya profile.
Requirements:
• For differently configurable functions for private and business calls:function activated

Exchange Line Settings
COMmander 6000/R/RX - Firmware V8.4 - Advanced Information V32 05/2022- 723 -
− Using the Configuration Manager (Subscriber (scr.) > Allsubscribers)
Exchange line authorisation - business | Expert / Exchange lineauthorisation - private calls | Expert
Defines which kind of phone numbers may be dialled with a subscriber.
International
All international and domestic telephone numbers can be dialled.
National
All domestic telephone numbers can be dialled.
City
All telephone numbers without a provider area code can be dialled.
Note: If GSM access is used for an outgoing call, the PBXautomatically dials the telephone number with the configured areacode (national destination code).
Only incoming
Incoming external calls can be accepted.
Only internal
No external calls can be made/answered.
exchange line dependent
The exchange line authorisation is configured separately for eachindividual external connection via Expert .

Exchange Line Settings
COMmander 6000/R/RX - Firmware V8.4 - Advanced Information V32 05/2022- 724 -
Preventing emergency calls
Emergency calls cannot be made. The subscriber hears a correspondingannouncement. This function is for example useful for remote extensionsas the emergency call is issued at the location of the PBX and not at thelocation of the remote extension.
Call restrictor - (outgoing) business calls
Call restrictor - (outgoing) private calls
Requirements:
• Configured call restrictor
− Using the Configuration Manager (User data > Special numberspage)
The subscriber can not dial the phone numbers entered in the callrestrictor irrespective of his exchange line authorisation. So it restricts theexchange line authorisation.
Call deblocker - (outgoing) business calls
Call deblocker - (outgoing) private calls
Requirements:
• Configured call deblocker
− Using the Configuration Manager (User data > Special numberspage)

Exchange Line Settings
COMmander 6000/R/RX - Firmware V8.4 - Advanced Information V32 05/2022- 725 -
The subscriber can dial the phone numbers entered in the call deblockerirrespective of his exchange line authorisation. So it extends the exchangeline authorisation.
Phone book authorisation - business calls
Phone book authorisation - private calls
Requirements:
• At least the exchange line authorisation Only internal, withemergency call
• Configured contact group Phone book version 1
− Using the Configuration Manager (User data > Address bookspage)
The subscriber can dial the phone numbers entered in the contact groupPhone book version 1 irrespective of his exchange line authorisation. Soit extends the exchange line authorisation.
Preferred exchange line - business calls | Expert / Preferredexchange line - private calls | Expert
Defines via which exchange line outgoing external calls will be routed.
Automatic occupation
For outgoing external calls, any available connection is used, whereby firstthe fixed network connections and then the VoIP connection and at lastthe GSM connections were taken into account.
Special preferred exchange lines
For outgoing external calls, the connections released under Expert areused depending on the selected priority. This makes the definition of a

Exchange Line Settings
COMmander 6000/R/RX - Firmware V8.4 - Advanced Information V32 05/2022- 726 -
preferred exchange line (priority = 1) with overflow to other connections(priority > 1) possible. Exchange lines with priority No automaticoccupation are not used for outgoing calls.
Note: If all released connections are busy, it is no longer possible tocall. The subscriber can only use a connection with the setting Noautomatic occupation by entering a character string (see ).
Note: The same priority may be allocated to different externalconnections in parallel.
Number presentation - (outgoing) business | Expert / Numberpresentation - (outgoing) private | Expert
Defines which phone number is presented.
No announcement
The phone number is suppressed.
Default
Both the DDI parallel to the internal number and the MSN on the PTMconnection over which the subscriber is called are presented on the PTMPconnection. (if the subscriber is not a member of the call distribution forthis connection, the first MSN is presented).
exchange line dependent
The phone number to be presented is configured separately for eachexternal connection under Expert .
Note: On a connection with a GSM gateway, the phone numberpresentation configured in the PBX is not used because the actualphone number presentation is directly configured in the individual GSMgateway.

Exchange Line Settings
COMmander 6000/R/RX - Firmware V8.4 - Advanced Information V32 05/2022- 727 -
Note: On a connection with CLIP no screening enabled, the numberpresentation defined here is not considered.
Note: Notes for suppressing number presentation
Note: Phone number suppression for VoIP calls is possible but it is notalways supported by the providers.
Note: If an emergency number is called while phone numbersuppression is enabled, phone number suppression is disabled onceso that the emergency service can identify the caller.
Note: If the number presentation only needs to be suppressed callby call, the Number presentation (outgoing) Default or exchangeline dependent . For the exchange line dependent option, eachexchange line can have an individual number presented to the networkprovider or to the caller separately. The number presentation to thecaller is suppressed by the phone before starting a call. The numberpresentation to the network provider is not suppressed by the phone.
Note: If the number presentation should always be suppressed,the Number presentation (outgoing) exchange line dependent .For each exchange line can a separate number be presented to thenetwork provider. To keep these numbers from being presented tothe caller, number presentation can be suppressed per exchange lineseparately.
Note: If number presentation needs to be suppressed between thePBX and the network provider, the Number presentation (outgoing)No announcement .
Note: For the option No announcement , the phone service CallingLine Identification Restriction (CLIR2) must be released by thenetwork provider.

Exchange Line Settings
COMmander 6000/R/RX - Firmware V8.4 - Advanced Information V32 05/2022- 728 -
Phone number presentation - incoming | Expert
Defines which phone number is presented back to the caller.
No announcement
The phone number is suppressed.
Default
Both the DDI parallel to the internal number and the MSN on the PTMconnection over which the subscriber is called are presented on the PTMPconnection.
exchange line dependent
The phone number to be presented is configured separately for eachexternal connection under Expert .
Note: For the option None , the phone service Connected LineIdentification Restriction (COLR2) must be released by the networkprovider.
Note: On a connection with a GSM gateway, the phone numberpresentation configured in the PBX is not used because the actualphone number presentation is directly configured in the individual GSMgateway.

Reachability
COMmander 6000/R/RX - Firmware V8.4 - Advanced Information V32 05/2022- 729 -
Reachability
Proceed as follows:
• Separately for subscribers
• Using the Configuration Manager
• Subscriber-related (Subscriber (scr.) > Properties)
SUBSCRIBER
Select the subscriber you want to display/configure.
• Function-related (Subscriber (scr.) > Function overview)
Configure
Opens the configuration of the single function for all subscribers.
Important: The settings done are only valid on the condition that theyare not overridden by a profile. The simultaneous display takes placeonly on page Subscriber (scr.) > Properties under Overridden byprofile in configuration.
Note: [Name configuration] ...: In the displayed configuration, thefunction is overridden by the displayed setting. Configuration using theConfiguration Manager (Subscriber (scr.) > Profiles > ...)
Note: not overridden by a profile: The function is currently notoverridden by a profile.
Note: (not profile-controlled): The function can not be overridden bya profile.
Call waiting
You will be notified of any incoming calls if already on another call.
Reachability
COMmander 6000/R/RX - Firmware V8.4 - Advanced Information V32 05/2022- 730 -
Do-not-Disturb
Callers are rejected.
Call deblocker (incoming)
Requirements:
• Configured call deblocker
− Using the Configuration Manager (User data > Special numbers)
The do-not-disturb function does not apply to callers who use one of thephone numbers entered in the selected call deblocker.
Call restrictor (incoming)
Requirements:
• Configured call restrictor
− Using the Configuration Manager (User data > Special numbers)
A caller, who transmitted one of the phone numbers entered in theselected call restrictor or no number, is rejected.
Follow-me | Destination number:
Internal and external calls to the subscriber are forwarded to the entereddestination number.
Multi-path call forwarding / FMC
Multi-path call forwarding behaviour|Destination number

Reachability
COMmander 6000/R/RX - Firmware V8.4 - Advanced Information V32 05/2022- 731 -
• Internal and external calls directed to the subscriber are also signalledat the entered destination number
• CFNR is executed
• Calls directed to a group are not considered
FMC behaviour|Destination number
• On a second call, the called subscriber is busy
• The multi-path call is not executed
• Call forwarding if Busy is executed
• an answering machine at the 2 nd B-channel (ISDN) ist not called
Call Forwarding | Settings | only external calls
External calls to the subscriber are forwarded. Internal calls are notforwarded.
Call Forwarding | Settings | Cascading
If call forwarding has been configured for the internal destination of anexisting call forwarding, it is possible to reroute already forwarded calls(cascading).
Calls also will be rerouted to the new call forwarding destination. Duringcascading, the PBX memorises the subscribers who have already beencalled for this call. If the subscriber is the destination of a call forwardingagain, the call ends with the previous destination.
The caller hears the dial tone until the call is accepted. If the destinationis busy or the maximum call duration has been reached, a busy signal isissued.

Reachability
COMmander 6000/R/RX - Firmware V8.4 - Advanced Information V32 05/2022- 732 -
Note: When switched off, cascading does not take place. Calls endwith the entered destination.
Call Forwarding | Settings | CF for group calls
Calls directed to a group in which the subscriber is logged in as incomingwill be forwarded to the CF destination of the subscriber.
Call Forwarding | CF immediately | Destination number:
Internal and external calls to the subscriber are forwarded immediately tothe entered destination number.
Call Forwarding | CF on busy | Destination number:
Internal and external calls to the subscriber are forwarded on busy to theentered destination number.
Call Forwarding | CF on no reply | Destination number:
Internal and external calls to the subscriber are forwarded after theentered delay time to the entered destination number.
Delay time for CF on no reply
Call forwarding after the waiting time entered here in sec.

Authorisations
COMmander 6000/R/RX - Firmware V8.4 - Advanced Information V32 05/2022- 733 -
Authorisations
Proceed as follows:
• Separately for subscribers
• Using the Configuration Manager
• Subscriber-related (Subscriber (scr.) > Properties)
SUBSCRIBER
Select the subscriber you want to display/configure.
• Function-related (Subscriber (scr.) > Function overview)
Configure
Opens the configuration of the single function for all subscribers.
Important: The settings done are only valid on the condition that theyare not overridden by a profile. The simultaneous display takes placeonly on page Subscriber (scr.) > Properties under Overridden byprofile in configuration.
Note: [Name configuration] ...: In the displayed configuration, thefunction is overridden by the displayed setting. Configuration using theConfiguration Manager (Subscriber (scr.) > Profiles > ...)
Note: not overridden by a profile: The function is currently notoverridden by a profile.
Note: (not profile-controlled): The function can not be overridden bya profile.

Authorisations
COMmander 6000/R/RX - Firmware V8.4 - Advanced Information V32 05/2022- 734 -
Sub-admin
The subscriber has the rights of a sub-administrator. For logging-in to theConfiguration Manager the password of the subscriber is used (in thiscase associated user name is sub-admin).
You can configure up to four sub-administrators.
Pick up
No
Calls of the subscriber may not be taken by pick-up.
Global
The subscriber may take calls to all other subscribers by pick-up.
Group(s)/voice mailbox(es)
This subscriber may take calls of other subscribers that are members ofgroups the subscriber is also member of. It does not make any differenceif the subscriber is currently logged-in or -out. The subscriber is authorisedto take over calls from those voice mailboxes of which he is the owner.
If a voice mailbox has a group as its owner or user, each subscriber who isa member of the group can use this authorisation to take over calls.
Configuration switching
The subscriber can switch configurations manually.
Speaker announcement
No
The subscriber may not perform speaker announcements.

Authorisations
COMmander 6000/R/RX - Firmware V8.4 - Advanced Information V32 05/2022- 735 -
[Name]
The subscriber can perform speaker announcements on the selectedannouncement output.
All announcement outputs
The subscriber can perform speaker announcements on allannouncement outputs.
Switching of relays and alarms
The subscriber can switch relays and alarms manually.
Controlling of the PBX via phone
The subscriber may change settings of the PBX (e. g. do-not-disturb)using a menu/function key or a character string.
Open door
No
The subscriber may not open a door.
[Name]
The subscriber can phone with the selected door and open the door bypressing a key.
All doors
The subscriber can phone with all doors and open the doors by pressing akey.

Authorisations
COMmander 6000/R/RX - Firmware V8.4 - Advanced Information V32 05/2022- 736 -
Features to be configured by the network provider (CF, key pad)
The subscriber can
• forward the own external number via phone.
• switch the permanent configuration on/off using a character string.
• send keypad information to the network provider.
Configuration of Scr CF to external numbers
The subscriber can forward the associated external number to an externaldestination.
Transfer of external calls externally
The subscriber can transfer a call between two external subscribers.
Delete list of single call records
The subscriber can delete the phone number of the communicationpartner from the last call made to ensure that this number is not viewed byunauthorised persons.
CF (groups) / Follow me
The subscriber can
• switch group properties of groups which the subscriber is a member of.
• switch on Follow-me.

Authorisations
COMmander 6000/R/RX - Firmware V8.4 - Advanced Information V32 05/2022- 737 -
Call Parking
The subscriber can park a caller in the parking zone or retrieve a waitingcaller from the parking zone.

Analogue Settings
COMmander 6000/R/RX - Firmware V8.4 - Advanced Information V32 05/2022- 738 -
Analogue Settings
Proceed as follows:
• Separately for subscribers
• Using the Configuration Manager
• Subscriber-related (Subscriber (scr.) > Properties)
SUBSCRIBER
Select the subscriber you want to display/configure.
• Function-related (Subscriber (scr.) > Function overview)
Configure
Opens the configuration of the single function for all subscribers.
Important: The settings done are only valid on the condition that theyare not overridden by a profile. The simultaneous display takes placeonly on page Subscriber (scr.) > Properties under Overridden byprofile in configuration.
Note: [Name configuration] ...: In the displayed configuration, thefunction is overridden by the displayed setting. Configuration using theConfiguration Manager (Subscriber (scr.) > Profiles > ...)
Note: not overridden by a profile: The function is currently notoverridden by a profile.
Note: (not profile-controlled): The function can not be overridden bya profile.
Requirements:
• Subscriber is an analogue end device

Analogue Settings
COMmander 6000/R/RX - Firmware V8.4 - Advanced Information V32 05/2022- 739 -
CLIP info
Requirements:
• Subscriber is a CLIP-capable analogue phone
The phone number information (if transmitted) is displayed on the displayof the phone.
Extended CLIP info
Requirements:
• Subscriber is a CLIP-capable analogue phone
In the caller list of the phone date and time of missed calls are recorded.The name can be displayed instead of or in addition to the phone number.
Note: For some end devices, extended CLIP information can causeproblems and should therefore be disabled.
Charge pulse
AOCD - enabled
Switches on the conversion of charge information sent during the call intocharge pulses. The subscriber can evaluate the charge information sent tothem by the network provider transferred to display the charges they incur.
AOCE - as soon as possible
Switches on the conversion of charge information send at the end ofthe call into charge pulses. The subscriber can evaluate the chargeinformation sent to them by the network provider transferred to display thecharges they incur.
No

Analogue Settings
COMmander 6000/R/RX - Firmware V8.4 - Advanced Information V32 05/2022- 740 -
Switches off the conversion of the transferred charge information intocharge pulses.
Note: If the network provider sends charge information during andat the end of the call (AOCD) and you have specified this for thesubscriber, it may happen that not all the charges can be sent beforethe call is ended. The remaining information is then transferred at thebeginning of the next call.
Note: The charge pulse option should be switched off (No) for faxesand modems to prevent transfer problems.
Note: You will hear a slight crackling on the line when the charge pulseis switched on.
Hook flash timing
Hook flash timing enables the PBX to detect a flash signal from thesubscriber in question.
For this to work, the hook flash timing must correspond with the time thatis configured for the flash signal on the analogue end device (see thephone manual).
Note: DTMF phones that execute various functions using the T-Netfunction key/menu use a flash of 300 ms to do this. In order to also usethese functions on the PBX, the same time as the hook flash timingmust be configured on the PBX. Usually, there is an additional flashbutton available on this phone that must also be configured with thisvalue (see the phone manual).
Note: Note that the PBX does not detect a receiver being hanged upuntil after hook flash timing is finished.

Analogue Settings
COMmander 6000/R/RX - Firmware V8.4 - Advanced Information V32 05/2022- 741 -
Ringtone for internal calls
The ringtone specifies which sequence of sounds is used to signal internalcalls to internal subscribers on the PBX.
Note: See Ringer tones for information about exceptions to signallingand sound sequences.

VoIP settings
COMmander 6000/R/RX - Firmware V8.4 - Advanced Information V32 05/2022- 742 -
VoIP settings
Proceed as follows:
• Separately for subscribers
• Using the Configuration Manager
• Subscriber-related (Subscriber (scr.) > Features
SUBSCRIBER)
Select the subscriber you want to display/configure.
• Function-related (Subscriber (scr.) > Functional Overview
Configure)
Opens the configuration of the individual functions for all subscribers.
Important: The settings done are only valid on the condition that theyare not overridden by a profile. The simultaneous display takes placeonly on page Subscriber (scr.) > Features under Overridden byprofile in configuration.
Note: [Name configuration] ...: In the displayed configuration, thefunction is overridden by the displayed setting. Configuration via theConfiguration Manager (Subscriber (scr.) > Profiles> ...)
Note: not overridden by a profile: The function is currently notoverridden by a profile.
Note: (not profile-controlled): The function cannot be controlled witha profile.
Requirement:
• Subscriber is a VoIP end device

VoIP settings
COMmander 6000/R/RX - Firmware V8.4 - Advanced Information V32 05/2022- 743 -
Jitter buffer
Specifies the size of the jitter buffer in milliseconds (duration of the audiosignals). In this time period RTP packets are cached (lower values = lowernumber, greater values = greater number). Delays in the transmission andloss of packets can be compensated that way.
Echo cancellation
The system compensates for local echoes and reverberation effectsduring internal VoIP calls.
SIP alert info
Select the options for signalling call tones on end devices. For signalling,the Invite is sent to the end device to transfer the call types. Dependingon the device, the call types are either fully converted into call tones, orconverted in a simplified version. The following options are available here.
External and internal calls
Device uses this selection of call types to signal call tones.
External, internal, group, door and alarm calls
Device uses all the call types supported by the PBX to signal call tones.
This is the default setting when a subscriber is configured.
If problems occur with signalling on the end device, use one of the optionslisted above.

VoIP settings
COMmander 6000/R/RX - Firmware V8.4 - Advanced Information V32 05/2022- 744 -
Allowing Update Messages
If the function is enabled and Online name search is activated, the namewill be updated while the connection is being set up.
When Blind Transfer is activated and the function is enabled, the nameas well as the telephone number will be updated while the connection isbeing set up.
Note: In the event of problems while the connection is being set up,this function should be disabled as a possible cause.
RTP encryption
Allows an exception from the default settings of the PBX for thecorresponding VoIP subscriber. The default setting is Adopt fromAdministration ->SIPS/SRTP internal (default).
Applying the exception is required if:
• The corresponding phone does not support the settings of the PBX.This may cause problems e.g., during a call being established.
• You must circumvent the settings of the PBX for test purposes ortrouble shooting.
Note: The settings of the PBX for the corresponding subscriber andthe settings of the phone must match.
Adopt from Administration ->SIPS/SRTP internal (default)
The PBX setting applies for the subscriber.
Only encrypted
Example: SRTP is not enabled in the PBX. The phone requires anenabled SRTP.

VoIP settings
COMmander 6000/R/RX - Firmware V8.4 - Advanced Information V32 05/2022- 745 -
Only unencrypted
Example: SRTP is enabled in the PBX. The phone does not supportSRTP.
Format of transferred telephone number
The PBX supports several formats to display the country code of incomingcalls on the display of the VoIP phone being called, e. g. adjusted to asmall display.
Note: With the phones COMfortel 3200/3500 and COMfortel D-series,the format country code with leading + sign (e. g. + 49 5306) cannot beused.
Features of the phone|Configure
The Configuration Manager of the phone opens.
Note: For a handset of the COMfortel WS-500X Handset devicetype, the Web Configurator of the base station to which this device isassigned opens.
Assigning the MAC address of the device
The MAC address of a phone is needed to identify a phone that isassigned to a specific subscriber. For all transactions between phone andPBX the PBX must be able to identify the MAC address of the phone sothat the phone can be matched to a subscriber and his/her provisioningdata.
found devices
Select one of the existing MAC adresses.
assigned devices

VoIP settings
COMmander 6000/R/RX - Firmware V8.4 - Advanced Information V32 05/2022- 746 -
MAC adresses already assigned to the subscribers.
manual assignement
Enter manually (only digits) or take over a MAC adress after reading witha bar code scanner.
The MAC address of a device can be found as follows:
• Retrieving from a client certificate sended by the phone
• Reading with a bar code scanner enabled and connected to thecomputer (e. g. via a USB interface)
• Reading e. g. on the menu oft the phone or on a label
Note: If a MAC address has been entered and assigned to asubscriber, the corresponding phone can already be provided withprovisioning data during its first boot process.
IPUI (only COMfortel WS-500X Handsets)
Current IPUI
The IPUI already assigned to this subscriber.
free IPUI
Selection of an unassigned IPUI for this subscriber.
COMfortel WS-500 (only COMfortel WS-500X Handsets)
Assignment of this subscriber to a specific base station.
Header file
Display of the header file which is assigned to the subscriber.

VoIP settings
COMmander 6000/R/RX - Firmware V8.4 - Advanced Information V32 05/2022- 747 -
• Using the Configuration Manager (Subscriber (scr.) > IPprovisioning > File management)
Provisioning file
Display of the provisioning file which is assigned to the subscriber.
• Using the Configuration Manager (Subscriber (scr.) > IPprovisioning > File management)
Format of transferred phone number for LDAP requests
The PBX supports different formats, so you can dial the contact's phonenumber correctly using an LDAP request.
Important: The format can be configured in different places,depending on the username used when logging in:
• cn=auerswaldschandelah,dc=auerswald: User data >Address Books > Settings > Format of transferred phonenumber for LDAP requests
• telephoneNumber= ,dc=auerswald: Subscriber (scr.) >Configure > VoIP settings > Format of transferred phonenumber for LDAP requests
Note: Country code with leading zeros and exchange line accessnumber (e.g. 00495306...): If exchange line request type Internalphone is set for the subscriber, the exchange line access number isinserted before the phone number. This applies for the following devicetypes: Standard VoIP phone, COMfortel WS-500X Handset.

Voicemail /Fax Box
COMmander 6000/R/RX - Firmware V8.4 - Advanced Information V32 05/2022- 748 -
Voicemail /Fax Box
Proceed as follows:
• Separately for subscribers
• Using the Configuration Manager
• Subscriber-related (Subscriber (scr.) > Properties)
SUBSCRIBER
Select the subscriber you want to display/configure.
• Function-related (Subscriber (scr.) > Function overview)
Configure
Opens the configuration of the single function for all subscribers.
Important: The settings done are only valid on the condition that theyare not overridden by a profile. The simultaneous display takes placeonly on page Subscriber (scr.) > Properties under Overridden byprofile in configuration.
Note: [Name configuration] ...: In the displayed configuration, thefunction is overridden by the displayed setting. Configuration using theConfiguration Manager (Subscriber (scr.) > Profiles > ...)
Note: not overridden by a profile: The function is currently notoverridden by a profile.
Note: (not profile-controlled): The function can not be overridden bya profile.
Fax box | Phone number of the box
Requirements:
• Created fax box for the subscriber

Voicemail /Fax Box
COMmander 6000/R/RX - Firmware V8.4 - Advanced Information V32 05/2022- 749 -
Note: If it is not clear whether it is a fax or not, the call will be signaledto the subscriber or it will be accepted by the voice mailbox.
Note: Note. A fax call which is accepted by a voice mailbox will not beforwarded to a fax box.
Voice mailbox | Phone number of the box
Requirements:
• Created voice mailbox for the internal subscriber:
Both the subscriber and the selected voice mailbox will be automaticallycalled for all incoming calls made to the internal number of the subscriber.
Important: The PBX supports only one central answering machine. Ananswering machine at the COMfortel system phone will be disabled assoon as a voice mailbox is selected for the subscriber. Querying anddeleting voice messages as well as replaying own announcements isstill possible. The call recording function can be used.
Note: If call forwarding immediately (subscriber/group), the boss/secretary function (system phone) or a waiting field reception (for onewaiting field group, one enabled waiting field reception is sufficient) isenabled, the call will not be made to the voice mailbox!
Voice mailbox | Call acceptance type
immediately
The voice mailbox will be called immediately.
on busy
The voice mailbox will be called if the internal number of the subscriberis busy and if no call forwarding on busy has been enabled for thesubscriber.

Voicemail /Fax Box
COMmander 6000/R/RX - Firmware V8.4 - Advanced Information V32 05/2022- 750 -
on no reply
The voice mailbox will be called after expiration of the entered delay time.
on no reply + on busy
The voice mailbox will be called if the subscriber does not reply or if theinternal number of the subscriber is busy.
Delay time for CF on no reply
Call acceptance during the time entered here.
Info call (voice mail function)
The arrival of new voice messages immediately after completion ofthe recording will be signaled by a call from the voice mailbox to thesubscriber. When this is done, the phone number or name of the voicemailbox is shown on the phone display.
Note: COMfortel system phones (ISDN, VoIP) do not receive infocalls. New voice message are displayed on these phones via LEDsignalling (e. g. message button).
Settings
COMmander 6000/R/RX - Firmware V8.4 - Advanced Information V32 05/2022- 751 -
Settings
Proceed as follows:
• Separately for subscribers
• Using the Configuration Manager
• Subscriber-related (Subscriber (scr.) > Properties)
SUBSCRIBER
Select the subscriber you want to display/configure.
• Function-related (Subscriber (scr.) > Function overview)
Configure
Opens the configuration of the single function for all subscribers.
Important: The settings done are only valid on the condition that theyare not overridden by a profile. The simultaneous display takes placeonly on page Subscriber (scr.) > Properties under Overridden byprofile in configuration.
Note: [Name configuration] ...: In the displayed configuration, thefunction is overridden by the displayed setting. Configuration using theConfiguration Manager (Subscriber (scr.) > Profiles > ...)
Note: not overridden by a profile: The function is currently notoverridden by a profile.
Note: (not profile-controlled): The function can not be overridden bya profile.
Baby call (connection without dialling) | Destination number:
Requirements:
• Subscriber is not a VoIP phone or VoIP system phone

Settings
COMmander 6000/R/RX - Firmware V8.4 - Advanced Information V32 05/2022- 752 -
After picking up the receiver, the phone number entered is automaticallydialled.
Billing factor
Indicates the value used to convert the subscriber's phone costs. Thisfactor is used to multiply the charges transmitted from the networkprovider or the calculated charges. The phone costs calculated in this wayare used in the call data list.
Preliminary pick-up query and monitoring
Requirements:
• VoIP end device which can evaluate the available information by BLF
• VoIP phone from another manufacturer: SIP convenience package/ SIP convenience package brand plus enabled (optional, seeActivation)
All information about the calls of the subscriber is available for evaluationby BLF.
A preliminary pick-up query allows a subscriber, even before a pick-up, tosee which caller he would be picking up.
Note: When switched off, no phone numbers of the subscriber‘s callswill be transmitted by BLF.
Private exchange line access without PIN
Requirements:
• Differently configurable functions for private and business callsactivated

Settings
COMmander 6000/R/RX - Firmware V8.4 - Advanced Information V32 05/2022- 753 -
− Using the Configuration Manager (Subscriber (scr.) > Allsubscribers)
The subscriber is able to make private calls without entering a user PINbut only on his own phone.
Note: When authorisation is granted for initiating personal calls withouta PIN, there is no protection against misuse by other internal users.
Signalling by tones
Internal dial tone
Specifies which tone the user hears after picking up the receiver or afterpressing the flash or query key if a line is available. It is then possible todial a phone number.
Note: See Sound for information about sound sequences.
Busy tone at end of call
The PBX generates a busy signal at the end of the call (e. g. thecommunication partner hangs up).
For some answering machines, this busy signal does not interrupt arecording. These answering machines cannot differentiate between thebusy signal and speech. For such cases, the busy signal can be disabled.
Note: See Sound for information about sound sequences.
Special dial tone for CF, Do-not-Disturb, baby call/hotline
The PBX generates a special dial tone to bring attention to a configuredfunction (do-not-disturb, baby call (connection without dialling)).

Settings
COMmander 6000/R/RX - Firmware V8.4 - Advanced Information V32 05/2022- 754 -
Note: See Sound for information about sound sequences.
Special dial tone for filled call data memory
the PBX generates a special dial tone to bring attention that call datamemory has reached capacity.
Note: See Sound for information about sound sequences.
Special functions
Exchange line request
Requirements:
• System-wide automatic exchange line request switched off andentered exchange line access number
− Using the Configuration Manager (Public switched tel. networks> Exchange line request)
Internal phone
For external calls, the prefix of the Exchange line access number isrequired.
Direct exchange device
When picking up the receiver, an external line is requested instantly. Forinternal calls, the prefix ** is required.
Automatic exchange line request
The PBX automatically distinguishes between internal and externalnumbers with the analysis of the digit sequence and the adjustment of thedialled phone number and the internal dial plan.

Settings
COMmander 6000/R/RX - Firmware V8.4 - Advanced Information V32 05/2022- 755 -
Note: The selection Automatic exchange line request is onlyavailable for IP DECT phones as well as COMfortel 1200 IP andCOMfortel C-400. If you want to use this function for other phones,you must switch on the system-wide automatic exchange line request(Public switched tel. networks > Exchange line request).
Note: The behaviour of the IP system phones when picking up thereceiver, depends on the default account selection (see manual ofthe phone). For some IP system phones, the default account can bedetermined by the settings for the exchange line request of the PBX.
Call take-over
This is reasonable for the pick-up of calls to answering machines, faxmachines or modems.
If call take-over is enabled for an answering machine and this answeringmachine takes a call earlier than a subscriber, the subscriber may takethis call back from the answering machine. The answering machine willreceive a busy signal then.
No
Calls of this subscriber may not be taken over.
Global
Calls of this subscriber may be taken over by every other phone.
Group(s)
Calls of this subscriber may be taken over by members of groups thesubscriber is also member of. It does not make any difference if thesubscriber is currently logged-in or -out.

Settings
COMmander 6000/R/RX - Firmware V8.4 - Advanced Information V32 05/2022- 756 -
InterCom (announcement/hands-free calling)
Requirements:
• System phone that supports InterCom (optional, see phone manual)
The subscriber takes automatically an InterCom call directed to him.
Transmission of the display name
Requirements:
• VoIP device with entered display name
• SIP convenience package / SIP convenience package brand plusenabled (optional, see Activation)
The entered display name will be transmitted when the subscriber makesan internal call and displayed on the called phone.
Note: When switched off, the subscriber name entered in the PBXwill be displayed on the called phone when the subscriber makes aninternal call. If the phone number of the subscriber has been enteredin the local phone book of the called phone, the subscriber name issuppressed by the phone book entry.
Alarm device
Requirements:
• System phone that supports signalling for alarm devices (optional, seephone manual)
An internal call of the subscriber is signaled as an alarm call on a systemphone.

Unassigned phones
COMmander 6000/R/RX - Firmware V8.4 - Advanced Information V32 05/2022- 757 -
Unassigned phones
Managing Unassigned Phones Managing Unassigned Phones

Managing Unassigned Phones
COMmander 6000/R/RX - Firmware V8.4 - Advanced Information V32 05/2022- 758 -
Managing Unassigned Phones
Phones that are still to be used on the PBX can here be assigned to asubscriber.
Phones that are not in use, not connected or not assigned to a subscribershould be removed from the list.
Proceed as follows:
• Using the Configuration Manager (Subscriber (scr.) > Unassignedphones)
Select the line of the phone to be removed in the register VoIP phones orOther phones and click Delete.
or
Assign a subscriber to a VoIP phone in the list field to the right of thecorresponding VoIP phone.

All subscribers
COMmander 6000/R/RX - Firmware V8.4 - Advanced Information V32 05/2022- 759 -
All subscribers
Settings all Subscribers Settings all Subscribers
Settings all Subscribers
COMmander 6000/R/RX - Firmware V8.4 - Advanced Information V32 05/2022- 760 -
Settings all Subscribers
Proceed as follows:
• Using the Configuration Manager (Subscriber (scr.) > Allsubscribers)
Max. duration of switched/forwarded calls: external with external(1..600 min.)
Specifies after how many minutes the PBX end the transferred orforwarded call (external with external), if two call channels of the PBXwere used for forwarding.
Frequency of the charge meter pulse
The charge pulse frequency is adjustable, if necessary (depending on thecountry settings of the PBX).
Note: 16 kHz is the standard value in Germany.
Ringer frequency
Specifies the ringer voltage frequency the PBX uses to signalise calls tointernal analogue subscribers.
ISDN scr may move with phone/change ports
The ISDN devices may be connected to any internal S0/UP0 port. ThePBX recognises the subscriber and moves him to another port.
Note: When switched off, an ISDN device may be plugged intoanother RJ socket of the internal S0/UP0 port, but it has to be thesame internal bus.

Settings all Subscribers
COMmander 6000/R/RX - Firmware V8.4 - Advanced Information V32 05/2022- 761 -
Delay time for baby / senior call (1..20 sec.)
Specifies after how many seconds the destination number is dialledautomatically after picking up the receiver
Differently configurable functions for private and business calls
Two different configurations can be created for each of the functions listedbelow – one for private calls and one for business calls.
Note: When switched off, only one configuration can be created forthe functions listed below. This applies to private calls as well as tobusiness calls.
Note: If differently configurable functions for private and business callsare disabled, the PBX takes over the configuration for business callsas joint configuration.
Note: If differently configurable functions for private and business callsare enabled again, the PBX takes over the settings changed since thelast disabling only for business calls. For this reason, you will need tocheck the configurations for private calls.
Subscribers may create own passwords
Subscribers may generate additional Configuration Manager or APIpasswords as well as delete existing passwords. If under Devices> Action URLs, Subscribers may generate own passwords foraccessing Action URLs is activated, then the subscriber may alsogenerate or delete passwords for Action URLs.

Groups
COMmander 6000/R/RX - Firmware V8.4 - Advanced Information V32 05/2022- 762 -
Groups
Phone numbersProfilesProperties Phone numbersProfilesProperties

Phone numbers
COMmander 6000/R/RX - Firmware V8.4 - Advanced Information V32 05/2022- 763 -
Phone numbers
Management Groups Management Groups

Management Groups
COMmander 6000/R/RX - Firmware V8.4 - Advanced Information V32 05/2022- 764 -
Management Groups
Proceed as follows:
• Using the Configuration Manager (Groups > Phone numbers)
Phone Number
This (exchange line access number) is an internal number. You can selectany of the numbers in the internal supply of phone numbers. This numberis then used for distributing calls and can be called directly by an internalsubscriber. (Entry with New)
Note: Double allocation of a number is not possible.
Note: Using numbers with few digits (two or three-digit numbers)inevitably restricts the possible supply of numbers requiring moredigits. For example, if the number 12 is assigned, the numbers120-129 and 1200-1299 will no longer be available.
Note: The default exchange line access number on the PBX is 0 in thefactory settings. However, this can be changed. Note that changing theexchange line access number restricts the dial plan.
Name
Freely selectable name. This name is used to identify the group withinthe PBX and the connected system phones. The name can also betransferred to the VoIP end devices via LDAP server.
Property Configure
Opens the configuration of the group.
Management Groups
COMmander 6000/R/RX - Firmware V8.4 - Advanced Information V32 05/2022- 765 -
Filter:
The list of groups is filtered by the entered or selected value.
New
Adds a new group. You must then make the settings for this new group.
Note: Up to 64 groups can be created.
Delete
Deletes the entries marked in the list.

Profiles
COMmander 6000/R/RX - Firmware V8.4 - Advanced Information V32 05/2022- 766 -
Profiles
Management ProfileSettings of the Group ProfilesSettings Profile Assignment Management ProfileSettings of the Group ProfilesSettings Profile Assignment

Management Profile
COMmander 6000/R/RX - Firmware V8.4 - Advanced Information V32 05/2022- 767 -
Management Profile
Proceed as follows:
• Using the Configuration Manager
Profile name
The available profiles (default profiles, user-defined profiles) aredisplayed.
View
The selected settings can be viewed (default profiles).
Configure
The user-defined profiles can be adapted to the correspondingrequirements (user-defined profiles).
New
Creation of a new profile.
Settings of the Group Profiles
COMmander 6000/R/RX - Firmware V8.4 - Advanced Information V32 05/2022- 768 -
Settings of the Group Profiles
Basic Network SettingsExchange Line SettingsReachabilityVoicemail-/Fax BoxSettings Basic Network SettingsExchange Line SettingsReachabilityVoicemail-/Fax BoxSettings

Basic Network Settings
COMmander 6000/R/RX - Firmware V8.4 - Advanced Information V32 05/2022- 769 -
Basic Network Settings
Proceed as follows:
• Separately for profiles
• Using the Configuration Manager
• Profile-related (Groups > Profiles > Configuration > Configure)
PROFILE CONFIGURATION
Select the profile you want to display/configure.
• Function-related (Groups > Profiles > Functional Overview)
Configure
Opens the configuration of the single function for all profiles.
Profile-controlled settings
The profile setting overrides the group setting.
Note: When switched off, the setting under Groups > Featuresapplies.
Ringing sequence | after:
All
All subscribers logged-in to the group will ring simultaneously. Selectedsubscribers will start to ring after the configured delay time (after:). If acall was not accepted, although all logged-in members of the group werecalled, the call would be finished with a busy signal.
All - Split Group
The call is handled almost similar to the ringing sequence All. The onlydifference is the way multiple calls to the group are handled: If the group

Basic Network Settings
COMmander 6000/R/RX - Firmware V8.4 - Advanced Information V32 05/2022- 770 -
receives further calls during an active call, the group will be split intoseveral smaller groups ringing for a specific active call. But there willnever ring more calls in the group than the number of free available groupmembers. Additional calls will be rejected with a busy then. If a call isaccepted the other phones ringing so far for this call are assigned to theother pending calls and will immediately start to ring again. If a groupmember finishes a call, this subscriber will immediately ring again forthe pending calls. The timer for the configured delay time (after:) startsafter receiving the first call to the group and will not restart for additionalincoming calls.
Linear - fixed - Split Group
Only the phone of one group member will ring. After the configured delaytime (after:) another single group member will be called. The order of callsdepends on the configured Priority. If a call was not accepted, althoughall logged-in members of the group were called, the call would be finishedwith a busy signal.
Linear - balancing - Split Group
Only the phone of one group member will ring. After the configured delaytime (after:) another single group member will be called. The order of thecalls depends on the configured Priority: First of all the member of thegroup first logged-in gets the position 1 in the order of calls, the secondone the position 2, ... . If position 1 takes a call, the second call will beassigned to position 2. The member of the group with the position 1 willget the last position in the order for a future call after he has finished thecurrent call. If a call was not accepted, although all logged-in members ofthe group were called, the call would be finished with a busy signal.
Linear - fixed - rotating - Split Group
Only the phone of one group member will ring. After the configured delaytime (after:) another single group member will be called. If all membersof a group are called, the process will be restarted with the first member

Basic Network Settings
COMmander 6000/R/RX - Firmware V8.4 - Advanced Information V32 05/2022- 771 -
of the group of the call order. In the first rotation the next member of thegroup of the call order will be called immediately if a subscriber is busy.In the second rotation the busy subscribers will hear knocking (only fromexternal). The order of calls depends on the configured Priority.
Note: System phones control the call waiting itself, so the ringingsequence can vary.
Linear - balancing - rotating - Split Group
Only the phone of one group member will ring. After the configured delaytime (after:) another single group member will be called. If all membersof a group are called, the process will be restarted with the first memberof the group of the call order. In the first rotation the next member of thegroup of the call order will be called immediately if a subscriber is busy.In the second rotation the busy subscribers will hear knocking (only fromexternal). The order of the calls depends on the configured Priority: Firstof all the member of the group first logged-in gets the position 1 in theorder of calls, the second one the position 2, ... . If position 1 takes a call,the second call will be assigned to position 2. The member of the groupwith the position 1 will get the last position in the order for a future callafter he has finished the current call.
Adding - fixed - Split Group
Here initially only one group members' phone is ringing. After theconfigured delay time (after:) another single group member will be called.If the group receives another call B initially the free group members willring one after the other (adding). If for the first call A less than half of thegroup members are ringing more members are added to this call untilexactly the half is reached. If for the first call A more than half of the groupmembers are ringing, no members are added to this call (frozen). Onlythe remaining subscribers are added to call B. If all group members arealready ringing for call A, the group is split for the calls. The order of callsdepends on the configured Priority. If a call was not accepted, although

Basic Network Settings
COMmander 6000/R/RX - Firmware V8.4 - Advanced Information V32 05/2022- 772 -
all logged-in members of the group were called, the call would be finishedwith a busy signal.
Adding - balancing - Split Group
Here initially only one group members' phone is ringing. After theconfigured delay time (after:) another single group member will be called.If the group receives another call B initially the free group members willring one after the other (adding). If for the first call A less than half of thegroup members are ringing more members are added to this call untilexactly the half is reached. If for the first call A more than half of the groupmembers are ringing, no members are added to this call (frozen). Onlythe remaining subscribers are added to call B. If all group members arealready ringing for call A, the group is split for the calls. The order of thecalls depends on the configured Priority: First of all the member of thegroup first logged-in gets the position 1 in the order of calls, the secondone the position 2, ... . If position 1 takes a call, the second call will beassigned to position 2. The member of the group with the position 1 willget the last position in the order for a future call after he has finished thecurrent call. If a call was not accepted, although all logged-in members ofthe group were called, the call would be finished with a busy signal.
Adding - fixed - rotating - Split Group
Here initially only one group members' phone is ringing. After theconfigured delay time (after:) another single group member will be called.If the group receives another call B initially the free group members willring one after the other (adding). If for the first call A less than half of thegroup members are ringing more members are added to this call untilexactly the half is reached. If for the first call A more than half of the groupmembers are ringing, no members are added to this call (frozen). Onlythe remaining subscribers are added to call B. If all group members arealready ringing for call A, the group is split for the calls. The order of callsdepends on the configured Priority. If finally all logged-in members of a

Basic Network Settings
COMmander 6000/R/RX - Firmware V8.4 - Advanced Information V32 05/2022- 773 -
group are called, the busy subscribers will hear knocking additionally (onlyfrom external).
Adding - balancing - rotating - Split Group
Here initially only one group members' phone is ringing. After theconfigured delay time (after:) another single group member will be called.If the group receives another call B initially the free group members willring one after the other (adding). If for the first call A less than half of thegroup members are ringing more members are added to this call untilexactly the half is reached. If for the first call A more than half of the groupmembers are ringing, no members are added to this call (frozen). Onlythe remaining subscribers are added to call B. If all group members arealready ringing for call A, the group is split for the calls. The order of thecalls depends on the configured Priority: First of all the member of thegroup first logged-in gets the position 1 in the order of calls, the secondone the position 2, ... . If position 1 takes a call, the second call will beassigned to position 2. The member of the group with the position 1 willget the last position in the order for a future call after he has finished thecurrent call. If finally all logged-in members of a group are called, the busysubscribers will hear knocking additionally (only from external).

Exchange Line Settings
COMmander 6000/R/RX - Firmware V8.4 - Advanced Information V32 05/2022- 774 -
Exchange Line Settings
Proceed as follows:
• Separately for profiles
• Using the Configuration Manager
• Profile-related (Groups > Profiles > Configuration > Configure)
PROFILE CONFIGURATION
Select the profile you want to display/configure.
• Function-related (Groups > Profiles > Function overview)
Configure
Opens the configuration of the single function for all profiles.
Profile-controlled settings
The profile setting overrides the group setting.
Note: When switched off, the setting under Groups > Propertiesapplies.
Exchange line authorisation | Expert
Defines which kind of phone numbers may be dialled with a groupmember logged in as outgoing.
International
All national and international phone numbers can be dialled.
National
All national phone numbers can be dialled.

Exchange Line Settings
COMmander 6000/R/RX - Firmware V8.4 - Advanced Information V32 05/2022- 775 -
City
All phone numbers with the same local area code can be dialled.
Exchange line dependent
The exchange line authorisation is configured under Expert separately foreach connection.
As subscriber
The exchange line authorisation of the subscriber is used.
No
Emergency numbers can be dialled, if the exchange line authorisation ofthe subscriber permits this.
Call restrictor (outgoing)
None
No call restrictor is used for group members logged in as outgoing.
As subscriber
The call restrictor selected for a subscriber is used.
Call deblocker (outgoing)
None
No call deblocker is used for group members logged in as outgoing.
As subscriber
The call deblocker selected for a subscriber is used.

Exchange Line Settings
COMmander 6000/R/RX - Firmware V8.4 - Advanced Information V32 05/2022- 776 -
Phone book authorisation
Requirements:
• Exchange line authorisation allows at least emergency calls
• Configured contact group Phone book version 1
− Using the Configuration Manager (User data > Address books)
No
All group members logged in as outgoing have no phone bookauthorisation
Yes
All group members logged in as outgoing can dial the phone numbersentered in the contact group Phone book version 1 irrespective of hisexchange line authorisation. So it extends the exchange line authorisation.
As subscriber
The phone book authorisation activated for a subscriber is used.
Preferred exchange line | Expert
Defines via which exchange line outgoing external calls will be routed by agroup member logged in as outgoing.
Automatic occupation
For outgoing external calls, any available connection is used, whereby firstthe fixed network connections and then the VoIP connection and at lastthe GSM connections were taken into account.
Special preferred exchange lines
For outgoing external calls, the connections released under Expert areused depending on the selected priority. This makes the definition of a

Exchange Line Settings
COMmander 6000/R/RX - Firmware V8.4 - Advanced Information V32 05/2022- 777 -
preferred exchange line (priority = 1) with overflow to other connections(priority > 1) possible. Exchange lines with priority No automaticoccupation are not used for outgoing calls.
As subscriber
The preferred exchange line of the subscriber is used.
Note: If all released connections are busy, it is no longer possible tocall. The subscriber can only use a connection with the setting Noautomatic occupation by entering a character string (see TargetedExchange Line Access).
Note: The same priority may be allocated to different externalconnections in parallel.
Number presentation (outgoing) | Expert
Defines which phone number is presented by a group member logged inas outgoing.
No
The phone number is suppressed.
Standard
Both the DDI parallel to the internal number and the MSN on the PTMPconnection are displayed on the PTP connection over which the groupis called (if the group is not a member of the call distribution for thisconnection, the first MSN is presented).
Exchange line dependent
The phone number to be presented is configured separately for eachexternal connection under Expert.
Note: On a connection with a GSM gateway, the phone numberpresentation configured in the PBX is not used because the actual

Exchange Line Settings
COMmander 6000/R/RX - Firmware V8.4 - Advanced Information V32 05/2022- 778 -
phone number presentation is directly configured in the individual GSMgateway.
Note: On a connection with CLIP no screening enabled, the numberpresentation defined here is not considered.
Note: For the option No, the phone service Calling LineIdentification Restriction (CLIR2) must be released by the networkprovider.
Number presentation (incoming) | Expert
Defines which phone number is presented back to the caller by a groupmember logged in as outgoing.
No
The phone number is suppressed.
Standard
Both the DDI parallel to the internal number and the MSN on the PTMconnection over which the group is called are presented on the PTMPconnection.
Exchange line dependent
The phone number to be presented is configured separately for eachexternal connection under Expert.
Note: For the option No, the phone service Connected LineIdentification Restriction (COLR2) must be released by the networkprovider.
Note: On a connection with a GSM gateway, the phone numberpresentation configured in the PBX is not used because the actualphone number presentation is directly configured in the individual GSMgateway.

Reachability
COMmander 6000/R/RX - Firmware V8.4 - Advanced Information V32 05/2022- 779 -
Reachability
Proceed as follows:
• Separately for profiles
• Using the Configuration Manager
• Profile-related (Groups > Profiles > Configuration > Configure)
PROFILE CONFIGURATION
Select the profile you want to display/configure.
• Function-related (Groups > Profiles > Function overview)
Configure
Opens the configuration of the single function for all profiles.
Profile-controlled settings
The profile setting overrides the group setting.
Note: When switched off, the setting under Groups > Propertiesapplies.
Reserved call channels | Number
External exchange line: For outgoing external calls of the group, theselected number of call channels of the selected external exchange linewill be reserved. These call channels are never available to the othersubscribers or groups.
No reservation
Call channels will not be reserved.
Note: For a VoIP account the possible number depends on themaximum number of VoIP channels, which is configered for the VoIP

Reachability
COMmander 6000/R/RX - Firmware V8.4 - Advanced Information V32 05/2022- 780 -
provider (Public switched tel. networks > Voice over IP (VoIP page)> Provider > Configure).
Note: If a call channel should be reserved for one subscriber thissubscriber has to be assigned alone to a group.
Note: A call channel reserved for a group is only available for themembers of the group who are logged in the group outgoing.
Busy-on-Busy
Use case
• Announcement before answering (On busy or Always) is enabled
• The number of calls put through to the waiting loop should be limitedby Busy-on-Busy so that not more callers are in the waiting loop thancan be handled.
• Callers who are not put through to the waiting loop due to the limit,hear the busy tone.
• For this, Busy-on-Busy dynamic may not be selected.
deactivated
The number of callers to the group is unlimited.
busy from x connections on
The number of callers to the group is limited to a specific number.
dynamic
Note: Selecting dynamic can have effects on the function Do-not-disturb, Call waiting and Waiting loop if Announcement beforeanswering is enabled.

Reachability
COMmander 6000/R/RX - Firmware V8.4 - Advanced Information V32 05/2022- 781 -
Registered and logged-in group members are recorded and the numberof connections made to the group is automatically corrected downwards ifnecessary.
Ann. before answering
Off
On busy
When calling a busy group (all group members are busy) the caller hearsan announcement before answering for greeting. After the announcementbefore answering, the caller is put into the waiting loop and hears Musicon Hold.
Always
When calling a group the caller always hears the announcement beforeanswering for greeting. If the line is busy, he is put into the waiting loopafter the announcement before answering and hears Music on Hold. If thecalled phones are available, the caller hears Music on Hold also while thephones are ringing.
Ann. before answering | Call signalisation
Immediately
The call is signalled during the announcement before answering.
After announcement before answering
The call is signalled after the announcement before answering when thecaller hears Music on Hold.

Reachability
COMmander 6000/R/RX - Firmware V8.4 - Advanced Information V32 05/2022- 782 -
Ann. before answering | Selection of announcement
Announcement before answering which is played for the caller.
Call restrictor (incoming)
None
No call restrictor is used for group members logged in as outgoing.
As subscriber
The call restrictor selected for a subscriber is used.
Call deblocker (incoming)
None
No call deblocker is used for group members logged in as outgoing.
As subscriber
The call deblocker selected for a subscriber is used.
Multi-path Call Forwarding | Destination number:
Internal and external calls to the group are signaled additionally to theentered destination number.
Note: Multi-path call forwarding for a group is executed during theentire calling period independent of the ringing sequence for the group.It is not executed if the group itself is the destination of a forwardedcall.

Reachability
COMmander 6000/R/RX - Firmware V8.4 - Advanced Information V32 05/2022- 783 -
Call Forwarding | Settings | only external calls
External calls to the group are forwarded. Internal calls are not forwarded.
Call Forwarding | Settings | Cascading
If call forwarding has been configured for the internal destination of anexisting call forwarding, it is possible to reroute already forwarded calls(cascading).
Calls also will be rerouted to the new call forwarding destination. Duringcascading, the PBX memorises the subscribers who have already beencalled for this call. If the subscriber is the destination of a call forwardingagain, the call ends with the previous destination.
The caller hears the dial tone until the call is accepted. If the destinationis busy or the maximum call duration has been reached, a busy signal isissued.
Note: When switched off, cascading does not take place. Calls endwith the entered destination.
Call Forwarding | Settings | CF on group call
Calls directed to a group of which the group is a member will be forwardedto the CF destination of the group.
Call forwarding | Settings | Destination number visible
The call forwarding destination number is displayed to the caller.

Reachability
COMmander 6000/R/RX - Firmware V8.4 - Advanced Information V32 05/2022- 784 -
Call Forwarding | immediately | Destination number:
Internal and external calls to the group are forwarded immediately to theentered destination number.
Call Forwarding | on busy | Destination number:
Internal and external calls to the group are forwarded on busy to theentered destination number.
Call Forwarding | on no reply | Destination number:
Internal and external calls to the group are forwarded after the entereddelay time to the entered destination number.
Delay time for CF on no reply
Call forwarding after the waiting time entered here in sec.
Call Forwarding | on all logged out | Destination number:
Internal and external calls to the group are forwarded to the entereddestination number, if all group members are logged out.

Voicemail-/Fax Box
COMmander 6000/R/RX - Firmware V8.4 - Advanced Information V32 05/2022- 785 -
Voicemail-/Fax Box
Proceed as follows:
• Separately for profiles
• Using the Configuration Manager
• Profile-related (Groups > Profiles > Configuration > Configure)
PROFILE CONFIGURATION
Select the profile you want to display/configure.
• Function-related (Groups > Profiles > Function overview)
Configure
Opens the configuration of the single function for all profiles.
Profile-controlled settings
The profile setting overrides the group setting.
Note: When switched off, the setting under Groups > Propertiesapplies.
Voice mailbox | Call acceptance type
immediately
The voice mailbox will be called immediately.
on no reply
The voice mailbox will be called after expiration of the entered delay time.
on busy

Voicemail-/Fax Box
COMmander 6000/R/RX - Firmware V8.4 - Advanced Information V32 05/2022- 786 -
The voice mailbox will be called if the internal number of the group is busyand if no call forwarding on busy has been enabled for the group.
on no reply + on busy
The voice mailbox will be called if the group does not reply or if theinternal number of the group is busy.
on all logged out
The voice mailbox will be called when all group members are logged out.
Delay time for CF on no reply
Call acceptance during the time entered here.

Settings
COMmander 6000/R/RX - Firmware V8.4 - Advanced Information V32 05/2022- 787 -
Settings
Proceed as follows:
• Separately for profiles
• Using the Configuration Manager
• Profile-related (Groups > Profiles > Configuration > Configure)
PROFILE CONFIGURATION
Select the profile you want to display/configure.
• Function-related (Groups > Profiles > Function overview)
Configure
Opens the configuration of the single function for all profiles.
Profile-controlled settings
The profile setting overrides the group setting.
Note: When switched off, the setting under Groups > Propertiesapplies.
Number presentation (internally)
Group numbers
All group members logged in as outgoing will present the group numberfor internal outgoing calls. If the group is internally called the subscribernumber is transferred back.
Subscriber number
All group members logged in as outgoing will present their own subscribernumber for internal outgoing calls.

Settings
COMmander 6000/R/RX - Firmware V8.4 - Advanced Information V32 05/2022- 788 -
Preliminary pick-up query and monitoring
Requirements:
• VoIP end device which can evaluate the available information by BLF
• VoIP phone from another manufacturer: SIP convenience package/ SIP convenience package brand plus enabled (optional, seeTechnical Data in the Instructions)
All information about the incoming calls of the group is available forevaluation by BLF.
Note: When switched off, no phone numbers of the group‘s calls aretransmitted by BLF.
Pick-up of all calls to group members
A member of this group can pick up calls to the phone number of thegroup as well as direct calls to individual members of the group.
Note: When switched off, group members can only pick up direct callsto the phone number of the group.

Settings Profile Assignment
COMmander 6000/R/RX - Firmware V8.4 - Advanced Information V32 05/2022- 789 -
Settings Profile Assignment
Proceed as follows:
• Using the Configuration Manager
A configuration depending profile can be assigned to each subscriber,group or voice mail/fax box.
Assign profile to all
The same profile is assigned to all subcribers, groups or boxes for oneconfiguration.

Properties
COMmander 6000/R/RX - Firmware V8.4 - Advanced Information V32 05/2022- 790 -
Properties
Settings of the Group Properties Settings of the Group Properties

Settings of the Group Properties
COMmander 6000/R/RX - Firmware V8.4 - Advanced Information V32 05/2022- 791 -
Settings of the Group Properties
Basic Network SettingsExchange Line SettingsReachabilityVoicemail/Fax BoxSettings Basic Network SettingsExchange Line SettingsReachabilityVoicemail/Fax BoxSettings

Basic Network Settings
COMmander 6000/R/RX - Firmware V8.4 - Advanced Information V32 05/2022- 792 -
Basic Network Settings
Proceed as follows:
• Separately for groups
• Using the Configuration Manager (Groups > Features)
GROUP
Select the group you want to display/configure.
Important: The settings done are only valid on the condition thatthey are not overridden by a profile. The simultaneous display takesplace on page Groups > Features under Overridden by profile inconfiguration.
Note: [Name configuration] ...: In the displayed configuration, thefunction is overridden by the displayed setting. Configuration via theConfiguration Manager (Groups > Profiles> ...)
Note: not overridden by a profile: The function is currently notoverridden by a profile.
Note: (not profile-controlled): The function cannot be controlled witha profile.
Ringing sequence | after:
All
All subscribers logged-in to the group will ring simultaneously. Selectedsubscribers will start to ring after the configured delay time (after:). If acall was not accepted, although all logged-in members of the group werecalled, the call would be finished with a busy signal.
All - Split Group

Basic Network Settings
COMmander 6000/R/RX - Firmware V8.4 - Advanced Information V32 05/2022- 793 -
The call is handled almost similar to the ringing sequence All. The onlydifference is the way multiple calls to the group are handled: If the groupreceives further calls during an active call, the group will be split intoseveral smaller groups ringing for a specific active call. But there willnever ring more calls in the group than the number of free available groupmembers. Additional calls will be rejected with a busy then. If a call isaccepted the other phones ringing so far for this call are assigned to theother pending calls and will immediately start to ring again. If a groupmember finishes a call, this subscriber will immediately ring again forthe pending calls. The timer for the configured delay time (after:) startsafter receiving the first call to the group and will not restart for additionalincoming calls.
Linear - fixed - Split Group
Only the phone of one group member will ring. After the configured delaytime (after:) another single group member will be called. The order of callsdepends on the configured Priority. If a call was not accepted, althoughall logged-in members of the group were called, the call would be finishedwith a busy signal.
Linear - balancing - Split Group
Only the phone of one group member will ring. After the configured delaytime (after:) another single group member will be called. The order of thecalls depends on the configured Priority: First of all the member of thegroup first logged-in gets the position 1 in the order of calls, the secondone the position 2, ... . If position 1 takes a call, the second call will beassigned to position 2. The member of the group with the position 1 willget the last position in the order for a future call after he has finished thecurrent call. If a call was not accepted, although all logged-in members ofthe group were called, the call would be finished with a busy signal.
Linear - fixed - rotating - Split Group

Basic Network Settings
COMmander 6000/R/RX - Firmware V8.4 - Advanced Information V32 05/2022- 794 -
Only the phone of one group member will ring. After the configured delaytime (after:) another single group member will be called. If all membersof a group are called, the process will be restarted with the first memberof the group of the call order. In the first rotation the next member of thegroup of the call order will be called immediately if a subscriber is busy.In the second rotation the busy subscribers will hear knocking (only fromexternal). The order of calls depends on the configured Priority.
Note: System phones control the call waiting itself, so the ringingsequence can vary.
Linear - balancing - rotating - Split Group
Only the phone of one group member will ring. After the configured delaytime (after:) another single group member will be called. If all membersof a group are called, the process will be restarted with the first memberof the group of the call order. In the first rotation the next member of thegroup of the call order will be called immediately if a subscriber is busy.In the second rotation the busy subscribers will hear knocking (only fromexternal). The order of the calls depends on the configured Priority: Firstof all the member of the group first logged-in gets the position 1 in theorder of calls, the second one the position 2, ... . If position 1 takes a call,the second call will be assigned to position 2. The member of the groupwith the position 1 will get the last position in the order for a future callafter he has finished the current call.
Adding - fixed - Split Group
Here initially only one group members' phone is ringing. After theconfigured delay time (after:) another single group member will be called.If the group receives another call B initially the free group members willring one after the other (adding). If for the first call A less than half of thegroup members are ringing more members are added to this call untilexactly the half is reached. If for the first call A more than half of the groupmembers are ringing, no members are added to this call (frozen). Only

Basic Network Settings
COMmander 6000/R/RX - Firmware V8.4 - Advanced Information V32 05/2022- 795 -
the remaining subscribers are added to call B. If all group members arealready ringing for call A, the group is split for the calls. The order of callsdepends on the configured Priority. If a call was not accepted, althoughall logged-in members of the group were called, the call would be finishedwith a busy signal.
Adding - balancing - Split Group
Here initially only one group members' phone is ringing. After theconfigured delay time (after:) another single group member will be called.If the group receives another call B initially the free group members willring one after the other (adding). If for the first call A less than half of thegroup members are ringing more members are added to this call untilexactly the half is reached. If for the first call A more than half of the groupmembers are ringing, no members are added to this call (frozen). Onlythe remaining subscribers are added to call B. If all group members arealready ringing for call A, the group is split for the calls. The order of thecalls depends on the configured Priority: First of all the member of thegroup first logged-in gets the position 1 in the order of calls, the secondone the position 2, ... . If position 1 takes a call, the second call will beassigned to position 2. The member of the group with the position 1 willget the last position in the order for a future call after he has finished thecurrent call. If a call was not accepted, although all logged-in members ofthe group were called, the call would be finished with a busy signal.
Adding - fixed - rotating - Split Group
Here initially only one group members' phone is ringing. After theconfigured delay time (after:) another single group member will be called.If the group receives another call B initially the free group members willring one after the other (adding). If for the first call A less than half of thegroup members are ringing more members are added to this call untilexactly the half is reached. If for the first call A more than half of the groupmembers are ringing, no members are added to this call (frozen). Onlythe remaining subscribers are added to call B. If all group members are

Basic Network Settings
COMmander 6000/R/RX - Firmware V8.4 - Advanced Information V32 05/2022- 796 -
already ringing for call A, the group is split for the calls. The order of callsdepends on the configured Priority. If finally all logged-in members of agroup are called, the busy subscribers will hear knocking additionally (onlyfrom external).
Adding - balancing - rotating - Split Group
Here initially only one group members' phone is ringing. After theconfigured delay time (after:) another single group member will be called.If the group receives another call B initially the free group members willring one after the other (adding). If for the first call A less than half of thegroup members are ringing more members are added to this call untilexactly the half is reached. If for the first call A more than half of the groupmembers are ringing, no members are added to this call (frozen). Onlythe remaining subscribers are added to call B. If all group members arealready ringing for call A, the group is split for the calls. The order of thecalls depends on the configured Priority: First of all the member of thegroup first logged-in gets the position 1 in the order of calls, the secondone the position 2, ... . If position 1 takes a call, the second call will beassigned to position 2. The member of the group with the position 1 willget the last position in the order for a future call after he has finished thecurrent call. If finally all logged-in members of a group are called, the busysubscribers will hear knocking additionally (only from external).
Phone number | Name
Group member. (Entry with New)
Priority
Requirements:
• Configured ringing sequence: Not All or All - Split Group

Basic Network Settings
COMmander 6000/R/RX - Firmware V8.4 - Advanced Information V32 05/2022- 797 -
Specifies the order of calls within the group for the ringing sequence(change with | ).
Status of incoming calls
Logged in
Logs the phone into the group.
Logged out
Logs the phone out of the group.
Permanently logged in
Permanently logs the phone of a subgroup into the main group.
Status of outgoing calls
Logged in
Logs the phone into the group.
Logged out
Logs the phone out of the group.
Permanently logged in
Permanently logs the phone of a subgroup into the main group.
Ringing delay
Requirements:
• Configured ringing sequence: All or All - Split Group
The subscriber rings after the configured delay time (after:).

Basic Network Settings
COMmander 6000/R/RX - Firmware V8.4 - Advanced Information V32 05/2022- 798 -
New
Selects a new group member from the configured subscribers and groupsand adds it to the list.
Note: Up to 40 internal subscribers or groups can be assigned to agroup as members.
Delete
Deletes the entries marked in the list.

Exchange Line Settings
COMmander 6000/R/RX - Firmware V8.4 - Advanced Information V32 05/2022- 799 -
Exchange Line Settings
Proceed as follows:
• Separately for groups
• Using the Configuration Manager (Groups > Properties)
GROUP
Select the group you want to display/configure.
Important: The settings done are only valid on the condition thatthey are not overridden by a profile. The simultaneous display takesplace on page Groups > Properties under Overridden by profile inconfiguration.
Note: [Name configuration] ...: In the displayed configuration, thefunction is overridden by the displayed setting. Configuration using theConfiguration Manager (Groups > Profiles > ...)
Note: not overridden by a profile: The function is currently notoverridden by a profile.
Note: (not profile-controlled): The function can not be overridden bya profile.
Exchange line authorisation | Expert
Defines which kind of phone numbers may be dialled with a groupmember logged in as outgoing.
International
All national and international phone numbers can be dialled.
National

Exchange Line Settings
COMmander 6000/R/RX - Firmware V8.4 - Advanced Information V32 05/2022- 800 -
All national phone numbers can be dialled.
City
All phone numbers with the same local area code can be dialled.
Exchange line dependent
The exchange line authorisation is configured under Expert separately foreach connection.
As subscriber
The exchange line authorisation of the subscriber is used.
No
Emergency numbers can be dialled, if the exchange line authorisation ofthe subscriber permits this.
Call restrictor (outgoing)
None
No call restrictor is used for group members logged in as outgoing.
As subscriber
The call restrictor selected for a subscriber is used.
Call deblocker (outgoing)
None
No call deblocker is used for group members logged in as outgoing.
As subscriber
The call deblocker selected for a subscriber is used.

Exchange Line Settings
COMmander 6000/R/RX - Firmware V8.4 - Advanced Information V32 05/2022- 801 -
Phone book authorisation
Requirements:
• Exchange line authorisation allows at least emergency calls
• Configured contact group Phone book version 1
− Using the Configuration Manager (User data > Address books)
No
All group members logged in as outgoing have no phone bookauthorisation
Yes
All group members logged in as outgoing can dial the phone numbersentered in the contact group Phone book version 1 irrespective of hisexchange line authorisation. So it extends the exchange line authorisation.
As subscriber
The phone book authorisation activated for a subscriber is used.
Preferred exchange line | Expert
Defines via which exchange line outgoing external calls will be routed by agroup member logged in as outgoing.
Automatic occupation
For outgoing external calls, any available connection is used, whereby firstthe fixed network connections and then the VoIP connection and at lastthe GSM connections were taken into account.
Special preferred exchange lines
For outgoing external calls, the connections released under Expert areused depending on the selected priority. This makes the definition of a

Exchange Line Settings
COMmander 6000/R/RX - Firmware V8.4 - Advanced Information V32 05/2022- 802 -
preferred exchange line (priority = 1) with overflow to other connections(priority > 1) possible. Exchange lines with priority No automaticoccupation are not used for outgoing calls.
As subscriber
The preferred exchange line of the subscriber is used.
Note: If all released connections are busy, it is no longer possible tocall. The subscriber can only use a connection with the setting Noautomatic occupation by entering a character string (see TargetedExchange Line Access).
Note: The same priority may be allocated to different externalconnections in parallel.
Number presentation (outgoing) | Expert
Defines which phone number is presented by a group member logged inas outgoing.
No
The phone number is suppressed.
Standard
Both the DDI parallel to the internal number and the MSN on the PTMPconnection are displayed on the PTP connection over which the groupis called (if the group is not a member of the call distribution for thisconnection, the first MSN is presented).
Exchange line dependent
The phone number to be presented is configured separately for eachexternal connection under Expert.
Note: On a connection with a GSM gateway, the phone numberpresentation configured in the PBX is not used because the actual

Exchange Line Settings
COMmander 6000/R/RX - Firmware V8.4 - Advanced Information V32 05/2022- 803 -
phone number presentation is directly configured in the individual GSMgateway.
Note: On a connection with CLIP no screening enabled, the numberpresentation defined here is not considered.
Note: For the option No, the phone service Calling LineIdentification Restriction (CLIR2) must be released by the networkprovider.
Number presentation (incoming) | Expert
Defines which phone number is presented back to the caller by a groupmember logged in as outgoing.
No
The phone number is suppressed.
Standard
Both the DDI parallel to the internal number and the MSN on the PTMconnection over which the group is called are presented on the PTMPconnection.
Exchange line dependent
The phone number to be presented is configured separately for eachexternal connection under Expert.
Note: For the option No, the phone service Connected LineIdentification Restriction (COLR2) must be released by the networkprovider.
Note: On a connection with a GSM gateway, the phone numberpresentation configured in the PBX is not used because the actualphone number presentation is directly configured in the individual GSMgateway.

Reachability
COMmander 6000/R/RX - Firmware V8.4 - Advanced Information V32 05/2022- 804 -
Reachability
Proceed as follows:
• Separately for groups
• Using the Configuration Manager (Groups > Properties)
GROUP
Select the group you want to display/configure.
Important: The settings done are only valid on the condition thatthey are not overridden by a profile. The simultaneous display takesplace on page Groups > Properties under Overridden by profile inconfiguration.
Note: [Name configuration] ...: In the displayed configuration, thefunction is overridden by the displayed setting. Configuration using theConfiguration Manager (Groups > Profiles > ...)
Note: not overridden by a profile: The function is currently notoverridden by a profile.
Note: (not profile-controlled): The function can not be overridden bya profile.
Reserved call channels | Number
External exchange line: For outgoing external calls of the group, theselected number of call channels of the selected external exchange linewill be reserved. These call channels are never available to the othersubscribers or groups.
No reservation
Call channels will not be reserved.

Reachability
COMmander 6000/R/RX - Firmware V8.4 - Advanced Information V32 05/2022- 805 -
Note: For a VoIP account the possible number depends on themaximum number of VoIP channels, which is configered for the VoIPprovider (Public switched tel. networks > Voice over IP (VoIP page)> Provider > Configure).
Note: If a call channel should be reserved for one subscriber thissubscriber has to be assigned alone to a group.
Note: A call channel reserved for a group is only available for themembers of the group who are logged in the group outgoing.
Busy-on-Busy
Use case
• Announcement before answering (On busy or Always) is enabled
• The number of calls put through to the waiting loop should be limitedby Busy-on-Busy so that not more callers are in the waiting loop thancan be handled.
• Callers who are not put through to the waiting loop due to the limit,hear the busy tone.
• For this, Busy-on-Busy dynamic may not be selected.
deactivated
The number of callers to the group is unlimited.
busy from x connections on
The number of callers to the group is limited to a specific number.
dynamic
Note: Selecting dynamic can have effects on the function Do-not-disturb, Call waiting and Waiting loop if Announcement beforeanswering is enabled.

Reachability
COMmander 6000/R/RX - Firmware V8.4 - Advanced Information V32 05/2022- 806 -
Registered and logged-in group members are recorded and the numberof connections made to the group is automatically corrected downwards ifnecessary.
Ann. before answering
Off
On busy
When calling a busy group (all group members are busy) the caller hearsan announcement before answering for greeting. After the announcementbefore answering, the caller is put into the waiting loop and hears Musicon Hold.
Always
When calling a group the caller always hears the announcement beforeanswering for greeting. If the line is busy, he is put into the waiting loopafter the announcement before answering and hears Music on Hold. If thecalled phones are available, the caller hears Music on Hold also while thephones are ringing.
Ann. before answering | Call signalisation
Immediately
The call is signalled during the announcement before answering.
After announcement before answering
The call is signalled after the announcement before answering when thecaller hears Music on Hold.

Reachability
COMmander 6000/R/RX - Firmware V8.4 - Advanced Information V32 05/2022- 807 -
Ann. before answering | Selection of announcement
Announcement before answering which is played for the caller.
Rework time
Time that a group member cannot be called after an incoming internal orexternal call (e. g. for Call Center agents). During this time, the do-not-disturb function is enabled for the subscriber.
Note: The rework time can be cancelled at any time by switching offthe do-not-disturb function (e. g. using a function key at the systemphone).
Note: The following characteristics apply for the devices COMfortel3200/3500: Enabling this function on the telephone is not displayedin the configuration manager of the PBX. Enabling this function in theconfiguration manager of the PBX has no influence on the telephone(status is not displayed under the function keys)
Call restrictor (incoming)
None
No call restrictor is used for group members logged in as outgoing.
As subscriber
The call restrictor selected for a subscriber is used.
Call deblocker (incoming)
None
No call deblocker is used for group members logged in as outgoing.

Reachability
COMmander 6000/R/RX - Firmware V8.4 - Advanced Information V32 05/2022- 808 -
As subscriber
The call deblocker selected for a subscriber is used.
Follow-me | Destination number:
Internal and external calls to the group are forwarded to the entereddestination number.
Multi-path Call Forwarding | Destination number:
Internal and external calls to the group are signaled additionally to theentered destination number.
Note: Multi-path call forwarding for a group is executed during theentire calling period independent of the ringing sequence for the group.It is not executed if the group itself is the destination of a forwardedcall.
Call Forwarding | Settings | only external calls
External calls to the group are forwarded. Internal calls are not forwarded.
Call Forwarding | Settings | Cascading
If call forwarding has been configured for the internal destination of anexisting call forwarding, it is possible to reroute already forwarded calls(cascading).
Calls also will be rerouted to the new call forwarding destination. Duringcascading, the PBX memorises the subscribers who have already beencalled for this call. If the subscriber is the destination of a call forwardingagain, the call ends with the previous destination.

Reachability
COMmander 6000/R/RX - Firmware V8.4 - Advanced Information V32 05/2022- 809 -
The caller hears the dial tone until the call is accepted. If the destinationis busy or the maximum call duration has been reached, a busy signal isissued.
Note: When switched off, cascading does not take place. Calls endwith the entered destination.
Call Forwarding | Settings | CF on group call
Calls directed to a group of which the group is a member will be forwardedto the CF destination of the group.
Call Forwarding | immediately | Destination number:
Internal and external calls to the group are forwarded immediately to theentered destination number.
Call Forwarding | on busy | Destination number:
Internal and external calls to the group are forwarded on busy to theentered destination number.
Call Forwarding | on no reply | Destination number:
Internal and external calls to the group are forwarded after the entereddelay time to the entered destination number.
Delay time for CF on no reply
Call forwarding after the waiting time entered here in sec.

Reachability
COMmander 6000/R/RX - Firmware V8.4 - Advanced Information V32 05/2022- 810 -
Call Forwarding | on all logged out | Destination number:
Internal and external calls to the group are forwarded to the entereddestination number, if all group members are logged out.

Voicemail/Fax Box
COMmander 6000/R/RX - Firmware V8.4 - Advanced Information V32 05/2022- 811 -
Voicemail/Fax Box
Proceed as follows:
• Separately for groups
• Using the Configuration Manager (Groups > Properties)
GROUP
Select the group you want to display/configure.
Important: The settings done are only valid on the condition thatthey are not overridden by a profile. The simultaneous display takesplace on page Groups > Properties under Overridden by profile inconfiguration.
Note: [Name configuration] ...: In the displayed configuration, thefunction is overridden by the displayed setting. Configuration using theConfiguration Manager (Groups > Profiles > ...)
Note: not overridden by a profile: The function is currently notoverridden by a profile.
Note: (not profile-controlled): The function can not be overridden bya profile.
Fax box | Phone number of the box
Requirements:
• Voice mail/fax function (optional, see Technical Data in theInstructions)
• Created fax box for the group

Voicemail/Fax Box
COMmander 6000/R/RX - Firmware V8.4 - Advanced Information V32 05/2022- 812 -
Note: If it is not clear whether it is a fax or not, the call will be signaledto the group or it will be accepted by the voice mailbox.
Note: If a fax call is accepted by the group, it can be forwarded to afax box by means of blind transfer.
Note: A fax call which is accepted by a voice mailbox will not beforwarded to a fax box.
Voice mailbox | Box number
Requirements:
• Voice mail/fax function (optional, see Technical Data in theInstructions)
• Created voice mailbox for the group
Both the group and the selected voice mailbox will be automatically calledfor all incoming calls made to the internal number of the group.
Important: The PBX supports only one central answering machine. Ananswering machine at the COMfortel system phone will be disabled assoon as a voice mailbox is selected for the subscriber. Querying anddeleting voice messages as well as replaying own announcements isstill possible. The call recording function can be used.
Note: If call forwarding immediately (subscriber/group), the boss/secretary function (system phone) or a waiting field reception (for onewaiting field group, one enabled waiting field reception is sufficient) isenabled, the call will not be made to the voice mailbox!
Voice mailbox | Call acceptance type
immediately
The voice mailbox will be called immediately.

Voicemail/Fax Box
COMmander 6000/R/RX - Firmware V8.4 - Advanced Information V32 05/2022- 813 -
on no reply
The voice mailbox will be called after expiration of the entered delay time.
on busy
The voice mailbox will be called if the internal number of the group is busyand if no call forwarding on busy has been enabled for the group.
on no reply + on busy
The voice mailbox will be called if the group does not reply or if theinternal number of the group is busy.
on all logged out
The voice mailbox will be called when all group members are logged out.
Delay time for CF on no reply
Call acceptance during the time entered here.

Settings
COMmander 6000/R/RX - Firmware V8.4 - Advanced Information V32 05/2022- 814 -
Settings
Proceed as follows:
• Separately for groups
• Using the Configuration Manager (Groups > Properties)
GROUP
Select the group you want to display/configure.
Important: The settings done are only valid on the condition thatthey are not overridden by a profile. The simultaneous display takesplace on page Groups > Properties under Overridden by profile inconfiguration.
Note: [Name configuration] ...: In the displayed configuration, thefunction is overridden by the displayed setting. Configuration using theConfiguration Manager (Groups > Profiles > ...)
Note: not overridden by a profile: The function is currently notoverridden by a profile.
Note: (not profile-controlled): The function can not be overridden bya profile.
Number presentation (internally)
Group numbers
All group members logged in as outgoing will present the group numberfor internal outgoing calls. If the group is internally called the subscribernumber is transferred back.
Subscriber number

Settings
COMmander 6000/R/RX - Firmware V8.4 - Advanced Information V32 05/2022- 815 -
All group members logged in as outgoing will present their own subscribernumber for internal outgoing calls.
Preliminary pick-up query and monitoring
Requirements:
• VoIP end device which can evaluate the available information by BLF
• VoIP phone from another manufacturer: SIP convenience package/ SIP convenience package brand plus enabled (optional, seeTechnical Data in the Instructions)
All information about the incoming calls of the group is available forevaluation by BLF.
Note: When switched off, no phone numbers of the group‘s calls aretransmitted by BLF.
Pick-up of all calls to group members
A member of this group can pick up calls to the phone number of thegroup as well as direct calls to individual members of the group.
Note: When switched off, group members can only pick up direct callsto the phone number of the group.
Central caller list
Calls saved in the caller list are automatically refreshed for all groupmembers. That means, if a connection is established (incoming oroutgoing) from a group member to a caller in the caller list, the phonenumber is deleted from the caller lists of the other group members, too.

Devices
COMmander 6000/R/RX - Firmware V8.4 - Advanced Information V32 05/2022- 816 -
Devices
Voice mail and fax boxesDevice WizardDoor TerminalsAnnouncement OutputsAlarmsRelays (Actuators)Action URLs Voice mail and fax boxesDevice WizardDoor TerminalsAnnouncement OutputsAlarmsRelays (Actuators)Action URLs

Voice mail and fax boxes
COMmander 6000/R/RX - Firmware V8.4 - Advanced Information V32 05/2022- 817 -
Voice mail and fax boxes
Management Voice mail and fax boxesManagement ProfileSettings Profile AssignmentSettings of the Voice Mail/Fax FunctionSettings of the Voice MailboxSettings for the Fax Box Management Voice mail and fax boxesManagement ProfileSettings Profile AssignmentSettings of the Voice Mail/Fax FunctionSettings of the Voice MailboxSettings for the Fax Box

Management Voice mail and fax boxes
COMmander 6000/R/RX - Firmware V8.4 - Advanced Information V32 05/2022- 818 -
Management Voice mail and fax boxes
Using the Configuration Manager (Devices > Voice mail and fax boxes >Phone numbers)
Note: Click the column headings to change the sorting criteria. Clickthe column headings again to change the sorting order.
Requirements:
• Voice mail and fax function (optional, see Activation)
New
Depending on the selection, a new voice mailbox or fax box will beadded.After that, the settings for the voice mailbox/fax box must be made.
Type
Select a voice mailbox or fax box.
Phone NumberorPhone Number from until
You can select any of the numbers in the internal supply of phonenumbers.
Single box for one owner
Enter an internal phone number in the entry field fromorPhone Number.
Several boxes for one owner
Enter the lowest phone number of the number range between 10 up to9999, in the from and enter the highest phone number of the numberrange in the entry field until.

Management Voice mail and fax boxes
COMmander 6000/R/RX - Firmware V8.4 - Advanced Information V32 05/2022- 819 -
Note: Double allocation of a number is not possible.
Note: Using numbers with few digits (two or three-digit numbers)inevitably restricts the possible supply of numbers requiring moredigits. For example, if the number 12 is assigned, the numbers120-129 and 1200-1299 will no longer be available.
Note: The default exchange line access number on the PBX is 0 in thefactory settings. However, this can be changed. Note that changing theexchange line access number restricts the dial plan.
Name
Freely selectable name. This name is used to identify the box within thePBX and the connected system phones.
Owner
Select the internal phone number under subscriber or group that is to beassigned to the box.
An owner can query the box. If the administrator has not refused theaccess authorisation, the owner can perform the following changes/actions using the Configuration Manager:
• Copying, moving, and deleting messages
• Properties of the box not controlled via a profile (except Users/authorisations and the maximum recording capacity)
• Voice mail/fax box properties of the subscribers and groups notcontrolled via a profile
For a voice mailbox, the owner can additionally perform the followingchanges/actions:

Management Voice mail and fax boxes
COMmander 6000/R/RX - Firmware V8.4 - Advanced Information V32 05/2022- 820 -
• Recording, storing in the PBX, reading from the PBX (downloading),listening to and deleting of announcements
• Properties of the box under Call acceptance/announcement that arenot controlled via a profile
The following properties of the owner will be applied to the box:
• Exchange line settings of the subscriber or exchange line settings ofthe group (in a group with the Exchange line authorisation: Use theexchange line authorisation of the subscriber, the box does nothave any exchange line authorisation).
• Only for subscribers: call allowance account
Note: Boxes can be preconfigured by not assigning an owner tothe box. Nevertheless, the boxes cannot be used until an owner isassigned.
Based on
Select a template from all boxes created so far.
Template:
Voice mailbox
The new voice mailbox obtains all properties of the selected templateduring creation (except for Users/authorisations, PIN for remote accessand Announcements).
Fax box
The new fax box obtains all properties of the selected template duringcreation (except for Users/authorisations).
Standard

Management Voice mail and fax boxes
COMmander 6000/R/RX - Firmware V8.4 - Advanced Information V32 05/2022- 821 -
The Basic settings are used for the box just created.
1:1 assignment
If you want to be able to see from the number to which internal subscriberor internal group the box belongs, you can assign corresponding boxnumbers:
• You can add a digit (prefix) for the box numbers to an up to 3-digitinternal subscriber/group number.
Example: The subscribers 400, 401, 402, 405, 407 are to be assignedthe boxes 7400, 7401, 7402, 7405, 7407.
• If the internal subscriber/group numbers have 4 digits, the boxnumbers can be created by replacing the first digit.
Example: The subscribers 4400, 4401, 4402, 4405, 4407 are to beassigned the boxes 7400, 7401, 7402, 7405, 7407.
Note: The number range selected for the box numbers needs tobe sufficiently large: The number range for the examples (from7400 to 7407) includes eight numbers, even though only the fivecorresponding boxes are created.
Note: If the corresponding number range contains an internal number(subscriber, group) which is already owner of a group of the type to becreated (voicemail or fax box), no further box will be created for thisnumber.
Note: If the selected number range for the box numbers alreadycontains a corresponding box number, the owner of the box remainsthe same and a message will be displayed.
Note: If the new owner is not yet an owner of user of another box, therecently created box will automatically be enabled for the subscriber orgroup.

Management Voice mail and fax boxes
COMmander 6000/R/RX - Firmware V8.4 - Advanced Information V32 05/2022- 822 -
Requirements:
• Configured internal subscribers and/or groups
• The number range for the numbers of the boxes is still free.
A new box within the box number range from ... to must completely beconfigured. Then the box can be assigned by clicking Save > 1:1assignment.
Box numbers which correspond automatically for different owners arecreated.
Properties Configure
Opens the configuration page for the box.
Filter:
The list of boxes is filtered by the entered or selected value.
Delete
Deletes the entries marked in the list.
Restoring boxes
Due to missing data in on the data storage device (e. g. because of anexchange) or in the database of the PBX, the affected boxes are not readyto use.
The boxes affected by this function are marked with .

Management Voice mail and fax boxes
COMmander 6000/R/RX - Firmware V8.4 - Advanced Information V32 05/2022- 823 -
Missing data on the data storage device
Restoring
Note: The restoration of the boxes does not include the messages,box-specific announcements and voice files.
Missing data in the database on the PBX
You can restore these boxes using the following data:
• Internal telephone number and name of the box
• Messages
• Box-specific announcements
Note: Internal numbers must only be assigned once in the PBX. Theformer phone number of the box to be restored cannot be used if it isstill present in the PBX as an internal number (Overviews > Dial plan> Total overview).
Type
Select one of the available options.
Phone Number
If the phone number is already present, a new internal number between10 up to 9999 must be entered in the entry field for the box to be restored.
Note: Using numbers with few digits (two or three-digit numbers)inevitably restricts the possible supply of numbers requiring moredigits. For example, if the number 12 is assigned, the numbers120-129 and 1200-1299 will no longer be available.

Management Voice mail and fax boxes
COMmander 6000/R/RX - Firmware V8.4 - Advanced Information V32 05/2022- 824 -
Note: The default exchange line access number on the PBX is 0 in thefactory settings. However, this can be changed. Note that changing theexchange line access number restricts the dial plan.
Owner
If necessary, select the internal phone number of the owner.
Restoring
Management Profile
COMmander 6000/R/RX - Firmware V8.4 - Advanced Information V32 05/2022- 825 -
Management Profile
Proceed as follows:
• Using the Configuration Manager
Profile name
The available profiles (default profiles, user-defined profiles) aredisplayed.
View
The selected settings can be viewed (default profiles).
Configure
The user-defined profiles can be adapted to the correspondingrequirements (user-defined profiles).
New
Creation of a new profile.

Settings Profile Assignment
COMmander 6000/R/RX - Firmware V8.4 - Advanced Information V32 05/2022- 826 -
Settings Profile Assignment
Proceed as follows:
• Using the Configuration Manager
A configuration depending profile can be assigned to each subscriber,group or voice mail/fax box.
Assign profile to all
The same profile is assigned to all subcribers, groups or boxes for oneconfiguration.

Settings of the Voice Mail/Fax Function
COMmander 6000/R/RX - Firmware V8.4 - Advanced Information V32 05/2022- 827 -
Settings of the Voice Mail/Fax Function
System InformationAutomatic Clean-UpMemoryAutomatic Memory CheckChannels Simultaneously for Outgoing CallsLanguage Files System InformationAutomatic Clean-UpMemoryAutomatic Memory CheckChannels Simultaneously for Outgoing CallsLanguage Files

System Information
COMmander 6000/R/RX - Firmware V8.4 - Advanced Information V32 05/2022- 828 -
System Information
Proceed as follows:
• Using the Configuration Manager (Devices > Voice mail and faxboxes > Basic settings page)
• Jointly for all Voice mail and fax boxes
Requirements:
• Voice Mail/Fax function (optional, see Activation)
Link to the page Administration > System messages for specifying howthe system reacts to system information.
Generate notification at | … memory utilisation
When the amount of memory used exceeds the specified level, thisinformation is logged and, if specified, sent as an e-mail.
Automatic Clean-Up
COMmander 6000/R/RX - Firmware V8.4 - Advanced Information V32 05/2022- 829 -
Automatic Clean-Up
Proceed as follows:
• Using the Configuration Manager (Devices > Voice mail and faxboxes > Basic Settings)
• Jointly for all Voice mail and fax boxes
Requirements:
• voice mail and fax function (optional, see Activation)
Perform at memory utilisation
When the amount of memory used reaches the specified level, the oldestmessage that is marked as read is deleted when a new message isreceived. Archived messages will not be deleted.
Note: If the clean-up fails, this information is logged and, if specified,sent as an e-mail.
Type of clean-up
oldest messages in each box
The oldest messages marked as read in each box will be deleted.
oldest messages in the system
The oldest messages marked as read, of all messages stored in the voicemail/fax system, will be deleted (even if all messages belong to only onebox).

Memory
COMmander 6000/R/RX - Firmware V8.4 - Advanced Information V32 05/2022- 830 -
Memory
Proceed as follows:
• Using the Configuration Manager (Devices > Voice mail and faxboxes > Basic settings)
• Jointly for all voice mail and fax boxes
Requirements:
• Voice mail/fax function (optional, see Activation)
Activate encryption
The whole partition of the data storage device is encrypted using apassword.
Important: In order to have the partition encrypted the data storagedevice needs to be formatted first.
Important: The recorded data is saved unencrypted on the datastorage device.
Password
If the encryption is activated for the first time, the admin password of thePBX is set.
Alternatively, you can set a personal password via Edit password.
Note: Formatting the data storage device is not possible until youselected save.

Memory
COMmander 6000/R/RX - Firmware V8.4 - Advanced Information V32 05/2022- 831 -
Formatting
The inserted data storage device is formatted and the directory treerequired for the voice mail and fax function is created.
Important: When the inserted data storage device is formatted, all thedata currently present on it is deleted.
Important: After the data storage device has been formatted withthe EXT4 file system it can no longer be read on a Windows PC. Forthis reason, Windows prompts you to format the data storage device.Under no circumstances should you confirm this prompt by selecting"Yes".

Automatic Memory Check
COMmander 6000/R/RX - Firmware V8.4 - Advanced Information V32 05/2022- 832 -
Automatic Memory Check
Proceed as follows:
• Using the Configuration Manager (Devices > Voice mail and faxboxes > Basic settings)
• Jointly for all voice mail/fax boxes
Requirements:
• Voice mail/fax function (optional, see Activation)
Automatic memory check
The data storage device is automatically checked for errors at the selectedinterval and at the selected time.
Note: If the memory check fails, this information is logged and, ifspecified, sent as an e-mail.
Interval
off
The memory check is disabled.
daily
The memory check will be made daily.
weekly
The memory check will be made weekly.
monthly
The memory check will be made on the 1st day of every month.

Automatic Memory Check
COMmander 6000/R/RX - Firmware V8.4 - Advanced Information V32 05/2022- 833 -
Time
Time at which the memory check is performed.
Note: The memory check may take a few minutes. The voice mailand fax boxes cannot be accessed during the memory check. Forthis reason, the memory check should be performed at a time whenaccess to the voice mail and fax boxes is not required (e.g. at night).

Channels Simultaneously for Outgoing Calls
COMmander 6000/R/RX - Firmware V8.4 - Advanced Information V32 05/2022- 834 -
Channels Simultaneously for Outgoing Calls
Proceed as follows:
• Using the Configuration Manager (Devices > Voice mail and faxboxes > Basic settings page)
• Jointly for all Voice mail and fax boxes
Requirements:
• Voice Mail/Fax function (optional, see Activation)
Simultaenously used channels for outgoing calls
Maximum number of call channels that can be used simultaneously foroutgoing calls from the Voice Mail/Fax function (message forwarding, faxtransfer).

Language Files
COMmander 6000/R/RX - Firmware V8.4 - Advanced Information V32 05/2022- 835 -
Language Files
Proceed as follows:
• Using the Configuration Manager (Devices > Voice mail and faxboxes > Basic settings page)
• Jointly for all Voice mail and fax boxes
Requirements:
• Voice Mail/Fax function (optional, see Activation)
The voice mailboxes' default announcements, and also the spoken userguidance for remote access, are stored in "language files" (for English-language announcements, english.fs is used). Up to four language filescan be stored and used simultaneously. This means different languagescan be used for different voice mailboxes.
Import
The language file (*.fs) stored on a (PC) data storage device is selectedand imported.
Default language
Unless a different language has been selected for specific voicemailboxes, the selected language is usually used for all voice mailboxannouncements.
Note: The first language imported into the PBX is automatically set asDefault language.

Settings of the Voice Mailbox
COMmander 6000/R/RX - Firmware V8.4 - Advanced Information V32 05/2022- 836 -
Settings of the Voice Mailbox
Box SettingsUsers/AuthorisationsAnnouncementsCall Acceptance/Announcements Box SettingsUsers/AuthorisationsAnnouncementsCall Acceptance/Announcements

Box Settings
COMmander 6000/R/RX - Firmware V8.4 - Advanced Information V32 05/2022- 837 -
Box Settings
Using the Configuration Manager (Device > Voice mail and fax boxes >Properties)
VOICE MAIL AND FAX BOXES
Select the voice mailbox for which the settings are to be made.
Language of the announcements
If several language files have been imported, the language of theannouncements can be configured (Devices > Voice mail and fax boxes> Basic settings).
Standard
The language file is used that is set under Devices > Voice mail and faxboxes > Basic settings.
e. g. deutsch - V02.01
The language of the selected language file is used.
Automatic replay of new messages
Note: This setting does not affect querying the voice mailbox with asystem phone.
All new messages will be replayed automatically without the need forfurther inputs and marked as listened to if the voice mailbox is queried or ifmessage forwarding is used.

Box Settings
COMmander 6000/R/RX - Firmware V8.4 - Advanced Information V32 05/2022- 838 -
Remote access
A voice mailbox can be queried from an external connection. The remoteaccess can be performed by the administrator, sub-administrator, orowner/user after entering the corresponding PIN
PIN for remote access
Freely selectable 6-digit PIN. With the exception of the admin PIN, a PINmust not begin with a zero.
Note: If no entry is made, the PIN of the box owner is automaticallyused.
Note: All pins in the PBX are unambiguous. This means it is notpossible to assign the same PIN twice. As the PINs can also beentered by phone, only numbers are allowed.
Message forwarding
Incoming new messages are forwarded to the configured destination
Destination number
Internal number
External number without exchange line access number
Forwarding after lately recorded messages
Enter the number of messages between 1 and 20, after which theforwarding can be started (depending on the configured notification timeperiod).
Notification time period from hr until hr

Box Settings
COMmander 6000/R/RX - Firmware V8.4 - Advanced Information V32 05/2022- 839 -
Enter the time period in which the messages are to be forwarded.
daily
The messages are forwarded daily in a determined time period.
Mon - Fri until Sun
The messages are forwarded on the selected week days in a determinedtime period.
Number of repetitions with min. pause
Select the repetitions in the first list field and select the pause lengthbetween the forwarding attempts in the second list field respectively inbetween 0 and 9 repetitions or minutes.
Call take-over
The call take-over function enables a user to take over a call which wasaccepted by the voice mailbox.
global
Every internal subscriber is permitted to take over calls.
Authorised users
Every owner or user is permitted to take over calls. If a group is owner oruser, every group member can take over calls.
Maximum recording capacity
The maximum recording capacity specifies the maximum memorycapacity in megabytes (MB) available for the recording of messages ofthe box. Additionally, the maximum length per recording can be specified.It indicates the number of minutes after which the voice mailbox ends arecording automatically (in as far as the caller has not already hung up).
Box Settings
COMmander 6000/R/RX - Firmware V8.4 - Advanced Information V32 05/2022- 840 -
Maximum size of the box
Enter a value for the recording capacity between 15 and 1048576 MB.Behind the entry field, it is displayed how much the entered value isin minutes. If no value is entered, the recording capacity is unlimited(maximum memory utilisation).
Maximum length per recording
Enter a value for the recording length between 1 and 99 min. If no value isentered, the recording length is unlimited (maximum memory utilisation).
Note: Under the following circumstances, the entered value is notavailable to the box:
• There is not enough memory capacity available on the storagemedia.
• There is not enough memory capacity available on the storagemedia.
Automatic clean-up
The memory is cleared when a certain fill level is reached.
Perform atxx %… memory utilization
If the maximum number of stored messages or the maximum recordingcapacity of the box (between 50 up to 95 %) is reached, the oldestmessages marked as read will be deleted as soon as new messagesarrive. Archived messages will not be deleted.
Note:If the clean-up fails, this information is logged and, if specified,sent as an e-mail.

Box Settings
COMmander 6000/R/RX - Firmware V8.4 - Advanced Information V32 05/2022- 841 -
E-mail transfer
Requirements:
• Configured outgoing mail server (under Administration > E-mail >Outgoing mail server)
Outgoing mail server
Standard
The e-mails are transferred via the default outgoing mail server.
Name of an outgoing mail server: The e-mails are transferred via theselected outgoing mail server.
Send e-mail in HTML format
Note: When switched off, e-mails are sent in text format.
Send on incoming messages
Attach incoming messages as file
In the case of an incoming message, this information is sent as an e-mail.
Audio file in MP3 format
The audio file is provided in *.MP3 format.
Note: When switched off, the audio file is provided in *.wav format.
Mark sent messages as read
In the message list, a sent message is marked as read.

Box Settings
COMmander 6000/R/RX - Firmware V8.4 - Advanced Information V32 05/2022- 842 -
Send at memory utilisation
Enter a value between 50 and 90 %. When the amount of memory usedexceeds the specified level, this information is sent as an e-mail.
Send in the case of failure of automatic clean-up
In the case of failure of automatic clean-up, this information is sent as ane-mail.
(System e-mail)
Link to the page Administration > System messages for specifying howthe system reacts to system information.
Language file
Select the language file.
Note: If you have created under Administration > E-mail >Internationalisation > New a user-defined language file and select it,the e-mails will be sent with the text modules of the selected languagefile.
Logo
Default logo
The default logo is used.
Name Logo
The selected logo is used.

Box Settings
COMmander 6000/R/RX - Firmware V8.4 - Advanced Information V32 05/2022- 843 -
Message recipients
E-mail transfer @Test
The e-mail addresses of up to 10 message recipients can be entered fore-mail transfer. Subsequently, a test e-mail can be sent to check whetherthe e-mail transfer to the message recipients entered works without fault.
Requirements:
• Configured DNS server (under Administration > IP configuration)
• Configured outgoing mail server (under Administration > E-mail >Outgoing mail server)
Note: The PBX enters sent e-mails in a log file (Monitoring > Systemmessages).
Note: E-mails sent by the PBX may be treated as spam mail by therecipient of the message.

Users/Authorisations
COMmander 6000/R/RX - Firmware V8.4 - Advanced Information V32 05/2022- 844 -
Users/Authorisations
Using the Configuration Manager (Device > Voice mail and fax boxes >Properties)
Voice mail and fax boxes
Select the voice mailbox for which the settings are to be made.
User and authorisations
A box can only be used if an owner has been assigned to it (Devices >Voice mail and fax boxes > Phone numbers). In addition to the owner,further users can be assigned to the box.
Requirements:
• Configured internal subscribers and/or groups
Note: An owner is automatically entered as a user with allauthorisations.
Note: All group members have the authorisations assigned to thegroup. If a group member or a subgroup is also entered individually asa user, the authorisations assigned to this user will also apply to thisgroup member/subgroup.
New
Opens a new line for selecting another user/group.

Users/Authorisations
COMmander 6000/R/RX - Firmware V8.4 - Advanced Information V32 05/2022- 845 -
User
Select a user/the users. If only one additional user is required, select theuser in the first list field. If more than one user is required, they are to beselected via both list fields (from ... to).
Administrate announcements
The authorisations of the announcements are expanded.
• Recording, storing in the PBX, reading from the PBX (downloading),listening to and deleting of announcements.
• Properties of the box under Call acceptance/Announcement, whichare not controlled via a profile.
Administrate settings
The authorisations of the properties of the box that are not controlledvia a profile are expanded (except for User/authorisations, Maximumrecording capacity and Fax ID).
Note: Only a user is permitted to change these settings via phone.
Announcements
COMmander 6000/R/RX - Firmware V8.4 - Advanced Information V32 05/2022- 846 -
Announcements
Using the Configuration Manager (Device > Voice mail and fax boxes >Properties)
VOICE MAIL AND FAX BOXES
Select the voice mailbox for which the settings are to be made.
Proceed as follows for saving:
• Using the Configuration Manager
Proceed as follows for recording, listening to and deleting:
• Using the Configuration Manager
• On the internal phone via character string (see Voice Mailbox)
Upload new recorded accouncement
You can save up to 10 announcements (audio files (*.wav)) lasting amaximum of 3 minutes each for each voice mailbox in the PBX.
The audio files (*.wav) must have the following properties:
• Format: 16 kHz, 16-bit, PCM, mono or 8 kHz, 8-bit, mono, A-law
• File name: up to 32 characters
Note: In the Internet, you can convert the audio files into the audioformat required for the PBX (see Auerswald Audio Converter). Forexample, use the Audio Converter to convert audio files (*.mp3, *.wavor *.raw) into G.711 (*.wav) audio format.
The audio file (*.wav) stored on a (PC) data storage device is selected andimported.

Announcements
COMmander 6000/R/RX - Firmware V8.4 - Advanced Information V32 05/2022- 847 -
Read from PBX Read
The announcements for the voice mailboxes saved in the PBX can besaved on the PC as backup copies.
Requirements:
• At least one existing announcement for the voice mailbox
Save or play the file on the PC.
Record announcement Record
Announcements for voice mailboxes can directly be recorded via thereceiver of an internal phone.
User
The phone is called.
Sub-administrator/administrator
Select the phone via the list field Record announcement at thesubscriber. The phone is called.
The call must be accepted and after the tone an announcement can berecorded.
Rename announcement Change
Change the announcement name.
Delete announcement Delete
The announcement will be deleted.

Call Acceptance/Announcements
COMmander 6000/R/RX - Firmware V8.4 - Advanced Information V32 05/2022- 848 -
Call Acceptance/Announcements
Using the Configuration Manager (Device > Voice mail and fax boxes >Properties)
VOICE MAIL AND FAX BOXES
Select the voice mailbox for which the settings are to be made.
Readiness
on
Switches the readiness on.
off
Switches readiness off.
configuration-dependent
The setting made in the profile (Devices > Voice mail and fax boxes >Profiles > Configuration) assigned to the currently valid configuration willapply.
Deputy function
Requirements:
• Corresponding announcement saved in the PBX
• Enabled Readiness of the voice mailbox
Note: This setting is also possible configuration-dependent via profiles(Devices > Voice mail and fax boxes > Profiles > Configuration >View).

Call Acceptance/Announcements
COMmander 6000/R/RX - Firmware V8.4 - Advanced Information V32 05/2022- 849 -
A caller can set up a connection to a deputy. For this purpose, the callerdials 1 via DTMF during the announcement or recording phase.
Destination number
Enter an internal or external phone number.
Note: For an external number that has less than five digits, the localarea code should additionally be entered.
Announcement with enabled deputy function
Select an announcement that is replayed for callers if the deputy functionis enabled.
Call acceptance/announcement
The call acceptance of the voice mailbox can be configured to showdifferent behaviour for different call types. The Call acceptance/announcement defines the standard behaviour for the case that no Call-specific behaviour applies.
Requirements:
• Readiness enabled
• Disabled Replacement function
• If Box announcement is selected: the corresponding announcementsaved in the PBX
Note: This settings is also possible configuration-dependentvia profiles (Devices > Voice mail and fax boxes > Profiles >Configuration > View).

Call Acceptance/Announcements
COMmander 6000/R/RX - Firmware V8.4 - Advanced Information V32 05/2022- 850 -
No call acceptance
All calls not controlled via Call-specific behaviour will not be accepted.The caller hears the call tone.
Reject call
All calls not controlled via Call-specific behaviour will not be accepted.The caller hears the busy signal (subscriber/group will not be calledadditionally) or the call tone (subscriber/group will be called).
Default announcement
All calls not controlled via Call-specific behaviour will be accepted.The announcement of the selected language file will be replayed (seeLanguage of the announcements under Devices > Voice mail and faxboxes > Properties > Box settings).
Box announcement
Select one of the available options in the list field on the right.
Recording
The caller can leave a message and the option Save short messagescan be enabled.
Save short messages
The phone number of the caller is displayed even when the caller does notleave a message or hangs up during the announcement.
Admin
Page User data > Messages
Owner
Page Messages (Voice mail and fax boxes)

Call Acceptance/Announcements
COMmander 6000/R/RX - Firmware V8.4 - Advanced Information V32 05/2022- 851 -
Note: The voice mailbox only records calls for which a caller leaves amessage (of more than two seconds).
Call-specific behaviour (exception table)
The call acceptance of the voice mailbox can be configured to showdifferent behaviour for different call types.
Note: If the call-specific behaviour is permanently set in aconfiguration by means of a profile, the corresponding table can beviewed. Click the corresponding profile name which is displayed in redfont. The corresponding profile configuration is displayed.
Requirements:
• Separately for voice mailboxes
• Separately for configurations
• Using the Configuration Manager
Note: This setting is also possible configuration-dependent via profiles(Devices > Voice mail and fax boxes > Profiles > Configuration >View).
Call type
Anonymous callers
Call acceptance for calls without transferred phone number.
Internal calls
Call acceptance for internal calls.
Door terminal calls

Call Acceptance/Announcements
COMmander 6000/R/RX - Firmware V8.4 - Advanced Information V32 05/2022- 852 -
Call acceptance for door calls.
External calls
Call acceptance for external calls.
User-defined
Call acceptance for calls from the entered phone number range (Ext.phone number/range, e. g. 00 for calls from abroad).
Call acceptance
Standard
For call acceptance see Call acceptance/announcement underStandard behaviour.
No call acceptance
No reaction on calls, the caller hears the call tone.
Reject call
The caller hears the busy signal (subscriber/group will not be calledadditionally) or the call tone (subscriber/group will be called).
Default announcement
The announcement of the selected language file will be replayed (seeLanguage of the announcements under Devices > Voice mail and faxboxes > Properties > Box settings). (No further action is required.)
Box announcement
The announcement of the voice mailbox selected in the Announcementlist field (Announcement 1 to 10) will be replayed.
Recording

Call Acceptance/Announcements
COMmander 6000/R/RX - Firmware V8.4 - Advanced Information V32 05/2022- 853 -
The caller can leave a message. The setting for Save short messagesalso applies to the call-specific behaviour.

Settings for the Fax Box
COMmander 6000/R/RX - Firmware V8.4 - Advanced Information V32 05/2022- 854 -
Settings for the Fax Box
Box SettingsUsers/AuthorisationsCall Acceptance Box SettingsUsers/AuthorisationsCall Acceptance

Box Settings
COMmander 6000/R/RX - Firmware V8.4 - Advanced Information V32 05/2022- 855 -
Box Settings
Using the Configuration Manager (Device > Voice mail and fax boxes >Properties)
VOICE MAIL AND FAX BOXES
Select the fax box for which the settings are to be made.
Fax ID
Sender name
Fax ID (phone number)
The fax ID is inserted into the top line of a fax during the fax transfer and,thus, permits an exact identification of the sender.
Note: Recipients of a fax frequently send their responses to thenumber entered in the header of the fax. Therefore, the number underFax ID (phone number), should be one of your own extensions/phonenumbers with fax acceptance.
Enter a sender name that is to be inserted into the top line of a fax alongwith the fax ID.
Enter the complete phone number of the own external connection asfax ID. Number in the format +[country prefix][city code][external phonenumber] (e. g. +495306920094).
Fax transmission
ECM (Error Correction Mode)

Box Settings
COMmander 6000/R/RX - Firmware V8.4 - Advanced Information V32 05/2022- 856 -
Transmission errors occurring during the transmission (e. g. becauseof faulty lines) will be corrected provided that EMC operation (ErrorCorrection Mode) has also been configured for the opposite end.
Note: If transmission errors occur very often (e. g. overseas linesof VoIP connections with frequent packet losses), the transmissioncannot be carried out since the fax machines involved will cancel thetransmission due to an excessive number of transmission repetitions.In such cases, it may be sensible to disable EMC error correction.Without EMC error correction, the transmission errors occurred will bedisplayed as erroneous dots or lines.
A maximum of 9600 baud
The transmission rate of a fax will be adapted in such a way that afaultless transmission quality will be reached, where possible.
Note: The PBX supports a maximum transmission rate of 14400baud. This transmission rate may be too high for specific lines (e. g.overseas lines or VoIP connections) and may lead to transmissioninterferences. In such cases, it may be sensible to restrict thetransmission rate to 9600 baud
Maximum recording capacity
Maximum size of the box
The maximum recording capacity specifies the maximum memorycapacity in megabytes (MB) available for the recording of messages of thebox.
Enter a value for the recording capacity between 15 and 999 MB. Behindthe entry field, it is displayed how much the entered value is in minutes. Ifno value is entered, the recording capacity is unlimited (maximum memoryutilisation).

Box Settings
COMmander 6000/R/RX - Firmware V8.4 - Advanced Information V32 05/2022- 857 -
Note: Under the following circumstances, the entered value is notavailable for the box:
• There is not enough memory capacity available on the storagemedia.
• The memory capacity on the storage media is utilised by otherboxes.
Automatic clean-up
The memory is cleared when a certain fill level is reached.
Perform atxx %… memory utilization
If the maximum number of stored messages or the maximum recordingcapacity of the box (between 50 up to 95 %) is reached, the oldestmessages marked as read will be deleted as soon as new messagesarrive. Archived messages will not be deleted.
Note:If the clean-up fails, this information is logged and, if specified,sent as an e-mail.
E-mail transfer
Requirements:
• Configured outgoing mail server (under Administration > E-mail >Outgoing mail server)
Outgoing mail server
Standard
The e-mails are transferred via the default outgoing mail server.

Box Settings
COMmander 6000/R/RX - Firmware V8.4 - Advanced Information V32 05/2022- 858 -
Name of an outgoing mail server: The e-mails are transferred via theselected outgoing mail server.
Send e-mail in HTML format
Note: When switched off, e-mails are sent in text format.
Send on incoming messages
Attach incoming messages as file
Note: Faxes are provided as *.pdf files.
Mark sent messages as read
Important: If automatic marking as read is enabled, the fax box will becleaned up automatically. This option should normally be enabled
Send at memory utilisation
Enter a value between 50 and 90 %. When the amount of memory usedexceeds the specified level, this information is sent as an e-mail.
Send in the case of failure of automatic clean-up
If the automatic clean-up fails, an e-mail is sent.
(System-e-mail)
Link to the page Administration > System messages for specifying howthe system reacts to system information.
Send after fax transfer
off

Box Settings
COMmander 6000/R/RX - Firmware V8.4 - Advanced Information V32 05/2022- 859 -
Disables e-mail transfer after fax transfer.
in the case of errors
Enables e-mail transfer after failed fax transfer.
Always
Enables e-mail transfer after fax transfer.
Attach sent message to file.
Language file
Select the language file.
Note: If you have created under Administration > E-mail >Internationalisation > New a user-defined language file and select it,the e-mails will be sent with the text modules of the selected languagefile.
Logo
Default logo
The default logo is used.
Name logo
The selected logo is used.

Box Settings
COMmander 6000/R/RX - Firmware V8.4 - Advanced Information V32 05/2022- 860 -
Message recipients
E-mail transfer @Test
The e-mail addresses of up to 10 message recipients can be entered fore-mail transfer. Subsequently, a test e-mail can be sent to check whetherthe e-mail transfer to the message recipients entered works without fault.
Requirements:
• Configured DNS server (under Administration > IP configuration)
• Configured outgoing mail server (under Administration > E-mail >Outgoing mail server)
Note: The PBX enters sent e-mails in a log file (Monitoring > Systemmessages).
Note: E-mails sent by the PBX may be treated as spam mail by therecipient of the message.

Users/Authorisations
COMmander 6000/R/RX - Firmware V8.4 - Advanced Information V32 05/2022- 861 -
Users/Authorisations
Using the Configuration Manager (Device > Voice mail and fax boxes >Properties)
VOICE MAIL AND FAX BOXES
Select the fax box for which the settings are to be made.
User and authorisations
A box can only be used if an owner has been assigned to it (Devices >Voice mail and fax boxes > Phone numbers). In addition to the owner,further users can be assigned to the box.
Note: An owner is automatically entered as a user with allauthorisations.
Note: All group members have the authorisations assigned to thegroup. If a group member or a subgroup is also entered individually asa user, the authorisations assigned to this user will also apply to thisgroup member/subgroup.
Requirements:
• Configured internal subscribers and/or groups
New
Opens a new line for selecting another user/group.

Users/Authorisations
COMmander 6000/R/RX - Firmware V8.4 - Advanced Information V32 05/2022- 862 -
User
Select a user/the users. If only one additional user is required, select theuser in the first list field. If more than more user is required, they are to beselected via both list fields (from ... to).
Administrate settings
The authorisations of the properties of the box that are not controlledvia a profile are expanded (except for User/authorisations, Maximumrecording capacity and Fax ID).

Call Acceptance
COMmander 6000/R/RX - Firmware V8.4 - Advanced Information V32 05/2022- 863 -
Call Acceptance
Using the Configuration Manager (Device > Voice mail and fax boxes >Properties)
Voice mail and fax boxes
Select the fax box for which the settings are to be made.
User and authorisations
A box can only be used if an owner has been assigned to it (Devices >Voice mail and fax boxes > Phone numbers). In addition to the owner,further users can be assigned to the box.
Note: An owner is automatically entered as a user with allauthorisations.
Note: All group members have the authorisations assigned to thegroup. If a group member or a subgroup is also entered individually asa user, the authorisations assigned to this user will also apply to thisgroup member/subgroup.
Requirements:
• Configured internal subscribers and/or groups
New
Opens a new line for selecting another user/group.

Call Acceptance
COMmander 6000/R/RX - Firmware V8.4 - Advanced Information V32 05/2022- 864 -
User
Select a user/the users. If only one additional user is required, select theuser in the first list field. If more than more user is required, they are to beselected via both list fields (from ... to).
Administrate settings
The authorisations of the properties of the box that are not controlledvia a profile are expanded (except for User/authorisations, Maximumrecording capacity and Fax ID).

Device Wizard
COMmander 6000/R/RX - Firmware V8.4 - Advanced Information V32 05/2022- 865 -
Device Wizard
Management of the Device Wizard Management of the Device Wizard

Management of the Device Wizard
COMmander 6000/R/RX - Firmware V8.4 - Advanced Information V32 05/2022- 866 -
Management of the Device Wizard
Device Wizard2TSM ModuleDoor TerminalsConfiguring Analogue Door TerminalsConfiguring VoIP Door TerminalConfigurig IP Switch RelaysConfiguring Loudspeaker AnnouncementsOnline Configuration Device Wizard2TSM ModuleDoor TerminalsConfiguring Analogue Door TerminalsConfiguring VoIP Door TerminalConfigurig IP Switch RelaysConfiguring Loudspeaker AnnouncementsOnline Configuration

Device Wizard
COMmander 6000/R/RX - Firmware V8.4 - Advanced Information V32 05/2022- 867 -
Device Wizard
Proceed as follows:
• Using the Configuration Manager (Devices > Device wizard >Configure)
Name
Freely selectable name (maximum of 16 characters).
Device template
Select the device template corresponding to the device.
Module
Select the module on that the device is connected.
Port
Port to which the device is connected.
New
A new device template is created.
Delete
Deletes the entries that are marked in the list.

Device Wizard
COMmander 6000/R/RX - Firmware V8.4 - Advanced Information V32 05/2022- 868 -
File management
List of all device templates.
Import a new device template in XML format.
The device template is saved as an *.xml file to the data storage device(PC).
Configure
Opens the configuration of the device template.
2TSM Module
COMmander 6000/R/RX - Firmware V8.4 - Advanced Information V32 05/2022- 869 -
2TSM Module
Proceed as follows:
• Using the Configuration Manager (Devices > Device wizard >Configure)
After adding a COMmander 2TSM (R) module and the connected devices(for example, FTZ door terminals, loudspeaker system), the PBX providesfunctions like door functions and loudspeaker announcement.
With the module basic configuration described here, two door terminals,one announcement output, seven relays and four switch inputs arecreated as devices in the configuration of the PBX. The door terminals andthe announcement output are allocated each an internal number where itcan be called. The relays 1 to 3 are assigned to the first door terminal, therelays 4 to 6 are assigned to the second door terminal. The switch inputs1 to 4 are assigned all to the first door terminal. Door calls can be createdfor the switch inputs by selecting call destinations.
Door terminal 1, Door terminal 2, Announcement output
Phone Number
This (exchange line access number) is an internal number. You can selectany of the numbers in the internal supply of phone numbers. This numbercan be called directly by an internal subscriber.
Door terminal: When put together with the numbers of the door bellbuttons, this creates 3 to 4-digit phone numbers.
Note: Double allocation of a number is not possible.
Note: Using numbers with few digits (two or three-digit numbers)inevitably restricts the possible supply of numbers requiring more

2TSM Module
COMmander 6000/R/RX - Firmware V8.4 - Advanced Information V32 05/2022- 870 -
digits. For example, if the number 12 is assigned, the numbers120-129 and 1200-1299 will no longer be available.
Note: The default exchange line access number on the PBX is 0 in thefactory settings. However, this can be changed. Note that changing theexchange line access number restricts the dial plan.
Relay X, Switch input X
Name
Enter the names of the relays and switch inputs.
Destination number
Select or enter the required call destination (external number, short-codenumber, internal number of the individual phone, internal phone number ofthe group).
Note: To create further configurations for a door terminal, open thepage Devices > Door terminals. The configuration is described hereDoor Functions.
Note: To create further configurations for the announcement output,open the page Devices > Announcement outputs. The configurationis described here Loudspeaker Announcement.
Note: To create further configurations for the relays, open the pageDevices > Relays (actuators). The configuration is described hereRelays (Actuators).
Note: For using one or more switch inputs with alarm functions, openthe page Devices > Alarms. The configuration is described hereAlarm.
Note: To change the settings of the configured COMmander 2TSM(R) module, click Devices > Device wizard on Configure.
2TSM Module
COMmander 6000/R/RX - Firmware V8.4 - Advanced Information V32 05/2022- 871 -
Note: To reset the COMmander 2TSM (R) module to the defaultsettings of the device template, on page Hardware > Selection ofmodules, select the option not in use and then again 2TSM module.Subsequently, open the page Devices > Device wizard and configurethe COMmander 2TSM (R) module again.

Door Terminals
COMmander 6000/R/RX - Firmware V8.4 - Advanced Information V32 05/2022- 872 -
Door Terminals
Proceed as follows:
• Using the Configuration Manager (Devices > Device wizard >Configure)
An existing door terminal can be connected to the PBX so that variousdoor functions such as speech connection with the door and actuationof the door opener from internal phones can be carried out. This doorterminal must be created in the configuration of the PBX and allocated aninternal number where it can be called.
The door terminal and the relays and switch inputs (door bell buttons)available for it can be created with the device wizard. Door calls canbe created for the switch inputs of the door terminal by selecting calldestinations. To detect their actuation e. g. because a door bell button hasbeen pressed, the PBX needs to know which DTMF sequence or whichSIP invite the door terminal sends when a button is pressed (see manualand settings of the device in question).
Note: The DTMF sequence or the SIP invite is the phone number thatthe device dials when a doorbell button is pressed.
Note: After the door terminal has been configured in the PBX, thecomplete door call distribution will be controlled by the PBX – withregard to the call destinations as well as with regard to the maximumcall duration. The maximum call duration can only be limited here, butnot longer than the value configured in the door station
Note: The door call distribution can be set to depend on theconfiguration – differently for night and day, for example.
Only for VoIP door terminals: To create a connection with a VoIP doorterminal, the PBX needs to know the SIP password of the connecteddevice. To control the relays and switch inputs, the PBX also needs

Door Terminals
COMmander 6000/R/RX - Firmware V8.4 - Advanced Information V32 05/2022- 873 -
to know IP address and port of the connected device as well asauthentication data (user name and password) to control the relays (seemanual and settings of the device in question).
Various door terminals supported by the PBX are available as devicetemplates. They already include several default values for operation of thedoor terminals in their factory settings.
If no of the device templates on offer matches your installation, you canselect a user-defined device template.
If you use an FTZ door terminal with a COMmander 2TSM (R) module, thedoor terminal is created when configuring the module (see 2TSM Module).

Configuring Analogue Door Terminals
COMmander 6000/R/RX - Firmware V8.4 - Advanced Information V32 05/2022- 874 -
Configuring Analogue Door Terminals
Proceed as follows:
• Using the Configuration Manager (Devices > Device wizard >Configure)
Phone Number
This (exchange line access number) is an internal number. You can selectany of the numbers in the internal supply of phone numbers. This numbercan be called directly by an internal subscriber. When put together with thenumbers of the door bell buttons, this creates 3 to 4-digit phone numbers.(Select Devices > Device wizard > New)
Note: Double allocation of a number is not possible.
Note: Using numbers with few digits (two or three-digit numbers)inevitably restricts the possible supply of numbers requiring moredigits. For example, if the number 12 is assigned, the numbers120-129 and 1200-1299 will no longer be available.
Note: The default exchange line access number on the PBX is 0 in thefactory settings. However, this can be changed. Note that changing theexchange line access number restricts the dial plan.
Relay X, Switch input X
Name
Enter the names of the relays and switch inputs.

Configuring Analogue Door Terminals
COMmander 6000/R/RX - Firmware V8.4 - Advanced Information V32 05/2022- 875 -
DTMF sequence
Requirements:
• Expert settings
Enter the request that is assigned to the door bell button within the doorterminal. Possible entries: Digits and characters (Possible entries: *, #).
Destination number
Select or enter the required call destination (external number, short-codenumber, internal number of the individual phone, internal number of thegroup).
Note: The call destination is first entered identically for allconfigurations. It can be changed later.
Note: If a door call should also be executed via VoIP accounts or GSMgateways, in any case the external number must be entered with thecorresponding city code, even if it is the local prefix.
Note: To create further configurations for a door terminal, open thepage Devices > Door terminals and click Configure in the line of thecorresponding door terminal.

Configuring VoIP Door Terminal
COMmander 6000/R/RX - Firmware V8.4 - Advanced Information V32 05/2022- 876 -
Configuring VoIP Door Terminal
Proceed as follows:
• Using the Configuration Manager (Devices > Device wizard >Configure)
Phone Number
This (exchange line access number) is an internal number. You can selectany of the numbers in the internal supply of phone numbers. This numbercan be called directly by an internal subscriber. When put together with thenumbers of the door bell buttons, this creates 3 to 4-digit phone numbers.(Select Devices > Device wizard > New)
Note: Double allocation of a number is not possible.
Note: Using numbers with few digits (two or three-digit numbers)inevitably restricts the possible supply of numbers requiring moredigits. For example, if the number 12 is assigned, the numbers120-129 and 1200-1299 will no longer be available.
Note: The default exchange line access number on the PBX is 0 in thefactory settings. However, this can be changed. Note that changing theexchange line access number restricts the dial plan.
SIP Password
Enter the SIP password required by the connected device.
IP configuration
IP address

Configuring VoIP Door Terminal
COMmander 6000/R/RX - Firmware V8.4 - Advanced Information V32 05/2022- 877 -
Enter the IP address required by the connected device. Possible entries:IP address with a range of 0 to 255 (example: 192.168.0.240).
Port
Enter the port required by the connected device. Possible entries: 1 to65535.
User name
Enter the user name (authentication data to control the relays).
Password
Enter the password (authentication data to control the relays).
Relay X, Switch input X
Name
Enter the names of the relays and switch inputs.
Destination number
Select or enter the required call destination (external number, short-codenumber, internal number of the individual phone, internal number of thegroup).
Note: The call destination is first entered identically for allconfigurations. It can be changed later.
Note: If a door call should also be executed via VoIP accounts or GSMgateways, in any case the external number must be entered with thecorresponding city code, even if it is the local prefix.

Configuring VoIP Door Terminal
COMmander 6000/R/RX - Firmware V8.4 - Advanced Information V32 05/2022- 878 -
Note: To create further configurations for a door terminal, open thepage Devices > Door terminals and click Configure in the line of thecorresponding door terminal.
SIP invite
Enter the SIP invites which the connected door terminal uses as signal.(Possible entries: Digits and the characters * and #).
Note: If default values have already been entered in the devicetemplate, the entry fields will not be displayed. If you want to changethese values, click Expert.

Configurig IP Switch Relays
COMmander 6000/R/RX - Firmware V8.4 - Advanced Information V32 05/2022- 879 -
Configurig IP Switch Relays
Proceed as follows:
• Using the Configuration Manager (Devices > Device wizard >Configure)
An existing IP switch relay can be connected to the PBX so that variousfunctions controled by the PBX (see ) can be carried out. This IP switchrelay must be created in the configuration of the PBX.
The IP switch relay and the relays available for it can be created withthe device wizard. To control the relays, the PBX needs to know the IPaddress, port, user name (optional) and password of the connected device(see manual and settings of the device in question).
Various IP switch relays supported by the PBX are available as devicetemplates. They already include several default values for operation of theIP switch relays in their factory settings.
If no of the device templates on offer matches your installation, you canselect a user-defined device template.
In addition, you can select a simplified device template (IPBox Simple)which will make it easier for you to create an IP switch relay with theoperating mode Manual relay.
IP configuration
IP address
Enter the IP address required by the connected device. Possible entries:IP address with a range of 0 to 255 (example: 192.168.0.240).
Port

Configurig IP Switch Relays
COMmander 6000/R/RX - Firmware V8.4 - Advanced Information V32 05/2022- 880 -
Enter the port required by the connected device. Possible entries: 1 to65535.
Note: Normally, the default port is port 80.
User name
Enter the user name required by the connected device.
Password
Enter the password required by the connected device.
Relay X, Name
Enter the names of the relays.

Configuring Loudspeaker Announcements
COMmander 6000/R/RX - Firmware V8.4 - Advanced Information V32 05/2022- 881 -
Configuring Loudspeaker Announcements
Proceed as follows:
• Using the Configuration Manager (Devices > Device wizard >Configure)
In order to make loudspeaker announcements, a device that can be usedas announcement output (e. g. an a/b-Audiobox at a loudspeaker system)must be connected to the PBX. This announcement output must becreated in the configuration of the PBX and assigned an internal numberto call it.
The announcement output can be created with the device wizard. Variousdevices supported by the PBX that can be used as announcement outputare available as device templates for this purpose. Their factory settingsalready include several default values for operation of the announcementoutputs.
If no of the device templates on offer matches your installation, you canselect a user-defined device template.
Phone Number
This (exchange line access number) is an internal number. You can selectany of the numbers in the internal supply of phone numbers. This numbercan be called directly by an internal subscriber. (Entry on page Devices >Device wizard)
Note: Double allocation of a number is not possible.
Note: Using numbers with few digits (two or three-digit numbers)inevitably restricts the possible supply of numbers requiring moredigits. For example, if the number 12 is assigned, the numbers120-129 and 1200-1299 will no longer be available.

Configuring Loudspeaker Announcements
COMmander 6000/R/RX - Firmware V8.4 - Advanced Information V32 05/2022- 882 -
Note: The default exchange line access number on the PBX is 0 in thefactory settings. However, this can be changed. Note that changing theexchange line access number restricts the dial plan.
Relay X, Name
Enter the names of the relays.

Online Configuration
COMmander 6000/R/RX - Firmware V8.4 - Advanced Information V32 05/2022- 883 -
Online Configuration
Proceed as follows:
• Using the Configuration Manager (Devices > Device wizard >Configure)
IMPORTING DEVICE TEMPLATE
A device template is either imported from the Internet Load configurationor from a file Import from file.

Door Terminals
COMmander 6000/R/RX - Firmware V8.4 - Advanced Information V32 05/2022- 884 -
Door Terminals
Management of the Door TerminalSettings of the Door TerminalSettings Door Call Management of the Door TerminalSettings of the Door TerminalSettings Door Call

Management of the Door Terminal
COMmander 6000/R/RX - Firmware V8.4 - Advanced Information V32 05/2022- 885 -
Management of the Door Terminal
Door Calls+Relays Door Calls+Relays

Door Calls+Relays
COMmander 6000/R/RX - Firmware V8.4 - Advanced Information V32 05/2022- 886 -
Door Calls+Relays
Proceed as follows:
• Using the Configuration Manager (Devices > Door terminals)
Phone Number
This (exchange line access number) is an internal number. You can selectany of the numbers in the internal supply of phone numbers. This numbercan be called directly by an internal subscriber. When put together with thenumbers of the door bell buttons, this creates 3 to 4-digit phone numbers.(Select Devices > Device wizard > New)
Note: Double allocation of a number is not possible.
Note: Using numbers with few digits (two or three-digit numbers)inevitably restricts the possible supply of numbers requiring moredigits. For example, if the number 12 is assigned, the numbers120-129 and 1200-1299 will no longer be available.
Note: The default exchange line access number on the PBX is 0 in thefactory settings. However, this can be changed. Note that changing theexchange line access number restricts the dial plan.
Name
Freely selectable name. This name is used to identify the door terminalwithin the PBX and the connected system phones. The name can also betransferred to the VoIP end devices via LDAP server.

Door Calls+Relays
COMmander 6000/R/RX - Firmware V8.4 - Advanced Information V32 05/2022- 887 -
Module | Port
Module and port to which the device that can be used as door terminal (e.g. a TFS Universal-Plus) is connected.
Configure
Opens the configuration of the door terminal.
Relais
Requirements:
• Relay/actuator (optional, see Technical Data in the Instructions)
• Created door terminal
A relay with the operating mode Speaking, Door opener or Light isassigned to the door terminal.
A relay used for this purpose can, for example, be part of a connecteddoor terminal or be connected to the same port (a/b Switching Module).Alternatively, it is also possible to use a relay for the door function whichis part of another connected device (e. g. an IP switch relay). In this caseit must first be created in the configuration of the PBX as part of this otherdevice and then be assigned to the door terminal. It then remains partof this other device in the configuration of the PBX, but takes over theselected door function for the door terminal.
If suitable relays have already been configured on the page Devices >Relays (Actuators), a list field will appear now. Select one of the existingrelays and click .

Door Calls+Relays
COMmander 6000/R/RX - Firmware V8.4 - Advanced Information V32 05/2022- 888 -
If you do not want to use any of the existing relays, select New relays inthe list field ( cancels the operation). Enter a freely selectable name forthe relay and click Ok.
Note: Alternatively, you can also create and assign relays on the pageDevices > Relays (Actuators).
Note: For a detailed description of the operating modes, refer to thechapter .
Link to the page Devices > Relays (actuators)
Deletes the relay or opens the configuration of the relay.
Türrufe
Requirements:
• Switch input (optional, see Technical Data in the Instructions)
• Created door terminal
The door bell buttons of a door terminal can be used to initiateconfiguration-dependent internal and external door calls. For this purpose,the door bell buttons must be created as switch inputs in the PBX. Theymust then be allocated call destinations and assigned to the door terminal.To detect a door call, e. g. because a door bell button has been pressed,the PBX needs to know which DTMF sequence or which SIP invite the

Door Calls+Relays
COMmander 6000/R/RX - Firmware V8.4 - Advanced Information V32 05/2022- 889 -
connected device sends in this case (see manual and settings of thedevice in question).
Note: The DTMF sequence or the SIP invite usually is the phonenumber assigned to the door bell button within the door terminal.After the door terminal has been configured in the configuration of thePBX, the door call distribution will be controlled completely – includingconfiguration-dependently – by the PBX.
Click the second under Door calls + relays in the line for thecorresponding door terminal.
Enter a name for the switch input in the Switch input entry field.
Enter a value under DTMF sequence (for analogue door terminals) orSIP invite (for VoIP door terminals). To detect that the alarm has beentriggered, e. g. because a door bell button has been pressed, the PBXneeds to know which DTMF sequence or which SIP invite the connecteddevice sends in this case (see manual and settings of the device inquestion). The DTMF sequence or the SIP invite usually is the phonenumber assigned to the door bell button within the door terminal.
Only for FTZ door terminals with COMmander 2TSM (R) module: In theBell list field, select a switch input.
Note: If all existing switch inputs are assigned to the first door terminalof the COMmander 2TSM (R) module (basic configuration), therequired switch inputs have to be deleted on the first door terminal.
In the Destination number list field, select the required call destination.Or after selecting Enter destination number, in the Destination numberentry field, enter the required call destination. Possible entries:
External number
Short-code number
Internal number of the individual phone

Door Calls+Relays
COMmander 6000/R/RX - Firmware V8.4 - Advanced Information V32 05/2022- 890 -
Internal phone of the group
Note:
Note: The call destination is first entered identically for allconfigurations. It can be changed afterwards.
Note: If a door call should also be executed via VoIP accounts or GSMgateways, in any case the external number must be entered with thecorresponding city code, even if it is the local prefix.
Click Ok.
Note: To create further configurations for a door call or the
corresponding switch input, click in the line of the correspondingdoor call. The configuration is described below and in the chapterSwitch Input.
Deletes the switch input or opens the configuration of the door call.

Settings of the Door Terminal
COMmander 6000/R/RX - Firmware V8.4 - Advanced Information V32 05/2022- 891 -
Settings of the Door Terminal
Configuration of the Door Terminal Configuration of the Door Terminal

Configuration of the Door Terminal
COMmander 6000/R/RX - Firmware V8.4 - Advanced Information V32 05/2022- 892 -
Configuration of the Door Terminal
Proceed as follows:
• Separately for door terminals
• Using the Configuration Manager (Devices > Door terminals >Configure)
Requirements:
• Created door terminal
Analogue door terminal
Enable connection
Finish connection
Specifies which DTMF sequences the PBX uses to control the analoguedoor terminal to enable or terminate the connection. For information aboutwhich DTMF sequences the connected device requires, see the manual ofthe device in question.
Note: You can use the comma ',' character as a pause of half asecond.
Dead time
Specifies how many milliseconds the PBX will wait before it sends DTMFsequences to the door terminal again. For information about how muchtime the connected device requires to be ready for reception again afterreceiving DTMF sequences, see the manual of the device in question.

Configuration of the Door Terminal
COMmander 6000/R/RX - Firmware V8.4 - Advanced Information V32 05/2022- 893 -
VoIP Door Terminal
SIP password
To create a connection with a VoIP door terminal, the PBX needs the SIPpassword of the connected device (see manual and settings of the devicein question).

Settings Door Call
COMmander 6000/R/RX - Firmware V8.4 - Advanced Information V32 05/2022- 894 -
Settings Door Call
Proceed as follows:
• Separately for door calls
• Using the Configuration Manager (Devices > Door terminals > Door
terminal calls > )
Requirements:
• Configured door call
CONFIGURATION OF THE DOOR CALL
Select the door call you want to configure.
Level
Requirements:
• Created switch input for a COMmander 2TSM(R) module
The level must be configured depending on the signal applied.
High level
A voltage of 5-15 V AC/DC was applied.
Low level
GND was applied.
DTMF sequence
Requirements:

Settings Door Call
COMmander 6000/R/RX - Firmware V8.4 - Advanced Information V32 05/2022- 895 -
• Created switch input for an analogue device
Specifies which DTMF sequence the PBX detects, for example,as theactuation of a door bell button to then trigger an alarm or a door call. Forinformation about which DTMF sequences the connected device sends,see the manual of the device in question.
Note: The DTMF sequence usually is the phone number assigned tothe door bell button within the door terminal.
SIP invite
Requirements:
• Created switch input for a VoIP device
Specifies which SIP invite the PBX detects, for example,as the actuationof a door bell button to then trigger an alarm or a door call. For informationabout which SIP invite the connected device sends, see the manual of thedevice in question.
Note: The SIP invite usually is the phone number assigned to the doorbell button within the door terminal.
Destination number
Proceed as follows:
• Separately for configurations
Select the destination number you want to assign to a door call.
Ringtone
Proceed as follows:
• Separately for configurations

Settings Door Call
COMmander 6000/R/RX - Firmware V8.4 - Advanced Information V32 05/2022- 896 -
The ringtone specifies which sequence of sounds is used to signal doorcalls to internal subscribers on the PBX.
Note: See Ringer tones for information about exceptions to signallingand sound sequences.
Call duration
Proceed as follows:
• Separately for configurations
Select a call duration during which a door call is to be signalled to aninternal subscriber.
Note: Set the call duration in the connected door terminal to themaximum call duration. The actual call duration will then be limited bythe PBx.
Exchange line dialling/number presentation DDI
Proceed as follows:
• Separately for configurations
The option permits the precise selection of the external connection andeven of the phone number to be presented.
All ext. lines or internal
Door calls can be made on internal or on all external channels.
External connection
Door calls will be made on the selected external connection.
In the DDI entry field, enter the DDI to be presented from the extensionsblock under the corresponding slot. If the DDI is displayed in red font

Settings Door Call
COMmander 6000/R/RX - Firmware V8.4 - Advanced Information V32 05/2022- 897 -
subsequently, it either does not belong to the value range or the maximumnumber of own phone numbers has already been entered.
Second ringer
Proceed as follows:
• Separately for configurations
Requirements:
• Created relay with operating mode Second ringer
A second ringer can additionally be installed at locations where ringing ofthe phone will not always be heard. It will then be triggered by a relay withthe operating mode second ringer which is assigned to the door call.

Announcement Outputs
COMmander 6000/R/RX - Firmware V8.4 - Advanced Information V32 05/2022- 898 -
Announcement Outputs
Management Announcement OutputSettings Announcement Output Management Announcement OutputSettings Announcement Output

Management Announcement Output
COMmander 6000/R/RX - Firmware V8.4 - Advanced Information V32 05/2022- 899 -
Management Announcement Output
Proceed as follows:
• Using the Configuration Manager (Devices > Announcementoutputs)
Phone Number
This (exchange line access number) is an internal number. You can selectany of the numbers in the internal supply of phone numbers. This numbercan be called directly by an internal subscriber. (Entry on page Devices >Device wizard)
Note: Double allocation of a number is not possible.
Note: Using numbers with few digits (two or three-digit numbers)inevitably restricts the possible supply of numbers requiring moredigits. For example, if the number 12 is assigned, the numbers120-129 and 1200-1299 will no longer be available.
Note: The default exchange line access number on the PBX is 0 in thefactory settings. However, this can be changed. Note that changing theexchange line access number restricts the dial plan.
Name
Freely selectable name. This name is used to identify the announcementoutput within the PBX and the connected system phones. The name canalso be transferred to the VoIP end devices via LDAP server.

Management Announcement Output
COMmander 6000/R/RX - Firmware V8.4 - Advanced Information V32 05/2022- 900 -
Module | Port
Module and port to which the device that can be used as announcementoutput (e. g. an a/b-Audiobox at a loudspeaker system) is connected.
Configure
Opens the configuration of the announcement output.
Relay
Requirements:
• Relay/actuator (optional, see Technical Data in the Instructions)
A relay with the operating mode Speaking, which is enabled during theloudspeaker announcement, is assigned to the alarm. This relay can beused to switch over the loudspeaker area of the loudspeaker system, forexample, or to switch on an additional lamp which draws attention to theannouncement.
If suitable relays have already been configured on the page Devices >Relays (Actuators), a list field will appear now. Select one of the existingrelays and click .
If you do not want to use any of the existing relays, select New relays inthe list field ( cancels the operation). Enter a freely selectable name forthe relay and click Ok.
Note: Alternatively, you can also create and assign relays on the pageDevices > Relays (Actuators).

Management Announcement Output
COMmander 6000/R/RX - Firmware V8.4 - Advanced Information V32 05/2022- 901 -
Note: For a detailed description of the operating modes, refer to .
Link to the page Devices > Relays (actuators)
Deletes the relay or opens the configuration of the relay.

Settings Announcement Output
COMmander 6000/R/RX - Firmware V8.4 - Advanced Information V32 05/2022- 902 -
Settings Announcement Output
Proceed as follows:
• Separately for announcement outputs
• Using the Configuration Manager (Devices > Announcementoutputs > Configure)
Requirements:
• Created announcement output
CONFIGURATION OF THE ANNOUNCEMENT OUTPUT
Select the announcement output you want to configure.
Enable connection
Finish connection
Specifies which DTMF sequences the PBX uses to control the analogueannouncement outputs to enable or terminate the connection. Forinformation about which DTMF sequences the connected device requires,see the manual of the device in question.
Note: You can use the comma ',' character as a pause of half asecond.
Dead time
Specifies how many milliseconds the PBX will wait before it sends DTMFsequences to the announcement output again. For information abouthow much time the connected device requires to be ready for reception

Settings Announcement Output
COMmander 6000/R/RX - Firmware V8.4 - Advanced Information V32 05/2022- 903 -
again after receiving DTMF sequences, see the manual of the device inquestion.

Alarms
COMmander 6000/R/RX - Firmware V8.4 - Advanced Information V32 05/2022- 904 -
Alarms
Management of the AlarmsSettings AlarmSettings of the Switch Inputs Management of the AlarmsSettings AlarmSettings of the Switch Inputs

Management of the Alarms
COMmander 6000/R/RX - Firmware V8.4 - Advanced Information V32 05/2022- 905 -
Management of the Alarms
Switch input+Relay
Proceed as follows:
• Using the Configuration Manager (Devices > Alarms)
Phone Number
This (exchange line access number) is an internal number. You can selectany of the numbers in the internal supply of phone numbers. This numbercan be called directly by an internal subscriber to initiate an alarm. (Entrywith New)
Note: Double allocation of a number is not possible.
Note: Using numbers with few digits (two or three-digit numbers)inevitably restricts the possible supply of numbers requiring moredigits. For example, if the number 12 is assigned, the numbers120-129 and 1200-1299 will no longer be available.
Note: The default exchange line access number on the PBX is 0 in thefactory settings. However, this can be changed. Note that changing theexchange line access number restricts the dial plan.
Name
Freely selectable name. This name is used to identify the alarm within thePBX.
Enable alarm
off

Management of the Alarms
COMmander 6000/R/RX - Firmware V8.4 - Advanced Information V32 05/2022- 906 -
The alarm input is disabled. It is not possible to initiate an alarm.
once
The alarm can be initiated only once. Subsequently, the alarm input will bedisabled and will have to be enabled once again.
always
After an alarm is triggered off, the alarm input continues to be enabled. Afurther alarm can be triggered off.
Configure
Opens the configuration of the alarm.
New
Adds a new alarm. You must then make the settings for this new alarm.
Delete
Deletes the entries marked in the list.

Switch input+Relay
COMmander 6000/R/RX - Firmware V8.4 - Advanced Information V32 05/2022- 907 -
Switch input+Relay
Relay
Requirements:
• Relay/actuator (optional, see Technical Data in the Instructions)
• Created device (e. g. door terminal, IP switch relay) whose part therelay is
A relay with the operating mode Alarm, which is used to enable e. g. asiren when the alarm has been triggered, is assigned to the alarm.
In the list field, select one of the existing relays and click .
If you do not want to use any of the existing relays, select New relay inthe list field ( cancels the operation). Enter a freely selectable name forthe relay and select the device as whose part the relay is to be created inthe Add to list field. Click Ok.
Note: The relay remains part of this other device (e. g. door terminal,IP switch relay) in the configuration of the PBX, but takes over theselected alarm function for the alarm.
Note: For a detailed description of the operating modes, refer to .
Link to the page Devices > Relays (actuators)

Switch input+Relay
COMmander 6000/R/RX - Firmware V8.4 - Advanced Information V32 05/2022- 908 -
Deletes the relay or opens the configuration of the relay.
Switch input
Requirements:
• Switch input (optional, see Technical Data in the Instructions)
• Created device (e. g. a door terminal) whose part the switch input is (e.g. a still free door bell button)
A switch input that can be used to trigger the alarm, is assigned to thealarm.
In the list field, select one of the existing switch inputs and click .
If you do not want to use any of the existing switch inputs, select Newswitch input in the list field ( cancels the operation). Enter a freelyselectable name for the switch input and select the device as whose partthe switch input is to be created in the Add to list field.
Enter a value under DTMF sequence (for analogue door terminals) orSIP invite (for VoIP door terminals). To detect that the alarm has beentriggered, e. g. because a door bell button has been pressed, the PBXneeds to know which DTMF sequence or which SIP invite the connecteddevice sends in this case (see manual and settings of the device inquestion). The DTMF sequence or the SIP invite usually is the phonenumber assigned to the door bell button within the door terminal.
Click Ok.
Switch input+Relay
COMmander 6000/R/RX - Firmware V8.4 - Advanced Information V32 05/2022- 909 -
Note: The switch input remains part of this other device (e. g. doorterminal) in the configuration of the PBX, but takes over the selectedalarm function for the alarm.
Deletes the switch input or opens the configuration of the switch input.
Settings Alarm
COMmander 6000/R/RX - Firmware V8.4 - Advanced Information V32 05/2022- 910 -
Settings Alarm
Proceed as follows:
• Separately for alarms
• Using the Configuration Manager (Devices > Alarms > Configure)
Requirements:
• Configured alarm
CONFIGURATION OF THE ALARM
Select the alarm you want to configure.
Enable alarm
off
The alarm input is disabled. It is not possible to initiate an alarm.
once
The alarm can be initiated only once. Subsequently, the alarm input will bedisabled and will have to be enabled once again.
always
After an alarm is triggered off, the alarm input continues to be enabled. Afurther alarm can be triggered off.
Number of alarm loops
Specifies how many alarm loops are to be performed before the alarm isacknowledged.

Settings Alarm
COMmander 6000/R/RX - Firmware V8.4 - Advanced Information V32 05/2022- 911 -
Alarm announcement
Select the announcement to be played to alarm subscribers.
Alarm subscriber (destination number)
Select up to four internal or external phone numbers to be called when thePBX performs an alarm loop.
Entering the destination number
Use this to enter a phone number manually.
Possible entries:
External number
Short-code dialling number
Internal number of the individual phone
Internal number of the group
Note: The default exchange line access number on the PBX is 0 in thefactory settings. However, this can be changed.
Note: You can set the display text that will be displayed if an alarmcall is made to the internal subscribers, which have been selected asalarm subscribers, here (Functions > CLIP texts).
Exchange line dialling / number presentation > DDI
---: Alarm calls can be made on all external channels.
External connection: alarm call is made on the selected externalconnection. The selected phone number is transmitted.
Note: You must select the DDI number to be sent for a PTPconnection from the extensions block. If the DDI number is then

Settings Alarm
COMmander 6000/R/RX - Firmware V8.4 - Advanced Information V32 05/2022- 912 -
displayed in red text, either it is not in the value range, or the maximumnumber of external phone numbers has already been entered.
Note: Alarm calls should preferably be made via the land line.
Alarm delay time (0..99)
Specifies how many seconds elapse, after the alarm is triggered on theswitch input, before the first alarm loop starts.
Alarm waiting time (0..99)
Specifies how many seconds elapse before an alarm is repeated, if it hasnot been acknowledged.
Alarm can be triggered by Action URL
Provided that the access authorisation to Action URLs is granted system-wide or for a subscriber, the individual alarm can be triggered by ActionURLs.

Settings of the Switch Inputs
COMmander 6000/R/RX - Firmware V8.4 - Advanced Information V32 05/2022- 913 -
Settings of the Switch Inputs
Switch Input+Relay Switch Input+Relay

Switch Input+Relay
COMmander 6000/R/RX - Firmware V8.4 - Advanced Information V32 05/2022- 914 -
Switch Input+Relay
Proceed as follows:
• Separately for switch inputs
• Using the Configuration Manager (Devices > Alarms > Switch input
> )
Requirements:
• Created switch input
CONFIGURATION OF THE SWITCH INPUT
Select the switch input to be configured.
Level
Requirements:
• Created switch input for a COMmander 2TSM(R) module
The level must be configured depending on the signal applied.
High level
A voltage of 5-15 V AC/DC was applied.
Low level
GND was applied.
DTMF sequence
Requirements:
• Created switch input for an analogue device

Switch Input+Relay
COMmander 6000/R/RX - Firmware V8.4 - Advanced Information V32 05/2022- 915 -
Specifies which DTMF sequence the PBX detects, for example,as theactuation of a door bell button to then trigger an alarm or a door call. Forinformation about which DTMF sequences the connected device sends,see the manual of the device in question.
Note: The DTMF sequence usually is the phone number assigned tothe door bell button within the door terminal.
SIP invite
Requirements:
• Created switch input for a VoIP device
Specifies which SIP invite the PBX detects, for example,as the actuationof a door bell button to then trigger an alarm or a door call. For informationabout which SIP invite the connected device sends, see the manual of thedevice in question.
Note: The SIP invite usually is the phone number assigned to the doorbell button within the door terminal.

Relays (Actuators)
COMmander 6000/R/RX - Firmware V8.4 - Advanced Information V32 05/2022- 916 -
Relays (Actuators)
Management Relays (Actuators)Settings of the Relays (Actuators) Management Relays (Actuators)Settings of the Relays (Actuators)

Management Relays (Actuators)
COMmander 6000/R/RX - Firmware V8.4 - Advanced Information V32 05/2022- 917 -
Management Relays (Actuators)
Proceed as follows:
• Using the Configuration Manager (Devices > Relays (actuators))
Name
Freely selectable name (maximum of 16 characters).
Identity number
Identification number of the relay which is automatically assigned when anew relay is created.
Module
Select the module on that the device is connected.
Port
Port to which the device is connected.
Operating mode
Select an operating mode.
Note: Relays can have various functions on the PBX. For a detaileddescription see here Relays (Actuators).
used by
Assigns a device to the relay.

Management Relays (Actuators)
COMmander 6000/R/RX - Firmware V8.4 - Advanced Information V32 05/2022- 918 -
New
A new relay is created and assigned to a device.
Delete
Deletes the entries that are marked in the list.
Configure
Opens the configuration of the device template.

Settings of the Relays (Actuators)
COMmander 6000/R/RX - Firmware V8.4 - Advanced Information V32 05/2022- 919 -
Settings of the Relays (Actuators)
2TSM ModuleAnalogue Door TerminalVoIP Door TerminalIP Switch RelayLoudspeaker Announcements 2TSM ModuleAnalogue Door TerminalVoIP Door TerminalIP Switch RelayLoudspeaker Announcements
2TSM Module
COMmander 6000/R/RX - Firmware V8.4 - Advanced Information V32 05/2022- 920 -
2TSM Module
Proceed as follows:
• Using the Configuration Manager (Devices > Relays (actuators) >Configure)
CONFIGURATION OF THE RELAY
Select the relay.
Switching duration
Specifies after how many seconds the PBX will switch off the relay.Possible entries: 0 bis 6000 (0 only for manual relays).
Note: The switching duration is used for relays with the operatingmodes Light, Door opener, Alarm, PC relay and Manual relay.
Note: To enable the PBX to switch off the relay after the specifiedswitching duration, off control must be supported by the relay andbe switched on (for some relays, e. g. the a/b Switching Modules,switching off cannot be controlled). Alternatively, the hold time of therelay can be used.

Analogue Door Terminal
COMmander 6000/R/RX - Firmware V8.4 - Advanced Information V32 05/2022- 921 -
Analogue Door Terminal
Proceed as follows:
• Using the Configuration Manager (Devices > Relays (actuators) >Configure)
CONFIGURATION OF THE RELAY
Select the relay.
Off control
Requirements:
• Created relay
The PBX will switch off relays with the operating modes Light, Dooropener, Alarm and PC relay after the specified switching duration.
Note: When switched off, the hold time of the relay will be used. ThePBX does not actively switch off the relay.
Note: As a a pre-requisite, off control must be supported by the relay(for some relays, e. g. the a/b Switching Modules, switching off cannotbe controlled).
Switching duration
The switching duration of a relay specifies after how many seconds thePBX will switch off the relay. Possible entries: 0 to 6000 (0 only for manualrelays).
Note: The switching duration is used for relays with the operatingmodes Light, Door opener, Alarm, PC relay and Manual relay.
Analogue Door Terminal
COMmander 6000/R/RX - Firmware V8.4 - Advanced Information V32 05/2022- 922 -
Note: To enable the PBX to switch off the relay after the specifiedswitching duration, off control must be supported by the relay andbe switched on (for some relays, e. g. the a/b Switching Modules,switching off cannot be controlled). Alternatively, the hold time of therelay can be used.
Hold time
If switching off is not to be controlled by the PBx (for some relays, e. g. thea/b Switching Modules, switching off cannot be controlled), the hold timeof the relay can be used instead of the switching duration. This will onlymake sense if the hold time of the relay is sufficiently long, for example fora door opener.
The PBX needs to know how long the relay will be held in order tosignalise holding of the relay on the system phones (see the manual of thedevice in question).
Requirements:
• Created relay
• Off control switched on for the relay
Enter the hold time of the relay in milliseconds. Possible entries: 10 to10000 ms.
Relay can be triggered by Action URL
Provided that the access authorisation to Action URLs is granted system-wide or for a subscriber, the individual relay can be triggered by ActionURLs.

VoIP Door Terminal
COMmander 6000/R/RX - Firmware V8.4 - Advanced Information V32 05/2022- 923 -
VoIP Door Terminal
Proceed as follows:
• Using the Configuration Manager (Devices > Relays (actuators) >Configure)
CONFIGURATION OF THE RELAY
Select the relay.
PBX is decisive (primary)
The available relays on an IP switch relay can also be toggled withoutaffecting the PBX. In some situations, e.g. if the PBX is switched off at theswitching point, the PBX cannot identify the state of the relay.
The PBX restores the relay to the last state it was able to identify after it isrebooted.
Off control
Requirement:
• the relay must have been set up
The PBX will switch off relays with the operating modes Light, Dooropener, Alarm and PC relay after the specified switching duration.
Note: When switched off, the hold time of the relay will be used. ThePBX does not actively switch off the relay.
Note: As a a pre-requisite, off control must be supported by the relay(for some relays, e. g. the a/b Switching Modules, switching off cannotbe controlled).

VoIP Door Terminal
COMmander 6000/R/RX - Firmware V8.4 - Advanced Information V32 05/2022- 924 -
Switching duration
Specifies after how many seconds the PBX will switch off the relay.Possible entries: 0 to 6000 (0 only for manual relays).
Note: The switching duration is used for relays with the operatingmodes Light, Door opener, Alarm, PC relay and Manual relay.
Note: To enable the PBX to switch off the relay after the specifiedswitching duration, off control must be supported by the relay andbe switched on (for some relays, e. g. the a/b Switching Modules,switching off cannot be controlled). Alternatively, the hold time of therelay can be used.
Hold time
If switching off is not to be controlled by the PBx (for some relays, e.g. thea/b Switching Modules, switching off cannot be controlled), the hold timeof the relay can be used instead of the switching duration. This will onlymake sense if the hold time of the relay is sufficiently long, for example fora door opener.
The PBX needs to know how long the relay will be held in order tosignalise holding of the relay on the system phones (see the manual of thedevice in question).
Requirement:
• the relay must have been set up
• Off control switched on for the relay
Enter the hold time of the relay in milliseconds. Possible entries: 10 to10000.

VoIP Door Terminal
COMmander 6000/R/RX - Firmware V8.4 - Advanced Information V32 05/2022- 925 -
Relay can be triggered by Action URL
Provided that the access authorisation to Action URLs is granted system-wide or for a subscriber, the individual manual relay can be triggered byAction URLs.

IP Switch Relay
COMmander 6000/R/RX - Firmware V8.4 - Advanced Information V32 05/2022- 926 -
IP Switch Relay
Proceed as follows:
• Using the Configuration Manager (Devices > Relays (actuators) >Configure)
CONFIGURATION OF THE RELAY
Select the relay.
PBX is decisive (primary)
The available relays on an IP switch relay can also be toggled withoutaffecting the PBX. In some situations, e.g. if the PBX is switched off at theswitching point, the PBX cannot identify the state of the relay.
The PBX restores the relay to the last state it was able to identify after it isrebooted.
Off control
Requirement:
• the relay must have been set up
The PBX will switch off relays with the operating modes Light, Dooropener, Alarm and PC relay after the specified switching duration.
Note: When switched off, the hold time of the relay will be used. ThePBX does not actively switch off the relay.
Note: As a a pre-requisite, off control must be supported by the relay(for some relays, e. g. the a/b Switching Modules, switching off cannotbe controlled).

IP Switch Relay
COMmander 6000/R/RX - Firmware V8.4 - Advanced Information V32 05/2022- 927 -
Switching duration
Specifies after how many seconds the PBX will switch off the relay.Possible entries: 0 to 6000 (0 only for manual relays).
Note: The switching duration is used for relays with the operatingmodes Light, Door opener, Alarm, PC relay and Manual relay.
Note: To enable the PBX to switch off the relay after the specifiedswitching duration, off control must be supported by the relay andbe switched on (for some relays, e. g. the a/b Switching Modules,switching off cannot be controlled). Alternatively, the hold time of therelay can be used.
Hold time
If switching off is not to be controlled by the PBx (for some relays, e.g. thea/b Switching Modules, switching off cannot be controlled), the hold timeof the relay can be used instead of the switching duration. This will onlymake sense if the hold time of the relay is sufficiently long, for example fora door opener.
The PBX needs to know how long the relay will be held in order tosignalise holding of the relay on the system phones (see the manual of thedevice in question).
Requirement:
• the relay must have been set up
• Off control switched on for the relay
Enter the hold time of the relay in milliseconds. Possible entries: 10 to10000.

IP Switch Relay
COMmander 6000/R/RX - Firmware V8.4 - Advanced Information V32 05/2022- 928 -
Relay can be triggered by Action URL
Provided that the access authorisation to Action URLs is granted system-wide or for a subscriber, the individual manual relay can be triggered byAction URLs.

Loudspeaker Announcements
COMmander 6000/R/RX - Firmware V8.4 - Advanced Information V32 05/2022- 929 -
Loudspeaker Announcements
Proceed as follows:
• Using the Configuration Manager (Devices > Relays (actuators) >Configure)
CONFIGURATION OF THE RELAY
Select the relay.
Off control
Requirements:
• Created relay
The PBX will switch off relays with the operating modes Light, Dooropener, Alarm and PC relay after the specified switching duration.
Note: When switched off, the hold time of the relay will be used. ThePBX does not actively switch off the relay.
Note: As a a pre-requisite, off control must be supported by the relay(for some relays, e. g. the a/b Switching Modules, switching off cannotbe controlled).
Switching duration
The switching duration of a relay specifies after how many seconds thePBX will switch off the relay. Possible entries: 0 to 6000 (0 only for manualrelays).
Note: The switching duration is used for relays with the operatingmodes Light, Door opener, Alarm, PC relay and Manual relay.

Loudspeaker Announcements
COMmander 6000/R/RX - Firmware V8.4 - Advanced Information V32 05/2022- 930 -
Note: To enable the PBX to switch off the relay after the specifiedswitching duration, off control must be supported by the relay andbe switched on (for some relays, e. g. the a/b Switching Modules,switching off cannot be controlled). Alternatively, the hold time of therelay can be used.
Hold time
If switching off is not to be controlled by the PBx (for some relays, e. g. thea/b Switching Modules, switching off cannot be controlled), the hold timeof the relay can be used instead of the switching duration. This will onlymake sense if the hold time of the relay is sufficiently long, for example fora door opener.
The PBX needs to know how long the relay will be held in order tosignalise holding of the relay on the system phones (see the manual of thedevice in question).
Requirements:
• Created relay
• Off control switched on for the relay
Enter the hold time of the relay in milliseconds. Possible entries: 10 to10000 ms.
Relay can be triggered by Action URL
Provided that the access authorisation to Action URLs is granted system-wide or for a subscriber, the individual relay can be triggered by ActionURLs.

Loudspeaker Announcements
COMmander 6000/R/RX - Firmware V8.4 - Advanced Information V32 05/2022- 931 -
CONFIGURATION OF ANALOGUE RELAYS
Dead time
The PBX uses DTMF sequences to control the analogue relays. For thispurpose, the PBX needs to know how much time the connected devicerequires to be ready for reception again after receiving DTMF sequences(see the manual of the device in question).
Requirements:
• Created analogue relay
Specifies how many milliseconds the pbx will wait before it sends DTMFsequences to the connected device again. Possible entries: 0 to 10000milliseconds.
Switching
The PBX uses DTMF sequences to control the analogue relays. For thispurpose, the PBX needs to know which DTMF sequences the connecteddevice requires to switch the relay on or off (see the manual of the devicein question).
Requirements:
• Created analogue relay
Switch on, Switch off
Enter DTMF sequences required by the connected device. Possibleentries: Digits and the characters * and # and the comma ',' character as apause of half a second.

Action URLs
COMmander 6000/R/RX - Firmware V8.4 - Advanced Information V32 05/2022- 932 -
Action URLs
Management of the Action URLs (HTTP Request)Settings Action URL (HTTP Request) Management of the Action URLs (HTTP Request)Settings Action URL (HTTP Request)

Management of the Action URLs (HTTP Request)
COMmander 6000/R/RX - Firmware V8.4 - Advanced Information V32 05/2022- 933 -
Management of the Action URLs (HTTP Request)
Action URLs (incoming)Action URLs (outgoing)Event type Action URLs (incoming)Action URLs (outgoing)Event type

Action URLs (incoming)
COMmander 6000/R/RX - Firmware V8.4 - Advanced Information V32 05/2022- 934 -
Action URLs (incoming)
Proceed as follows:
• Using the Configuration Manager (Devices > Action URLs page)
You can find further information about the structure of an ActionURL, the switching of relays, the triggering of an alarm etc. in theAuerswald DokuWiki.
New
Adds a new Action URL. You must then make the settings for this newAction URL.
Delete
Deletes the entries that are marked in the list.
Incoming Action URLs enabled
System-wide access. Requirement for the following settings.
Action URLs only within the local network
Triggered exclusively on the local network.
subscribers may generate own passwords for accessing ActionURLs
For the subscriber login, additional passwords can be configured undersubscriber properties.
Action URLs (incoming)
COMmander 6000/R/RX - Firmware V8.4 - Advanced Information V32 05/2022- 935 -
Passwords for accessing Action URLs > Configure
Requirements:
• Enabled Subscribers may generate own passwords for accessingAction URLs
Note: Additional passwords can also be created for individualsubscribers (Subscriber (scr.) > Phone numbers > Configure >Basic settings).
Page for editing additional passwords.
Access to Action URLs
System-wide access
Save
Displays the automatically created passwords that is only displayed once.Therefore, it should be copied to the clipboard.
Note: When switched off, the password is only created whenaccessing the PBX via a secure HTTPS connection.

Action URLs (outgoing)
COMmander 6000/R/RX - Firmware V8.4 - Advanced Information V32 05/2022- 936 -
Action URLs (outgoing)
Proceed as follows:
• Using the Configuration Manager (Devices > Action URLs page)
You can find further information about the structure of an ActionURL, the switching of relays, the triggering of an alarm etc. in theAuerswald DokuWiki.
New
Adds a new Action URL. You must then make the settings for this newAction URL.
Delete
Deletes the entries that are marked in the list.
Name
Freely selectable name to identify the Action URL within the PBX.
Action URL
Protocol, IP/URL and command must be understood by the receivingdevice (example: http://phoneIP/remote_control?action=HANGUP). Youfind further information in the device manual.
Configure
Opens the configuration of the Action URL.

Event type
COMmander 6000/R/RX - Firmware V8.4 - Advanced Information V32 05/2022- 937 -
Event type
Proceed as follows:
• Using the Configuration Manager (Devices > Action URLs page)
You can find further information about the structure of an ActionURL, the switching of relays, the triggering of an alarm etc. in theAuerswald DokuWiki.
New
Adds a new Action URL. You must then make the settings for this newAction URL.
Delete
Deletes the entries that are marked in the list.
Alarm
In the first list feld, select one of the existing alarms, select the alarm typein the second list field and click .
If you do not want to use any of the existing alarms, select New alarm inthe list field ( cancels the operation). Enter the phone number of thealarm and a freely selectable name. In the list field Alarm type, select thealarm type. Click Ok.
Note: You can successively select all three alarm types for one ActionURL.

Event type
COMmander 6000/R/RX - Firmware V8.4 - Advanced Information V32 05/2022- 938 -
Phone Number
This (exchange line access number) is an internal number. You can selectany of the numbers in the internal supply of phone numbers. This numbercan be called directly by an internal subscriber to initiate an alarm. (Entrywith New)
Note: Double allocation of a number is not possible.
Note: Using numbers with few digits (two or three-digit numbers)inevitably restricts the possible supply of numbers requiring moredigits. For example, if the number 12 is assigned, the numbers120-129 and 1200-1299 will no longer be available.
Note: The default exchange line access number on the PBX is 0 in thefactory settings. However, this can be changed. Note that changing theexchange line access number restricts the dial plan.
Name
Freely selectable name. This name is used to identify the alarm within thePBX.
Alarm type
You can select all alarm types for one alarm:
Alarm start
The Action URL will be assigned to the alarm type Alarm start. When analarm is triggered, the Action URL is sent.
Note: If an alarm delay time was entered, the alarm call via the ActionURL starts after the alarm delay time.
Event type
COMmander 6000/R/RX - Firmware V8.4 - Advanced Information V32 05/2022- 939 -
Alarm acknowledged
The Action URL will be assigned to the alarm type Alarm acknowledged.As soon as an alarm subscriber (configured under Devices > Alarms >Configure > Alarm subscriber (destination number)) acknowlegded thealarm, the Action URL is sent
Note: A device from another manufacturer that is not recognized bythe PBX, cannot acknowlegde an alarm call by entering the DTMF digit0.
Alarm timeout
The Action URL will be assigned to the alarm type Alarm timeout. If noneof the alarm subscribers acknowledges the alarm, the alarm call ends afterthe set alarm loops and the Action URL is sent.
Link to page Devices > Alarms
Delets the alarm or opens the configuration of the alarm.

Settings Action URL (HTTP Request)
COMmander 6000/R/RX - Firmware V8.4 - Advanced Information V32 05/2022- 940 -
Settings Action URL (HTTP Request)
Proceed as follows:
• Separately for Action URLs
• Using the Configuration Manager (Devices > Action URLs >Configure)
Requirements:
• Configured Action URL
CONFIGURATION OF THE ACTION URL
Select the alarm you want to configure.
User name
Enter the device‘s username that shall be reached via the Action URL.
Password
Enter the password that belongs to the username.
Response required
If the function is enabled, the PBX waits for a feedback of the receivingdevice after having sent the Action URL and displays a correspondingmessage about the correct or incorrect sending (under Monitoring >System messages). Therefore, activating this function is generallyrecommended.
Note: The command to be executed in the Action URL must becorrectly understood by the receiving device, also in order to

Settings Action URL (HTTP Request)
COMmander 6000/R/RX - Firmware V8.4 - Advanced Information V32 05/2022- 941 -
give according feedback. This should always be controlled whenconfiguring an Action URL.
If the SIP port of the internal VoIP registrar is modified, the internalSIPS port of the internal VoIP registrar is also changed automatically. Amessage concerning the Action URL that was sent is displayed by thePBX.

Time control
COMmander 6000/R/RX - Firmware V8.4 - Advanced Information V32 05/2022- 942 -
Time control
ConfigurationsSwitching Times ConfigurationsSwitching Times

Configurations
COMmander 6000/R/RX - Firmware V8.4 - Advanced Information V32 05/2022- 943 -
Configurations
Management Configuration Management Configuration

Management Configuration
COMmander 6000/R/RX - Firmware V8.4 - Advanced Information V32 05/2022- 944 -
Management Configuration
Proceed as follows:
• Using the Configuration Manager
Automatic configuration switching
Requirements:
• Minimum of two configured configurations and configured switchingtimes
• Current PBX time
Time-controlled configurations are toggled according to the PBX internalclock.
Note: If automatic configuration switchover is enabled, theconfiguration enabled under Time control > Switching times forthe current time becomes active. If a different configuration is thenswitched manually, this remains active until the next switching time.
Controllable with system relay: Aut.Konfig.um. (900)
Requirements:
• Automatic configuration switchover is enabled
Automatic configuration switchover is controllable via phone.
Configuration name
Freely selectable name. This name is used to identify the configurationwithin the PBX.

Management Configuration
COMmander 6000/R/RX - Firmware V8.4 - Advanced Information V32 05/2022- 945 -
Identification number
Automatically issued number. Is used for manual switching of aconfiguration by a programming sequence.
Note: All previously assigned identification numbers can be viewedsorted by number, name or type under Overviews > Identificationnumber table.
Activate
The selected configuration is switched on.
Note: To switch off a configuration, switch on a different configuration.
New
Adds a new configuration to the list. The settings made for the existingconfiguration are copied. You must then make the individual settings forthe configuration.
Delete
Deletes the entries marked in the list.
Copy
Configuration settings are copied from one configuration into other,selected configurations.

Switching Times
COMmander 6000/R/RX - Firmware V8.4 - Advanced Information V32 05/2022- 946 -
Switching Times
Management Switching Times Management Switching Times
Management Switching Times
COMmander 6000/R/RX - Firmware V8.4 - Advanced Information V32 05/2022- 947 -
Management Switching Times
Proceed as follows:
• Using the Configuration Manager
Requirements:
• At least two configured configurations
• Automatic configuration switchover is enabled
− Using the Configuration Manager (Time control > Switchingtimes)
• For using the holidays: Configured and enabled holidays
− Using the Configuration Manager (Functions > Calendar)
Time
Time (format hh : mm) when the selected configuration is to be activated.(Select New to enter.)
Note: A configuration applies until another configuration (manual orautomatic) is enabled, also beyond the daily change. An exceptionis the transition from a holiday to a normal weekday. In this case, theconfiguration activated for the holiday will only be active until 23:59.The normal configuration for a weekday will be activated at 0:00 of thefollowing day (even if a configuration was activated manually on theholiday).
Configuration
Configuration to be activated.

Management Switching Times
COMmander 6000/R/RX - Firmware V8.4 - Advanced Information V32 05/2022- 948 -
Wake-up announcement
Defines which wake-up announcement the user hears when accepting awake-up call. Three wake-up announcements are available to indicate thetime of day.
New
Adds a new switching time to the list. For this switching time settings mustbe configured.
Delete
Deletes the entries marked in the list.
Copy
Switching times are copied from one weekday to other selectedweekdays.

Routing
COMmander 6000/R/RX - Firmware V8.4 - Advanced Information V32 05/2022- 949 -
Routing
Soft-LCR 4.0VoIP and GSM Routing Soft-LCR 4.0VoIP and GSM Routing

Soft-LCR 4.0
COMmander 6000/R/RX - Firmware V8.4 - Advanced Information V32 05/2022- 950 -
Soft-LCR 4.0
Management LCR SubscribersManagement LCR ProvidersManagement Networks and LCR importManagement Area Codes/Area Code RangesManagement LCR Tables Management LCR SubscribersManagement LCR ProvidersManagement Networks and LCR importManagement Area Codes/Area Code RangesManagement LCR Tables

Management LCR Subscribers
COMmander 6000/R/RX - Firmware V8.4 - Advanced Information V32 05/2022- 951 -
Management LCR Subscribers
Proceed als follows:
• Using the Configuration Manager (Routing > Soft-LCR 4.0 > LCRsubscriber)
Phone number | Name
Requirements:
• Enabled LCR subscribers
Select the subscribers for whom automatic LCR is to be carried out.(Select New to enter.)
New
Adds a new subscriber to the list.
Delete
Deletes the entries marked in the list.

Management LCR Providers
COMmander 6000/R/RX - Firmware V8.4 - Advanced Information V32 05/2022- 952 -
Management LCR Providers
Proceed as follows:
• Using the Configuration Manager (Routing > Soft-LCR 4.0 >Provider)
Note: Note. LCR for Call Through calls is switched on/off onthe page Functions > Call Through under EXCHANGE LINESETTINGS.
Note: Manual LCR by dialling a preceding provider area code isalways possible if the network provider supports dial-around service.
Provider area code
Provider area code without an exchange line access number. (Select New to enter.)
Provider name
Freely selectable name. This name is used to identify the provider withinthe PBX. (Select New to enter.)
New
Adds a new provider to the list.
Up to 50 dial-around providers can be created.
Delete
Deletes the entries marked in the list.

Management Networks and LCR import
COMmander 6000/R/RX - Firmware V8.4 - Advanced Information V32 05/2022- 953 -
Management Networks and LCR import
Proceed as follows:
• Using the Configuration Manager (Routing > Soft-LCR 4.0 >Networks and LCR import)
Create
Requirements:
• Created own local area code
The networks City, Region, National and International can automaticallybe created based on the local area code. The include the data for theArea code/Area code range.
Important: When networks are created automatically, the existingLCR data is deleted.
Name
Freely selectable name. This name is used to identify the network withinthe PBX. (Select New to enter.)
Configure
Opens the configuration of the networks and the corresponding prefixes.
New
Adds a new network to the list.
Up to 60 networks can be created manually.

Management Networks and LCR import
COMmander 6000/R/RX - Firmware V8.4 - Advanced Information V32 05/2022- 954 -
Delete
Deletes the entries marked in the list.
Import
Select and import an LCR configuration file (*.xml, *.txt, also compressed*.gz) that is stored on a (PC) data storage device.
Note: Using special tariff calculators you can calculate an LCRconfiguration (provider, tariff groups and data) and import this into thePBX (e. g. Telefonsparbuch.de).
Important: When importing configuration data, existing LCR data isdeleted.
Export
A completed LCR configuration is saved to a data storage device in a *.gzfile.

Management Area Codes/Area Code Ranges
COMmander 6000/R/RX - Firmware V8.4 - Advanced Information V32 05/2022- 955 -
Management Area Codes/Area Code Ranges
Proceed as follows:
• Using the Configuration Manager (Routing > Soft-LCR 4.0 > Netzeund LCR-Import > Configure)
Area codes/area code ranges
Digit sequence for an area code or area code range. (Select Neu toenter.)
A prefix contains the prefix or all of the prefixes from the area that shouldbe collected for the network (e.g., local phone network, regional network,international network).
Name
Freely selectable name. This name is used for identification within thePBX.
New
Adds a new area code/area code range to the list.
Up to 1000 entries can be created for all networks in total.
Delete
Deletes the entries marked in the list.

Management LCR Tables
COMmander 6000/R/RX - Firmware V8.4 - Advanced Information V32 05/2022- 956 -
Management LCR Tables
Proceed as follows:
• Using the Configuration Manager (Routing > Soft-LCR 4.0 > LCR-Tables > Configure)
Day
Requirements:
• For use of holidays: holidays created and LCR active
− Using the Configuration Manager (Functions > Calendar)
Weekdays when dialling is to be carried out using the correspondingprovider.
Time
Time point starting on the corresponding Day when the dial attempt is tobe carried out via the corresponding provider. (Select New to enter.)
Provider
no LCR
The dial attempt is initiated without a provider area code.
generate busy
The dial attempt is ended and a busy signal is issued.
Provider name: The dial attempt is initiated using the area code enteredunder Routing > Soft-LCR 4.0 > Providers.
Note: During the dial attempt, if the selected provider under Mainprovider is busy, the selected provider under 1st fallback provider is

Management LCR Tables
COMmander 6000/R/RX - Firmware V8.4 - Advanced Information V32 05/2022- 957 -
attempted, etc. If still no connection is established during the dial withthe 2nd fallback provider, a busy signal is issued.
Price per connection
Proceed as follows:
• Separately for main provider, 1st and 2nd fallback provider.
Indicates the fee a provider charges for the establishment of a connection,based on the currency entered in the PBX (Functions > Call allowanceaccounts).
Price per minute
Proceed as follows:
• Separately for main provider, 1st and 2nd fallback provider
The PBX uses Price per minute for internal calculations and displaypurposes during calls that are initiated by an LCR subscriber and perhapsa Call Through user and routed via the corresponding provider.
The Price per minute refers to the currency entered in the PBX(Functions > Call allowance accounts under CHARGES).
Metering pulse interval 1st pulse
Proceed as follows:
• Separately for main provider, 1st and 2nd fallback provider
Seconds the provider assigns the first meter pulse after the connectionhas been established (after CONNECT).
Note: This meter pulse is fully billed by the provider even if the call isended before this time has elapsed.

Management LCR Tables
COMmander 6000/R/RX - Firmware V8.4 - Advanced Information V32 05/2022- 958 -
Second pulse
Proceed as follows:
• Separately for main provider, 1st and 2nd fallback provider
Charge pulse time unit used to bill a call after the first metering pulse.
Note: For second pulses of differing lengths, enter the mostunfavourable meter pulse.
Note: The provider bills each started meter pulse in full.
New
Adds a new LCR table to the list.
Delete
Deletes the entries marked in the list.

VoIP and GSM Routing
COMmander 6000/R/RX - Firmware V8.4 - Advanced Information V32 05/2022- 959 -
VoIP and GSM Routing
Settings for VoIP/GSM Routing Settings for VoIP/GSM Routing

Settings for VoIP/GSM Routing
COMmander 6000/R/RX - Firmware V8.4 - Advanced Information V32 05/2022- 960 -
Settings for VoIP/GSM Routing
Exception NumbersRouting Configuration-Dependent Exception NumbersRouting Configuration-Dependent

Exception Numbers
COMmander 6000/R/RX - Firmware V8.4 - Advanced Information V32 05/2022- 961 -
Exception Numbers
Proceed as follows:
• Using the Configuration Manager (Routing > VoIP and GSM routing)
Phone number / range
Exception numbers, for which the selected connection should bedetermined. Up to 400 exception numbers can be entered. (Select Newto enter.)
Note: Do not enter the phone numbers for software updates (systemphone) etc. numbers as exception numbers.
Name
Freely selectable name. This name is used to identify the exceptionnumber within the PBX.
1st dialling/2nd dialling/3rd dialling
Select the connection to be used for the exception number..
send busy
The dial attempt is ended and a busy signal is issued.
All fixed network lines
The dialling is carried out by one of the external ports without GSMgateway of the configured ISDN PTMP connections or ISDN PTPconnections.

Exception Numbers
COMmander 6000/R/RX - Firmware V8.4 - Advanced Information V32 05/2022- 962 -
PBX base number [extensions block (DDIs)] | Name of connection: Thedialling is carried out by the selected external port of the ISDN PTPconnection.
Slot x - Port No | Name of connection: The dialling is carried out by theselected external port of the ISDN PTMP connection.
VoIP: all accounts
The dial attempt is made over one of the configured VoIP accounts.
VoIP
All GSM lines
The dialling is carried out by one of the external ports with GSM gatewayof the configured ISDN PTMP connections or ISDN PTP connections.
GSM
PBX base number [extensions block (DDIs)] | Name of connection: Thedialling is carried out by the GSM gateway at the selected external port ofthe ISDN PTP connection.
GSM
Slot x - Port No | Name of connection: The dialling is carried out by theGSM gateway at the selected external port of the ISDN PTMP connection.
New
Adds a new exception number to the list. You must then make the settingsfor the exception number.

Exception Numbers
COMmander 6000/R/RX - Firmware V8.4 - Advanced Information V32 05/2022- 963 -
Delete
Deletes the entries marked in the list.
Export
The columns Phone number / range and Name are saved to the (PC)data storage device in a file called ausnahmerufnr.csv.
Import
A text file (e.g., *.txt, *.csv, data arranged in rows and separated bysemicolons) stored on a (PC) data storage device is selected andimported in the columns Phone number / range and Name.
Note: The option All fixed network lines under 1st dialling or theoption send busy for the 2nd dialling and 3rd dialling is selected forthe imported phone numbers. This must be manually adapted later.

Routing Configuration-Dependent
COMmander 6000/R/RX - Firmware V8.4 - Advanced Information V32 05/2022- 964 -
Routing Configuration-Dependent
Proceed as follows:
• Using the Configuration Manager (Routing > VoIP and GSM Routing> Routing configuration dependent)
Configurations [Name]
For all configurations
In case that the selected provider has low prices only for a limited space oftime, you can switch on and off single exception numbers by configuration.
Configuration, during which the exception number is used.

Functions
COMmander 6000/R/RX - Firmware V8.4 - Advanced Information V32 05/2022- 965 -
Functions
Exchange Line TransferAutomatic ReceptionsCall ThroughCLIP TextsShort-Code MacrosCall Allowance AccountsHotel FunctionCalendarLAN TAPICall ParkingOnline Name SearchWaiting FieldMusic on Hold and AnnouncementsWake-Up Times Exchange Line TransferAutomatic ReceptionsCall ThroughCLIP TextsShort-Code MacrosCall Allowance AccountsHotel FunctionCalendarLAN TAPICall ParkingOnline Name SearchWaiting FieldMusic on Hold and AnnouncementsWake-Up Times

Exchange Line Transfer
COMmander 6000/R/RX - Firmware V8.4 - Advanced Information V32 05/2022- 966 -
Exchange Line Transfer
Settings for Exchange Line Transfer Settings for Exchange Line Transfer

Settings for Exchange Line Transfer
COMmander 6000/R/RX - Firmware V8.4 - Advanced Information V32 05/2022- 967 -
Settings for Exchange Line Transfer
Proceed as follows:
• Using the Configuration Manager (Functions > Exchange linetransfer)
Exchange line settings for the manually switched exchange lineaccess
Configure special exchange line settings
The exchange line settings (e.g., exchange line authorisation, callrestrictor (outgoing), call deblocker (outgoing)) for the manually switchedexchange line access will be configured specifically for this purpose.
Use the exchange line settings of the transferring subscriber
The exchange line settings for the manually switched exchange lineaccess are set depending on the transferring subscriber.
Callback option
The requesting subscriber can trigger a callback after initiating an externalcall.
Charge burden
Transferring subscriber
The charges for a call are billed to the transferring subscriber.
Requesting subscriber
The charges for a call are billed to the requesting subscriber.
Settings for Exchange Line Transfer
COMmander 6000/R/RX - Firmware V8.4 - Advanced Information V32 05/2022- 968 -
Time limitation for establishing the external call (1..60 min)
Specifies how many minutes the exchange line access will persist atmaximum if a call is not initiated successfully.

Automatic Receptions
COMmander 6000/R/RX - Firmware V8.4 - Advanced Information V32 05/2022- 969 -
Automatic Receptions
Management Automatic ReceptionSettings for Automatic Receptions Management Automatic ReceptionSettings for Automatic Receptions

Management Automatic Reception
COMmander 6000/R/RX - Firmware V8.4 - Advanced Information V32 05/2022- 970 -
Management Automatic Reception
Proceed as follows:
• Using the Configuration Manager ((Seite Functions > AutomaticReceptions)
Requirements:
• Activated function Automatic Reception (optional, see Activation)
Internal number of the reception
This (exchange line access number) is an internal number. You can selectany of the numbers in the internal supply of phone numbers. This numberis then used for distributing calls and can be called directly by an internalsubscriber.
Note: Double allocation of a number is not possible.
Note: Using numbers with few digits (two or three-digit numbers)inevitably restricts the possible supply of numbers requiring moredigits. For example, if the number 12 is assigned, the numbers120-129 and 1200-1299 will no longer be available.
Note: The default exchange line access number on the PBX is 0 in thefactory settings. However, this can be changed. Note that changing theexchange line access number restricts the dial plan.
Name
Freely selectable name. This name is used to identify the automaticreception within the PBX.

Management Automatic Reception
COMmander 6000/R/RX - Firmware V8.4 - Advanced Information V32 05/2022- 971 -
Configure
Opens the configuration of the automatic reception.
New
Adds a new automatic reception. You must then make the settings for thisnew automatic reception.
Note: A maximum of ten automatic receptions can be created.
Delete
Deletes the entries marked in the list.

Settings for Automatic Receptions
COMmander 6000/R/RX - Firmware V8.4 - Advanced Information V32 05/2022- 972 -
Settings for Automatic Receptions
SettingsDestination Number SettingsDestination Number
Settings
COMmander 6000/R/RX - Firmware V8.4 - Advanced Information V32 05/2022- 973 -
Settings
Proceed as follows:
• Separately for Automatic Receptions
• Using the Configuration Manager (Functions > AutomaticReceptions > Configure)
Requirements:
• A configured automatic reception
Announcement
Select the greeting to be played to callers. Make your selection from theannouncements for automatic receptions and the announcements beforeanswering.
Note: Under some circumstances, a greeting with background musicmay cause errors because the audible touch tones cannot be properlyrecognized, or parts of the music may be interpreted as touch tones.
Max. number of external calls on hold in parallel
Specifies how many external calls can be kept on hold at the same time.The caller hears the busy signal if this number is exceeded. Externalcalls on hold are calls that have either not yet been transferred orcalls that have been transferred back to the automatic reception. Thisrestriction does not apply to internal callers and to callers transferred by asuperordinated reception.

Settings
COMmander 6000/R/RX - Firmware V8.4 - Advanced Information V32 05/2022- 974 -
Max. number of the repetitions per call
Specifies how often the greeting is played if the caller does not input avalid number. The system react as if the destination was busy/did notreply, after the announcements and the subsequent waiting time haselapsed.
Waiting time between the announcements or until transfer to thedefault destination
Specifies how long the PBX waits (in seconds) for a valid input betweenand after the announcements.
Reaction if the destination is busy/does not reply
If the caller enters a valid suffix dialling digit, the destination subscriber isnotified that a call is present.
If the call is not answered, the announcement if the destination is busy/does not reply is played.
If the destination is busy, call waiting is enabled provided that thedestination subscriber has enabled this function. If he rejects the callwaiting call, the announcement if the destination is busy/does not reply isplayed.
Note: For internal calls, it is tried to reach the destination number formax. 2 minutes, external calls for max. 8 minutes. This time dependson the settings made. VoIP and ISDN subscribers, for example, canonly be called for 3 minutes if the call is not answered.
The system then reacts according to the following setting.
End of the call

Settings
COMmander 6000/R/RX - Firmware V8.4 - Advanced Information V32 05/2022- 975 -
Three short busy signals are played and the PBX ends the existing call.
Call default destination
The PBX transfers the existing call to the default destination numberentered below. If the call is not answered there either, three short busysignals are played and the PBX ends the existing call.
Note: If the destination number and the default destination number areidentical, the PBX cuts off the call without calling again.
Repeat Automatic Reception
The PBX transfers the existing call to the automatic reception that wascalled previously.
Announcement if destination is busy/does not reply
Select the announcement to be played to a caller if the destination isbusy or does not reply. Make your selection from the announcements forautomatic receptions and the announcements before answering, or do notselect an announcement.
Default destination number
Possible entries:
Internal number of a subscriber
Internal number of a group
Internal number of a voice mailbox
Internal number of another automatic reception
Note: Note that an internal subscriber or a group must have at leastOnly incoming, with emergency call exchange line authorisation toenable them to answer a call transferred by the automatic reception.

Settings
COMmander 6000/R/RX - Firmware V8.4 - Advanced Information V32 05/2022- 976 -
Note: An external destination number can be reached by entering aninternal destination which is forwarded to an external one (e.g. via callforwarding (subscribers or groups) with the required external phonenumber as destination number).
Music on Hold during the ringing period
If the Music on hold during the ringing period option has been enabled, acaller transferred by the automatic reception will only hear the music onhold during this process (pressing the R key, dialling the internal number,and ringing period).
Note: When switched off, the caller hears the call tone during the callphase.

Destination Number
COMmander 6000/R/RX - Firmware V8.4 - Advanced Information V32 05/2022- 977 -
Destination Number
Proceed as follows:
• Separately for Automatic Receptions
• Using the Configuration Manager (Functions > AutomaticReceptions > Configure)
Requirements:
• A configured automatic reception
DTMF | Destination number
x
Specifies the in-house destination to which the PBX should automaticallytransfer calls after the caller inputs a DTMF suffix dialling digit 0 to 9.
Possible entries:
Internal number of a subscriber
Internal number of a group
Internal number of a voice mailbox
Internal number of another automatic reception
* under DTMF 1- 9: All internal numbers for subscribers, groups, voicemailboxes and automatic receptions that start with a number marked with* can be selected directly by redialling.
Note: If the caller enters * e.g. for DTMF 4: All internal subscribers,groups, voice mailboxes and automatic receptions whose phone

Destination Number
COMmander 6000/R/RX - Firmware V8.4 - Advanced Information V32 05/2022- 978 -
numbers start with 4 (4xxx) can be reached by directly redialling theirphone number.
Note: If the caller enters *: The subscriber is given a maximum of 10seconds in which to enter each digit. If this time period is exceeded,or if they dial an invalid phone number (subscriber, group, automaticreception), the announcement if the destination is busy/does notreply is played, and the caller will be automatically connected with theautomatic reception they called previously.
Note: Note that an internal subscriber or a group must have at leastOnly incoming, with emergency call exchange line authorisation toenable them to answer a call transferred by the automatic reception.
Note: An external destination number can be reached by entering aninternal destination which is forwarded to an external one (e.g. via callforwarding (subscribers or groups) with the required external phonenumber as destination number).

Call Through
COMmander 6000/R/RX - Firmware V8.4 - Advanced Information V32 05/2022- 979 -
Call Through
Settings for Call Through Settings for Call Through

Settings for Call Through
COMmander 6000/R/RX - Firmware V8.4 - Advanced Information V32 05/2022- 980 -
Settings for Call Through
Exchange Line SettingsCall AssignmentCall Through User Exchange Line SettingsCall AssignmentCall Through User
Exchange Line Settings
COMmander 6000/R/RX - Firmware V8.4 - Advanced Information V32 05/2022- 981 -
Exchange Line Settings
Proceed as follows:
• Using the Configuration Manager (Functions > Call Through)
LCR for Call Through calls
Requirements:
• Configured LCR
− Using the Configuration Manager (Routing > Soft-LCR 4.0
Even for Call Through calls the most cost-effective phone service provideris determined.
PIN for Call Through calls
In the case of a call, the PIN of the caller is transmitted via DTMF. The PINis then compared with the Call Through PIN.
Note: The transmission of the phone number is required. Therefore,anonymous callers do not get a Call Through authorisation.
Note: If the PIN is locked, the access is only locked for the CallThrough subscriber who made the misentry.
Max. duration of an external Call Through call (1..99 min.)
Specifies after how many minutes an external Call Through call is endedby the PBX, due to security reasons.

Exchange Line Settings
COMmander 6000/R/RX - Firmware V8.4 - Advanced Information V32 05/2022- 982 -
Special exchange line settings Configure
You can make the following exchange line settings for internal subscribers,but also for Call Through calls:
• Exchange line authorisation
• Call restrictor (outgoing)
• Call deblocker (outgoing)
• Preferred exchange line
• Number presentation (outgoing)
• Number presentation (incoming)
Call Assignment
COMmander 6000/R/RX - Firmware V8.4 - Advanced Information V32 05/2022- 983 -
Call Assignment
Proceed as follows:
• Using the Configuration Manager (Functions > Call Through)
Call Through number
Requirements:
• To use VoIP numbers: Standard (use of From header as screenednumber) configured for the VoIP provider as evaluation type ofincoming SIP messages
− Using the Configuration Manager (Public switched tel. networks> VoIP > Provider > Configure
Select the external phone number, that the Call Through user must dial tocall the PBX for Call Through.
Note: Call Through numbers are not included in call distribution andcannot be diverted.
Max. number
Specifies how many how many simultaneous Call Through calls arepermitted for the exchange line.
---: No Call Through calls are permitted.

Call Through User
COMmander 6000/R/RX - Firmware V8.4 - Advanced Information V32 05/2022- 984 -
Call Through User
Proceed as follows:
• Using the Configuration Manager (Functions > Call Through)
Short-code dialling number
Requirements:
• Contact created for the Call Through user (e.g., mobile phone).
− Using the Configuration Manager (User data > Address books >Contacts and assignment)
Select the Call Through user according to its display name. (Select New to enter.)
Note: Call Through is automatically configured for each of the fourphone numbers that can be entered for each contact, but only for atotal of 400 contacts.
Call restrictor/deblocker
If call restrictor and deblocker for Call Through are configured, the phonenumber dialled by the Call Through user is checked.
New
Adds a new Call Through user to the list. You must then make the settingsfor the Call Through user.
Delete
Deletes the entries marked in the list.

CLIP Texts
COMmander 6000/R/RX - Firmware V8.4 - Advanced Information V32 05/2022- 985 -
CLIP Texts
Settings CLIP Texts Settings CLIP Texts

Settings CLIP Texts
COMmander 6000/R/RX - Firmware V8.4 - Advanced Information V32 05/2022- 986 -
Settings CLIP Texts
CLIP texts can be configured for the following calls and functions:
• CCBS callbacks
The configured CLIP text is displayed on system phones during acallback on busy.
• CCNR callbacks
The configured CLIP text is displayed on system phones during acallback on no reply.
• Alarm calls
The configured CLIP text is displayed on system phones during analarm call.
• Wake-up calls
The configured CLIP text is displayed on analogue phones during awake-up call.
• Exchange line reservation
The configured CLIP text is displayed on analogue phones duringa call to signal that a line that was previously busy has becomeavailable.
• TAPI
The configured CLIP text is displayed on analogue phones during acall that signals the LAN-TAPI function.
• Callbacks
The configured CLIP text is displayed on analogue phones during acallback (on busy or on no reply).

Settings CLIP Texts
COMmander 6000/R/RX - Firmware V8.4 - Advanced Information V32 05/2022- 987 -
Proceed as follows:
• Using the Configuration Manager (Functions > CLIP texts)
Requirements:
• System phone or analogue phone with alphanumerical CLIPinformation
• Phone number display (CLIP): CLIP info and Extended CLIP infoenabled for the analogue subscriber

Short-Code Macros
COMmander 6000/R/RX - Firmware V8.4 - Advanced Information V32 05/2022- 988 -
Short-Code Macros
Management Macro Short-Code Number Management Macro Short-Code Number

Management Macro Short-Code Number
COMmander 6000/R/RX - Firmware V8.4 - Advanced Information V32 05/2022- 989 -
Management Macro Short-Code Number
Proceed as follows:
• Using the Configuration Manager (Functions > Macro short-codenumber)
Important: For short-code macros, the automatic exchange linerequest is always enabled. Therefore, short-code macros withpostdialling could have problems with the length check so that the areacode must always be dialled.
Note: The replacement of an internal number by another internalnumber is not supported.
Note: It is not possible to integrate a macro into another macro.
Macro types:
Simple digit sequence that is replaced by the macro short-code.
• 0-9
• *
• #
Character sequence that by dialling the macro short-code is transferred tothe macro dialler and then started.
• Z (0-9, *, #)
• W (1-5) waiting time/break time of 1-5 s
• H Hang up with hook key
• C Waiting for connection

Management Macro Short-Code Number
COMmander 6000/R/RX - Firmware V8.4 - Advanced Information V32 05/2022- 990 -
Note: If the macro does not end with an H and the macro dialler isafter the execution of a macro in an active connection, the call will beconnected to the subscriber who triggered it.
Macro short-code number
Note: A short-code number must not begin with 0 or the exchange lineaccess number.
For example: the internal number 60 for the pick-up sequence ##06.
Macro name
For example: Pick-up
Macro sequence
Digit sequence (e. g. ##06) or sequence of macro commands that areselected or triggered by the short-code.
New
Delete
Prints a list of all configured short-code macros.

Call Allowance Accounts
COMmander 6000/R/RX - Firmware V8.4 - Advanced Information V32 05/2022- 991 -
Call Allowance Accounts
Settings of the Call Allowance Account Settings of the Call Allowance Account

Settings of the Call Allowance Account
COMmander 6000/R/RX - Firmware V8.4 - Advanced Information V32 05/2022- 992 -
Settings of the Call Allowance Account
ChargesAccount DebitCall Allowance Accounts ChargesAccount DebitCall Allowance Accounts

Charges
COMmander 6000/R/RX - Firmware V8.4 - Advanced Information V32 05/2022- 993 -
Charges
Proceed as follows:
• Using the Configuration Manager (Functions > Call allowanceaccounts)
Requirements:
• ISDN connection
• The AOCD service attribute released by the network provider (chargetransmission during the connection)
• Configured LCR
− Using the Configuration Manager (Routing > Soft-LCR 4.0)
Currency name
Specifies which abbreviation is used for the currency in the ConfigurationManager (e.g., "EUR" for Euros).
Price per unit
Is used for internal calculations and the display. The value refers to thecurrency entered (e.g., EUR 0,0600 for 6 cents).
Note: For Least Cost Routing (LCR), the tariff information of dial-around providers is saved in the PBX. This data (prices + charge pulseinterval) replace the cost per call unit entered here for all LCR calls.
Maximum credit for an account (max. 500 EUR)
Specifies the highest amount that a call allowance account may notexceed.

Charges
COMmander 6000/R/RX - Firmware V8.4 - Advanced Information V32 05/2022- 994 -
Call charge recording changes with scr
After transferring a call to another internal end device, the account of theother subscriber is debited.

Account Debit
COMmander 6000/R/RX - Firmware V8.4 - Advanced Information V32 05/2022- 995 -
Account Debit
Proceed as follows:
• Using the Configuration Manager (Functions > Call allowanceaccounts)
Requirements:
• ISDN connection
• The AOCD service attribute released by the network provider (chargetransmission during the connection)
• Configured LCR
− Using the Configuration Manager (Routing > Soft-LCR 4.0)
Charge account for business calls
Charge account for private calls
Charge account for group calls
The configured call allowance accounts are debited in the case ofbusiness calls, private calls and/or group calls.

Call Allowance Accounts
COMmander 6000/R/RX - Firmware V8.4 - Advanced Information V32 05/2022- 996 -
Call Allowance Accounts
Proceed as follows:
• Using the Configuration Manager (Functions > Call allowanceaccounts)
Requirements:
• ISDN connection
• The AOCD service attribute released by the network provider (chargetransmission during the connection)
• Configured LCR
− Using the Configuration Manager (Routing > Soft-LCR 4.0)
Important: You cannot enter/set/recharge a call allowance balance ifUnlimited allowance under Charge according the following patternis selected.
Call allowance balance (EUR)
Specifies the current call allowance balance of the call allowance account.
Charge according the following pattern
Unlimited allowance
The call allowance account has no effect.
Manual
The call allowance account is set only manually.
Increase ... by

Call Allowance Accounts
COMmander 6000/R/RX - Firmware V8.4 - Advanced Information V32 05/2022- 997 -
The call allowance account is increased at intervals by the configuredallowance charge amount. Charging manually is possible.
Set ... to
The call allowance account is set at intervals to the configured allowancecharge amount. Charging manually is possible.
Allowance charge amount (EUR)
Specifies the value with which the call allowance account is chargedmanually or at the configured intervals.
Recharge call allowance
Several call allowance accounts are increased simultaneously by theconfigured allowance charge amount. Select the check boxes of thesubscribers in question and click Save.
Set call allowance
Several call allowance accounts are set simultaneously to the samevalue. Select the check boxes of the subscribers in question, enter the callallowance balance under on and click Save.
Set allowance amount
For several call allowance accounts the allowance charge amounts areset simultaneously to the same value. Select the check boxes of thesubscribers in question, enter the allowance charge amounts under onand click Save.

Hotel Function
COMmander 6000/R/RX - Firmware V8.4 - Advanced Information V32 05/2022- 998 -
Hotel Function
Settings of the Hotel FunctionManagement of the Hotel Function Settings of the Hotel FunctionManagement of the Hotel Function

Settings of the Hotel Function
COMmander 6000/R/RX - Firmware V8.4 - Advanced Information V32 05/2022- 999 -
Settings of the Hotel Function
Printer SettingsPrint Options Printer SettingsPrint Options

Printer Settings
COMmander 6000/R/RX - Firmware V8.4 - Advanced Information V32 05/2022- 1000 -
Printer Settings
Proceed as follows:
• Using the Configuration Manager (Functions > Hotel function >Create print form)
Active
The telephone bill is issued directly to a printer.
USB printer
Printers that are compatible with PCL4 printer language (HP Laserjet)are supported. PCL6 or PCL5c emulation is downward compatible andincludes PCL4.
Network printer
IP address and port must be entered. Printers with an interface compatiblewith HP JetDirect and the print format PCL3 (and later versions) aresupported.
Form feed
Each telephone bill is printed out on an individual page.
Note: When switched off, the telephone bills (original document +copies) are printed out in sequence without blank lines.
Number of printouts
Number (max. 4) of invoices to be printed out (original document +copies).

Printer Settings
COMmander 6000/R/RX - Firmware V8.4 - Advanced Information V32 05/2022- 1001 -
Note: When printing out an interim invoice, this setting is ignored andonly the original is printed.
Print quality
Draft
Fast print in draft quality.
Letter
Invoice in letter quality.

Print Options
COMmander 6000/R/RX - Firmware V8.4 - Advanced Information V32 05/2022- 1002 -
Print Options
Proceed as follows:
• Using the Configuration Manager (Functions > Hotel function >Create print form)
Header text | Bold | Header X
7 lines (max. 80 characters per line) are available. If an empty line isrequired, you must also leave it out here.
Subject | Bold | Invoice headline
Max. 80 characters.
Invoice data
Headlines of the invoice data Invoice no, Check-in and Check-out arefreely selectable (recommended: preset texts).
Column headlines
The column headlines of the itemised bills Date, Time, Duration, Phonenumber and Amount are freely selectable (recommended: preset texts).
Final amount
Headlines of the final amount Sum, (incl. VAT), Tax and VAT are freelyselectable (recommended: preset texts).
Print tax
The included VAT is shown additionally.

Print Options
COMmander 6000/R/RX - Firmware V8.4 - Advanced Information V32 05/2022- 1003 -
Currency name
The currency appears after the invoice amount.
Missing call data
If the call data storage capacity is exceeded, a note appears on thetelephone bill that is entered here (e. g. Calls before the following dateare not included in the overview:)
Footer text | Bold | Footer X
3 lines (max. 80 characters per line) are available.
Separator | Date | Time
For example: 01.01.2000 - 12:00
Preadjustment
Existing entries are discarded and automatic text suggestions are entered.
Print test page
To check the layout.

Management of the Hotel Function
COMmander 6000/R/RX - Firmware V8.4 - Advanced Information V32 05/2022- 1004 -
Management of the Hotel Function
Hotel Reception SubscribersRoom Subscribers Hotel Reception SubscribersRoom Subscribers

Hotel Reception Subscribers
COMmander 6000/R/RX - Firmware V8.4 - Advanced Information V32 05/2022- 1005 -
Hotel Reception Subscribers
Proceed as follows:
• Using the Configuration Manager (Functions > Hotel function >Hotel reception subscribers)
New
Adds new hotel reception phone from the configured ISDN system phonesubscribers.
Delete
Deletes the entries marked in the list.

Room Subscribers
COMmander 6000/R/RX - Firmware V8.4 - Advanced Information V32 05/2022- 1006 -
Room Subscribers
Proceed as follows:
• Using the Configuration Manager (Functions > Hotel function >Room subscribers)
Prevent Room2Room
Calls between hotel room phones are not possible. Calls to other internalsubscribers (e. g. reception, room service, etc.) are still possible.
New
Adds a new hotel room phone from the configured subscribers.
Delete
Deletes the entries marked in the list.

Calendar
COMmander 6000/R/RX - Firmware V8.4 - Advanced Information V32 05/2022- 1007 -
Calendar
Management Calendars Management Calendars
Management Calendars
COMmander 6000/R/RX - Firmware V8.4 - Advanced Information V32 05/2022- 1008 -
Management Calendars
Proceed as follows:
• Using the Configuration Manager (Functions > Calendar)
New
For individual data (e. g. company vacations). General holidays are addedwith Add holiday list or alternatively by double-clicking a day.
Note: Editing holidays: Tapping the holiday and clicking .
Fill out Name and Date and select an Option:
• active: Day is enabled as holiday.
• once: Day is enabled as holiday only for the current year.
• LCR active: Day is enabled as LCR.
Deleting calendar
All holiday entered into the calendar will be deleted.
Import
Select and import a holiday file (*.ft) previously exported from another PBXof the same design and saved on a data storage device (PC)
Export
The entered holidays are saved to the (PC) data storage device in an *.ftholiday file so they can be imported afterwards to a different PBX of thesame design.

Management Calendars
COMmander 6000/R/RX - Firmware V8.4 - Advanced Information V32 05/2022- 1009 -
Add holiday list
The holidays valid for the country/federal state are added for anindefinite period. Holidays with data that changes yearly are calculatedautomatically by the PBX.
Note: Holidays inserted in this manner can be edited or deletedindividually as needed. Each of these changes is carried outautomatically for all calendar years.

LAN TAPI
COMmander 6000/R/RX - Firmware V8.4 - Advanced Information V32 05/2022- 1010 -
LAN TAPI
Settings for LAN TAPI Settings for LAN TAPI

Settings for LAN TAPI
COMmander 6000/R/RX - Firmware V8.4 - Advanced Information V32 05/2022- 1011 -
Settings for LAN TAPI
SettingsSubscribers SettingsSubscribers
Settings
COMmander 6000/R/RX - Firmware V8.4 - Advanced Information V32 05/2022- 1012 -
Settings
Proceed as follows:
• Using the Configuration Manager (Functions > LAN TAPI)
IP address or URL of the TSP client
If a TSP client is successfully registered for the first time, the IP addressor URL of the device on which the TSP client is installed is enteredautomatically.
Network port of the TAPI server (1024-65535)
Port on the PBX which is used for communications with the TAPI server.
Note: The new configuration will only become effective after the PBXor the TAPI server has been restarted.
Password for the network connection of the TAPI server
Freely selectable password that consists of 8 to 32 characters containingdigits, letters (upper and lower case, but no German umlauts and ß)and special characters - _ . ! ~ * ' ( ) & = + $ ,. The password is used forcommunications with the TAPI server.
Notices:
To change current PINs and passwords, click on Edit PIN andpassword.
A coloured bar under the entry field shows the security level of thepassword (red = low level, green = high level).

Settings
COMmander 6000/R/RX - Firmware V8.4 - Advanced Information V32 05/2022- 1013 -
Passwords with a low security level cannot be saved.
Caution:
A high level does not automatically indicate a secure password. Thiscan also be achieved by name and date of birth in connection withspecial characters. However, names and dates of birth should not beused for passwords.
• To create a secure password you can consult, for example, theguidelines of the German Federal Office for Information Security(BSI, in German).
Visible PINs and passwords are a security risk.
• After entering, select Hide PIN and password.
Restart TAPI server | Restart
Restarts the TAPI server.
Use PBX Call Assist
Requirements:
• PBX Call Assist function enabled (optional, see Activation)
PBX Call Assist is a CTI software available from Auerswald. Its use mustbe switched on in the PBX.
All available TAPI lines are administrated by the corresponding serversoftware UCServer. Other TAPI applications cannot be used in parallel.
Further steps:

Settings
COMmander 6000/R/RX - Firmware V8.4 - Advanced Information V32 05/2022- 1014 -
• Install the server and client software. You will find the installation fileson the Internet (see Auerswald Service Portal).

Subscribers
COMmander 6000/R/RX - Firmware V8.4 - Advanced Information V32 05/2022- 1015 -
Subscribers
Proceed as follows:
• Using the Configuration Manager (Functions > LAN TAPI)
New
Selects a LAN TAPI subscriber from the configured phones and adds itto the list. All subscribers that should be controlled over a PC must beconfigured for LAN-TAPI.
Note: If PBX Call Assist is switched on, all available TAPI lines willinstead be administrated by the corresponding UCServer serversoftware.
Delete
Deletes the entries marked in the list.

Call Parking
COMmander 6000/R/RX - Firmware V8.4 - Advanced Information V32 05/2022- 1016 -
Call Parking
Settings Call Parking Settings Call Parking

Settings Call Parking
COMmander 6000/R/RX - Firmware V8.4 - Advanced Information V32 05/2022- 1017 -
Settings Call Parking
Proceed as follows:
• Using the Configuration Manager (Functions > Call parking)
Internal basis telephone number
This (exchange line access number) is an internal number. You can selectany of the numbers in the internal supply of phone numbers. When puttogether with the 10 possible park positions 0-9, this creates ten 3 to 4-digit phone numbers. These numbers can then be used to select theparking zone for call parking.
Note: The function Call parking can be expanded to 30 possible parkpositions via activation. The possible park positions can be taken fromthe web interface after the internal basic number has been assigned.This function is only available in certain countries.
Note: Double allocation of a number is not possible.
Note: Using numbers with few digits (two or three-digit numbers)inevitably restricts the possible supply of numbers requiring moredigits. For example, if the number 12 is assigned, the numbers120-129 and 1200-1299 will no longer be available.
Note: The default exchange line access number on the PBX is 0 in thefactory settings. However, this can be changed. Note that changing theexchange line access number restricts the dial plan.
Name
Freely selectable name. This name is used to identify the internal phonenumber within the PBX.

Settings Call Parking
COMmander 6000/R/RX - Firmware V8.4 - Advanced Information V32 05/2022- 1018 -
Hold time (1..20 min.)
Specifies how many minutes a call is kept in the internal parking zoneat most. After the hold time has elapsed, the subscriber that put the callin the parking zone is again signaled that the call is still there. If thissubscriber is busy, the call is put back on hold in the parking zone. If thehold time elapses a second time without the call being transferred, theconnection is disconnected and the caller hears the busy signal.

Online Name Search
COMmander 6000/R/RX - Firmware V8.4 - Advanced Information V32 05/2022- 1019 -
Online Name Search
Management Provider Online Name SearchManagement Online Name Search Group FiltersSettings Online Name Search Group FiltersSettings Online Name Search Text Converter Management Provider Online Name SearchManagement Online Name Search Group FiltersSettings Online Name Search Group FiltersSettings Online Name Search Text Converter
Management Provider Online Name Search
COMmander 6000/R/RX - Firmware V8.4 - Advanced Information V32 05/2022- 1020 -
Management Provider Online Name Search
Proceed as follows:
• Using the Configuration Manager (Functions > Online name search> Basic settings)
Note: The service provider list accommodates up to five serviceproviders.
Online name search
Requirements:
• A configured DNS server and, if necessary, an HTTP proxy server
− Using the Configuration Manager (Administration > IPconfiguration)
• At least one online service provider must have been entered for theonline name search
The PBX attempts to obtain the missing name from the selected serviceprovider.
Active
Select the service provider to be used for the online name search. (Select New to enter.)
Configure
Opens the configuration of the provider and the corresponding groupfilters.

Management Provider Online Name Search
COMmander 6000/R/RX - Firmware V8.4 - Advanced Information V32 05/2022- 1021 -
Online service provider
Requirements:
• PBX with an existing Internet connection
A file with individual provider access data (*.n2n) will be downloaded fromthe update server. This file is then saved directly to the PBX.
Note: The access data provided for the download is for informationpurposes only, and is not mandatory.
New
Adds a new provider to the list of providers. You must then make thesettings for the VoIP provider.
Delete
Deletes the entries marked in the list.
Import
Select and import a provider file (*.n2n), that is stored on a (PC) datastorage device or download a configuration from the Internet.
Note: The data of the import file is added to the existing list ofproviders, without verification whether a provider is already containedin the list (double entries).
Export
The selected provider is saved to the (PC) data storage device in a filecalled nr2name_config.n2n.

Management Provider Online Name Search
COMmander 6000/R/RX - Firmware V8.4 - Advanced Information V32 05/2022- 1022 -
Copy
Selects an existing provider from the list of providers and uses thatprovider as the basis for creating a new VoIP provider.
Standard
Resets the data of the service providers to default values.
Note: The data of the service providers is added to the existing list ofproviders, without verification whether a provider is already containedin the list (double entries).
Note: If resetting the data would cause the number of providers toexceed the maximum number of five entries, the data is not importedand an error message is displayed.
Test
Requirements:
• A configured DNS server, a configured gateway and, if necessary, anHTTP proxy server
− Using the Configuration Manager (Administration > IPconfiguration)
• Entries in the provider list
Tests the search properties. In the Phone number entry field, enter thephone number to be tested, in the Filter (search properties) list field,select how many of the configured search properties are to be processed,and click Execute.

Management Online Name Search Group Filters
COMmander 6000/R/RX - Firmware V8.4 - Advanced Information V32 05/2022- 1023 -
Management Online Name Search Group Filters
Proceed as follows:
• Using the Configuration Manager (Functions > Online name search> Basic settings > Configure)
Important: To create group filters, you need know-how in HTML,HTTP, and regular expressions.
Note: The filter list accommodates up to five group filters.
Group filter
|
Freely selectable name for the group filter. (Select New to enter.)
Note: If several group filters have been created, the sequence ofapplication of these filters can be determined (priority). A group filterwill only be processed if the application of group filters with a higherpriority has not been successful.
Configure
Opens the configuration of the group filter.
New
Adds a new group filter to the list of filters. You must then make thesettings for the group filter.
Delete
Deletes the entries marked in the list.

Management Online Name Search Group Filters
COMmander 6000/R/RX - Firmware V8.4 - Advanced Information V32 05/2022- 1024 -
Copy
Selects an existing group filter from the list of filters and uses that groupfilter as the basis for creating a new group filter.

Settings Online Name Search Group Filters
COMmander 6000/R/RX - Firmware V8.4 - Advanced Information V32 05/2022- 1025 -
Settings Online Name Search Group Filters
The group filters specify according to which search commands orcharacter strings the response of the service provider (HTML code) will besearched.
If one of these search properties is found in the response of the serviceprovider, the response will be modified according to the configuredproperties. The further search properties will be processed accordinglyand the search result will be output.
Proceed as follows:
• Using the Configuration Manager (Functions > Online name search> Basic settings > Configure > Configure)
Important: To create group filters, you need know-how in HTML,HTTP, and regular expressions.
Note: The filter list accommodates up to five group filters.
Search property
|
Search command (regular expression) or the character string you want tosearch for. (Select New to enter.)
Note: If several search properties have been created, the sequenceof application of these search properties can be determined (priority).A search property will only be processed if the application of searchproperties with a higher priority has not been successful.
Mode
Use Match

Settings Online Name Search Group Filters
COMmander 6000/R/RX - Firmware V8.4 - Advanced Information V32 05/2022- 1026 -
The response of the server (HTML code) will be filtered according to thesearch property and only the search result will be further processed.
Delete Match
The response of the server (HTML code) will be filtered according to thesearch property and the search result will be deleted. Only the rest will befurther processed.
Replace Match
The response of the server (HTML code) will be filtered according to thesearch property and the search result will be replaced by the substitutetext. The modified response will then be further processed completely.
Line Mode
The search is made line-by-line.
New
Adds a new search property to the list. You must then make the settingsfor the search property.
Delete
Deletes the entries marked in the list.
Copy
Selects an existing search property from the list and uses that searchproperty as the basis for creating a new search property.

Settings Online Name Search Text Converter
COMmander 6000/R/RX - Firmware V8.4 - Advanced Information V32 05/2022- 1027 -
Settings Online Name Search Text Converter
The server transmits the search result of an online name search in HTMLcode. To view the result of the online name search, some characters inthe determined name may have to be converted. The characters will beconverted automatically if the characters, character strings, or texts tobe substituted are entered into the text converter. During conversion, thecharacter string will be substituted by the corresponding text.
Note: Up to 64 character strings can be entered into the text converter.
Proceed as follows:
• Using the Configuration Manager (Functions > Online name search> Text converter)
Received string
Characters, character strings, or texts to be substituted. (Select New toenter.)
Text substitute
Characters, character strings, or texts, with which the received stringsshould be substituted.
New
Adds a new character string to the list. You must then make the settingsfor the character string.
Delete
Deletes the entries marked in the list.

Settings Online Name Search Text Converter
COMmander 6000/R/RX - Firmware V8.4 - Advanced Information V32 05/2022- 1028 -
Standard
Resets the character strings to default values.

Waiting Field
COMmander 6000/R/RX - Firmware V8.4 - Advanced Information V32 05/2022- 1029 -
Waiting Field
Settings Waiting Field Settings Waiting Field

Settings Waiting Field
COMmander 6000/R/RX - Firmware V8.4 - Advanced Information V32 05/2022- 1030 -
Settings Waiting Field
Proceed as follows:
• Using the Configuration Manager (Functions > Waiting field)
Automatic call take over
No automatic
Incoming calls must be put manually into the waiting field.
On busy
Incoming calls are automatically put into the waiting field if all waitingfield reception phones are busy. (In this case, “busy” means that thereis an ongoing call in the active waiting field receptions or an outgoing orincoming call is ringing. If a caller is waiting in the waiting field, this doesnot count as “busy”.)
After 0..120 sec.
Incoming calls are indicated for a duration of x seconds in the waiting fieldreception and then automatically put into the waiting field if not alreadyaccepted manually.
Subscriber/group number for the Waiting Field
Select the group that is to be used as waiting field (alternatively singlewaiting field reception).

Music on Hold and Announcements
COMmander 6000/R/RX - Firmware V8.4 - Advanced Information V32 05/2022- 1031 -
Music on Hold and Announcements
Management of the Music On Hold and AnnouncementsSettings for Music On Hold and Announcements Management of the Music On Hold and AnnouncementsSettings for Music On Hold and Announcements

Management of the Music On Hold and Announcements
COMmander 6000/R/RX - Firmware V8.4 - Advanced Information V32 05/2022- 1032 -
Management of the Music On Hold andAnnouncements
Own FilesSystem Files Own FilesSystem Files

Own Files
COMmander 6000/R/RX - Firmware V8.4 - Advanced Information V32 05/2022- 1033 -
Own Files
Proceed as follows:
• Using the Configuration Manager (Functions > Music on Hold andAnnouncements > File management)
MEMORY UTILISATION
The combined total size of all audio files (*.wav) stored in the PBX mustbe less than 20 MB. The amount of memory already used, and theremaining capacity, are displayed (in MB and as a percentage).
This list is where you manage the audio files you have created for thedifferent PBX functions. You can use an external programme to createthe audio files and then import them. Alternatively, you can record theannouncements one of the PBX's internal phones (see Short reference).You can then assign the following file names to the audio files you createfor the different functions:
• AudioIn_MoH.wav (music on hold)
• Phone_Alarm_x.wav (announcement for alarm)
• Phone_Auto_x.wav (announcement for automatic reception)
• Phone_Hold_Line.wav (announcement for music on hold)
• Phone_TvM_x.wav (announcement for announcement beforeanswering)
• Phone_Wakeup_x.wav (announcement for wake-up function)
• emergency_call_not_possible_de.wav (announcement for emergencycall)

Own Files
COMmander 6000/R/RX - Firmware V8.4 - Advanced Information V32 05/2022- 1034 -
Listen
A suitable programme is used to open the audio file. The file is then eitherplayed or saved to a (PC) data storage device.
Delete
Deletes the entries marked in the list.
Import
The audio file (*.wav) stored on a (PC) data storage device is selected andimported.
Note: The audio files (*.wav) must have the following properties:Format: 8-bit, A-law, 8 kHz, mono and file name containing 32characters.
Note: In the Internet, you can convert the audio files into the audioformat required for the PBX (see Auerswald Audio Converter). Forexample, use the Audio Converter to convert audio files (*.mp3, *.wavor *.raw) into G.711 (*.wav) audio format.

System Files
COMmander 6000/R/RX - Firmware V8.4 - Advanced Information V32 05/2022- 1035 -
System Files
Proceed as follows:
• Using the Configuration Manager (Functions > Music on Hold andAnnouncements > File management)
MEMORY UTILISATION
The combined total size of all audio files (*.wav) stored in the PBX mustbe less than 20 MB. The amount of memory already used, and theremaining capacity, are displayed (in MB and as a percentage).
The audio files already stored in the PBX for various different PBXfunctions are displayed in this list. The Standard assignment columnshows which audio file is usually used for each function.
Listen
A suitable programme is used to open the audio file. The file is then eitherplayed or saved to a (PC) data storage device.

Settings for Music On Hold and Announcements
COMmander 6000/R/RX - Firmware V8.4 - Advanced Information V32 05/2022- 1036 -
Settings for Music On Hold and Announcements
Source for music on holdMusic on hold with announcementmusic on Hold during the ringing periodMusic on holdAlarmannouncement before answeringWake-Up AnnouncementsAutomatic receptionsEmergency call Source for music on holdMusic on hold with announcementmusic on Hold during the ringing periodMusic on holdAlarmannouncement before answeringWake-Up AnnouncementsAutomatic receptionsEmergency call

Source for music on hold
COMmander 6000/R/RX - Firmware V8.4 - Advanced Information V32 05/2022- 1037 -
Source for music on hold
Proceed as follows:
• Using the Configuration Manager (Functions > Music on Hold/announcements > File assignment page)
Source of the Music on Hold
No announcement
No music on hold is played.
Internal (PBX)
The music on hold is played from the PBX.
External (door terminal module)
The music on hold is imported from an external source using the cinchjack on the optionally available COMmander 2TSM(-R) module.
External music on hold: Selection of 2TSM module with audio input
Select the module slot you want to use to import the external music onhold to a COMmander 2TSM(-R) module.

Music on hold with announcement
COMmander 6000/R/RX - Firmware V8.4 - Advanced Information V32 05/2022- 1038 -
Music on hold with announcement
Proceed as follows:
• Using the Configuration Manager (Functions > Music on Hold/announcements > File assignment page)
Volume of music on hold during the announcement
Specifies how loudly the music on hold should be played during theannouncement.
Mix announcement into music on hold
An announcement is played together with music on hold.
Note: When switched off, music on hold is played without an additionalannouncement.
Announcement delay time (0..60 sec.)
Specifies how many seconds delay there will be between the individualrepetitions of the announcement.

music on Hold during the ringing period
COMmander 6000/R/RX - Firmware V8.4 - Advanced Information V32 05/2022- 1039 -
music on Hold during the ringing period
Proceed as follows:
• Using the Configuration Manager (Functions > Music on Hold/announcements > File assignment page)
Blind Transferring
A caller connected by a blind transfer will exclusively hear music on holdduring this process (pressing the R key, dialling of internal number, andringing period).
Note: When switched off, the caller hears the ringtone during theringing phase.
Ann. before answering
A caller hears the music on hold after the playback of the announcementbefore answering.
Note: When switched off, the caller hears the ringtone during theringing phase.

Music on hold
COMmander 6000/R/RX - Firmware V8.4 - Advanced Information V32 05/2022- 1040 -
Music on hold
Proceed as follows:
• Using the Configuration Manager (Functions > Music on Hold/announcements > File assignment page)
Audio file (*.wav)
Select the audio files that are to be used for the music on hold andfunction.
Standard announcement
For standard case, the PBX uses an audio file shown under Functions >Music on Hold/announcements > File management > System Files.
Volume on phone (in %)
Specifies how loudly the audio file is to be played on the phone.
Note: The volume at the phone for emergency calls cannot be setunder 50 %.
Listen
A suitable programme is used to open the audio file. The file is then eitherplayed or saved to a (PC) data storage device.

Alarm
COMmander 6000/R/RX - Firmware V8.4 - Advanced Information V32 05/2022- 1041 -
Alarm
Proceed as follows:
• Using the Configuration Manager (Functions > Music on Hold/announcements > File assignment page)
Audio file (*.wav)
Select the audio files you want to use as alarm announcements. Specifywhich alarm announcement is to be used for an alarm ounder Boxes >Alarms > Configure.
Standard announcement
For standard case, the PBX uses an audio file shown under Functions >Music on Hold/announcements > File management > System Files.
Volume on phone (in %)
Specifies how loudly the audio file is to be played on the phone.
Note: The volume at the phone for emergency calls cannot be setunder 50 %.
Listen
A suitable programme is used to open the audio file. The file is then eitherplayed or saved to a (PC) data storage device.

announcement before answering
COMmander 6000/R/RX - Firmware V8.4 - Advanced Information V32 05/2022- 1042 -
announcement before answering
Proceed as follows:
• Using the Configuration Manager (Functions > Music on Hold/announcements > File assignment page)
Audio file (*.wav)
Select the audio files that are to be used as announcement beforeanswering files. Specify which announcement before answering is to beused for the Ann. before Answering function in the Groups > Properties> Reachability and Public switched tel. networks > Call distributionpages.
Default ann.
For the standard announcement, the PBX uses the audio file specified asthe standard file in Functions > Music on Hold and Announcements >File management > System Files.
Volume on phone (in %)
Specifies how loudly the audio file is to be played on the phone.
Note: The volume at the phone for emergency calls cannot be setunder 50 %.
Listen
A suitable programme is used to open the audio file. The file is then eitherplayed or saved to a (PC) data storage device.

Wake-Up Announcements
COMmander 6000/R/RX - Firmware V8.4 - Advanced Information V32 05/2022- 1043 -
Wake-Up Announcements
Proceed as follows:
• Using the Configuration Manager (Functions > Music on Hold/announcements > File assignment page)
Audio file (*.wav)
Select the audio files you want to use as wake-up announcements.Specify which wake-up announcements are to be used for the wake-upfunction on the Time control > Switching times page.
Default ann.
For the standard announcement, the PBX uses the audio file specified asthe standard file in Functions > Music on Hold and Announcements >File management > System Files.
Volume on phone (in %)
Specifies how loudly the audio file is to be played on the phone.
Note: The volume at the phone for emergency calls cannot be setunder 50 %.
Listen
A suitable programme is used to open the audio file. The file is then eitherplayed or saved to a (PC) data storage device.

Automatic receptions
COMmander 6000/R/RX - Firmware V8.4 - Advanced Information V32 05/2022- 1044 -
Automatic receptions
Proceed as follows:
• Using the Configuration Manager (Functions > Music on Hold/announcements > File assignment page)
Audio file (*.wav)
Select the audio files you want to use as welcome announcements.Specify which welcome announcements are to be used for an automaticreception in Functions > Automatic Receptions > Configure.
Default ann.
For the standard announcement, the PBX uses the audio file specified asthe standard file in Functions > Music on Hold and Announcements >File management > System Files.
Volume on phone (in %)
Specifies how loudly the audio file is to be played on the phone.
Note: The volume at the phone for emergency calls cannot be setunder 50 %.
Listen
A suitable programme is used to open the audio file. The file is then eitherplayed or saved to a (PC) data storage device.

Emergency call
COMmander 6000/R/RX - Firmware V8.4 - Advanced Information V32 05/2022- 1045 -
Emergency call
Proceed as follows:
• Using the Configuration Manager (Functions > Music on Hold/announcements > File assignment page)
Audio file (*.wav)
Select the audio file that is to be used for the emergency call function.
Standard announcement
For standard case, the PBX uses an audio file shown under Functions >Music on Hold/announcements > File management > System Files.
Volume on phone (in %)
Specifies how loudly the audio file is to be played on the phone.
Note: The volume at the phone for emergency calls cannot be setunder 50 %.
Listen
A suitable programme is used to open the audio file. The file is then eitherplayed or saved to a (PC) data storage device.

Wake-Up Times
COMmander 6000/R/RX - Firmware V8.4 - Advanced Information V32 05/2022- 1046 -
Wake-Up Times
Settings for Wake-Up Functions Settings for Wake-Up Functions

Settings for Wake-Up Functions
COMmander 6000/R/RX - Firmware V8.4 - Advanced Information V32 05/2022- 1047 -
Settings for Wake-Up Functions
SettingsWake-up Times for Subscribers SettingsWake-up Times for Subscribers

Settings
COMmander 6000/R/RX - Firmware V8.4 - Advanced Information V32 05/2022- 1048 -
Settings
Proceed as follows:
• Using the Configuration Manager (Functions > Wake-up times)
Maximum number of wake-up call attempts per wake-up time
Specifies how often a wake-up call is made during each wake-up time.When a wake-up call is acknowledged, the wake-up process for eachwake-up time is interrupted.
Call duration of a wake-up call (30..120 sec.)
Specifies how long an individual wake-up call is played on an end device.
Pause between the first and second wake-up call
This specifies how many minutes pause there is between the first andsecond wake-up call.
Pause between all following wake-up calls
Specifies how many minutes pause there is between subsequent wake-upcalls.
Record wake-up calls in the call database
Wake-up calls are recorded in the call database.
Use wake-up times of Sundays for holidays
Requirements:

Settings
COMmander 6000/R/RX - Firmware V8.4 - Advanced Information V32 05/2022- 1049 -
• holidays must have been configured and enabled
The wake-up calls set up for a Sunday are played on enabled holidays.
Note: When switched off, the wake-up calls of the correspondingweekdays are played on holidays.

Wake-up Times for Subscribers
COMmander 6000/R/RX - Firmware V8.4 - Advanced Information V32 05/2022- 1050 -
Wake-up Times for Subscribers
Proceed as follows:
• Using the Configuration Manager (Functions > Wake-up times)
WAKE-UP TIMES FOR SUBSCRIBERS
Select the subscriber whose wake-up times are to be displayed/configured.
Wake-up times
Time (format: hh:mm) at which the wake-up call is to be made. (Select New to enter.)
Configured via
wake-up time was configured using the Configuration Manager.
wake-up time was configured using a character string on the internalphone.
Day
Weekday/s on which the wake-up call is made.
Always
Multiple wake-up calls are enabled. The wake-up call is made for theduration of the specified time, until the user switches it off.
Note: Single wake-up call is enabled. A wake-up call is made once,then switched off automatically.

Wake-up Times for Subscribers
COMmander 6000/R/RX - Firmware V8.4 - Advanced Information V32 05/2022- 1051 -
activated
Wake-up call is switched on and will be made on the next possible date.
New
Adds a new wake-up time.
Note: A maximum of 20 wake-up times can be configured persubscriber.
Delete
Deletes the entries marked in the list.

User data
COMmander 6000/R/RX - Firmware V8.4 - Advanced Information V32 05/2022- 1052 -
User data
Call DataAddress BooksSpecial NumbersMessages Call DataAddress BooksSpecial NumbersMessages

Call Data
COMmander 6000/R/RX - Firmware V8.4 - Advanced Information V32 05/2022- 1053 -
Call Data
Management Call DataCall Data Column SettingsSettings FilterSettings Call Data Management Call DataCall Data Column SettingsSettings FilterSettings Call Data

Management Call Data
COMmander 6000/R/RX - Firmware V8.4 - Advanced Information V32 05/2022- 1054 -
Management Call Data
Proceed as follows:
• Using the Configuration Manager (User data > Call data > Call datalist)
Date and time
Display of the date/time when the call was started.
Duration
Display of the call duration.
LCRNo
Display of the dialled number of the LCR provider, if an external numberwas dialled via a provider (manual entry or automatic LCR).
External partner
Displays call partner's external phone number.
• Dialled calls: Displays the phone number that was dialled.
• Incoming calls: Displays the phone number transferred by the caller(CLIP information; not for unknown phone numbers).
• Wake-up calls: Displays the phone number of the person receivingthe call.
Important: The phone numbers in an incoming VoIP conversationcan only be used for callbacks if Evaluation of incoming SIPmessages is active.

Management Call Data
COMmander 6000/R/RX - Firmware V8.4 - Advanced Information V32 05/2022- 1055 -
Note: In the case of private calls, the last three digits are notrecorded. Only an anonymised phone number is displayed (the lastthree digits are represented by ***).
The phone number is entered in a call restrictor.
The call partner's name and phone number are transferred to the address books.
Online name search: This is where you can add the name to the call data record and
also check and update it.
Requirement: Online name search is configured and enabled.
Soft Call: Dials the phone number directly.
Requirement: User is logged on to configuration manager with Phone bookauthorisation (business).
Requirements for D-series telephones: Action URL function activated in the
telephone. Identical token in the PBX and telephone.
External Name
Displays the name of the external call partner if stored under User data> Address books (Users: Address books) or transmitted via CLIP. ForVoIP calls, the Display name (Public switched tel. networks > VoIP >Provider > Configure) is displayed if there is no entry in the address bookfor this VoIP number.
Note: If there is no External name available, the data record can beupdated via the Online name search function.

Management Call Data
COMmander 6000/R/RX - Firmware V8.4 - Advanced Information V32 05/2022- 1056 -
Scr No.Invoice
Displays the internal subscriber or group number for:
• Outgoing calls (business): Subscriber number of the end device. Ifthe internal subscriber is logged-in to a group, the group number isdisplayed.
• Private calls:
Initiation with PIN: Internal number
Initiation without PIN: Internal number of the executing end device
• Incoming calls: Internal subscriber or group number dialled by thecaller
• Alarm calls: Phone number of this alarm
• Call Through call: External number of the Call Through user
• Door-to-external calls: Phone number of the door terminal
• Wake-up calls: Internal number of the person to be woken up
Scr Name Invoice
Displays the subscriber or group name for:
• Internal subscriber numbers
• Internal group numbers
• Alarm calls
• Call Through users
• Door-to-external calls

Management Call Data
COMmander 6000/R/RX - Firmware V8.4 - Advanced Information V32 05/2022- 1057 -
Scr no.real
Displays the internal subscriber or group or group number for:
• Outgoing calls (business or private): Internal number is displayed.
• Incoming calls: Internal number of the accepting end device orexternal number of the accepting external call forwarding destination(unsuccessful calls are not displayed).
• Alarm calls to an internal subscriber: Phone number of the internalend device (alarm calls to external subscribers are not displayed).
• Door-to-external calls: Internal subscriber number who forwarded thecall to an external connection (direct calls to external subscribers arenot displayed).
Scr Name real
Displays the subscriber or group name for:
• Internal subscriber numbers
• Internal group numbers
• Alarm calls
• Call Through users or external numbers
• Door-to-external calls
Connection no.
Displays the own phone number.
• Outgoing call: Phone number used for forwarding the call to thepublic exchange

Management Call Data
COMmander 6000/R/RX - Firmware V8.4 - Advanced Information V32 05/2022- 1058 -
• Incoming call: Phone number dialled by the caller
• Call made via ISDN PTMP connection: MSN
• Call made via ISDN PTP connection: PBX base number + DDI oradditional number
• Call made via analogue connection: Analogue number
• VoIP call: VoIP number
Charges
Amount charged for the call
• LCR data
• Data transmitted by the network provider (units are calculated intocharges with the price per unit entered under Functions > Callallowance accounts.
Note: If the charges for the calls are to be recorded, transmission ofthe call charges must be enabled on the external S0 ports.
Note: If using an analogue exchange line or a VoIP account forexternal calls, no charges will be displayed unless charges have beenentered via Soft LCR tables and the subscriber uses uses the LCRfunction.
Direction
Outgoing or incoming call.
Billing Type
business Business call

Management Call Data
COMmander 6000/R/RX - Firmware V8.4 - Advanced Information V32 05/2022- 1059 -
private Private call: External call with private exchange line access
successful Successful call
unsuccessful Unsuccessful call
Call Type
The text entered in the print options or the default text for this call type isdisplayed.
Project (Proj.)
Call charges or times can be billed according to individual projects.Business calls are then initiated with project numbers that are recordedand displayed if the call was successfully transferred.
Standard sorting
The call data is sorted by date and time.
Refresh
The call data list is refreshed.
Delete
Deletes the entries marked in the list.
Delete all
All marked entries in the list will be deleted.

Management Call Data
COMmander 6000/R/RX - Firmware V8.4 - Advanced Information V32 05/2022- 1060 -
Export
The current data in the table (gesp_dat.csv.gz) can be exported(gespr_dat.csv) for further processing.
Important: Note the following legal notes before saving the call data.
The call data include, amongst others, the following legallyespecially protected components:
• The time of a call
• The phone numbers of the internal and external participants
• The duration of a call
Note: Before the call data are being saved, all subscribers to the PBXmust be informed that these contents will be forwarded. They mustalso be informed about who will use the data received.
Note: It is absolutely necessary to store the data safely and inaccordance with the legal requirements.
Note: If you want to make the call data available to your specialiseddealer or to the manufacturer for error analysis, you must make surethat the legal requirements are fulfilled.
All entries are printed.

Call Data Column Settings
COMmander 6000/R/RX - Firmware V8.4 - Advanced Information V32 05/2022- 1061 -
Call Data Column Settings
Proceed as follows:
• Using the Configuration Manager (User data > Call data > Printoptions)
Date
Display of the date at the beginning of the call.
Time
Displays the time at the beginning of the call.
Duration
Display of the call duration.
LCRNo
Display of the dialled number of the LCR provider, if an external numberwas dialled via a provider (manual entry or automatic LCR).
External partner
Displays call partner's external phone number.
• Dialled calls: Displays the phone number that was dialled.
• Incoming calls: Displays the phone number transferred by the caller(CLIP information; not for unknown phone numbers).
• Wake-up calls: Displays the phone number of the person receivingthe call.

Call Data Column Settings
COMmander 6000/R/RX - Firmware V8.4 - Advanced Information V32 05/2022- 1062 -
Important: The phone numbers in an incoming VoIP conversationcan only be used for callbacks if Evaluation of incoming SIPmessages is active.
Note: In the case of private calls, the last three digits are notrecorded. Only an anonymised phone number is displayed (the lastthree digits are represented by ***).
The phone number is entered in a call restrictor.
The call partner's name and phone number are transferred to the address books.
Online name search: This is where you can add the name to the call data record and
also check and update it.
Requirement: Online name search is configured and enabled.
Soft Call: Dials the phone number directly.
Requirement: User is logged on to configuration manager with Phone bookauthorisation (business).
Requirements for D-series telephones: Action URL function activated in the
telephone. Identical token in the PBX and telephone.
External Name
Displays the name of the external call partner if stored under User data> Address books (Users: Address books) or transmitted via CLIP. ForVoIP calls, the Display name (Public switched tel. networks > VoIP >Provider > Configure) is displayed if there is no entry in the address bookfor this VoIP number.
Note: If there is no External name available, the data record can beupdated via the Online name search function.

Call Data Column Settings
COMmander 6000/R/RX - Firmware V8.4 - Advanced Information V32 05/2022- 1063 -
Scr No.Invoice
Displays the internal subscriber or group number for:
• Outgoing calls (business): Subscriber number of the end device. Ifthe internal subscriber is logged-in to a group, the group number isdisplayed.
• Private calls:
Initiation with PIN: Internal number
Initiation without PIN: Internal number of the executing end device
• Incoming calls: Internal subscriber or group number dialled by thecaller
• Alarm calls: Phone number of this alarm
• Call Through call: External number of the Call Through user
• Door-to-external calls: Phone number of the door terminal
• Wake-up calls: Internal number of the person to be woken up
Scr Name Invoice
Displays the subscriber or group name for:
• Internal subscriber numbers
• Internal group numbers
• Alarm calls
• Call Through users
• Door-to-external calls

Call Data Column Settings
COMmander 6000/R/RX - Firmware V8.4 - Advanced Information V32 05/2022- 1064 -
Scr no.real
Displays the internal subscriber or group or group number for:
• Outgoing calls (business or private): Internal number is displayed.
• Incoming calls: Internal number of the accepting end device orexternal number of the accepting external call forwarding destination(unsuccessful calls are not displayed).
• Alarm calls to an internal subscriber: Phone number of the internalend device (alarm calls to external subscribers are not displayed).
• Door-to-external calls: Internal subscriber number who forwarded thecall to an external connection (direct calls to external subscribers arenot displayed).
Scr Name real
Displays the subscriber or group name for:
• Internal subscriber numbers
• Internal group numbers
• Alarm calls
• Call Through users or external numbers
• Door-to-external calls
Connection no.
Displays the own phone number.
• Outgoing call: Phone number used for forwarding the call to thepublic exchange

Call Data Column Settings
COMmander 6000/R/RX - Firmware V8.4 - Advanced Information V32 05/2022- 1065 -
• Incoming call: Phone number dialled by the caller
• Call made via ISDN PTMP connection: MSN
• Call made via ISDN PTP connection: PBX base number + DDI oradditional number
• Call made via analogue connection: Analogue number
• VoIP call: VoIP number
Charges
Amount charged for the call
• LCR data
• Data transmitted by the network provider (units are calculated intocharges with the price per unit entered under Functions > Callallowance accounts.
Note: If the charges for the calls are to be recorded, transmission ofthe call charges must be enabled on the external S0 ports.
Note: If using an analogue exchange line or a VoIP account forexternal calls, no charges will be displayed unless charges have beenentered via Soft LCR tables and the subscriber uses uses the LCRfunction.
Billing factor
Dispalay of the cobversion factor for the costs. The value can be changeddepending on the subscriber. The change then applies only to calls afterthe change.

Call Data Column Settings
COMmander 6000/R/RX - Firmware V8.4 - Advanced Information V32 05/2022- 1066 -
Note: For logged in users, the Billing factor (Fact.) is not visible.Instead, the calculated product of transmitted charges and Billingfactor (Fact.) is displayed under Charges.
Direction
Outgoing or incoming call.
Billing Type
business Business call
private Private call: External call with private exchange line access
successful Successful call
unsuccessful Unsuccessful call
Call Type
The text entered in the print options or the default text for this call type isdisplayed.
Project (Proj.)
Call charges or times can be billed according to individual projects.Business calls are then initiated with project numbers that are recordedand displayed if the call was successfully transferred.

Call Data Column Settings
COMmander 6000/R/RX - Firmware V8.4 - Advanced Information V32 05/2022- 1067 -
Hotel invoice number (Hotld)
The check-in via the hotel reception phone automatically generates a 5-digit billing number which is displayed for calls via the hotel function.
Call data list
The table column is added to the call data list.
Description in call data list
Displays the description of the colum in the call data list.
Standard
All settings will be reset to the standard values.

Settings Filter
COMmander 6000/R/RX - Firmware V8.4 - Advanced Information V32 05/2022- 1068 -
Settings Filter
Filter CriteriaConfigure Filter CriteriaConfigure

Filter Criteria
COMmander 6000/R/RX - Firmware V8.4 - Advanced Information V32 05/2022- 1069 -
Filter Criteria
Proceed as follows:
• Using the Configuration Manager (User data > Call data > Filter)
Filter name
Name of the used filter (standard or own filter).
Time period
Filter criteria for the time period.

Configure
COMmander 6000/R/RX - Firmware V8.4 - Advanced Information V32 05/2022- 1070 -
Configure
Proceed as follows:
• Using the Configuration Manager (User data > Call data > Filter)
PERIOD
Default period
For example today
Configuring the following parameters:
• Period (only for the selection user-defined): Fixed period
• Daytime: Fixed daytime
• Call duration: Displays calls of a certain length
• Charges: Displays calls of a certain call charge
DIRECTION
Incoming calls, Outgoing calls
Calls that are displayed after being filtered.
BILLING TYPE
Private Calls, Business Calls, Successful Calls, Unsuccessful Calls
Calls that are displayed after being filtered.
HOTEL FUNCTION
Hotel invoice number (1..65535)

Configure
COMmander 6000/R/RX - Firmware V8.4 - Advanced Information V32 05/2022- 1071 -
Entering the hotel invoice number.
CALL TYPE
Characteristic a call may have
Call type if only these calls are to be displayed after being filtered.
SPECIFIC FILTERING
Possible entries for the following settings: Phone number, name andreplacement *
Subscriber (Scr no. invoice + scrno.real)
Calls made by selected internal subscribers.
Connection number Calls initiated via the own external number.
External partner Calls made with selected external subscribers.
Project number/s Calls assigned to certain projects.
Back
Back to previous page.

Settings Call Data
COMmander 6000/R/RX - Firmware V8.4 - Advanced Information V32 05/2022- 1072 -
Settings Call Data
Call data managementSFTP transfer Call data managementSFTP transfer

Call data management
COMmander 6000/R/RX - Firmware V8.4 - Advanced Information V32 05/2022- 1073 -
Call data management
Proceed as follows:
• Using the Configuration Manager (User data > Call data > Settings)
Selection of the calls to be recorded in order to avoid filling the call datamemory too fast.
Dialled calls
Note: The transmission of the charge information can be disabled forISDN (Public switched tel. networks > ISDN > PTMP connectionand Public switched tel. networks > ISDN > PBX base numbers/trunk bundles > Configure).
The following calls can be recorded:
• Chargeable calls
Chargeable calls and unsuccessful outgoing calls (e. g. transfercharges).
• Free of charge/calls without charge information
Calls that are free of charge or for which no charge information istransmitted.
− Successful only
Calls that are free of charge or for which no charge information istransmitted (unsuccessful calls are not displayed)
• Private calls with partial telephone number privacy
For reasons of data protection, the traceability of external numbers foroutgoing private calls can be dispensed with. The last three digits of
Call data management
COMmander 6000/R/RX - Firmware V8.4 - Advanced Information V32 05/2022- 1074 -
the phone number are displayed with ***. The remaining call data isrecorded.
Incoming Calls
• Successful
− Only with charges
Calls that cause charges (e.g. collect calls).
• Unsuccessful
Unsuccessful calls.
• Charges independent from calls
Calls with additional charges (e.g. the transfer charge for collect calls).
General settings
• Record Wake-up calls in the call database
Wake-up calls to internal subscribers (see Functions > Wake-uptimes)

SFTP transfer
COMmander 6000/R/RX - Firmware V8.4 - Advanced Information V32 05/2022- 1075 -
SFTP transfer
Proceed as follows:
• Using the Configuration Manager (User data > Call data > Settings)
A call data file is provided in configurable intervals through the SFTPserver of the PBX for pickup.
General Settings
Determines in which form the call data is provided.
• Data separator
• Generate header
call data file
Determines when and how often a call data file is provided.
• File creation
• Cleanup interval
• Automatic deletion if (1..200 MB) is used
• Folder of call data files /calldata/
Hotel function
Settings for providing subscriber-related call data in hotel operation.
• Creation of a subscriber-relating file for each check-out
• Cleanup interval
• Automatic deletion if (1..200 MB) is used

SFTP transfer
COMmander 6000/R/RX - Firmware V8.4 - Advanced Information V32 05/2022- 1076 -
• Folder of call data files /checkoutdata/

Address Books
COMmander 6000/R/RX - Firmware V8.4 - Advanced Information V32 05/2022- 1077 -
Address Books
Management Contacts and assignmentSettings of the ContactsSettings of the Contact GroupsSettings of the Contact Group AuthorisationsSettings Standard Contact GroupsSettings of the Address BooksSettings Address Book Transmission for DECT HandsetsInformation about Transfer via LDAP Server Management Contacts and assignmentSettings of the ContactsSettings of the Contact GroupsSettings of the Contact Group AuthorisationsSettings Standard Contact GroupsSettings of the Address BooksSettings Address Book Transmission for DECT HandsetsInformation about Transfer via LDAP Server

Management Contacts and assignment
COMmander 6000/R/RX - Firmware V8.4 - Advanced Information V32 05/2022- 1078 -
Management Contacts and assignment
ContactsContact Groups and AssignmentGoogle Contact GroupsCSV Import Group ContactsContact Groups and AssignmentGoogle Contact GroupsCSV Import Group

Contacts
COMmander 6000/R/RX - Firmware V8.4 - Advanced Information V32 05/2022- 1079 -
Contacts
Proceed as follows:
• As administrator: User data > Address Books > Contacts andassignment
• As a subscriber: Contacts and assignment
Requirements:
• For users: read access to at least one contact group
All contacts
All contacts are displayed.
Note: Searching for contacts can be restricted in the following way:
• via contact groups by clicking a contact group.
• using the filter by entering at least one character or digit in one ormore of the entry fields.
• using the tabs by clicking All, Contacts without contact groups,or an initial letter.
Buttons for each contact for:
View
Editing
Displaying the QR code

Contacts
COMmander 6000/R/RX - Firmware V8.4 - Advanced Information V32 05/2022- 1080 -
Exporting a vCard (Format vCard 2.1)
Soft Call
Requirements:
• Logged in as subscriber
The stored phone number is automatically dialled.
New
Delete
In the All contacts view, you can delete either individual contacts or allcontacts from a standard or DECT contact group. To delete a contact froma Google contact group, you first need to delete the contact in Gmail.The contact will then be deleted from the Google contact group linked toGmail after the next synchronisation.
Important: Deleting a contact cannot be undone.
Proceed as follows for subscribers:
• Write access to at least one contact group
• Only contacts that are assigned to the contact groups for which thesubscriber has write access
Note: You can select and delete multiple contacts at the same time byholding down the Shift or Ctrl key.
Note: The Delete button is only available in the All contacts view.

Contacts
COMmander 6000/R/RX - Firmware V8.4 - Advanced Information V32 05/2022- 1081 -
Delete all
If you have administrator or sub-administrator authorisation, you candelete all the contacts simultaneously in the All contacts view.
Important: If you delete all the contacts you cannot undo this step.
Note: The Delete all button is only available in All contacts view.
vCard v2.1 import
Import of a vCard in version 2.1.
CSV import
All contacts: For exported address books in *.csv format, e.g. from aCOMmander 6000 that is using an older firmware version or another PBX,the contact data contained therein can be imported here and the contactscan be assigned to one or more contact groups.
Phone book version 1: CSV imports from an old phone book exportare assigned to this contact group. Contacts whose fields are identical toexisting contacts will be overwritten. In all other cases a new contact willbe created.
Requirements:
• Admin or sub-admin rights
• CSV file in address book format
Notices:

Contacts
COMmander 6000/R/RX - Firmware V8.4 - Advanced Information V32 05/2022- 1082 -
CSV import is not available for subscribers and only available in thefollowing view: All contacts.
The contacts are automatically assigned to the predefined standardcontact groups.
CSV FILE
A csv file (*.csv) is loaded into the PBX via the Configuration Manager.
IMPORT
Select an import template.
PREVIEW
Display the entries in the CSV file.
CSV export
Requirements:
• For users: read access to at least one contact group
You can export contact groups, contacts with the same initial letter or Allcontacts in a single text file (*.csv).
Important: Note the following legal notes. It might be that thecontacts include the following legally especially protected components:
• Private and work address
• Private and work phone and fax numbers
• Birthdays
• Photos of the person (in connection with the data backup)

Contacts
COMmander 6000/R/RX - Firmware V8.4 - Advanced Information V32 05/2022- 1083 -
• Electronic contact addresses (private and work), e.g. the e-mailaddresses
• Position and department within a company
Notices:
Before the contacts are being saved, all subscribers to the PBX mustbe informed that these contents will be forwarded and about who willuse the data received.
It is essential to store the data securely and in accordance with legalrequirements.
If you want to make the contacts available to your specialised dealeror to the manufacturer for error analysis, you must make sure that thelegal requirements are fulfilled.

Contact Groups and Assignment
COMmander 6000/R/RX - Firmware V8.4 - Advanced Information V32 05/2022- 1084 -
Contact Groups and Assignment
Proceed as follows:
• Using the Configuration Manager (User data > Address books >Contacts and assignment)
Note: The contacts in the DECT 900 and DECT 900C contact groupsmust also be contained in the Phone book version 1.
Note: Only one type can be selected per contact group. It is notpossible to change the contact group type afterwards.
Note: If you have not selected a type, the Standard contact grouptype is automatically assigned to the new contact group.
Delete contacts in contact group
The selected contact will be removed from all contact groups.
The selected contact will be removed permanently.
Important: Deleting a contact cannot be undone.
Proceed as follows for subscribers:
• Write access to at least one contact group
• Only contacts that are assigned to the contact groups for which theuser has write access
Note: You can select and delete multiple contacts at the same time byholding down the Shift or Ctrl key.
CSV export
Requirements:
Contact Groups and Assignment
COMmander 6000/R/RX - Firmware V8.4 - Advanced Information V32 05/2022- 1085 -
• For users: read access to at least one contact group
You can export contact groups, contacts with the same initial letter or Allcontacts in a single text file (*.csv).
Important: Note the following legal notes. It might be that thecontacts include the following legally especially protected components:
• Private and work address
• Private and work phone and fax numbers
• Birthdays
• Photos of the person (in connection with the data backup)
• Electronic contact addresses (private and work), e.g. the e-mailaddresses
• Position and department within a company
Notices:
Before the contacts are being saved, all subscribers to the PBX mustbe informed that these contents will be forwarded and about who willuse the data received.
It is essential to store the data securely and in accordance with legalrequirements.
If you want to make the contacts available to your specialised dealeror to the manufacturer for error analysis, you must make sure that thelegal requirements are fulfilled.

Google Contact Groups
COMmander 6000/R/RX - Firmware V8.4 - Advanced Information V32 05/2022- 1086 -
Google Contact Groups
Proceed as follows:
• Using the Configuration Manager (User data > Address books >Contacts and assignment)
Max. 5 Google groups are displayed. If you have a Gmail account withcontact data, they can be transferred into the address books of the PBXand dragged into the desired contact group (exception: Google groups).
On Google groups you have only read access. Contacts from Googlegroups can only be copied into another contact group. Changes mustbe made directly in the Gmail account. They are adopted with the nextsynchronization. If you delete a Gmail contact from a standard or DECTcontact group, it still remains in the Google group.
Delete contacts in contact group
The selected contact will be removed from all contact groups.
The selected contact will be removed permanently.
Important: Deleting a contact cannot be undone.
Proceed as follows for subscribers:
• Write access to at least one contact group
• Only contacts that are assigned to the contact groups for which theuser has write access
Note: You can select and delete multiple contacts at the same time byholding down the Shift or Ctrl key.

Google Contact Groups
COMmander 6000/R/RX - Firmware V8.4 - Advanced Information V32 05/2022- 1087 -
CSV export
Requirements:
• For users: read access to at least one contact group
You can export contact groups, contacts with the same initial letter or Allcontacts in a single text file (*.csv).
Important: Note the following legal notes. It might be that thecontacts include the following legally especially protected components:
• Private and work address
• Private and work phone and fax numbers
• Birthdays
• Photos of the person (in connection with the data backup)
• Electronic contact addresses (private and work), e.g. the e-mailaddresses
• Position and department within a company
Notices:
Before the contacts are being saved, all subscribers to the PBX mustbe informed that these contents will be forwarded and about who willuse the data received.
It is essential to store the data securely and in accordance with legalrequirements.
If you want to make the contacts available to your specialised dealeror to the manufacturer for error analysis, you must make sure that thelegal requirements are fulfilled.

CSV Import Group
COMmander 6000/R/RX - Firmware V8.4 - Advanced Information V32 05/2022- 1088 -
CSV Import Group
Proceed as follows:
• Using the Configuration Manager (User data > Adress books >Contacts and assignment)
Display of imported CSV contacts that are stored temporarily in the PBX.You can select the contact data and drag it into the view All contacts ordirectly into a contact group (except from Google contact groups).
Delete contacts in the CSV contact group
The selected contact is deleted from the CSV import group.
Important: Deleting a contact cannot be undone.
Requirements for subscribers:
• Write access to at least one contact group
• Only contacts that are assigned to the contact groups for which thesubscriber has write access
Note: You can select and delete multiple contacts at the same time byholding down the Shift or Ctrl key.
Delete all CSV contact groups
All contacts are deleted from the CSV import group.
Important: Deleting a contact cannot be undone.
Requirements for subscribers:
• Write access to at least one contact group

CSV Import Group
COMmander 6000/R/RX - Firmware V8.4 - Advanced Information V32 05/2022- 1089 -
• Only contacts that are assigned to the contact groups for which theuser has write access
Adopting contacts from CSV import group
Select all or a selected CSV contact you want to adopt from the CSVimport group into the pbx.
Important: Deleting a contact cannot be undone.
CONTACT GROUPS
Select all or a selected contact group.
Move
The CSV contacts are moved into all or a selected contact group.
Requirements for subscribers:
• Write access to at least one contact group
• Only contacts that are assigned to the contact groups for which thesubscriber has write access

Settings of the Contacts
COMmander 6000/R/RX - Firmware V8.4 - Advanced Information V32 05/2022- 1090 -
Settings of the Contacts
Proceed as follows:
• Using the Configuration Manager (User data > Address Books >
Contacts and assignment > , )
A contact must at least consist of a phone number and a correspondingentry in the entry fields Surname and Company. Additionally, you can addfurther phone numbers (up to 4), names, e-mail and Internet addresses,postal addresses and a contact image. Furthermore, a contact is assignedto one or more contact group(s).
For the displaying in the call data list and for various connected phonesthe display name is used. If you have not entered anything in the entryfield display name, the display name will automatically be generatedfrom the entries in the entry fields First name and Surname. If there areno entries at all in the entry fields First name and Surname, the displayname will then be generated from the entry in the entry field Company.
Note the following differences when using the contact data in theconnected phones:
COMfortel 1400 IP, 2600 IP, 3200, 3500 und 3600 IP
In the contact list of the phone almost all contact data will be displayedexcept for display name, department name and birthday. Exception: If nofirst name or surname was entered at all for a contact, the display namewill be displayed.
If there already is a contact entry with the same phone numbers in thelocal phone book, the contacts will be merged in the phone. The localphone book name entry is preserved.

Settings of the Contacts
COMmander 6000/R/RX - Firmware V8.4 - Advanced Information V32 05/2022- 1091 -
COMfortel 1400, 2600
In the phone‘s contact list the display name will be displayed.
Additionally to the display name, four phone numbers per contact will bedisplayed.
COMfortel 1200, 1600
In the contact list of the phone only the first 16 characters of the displayname will be displayed (perhaps more, depending on space and characterwidth).
Additionally to the display name, four phone numbers per contact will bedisplayed.
COMfortel 1100, 1500, 2500 (AB), VoIP 2500 AB und DECT 900
In the contact list of the phone only the first 16 characters of the displayname will be displayed.
Additionally to the display name only one phone number per contactwill be displayed.Therefore, for these phones a contact for each phonenumber must be created in the contact group Phone book version 1.
New

Settings of the Contact Groups
COMmander 6000/R/RX - Firmware V8.4 - Advanced Information V32 05/2022- 1092 -
Settings of the Contact Groups
Proceed as follows:
• Using the Configuration Manager (User data > Address Books >Contact Groups)
Contact groups
Name of the contact group.
Number of contacts in contact group
Specifies how many contacts are existing in a contact group.
Contact group type
To organise large address books, up to 20 contact groups can be createdand assigned for All contacts.
The contact group Phone book version 1 is created automatically.Only over these, contacts can be provided to also older system phones(COMfortel 1100, 1500, 2500 (AB), VoIP 2500 AB). The phone books ofthese system phones as well as the Phone book version 1 are limited to400 contacts. Only one phone number can be stored per contact.
Note: Subscribers with phone book authorisation and read accessto Phone book version 1 can dial exchange line numbers withoutexchange line authorisation.
Administrators and sub-administrators can create own contact groupsand assign types to them. These types set the possible size of the contactgroup and specify the phones to which the contacts in this contact groupare to be transmitted.

Settings of the Contact Groups
COMmander 6000/R/RX - Firmware V8.4 - Advanced Information V32 05/2022- 1093 -
Contact group type
Standard • A maximum of 2000 contacts
• For the system phones
− COMfortel 1400 IP/2600 IP/3600 IP
− COMfortel 3200/3500
− COMfortel 1200/1400/1600/2600
DECT 900 • A maximum of 140 contacts
• For COMfortel DECT 900 handsets
DECT 900c • A maximum of 250 contacts
• For COMfortel DECT 900 handsets
Google • For synchronisation with Gmail
Note: The contacts in the DECT 900 and DECT 900C contact groupsmust also be contained in the Phone book version 1.
Note: Only one type can be selected per contact group. It is notpossible to change the contact group type afterwards.
Note: If you have not selected a type, the Standard contact grouptype is automatically assigned to the new contact group.
Last Google update
Displays the date and time on which the Google contact group was lastsynchronised with the Gmail account's contact data, either automaticallyor manually.

Settings of the Contact Groups
COMmander 6000/R/RX - Firmware V8.4 - Advanced Information V32 05/2022- 1094 -
Configure
Use the PBX Google contact group contact group type to transfercontact data from a Gmail account to the PBX's address books. Once youhave created a Google contact group, you can synchronise it with oneor all the contact groups managed under Gmail. You can either do thismanually or on a time-specific basis.
Note: From firmware version 8.0 onwards, synchronisation isperformed via a different interface. Reauthentication is required forexisting Google contact groups. A note is displayed next to the buttonto this effect. After authentication, you can continue configuring thecontact group.
ACCESS DATA
Release code
This code is generated and transferred automatically by Google.
Copy
Copies the release code to the clipboard so it can be used forauthentication.
Authentication
You are transferred directly to Google, so you can authenticate yourGoogle account. Input the required data in the authentication dialogue.
CONFIGURATION
Google synchronisation active
The Google contact group is synchronised with the contact data in theGmail account.

Settings of the Contact Groups
COMmander 6000/R/RX - Firmware V8.4 - Advanced Information V32 05/2022- 1095 -
Last update
Displays the date and time on which the Google contact group was lastsynchronised with the Gmail account's contact data, either automaticallyor manually.
Update interval
Enter the time interval for automatic synchronisation.
Google Contact Groups
Select the Google contact groups that are to be synchronisedautomatically.
Manual synchronisation
Manual synchronisation of the Gmail managed contact group can beinitiated at any time, regardless of automatic synchronisation. The statuscan be queried on the User data > Address Books > Contacts andassignment page.
g There is no synchronisation yet
g Synchronisation successful
g Synchronisation is running
g Synchronisation not successful
Note: A maximum of 2000 contacts can be synchronised.

Settings of the Contact Groups
COMmander 6000/R/RX - Firmware V8.4 - Advanced Information V32 05/2022- 1096 -
New
A new contact group is added.
Save
The changes are saved.
Delete
The selected contact group is deleted.
Requirements for subscribers:
• Write access to at least one contact group
• Only contacts that are assigned to the contact groups for which thesubscriber has write access
Note: You can select and delete multiple contact groups at once byholding down the Shift or Ctrl key.

Settings of the Contact Group Authorisations
COMmander 6000/R/RX - Firmware V8.4 - Advanced Information V32 05/2022- 1097 -
Settings of the Contact Group Authorisations
AuthorizationsContact group filter AuthorizationsContact group filter

Authorizations
COMmander 6000/R/RX - Firmware V8.4 - Advanced Information V32 05/2022- 1098 -
Authorizations
The administrator or sub-administrator assigns read and/or writeauthorisations to the individual subscribers for the contact groups.
A subscriber with read access to at least one contact group may via theContacts and assignment:
• search for and display a contact
• dial from within the contacts (Soft Call)
• read the QR code
• export a contact data record (vCard)
A subscriber with write an read acces may via the Contacts andassignment and Standard contact groups:
• create contacts
• import contact images
• edit contacts
• import contact data sets (vCard)
• adopt contacts from the call data list
• enter short-code numbers
• delete contacts
• Exporting address books
• switch the use as standard contact group on/off
• assign contacts to a contact group
• delete contacts from a contact group

Contact group filter
COMmander 6000/R/RX - Firmware V8.4 - Advanced Information V32 05/2022- 1099 -
Contact group filter
Proceed as follows:
• Using the Configuration Manager (User data > Address Books >Contact group authorisations)
Requirements:
• At least one configured contact group
CONTACT GROUP FILTER
Select a contact group or all contact groups for editing the authorisationsfor individual subscribers.
Filter: Enter filter criteria for the search of contacts into the entry fields
Phone number and Name.
All: The subscriber receives read and write access for all contact groups.
Read access: The subscriber receives read access for this contact group.
Write access: The subscriber receives write access for this contact group.

Settings Standard Contact Groups
COMmander 6000/R/RX - Firmware V8.4 - Advanced Information V32 05/2022- 1100 -
Settings Standard Contact Groups
InformationLogged-in SubscriberSubscriber with Write Authorisation InformationLogged-in SubscriberSubscriber with Write Authorisation

Information
COMmander 6000/R/RX - Firmware V8.4 - Advanced Information V32 05/2022- 1101 -
Information
New contacts are automatically assigned to the specified standardcontact groups either as soon as they are created (when you click the New button), or they are imported as a vCard or from the call data list.However, contacts that have been created by importing an address bookfile are not automatically assigned to a standard contact group.
You can define one or more contact group(s) as your standard contactgroup. If you are logged on as a user, you must define at least one contactgroup as your standard contact group before you can create a contact.This is because users cannot create a contact without a contact group.
A Google contact group cannot be used as standard contact group.

Logged-in Subscriber
COMmander 6000/R/RX - Firmware V8.4 - Advanced Information V32 05/2022- 1102 -
Logged-in Subscriber
Proceed as follows:
• As administrator: User data > Address Books > Standard contactgroups
• As a subscriber: Contacts and assignment
Requirements:
• For users: read access to at least one contact group
Name
Name of the logged-in subscriber.
Standard contact groups
The contact group is defined as standard contact group.

Subscriber with Write Authorisation
COMmander 6000/R/RX - Firmware V8.4 - Advanced Information V32 05/2022- 1103 -
Subscriber with Write Authorisation
Proceed as follows:
• As administrator: User data > Address Books > Standard contactgroups
• As a subscriber: Contacts and assignment
Requirements:
• For subscribers: write access to at least one contact group
Phone Number
Phone number of the phone.
Name
Name of the phone.
Save
The changes are saved.

Settings of the Address Books
COMmander 6000/R/RX - Firmware V8.4 - Advanced Information V32 05/2022- 1104 -
Settings of the Address Books
LDAP serverConversionPassword for the Access via COMfortel DECT IP1040 LDAP serverConversionPassword for the Access via COMfortel DECT IP1040

LDAP server
COMmander 6000/R/RX - Firmware V8.4 - Advanced Information V32 05/2022- 1105 -
LDAP server
Proceed as follows:
• Using the Configuration Manager (User data > Address Books >Settings)
Enable server
The PBX's LDAP server is one of the databases based on this protocol. Itstores the contact data for the PBX's central address books. As the LDAPserver displays the contact data stored in the central address books, it canalso hold up to 2000 contacts like the address books.
The LDAP server is needed to transfer the PBX's contact data to those IPend devices which support this transfer method (e.g. IP DECT servers orSIP phones with LDAP support). Any contact data that is input directly ona phone is not transferred to the central address books.
Auerswald/FONtevo provides LDAP support for the following IP enddevices:
• IP phone: COMfortel 1200 IP
• IP phones: COMfortel 1400 IP/2600 IP/3600 IP (firmware version 2.4A,or later)
• IP-DECT server: COMfortel WS-400 IP, COMfortel WS-650 IP (onlyAuerswald)
• IP-DECT handsets: COMfortel M-100/200/210/300/310 (onlyAuerswald)
Contact data can be transferred to the IP end devices.
Note: When switched off, the security and performance of the PBX areimproved. No contact data can be transferred to the IP end devices.

LDAP server
COMmander 6000/R/RX - Firmware V8.4 - Advanced Information V32 05/2022- 1106 -
Note: The LDAP server's IP address matches the PBX's IP addressand is predefined.
Only allow encrypted data transmission
The following ports are used for communication between end device andPBX:
LDAP 389
LDAP StartTLS 389
LDAPS 636
Simplified user name
Freely selectable part of the user name.
The user name along with the associated password is needed forauthentification of IP end devices on the LDAP server so that they have(only read) access to all the contact data that is currently present on theLDAP server.
Exported contact groups
Requirements:
• At least one contact group that is configured in the address books
Select the contact groups (up to 5), which are transferred to the LDAPserver and therefore also to the IP end devices.
The user name resulting from the name of the contact group along withthe associated password is needed for authentification of IP end devices

LDAP server
COMmander 6000/R/RX - Firmware V8.4 - Advanced Information V32 05/2022- 1107 -
on the LDAP server so that they have (only read) access to the contactdata for this contact group.
Password
Freely selectable password that consists of 8 to 32 characters containingdigits, letters (upper and lower case, but no German umlauts and ß) andspecial characters - _ . ! ~ * ' ( ) & = + $ ,.
Note: To change current passwords, click on Edit passwords.
Note: A coloured bar under the entry field shows the security level ofthe password (red = low level, green = high level).
Note: Passwords with a low security level can not be saved.
Caution: A high level does not necessarily indicate a secure passwordas this can also be reached by entering names and birth dates inconnection with special characters. However, names and birth datesshould not be used as passwords.
• To create a secure password you can consult, for example, theguidelines of the German Federal Office for Information Security(BSI, in German).
Caution: Visible passwords are a security risk.
• After entering the PIN/password, click on Hide passwords.
Format of transferred phone number for LDAP requests
The PBX supports different formats, so you can dial the contact's phonenumber correctly using an LDAP request.
Important: The format can be configured in different places,depending on the username used when logging in:

LDAP server
COMmander 6000/R/RX - Firmware V8.4 - Advanced Information V32 05/2022- 1108 -
• cn=auerswaldschandelah,dc=auerswald: User data >Address Books > Settings > Format of transferred phonenumber for LDAP requests
• telephoneNumber= ,dc=auerswald: Subscriber (scr.) >Configure > VoIP settings > Format of transferred phonenumber for LDAP requests
Conversion
COMmander 6000/R/RX - Firmware V8.4 - Advanced Information V32 05/2022- 1109 -
Conversion
Proceed as follows:
• Using the Configuration Manager (User data > Address Books >Settings)
Display name conversion
If you did not enter any data in the Display name field when you createda contact, the display name is generated automatically from the entriesin the First name and Surname entry fields, in accordance with thepredefined conversion process, when you save the entry.
Surname,First name: Display names are formed from the surname andthe first name (separated by a comma and a blank space).
First name Surname: Display names are formed from the first name, ablank space and the surname.
Note: If no data is present either in the First name entry field or theSurname entry field, the display name is generated from the entry inthe Company entry field.

Password for the Access via COMfortel DECT IP1040
COMmander 6000/R/RX - Firmware V8.4 - Advanced Information V32 05/2022- 1110 -
Password for the Access via COMfortel DECT IP1040
User name IKON
The user name along with the associated password is needed forauthentification of a COMfortel DECT IP1040 on the PBX so that it has(only read) access to the contact data. The access with other passwords(e. g. the admin password) is not recommended, as the password issent unencrypted by the COMfortel DECT IP1040. The access must beconfigured in the Configuration Manager of the COMfortel DECT IP1040(Network/PBX > More servers under Telephone book).
Password
Freely selectable password that consists of 8 characters containing digits,letters (upper and lower case, but no German umlauts and ß).
Notices:
To change current PINs and passwords, click on Edit PIN andpassword.
A coloured bar under the entry field shows the security level of thepassword (red = low level, green = high level).
Passwords with a low security level cannot be saved.
Caution:
A high level does not automatically indicate a secure password. Thiscan also be achieved by name and date of birth in connection with

Password for the Access via COMfortel DECT IP1040
COMmander 6000/R/RX - Firmware V8.4 - Advanced Information V32 05/2022- 1111 -
special characters. However, names and dates of birth should not beused for passwords.
• To create a secure password you can consult, for example, theguidelines of the German Federal Office for Information Security(BSI, in German).
Visible PINs and passwords are a security risk.
• After entering, select Hide PIN and password.
Settings Address Book Transmission for DECT Handsets
COMmander 6000/R/RX - Firmware V8.4 - Advanced Information V32 05/2022- 1112 -
Settings Address Book Transmission for DECTHandsets
Proceed as follows:
• Using the Configuration Manager (User data > Address Books >Contacts and assignment)
Requirements:
• Base station COMfortel DECT IP1040 operated on the PBX
• COMfortel DECT 900/900C Handsets
• For users: read access for those contact groups whose entries are tobe transmitted to the phone books of the handsets
• Configured password for the access via COMfortel DECT IP1040
− Using the Configuration Manager (User data > Address Books >Settings)
Note: The access with other passwords (e. g. the adminpassword) is not recommended, as the password is sentunencrypted by the COMfortel DECT IP1040. The access must beconfigured in the Configuration Manager of the COMfortel DECTIP1040 (Network/PBX > More servers under Telephone book).
• Configured DECT system phoneorIP DECT system phone
− Using the Configuration Manager (Subscriber (scr.) > Phonenumbers)
• Contact groups of the type COMfortel DECT 900 Handsets and/orCOMfortel DECT 900C Handsets

Settings Address Book Transmission for DECT Handsets
COMmander 6000/R/RX - Firmware V8.4 - Advanced Information V32 05/2022- 1113 -
The phone numbers with their corresponding names entered in theaddress books can be transmitted into one or more COMfortel DECT900/900C Handsets.
Note: Up to 140 (COMfortel DECT 900) or 250 (COMfortel DECT900C) phonebook entries may be transferred to a handset.
• Phone numbers that were manually entered into the handset willnot be overwritten by the Configuration Manager. That means thesephone numbers can only be changed or deleted manually.
• The Configuration Manager only uses the memory locations thathave not been defined manually. Entries that were defined usingthe Configuration Manager, will be overwritten by the ConfigurationManager.
• If more phone numbers have been selected than available in thememory locations of the handset, phone numbers are transmittedto the handset until all the memory locations are filled. The phonenumbers with lower short-code dial numbers are transferred first.
Notices:
As soon as the changes on the page User data > Address Books> Contact group authorisations have been saved, the PBX startsto distribute the assigned entries to the corresponding handsets untilall memory cells have been filled. If a handset is currently not readyfor the data transfer (switched off, impossible to reach or in a call),the PBX will try the next handset after a few minutes until all data hasbeen distributed.
The handset is not reachable during a data transfer (duration 2minutes max.) and there is "Copying from PBX" in the display.

Settings Address Book Transmission for DECT Handsets
COMmander 6000/R/RX - Firmware V8.4 - Advanced Information V32 05/2022- 1114 -
At an IKON DECT 1020, UTF-8 charachters cannot be used in thename field of the phone book entries.
Information about Transfer via LDAP Server
COMmander 6000/R/RX - Firmware V8.4 - Advanced Information V32 05/2022- 1115 -
Information about Transfer via LDAP Server
For the transfer of contact data from the LDAP server of the PBX to the IPend device you have to enter the following values into the end device.
For the transfer of all selected contact groups (e.g. in the factory settings):
• User name cn=auerswaldschandelah,dc=auerswald
• BaseDN dc=auerswald
• Password auerswaldsecret
For the transfer of single contact groups (e.g. for contact group DECT1):
• User name cn=DECT1,dc=auerswald
• BaseDN ou=DECT1,dc=auerswald
• Password is configurable
For the transfer of contacts of a single subscriber (e.g. for the internalnumber 31):
• User name telephoneNumber=31,dc=auerswald
• BaseDN dc=auerswald
• In this case the password is the user password of the subscriber.
Notices:
You must enter the complete character string
Ensure you type the capital and lower-case letters correctly, and donot type any blank spaces before or after the , and = characters.
User data > Address Books > Settings: To avoid input errors, youcan mark and copy the user name and BaseDN in the lines below theinput and list fields.

Information about Transfer via LDAP Server
COMmander 6000/R/RX - Firmware V8.4 - Advanced Information V32 05/2022- 1116 -
Administration > Phonebook: In the configuration manager of theIP DECT server COMfortel WS-400 IP or COMfortel WS-650 IP, theuser name and BaseDN must be entered in the following fields: Username (e.g. cn=auerswaldschandelah,dc=auerswald) in the entryfield Bind user and the BaseDN (e.g. dc=auerswald) in the entry fieldBase.

Special Numbers
COMmander 6000/R/RX - Firmware V8.4 - Advanced Information V32 05/2022- 1117 -
Special Numbers
ManagementConfiguration ManagementConfiguration

Management
COMmander 6000/R/RX - Firmware V8.4 - Advanced Information V32 05/2022- 1118 -
Management
Proceed as follows:
• Using the Configuration Manager (User data > Special numbers)
Name
Name of the call deblocker/call restrictor.
Type
This column displays the direction (incoming/outgoing) of the calldeblocker/call restrictor.
Reject anonymous calls
Anonymous incoming calls are rejected by the call restrictor.
Reject calls with special characters
The following characters are valid for phone numbers: 0-9, space, (), - , +.Phone numbers containing other characters will be rejected.
Ext.number/range / Name
Display of the phone number/range and name of the correspondingnumber.

Configuration
COMmander 6000/R/RX - Firmware V8.4 - Advanced Information V32 05/2022- 1119 -
Configuration
Proceed as follows:
• Using the Configuration Manager (User data > Special numbers >Configure)
Phone number / range
Phone number and range of the corresponding call deblocker/callrestrictor.
Name
Name of the corresponding phone number.
New
A new call deblocker/call restrictor is added.
Save
The changes are saved.
Delete
The selected entry will be deleted.

Messages
COMmander 6000/R/RX - Firmware V8.4 - Advanced Information V32 05/2022- 1120 -
Messages
Management Management

Management
COMmander 6000/R/RX - Firmware V8.4 - Advanced Information V32 05/2022- 1121 -
Management
Requirements:
• At least one received voice message or fax
• For the replay of the voice message: installed audio player
• To read the fax: installed Acrobat Reader
Proceed as follows:
• Using the Configuration Manager
− For admin: User data > Address books > Messages
− For user: Messages (Voice mail-/fax boxes)
MESSAGES
Selcet the voice mailbox in question according to its name or number.
Filter
all
Shows all messages/faxes including those in the archive.
new
Shows only new messages/faxes.
today to last month
Shows all messages/faxes received in the specified time which have notyet been archived.
Archive

Management
COMmander 6000/R/RX - Firmware V8.4 - Advanced Information V32 05/2022- 1122 -
Shows all messages/faxes moved to the archive.
Direction
all
Shows all messages/faxes including those in the archive.
received
Shows only the received messages/faxes.
sent
Shows only the sent messages/faxes.
Search (phone number or name) Search
Phone number
Only messages/faxes are displayed which contain the searched phonenumber in the Caller, Call destination, or Exchange line columns.
Phone number ranges
Only messages/faxes are displayed which contain the searched phonenumber range in the Caller, Call destination, or Exchange line columns(e. g. 00 for international calls).
Name
Only messages/faxes are displayed which contain the searched name inthe Caller or Exchange line columns.
Name fragment
Only messages/faxes are displayed which contain the text with thesearched character string in the Caller or Exchange line columns.
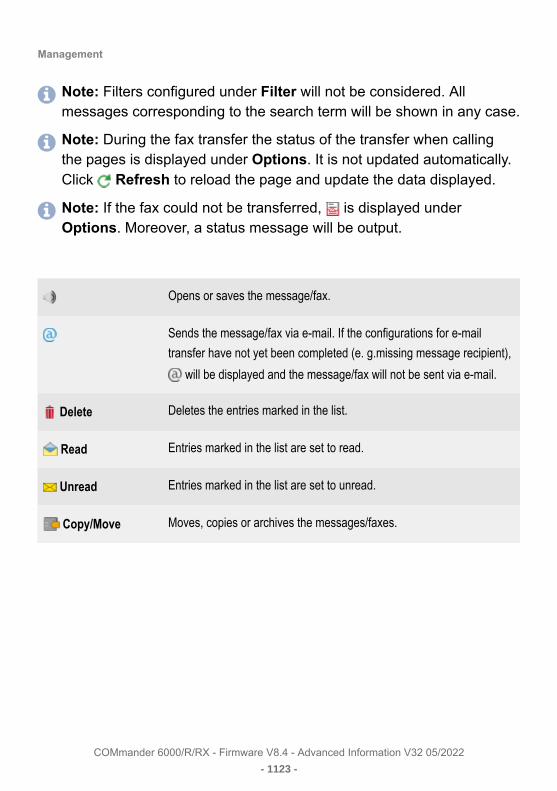
Management
COMmander 6000/R/RX - Firmware V8.4 - Advanced Information V32 05/2022- 1123 -
Note: Filters configured under Filter will not be considered. Allmessages corresponding to the search term will be shown in any case.
Note: During the fax transfer the status of the transfer when callingthe pages is displayed under Options. It is not updated automatically.Click Refresh to reload the page and update the data displayed.
Note: If the fax could not be transferred, is displayed underOptions. Moreover, a status message will be output.
Opens or saves the message/fax.
Sends the message/fax via e-mail. If the configurations for e-mail
transfer have not yet been completed (e. g.missing message recipient),
will be displayed and the message/fax will not be sent via e-mail.
Delete Deletes the entries marked in the list.
Read Entries marked in the list are set to read.
Unread Entries marked in the list are set to unread.
Copy/Move Moves, copies or archives the messages/faxes.

Administration
COMmander 6000/R/RX - Firmware V8.4 - Advanced Information V32 05/2022- 1124 -
Administration
Dealer and Operator DataActivationAccess AuthorisationsData BackupFirmware update and restartDate and time of the PBXIP ConfigurationVoIP ConfigurationRemote ConfigurationSIPS/SRTP Internal (VoIP)IP Block- and AllowlistCertificatesE-MailSystem MessagesLoggingService Data Dealer and Operator DataActivationAccess AuthorisationsData BackupFirmware update and restartDate and time of the PBXIP ConfigurationVoIP ConfigurationRemote ConfigurationSIPS/SRTP Internal (VoIP)IP Block- and AllowlistCertificatesE-MailSystem MessagesLoggingService Data

Dealer and Operator Data
COMmander 6000/R/RX - Firmware V8.4 - Advanced Information V32 05/2022- 1125 -
Dealer and Operator Data
Management of the PBX, Dealer and Operator Data Management of the PBX, Dealer and Operator Data

Management of the PBX, Dealer and Operator Data
COMmander 6000/R/RX - Firmware V8.4 - Advanced Information V32 05/2022- 1126 -
Management of the PBX, Dealer and Operator Data
Administrator AccessPBX DataDealer DataOperator and Location of the PBX Administrator AccessPBX DataDealer DataOperator and Location of the PBX

Administrator Access
COMmander 6000/R/RX - Firmware V8.4 - Advanced Information V32 05/2022- 1127 -
Administrator Access
Proceed as follows:
• Using the Configuration Manager (Administration > Dealer andoperator data)
Administrator access > Change
Requirements:
• Knowledge of the current admin password
The user data for the administrator access are used for administratorregistration on the PBX.
Note: Changes at the administrator access are only possible with anencrypted HTTPS connection.
Note: After a change, a new regisration is required.
Admin user name
Consists of up to 32 characters containing digits, letters (upper and lowercase, but no umlauts and ß).
Change admin PIN
Enables the input option (6 characters (digits)) for Admin PIN and Repeatadmin PIN (e. g. for access to COMfortel Set).
Note: All PINs in the PBX are unambiguous. Therefore, you cannotassign the same PIN twice.
Note: Avoid using PINs that can easily be found out (e. g. birthdays,specific dates, 123456, etc.)

Administrator Access
COMmander 6000/R/RX - Firmware V8.4 - Advanced Information V32 05/2022- 1128 -
Change admin password
Enables the input option Admin password and Repeat admin password(8-32 characters containing digits, letters (upper and lower case, but noumlauts and ß), special characters - _ . ! ~ * ' ( ) & = + $ ,).
Note: A coloured bar under the entry field shows the security level ofthe password (red = low level, green = high level).
Note: Passwords with a low security level cannot be saved.
Caution: A high level does not necessarily indicate a secure passwordas this can also be reached by entering names and birth dates inconnection with special characters. However, names and birth datesshould not be used as passwords.
• To create a secure password you can consult, for example, theguidelines of the German Federal Office for Information Security(BSI, in German).
Please confirm your changes with the current admin password
Protection against unauthorised changes.
PBX Data
COMmander 6000/R/RX - Firmware V8.4 - Advanced Information V32 05/2022- 1129 -
PBX Data
Proceed as follows:
• Using the Configuration Manager (Administration > Dealer andoperator data)
PBX name
For identification of the PBX. It is displayed in the status line and the PBXdata overview (click on the logo).
PBX description
This is used to enter any additional PBX information that may be required.

Dealer Data
COMmander 6000/R/RX - Firmware V8.4 - Advanced Information V32 05/2022- 1130 -
Dealer Data
Proceed as follows:
• Using the Configuration Manager (Administration > Dealer andoperator data)
Company...Homepage
Data of the specialised dealer or qualified electrician who commissionedthe PBX and is servicing it. They appear in the overview when you clickthe logo.

Operator and Location of the PBX
COMmander 6000/R/RX - Firmware V8.4 - Advanced Information V32 05/2022- 1131 -
Operator and Location of the PBX
Proceed as follows:
• Using the Configuration Manager (Administration > Dealer andoperator data)
Company...Coverage
Location data of the PBX. Appears on the overview when you click on thelogo.

Activation
COMmander 6000/R/RX - Firmware V8.4 - Advanced Information V32 05/2022- 1132 -
Activation
Management Activation Management Activation

Management Activation
COMmander 6000/R/RX - Firmware V8.4 - Advanced Information V32 05/2022- 1133 -
Management Activation
If you log in to the Online Shop, the upgrading status of the PBX isrecognised on basis of the serial number, you will be presented with thepossible upgrade options.
Note: You can carry out the expansion activation in the online shop orhave your dealer do it for you.
Requirements:
• A user account in the Online Shop
NUMBER OF ENABLED FUNCTIONS
Overview of the enabled functions.
ACTIVATION CODE FOR EXTENDED FUNCTIONS
Enter activation/voucher code
Important: When you change a voucher code into an activation code,the right of withdrawal expires before expiry of the withdrawal period.
Enter and confirm an activation or voucher code.
Open Voucher Center
Opens the Voucher Center, to change a voucher by entering the vouchercode and the serial number.
Purchase voucher code | Open Shop
Opens the online shop.

Management Activation
COMmander 6000/R/RX - Firmware V8.4 - Advanced Information V32 05/2022- 1134 -
Refresh
The overview of the enabled functions is refreshed.

Access Authorisations
COMmander 6000/R/RX - Firmware V8.4 - Advanced Information V32 05/2022- 1135 -
Access Authorisations
Configuring Access Authorisation Configuring Access Authorisation

Configuring Access Authorisation
COMmander 6000/R/RX - Firmware V8.4 - Advanced Information V32 05/2022- 1136 -
Configuring Access Authorisation
Proceed as follows:
• Using the Configuration Manager (Administration > Accessauthorisations)
1. Click next to the required page to list all subpages.
2. Select or clear all check boxes for the pages to which sub-admin anduser shall have access.

Data Backup
COMmander 6000/R/RX - Firmware V8.4 - Advanced Information V32 05/2022- 1137 -
Data Backup
Management of the Configuration Data Management of the Configuration Data

Management of the Configuration Data
COMmander 6000/R/RX - Firmware V8.4 - Advanced Information V32 05/2022- 1138 -
Management of the Configuration Data
Store Configuration Data in the PBXRead Configuration Data from the PBXReset ConfigurationRegenerate ConfigurationRestore old Configuration DataInsert Restoration Point Store Configuration Data in the PBXRead Configuration Data from the PBXReset ConfigurationRegenerate ConfigurationRestore old Configuration DataInsert Restoration Point

Store Configuration Data in the PBX
COMmander 6000/R/RX - Firmware V8.4 - Advanced Information V32 05/2022- 1139 -
Store Configuration Data in the PBX
Proceed as follows:
• Using the Configuration Manager (Administration > Data backup)
• For automatic upload: Using the PBX
Store in the PBX
Important: Saving an old configuration overwrites the currentconfiguration data.
Note: A configuration file that was created with an older firmwareversion, may possibly not contain all of the configuration data (forexample, data for new functions that were added by a firmwareupdate).
Select and import a configuration file (*.cfg) that is stored on a (PC) datastorage device. The following data packages can be selected for import:
• Apply configuration data (cannot be edited)
• Save network settings
• Apply PBX data
• Transfer music on hold and announcements
• Contact images
• COMfortel IP Editor

Read Configuration Data from the PBX
COMmander 6000/R/RX - Firmware V8.4 - Advanced Information V32 05/2022- 1140 -
Read Configuration Data from the PBX
Proceed as follows:
• Using the Configuration Manager (Administration > Data backup)
• For automatic upload: Using the PBX
Read from PBX
Important: Note the following legal notes before saving the databackup.
The data backup includes, amongst others, the following legallyespecially protected components:
• Configuration of the PBX
• Names of internal subscribers
• Passwords of PBX, subscribers, VoIP accounts and VoIPsubscribers
• Address books of the PBX
• Connection data sets with destination, source, and timeinformation of a telecommunication connection
Note: Before the data backup is being saved, all subscribers to thePBX must be informed that these contents will be forwarded. Theymust also be informed about who will use the data received.
Note: It is absolutely necessary to store the data safely and inaccordance with the legal requirements.
Note: If you want to make the data backup available to yourspecialised dealer or to the manufacturer for error analysis, you mustmake sure that the legal requirements are fulfilled.

Read Configuration Data from the PBX
COMmander 6000/R/RX - Firmware V8.4 - Advanced Information V32 05/2022- 1141 -
The configuration is saved to the (PC) data storage device asconfiguration file (*.cfg) The following data packages can be selected forexport:
• Read configuration data (cannot be edited)
• Read network settings
• Read PBX data
• Read music on hold and announcements
• Contact images
• COMfortel IP Editor

Reset Configuration
COMmander 6000/R/RX - Firmware V8.4 - Advanced Information V32 05/2022- 1142 -
Reset Configuration
Proceed as follows:
• Using the Configuration Manager (Administration > Data backup)
• For automatic upload: Using the PBX
Reset configuration
When resetting the configuration, the following parameters are maintainedin contrast to a reset to the ex-factory state via the buttons:
• Admin user name, admin PIN and admin password
• IP address settings
• Web server port setting
• Time
• NTP server settings
• Dealer and operator data
• Saved hold music and announcements
• Call data
• System messages
• Restoration points

Regenerate Configuration
COMmander 6000/R/RX - Firmware V8.4 - Advanced Information V32 05/2022- 1143 -
Regenerate Configuration
Proceed as follows:
• Using the Configuration Manager (Administration > Data backup)
• For automatic upload: Using the PBX
Regenerate
When regenerating the configuration, the configuration data is read out ofthe PBX. The database is reset, and the configuration data is restored tothe PBX once more. This eliminates internal errors the configuration datamay contain. The configuration of the PBX remains unchangend.

Restore old Configuration Data
COMmander 6000/R/RX - Firmware V8.4 - Advanced Information V32 05/2022- 1144 -
Restore old Configuration Data
Proceed as follows:
• Using the Configuration Manager (Administration > Data backup)
• For automatic upload: Using the PBX
Configuration file
Requirements:
• Set restoration point
Select the configuration file to be restored.
Restore network settings
Enables the restoration of the network settings.
Restore
Important: Restoring an old configuration overwrites the currentconfiguration data.
Note: A configuration file that was created with an older firmwareversion, may possibly not contain all of the configuration data (forexample, data for new functions that were added by a firmwareupdate).
Requirements:
• Selected configuration file

Restore old Configuration Data
COMmander 6000/R/RX - Firmware V8.4 - Advanced Information V32 05/2022- 1145 -
The configuration data is restored at the restoration point. The PBXrestarts.

Insert Restoration Point
COMmander 6000/R/RX - Firmware V8.4 - Advanced Information V32 05/2022- 1146 -
Insert Restoration Point
Proceed as follows:
• Using the Configuration Manager (Administration > Data backup)
• For automatic upload: Using the PBX
Insert restoration point
If a restoration point for the configuration data is set, the currentconfiguration data is saved in a configuration file in the PBX. Theconfiguration files are archived with information about the time and datethey were created. They are available in the Configuration file list fieldunder RESTORE OLD CONFIGURATION DATA.
A maximum of ten restoration points are set. If an eleventh restorationpoint is set, the oldest of the current restoration points is overwritten.
Note: A restoration point is automatically inserted at every firmwareupdate.

Firmware update and restart
COMmander 6000/R/RX - Firmware V8.4 - Advanced Information V32 05/2022- 1147 -
Firmware update and restart
Management of the Firmware Updates Management of the Firmware Updates

Management of the Firmware Updates
COMmander 6000/R/RX - Firmware V8.4 - Advanced Information V32 05/2022- 1148 -
Management of the Firmware Updates
Store the firmware in the PBX (manual firmware update)Firmware Update via Update ServerFirmware Update for VoIP System PhonesRestore firmware (reboot)Reset of the PBX (Restart)Power down of the PBX Store the firmware in the PBX (manual firmware update)Firmware Update via Update ServerFirmware Update for VoIP System PhonesRestore firmware (reboot)Reset of the PBX (Restart)Power down of the PBX

Store the firmware in the PBX (manual firmware update)
COMmander 6000/R/RX - Firmware V8.4 - Advanced Information V32 05/2022- 1149 -
Store the firmware in the PBX (manual firmwareupdate)
Proceed as follows:
• Using the Configuration Manager (Administration > Firmwareupdate and restart)
• To restore firmware, to restart and (only COMmander 6000/R/RX) topower down the PBX: By clicking a button on the PBX
Start firmware update
Requirements:
• A firmware file (*.rom) saved on a data storage device (PC)
Note: You can find a new firmware file on the Internet (seeAuerswald Service Portal). Alternatively, you can get a newfirmware file from your specialised dealer.
A firmware file (*.rom) is saved in the PBX via the Configuration Managerand the firmware is enabled after a reboot.
Automatic restart
Automatically restarts the PBX and activates the firmware after clickingon Import. The step Initiate reboot will be skipped.
Initiate reboot
Restarts the PBX and enables the firmware.
Select and import a firmware file (*.rom) that is stored on a (PC) datastorage device.

Firmware Update via Update Server
COMmander 6000/R/RX - Firmware V8.4 - Advanced Information V32 05/2022- 1150 -
Firmware Update via Update Server
Proceed as follows:
• Using the Configuration Manager (Administration > Firmwareupdate and restart)
• To restore firmware, to restart and (only COMmander 6000/R/RX) topower down the PBX: By clicking a button on the PBX
Address of the update server
Address of the update server that consists of four blocks with three digitsfor IPv4 addresses or eight blocks with four digits or characters for IPv6addresses.
Note: The factory settings are already configured with the address ofthe update server (www.auerswald-update.de).
update
Requirements:
• Configured address of the update server
• Configured DNS server and, if necessary, an HTTP proxy server(Administration > IP configuration)
• Configured gatewayAdministration > IP configuration)
• COMfortel 2500, COMfortel 1500, COMfortel 1100: Entered phonenumber of the update server (+49 5306 9200510) into the phones (e.g.via COMfortel Set)
When an instant firmware update is activated via the update server, thefirmware update is initiated automatically. A connection to the updateserver is set up and then the server sends the latest firmware to the PBX.

Firmware Update via Update Server
COMmander 6000/R/RX - Firmware V8.4 - Advanced Information V32 05/2022- 1151 -
You can perform immediate firmware updates both for the PBX and for theCOMfortel system telephones connected to it.
PBX firmware update
ISDN COMfortel firmware update
Enables the immediate firmware update of the PBX and/or all connectedISDN COMfortel system phones.
Interval Period clock
Note: Regular firmware updates are only possible for ISDN systemphones.
Requirements:
• Configured address of the update server
• Configured DNS server and, if necessary, an HTTP proxy server(Administration > IP configuration)
• COMfortel 2500, COMfortel 1500, COMfortel 1100: Entered phonenumber of the update server (+49 5306 9200510) into the phones (e.g.via COMfortel Set)
If the regular firmware update option is enabled, you can specify thefrequency and time period in which the system is to look for new firmware.The firmware update is then triggered automatically once a connection tothe update server has been set up and new firmware has been found.
ISDN COMfortel firmware update
Enables the regular firmware update of all connected ISDN COMfortelsystem phones.

Firmware Update via Update Server
COMmander 6000/R/RX - Firmware V8.4 - Advanced Information V32 05/2022- 1152 -
Update Status
If an update of the PBX has been initiated from the update server, you willfind the following information :
• Update status: information about the update that is currently beingperformed. An error message appears if the update encounters aproblem
• Date of the last update attempt
• Date of the last successful update
Only the update status is displayed (during the update) for system phoneupdates.
Note: When you open the page it first shows the status, which isautomatically updated every 30 seconds.
Online configuration
If searching for available firmware updates is switched on, the PBXsearches the update server for available firmware updates. Theiravailability is signalled by a system message when you log on to theConfiguration Manager (as administrator) or when you open the pageAdministration > Firmware update and restart (as administrator or sub-administrator).
Requirements to carry out a search:
• PBX connected to broadband Internet access
• Configured address of the update server
• Configured gatewayAdministration > IP configuration)

Firmware Update for VoIP System Phones
COMmander 6000/R/RX - Firmware V8.4 - Advanced Information V32 05/2022- 1153 -
Firmware Update for VoIP System Phones
Proceed as follows:
• Using the Configuration Manager (Administration > Firmwareupdate and restart)
• To restore firmware, to restart and (only COMmander 6000/R/RX) topower down the PBX: By clicking a button on the PBX
If COMfortel 1400 IP/2600 IP and/oder COMfortel 3600 IP system phoneshave been configured at the phones itself as firmware-distributing phones,you will find the following information here:
• IPv4 address of the distributing phone
• Version number of the current firmware stored in this phone

Restore firmware (reboot)
COMmander 6000/R/RX - Firmware V8.4 - Advanced Information V32 05/2022- 1154 -
Restore firmware (reboot)
Proceed as follows:
• Using the Configuration Manager (Administration > Firmwareupdate and restart)
• To restore firmware, to restart and (only COMmander 6000/R/RX) topower down the PBX: By clicking a button on the PBX
Restoring Firmware
Requirements:
• Firmware update performed
The PBX retains not only the current firmware used but also the firmwarepreviously used in the flash memory. If necessary, the old firmware can berestored again.
Caution:The PBX reboots automatically after you restore thepreviously used firmware. This interrupts all the connections with/to theweb server, all the calls and the data services. Information that is notsaved will be lost!

Reset of the PBX (Restart)
COMmander 6000/R/RX - Firmware V8.4 - Advanced Information V32 05/2022- 1155 -
Reset of the PBX (Restart)
Proceed as follows:
• Using the Configuration Manager (Administration > Firmwareupdate and restart)
• To restore firmware, to restart and (only COMmander 6000/R/RX) topower down the PBX: By clicking a button on the PBX
Restart phone
Requirements:
• Configured timeframe until restart
The Power LED lights up green until all calls have ended or until the setwaiting time has expired. If all calls, all connections to/from the web serverand all data services are terminated, the PBX will perform a restart (evenbefore the defined time has elapsed). If a call (a connection) is active afterthe time has elapsed, this call will be interrupted to perform the restart.
The Power LED lights/flashes red and orange for up to two minutes.
If the Power LED lights up green again, the restart is complete and thePBX is ready for operation.
Note: If the Power LED remains continuously lit in red, an error hasoccurred. Please contact your dealer or the manufacturer directly.
Minutes
Select a timeframe until restart or power down.

Power down of the PBX
COMmander 6000/R/RX - Firmware V8.4 - Advanced Information V32 05/2022- 1156 -
Power down of the PBX
Proceed as follows:
• Using the Configuration Manager (Administration > Firmwareupdate and restart)
Shutdown
As soon as the Power LED starts to shine red, you have approximately 90seconds to pull the power plug of the PBX and of accessory equipment—ifrequired—out of the socket.
If the power plug is not pulled out of the socket after this time has run out,the PBX restarts (Restart).

Date and time of the PBX
COMmander 6000/R/RX - Firmware V8.4 - Advanced Information V32 05/2022- 1157 -
Date and time of the PBX
Settings of Date and time of the PBX Settings of Date and time of the PBX

Settings of Date and time of the PBX
COMmander 6000/R/RX - Firmware V8.4 - Advanced Information V32 05/2022- 1158 -
Settings of Date and time of the PBX
One-Time Configuration of Date and timeAutomatic Synchronisation of the PBX Time/DateAutomatic Distribution of the PBX Time/Date One-Time Configuration of Date and timeAutomatic Synchronisation of the PBX Time/DateAutomatic Distribution of the PBX Time/Date

One-Time Configuration of Date and time
COMmander 6000/R/RX - Firmware V8.4 - Advanced Information V32 05/2022- 1159 -
One-Time Configuration of Date and time
Proceed as follows:
• Using the Configuration Manager (Administration > Date and time ofthe PBX)
• Using a character string on the internal phone (see Time and Date (ofthe PBX))
Manual
The time can be entered manually.
Time
Enter in format: hh: mm: ss
Date
Enter in format: JJJJ. MM. TT
Time zone
UTC
The UTC (Coordinated Universal Time - world time) is a combination ofthe International Atomic Time (TAI) and Universal Time (UT). It is usedinstead to Greenwich Mean Time (GMT).
Location name
E. g. Berlin
Set now
Take from PC
The time is took from the PC.
Time zone

One-Time Configuration of Date and time
COMmander 6000/R/RX - Firmware V8.4 - Advanced Information V32 05/2022- 1160 -
UTC
The UTC (Coordinated Universal Time - world time) is a combination ofthe International Atomic Time (TAI) and Universal Time (UT). It is usedinstead to Greenwich Mean Time (GMT).
City name
E. g. Berlin

Automatic Synchronisation of the PBX Time/Date
COMmander 6000/R/RX - Firmware V8.4 - Advanced Information V32 05/2022- 1161 -
Automatic Synchronisation of the PBX Time/Date
Proceed as follows:
• Using the Configuration Manager (Administration > Date and time ofthe PBX)
• Using a character string on the internal phone (see Time and Date (ofthe PBX))
From the ISDN network
Note: The network provider usually transmits a time precisely to theminute.
Note: The time is updated at most once per hour.
Requirements:
• External S0 port (optional, see Technical Data in the Instructions)
• Disabled automatic updating of the PBX time via the network
After each ISDN call
The time transmitted by the network provider during an outgoing externalcall is used for setting the PBX time.
oder
Automatic ISDN call
(no entry = first MSN/DDI entered)
The time transmitted by the network provider during an outgoing externalcall is used for setting the PBX time.

Automatic Synchronisation of the PBX Time/Date
COMmander 6000/R/RX - Firmware V8.4 - Advanced Information V32 05/2022- 1162 -
From the Internet from an NTP server
Requirements:
• PBX connection to the server network
• Disabled automatic updating of the PBX time after each ISDN call
Update interval
Select one of the availbale options.
Note: The automatic updating of the PBX time via the network isperformed at the selected time interval (e.g., every 5 hours).
Public time server NTP server
The PBX time will be accepted from an NTP server at the selected timeinterval. Select the country in the upper list field and select the NTP serverin the lower entry field.
or
Manual server Port
Enter the address of the local NTP server or name of an external NTPserver in the first entry field and the corresponding port in the second entryfield.
Note: You should receive the address from the system administrator ofthe network.

Automatic Distribution of the PBX Time/Date
COMmander 6000/R/RX - Firmware V8.4 - Advanced Information V32 05/2022- 1163 -
Automatic Distribution of the PBX Time/Date
Proceed as follows:
• Using the Configuration Manager (Administration > Date and time ofthe PBX)
• Using a character string on the internal phone (see Time and Date (ofthe PBX))
NTP server service
Requirements:
• PBX connection to the network
The PBX can be used as an NTP server by other devices in the network.

IP Configuration
COMmander 6000/R/RX - Firmware V8.4 - Advanced Information V32 05/2022- 1164 -
IP Configuration
Settings of the IP Configuration Settings of the IP Configuration

Settings of the IP Configuration
COMmander 6000/R/RX - Firmware V8.4 - Advanced Information V32 05/2022- 1165 -
Settings of the IP Configuration
Server ConfigurationEthernet ConfigurationVMF Slot X/XVoIP Slot XDNS ConfigurationHTTP Proxy ConfigurationSFTP Server Server ConfigurationEthernet ConfigurationVMF Slot X/XVoIP Slot XDNS ConfigurationHTTP Proxy ConfigurationSFTP Server

Server Configuration
COMmander 6000/R/RX - Firmware V8.4 - Advanced Information V32 05/2022- 1166 -
Server Configuration
Proceed as follows:
• Using the Configuration Manager (Administration > IPConfiguration)
Port of the webserver
Port 80 is used for accessing the web server by default. The addresscan thus be entered as follows: http://192.168.55.13, for example. Onlywhen accessing via Ethernet the value (e. g. 8081 instead of 80) has tobe entered when modifying the port (e. g. http://192.168.55.13:8081). Achange of the port should be made for security reasons especially if thePBX has to be accessible from the Internet (via a router and a fixed IPaddress).
You can view the ports already configured on the Overview > Ports page.
Caution: A port change will be made out of security reasonsespecially if the PBX has to be reachable from the Internet (via routerand fixed IP address).
HTTPS port of the webserver
Port 443 is used for accessing the web server by default. The addresscan thus be entered as follows: http://192.168.55.13, for example. Onlywhen accessing via Ethernet the value (e. g. 4432 instead of 443) has tobe entered when modifying the port (e. g. https://192.168.55.13:8081). Achange of the port should be made for security reasons especially if thePBX has to be accessible from the Internet (via a router and a fixed IPaddress).
You can view the ports already configured on the Overview > Ports page.

Server Configuration
COMmander 6000/R/RX - Firmware V8.4 - Advanced Information V32 05/2022- 1167 -
Caution: A port change will be made out of security reasonsespecially if the PBX has to be reachable from the Internet (via routerand fixed IP address).
Force HTTPS connection
The connection is carried out via HTTPS to secure the access to theConfiguration Manager. An access via HTTP will be forwarded to HTTPS.
Note: When switched off, the connection is carried out via HTTP.
Webserver access only within local network
For the increased security, the webserver access is limited to the localnetwork.
API access only within local network
For the increased security, the API access is limited to the local network.
Increased security/Content Security Policy
The CSP header is activated. Cross-Site-Scripting attacks by foreignsources should be prevented by this.
Note: Enabling this function can lead to problems in connection withsome add-ons.
Configuration port for system phones
Enter the configuration port for system phones with the range 1 to 65535.It indicates which port on the PBX is used by the configuration software onthe ISDN system phone during the transmission.

Server Configuration
COMmander 6000/R/RX - Firmware V8.4 - Advanced Information V32 05/2022- 1168 -
Language
Select the language.
Forced logout if no action happens after Minutes (5..60)
The time lapse with the range 5 to 60 for a forced logout defines afterhow many minutes a user is automatically logged out of the ConfigurationManager if no action has been taken in the Configuration Manager withina configured time period. If an action happens after the automatic logout,the user will see the page for a new login.

Ethernet Configuration
COMmander 6000/R/RX - Firmware V8.4 - Advanced Information V32 05/2022- 1169 -
Ethernet Configuration
Proceed as follows:
• Using the Configuration Manager (Administration > IPConfiguration)
Receive the IP address automatically (DHCP client)
The PBX automatically receives its IP address from the DNS server.
Assigning IP address manually
Requirements:
• Disabled DHCP client
IP address
IPv4 address in the range 0-255 (example: 192.168.0.240).
Apply immediately
The IPv4 address is immediately applied and the PBX is routed to the newIPv4 address. Renewed registration required.
Apply at restart
The IPv4 address is not applied until the next time the PBX is restarted.
Subnet mask
IPv4 address of the subnet mask in the range 0-255 (example:255.255.255.0).
Gateway
IPv4 address of the gateway in the range 0-255 (example: 192.168.0.2).
Ethernet Configuration
COMmander 6000/R/RX - Firmware V8.4 - Advanced Information V32 05/2022- 1170 -
Permanent IP address from the APIPA address range
The PBX can be reached via the IP address 169.254.1.240, if
• it is directly connected to an individual computer which automaticallyreceives its IP address.
• it is connected to a router that automatically assigns IP addresses.
IPv6 Configuration
Opens the IPv6 configuration.
IPv6 mode
If IPv6 is switched on, an IP address complying with version 6 of theInternet protocol can be assigned to the PBX. Thanks to the greaterlength of IPv6 addresses (eight blocks with four digits each, example:3001:00FF:ABC0:0EAC:0001:0000:0000:000F), IPv6 offers a greaternumber of available IP addresses than version 4 of the Internet protocol(IPv4).
disabled
Switches the use of IPv6 addresses off.
SLAAC
Automatically assigns an IPv6 address to the PBX.
static
Assigns a user-defined IPv6 address to the PBX.
Note: If IPv6 has been disabled for the PBX, IPv6 can also not beenabled for any modules. If, in the reverse, IPv6 has been enabled for

Ethernet Configuration
COMmander 6000/R/RX - Firmware V8.4 - Advanced Information V32 05/2022- 1171 -
the PBX, it is also enabled automatically for all modules and cannot bedisabled.
IPv6 settings
Requirements:
• IPv6 status IPv6 static selected
IPv6 address
Enter the IPv6 address of the PBX.
Prefix length
Enter the prefix length in the range 1 to 128. The prefix specifies to whichsubnet the IPv6 address belongs.
IPv6 Gateway
Enter the IPv6 gateway. Possible entries: Digits, characters and :.
VMF Slot X/XVoIP Slot X
COMmander 6000/R/RX - Firmware V8.4 - Advanced Information V32 05/2022- 1172 -
VMF Slot X/XVoIP Slot X
Proceed as follows:
• Using the Configuration Manager (Administration > IPConfiguration)
Configure the Ethernet configuration on the VMF or the VoIP module.
Note: If you do not want to assign a permanent IPv4 address to themodule, clear the check box Receive the IP address automatically(DHCP client).
Requirements:
• Inserted COMmander VMF module or COMmander VMF-R module orinserted COMmander 8/16VoIP module or COMmander 8/16VoIP-Rmodule
Receive the IP address automatically (DHCP client)
The PBX automatically receives its IP address from the DNS server.
Assigning IP address manually
Requirements:
• Disabled DHCP client
IP address
IPv4 address in the range 0-255 (example: 192.168.0.240).
Apply immediately
The IPv4 address is immediately applied and the PBX is routed to the newIPv4 address. Renewed registration required.
Apply at restart

VMF Slot X/XVoIP Slot X
COMmander 6000/R/RX - Firmware V8.4 - Advanced Information V32 05/2022- 1173 -
The IPv4 address is not applied until the next time the PBX is restarted.
Subnet mask
IPv4 address of the subnet mask in the range 0-255 (example:255.255.255.0).
Gateway
IPv4 address of the gateway in the range 0-255 (example: 192.168.0.2).
IPv6 Configuration
Opens the IPv6 configuration.
IPv6 mode
If IPv6 is switched on, an IP address complying with version 6 of theInternet protocol can be assigned to the PBX. Thanks to the greaterlength of IPv6 addresses (eight blocks with four digits each, example:3001:00FF:ABC0:0EAC:0001:0000:0000:000F), IPv6 offers a greaternumber of available IP addresses than version 4 of the Internet protocol(IPv4).
disabled
Switches the use of IPv6 addresses off.
SLAAC
Automatically assigns an IPv6 address to the PBX.
static
Assigns a user-defined IPv6 address to the PBX.
Note: If IPv6 has been disabled for the PBX, IPv6 can also not beenabled for any modules. If, in the reverse, IPv6 has been enabled for

VMF Slot X/XVoIP Slot X
COMmander 6000/R/RX - Firmware V8.4 - Advanced Information V32 05/2022- 1174 -
the PBX, it is also enabled automatically for all modules and cannot bedisabled.
IPv6 settings
Requirements:
• IPv6 status IPv6 static selected
IPv6 address
Enter the IPv6 address of the PBX.
Prefix length
Enter the prefix length in the range 1 to 128. The prefix specifies to whichsubnet the IPv6 address belongs.
IPv6 Gateway
Enter the IPv6 gateway. Possible entries: Digits, characters and :.

DNS Configuration
COMmander 6000/R/RX - Firmware V8.4 - Advanced Information V32 05/2022- 1175 -
DNS Configuration
Proceed as follows:
• Using the Configuration Manager (Administration > IPConfiguration)
Note: If you do not enter a DNS server, the gateway is automaticallyused instead.
First DNS server Second DNS server
IPv4 address
Four blocks separated by a dot (.).
IPv6 address
Eight blocks separated by a colon (:).
Note: Click Test connection, to check functioning of the Internetconnection. The PBX will then send a Ping command to test whetherwww.google.de can be reached. www.google.de has been chosenbecause it can usually be reached
A DNS server is necessary for Internet access. The data is specified bythe Internet service provider or system administrator of the network.
Requirements:
• DHCP disabled or DHCP enabled and Use own DNS server enabled
Use own DNS server
Requirements:
• DHCP enabled
Despite the enabled DHCP client, the DNS server set here is used.

DNS Configuration
COMmander 6000/R/RX - Firmware V8.4 - Advanced Information V32 05/2022- 1176 -
Note: When switched off, the PBX receives the DNS server addressautomatically from a DHCP server.

HTTP Proxy Configuration
COMmander 6000/R/RX - Firmware V8.4 - Advanced Information V32 05/2022- 1177 -
HTTP Proxy Configuration
Proceed as follows:
• Using the Configuration Manager (Administration > IPConfiguration)
HTTP-Proxy
An HTTP proxy is a proxy for the HTTP protocol, over which Internet sitesare called or files downloaded.
The HTTP-Proxy is enabled and additional settings must be made:
IP address or URL | Port
Enter the IP address or URL:
IPv4 address
Four blocks separated by a dot (.).
IPv6 address
Eight blocks separated by a dot (.).
URL
Characters (example: www.proxyserver.de)
Enter the related port number (port) in the range 1 to 65535.
Note: If you do not enter anything in this entry field, port 3128 will beentered automatically.
Proxy authorisation
The proxy authorisation is enabled and additional settings must be made:
User name

HTTP Proxy Configuration
COMmander 6000/R/RX - Firmware V8.4 - Advanced Information V32 05/2022- 1178 -
Enter a username for the authorisation to the HTTP proxy.
Password
Enter the related password.

SFTP Server
COMmander 6000/R/RX - Firmware V8.4 - Advanced Information V32 05/2022- 1179 -
SFTP Server
Proceed as follows:
• Using the Configuration Manager (Administration > IPConfiguration)
SFTP server
The SFTP network protocol is used for the secure data transfer betweenthe PBX and external programmes. For this purpose, the PBX uses anSFTP server from which call data files can be downloaded.
Enable the SFTP server if you want to forward this file to externalprogrammes (e.g. evaluation programmes).
A password is required.
8 to 32 digits:
• Digits: 0- 9
• Characters: a- z, A- Z, no German umlauts and ß
• Special characters - _ . ! ~ * ' ( ) & = + $ ,
Note: To change current passwords, click on Edit passwords.
Note: For registering at the SFTP server of the PBX an externalprogramme requires the user name and password. The user name ispredefined netstorage and displayed under User name.
Note: A coloured bar under the entry field shows the security level ofthe password (red = low level, green = high level).
Note: Passwords with a low security level can not be saved.
Caution: A high level does not necessarily indicate a secure passwordas this can also be reached by entering names and birth dates in

SFTP Server
COMmander 6000/R/RX - Firmware V8.4 - Advanced Information V32 05/2022- 1180 -
connection with special characters. However, names and birth datesshould not be used as passwords.
Caution: Visible passwords are a security risk.
• After entering, click Hide passwords.

VoIP Configuration
COMmander 6000/R/RX - Firmware V8.4 - Advanced Information V32 05/2022- 1181 -
VoIP Configuration
Settings for VoIP Settings for VoIP

Settings for VoIP
COMmander 6000/R/RX - Firmware V8.4 - Advanced Information V32 05/2022- 1182 -
Settings for VoIP
Distribution of the VoIP ChannelsNotificationSIPRTPQuality of ServiceSTUN Server for the Connection of External VoIP Subscribers Distribution of the VoIP ChannelsNotificationSIPRTPQuality of ServiceSTUN Server for the Connection of External VoIP Subscribers

Distribution of the VoIP Channels
COMmander 6000/R/RX - Firmware V8.4 - Advanced Information V32 05/2022- 1183 -
Distribution of the VoIP Channels
Proceed as follows:
• Using the Configuration Manager (Administration > VoIPConfiguration)
Requirements:
• VoIP channels (optional, see Technical Data in the Instructions)
Channel reserved for voicemail/fax
Number of channels to be used for voice mail/fax and not for VoIP.
Available VoIP channels
External VoIP channels
Number of VoIP channels to be used only as external VoIP channels.
Internal VoIP channels
Number of VoIP channels to be used only as internal VoIP channels.
Available VoIP channels for dynamic assignment
Number of VoIP channels to be used as internal or external VoIP channelsdepending on the need.

Notification
COMmander 6000/R/RX - Firmware V8.4 - Advanced Information V32 05/2022- 1184 -
Notification
Notification
When the function is activated, a message is sent or the systemmessages indicate that there are not enough external VoIP channelsavailable for calls.
Note: No messages are sent or system messages are displayed if themaximum number of VoIP channels has already been activated.

SIP
COMmander 6000/R/RX - Firmware V8.4 - Advanced Information V32 05/2022- 1185 -
SIP
Proceed as follows:
• Using the Configuration Manager (Administration > VoIPConfiguration)
Requirements:
• VoIP channels (optional, see Technical Data in the Instructions)
SIP port of the internal VoIP registrar (1 to 65535)
You will need to change this if one of the VoIP providers you use uses thedefault value 5060 set here.
Important: If the SIP port of the internal VoIP registrar is modifiedwhile it is running, all the calls will be interrupted.
Note: If the SIP port of the internal VoIP registrar is modified, theinternal SIPS port of the internal VoIP registrar is also changedautomatically. The internal SIPS port is calculated automatically fromthe SIP port of the internal VoIP registrar + 1).
Note: The page Overviews > Ports shows an overview of the PBXports (incoming and outgoing).
Note: You must change the SIP port of the internal VoIP registrar inevery VoIP phone that is connected to the PBX.

RTP
COMmander 6000/R/RX - Firmware V8.4 - Advanced Information V32 05/2022- 1186 -
RTP
Proceed as follows:
• Using the Configuration Manager (Administration > VoIPConfiguration)
Requirements:
• VoIP channels (optional, see Technical Data in the Instructions)
VoIP module/CPU
The RTP port is a port on the local system that is used as the outgoingport for RTP transfers.
Note: The page Overviews > Ports shows an overview of the PBXports (incoming and outgoing).

Quality of Service
COMmander 6000/R/RX - Firmware V8.4 - Advanced Information V32 05/2022- 1187 -
Quality of Service
Proceed as follows:
• Using the Configuration Manager (Administration > VoIPConfiguration)
Requirements:
• VoIP channels (optional, see Technical Data in the Instructions)
DiffServ
Requirements:
• Existing and enabled DiffServ support on all active networkcomponents
DiffServ is used to prioritise the handling of language packages (VoIP) andto achieve better voice quality for VoIP calls. DiffServ can be evaluatedin networks that include active network components, such as routersor switches, to enable packets to be forwarded in accordance with theirpriority.
As proposed in RFC 4594, the DSCP values are set for VoIP calls(signalling (SIP): CS5, voice (RTP): EF).
Note: DiffServ is not usually supported by VoIP providers. As aresult, this setting may not be taken into consideration under certaincircumstances on the Internet.
Note: To adopt the change, reboot the PBX.
STUN Server for the Connection of External VoIP Subscribers
COMmander 6000/R/RX - Firmware V8.4 - Advanced Information V32 05/2022- 1188 -
STUN Server for the Connection of External VoIPSubscribers
Proceed as follows:
• Using the Configuration Manager (Administration > VoIPConfiguration)
Requirements:
• VoIP channels (optional, see Technical Data in the Instructions)
STUN server
IP address or URL
Port
Requirements:
• support for public DNS mapping by the router on the PBX network
• call forwarding from the SIP port of the internal VoIP registrar to thePBX's IP address in the router
• configured DNS server
The STUN server entered here can be used to connect to external privatebranch exchanges.
Note: If all external private branch exchanges are connected to thePBX network via a VPN tunnel, no STUN server needs to be entered.
Note: If IP protocol IPv6 is selected, STUN cannot be used as a NATmethod either for SIP or RTP.

STUN Server for the Connection of External VoIP Subscribers
COMmander 6000/R/RX - Firmware V8.4 - Advanced Information V32 05/2022- 1189 -
Note: The page Overviews > Ports shows an overview of the PBXports (incoming and outgoing).

Remote Configuration
COMmander 6000/R/RX - Firmware V8.4 - Advanced Information V32 05/2022- 1190 -
Remote Configuration
Settings for the Remote Configuration Settings for the Remote Configuration

Settings for the Remote Configuration
COMmander 6000/R/RX - Firmware V8.4 - Advanced Information V32 05/2022- 1191 -
Settings for the Remote Configuration
Remote ProgrammingAuthorisation for Remote ConfigurationRemote Configuration of the System TelephonesRemote configuration via Remote Access Server in the Internet Remote ProgrammingAuthorisation for Remote ConfigurationRemote Configuration of the System TelephonesRemote configuration via Remote Access Server in the Internet

Remote Programming
COMmander 6000/R/RX - Firmware V8.4 - Advanced Information V32 05/2022- 1192 -
Remote Programming
Proceed as follows:
• Using the Configuration Manager (Administration > Remoteconfiguration)
ARA PIN
The ARA PIN is required for the following purposes:
• As a PIN for remote programming from an external phone (e.g. forenabling remote configuration or switching the alarm on/off)
Note: To change an existing PIN, click on Edit PIN.
Note: All the PINs in the PBX are unique. For this reason, you cannotassign the same PIN twice.
Note: Do not use dates of birth or dates as PINs. This makes it easyfor an attacker to find out the correct PIN. Do not use PINs which areeasy to guess, such as 111111 or 123456.
Caution:Visible PINs are a security risk.
• After you enter your password, click on Hide PIN.
Remote switching number
Requirements:
• external numbers have been entered
The remote switching number is required for the following purposes:

Remote Programming
COMmander 6000/R/RX - Firmware V8.4 - Advanced Information V32 05/2022- 1193 -
• As a PBX phone number for remote programming from an externalphone (e.g. for enabling remote configuration or switching the alarmon/off)
Note: If no remote switching number has been entered, you mustdial a character string on an internal telephone to unlock the PBX forremote configuration. After this, the PBX can be accessed via everyassociated MSN/DDI number.
Note: You cannot use call forwarding to divert this phone number.
Note: You must select the DDI number to be sent for a PTPconnection from the extensions block. If the DDI number is thendisplayed in red text, either it is not in the value range, or the maximumnumber of external phone numbers has already been entered.

Authorisation for Remote Configuration
COMmander 6000/R/RX - Firmware V8.4 - Advanced Information V32 05/2022- 1194 -
Authorisation for Remote Configuration
Proceed as follows:
• Using the Configuration Manager (Administration > Remoteconfiguration)
Dealer access number X
Specifies the connection from which the PBX can be configured remotelywithout manual release. To do this, the PC connected to the PBX via anexternal ISDN connection must send the dealer access number that isentered here.
Note: Enter the phone number along with its local area code.
Note: If you do not enter a dealer access number, or if the transmittednumber does not match the number you enter, you must dial acharacter string on an internal telephone to unlock the PBX for remoteconfiguration.

Remote Configuration of the System Telephones
COMmander 6000/R/RX - Firmware V8.4 - Advanced Information V32 05/2022- 1195 -
Remote Configuration of the System Telephones
Proceed as follows:
• Using the Configuration Manager (Administration > Remoteconfiguration)
Remote switching number
Requirements:
• external numbers have been entered
The system telephone remote switching number is used to set up anexternal ISDN connection using the COMfortel Set configuration software.
Note: You cannot use call forwarding to divert this phone number.
Note: You must select the DDI number to be sent for a PTPconnection from the extensions block. If the DDI number is thendisplayed in red text, either it is not in the value range, or the maximumnumber of external phone numbers has already been entered.

Remote configuration via Remote Access Server in the Internet
COMmander 6000/R/RX - Firmware V8.4 - Advanced Information V32 05/2022- 1196 -
Remote configuration via Remote Access Server inthe Internet
Proceed as follows:
• Using the Configuration Manager (Administration > Remoteconfiguration)
Enable dealer access via Internet
Requirements:
• configured network connection with DNS server and Gateway
The PBX can be configured remotely via the Internet with the (Auerswald)Remote Access Server (see Configuring the PBX remotely via the Internetwith (Auerswald) Remote Access Server).

SIPS/SRTP Internal (VoIP)
COMmander 6000/R/RX - Firmware V8.4 - Advanced Information V32 05/2022- 1197 -
SIPS/SRTP Internal (VoIP)
Settings SIPS/SRTP Settings SIPS/SRTP

Settings SIPS/SRTP
COMmander 6000/R/RX - Firmware V8.4 - Advanced Information V32 05/2022- 1198 -
Settings SIPS/SRTP
SIPS/SRTPRoot CertificatePBX Certificate
Proceed as follows:
• Using the Configuration Manager (Administration > Internal SIPS/SRTP (VoIP))
SIPS/SRTPRoot CertificatePBX Certificate

SIPS/SRTP
COMmander 6000/R/RX - Firmware V8.4 - Advanced Information V32 05/2022- 1199 -
SIPS/SRTP
Proceed as follows:
• Using the Configuration Manager (Administration > Internal SIPS/SRTP (VoIP))
SIPS/SRTP
Requirements:
• internal VoIP channels that support SIPS and SRTP (optional, seeTechnical Data in the Instructions)
• suitable keys and certificates stored on the PBX (valid PBX certificate,private key of the PBX certificate, valid root certificate)
Internal VoIP call connections are encrypted to prevent listening in. Theconnection setup and termination, and also call signalling, are encryptedwith SIPS. The call data is encrypted with SRTP.
Note: The certificates/keys this process requires can either begenerated in the PBX or externally, and then imported from a (PC)data storage device.
Note: SIPS/SRTP must also be enabled in the VoIP phones. Inaddition, the certificate must be verified. For this, you may need theFingerprint.
Important: SIPS/SRTP must be switched off before you can changea certificate. When switching it on again, it may happen that calls areinterrupted.

Root Certificate
COMmander 6000/R/RX - Firmware V8.4 - Advanced Information V32 05/2022- 1200 -
Root Certificate
Proceed as follows:
• Using the Configuration Manager (Administration > Internal SIPS/SRTP (VoIP))
All properties of the certificate are displayed:
• the period of validity
• by whom and for whom the certificate has been issued
• more information (e.g. serial number and version)
Publisher
Publisher of the root certificate.
Import
Select a certificate that is stored on a data storage device and store it inthe PBX.
Export
The certificate stored in the PBX is downloaded from the device andsaved to a (PC) data storage device.
Renew
The certificate is renewed. This affects, among other things, the period ofvalidity and the fingerprint of the certificate.

Root Certificate
COMmander 6000/R/RX - Firmware V8.4 - Advanced Information V32 05/2022- 1201 -
Delete
Deletes a certificate currently saved in the PBX after user confirmation atthe prompt.
Fingerprint
Fingerprint of the root certificate. The fingerprint clearly identifies the rootcertificate with a numerical code.
Note: If the root certificate is renewed, a new fingerprint is generatedautomatically.

PBX Certificate
COMmander 6000/R/RX - Firmware V8.4 - Advanced Information V32 05/2022- 1202 -
PBX Certificate
Proceed as follows:
• Using the Configuration Manager (Administration > Internal SIPS/SRTP (VoIP))
All properties of the certificate are displayed:
• the period of validity
• by whom and for whom the certificate has been issued
• more information (e.g. serial number and version)
Note: A pbx certificate can not be saved when a change is made,it must be renewed. This affects, among other things, the period ofvalidity and the fingerprint of the certificate.
Owner
Owner of the pbx certificate.
Common name (CN)
Entry of an IP address or domain.
SIPS URI
URI entries.
DNS
DNS entries.

PBX Certificate
COMmander 6000/R/RX - Firmware V8.4 - Advanced Information V32 05/2022- 1203 -
Import
Select a certificate that is stored on a data storage device and store it inthe PBX.
Export
The certificate stored in the PBX is downloaded from the device andsaved to a (PC) data storage device.
Renew
The certificate is renewed. This affects, among other things, the period ofvalidity and the fingerprint of the certificate.
Delete
Deletes a certificate currently saved in the PBX after user confirmation atthe prompt.
Private key
Private key is available
A private key is available in the pbx certificate.
No private key available
A private key is not available in the pbx certificate.
Note: If the pbx certificate is renewed, a new private key is generatedautomatically.

PBX Certificate
COMmander 6000/R/RX - Firmware V8.4 - Advanced Information V32 05/2022- 1204 -
Import
Select a certificate that is stored on a data storage device and store it inthe PBX. An existing certificate will be overwritten.
Delete
Deletes the private key currently saved in the PBX after user confirmationat the prompt.

IP Block- and Allowlist
COMmander 6000/R/RX - Firmware V8.4 - Advanced Information V32 05/2022- 1205 -
IP Block- and Allowlist
Settings of the IP Block- and Allowlist Settings of the IP Block- and Allowlist

Settings of the IP Block- and Allowlist
COMmander 6000/R/RX - Firmware V8.4 - Advanced Information V32 05/2022- 1206 -
Settings of the IP Block- and Allowlist
IP Block- and Allowlist IP Block- and Allowlist

IP Block- and Allowlist
COMmander 6000/R/RX - Firmware V8.4 - Advanced Information V32 05/2022- 1207 -
IP Block- and Allowlist
Proceed as follows:
• Using the Configuration Manager ((Seite Administration > IP block-and allowlist)
Enable IP blocklist
If traffic from a particular IP address is evaluated as being too high - andtherefore probably malicious- this IP address is blocked. This means thataccesses from this IP address to the PBX are initially prevented for oneminute (single block by block time). The administrator is informed aboutthe block (Monitoring > Status report). During the block time the PBXcontinues to monitor the traffic from this IP address. If the traffic from thisIP address to the PBX continues to be too high, the single block time isextended (block time restarts).
If the number of attacks from IP addresses over the Internet exceeds athreshold, all traffic outside of the local network is blocked (global block).The local network is the network configured for the CPU (Administration> IP configuration under ETHERNET CONFIGURATION).
The administrator must then put in place appropriate measures to protectthe PBX within its infrastructure (e.g. using routers or bridges).
Note: The global block deletes all further entries (single blocks) fromthe blocklist.
Note: When you open the page it first shows the status, which isautomatically updated every 30 seconds.
Important: All the entries in the blocklists are deleted when you rebootthe PBX.

IP Block- and Allowlist
COMmander 6000/R/RX - Firmware V8.4 - Advanced Information V32 05/2022- 1208 -
Network-based access attempts, such as the number of data packets persecond or SIP authentication failures are monitored and evaluated.
New
IP address
Enter a new IP address in the entry fields.
IPv4 address
Four blocks separated by a dot (.).
IPv6 address
Eight blocks separated by a colon (:).
Subnet mask
Subnet mask
Four blocks separated by a dot (.).
Prefix
Digits 1 to 128.
Note: The subnet mask is entered automatically for a networkcomputer when you click Network calculator. You can then also setthe CIDR suffix and so the CIDR notation.
The values for Host IP appear automatically in the list.
Transfer to allowlist
Configured locks can be transferred into the allowlist.
Select the blocklist entry Transfer

IP Block- and Allowlist
COMmander 6000/R/RX - Firmware V8.4 - Advanced Information V32 05/2022- 1209 -
Delete
The administrator can view automatically configured restrictions, and ifnecessary cancel them, in the IP blocklists.
The marked entry will be deleted.

Certificates
COMmander 6000/R/RX - Firmware V8.4 - Advanced Information V32 05/2022- 1210 -
Certificates
Management of the Certificates Management of the Certificates

Management of the Certificates
COMmander 6000/R/RX - Firmware V8.4 - Advanced Information V32 05/2022- 1211 -
Management of the Certificates
InformationNot trustworthyTrustworthyCertificate AuthoritiesWebserverSIPS/SRTP internal (VoIP)View InformationNot trustworthyTrustworthyCertificate AuthoritiesWebserverSIPS/SRTP internal (VoIP)View

Information
COMmander 6000/R/RX - Firmware V8.4 - Advanced Information V32 05/2022- 1212 -
Information
When an encrypted connection (e. g. SIPS) is being set up, it is importantto verify the authenticity of the server and, consequently, the identity ofa web page. During setup of a connection the certificate provided by theserver is checked against a root certificate stored in the PBX.

Not trustworthy
COMmander 6000/R/RX - Firmware V8.4 - Advanced Information V32 05/2022- 1213 -
Not trustworthy
Proceed as follows:
• Using the Configuration Manager (Administration > Certificates)
If checking of the server certificate against the root certificate (or stack ofcertificates) stored in the PBX fails, the connection will be interrupted andthe certificate will be regarded as not trustworthy.
Issuer
The column displays the issuer of the certificate.
Issued on
The column displays when the certificate has been issued.
Valid until
The column displays the validity period of the certificate.
Trust certificate
The marked certificate is considered trustworthy.

Trustworthy
COMmander 6000/R/RX - Firmware V8.4 - Advanced Information V32 05/2022- 1214 -
Trustworthy
Proceed as follows:
• Using the Configuration Manager (Administration > Certificates)
If checking of the server certificate against the root certificate (or stack ofcertificates) stored in the PBX does not fail, the connection will be set upand the certificate will be regarded as trustworthy.
Issuer
The column displays the issuer of the certificate.
Issued on
The column displays when the certificate has been issued.
Valid until
The column displays the validity period of the certificate.
Import
Select a certificate that is stored on a data storage device and store it inthe PBX.

Certificate Authorities
COMmander 6000/R/RX - Firmware V8.4 - Advanced Information V32 05/2022- 1215 -
Certificate Authorities
Proceed as follows:
• Using the Configuration Manager (Administration > Certificates)
A certificate authority is an organisation that issues digital certificates.A digital certificate serves to assign a specific public key to a person ororganisation. The certificate authority certifies this assignment by addingits own digital signature.
Issuer
The column displays the issuer of the certificate.
Issued on
The column displays when the certificate has been issued.
Valid until
The column displays the validity period of the certificate.
New
Individual certificates are added again or all certificates are restored.
Save
The changes are saved.

Certificate Authorities
COMmander 6000/R/RX - Firmware V8.4 - Advanced Information V32 05/2022- 1216 -
Delete
Deletes a certificate currently saved in the PBX after user confirmation atthe prompt.

Webserver
COMmander 6000/R/RX - Firmware V8.4 - Advanced Information V32 05/2022- 1217 -
Webserver
Proceed as follows:
• Using the Configuration Manager (Administration > Certificates)
Issuer
The column displays the issuer of the certificate.
Issued on
The column displays when the certificate has been issued.
Valid until
The column displays the validity period of the certificate.

SIPS/SRTP internal (VoIP)
COMmander 6000/R/RX - Firmware V8.4 - Advanced Information V32 05/2022- 1218 -
SIPS/SRTP internal (VoIP)
Proceed as follows:
• Using the Configuration Manager (Administration > Certificates)
Requirements:
• internal VoIP channels that support SIPS and SRTP
• suitable keys and certificates stored on the PBX (valid PBX certificate,private key of the PBX certificate, valid root certificate)
Note: The certificates/keys this process requires can either begenerated in the PBX or externally, and then imported from a (PC)data storage device.
Note: SIPS/SRTP must also be enabled in the VoIP phones. Inaddition, the certificate must be verified. For this, you may need theFingerprint.
Important: SIPS/SRTP must be switched off before you can changea certificate. When switching it on again, it may happen that calls areinterrupted.
Issuer
The column displays the issuer of the certificate.
Issued on
The column displays when the certificate has been issued.
Valid until
The column displays the validity period of the certificate.

SIPS/SRTP internal (VoIP)
COMmander 6000/R/RX - Firmware V8.4 - Advanced Information V32 05/2022- 1219 -
Delete
Deletes a certificate currently saved in the PBX after user confirmation atthe prompt.

View
COMmander 6000/R/RX - Firmware V8.4 - Advanced Information V32 05/2022- 1220 -
View
Proceed as follows:
• Using the Configuration Manager (Administration > Certificates)
All properties of the certificate are displayed:
• the period of validity
• by whom and for whom the certificate has been issued
• more information (e.g. serial number and version)
Publisher
Publisher of the root certificate.
Import
Select a certificate that is stored on a data storage device and store it inthe PBX.
Export
The certificate stored in the PBX is downloaded from the device andsaved to a (PC) data storage device.
Renew
The certificate is renewed. This affects, among other things, the period ofvalidity and the fingerprint of the certificate.

View
COMmander 6000/R/RX - Firmware V8.4 - Advanced Information V32 05/2022- 1221 -
Delete
Deletes a certificate currently saved in the PBX after user confirmation atthe prompt.

COMmander 6000/R/RX - Firmware V8.4 - Advanced Information V32 05/2022- 1222 -
Settings Outgoing Mail ServerManagement LogoManagement InternationalisationSettings Internationalisation Settings Outgoing Mail ServerManagement LogoManagement InternationalisationSettings Internationalisation

Settings Outgoing Mail Server
COMmander 6000/R/RX - Firmware V8.4 - Advanced Information V32 05/2022- 1223 -
Settings Outgoing Mail Server
Proceed as follows:
• Using the Configuration Manager (Administration > E-mail >Outgoing mail server)
• Separately fpr outgoing mail servers
Requirements:
• Knowledge of the access data for the outgoing mail server
OUTGOING MAIL SERVER (SMTP)
Select the outgoing mail server for which the settings are to be made.
New
A new outgoing mail server is added.
Name
Freely selectable name. This name is used to identify the outgoing mailserver within the PBX and from connected system phones.
Address
Enter the address of the outgoing mail server:
IPv4 address

Settings Outgoing Mail Server
COMmander 6000/R/RX - Firmware V8.4 - Advanced Information V32 05/2022- 1224 -
Four blocks separated by a dot (.).
IPv6 address
Eight blocks separated by a colon (:).
Port
Note: In the factory settings, the port is set to 25.
Requirements:
• Knowledge of the access data for the outgoing mail server
Enter the port number of the outgoing mail server between 1 and 65535.You can obtain the port number from your e-mail provider or read it up inthe Internet.
Authentication type
No authentication
Disables authentication.
User name / Password (AUTH PLAIN)
Enables authentication via password.
User name / Password (AUTH LOGIN)
Enables authentication via password.
MD5 challenge-response (AUTH CRAM-MD5)
Enables authentication via MD5 challenge-response (MD5 = Message-Digest Algorithm 5).
automatically
The authentication type is set automatically.

Settings Outgoing Mail Server
COMmander 6000/R/RX - Firmware V8.4 - Advanced Information V32 05/2022- 1225 -
User name
Requirements:
• Enables authentication
Enter the username. In the most cases, this is your e-mail address.
Password
Requirements:
• Enabled authentication
Enter the password that belongs to the username.
Encryption (SSL)
If encryption is enabled, the connection of the outgoing mail server issecured using the SSL (Secure Socket Layer) protocol. The data istransferred via https.
No encryption
Switches encryption off.
Encryption (SSL) to STARTTLS
Switches encryption on after STARTTLS.
Encryption (SSL) immediately
Switches encryption immediately on.
Default outgoing mail server
The outgoing mail server first configured in the PBX is automaticallyswitched on as Default outgoing mail server. To switch it off, use as

Settings Outgoing Mail Server
COMmander 6000/R/RX - Firmware V8.4 - Advanced Information V32 05/2022- 1226 -
Default outgoing mail server must be switched on for another outgoingmail server.
The selected outgoing mail server is used as default.
Note: The setting Default outgoing mail server is shown in gray toindicate that the outgoing mail server is now being used as default. Toswitch it off, use as Default outgoing mail server must be switchedon for another outgoing mail server.
Sender
Enter the address of the e-mail sender. It is used to display it to therecipient of the e-mails.
Delete
The outgoing mail server will be deleted.
Management Logo
COMmander 6000/R/RX - Firmware V8.4 - Advanced Information V32 05/2022- 1227 -
Management Logo
The PBX supports any number of logos (limited by the total memory).These can be freely assigned to individual e-mail functions of the PBX(system e-mails, forwarding of voice mail and fax messages).
Proceed as follows for configuration:
• Using the Configuration Manager (Administration > E-mail > Logomanagement)
Import
Note: The logo must have the file format *.jpg and should have a sizeof 160 x 60 pixels (width x height).
Note: The file may have a size of 50 kB max. The memory for all logosis limited to 500 kB.
Note: If do not import your own logo, the Auerswald/FONtevo logoincluded in the scope of supply will be used.
Select and import an image file (*.jpg) that is stored on a data storagedevice (PC).
Delete
Deletes the entries marked in the list.

Management Internationalisation
COMmander 6000/R/RX - Firmware V8.4 - Advanced Information V32 05/2022- 1228 -
Management Internationalisation
Proceed as follows:
• Using the Configuration Manager (Administration > E-mail >Internationalisation)
New
A new language file is added.
Import
Note: The name of the file must be unambiguous. It is displayed in theConfiguration Manager and cannot be changed.
Note: The file structure of the imported language file must be identicalto the file structure of the default language file. To this end, export alanguage file to your PC and edit the text fields of the language filewithout changing the structure of the *.xml file.
Select and import a language file (*.xml) that is stored on a data storagedevice (PC).
Export
The list of providers is saved to the data storage device (PC) in an *.xmlfile.
View
Opens the page to view the different text elements.

Management Internationalisation
COMmander 6000/R/RX - Firmware V8.4 - Advanced Information V32 05/2022- 1229 -
Configure
Opens the configuration of the user-defined language file.
Delete
Deletes the entries marked in the list.

Settings Internationalisation
COMmander 6000/R/RX - Firmware V8.4 - Advanced Information V32 05/2022- 1230 -
Settings Internationalisation
Proceed as follows:
• Using the Configuration Manager (Administration > E-mail >Internationalisation > View)
LANGUAGE FILE NAME - MAIL TYPE
Select a text element category
Test e-mail
Text modules to generate a test e-mail.
Mailbox: New message
Text modules to generate an e-mail with information about a newmessage.
Mailbox: Automatic clean-up failed
Text modules to generate an e-mail regarding failure of automatic clean-up.
Mailbox: Storage space warning
Text modules to generate an e-mail when a specified storage capacity hasbeen exceeded.
Mailbox: Fax transmission successful
Text modules to generate an e-mail regarding successful fax transmission.
Mailbox: Fax transmission failed
Text modules to generate an e-mail regarding failure of fax transmission.
System log

Settings Internationalisation
COMmander 6000/R/RX - Firmware V8.4 - Advanced Information V32 05/2022- 1231 -
Text modules to generate an e-mail with system information, malfunctionsand safety warnings.
Common
General text modules.
Date and time
Text modules with variables for date and time.
• Date:
Day: DD
Month: MM
Year: YYYY
• Time:
Hour (24-hour format): hh24
Hour (12-hour format): hh12
Minute: mm
Second: ss
am/pm (only English language template): ampm

System Messages
COMmander 6000/R/RX - Firmware V8.4 - Advanced Information V32 05/2022- 1232 -
System Messages
Settings of the System Message Settings of the System Message

Settings of the System Message
COMmander 6000/R/RX - Firmware V8.4 - Advanced Information V32 05/2022- 1233 -
Settings of the System Message
Transfer of System E-MailsLogs to be Sent as E-MailsEvents for System LogsStatus Messages and Notes Transfer of System E-MailsLogs to be Sent as E-MailsEvents for System LogsStatus Messages and Notes

Transfer of System E-Mails
COMmander 6000/R/RX - Firmware V8.4 - Advanced Information V32 05/2022- 1234 -
Transfer of System E-Mails
Proceed as follows:
• Using the Configuration Manager (Administration > Systemmessages)
Requirements:
• configured outgoing mail server
− Using the Configuration Manager (Administration > E-mail >Outgoing Mail Server)
• configured DNS server
− Using the Configuration Manager (Administration > IPConfiguration)
Outgoing mail server
Select the outgoing mail server that will be used to send system e-mails.
Default
System e-mails are sent by the default outgoing mail server.
Send e-mail in HTML format
System e-mails are sent in HTML format.
Note: When switched off, system e-mails are sent in text format.

Transfer of System E-Mails
COMmander 6000/R/RX - Firmware V8.4 - Advanced Information V32 05/2022- 1235 -
Language file
Select the language file whose text modules are to be used for system e-mails.
Note: If you have created under Administration > E-mail >Internationalisation > New a user-defined language file and select it,the e-mails will be sent with the text modules of the selected languagefile.
URL format for hyperlinks
Select the format for the link in system e-mails to the system messageoverview on the Monitoring > System messages page.
with IPv4 address
Link starts with https: and the PBX's IPv4 address.
with IPv6 address
Link starts with https: and the PBX's IPv6 address (if present).
User-defined
A URL prefix defined by the user is set.
URL prefix
Requirements:
• user-defined URL format
network-specific part of the URL which comes before the device-specificpart of the URL. This enables you to call hyperlinks from a phone that isnot on the PBX's internal network.

Transfer of System E-Mails
COMmander 6000/R/RX - Firmware V8.4 - Advanced Information V32 05/2022- 1236 -
Example: Input https://www.auerswald.de for this link https://www.auerswald.de/statics/html/index.htm#page_systemlogfiles.html
Logo
Select the logo to be used on system e-mails.
Message recipients E-mail address 1
E-mail address to which system e-mails are sent. Up to 10 e-mailaddresses can be entered here.
@ Testen
Send a test e-mail to the specified message recipients.

Logs to be Sent as E-Mails
COMmander 6000/R/RX - Firmware V8.4 - Advanced Information V32 05/2022- 1237 -
Logs to be Sent as E-Mails
Proceed as follows:
• Using the Configuration Manager (Administration > Systemmessages)
Requirements:
• configured outgoing mail server
− Using the Configuration Manager (Administration > E-mail >Outgoing Mail Server)
• configured DNS server
− Using the Configuration Manager (Administration > IPConfiguration)
System information
System information is sent as e-mails (except for system informationabout the sending of system e-mails)
Note: When switched off, system information is only logged.
Simple malfunctions
Simple malfunctions are sent as e-mails.
Note: When switched off, simple malfunctions are only logged.
Serious malfunctions
Serious malfunctions are sent as e-mails.

Logs to be Sent as E-Mails
COMmander 6000/R/RX - Firmware V8.4 - Advanced Information V32 05/2022- 1238 -
Security warnings
Security warnings are sent as e-mails.
x Waiting time until e-mail is sent
Specifies how long (in minutes) the PBX waits after the system event hasoccurred until it sends an e-mail. System events that occur during thewaiting time are also included in this e-mail.

Events for System Logs
COMmander 6000/R/RX - Firmware V8.4 - Advanced Information V32 05/2022- 1239 -
Events for System Logs
Proceed as follows:
• Using the Configuration Manager (Administration > Systemmessages)
Requirements:
• configured outgoing mail server
− Using the Configuration Manager (Administration > E-mail >Outgoing Mail Server)
• configured DNS server
− Using the Configuration Manager (Administration > IPConfiguration)
Temperature monitoring CPU alarm temperature
A serious malfunction is logged when the CPU temperature rises abovethis threshold.
Temperature monitoring Power supply alarm temperature
A serious malfunction is logged when the power supply temperature risesabove this threshold.
Relay monitoring
A system information log is created when a relay is switched on or off.

Status Messages and Notes
COMmander 6000/R/RX - Firmware V8.4 - Advanced Information V32 05/2022- 1240 -
Status Messages and Notes
Proceed as follows:
• Using the Configuration Manager (Administration > Systemmessages)
Requirements:
• configured outgoing mail server
− Using the Configuration Manager (Administration > E-mail >Outgoing Mail Server)
• configured DNS server
− Using the Configuration Manager (Administration > IPConfiguration)
Reset hidden pop-up elements for users Execute
Click on Do not display this notice again to hide warnings and notesthat are displayed as pop-up elements during configuration or after youregister in the Configuration Manager. You can also restore the hiddenpop-up elements again if required.

Logging
COMmander 6000/R/RX - Firmware V8.4 - Advanced Information V32 05/2022- 1241 -
Logging
Settings of the Logging Settings of the Logging

Settings of the Logging
COMmander 6000/R/RX - Firmware V8.4 - Advanced Information V32 05/2022- 1242 -
Settings of the Logging
Logging Logging

Logging
COMmander 6000/R/RX - Firmware V8.4 - Advanced Information V32 05/2022- 1243 -
Logging
Proceed as follows:
• Using the Configuration Manager (Administration > Logging)
Logging activated
Note the following legal notes before permitting D-channel output viaIP.
After permission, every computer within the LAN network can record a D-channel protocol of the PBX without any further password protection.
It might be that the recorded protocol includes the following components:
• Connection data sets with destination, source, and time information ofa telecommunication connection
• Configuration data of the PBX and connected phones, as well as thecorresponding PINs and passwords
• Address books of the PBX
Before any recording, all participants in the telecommunication connectionmust be informed that these contents will be recorded and must also beinformed who will use the recorded data.
If you want to make the recorded data available to your specialised dealeror to the manufacturer for error analysis, you must make sure that thelegal requirements are fulfilled.
Connection data can be recorded with the D-channel decoder PCprogramme (D-channel output via IP) or on a syslog server. Enter ok in

Logging
COMmander 6000/R/RX - Firmware V8.4 - Advanced Information V32 05/2022- 1244 -
the entry field, to accept the legal notes and then click D-channel outputvia IP.
Logging system
Connection data can be logged using the D-channel decoder PCprogramme or on a syslog server configured for this purpose.
Important: If Logging enabled is enabled and D-channel hasbeen selected, anyone within the network can record a D-channelprotocol over IP. A D-channel protocol also displays sensitive data,such as call connection data. That is why you should only enable theLogging enabled function if you need to create logs for error analysispurposes.
D-channel decoder
Install the D-channel decoder PC programme and initiate logging (seeRecording the D-Channel Protocol).
Syslog server
Enter the IP address and the port of the syslog server.
Configuring the syslog server
A protocol can be recorded to log and display control and managementinformation about the connections to the PBX e.g. to display errors. Youwill thus be able to see the error type, and maybe even its cause, from thelist of transferred information.
Requirements:
• Syslog server configured by the system administrator
• Knowledge of the IPv4 or IPv6 address and UDP port number of thesyslog server

Logging
COMmander 6000/R/RX - Firmware V8.4 - Advanced Information V32 05/2022- 1245 -
Syslog server IP
Enter the IPv4 or IPv6 address of the syslog server.
Syslog server port
Enter the UDP port number of the syslog server.
Logging of the connection data will start as soon as you have saved yoursettings.

Service Data
COMmander 6000/R/RX - Firmware V8.4 - Advanced Information V32 05/2022- 1246 -
Service Data
Exporting Service Data Exporting Service Data

Exporting Service Data
COMmander 6000/R/RX - Firmware V8.4 - Advanced Information V32 05/2022- 1247 -
Exporting Service Data
Proceed as follows:
• Using the Configuration Manager (Administration > Service data)
If the PBX exhibits a malfunction which is not caused by incorrectoperation or external influences, the service data can be used to diagnosethe malfunction.
Note the following legal notes before saving the service data.
The service data include, amongst others, the following legally especiallyprotected components:
• Configuration of the PBX
• Names of internal subscribers
• Passwords of PBX, subscribers, VoIP accounts and VoIP subscribers
• Address books of the PBX
• Connection data sets with destination, source, and time information ofa telecommunication connection
All PBX subscribers must be informed prior to storing the service data thattransmission of this content takes place and by whom the data obtained isprocessed.
If you want to provide the service data to your specialised dealer orto the manufacturer for error analysis, you must ensure that the legalrequirements are met.
Proceed as follows:
1. Accept the legal notes by entering ok in the entry field.
2. Click Download service data.

Exporting Service Data
COMmander 6000/R/RX - Firmware V8.4 - Advanced Information V32 05/2022- 1248 -
3. Save the file.
Import FTP directory
The service data is imported together with the FTP directory.
Note: If the FTP directory is too full, importing the service data mayfail.
Export of Announcement Directory
The service data is exported together with the directory of announcementsand music on hold.
Note: Too large amounts of data due to a larger number of WAV-filesin this directory may result in a longer download. Do not choose thisoption, if this is not wanted.

Appendix Hardware
COMmander 6000/R/RX - Firmware V8.4 - Advanced Information V32 05/2022- 1249 -
Appendix HardwareStatus Displays on the LEDsButtonsPrinters and Data Storage Devices at the USB HostConnecting Devices to the 2TSM (R) Module Status Displays on the LEDsButtonsPrinters and Data Storage Devices at the USB HostConnecting Devices to the 2TSM (R) Module

Status Displays on the LEDs
COMmander 6000/R/RX - Firmware V8.4 - Advanced Information V32 05/2022- 1250 -
Status Displays on the LEDs
LED functions on the base circuit board
The LED display field on the unit is used to keep track of the operatingstate.
Status LED: User prompt:
Flashes red (50/50 ms) Pressing the SW default button is detected.
Flashes red (0,5/0,5 s) The SW default button was pressed long enough.
Flashes orange (50/50 ms) Pressing the SW altern. button is detected.
Flashes orange (0,5/0,5 s) The SW altern. button was pressed long enough.
Status LED: Power LED: PBX status (after restart):
Lit in red Lit in red The boot partition is being tested.
Lit in orange Lit in red The kernel is being loaded from the partition.
Lit in green Lit in red The kernel is being initialised.
Lit in green Lit in orange The kernel modules are being loaded.
Lit in green Flashes orange The data base is being initialised/converted.
Lit in green Lit in green The PBX is ready for operation.

Status Displays on the LEDs
COMmander 6000/R/RX - Firmware V8.4 - Advanced Information V32 05/2022- 1251 -
Status LED: Power LED: PBX status (in the case of an error):
Flashes red (1/1 s) Lit in red No valid boot partition was found. System is
paused.
Flashes orange (1/1
s)
Lit in red In both boot partitions no constant kernel data were
found. System is paused.
Note: If the Power LED remains constantly lit in red even after arestart, an error has occured. Please contact your dealer or themanufacturer directly.
Status LED: Power LED: PBX status (during powering down):
Lit in green Flashes green Indicates the period in which the delayed powering
down can be initiated. If you let go of the button
during this period, the PBX powers down after all
current calls are terminated.
Lit in green Off Indicates the period in which the PBX can be
powered down immediately. If you let go of the
button during this period, the PBX powers down
immediately and current calls will be interrupted.
Lit in green Flashes green The delayed powering down has been enabled and
the PBX waits for the termination of the last call.
Lit in green Lit in red The PBX is powered down completely.

Status Displays on the LEDs
COMmander 6000/R/RX - Firmware V8.4 - Advanced Information V32 05/2022- 1252 -
LAN-Link LED: Status of the Ethernet Interface:
Lit in green On the Ethernet layer 1 could be enabled.
Off Ethernet is not connected or no layer 1 is detected.
LAN-Activity LED: Transfer Activities on the Ethernet Interface:
Flashes orange One or several packets have been sent or received.
Off No transfer activity on the Ethernet interface.
LED functions on the S0 modules
Status LED: Status of the associated S0 port:
Flickers A B-channel is in use.
Lights up Both B-channels are in use.
Lights up briefly D-channel message has been received/sent.
Flashes with 0.5 Hz Layer 1 is enabled.
LED functions on the UP0 modules
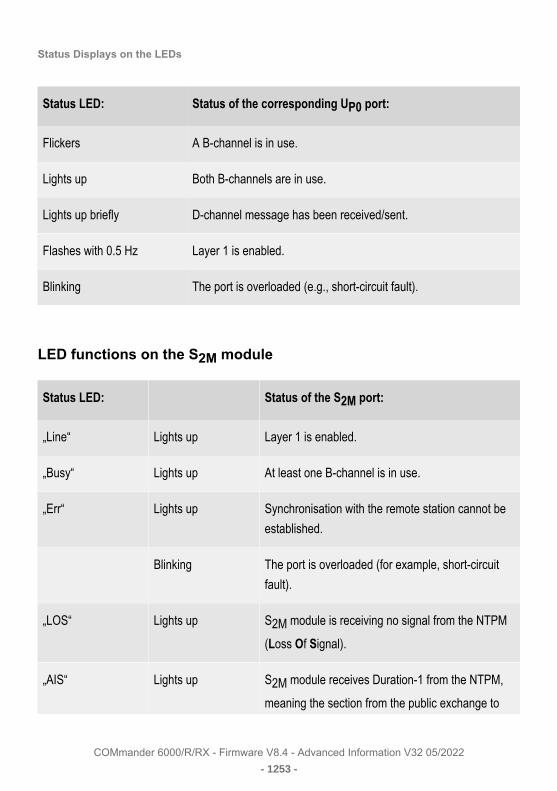
Status Displays on the LEDs
COMmander 6000/R/RX - Firmware V8.4 - Advanced Information V32 05/2022- 1253 -
Status LED: Status of the corresponding UP0 port:
Flickers A B-channel is in use.
Lights up Both B-channels are in use.
Lights up briefly D-channel message has been received/sent.
Flashes with 0.5 Hz Layer 1 is enabled.
Blinking The port is overloaded (e.g., short-circuit fault).
LED functions on the S2M module
Status LED: Status of the S2M port:
„Line“ Lights up Layer 1 is enabled.
„Busy“ Lights up At least one B-channel is in use.
„Err“ Lights up Synchronisation with the remote station cannot be
established.
Blinking The port is overloaded (for example, short-circuit
fault).
„LOS“ Lights up S2M module is receiving no signal from the NTPM
(Loss Of Signal).
„AIS“ Lights up S2M module receives Duration-1 from the NTPM,
meaning the section from the public exchange to

Status Displays on the LEDs
COMmander 6000/R/RX - Firmware V8.4 - Advanced Information V32 05/2022- 1254 -
Status LED: Status of the S2M port:
the NTPM has been interrupted (Alarm Indicating
Signal).
„RDI“ Lights up NTPM receives no signal from the S2M module
(Remote Defect Indication).
LED functions on the 2TSM module
Status LED: Status of the Relay:
Lights up Relays is switched on.
Off Relays is switched off.

Buttons
COMmander 6000/R/RX - Firmware V8.4 - Advanced Information V32 05/2022- 1255 -
Buttons
InformationPerforming a Restart Immediately by Pressing a ButtonRestoring Firmware at the Touch of a ButtonRestore Factory Settings at the Touch of a ButtonShutting the PBX Down by Pressing a Button InformationPerforming a Restart Immediately by Pressing a ButtonRestoring Firmware at the Touch of a ButtonRestore Factory Settings at the Touch of a ButtonShutting the PBX Down by Pressing a Button

Information
COMmander 6000/R/RX - Firmware V8.4 - Advanced Information V32 05/2022- 1256 -
Information
COMmander 6000: On the Base Cuircuit Board of the PBX, the variousbuttons are located to e. g. reboot the PBX, to restore the previousfirmware or to set the PBX to factory settings.
COMmander 6000R/RX: On the CPU module of the PBX, the variousbuttons are located to e. g. reboot the PBX, to restore the previousfirmware, to set the PBX to factory settings or to shut down the PBX.

Performing a Restart Immediately by Pressing a Button
COMmander 6000/R/RX - Firmware V8.4 - Advanced Information V32 05/2022- 1257 -
Performing a Restart Immediately by Pressing aButton
Warning: Touching voltage-carrying conductors or phone connectionscan cause life-threatening electric shocks.
• For some installation and maintenance work, it is necessary toopen the PBX while it is in operation (qualified electrician only).Make sure that the PBX is never left unattended while working withan open casing. Close the casing after completing this work.
• Only a qualified electrician may perform installation work within anopen casing or service work using the buttons inside the casing. Ifnecessary, commission a specialised dealer to perform this work.
Warning: Power surges, which can occur during electrical storms, cancause life-threatening electric shocks and damage or destroy the PBX.
• Do not open the PBX during an electrical storm.
1. Press the Reset button (for COMmander 6000 on the base circuitboard; for COMmander 6000R/6000RX at the front of casing).
The Power LED lights up/flashes in red and orange for up to twominutes.
When the Power LED lights up in green again, the restart is completeand the PBX is ready for operation.
Note: If the Power LED remains continuously lit in red, an errorhas occurred. Please contact your dealer or the manufacturerdirectly.

Restoring Firmware at the Touch of a Button
COMmander 6000/R/RX - Firmware V8.4 - Advanced Information V32 05/2022- 1258 -
Restoring Firmware at the Touch of a Button
Requirements:
• Firmware update performed
Warning: Touching voltage-carrying conductors or phoneconnections can cause life-threatening electric shocks.
• For some installation and maintenance work, it is necessaryto open the PBX while it is in operation (qualified electricianonly). Make sure that the PBX is never left unattended while itis running with an open casing.
• Only qualified electricians should perform installation workwithin an open housing or perform service tasks using thebuttons inside the casing.
Warning: Power surges, which can occur during electrical storms,can cause life-threatening electric shocks.
• Do not open the PBX during an electrical storm.
Note: The previous firmware will only be retained in the flashmemory for four weeks. After four weeks, the previous firmware willbe overwritten by the current firmware to prevent the restoration ofobsolete data.
1. Press the Reset button (for COMmander 6000 on the base circuitboard; for COMmander 6000R/6000RX on the front panel).
2. Within the space of two seconds, push the SW altern. button and holdit.
The Status LED starts to quickly blink in orange.
After a few seconds, the blinking of the Status starts to blink slowly.
3. Release the SW altern. button.

Restoring Firmware at the Touch of a Button
COMmander 6000/R/RX - Firmware V8.4 - Advanced Information V32 05/2022- 1259 -
The Firmware is restored.
1. Reset button
2. SW altern. button
3. StatusLED

Restore Factory Settings at the Touch of a Button
COMmander 6000/R/RX - Firmware V8.4 - Advanced Information V32 05/2022- 1260 -
Restore Factory Settings at the Touch of a Button
If the factory settings on the PBX are restored, all of the settings aredeleted or reset to the original settings before the device was firstconfigured.
Warning: Touching voltage-carrying conductors or phone connectionscan cause life-threatening electric shocks.
• For some installation and maintenance work, it is necessary toopen the PBX while it is in operation (qualified electrician only).Make sure that the PBX is never left unattended while working withan open casing. Close the casing after completing this work.
• Only a qualified electrician may perform installation work within anopen casing or service work using the buttons inside the casing. Ifnecessary, commission an authorised dealer to perform this work.
Warning: Power surges, which can occur during electrical storms, cancause life-threatening electric shocks and damage or destroy the PBX.
• Do not open the PBX during an electrical storm.
1. Press the Reset button (for COMmander 6000 on the base circuitboard; for COMmander 6000R/6000RX at the front of casing).
2. Press the SW default button within 2 seconds and hold it for 10-15seconds.
The Power LED starts to quickly blink in red.
After 5 seconds the LED Status starts to blink slowly.
3. Release the SW default button.
Note: If the Power LED remains continuously lit in red, an errorhas occurred. Please contact your dealer or the manufacturerdirectly.

Restore Factory Settings at the Touch of a Button
COMmander 6000/R/RX - Firmware V8.4 - Advanced Information V32 05/2022- 1261 -
Note: If you release the SW default button too late (the PowerLED is no longer flashing), restart the PBX without making anychanges.

Shutting the PBX Down by Pressing a Button
COMmander 6000/R/RX - Firmware V8.4 - Advanced Information V32 05/2022- 1262 -
Shutting the PBX Down by Pressing a Button
Requirements:
• COMmander 6000R or 6000RX
• Delayed powering down: Press the Power button for 1,5 to 4 seconds.
The LED starts to blink in green light. The PBX powers down withoutdisconnecting ongoing calls.
• Immediate powering down: Press the Power button for more than 4seconds.
The LED turns off. The PBX is powered down immediately.
Important: If you press the Power button less than 1,5 seconds ormore than 14 seconds the PBX will not be powered down.

Printers and Data Storage Devices at the USB Host
COMmander 6000/R/RX - Firmware V8.4 - Advanced Information V32 05/2022- 1263 -
Printers and Data Storage Devices at the USB Host
Connection possibilities:
• USB memory stick
• USB printer
Important: The data storage devices used require an EXT4formatting. For read access to USB memory sticks, for example forautomatic transfer of a configuration, FAT or FAT32 formatting is alsosupported.
Note: The connection of a USB hub is not supported.
Note: You can use any printer with at least PCL4 emulation and USBport. PCL6 or PCL5c emulation is downward compatible and includesPCL4.

Connecting Devices to the 2TSM (R) Module
COMmander 6000/R/RX - Firmware V8.4 - Advanced Information V32 05/2022- 1264 -
Connecting Devices to the 2TSM (R) Module
Connecting a Door Terminal System in Accordance with FTZ 123D12-0Connecting a Door Bell ButtonConnecting a Door Bell Button and a Door BellConnecting a Door Opener (or Other Devices) to a RelayConnecting a Second RingerConnecting a Device for Alarm FunctionsConnecting an External Input Device for Music on HoldConnecting a Loudspeaker for Announcements
This section describes the connection of different devices to the 2TSM (R)module.
Warning: Touching voltage-carrying conductors or phone connectionscan cause life-threatening electric shocks.
• The PBX contains hazardous voltages, even outside the powersupply unit (for instance ringer voltages). Work on active, contact-hazardous parts is only permitted after creating a voltage-freestate. Working close to active parts is only permitted if these partsare voltage-free or are protected against direct contact
• COMmander 6000: Pull out the power plug of the PBX beforeinstructing a qualified electrician to open the casing to install theexpansion module or perform switching or connecting services.
• COMmander 6000: Wait at least 3 minutes for the discharge of anycapacitor in the device after disconnecting it from the main powersupply.
Important: Improper use can cause, for example, functionalrestrictions or interference, the destruction of the device or, in a worst-case scenario, personal injury.

Connecting Devices to the 2TSM (R) Module
COMmander 6000/R/RX - Firmware V8.4 - Advanced Information V32 05/2022- 1265 -
• Only connect equipment that is compatible with the proper use ofthe PBX.
Connecting a Door Terminal System in Accordance with FTZ 123 D12-0Connecting a Door Bell ButtonConnecting a Door Bell Button and a Door BellConnecting a Door Opener (or Other Devices) to a RelayConnecting a Second RingerConnecting a Device for Alarm FunctionsConnecting an External Input Device for Music on HoldConnecting a Loudspeaker for Announcements

Connecting a Door Terminal System in Accordance with FTZ 123 D12-0
COMmander 6000/R/RX - Firmware V8.4 - Advanced Information V32 05/2022- 1266 -
Connecting a Door Terminal System in Accordancewith FTZ 123 D12-0
Warning: Power surges, which can occur during electrical storms, cancause life-threatening electric shocks or damage or destroy the PBX.
• Hire a qualified electrician to lay the cables within the building.
Note: You will find wiring diagrams for the connection of differentdoor terminal systems to the PBX on the Internet (see Auerswald:Auerswald Service Portal, FONtevo: FONtevo Support).
Requirements:
• Installation cable (e. g. J-Y(St)Y 2x2x0.6) with the followingcharacteristics:
− At least three wires
− Unscreened; however: screened for unfavourable conditions, forexample, near a strong transmitter or an electrical power line
• Door terminal system from Auerswald/FONtevo: Operating voltageswitched on at the relay contact to be used
2TSM Modul:
2TSM-R-Modul:
1. Lay the line.

Connecting a Door Terminal System in Accordance with FTZ 123 D12-0
COMmander 6000/R/RX - Firmware V8.4 - Advanced Information V32 05/2022- 1267 -
2. Connect the TS11 terminal (or TS21) to the operating voltage input ofyour door terminal system (e. g. labelled V or DC/AC).
3. Connect the TGnd terminal to the ground connection input of yourdoor terminal system (e. g. labelled 0V or GND).
4. Connect the TNF1 terminal (or TNF2) to the low-frequency input/output of your door terminal system (e. g. labelled NF).
Further steps:

Connecting a Door Terminal System in Accordance with FTZ 123 D12-0
COMmander 6000/R/RX - Firmware V8.4 - Advanced Information V32 05/2022- 1268 -
• To finish commissioning, you need to configure the COMmander 2TMS(R) module in the Configuration Manager and set up the correspondingdoor terminal.

Connecting a Door Bell Button
COMmander 6000/R/RX - Firmware V8.4 - Advanced Information V32 05/2022- 1269 -
Connecting a Door Bell Button
Warning: Power surges, which can occur during electrical storms, cancause life-threatening electric shocks or damage or destroy the PBX.
• Do not open an already connected PBX during an electrical storm.Also avoid disconnecting and connecting electrical lines during anelectrical storm.
Requirements:
• Installation cable (e. g. J-Y(St)Y 2x2x0.6) with the followingcharacteristics:
− At least five wires (for four door bell buttons)
− Unscreened; however: screened for unfavourable conditions, forexample, near a strong transmitter or an electrical power line
1. Lay the line.
2. Connect the But1/Klin1 terminal to the contact of the first door bellbutton (e. g. labelled % 1).

Connecting a Door Bell Button
COMmander 6000/R/RX - Firmware V8.4 - Advanced Information V32 05/2022- 1270 -
3. Connect the But2/Klin2 terminal to the contact of the second door bellbutton (e. g. labelled % 2).
4. Connect the But3/Klin3 terminal to the contact of the third door bellbutton (e. g. labelled % 3).
5. Connect the But4/Klin4 terminal to the contact of the forth door bellbutton (e. g. labelled % 4).
6. Connect the +12Volt terminal to the joint contact of the door bellbuttons (e. g. labelled % ).

Connecting a Door Bell Button
COMmander 6000/R/RX - Firmware V8.4 - Advanced Information V32 05/2022- 1271 -
Further steps:
• To finish commissioning, you need to configure the COMmander 2TMS(R) module in the Configuration Manager and set up the correspondingdoor terminal.

Connecting a Door Bell Button and a Door Bell
COMmander 6000/R/RX - Firmware V8.4 - Advanced Information V32 05/2022- 1272 -
Connecting a Door Bell Button and a Door Bell
Warning: Power surges, which can occur during electrical storms, cancause life-threatening electric shocks or damage or destroy the PBX.
• Do not open an already connected PBX during an electrical storm.Also avoid disconnecting and connecting electrical lines during anelectrical storm.
Requirements:
• Installation cable (e. g. J-Y(St)Y 2x2x0.6) with the followingcharacteristics:
− At least three wires (for two door bell buttons)
− Unscreened; however: screened for unfavourable conditions, forexample, near a strong transmitter or an electrical power line
• A door bell transformer
1. Lay the lines.
2. Connect the But1/Klin1 terminal to the contact of the first door bellbutton (e. g. labelled % 1) and with the first door bell.

Connecting a Door Bell Button and a Door Bell
COMmander 6000/R/RX - Firmware V8.4 - Advanced Information V32 05/2022- 1273 -
3. Connect the But2/Klin2 terminal to the contact of the second door bellbutton (e. g. labelled % 2) and the second door bell.
4. Connect the TGnd terminal to the two door bells and the door belltransformer.
5. Connect the door bell transformer to the joint contact of the door bellbuttons (e. g. labelled % ).

Connecting a Door Bell Button and a Door Bell
COMmander 6000/R/RX - Firmware V8.4 - Advanced Information V32 05/2022- 1274 -
Further steps:
• To finish commissioning, you need to configure the COMmander 2TMS(R) module in the Configuration Manager and set up the correspondingdoor terminal.

Connecting a Door Opener (or Other Devices) to a Relay
COMmander 6000/R/RX - Firmware V8.4 - Advanced Information V32 05/2022- 1275 -
Connecting a Door Opener (or Other Devices) to aRelay
Warning:Power surges, which can occur during electrical storms, cancause life-threatening electric shocks.
• Do not open an already connected PBX during an electrical storm.Do not connect or disconnect power cables during an electricalstorm.
Requirements:
• J-Y(St)Y 2x2x0.6) with the following characteristics:
− at least two cores
− unscreened, but screened if conditions are unfavourable, forexample, near a strong transmitter or an electrical power line
• A door bell transformer as supply for the door opener (or the device tobe connected)
Note:For information about the supply voltage required, read thedocumentation of the door opener (or the device to be connected).
Warning:Too high voltage at the relay contacts may damage ordestroy the PBX.
• Note the maximum capacity of the relay contacts of 30 V/1 A.
• Using a series relay if you are planning to switch devicespowered by mains voltage.
1. Lay the lines.
2. Connect the TO11 terminal (or TO21) to the switch input of the dooropener.

Connecting a Door Opener (or Other Devices) to a Relay
COMmander 6000/R/RX - Firmware V8.4 - Advanced Information V32 05/2022- 1276 -
3. Connect the TO12 terminal (or TO22) to the door bell transformer.
4. Connect the door bell transformer to the switch input of the dooropener.
Note:In addition, the third and sixth relay provide a closed-circuitcontact (NC).

Connecting a Door Opener (or Other Devices) to a Relay
COMmander 6000/R/RX - Firmware V8.4 - Advanced Information V32 05/2022- 1277 -
Further steps:
• To finish commissioning, you need to configure the COMmander 2TMS(R) module in the Configuration Manager and set up the correspondingdoor terminal.

Connecting a Second Ringer
COMmander 6000/R/RX - Firmware V8.4 - Advanced Information V32 05/2022- 1278 -
Connecting a Second Ringer
Warning: Power surges, which can occur during electrical storms, cancause life-threatening electric shocks or damage or destroy the PBX.
• Do not open an already connected PBX during an electrical storm.Also avoid disconnecting and connecting electrical lines during anelectrical storm.
Requirements:
• Installation cable (e. g. J-Y(St)Y 2x2x0.6) with the followingcharacteristics:
− At least two wires
− Unscreened; however: screened for unfavourable conditions, forexample, near a strong transmitter or an electrical power line
1. Lay the lines.
2. Connect the 2nd Bell/Zweitkl. terminal to the second ringer.

Connecting a Second Ringer
COMmander 6000/R/RX - Firmware V8.4 - Advanced Information V32 05/2022- 1279 -
3. Connect the Gnd terminal to the second ringer.
Further steps:
• To finish commissioning, you need to configure the COMmander 2TMS(R) module in the Configuration Manager and set up the correspondingrelay.
Connecting a Device for Alarm Functions
COMmander 6000/R/RX - Firmware V8.4 - Advanced Information V32 05/2022- 1280 -
Connecting a Device for Alarm Functions
Warning: Power surges, which can occur during electrical storms, cancause life-threatening electric shocks or damage or destroy the PBX.
• Do not open an already connected PBX during an electrical storm.Also avoid disconnecting and connecting electrical lines during anelectrical storm.
Warning: The alarm functions of the PBX do not comply with thesafety-related requirements regarding alarm systems for the protectionof life and limb.
• Only use the PBX for simple monitoring tasks without safety-related requirements.
Requirements:
• Installation cable (e. g. J-Y(St)Y 2x2x0.6) with the followingcharacteristics:
− At least two wires
− Unscreened; however: screened for unfavourable conditions, forexample, near a strong transmitter or an electrical power line
1. Lay the lines.
2. Connect the But4/Klin4 terminal, for example, to the alarm contact.

Connecting a Device for Alarm Functions
COMmander 6000/R/RX - Firmware V8.4 - Advanced Information V32 05/2022- 1281 -
3. Connect the +12Volt terminal, for example, to the alarm contact.

Connecting a Device for Alarm Functions
COMmander 6000/R/RX - Firmware V8.4 - Advanced Information V32 05/2022- 1282 -
Further steps:
• To finish commissioning, you need to configure the COMmander 2TMS(R) module in the Configuration Manager, set up the alarm and set upthe corresponding switch input.

Connecting an External Input Device for Music on Hold
COMmander 6000/R/RX - Firmware V8.4 - Advanced Information V32 05/2022- 1283 -
Connecting an External Input Device for Music onHold
Note: If you use external music on hold, pay attention to the copyrightissues for certain music.
Requirements:
• Connecting cable with cinch connector
1. Connect the Audio In cinch socket to the output socket of the externalinput device.

Connecting an External Input Device for Music on Hold
COMmander 6000/R/RX - Firmware V8.4 - Advanced Information V32 05/2022- 1284 -
1. Volume
Further steps:
• To finish commissioning, you need to configure the COMmander 2TMS(R) module in the Configuration Manager and set up the module as thesource of Music on Hold.
• To save power, you can switch the power supply of the external inputdevice on and off using a relay of the PBX.

Connecting an External Input Device for Music on Hold
COMmander 6000/R/RX - Firmware V8.4 - Advanced Information V32 05/2022- 1285 -
• If required, you can modify the volume of the external Music on Holdwith the Volume Audio In control of the module.

Connecting a Loudspeaker for Announcements
COMmander 6000/R/RX - Firmware V8.4 - Advanced Information V32 05/2022- 1286 -
Connecting a Loudspeaker for Announcements
Requirements:
• Connecting cable with cinch connector
1. Connect the Audio Out cinch socket to the input socket of theloudspeaker.

Connecting a Loudspeaker for Announcements
COMmander 6000/R/RX - Firmware V8.4 - Advanced Information V32 05/2022- 1287 -

Connecting a Loudspeaker for Announcements
COMmander 6000/R/RX - Firmware V8.4 - Advanced Information V32 05/2022- 1288 -
Further steps:
• To finish commissioning, you need to configure the COMmander 2TMS(R) module in the Configuration Manager.
• To save power, you can switch the power supply of the loudspeaker onand off using a relay of the PBX.

Glossary
COMmander 6000/R/RX - Firmware V8.4 - Advanced Information V32 05/2022- 1289 -
GlossaryTechnical Terms and FunctionsAbbreviations Technical Terms and FunctionsAbbreviations

Technical Terms and Functions
COMmander 6000/R/RX - Firmware V8.4 - Advanced Information V32 05/2022- 1290 -
Technical Terms and Functions
ABCDEFGHIJLMNOPQRSTUVWZ ABCDEFGHIJLMNOPQRSTUVWZ

A
COMmander 6000/R/RX - Firmware V8.4 - Advanced Information V32 05/2022- 1291 -
A
AccountExchange LineAPIPA(Auerswald) Remote Access ServerRemote Extension AccountExchange LineAPIPA(Auerswald) Remote Access ServerRemote Extension

Account
COMmander 6000/R/RX - Firmware V8.4 - Advanced Information V32 05/2022- 1292 -
Account
Authorisation to access a VoIP provider or a VoIP PBX. Users mustidentify themselves by logging in with a username and a password.

Exchange Line
COMmander 6000/R/RX - Firmware V8.4 - Advanced Information V32 05/2022- 1293 -
Exchange Line
General term for a connection that links the PBX to the public switchedphone network. The exchange line joins the provider‘s local exchange andthe phone connection.

APIPA
COMmander 6000/R/RX - Firmware V8.4 - Advanced Information V32 05/2022- 1294 -
APIPA
Automatic Private IP Addressing - allows network interfaces to beconfigured automatically. A device that supports APIPA allocates itself arandom IP address from the range 169.254.1.0 to 169.254.254.255 or hasa permanent IP address from the APIPA address range.

(Auerswald) Remote Access Server
COMmander 6000/R/RX - Firmware V8.4 - Advanced Information V32 05/2022- 1295 -
(Auerswald) Remote Access Server
(Auerswald) Remote Access Server - for remote configuration of the PBXvia user interface and Internet access (Auerswald) Remote Access.

Remote Extension
COMmander 6000/R/RX - Firmware V8.4 - Advanced Information V32 05/2022- 1296 -
Remote Extension
Internal subscriber (e.g., home office, outlying parts of the building, branchoffices) connected to a central phone system via a public network (e.g.,the Internet). The distance between the phone system and the outlyingextension is not relevant.

B
COMmander 6000/R/RX - Firmware V8.4 - Advanced Information V32 05/2022- 1297 -
B
B-Channel B-Channel

B-Channel
COMmander 6000/R/RX - Firmware V8.4 - Advanced Information V32 05/2022- 1298 -
B-Channel
Bearer channel) - ISDN channel for the transportation of user data (e. g.speech) for direct communication between subscribers.

C
COMmander 6000/R/RX - Firmware V8.4 - Advanced Information V32 05/2022- 1299 -
C
Dial-aroundCDClientCLIP No ScreeningCodec Dial-aroundCDClientCLIP No ScreeningCodec

Dial-around
COMmander 6000/R/RX - Firmware V8.4 - Advanced Information V32 05/2022- 1300 -
Dial-around
Service that allows a subscriber to make calls via another provider thanthe provider of the phone connection. In this way, the subscriber can useother - often less expensive - providers.

CD
COMmander 6000/R/RX - Firmware V8.4 - Advanced Information V32 05/2022- 1301 -
CD
Call Deflection - refers to call forwarding during the ringing period. If CallDeflection has been activated, the called subscriber can deflect the call ona case-to-case basis while the phone is still ringing.

Client
COMmander 6000/R/RX - Firmware V8.4 - Advanced Information V32 05/2022- 1302 -
Client
Piece of computer hardware or software that accesses a service madeavailable by a server.

CLIP No Screening
COMmander 6000/R/RX - Firmware V8.4 - Advanced Information V32 05/2022- 1303 -
CLIP No Screening
Phone service for outgoing calls that allows the party called to see acustomer-defined phone number instead of the phone number assignedby the network provider.
In this context, no screening means that the customer-defined number isnot checked by the public exchange against the assigned numbers. It maycontain any phone number you define (e.g., a service phone number).

Codec
COMmander 6000/R/RX - Firmware V8.4 - Advanced Information V32 05/2022- 1304 -
Codec
Method to encode (digitise) analogue voice data for transmission anddecode it again to convert it into back into voice. There are variouscodecs that feature different voice data compression rates thereby requiredifferent band widths for data transmission. The equality of VoIP calls isdependent on the codec used.

D
COMmander 6000/R/RX - Firmware V8.4 - Advanced Information V32 05/2022- 1305 -
D
DDIDECTDHCPDiffServD-ChannelDNSDomainDSLDynDNS DDIDECTDHCPDiffServD-ChannelDNSDomainDSLDynDNS

DDI
COMmander 6000/R/RX - Firmware V8.4 - Advanced Information V32 05/2022- 1306 -
DDI
Direct Dial In - extension number for dialling directly to a specificsubscriber on a phone system. Example: In the number 0 53 06 / 92 00 -700, 700 is the Direct Dial In number (DDI) for the Auerswald info-line.

DECT
COMmander 6000/R/RX - Firmware V8.4 - Advanced Information V32 05/2022- 1307 -
DECT
Digital Enhanced Cordless Telecommunications (previously DigitalEuropean Cordless Telephony) - a standard for digital cordless phonesand data transmission (also see GAP). Auerswald DECT systems provideencrypted transmission between mobile handset and base station.

DHCP
COMmander 6000/R/RX - Firmware V8.4 - Advanced Information V32 05/2022- 1308 -
DHCP
The IP address is temporarily allocated for a certain amount of time. Ifthe address is no longer required by the client, the server has access to itagain and can allocate it to another client.

DiffServ
COMmander 6000/R/RX - Firmware V8.4 - Advanced Information V32 05/2022- 1309 -
DiffServ
Differentiated Services Flag - flag evaluated by active networkcomponents such as routers or switches in networks in order to forwardpackets according to their priority. This is necessary, for example, to givevoice packets (VoIP) priority and to achieve better voice quality.

D-Channel
COMmander 6000/R/RX - Firmware V8.4 - Advanced Information V32 05/2022- 1310 -
D-Channel
Delta channel - ISDN channel for the transportation of signallinginformation between end device and public exchange.

DNS
COMmander 6000/R/RX - Firmware V8.4 - Advanced Information V32 05/2022- 1311 -
DNS
Domain Name Service - needed to translate Internet addresses. Thename of a computer on the Internet (for example, Auerswald) is assignedto the corresponding IP address. This service is provided by DNS serversat the various Internet service providers or by upper domain servers.

Domain
COMmander 6000/R/RX - Firmware V8.4 - Advanced Information V32 05/2022- 1312 -
Domain
Globally unique name of a website, consisting of third-level domain (e. g.the service name “www“), second-level domain (e. b. “auerswald“) andtop-level domain (e. g. the country code “uk“). The domain is part of theURL.

DSL
COMmander 6000/R/RX - Firmware V8.4 - Advanced Information V32 05/2022- 1313 -
DSL
Digital Subscriber Line - Internet access technology using a digitaltransmission standard that provides wide bandwidths for the transmissionof data via telecommunication networks.

DynDNS
COMmander 6000/R/RX - Firmware V8.4 - Advanced Information V32 05/2022- 1314 -
DynDNS
DynDNS services make it possible to access an Internet connectiondespite a dynamic IP address. To do this, the service provider assigns thechanging IP address of an Internet connection to a permanent domainname (e.g., YourName.DynDNS.org).

E
COMmander 6000/R/RX - Firmware V8.4 - Advanced Information V32 05/2022- 1315 -
E
Echo CancellationEnd DeviceEthernet Echo CancellationEnd DeviceEthernet

Echo Cancellation
COMmander 6000/R/RX - Firmware V8.4 - Advanced Information V32 05/2022- 1316 -
Echo Cancellation
Local echos and reverberation effects are compensated using echocancellation. For example, an echo is generated on the receiver of aphone; the voice of the caller emanates from the loud speakers andreaches the microphone where it is then transmitted back.
End Device
COMmander 6000/R/RX - Firmware V8.4 - Advanced Information V32 05/2022- 1317 -
End Device
Device that can be operated on a communication network or on a PBX,e.g. phone, fax machine, answering machine etc.

Ethernet
COMmander 6000/R/RX - Firmware V8.4 - Advanced Information V32 05/2022- 1318 -
Ethernet
Network system with a speed of 10/100/1000 Mbit/s that was developedby the companies INTEL, DEC and Xerox.

F
COMmander 6000/R/RX - Firmware V8.4 - Advanced Information V32 05/2022- 1319 -
F
FirewallFirmwareFlash FirewallFirmwareFlash

Firewall
COMmander 6000/R/RX - Firmware V8.4 - Advanced Information V32 05/2022- 1320 -
Firewall
Network security component that uses a set of security rules to protect acomputer network or an individual computer against unauthorised accessto or from the network.

Firmware
COMmander 6000/R/RX - Firmware V8.4 - Advanced Information V32 05/2022- 1321 -
Firmware
Operating software on the phone or PBX that is stored in the device itself.The device cannot function without firmware.

Flash
COMmander 6000/R/RX - Firmware V8.4 - Advanced Information V32 05/2022- 1322 -
Flash
Storage device (e. g. a USB memory stick) for the non-volatile storage ofdata within a minimum of space without permanent power supply.

G
COMmander 6000/R/RX - Firmware V8.4 - Advanced Information V32 05/2022- 1323 -
G
GAPPrefixGateway GAPPrefixGateway

GAP
COMmander 6000/R/RX - Firmware V8.4 - Advanced Information V32 05/2022- 1324 -
GAP
Generic Access Profile - transmission protocol for cordless phones.Describes the basic functions for the communication of DECT devicesfrom different manufacturers among themselves.
Prefix
COMmander 6000/R/RX - Firmware V8.4 - Advanced Information V32 05/2022- 1325 -
Prefix
Number range containing the prefix or all of the prefixes from the area thatshould be collected for the network (e.g., local phone network, regionalnetwork, international network).

Gateway
COMmander 6000/R/RX - Firmware V8.4 - Advanced Information V32 05/2022- 1326 -
Gateway
PC or router used as an intermediary between two networks. The Internetservice provider is the gateway for direct Internet dial-up connections. Ifyou use a router, this is the gateway in a local network.

H
COMmander 6000/R/RX - Firmware V8.4 - Advanced Information V32 05/2022- 1327 -
H
HostHTTP ProxyHTTPSHyperlink HostHTTP ProxyHTTPSHyperlink

Host
COMmander 6000/R/RX - Firmware V8.4 - Advanced Information V32 05/2022- 1328 -
Host
Component of a data processing system that manages larger applicationprograms and data volumes and makes them available to lower-orderservers and clients.

HTTP Proxy
COMmander 6000/R/RX - Firmware V8.4 - Advanced Information V32 05/2022- 1329 -
HTTP Proxy
Proxy for the HTTP protocol, over which Internet sites are called or filesdownloaded.

HTTPS
COMmander 6000/R/RX - Firmware V8.4 - Advanced Information V32 05/2022- 1330 -
HTTPS
Hypertext Transfer Protocol Secure - communication protocol for tap-proofdata transfer with encryption within the World Wide Web.

Hyperlink
COMmander 6000/R/RX - Firmware V8.4 - Advanced Information V32 05/2022- 1331 -
Hyperlink
Electronic cross reference, e. g. inside an Internet document, to a definedlocation within the same or a different document.

I
COMmander 6000/R/RX - Firmware V8.4 - Advanced Information V32 05/2022- 1332 -
I
IADIP AddressIPv4 AddressIPv6 AddressISDNPD IADIP AddressIPv4 AddressIPv6 AddressISDNPD

IAD
COMmander 6000/R/RX - Firmware V8.4 - Advanced Information V32 05/2022- 1333 -
IAD
The IAD (Integrated Access Device) is a device for realising an Internetconnection. Usually, this device is provided by the Internet provider.

IP Address
COMmander 6000/R/RX - Firmware V8.4 - Advanced Information V32 05/2022- 1334 -
IP Address
Unique numerical address within a TCP/IP network that is assigned to onedevice and ensures that data packages reach the correct recipient.

IPv4 Address
COMmander 6000/R/RX - Firmware V8.4 - Advanced Information V32 05/2022- 1335 -
IPv4 Address
Certain ranges are reserved for the operation of local networks:
• Class A: 10.x.x.x (for networks with up to 16.5 million PCs)
• Class B: 172.16.x.x to 172.31.x.x (for networks with up to 65534 PCs)
• Class C: 192.168.0.x to 192.168.255.x (for networks with up to 254PCs)
These addresses have no validity on the Internet; this means that datapackets with this sender type or recipient address cannot be transportedon the Internet. However, they can be used in local networks withoutrestriction. The advantage of this is that if data from a local networkconfigured in this way comes in contact with the Internet, none of thedata on the computers in the local network can leak out or be accessedexternally.

IPv6 Address
COMmander 6000/R/RX - Firmware V8.4 - Advanced Information V32 05/2022- 1336 -
IPv6 Address
IPv4 addresses comprise eight blocks with four digits orcharacters each that are separated by a colon, for example,3001:00FF:ABC0:0EAC:0001:0000:0000:000F, or, abbreviated,3001:FF:ABC0:EAC:1::F.
Thanks to the greater length of IPv6 addresses, IPv6 offers a greaternumber of available IP addresses than version 4 of the Internet protocol(IPv4).

ISDN
COMmander 6000/R/RX - Firmware V8.4 - Advanced Information V32 05/2022- 1337 -
ISDN
Integrated Services Digital Network) - digital network that combines thedifferent communication services, e. g. telephony, telefax groups 2 and3, data transmission, etc. Unlike analogue networks, ISDN uses digitaltransmission.

PD
COMmander 6000/R/RX - Firmware V8.4 - Advanced Information V32 05/2022- 1338 -
PD
Pulse dialling - an older dialling method that transmits the dialled numberto the exchange by interrupting the current in the A-wire of the phoneconnection.

J
COMmander 6000/R/RX - Firmware V8.4 - Advanced Information V32 05/2022- 1339 -
J
Jitter Buffer Jitter Buffer

Jitter Buffer
COMmander 6000/R/RX - Firmware V8.4 - Advanced Information V32 05/2022- 1340 -
Jitter Buffer
Buffers RTP packages, to compensate irregular transfer rates of theInternet.
A high jitter buffer reduces short interruptions during the call. In return thedelay of the RTP packages increases.

L
COMmander 6000/R/RX - Firmware V8.4 - Advanced Information V32 05/2022- 1341 -
L
LANLDAPLED LANLDAPLED

LAN
COMmander 6000/R/RX - Firmware V8.4 - Advanced Information V32 05/2022- 1342 -
LAN
Local Area Network - connects computers over company or homenetworks.

LDAP
COMmander 6000/R/RX - Firmware V8.4 - Advanced Information V32 05/2022- 1343 -
LDAP
Lightweight Directory Access Protocol) - enables you to query the data ina directory service (a hierarchical database) over the network.

LED
COMmander 6000/R/RX - Firmware V8.4 - Advanced Information V32 05/2022- 1344 -
LED
Light emitting diode - electronic device similar to a lamp and used fordisplays (also multi-coloured).

M
COMmander 6000/R/RX - Firmware V8.4 - Advanced Information V32 05/2022- 1345 -
M
MAC AddressPTMPDTMFMSN MAC AddressPTMPDTMFMSN
MAC Address
COMmander 6000/R/RX - Firmware V8.4 - Advanced Information V32 05/2022- 1346 -
MAC Address
Media Access Control address - specific, unique hardware addressspecified for each individual single network card used in the whole world.This means that the network card is unique and can be controlled anddetected detected by the network without any problems.The IP addresseson the TCP/IP network are always mapped to the respective MACaddress.
MAC addresses are represented in a byte-by-byte format, withthe individual bytes being separated by colons or hyphens, e. g.00:09:52:04:4B:13.

PTMP
COMmander 6000/R/RX - Firmware V8.4 - Advanced Information V32 05/2022- 1347 -
PTMP
Point-to-Multipoint - ISDN connection with 3 to 10 independent phonenumbers (MSNs). They can be assigned to one or more devices, includingPBXs.

DTMF
COMmander 6000/R/RX - Firmware V8.4 - Advanced Information V32 05/2022- 1348 -
DTMF
Dual Tone Multi Frequency dialling - dialling method that transmits thedialled number to the exchange as two superimposed sinusoidal signals.

MSN
COMmander 6000/R/RX - Firmware V8.4 - Advanced Information V32 05/2022- 1349 -
MSN
Multiple Subscriber Numbers - multiple phone numbers where an ISDNPTMP connection can be reached. The MSN is the part of the phonenumber without a local prefix.

N
COMmander 6000/R/RX - Firmware V8.4 - Advanced Information V32 05/2022- 1350 -
N
NATExtensionNetworkNTP NATExtensionNetworkNTP

NAT
COMmander 6000/R/RX - Firmware V8.4 - Advanced Information V32 05/2022- 1351 -
NAT
Network Address Translation - permits the mapping of a specific IPaddress used within a network to another IP address used by anothernetwork. This function is e. g. performed by a router which connects alocal area network to the Internet.

Extension
COMmander 6000/R/RX - Firmware V8.4 - Advanced Information V32 05/2022- 1352 -
Extension
Internal connections of a PBX together with the devices, e. g. phones andtelefaxes, connected to them.

Network
COMmander 6000/R/RX - Firmware V8.4 - Advanced Information V32 05/2022- 1353 -
Network
System of more than one computer and other communication devices thatenable multiple users to access common resources such as files, printers,etc.
NTP
COMmander 6000/R/RX - Firmware V8.4 - Advanced Information V32 05/2022- 1354 -
NTP
If a local NTP server is available in a local network, it can be selected, or apublic NTP server from a public list on the Internet can be used.

O
COMmander 6000/R/RX - Firmware V8.4 - Advanced Information V32 05/2022- 1355 -
O
Outbound Proxy Outbound Proxy

Outbound Proxy
COMmander 6000/R/RX - Firmware V8.4 - Advanced Information V32 05/2022- 1356 -
Outbound Proxy
Intermediate server that processes all VoIP requests and connectionsgoing to the provider (except registration).

P
COMmander 6000/R/RX - Firmware V8.4 - Advanced Information V32 05/2022- 1357 -
P
PINPoEPortProxy Server PINPoEPortProxy Server

PIN
COMmander 6000/R/RX - Firmware V8.4 - Advanced Information V32 05/2022- 1358 -
PIN
Personal Identification Number - multi-digit secret code that has to beentered to get access to services or authorisations.

PoE
COMmander 6000/R/RX - Firmware V8.4 - Advanced Information V32 05/2022- 1359 -
PoE
PoE is described in the IEEE 802.3af standard.

Port
COMmander 6000/R/RX - Firmware V8.4 - Advanced Information V32 05/2022- 1360 -
Port
A single PC can simultaneously establish multiple connections andprovide multiple services for other PCs. Ports are used to differentiatethese connections from parallel connections. Due to a commonagreement, PCs usually provide their services on ports 1 to 1023.Outgoing connections are usually established starting at port 1024. Mostservices that use the standard port numbers (for example, web browsersuse port 80).

Proxy Server
COMmander 6000/R/RX - Firmware V8.4 - Advanced Information V32 05/2022- 1361 -
Proxy Server
Acts as the interface to the Internet or between two networks. A proxyserver receives queries from a computer in an Intranet, for example. Itthen connects to the Internet (on behalf of the computer) to forward thequeries and return the (if necessary, filtered) responses. To achieve this,the HTTP proxy uses the Internet's HTTP protocol.

Q
COMmander 6000/R/RX - Firmware V8.4 - Advanced Information V32 05/2022- 1362 -
Q
QoSQR Code QoSQR Code

QoS
COMmander 6000/R/RX - Firmware V8.4 - Advanced Information V32 05/2022- 1363 -
QoS
Quality of service - service of the router or switch that provides constantlyhigh speech quality by prioritising speech data (RTP data packages).

QR Code
COMmander 6000/R/RX - Firmware V8.4 - Advanced Information V32 05/2022- 1364 -
QR Code
Quick Reponse Code - two-dimensional code for binary representation of
data in a matrix of black and white squares: .

R
COMmander 6000/R/RX - Firmware V8.4 - Advanced Information V32 05/2022- 1365 -
R
RegistrarRouterRouting RegistrarRouterRouting

Registrar
COMmander 6000/R/RX - Firmware V8.4 - Advanced Information V32 05/2022- 1366 -
Registrar
A registrar (domain name registar) is an organisation or a company thatregisters Internet domains.

Router
COMmander 6000/R/RX - Firmware V8.4 - Advanced Information V32 05/2022- 1367 -
Router
Routers connect two separate networks. This means, for example, thatyou can connect the local network to another LAN or a WAN. When aPC wants to send a data packet, this packet must travel over a router.The router uses the IP address to detect the network it must send thedata to. In addition to connecting to networks, routers can also executecertain control functions, such as maintaining a simple firewall. In a homenetwork, routers are usually used to connect the local network to theInternet and to enable simultaneous Internet access for multiple users.

Routing
COMmander 6000/R/RX - Firmware V8.4 - Advanced Information V32 05/2022- 1368 -
Routing
Identification of paths for the flow of data within computer networks.Routing determines the complete path of a set of data through thenetwork.

S
COMmander 6000/R/RX - Firmware V8.4 - Advanced Information V32 05/2022- 1369 -
S
S0 Basic AccessS0 PortS2M Primary Rate Multiplex AccessSD/SDHC/SD-XC CardServerSIPSIP-DDI (SIP Trunking)SIP PortSMTPSoft CallSoftphoneStructured CablingSTUNSubnet maskSwitchSyslog ServerSystem Phone
SS0 Basic AccessSS0 PortSS2M Primary Rate Multiplex AccessSD/SDHC/SD-XC CardServerSIPSIP-DDI (SIP Trunking)SIP PortSMTPSoft CallSoftphoneStructured CablingSTUNSubnet maskSwitchSyslog ServerSystem Phone

S0 Basic Access
COMmander 6000/R/RX - Firmware V8.4 - Advanced Information V32 05/2022- 1370 -
S0 Basic Access
ISDN basic access with a maximum of two speech channels and one datachannel (D-channel). A difference is made between external and internalS0. An external S0 port can be used as PTP or PTMP connection. Onthe internal S0port, the COMfortel system phones, other ISDN devicesand ISDN PC controllers are connected. The internal bus acts as PTMPconnection.

S0 Port
COMmander 6000/R/RX - Firmware V8.4 - Advanced Information V32 05/2022- 1371 -
S0 Port
ISDN port with two payload channels and a data channel. Twosimultaneous connections are possible on an S0 port.

S2M Primary Rate Multiplex Access
COMmander 6000/R/RX - Firmware V8.4 - Advanced Information V32 05/2022- 1372 -
S2M Primary Rate Multiplex Access
A S2M primary rate multiplex access provides the PBX with up to 30speech channels (B-channels) and one data channel (D-channel). It isdesigned as a PTP connection and can be operated in combination withISDN basic access connections (S0 ports).

SD/SDHC/SD-XC Card
COMmander 6000/R/RX - Firmware V8.4 - Advanced Information V32 05/2022- 1373 -
SD/SDHC/SD-XC Card
Secure, digital memory cards that use flash-type storage (non-volatilestorage). Their special shape protects them from wrong insertion intothe card slot. A lateral device for write protection (sliding switch) protectsthem from accidental deletion of data. SD cards can store up to 2 GB(SD 1.1 standard) whereas SDHC cards can store up to 32 GB (SD 2.0standard). SC-XC cards can store from 32 GB to - theoretically - 2.048 GB(SD 3.0 standard). Information on recommended memory cards can befound in the Internet (see Auerswald: Auerswald Service Portal, FONtevo:FONtevo).

Server
COMmander 6000/R/RX - Firmware V8.4 - Advanced Information V32 05/2022- 1374 -
Server
Computer or a software that fulfils different tasks as part of the network.It provides, for example, other users (clients) in this network with certaininformation, data and services.

SIP
COMmander 6000/R/RX - Firmware V8.4 - Advanced Information V32 05/2022- 1375 -
SIP
Session Initiation Protocol - network protocol which provides establishinga communication session between two or more subscribers. Via SIP onlycommunication conditions are arranged. Other protocols such as RTP areresponsible for actual data transmission.

SIP-DDI (SIP Trunking)
COMmander 6000/R/RX - Firmware V8.4 - Advanced Information V32 05/2022- 1376 -
SIP-DDI (SIP Trunking)
Some VoIP providers also support a VoIP PTP connection with a DirectDial In option. The provider allocates a PBX base number with additionalDirect Dial In numbers (DDI numbers), e.g., 9200–0.

SIP Port
COMmander 6000/R/RX - Firmware V8.4 - Advanced Information V32 05/2022- 1377 -
SIP Port
Port of the local system used as the communication port for the SIPtransfer.
SMTP
COMmander 6000/R/RX - Firmware V8.4 - Advanced Information V32 05/2022- 1378 -
SMTP
Simple Mail Transfer Protocol - network protocol used for the securetransfer of e-mails between the PBX and external mail servers. The PBXneeds an external SMTP server (outgoing mail server) to send system e-mails or forward voice mail messages and fax messages.
Under Administration > E-mail > Outgoing mail serveryou can enterdifferent outgoing mail servers. If no outgoing mail server has beenentered, no e-mails can be sent.

Soft Call
COMmander 6000/R/RX - Firmware V8.4 - Advanced Information V32 05/2022- 1379 -
Soft Call
With the soft call function, a user can use the Configuration Manager ofthe PBX to dial an external number directly from the phone book or thecall data list.

Softphone
COMmander 6000/R/RX - Firmware V8.4 - Advanced Information V32 05/2022- 1380 -
Softphone
Softphone is short for software phone. This is an app (also known as asoft client) for conducting VoIP calls via a mobile phone or Computer.

Structured Cabling
COMmander 6000/R/RX - Firmware V8.4 - Advanced Information V32 05/2022- 1381 -
Structured Cabling
Structured cabling provides a uniform cable infrastructure for differentservices such as speech (analogue, ISDN) and data (IP-based networks).Structured cabling is subdivided into primary, secondary and tertiarystructured cabling.

STUN
COMmander 6000/R/RX - Firmware V8.4 - Advanced Information V32 05/2022- 1382 -
STUN
Simple Transversal of UDP over NATs - used to determine the public IPaddress of an Internet connection. To do this, a STUN request is sent to aSTUN server, which then shares its own IP address allocated by the VoIPprovider with the Internet connection.

Subnet mask
COMmander 6000/R/RX - Firmware V8.4 - Advanced Information V32 05/2022- 1383 -
Subnet mask
The value of the subnet mask, as with IP addresses, is often given indecimal form (for example, 255.255.255.0 for IPv4 addresses).

Switch
COMmander 6000/R/RX - Firmware V8.4 - Advanced Information V32 05/2022- 1384 -
Switch
Active network distributor that distributes data packages to a destinationdefined by an IP address among the different segments of a network.

Syslog Server
COMmander 6000/R/RX - Firmware V8.4 - Advanced Information V32 05/2022- 1385 -
Syslog Server
Records protocols with control and management information about thePBX. This information helps to identify errors and, where possible, theircauses.

System Phone
COMmander 6000/R/RX - Firmware V8.4 - Advanced Information V32 05/2022- 1386 -
System Phone
Thanks to their integration into the system, system telefphones simplifythe operation of the entire system and additionally offer numerouspossibilities to use PBX functions and signalise their status visually and, inpart, accustically.

T
COMmander 6000/R/RX - Firmware V8.4 - Advanced Information V32 05/2022- 1387 -
T
TAPITCPTemplatePTPT-Net FunctionsDriver TAPITCPTemplatePTPT-Net FunctionsDriver

TAPI
COMmander 6000/R/RX - Firmware V8.4 - Advanced Information V32 05/2022- 1388 -
TAPI
Phone Application Programming Interface - name of a standardisedsoftware interface for computer-assisted telephony (CTI). TAPI ensuresthat software and hardware from various manufacturers are compatiblewith each other.

TCP
COMmander 6000/R/RX - Firmware V8.4 - Advanced Information V32 05/2022- 1389 -
TCP
Transmission Control Protocol - transport protocol that segments datainto packets up to a specified size and reliably sends these individual datapackets in the correct sequence to the recipient address. In this process,every data packet sent must be resent until it has been confirmed asarrived. In order to make sure this happens, a large amount of informationis sent along with the actual payload data. Most Internet services areimplemented with TCP, e.g., HTTP (WWW), SMTP/POPS (e-mail), etc.

Template
COMmander 6000/R/RX - Firmware V8.4 - Advanced Information V32 05/2022- 1390 -
Template
File (here: provisioning file) with default provisioning data that can bereplaced by subscriberspecific provisioning data.

PTP
COMmander 6000/R/RX - Firmware V8.4 - Advanced Information V32 05/2022- 1391 -
PTP
Point-to-Point - ISDN connection with Direct Dial In option. A providerallocates a PBX base number with additional Direct Dial In numbers(DDIs), e.g., 9200–0. PBXs are usually operated on a PTP connection.

T-Net Functions
COMmander 6000/R/RX - Firmware V8.4 - Advanced Information V32 05/2022- 1392 -
T-Net Functions
Functions available on the analogue T-Net in Germany. There areanalogue comfort phones with pre-defined function keys or menus for T-Net functions such as callback on busy, call forwarding, toggling betweenconversations or conference calling.

Driver
COMmander 6000/R/RX - Firmware V8.4 - Advanced Information V32 05/2022- 1393 -
Driver
Program or software module that controls the interaction between anoperating system or program and the interfaces to connected devices(keyboard, printer, monitor, etc.) or virtual devices.

U
COMmander 6000/R/RX - Firmware V8.4 - Advanced Information V32 05/2022- 1394 -
U
UDPUP0URL UDP
UUP0URL
UDP
COMmander 6000/R/RX - Firmware V8.4 - Advanced Information V32 05/2022- 1395 -
UDP
User Datagram Protocol) - protocoll used to send data packets overnon-secure communication lines without a connection. This means thatsuccessful transmission is dependent on the application and is thereforenot always guaranteed. UDP itself does not verify whether data has beentransmitted successfully. When a UDP packet is sent, the sender cannotassume that the packet will indeed arrive at the recipient. This particularprotocol needs only a small amount of additional information, and resultsin a better data throughput rate in a well-functioning network, e. g., on aLAN. UDP is used by DNS servers, for example.

UP0
COMmander 6000/R/RX - Firmware V8.4 - Advanced Information V32 05/2022- 1396 -
UP0
The UP0 interface is used as PTMP connection to link up digital enddevices via a single twin wire. System phones of the COMfortel series aredirectly connected to the internal UP0 port; other ISDN devices can beconnected to the UP0 port the via a UP0/S0 adapter.

URL
COMmander 6000/R/RX - Firmware V8.4 - Advanced Information V32 05/2022- 1397 -
URL
Uniform Source Locator - complete address of a resource (e. g. awebsite), consisting of a scheme (e. g. „http://“) and a scheme-specificpart (e. g. domain „www.auerswald.de/“ and path „en/products/pbx/home-office.html...“).

V
COMmander 6000/R/RX - Firmware V8.4 - Advanced Information V32 05/2022- 1398 -
V
Public ExchangeVoIP AccountVoIP ProviderVoucherVPN Public ExchangeVoIP AccountVoIP ProviderVoucherVPN

Public Exchange
COMmander 6000/R/RX - Firmware V8.4 - Advanced Information V32 05/2022- 1399 -
Public Exchange
Node point on the public telecommunication network.

VoIP Account
COMmander 6000/R/RX - Firmware V8.4 - Advanced Information V32 05/2022- 1400 -
VoIP Account
Account configured with a VoIP provider who provides the necessaryaccess data required for VoIP calls. For this purpose, you need to registeryour name and address with a provider via their web site. Finally, one ormore phone numbers accessible from the public switched network andthe Internet as well as an account with a user name and password areallocated. Most of the time, it only takes a few minutes to configure theregistered connection which can then be used almost immediately.

VoIP Provider
COMmander 6000/R/RX - Firmware V8.4 - Advanced Information V32 05/2022- 1401 -
VoIP Provider
Internet service provider offering internet telephony (VoIP, Voice overInternet Protocol).

Voucher
COMmander 6000/R/RX - Firmware V8.4 - Advanced Information V32 05/2022- 1402 -
Voucher
Voucher for a function release for a specific device type (e.g. automaticreceptions for COMpact 4000). This is not tied to an individual serialnumber.

VPN
COMmander 6000/R/RX - Firmware V8.4 - Advanced Information V32 05/2022- 1403 -
VPN
Virtual Private Network - connects remote or neighbouring networks (LAN)to the internal network using a VPN tunnel. The tunnel functions basicallyas a channel in which embedded data is transported from one network tothe other.

W
COMmander 6000/R/RX - Firmware V8.4 - Advanced Information V32 05/2022- 1404 -
W
WAN WAN

WAN
COMmander 6000/R/RX - Firmware V8.4 - Advanced Information V32 05/2022- 1405 -
WAN
Wide Area Network - a public network, e. g. the Internet.

Z
COMmander 6000/R/RX - Firmware V8.4 - Advanced Information V32 05/2022- 1406 -
Z
Certificate Certificate

Certificate
COMmander 6000/R/RX - Firmware V8.4 - Advanced Information V32 05/2022- 1407 -
Certificate
A (digital) certificate is similar to a digital passport that serves toidentify the owner of the certificate. Its authenticity can be verified bycryptographic procedures. The certificate thus confirms the identity ofa person or a company by means of an asymmetric key, thus ensuringthat the person or company really is the person/company it claims to be.Certificates are issued by an officicial institution, the Certification Authority(CA).

Abbreviations
COMmander 6000/R/RX - Firmware V8.4 - Advanced Information V32 05/2022- 1408 -
Abbreviations
AOCD Advice Of Charge During Call Charge information during and at the end
of the call
AOCE Advice Of Charge End of Call Charge information at the end of the call
APIPA Automatic Private IP Addressing
ARA Auerswald Remote Access
CF
Call forwarding
BLF Busy Lamp Field Busy Lamp Field
CAPI Common ISDN Application
Programming Interface
CCBS Completion of Calls to Busy
Subscriber
Recall on busy
CCNR Completion of Calls on No Reply Recall on no reply
Call Deflection call forwarding via the called person
CD (PR) Call Deflection (Partial Rerouting) call forwarding of direct dial in numbers in
the public exchange
CFB Call Forwarding on Busy Enable Call Forward Busy
CFNR Call Forwarding on No Reply Call forwarding on no reply
CFU Call Forwarding Unconditional Call forwarding immediately

Abbreviations
COMmander 6000/R/RX - Firmware V8.4 - Advanced Information V32 05/2022- 1409 -
CIDR Classless Inter-Domain Routing
CLIP Calling Line Identification Presentation Phone number display
CLIR Calling Line Identification Restriction Phone number is not displayed if that is
appropriate
CNIP Calling Name Identification
Presentation
Calling Name Identification Presentation
CNIR Calling Name Identification Restriction Calling Name Identification Restriction
COLR Connected Line Identification
Restriction
Connected Line Identification Restriction
CoNDIS Connection-Oriented Network Driver
Interface Specification
CSV Comma-Separated Values
CTI Computer Telephony Integration Computer Telephony Integration
DDI Direct Dial-In Extension
DECT Digital Enhanced Cordless
Telecommunications
Digital Enhanced Cordless
Telecommunications
dial-up
connection
dial-up connection
DHCP Dynamic Host Configuration Protocol
DiffServ Differentiated Services Flag
DIP Dual Inline Package
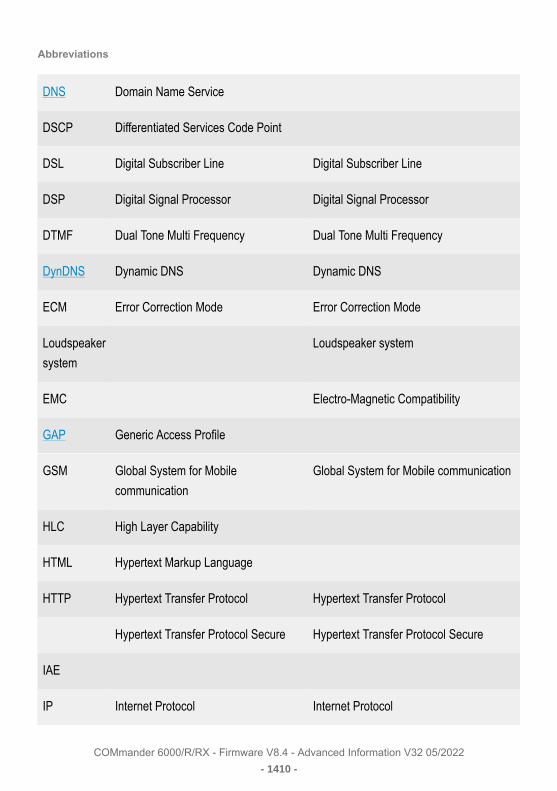
Abbreviations
COMmander 6000/R/RX - Firmware V8.4 - Advanced Information V32 05/2022- 1410 -
DNS Domain Name Service
DSCP Differentiated Services Code Point
DSL Digital Subscriber Line Digital Subscriber Line
DSP Digital Signal Processor Digital Signal Processor
DTMF Dual Tone Multi Frequency Dual Tone Multi Frequency
DynDNS Dynamic DNS Dynamic DNS
ECM Error Correction Mode Error Correction Mode
Loudspeaker
system
Loudspeaker system
EMC
Electro-Magnetic Compatibility
GAP Generic Access Profile
GSM Global System for Mobile
communication
Global System for Mobile communication
HLC High Layer Capability
HTML Hypertext Markup Language
HTTP Hypertext Transfer Protocol Hypertext Transfer Protocol
Hypertext Transfer Protocol Secure Hypertext Transfer Protocol Secure
IAE
IP Internet Protocol Internet Protocol

Abbreviations
COMmander 6000/R/RX - Firmware V8.4 - Advanced Information V32 05/2022- 1411 -
IPUI International Portable User Identity International Portable User Identity
Integrated Services Digital Network Integrated Services Digital Network
PulseDialling
CW
Short-code
LAN Local Area Network Lightweight Directory Access Protocol
LCR Least Cost Routing
Lightweight Directory Access Protocol Protocol for easy access to directory
server
LED Light-emitting diode
MAC Media Access Control
MWI Message Waiting Indication
Dual TMrequency
MSN Multiple Subscriber Number
NAT Network Address Translation
NF
Low frequency
NT Network Termination for ISDN Basic
rate Access
Network Termination for ISDN Basic rate
Access
NTP Network Time Protocol
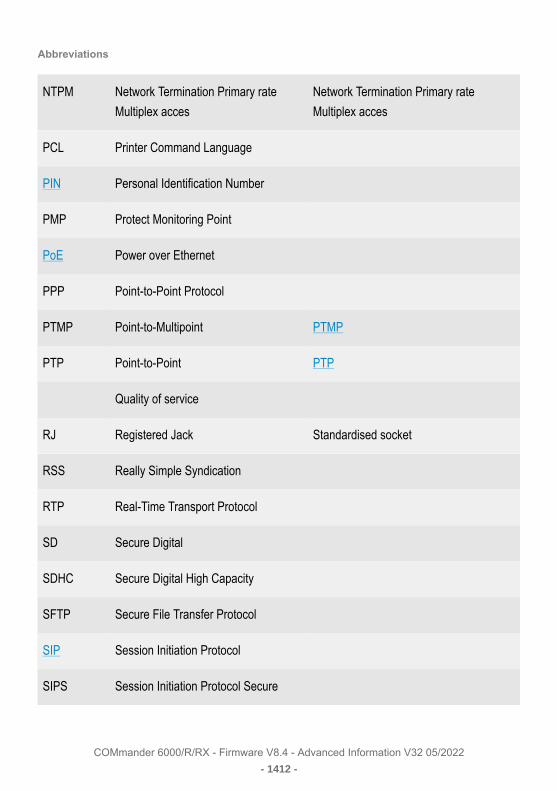
Abbreviations
COMmander 6000/R/RX - Firmware V8.4 - Advanced Information V32 05/2022- 1412 -
NTPM Network Termination Primary rate
Multiplex acces
Network Termination Primary rate
Multiplex acces
PCL Printer Command Language
PIN Personal Identification Number
PMP Protect Monitoring Point
PoE Power over Ethernet
PPP Point-to-Point Protocol
PTMP Point-to-Multipoint PTMP
PTP Point-to-Point PTP
Quality of service
RJ Registered Jack Standardised socket
RSS Really Simple Syndication
RTP Real-Time Transport Protocol
SD Secure Digital
SDHC Secure Digital High Capacity
SFTP Secure File Transfer Protocol
SIP Session Initiation Protocol
SIPS Session Initiation Protocol Secure

Abbreviations
COMmander 6000/R/RX - Firmware V8.4 - Advanced Information V32 05/2022- 1413 -
SMTP Simple Mail Transfer Protocol
SRTP Secure Real-Time Transport Protocol
STUN Simple Transversal of UDP over NATs
SW Software
TAPI Phone Application Programming
Interface
TCP Transmission Control Protocol
Sub
Subscriber
TSM
door terminal module
UAE
UDP User Datagram Protocol
CF
Call forwarding
Uniform Resource Locator Uniform Resource Locator
USB Universal Serial Bus
UPS
Uninterrupted Power Supply
UTC Coordinated Universal Time
VMF Voice Mail and Fax
VoIP Voice over Internet Protocol

Abbreviations
COMmander 6000/R/RX - Firmware V8.4 - Advanced Information V32 05/2022- 1414 -
VPN Virtual Private Network
WAN Wide Area Network
XML Extensible Markup Language


