Embed Size (px)
Citation preview

Grand Valley State UniversityScholarWorks@GVSU
Books and Contributions to Books University Libraries
6-2016
Customizing Vendor Systems for Better UserExperiences: The Innovative Librarian's GuideMatthew ReidsmaGrand Valley State University
Follow this and additional works at: https://scholarworks.gvsu.edu/library_books
Part of the Cataloging and Metadata Commons, and the Information Literacy Commons
This Book is brought to you for free and open access by the University Libraries at ScholarWorks@GVSU. It has been accepted for inclusion in Booksand Contributions to Books by an authorized administrator of ScholarWorks@GVSU. For more information, please contact [email protected].
ScholarWorks CitationReidsma, Matthew, "Customizing Vendor Systems for Better User Experiences: The Innovative Librarian's Guide" (2016). Books andContributions to Books. 19.https://scholarworks.gvsu.edu/library_books/19

CUSTOMIZING VENDOR SYSTEMS FOR BETTER
USER EXPERIENCES
4148-900-2pass-0FM-r02.indd 1 07-04-2016 22:06:50

Recent Titles in Libraries Unlimited’s Innovative Librarian’s Guide Series
Digitizing Audiovisual and Nonprint Materials: The Innovative Librarian’s GuideScott Piepenburg
Making the Most of Digital Collections through Training and Outreach: The Innovative Librarian’s GuideNicholas Tanzi
Digitizing Your Community’s History: The Innovative Librarian’s GuideAlex Hoffman
4148-900-2pass-0FM-r02.indd 2 07-04-2016 22:06:50

CUSTOMIZING VENDOR SYSTEMS FOR BETTER
USER EXPERIENCESThe Innovative Librarian’s Guide
Matthew Reidsma
INNOVATIVE LIBRARIAN’S GUIDE
4148-900-2pass-0FM-r02.indd 3 07-04-2016 22:06:50

Copyright © 2016 by Matthew Reidsma
All rights reserved. No part of this publication may be reproduced, stored in a retrieval system, or transmitted, in any form or by any means, electronic, mechanical, photocopying, recording, or otherwise, except for the inclusion of brief quotations in a review, without prior permission in writing from the publisher.
Library of Congress Cataloging-in-Publication Data
[CIP data TO COME]
ISBN: 978-1-4408-4384-6 EISBN: 978-1-4408-4385-3
20 19 18 17 16 1 2 3 4 5
This book is also available as an eBook.
Libraries UnlimitedAn Imprint of ABC-CLIO, LLC
ABC-CLIO, LLC130 Cremona Drive, P.O. Box 1911Santa Barbara, California 93116-1911www.abc-clio.com
This book is printed on acid-free paper Manufactured in the United States of America
4148-900-2pass-0FM-r02.indd 4 07-04-2016 22:06:50

Contents
Acknowledgments vii
Chapter 1 Library Vendor Tools 1
Chapter 2 JavaScript and Vendor Tools 11
Chapter 3 Working with Developer Tools 19
Chapter 4 JavaScript Basics 27
Chapter 5 JavaScript Bookmarklets 43
Chapter 6 Advanced JavaScript 55
Chapter 7 JavaScript Examples 67
Chapter 8 jQuery Basics 79
Chapter 9 Advanced jQuery 93
Chapter 10 jQuery Examples 105
Chapter 11 Getting Data In and Out of Vendor Tools 115
Chapter 12 AJAX Examples 127
Chapter 13 Helper Scripts in PHP 141
Conclusion 163Index 165
4148-900-2pass-0FM-r02.indd 5 07-04-2016 22:06:50

4148-900-2pass-0FM-r02.indd 6 07-04-2016 22:06:50

Acknowledgments
My name may be on this book, but that doesn’t tell the whole story. I need to thank many others who helped and encouraged me along the way.
The “Marys” at Infopeople pushed me to present on this topic, and Lise Dyckman at Libraries Unlimited convinced me that it should be a book. Any clarity in my words in these pages was coaxed out of me by Lise. Any errors remain my own.
My colleagues at Grand Valley State University (GVSU) make me excited to get to work each morning. Every day all hands are on deck to improve the library for our users, and I couldn’t be more proud to be a Laker.
Matt Ruen, GVSU’s Scholarly Communications librarian, ably guided me through the process of turning this book into an experiment into open access monograph publishing. Libraries Unlimited was eager to take a chance on giving the book away after three years, which is a risk for all involved. I’m glad to have them as a partner in this.
I am inspired daily by Dave Pattern, Andromeda Yelton, Annette Bailey, Erin White, Shariq Torres, Alison Tinker, John Fink, Kirsten Lamb, Jenny Jing, and everyone in the library world who share their code. This book wouldn’t be possible without you.
As I wrote this book, my family gave me a space free of computers and code but full of inspiration. Wendy, you are patient beyond measure (how do you do that?). And whenever I think something cannot be done, my children remind me that anything is possible if you start the day with a good breakfast.
4148-900-2pass-0FM-r02.indd 7 07-04-2016 22:06:50

4148-900-2pass-0FM-r02.indd 8 07-04-2016 22:06:50

Chapter 1
Library Vendor Tools
If your library is like most, you have a lot of different tools that your users access over the web to get things done: catalogs (OPACs), interlibrary loan, LibGuides, discovery layers, and more. If your library is large, you might have developer (or a few) who can write custom software for your library, but chances are, your developer(s) wouldn’t be able to build and maintain an entire integrated library system (ILS) that lets your catalogers maintain MARC records, connects to external providers to import MARC records, keeps track of all circulating materials and late fines, and provides an intuitive way for your users to find the books they want. On top of that they won’t be able to tackle building an interlibrary loan (ILL) system from scratch that talked to OCLC, seamlessly sending requests to libraries around the world while keeping users up-to-date on the status of requests. They also won’t have the time to build a search tool that searches across all of the vendor databases your library subscribes to, integrating search results from different providers into a clean and easy-to-use results screen.
Even if your developers could do these things, they most likely couldn’t do them all. And if your library is not a large library, then forget it. Even if you have a developer or two, building all of the tools you need to run a library from scratch is beyond the scope of a one- or two-person team. Build-ing and maintaining these large software programs is a huge undertaking, and in strictly economic terms, it doesn’t make much sense to pay develop-ers to create something that is available out in the marketplace for less than the combined annual salary of a handful of programmers. And because the underlying data that these programs trade in is designed to be shared across libraries—MARC records, OCLC ILL requests, and so on—it makes sense to have a few providers focus on making sure that these tools work reliably with the data formats that drive library systems today.
And so our libraries purchase software from vendors: an ILS to handle cataloging, circulation, acquisitions, and run the OPAC; interlibrary loan software to borrow items from other libraries; course reserve software in aca-demic libraries to manage reserves and track copyright; discovery layers to
4148-900-2pass-01-r02.indd 1 07-04-2016 22:06:53

2 Customizing Vendor Systems for Better User Experiences
make it easier to search across dozens of competing research databases. And on and on.
THE STATE OF LIBRARY VENDOR TOOLSBut just because we’ve all chosen to let software vendors provide the tools to run libraries doesn’t mean that we’re living in a library software paradise. In some cases, libraries do not have much of a choice at all in selecting the tools that run their day-to-day operations. Libraries that belong to a consortium often use the ILS chosen by that group, rather than choosing their own tool to fit their local workflows. Or there may be local limitations that affect the choice. Here at Grand Valley State University (GVSU) in Allendale, Michi-gan, we’re using the ILS that will operate the three different Automated Stor-age and Retrieval Systems (ASRS) at two of our different campuses. Because we have cranes from two different manufacturers, the choice of ILS we have is limited to whomever can talk to both of these systems fluently.
Even libraries that are not constrained by consortia or technical limitations often make choices for reasons other than the best fit for the local environ-ment. Cost is a huge factor in these systems, which can run into the hundreds of thousands of dollars a year. Many libraries have turned to open-source ILS solutions like Evergreen and Koha for this reason, although the investment in modifying these tools for the local environment is paid either through hir-ing consultants or through paying developers. But in the end, the best price might not provide the best features for library staff or library users.
Because library software vendors are developing tools that can be used by any library, they also lack a lot of the local customizations that would help them fit into a library’s culture and workflow. As a result, we all have stories of how we’ve found tedious workarounds in new software so that we can continue to process invoices in the same way as the old system, or the way the billing office requires. Or we add explanatory text to a website to explain why this request button works differently this week on the new software than it did last week on the old. And because these tools are large and complex, they often lack the detailed level of customization we would expect from tools built for people and the way they work.
THE BASICS OF LIBRARY VENDOR TOOLSThat is not to say that vendor tools cannot be customized. The ILS in particu-lar often allows staff an unprecedented amount of customization to accom-modate different cataloging and acquisitions workflows. Yet other vendor tools offer almost no staff customizations, like OCLC’s ILLiad ILL software. Sure, you can reorder the queues in staff view, but the fields and screens and colors and workflows are locked in by Atlas Systems and OCLC, the makers of the software.
4148-900-2pass-01-r02.indd 2 07-04-2016 22:06:53

Library Vendor Tools 3
Yet most vendors allow customizations to the staff side of their tools, allowing us to adapt tools to existing workflows or local culture. One of the reasons for this is that staff are the ones choosing the tools. Even in libraries where Requests for Proposals (RFPs) are analyzed and approved by adminis-tration, the on-the-ground staff often get an opportunity to kick the tires of any potential new software to see how it will fit in with existing workflows. User tests are almost never a part of this discussion, and few vendors have teams dedicated to promoting user-centered design in their products.
And so most library vendors give us the ability to customize the header of the public side of the tool to match our library’s “branding,” and maybe change the color of links or the footer text. In rare cases we might get to tinker with the order of items on the user’s screen. But in no case do we have con-trol over the automatically generated HTML markup vendors wrap around the data they add to pages, and so even when we try to add our own custom styles, we find our hands are tied by trying to style nested tables to look like lists.1
Library vendors have approached customization as part of “branding” the system, and so limiting the customizations to colors and logos makes sense from their perspective. Yet those of us who have been charged with making these systems work for library users have known for years that making some-thing intuitive and usable is not the realm of the marketing department. As more and more libraries run usability tests on their vendor tools, they are beginning to understand how far we have to go in making our library tools usable by the general public.
In this book, I’ll walk you through some strategies and techniques for changing vendor tools. I’ve been doing this for years at GVSU, and many of my modifications have been adopted as “official” by the vendors. ProQuest’s redesigned link resolver, 360Link 2.0, takes my modification script as the basis for its user interface, while Summon 2.0’s design was informed in part by the detailed usage statistics package I wrote for its predecessor, Summon 1.0.
With a little persistence and tinkering, most vendor tools can be modified.
CUSTOMIZING TOOLS: TEMPLATES AND CUSTOM CSSMost hosted vendor tools offer some form of customization for their products, often in allowing changes to the visual layout of the web pages generated by the vendor software. These changes might be classified as “cosmetic,” allowing a library to change the colors of the links and headings to match their prefer-ences, or adding a logo to the upper left-hand corner of the banner. ProQuest’ Summon 1.0 discovery service, for instance, limits the customization to a handful of options, including a logo file, the header background color, and link colors.
Other vendors go further, allowing us to add in chunks of HTML, the markup language of the web. This can help us give the vendor sites the feel
4148-900-2pass-01-r02.indd 3 07-04-2016 22:06:53

4 Customizing Vendor Systems for Better User Experiences
of other library web pages, by including global navigation or footers. In Pro-Quest’s 360 Link link resolver, for example, libraries are given the opportu-nity to “brand” the header and footer of the system with HTML, but not the entire template.
In rare cases, vendors might give us nearly complete control over the entire look and feel of the template of a page. We can customize the HTML and CSS, the stylesheets that control the visual look of web pages, and the vendor will insert the content in the places we specify. Most OPACs offer this kind of customization, as do other systems, like ILLiad (OCLC’s interlibrary loan software) and LibGuides 2.0’s templates.
These customization features are useful for bringing your library’s brand-ing across multiple systems, but they only go so far. Even in the cases where the vendor gives us control over the HTML template, the dynamically gen-erated parts of the system are controlled by the vendor. For instance, here’s a sample of the holdings section of our catalog. In the first example, you can see the HTML I’ve used to make the template, as well as the “token” (<!--{holdings}-->) I’ve included to let WebPAC Pro, our OPAC, create the actual holding information. (If this is your first time seeing raw HTML, I’ll walk you through what you’re seeing in the paragraph that fol-lows. I’d also recommend taking a look at CodeAcademy’s HTML tutorials at http://www.codecademy.com.)
<div id="holdings"><!—{holdings}—></div>
Here I’m creating an element, called a “div” (short for division). It’s basi-cally a box of content that I can style however I want. It has an ID assigned to it, which here is “holdings.” I can use the ID to create styles that will apply to every HTML element with the ID of “holdings.” In my case, I wanted to make a flexible container for the holding information, because I know that we have users who use desktops and tablets and phones, and I want to make sure that the holding information looks great on any of those devices. But when we view the page in a web browser, WebPAC Pro fills in the token with HTML (I’ve simplified it a bit):
<div id="holdings"><table class="bib_items" width="100%"><tbody><tr class=“bibItemsHeader"><th width="38%">Location</th><th width="38%">Call No.</th><th width="24%">Status</th>
</tr>
4148-900-2pass-01-r02.indd 4 07-04-2016 22:06:53

Library Vendor Tools 5
<tr class="bibItemsEntry"><td width="38%">3rd Floor</td><td width="38%">PN1997. B3448 2005</td><td width="24%">DUE 8/15/2015</td>
</tr></tbody>
</table></div>
That token from the first example, <!—{holdings}—>, has been expanded into a <table> element. Although I wrap the table in a <div> with the ID of my own choosing, I’m still stuck with this table for layout. So while my OPAC gives me the ability to customize the container that holds the content my users are looking for, I’m unable to change how the content itself is structured. Although this is better than the customizations offered by Summon, the customizations I can make here are still essentially cosmetic, more in line with “branding” than with a redesign.
CUSTOMIZATIONS BEYOND BRANDINGIn the 2015 Horizon Report Library Edition, one of the top trends all libraries need to be aware of was the increased importance of user experience (UX) in library systems, services, and tools (New Media Consortia 2015). More than just branding, more than just visual design, more even than simply interac-tion design, UX is a way of designing that focuses on the entire experience of a user as he or she works through an activity, takes part in a service, or uses a tool. UX focuses on improving not only the functionality of tools, but also the emotional experience for the user. It’s a more holistic approach to design-ing for people, involving visual design, interaction design, and copywriting. In short, to improve the UX of our tools, we need to be able to do more than change the background color of the header or add our website’s navigation.
Vendor tools often meet some of the higher-level needs of our libraries but fall short in some of the other details. If your library does usability testing, you might find serious usability issues with a tool that you are powerless to change. At GVSU, I was in that situation in 2011 with our link resolver, 360 Link. Thankfully, I found a way around the vendor’s limitations, a technique I’ve applied to nearly every vendor tool we now have. There is a better way, and it’s fairly easy to do.
Beyond Official: Using JavaScript to Modify SystemsSometimes, the customization options offered by vendors are enough. But often, we find that something about the code that we can’t change is causing a problem. Sometimes it’s a conflict with the way we’re trying to make the
4148-900-2pass-01-r02.indd 5 07-04-2016 22:06:53
6 Customizing Vendor Systems for Better User Experiences
page look. Sometimes, though, the code the vendor provides makes it hard for our users to complete tasks, or get the most out of our services. In these cases, modifying the CSS and HTML template will not be enough. Often these issues get reported to the vendor as bugs or feature requests, but there is no guarantee that the vendor will make the needed changes, or make them in a timely manner.
But there is another way. The modern web is built on more than just HTML and CSS. The more sophisticated interactions we’ve come to expect ever since the dawn of “Web 2.0” a decade ago that continue to power “web applica-tions” today are due to the use of JavaScript, a lightweight scripting language that runs in the web browser rather than on a server. In my previous example from our OPAC, I can’t modify the code that the vendor generates through the <!—{holdings}—> token because the code itself runs on the vendor’s web server. But since JavaScript runs in the web browser, the vendor’s site will have already created the item holdings HTML when the script runs, so I’m able to make changes to the <table> in the user’s browser. You won’t have to wait for the vendor to modify their code, and the JavaScript will execute quickly enough in the browser so that your users won’t even notice you made a change.
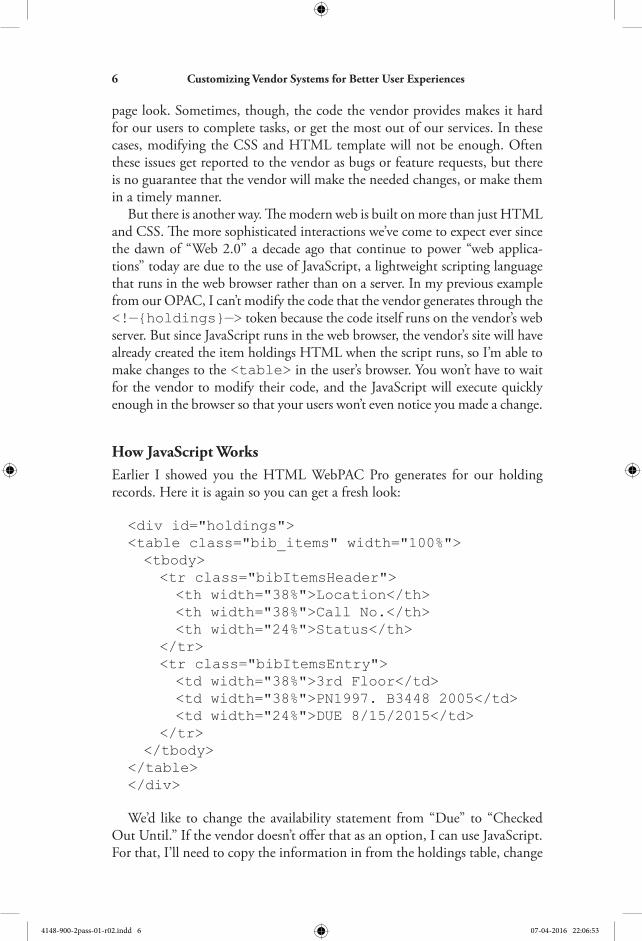
How JavaScript WorksEarlier I showed you the HTML WebPAC Pro generates for our holding records. Here it is again so you can get a fresh look:
<div id="holdings"><table class="bib_items" width="100%"><tbody><tr class="bibItemsHeader"><th width="38%">Location</th><th width="38%">Call No.</th><th width="24%">Status</th>
</tr><tr class="bibItemsEntry"><td width="38%">3rd Floor</td><td width="38%">PN1997. B3448 2005</td><td width="24%">DUE 8/15/2015</td>
</tr></tbody>
</table></div>
We’d like to change the availability statement from “Due” to “Checked Out Until.” If the vendor doesn’t offer that as an option, I can use JavaScript. For that, I’ll need to copy the information in from the holdings table, change
4148-900-2pass-01-r02.indd 6 07-04-2016 22:06:53

Library Vendor Tools 7
out the words, and then replace them on the page. Let’s make a simple Java-Script function.
First, I’ll need to declare something called a “variable.” Variables are like a container that can hold any value you want. In this case, I want to store the date that is listed in the availability cell. In JavaScript, you declare a variable with the var statement. It’s a good idea to call your variables something that will remind you what they are for, so that you remember later when you have to update or fix your code. (You’ll never remember what the variable sillyWord was, even if it was funny to you at the time.) I’ll call this variable dueText:
var dueText;
Now my script has a variable. Now, I want to get that date value, which is in the last table cell. I want to make the variable dueText equal to the text of that cell. To do that, I’ll target the ID of the <div> that contains the markup, since IDs are unique and should be used only once on each page. JavaScript has a handy method called getElementById() that we’ll use to grab this element. I’ll then use the JavaScript querySelector() method to target the last cell in the table inside of the <div>. I can do this by looking for the unique characteristics of that cell, which in this case are that it is the last cell in the row, and that it is the only cell with a width dec-laration of 24%. Then we’ll set the value of the variable as the content of that cell using the innerHTML property.
var dueText = document.getElementById('holdings') .querySelector('table.bib_items tr.bibItemsEntry td[width="24%"]').innerHTML;
Now the value of our dueText variable is “Due 8/1/2015.” We’re getting closer, but we really want to drop the “Due” part of the string and replace it with “Checked Out Until.” JavaScript has a way to replace text in a string using the replace() method. We need to specify the text we want replaced and the new text we want added, and JavaScript will change the value of our variable for us.
var dueDate = dueText.replace(/DUE/g, "Checked Out Until");
Now we have a new variable called dueDate with a value of “Checked Out Until 8/1/2015.” We can rewrite the text of the availability cell with the new wording and the date, using the innerHTML property we used earlier:
document.getElementById('holdings').querySelector ('table.bib_items tr.bibItemsEntry td[width= "24%"]').innerHTML = dueDate;
4148-900-2pass-01-r02.indd 7 07-04-2016 22:06:53

8 Customizing Vendor Systems for Better User Experiences
This again targets the element with the ID of holdings, and sets the text of the table cell with a width of 24% to the value of the variable due-Date. Here’s the whole script:
var dueText = document.getElementById('holdings') .querySelector('table.bib_items tr.bibItemsEntry td[width="24%"]').innerHTML;
var dueDate = dueText.replace(/DUE/g, "Checked Out Until");
document.getElementById('holdings').querySelector ('table.bib_items tr.bibItemsEntry td[width="24%"]') .innerHTML = dueDate;
I should note that there isn’t always a “correct” way to do things in Java-Script. For instance, instead of using the replace() method to swap out the text of availability message, I could have used another method to break the message apart at the space, and then tacked on the new text to the begin-ning of the date. There are often several ways to achieve the same result.
A Few Library ExamplesLooking at a theoretical example is one thing, but seeing how different librar-ies have implemented JavaScript modifications to their vendor tools should give you a better understanding of what can be done with this technique. Over the rest of this book we’ll spend time looking more closely at each of these examples (and many more).
Trinity College, Cambridge: Vote for More Books BookmarkletTrinity College Library at Cambridge University has a problem most
libraries have: not enough copies of the most popular books. Kirsten Lamb of Trinity College Library knew that there was more demand than the recall statistics were showing. An extensive university-wide study uncovered a host of small “black-market”–like student run exchanges for popular books to supplement the meager library stock, including at Trinity (Murphy 2015). Lamb wanted to offer students the opportunity to “vote” to have the library purchase more copies of popular books, to capture the voices of the students who weren’t comfortable recalling a book. She didn’t know how to implement such a thing in the OPAC.
I wrote her a proof-of-concept script that could be triggered by a simple bookmark in someone’s browser, showing how the vote button might look and work. By creating a “bookmarklet” to launch the script, Lamb and her colleagues were able to try out the modification and test on students before they spend more time and energy on the project.
4148-900-2pass-01-r02.indd 8 07-04-2016 22:06:53

Library Vendor Tools 9
You can see the code for this bookmarklet as well as an animation of it in action at https://github.com/mreidsma/OPAC-Vote. We’ll take a closer look at this bookmarklet in Chapters 5 and 13.
Grand Valley State University: hasMedia? A Script to Add Streaming VideoUntil recently, GVSU used CONTENTdm for our digital collections.
Since we couldn’t afford to pay for hosting of all of our streaming video, we wanted a way to use CONTENTdm for metadata and transcripts, but to pull streaming media from another server. I wrote a simple script that checks for whether the item metadata says that there is a streaming media (audio or video) component, and then uses JavaScript to insert an HTML5 <audio> or <video> element that pulls the source from our other server. Just in case the user is on an old browser, we have a Flash video fallback, too.
You can see the full code for hasMedia? at https://github.com/mreidsma/hasMedia-. We’ll explore this tool more in Chapter 11.
Brigham Young University: ILLiadPlusA lot of libraries use ILLiad, the interlibrary loan software now sold by
OCLC. ILLiad’s default public templates are not known for their exceptional design or user-friendliness. In 2013, Brigham Young University redesigned the ILLiad software, but rather than simply changing the visual look of the tool, it built a small JavaScript application that sits on top of ILLiad and improves both the functionality and the interactions.
Brigham Young has put the source code for ILLiadPlus online, so you can see it at https://github.com/byuhbll/ILLiadPlus.
Before we can dive into these customizations, we’ll spend some time get-ting acquainted with JavaScript, and particularly the methods and functions that work well for modifying web tools that we didn’t create ourselves. Along the way we’ll explore tools and techniques as well as existing customizations made by libraries all over the world. As the book progresses, we will spend more time looking at code and dissecting how it works, as well as why it was needed. If you don’t have experience reading code or working in Java-Script, don’t worry. Everyone who works with JavaScript starts somewhere, and it’s okay not to know things! I’ll do my best to walk you through each bit of code, explaining what it does and why it works, and I’ve created a supplementary website for you to practice running JavaScript code right in the browser to help you feel more comfortable with the concepts. You can find the site at http://mreidsma.github.io/vendor_tools. Making vendor tools better can be a lot of work, but the challenge can be a lot of fun, too. Let’s get started!
4148-900-2pass-01-r02.indd 9 07-04-2016 22:06:53

10 Customizing Vendor Systems for Better User Experiences
NOTE1. My frustration at library software vendors that use HTML tables for layout will be
a repeating theme throughout this book.
REFERENCESMurphy, H. (2015, May 7). WhoHas?: The Pilot. [Web log post]. Retrieved from
https://futurelib.wordpress.com/2015/05/07/whohas-the-pilot.New Media Consortia. (2015). NMC Horizon Report: 2015 Library Edition. Retrieved
from http://cdn.nmc.org/media/2015-nmc-horizon-report-library-EN.pdf.
4148-900-2pass-01-r02.indd 10 07-04-2016 22:06:53

Chapter 2
JavaScript and Vendor Tools
If you have experience writing HTML and CSS for the web, then you’re prob-ably heard of the distinction between “structure” and “presentation” that was the rallying cry of the web standards movement a decade ago. HTML was never meant to be a markup language that allowed authors to control the pres-entation of their pages. It was a semantic language that was designed to help academics structure web pages in the same way that they structured research papers: hierarchical headings, paragraphs, blockquotes, tables of data, and eventually, images and other media.1 In the early days of the web, styles were controlled by the user in his or her browser’s preferences (Lialina 2012). But when the web became a commercial phenomenon, businesses and individuals wanted more control over just how these pages looked, not for the users, but for themselves. Designers didn’t want anyone looking at a page in Comic Sans, for instance, so control of how a page looked moved into the page’s markup. Pages became filled with <font> and <img> tags, and designers tried different ways of controlling the placement of objects on a web page. Despite the fact that CSS was available to them, for a lot of designers, it made more sense to control the look and feel of pages from the HTML markup.
But over a decade ago, designers pushed to move presentation out of markup and keep HTML and CSS separate. In most of the popular web in 2015, structure and presentation were separated, <table> elements were no longer used for markup, and stylesheets controlled the look and feel of sites.2 But with the advent of “Web 2.0,” the greater dependence on interac-tivity on the web added a new dimension to pages. JavaScript isn’t the same as the structural markup, and it isn’t strictly presentation. Where does JavaScript fit in to the structure of web pages?
Aaron Gustafson proposed adding JavaScript as a third layer of the web. HTML was the structural semantic layer; CSS was presentation and style; and finally, JavaScript was the interaction layer that enhanced the way users could interact with a website (2008). But JavaScript can be used for more than just beefing up interaction, as we will see in examples of the first few chapters. JavaScript has the power to change the presentation and semantic layers, in addition to adding its own unique interactive qualities.
4148-900-2pass-02-r02.indd 11 07-04-2016 22:06:57

12 Customizing Vendor Systems for Better User Experiences
Many vendors allow libraries to add JavaScript to the public-facing web-sites generated by the vendor tool (e.g., adding JavaScript in the ILS to affect the OPAC but not the back-end ILS functions). Vendors often give the abil-ity to add JavaScript so that libraries can enhance a site’s interactions, for instance, by automatically submitting forms when a <select> element is used, or showing and hiding certain bits of information depending on some user preference. And while these are useful techniques for customizing vendor tools, I want to propose that we can do more. We are limited in the kinds of customizations we can make to the interaction layer by the very structure of the other two layers, semantics and presentation. While we can write CSS styles to override the default styles that ship with the vendor tool, we have less flexibility to change both the presentation and interaction layers because we’re stuck with automatically generated HTML on the semantic layer that often does not adhere to web standards.
The trouble is that most library vendors haven’t grasped the separation between the semantic layer and the presentation layer fully. Here at GVSU, our OPAC generates countless <tables> nested within other <tables>, none of which contain any tabular data. Rather, these <table> elements serve to control how the content looks and where it fits on a screen, and thus use semantic HTML markup to do the job of CSS. The problem is, you can-not easily restyle nested tables to look like much besides a few nested tables. Because the foundation created by the library software vendor did not respect the separation between the semantic, presentation, and interaction layers, I often need to change the HTML markup of a site before I can improve the presentation or interaction.
You may want to hide some content from your user by default and show it only if your user asks for it. This is really useful in situations where your vendor tool spits out a dozen possible holdings of a book or a dozen different databases that hold the article you’re looking for. These lists are often over-whelming to users, and so it makes sense to promote the best result and then offer the user other options. We had this exact experience a few years ago with the 360 Link link resolver at GVSU.3
Often our users would encounter a long list of databases that offered the full text of an article they wanted. Yet, they were unsure which of the many links to click. In part, this was because the vendor hadn’t added any visual cues about the best link to choose. In fact, all of the links looked exactly the same! The link for “Article,” “Journal,” and the database name all were styled to be plain text links, with no apparent hierarchy. What the user didn’t know was that our team had worked hard to order the databases so that the most reliable ones were displayed at the top of the list. But without simple design techniques to give the top results additional visual weight, the failure rate to get to a full-text article was nearly 35%.
But visual design, something that could have been addressed with CSS on the presentation layer, was only half of it. Our research showed us that our
4148-900-2pass-02-r02.indd 12 07-04-2016 22:06:57

JavaScript and Vendor Tools 13
users had gotten the message over the past decade that full-text articles could be found behind links with the word “Full Text” in them, so most were una-ware that the “Article” link would take them to what they wanted. In addi-tion, the list was marked up in HTML as nested <table> elements. Each row was its own <table>, set within a larger <table>. Any attempt to style these <table> elements ran into problems, and our initial attempts to emphasize the first result over others worked in some browsers but not others. In the end, the semantic layer made it impossible for us to enhance the site on both the presentation and interaction layers. And so we decided to change the semantic layer altogether.
Based on watching our users encounter this tool in usability tests, my idea was to make the best link to the article’s full text the most prominent thing on the page. I’d then hide any additional resources from view by default, but offer the user a way to make them visible. To do this, I wrote some JavaScript that looped over each of the nested <table> elements in the results, saving the links and database names and other important information from the old markup. I then used JavaScript to completely replace all of the <table> elements with more semantic HTML lists. This included a small trigger that would toggle the additional resources into view, offering to either “Show” or “Hide” the additional resources.
We’ve been running this script since 2011, and the failure rate for users coming to the link resolver is below 10%, and those are mostly due to bad OpenURL links and not problems with the design of the system.4 The tech-nique worked so well that a few dozen other libraries started using the script, and then ProQuest redesigned the tool to include default templates that are based on our design.
After this project, I realized that JavaScript could be useful in libraries not just for its ability to enhance the interaction layer of a web page, but also for its ability to alter the semantic layer. Rather than simply enhancing an existing page, I was looking to re-create the page with a different structure, so that the presentation and interaction layers might work better to help our users accomplish their tasks. In short, I was doing more than adding scripts. I was building JavaScript applications that ran on top of existing systems. This book is a primer on how to plan for, design, and build these JavaScript applications for your vendor tools so that your users can be more successful and ultimately have a better experience using your library’s digital tools.
While I am a big advocate for using JavaScript for customizing vendor sites, there are some things you should know about before deciding that this is the right technique for you.
GETTING JAVASCRIPT INTO VENDOR TOOLSPerhaps the biggest challenge in modifying vendor tools with JavaScript is figuring out how to get the scripts onto the web pages. There are four
4148-900-2pass-02-r02.indd 13 07-04-2016 22:06:57

14 Customizing Vendor Systems for Better User Experiences
ways to do this. You’ll have to examine each of your systems carefully to see which method would be the most appropriate. I also maintain an online crowd-sourced matrix of vendors and tools, showing whether it is possible to add JavaScript along with tips for doing so at http://gvsu.edu/s/YT.
1. Custom JavaScript Field in the SettingsSome vendors encourage libraries to modify their tools with JavaScript and go so far as to make it easy to do by offering a field in the settings for selecting a customization script. While some vendors offer a dedicated “script URL” field, more often than not you’ll find a vendor offering to let you enter HTML for custom JavaScript, CSS, or even some HTML markup.
If offered by your vendor, this is usually the best option, since the scripts will be set up to load at the right time so as to take advantage of all the other JavaScript libraries and functions that come with the vendor system. Setup is as simple as selecting a file from your web server and entering the path, or adding a <script> element to the “Custom Header” or “Custom Footer.”
These systems include:
• ProQuest’s Summon 2.0 and 360Link 2.0• Several of Springshare’s 2.0 products, including LibGuides• ReadingHouse’s Select Reads
2. Add <script> Elements in the HTML TemplateThis is the most common way of adding JavaScript to a vendor tool. Since many vendors give libraries the option to “brand” the vendor tool to match the institution’s colors, there is often a way to add custom HTML to a tool. Since JavaScript is normally loaded through the HTML <script> ele-ment, we can simply add a <script> element pointing to the JavaScript file we’d like to load, for instance:
<script src="//mylibrary.org/js/wickedscript.js"> </script>
Adding this line into your HTML template will tell the browser to load and execute the wickedscript.js script on at the URL in the src attribute. You won’t see this as a separate field in your vendor’s customization settings, so you’ll just have to add it to the HTML template yourself.
When choosing where to load your custom scripts, there are a few consid-erations you’ll need to keep in mind. JavaScript is executed when it is loaded, so if your script relies on functions or libraries loaded in a different JavaScript file, you’ll need to load your own scripts after the scripts they depend on load. JavaScript is also blocking, which means that browsers will stop loading other assets while they load your JavaScript file. For this reason, it’s good practice
4148-900-2pass-02-r02.indd 14 07-04-2016 22:06:57

JavaScript and Vendor Tools 15
to load your JavaScript files near the closing </body> element, so that the HTML and CSS can all load without interference.
However, most modern browsers now support the async and defer attributes for the <script> element, allowing scripts to be loaded with-out blocking other page assets from loading. The async attribute tells the browser to load the JavaScript file asynchronously, executing it when it is ready but continuing to load the rest of the page. The defer attribute tells the browser to delay executing the script until the page has loaded fully. These attributes allow scripts to be loaded in the <head> without blocking the rendering of the page. They might be a good fit for your project if you can add custom scripts only to the <head>.5
Vendor tools that work best with template script loading include:
• Most OPACs• OCLC’s ILLiad interlibrary loan software
3. Use a Text FieldIf your vendor doesn’t allow you to add a custom script or modify the HTML template, you might have to get creative. However, sometimes vendors will allow you to customize text on the page, and often these text fields do not strip out HTML, in case you want to add some formatting to your text. For-tunately, you can often use these fields to add a <script> element to load your customization scripts.
I should note that this is a method of last resort. The first time I ran into this method was when I had written a few scripts to modify the discovery system of Serials Solutions, Summon 1.0, but couldn’t figure out how to load them since the template wasn’t customizable. Fortunately, Dave Pattern of the University of Huddersfield tried inserting a <script> element into the “Custom Link Text” field and found that the script was loaded by the discovery layer (Pattern 2012). Dave and I each went on to develop many customizations for Summon 1.0, including improved usage statistics and interface customizations. You can also add scripts to more modern tools like Alma by Ex Libris by adding <script> elements to the HTML parsing of the Custom Labels field, but this method hasn’t proven as reliable as the Summon text field.
4. Bookmarklets or ExtensionsSometimes it just isn’t possible to add JavaScript to a vendor tool. Here at GVSU, our digital preservation tool, Preservica, is built on a shared Word-Press server. Because the folks at Preservica couldn’t confirm that any cus-tom scripts added to our site wouldn’t affect other sites, they’ve locked down all of the shared Preservica instances so custom scripts cannot be added. Other common tools used by libraries such as SignUp event calendar from
4148-900-2pass-02-r02.indd 15 07-04-2016 22:06:57

16 Customizing Vendor Systems for Better User Experiences
Evanced Solutions also do not allow you to add any custom JavaScript to the page.
If we wanted to make some customizations, we could still create a script and then offer a bookmarklet or extension to our users to load the customi-zations. The downside of this is that it requires our users to take an extra step before the customizations are loaded. For bookmarklets, that means every time a user visits a page, he or she has to click the bookmarklet. Extensions can be configured to modify a site when it is loaded, but the user still has to install and enable the browser extension. If the user jumps between browsers, they would have to install a different extension for each browser (and you would have to write and maintain multiple extensions). Nevertheless, if the customizations are worth having, this can be an option. We’ll explore book-marklets in Chapter 5.
MAINTENANCEIt is worth mentioning here that this technique requires some time to main-tain the scripts. Unlike writing your own system, writing a JavaScript mod-ification often relies on markup that is generated by the vendor tool. If the vendor upgrades the tool and changes any of the markup, even something as small as changing the classes or IDs associated with certain HTML elements, your scripts may break.
Other things can affect your modifications as well. ProQuest’s Summon 2.0 service changed the way that custom scripts have been loaded recently to better support library customizations of the AngularJS framework that Sum-mon is based on. This was a great thing, because it enabled libraries to make more sophisticated customizations to the discovery tool, but it had a side effect at GVSU. The modifications I’ve made are all made using a JavaScript library called jQuery. Since Summon changed the script loading to happen at the same time the Angular framework and the jQuery library were loaded, our scripts failed because they expected the jQuery library to already be loaded and available. Thankfully, we realized that there was a problem, and we were able to modify our code to wait about half a second before running, giving jQuery enough time to load before we attempted to use its functionality.
This has involved monitoring all of the systems we’ve modified and taking time to regularly update the scripts when they break. This can be as simple as regularly using the tool you’ve modified to make sure it’s working as expected. All modifications to vendor tools, no matter how minor, will require some maintenance.
NOTES1. Olia Lialina has written a fascinating examination of the early days of “web
design,” highlighting what she calls “Prof. Dr. Style.” The way that early academics
4148-900-2pass-02-r02.indd 16 07-04-2016 22:06:57

JavaScript and Vendor Tools 17
“designed” their web pages is a way to see back to the roots of the web, especially when it comes to design. You can read her essay at http://contemporary-home- computing.org/prof-dr-style.
2. One notable exception to the commercial separation of structure and presentation is library vendor tools. cf. Chapter 1, note 1.
3. A link resolver is a piece of software that sits between databases or databases and discovery systems and parses a link in the OpenURL format, which is a URL full of bibliographic information about the requested resource. The link resolver helps direct users to any one of thousands of subscription databases that may hold the full text of an article they are looking for based on the bibliographic information. You can learn more at Wikipedia at https://en.m.wikipedia.org/wiki/OpenURL.
4. You can see the full code for this script at https://github.com/gvsulib/360Link-Reset.5. Libraries should know that Internet Explorer (IE) 9 and below do not support async and have only partial support for defer, however, so you should use them with caution if you are supporting older versions of IE. You can always check for support of this function by checking http://caniuse.com/#feat=script-async and http://caniuse.com/#feat=script-defer.
REFERENCESGustafson, A. (2008). Understanding Progressive Enhancement. A List Apart: For
People Who Make Websites, 269. Retrieved from http://alistapart.com/article/understandingprogressiveenhancement.
Lialina, O. (2010). Prof. Dr. Style: Top 10 Web Design Styles of 1993 (Vernacular Web 3). Retrieved from http://contemporary-home-computing.org/prof-dr-style.
Pattern, D. (2012). Hacking Summon for Fun and Profit, Part 1. [Web log post]. Retrieved from http://www.daveyp.com/2012/05/05/hacking-summon-for-fun- and-profit-part-1.
4148-900-2pass-02-r02.indd 17 07-04-2016 22:06:57

4148-900-2pass-02-r02.indd 18 07-04-2016 22:06:57

Chapter 3
Working with Developer Tools
If you have experience designing for the web or writing JavaScript, you are probably familiar with the Developer Tools, a suite of tools that allow you to look under the hood of a website to see all of the parts that make it function the way it does. (In WebKit browsers, like Safari, it’s known as the “Web Inspector.”) If you’ve never heard of Developer Tools, that’s okay! I’m going to walk you through using them, because even if you never write a lick of JavaScript, Developer Tools are great for evaluating your library’s web tools. (Plus, they let you look at other people’s websites, too. It’s like getting to see how magicians do things.)
Developer Tools not only will enable us to poke around in the guts of our vendor tools, but will also allow us to test out sample JavaScript through the Web Console, a sort of command-line interface that gives you real-time feedback about the website as well as allows us to enter commands to modify the current web page.
In the following examples, I’m going to be using the Chrome’s DevTools (what Chrome calls Developer Tools). You don’t have to use Chrome, since most browsers come with Developer Tools.1 While Internet Explorer (IE) 9 and up have a passable set of Developer Tools, they are still not great. Press F12 to use them if you’re stuck with IE.
DevTools is available in Chrome in two ways:
1. Right-click (on Mac, Ctrl-click) on any web page and select “Inspect Element.”2. Using the Chrome menu: More Tools > Developer Tools.
When DevTools first opens up, you’ll see something that looks a lot like the Page’s “source” code, as seen in Figure 3.1. But DevTools isn’t just showing you the HTML that was written to make the web page. Rather, it’s showing you something called the DOM, or Document Object Model. The DOM is the current, live state of the web page after the HTML and CSS are loaded and JavaScript is executed. The difference here for our purposes is that the Page
4148-900-2pass-03-r02.indd 19 07-04-2016 22:07:01

20 Customizing Vendor Systems for Better User Experiences
Source never changes, even when JavaScript modifies some wording or markup. The DOM is constantly changing, reacting to JavaScript and user interactions.
THE ELEMENTS BROWSERThe Elements browser is where you can see the DOM and browse through all of the HTML and CSS that make the site work. We’ll get more in depth with these parts of DevTools as the book progresses, but in the meantime, I want you to get a bit more of an overview of how the Elements browser fits into the workflow for modifying vendor tools.
The Elements browser is the default view for your Developer Tools. No matter which browser you use, opening up Developer Tools will always open the Elements browser first. This is where the DOM is displayed, updat-ing in real time along with the page, according to scripts running or user interactions.
THE DOM TREEThe Elements browser provides a visual structure of the DOM tree—the structure of all of the nodes that make up the existing page. Since the DOM tree represents the current state of the page, it’s a better place than the Page Source to see the HTML structure of a web page. Not only does the DOM change from JavaScript targeting elements on the page, but the browser also adapts to incorrect markup, meaning that a page with a few missing
Figure 3.1 The Developer Tools opens a new window on your web pages.
4148-900-2pass-03-r02.indd 20 07-04-2016 22:07:01

Working with Developer Tools 21
closing elements, like </div>, might have a different DOM than Page Source simply because the browser changes the page structure to correct the invalid markup. This can be useful if your page isn’t displaying the way you expected, since the DOM tree can help you see where the browser is correct-ing mistakes and altering the layout you had intended.
When working with vendor tools, you will often find yourself wanting to change the text of an element, or move or remove an element from the DOM. To correctly target the proper element, you can use the Elements browser to look over the DOM tree and find the element in question. As you browse, you will encounter some DOM nodes that are collapsed, with a “▶” symbol next to them. Clicking on the “▶” symbol will expand the nodes, showing more nodes inside. The DOM tree will show you whether the ele-ment has any attributes you might target with your script, such as an ID or a particular class.
While in this book our goal is to write JavaScript to make changes to a page, often we can test out preliminary ideas right in the Elements browser, since it allows us to edit any element or attribute right in the DOM tree. This can be as simple as adding a class to an element so that different CSS styles are applied, rewriting the text of the element to see how a different message might look, or moving the element to a different spot on the page.
To edit an element, you can double-click on the element name, and it will be editable. This is useful for changing headings, for instance, so you can try changing an <h2> to an <h3>. You can also edit attribute values (like classes or IDs) by double-clicking on the attribute value, or you can right-click on the element to select either Edit or Add attribute.
If you’d prefer to edit an element or a section of the page in HTML, you can right-click on the parent element and select “Edit as HTML.” This can be useful especially if you want to paste in some other HTML you’ve written.
You can also edit the page by removing elements entirely, either by selecting the element and pressing Delete, or by right-clicking and selecting “Delete element.” Or you might want to move an element from the top of the page to the bottom, to see how things will look. In most Developer Tools, you can simply select the element and drag it to where you want it to be. If that doesn’t work, you can try cutting and pasting. If you realize you’ve made a mistake and deleted something you wish you’d kept or if you’ve made too many changes, you can always refresh the page, and it will go back to the way it was. Editing in the Elements browser is temporary, but it allows us to try things much more easily than if we had to start from scratch and write a lot of HTML or JavaScript.
Applied StylesThe Elements browser isn’t just about the HTML elements, however. Figure 3.2 shows the right side pane of the Elements browser, where the CSS
4148-900-2pass-03-r02.indd 21 07-04-2016 22:07:01
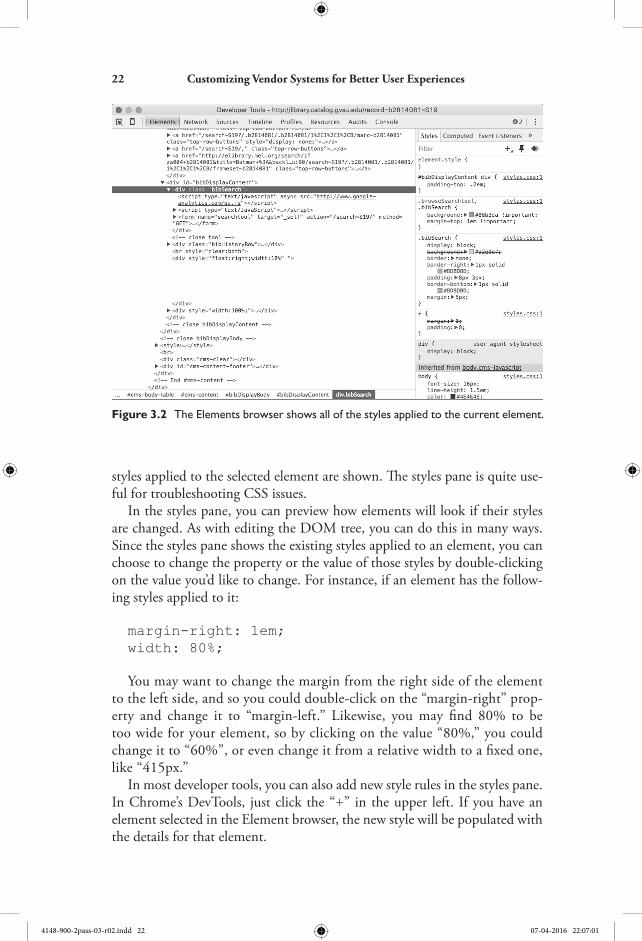
22 Customizing Vendor Systems for Better User Experiences
styles applied to the selected element are shown. The styles pane is quite use-ful for troubleshooting CSS issues.
In the styles pane, you can preview how elements will look if their styles are changed. As with editing the DOM tree, you can do this in many ways. Since the styles pane shows the existing styles applied to an element, you can choose to change the property or the value of those styles by double-clicking on the value you’d like to change. For instance, if an element has the follow-ing styles applied to it:
margin-right: 1em;
width: 80%;
You may want to change the margin from the right side of the element to the left side, and so you could double-click on the “margin-right” prop-erty and change it to “margin-left.” Likewise, you may find 80% to be too wide for your element, so by clicking on the value “80%,” you could change it to “60%”, or even change it from a relative width to a fixed one, like “415px.”
In most developer tools, you can also add new style rules in the styles pane. In Chrome’s DevTools, just click the “+” in the upper left. If you have an element selected in the Element browser, the new style will be populated with the details for that element.
Figure 3.2 The Elements browser shows all of the styles applied to the current element.
4148-900-2pass-03-r02.indd 22 07-04-2016 22:07:01

Working with Developer Tools 23
THE CONSOLEYou’ll see several other tabs across the top of the DevTools window, the last of which is “console.” The console in DevTools is super powerful and allows you to do a lot, including:
1. See errors and problems with your site. (Or other programmed feedback.)2. Interact with the page, using console commands and JavaScript.
A full treatment of the power of the console is beyond the scope of this chapter. Fortunately, most of what we need to do to modify vendor tools centers on these two functions.
NOTIFICATIONS, ERRORS, AND DEBUGGINGFirst, the console will report any errors or notifications resulting from run-ning the JavaScript on the page. Errors will be displayed in red, with details as to what kind of error was encountered, as well as details about the file and line number of the code that caused the error.
The console will also show you notifications, which are like warnings rather than errors. While errors will stop the rest of a JavaScript file from executing, notifications will appear when the code uses deprecated methods or functions. While most of the time you won’t have to worry about the browser showing you notifications, browsers make it easy for developers to take advantage of this functionality so we can have real-time feedback on what our scripts are doing.
If you’re near a computer, open up http://gvsu.edu/s/Zg in your browser. You should see a catalog record for Batman: The Dark Knight Returns in GVSU’s OPAC. Now open up DevTools and click on the console tab. You should see several messages listed here, the first of which is an error, high-lighted in red. (This is because the vendor is trying to use a function, called initSort(), before they have actually defined it.) The following messages were all added by me as part of the script that modifies this page.
First, I log the values of a few variables defined from the text on the page, including the availability label (either AVAILABLE or DUE), whether the item is in the stacks or in our ASRS crane, and the URL of the request but-ton. Then I’m testing for the occurrence of several words in various places on the page to see whether the book is noncirculating. (We’ll learn more about the JavaScript method indexOf() in a later chapter.) If the key-words are not found, then the console will show “-1.” Finally I output a few messages letting me know that certain functions are running. Figure 3.3 shows how it looked when I wrote this chapter. (Remember: always plan for maintenance!)
4148-900-2pass-03-r02.indd 23 07-04-2016 22:07:01

24 Customizing Vendor Systems for Better User Experiences
Each of these describes the function that is running and then shows me the file name where the console.log() function was called (catalog.js in all of these cases), as well as the line number of the function. (If you’d like, you can see exactly which line of code made some of this output on GitHub: http://gvsu.edu/s/00T.)
278. console.log('This item circulates: Adding
request button');
This helps me when I’m writing JavaScript, because I can have my scripts output values and messages at different stages, so I know how things are per-forming. (Don’t worry if the previous code doesn’t make sense to you—we’ll go over how to write JavaScript and jQuery code later in the book.)
INTERACTING WITH A WEB PAGESeeing errors and warnings is one thing, but the console also enables us to interact with the page in many ways, and this is how we’ll be using the con-sole for most of this book. To show you how it works, I think it would be best for you to do some exercises as we move through this chapter. If you’re near a computer, follow along.
I’d like you to open up http://mreidsma.github.com/vendor_tools in your browser and then open DevTools. (If you aren’t using Chrome, load a web page and right-click and select “Inspect Element.” If you’re using IE, press F12.)
Once your DevTools window opens up, click on the “Console” link. You should now be looking at a console that looks a bit like the one you saw for my catalog page, except there probably aren’t any errors or messages waiting for you.
Now, enter the following JavaScript into the console next to the chevron (>) and then hit enter. (You’ll notice that this code is in a handy block for
Figure 3.3 The console shows messages from one of my scripts so I can make sure everything is working.
4148-900-2pass-03-r02.indd 24 07-04-2016 22:07:01

Working with Developer Tools 25
you right on the exercises web page so you can select and copy rather than type this out!)
var liList = document.getElementById("table-of-
contents").getElementsByTagName("li");
var liElements = liList.length;
alert('There are ' + liElements + ' exercises for
this book.');
What happened? Did you get a message that told you how many exercises are available on this site?
Congratulations! You may have just run your first bit of JavaScript! What the previous script does is look on the exercises site for this book for an ele-ment with the ID of table-of-contents using the JavaScript method getElementById() and then count the number of list elements (<li>) inside using the method getElementsByTagName(). Since each list element holds a link to one set of exercises that go along with this book, we can count the total number of exercises with this simple script. The final line calls the JavaScript alert() function to pop up a window telling you how many exercises were found.
Remember above when I mentioned the function console.log(), and how you can use it to write things to the console? Well, we might want to know how many exercises are available, but we certainly don’t want every visitor to our website to get an alert() window. In that case, we might replace the alert() in the last line with console.log(). Try running the code again with this in place of the last line:
console.log('There are ' + liElements +
' exercises for this book.');
What happened that time? Did you get a message in the console? Con-gratulations! You might have just set up your first bit of debugging code in JavaScript!
PUTTING IT ALL TOGETHERThis chapter was by no means an exhaustive introduction to the Developer Tools, but it should have given you a new way to look at web pages. You now know how to examine the DOM tree of any website, to explore the current styles applied to any element, and to use the console to read messages and even run some commands. As we work together through this book, we’ll con-tinue to use the Developer Tools, refining what we’ve covered here and going more in depth with new techniques and tools for troubleshooting and testing our vendor tool modifications.
4148-900-2pass-03-r02.indd 25 07-04-2016 22:07:01

26 Customizing Vendor Systems for Better User Experiences
NOTE1. There are a lot of in-depth resources on using the developer tools. Here are some
articles that go in depth depending on your browser of choice:• Bowler, C. (2013). The Basics of Safari’s Web Inspector. http://chrisbowler
.com/journal/web-inspector. The definitive guide to using the Web Inspector in the Safari browser.
• Google. (2014). Chrome DevTools. https://developers.google.com/chrome- developer-tools/. The official documentation from Google on using the Web Inspector in Chrome.
• Mozilla. (2014). Page Inspector. https://developer.mozilla.org/en-US/docs/Tools/Page_Inspector. The official documentation from Mozilla on using the Web Inspector in Firefox.
4148-900-2pass-03-r02.indd 26 07-04-2016 22:07:01

Chapter 4
JavaScript Basics
Like all languages, JavaScript has rules that regulate how it can be used. Gram-matically incorrect statements don’t necessarily impede our understanding of a spoken language, or misspellings of a written language. If we are fluent in a language, we can understand speakers with different accents or cadences without difficulty. JavaScript, however, is not as forgiving as we are in our chosen spoken and written languages. It expects rigid adherence to the syntax rules and will often stop executing scripts altogether if it finds a mistake or typo along the way.
In Chapter 3, we looked at a few snippets of JavaScript code for counting the number of exercises on the supplementary exercises site for this book. Here it is again:
var liList = document.getElementById("table-of- contents").getElementsByTagName("li");
var liElements = liList.length;alert('There are ' + liElements + ' exercises for this book.');
Each line in this code is called a statement. Statements are instructions we write to tell JavaScript what to do and are executed in the order that they are written, top to bottom. You’ll also notice that each of the statements ends with a semicolon. JavaScript statements always end in a semicolon. Some lines in JavaScript do not end in a semicolon, however, which we’ll see when we get to the section on functions later in this chapter.
Some languages are very picky about white space, but JavaScript is not. You can use as much or as little white space as you like, and giving space between statements and functions will make your code more readable. Writ-ing readable code will help you or someone else trace down problems in the future. It is also good practice to add comments to your code. Comments are ignored when JavaScript is run, but they are useful for people who look the code over so that they can understand how it works. You can create a
4148-900-2pass-04-r02.indd 27 07-04-2016 22:07:05

28 Customizing Vendor Systems for Better User Experiences
comment on a single line by starting it with a double forward slash, //, or wrap a multiline comment in a forward slash–asterisk combination, like this:
/* This is a multi line comment Written by me*/
DATA TYPESIn Chapter 3, we looked at variables in JavaScript, which are containers that allow you to store other data in them and retrieve it later. In our example, we stored a DOM element in a variable, allowing us to count the number of list elements on the page.
In these statements we have two variables, liList, which contains the DOM elements inside of the ID table-of-contents, and liElements, which is the value of the JavaScript length property of the liList variable. Although we didn’t talk about it at the time, these two variables contain very different types of content. The first contains a group of HTML elements, while the second contains only numbers as a result of counting the number of HTML elements in the first variable.
JavaScript allows you to save several different types of data in variables. Unlike some other programming languages, however, JavaScript does not require you to declare which type of data you are planning to store in a var-iable when you create it. All you have to do is declare a variable, and then JavaScript will guess what kind of data you have based on the information you give it. This makes writing code easier and faster, but at times, JavaScript might think that a variable contains a different data type that you’d intended to store, which will cause an error.
However, JavaScript data types are dynamic, which means that you can change not only the data stored within a variable, but also the data type itself. That means that at one point in your script, you might have a variable that contains a string of characters, while later it might become a numeric variable.
Data types are important because they not only tell you what kind of vari-able you have, but also will affect what you can do with the data in your vari-able. Some JavaScript functions, for instance, will work only on certain types of variables. indexOf(), a method we’ll look at later in this chapter that allows you to search for a pattern of characters within a larger set of data, will not work on numbers. Other JavaScript operators change their function depending on the variable type. The + operator allows you to concatenate two strings of data, but when used with numbers, it serves as an addition operator, adding the two numbers together. Be careful with dynamic data types, since if the data type of your variable changes during your script, you may not be able to predict the behavior of JavaScript operators or functions.
4148-900-2pass-04-r02.indd 28 07-04-2016 22:07:05

JavaScript Basics 29
StringsOne of the most common data types in JavaScript is a string. Strings are a series of characters written within quotes. You can use single or double quotes for strings, but if you need to use quotes as part of your string, they cannot match the quotes that surround the variable. For instance, this string variable is valid:
var myString = 'He said "How are you?"';
The double quotes inside the string are not the same as the single quotes that define the boundaries of the string. If instead I chose to declare the vari-able like this, it would throw an error:
var myString = "He said "How are you?"";
Initially, JavaScript would assume that the string was contained within the first set of quotes, that is, “He said ”. But then the following characters wouldn’t fit in with the JavaScript syntax that would be expected outside of the variable declaration and would cause an error.
If you absolutely want to use double quotes in both cases, then you can use a backward slash \ to escape the double quotes in the string, letting JavaScript know that the quotes are actually part of the string and not the containing quotes:
var myString = "He said \"How are you?\"";
NumbersJavaScript also has a data type for numbers. Unlike other programming lan-guages, JavaScript has only a single data type, regardless of whether the num-ber has decimals or is a whole number. To declare a variable as a number, do not use any quotation marks, since quotes tell JavaScript to expect a string. These are JavaScript variables with the number data type:
var myNumber = 17;var myDecimal = 6.9780;
However, the following does not have a number data type; it is a string:
var myNumber = "17";
You can perform arithmetic in JavaScript using variables with the number data type. If you’re near your computer, open up your browser and Developer Tools (it doesn’t matter what web page you are on). If you go to the console and type 4 + 8 and then hit enter, the console will execute this and return a
4148-900-2pass-04-r02.indd 29 07-04-2016 22:07:05

30 Customizing Vendor Systems for Better User Experiences
numeric value (in this case, 12). You can also do math with numeric variables. Try running the following code in your console (you can copy and paste from the JavaScript Basics section of the exercises website if you like):
var myNumber = 17;var myDecimal = 6.9780;myNumber + myDecimal;
Since both of these variables are numbers, JavaScript will add them just as in our previous example. (You should get 23.978.) However, if you declare the variables as strings, you’ll find that even though the value of the variable is still numeric, the data type has changed and the + operator no longer adds the numbers up. Try this:
var myNumber = '17';var myDecimal = '6.9780';myNumber + myDecimal;
See what happened? You should have gotten 176.9780 for a result. Instead of adding the numbers, JavaScript concatenated the values as strings. If we look back at the sample code we used in Chapter 3, you’ll see that I used the + operator to add a few strings together in an alert() function to tell how many exercises were available in this book.
BooleansBoolean variables are neither numbers nor strings; they can only be true or false. This can be useful when you need to know if a certain condition is true before you execute a function. To declare a Boolean variable, we can simply declare a variable to be either true or false:
var myBoolean = true;
Like numbers, Booleans do not use quotation marks, since that would make the variable a string. We can also use the console to test out JavaScript’s handling of Booleans. Try typing this into the console and then hit enter:
50 > 20
JavaScript will return true, since the mathematical expression is correct. We can reverse it and try running this in the console:
20 > 50
This should return false.
4148-900-2pass-04-r02.indd 30 07-04-2016 22:07:05

JavaScript Basics 31
We can use the JavaScript function Boolean() to test the Boolean value of anything. In general, everything that has a “real” value will return true, so most JavaScript strings and number variables will return true (number vari-ables with the value of zero and empty strings will return false). This can be useful if we want to test whether a string has a value or not. For instance, try this code in the console:
var myString = '';Boolean(myString);
Even though the variable has been created, it doesn’t have a value and so the Boolean() function returns false. However, this example returns true:
var myString = 'This is my string variable';Boolean(myString);
Undefined and null variables will also return false. We’ll explore Boolean variables more later in this chapter when we get to conditional statements.
ArraysArrays are collections of values that are grouped together under a single Java-Script variable. They can be useful for storing groups of values that are similar, although you can have different data types in the same array. To create a new array, you can either write it as a literal with square brackets, separating each item by a comma, or use the JavaScript new keyword:
var myArray = ["Books", "Articles", "Databases", 56];var myArray = new Array("Books", "Articles", "Databases", 56);
You can access the values stored in the array by using the value’s index num-ber. Since JavaScript begins counting with 0 rather than 1, the first item in an array is index 0, the second item index 1, and so on. To access the value for the second item in the earlier array, I could use myArray[1]. You can try run-ning the following code in your console to see how this works. What happens when you change the index number in the console.log() function?
var myArray = ["Books", "Articles", "Databases", 56];console.log(myArray[2]);
ObjectsObjects are like arrays in that they are containers for many values, but an object contains named values. An object contains named properties for each
4148-900-2pass-04-r02.indd 31 07-04-2016 22:07:05

32 Customizing Vendor Systems for Better User Experiences
value, rather than relying on a numeric index like arrays. You can create an object with a literal using curly braces:
var myObject = {color: "red", weight: 120, name: "Bertha", age: 3} ;
Like arrays, we can now refer to the named values of our arrays by using the name of the property, rather than a numeric index. I can refer to myObject.name or myObject.age. Try running the following code in the console and experiment with changing the object’s property in the console.log() function.
var myObject = {color: "red", weight: 120, name: "Bertha", age: 3} ;
console.log(myObject.weight);
Objects and arrays are very useful when you want to store a lot of similar val-ues without having to name a bunch of variables myValue1, myValue2, myValue3, and so on.
OPERATORSJavaScript uses a number of operators that allow you to assign or compare values of variables.
Arithmetic OperatorsWe’ve already looked at the addition operator, the +, when used with Java Script number variables. But JavaScript also allows for other mathematical operators:
• - for subtraction• * for multiplication• / for division
In addition, there are other numeric operators that can be useful. For instance, ++ is used to increment a JavaScript number variable by one, and -- is used to decrement a number variable by one. These can come in handy when running function over a large set of data, like we will do with loops in Chapter 6. If you need to keep track of how many times the loop has run, you can set a variable to increment each time the loop runs, like this:
for(i = 0; i < 10; i++) { // Do something}
Here the for() loop first sets a variable called i to the numeric value of 0. It then runs the statements inside of the loop as long as the second statement
4148-900-2pass-04-r02.indd 32 07-04-2016 22:07:05

JavaScript Basics 33
is true. As long as i continues to be less than 10, the loop will run. Finally, the last statement increments the value of i by one each time the loop runs. Instead of writing i = i + 1, we can just write i++.
Assignment OperatorsWe’ve also seen at least one operator for assigning a value to a JavaScript var-iable: the =. If we want to set the value of the variable myVariable to the phrase “Seashells by the sea shore,” we can use the = to do that:
var myVariable = "Seashells by the sea shore";
One useful assignment operator that we will also use is the += variable. This operator assigns the value of a variable to whatever the existing value is plus the new value. In the case of numeric variables, this will be the same as using the addition operator. But in the case of strings, this will concatenate the strings for you. For instance:
// Numeric variablesvar myVariable = 5;myVariable += 15; // Returns 20
// String variablesvar myVariable = "Today is ";myVariable += "Sunday"; // Returns "Today is Sunday"
Comparison OperatorsComparison operators are used to compare two values. These are useful when you need to compare two variables, or a variable to see if it has a value you’d expect, or whether it doesn’t have the value you expect it to have. These are the most common comparison operators:
• == values are equal to each other• === values are equal and variables are of the same type• != values are not equal• < first value less than the second• > first value greater than the second• <= first value is less than or equal to the second• >= first value is greater than or equal to the second
Later in this chapter, we’ll talk about conditionals, which allow us to run certain statements or functions only if certain conditions are met. We can test for those conditions using the comparison operators, like this:
var myVariable = 5;if(myVariable > 2) { // Do something}
4148-900-2pass-04-r02.indd 33 07-04-2016 22:07:05

34 Customizing Vendor Systems for Better User Experiences
METHODS AND PROPERTIESJavaScript includes a number of built-in methods that help you work with the contents of your variables. Some methods work with only one or two data types, so it’s good to know what kind of data type your variables are before you start planning to use methods. A full treatment of JavaScript methods is far beyond the scope of this chapter, but I will be using several string methods regularly in the examples that I’d like to introduce you to. In addition, the length property can be useful for both determining the length of strings and examining the number of values in an array.
indexOf() MethodWhile the JavaScript comparison operators will allow you to compare two strings to see if they are either identical or different, they won’t let you see if a variable contains a certain character or string. For instance, if you want to know whether or not a book is checked out from looking at the availability table in your OPAC, you might not be able to use the comparison operator to find an exact match of a string like “Checked Out” or “Due.” In the case of GVSU, the availability table tells us the item is “Due,” but then also gives the due date for the item. Because we’d want to ignore all parts of the avail-ability table string and focus on just the “Due” aspect, we need to use the indexOf() method for strings to see if the substring “Due” is present inside of the larger availability table string.
The indexOf() method will return a numeral indicating the starting position of the substring if it finds the string. It will return -1 if the substring isn’t found.
var availability = 'Due 8/14/2016';console.log(availability.indexOf('8');// Returns 4, since the substring begins with the fifth character.
split() MethodOften when working with vendor tools, you’ll want to use part of a string that the vendor has added to an element. In the last example, instead of finding the “Due” substring, we might want to just get the due date and use it else-where. We can use the split() method to break up the string into an array whenever a specific character or characters occur. For instance, to break the availability message above up at every space, we’d use:
var availability = 'Due 8/14/2016';var parts = availability.split(" ");console.log(parts[1]); // Returns 8/14/2016
4148-900-2pass-04-r02.indd 34 07-04-2016 22:07:05

JavaScript Basics 35
Since there is only one space in this string, the array has just two parts:
parts = [[0] => 'Due',[1] => '8/14/2016'
]
Now we can use this due date in our code anywhere we like by referring to the variable part[1]. We could also split the array at the forward slash ('/'), where we’d end up with a different array, using var parts = availability.spit('/');
parts = [[0] => 'Due 8',[1] => '14',[2] => '2016'
]
This array has more values because there were more forward slashes in the string than spaces.
length PropertySometimes we need to know whether a certain value is on a web page, how many times a value occurs, or even how many characters a string has. That’s where the length property comes in handy. For strings, length tells how many characters a string has, like this:
var availability = 'Due 8/14/2016';console.log(availability.length);// Returns 13, the number of characters in the string
But strings are not the only variable type to have the length property. When working with arrays, you can find the number of items in an array using the length property:
var myArray = ["Books", "Articles", "Databases", 56];console.log(myArray.length); // Returns 4
This can be extremely useful when we are looking for certain strings or ele-ments in the DOM, especially when paired with conditionals (as well see later in this chapter).
innerHTML PropertyThe innerHTML property allows us to access the HTML content of an element. This can be useful both for saving the contents of an element to a variable and for replacing the contents of an element.
4148-900-2pass-04-r02.indd 35 07-04-2016 22:07:05

36 Customizing Vendor Systems for Better User Experiences
While there is an innerText property of DOM nodes, it is not standard and is only supported in some browsers.1 You can use the textContent property to retrieve the plain text content of an element, since that is sup-ported in all browsers.
getElementById() MethodOftentimes, we need to find a specific element in the DOM. Since the ID attribute can be used only once on a page, we can use the native JavaScript method getElementById() to target that specific DOM element. Let’s say we have the following markup:
<div id="container"><div id="content"><p>This is some awesome content!</p>
</div><p>And here is some more!</p>
</div>
If we want to get the contents of just the inner <div> with the ID of content, then we can use the following statement:
var myContent = document.getElementById('content') .innerHTML;
This will return <p>This is some awesome content!</p>. (If we just want the text, we can replace the innerHTML with textContent.) However, if we want to get both of the paragraphs, we could use:
var myContent = document.getElementById('container') .innerHTML;
This will return all of the HTML inside of the <div> with the ID of container, including the <div id="content">. (Using textContent instead of innerHTML would return: “This is some awe-some content! And here is some more!”) We can also simply store the entire DOM element in a variable, like this:
var myContent = document.getElementById('container');
But it’s also possible to replace the HTML or text inside of an element that has an ID. Let’s say we wanted to change the text inside of the <div id= "content">. We might use the following statement:
document.getElementById('contents').innerHTML = '<p>This is some AMAZING content!</p>';
4148-900-2pass-04-r02.indd 36 07-04-2016 22:07:05

JavaScript Basics 37
querySelector() and querySelectorAll() MethodsUsing getElementById() is the fastest way to natively target an element in the DOM. However, when working with vendor tools, we are not always able to make sure that the elements we need have an ID associated with them (or, in the case of some vendors, that IDs are unique to the page). Modern browsers support another function, querySelector(), that allows us to use CSS-style selectors to target much more than just IDs. We can find items by class or by their ancestors. Any CSS selector syntax is supported. For instance, using the markup from the last example, if we wanted to capture the paragraph element that was not inside of the <div id="content">, we could use the following statement:
var myVariable = document.querySelector('#container > p');
This would match only the paragraph outside the <div id="content">, since the CSS selector is asking for paragraph elements that are direct chil-dren of the <div id="container">. The paragraph inside of the <div id="content"> wouldn’t match, since it is a direct child of content.
The querySelector() function finds the first match in the DOM only. If you have multiple items that match your criteria (such as a number of list elements), then you can use querySelectorAll(), which will match all instances of the selectors in the DOM and create an array of matches. The downside of using querySelector() is that it is not supported in IE 8 and above.2 If, like many libraries, you are still seeing a lot of users on IE 8, you might want to avoid using querySelector() and instead look at a JavaScript library like jQuery to provide robust cross-browser support for CSS-style selectors. We’ll cover jQuery in more depth later in this book.
alert() and console.log() MethodsWe’ve already seen these two functions in action, used to show a message to us either as a browser alert window or in the console. The alert() function is useful when you want to let the user know something. If you as the devel-oper need to know something, then you should use the console.log() function. It will be invisible to users, and you can log as much information as you want.
It’s also very easy to accidentally make a script live with testing code in it, and if you use alert(), that can be very annoying! (I once had a vendor tool that would pop up an alert window every time anyone clicked on a page. The code was used in testing, but they forgot to remove it before they pushed it live to their paying customers! Had they used console.log(), no one would have noticed if they forgot to remove the function.)
One caveat with console.log() is that it isn’t supported fully by IE 8 and below, so we’ll likely need to create a conditional that checks for console
4148-900-2pass-04-r02.indd 37 07-04-2016 22:07:05

38 Customizing Vendor Systems for Better User Experiences
support before running the function, to prevent the browser from throwing an error and ignoring the rest of your JavaScript file:
if(typeof console === "undefined") {console.log = function(){};
};
This creates an empty function called console.log() when run in a browser that does not support console.log() natively. Of course, the console won’t display any messages in this case, but your code will run without the browser throwing an error whenever it encounters a console.log() function.
encodeURI() and encodeURIComponent() MethodsAt times you might need to pass values to another script on a server some-where by putting the value of a variable in a URL. The trouble is, URLs do not like certain characters, like spaces. Other characters, like slashes, have special meaning within a URL. Before we add any value into a URL, we need to encode it by converting all of the special characters into percent-value char-acters. While a URL won’t pass a space by itself in the URL, you can replace the space with %20, which is the percent-encoded value of the space.
In JavaScript, we can do this easily with the encodeURI() and encodeURIComponent() methods. To encode a variable to be passed in a URL, I’d use the encodeURLComponent() method to percent-escape all of the special characters in the string:
var myVariable = 'This is a forward slash: /';var path = 'http://mywebsite.com/?text=';console.log(encodeURIComponent(path + myVariable));
The output here in the console is a variable with an encoded string attached:
http%3A%2F%2Fmywebsite.com%2F%3Ftext%3DThis%20is%20a%20forward%20slash%3A%20%2F
While encodeURIComponent() will encode all of the special char-acters parsed in a URL, encodeURI() can be used on complete URLs, since it will parse only characters that might need some encoding, rather than all of the special characters for URLs. (encodeURI() won’t touch forward slashes or colons, for instance.) Here we might use:
var myVariable = 'This is a forward slash: /';var path = 'http://mywebsite.com/?text=';console.log(encodeURI(path + myVariable));
4148-900-2pass-04-r02.indd 38 07-04-2016 22:07:05

JavaScript Basics 39
Th console.log() returns the following line, which does not encode the forward slash or the colon at the end of the string:
http://mywebsite.com/?text=This%20is%20a%20forward %20slash:%20/
CONDITIONALSA conditional statement is like a test that we can use to see if certain condi-tions are met before executing some code. Conditionals are written in the form of “if this, then that,” and sometimes as “if this, then that, else another thing.” Conditionals can be Boolean values to see if an element exists on a page or if a variable is defined, or they can use comparative statements to see if two values are identical or different.
This conditional statement checks to see if an element with the ID of content exists on a page. The statement is checking to see if the getElementById() returns true, the Boolean value, which means that the item does exist. If it returns true, then the code inside of the first set of curly braces will execute. If it doesn’t exist, then the conditional will return false, and the code in the else statement will execute. You can try it yourself in the console. (Visit the exercises site and click “JavaScript Basics” to find the code ready for copying and pasting into your Developer Tools console.)
if(document.getElementById('comments')) {console.log('This page has a comments section.');
} else {console.log('I don’t see a comments section with an ID of comments');
}
You can try running this code on several different websites. You might get different responses depending on the page’s markup!
We might also try a conditional that compares two values before it decides to execute some code. This code checks the page for a title that matches “JavaScript Basics” before it executes the code in the curly braces. If the con-dition of the two values matching isn’t met, then nothing will happen. (Run this on the “JavaScript Basics” page if you want the code to run. Try it else-where to see what happens when the conditional returns false.)
if(document.title == 'JavaScript Basics') {document.body.style.backgroundColor = 'black';document.body.style.color = 'white';
}
4148-900-2pass-04-r02.indd 39 07-04-2016 22:07:05

40 Customizing Vendor Systems for Better User Experiences
If the comparative selector determines that the page title is identical to “JavaScript Basics,” then the script will change the background color of the page to black and the text to white. (You can refresh the page to get it back to normal.)
FUNCTIONSSometimes we want to link together several JavaScript methods and func-tions into some code and run it over and over. Thankfully, JavaScript allows us to create our own functions. Functions are like variables for JavaScript commands—we can type them once and then reuse them over and over in dif-ferent situations by just typing the name of the function. Like the native func-tions, named functions just take some sort of input and produce an output.
One of the most common things I type in JavaScript is the code to select an element by its ID:
document.getElementById(ID);
I might type that same bit of code a hundred times in a large JavaScript appli-cation, so I could save myself time by rewriting this as a function. Here’s what I might come up with:
function e(id) {document.getElementById(id);
}
What I’ve done here is created a function called e() that acts as a short-cut for the longer document.getElementById(). Now, instead of typing the longer version, I can type e() and pass the ID I want to the function. That means that the two versions of code shown here are equivalent in JavaScript:
// Method Onevar myVariable = document.getElementById('content');var myVariable2 = document.getElementById('content2');var myVariable3 = document.getElementById('content3');
// Method Twofunction e(id) {document.getElementById(id);
}var myVariable = e('content');var myVariable2 = e('content2');var myVariable3 = e('content3');
4148-900-2pass-04-r02.indd 40 07-04-2016 22:07:05
JavaScript Basics 41
Each time I need to declare document.getELementById() method, I can just use e() as a shortcut, and over a long JavaScript file, that can save a lot of typing. It also has the benefit of making your JavaScript files smaller, so your users won’t have to download as much code. And it makes maintenance easier. Instead of changing the code in three places, I could update the e() function in one place.
Variable ScopeIn JavaScript, variables have a particular scope that governs where they can be used. Any variable that is created outside of a function with a var statement is assigned a global scope, which means it can be used anywhere in the script, including inside of functions.3 However, a variable that is created inside of a function with the var keyword has a local scope, which means that the vari-able with that name is specific to the function, and the value will not transfer outside of that function.
Here is an example of a variable with global scope:
var myVariable = 'Another variable!';function myFunction() {console.log(myVariable);
}myFunction(); // returns 'Another variable!'
The variable has been defined outside of the scope of a function, and so its value transfers globally throughout our script. However, if we change our code to instead define our variable with local scope, we’ll find that the value of the variable is not available to outside of the function’s scope:
function myFunction() {var myVariable = 'Another variable!';
}myFunction();console.log(myVariable); // returns Uncaught ReferenceError: myVariable1 is not defined
If we need to access the value of a variable outside of a function, we can either declare it to have global scope or return the value of the variable from the function with the JavaScript return statement, like this:
function myFunction() {var myVariable = 'Another variable!';return myVariable;
}console.log(myFunction()); // returns 'Another variable!'
4148-900-2pass-04-r02.indd 41 07-04-2016 22:07:05

42 Customizing Vendor Systems for Better User Experiences
Now that we have the basics of JavaScript to work with, we’ll put together some small JavaScript bookmarklets that we can run right from our browser as a way to test all of our new methods and functions.
NOTES1. innerText was introduced by Microsoft into Internet Explorer, and WebKit
browsers tend to support it for compatibility reasons. Since the standard way to get the HTML content of an element is to use innerHTML, the naming convention alone makes innerText seem like the correct property of an ele-ment. However, the correct way to retrieve plain text is to use the textContent property. You should know that there are slight differences in the way that innerText and textContent handle white space, especially if you are scraping a lot of text off a page.
2. You can check the current level of support for querySelector() and query SelectorAll() at http://caniuse.com/#feat=queryselector.
3. You can also declare a variable anywhere without the var keyword, and it will be assigned a global scope. So this code would work fine:
function myFunction() {myVariable = 'Another variable!';
}myFunction();console.log(myVariable); // returns 'Another variable!'
4148-900-2pass-04-r02.indd 42 07-04-2016 22:07:05

Chapter 5
JavaScript Bookmarklets
In the first three chapters, we looked at some of the problems associated with modifying vendor tools and how JavaScript might be a way to make changes that improve the usability and experience of the library for our users. In Chapter 4, we started looking at the basics of JavaScript, how to construct a statement and a function, and how to use the variables we’d explored in Chapter 3. In this chapter, we’ll look at some simple modifications done to vendor tools in JavaScript, executed as “bookmarklets.” For some tools, these techniques will be our only hope of adding customizations or modifications, but they can also be useful as tools to test new modifications.
We’ll spend time looking at the structure of bookmarklets and how they work, and then examine a few case studies from the library world.
WHAT ARE BOOKMARKLETS?A bookmarklet is a browser bookmark that contains JavaScript rather than a traditional URL. When you click a bookmarklet, rather than opening another web page like a traditional bookmark, the bookmarklet loads Java-Script to enhance the current page. In previous chapters, I had you run some JavaScript on web pages by first opening Developer Tools, switching over to the console, and then pasting the code at the chevron. A bookmarklet works in a similar way, but instead of pasting code into the console, the browser executes it when you click on the bookmark.
There are a lot of bookmarklets available all around the web these days. Maybe you’ve heard of or used one of these?
• QuietTube: Lets you watch any YouTube video without the ads or comments on the page. Click it on a YouTube page. http://quietube.com.
• Instapaper: Works on any page to save text to read later. http://instapaper.com.• Huffduffer: Works on any page to save audio for later. http://huffduffer.com.• KickAss: Works on any page, lets you play Asteroids on any website. http://kick
assapp.com.
4148-900-2pass-05-r02.indd 43 07-04-2016 22:07:08

44 Customizing Vendor Systems for Better User Experiences
Each of these bookmarklets works in the same way. If you’ve ever looked at a Uniform Resource Locator (URL) in your browser, you may have noticed the http:// or https:// before the actual URL. Those letters are called a “URI Scheme,” and they tell the browser what kind of information will follow. (URI stands for Uniform Resource Identifier and the URL is one kind of URI.) The URI scheme for the web is “HyperText Transfer Protocol,” or HTTP (the “s” is for secure, in the case of encrypted web browsing). So, when a browser sees the http:// before something, it knows that what follows is a web address. Let’s try an experiment. If you’re near a web browser, open up a new browser window and type the following into the URL bar:
http://This is a URL
See how the browser tried to open a web page called “This is a URL,” even though that clearly wasn’t a proper URL? That’s because you told the browser to expect a URL when you typed http://. Let’s try one more. Type this:
mailto:Larry
What happened? Did your browser try to open a new e-mail to Larry? That’s because the mailto: URI tells the browser that it’s dealing with an e-mail address, even if the e-mail address isn’t valid. There are a lot of URI schemes besides http:// and mailto:, and that’s how bookmarklets work.1 Instead of telling the browser to expect a URL or an e-mail address, we tell it to expect some JavaScript with the javascript: URI.
Installing Bookmarklets in Your BrowserBookmarklets like the ones I shared earlier, and like those you’ll encounter on the exercises page for this chapter, can often be added to your browser by drag-ging the bookmarklet link from a web page into the bookmarks bar of your browser. However, this doesn’t work in older versions of Internet Explorer, and it doesn’t work when you’ve written your own bookmarklet code! But you can usually install a bookmarklet in a browser by following these steps:
1. Create a bookmark to any web page by selecting “Bookmark this page” from the browser’s “Bookmarks” menu. (Bookmarks are called “Favorites” in Internet Explorer.)
2. Open the Bookmarks manager and edit the bookmark you just created. Some-times this is called “Edit Bookmark,” but sometimes it is something unclear like “Properties.” You’re looking for a way to edit the name and URL of the bookmark.
3. Paste your JavaScript code into the URL field of the bookmark and name it some-thing you’ll remember.
4. Save it!
You should now have a bookmark saved in your browser that will execute your JavaScript code. Since there are many browsers out there with different
4148-900-2pass-05-r02.indd 44 07-04-2016 22:07:08

JavaScript Bookmarklets 45
settings (and those settings change all the time, whenever new versions are released), you might need to find more detailed instructions for installing a bookmarklet manually. A print book isn’t going to help you here, but there are guides on the web for installing bookmarklets in different browsers. I maintain one at the exercises site for this book under Bookmarklets if you need help.
Modifying Web Pages with BookmarkletsLet’s look at an example. Open up the exercises web page and click the “Bookmarklets” link. On occasion, I thought that this page needed a more colorful header than the simple blue and gray. Let’s make a bookmarklet that adds some color to this page. See the button that says “Rainbow Header?” Go ahead and click that link.
Now take a look at the header of the site. Is it rainbow colored? These changes could be made by editing the CSS for our page, but we might not always want the rainbow colors. And so, using JavaScript, we are able to change the styles of the page when the bookmarklet link is clicked. Let’s take a look at the code for this bookmarklet (I’ve added some line breaks to make it easier to read):
javascript:(function() {var headerDiv = document.getElementById ('page-header');
headerDiv.style.backgroundImage = 'url (http://matthew.reidsrow.com/courseware/vendortools/rainbow.png)';
headerDiv.style.backgroundRepeat='repeat';}) ();
First we see the javascript: URI, letting the browser know to expect JavaScript instead of another type of URI. Then we have a function decla-ration. When we looked at functions in Chapter 4, we created named func-tions, which allowed us to write the code once and run it over and over again with different inputs. But other times we don’t want to name our functions, so we instead use an anonymous function wrapped around our code. Anony-mous functions usually can’t be run more than once, but for bookmarklets, that’s not a problem. The real benefit is that using an anonymous function tells the browser to execute the code on the current page rather than opening a blank page to execute the script.
Do you see how our anonymous function has parentheses wrapped around it and an extra set at the end? This anonymous function is set up to run immediately when the browser encounters it, and these extra paren-theses are what execute the function. This kind of function is called an Immediately-Invoked Function Expression or IIFE. Normal functions have the pattern of functionName(), and IIFEs simply replace the function name with the details of the function wrapped in parentheses.
4148-900-2pass-05-r02.indd 45 07-04-2016 22:07:08

46 Customizing Vendor Systems for Better User Experiences
Inside the anonymous function, we have the JavaScript code that makes this work. First, I’m storing the location of the page header in a variable called headerDiv. The page header on the exercises page has an ID of page-header, so I can use the JavaScript method getElementById() to find it.
Next, we set a few style attributes on our page header. First, we set the CSS background-image property to be the rainbow image at the URL given. (You’ll notice that in CSS we write background-image, while in JavaScript we drop the dash and write the term all scrunched together, with the first letter of each word capitalized: backgroundImage. Writ-ing terms like this is called “camel case,” since the capitals appearing in the middle of a long term look like humps on a camel.) Since the image we’re using isn’t wide enough to fill the whole page header, I’ve also set the CSS background-repeat property (backgroundRepeat in camel case) to repeat, which will tile the image both vertically and horizontally.
If you’re sick of the rainbow header, you can refresh the page to get a fresh start. Since the code was executed in the DOM using JavaScript, we can get rid of it by reloading the page from the server. To get the rainbow header again, we’ll have to click the bookmarklet once the page reloads, just like in Chapter 3 when we looked at adding scripts to the console in the Developer Tools.
In fact, a bookmarklet is like a Developer Tools console shortcut in this way. You can try entering the earlier script into your console while inspecting the exercises web page. You’ll find exactly the same result as clicking the book-marklet, because both options allow you to temporarily execute JavaScript on a web page. But if you had never used the Developer Tools before Chapter 3 of this book, you’ll recognize that bookmarklets are easier to share with others than instructions for pasting code into the Developer Tools console.
Adding Elements with BookmarkletsModifying an existing element is one thing bookmarklets are good for, but we can run any JavaScript we’d like. We can add new elements to a page, remove elements, move things around, or change the wording of a phrase or the src attribute of an image. Bookmarklets allow us to unlock the power of Java-Script without actually adding <script> elements to a page’s markup. In the last example, we modified an existing element, but I’d like to experiment with adding a new element to a page.
On the example site’s “Bookmarklets” page, look for the button that says “Add Unicorn.” Go ahead and click it to see what happens. Did a sparkly unicorn appear on your screen? I hope so! Let’s take a look at the code for the bookmarklet to see how that worked (line breaks added for readability):
javascript:(function(){var unicorn = document.createElement('img');
4148-900-2pass-05-r02.indd 46 07-04-2016 22:07:08

JavaScript Bookmarklets 47
unicorn.src='http://matthew.reidsrow.com/courseware/vendortools/unicorn.gif';
unicorn.alt='Unicorn!';unicorn.style.position= fi edunicorn.style.left='0';unicorn.style.top='10%';document.body.appendChild(unicorn);
})();
Despite being a bit more code than the last time, this bookmarklet is quite simple. The first bit of JavaScript inside of our anonymous function creates a new <img> element stored in the variable “unicorn.” The rest of the lines set the various attributes of the image, from the source URL (src), the alt text, and finally, the CSS that sets the fixed position on the page. Finally, we append the new element to the <body> element of our web page using the appendChild() method, and the image appears in the DOM right before the closing </body> tag. If you open up your Developer Tools Ele-ments browser, you’ll see the <img> tag at the end of the DOM.
Because this script interacts with the DOM only by adding a new element to the <body> element (what is called the “parent” element), something every web page has, this script will work on most web pages.
Removing or Changing Content with BookmarkletsOften in modifying library vendor tools, we want to remove something that a vendor has added, or maybe move it to a different place on the page. Like the appendChild() method, JavaScript has a method for removing elements, called removeChild(). Like appendChild(), removeChild() must be called from the parent element, rather than on the element itself.
Let’s take a look at an example. On the exercise site’s Bookmarklets page, click the button that says “Remove Header.” What happened? Instead of turning into a rainbow like the first bookmarklet, the page header should have disappeared. Here is the bookmarklet code (line breaks added):
javascript:(function(){var header = document.getElementById('page- header');
document.body.removeChild(header);})();
Here we define the element we want to remove using getElementById() and store it in the variable “header.” Since #page-header is a child of the <body> element, we can target the parent element by simply using the DOM tree’s body section and then use the removeChild() method to remove the element we stored in the “header” variable.
4148-900-2pass-05-r02.indd 47 07-04-2016 22:07:08

48 Customizing Vendor Systems for Better User Experiences
However, maybe we didn’t want to simply remove the page header; maybe we wanted to put it below all of the other content, making it more of a footer than a header. We could do this in much the same way as removing the page header. Instead of calling removeChild() on the header, we could simply use the appendChild() method to append the contents of the “header” variable to a parent, in this case the <body> element:
javascript:(function(){var header = document.getElementById('page- header');
document.body.appendChild(header);})();
The DOM will not duplicate the header here, leaving one at the top and appending the other to the end of the <body> element. Rather, it takes the DOM element that is stored in the variable “header” and moves it to a new location with the appendChild() method. You can test this bookmarklet by clicking on the “Move Header” button.
WRITING BOOKMARKLETSBookmarklets are just simple script written in JavaScript, so writing them isn’t much different from writing JavaScript for your website.
The simplest kind of bookmarklet is one that has the script itself right in the bookmarklet, like the examples we looked at earlier. Let’s try to make one ourselves. Let’s take a look at the code we ran in Chapter 3 on the exercises website for this book. Here it is:
var liList = document.getElementById("table-of- contents").getElementsByTagName("li");
var liElements = liList.lengthalert( here are liElements e ercises for this book.');
Let’s turn that into a bookmarklet. Go ahead and open up your text editor.2 We first need to start our bookmarklet with the JavaScript URI: javascript: Now let’s add the syntax for an anonymous function:
a ascript:(function() { ) ()
Once you’ve got that, you can replace the in the function with the code for the bookmarklet. (Remember that you can visit the exercises site to copy and paste the code.) Make sure to remove any line breaks, so that everything is on the same line (it might wrap to the next line, and that’s okay. We just
4148-900-2pass-05-r02.indd 48 07-04-2016 22:07:08

JavaScript Bookmarklets 49
don’t want any carriage returns in the bookmarklet code.) You should have something like this:
javascript:(function(){var liList = document.getElementById("table-of-contents") .getElementsByTagName("li"); var liElements = liList.length;alert('There are ' + liElements e ercises for this boo . ) )()
Once you’ve finished your bookmarklet, you need to install it into your browser. (See the section on installing bookmarklets if you run into trouble.) Save the bookmark to your bookmarks bar and then load the main page of the exercises website to test it out!
Did it work? You should have the same alert you saw in from the exercise in Chapter 3. If it didn’t, check your console. You may have an error in your script, most likely from a typo. Carefully check over the code in the book-marklet’s URL field and make sure that every semicolon and parenthesis is in place.
This can be really useful for testing small bits of code, but you’ll have to update the bookmarklet in the browser each time you make a change. If you’ll be making a lot of changes to a script, or your script is too complex to squeeze into the bookmarklet, embedding all the code into the bookmarklet isn’t the best option.
CREATING COMPLEX BOOKMARKLETSSometimes the script you’d like to load is a little too complex to fit inside the JavaScript URI (there is a character limit of around 2,000 characters in the URI field, although this varies with browser). In that case, you can load an external script using the bookmarklet. The way this works is almost just like the unicorn bookmarklet we looked at earlier. But instead of creating an <img> element, we’ll create a <script> element and set the src attrib-ute to be the location of our script.
First, let’s create a new <script> element. We’ll tell the current docu-ment to make a new <script> in a variable using the createElement() method:
var newScript = document.createElement('script');
Now we need to set the src attribute to be a URL of a script. I’ve added a script to my server that you can use, so let’s set the src URL to http://matthew .reidsrow.com/courseware/vendortools/js/bookmarklet.js, like this:
newScript.src = '//mreidsma.github.io/vendor_tools/js/bookmarklet.js';
4148-900-2pass-05-r02.indd 49 07-04-2016 22:07:09

50 Customizing Vendor Systems for Better User Experiences
JavaScript allows us to set the attributes of HTML elements stored in var-iables, and here we’re setting the src property of the newScript variable. In the previous unicorn bookmarklet, we also set the alt text and defined some inline CSS rules using the style property.
All that is left in our bookmarklet is to add the script to the document. We can do that by using the appendChild() method on the body of the document to add the script right before the closing </body> tag.
document.body.appendChild(newScript);
That’s it! Now we’ll convert this code into a bookmarklet by wrapping it in an anonymous function and prefixing the whole thing with the JavaScript URI. In the end, we have this new bookmarklet:
javascript:(function(){var newScript = document.createElement('script');newScript .src = '//mreidsma.github.io/vendor_ tools/js/bookmarklet.js';document.body .appendChild(newScript);})();
You can add this bookmarklet to your browser following the instructions on the exercises web page. You can click it on most pages, and it should look familiar!
We can further streamline the bookmarklet by looking at the code care-fully. Notice how the first statement sets the variable newScript to be a DOM element, and then the second statement sets the src attribute of that variable? Well, JavaScript allows us to chain certain statements, and in this case, we can consolidate these two statements into one statement:
document.createElement('script').src = '//mreidsma.github.io/vendor_tools/js/bookmarklet.js';
Now in just one statement, I’ve created a new <script> element and set the src attribute.
The benefit of this type of bookmarklet is that you have to create the book-marklet only once, since all of the changes happen in the script, which is hosted somewhere else. I use this method a lot for sharing code with my colleagues. I can help them install a bookmarklet once, then have them test out the changes on a website, and then make iterative changes once I get feedback. All I have to do is to update the script on the server. Meanwhile, my colleagues don’t have to update the bookmarklet at all, since it will pull in the updated script every time.
4148-900-2pass-05-r02.indd 50 07-04-2016 22:07:09

JavaScript Bookmarklets 51
SOME LIBRARY EXAMPLESAdding rainbow and unicorns is fun, but hardly the kind of thing you’ll be using bookmarklets for on your library’s vendor tools. But libraries are using bookmarklets in many ways. You can choose to use bookmarklets to:
• Test new code: Speeds up implementation since you don’t have to open the con-sole every time, easy to share tests with nontechnical colleagues, users.
• Search or save: A library might create a bookmarklet that lets users search the catalog for books or ISBNs listed on a website, or save a book from Amazon to a reading list.
• Allow users to opt-in to changes: Allow users to install bookmarklets that im-prove a system or service—this is a lot of work for users, since they must install the bookmarklet and remember to run it. This should be only a last resort when you can’t make changes to the vendor tool.
ProQuest’s 360Link 2.0 BookmarkletProbably the simplest bookmarklet I’ve seen in the library world is one from ProQuest, which allows libraries that subscribe to the 360 Link link resolver to test out the newly redesigned 360 Link 2.0 without going live. The premise behind the bookmarklet is simple: on any existing 360 Link page, click the bookmarklet, and the page will reload with the new interface in place, allow-ing libraries to test out the redesigned tool on any number of different results. The code for the bookmarklet is simple:
javascript:location.href=location+'&newUI= 1clickoff';
Here we begin with our JavaScript URI, and we’re reloading the page, so there is no need to worry about using an anonymous function. Instead, we set the location’s URL (called an href in HTML lingo) to the existing location plus a new parameter: newUI, which tells the link resolver to show the new interface. 360 Link 2.0 has several options for how to display the results, and so the value of newUI determines how the link resolver will behave.
You can see an animation of the ProQuest bookmarklet in action on the exercises web page for Bookmarklets. It’s a simple, easy way to have your col-leagues test something new while not affecting users.
The University of Michigan’s Proxy BookmarkletAnother popular bookmarklet in the academic library world is the “proxy” bookmarklet, which allows a library user who stumbles upon a licensed resource in the open web to reload the current page through the institution’s proxy server. This way researchers who discover a promising article through a journal or vendor website can click a bookmarklet to see whether their library
4148-900-2pass-05-r02.indd 51 07-04-2016 22:07:09

52 Customizing Vendor Systems for Better User Experiences
subscribes to the resource rather than having to head to the library website to search for the title or author of the piece.
Many academic libraries offer proxy bookmarklets to their users, but most cite the University of Michigan as the first academic library to popularize the proxy bookmarklet.3 The bookmarklet itself isn’t much different from ProQuest’s 360 Link 2.0 bookmarklet, in that it merely reloads the current page with some different parameter set. Here’s the code for Michigan’s proxy bookmarklet:
a ascript: oid( indo .location= http: pro y .lib.umich.edu/login?url='+location.href)
Here the University of Michigan libraries are using JavaScript to reload the page with a proxy prefix, which is similar to what ProQuest did with its book-marklet. However, you can see that they’ve used different methods to obtain the URL information and to load the page, but both methods work. Like ProQuest, Michigan doesn’t use an anonymous function in the way we’ve seen, since it is reloading the page anyway. However, it uses the JavaScript void() operator, which in this case is functionally the same as using an anonymous function.
Trinity College (Cambridge) Popular Book Voting BookmarkletIn Chapter 1, I showed you a glimpse of a proof-of-concept script I wrote for Kirsten Lamb of Trinity College Library at Cambridge University. Cam-bridge University Libraries is an interesting place, a decentralized sprawling system of small departmental and college libraries that each has its own access rules and borrowing policies. Over the past year, it’s been working with the London design firm Modern Human to conduct ethnographic research in the libraries and help imagine the “next-generation” of library services. (You can read all about their projects on the Future Lib blog at http://futurelib .wordpress.com.)
One of the interesting discoveries from this research was the existence of many disconnected, informal “black-market”–style book exchanges around the university that had popped up among students to help meet the need for very popular books. The research indicated that the number of holds and recalls put on a book was not the full story of its popularity. In fact, many stu-dents had given up recalling books and would go straight to the informal black market once they determined that the book wasn’t available (Murphy 2015).
One solution the libraries are working toward is centralizing the black market with a program called WhoHas? But Kirsten also had an idea she wanted to test out at Trinity. She wondered if there was a way to get the folks who had opted out of placing holds and recalls to still let the library know that there was a greater demand for particular titles. She envisioned a button that would allow users to “vote” for the library to purchase more copies of a
4148-900-2pass-05-r02.indd 52 07-04-2016 22:07:09

JavaScript Bookmarklets 53
book. It would be anonymous and quick, and perhaps invite more participa-tion than the recall system.
I needed a more complicated script to make a proof-of-concept for Kirsten, so instead of writing the JavaScript into the bookmarklet, I used the book-marklet to load a more complex script. (You can see all of the code for the tool on GitHub at https://github.com/mreidsma/OPAC-Vote.) Here’s the bookmarklet:
javascript:(function() {document.body.appendChild(document. createElement('script')).src='http://gvsulib .com/temp/OPAC-Vote/opacvote.js';})();
As you can see, it’s just like the previous example where we loaded a script. The full JavaScript that gets loaded has some interesting features I’d like to point out, though (you can view the entire code at https://github .com/mreidsma/OPAC-Vote/blob/master/opacvote.js). First, I’ve added a section where a user can easily modify some of the language and links, so that even folks without a lot of experience can write code and modify the script and get it up and running. The rest of the script follows the following workflow:
1. Check to make sure we’re on a book record page by looking for a <div> element with the ID of recordnum.
2. Add the custom stylesheet for the new button to the document’s head using createElement() and appendChild().
3. Look at the record URL to get the bibliographic record number, which is part of the URL’s href attribute.
4. Create the new voting link on the page right under the item record table using createElement() and appendChild().
5. Finally, watch for clicks on the new voting link and switch the text of the button once someone has voted by setting a “listener” with the addEvent Listener() method, something we’ll cover more in Chapter 6.
You can see an animation of the bookmarklet in action on the GitHub page for the code. You can also follow the directions on GitHub and install it in your browser and run it on the Trinity College Catalogue. The script appends a 1×1 transparent <img> (set to not display) to the <body> ele-ment when the vote button is clicked, but the src of the <img> is really a PHP script that not only echoes back the image to the browser but also saves the record number in a spreadsheet for library staff to review. (We’ll look at the PHP script that records the data in Chapter 13.)
In this chapter, we looked at writing JavaScript bookmarklets as a first step toward modifying vendor tools. While we can offer bookmarklets to users as
4148-900-2pass-05-r02.indd 53 07-04-2016 22:07:09
54 Customizing Vendor Systems for Better User Experiences
a way to apply modifications, most bookmarklets are more useful as tools for testing JavaScript modifications or for getting information from one website into another. In the following chapters, we will begin looking at some more involved JavaScript vendor tool modifications.
NOTES1. You can see a nearly complete list of URI schemes at http://www.iana.org/assign
ments/uri-schemes/uri-schemes.xhtml.2. Make sure you use a plain text editor and not a word processing program! The
exercises site has a section on “Text Editors” if you need help choosing one.3. Michigan’s bookmarklet is available at http://www.lib.umich.edu/mlibrary-labs/
proxy-server-bookmarklet.
REFERENCEMurphy, H. (2015). WhoHas?: The Pilot. [Web log post]. Retrieved from https://
futurelib.wordpress.com/2015/05/07/whohas-the-pilot.
4148-900-2pass-05-r02.indd 54 07-04-2016 22:07:09

Chapter 6
Advanced JavaScript
We’ve now explored the basics of JavaScript, putting together statements into small functions that can be executed as bookmarklets. Armed with these basic JavaScript functions, we can make a lot of changes to our vendor tools.
But we’re still missing some important pieces of the puzzle. While we can store a group of items in an array and create a function, we don’t yet have a way to run the function on each value of the array. In programming terms, this is called a loop, where you loop the same code over and over a set of inputs. Loops are quite useful for scraping data off of an existing web page, where you might have a dozen or more search results that you’d like to reformat. Without loops, we’d have to run a function manually on each of the results, which would be difficult if there wasn’t a way to predictably target each result in the list.
We also haven’t yet covered a way to react to user interactions with a page. It’s all fine and good to add unicorns, but what if you want only the unicorn to appear when the user clicks a certain link or does something unexpected? We need a way to listen for events and then execute a function when they happen.
LOOPSWe’ve already seen how to find an item on a page with an ID using getElementById() or a group of items with the same class using querySelector(). But sometimes you want to go through each item in a group and do something to it. Loops will “loop” over a group of elements running whatever function you specify.
To start a loop in JavaScript, we can use the for() statement. We briefly looked at the simple for() statement in Chapter 4 when we looked at mathematical operators. The statement takes three expressions: initialization, condition, and the final expression.
for (initiali ation condition final e pression ) { statement}
4148-900-2pass-06-r02.indd 55 07-04-2016 22:07:13

56 Customizing Vendor Systems for Better User Experiences
The initialization expression is evaluated once at the beginning of the loop. This can be useful for creating a counter variable to keep track of how many times the loop has run. The condition expression is evaluated before each loop iteration. The condition is useful for determining whether the loop should continue to run or not, and evaluates as a Boolean, either true or false. Once the condition returns false, the loop will stop. The final expression is evaluated at the end of each loop iteration. If you’re using a counter variable, this is a good place to increment it. Let’s take a look at an example, like the one we saw in Chapter 4:
for ( ar i = i i ) {console.lo (i)
}
In this example, the initialization expression defines a new variable called i and sets the initial value of i to 0. The for() statement then executes the conditional expression, which checks to make sure that the value of i is still less than 5 before it runs the statement in the curly braces. If the conditional evaluates to true, then it runs the console.lo () function and outputs the value of i. After executing the console.lo () function, the for() statement evaluates the final expression, which increments the value of i by 1. It then starts the loop over by evaluating the conditional expression again, until it finds that i is no longer less than 5. You can try running this for() statement in the console to see the output.
Let’s take a look at an example of a loop in action. Figure 6.1 shows a sim-plified example of a list of full-text results for an article like you might find in a vendor tool. Even though I’ve simplified the markup, you can see that it’s series of nested tables. In addition,
di id="lin resol er"tabletr class="ro "tdtabletrtd class="article" a href=" article1" rticle a tdtd class=" ournal" a href=" ournal1" ournal a tdtd class="database" a href=" database1" atabase ame a tdtd class="dates" 1 present tdtr
table
4148-900-2pass-06-r02.indd 56 07-04-2016 22:07:13

Advanced JavaScript 57
tdtrtr class="ro "tdtabletrtd class="article" a href=" article " rticle a tdtd class=" ournal" a href=" ournal " ournal a tdtd class="database" a href=" database " atabase ame a tdtd class="dates" 1 1 1 tdtr
tabletd
trtabledi
The information in this list that’s important for the user is:
• Links for articles, journals, and databases• Database names• Date coverage
From watching a lot of users try to use table-based results lists like this over the years, I can tell you that they aren’t really sure which link to click. “Article” is not the keyword that we’ve trained folks to look for in academic libraries; they expect to see “Full Text.” In addition, the prominent links to browse all issues of the journal and the recognizable name of the database are there as links as a sort of last resort. If the article link fails, so the theory goes, the user can click on one of those to do a more detailed search of the journal or database site.
Anyone who has any passing familiarity with how users interact with web pages will see the problem here. Users do not read pages carefully unless they have to. They scan quickly, looking for familiar words or visual cues to tell
Figure 6.1 A simple list of full-text options.
4148-900-2pass-06-r02.indd 57 07-04-2016 22:07:13

58 Customizing Vendor Systems for Better User Experiences
them where they need to click. Since all of the links in this table look the same, there isn’t any visual cue to that the “Article” link is what they are sup-posed to click on. In fact, based on a number of usability tests and analyzing years of usage data, I can tell you that most of GVSU’s users clicked the data-base link, because the name of the database was familiar to them, or because it was the longest link. However, this is arguably the last link we want them to click! They’re not likely to find the article they want by heading to the data-base, especially when they left a page with a link that should have directed them right to what they wanted.
The ideal thing to do here is to reformat the tables into something that gives users more contextual information about what the different links are for. Because we have several rows of the same kind of data, we can use some arrays to store groups of values together. In this case, we’ll create some arrays for the different types of links. We can even chain my variable declarations to make the code shorter:
ar article in s = ne rray() ournal in s = ne rray() database in s = ne rray() database ames = ne rray() dates = ne rray()
Now we need to find a way to store all of the information that is important to the user in these arrays. I can do this by using a loop to iterate through each row of the first table, running the same function on each row to grab the appropriate data and store it in the right arrays.
First, we’ll target the parent table with the getElementById() method and then find all of the tr elements within this table with a class of ro using uery elector ll(). I’ll start my for() statement by creating a counter variable to increment each time until it has looked at each tr class="ro " in the markup.
ar lin s = document. etElement y d( lin resol er ) . uery elector ll( tr.ro )
for( ar i = i lin s.len th i ) {article in s i = lin s i . uery elector( td. article a ).hrefournal in s i = lin s i . uery elector( td. ournal a ).href
database in s i = lin s i . uery elector( td. database a ).href
database ames i = lin s i . uery elector( td. database a ).te t ontent
dates i = lin s i . uery elector( td.dates ). te t ontent
}
4148-900-2pass-06-r02.indd 58 07-04-2016 22:07:13

Advanced JavaScript 59
Notice that when I save the data into the array, I’m using the i variable to act as a key. A key is like a numeric index for the array, so that we can know in which position in the array each of our pieces of data is located. We’ll specify that key by using square brackets with the key inside when we save the data to our variables, like in the following code.1
Let’s try running this code in the Developer Tools. Visit the exercises site for the book and head to Advanced JavaScript > Loops. You should now see the results table from Figure 6.1. You should also see the code I printed earlier ready for you to copy and paste with some console.lo () methods to show you the contents of the arrays. Paste this code into the console, and you will see the contents of the arrays echoed after the for() statement runs. Hopefully, you saw the results of the loop printed out for you in the console, like this:
" article1" " article "" ournal1" " ournal "" database1" " database "" atabase ame 1" " atabase ame ""1 present" "1 1 1 "
Now we have several arrays populated with the important data from the ven-dor web page. Retrieving that data is as easy as specifying the array and key for the piece of data we’re looking for. For instance, if I wanted to target a single value inside the array, like the second row, I could put the number that corresponds to that row in the square brackets.
console.lo (database ame 1 )
Loops and arrays are the building blocks of manipulating vendor tools. After gathering all of the information from a page, we can create entirely new markup using the variables we just saved. If I want to change the markup of the table to an unordered list, I can first save all of the vendor data with a for() statement and then create the new markup with another for() statement. First, I’ll use the JavaScript function createElement() to cre-ate a new HTML ul element stored in the variable lin ontainer. I’ll then use a loop to add li elements to the container, populated with values from the arrays I built while scraping the table full of links.
ar lin ontainer = document.createElement( ul )for( ar i = i lin s.len th i ) { ar ne ist tem = document.createElement( li )ne ist tem.inner = a href=" article in s i " class="article" ull e t nline a
from a href=" database in s i " class= "database" database ames i a . br
4148-900-2pass-06-r02.indd 59 07-04-2016 22:07:13

60 Customizing Vendor Systems for Better User Experiences
span class="dates" o era e: dates i span small ( a href=" ournal in s i " ro se ournal a small )
lin ontainer.append hild(ne ist tem)}// Remove the old tablear old able = document. uery elector( lin resol er table )
document. etElement y d( lin resol er ) .remo e hild(old able) dd the ne list
document. etElement y d( lin resol er ) .append hild(lin ontainer)
Here we’ve not only created a new ul element, but we’ve cycled through all of our arrays and created new li elements that have the appropri-ate content from the original table, but with better markup and the ability to control the order of the data. You can head back to the exercises page and run both of these scripts together (see the bottom of the Advances Java-Script > Loops page). After you’ve run the combined script, look at your Ele-ments browser. Do you see how the markup has changed inside of the <div id="lin resol er" ? You no longer have nested table elements; you instead have a ul with the same data in each of its list elements.
And since we applied classes to each of our links when we created the new ul , we can control how they are styled, and we suddenly have a lot more
flexibility with the look and feel of our tool than we did when we accepted the automatically generated HTML markup from the vendor!
Let’s see how that might look. If we apply the following CSS, our page will change dramatically:
lin resol er li {mar in bottom: 1 p
}li a.article {bac round color: bluecolor: hitepaddin : p 1 pte t decoration: none
}li a.database {color: blacte t decoration: nonecursor: pointer
}
4148-900-2pass-06-r02.indd 60 07-04-2016 22:07:13

Advanced JavaScript 61
li span.datesli small {color: display: inline blocfont si e: 1 pmar in top: 1 p
}
You can add these styles to the exercises page you just modified by running this code in the console, which will add a new stylesheet with these styles to the page:
ar ne tyles = document.createElement( lin )ne tyles.rel = stylesheetne tyles.type = te t cssne tyles.href = mreidsma. ithub.io endor tools css chapter .css
document.head.append hild(ne tyles)
Figure 6.2 The modified results list.
What changed? Do you see how it would be hard to mistake which of the links should be clicked?
EVENT LISTENERSSometimes we need to do more than just change how something looks or the underlying markup. Since many vendor tools rely on user interactions, we can change the functionality of a system or add additional content based on user input. JavaScript makes it easy to set “listeners,” which watch particular elements for interactions and then execute code. For instance, it can be useful to hide some information until a user requests it, like extra article results or explanatory text.
4148-900-2pass-06-r02.indd 61 07-04-2016 22:07:13

62 Customizing Vendor Systems for Better User Experiences
Although in the last section, we did simplify the format of the results list, users still might have a hard time deciding which link to click. Since we have multiple results, we have more than one prominent “Full-Text” button. We often assume that users will click the first result in the list, and that’s certainly been true when a set of results come back to an unknown search. But this results list I’m showing is different. Each of the results is a link to the same article, and so in usability tests over the past five years, I’ve watched countless users get stuck trying to decide which of the two Full-Text buttons is the best one to click.
At GVSU, we spend a lot of time ranking our databases from the most reliable to the least. So in our link resolver’s results list, the top result is the best one. To make navigating to the full text easier, we show only the result, since it should be the most reliable. We then hide the other results, so that our users will try the first result to see the full text of an article. But just in case something happens with that first link, like the database being down or a bad OpenURL link, we want the user to have the option to see the other sources. And so the additional results can be shown by clicking “Show Additional Results.” Once the items are visible, the “Show” changes to say “Hide,” and clicking it again will hide the results.
The JavaScript to do this is simple. Let’s make a few changes to the ul -based markup we made with our script in the section on Loops and assume we have the following list of articles. You can see the markup in action on the examples website, under Advanced JavaScript > Event Listeners. We’ll pull out the first result on its own and then create a list of additional results along with bit of text that a user can click to show or hide the results, as in Figure 6.3. (I’ve simplified the markup of additional results so you can better see what we’re dealing with. You could certainly add back in the dates and journal links.)
Figure 6.3 The reformulated results list, with the first result separated out.
4148-900-2pass-06-r02.indd 62 07-04-2016 22:07:13

Advanced JavaScript 63
di class="first result"a href=" " class="article" ull e t nline a from a href=" " class="database" cademic earch atabase a br
span class="dates" o era e: 1 present spansmall a href=" " ro se the ournal a smalldi
p id="results to le" ho additional results pul id="additional results"li a href=" " ull e t nline a from atabase.
lili a href=" " ull e t nline a from atabase.
lili a href=" " ull e t nline a from atabase.
liul
Now we need to think through just what our script will do. First, it needs to hide the ul id="additional results" . Then, if anyone clicks on the “Show additional results” text, it needs to show <ul id="additional results" and change the label of the text in p id="results to le" from “Show” to “Hide.” Finally, it needs to hide the results if the text is clicked again and change the label back to “Show.”
First, you’ll notice that the “Show additional results” text isn’t a link, so how will we convince folks to click on it? We can use CSS to style the para-graph to be just like a link, including how the user’s cursor appears when it hovers over the text. Here we’ll make the text color blue, add an underline, and style the pointer:
results to le {color: bluete t decoration: underlinecursor: pointer
}
We can use JavaScript to hide the additional results by toggling the ul ’s CSS display property to none. We could just use straight CSS for this, but since we need JavaScript to show the content, I like to use JavaScript to hide things just in case something goes wrong with the execution of the script. If JavaScript failed to load, the additional results won’t be hidden, and the user can still use them.
document. etElement y d( additional results ) .style.display = none
4148-900-2pass-06-r02.indd 63 07-04-2016 22:07:13

64 Customizing Vendor Systems for Better User Experiences
Now we need to add an event listener to the element we want our user to click. We can do this with the JavaScript addE ent istener() method.2 We’ll look for a JavaScript mousedo n event (which is the first part of a click) and then run a function that will show the <ul id="additional results" and change the text:3
document. etElement y d( results to le ) .addE ent istener( mousedo n function() {
ho the listdocument. etElement y d( additional results ).style.display = bloc
han e the te t labelthis.te t ontent = ide additional results
});
In this function, we’re using another new JavaScript term. this is a reserved word in JavaScript, which means that it can’t be used for variable names or other things. In our previous function, this refers to the element that is clicked to implement the function. So in our case, this is the same as saying document. etElement y d ( results to le ). It’s a shorthand way of referring to the item that the function is focusing on.4
Our script works pretty well, as long as we click it only once! If we click it again to “Hide” the results, nothing will happen because the <ul id="additional results" is already visible, and the label already says “Hide.” What we need is to add a conditional statement to check to see if the list is visible or not. We could check the list’s display property, or we could check the text of the toggle. It’s really up to you to decide how you want to write the conditional. In this case, let’s check the text of the toggle:
document. etElement y d( results to le ) .addE ent istener( mousedo n function() {if(this.te t ontent = = ho additional results ) {document. etElement y d( additional results ).style.display = bloc
this.te t ontent = ide additional results else {document. etElement y d( additional results ).style.display = none
this.te t ontent = ho additional results}
});
4148-900-2pass-06-r02.indd 64 07-04-2016 22:07:13

Advanced JavaScript 65
Figure 6.4 shows our new function that responds to user input and shows or hides some additional results. Go ahead and try running this script in the console from the exercises Advanced JavaScript > Event Listeners page.
Once we start adding event listeners into our code, we need a way to see where they are and how they behave in the DOM. Unlike toggling CSS properties or echoing output to the console, event listeners are not visible in the markup or console until they’ve run. Thankfully, you can use the Elements browser of the Developer Tools to find, examine, and learn about event listeners.
In Chrome, the rightmost column of the Elements browser defaults to the “Styles” tab, where you see the computed CSS styles for the actively selected element. To the right of that tab, you’ll see a few other tabs, including the “Event Listeners” tab. Click over to that tab, and you’ll see any event listeners listed for the currently selected element. (In Safari, the Event Listeners “tab” is the one at the bottom of the styles pane. In Firefox, you’ll find event listeners represented in the HTML view by an “ev” icon at the end of the element. Clicking this icon will give you more details.)
While this will show you what event listeners are attached to an element, it doesn’t show you what happens when the event is actually triggered. Here we can use another of the Developer Tools tabs, the “Source” tab. On the far right column, scroll down to find the “Event Listener Breakpoints” section and expand the section to see all of the different event listeners you can watch. Select the ones you want and then interact with your page. You’ll see the events fire in the Sources pane of the Developer Tools as things are working. This can be very useful when you’re trying to figure out why an event listener isn’t working properly.5
We’ve covered a lot of ground in these first six chapters, learning the basics of JavaScript, creating some bookmarklets, and then experimenting with loops and changing page interactions.
NOTES1. If you don’t need to specify the key to the array, you can use the JavaScript push() array method to add new items to the end of the array, like this:
ar my rray = " oo " "Video ape" " anuscript"my rray.push(" V ")
Figure 6.4 Our new results list with results hidden or shown.
4148-900-2pass-06-r02.indd 65 07-04-2016 22:07:13

66 Customizing Vendor Systems for Better User Experiences
console.lo (my rray) Returns " oo " "Video ape" " anuscript" " V "
2. The addE ent istener() method doesn’t work in IE 8 and below, so if you’re supporting older browsers, you’ll have to accommodate the different functions that IE 8 uses, namely, the attachEvent() method. You can do this by using a con-ditional statement to see if the Boolean value of the addE ent istener() method returns true, since that means the browser supports the method. If it returns false, you can then run attachEvent(). Your script might look like this:
if(addE ent istener()) {addE ent istener( mousedo n function() { ) else {attachE ent( onmousedo n function() { )
}
3. There are three main events that JavaScript allows you to attach handlers to on clicks, and they are prioritized in this order:
1. mousedo n. mouseup. clic
You can certainly use the JavaScript click event, but if anything else gets tied to a mousedo n or mouseup event, then your click event will be ignored. To be safe, I generally watch for the mousedo n event.
4. The actual value of this is dependent largely on scope. For a detailed discussion of this and scope, I recommend Kyle Simpson’s readable treatment of the mis-understood this keyword in the You Don’t Know JS series, available for free on GitHub: https://github.com/getify/You-Dont-Know-JS/blob/master/this%20& %20object%20prototypes/ch1.md.
5. I actually use a bookmarklet created by Allan Jardine called “Visual Event,” which displays event listeners in a visual way right on the page. You can find the code and instructions to install it at https://github.com/DataTables/VisualEvent.
4148-900-2pass-06-r02.indd 66 07-04-2016 22:07:13

Chapter 7
JavaScript Examples
In the past six chapters, we have covered a lot of ground, from the basics of JavaScript to techniques for changing the content and enhancing our users’ interactions within vendor tools. While I’ve provided examples at each step, a series of examples out of the context of a whole vendor system isn’t going to give you a complete understanding of what can be done to vendor tools with JavaScript. So in this chapter, I’d like to slow down a bit and put the JavaScript we’ve covered so far into action by modifying a few vendor tools. The problems I’ll present with these vendor tools are common to many institutions, and the solutions require only the JavaScript we’ve covered so far.
EXAMPLE: OPAC BOOK AVAILABILITYNearly every library has an online catalog (OPAC). Most OPACs display search and holdings result in a tabular format, and GVSU’s catalog is no exception. But our users consistently find it difficult to understand the data presented in the tables and often have difficulty doing basic tasks in the cat-alog, like determining which copies of a book are available. Aaron Schmidt argues that the cause of this difficulty is baked into the design: “Library cat-alogs . . . are not designed to help people accomplish library tasks. Instead, they’re designed to expose catalog records” (2013).
One complaint we’ve received from users is that there are no visual cues to let them quickly scan for information that is important to them. In fact, the default order of the holdings table in GVSU’s OPAC is almost the opposite of what we found our users were interested in. What our users wanted was to first know whether an item was available, and then which library it was in, and finally, how to find it. But our results instead put the availability state-ment last, starting with the location and call numbers. Figure 7.1 provides a sample of what the holdings table looks like in our OPAC.
Users have to scan the table from right to left in order to find an item they want. And you can see the challenges they have in the sample given in Figure 7.1, since one of our copies of this book has three holds, while
4148-900-2pass-07-r02.indd 67 07-04-2016 22:07:17

68 Customizing Vendor Systems for Better User Experiences
another copy sits on the shelf. If it were easy to determine a book’s availa-bility, wouldn’t one of the users who placed a hold instead have requested the available book? To solve this problem, we’ll use JavaScript to reorder the information from this table to better match user expectations.
There is more room for improvement than simply reordering things. In her treatment of holdings table design patterns, Bohyun Kim emphasizes that we should “reveal just enough information that is essential to determine the next action” for the user (2013). Since GVSU has many of its items in one of three Advanced Storage and Retrieval Systems (ASRS), the next action for many books is to request the item. But before we can request an item, we need to be sure it is available. So a second step in our modification will be to make the availability status easy to scan.1
Let’s start by looking over the markup for the table. I’ve copied and pasted the actual HTML markup generated by my OPAC here, in all its messiness:
<table class="bib_items">
<tbody>
<tr class="bibItemsHeader">
<th width="38%" class="bibItemsHeader">
Location
</th>
<th width="38%" class="bibItemsHeader">
Call No.
</th>
<th width="24%" class="bibItemsHeader">
Status
</th>
</tr>
<tr class="bibItemsEntry">
<td width="38%">Mary Idema Pew - 3rd Floor</td>
<td width="38%">PS3562.E353 G6 2015</td>
<td width="24%">DUE 09-17-15 +2 HOLDS</td>
</tr>
<tr class="bibItemsEntry">
<td width="38%">Steelcase Popular Reading</td>
<td width="38%">PS3562.E353 G6 2015 c.2</td>
<td width="24%">AVAILABLE</td>
</tr>
Figure 7.1 OPACs usually display holdings in a table that is hard to scan.
4148-900-2pass-07-r02.indd 68 07-04-2016 22:07:17

JavaScript Examples 69
<tr class="bibItemsEntry">
<td width="38%">Mary Idema Pew - Popular
Reading (1st Floor)</td>
<td width="38%">PS3562.E353 G6 2015 c.3</td>
<td width="24%">DUE 10-07-15</td>
</tr>
</tbody>
</table>
Our first step is going to be grabbing the content from each of these table cells so that we can rewrite the table as an unordered list, and we’ll assign it an ID so that it’ll be easy to apply styles. Rather than creating a series of arrays and running two loops, one to grab data and one to create the new list ele-ments, we’ll do both with a single loop to make the code shorter. We’ll create a new <ul> element before we start our loop:
var newList = document.createElement('ul');
newList.id = 'availability-list';
The plan is to write code that grabs data from each of the three cells in each row that has a class of bibItemsEntry and then creates a new list element that is appended to the element stored in newList that we created earlier. Here’s a loop that will do just that:
var rows = document.querySelectorAll('table.
bib_items tr.bibItemsEntry');
for(var i = 0; i < rows.length; i++) {
// Save content to variables
var content = rows[i].getElementsByTagName('td');
var availableText = content[2].textContent;
// Set color of availability statement
var avail_classes = 'availability';
if(availableText.indexOf('AVAILABLE') > -1) {
avail_classes += ' avail';
} else {
avail_classes += ' unavail';
}
// Build new list item
var newListItem = document.createElement('li');
newListItem.innerHTML = '<span class="' +
avail_classes + '">' + content[2]
.textContent +'</span>'
4148-900-2pass-07-r02.indd 69 07-04-2016 22:07:17

70 Customizing Vendor Systems for Better User Experiences
+ ' <span class="location">' + content[0]
.textContent + '</span>'
+ ' <span class="callno">' + content[1]
.textContent + '</span>';
// Add to list
newList.appendChild(newListItem);
}
The first section of this loop saves the information from each of the three cells in the table to separate variables. Because the markup doesn’t have many identifying characteristics, I chose to use the getElementsByTagName() function to grab the content from each of the table cells into a new array. I can then call each bit of data by referring to the array key for each of the items, where [0] is for the location, [1] is for call number, and [2] is for the availability statement.
The second chunk of code is a conditional statement that checks to see if the item is available or not, and then sets the appropriate CSS classes to color-code the availability statement. If the item is available, then the class avail will set the background color to green. If the item has been checked out, then the class unavail will set the background color to red.
The third section of our code builds a new <li> element and sets the innerHTML property to a series of <span> elements with appropriate classes so we can use CSS to style different parts of the available statement. And finally, we append that new <li> to our <ul>. All that is left is replac-ing the table with our new list.
This turns out to be trickier than you might think, since we need to append our content to a parent element. Fortunately, we can take advantage of the vendor’s markup and the tolerance of browsers to strange markup. We can use CSS to hide the <tbody> of our table, while keeping the parent element, the <table class="bib_items">, visible. Then we’ll append our list to the <table>, where it will be displayed as a block item by every browser, even though it is wrapped by a <table> element.2 You can see the new list in Figure 7.2.
var table = document.querySelector('table.bib_items');
var tableBody = table.querySelector('tbody');
table.removeChild(tableBody);
table.style.display = 'block';
table.appendChild(newList);
Figure 7.2 Our new scannable holdings list.
4148-900-2pass-07-r02.indd 70 07-04-2016 22:07:17

JavaScript Examples 71
You can visit the exercises site for this book and test this code under the JavaScript Examples page. The code on that page also adds a CSS file that styles the availability message into a large colored block that makes it easy to scan for users.
EXAMPLE: ILL REGISTRATION FORMLike many libraries, GVSU uses the ILLiad ILL client from OCLC to han-dle our interlibrary loan requests for borrowing and lending. For our users, their first interaction with ILLiad is an imposing form that they must fill out before their account will work. As you can see in Figure 7.3, the default form from ILLiad asks for a lot of information, including two mailing addresses. And despite the fact that only a small percentage of our users ever get items mailed to them, it required at least one mailing address from everyone.
If users did not complete the registration, ILLiad would “disavow” their account, and they wouldn’t be able to request any items until someone in the ILL office manually filled in the information for them. Because the initial
Figure 7.3 The default ILLiad registration screen.
4148-900-2pass-07-r02.indd 71 07-04-2016 22:07:18
72 Customizing Vendor Systems for Better User Experiences
form was so long, we had almost 20% of our new users get disavowed because they didn’t bother to fill out the form. Clearly something needed to be done.
We started by removing many of the requirements in ILLiad’s Customiza-tion Manager software, but even when we made it optional to add an address, the sheer number of form fields overwhelmed our users and made them leave the form unfilled. So we tackled the form’s markup next, since ILLiad gives us more flexibility in changing markup than the OPAC did in the example earlier.
First, we removed all unnecessary requirements for fields to be filled out. When I spoke with our interlibrary loan specialist, she told me that as long as she has an e-mail address and verification that the user is in good standing with the university, then she could get materials. In order to verify some-one’s status, we needed a little more than their e-mail address, so we also require name and current status (faculty, staff, or student). In addition, we require users to specify a default pickup location for any physical items, but we default this to the main campus library, which works for most of our users.
When testing this new form, I came across a number of other issues that I needed to address to make the registration process as easy as possible for users. First, the pickup locations in ILLiad are displayed as the three-letter code used by the software to differentiate between locations. Who on my campus will know the difference between LIB and OCS? Not to mention the fact that if you’ve already selected a location, it not only appears at the top of the list, but also appears further down in the dropdown.
Second, the address fields are still visible, even though 95% of our users will never need them. The ILL office needs the address of only distance educa-tion students, those students who are enrolled in classes at one of our satellite campuses without library services or taking courses entirely online. We need a way to make this information available to those students while not over-whelming the majority of users with this added field.
Third, we found that students expected an easy way to clear out the con-tents of the input fields. Since Google popularized the “clear” button on its search box, some of our users have become perplexed at how to get rid of any information they had typed in an input field without clicking a clear button. (It never occurred to them that before clear buttons were a thing, you could just delete the text!)
Changing the Text of Form FieldsThe default drop-down menu for pickup locations is generated with a token added to the ILLiad template. By default, this form field just shows the three-letter combination assigned by ILLiad to each location, which of course has no meaning to anyone who uses the software.
The first step in making this situation better is to actually write some HTML. Rather than let ILLiad build the whole select form automatically,
4148-900-2pass-07-r02.indd 72 07-04-2016 22:07:18

JavaScript Examples 73
we’ll code the location <select> by hand and add in a token that will display the currently selected item.
<label for="NVTGC">Preferred Pickup Location</label>
<select id="NVTGC" name="NVTGC">
<optgroup label="Current pickup location">
<option value="<#PARAM name="NVTGC">"
selected><#PARAM name="NVTGC"></option>
</optgroup>
<optgroup label="Select new pickup location">
<option value="LIB"> Mary Idema Pew Library
@ Allendale</option>
<option value="STEEL">Steelcase Library
@ DeVos</option>
<option value="FREY">Frey Learning Center
@ CHS</option>
</optgroup>
<optgroup label="Distance Education?">
<option value="OCS">Ship Books to me</option>
</optgroup>
</select>
Here I’ve grouped the currently selected location in one cluster, the physical locations in another, and distance education shipping in a third <optgroup> element, which acts like a divider for items in a <select> element. By breaking out the currently selected item (which will be echoed as a three-letter code by the <#PARAM name="NVTGC"> token), I’ve tried to reduce the confusion of having the same entry repeat twice. Although now by hard-coding the locations, we’ve managed to make selecting the new items a bit more intuitive. But we’re still stuck with one <option> that displays a three-letter code.
Remember when we used JavaScript to change the textContent prop-erty of an element? We can do the same thing here, except that <option> elements are a bit different than other HTML elements, since they are sub-ordinate to the <select> element. textContent won’t work to change the text inside of them. But luckily, <option> has a text property that works the same way. By targeting the <select> using its ID, and then selecting the numerical index of the <option> we want to change, we can access the text property and rewrite the label on the fly (the element’s value remains the same, though, which is fine, since that’s what the soft-ware cares about).
document.getElementById('NVTGC').options[0].
text = 'New Text';
4148-900-2pass-07-r02.indd 73 07-04-2016 22:07:18

74 Customizing Vendor Systems for Better User Experiences
Of course, we need something a bit more sophisticated than this, since we need to know exactly what we should be changing the text to, depending on the three-letter code. We can do that with a set of conditionals:
var pickupLocation = document.getElementById
('NVTGC').options[0];
if(pickupLocation.value == 'LIB') {
pickupLocation.text = "Mary Idema Pew
Library @ Allendale";
}
if(pickupLocation.value == 'STEEL') {
pickupLocation.text = "Steelcase Library @ DeVos";
}
if(pickupLocation.value == 'FREY') {
pickupLocation.text = "Frey Learning Center @ CHS";
}
if(pickupLocation.value == 'OCS') {
pickupLocation.text = "Ship Books to Me";
}
Hide Address until NeededNext I needed to address the address fields for the registration form. We’d already made them not required, but we didn’t want most of our users to feel the need to add that information, since we need it only for distance education folks. I decided to hide the address information by default and then show it only when it was needed, using an event listener. Unlike the previous event listener examples, where we listened for user input in the way of clicks, here I want the address fields to show only if the “Ship Books to me” <option> is selected. We can do that by watching the <select> element for a change event.
I’ll start by adding a <div> around the address fields with an ID of address fields, so that I can easily target it with JavaScript. Here’s my new markup:
di id="address fields"<label for="Address">Address (No P.O. Boxes)
</label>
<input id="Address" name="Address" placeholder=
"Address" type="text" />
<label for="City">City</label>
<input id="City" name="City" type="text" />
<label for="State">State</label>
<input id="State" name="State" type="text" />
<label for="Zip">Zip</label>
<input id="Zip" name="Zip" type="text" />
</div>
4148-900-2pass-07-r02.indd 74 07-04-2016 22:07:18
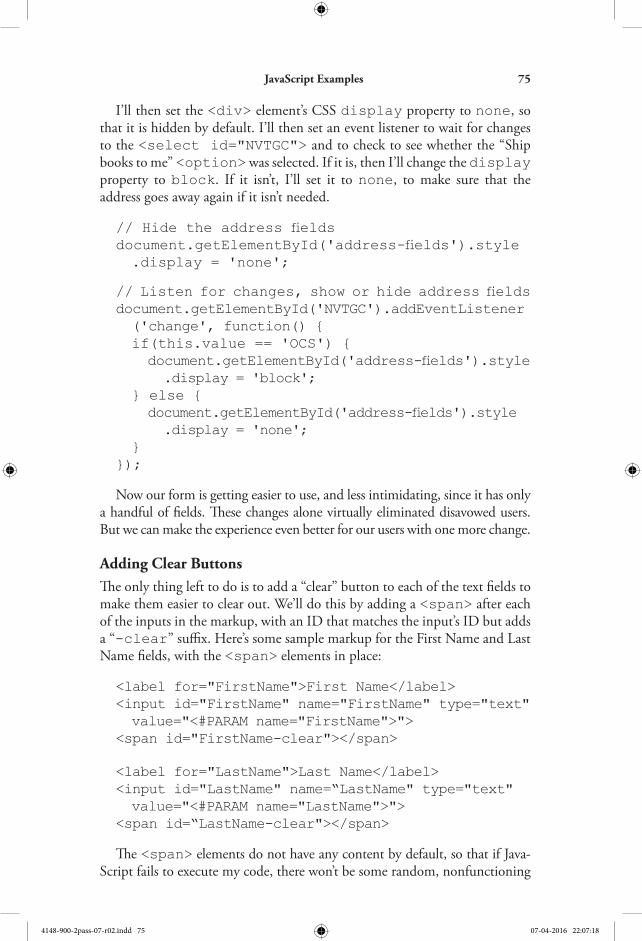
JavaScript Examples 75
I’ll then set the <div> element’s CSS display property to none, so that it is hidden by default. I’ll then set an event listener to wait for changes to the <select id="NVTGC"> and to check to see whether the “Ship books to me” <option> was selected. If it is, then I’ll change the display property to block. If it isn’t, I’ll set it to none, to make sure that the address goes away again if it isn’t needed.
ide the address fieldsdocument. etElement y d( address fields ).style .display = 'none';
isten for chan es sho or hide address fieldsdocument.getElementById('NVTGC').addEventListener
('change', function() {
if(this.value == 'OCS') {
document. etElement y d( address fields ).style .display = 'block';
} else {
document. etElement y d( address fields ).style .display = 'none';
}
});
Now our form is getting easier to use, and less intimidating, since it has only a handful of fields. These changes alone virtually eliminated disavowed users. But we can make the experience even better for our users with one more change.
Adding Clear ButtonsThe only thing left to do is to add a “clear” button to each of the text fields to make them easier to clear out. We’ll do this by adding a <span> after each of the inputs in the markup, with an ID that matches the input’s ID but adds a “-clear” suffix. Here’s some sample markup for the First Name and Last Name fields, with the <span> elements in place:
<label for="FirstName">First Name</label>
<input id="FirstName" name="FirstName" type="text"
value="<#PARAM name="FirstName">">
<span id="FirstName-clear"></span>
<label for="LastName">Last Name</label>
<input id="LastName" name=“LastName" type="text"
value="<#PARAM name="LastName">">
<span id=“LastName-clear"></span>
The <span> elements do not have any content by default, so that if Java-Script fails to execute my code, there won’t be some random, nonfunctioning
4148-900-2pass-07-r02.indd 75 07-04-2016 22:07:18

76 Customizing Vendor Systems for Better User Experiences
clear buttons trailing each of these <input> elements. We’ll add the content with JavaScript, so we can make sure that they appear only when they will be functional.
First we’ll create the content of the button, which will be a letter “X.” We’ll use CSS to style it and position it over the end of the <input> element, so that it will be clear to which element it belongs. Then we’ll set an event listener on the clear buttons that will reset the value attribute of the related <input> element if clicked by a user. Here is the JavaScript:
function addClearButton(id) {
if(document.getElementById(id)) {
var inputField = document.getElementById(id);
var clearspan = document.getElementById(id +
'-clear');
clearspan.innerHTML = 'X';
clearspan.className = 'clear-button';
clearspan.addEventListener('mousedown',
function() {
inputField.value = '';
inputField.focus();
});
}
}
// Add the clear buttons to the inputs
addClearButton('FirstName');
addClearButton('LastName');
Since I need to add the clear buttons to two different <input> elements, it doesn’t make sense to type the code twice. So instead, I created a function that takes an ID as an input, and then adds the X to the <span> element and sets the event listener. I then just have to call the function and pass it the ID for each of the <input> elements I want to have a clear button.
The problem now is that our clear “button” looks just like an X that is stuck at the end of the input. We need to style it to look more like a clear button, by moving it into the input field, styling the background to look like a gray, round button, and changing the cursor to be a pointer. Here is the CSS we can use:
clear-button {
background-color: #bbb;
color: #fff;
border-radius: 10em;
cursor: pointer;
font-family: sans-serif;
4148-900-2pass-07-r02.indd 76 07-04-2016 22:07:18

JavaScript Examples 77
font-size: 10px;
padding: .5em .7em;
display: inline-block;
position: relative;
left: -3em;
bottom: .25em;
}
Our new ILLiad form, seen here in Figure 7.4, looks quite a bit different from the one we started with. (You can also view each step of this process on the exercise site under JavaScript Examples > ILL Registration Form.)
Figure 7.4 Our new ILLiad registration form, with custom HTML, CSS, and JavaScript.
4148-900-2pass-07-r02.indd 77 07-04-2016 22:07:18

78 Customizing Vendor Systems for Better User Experiences
In these two examples, we’ve seen that writing JavaScript to target existing DOM elements can be tricky at times, since library vendors don’t always pro-vide us with handy IDs for each element. We have better luck with systems like ILLiad that allow us to have (nearly) free reign over the template of the page. But for those other vendor tools that give us trouble, we have other options, and in Chapter 8, I’ll introduce you to the jQuery library, which makes writing JavaScript code more like writing HTML and CSS.
NOTES1. While I’d prefer to have the OPAC send the first available copy of a book to the
user, at GVSU, we’re unable to do that. First, our ASRS items require requesting by item so that the user who is expecting to pick up an item from the crane in a few minutes doesn’t instead get a book from another campus, which would take a day to arrive. And second, we’ve never purchased the overpriced “record-level holds” module from our ILS provider, Innovative Interfaces. Your situation will hopefully be different.
2. Purists may balk here, but I say desperate times call for desperate measures. We’ll look at some less “hacky” ways to get this list into the markup in Chapter 10 when we’ve covered the jQuery library.
REFERENCESKim, B. (2013). Redesigning the Item Record Summary View in a Library Cata-
log and a Discovery Interface. [Web log post]. Retrieved from http://acrl.ala .org/techconnect/post/redesigning-the-item-record-summary-view-in-a-library- catalog.
Schmidt, A. (2013). Catalog by Design. Library Journal, 138(2), 19.
4148-900-2pass-07-r02.indd 78 07-04-2016 22:07:18

Chapter 8
jQuery Basics
So far we’ve covered writing statements and functions in JavaScript to make changes to the DOM for a website. JavaScript syntax takes a little getting used to, especially if you’ve never written in a scripting language before. And as you’ve seen a few times so far, some JavaScript functions are not supported in every browser. Remember the super useful querySelector(), which allowed us to use CSS-style selectors to find elements in the DOM? It wasn’t supported in Internet Explorer until IE 9, and so libraries that support IE 8 can’t rely on it (which includes almost all libraries, as of this writing).
But as we learned in Chapter 4, we can create our own named functions in JavaScript, and those functions can be simple (like the examples we’ve seen so far) or extremely complex. You can also create entire libraries of new func-tions that extend JavaScript, so that you add whole new possibilities to the language. One of the most popular libraries for JavaScript is jQuery, which answers the two challenges of writing native JavaScript I mentioned earlier. First, its functions are named intuitively in plain English! While an argument can be made that JavaScript for the most part has functions that have names that explain what the function does (e.g., encodeURIComponent() encodes the components of a URI), the names are a bit more technical than the JavaScript beginner would often like .querySelector() is a good example. While technically the function does query the DOM for the spec-ified CSS selectors, the jQuery version of this function is .find(), which explains much more clearly what the function does.
Second, jQuery offers excellent cross-browser support for its library of functions. While querySelector() doesn’t work in IE 8, you can use jQuery’s .find() function back to IE 6 and know that it will work.
Because jQuery’s syntax relies on CSS-style selectors, it’s often easier to understand if you are comfortable writing HTML and CSS.1 Of course, jQuery is still a library for JavaScript, and so a basic understanding of how JavaScript works, how statements are created and executed, and how func-tions and scope work is required to get the most out of jQuery. And since jQuery is an extension of JavaScript, we can mix and match JavaScript and jQuery statements to build functions, so having an understanding of the
4148-900-2pass-08-r02.indd 79 07-04-2016 22:07:22

80 Customizing Vendor Systems for Better User Experiences
strengths of each will help us build better and more reliable JavaScript appli-cations and make those pesky vendor tools better for our users.
ADDING jQUERYIn all of our examples so far, we’ve been able to jump right in and write what-ever JavaScript we needed, and then either paste it into the console or run it as a bookmarklet. There was no need to load any special dependencies so that the browser would understand the code we ran. This is because the browsers all support JavaScript natively, since JavaScript has come to be one of the three building blocks of the web, as we saw in Chapter 2: HTML provides the semantic foundation, CSS puts on the presentation layer, and finally, JavaScript enhances the mix by adding in an interaction layer.
Once we dive into jQuery, though, we’ll have to plan ahead to make sure the browser knows that we’re using jQuery. Since jQuery is a JavaScript library, we’ll have to load on our page with a <script> element before we start using jQuery to play with the DOM. We can do that by loading jQuery before any of the scripts that rely on it, like this:
<script src="/js/jquery.js"></script><script src-"/js/myscripts.js"></script></body>
Hosting jQueryjQuery is a JavaScript library, which means it is just another JavaScript file that we can load on our servers and include in our websites. However, we need to give some thought to how we load jQuery into our vendor tools. Sometimes this will be dictated by the vendor tool itself, and other times we’ll have to make a choice above where we load jQuery.
For instance, there are many vendor tools that rely on jQuery. Discovery tools like ProQuest’s Summon and Ex Libris’s Primo already load a version of jQuery because the vendor uses it to build up the interaction layer of the vendor tool. In this case, there is no need to load jQuery, since the library has already been loaded. You can simply write your code using jQuery and load it into the vendor tool. (The public matrix of library vendor tools I maintain at http://gvsu.edu/s/YT has notes about which vendors load jQuery by default.)
However, many vendor tools do not use jQuery. In that case, you have a few options about how to load the library. You can simply download the latest version of jQuery from http://jquery.com and upload it to your site, and then include that URL in the src attribute of a <script> element. Or you can use a Content Delivery Network (CDN) to load a remote version of jQuery. Each of these options has its own set of benefits and drawbacks, so you’ll have to weigh your options before you decide which one is right for your situation.
4148-900-2pass-08-r02.indd 80 07-04-2016 22:07:22

jQuery Basics 81
If you choose to host the jQuery file yourself, you can have complete con-trol over the version you choose, and the script will be loaded from the same server as your other scripts, which means you won’t have to worry about relying on someone else’s security certificates or domain.
For instance, at GVSU, our IT department has been installing browser extensions like The Electronic Frontier Foundation’s Privacy Badger on many staff machines and ratcheting up the security settings without testing many of our university resources or creating a white list. Often we find that IT has disabled the ability to load any files that are not hosted on the same domain as the web page, meaning that if you are looking at the page at mylibrary.org, all of the scripts and images and CSS files must also be hosted on the mylibrary.org domain. If you use hosted vendor tools, you likely have a vendor tool at mylibrary.vendor.com that loads scripts from mylibrary.org, or maybe you use Google’s CDN to load libraries like jQuery. With these security settings prohibiting loading any assets from other domains, your vendor tools won’t be able to load scripts, styles, or images if they are not explicitly hosted on the vendor’s domain.
jQuery is also a large file, weighing in at almost 300kb, so hosting it your-self requires you to do some work to make the load time a little faster for your users. (For perspective, the entire GVSU library home page is about 250kb).
First, you can compress the file with a script minimization tool. (The online tool http://jscompress.com is my favorite.) This will strip out all of the white space and comments from the file, as well as shorten all of the variable names and remove unnecessary syntax to make the file as small as possible. Once we have minimized the file, we still have a script that is nearly 90Kb, which is still quite large. While that will load much more quickly than the 300kb unminimized file, it’s still a lot to ask folks to load, especially those visiting your site on a mobile device over a cellular connection. If you have access to the server that hosts your script, you can turn on server compression so that all scripts will load gzipped, knocking the total file size of jQuery down to a respectable 33kb.
An easier solution if you don’t need absolute control over the contents of the script is to use a CDN to load a specified version of jQuery. CDNs specialize in very fast connections, with minimized scripts sent gzipped upon request. Google’s Developer Libraries is an extremely reliable CDN that offers many versions of jQuery (and other libraries) that can be included on your site simply by adding the Google CDN <script> element into your site.2
Since many different sites use the Google CDN, you can potentially speed up your users’ site load even more since it is likely that they have visited another site with the same Google CDN version of jQuery you’ll use. In many cases, that script will have cached itself on your users’ computer, and they won’t have to load anything new at all.
4148-900-2pass-08-r02.indd 81 07-04-2016 22:07:22

82 Customizing Vendor Systems for Better User Experiences
jQuerify BookmarkletAdding jQuery to a site is easy when you can edit the HTML template of your vendor tool. But sometimes you’d like to test our jQuery code on a site, and you don’t want to make everyone loading the page also load jQuery. (Or perhaps your vendor won’t let you load any JavaScript, and you want to show how a customization might work.) Fortunately, we can use some of the things we’ve already learned in the book to add jQuery to nearly every page on the web, which will allow us to run jQuery code in the console.
We’ll create a simple bookmarklet you can add to your browser’s book-marks bar that will check any new page for jQuery, and if it doesn’t find jQuery on the page, it will load it for you. It also checks to see whether any other libraries are present, and if they are, it loads jQuery in no on ict() mode. The bookmarklet is based on one written a few years ago by Karl Swed-berg (2012). Here I’ve included a stripped-down version of the bookmarklet so we can walk through the code. (You can find the full version you can install on the exercises page under “jQuery Basics”.)
(function() {var otherlib = false, msg = '';if(typeof uery = undefined ) {
msg = 'This page already using jQuery v' + jQuery.fn.jquery;
return showMsg();} else if (typeof $=='function') {
otherlib=true;}function getScript(url,success){var script=document.createElement('script');script.src=url;
document.getElementsByTagName('head')[0] .appendChild(script);success();
}function showMsg() {
console.log(msg);}getScript('https://ajax.googleapis.com/ajax/libs/jquery/1.11.3/jquery.min.js',function() {
setTimeout(function() {ms = his pa e is no uerified ith v' + jQuery.fn.jquery;
if (otherlib) { ms = and no on ict(). se () not ().
4148-900-2pass-08-r02.indd 82 07-04-2016 22:07:22

jQuery Basics 83
= uery.no on ict()}
return showMsg(); }, 2500);
});})();
Here we start with an anonymous function so that the bookmarklet runs on the current page rather than loading a new blank page to evaluate the script. It then runs a conditional statement, checking to see if the function jQuery has been defined. If it has been defined (the comparative statement != means “is not undefined” or “it is defined”), then the script lets us know that jQuery is already loaded. If jQuery is undefined but the jQuery short-cut of $ has already been mapped to a function, then the script knows that another library is using the shortcut and sets a flag that another library exists (the Boolean variable otherlib).
After this conditional, the bookmarklet defines the getScript() func-tion, which takes a URL and adds a <script> element to the document’s <head>. If the function is a success, it calls the function defined in the success variable.
Finally, the bookmarklet calls the newly defined getScript() func-tion, passing a URL for a minimized jQuery script hosted on the jQuery CDN. It waits 2.5 seconds (using a JavaScript setTimeout() method), then sets up no on ict() mode if necessary. Regardless of the outcome, it sends a message to the console letting us know the results of the script.
Once the bookmarklet has been executed, jQuery will be available on the page. We can then run bookmarklets that require jQuery or enter jQuery code into the console.
The full version of this bookmarklet doesn’t echo to the console, but dis-plays the feedback messages right on the web page. It’s not a practical solution for our library users, but it can be extremely useful for testing new scripts that use jQuery when the page we’re manipulating doesn’t already load jQuery.
jQUERY SYNTAXFor the most part, jQuery syntax follows JavaScript syntax, since jQuery extends JavaScript’s functionality. But there are a few instances where jQuery changes the way we can write statements that are important to note.
$ and noConflict() ModejQuery statements differ from JavaScript statements in that they first invoke the jQuery function. In the previous section where we examined the jQuer-ify bookmarklet, we saw how checking whether jQuery was defined let us know whether the jQuery library had been loaded. Once jQuery has
4148-900-2pass-08-r02.indd 83 07-04-2016 22:07:22

84 Customizing Vendor Systems for Better User Experiences
been defined, we start all of our jQuery statements with jQuery(). As you can imagine, typing jQuery every time you want to invoke a jQuery statement can get tiresome and make your code much longer than it needs to be. Thankfully, jQuery uses a shortcut for the jQuery function that is quick to type and easily recognizable: $. All you need to do to start a jQuery state-ment is to begin it with a $, and the browser will recognize that it requires the jQuery library. Here’s a simple jQuery statement so you can see it in action:
var pageBody = $('body');
This statement saves the DOM <body> element in a variable called pageBody. The statement is equivalent to writing:
var pageBody = jQuery('body');
Over the course of a long file, writing $ in place of jQuery will save a lot of typing and make your file quite a bit smaller. Of course, we can’t always use the $ shortcut, since sometimes other libraries or functions will have already reserved the $ in place of another function.3 In that case, we need to change the shortcut for jQuery to something else, using jQuery’s no on ict() method.
As we saw earlier in the bookmarklet code, if we found that the $ was already defined as a function, then we needed to map the shortcut for our new version of jQuery to $jq using the no on ict() function. This way we can prefix our jQuery statements with $jq, and the browser will execute them using the jQuery library we have loaded, rather than the other library that has reserved the $ function.
This can also be useful if you need to load a different version of jQuery than the vendor loads. There is nothing that says you can’t have two versions of jQuery loaded on a page, since earlier versions of jQuery may support some functions that are missing from newer versions (and vice versa). If you need to load a second version of jQuery on a page, make sure you load it with no on ict() enabled so that the browser will know which version to run your commands through.
jQuery StatementsLike JavaScript, we write jQuery code by grouping together statements that are executed in order, from the top of the file to the bottom. jQuery state-ments always end in a semicolon, just like JavaScript.
Here are both a JavaScript and a jQuery statement for setting the back-ground color of all the <div> elements on a page:
// JavaScriptdocument.getElementsByTagName('div').style .backgroundColor = 'green';
4148-900-2pass-08-r02.indd 84 07-04-2016 22:07:22

jQuery Basics 85
// jQuery$('div').css('background-color', 'green');
The real power of jQuery statements is that jQuery uses CSS-style selectors to find elements in the DOM. Rather than targeting the ID of single item, or using getElementsByTagName() to target all of the <div> elements, jQuery makes selecting these as easy as it is in CSS. jQuery also honors CSS psuedo-selectors and has a few psuedo-selectors of its own. Here is a jQuery statement to change the background color of any <div> that is the first child of its parent:
( di :first child ).css( bac round color 'green');
By using CSS-style selectors, jQuery’s engine for selecting elements in the DOM is as powerful as querySelector(), although supported in more browsers. In addition, though, jQuery has some additional selectors that take it above and beyond native JavaScript functions, and even CSS.
For the purposes of modifying vendor tools, often we don’t have the luxury of vendors adding appropriate classes or IDs to the elements we need to tar-get. What’s more, vendors do not often take much care in crafting the HTML source order of the elements that make up the pages of their tools, so even targeting things with CSS pseudo-selectors can be challenging. Fortunately, jQuery’s :contains() selector allows us to target elements in the DOM based on the text content inside of the element. So we can toggle the color of an availability statement in your OPAC to red if the text contains the word “Due” or “Checked Out,” rather than relying on the vendor to put a specific class on the availability message depending on whether an item was available or not. For instance, here is a jQuery statement for changing the color of the text in an availability message if the text of the message contains the word “Due”:
$('td[width="24%"]:contains("DUE")').css ('color', 'red');
Compare that to how we would have to write a similar function in Java-Script. We’d need to loop through each of the table cells with a width of 24%, capture the text of the element, and then check to see if it contained the word “Due.” If it did, then we’d have to set the style.color property of the element to red:
var tableCells = document.querySelectorAll('td [width="24%"]');
for(var i = 0; i < tableCells.length; i++) {
4148-900-2pass-08-r02.indd 85 07-04-2016 22:07:22

86 Customizing Vendor Systems for Better User Experiences
if(tableCells[i].indexOf('Due') > -1) {tableCells[i].style.color = 'red';
} }
The jQuery version is not only shorter, but also much more readable (and not to mention faster to execute). From left to right, it says “Find all the table cells with a width of 24% that contain the word “Due,” and add the CSS rule color: red;.” The JavaScript version is much more complex, involv-ing loops and conditionals, and will work only if you can ensure that your users will have browsers that support querySelectorAll(). Without querySelectorAll(), we’d have to add in another conditional, using getElementsByTagName() to grab all of the table cells and then check to see whether they had the width property set to 24% before testing to see if the text contained “Due.” It’s certainly possible, but it takes longer to write these kinds of functions and is more challenging to maintain. And if you’re making a lot of modifications to a vendor tool, you’ll save a lot of time by writing jQuery code.
Like JavaScript, we can chain jQuery statements together to save writing code. For instance, if we wanted to set the height, width, and background color of an HTML element, we could do that in a single statement with jQuery, like this:
$('td[width="24%"]:contains("DUE")').css('color', 'red').css('width', '45%').css('height', '100px');
Note that adding CSS styles with jQuery uses CSS syntax, unlike JavaScript, which uses camel case versions of the styles to set the DOM node style properties.
Mixing and Matching jQuery and JavaScriptSince jQuery is a JavaScript library, you can mix and match JavaScript and jQuery statements when you’re writing your code. For instance, we could create a hybrid loop and conditional like the one we looked at earlier for changing the text of a catalog availability statement by using jQuery’s excel-lent selectors to find the items and then using native JavaScript to make the style changes:
var tableCells = $('td[width="24%"]:contains("DUE")');for(var i = 0; i < tableCells.length; i++) {
tableCells[i].style.color = 'white';tableCells[i].style.backgroundColor = 'red';
}
4148-900-2pass-08-r02.indd 86 07-04-2016 22:07:22

jQuery Basics 87
Of course, this example could just as easily be written as a chain of jQuery methods as a single statement:
$('td[width="24%"]:contains("Due")').css('color', 'white').css('background-color','red');
BASIC jQUERY METHODSLike JavaScript, jQuery comes with a number of built-in methods that are effective shorthands for longer functions written in native JavaScript. While a treatment of all of jQuery’s methods is far beyond the scope of this book, there are a few methods that are useful when working to manipulate existing web pages, as we will do with vendor tools. (A full treatment of jQuery meth-ods is available at http://api.jquery.com.)
.find()The .find() method allows you to locate an element as a descendant of a specific DOM item or selector. Let’s start with the following markup, which we’ll use when looking at all of the methods covered in this chapter. (You’ll find this markup available in the exercises site under “jQuery Basics.”)
<div id="wrapper"><p>This is a paragraph
</p><img src="img/mypic.jpg" alt="My photo" />
</div><p>Here is another paragraph
</p>
If we want to find the paragraph inside of the <div id="wrapper">, we can use the following jQuery statement:
( rapper ).find( p )
This will return only the first paragraph, and not the one that is outside of the <div>. Technically, you don’t need to use .find() to select this element, since you could use the CSS selectors in the first part of the statement:
$('#wrapper p');
However, .find() is actually faster than using straight CSS selectors, and it is easier to troubleshoot complex queries if you can break apart different
4148-900-2pass-08-r02.indd 87 07-04-2016 22:07:22

88 Customizing Vendor Systems for Better User Experiences
selectors into .find() methods rather than jumbling them all up in a single selector.
.attr() and .css()In JavaScript, to set or find the value of a particular attribute, we used the attribute’s property name (often written in camel case), like this:
document.getElementById('wrapper') .getElementsByTagName('img') .alt = 'My awesome photo';
This requires knowing the name of the attribute’s node property, but allows access to most attributes this way.4 In jQuery, we can use the .attr() method to target the attribute as it is written in the markup. So the previous statement becomes:
( rapper ).find( im ).attr( alt 'My awesome photo');
If we instead wanted to capture the existing value of the alt attribute of an <img>, we could simply set that value in a variable:
ar my lt = ( rapper ).find( im ).attr( alt )
The same is true of setting CSS styles with jQuery, as we’ve already seen. Although instead of using the .attr() method, we use the .css() method, so that instead of writing:
document.getElementById('wrapper').style .color = 'red';
we can write:
$(‘#wrapper').css('color','red');
And if we need to know the current value of a CSS property, we can leave off the last parameter of the .css() method:
var myColor = $('#wrapper').css('color');
.text() and .html()When we looked at JavaScript for methods to set or capture the HTML or text contents of an element, we used the innerHTML or textContent property of the node. In jQuery, we can use the .text() and .html()
4148-900-2pass-08-r02.indd 88 07-04-2016 22:07:22

jQuery Basics 89
methods, which are much easier to remember. To find the text value of a paragraph, we can set a variable:
ar my e t = ( rapper ).find( p ).te t()
To set a value, we can pass it on as a parameter to the .html() and .text() methods. If we wanted to add a little markup to the paragraph inside of the <div id="wrapper">, we could write:
( rapper ).find( p ).html( his is em my fa orite </em> paragraph!');
.show() and .hide()JavaScript does not have any native functions for showing and hiding content. Instead, we need to set the style.display property of an element to either none (to hide it) or to the appropriate value to show it. In essence, jQuery does exactly the same thing. But rather than write out .css('display', 'none') to hide an item, you can use the .hide() method. To show an item that has already been hidden, we can use .show().
Later in the book, we’ll look at more elegant ways of showing and hiding content, such as sliding content in and out.
Moving Up and Down the DOMjQuery’s selector engine is exceptionally powerful for selecting elements in the same way we expect CSS selectors to work. However, CSS has some limita-tions when it comes to selecting items. You cannot select parent elements or other ancestors with CSS, only children and other descendants. Fortunately, jQuery allows you to move both down and up the DOM tree with a number of selectors.
Let’s say we wanted to check the text in the paragraph inside of <div id="wrapper"> and then make some changes to either the styles or the content of the DOM based on the value of this paragraph. We’ll start with this conditional statement:
if( ( rapper ).find( p ).te t() == his is a paragraph') {// Do something
}
To change the background color of the paragraph’s parent element, in this case, #wrapper, we could add this statement inside of the curly brackets of our conditional statement:
$(this).parent().css('background-color','green');
4148-900-2pass-08-r02.indd 89 07-04-2016 22:07:22

90 Customizing Vendor Systems for Better User Experiences
The .parent() method always goes up one level of the DOM tree, never more. The .children() method always goes down the DOM tree, but as many levels as needed. To find the paragraph within the <div id="wrapper">, we’d use this statement:
$('#wrapper').children('p')
But perhaps we’d rather hide the image within <div id="wrapper">, in which case we can use the .next() method to identify the next <img> within the paragraph:
$(this).next('img').hide();
If we need to go several levels up the DOM tree, we could always chain a bunch of .parent() methods, but we’d need to know the exact number of steps up or down the DOM tree to travel. (And I can say that sometimes this changes with vendor tools when you least expect it.) A better solution is to use the .closest() method, which will find the closest match for the selector up the DOM tree, regardless of how many steps it has to go..closest() won’t find items that are not ancestors of the starting ele-
ment, though. For instance, the following statement will not find the para-graph outside of the <div id="wrapper">:
( rapper ).find( im ).closest( p )
To select the paragraph outside of the <div id="wrapper">, we’d need to combine the .next() method with the .parent() method.
( rapper ).find( im ).parent().ne t( p )
.append() and .prepend()Adding elements to the DOM in JavaScript involves building up a new element node using createElement() and then appending it to the appropriate parent element. In jQuery, we can simplify the process a bit by merely using the .prepend() or .append()to place an item at the beginning or end of a parent element. We can add HTML markup or text, without needing to build up DOM nodes. For instance, to add a heading to our sample markup, we can . prepend() the markup to the <div id="wrapper"> like this:
$('#wrapper').prepend('<h1>This is a heading</h1>');
And like JavaScript, we can use the .append() and .prepend() func-tions to move content from one place to another. For instance, to move the
4148-900-2pass-08-r02.indd 90 07-04-2016 22:07:22

jQuery Basics 91
last <p> element inside of the <div id="wrapper">, we could use this statement:
$('#wrapper').next('p').append('#wrapper');
jQuery’s powerful selector engine greatly simplifies writing JavaScript to manipulate vendor tools. And because it extends native JavaScript, we con-tinue to have the flexibility to mix and match functions and methods from each, depending on our needs.
For the rest of this book, I’ll focus on jQuery for traversing the DOM of vendor tools and making changes. But first I’d like to explore some of jQuery’s functions that help us run loops and listen for interactions. jQuery’s cross-browser support will make executing code when a user clicks (or scrolls, or presses a key) much easier than if we relied on native JavaScript alone.
NOTES1. I know what you’re thinking now: “Why on earth didn’t you teach us jQuery
first!?!” I’ll explain in a moment. I promise.2. Google Developer Libraries is available at https://developers.google.com/speed/
libraries/?hl=en.3. A good example of this is GVSU’s link resolver, ProQuest’s 360 Link. ProQuest
uses an older JavaScript library called Prototype to manipulate the DOM, and since Prototype loads before any library-defined scripts, it reserves the $ variable before jQuery can define it. As such, we have to load jQuery in no on ict() mode before we can use it, since calls to $ will tell the browser to run the functions defined by the Prototype library rather than jQuery. This is why all calls to jQuery in our 360 Link Reset script begin with $j, rather than $. Prototype had already claimed the $ shortcut. (You can see the full code for this script at https://github .com/gvsulib/360Link-Reset.)
4. There is also a DOM getAttribute() method in native JavaScript that is well supported, in case there isn’t a node property for the attribute in question, like HTML5 data attributes.
REFERENCESwedberg, K. (2012). Better, Stronger, Safer jQuerify Bookmarklet. [Web log post].
Retrieved from http://www.learningjquery.com/2009/04/better-stronger-safer- jquerify-bookmarklet.
4148-900-2pass-08-r02.indd 91 07-04-2016 22:07:22

4148-900-2pass-08-r02.indd 92 07-04-2016 22:07:22

Chapter 9
Advanced jQuery
We saw in the last chapter how jQuery simplifies many JavaScript techniques. We learned shortcut methods for selecting elements in the DOM using jQuery’s powerful CSS-style selector engine and learned to manipulate the text, HTML, and position of those elements. But as with our introduction to JavaScript early in the book, we’re still missing a few pieces of the puzzle. While we can continue to build loops using the JavaScript for() method and add event listeners with addEventListener(), jQuery also has its own methods for implementing loops and listening for events. Since jQuery’s implementations are different than native JavaScript, it’s important to see the differences, since at times one can be easier to use than the other.
ADVANCED jQUERY METHODSThere are a number of useful methods built in to the jQuery library that are more cumbersome in native JavaScript. Loops lead the pack, but there are also new ways of manipulating elements that can make our code easier to write.
.remove() and .empty()There are times when we want to completely remove an element from a ven-dor tool. This can be a visible element, like a <div> or a <p> on the page, or it can be a page asset, like a stylesheet added by the vendor that is making it difficult for you to customize the styles of the tool.
jQuery provides a simple method for removing an element from the DOM altogether: .remove(). Simply target the element with a jQuery selector and then apply the .remove() method to it. Unlike the .hide() method, the .remove() method actually removes the code right out of the DOM, so there is no bringing back the element later as you can with .show().
I use the .remove() method most often when removing <link> ele-ments in a vendor tool that load stylesheets. Even though the stylesheet will
4148-900-2pass-09-r02.indd 93 07-04-2016 22:07:26

94 Customizing Vendor Systems for Better User Experiences
already have been loaded by the user’s browser, by removing it from the DOM, the browser will stop applying its styles. This is quite helpful if you don’t want to overwrite all of the styles applied by a vendor. Here is a statement that will remove all of the <link> elements in the <head> of the page:
( head ).find( lin ).remo e()
While useful, this approach is a little bit like carpet bombing the ven-dor tool; it will remove all of the stylesheets for sure, but it will remove all other kinds of <link> elements as well, including RSS feeds, favi-cons, and the application icons loaded on mobile devices when the site is added to the home screen.1 We’d be better off targeting just the <link> elements that are stylesheets, which will all have the rel attribute set to stylesheet.
( head ).find( lin rel="stylesheet" ).remo e()
We can be even more selective, using the CSS-style selectors to add a pseudo-selector if we need to target only one of the vendor’s stylesheets. Here’s a statement that removes the second stylesheet in the <head> (using the index of 1, since JavaScript starts counting with 0):
( head ).find( lin rel="stylesheet" :nth child(1) ).remo e()
At times we might want to remove the contents of an element in the DOM, but not remove the element itself. After all, it might have structural significance for the page, or in the case of many vendor tools, its existence might help the page look the way it does. In this case, we can use the jQuery .empty() method to remove all of the content from the element, while keeping the element in the DOM. Let’s say we have the following markup:
di class="sidebar"h elcome to the idebar h<p>We are very excited to have you visit the sidebar of our ebsite today. pim src="im sidebar. p " alt=" idebar lo o" di
Here we might need to keep this di class="sidebar">, since it probably controls the width of the other elements on the page. If we simply use .remove() to take the element out, we’ll probably be left with a gap on the right or left of the page. While we could correct that with CSS, we have another option. By using the .empty() method, we can keep the structural
4148-900-2pass-09-r02.indd 94 07-04-2016 22:07:26
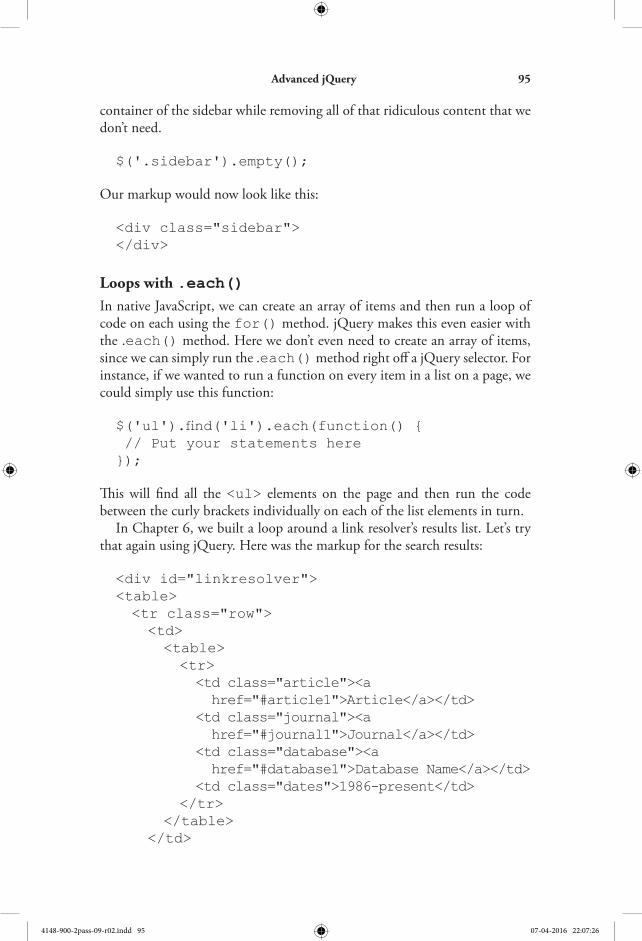
Advanced jQuery 95
container of the sidebar while removing all of that ridiculous content that we don’t need.
( .sidebar ).empty()
Our markup would now look like this:
di class="sidebar"di
Loops with .each()In native JavaScript, we can create an array of items and then run a loop of code on each using the for() method. jQuery makes this even easier with the .each() method. Here we don’t even need to create an array of items, since we can simply run the .each() method right off a jQuery selector. For instance, if we wanted to run a function on every item in a list on a page, we could simply use this function:
( ul ).find( li ).each(function() { ut your statements here)
This will find all the <ul> elements on the page and then run the code between the curly brackets individually on each of the list elements in turn.
In Chapter 6, we built a loop around a link resolver’s results list. Let’s try that again using jQuery. Here was the markup for the search results:
di id="lin resol er"tabletr class="ro "<td>
table<tr>
td class="article" a href=" article1" rticle a tdtd class=" ournal" a href=" ournal1" ournal a tdtd class="database" a href=" database1" atabase ame a tdtd class="dates" 1 present tdtr
tabletd
4148-900-2pass-09-r02.indd 95 07-04-2016 22:07:26

96 Customizing Vendor Systems for Better User Experiences
trtr class="ro "<td>
table<tr>
td class="article" a href=" article " rticle a tdtd class=" ournal" a href=" ournal " ournal a tdtd class="database" a href=" database " atabase ame a tdtd class="dates" 1 1 1 tdtr
tabletd
trtabledi
If you remember, we wanted to cycle over each of the nested tables and grab the appropriate data in each of the rows for the results. In the past example, we had specific classes for each of the tables, but you’ll notice that I removed those from this markup. With native JavaScript, it can be challenging to write code that easily finds elements in the DOM if you don’t have an ID or class or some other identifying attribute to target. But since jQuery allows us to use CSS-style selectors, we’ll be able to find the data we need more easily. And since you are unlikely to be handed the kind of markup that is easily manipulated by JavaScript from your vendors, we might as well accept that jQuery is often better at targeting DOM items in vendor tools than native JavaScript.
Our new jQuery loop needs to target the di id="linkresolver"> first and then examine each of the nested tables in the first set of <td> ele-ments. We can start our jQuery statement by looking at the tables inside of other tables:
( lin resol er table table ).each(function() { ur code ill o here)
Now that we’ve targeted the table cells, we’ll look through the tables to build our arrays of data for each record. Like the last time, I’ll build an array for each kind of result. Since I’m not using a counter variable, I’ll use the
4148-900-2pass-09-r02.indd 96 07-04-2016 22:07:26

Advanced jQuery 97
Java Script push() method to add each new item to the end of the appro-priate array:
efine the ariablesar article in s = ne rray() ournal in s = ne rray() database in s = ne rray() database ames = ne rray() dates = ne rray()
( lin resol er table table ).each(function() { imit the scopear ro = (this).find( tr ) et lin s
article in s.push( (ro ).find( td a:contains(" rticle") ).attr( href ))ournal in s.push( (ro ).find( td a:contains(" ournal") ).attr( href ))
database in s.push( (ro ).find( td:nth child ( ) a ).attr( href ))
et detailsdatabase ames.push( (ro ).find( td:nth child ( ) a ).te t())
dates.push( (ro ).find( td:last child ).te t()))
This script is about the same length as the native JavaScript function we wrote in Chapter 6 to do the same thing, but it is quite a bit more readable. The first line is identical to the old script, where we define our variables, in this case, all arrays. Then we use a jQuery selector to target the child <td> elements of the parent table . Each of these contains a nested table, and so to save some typing, I created a variable named row that serves as a proxy for this jQuery selector. That saves me a lot of typing, since I have to use that scope on each of the statements grabbing data from the page.
After that, I use the push() method to append the data in each state-ment to the appropriate array, and in the end, I have exactly the same arrays I had with the code in Chapter 6. (You’ll see a familiar version of this ready to paste into your console on the exercises site under Advanced jQuery > Loops with .each().) However, remember that this markup didn’t have any of the helpful classes or attributes that let me target specific elements. Instead, I had to rely on the CSS pseudo child selectors and jQuery’s :contains selector. The native JavaScript code to target each of those specific elements would have been much more complex, and the lack of useful unique identi-fiers on each element is a lot closer to the actual code we’re working with at GVSU on the ProQuest 360 Link link resolver.2
4148-900-2pass-09-r02.indd 97 07-04-2016 22:07:26

98 Customizing Vendor Systems for Better User Experiences
Event Listeners: .on() and .click()In Chapter 6, we also learned to add event listeners to our code with the addEventListener() method, which meant that we could make our tools even more interactive by running certain code only when a user clicked on a particular link. jQuery makes event listeners even easier than native JavaScript, since you don’t have to worry about whether IE 8 and below sup-port the jQuery .on() method. We can add an event listener on mouse click in almost the same way as addEventListener():
( tri er ).on( clic function() { Run this code hen user clic s
)
We can also target a number of other events besides click using the .on() method. However, jQuery also provides a number of shortcut functions for common event listeners, like .click() and .mousedown(). Since one of the great benefits of jQuery is its readability, you can choose whichever of the event listeners you prefer. I prefer using the shortcut methods over .on() because it’s less to write and I feel that it makes the code easier to read. The same code provided earlier would read like this with .click():
( tri er ).clic (function() { Run this code hen user clic s)
Reading this, it says “find the element with the ID of trigger, and when some-one clicks on it, run this code.”
In Chapter 6, we used our knowledge of JavaScript to rewrite the search results list in the link resolver and then hide all of the results except for the first one. We then gave the user the opportunity to click to “Show Additional Results,” and we’d oblige while also changing the label of the trigger to “Hide Additional Results.” We first used the JavaScript createElement() methods to make a new HTML element and then added it to the DOM with appendChild() to make a more semantic list that emphasized the first result. Here was the markup:
di class="first result" a href=" " ull e t nline a from a href=" " class="database" cademic earch atabase a br
span class="dates" o era e: 1 present span small a href=" " ro se the ournal a )di
p id="results to le" ho additional results pul id="additional results"
4148-900-2pass-09-r02.indd 98 07-04-2016 22:07:26

Advanced jQuery 99
li a href=" " ull e t nline a from atabase ame. li
li a href=" " ull e t nline a from atabase ame. li
li a href=" " ull e t nline a from atabase ame. li
ul
Now we’ll take a look again at this, rewriting the script in jQuery to hide the additional results and show them when the user clicks the results to le.First we need to hide the ul id="additional results">, which
is best handled with the jQuery .hide() method. That way, if jQuery fails to load, the results will still be visible.
( additional results ).hide()
Then we’ll set an event listener to wait for clicks on the p id="results toggle"> before showing the additional results:
( results to le ).mousedo n(function() { ( additional results ).sho ())
It’s quite simple! But of course, we need to make this script a bit more sophis-ticated, since we also need to hide the additional results when they are shown and change the label of the toggle to reflect this. We can do this with a simple conditional, just like in native JavaScript:
( results to le ).mousedo n(function() {if( ( additional results ).css( display ) == none )
{ ho (this).te t( ide dditional Results ) ( additional results ).sho () else { ide (this).te t( ho dditional Results ) ( additional results ).hide() })
Since the focus of the .click() statement is the p id="results toggle">, we can use the JavaScript word this to refer to it when working on our script. This makes the script short and quite readable: “If
4148-900-2pass-09-r02.indd 99 07-04-2016 22:07:26

100 Customizing Vendor Systems for Better User Experiences
someone clicks on this and if the additional results are hidden, change the text of this to read ‘Hide Additional Results’ and then show the results.”
.addClass(),.removeClass(), and .hasClass()In the last chapter, we looked at the jQuery .attr() method, which allowed us to access any element’s attributes with the same attribute names used when writing the HTML markup. While we can access the classes by using the .attr('class') method, this returns or sets the entire list of classes. Since jQuery makes interaction enhancements quite easy, having a shorthand method to simply add or remove a class can prove useful.
In the script we just created, we use the jQuery .hide() and .show() methods to control the display property of the additional results element; we might instead toggle a class to the element and use a CSS rule to control whether or not the item is visible. For instance, we could create the following CSS rule:
.hide {display: none
}
This could be a useful rule in many contexts outside of the additional results scenario, so rather than come up with another method for hiding content, why not just use the CSS rule that could be used elsewhere? When we want to hide an item, we can just add the class hide to it, and CSS will handle toggling the display property to none. We can do that easily with the jQuery .addClass() method, and when we want to show the item, we can use the .removeClass() method. These make toggling classes much easier than using JavaScript’s native class ame property or even jQuery’s. attr('class'), since you don’t need to deal with all of the classes applied to an element. Here’s the script to show or hide additional resources with .addClass() and .removeClass() in place of .show() and .hide():
( additional results ).add lass( hide )( results to le ).clic (function() { if( ( additional results ).has lass( hide )) { ho (this).te t( ide dditional Results )
( additional results ).remo e lass ( hide )
else { ide (this).te t( ho dditional Results ) ( additional results ).add lass( hide ) })
4148-900-2pass-09-r02.indd 100 07-04-2016 22:07:26

Advanced jQuery 101
Notice that instead of checking the value of the display property for the ul id="additional results" , I instead used the jQuery .hasClass() method to check to see if the element in the selector had the hide class assigned to it. Since .hasClass() is a Boolean, it will return true or false, making it perfect for a conditional.
.slideUp(),.slideDown(), and .slideToggle()jQuery’s excellent shorthand methods for showing and hiding content, .show() and .hide(), are great. But jQuery has many other methods for showing and hiding content that enhance the content’s visual transitions from hidden to visible. One of the most common is to have content slide in or out of view.
jQuery lets us slide our content in and out easily using either the .slideUp() or .slide o n() methods. For instance, if we wanted to slide the additional results up and down when a user clicked instead of hav-ing them appear and vanish, we could replace the .show() and .hide() methods in our script with .slide o n() (to show) and .slideUp() (to hide).
( additional results ).css( display none )( results to le ).clic (function() {if( ( additional results ).css( display ) ==
none ) { ho
(this).te t( ide dditional Results )( additional results ).slide o n()
else { ide
(this).te t( ho dditional Results )( additional results ).slide p()
})
We can also control how quickly the slide happens by passing a value in milliseconds to the methods. Here I’m showing the content very quickly, in just 200 milliseconds, and hiding it slowly, taking a full second to slide the content up:
( additional results ).css( display none )( results to le ).clic (function() {if( ( additional results ).css( display ) ==
none ) { ho
(this).te t( ide dditional Results )
4148-900-2pass-09-r02.indd 101 07-04-2016 22:07:26

102 Customizing Vendor Systems for Better User Experiences
( additional results ).slide o n( ) else {
ide(this).te t( ho dditional Results )( additional results ).slide p(1 )
})
If you don’t need to add anything other than the toggling back and forth of the slide, you can save time by using the jQuery .slide o le() method, which will calculate whether the element is visible or not without having to write a conditional. For instance, if we didn’t need to change the label of the trigger, we could write our entire function like this:
( results to le ).clic (function() { ( additional results ).slide o le())
DEFERRING SCRIPT EXECUTIONIn Chapter 2, we looked at two attributes of the <script> element, async and defer, as a way to help control when your scripts run during page load. Since we want to be sure that our scripts execute after the DOM is loaded, we can use the defer attribute on our <script> elements, but this has sketchy support in older browsers. And while loading our <script> ele-ments right above the closing body tag makes sure that the DOM is loaded before our executing scripts, it can still be useful to defer an entire script or even a few functions. There are several ways to do this in JavaScript and jQuery.
$(document).ready()We’ve learned about event listeners for user interactions, like JavaScript’s addEventHandler() or jQuery’s .on(), but there are other events in JavaScript than just those initiated by users with a mouse, a keystroke, or a swipe. Some of these events are tied to the DOM itself, either on the window object (which is like the container for your web page’s content) or on the document object (which is the DOM document itself, home to your HTML markup). As your page loads, there are events that fire on both window and document, letting you know about the progress of the page load.
In jQuery, there is a an event that fires as soon as the DOM has been fully loaded: the .ready() event. .ready() fires when the document is fully loaded, so that all of the markup on the page is available. In jQuery, you can defer the loading of a script until the .ready() event fires, so that
4148-900-2pass-09-r02.indd 102 07-04-2016 22:07:26

Advanced jQuery 103
you can be sure that any DOM element that you need to enhance is availa-ble before you try to manipulate it with a script. The .ready() event fires once the DOM is ready, but before all of the other page assets are loaded, like images, scripts, and stylesheets.
We can set our code to wait to execute until the .ready() event by wrap-ping it in an anonymous function tied to the document:
(document).ready(function() { ll our scripts o here)
You can have as many blocks of script bound to the .ready() event as you like, which is useful if your scripts are broken up across multiple files (or if the vendor is already binding some code to the .ready() event).
JavaScript’s native window.onloadAnother event tied to page load takes place on the window object. When everything is fully loaded, then an onload event is fired by the window object. The difference between the onload event on the window object and the jQuery .ready() event on the document is that window.onload only fires once the document is loaded and all of the other images, scripts, stylesheets, and other links, frames, and other assets are loaded. The window.onload event fires after the .ready() event in jQuery.
If we want to ensure that our script doesn’t run until all of the content is loaded, we can tie our scripts to the window.onload event, so that none of our scripts will be executed until the onload event fires. The easiest way to do this is to wrap all of your scripts in an anonymous function that fires at the onload event, like this:
indo .onload = function() { ut all of your scripts here}
Of course, not all of your scripts might need to be deferred until the onload event, so you could be selective about which scripts are deferred.
One difference between .ready() and onload is that you can have only one window.onload referenced per page. If you try to use window.onload more than once, the page will execute only the last one. So, if your vendor has beaten you to the punch and is already using the onload, you might need to try .ready(), and if you need to wait for images, then add a set imeout()method around your relevant state-ments. onload is also native to JavaScript so you don’t need the jQuery library to use it.
4148-900-2pass-09-r02.indd 103 07-04-2016 22:07:26

104 Customizing Vendor Systems for Better User Experiences
setTimeout()Sometimes I’ve found it necessary to defer the execution of a function or two for just a small amount of time to let a vendor’s JavaScript finish executing or making changes to a template or page, and I can’t tie my changes to either the .ready() event or the onload because they execute too early. In these cases, I’ve had to resort to setting a bit of a delay in my scripts so that certain functions don’t run for half a second or so, just to make sure that all of the vendor’s content is in place before I monkey around with it in JavaScript.set imeout() takes two parameters: the function that you’ll execute
once the specified amount of time has passed, and the number of millisec-onds to wait before executing the code. Here’s a simple example that will show an alert box after five seconds (you can try this in the console to see how it works):
set imeout(function() {alert( ou aited seconds for me ) )
In the Summon 2.0 discovery layer that GVSU uses, I’ve found that running jQuery, even when bound to the .ready() event, will often fire before the actual content has been added to the page. (The reason that the document fires the .ready() event without all the content is because the content itself is being added by JavaScript, so it isn’t actually in the DOM.) I find that if I wait just half a second, the content is there and I can make my changes, and the wait is imperceptible to most users. Not all of the scripts need to wait, though, so only a few statements are contained in the set imeout() method. You can see the way I’m using this method on GitHub, at http://gvsu.edu/s/ZB.
Now that we’ve explored some of jQuery’s more advanced methods, why don’t we revisit some of those examples we covered in Chapter 7. Seeing how these different tools can work together to change a library tool in practice will help you better plan for the modifications you’ll make on your own vendor tools.
NOTES1. A full treatment of the kinds of <link> elements can be found at https://devel
oper.mozilla.org/en-US/docs/Web/HTML/Element/link.2. ProQuest’s 360 Link 1.0 is full of duplicate IDs, which are not allowed normally
in HTML. So the power of etElement y d() is useless, because that func-tion targets only a single item. When you have eight of the same IDs on a page, then the function doesn’t behave as you’d expect. CSS pseudo child selectors are still the best way to target items on the page.
4148-900-2pass-09-r02.indd 104 07-04-2016 22:07:26
Chapter 10
jQuery Examples
In the last two chapters, we learned how to use jQuery to do the same things we’d covered in the sections on native JavaScript. Because our vendor tools often do not have clean and semantic HTML markup with useful IDs for hooks into our scripts, jQuery’s CSS-style selectors are a useful addition to our toolbox for making vendor tool modifications. We also walked through many of our original examples from Chapters 4 and 6, re-creating those use-ful JavaScript methods with their jQuery equivalents. But like JavaScript, learning methods in isolation of a real-world problem isn’t going to give the understanding needed to write scripts to modify vendor tools. So let’s revisit Chapter 7, where we built two small scripts to modify some common tools. The first reformatted the holdings table in an OPAC, while the second recon-figured the registration form for interlibrary loan software. These examples helped shed light on what is possible when we use JavaScript to modify ven-dor tools. In this chapter, we’ll go back over these examples and build our modifications with jQuery.
EXAMPLE: OPAC HOLDINGS TABLEAs we saw in Chapter 7, the holdings tables in most OPACs are less than useful. Our research at GVSU showed that our users wished they had some sort of visual cue to tell them which copies of a book were available. The information included by the OPAC was also placed in the wrong order. Our users were primarily interested in whether an item was available or not, and that was the last bit of information included. Here is the markup for this table, reproduced from Chapter 7. (You can see the table itself in Figure 7.1.)
<table class="bib_items">
<tbody>
<tr class="bibItemsHeader">
<th width="38%" class="bibItemsHeader">
Location
</th>
4148-900-2pass-10-r02.indd 105 07-04-2016 22:07:30

106 Customizing Vendor Systems for Better User Experiences
<th width="38%" class="bibItemsHeader">
Call No.
</th>
<th width="24%" class="bibItemsHeader">
Status
</th>
</tr>
<tr class="bibItemsEntry">
<td width="38%">Mary Idema Pew - 3rd Floor</td>
<td width="38%">PS3562.E353 G6 2015</td>
<td width="24%">DUE 09-17-15 +2 HOLDS</td>
</tr>
<tr class="bibItemsEntry">
<td width="38%">Steelcase Popular Reading</td>
<td width="38%">PS3562.E353 G6 2015 c.2</td>
<td width="24%">AVAILABLE</td>
</tr>
<tr class="bibItemsEntry">
<td width="38%">Mary Idema Pew - Popular
Reading (1st Floor)</td>
<td width="38%">PS3562.E353 G6 2015 c.3</td>
<td width="24%">DUE 10-07-15</td>
</tr>
</tbody>
</table>
Previously, we used JavaScript to capture the information presented in the holdings table and then created a new list in semantic HTML, using a <ul> element. We also brought the availability of the item to the beginning of the statement and used CSS to style it to provide a quick visual cue as to whether the book was available or not. We can do the same with jQuery, although the syntax will be a little different.
First, we need to target the table on the page and then run a loop over each of the <tr> elements so we can grab the data. Once we have the data for each row, we’ll reformat it into a set of <li> elements that we’ll append to our new <ul> element. When we made changes to this holdings table with native JavaScript, we used the JavaScript createElement() method to create a new DOM node for our <ul> element. jQuery doesn’t replace the native JavaScript DOM methods like this, so we could certainly take a similar approach. However, jQuery’s ability to work with markup as strings rather than as DOM nodes is one of the appeals to the library for novices. So instead of creating new DOM nodes for our <ul> and each of our <li> elements, we’ll create a new string variable that contains the markup written as if we were working on an HTML page.
4148-900-2pass-10-r02.indd 106 07-04-2016 22:07:30

jQuery Examples 107
The challenge of this approach is that we need a way to prefix the string with the opening <ul> tag and then append it with the closing tag. The way I’ll approach this is to create the variable that will hold our markup with the opening tag, then use the loop to append each successive <li> element, and finally, when the loop has finished running, I’ll add the closing </ul> tag before adding the new markup to the DOM. First I’ll start our variable:
var newList = '<ul id="availability-list">';
Now I’ll create my jQuery loop, using the .each() method:
( table.bib items ).find( tr.bib temsEntry ).each (function() {
// Save content to variables
ar location = (this).find( td:first ).te t()ar call o = (this).find( td:nth child( ) ).te t()ar a ailability = (this).find( td:last ).te t()
// Build new list item, append to newList
newList += '<li><span class="availability">' +
availability + '</span> <span class="location">' +
location + '</span> <span class="callno">' +
callNo + '</span></li>';
});
newList += '</ul>';
In native JavaScript, we used the getElementsByTagName() method to grab each of the <td> elements in each row to populate an array. Here I used jQuery to target each of the table cells individually, using jQuery pseudo-selectors. While we could use the CSS :first child and :last child selectors here, jQuery also includes its own native :first and :last selectors, which just target the absolute first and last elements in a particular selector. Each of these list items is constructed as a string, which makes the markup more readable if you are more comfortable in HTML than you are with JavaScript.1 We add each of these list elements to our initial newList variable with the append operator, +=. Then we need to close out the list with a </ul> tag. Now we have the HTML markup for our new hold-ings list as a string of markup rather than as a DOM node. All that is left is to get it into the page.
In the section on native JavaScript, we used the JavaScript querySelector() function to find the <table> with a class of bib_items. Since we had built our new list as a DOM node using the createElement() method, we could simply use the appendChild() method to add new node to the existing element. However, because we created
4148-900-2pass-10-r02.indd 107 07-04-2016 22:07:30

108 Customizing Vendor Systems for Better User Experiences
our markup as a string of HTML this time, we won’t be able to use the appendChild() method, since it works only on DOM nodes. We’ll have to change the HTML of an element to the contents of our newList varia-ble to add our markup. This might be a bit easier than the last time, where we had to append the element to a <table> while also using CSS to hide the <tbody> section of the table and asking the browser to display the table as a block element rather than as a table. This time around, however, we can use jQuery to replace the contents of the <table class="bib_items"> with our markup, so that the only CSS we need to apply is to force browsers to display the table as a block element. And since both of these target the same element, we can chain our methods into a single statement:
$('table.bib_items').css('display','block')
.html(newList);
However, we’re not done yet. In our markup, we intentionally wrapped each of our pieces of information in <span> elements with appropriate classes. This lets us style each of the elements easily, but it stops short of us knowing whether an item is actually available or not, and changing the styles to reflect that. In Chapter 7, we used the JavaScript inde f() method to compare the contents of the availability statement with the string “AVAILA-BLE.” If we found that the statement contained “AVAILABLE,” we added a class to the <span> that used CSS to display the statement as a green box with white writing. If we didn’t find the “AVAILABLE” statement, we styled the statement to be red with white text.
We’ll follow the same strategy with jQuery, even replicating the inde f() method we used in Chapter 7:
var avail_classes="availability unavail";
if(a ailability.inde f( V E ) 1) { avail_classes="availability avail";
}
Now we’ll add in the avail_classes variable to the list element we’re creating, so that the last statement of the function executed by the .each() method will be:
// Build new list item, append to newList
newList += '<li><span class="' + avail_classes + '">' +
availability + '</span> <span class="location">' +
location + '</span> <span class="callno">' + callNo +
'</span></li>';
This way our conditional checks the contents of the availability statement and toggles the classes when the HTML is created. The CSS hasn’t changed
4148-900-2pass-10-r02.indd 108 07-04-2016 22:07:30

jQuery Examples 109
since Chapter 7, and in fact, the end result looks the same as it did with native JavaScript, as you can see in Figure 10.1.
You’ll find the code for this modification further down on the jQuery Examples > OPAC Holdings page.
EXAMPLE: ILL REGISTRATION FORMIn Chapter 7, we also wrote a modification for our interlibrary loan registra-tion form, taking a long, unwieldy form and converting it into a streamlined, interactive page that reduced sign-up errors drastically. We did this both by modifying the HTML templates that OCLC provides for ILLiad and by add-ing an interaction layer of native JavaScript to change the text of some form options, to hide certain fields until they are needed, and to add convenient “clear” buttons to our input fields to make it easier for mobile device users to complete the forms. In this chapter, we’ll revisit those solutions, but we will use jQuery to write the code to make our changes.
Changing the Text of Form FieldsIn Chapter 7, we created a new, more usable drop-down menu for our default pickup locations by manually writing HTML instead of letting ILLiad gen-erate it automatically. Since ILLiad displays pickup locations as three- to five-letter codes, it was essential to display the full name of each location to our users to ensure that the form was filled out correctly. While writing the HTML solved the problem for displaying the text of new pickup locations, it didn’t help us change the text of the currently selected location, which we inserted into the form with a token. Here is the markup from the form:
<label for="NVTGC">Preferred Pickup Location</label>
<select id="NVTGC" name="NVTGC">
<optgroup label="Current pickup location">
<option value="<#PARAM name="NVTGC">" selected>
<#PARAM name="NVTGC"></option>
</optgroup>
<optgroup label="Select new pickup location">
<option value="LIB"> Mary Idema Pew Library
@ Allendale</option>
Figure 10.1 jQuery makes it easier to write the code, but the end result looks the same.
4148-900-2pass-10-r02.indd 109 07-04-2016 22:07:30

110 Customizing Vendor Systems for Better User Experiences
<option value="STEEL">Steelcase Library @
DeVos</option>
<option value="FREY">Frey Learning Center @
CHS</option>
</optgroup>
<optgroup label="Distance Education?">
<option value="OCS">Ship Books to me</option>
</optgroup>
</select>
Our previous solution was to capture the text of the currently selected <option> and then use a series of conditionals to change the text from the code to the full name of the library. With jQuery, we can make this even easier, by simply using the .te t() method on jQuery selectors that target the :contains pseudo-selector. These four lines will replace all of the con-ditionals we wrote in Chapter 7:
( option:contains(" ") ).te t( ary dema e Library @ Allendale');
( option:contains(" EE ") ).te t( teelcase Library @ DeVos');
( option:contains(" RE ") ).te t( rey earnin Center @ CHS');
( option:contains(" ") ).te t( hip oo s to Me');
The jQuery selectors will look for any <option> element on the page that contains the text in the pseudo-selector. If found, they will set the text to the value in the .te t() method. If no <option> contains the selected text, then the statements won’t do anything. You can test it out for yourself on the exercises site under jQuery Examples > ILL Registration Form.
Hide Address until NeededAs we saw in the previous chapters, jQuery has a number of shortcut methods for hiding and showing text. When we wrote our native JavaScript modifica-tion, we toggled the CSS display property of the element we wanted to hide. This made the new address fields appear or disappear suddenly. With jQuery, however, we have the ability to use more sophisticated transitions, which can often help users better understand that new content or fields have appeared. As we rewrite this modification with jQuery, we’ll have the new address fields slide in and out rather than appear and disappear.
If you remember, we made some HTML modifications to the template to make this customization easier to accomplish. First, we wrapped the entire set of address fields in a <div> with an ID of address fields, so that
4148-900-2pass-10-r02.indd 110 07-04-2016 22:07:30

jQuery Examples 111
we could easily target all of the fields at once. Then we used JavaScript’s addEventListener() method to wait for changes to the <select> element for choosing the default pickup location. If a user chose “Ship books to me” (which has a value of OCS), then we’d show the <div id="address fields" . If the user chose something else, we’d hide the <div>. Here is the markup:
di id="address fields"label for=" ddress" ddress ( o . . o es) </label>
<input id="Address" name="Address" placeholder=
" ddress" type="te t" <label for="City">City</label>
input id=" ity" name=" ity" type="te t" <label for="State">State</label>
input id=" tate" name=" tate" type="te t" <label for="Zip">Zip</label>
input id=" ip" name=" ip" type="te t" </div>
First, we’ll hide the di id="address fields" , since our event listener will expect it to be hidden by default:
( address fields ).hide()
Then we’ll set an event listener with the jQuery .on() method. The syntax for this event listener is quite similar to the native JavaScript addEventListener() method:
$('select#NVTGC').on('change', function() {
if($(this).val() == 'OCS') {
( address fields ).slide o n( ) } else {
( address fields ).slide p( ) }
});
Now our form is easier to use, with only a few fields visible by default. Dis-tance education students will see a few additional fields that elegantly slide in and out when pickup locations are chosen; otherwise, both the address fields will remain hidden. This small change to the transitions between showing and hiding the address fields has made for a less jarring experience for our users. In usability tests and interviews, we’ve found that in situations like this, having a slightly longer animated transition like a slide helps our users better
4148-900-2pass-10-r02.indd 111 07-04-2016 22:07:30

112 Customizing Vendor Systems for Better User Experiences
understand the context for the additional content and prepares them to fill out the extra fields more than making all of the fields appear at once.
You can test the code for this fix on the exercises page, under jQuery Examples > ILL Registration Form.
Adding Clear ButtonsThe last step in modifying our form was to add “clear” buttons to the end of each <input> element, allowing users to easily clear the contents of a field. This is especially important for mobile users, who will find themselves tog-gling around in their on-screen keyboards for the backspace key if they need to make major changes to the form.
We made some small changes to the template markup to make the clear buttons work. We added an empty <span> element after each <input type="te t" , with an ID that matched the input but that had an addi-tional -clear suffix. Here again is the markup for the first and last name fields:
<label for="FirstName">First Name</label>
input id=" irst ame" name=" irst ame" type="te t" value="<#PARAM name="FirstName">">
<span id="FirstName-clear"></span>
<label for="LastName">Last Name</label>
input id=" ast ame" name=" ast ame" type="te t" value="<#PARAM name="LastName">">
<span id="LastName-clear"></span>
The <span> elements are intentionally empty, so that if the jQuery fails to load or execute, we won’t have nonfunctioning clear buttons hanging out on the page. We’ll add the contents of the clear button in with jQuery.
If we’ve added a <span> to every input type="te t" on the page, we can use a loop to add the clear buttons and the event listeners to simplify the code. When we built this modification with native JavaScript, we used a function and then passed the function the ID of the input we wanted to add a clear button to. This is just another way to accomplish the same thing.
( input type="te t" ).each(function() { var inputID = $(this).attr('id');
$("#" + inputID + "-clear").addClass('clear-button').
te t( ).clic (function() { $('input#' + inputID).val('');
$('input#' + inputID).focus();
});
});
4148-900-2pass-10-r02.indd 112 07-04-2016 22:07:30

jQuery Examples 113
This is a bit less code than the native JavaScript version and takes advan-tage of method chaining in jQuery, where we are able to set the content and class of the clear button and set an event listener at the same time.
You can experiment with this jQuery code on the exercises site, under jQuery Examples > ILL Registration Form.
Now that we’ve spent time working our way back through a few of our earlier examples using the jQuery library, we’re ready to tackle the next big hurdle of modifying vendor tools: how do you get content from one site into another? We’ll explore jQuery’s methods for cross-site scripting in the next few chapters.
NOTE1. You could do the same thing in native JavaScript with the innerHTML property
of an element.
4148-900-2pass-10-r02.indd 113 07-04-2016 22:07:30

4148-900-2pass-10-r02.indd 114 07-04-2016 22:07:30

Chapter 11
Getting Data In and Out of Vendor Tools
Sometimes, vendor tools do not include all of the information we or our users prefer. Sometimes an institutional policy or government regulation requires us to display license information for electronic resources, but our vendor tools don’t have a way for us to comply. Perhaps you’d like to embed streaming video or audio into your digital collections tool, but you don’t have the storage space on the vendor’s server. Or perhaps you’d like to get rid of your OPAC or database list, and integrate it with another vendor product. Each of these is possible, but requires that you get data in or out of your vendor tool.
GETTING DATA IN WITH AJAXjQuery has several built-in functions to connect asynchronously to other servers with JavaScript (which is called Asynchronous JavaScript, or AJAX). $.ajax(),$.get(), and .load() are some of the most common that we’ll cover in this chapter. While each of these methods is a little different, using JavaScript to connect to another server requires permission from the other server. This is because browsers have a security feature called the same-origin policy, which means that web pages can access data from another page only if they both come from the same server and are loaded with the same URI scheme.1 This helps to protect your data on one site from being accessed by a malicious script somewhere else without your permission. However, if you are writing your own scripts, you’ll need to change some settings on your web server or in your server-side scripts to allow external scripts to share data. We’ll cover some of the technical details of setting up cross-domain access in Chap-ter 13, when we examine building simple PHP programs to parse data sent by your scripts.
Assuming your server has been set up to share data with your vendor tools, you can connect using AJAX to get data into your vendor tools. Let’s look at some examples of pulling external data into vendor tools.
4148-900-2pass-11-r02.indd 115 07-04-2016 22:07:34

116 Customizing Vendor Systems for Better User Experiences
Example: HasMedia? for CONTENTdm at GVSUThis example uses JavaScript to creatively add content to a page, but doesn’t actu-ally use AJAX. We’ve hosted out digital collections in OCLC’s CONTENTdm for years, but we didn’t pay for much storage space, only enough for storing scanned images and PDFs. When we started maintaining several large streaming video collections, we needed a way to affordably get our streaming video into the CONTENTdm pages. Buying more hosting was out of question, since the terabyte or so that we would need would have cost us tens of thousands of dollars a year, so a colleague and I came up with another solution.
I wrote a very simple script that looked at the metadata on each full record page. If the metadata showed that the file types included “Moving pictures” or “audio,” then I would have the browser fetch an audio or video file from another server; I’d then embed the media file on the page using the HTML5 <video> or <audio> elements. Since at the time we were still supporting browsers that did not support HTML5 (like IE 8), we also used a streaming Flash version of the file as a fallback.
My colleague created a directory structure on the other server based on the metadata elements available to me on each full record page. Each file lived in a folder named after the CONTENTdm collection number it belonged to, and the files were named with the Digital Identifier field from CON-TENTdm. I could then target media files with the following URL pattern:
http://gvsulib.com/media/[CONTENTdm Collection
umber i ital dentifier . E tension
So for the video for an interview with Larry Terborg in the Veterans His-tory Project Collection (CONTENTdm Collection p4103coll2 and Digital Identifier LTerborg1591V), I’d need to find the MP4 version of the video at:
http://gvsulib.com/media/p4103coll2/LTerborg1591V
.mp4
This pattern allowed us to know exactly which files we would need based entirely on two metadata elements displayed on the page.
Let’s take a look at a simplified version of the script. First, we can find the collection number by targeting the value of a hidden <input> element on the page.
var collection = $("input#cdm_collection").val();
Next, we can grab the digital identifier by finding the field label in a table cell and then targeting the next table cell, which contains the value we are after. We can do this with the jQuery .next() method.
4148-900-2pass-11-r02.indd 116 07-04-2016 22:07:34

Getting Data In and Out of Vendor Tools 117
var recordno = $("td.description_col1:contains('Digital
dentification )").ne t().te t()
Now we need to grab the whole text of the metadata fields as a string, and then we check for the occurrence of the metadata term for a movie. If it finds the term, it uses the jQuery .prepend() method to add markup for an HTML 5 <video> element on the page with the various video formats as <source> elements. The src attributes of the <source> elements are all populated with the data from the metadata fields for collection and the Digital Identification.
// Get all the metadata in one string
var metaData = $("td.description_col2").text();
// Check to see if it has the "Moving Image"
keyword
if(metaData.indexOf('Moving image') > -1)
{// Has a movie!
$("#tabs").prepend('
<video controls>
<source src="http://path/to/media/'+
collection + '/' + recordno + '.ogv"
type="video/ogg">
<source src="http://path/to/media/' +
collection + '/' + recordno + '.mp4\"
type="video/mp4">
</video>
');
}
In this case, I didn’t need to worry about cross-domain compliance, since I am simply embedding video and audio files from another server into an HTML document. This is how HTML media elements work, so there was no need to reconfigure my server. Only when I need to get text or data from one server to another into a document do we need to make sure that the server allows cross-domain requests.
Figure 11.1 shows a CONTENTdm page with the streaming video ele-ment added.
Example: Database Licenses in the Link Resolver at Queen’s UniversityIn 2013, Jenny Jing from Queen’s University in Canada wrote me because she needed a way to get database license links into Queen’s 360Link link resolver. My solution was a simple bit of jQuery using the $.get() function that
4148-900-2pass-11-r02.indd 117 07-04-2016 22:07:34
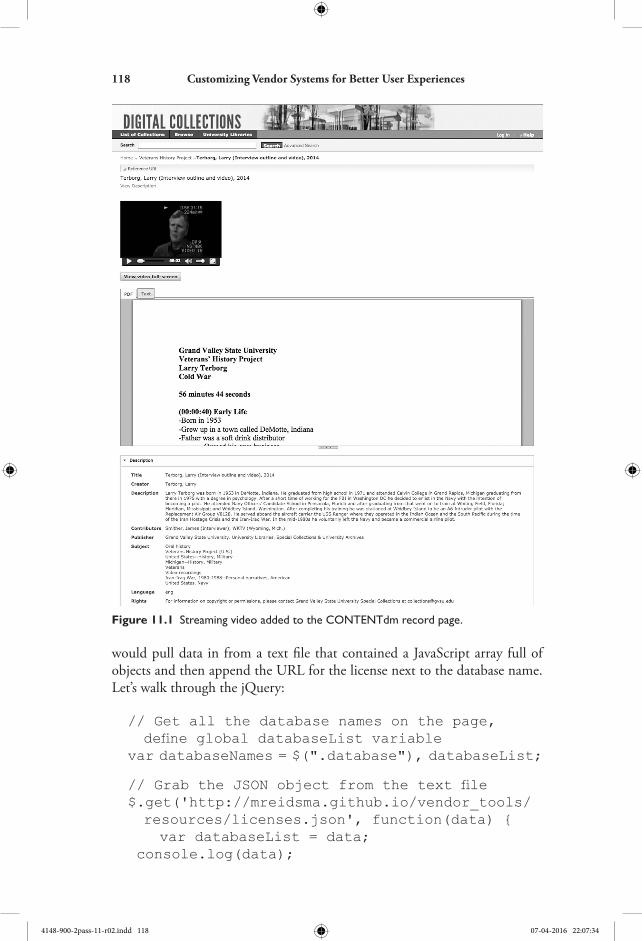
118 Customizing Vendor Systems for Better User Experiences
would pull data in from a text file that contained a JavaScript array full of objects and then append the URL for the license next to the database name. Let’s walk through the jQuery:
// Get all the database names on the page,
define lobal database ist ariablevar databaseNames = $(".database"), databaseList;
rab the ob ect from the te t file$.get('http://mreidsma.github.io/vendor_tools/
resources/licenses.json', function(data) {
var databaseList = data;
console.log(data);
Figure 11.1 Streaming video added to the CONTENTdm record page.
4148-900-2pass-11-r02.indd 118 07-04-2016 22:07:34

Getting Data In and Out of Vendor Tools 119
// Find the databases in the databaseList,
append links
for(i = 0; i < databaseNames.length; i++) {
// Get the database name from the page
var databaseText = $(databaseNames[i])
.find( a ).te t()console.log(databaseList[databaseText]);
var licenseURL = databaseList[databaseText];
$(databaseNames[i]).append(' <a href="' +
licenseURL + '" class="license">License
Information</a>');
}
});
First, we collect all of the database elements in an array called data baseNames. Then we use the $.get() method to pull the external JavaScript Object Notation (JSON) file into the variable called databaseList. Here is a sample of the JSON file, formatted as a JSON object:
{
"Academic Search Database": "http://path/to/license",
"ProSearching Search Database": "http://path/
to/license",
"Tiny Specialist Database": "http://path/to/license"
}
The format of this object has the database name as the property, with the URL as the value. Once we get the text version of the database name, we can use the property notation of JavaScript objects to call the URL from the object, as we do here with databaseList.databaseText. Finally, we append the link to the database container with the text to “License Information.”
This technique is quite useful, planting an external file with data in it and pulling that in to your script. You can even dynamically generate the JSON file with a script pulling from a database, or you can manually manage it. Since license information doesn’t likely change much, we could make due here with a manually managed file. But in Chapter 13, we’ll look more at how to pull dynamic data from server-side scripts written in PHP. For now, you can test this version of the Queen’s script on the exercises site under AJAX > License Information.
Example: Show All Holdings on One Screen in the OPAC, GVSUI also use jQuery to pull all holding data onto our OPAC pages to improve the experience of finding popular books for our users. In WebPAC Pro, any
4148-900-2pass-11-r02.indd 119 07-04-2016 22:07:34

120 Customizing Vendor Systems for Better User Experiences
record with more than 10 holdings (or a journal with more than 10 items) has the list of holdings split up between two screens. The first 10 items are listed on the bib record, where users expect them to be, but the rest are on a separate page that loads if you click “View all copies.” Since these pages are both on the same server, I realized that I could pull all of the holdings on the main record page and then hide all but the first 10, allowing users to see the full list of holdings by clicking “Show more copies” and using jQuery to slide these extra copies out. That would save my users having to load a separate page, and I realized that as I parsed the content from the full holdings list, I could sort the items to put all of the available copies first.
First, I took advantage of a parameter for the .load() method, where you can pass it a selector and it will load only that element on the target page, without having to grab the entire HTML page. I could find the URL of the full holdings list as the action attribute of the <form>. I realized that I needed only the <table class="bib_items"> from the full hold-ings page, and so I added an empty <div> to the bottom of my page, set it to not display, and then loaded the full holdings list into the hidden element. Once the content was loaded, I created a function that would work with the new data:
// Get URL of additional copies
ar load rl = ( bib isplay ontent center ).find( form ).attr( action )
$('#additionalCopies').load(loadUrl + '. bib_items',
function() {
// Parse the holdings and replace the default
holdings table
});
Once the callback function fires, I’ll have the whole <table class= "bib_items"> from the full holdings list in a hidden <div> on my page. Here I can use a similar loop to cycle through all of the table rows to grab my data. I can sort the different item records based on whether or not they are available. To do this, I’ll create two arrays, one for available items and one for unavailable. Once I’ve cycled through all of the items, I’ll concatenate the arrays into one and then run a second loop that creates a new <div> element that contains the first 10 items and another that contains the rest. Finally, I’ll add a trigger to show or hide the additional elements and set an event listener to watch for clicks. I’ve included com-ments throughout this code, since it is a bit longer than other modifications we’ve looked at.
Since the following code belongs inside of the .load() callback func-tion, the JavaScript keyword this refers to the hidden <div> with all of
4148-900-2pass-11-r02.indd 120 07-04-2016 22:07:34

Getting Data In and Out of Vendor Tools 121
the holdings listed, which has an ID of additional-copies. The refor-matting part of the function should look familiar from Chapters 7 and 10, since I’m dealing with the same markup.
// Reformat new items into arrays
var allHoldings = new Array(), availableHoldings =
new Array(), unavailableHoldings = new Array(),
periodicals;
// Get URL of additional copies
var loadUrl = 'resources/allholdings.html';
// Load additional copies into hidden div for
processing
var hiddenDiv = document.createElement('div');
hiddenDiv.id = 'additionalCopies';
hiddenDiv.style.display = 'none';
document.body.appendChild(hiddenDiv);
$('#additionalCopies').load(loadUrl + '. bib_items',
function() {
// Hide the view additional button
$('#allholdings-link').hide();
(this).find( tr.bib temsEntry ).each(function() {
ar a ail e t = (this).find( td:last child ).text().trim();
ar a ocation = (this).find( td:first ).text().trim();
ar a all o = (this).find( td:nth child( ) ).text().trim();
if(availText.indexOf('AVAILABLE') > -1) {
// Add to available object
availableHoldings.push({"Availability":
availText, "Classes": "availability avail",
"Location": aLocation, "Callno": aCallNo});
} else {
// Add to unavailable object
unavailableHoldings.push({"Availability":
availText, "Classes": "availability unavail",
"Location": aLocation, "Callno": aCallNo});
}
}) ;
4148-900-2pass-11-r02.indd 121 07-04-2016 22:07:34

122 Customizing Vendor Systems for Better User Experiences
// Combine all items
allHoldings = availableHoldings.concat
(unavailableHoldings);
// Add new containers
( .bib items ).find( tbody ).hide()$('.bib_items').append('<div id="top-results">
</div>');
$('.bib_items').append('<div id="trigger">
Show Additional Copies</div>');
$('.bib_items').append('<div id="additional-results"
style="display:none;"></div>');
$('#trigger').css('color', '#1F65A0').css
('cursor','pointer').css('margin-top','1em');
$('#trigger').click(function() {
$('#additional-results').slideToggle(400);
if($(this).text() == 'Show Additional Copies') {
$(this).text('Hide Additional Copies');
} else {
$(this).text('Show Additional Copies');
}
}) ;
for(t=0;t < allHoldings.length; t++) {
if(t < 10) {
$('#top-results').append('<div class=
"availability-table"><span class="' +
allHoldings[t].Classes + '">' +
allHoldings[t].Availability + '</span>
<span class="location">' + allHoldings[t].
Location + '</span> <span class =
"call-number">' + allHoldings[t].Callno +
'</span></div>');
} else {
$('#additional-results').append('<div class
="availability-table"><span class="' +
allHoldings[t].Classes + '">' +
allHoldings[t].Availability + '</span> <span
class="location">' + allHoldings[t].
Location + '</span> <span class ="call-
number">' + allHoldings[t].Callno +
'</span></div>');
}
}
}) ;
4148-900-2pass-11-r02.indd 122 07-04-2016 22:07:34

Getting Data In and Out of Vendor Tools 123
Now we have list of elements on the page, formatted like our earlier experi-ments with the holdings table. But we also have all of our elements on a single page, which is a win for users who don’t have to visit a second page just to see all copies of a book. Besides, the items are now listed in order depending on their current availability, so users have less reason to look at the additional results, since available items will be listed first.
You can test this script out on the exercises site, under AJAX > Show All OPAC Holdings.
GETTING DATA OUT WITH AJAXGetting data into your library vendor tools is one thing, but sometimes you want to get data out. Perhaps you need data from one vendor tool to be in another, or you need to better understand how users interact with your site. Or perhaps you’d just like to build a whole new interface for a vendor tool that lacks an application programming interface. Whatever the reason, there are a few ways to get data out of vendor tools using JavaScript and jQuery.
Let’s say we want to record the ISBN number of each book that is clicked on in a results list. I’ll assume that the ISBN of the clicked item is stored in a variable called isbn. We can use the $.ajax() function to send that data to a PHP script on the server, where it could be saved.
var isbn = '1582348251';
$.ajax({
method: "POST",
crossdomain: true,
url: "http://matthew.reidsrow.com/courseware/
vendortools/week4/ajax1.php",
data: {no: isbn}
})
.done(function(msg) {
alert ("Data Saved: " + msg) ;
});
First we tell the $.ajax() function to use the POST request method, rather than GET. The POST HTTP request method does not expose the data in the URL of the request, but instead can send it in the request head-ers. It also means we don’t have the character limit of the URL against us, so we can send large amounts of data. Next, we set the crossdomain flag as true, since this script is not on the same server as the web page that calls it. Then we send the request to a URL on my server, before setting our ISBN number in the data attribute with a POST key of no. Once the script succeeds, we ask the browser to pop up an alert box with the message
4148-900-2pass-11-r02.indd 123 07-04-2016 22:07:34

124 Customizing Vendor Systems for Better User Experiences
“Data Saved” plus anything that the browser might send back to us about the request. (There usually isn’t much.) You can go ahead and try this script on the exercises site.
We can also use this method to save user input. The following script will prompt you for your favorite movie and then save that information to a file on my server. You’ll find the code on the exercises site.
var movie = prompt("What is your favorite movie?");
$.ajax({
method: "POST",
crossdomain: true,
url: "http://matthew.reidsrow.com/courseware/
vendortools/week4/ajax2.php",
data: {film: mo ie})
.done(function(msg) {
alert ("All set! I loved " + movie + " too.") ;
});
Answer the question, and you should get a response alert back from the browser. Once you’ve gotten your response, go ahead and open up the fol-lowing URL: http://gvsu.edu/s/00Z. You’ll see a list of all the answers so far, along with the dates and times that they were left! Is yours on the list? Any movies here that you haven’t seen? We’ll cover the PHP script that saves the information in Chapter 13.
Getting around the Same-Origin PolicyCross-domain requests can be extremely finicky, so if you don’t have a lot of data to get out of a system and you don’t have a need to use a POST request to keep data confidential, there are other ways. One of my favorites is to use a regular HTTP request in the form of an <img> element. All you need to do is to use JavaScript to add one of those elements to the page, set its CSS display property to none, and then pass the data you want to save in the URL to a PHP script. Let’s look at an example.
If I want to make a bookmarklet that saves the title and URL of a page to a text file on my server for later reading, I could get this information out of the page to my server with the following code:
var path = encodeURIComponent(window.location.href);
var title = encodeURIComponent(document.title);
var imageHack = document.createElement('img');
imageHack.style.display = 'none';
4148-900-2pass-11-r02.indd 124 07-04-2016 22:07:34

Getting Data In and Out of Vendor Tools 125
imageHack.src = 'http://matthew.reidsrow.com/
tools/bookmarks.php?url=' + path + '&title=' +
title;
document.body.appendChild(imageHack);
alert('Your URL was saved.');
You can find this bookmarklet on the exercises site under AJAX > Reading list, where you’ll also find a link to read the text file that stores all the data. We’ll cover the PHP that saves the data in Chapter 13.
Now that we’ve explored a few ways to get data in and out of our ven-dor tools with JavaScript, let’s take a look at some examples from the library world. We’ll look at code to bring database recommendations in to a discov-ery layer as well as a sophisticated JavaScript application to bring the entire functionality of a library’s OPAC into its discovery system.
NOTE1. The Wikipedia article on the same-origin policy has a clear discussion of the pol-
icy, why it exists, and what its implications are https://en.wikipedia.org/wiki/Same-origin_policy.
4148-900-2pass-11-r02.indd 125 07-04-2016 22:07:34

4148-900-2pass-11-r02.indd 126 07-04-2016 22:07:34

Chapter 12
AJAX Examples
In the last chapter, we looked at different ways to get data in and out of our vendor tools, highlighting a few different techniques. But like our forays into native JavaScript and jQuery, sometimes it helps to step back and dissect a real-world example or two to really understand what can be done with these techniques. I’d like to spend some time looking at two scripts, one by a team at Virginia Commonwealth University and the other by Dave Pattern of the University of Huddersfield in the United Kingdom, that show a few things you can do with jQuery in your vendor tools once you start using AJAX to send data in and out.
VIRGINIA COMMONWEALTH UNIVERSITY LIBRARY’S DATABASE RECOMMENDERVirginia Commonwealth University (VCU) library uses the Primo discovery service as its primary search tool. When researchers do a search, Primo dis-plays articles from many of VCU’s databases, books, and media from the cat-alog, digital, and special collection items, and more. But one thing that Primo did not do well was recommending appropriate subject databases or research guides based on the user’s search. So Erin White, the web systems librarian, web applications developer Shariq Torres, and web designer Alison Tinker decided to create a “Google Adwords-esque” database and subject guide rec-ommender (White 2015). The idea was to look at a user’s search and, if was broad enough to match up with a subject discipline, have the recommender insert a new DOM element at the top of the search results that would point users to appropriate databases and LibGuides.
There are several components involved in VCU’s process here, but we’ll concern ourselves with two of them: getting the search results out of Primo and into a house-built system that will match the user’s search terms with databases and guides, and then getting those suggested results back into Primo as DOM elements. Since our focus is on using JavaScript, we’ll leave the custom tool out of this, although we’ll cover tools like it in the
4148-900-2pass-12-r02.indd 127 07-04-2016 22:12:33

128 Customizing Vendor Systems for Better User Experiences
next chapter. For now, I’ll be sure to show you the data formats that are generated from their tool.
First, VCU executes a custom script whenever Primo loads in a browser. It checks to see if a search has been run by looking at the contents of the search box. If it finds a value for the <input id="search field">, then it does an $.ajax() call to its custom PHP script:
ar searched term = ( search field ). al()if(searched_term !== "") { $.ajax({
url:'https://apps.library.vcu.edu/assets/shared/includes/extra_search.php?q=' + encodeURI(searched_term),
complete: function(data) {var responseJSON = jquery.parseJSON(data .response e t)
if(data.status === 200) { console.lo ( success ) console.lo (response )
if(parseInt(responseJSON.results.dbs.SEGMENTS. JAGROOT.RESULT.DOCSET["@TOTALHITS"]) !== 0 || response JSON.results.guides.length !== 0) {
buildSuccessBlock(responseJSON, searched term)
} else { console.lo ( error for e tra search: )
console.log('response status is ' + data .status)
console.log(response text is ' + data .status e t)
} } ) }
This statement uses the $.ajax() function to do an HTTP request to the custom PHP script (extra_search.php) and passes the script the search term as a GET request (as the value of q). Once the method is complete, the anonymous function detailed in the complete parameter is run on the response, stored in the variable data. Since the results are sent from the custom PHP tool in JSON format, first the function parses the JSON using jQuery’s .parseJSON() method to make a JavaScript object stored in the responseJSON variable. The JSON object is then echoed to the console, along with a “success~!!” notice. The structure of the JSON that is returned is
4148-900-2pass-12-r02.indd 128 07-04-2016 22:12:33

AJAX Examples 129
fairly complex, but I’ve reproduced a simplified version of the structure here, so you can see some of the object properties that are used in the following functions. (You can see a more detailed version of the JSON object at the exercises site.)
{ "results":{ "dbs":{ "SEGMENTS":{
"@xmlns:sear":"http:\/\/www.exlibrisgroup .com\/xsd\/jaguar\/search", "JAGROOT":{ "RESULT":{ "DOCSET":{ "@HIT_TIME":"38", "@TOTALHITS":"6", "@FIRSTHIT":"1", "@LASTHIT":"6", "@TOTAL_TIME":"79", "@IS_LOCAL":"true", "DOC":[ { "PrimoNMBib":{
"@xmlns":"http:\/\/www.exlibris group.com\/xsd\/primo\/primo_nm_bib",
"record":{ "display":{ "type":"dbaz", "title":"CINAHL Complete",
"format":"electronic database","identifier":"http:
.library.vcu.edu\/search\/133",
"subject":[ "Allied Health", "Nursing" ], "description":"Expanded version of the Cumulative Index to Nursing and Allied Health Literature with full text for over 1300 journals, plus evidence-based care sheets, legal cases, drug records, and more than 200 books.", "source":"DBAZ", "rights":"VCU," }
4148-900-2pass-12-r02.indd 129 07-04-2016 22:12:33

130 Customizing Vendor Systems for Better User Experiences
} } }, ] } }, "searchToken":"0" } } }, "guides":[ { "name":"History of Nursing", "id":"47631" }, { "name":"Nursing", "id":"47638" } ] } }
You can see the full JSON response by visiting the tool in your browser and changing the search parameters in the URL to see how different searches work. Here’s the URL for a search for nursing:
https://apps.library.vcu.edu/assets/shared/includes/ extra_search.php?q=nursing
Once the script has parsed the JSON response, it checks to see if the HTTP response code was 200, which means “okay,” or the request was successful.1 If it was, then it reports the success to the console and then checks to make sure that there are both a recommended database and a recommended LibGuide (that’s the OR comparative operator, typed as double pipes: ||). It does this by checking the length property of the relevant parts of the JSON object, to make sure that neither is zero. If both recommendations are present, then the script runs the buildSuccessBlock() function to add suggestions to the DOM.
If the HTTP response code is something other than 200, then the script echoes the response code and the error text to the console, which can help the developer track down problems in the future.
When everything works as planned, and both a database and a guide are recommended, the buildSuccessBlock() function begins by creating a
4148-900-2pass-12-r02.indd 130 07-04-2016 22:12:33

AJAX Examples 131
new variable called htmlText that contains the markup of the new element. It then checks again to make sure that there is a database recommendation before adding markup to display it with the addEntry() function that builds the HTML template for each result. If there is more than one data-base, it will show the first database and then insert a link to see more recom-mended results. The buildsuccessBlock() function then runs the addEntry() function to add the LibGuide recommendation and a link that shows more related guides based on the user’s search.
Here’s the buildSuccessBlock() function in its entirety (I’ve sim-plified it a bit for our discussion):
function buildSuccessBlock(json, query){ ar html e t = " di class= e tra results "var length = parseInt(json.results.dbs.SEGMENTS.
R .RE . E " " ) if(length !== 0){ html e t = " p Related atabases p "
if(length == 1) {htmlText += addEntry(json. results.dbs.SEGMENTS.JAGROOT.RESULT.DOCSET.
db ) if(length > 1) { htmlText += addEntry(json.results.dbs.SEGMENTS.JAGROOT.RESULT.DOCSET.DOC[0], 'db')}
htmlText += "<a onclick='ga(\"send\", \"event\", \"link\", \"click\", \"" + ‘prod-adwords- database-link' + "\", {\"page\": \"https://apps.library.vcu.edu/dblist/search?q=" encode R omponent( uery) " " ) href='https://apps.library.vcu.edu/dblist/search?q=" + encodeURIComponent(query) + "'> ee more database results ra uo a "
}
if(json.results.guides.length !== 0){ html e t = " p Related Research uides p "
htmlText += addEntry(json.results.guides[0], uide )
htmlText += "<a onclick='ga(\"send\", \"event\", \"link\", \"click\", \"" + 'prod-adwords- libguides-link' + "\", {\"page\": \"http://guides.library.vcu.edu/srch.php?q=" + encode R omponent( uery) " " ) href='http://guides.library.vcu.edu/srch .php?q=" + encodeURIComponent(query) + "'> ee more research uides ra uo a "
}
4148-900-2pass-12-r02.indd 131 07-04-2016 22:12:33

132 Customizing Vendor Systems for Better User Experiences
html e t " di " //we are about to show the expanded results, so let's end a Goolge Analytics event
( results ist o d ).prepend(html e t)ga("send", {'hitType': 'event', 'eventCategory': 'adwords_shown', 'eventAction':'show', non nteraction : true )
}
The addEntry() function that is called from buildSuccess Block() builds the HTML markup as a string stored in the htmlText variable, and then returns that HTML to the buildSuccess Block() function, and includes it as part of the htmlText variable from buildSuccessBlock().2 Since the addEntry() function receives the contents of the object that contains the suggestions for each type of content, it merely checks to see if it is dealing with a database (db) or a LibGuide (guide) before building the HTML for the result.
function addEntry(entry, type){ ar html e t = console.lo (entry) if(type === "db"){
htmlText += "<strong><a onclick='ga(\"send\", \"event\", \"link\", \"click\", \"" + 'prod-adwords-database-link' + "\", {\"page\": \"" + entry.PrimoNMBib.record.display.identifier " " ) href= " entry.rimo ib.record.display.identifier " " entry.PrimoNMBib.record.display.title + " a stron span mdash " entry. PrimoNMBib.record.display.description + " span br "
} if(type === "guide"){
htmlText += "<strong><a onclick='ga(\"send\", \"event\", \"link\", \"click\", \"" + 'prod-adwords-libguides-link' + "\", {\"page\": \"http://guides.library.cu.edu c.php =" entry.id " " ) href='http://guides.library.vcu.edu/c .php?g=" + entry.id + "'>" + entry.name + " a stron br "
} return html e t }
4148-900-2pass-12-r02.indd 132 07-04-2016 22:12:33

AJAX Examples 133
Finally, after buildSuccessBlock() finishes calling addEntry() for its databases and guides, it uses the jQuery .prepend() method to add the new markup to the beginning of the element with the ID of resultsListNoId. It also adds a Google Analytics event with the ga() function, defined in the Google Analytics script included on the page, to indicate that the recommendation was added.3
Figure 12.1 shows the final product, with the new DOM element that recom-mends the databases and LibGuides on display. You can try out this tool your-self in a browser at http://search.library.vcu.edu. Trying simple searches works best, like “nursing” or “art history.” More complex searches do not have results mapped to them in the custom tool, and so no recommendations are shown.
DUMPING THE OPAC AT THE UNIVERSITY OF HUDDERSFIELDAnother sophisticated vendor modification that involves getting data in and out of a vendor tool is Dave Pattern’s “Dump the OPAC” project at the University of Huddersfield. Huddersfield was the first non-U.S. customer for ProQuest’s Summon discovery service, but the library continued to operate a separate OPAC for managing user requests, renewals, and fines. In 2013, Dave decided that Huddersfield should “dump” its OPAC and move this functionality into
Figure 12.1 The search result screen at VCU with the Google Adwords-esque database recommender.
4148-900-2pass-12-r02.indd 133 07-04-2016 22:12:33

134 Customizing Vendor Systems for Better User Experiences
Summon (2013). And so with a few clever scripts that pulled in OPAC func-tionality, Dave and his colleagues were able to retire the public facing OPAC and refer all users to the discovery layer to manage their library account.4
At Huddersfield, users can now renew items, place holds, view and pay fines, track their reading lists, and see their checkout history (if they opt in) right in the Summon interface. By default, Summon displays book informa-tion in a “details” page before sending a user off to the OPAC record, and so Dave loaded much of the additional content his users wanted from the OPAC and replaced the rather sparse offerings that Summon provided. As seen in Figure 12.2, Dave’s scripts add a tabbed box that allows the user to see basic and detailed bibliographic information, recommendations for similar books, and table of contents and summary information. To top it all off, Dave also added a virtual shelf browser that loads a number of books shelved nearby so that the user has an opportunity to browse the books that are shelved nearby without ever having to leave his or her computer. You can see this in action by searching for a book at http://hud.summon.serialssolutions.com.
Dave accomplishes his virtual bookshelf with a series of clever functions and a helper script that runs on one of the library’s servers that gets book information out of the ILS and into a format that the custom scripts can use. Since he is loading a lot of information from another server, Dave uses a modern solution for circumventing the same-origin policy. He requests all of his data in JSONP (JSON with padding) format. When doing a traditional request for data in the JSON format, an AJAX call like the following one would expect to see a result like that displayed in the data variable:
$.ajax({ type: 'GET', datatype: 'json', url: '//mysite.com/path/to/script',
Figure 12.2 uddersfield s oo detail pa e in ummon.
4148-900-2pass-12-r02.indd 134 07-04-2016 22:12:33

AJAX Examples 135
success: function (data) {console.lo (data) )// Returns:// {"id": "1675", "title": "I'm in Love with a Vampire", "author": "Puddleglove, Hilda B."}
If a browser calls this AJAX method and the servers have not agreed on cross-domain sharing, then the browser will see the earlier JSON block of data as a potentially malicious script and refuse to make it available to the page. JSONP is a clever work-around to the same-origin policy, since it returns JavaScript data wrapped in a function call, so that the site interprets the response as a script rather than a block of data. Since the new function is a JSON block defined within a function, all of the values of the data are still accessible to the other scripts. And since the browser interprets the results as a new script, it doesn’t violate the same-origin policy, which governs the exchange of data blocks only in JavaScript. Here’s the same function call with JSONP:
$.ajax({ type: "GET", dataType: "jsonp", crossdomain: true, url: '//mysite.com/path/to/script/?callback= myScript',
success: function(data) {console.lo (data) )// Returns:// myScript ({"id": "1675", "title": "I'm in Love with a Vampire" "author": " uddle lo e ilda ." )
The function call, in this case myScript(), is the “padding” around the JSON file. Ideally, we could specify the script you expect to get in return using the callback parameter in the URL call as I have done earlier, but as we will see in Dave’s scripts, that is not necessary. The script you call needs to return the results only in JSONP format, rather than pure JSON.
As Dave’s scripts begin rewriting the Summon book detail page, he initializes the virtual shelf browsing carousel by calling the libInitBookshelf() function, passing it the bibliographic ID the ILS uses to refer to this record. (The bib record ID is hidden in the markup on the Summon page, as part of an OpenURL they use for making the records available to citation manage-ment software.) Here is the initialization function:
function libInitBookshelf(thisBibId) { $.ajax({ type: 'GET',
4148-900-2pass-12-r02.indd 135 07-04-2016 22:12:34

136 Customizing Vendor Systems for Better User Experiences
dataType: 'jsonp', crossDomain: true,url:'https://library3.hud.ac.uk/services/api/summonbookshelf/?bib=' + thisBibId,
success: function(data) { setTimeout(function() { libBuildBookshelf(data, 0), 1000}), error: function(data, type) { console.log('Error initialising bookshelf: ' + this ib d)
} ) }
This function executes the $.ajax() function to pull in JSONP data from the custom bookshelf script on his server. If the AJAX call is success-ful, then he calls another function that is wrapped in a setTimeout() method, forcing the script to wait one second before doing anything. (This is because all the while, Summon is doing AJAX calls of its own while loading items into the DOM, and it’s possible that the element that Dave is planning to add these book covers to has not yet been loaded.) If the AJAX call fails, then the method logs the error to the console.
The success function passes the data returned from the bookshelf script on to another function, libBuildBookshelf(), passing the data returned from the AJAX call as the variable books. The new function checks the width of the user’s browser window by seeing how wide Summon is displaying the element the bookshelf will be added to in order to deter-mine how many items can be displayed at once. It then checks to make sure that there are 77 items in the JSON object that was returned by the earlier AJAX call, which means that the JSON object contains information on 77 books. If it does, then the script sets the default parameters for the carousel, including the width of the shelf and how many books are visible by creating a number of variables. It then adds HTML to create the carousel for the books, as long as the user’s screen is large enough. Here is the first part of the function (I have removed some of the parts of Dave’s actual script to simplify things a bit):
function libBuildBookshelf(books) {var libShelfWidth = $('#libraryBookshelf').
idth()ar len th = boo s.len thif(length === 77) {// Set defaults
4148-900-2pass-12-r02.indd 136 07-04-2016 22:12:34

AJAX Examples 137
ar lib helf i idth = ar lib helf tart = ar lib helfVisible = ar lib ffset = 1
}
if(libShelfWidth > 400) {$('#libraryBookshelf').html('<div class= "heading">Browse the Shelf</div><div id= "library oo shelf ontent" style="border: idth: lib helf i idth p hei ht: 1 p " di style="min hei ht:1 p display:none " class="ima e carousel" di id="li o " style="hei ht: p " di di style="clear:both " di a class="pre " id="liBo2_prev" href="#"><span>Prev</span> </a><a class="next" id="liBo2_next" href="#"> <span>Next</span></a><div class="pagination" id= li o pa " di di )
Now the script has to put the containing HTML elements for the carousel in place. Here is what the new markup looks like, before adding data:
<div id="libraryBookshelf"> <div class="heading">Browse the Shelf</div><div id="libraryBookshelfContent" style= "border: idth: p hei ht: 1 p "di style="min hei ht: 1 p display: none " class="image_carousel">
di id="li o " style="hei ht: p " di di style="clear: both " di
<a class="prev" id="liBo2_prev" href="#"> <span>Prev</span></a>
<a class="next" id="liBo2_next" href="#"> <span>Next</span></a>
<div class="pagination id="liBo2_pag"></div> </div> </div></div>
Next, Dave gets ready to parse the data that was returned from the AJAX call, which is now stored as an array of objects in the variable books inside of this function. Here is a sample of the data his function returns (you can see a complete file, with all 77 books in it, at the exercises site):
4148-900-2pass-12-r02.indd 137 07-04-2016 22:12:34

138 Customizing Vendor Systems for Better User Experiences
[ { "bib":"532536", "selectable":1, "class":"741.580285 ROB",
"title":"Character animation : 2D skills for better 3D",
"image":"https://library3.hud.ac.uk/bookcovers/ 6/3/5/532536.100w.jpg"
}, { "bib":"820704", "selectable":1, "class":"741.5809 WAT", "title":"Watch me move : the animation show","image":"https://library3.hud.ac.uk/bookcovers/ 4/0/7/820704.100w.jpg"
}, { "bib":"619282", "selectable":1, "class":"741.580979 THO", "title":"The illusion of life : Disney animation","image":"https://library3.hud.ac.uk/bookcovers/ 2/8/2/619282.100w.jpg"
} ]
He uses a for() loop to cycle through each of the books, creating new images of each book cover with the book’s title as the alt attribute. He also adds an inline onclick listener on each of the images, which will redirect the user to another Summon book detail page by calling another function. Finally, when all of the book images have been added to the html variable, Dave inserts it into the <div> with an ID of liBo2 using the jQuery .html() method:
ar html = for( ar i = lib ffset i (len th lib ffset) i ) { html = im if(books[i].selectable) {html += 'onclick="loadBook(' + books[i].bib + ',
clic nVirtual oo shelf ) "}
4148-900-2pass-12-r02.indd 138 07-04-2016 22:12:34

AJAX Examples 139
html += ' title="' + books[i].title + '" alt="' + books[i].title + '" src="' + books[i].image + " hei ht="1 " idth="1 "
if(books[i].selectable === 0) {html = style="border: p solid f paddin : p cursor: default "
} html = }( library oo shelf li o ).html(html)
Now that the content has been added to the markup, Dave initializes the jQuery carousel plug-in with the .carouFredSel() method, passing it many of the defaults that were set earlier. At this point, the carousel naviga-tion is controlled by the plug-in, so clicks on the previous and next buttons will scroll to show additional books that are shelved nearby.
setTimeout(function() { $('#liBo2').carouFredSel({ items: { start: libShelfStart, visible: libShelfVisible }, circular: false, infinite: false auto: false, prev: { button: '#liBo2_prev', key: 'left' }, next: { button: '#liBo2_next', key: 'right' }, pagination: '#liBo2+pag', transition: true}) 1 )
The resulting carousel looks great on the record page and allows users to see (and request) nearby items on the shelf. Of course, while we’ve walked through how Dave got nearby books into his vendor tool and how the team at VCU added database recommendations, both of these modifications relied on
4148-900-2pass-12-r02.indd 139 07-04-2016 22:12:34

140 Customizing Vendor Systems for Better User Experiences
server-side scripts pulling the data from databases or from other vendor tools. In the next chapter, we’ll take a look at creating a few simple scripts in PHP that will deliver JSON or JSONP formatted data to your AJAX scripts so that you can get information that is useful to your patrons into the tools where they need it most.
NOTES1. You might be most familiar with the HTTP response codes 404 (not found) and
500 (Internal Server Error). I suspect this because you are reading a book about library vendor tools. A full list of HTTP response codes is available on the W3 site at http://w3.org/Protocols/HTTP/HTRESP.html.
2. It is a good example of JavaScript scope here, since both functions, buildSuccessBlock() and addEntry() have variables called htmlText. Since htmlText was defined within each of the functions, its scope is local to that function. So when buildSuccessBlock() calls the addEntry() function, which defines a variable called htmlText, the origi-nal htmlText variable from buildSuccessBlock() is not overwritten. The new variable has its own local scope.
3. Emily Lynema and Adam Constabaris from North Carolina State University did a nice presentation on using Google Analytics event tracking in discovery tools at Code4Lib’s Annual Conference in 2013. The video of the presentation is available at http://code4lib.org/conference/2013/lynema-constabaris.
4. You can see the full versions of Dave’s scripts at http://library3.hud.ac.uk/perl/user/summon/summonJS.loader.pl and http://library3.hud.ac.uk/perl/user/summon/ summonJS.pl, and try out sample searches at http://hud.summon.serialssolutions .com. Much of the custom functionality is available only to logged-in users.
REFERENCESPattern, D. (2013). Operation Dump the OPAC. [Web log post]. Retrieved from
http://www.daveyp.com/2013/05/16/operation-dump-the-opac.White, E. (2015). Easier Access for Databases and Research Guides at VCU Libraries.
[Web log post]. Retrieved from http://erinrwhite.com/easier-access-for-databases- and-research-guides-at-vcu-libraries.
4148-900-2pass-12-r02.indd 140 07-04-2016 22:12:34

Chapter 13
Helper Scripts in PHP
Since we’ve learned about AJAX, we’ve seen a number of ways to get data in and out of our vendor tools. However, most of these techniques require a helper script living on a server. This helper script is written in a server-side language and handles processing of the data sent by a vendor tool (saving it in a file or database) or taking the input and generating some output to send back in to the vendor tool (formatting it in a way that your JavaScript mod-ification can understand). In some early examples, like the Trinity College bookmarklet and the simple “Favorite movie” prompt we created in Chap-ter 11, the script acts only to save data in a text file or a comma-separated value spreadsheet (.csv file). In other, more complex situations, the helper tool saves data to a database or does a database query based on input received by the helper script. Other helper scripts, like VCU’s database recommender, also query another vendor tool’s API (application programming interface), a method some vendor tools provide for libraries to get data out of a tool easily.
In this chapter, we’ll dip our toes into writing server-side scripts to manage some of the data we’d like to get in or out of our vendor tools. Server-side scripts differ from JavaScript and jQuery in that they do not run in a user’s browser, but rather run on a web server. Every web page you visit in your browser is itself living on a web server somewhere, and any web page that is not static HTML is written in a server-side language that allows it to dynamically change content based on what is stored in a database and the specific requests that a user has made. Pages in a content management system, or on your personal blog, or on Facebook and Twitter are all dynamically generated by server-side languages.
There are many server-side languages we could use for this purpose, and the library development community has a wide range of preferred languages: PHP, Python, and ruby are the most popular. Virginia Commonwealth Uni-versity (VCU) built its database and LibGuides recommender in PHP, while Dave Pattern wrote his server-side tools in Perl. All of GVSU’s server-side tools are written in PHP, because it’s the language I’m most comfortable in. It’s also what powers Wordpress.com and Facebook, two of the most visited sites on the web. And since it’s been around (and popular) longer than many other server-side scripting languages, there are a lot of great tutorials and resources
4148-900-2pass-13-r02.indd 141 07-04-2016 22:07:43

142 Customizing Vendor Systems for Better User Experiences
out for beginners.1 A full treatment of PHP is far beyond the scope of this book, but I’ll walk you through a few sample scripts that interact with various AJAX modifications we’ve made throughout the last few chapters, and this will get you familiar with the basic principles behind processing PHP data.
BASIC PHP SYNTAXThere are some differences between JavaScript files and PHP files. With JavaScript, you can include scripts in an HTML page (with a file extension of .html) by simply wrapping the script in a <script> element. When your file is entirely JavaScript, however, you use the .js extension, and there is no need to use the <script> element, since everything in the file is treated as JavaScript. PHP, on the other hand, can be included only in files with the .php file extension. PHP files can (and often do) contain HTML as well, with the PHP blocks set off by opening and closing PHP tags, which tell PHP where to start and stop interpreting the PHP language:
<?php echo "This is a PHP block";?>
Unlike JavaScript files, even PHP files that contain only PHP must wrap the code in the opening and closing tags.2
Variables in PHP are similar to those in JavaScript, in that they are assigned with the “=” operator. However, in PHP, variables begin with a $ rather than with the var statement:
$myVariable = "This is a string";
Like JavaScript, PHP statements end in semicolons, to let the language know that the statement is completed. If you find that you’re having errors with your PHP scripts, it’s often because a semicolon is misplaced.
In JavaScript, when we want to display content to the user, we have a few options. We can use the alert() function to display a pop-up window, or we can use the innerHTML or textContent properties of a DOM element to display text. In addition, we can use the createElement() method to add entire DOM elements. jQuery makes it even easier, by pri-oritizing adding content by strings. In many ways, PHP is a bit more like jQuery. We can display items on the web page using the echo statement, which will print exactly what we add in between the quotes onto the DOM, right where the statement occurs in the source:
echo "This is a statement."; // Outputs "This is a statement”
4148-900-2pass-13-r02.indd 142 07-04-2016 22:07:43

Helper Scripts in PHP 143
We can also echo the contents of variables:
echo $myVariable; // Outputs "This is a string.”
And because PHP can be mixed with HTML, we can echo HTML and intersperse it with the contents of variables. Unlike JavaScript, the concatena-tion operator for strings in PHP is a period,. :
echo "<p>What is this? ". $myVariable. "</p>";// Outputs "<p>What is this? This is a string.</p>"
Handling HTTP RequestsPHP has a simple way of retrieving data from HTTP requests like the ones we created in the chapters on AJAX. We can access the HTTP request as an associative array, using the predefined variables $_GET, $_POST, or $_REQUEST. For instance, let’s say we did the following AJAX request with three key-value pairs of data, like this:
$.get(url: '//myscript.php',data: {name: "John Smith", age: 45, address: "123 Anystreet"}
).done(function(data) {console.log(data);
});
At the PHP script, myscript.php, we’ll need a way to capture the values of the data that was sent by the AJAX request. Since we’re dealing with a GET request, we can use the predefined GET variable to access these key-value pairs as an array, in much the same way we access arrays in JavaScript (although in PHP we can use named keys instead of numeric indexes, if they are available).
<?php $name = $_GET['name']; // Value is now "John Smith" $age = $_GET['age']; // Value is now "45"$address = $_GET['address']; // Value is now "123 Anystreet"
?>
The $_REQUEST variable is used when we’re not sure whether we’re deal-ing with a GET or a POST request (or perhaps when we’re dealing with both!). $_REQUEST gives you access to both the arrays of the $_POST and $_GET variables, so we could also substitute all of the $_GET occurrences in our earlier code with $_REQUEST.
4148-900-2pass-13-r02.indd 143 07-04-2016 22:07:43

144 Customizing Vendor Systems for Better User Experiences
If our AJAX request uses the POST method, we can use the predefined $_POST variable to access the values as an array:
$.ajax({ method: "POST", url: "myscript.php",data: {name: "John Smith", age: 45, address: "123 Anystreet"},
success: function(data) { console.log(data); }, error: function(data) { console.log('There was an error: ' + data); } });
<?php $name = $_POST['name']; // Value is now "John Smith" $age = $_POST['age']; // Value is now "45"$address = $_POST['address']; // Value is now "123 Anystreet"
?>
ScopeVariable scope is slightly different in PHP as well. In JavaScript, to assign a variable a global scope, you need to define it only outside of a user-defined function.3 In PHP, variables included within a user-defined function, even if they were defined outside of the function, will be assigned a local scope inside of the function. Let’s look at this example:
<?php $myVariable = "This is a PHP block"; // global scope
function myFunction() { echo $myVariable; // local scope}
myFunction(); // No output!
Here, we have created two $myVariable variables: one with global scope (the first one) and then another with local scope (inside the function). When the function tries to echo the contents of the local scope variable, it realizes that the variable has no value, because it is a different variable than the one with global scope!
Remember when we looked at VCU’s database recommender in Chap-ter 12, and they used the variable htmlText inside two different functions?
4148-900-2pass-13-r02.indd 144 07-04-2016 22:07:43
Helper Scripts in PHP 145
Those variables had the same name, but they had entirely different contents. That’s because they each had separate local scopes, and so there was no con-flict in using the same variable name twice. (It is, however, hard to follow a script if it has several variables with the same name but different scope.) In PHP, to get around this scope issue, we need to explicitly assign the variable a global scope within the user-defined function, using the global keyword:
<?php $myVariable = "This is a PHP block"; // global scope
function myFunction() { global $myVariable;
echo $myVariable; // global scope!}
myFunction(); // Outputs: "This is a PHP block”
Cross-Domain RequestsWe’ve talked a little about the same-origin policy, which prevents malicious scripts from pulling in (or extracting) data from scripts that are not on the same server as the requesting script. We’ve also looked at a few methods for getting data in and out without violating same origin, such as using the JSONP format or simply doing an HTTP request in an <img> element, and passing the data you want to get out in the src element as part of the URL. But there are ways to configure your server-side scripts to play nicely with the same-origin policy, as well. After all, the same-origin policy prevents only unwanted cross-domain sharing, but if you control the scripts on both sides of the connection, there is no reason you shouldn’t be able to connect them together and exchange data.
In PHP, the easiest way to allow cross-domain connections is by modifying the PHP headers that are sent when the script is run on the server. This header will allow cross-domain sharing from the URLs you specify. PHP headers must be sent before anything else in a file, though, so we need to include it immediately after the first opening tag:
<?phpheader("Access-Control-Allow-Origin: *");
This header will allow cross-site scripting from any domain, so unless you’re running a site like Google Analytics, you probably don’t want to use the * wildcard. Instead, you can specify which domains should have access:
<?phpheader("Access-Control-Allow-Origin:http://mylibrary.org");
header("Access-Control-Allow-Origin:https://mylibrary.org");
4148-900-2pass-13-r02.indd 145 07-04-2016 22:07:43

146 Customizing Vendor Systems for Better User Experiences
header("Access-Control-Allow-Origin:http://myserver.com”);
Notice that I’ve sent two headers with the same URL but with different pro-tocols. The Access-Control-Allow-Origin header requires that the protocol be specified, so if you might need to connect over both http and https, it’s best to set them both specifically.
Of course, if you are running your web server on the Apache web server software, which powers over half the servers on the web (Netcraft 2013), you can also set the configuration of a file directory that contains your PHP files using the Apache .htaccess file..htaccess is a sort of configuration file for a directory, and it can be
used for many things, including redirects or URL rewriting. The benefit of using the .htaccess file to allow cross-site scripting is that you can ensure that all files in the directory (and subdirectories) will be accessible to scripts, rather than having to set a PHP header on each one. Here is an .htaccess file with cross-site scripting enabled for all sites:
<IfModule mod_headers.c> Header set Access-Control-Allow-Origin "*"</IfModule>
Like the PHP headers, we can also specify the sites we would like to have access to the scripts inside, like this:
<IfModule mod_headers.c> Header set Access-Control-Allow-Originhttp://mylibrary.org Header set Access-Control-Allow-Originhttps://mylibrary.org Header set Access-Control-Allow-Originhttp://myserver.com</IfModule>
Now the server will respond to the browser when a script from one of the specified URLs requests a connection and will allow the request to go through. If a server that was not explicitly given access tries to send a request to our scripts, however, the server will throw an Access-Control-Allow-Origin error and refuse to load any content or data from the requesting script.
SAVING DATA TO A TEXT FILEWe looked at several examples in Chapter 11 of how to get data out of a vendor tool and into a simple data storage format like a text file or a .csv spreadsheet. While working with large amounts of sensitive data would make
4148-900-2pass-13-r02.indd 146 07-04-2016 22:07:43

Helper Scripts in PHP 147
this an impractical solution, if you’re just capturing non-identifying data for a short period of time, it can make sense as a quick and dirty solution. You don’t need to set up a database or do any complex MySQL queries. All you need to do is to capture the information in the request and append it to a preexisting file on the server. Let’s take a look at a few examples we’ve already seen.
Example: Trinity College BookmarkletBack in Chapter 4, we looked at a bookmarklet I built for Trinity College Library at Cambridge University that allowed users to vote for more copies of popular books. Since there was no identifying information that would be gathered from this script and the volume of data was going to be fairly small, I decided to use a .csv file to capture the data. This had the added benefit of putting the data in a format that was immediately usable by the staff that would be analyzing it, since they could open it up in Excel or even a text editor.
The bookmarklet sends data to the server not by using an AJAX call, but instead by inserting an <img> element on the page that had its src attrib-ute set to a PHP script that records the data. Here’s the relevant JavaScript that makes the call. (The bib record number was saved in an array called record under the index of 1):
var voteHack = document.createElement('img');voteHack.style.display = 'none';voteHack.src = 'opacvote.php?record=' + record[1];document.body.appendChild(voteHack);
The PHP script, opacvote.php, needs to do a few things. First, since it is being called inside of an <img> element, it should actually return an image to the browser. Then it needs to record the time and record number to the spreadsheet. It doesn’t need to send any data back to the script.
First, we tell the server that we’re dealing with PHP by including the PHP opening tag. Then, we set the Access-Control-Allow-Origin header to allow all incoming requests.4 Then, since we’re passing this script off as a GIF, we’ll need to send a header to tell the browser that this is an image file, with the GIF format:
<?phpheader("Access-Control-Allow-Origin: *");header("Content-Type: image/gif");
Once the headers have been set, we can send other data. In this case, we’ll echo the contents of an image, which will display graphically in the browser. (Although we’ve set the display property of the image to none, so it won’t actually display.)
To echo back an image, we can use a base64 encoded version of the image itself. Base64 encoding turns the image into a string of garbled-looking text,
4148-900-2pass-13-r02.indd 147 07-04-2016 22:07:43
148 Customizing Vendor Systems for Better User Experiences
but the browser will be able to interpret it as an actual image and magically convert it into something visual. In this case, I’m encoding a 1 pixel square transparent GIF. (You can do this on the command line using openssl, but there are a lot of free online tools that allow you to encode images in base64).
echo base64_decode('R0lGODlhAQABAJAAAP8AAAAAACH5BAUQAAAALAAAAAABAAEAAAICBAEAOw==');
Now our script has proven to the browser that it is, indeed, an image, and it’s opened the door for cross-site scripting. Now, we need to get the value of the record variable from the GET request and grab the current time. The record is as simple as using the array inside the $_GET variable:
$recordNo = $_GET['record'];
But the date still needs work. The PHP time statement will give you the exact time to the second, but it displays it as seconds since January 1, 1970. (This is called UNIX time.) While UNIX time is quite useful when work-ing with code, it isn’t easy for humans to read, so we’ll want to convert the current time into something more readable by our staff. We’ll use the PHP date statement to convert the UNIX time to a traditional month/day/year representation.5 (The hour the vote was submitted isn’t that important, but we can choose from a variety of date formats, listed at http://php.net/manual/en/function.date.php). Here’s how we’ll determine the date:
$time = date('m/d/Y', time());
Now we have a set of two values that we want to add to our spreadsheet. In order to append them to a .csv file, however, we need them to be in an array, so we’ll create a new PHP array stored in the variable $data:
$data = array($time, $recordNo);
Next, we’ll open a .csv file on the server by setting a variable called $DataFile as the opened file. However, to make the code more stream-lined, we’ll actually set the variable by checking to see if the variable cannot be set. That’s what the ! is for in front of the variable name. This conditional statement says “If the variable $DataFile cannot be set to open the file in append mode (that’s the “a” parameter), then run this function.” As long as the variable can be set, then the script continues.
if (!$DataFile = fopen("opacvote.csv", "a")) { echo " ailure: cannot open file" die};
4148-900-2pass-13-r02.indd 148 07-04-2016 22:07:43

Helper Scripts in PHP 149
Once the file is open, we can use the same kind of statement structure to append our information stored in $data. We’ll run a conditional that checks to see if it wasn’t possible to append the $data variable with the fputcsv statement and echoes an error if it finds a problem. Otherwise, the script will simply append the contents of $data and move on.
if (!fputcsv($DataFile, $data)) { echo " ailure: cannot rite to file" die};
Finally, we need to close the .csv file, since we’re done writing to it:
fclose($DataFile);
The complete PHP script for appending data to a .csv file is as follows and can be modified quite easily to accommodate whatever data you might want to throw at it.
<?phpheader("Access-Control-Allow-Origin: *");header("Content-Type: image/gif");echo base64_decode('R0lGODlhAQABAJAAAP8AAAAAACH5BAUQAAAALAAAAAABAAEAAAICBAEAOw==');
// Set variables$recordNo = $_GET['record'];$time = date('m/d/Y', time());
// Create array$data = array($time, $recordNo);
ppend to. cs fileif (!$DataFile = fopen("opacvote.csv", "a")) { echo " ailure: cannot open file" die};if (!fputcsv($DataFile, $data)) { echo " ailure: cannot rite to file" die};fclose($DataFile);?>
The Trinity College Library script is very similar to the “Favorite Movie” script we looked at in Chapter 11. On the exercises site, I provide the PHP code as well as a bookmarklet version of the script that you can install on
4148-900-2pass-13-r02.indd 149 07-04-2016 22:07:43

150 Customizing Vendor Systems for Better User Experiences
your own server. By making changes to the PHP file to record different types of information, you’ll become more familiar with how these types of PHP scripts work.
SAVING DATA TO A MYSQL DATABASEWhile saving data to a publicly accessible file might be fine for some appli-cations, it won’t help us when we have to save large amounts of data, when we have to save any information that is identifiable (like search queries, IP addresses, etc.), or when we need to access previously saved data from a script. In these cases, it’s best to store our information in a database. MySQL is a relational database format that is easy to work with from most scripting lan-guages and is installed on many web servers. In these examples, I’ll be using PHP to interact with MySQL databases to store and retrieve data.
It would help if we discussed what, exactly, a database is. In this chapter, a database is a structured set of data. The database itself is composed of various tables, which each stores particular types of data. Think of tables like individ-ual sheets in a spreadsheet. The spreadsheet columns are the different types of data, and each new set of data we insert into the database is a spreadsheet row. Tables 13.1, 13.2, and 13.3 show examples of tables in a database that each has a field for a record_id. This common field is called a key, and we can use it to match up fields in different tables that all belong to the same set of data.
Table 13.3 Users
user_id first_name last_name email
44 Matthew Reidsma [email protected] Jerry Smith [email protected] Sally Veenstra [email protected]
Table 13.2 Circulation History
record_id user_id date_checked_out date_due 15 187 June 3, 2015 June 21, 2015 15 1999 June 22, 2015 July 14, 2015167 44 June 5, 2015 June 23, 2015
Table 13.1 Book Record
record_id Title Author 15 My favorite Book Augustus Sharpe167 I’m in Love with a Vampire Hilda B. Puddleglove
4148-900-2pass-13-r02.indd 150 07-04-2016 22:07:43

Helper Scripts in PHP 151
These sample tables show a simple way to connect two kinds of data. In this case, the Table 13.1 is a bare-bones book record table. Each book is assigned a record_id, and then the title and author are listed in the same row (or record) as the matching record_id. Table 13.2 is a very simple circulation record table. Here, the first column tells us which book we are dealing with by representing the book’s record_id. We can find the title and author of the book by looking up the record_id in Table 13.1, so there is no reason to duplicate this information in the circulation table. Each book has a checkout record attached to it, with the user_id of the user who checked the book out as well as the day it went out and the day it was due. The user_id field allows us to look up the name and e-mail of the user who checked out the book, which is all stored in the user table, Table 13.3.
By building in keys like the record_id and user_id into multiple tables, we can encode relationships between the different tables in our data-base. In this case, the book record is related to the different times that the book was checked out by different users. (And the checkouts are related to the users in the same way.) MySQL databases are relational databases, which sim-ply means that we structure the data in tables that are related to one another, using keys. When we design our database, we’ll keep this relational model in mind.
Example: Search Query StatisticsBefore we can connect to a database and populate it or retrieve data, we need to create the database in MySQL. While this can be done programmatically through PHP by running a CREATE DATABASE query, it’s often easier to create your database through an online MySQL interface like phpMyAdmin. In fact, some servers are configured so that you must create new databases through a web-based tool.6
In this first example, we’re going to build a database for tracking the searches our users input from all of our search tools, along with the time they did the search. Since we will have multiple search tools, we’ll create two tables: one for the search tool names paired with a numeric ID, and another for the queries themselves. Tables 13.4 and 13.5 show what our database structure will look like. I’ve also populated the search tools table, since it has fixed contents, while the search query table is empty:
Table 13.4 Search Tools
tool_id search_tool search_url1 Discovery Layer //gvsu.summon.serialssolutions.com/search/q=2 OPAC //library.catalog.gvsu.edu/search/?searchtype=
X&searcharg=3 LibGuides //libguides.gvsu.edu/srch.php?q=
4148-900-2pass-13-r02.indd 151 07-04-2016 22:07:43

152 Customizing Vendor Systems for Better User Experiences
MySQL also allows us to set each of our columns as a different data type, much in the way that JavaScript (and PHP) allows us to set different data types to our variables. In the search_tools table, the first column will be an INTEGER column, which means that the field will allow only num-bers. The search_tool column will be a VARCHAR data type, which means “variable characters.” We can enter any kind of character into this field, as long as we specify the maximum length of the field when we create it. Since we likely won’t have anything longer than 40 characters, we can set the specified length to be 40 characters. We’ll do a longer VARCHAR with the search_url field, up to 255 characters, which will hold the base URL for searching these tools.
The second table gives us a few more options. The query_id field and the search_tool field will both be numeric keys, so we can set those to the INTEGER. In addition, we want the query_id field to automatically add 1 for each search query, so we need to add the MySQL auto_increment flag to that column. The timestamp field can be the MySQL TIMESTAMP format, which will also allow us to set it to automatically fill the current time by default. Finally, the search_query field will need to hold a lot of content, so we’ll use the TEXT column type, which allows us practically unlimited length when storing data. (And we’ll need it. You’d be surprised how many times users paste entire abstracts into the search field.7)
Now that we’ve designed our tables for our database, we can use the MySQL CREATE TABLE function, or we can build them through php-MyAdmin. (I’ve included more detail on how to do this on the exercises site.) Creating the database and the table are one-time tasks, so I recommend doing them outside of your code, if you can help it. For the rest of this example, I’ll assume we’ve already created our database and tables.
I’ll also assume we’ve created a few scripts in each of our search tools that either sends an AJAX request to our PHP script or else adds an <img> to the DOM with the URL set to the PHP script. Here are some samples of what those scripts might look like. The first is for the Discovery Layer, and the second is for the OPAC:
// Discovery Layer script with AJAXvar search_query = $('input[type="text"]').val();
$.ajax({ method: 'GET', url: '//mylibrary.org/searches.php', data: {tool: '1', search: search_query},
Table 13.5 Search Queries
query_id timestamp search_tool_id search_query
4148-900-2pass-13-r02.indd 152 07-04-2016 22:07:43

Helper Scripts in PHP 153
success: function() { console.log('Search query recorded.'); } });
// OPAC Script without AJAXvar search_query('input[type="text"]).val();
$('body').append('<imgsrc="//mylibrary.org/searches.php?tool=2&search=' + encodeURIComponent(search_query) + '" style="display: none;" />’);
Now we have JavaScript sending a GET request to a PHP script with the type of tool the search is coming from, as well as the search query itself. Our tool needs to first echo back an appropriate image, if necessary, and then parse the request and populate the search_queries table with the new search record.
The first part is easy, since it’s the same as our example with the earlier text files. However, we’ll need to know whether or not our PHP script should echo the contents of an image back to the requesting site. In the JavaScript code above, only the OPAC needs to have an image returned. Since the OPAC’s tool ID is 2, we can check for the value of $_GET['tool'] before setting all of our headers, and echo back the image information if the request is coming from the OPAC. So the beginning of our search.php file is here:
<?phpheader("Access-Control-Allow-Origin: *");if($_GET['tool'] == 2) {// Show image for OPAC header('Content-Type: image/gif'); echo base64_decode('R0lGODlhAQABAJAAAP8AAAAAACH5BAUQAAAALAAAAAABAAEAAAICBAEAOw==');
}
Now we’ll parse the GET request to get the numeric value of the search tool as well as the URL-encoded search string (which we’ll decode with PHP using the urldecode statement):
// Set variables$tool = $_GET['tool'];$search = urldecode($_GET['search']);
Now we have the values we need stored in variables, but we have one problem: we haven’t checked these values for malicious content. When we were storing data in a text file, no combination of characters would affect the
4148-900-2pass-13-r02.indd 153 07-04-2016 22:07:43

154 Customizing Vendor Systems for Better User Experiences
append function, but now that we’ve moved to working with a database, we need to be a bit more careful. Since we can issue commands to delete or mod-ify any record or table in our database through a query in PHP, if someone wanted to, they could enter some MySQL syntax to delete our tables right in the search box, and when we ran our query to save the data, we’d instead accidentally delete all of our data.8
Fortunately, there is an easy way to protect our database from these attacks. First, however, we need to connect to the database from PHP so we can use a MySQL statement to clean up our search query. We can do this by creat-ing a new mysqli object and passing it our database hostname (usually localhost), our database username and password, and the database name we want to connect to. (If you use a version-control system like git, make sure you keep your database credentials in a separate PHP file that is ignored by your version control software. You don’t want to inadvertently publish your database’s username and password to the world!9)
This should get us into the earlier sample database, as long as we have a user with these credentials:
$db = new mysqli("localhost", "my_user", "my_password", "searches");
Now we can add some safety precautions while saving the data from our request. First, we know that the value of the search tool will be a number, so we can do a check with PHP to check to make sure that the value is strictly numeric, and to stop the script if it isn’t:
if(is_numeric($_GET['tool'])) { $tool = $_GET['tool'];} else { die;}
The search query presents a different challenge, and that is why we’ve already set up our database connection. We’ll take advantage of a PHP function that uses the SQL server to escape any sensitive strings in the query that could cause problems for our database. We do this by calling our MySQL object stored in the $db variable, and then we’ll call the real_escape_string function on our string:
$search = urldecode($_GET['search']);$search = $db->real_escape_string($search));
Now we’ve protected our database from possible attack, and we have our bits of data stored in two variables. All that is left is to insert a new row into the search_queries table of our database. Looking back at the table
4148-900-2pass-13-r02.indd 154 07-04-2016 22:07:43

Helper Scripts in PHP 155
structure, however, we have two additional fields that will be filled in auto-matically by the SQL server when we do the query: the query_id field has an auto_increment flag, which means the SQL server will check to see what the query_id of the last record added was, and will increment that by one and automatically fill it in. So we won’t set an explicit value for that field. The timestamp field also is set to automatically set itself to the current timestamp, so we will let the SQL server set that as well. To allow the SQL server to set a default value, we simply leave it out of our declaration. The other values we’ll populate with the values from our request:
$result = $db->query("INSERT INTO search_queries SET search_tool ='$tool', search_query='$search'");
That’s all there is to it. Our table now has a new row added to it, with the most recent query added. Over time, recording all of these searches in one place could yield some very interesting results. Here is the complete PHP file to record search queries from various tools:
<?phpheader("Access-Control-Allow-Origin: *");if($_GET['tool'] == 2) {// Show image for OPAC header('Content-Type: image/gif'); echobase64_decode('R0lGODlhAQABAJAAAP8AAAAAACH5BAUQAAAALAAAAAABAAEAAAICBAEAOw==');
}
// Connect to the database$db = new mysqli("localhost", "root", "root", "searches");
// Save the data from the requestif(is_numeric($_GET['tool'])) { $tool = $_GET['tool']; echo $tool;} else { echo 'Not numeric'; die;}$search = urldecode($_GET['search']);$search = $db->real_escape_string($search);// Save data to the database$result = $db->query("INSERT INTO search_queries SET search_tool ='$tool', search_query= '$search'");
?>
4148-900-2pass-13-r02.indd 155 07-04-2016 22:07:43

156 Customizing Vendor Systems for Better User Experiences
This PHP script will work with any GET request with this data format, so you’re not limited to adding an <img> element to the DOM. $.ajax() or $.get() functions would work just as well.
RETRIEVING DATA FROM A DATABASENow that we’ve saved information to a database, it’s time to try getting that data back out and sending it back to the requesting script in our vendor tool. To do this, a simple HTTP request like an <img> tag isn’t going to work. We’ll need to use a proper AJAX call so that we can define what to do with the data that is returned from the script.
Let’s take our search query script and add a feature that recommends other search tools if the keywords you are searching have been run in another search tool more than five times. That way, if you’re using the OPAC to do a search that is frequently done in the Discovery Layer, users will see that the same search potentially works in other systems. To enhance this feature, we’ll add a new bit of data to our search_queries table: the number of results each search returns. The new table format for search_queries will look like Table 13.6:
To get the number of results, we’ll have to get creative in each of our sys-tems. By running a sample search in each and looking in our Developer Tools’ Elements browser, we can find the element that contains the text showing the total number of results retrieved for our search. For instance, in LibGuides 2.0, the number of results is shown in the following piece of markup:
<div id="s-lg-srch-range" class="pull-left"> Showing 1 - 19 (of 19) for: batman</div>
Here the number we are interested in is the number inside of the parentheses, “19.” By capturing the text of this <div id="s-lg-srch-range"> and then splitting the string at each space, we can break up the string to even-tually get the number of results on its own, like this:
// break string at spacesvar allResults = $('#s-lg-srch-range').text().split(' ');// Remove the parenthesisvar lgTotal = allResults[5].replace(')', '');
console.log(lgTotal); // Returns 19
Table 13.6 Search Queries
query_id timestamp search_tool_id search_query no_of_results
4148-900-2pass-13-r02.indd 156 07-04-2016 22:07:43

Helper Scripts in PHP 157
Of course, each of our systems will have a different technique for capturing the total number of results. Our OPAC requires a different technique. Here is the relevant markup from WebPAC Pro:
<div class="browseSearchtoolMessage"> <i>116 results found.</i> Sorted by <strong>relevance</strong> | <a href="/search~S19/X?batman&SORT=DX">date</a> | <a href="/search~S19/X?batman&SORT=AX">title</a>.</div>
We can take a similar approach to LibGuides, but targeting a different ele-ment for the text and choosing the first item in the array (index 0):
var allResults = ( di .bro se earchtool essa e ).find( i ).te t().split(' ');
var catalogTotal = allResults[0];
console.log(catalogTotal); // Returns 116
So let's add this to our AJAX request in our script for saving data:
// OPAC Resultsvar search_query = $('input[type="text"]').val();var allResults =
( di .bro se earchtool essa e ).find( i ) .text().split(' ');
var catalogTotal = allResults[0];
$.ajax({ method: 'POST', url: '//mylibrary.org/searches.php', data: {tool: '2', search: search_query, results: catalogTotal},
success: function() { console.log('Search query recorded.'); } });
We’re going to need to improve upon our success function once we’ve set up our PHP script to return data, but first we need to see what that data will look like. We can start with the PHP script we created in the last section,
4148-900-2pass-13-r02.indd 157 07-04-2016 22:07:43

158 Customizing Vendor Systems for Better User Experiences
although we’ll need to add code to check to make sure that the search totals don’t contain any malicious strings that could cause problems for our data-base. Since some search tools include commas in numbers above 1,000, I’ll use real_escape_string() to clean the data rather than checking to ensure that the variable is numeric. We’ve also switched from a GET request to a POST request, so we’ll need to change the predefined variable for the results array we want:
if(is_numeric($_POST['tool'])) { $tool = $_POST['tool'];} else { die;}$search = urldecode($_POST['search']);$search = $db->real_escape_string($search));$no_results = $db->real_escape_string($_POST['results']);
Next, we need to add the value of $results to our query to add a row to the database:
// Save data to the database$result = $db->query("INSERT INTO search_ queries SET search_tool ='$tool', search_ query='$search', no_of_results='$no_results'");
Now our script is ready to save our enhanced data, but we still aren’t returning data to our original scripts recommending other tools. To do that, we’ll want to do another database query to see if the same search has been run more than five times in any other search tool. This MySQL query is a little complex, but I’ll walk you through it and show you what the output looks like.
First, we want to SELECT items from the database, rather than INSERT them. What we want the database to return is a new value called count that contains the total number of rows that match the criteria set after the WHERE keyword. We also want to have the new number of results, as well as the tool name and URL so that we can build readable links for the user. Since this information is spread across two tables, we’ll use the FROM keyword to tell the query to include both tables and specify which table each of the fields is from as a prefix (e.g., search_tools.search_tool).
After the WHERE keyword, we’ll look for records that match the existing search query, and that did not occur in the search tool the user is already in. We’ll also ask to have the search tool ID match in each of the tables, so that the tool’s name and URL will stay with the relevant data. Finally, we’ll
4148-900-2pass-13-r02.indd 158 07-04-2016 22:07:43

Helper Scripts in PHP 159
ask the database to group all of the results by the search tool they belong to, but only to show us results that have more than five rows. Here is our MySQL query:
SELECT COUNT(query_id) as count,search_queries.no_of_results,search_tools.search_tool,search_tools.search_urlFROM search_queries,search_toolsWHERE search_queries.search_query = '$search'AND search_queries.search_tool != '$tool'AND search_queries.search_tool = search_tools.tool_idGROUP BY search_tools.tool_idHAVING count > 5
We can use PHP to run this query on the $db object, using the query method:
$suggestions = $db->query("SELECT COUNT(query_id) as count,
search_queries.no_of_results,search_tools.search_tool,search_tools.search_urlFROM search_queries,search_toolsWHERE search_queries.search_query = '$search'AND search_queries.search_tool != '$tool'AND search_queries.search_tool = search_tools.tool_idGROUP BY search_tools.tool_idHAVING count > 5");
Next, we can check to make sure that the query ran properly by checking the Boolean value of the $suggestions variable.
if($suggestions) {// true- it worked! // Process the results } else {// false // An error happened }
If we have results, they will be stored in the $suggestions variable as an object. Table 13.7 shows what the results would look like as a table if we matched the search results from the Discovery Layer (tool_id = 1).
4148-900-2pass-13-r02.indd 159 07-04-2016 22:07:43

160 Customizing Vendor Systems for Better User Experiences
Now we need to process the results. First, we’ll check to see how many other tools were recommended with the num_rows property of the $suggestions variable. If there is at least one, then, we can create a loop to iterate through all of the results in our results array using a PHP while loop to see which tools have been suggested. Then, we’ll create a new HTML <div> stored in a variable that will serve as a container for our recommendations. We’ll echo the new markup back to our original script, which will be available in our jQuery AJAX success function as the JavaScript variable data:
$number_of_tools = $suggestions->num_rows;if($number_of_tools > 0) {
echo '<div id="suggested-tools"><h4>Others have searched for this in:</h4></br />';// Grab each row as an object and select the relevant properties
while($other_tools = $suggestions->fetch_array()) { echo '<p><a href="'.
$other_tools['search_url']. urlencode ($search). '">'. $other_tools['search_tool']. '</a>: '. $other_tools['no_of_results']. ' results</p>';}
echo '</div>'; // Close the container}
Now when our search query script does an AJAX call to record the search terms, it also checks the database for whether the same search has been done in another tool more than five times. If so, it creates an HTML block that it sends back to the original AJAX script. (You can see the full version of this new script on the exercises site.) So now we need to write some jQuery to append that HTML markup to original search page, within the AJAX success function of our JavaScript. Since this sample function is running on the OPAC, the search results container is <div id="opac_results">, and our JavaScript data variable is already HTML, since it was created by the echo statements in our PHP script as it went through the query results:
Table 13.7 Query Results
Count no_of_results search_tool search_url40 1207 Catalog //library.catalog.gvsu.edu/search/?
searchtype=X&searcharg=25 2469 LibGuides //libguides.gvsu.edu/srch.php?q=
4148-900-2pass-13-r02.indd 160 07-04-2016 22:07:43

Helper Scripts in PHP 161
$.ajax({ method: 'GET', url: '//mylibrary.org/searches.php', data: {tool: '2', search: search_query, results: catalogTotal},
success: function(data) { console.log('Search query recorded.'); $('#opac_results').prepend(data); } });
Now, in the case of HTML markup being returned from the searches.php script, we’ll see the recommendations at the top of our search results list, like in Figure 13.1. You can see a sample of this script on the exercises site, under Helper Scripts in PHP > Retrieving Data.
Having the ability to create your own repositories for data can help you transform the way your users interact with your vendor tools. By pulling data from one tool into another, offering suggestions or making connections between different services or parts of our collections, we can give our users a better understanding of the breadth of services we offer.
Figure 13.1 Suggestion of searches in other tools as part of our results.
4148-900-2pass-13-r02.indd 161 07-04-2016 22:07:43

162 Customizing Vendor Systems for Better User Experiences
NOTES1. http://codeacademy.com has a terrific introduction to PHP tutorial, and your
library probably has a copy or two of some PHP and MySQL introduction.2. The closing tag is optional at the end of a file, since it can often add unnecessary
white space to a document when the PHP file is included in another PHP file using the require or include statements.
3. Technically, you can also define it inside of a user-defined function without the var statement, but I find this makes scripts hard to read for others unless you are diligent about commenting about variable scope. And let’s face it: you’re not going to be. (I am not, either.) Better to stick to common conventions so that the script can be read more easily by someone who didn’t write it, or even by the person who did six months later.
4. In this particular example, you don’t actually need this, since the browser thinks you’re loading an image. I still think it’s good practice in these situations, though.
5. Of course, since I made this for a British library, the code I shipped had the date formatted in day/month/year format, or 'd/m/Y'.
6. I’m assuming that if you don’t have a server with a graphical admin for MySQL like phpMyAdmin, then you either know more about setting up servers than I do, or you have someone else on staff who does. If all else fails, you can read the MySQL manual sections on the CREATE function, which will allow you to create a new database table.
7. In the following example, I’ll be using a GET request, which has a character limit in some browsers that may affect how much of a large query gets sent with the request. To ensure that everything gets captured, we could use a POST request. (I’ll switch to a POST request when we modify the script later in the chapter.)
8. It happens all the time. The text file I maintain that records failed searches for the library jargon translator unbraryit.com is filled with malicious searches trying to wipe out our nonexistent database.
9. If you do accidentally push your database credentials to a public site like GitHub, don’t worry. There are steps you can take to fix it. GitHub has a great step-by-step guide at https://help.github.com/articles/remove-sensitive-data, but whatever you do, you need to change your database username and password right away.
REFERENCESNetcraft. (2013). June 2013 Web Server Survey. Retrieved from http://news.netcraft
.com/archives/2013/06/06/june-2013-web-server-survey-3.html.Wikipedia. (2015). UNIX Time. Retrieved from https://en.wikipedia.org/wiki/
Unix_time.Yelton, A. (2015). Coding for Librarians: Learning by Example. Chicago: ALA
TechSource.
4148-900-2pass-13-r02.indd 162 07-04-2016 22:07:43
Conclusion
Every library that pays for hosted vendor tools has a list of improvements they’d love to make. Those features that affect our users tend to get second billing, because we’re often so focused on the roadblocks in our own workflows that we fail to see the difficulties our users face. But since those public-facing portions of our vendor tools are web-based tools, we have options, even if our vendors offer only limited customizations.
As we’ve seen in this book, using JavaScript to build small (or large) applications that run in a user’s browser can be a straightforward solution to some of the issues our users face with the tools we offer. Some of those changes will have an extremely low barrier to entry, such as changing one line of text on tool that makes it easy to add JavaScript. Others will require more, perhaps to re-create the functionality of several tools within a single vendor interface. But it can be done.
I’ve shared with you a toolkit for making changes to vendor websites, from the basics of writing JavaScript to techniques for testing code right in your browsers. We’ve looked at more efficient ways to write JavaScript, such as the jQuery library, and even dipped our toes into server-side scripting, adding new functionality to ven-dor tools by having JavaScript and PHP work together. My goal has been to give you the fundamentals and show you some of the things that can be done with these techniques. How you apply them is up to you.
If you do make changes to your vendor tools, I hope you’ll share them with others. At GVSU, we post all of our custom code to GitHub, allowing anyone to download and modify it for their own use.1 But that’s not the only way to share. Both Dave Pattern and the Library Web Team at VCU shared their customizations by blogging about them. Brigham Young University Libraries’ staff gave talks and shared their slides and code for their ILLiad customizations.2 Andromeda Yelton has collected a number of librarian-written vendor tool customizations in her excellent Library Technology Report entitled Coding for Librarians: Learning by Example.3 There are many ways to share, but remember that you and your users are probably not alone in wanting solutions to vendor tool problems.
Even if you don’t publicize your changes, by modifying tools with JavaScript, you will be forced to share, a bit. Since JavaScript runs in the browser, anyone who can visit your web page can see your code and learn from it. Even if you don’t share with other libraries, I encourage you to show your vendors the changes you’ve made and why. When ProQuest team members saw the custom JavaScript I wrote to rewrite
4148-900-2pass-BM1-r02.indd 163 07-04-2016 22:07:49

164 Conclusion
the 360 Link link resolver, they used my user research and design solutions as a basis for the 360 Link 2.0 redesign. Likewise, by sharing the usage data I collected with other libraries, ProQuest was able to benefit from interaction data at over a dozen universities around the world, which helped them develop Summon 2.0. At the very least, you might make a case for having your vendor make (and maintain) some of the improvements your tools need. Either way, your users will benefit.
Often we approach choosing a tool for our library from a set of opposites: either we build it ourselves and get all the functionality we want, or we buy the tool from a vendor and settle for what is offered. But this is a false choice. We’ve always had some options for making changes to vendor tools. At times, we’ve petitioned vendors to make changes and rallied other libraries to our cause. At other times, we’ve exercised the free market to “encourage” vendors to make needed changes lest we move on to another tool (along with our hefty annual payments). But these are not scalable or sustainable techniques for change. And since many libraries are small and lack the kind of resources to build sophisticated web applications from scratch, building their own is also off the table. We all need another way.
I’ve been using the techniques outlined in this book for the past five years at GVSU to make real, lasting improvements to our systems. Our users have noticed, and thanked us, and as I’ve mentioned (too many times, perhaps?), our vendors are starting to notice, too. By making the kinds of changes that JavaScript allows, we’re able to let vendors handle some of the dirty work of hosting and maintaining a large software product, while we are able to focus on putting value where it is needed most: in the areas that cause difficulties for our users. By looking closely at your tools and watching your users to find trouble spots, you can improve your tools, one feature at a time. All it takes is a text editor, your browser’s Developer Tools, and a little bit of patience. Your users will thank you.
NOTES1. You’ll find our code at http://github.com/gvsulib.2. You’ll find a PDF version of their talk, along with speaking notes, at http://www.atlas-sys
.com/conference2013/presentations/Re-imagining_your_online_presence.pdf. Their code for ILLiadPlus is at https://github.com/byuhbll/ILLiadPlus.
3. Andromeda built a great little summary website of many of the librarian-created software projects to accompany the book at http://thatandromeda.github.io/ltr.
4148-900-2pass-BM1-r02.indd 164 07-04-2016 22:07:49

Index
addClass() method, jQuery, 100, 112addEventListener() method, 64, 66, 75 – 76,
93, 98AJAX. See Asynchronous JavaScriptajax() method, jQuery, 115, 123 – 24, 128,
135 – 36, 144, 152, 157alert() function, 25, 30, 37 – 38AngularJS, 16Anonymous function, 45 – 46, 50, 83append() method, jQuery, 90 – 91, 119,
121 – 22, 153appendChild() method, 47 – 48, 50, 98,
107, 124Application programming interface
(API), 141array() function, PHP, 148 – 49Arrays, 31 – 32; in JavaScript, 31 – 32,
34 – 35, 58 – 60, 70, 96 – 97, 119, 121, 147; in PHP, 148
Asynchronous JavaScript (AJAX), 115, 117 – 24, 141 – 42, 152
attachEvent() method, 66attr() method, jQuery, 88, 100Audio element, HTML, 9, 116 – 17Automated Storage and Retrieval System
(ASRS), 2, 23, 68, 78
Base64 encoding, 147 – 48Bookmarklet, 8 – 9, 15 – 16, 124 – 25, 141;
definition, 43; examples, 43 – 47, 49 – 54, 82 – 83; installing, 44 – 45; jQuerify, 82 – 83; writing, 48
Boolean() function, 31Boolean values, 39, 56, 66
Branding, 3 – 5Browser extension, 16Brigham Young University, 9, 163
Camel case, 46Cascading style sheets (CSS), 3 – 4, 6,
19 – 22, 60 – 61, 63; as presentation layer, 11 – 13; pseudo class selectors, 97, 104, 107; selector syntax, 37, 85 – 86, 91, 93 – 94, 104 – 5
Catalog. See OPACCDN. See Content delivery networkChange event, 111children() method, jQuery, 90className property, 100click() method, jQuery, 98 – 100, 112closest() method, jQuery, 90Concatenation, 30; in JavaScript, 30, 33,
107 – 8, 131 – 32, 137; in PHP, 143Conditional statement, 33, 39 – 40, 56, 64,
83, 99, 122, 131 – 32, 137Console, 19, 23 – 25console.log() function, 24 – 25, 31 – 32,
37 – 38:contains selector, jQuery, 85, 97, 110Content delivery network (CDN), 80 – 81CONTENTdm, 9, 116 – 18createElement() method, 49, 90, 98,
106 – 7, 124Cross-domain requests. See Same-origin
policyCSS. See Cascading style sheetscss() method, jQuery, 84 – 86, 88 – 89,
108, 122
AuQ1
4148-900-2pass-BM2-r02.indd 165 07-04-2016 22:07:52

166 Index
Database recommender, 127 – 33date() function, PHP, 148 – 49Developer Tools, 19 – 26; Chrome browser,
20 – 22; event listeners, 65; Internet Explorer browser, 19; prototyping CSS changes, 21 – 22 ; prototyping HTML changes, 21; prototyping JavaScript changes, 24 – 25, 46; tutorials, 26
DevTools. See Developer ToolsDisplay property, 63 – 64, 75, 100, 110,
121, 124, 147Document Object Model (DOM), 19 – 20;
elements, 28; nodes, 21; tree, 20 – 21DOM. See Document Object Model
each() method, jQuery, 95 – 97, 107 – 8, 112, 121
Echo function, PHP, 142, 160Elements Browser, 20 – 22empty() method, jQuery, 93 – 95encodeURI() method, 38 – 39encodeURIComponent() method,
38 – 39, 124ExLibris Group; Alma, 15; Primo, 80,
127 – 28Evanced SignUp, 15 – 16Event listeners, 61 – 65, 98 – 102, 138
find() method, jQuery, 79, 87 – 88, 121 – 22, 157
fclose() function, PHP, 149fopen() function, PHP, 148 – 49for() method, 32 – 33, 55 – 56, 58 – 59, 95,
107, 122fputcsv() function, PHP, 149FutureLib, University of Cambridge,
52 – 53
get() method, jQuery, 115, 117 – 18, 143getAttribute() method, 91getElementById() method, 7, 25,
36 – 37, 104getElementsByTagName() method, 25, 70,
86, 107Google Analytics, 133, 140Google Developer Libraries, 81, 91Grand Valley State University (GVSU),
2 – 3, 5, 9, 12, 15 – 16, 23, 62, 67 – 71, 71 – 78, 81, 91, 141, 163 – 64
Gustafson, Aaron, 11GVSU. See Grand Valley State University
hasClass() method, jQuery, 100 – 101hide() method, jQuery, 89, 93, 99,
100 – 101, 121Horizon Report Library Edition, 5HTML. See HyperText Markup Languagehtml() method, jQuery, 88 – 89, 137, 139HTTP. See HyperText Transfer ProtocolHyperText Markup Language (HTML),
3 – 6, 19 – 20; as semantic layer, 11 – 13, 20
HyperText Transfer Protocol (HTTP), 130; response codes, 130, 140
ILLiad, 2, 4, 9, 15, 71 – 78, 109 – 13, 163ILLiad Plus, 9, 163Immediately-invoked function expression
(IIFE), 45indexOf() method, 23, 28, 34, 108innerHTML property, 7, 35 – 36, 70,
88, 113innerText property, 36, 42Input element, HTML, 75 – 76, 112,
116, 128Internet Explorer browser, 17; support, 17,
37, 66, 79, 98, 116
JavaScript, 5 – 7, 11, 19, 86 – 87, 163; adding to a web page, 13 – 16; comments, 27 – 28; compressing files, 81; data types, 28 – 32, 34; errors, 23 – 24, 27; escaping quotes, 29; functions, 40 – 41, 130 – 32, 134; hiding content, 74 – 75; as inter-action layer, 11 – 13; load order, 14 – 16, 102 – 4; loops, 13, 32 – 33, 55 – 61, 69, 93, 95 – 97, 106 – 8; maintenance, 16; statements, 27, 84 – 86; white space, 27
JavaScript Object Notation (JSON), 118 – 19, 128 – 30, 134 – 35, 137 – 39
JavaScript Object Notation with Padding (JSONP), 134 – 36, 139, 145
Jing, Jenny, 117 – 19jQuery, 16, 37, 79 – 80, 83 – 84, 93, 105,
115, 163; adding from bookmarklet, 82 – 83; :first selector, 107; hosting, 80 – 81; :last selector, 107; loops, 95 – 97, 107 – 8, 112, 121; statements, 84 – 86
4148-900-2pass-BM2-r02.indd 166 07-04-2016 22:07:52

Index 167
JSON. See JavaScript Object NotationJSONP. See JavaScript Object Notation with
Padding
Kim, Bohyun, 68
Lamb, Kirsten, 8, 52 – 53Length property, 34 – 35LibGuides, 1, 4, 14, 127 – 33, 156Link element, HTML, 93 – 94, 104Link resolver, definition, 17Literals, 31 – 32load() method, jQuery, 115, 120 – 22
Method chaining, 113mousedown() method, jQuery, 98 – 99MySQL, 147, 150; INSERT statement,
155; protecting against injection attacks, 154, 158; SELECT statement, 158 – 59
mysqli object, PHP, 154 – 55, 158 – 59
next() method, jQuery, 90, 117noConflict(), jQuery, 82 – 84, 91num_rows mysqli method, PHP, 160
OCLC, 1 – 2, 9, 109, 116Objects, 31 – 32, 119on() method, jQuery, 98 – 100, 102, 111Onchange. See Change eventOnload. See window.onload eventOnline public access catalog (OPAC), 1, 4,
8, 15, 67 – 71, 78, 133, 156 – 57; holdings display, 4, 12, 23, 34, 67 – 71, 105 – 9, 119
OPAC. See Online public access catalogOperators, 32; arithmetic, 28, 30, 32 – 33;
assignment, 33, 107 – 8; comparison, 32 – 33, 130 – 32, 136
Optgroup element, HTML, 73Option element, HTML, 73 – 74, 109 – 10;
value attribute, 73 – 74, 76
Page source, 19 – 21parent() method, jQuery, 89 – 90Pattern, Dave, 15, 127, 133 – 39,
140 – 41, 163PHP, 123 – 24, 139, 141 – 42, 152, 163;
functions, 144 – 45; headers, 145 – 47,
153; HTTP requests, 143, 153 – 55, 158; loops, 160; statements, 142; syntax, 142; variables, 142; writing to files, 148 – 49
prepend() method, jQuery, 90 – 91, 117, 132 – 33
Preservica, 15 – 16ProQuest, 3 – 4, 13 – 14, 51, 80, 133, 163;
Summon discovery layer, 3, 14 – 16, 80, 133 – 39; 360 Link link resolver, 3 – 5, 12, 14, 51, 91, 97, 104, 117 – 19, 164
Prototype JavaScript Framework, 91Proxy bookmarklet, 51 – 52push() method, 65, 97, 121
Queen’s University, 117 – 19querySelector() method, 7, 37, 42, 79, 107querySelectorAll() method, 37, 42, 86
Readinghouse’s Select Reads, 14ready() method, jQuery, 102 – 4real_escape_string method, PHP, 154, 158Relational database, 150 – 51remove() method, jQuery, 93 – 95removeChild() method, 47removeClass() method, jQuery, 100replace() method, 7 – 8, 156
Same-origin policy, 115, 117, 123 – 25, 134 – 35, 145 – 46
Schmidt, Aaron, 67Script element, HTML, 15 – 15, 49 – 50, 80,
102, 142; async attribute, 15, 17, 102; defer attribute, 15, 17, 102
Scope, 41 – 42; JavaScript variables, 40 – 41, 130 – 32, 134; PHP variables, 144 – 45
Select element, HTML, 73 – 74, 109 – 10setTimeout() method, 83, 103 – 4show() method, jQuery, 89, 93, 100 – 101slideDown() method, jQuery, 101 – 2, 111slideToggle() method, jQuery, 101 – 2slideUp() method, jQuery, 101 – 2, 111split() method, 34 – 35, 156 – 57Style property, 50Swedberg, Karl, 82
Table element, HTML, 11 – 13, 56 – 58, 70, 95 – 96, 106 – 8, 120; for layout, 5, 10, 12
4148-900-2pass-BM2-r02.indd 167 07-04-2016 22:07:52

168 Index
text() method, jQuery, 88 – 89, 110, 122, 156 – 57
textContent property, 36, 42, 73, 88Text property, 73 – 74this, reserved word, 64, 66, 99 – 100,
120 – 22time() function, PHP, 148 – 49Tinker, Alison, 127Torres, Shariq, 127Trinity College Library, 8 – 9, 52 – 54, 141,
147 – 49
University of Cambridge, 8 – 9, 52 – 54, 141, 147 – 49
University of Huddersfield, 15, 127, 133University of Michigan, 51 – 52URI schemes, 44, 115urldecode() function, PHP, 153Usability testing, 3, 5, 13, 58, 62User experience (UX), 5
val() method, jQuery, 116, 128, 152 – 53, 157
Variables, 7, 28, 33, 142, 162; Booleans, 30 – 31, 101, 159; naming, 7; numbers, 29; strings, 29. See also scope
var statement, 7Video element, HTML, 9, 116 – 17Virginia Commonwealth University,
127 – 33, 139, 141, 144 – 45, 163Void operator, 52
Web Inspector. See Developer ToolsWebPAC Pro, 4 – 6, 8, 12, 23, 67 – 71,
119 – 23, 157While statement, PHP, 160White, Erin, 127window.onload event, 103 – 4WordPress; shared server, 15
Yelton, Andromeda, 163
4148-900-2pass-BM2-r02.indd 168 07-04-2016 22:07:52

AUTHOR QUERY
1 Please confirm if JavaScript commands should be set in a different found in the index as well. If so, please ask the author to make changes.
4148-900-2pass-BM2-r02.indd 169 07-04-2016 22:07:52

About the Author
Matthew Reidsma is Web Services Librarian at Grand Valley State University in Allendale, Michigan. He is the cofounder and editor-in-chief of Weave: Journal of Library User Experience, a peer-reviewed, open access journal for library user experi-ence professionals. He has an MLIS from the University of Wisconsin–Milwaukee and a masters in theological studies from Harvard Divinity School.
He writes and speaks frequently about library websites, user experience, and responsive design around the world. Library Journal named him a “Mover and Shaker” in 2013, which led to many unfortunate dance-related jokes in the Reidsma household. He writes about libraries and technology at matthewreidsma.com.
4148-900-2pass-BM3-r02.indd 1 07-04-2016 22:07:56