Embed Size (px)
Citation preview

BAKER'SSELECT
MODELABM2H22
INSTRUCTIONMANUALWELBILT
HOUSEHOLD USE ONLY

IMPORTANTSAFEGUARDSWHEN USING ELECTRICAL APPLIANCES, BASIC SAFETY PRECAUTIONS SHOULD ALWAYS BEFOLLOWED, INCLUDING THE FOLLOWING:
.
2.
.
,
5.
,
°
,
9.
10.11.12.
13.14.15.
16.17.18.19.
20.
Read all instructions carefully.Do not touch hot surfaces. Use handles or knobs and a potholder. Do not close or clog the steam
vent openings under any circumstances.To protect against electrical shock, do not immerse cord, plug, or any other part of this breadmachine, in water or other liquid.Close supervision is necessary when any appliance is used by or near children.
Unplug the power supply cord when the appliance is not in use, or before cleaning.Allow to cool before putting on or taking off any parts.Do not use or operate the appliance with a damaged cord or plug, or after the appliancemalfunctions or has been damaged in any manner. Return appliance to the nearest authorized
service facility for examination, repair or adjustment.The use of accessory attachments not recommended or sold by the manufacturer may cause
injuries.Do not use outdoors.
Do not let the power supply cord hang over the edge of table or counter, or touch hot surfaces.Do not place the appliance on or near hot gas or electric burners, or in a heated oven.Extreme caution must be used when moving an appliance ccntaining hot contents or liquids.
To disconnect, press STOP,then remove plug from wall outlet. Grip plug and pull from wall outlet.
Never pull on the cord.Do not use the bread machine for other than intended use.
Avoid contact with moving parts during operation.Do not pour any ingredients directly into the bread machine- only into the baking pan. The baking
pan must then be placed in the machine.Do not operate this appliance in the presence of explosive and/or flammable fumes.This appliance is intended for HOUSEHOLD USE ONLY and not for commercial or industrial use.
To avoid damaging the machine, do not place the baking pan or any object on top of the unit.Do not clean with scouring pads. Pieces can break off the pad and touch electrical parts, creating arisk of electric shock.Do not use bread machine for storage purposes nor insert any utensils, as they may create a fire orelectric shock:
""'" "HES u_n_nm'm"bn m_'m'u r_ ua v," n E INonnu nnuNSThis appliance has a polarized plug (one blade is wider than the other). As a safety feature, this plug will fitin a polarized outlet only one way. If the plug does not fit fully inthe outlet, reverse the plug. If it still does
not fit, contact a qualified electrician. DO NOT ATTEMPT TO DEFEATTHIS SAFETY FEATURE.A short power-supply cord is provided to reduce the risk of becoming entangled in or tripping over alonger cord. An extension cord may be used if precautions are taken in their use, If an extension cord isused:
1. The marked electrical rating of the extension cord should be at least as great as the electrical rating of
the appliance.
2. The cord should be arranged so that it will not drape over the countertop or tabletop where• it can be
pulled on by children or tripped over accidentally.
2

AboutYourBreadMachine
The bread machine makes LARGE (1 1/2 lb.) and EXTRA LARGE (2 lb.)horizontal loaves of breads.
Two-paddle horizontal bread pan makes traditional shaped bread.
The bread machine has 33 settings. See Bread Machine Cycle Times, page 15.
Special ULTRA FASTsetting allows you to complete the breadmaking process in 58 minutes.
Special recipes must be used for these cycles.
The Fruit and Nut Beep signals when it is time to add ingredients such as fruits, nuts, or chips.It will maintain ingredients' shape and texture rather than be chopped up by the kneading blade.If you use the TIMER to delay baking, you may add all the ingredients at once and bypass the
function. However, the fruits, nuts, or chips may get somewhat chopped.
RAPID settings for BASIC, FRENCH, and WHOLE WHEAT breads allow you to make standardrecipes in a shorter period of time. Choose the RAPID setting by pressing the COLOR key.
The crust color of your fresh homemade bread can be controlled for personal preference.
13-HOUR PROGRAMMABLE TIMER lets you wake up to hot baked bread in the morning.
Large VIEWING WINDOW allows you to watch the breadmaking process.
The KEEPWARM function prevents the bread from getting soggy by keeping finished bread
warm up to an hour after the baking is completed. This function stops when the unit isturned OFF/STOP or is unplugged.
The bread machine is designed with a cool-touch exterior.
The bread machine has POWER LOSS MEMORY, which resumes cycle where it left off whena short-term power loss occurs.
Do not cover the bread machine with towels or other materials that may prevent steam fromescaping. Some steaming from vents is normal.
Do not place any objects on top of the bread machine.
Unplug the unit and wait until it cools, then remove any spilled ingredients or crumbs from the
baking chamber of the bread machine by wiping with a damp sponge or cloth. See Care andCleaning, page 14.
IMPORTANT: Always add ingredients in the order they are specified in the recipe. For best results,accurate measuring of ingredients is vital. Do not put larger quantities than recommended into
the baking pan as it may produce poor results and may damage the bread machine.
To clear a programafter youhavestartedit, pushthe "START/STOP"buttonuntil youhear abeep. Zeroeswill appear in the displaywindowandyoucan nowenter anotherprogram.
3

BeforeYourFirstUse
Enjoy using your Welbilt ® Bread Machine. Before your first use, please take a few minutes to read thisInstruction Manual and keep it handy for reference. Please pay particular attention to the safety
instructions we have provided for your protection.
Carefully unpack the bread machine and remove all packaging materials. To remove any dust that mayhave accumulated during packing, wipe the baking pan, kneading blade and outside surface of the bread
machine with a clean, damp cloth. Do not use scouring pads or any abrasives on any part of thebread machine.
Plug the cord into a 120-volt AC outlet. The cord length of this bread machine was selected to reduce the
possibility of tangling or tripping over a longer cord. If more cord length is needed, use a UL certifiedextension cord rated no less than 15 amperes and 120 volts. The longer cord should be arranged so that
it will not drape over the countertop where it can be pulled on by children or tripped over.
TABLEOFCONTENTS
OPERATING INSTRUCTION SECTION
Important Safeguards 2About Your Bread Machine 3Before Your First Use 4Know Your Bread Machine 5Control Panel 6Setting Descriptions 7-8Using Your Bread Machine 9-12Using the Timer 13Slicing and Storing Bread 13Care and Cleaning 14Bread Machine Cycle Times 15Know Your Ingredients 16-18Measuring Your Ingredients 19Recipe Tips 20RECIPE SECTION
White Bread 21Ultra Fast White Bread 21Rye Bread 2iOnion Bread 22Egg Bread 22Ultra Fast Egg Bread 22Honey Oats Bread 23Pesto Bread 23Ultra Fast Pesto Bread 23Cheve-Cracked Pepper Bread 24Ultra Fast Cheve-Cracked Pepper Bread 24French Bread 25100% Whole Wheat Bread 25Triple Wheat Bread 25Pumpernickel Bread 26Shredded Wheat Bread 26Cranberry Walnut 27
Rich Sweet BreadHoliday BreadCinnamon Raisin BreadAbout Quick BreadsApple Walnut LoafBanana Nut BreadIrish Soda BreadCorn BreadCinnamon RollsPizza CrustDinner RollsDanish PastriesSoft PretzelBread SticksHand Shaped French BreadBagelsEgg BagelsSun Dried Tomato Bagels
Strawberry PreservesA; ......... _ ....... I,-,_
LUW OU_i:l.I O!.Ii;!.VVUUI ly ddlll
About Gluten-Free BreadsGluten-Free Potato BreadGluten-Free Cinnamon Raisin BreadGluten-Free Mock Light RyeGluten-Free Brown & White Rice BreadGluten-Free Cheddar LoafGluten-Free Romano Bean BreadGluten-Free Cardamom Fruit Bread
HELP SECTION
272828293030303131323233
TroubleshootingQuestions & AnswersBaking Tips For Yeast BreadsLimited Warranty
34353536373738383940404141424344
4546-484951
4

KnowYourBreadMachine
ABM2H22MAKES11/2AND2LB.HORIZONTALLOAVES
. ,
,
1. Lid2. Lid Handle
3. Large Viewing Window4. Air Vents5. Breadpan6. Baking Chamber(not shown)7. Control Panel
8. Cool-Touch Body9. Power Cord with Plug
10. Drive Shafts
11. Kneading Blades12. Bread Pan Handle
11.
12.
5.
10.
5

f
ControlPanel
Model ABM2H22
.
1.
2.&
4.5.
&7.&9.
lO.
Timer
Preheat
Knead
Rest
Light Medium
BASIC
FRENCH
WHOLE WHEAT
SWEET
ULTRA FAST
QUICK
DOUGH
BAGEL DOUGH
JAMBAKE
1.5 lb. 2 Lb.
Rise
Dark Rapid
TIMER
0
WELBILT _
11.
.
,
NOTE: When using the touchpad controls, be sure to press the pad until you hear a beep.
• ShowstheSELECTnumberselected.1 DISPLAY • ShowstheLOAFsizeselected.
WINDOW • ShowstheCRUSTCOLORselected.• Showsminute-by-minutebakingtimecountdown.• ShowsDELAYBAKINGTIMEselected,• Showsthestage of breadmaking (TIMER, PREHEAT,KNEAD,REST,RISE, BAKE,WARM, END).
2 TIMER • use when setting the TIMERto delay baking.• Press• andV arrowsto settimerfor delayedcompletionupto 12 hoursand58 minuteslater.
• Arrows will move time up or down in lO-minute increments. Pressand hold button for_nmf,'Je÷ar mn_lamanf TIh/IED io nnf m_gil_hla nn _,,J,.,e mml,,e nla_ca t-h_t, lz fh_ 12rp#d
I(J, OLbl IIIUV_*JIIII.,/IIL. I IIVII--I I IO IIUL (.,ILVU*II{JL,_/Ir_ * &JII _*_y_gl'*J*.J_ _*Jl'_,,l_*-_._l_,,,a gll_l_ LII_ _1_
Machine CycleTimes,page 15.
3 SELECT • Press to select the baking cycle of your choice. The selected cycleautomatically assignsthe time neededto complete the process.
4 COLOR
5 LOAF
6 START/STOP
• Press to select the crust color.
• Press to select the loaf size: LARGE(1 1/2 lb.) or EXTRALARGE(2 lb.).
• Press to start operation or begin TIMER countdown for delayedcompletion.• Press and hold until you hear a beepto stop operationor to cancela TIMER setting.
NOTE: Do not press "STOP" when checking the progress of bread.
6
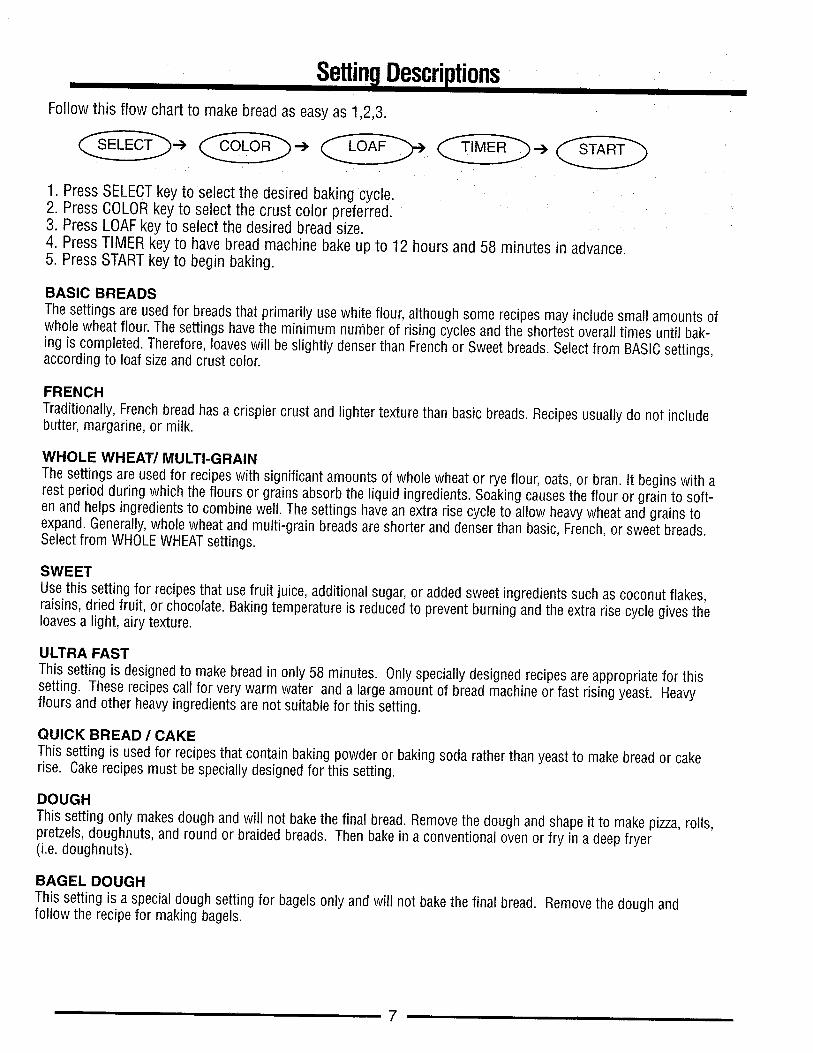
Settin lDescriptionsFollow this flow chart to make bread as easy as 1,2,3.
1. Press SELECT key to select the desired baking cycle.2. Press COLOR key to select the crust color preferred.3. Press LOAF key to select the desired bread size.4. Press TIMER key to have bread machine bake up to 12 hours and 58 minutes in advance.5. Press START key to begin baking.
BASIC BREADSThe settings are used for breads that primarily use white flour, although some recipes may include small amounts ofwhole wheat flour. The settings havethe minimum number of rising cyclesand the shortest overall times until bak-ing is completed. Therefore,loaveswill be slightly denser than Frenchor Sweetbreads. Select from BASICsettings,according to loaf size and crust color.
FRENCH
Traditionally, French bread has a crispier crust and lighter texture than basic breads. Recipes usually do not includebutter, margarine, or milk.
WHOLE WHEAT/MULTI-GRAINThe settings are used for recipes with significant amounts of whole wheator rye flour, oats, or bran. It begins with arest period during which the flours or grains absorb the liquid ingredients.Soaking causes the flour or grain to soft-en and helps ingredients to combinewell. The settings havean extra rise cycle to allow heavywheat and grains toexpand. Generally,whole wheat and multi-grain breads are shorter and denser than basic, French,or sweet breads.Select from WHOLEWHEATsettings.
SWEETUsethis setting for recipes that usefruit juice, additional sugar, or added sweet ingredients such as coconut flakes,raisins, dried fruit, or chocolate. Bakingtemperature is reducedto prevent burning and the extra rise cycle gives theloavesa light, airy texture.
ULTRA FAST
This setting is designedto make bread in only 58 minutes. Only specially designed recipesare appropriate for thissetting. These recipes cal! for very warm water and a large amount of bread machine or fast rising yeast. Heavyflours and other heavy ingredientsare not suitable for this setting.
QUICK BREAD ! CAKEThis setting is used for recipesthat contain baking powder or baking soda rather than yeast to make bread or cakerise. Cakerecipes must be specially designedfor this setting.
DOUGHThis setting only makesdough and will not bakethe final bread. Removethe dough and shape it to make pizza,rolls,pretzels,doughnuts, and round or braided breads. Thenbake in a conventional oven or fry in a deepfryer(i.e. doughnuts).
BAGEL DOUGHThis setting is a special dough setting for bagels only and will not bake the final bread. Removethe dough andfollow the recipe for making bagels.
i 7 i i

JAMUsethis settingfor makingjamfrom freshfruits. Donot doublerecipesor allowingredientsto boiloverthe pan into the baking chamber.Should this happen,stop the machine immediately.Allow tocool and cleanthoroughly.
BAKEThis is a bake-only setting that does not mix. If you havebaked a loaf of bread in your machineandwould prefer a darker crust, usethe BAKEsetting to bakethe loaf for a longer period of time. Setthemachine to the BAKEsetting and press the STARTkey. Watch your time and stop the machinewhendesired. The bakecycle is preset for 60 minutes. This setting is especiallyhelpful when making gluten-free breads (see page39).
8

Usin lYourBreadMachine
Theseare instructions for bread baking only-not dough, jam or bakecycles.Thebread settings in thisunit will combine ingredients, knead,and make bread from start to finish automatically.The DOUGHsetting makes dough for a variety of recipesthat can be shapedand baked in an oven. Todelaycompletion, the automatic TIMER may be programmed to make bread or dough while you are at work orasleep. SeeUsing The Timer,page 13.
The recipes included with this booklet have been thoroughly tested to ensure best results. Recipes havebeen created by home economists specifically for these bread machines and may not produce acceptableresults in other similar bread machines.
FOR ALL BREAD BAKING SETTINGS, FOLLOW THESE INSTRUCTIONS:
1 Openthe lid and removethe baking pan by pulling slightly forward onthe handle,then up and out. It is important to remove the baking pan
i from the unit when putting ingredients into the pan. This will prevent
accidentally spilling ingredients into '_----/-/_! /
the baking chamber.
2' Attach the kneading blades onto the shafts inside the baking pan bylining up the flat side of the bladewith the flat side on the shaft. Push
the__blades......firmly ontol_ the shafts. _ __
3 Selecta recipe from the recipe section of this booklet. When followingthe recipes:Measure ingredientscarefullyandaccurately.To measure liquids,use a see-through liquidmeasuring cup and check the measure-ment at eye level. When measuring dry ingredients, use a standarddry measuringcup and levelthe ingredients with a straightedgeknife. Slightly inaccuratemeasurementcan makea differenceinresults. Use standard measuring spoons and leveloff with astraightedge knife.See Measuring Your Ingredients, page 19.• Always add ingredients into the bakingpanin the order listed.• Always add yeast last. Besure the yeast does not touch the liquid
WARNING:• Placeyour breadmachinewhereit is level,stable,andsecure.
• Ingredientsspilled in bakingchambercancausefire whenignitedby the heatingelement.
• Besureto set the kneadingbladesfirmly in placeto pre-ventbladesfrom coming offduring operation,which may -affectthe kneadingor mixing.
• Besure the shafts arecleanof any residue(i.e. dough).This will ensurethe kneadingbladeswill fully fit into placeand will preventbladesfromstickingto shafts.
• Becarefulnot to mix theyeastwith anyof the wetingredients,especiallywhenuRinn fhn d#lmmrt fimnr..... _ ........ j .........
feature.Otherwise,the breadmaynot rise properly.
Breadrnaking Tip:After5 minutesof kneading, ,openthe lid of the breadma-chineand checkthe doughconsistency.Thedoughshouldform asoft, tacky ball.
ingredients.
Liquids 1! !/ Inrgyredients 1 Yeast(i.e. flour)
If too dry, addliquid. If toowet, addflour.
Note:Additionalliquid or flourshould beaddedin1/2- 1 TBSP.increments.
9
4
5
6
7
, Usin lYourBreadMachine
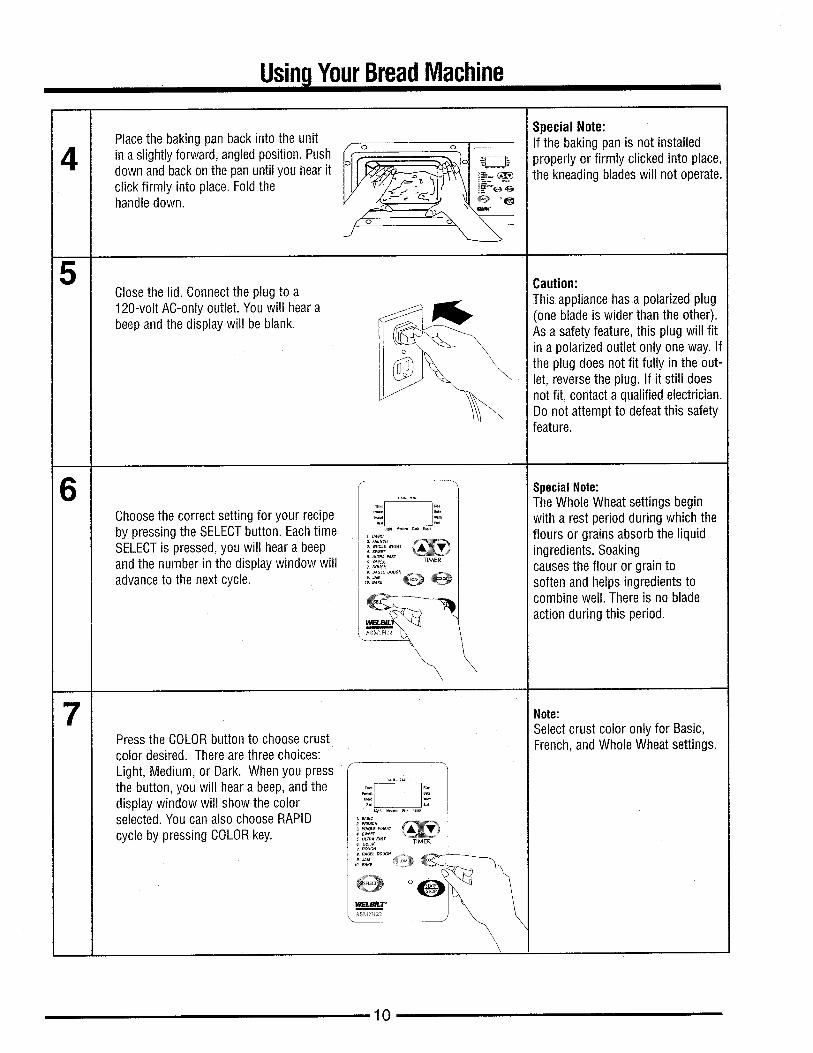
Placethe baking pan back into the unitin aslightly forward, angledposition. Pushdown andback onthe pan until you hear itclick firmly into place. Foldthehandle down.
Closethe lid. Connect the plug to a120-volt AC-only outlet. Youwill hearabeepand the display wil! be blank.
Choosethe correct setting for your recipeby pressing the SELECTbutton. EachtimeSELECTis pressed, you will hear a beepand the number in the display window willadvanceto the next cycle.
n ..... ±L-- P,t'_l r'ln L...LJ.^_ ^1-. ......... _-1"I_5_5 L!IU UULUI_ UULLUII to L:IIUU;)U L, lUbL
color desired. Thereare three choices:Light, Medium, or Dark. When you pressthe button, you will hear a beep, and thedisplay windowwill show the co!orselected.Youcan also choose RAPID
cycleby pressing COLORkey.
o
\
_.BASIC
2. FRENC,_. WHOLEW;_AT4. SWEET5. ULTRA_ST
QUICK "rIMER_OUGH
_,_Aslc
_. W_OLEWHEAT_. SWEar5, ULn_AFAST TIMER
z _OUGH
o
\
Special Note:If the baking pan is not installedproperly or firmly clicked into place,the kneading bladeswill not operate.
Caution:This appliance has a polarized plug(one blade is wider than the other).As a safety feature, this plug will fitin a polarized outlet only one way. Ifthe plug does not fit fully in the out-let, reversethe plug. If it still doesnot fit, contact a qualified electrician.Do not attempt to defeat this safetyfeature.
SpecialNote:The Whole Wheat settings beginwith a rest period during which theflours or grains absorb the liquidingredients. Soakingcausesthe flour or grain tosoften and helps ingredients tocombine well. There is no bladeaction during this period.
Note:Select crust color only for Basic,French, and Whole Wheatsettings.
10

Usin lYourBreadMachine
8
9
10
11
Press the LOAFbutton to choose thedesired loaf size. When you press thebutton, you will hear a beep, and thedisplay window will show the sizeof the loaf selected.
i
! Timeri Preheat
Knead
I Rest
Light
1.5 |b. 21.b.
Rise
Bake
Warm
End
Medium Dark Rapid
Pressthe TIMER button to delay the completion of your bread for up to 13hours. For details seethe Using The Timer, page 13.
I
1, B_s_c
2. FRENCH3. WHOLEWH_T
5 ULTR__AST TIMEReU_CK7 _OUGH8 8_G_LOOUG_ ,
Press the START/STOPbutton to begin.The remaining time will count down inone-minute increments. When the bakingtime is completed, a beepwill sound fivetimes.
To cancela program once you havestarted it, press the START/STOPbutton again until you hear a beep.You can now reprogram the machine.
I
I
The bread machine is designed with a KeepWarm feature that automaticallybegins when the bake time is completed. This wil! continue for up to 60 min-utes after baking is complete. During this time, the bread machinewill circulatehnt _ir tn kp._.pthp.hrp._dw_rm _nd th_.rp,will hp..5hp.p.p_P.\/_.ry.5minHt_._Yn=lmay remove the baking pan at any time during the KeepWarm cycle. To turn offthe KeepWarm feature before the 60 minutes are up, simply pressthe STOPbutton and hold it until you heara beep. UNPLUGTHEUNITWHEN FINISHED.Never leavethe unit plugged in when not in use.
Note:
Select Loaf Size only for French, Basic,Whole Wheat,Sweet, and UltraFastsettings.
SpecialNote:For some cycles, there is no timer set-ting. SeeBread Machine Cycle Times,page 15.
Breadrnaking Tip:After 5 minutes of kneading, openthelid of the breadmachine and check the
dough consistency. The dough shouldform a soft, tacky ball. If too dry, addliquid. If too wet, add flour.
Note:Additionalliquidor flour shouldbeaddedin 1/2-1 TBSP.increments.
Note:TheKeepWarmfeaturedoesnotfunctiononsomecycles.See
11

Usin lYourBreadMachine
12
13
14
The bread machinehas a convenient viewing window so that you maywatch theprogress of the bread as it is mixed, kneaded,and baked.Occasionally,somemoisture may form in the window during baking.You may lift the lid to lookinside during mixing and kneading stages.However,DO NOTOPENTHELIDDURINGTHEBAKINGCYCLE,(approximately the last hour) as this may causethe breadto collapse.
To remove the bread from the baking pan, use potholdersor ovenmitts andpull slightly forward on the handle, then up and out. Turn the pan upside downand shakethe breadout onto a wire cooling rack. The baking pan has a non-stick finish so the breadshould come out easily. Do not use metal utensils toremovebread as they may scratch the non-stick surface. If you have difficultyremoving breadfrom the baking pan, slide a flat rubber or plastic spatula alongthe sides of the panto loosen the loaf. Turn the panover and shakethe loaf out.
Allow the breadto cool before slicing. See Slicing and Storing Bread, page 13.If the kneading bladeremains in the bottom of the baking pan, fill the baking panwith hot water to loosen. If the kneading blade remains in the bottom of thebread, use the end of a plastic spoon or other non-metal utensil to remove. Donot use a knife or any other sharp metal object as it will scratch the non-stickcoating on the kneading blade.
Warning:To avoid damaging the breadmachine, do not put any objecton top of the unit.
Note:Always check to see where thekneading blade is when removinga baked loaf of bread. If it remainsstuck in the bread,you maydamageit by cutting into it whileslicing.
Occasionallythe kneading blademay becomestuck in the bread,There is nothingwrongwithyourbread machine. Simply use a forkand pry the bladeout of the bread.
Important:
' o /
If the temperature in the breadchamber is higher than 122° F,theDISPLAYWINDOWwill show "E01". If the temperature is lower than 14° F, theDISPLAYWINDOWwill show "EO0".
- PlaGewarm-waterin pan -immediately after removing breadto prevent bladesfrom sticking toshaft.
Warning:If "E01" error message appears,donot makeanother loaf until thebread machinecools down. If"EO0"error messageappears, allowthe machineto warm upabove14° E
12

Using!TheTimer
TO SET THE TIMER, FOLLOW THESE INSTRUCTIONS:
1
2
First, follow steps 1 thru 8 in Using Your Bread Machine, pages 9-11.Note: The maximum length of delay is up to 12 hours and 58 minutes, depending on the
selected setting.Note: Do not use the TIMER with recipes that call for perishable ingredients, such as eggs, freshmilk, sour cream, or cheese.
To set the TIMER, press and hold the • arrow on the control panel until the display shows the
total program time. If you pass the desired time, simply press • to go back.Note:
You do not need to mathematically calculate the difference between the setting time and
the total hours you want. The machine will automatically adjust to include the setting time.Simply set the TIMER for your total hours.
Once you have set the time, press START.The colon (:) in the display will flash to indicate thatthe TIMER has beenset, and the countdown will begin. The TIMER will count down in
one-minute increments. When the display reaches 0:00, the bread is complete and the beeper willsound.
For example, it is 8 p.m. now. You want to wake up to a 2 lb. loaf of basic white bread at 8 a.m.The total time between 8 p.m. and 8 a.m_ is 12 hours.
© Press and hold the
• arrow on the
control panel untilthe display shows12:00. Press START.
Q The machine willautomatically start
i~ i
making bread at4:35 a.m.
Q A fresh-bakedloaf of bread is
ready to serve at.
8:00 a.m.
SLICINGAND STORINGBREADFor best results, place bread on a wire rack and allow it to cool 15 to 30 minutes before slicing. Use an
electric knife for even slices or use a sharp serrated knife. For square slices, place the loaf on its side andslice across.
Store unused bread tightly covered (reclosable plastic bags or plastic containers work well) at room tem-perature for up to three days. For longer storage (up to one month), place bread in a tightly covered con,tainer in the freezer. Since homemade bread has no preservatives, it tends to dry out and become stalefaster than commercially-made bread.
Leftover slightly hardened bread may be cut into 1/2-inch or 1-inch cubes and used in recipes to make
croutons, bread pudding, or stuffing.

CareandCleanin l
CAUTION:To prevent electrical shock, unplug the unit before cleaning. Allow the bread machine to cool beforecleaning. Do not immerse or splash either the body or lid in any liquid as this may cause damageand/or electric shock.
For best performance and maintenance, clean the bread machine after each useas follows:
Outer Body, Lid, and Baking Chamber:Wipe the lid and outer body of the unit with a damp cloth or slightly damp sponge.
Use a damp sponge or cloth to wipe out any flour, crumbsl or other materials from
the baking chamber. Dry thoroughly.
Baking Pan and Kneading Blades:Both the baking pan and kneading blades have non-stick surfaces. Do not use any harsh cleansers, abra-sive materials, or utensils that may scratch the surfaces. Over time, the non-stick surface may change in
appearance due to moisture and steam. This is normal and has no effect on its use or quality.
Remove the baking pan and kneading blades from the baking chamber before
cleaning. Wipe the outside of the baking pan with a damp cloth. NEVERIMMERSE THE BAKING PAN in water or other liquid. Wash the inside of the
baking pan with warm, soapy water. If the kneading blades get stuck, fill thebaking pan with hot water and soak for 30 minutes or until they loosen andcan be removed easily. If the hole in the kneading blades become clogged,
carefully clean it out with a wooden or plastic toothpick. Use care to avoid
toothpick scratching blade surface or getting stuckin blades.
Never use any of the following to clean your bread machine:• Paint Thinner
• Benzine
• Steel Wool Pads
• Polishing Powder• Chemical Dustcioth
CAUTION: DO NOT place any part or parts of the bread machine in the dishwasher.
STORING THE UNIT
Be sure to dry all parts before storing including the viewing window. Close the lid, and do not store
anything on top of the bread machine.
TROUBLESHOOTING
Specific questions about the bread machine functions and problems with ingredients or recipesareaddressed in the QuestionsandAnswers section on pages46-48. For better performance,allow the unit
to cool completely before beginning to bakea second loaf of bread. Youcan speedcooling by openingthe lid, removing the baking pan, and allowing the baking chamberto cool.
14

o'1
MENU COLOR LOAF Total Rest Knead i Rest Knead 2 Rise 1 Punch Rise 2 Shape Rise 3 Baking Keep Fruit & Setting
Time i Warm NutsI
5m 5m 20m 39m 10s 25m50s 5s 49m45s 53m Hr. 2:59 15m 5m 20m 39m 10s 25m50s 15s 49m45s 60m Hr. 3:08 25m 5m 20m ' 39m 10s 25m50s 5s 49m45s 53m Hr. 2:59 35m 5m 20m 39m lOs 25m50s 15s 49m45s 60m Hr. 3:08 45m 5m 20m ! 39m lOs 25m50s 15s 49m45s 53m Hr. 2:59 55m 5m 20m i 39m lOs 25m50s 15s 49m45s 60m Hr. 3:08 6
5m 5m 20m ' 15m lOs 8m50s lOs 29m50s 53m Hr. 1:59 75m 5m 20m ! 15m lOs 8m50s lOs 29m50s 60m Hr. 2:07 85m 5m 20m ! 39m lOs 30m50s lOs 59m50s 52m Hr. N/A 95m 5m 20m 39m lOs 30m50s lOs 59m50s 55m Hr. N/A 10
5m 5m 20m 39m lOs 30m50s lOs 59m50s 52m Hr. N/A 115m 5m 20m 39m lOs 30m50s lOs 59m50s 55m Hr. N/A 125m 5m 20m !_ 39m 10s 30m50s 0s 59m50s 52m Hr. N/A 135m 5m 20m 39m lOs 3Qm50s l_Os 59m50s 55m Hr. _NJ_A 14____5m 5m 20m 15m lOs 15m50s lOs 38m50s 52m Hr. N/A 155m 5m 20m , 15m lOs 15m50s Os 38m50s 55m Hr. N/A 16
30m 5m 5m 15m 49m lOs 2_5m50s. Os _44m50s 50m Hr. 3:00 1730m 5m 5m !5__m____49.m lOs 25m50s Os 44m50s 53m Hr. 3:03 1830m 5m 5m 15m 49m lOs 25m50s Os 44m50s 50m Hr. 3:00 1930m 5m 5m 15m 49m lOs 25m50s Os 44m50s 53m Hr. 3:03 20
BASIC
FRENCH
Light 1.5 LB. 3:182 LB. 3:25
Medium 1.5 LB 3:182 LB. 3:25
Dark 1.5 LB. 3:182 LB. 3:25
_d._ 1.5 LB. 2:172 LB. 2:24
Light 1.5 LB. 3:322 LB. 3:35
Medium 1.5 LB. 3:322 LB. 3:35
Dark 1.5 LB. 3:322 LB. 3:35
L_RaJ_id 1.5 LB. 2:322 LB. 2:35
Light 1.5 LB. 3:452 LB. 3:48
Medium 1.5 LB. 3:45
WHOLE 2 LB. 3:48WHEAT Dark 1.5 LB. _3_. J3mO___m__
2 LB. 3:48 30m 5m 5m 15m 49m lOsRapid 1.5 LB. 2:30 5m 5m 5m 15m ' 24m lOs
2 LB. 2:33 5m 5m 5m 15m 24m lOs
SWEET Medium 1.5 LB. 3:22 5m 5m 20m : 39m lOs
BREAD 2 LB. 3:27 5m 5m 20m i 39m lOsULTRA Medium 1.5LB. 0:58 .... 13m _FAST 2 LB. 0:58 10m :
QUICK 1:43 3m 5m 5m :
DOUGH 1:30 5m 5m 20m : 60mBAGELDOUGH 2:00 29m 90m 60s
JAM 1:05 15mBAKE 1:00
I
_5.L 1_ ',..._4_