Embed Size (px)
Citation preview

Team 1912 CombustionIgnition Team Manual
An Introduction to FIRST LabVIEW
Written by Rachel Holladay
Programming in FIRST
Language Choices – LabVIEW, Java, C++
Used for Robot Control -Autonomous: decisions made based on senors
or preprogrammed movementsTele-op: decisions made based on operator
input from the drivers
Two part System
● Front Panel -
● Looks like a display board, user interface
● Controls allow you to input data
● Indicator allow you to extract data
● Block Diagram -
● Home to the actual code
● Full of loops, conditionals, statements
● Most of the work is done here

General Structure
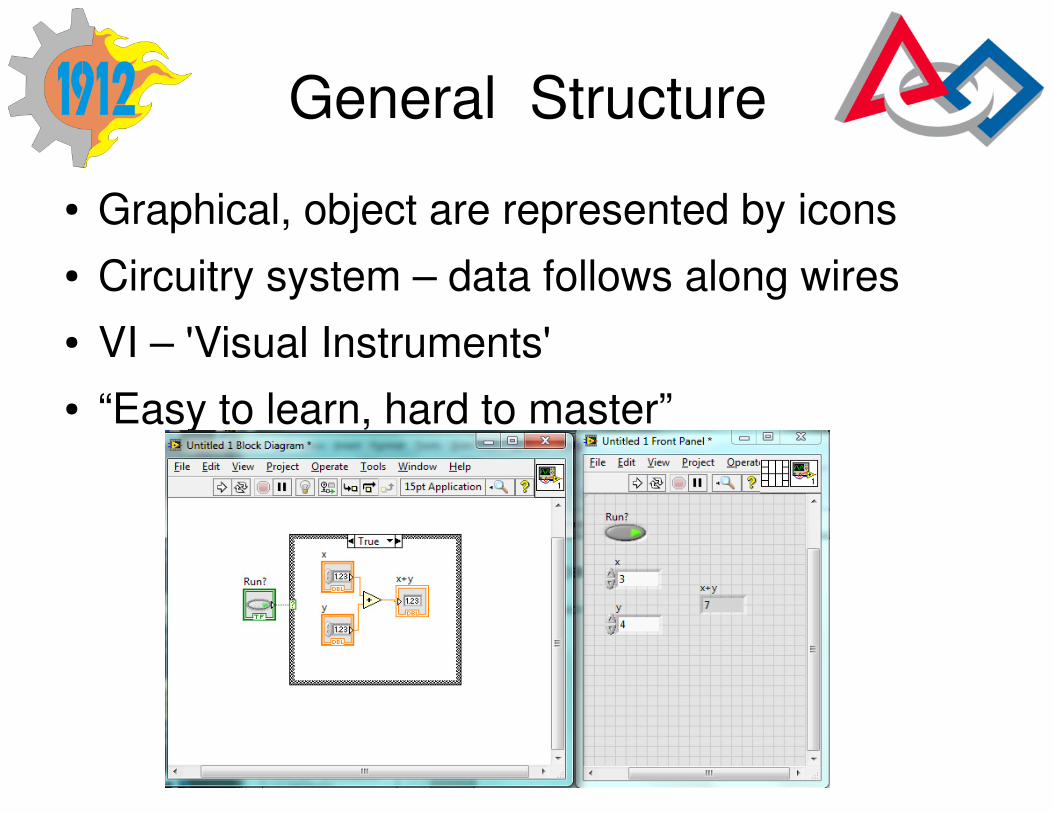
● Graphical, object are represented by icons
● Circuitry system – data follows along wires
● VI – 'Visual Instruments'
● “Easy to learn, hard to master”
Basics: WPI Library
● Created by the Worcester Polytechnic Institute
● Contains all the specialty FIRST subVIs
● Includes eight subcategories -
● Robot Drive
● Sensors
● Acuators
● Driver Station
● Camera
● Communications
● Utilities
Framework
● The main structure that holds FRC code together, allows it to run smoothly on the robot etc.
● You must work within the framework and YOU SHOULD NEVER EDIT THE FRAMEWORK
● Otherwise the FMS (field management system) will be unable to connect to you robot and it will not move. Ever.
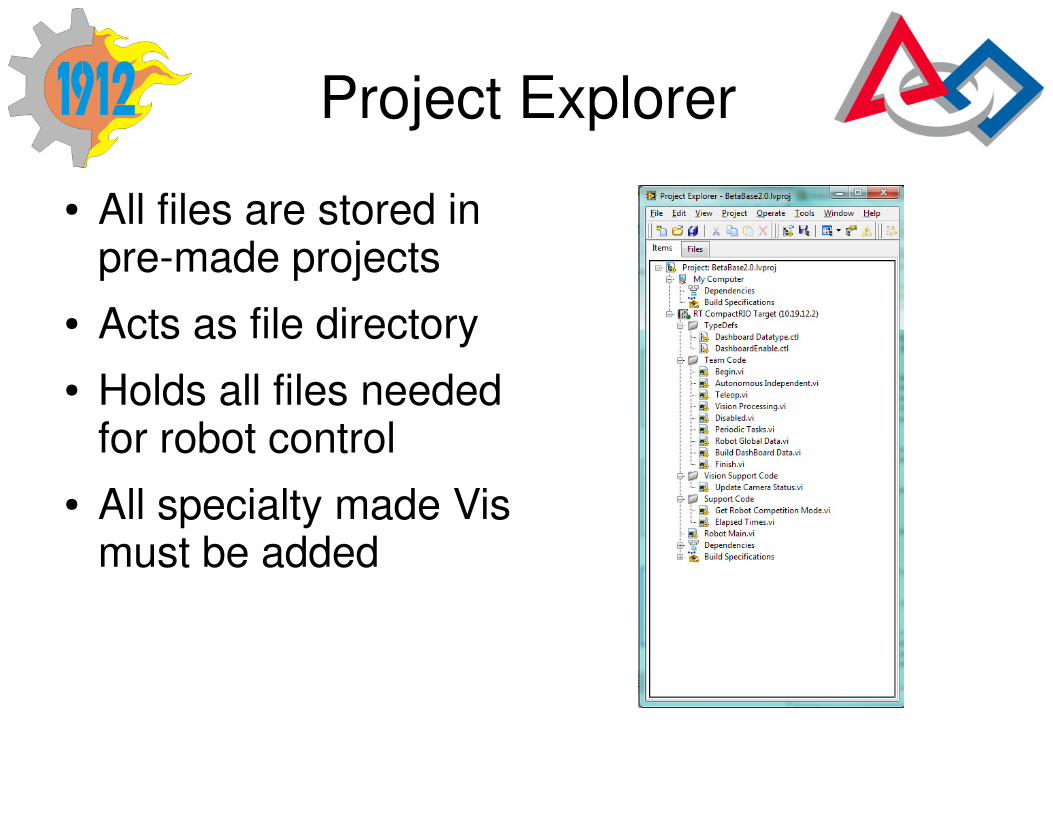
Project Explorer
● All files are stored in pre-made projects
● Acts as file directory
● Holds all files needed for robot control
● All specialty made Vis must be added
Vis: Robot Main
● The main combining point of focus for the project
● Should not be edited under any circumstances
● Mainly helps the FMS system understand and runs the code
● DO NOT EDIT THIS
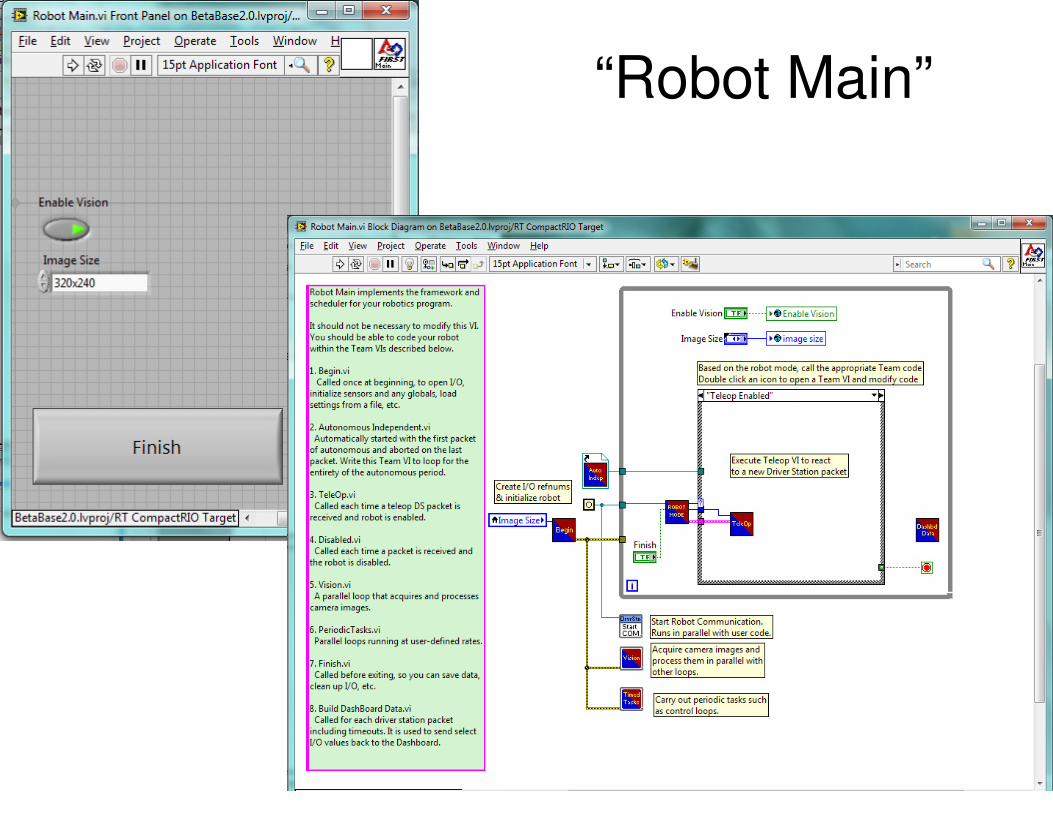
“Robot Main”
VIs- Begin
● “Called once at beginning, to open I/O, initialize sensors and any globals, load settings from a file, etc.”
● First thing run on robot boot up
● Opens and assigns all variables and hardware
● EX) Opens a joystick and assigns it to USB 1
● EX) Opens a motor and assigns it to PWM 1 with a true inversion
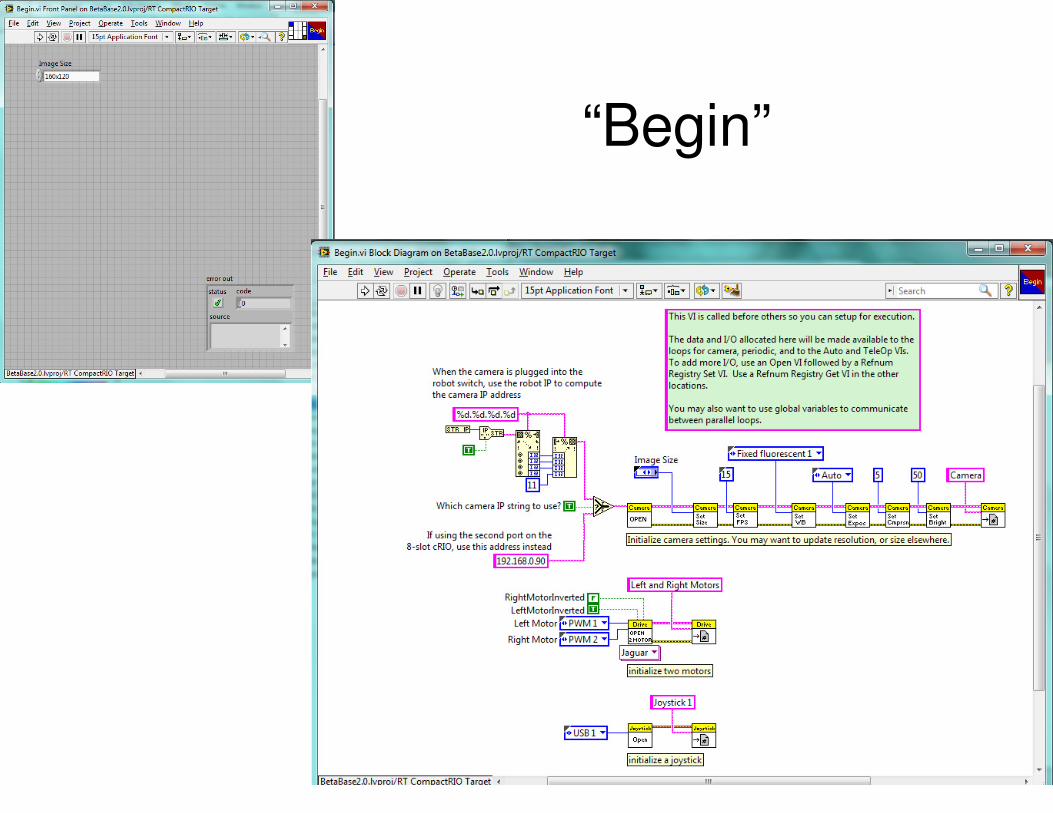
“Begin”
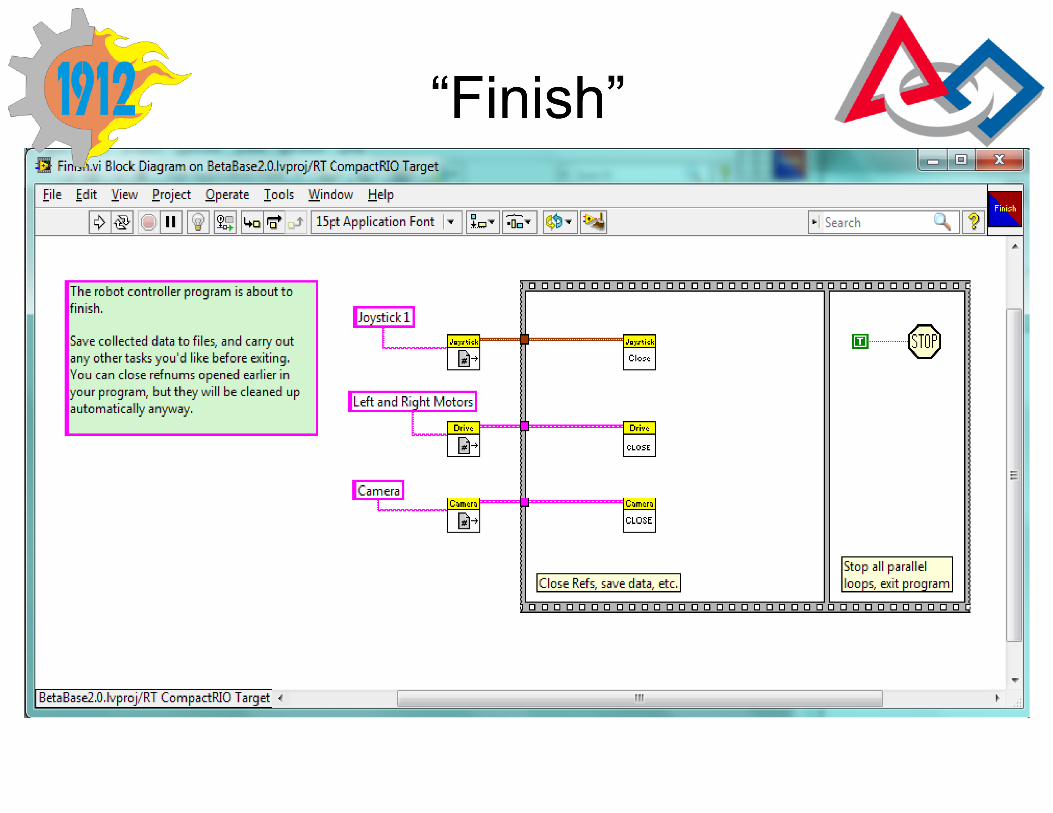
VIs- Finish
● “Called before exiting, so you can save data, clean up I/O, etc.”
● Doesn't actually run in competition
● Does the inverse of begin, it closes everything
● EX) Closes the joystick, motor, etc.
● If you open something in Begin, close it in Finish, it's just neat practice
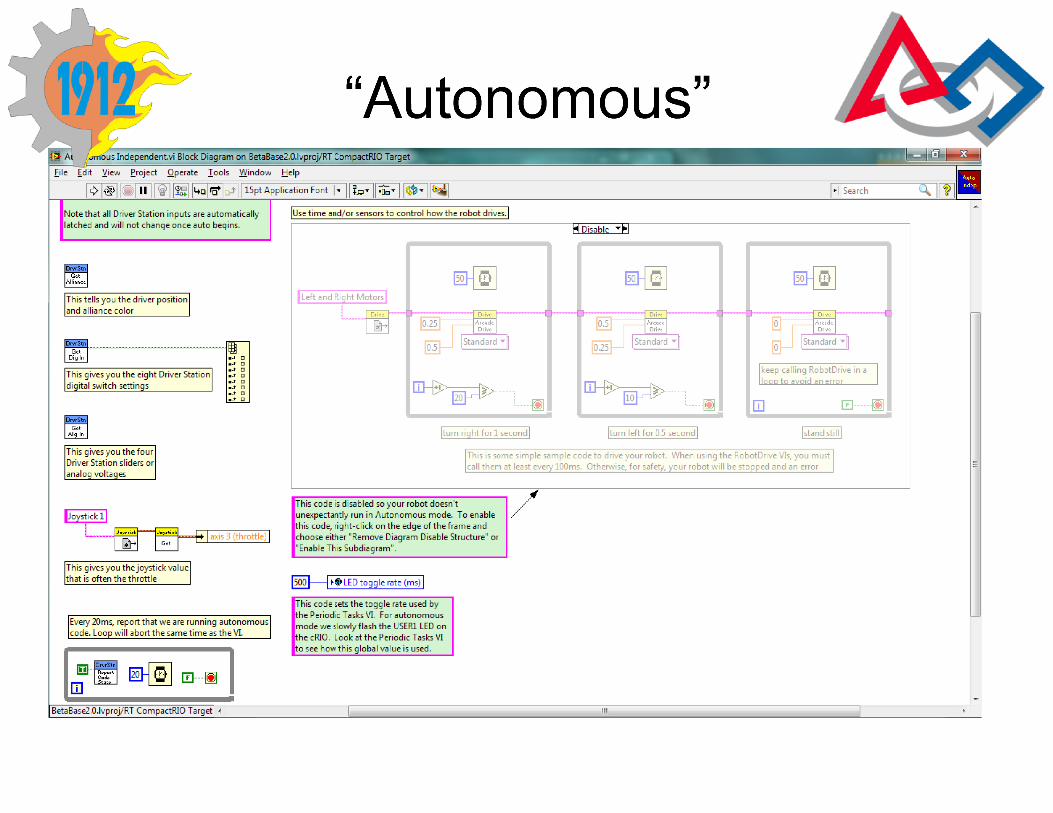
VIs- Autonomous
● “Automatically started with the first packet of autonomous and aborted on the last packet. Write this Team VI to loop for the entirety of the autonomous period.”
● Runs autonomous code for 15 second period
● Can either be based on sensor input or based on dead reckoning
● Framework provides an example of a simple dead reckoning driving maneuver
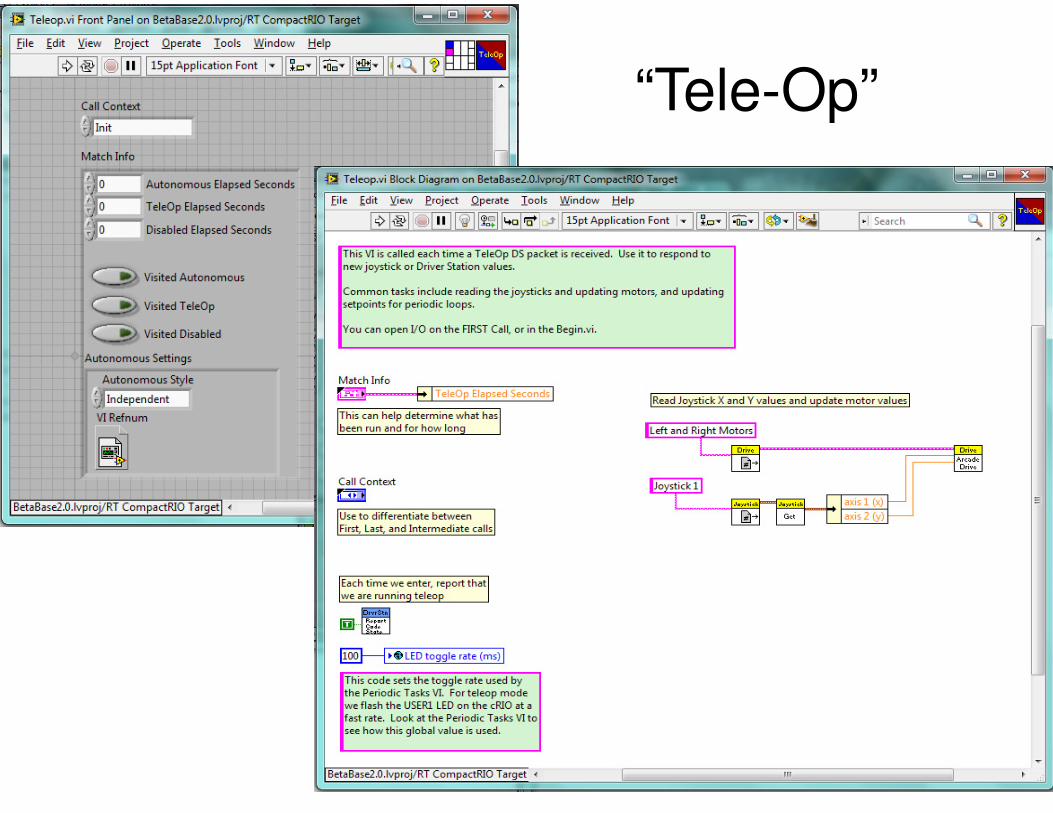
VIs - Tele-Op
● “Called each time a teleop DS packet is received and robot is enabled.”
● Main body – hold Tele-Op code
● Normally holds drive code and any Challenge related code, such as an arm or kicker
● Framework provides arcade drive
“Tele-Op”
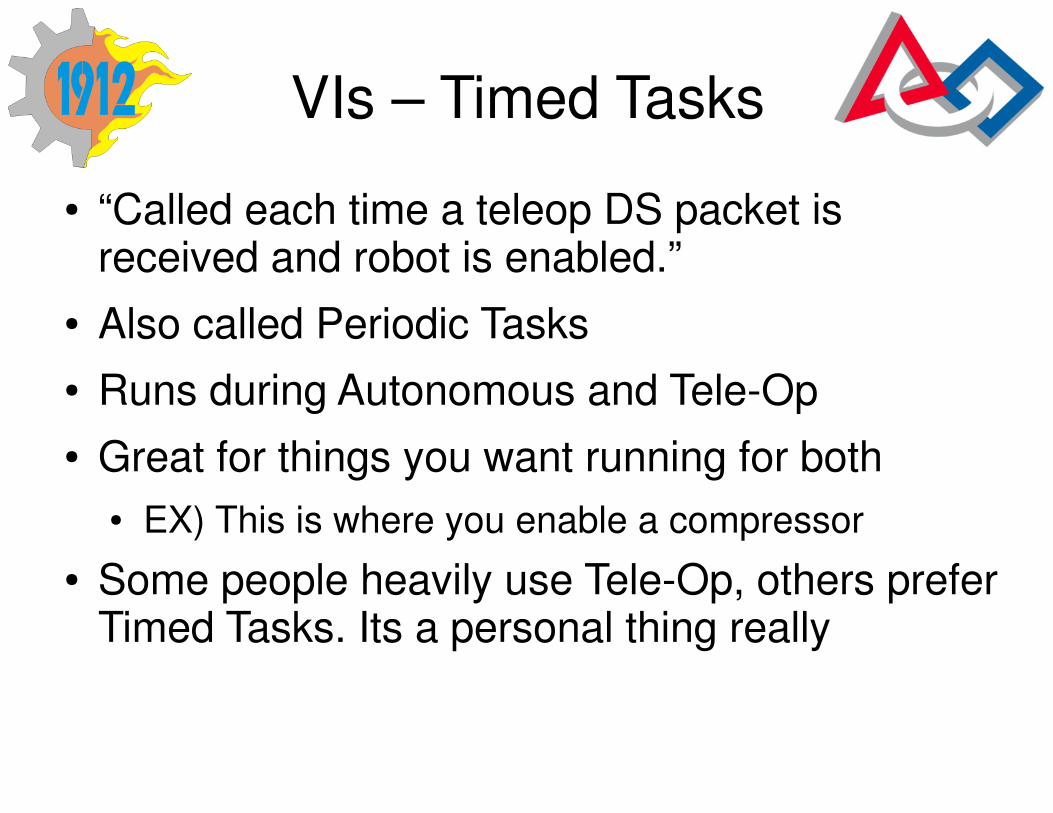
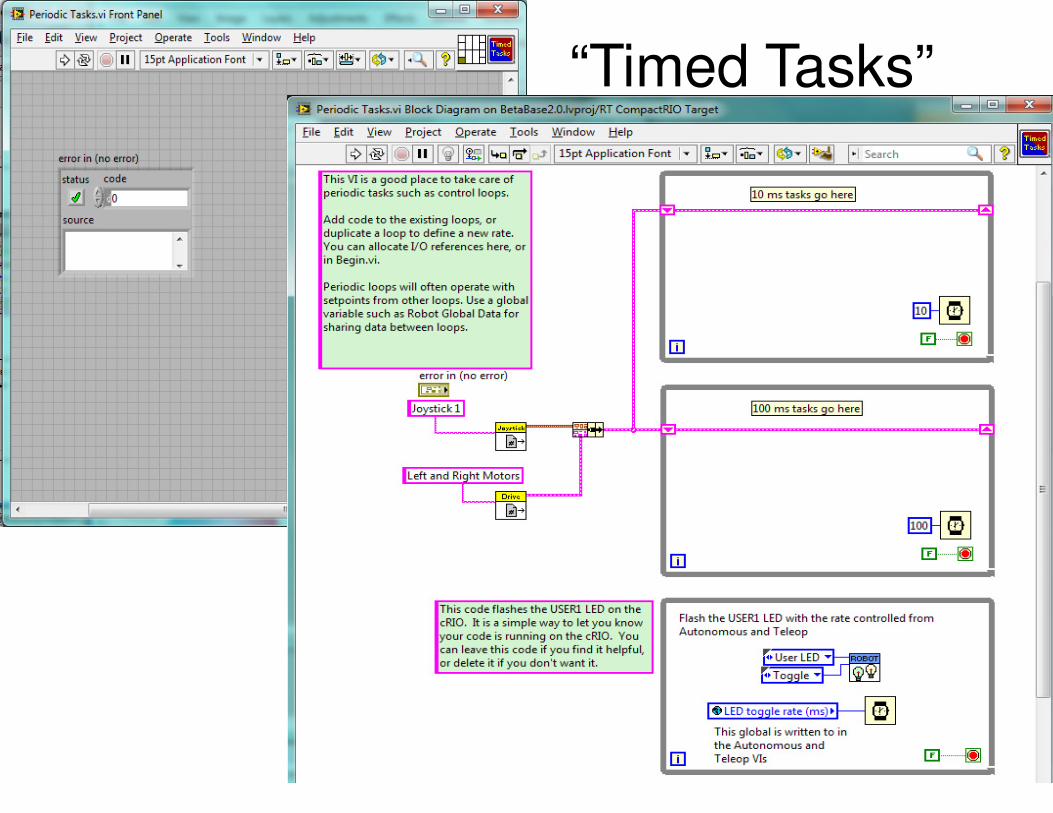
VIs – Timed Tasks
● “Called each time a teleop DS packet is received and robot is enabled.”
● Also called Periodic Tasks
● Runs during Autonomous and Tele-Op
● Great for things you want running for both
● EX) This is where you enable a compressor
● Some people heavily use Tele-Op, others prefer Timed Tasks. Its a personal thing really
“Timed Tasks”
VIs- Vision
● “A parallel loop that acquires and processes camera images.”
● Holds any code related to your camera
● Often gets neglected because the camera is a very commonly neglected element
● Framework provides a camera feed on the dashboard, which is a neat feature
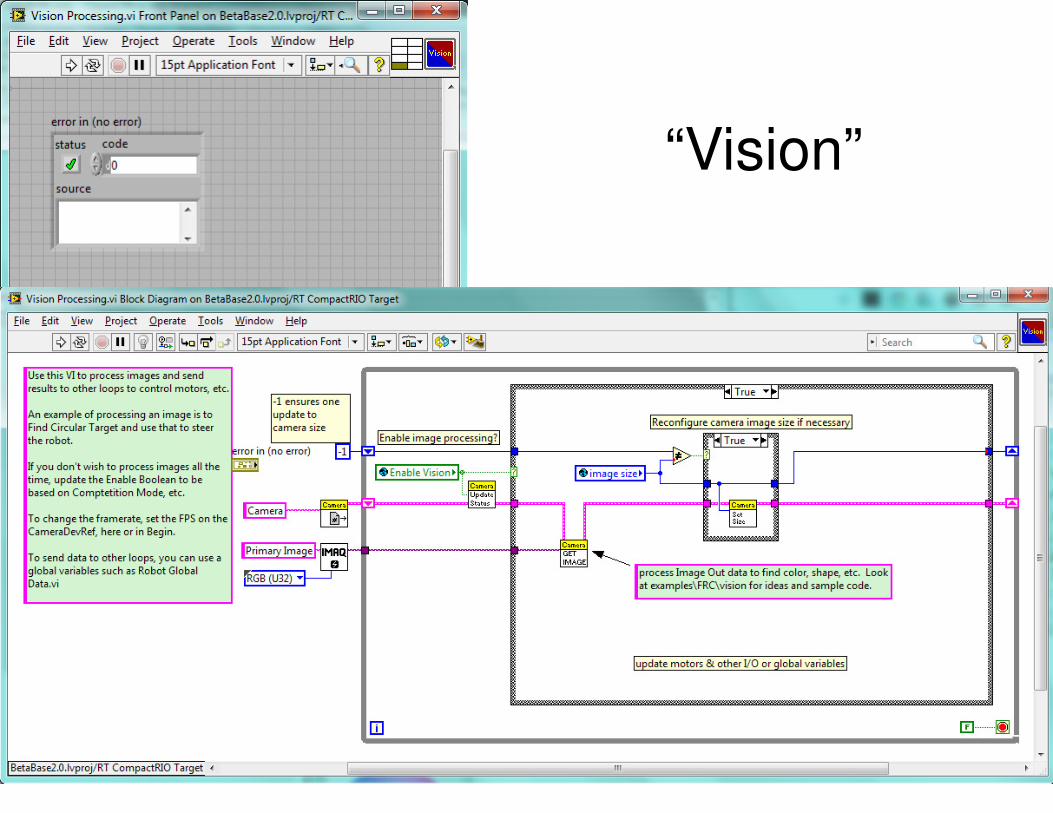
“Vision”
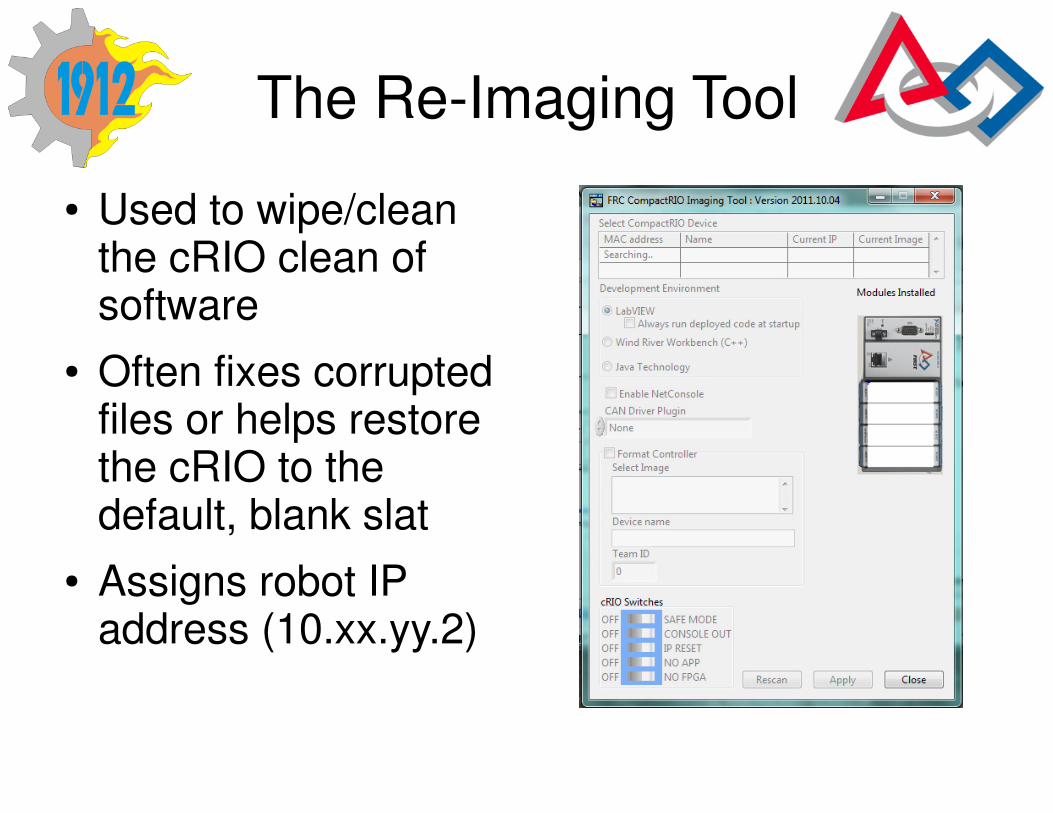
The Re-Imaging Tool
● Used to wipe/clean the cRIO clean of software
● Often fixes corrupted files or helps restore the cRIO to the default, blank slat
● Assigns robot IP address (10.xx.yy.2)
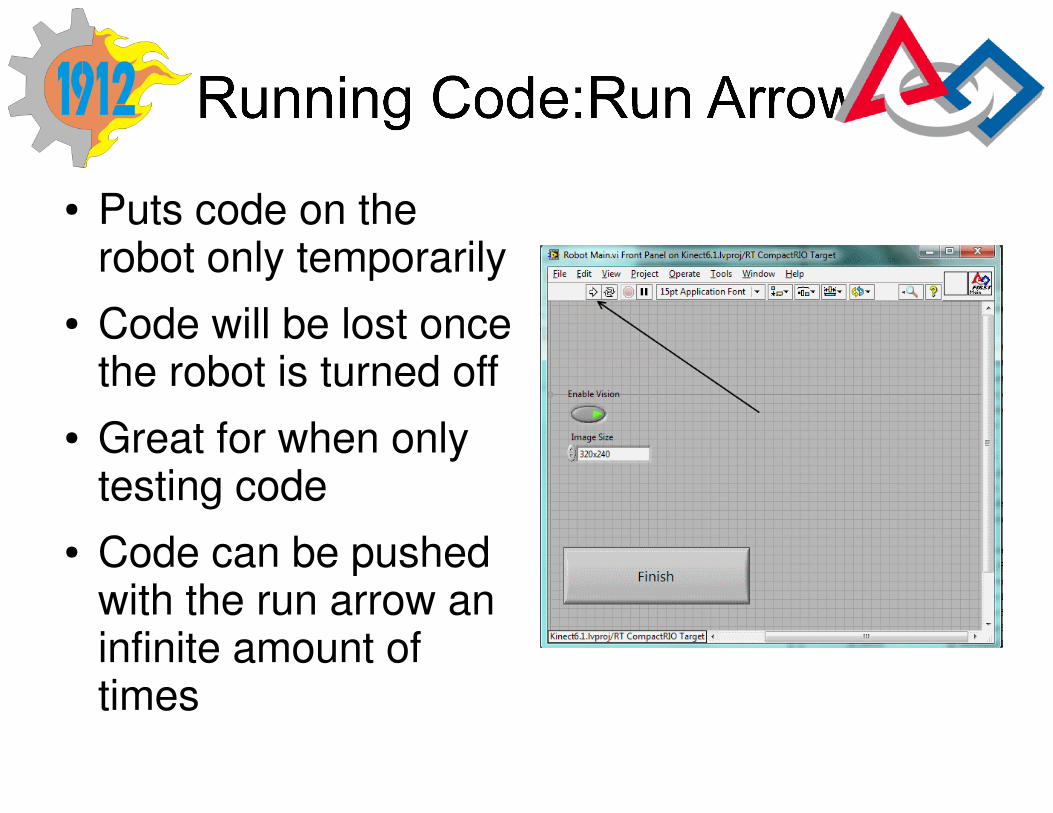
● Puts code on the robot only temporarily
● Code will be lost once the robot is turned off
● Great for when only testing code
● Code can be pushed with the run arrow an infinite amount of times
● Builds a package of the code and then deploys the code on to the robot
● Will stay on the robot permanently even after turned off
● Does take a few minutes to do
● An executable must run for competition
● To remove or change a new executable must be pushed down or the cRIO must be re-imaged
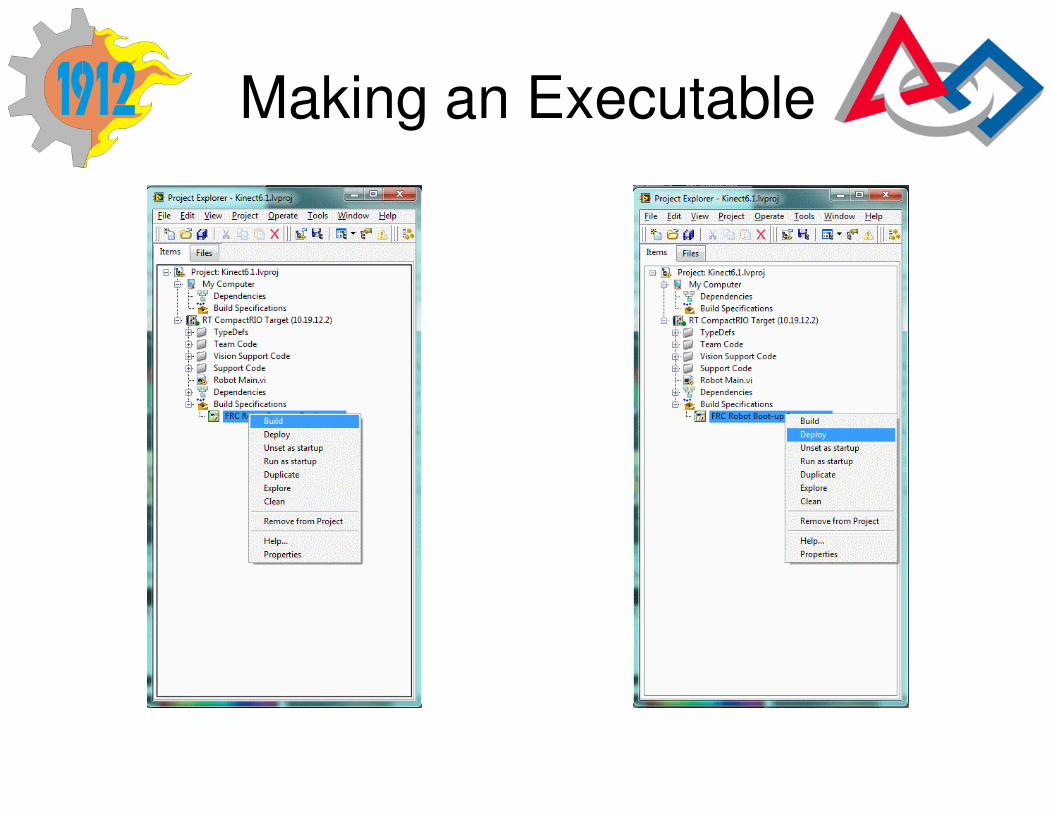
Making an Executable
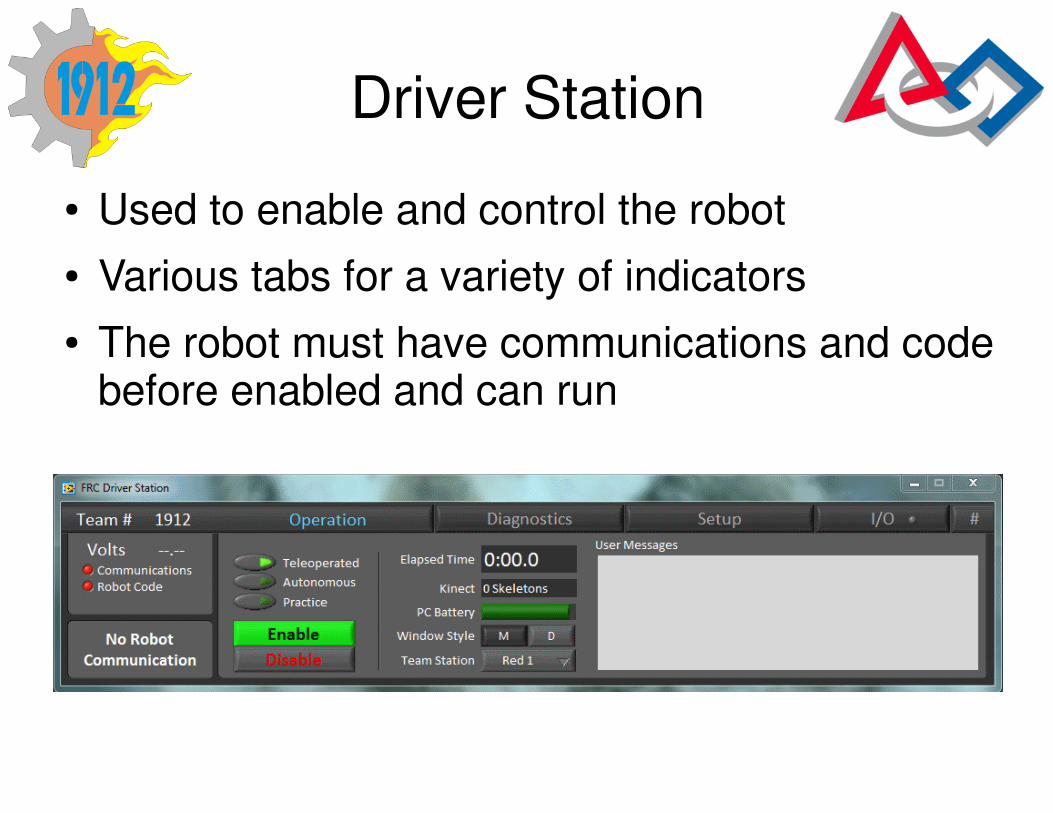
Driver Station
● Used to enable and control the robot
● Various tabs for a variety of indicators
● The robot must have communications and code before enabled and can run
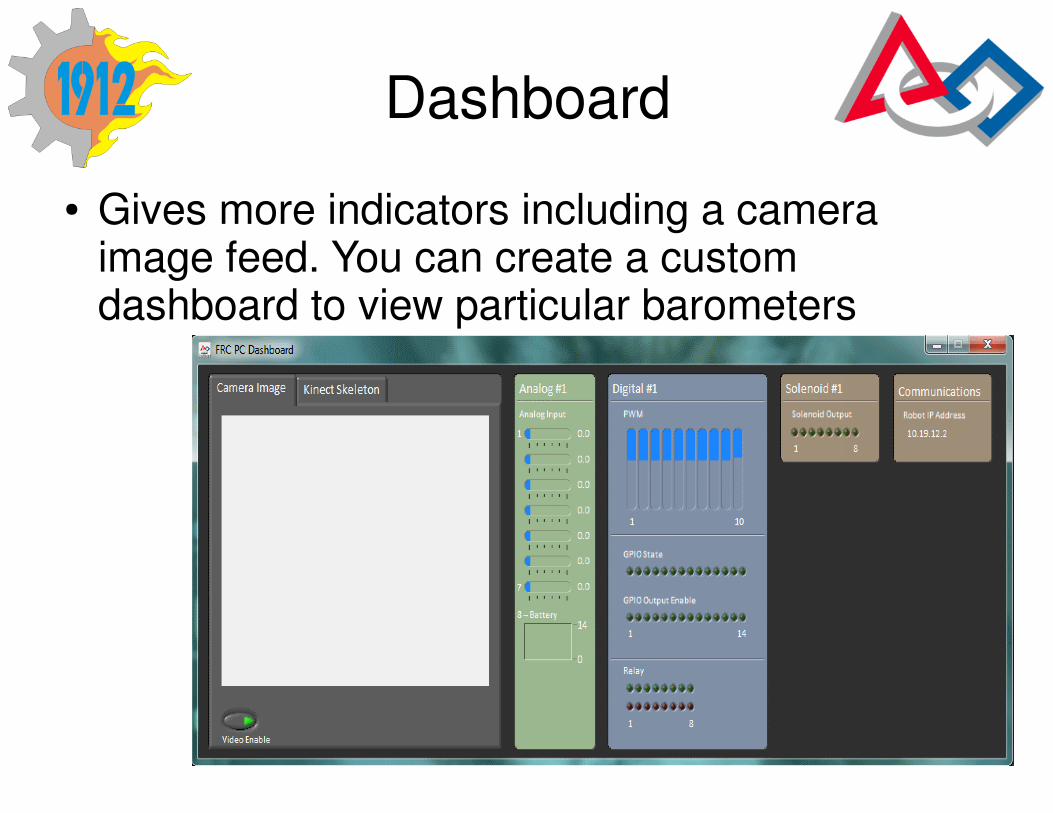
Dashboard
● Gives more indicators including a camera image feed. You can create a custom dashboard to view particular barometers
Classmate Clamshell
● A smaller portable computer given in the KoP
● Two mode of operation:
● Developer: acts as a regular computer
● Driver Station: automatically pulls up the Driver Station and Dashboard. Used in competition
● This computer should not be used as the main programming laptop. A separate computer should be used.
Good Practices
● Keep I/O log for documentation
● Limit closed loop and sensor control
● Plan out code before coding
● When possible, break things into steps
● The best programmer understands their mechanical environment and is embedded within the design and implementation process. That and (hopefully) stays on schedule..
Tip Jar
● An excellent way to teach yourself LabVIEW is through a series of videos produced by NI, the Tip Jar. This useful set of almost 20 videos includes topics that range from "Debugging Your FRC code" to "LabVIEW intro for C++ Programmers"
● http://www.lvmastery.com/tipjar