Embed Size (px)
Citation preview
ENABLING BRIGHT OUTCOMES
Installation Manual
TLD+ Zoom Lens Safety Cable

Barco NVPresident Kennedypark 35, 8500 Kortrijk, Belgiumwww.barco.com/en/supportwww.barco.com
3
When to use the safety cable?The lens safety cable must be used in any circumstance where the projector is mounted above people. Do thisto secure the mounted lens in the lens holder.
Why replace the existing safety cable?Up until recently, all lenses for event projectors weighed 7 kg or less. The lens safety cable included with everyevents projector was able to secure every single lens available in the Barco gamma.Due to the release of the TLD+ Ultra 0.8–1.16 lens, there are now lenses available that weigh more than 11kg, which this safety cable can no longer support in a safe fashion.In order to safely handle all lenses that are available, a new safety cable must be used, which is installed onthe lens in a new fashion.
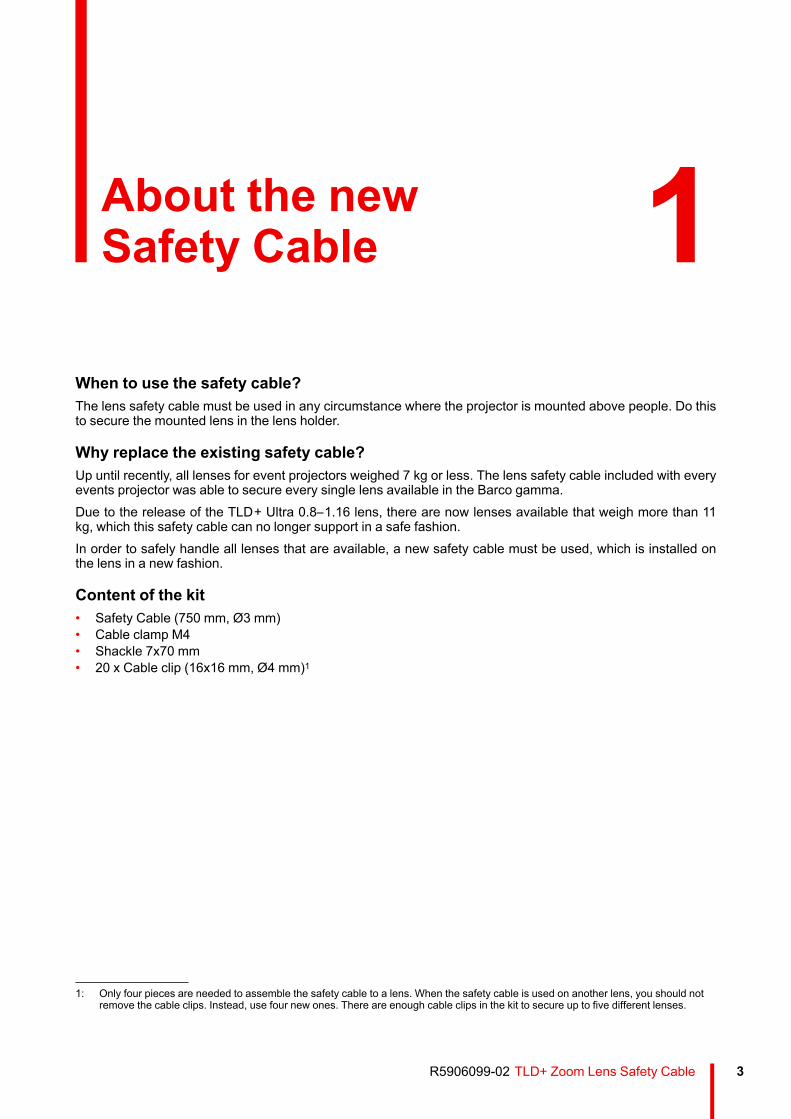
Content of the kit• Safety Cable (750 mm, Ø3 mm)• Cable clamp M4• Shackle 7x70 mm• 20 x Cable clip (16x16 mm, Ø4 mm)1
R5906099-02 TLD+ Zoom Lens Safety Cable
About the newSafety Cable 1
1: Only four pieces are needed to assemble the safety cable to a lens. When the safety cable is used on another lens, you should notremove the cable clips. Instead, use four new ones. There are enough cable clips in the kit to secure up to five different lenses.
R5906099-02 TLD+ Zoom Lens Safety Cable4
Image 1-1
About the new Safety Cable
R5906099-02 TLD+ Zoom Lens Safety Cable 5
1.1 Configuration differencesConfiguration differencesThere are three different configurations for the safety cable. The configuration used depends on the usedcarrying handle or hoisting eye and on the length of lens used.Configuration A applies to the following setups:• All UDX projectors and variants, when connecting to the bottom bar of the rigging frame.• All XDL projectors and variants.• All HDX projectors and variants, when connecting to the bottom carrying handle.• All HDF projectors and variants, when connecting to the bottom carrying handle.• All RLM projectorsConfiguration B applies to the following setups:• All UDX projectors and variants, when connecting to the upper bar of the rigging frame.• All HDX projectors and variants, when connecting to the top carrying handle.• All HDF projectors and variants, when connecting to the HDF hoisting eye.• All RLM projectorsConfiguration C applies to all projectors, but is only applicable for lenses with a very short barrel.
1.2 Mounting the safety cable to the lensCAUTION: This procedure is only applicable for configurations A & B. For configuration C, see“Mounting the safety cable to a short barrel lens”, page 6.
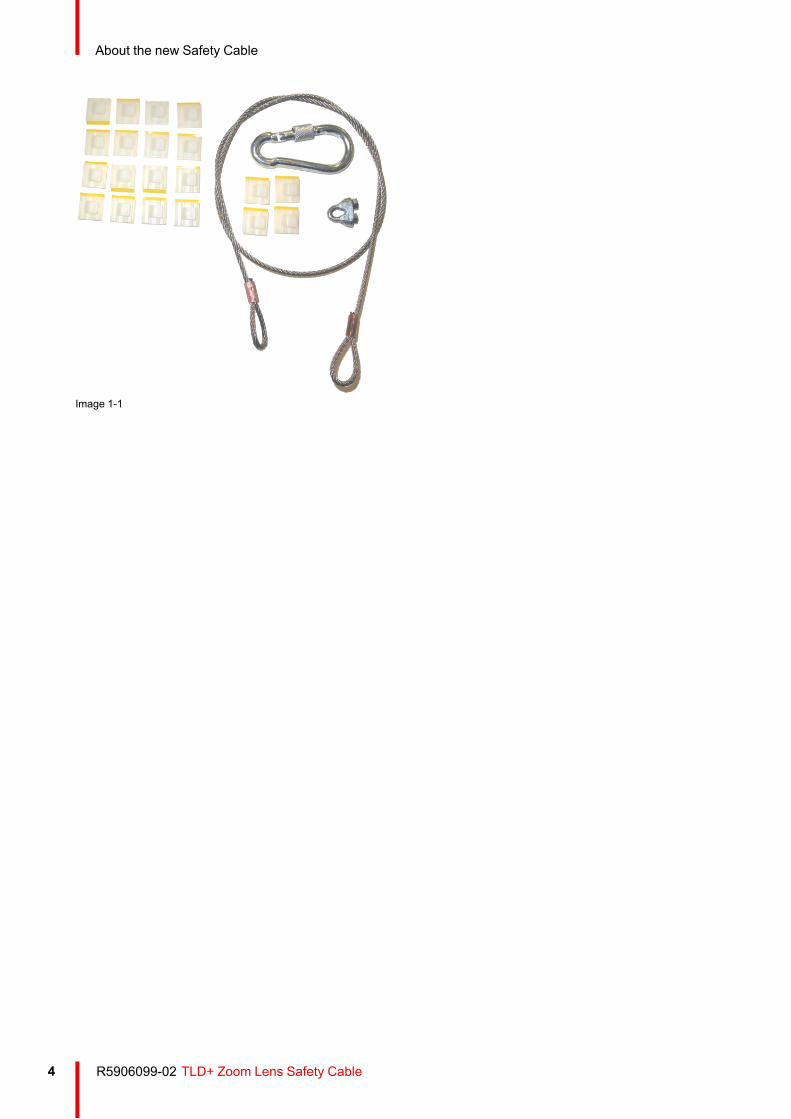
How to mount the cable1. Paste four cable clips on the lens as illustrated (reference 1). Orient the open side of the clips towards the front
of the lens.
1
2
Image 1-2
1
2
Image 1-3
2. Snap the first loop end of the safety cable into one of the following clips and let the loop end point downwards.1. Configuration A: Use the upper clip on the side of the cable bundle (reference 2, Image 1-2).2. Configuration B: Use the upper clip on the non-wired side (reference 2, Image 1-3).
3. Slide the rest of the cable around the lens counterclockwise. Click the cable into every clip it passes in thisloop.
Note: Make sure the cable passes between the lens and the cable bundle.
About the new Safety Cable
R5906099-02 TLD+ Zoom Lens Safety Cable6
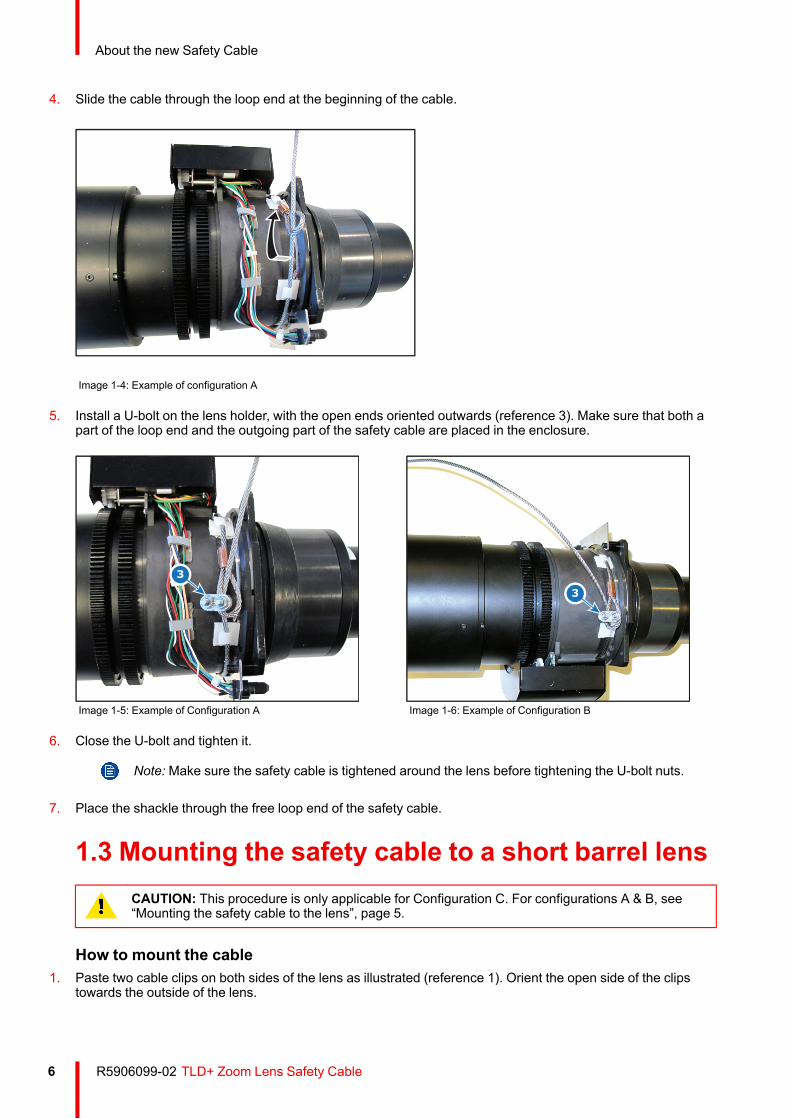
4. Slide the cable through the loop end at the beginning of the cable.
Image 1-4: Example of configuration A
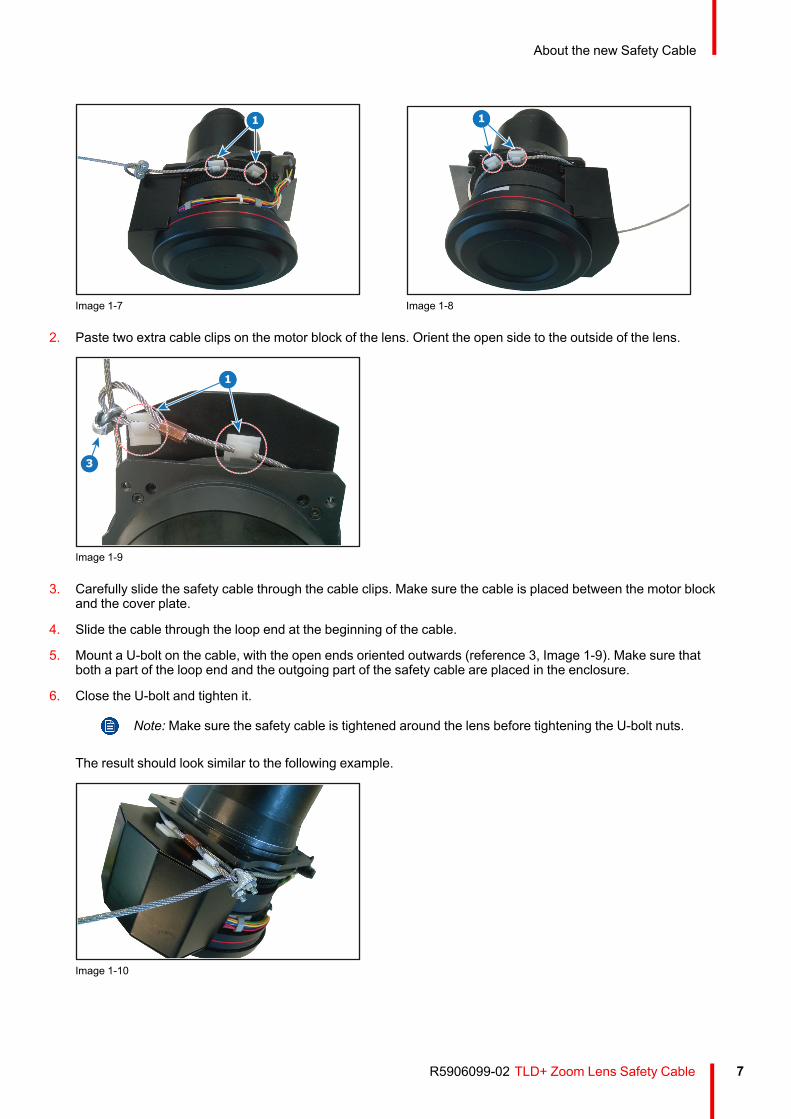
5. Install a U-bolt on the lens holder, with the open ends oriented outwards (reference 3). Make sure that both apart of the loop end and the outgoing part of the safety cable are placed in the enclosure.
3
Image 1-5: Example of Configuration A
3
Image 1-6: Example of Configuration B
6. Close the U-bolt and tighten it.
Note: Make sure the safety cable is tightened around the lens before tightening the U-bolt nuts.
7. Place the shackle through the free loop end of the safety cable.
1.3 Mounting the safety cable to a short barrel lensCAUTION: This procedure is only applicable for Configuration C. For configurations A & B, see“Mounting the safety cable to the lens”, page 5.
How to mount the cable1. Paste two cable clips on both sides of the lens as illustrated (reference 1). Orient the open side of the clips
towards the outside of the lens.
About the new Safety Cable
R5906099-02 TLD+ Zoom Lens Safety Cable 7
1
Image 1-7
1
Image 1-8
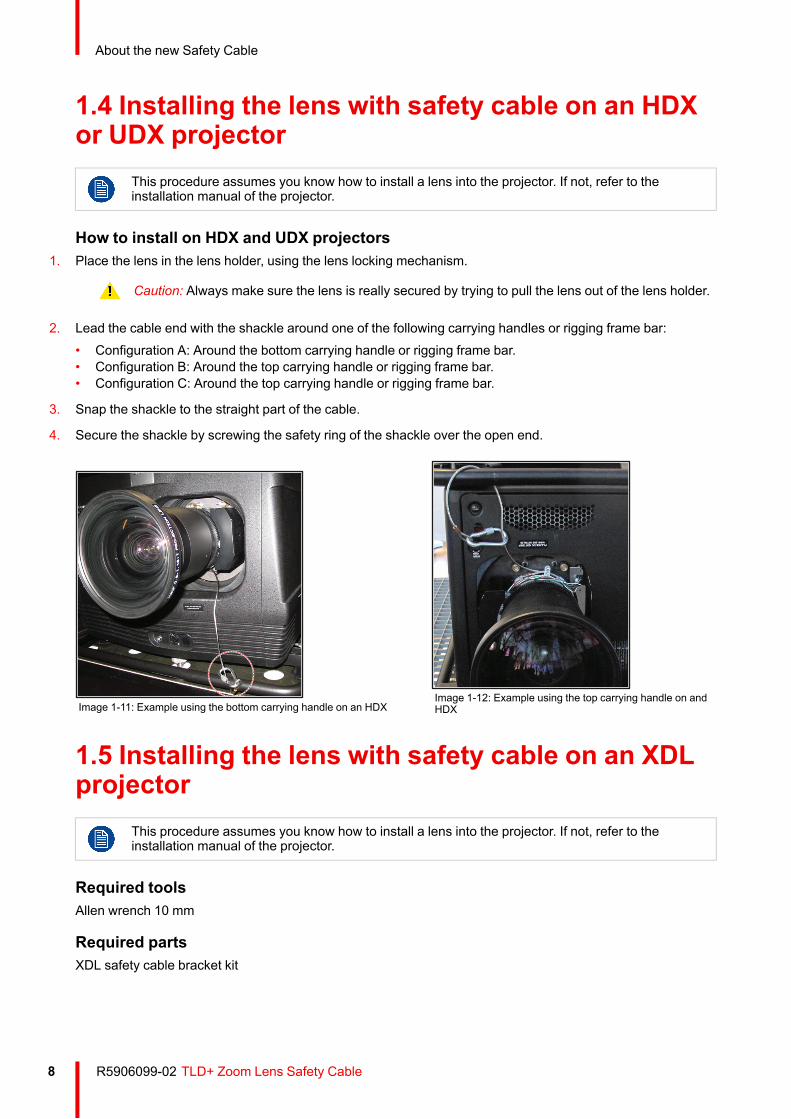
2. Paste two extra cable clips on the motor block of the lens. Orient the open side to the outside of the lens.
1
3
Image 1-9
3. Carefully slide the safety cable through the cable clips. Make sure the cable is placed between the motor blockand the cover plate.
4. Slide the cable through the loop end at the beginning of the cable.
5. Mount a U-bolt on the cable, with the open ends oriented outwards (reference 3, Image 1-9). Make sure thatboth a part of the loop end and the outgoing part of the safety cable are placed in the enclosure.
6. Close the U-bolt and tighten it.
Note: Make sure the safety cable is tightened around the lens before tightening the U-bolt nuts.
The result should look similar to the following example.
Image 1-10
About the new Safety Cable
R5906099-02 TLD+ Zoom Lens Safety Cable8
1.4 Installing the lens with safety cable on an HDXor UDX projector
This procedure assumes you know how to install a lens into the projector. If not, refer to theinstallation manual of the projector.
How to install on HDX and UDX projectors1. Place the lens in the lens holder, using the lens locking mechanism.
Caution: Always make sure the lens is really secured by trying to pull the lens out of the lens holder.
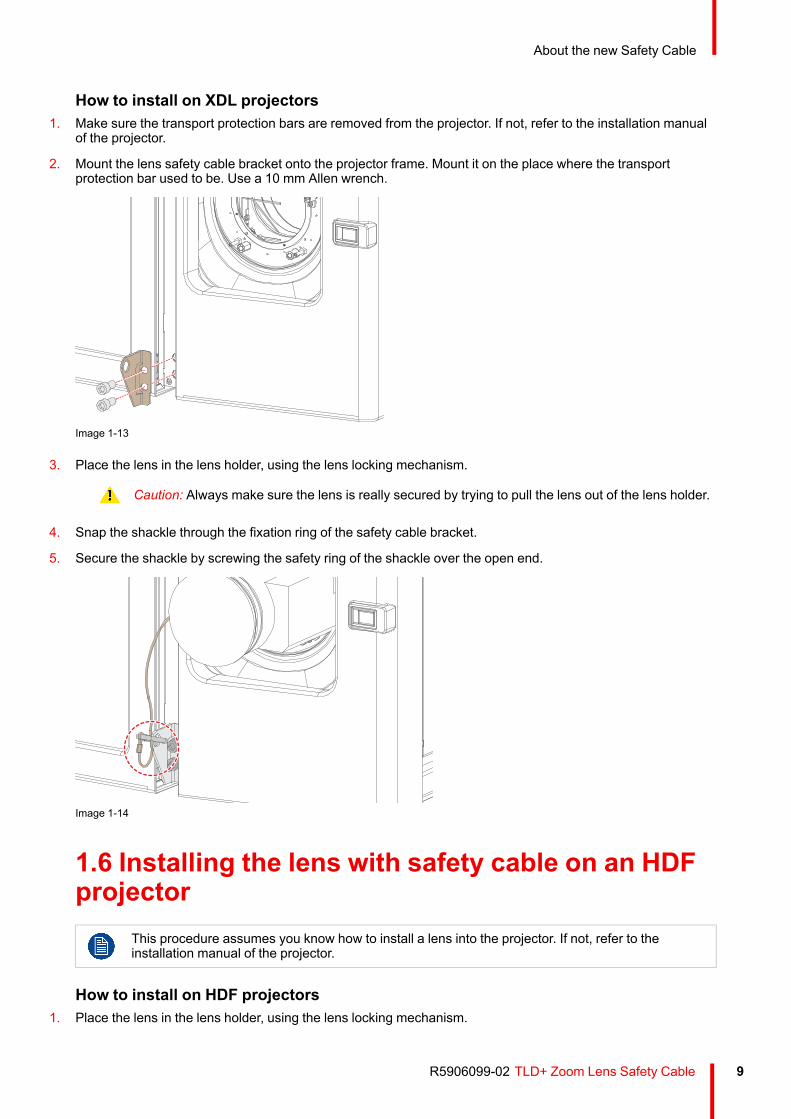
2. Lead the cable end with the shackle around one of the following carrying handles or rigging frame bar:• Configuration A: Around the bottom carrying handle or rigging frame bar.• Configuration B: Around the top carrying handle or rigging frame bar.• Configuration C: Around the top carrying handle or rigging frame bar.
3. Snap the shackle to the straight part of the cable.
4. Secure the shackle by screwing the safety ring of the shackle over the open end.
Image 1-11: Example using the bottom carrying handle on an HDXImage 1-12: Example using the top carrying handle on andHDX
1.5 Installing the lens with safety cable on an XDLprojector
This procedure assumes you know how to install a lens into the projector. If not, refer to theinstallation manual of the projector.
Required toolsAllen wrench 10 mm
Required partsXDL safety cable bracket kit
About the new Safety Cable
R5906099-02 TLD+ Zoom Lens Safety Cable 9
How to install on XDL projectors1. Make sure the transport protection bars are removed from the projector. If not, refer to the installation manual
of the projector.
2. Mount the lens safety cable bracket onto the projector frame. Mount it on the place where the transportprotection bar used to be. Use a 10 mm Allen wrench.
Image 1-13
3. Place the lens in the lens holder, using the lens locking mechanism.
Caution: Always make sure the lens is really secured by trying to pull the lens out of the lens holder.
4. Snap the shackle through the fixation ring of the safety cable bracket.
5. Secure the shackle by screwing the safety ring of the shackle over the open end.
Image 1-14
1.6 Installing the lens with safety cable on an HDFprojector
This procedure assumes you know how to install a lens into the projector. If not, refer to theinstallation manual of the projector.
How to install on HDF projectors1. Place the lens in the lens holder, using the lens locking mechanism.
About the new Safety Cable
R5906099-02 TLD+ Zoom Lens Safety Cable10
Caution: Always make sure the lens is really secured by trying to pull the lens out of the lens holder.
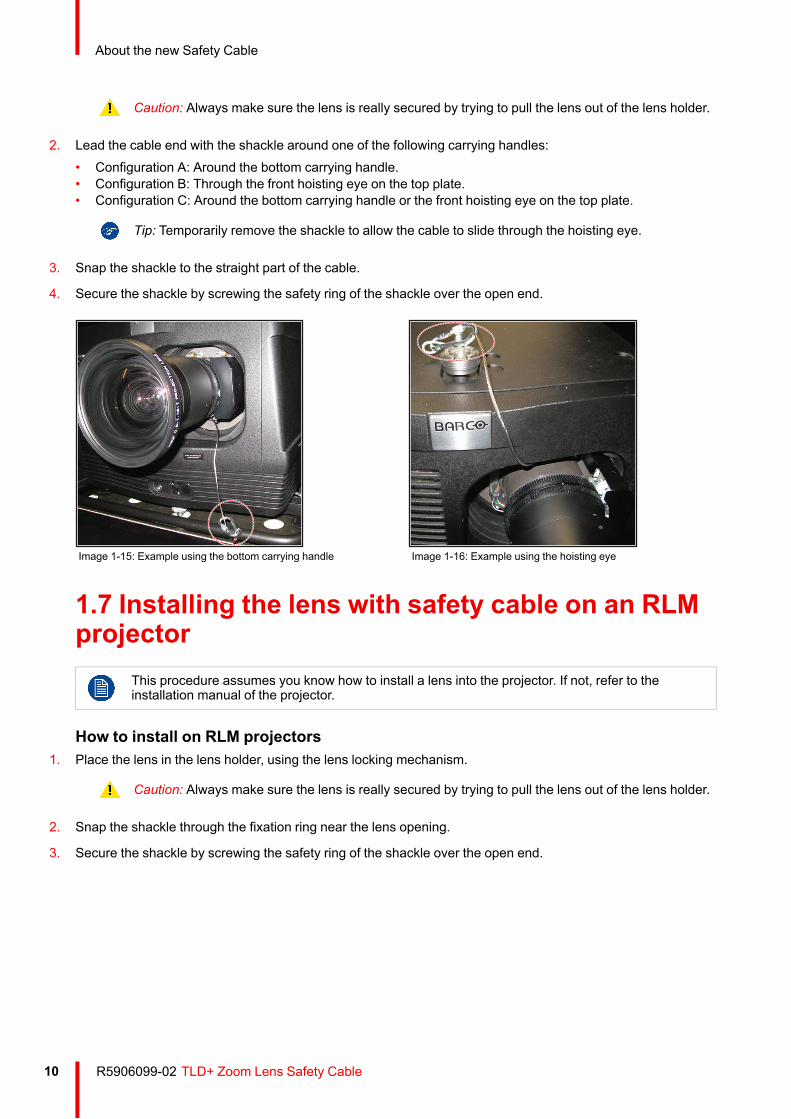
2. Lead the cable end with the shackle around one of the following carrying handles:• Configuration A: Around the bottom carrying handle.• Configuration B: Through the front hoisting eye on the top plate.• Configuration C: Around the bottom carrying handle or the front hoisting eye on the top plate.
Tip: Temporarily remove the shackle to allow the cable to slide through the hoisting eye.
3. Snap the shackle to the straight part of the cable.
4. Secure the shackle by screwing the safety ring of the shackle over the open end.
Image 1-15: Example using the bottom carrying handle Image 1-16: Example using the hoisting eye
1.7 Installing the lens with safety cable on an RLMprojector
This procedure assumes you know how to install a lens into the projector. If not, refer to theinstallation manual of the projector.
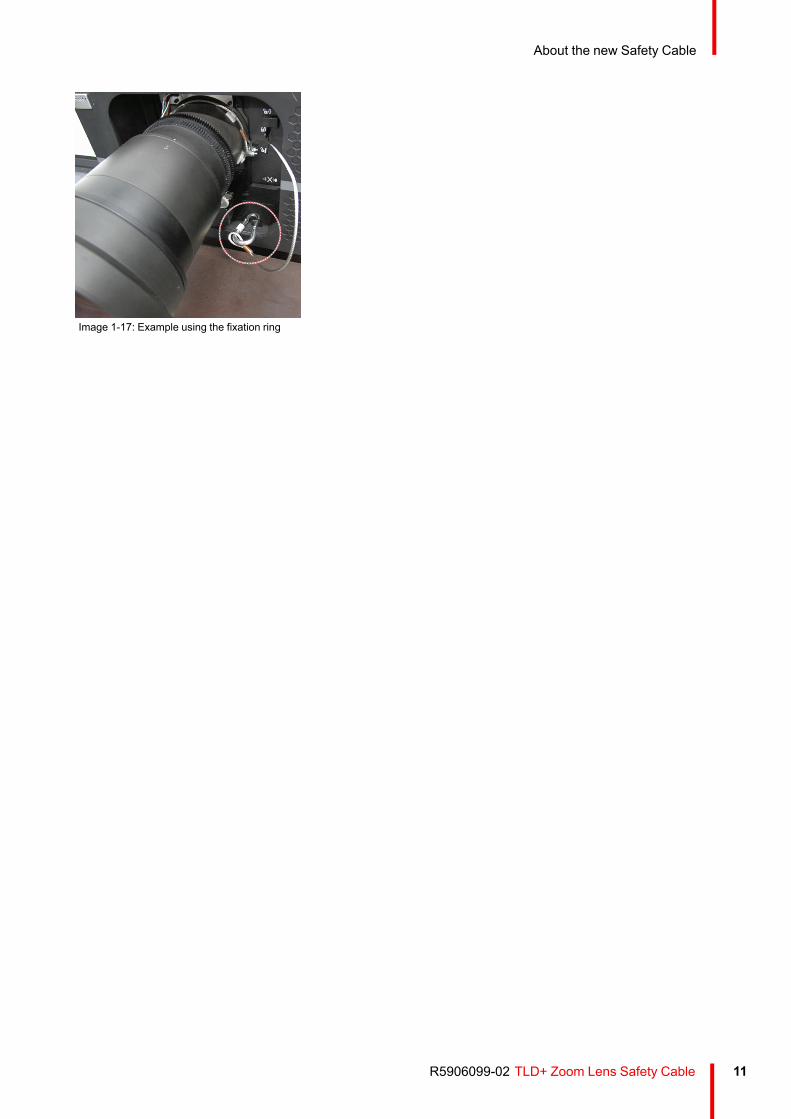
How to install on RLM projectors1. Place the lens in the lens holder, using the lens locking mechanism.
Caution: Always make sure the lens is really secured by trying to pull the lens out of the lens holder.
2. Snap the shackle through the fixation ring near the lens opening.
3. Secure the shackle by screwing the safety ring of the shackle over the open end.
About the new Safety Cable
R5906099-02 TLD+ Zoom Lens Safety Cable 11
Image 1-17: Example using the fixation ring
About the new Safety Cable

Barco NV | President Kennedypark 35, 8500 Kortrijk, Belgium|www.barco.com
R5906099-02 | 07/09/2018


