Embed Size (px)
Citation preview

Walkthrough for Shadows Over Soubar (SOS)
Mod name: Shadows Over Soubar ("SOS")Rating: 9.5 out of 10!Compatible with: Baldur's Gate 2 Throne of Bhaal; Baldur's Gate Trilogy
When did: Early Chapter 6 (Protagonist had 3 million xp) (played January 2017)Recommended to do when:
Do when Protagonist has at least 3 million xp as there are a lot of tough fights
Earliest could do: Chapter 2; Protagonist must have a StrongholdDifficulty: Difficult (but do-able)
What the mod does: Adds a large quest to BG2 SoA which is based in the town of Soubar. The mod adds: many new areas; new companions; new and duplicate items; weapons that are normally found in ToB onlySOS modifies Waukeen's Promenade map; therefore must install the mod before coming out of the initial dungeon/Chateau Irenicus.
Experience: About 1.5 - 2.5 million xp in total for the main part of the mod, depending on how completionist the play through is and if all enemies are defeatedAn additional 5 million xp can be gained by doing Selence's third quest (recommended to do after completing the main quest in Ch. 6)
Some of the items:
Many duplicates of SoA and ToB items; we chose to keep only a few items, mostly for the mages, such as: Belt of Inertial Barrier, Rogue's Cowl, Ring of Earth Control, and an Amulet of Power.Other items that can be found include Carsomyr +5 and +6, Robe of Vecna, Cloak of Balduran, Darksteel Shield +4, a +2 shield with 25% Magic Resistance, Gram the Sword of Grief +5, and a Ring of Gaxx! (Just to name a few of the high-powered items.)
Where to download: http://www.shsforums.net/files/file/63-shadows-over-soubar-v113/
Installation note: To experience all the quests must install before coming out of Irenicus Dungeon (the Promenade area map is changed by SOS; so is the Copper Coronet map).
To avoid having to use the CLUAConsole commands must at a minimum install before entering the Copper Coronet.
If you install later, during a current game, the CLUAConsole commands will need to be used. The quickest way to start the mod without missing much is to CLUAConsole the two letters which are found in the Copper Coronet (upstairs, Llynis' room).You will not miss much by skipping Selence's quests and then bringing the two letters to Umar Hills once you have a Stronghold; this begins the main part of the mod (90% of the mod content).
Bug note: Generally the SOS quest/mod can be finicky and will probably crash at one point; the walkthrough provided with the mod is not detailed enough at times so this walkthrough attempts to address the finicky parts more concisely.
Conflict with the De'Arnise Stronghold quest
Upon completing SOS quests the Keep Messenger would not show-up to inform of the fourth fighter stronghold quest (IV). In this quest Lord Farthington Roenall wants the Keep; do not give it!
To spawn use Shadowkeeper to change the variable KPRUNNERSPAWN to 0 (from 1); or, use the CLUAConsole command: CLUAConsole:CreateCreature("KPRUNNERSPAWN")
I think the messenger probably spawned during SOS but the party did not notice him or see him, thus we missed his message.However, you can probably just go to De'Arnise and speak with Major Domo to initiate the stronghold quest.
14 © bg2mez

CLUAConsole: The Console might be needed but is not required. To activate:- Open the file baldur.ini in the root of your Baldur's Gate II directory with Notepad.
- Add the line to the Baldur's Gate 2 ini file: Debug Mode=1 under
[Program Options].You may wish to make of copy of baldur.ini before you change it, because Baldur's Gate II may no longer run properly if there is an error in this file.- When you are playing Baldur's Gate II, press CTRL-SPACE to open the console, a two-line window will then open at the bottom of the screen, and then type the command:
CLUAConsole:MoveToArea("x" ) - Teleports selected characters
to the area x . x must be in quotation marksCLUAConsole:CreateItem("x" ) - Puts item x into your inventory. x
must be in quotation marks
Shadows Over Soubar Walkthrough
Contentspage
New NPC's in Athkatla and Umar Hills and their side quests ……………………………………………………16
Step 1: Athkatla: Selence's quests: either skipping over or completing them …………………………………16
Step 2: Umar Hills ……………………………………………………………………………………………………20
Step 3: River Chionthar (can skip) ………………………………………………………………………………. 20
Step 4-7: Soubar Town Hall and the Soubar quests ………………………………………………………………21-28
The Spy quest …………………………………………………………………………………… 23
Step 8: Selence's 3rd Quest (optional) …………………………………………………………………………….28-30
Defeating Lolth ……………………………………………………………………………………29
Latest version available for download at scribd.com and http://www.shsforums.net
SOS Walkthrough v. 1.52, June 29, 2018 By: bg2mez © 2017-18, All Rights Reserved.
15 © bg2mez

New NPC's from Shadows Over Soubar Encountersor Quests? How many? When?
Slums: Copper Coronet: Bolivar is near the small tables near the bar: chaotic good fighter no -
Umar Hills: Near the Tavern: Tomas is outside, just east of the tavern: neutral swashbuckler yes 1; bring him to the Bridge District
River Chionthar:South-east: Charlotte is outside: stalker, with "fallen" status yes 1; within 7 days after she initially joins the party
Walkthrough for SOS Notes/Items
Step 1
1a.1a: Copper Coronet:
Method 1 (skipping Selence's quests):
OPTION A: Copper Coronet back rooms, upstairs in "Llynis' room": Nalia can open the chest with the 2 letters using Potion of Master Thievery (-> skill 60 + 40 = 100) or cast Knock; Jan can open with
his skill level (95). The chest will not contain the usual Emerald or scrolls (Resist Fear, Luck).Get the two letters, do not Identify the Sealed Letter; bring them to Umar Hills after acquiring a Stronghold to continue SOS.
"Selence's room" in the Copper Coronet back rooms, upstairs
1a.1b: South Promenade:
OPTION B: Jan pick pocket the key from Selence in the Promenade. Keldorn or a mage can cast Dispel if she goes into the shadows. Use the key to open the chest located upstairs in the Copper
Coronet back rooms (Llynis' room). Use the key to open the chest located upstairs in the Copper Coronet back rooms (Llynis' room). Get the two letters, do not Identify the Sealed Letter; bring them to Umar Hills after acquiring a Stronghold.
Note: the Adventure Mart will be locked and inaccessible at night from 21:30 to 08:00, even though a thief can perhaps "unlock" the door.
You could use the Console to get the letters: CLUAConsole:CreateItem("CBLTCNT1") and "CBLTCNT2" which are the Introduction Letter and Sealed Letter (do not identify!)
16 © bg2mez

Selence in the Promenade (south)
Step 1 (1b) Method 2 (the complete sequence):Note: this method is written throughout the BG2 walk through as wellDo Selence's two (optional) quests; they cannot be completed until Chapter 6 as the first quest requires a visit to Brynnlaw (the mod is intended for level 15 characters at a minimum). You do not have to pay Gaelan Bayle anything to complete the quests. If you pay him
100k gp, he gives you the key which can be pick pocketed by Jan from Selence, or given to you after completing Selence's first two quests! That's all you get from Gaelan! If you pay 10k gp, he will tell you to go talk to someone (Ceeb Isson) in the Trademeet tavern; Ceeb will be there regardless!
1b.1: South Promenade:
Talk to Selence Hillstar: she will go invisible and refuse to talk with you again until Chapter 6, or until you have spoken with Ceeb Isson in Trademeet.
ENCOUNTER Gaelan Bayle:1b.1a1: OPTION A: hear him out, but there is no need to pay him the 10k gp
Selence's 1st Quest (part 1)1b.1a2:Trademeet:
Vyatri's Pub: talk to Ceeb Isson (can pick pocket for chance of getting a high level scroll!) -> cut scene with Soldiers who fire a couple of arrows at "gold" soldiers: "Soldier… hush yourself. I hear noises yonder!..."Talk to Ceeb Isson again
1b.1a3: South Promenade:
Selence Hillstar is now visible! Talk to her, she gives the first quest: Q (Owed Money); continue to step 1c
1b.1b1: OPTION B: optionally, pay Gaelan Bayle the 10k gp to avoid having to travel to Trademeet -> cut scene with Soldiers who fire a couple of arrows at "gold" soldiers: "Soldier… hush yourself. I hear noises yonder!..."
1b.1b2: Then, to get Selence to become visible and talk to us: A) travel or rest for 24 hours and she will talk "Err there…psssst. This way." and then give Quest 1 (Owed Money)or B) Aerie or Keldorn cast Dispel and she will talk to us as well!
1c: Government: Deril Estate: talk to the Butler (Servant): "I am Sir William's butler..." talk 1, 2, 1 (Brynnlaw), 2 (He forgot to give me a key!), 1, 1. We
17 © bg2mez

need to locate Sir William in Brynnlaw for the key for his safe which contains the gold that Selence is looking for.
Talk to Selence again if you wish, but basically that's all we are to do for now!
In Chapter 6 we will use the key and give her the owed gold. She then will give her 2nd quest (rob the Adventure Mart at night and bring the ten items to her in the Five Flagons), after which she rewards us with the key to the chest upstairs in the Copper Coronet
back rooms (Llynis' room). The chest contains two letters that are to be brought to Umar Hills once you have a Stronghold.
Selence's 1st Quest (part 2)Brynnlaw (Chapter 4):
Note: it must be daytime to continue the SOS mod. Rest in the
Guildhouse hallway or in the "dungeon" at the north end of the
hallway, to bring the clock to daytime, to be able to speak to Sir
William in Lady Galvena's bedroom and acquire the Safe Key
Sir William is in Lady Galvena's bedroom next to the bed! Daytime only (may need to rest): speak to him (2, 1; and then talk again 5x1, 2, 1, 1, 1, 3, 1) and he admits to having an affair with Bylanna! He gives you the safe key! Item is Sir William's Safe Key *Sir William's Safe Key
"CBWLKEY1" which enables you to open the safe in Deril's Estate for the gold to pay Selence.
Selence's 1st Quest (part 3)Athkatla (Chapter 6):
Deril Estate, Government District: use the Safe Key (from Brynnlaw) to open the safe in for the gold to pay Selence, 12k xp[Or, use the Console to get the key: CLUAConsole:CreateItem("CBWLKEY") which is called "Sir William's Safe Key"][Or, use the Console to get Sir William's gold: CLUAConsole:CreateItem("'CBSHGOLD") which is called '"Gold"]
Finalize the quest and her inventory becomes available (we buy nothing; Mithran's Cloak for 9576 gp is tempting, though!)
Selence's 2nd Quest
Step 1.2 Promenade: the stairs are located in the south at the sconce beside the second lion statue and will only be present at night after receiving Selence's 2nd quest (it will be in Chapter 6). However, you won't really missing anything by not doing the quest.
Stairs to beneath the Adventure Mart at night, through the sconce at the 2nd south lion statue
18 © bg2mez

Enter the sconce/lion statue into a labyrinth maze (area AR4201)
Ken the Baker (optional): talk 2 for REP +1 REP +1
De-trap one trap on the way to the "large" room, which also has a trap. Take the north passage: immediate trap; next traps (two) are in the final hallway in the north-west.
Note: only a Thief with sufficient carrying capacity needs to be sent
into the Adventure Mart to get Selence's items
Consider to use Invisibility to get past the Greater Werewolves, or defeat them with two strong, buffed fighter-types, and a summoned creature for fodder.
Tip North-west: enter through the "back door" of the Adventure Mart must send-in one character at a time (glitch)
Adventure Mart (area AR4202): Traps! De-trap to the west and south, de-trap the long table near the front of the store and take the ten items. Bring them all to Selence.
Optional side quest
Labyrinth maze: take the south exit through a "sewer pipe" into the basement of a mansion; speak with Lord Hammerhand Backo Q (save his daughter; kill the beasties)
Tip At night there will only be enemies on the top floor of the mansion!
Top floor: defeat the Greater Werewolves with meleeDefeat the Master Werewolf with two mages using magic; must be quick due to his regeneration:Cast Pierce Shield (lowers his resistance), Lower Resistance, followed by Horrid Wilting x4 and Magic Missiles x8!
Let him chase a character wearing Boots of Speed and the Ring of Gaxx to distract the Master Werewolf from the mages; can also
summon creatures as fodder (Skeleton Warriors or Mordenkainen's Sword are good here); 140k xp for the kill!
Another option is Doom or Greater Malison to lower his saving throws, and perhaps Finger of Death for the kill.
Note: Maze and Dire Charm spells work on the Master Werewolf but are not sufficient to enable finalizing the quest with Betra Bucko.
Talk to Betra Bucko to finalize and she returns downstairs; finalize
downstairs with Lord Bucko 10k xp all! 16k gp awarded as well.
Step 1.3 Five Flagons, upstairs: give the ten items to Selence for lots of gold, or keep them (we do not want the gold). Aerie will try the Argent Shield (AC+3 and +25% Magic Resistance!)
*Argent Shield +2
Sea's Bounty, downstairs: finalize the 2nd quest with Selence 0 xp (no need to wait two hours) and she gives the Key to the locked chest in the Copper Coronet upstairs (Llynis' room). Do not buy or use Selence's overpowered items!
*Key
Copper Coronet upstairs (Llynis' room): get the two Letters from the locked chest of drawers; do not identify the Sealed Letter
*Introduction Letter*Sealed letter
19 © bg2mez

Step 2 Umar Hills: once you have your Stronghold, bring the two letters to Umar Hills. A message will appear (after about 5 seconds) followed by a cut scene with Mayor Melandor, Gaius and Arvin, and another cut scene with Rolf Sureblade and a large army.Tomas Tamalson, swashbuckler, is here (joinable NPC)
Umar Inn: enter the Umar Inn to meet Lord Arvin Kothonos (mage) and Gaius Varros (paladin). There is a cutscene with Willet the Stableboy and Vincenzo the Innkeep.After the explanation, talk to Gaius and then Arvin -> forced Rest of 24 hours and we all become fatigued!
After getting information in the Inn, leave by the south door to go outside and speak with Arvin and then Gaius; the worldmap is updated with River Chionthar, located south of Soubar and east of Baldur's Gate. Take the carriage or travel by foot.
Conflict with stronghold quests (timed quests)It takes nearly three days to get to the next map, and four days to return e.g. to de'Arnise Hold; plan Stronghold quests accordingly. The Keep Messenger will not show-up in the Soubar areas, but simply go to de'Arnise at the appropriate time and speak with Major
Domo for the quest
Step 3
3a:
Method 1 (the complete sequence):
River Chionthar (a new map on the worldmap, AR4220): Charlotte is here, wearing a Ring of Earth Control, but she is not plot criticalProceed to the north-west and exit the map to the River map, or talk
to Charlotte for a Quest (poisoned river). Walk south and observe an Ogre named Narulf; talk to him but we eventually come to blows, 2550 xp! Loot the Belladonna Potion (juice) and a Club +3.
Talk to Charlotte again, tell her that the Ogre is the violent type;
follow her south and then talk to her once more, Charlotte joins! *Ring of Earth ControlWe leave her here! At some point during the next seven days, after the water has purified itself of the poison, can ask Charlotte to re-join again; bring her across the south-east bridge for a reward of 50k xp all! And, Charlotte gets an additional 100k xp.
River map: you must cross the river, which is a "raging river." Cross one character at a time, from the river bank just north of the tree. Once your party is ready, save the game, exit the map at the north-west corner, watch the full motion video and then immediately hit Quicksave to avoid the game from crashing.
Bug / Crash EXITING THE RIVER MAP BUG: if the game crashes while trying to
enter Soubar (AR4230): this should work: restart BG2, load the
autosave and click the exit point in the north-west to exit the map ->
Soubar! Immediate Quicksave! It works!The error message we got was: An assertion failed in CGameArea.cpp at line number 1180
Tip RETURNING TO ATHKATLA: in case you want to return to Athkatla,
the exit from the "raging river" map is on the north edge of the
north-east (top-right) corner. The party has to cross the raging
river to get back to Charlotte's map/AthkatlaIf the game crashes while trying to enter Soubar: this should work: restart BG2, load the autosave and click the exit point; immediate Quicksave when the next map has loaded!
20 © bg2mez

Exit location (north-east corner) from the "raging river" map back to Charlotte's river map
3b: Method 2 (short-cut to Soubar):
You won't miss anything much except Charlotte by using the Console command to quickly get to Soubar:CLUAConsole:MoveToArea("AR4230") or the Town Hall AR4289
Step 4 Soubar Town Hall (mid-map): talk to Sirrus Melandor: Mayor of Soubar to get the main Quest (Bandits; Rolf Sureblade; Lyrar's Hold)
Note: can save game inside the buildings but not on the streets of
Soubar
Splintered Stair (inn in the north-west): optionally speak with Ludwig Kross, talk 2, 2, 1 or 2 to get access to Jill Ann Kross' inventory of "clothing"; can also find some over-powered cloaks and robes
in a trapped cabinet on the top floor (although the Cloak of the Shield would be quite useful for this mod)
Spell selection should include significant healing spells such as
Heal (x3), Cure Medium Wounds (x3), Cure Serious Wounds (x3);
also select Free Action (x3), several Magic Missiles, Invisibility,
Web, Slow, Confusion, Greater Malison, Chaos, Animate Dead; and
several Horrid Wilting or Fireball or Cloudkill, etc. Chaotic
Commands is not needed throughout SOS.
Step 5 Rest and memorize spells and then speak to the Mayor again to get the main Quest (join the Militia)
Chaunteau Science Reading Room: can buy scrolls; has containers for convenient storage of gear and loot; can loot a Tome of Clear Thought (INT +1), Ring of Invisibility (can be a life saver for mages later on), and Periapt Amulet of Life Protection (+3 bonus to saves vs. death)
*Ring of Invisibility
Tip Consider to store your gear now somewhere convenient because the Militia will take all of your inventory and equipped items away from you when you begin their quest. You can get and wear your gear later, despite what the Militia will say, with no consequence.
21 © bg2mez

Step 6 (the main
quests)
Soubar Guard Barracks: talk to the Soubar Major for the main Quest (Enlisted). Put any equipment you might still be wearing in the Foot Locker (bag of holding) that he supplies, otherwise you will lose it for good! It is returned intact at the end of the quest.
Quest 1 Talk to the Major again for a Quest (Patrol)Get your gear now (from where you stored it) if desired; we only get the Ring of Gaxx, Jaheira's Harper Pin and a Girdle of STR 21 (and we will survive just fine)
North-west: ENCOUNTER Soubar Sergeant: the objective of the quest is simply to survive; help as able
Soubar Guard Barracks: finalize the quest with the Major and getanother Q (Burning Farm/Rescue scouts); you get a Travel Bag with a Ring of Regeneration and a Telescope.
*Bag of Holding (Travel Bag)*Ring of Regeneration
Make sure the party has their spells memorized (Heal spell) for the
next quest (tough fight!)
Quest 2 Farm: this is a new area/map. Talk to Soubar Sergeant. Prepare for a big battle including vs missiles; fight all but do not immediately talk with the Sergeant
Tip After all enemies have been defeated click on the four dead bodies (stand on them) that are laying on the ground near the building.
Move to just north of the windmill, near a white tree ->ENCOUNTER Charlie, REP+1 REP +1
Invite the boy to come with us, bring him to the Soubar Sergeant; finalize the quest with the Sergeant (talk 1, 1, 1) -> farm quest is now completed and we are back in Soubar
Soubar Guard Barracks: talk to the Soubar Sergeant; he says to Rest but you do not have to (just leave the building and return 2x).
Talk to the Sergeant again -> Promotion to Sergeant! 30k xp
Quest 3 Talk to the Major to get the next Quest (Displaced Villagers/Narwhal Tavern: keep the peace and arrest troublemakers)
IMPORTANT NOTE: save game here, in case one Triel Villager is
killed in the Narwhal, which can cause a bug when trying to finalize
the quest with the Major (although four killed is ok!)
Outside the Narwhal: five Soubar Guards follow you to the tavern; wait a few seconds outside the entrance for all guards to arrive (or talk to one of them) and you are given 10x Manacles. Equip the manacles in the gloves/gauntlets slot of each party member.
Tip Narwhal: enter the tavern with a manacle equipped in the gloves/gauntlets slot, using all your party members so the arrests can be made quickly. Wait for the fighting to actually begin and then click on "use item" and use on a Triel villager to arrest them.
After each villager is manacled/arrested quickly talk to them to send them to the Barracks' jail/gaol, 1k xp each.
Repeat with the other villagers until they are all arrested (or dead?) for 1k xp each (we arrested 6 of them and the quests worked; current play through had one die, and we encountered a bug:
Bug If one (only) of the Triel villagers gets killed, you will not be able to finalize the next quest (training the Triel men) with the Major. The
22 © bg2mez

variable "CbPartyTrainedOneNewGuard" must not equal 9; 6 or 10 are verified to work!
Talk to the Soubar Guards and say to return to the barracks (optional)
Soubar Guard Barracks: finalize with the Major and he provides you with a few over-powered items in the nearby bookcase
*Boots of Speed*Ring of Protection +2
Bandit attack: on the streets of town bandits are attacking! Protect vs missiles and then fight some near the Town Hall (we killed about 7). Report back to the Major after a few are killed; can finalize the quest at this time as well! The Major says to report to the Mayor.
Or, if needed: fight some more bandits, finalize with the Major
Soubar Town Hall: Mayor: talk 1
Quest 4 Soubar Guard Barracks: return to the Major for another Quest (Training Militia Men; recruit and train the Triel prisoners). In the Barracks, go downstairs to the prison/gaol and recruit the Triel men by talking to them (may need several attempts to convince them).
Daytime only: leave the map at the south-west to the training area
Tip Train the Triel Villagers in the Daytime only! Otherwise the quest
could be bugged
Training area: in the daytime talk to the middle Soubar Guard (talk 2 "I'm supposed to get some new recruits trained…need some regulation equipment and a lot of training.") and the 8-10 minutes of training begins.Talk 2 to the middle Soubar Guard again -> cutscene
Keep talking 2 to the guard (8 times in total) for more training cut scenes; after, the recruits return to town.
Soubar Guard Barracks: finalize with the Major 10k xp and he gives the next Quest (Spy in Soubar)
Note: consider to use Shadowkeeper or the Console if the Major will not allow finalization of the Training Militia Men quest, i.e. if you cannot tell him that the training is finished: SetGlobal("CbPartyTrainedOneNewGuard","GLOBAL",10)
Quest 5 Spy quest: there are several possible methods to successfully complete the quest, but just as many ways to break it! Note that the Soubar Social club is inaccessible even though it is mentioned during this quest; it is never accessible throughout the entire mod!
Spy quest "logic" includes:- Any of the suspects could be the spy (even the Mayor!)- Whomever you don't ask about will be the spy- Ask each suspect one question about another suspect, never ask them about themselves and never ask two suspects about the same suspect or the quest becomes broken and you will might get NO VALID LINKS OR REPLIES
The suspects are: 1) Winthrop 2) the Ranger 3) Charlie 4) the Mayor 5) Ceeb Isson (mage) 6) some fighters in a warehouse in the south-west
23 © bg2mez

and: 7) possibly someone in the Soubar Social club but it is permanently locked and inaccessible (it's a red herring)
Winthrop's Inn (large house/manor in north/north-east):Tip Talk to Winthrop (talk 1,2, 6x1) about a spy in Soubar and then wait
several seconds for an encounter with the Ranger that is
standing around in the tavern.
With the Ranger talk 5x1 (ask for help), 2 (ask about business
owners), 4 (stick to the list), 2 (ask about Winthrop)Winthrop: ask about the Ranger (talk 1, 2, 1, 1)
Save game here in case of problems with the quest.We completed the quest by implicating the Mayor:
THE MAYOR AS THE SPY:
Note: even though the Mayor is implicated, the main SOS quest will
be able to be successfully completed!
Barracks: Charlie: ask about the Social Club (talk 3x 1)
Town Hall, 2nd floor: Mayor: ask about the mage Ceeb Isson (talk 1,
1, 2, 1, 1)
North-west house: the north house is "Miller Place": three floor traps on level 1 near the hallway entrance! Several trapped containers and floor traps on levels 2 and 3 of the house. *Fire Tooth +3
Talk to Ceeb Isson ask about the fighters in an abandoned
warehouse (talk 1, 1, 4)
Note: Ceeb Isson is invincible throughout the entire mod, even if he
eventually is accused of being the spy
South-west Warehouse: Fighters: ask about Charlie; eventually she will reply that she knew his pa/father (talk 1; then 2; then 3; then 5;
then finally talk 1, 2)
Town Hall: return to the Mayor and talk 1, 1, and he admits guilt!
Rolf Sureblade gates in! Focus on taking Rolf down to "Near Death" but do not fight the Mayor. Rolf and the Mayor depart! The other eight bandits that gate-in are an easy fight.
Note: if the Mayor becomes a "hostile" (red circle) just leave him;
the quest will be ok
Another spy quest solution that works:
CEEB ISSON AS THE SPY:
Talk to Winthrop (talk 1,2, 6x1) about a spy in Soubar and then wait several seconds for an encounter with the RangerWith the Ranger talk 5x1 (ask for help), 2 (ask about business
owners), 4 (stick to the list), 2 (ask about Winthrop)Winthrop: ask about the Ranger (talk 1, 2, 1, 1)
Barracks: Charlie: ask about the Social Club (talk 3x 1)
Mayor: ask about the fighters in the warehouse (talk 1, 1, 1)
South-west Warehouse: Fighters: ask about Charlie; eventually she will reply that she knew his pa/father (talk 1; then 2; then 3; then 5;
then finally talk 1, 2)
Ceeb Isson: ask about the Mayor (talk 1, 1, 1); talk to Ceeb again and Rolf Sureblade gates in! Focus on taking Rolf down to "Near Death" but do not fight Ceeb (Ceeb is invincible); he and Ceeb
24 © bg2mez

depart! The other eight bandits that gate-in are an easy fight.
Soubar Guard Barracks: finalize the spy quest with the Major ->
Promotion to Captain! 0 xp; cutscene to remove your armor; your
belongings are returned (in the Foot Locker)!
Quest 6 Talk to the Major Q (Captain of a Company): go outside near the Town Hall and give each soldier a duty/command
Quest 7 Finalize with the Major, he gives yet another Quest (letters to Athkatla and Trademeet)Note: Trademeet is area "AR2000"
Tip RETURNING TO ATHKATLA: the exit from the "raging river" map to
"Charlotte's river map" is on the north edge of the north-east (top-
right) corner, to return to Athkatla, etc.
Bug / Crash EXITING THE RIVER MAP BUG: if your game crashes this works on
my machine: restart your computer, start BG2, load the autosave
and click the exit point in the north-east to exit the map -> Charlotte's river map! Immediate Quicksave!My error message once again was: An assertion failed in CGameArea.cpp at line no. 1180
Deliver the letters:Athkatla, Temple District: talk 2x to Prelate
Trademeet: talk to High Merchant Logan Coprith
Tip RETURNING TO SOUBAR:From "Charlotte's river map" consider to use the Console command to quickly get to Soubar:CLUAConsole:MoveToArea("AR4230")
Or: River map: you must cross the river, which is a "raging river." Cross one character at a time; exit the map at the north-west
Soubar: mid-west Inn (at 760, 1660; press X to see the coordinates): can loot Gram the Sword of Grief from a trapped chest, which is a powerful Two-Handed sword useful for the remainder of SOS
*Gram the Sword of Grief
Soubar Guard Barracks: finalize with the Major 60k xp. Rest and prepare for a lengthy battle outside against about 100 Bandits for about 300-400k xp in total!
Finalize with the Major -> Promotion to Chief Lieutenant! 0 xp
Quest 8 He now wants to bring the fight to Rolf Sureblade himself!
Soubar Town Hall: talk to Gaius Varros; he also wants to bring the fight to Rolf Sureblade, and says to speak with the Major again
Tip
Soubar Guard Barracks: the Major mentions "a warren of tunnels…the warrens connect to Lyrar's Hold…" but this area is inaccessible unless you use the CLUAConsole; however, it is recommended to take the direct route (overland) to Lyrar's Hold (make sure you protect everyone vs fire!).By going directly to Lyrar's Hold a Carsomyr +6 will be dropped by one of the opponents! Use this weapon in SOS, as the fights are difficult, but do not use after SOS is completed. Can visit the Warrens areas later, upon returning to Soubar from Lyrar's Hold.
Leave for Lyrar's Hold from the mid-northwest exit from Soubar
25 © bg2mez
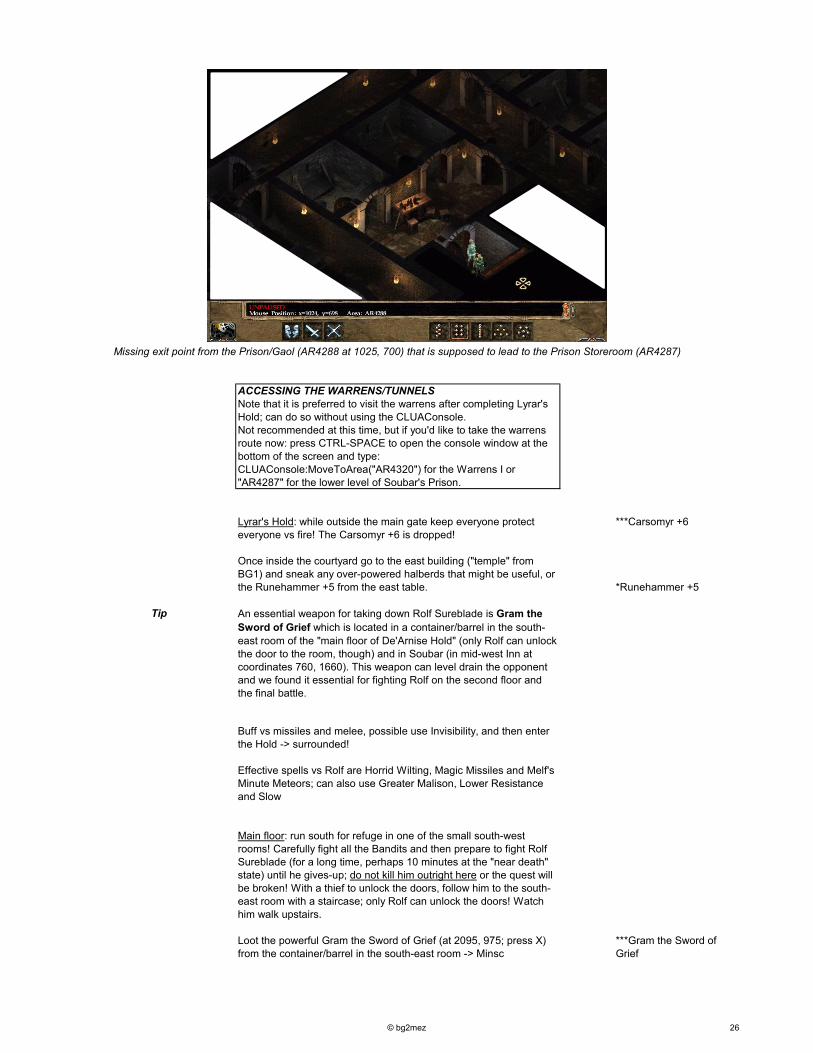
Missing exit point from the Prison/Gaol (AR4288 at 1025, 700) that is supposed to lead to the Prison Storeroom (AR4287)
ACCESSING THE WARRENS/TUNNELSNote that it is preferred to visit the warrens after completing Lyrar's Hold; can do so without using the CLUAConsole.Not recommended at this time, but if you'd like to take the warrens route now: press CTRL-SPACE to open the console window at the bottom of the screen and type:CLUAConsole:MoveToArea("AR4320") for the Warrens I or "AR4287" for the lower level of Soubar's Prison.
Lyrar's Hold: while outside the main gate keep everyone protect everyone vs fire! The Carsomyr +6 is dropped!
***Carsomyr +6
Once inside the courtyard go to the east building ("temple" from BG1) and sneak any over-powered halberds that might be useful, or the Runehammer +5 from the east table. *Runehammer +5
Tip An essential weapon for taking down Rolf Sureblade is Gram the
Sword of Grief which is located in a container/barrel in the south-
east room of the "main floor of De'Arnise Hold" (only Rolf can unlock the door to the room, though) and in Soubar (in mid-west Inn at coordinates 760, 1660). This weapon can level drain the opponent and we found it essential for fighting Rolf on the second floor and the final battle.
Buff vs missiles and melee, possible use Invisibility, and then enter the Hold -> surrounded!
Effective spells vs Rolf are Horrid Wilting, Magic Missiles and Melf's Minute Meteors; can also use Greater Malison, Lower Resistance and Slow
Main floor: run south for refuge in one of the small south-west rooms! Carefully fight all the Bandits and then prepare to fight Rolf Sureblade (for a long time, perhaps 10 minutes at the "near death" state) until he gives-up; do not kill him outright here or the quest will be broken! With a thief to unlock the doors, follow him to the south-east room with a staircase; only Rolf can unlock the doors! Watch him walk upstairs.
Loot the powerful Gram the Sword of Grief (at 2095, 975; press X) from the container/barrel in the south-east room -> Minsc
***Gram the Sword of Grief
26 © bg2mez

IMPORTANT NOTE: a very reasonable way to take down Rolf
Sureblade is by using Gram the Sword of Grief which can level-
drain Rolf, e.g. use Minsc, with a strength potion; however, do not
kill Rolf until the final battle atop his "tower" or the quest is broken.
South-west room: two floor traps, trapped chests! Access this room from the south-west of Lyrar's Hold main floor to find Sureblade's Journal (evidence) and several Potion of Superior Healing
*Sureblade's Journal
Second floor: save game and then go upstairs. With Minsc wielding Gram the Sword of Grief fight Rolf Sureblade (for a long time at the "near death" state) until he speaks; do not kill him outright here or the quest will be broken!
Tip Stop everyone from fighting him when he begins to speak: "Besheba's Breasts! Where are my men?!? Meet me in my private quarters!" With a thief to unlock the door, follow him to the "library" room at the middle-south and watch him go up the spiral staircase. Major save game.
Tip You do not have to fight all of the enemies on the second floor of Lyrar's Hold (e.g. use Invisibility); however the east side, in the room with a fireplace, has a mage that will drop a Belt of Inertial Barrier and an Amulet of Power!
*Belt of Inertial Barrier*Amulet of Power
Tower level 1-5: fight enemies on levels 1, 2, 3; save game on the 4th level; fight Rolf Sureblade on level 5 with Minsc wielding Gram the Sword of Grief, blessed, hasted and with strength 24.Use summoned creatures as decoys or Jaheira with Iron Skins and a healer behind her! Can use Finger of Death on Rolf as well, if necessary. Rolf eventually goes down! Save game!
Can explore the other areas including the Warrens if desired; or simply take the overland route back to Soubar.- 2nd floor of Lyrar's Hold: Central room: Cloak of Balduran in a cabinet (at 1060, 1200) North-west bedroom: Manual of Gainful Exercise in a trapped container (at 625, 965)Take the spiral staircase down to the basement
- Lyrar's Hold Basement: fight a few enemies; large room contains a trapped tomb with overpowered items (avoid the floor trap by walking along the south wall). Exit Lyrar's Hold via a dirt tunnel at the north-west, leading to the Warrens II.
- Warrens II (AR4325): difficult fights! Use magic such as Chain Lightning and Horrid Wilting vs the Tremor Worms
- Warrens I (AR4320): difficult fights!
- Barracks basement area: Prison Storeroom (AR4287): can loot several overpowered items from ToB in trapped containers; use the Crowbar to open crates Cannot return to this Storeroom area after exiting at the north-west, which brings us to the Soubar Prison/Barracks Basement (AR4288 is missing an exit point at 1025, 700)
Step 7 Return to Soubar (Town Hall or Barracks): report the success to the Mayor or to the Major! 200k xp awarded plus 100k xp for the Protagonist Congratulations on completing Shadows Over Soubar! Can also speak with Gaius and Arvin. Great mod!
At this time we rolled-back the gained experience to the pre-SOS amount by using Shadowkeeper (the Protagonist had gained 400k
27 © bg2mez

xp; all other party members had gained 300k xp).
For fun we kept only a couple of nice items from SOS for the mages: Belt of Inertial Barrier, Amulet of Power, and Cloak of Balduran! And, the Ring of Earth Control for Jaheira.
SELENCE'S ADDITIONAL QUEST (3RD QUEST)
Step 8 (optional) Can do this quest before defeating Sureblade and completing SOS, but it is recommended to wait due to the difficulty. It is good to have completed the Bodhi/main quest first before asking Selence to join your party, to clear the way for Selence's quest in the Graveyard
This quest leads to several Stronghold-like quests in which Selence cannot leave the party; we did not want to partake.
Enter the Sea’s Bounty and ask Selence about a big job; she will ask to join your party outside of the tavern: she speaks about going to the Graveyard District.
Bring Gram the Sword of Grief +5 for the final battle; bring one or two Potions of Mind Focusing and of Genius to help in the final battle vs Mind Flayers; Oil of Speed and Potions of Heroism and Cloud Giant Strength x2
Graveyard, central tomb: many trapped containers; fighting enemies here is optional.Have a Phylactery in inventory to destroy a Banelich, cast MagicMissiles to hopefully disrupt their spell casting; consider to use Horrid Wilting as well; 20k xp each, but they are optional fights.
Note: Resting near the exit of this level is the best place to Rest
during this quest; cannot rest in the next two areas without being
interrupted, even when they are cleared of foes.
Prepare spells for the final battle: Skeleton Warriors and Mordy's
Swords are key to distract the Mind Flayers and keep them
occupied while focused on Lolth!Consider also: Invisible Stalkers; Greater Malison, Pierce Shield,
Lower Resistance, Melf's Minute Meteors, Haste, Bless, Aid,
Chaotic Commands (x6) or use Greenstone Amulet; Resist Fear
and Horrid Wilting (can cast at Lolth's helpers without them noticing
the party!)
2nd Area (Catacombs level 2): immediate floor trap. ENCOUNTER Avatar of Lolth at two locations; fight 115k xp and gives access to the narrow west hallway for the final, very tough battle vs Lolth and continuously spawning Mind Flayers
West passage: two traps; fight some Mind Flayers and then use Stealth or Invisibility to scope out what lies ahead but do not let Lolth see you!Final Battle vs Mind Flayers, Lolth and her helpers: carefully take down her helper clerics and mages first, as well as the first wave of Mind Flayers BUT DO NOT let Lolth see you otherwise the room could fill with Mind Flayers. Can throw in spells such as Greater
Malison and Horrid Wilting to soften-up Lolth's helpers without them detecting you.
28 © bg2mez

Defeating LolthBasically it helps a lot if Lolth is positioned such that you can walk right next to her, while invisible, and that she isn't completely surrounded by Mind Flayers (see screenshot)Fight with full concentration on her using Gram the Sword of Grief +5, with high strength, and Flail of Ages +3 fully buffed and hasted, having several Mordenkainen's Swords summoned as a distraction for the Mind Flayers; all others using ranged weapons or cast spells.
Lolth in a killable position. Minsc and Protagonist approach in Stealth mode with maximum strength, hasted and fully buffed.Take her down fast (may need to use Greater Whirlwind) as the Mind Flayers can continuously spawn from the back room.
Skeleton Warriors, Mordy's Swords and Invisible Stalkers are excellent distractions here for the Mind Flayers.Jaheira use Sling of Seeking; mages optionally can cast Greater Malison and Melf's Minute Meteors.
Minsc: wield Gram the Sword of Grief +5: drink a potion of strength (STR 23 or more is recommended) and Agility; wear Boots of Speed, Ring of Gaxx; use Greater Whirlwind if have (otherwise Aerie/Imoen cast Haste) and Stealth to take position
Protagonist: Flail of Ages +3, drink a Potion of Mind Focusing and Potion of Genius to be safe; summon a Skeleton Warrior; fully buffed and hasted use Stealth to take position
Jaheira: use Sling of Seeking +2 and Sunstone Bullets if have; Creeping Doom works; keep her away from any mobs of Mind Flayers, she seems to not last very well.
Mages: summon Skeleton Warriors and Mordy's Swords; use Invisibility 10' Radius to get them an element of surprise; use Greater Malison, Melf's Minute Meteors, Haste and Horrid Wilting
Selence: keep her out of harm's way but use items to summon more fodder
If the party needs to Rest, can do so in the previous area at the west exit
Lolth goes down for 4 million xp! Watch Intelligence levels if Mind Flayers attack Minsc or the Protagonist.We will roll-back the xp from this quest (using Shadowkeeper) and not use any items or loot gold from this area.
Next Area (take the north exit): Talk to Te Elle Q (kill a dragon)The dragon is in the south (no traps here), use Breach for an easy fight 68k xp, 12k gp dropped
29 © bg2mez

Selence will then say "I need to go and take care of some business…Meet me on the first level in a few hours."She will be located in the first area in the first room in the south (AR4210 at 3000, 2000); she will want to join the party but probably cannot dismiss her until the Stronghold quests are completed
SELENCE'S STRONGHOLD
Step 9 (optional) Basically she will be found in the south room (the first room) of the first area after entering from the Graveyard. Every three days or so she will have a thieving quest involving fenced goods. We chose not to partake, but what a great adventure SOS has been!Hats off to the developers! With a little polishing this mod will be a 10 out of 10!
30 © bg2mez