Embed Size (px)
Citation preview
22 • March 2013 Mules and More Magazine
Hobble Trainingby Tim DoudDiamond Creek MulesCody, Wyoming
Teaching a mule to hobble is a good lesson for your mule. Hobbling is linking two of the mule’s legs to-
gether with a short length of rope or leather, to slow or stop the forward motion of the mule. Most times the two front legs are hobbled.
Hobbling is typically used by trail riders or outfitters who wish to keep their mules close to camp so they don’t have to use less safe methods like high-lining or picketing. Trail riders can also use hobbling to allow a mule to graze when stopping for lunch. Packers, who work for outfitters, use hobbling as a way to hold their pack string when dismount-ing to fix a pack. The riding animal is hobbled and the pack string is then tied to the riding animal. This gives the packer the ability to hobble the riding animal, just like tying to a tree, any time he needs to make adjustments.
Hobbling will also teach your mule not to fight against pressure on his feet or legs. This comes in handy should the mule get a foot caught in a wire fence or get a leg tangled between two bars of a panel.
Mules are very different than horses. When a horse feels trapped, the horse will panic in most cases if not trained ap-propriately. If a horse gets a foot caught in a wire fence, he will pull and pull and pull tearing his leg up and possibly cripple himself for life, or even injury himself so badly that he does not survive.
A mule, however, will usually not fight when he realizes he will hurt himself. If a mule gets a foot caught in the wire fence, he may fight for a short time, but when the mule fig-ures out that he will hurt himself badly or even not survive, he will normally wait for help.
Now to the lesson; as always, it is your job to keep the mule safe when teaching him or her something. So start your training is a safe area, like a round pen. For this lesson, in particular, make sure the pen has safe soft footing, no rocks or sharp objects, and no obstacles in the pen so the mule does not spook.
As with any training lesson, you should work slow and in steps. Once the mule is completely comfortable with the current step you are teaching, then you can move to the next step; never before.
Next, always keep yourself safe should the mule panic. Should your mule panic, give him room and get out of the way. As you work with the mule, he will tell you how he will react to hobbles. Think about the reactions of your mule before you start also. If the mule reacts violently to anything around or touching his legs and feet, he will react violently to being hobbled. The mule must be comfortable with ropes
and other objects around his legs before you teach him to hobble, otherwise you are setting up a wreck.
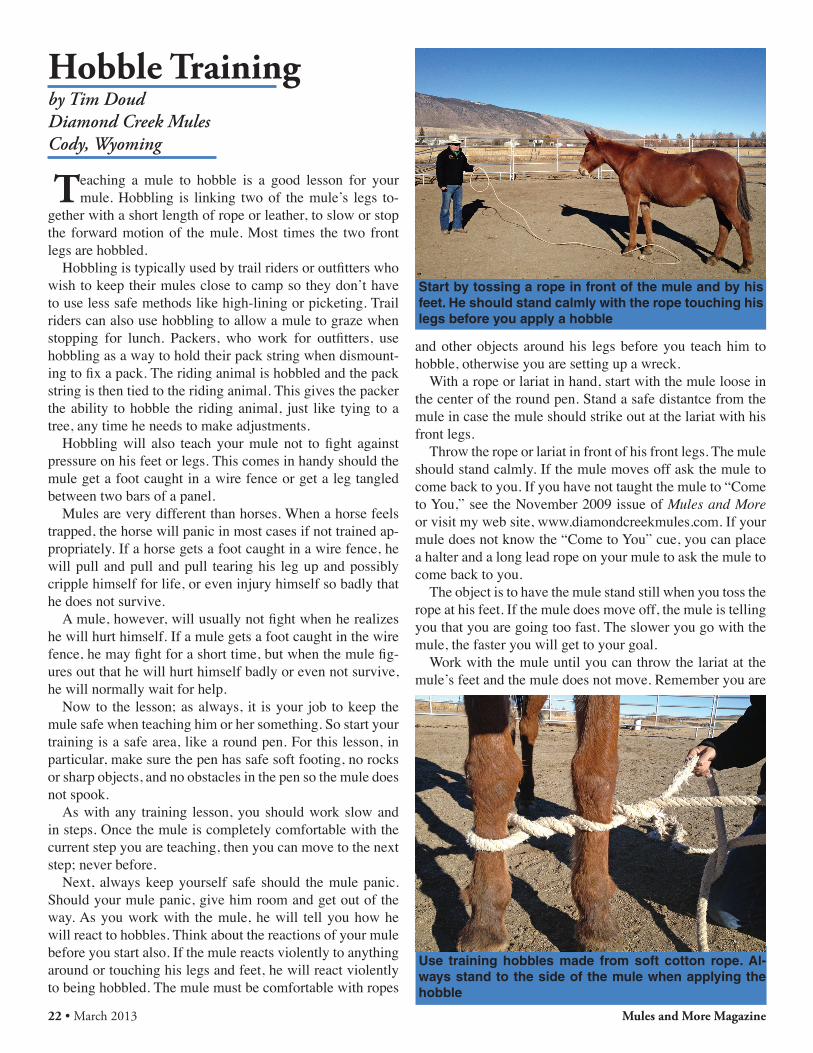
With a rope or lariat in hand, start with the mule loose in the center of the round pen. Stand a safe distantce from the mule in case the mule should strike out at the lariat with his front legs.
Throw the rope or lariat in front of his front legs. The mule should stand calmly. If the mule moves off ask the mule to come back to you. If you have not taught the mule to “Come to You,” see the November 2009 issue of Mules and More or visit my web site, www.diamondcreekmules.com. If your mule does not know the “Come to You” cue, you can place a halter and a long lead rope on your mule to ask the mule to come back to you.
The object is to have the mule stand still when you toss the rope at his feet. If the mule does move off, the mule is telling you that you are going too fast. The slower you go with the mule, the faster you will get to your goal.
Work with the mule until you can throw the lariat at the mule’s feet and the mule does not move. Remember you are
Use training hobbles made from soft cotton rope. Al-ways stand to the side of the mule when applying the hobble
Start by tossing a rope in front of the mule and by his feet. He should stand calmly with the rope touching his legs before you apply a hobble
March 2013 • 23 Mules and More Magazine
not throwing the lariat hard or fast at the mule. If you get aggressive with the lariat, you are telling the mule that you want the mule to move. We do not want the mule to move.
You should be able to throw and touch the mule all over his legs with the lariat before you move to the next step.
Next, we will take a soft cotton rope and teach the mule to give to pressure on his feet.
Place the rope half way around one front foot and apply light pressure. Do not tie the rope to his foot as this is too much too soon. You will be holding on to both ends of the rope. The mule should feel pressure on his foot and pick up his foot. If the mule stands still and will not pick up his foot, add more pressure to the rope. Keep adding pressure until the mule picks up his foot. If the mule moves or takes off, you are adding too much pressure or you have not done enough with the lariat to make your mule comfortable.
With the soft cotton rope, start asking the mule to pick up his foot to the back. This is easiest for the mule. Work through the exercise until the mule will pick up his foot with light pressure. Then we will apply pressure to the front, side and all over the mule’s foot, asking him to pick up his foot each time. We will teach the mule to pick up both front feet in this manner.
Anytime we teach the mule something, it will show up 10 times later in his training. By teaching the mule to pick his feet up, you have also just made the farrier’s job easier.
After the mule is calm and comfortable with the rope touching both front feet and will pick up both front feet with light pressure, we will move to the next step.
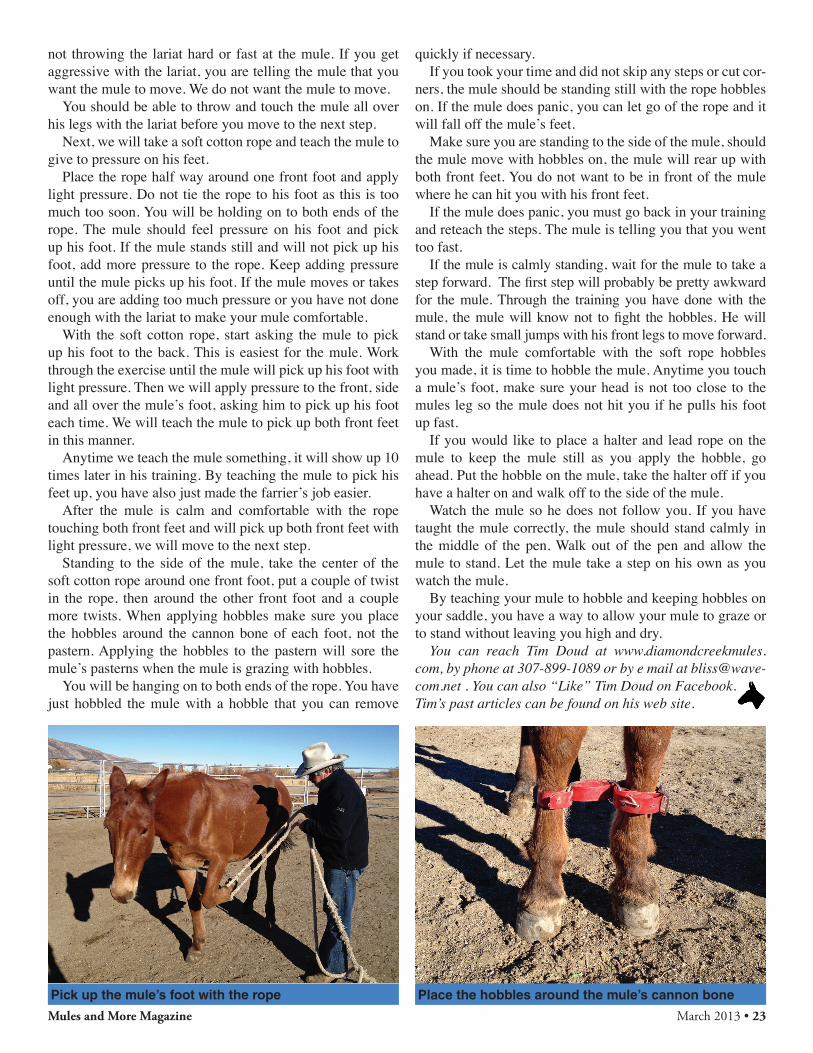
Standing to the side of the mule, take the center of the soft cotton rope around one front foot, put a couple of twist in the rope, then around the other front foot and a couple more twists. When applying hobbles make sure you place the hobbles around the cannon bone of each foot, not the pastern. Applying the hobbles to the pastern will sore the mule’s pasterns when the mule is grazing with hobbles.
You will be hanging on to both ends of the rope. You have just hobbled the mule with a hobble that you can remove
quickly if necessary.If you took your time and did not skip any steps or cut cor-
ners, the mule should be standing still with the rope hobbles on. If the mule does panic, you can let go of the rope and it will fall off the mule’s feet.
Make sure you are standing to the side of the mule, should the mule move with hobbles on, the mule will rear up with both front feet. You do not want to be in front of the mule where he can hit you with his front feet.
If the mule does panic, you must go back in your training and reteach the steps. The mule is telling you that you went too fast.
If the mule is calmly standing, wait for the mule to take a step forward. The first step will probably be pretty awkward for the mule. Through the training you have done with the mule, the mule will know not to fight the hobbles. He will stand or take small jumps with his front legs to move forward.
With the mule comfortable with the soft rope hobbles you made, it is time to hobble the mule. Anytime you touch a mule’s foot, make sure your head is not too close to the mules leg so the mule does not hit you if he pulls his foot up fast.
If you would like to place a halter and lead rope on the mule to keep the mule still as you apply the hobble, go ahead. Put the hobble on the mule, take the halter off if you have a halter on and walk off to the side of the mule.
Watch the mule so he does not follow you. If you have taught the mule correctly, the mule should stand calmly in the middle of the pen. Walk out of the pen and allow the mule to stand. Let the mule take a step on his own as you watch the mule.
By teaching your mule to hobble and keeping hobbles on your saddle, you have a way to allow your mule to graze or to stand without leaving you high and dry.
You can reach Tim Doud at www.diamondcreekmules.com, by phone at 307-899-1089 or by e mail at [email protected] . You can also “Like” Tim Doud on Facebook. Tim’s past articles can be found on his web site.
Pick up the mule’s foot with the rope Place the hobbles around the mule’s cannon bone