Embed Size (px)
Citation preview
CE 311 K - Introduction to Computer Methods Lab 2 - Introduction to Microsoft Visual Basic Microsoft Visual Basic The purpose of this assignment is to introduce you to the development environment, Microsoft Visual Basic, that we will be using in this course. After finishing this assignment, you will be able create a simple form and execute a simple program using the system. Access to Microsoft Visual Basic Open Microsoft Visual Basic from start menu of the left bottom side of the window, that is Start\All Programs\Microsoft Visual Basic 2010 Express Edition
Figure 1. Starting up the MS Visual Basic Application.
Creating New Project Workspace Once you select and open the Microsoft Visual Basic, you should see the following “New Project window”
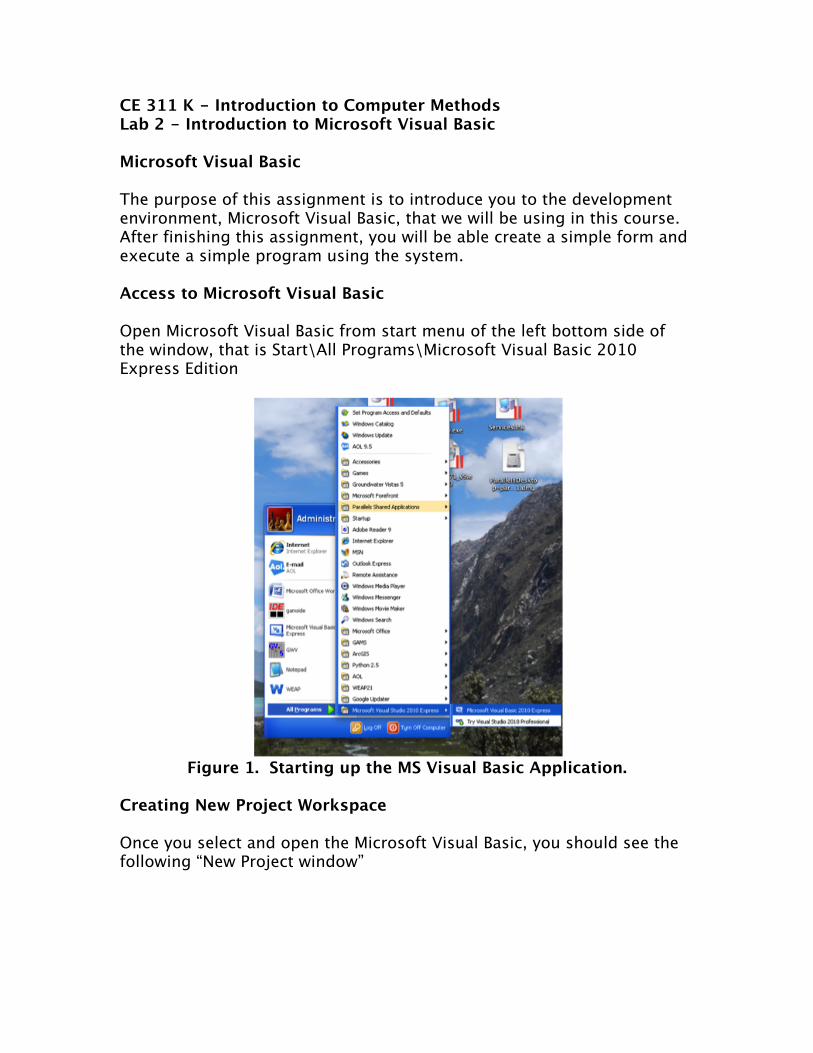
Figure 2. New Project Window
Select “File New Project” to create a new project. Your desktop will now look something like the figure below.
Figure 3. Windows Application Window
Select “Windows Form Application”. You can give your “application” a name, or simply accept the default offered “WindowsApplication1”.
Click “OK”. Now your desktop should look something like the figure below.
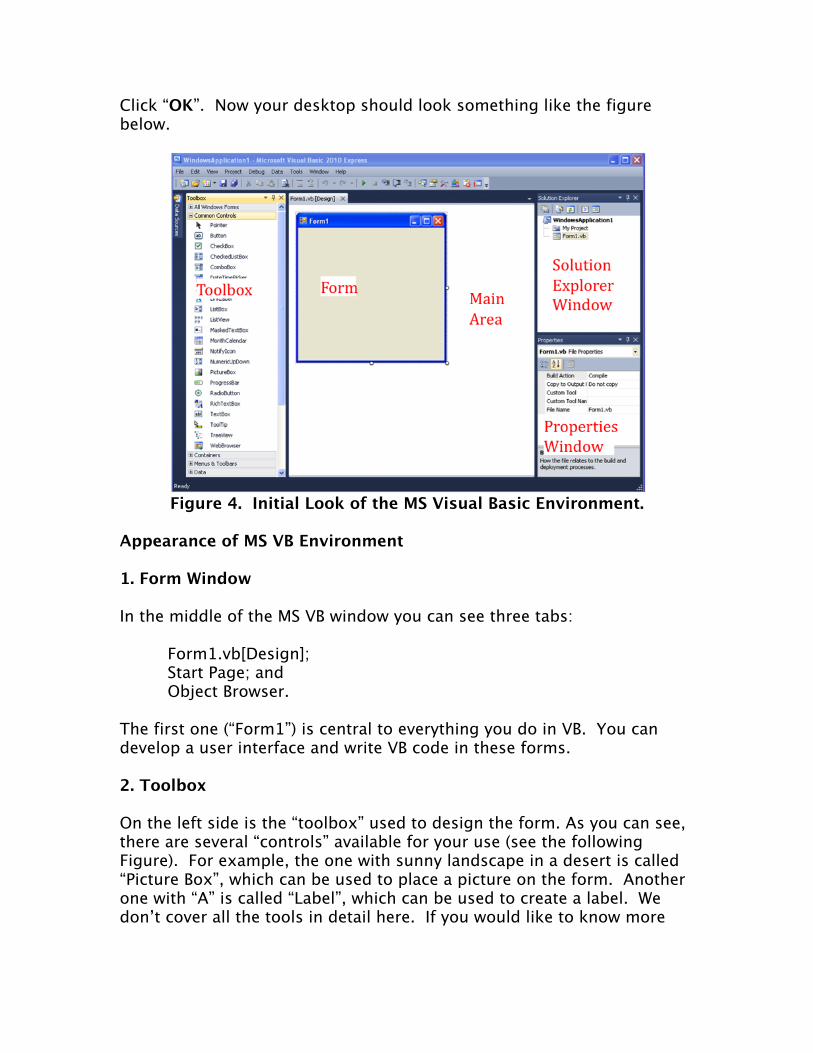
Figure 4. Initial Look of the MS Visual Basic Environment.
Appearance of MS VB Environment 1. Form Window In the middle of the MS VB window you can see three tabs:
Form1.vb[Design]; Start Page; and Object Browser.
The first one (“Form1”) is central to everything you do in VB. You can develop a user interface and write VB code in these forms. 2. Toolbox On the left side is the “toolbox” used to design the form. As you can see, there are several “controls” available for your use (see the following Figure). For example, the one with sunny landscape in a desert is called “Picture Box”, which can be used to place a picture on the form. Another one with “A” is called “Label”, which can be used to create a label. We don’t cover all the tools in detail here. If you would like to know more
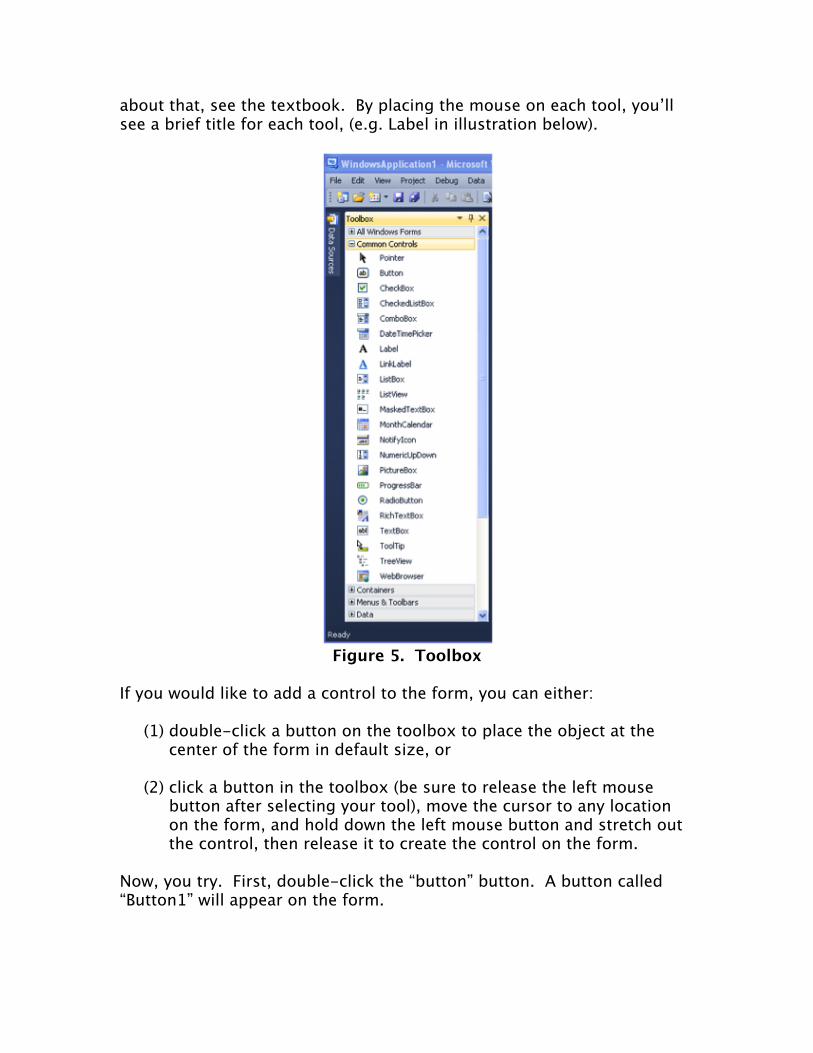
about that, see the textbook. By placing the mouse on each tool, you’ll see a brief title for each tool, (e.g. Label in illustration below).
Figure 5. Toolbox
If you would like to add a control to the form, you can either:
(1) double-click a button on the toolbox to place the object at the center of the form in default size, or
(2) click a button in the toolbox (be sure to release the left mouse
button after selecting your tool), move the cursor to any location on the form, and hold down the left mouse button and stretch out the control, then release it to create the control on the form.
Now, you try. First, double-click the “button” button. A button called “Button1” will appear on the form.
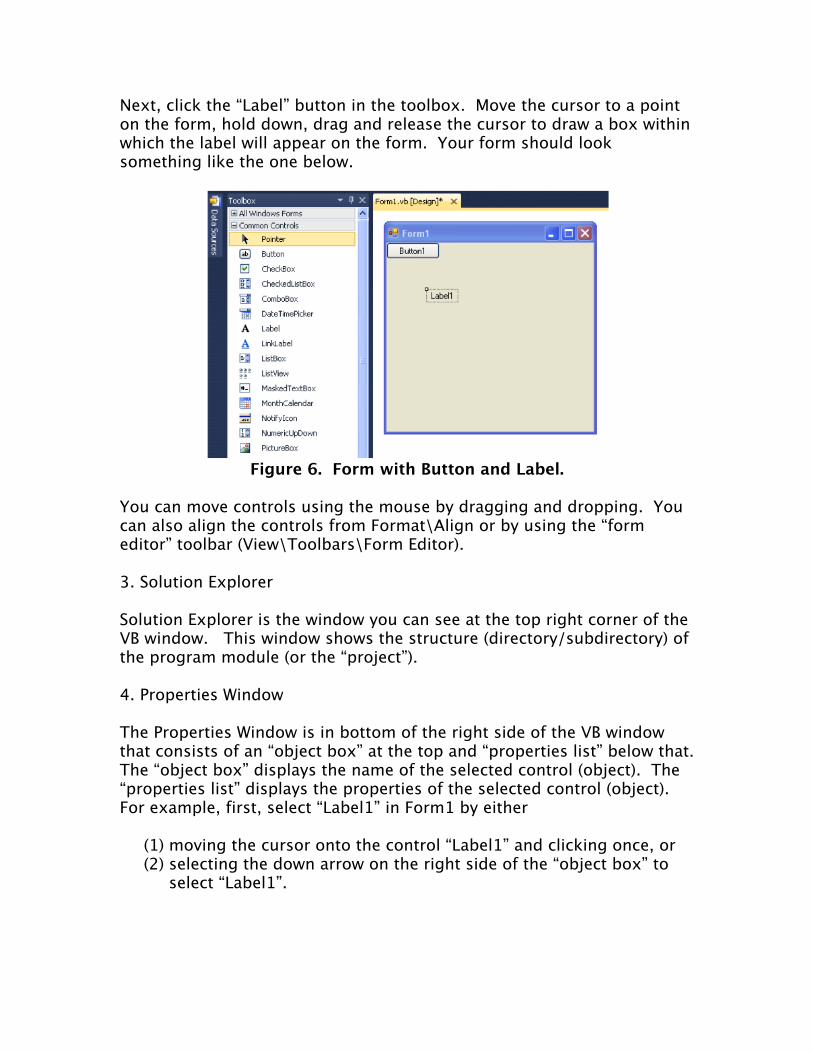
Next, click the “Label” button in the toolbox. Move the cursor to a point on the form, hold down, drag and release the cursor to draw a box within which the label will appear on the form. Your form should look something like the one below.
Figure 6. Form with Button and Label.
You can move controls using the mouse by dragging and dropping. You can also align the controls from Format\Align or by using the “form editor” toolbar (View\Toolbars\Form Editor). 3. Solution Explorer Solution Explorer is the window you can see at the top right corner of the VB window. This window shows the structure (directory/subdirectory) of the program module (or the “project”). 4. Properties Window The Properties Window is in bottom of the right side of the VB window that consists of an “object box” at the top and “properties list” below that. The “object box” displays the name of the selected control (object). The “properties list” displays the properties of the selected control (object). For example, first, select “Label1” in Form1 by either
(1) moving the cursor onto the control “Label1” and clicking once, or (2) selecting the down arrow on the right side of the “object box” to
select “Label1”.
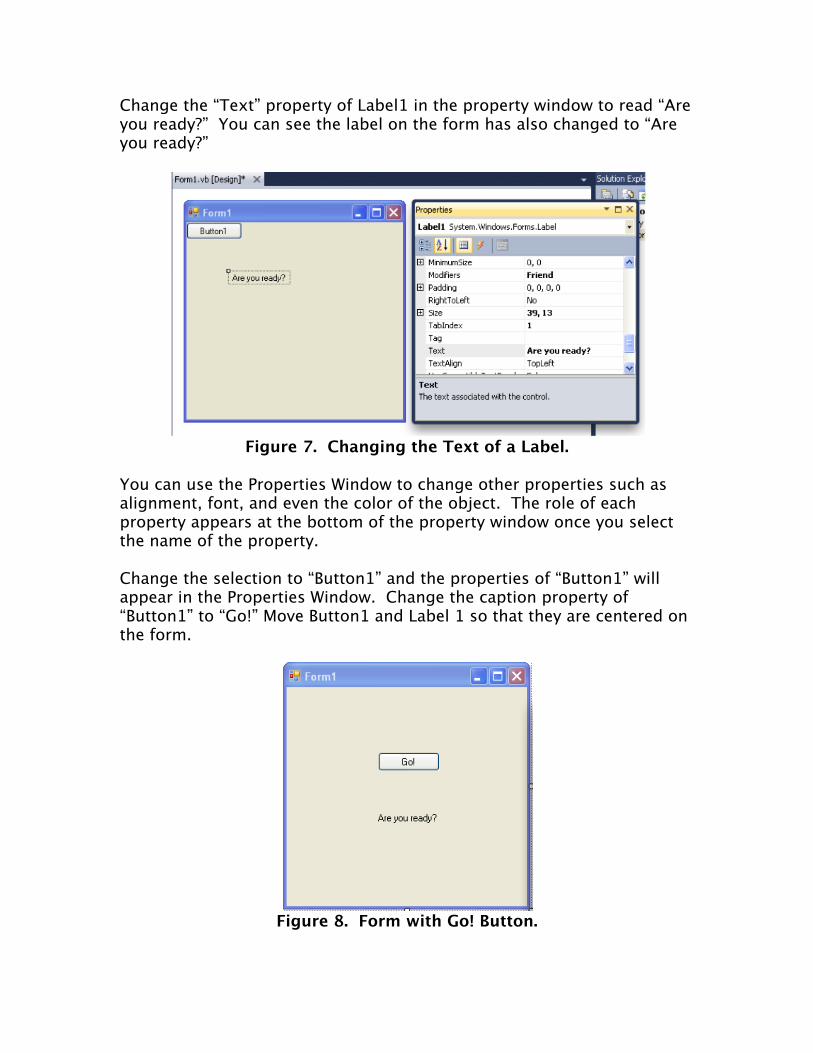
Change the “Text” property of Label1 in the property window to read “Are you ready?” You can see the label on the form has also changed to “Are you ready?”
Figure 7. Changing the Text of a Label.
You can use the Properties Window to change other properties such as alignment, font, and even the color of the object. The role of each property appears at the bottom of the property window once you select the name of the property. Change the selection to “Button1” and the properties of “Button1” will appear in the Properties Window. Change the caption property of “Button1” to “Go!” Move Button1 and Label 1 so that they are centered on the form.
Figure 8. Form with Go! Button.
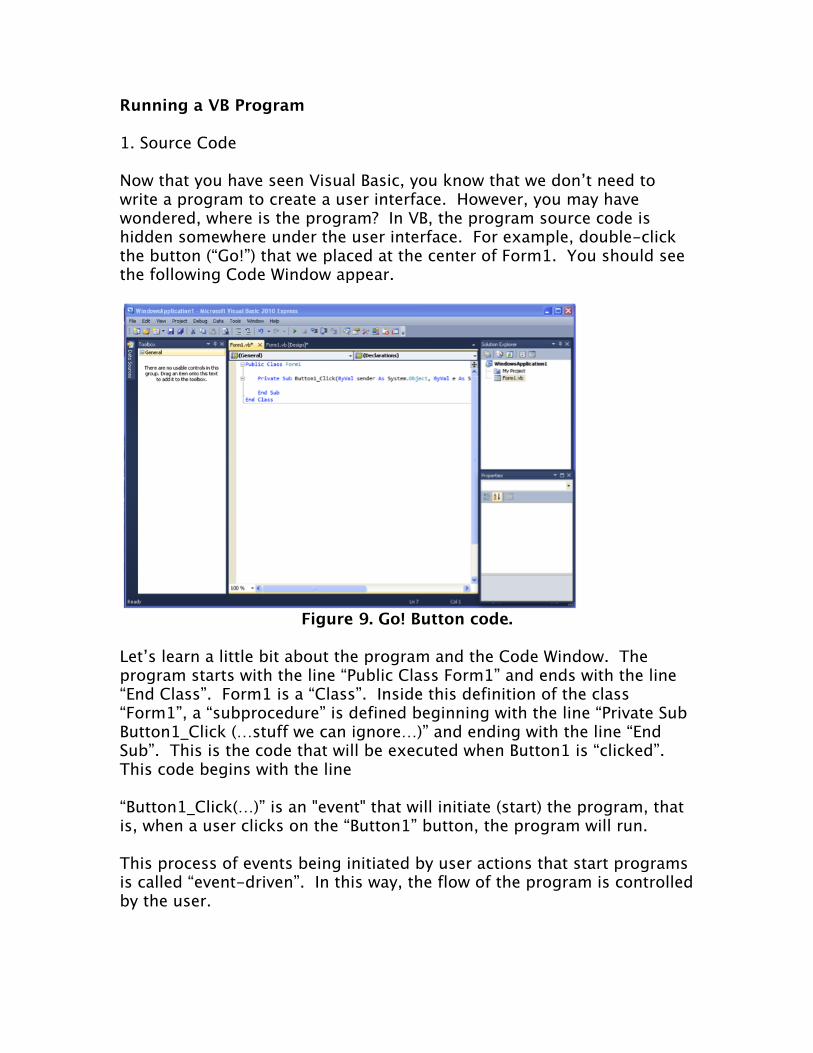
Running a VB Program 1. Source Code Now that you have seen Visual Basic, you know that we don’t need to write a program to create a user interface. However, you may have wondered, where is the program? In VB, the program source code is hidden somewhere under the user interface. For example, double-click the button (“Go!”) that we placed at the center of Form1. You should see the following Code Window appear.
Figure 9. Go! Button code.
Let’s learn a little bit about the program and the Code Window. The program starts with the line “Public Class Form1” and ends with the line “End Class”. Form1 is a “Class”. Inside this definition of the class “Form1”, a “subprocedure” is defined beginning with the line “Private Sub Button1_Click (…stuff we can ignore…)” and ending with the line “End Sub”. This is the code that will be executed when Button1 is “clicked”. This code begins with the line “Button1_Click(…)” is an "event" that will initiate (start) the program, that is, when a user clicks on the “Button1” button, the program will run. This process of events being initiated by user actions that start programs is called “event-driven”. In this way, the flow of the program is controlled by the user.
We need to add some code to the “Button1_Click()” event to make something happen when we “click” the button. How about this?
Public Class Form1 Private Sub Button1_Click(…) Handles Button1.Click Label1.Text = "Only old, grey programmers use FORTRAN" End Sub End Class
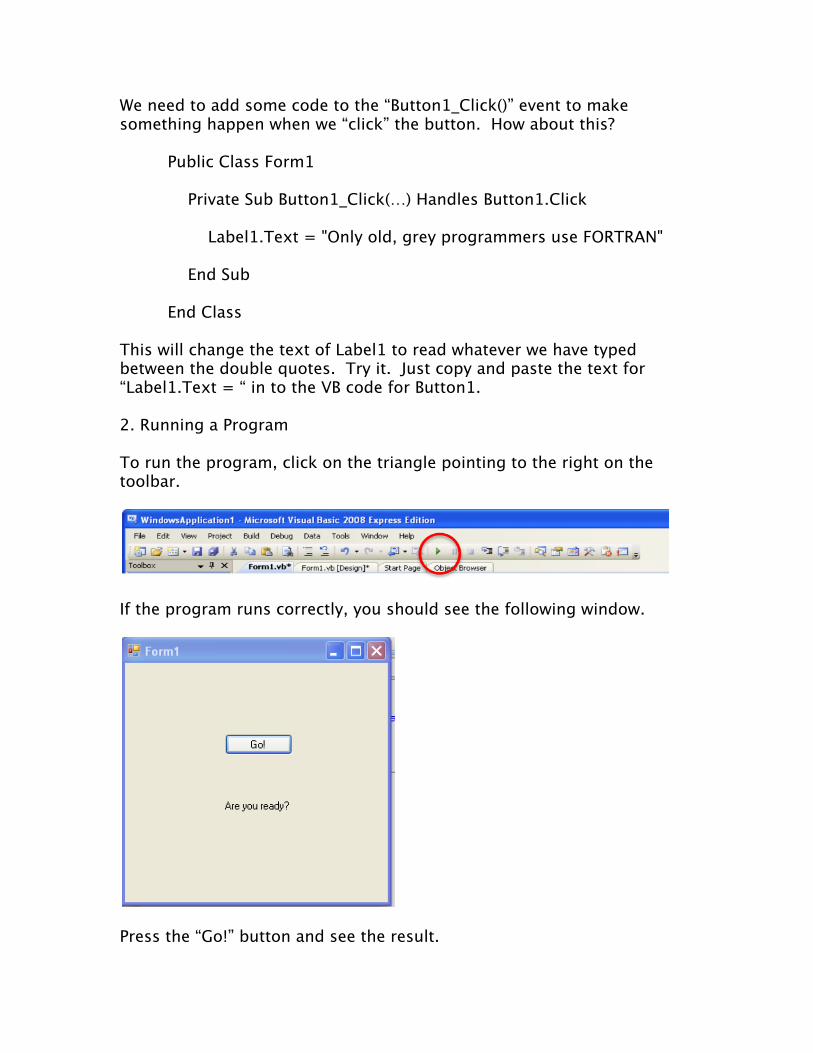
This will change the text of Label1 to read whatever we have typed between the double quotes. Try it. Just copy and paste the text for “Label1.Text = “ in to the VB code for Button1. 2. Running a Program To run the program, click on the triangle pointing to the right on the toolbar.
If the program runs correctly, you should see the following window.
Press the “Go!” button and see the result.
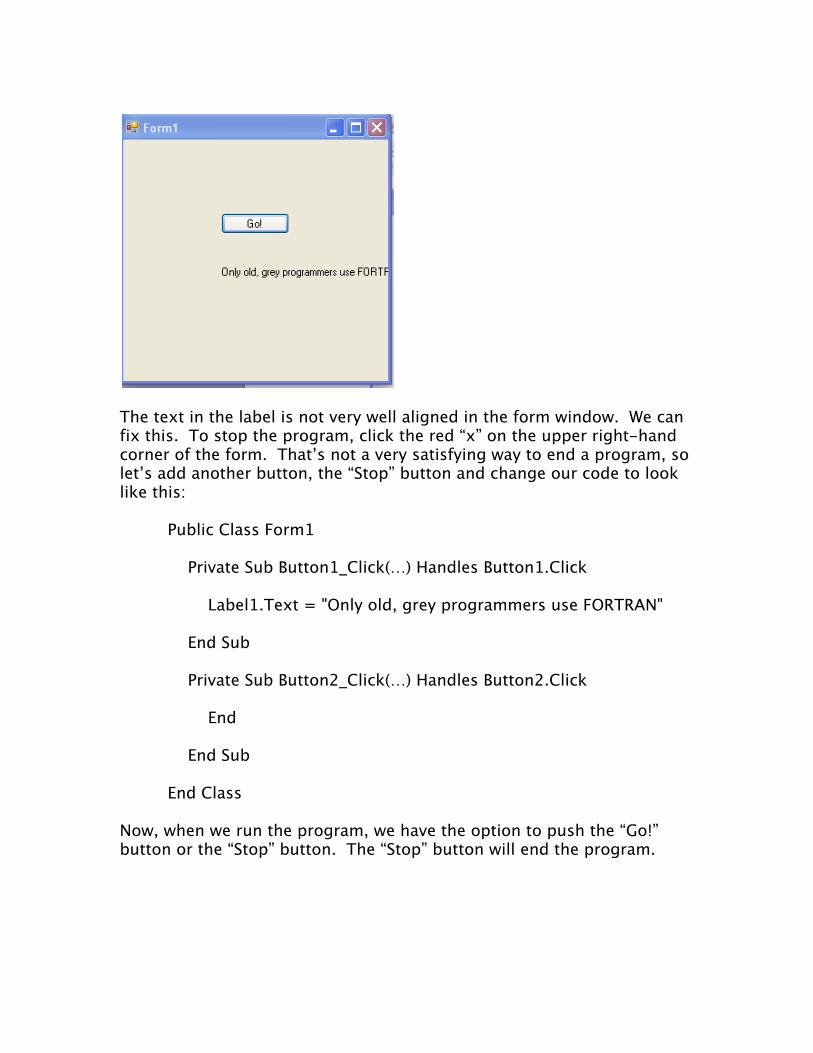
The text in the label is not very well aligned in the form window. We can fix this. To stop the program, click the red “x” on the upper right-hand corner of the form. That’s not a very satisfying way to end a program, so let’s add another button, the “Stop” button and change our code to look like this:
Public Class Form1 Private Sub Button1_Click(…) Handles Button1.Click Label1.Text = "Only old, grey programmers use FORTRAN" End Sub Private Sub Button2_Click(…) Handles Button2.Click End End Sub End Class
Now, when we run the program, we have the option to push the “Go!” button or the “Stop” button. The “Stop” button will end the program.
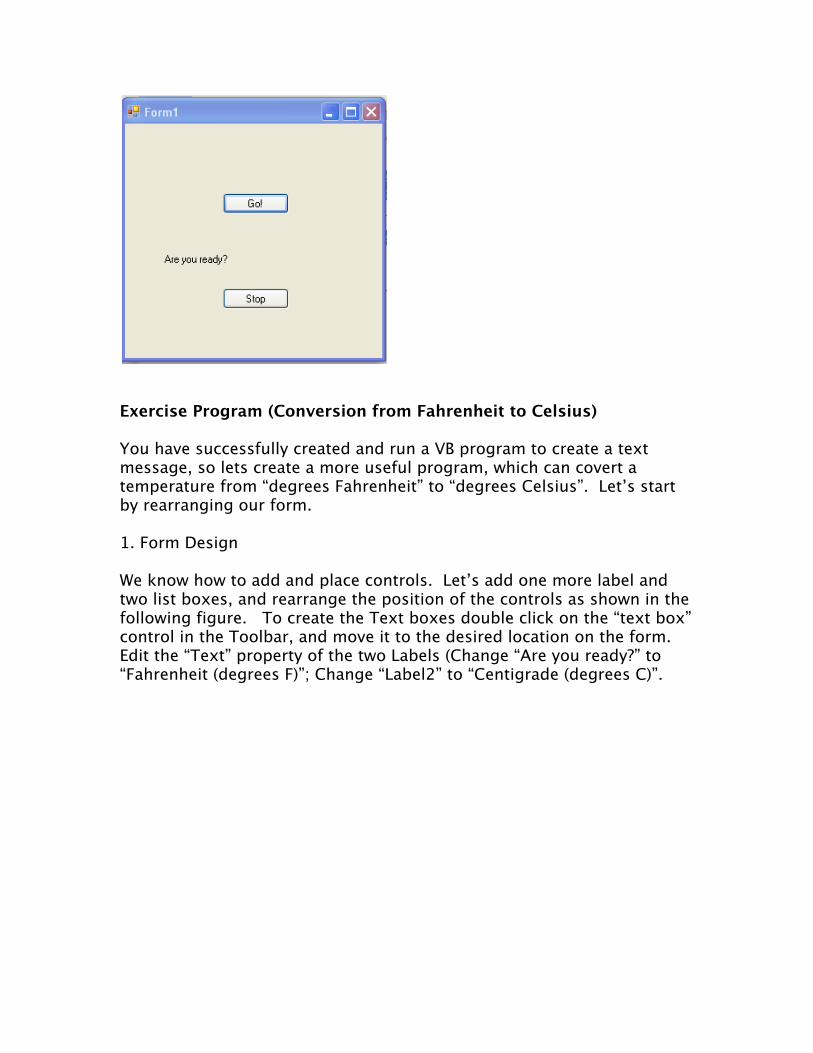
Exercise Program (Conversion from Fahrenheit to Celsius) You have successfully created and run a VB program to create a text message, so lets create a more useful program, which can covert a temperature from “degrees Fahrenheit” to “degrees Celsius”. Let’s start by rearranging our form. 1. Form Design We know how to add and place controls. Let’s add one more label and two list boxes, and rearrange the position of the controls as shown in the following figure. To create the Text boxes double click on the “text box” control in the Toolbar, and move it to the desired location on the form. Edit the “Text” property of the two Labels (Change “Are you ready?” to “Fahrenheit (degrees F)”; Change “Label2” to “Centigrade (degrees C)”.

Now, we are going to write the code to convert temperatures in degrees Fahrenheit to degrees Centigrade. To simplify this, change the “(Name)” property of the “Text1” text box to “txtF” and the “(Name)” property of the “Text2” text box to “txtC” for convenience in writing the code. 2. Writing the Code Now, it’s time to write the code. Double-click the “Go!” button and write the code between “Private Sub Button1.Click()” and “End Sub.” You should insert some information and comment about the program. The information you should include is ‘Your Name’, ‘Title of Program/Assignment’, ‘Date written’, and/or ‘Date Due’ etc. Anything that is prefaced by a single quote mark ‘ is considered as a comment and is not part of the executable program code. Next, determine the equation required for the conversion from Fahrenheit to Celsius. As you know,
(Celsius) = ((Fahrenheit) –32) * 5/9 The value in the text box “txtF” can be accessed as “txtF.Text”, and similarly, “txtC” can be accessed as “txtC.Text”. Here, “*.Text” is the extension code for the “Text” property of each text box (i.e., “txtC” and “txtF”).
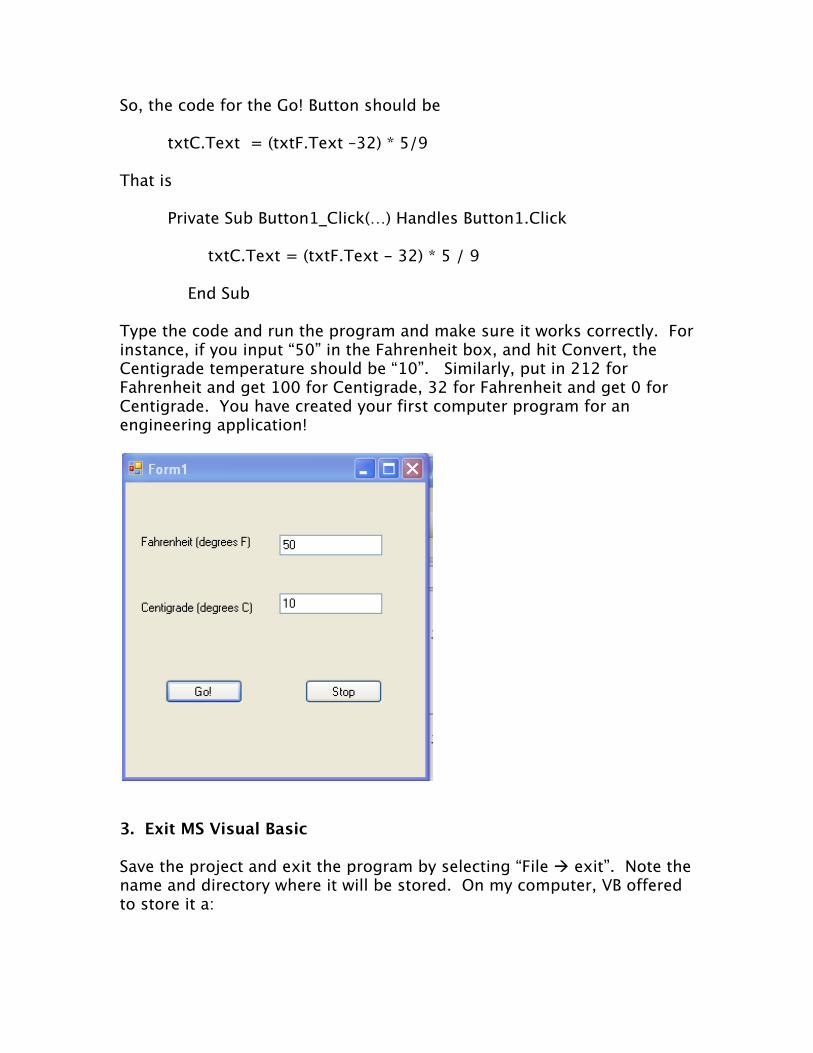
So, the code for the Go! Button should be
txtC.Text = (txtF.Text –32) * 5/9 That is
Private Sub Button1_Click(…) Handles Button1.Click txtC.Text = (txtF.Text - 32) * 5 / 9 End Sub
Type the code and run the program and make sure it works correctly. For instance, if you input “50” in the Fahrenheit box, and hit Convert, the Centigrade temperature should be “10”. Similarly, put in 212 for Fahrenheit and get 100 for Centigrade, 32 for Fahrenheit and get 0 for Centigrade. You have created your first computer program for an engineering application!
3. Exit MS Visual Basic Save the project and exit the program by selecting “File exit”. Note the name and directory where it will be stored. On my computer, VB offered to store it a:

C:\Documents and Settings\Administrator\My Documents\Visual Studio 2008\Projects
You can select a better name and directory if you like. Assignment (Make a New Unit Converter Application) You are now able to create a simple user interface and write a simple program using Microsoft Visual Basic to do some calculations. Please create a new application of your own devising that is similar in scope to the one you have just completed, in other words, an application that does a simple calculation to convert information in one set of units to another. To Be Turned In: You can paste all of the following items into a MS Word document and print it and hand it in, or email it to me at: [email protected]. Be sure to put you name on the first laine of the document.
1. A printed copy of a screen capture (alt Prnt Scrn) of your Fahrenheit to Centigrade converter interface, like that shown above, with a different temperature converted than that shown here.
2. A printed copy of your VB code for the Fahrenheit to Centigrade converter, including the comment statements.
3. A brief explanation of the purpose of your new unit converter
application that you have created.
4. A screen capture of the interface for your unit converter application.
5. A copy of the VB code for your unit converter application.


![[EMC 311] Chapter 1 Introduction to Raspberry Pi](https://img.pdfslide.net/doc/110x75/577cd81d1a28ab9e78a070af/emc-311-chapter-1-introduction-to-raspberry-pi.jpg)