Embed Size (px)
Citation preview

Dell EMC RecoverPoint for VirtualMachinesVersion 5.2
Installation and Deployment GuideP/N 302-004-997
Rev 08
October 2019

Copyright © 2018-2019 Dell Inc. or its subsidiaries. All rights reserved.
Dell believes the information in this publication is accurate as of its publication date. The information is subject to change without notice.
THE INFORMATION IN THIS PUBLICATION IS PROVIDED “AS-IS.” DELL MAKES NO REPRESENTATIONS OR WARRANTIES OF ANY KIND
WITH RESPECT TO THE INFORMATION IN THIS PUBLICATION, AND SPECIFICALLY DISCLAIMS IMPLIED WARRANTIES OF
MERCHANTABILITY OR FITNESS FOR A PARTICULAR PURPOSE. USE, COPYING, AND DISTRIBUTION OF ANY DELL SOFTWARE DESCRIBED
IN THIS PUBLICATION REQUIRES AN APPLICABLE SOFTWARE LICENSE.
Dell Technologies, Dell, EMC, Dell EMC and other trademarks are trademarks of Dell Inc. or its subsidiaries. Other trademarks may be the property
of their respective owners. Published in the USA.
Dell EMCHopkinton, Massachusetts 01748-91031-508-435-1000 In North America 1-866-464-7381www.DellEMC.com
2 Dell EMC RecoverPoint for Virtual Machines Installation and Deployment Guide

7
9
11
Introduction to RecoverPoint for VMs 13RecoverPoint for VMs system........................................................................... 14
Preparing to install RecoverPoint for VMs 17RecoverPoint for VMs networking example.......................................................18Planning your system........................................................................................ 19
System limitations................................................................................ 19Allocating IP addresses.........................................................................19Documenting the installation settings .................................................. 19Choosing a vRPA topology................................................................... 19Choosing a vRPA performance profile..................................................20I/O throttling........................................................................................ 21Choosing a network adapter topology.................................................. 21
Preparing the VMware environment................................................................. 22Supported vSphere versions................................................................ 22Preparing the network......................................................................... 23Preparing the storage.......................................................................... 23
Understanding the installation flow...................................................................24
Installing the RecoverPoint for VMs system 27Download the installation package.................................................................... 28Deploy vRPAs................................................................................................... 28Install vRPA clusters......................................................................................... 29Connect vRPA clusters......................................................................................31Register and license the system........................................................................32Protect VMs..................................................................................................... 33
Maintaining RecoverPoint for VMs 35Register ESXi clusters...................................................................................... 36Configure VMkernel ports.................................................................................36Enable communication between vRPA clusters.................................................37Modify vRPA cluster network settings..............................................................37Change the RPA communication security level................................................. 37Modify the network topology............................................................................38Installing the splitter with Boxmgmt CLI........................................................... 38Install the splitter with the RecoverPoint for VMs VIB installer.........................38Install JAM........................................................................................................39Add vRPAs to a vRPA cluster........................................................................... 40
Figures
Tables
Preface
Chapter 1
Chapter 2
Chapter 3
Chapter 4
CONTENTS
Dell EMC RecoverPoint for Virtual Machines Installation and Deployment Guide 3
Remove a vRPA from a vRPA cluster................................................................40Replace a vRPA................................................................................................. 41Change default passwords................................................................................ 42Collect logs....................................................................................................... 42
Upgrading RecoverPoint for VMs 45Upgrade overview............................................................................................. 46Migrate to IP communication mode...................................................................47The Upgrade and Maintenance package............................................................47Upgrade a vRPA Cluster................................................................................... 47Upgrade splitters and JAMs for entire ESX cluster........................................... 48Upgrade splitter for single ESXi host................................................................ 49Upgrade JAM for single ESXi host.................................................................... 50Upgrade the RecoverPoint for VMs plug-in.......................................................51
Uninstalling RecoverPoint for VMs 53Using the RecoverPoint for VMs uninstall tool..................................................54What the RecoverPoint for VMs uninstall tool does..........................................54Preparing to uninstall vRPA clusters................................................................. 54
Unprotect VMs.................................................................................... 54Remove ESXi clusters from vRPA clusters...........................................54Uninstall a vRPA cluster.......................................................................55
Run the RecoverPoint for VMs uninstall tool.................................................... 55Finishing up the uninstall...................................................................................57
Uninstall the RecoverPoint for VMs splitters........................................57Uninstall JAM.......................................................................................57Removing unused directories............................................................... 58
Installing in VxRail environments 59Deploying RecoverPoint for VMs in a VxRail™ environment.............................. 60
Downloading from the VxRail market place.......................................... 60Preparing the network for VxRail......................................................... 60Create vRPAs for VxRail...................................................................... 60Create and configure VMkernel ports for VxRail...................................61Create a vRPA cluster for VxRail.......................................................... 61Adding VxRail appliances or nodes....................................................... 62
Troubleshooting RecoverPoint for VMs installation 63Troubleshooting vRPAs.....................................................................................64
vRPA is down.......................................................................................64vRPA is detached from the vRPA cluster.............................................64vRPA cannot detect storage or splitter................................................65
Troubleshooting splitters.................................................................................. 65Splitter is not visible or in error state................................................... 65
Troubleshooting the RecoverPoint for VMs plug-in.......................................... 65vSphere Web client does not contain plug-in....................................... 65Plug-in does not detect the vRPA cluster............................................ 66
Troubleshooting RecoverPoint for VMs replication...........................................66CG in high-load transfer state or initialization not completing..............66Consistency group is in Error state...................................................... 67
ESXi UUID duplication ......................................................................................67Getting help...................................................................................................... 68
Chapter 5
Chapter 6
Chapter 7
Chapter 8
Contents
4 Dell EMC RecoverPoint for Virtual Machines Installation and Deployment Guide

RecoverPoint for VMs installation form 69Installation data forms.......................................................................................70
Support procedures for uninstalling vRPA clusters 73Uninstalling a single vRPA cluster from a vCenter manually.............................. 74Uninstalling all vRPA clusters from a vCenter manually.....................................75Unprotect VMs................................................................................................. 76Remove ESXi clusters from vRPA clusters........................................................76Remove a vRPA from a vRPA cluster................................................................76Detaching vRPAs.............................................................................................. 76Powering off vRPAs.......................................................................................... 77Deleting the repository folder............................................................................77Verifying that the configuration parameters are empty..................................... 77Removing custom tokens from the Managed Object Browser........................... 77Unregistering the RP extension from the Managed Object Browser................. 78Unregistering the plug-in from the Managed Object Browser........................... 79Removing unused directories............................................................................ 79Uninstall the RecoverPoint for VMs splitters.................................................... 80Uninstall JAM....................................................................................................80
vSphere upgrades 81Upgrading vCenter............................................................................................82Upgrading ESXi.................................................................................................82
Installing on Nutanix 85Installing RecoverPoint for VMs on Nutanix......................................................86
Appendix A
Appendix B
Appendix C
Appendix D
Contents
Dell EMC RecoverPoint for Virtual Machines Installation and Deployment Guide 5

Contents
6 Dell EMC RecoverPoint for Virtual Machines Installation and Deployment Guide

RecoverPoint for VMs system........................................................................................... 15Networking example.......................................................................................................... 18Stages of the installation flow...........................................................................................24
123
FIGURES
Dell EMC RecoverPoint for Virtual Machines Installation and Deployment Guide 7

Figures
8 Dell EMC RecoverPoint for Virtual Machines Installation and Deployment Guide

Procedures in the installation flow.................................................................................... 24Procedures in the protection flow.....................................................................................25Example: vRPA cluster/site form...................................................................................... 70Example: vRPA IP form......................................................................................................71Example: Site map.............................................................................................................72
12345
TABLES
Dell EMC RecoverPoint for Virtual Machines Installation and Deployment Guide 9

Tables
10 Dell EMC RecoverPoint for Virtual Machines Installation and Deployment Guide

Preface
As part of an effort to improve product lines, we periodically release revisions of software andhardware. Therefore, some functions described in this document might not be supported by allversions of the software or hardware currently in use. The product release notes provide the mostup-to-date information on product features.
Contact your technical support professional if a product does not function properly or does notfunction as described in this document.
Note: This document was accurate at publication time. Go to Online Support (https://support.emc.com) to ensure that you are using the latest version of this document.
Purpose
This document describes how to install and configure a Recoverpoint for Virtual Machines system.
Audience
This document is intended for Virtualization Administrators who manage, maintain and scale theirvirtual environments, and Application Administrators who monitor application performance.
Related documentation
The following publications provide additional information:
l RecoverPoint for Virtual Machines Release Notes
l RecoverPoint for Virtual Machines Quick Start Installation Poster
l RecoverPoint for Virtual Machines Basic Configuration Installation Guide
l RecoverPoint for Virtual Machines Installation and Deployment Guide
l RecoverPoint for Virtual Machines Product Guide
l RecoverPoint for Virtual Machines Administrator's Guide
l RecoverPoint for Virtual Machines CLI Reference Guide
l RecoverPoint for Virtual Machines Deployment REST API Programming Guide
l RecoverPoint for Virtual Machines REST API Programmer's Guide
l RecoverPoint for Virtual Machines Security Configuration Guide
l RecoverPoint for Virtual Machines Scale and Performance Guide
l RecoverPoint for Virtual Machines FAQ
l Recoverpoint for Virtual Machines Simple Support Matrix
In addition to the core documents, we also provide White papers and Technical Notes onapplications, arrays, and splitters.
Typographical conventions
This document uses the following style conventions:
Bold Used for names of interface elements, such as names of windows,dialog boxes, buttons, fields, tab names, key names, and menu paths(what the user specifically selects or clicks)
Italic Used for full titles of publications referenced in text
Monospace Used for:
Dell EMC RecoverPoint for Virtual Machines Installation and Deployment Guide 11

l System code
l System output, such as an error message or script
l Pathnames, filenames, prompts, and syntax
l Commands and options
Monospace italic Used for variables
Monospace bold Used for user input
[ ] Square brackets enclose optional values
| Vertical bar indicates alternate selections - the bar means “or”
{ } Braces enclose content that the user must specify, such as x or y orz
... Ellipses indicate nonessential information omitted from the example
Where to get help
Technical support, product, and licensing information can be obtained as follows:
Product information
For documentation, release notes, software updates, or information about products, go toOnline Support at https://support.emc.com.
Technical support
Go to Online Support and click Service Center. You will see several options for contactingTechnical Support. Note that to open a service request, you must have a valid supportagreement. Contact your sales representative for details about obtaining a valid supportagreement or with questions about your account.
Your comments
Your suggestions will help us continue to improve the accuracy, organization, and overall quality ofthe user publications. Send your opinions of this document to [email protected].
Preface
12 Dell EMC RecoverPoint for Virtual Machines Installation and Deployment Guide

CHAPTER 1
Introduction to RecoverPoint for VMs
RecoverPoint for VMs is a virtualized solution that provides data replication, protection, andrecovery within the VMware vSphere environment. Definition of key terms and a system diagramhelp you to understand the system operation.
l RecoverPoint for VMs system............................................................................................... 14
Dell EMC RecoverPoint for Virtual Machines Installation and Deployment Guide 13

RecoverPoint for VMs systemKey components of the RecoverPoint for VMs system are defined and illustrated.
Key system components that are involved in this installation include:
vRPA
The virtual RecoverPoint Appliance is a data appliance that manages data replication. You willcreate the vRPAs you need by using the vSphere Web Client from the vCenter Server.
vRPA cluster
A group of up to 8 vRPAs that work together to replicate and protect data. You will create thevRPA clusters and connect them to the system by using the RecoverPoint for VMs Deployerwizards.
RecoverPoint for VMs plug-in
The vSphere Web Client user interface for managing VM replication. Automatically installedafter you create the vRPA cluster.
RecoverPoint for VMs splitter
Proprietary software installed on every ESXi host in an ESXi cluster involved in RecoverPointreplication or running virtual RPAs. Splits every write to the VMDK and sends a copy of thewrite to the vRPA and then to the designated storage volumes. Automatically installed afteryou register the ESXi cluster.
RecoverPoint for VMs system
One or more connected vRPA clusters.
Figure 1 on page 15 provides a reference diagram that shows the vRPA and vRPA clusters withinthe RecoverPoint for VMs system. The diagram shows how these components interconnect withinthe VMware vSphere environment.
Introduction to RecoverPoint for VMs
14 Dell EMC RecoverPoint for Virtual Machines Installation and Deployment Guide

Figure 1 RecoverPoint for VMs system
vCenter Server
vRPA
ESXi
vCenter Server
vRPA
ESXiData
Data
LAN
LAN
LegendRecoverPoint for VMs Splitter
RecoverPoint for VMs Plug-in for vCenter Server
WAN WAN
Site A Site B
vRPA vRPA vRPA Cluster
vRPA Cluster
Introduction to RecoverPoint for VMs
Dell EMC RecoverPoint for Virtual Machines Installation and Deployment Guide 15

Introduction to RecoverPoint for VMs
16 Dell EMC RecoverPoint for Virtual Machines Installation and Deployment Guide

CHAPTER 2
Preparing to install RecoverPoint for VMs
Guidelines help you choose the number of vRPAs and vRPA clusters, vRPA performance profile,and network adapter topology. Preparing the VMware network and determining storage capacitysets the stage for a successful installation.
l RecoverPoint for VMs networking example........................................................................... 18l Planning your system............................................................................................................. 19l Preparing the VMware environment...................................................................................... 22l Understanding the installation flow....................................................................................... 24
Dell EMC RecoverPoint for Virtual Machines Installation and Deployment Guide 17

RecoverPoint for VMs networking exampleA reference diagram is a valuable tool for planning your RecoverPoint for VMs system. Thediagram shows an example of the network that interconnects key system components.
For clarity, Figure 2 on page 18 shows the components and interconnections of only one site in asmall system. The IP addresses are for illustration purposes only.
The remaining sections of this chapter will help you to plan a system that meets your specificrequirements.
Figure 2 Networking example
Preparing to install RecoverPoint for VMs
18 Dell EMC RecoverPoint for Virtual Machines Installation and Deployment Guide

Planning your system
System limitationsUnderstanding system limitations facilitates the installation of the RecoverPoint for VMs system.
Successful operation of RecoverPoint for VMs depends on a persistent vSphere deployment.
For a comprehensive and up-to-date list of system limitations, see the RecoverPoint for VirtualMachines Release Notes.
Allocating IP addressesKnowing how many IP addresses you need for the RecoverPoint for VMs system helps you toallocate the IP addresses before the installation is scheduled.
The RecoverPoint for VMs system requires these IP addresses:
l Cluster management IP address for each vRPA cluster
l An IP address for each vRPA network adapter (see Choosing a network adapter topology onpage 21)
l An IP address for each VMkernel port
To allocate the necessary IP addresses for the RecoverPoint for VMs system, consult with thenetwork administrator.
Document these addresses in an installation data form or spreadsheet before you begin theinstallation.
Documenting the installation settingsCreating an inventory of the RecoverPoint for VMs system ensures that you have all the requiredsettings before the installation begins.
As you perform the required planning, create an installation data form or spreadsheet to record thevalues that you type during the installation. See Installation data forms on page 70 for examples.
Adhere to a consistent naming and numbering convention for the components of the RecoverPointfor VMs system. For example:
l For vRPAs: <vRPA_name>_1, <vRPA_name>_2, ... <vRPA_name>_8l For vRPA clusters: <vRPA_cluster_site_name_1>, <vRPA_cluster_site_name_2> (for
example: London_1 or New York_2)
Choosing a vRPA topologyThe first step in planning the RecoverPoint for VMs system is to determine how many vRPAs youneed in each vRPA cluster and how many vRPA clusters you need in the system.
How many vRPAs?Determining the number of vRPAs in the system is based on existing storage capacity, VMwareinfrastructure, and replication requirements such as high availability or product evaluation.
For typical installations, two vRPAs per vRPA cluster is sufficient. Two vRPAs per vRPA clusterprovide the high availability that most production environments require.
For production environments that do not require high availability or for product evaluation in non-production environments, a single vRPA per cluster is also possible.
Preparing to install RecoverPoint for VMs
Dell EMC RecoverPoint for Virtual Machines Installation and Deployment Guide 19

To scale up and support higher throughput, you may non-disruptively add vRPAs (up to 8) to eachvRPA cluster.
All vRPA clusters in a system must have the same number of vRPAs.
The actual number of vRPAs that you need for each vRPA cluster depends on the capabilities ofyour storage, network, ESXi hosts, and the scale and performance requirements of your system.
For specific details and examples, refer to the RecoverPoint for Virtual Machines Scale andPerformance Guide.
How many vRPA clusters?The number of vRPA clusters you need is based on whether you require local or remote replication,or both.
For most installations, you will install two vRPA clusters in your RecoverPoint for VMs system.
For local replication, you need only one vRPA cluster. To support remote replication, two vRPAclusters are required. The maximum number of vRPA clusters in a system is five.
A vRPA cluster is confined to a single ESXi cluster. All vRPAs in a vRPA cluster must be in thesame ESXi cluster.
A vRPA cluster protects VMs on the same or a different ESXi cluster. This capability requiresconnections between the vRPA cluster and the ESXi hosts (see Preparing the network on page23).
For specific details and examples, refer to the RecoverPoint for Virtual Machines Scale andPerformance Guide.
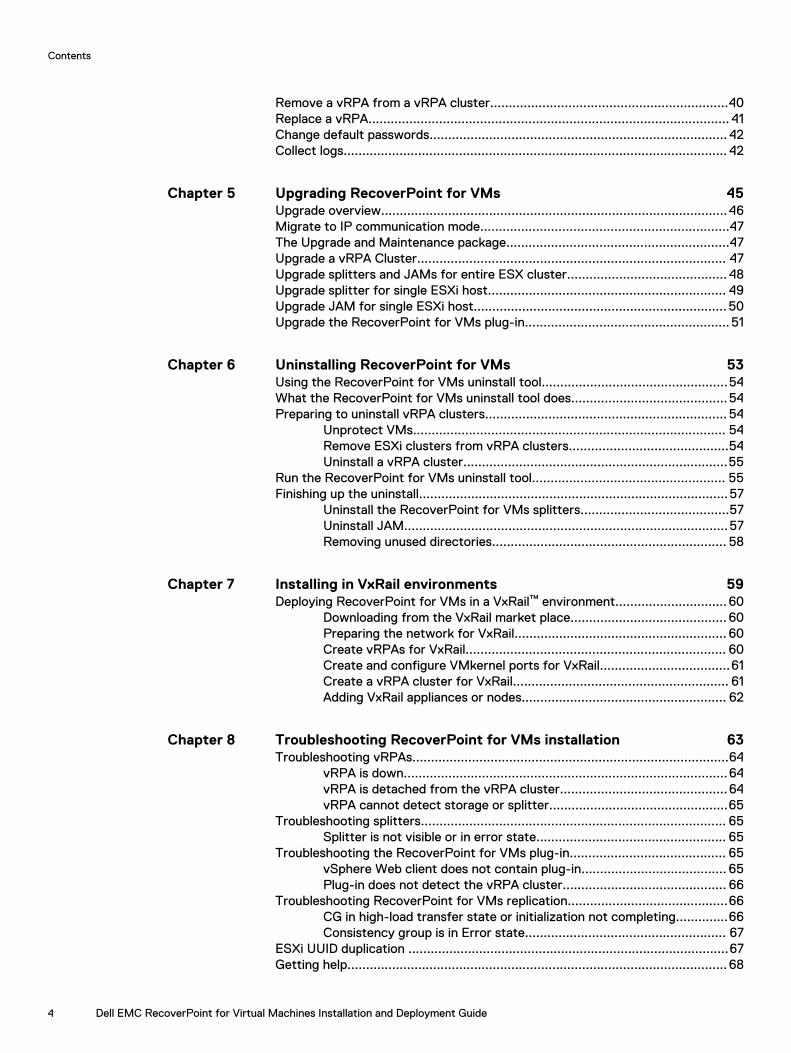
Choosing a vRPA performance profileThe vRPA performance profile defines the number of virtual CPUs, RAM, and VMDK capacityallocated to each vRPA. You choose a performance profile depending on the number of protectedVMs and expected throughput.
For most installations, 2 CPUs and 4 or 8 GB RAM is sufficient.
The actual vRPA performance profile that you need depends on these factors:
l IOPS and throughput of protected VMs
l The number of VMs protected by the vRPA cluster
You can change the resource allocation later by using the vSphere vCenter Web Client.
Decide which of these vRPA performance profiles you need:
Bronze, low performance, < 256 VMs
(Supported only in releases earlier than 5.2.0.2.)
2 virtual CPUs
4 GB RAM
35 GB VMDK capacity
Bronze +, low performance, 256+ VMs
2 virtual CPUs
8 GB RAM
35 GB VMDK capacity
Silver, medium performance, 256+ VMs
4 virtual CPUs
Preparing to install RecoverPoint for VMs
20 Dell EMC RecoverPoint for Virtual Machines Installation and Deployment Guide
8 GB RAM
35 GB VMDK capacity
Gold, high performance, 256+ VMs
8 virtual CPUs
8 GB RAM
35 GB VMDK capacity
This selection is made when you create vRPAs from the OVF wizard in the vSphere Web Client.
NOTICE By default, all RAM is reserved and vCPU reservation is set to 3400MHz.
If required, you can add memory and CPU resources after initial OVA deployment. For each vRPA,power off the vRPA, select Edit Settings for the vRPA VM, and add the needed resources.
For details and examples, refer to the RecoverPoint for Virtual Machines Scale and PerformanceGuide.
I/O throttlingI/O throttling is used to slow down storage reads that are part of the initialization (full-sweep)process.
I/O throttling mitigates the negative impact of initialization on production performance. As aresult, however, the initialization process may take longer than expected.
The initial default I/O throttling behavior varies according to the RecoverPoint for VMs productrelease. The default behavior is valid for both new installs and upgrades to the release.
RecoverPoint for VMs release Initial default I/O throttling behavior
5.2.0.1 and earlier Not enabled
5.2.0.2 and 5.2.0.3 Enabled at "low" level (200 MBps)
5.2.0.4 and later Enabled at custom level (400 MBps)
You can use the config_io_throttling Sysmgmt CLI command to set the I/O throttlingsetting.
For more information on I/O throttling, see the RecoverPoint for Virtual Machines Scale andPerformance Guide and the RecoverPoint for Virtual Machines CLI Reference Guide.
Choosing a network adapter topologyRecoverPoint for VMs supports LAN, WAN, and data interfaces distributed across multiplenetwork adapters or combined into one. The choice depends on the requirements for highavailability and performance.
Combining multiple interfaces on one network adapter is recommended for small environments.The advantage is a smaller network footprint and ease of installation and management.
Where high availability and performance are desired, you should separate the LAN and WANinterfaces from the data interfaces (recommended for most installations). For even betterperformance, place each network on a separate virtual switch.
Decide which of these network adapter topologies you need:
One network adapter
WAN + LAN + Data combined
Preparing to install RecoverPoint for VMs
Dell EMC RecoverPoint for Virtual Machines Installation and Deployment Guide 21

Fewer IP addresses to create and manage
Not for high availability solutions
Two network adapters (the default and recommended configuration)
WAN + LAN combined, Data separated
Better performance, high availability
Two network adapters
LAN + Data combined, WAN separated
Better performance, high availability
DHCP for LAN is not supported
Three network adapters
WAN, LAN, and Data separated
Better performance, high availability
DHCP for LAN is not supported
Four network adapters
WAN and LAN separated, Data separated on two dedicated network adapters
Compatible with previous releases
Best performance and high availability. Use different subnet masks for the two Data IPaddresses.
DHCP for LAN is not supported
NOTICE Beginning with RecoverPoint for VMs 5.2.1, IPv6 is supported on vRPA LAN and WANinterfaces, but not on vRPA Data interfaces. In product versions earlier than 5.2.1, IPv6 is notsupported.
This selection is made when you run the Install a vRPA cluster wizard in the RecoverPoint for VMsDeployer.
For high-availability deployments in which clients have redundant physical switches, route eachdata card to a different virtual switch with a separate network adapter.
For each network adapter, you have the option to assign a dynamic or static IP addresses.
When using Dynamic Host Configuration Protocol (DHCP):
l Separating WAN and LAN interfaces on different network adapters is supported only whenusing static IP addresses for the LAN interface
l Redundant, highly available DHCP servers in the network ensure that when a vRPA restarts, itacquires an IP address
Preparing the VMware environment
Supported vSphere versionsFor the most up-to-date information on supported VMware vCenter and vSphere versions, refer tothe Simple Support Matrix available online at https://support.emc.com.
Preparing to install RecoverPoint for VMs
22 Dell EMC RecoverPoint for Virtual Machines Installation and Deployment Guide

Preparing the networkThe RecoverPoint for VMs splitter communicates with the vRPAs through a VMKernel port.Setting up separate VMkernel ports is the best practice for isolating splitter traffic from othernetwork traffic. You isolate the traffic by placing the vRPA data interface and a dedicatedVMkernel port on a private (separate) subnet. Avoid using the same subnet that is used also forhigh availability (vMotion) and hosts (applications).
Depending on your existing network, you may not need to configure any additional VMkernel ports,or if so, you can do so later from the RecoverPoint for VMs plug-in UI, even after you haveprotected VMs and are ready to begin replication. RecoverPoint for VMs assists in automaticallycreating VMkernel ports for all the ESXi hosts in the ESXi cluster. The procedure is described inthe RecoverPoint for Virtual Machines Administrator's Guide.
Alternatively, you can configure VMkernel ports manually by following the procedure in ConfigureVMkernel ports on page 36.
The number of VMkernel ports you need is based on the network adapter topology you previouslyselected. If you decided to use four network adapters for the topology, create two VMkernel ports.Otherwise, one VMkernel port is required.
Establishing vCenter-to-vRPA communicationDuring installation, the vCenter server communicates to the vRPAs over port 443 to acquire theRecoverPoint for VMs plug-in. The ESXi clusters communicate over the network with the vRPAtargets.
Procedure
l Ensure that you open port 443 between the vCenter and the vRPAs.
l Ensure that ESXi clusters can communicate with their vRPA targets. Configure the ESXifirewall profile to allow communication through the network.
l See the RecoverPoint for Virtual Machines Security Configuration Guide for more information.
Preparing the storageDetermining the amount and types of storage you need requires careful planning, guidelines, andsizing tools.
RecoverPoint for VMs replicates VMs on any type of storage that VMware supports includingVMFS, NFS, vSAN, and VVols.
Ensure that all ESXi hosts in the cluster where the vRPAs reside share the datastore for therepository VMDK.
RecoverPoint for VMs requires additional storage for journal VMDKs to store point-in-time history.This storage is needed at local and remote sites. The amount of journal storage you need dependson site-specific installation and replication requirements and requires careful planning. A generalguideline is to begin with a number that is 15–25% of the total protected VM capacity. If required,you may add additional storage later. To size the system according to estimated workloads, usethe RecoverPoint Sizer tool. See https://help.psapps.emc.com/display/HELP/RecoverPoint+Sizer.
The total storage capacity that is required includes:
l Storage for production VMs at the production site
l Storage for replica VMs at the replica site
l Storage for journal VMDKs
l 35 GB for each vRPA in the RecoverPoint for VMs system
Preparing to install RecoverPoint for VMs
Dell EMC RecoverPoint for Virtual Machines Installation and Deployment Guide 23

A persistent scratch location on the ESXi host is required for storing splitter configurationinformation. The scratch location (/scratch/log) requires at least 500 MB of free storagespace on a permanently available persistent storage device.
Note: Each ESXi host should have its own dedicated datastore for the scratch directory.
For more details and examples, refer to the RecoverPoint for Virtual Machines Scale andPerformance Guide.
For additional guidelines and sizing tools, contact Customer Support.
Note: Shared virtual disks (VMDK/RDM) are not supported.
Understanding the installation flowThe complete work flow includes installation and protection. Understanding the stages of the workflow helps you to successfully install the RecoverPoint for VMs system and protect VMs.
Figure 3 on page 24 shows the major stages of the installation flow. Table 1 on page 24 providesdetails of the required procedures for each stage of the installation flow. Table 2 on page 25 liststhe tasks that are performed in the RecoverPoint for VMs plug-in to protect VMs.
Figure 3 Stages of the installation flow
Download installation
packageDeploy vRPAs
Install and connect vRPA
clusters
Registration and licensing Protect VMs
Pre-deployment RecoverPoint for VMs Deployer
Complete installation in the RecoverPoint for VMs plug-in
Table 1 Procedures in the installation flow
Stage of installation flow Sequence of procedures inthe installation flow
Interface
Download installation package Download the installationpackage on page 28
Online support site
Deploy vRPAs Deploy vRPAs on page 28 vSphere Web Client
Install and connect vRPAclusters
Install vRPA clusters on page29
RecoverPoint for VMsDeployer
Preparing to install RecoverPoint for VMs
24 Dell EMC RecoverPoint for Virtual Machines Installation and Deployment Guide

Table 1 Procedures in the installation flow (continued)
Stage of installation flow Sequence of procedures inthe installation flow
Interface
Connect vRPA clusters onpage 31
Table 2 Procedures in the protection flow
RecoverPoint for VMs plug-in step
Sequence of procedures Interface
Registration and licensing Register and license thesystem on page 32
vSphere Web Client >RecoverPoint for VMs plug-in
Protect VMs Protect VMs on page 33 vSphere Web Client >RecoverPoint for VMs plug-in
Preparing to install RecoverPoint for VMs
Dell EMC RecoverPoint for Virtual Machines Installation and Deployment Guide 25

Preparing to install RecoverPoint for VMs
26 Dell EMC RecoverPoint for Virtual Machines Installation and Deployment Guide

CHAPTER 3
Installing the RecoverPoint for VMs system
Installing the RecoverPoint for VMs system involves deploying the vRPAs, installing the vRPAclusters, and connecting the vRPA clusters together. You register and license the system, andthen begin protecting VMs.
l Download the installation package.........................................................................................28l Deploy vRPAs........................................................................................................................28l Install vRPA clusters..............................................................................................................29l Connect vRPA clusters.......................................................................................................... 31l Register and license the system............................................................................................ 32l Protect VMs..........................................................................................................................33
Dell EMC RecoverPoint for Virtual Machines Installation and Deployment Guide 27

Download the installation packageDownload the installation software kit and uncompress the .zip file.
About this task
Note: To complete a registration form requesting a download for evaluation, Try and Buycustomers should go to http://www.emc.com/products-solutions/trial-software-download/recoverpointforvms.htm.
Procedure
1. Browse to https://support.emc.com/downloads.
2. Perform a search in the Type a Product Name text box for RecoverPoint for VirtualMachines.
3. Locate and download RecoverPoint for Virtual Machines <version> InstallationKit.
Example of downloaded file:RecoverPoint_for_Virtual_Machines_<version>_Installation_Kit_<md5_checksum>.zip
4. Uncompress the .zip file.
The .zip file contains the OVA file that is needed for the installation.
5. (Recommended) Obtain documentation for RecoverPoint for VMs.
6. Continue to the next section, "Deploy vRPAs."
Deploy vRPAsDeploy a standard OVA to create vRPAs for RecoverPoint for VMs.
Before you begin
Ensure that you have completed:
l Preparations for installation.
l Installation data form or spreadsheet to facilitate entering requested information(recommended). See Installation data forms on page 70.
Procedure
1. In the vSphere Web Client, right-click an ESXi host and select Deploy OVF Template....
2. In the Select name and folder screen, type a name for this vRPA and select a folder or datacenter.
If you type the name of an existing vRPA, you are not permitted to continue.
3. In the Select resource screen, specify the vRPA OVF package location.
4. In the Review details screen, review the general properties of the OVF template. To accept,click Next.
5. In the Accept License Agreements screen, if you accept the terms of the End-UserLicense Agreement, click Accept and Next.
6. In the Select configuration screen, select the desired vRPA performance profile.
7. If prompted to select a resource, in the Select a resource screen, select a cluster, host, orresource pool.
Installing the RecoverPoint for VMs system
28 Dell EMC RecoverPoint for Virtual Machines Installation and Deployment Guide

8. In the Select storage screen, select a disk format, storage policy, and high-performancedatastore (best practice) to host the vRPA virtual machine files.
All ESXi hosts in the cluster where the vRPAs reside must share the datastore where therepository VMDK resides.
Do not deploy the vRPA on a local datastore.
9. In the Setup networks screen, select a destination network for the RecoverPointManagement Network, and select an IP protocol.
10. In the Customize template screen, type these vRPA LAN settings: IP address, subnetmask, and gateway.
Follow instructions on the screen for using DHCP or static IP addresses depending on thenetwork adapter topology.
11. The Ready to Complete screen summarizes all the selections. Select Power on afterdeployment. To create the vRPA, click Finish.
The Deploying vRPA screen appears, showing the progress.
12. To create additional vRPAs, repeat this procedure.
13. When you finish creating vRPAs, continue to the next section, "Install vRPA clusters."
Results
When a vRPA is created, the vRPA Summary tab shows the vRPA package contents as specified.The selected IP policy is implemented automatically when the vRPA is powered on.
After you finish
To enable redundancy in case an ESXi host or datastore fails, ensure that vRPAs do not share thesame ESXi host or datastore.
Install vRPA clustersFollow the Install a vRPA cluster wizard to create one or more vRPA clusters for RecoverPointfor VMs.
About this task
When you are prompted to type data, consult the installation data form or spreadsheet that youcreated when planning the system (recommended). See Installation data forms on page 70.
Procedure
1. In a web browser, type https://<LAN-ip-address> where <LAN-ip-address> is the LAN IPaddress of vRPA 1 or vRPA 2 in the cluster you are installing. In the home page, clickRecoverPoint for VMs Deployer.
If you are using DHCP, obtain the LAN IP address from the vSphere Web Client by selectingthe vRPA and clicking the Summary tab.
2. If prompted, type the login credentials for the admin user and click Sign in.
The RecoverPoint for VMs Deployer home page appears.
3. Select the Install a vRPA cluster wizard.
4. On the Version Requirements page, the version requirements file is automaticallydownloaded and validated to ensure that the system meets the requirements. If you havea .json configuration file that you want to import, click the Settings icon and then clickImport.
Installing the RecoverPoint for VMs system
Dell EMC RecoverPoint for Virtual Machines Installation and Deployment Guide 29

If version requirements verification is successful, click Next to continue. If issues are found,analyze and fix blocking issues before continuing.
If the version requirements file fails to download, you are prompted to select one of theseoptions:
l Retry downloading the up-to-date requirements from EMC Online Support
l Provide version requirements file manually
l Do not check version requirements
Note: To obtain the version requirements file for offline installation, browse to https://rplicense.emc.com/download. This page provides an option to download or email the a-cca.xml file. If this option is not available, open a Service Request with CustomerSupport Services (severity level 3). In the request, ask for the latest versionrequirements file for the RecoverPoint for VMs Deployer. The file is provided within one(1) business day and must be used within 30 days.
5. On the Installation Prerequisites page, type the requested information for the vCenter onwhich the current vRPA is running, and then click Connect.
If the SSL Certificate window appears, verify the vCenter's SSL certificate and clickConfirm.
6. Review the Pre-installation Validation Results area. If validation errors are listed, fix thembefore proceeding.
If an error can be automatically fixed, the Fix button appears in the Auto-Fix column.
7. On the Environment Settings page, define the required settings.
l Type a name for the vRPA cluster.
l In RecoverPoint for VMs 5.2.0.3 or earlier, for better security, select the Authenticatedand encrypted communication between vRPAs checkbox (recommended). For betterperformance, clear this checkbox.In RecoverPoint for VMs 5.2.0.4 or later, to change this setting, use the procedure,"Changing the vRPA communication security level", in the RecoverPoint for VMs SecurityConfiguration Guide.
l To align with security best practices, replace the default admin user password with anew unique password.
NOTICE The admin user (with the administrator role) is authorized with all accesspermissions for managing your RecoverPoint for VMs system. The password for theadmin user serves also as the password for the root user across all vRPAs in thesystem.
l Type IP addresses for DNS and NTP servers.NOTICE If you have a cloud copy, all vRPAs must be able to resolve amazonaws.comaddresses, so all vRPA clusters will require an appropriately configured DNS server.See the RecoverPoint for VMs Cloud Solutions Guide for more information.
8. On the vRPA Settings page:
a. Select the vRPAs for the vRPA cluster and click the Apply Selection button.
b. Select a repository volume from the list. All ESXi hosts in the cluster where the vRPAsreside must share this volume.
9. On the Network Settings page, provide the requested settings for the vRPA cluster and itsvRPAs.
Installing the RecoverPoint for VMs system
30 Dell EMC RecoverPoint for Virtual Machines Installation and Deployment Guide

l In the Network Adapters Configuration area, keep the default setting or click Edit tochoose a different network adapter topology.
l In the Network Mapping area, for each network adapter, select a value and whether touse DHCP. Type a Cluster Management IP address.
l In the vRPA Settings area, type the requested IP addresses. If the networkconfiguration requires gateways to communicate with remote vRPA clusters, click Addto insert each gateway. For each gateway that you add at the current cluster, add agateway at the remote cluster.
l In the Advanced Settings area, change the MTU values only if required. MTU valuesmust be consistent across the communication interface from source to target. See KBarticle 484259 for more information.
10. On the Deployment progress page, on reaching 100%, click Finish to return to the homepage. To export a configuration file of the vRPA cluster settings, click the Settings icon(upper right), and then click Export. This file provides a record of the vRPA clusterconfiguration for the major version you have installed. You use it to restore the vRPA clustersettings after an installation failure (requiring the installation to be repeated).
If installation fails:
l To identify the cause of failure, review the displayed error messages.
l To return to the step in the wizard where you can fix the problem, click Back. Fix theproblem and retry the installation.
l Alternatively, you can retry the operation that failed by clicking Retry the operation.
l If installation continues to fail, contact Customer Support.
11. To enable multi-site replication, create additional vRPA clusters by repeating this procedurefor each site.
12. When all vRPA clusters are created, continue to the next section, "Connect the vRPAclusters."
Results
Installation of the RecoverPoint for VMs plug-in for vSphere vCenter is initiated.
The plug-in installation usually occurs immediately, but it might take some time for the vCenter toidentify the plug-in. If you experience issues with the RecoverPoint for VMs plug-in, log out andlog in again to the vSphere Web Client as described in "Troubleshooting the RecoverPoint for VMsplug-in."
Splitters and Journal Access Modules (JAMs) are pushed to all ESXi hosts in the ESXi clusterwhere the vRPAs are installed.
Connect vRPA clustersTo enable replication between any two vRPA clusters, use the Connect vRPA clusters wizard toestablish a connection between them.
Before you begin
In this procedure, the "current" cluster is defined as the vRPA cluster to which the Connect vRPAclusters wizard is currently pointed. The "remote" cluster is the vRPA cluster at a remote site.This wizard helps you to connect a remote vRPA cluster to the current vRPA cluster.
The remote vRPA cluster must not:
l Be in maintenance mode.
Installing the RecoverPoint for VMs system
Dell EMC RecoverPoint for Virtual Machines Installation and Deployment Guide 31

l Be an existing, configured vRPA cluster.
l Have protected VMs, consistency groups, or group sets.
l Have user or journal volumes.
l Have a license other than a vCenter license.
l Have been previously connected to a vRPA cluster
Note: A remote vRPA cluster that meets these requirements is called a "clean" cluster.
Ensure that you have a completed installation data form or spreadsheet (recommended).
Do not exceed the maximum number of five vRPA clusters per system.
If you require a gateway for communication between vRPA clusters, add a gateway at each vRPAcluster before connecting between the clusters.
Procedure
1. In a web browser, type https://<cluster_management-ip-address>/WDM for the vRPAcluster that you want to connect.
2. In the RecoverPoint for VMs Deployer home page of the current cluster, select the ConnectvRPA clusters wizard.
3. On the Environment Settings page, type the requested information for the remote cluster.It is important to enter the WAN IP of one of the remote vRPAs.
4. In the Current Cluster Settings area, review the list of gateways that are configured forthis vRPA cluster. If required, add one or more gateways on the current vRPA cluster.Remember that for each additional gateway at the current cluster, you must add a gatewayat the remote cluster.
5. On the Add Cluster Progress page, the remote cluster is connected to your RecoverPointfor VMs system, and IP communication is enabled between the remote cluster and thecurrent cluster.
Note: This does not enable communication between the remote cluster and any otherclusters in your system. To enable communication between the remote cluster andadditional clusters, follow the procedure in Enable communication between vRPAclusters on page 37.
6. Continue to the next section, "Register and license the system".
Register and license the systemUse the RecoverPoint for VMs plug-in to register and license your system. Registration andlicensing enables support and provides important product updates to keep your system runningoptimally.
Procedure
1. Ensure that you activate your entitlements.
This procedure is in the "Activate your entitlements and create your license files" section ofthe RecoverPoint for Virtual Machines Administrator's Guide or the RecoverPoint for VirtualMachines Cloud Solution Guide.
2. Use the Getting Started Wizard to add licenses and register your RecoverPoint for VMssystem.
This procedure is in the "License and register RecoverPoint for VMs" section of theRecoverPoint for Virtual Machines Administrator's Guide or RecoverPoint for Virtual MachinesCloud Solution Guide.
Installing the RecoverPoint for VMs system
32 Dell EMC RecoverPoint for Virtual Machines Installation and Deployment Guide

3. Continue to the next section, "Protect VMs".
Protect VMsThe RecoverPoint for VMs system is ready for operation. Use the RecoverPoint for VMs plug-in tobegin protecting VMs.
Procedure
1. Protect the VMs by right-clicking each VM and selecting the protection option. Detailedinstructions are in the RecoverPoint for Virtual Machines Administrator's Guide.
2. After protection is enabled, monitor the system as described in the RecoverPoint for VirtualMachines Administrator's Guide.
Installing the RecoverPoint for VMs system
Dell EMC RecoverPoint for Virtual Machines Installation and Deployment Guide 33

Installing the RecoverPoint for VMs system
34 Dell EMC RecoverPoint for Virtual Machines Installation and Deployment Guide

CHAPTER 4
Maintaining RecoverPoint for VMs
Maintaining the RecoverPoint for VMs system involves tasks such as collecting logs, modifyingvRPA cluster network settings and topology, and adding, removing, or replacing vRPAs.
l Register ESXi clusters...........................................................................................................36l Configure VMkernel ports..................................................................................................... 36l Enable communication between vRPA clusters..................................................................... 37l Modify vRPA cluster network settings.................................................................................. 37l Change the RPA communication security level......................................................................37l Modify the network topology................................................................................................ 38l Installing the splitter with Boxmgmt CLI................................................................................38l Install the splitter with the RecoverPoint for VMs VIB installer............................................. 38l Install JAM............................................................................................................................ 39l Add vRPAs to a vRPA cluster................................................................................................40l Remove a vRPA from a vRPA cluster.................................................................................... 40l Replace a vRPA......................................................................................................................41l Change default passwords.................................................................................................... 42l Collect logs............................................................................................................................42
Dell EMC RecoverPoint for Virtual Machines Installation and Deployment Guide 35

Register ESXi clustersBy default, ESXi clusters are registered automatically as part of the Protect VM procedure.
About this task
Alternatively, you can register ESXi clusters manually, using the RecoverPoint for VMs plug-in tothe vSphere Web Client.
Procedure
1. Access the vSphere Web Client at: https://<vCenter-ip-address>:9443/vsphere-client/. In the vSphere Web Client home page, click RecoverPoint for VMsManagement > Administration > vRPA Clusters.
2. Select the ESXi Clusters tab.
3. Click Add to register an ESXi cluster. Verify that the connectivity status is OK. If there areconnectivity issues with the cluster, click Troubleshoot.
Configure VMkernel portsYou can configure the VMKernel ports from the RecoverPoint for VMs plug-in UI, and they will beautomatically created for all the ESXi hosts in the ESXi cluster. Alternatively, you can use thisprocedure to manually configure VMkernel ports.
Before you begin
An ESXi must be registered (see Register ESXi clusters on page 36) before you can configureVMkernel adapters on it.
Procedure
1. For each ESXi host, click Manage > Networking > VMkernel adapters.
2. Add the VMkernel adapters.
l Assign IP addresses that are on a routable subnet or on the same subnet as the vRPAdata interfaces.
It is recommended also that the VMkernel and vRPA data ports be on the same L2network.
l For a standard vSwitch, create a VMkernel port with the network label: RP-VM-Kernel-Port-Group
l For a distributed vSwitch:
n Create a VMkernel port on the relevant port group.
n On the Ports tab of the Distributed Ports Group page, label each VMkernel port thatis to be used for splitter-to-vRPA communication as RP-VM-Kernel-Port-Key.
The vRPA data IP addresses are assigned when deploying the vRPA cluster.
Maintaining RecoverPoint for VMs
36 Dell EMC RecoverPoint for Virtual Machines Installation and Deployment Guide

Enable communication between vRPA clustersUse this procedure to enable communication between pairs of vRPA clusters in your system.
About this task
Use the Connect vRPA clusters wizard in the RecoverPoint for VMs Deployer to add a vRPAcluster to your system, and to enable IP communication between that new cluster and one of theexisting clusters. For more information, see Connect vRPA clusters on page 31.Use the following procedure to enable communication between additional pairs of clusters.
Procedure
1. Use an SSH client to connect as admin user to a cluster management vRPA of one of thepair of vRPA clusters between which you want to enable communication.
2. From the Boxmgmt CLI Main Menu, select Cluster operations > Configure connectiontypes to other clusters in the system > Configure cluster connection types.
3. Select the vRPA cluster with which you want to enable communication.
Results
Bi-directional IP communication is enabled between the designated pair of vRPA clusters.Repeat this procedure for each pair of vRPA clusters for which you want to enable communication.
Modify vRPA cluster network settingsUse the Modify vRPA cluster network wizard to change network settings.
Before you begin
To modify the network adapter topology, refer to Modify the network topology on page 38.
Procedure
1. In a web browser, type https://<cluster_management-ip-address>/WDM for the vRPAcluster that you want to modify.
2. In the home page, click RecoverPoint for VMs Deployer.
3. If prompted, type the login credentials for the admin user and click Sign in.
4. Under More actions, select Modify vRPA cluster network.
5. Make the desired changes to the Environment Settings page. If you have a .jsonconfiguration file that you want to import, hover over the Settings icon and click Import.
6. Make the desired modifications changes to the Network Settings page.
Some settings cannot be modified.
7. To apply the changes, click Modify. To export a configuration file of the vRPA clustersettings, click the Settings icon (upper right), and then click Export. This file provides arecord of the vRPA cluster configuration.
Change the RPA communication security levelFor information about the RPA communication security level, including a procedure for changing it,see the RecoverPoint for VMs Security Configuration Guide.
Maintaining RecoverPoint for VMs
Dell EMC RecoverPoint for Virtual Machines Installation and Deployment Guide 37

Modify the network topologyUse this procedure to modify the existing network topology.
Procedure
1. Pause transfer between the production and copies of the consistency groups for the vRPAcluster that you are modifying.
2. From the vSphere Web Client, add the vNIC on all vRPA VMs. Ensure that the type isVMXNET3.
3. Use an SSH client to log in to the vRPA as the admin user.
a. Detach the vRPA from the vRPA cluster. From the Main menu, select Clusteroperations > Detach RPA from cluster.
b. From the Main menu, select Setup > Modify settings > Enter cluster details >Network Interface and IPs Configuration.
c. Select the network topology that you want to use.
d. Attach the vRPA back to the cluster. From the Main menu, select Cluster operations >Attach RPA to cluster.
4. Repeat step 3 on page 38 for each vRPA in the vRPA cluster.
5. Start transfer between the production and copies of the consistency groups for themodified vRPA cluster.
Installing the splitter with Boxmgmt CLIEnsure that all vRPAs reside on ESXi hosts with a splitter installed. Splitters are installedautomatically during system installation. You can use this procedure to install splitters manually.
Procedure
1. Use an SSH client to connect as admin user to a cluster management vRPA.
2. From the boxmgmt Main Menu, select Setup > Advanced options > Splitter actions >Upgrade Splitter.
3. Provide the vCenter Server credentials.
4. Let the system provide the vCenter certificate automatically and, if it's correct, approve thecertificate.
5. Select one or more of the ESXi cluster(s) in this vCenter on which you want to deploy thesplitters.
Install the splitter with the RecoverPoint for VMs VIB installerDuring system installation, the RecoverPoint for VMs splitter VIB is installed on ESXi hostsautomatically. Use this procedure if you need to install the splitter VIB manually.
Before you begin
You may need to enable ESXi Shell and SSH access before proceeding. Refer to VMwaredocumentation for more information.
Procedure
1. To copy the splitter VIB, use an SSH client with secure copy protocol:
Maintaining RecoverPoint for VMs
38 Dell EMC RecoverPoint for Virtual Machines Installation and Deployment Guide

scp <vib name> <username>@<ESXi host IP>:/scratchNote: Do not erase the/scratch space.
scp EMC_bootbank_emcjiraf_5.2.0.0.a.281-6.0.0.3657938.vibroot@10.10.10.10:/scratch
2. To install the splitter VIB in the ESXi host console, run the following command:
esxcli software vib install -v /<vib_full_path> --no-sig-check
If installation is successful, the following message appears:Installation Result Message: Operation finished successfully. Reboot Required: false VIBs Installed: EMC_Recoverpoint_bootbank_RP-splitter_RPS-<version number> VIBs Removed: VIBs Skipped:
3. Confirm installation of the splitter VIB in the ESXi host console by using SSH to run thefollowing command:
esxcli software vib list
The RecoverPoint for VMs splitter installation name should appear at the top of the list.
4. Repeat this procedure for every ESX on which you want to install the RecoverPoint for VMssplitter VIB.
Install JAMDuring new installations of RecoverPoint for VMs 5.2 and later (but not upgrades to 5.2), theRecoverPoint for VMs Journal Access Module (JAM) VIB is installed automatically on all ESXihosts that belong to ESXi clusters on which vRPAs are running. Use this procedure if you need toinstall the JAM VIB manually.
Before you begin
You may need to enable ESXi Shell and SSH access before proceeding. Refer to VMwaredocumentation for more information.
Procedure
1. To copy the JAM VIB, use an SSH client with secure copy protocol:
scp <vib name> <username>@<ESXi host IP>:/scratchNote: Do not erase the/scratch space.
scp EMC_bootbank_emcjiraf_5.2.0.0.a.281-6.0.0.3657938.vibroot@10.10.10.10:/scratch
2. To install the JAM VIB in the ESXi host console, run the following command:
esxcli software vib install -v /<vib_full_path> --no-sig-check
If installation is successful, the following message appears:Installation Result Message: Operation finished successfully. Reboot Required: false VIBs Installed: EMC_Recoverpoint_bootbank_emcjiraf_RPS-<version number> VIBs Removed: VIBs Skipped:
Maintaining RecoverPoint for VMs
Dell EMC RecoverPoint for Virtual Machines Installation and Deployment Guide 39

3. Confirm installation of the JAM VIB in the ESXi host console by using SSH to run thefollowing command:
esxcli software vib list
The RecoverPoint for VMs JAM installation name should appear at the top of the list.
4. Repeat this procedure for every ESX on which you want to install the RecoverPoint for VMsJAM VIB.
Add vRPAs to a vRPA clusterUse this procedure to add a vRPA to an existing vRPA cluster. A vRPA cluster can have up to 8vRPAs, and all vRPAs in a cluster must run the same RecoverPoint for VMs version.
Procedure
1. In a web browser, type https://<cluster_management-ip-address>/WDM for the vRPAcluster to which you want to add vRPAs.
2. In the home page, click RecoverPoint for VMs Deployer.
3. If prompted, type the login credentials for the admin user and click Sign in.
4. Under More actions, click Add vRPAs to vRPA cluster.
5. In the Add Prerequisites step, acknowledge that you have met the listed conditions byselecting the checkbox.
6. In the Add vRPAs step, select one or more VMs/vRPAs to add to the cluster.
l New vRPAs must have the same RecoverPoint software ISO image as the existingvRPAs in the cluster.
l A cluster can have a maximum of 8 vRPAs.
7. In the vRPA Cluster Settings and vRPA Settings sections, type required information forthe vRPAs you are adding.
8. In the Add vRPAs Progress step, on reaching 100%, click Finish to return to the HomePage.
If adding a vRPA fails:
l To identify the cause of failure, review the displayed error messages.
l To return to the step in the wizard where you can fix the problem, click Back. Fix theproblem, and then retry the installation wizard from that point.
l Alternatively, you can retry the operation that failed by clicking Retry the operation.
l If adding a vRPA continues to fail, contact Customer Support.
Remove a vRPA from a vRPA clusterUse this procedure to remove a vRPA from a vRPA cluster. You cannot remove a vRPA if thecluster has 2 or fewer vRPAs.
Procedure
1. In a web browser, type https://<cluster_management-ip-address>/WDM for the vRPAcluster from which you want to remove a vRPA.
2. In the home page, click RecoverPoint for VMs Deployer.
Maintaining RecoverPoint for VMs
40 Dell EMC RecoverPoint for Virtual Machines Installation and Deployment Guide

3. If prompted, enter the login credentials for the admin user and click Sign in.
4. Under More actions, click Remove vRPA from vRPA cluster.
l The highest numbered vRPA (the last one added) will be removed.
l The consistency groups of the removed vRPA will be non-disruptively moved to adifferent vRPA.
l The preferred vRPA setting for those consistency groups will be automatically updated.
Replace a vRPAUse this procedure and wizard to replace a vRPA with a different vRPA.
Before you begin
This wizard does not support replacing a vRPA within a vRPA cluster that has only one vRPA. Ifyou must replace a vRPA in a single-vRPA cluster, contact Customer Support.
About this task
Deploy the new, replacement vRPA with the same IP settings as the faulty vRPA you want toreplace. Ensure that the replacement vRPA is shut down. To shut down the replacement vRPA,login as admin user and select Main Menu > Shutdown / Reboot operations > Shutdown RPA.
Procedure
1. In a web browser, type https://<cluster_management-ip-address>/WDM for the vRPAcluster in which you want to replace a vRPA.
2. In the home page, click RecoverPoint for VMs Deployer.
3. If prompted, type the login credentials for the admin user and click Sign in.
4. Under More actions, click Replace vRPA.
5. In the Prerequisites step, acknowledge that you have met the listed conditions by selectingthe checkbox.
6. In the Replace vRPA step, select the vRPA that you want to replace.
7. Select the vRPA you want to add as a replacement.
8. In the Replacement Progress step, on reaching 100% click Finish to return to the homepage.
If replacing a vRPA fails:
l To identify the cause of failure, review the displayed error messages.
l To return to the step in the wizard where you can fix the problem, click Back. Fix theproblem, and then retry the installation wizard from that point.
l Alternatively, you can retry the operation that failed by clicking Retry the operation.
l If replacing a vRPA continues to fail, contact Customer Support.
Maintaining RecoverPoint for VMs
Dell EMC RecoverPoint for Virtual Machines Installation and Deployment Guide 41

Change default passwordsTo align with security best practices, change the default passwords for the predefined users ofyour RecoverPoint for VMs system.
About this task
Predefined user Default password Notes
admin admin New install or upgrade. In new install,you set a unique password duringinstallation.
boxmgmt boxmgmt New install (of 5.2 or 5.2.0.1) orupgrade.
Note: In new installations ofRecoverPoint for VMs 5.2.0.2 andlater, there is no predefinedboxmgmt user.
security-admin security-admin Upgrade only.
SE kashyaSE Upgrade only.
For new RecoverPoint for VMs 5.2 installs, you must replace the default admin password with aunique one whenever you install a vRPA cluster. The admin user password serves also as thepassword for the root user.
If, however, you have upgraded your system from RecoverPoint for VMs 5.1.1.4, you could still beusing the default admin (and root) password. If so, run this procedure to change the adminpassword,
NOTICE Keep passwords in a place where they are secure and available to you.
Procedure
1. Create an SSH connection to the vRPA management IP address, using your RecoverPointfor VMs admin username and password to log into the Boxmgmt CLI. Then select Systemmanagement CLI to open the Sysmgmt CLI.
Alternatively, if you have created a user with the sysmgmt role (RecoverPoint for VMs5.2.0.2 or later), use that user to log in directly to the Sysmgmt CLI.
2. In the Sysmgmt CLI, run the set_password command to change the password for thecurrent user, or run the set_user command to change the password of another user,provided that your user/role includes the security permission.
Collect logsDuring deployment, collecting logs for the current cluster and its vRPAs provides information thatmay be helpful in troubleshooting the installation.
Procedure
1. In a web browser, type https://<LAN-ip-address> where <LAN-ip-address> is the LAN IPaddress of the first vRPA in the cluster. In the vRPA home page, click RecoverPoint forVMs Deployer.
2. If prompted, type the login credentials for the admin user and click Sign in.
Maintaining RecoverPoint for VMs
42 Dell EMC RecoverPoint for Virtual Machines Installation and Deployment Guide

3. At the upper right of the home page, click the Settings icon, and then click Collect Logs.
4. In the Collect Cluster Logs dialog box, type start and end times for log collection.
5. If required, under the Advanced section, you may add one or more vRPAs from otherclusters to the log collection.
6. To begin the log collection, click Collect Logs.
Depending on the size of the environment, log collection may take several minutes tocomplete. A message in the Collect Cluster Logs dialog box indicates when the logcollection is complete. Collected logs are stored in the vRPA file system.
7. To download a log file, click the name of the cluster in the Location column of the CollectCluster Logs dialog box.
This action opens a browser window to the downloadable log file. To download it, clickthe .tar file.
Maintaining RecoverPoint for VMs
Dell EMC RecoverPoint for Virtual Machines Installation and Deployment Guide 43

Maintaining RecoverPoint for VMs
44 Dell EMC RecoverPoint for Virtual Machines Installation and Deployment Guide

CHAPTER 5
Upgrading RecoverPoint for VMs
Upgrading RecoverPoint for VMs involves downloading the upgrade package and sequentiallyupgrading the vRPA clusters, the splitters, and the RecoverPoint for VMs plug-in.
l Upgrade overview................................................................................................................. 46l Migrate to IP communication mode....................................................................................... 47l The Upgrade and Maintenance package................................................................................ 47l Upgrade a vRPA Cluster........................................................................................................ 47l Upgrade splitters and JAMs for entire ESX cluster................................................................48l Upgrade splitter for single ESXi host.....................................................................................49l Upgrade JAM for single ESXi host........................................................................................ 50l Upgrade the RecoverPoint for VMs plug-in........................................................................... 51
Dell EMC RecoverPoint for Virtual Machines Installation and Deployment Guide 45

Upgrade overviewUpgrade the RecoverPoint for VMs system to a later version by downloading the desired upgradepackage. Then upgrade the vRPA clusters, splitters, JAM VIBs (if VIBs exist in earlier version), andRecoverPoint for VMs plug-in.
In general, upgrading RecoverPoint for VMs consists of:
l Downloading the upgrade package
l Upgrading the vRPA clusters
l Upgrading the RecoverPoint for VMs splitters
l Upgrading the RecoverPoint for VMs JAM VIBs (only when the original installation wasRecoverPoint for VMs 5.2 or later)
l Upgrading RecoverPoint for VMs plug-in
For upgrades to RecoverPoint for VMs 5.2, the source version must always be RecoverPoint forVMs 5.1.1.4 (or later 5.1.1.x release), so you may have to first upgrade to 5.1.1.4 before you will beable to upgrade to 5.2. Furthermore, before upgrading to 5.2, communication between vRPAs andsplitters in RecoverPoint 5.1.1.4 (or later 5.1.1.x release) will need to be in IP mode (and not iSCSI);hence, you may need to run a procedure to migrate your system from iSCSI to IP mode.
For RecoverPoint for VMs 5.2, vCenters and ESXi hosts must be running version 6.0 Update 2 orhigher. If not, upgrade the vCenters and ESXi hosts before beginning the upgrade.
When upgrading RecoverPoint for VMs, all existing RecoverPoint for VMs settings are preserved.There is no journal loss and no full sweep.
To upgrade your environment (vRPAs, splitters, and plug-in) from version 5.1.1, 5.1.1.1, 5.1.1.2, or5.1.1.3 to 5.2:
1. Upgrade the vRPAs to 5.1.1.4.
2. If necessary, migrate vRPA-splitter communication to IP. See Migrate to IP communicationmode on page 47.
3. Upgrade the vRPAs to 5.2 (or later 5.2.x version).
4. Upgrade the splitters to 5.2 (or later 5.2.x version).
5. Upgrade the plug-in to 5.2 (or later 5.2.x version).
To upgrade your environment (vRPAs, splitters, and plug-in) from version 5.1.0.x and earlier to 5.2:
1. Upgrade the vRPAs to 5.1.1.4.
2. Upgrade the splitters to 5.1.1.4.
3. Migrate vRPA-splitter communication to IP. See Migrate to IP communication mode on page47.
4. Upgrade the vRPAs to 5.2 (or later 5.2.x version).
5. Upgrade the splitters to 5.2 (or later 5.2.x version).
6. Upgrade the plug-in to 5.2 (or later 5.2.x version).
To upgrade your environment (vRPAs, splitters, JAM VIBs, and plug-in) from version 5.2.x to alater 5.2.x:
1. Upgrade the vRPAs to the later 5.2.x version.
2. Upgrade the splitters to the later 5.2.x version.
3. Where JAM VIBs exist on the earlier 5.2.x version, upgrade the JAM VIBs to the later 5.2.xversion.
Upgrading RecoverPoint for VMs
46 Dell EMC RecoverPoint for Virtual Machines Installation and Deployment Guide

4. Upgrade the plug-in to the later 5.2.x version.
After completing the upgrade, observe the following:
l Force the browser to reload updated files. From the Deployer home page, type CTRL + F5.
l Shadow VMs are not required. The copy VM is used in low resources mode. After upgrading toRelease 5.1 and later, shadow VMs are automatically removed.
Migrate to IP communication modeWhen running RecoverPoint for VMs 5.1.1 or 5.1.1.x, you can migrate an existing RecoverPoint forVMs iSCSI environment to the IP communication mode. vRPA-splitter communication must be inIP mode before attempting to upgrade to RecoverPoint for VMs 5.2 (or later).
Procedure
1. In a web browser, type https://<cluster_management-ip-address>. In the vRPA homepage, click RecoverPoint for VMs Deployer.
2. If prompted, type the login credentials for the admin user and click Sign in.
3. From the RecoverPoint for VMs Deployer home page, click Changing splittercommunication mode to IP.
4. In the Migrate to IP communication mode dialog box, verify that the listed prerequisitesare satisfied. If the environment:
l Does not satisfy the listed prerequisites, click Cancel, and perform the necessaryupgrades.
l Satisfies the listed prerequisites, click OK.
Deployer tries to migrate the environment to IP communication mode.
5. If the migration is:
l Successful, click Close.
l Not successful, fix the errors that are listed, and retry the migration procedure. If stillunsuccessful, collect logs and contact Customer Support.
Results
The environment has successfully migrated to IP communication mode. RecoverPoint for VMs nolonger requires iSCSI adapters on the ESXi and you may remove them.
The Upgrade and Maintenance packageDownload the RecoverPoint for VMs Upgrade and Maintenance Kit. The Upgrade and MaintenanceKit is a zip file that consists of multiple components required for the upgrade.
Download the RecoverPoint for VMs Upgrade and Maintenance Kit from http://support.emc.com.
Upgrade a vRPA ClusterThe RecoverPoint for VMs Deployer supports non-disruptive upgrades for clusters with two ormore vRPAs and enables upgrading an ISO image without re-protecting VMs.
Before you begin
If you are upgrading a cluster that has only one vRPA, the upgrade is disruptive to replication, butthe upgrade occurs without full sweep or journal loss. Also, during the vRPA restart, the UpgradeProgress report may not update, and Deployer may become temporarily unavailable. When the
Upgrading RecoverPoint for VMs
Dell EMC RecoverPoint for Virtual Machines Installation and Deployment Guide 47

vRPA completes its restart, the user can log back in to Deployer and observe the UpgradeProgress to completion.
When you upgrade a cluster that has two or more vRPAs and is connected to a cluster with asingle vRPA, a partially disruptive upgrade occurs. When the first vRPA is upgraded, allconsistency groups move to another RPA. However, for consistency groups that are replicated inthe single vRPA, replication stops while the first vRPA is upgraded.
CAUTION Do not attempt to upgrade multiple connected clusters at the same time. Thispractice is not supported. Rather, upgrade connected vRPA clusters one cluster at a time untilall of the connected vRPA clusters are upgraded to the same release.
Procedure
1. In a web browser, type https://<cluster_management-ip-address>/WDM for the vRPAcluster that you want to upgrade.
2. In the home page, click RecoverPoint for VMs Deployer.
3. If prompted, type the login credentials for the admin user, and click Sign in.
4. Click Upgrade a vRPA cluster.
The wizard performs a system check.
5. In the Upgrade Prerequisites step, ensure that you meet the conditions that are listed onthe screen. Select the checkbox: I have fulfilled these conditions.
6. In the ISO step, choose how you want to provide the ISO image for upgrading RecoverPointfor VMs.
7. In the Change Version Requirements step, the version requirements file is automaticallydownloaded and validated to ensure that the system meets the requirements. If the versionrequirements file fails to download, select one of these options:
l Retry downloading the up-to-date requirements from Online Support
l Provide version requirements file manually
l Do not check version requirements
Issues that are found are displayed for you to analyze. It is recommended that you fixblocking issues before continuing.
8. In the System Diagnostics step, Deployer checks for tweak modifications and signedscripts on the vRPAs. If discovered, these modifications are collected and the user isprompted to send the modifications file to Customer Support for analysis.
9. In the Upgrade Progress step, the progress bar displays the replacement progress. Onreaching 100%, click Finish to return to the Deployer home page.
10. If upgrading fails, review the displayed error message to identify the cause of the failure. Tocorrect the issue and retry the upgrade, click Back.
If upgrading a vRPA continues to fail, contact Customer Support.
Upgrade splitters and JAMs for entire ESX clusterFor a system that is running RecoverPoint for VMs 5.2.2 or later, use this procedure to upgradesplitters and JAM VIBs on all of the ESXi hosts in an ESX cluster.
Before you begin
To maintain uninterrupted replication throughout the upgrade of all splitters and JAMs, ensure thatat least two ESXi hosts in the ESX cluster have an installed splitter.
Upgrading RecoverPoint for VMs
48 Dell EMC RecoverPoint for Virtual Machines Installation and Deployment Guide

The ESX cluster must contain at least two ESXi hosts that are not already in maintenance modeprior to running the upgrade procedure.
Ensure that DRS is enabled in automatic mode.
Procedure
1. Use an SSH client to log in to the vRPA as the admin user.
2. From the Main menu, select Setup > Advanced options > Splitter actions > UpgradeSplitter.
3. Enter the requested information: vCenter Server IP address and TCP port number (if otherthan the default, 443), and the vCenter credentials.
4. Let the system provide the vCenter certificate automatically and, if it's correct, approve thecertificate.
5. Select the ESX cluster on which to upgrade the RecoverPoint for VMs splitters and JAMVIBs.
The splitter and JAM VIB version currently installed on each of the ESXi hosts is listed,along with the splitter and JAM VIB version to be installed by the upgrade (that is, the VIBsfor the currently installed RecoverPoint for VMs version).
6. Type y to begin the upgrade.
Each ESXi host enters maintenance mode, in turn, as its splitter and JAM VIBs areupgraded. The table of splitter and JAM VIB versions is updated as the upgrade progresses.
Upgrade splitter for single ESXi hostUse this procedure to upgrade the RecoverPoint for VMs splitter on a single ESXi host.
Before you begin
You may need to enable ESXi Shell and SSH access before proceeding. Refer to VMwaredocumentation for more information.
About this task
To keep vRPAs working during the splitter upgrade, ensure that at least two ESXi hosts have aninstalled splitter.
Procedure
1. On the ESXi host, vMotion all VMs to another ESXi host.
2. At the ESXCLI, enter maintenance mode. From the ESXi host console, use SSH to run thefollowing command:
esxcli system maintenanceMode set -e=true
Note: For VSAN environments, this command requires an additional switch (refer to thevSphere documentation for the vSphere version that you are using).
3. Remove the old RecoverPoint vSphere Installation Bundle on the ESXi host.
esxcli software vib remove -n "RP-Splitter"
4. Install the splitter by using this method:
a. To copy the RecoverPoint VIB to the tmp directory, use an SSH client with secure copyprotocol:
scp <vib name> <username>@<ESXi host IP>:/scratch
Upgrading RecoverPoint for VMs
Dell EMC RecoverPoint for Virtual Machines Installation and Deployment Guide 49

NOTICE Do not erase the /scratch space during the upgrade.
Example:scp kdriver_RPESX-00.5.0.0.0.0.h.152.000.vib [email protected]:/scratch
b. To install the splitter, in the ESXi host console, run the following command:
esxcli software vib install -v /scratch/<vib_full_path> --no-sig-check
If installation is successful, the following message appears:Installation Result Message: Operation finished successfully. Reboot Required: false VIBs Installed: EMC_Recoverpoint_bootbank_RP-Splitter_RPS-<version number> VIBs Removed: VIBs Skipped:
c. Confirm installation of the splitter in the ESXi host console by using SSH to run thefollowing command:
esxcli software vib list
The RecoverPoint for VMs splitter installation bundle name should appear at the top ofthe list.
5. On the ESXi host, exit maintenance mode by running the following command:
esxcli system maintenanceMode set -e=false
6. vMotion the VMs back to this ESXi host.
7. Repeat this procedure for each ESXi host.
Upgrade JAM for single ESXi hostUse this procedure to upgrade the RecoverPoint for VMs JAM VIB for a single ESXi host.
Before you begin
Note: For new installations of RecoverPoint for VMs 5.2 and later, the RecoverPoint for VMsJournal Access Module (JAM) VIB is installed automatically on all ESXi hosts that belong toESXi clusters on which vRPAs are running. For an upgrade from 5.2.x to a later 5.2.x version,you must manually upgrade the JAM VIB on the ESXi hosts.
You may need to enable ESXi Shell and SSH access before proceeding. Refer to VMwaredocumentation for more information.
Ensure that the JAM VIB for the earlier 5.2.x version exists on the ESXi host on which you areupdating the JAM VIB.
Procedure
1. On the ESXi host, vMotion all VMs to another ESXi host.
2. At the ESXCLI, enter maintenance mode. From the ESXi host console, use SSH to run thecommand:
esxcli system maintenanceMode set -e=trueNote: For VSAN environments, this command requires an additional switch. Refer to thevSphere documentation for the vSphere version that you are using.
3. To remove the old JAM installation, run the command:
esxcli software vib remove –n emcjiraf
Upgrading RecoverPoint for VMs
50 Dell EMC RecoverPoint for Virtual Machines Installation and Deployment Guide

4. Install the new JAM VIB.
a. Use an SSH client with secure copy protocol to copy the RecoverPoint JAM VIB:
scp <vib name> <username>@<ESXi host IP>:/scratchNote: Do not erase the/scratch space during the upgrade.
scp EMC_bootbank_emcjiraf_5.2.0.0.a.281-6.0.0.3657938.vibroot@10.10.10.10:/scratch
b. To install the JAM VIB in the ESXi host console, run the command:
esxcli software vib install -v /scratch/<vib_full_path> --no-sig-check
If installation is successful, the following message appears:Installation Result Message: Operation finished successfully. Reboot Required: false VIBs Installed: EMC_Recoverpoint_bootbank_emcjiraf_RPS-<version number> VIBs Removed: VIBs Skipped:
c. Confirm installation of the JAM VIB in the ESXi host console by using SSH to run thecommand:
esxcli software vib list
The RecoverPoint for VMs JAM installation name should appear at the top of the list.
5. On the ESXi host, exit maintenance mode by running the command:
esxcli system maintenanceMode set -e=false6. vMotion the VMs back to this ESXi host.
7. Repeat this procedure for every ESXi host on which you want to upgrade the RecoverPointfor VMs JAM VIB
Upgrade the RecoverPoint for VMs plug-inUse the vSphere Web Client to upgrade the RecoverPoint for VMs plug-in.
Before you begin
The vRPA is backward-compatible, but the RecoverPoint for VMs plug-in is not. New vRPAs workwith older plug-ins, but a new RecoverPoint for VMs plug-in might not be able to communicatewith older vRPAs. Therefore, the RecoverPoint for VMs plug-in version must correspond with theversion of the oldest vRPA cluster.
About this task
Upgrade the RecoverPoint for VMs plug-in for each vCenter in the system.
Procedure
1. Access the vSphere Web Client at: https://<vCenter-ip-address>:9443/vsphere-client/. In the vSphere Web Client home page, click the RecoverPoint forVMs icon.
2. Click the Help... link at the top right of the RecoverPoint for VMs Management screen,and select Upgrade RecoverPoint for VMs.
3. In the Upgrade RecoverPoint for VMs window, select the upgrade version and click OK.
4. Log out all active user sessions of the vSphere Web Client, and log back in. Verify that theRecoverPoint for VMs plug-in is listed under Inventories.
Upgrading RecoverPoint for VMs
Dell EMC RecoverPoint for Virtual Machines Installation and Deployment Guide 51
5. If the RecoverPoint for VMs plug-in is not listed under Inventories, restart the vCenter WebClient service to ensure that all active user sessions are disconnected.
After upgrading the plug-in, you will not be able to access vRPA clusters that are runningearlier versions of RecoverPoint for VMs.
Upgrading RecoverPoint for VMs
52 Dell EMC RecoverPoint for Virtual Machines Installation and Deployment Guide

CHAPTER 6
Uninstalling RecoverPoint for VMs
You can uninstall a single vRPA cluster or all vRPA clusters from a vCenter. The uninstall tool scansthe vCenter, datastores, and ESXi hosts. It removes vRPAs (production and copy VMs),configuration objects, and repository and journal volumes.
l Using the RecoverPoint for VMs uninstall tool...................................................................... 54l What the RecoverPoint for VMs uninstall tool does.............................................................. 54l Preparing to uninstall vRPA clusters..................................................................................... 54l Run the RecoverPoint for VMs uninstall tool.........................................................................55l Finishing up the uninstall....................................................................................................... 57
Dell EMC RecoverPoint for Virtual Machines Installation and Deployment Guide 53

Using the RecoverPoint for VMs uninstall toolThe uninstall tool removes vRPA clusters and their configuration entities from a vCenter.
The Uninstall tool has the following options:
l uninstall - Uninstalls a single vRPA cluster from a vCenter. Use this option to:
n Replace a Try and Buy or Beta version with a supported production version
n Remove a vRPA cluster (after data migration)
n Remove unwanted elements from the vCenter environment
l full_rp_uninstall - Uninstalls all vRPA clusters from a vCenter. Use this option tocompletely remove all RecoverPoint entities and clusters from the vCenter.
What the RecoverPoint for VMs uninstall tool doesThe RecoverPoint fo VMs uninstall tool removes vRPAs, shadow VMs, configuration objects, andrepository and journal volumes.
Running the RecoverPoint for VMs Uninstall tool does the following:
1. Scans the vCenter, datastores, and ESXi hosts.
2. Displays a list of all detected vRPA clusters and marks them either active or suspectedinactive. Active clusters are clusters that have registered vCenter tokens during the last hour.
3. After you select which vRPA clusters the tool should uninstall, the tool removes the followingfrom the selected vRPA clusters: production and replica VMs that were running vRPAs,shadow VMs (if they exist), RecoverPoint configuration objects, and the repository and journalvolumes.
In addition to all the actions performed when uninstalling one vRPA cluster, uninstalling all vRPAsremoves all vRPA clusters on the selected vCenter with all related elements. It also removes fromthe vCenter RecoverPoint elements not belonging to a specific vRPA cluster, such as theRecoverPoint vCenter plug-in.
Preparing to uninstall vRPA clusters
Unprotect VMsTo stop replication for a vRPA, unprotect the associated VM.
Procedure
1. In the vSphere Web Client home page, click the RecoverPoint for VMs Managementicon > Protection tab. Click Virtual Machines.
2. Select the VM you wish to stop replicating. Click the Unprotect icon. Repeat for eachprotected VM.
Remove ESXi clusters from vRPA clustersUse the vSphere Web Client and this procedure to remove a ESXi cluster from a vRPA cluster.
Procedure
1. In the vSphere Web Client home page, click the RecoverPoint for VMs Managementicon > Administration tab.
Uninstalling RecoverPoint for VMs
54 Dell EMC RecoverPoint for Virtual Machines Installation and Deployment Guide

2. Click vRPA Clusters.
3. Select the relevant vRPA cluster.
4. Click the ESX Clusters tab.
5. Click the garbage can icon next to each ESXi cluster to remove that ESXi cluster from theselected vRPA cluster.
Uninstall a vRPA clusterThe Uninstall a vRPA cluster from this system wizard guides you in uninstalling a vRPA cluster. Usethe uninstall tool to uninstall the last vRPA cluster.
Before you begin
l You cannot uninstall a cluster from a single-cluster system.
l After you uninstall a vRPA cluster, you cannot reuse the cluster or its vRPAs.
l When you uninstall a vRPA cluster, the vRPAs are shut down and cannot be restored.
l If required, collect logs before you uninstall the cluster. Log collection for the cluster is notpossible later.
About this task
If you want to remove only one vRPA cluster from a system with two or more clusters, performthese steps from a vRPA cluster that is remaining in the system (and not from the cluster that youwant to remove).
If you want to remove all of the vRPA clusters, perform these steps from one of the clusters. Thelast remaining cluster must be removed by using the uninstall tool.
Procedure
1. In a web browser, type https://<cluster_management-ip-address>/WDM for the vRPAcluster that you want to uninstall.
2. In the home page, click RecoverPoint for VMs Deployer.
3. If prompted, type the login credentials for the admin user and click Sign in.
4. Under More actions, click Uninstall a vRPA cluster from this system.
5. Select the vRPA cluster that you want to remove. Click OK.
If cluster removal does not succeed, try again. If cluster removal fails, contact CustomerSupport.
Results
The vRPA cluster is successfully uninstalled. Continue to the next procedure.
Run the RecoverPoint for VMs uninstall toolDownload the uninstall tool, uncompress the .bat file, and run the tool in the command line.
Before you begin
Obtain the IP and TCP port number of the vCenter (or vCenters) you want to scan, the vCenterusername (and domain name, if one exists), and the vCenter password.
System requirements for the computer running the Uninstall tool:
l Microsoft Windows
l Java 7 or higher
Uninstalling RecoverPoint for VMs
Dell EMC RecoverPoint for Virtual Machines Installation and Deployment Guide 55

Note: If a time difference of more than 30 minutes exists between the vRPA and the computerrunning the Uninstall tool, the tool may recognize the vRPA cluster as inactive when it is not.(The time difference is not influenced by different time zones.)
Procedure
1. Navigate to the RecoverPoint for Virtual Machines download page under the Tools &Utilities section and click the RecoverPoint for Virtual Machines Uninstaller Tool link. Thelink is also referenced from the Customer Installation kit.
NOTICE Use only the version of the uninstall tool that is compatible with theRecoverPoint for VMs release that is installed on the vRPA cluster that you want touninstall. For the latest support information, see the Simple Support Matrix for yourversion of RecoverPoint for VMs.
2. From a computer with IP connectivity to the vCenters managing the RecoverPoint VMs youwant to uninstall, unzip the zip file.
3. Double click on uninstaller.bat.
The RecoverPoint for VMs Uninstall Tool opens in a command line.
4. Perform one of the following actions:
Option Description
If uninstalling a single vRPA cluster from a vCenter …type uninstall.
If uninstalling all vRPA clusters from a vCenter …type full_rp_uninstall.
Type --h after a command to view an explanation of that command. Type help to view ashort explanation of all available commands.
5. Enter the IP address of the vCenter.
6. Enter the vCenter's TCP port number or press Enter for the default port (443).
7. Enter the vCenter's username.
8. Enter the vCenter's password.
The tool tests connectivity and logs in to the vCenter.
9. Type y if you want to add another vCenter. Type n if you do not.
If you have remote vRPA clusters connected to a different vCenter, type that vCenter's IPaddress if you want to uninstall that cluster as well.
The tool displays a list of detected vRPA clusters.
10. Perform one of the following actions:
Option Description
If uninstalling a single vRPAcluster from a vCenter
Type the index number of the vRPA cluster that youwant to uninstall. To remove more than one cluster,type the index numbers separated by commas (forexample: 1,4,9).
If uninstalling all vRPA clustersfrom a vCenter
Type y to perform the uninstallation.
Results
The tool begins to scan and uninstall the cluster (or clusters).
Uninstalling RecoverPoint for VMs
56 Dell EMC RecoverPoint for Virtual Machines Installation and Deployment Guide

If the process notifies you that it did not uninstall all objects, you may run the uninstall operationagain.
RecoverPoint splitters are not removed by the uninstall tool. They can be manually removed fromeach ESXi host. For instructions, see Uninstall the RecoverPoint for VMs splitters on page 57.
Finishing up the uninstall
Uninstall the RecoverPoint for VMs splittersUse the ESXCLI to uninstall the RecoverPoint for VMs splitters.
Procedure
1. Use ESXCLI to obtain a list of all installed vSphere Installation Bundles (VIBs):
esxcli software vib list
2. Ensure that a bundle named RP-Splitter is installed.
3. On the ESXi host, enter maintenance mode:
esxcli system maintenanceMode set -e=true
Note: For VSAN environments, this command requires an additional switch (refer to thevSphere documentation for the vSphere version that you are using).
4. To uninstall the splitter, type:
esxcli software vib remove -n "RP-Splitter"Note: If you want to remove the JAM VIB also (while still in maintenance mode), run thecommand:esxcli software vib remove –n emcjiraf
5. On the ESXi host, exit maintenance mode:
esxcli system maintenanceMode set -e=false
Uninstall JAMUse this procedure to uninstall the JAM VIB from an ESXi host.
Procedure
1. On the ESXi host, vMotion all VMs to another ESXi host.
2. At the ESXCLI, enter maintenance mode. From the ESXi host console, use SSH to run thecommand:
esxcli system maintenanceMode set -e=trueNote: For VSAN environments, this command requires an additional switch. Refer to thevSphere documentation for the vSphere version that you are using.
3. To remove the old JAM installation, run the command:
esxcli software vib remove –n emcjirafNote: If you want to remove the splitter VIB also (while still in maintenance mode), runthe command:esxcli software vib remove -n "RP-Splitter"
4. On the ESXi host, exit maintenance mode:
Uninstalling RecoverPoint for VMs
Dell EMC RecoverPoint for Virtual Machines Installation and Deployment Guide 57

esxcli system maintenanceMode set -e=false
Removing unused directoriesFrom the vCenter, remove RecoverPoint for VMs plug-in directories which are no longer beingused.
Procedure
1. Connect to the vCenter server (using a local network mapping or Remote DesktopConnection). Delete the following folder:
l vCenter 5.5 and Windows vCenter: C:\ProgramData\VMware\vSphere WebClient\vc-packages\vsphere-client-serenity\com.emc.recoverpoint.vwc-<version>
l vCenter 5.5 and vCSA: /var/lib/vmware/vsphere-client/vc-packages/vsphere-client-serenity/com.emc.recoverpoint.vwc-<version>
l vCenter 6.0/6.5/6.7 and Windows vCenter: C:\ProgramData\VMware\vCenterServer\cfg\vsphere-client\vc-packages\vsphere-client-serenity\com.emc.recoverpoint.vwc-<version>
l vCenter 6.0/6.5/6.7 and vCSA: /etc/vmware/vsphere-client/vc-packages/vsphere-client-serenity/com.emc.recoverpoint.vwc-<version>
2. Restart the vSphere Web Client. For instructions, refer to VMware KB1003895 (Windows), VMware KB2109887 (Linux - vCenter 6.x), or VMware KB2147152 (Linux - vCenter 6.5).
Uninstalling RecoverPoint for VMs
58 Dell EMC RecoverPoint for Virtual Machines Installation and Deployment Guide

CHAPTER 7
Installing in VxRail environments
Installing RecoverPoint for VMs in VxRail environments is similar to a standard installation butincludes a few specific requirements for preparing the network, configuring VMkernel ports,creating vRPAs and vRPA clusters, and adding VxRail appliances or nodes.
l Deploying RecoverPoint for VMs in a VxRail™ environment.................................................. 60
Dell EMC RecoverPoint for Virtual Machines Installation and Deployment Guide 59
Deploying RecoverPoint for VMs in a VxRail™ environmentFollow specific guidelines when deploying Recoverpoint for VMs in a VxRail environment.
About this task
When deploying RecoverPoint for VMs on VxRail appliances, follow the guidelines in this chapteralong with the instructions that are listed in Preparing the network on page 23, Deploy vRPAs onpage 28, and Install vRPA clusters on page 29.
Downloading from the VxRail market placeDownload the latest qualified RecoverPoint for VMs release from the VxRail manager marketplace.
Preparing the network for VxRailPrepare the network for the VxRail environment by choosing a network adapter topology anddefining the required ports.
About this task
VxRail supports adding a PCIe NIC to the node in E, P, S, and V Series. VxRail initialization doesnot impact the PCIe NIC. You can connect unused ports to the VxRail system vSphere Distributedswitch. Alternatively, you can create a vSphere Standard Switch (VSS)/vSphere Distributedswitch and connect the unused ports after initialization. The ports are available for uses such asRecoverPoint traffic. VxRail G-Series 2x10G models have only 2x10G ports.
In VxRail 4.0 and later, vSphere Network I/O Control (NIOC) is enabled during initialization, andvSAN traffic has the highest priority to consume the bandwidth in contention. If NIOC is enabledwith the default VxRail setting, you can use the vSAN port for other traffic.
The configuration described here uses the G-Series 2x10G model uplink configuration and VxRailsystem vSphere Distributed switch default name ("VMware HCIA Distributed Switch") as anexample. Choose a vSwitch and uplink name according to the VxRail model and uplinkconfiguration.
Prepare the required port groups on the VMware HCIA Distributed Switch.
Procedure
l Use the default configuration of two network adapters (WAN + LAN on one adapter and dataon the other) unless required to use a different network adapter topology. For thisconfiguration, define two port groups: RP_WAN+LAN and RP_DATA.
l If using a single network adapter, define one port group: RP_ALL.
l If using four network adapters, define four port groups: RP_WAN, RP_LAN, RP_DATA1,RP_DATA2.
Create vRPAs for VxRailUse the OVA file and guidelines in this procedure to create vRPAs for VxRail environments.
About this task
When creating vRPAs:
Procedure
l In the Select storage screen, in the VM Storage Policy drop down, select MARVIN-STORAGE-PROFILE. The compatible VSAN datastore will be selected.
Installing in VxRail environments
60 Dell EMC RecoverPoint for Virtual Machines Installation and Deployment Guide

l Deploy two vRPAs and configure VM-Host affinity rules to avoid running both vRPAs on thesame ESXi node (recommended).
Create and configure VMkernel ports for VxRailCreate and configure VMkernel ports for VxRail environments.
Procedure
1. Create one or two VMkernel ports on each ESXi node by selecting an existing distributedvSwitch “VMware HCIA Distributed Switch.”
A single VMkernel port is required when using the default of two network adapters (WAN +LAN on one network adapter and data on the other network adapter). This configuration isstandard. Two VMkernel ports are required when you are using two network adapters fordata.
2. To select one network adapter (uplink) as active, override the NIC teaming policy. The othernetwork adapter should be marked as unused.
When using a single VMKernel port, assign uplink1 to the port.
When using two VMkernel ports:
l Assign uplink1 to one VMkernel port and uplink2 to the second VMkernel port.
l For uplink2, use traffic shaping to limit bandwidth to no more than 1Gb/s (if NIOC isenabled with the default VxRail setting, traffic shaping is optional):
a. Locate the port group, right-click it, and select Edit Settings.
b. In the Edit Settings window, change traffic shaping for the port group:
Traffic shaping Field Value
Ingress Peak bandwidth (kb/s) 1048576
Burst size (KB) 102400
Egress Status Enabled
Average bandwidth (kb/s) 1048576
Peak bandwidth (kb/s) 1048576
Burst size (KB) 102400
Create a vRPA cluster for VxRailUse the Install a vRPA cluster wizard to create a vRPA cluster for the VxRail environment.
About this task
When creating a vRPA cluster:
Procedure
l In the Environment Settings step, select the vSAN datastore from the table of availabledatastores.
l In the Network Settings step of the wizard, specify the vRPA data network addresses (andnot the VMkernel port IP addresses that were created earlier).
Installing in VxRail environments
Dell EMC RecoverPoint for Virtual Machines Installation and Deployment Guide 61

Adding VxRail appliances or nodesAdding a VxRail appliance or node requires verifying the node addition, configuring ESXi nodes,registering the new ESXi clusters, and adjusting VM-host affinity rules.
About this task
After adding a VxRail appliance or a node to an existing appliance:
Procedure
1. Verify that the nodes are added into the same vSAN cluster and under the same vCenter.
2. Configure each ESXi node with the required data network adapters for enabling splitter-to-vRPA communication.
3. If you created a new ESXi cluster, register it within the vRPA cluster.
This action installs the RecoverPoint for VMs splitters on the new ESXi nodes.
4. Adjust VM-host affinity rules for the vRPAs to ensure that they are running on separateESXi servers.
Installing in VxRail environments
62 Dell EMC RecoverPoint for Virtual Machines Installation and Deployment Guide
CHAPTER 8
Troubleshooting RecoverPoint for VMsinstallation
When the RecoverPoint for VMs installation is not successful, knowing how to troubleshoot thevRPAs, splitters, RecoverPoint for VMs plug-in, and replication helps you to fix the problem.
Some commands that may be useful in troubleshooting can be run from the root user, including:ethtool, kps.pl, ping6, uptime, date, ssh, telnet, arping32, switch utils (Dell EMC CustomerSupport only), netstat, arp, ping, top, and su.
l Troubleshooting vRPAs......................................................................................................... 64l Troubleshooting splitters.......................................................................................................65l Troubleshooting the RecoverPoint for VMs plug-in...............................................................65l Troubleshooting RecoverPoint for VMs replication............................................................... 66l ESXi UUID duplication .......................................................................................................... 67l Getting help.......................................................................................................................... 68
Dell EMC RecoverPoint for Virtual Machines Installation and Deployment Guide 63

Troubleshooting vRPAsThis section describes how to troubleshoot these vRPA conditions:
l vRPA is down
l vRPA is detached from cluster
l vRPA does not see storage or splitter
vRPA is downIf a vRPA is down (powered off), check for vRPA errors, vRPA cluster status, and conflicts in thevRPA resource reservation. To investigate the root cause, collect and analyze logs. From thevSphere Web Client, power on the vRPA.
Procedure
1. Check the RecoverPoint for VMs dashboard for Error events indicating that the vRPA is notonline.
2. Log in to a surviving vRPA and type the RecoverPoint admin username and password to login to the Boxmgmt CLI. Then select System management CLI to open the Sysmgmt CLI.Alternatively, if you have created a user with the sysmgmt role (RecoverPoint for VMs5.2.0.2 or later), use that user to log in directly to the Sysmgmt CLI. To check the clusterstatus, use the get_system_status Sysmgmt CLI command. Choose to retrieve thestatus of all categories.
3. Confirm that the failed vRPA cannot be reached.
4. Check any conflicts in the vRPA resource reservation that might have led to the vRPA beingpowered off. Resolve any issues before proceeding.
5. In the vSphere Web Client, right-click the vRPA that is down and select All vCenterActions > Power > Power On.
6. To ensure that the vRPA was powered on successfully, monitor the vRPA console in thevSphere Web Client.
7. To investigate the root cause of the vRPA failure, collect logs.
vRPA is detached from the vRPA clusterIf the vRPA is detached from the vRPA cluster, check for vRPA errors and cluster status.
Procedure
1. Check the RecoverPoint for VMs dashboard for Error events indicating that the vRPAcannot access storage or communicate with the splitters.
2. Create an SSH connection to a surviving vRPA, using your RecoverPoint for VMs adminusername and password to log into the Boxmgmt CLI. Then select System managementCLI to open the Sysmgmt CLI. Alternatively, if you have created a user with the sysmgmtrole (RecoverPoint for VMs 5.2.0.2 or later), use that user to log in directly to the SysmgmtCLI. Use the get_system_status Sysmgmt CLI command to check the cluster status.Choose to retrieve the status of all categories.
3. Confirm that the detached vRPA cannot be reached from the surviving vRPA.
4. Log in to the Boxmgmt CLI of the detached vRPA using admin username and password, andselect Cluster operations > Attach RPA to Cluster. To ensure that the vRPA was poweredon successfully, monitor the vRPA console in the vSphere Web Client.
Troubleshooting RecoverPoint for VMs installation
64 Dell EMC RecoverPoint for Virtual Machines Installation and Deployment Guide

5. To investigate the root cause of the vRPA detachment from the cluster, collect logs.
6. If you are using a licensed version of RecoverPoint for VMs, contact Customer Support.
vRPA cannot detect storage or splitterWhen a vRPA cannot detect the storage or the splitters, investigate the status of the vRPA andsplitters. Collect and analyze the logs.
Procedure
1. Ensure the vRPA is online.
2. Ensure the vRPA is attached to the cluster.
3. Verify that the splitters are running:
a. Login to ESXi hosts.
b. Run: ps |grep kdriver
c. Ensure that splitter processes are running.
4. To investigate the root cause of why the vRPA went down, collect logs.
5. If you are using a licensed version of RecoverPoint for VMs, contact Customer Support.
Troubleshooting splittersThe section describes how to troubleshoot the splitter when it is not visible or is in error state.
Splitter is not visible or in error stateTo determine why the splitter is not visible or in error, check splitter processes and investigatelogs.
Procedure
1. If possible, vMotion any protected VMs from ESXi hosts with splitters in error statecontinue or resume replication.
2. Ensure that the splitter processes are running on the host you are troubleshooting:
a. Login to the ESXi host and use the following command: ps |grep kdriver
b. If processes are not running, place the ESXi node in maintenance mode and restart.
3. To investigate the root cause of the splitter failure, collect logs.
4. If you are using a licensed version of RecoverPoint for VMs, contact Customer Support.
Troubleshooting the RecoverPoint for VMs plug-inThis section describes how to troubleshoot these conditions:
l vSphere Web client does not contain plug-in
l Plug-in does not see the vRPA cluster
vSphere Web client does not contain plug-inAbout this task
Go through the following steps until the problem is resolved:
Troubleshooting RecoverPoint for VMs installation
Dell EMC RecoverPoint for Virtual Machines Installation and Deployment Guide 65

Procedure
1. Log out of vSphere Web client and log back in. Check if the RecoverPoint for VMs plug-in islisted under Inventories.
2. If the RecoverPoint for VMs plug-in is not listed, close all active vSphere Web client usersessions. Then check if the RecoverPoint for VMs plug-in is listed under Inventories.
3. If the RecoverPoint for VMs plug-in is still not listed, restart the vCenter Web Client service.
4. If the plug-in is still not visible in the vSphere Web Client, validate the vCenter Credentialsconfiguration. You may need to reconfigure vCenter credentials. Consult Customer Supportif protected VMs exist.
5. If the plug-in is still not visible in the vSphere Web Client, collect logs to investigate the rootcause of why the plug-in is not visible.
Plug-in does not detect the vRPA clusterAbout this task
Go through the following steps until the problem is resolved:
Procedure
1. Log out of the vSphere Web Client and log back in.
2. Refresh the vSphere Web Client.
3. Log out all users from the vSphere Web Client.
4. Restart the vSphere Web Client.
5. Log in to the Managed Object Browser at https://<vSphere Web Client>/mob.Ensure the vCenter credentials are configured correctly.
Access to the Managed Object Browser is disabled by default in vSphere 6.0 and later. Forinstructions on how to enable access, refer to VMware KB2108405.
6. Restart vRPA1.
7. Restart vRPA2.
8. To investigate the root cause of the vRPA failure, collect logs.
9. If you are using a licensed version of RecoverPoint for VMs, contact Customer Support.
Troubleshooting RecoverPoint for VMs replicationThis section describes how to troubleshoot these conditions:
l Consistency group is in high-load transfer state or initialization is not completing
l Consistency group is in error state
CG in high-load transfer state or initialization not completingProcedure
1. If consistency groups are not balanced across vRPAs, create an SSH connection to thevRPA management IP address, and type the RecoverPoint admin username and password tolog in to the Boxmgmt CLI. Then select System management CLI to open the SysmgmtCLI. Alternatively, if you have created a user with the sysmgmt role (RecoverPoint for VMs5.2.0.2 or later), use that user to log in directly to the Sysmgmt CLI. Run thebalance_load Sysmgmt CLI command and change consistency group assignments. Formore information about load balancing, see the RecoverPoint for Virtual MachinesAdministrator’s Guide.
Troubleshooting RecoverPoint for VMs installation
66 Dell EMC RecoverPoint for Virtual Machines Installation and Deployment Guide

2. If the throughput required by a consistency group exceeds the availability on a single vRPA,review the vRPA profile to see if additional resources can be added to meet higher IOPSrequirements.
3. Enabling deduplication when WAN compression is also enabled may overload the vRPA andconsequently degrade replication performance. For more information, see the RecoverPointfor Virtual Machines Scale and Performance Guide.
a. It is recommended to enable WAN and journal compression and disable deduplication.
b. If the consistency group contains more than one VM, consider moving VMs to dedicatedconsistency groups and using group sets as needed.
c. Consider adding vRPAs (up to 8) to the vRPA cluster for additional resources.
d. Review ESXi resources to ensure that there is no contention.
4. If needed, create an SSH connection to the vRPA management IP address, and type theRecoverPoint admin username and password to log in to the Boxmgmt CLI. Then selectSystem management CLI to open the Sysmgmt CLI. Alternatively, if you have created auser with the sysmgmt role (RecoverPoint for VMs 5.2.0.2 or later), use that user to log indirectly to the Sysmgmt CLI. Run the config_io_throttling command to slow downproduction storage reads during full sweep process.
Consistency group is in Error stateProcedure
1. Perform all of the procedures suggested for a consistency group in high-load state.
2. If the consistency group is still in Error state, try the following:
a. Check if the image access buffer is full. If so, disable image access.
b. Resolve any WAN issues.
c. Check if the consistency group is in a permanent high-load state.
3. To investigate why the consistency group is in error state, collect logs.
4. If you are using a licensed version of RecoverPoint for VMs, contact Customer Support.
ESXi UUID duplicationIn the VMware environment, each ESXi host is assigned a Universally Unique ID (UUID).RecoverPoint for VMs uses these UUIDs to maintain the integrity of replicated copies and protectthe ESXi hosts from data corruption.
However, in some cases, a UUID might change with results that include:
l More than one ESXi host within a cluster reporting the same UUID.
l A single ESXi host reporting a different UUID after host restart (or similar operations).
l A single ESXi host reporting a degenerated UUID with all 0's or F's.
These cases can occur when using hardware that is not certified by VMware because the UUID isbased on the BIOS UUID reported by the underlying server hardware. For more information aboutduplicate UUIDs, see VMware Knowledgebase Article 2006865.
Duplicate or degenerated UUIDs can cause the following:
l The RecoverPoint cluster can experience reboot regulation (vRPAs restarting over and overagain until they detach from the cluster).
l The RecoverPoint consistency groups may not be able to recognize, connect to, orcommunicate with the splitter on the affected ESXi hosts.
Troubleshooting RecoverPoint for VMs installation
Dell EMC RecoverPoint for Virtual Machines Installation and Deployment Guide 67

RecoverPoint for VMs replaces the use of VMware's ESXi host UUID and creates its own uniqueidentifier, which ensures that no duplicate or degenerated UUIDs exist in the system. Thesubstitution occurs only if the:
l vRPA cluster version supports this feature
l Splitter version supports this feature
For versions that do not support this feature, RecoverPoint for VMs displays a warning about thecondition.
Getting helpSupport, product, and licensing information can be obtained as follows:
l Product information — For documentation, release notes, software updates, or informationabout products, access Online Support at: https://support.emc.com
l Technical support — Access to Online Support and click Service Center. You will see severaloptions for contacting Technical Support. Note that to open a service request, you must havea valid support agreement. Contact your sales representative for details about obtaining a validsupport agreement or with questions about your account.
Troubleshooting RecoverPoint for VMs installation
68 Dell EMC RecoverPoint for Virtual Machines Installation and Deployment Guide

APPENDIX A
RecoverPoint for VMs installation form
To streamline the installation tasks, create the RecoverPoint for VMs installation form during theplanning phase. The installation form is a data sheet or spreadsheet that lists the site-specificvalues that you require to successfully complete the installation.
l Installation data forms........................................................................................................... 70
Dell EMC RecoverPoint for Virtual Machines Installation and Deployment Guide 69

Installation data formsThe best practice for successful installations is to collect and document required data before theinstallation.
The forms that are provided in this section are examples of the types of information you shouldcollect before installation. You can create a planning spreadsheet that matches specificrequirements (number of vRPA clusters, network topology, and so forth).
You are directed to type the data from these forms (or similar data sheet) during the installationprocess.
Table 3 Example: vRPA cluster/site form
vRPA cluster vRPA cluster 1 vRPA cluster 2 vRPA cluster 3 vRPA cluster 4 vRPA cluster 5
Cluster/sitename
Time zone
Local domain
Primary DNSserver (optional)
Secondary DNSserver (optional)
NTP server(recommended)
Clustermanagement IP
Managementdefault gatewayIP
Managementsubnet mask IP
WAN defaultgateway
WAN subnetmask
SMTP (optional)
vCenter IP
vCentercredentials
vCentercredentials
VMkernel IP pool
ESXi 1
_Data1 IP
RecoverPoint for VMs installation form
70 Dell EMC RecoverPoint for Virtual Machines Installation and Deployment Guide

Table 3 Example: vRPA cluster/site form (continued)
vRPA cluster vRPA cluster 1 vRPA cluster 2 vRPA cluster 3 vRPA cluster 4 vRPA cluster 5
_Data2 IP
_Management IP
ESXi 2
_Data1 IP
_Data2 IP
_Management IP
Table 4 Example: vRPA IP form
vRPA vRPA IPs Site:__________
Site:__________
Site:__________
Site:__________
Site:__________
vRPA_1
LAN IP
WAN IP
Data1 IP
Data2 IP
vRPA_2
LAN IP
WAN IP
Data1 IP
Data2 IP
vRPA_3
LAN IP
WAN IP
Data1 IP
Data2 IP
vRPA_4
LAN IP
WAN IP
Data1 IP
Data2 IP
vRPA_5
LAN IP
WAN IP
Data1 IP
Data2 IP
vRPA_6
LAN IP
WAN IP
Data1 IP
Data2 IP
RecoverPoint for VMs installation form
Dell EMC RecoverPoint for Virtual Machines Installation and Deployment Guide 71

Table 4 Example: vRPA IP form (continued)
vRPA vRPA IPs Site:__________
Site:__________
Site:__________
Site:__________
Site:__________
vRPA_7
LAN IP
WAN IP
Data1 IP
Data2 IP
vRPA_8
LAN IP
WAN IP
Data1 IP
Data2 IP
Table 5 Example: Site map
Site Site1 (Prod) Site2 (Remote) Site2 (Remote) Site3 (Remote) Site3 (Remote)
Cluster Cluster1 Cluster2 Cluster3 Cluster4 Cluster5
vCenter <name><ip_address>
<name><ip_address>
<name><ip_address>
<name><ip_address>
<name><ip_address>
ESXi 1 <name><ip_address>
<name><ip_address>
<name><ip_address>
<name><ip_address>
<name><ip_address>
ESXi 2 <name><ip_address>
<name><ip_address>
<name><ip_address>
<name><ip_address>
<name><ip_address>
vRPA 1 <ip_address> <ip_address> <ip_address> <ip_address> <ip_address>
vRPA 2 <ip_address> <ip_address> <ip_address> <ip_address> <ip_address>
ClusterMgmt
<ip_address> <ip_address> <ip_address> <ip_address> <ip_address>
NIC1 IP(WAN)
<ip_address>RPA1<ip_address>RPA2
<ip_address> RPA1<ip_address>RPA2
<ip_address> RPA1<ip_address> RPA2
<ip_address>RPA1<ip_address>RPA2
<ip_address> RPA1<ip_address> RPA2
Data 1 <ip_address>RPA1<ip_address>RPA2
<ip_address> RPA1<ip_address>RPA2
<ip_address> RPA1<ip_address> RPA2
<ip_address>RPA1<ip_address>RPA2
<ip_address> RPA1<ip_address> RPA2
Data 2 <ip_address>RPA1<ip_address>RPA2
<ip_address> RPA1<ip_address>RPA2
<ip_address> RPA1<ip_address> RPA2
<ip_address>RPA1<ip_address>RPA2
<ip_address> RPA1<ip_address> RPA2
RecoverPoint for VMs installation form
72 Dell EMC RecoverPoint for Virtual Machines Installation and Deployment Guide

APPENDIX B
Support procedures for uninstalling vRPAclusters
When the automated uninstall tool is unavailable, you can manually uninstall a vRPA cluster byusing support procedures to guide you.
l Uninstalling a single vRPA cluster from a vCenter manually...................................................74l Uninstalling all vRPA clusters from a vCenter manually......................................................... 75l Unprotect VMs......................................................................................................................76l Remove ESXi clusters from vRPA clusters............................................................................ 76l Remove a vRPA from a vRPA cluster.................................................................................... 76l Detaching vRPAs...................................................................................................................76l Powering off vRPAs.............................................................................................................. 77l Deleting the repository folder................................................................................................ 77l Verifying that the configuration parameters are empty......................................................... 77l Removing custom tokens from the Managed Object Browser............................................... 77l Unregistering the RP extension from the Managed Object Browser......................................78l Unregistering the plug-in from the Managed Object Browser................................................79l Removing unused directories.................................................................................................79l Uninstall the RecoverPoint for VMs splitters.........................................................................80l Uninstall JAM........................................................................................................................ 80
Dell EMC RecoverPoint for Virtual Machines Installation and Deployment Guide 73

Uninstalling a single vRPA cluster from a vCenter manuallyPerform this procedure to uninstall one vRPA cluster from a vCenter.
Before you begin
Obtain the internal cluster name of the vRPA you are uninstalling by connecting to the vRPABoxmgmt CLI as the admin user, and selecting Main Menu > Setup > View Settings.
About this task
You must perform this procedure for each vRPA cluster you want to uninstall.
If removing the last vRPA cluster on the vCenter, use the procedure Uninstalling all vRPA clustersfrom a vCenter manually on page 75 instead of this one.
Procedure
1. If the vRPA cluster is active:
a. Unprotect the virtual machines. For more information, see Unprotect VMs on page 76.
b. Remove all ESX clusters from the vRPA cluster. For more information, see Remove ESXiclusters from vRPA clusters on page 76. Repeat this step for all ESX clusters in thevRPA cluster.
2. If you are removing just one vRPA cluster from a system with at least two clusters, performthe following procedure: Uninstall a vRPA cluster on page 55.
If the procedure Uninstall a vRPA cluster on page 55 was successful, skip to step 6 on page74. If the procedure Uninstall a vRPA cluster on page 55 failed, continue with the nextstep.
3. Detach the vRPAs from the cluster. For more information, see Detaching vRPAs on page76.
4. Power off the vRPAs. For more information, see Powering off vRPAs on page 77.
5. Remove the custom tokens that correspond to the RecoverPoint for VMs cluster ID. Formore information, see Removing custom tokens from the Managed Object Browser on page77.
6. Delete from all datastores the repository folder of the cluster you are uninstalling. For moreinformation, see Deleting the repository folder on page 77.
7. Verify that the configuration parameters are empty. For more information, see Verifyingthat the configuration parameters are empty on page 77.
Note: Perform this step only if you encountered problems when unprotecting the VMs.Performing this step requires downtime of the production VM.
8. Ensure that the vRPA virtual machines are powered off, and delete them.
9. If the ESX cluster you are removing is not registered to any other vRPA cluster, you canuninstall the RecoverPoint for VMs splitter on that ESXi host. For more information, see Uninstall the RecoverPoint for VMs splitters on page 57.
Support procedures for uninstalling vRPA clusters
74 Dell EMC RecoverPoint for Virtual Machines Installation and Deployment Guide

Uninstalling all vRPA clusters from a vCenter manuallyPerform this procedure to uninstall all vRPA clusters from a vCenter.
Before you begin
Obtain the internal cluster name of the vRPA you are uninstalling by connecting to the vRPABoxmgmt CLI as the admin user, and selecting Main Menu > Setup > View Settings.
About this task
You must perform this procedure for each vRPA cluster you want to uninstall.
Procedure
1. If the vRPA cluster is active:
a. Unprotect the virtual machines. For more information, see Unprotect VMs on page 76.
b. Remove all ESX clusters from the vRPA clusters. For more information, see RemoveESXi clusters from vRPA clusters on page 76. Repeat this step for all ESX clusters in allvRPA clusters.
2. If you are removing just one vRPA cluster from a system with at least two clusters, performthe following procedure: Uninstall a vRPA cluster on page 55.
If the procedure Uninstall a vRPA cluster on page 55 was successful, skip to step 6 on page75. If the procedure Uninstall a vRPA cluster on page 55 failed, continue with the nextstep.
3. Detach the vRPAs from the cluster. For more information, see Detaching vRPAs on page76.
4. Power off the vRPAs. For more information, see Powering off vRPAs on page 77.
5. Remove the custom tokens that correspond to the RecoverPoint for VMs Internal clustername. For more information, see Removing custom tokens from the Managed ObjectBrowser on page 77.
6. Delete from all datastores the repository folders of all clusters. For more information, see Deleting the repository folder on page 77.
7. Verify that the configuration parameters are empty. For more information, see Verifyingthat the configuration parameters are empty on page 77.
Note: Perform this step only if you encountered problems when unprotecting the VMs.Performing this step requires downtime of the production VM.
8. Ensure that the vRPA virtual machines are powered off, and delete them.
9. Unregister the plug-in from the Managed Object Browser. For more information, see Unregistering the plug-in from the Managed Object Browser on page 79.
10. Uninstall the RecoverPoint for VMs splitter. For more information, see Uninstall theRecoverPoint for VMs splitters on page 57.
11. Unregister the RecoverPoint extension from the Managed Object Browser. For moreinformation, see Unregistering the RP extension from the Managed Object Browser on page78.
12. Remove the RecoverPoint datastore element. Delete the RecoverPoint.flp file locatedin the RecoverPoint folder.
Support procedures for uninstalling vRPA clusters
Dell EMC RecoverPoint for Virtual Machines Installation and Deployment Guide 75

Unprotect VMsTo stop replication for a vRPA, unprotect the associated VM.
Procedure
1. In the vSphere Web Client home page, click the RecoverPoint for VMs Managementicon > Protection tab. Click Virtual Machines.
2. Select the VM you wish to stop replicating. Click the Unprotect icon. Repeat for eachprotected VM.
Remove ESXi clusters from vRPA clustersUse the vSphere Web Client and this procedure to remove a ESXi cluster from a vRPA cluster.
Procedure
1. In the vSphere Web Client home page, click the RecoverPoint for VMs Managementicon > Administration tab.
2. Click vRPA Clusters.
3. Select the relevant vRPA cluster.
4. Click the ESX Clusters tab.
5. Click the garbage can icon next to each ESXi cluster to remove that ESXi cluster from theselected vRPA cluster.
Remove a vRPA from a vRPA clusterUse this procedure to remove a vRPA from a vRPA cluster. You cannot remove a vRPA if thecluster has 2 or fewer vRPAs.
Procedure
1. In a web browser, type https://<cluster_management-ip-address>/WDM for the vRPAcluster from which you want to remove a vRPA.
2. In the home page, click RecoverPoint for VMs Deployer.
3. If prompted, enter the login credentials for the admin user and click Sign in.
4. Under More actions, click Remove vRPA from vRPA cluster.
l The highest numbered vRPA (the last one added) will be removed.
l The consistency groups of the removed vRPA will be non-disruptively moved to adifferent vRPA.
l The preferred vRPA setting for those consistency groups will be automatically updated.
Detaching vRPAsProcedure
1. Use an SSH client to connect to a vRPA and enter login credentials for the admin user.
2. From the Main Menu, select Cluster Operations > Detach from Cluster.
Replication is paused.
Support procedures for uninstalling vRPA clusters
76 Dell EMC RecoverPoint for Virtual Machines Installation and Deployment Guide

3. Repeat this procedure on all vRPAs in all vRPA clusters in the system.
Powering off vRPAsProcedure
1. At the vSphere Web Client, in Inventory, select VMs and Templates.
2. Select each vRPA, right-click and select All vCenter Actions > Power > Power Off.
Deleting the repository folderProcedure
1. At the vSphere Web Client, select Home > Storage > Manage.
2. Select the datastore where the repository folder was created.
3. In the list of files displayed in the Files subtab, locate and open the RPvStorage folder.
4. Within the RPvStorage folder, delete all folders and/or files that include the Internalcluster name.
Verifying that the configuration parameters are emptyAbout this task
Note: Performing this task requires downtime of the production VM.
Procedure
1. At the vSphere Web Client, in Inventory, select Hosts and Clusters. Select a VM that wasprotected by RecoverPoint for VMs. Power off the VM. Right-click and select EditSettings...
2. In the Edit Settings dialog box, select the VM Options tab. Expand the Advanced column.In the Configuration Parameters row, click Edit Configuration... to edit the advancedconfiguration parameters.
3. In the Configuration Parameters window, ensure that all configuration parameters with"RecoverPoint" or "esx_splitter" in the name have empty values.
The following parameters must not exist or have empty values:
l RecoverPoint RPA number
l RecoverPoint CGUID
l RecoverPoint Cluster ID
l esx_splitter.globalOptions
l esx_splitter.scsi0:1.options
Removing custom tokens from the Managed Object BrowserAbout this task
The custom tokens that correspond to the RecoverPoint for VMs cluster ID need to be removedfrom the cluster(s) being reinstalled for all previously used vCenters.
Support procedures for uninstalling vRPA clusters
Dell EMC RecoverPoint for Virtual Machines Installation and Deployment Guide 77

Note: Access to the Managed Object Browser is disabled by default in vSphere 6.0. Forinstructions on how to enable access, refer to VMware KB2108405.
Procedure
1. In a web browser, enter the fully-qualified domain name (or IP address) of the vCenterServer system:
https://<hostname.yourcompany.com>/mob/?moid=CustomFieldsManager
2. Log in using your vCenter login credentials.
3. In the Methods table, select RemoveCustomFieldDef.
A new browser window opens with the void RemoveCustomFieldDef command displayed.
4. In the Parameters table, enter the value of a custom field listed in the Properties table thatcorresponds to the Internal cluster name, RecoverPoint_TOKEN, for example,config.RecoverPoint_TOKEN;3070371118132351610.
5. Click Invoke Method.
6. If you are reinstalling several clusters, repeat steps 3 through 5 for each custom field listedin the Properties table that corresponds to the Internal cluster names.
Unregistering the RP extension from the Managed ObjectBrowser
About this task
The RecoverPoint extension should be unregistered from the Managed Object Browser at eachvCenter that contains ESXi hosts that are hosting vRPA clusters.
Note: Access to the Managed Object Browser is disabled by default in vSphere 6.0. Forinstructions on how to enable access, refer to VMware KB2108405.
Procedure
1. In a web browser, enter the fully-qualified domain name (or IP address) for the ESXi orvCenter Server system:
https://<hostname.yourcompany.com>/mob/?moid=ExtensionManager
2. Log in using your vCenter login credentials.
3. In the Methods table, select UnregisterExtension.
A new browser window opens with void UnregisterExtension command displayed.
4. In the Parameters table, enter com.emc.recoverpoint.vwc in the value field and clickInvoke Method.
5. Connect to the vCenter server (using a local network mapping or Remote DesktopConnection). Delete the following folder:
l vCenter 5.1/5.5 and Windows vCenter: C:\ProgramData\VMware\vSphere WebClient\vc-packages\vsphere-client-serenity\com.emc.recoverpoint.vwc-<version>
l vCenter 5.1/5.5 and vCSA: /var/lib/vmware/vsphere-client/vc-packages/vsphere-client-serenity/com.emc.recoverpoint.vwc-<version>
l vCenter 6.0/6.5/6/7 and Windows vCenter: C:\ProgramData\VMware\vCenterServer\cfg\vsphere-client\vc-packages\vsphere-client-serenity\com.emc.recoverpoint.vwc-<version>
Support procedures for uninstalling vRPA clusters
78 Dell EMC RecoverPoint for Virtual Machines Installation and Deployment Guide
l vCenter 6.0/6.5/6.7 and vCSA: /etc/vmware/vsphere-client/vc-packages/vsphere-client-serenity/com.emc.recoverpoint.vwc-<version>
6. Restart the vSphere Web Client. For instructions, refer to VMware KB1003895 (Windows), VMware KB2109887 (Linux - vCenter 6.x), or VMware KB2147152 (Linux - vCenter 6.5).
Unregistering the plug-in from the Managed Object BrowserAbout this task
Unregister the RecoverPoint for VMs plug-in from the Managed Object Browser at each vCenterthat contains ESXi hosts hosting vRPA clusters. Unregister the plug-in while the vRPAs aredetached.
Note: Access to the Managed Object Browser is disabled by default in vSphere 6.0. Forinstructions on how to enable access, refer to VMware KB2108405.
Procedure
1. In a web browser, enter the fully-qualified domain name (or IP address) of the ESXi orvCenter Server system:
https://<hostname.yourcompany.com>/mob/?moid=ExtensionManager
2. Log in using your vCenter login credentials.
3. In the Methods table, select UnregisterExtension.
A new browser window opens with void UnregisterExtension command displayed.
4. In the Parameters table, enter com.emc.recoverpoint.vwc for the value and click InvokeMethod.
Removing unused directoriesFrom the vCenter, remove RecoverPoint for VMs plug-in directories which are no longer beingused.
Procedure
1. Connect to the vCenter server (using a local network mapping or Remote DesktopConnection). Delete the following folder:
l vCenter 5.5 and Windows vCenter: C:\ProgramData\VMware\vSphere WebClient\vc-packages\vsphere-client-serenity\com.emc.recoverpoint.vwc-<version>
l vCenter 5.5 and vCSA: /var/lib/vmware/vsphere-client/vc-packages/vsphere-client-serenity/com.emc.recoverpoint.vwc-<version>
l vCenter 6.0/6.5/6.7 and Windows vCenter: C:\ProgramData\VMware\vCenterServer\cfg\vsphere-client\vc-packages\vsphere-client-serenity\com.emc.recoverpoint.vwc-<version>
l vCenter 6.0/6.5/6.7 and vCSA: /etc/vmware/vsphere-client/vc-packages/vsphere-client-serenity/com.emc.recoverpoint.vwc-<version>
2. Restart the vSphere Web Client. For instructions, refer to VMware KB1003895 (Windows), VMware KB2109887 (Linux - vCenter 6.x), or VMware KB2147152 (Linux - vCenter 6.5).
Support procedures for uninstalling vRPA clusters
Dell EMC RecoverPoint for Virtual Machines Installation and Deployment Guide 79

Uninstall the RecoverPoint for VMs splittersUse the ESXCLI to uninstall the RecoverPoint for VMs splitters.
Procedure
1. Use ESXCLI to obtain a list of all installed vSphere Installation Bundles (VIBs):
esxcli software vib list
2. Ensure that a bundle named RP-Splitter is installed.
3. On the ESXi host, enter maintenance mode:
esxcli system maintenanceMode set -e=true
Note: For VSAN environments, this command requires an additional switch (refer to thevSphere documentation for the vSphere version that you are using).
4. To uninstall the splitter, type:
esxcli software vib remove -n "RP-Splitter"Note: If you want to remove the JAM VIB also (while still in maintenance mode), run thecommand:esxcli software vib remove –n emcjiraf
5. On the ESXi host, exit maintenance mode:
esxcli system maintenanceMode set -e=false
Uninstall JAMUse this procedure to uninstall the JAM VIB from an ESXi host.
Procedure
1. On the ESXi host, vMotion all VMs to another ESXi host.
2. At the ESXCLI, enter maintenance mode. From the ESXi host console, use SSH to run thecommand:
esxcli system maintenanceMode set -e=trueNote: For VSAN environments, this command requires an additional switch. Refer to thevSphere documentation for the vSphere version that you are using.
3. To remove the old JAM installation, run the command:
esxcli software vib remove –n emcjirafNote: If you want to remove the splitter VIB also (while still in maintenance mode), runthe command:esxcli software vib remove -n "RP-Splitter"
4. On the ESXi host, exit maintenance mode:
esxcli system maintenanceMode set -e=false
Support procedures for uninstalling vRPA clusters
80 Dell EMC RecoverPoint for Virtual Machines Installation and Deployment Guide

APPENDIX C
vSphere upgrades
You may be required to upgrade a vCenter or an ESXi host that is used in the RecoverPoint forVMs system. Information about these tasks helps you to successfully perform these upgrades.
l Upgrading vCenter................................................................................................................ 82l Upgrading ESXi..................................................................................................................... 82
Dell EMC RecoverPoint for Virtual Machines Installation and Deployment Guide 81

Upgrading vCenterAbout this task
The vCenter upgrade is transparent to RecoverPoint for VMs provided that the upgrade processdoes not cause a change in the vCenter UUID.
Use this procedure when you need to upgrade the vCenter within a RecoverPoint for VMs system.
During the upgrade:
l vRPA clusters cannot be managed from this vCenter. Ensure you have access to othervCenters.
l Data replication and recovery point objective (RPO) might be affected.
l vCenters in Enhanced Linked Mode might be impacted (one vCenter at a time).
l RecoverPoint for VMs plug-in should remain intact.
CAUTION To avoid changing the vCenter UUID during the upgrade process, ensure that youselect the Use existing inventory option.
Procedure
1. If you are upgrading to vCenter 6.0, follow these best practices: Upgrading to vCenterServer 6.0 best practices.
2. If you are upgrading to vCenter 6.5, follow these best practices: Upgrading to vCenterServer 6.5 best practices.
3. If you are upgrading to vCenter 6.7, follow these best practices: Upgrading to vCenterServer 6.7 best practices.
Results
NOTICE If RecoverPoint for VMs is in an error state after you upgrade the vCenter, check ifthe vCenter UUID has changed. If it has, contact Customer Support.
Upgrading ESXiAbout this task
Use this procedure when you need to upgrade the ESXi within a RecoverPoint for VMs system.This procedure provides pre-upgrade and post-upgrade instructions when upgrading ESXi.Reference to VMware documentation is provided.
Procedure
1. At the ESXCLI, enter maintenance mode. From the ESXi host console, use SSH to run thefollowing command:
esxcli system maintenanceMode set -e=true
Note: For VSAN environments, this command requires an additional switch (refer to thevSphere documentation for the vSphere version that you are using).
If DRS is in automatic mode, vMotion is carried out automatically. If not, you must manuallyuse vMotion to move all VMs to a different ESXi host in the ESX cluster.
2. Follow VMware instructions for ESXi upgrade.
vSphere upgrades
82 Dell EMC RecoverPoint for Virtual Machines Installation and Deployment Guide

Upgrading to 6.0 Methods for upgrading to VMware ESXi 6.0
Upgrading to 6.5 Upgrading ESXi hosts (to ESXi 6.5)
Upgrading to 6.7 VMware ESXi Upgrade (to ESX 6.7)
3. Exit maintenance mode.From the ESXi host console, use SSH to run the followingcommand:
esxcli system maintenanceMode set -e=false
If DRS is not in automatic mode, use vMotion to manually move VMs to the upgraded ESXihost.
4. Repeat this procedure for the remaining ESXi hosts in the ESX cluster.
vSphere upgrades
Dell EMC RecoverPoint for Virtual Machines Installation and Deployment Guide 83

vSphere upgrades
84 Dell EMC RecoverPoint for Virtual Machines Installation and Deployment Guide

APPENDIX D
Installing on Nutanix
When installing RecoverPoint for VMs on Nutanix, if installing a version earlier than 5.2.2, youmust first manually edit the settings for Nutanix storage containers that will be used byRecoverPoint for VMs.
l Installing RecoverPoint for VMs on Nutanix.......................................................................... 86
Dell EMC RecoverPoint for Virtual Machines Installation and Deployment Guide 85

Installing RecoverPoint for VMs on NutanixWhen installing a RecoverPoint for VMs version earlier than 5.2.2 on Nutanix, you must manuallymodify settings for Nutanix containers that will be used by RecovePoint for VMs before you installyour RecoverPoint for VMs system.
Before you begin
RecoverPoint for VMs is supported by Nutanix AOS 4.7.5 or 5.0.2, or later. If necessary, upgradeyour Nutanix installation to one of those versions.
NOTICE You do not need to modify the Nutanix settings if you are installing RecoverPoint forVMs 5.2.2 or later.
Procedure
1. To properly modify the Nutanix container settings, follow the instructions in Dell EMCKnowledge Base Article 495379 and its attachments.
2. Perform a normal Installlation of your RecoverPoint for VMs system, version 5.1.1 or later.
Installing on Nutanix
86 Dell EMC RecoverPoint for Virtual Machines Installation and Deployment Guide