Embed Size (px)
Citation preview
8/6/2019 Enu WC74XX Sys Admin Guide
http://slidepdf.com/reader/full/enu-wc74xx-sys-admin-guide 1/208
WorkCentre® 7400 Series
Multifunction Printer
WorkCentre®
7425/7428/7435System Administrator GuideEnglish
Français Guide de l’administrateur système
Español Guía del administrador del sistema
Português Guia de Administração do Sistema

8/6/2019 Enu WC74XX Sys Admin Guide
http://slidepdf.com/reader/full/enu-wc74xx-sys-admin-guide 2/208
Copyright © 2009 Xerox Corporation. All Rights Reserved. Unpublished rights reserved under the copyright laws of the United States.
Contents of this publication may not be reproduced in any form without permission of Xerox Corporation.
Copyright protection claimed includes all forms of matters of copyrightable materials and information now allowed by statutory or
judicial law or hereinafter granted, including without limitation, material generated from the software programs which are displayed
on the screen such as styles, templates, icons, screen displays, looks, etc.
Xerox®, CentreWare®, WorkCentre®, PrintingScout®, and Walk-Up® are trademarks of Xerox Corporation in the United States and/or
other countries.
Adobe Reader®, Adobe Type Manager®, ATM™, Flash®, Macromedia®, Photoshop®, and PostScript® are trademarks of
Adobe Systems Incorporated in the United States and/or other countries.
Apple®, AppleTalk®, Bonjour®, EtherTalk®, Macintosh®, Mac OS®, and TrueType® are trademarks of Apple Computer, Inc. in the
United States and/or other countries.
HP-GL®, HP-UX®, and PCL® are trademarks of Hewlett-Packard Corporation in the United States and/or other countries.
IBM® and AIX® are trademarks of International Business Machines Corporation in the United States and/or other countries.
Microsoft®, Windows Vista®, Windows®, and Windows Server® are trademarks of Microsoft Corporation in the United States and/or
other countries.
Novell®, NetWare®, NDPS®, NDS®, Novell Directory Services®, IPX™, and Novell Distributed Print Services™are trademarks of
Novell, Incorporated in the United States and/or other countries.
SGI® IRIX® is a trademark of Silicon Graphics, Inc.
SunSM, Sun Microsystems™, and Solaris™ are trademarks of Sun Microsystems, Incorporated in the United States and/or other
countries.
UNIX® is a trademark in the United States and other countries, licensed exclusively through X/Open Company Limited.
As an ENERGY STAR® partner, Xerox Corporation has determined that this product meets the ENERGY STAR guidelines for energy
efficiency. The ENERGY STAR name and logo are registered U.S. marks.
8/6/2019 Enu WC74XX Sys Admin Guide
http://slidepdf.com/reader/full/enu-wc74xx-sys-admin-guide 3/208
WorkCentre 7425/7428/7435
System Administrator Guide
3
Contents
1 General Information
Resources . . . . . . . . . . . . . . . . . . . . . . . . . . . . . . . . . . . . . . . . . . . . . . . . . . . . . . . . . . . . . . . . . . . . . . . . . . 10
2 Installation
Installation . . . . . . . . . . . . . . . . . . . . . . . . . . . . . . . . . . . . . . . . . . . . . . . . . . . . . . . . . . . . . . . . . . . . . . . . 12
Overview . . . . . . . . . . . . . . . . . . . . . . . . . . . . . . . . . . . . . . . . . . . . . . . . . . . . . . . . . . . . . . . . . . . . . . . 12Changing the Default Main Screen. . . . . . . . . . . . . . . . . . . . . . . . . . . . . . . . . . . . . . . . . . . . . . . 12
Print Driver Installation . . . . . . . . . . . . . . . . . . . . . . . . . . . . . . . . . . . . . . . . . . . . . . . . . . . . . . . . . . . . . 13
Supported Operating Systems . . . . . . . . . . . . . . . . . . . . . . . . . . . . . . . . . . . . . . . . . . . . . . . . . . . 13Obtaining Drivers . . . . . . . . . . . . . . . . . . . . . . . . . . . . . . . . . . . . . . . . . . . . . . . . . . . . . . . . . . . . . . . 13TCP/IP Peer to Peer (LPR or Standard TCP/IP) Printing. . . . . . . . . . . . . . . . . . . . . . . . . . . . . 13
NetBIOS over IP Peer to Peer Printing . . . . . . . . . . . . . . . . . . . . . . . . . . . . . . . . . . . . . . . . . . . . 14NetBIOS over IP Client/Server Printing . . . . . . . . . . . . . . . . . . . . . . . . . . . . . . . . . . . . . . . . . . . 15IPP Printing – Windows . . . . . . . . . . . . . . . . . . . . . . . . . . . . . . . . . . . . . . . . . . . . . . . . . . . . . . . . . 16EtherTalk (AppleTalk) Peer to Peer Printing . . . . . . . . . . . . . . . . . . . . . . . . . . . . . . . . . . . . . . . 18Common UNIX Printing System (CUPS) . . . . . . . . . . . . . . . . . . . . . . . . . . . . . . . . . . . . . . . . . . 19Installing Unicode Fonts . . . . . . . . . . . . . . . . . . . . . . . . . . . . . . . . . . . . . . . . . . . . . . . . . . . . . . . . 20
3 Administrative Tools
Configuration Report . . . . . . . . . . . . . . . . . . . . . . . . . . . . . . . . . . . . . . . . . . . . . . . . . . . . . . . . . . . . . . . 22
CentreWare Internet Services . . . . . . . . . . . . . . . . . . . . . . . . . . . . . . . . . . . . . . . . . . . . . . . . . . . . . . . 23
System Administrator Login ID and Passcode. . . . . . . . . . . . . . . . . . . . . . . . . . . . . . . . . . . . . 23
Changing Internet Services (HTTP) Settings . . . . . . . . . . . . . . . . . . . . . . . . . . . . . . . . . . . . . . 23Proxy Server Settings. . . . . . . . . . . . . . . . . . . . . . . . . . . . . . . . . . . . . . . . . . . . . . . . . . . . . . . . . . . . 24Overview . . . . . . . . . . . . . . . . . . . . . . . . . . . . . . . . . . . . . . . . . . . . . . . . . . . . . . . . . . . . . . . . . . . . . . . 25Status Tab . . . . . . . . . . . . . . . . . . . . . . . . . . . . . . . . . . . . . . . . . . . . . . . . . . . . . . . . . . . . . . . . . . . . . 25Jobs Tab . . . . . . . . . . . . . . . . . . . . . . . . . . . . . . . . . . . . . . . . . . . . . . . . . . . . . . . . . . . . . . . . . . . . . . . 25Print Tab . . . . . . . . . . . . . . . . . . . . . . . . . . . . . . . . . . . . . . . . . . . . . . . . . . . . . . . . . . . . . . . . . . . . . . . 25Scan Tab. . . . . . . . . . . . . . . . . . . . . . . . . . . . . . . . . . . . . . . . . . . . . . . . . . . . . . . . . . . . . . . . . . . . . . . 26Properties Tab . . . . . . . . . . . . . . . . . . . . . . . . . . . . . . . . . . . . . . . . . . . . . . . . . . . . . . . . . . . . . . . . . 26Details of Some Properties Tab Features . . . . . . . . . . . . . . . . . . . . . . . . . . . . . . . . . . . . . . . . . 29Support Tab . . . . . . . . . . . . . . . . . . . . . . . . . . . . . . . . . . . . . . . . . . . . . . . . . . . . . . . . . . . . . . . . . . . 39
4 Network Management
General . . . . . . . . . . . . . . . . . . . . . . . . . . . . . . . . . . . . . . . . . . . . . . . . . . . . . . . . . . . . . . . . . . . . . . . . . . . . 42
Ethernet Speed Setting. . . . . . . . . . . . . . . . . . . . . . . . . . . . . . . . . . . . . . . . . . . . . . . . . . . . . . . . . . 42
TCP/IP Protocol Configuration. . . . . . . . . . . . . . . . . . . . . . . . . . . . . . . . . . . . . . . . . . . . . . . . . . . . . . . 43
Accessing TCP/IP Protocol Settings at the Printer . . . . . . . . . . . . . . . . . . . . . . . . . . . . . . . . . 43
TCP/IP LPD Enablement . . . . . . . . . . . . . . . . . . . . . . . . . . . . . . . . . . . . . . . . . . . . . . . . . . . . . . . . . . . . 46
Changing LPD Settings at the Printer. . . . . . . . . . . . . . . . . . . . . . . . . . . . . . . . . . . . . . . . . . . . . 46
8/6/2019 Enu WC74XX Sys Admin Guide
http://slidepdf.com/reader/full/enu-wc74xx-sys-admin-guide 4/208
WorkCentre 7425/7428/7435
System Administrator Guide
4
TCP/IP Dynamic Addressing. . . . . . . . . . . . . . . . . . . . . . . . . . . . . . . . . . . . . . . . . . . . . . . . . . . . . . . . . 48
TCP/IP Configuration Selection List . . . . . . . . . . . . . . . . . . . . . . . . . . . . . . . . . . . . . . . . . . . . . . 48
IP Filtering (IP Address Restriction) . . . . . . . . . . . . . . . . . . . . . . . . . . . . . . . . . . . . . . . . . . . . . . . . . . 50
Configure Port 9100 (Raw Printing) . . . . . . . . . . . . . . . . . . . . . . . . . . . . . . . . . . . . . . . . . . . . . . . . . . 51
Microsoft (NetBIOS over IP) Networks . . . . . . . . . . . . . . . . . . . . . . . . . . . . . . . . . . . . . . . . . . . . . . . 52
Before You Start . . . . . . . . . . . . . . . . . . . . . . . . . . . . . . . . . . . . . . . . . . . . . . . . . . . . . . . . . . . . . . . . 52IPP Configuration . . . . . . . . . . . . . . . . . . . . . . . . . . . . . . . . . . . . . . . . . . . . . . . . . . . . . . . . . . . . . . . . . . 54
Changing IPP Settings at the Printer . . . . . . . . . . . . . . . . . . . . . . . . . . . . . . . . . . . . . . . . . . . . . 54
EtherTalk (AppleTalk) Configuration . . . . . . . . . . . . . . . . . . . . . . . . . . . . . . . . . . . . . . . . . . . . . . . . . 57
Changing EtherTalk Settings at the Printer . . . . . . . . . . . . . . . . . . . . . . . . . . . . . . . . . . . . . . . 57
AS400 Printing . . . . . . . . . . . . . . . . . . . . . . . . . . . . . . . . . . . . . . . . . . . . . . . . . . . . . . . . . . . . . . . . . . . . . 59
AS400 Raw TCP/IP Printing to Port 9100 (CRTDEVPRT) . . . . . . . . . . . . . . . . . . . . . . . . . . . 59
5 Security
Authentication . . . . . . . . . . . . . . . . . . . . . . . . . . . . . . . . . . . . . . . . . . . . . . . . . . . . . . . . . . . . . . . . . . . . . 62
Overview . . . . . . . . . . . . . . . . . . . . . . . . . . . . . . . . . . . . . . . . . . . . . . . . . . . . . . . . . . . . . . . . . . . . . . . 62Configuring Authentication . . . . . . . . . . . . . . . . . . . . . . . . . . . . . . . . . . . . . . . . . . . . . . . . . . . . . 63Configuring Xerox Secure Access (Authentication) . . . . . . . . . . . . . . . . . . . . . . . . . . . . . . . . 69Access Control. . . . . . . . . . . . . . . . . . . . . . . . . . . . . . . . . . . . . . . . . . . . . . . . . . . . . . . . . . . . . . . . . . 73802.1x . . . . . . . . . . . . . . . . . . . . . . . . . . . . . . . . . . . . . . . . . . . . . . . . . . . . . . . . . . . . . . . . . . . . . . . . . 74Encryption Service Overview . . . . . . . . . . . . . . . . . . . . . . . . . . . . . . . . . . . . . . . . . . . . . . . . . . . . . 75Configuration of HTTPS (SSL/TLS) Communication Encryption. . . . . . . . . . . . . . . . . . . . . 76Configuration of E-mail Encryption/Digital Signature. . . . . . . . . . . . . . . . . . . . . . . . . . . . . . 78Configuration of Scan File Signatures (PDF/XPS Documents) . . . . . . . . . . . . . . . . . . . . . . 81IP Sec . . . . . . . . . . . . . . . . . . . . . . . . . . . . . . . . . . . . . . . . . . . . . . . . . . . . . . . . . . . . . . . . . . . . . . . . . . 82FIPS 140-2 . . . . . . . . . . . . . . . . . . . . . . . . . . . . . . . . . . . . . . . . . . . . . . . . . . . . . . . . . . . . . . . . . . . . . 83
Scheduled Image Overwrite . . . . . . . . . . . . . . . . . . . . . . . . . . . . . . . . . . . . . . . . . . . . . . . . . . . . . . . . . 84
Secure Watermark. . . . . . . . . . . . . . . . . . . . . . . . . . . . . . . . . . . . . . . . . . . . . . . . . . . . . . . . . . . . . . . . . . 85Configuring Secure Watermark . . . . . . . . . . . . . . . . . . . . . . . . . . . . . . . . . . . . . . . . . . . . . . . . . . 85
Secure Print . . . . . . . . . . . . . . . . . . . . . . . . . . . . . . . . . . . . . . . . . . . . . . . . . . . . . . . . . . . . . . . . . . . . . . . . 87
Using Secure Print from the Print Driver . . . . . . . . . . . . . . . . . . . . . . . . . . . . . . . . . . . . . . . . . . 87Using Secure Print from CentreWare Internet Services . . . . . . . . . . . . . . . . . . . . . . . . . . . . 87
Xerox Common Access Card. . . . . . . . . . . . . . . . . . . . . . . . . . . . . . . . . . . . . . . . . . . . . . . . . . . . . . . . . 89
Supported Card Readers . . . . . . . . . . . . . . . . . . . . . . . . . . . . . . . . . . . . . . . . . . . . . . . . . . . . . . . . 89Supported Card Types . . . . . . . . . . . . . . . . . . . . . . . . . . . . . . . . . . . . . . . . . . . . . . . . . . . . . . . . . . 89Preparation . . . . . . . . . . . . . . . . . . . . . . . . . . . . . . . . . . . . . . . . . . . . . . . . . . . . . . . . . . . . . . . . . . . . 90Installing the Common Access Card Software . . . . . . . . . . . . . . . . . . . . . . . . . . . . . . . . . . . . 91Enabling and Configuring the Common Access Card Feature . . . . . . . . . . . . . . . . . . . . . . 92
6 Scanning and Faxing
Enabling Options with Software Keys . . . . . . . . . . . . . . . . . . . . . . . . . . . . . . . . . . . . . . . . . . . . . . . . 98
Special Features . . . . . . . . . . . . . . . . . . . . . . . . . . . . . . . . . . . . . . . . . . . . . . . . . . . . . . . . . . . . . . . . . . . . 99

8/6/2019 Enu WC74XX Sys Admin Guide
http://slidepdf.com/reader/full/enu-wc74xx-sys-admin-guide 5/208
WorkCentre 7425/7428/7435
System Administrator Guide
5
Scan to E-mail. . . . . . . . . . . . . . . . . . . . . . . . . . . . . . . . . . . . . . . . . . . . . . . . . . . . . . . . . . . . . . . . . . . . . 100
E-mail Overview . . . . . . . . . . . . . . . . . . . . . . . . . . . . . . . . . . . . . . . . . . . . . . . . . . . . . . . . . . . . . . . 100Preparations. . . . . . . . . . . . . . . . . . . . . . . . . . . . . . . . . . . . . . . . . . . . . . . . . . . . . . . . . . . . . . . . . . . 100Installation Procedure. . . . . . . . . . . . . . . . . . . . . . . . . . . . . . . . . . . . . . . . . . . . . . . . . . . . . . . . . .101LDAP Server Configuration . . . . . . . . . . . . . . . . . . . . . . . . . . . . . . . . . . . . . . . . . . . . . . . . . . . . .106
Network Scanning (Using Templates). . . . . . . . . . . . . . . . . . . . . . . . . . . . . . . . . . . . . . . . . . . . . . .112
Overview . . . . . . . . . . . . . . . . . . . . . . . . . . . . . . . . . . . . . . . . . . . . . . . . . . . . . . . . . . . . . . . . . . . . . . 112Installation Checklist. . . . . . . . . . . . . . . . . . . . . . . . . . . . . . . . . . . . . . . . . . . . . . . . . . . . . . . . . . .113Configure a Scan Filing Location. . . . . . . . . . . . . . . . . . . . . . . . . . . . . . . . . . . . . . . . . . . . . . . .114Configure a Scan Filing Repository using FTP . . . . . . . . . . . . . . . . . . . . . . . . . . . . . . . . . . . .114Configure a Scan Filing Repository using SMB . . . . . . . . . . . . . . . . . . . . . . . . . . . . . . . . . . .115Testing Network Scanning (using templates) . . . . . . . . . . . . . . . . . . . . . . . . . . . . . . . . . . . .120
Scan to PC (FTP/SMB) . . . . . . . . . . . . . . . . . . . . . . . . . . . . . . . . . . . . . . . . . . . . . . . . . . . . . . . . . . . . .121
Overview . . . . . . . . . . . . . . . . . . . . . . . . . . . . . . . . . . . . . . . . . . . . . . . . . . . . . . . . . . . . . . . . . . . . . . 121Installation Procedure. . . . . . . . . . . . . . . . . . . . . . . . . . . . . . . . . . . . . . . . . . . . . . . . . . . . . . . . . .122Enabling Ports and Setting TCP/IP . . . . . . . . . . . . . . . . . . . . . . . . . . . . . . . . . . . . . . . . . . . . . .122Receiving Computer Configuration. . . . . . . . . . . . . . . . . . . . . . . . . . . . . . . . . . . . . . . . . . . . . .123
Adding the Receiving Computer’s Address to the Address Book . . . . . . . . . . . . . . . . . . .124Using the Scan to PC (FTP/SMB) Feature . . . . . . . . . . . . . . . . . . . . . . . . . . . . . . . . . . . . . . . .125
Scan to Home . . . . . . . . . . . . . . . . . . . . . . . . . . . . . . . . . . . . . . . . . . . . . . . . . . . . . . . . . . . . . . . . . . . . . 126
Preparing for Scan to Home Installation. . . . . . . . . . . . . . . . . . . . . . . . . . . . . . . . . . . . . . . . . 126Configure Scan to Home . . . . . . . . . . . . . . . . . . . . . . . . . . . . . . . . . . . . . . . . . . . . . . . . . . . . . . .126
Scanning to the Printer’s Hard Drive (Folders) . . . . . . . . . . . . . . . . . . . . . . . . . . . . . . . . . . . . . . . 128
Setting Up Folders at the Printer . . . . . . . . . . . . . . . . . . . . . . . . . . . . . . . . . . . . . . . . . . . . . . . . 128
Setup and Use of Job Flow Sheets with Folders . . . . . . . . . . . . . . . . . . . . . . . . . . . . . . . . . . . . . .131
Overview . . . . . . . . . . . . . . . . . . . . . . . . . . . . . . . . . . . . . . . . . . . . . . . . . . . . . . . . . . . . . . . . . . . . . . 131Enabling Ports and Setting TCP/IP . . . . . . . . . . . . . . . . . . . . . . . . . . . . . . . . . . . . . . . . . . . . . .131Configuring the SNMP Port . . . . . . . . . . . . . . . . . . . . . . . . . . . . . . . . . . . . . . . . . . . . . . . . . . . . . 133
Creating Job Flow Sheets. . . . . . . . . . . . . . . . . . . . . . . . . . . . . . . . . . . . . . . . . . . . . . . . . . . . . . .133
Scan to PC Desktop. . . . . . . . . . . . . . . . . . . . . . . . . . . . . . . . . . . . . . . . . . . . . . . . . . . . . . . . . . . . . . . .136
Overview . . . . . . . . . . . . . . . . . . . . . . . . . . . . . . . . . . . . . . . . . . . . . . . . . . . . . . . . . . . . . . . . . . . . . . 136Software Installation Procedure . . . . . . . . . . . . . . . . . . . . . . . . . . . . . . . . . . . . . . . . . . . . . . . .136
Installing and Using the Network Scanner Utility . . . . . . . . . . . . . . . . . . . . . . . . . . . . . . . . . . . . 138
Before Installing the Network Scanner Utility. . . . . . . . . . . . . . . . . . . . . . . . . . . . . . . . . . . . 138Installing the Network Scanner Utility. . . . . . . . . . . . . . . . . . . . . . . . . . . . . . . . . . . . . . . . . . . 138Uninstalling the Network Scanner Utility . . . . . . . . . . . . . . . . . . . . . . . . . . . . . . . . . . . . . . . .138Importing Scanned Data from the Folder to an Image-Editing Application . . . . . . . . 138Importing Scanned Data from the Folder using Network Scanner Utility 3. . . . . . . . .139
Xerox Extensible Interface Program. . . . . . . . . . . . . . . . . . . . . . . . . . . . . . . . . . . . . . . . . . . . . . . . .140
XEIP Setup . . . . . . . . . . . . . . . . . . . . . . . . . . . . . . . . . . . . . . . . . . . . . . . . . . . . . . . . . . . . . . . . . . . .140
Fax . . . . . . . . . . . . . . . . . . . . . . . . . . . . . . . . . . . . . . . . . . . . . . . . . . . . . . . . . . . . . . . . . . . . . . . . . . . . . . . 142
Overview . . . . . . . . . . . . . . . . . . . . . . . . . . . . . . . . . . . . . . . . . . . . . . . . . . . . . . . . . . . . . . . . . . . . . . 142LAN Fax (PCL Drivers) . . . . . . . . . . . . . . . . . . . . . . . . . . . . . . . . . . . . . . . . . . . . . . . . . . . . . . . . . .151LAN Fax (PostScript Drivers) . . . . . . . . . . . . . . . . . . . . . . . . . . . . . . . . . . . . . . . . . . . . . . . . . . . .152
8/6/2019 Enu WC74XX Sys Admin Guide
http://slidepdf.com/reader/full/enu-wc74xx-sys-admin-guide 6/208
WorkCentre 7425/7428/7435
System Administrator Guide
6
Server Fax. . . . . . . . . . . . . . . . . . . . . . . . . . . . . . . . . . . . . . . . . . . . . . . . . . . . . . . . . . . . . . . . . . . . . . . . .154
Overview . . . . . . . . . . . . . . . . . . . . . . . . . . . . . . . . . . . . . . . . . . . . . . . . . . . . . . . . . . . . . . . . . . . . . . 154Installation Checklist. . . . . . . . . . . . . . . . . . . . . . . . . . . . . . . . . . . . . . . . . . . . . . . . . . . . . . . . . . .154Configure a Fax Filing Location (Repository). . . . . . . . . . . . . . . . . . . . . . . . . . . . . . . . . . . . .155Configure a Fax Filing Repository using FTP . . . . . . . . . . . . . . . . . . . . . . . . . . . . . . . . . . . . .156Configure a Fax Filing Repository using SMB . . . . . . . . . . . . . . . . . . . . . . . . . . . . . . . . . . . . 157
Configure a Fax Filing Repository using SMTP . . . . . . . . . . . . . . . . . . . . . . . . . . . . . . . . . . . 159Features that Support Server Fax . . . . . . . . . . . . . . . . . . . . . . . . . . . . . . . . . . . . . . . . . . . . . . .160
Internet Fax (iFAX) . . . . . . . . . . . . . . . . . . . . . . . . . . . . . . . . . . . . . . . . . . . . . . . . . . . . . . . . . . . . . . . .162
Overview . . . . . . . . . . . . . . . . . . . . . . . . . . . . . . . . . . . . . . . . . . . . . . . . . . . . . . . . . . . . . . . . . . . . . . 162Installation Procedure. . . . . . . . . . . . . . . . . . . . . . . . . . . . . . . . . . . . . . . . . . . . . . . . . . . . . . . . . .162Enabling the E-mail Ports and Setting TCP/IP . . . . . . . . . . . . . . . . . . . . . . . . . . . . . . . . . . . .163Configuring the E-mail Environment . . . . . . . . . . . . . . . . . . . . . . . . . . . . . . . . . . . . . . . . . . . .164Testing iFAX. . . . . . . . . . . . . . . . . . . . . . . . . . . . . . . . . . . . . . . . . . . . . . . . . . . . . . . . . . . . . . . . . . .167
7 Printer Management
Xerox Standard Accounting . . . . . . . . . . . . . . . . . . . . . . . . . . . . . . . . . . . . . . . . . . . . . . . . . . . . . . . . 170
Overview . . . . . . . . . . . . . . . . . . . . . . . . . . . . . . . . . . . . . . . . . . . . . . . . . . . . . . . . . . . . . . . . . . . . . . 170Enabling Xerox Standard Accounting. . . . . . . . . . . . . . . . . . . . . . . . . . . . . . . . . . . . . . . . . . . .171Create a Group Account. . . . . . . . . . . . . . . . . . . . . . . . . . . . . . . . . . . . . . . . . . . . . . . . . . . . . . . .171Create a User Account and Set Usage Limits . . . . . . . . . . . . . . . . . . . . . . . . . . . . . . . . . . . . 171Maximum Usage Limits and Resetting Individual Usage Limits . . . . . . . . . . . . . . . . . . .172Using XSA at the printer. . . . . . . . . . . . . . . . . . . . . . . . . . . . . . . . . . . . . . . . . . . . . . . . . . . . . . . . 172Resetting Usage Data. . . . . . . . . . . . . . . . . . . . . . . . . . . . . . . . . . . . . . . . . . . . . . . . . . . . . . . . . .173Print a Usage Report . . . . . . . . . . . . . . . . . . . . . . . . . . . . . . . . . . . . . . . . . . . . . . . . . . . . . . . . . . .173Enable XSA in your Print Drivers. . . . . . . . . . . . . . . . . . . . . . . . . . . . . . . . . . . . . . . . . . . . . . . . .173Backing Up XSA Data and Settings and Cloning to Another Device. . . . . . . . . . . . . . . .174Audit Log . . . . . . . . . . . . . . . . . . . . . . . . . . . . . . . . . . . . . . . . . . . . . . . . . . . . . . . . . . . . . . . . . . . . .175
Annotation (Bates Stamping) . . . . . . . . . . . . . . . . . . . . . . . . . . . . . . . . . . . . . . . . . . . . . . . . . . . . . .177Overview . . . . . . . . . . . . . . . . . . . . . . . . . . . . . . . . . . . . . . . . . . . . . . . . . . . . . . . . . . . . . . . . . . . . . . 177Configuring Bates Stamp Settings . . . . . . . . . . . . . . . . . . . . . . . . . . . . . . . . . . . . . . . . . . . . . . 177Configuring a Precise Bates Stamp Location. . . . . . . . . . . . . . . . . . . . . . . . . . . . . . . . . . . . .177
Media Card Reader . . . . . . . . . . . . . . . . . . . . . . . . . . . . . . . . . . . . . . . . . . . . . . . . . . . . . . . . . . . . . . . .179
Media Card Reader Hardware . . . . . . . . . . . . . . . . . . . . . . . . . . . . . . . . . . . . . . . . . . . . . . . . . .179Supported Media and File Formats. . . . . . . . . . . . . . . . . . . . . . . . . . . . . . . . . . . . . . . . . . . . . .179Inserting and Ejecting Media . . . . . . . . . . . . . . . . . . . . . . . . . . . . . . . . . . . . . . . . . . . . . . . . . . . 180Media Print Text Tab. . . . . . . . . . . . . . . . . . . . . . . . . . . . . . . . . . . . . . . . . . . . . . . . . . . . . . . . . . . 181Index Print . . . . . . . . . . . . . . . . . . . . . . . . . . . . . . . . . . . . . . . . . . . . . . . . . . . . . . . . . . . . . . . . . . . .181Advanced Settings . . . . . . . . . . . . . . . . . . . . . . . . . . . . . . . . . . . . . . . . . . . . . . . . . . . . . . . . . . . . .181Selecting and Printing Photo Files. . . . . . . . . . . . . . . . . . . . . . . . . . . . . . . . . . . . . . . . . . . . . . .181Problem Solving . . . . . . . . . . . . . . . . . . . . . . . . . . . . . . . . . . . . . . . . . . . . . . . . . . . . . . . . . . . . . . .182
USB Printing . . . . . . . . . . . . . . . . . . . . . . . . . . . . . . . . . . . . . . . . . . . . . . . . . . . . . . . . . . . . . . . . . . . . . . 184
Overview . . . . . . . . . . . . . . . . . . . . . . . . . . . . . . . . . . . . . . . . . . . . . . . . . . . . . . . . . . . . . . . . . . . . . . 184Supported Media and File Formats. . . . . . . . . . . . . . . . . . . . . . . . . . . . . . . . . . . . . . . . . . . . . .184Selecting and Printing Text Files . . . . . . . . . . . . . . . . . . . . . . . . . . . . . . . . . . . . . . . . . . . . . . . .185Selecting and Printing Photo Files. . . . . . . . . . . . . . . . . . . . . . . . . . . . . . . . . . . . . . . . . . . . . . .186

8/6/2019 Enu WC74XX Sys Admin Guide
http://slidepdf.com/reader/full/enu-wc74xx-sys-admin-guide 7/208
WorkCentre 7425/7428/7435
System Administrator Guide
7
Thumbnail Preview . . . . . . . . . . . . . . . . . . . . . . . . . . . . . . . . . . . . . . . . . . . . . . . . . . . . . . . . . . . . . . . .187
Hard Disk Data Encryption . . . . . . . . . . . . . . . . . . . . . . . . . . . . . . . . . . . . . . . . . . . . . . . . . . . . . . . . .188
To Verify or Change Hard Disk Data Encryption. . . . . . . . . . . . . . . . . . . . . . . . . . . . . . . . . .188Encryption Key For Confidential Data . . . . . . . . . . . . . . . . . . . . . . . . . . . . . . . . . . . . . . . . . . .188
Xerox Smart eSolutions . . . . . . . . . . . . . . . . . . . . . . . . . . . . . . . . . . . . . . . . . . . . . . . . . . . . . . . . . . . .189
Enable communications with the Xerox Smart eSolutions Server . . . . . . . . . . . . . . . . . . 189Cancelling Communications with the Xerox Smart eSolutions Server . . . . . . . . . . . . . .190
8 Troubleshooting
General Troubleshooting Procedure. . . . . . . . . . . . . . . . . . . . . . . . . . . . . . . . . . . . . . . . . . . . . . . . .192
TCP/IP Troubleshooting . . . . . . . . . . . . . . . . . . . . . . . . . . . . . . . . . . . . . . . . . . . . . . . . . . . . . . . . . . .193
Check Physical Media and Network Interface Cards . . . . . . . . . . . . . . . . . . . . . . . . . . . . . . 193At the Printer . . . . . . . . . . . . . . . . . . . . . . . . . . . . . . . . . . . . . . . . . . . . . . . . . . . . . . . . . . . . . . . . . .193At the Computer. . . . . . . . . . . . . . . . . . . . . . . . . . . . . . . . . . . . . . . . . . . . . . . . . . . . . . . . . . . . . . .194
NetBIOS over IP Troubleshooting . . . . . . . . . . . . . . . . . . . . . . . . . . . . . . . . . . . . . . . . . . . . . . . . . . 195
Check Physical Media and Network Interface Cards . . . . . . . . . . . . . . . . . . . . . . . . . . . . . . 195
At the Printer . . . . . . . . . . . . . . . . . . . . . . . . . . . . . . . . . . . . . . . . . . . . . . . . . . . . . . . . . . . . . . . . . .195At the DNS or WINS Server . . . . . . . . . . . . . . . . . . . . . . . . . . . . . . . . . . . . . . . . . . . . . . . . . . . . . 196At the Computer. . . . . . . . . . . . . . . . . . . . . . . . . . . . . . . . . . . . . . . . . . . . . . . . . . . . . . . . . . . . . . .196
IPP Troubleshooting . . . . . . . . . . . . . . . . . . . . . . . . . . . . . . . . . . . . . . . . . . . . . . . . . . . . . . . . . . . . . .198
Check Physical Media and Network Interface Cards . . . . . . . . . . . . . . . . . . . . . . . . . . . . . . 198At the Printer . . . . . . . . . . . . . . . . . . . . . . . . . . . . . . . . . . . . . . . . . . . . . . . . . . . . . . . . . . . . . . . . . .198At the Computer. . . . . . . . . . . . . . . . . . . . . . . . . . . . . . . . . . . . . . . . . . . . . . . . . . . . . . . . . . . . . . .199
EtherTalk Troubleshooting . . . . . . . . . . . . . . . . . . . . . . . . . . . . . . . . . . . . . . . . . . . . . . . . . . . . . . . . .201
Check Physical Media and Network Interface Cards . . . . . . . . . . . . . . . . . . . . . . . . . . . . . . 201At the Printer . . . . . . . . . . . . . . . . . . . . . . . . . . . . . . . . . . . . . . . . . . . . . . . . . . . . . . . . . . . . . . . . . .201At a Macintosh Computer . . . . . . . . . . . . . . . . . . . . . . . . . . . . . . . . . . . . . . . . . . . . . . . . . . . . . . 201
Scanning to Hard Drive Troubleshooting . . . . . . . . . . . . . . . . . . . . . . . . . . . . . . . . . . . . . . . . . . .202Check Physical Media and Network Interface Cards . . . . . . . . . . . . . . . . . . . . . . . . . . . . . . 202At the Computer. . . . . . . . . . . . . . . . . . . . . . . . . . . . . . . . . . . . . . . . . . . . . . . . . . . . . . . . . . . . . . .202At the Printer . . . . . . . . . . . . . . . . . . . . . . . . . . . . . . . . . . . . . . . . . . . . . . . . . . . . . . . . . . . . . . . . . .202At the Computer. . . . . . . . . . . . . . . . . . . . . . . . . . . . . . . . . . . . . . . . . . . . . . . . . . . . . . . . . . . . . . .203
Image Quality Troubleshooting . . . . . . . . . . . . . . . . . . . . . . . . . . . . . . . . . . . . . . . . . . . . . . . . . . . .204
Color Calibration. . . . . . . . . . . . . . . . . . . . . . . . . . . . . . . . . . . . . . . . . . . . . . . . . . . . . . . . . . . . . . .206

8/6/2019 Enu WC74XX Sys Admin Guide
http://slidepdf.com/reader/full/enu-wc74xx-sys-admin-guide 8/208
WorkCentre 7425/7428/7435
System Administrator Guide
8

8/6/2019 Enu WC74XX Sys Admin Guide
http://slidepdf.com/reader/full/enu-wc74xx-sys-admin-guide 9/208
9
1General Information
This chapter includes:
• Resources on page 10
8/6/2019 Enu WC74XX Sys Admin Guide
http://slidepdf.com/reader/full/enu-wc74xx-sys-admin-guide 10/208
General Information
WorkCentre 7425/7428/7435
System Administrator Guide
10
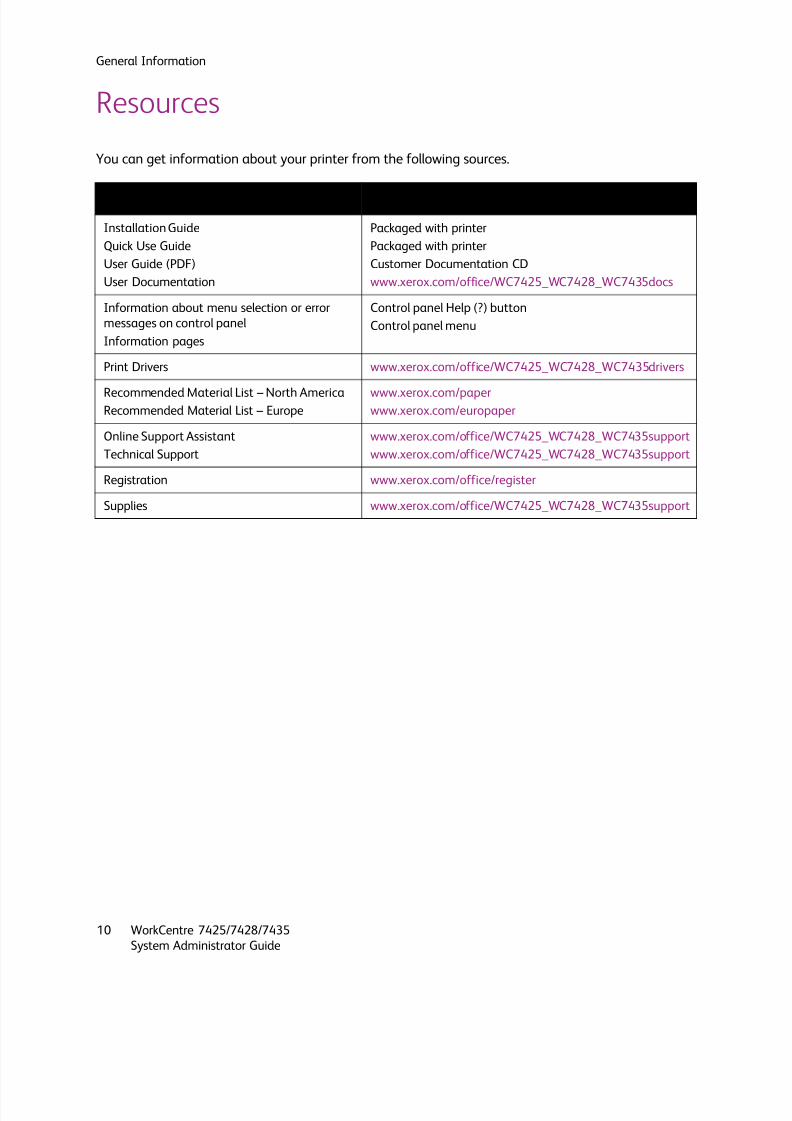
Resources
You can get information about your printer from the following sources.
Information Source
Installation Guide
Quick Use Guide
User Guide (PDF)
User Documentation
Packaged with printer
Packaged with printer
Customer Documentation CD
www.xerox.com/office/WC7425_WC7428_WC7435docs
Information about menu selection or error
messages on control panel
Information pages
Control panel Help (?) button
Control panel menu
Print Drivers www.xerox.com/office/WC7425_WC7428_WC7435drivers
Recommended Material List – North AmericaRecommended Material List – Europe
www.xerox.com/paperwww.xerox.com/europaper
Online Support Assistant
Technical Support
www.xerox.com/office/WC7425_WC7428_WC7435support
www.xerox.com/office/WC7425_WC7428_WC7435support
Registration www.xerox.com/office/register
Supplies www.xerox.com/office/WC7425_WC7428_WC7435support

8/6/2019 Enu WC74XX Sys Admin Guide
http://slidepdf.com/reader/full/enu-wc74xx-sys-admin-guide 11/208
11
2Installation
This chapter includes:
• Installation on page 12
• Print Driver Installation on page 13
8/6/2019 Enu WC74XX Sys Admin Guide
http://slidepdf.com/reader/full/enu-wc74xx-sys-admin-guide 12/208
Installation
WorkCentre 7425/7428/7435
System Administrator Guide
12
Installation
Overview
1. Connect one end of a Category 5 twisted pair cable to a live network drop. Connect the other endof the cable to the RJ–45 socket at the rear of the printer.
2. Set the printer's power switch toOn and wait until the main screen is displayed.
3. Print a Configuration Report. Refer to the Configuration Report to determine which ports andprotocols are enabled for your network. For more information see Configuration Report on page 22.
4. Enable the printer’s internet services (HTTP) and TCP/IP protocol so that you can configure theprinter using the CentreWare Internet Services Web interface. For more information seeCentreWare Internet Services on page 23.
5. Install the print drivers and set up computers to communicate with the printer.
6. If you have purchased optional features for your printer, such as Scanning to the printer's HardDrive, configure these options. For more information see Scanning and Faxing on page 97.
Changing the Default Main Screen
1. Press the Log In/Out button on the control panel.
2. Enter the System Administrator’s Login ID and Passcode if prompted (default admin, 1111), andpress Enter.
3. Press the Machine Status button.
4. Touch the Tools tab.
5. Touch Common Service Settings, touch Screen/Button Settings, select Service Screen Default,touch Change Settings, make your selection and touch Save.
6. Touch Close until the Tools tab is displayed.7. Wait for the Auto Clear service to log you out.

8/6/2019 Enu WC74XX Sys Admin Guide
http://slidepdf.com/reader/full/enu-wc74xx-sys-admin-guide 13/208
8/6/2019 Enu WC74XX Sys Admin Guide
http://slidepdf.com/reader/full/enu-wc74xx-sys-admin-guide 14/208
Installation
WorkCentre 7425/7428/7435
System Administrator Guide
14
Configure the Print Driver
1. Click Start, select Printers and Faxes. The Vista path is Start\Control Panel\Printer(s).
2. Right click the printer's icon and select Properties.
3. Use the available tabs to set the printer's job processing defaults, including enabling Bi-DirectionalCommunication. Additional settings may be accessed by clicking the Printing Preferences button
on the General Tab.
NetBIOS over IP Peer to Peer Printing
Before You Start
1. Obtain the print driver for your computer's operating system. See Obtaining Drivers on page 13.
2. Print a Configuration Report. See Configuration Report on page 22.
3. On the Configuration Report, verify that SMB and TCP/IP are enabled. Verify that the workgroup'sdefault name is Workgroup, or a valid, 15 character maximum, workgroup name. Also note theprinter's SMB Host Name (which assures the uniqueness of the printer's name within the
Workgroup). To enable SMB, see Microsoft (NetBIOS over IP) Networks on page 52. Modify thename of the Workgroup, or printer's name (SMB Host name) using CentreWare Internet Services.
4. Make sure to configure the DNS/WINS Server(s) for NetBIOS name to IP address resolution. Thenprovide the printer with the addresses of the Servers. For more information, see TCP/IP ProtocolConfiguration on page 43.
An Alternate Procedure for Setting up NetBIOS over IP Peer to Peer Printing
Note: Experienced System Administrators can use the following procedure:
1. On Windows XP computers, from the Properties selection of the Local Area Connection icon,verify that the Internet Protocol (TCP/IP) is installed. Select the protocol and click Properties. Verifythat TCP/IP is configured for use of the DNS Server. Click the Advanced button and select the DNS
tab. Verify that the check box labeled Register this connection's addresses in DNS is checked. Selectthe WINS Tab and verify that the NetBIOS setting is set to either Use NetBIOS Setting from theDHCP Server, or that NetBIOS is enabled over TCP/IP. Click Cancel twice and verify that the Clientfor Microsoft Networks is installed. Finally, with your Operating System Installer Disk readilyavailable, through Add/Remove Programs and Add/Remove Windows Components, select OtherNetwork File and Print Services. Click Details, check the box for Print Services for UNIX, and clickOK and Next.
2. When prompted for the Name or address of the server providing LPD enter the printer'sSMB HostName as seen on the printer's Configuration Report.
3. When prompted for a queue name, enter your preference of an easily-identified name for thisprinter.
4. Install the print driver on your computer and, when prompted to select a port to print through,select the LPR port that you just created.
5. Print a Test Print to verify successful communication with the printer.
8/6/2019 Enu WC74XX Sys Admin Guide
http://slidepdf.com/reader/full/enu-wc74xx-sys-admin-guide 15/208
Print Driver Installation
WorkCentre 7425/7428/7435
System Administrator Guide
15
NetBIOS over IP Client/Server Printing
Before You Start
1. Obtain the print driver for your computer's operating system. See Obtaining Drivers on page 13.
2. Print a Configuration Report. See Configuration Report on page 22.
3. On the Configuration Report, verify that SMB is enabled. Also, verify that TCP/IP is enabled as oneof the supported protocols. To enable SMB, see Microsoft (NetBIOS over IP) Networks on page 52).
4. Set Up a Server to Queue Jobs to the Printer. If you have not already set up a Server, for a quick-step set up procedure, for help see Microsoft (NetBIOS over IP) Networks on page 52.
Windows Print Driver Installation
Verify that the Correct Protocols and Services are Installed in the Computer
1. Verify that the Internet protocol (TCP/IP) is installed in the Computer. On the Windows XP desktop,click Start, Control Panel, and double click Network Connections. Right click the Local AreaConnection icon and select Properties.
On the Windows 2000 Desktop, right click the My Network Places icon and select Properties. Rightclick the Local Area Connection icon and select Properties.
2. Verify that the Internet Protocol (TCP/IP) has been loaded. If it has, click this item and click theProperties button to verify that this computer is using either a dynamic or static method to obtaina valid TCP/IP address.
3. Also verify that this computer is using a DNS (or WINS) Server for resolution of the NetBIOS Hostname (typically the same name as the computer's Internet host name). If the TCP/IP protocol isnot loaded, click the Install… button, then select Protocol as the type of network component thatyou wish to install. Click the Add… button and select Internet Protocol (TCP/IP).
4. With your operating system installer disk readily available, click theHave Disk… button and followany remaining instructions.
5. Verify that the Client for Microsoft Networks is installed in the computer. On the Windows XPdesktop, click Start, Control Panel, and double click Network Connections. Right click the LocalArea Connection icon and select Properties.
On the Windows 2000 Desktop, right click the My Network Places icon and select Properties. Rightclick the Local Area Connection icon and select Properties.
6. If the Client for Microsoft Networks is not loaded, click theInstall… button, then select Client asthe type of network component that you wish to install.
7. Click the Add… button and select Client for Microsoft Networks.
8. With your operating system installer disk readily available, click theHave Disk… button and followany remaining instructions.
Add the Printer to the Windows Desktop
1. On the desktop, from Start, select Printers and Faxes.
2. Double-click Add Printer. From Printer Tasks, select Add a printer.
3. When the Add Printer Wizard displays, click Next.
4. Select Network Printer and click Next.
8/6/2019 Enu WC74XX Sys Admin Guide
http://slidepdf.com/reader/full/enu-wc74xx-sys-admin-guide 16/208
8/6/2019 Enu WC74XX Sys Admin Guide
http://slidepdf.com/reader/full/enu-wc74xx-sys-admin-guide 17/208
Print Driver Installation
WorkCentre 7425/7428/7435
System Administrator Guide
17
5. On the report, verify that IPP is enabled. If it is not, enable it. See IPP Configuration on page 54.
6. Verify that IPP is using DNS to resolve Host Names to IP Addresses in support of IPP printing. Enteryour printer’s IP address into your Web browser’s address field to accessCentreWare Internet Services. Click the Properties tab. Click the Connectivity folder, then on theProtocols folder and select IPP. Verify that the DNS Enablement check box is selected.
Verify that TCP/IP is Installed in the Computer
1. On the Windows 2000 Desktop, right click theMy Network Places icon and select Properties. Rightclick the Local Area Connection icon and select Properties.
On the Windows XP desktop, click Start, Control Panel, and double click Network Connections.
2. Right click the Local Area Connection icon and select Properties.
3. Verify that the Internet Protocol (TCP/IP) has been loaded. If it has, click this item and click theProperties button to verify that this computer is using either a dynamic or static method to obtaina valid TCP/IP address.
4. If the TCP/IP protocol is not loaded, click the Install… button, then select Protocol as the type of network component that you wish to install. Click the Add… button and select Internet Protocol
(TCP/IP).5. With your Operating System Installer Disk readily available, click Have Disk… and follow any
remaining instructions.
6. Once the protocol has been installed, you can click the item and click the Properties button to verifyor set up the method being used for TCP/IP addressing.
Add the Printer to the Windows Desktop
1. On the desktop, from the Start menu, select Printers and Faxes. The Vista path is Start\Control Panel\Printer(s) .
2. On Windows XP, from Printer Tasks, select Add a printer.
3. When the Add Printer Wizard displays, click Next.
4. Select Network Printer and click Next.
5. To create an IPP printer select Connect to a printer on the Internet….
6. Type http:// followed by the printer's fully qualified Domain name or IP address in the URL field.You may have to type /ipp after the printer's name or ip address. the printer's name can be eitherthe Internet Host Name or the SMB Host Name as shown on the printer's Configuration Report,depending on the name resolution used by your network (DNS or WINS).
7. Click Next.
8. When prompted for the driver files, select Have Disk and browse to the location of your print driver.
9. Select the .INF file then click Open.
10. When the Install from Disk screen displays, verify the path and file name are correct and clickOK.
11. Select the model that corresponds to your printer and clickNext.
12. Enter a name for your printer and select either Yes or No for making this printer your defaultWindows printer. Select Yes if you will be printing primarily to this printer from your Windowsapplications. Click Next.
13. Select Yes to print a test page. Click Next.
14. Click Finish.
8/6/2019 Enu WC74XX Sys Admin Guide
http://slidepdf.com/reader/full/enu-wc74xx-sys-admin-guide 18/208
Installation
WorkCentre 7425/7428/7435
System Administrator Guide
18
Configure the Print Driver
1. On the Windows XP desktop, fromStart, select Printers and Faxes. The Vista path is Start\Control Panel\Printer(s).
2. Right click the printer's icon and select Properties. Use the available tabs to set the printer's jobprocessing defaults, including enabling Bi-Directional Communication. Additional settings may beaccessed by clicking the Printing Preferences button on the General tab.
EtherTalk (AppleTalk) Peer to Peer Printing
Before You Start
1. Obtain the print driver for your computer's operating system. See Obtaining Drivers on page 13.
2. Print a Configuration Report. See Configuration Report on page 22.
3. On the Configuration Report, under the EtherTalk data label, verify that the EtherTalk port isenabled, and that the printer has been assigned an EtherTalk (Printer) Name and an EtherTalkzone. If one or more of these parameters needs to be configured, see EtherTalk (AppleTalk)Configuration on page 57.
Installation Instructions for Macintosh OS X 10.3 and Newer
1. Double click to open the folder containing the drivers.
2. Double click to open the machine model.dmg.
3. Double click to open the machine model.pkg file.
4. When the Welcome screen displays, click Continue.
5. Click Continue, then Agree or Accept to accept the License Agreement.
6. Select the required disk (if necessary) where you want to install the printer. ClickContinue.
7. Click Install.
8. Click Close, and restart the computer.9. When the computer has restarted, double click the hard drive icon.
10. Double click the Applications icon.
11. Double click the Utilities folder.
12. Double click Print Center icon.
13. Double click Add to add a new printer.
14. Select AppleTalk as your network protocol.
15. Select the required AppleTalk zone.
16. Select the printer that you wish to set up.
17. Select the Printer Model (that is, choose the PPD for your printer).
18. Click Add.
19. Print a document from an application to verify that the printer is installed correctly.
8/6/2019 Enu WC74XX Sys Admin Guide
http://slidepdf.com/reader/full/enu-wc74xx-sys-admin-guide 19/208
Print Driver Installation
WorkCentre 7425/7428/7435
System Administrator Guide
19
Common UNIX Printing System (CUPS)
Overview
The Common UNIXS Printing System (CUPS) was created by Easy Software Products in 1998 as a
modern replacement for the Berkeley Line Printer Daemon (LPD) and AT&T Line Printer (LP) systemdesigned in the 1970's for printing text to line printers.
Currently available for downloading from a number of sources on the Internet, such as www.cups.org,CUPS is offered in both source code and binary distributions.
Before You Start
Verify that IPP and Port 9100 are enabled at your printer. For more information see IPP Configurationon page 54 and Configure Port 9100 (Raw Printing) on page 51.
Installing CUPS on the UNIX computer
The instructions for installing and building CUPS are contained in the CUPS Software AdministratorsManual, written and copyrighted by Easy Software Products and available for downloading atwww.cups.org/documentation.php . An Overview of the Common UNIX Printing System, Version 1.1 byEasy Software is also available at this site.
A case history of the building and installation of CUPS source code on a FreeBSD 4.2 machine, isdescribed in the article entitled Using CUPS – the Common UNIX Printing System, by Ralph Krause,available at www.cups.org, through thes/documentation/tutorials/BSD Today – Using CUPS selections.Directory locations for the CUPS files, as described in this article, are the following:
• Programs were copied to /usr/local/bin and usr/local/sbin.
• Documentation was copied to /usr/local/share/docs/cups.
• A directory called /usr/local/share/cups was created for various CUPS data files.
• The configuration files were copied to /usr/local/etc/cups.
The binary distribution of CUPS is available in tar format with installation and removal scripts, as wellas in rpm and dpkg formats for RedHat and Debian versions of Linux. After logging into the computeras root (su) and downloading the appropriate files to the root directory, the CUPS installation processbegins as follows:
Tar format:
After untarring the files, run the installation script with ./cups.install (and pressEnter).
RPM format:
rpm -e lpr
rpm -i cups-1.1-linux-M.m.n-intel.rpm (and press Enter).
8/6/2019 Enu WC74XX Sys Admin Guide
http://slidepdf.com/reader/full/enu-wc74xx-sys-admin-guide 20/208
Installation
WorkCentre 7425/7428/7435
System Administrator Guide
20
Debian format:
dpkg -i cups-1.1-linux-M.m.n-intel.deb (and press Enter).
Note: RedHat Linux, versions 7.3 and newer, include CUPS support, so software downloading isunnecessary. Also, CUPS is the default printing system used by Mandrake Linux.
Installing the Xerox PPD on the Computer
The Xerox PPD for CUPS should be available on one of the CDs that came with your printer. If you nolonger have the CDs, download the PPD from:
www.xerox.com/office/WC7425_WC7428_WC7435support .
From the CD or from the downloaded Internet file, with root privileges copy the PPD into your cups ppdfolder on your computer. If you are unsure of the folder's location, use the Find command to locate theppd's. An example of the location of the ppd.gz files in RedHat 8.1 is /usr/share/cups/model.
Adding the Xerox Printer
1. Use the PS command to make sure that the CUPS daemon is running. The daemon can berestarted from Linux using the init.d script that was created when the CUPS RPM was installed. Thecommand is > /etc/init.d/cups restart. A similar script or directory entry should have been created inSystem V and BSD. For the example of CUPS built and installed on a FreeBSD 4.2 machine from thesource code, run cupsd from /usr/local/sbin. (cd /usr/local/sbin cupsd press Enter).
2. Type http://localhost:631/admin into the address (URL) box of your Web browser and press Enter.
3. For User ID, type root. For the requested password, type the root password.
4. Click Add Printer and follow the on screen prompts to add the printer to the CUPS printer list.
Printing with CUPS
CUPS supports the use of both the System V (lp) and Berkeley (lpr) printing commands.• Use the -d option with the lp command to print to a specific printer.
lp -dprinter filename (and press Enter)
• Use the -P option with the lpr command to print to a specific printer.
lpr -Pprinter filename (and press Enter)
For complete information on CUPS printing capabilities, see the CUPS Software Users Manual availablefrom www.cups.org/documentation.php .
Installing Unicode Fonts
The Xerox Unicode 3.0 font kit for SAP is available for this printer. Install the Unicode fonts to printdocuments in multiple languages, in an SAP environment. To order the kit, contact your Xeroxrepresentative.

8/6/2019 Enu WC74XX Sys Admin Guide
http://slidepdf.com/reader/full/enu-wc74xx-sys-admin-guide 21/208
21
3Administrative Tools
This chapter includes:
• Configuration Report on page 22
• CentreWare Internet Services on page 23

8/6/2019 Enu WC74XX Sys Admin Guide
http://slidepdf.com/reader/full/enu-wc74xx-sys-admin-guide 22/208
Administrative Tools
WorkCentre 7425/7428/7435
System Administrator Guide
22
Configuration Report
To print a Configuration Report:
1. Press the Machine Status button on the control panel.
2. Press the Print Reports button.
3. Press the Copy Reports button.
4. Press the Configuration Report button.
5. Press the green Start button, to the right of the control panel’s numeric keypad.
6. The printing process will be displayed on the touch screen.
The Configuration Report is formatted into two columns with horizontal ruled lines indicating fourdistinct data display areas on the print.
• The first area displays System Settings.
• The second area displays Copy Service Settings.
• The third area displays Print Service Settings.• The fourth area displays Communication Settings.
8/6/2019 Enu WC74XX Sys Admin Guide
http://slidepdf.com/reader/full/enu-wc74xx-sys-admin-guide 23/208
CentreWare Internet Services
WorkCentre 7425/7428/7435
System Administrator Guide
23
CentreWare Internet Services
CentreWare Internet Services is the Web interface to the HTTP server in the printer. It allows you toconfigure the printer remotely from a Web browser on a network computer.
Note: You must set your Web browser so that it will not use a proxy server to accessCentreWare Internet Services.
System Administrator Login ID and Passcode
If authentication is enabled, you must enter the system administrator login ID and passcode to accessall printer settings. These credentials are required when accessing printer settings at the control panel.and through CentreWare Internet Services. You are required to enter system administrator credentialswhen accessing settings in the Properties tab in CentreWare Internet Services.
The default settings are:
• Administrator Login ID: admin• Passcode: 1111
For more information see Authentication on page 62.
Changing Internet Services (HTTP) Settings
1. Press the Log In/Out button on the control panel.
2. Enter the System Administrator’s Login ID and Passcode if prompted (default admin, 1111), andpress Enter.
3. Press the Machine Status button.
4. Press the Tools tab.5. Press Connectivity & Network Setup.
6. Press Port Settings.
7. When the Port Settings menu displays, press the down arrow key to view additional selections.
8. Press the Internet Services (HTTP) selection line.
9. Press the Change Settings button in the lower right corner of the Port Settings menu screen.
10. When the Internet Services (HTTP) menu displays, you have two settings available for selection.The Port Settings menu selections are Port Status and Internet Services Port Number. Afterpressing the selection line, to access available settings press the Change Settings button in thelower right corner of the touch screen.
Enabling Internet Services (HTTP)
1. Press Port Status in the Internet Services (HTTP) menu.
2. Press the Change Settings button.
3. Press Enabled.
4. Press Save.
8/6/2019 Enu WC74XX Sys Admin Guide
http://slidepdf.com/reader/full/enu-wc74xx-sys-admin-guide 24/208
Administrative Tools
WorkCentre 7425/7428/7435
System Administrator Guide
24
5. To exit the screen, without making any changes, press the Cancel button.
Internet Services Port Number
1. Press Internet Services Port Number in the Internet Services (HTTP) menu.
2. Press Change Settings.
3. On the Port Number screen, use the keypad to enter the port number (default of 80).
4. Press Save.
5. Press Cancel to exit without making changes.
6. To exit the Internet Services Selection Menu touchClose in the upper right corner of the touchscreen.
7. To exit the Port Settings menu, returning to the printer's Tools screen, touchClose again.
Proxy Server Settings
To use the Web Service button on the printer (if available), which enables the printer to access HTTP
file servers on the Internet, you need to enter your Proxy Server information as described here.
1. Open your Web browser and enter the IP address of the printer in the address field. Press Enter toopen CentreWare Internet Services.
2. Click the Properties tab.
3. Enter the system administrator User Name and Password (defaultadmin, 1111) if prompted.
4. Click the Connectivity folder, then the Protocols folder.
5. Select Proxy Server Settings folder.
6. Place a check mark in the Use Proxy Server check box.
7. From the Proxy Setup drop down menu, select either Same Proxy for All Protocols, or DifferentProxy for each Protocol, depending upon your Proxy Server setup.
8. In the Addresses to Bypass Proxy Server box, enter up to 1024 characters of IP addresses, fullyqualified host names, or wildcard host names (such as *.eng), separated by semicolons. Functioninglike the local address exception list in a typical Web browser, these addresses will be permitted tobypass the Proxy Server.
9. For the HTTP or HTTPS Server Names, provide a name of up to 255 characters in length for one orboth of these Proxy Servers. A fully qualified domain name or IP address can be used.
Note: Make sure that DNS is enabled See TCP/IP Protocol Configuration on page 43.
10. Leave the Port Number set to 8080 (the IANA recognized proxy port) unless you are using adifferent port number. If you are using a different port number, enter it in the available box.
11. Check the Authentication box if client authentication is required for the Proxy Server.
12. Enter the Login Name for access to the proxy server. Up to 32 characters can be entered.
13. Enter the Password for access to the proxy server. Up to 32 characters can be entered.
14. Click Apply.
15. Enter the System Administrator user ID and password when prompted and click OK.
8/6/2019 Enu WC74XX Sys Admin Guide
http://slidepdf.com/reader/full/enu-wc74xx-sys-admin-guide 25/208
CentreWare Internet Services
WorkCentre 7425/7428/7435
System Administrator Guide
25
Overview
CentreWare Internet Services contains the following main menu tabs:
• Status: View the status of the printer's trays and consumables.
• Jobs: View the current job queue, as well as a history of processed jobs.
• Print: Change Job Submission settings.• Scan: Create and edit Distribution Templates.
• Properties: Allows you to configure the printer for job processing, options support, and networkcommunications.
Note: If authentication is enabled, you must enter the system administrator User Name and Password(default admin, 1111) if prompted, to access the Properties tab.
• Support: View system administrator and Xerox contact information.
Status Tab
The Status tab allows you to see the status of the printer’s trays and consumables.• General for a general description of the printer. Click Reboot Machine to restart the printer.
• Trays: View the status of the desired item.
• Consumables: View the status of the desired item.
Press Refresh a refresh a status page.
Jobs Tab
The Jobs tab allows you to view the current job queue, as well as a history of processed jobs.
• Active Jobs: View the current job queue.
• Job History List Folder: View a list of jobs that have been printed, copied, and scanned.
• Error History: View a list of Errors and the time and date when they occurred.
Print Tab
The Print tab allows you to edit job submission settings. Delivery methods include Immediate Print,Sample Set, Delayed Print, and Secure Print. Click Browse… to locate your print-ready job. Click SubmitJob when you are ready to submit your job. For information, see Secure Print on page 87.
Note: Print-ready jobs must be in a file format that the printer recognizes (PostScript files with a .ps fileextension, for example).

8/6/2019 Enu WC74XX Sys Admin Guide
http://slidepdf.com/reader/full/enu-wc74xx-sys-admin-guide 26/208
Administrative Tools
WorkCentre 7425/7428/7435
System Administrator Guide
26
Scan Tab
Includes Job Templates, Folder, and Job Flow Sheets.
• Folder: Lets you create individual folders into which you can direct scanned documents. Thesedocuments can then be retrieved and printed, either at the printer or locally at your computer, asexplained in the Scanning to the printer’s Hard Drive (Folder) topic. For more information seeScanning to the Printer’s Hard Drive (Folders) on page 128.
• Job Templates: Customize and use Job Templates to scan and transfer documents directly toNetwork Servers. For more information see Network Scanning (Using Templates) on page 112.
• Job Flow Sheets: Change the sheet type, and order and assign a user name. For more informationsee Setup and Use of Job Flow Sheets with Folders on page 131.
Properties Tab
The Properties tab allows you to configure the printer's job processing options and networkcommunications settings.
Note: If authentication is enabled, you must enter the system administrator User Name and Password(default admin, 1111) if prompted to access the Properties tab. You may also be prompted for the username and password when changing settings in the Properties tab.
• Configuration Overview: Provides shortcuts to commonly used configuration pages within theProperties tab. Click Settings, then Configure, to go directly to the page without having tonavigate through the folders in the directory tree on the left.
• Description: Allows you to see and edit basic identification information about your printer.
General Setup Folder
The General Setup folder contains the following pages and folders:
• Configuration: Lists current printer settings such as memory allocation; available page descriptionlanguages and their version numbers; firmware (software) versions for the controller and printercomponents; hard disk partition information; and hardware information (indicating the availabilityof the Ethernet Port and Hard Disk, for example).
• Job Management: Allows you to set permissions that allow system administrators or general (non-administrator) users to delete jobs from the printer’s print queue.
• Paper Tray Attributes: Provides a display of the available trays (including bypass), their mediasettings, and tray selection order.
• Paper Settings: Displays paper settings, which can be manipulated and set for installed trays. Seethe printer's User Guide for more information.
• Power Saver Settings: Displays the settings for low power mode and sleep mode. Low Power Modeis selectable from 1 to 240 minutes. Sleep Mode is selectable from 1 to 240 minutes.
• Stored Job Settings: Set a minimum passcode length for jobs stored on the printer.
• Memory Settings: View or change the amount of memory allocated on the hard drive for spoolingincoming jobs into buffers (dedicated to specific ports or protocols).
• Internet Services Settings: View or change the Auto Refresh Interval, or the Display Language (if available).
8/6/2019 Enu WC74XX Sys Admin Guide
http://slidepdf.com/reader/full/enu-wc74xx-sys-admin-guide 27/208
CentreWare Internet Services
WorkCentre 7425/7428/7435
System Administrator Guide
27
• Pool Server Settings: Set up the login details from this device to a remote template pool server.
• Cloning: Copy the settings and Web-generated scan templates of one printer and transfer them toother printers operating with the same version of system software. Groups of settings can becloned, depending on the optional features installed on the printer.
• Alert Notification Folder
• Billing Meter Read Alerts: Set up an e-mail notification to the designated Billing Administratorwhenever billing meters are automatically read by the Meter Assistant.
• Supplies Data Sent Alerts: Set the receiving E-mail address for alerts from the SuppliesAssistant.
• Billing & Counters Folder: View the total number of pages, images, or jobs processed by theprinter.
• Smart eSolutions Folder: Set up automatic billing meter reading and supplies reporting. For moreinformation see Xerox Smart eSolutions on page 189.
Connectivity Folder
• Port Settings: Enable or disable ports. Note that if any selections, such as Port 9100 for example,are unavailable for setting using the printer's control panel, they can be set here. You can enable ordisable the following ports:
• EtherTalk
• NetWare (for Novell networks)
• SNMP
• SMB
• LPD
• Port 9100
• Send E-mail
• Receive E-mail• E-mail Notification Service
• Internet Services
• FTP Client
• IPP
• UPnP Discovery
• WebDAV
• Bonjour
• WSD
• SOAP
• Physical Connections Folder
• Ethernet: View or change Ethernet (speed) Settings from a drop down selection list. Selectionsinclude: Auto (auto sensing), (10/100Base-TX), 100Base-TX (Half or Full Duplex), and 10Base-TX (Half or Full Duplex). The MAC Address of the printer is also displayed, but not editable.
• Parallel: View or change the enablement settings for Bi-Directional Communications (a checkbox) and Auto Eject Time (Parallel Port Timeout), with a range of 5 to 1275 seconds.
8/6/2019 Enu WC74XX Sys Admin Guide
http://slidepdf.com/reader/full/enu-wc74xx-sys-admin-guide 28/208
Administrative Tools
WorkCentre 7425/7428/7435
System Administrator Guide
28
• USB: View or change the Auto Eject Time, which is the length of time the Controller will wait foran end of job command before processing the job.
Note: Parallel and USB are options that must installed before they will be displayed.
• Protocols Folder: View or modify the communication protocols used by the printer. SMTP Server,and POP3 Setup allow you to configure E-mail server addresses, for E-mail scanning. Set your proxy
server parameters for Meter Assistant and Web Service (if available)on the Proxy Server page.• LDAP Folder: The LDAP folder contains the same settings available under Authentication
Configuration in the Security folder. This allows you to configure authentication for the printerusing LDAP, or to independently configure LDAP for use with the printer, such as in addressbook for E-mail.
Services Folder
• Print Mode: Set the page description language emulation used by the printer's input portsdisplayed on the screen. Depending upon the Ports enabled at the printer, the list of ports willinclude: Parallel, AppleTalk (with PostScript), SMB, LPD, IPP and Port 9100. Typical page descriptionselections for each port include: Auto (auto select), PostScript, HP-GL/2, PCL, and TIFF/JPEG.
• Language Emulations Folder: View and change the printer's default preferences for processingPage Description Languages.
• E-mail Folder: View and change the printer's default E-mail message settings, and import a publicaddress book from a .CSV file, for use with E-mail, Fax, and Internet Fax. Click the Browse… buttonto locate your CSV formatted file, then click Import Now.
• Internet Fax: View and change the printer's default Internet Fax message settings, and import apublic address book from a .CSV file, for use with E-mail, Fax, and Internet Fax. Click the Browse… button to locate your CSV formatted file, then click Import Now.
• Fax Folder: View and change the printer's default Fax and Server Fax setttings, and import a publicaddress book from a .CSV file, for use with E-mail, Fax, and Internet Fax. Click the Browse… button
to locate your CSV formatted file, then click Import Now. Enable or disable Confirmation printing(Server Fax).
• Network Scanning Folder: Set up Network Scanning using Templates.
• Machine Software Folder:
• Upgrades: Enable the printer for software upgrades.
• Manual Upgrade: Upgrade the printer software.
• Xerox Services Folder: Set up the Xerox Communication Server. This is the Xerox server thatsupports automatic billing and supplies reporting. For more information see Xerox Smart eSolutionson page 189.
• Custom Services Folder
• Validation Options: Works with a validation server, which is used in an enterprise network tocertify the authenticity of Digital Certificates used for file encryption. Note that DigitalCertificates typically work with SSL/TLS encryption, which is set up from the Machine DigitalCertificate Management in the Security folder. The host name and path settings for avalidation server are set up through the Validation Server in the Network Scanning subfolder.
• Custom Services: Enable Custom Services and Password Transmission.
8/6/2019 Enu WC74XX Sys Admin Guide
http://slidepdf.com/reader/full/enu-wc74xx-sys-admin-guide 29/208
CentreWare Internet Services
WorkCentre 7425/7428/7435
System Administrator Guide
29
Accounting Folder
Configure Accounting server and login options.
Security Folder
• Authentication Configuration: Set up the printer with local and remote Authentication. UserDetails Setup is used to configure the characteristics of the login prompt for UserAuthentication.
• Remote Authentication Server: Configure authentication administered by a remote server.
• IP Filtering: Set up IP address restrictions for access to this device.
• Audit Log: Enable or disable the Audit Log.
• Machine Digital Certificate Management: Manage digital certificates stored on the printer.
• IP Sec: Configure IP Sec encryption.
• Certificates Management: Sets the categories for trusted certificate management (used withdigital certificates).
• 802.1x : Enable and configure 802.1x settings.• SSL / TLS: Configure the settings for SSL / TLS encryption.
• PDF / XPS Security Settings: Add a digital signature to PDF and XPS files.
• System Administrator Settings: Change the Login ID and Passcode used by the SystemAdministrator to access Tools on the printer’s control panel, and to modify Properties inCentreWare Internet Services.
Details of Some Properties Tab Features
Setting TIFF (and other PDL) Processing Properties
To set the Printer's default TIFF / JPEG, PostScript, PCL, or HP-GL/2 processing properties, perform thefollowing steps:
1. Open your Web browser and enter the IP address of the printer in the address field. Press Enter toopen CentreWare Internet Services.
2. Click the Properties tab.
3. Enter the system administrator User Name and Password (defaultadmin, 1111) if prompted.
4. Click the Services folder.
5. Click the Printing folder, then the Language Emulations folder.
6. Click TIFF / JPEG, or PostScript, or PCL, or HP-GL/2 to access the printer's list of default settings forprocessing the selected Page Description Language.
7. Select a Printer number and click Edit (when available) to access a list of numerous processingsettings.
8. Click Apply.
8/6/2019 Enu WC74XX Sys Admin Guide
http://slidepdf.com/reader/full/enu-wc74xx-sys-admin-guide 30/208
Administrative Tools
WorkCentre 7425/7428/7435
System Administrator Guide
30
Setting PDL Emulations
To set the PDL (Page Description Language) Emulations, used by the printer's Input Ports, perform thefollowing steps:
1. Open your Web browser and enter the IP address of the printer in the address field. Press Enter toopen CentreWare Internet Services.
2. Click the Properties tab.
3. Enter the system administrator User Name and Password (defaultadmin, 1111) if prompted.
4. Click the Services folder.
5. Click the Printing folder, then the Language Emulations folder.to see the Page DescriptionLanguages currently supported by system software.
6. Click Print Mode to access a list of the printer's Input Ports, displaying the Page DescriptionLanguage emulations they are currently set to use.
7. Depending upon the Ports enabled at the printer, the list of displayed Ports includes: Parallel,AppleTalk (with PostScript), SMB, LPD, IPP, WSD, and Port 9100. Typical Page Descriptionselections for each Port include: Auto (auto select), PostScript, HP-GL/2, PCL and TIFF/JPEG.
8. Click Apply.
Banner Sheet Printing
When documents are sent to print at the printer, a banner sheet is printed identifying the PC that sentthe print job. The banner sheet is printed on paper from a selected tray. When the selected tray isempty, the printer will automatically switch to another tray with the same size paper and print thebanner sheet from that tray. The printer will continue to print banner sheets from this secondary trayuntil the selected tray is refilled.
To set banner sheet printing and select a banner sheet paper tray:
1. Press the Log In/Out button on the control panel.2. Enter the System Administrator’s Login ID and Passcode if prompted (default admin, 1111), and
press Enter.
3. Press the Machine Status button.
4. Touch the Tools tab.
5. Touch System Settings.
6. In the Group column, touch Print Service Settings.
7. In the Features column, touch Other Settings.
8. On the Other Settings screen, in the Items column, touchBanner Sheet, then touch ChangeSettings.
9. On the Banner Sheet screen, select one of the following:• Off
• Start Sheet (the default choice)
• End Sheet
• Start Sheet & End Sheet
10. Touch Save.
8/6/2019 Enu WC74XX Sys Admin Guide
http://slidepdf.com/reader/full/enu-wc74xx-sys-admin-guide 31/208
CentreWare Internet Services
WorkCentre 7425/7428/7435
System Administrator Guide
31
11. To select a banner sheet tray:
a. On the Other Settings screen, in the Items column, touchBanner Sheet Tray, then touchChange Settings.
b. Select the tray that will hold the banner sheet paper.
c. Tray 3 is the suggested choice, with Tray 4 as the secondary tray.
12. Touch Save.
Set the Ethernet Speed
1. Open your Web browser and enter the IP address of the printer in the address field. Press Enter toopen CentreWare Internet Services.
2. Click the Properties tab.
3. Enter the system administrator User Name and Password (defaultadmin, 1111) if prompted.
4. Click the Connectivity folder, then the Physical Connections folder.
5. Click Ethernet.
6. Select your network speed from the drop down list.
7. Click Apply, then click Reboot Machine.
Configure TCP/IP Settings
1. Open your Web browser and enter the IP address of the printer in the address field. Press Enter toopen CentreWare Internet Services.
2. Click the Properties tab.
3. Click the Connectivity folder, then the Protocols folder.
4. Click TCP/IP.
5. Review the available selections as displayed on your screen and explained in the TCP/IP
Configuration Selection List, below.6. Accept the default Host Name, or type in your own unique Host Name for this printer.
7. Select the desired method for obtaining an IP Address.
8. If Static is selected, type in the addresses that apply for IP Address, Subnet Mask, and Gateway.
Caution: Changing the IP address for the printer will affect NetBIOS/IP, LPR/LPD, FTP, SNMP, and Port9100 printing. It will also interrupt the ability to communicate with the printer using theCentreWare Internet Services. When you change the printer's IP Address, make sure to print out aConfiguration Report so that you have a record of the TCP/IP addresses for use with computers thatneed to communicate with the printer using TCP/IP.
Note: If DHCP or BOOTP addressing method is selected, you cannot manually change the IP Address,
Subnet Mask, or Gateway. Select Manual if you wish to manually enter these addresses.Note: When using DHCP, set a reasonably long Lease Time for the IP Address so that the printer can berestarted, when taken out of service for maintenance, without being assigned a new IP Address.
Note: Upon rebooting, when the system comes up, if it can’t locate a DHCP server on the network it willuse whatever IP address it was previously configured with.
8/6/2019 Enu WC74XX Sys Admin Guide
http://slidepdf.com/reader/full/enu-wc74xx-sys-admin-guide 32/208
Administrative Tools
WorkCentre 7425/7428/7435
System Administrator Guide
32
9. Determine the method to use to supply the DNS Server IP Addresses (to resolve Host Names withIP Addresses).
10. Determine whether or not Dynamic DNS should be enabled.
11. Click Apply, then click Reboot Machine.
TCP/IP Configuration Selection List
As displayed on your screen, the following selections are available for TCP/IP Configuration.
• IP Mode: Select the IP Mode that applies to your network environment.
• General
• Host Name: The default entry assures a name that is unique to this device on the network.
• IP Address Resolution: Use this drop down menu to select the method to use to assign IPAddresses. Select Static, DHCP, RARP, BOOTP, or DHCP/Autonet. Note that with the Autonetoption selected, if a Windows 2000 client can’t contact the DHCP server, it will assign itself anIP address from the 169.254.0.0 class B address space. This is also known as zero configuration,or Bonjour, networking. Make sure to check the Enabled box for Self Assigned Address at the
bottom of your screen.• IP Address: To be filled in manually only when Static addressing is selected.
• Subnet Mask: To be filled in manually only when Static addressing is selected.
• Gateway Address: To be filled in manually only when Static addressing is selected.
• Domain Name: Enter the fully qualified domain name here. For example: xerox.com.
• DNS Configuration
• DNS Server Address Resolution: If enabled with a check mark, the printer will contact theDHCP Server for the IP Addresses of up to three DNS Servers. If unchecked, this informationmust be entered manually.
• Three DNS Address boxes are supplied for the manual entry of DNS Server addresses.
• Dynamic DNS Update: If your DNS Server does not support dynamic IP address updates thereis no need to enable this check box. Check the Overwrite box to enable DNS informationoverwriting.
• Generate Domain Search List Automatically: A check box is provided for enabling automaticDomain searches.
• Domain Names 1,2,3: Three text boxes are provided for the entry of Domains to search (forexample, Xerox.com).
• Connection Timeout: An entry box is provided for entering a Timeout for searches of Domains.
• Zero Configuration Networking: Used with DHCP/Autonet selected from the IP AddressResolution drop down menu, when this box is checked the printer will assign itself an IP addressfrom the 169.254.0.0 class B address space.
Note: Changes to TCP/IP settings will not be applied until you restart (reboot) the printer.
8/6/2019 Enu WC74XX Sys Admin Guide
http://slidepdf.com/reader/full/enu-wc74xx-sys-admin-guide 33/208
CentreWare Internet Services
WorkCentre 7425/7428/7435
System Administrator Guide
33
Configure LPD
1. Open your Web browser and enter the IP address of the printer in the address field. Press Enter toopen CentreWare Internet Services.
2. Click the Properties tab.
3. Enter the system administrator User Name and Password (defaultadmin, 1111) if prompted.
4. Click the Connectivity folder, then the Protocols folder.
5. Select LPD in the directory tree.
6. The available selections include:
• Port Number: (Default value is 515.) As this is the port for the TCP Spooler assigned by theIANA (Internet Assigned Numbers Authority), the default value should not need to bechanged.
• TBCP Filter: (Displayed when PostScript is enabled).
• Connection Time-Out
• Maximum Number of Sessions: Enter the maximum number of simultaneously connectedhosts for this interface.
7. Enter a Time Out value for jobs being sent to the printer through this port. This is the length of time that the controller will wait for an end of job command before printing the current job.
8. Click the Apply to accept the changes, or Undo to return the settings to their previous values.
Note: Changes to settings are not applied until you restart the printer. A Reboot Machine button isavailable on the Status Tab of CentreWare Internet Services.
Configure SNMP
It is possible to remotely define and modify GET (Read Only), SET (Read/Write), and Trap SNMP(Simple Network Management Protocol) community names for the printer. You can also enter the
System Administrator's Name here for packet identification purposes.
SNMP Community Name properties that can be configured
• Community Name (Read Only): This is the password for SNMP GET requests from the SNMPManager to the Agent in the printer. Applications, such as Xerox Printer Map or CentreWareConductor, obtaining information from the printer by SNMP use this password.
• Community Name (Read/Write): This is the password for SNMP SET requests from the SNMPManager to the Agent in the printer. Applications, such as Xerox Printer Map or CentreWareConductor, which set information on the printer by SNMP use this password.
• Community Name (Trap Notification): This is the default password for SNMP TRAPS sent fromthe printer to the Manager by SNMP.

8/6/2019 Enu WC74XX Sys Admin Guide
http://slidepdf.com/reader/full/enu-wc74xx-sys-admin-guide 34/208
Administrative Tools
WorkCentre 7425/7428/7435
System Administrator Guide
34
Configuring SNMP Community Names in CentreWare Internet Services
1. Open your Web browser and enter the IP address of the printer in the address field. Press Enter toopen CentreWare Internet Services.
2. Click the Properties tab.
3. Enter the system administrator User Name and Password (defaultadmin, 1111) if prompted.
4. Click the Connectivity folder, then the Protocols folder.
5. Select SNMP Configuration in the directory tree, and check the Enable box for the version desired.
6. Enter a name for Community Name (Read Only), also known as GET.
7. Enter a name for Community Name (Read/Write), also known as SET.
Caution: Caution: If you change the GET and/or SET Community Names, you must also change thenames in all network applications that are communicating by SNMP with this printer.
8. Enter a name for Community Name (Trap Notification). This is the default password for SNMPTRAPS sent from the printer to the Manager by SNMP.
9. Optionally enter the System Administrator's name for packet identification purposes.
10. Select a trap and click Edit in the Trap Notification Settings section.11. Select your transport method (IPX or UDP) and fill in the trap destination information for your
selected method.
12. Select the event(s) that you wish to report on by checking the applicable box(es).
13. Click Apply to accept the changes, or the Undo button to return the settings to their previousvalues.
Note: Changes to settings will not be applied until you restart the printer. A Reboot Machine button isavailable on the Status Tab of CentreWare Internet Services.
Configuring IPP
1. Open your Web browser and enter the IP address of the printer in the address field. Press Enter toopen CentreWare Internet Services.
2. Click the Properties tab.
3. Enter the system administrator User Name and Password (defaultadmin, 1111) if prompted.
4. Click the Connectivity folder, then the Protocols folder.
5. Select IPP in the directory tree.
6. The available selections include:
• Port Number Static Display: This is the port number assigned by IANA (Internet AssignedNumbers Authority. The default value is 631.
• Additional Port Number: You can enter port 80 (HTTP) here as a backup port.
• TBCP Filter: Displayed when PostScript is enabled.
• Administrator Mode: This is disabled by default.
• DNS
• Connection Time-out
7. Select the DNS check box. The DNS Server will be available to resolve Host Names to IP Addresses,in support of printing with IPP.
8/6/2019 Enu WC74XX Sys Admin Guide
http://slidepdf.com/reader/full/enu-wc74xx-sys-admin-guide 35/208
CentreWare Internet Services
WorkCentre 7425/7428/7435
System Administrator Guide
35
8. Enter a Connection Time Out value for jobs being sent to the printer through this Port. This is thelength of time that the Controller will wait for an end of job command before printing the current job.
9. Click Apply to accept changes, or Undo to return settings to their previous values.
Note: Setting changes are not applied until you restart the printer. There is a Reboot Machine button
on the Status tab of CentreWare Internet Services.
Modify the HTTP (Internet Services) Settings
1. Open your Web browser and enter the IP address of the printer in the address field. Press Enter toopen CentreWare Internet Services.
2. Click the Properties tab.
3. Enter the system administrator User Name and Password (defaultadmin, 1111) if prompted.
4. Click the Connectivity folder, then the Protocols folder.
5. Select HTTP in the directory tree.
6. The available selections include:
• Port Number: The default value is 80, which is the HTTP Port number assigned by the IANA(Internet Assigned Numbers Authority). This default value should not need to be changed.
• Maximum Connections
• Connection Time-out
• Secure HTTP (SSL): Select the check box to set all HTTP communications with the printer toencrypted communications. If you do this you will have to have a digital certificate installed onthe printer. For more information see Configuration of HTTPS (SSL/TLS) CommunicationEncryption on page 76.
• Secure HTTP Port Number: HTTP traffic will be routed to this port when using HTTP with SSLencryption.
7. In the Maximum Connections entry box, accept the default value, or enter a number for themaximum number of hosts (networked computers) that can be connected to the printer's HTTPServer (CentreWare Internet Services) at one time.
8. In the Connection Time-Out entry box, accept the default value, or enter the number of secondsthat a browser connection can remain open without any activity.
9. Click Apply to apply setting changes, or Undo to return settings to their previous values.
Note: Setting changes are not applied until you restart the printer. There is a Reboot Machine buttonon the Status Tab of CentreWare Internet Services.

8/6/2019 Enu WC74XX Sys Admin Guide
http://slidepdf.com/reader/full/enu-wc74xx-sys-admin-guide 36/208
Administrative Tools
WorkCentre 7425/7428/7435
System Administrator Guide
36
Configure WSD (Web Services on Devices)
As stated by Microsoft, WSD is Microsoft’s implementation of the printers Profile for Web Services(DPWS) standard, a specification that enables devices, such as printers, cell phones, cameras, andhome entertainment centers, to use standard Web-based protocols (HTTP and UDP) to discover oneanother, advertise their services over the IP (versions 4 or 6) network, and report on their operational
status.
Typically, a device such as a network printer will use a small amount of flash memory to store WSD-related information. The WSD device then advertises a primary endpoint that can be located throughWS-Discovery (via UDP) on a Windows Vista client.
The endpoint supplies metadata about itself through WS-Metadata Transfer. This information typicallyincludes manufacturer, device information, and service host metadata (information on offeredservices).
WSD provides two way communication, enabling a printer to both receive jobs and to send statusnotifications to Windows clients when events occur, such as supplies running low.
To configure this printer for WSD, perform the following steps.
1. Open your Web browser and enter the IP address of the printer in the address field. Press Enter toopen CentreWare Internet Services.
2. Click the Properties tab.
3. Enter the system administrator User Name and Password (defaultadmin, 1111) if prompted.
4. Click the Connectivity folder, then the Protocols folder.
5. Select WSD in the directory tree.
6. The available selections include:
• Port Number: Enter the port number between 1 and 65535. Port 80 is the recommended HTTPdefault. Do not use the numbers assigned to the other ports.
• TBCP Filter: Check to enable TBCP Filter when PostScript data is to be processed. This is onlyavailable when the optional PostScript 3 kit is installed. When the transmission data includesbinary data or EPS data, disable this. For Windows, follow the Output Protocol setting in theprinter Settings tab of the Properties screen of the print driver.
• Data Receive Time-Out: Enter the timeout period for receiving data from WSD clients between1 and 65535 seconds in 1 second increments.
• Notification Delivery Time-Out: Enter the timeout period for notification delivery to WSDclients between 1 and 60 seconds in 1 second increments.
• Maximum TTL: The Time to Live setting (in seconds) for undelivered IP datagrams (such asUDP being used with WSD). Enter a value 1 and 10.
• Maximum Number of Subscribers: Enter the maximum number of clients for reservednotification between 1 and 200.
7. Click Apply to apply setting changes, or the Undo button to return settings to their previous values.
Note: Setting changes are not applied until you restart the printer. There is a convenient button on theStatus Tab of CentreWare Internet Services.

8/6/2019 Enu WC74XX Sys Admin Guide
http://slidepdf.com/reader/full/enu-wc74xx-sys-admin-guide 37/208
CentreWare Internet Services
WorkCentre 7425/7428/7435
System Administrator Guide
37
Configure Port 9100 (Raw Printing)
1. Open your Web browser and enter the IP address of the printer in the address field. Press Enter toopen CentreWare Internet Services.
2. Click the Properties tab.
3. Enter the system administrator User Name and Password (defaultadmin, 1111) if prompted.
4. Click the Connectivity folder, then the Protocols folder.
5. Select Port 9100.
6. The available selections include:
• TCP Port Number: The default is 9100. This does not need to be changed.
• TBCP Filter: Displayed when PostScript is enabled.
• Connection Time-Out
7. Enter a Time Out value for jobs being sent to the printer through this port. This is the length of timethat the Controller will wait for an end of job command before printing the current job.
8. Click Apply to accept changes, or Undo to return settings to their previous values.
Note: Setting changes are not applied until you restart the printer.Note: If Port 9100 is not displayed in the Properties Tab directory tree, click Port Status in the directorytree. Use your mouse to place a check mark in the check box on the Port 9100 line. Click the Apply button, then click the Reboot Machine button (always available on the Status Tab) to remotely rebootthe printer.
IP Filtering (IP Address Restriction)
Using CentreWare Internet Services, access to the printer's Services can be restricted by Host IPAddress.
To restrict device access, perform the following steps:1. Open your Web browser and enter the IP address of the printer in the address field. Press Enter to
open CentreWare Internet Services.
2. Click the Properties tab.
3. Enter the system administrator User Name and Password (defaultadmin, 1111) if prompted.
4. Click the Security folder.
5. Select IP Filtering.
6. Choose which IP Filtering to apply depending upon the address space used with your network.Note that IPv4 is the traditional (xxx.xxx.xxx.xxx) address space used with TCP/IP networks.
• IP Filter Enablement: If enabled with a check mark, access to the printer's services will berestricted to the list of IP Addresses and Subnet Masks specified by clicking the Edit button. If disabled (unchecked), host access to the printer is universal (unrestricted).
• Add or Edit: When this button is clicked, a list of ten lines of IP Address and Subnet Mask entryboxes is displayed. Sometimes referred to as a restriction list, this list is used to supply the IPAddresses and Subnet Masks of up to ten hosts (individual computers) that are authorized toaccess the printer's services. All other hosts, not specified in this list, will be prevented fromaccessing the printer's services.
8/6/2019 Enu WC74XX Sys Admin Guide
http://slidepdf.com/reader/full/enu-wc74xx-sys-admin-guide 38/208
Administrative Tools
WorkCentre 7425/7428/7435
System Administrator Guide
38
7. Click Apply when done.
Note: Changes to settings are not applied until you restart the printer. A Reboot Machine button isavailable on the Status Tab of CentreWare Internet Services.
Configure EtherTalk (AppleTalk)
1. Open your Web browser and enter the IP address of the printer in the address field. Press Enter toopen CentreWare Internet Services.
2. Click the Properties tab.
3. Enter the system administrator User Name and Password (defaultadmin, 1111) if prompted.
4. Click the Connectivity folder, then the Protocols file folder.
5. Select EtherTalk in the directory tree.
Note: If EtherTalk is not displayed in the Properties Tab directory tree, click the Port Settings in thedirectory tree. Use your mouse to place a check mark in the check box on the EtherTalk line. Click theApply button.
6. The available selections include:• Printer Name
• Zone Name
7. Enter the name that you wish to assign to this printer. This is the name that will appear in theChooser.
8. Either accept the default zone of * which lets the closest router assign the printer to a zone, orassign the printer to a zone (with a 32 character naming limit).
9. Click the Apply button to accept changes, or Undo to return settings to their previous values.
Note: Changes to settings are not applied until you restart the printer. A Reboot Machine button isavailable on the Status Tab of CentreWare Internet Services.
E-mail, SMTP, and POP3 Settings
You can change E-mail, SMTP, and POP3 settings in CentreWare Internet Services. For completeinformation on required E-mail settings, see Scan to E-mail on page 100.
Bonjour (if available)
Bonjour (also called Zero-Configuration Networking) allows devices to communicate using 169.254/16IPv4 addressing, over the same physical or logical (such as in ad hoc, or isolated (non- DHCP)networks).
When the Bonjour protocol is enabled on ALL communicating devices, and those devices areconnected, Host names of the individual devices will be resolved to IPv4 addressing, without the use of a DNS server, and IP communications can then take place.
8/6/2019 Enu WC74XX Sys Admin Guide
http://slidepdf.com/reader/full/enu-wc74xx-sys-admin-guide 39/208
CentreWare Internet Services
WorkCentre 7425/7428/7435
System Administrator Guide
39
To view the Host Name and Printer Name automatically assigned to this machine under Bonjour, dothe following:
1. Open your Web browser and enter the IP address of the printer in the address field. Press Enter toopen CentreWare Internet Services.
2. Click the Properties tab.
3. Enter the system administrator User Name and Password (defaultadmin, 1111) if prompted.4. Click the Properties tab.
5. Click the Connectivity folder, then the Protocols folder.
6. Click Bonjour.
Note: If Bonjour is not displayed in the Properties tab, click Port Settings and check Bonjour. ClickApply. If Bonjour is not available in the Port Settings list, click TCP/IP in the Protocols folder, and scrollto the bottom of the displayed page to Zero-Configuration networking.
7. Make a note of the Host Name and Printer Name for reference in working with other Bonjour (zero-configuration) connected computers.
Note: You can change these names, however the Host Name must be unique on the network. The
automatically generated Host Name should assure its uniqueness. The Host Name has a 32 characterlimit, while the Printer Name has a 62 character limit. If you change either name, be sure to click Apply.You can reboot the printer remotely using the Reboot Machine button, which is available on the StatusTab of CentreWare Internet Services.
Support Tab
Click Change Settings to edit the contact information.

8/6/2019 Enu WC74XX Sys Admin Guide
http://slidepdf.com/reader/full/enu-wc74xx-sys-admin-guide 40/208
Administrative Tools
WorkCentre 7425/7428/7435
System Administrator Guide
40
8/6/2019 Enu WC74XX Sys Admin Guide
http://slidepdf.com/reader/full/enu-wc74xx-sys-admin-guide 41/208
41
4Network Management
This chapter includes:
• General on page 42
• TCP/IP Protocol Configuration on page 43
• TCP/IP LPD Enablement on page 46
• TCP/IP Dynamic Addressing on page 48
• IP Filtering (IP Address Restriction)on page 50
• Configure Port 9100 (Raw Printing) on page 51
• Microsoft (NetBIOS over IP) Networks on page 52
• IPP Configuration on page 54
• EtherTalk (AppleTalk) Configuration on page 57
• AS400 Printing on page 59

8/6/2019 Enu WC74XX Sys Admin Guide
http://slidepdf.com/reader/full/enu-wc74xx-sys-admin-guide 42/208
Network Management
WorkCentre 7425/7428/7435
System Administrator Guide
42
General
Ethernet Speed Setting
The printer's Ethernet Interface has speed settings of Auto (10/100Base-TX, 100Base-TX (Half or FullDuplex), and 10Base-TX (Half or Full Duplex). By default the Ethernet Port Configuration is set to Auto.
To Change the Network Speed
1. Press the Log In/Out button on the control panel.
2. Enter the System Administrator’s Login ID and Passcode if prompted (default admin, 1111), andpress Enter.
3. Press the Machine Status button.
4. Touch the Tools tab.
5. Press Connectivity & Network Setup.
6. Press Protocol Settings.
7. When the Protocol Settings menu displays, the selection line labeled Ethernet Rated Speed.
8. Press the Change Settings button.
9. On the Ethernet Rated Speed screen note which one of the buttons is highlighted as the currentsetting for Ethernet speed. The available settings are Auto (default), 100 Mbps Full Duplex, 100Mbps Half Duplex, 10 Mbps Full Duplex, 10 Mbps Half Duplex.
10. To change settings, press your setting of choice, then press the Save button.
11. To exit the Ethernet Setting screen, without making any changes, press the Cancel button.
12. To exit the Protocol Settings menu, returning to the Tools tab, press theClose button.
13. Wait several seconds and the Auto Clear service should log you out.
Note: Note that if you changed any settings in the Protocol Settings menu, the printer willautomatically reboot to register and enable your new settings.
8/6/2019 Enu WC74XX Sys Admin Guide
http://slidepdf.com/reader/full/enu-wc74xx-sys-admin-guide 43/208
TCP/IP Protocol Configuration
WorkCentre 7425/7428/7435
System Administrator Guide
43
TCP/IP Protocol Configuration
To view or change the settings of the printer's TCP/IP Protocol Configuration, perform the followingsteps:
Accessing TCP/IP Protocol Settings at the Printer
1. Press the Log In/Out button on the control panel.
2. Enter the System Administrator’s Login ID and Passcode if prompted (default admin, 1111), andpress Enter.
3. Press the Machine Status button.
4. Touch the Tools tab.
5. Press Connectivity & Network Setup.
6. Press Protocol Settings.
7. When the Protocol Settings menu displays, note that with the exception of selection one (EthernetRated Speed), the remaining selections are specific to TCP/IP address settings. Choose your settingby pressing the numbered, horizontal selection line on the touch screen. Note that the currentstatus of each setting is shown on the applicable line. After pressing a selection line, to accessavailable settings press the Change Settings button in the lower right corner of the touch screen.
TCP/IP – IP Mode
1. Press the selection line labeled TCP/IP – Mode.
2. Press Change Settings.
3. Select the IP Mode best suited to your network environment. Note that your choices include IPv4Mode, IPv6 Mode, and Dual Stack. The printer supports IPv6 addressing with an automatically-
built Local Address for broadcasting to routers that can supply the network layer configurationparameters.
4. For traditional networks (using an address space of xxx.xxx.xxx.xxx), select IPv4 and press Save.
5. Note that the printer may reboot.
IP Address Resolution
1. On the Protocol Settings menu, press the selection line labeledIPv4 (or other mode) AddressResolution.
2. Press the Change Settings button.
3. On the settings screen, note which one of the buttons is highlighted as the current setting for theTCP/IP Addressing method. The available settings are DHCP, BOOTP, RARP, DHCP/Autonet, andSTATIC. DHCP/Autonet is the default setting.
4. To change settings, press your selection of choice, then press theSave button.
5. To exit the screen, without making any changes, press the Cancel button.
6. Press Close and, if you made any changes, the system will reboot.
8/6/2019 Enu WC74XX Sys Admin Guide
http://slidepdf.com/reader/full/enu-wc74xx-sys-admin-guide 44/208
Network Management
WorkCentre 7425/7428/7435
System Administrator Guide
44
IPv4 IP Address
1. Used for static IP Addressing (with STATIC selected as your addressing method), on the ProtocolSettings menu, press the selection line labeled IPv4 Address. Note that the IP Address may beviewed, but not changed, with dynamic addressing enabled.
2. Press the Change Settings button.
3. On the settings screen, use the numeric keypad to enter the appropriate IP Address.
4. To save settings, press the Save button.
5. To exit the screen, without making any changes, press the Cancel button.
IPv4 Subnet Mask
1. Used for static IP Addressing (with STATIC selected as your addressing method), on the ProtocolSettings menu, press the selection line labeledIPv4 Subnet Mask. Note that the Subnet Mask maybe viewed, but not changed, with dynamic addressing enabled.
2. Press the Change Settings button.
3. On the settings screen, use the numeric keypad to enter the appropriate Subnet Mask.
4. To save settings, press the Save button.
5. To exit the screen, without making any changes, press the Cancel button.
IPv4 Gateway Address
1. Used for static IP Addressing (with STATIC selected as your addressing method), on the ProtocolSettings menu, press the selection line labeled IPv4 Gateway Address. Note that the Gatewayaddress may be viewed, but not changed, with dynamic addressing enabled.
2. Press the Change Settings button.
3. On the settings screen, use the numeric keypad to enter the appropriate gateway.
4. To save settings, press the Save button.5. To exit the screen, without making any changes, press the Cancel button.
IPv4 IP Filter (IP Address Restriction)
Note: Before enabling the IPv4 IP filter, open CentreWare Internet Services on your computer. This willprevent you from accidentally disabling communication with the printer from your computer (blockingyour own IP address).
1. In the Protocol Settings menu, press the selection line labeledIPv4 IP Filter.
2. Press the Change Settings button.
3. On the settings screen, note which of the two buttons is highlighted as the current setting for IP
Address restriction. The available settings are Enabled or Disabled. Disabled is the factory defaultsetting.
4. To change settings, press your setting of choice, then press the Save button.
5. To return to the Protocol Settings menu, without making changes, press theCancel button.
8/6/2019 Enu WC74XX Sys Admin Guide
http://slidepdf.com/reader/full/enu-wc74xx-sys-admin-guide 45/208
TCP/IP Protocol Configuration
WorkCentre 7425/7428/7435
System Administrator Guide
45
Exiting the Protocol Settings Menu and Returning to the Tools Tab
1. To exit the Protocol Settings menu, returning to the Tools tab, press theClose button in the upperright corner of the Protocol Settings menu screen.
2. Wait several seconds and the Auto Clear service should log you out.
Note: If you changed any settings in the Protocol Settings menu, the printer will automatically rebootto register and enable your new settings.

8/6/2019 Enu WC74XX Sys Admin Guide
http://slidepdf.com/reader/full/enu-wc74xx-sys-admin-guide 46/208
Network Management
WorkCentre 7425/7428/7435
System Administrator Guide
46
TCP/IP LPD Enablement
To support TCP/IP printing through the computer's LPR port in the case of Windows XP, the LPD (LinePrinter Daemon) must be enabled at the printer.
Changing LPD Settings at the Printer
To view or change the printer's LPD setting, perform the following steps:
1. Press the Log In/Out button on the control panel.
2. Enter the System Administrator’s Login ID and Passcode if prompted (default admin, 1111), andpress Enter.
3. Press the Machine Status button.
4. Touch the Tools tab.
5. Press Connectivity & Network Setup.
6. Press Port Settings.7. When the Port Settings menu displays, press the selection line labeledLPD.
8. Press the Change Settings button in the lower right corner of the Port Settings menu screen.
9. When the LPD selections menu displays, note that you have a choice of setting selections bynumbered horizontal lines, with the current status of each setting shown. The Close button in theupper right corner of the screen returns you to the Port Settings menu. After pressing the selection,to access available settings press the Change Settings button in the lower right corner of the touchscreen.
Port Status (LPD Enablement)
1. On the LPD selections menu, press the selection line labeled Port Status.2. Press the Change Settings button.
3. On the LPD Port Status screen, note which of the two buttons is highlighted as the current settingfor LPD Enablement. The available settings are Enabled or Disabled. For the LPD to function, itmust be set to Enabled.
4. To change settings, press your setting of choice, then press the Save button.
5. To exit the screen, without making any changes, press the Cancel button.
LPD Port Number
1. On the LPD selections menu, press the selection line labeled LPD Port Number.
2. Press the Change Settings button.
3. Note the setting of Port 515, which is the recommended, default value. To change the setting, usethe keypad displayed on screen.
4. To change settings, press your setting of choice, then press the Save button.
5. To exit the screen, without making any changes, press the Cancel button.
8/6/2019 Enu WC74XX Sys Admin Guide
http://slidepdf.com/reader/full/enu-wc74xx-sys-admin-guide 47/208
TCP/IP LPD Enablement
WorkCentre 7425/7428/7435
System Administrator Guide
47
LPD Maximum Number of Sessions
1. Select LPD – Maximum Number of Sessions.
2. Press Change Settings.
3. Select a number from 1 to 10.
4. To change settings, press Save.
5. To exit, without making changes, press Cancel.
Exiting the LPD Selections Menu
To exit the LPD selections menu, which returns you to the Port Settings menu, press the Close button inthe upper right corner of the touch screen.
Exiting the Port Settings Menu and Returning to the Tools Tab
1. To exit the Port Settings menu, returning to the printer's Tools screen, press theClose button in theupper right corner of the Port Settings menu screen.
2. Wait several seconds and the Auto Clear service should log you out.
Note: If you changed any settings in the Port Settings menu, the printer will automatically reboot toregister and enable your new settings.
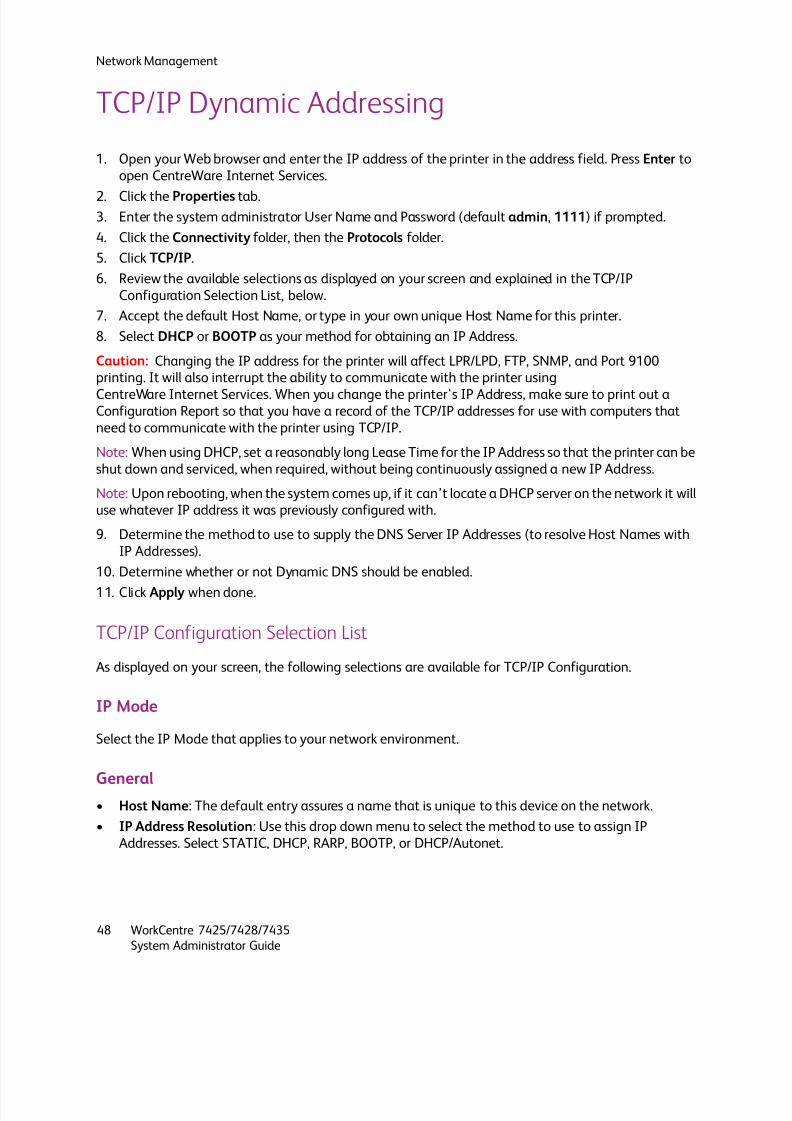
8/6/2019 Enu WC74XX Sys Admin Guide
http://slidepdf.com/reader/full/enu-wc74xx-sys-admin-guide 48/208
Network Management
WorkCentre 7425/7428/7435
System Administrator Guide
48
TCP/IP Dynamic Addressing
1. Open your Web browser and enter the IP address of the printer in the address field. Press Enter toopen CentreWare Internet Services.
2. Click the Properties tab.3. Enter the system administrator User Name and Password (defaultadmin, 1111) if prompted.
4. Click the Connectivity folder, then the Protocols folder.
5. Click TCP/IP.
6. Review the available selections as displayed on your screen and explained in the TCP/IPConfiguration Selection List, below.
7. Accept the default Host Name, or type in your own unique Host Name for this printer.
8. Select DHCP or BOOTP as your method for obtaining an IP Address.
Caution: Changing the IP address for the printer will affect LPR/LPD, FTP, SNMP, and Port 9100printing. It will also interrupt the ability to communicate with the printer using
CentreWare Internet Services. When you change the printer's IP Address, make sure to print out aConfiguration Report so that you have a record of the TCP/IP addresses for use with computers thatneed to communicate with the printer using TCP/IP.
Note: When using DHCP, set a reasonably long Lease Time for the IP Address so that the printer can beshut down and serviced, when required, without being continuously assigned a new IP Address.
Note: Upon rebooting, when the system comes up, if it can’t locate a DHCP server on the network it willuse whatever IP address it was previously configured with.
9. Determine the method to use to supply the DNS Server IP Addresses (to resolve Host Names withIP Addresses).
10. Determine whether or not Dynamic DNS should be enabled.
11. Click Apply when done.
TCP/IP Configuration Selection List
As displayed on your screen, the following selections are available for TCP/IP Configuration.
IP Mode
Select the IP Mode that applies to your network environment.
General• Host Name: The default entry assures a name that is unique to this device on the network.
• IP Address Resolution: Use this drop down menu to select the method to use to assign IPAddresses. Select STATIC, DHCP, RARP, BOOTP, or DHCP/Autonet.
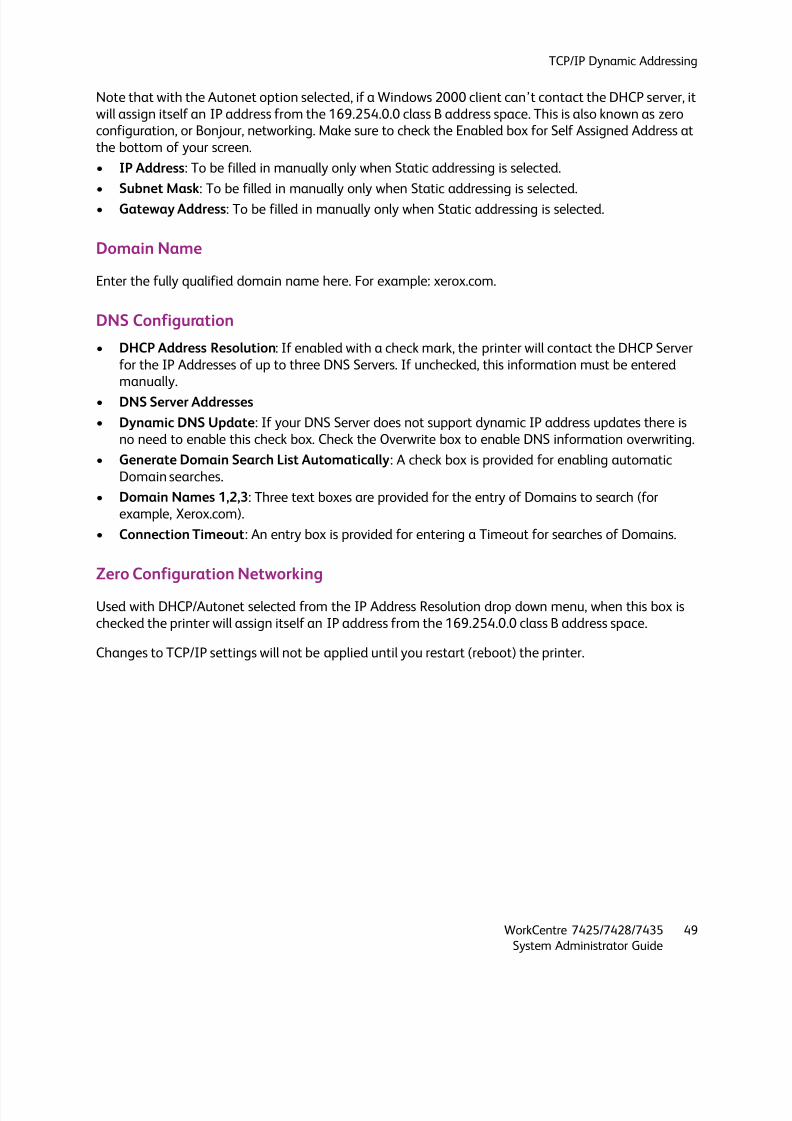
8/6/2019 Enu WC74XX Sys Admin Guide
http://slidepdf.com/reader/full/enu-wc74xx-sys-admin-guide 49/208
TCP/IP Dynamic Addressing
WorkCentre 7425/7428/7435
System Administrator Guide
49
Note that with the Autonet option selected, if a Windows 2000 client can’t contact the DHCP server, itwill assign itself an IP address from the 169.254.0.0 class B address space. This is also known as zeroconfiguration, or Bonjour, networking. Make sure to check the Enabled box for Self Assigned Address atthe bottom of your screen.
• IP Address: To be filled in manually only when Static addressing is selected.
• Subnet Mask: To be filled in manually only when Static addressing is selected.
• Gateway Address: To be filled in manually only when Static addressing is selected.
Domain Name
Enter the fully qualified domain name here. For example: xerox.com.
DNS Configuration
• DHCP Address Resolution: If enabled with a check mark, the printer will contact the DHCP Serverfor the IP Addresses of up to three DNS Servers. If unchecked, this information must be enteredmanually.
• DNS Server Addresses
• Dynamic DNS Update: If your DNS Server does not support dynamic IP address updates there isno need to enable this check box. Check the Overwrite box to enable DNS information overwriting.
• Generate Domain Search List Automatically: A check box is provided for enabling automaticDomain searches.
• Domain Names 1,2,3: Three text boxes are provided for the entry of Domains to search (forexample, Xerox.com).
• Connection Timeout: An entry box is provided for entering a Timeout for searches of Domains.
Zero Configuration Networking
Used with DHCP/Autonet selected from the IP Address Resolution drop down menu, when this box ischecked the printer will assign itself an IP address from the 169.254.0.0 class B address space.
Changes to TCP/IP settings will not be applied until you restart (reboot) the printer.
8/6/2019 Enu WC74XX Sys Admin Guide
http://slidepdf.com/reader/full/enu-wc74xx-sys-admin-guide 50/208
Network Management
WorkCentre 7425/7428/7435
System Administrator Guide
50
IP Filtering (IP Address Restriction)
1. Open your Web browser and enter the IP address of the printer in the address field. Press Enter toopen CentreWare Internet Services.
2. Click the Properties tab.3. Enter the system administrator User Name and Password (defaultadmin, 1111) if prompted.
4. Click the Properties Tab.
5. Click the Security folder.
6. Select IP Filtering.
7. In either the IPv4 area or the IPv6 area, complete the following steps.
Note: IPv4 is the traditional (xxx.xxx.xxx.xxx) address space used with TCP/IP networks.
a. To allow universal, unrestricted access to the printer, clear theEnabled check box.
b. To restrict access to specific IP Addresses and Subnet Masks:
• Click the Enabled check box.• Click Add or Edit to add or edit an IP address from which you intend to accept jobs. Click Apply.
Note: IP filtering will not work until at least one IP address has been added. This prevents turning off ALL access to the printer.
• Click Delete to delete an IP address. Click Apply.
8. Click Apply when done.
9. Send a test job.

8/6/2019 Enu WC74XX Sys Admin Guide
http://slidepdf.com/reader/full/enu-wc74xx-sys-admin-guide 51/208
Configure Port 9100 (Raw Printing)
WorkCentre 7425/7428/7435
System Administrator Guide
51
Configure Port 9100 (Raw Printing)
1. Open your Web browser and enter the IP address of the printer in the address field. Press Enter toopen CentreWare Internet Services.
2. Click the Properties tab.3. Enter the system administrator User Name and Password (defaultadmin, 1111) if prompted.
4. Click the Connectivity folder on the left, then the Protocols folder.
5. Select Port 9100 in the directory tree.
6. The available selections include:
• TCP Port Number: The default value is 9100. This typically does not need to be changed.
• End of Job Timeout: Enter a Time Out value for jobs being sent to the printer through thisPort. This is the length of time that the Controller will wait for an end of job command beforeprinting the current job.
• TBCP Filter: A check box (displayed when PostScript is enabled).
7. Click the Apply button to accept changes, or the Undo button to return settings to their previousvalues.
Note: Setting changes are not applied until you restart the printer.
Note: If Port 9100 is not displayed in the Properties Tab directory tree, click the Port Status in theConnectivity folder in the tree. In the Port Status table, use your mouse to place a check mark in thecheck box on the Port 9100 line. Click the Apply button, then click the Reboot button (always availableon the Status Tab) to remotely reboot the printer.
8/6/2019 Enu WC74XX Sys Admin Guide
http://slidepdf.com/reader/full/enu-wc74xx-sys-admin-guide 52/208
Network Management
WorkCentre 7425/7428/7435
System Administrator Guide
52
Microsoft (NetBIOS over IP) Networks
Before You Start
1. Print a Configuration Report. See Configuration Report on page 22.2. Referring to the report, verify that SMB is enabled. To enable SMB at the printer, if required, follow
the procedure below.
3. Referring to the Configuration Report, verify that DNS is enabled. The use of Naming Servers isrequired to resolve NetBIOS device names to IP addresses for packet routing over the TCP/IPnetwork.
4. To enable the printer to communicate with the Naming Servers, seeTCP/IP Dynamic Addressing onpage 48.
5. When using WINS or DNS, be sure to refer to your Server Operating System documentation for theappropriate procedure to use to enable NetBIOS name to IP address resolution on the Server.
Enabling SMB Setting at the Printer
1. Press the Log In/Out button on the control panel.
2. Enter the System Administrator’s Login ID and Passcode if prompted (default admin, 1111), andpress Enter.
3. Press the Machine Status button.
4. Touch the Tools tab.
5. Press Connectivity & Network Setup.
6. Press Port Settings.
7. When the Port Settings menu displays, press the SMB selection line.
8. Press the Change Settings button in the lower right corner of the Port Settings menu screen.9. When the SMB selection menu displays, note that you have only one setting available on a single,
numbered horizontal line. Press this selection line.
10. Press the Change Settings button.
11. On the SMB Port Status screen, note which of the two buttons is highlighted as the current settingfor SMB Enablement. The available settings are Enabled or Disabled. To enable SMB at the printer,select the Enabled setting.
12. Press the Save button on the touch screen, which returns you to the SMB selection menu. (To exitthe screen, without making changes, press the Cancel button.)
13. Exit the SMB selection menu and return to the Port Settings menu by pressing theClose button inthe upper right corner of the touch screen.
14. Exit the Port Settings menu by pressing theClose button in the upper right corner of the PortSettings menu screen.
15. To exit the Tools screen, wait several seconds for the Auto Clear service to log you out.
8/6/2019 Enu WC74XX Sys Admin Guide
http://slidepdf.com/reader/full/enu-wc74xx-sys-admin-guide 53/208
Microsoft (NetBIOS over IP) Networks
WorkCentre 7425/7428/7435
System Administrator Guide
53
Viewing or Configuring the SMB Host Name or WINS Server
1. Open your Web browser and enter the IP address of the printer in the address field. Press Enter toopen CentreWare Internet Services.
2. Click the Properties tab.
3. Enter the system administrator User Name and Password (defaultadmin, 1111) if prompted.
4. Click the Properties Tab.
5. Click the Connectivity folder, then the Protocols folder.
6. Select Microsoft Networking in the directory tree.
7. The available selections include:
• Transport
• Maximum Connections
• Workgroup Name
• SMB Host Name
• TBCP Filter: (Displayed when PostScript is enabled).
• An enabling check box for supporting Unicode (supplying the Host name and Workgroup namein Unicode characters during SMB transmission).
• An enabling check box for Auto Master Mode. When the master browser for the workgroupcannot be found, if this box is checked, this host will become the master browser.
• An enabling check box for Password Encryption (during SMB transmission).
• WINS Server: For using a WINS Server to resolve NetBIOS names (SMB host names) to IPaddresses.
8. Select TCP/IP from the Transport menu.
9. Accept the default value, or enter a value from 3 to 10, for maximum number of connectionsallowed in Maximum Connections.
10. Accept the Workgroup name shown, or enter your own workgroup name.
11. Either accept the default SMB Host Name, which is automatically built by the printer to assure thename's uniqueness, or enter your preferred name. Note that this will be the NetBIOS name that isresolved by the Naming Server (DNS or WINS) to an IP Address for the printer.
12. If using a WINS server, enable the WINS Server Address Resolution check box. When enabled, theprinter will contact the DHCP Server for the IP Addresses of the Primary and Secondary WINS(Windows Internet Naming Service) Servers. Note that two IP Address lines, with entry boxes, areprovided for manual entry (when DHCP is not selected).
13. To apply setting changes, click the Apply button, then click the Reboot button to reboot the printer.To exit without making any changes, click the Undo button.
Note: To use the printer's NetBIOS name over the TCP/IP Network, the DNS and WINS Servers must be
configured for NetBIOS name to IP address resolution. Also, make sure that the printer is informed of the addresses of the DNS/WINS Servers. For more information see TCP/IP Dynamic Addressing onpage 48 and Microsoft (NetBIOS over IP) Networks on page 52.
Setting Up a Computer to Print Directly to the printer
See Microsoft (NetBIOS over IP) Networks on page 52.
8/6/2019 Enu WC74XX Sys Admin Guide
http://slidepdf.com/reader/full/enu-wc74xx-sys-admin-guide 54/208
Network Management
WorkCentre 7425/7428/7435
System Administrator Guide
54
IPP Configuration
The Internet Printing Protocol provides a convenient way to print over the Internet or Intranet usingthe printer's IP address. To support this type of printing, make sure that Port 9100 is enabled at the
printer. Click Port Status in the Connectivity folder on the Properties Tab of CentreWare InternetServices and make sure that the check box on the Port 9100 line is checked. The Internet PrintingProtocol must also be enabled at the printer, and the Internet Print Service must be available andinstalled on the individual computer's version of Windows. IPP support is already built into Windowsoperating systems. For other desktop operating systems it is available as a download from Microsoft atwww.microsoft.com. The final step is to install the IPP print driver. For more information, see PrintDriver Installation on page 13.
Changing IPP Settings at the Printer
1. Press the Log In/Out button on the control panel.
2. Enter the System Administrator’s Login ID and Passcode if prompted (default admin, 1111), andpress Enter.
3. Press the Machine Status button.
4. Touch the Tools tab.
5. Press Connectivity & Network Setup.
6. Press Port Settings.
7. Press the IPP selection line on the Port Settings menu.
8. Press the Change Settings button in the lower right corner of the Port Settings menu screen.
9. When the IPP selection menu displays, note that you have two selections available on numberedhorizontal lines. The first selection is Port Status. The second is IPP – Added Port Number. The Closebutton in the upper right corner of the screen returns you to the Port Settings menu. After pressing
the horizontal line selection, to access available settings press the Change Settings button in thelower right corner of the touch screen.
Port Status (IPP Enablement)
1. On the IPP selection menu, press Port Status.
2. Press the Change Settings button.
3. On the IPP Port Status screen, note which of the two buttons is highlighted as the current settingfor IPP Enablement. The available settings are Enabled or Disabled. To print with IPP, this settingmust be Enabled.
4. To change settings, press your setting of choice, then press the Save button.
5. To exit the screen, without making any changes, press the Cancel button.
8/6/2019 Enu WC74XX Sys Admin Guide
http://slidepdf.com/reader/full/enu-wc74xx-sys-admin-guide 55/208
IPP Configuration
WorkCentre 7425/7428/7435
System Administrator Guide
55
IPP – Added Port Number
Note: If you just enabled the IPP port, the machine may have to reboot before you can view or changethe Port Number.
1. On the IPP Selection menu, press the selection line labeled IPP – Added Port Number.
2. Press the Change Settings button.
3. Use the displayed keypad to add a Port Number, such as 80 (the displayed default for HTTP).
4. To save the setting, press Save.
5. To exit the screen, without making any changes, press Cancel.
Exiting the IPP Selection Menu
To exit the IPP selection menu, which returns you to the Port Settings menu, press the Close button inthe upper right corner of the touch screen.
Exiting the Port Settings Menu and Returning to the Tools Tab
1. To exit the Port Settings menu, returning to the Tools screen, press theClose button in the upperright corner of the Port Settings menu screen.
2. Wait several seconds and the Auto Clear service should log you out.
Note: If you changed any settings in the Port Settings menu, the printer will automatically reboot toregister and enable your new settings.
Configuring IPP Settings with CentreWare Internet Services
1. Open your Web browser and enter the IP address of the printer in the address field. Press Enter toopen CentreWare Internet Services.
2. Click the Properties tab.3. Enter the system administrator User Name and Password (defaultadmin, 1111) if prompted.
4. Click the Connectivity folder, then the Protocols folder.
5. Click IPP.
6. The available selections include:
• Port Number: The default value is 631. This is the port number assigned by IANA (InternetAssigned Numbers Authority.
• Add Port Number
• TBCP Filter: Displayed when PostScript is enabled.
• Administrator Mode: This is disabled by default.
• DNS Enablement
• Connection Timeout
7. Verify that DNS is checked (Enabled) by default. If enabled, the DNS Server will resolve HostNames to IP Addresses, in support of printing with IPP.

8/6/2019 Enu WC74XX Sys Admin Guide
http://slidepdf.com/reader/full/enu-wc74xx-sys-admin-guide 56/208
Network Management
WorkCentre 7425/7428/7435
System Administrator Guide
56
8. Enter a Time Out value for jobs being sent to the printer through this Port. This is the length of time that the Controller will wait for an end of job command before printing the current job.
9. Click the Apply button to accept changes, or the Undo button to return settings to their previousvalues.
Note: Setting changes are not applied until you restart the printer.
8/6/2019 Enu WC74XX Sys Admin Guide
http://slidepdf.com/reader/full/enu-wc74xx-sys-admin-guide 57/208
EtherTalk (AppleTalk) Configuration
WorkCentre 7425/7428/7435
System Administrator Guide
57
EtherTalk (AppleTalk) Configuration
The EtherTalk Protocol enables computer to printer communications over the EtherTalk (AppleTalk)network.
Changing EtherTalk Settings at the Printer
1. Press the Log In/Out button on the control panel.
2. Enter the System Administrator’s Login ID and Passcode if prompted (default admin, 1111), andpress Enter.
3. Press the Machine Status button.
4. Touch the Tools tab.
5. Press Connectivity & Network Setup.
6. Press Port Settings.
7. Press the EtherTalk selection line on the Port Settings menu.8. Press the Change Settings button in the lower right corner of the Port Settings menu screen.
9. When the EtherTalk selection menu displays, note that you have only one selection available on asingle, numbered horizontal line, with the current status of this setting shown. The Close button inthe upper right corner of the screen returns you to the Port Settings menu. After pressing thehorizontal line selection, to access available settings press the Change Settings button in the lowerright corner of the touch screen.
Port Status (EtherTalk Enablement)
1. On the EtherTalk selection menu, press the selection line labeledPort Status.
2. Press the Change Settings button.
3. On the Port Status screen, note which of the two buttons is highlighted as the current setting forEtherTalk Enablement. The available settings are Enabled or Disabled. To print with EtherTalk, thissetting must be Enabled.
4. To change settings, press your setting of choice, then press the Save button.
5. To exit the screen, without making any changes, press the Cancel button.
Exiting the EtherTalk Selection Menu
To exit the EtherTalk selection menu, which returns you to the Port Settings menu, press the Close button in the upper right corner of the touch screen.
8/6/2019 Enu WC74XX Sys Admin Guide
http://slidepdf.com/reader/full/enu-wc74xx-sys-admin-guide 58/208
Network Management
WorkCentre 7425/7428/7435
System Administrator Guide
58
Exiting the Port Settings Menu and Returning to the Tools Tab
1. To exit the Port Settings menu, returning to the Tools screen, press theClose button in the upperright corner of the Port Settings menu screen.
2. Wait several seconds for the Auto Clear service to log you out.
Note: If you changed any settings in the Port Settings menu, the printer will automatically reboot toregister and enable your new settings.
Configuring EtherTalk Settings with CentreWare Internet Services
1. Open your Web browser and enter the IP address of the printer in the address field. Press Enter toopen CentreWare Internet Services.
2. Click the Properties tab.
3. Enter the system administrator User Name and Password (defaultadmin, 1111) if prompted.
4. Click the Connectivity folder, then the Protocols folder.
5. Click AppleTalk (EtherTalk).
Note: If this selection is unavailable, click Port Status, check the EtherTalk box, then click Apply.
6. The available selections include:
• Printer Name: Enter the name that you wish to assign to this Printer. This is the name that willappear in the Chooser.
• Zone Name: Either accept the default zone of * which lets the closest router assign the printerto a zone, or assign the printer to a zone (with a 32 character naming limit).
7. Click Apply to accept changes, or Undo to return settings to their previous values.
Note: Setting changes are not applied until you restart (reboot) the printer.

8/6/2019 Enu WC74XX Sys Admin Guide
http://slidepdf.com/reader/full/enu-wc74xx-sys-admin-guide 59/208
AS400 Printing
WorkCentre 7425/7428/7435
System Administrator Guide
59
AS400 Printing
AS400 Raw TCP/IP Printing to Port 9100 (CRTDEVPRT)
This is the procedure to set up printing to a printer from an AS/400 using the SNMP drivers. Thisprocedure is intended for users familiar with the AS/400 system, especially those experienced withprinting in an AS/400 environment. The AS/400 must run V4R5 of OS/400 so that the SNMP drivers arepresent (or V4R3/V4R4 with the most current PTFs installed). The printer must have port 9100 enabled.
To enable port 9100
1. Open your Web browser and enter the IP address of the printer in the address field. Press Enter toopen CentreWare Internet Services.
2. Click the Properties tab.
3. Enter the system administrator User Name and Password (defaultadmin, 1111) if prompted.
4. Click the Connectivity folder.5. Click the Protocols folder.
6. Select Port 9100 in the directory tree.
7. Ensure the Enabled box is checked to enable Raw TCP/IP Printing.
8. Leave the TCP Port Number set to 9100 for Port 1.
9. Leave the Bidirectional and Maximum Connections settings at their default values.
10. Set the End of Job Timeout to the number of seconds to wait before processing a job without anEnd Of Job indicator.
11. Leave the PDL Switching Enabled box at its default value.
12. Click Apply to accept the changes, Undo to return the settings to their previous values, or Default
All to enter printer defaults for all settings (recommended).
Note: The settings are not applied until you restart the printer.
13. Click the Status Tab.
14. Click the Reboot Machine button and click OK to reboot the printer. The network controller takesapproximately 5 minutes to reboot and network connectivity will be unavailable during this time.
8/6/2019 Enu WC74XX Sys Admin Guide
http://slidepdf.com/reader/full/enu-wc74xx-sys-admin-guide 60/208
Network Management
WorkCentre 7425/7428/7435
System Administrator Guide
60
To create a device description
To create a device description from your terminal's command line.
1. Select the F-4 key to prompt the CRTDEVPRT command. Enter the following parameters:
• Device Description: Xeroxprinter
• Device Class: *lan• Device Type: 3812
• Device Model: 1
2. Press Enter to continue, and enter the following parameters:
• Lan Attachment: *IP
• Port Number: 9100
• Online at IPL: *yes
• Font Identifier: 11
• Form Feed *autocut
Note: For some versions of AS400, the default may match some of these parameters.
3. Leave all other parameters at their defaults, press Enter, and enter the following parameters:
• Activation Timer: 170
• Inactivity Timer: *sec15
• Host Print Transform: *yes
4. Press Enter to continue, and enter the following parameter:
• Manufacturer Type and Model: *hp5si
5. Leave the remaining parameters set to their default values and press Enter to continue. Enter thefollowing parameters:
• Remote Location: Enter the IP address of the printer.
• User defined options: *IBMSHRCNN• System driver program: *IBMSNMPDRV
6. Leave all other options set to the default values and press Enter. A message indicates that youcreated the printer Xeroxprinter.
7. Set the printer on and start a print writer. Then place a spool file in the appropriate queue to testthe printer.

8/6/2019 Enu WC74XX Sys Admin Guide
http://slidepdf.com/reader/full/enu-wc74xx-sys-admin-guide 61/208
61
5Security
This chapter includes:
• Authentication on page 62
• Scheduled Image Overwrite on page 84
• Secure Watermark on page 85
• Secure Print on page 87
• Xerox Common Access Card on page 89
8/6/2019 Enu WC74XX Sys Admin Guide
http://slidepdf.com/reader/full/enu-wc74xx-sys-admin-guide 62/208
Security
WorkCentre 7425/7428/7435
System Administrator Guide
62
Authentication
Overview
Procedure
1. Set up authentication
2. Set up authorization (LDAP authorization access)
3. Set up access control (device access, service access)
Users Types
• Authenticated Users: Are registered with the printer. When using a restricted service,authenticated users are prompted to type their user IDs on the authentication screen.
• Guest Users: Are permitted to use the printer using the Guest password set by the System
Administrator.
Authentication Types
• No Login Required: Users can access any service without restriction. This is the default type for theprinter.
• Login to Local Accounts: This type uses the user information registered on the printer to manageauthentication.
Note: Setting Login Type to Login to Local Accounts automatically sets Accounting Type to LocalAccounting. Local Accounting cannot be disabed while Login Type is set to Login to Local Accounts.
• Login to Remote Accounts: Network Access (authentication) uses the user information managedon a remote accounting service to manage authentication. Network Access allows a unifiedmanagement of user information for multiple devices.
Note: When registering user information on a remote authentication server, use up to 32 characters fora user ID and up to 128 characters for a password. For SMB, the password limit is 32 characters.
• Login Type set to Xerox Secure Access: This authentication type is used for third-party solutionsthat support Xerox Secure Access.
Effects of Authentication on Job Flow Sheets and Folders
When Login to Local Accounts is enabled, even if authentication is not enabled for the copy, fax, scan,
or print services, authentication will be required for folder and job flow sheet operations.
For full details on the effects of Authentication on Job Flow Sheets and Folders, refer to that topic inthe printer’s User Guide.
8/6/2019 Enu WC74XX Sys Admin Guide
http://slidepdf.com/reader/full/enu-wc74xx-sys-admin-guide 63/208
Authentication
WorkCentre 7425/7428/7435
System Administrator Guide
63
Configuring Authentication
Preparations:
1. Ensure that the printer is on and connected to the network.
2. Ensure that the TCP/IP and HTTP protocols are configured on the printer, and you can access
CentreWare Internet Services. For more information see CentreWare Internet Services on page 23.3. Ensure that the Authentication Server to be used is functional on your network. Refer to your
manufacturer’s documentation for instructions to complete this task.
Configuring Local Machine Authentication
When Login to Local Accounts is enabled, the System Administrator can define pass codes forauthorized users (and guests, when the selection is available) to use to authenticate to the system andaccess restricted services.
1. Open your Web browser and enter the IP address of the printer in the address field. Press Enter toopen CentreWare Internet Services.
2. Click the Properties tab.
3. Enter the system administrator User Name and Password (defaultadmin, 1111) if prompted.
4. Select the Security folder, then Authentication Configuration. Enter your user name andpassword at the prompt (default: admin, 1111).
5. Select Login to Local Accounts from the Login Type drop down list.
6. Select the Print Stored File from Folder, or Folder to PC/Server Enabled check boxes to enablethese services.
7. Select the Non-account Print Enabled check box if you want to enable printing for people withoutaccounts.
8. Click Apply, then click Reboot Machine.
9. Refresh your browser, click the Security folder, then Authentication Configuration.10. Click Next.
11. To create or edit a user account, enter an Account Number in theAccount Number box and clickEdit. You can have up to 1000 user accounts.
12. Set the following for the user.
• Feature Access: Copy Service, Fax Service, Scan Service, Print Service
• User Role: System Administrator, Account Administrator, User, Authorization Group
Note: Authorization Group is a feature that has its own configuration options in CentreWare InternetServices.
Note: Set each Feature Access as desired. Do not set a Feature Access to No Access, unless you wish todeny user access to that specific feature.
13. Click Apply.
8/6/2019 Enu WC74XX Sys Admin Guide
http://slidepdf.com/reader/full/enu-wc74xx-sys-admin-guide 64/208
Security
WorkCentre 7425/7428/7435
System Administrator Guide
64
To configure Local Machine Authentication at the printer:
1. Press the Log In/Out button on the control panel.
2. Enter the System Administrator’s Login ID and Passcode if prompted (default admin, 1111), andpress Enter.
3. Press the Machine Status button.
4. Touch the Tools tab.5. Touch Authentication/Security Settings, then Authentication.
6. Touch Login Type to change the Login Type, or touch Access Control, then Feature Access tochange Feature Access.
To view, create and edit user accounts at the printer:
1. Touch Account in the Tools tab.
2. Touch View User Accounts.
Configuring Remote Authentication
When Login to Remote Accounts is enabled, users of the printer will be asked to provide a user nameand password to be validated by the designated authentication server. If this validation is successful,the printer and any restricted services will be available for individual use.
1. Open your Web browser and enter the IP address of the printer in the address field. Press Enter toopen CentreWare Internet Services.
2. Click the Properties tab.
3. Enter the system administrator User Name and Password (defaultadmin, 1111) if prompted.
4. Select the Security folder, then the Authentication Configuration. Enter your user name andpassword at the prompt (default: admin, 1111).
5. Select Login to Remote Accounts from the Login Type drop down list.
6. Select the Print Stored File from Folder, or Folder to PC/Server Enabled check boxes to enablethese services.
7. Select the Non-account Print Enabled check box if you wish to allow printing for a user withoutand account.
8. If you want to allow guest access to the printer, selectOn next to Guest User. The default setting isOff . If you select On, enter a Guest user name and a passcode (4 – 12 alphanumeric characters).Retype the passcode.
9. To have the printer cache remote account information, select Enabled next to Save remoteaccounts in this machine. Specify if you want to have the cached information deleted (clickDelete Remote Accounts), and specify how often you want to delete cached information byselecting a deletion day, month and time.
10. Click Apply, then Reboot Machine.11. Click Next.
12. Click Configure for Authentication System.
13. Select your system (Kerberos (Windows 2000), Kerberos (Solaris), LDAP, SMB, or AuthenticationAgent)from the Authentication System Settings drop down list and click Apply.
14. Enter the Server Response Time-Out, and the Search Time-Out.
8/6/2019 Enu WC74XX Sys Admin Guide
http://slidepdf.com/reader/full/enu-wc74xx-sys-admin-guide 65/208
Authentication
WorkCentre 7425/7428/7435
System Administrator Guide
65
15. Select the Enabled check box next to Assign UPN (User Principal Name) if desired.
16. Click Reboot Machine.
Configure Remote Authentication for a Kerberos Server (Windows 2000 or Solaris)
1. Open your Web browser and enter the IP address of the printer in the address field. Press Enter to
open CentreWare Internet Services.2. Click the Properties tab.
3. Enter the system administrator User Name and Password (defaultadmin, 1111) if prompted.
4. Click the Security folder.
5. Click the Remote Authentication Servers folder. Enter your user name and password at theprompt (default: admin, 1111).
6. Click Authentication System and pick Kerberos (Windows 2000) or Kerberos (Solaris) from thedrop down list. Click Apply, and click Reboot Machine.
7. Navigate back to the Remote Authentication Servers folder and click Kerberos Server.
8. Under Kerberso Server 1 (Default), enter the Primary Server Name / IP Address, Primary PortNumber (default port for a Kerberos server is 88), and the Domain Name (Realm name).
Note: Realm name for a Kerberos (Solaris) server should be in upper case. Example: YOURDOMAIN.NET
9. Enter the IP Address of the Primary Server.
10. The Secondary Server information is optional.
11. Enter details for up to 4 alternate Domain Controllers and backups, if required.
12. Click Apply, and supply the Administrator User name and password if prompted.
Configure Remote Authentication for SMB
1. Open your Web browser and enter the IP address of the printer in the address field. Press Enter toopen CentreWare Internet Services.
2. Click the Properties tab.3. Enter the system administrator User Name and Password (defaultadmin, 1111) if prompted.
4. Click the Security folder.
5. Click the Remote Authentication Servers folder. Enter your user name and password at theprompt (default: admin, 1111).
6. Click Authentication System and pick SMB from the Authentication System Settings drop downlist.
7. Enter the Server Response Time-Out, and the Search Time-Out.
8. Select the Enabled check box next to Assign UPN (User Principal Name) if desired.
9. Click Apply, and click Reboot Machine.
10. Click SMB Server.11. From the SMB Server Setup drop down menu, select your desired method. The selections include:
By Domain Name, and By Domain Name and Server Address / IP Address.
12. Enter the Domain name (up to 15 characters) in the Domain Name box, for every DomainController specified. This entry is required regardless of the selection made from the SMB ServerSetup drop down menu.
8/6/2019 Enu WC74XX Sys Admin Guide
http://slidepdf.com/reader/full/enu-wc74xx-sys-admin-guide 66/208
Security
WorkCentre 7425/7428/7435
System Administrator Guide
66
Note: FQDN requires DNS and SMB Host Name requires WINS to be enabled on the printer.
13. Enter the IP Address, FQDN, or SMB host name of the domain controller (up to 64 characters) inthe SMB Server 1 Server Name / IP Address box (if By Domain Name and Server Address / IPAddress was selected for SMB Server Setup).
14. Enter the IP Address, FQDN, or SMB host name of up to 4 additional SMB servers, if applicable.
Note: FQDN requires DNS and SMB Host Name requires WINS to be enabled on the printer.
15. Click Apply.
Configure Remote Authentication for LDAP
1. Set up the LDAP Server. For information about setting up an LDAP server, see LDAP ServerConfiguration on page 106.
2. Open your Web browser and enter the IP address of the printer in the address field. Press Enter toopen CentreWare Internet Services.
3. Click the Properties tab.
4. Enter the system administrator User Name and Password (defaultadmin, 1111) if prompted.
5. Click the Security folder.
6. Click the Remote Authentication Servers folder. Enter your user name and password at theprompt (default: admin, 1111).
7. Click Authentication System and pick LDAP from the Authentication System Settings drop downlist.
8. Enter the Server Response Time-Out, and the Search Time-Out.
9. Select the Enabled check box next to Assign UPN (User Principal Name) if desired.
10. Click Apply, and click Reboot Machine.
LDAP User Mappings
You can click LDAP User Mappings to specify the attributes to search for within the LDAP database.For more information about LDAP user mappings, see LDAP User Mappings on page 108.
LDAP Authentication
To set LDAP for authentication, click LDAP Authentication. For Authentication Method, choose eitherDirect Authentication or Authentication of User Attributes. Direct Authentication uses the user nameand password entered by the User for authentication with the LDAP server. Authentication of UserAttributes allows you to specify the what is entered by the user (Attribute of Typed User Name) andwhat is used by the device (Attribute of the Login User Name) to authenticate the user. If Use AddedText String is enabled (default disabled), then what ever text is entered in the Text String Added to UserName box is added to the user input prior to authentication.
Knowledge of LDAP Server authentication requirements and capabilities are required to properlyconfigure these settings.

8/6/2019 Enu WC74XX Sys Admin Guide
http://slidepdf.com/reader/full/enu-wc74xx-sys-admin-guide 67/208
Authentication
WorkCentre 7425/7428/7435
System Administrator Guide
67
LDAP Group Access
LDAP server user groups can be used to control access to the printer. For example, the LDAP server maycontain a group of users called Admin. You can configure the Admin group on the printer so that themembers of that group will have administrator access to the printer. When a user logs in at the printerwith their network authentication account, the printer performs an LDAP look-up to determine if the
user is a member of any groups. If the LDAP server confirms that the user is a member of the Admingroup, the user will have administrator access.
The following groups are available:
• Color Access Group
• System Administrator Access Group
• Account Administrator Authorization Group
In one of the group access boxes, enter a name for the group. Repeat for other group access boxes.
Note: Entries should be in base DN format (for instance, cn=Admin, ou=people, dc=xerox, dc=com).
Configuring Network Authentication (by a Remote Accounting server)
Network authentication uses the user information managed on a remote Accounting server to manageauthentication (access) to available machine services.
Enable Network Authentication
To enable Network Authentication for use with this printer, at your networked computer, perform thefollowing steps:
1. Open your Web browser and enter the IP address of the printer in the address field. Press Enter toopen CentreWare Internet Services.
2. Click the Properties tab.3. If prompted, enter the system administrator user name and password (default: admin, 1111).
4. Select the Security folder, then the Authentication Configuration.
5. Select Login to Remote Accounts from the Login Type drop down list.
6. Select the Print Stored File from Folder, or Folder to PC/Server Enabled check boxes to enablethese services.
7. Select the Non-account Print Enabled check box if you want to enable printing for people withoutaccounts.
8. Click Apply, then click Reboot Machine.
9. Refresh your browser, click the Accounting folder, then Accounting Configuration.
10. Select Network Accounting from the Accounting Type drop down list.11. From the Verify User Details drop down menu, select either Yes or No (keep logon records). The
Yes selection will verify user information. When No (keep logon records) is selected, User ID andAccount ID must be entered at the printer, but user information will not be checked. A logon recordwill be kept by the printer, however.
12. Click Apply, then click Reboot Machine.
8/6/2019 Enu WC74XX Sys Admin Guide
http://slidepdf.com/reader/full/enu-wc74xx-sys-admin-guide 68/208
Security
WorkCentre 7425/7428/7435
System Administrator Guide
68
Note: Refresh your Web browser, then click User Details Setup to set the Store User Details setting. Youcan set either NVM or hard disk as the destination for saved authentication information. User DetailsSetup also allows you to configure the characteristics of the login prompt for User Authentication.
Configure Communications Between the Accounting Server and the Printer
Refer to the remote Accounting server manufacturer's documentation for the specific procedures tofollow to configure communications between the server and the printer.
The server will contact the printer based upon Accounting service parameters set up at the server, suchas the printer's IP address and polling frequency.
Required network communications and server settings will be stated by the server's manufacturer.
Sample list of set up requirements for Xerox Secure Access Unified ID System's Accounting service
• Enable TCP/IP and HTTP on the printer.
• Set up a static or reserved DHCP IP address for the printer.
• Enable TCP/IP port 80 communications at the printer.
• Download the Controller Interface for Xerox from the Xerox Secure Access Unified ID System™ Website.
• Install the Controller Interface for Xerox at the server.
• Verify that you have purchased a license for the Controller Interface for Xerox, as well as a licensefor each device communicating with the server.
• Register each printer at the server (using the printer's IP address for identification).
Enable the Accounting Option in Computer Print Drivers
Use the Windows Add Printer dialogs to add the printer's print driver to individual, networkedcomputers. For more information see Print Driver Installation on page 13.
In the print driver default setting dialogs, locate and then enable the Accounting option. This stepassures that print jobs from individual computers will be recognized by the authentication system,rather than being unrecognized and deleted by the printer.
For Windows operating systems, the default setting dialogs are accessed by right clicking on theprinter's icon in the Printers window for Windows 2000, or the Printers and Faxes window for WindowsXP. Select Properties from the displayed menu, then locate and enable the Accounting option.
8/6/2019 Enu WC74XX Sys Admin Guide
http://slidepdf.com/reader/full/enu-wc74xx-sys-admin-guide 69/208
Authentication
WorkCentre 7425/7428/7435
System Administrator Guide
69
Configuring Xerox Secure Access (Authentication)
Xerox Secure Access enables customers to leverage Xerox Partner Solutions to provide userauthentication with an optional card reader. Users can access the features available at the printer oncethey have been authenticated.
Secure Access and Accounting
Secure Access can be enabled with Network Accounting or the Xerox Standard Accounting feature foraccounting purposes. To configure Xerox Secure Access with Network Accounting, refer to theConfiguring Network authentication (by a remote Accounting server) topic in this section. To configureXerox Secure Access with Xerox Standard Accounting, refer to the Optional information, in theInformation Checklist below, then see Enabling Xerox Standard Accounting on page 171.
Note: Secure Access cannot be enabled at the same time as Foreign printer Interface.
Information Checklist
1. Ensure that the printer is fully functional on the network. TCP/IP and HTTP protocols must beconfigured so that you can access CentreWare Internet Services.
2. Ensure that the Xerox Partner authentication solution (Secure Access Server, Controller, and CardReader) is installed and communicating with the printer. Follow the installation instructions fromthe manufacturer of the authentication solution to correctly set the printers up.
3. Ensure that SSL (Secure Sockets Layer) is configured on the printer. The Xerox Partnerauthentication solution communicates with the printer via HTTPS.
4. (Optional) Ensure that Network Accounting is configured if you want the printer to send useraccount information to a Network Accounting server. Open your Web browser and enter the IPaddress of the printer in the address field. Press Enter to open CentreWare Internet Services. Clickthe Properties tab, click the Security folder, click Authentication Configuration, and select XeroxSecure Access for Login Type, matched to Network Accounting for Accounting Type.
5. For use with Xerox Standard Accounting, you select Xerox Secure Access for Login Type, then selectXerox Standard Accounting for Accounting Type. For instructions on setting up Xerox StandardAccounting, see Enabling Xerox Standard Accounting on page 171. For instructions on setting upyour Network Accounting server, refer to the instructions that came with your accounting package,and see Configuring Network Authentication (by a Remote Accounting server)on page 67.
Note: When authentication is set to Xerox Secure Access, Xerox Standard Accounting is not available.
You may also need another Authentication Server (running LDAP in an ADS environment, forexample) to communicate with the Secure Access Server providing that server with user credentialinformation. A second Authentication Server may be necessary for Web User InterfaceAuthentication, if this feature is additionally desired.
6. If you have an LDAP server on your network, you can configure LDAP on the printer, preferably fromthe Remote Authentication Server / Directory Service folder. For more information, see LDAP ServerConfiguration on page 106.
8/6/2019 Enu WC74XX Sys Admin Guide
http://slidepdf.com/reader/full/enu-wc74xx-sys-admin-guide 70/208
Security
WorkCentre 7425/7428/7435
System Administrator Guide
70
Configuring Xerox Secure Access with Remote Authentication
To configure Xerox Secure Access with Remote Authentication:
1. Open your Web browser and enter the IP address of the printer in the address field. Press Enter toopen CentreWare Internet Services.
2. Click the Properties tab.
3. If prompted, enter the system administrator user name and password (default: admin, 1111).
4. Click the Security folder, then Authentication Configuration.
5. In the Authentication Configuration > Step 1 of 2 page:
a. Select Xerox Secure Access from the Login Type drop down list.
b. Select the Print Stored File from Folder, or Folder to PC/Server Enabled check boxes to enablethese services.
c. Select the Non-account Print: Enabled check box if you wish to allow printing for a userwithout and account.
d. Select Apply, then reboot the printer after the prompt.
e. Select Next to continue to the Authentication Configuration > Step 2 of 2 page.6. In the Authentication Configuration > Step 2 of 2 page, click Configure next to Authentication
System.
7. In the Authentication System page:
a. Select Authentication Agent from the Authentication System Settings drop down list,
b. Set the Server Response Time-out, and Search Time-out.
c. Select the Assign UPN (User Principal Name): Enabled check box to assign a user principalname.
d. Select Apply, then reboot the printer after the prompt.
8. To set service access:
a. Refresh your Web browser.b. Click the Security folder, then Authentication Configuration.
c. In the Authentication Configuration > Step 1 of 2 page, click Next.
d. Under Device Default State Configuration, click Configure next to Service Access.
e. Select one of the following for each service you want to control:
• Unlocked: Allow unrestricted access.
• Locked (Show Icon): Require login for access. The service icon is visible to all users in the allservices screen.
• Locked (Hide Icon): Require login for access. The service icon is hidden until an authorized userlogs in.
f. Click Apply and enter the Administrator User name and password when prompted (default of admin and 1111).
g. Click OK.
h. Click Reboot Machine when it displays on screen.

8/6/2019 Enu WC74XX Sys Admin Guide
http://slidepdf.com/reader/full/enu-wc74xx-sys-admin-guide 71/208
Authentication
WorkCentre 7425/7428/7435
System Administrator Guide
71
Enable Specific Xerox Secure Access Settings
1. Open your Web browser and enter the IP address of the printer in the address field. Press Enter toopen CentreWare Internet Services.
2. Click the Properties tab.
3. Enter the system administrator User Name and Password (defaultadmin, 1111) if prompted.
4. Select the Security folder.5. In the Security folder, select the Remote Authentication Servers folder.
6. In the Remote Authentication Servers folder, select Xerox Secure Access Settings.
7. In the Xerox Secure Access Settings area:
a. Enter text in theDefault Prompt and Default Title boxes to create the prompt and prompttitle that will be displayed on the printer’s screen informing users how to authenticatethemselves at the printer.
b. If the Title and Prompt have been configured on the Secure Access Server, then thatinformation will override the information entered here.
c. Select the Enable box for Local Login to allow users to log in locally at the printer.
d. Select the Enable box for Get Accounting Code to get user accounting data from a networkedAccounting Server (if used).
e. Click Apply.
Using Secure Access
1. Read the printer’s prompt to determine what needs to be done to be authenticated at the printer.Authentication methods include swiping a card, placing a proximity card near the reader, orentering a user ID or PIN (personal identification number).
2. If the printer requests further information such as accounting details, enter this information at theprinter.
3. The printer will confirm successful authentication allowing access to previously locked system
features.4. When finished, press the Login/Out button.
Configure Color Copy Access for LDAP Group
Refer to your LDAP server documentation for the full range of information that can be entered into thisLDAP dialog to fully support both e-mail applications and authentication using your LDAP server.
Creating Color Access Group within Active Directory
This procedure describes how to create an Active Directory color access group to be used to restrictcolor copying and printing.
Click Start, click Control Panel, double-click Administrative Tools, and then click Active DirectoryUsers and Computers.
1. In the Active Directory Users and Computers window, expand the domain folder.
2. In the console tree, right-click theUsers folder in which you want to add a new group.
3. Click New, and then click Group.
8/6/2019 Enu WC74XX Sys Admin Guide
http://slidepdf.com/reader/full/enu-wc74xx-sys-admin-guide 72/208
Security
WorkCentre 7425/7428/7435
System Administrator Guide
72
4. Type the name of the new group. Use a name that you can easily associate with the role or servicefor which you are creating.
5. To add users and/or groups to the newly created color access group, right-click the group and selectProperties.
6. Click the Members tab, then click the Add button to add members to the group.
7. Click Finish.
LDAP Group Access
1. Click the Properties tab, click the Connectivity folder, click the Protocols folder, then click the LDAP folder.
2. In the LDAP folder, click LDAP Group Access.
3. On the LDAP Group Access page:
4. In the Color Authorization area, on the Color Access Group line, typeCN=Color,CN=Users,DC=crmttrinity,DC=lab
5. Click Apply, then reboot the printer at the prompt.
6. Continue with the next procedure to set Authentication Configuration.
Authentication Configuration
1. Click the Properties tab, then click the Security folder.
2. Click Authentication Configuration.
3. The Properties tab refreshes and the Authentication Configuration > Step 1 of 2 page appears.
4. On the Authentication Configuration > Step 1 of 2 page, in the Authentication Configuration box:
a. In the Login Type drop down list, click or verify Login to Remote Accounts.
b. On the Folder to PC / Server line, click or verify the Enabled check box.
c. On the Non-account Print line, ensure that the Enabled check box is not checked if you wish toenable people without accounts to continue to print.
d. On the Guest User line, in the drop down list, click or verify Off .
5. Click Apply, then reboot the printer following the prompt.
6. Continue with the next procedure to set Authentication System.
Authentication System
1. Click the Properties tab, click the Security folder, then click the Remote Authentication Servers folder.
2. In the Remote Authentication Servers folder, click Authentication System.
3. On the Authentication System page, in theAuthentication Type box:
a. In the Authentication System Settings drop down list, click or verify LDAP.
b. Click Apply, then reboot the printer at the prompt.
Configure Color Copy Access Control at the Printer
1. Press the Log In/Out button on the printer control panel.
2. Enter the default User Name (admin) and Password (1111) if prompted.
3. Touch Enter.
8/6/2019 Enu WC74XX Sys Admin Guide
http://slidepdf.com/reader/full/enu-wc74xx-sys-admin-guide 73/208
Authentication
WorkCentre 7425/7428/7435
System Administrator Guide
73
4. Press the Machine Status button.
5. Touch the Tools tab.
6. Touch Authentication / Security Settings.
7. In the Group column, touch Authentication.
8. In the Features column, touch Access Control.
9. On the Access Control screen, touch Feature Access.
10. On the Feature Access screen:
a. In the Items column, touch Color Copying.
b. Touch the Change Settings button.
11. On the Color Copy screen, touch Locked, then touch Save.
12. Reboot the printer.
13. Press the Services button, touch the Copy icon, then the Color button.
14. The Login screen appears. The printer is configured for Color Copy Access for LDAP Group.
To Enable Print Color Access Control
This process will restrict a user from printing in color unless they are authorized to do so via the ActiveDirectory group.
1. Click Start, click Control Panel, double-click Printers and Faxes, then right-click the printer to beenabled. In the printer pop-up menu, click Properties.
2. In the Properties dialog box, click the Options tab.
3. On the Options tab, in the Options Settings area, click thePredefined Configurations folder.
4. In the the Predefined Configurations area, click the Color Access Control field and click Enabled.
5. Click the Color Access Group field and type or enter the color access group name.
6. Click Apply, then click OK.
Note: On the client side, if the user that installs the print driver is a member of the group givenpermission to print in color, then the Output Color option within the driver will be selectable betweenColor and Black and White. If the user does not have permission to print in color, then the Output Coloroption within the driver will list Black and White and is not selectable.
Access Control
After configuring the Authentication system, you must specify what services and features are to becontrolled by authentication and will require the user login.
• Device Access: Use for restricting access to the Services Pathway, Job Status Pathway, or MachineStatus pathway. Device Access settings are:
• Unlocked: Allow unrestricted access
• Locked: Require login for access.
• Service Access: Use for restricting access to each individual service (copy, e-mail, etc). ServicesAccess settings are:
• Unlocked: Allow unrestricted access.
8/6/2019 Enu WC74XX Sys Admin Guide
http://slidepdf.com/reader/full/enu-wc74xx-sys-admin-guide 74/208
Security
WorkCentre 7425/7428/7435
System Administrator Guide
74
• Locked (Show Icon): Require login for access. The service icon is visible to all users in the allservices screen
• Locked (Hide Icon): Require login for access. The service icon is hidden until an authorized userlogs in.
1. Open your Web browser and enter the IP address of the printer in the address field. Press Enter toopen CentreWare Internet Services.
2. Click the Properties tab.
3. Enter the system administrator User Name and Password (defaultadmin, 1111) if prompted.
4. Click the Security folder
5. Click Authentication Configuration.
6. In the Authentication Configuration box, select theNext button.
7. In the Device Default State Configuration section, select theConfigure button next to DeviceAccess and/or Service Access, and Apply and supply the Administrator User name and password if prompted.
802.1xThe printer supports 802.1x authentication based on the Extensible Application Protocol (EAP). 802.1xcan be enabled for devices connected through both wired and wireless Ethernet networks. As describedhere, the 802.1x configuration is used to authenticate the printer, rather than individual users. Afterthe printer has been authenticated, it will be accessible to users on the network.
The administrator can configure the printer to use one EAP type. EAP types currently supported on theprinter are:
• EAP-MD5
• PEAP/EAP-MS-CHAPv2
• EAP-MS-CHAPv2
Information Checklist
Create a user name and password on your authentication server which will be used to authenticate theXerox device.
Ensure your 802.1x authentication server and authentication switch are available on the network.
Configure 802.1x with CentreWare Internet Services
1. Open your Web browser and enter the IP address of the printer in the address field. Press Enter to
open CentreWare Internet Services.2. Click the Properties tab.
3. Enter the system administrator User Name and Password (defaultadmin, 1111) if prompted.
4. Click the Security folder.
5. Click IEEE 802.1x.
6. Select the Enabled check box next to Enable IEE 802.1x.

8/6/2019 Enu WC74XX Sys Admin Guide
http://slidepdf.com/reader/full/enu-wc74xx-sys-admin-guide 75/208
Authentication
WorkCentre 7425/7428/7435
System Administrator Guide
75
7. Select the required Authentication Method.
8. Enter the User Name and Password required by your authentication switch and server.
9. Click Apply, then Reboot Machine.
Encryption Service Overview
You may have to purchase the Security Kit option to enable encryption with your printer. If you cannotgenerate a self-signed certificate, or enable SSL/TLS Communication, as stated under Configuration of HTTP Communication Encryption, in this section, contact your Xerox Representative to purchase theoption.
The communication data between the printer and computers on a network can be encrypted.Encryption for the printer is set up using CentreWare Internet Services. Note that the quickest andeasiest, although not the most trusted, method to use to set up initial HTTP communication encryptionis the generation of a self-signed certificate. Click Printer Digital Certificate Management in theSecurity folder on the Properties page of CentreWare Internet Services. Use this to manage all thedigital certificates, of various types, stored on the printer.
Types of Encryption Services Available
Encryption of HTTP Communications from a Client to the Printer (Server Certificate)
The SOAP port, Internet service (HTTP) port, IPP port, and WebDAV port use the HTTP server of theprinter.
The SSL/TLS suite of protocols is used in the encryption of HTTP communications from a client to theprinter. A user of a client computer accesses the printer’s HTTP server by typing https://, followed bythe IP address of the printer, into the Address box of a Web browser application. The printer then offersthe client a Digital Certificate, which the client accepts (after reviewing the validity of same). Uponacceptance of the Digital Certificate, a Public Key exchange takes place, encryption algorithms areagreed upon between the two parties, and the client uses the server’s Public Key to communicate withthe server using digitally signed and encrypted data.
Digital certificates imported from a Certificate Authority, or self-signed certificates created withCentreWare Internet Services, can be used as SSL/TLS certificates on the printer’s HTTP server.
Encryption of HTTP Communications from the Printer to a Remote Server (Client Certificate)
The SSL/TLS suite of protocols is used to encrypt HTTP communications with a remote server.
No client certificate is typically required for this activity. However, if a remote server is set to require an
SSL client certificate, an SSL/TLS client certificate must be registered on the printer.Digital certificates imported from a Certificate Authority can be used as SSL/TLS certificates on theprinter’s HTTP server.
Note: When Remote Server Certificate Validation is enabled, under SSL/TLS Settings in CentreWareInternet Services, the root certificate of the remote server must be registered to the printer (importedwith CentreWare Internet Services) to verify the Digital certificate of same.
8/6/2019 Enu WC74XX Sys Admin Guide
http://slidepdf.com/reader/full/enu-wc74xx-sys-admin-guide 76/208
Security
WorkCentre 7425/7428/7435
System Administrator Guide
76
E-mail Encryption/Digital Signature
S/MIME certificates, imported from a Certificate Authority (in PKCS7 format), can be used on theprinter’s for E-mail Encryption.
Note: To import S/MIME certificates, use the Machine Digital Certificate Management in the Security folder on the Properties tab of CentreWare Internet Services.
Encryption/Digital Signature of Scanned Files (PDF/XPS Documents)
While no digital signatures are required to encrypt PDF and XPS documents, these documents can besigned with imported PKCS12 Digital signatures.
When adding digital signatures to PDF or XPS documents, scan file certificates imported to the printerfrom a Certificate Authority, are typically used.
To import PKCS12 scan file certificates, use the Machine Digital Certificate Management in theSecurity folder on the Properties Page of CentreWare Internet Services.
IP Sec (typically used to encrypt FTP) can be enabled from the Security file folder on the Properties tabof CentreWare Internet Services.
802.1x can be enabled for devices connected through both wired and wireless Ethernet networks. It isused to authenticate the printer on the 802.1x network, rather than individual users. 802.1x can beenabled from the Security file folder on the Properties tab of CentreWare Internet Services.
Configuration of HTTPS (SSL/TLS) Communication Encryption
Two methods are available depending on the type of certificate.
• Create a self-signed certificate on the printer with CentreWare Internet Services, and enableHTTPS. This method is used primarily for Server certificates.
• Enable HTTPS, and import a signed certificate from a Certificate Authority, using the MachineDigital Certificate Management in the Security folder on the Properties Page of CentreWareInternet Services.
• To see this, at least one certificate must have been created and stored on the printer.This is one of the purposes for creating a self-signed certificate.
Before enabling any encryption or digital signing feature, or importing any digital certificates, checkthe status of the certificate and create a new certificate if there is not one already created:
1. In CentreWare Internet Services, click the Properties tab, then click the Security folder.
2. Click Machine Digital Certificate Management.
3. Click Create New Certificate.4. Select Self-Signed Certificate and click Continue.
5. Select Public Key Size (512 Bits or 1024 Bits).
6. Set Issuer (default device host name)
7. Apply.
8/6/2019 Enu WC74XX Sys Admin Guide
http://slidepdf.com/reader/full/enu-wc74xx-sys-admin-guide 77/208
Authentication
WorkCentre 7425/7428/7435
System Administrator Guide
77
After clicking Machine Digital Certificate Management in the Security folder, the current status isdisplayed. If the status shows "A Self-Signed Certificate is established on this machine", then you donot need to create new certificate.
Note: You must enable HTTP – SSL/TLS Communication in order to Upload Signed Certificates and tosee Certificate Management , and Certificate Revocation Retrieval Settings in the Security folder.
Configuring Certificates with CentreWare Internet Services
Two methods are available to configure certificates with CentreWare Internet Services: creating a self-signed certificate (for SSL server), and importing a signed certificate from a Certificate Authority.
This section describes how to create a self-signed certificate (for SSL server).
Note: When importing a certificate, if the same certificate has been already registered in Local Deviceor Others, the certificate cannot be imported. Delete the registered certificate before importing.
1. Open your Web browser and enter the printer’s IP address into the Address box of your Webbrowser, and press the Enter key.
2. Click the Properties tab.3. Click the Security folder.
4. Click Machine Digital Certificate Management.
5. When prompted, enter the system administrator user name and password (default: admin, 1111).
6. Generate a certificate.
a. Click the Create Self-Signed Certificate button.
b. Set the size of the Public Key as necessary.
c. Set Issuer as necessary.
7. Click the Apply button.
8. Refresh the Web browser.
9. Click the Security folder.
10. Click SSL/TLS Settings.
11. Select the Enable check box for SSL / TLS Server Communication.
12. Check the SSL / TLS Port Number.
Note: The default port is 443.
13. Click Apply and click Reboot Machine. The printer will be unavailable for a short period of time.
8/6/2019 Enu WC74XX Sys Admin Guide
http://slidepdf.com/reader/full/enu-wc74xx-sys-admin-guide 78/208
Security
WorkCentre 7425/7428/7435
System Administrator Guide
78
Configuration of E-mail Encryption/Digital Signature
Configuration on the Printer
Import an S/MIME certificate from a Certificate Authority (in PKCS7 format), then configure the
certificate on the printer using CentreWare Internet Services.
To send encrypted e-mail from the machine, you will need the public key of the recipient to be loadedon the device.
Note: The e-mail address of the machine must match the e-mail address specified in the certificatemust match, otherwise S/MIME will be disabled.
Note: The e-mail address of the device must be set before you are able to select the S/MIME devicecertificate to use.
Configuration on a Computer
To send encrypted e-mail to the printer, you will need a copy of the printer’s S/MIME certificate on yourcomputer to allow you to encrypt E-mail being sent to the printer. The S/MIME certificate representsthe Public Key of the printer, allowing encryption or digital signing to take place.
To acquire the Public Key, you must use the Export feature or send a digitally signed E-mail.
Configuring S/MIME certificates with CentreWare Internet Services
To configure S/MIME certificates with CentreWare Internet Services, first enable HTTPcommunications (as stated under Configuration of HTTP Communication Encryption in this section).Next, import an S/MIME certificate from a Certificate Authority (in PKCS7 format). Finally, enableS/MIME.
First import an S.MIME certificate:
1. Open your Web browser and enter the printer's IP address, beginning with https, into the Addressbox of your Web browser, and press Enter.
Example:
https://192.168.1.1/
2. Click the Properties tab.
3. Click the Security folder.
4. Click Machine Digital Certificate Management.
5. When prompted, enter the system administrator user name and password (default: admin, 1111).

8/6/2019 Enu WC74XX Sys Admin Guide
http://slidepdf.com/reader/full/enu-wc74xx-sys-admin-guide 79/208
Authentication
WorkCentre 7425/7428/7435
System Administrator Guide
79
6. Click Upload Signed Certificate.
Note: When importing a certificate, if the same certificate has been already registered in Local printeror Others, the certificate cannot be imported. Delete the existing certificate before importing the newone.
a. Enter the Password. (if required)
b. Re-enter the Password (if required).
c. Enter a file name for the file you want to import, or select the file to be imported by clicking theBrowse button.
7. Click the Import button.
8. Refresh the Web browser.
9. Click the Security folder.
Configure the certificate:
10. Click Certificates Management.
11. Select Local printer for Category, S/MIME for Certificate Purpose, and then click the Display the
List button.12. Place a check mark in the box in front of the Certificate you wish to view details for.
13. Click the Certificate Details button.
14. Click the Use this certificate button.
15. Click Reboot Machine. The printer will be unavaillable for a short period of time.
Configure S/MIME settings:
16. Refresh the Web browser.
17. Click the Security folder.
18. Click SSL/TLS Settings.
19. Select the Enable check box for S/MIME Communication.
20. Apply the settings.
a. Click Apply.
b. The right frame on the Web browser will change to the printer reboot display.
c. Click Reboot Machine. The printer will be unavailable for a short period of time.
Configure the settings for S/MIME.
21. Refresh the Web browser.
22. Click the Security folder.
23. Click S/MIME Settings and set the following items.
• Message Digest Algorithm: Select a message digest algorithm from SHA1 or MD5.
• Contents Encryption Method: Select a contents encryption method from 3DES, RC2-40, RC2-64, or RC2-128.
• Certificate Auto Store: Click the check box to automatically save an S/MIME certificateattached to an e-mail received from an address registered in your address book.
• Receive Untrusted E-mail: Decide whether or not you wish to receive untrusted E-mail.
• Receive Untrusted iFAX: Decide whether or not you wish to receive untrusted iFAXes.
8/6/2019 Enu WC74XX Sys Admin Guide
http://slidepdf.com/reader/full/enu-wc74xx-sys-admin-guide 80/208
Security
WorkCentre 7425/7428/7435
System Administrator Guide
80
• Digital Signature – Outgoing E-mail: Decide whether or not to add a digital signature tooutgoing E-mail, and the method to use if a signature is desired. SelectAlways Add Signature,Do not add Signature, or Select During Send.
• Digital Signature – Outgoing iFAX: Decide whether or not to add a digital signature tooutgoing iFAXes, and the method to use if a signature is desired.
Note: The Fax option is required.24. Click Apply.
Configuration on a Computer
The following describes the configuration for a remote, networked computer.
Sending Scanned Data by S/MIME Encrypted E-mail from the Printer to a Computer
An S/MIME certificate must be imported, configured, and stored on the printer as stated in this sectionunder Configuring S/MIME certificates with CentreWare Internet Services.
When importing the S/MIME certificate, make sure that a root certificate is included for use with theSupported E-mail applications shown below.
Receiving E-mail with S/MIME Digital Signature from the Printer
No settings are required on a recipient computer.
Sending S/MIME Encrypted E-mail by E-mail Printing from a Computer to the Printer
It is necessary to register the S/MIME certificate of the printer on the computer.
There are two methods to set an S/MIME certificate of the printer on the computer:
• Sending e-mail with S/MIME digital signature from the printer to the computer
To send e-mail with an S/MIME digital signature from the printer, configure to attach the digitalsignature when sending E-mail in the Digital Signature – Outgoing E-mail settings.
• Exporting an S/MIME certificate to the computer using CentreWare Internet Services andregistering the exported S/MIME certificate in the certificate storage location of the E-mailapplication.
Note that the exporting of certificates is accomplished using the Trusted Certificates Managementunder Security folder on the Properties page of CentreWare Internet Services. For information onhow to register a certificate in an E-mail application, refer to the manuals provided with the E-mailapplication.
Sending E-mail with S/MIME digital signature from a computer to the printer
It is necessary to register a personal certificate of a sender's E-mail address, an intermediate certificateauthority certificate of the personal certificate, and a root certificate on the printer.
8/6/2019 Enu WC74XX Sys Admin Guide
http://slidepdf.com/reader/full/enu-wc74xx-sys-admin-guide 81/208
Authentication
WorkCentre 7425/7428/7435
System Administrator Guide
81
Supported E-mail applications
E-mail applications that can send and receive E-mail to and from the printer are:
• Outlook 2000/2002/2003
• Outlook Express 6
• Netscape 7.x
Configuration of Scan File Signatures (PDF/XPS Documents)
Configuration at the Printer
Import a certificate from a Certificate Authority (in PKCS12 format), then configure the certificate onthe printer using CentreWare Internet Services.
Configuration on a Computer
Prepare for verification of the PDF or XPS signature.
Configuring Scan File certificates with CentreWare Internet Services
To configure certificates with CentreWare Internet Services, first enable HTTP communications (asstated under Configuration of HTTP Communication Encryption in this section). Next, import acertificate from a Certificate Authority (in PKCS12 format). Finally, set the certificate as a scan filecertificate.
1. Start a Web browser.
2. Enter the printer's IP address, beginning with https, into the Address box of your Web browser, andpress Enter.
Example:https://192.168.1.1/
3. Click the Properties tab.
4. Click the Security folder.
5. Click Machine Digital Certificate Management.
6. Click Upload Signed Certificate.
Note: When importing a certificate, if the same certificate has been already registered in Local printeror Others, the certificate cannot be imported. Delete the existing certificate before importing the newone.
a. Enter the Password.
b. Re-enter the Password.
c. Enter a file name for the file you want to import, or select the file to be imported by clicking theBrowse button.
d. Click the Import button. When a screen to enter the user name and password appears, enterthe System Administrator user ID and password into User Name and Password, and then clickOK.

8/6/2019 Enu WC74XX Sys Admin Guide
http://slidepdf.com/reader/full/enu-wc74xx-sys-admin-guide 82/208
Security
WorkCentre 7425/7428/7435
System Administrator Guide
82
Note: The default user ID is admin and the default password is 1111.
7. Refresh the Web browser.
8. Click the Security folder.
9. Configure the certificate.
a. Click Trusted Digital Certificate Management.
b. Select Local printer for Category, Scan File for Certificate Purpose, and then click the Displaythe List button.
c. Place a check mark in the box in front of the certificate you wish to view details for.
d. Click the Certificate Details button.
e. Click the Use this certificate button.
f. Click Reboot. The printer will reboot and the setting values will be reflected.
10. Configure the settings for PDF/XPS Signatures.
a. Refresh the Web browser.
b. Click the Security folder.
c. Click PDF/XPS Security Settings and then set the following items.• PDF Signature: Select the setting for PDF Signature from Do not add signature, Always add
visible signature, Always add invisible signature, or Select during send.
• XPS Signature: Select the setting for XPS Signature from Do not add signature, Always addvisible signature, Always add invisible signature, or Select during send.
d. Click the Apply button.
Configuration on a Computer
Confirm that the digital certificate being used by the printer to encrypt PDF and XPS files has beenimported and is registered on the recipient’s computer. This will assure the ability to conduct two way
digital signing of files, should this capability be desired or needed.
IP Sec
IP Sec (IP Security) is comprised of the IP Authentication Header and IP Encapsulating SecurityPayload protocols, that secure IP communications at the network layer of the protocol stack, usingboth authentication and data encryption techniques. The ability to send IP Sec encrypted data to theprinter is provided by the use of a public cryptographic key, following a network negotiating sessionbetween the initiator (client computer) and the responder (printer or server). To send encrypted data tothe printer, the computer and the printer have to establish a Security Association with each other byverifying a matching password (shared secret) to each other. If this authentication is successful, asession public key will be built and used to send IP Sec encrypted data over the TCP/IP network to theprinter.
Providing additional security during the Public Key negotiating process, Digital Certificates canalternatively be used in place of the Shared Secret, to encrypt the Public Key information beingexchanged between communicating parties. The Digital Certificate resides on the printer (managed asstated in this Encryption section in the Configuring Scan File certificates topic) and must also havebeen imported and stored on the computer that is encrypting data being sent to the printer.
8/6/2019 Enu WC74XX Sys Admin Guide
http://slidepdf.com/reader/full/enu-wc74xx-sys-admin-guide 83/208
Authentication
WorkCentre 7425/7428/7435
System Administrator Guide
83
Certificates add digital signatures (individualized checksums verifying data integrity) to datagramsduring the public key negotiating process, greatly assisting in securing that data from network sniffers.
Enabling IP Sec
1. Open your Web browser and enter the IP address of the printer in the address field. Press Enter to
open CentreWare Internet Services.2. Click the Properties tab.
3. Enter the system administrator User Name and Password (defaultadmin, 1111) if prompted.
4. Click the Security folder.
5. Select IP Sec in the directory tree.
6. Enable the Protocol by placing a checkmark in the Enabled box.
7. Select Pre-Shared Key to use the Shared Secret (between this device and remote computers alsopossessing the secret). Note that if you select Digital Signature, the Shared Secret boxes will begrayed out and you will have to supply a certificate stored on this device to the remote computerthat wishes to send IP Sec encrypted data to this device.
8. Enter the Shared Secret (a password) in the Shared Secret and Verify Shared Secret boxes.9. Select Enabled (default setting) for the Communicate with Non-IP Sec Device setting, so that
computers not set up for encryption can still communicate with this device.
10. Click Apply when done and supply the Administrator User Name and Password, if prompted.
Note: The default user ID is admin and the default password is 1111.
FIPS 140-2
To enable FIPS 140-2 encryption:
1. Open your Web browser and enter the IP address of the printer in the address field. Press Enter to
open CentreWare Internet Services.2. Click the Properties tab.
3. If prompted, enter the system administrator user name and password (default: admin, 1111).
4. Click the Security folder and click FIPS140 Validation Mode.
5. Click the Enabled check box and click Apply.
Note: FIPS 140-2 encryption does not apply to the following services and protocols: SMB, NetWare,SNMP v3, PDF Direct Print Service.

8/6/2019 Enu WC74XX Sys Admin Guide
http://slidepdf.com/reader/full/enu-wc74xx-sys-admin-guide 84/208
Security
WorkCentre 7425/7428/7435
System Administrator Guide
84
Scheduled Image Overwrite
A TCP/IP network-connected device can be set to overwrite image data on a scheduled basis.
The Image Overwrite will delete all image data from the hard disk.
To enable a scheduled image overwrite, perform the following steps:
1. Open your Web browser and enter the IP address of the printer in the address field. Press Enter toopen CentreWare Internet Services.
2. Click the Properties tab.
3. Click the Security folder.
4. Click Scheduled Image Overwrite.
5. Click the Scheduled Image Overwrite Enabled check box.
6. Configure the Frequency, Day, Week, Hour, and Minute settings.
Note: The printer will be taken off-line each day at the specified time to perform the overwrite.
7. Click Apply.
8. Click OK to confirm.
9. If prompted, enter the system administrator user name and password (default: admin, 1111).
8/6/2019 Enu WC74XX Sys Admin Guide
http://slidepdf.com/reader/full/enu-wc74xx-sys-admin-guide 85/208
Secure Watermark
WorkCentre 7425/7428/7435
System Administrator Guide
85
Secure Watermark
This procedure enables the System Administrator to set parameters for the inclusion of a SecureWatermark as the background for any documents that are copied or printed on this, or another
identical model machine.
Secure Watermark works with copy job, client print, folder print, media print, incoming fax prints andreports.
You must purchase the Security option to enable this feature. Contact your Xerox representative topurchase the option.
Secure Watermark configuration items include:
• Default Watermark Effect
• Default Watermark
• Font Size
• Background Pattern
• Date Format
• Font Color
• Density
• Watermark / Background Contrast
• Force Watermark – Copy Job
• Force Watermark – Client Print
• Force Watermark – Print Stored File
• Force Watermark – Media Print
• Custom Watermark 1• Custom Watermark 2
• Custom Watermark 3
Configuring Secure Watermark
1. Press the Log In/Out button on the control panel.
2. Enter the System Administrator’s Login ID and Passcode if prompted (default admin, 1111), andpress Enter.
3. Press the Machine Status button.
4. Touch the Tools tab.
5. Touch System Settings.
6. Touch Common Service Settings.
7. Touch Watermark. If not visible, use the scrolling arrow in the Features column.
8. On the Watermark screen, in the Items column, touch the item to be configured, then touchChange Settings. The screen for the item will open.
9. On the selected item screen, make your change and touch Save.

8/6/2019 Enu WC74XX Sys Admin Guide
http://slidepdf.com/reader/full/enu-wc74xx-sys-admin-guide 86/208
Security
WorkCentre 7425/7428/7435
System Administrator Guide
86
10. Touch Close to return to the Tools tab.
11. Press the Log In/Out button.
12. Select Log Out.
13. Place a copy in the document feeder of the printer and press the Start button.
14. Place the copy just made into the document feeder of the same, or an identical model, machine,
and attempt to make a copy. Note that copying of this document is prohibited.
8/6/2019 Enu WC74XX Sys Admin Guide
http://slidepdf.com/reader/full/enu-wc74xx-sys-admin-guide 87/208
Secure Print
WorkCentre 7425/7428/7435
System Administrator Guide
87
Secure Print
Supported by the printer’s print driver, or CentreWare Internet Services Print tab, this feature directsthe printing of confidential documents, or documents which should not be seen by third parties, to a
User Account on the printer. The user can then access his or her Account, with a numeric password, atthe printer, and privately print out the stored documents.
Using Secure Print from the Print Driver
To use the Secure Print feature from the print driver, installed on a networked computer, perform thefollowing steps.
1. Open a document to print from the computer.
2. Select Print in your software application, select the Printer, then select Properties.
3. On the Paper / Output tab, select Secure Print as your Job Type.
4. Enter Passcode (1-12 digits). Enter the Passcode again in the Confirm Passcode field.
5. Click Setup… and enter a User ID (such as 001) and a numeric password.
6. Click OK on successive driver screens until the job prints.
7. Go to the printer and press the Job Status button.
8. Press the Secure Print Jobs & More tab.
9. Press Secure Print.
10. Highlight your user ID and press Job List.
11. Enter Passcode and select Confirm.
12. Select a job or select Select All.
13. Click Print.
14. Press Close several times, when done, to return to the Job Status screen.15. Press the Services button on the control panel to return to the Services screen.
Using Secure Print from CentreWare Internet Services
1. Open your Web browser and enter the IP address of the printer in the address field. Press Enter toopen CentreWare Internet Services.
2. Click the Print tab.
3. Scroll down to the bottom of the page to see the Secure Print radio button.
4. Click the Secure Print radio button to enable it.
5. Enter a User ID (such as 001).
6. Enter your desired, numeric passcode in the two boxes provided.
7. Use the Browse… button to locate your PRINT READY file.
8. Click Submit Job. Then go to the printer and press the Job Status button.
9. Press the Secure Print Jobs & More tab.
10. Press Secure Print.

8/6/2019 Enu WC74XX Sys Admin Guide
http://slidepdf.com/reader/full/enu-wc74xx-sys-admin-guide 88/208
Security
WorkCentre 7425/7428/7435
System Administrator Guide
88
11. Highlight your user ID and press Job List.
12. Enter Passcode and select Confirm.
13. Select a job or select Select All.
14. Click Print.
15. Press Close several times, when done, to return to the Job Status screen.
16. Press the Services button on the control panel to return to the Services screen.

8/6/2019 Enu WC74XX Sys Admin Guide
http://slidepdf.com/reader/full/enu-wc74xx-sys-admin-guide 89/208
Xerox Common Access Card
WorkCentre 7425/7428/7435
System Administrator Guide
89
Xerox Common Access Card
Xerox Common Access Card is an optional solution which provides an advanced level of security tosensitive information. By using this solution, you can restrict access to the walk-up features of the
printer. This ensures that only authorized users are able to copy, scan, E-mail, and fax information.
The key benefit of this solution is its two-factor identification requirement. Users must insert theiraccess card and enter a unique Personal Identification Number (PIN) at the device. This providesadded security in the event that a card is lost or stolen.
The Xerox Common Access Enablement kit integrates with Xerox multifunction printers and existingcommon access and personal identity verification cards and readers.
Supported Card Readers
The customer is responsible for providing a card reader for each Printer. The following card readers are
compatible with the solution:• Gemplus GemPC Twin
• Gemplus GemPC USB SL
• SCM Micro SCR3310
• Panasonic ZU9PS
• Omnikey Cardman 3021USB
• Omnikey Cardman 3121USB
Note: Other CCID compliant readers may function with the solution, but have not been validated.
Supported Card TypesThe customer is also responsible for purchasing and configuring the access cards. The following cardtypes are recommended:
• Axalto Pegasus 64K / V2
• Axalto Cyberflex 32K / V1
• Axalto Cyberflex 64K \ V2
• Gemplus GemXpresso 64K / V2
• Oberthur 72K \ V2
• Oberthur Cosmopoll 32K / V1
• Oberthur D1 72K / V2 (contact-less and PIV)
Note: Other card types may function with the solution, but have not been validated.
8/6/2019 Enu WC74XX Sys Admin Guide
http://slidepdf.com/reader/full/enu-wc74xx-sys-admin-guide 90/208
Security
WorkCentre 7425/7428/7435
System Administrator Guide
90
Preparation
The following items and information are required before installation
• Compatible Card Reader: See Supported Card Readers on page 89.
• Compatible Access Card: See Supported Card Types on page 89.
• Common Access Card Enablement Kit• TCP/IP enabled on the Printer
• DNS Host name or static IP address assigned
• Network Settings to be checked to ensure network is fully functional
• Domain Controller (DC) information:
• Domain Controller authentication environment
• IP address or Host Name
• Domain information
• Domain Controller Root and Intermediate certificates
• Check that all certificates are in 64 bit X.509 format
• Determine if the DC is registered with the OCSP at this site
• OCSP Server information:
• OCSP Server URL
• OCSP Root and Intermediate Certificates
• Check that all certificates are in 64 bit X.509 format
• Proxy Server configuration details
To set up the Domain Controller (DC) validation, you will need to determine if your site validates theDC against the OCSP server. Many sites use OCSP to validate individuals, but do not register the DCwith it. If you set up the Printer to validate the DC and it isn’t registered, the procedure will fail.
The retrieved DC certificate is compared to the one stored at installation. This provides a high level of security as it prevents rogue DCs masquerading as the real DC.
Note: Certificates are often obtained from the Information Technology professionals that support yourorganization.
Server Requirements
Ensure your network infrastructure supports Common Access Card or Personal IdentificationVerification (PIV).
Names or IP addresses of all servers and domains are required during setup.
Electrical Requirements
The USB port on the back of the printer’s network controller provides the power required for any of thesupported card readers.
8/6/2019 Enu WC74XX Sys Admin Guide
http://slidepdf.com/reader/full/enu-wc74xx-sys-admin-guide 91/208
Xerox Common Access Card
WorkCentre 7425/7428/7435
System Administrator Guide
91
Installing the Common Access Card Software
Ensure that you have downloaded the Xerox WorkCentre software before performing theseinstructions.
If you are using a Proxy Server to reach external addresses, turn the proxy off at your browser before
beginning the software install process. You can also send the printer to the list of exceptions that donot use the Proxy Server.
Follow the instructions below to install the Xerox WorkCentre software.
Enable software upgrades:
1. Open your Web browser and enter the IP address of the printer in the address field. Press Enter toopen CentreWare Internet Services.
2. Click the Properties tab.
3. If prompted, enter the system administrator user name and password (default: admin, 1111).
4. Click the Services folder.
5. Select Machine Software, then Upgrades.6. Select the Enabled check box, and then select Apply.
Locate the Software:
7. Select Properties then Services.
8. Select Machine Software then Manual Upgrade.
9. Browse to the location of the software which was downloaded from the Xerox Web site and selectthe file.
10. The path to the software file displays in the browse window.
Install the software on the Printer:
11. Select Install Software. The software file will begin uploading, and a message will be displayedwhen finished.
The status of the upgrade is shown at the printer and the CentreWare Internet Services interface is nolonger accessible.
Check the upgrade status:
12. Check the upgrade status at the printer, by pressing the Machine Status button on the controlpanel and verifying the updated System Software level.
13. Once the software has been upgraded, the printer reboots automatically.
Note: The system may reboot more than once, depending on the software level of the machine before
the upgrade.14. Print out a Configuration Report to verify the new software level.
15. The Common Access Card settings are now ready for configuring, using the CentreWare InternetServices interface.
8/6/2019 Enu WC74XX Sys Admin Guide
http://slidepdf.com/reader/full/enu-wc74xx-sys-admin-guide 92/208
Security
WorkCentre 7425/7428/7435
System Administrator Guide
92
Enabling and Configuring the Common Access Card Feature
Enabling the Common Access Card Software Option
Once the correct version of the software has been successfully loaded and verified, the Common
Access Card software feature needs to be enabled on the printer.
This procedure should be performed by your System Administrator, or someone with System Adminaccess rights.
1. Press the Log In/Out button on the control panel.
2. Using the keyboard screen, enter the following PIN number into the System Administrator’s LoginID field: *6421145151.
Note: To de-activate the PIN number, simply enter the following PIN number into the SystemAdministrator’s Login ID field: *6421145150.
3. Touch Next.
4. Touch Logout. The printer will reboot.
5. Login as the System Administrator and select theMachine Status button.
6. Locate the Tools tab and select theSystem Settings followed by the Common Settings option,and then the Maintenance option.
7. Next, select the Software Option button and select the Keyboard button to enter the suppliednumber.
8. When finished, press the Save button, followed by the Reboot button for changes to take effect.
Configuring the Date and Time to update automatically using Network Time
Protocol (NTP)
Ensure that the NTP Enable box is enabled on the printer. In order to do so, the System Administratormust log in to the printer.
1. Press the Log In/Out button on the control panel.
Note: In order to login as the System Administrator, you must select System Administrator from thepull down menu. Verify that this selection is being made. If you see the option for Registered User, thenyou will not be able to login as the System Administrator.
2. Enter the System Administrator’s Login ID and Passcode if prompted (default admin, 1111), andpress Enter.
3. Next, select the Machine Status button.
4. Touch the Tools tab.
5. On the right side of the display, under Features, select theMachine Clock/Timers option.
6. Select the option for NTP Time Synchronization.
7. Select the Change Settings option and select the On option.
8. Select the Save option.
9. Select the Time Server Address option.
8/6/2019 Enu WC74XX Sys Admin Guide
http://slidepdf.com/reader/full/enu-wc74xx-sys-admin-guide 93/208
Xerox Common Access Card
WorkCentre 7425/7428/7435
System Administrator Guide
93
10. Select the Change Settings option and enter the IP address of the server in which the networktime will be synched with.
11. Press the Save button.
12. Press the Log In/Out button.
13. Touch Logout. The printer will automatically reboot.
Configure Authentication settings for CAC
Note: These installation steps can also be performed at the printer. This is be done by logging in as theSystem Administrator, selecting the Machine Status button, then proceeding to the Tools tab andnavigating to the Authentication/Security Settings button. From the Authentication/SecuritySettings button, continue to navigate to Authentication, followed by Login Type. Then navigate backto the Tools menu option for System Settings. Select Common Service Settings and navigate toConnectivity & Network Setup. Select Remote Authentication Server Settings, followed byAuthentication Systems. Then select Kerberos (Windows 2000). Enter the network settings for theAuthentication server by selecting Kerberos Server Settings.
To configure the Authentication settings from your computer, you must use CentreWare InternetServices.
Note: Verify that your Common Access Card reader is plugged in and operational.
1. Open your Web browser and enter the IP address of the printer in the address field. Press Enter toopen CentreWare Internet Services.
2. Click the Properties tab.
3. Enter the system administrator User Name and Password (defaultadmin, 1111) if prompted.
4. Click the Security folder.
5. Select the option for Authentication Configuration, and select Login to Remote Accounts fromthe pull down menu. After selected, press the Apply button. The system will automatically reboot.
6. While still in the Security folder, scroll down and click the Remote AuthenticationServers/Authentication System Settings folder.
7. Locate and select the Authentication System folder.
8. Press the pull down arrow and select the option for Kerberos (Windows 2000) and select Apply.
9. Enter the Kerberos server network address and realm name for all available Kerberos servers.
10. When entering the domain names, make sure to use ALL CAPS in the field.
Configuring the CAC Device Access Control
Note: This installation process can also be performed at the printer. This can be done by logging in asthe System Administrator, selecting the Machine Status button, then proceeding to the Tools tab and
navigating to the Authentication /Security Settings button. From the Authentication/SecuritySettings button, continue to navigate to Authentication, followed by Access Control.
1. Continuing from the previous setup, select Authentication Configuration in the Security folder.
2. Select either the Device Access configure button, or the Service Access configuration button.
3. If you select the Device Access configure button, the following window will appear.
8/6/2019 Enu WC74XX Sys Admin Guide
http://slidepdf.com/reader/full/enu-wc74xx-sys-admin-guide 94/208
Security
WorkCentre 7425/7428/7435
System Administrator Guide
94
Note: If you wish to “Lock” individual device pathways, you may choose to lock any combination of AllServices, Job Status Pathway, or Machine Status Pathway. After you have made your selection, orselections, press the Apply button for your selections to be saved.
Use this option to Lock individual Services as well as configure your desired combination of services.
Note: When the Common Access Card is enabled, the full Copy Service feature is locked by default.
Configure CAC Settings at the Printer
Note: Be sure that the Common Access Card Reading device has been installed prior to the followingprocedure steps.
1. Press the Log In/Out button on the control panel.
2. Enter the System Administrator’s Login ID and Passcode if prompted (default admin, 1111), andpress Enter.
3. Select the Authentication/Security Settings button, followed by the Authentication button.
4. Select the User Details Setup button, and set the Use of Smartcard option to Enabled.
Note: If you set this value to Enable PKI Only, the smartcard is used only for signing and/or encryptingthe scan document, not for authentication.
5. Set the SmartCard Link Mode to No Passcode required.
6. Set the SmartCard Certificate Verification Mode to Disabled.
Note: By setting the option to Disabled, you are only verifying the PIN on the card. By selecting theoption for Enabled, you are verifying both the PIN and the Certificate.
Setting up Certificates for Authentication
The following procedure is performed using the CentreWare Internet Services. Access the Printer by
typing in the device’s’ IP address in your Web browser’s address field.Note: Certificates can only be registered on the device when SSL is enabled on the device. This can beaccomplished by first creating a self-signed certificate on the device and then enabling SSL. Thisprocedure must be performed by someone with System Administrator rights.
1. At your computer, Login to the CentreWare Internet Services as the System Administrator.
2. Select the Properties tab, and select the Security folder and navigate down until you locate theMachine Digital Certificate Management option.
3. Select the Create New Self Signed Certificate option.
4. Select Apply.
5. Next, while still under the Security folder, scroll down the list and locate the option for SSL / TLS
Settings.6. The following window will be displayed. Under the HTTP – SSL / TSL Communication check box,
make the selection for Enabled, and then select Apply.
7. The Printer will need to be rebooted before the changes can take effect. Select theRebootMachine option.
8/6/2019 Enu WC74XX Sys Admin Guide
http://slidepdf.com/reader/full/enu-wc74xx-sys-admin-guide 95/208
Xerox Common Access Card
WorkCentre 7425/7428/7435
System Administrator Guide
95
Note: After the Printer has returned online, the System Administrator can load the required RootCertificate Authority certificates for the Domain Controllers and the OCSP Server.
8. At your computer, within the option for Machine Digital Certificate Management locate andselect the option for Upload Signed Certificate. This option should now be available to you basedon the machine reboot.
Uploading Signed Certificates
After selecting the Upload Signed Certificate option, the System Administrator will perform thefollowing procedures.
1. Upon selecting the Upload Signed Certificate button, the following window will display. TheSystem Administrator can browse to the directory location on the PC where the certificates will bestored.
2. After the certificate has been saved to the PC, the System Administrator can manage certificatesthat are loaded onto the Printer, as well as the functions they are to be used for.
Note: In order to review all the certificates, select the option for Other to view the available
certificates.
3. Select the desired options and select the Display the list button.
4. When the certificates are listed, you can select one by checking the box and then selectCertificateDetails to review.
5. The Certificate Details window will allow the System Administrator to Export this certificate, Delete,or Use this certificate.
Checking Proxy Server details
If required by your network environment, ensure the Proxy Server details have been configured.
1. At your computer, select the Properties tab in CentreWare Internet Services.2. From the displayed window, select the option for Connectivity.
3. Next, select the option for Proxy Server.
4. The Proxy Server option needs to be Enabled and the server address needs to be configured.
5. Select the option for Apply.
Certificate Revocation Retrieval Settings
The System Administrator can use the functionality found in the Certificate Revocation RetrievalSettings option to configure the desired Online Certificate Status Protocol (OCSP) or CertificateRevocation List (CRL).
1. Under the Security folder, select the option for Certificate Revocation Retrieval Settings.
2. Under the Level of Certificate Verification section, select theLevel of Certificate Verification setting for the Common Access Card to High.
The following Level of Certificate Validation descriptions are listed below;
• Low: The revocation status of certificates is not checked.
8/6/2019 Enu WC74XX Sys Admin Guide
http://slidepdf.com/reader/full/enu-wc74xx-sys-admin-guide 96/208
Security
WorkCentre 7425/7428/7435
System Administrator Guide
96
• Medium: The revocation status of certificates is checked, but if the certificate status cannot beobtained due to a network issue, the certificate will be considered valid.
• High: The revocation status of certificates is checked. A certificate is only considered valid afterverifying that the certificate has not been revoked.
3. Next, under Retrieval of Certificate Status, select the option for By OCSP for Common AccessCard setup.
Note: The By Retrieving CRL option checks the certificate status on the Printer after retrieving a CRL.
4. Next, under the URL for the OCSP Responder With option, this should be setup by the SystemAdministrator for the Common Access Card setup. There is also an option to use an URL that’savailable on a certificate.
5. Next, set the OCSP Communication Timeout Value option based on your network performance.
6. Under the CRL options, verify that the check mark box for Auto Retrieval of CRL is unchecked.
Note: The CRL Retrieval Time-out is not required for Common Access Card setup.
7. Upon making your selections, select the Apply button to register your selections. This will initiatethe printer to reboot, allowing the settings to take effect.
Configuring E-mail Signing Feature
The following procedure will be performed at the printer.
1. Press the Log In/Out button on the control panel.
2. Enter the System Administrator’s Login ID and Passcode if prompted (default admin, 1111), andpress Enter.
3. Press the Machine Status button.
4. Touch the Tools tab.
5. Select the option for System Settings.
6. Locate and select the option for Connectivity & Network Set-up.7. On the right side of the display, scroll down the list and locate the option forSecurity Settings.
8. Select the option for S/MIME Settings.
• For Option #6 Digital Signature – Outgoing Mail, select the option for Always Add Signature and press the Save button.
• For Option #7 Signing Certificate – Outgoing Email, select the option for SmartCardCertificate and press the Save button.
9. Press the Log In/Out button, and select the option forReboot.
8/6/2019 Enu WC74XX Sys Admin Guide
http://slidepdf.com/reader/full/enu-wc74xx-sys-admin-guide 97/208
97
6Scanning and Faxing
This chapter includes:
• Enabling Options with Software Keys on page 98
• Special Features on page 99
• Scan to E-mail on page 100
• Network Scanning (Using Templates) on page 112
• Scan to PC (FTP/SMB) on page 121
• Scan to Home on page 126
• Scanning to the Printer’s Hard Drive (Folders) on page 128
• Setup and Use of Job Flow Sheets with Folders on page 131
• Scan to PC Desktop on page 136
• Installing and Using the Network Scanner Utility on page 138• Xerox Extensible Interface Program on page 140
• Fax on page 142
• Server Fax on page 154
• Internet Fax (iFAX) on page 162
8/6/2019 Enu WC74XX Sys Admin Guide
http://slidepdf.com/reader/full/enu-wc74xx-sys-admin-guide 98/208
Scanning and Faxing
WorkCentre 7425/7428/7435
System Administrator Guide
98
Enabling Options with Software Keys
Options such as Scanning (E-Mail, Folder, Network, Twain), Security (Disk Overwrite, SecureWatermark), Internet Fax (iFAX), Server Fax, and Job Based Accounting, require purchase and
subsequent enabling with a supplied 12 character key. Software keys are usually included with the kitdocumentation as a sticker on the manual, or they may be already installed on the printer as per thepurchase agreement.
Upon receipt of the software key, use the following procedure to enable the associated Option.
1. Press the Log In/Out button on the control panel.
2. Enter the System Administrator’s Login ID and Passcode if prompted (default admin, 1111), andpress Enter.
3. Press the Machine Status button.
4. Touch the Tools tab.
5. Touch System Settings.
6. Touch Common Service Settings.
7. Touch Maintenance. Note that you may have to use the scrolling arrow to see this selection.
8. Touch Software Options and touch Keyboard. Enter the key, using the on-screen keyboard, in thebox provided.
9. Touch Save, then touch Reboot.
8/6/2019 Enu WC74XX Sys Admin Guide
http://slidepdf.com/reader/full/enu-wc74xx-sys-admin-guide 99/208
Special Features
WorkCentre 7425/7428/7435
System Administrator Guide
99
Special Features
Some features can be customized, and special features can be enabled. For example, you can changethe duration of built-in timers. Contact your Xerox representative for more information about special
features, and special feature codes.
To enable a special feature:
1. Open your Web browser and enter the IP address of the printer in the address field. Press Enter toopen CentreWare Internet Services.
2. Click the Properties tab.
3. If prompted, enter the system administrator user name and password (default: admin, 1111).
4. Click the Security folder, then Feature Enablement.
5. Enter the code for the special feature and click Apply.

8/6/2019 Enu WC74XX Sys Admin Guide
http://slidepdf.com/reader/full/enu-wc74xx-sys-admin-guide 100/208
Scanning and Faxing
WorkCentre 7425/7428/7435
System Administrator Guide
100
Scan to E-mail
E-mail Overview
You must purchase the Scanning option to Scan to E-mail. If you did not, contact your XeroxRepresentative to purchase this option.
The following E-mail features are available.
• E-mail: Scanned documents can be converted into an electronic format and transmitted via E-mail.
• iFAX: Unlike conventional fax machines which utilize public phone lines, the printer can transmit orreceive scanned data as e-mail attachments using either corporate networks or the Internet.
Contents of E-mail are processed according to the settings of Print iFAX Headers and Contents inCentreWare Internet Services.
• E-mail Printing: E-mail with attachments in either TIFF or PDF format can be sent to the printer.Received E-mail will automatically be printed. Contents of E-mail are processed according to the
settings of Print Mail Headers and Contents in CentreWare Internet Services.• Job Completion Notice: When a computer has submitted a job to the printer, a notification of the
job’s completion can be sent by E-mail.
Xerox recommends that you register the address of a network administrator or a shared address.
Preparations
Before you set up the Scan to Email feature, confirm that:.
1. The printer is turned on and connected to a network.
2. TCP/IP protocol is enabled on the printer.
3. The device has been set up with DNS.4. The Domain Name settings for the network have been correctly setup for the printer.
Obtain the following information:
Item Description
SMTP, POP3, or SMTP mail server
Host Name or IP address.
If using an external mail server, ask your internet service provider to
provide this information.
SMTP, POP3, or SMTP login and
password.
The printer’s assigned email address. This E-mail address will appear in the From field on E-mails sent fromthe printer.
Email addresses (optional). A local address book can be created to store E-mail addresses.
LDAP server host name. Email addresses stored in a network address book LDAP can be
referenced from the printer.

8/6/2019 Enu WC74XX Sys Admin Guide
http://slidepdf.com/reader/full/enu-wc74xx-sys-admin-guide 101/208
Scan to E-mail
WorkCentre 7425/7428/7435
System Administrator Guide
101
Registering an E-mail account
A mail account for the printer needs to be registered to a mail server when using POP3 mail receivingprotocol.
Note: For information on mail account registration, refer to your mail server documentation.
Configuring E-mail Environment
Enable the E-mail ports and configure the printer E-mail address, TCP/IP environment, and E-mailserver from the printer.
Installation Procedure
This section describes the configuration procedure to use the E-mail feature on the printer.
The following two steps are necessary to use the E-mail feature.
• Enabling the E-mail ports and setting TCP/IP• Configuring the E-mail Environment
Enabling the E-mail Ports and Setting TCP/IP
First enable the E-mail ports, then set the IP address.
1. Press the Log In/Out button on the control panel.
2. Enter the System Administrator’s Login ID and Passcode if prompted (default admin, 1111), andpress Enter.
3. Press the Machine Status button.
4. Touch the Tools tab.
5. Select System Settings.
6. Select Connectivity & Network Setup.
7. Select Port Settings.
8. On the Port Settings screen, select Send E-mail and then select Change Settings.
9. On the Send E-mail screen, select Port Status and select Change Settings.
10. On the Send E-mail Port Status screen, select Enabled then select Save.
11. Select Close.
12. On the Port Settings screen, select Receive E-mail, then select Change Settings.
13. On the Receive E-mail screen, select Port Status, then Change Settings.
14. On the Receive E-mail Port Status screen, select Enabled, then select Save and Close.15. On the Port Settings screen, select Email Notification Service, then select Change Settings.
16. On the Email Notification Service screen, select Port Status, then Change Settings.
17. Select Enabled, then Save.
18. Select Close until the Tools screen is displayed.
19. Set an IP address.
8/6/2019 Enu WC74XX Sys Admin Guide
http://slidepdf.com/reader/full/enu-wc74xx-sys-admin-guide 102/208
Scanning and Faxing
WorkCentre 7425/7428/7435
System Administrator Guide
102
If an IP address is already set, this step is not necessary. Also, in an environment with DHCP orBOOTP, configure the way to obtain an IP address. If the address cannot be obtainedautomatically or static configuration is preferred, configure an IP address, a subnet mask, and agateway address as stated below.
a. Select Protocol Settings.
b. Select IPv4 (or other mode) Address Resolution and then select Change Settings.
c. Select one from DHCP, BOOTP, RARP, DHCP/Autonet or Static and then select Save. If youselect anything other than Static, proceed to Step 4.
Note: When using a DHCP server, also configure the DNS, or WINS (Windows Internet Name Service)server (WINS for SMB support). To set a DHCP server, use CentreWare Internet Services.
d. On the Protocol Setting screen, selectTCP/IP - IP Address and select Change Settings.
e. Enter the IP address using the numeric keypad.
Note: Enter address in the format xxx.xxx.xxx.xxx. The xxx should be a numeric value in the range from0 to 254. 224 – 255.xxx.xxx.xxx and 127.xxx.xxx.xxx cannot be used.
Note: When moving to the next value without entering all 3 digits, select Next.
f. Select Save.
g. Configure TCP/IP - Subnet Mask and TCP/IP - Gateway Address using the same process asstated above.
Note: Enter the Gateway address in the format xxx.xxx.xxx.xxx. The xxx should be a numeric value inthe range from 0 to 255. However, 224 – 255.xxx.xxx.xxx and 127.xxx.xxx.xxx cannot be used.
Note: Specify the subnet mask by a combination of the numbers 0, 128, 192, 224, 240, 248, 252, 254,and 255. However, you cannot use 0 between non-zero values.
Note: If you do not set the gateway address, enter 0.0.0.0.
20. Select Close until the Tools screen is displayed.
21. Wait several seconds for the Auto Clear service to log you out.22. If you changed any settings, the printer will automatically reboot to register and enable your new
settings. After the printer is restarted, print out a Configuration Report to confirm that the ports areenabled and TCP/IP is correctly configured.
For information on how to print a Configuration Report, see Configuration Report on page 22.
Configuring E-mail
Note: This can also be done using CentreWare Internet Services. For more information, see CentreWareInternet Services on page 23.
1. Press the Log In/Out button on the control panel.
2. Enter the user ID with the numeric keypad or the keyboard displayed on screen, and select Enter.
Note: The default user ID is admin. When using the Authentication feature, a password is required. Thedefault password is 1111.
3. Press the Machine Status button.
8/6/2019 Enu WC74XX Sys Admin Guide
http://slidepdf.com/reader/full/enu-wc74xx-sys-admin-guide 103/208
Scan to E-mail
WorkCentre 7425/7428/7435
System Administrator Guide
103
4. Set the E-mail address, host name, and domain name.
a. Select the Tools tab.
b. Select Connectivity & Network Setup.
c. Select Machine’s E-mail Address/Host Name.
d. Select E-mail Address and then select Change Settings.
e. Enter an E-mail address using the displayed keyboard.
f. Select Save.
g. Set a host name and a domain name.
h. Select Close.
If SMTP has been selected as the Mail Receiving Protocol
Aliases cannot be configured. A user can choose an account name (the left side of the @). An address(the right side of the @) is a combination of a host name and a domain name.
Example: [email protected]
• Account name: mymail
• Host name: myhost
• Domain name: example.com
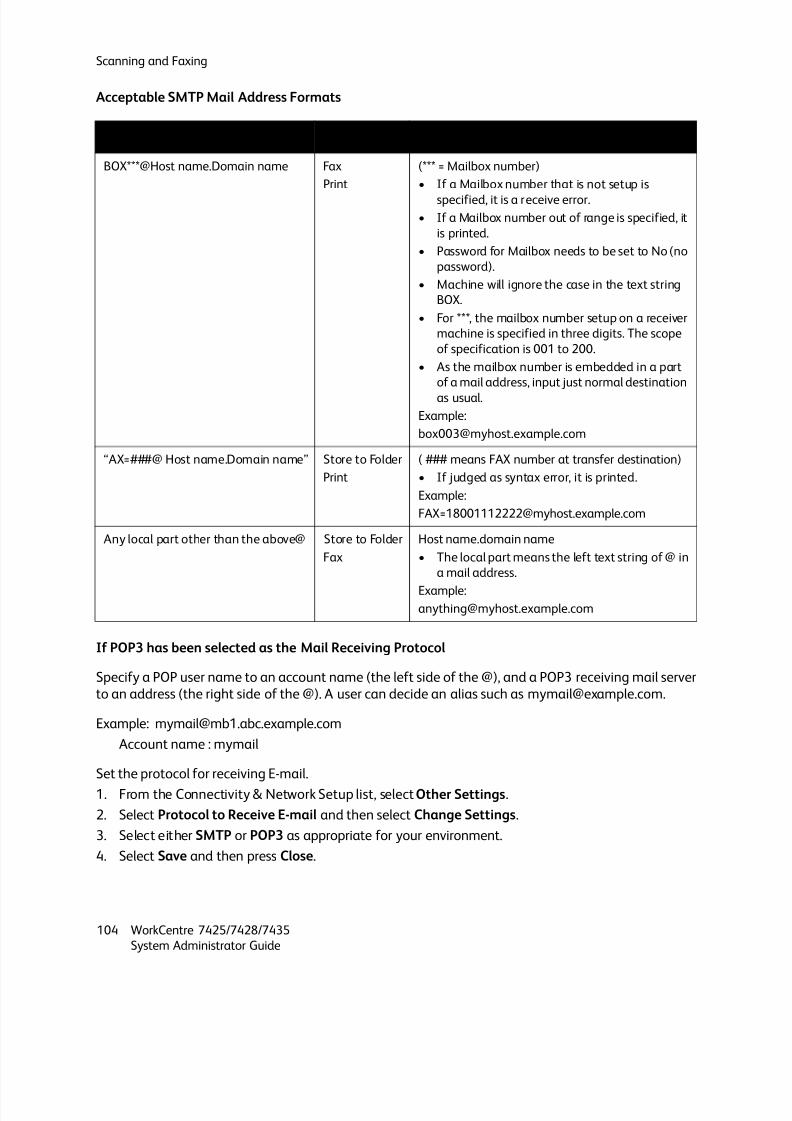
8/6/2019 Enu WC74XX Sys Admin Guide
http://slidepdf.com/reader/full/enu-wc74xx-sys-admin-guide 104/208
Scanning and Faxing
WorkCentre 7425/7428/7435
System Administrator Guide
104
Acceptable SMTP Mail Address Formats
If POP3 has been selected as the Mail Receiving Protocol
Specify a POP user name to an account name (the left side of the @), and a POP3 receiving mail serverto an address (the right side of the @). A user can decide an alias such as [email protected].
Example: [email protected]
Account name : mymail
Set the protocol for receiving E-mail.
1. From the Connectivity & Network Setup list, selectOther Settings.
2. Select Protocol to Receive E-mail and then select Change Settings.
3. Select either SMTP or POP3 as appropriate for your environment.
4. Select Save and then press Close.
Received Mail Destination Services Description
BOX***@Host name.Domain name Fax
(*** = Mailbox number)
• If a Mailbox number that is not setup is
specified, it is a receive error.
• If a Mailbox number out of range is specified, it
is printed.
• Password for Mailbox needs to be set to No (no
password).
• Machine will ignore the case in the text string
BOX.
• For ***, the mailbox number setup on a receiver
machine is specified in three digits. The scope
of specification is 001 to 200.
• As the mailbox number is embedded in a part
of a mail address, input just normal destination
as usual.
Example:
“AX=###@ Host name.Domain name” Store to Folder
( ### means FAX number at transfer destination)
• If judged as syntax error, it is printed.
Example:
Any local part other than the above@ Store to Folder
Fax
Host name.domain name
• The local part means the left text string of @ in
a mail address.
Example:[email protected]
8/6/2019 Enu WC74XX Sys Admin Guide
http://slidepdf.com/reader/full/enu-wc74xx-sys-admin-guide 105/208
Scan to E-mail
WorkCentre 7425/7428/7435
System Administrator Guide
105
If SMTP has been selected as the Mail Receiving Protocol
1. From the Connectivity & Network Setup list, select Outgoing/Incoming Email Settings (i.e. E-mailSend/Receive Settings).
2. Select SMTP Server Settings and then set the following item for the SMTP server.
• SMTP Server Port Number: Enter a value in the range from 1 to 65535. The default is 25.
If POP3 has been selected for the Mail Receiving Protocol
1. From the Connectivity & Network Setup list, select Outgoing/Incoming Email Settings (i.e. E-mailSend/Receive Settings).
2. Select POP3 Server Settings and then set the following items for the POP3 server.
• Server Name/IP Address: Enter the POP3 Server Name/IP Address and press Save.
Note: Enter the address in the format xxx.xxx.xxx.xxx. The xxx should be a numeric value in the rangefrom 0 to 255. However, 224 – 255.xxx.xxx.xxx and 127.xxx.xxx.xxx cannot be used.
• Port Number: Enter a value in the range from 1 to 65535. The default is 110.
Note: Do not use the numbers of any other ports.
• Pollling Interval: Set the interval for checking the e-mail on the POP3 server.
• Login Name: Enter the name to log in to the POP3 server and pressSave.
• Password: Enter the same password twice in the New Password and Re-enter Password. If youdo not set the password, leave it blank and select Save.
• POP Password Encryption: Select On (APOP) to encrypt the password, if desired. Select Save and then press Close.
3. Set the protocol for sending E-mail.
From the Connectivity & Network Setup list, select Outgoing/Incoming Email Settings, then selectSMTP Server Settings, and set the following items for the SMTP server.
• SMTP Server Name/IP Address: Enter the SMTP Server Name/IP Address and press Save.
Note: Enter the address in the format xxx.xxx.xxx.xxx. The xxx should be a numeric value in the rangefrom 0 to 255. However, 224 – 255.xxx.xxx.xxx and 127.xxx.xxx.xxx cannot be used.
• SMTP Server Port Number: Enter a value in the range from 1 to 65535. The default is 25.
Note: This configuration is not necessary if SMTP has been selected for the Mail Receiving Protocol andhas already been configured.
• E-mail Send Authentication: Select Off , POP before SMTP, or SMTP AUTH. If you are havingtrouble sending E-mail, to see if Authentication is the problem, set this item to Off and set theSMTP Server IP Address (above) to a server that does not require authentication.
Note: If POP before SMTP is selected, the POP3 settings must be set.
• SMTP AUTH Login Name: Set this item if SMTP AUTH is selected for E-mail SendAuthentication.
• SMTP AUTH Password: Set this item if SMTP AUTH is selected for E-mail Send Authentication.Enter the same password twice in the New Password and Re-enter Password. If you do not setthe password, leave it blank and select Save.
4. Select Close until the Connectivity & Network Setup list is again displayed.
8/6/2019 Enu WC74XX Sys Admin Guide
http://slidepdf.com/reader/full/enu-wc74xx-sys-admin-guide 106/208
Scanning and Faxing
WorkCentre 7425/7428/7435
System Administrator Guide
106
5. Setting S/MIME Security (optional).
a. From the Connectivity & Network Setup list, selectSecurity Settings. If the selection is notvisible, use the scrolling arrow to display it.
b. Select S/MIME Settings and set the following items.
• Device Certificate – S/MIME: Link a certificate to the printer. You must have an S/MIME
certificate on the printer to perform encryption. For information on S/MIME certificates, seeConfiguring S/MIME certificates with CentreWare Internet Services on page 78.
• S/MIME Communication: Set whether to enable or disable S/MIME Communication when acertificate ID is set.
• Receive Untrusted E-mail: Set whether to receive untrusted E-mail or not.
• Receive Untrusted iFAX : Set whether to receive untrusted iFAX or not.
• Message Digest Algorithm: Select a message digest algorithm from SHA1 or MD5.
• Message Encryption Method: Select a contents encryption method from 3DES, RC2-40, RC2-64, or RC2-128.
• Digital Signature – Outgoing E-mail: Set whether to always attach a digital signature to E-mail or to select a digital signature when sending E-mail.
• Digital Signature – Outgoing iFAX: Set whether to always attach a digital signature to iFAX orto select a digital signature when sending iFAX.
• Signing Certificate for Email Attachment: Device Certificate allows you to determine whichcertific ate is to be used to sign Email attachment. Smart Card Certificate is only effective whenAlways add signature is selected for Digital Signature – Outgoing Email.
• Certificate Auto Store: Select whether or not to automatically store a S/MIME certificateattached with the E-mail when receiving E-mail sent from an address registered in the addressbook.
6. Select Close repeatedly until the Tools screen is displayed.
7. Wait several seconds for the Auto Clear service to log you out.
8. After the printer is restarted, print a Configuration Report to confirm that each item is configured.For information on how to print a Configuration Report, see Configuration Report on page 22.
9. Test the E-mail transmission from the printer by pressing the Services button, then touching the on-screen E-mail button, then the New Recipient button. Type in your E-mail address, then pressClose.Place a document in the document feeder and press the green Start button on the control panel.
Note: To set up the address book for use with LDAP (network search), see LDAP Authentication onpage 66.
LDAP Server Configuration
1. Open your Web browser and enter the IP address of the printer in the address field. Press Enter to
open CentreWare Internet Services.
2. Click the Properties tab.
3. Click the Connectivity folder, then the Protocols folder, then the LDAP folder.
4. Click LDAP Server, and under Server Information, enter the IP address (or host name) in the box
Note: If entering the LDAP address by host name, make sure to use the fully qualified domain name of the LDAP server (for example, ldapserver.mycompany.com)

8/6/2019 Enu WC74XX Sys Admin Guide
http://slidepdf.com/reader/full/enu-wc74xx-sys-admin-guide 107/208
Scan to E-mail
WorkCentre 7425/7428/7435
System Administrator Guide
107
5. Enter the Port Number (default 389).
6. Specify the LDAP server type from the LDAP Server drop down list.
7. If desired, enter the path to the LDAP objects to limit the LDAP search in the Search Directory Rootarea. The entry should be in base DN format (for instance, ou=people, dc=xerox, dc=com).
8. For Login Credentials to search entries, choose whether system credentials entered on CentreWare
Internet Services will be used for LDAP queries, or the Credentials of the Remotely AuthenticatedUser (Credentials entered by the user when logging in at the machine’s control panel). For SystemLogin Name and Password, enter the Login Name and Password (if required) in the boxes providedfor access to the LDAP server.
Note: Login credentials are not required to supply address information for E-mail.
9. Enter your required number for Maximum Number of Search Results. This is the maximum numberof addresses that will appear which match the search criteria selected by the user.
10. Select Use LDAP Server Time-Out or select Wait and enter a Search Time-Out (5-120 seconds).
11. Select the LDAP Referrals: Enabled check box if you would like the server to refer to additionalLDAP servers, when user information is initially unavailable.
12. If using LDAP Referrals, enter the number of additional servers (1-5) to check for user information(LDAP Referral Hop Limit).
13. For Perform Query On, select the method that you would like LDAP to use to perform searches.
• Mapped Name Field: Will search on the single LDAP field currently mapped to Common Nameon the LDAP User Mappings page
• Surname and Given Name Fields: Will combine the sn and givenName fields in LDAP andsearch on the combination of both.
14. Click Apply, and enter the Administrator User name and password if prompted.
15. To enable encryption (SSL) for LDAP communications, perform the following.
a. Open your Web browser and enter the IP address of the printer in the address field. PressEnter to open CentreWare Internet Services.
b. Click the Properties tab.
c. Enter the system administrator User Name and Password (defaultadmin, 1111) if prompted.
d. Click the Security folder.
e. Click SSL/TLS Settings.
f. Check the Enabled check box next to LDAP – SSL / TLS Communication.
g. Click Apply and enter the Administrator User name and password if prompted.
h. Reboot the printer.

8/6/2019 Enu WC74XX Sys Admin Guide
http://slidepdf.com/reader/full/enu-wc74xx-sys-admin-guide 108/208
Scanning and Faxing
WorkCentre 7425/7428/7435
System Administrator Guide
108
LDAP User Mappings
You can click LDAP User Mappings in the LDAP setup section to test LDAP searches, verify mappingsand specify the attributes to search for within the LDAP database. The LDAP test function will performthe same search that would occur at the machine’s control panel. It will base its search on the currentsettings for Search Name Order (Mapped Name Field or the combination of Surname, GivenName, the
LDAP field currently Mapped to Common Name on the LDAP User Mappings page (if Search Order isset to Mapped Name Field) and Custom Filters (if configured). The test page will return the firstmatching search result for the test name entered and populate the LDAP Mappings drop down boxeswith all LDAP fields / attributes returned for that entry.
Note: The device uses partial name searches, so searching for smit, will return Smith, Joe; Smithson,John; etc. This can be overridden using custom filters.
1. Open your Web browser and enter the IP address of the printer in the address field. Press Enter toopen CentreWare Internet Services.
2. Click the Properties tab.
3. Enter the system administrator User Name and Password (defaultadmin, 1111) if prompted.
4. Click the Connectivity folder, then the Protocols folder, then the LDAP folder.5. Click LDAP User Mappings
6. To verify / change LDAP mappings, you must first perform a test search. In the User Name box,enter a name or part of a name that is in LDAP and press the Search button.
7. If the search is successful, the drop down boxes in the Properties section and the Example of searchresult column will get populated with the results. Change the Imported Headings drop downs tomatch the LDAP field you wish to map to the associated property (Common Name, Email Address,Business Phone, Office, Business Address, Home). If the search is not successful, verify LDAPsettings and try again.
Custom Filters
You can click Custom Filters in the LDAP setup section to customize LDAP searches. For the EmailAddress Filter, in the box provided, type in the LDAP search string (filter) that you wish to apply. Thefilter defines a series of conditions that the LDAP search must fulfill in order to return the informationyou seek. The form of the typtext filesed search string (filter) is LDAP objects placed inside parenthesis.In the search filter, LDAP should be used to specify the text entered by the user as the search criteria.For example, to find all users with common name that starts with the search string entered by the user,the filter would be (cn=LDAP*). If you are not familiar with LDAP search strings, use an Internet browsersearch to find examples.
E-Mail Recipient Control
Domain Filtering
Domain filtering allows you to configure a list of up to 50 domain names that are either:
• Restricted: Blocked as email recipients
• Authorized: Allowed as email recipients
8/6/2019 Enu WC74XX Sys Admin Guide
http://slidepdf.com/reader/full/enu-wc74xx-sys-admin-guide 109/208
Scan to E-mail
WorkCentre 7425/7428/7435
System Administrator Guide
109
Using Blocked Domains will not allow the user to add any email recipient that is in the blocked domainlist. All other domains are allowed. Using Allowed Domains will only allow the user to add recipientsthat are contained in the authorized domain list. All other domains are blocked.
1. Open your Web browser and enter the IP address of the printer in the address field. Press Enter toopen CentreWare Internet Services.
2. Click the Properties tab.
3. If prompted, enter the system administrator user name and password (default: admin, 1111).
4. Click the Services folder, then the Email folder.
5. Click Defaults.
6. In the General section, click Edit.
7. In the Domain Filtering section, choose either Allow Domains to specify a list of authorizeddomain names or Block Domains to specify a list of restricted domain names.
8. Scroll to the bottom of the screen and selectApply. You will be prompted to reboot the machine.
9. Return to the Domain Filtering section and select the Edit button.
10. Input up to 50 domain names in the domain list.
11. Scroll to the bottom of the screen and clickApply. Supply the Administrator User name andpassword if prompted.
Restricting a User from Editing the Address Book
The machine can be configured such that users are not able to edit the public address book that isstored locally on the device. When using Local Authentication, you may grant certain users theprivilege of editing the address book when this restriction is enabled (See Local Authentication setup).For all other types of authentication, only the System Administrator will be able to modify the publicaddress book with this restriction enabled.
1. Press the Log In/Out button on the control panel.
2. Enter the System Administrator’s Login ID and Passcode if prompted (default admin, 1111), andpress Enter.
3. Press the Machine Status button.
4. Touch the Tools tab.
5. Select System Settings.
6. Select Common Service Settings
7. Select Other Settings.
8. Select Restrict User to edit Address Book and press Change Settings
9. Choose Yes and press Save.
Only Allow Recipients from the Address Books
The machine may be configured to only allow the user to select email recipients from the AddressBooks. This will prevent emails to any recipients that are not contained in the address books. To ensuresecurity, the users should be restricted from editing the address book when enabling this setting (seeabove).
1. Press the Log In/Out button on the control panel.
8/6/2019 Enu WC74XX Sys Admin Guide
http://slidepdf.com/reader/full/enu-wc74xx-sys-admin-guide 110/208
Scanning and Faxing
WorkCentre 7425/7428/7435
System Administrator Guide
110
2. Enter the System Administrator’s Login ID and Passcode if prompted (default admin, 1111), andpress Enter.
3. Press the Machine Status button.
4. Touch the Tools tab.
5. Select System Settings.
6. Select Common Service Settings7. Select Other Settings
8. Select Recipient Selection Method and press Change Settings.
9. Choose Only from Address Book and press Save.
Automatically Add User to the To or CC fields and Locking the Recipient List
The machine may be configured to automatically add the authenticated user to the To and/or the CCfields when sending an email. Additionally, you may restrict the user from adding any additionalrecipients so they are only authorized to email their own account. To enable this feature you must:
• Configure LDAP.
• Configure Authentication.
• Restrict Access to (Lock) the E-mail service.
• Enable Add me to To field or Add me to CC field.
• Lock the recipient list (optional)
1. Configure LDAP. See LDAP Server Configuration on page 106.
2. Configure Authentication. See Configuring Authentication on page 63.
3. Restrict Access to (Lock) the E-mail service. SeeAccess Control on page 73.
4. Enable Add me to To field or Add me to CC field and lock the recipient list.
a. Open your Web browser and enter the IP address of the printer in the address field. PressEnter
to open CentreWare Internet Services.b. Click the Properties tab.
c. If prompted, enter the system administrator user name and password (default:admin, 1111).
d. Click the Services folder, then the Email folder
e. Click Defaults
f. Check the Enabled check box next to Add me to To field to automatically add the user as a Torecipient.
g. Check the Enabled check box next to the Add me to CC field to automatically add the user asa CC recipient.
h. Lock the recipient list (optional). In theEdit E-mail Recipients section, uncheck the Enabled
check box.\i. Click Apply and enter the Administrator User name and password if prompted.
8/6/2019 Enu WC74XX Sys Admin Guide
http://slidepdf.com/reader/full/enu-wc74xx-sys-admin-guide 111/208
Scan to E-mail
WorkCentre 7425/7428/7435
System Administrator Guide
111
Custom Keyboard Button
You can customize the .com button on the keyboard of the control panel.
1. Press the Log In/Out button on the control panel.
2. Enter the System Administrator’s Login ID and Passcode if prompted (default admin, 1111), andpress Enter.
3. Press the Machine Status button.
4. Touch the Tools tab.
5. Select System Settings.
6. Select Common Service Settings.
7. Select Screen / Button Settings.
8. Select Customize Keyboard Button.
9. Enter the text to appear on the custom keyboard button.
10. Press Preview to preview the custom keyboard button.
11. Press Save.
8/6/2019 Enu WC74XX Sys Admin Guide
http://slidepdf.com/reader/full/enu-wc74xx-sys-admin-guide 112/208
Scanning and Faxing
WorkCentre 7425/7428/7435
System Administrator Guide
112
Network Scanning (Using Templates)
Overview
Network Scanning is an optional feature for this printer, available for purchase from your Xerox SalesRepresentative.
Network Scanning allows a user to scan an original document and convert it to an electronic file. Thefinal destination of the electronic file depends on the template chosen by the user at the printer.
The template may reside on the printer, or may be cached on the printer from a pool of templatespulled from a remote server.
The set up of templates, template pool servers, and file repositories is accomplished using CentrewareInternet Services (the printer’s internally-contained Web pages) as stated in this section.
Once the scanned file is stored on the pre-determined server, the file can be redirected and
manipulated with such software as the following:
SMARTsend scanning services
Built on the Microsoft .NET platform, this server-based software works with new and legacyMultifunction Systems to enable hardcopy documents to be scanned in black and white or color, andconverted into such standard digital formats as PDF, JPEG, and TIFF. This Web-based applicationrequires no additional client software installation and uses wizards to simplify workflow (template)creation. Once a workflow, or distribution process, is created, it can be saved as a paper or electroniccover sheet. The cover sheet can be set up to direct the scanned file to a wide variety of destinations.Such destinations include an email address or distribution list, network folder, FTP folder, remote
printer, Web URL, Domino.doc, Domino, Microsoft SharePoint and Xerox DocuShare.
Scan to PC Desktop
For information regarding the use of Scan to PC Desktop, including Paperport, OmniPage, andImageRetriever applications, see Scan to PC Desktop on page 136.
Additional Notes
Network Scanning User Authentication
Authentication can be enabled to prevent unauthorized access to the Network Scanning feature. If Authentication is enabled, users will be prompted to enter a 4 to 12 digit pass code before they canaccess the Network Scanning feature. For more information see Authentication on page 62.

8/6/2019 Enu WC74XX Sys Admin Guide
http://slidepdf.com/reader/full/enu-wc74xx-sys-admin-guide 113/208
Network Scanning (Using Templates)
WorkCentre 7425/7428/7435
System Administrator Guide
113
Multifunction Printer Authentication
If using a SMARTsend server, a valid Windows account must be created on the SMARTsend Server forthe printer's authentication. The account enables each device to communicate with the SMARTsendserver to exchange template information and other configuration data. For account creationinstructions, refer to the FreeFlow SMARTsend Installation and Administration Guide.
Template Considerations when using SMARTsend
A single Xerox printer cannot use both CentreWare Network Scanning services and SMARTsend. If legacy CentreWare Network Scanning Services templates need to be utilized within SMARTsend, usethe SMARTsend Template Importer to import the desired templates, as stated in the FreeFlowSMARTsend Installation and Administration Guide.
Use of a Validation Server
If you will be communicating with HTTPS to servers using SSL/TLS encryption, you can set the hostname and directory (which might be a cache on a Repeater) of the Validation Server used to validate
Digital Certificates over the enterprise network. To set these parameters, enter the IP Address of theprinter into your Web browser and press Enter. Click the Properties tab in CentreWare InternetServices, then click the Services folder. Select Network Scanning, then Validation Server. Select HTTP or HTTPS, enter the host name of the server, then enter the directory name (if required) specified bythe validation server manufacturer. Click Apply.
Installation Checklist
Please ensure that the following items are available or have been performed.
1. Ensure the printer is on and connected to a network.
2. Enable the purchased Scanning option. For instructions, see Enabling Options with Software Keys
on page 98. Contact your Xerox Sales Representative if you have not purchased the Scanningoption.
3. Ensure that the TCP/IP and HTTP protocols are configured on the printer and are fully functional.This is required to access CentreWare Internet Services to configure Network Scanning.
To verify that the TCP/IP and HTTP protocols are correctly configured, print a Configuration Report.For more information see Configuration Report on page 22.
To configure TCP/IP, see TCP/IP Protocol Configuration on page 43.
To enable HTTP, see Enabling Internet Services (HTTP) on page 23.
4. Ensure that the FTP Client and SMB port are enabled on the printer. To verify this, print aConfiguration Report.
To enable FTP and SMB, see Scan to PC (FTP/SMB) on page 121.5. Note that after configuring a scan filing location (file repository) you need to create at least one
template for users to select to scan their documents to the pre-configured repository.
8/6/2019 Enu WC74XX Sys Admin Guide
http://slidepdf.com/reader/full/enu-wc74xx-sys-admin-guide 114/208
Scanning and Faxing
WorkCentre 7425/7428/7435
System Administrator Guide
114
Configure a Scan Filing Location
Scanning with the printer is accomplished through user selection of templates on the printer that routescanned jobs to network servers. After storage on the server, the files can be retrieved at any properlyconfigured networked computer. A dedicated file server is not required to receive scans. A dedicatedserver is required, however, for the installation and use of SMARTsend software to remotely manage
the pool of templates (workflows), displayed locally to device users, if so desired. Scanning isconfigured on the printer using one of the file transfer options below.
• FTP (File Transfer Protocol): Requires an FTP service running on a server or a computer.
• SMB (Server Message Block): Available for filing to an environment that supports the SMBprotocol.
Note: As other filing methods become available, their configuration will be similar to the procedures forconfiguring scan filing repositories using FTP and SMB described in this section.
Configure a Scan Filing Repository using FTP
Installation Checklist
1. Ensure that a File Transfer Protocol (FTP) service is running on the server or computer where imagesscanned by the printer will be stored. Write down the IP address or host name.
2. Create a user account and password for the printer. When a document is scanned, the printer logsin using the account, transfers the file to the server or computer and logs out. Write down the useraccount and password.
3. Create a directory (folder) within the FTP root to be used as a scan filing location (repository). Writedown the directory name.
Enter the Scan Repository Details in CentreWare Internet Services
1. At your computer, open your Web browser and enter the IP address of the printer in the Address orLocation field. Press Enter.
2. Click the Properties tab.
3. Click the Services folder, then the Network Scanning file folder.
4. Click the File Repository Setup.
5. Select Edit, or a File Repository Setup number in the Default File or Alternate File Destinations list,then click Edit.
6. Enter a Name to describe the File Repository.
7. Select FTP for Protocols.
8. Enter either an IP Address or Host Name for the server.9. Enter 21 for Port Number.
10. For Document Path, type in the name of the folder on the remote server that has been set up toreceive device scans. Do not use forward slashes as the printer will add them by default.
11. Supply the Login Name and Password for the printer to log into the file server. The default loginmethod is System (for automatic device log in). Available options are Authenticated User andDomain, Authenticated User, Prompt at User Interface, and System. If Remotely Authenticated

8/6/2019 Enu WC74XX Sys Admin Guide
http://slidepdf.com/reader/full/enu-wc74xx-sys-admin-guide 115/208
Network Scanning (Using Templates)
WorkCentre 7425/7428/7435
System Administrator Guide
115
User (and domain) is selected, the authenticated user (and domain) details will be used forauthentication at the file repository. (Remote Authentication must be configured). If Prompt atUser interface is chosen, user will be prompted at the time of the scan. If system is selected, theLogin Name and Password specified for System will always be used for authentication at the filerepository.
12. Re-enter the password.
13. Click Apply.
14. Enter the administrator User Name and Password and click OK. The default is admin and 1111.
15. Test the FTP connection by logging into the scan directory from a remote PC using the useraccount and password. Create a new folder within the directory and then delete the folder. If youcannot perform this function, check the user account access rights and FTP service setup.
Configure General Settings
1. Click General.
2. To print a Confirmation Sheet after every scan job, select On from the Confirmation Sheet dropdown menu.
3. Check the User Name and Domain Name boxes if you want these items to appear on the Job Log.The Job Log works with the Document Management Fields feature and is filed with the scan job.
4. Click Apply.
5. Enter the administrator User Name and Password and click OK. The default is admin and 1111.
Configure a Scan Filing Repository using SMB
Installation Checklist
1. Create a shared folder to be used as a scan filing location (repository) for scanned documents.
Note the Share Name of the folder and the Computer Name or Server Name.2. Create a user account and password for the printer with full access rights to the scan directory.
Write down the user account and password.
3. Test the settings by attempting to connect to the shared folder from another PC by logging in withthe user account and password. Create a new folder within the directory and then delete the folder.If you cannot perform this function check the user account access rights.
Enter the Scan Repository Details in CentreWare Internet Services
1. At your computer, open your Web browser and enter the IP address of the printer in the Address orLocation field. Press Enter.
2. Click the Properties tab.3. Click the Services folder, then the Network Scanning file folder.
4. Click the File Repository Setup.
5. Select Edit, or a File Repository Setup number in the Default File or Alternate File Destinations list, then click Edit.
6. Enter a Name to describe the File Repository.
8/6/2019 Enu WC74XX Sys Admin Guide
http://slidepdf.com/reader/full/enu-wc74xx-sys-admin-guide 116/208
Scanning and Faxing
WorkCentre 7425/7428/7435
System Administrator Guide
116
7. Select SMB for Protocols.
8. Enter either an IP Address or Host Name for the server.
9. Enter 445 for Port Number.
10. Enter the Share Name in the Share box.
11. For Document Path, type in the name of the folder on the remote server that has been set up to
receive device scans. Do not use back slashes as the printer will add them by default.12. Supply the Login Name and Password for the printer to log into the file server. Note that the
default login method is System (for automatic device log in).
13. Re-enter the password.
14. Click Apply.
15. Enter the administrator User Name and Password and click OK. The default is admin and 1111.
Configure General Settings
1. Click General.
2. To print a Confirmation Sheet after every scan job, select On from the Confirmation Sheet dropdown menu.
3. Check the User Name and Domain Name boxes if you want these items to appear on the Job Log.The Job Log works with the Document Management Fields feature and is filed with the scan job.
4. Click Apply.
5. Enter the administrator User Name and Password and click OK. The default is admin and 1111.
Configure Scan to HTTP
The printer can be configured to scan to either an HTTP or an HTTPS destination. To set up a remotetemplate pool repository, see the next procedure.
To Configure the Scan Repository Details using CentreWare Internet Services:
1. At your computer, open your Web browser and enter the IP address of the printer in the Address orLocation field. Press Enter.
2. Click the Properties tab.
3. Click the Services folder, then the Network Scanning folder.
4. Click File Repository Setup.
5. On the File Repository Setup page, in the Default File Destination box, click Edit.
6. On the File Destination page, in the Settings area:
a. On the Friendly Name line, type the name of the file destination.
7. In the Protocol drop down box, click HTTP or HTTPS.b. The Settings area refreshes and displays more options.
c. If you are using HTTP:
• On the Host Name / IP Address & Port line, type either an IP Address or Host Name for theserver.
• In the Port Number box (unlabeled), type 80.
8/6/2019 Enu WC74XX Sys Admin Guide
http://slidepdf.com/reader/full/enu-wc74xx-sys-admin-guide 117/208
Network Scanning (Using Templates)
WorkCentre 7425/7428/7435
System Administrator Guide
117
d. If you are using HTTPS:
• On the Host Name / IP Address & Port line, type either an IP Address or Host Name for theserver.
• In the Port Number box (unlabeled), type 443.
• If you are using SSL, select the Validate Repository SSL Certificate (trusted, not expired,
correct FQDN) check box.e. For either HTTP or HTTPS, if you are using a proxy server:
• Click View HTTP Proxy Server Settings.
• On the Proxy Server page, verify that the settings match those in your proxy serverenvironment. Make changes as needed, then click Apply.
f. On the Document Path line, type the HTTP address. Example: /Inetpub/wwwroot/scans/.
g. In the Login Credentials to Access the Destination area, click your choice of log in credentials tobe used.
h. Type the Login Name and Password for the printer.
i. Type the password in the Retype Password box.
j. Click Apply.8. If prompted. type the administrator User Name and Password and click OK. The default is admin
and 1111.
9. To set up a remote template pool repository, see the next procedure, Setting up a RemoteTemplate Pool Repository.
Setting up a Remote Template Pool Repository (optional)
1. At your computer, open your Web browser and enter the IP address of the printer in the Address orLocation field. Press Enter.
2. Click the Properties tab.
3. Click the Services folder, then the Network Scanning file folder.
4. Click the Advanced folder, then click the Template Pool Setup.
5. On the Template Pool Setup page, in the Remote Template Repository area:
a. In the Protocol drop down box, click HTTP or HTTPS.
The Remote Template Repository area refreshes and displays more options.
b. If you are using HTTP:
• On the Host Name / IP Address & Port line, type either an IP Address or Host Name for theserver.
• In the Port Number box (unlabeled), type 80.
c. If you are using HTTPS:
• On the Host Name / IP Address & Port line, type either an IP Address or Host Name for theserver.
• In the Port Number box (unlabeled), type 443 for the port number.
• If you are using SSL, click the Validate Repository SSL Certificate (trusted, not expired,correct FQDN) check box.
8/6/2019 Enu WC74XX Sys Admin Guide
http://slidepdf.com/reader/full/enu-wc74xx-sys-admin-guide 118/208
Scanning and Faxing
WorkCentre 7425/7428/7435
System Administrator Guide
118
d. For either HTTP or HTTPS, if you are using a proxy server:
• Click View HTTP Proxy Server Settings.
• On the Proxy Server page, verify that the settings match those in your proxy serverenvironment. Make changes as needed, then click Apply.
e. On the Script path and filename (from HTTP root) line, type the script path and filename
(from HTTP root). Example: /xerox.asp.f. On the Document Path line, type the HTTP address. Example: /Inetpub/wwwroot/scans/.
g. Type the Login Name and Password for the printer.
h. Retype the password.
i. Click Apply.
6. If prompted. type the administrator User Name and Password and click OK. The default is admin and 1111.
Configuring the Default Template in CentreWare Internet Services
You need to create at least one template for users to select to scan their documents to the pre-configured repository. This template is often referred to as the Default Template. The template can becreated with either CentreWare Internet Services or SMARTsend software running on a remotetemplate pool server. Once a default template has been created, users can use the Scan tab of CentreWare Internet Services to create individual templates, using the default template as a base.
To create and configure the default template with CentreWare Internet Services, perform the followingsteps:
1. At your computer, open your Web browser and enter the IP address of the printer in the Address orLocation field. Press Enter.
2. Click the Properties tab.
3. Click the Services folder, then the Network Scanning file folder.
4. Click the Default Template.
5. To edit the filing destinations, on the Default Template page, in the File area, click Edit.
6. In the Filing Destination area:
a. Select a filing policy from the drop down list. Note that you can simply accept the defaultpolicy (Rename New File).
b. For File Destination, note that the displayed destination should match the informationpreviously entered when you configured your Scan Filing Repository. If you have more thanone repository, the drop down list allows you to choose your repository.
c. To add a scanning destination subdirectory, in the Add (Optional) box, type the name of thesubdirectory to be added.
d. Click Apply to save any changes, or Undo to exit without saving changes. If you clicked Apply,be prepared to enter the administrator User Name (default of admin) and Password (default of 1111), if prompted.
8/6/2019 Enu WC74XX Sys Admin Guide
http://slidepdf.com/reader/full/enu-wc74xx-sys-admin-guide 119/208
Network Scanning (Using Templates)
WorkCentre 7425/7428/7435
System Administrator Guide
119
7. Document Management Field (Optional)
Click Add to add data fields to the template. Note that if the box contains listings, you can makeindividual selections, then click Edit instead. This information is filed with your scanned documentin the Job Log. The Job Log can then be accessed by third-party software and the informationretrieved and associated with the scanned file.
a. Click Add.
b. Refer to the displayed descriptions to set your parameters as desired.
c. Click Apply when done.
8. To set parameters for the default template, select Edit for any of the available categories of settings. These include: Network Scanning, Advanced Settings, Layout Adjustment, Filing Options,Report Options, Network Scanning Image Settings, and Compression Capability. Click Apply tosave your settings.
9. Linearized PDF files allow the first page of a large PDF file to be displayed in a user's Web browser,before the entire file is downloaded from the Web server. This fast first page display helps toalleviate Internet user frustration in waiting for an entire file to download before displaying thefile's contents.
10. To set the printer to create linearized PDF files:a. On the Default Template page, in the Network Scanning Image Settings area, click Edit.
b. In the Fast Web Viewing Options area, click Linearized PDF.
c. Click Apply.
11. Searchable PDF and PDF/A. The Searchable Format provides a second layer of data with the text of the scanned document. The second layer is converted via OCR technology, enabling the text of thedocument to be searched, copied, and pasted.
12. To set the printer to create searchable PDF files:
a. On the Default Template page, in the Network Scanning Image Settings area, click Edit.
b. In the Searchable PDF Defaults area, click Searchable.
c. Click Apply.
XPS is Microsoft's electronic paper format, an alternative to PDF. XPS is currently supported as a savedfile format in Microsoft Office 2007, with an XPS viewer built into Windows Vista. Microsoft states thatWindows Vista uses the XPS format as a document format, a windows spool file format, and a pagedescription language for printers.
Note: If the Searchable XPS option is available, the Searchable Format provides a second layer of datawith the text of the scanned document. The second layer is converted via OCR technology, enablingthe text of the document to be searched, copied, and pasted.
Select MRC Compression, if available, to use Mixed Raster Content (MRC) compression. MRC is used todivide the scanned image based on content, and then compress each area in the optimal manner for
that image area. This option allows for smaller output files with better image quality.
Note: Some PDF reading application s may not support MRC compressed PDF’s.
8/6/2019 Enu WC74XX Sys Admin Guide
http://slidepdf.com/reader/full/enu-wc74xx-sys-admin-guide 120/208
Scanning and Faxing
WorkCentre 7425/7428/7435
System Administrator Guide
120
Setting up a Remote Template Pool Repository (optional)
1. At your computer, open your Web browser and enter the IP address of the printer in the Address orLocation field. Press Enter.
2. Click the Properties tab.
3. Click the Services folder, then the Network Scanning file folder.
4. Click the Advanced folder, then click Template Pool Setup.
5. For Protocol, use the drop down menu to select the protocol you will be using to communicate withthe template pool server. Current selections are FTP, NewWare, SMB, HTTP, and HTTPS. Otherselections, when available, will be set up similarly.
6. Supply the Host Name / IP Address (and Share Name, in the case of SMB).
7. Supply the Port Number. The default is 21 for FTP, 445 for SMB, and 80 for HTTP and HTTPS.
8. For Document Path, type in the name of the folder on the remote server containing the pool of templates. Do not use forward slashes with FTP or back slashes with SMB.
9. Supply the Login Name (account name) and Password for the printer to access the remote server.
Note: For information on creating accounts on the SMARTsend server, refer to the FreeFlow SMARTsend
Installation and Administration Guide.
10. Re-enter the password in the Retype Password box.
11. If available, check the Polling Settings check box to set up automatic, timed polling with thetemplate pool server. This will help to assure that the latest scanning templates are available tousers of the printer.
12. Click Apply.
13. Enter the administrator User Name and Password and click OK. The default is admin and 1111.
Testing Network Scanning (using templates)
1. Press the Services button on the control panel.2. Press the Network Scanning button.
3. See if the template you created is displayed on screen.
4. If it is, press it. If it is not, return to the beginning of this section and repeat the requiredprocedures.
5. Place a document in the document feeder and press the Start button.
6. On a network-connected PC, open a connection to the repository server, log in, and see if thedocument arrived in the repository folder.
8/6/2019 Enu WC74XX Sys Admin Guide
http://slidepdf.com/reader/full/enu-wc74xx-sys-admin-guide 121/208
Scan to PC (FTP/SMB)
WorkCentre 7425/7428/7435
System Administrator Guide
121
Scan to PC (FTP/SMB)
Overview
This feature is designed to convert scanned data to TIFF, JPEG, or PDF format, and then use the FTP orSMB protocol to send the data to a computer (server or computer) on the network.
Note: It is assumed that you purchased the Scanning option to enable Scanning to FTP/SMB with yourprinter. If you did not, contact your Xerox Representative to purchase this option.
Note: For scanning to SMB, make sure that a shared folder is created for saving scanned data on thenetwork.
Note: For scanning to FTP, make sure that the server is running the FTP service and that you havecreated a directory within the FTP root to be used as a scan filing location.
Requirements for FTP
When using FTP transmission, one of the following FTP servers, with an account on that server (loginname and password), is required.
• Microsoft Windows Server 2003
FTP service of Microsoft Internet Information Server 6.0
• Microsoft Windows 2000 Server, Microsoft Windows Server 2008, Microsoft Windows 2000Professional, Microsoft Windows XP, Microsoft Windows Vista
FTP service of Microsoft Internet Information Server 3.0 or later
• Mac OS X
FTP service of Mac OS X 10.1.5/10.2.x/10.3.8/10.3.9/10.4.2
Refer to the manual provided with the software for how to configure the FTP service.
Requirements for SMB
When using SMB transmission, a computer running one of the following Operating Systems, whichincludes a shared folder, is required.
• Microsoft Windows 2000
• Microsoft Windows Server 2003
• Microsoft Windows XP
8/6/2019 Enu WC74XX Sys Admin Guide
http://slidepdf.com/reader/full/enu-wc74xx-sys-admin-guide 122/208
Scanning and Faxing
WorkCentre 7425/7428/7435
System Administrator Guide
122
Installation Procedure
This section describes the configuration procedure to use the Scan to PC (FTP/SMB) feature on theprinter.
The following two steps are necessary to use the Scan to PC (FTP/SMB) feature.
1. Enable the required ports and set TCP/IP. Enable the FTP port and SMB port on the printer, andthen set the printer’s IP address. If you will be using SMB on a Microsoft Network, make sure toenable either DNS or WINS as part of the TCP/IP configuration. For FTP, make sure that DNS isenabled.
2. Preparing an FTP directory or SMB shared folder on the receiving computer (server or computer).Create an FTP directory or SMB shared folder to receive scanned documents over the network.
Enabling Ports and Setting TCP/IP
To use Scan to PC (FTP/SMB) you need to enable the applicable Ports (SMB or FTP client) on the printer,and make sure that an IP address has been set on the printer.
Note: The configuration can also be performed using CentreWare Internet Services. For information,see CentreWare Internet Services on page 23.
1. Press the Log In/Out button on the control panel.
2. Enter the System Administrator’s Login ID and Passcode if prompted (default admin, 1111), andpress Enter.
3. Press the Machine Status button.
4. Touch the Tools tab.
5. When using the SMB protocol, enable the SMB port.
a. Select Connectivity & Network Setup.
b. Select Port Settings.c. Select SMB and then select Change Settings.
d. Select Port Status and then select Change Settings.
e. Select Enabled then select Save.
f. Select Close until the Port Settings screen is displayed.
6. When using the FTP protocol, enable the FTP client port.
a. From the Tools tab, select Connectivity & Network Setup, then Port Settings.
b. From the Port Settings screen, select FTP Client and then select Change Settings.
c. Select Port Status and then select Change Settings.
d. Select Enabled then select Save.
e. Select Close repeatedly until the Tools screen is displayed.
8/6/2019 Enu WC74XX Sys Admin Guide
http://slidepdf.com/reader/full/enu-wc74xx-sys-admin-guide 123/208
Scan to PC (FTP/SMB)
WorkCentre 7425/7428/7435
System Administrator Guide
123
7. Set an IP address.
If an IP address is already set, this step is not necessary. Also, in an environment with DHCP orBOOTP, configure the way to obtain an IP address. If the address cannot be obtainedautomatically, or static configuration is preferred, configure an IP address, a subnet mask, and agateway address as follows.
a. Select Protocol Settings.
b. Select IPv4 (or other mode) Address Resolution, then select Change Settings.
c. Select one from DHCP, BOOTP, RARP, DHCP/Autonet or Static, and then select Save. If youselect anything other than Static, proceed to Step 5.
Note: When communicating by TCP/IP make sure to enable the use of a DNS (or WINS for SMB) serverin CentreWare Internet Services.
d. On the Protocol Settings screen, select TCP/IP – IP Address and then Change Settings.
e. Enter the IP address using the numeric keypad.
Note: Enter the address in the format xxx.xxx.xxx.xxx. The xxx should be a numeric value in the rangefrom 0 to 255. However, 224 – 255.xxx.xxx.xxx and 127.xxx.xxx.xxx cannot be used.
f. Select Save.
g. Configure TCP/IP – Subnet Mask and TCP/IP – Gateway Address using the same process asstated above.
Note: Enter the Gateway address in the format xxx.xxx.xxx.xxx. The xxx should be a numeric value inthe range from 0 to 255. However, 224 – 255.xxx.xxx.xxx and 127.xxx.xxx.xxx cannot be used.
Note: Specify the subnet mask by a combination of the numbers 0, 128, 192, 224, 240, 248, 252, 254,and 255. However, you cannot use 0 between non-zero values.
Note: If you do not set the gateway address, enter 0.0.0.0.
8. Select Close until the Tools screen is displayed.
9. Wait several seconds for the Auto Clear service to log you out.10. If you changed any settings, the printer will automatically reboot to register and enable your new
settings. After the printer is restarted, print out a Configuration Report to confirm that the ports areenabled and TCP/IP is correctly configured. For more information, see Configuration Report onpage 22.
Receiving Computer Configuration
The following describes the configuration procedure for the receiving computer (server or computer).
Using FTP
1. Ensure that File Transfer Protocol (FTP) services is running on the server or computer where imagesscanned by the printer will be stored. Note down the IP address or host name.
2. Create a user account and password for the printer. When a document is scanned, the printer logsin using the account, transfers the file to the server or computer and logs out. Note down the useraccount and password details.

8/6/2019 Enu WC74XX Sys Admin Guide
http://slidepdf.com/reader/full/enu-wc74xx-sys-admin-guide 124/208
Scanning and Faxing
WorkCentre 7425/7428/7435
System Administrator Guide
124
3. Create a directory within the FTP root to be used as a scan filing location (repository). Note downthe directory path.
4. Test the FTP connection by logging in to the scan directory from a PC with the user account andpassword. Create a new folder within the directory and then delete the folder. If you cannotperform this function check the user account access rights and the FTP service setup.
Using SMB
1. Create a shared folder to be used as a scan filing location (repository) for scanned documents.Note the Share Name of the folder and the Computer Name or Server Name.
2. Create a user account and password for the printer with full access rights to the scan directory.Note down the user account and password.
3. Test the settings by attempting to connect to the shared folder from another PC by logging in withthe user account and password. Create a new folder within the directory and then delete the folder.If you cannot perform this function check the user account access rights.
Adding the Receiving Computer’s Address to the Address BookTo direct your scanned documents to the appropriate receiving computer (server or computer) you willneed to add the Receiving Computer’s Address to the printer’s Address Book as follows.
1. Press the Log In/Out button on the control panel.
2. Enter the System Administrator’s Login ID and Passcode if prompted (default admin, 1111), andpress Enter.
3. Press the Machine Status button.
4. Touch the Tools tab.
5. Select Setup & Calibration, then touch Address Book.
6. Select an available Address Number.
7. Touch Create/Delete.
8. Touch Address Type, then touch Change Settings.
9. Select Server as the address type, and select Save.
10. Select each item to be set, and select Change Settings. When each setting is complete, selectSave.
11. Select Transfer Protocol from the Configuration Report and select FTP or SMB or SMB (UNCformat).
12. When FTP or SMB is selected, touch Server Name/IP Address on the Configuration Report andenter the Host name or IP Address of the computer (server or computer) designated to receivescanned files. When entering a Host name, use the fully qualified domain name. For example:
myhost.example.com. Do not use forward or backward slashes.13. Select Shared Name (SMB Only) to enter the name of the shared folder on the receiving
computer. Enter the name only, without any backward slashes.
14. Select Save In to enter the directory for storing documents. When FTP or SMB is selected, supplythe name of the directory (without any forward or backward slashes). When SMB (UNC format) isselected, if available, use the Universal Naming Convention format such as \\host name\sharedname\directory name.
8/6/2019 Enu WC74XX Sys Admin Guide
http://slidepdf.com/reader/full/enu-wc74xx-sys-admin-guide 125/208
Scan to PC (FTP/SMB)
WorkCentre 7425/7428/7435
System Administrator Guide
125
15. Select User Name and provide the User account name assigned to the directory on the receivingcomputer.
16. Select Password and provide the password to access the User account on the receiving computer.
17. Select Port Number to set the communications port number. Standard Port is recommended.
18. When done changing and saving settings, touch Close (repeatedly, if necessary) to exit to the
Tools screen.19. Wait several seconds for the Auto Clear service to log you out.
Using the Scan to PC (FTP/SMB) Feature
After the appropriate ports have been enabled, TCP/IP has been configured, and the receivingcomputers address added to the Address Book, the Scan to PC (FTP/SMB) feature can be used asfollows.
1. Select Scan to PC from the Services screen.
2. Touch Transfer Protocol, select a protocol, and touch Save.
3. Note that you can touch the blank lines on the screen and manually enter Server settings, or touchAddress Book. For SMB you can also browse the Microsoft Network.
4. Select the Receiving Computer (computer or server) in the list contained in the Address Book andtouch Save.
5. Place your document in the document feeder and press the control panel’s large, green Start button. Progress of the data transfer will be displayed on screen.
8/6/2019 Enu WC74XX Sys Admin Guide
http://slidepdf.com/reader/full/enu-wc74xx-sys-admin-guide 126/208
Scanning and Faxing
WorkCentre 7425/7428/7435
System Administrator Guide
126
Scan to Home
The Scan to Home option is supported through the Network Scanning service. Essentially, it is atemplate file (.xst) stored locally on the printer, but in a different directory than the network scanning
templates or folder folders.
To acccess the Scan to Home template, press the Services button at the control panel, and touchNetwork Scanning . The printer queries LDAP to acquire the authenticated user’s home directory, orappends the authenticated user’s login name to a predefined network home path.
Preparing for Scan to Home Installation
1. Ensure the printer is fully functioning on the network prior to installation.
2. Enable the Scan to Home option. For instructions, seeEnabling Options with Software Keys onpage 98. Contact your Xerox Sales Representative if you have not purchased the Scan to Homeoption.
3. Ensure that the TCP/IP and HTTP protocols are configured on the printer and fully functional. Thisis required to access CentreWare Internet Services to configure Network Scanning.
4. Enable LDAP authentication. For more information, see LDAP Authentication on page 66.
5. Configure the LDAP protocol for the System (or an Authenticated User) to log in to the LDAP server.For more information, see LDAP Server Configuration on page 106.
Configure Scan to Home
Note: Scan to Home does not work without Remote Account mode.
1. Press the Log In/Out button on the control panel.
2. Enter the System Administrator’s Login ID and Passcode if prompted (default admin, 1111), andpress Enter.
3. Press the Machine Status button.
4. Touch the Tools tab.
5. Touch Authentication / Security Settings, then Authentication, then Login Type. Select Login toRemote Accounts.
6. Select Save.
7. Select Yes to change login type.
8. Press the Login/Out btton.
9. Select Reboot Now.
10. At your computer, open your Web browser and enter the IP address of the printer in the Address orLocation field. Press Enter.
a. Click the Properties tab.
b. Select the Security folder.
11. Select the Remote Authentication Servers folder.
8/6/2019 Enu WC74XX Sys Admin Guide
http://slidepdf.com/reader/full/enu-wc74xx-sys-admin-guide 127/208
Scan to Home
WorkCentre 7425/7428/7435
System Administrator Guide
127
12. Select Authentication System, select LDAP from the Authentication Settings drop down list, thenclick Apply. Click Reboot Machine.
13. Select Authentication Configuration.
14. In the Login Type box, select Login to Remote Accounts, then click Apply. The printer will reboot.
15. At your computer, open your Web browser and enter the IP address of the printer in the Address or
Location field. Press Enter.16. Click the Properties tab.
17. Select the Services folder.
18. Select the Scan to Home folder.
19. Select General.
20. On the Scan to Home page, in the Status area:
a. On the Status line, click the enabled box.
b. In the Friendly Name box, type in a user-recognizable name of up to 35 characters for thetemplate that will appear in Template Details on the printer’s touch screen.
c. On the Determine Home Directory line, ensure that the radio button next to LDAP Query is
selected.d. The printer will query the LDAP server with the user’s authenticated login name and retrieve
the user’s home directory to set up the template scanning path to that directory.
21. In the LDAP Mapping for Home Directory area:
a. To define the LDAP home directory to a name other than homeDirectory, click LDAP Mappingfor Home Directory.
b. To create a scanning subdirectory within the user’s home directory, select AutomaticallyCreate Subdirectory and specify a general name.

8/6/2019 Enu WC74XX Sys Admin Guide
http://slidepdf.com/reader/full/enu-wc74xx-sys-admin-guide 128/208
Scanning and Faxing
WorkCentre 7425/7428/7435
System Administrator Guide
128
Scanning to the Printer’s Hard Drive (Folders)
You must purchase the scanning option to scan to a folder on the printer’s hard drive. Contact yourXerox Representative for more information.
Refer to the Enabling Options with Software Keys in this section to enable your purchased option onthe printer with the supplied 12 character key.
Setting Up Folders at the Printer
Scanning to the printer's hard drive requires the set up of individual Folders to receive scanned files. Upto 200 Folders can be set up to support this type of scanning. To set up Folders, perform the followingsteps:
Note: If you log in as Administrator all folders are created with the owner as System Administrator.
1. Press the Log In/Out button on the control panel.
2. Enter the System Administrator’s Login ID and Passcode if prompted (default admin, 1111), andpress Enter.
3. Press the Machine Status button.
4. Touch the Tools tab.
5. Press Setup & Calibration.
6. Press Create Folder.
7. When the numbered list of folders is shown on screen, use the supplied arrow keys to scroll throughthe list to locate an unassigned folder number.
8. Select an unassigned folder number from the displayed list.
9. Press the Create & Delete button in the lower right corner of the folder selection screen.
10. When the New Folder – Passcode screen displays, use the On and Off buttons on the left side of thescreen to determine whether or not a password will be required to access the folder. If On isselected, use the printer's numeric keypad to enter a numbered password.
11. Press the Save button to save your settings. (To exit the screen, without saving settings, press theCancel button.)
12. When the Folder settings screen displays (after assigning a password), note that you have fivesetting selections displayed on five numbered horizontal lines. The available selections include:Folder Name, Check Folder Passcode, Delete Files After Retrieval, Delete Expired Files, and Link JobFlow Sheet to Folder.
13. To assign a name to the folder, press the Folder Name selection line.
14. Press the Change Settings button.15. Use the touch screen keyboard to enter a name for your folder.
16. When finished entering in a name, press the Save button in the upper right corner of the screen.(To exit the screen, without saving changes, press the Cancel button.)
17. On the Folder settings screen, press any other selection lines of interest and touch theChangeSettings button, as previously described, to access and make setting changes. Use the Save buttonto save your changes.
8/6/2019 Enu WC74XX Sys Admin Guide
http://slidepdf.com/reader/full/enu-wc74xx-sys-admin-guide 129/208
Scanning to the Printer’s Hard Drive (Folders)
WorkCentre 7425/7428/7435
System Administrator Guide
129
18. To exit the Folder settings screen, press the Close button in the upper right corner of the screen.
19. To exit the screen that lists all assigned and unassigned folders, press theClose button in the upperright corner of the screen.
Configuring Expiration Settings for Stored Documents
This setting allows the System Administrator to set a document expiration timer to delete documentsstored in, but not retrieved from, folders.
1. Press the Log In/Out button on the control panel.
2. On the keypad enter admin or the current System Administrator Login ID. Touch Next whenfinished.
3. On the keypad enter 1111 or the current Passcode. Touch Enter when finished.
4. From the Tools screen, use the arrow control in the Group menu to scroll to Stored File Settings.
5. Select Expiration Date for Files in Folder and touch Change Settings.
6. Select On, set the timer controls, and touch Save.
7. Make any other selections desired, press Change Settings, then press Save.
8. Press Close to return to the Tools screen.
9. To exit the Tools screen, wait several seconds for the Auto Clear service to log you out.
Setting Up Folders with CentreWare Internet Services
Note: Scanning to the printer's hard drive requires the set up of individual Folders to receive scannedfiles. Up to 200 Folders can be set up to support this type of scanning. To set up Folders, perform thefollowing steps:
1. Open your Web browser and enter the IP address of the printer in the address field. Press Enter toopen CentreWare Internet Services.
2. Click the Scan tab.3. Click Folder.
4. When the numbered list of folders is shown, locate an unassigned folder number from thedisplayed list and click the Create button for that folder.
5. Type in a name for this Folder in the Folder Name entry box.
6. Type in a pass code in the Folder Passcode entry box.
7. Confirm the pass code by retyping it in the Retype Passcode box.
8. Use the drop down arrow to set Check Folder Passcode to Always (recommended) to secure yourfolder.
9. Place a checkmark in the Delete Files after Print or Retrieve box if you wish to delete documents
from your folder after retrieving or printing.10. Place a checkmark in the Delete Expired Files with box to use this feature in place of, or as an
augmentation to, Auto Delete.
11. Click Apply when done.

8/6/2019 Enu WC74XX Sys Admin Guide
http://slidepdf.com/reader/full/enu-wc74xx-sys-admin-guide 130/208
Scanning and Faxing
WorkCentre 7425/7428/7435
System Administrator Guide
130
Scanning to Folders
Scanning to the printer's hard drive requires the set up of individual folders to receive scanned files. Upto 200 folders can be set up to support this type of scanning. To learn how to set up an individualfolder, see Setting Up Folders at the Printer on page 128.
To scan to a Folder, perform these steps:1. From the printer's Main screen, press theScan to Folder button.
2. When the Scan to Folder screen displays, a list of Folders will be shown. Use the supplied arrow toscroll through the icons to locate your Folder.
3. Select your Folder by pressing its selection line on the touch screen.
4. When the Password screen displays, enter your password (series of numbers) using the controlpanel's numeric keypad.
5. Press the Confirm button on the touch screen.
6. Use the displayed controls to set up scanning parameters, then place your document in thedocument feeder, and press the control panel’s large, green Start button.
7. Press the Services button to return to the printer’s Main screen.
Retrieving Images from Folders
Images are retrieved from Folders using CentreWare Internet Services.
1. Open your Web browser and enter the IP address of the printer in the address field. Press Enter toopen CentreWare Internet Services.
2. Click the Scan Tab.
3. Click Folder.
4. Locate your folder, then click File List.
5. Enter your Passcode when prompted and click Apply.
6. Use your mouse to place a check mark in the box in front of the file that you wish to retrieve.
7. After selecting individual retrieval options, click theRetrieve button. Note that you can also specifyprinting options and print the document by clicking Print File.
8. Click Save this provided on the next screen displayed to begin the image downloading process.
9. Note that after downloading a document, you can delete that document from your Folder byrechecking the box in front of the file just downloaded and clicking the Delete button.
8/6/2019 Enu WC74XX Sys Admin Guide
http://slidepdf.com/reader/full/enu-wc74xx-sys-admin-guide 131/208
Setup and Use of Job Flow Sheets with Folders
WorkCentre 7425/7428/7435
System Administrator Guide
131
Setup and Use of Job Flow Sheets with Folders
Overview
Job flow is a feature for executing a series of registered actions.
The target of a job flow is documents stored in a Folder.
Two methods are available:
• Automatically start a job flow when a document is stored in a Folder
• Select a job flow to manually act on documents stored in a Folder.
To start a job flow, you must link the job flow sheet to a Folder, or to documents within a Folder.Documents are then processed as specified on the job flow sheet.
To automatically document processing in a Folder with a job flow sheet, see Creating a Folder and
Linking to a Job Flow Sheet (for Automatic Processing) on page 134.
To manually link document processing in a Folder with a job flow sheet, see Manually Linking to a JobFlow Sheet to Documents in a Folder on page 135.
Features supported for Job Flow
Enabling Ports and Setting TCP/IP
In order to use the job flow service, you must enable the SOAP port, the SNMP port, the Internet
Service (HTTP) port, and set IP addresses. The procedure for setting the printer is as follows.Note: The configuration can also be performed using CentreWare Internet Services. For moreinformation, see CentreWare Internet Services on page 23.
1. Press the Log In/Out button on the control panel.
2. Enter the System Administrator’s Login ID and Passcode if prompted (default admin, 1111), andpress Enter.
Incoming Folder Documents Available Outgoing processing
Faxes for private polling Printing, Fax forwarding (up to 100 recipients), iFAX transmission (up to
100 recipients
Scanned documents Printing, Fax forwarding (up to 100 recipients), iFAX transmission (up to100 recipients
Fax to Folder Printing, Fax forwarding (up to 100 recipients), iFAX transmission (up to
100 recipients
iFAX received Printing, Fax forwarding (up to 100 recipients), iFAX transmission
depending on System Administration mode settings
8/6/2019 Enu WC74XX Sys Admin Guide
http://slidepdf.com/reader/full/enu-wc74xx-sys-admin-guide 132/208
Scanning and Faxing
WorkCentre 7425/7428/7435
System Administrator Guide
132
3. Press the Machine Status button.
4. Touch the Tools tab.
5. Enable the SOAP port.
a. Select Connectivity & Network Setup.
b. Select Port Settings.
c. Select SOAP and then select Change Settings.
d. Select Port Status and then select Change Settings.
e. Select Enabled then select Save.
f. Select Close until the Port Settings screen is displayed.
6. Enable the SNMP port.
a. Select SNMP and then select Change Settings.
b. Select Port Status and then select Change Settings.
c. Select Enabled then select Save.
d. Select Close until the Port Settings screen is displayed.
e. Enable the Internet Service (HTTP) port using the same process as stated above.f. Select Close repeatedly until the Tools screen is displayed.
7. Set an IP address.
If an IP address is already set, this step is not necessary. Also, in an environment with DHCP orBOOTP, configure the way to obtain an IP address. If the address cannot be obtainedautomatically, or static configuration is preferred, configure an IP address, a subnet mask, and agateway address as follows.
a. Select Protocol Settings.
b. Select IPv4 (or other mode) Address Resolution and then select Change Settings.
c. Select one from DHCP, BOOTP, RARP, DHCP/Autonet or Static, and then select Save. If youselect anything other than Manual, proceed to Step 5.
Note: When communicating by TCP/IP make sure to enable the use of a DNS (or WINS for SMB)servere in CentreWare Internet Services.
d. On the Protocol Settings screen, select TCP/IP – IP Address and then Change Settings.
e. Enter the IP address using the numeric keypad.
f. Enter the address in the format xxx.xxx.xxx.xxx. The xxx should be a numeric value in the rangefrom 0 to 255. However, 224 – 255.xxx.xxx.xxx and 127.xxx.xxx.xxx cannot be used.
g. Select Save.
h. Configure TCP/IP – Subnet Mask and TCP/IP – Gateway Address using the same process asstated above.
Note: Enter the Gateway address in the format xxx.xxx.xxx.xxx. The xxx should be a numeric value inthe range from 0 to 255. However, 224 – 255.xxx.xxx.xxx and 127.xxx.xxx.xxx cannot be used.
Note: Specify the subnet mask by a combination of the numbers 0, 128, 192, 224, 240, 248, 252, 254,and 255. However, you cannot use 0 between non-zero values.
If you do not set the gateway address, enter 0.0.0.0.
8. Select Close until the Tools screen is displayed.
8/6/2019 Enu WC74XX Sys Admin Guide
http://slidepdf.com/reader/full/enu-wc74xx-sys-admin-guide 133/208
Setup and Use of Job Flow Sheets with Folders
WorkCentre 7425/7428/7435
System Administrator Guide
133
9. Wait several seconds for the Auto Clear service to log you out.
10. If you changed any settings, the printer will automatically reboot to register and enable your newsettings. After the printer is restarted, print out a Configuration Report to confirm that the ports areenabled and TCP/IP is correctly configured. For information on how to print a Configuration Report,see Configuration Report on page 22.
Configuring the SNMP Port
Configure the transport protocol for the SNMP port using CentreWare Internet Services.
1. Start a Web browser on a network connected computer.
2. Enter the printer’s IP address in the address box of the browser and press Enter.
3. Click the Properties tab.
4. Click Port Status.
5. Select (place a checkmark in) the UDP check box next to SNMP.
6. Click Apply.
7. Enter the System Administrator user ID and password when prompted and click OK.8. Click the Reboot button when it displays. If a Reboot button fails to display, click the Status tab
and click Reboot Machine from that screen.
Creating Job Flow Sheets
Before you can a job flow sheet to a folder, you need to create at least one job flow sheet. To create a job flow sheet, perform the following steps.
1. Press the Log In/Out button on the control panel.
2. Enter the System Administrator’s Login ID and Passcode if prompted (default admin, 1111), andpress Enter.
3. Press the Machine Status button.
4. Touch the Tools tab.
5. Select Setup & Calibration.
6. Touch Create Job Flow Sheets.
Note: If this selection is unavailable, follow the instructions in the next topic, Creating a Folder andLinking to a Job Flow Sheet, to create your flow sheet.
7. Touch Create.
8. Select items to be set from the displayed item list, then touchChange Settings. When done, touchSave.
• Name: Set the name, up to 128 characters in length, for the job flow sheet.• Description: Set the description, up to 256 characters in length, for the job flow sheet.
• Keyword: Enter a keyword, up to 12 characters in length, for job flow search.
• Send as Fax: Specify the fax transmission address. You can specify a total of up to 100addresses, using either Address Numbers or by manual input (New Recipient).
8/6/2019 Enu WC74XX Sys Admin Guide
http://slidepdf.com/reader/full/enu-wc74xx-sys-admin-guide 134/208
Scanning and Faxing
WorkCentre 7425/7428/7435
System Administrator Guide
134
• Send as iFAX: Specify the E-mail address. You can specify the address using either the AddressBook, or by manual input (New Recipient).
• Send as E-mail: Specify the E-mail address. You can specify the address using either theAddress Book, or by manual input (New Recipient).
• Transfer via FTP (1) and (2): Specify transfer to an FTP server. You can specify the addressusing either the Address Book, or by manual entry into the boxes supplied.
• Transfer via SMB (1) and (2): Specify transfer to an SMB server. You can specify the addressusing either the Address Book, or by manual entry into the boxes supplied.
• Print : Select On (if desired), then specify Print and Finishing settings. This prints a copy of yourdocument after it has been scanned.
9. When done with setting selections, touch Save.
10. Touch Close or Exit to exit the Setup Menu screen and return to the Tools screen.
11. Wait several seconds for the Auto Clear service to log you out.
Creating a Folder and Linking to a Job Flow Sheet (for Automatic Processing)
Before you can a job flow sheet to a folder, you need to create at least one folder for your use. In theprocess of creating the folder, you can to your newly created Job Flow Sheet.
To create a folder and it to a Job Flow Sheet (for automatic processing), perform the following steps.
1. Press the Log In/Out button on the control panel.
2. Enter the System Administrator’s Login ID and Passcode if prompted (default admin, 1111), andpress Enter.
3. Press the Machine Status button.
4. Touch the Tools tab.
5. Select the Setup & Calibration button.
6. Press the Create Folder button.7. When the numbered list of Folders is shown on screen, use the supplied arrow keys to scroll through
the list to locate an unassigned Folder number.
8. Select an unassigned Folder number from the displayed list.
9. Press the Create & Delete button in the lower right corner of the Folder selection screen.
10. When the New Folder – Passcode screen displays, use the On and Off buttons on the left-hand sideof the screen to determine whether or not a password will be required to access the Folder. If On isselected, use the printer's numeric keypad to enter a numbered passcode of up to 20 digits.
11. Press the Save button to save your settings. (To exit the screen, without saving settings, press theCancel button.)
12. When the Folder settings screen displays (after assigning a password), note that you have five
setting selections displayed on five numbered horizontal lines. The available selections include:Folder Name, Check Passcode, Delete Documents After Retrieval, Delete Expired Documents, andJob Flow Sheet to Folder.
13. To assign a name to the Folder, press the Folder Name selection line.
14. Press the Change Settings button.
15. Use the touch screen keyboard to enter a name for your Folder.
8/6/2019 Enu WC74XX Sys Admin Guide
http://slidepdf.com/reader/full/enu-wc74xx-sys-admin-guide 135/208
Setup and Use of Job Flow Sheets with Folders
WorkCentre 7425/7428/7435
System Administrator Guide
135
16. When finished entering in a name, press the Save button in the upper right corner of the screen.(To exit the screen, without saving changes, press the Cancel button.)
17. On the Folder settings screen, press any other selection lines of interest and use the ChangeSettings button, as previously described, to access and make setting changes. Use theSave buttonto save your changes.
18. To link this Folder with your Job Flow Sheet, touch Job Flow Sheet to Folder and touch Change Settings.
19. Touch Create/Change to set the Folder to a previously-created Job Flow Sheet.
Note: If no Job Flow sheets are displayed, press Create to create one and follow the instructionssupplied in the Creating Job Flow Sheets topic in this section.
20. Select your Job Flow Sheet from the list (clicking Refresh, if necessary) and touch Save.
21. Touch the Auto Start check box to place a checkmark in the box for automatic processing of documents as they are received in the Folder.
22. To exit the Job Flow Sheet to Folder screen, press the Close button in the upper right corner of thescreen.
23. To exit the Folder settings screen, press the Close button in the upper right corner of the screen.24. To exit the screen that lists all assigned and unassigned Folders, returning to the Tools screen, press
the Close button.
25. Wait several seconds for the Auto Clear service to log you out.
Manually Linking to a Job Flow Sheet to Documents in a Folder
1. Touch Send from Folder on the Services screen.
2. Select a Folder, enter the password, then touch Confirm.
3. On the Document List screen, select a document.
4. Touch Job Flow Settings.
5. Touch Select Job Flow Sheet.
6. Select a job flow sheet and press the on-screen Start button.
Testing Job Flow Sheet Operation (for Automatic Processing)
1. Press the Services button on the control panel.
2. Touch Scan to Folder.
3. Select your Folder, enter the password, then touch Confirm.
4. Place a document in the document feeder.
5. Select your scanning options.
6. Press the control panel’s large, green Start button.7. Check the destination that was specified on your Job Flow Sheet to verify that the document was
received.

8/6/2019 Enu WC74XX Sys Admin Guide
http://slidepdf.com/reader/full/enu-wc74xx-sys-admin-guide 136/208
Scanning and Faxing
WorkCentre 7425/7428/7435
System Administrator Guide
136
Scan to PC Desktop
Overview
Scan to PC Desktop is now a core element of the Xerox FreeFlow Digital Workflow collection for theoffice.
With either solution, the purpose of PaperPort is to create a program on the networked PC, providing awindows-style desktop for the management of scanned image and text items.
The purpose of OmniPage is to quickly turn PDF files into easily editable word processing andspreadsheet documents.
The purpose of Image Retriever 5.2 is to provide a method to monitor a specified server folder forincoming scanned items. Monitoring of E-mail can also be added in the case of the Professionalprogram edition.
The Scan to PC Desktop solution is typically sold in 25 user licenses packages. For enterprises requiringmore than 100 licenses, special pricing is available. Consult your Xerox Representative for details.
Perform the procedures for setting up this device to Scan to SMB. For more information, see Scan to PC(FTP/SMB) on page 121.
Software Installation Procedure
To install Scan to PC Desktop components on networked computers, refer to the Scan to PC DesktopNetwork Installation Guide, Version 7.0. This document should have come with your software licensepackage, and is also available from www.xerox.com/support. If you go to the Web site, type Scan to PC
Desktop in the upper right corner Search box and press Enter. Select Support under FreeFlow Scan toPC Desktop. Select your language and click Go.
The software manufacturer requires PaperPort to be installed before Image Retriever in all cases. Also,during the installation of PaperPort Professional 10, PDF Create! 2.0 must be installed.
Configure Image Retriever 5.2 on Networked Computers
Referring to the Scan to PC Desktop: Image Retriever 5.2 documentation, configure Image Retriever5.2 on the networked computers.
Testing Scan to PC Operation
1. Perform a scan at the printer.
2. Go to a networked computer running Image Retriever 5.2.
3. Right click the Image Retriever icon in Windows.
4. Click the Settings command to display the Image Retriever Settings dialog.
5. Verify that the SMB Repository (server) UNC is pointing correctly to the server and shared folder.

8/6/2019 Enu WC74XX Sys Admin Guide
http://slidepdf.com/reader/full/enu-wc74xx-sys-admin-guide 137/208
Scan to PC Desktop
WorkCentre 7425/7428/7435
System Administrator Guide
137
6. Click Get Now.
7. Start the PaperPort program and verify that the scanned item appears on the PaperPort desktop.
8/6/2019 Enu WC74XX Sys Admin Guide
http://slidepdf.com/reader/full/enu-wc74xx-sys-admin-guide 138/208
Scanning and Faxing
WorkCentre 7425/7428/7435
System Administrator Guide
138
Installing and Using the Network Scanner Utility
To retrieve scanned documents directly from a folder into an image-editing application such asAdobe® Photoshop®, you need to install the Network Scanner Utility (scan driver) on your computer.
You can additionally install and use Network Scanner Utility 3 to view and import scanned files,without using a client-side image-editing program. For Network Scanner Utility 3 installationinstructions, refer to instructions contained on the Driver/Network Utility CD ROM that came with theprinter.
Before Installing the Network Scanner Utility
Before installing the Network Scanner Utility, make sure that your computer meets the followingrequirements:
• You must be running Windows XP or Windows 2000. Windows 2000 Server/Advanced ServerTerminal Service is not compatible with this feature.
• Your computer must be operating with a i486DX4/100 MHz processor or faster, have 32 MB RAMor greater, and have 40 MB or more of free hard drive space (not including space for storingscanned data).
• Your computer must be connected to a network using the TCP/IP protocol.
• Your image-editing application must be compatible with the TWAIN interface to import scanneddata.
Installing the Network Scanner Utility
1. Insert the Driver/Network Utility (Windows) CD ROM into your computer’s CD drive.
2. Open Windows Explorer, click the drive letter for your CD ROM drive, and open Drivers\Scan\Disk1.3. Double click Setup.exe and follow the instructions displayed on screen.
Uninstalling the Network Scanner Utility
1. From the Windows 2000 desktop, from the Start menu, select Settings, Control Panel, then doubleclick Add/Remove Programs. On the Windows XP desktop, click Start, Control Panel, then doubleclick Add/Remove Programs.
2. Select Fuji Xerox Network Scanner Utility, then click Add Remove.
3. Click Yes.
Importing Scanned Data from the Folder to an Image-Editing Application
1. Start a TWAIN-compatible application program, such as Photoshop.
2. From the File menu, select the command for selecting the scan source (Import/Twain Source, inPhotoshop).
3. Select FX Network Scan from the displayed list and click Select.
8/6/2019 Enu WC74XX Sys Admin Guide
http://slidepdf.com/reader/full/enu-wc74xx-sys-admin-guide 139/208
Installing and Using the Network Scanner Utility
WorkCentre 7425/7428/7435
System Administrator Guide
139
4. From the File menu, select the command to import the image from the scanner. In Photoshop, forexample, this would be Import/Twain.
5. If the scanner doesn't automatically display on screen allowing its selection with theSelectScanner button, perform the next six steps. Otherwise go to step 12 below.
6. Click Refresh.
7. Click Options.8. Click Change Display in the scanner selection box.
9. To display scanners on other sub-networks, register them under Scanner Registration.
10. Click OK.
11. Select the scanner for connection from the displayed list, then click Select Scanner. You can alsodouble click the displayed scanner's name.
12. Enter the folder number and password when prompted.
13. Click Open Folder.
14. From the displayed document list, select the document you wish to import and clickImport.
Importing Scanned Data from the Folder using Network Scanner Utility 31. On your Windows desktop, select Start\Programs\FujiXerox\Network Scanner Utility\Network
Scanner Utility 3.
2. Select the scanner for connection from the displayed list, then clickSelect Scanner.
3. If no items are shown in the list, click Refresh, then Options, then Change Display and register thescanner’s IP address and name. Click OK when done.
4. Enter the folder number and password when prompted.
5. Click Open Folder.
6. From the displayed document list, select the document you wish to import and clickImport.
8/6/2019 Enu WC74XX Sys Admin Guide
http://slidepdf.com/reader/full/enu-wc74xx-sys-admin-guide 140/208
Scanning and Faxing
WorkCentre 7425/7428/7435
System Administrator Guide
140
Xerox Extensible Interface Program
Xerox Extensible Interface Platform (XEIP) enables independent software vendors and partners todevelop customized programs to be accessed directly from the Xerox device. Users can enter their
authentication login at the printer and access a set of features and options designed specifically fortheir business needs.
For example, a hospital could customize the printer to help better manage patient forms. By touchingan icon on the display, a healthcare worker could access the hospital's Web-based documentmanagement system and browse a list of patient forms.
Users can quickly scan and capture paper documents, preview thumbnails, and add them to frequentlyused document storage locations. For example:
• A tutor can scan notes directly to a specific course repository for students to access.
• A student can scan assessment papers to their course folder for their tutor to mark.
Xerox Extensible Interface Platform utilizes Web-based Xerox Partner solutions including Omtool™,Xerox Secure Access Unified ID System™ and FreeFlow™ SMARTsend™ to enable users to accessdocument repositories at the printer display screen.
Additional resources may be required on the printer depending on the solution. For further information,contact your Xerox Sales Representative.
XEIP Setup
1. Open your Web browser and enter the IP address of the printer in the address field. Press Enter toopen CentreWare Internet Services.
2. Click the Properties tab.
3. If prompted, enter the system administrator user name and password (default: admin, 1111).
4. To enable the printer for XEIP applications:
a. Click the Properties tab.
b. Click the Services folder, the Custom Services folder, then Custom Services.
c. In the Custom Services area, click Enabled.
d. Click Apply.
5. To enable a digital certificate (if needed):
a. Click the Properties tab.
b. Click the Security folder, then Machine Digital Certificate Management.
c. Click Create New Certificate.d. Select Self-Signed Certificate or Certificate Signing Request (CSR). Click Continue.
e. In the Create Self-Signed Certificate area, select Public Key Size. Click Apply.
8/6/2019 Enu WC74XX Sys Admin Guide
http://slidepdf.com/reader/full/enu-wc74xx-sys-admin-guide 141/208
Xerox Extensible Interface Program
WorkCentre 7425/7428/7435
System Administrator Guide
141
6. To enable SSL:
a. Click the Properties tab.
b. Click the Security folder, then SSL/TLS Settings.
c. If prompted, enter the system administrator user name and password (default:admin, 1111).
d. In the SSL/TLS Settings area, on the HTTP – SSL / TLS Communication line, click Enabled.
e. Click Apply.
Note: If changes were made to the SSL settings you may need to reboot the system. When SSL isenabled, you must enter https:// (before your printer’s IP address) in the address field of your browserto access CentreWare Internet Services. Example: https://13.140.244.11.
7. To enable the ports:
a. Click the Properties tab.
b. Click the Connectivity folder, then Port Settings.
c. On the SNMP line, click Enabled.
d. On the SMB line, click Enabled.
e. On the FTP Client line, click Enabled.f. On the SOAP line, click Enabled.
g. Click Apply.
8. To ensure that IPv4 is enabled by default:
a. Click the Properties tab.
b. Click the Connectivity folder, then the Protocols folder.
c. In the Protocols folder, click TCP/IP.
d. In the IP Mode area, on the IP Mode line, click or verify IPv4.
e. If you clicked IPv4, click Apply.
EIP applications can now register to the printer. You may need to map buttons to Custom Services
at the printer in order to see the new applications.
8/6/2019 Enu WC74XX Sys Admin Guide
http://slidepdf.com/reader/full/enu-wc74xx-sys-admin-guide 142/208
Scanning and Faxing
WorkCentre 7425/7428/7435
System Administrator Guide
142
Fax
Overview
The optional Fax feature works much the same as a standard facsimile machine. Extra features,covered in this section, such as the Address Book, Group Dial, Comments, and the use of Folders, aremeant to provide additional capabilities in support of the Fax feature.
Note: It is assumed that you purchased the appropriate 1 or 3 line Fax hardware kit for use with yourprinter. If you did not, contact your Xerox Representative to purchase this option.
Note: The FAX or Internet Fax (iFAX) features and the Server Fax feature are mutually exclusive. If Server Fax is enabled, even if the printer is equipped with an internal fax board, scanning to the internalFAX will be disabled. While the Server Fax feature is enabled, the iFAX service will also be disabled. Alsonote that Folder to FAX (a Job Flow Sheet destination) and Direct Fax (LAN Fax) are not supportedwhen Server Fax is enabled. The default when both options have been installed is to enable the internalfax board and Internet Fax. Server Fax will be disabled. You can use CentreWare Internet Services, to
select which Fax Service to enable. For more information see Server Fax on page 154.
Checking and Setting Critical Fax Parameters
Refer to the Fax Settings Topic (including Fax Defaults and Fax Control) in this section to determine if Fax Defaults and Fax Control parameters are correctly set for your environment.
Before You Start
You cannot use the printer with a call waiting service.
A facsimile located close to a main unit of a cordless phone can cause distorted images or interruptedtransmission. The printer should be installed at least five meters away from the main unit of thecordless phone.
If the digital line leased for your company network is multiplexed, facsimile communication may berestricted as follows:
• The features using our unique transmission method, such as Recipient Print Sets, Relay Broadcastand Remote Folder, are not available.
• The transmission speed is limited.
• Super G3 cannot be used.
Communications modes• G3 (Auto) – Normal Fax communications: The printer automatically switches modes in the
following order of priority: Unique SG3 - Unique ECM - Unique G3 - ITU-T SG3 - ITU-T ECM - ITU-TG3 depending on the capabilities of the remote terminal.
• F4800: Select this mode when transmitting over noisy or bad telephone lines, as can be the casewith overseas calls.
8/6/2019 Enu WC74XX Sys Admin Guide
http://slidepdf.com/reader/full/enu-wc74xx-sys-admin-guide 143/208
Fax
WorkCentre 7425/7428/7435
System Administrator Guide
143
Connecting the Phone Line
• LINE 1 Connect the fax to a public switched telephone network (PSTN). An external telephonecannot be connected.
• TEL An external telephone is connected here.
• LINE 2 (Line 2) Connect to a public line.
• LINE 4 (Line 4) Connect to a public line.
Local Terminal Information Settings
1. Press the Log In/Out button on the control panel.
2. Enter the System Administrator’s Login ID and Passcode if prompted (default admin, 1111), andpress Enter.
3. Press the Machine Status button.
4. Touch the Tools tab.
5. Touch Fax Mode Settings.
6. Touch Local Terminal Information.7. Select the items to enter information and touchChange Settings.
a. Enter a Local Name, up to 20 characters, then touchSave.
b. Enter a Company Logo, up to 30 characters, then touch Save.
c. Enter a Machine Password, up to 20 digits, then touchSave.
Note: The password prevents your machine from receiving faxes, or being polled by other machinesthat are not F-Code compatible.
d. Enter G3 Fax ID, up to 20 digits, then touch Save.
e. Enter G3 Dial Type, Tone, 10pps, or 20pps, then touch Save.
f. Enter G3 Line Type, PSTN or PBX, then touch Save.
8. When complete, touch Close repeatedly until the Tools screen is displayed.
9. Wait several seconds for the Auto Clear service to log you out.
Address Book Setup
Use of this feature enables Fax users to select recipients by 3 digit numbers, which can be used tosupport speed dialing.
1. Press the Log In/Out button on the control panel.
2. Enter the System Administrator’s Login ID and Passcode if prompted (default admin, 1111), andpress Enter.
3. Press the Machine Status button.
4. Touch the Tools tab.
5. Select Setup & Calibration.
6. Touch Add Address Book Entry.
7. Select an available Address Number.
8. Touch Create/Delete.

8/6/2019 Enu WC74XX Sys Admin Guide
http://slidepdf.com/reader/full/enu-wc74xx-sys-admin-guide 144/208
Scanning and Faxing
WorkCentre 7425/7428/7435
System Administrator Guide
144
9. Touch Address Type, then touch Change Settings.
10. Touch Fax, then touch Save.
11. Select the items you would like to enter information for and touch Change Settings.
• Fax Number: Up to 128 characters, then touch Save.
• Name: Up to 18 characters, then touch Save.
• Index: Only 1 digit (used for a quick find), then touch Save.
• Relay Station setup: On or Off , then touch Save.
• Starting Rate: G3 Auto or Forced4800bps, then touch Save.
• Resolution: Choose one, then touch Save.
• Cover Note: On or Off , then touch Save. If On, select Comment (Recipient Comment) thentouch Save.
• Maximum Image Size: choose one then touch Save.
• Delayed Start: On or Off , then touch Save. If On, choose Start Time, then touch Save.
• Remote Folder: On or Off , then touch Save. If On, enter Folder number, then touch Next, andpassword if required.
• F Code: On or Off , then touch Save. If On, enter F Code and password, then touch Next.
Note: F Code is the transmission procedure set by the Communications and Information NetworkAssociation of Japan. DTMF Method: G3 Fax machines that support Manual Send can also make RelayBroadcasts for the printer. Refer to the Fax section of the printer’s User Guide for full information.
• Relay Broadcast: On or Off (This feature supports transmitting documents through a RelayStation. Refer to the Fax section of the printer’s User Guide for full information.) If On, enter 2digit Relay Station ID, touch Enter/Change Recipients. Enter Address Number or the GroupNumber and touch Add. Print at Relay Station, On or Off, then Touch Save.
12. When complete, touch Save to exit the settings screen.
13. Touch Close to exit the Address Book screen, returning to the Tools screen.
14. To exit the Tools screen, wait several seconds for the Auto Clear service to log you out.
Group Send Setup
This setting supports Group Send (broadcast) Fax transmissions to up to 20 address numbers in a pre-designated group. Refer to the Group Send topic in the printer’s User Guide for full information. To setup a Group, perform the following steps.
1. Press the Log In/Out button on the control panel.
2. Enter the System Administrator’s Login ID and Passcode if prompted (default admin, 1111), andpress Enter.
3. Press the Machine Status button.
4. Touch the Tools tab.
5. Select Setup & Calibration.
6. Touch Group Send.
7. Select a Group number.
8. Touch Create/Delete.

8/6/2019 Enu WC74XX Sys Admin Guide
http://slidepdf.com/reader/full/enu-wc74xx-sys-admin-guide 145/208
Fax
WorkCentre 7425/7428/7435
System Administrator Guide
145
9. Use the numeric keypad to enter the three-digit Address Numbers of recipients contained in theprinter’s Address Book.
Note: Refer to the Address Book Setup topic in this section to learn how to set up address numbers sothat they are available for selection here.
10. Touch Add to this Group to add recipients, one number at a time, to the group.
11. When complete, touch Save.
12. Touch Close to return to the Tools screen.
13. To exit the Tools screen, if desired, wait several seconds for the Auto Clear service to log you out.
Comments
This feature can be used to add comments to a Cover Note (Cover Page).
1. Press the Log In/Out button on the control panel.
2. Enter the System Administrator’s Login ID and Passcode if prompted (default admin, 1111), andpress Enter.
3. Press the Machine Status button.4. Touch the Tools tab.
5. Select Setup & Calibration.
6. Touch Comments.
7. Select a Comment number.
8. Touch Create/Delete.
9. Enter a Comment, up to 18 characters, then touch Save.
10. When complete, touch Close until the Tools screen is displayed.
11. To exit the Tools screen, if desired, wait several seconds for the Auto Clear service to log you out.
Create a Folder
The printer has 200 folders available. A folder must be created before you can use Remote Folder orroute received documents into folders (using the File Destination / Output Destination settings). FolderFax Receive or Private Polling documents are stored in the Folder. This is also convenient fordifferentiating between received documents and documents to be transmitted (such as by PrivatePolling).
1. Press the Log In/Out button on the control panel.
2. Enter the System Administrator’s Login ID and Passcode if prompted (default admin, 1111), andpress Enter.
3. Press the Machine Status button.
4. Touch the Tools tab.
5. Select Setup & Calibration.
6. Touch Folder.
7. Select an unassigned Folder number from the displayed list.
8/6/2019 Enu WC74XX Sys Admin Guide
http://slidepdf.com/reader/full/enu-wc74xx-sys-admin-guide 146/208
Scanning and Faxing
WorkCentre 7425/7428/7435
System Administrator Guide
146
8. Touch Create/Delete.
a. Check Passcode: Select On or Off, then touch Save. Note that it is recommended that youselect On, then provide a password, to secure access to your Folder.
b. Folder Name: Enter a name, then touch Save.
c. Check Passcode: The selections below are viewable when On is selected.
• Save (Write): A password is required in selecting a folder.• Print/Delete (Read): A password is required to print and delete folder documents.
• Always (All Operations): A password is required for both operations described above.
d. Delete Documents After Retrieval
• No: Saves documents in Folder.
• Yes: Deletes documents from Folder.
e. Delete Documents with Expiration Date
• No: Continues to save documents in Folder.
• Yes: Documents will be deleted from Folder after expiration date.
f. Link Job Flow Sheet to Folder: Select this option, then touch Change Settings to link a Job
Flow Sheet to this Folder. The Job Flow Sheet routes incoming jobs to other destinationsspecified on the Job Flow Sheet. To create a new Job Flow Sheet, to link to an existing Folder,touch Create/Change.
Note: For full information on the use of Job Flow Sheets, see Setup and Use of Job Flow Sheets withFolders on page 131.
9. When complete, touch Close until the Tools screen is displayed.
10. To exit the Tools screen, wait several seconds for the Auto Clear service to log you out.
File Destination / Output Destination
Received Fax documents will be routed to the output tray or Folder specified by these settings.1. Press the Log In/Out button on the control panel.
2. Enter the System Administrator’s Login ID and Passcode if prompted (default admin, 1111), andpress Enter.
3. Press the Machine Status button.
4. Touch the Tools tab.
5. Touch Fax Mode Settings.
6. Select File Destination/Output Destination.
7. Select the Box Selector – Line Setup button.
8. Touch Change Settings.
9. Make the appropriate selections and touch Save when done.
Note: If Box Selector is selected as an Output Destination, when On is selected, you will have to enter afolder number, then touch Save.
10. When complete, touch Close until the Tools screen is displayed.
11. Wait several seconds for the Auto Clear service to log you out.
8/6/2019 Enu WC74XX Sys Admin Guide
http://slidepdf.com/reader/full/enu-wc74xx-sys-admin-guide 147/208
Fax
WorkCentre 7425/7428/7435
System Administrator Guide
147
Fax Forwarding
For each Fax line, you can configure Incoming Faxes to be automatically routed to an internal Folder.Faxes that have been routed to one of these folders can be additionally sent to one or more of thefollowing destinations upon being received:
• Print: Print a hardcopy output of the received Fax.
• Send as Fax: Forward the Fax to another Fax Number
• Send as Internet Fax: Forward the Fax to an Internet Fax Address
• Send as Email: Forward the Fax to an email recipient as an attachment
• FTP transfer: File the Fax to an FTP repository
• SMB transfer: File the Fax to an SMP repository
To configure fax forwarding:
1. Open your Web browser and enter the IP address of the printer in the address field. Press Enter.
2. Click the Properties tab.
3. Click the Services folder, then the Fax folder.
4. Select Fax Receive Options.
5. In the Folder Selector Setup section, select the check box next to the line you wish to configure andpress Change Settings.
6. Select the enable check box for Save Incoming Fax in Designated Folder, specify the FolderNumber and press Apply. For more information see Create a Folder on page 145.
7. Select Fax Receive Options again.
8. In the Folder Selector Setup section, select the check box next to the line you wish to configure andclick Change Settings.
9. Select File Transfer Settings.
10. Check the boxes next to all destination options you would like faxes for this line to be forwarded to
and press Next.11. Enter appropriate settings for all selected destinations and pressApply.
Fax Settings (including Fax Defaults and Fax Control)
Common Settings: Audio Tones and Reports
1. Press the Log In/Out button on the control panel.
2. Enter the System Administrator’s Login ID and Passcode if prompted (default admin, 1111), andpress Enter.
3. Press the Machine Status button.
4. Touch the Tools tab.5. Touch Common Service Settings.
6. Touch Audio Tones. Select an item to change (Tone, Volume, etc.), touch Change Settings, set theitem, and touch Save.
7. Touch Close to return to Common Service Settings selections.
8/6/2019 Enu WC74XX Sys Admin Guide
http://slidepdf.com/reader/full/enu-wc74xx-sys-admin-guide 148/208
Scanning and Faxing
WorkCentre 7425/7428/7435
System Administrator Guide
148
8. Touch Reports. Select each item of interest, then touch Change Settings to modify the desiredsetting. Touch Save to save any new settings.
• Job History Report: Automatically print every 50 print operations. Default is 0=0ff .
• Activity Report: Automatically print every 100 transactions. Select either On or Off .
• Transmission Report-Undelivered: Automatically print. Select either On or Off .
• Transmission Report-Job Deleted: Automatically print. Select either On or Off .• Folder Report: Automatically print. Select either On or Off .
• Broadcast/Multi-poll Report: Automatically print. Select either On or Off .
• Relay Broadcast Report: Automatically print. Select Off , Send to Relay Station, Print at LocalStation, Send to Relay, or Print at Local.
Note: A Relay Station is another Fax-capable machine to which faxes can be sent. Use of the secondmachine can help to cut down on broadcast Fax phone charges, such as those associated with longdistance calls.
• Scan File Transfer Report
• 2-sided Report: Default is 1-sided.
• Recipient on Activity Report: How many characters from other party is printed on ActivityReport. Select First 40 characters, or Last 40 characters.
• Job Flow Error Report: Automatically print. Select either On or Off .
9. Touch Close to return to the Tools screen.
Fax Mode Settings (including Fax Defaults and Fax Control)
These settings include: Screen Defaults, Fax Defaults, Fax Control, File Destination / OutputDestination, Reduce/Enlarge Presets, Original Size Defaults, and Local Terminal Information.
For information on File Destination / Output Destination settings and Local Terminal Information
settings see Fax on page 142.
Note: Information on Fax Defaults and Fax Control is critical to the operation of the Fax feature andshould be carefully evaluated to assure that settings are correct for the current working environment.
1. Press the Log In/Out button on the control panel.
2. Enter the System Administrator’s Login ID and Passcode if prompted (default admin, 1111), andpress Enter.
3. Press the Machine Status button.
4. Touch the Tools tab.
5. Touch Fax Mode Settings.
6. Touch Screen Defaults.

8/6/2019 Enu WC74XX Sys Admin Guide
http://slidepdf.com/reader/full/enu-wc74xx-sys-admin-guide 149/208
Fax
WorkCentre 7425/7428/7435
System Administrator Guide
149
7. Select a Line to enter or change, then touch Change Settings. Touch Save to save any newsettings.
• Fax Screen Default: Select General Settings or Address Book This will be the Fax servicescreen that users see when they touch the Fax button.
• Address Book Default: Leave this setting at the default of 1, or enter an address book (Faxfolder) number to display when the Address Book button is touched by users of the Fax servicescreen. Note that the Fax folder needs to be created in advance of this setting.
• Transmission Screen: Select either On or Off .
8. Touch Close until the Fax Mode Settings selections are again displayed.
9. Touch Fax Defaults.
10. Select a Line to enter or change, then touch Change Settings. Touch Save to save any newsettings.
• Resolution
• Original Type
• Lighten/Darken
• Mixed Size Originals• Starting Rate: Select G3 Auto or Forced4800bps.
• Delayed Start – Start Time: This can be a useful feature for saving time-based phone charges.
• Transmission Header Text: Select On or Off . This adds the sender name and phone number tofaxes.
• Confirmation Options: Select On or Off . If set to On a report will print when transmissioncompletes successfully.
• Delivery Receipts/Read Receipts
• iFAX Profile
• iFAX Subject
11. Touch Close until the Fax Mode Settings selections are again displayed.12. Touch Fax Control.
13. Select the Line to enter or change, then touch Change Settings. Touch Save to save any newsettings.
• Re-enter Recipients
• Re-enter Broadcast Recipients
• Re-enter Speed Dial Recipients
• Transmission Header Text – Polling: You can leave this setting at its default value.
• Documents for Polling – Auto Delete: Set as desired to delete documents from folders afterpolling same.
• Rotate 90 degrees• Sender ID
• Save Undelivered Faxes
• Save Deleted Faxes
• Saved Faxes – Auto Delete
• Transmission Interval

8/6/2019 Enu WC74XX Sys Admin Guide
http://slidepdf.com/reader/full/enu-wc74xx-sys-admin-guide 150/208
Scanning and Faxing
WorkCentre 7425/7428/7435
System Administrator Guide
150
• Batch Send
• Manual Send/Receive Default: Select the default setting for manual Fax operations.
• Fax Receiving Mode: Leave this setting at Auto Receive for unattended operation.
• Border Limit
• Auto Reduce on Receipt
• Tray for Printing Incoming Faxes
• 2 Pages up on Receipt
• 2-sided Print
• Edge Erase – Top & Bottom Edges
• Edge Erase – Left & Right Edges
• Reduce 8.5 x 11 Original to A4
• Pseudo-Photo Gradation Mode
• Box Selector – Line Setup: Enable this setting to enable Fax Folders to receive incoming faxes.
• Memory Full Procedure
• Maximum Stored Pages• Mixed Sized Originals Scanning Mode
• Folder Receive Display (Priorities 1 through 3)
• Direct Fax: To use Direct Fax from the PCL or PostScript driver, make sure this setting isEnabled.
14. When complete, touch Close until the Tools screen is displayed.
15. Wait several seconds for the Auto Clear service to log you out.
To Configure Fax to Folder
1. Press the Log In/Out button on the control panel.
2. Enter the System Administrator’s Login ID and Passcode if prompted (default admin, 1111), andpress Enter.
3. Press the Machine Status button.
4. Touch the Tools tab.
5. Touch System Settings.
6. In the Group column, touch Fax Service Settings.
7. Touch System Settings. Under Group, select Fax Service Settings.
8. Under Features, touch Fax Control.
9. Touch Folder Selector Setup.
10. Touch Change Settings.
11. Touch Enable.
12. Touch Save.
13. Touch Close.
14. Under Features, select Fax Received Options.
15. Touch Folder Selector Setup.
8/6/2019 Enu WC74XX Sys Admin Guide
http://slidepdf.com/reader/full/enu-wc74xx-sys-admin-guide 151/208
Fax
WorkCentre 7425/7428/7435
System Administrator Guide
151
16. Touch the line you wish to configure.
17. Touch Change Settings.
18. Touch On.
19. Enter the folder number (use leading zeros).
20. Touch Save.
21. Touch Close.
22. Touch Close.
23. Log out.
LAN Fax (PCL Drivers)
You can facsimile documents directly from your PC in the same way you would print a document. Thisis known as the LAN Fax.
Initial Setup
Refer to the TCP/IP Peer to Peer (LPR or Standard TCP/IP) Printing topic, in the Print Drivers section, andadd the printer to the Windows 2000 or Windows XP desktop using a Standard TCP/IP Port. After thedriver has been installed, perform the following steps:
1. Right click the Printer’s icon and select Properties.
2. Click the Options tab, then click the Get Information from Printer button.
3. The Network Address box should now be displaying the printer’s IP address and a checkmarkshould appear in the Enable Bi-Directional Communication check box. Also, the Fax Module listingin the Items box should now be displayed as Available.
Adding a Recipient to a Fax Phonebook
1. From the File menu of your program, select Print to display the Print dialog.
2. Check that the correct (PCL) printer is selected, and then click Properties to display the Propertiesdialog.
3. On the Paper/Output tab, select Fax from the Job Type drop down menu. The options on the Faxtab will now be available for your selection.
4. Select the necessary settings on the Fax tab.
5. Click the Fax Phonebook button to select your fax recipient or to enter a new recipient.
6. If your recipient is not selectable from an existing Phonebook, selectNew…, select Individual, clickOK, enter the recipient’s Name and Fax number, and click OK.
7. Click Close to close the Fax Phonebook dialog, then click OK.
Sending the Fax
1. When the Print dialog is displayed, click OK.
2. On the Fax Recipient dialog, to send to the previously-entered, new recipient, clickLook UpPhonebook.
8/6/2019 Enu WC74XX Sys Admin Guide
http://slidepdf.com/reader/full/enu-wc74xx-sys-admin-guide 152/208
Scanning and Faxing
WorkCentre 7425/7428/7435
System Administrator Guide
152
3. Double click the name of the new individual previously entered (in step 6 above) and click OK.
Note: Alternatively, you can manually enter a Name (of up to 30 characters) and a Fax Number.
4. Click OK, then OK again to send your Fax.
LAN Fax (PostScript Drivers)You can facsimile documents directly from your PC in the same way you would print a document. Thisis known as the LAN Fax.
Initial Setup
Refer to the TCP/IP Peer to Peer (LPR or Standard TCP/IP) Printing topic, in the Print Drivers section, andadd the printer to the Windows 2000 or Windows XP desktop using a Standard TCP/IP Port. After thedriver has been installed, perform the following steps:
1. Right click the Printer’s icon and select Properties.
2. Click the Configuration tab, then click the Get Information from Printer button.
3. The Network Address box should now be displaying the printer’s IP address and a checkmarkshould appear in the Enable Bi-Directional Communication check box. Also the Fax Module listing,in the Installable Options folder on the printer Settings tab, should now be displayed as Available.If it is shown as Not Available, click the selection and set the Fax Module listing to Available.
Adding a Recipient to a Fax Phonebook
1. From the File menu of your program, select Print to display the Print dialog.
2. Check that the correct (PS) printer is selected, and then clickProperties to display the Propertiesdialog.
3. On the Paper/Output tab, select Fax from the Job Type drop down menu. The options on the Faxtab will now be available for your selection.
4. Select the necessary settings on the Fax tab.
5. Click the Fax Phonebook button to select your fax recipient or to enter a new recipient.
6. If your recipient is not selectable from an existing Phonebook, selectNew…, select Individual, clickOK, enter the recipient’s Name and Fax number, and click OK.
7. Click Close to close the Fax Phonebook dialog, then click OK.
Sending the Fax
1. When the Print dialog is displayed, click OK.
2. On the Fax Recipient dialog, to send to the previously-entered, new recipient, clickLook UpPhonebook.
3. Double click the name of the new individual previously entered (in step 6 above) and click OK.
Note: Alternatively, you can manually enter a Name (of up to 30 characters) and a Fax Number.
4. Click OK, then OK again to send your Fax.
8/6/2019 Enu WC74XX Sys Admin Guide
http://slidepdf.com/reader/full/enu-wc74xx-sys-admin-guide 153/208
Fax
WorkCentre 7425/7428/7435
System Administrator Guide
153
Stopping the Fax (when necessary)
1. Go to the printer and press the Job Status button.
2. Select the fax job you wish to cancel, in the Current and Pending Jobs list.
3. Press Cancel to cancel the job.
8/6/2019 Enu WC74XX Sys Admin Guide
http://slidepdf.com/reader/full/enu-wc74xx-sys-admin-guide 154/208
Scanning and Faxing
WorkCentre 7425/7428/7435
System Administrator Guide
154
Server Fax
Overview
The Server Fax feature enables you to fax documents without having a telephone line directlyconnected to your printer. This is achieved by sending the documents to a separate, networked faxserver with its owns to the telephone system.
It is assumed that you already purchased and enabled the Scanning option. If you did not, contactyour Xerox Representative to purchase same. A hard disk and network card are required devicehardware. Their presence can be confirmed by printing a Configuration Report. For more infomationsee Configuration Report on page 22.
The Server Fax option also needs to be purchased from your Xerox Representative, then enabled on theprinter using a software key. See Enabling Options with Software Keys on page 98.
As stated in this section, you will be setting up a network connection to a Xerox-certified, third party faxserver (server running fax management software) which will receive, store, and redirect incomingdocuments to the server's fax boards, or other destinations determined by fax server software setup.
Note: The FAX or Internet Fax (iFAX) features and the Server Fax feature are mutually exclusive. If Server Fax is enabled, even if the printer is equipped with an internal fax board, scanning to the internalfax will be disabled. While the Server Fax feature is enabled, the iFAX service will also be disabled. Alsonote that Folder to fax (a Job Flow Sheet destination) and Direct Fax (LAN Fax) are not supported whenServer Fax is enabled. The default when both options have been installed is to enable the internal faxboard and Internet Fax. Server Fax will be disabled. You can use CentreWare Internet Services, to selectwhich Fax Service to enable. For more information see Server Fax on page 154.
Installation ChecklistPlease ensure that the following items are available or have been performed.
1. Ensure the printer is fully functioning on the network prior to installation.
2. Enable the purchased Scanning option. For more information see Enabling Options with SoftwareKeys on page 98. Contact your Xerox Sales Representative if you have not purchased the Scanningoption.
3. Enable the purchased Server Fax option. For more information seeEnabling Options with SoftwareKeys on page 98. Contact your Xerox Sales Representative if you have not purchased the Server Faxoption.
4. Verify that Scan to Fax Server is now the currently enabled Fax Service, as follows:
a. At your computer, open your Web browser and enter the IP address of the printer in theAddress or Location field. Press Enter.
b. Click the Properties tab.
c. Click the Services folder.
d. Click the Fax folder.
8/6/2019 Enu WC74XX Sys Admin Guide
http://slidepdf.com/reader/full/enu-wc74xx-sys-admin-guide 155/208
Server Fax
WorkCentre 7425/7428/7435
System Administrator Guide
155
e. Click Fax Repository Setup and verify that Scan to Fax Server is displayed in the selection box.
f. Enter the administrator User Name and Password and click OK. The default is admin and 1111.
5. Ensure that the TCP/IP and HTTP protocols are configured on the printer and are fully functional.This is required to access the printer's CentreWare Internet Services Web pages, which can be usedto configure Server Fax settings from a network-connected computer.
To verify that the TCP/IP and HTTP protocols are correctly configured, print a Configuration Report.For more information Configuration Report on page 22.
To configure TCP/IP, see TCP/IP Protocol Configuration on page 43.
6. To enable HTTP, see Enabling Internet Services (HTTP) on page 23.
7. Ensure that the FTP Client and SMB port are enabled on the printer. To verify this, print aConfiguration Report.
To enable FTP and SMB, see Scan to PC (FTP/SMB) on page 121.
8. Install and configure the Xerox-certified, third party fax server per the fax management softwaremanufacturer's instructions.
Note: If the fax server will be using TCP/IP to communicate, it is recommended that the server be
assigned a static IP address.
Configure a Fax Filing Location (Repository)
Faxing from the printer to a fax server is very similar to the other methods of faxing available to userson the printer. The user simply selects the Fax button from the All Services screen, enters a Recipientphone number when prompted, places a document in the document feeder, and presses Start.
The scanned document is converted into a TIFF file, and a job log is sent along with the image data tothe fax server.
The transferred image resides in a directory on the fax server (commonly known as the fax repository).
The server monitors the repository for documents to be faxed, and faxes any documents it finds per therouting instructions contained in the job log. The System Administrator uses a Web browser on anynetworked computer to access the CentreWare Internet Services Web pages, residing on the printer, toconfigure communications with the fax server, and designate the location of the repository on theserver.
Protocols available for use in communicating with the fax server include:
• FTP (File Transfer Protocol): Requires an FTP service running on the fax server.
• SMB (Server Message Block): Available for filing to an environment that supports the SMBprotocol.
• SMTP: Follow the basic instructions for enabling the E-mail ports. See Scan to E-mail on page 100.
You will need to know the fully qualified domain name of the fax server on your network (e.g.SMTP.yournet.net). Also, follow the fax server software manufacturer's instructions to establish faxserver to email server communications in your network environment.
8/6/2019 Enu WC74XX Sys Admin Guide
http://slidepdf.com/reader/full/enu-wc74xx-sys-admin-guide 156/208
Scanning and Faxing
WorkCentre 7425/7428/7435
System Administrator Guide
156
Configure a Fax Filing Repository using FTP
Installation Checklist
1. Ensure that a File Transfer Protocol (FTP) service is running on the fax server where images scannedby the printer will be stored. Write down the IP address or Host Name.
2. Create a user account (login name) and password for the printer on the server. When a document isscanned, the printer logs in using the account, transfers the file to the server, and logs out. Writedown the user account (login name) and password.
3. Following the fax server software manufacturer's instructions, create a directory (repository) on theserver (likely within the FTP root) to be used as a scan filing location. Write down the directoryname and path to same.
4. If allowed by the fax server software manufacturer, test the FTP connection by logging into thescan directory from a remote PC using the user account and password. Create a new folder withinthe directory and then delete the folder. If you cannot perform this function, check the useraccount access rights and FTP service setup. You can also wait until you have finished setting updevice to server communications, as stated in this section, then send a fax to the server to test thecommunications setup.
Enter the Fax Repository Details in CentreWare Internet Services
1. Open your Web browser and enter the IP address of the printer in the address field. Press Enter toopen CentreWare Internet Services.
2. Click the Properties tab.
3. If prompted, enter the system administrator user name and password (default: admin, 1111).
4. Click the Services folder.
5. Click the Fax folder.
6. Click the Fax Repository Setup.7. Select FTP for Protocol.
8. Enter either an IP Address or Host Name for the fax server in the box or boxes provided.
9. Enter 21 for Port Number (for FTP).
10. For File Path, type in the name of the folder on the server that has been set up to receive devicescans. Do not use forward slashes.
11. Supply the Login Name and Password for the printer to log into the fax server.
12. Retype the password.
13. Click Apply.
14. If prompted, enter the administrator User Name and Password and click OK. The default is admin
and 1111.

8/6/2019 Enu WC74XX Sys Admin Guide
http://slidepdf.com/reader/full/enu-wc74xx-sys-admin-guide 157/208
Server Fax
WorkCentre 7425/7428/7435
System Administrator Guide
157
Configure General Settings
1. Click Defaults.
2. To print a Confirmation Sheet, select Auto Print On, Auto Print Off, or Print when delivery fails, fromthe drop down menu. Note that the Confirmation Sheet only shows whether data was sent to thefax server. It does not show whether the fax was successfully sent by the fax server.
3. Check the User Name and Domain (Realm) boxes if you want these items to appear on the JobLog. The Job Log is filed with the scan job.
4. Click Apply.
5. If prompted, enter the administrator User Name and Password and click OK. The default is admin and 1111.
Configure the Fax Server
Configure the fax server so that it is able to monitor the fax repository for incoming documents. Referto the fax management software manufacturer's documentation to complete this task.
Test Faxing through the Server
1. Go to the printer and press the Services button.
2. Press the Fax button.
3. Enter a valid fax number.
4. Place a document in the document feeder and press the Start button on the control panel.
5. Verify that the fax was received by the specified fax machine.
Configure a Fax Filing Repository using SMB
Installation Checklist
1. Following the fax server software manufacturer's instructions, create a shared folder on the faxserver to be used as a scan filing location (repository) for scanned documents. Write down theShare Name of the folder and the Computer Name or Server Name.
2. Create a user account (login name) and password for the printer on the server. Make sure that theprinter has full access rights to the scan directory. Write down the user account (login name) andpassword.
3. If allowed by the fax server software manufacturer, test the settings by attempting to connect tothe shared folder from another PC by logging in with the user account and password. Create a newfolder within the directory and then delete the folder. If you cannot perform this function check the
user account access rights and Share setup. Note that you can also simply wait until you havefinished setting up device to server communications, as stated in this section, then send a fax tothe server to test the communications setup.
8/6/2019 Enu WC74XX Sys Admin Guide
http://slidepdf.com/reader/full/enu-wc74xx-sys-admin-guide 158/208
Scanning and Faxing
WorkCentre 7425/7428/7435
System Administrator Guide
158
Enter the Fax Repository Details via CentreWare Internet Services
1. At your computer, open your Web browser and enter the IP address of the printer in the Address orLocation field. Press Enter.
2. Click the Properties tab.
3. Click the Services folder.
4. Click the Fax folder.
5. Click Fax Repository Setup and select SMB for Protocol.
6. Enter an IP Address or Host (NetBIOS) Name and Port.
7. Enter 139 for Port Number.
8. Enter Share name and File Path.
9. For Document Path, type in the name of the folder on the server that has been set up to receivedevice scans. Do not use back slashes.
10. Supply the Login Name and Password for the printer to log into the fax server.
11. Enter the password again in the Retype Password box.
12. Click Apply.13. If prompted, enter the administrator User Name and Password and click OK. The default is admin
and 1111.
Configure General Settings
1. Click Defaults.
2. To print a Confirmation Sheet, select Auto Print On, Auto Print Off , or Errors Only, from the dropdown menu. Note that the Confirmation Sheet only shows whether data was sent to the fax server.It does not show whether the fax was successfully sent by the fax server.
3. Check the User Name and Domain Name (Realm) boxes if you want these items to appear on theJob Log. The Job Log is filed with the scan job.
4. Click Apply.
5. If prompted, enter the administrator User Name and Password and click OK. The default is admin and 1111.
Configure the Fax Server
Configure the fax server so that it is able to monitor the fax repository for documents. Refer to the faxmanagement software manufacturer's documentation to complete this task.
Test Faxing through the Server
1. Go to the printer and press the Services button.
2. Press the Fax button.
3. Enter a valid fax number.
4. Place a document in the document feeder and press the Start button located to the right of thecontrol panel's numeric keypad.
5. Verify that the fax is received by the specified fax machine.
8/6/2019 Enu WC74XX Sys Admin Guide
http://slidepdf.com/reader/full/enu-wc74xx-sys-admin-guide 159/208
Server Fax
WorkCentre 7425/7428/7435
System Administrator Guide
159
Configure a Fax Filing Repository using SMTP
Installation Checklist
1. Ensure that the TCP/IP protocol is configured on the printer and is fully functional. To configureTCP/IP, see TCP/IP Protocol Configuration on page 43.
2. Follow the basic instructions for enabling the E-mail ports. See Scan to E-mail on page 100.
3. Also, in the Scan to E-mail section, follow the instructions for Configuring E-mail Environment to setthe Machine E-mail Address. This address will then be displayed in the From field of the Fax.
4. You will need to know the fully qualified domain name of the fax server on your network (e.g.SMTP.yournet.net).
5. Follow the fax server software manufacturer's instructions to create a directory (repository) on theserver to be used as a scan filing location.
6. Follow the fax server software manufacturer's instructions to determine what, if any, additionalprotocols or ports need to be enabled at the printer to support SMTP (email) filing with the server.
7. Follow the fax server software manufacturer's instructions to establish fax server to email server
communications in your network environment.
Enter the Fax Repository Details via CentreWare Internet Services
1. At your computer, open your Web browser and enter the IP address of the printer in the Address orLocation field. Press Enter.
2. Click the Properties tab.
3. Click the Services folder.
4. Click the Fax folder.
5. Click Fax Repository Setup and select SMTP for Protocol.
6. In the Domain Name box, enter the fully qualified domain name of the fax server on your network(e.g. SMTP.yournet.net).
7. For E-mail Address Display Format, choose whether to add FAX= in front of E-mail addressing. If indoubt, select Do not add FAX=.
8. Click Apply.
9. If prompted, enter the administrator User Name and Password and click OK. The default is admin and 1111.
Configure General Settings
1. Click the Defaults.
2. To print a Confirmation Sheet, select Auto Print On, Auto Print Off , or Error Only, from the dropdown menu. Note that the Confirmation Sheet only shows whether data was sent to the fax server.It does not show whether the fax was successfully sent by the fax server.
3. Check the User Name and Domain (Realm) boxes if you want these items to appear on the JobLog. The Job Log is filed with the scan job.
8/6/2019 Enu WC74XX Sys Admin Guide
http://slidepdf.com/reader/full/enu-wc74xx-sys-admin-guide 160/208
Scanning and Faxing
WorkCentre 7425/7428/7435
System Administrator Guide
160
4. Click Apply.
5. If prompted, enter the administrator User Name and Password and clickOK. The default is admin and 1111.
Configure the Fax Server
Configure the fax server so that it is able to monitor the fax repository for documents. Refer to the faxmanagement software manufacturer's documentation to complete this task.
Test Faxing through the Server
1. Go to the printer and press the Services button.
2. Press the Fax button.
3. Enter a valid email address.
4. Place a document in the document feeder and press the Start button on the control panel.
5. Verify that the email was received by the specified recipient.
Features that Support Server Fax
Address Book Setup
Use of this feature enables Fax users to select recipients by 3 digit numbers. Note that a maximum of 50 characters can be designated for each destination and that only fax destinations can be used. Alsonote that all Address Book information other than Fax Number, Destination Name, and IndexCharacter will be ignored. For example, the Extension/Outside line attribute of address book will beignored.
1. Press the Log In/Out button on the control panel.
2. Enter the System Administrator’s Login ID and Passcode if prompted (default admin, 1111), andpress Enter.
3. Press the Machine Status button.
4. Touch the Tools tab.
5. Select Setup & Calibration.
6. Touch Add Address Book Entry.
7. Select an available Address Number.
8. Touch Create/Delete.
9. Touch Address Type, then touch Change Settings.
10. Touch Fax, then touch Save.11. On the the Adddress (Speed Dial) - Fax screen, Enter the Fax number, Name and Index.
12. Touch Save twice.
8/6/2019 Enu WC74XX Sys Admin Guide
http://slidepdf.com/reader/full/enu-wc74xx-sys-admin-guide 161/208
Server Fax
WorkCentre 7425/7428/7435
System Administrator Guide
161
Group Send
This setting supports Group Send (broadcast) Fax transmissions to up to 20 address numbers in a pre-designated group.
Note: When Group Send is designated with Server Fax, the group number retained by the server is usedinstead of the group number retained by the printer. You will have to know what group the three digitnumber represents at the server, before selecting its use at the printer's control panel.
Fax Mode Settings (Screen Defaults and Fax Defaults such as Delayed Start)
These settings include Screen Defaults and Fax Defaults.
Screen defaults sets the screen displayed at the printer's control panel when the Fax button is pressed.
Fax defaults lets you set the parameters for Delayed Start communications. This can be a usefulfeature for saving time-based phone charges. Note that the fax will be immediately sent from theprinter to the fax server repository, however the server will send the fax at the time designated by this
feature.1. Press the Log In/Out button on the control panel.
2. Enter the System Administrator’s Login ID and Passcode if prompted (default admin, 1111), andpress Enter.
3. Press the Machine Status button.
4. Touch the Tools tab.
5. Touch Fax Mode Settings.
6. Touch Screen Defaults.
7. Select a Line to enter or change, then touch Change Settings. Touch Save to save any newsettings.
• Fax Screen Default: Select General Settings or Address Book This will be the Fax service screenthat users see when they touch the Fax button.
• Address Book Default: Leave this setting at the default of 1, or enter an address book (Faxfolder) number to display when the Address Book button is touched by users of the Fax servicescreen. Note that the Fax folder needs to be created in advance of this setting.
8. Touch Close until the Fax Mode Settings selections are again displayed.
9. Touch Fax Defaults.
10. Select Delayed Start – Start Time.
11. Touch Change Settings, make the desired changes, then touch Save.
12. Touch Close until the Tools screen is displayed.
13. Wait several seconds for the Auto Clear service to log you out.
Color Mode, Resolution, File Format, and File Name
Note that when using Server Fax, these features are set to fixed values which cannot be changed. Thesetting for Color Mode is Monochrome. The setting for Resolution is Fine, and the setting for FileFormat is TIFF. In addition, the Server Fax feature also automatically assigns file names.
8/6/2019 Enu WC74XX Sys Admin Guide
http://slidepdf.com/reader/full/enu-wc74xx-sys-admin-guide 162/208
Scanning and Faxing
WorkCentre 7425/7428/7435
System Administrator Guide
162
Internet Fax (iFAX)
Overview
When the iFAX feature is enabled, the printer can transmit scanned data as an e-mail attachmentusing either corporate networks or the Internet, unlike conventional fax machines which utilize publicphone lines. Also, the printer can receive e-mails transmitted from other machines which support theiFAX service. When the printer receives e-mail from an iFAX-compatible machine, the receiveddocument is printed automatically.
Note: It is assumed that you purchased the Internet Fax option to enable iFAX with your printer. If youdid not, contact your Xerox Representative to purchase this option.
Note: The FAX or Internet Fax (iFAX) features and the Server Fax feature are mutually exclusive. If Server Fax is enabled, even if the printer is equipped with an internal fax board, scanning to the internalFAX will be disabled. While the Server Fax feature is enabled, the iFAX service will also be disabled. Alsonote that Folder to FAX (a Job Flow Sheet destination) and Direct Fax (LAN Fax) are not supported
when Server Fax is enabled. The default when both options have been installed is to enable the internalfax board and Internet Fax. Server Fax will be disabled. You can use CentreWare Internet Services toselect which Fax Service to enable. For more information see Server Fax on page 154.
System Requirements
• Internet Fax kit
• The printer is connected to the network and communication through TCP/IP is available.
• The environment is prepared for e-mail exchange.
Installation Procedure
The configuration procedure to use the iFAX feature on the printer is comprised of the following steps.
1. Enable the ports which are used for the iFAX feature, and set an IP address of the printer.
2. Configure the items for the iFAX feature on the printer.
Note: The configuration can also be performed using CentreWare Internet Services. For moreinformation, see CentreWare Internet Services on page 23.
8/6/2019 Enu WC74XX Sys Admin Guide
http://slidepdf.com/reader/full/enu-wc74xx-sys-admin-guide 163/208
Internet Fax (iFAX)
WorkCentre 7425/7428/7435
System Administrator Guide
163
Enabling the E-mail Ports and Setting TCP/IP
First enable the ports for the e-mail feature, then set the IP address. The procedure for setting theprinter is as follows.
Note: First enable the E-mail port, then set the IP address.
Note: The configuration can also be performed using CentreWare Internet Services. For moreinformation, see CentreWare Internet Services on page 23.
1. Press the Log In/Out button on the control panel.
2. Enter the System Administrator’s Login ID and Passcode if prompted (default admin, 1111), andpress Enter.
3. Press the Machine Status button.
4. Touch the Tools tab.
5. Select System Settings.
6. Select Connectivity & Network Setup.
7. Select Port Settings.
8. On the Port Settings screen, select Receive E-mail and then select Change Settings.
9. On the Receive E-Mail screen, select Port Status and select Change Settings.
10. On the Receive E-Mail Port Status screen, select Enabled, then select Save.
11. Select Close until the Port Settings screen is displayed.
12. On the Port Settings screen, select Send E-Mail, and then select Change Settings.
13. On the Send E-Mail screen, select Port Status and select Change Settings.
14. On the Send E-Mail Port Status screen, select Enabled then select Save.
15. Select Close until the Tools screen is displayed.
16. Set the IP address.
If an IP address is already set, this step is not necessary. Also, in an environment with DHCP orBOOTP, configure the way to obtain an IP address. If the address cannot be obtainedautomatically or static configuration is preferred, configure an IP address, a subnet mask, and agateway address as stated below.
a. Select Protocol Settings.
b. Select IPv4 (or other mode) Address Resolution and then select Change Settings.
c. Select one from DHCP, BOOTP, RARP, DHCP/Autonet or Static and then select Save. If youselect anything other than Static, proceed to Step 4.
Note: When using a DHCP server, also configure the DNS, or WINS (Windows Internet Name Service)server (WINS for SMB support) in CentreWare Internet Services. For more information, see CentreWareInternet Services on page 23.
d. On the Protocol Settings screen, select TCP/IP - IP Address and select Change Settings.
e. Enter the IP address using the numeric keypad.
Note: Enter address in the format xxx.xxx.xxx.xxx. The xxx should be a numeric value in the range from0 to 255. However, 224 – 255.xxx.xxx.xxx and 127.xxx.xxx.xxx cannot be used.
f. Select Save.

8/6/2019 Enu WC74XX Sys Admin Guide
http://slidepdf.com/reader/full/enu-wc74xx-sys-admin-guide 164/208
Scanning and Faxing
WorkCentre 7425/7428/7435
System Administrator Guide
164
g. Configure TCP/IP - Subnet Mask and TCP/IP - Gateway Address.
Note: Enter the Gateway address in the format xxx.xxx.xxx.xxx. The xxx should be a numeric value inthe range from 0 to 255. However, 224 – 255.xxx.xxx.xxx and 127.xxx.xxx.xxx cannot be used.
Note: Specify the subnet mask by a combination of the numbers 0, 128, 192, 224, 240, 248, 252, 254,and 255. However, you cannot use 0 between non-zero values.
Note: If you do not set the gateway address, enter 0.0.0.0.
17. Select Close until the Tools screen is displayed.
18. Wait several seconds for the Auto Clear service to log you out.
19. If you changed any settings, the printer will automatically reboot to register and enable your newsettings. After the printer is restarted, print out a Configuration Report to confirm that the ports areenabled and TCP/IP is correctly configured. For information on how to print a Configuration Report,see Configuration Report on page 22.
Configuring the E-mail Environment
Note: The configuration can also be performed using CentreWare Internet Services. For moreinformation, see CentreWare Internet Services on page 23.
1. Press the Log In/Out button on the control panel.
2. Enter the System Administrator’s Login ID and Passcode if prompted (default admin, 1111), andpress Enter.
3. Press the Machine Status button.
4. Touch the Tools tab.
5. Select Connectivity & Network Setup.
6. Select Machine E-mail Address/Host Name.
7. Select E-mail Address and then select Change Settings.
8. Enter an E-mail address using the displayed keyboard.9. Select Save.
10. Set a host name and a domain name as above.
11. Select Close.
If SMTP has been selected for the Mail Receiving Protocol
Aliases cannot be configured. A user can decide an account name (the left side of the @ mark). Anaddress (the right side of the@ mark) is a combination of a host name and a domain name.
Example: [email protected]
• Account name: mymail
• Host name: myhost
• Domain name: example.com
If POP3 has been selected for the Mail Receiving Protocol
Specify a POP user name to an account name (the left side of the @ mark), and a POP3 receivingmail server to an address (the right side of the @ mark). A user can decide an alias such [email protected].
Example: [email protected]
8/6/2019 Enu WC74XX Sys Admin Guide
http://slidepdf.com/reader/full/enu-wc74xx-sys-admin-guide 165/208
Internet Fax (iFAX)
WorkCentre 7425/7428/7435
System Administrator Guide
165
• Account name: mymail
12. Set the protocol for receiving E-mail.
a. From the Connectivity & Network Setup list, select Other Settings.
b. Select E-mail Receive Protocol and then select Change Settings.
c. Select either SMTP or POP3 as appropriate for your environment.
d. Select Save.
e. Select Close.
If POP3 has been selected for the Mail Receiving Protocol
f. From the Connectivity & Network Setup list, select Outgoing/Incoming (i.e. E-mailSend/Receive Settings).
g. Select POP3 Server Settings and then set the following items for the POP3 server.
POP3 Server Name/Address
h. Enter the POP3 Server Name/IP Address and press Save.
Note: Enter the address in the format xxx.xxx.xxx.xxx. The xxx should be a numeric value in the rangefrom 0 to 255. However, 224 – 255.xxx.xxx.xxx and 127.xxx.xxx.xxx cannot be used.
POP3 Server Port Number
Enter a value in the range from 1 to 65535. The default is 110. Do not use the numbers of anyother ports.
Polling Interval
Set the interval for checking the e-mail on the POP3 server.
Login Name
Enter the name to log in to the POP3 server and pressSave.
Password
Enter the same password twice in the New Password and Re-enter Password. If you do not set the
password, leave it blank and select Save.POP3 Password Encryption
Select On (APOP) to encrypt the password, if desired.
a. Select Save.
b. Select Close.
13. Set the protocol for sending E-mail.
a. From the Connectivity & Network Setup list, select Outgoing/Incoming, then select SMTP Server Settings, and then set the following items for the SMTP server.
SMTP Server Name/Address
Enter the SMTP Server Name/IP Address and press Save.
Note: Enter the address in the format xxx.xxx.xxx.xxx. The xxx should be a numeric value in the rangefrom 0 to 255. However, 224 – 255.xxx.xxx.xxx and 127.xxx.xxx.xxx cannot be used.
SMTP Server Port Number
Enter a value in the range from 1 to 65535. The default is 25.
Note: This configuration is not necessary if SMTP has been selected for the Mail Receiving Protocol andhas already been configured.
8/6/2019 Enu WC74XX Sys Admin Guide
http://slidepdf.com/reader/full/enu-wc74xx-sys-admin-guide 166/208
Scanning and Faxing
WorkCentre 7425/7428/7435
System Administrator Guide
166
E-mail Send Authentication
Select one from Off , POP before SMTP, or SMTP AUTH. If you are having trouble sending E-mail,to see if Authentication is the problem, set this item to Off and set the SMTP Server IP Address(above) to a server that does not require authentication.
Note: If POP before SMTP is selected, the POP3 settings must be set.
SMTP AUTH Login Name
Set this item if SMTP AUTH is selected for E-mail Send Authentication.
SMTP AUTH Password
Set this item if SMTP AUTH is selected for E-mail Send Authentication. Enter the same passwordtwice in the New Password and Re-enter Password. If you do not set the password, leave it blankand select Save.
b. Select Close until the Connectivity & Network Setup list is again displayed.
Login Credentials for Sending Email
14. Select from System or Remotely Authenticated user. If Remotely Authenticated User is selected,the authenticated user details will be used for authentication of outgoing emails. (Remote
Authentication must be configured). If system is selected, the Login Name and Password specifiedfor System will always be used for authentication of outgoing emails.
15. Setting S/MIME Security (optional)
a. From the Connectivity & Network Setup list, select Security Settings. If the selection is notvisible, use the scrolling arrow to display it.
b. Select S/MIME Settings and set the following items:
• Device Certificate - S/MIME: Link a certificate to the printer. You must have an S/MIMEcertificate on the printer to perform encryption. For information on S/MIME certificates, seeConfiguring S/MIME certificates with CentreWare Internet Services on page 78.
• S/MIME Communication: Set whether to enable or disable S/MIME Communication when acertificate ID is set.
• Receive Untrusted E-mail: Set whether to receive untrusted E-mail or not.
• Receive Untrusted iFAX: Set whether to receive untrusted iFAX or not.
• Message Digest Algorithm: Select a message digest algorithm from SHA1 or MD5.
• Message Encryption Method: Select a contents encryption method from 3DES, RC2-40, RC2-64, or RC2-128.
• Digital Signature – Outgoing E-mail: Set whether to always attach a digital signature to E-mail or to select a digital signature when sending E-mail.
• Digital Signature – Outgoing iFAX: Set whether to always attach a digital signature to iFAX orto select a digital signature when sending iFAX.
• Certificate Auto Store: Select whether or not to automatically store a S/MIME certificate
attached with the E-mail when receiving E-mail sent from an address registered in the addressbook.
16. Select Close repeatedly until the Tools screen is displayed.
17. Wait several seconds for the Auto Clear service to log you out.
18. After the printer is restarted, print a Configuration Report to confirm that each item is configured.
For information on how to print a Configuration Report, see Configuration Report on page 22.
8/6/2019 Enu WC74XX Sys Admin Guide
http://slidepdf.com/reader/full/enu-wc74xx-sys-admin-guide 167/208
Internet Fax (iFAX)
WorkCentre 7425/7428/7435
System Administrator Guide
167
Testing iFAX
Sending From the Printer to Another iFAX-capable Machine
1. Test the iFAX transmission from the printer.
2. Press the Services button, then touch the Internet Fax button.3. Select New Recipient, then the To button, in the Recipient’s drop down list.
4. Enter the destination address, using the displayed keyboard.
5. Touch the Add button, then touch Close.
6. Place your document in the document feeder and press the Start button located to the immediateright of the control panel’s numeric keypad.
7. Check to see if the other machine printed the incoming iFAX.
Note: To set up the address book for use with LDAP (network search), see LDAP Authentication onpage 66.

8/6/2019 Enu WC74XX Sys Admin Guide
http://slidepdf.com/reader/full/enu-wc74xx-sys-admin-guide 168/208
Scanning and Faxing
WorkCentre 7425/7428/7435
System Administrator Guide
168
8/6/2019 Enu WC74XX Sys Admin Guide
http://slidepdf.com/reader/full/enu-wc74xx-sys-admin-guide 169/208
169
7Printer Management
This chapter includes:
• Xerox Standard Accounting on page 170
• Annotation (Bates Stamping) on page 177
• Media Card Reader on page 179
• USB Printing on page 184
• Thumbnail Preview on page 187
• Hard Disk Data Encryption on page 188
• Xerox Smart eSolutions on page 189
8/6/2019 Enu WC74XX Sys Admin Guide
http://slidepdf.com/reader/full/enu-wc74xx-sys-admin-guide 170/208
Printer Management
WorkCentre 7425/7428/7435
System Administrator Guide
170
Xerox Standard Accounting
Overview
When enabled, Xerox Standard Accounting (XSA) tracks the numbers of Copy, Print, Network Scanning,E-mail, Server Fax, Internet Fax and Embedded Fax jobs (when these features are installed on theprinter), for each user. Usage limits can also be applied to users to restrict the total numbers of copy,print, fax and scan jobs that a user can perform. Administrators can print a report which contains allXSA data.
XSA is set up through CentreWare Internet Services. Administrators must create accounts and specifylimits before users are authorized to access the printer.
When XSA is set up, users must enter their account details at the printer to use the printer. When theyhave finished their job, their XSA allocation is reduced by the number of prints, copies or scansperformed. When XSA is enabled, users must enter their account details in the printer driver to print
documents from their computers.
The XSA feature is mutually exclusive from any other accounting feature. If XSA is enabled at theprinter, you cannot enable Foreign printer Interface, Auditron or Network Accounting.
Each device supports unique XSA User IDs and Group Accounts.
All user IDs must be assigned to one or more group accounts.
Note: The XSA settings and account data are stored in the printer. It is strongly recommended that youback up the settings and data regularly using the Cloning available under the XSA folder of CentreWareInternet Services as described in this section. Should the printer lose your XSA data and settings youcan restore them from the backup file that you produced by the Cloning process.
Installation Checklist
Before starting the installation procedure, please ensure the following items are available or have beenperformed.
1. Ensure that your device is fully functioning on the network.
2. Ensure that the TCP/IP and HTTP protocols are configured on the printer and fully functioning. Thisis required to access CentreWare Internet Services to configure Xerox Standard Accounting.
To verify that the TCP/IP and HTTP protocols are correctly configured, print a Configuration Report. Formore information see Configuration Report on page 22.
To configure TCP/IP, see TCP/IP Protocol Configuration on page 43.
To enable HTTP, see Enabling Internet Services (HTTP) on page 23.
8/6/2019 Enu WC74XX Sys Admin Guide
http://slidepdf.com/reader/full/enu-wc74xx-sys-admin-guide 171/208
Xerox Standard Accounting
WorkCentre 7425/7428/7435
System Administrator Guide
171
Enabling Xerox Standard Accounting
1. Open your Web browser and enter the IP address of the printer in the address field. Press Enter toopen CentreWare Internet Services.
2. Click the Properties tab.
3. If prompted, enter the system administrator user name and password (default: admin, 1111).
4. Select the Accounting folder, then click Accounting Configuration.
5. Select Xerox Standard Accounting from the Accounting Type drop down list.
Note: It is also possible to select Xerox Accounting for use with an Authentication Server. See SecureAccess and Accounting on page 69.
6. Click Apply, then Reboot Machine.
7. Navigate back to the same page and click Next.
8. Under Device Default State Configuration, click Configure next to Service Access.
9. Select one of the following for each service you want to control:
• Unlocked: Allow unrestricted access.
• Locked (Show Icon): Require login for access. The service icon is visible to all users in the allservices screen.
• Locked (Hide Icon): Require login for access. The service icon is hidden until an authorized userlogs in.
10. Click Apply and enter the Administrator User name and password when prompted (default of admin and 1111).
11. Click OK., then click Reboot Machine.
Create a Group Account
1. On the Properties tab of CentreWare Internet Services, click theAccounting folder, then the Xerox
Standard Accounting folder.
2. Click Group Accounts to create a new group account.
3. In the Group Accounts Account ID box, enter an ID for the new group account (for example 001).The Group Account can be numeric values up to a maximum of 32 characters. Group Account ID'smust be unique.
4. Enter a name for the group account in the Account Name box (for example Xerox). The groupname can be alphanumeric characters to a maximum of 32 characters. The Group Account namemust be unique.
5. Click Apply. The account will now be available in the Group Accounts list. Refresh your browser,then click Group Accounts again to see the new group.
Create a User Account and Set Usage Limits
Note: At least one group account must be created before you create user accounts.
1. On the Properties tab of CentreWare Internet Services, click theAccounting folder, then the XeroxStandard Accounting folder in the directory tree.
2. Click Manage Accounting.
8/6/2019 Enu WC74XX Sys Admin Guide
http://slidepdf.com/reader/full/enu-wc74xx-sys-admin-guide 172/208
Printer Management
WorkCentre 7425/7428/7435
System Administrator Guide
172
3. Click the Add New User button.
4. Enter an ID for the user. The user ID can contain alphanumeric characters to a maximum of 32characters (for example: A10). User ID's must be unique.
5. Enter the user name (for example Jane Smith). The user name can contain alphanumericcharacters to a maximum of 32 characters. User names must be unique.
6. Enter a passcode in the Passcode box.7. Specify the usage limits for this account in the User Limits boxes. The maximum value for each
limit is 9999999.
8. Click Apply when you have finished setting the usage limits.
Maximum Usage Limits and Resetting Individual Usage Limits
The first time a user logs into the printer after they have reached their maximum usage limit, amessage displays on the touch screen. The message notifies the user that they have reached their limitfor the feature. Users will not be unable to use the feature until their limit is reset.
If the user performs a copy job at the printer, and mid way through the job their limit is exceeded, the job will not continue.
If the user performs a scan job at the printer, and mid way through the job their limit is exceeded, the job will be cancelled.
If the user's limit is reached before a print job is completed, the printer will notify the user that theirlimit has been reached. The job will be deleted from the print queue. The job may run over due tosheets committed to the paper path.
Note: The system administrator has unlimited access to the printer.
To Reset User Limits
1. On the Properties tab of CentreWare Internet Services, click theAccounting folder, then the XeroxStandard Accounting folder in the directory tree.
2. Click Manage Accounting.
3. Place a checkmark in the box for the desired User ID.
4. Click Limits and Access.
5. Enter the new User Limits, check the Reset box, and click Apply.
Using XSA at the printer
When you enable XSA, users must enter a valid user name at the printer to access any services to whichaccess restriction has been applied. Refer to Enable Xerox Standard Accounting in this section for thespecific service restricting procedure.
At the Printer
1. Press the Services button, if necessary, to display all the available service buttons.
2. Press any button representing a service to which restricted access has been applied.
8/6/2019 Enu WC74XX Sys Admin Guide
http://slidepdf.com/reader/full/enu-wc74xx-sys-admin-guide 173/208
Xerox Standard Accounting
WorkCentre 7425/7428/7435
System Administrator Guide
173
3. When the Press the Log In/Out button message displays on screen, press theLog In/Out button.
4. Enter a User ID and touch Confirm.
Note: If the User is a member of more than one Group Account, he or she will be asked to select theaccount that they wish to log into.
5. When the User is logged in, the selected service screen will be displayed. The User can now use that
service, with usage tracked by XSA.
Resetting Usage Data
At your Computer
1. Open your Web browser and enter the IP address of the printer in the address field. Press Enter toopen CentreWare Internet Services.
2. Click the Properties tab.
3. Enter the system administrator User Name and Password (defaultadmin, 1111) if prompted.
4. Click the Accounting folder, then the Xerox Standard Accounting folder in the directory tree.
5. Click the Report and Reset.6. To reset all usage data to zero, click the Reset Usage Data button.
7. Click OK to confirm.
Warning: Do not click Reset to Default unless you intend to delete all users, accounts and usage datafrom your machine.
Print a Usage Report
At your Computer
1. Open your Web browser and enter the IP address of the printer in the address field. Press Enter to
open CentreWare Internet Services.2. Click the Properties tab.
3. Enter the system administrator User Name and Password (defaultadmin, 1111) if prompted.
4. Click the Accounting folder, then the Xerox Standard Accounting folder in the directory tree.
5. Click the Report and Reset.
6. Click the Generate Report button.
7. Follow any additional displayed prompts to save the XSA Report.csv (comma separated value) fileto your computer.
Enable XSA in your Print Drivers
Refer to the driver documentation for the steps to follow to enable XSA in your print drivers.

8/6/2019 Enu WC74XX Sys Admin Guide
http://slidepdf.com/reader/full/enu-wc74xx-sys-admin-guide 174/208
Printer Management
WorkCentre 7425/7428/7435
System Administrator Guide
174
Backing Up XSA Data and Settings and Cloning to Another Device
The Cloning feature enables you to copy/backup settings, including Xerox Standard Accounting (XSA)settings and account information, to a file on your computer or Server. Cloning will create a .dat filethat can be used to restore the data and settings on the same machine or to clone the settings to othermachines. Both the source and target machines must have the same version of software for the .dat
file to be accepted. The software version is located on the Properties tab, under General Setup.
Settings available for cloning are:
• Connectivity settings
• E-Mail settings
• Internet Fax settings
• Job Management settings
• Authentication settings
• Fax settings
• Network Scanning Settings
• Network Scanning Templates• Audit Log settings
To clone / backup a machine’s settings
1. Open your Web browser and enter the IP address of the printer in the address field. Press Enter toopen CentreWare Internet Services.
2. Click the Properties tab.
3. Click the General Setup folder, then Cloning.
4. In the Cloning area, in the Create Clone File box, select the settings that you wish to clone.
• To see a detailed listing of the settings that will be cloned, click View Feature Details
• To clone all features, verify that all features are checked and then clickClone.
• To customize the configuration file, disable any of the features by clearing the check boxesnext to the feature(s), then click Clone.
5. Enter the current administrator User name and password, if prompted. The default isadmin and1111.
6. Right click the .dat link that appears and select Save Target As.
7. A dialog box will prompt you to specify and name and location for the cloned file. Ensure theextension reads .dat.
8. Click Save. The .dat file can now be used to restore the information to the same machine or toclone other machines.
8/6/2019 Enu WC74XX Sys Admin Guide
http://slidepdf.com/reader/full/enu-wc74xx-sys-admin-guide 175/208
Xerox Standard Accounting
WorkCentre 7425/7428/7435
System Administrator Guide
175
To Restore Settings or Clone Settings to another Machine
This procedure will cause the machine to reboot and will be unavailable over the network for severalminutes.
Note: All machines must have the same version of software for the .dat file to be accepted
1. Open your Web browser and enter the IP address of the printer in the address field. Press Enter toopen CentreWare Internet Services.
2. Click the Properties tab.
3. Enter the system administrator User Name and Password (defaultadmin, 1111) if prompted.
4. Click the General Setup folder, then Cloning.
5. In the Cloning area, in the Install Clone File box:
6. Click Browse and move through your file system to the .dat file.
7. Click Open.
8. Click Install.
9. If prompted, enter the current administrator User name and password. The default isadmin and
1111.10. The machine will be unavailable over the network for several minutes.
Once rebooted a Configuration Report should automatically print, if enabled. If the ConfigurationReport does not automatically print, manually print the Configuration Report. For more informationsee Configuration Report on page 22.
Looking at the Configuration Report, verify that some or all of your settings have been cloned to thenew machine. Also, note that it may be necessary for you to use your Web browser to view the XeroxStandard Accounting set up of Users and Groups on the new machine.
Audit LogWith TCP/IP and HTTP-based processes running on the printer, exposure to access attacks,eavesdropping, file tampering, service disruption, and identity (password) theft is significantlyincreased.
The Audit Log, regularly reviewed by the Security Administrator, often with the aid of third partyanalyzing tools, helps to assess attempted security breaches, identify actual breaches, and preventfuture breaches.
The Audit Log is enabled or disabled from the Audit Log on the Properties tab of CentreWare InternetServices, accessed from a networked computer running a Web browser. Access to logged data is alsoaccomplished from the Audit Log on the Properties tab of CentreWare Internet Services, butadditionally requires the enabling of SSL/TLS encryption. For more information see Configuration of HTTPS (SSL/TLS) Communication Encryption on page 76.
Events tracked in the Audit Log, include: Starting and Stopping of the printer, Login/Logout events,Changes to system settings, and job completions.

8/6/2019 Enu WC74XX Sys Admin Guide
http://slidepdf.com/reader/full/enu-wc74xx-sys-admin-guide 176/208
Printer Management
WorkCentre 7425/7428/7435
System Administrator Guide
176
Accessing the Audit Log feature
The Audit Log feature is accessed through CentreWare Internet Services as follows:
1. Open your Web browser and enter the IP address of the printer in the address field. Press Enter toopen CentreWare Internet Services.
2. Click the Properties tab.
3. Enter the system administrator User Name and Password (defaultadmin, 1111) if prompted.
4. Click the Audit Log.
5. Supply the Administrator User Name and Password (defaults of admin and 1111), whenprompted.
8/6/2019 Enu WC74XX Sys Admin Guide
http://slidepdf.com/reader/full/enu-wc74xx-sys-admin-guide 177/208
Annotation (Bates Stamping)
WorkCentre 7425/7428/7435
System Administrator Guide
177
Annotation (Bates Stamping)
Overview
Adding notes to scanned and copied pages (annotation) is primarily a user-controlled feature. BatesStamping is used in the legal profession to sequentially number or date/time-mark documents as theyare scanned and copied by the system. A number of parameters are available for selection, as specifiedbelow.
Note: Other forms of annotation are available, with default parameters set by the SystemAdministrator using the same button-pressing sequence stated in this section under Configuring aprecise bates stamp location. For these other forms of annotation, note that you will need to press theCopy Defaults button, after pressing Copy Service Settings on the Tools tab, to modify stampsettings.
Configuring Bates Stamp Settings
1. Insert a document in the printer's document feeder.
2. Press Copy on the Main (All Services) screen.
3. Press the Output Format tab.
4. Press the Annotations button.
5. Select Bates Stamp.
6. Set Bates Stamping to On.
7. Press the Prefix text box, and press Edit if necessary, to use the displayed keyboard to specify thePrefix to use.
8. Press Save.
9. Press the Number of Digits button to assign the number of digits for printed page numbers. PressSave to save setting changes.
10. Press Apply To in order to specify the pages on which to print the Bates Stamp. PressSave to savechanges.
11. Press Position to specify the relative position on the page for the printed Bates Stamp. Note that, if available, a precise location can be set by the System Administrator. Press Save to save changes.
12. Press Format & Style to specify the size and color of type for the Bates Stamp. Press Save to savechanges.
13. Press Save when done, then press Save again.
14. Press the Start button.
Configuring a Precise Bates Stamp Location
1. Press the Log In/Out button on the control panel.
2. Enter the System Administrator’s Login ID and Passcode if prompted (default admin, 1111), andpress Enter.
3. Press the Machine Status button.

8/6/2019 Enu WC74XX Sys Admin Guide
http://slidepdf.com/reader/full/enu-wc74xx-sys-admin-guide 178/208
Printer Management
WorkCentre 7425/7428/7435
System Administrator Guide
178
4. Touch the Tools tab.
5. Press Copy Service Settings.
6. Press Copy Control.
7. Press the down arrow to scroll to the Bates Stamping selection lines.
8. Press the applicable Bates Stamp position lines to set the precise location for your Bates stamp,
using x and y axes.9. Press Change Settings to change settings.
10. Press Save to save your changes.
11. Press Close until the System Settings screen is displayed.
12. Press Exit on the System Settings screen to return to the Main (All Services) screen.

8/6/2019 Enu WC74XX Sys Admin Guide
http://slidepdf.com/reader/full/enu-wc74xx-sys-admin-guide 179/208
Media Card Reader
WorkCentre 7425/7428/7435
System Administrator Guide
179
Media Card Reader
The Media Card Reader is available as an optional kit. After the Media Card Reader is installed, you canprint digital camera image data (Exif), and documents (PDF, TIFF) stored on the media card.
For more information, refer to the Media Card Reader User Guide.
Note: Exif is a file format that embeds information required to print data in an image taken by digitalcameras.
The printer uses two media printing modes:
• Media Print – Text: Prints data stored in document format. It is helpful to think of the word text assynonymous with document.
• Media Print – Photos: Prints data stored in the standard format of most digital cameras.
Media Card Reader Hardware
• Access Indicator: This light illuminates when the media card is inserted.
• Eject Button: Press this button to eject the media card.
• Media Slot: Insert the media card into this slot.
Supported Media and File Formats
The Media Card Reader supports CompactFlash media only. To use media other than CompactFlash,insert the media into a CompactFlash adaptor.
Note: The media and the CompactFlash adaptor are optional.
The media and file formats that can be used are as follows.
Supported Media
• SmartMedia
• CompactFlash
• CompactFlash (MicroDrive)
• SD Card
• Memory Stick
• xD-Picture Card
Supported File Formats
• Media Print – Photos
• JPEG
• TIFF: DCF1.0-compliant JPEG/TIFF (Exif2.0, Exif2.1, Exif2.2)
• Media Print – Text

8/6/2019 Enu WC74XX Sys Admin Guide
http://slidepdf.com/reader/full/enu-wc74xx-sys-admin-guide 180/208
Printer Management
WorkCentre 7425/7428/7435
System Administrator Guide
180
• PDF: .pdf, PDF1.3 or later
• TIFF: .tif, gray scale 4 bit/8 bit uncompressed, 4 bit/24 bit compressed by JPEG, compressed byMH/MMR
Important Notes and Restrictions
• MagicGate Memory Stick is not supported.
• Image files other than files in Exif format (JPEG and TIFF files created on computers) cannot beprinted.
• If an image file in Exif format is edited or saved on a computer, the file format is changed and nolonger remains in Exif format.
• Do not save image files and document files in the same medium.
• A media card containing over 900 files may not be detected properly.
• In Media Print – Text mode, PDF files or TIFF files stored in folders cannot be printed.
• PDF files stored on Mac OS cannot be printed and displayed on the screen.
• If characters not supported by the printer are used in file names, the file names will not be
displayed on the screen.
• Characters up to 255 can be recognized as a file name. However, not more than 100 characters willbe displayed.
• Use media formatted by digital cameras or computers (FAT12, 16, 32 only).
• Only use media recommended by Xerox. For the information on recommended media, contact ourCustomer Support Center.
• If anything is wrong with a media card, the process aborts within a few minutes and an errormessage appears.
• Before turning the printer Off, be sure to eject the media card.
Inserting and Ejecting MediaCaution: Do not press the Eject Button, pull out the USB cable, or power off the printer when theAccess Indicator light is illuminated. Data stored on the media card may be damaged.
1. Before ejecting the medium, touch the antistatic label.
2. Press the Eject button, and then pull out the media card.
Selecting and Printing Text Files
1. Insert the media card into the Media Slot of the Media Card Reader.
2. Press the Services button.
3. Touch the Media Print – Text icon.
4. After the files are imported, touch the appropriate button. You can choose from:
• Select All
• Select from List
• Select Range

8/6/2019 Enu WC74XX Sys Admin Guide
http://slidepdf.com/reader/full/enu-wc74xx-sys-admin-guide 181/208
Media Card Reader
WorkCentre 7425/7428/7435
System Administrator Guide
181
5. Touch the Media Print Text and Advanced Settings tabs as required to change any appropriateprint settings.
6. Press the Start button.
Media Print Text Tab
The Media Print Text tab allows you to select from a variety of printing options.
The options for the Media Print Text tab include:
• Output Color: Color or Black & White.
• Paper Supply: Choose the paper tray to be used as a source when printing.
• 2-sided Printing: Choose 1-sided, 2-sided (Flip on long edge), or 2-sided (Flip on short edge).
• Multiple-Up: Choose from Off, 2 Pages Up, or 4 Pages Up.
Index Print
The Index Print button allows you to print a collection of miniature (30mm x 40mm) images onto onepage from the files on the media card.
When you select the Index Print button, you will only be able to specify the number of copies printed.All other printing options remain at their previous settings.
Advanced Settings
The Advanced Settings tab allows you to select from a variety of printing options.
You can choose to set Bitmap Smoothing to On or Off on this tab. Selecting the On option smoothesout rough and jagged edges within your document.
Selecting and Printing Photo Files
1. Insert the media card into the Media Slot of the Media Card Reader.
2. Press the Services button.
3. Touch the Media Print – Photos icon.
4. After the files are imported, touch the appropriate button. You can choose from:
• Select All
• Select from List
• Select Range
5. Touch the Media Print Photos and Advanced Settings tabs as required to change any appropriateprint settings.
6. Press the Start button.
8/6/2019 Enu WC74XX Sys Admin Guide
http://slidepdf.com/reader/full/enu-wc74xx-sys-admin-guide 182/208
Printer Management
WorkCentre 7425/7428/7435
System Administrator Guide
182
Media Print Photos Tab
The Media Print Photos tab allows you to select from a variety of printing options. The Media PrintPhotos tab is shown below. The options for the Media Print Photos tab include:
• Output Color: Color or Black & White.
• Paper Supply: Choose the paper tray to be used as a source when printing.
• 2-sided Printing: Choose 1-sided, 2-sided (Flip on long edge), or 2-sided (Flip on short edge).
• Output Photo Size: Choose from Full Page Print, any available Output Size, or anywhere from 2to 8 Pictures per Page.
Index Print
The Index Print button allows you to print a collection of miniature (30mm x 40mm) images onto onepage from the files on the media card. When you select the Index Print button, you will only be able tospecify the number of copies printed. All other printing options remain at their previous settings.
Advanced Settings
The Advanced Settings tab allows you to select from a variety of printing options.
You can choose to set Bitmap Smoothing to On or Off on this tab. Selecting the On option smoothesout rough and jagged edges within your document.
Problem Solving
If one of the following symptoms occurs, or if an error message appears on the screen, follow theremedy to solve the problem.
Symptom 1: The access indicator light of the Media Card Reader does not illuminate.• Cause: The USB cable may not be connected correctly.
• Remedy: Turn the printer off, unplug the USB cable, and then insert the cable into theconnector securely.
Symptom 2: The Media Print - Photos and Media Print - Text icons are not displayed on the All Servicesscreen.
• Cause: The printer does not recognize the media card reader properly.
• Remedy: Power off the printer, pull out the USB cable, and then insert the cable into theconnector securely.

8/6/2019 Enu WC74XX Sys Admin Guide
http://slidepdf.com/reader/full/enu-wc74xx-sys-admin-guide 183/208
Media Card Reader
WorkCentre 7425/7428/7435
System Administrator Guide
183
Symptom 3: Blank sheets are output.
• Cause: Files that cannot be printed by the printer (image files not saved in Exif format) areincluded in the selected files.
• Remedy: Image files not saved in Exif format cannot be printed by Index Print. Delete theimage files that cannot be printed by Index Print, and then print files again.
Note: If an image file in Exif format is edited or saved on a computer, the file format is changed and nolonger remains in Exif format.
8/6/2019 Enu WC74XX Sys Admin Guide
http://slidepdf.com/reader/full/enu-wc74xx-sys-admin-guide 184/208
Printer Management
WorkCentre 7425/7428/7435
System Administrator Guide
184
USB Printing
Overview
The USB Printing option is available as a kit for the XOG Template Usage Guidelines printer.
If the Media Card Reader is installed, Exif image data from digital cameras and document files (PDF,TIFF) can be printed.
Note: Exif is a file format that embeds information required to print data in an image taken by digitalcameras. If an image file in Exif format is edited or saved on a computer, the file format is changedand no longer remains in Exif format.
The printer uses two media printing modes:
• Media Print – Text: Prints data stored in document format. It is helpful to think of the word text assynonymous with document.
• Media Print – Photos: Prints data stored in the standard format of most digital cameras.Note: The USB Printing option is similar to the Media Card Reader option, but there are severalimportant differences.
Supported Media and File Formats
USB Printing supports typical USB flash drives.
Supported File Formats
• Media Print - Text
• PDF: PDF1.3 or later• TIFF: gray scale 4 bit/8 bit uncompressed, 4 bit/24 bit compressed by JPEG, compressed by
MH/MMR
• XPS
• Media Print - Photos
• JPEG
• TIFF - DCF1.0-compliant JPEG/TIFF (Exif2.0, Exif2.1, Exif2.2)
Note: The photo files must be in the format that they were stored in on the camera. Copy the folder,(for instance, a DCIM folder) to the USB drive.
8/6/2019 Enu WC74XX Sys Admin Guide
http://slidepdf.com/reader/full/enu-wc74xx-sys-admin-guide 185/208
USB Printing
WorkCentre 7425/7428/7435
System Administrator Guide
185
Important Notes and Restrictions
• Image files other than files in Exif format (JPEG and TIFF files created on computers) cannot beprinted.
• If an image file in Exif format is edited or saved on a computer, the file format is changed and nolonger remains in Exif format.
• Do not save image files and document files in the same medium.
• In Media Print - Text mode, PDF files or TIFF files stored in folders cannot be printed.
• PDF files stored on Mac OS cannot be printed and displayed on the screen.
• If characters not supported by the printer are used in file names, the file names will not bedisplayed on the screen.
• Characters up to 255 can be recognized as a file name. However, not more than 100 characters willbe displayed.
Selecting and Printing Text Files
1. Insert the USB drive into the USB slot.2. Press the Services button.
3. Touch the Media Print – Text icon.
4. After the files are imported, touch the appropriate button. You can choose from:
• Select All
• Select From List
• Select Range
5. Touch the Media Print Text or Advanced Settings tabs as required to change any appropriateprint settings.
6. Touch the file to be printed.
7. Press the Start button.
Media Print Text Tab
The Media Print Text tab allows you to select from a variety of printing options.
The options for the Media Print Text tab include:
• Output Color: Color or Black & White.
• Paper Supply: Choose the paper tray to be used as a source when printing.
• 2-sided Printing: Choose 1-sided, 2-sided (Flip on long edge), or 2-sided (Flip on short edge).
• Output: Choose stapling options as needed.
• Index Print: The Index Print button allows you to print a collection of miniature (30mm x 40mm)images onto one page from the files on the media card. When you select the Index Print button,you will only be able to specify the number of copies printed. All other printing options remain attheir previous settings.

8/6/2019 Enu WC74XX Sys Admin Guide
http://slidepdf.com/reader/full/enu-wc74xx-sys-admin-guide 186/208
Printer Management
WorkCentre 7425/7428/7435
System Administrator Guide
186
Advanced Settings Tab
The Advanced Settings tab allows you to select from a variety of printing options.
• Multiple-Up: Choose from Off, 2 Pages Up, or 4 Pages Up.
• Bitmap Smoothing : Smoothes out rough and jagged edges within your document.
Selecting and Printing Photo Files
Note: The photo files must be in the format that they were stored in on the camera. Copy the folder,(for instance, a DCIM folder) to the USB drive.
Insert the USB drive into the USB slot.
1. Press the Services button.
2. Touch the Media Print – Photos icon.
3. After the files are imported, touch the appropriate button. You can choose from:
• Select All
• Select From List• Select Range
4. Touch the Media Print Photos or Advanced Settings tabs as required to change any appropriateprint settings.
5. Touch the file to be printed.
6. Press the Start button.
Media Print Photos Tab
The Media Print Photos tab allows you to select from a variety of printing options. The Media PrintPhotos tab is shown below. The options for the Media Print Photos tab include:
• Output Color: Color or Black & White.
• Paper Supply: Choose the paper tray to be used as a source when printing.
• 2-sided Printing: Choose 1-sided, 2-sided (Flip on long edge), or 2-sided (Flip on short edge).
• Output Photo Size: Choose from Full Page Print, any available Output Size, or anywhere from 2to 8 Pictures per Page.
• Index Print: The Index Print button allows you to print a collection of miniature (30mm x40mm) images onto one page from the files on the media card. When you select the IndexPrint button, you will only be able to specify the number of copies printed. All other printingoptions remain at their previous settings.
Advanced Settings Tab
The Advanced Settings tab allows you to select from a variety of printing options.
You can choose to set Bitmap Smoothing to On or Off on this tab. Selecting the On option smoothesout rough and jagged dges within your document.
8/6/2019 Enu WC74XX Sys Admin Guide
http://slidepdf.com/reader/full/enu-wc74xx-sys-admin-guide 187/208
Thumbnail Preview
WorkCentre 7425/7428/7435
System Administrator Guide
187
Thumbnail Preview
Thumbnail Preview is an optional feature and may not be available on your machine. Review theinstructions that are included in the Thumbnail kit.
To view a thumbnail preview and print a document
1. Press the Services button on the printer’s control panel.
2. Touch Send from Folder.
3. Select Folder Name. A list of Folder Names are displayed with a number association. The numbersare used as identifiers for commonly used folders. You may identify the folder by the name ornumber, depending on how you choose to identify the folder.
4. Select the document name from the Document List. The document selected will be used to send tothe printer. When a document is identified and selected, a check mark will be placed in the Orderfield. More than one document can be selected.
5. In the Folder, a document to be previewed may be any print, scan, or fax job On a thumb drive, a
document may only be a JPEG in the Exchangeable image file format (Exif). Exif JPEGS are JPEGsas they are stored on a digital camera. A JPEG produced by Photoshop or any other imagemodification and storage software will not work properly.
6. Select Thumbnail. The Thumbnail feature will open a preview window of the selected document. Asmall, thumbnail-sized image will display on your screen. This option is useful in determining if youhave chosen the correct document.
7. Select Print.
8. The folder print settings will display.
9. Select the Paper Supply, Output, and 2-sided Printing Options.
10. Select Print.
11. The selected document will be printed to the specified location.
8/6/2019 Enu WC74XX Sys Admin Guide
http://slidepdf.com/reader/full/enu-wc74xx-sys-admin-guide 188/208
Printer Management
WorkCentre 7425/7428/7435
System Administrator Guide
188
Hard Disk Data Encryption
The controller hard disk data encryption is enabled by default on your printer. This encryption featureprovides an additional level of data security on the printer, while operating at a low level within the
operating system. The impact on performance is very small.
Enabling or disabling disk encryption will result in a system reboot and a hard disk initialization. Duringhard disk initialization, all customer information, folders, templates, and other information stored onthe disk will be lost.
To Verify or Change Hard Disk Data Encryption
1. Press the Log In/Out button on the control panel.
2. Enter the System Administrator’s Login ID and Passcode if prompted (default admin, 1111), andpress Enter.
3. Press the Machine Status button.
4. Touch the Tools tab.
5. Touch Common Service Settings.
6. Scroll to Other Settings.
7. Touch Data Encryption, and touch Change Settings. Touch On, then touch Save.
Enabling or disabling disk encryption will result in a system reboot and a hard disk initialization. Duringhard disk initialization, all customer information, folders, templates, and other data stored on the diskwill be lost.
Encryption Key For Confidential Data
When enabling Data Encryption, the system administrator may also create an Encryption Key ForConfidential Data. The system administrator may either verify the default encryption key, or enter anew alpha-numeric string of up to 12 characters to be used by the encryption algorithm.
8/6/2019 Enu WC74XX Sys Admin Guide
http://slidepdf.com/reader/full/enu-wc74xx-sys-admin-guide 189/208
Xerox Smart eSolutions
WorkCentre 7425/7428/7435
System Administrator Guide
189
Xerox Smart eSolutions
To enable the printer for Automated Meter Reading and Supplies Replenishment:
Enable communications with the Xerox Smart eSolutions Server
1. Open your Web browser and enter the IP address of the printer in the address field. Press Enter toopen CentreWare Internet Services.
2. Click the Properties tab.
3. If prompted, enter the system administrator user name and password (default: admin, 1111).
4. Click the Services folder, then theXerox Services Folder
5. Click theXerox Communication Server
6. In the Communication Setup area, check the Server Communication check box
7. Set the transmission time for a time when the printer will most likely be turned on during the day
8. Click Apply.
Set up the Internet Proxy Server (optional)
1. Click the Properties tab.
2. Click the Connectivity folder, then the Protocols folder.
3. Click Proxy Server.
4. In the General area, select the User Proxy Server check box, click Enabled
5. If you have selected Same Proxy for all Protocols for Proxy Setup, you must enter the InternetProxy address in the HTTP section.
6. If you have selected Different Proxy for Each Protocol, be sure to enter the Internet Proxy address
in the HTTPS section.
7. Click Apply.
Configure DNS
1. Click the Properties tab.
2. Click the Connectivity folder and select the Protocols folder then selectTCP/IP.
3. In the DNS Configuration section select Obtain DNS Server Address Automatically, or manuallyenter the DNS Server address information (when using STATIC, BOOTP, or RARP IP addressresolution).
4. Click Apply.
5. You may be prompted to reboot the printer.
Validate that your Printer has been Registered for Smart eSolutions
1. Click the Properties tab.
2. Click the Services folder, then the Xerox Services folder.

8/6/2019 Enu WC74XX Sys Admin Guide
http://slidepdf.com/reader/full/enu-wc74xx-sys-admin-guide 190/208
Printer Management
WorkCentre 7425/7428/7435
System Administrator Guide
190
3. Click Xerox Communication Server
4. In the Communication Log area check for the word Success or Fail in the message.
• Example: id:20301,00 Success, , ,
• Example: id:20301,04 Fail, , ,
Cancelling Communications with the Xerox Smart eSolutions Server
1. Open your Web browser and enter the IP address of the printer in the address field. Press Enter toopen CentreWare Internet Services.
2. Click the Properties tab.
3. If prompted, enter the system administrator user name and password (default: admin, 1111).
4. Click the Services folder, then the Xerox Services folder.
5. Click Xerox Communication Server.
6. In the Communication Setup area, uncheck the Server Communication check box.
7. Click Apply.
8/6/2019 Enu WC74XX Sys Admin Guide
http://slidepdf.com/reader/full/enu-wc74xx-sys-admin-guide 191/208
191
8Troubleshooting
This chapter includes:
• General Troubleshooting Procedure on page 192
• TCP/IP Troubleshooting on page 193
• NetBIOS over IP Troubleshooting on page 195
• IPP Troubleshooting on page 198
• EtherTalk Troubleshooting on page 201
• Scanning to Hard Drive Troubleshooting on page 202
• Image Quality Troubleshooting on page 204

8/6/2019 Enu WC74XX Sys Admin Guide
http://slidepdf.com/reader/full/enu-wc74xx-sys-admin-guide 192/208
Troubleshooting
WorkCentre 7425/7428/7435
System Administrator Guide
192
General Troubleshooting Procedure
1. Make sure that the printer is ON and that the Main screen (typically the All Services screen) isdisplayed.
2. Make sure that the printer is plugged into a live network drop, typically with a Category 5 twistedpair cable attached to the RJ-45 socket at the rear of the printer.
Note: You can often determine if the drop is live by looking at the and activity (if available) light orlights at the rear of the printer. If these lights are lit and/or blinking, you have a live connection. If youcannot determine if the drop is live, plug the printer into another drop being used by another machinethat is fully functioning on the network. You can use a hub to connect both machines to the livenetwork drop so that you do not interrupt the operations of the working machine. If you do not haveaccess to a second working drop, or a hub, connect a laptop to the RJ-45 socket at the rear of theprinter using a crossover (not a patch) cable.
3. Print a Configuration Report. For more information, see Configuration Report on page 22. Referringto the Configuration Report, determine if the appropriate ports and protocols are enabled for your
Network environment.
To support communicating with the printer's CentreWare Internet Services, the TCP/IP protocolshould be enabled. The printer should also have a valid IP Address, Subnet Mask, and Gatewaydisplayed. For more information, see TCP/IP Protocol Configuration on page 43.
As some Network Environment settings can only be configured through CentreWare InternetServices on the printer, if this tool is shown as disabled on the Configuration Report. For moreinformation see Enabling Internet Services (HTTP) on page 23.
4. At any networked computer, or at your laptop connected to the printer with a crossover cable, openyour Web browser and enter the TCP/IP address of the printer (as shown on the ConfigurationReport) into the Address or Location field. Press Enter. If the HTTP port is enabled at the printer,you should see CentreWare Internet Services. Note that depending upon Authentication and
Encryption settings, you might also see an Administrator Log In prompt, or a Digital Certificateprompt. With the display of these prompts or pages you have proven that the printer iscommunicating with HTTP over the TCP/IP network. A ping command (see TCP/IPTroubleshooting), issued from the computer’s command prompt, can further verify this workingconnection.
5. To troubleshoot network communication problems interfering with printing or scanning to theprinter’s hard drive (folders), refer to the specific topic, that applies to your network operatingenvironment, within this Troubleshooting section.
6. To resolve problems with system options, refer to the Configuration Report to determine if theoptions are installed, enabled, and properly configured on your machine.
To enable purchased options, see Enabling Options with Software Keys on page 98.
To properly configure enabled options, see Scanning and Faxing on page 97.
8/6/2019 Enu WC74XX Sys Admin Guide
http://slidepdf.com/reader/full/enu-wc74xx-sys-admin-guide 193/208
TCP/IP Troubleshooting
WorkCentre 7425/7428/7435
System Administrator Guide
193
TCP/IP Troubleshooting
Use the following check list to troubleshoot your network communication problem.
Check Physical Media and Network Interface Cards
1. Verify that the printer is on.
2. Verify that the printer and Computer are using the correct cabling to communicate over thenetwork. Use category 3 UTP patch (not crossover) cable for 10 Base T communications, category 5UTP patch (not crossover) cable for 10 Base T / 100 Base TX communications, and Token Ringcabling for Token Ring networks.
3. Verify that the cable at both the printer and Computer is fully plugged into the Network InterfaceCard (NIC). Check the light, which is typically a green LED, to make sure that it is lit. Typically, butnot always, a second light on the Network Interface Card will be intermittently flashing, indicatingthe presence of network traffic. If neither of these lights is lit, there is a problem with the NIC.
At the Printer
1. Print a Configuration Report. Under the Ethernet Rated Speed data label on the List, verify thatyour communications speed is correctly set for your network and that you have a MAC addresslisted. The driver for your NIC works at the Media Access Control (MAC) layer of the protocol stack.If no MAC address is shown, you have either a bad NIC or no NIC at all. Replace or install theNetwork Interface Card.
2. Under the TCP/IP data label, determine the method being used to assign TCP/IP addressing to theprinter. Specifically note the Mode being used. IP version 4 is the traditional mode using addressformats of xxx.xxx.xxx.xxx. Verify that the IP Address, Subnet Mask, and Gateway addresses arecorrect for your network and have not changed from their previous settings.
Note: The use of DHCP (the DHCP Server) with a short lease time can cause the printer to be assigneda new IP Address when it is powered off for an extended period of time. This will interruptcommunications with computers using the old IP address. If you do not want the IP address to besubject to constant changes, either increase the lease time at the DHCP Server, or use the Static IPAddressing method. For more information see TCP/IP Protocol Configuration on page 43.
3. Under the LPD data label, if you are communicating with the printer through an LPR port, makesure that LPD is Enabled. Also verify that the displayed port number is 515. For more informationsee TCP/IP LPD Enablement on page 46.
4. Under the Port 9100 data label, to enable the printer to automatically determine the PageDescription Language to use in processing jobs sent over the computer's LPR port, make sure that
this Port is enabled. This is the meaning of the word raw when used to name the queue during LPRport creation. For more information, see Configure Port 9100 (Raw Printing) on page 51.
5. Under the CentreWare Internet Services data label, verify that this feature is Enabled.
8/6/2019 Enu WC74XX Sys Admin Guide
http://slidepdf.com/reader/full/enu-wc74xx-sys-admin-guide 194/208
Troubleshooting
WorkCentre 7425/7428/7435
System Administrator Guide
194
At the Computer
1. Open your Web browser and enter the TCP/IP address of the printer in the Address or Locationfield. Press Enter. If the printer's CentreWare Internet Services (Web pages) begin to display on thecomputer, you are communicating with the printer. If not, make sure that your Web browser is notset to use a proxy server and repeat the procedure. If unsuccessful, perform the next step.
2. Verify that the computer has been assigned an IP address, subnet mask, and gateway address byrunning a Command (DOS) prompt, typing ipconfig/all (Windows 2000/XP) and pressing Enter. If any of the addresses are incorrect or missing, right click the Network Neighborhood icon (MyNetwork Places in Windows 2000), and make sure that the TCP/IP protocol is installed andproperly configured for IP addressing. For XP, click Start/My Network Places, then right click in theopen window, select Properties, right click Local Area Connection, and then select Properties.
3. Run a Command (DOS) prompt on the computer and perform ping tests to verify successful packettransmission first to the computer's NIC, then to the Gateway (if being used), then to the printer'sNIC. To run Ping Tests, at the Command (DOS) prompt, type: ping xxx.xxx.xxx.xxx and press Enter.Note that there is a space between the word ping and the first xxx. Let xxx.xxx.xxx.xxx firstrepresent the computer's IP address, then the IP address of the default gateway, and finally the IP
address of the printer. If successful, you will receive a reply such as: Reply from xxx.xxx.xxx.xxx:bytes=32 time<10ms TTL=128. If you receive Time Out or 0 bytes received notifications, theprinter being pinged is incorrectly configured or malfunctioning.
4. If Web browser and Ping Tests are successful but you are still unable to print to the printer, verifythat the driver is using the correct LPR Port to print through. On Windows desktops, selectStart,Settings, Printers (Start/Printers and Faxes in XP), right click the printer's icon, and selectProperties. Select the Ports Tab (Windows 2000) and verify that the LPR Port being printedthrough matches the IP Address of the printer. If the IP address does not match, you are printingto the wrong device on the network. Either select the correct port from the displayed list, or use theAdd Port button to create a new port with an IP Address matching that of your printer.
5. If the correct Port is being used by the driver but you are still unable to print, perform the followingprocedure. In Windows 2000 or XP, verify that Print Services for UNIX are installed in the computer.For more information see TCP/IP Peer to Peer (LPR or Standard TCP/IP) Printing on page 13.
6. Note that access to this printer's Services can be restricted by Host IP addresses. As this featurecould cause communications to appear to fail in certain instances, see IP Filtering (IP AddressRestriction) on page 37.
7. To assure successful printing, make sure that the printer is configured to support the PageDescription Language (PDL) being used by your driver. To check the PDL being used by the driver,print a test job to file. Open and view the job in a program such as Notepad. The PDL being used bythe driver will be displayed in the first few lines of Printer Language. Next, check the PageDescription Languages being supported by the printer's ports. For more information, see SettingPDL Emulations on page 30. The PDL being used by the driver, and the PDL supported by the Portyou are printing to, must match for successful printing to occur.
8/6/2019 Enu WC74XX Sys Admin Guide
http://slidepdf.com/reader/full/enu-wc74xx-sys-admin-guide 195/208
NetBIOS over IP Troubleshooting
WorkCentre 7425/7428/7435
System Administrator Guide
195
NetBIOS over IP Troubleshooting
Use the following check list to troubleshoot your network communication problem.
Check Physical Media and Network Interface Cards
1. Verify that the printer is powered On.
2. Verify that the printer and Computer are using the correct cabling to communicate over thenetwork. Use category 3 UTP patch (not crossover) cable for 10 Base T communications, category 5UTP patch (not crossover) cable for 10 Base T / 100 Base TX communications, and Token Ringcabling for Token Ring networks.
3. Verify that the cable at both the printer and Computer is fully plugged into the Network InterfaceCard (NIC). Check the light, which is typically a green LED, to make sure that it is lit. Typically, butnot always, a second light on the Network Interface Card will be intermittently flashing, indicatingthe presence of network traffic. If neither of these lights is lit, there is a problem with the NIC.
At the Printer
1. Print a Configuration Report. On the Configuration Report, verify that SMB is enabled. For moreinformation, see Microsoft (NetBIOS over IP) Networks on page 52.
2. On the Configuration Report, note that the default name of the printer's workgroup is Workgroupand that the printer has a unique SMB Host Name. To modify the printer's Workgroup or SMB HostName, if required, use your computer's Web browser to access the CentreWare Internet Services.For more informtion, see Microsoft (NetBIOS over IP) Networks on page 52.
3. On the Configuration Report, under the TCP/IP data label, note what method the printer is using toacquire its TCP/IP addresses. If the method shown is STATIC, make sure that the printer has a validIP address, Subnet Mask, and Gateway address for the network.
4. On the Configuration Report, verify that DNS is enabled. The use of Naming Servers is REQUIREDto resolve NetBIOS device names to IP addresses for packet routing over the TCP/IP network. If indoubt as to whether DNS and WINS are enabled, see Microsoft (NetBIOS over IP) Networks onpage 52.
Warning: If the printer is not informed of the addresses of the DNS/WINS Servers, you may not beable to see or use the printer's NetBIOS name on the network. Make sure that the printer is informed of the addresses of the DNS/WINS Servers, using the instructions supplied in the above mentionedprocedures.
5. Under the CentreWare Internet Services data label, verify that this feature is Enabled. You must usethis tool at your computer if you need to change the printer's Workgroup name, the SMB Host
Name, the TCP/IP (internet) Host Name, or DNS settings. Note that when using DNS to resolvehost names to IP addresses, the NetBIOS name (SMB Host) and the TCP/IP Host Name must bethe same.

8/6/2019 Enu WC74XX Sys Admin Guide
http://slidepdf.com/reader/full/enu-wc74xx-sys-admin-guide 196/208
Troubleshooting
WorkCentre 7425/7428/7435
System Administrator Guide
196
At the DNS or WINS Server
1. Refer to the Server Operating System documentation for the appropriate procedure to use toenable Host name to IP address resolution on the Server.
2. Make sure that the printer's TCP/IP (internet) Host Name and NetBIOS (SMB Host) Name (whichshould be identical for DNS) is being mapped to an IP Address on the Server.
3. Refer to the printer's Configuration Report and verify that the printer's TCP/IP Host and NetBIOS(SMB Host) Names continue to match the entries in the Server's database. Also verify that the IPAddress shown on the Report matches the IP address in the Server's database. If the information isincorrect on the Server, NetBIOS communications from the computers to the printer will bedisrupted.
At the Computer
1. Open your Web browser and enter the TCP/IP address of the printer in the Address or Locationfield. Press Enter. If the printer's CentreWare Internet Services (Web pages) begin to display on thecomputer, you are communicating with the printer. If not, make sure that your Web browser is not
set to use a proxy server and repeat the procedure. If unsuccessful, perform the next step.2. On Windows 2000 computers, verify that the Internet protocol (TCP/IP) is installed and that it is
configured for DNS resolution of the NetBIOS Host Name. Also verify that the Client for MicrosoftNetworks is installed. Finally, through Add/Remove Programs and Add/Remove WindowsComponents, select Other Network File and Print Services, click Details, check the box for PrintServices for UNIX, and click OK and Next.
3. Run a Command (DOS) prompt on the computer and perform ping tests to verify successful packettransmission first to the computer's NIC, then to the Gateway (if being used), then to the printer'sNIC. To run Ping Tests, at the Command (DOS) prompt, type: ping xxx.xxx.xxx.xxx and press Enter.Note that there is a space between the word ping and the first xxx. Let xxx.xxx.xxx.xxx firstrepresent the computer's IP address, then the IP address of the default gateway, and finally the IPaddress of the printer (as shown on the Configuration Report).
4. If communicating with the printer in a Peer to Peer environment, at the Computer's Desktopdouble click the Network Neighborhood icon and see if the Printer's SMB Host Name appears inthe Workgroup indicated on the Configuration Report. If it does not, SMB may not be enabled atthe printer, or there is no Master Browser in the Workgroup. Check the Configuration Report toverify that SMB is enabled and, if necessary, enable Auto Master Mode. For more information, seeMicrosoft (NetBIOS over IP) Networks on page 52.
5. From your Computer's Desktop, click Start/Settings/Printers (Start/Printers and Faxes in XP), rightclick the Printer's icon and select Properties. From the Ports Tab (Windows 2000) determine thePort that the driver is using to print through. For peer to peer communications, the port nameshould match the SMB Host name of the printer as shown on the Configuration Report. If itdoesn't you are printing to the wrong port and either need to select the correct port or use theAdd
Port button to create a new port for the driver to print through. For more information, see TCP/IPPeer to Peer (LPR or Standard TCP/IP) Printing on page 13. If the name matches, use the GeneralTab of the driver to print a test page to determine the status of communications between theComputer and the printer.
6. If communicating with the printer in a Client/Server environment, at the Computer's Desktopdouble click the Network Neighborhood icon and see if the Printer's Server is displayed. If youdouble click the Server's name, a list of Shared printers should be displayed, with the Printer being
8/6/2019 Enu WC74XX Sys Admin Guide
http://slidepdf.com/reader/full/enu-wc74xx-sys-admin-guide 197/208
NetBIOS over IP Troubleshooting
WorkCentre 7425/7428/7435
System Administrator Guide
197
one of the printers shown. Note that since the Printer is identified as a Share name on the Server, itmay not have the same name as the SMB Host name on the Configuration Report. If you do notrecognize your Server or Printer's name in the list, perform the following step.
7. From your Computer's Desktop, click Start/Settings/Printers (Start/Printers and Faxes in XP),right click the Printer's icon and select Properties. From the Ports Tab (Windows 2000) determinethe Port that the driver is using to print through. For Client/Server communications, the port name
should be in the form of a UNC (universal naming convention) such as\\Computer_name\Share_name. If it isn't you are printing to the wrong port and either need toselect the correct port or use the Add Port button to create a new port for the driver to printthrough. If the name looks correct, use the General tab of the driver to print a test page todetermine the status of communications between the computer and the printer.
8. Note that if you have the UNC of the Printer, you can enter this into the text box of theRun command on your computer. When you press Enter, the computer will attempt to reconnect to thenetwork Server and Printer Share that was specified by the UNC. Depending upon how the Serverwas configured you can then either manually or automatically reinstall the driver.
9. To assure successful printing, make sure that the printer is configured to support the PageDescription Language (PDL) being used by your driver. To check the PDL being used by the driver,
print a test job to file. Open and view the job in a program such as Notepad. The PDL being used bythe driver will be displayed in the first few lines of Printer Language. Next, check the PageDescription Languages being supported by the printer's ports.The PDL being used by the driver,and the PDL supported by the Port you are printing to, must match for successful printing to occur.For more information, see Setting PDL Emulations on page 30.
8/6/2019 Enu WC74XX Sys Admin Guide
http://slidepdf.com/reader/full/enu-wc74xx-sys-admin-guide 198/208
Troubleshooting
WorkCentre 7425/7428/7435
System Administrator Guide
198
IPP Troubleshooting
Use the following check list to troubleshoot your network communication problem.
Check Physical Media and Network Interface Cards
1. Verify that the printer is powered On.
2. Verify that the printer and Computer are using the correct cabling to communicate over thenetwork. Use category 3 UTP patch (not crossover) cable for 10 Base T communications, category 5UTP patch (not crossover) cable for 10 Base T / 100 Base TX communications, and Token Ringcabling for Token Ring networks.
3. Verify that the cable at both the printer and Computer is fully plugged into the Network InterfaceCard (NIC). Check the light, which is typically a green LED, to make sure that it is lit . Typically, butnot always, a second light on the Network Interface Card will be intermittently flashing, indicatingthe presence of network traffic. If neither of these lights is lit, there is a problem with the NIC.
At the Printer
1. Print a Configuration Report. Under the Ethernet Rated Speed data label on the Report, verify thatyour communications speed is correctly set for your network and that you have a MAC addresslisted. The driver for your NIC works at the Media Access Control (MAC) layer of the protocol stack.If no MAC address is shown, you have either a bad NIC or no NIC at all. Replace or install theNetwork Interface Card.
2. Under the CentreWare Internet Services data label, verify that this feature isEnabled.
3. Under the TCP/IP data label, determine the method being used to assign TCP/IP addressing to theprinter. Verify that the IP Address, Subnet Mask, and Gateway addresses are correct for yournetwork and have not changed from their previous settings.
Note: The use of DHCP (the DHCP Server) with a short lease time can cause the printer to be assigneda new IP Address when it is powered off for an extended period of time. This will interruptcommunications with computers using the old IP address. If you do not want the IP address to besubject to constant changes, either increase the lease time at the DHCP Server, or use the Static IPAddressing method . For more information, see TCP/IP Protocol Configuration on page 43.
4. Under the IPP data label, verify that the IPP Port is Enabled. For more information, seeIPPConfiguration on page 54.
5. Under the IPP data label, verify that IPP is using DNS to resolve Host Names to IP Addresses insupport of IPP printing. If it is not, type the printer’s IP address into your Web browser’s addressfield and press enter. Click the Properties tab. Click the Connectivity folder, then the Protocols
folder and click IPP. Verify that the DNS Enablement Check Box is checked. If it is not checked,check it with your mouse and click Apply, then Reboot Machine.
6. Under the IPP data label, verify that the Port number associated with IPP is 631. This is the portnumber assigned to IPP by the Internet Assigned Numbers Authority.
8/6/2019 Enu WC74XX Sys Admin Guide
http://slidepdf.com/reader/full/enu-wc74xx-sys-admin-guide 199/208
IPP Troubleshooting
WorkCentre 7425/7428/7435
System Administrator Guide
199
At the Computer
Note: As IPP (the Internet Printing Protocol) is supported by all Windows computers, the followingprocedure is written specifically for Windows. The IPP printing service is available for other computeroperating systems through downloads from the Microsoft Web site. In general, troubleshootingprocedures for other operating systems will be similar to this one.
1. Open your Web browser and enter the TCP/IP address of the printer in the Address or Locationfield. Press Enter. If the printer's CentreWare Internet Services (Web pages) begin to display on thecomputer, you are communicating with the printer. If not, make sure that your Web browser is notset to use a proxy server and repeat the procedure. If unsuccessful, perform the next step.
2. Verify that the Internet protocol (TCP/IP) is installed in the Windows 2000 or XP computer. On theWindows 2000 Desktop, right click My Network Places and select Properties. Right click LocalArea Connection and select Properties. On the Windows XP desktop, click Start, Control Panel,and double click Network Connections. Right click the Local Area Connection icon and selectProperties. Verify that the Internet Protocol (TCP/IP) has been loaded. If it has, click (highlight) thisitem with your mouse and click the Properties button to verify that this computer is using either adynamic or static method to obtain a valid TCP/IP address, and that the computer's host name is
being resolved using DNS. If the TCP/IP protocol is not loaded, click the Install… button, thenselect Protocol as the type of network component that you wish to install. Click the Add… buttonand select Internet Protocol (TCP/IP). With your operating system installer disk readily available,click the Have Disk… button and follow any remaining instructions. Once the protocol has beeninstalled, you can click (highlight) the item with your mouse and click the Properties button toverify or set up the method being used for TCP/IP addressing.
3. Perform ping tests to verify successful packet transmission first to the computer's NIC, then to theGateway (if being used), then to the printer's NIC. To run Ping Tests, click Start, Run, then type:ping xxx.xxx.xxx.xxx and press Enter. Note that there is a space between the word ping and thefirst xxx. Let xxx.xxx.xxx.xxx first represent the computer's IP address, then the IP address of thedefault gateway, and finally the IP address of the printer. If successful, you will receive a reply suchas: Reply from xxx.xxx.xxx.xxx: bytes=32 time<10ms TTL=128. If you receive Time Out or 0 bytesreceived notifications, the printer being pinged is incorrectly configured or malfunctioning.
4. If Web browser and Ping Tests are successful but you are still unable to print to the printer, verifythat the driver is using an IPP Port to print through. From the Windows desktop, selectStart,Settings, Printers (Start/Printers and Faxes in XP), right click the printer's icon, and selectProperties. Select the Ports Tab and verify that the IPP Port being printed through matches the IPAddress, or fully qualified Domain Name, of the Printer. If the IP address (or fully qualified DomainName) does not match, you are printing to the wrong device on the network. Either select thecorrect port from the displayed list, or use the Add Port button to create a new IPP port with an IPAddress (or fully qualified Domain Name) matching that of your printer.
Note: A fully qualified Domain Name consists of the printer's internet Host Name, followed by itsinternet domain name, separated by periods.
5. Note that access to this printer's Services can be restricted by Host IP addresses. This feature couldcause communications to appear to fail in certain instances. For more information, see IP Filtering(IP Address Restriction) on page 50.

8/6/2019 Enu WC74XX Sys Admin Guide
http://slidepdf.com/reader/full/enu-wc74xx-sys-admin-guide 200/208
Troubleshooting
WorkCentre 7425/7428/7435
System Administrator Guide
200
6. To assure successful printing, make sure that the printer is configured to support the PageDescription Language (PDL) being used by your driver. To check the PDL being used by the driver,print a test job to file. Open and view the job in a program such as Notepad. The PDL being used bythe driver will be displayed in the first few lines of Printer Language. Next, check the PageDescription Languages being supported by the printer's ports. The PDL being used by the driver,and the PDL supported by the Port you are printing to, must match for successful printing to occur.
For more information, see Setting PDL Emulations on page 30.
8/6/2019 Enu WC74XX Sys Admin Guide
http://slidepdf.com/reader/full/enu-wc74xx-sys-admin-guide 201/208
EtherTalk Troubleshooting
WorkCentre 7425/7428/7435
System Administrator Guide
201
EtherTalk Troubleshooting
Use the following check list to troubleshoot your network communication problem.
Check Physical Media and Network Interface Cards
1. Verify that the printer is powered ON.
2. Verify that the printer and Computer are using the correct cabling to communicate over thenetwork. Use category 3 UTP patch (not crossover) cable for 10 Base T communications, category 5UTP patch (not crossover) cable for 10 Base T / 100 Base TX communications, and Token Ringcabling for Token Ring networks.
3. Verify that the cable at both the printer and Computer is fully plugged into the Network InterfaceCard (NIC). Check the light, which is typically a green LED, to make sure that it is lit. Typically, butnot always, a second light on the Network Interface Card will be intermittently flashing, indicatingthe presence of network traffic. If neither of these lights is lit, there is a problem with the NIC.
At the Printer
1. Print a Configuration Report. Under the Ethernet Rated Speed data label on the Report, verify thatyour communications speed is correctly set for your network and that you have a MAC addresslisted. The driver for your NIC works at the Media Access Control (MAC) layer of the protocol stack.If no MAC address is shown, you have either a bad NIC or no NIC at all. Replace or install theNetwork Interface Card.
2. Under the CentreWare Internet Services data label, verify that this feature is Enabled.
3. Under the EtherTalk data label, verify that the Port is enabled, and that printer has been assignedan EtherTalk Printer Name and an EtherTalk zone. If one or more of these parameters needs to beconfigured, see EtherTalk (AppleTalk) Configuration on page 57.
4. Under the EtherTalk data label and at the bottom of the Configuration Report, verify thatPostScript is installed in the printer. If a PostScript license is installed in the printer, the PostScriptlogo will be clearly displayed at the bottom of the Report.
Note: If a PostScript license is not installed in the printer, EtherTalk will not be displayed on theConfiguration Report, and will be unavailable for configuration using CentreWare Internet Services.Consult your Xerox Representative for assistance.
At a Macintosh Computer
Verify that the Printer is visible in the Chooser. If it is not, install the Driver and PPD file. For more
information, see EtherTalk (AppleTalk) Peer to Peer Printing on page 18.
8/6/2019 Enu WC74XX Sys Admin Guide
http://slidepdf.com/reader/full/enu-wc74xx-sys-admin-guide 202/208
Troubleshooting
WorkCentre 7425/7428/7435
System Administrator Guide
202
Scanning to Hard Drive Troubleshooting
Use the following check list to troubleshoot your network communication problem.
Note: It is assumed that you purchased the Scanning option to enable Scanning to the Hard Drive with
your printer. If you did not, contact your Xerox Representative to purchase this option.
Check Physical Media and Network Interface Cards
1. Verify that the printer is On.
2. Verify that the printer and Computer are using the correct cabling to communicate over thenetwork. Use category 3 UTP patch (not crossover) cable for 10 Base T communications, category 5UTP patch (not crossover) cable for 10 Base T / 100 Base TX communications, and Token Ringcabling for Token Ring networks.
3. Verify that the cable at both the printer and Computer is fully plugged into the Network InterfaceCard (NIC). Check the light, which is typically a green LED, to make sure that it is lit . Typically, but
not always, a second light on the Network Interface Card will be intermittently flashing, indicatingthe presence of network traffic. If neither of these lights is lit, there is a problem with the NIC.
At the Computer
1. Print a Configuration Report. Under the Ethernet Rated Speed data label on the Report, verify thatyour communications speed is correctly set for your network and that you have a MAC addresslisted. The driver for your NIC works at the Media Access Control (MAC) layer of the protocol stack.If no MAC address is shown, you have either a bad NIC or no NIC at all. Replace or install theNetwork Interface Card.
2. Under the CentreWare Internet Services data label, verify that this feature is enabled.
3. Under the TCP/IP data label, determine the method being used to assign TCP/IP addressing to theprinter. Verify that the IP Address, Subnet Mask, and Gateway addresses are correct for yournetwork and have not changed from their previous settings.
Note: The use of DHCP (the DHCP Server) with a short lease time can cause the printer to be assigneda new IP Address when it is powered off for an extended period of time. This will interruptcommunications with computers using the old IP address. If you do not want the IP address to besubject to constant changes, either increase the lease time at the DHCP Server, or use the Static IPAddressing method. For more information, see TCP/IP Protocol Configuration on page 43.
At the Printer
1. Verify that you have correctly set up your folder. For more information, see Setting Up Folders atthe Printer on page 128.
2. Scan a test document to your Folder. For more information, seeScanning to the Printer’s HardDrive (Folders) on page 128.
8/6/2019 Enu WC74XX Sys Admin Guide
http://slidepdf.com/reader/full/enu-wc74xx-sys-admin-guide 203/208
Scanning to Hard Drive Troubleshooting
WorkCentre 7425/7428/7435
System Administrator Guide
203
At the Computer
1. Open your Web browser and enter the TCP/IP address of the printer in the Address or Locationfield. Press Enter. If CentreWare Internet Services displays on the computer, you arecommunicating with the printer. If not, make sure that your Web browser is not set to use a proxyserver and repeat the procedure. If unsuccessful, perform the next step.
2. Verify that the computer has been assigned an IP address, subnet mask, and gateway address byrunning a Command (DOS) prompt, typing ipconfig/all (Windows 2000/XP) and pressing Enter If any of the addresses are incorrect or missing, right click the Network Neighborhood icon (MyNetwork Places in Windows 2000) and make sure that the TCP/IP protocol is installed andproperly configured for IP addressing.
3. Run a Command (DOS) prompt on the computer and perform ping tests to verify successful packettransmission first to the computer's NIC, then to the Gateway (if being used), then to the printer'sNIC. To run Ping Tests, at the Command (DOS) prompt, type: ping xxx.xxx.xxx.xxx and press Enter.Note that there is a space between the word ping and the first xxx. Let xxx.xxx.xxx.xxx firstrepresent the computer's IP address, then the IP address of the default gateway, and finally the IPaddress of the printer. If successful, you will receive a reply such as: Reply from xxx.xxx.xxx.xxx:
bytes=32 time<10ms TTL=128. If you receive Time Out or 0 bytes received notifications, theprinter being pinged is incorrectly configured or malfunctioning.
4. When CentreWare Internet Services are successfully displayed on your monitor, retrieve yourscanned test document. For more information, see Retrieving Images from Folders on page 130.
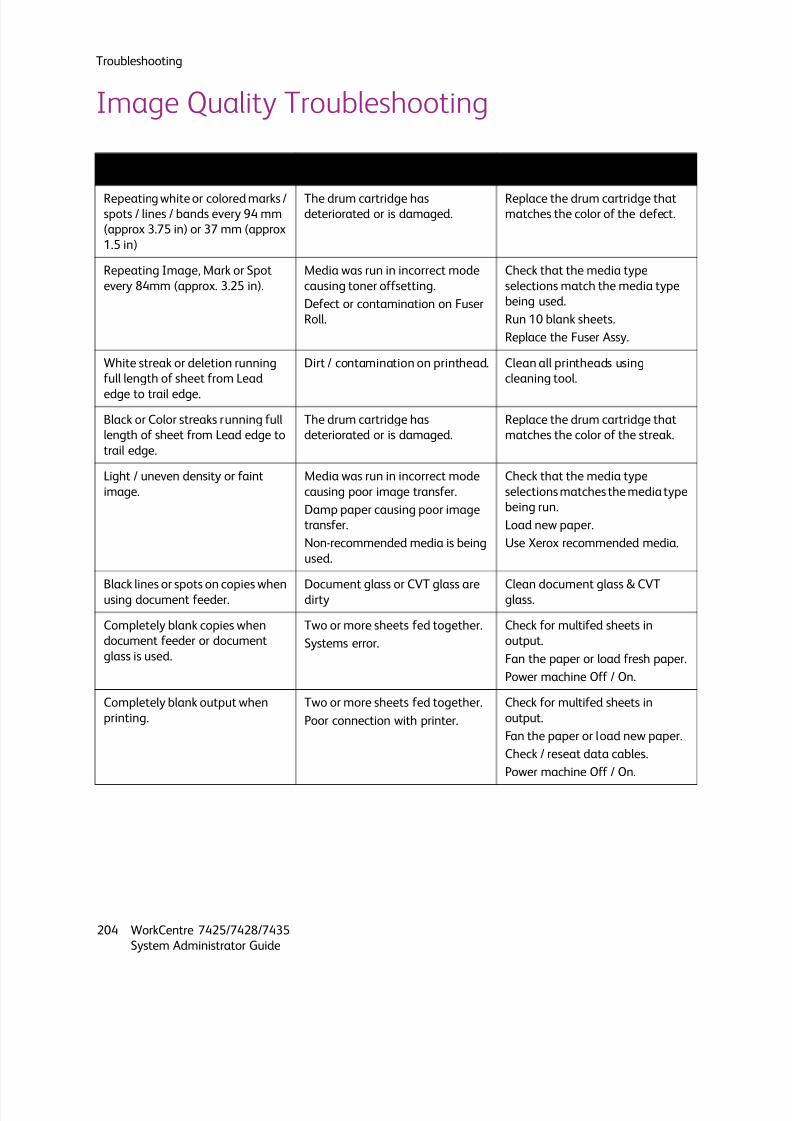
8/6/2019 Enu WC74XX Sys Admin Guide
http://slidepdf.com/reader/full/enu-wc74xx-sys-admin-guide 204/208
Troubleshooting
WorkCentre 7425/7428/7435
System Administrator Guide
204
Image Quality Troubleshooting
Problem Cause Solution
Repeating white or colored marks /spots / lines / bands every 94 mm
(approx 3.75 in) or 37 mm (approx
1.5 in)
The drum cartridge hasdeteriorated or is damaged.
Replace the drum cartridge thatmatches the color of the defect.
Repeating Image, Mark or Spot
every 84mm (approx. 3.25 in).
Media was run in incorrect mode
causing toner offsetting.
Defect or contamination on Fuser
Roll.
Check that the media type
selections match the media type
being used.
Run 10 blank sheets.
Replace the Fuser Assy.
White streak or deletion running
full length of sheet from Lead
edge to trail edge.
Dirt / contamination on printhead. Clean all printheads using
cleaning tool.
Black or Color streaks running full
length of sheet from Lead edge to
trail edge.
The drum cartridge has
deteriorated or is damaged.
Replace the drum cartridge that
matches the color of the streak.
Light / uneven density or faint
image.
Media was run in incorrect mode
causing poor image transfer.
Damp paper causing poor image
transfer.
Non-recommended media is being
used.
Check that the media type
selections matches the media type
being run.
Load new paper.
Use Xerox recommended media.
Black lines or spots on copies whenusing document feeder. Document glass or CVT glass aredirty Clean document glass & CVTglass.
Completely blank copies when
document feeder or document
glass is used.
Two or more sheets fed together.
Systems error.
Check for multifed sheets in
output.
Fan the paper or load fresh paper.
Power machine Off / On.
Completely blank output when
printing.
Two or more sheets fed together.
Poor connection with printer.
Check for multifed sheets in
output.
Fan the paper or load new paper.
Check / reseat data cables.
Power machine Off / On.

8/6/2019 Enu WC74XX Sys Admin Guide
http://slidepdf.com/reader/full/enu-wc74xx-sys-admin-guide 205/208
Image Quality Troubleshooting
WorkCentre 7425/7428/7435
System Administrator Guide
205
High background or dirt on copy. The document glass or document
cover is dirty.
Document may be transparent (a
transparency).
Document is on colored paper or
rough paper.
Document is on glossy paper.
Clean the document glass and
document cover.
Place a sheet of paper over
transparent documents.
Select Auto Background
Suppression.
For glossy documents place a
transparency between the
document and glass. Power
machine Off / On.
The copy density is too dark or too
light.
Copy density is set to Lighten or
Darken on Image Quality Image
options screen.
Check Lighten / Darken setting on
Image Quality Image Options
screen. Adjust as needed.
The Image is slightly misaligned
on Copies or Prints.
Paper is not properly loaded or
aligned in paper tray.
Paper guides in Tray 5 not aligned
with paper stack.
Guides in Document feeder are
not in correct position.
Check that paper is correctly
loaded in paper tray.
Ensure that guides are located
against stack in Tray 5.
Ensure that guides in document
feeder are correctly located.
Copy is misaligned or skewed. Document is not correctly located
on document glass.
Ensure that document is aligned
with registration edges on the
document glass.
Color reproduction is not as
expected.
Incorrect color matching settings
in print driver.
Color parameters have changed.
Check / correct color matching
driver settings.
Run Color calibration procedure -
see Color Calibration on page 206.
Missing image or image deletions. Damp paper causing poor image
transfer.
Paper in tray may be folded or
wrinkled.
Document on glass includes paste
up sections.
Load new paper.
Check condition of paper in paper
tray, replace a/r.
Place small stack of paper on top
of document to hold it flat to
document glass.
Wrinkled, damaged or Creased
Sheets.
Paper is damp / old.
Poor quality paper being used.
Paper not correctly loaded in
paper trays.
Load new paper.
Use Xerox recommended media.
Check / reload paper in trays.
Toner rubs off sheet or smudges. Media was run in incorrect modecausing poor fusing of image.
Damp paper being used.
Non recommended media being
used.
Two or more sheets fed together.
Check that the media typeselections matches the media type
being run. Load new paper.
Use Xerox recommended media.
Check for blank sheets in output.
Replace the Fuser Assy.
Problem Cause Solution

8/6/2019 Enu WC74XX Sys Admin Guide
http://slidepdf.com/reader/full/enu-wc74xx-sys-admin-guide 206/208
Troubleshooting
WorkCentre 7425/7428/7435
System Administrator Guide
206
Color Calibration
The color calibration procedure is used to ensure consistent color reproduction over time for copies andprints. Performing the calibration procedure adjusts the output densities to be as close to the printer’sspecified values as possible. If performed on media which has lower densities the outcome will beincreased densities and vice versa. It should be performed if optimal color reproduction andconsistency over time is desired.
1. Press the Log In/Out button on the control panel.2. Enter the System Administrator’s Login ID and Passcode if prompted (default admin, 1111), and
press Enter.
3. Press the Machine Status button.
4. Touch the Tools tab.
5. Select the Setup & Calibration button.
6. Select the Calibration button from the Group section. The Calibration screen will be displayed.
7. Select the required calibration button:
• Copy Job 1 – Text & Text/Photo Modes
• Copy Job 2 – Photo Mode
• Print Job 1 – Lower quality modes• Print Job 2 – Higher quality modes
8. Select the Paper Supply button. The Paper Supply screen will be displayed.
9. Select the required paper tray to print the Calibration Test Page from the list displayed, and thenselect the Save button.
10. Select the Target button.
11. Select the required calibration type:
• Copy & Print Jobs
• Copy Jobs Only
• Print Jobs Only
• None
Note: To fully calibrate both copies and prints it is necessary to run all four job types and apply them tothe corresponding type. If such precision is not needed one should select the most important outputtype and then apply the results to both copy and print jobs. If one is experiencing color reproductionissues in one Job type but not the others then it is only necessary to run calibration for the problematic job type.
Excessive paper curl. Paper is damp / old.
Poor quality paper being used.
Custom cut paper has wrong grain
direction.
Load new paper.
Turn paper stack over.
Use Xerox approved media, see
RML.
Load custom cut paper in different
orientation or cut short grain.
Problem Cause Solution
8/6/2019 Enu WC74XX Sys Admin Guide
http://slidepdf.com/reader/full/enu-wc74xx-sys-admin-guide 207/208
Image Quality Troubleshooting
WorkCentre 7425/7428/7435
System Administrator Guide
207
12. Select the Save button.
13. Select the Start button on the Touch Screen. A Calibration Test Page will print with instructions onhow to perform the calibration.
14. Follow the instructions to perform the calibration, and then select theStart button on the touchscreen. A message stating the calibration was successful or unsuccessful will be displayed.
Note: The calibration sheet with the two magenta (pink) squares on the top and bottom of the page,must be placed face -down (printed side) with the magenta squares along the left side of thedocument glass. If the calibration sheet is not positioned correctly on the glass, a message will bedisplayed. Make sure the calibration sheet is positioned correctly, and then select the Start button onthe Touch Screen.
Select the Confirm button.
15. Repeat steps 6 - 14 for any other calibration type that is required.
16. When finished calibrating, select the Close button.
17. Press the Log In/Out button on the control panel.
18. Select the Logout button on the Touch Screen.

8/6/2019 Enu WC74XX Sys Admin Guide
http://slidepdf.com/reader/full/enu-wc74xx-sys-admin-guide 208/208
Troubleshooting