Embed Size (px)
Citation preview
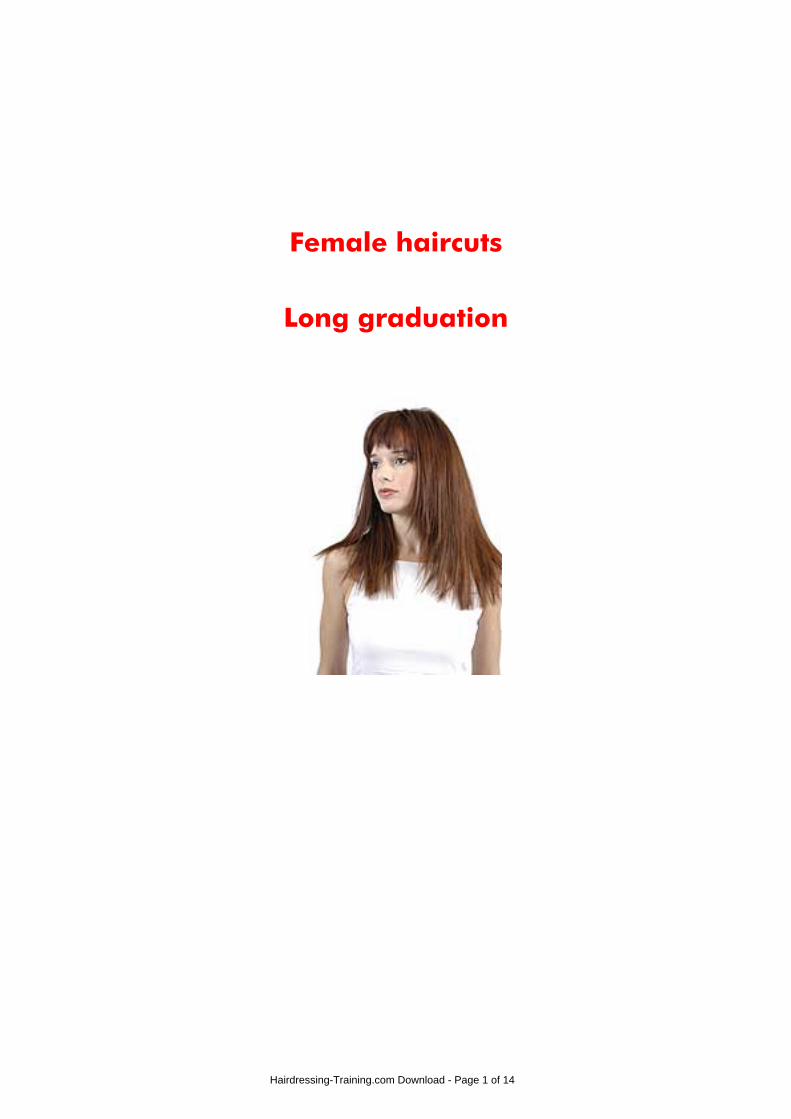
Female haircuts
Long graduation
Hairdressing-Training.com Download - Page 1 of 14
Long graduation
This haircut first became popular in the 1970s. It brought new movement to long hair andrevolutionised the way it was styled.
Long graduation allows you to create a soft, textured outline shape while still achieving height andvolume on the top.
This haircut is still one of the most popular styles for long hair and it has developed to includevariations in length, texture and movement. It can even be used to produce the straight, flat look thatis fashionable today.
Almost all face shapes and hair textures are suited to long graduation because it is so adaptable.For example, for a client with a square face, you can create short layers on the top of the head togive it length. Or, if your cliens has a long face, you can shorten the overall length of the cut to maketheir face appear rounder.
Long graduation is an adaptable, flexible and useful cut and it is likely to be the one that you usemost often.
Hairdressing-Training.com Download - Page 2 of 14
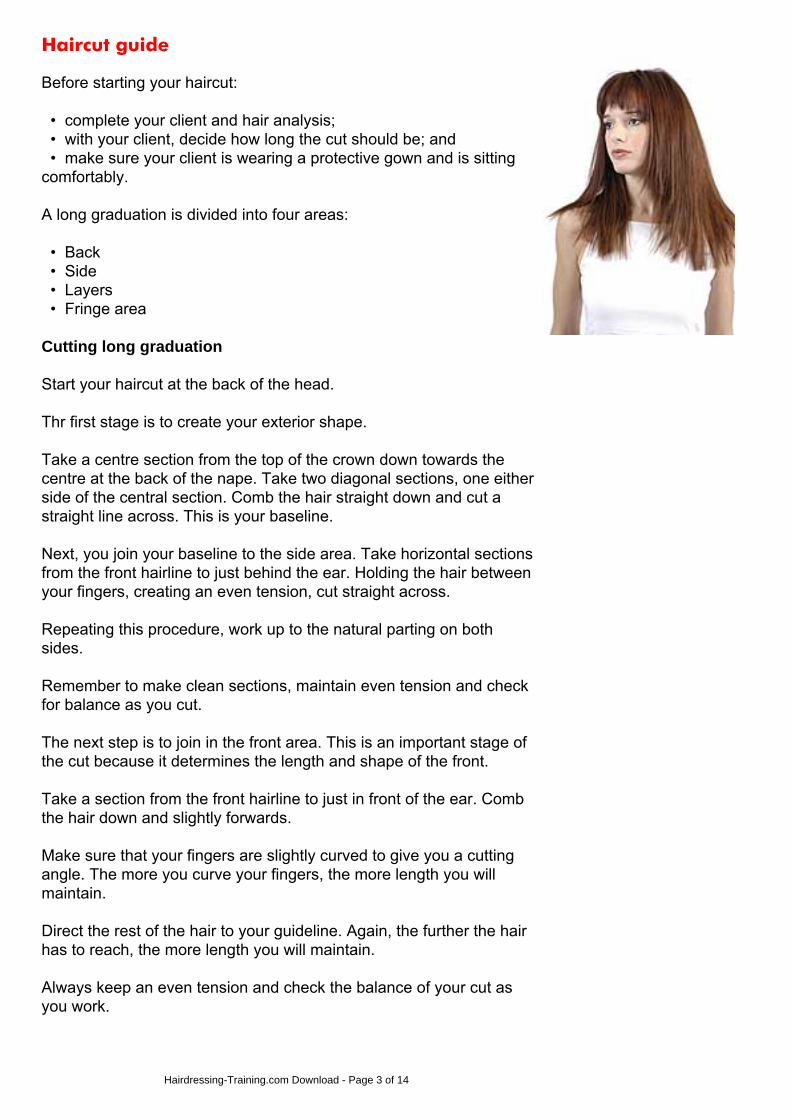
Haircut guide
Before starting your haircut:
• complete your client and hair analysis; • with your client, decide how long the cut should be; and • make sure your client is wearing a protective gown and is sittingcomfortably.
A long graduation is divided into four areas:
• Back • Side • Layers • Fringe area
Cutting long graduation
Start your haircut at the back of the head.
Thr first stage is to create your exterior shape.
Take a centre section from the top of the crown down towards thecentre at the back of the nape. Take two diagonal sections, one eitherside of the central section. Comb the hair straight down and cut astraight line across. This is your baseline.
Next, you join your baseline to the side area. Take horizontal sectionsfrom the front hairline to just behind the ear. Holding the hair betweenyour fingers, creating an even tension, cut straight across.
Repeating this procedure, work up to the natural parting on bothsides.
Remember to make clean sections, maintain even tension and checkfor balance as you cut.
The next step is to join in the front area. This is an important stage ofthe cut because it determines the length and shape of the front.
Take a section from the front hairline to just in front of the ear. Combthe hair down and slightly forwards.
Make sure that your fingers are slightly curved to give you a cuttingangle. The more you curve your fingers, the more length you willmaintain.
Direct the rest of the hair to your guideline. Again, the further the hairhas to reach, the more length you will maintain.
Always keep an even tension and check the balance of your cut asyou work.
Hairdressing-Training.com Download - Page 3 of 14
Follow your curved sectioning pattern back until you reach behind theear, pulling all the hair forwards to meet your guideline (butremembering not to include the fringe area at this stage of thehaircut).
The layering technique
You will use square layering in this haircut.
Create a top box section on the top of the head. Take a section fromboth sides, from the middle of the eyes back towards the top of thecrown.
Holding the hair straight up and keeping your fingers square to theheadshape, work forwards.
Next, work down from your top box section into the side areas. Directthe hair upwards to your guideline, keeping your fingers square to theheadshape. Repeat on the opposite side.
To create the square layering in the back area, take a profile linedown the centre of the head and dirct all the hair upwards to meetyour guideline. Remember to keep the angle in your fingers if youwant to maintain length and weight.
Hairdressing-Training.com Download - Page 4 of 14
Step 1 of 19 - Before you cut
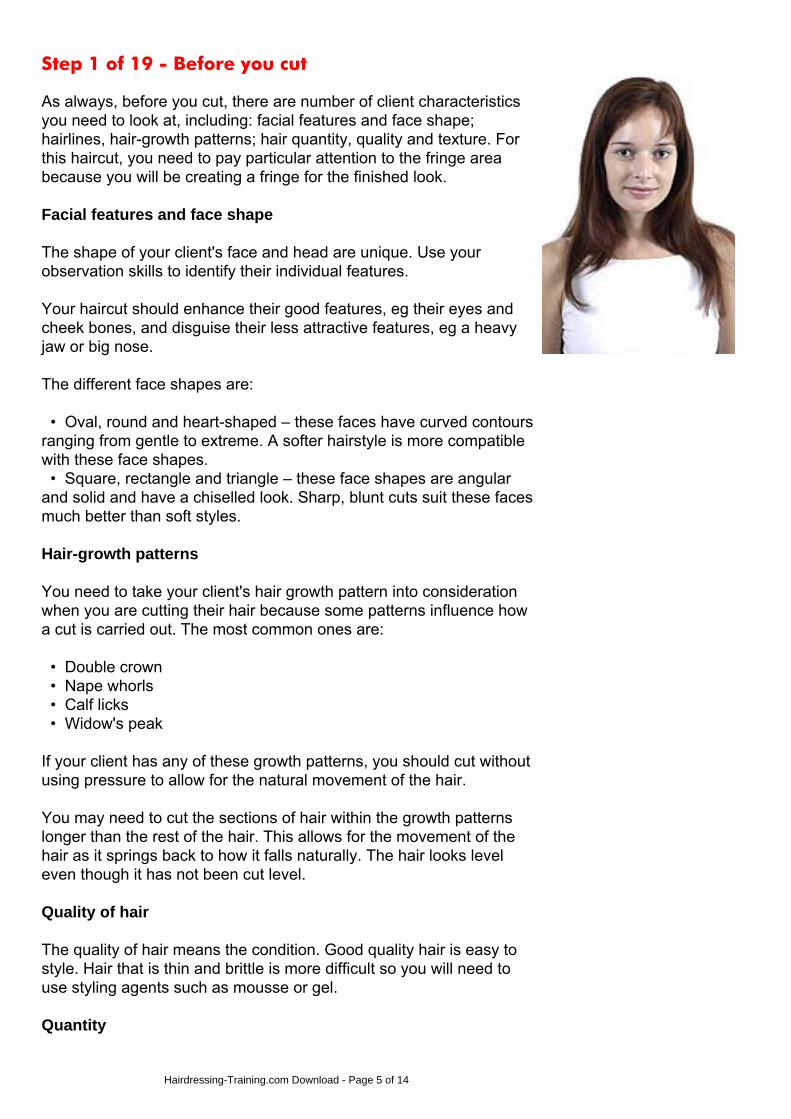
As always, before you cut, there are number of client characteristicsyou need to look at, including: facial features and face shape;hairlines, hair-growth patterns; hair quantity, quality and texture. Forthis haircut, you need to pay particular attention to the fringe areabecause you will be creating a fringe for the finished look.
Facial features and face shape
The shape of your client's face and head are unique. Use yourobservation skills to identify their individual features.
Your haircut should enhance their good features, eg their eyes andcheek bones, and disguise their less attractive features, eg a heavyjaw or big nose.
The different face shapes are:
• Oval, round and heart-shaped – these faces have curved contoursranging from gentle to extreme. A softer hairstyle is more compatiblewith these face shapes. • Square, rectangle and triangle – these face shapes are angularand solid and have a chiselled look. Sharp, blunt cuts suit these facesmuch better than soft styles.
Hair-growth patterns
You need to take your client's hair growth pattern into considerationwhen you are cutting their hair because some patterns influence howa cut is carried out. The most common ones are:
• Double crown • Nape whorls • Calf licks • Widow's peak
If your client has any of these growth patterns, you should cut withoutusing pressure to allow for the natural movement of the hair.
You may need to cut the sections of hair within the growth patternslonger than the rest of the hair. This allows for the movement of thehair as it springs back to how it falls naturally. The hair looks leveleven though it has not been cut level.
Quality of hair
The quality of hair means the condition. Good quality hair is easy tostyle. Hair that is thin and brittle is more difficult so you will need touse styling agents such as mousse or gel.
Quantity
Hairdressing-Training.com Download - Page 5 of 14
Quantity refers to the density of hair – how much hair is on the headand how thick or fine the hair shape is.
These factors are important when you are thinking about the balanceand control of a hair style. For example, it is easy to show volume onthick hair. On thin hair it is more difficult so you need to use stylinggels and mousses.
When you are applying chemical treatments, the thickness of yourclient's hair will dictate how much product and what techniques youuse. For example, fine hair can be more resistant to colour and permtreatments.
Texture
There are three types of hair texture:
• Fine • Medium/normal • Thick/coarse
The texture of your client's hair affects the size of the sections youtake. For thicker hair, you need finer sections to make sure theguideline is visible. You need to see the guideline to know exactlywhere to cut each section of hair.
In this case, our model's face shape is square.
Her hair type is naturally curly and it's density is above average.
Divide the hair cut into segments: back; side; front; and internal layers.
Step 2 of 19 - Checking hairlines
Hairline
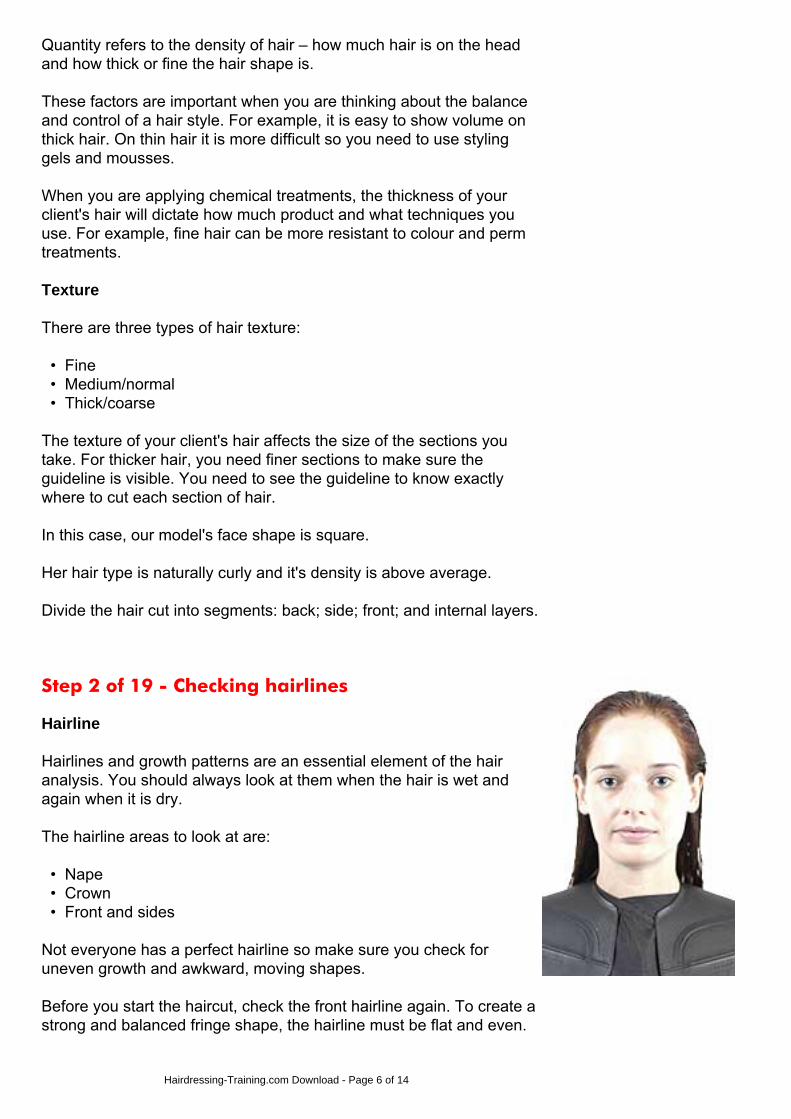
Hairlines and growth patterns are an essential element of the hairanalysis. You should always look at them when the hair is wet andagain when it is dry.
The hairline areas to look at are:
• Nape • Crown • Front and sides
Not everyone has a perfect hairline so make sure you check foruneven growth and awkward, moving shapes.
Before you start the haircut, check the front hairline again. To create astrong and balanced fringe shape, the hairline must be flat and even.
Hairdressing-Training.com Download - Page 6 of 14
Step 3 of 19 - Back area
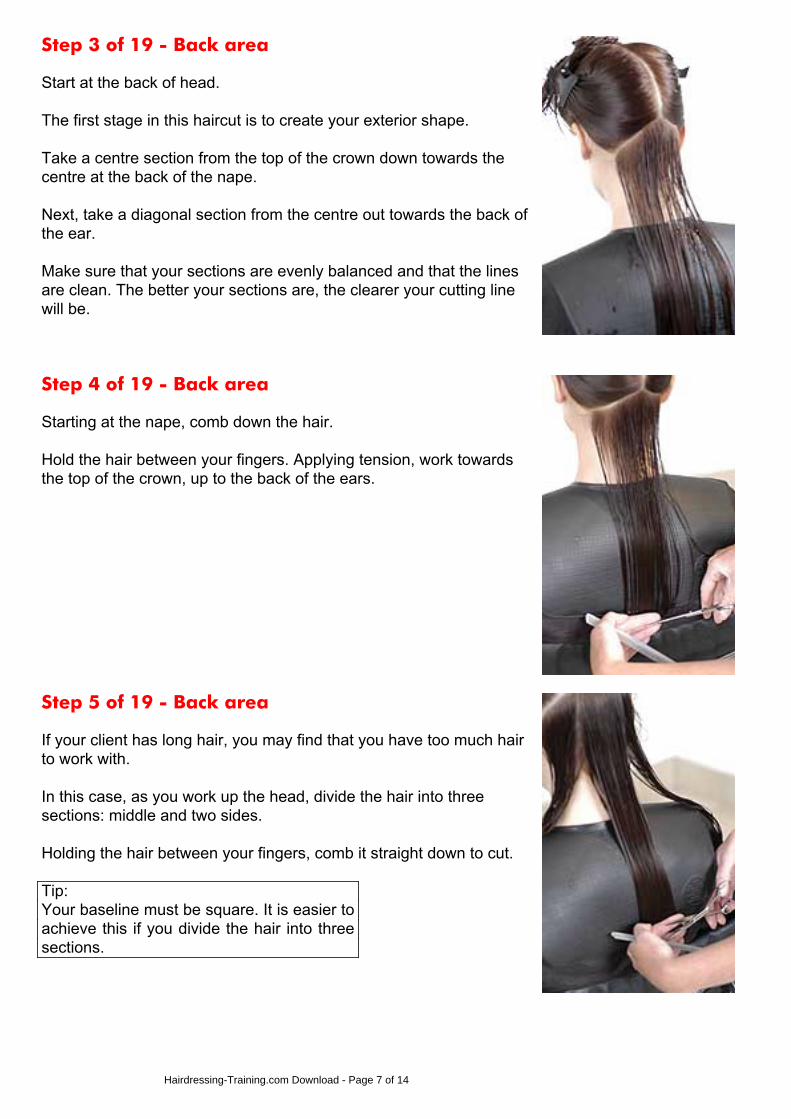
Start at the back of head.
The first stage in this haircut is to create your exterior shape.
Take a centre section from the top of the crown down towards thecentre at the back of the nape.
Next, take a diagonal section from the centre out towards the back ofthe ear.
Make sure that your sections are evenly balanced and that the linesare clean. The better your sections are, the clearer your cutting linewill be.
Step 4 of 19 - Back area
Starting at the nape, comb down the hair.
Hold the hair between your fingers. Applying tension, work towardsthe top of the crown, up to the back of the ears.
Step 5 of 19 - Back area
If your client has long hair, you may find that you have too much hairto work with.
In this case, as you work up the head, divide the hair into threesections: middle and two sides.
Holding the hair between your fingers, comb it straight down to cut.
Tip:Your baseline must be square. It is easier toachieve this if you divide the hair into threesections.
Hairdressing-Training.com Download - Page 7 of 14
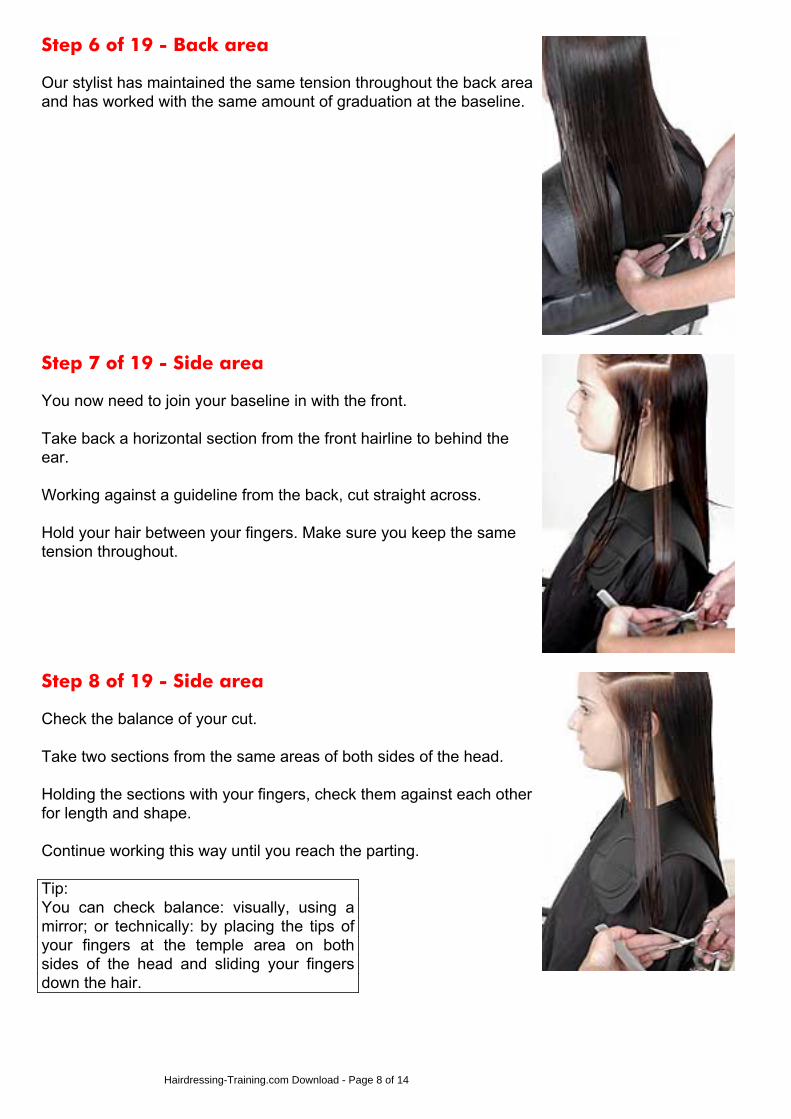
Step 6 of 19 - Back area
Our stylist has maintained the same tension throughout the back areaand has worked with the same amount of graduation at the baseline.
Step 7 of 19 - Side area
You now need to join your baseline in with the front.
Take back a horizontal section from the front hairline to behind theear.
Working against a guideline from the back, cut straight across.
Hold your hair between your fingers. Make sure you keep the sametension throughout.
Step 8 of 19 - Side area
Check the balance of your cut.
Take two sections from the same areas of both sides of the head.
Holding the sections with your fingers, check them against each otherfor length and shape.
Continue working this way until you reach the parting.
Tip:You can check balance: visually, using amirror; or technically: by placing the tips ofyour fingers at the temple area on bothsides of the head and sliding your fingersdown the hair.
Hairdressing-Training.com Download - Page 8 of 14
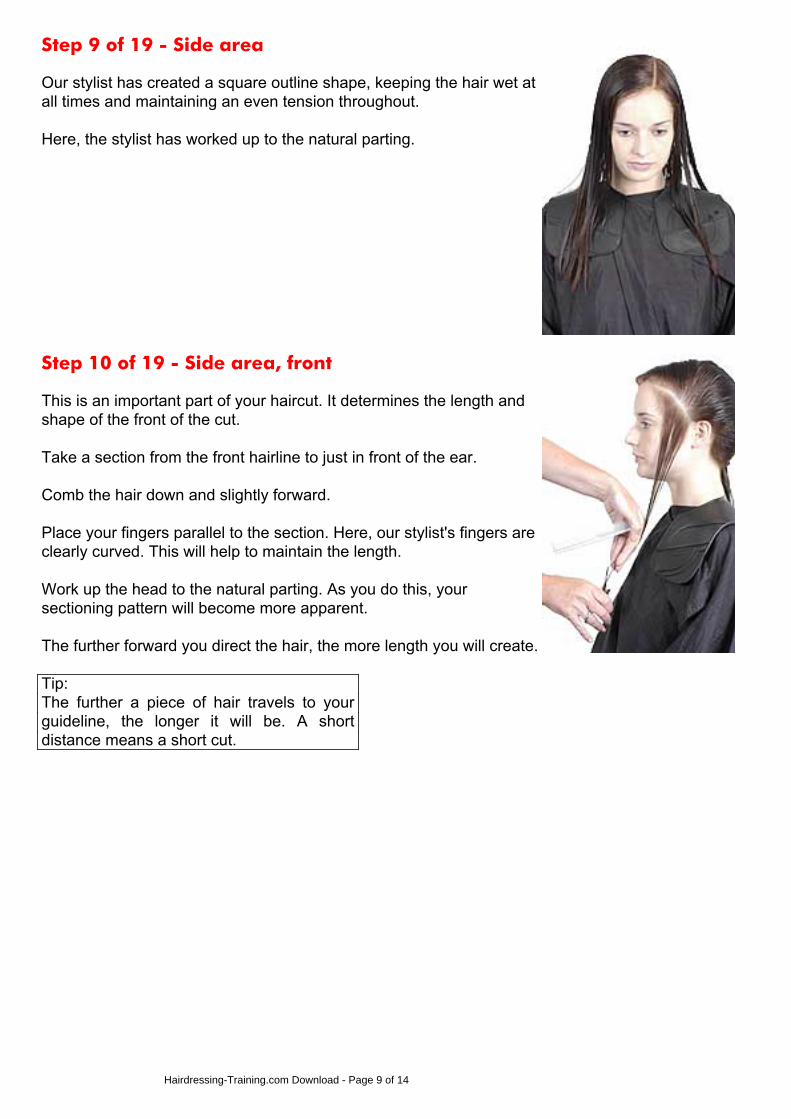
Step 9 of 19 - Side area
Our stylist has created a square outline shape, keeping the hair wet atall times and maintaining an even tension throughout.
Here, the stylist has worked up to the natural parting.
Step 10 of 19 - Side area, front
This is an important part of your haircut. It determines the length andshape of the front of the cut.
Take a section from the front hairline to just in front of the ear.
Comb the hair down and slightly forward.
Place your fingers parallel to the section. Here, our stylist's fingers areclearly curved. This will help to maintain the length.
Work up the head to the natural parting. As you do this, yoursectioning pattern will become more apparent.
The further forward you direct the hair, the more length you will create.
Tip:The further a piece of hair travels to yourguideline, the longer it will be. A shortdistance means a short cut.
Hairdressing-Training.com Download - Page 9 of 14
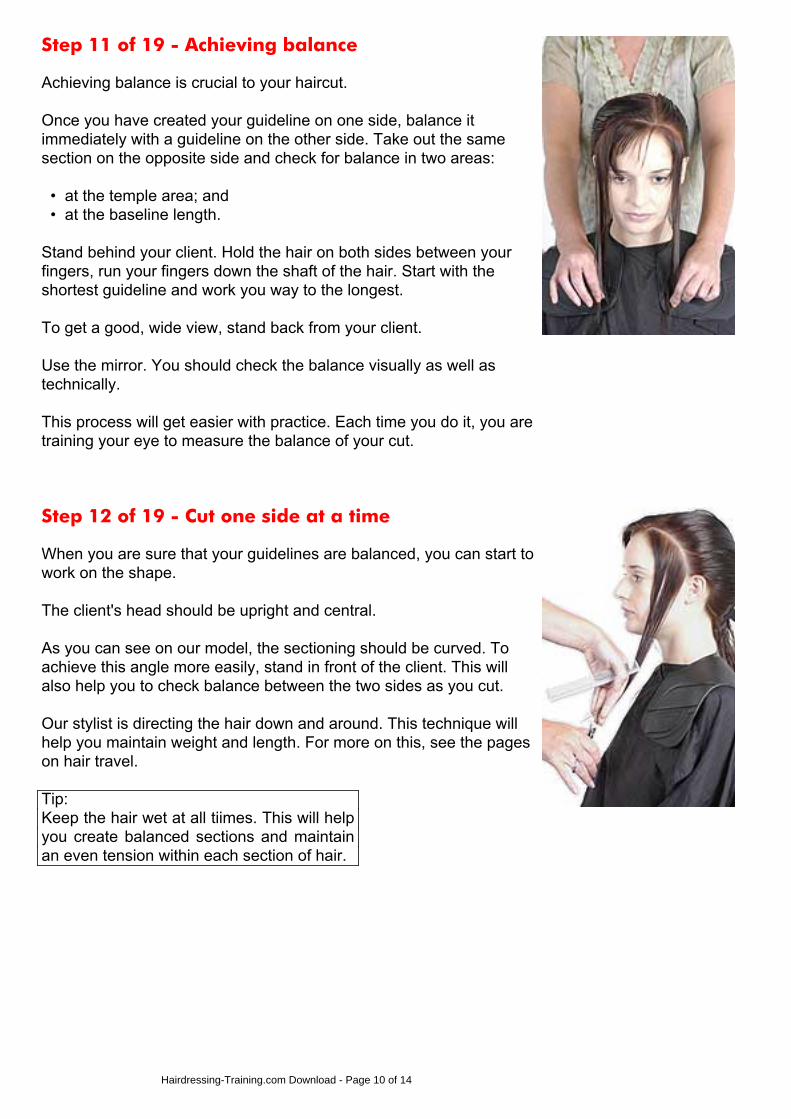
Step 11 of 19 - Achieving balance
Achieving balance is crucial to your haircut.
Once you have created your guideline on one side, balance itimmediately with a guideline on the other side. Take out the samesection on the opposite side and check for balance in two areas:
• at the temple area; and • at the baseline length.
Stand behind your client. Hold the hair on both sides between yourfingers, run your fingers down the shaft of the hair. Start with theshortest guideline and work you way to the longest.
To get a good, wide view, stand back from your client.
Use the mirror. You should check the balance visually as well astechnically.
This process will get easier with practice. Each time you do it, you aretraining your eye to measure the balance of your cut.
Step 12 of 19 - Cut one side at a time
When you are sure that your guidelines are balanced, you can start towork on the shape.
The client's head should be upright and central.
As you can see on our model, the sectioning should be curved. Toachieve this angle more easily, stand in front of the client. This willalso help you to check balance between the two sides as you cut.
Our stylist is directing the hair down and around. This technique willhelp you maintain weight and length. For more on this, see the pageson hair travel.
Tip:Keep the hair wet at all tiimes. This will helpyou create balanced sections and maintainan even tension within each section of hair.
Hairdressing-Training.com Download - Page 10 of 14
Step 13 of 19 - Bring the hair forward
As you work back towards the central point at the back of the head,bring the hair forward to meet the guideline at the front.
Notice the position of the stylist's fingers. Keep the angle of yourfingers the same from when you cut your first section through to theend of your haircut. This way you will create minimum graduation onyour cutting line.
To ensure that the hair is longer at the back, draw the back hairforward onto your front guideline.
Because you have already cut your back guideline, you will not becutting much off as you work your way through the back of the hair
Check the balance of your cut again.
Tip:Graduation allows the hair to turn under andbrush away from the face. The distance thehair travels to the guideline dictates thelength of your cut. A short distance will giveyou a short cut, a long distance a long cut.
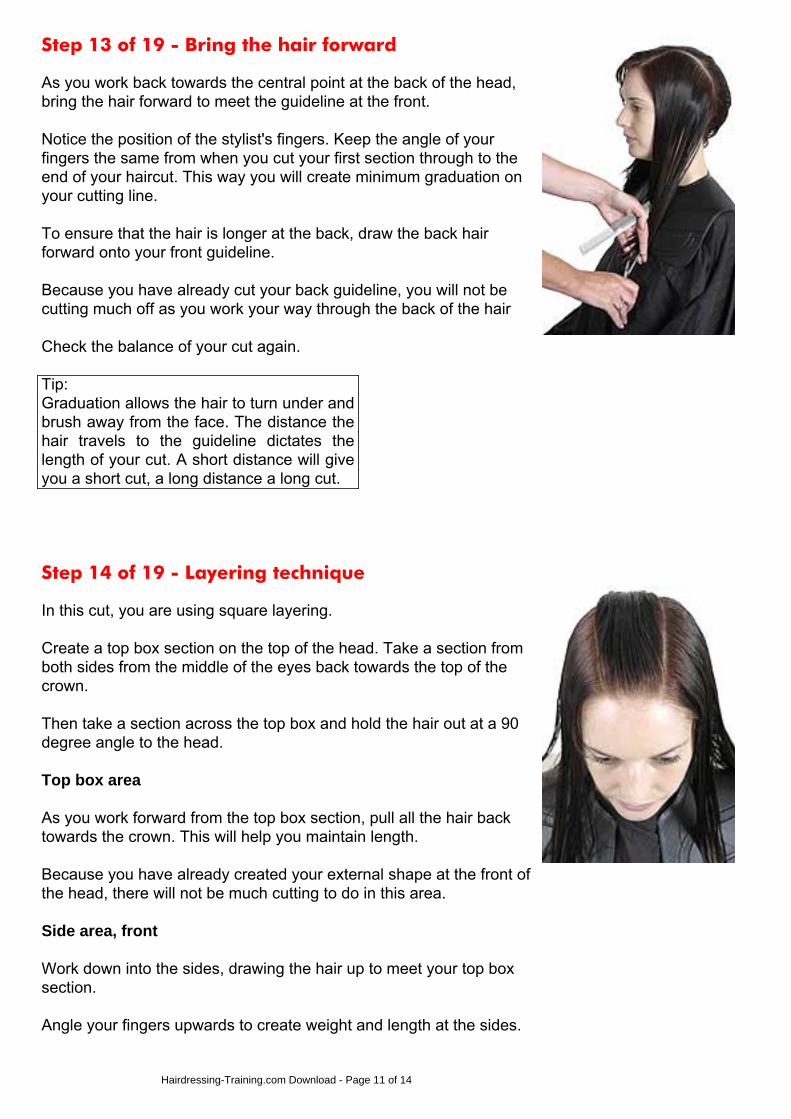
Step 14 of 19 - Layering technique
In this cut, you are using square layering.
Create a top box section on the top of the head. Take a section fromboth sides from the middle of the eyes back towards the top of thecrown.
Then take a section across the top box and hold the hair out at a 90degree angle to the head.
Top box area
As you work forward from the top box section, pull all the hair backtowards the crown. This will help you maintain length.
Because you have already created your external shape at the front ofthe head, there will not be much cutting to do in this area.
Side area, front
Work down into the sides, drawing the hair up to meet your top boxsection.
Angle your fingers upwards to create weight and length at the sides.
Hairdressing-Training.com Download - Page 11 of 14

Remember the rules of hair travel: the further your travels to aguideline, the longer it will be.
Step 15 of 19 - Layering, back area
Create a profile line down the central point of the head at the back.
Direct the hair upwards to the top of the crown to meet your guideline.And remember to angle your fingers to maintain length.
You have now created your guideline for the back of the head.
Step 16 of 19 - Layering, back area
Work out from the central point. Take a diagonal section workingdown into the nape.
This section is over directed, continuing the diagonal sections workingforward and pull the hair up to the central layering guideline.
It is important that you follow your guide line at all times.Keep the hairwet at all times.
When you first do this haircut you may find it difficult, due to workingwith a lot of hair, if this is the case take smaller sections.
Tip:Square layers will help you maintain lengthand weight at the sides of your haircut.Directing the hair over the crown will giveyou more weight and length overall.
Hairdressing-Training.com Download - Page 12 of 14
Step 17 of 19 - Fringe
You do not have to create a fringe with this haircut. You shoulddiscuss this option with your client during your consultation.
To create a fringe, take a section from the natural parting. On ourmodel, we are using a side parting.
From the parting, take a curved section out to the corner of the eyeson both sides.
Comb the hair down, using the wide teeth of your comb. This willshow up - and help you work with - any irregularities at the front, suchas an uneven hairline.
If there are any irregularities in the hairline, they should not come as asurprise. You should have been looking for them during your clientconsultation and analysis.
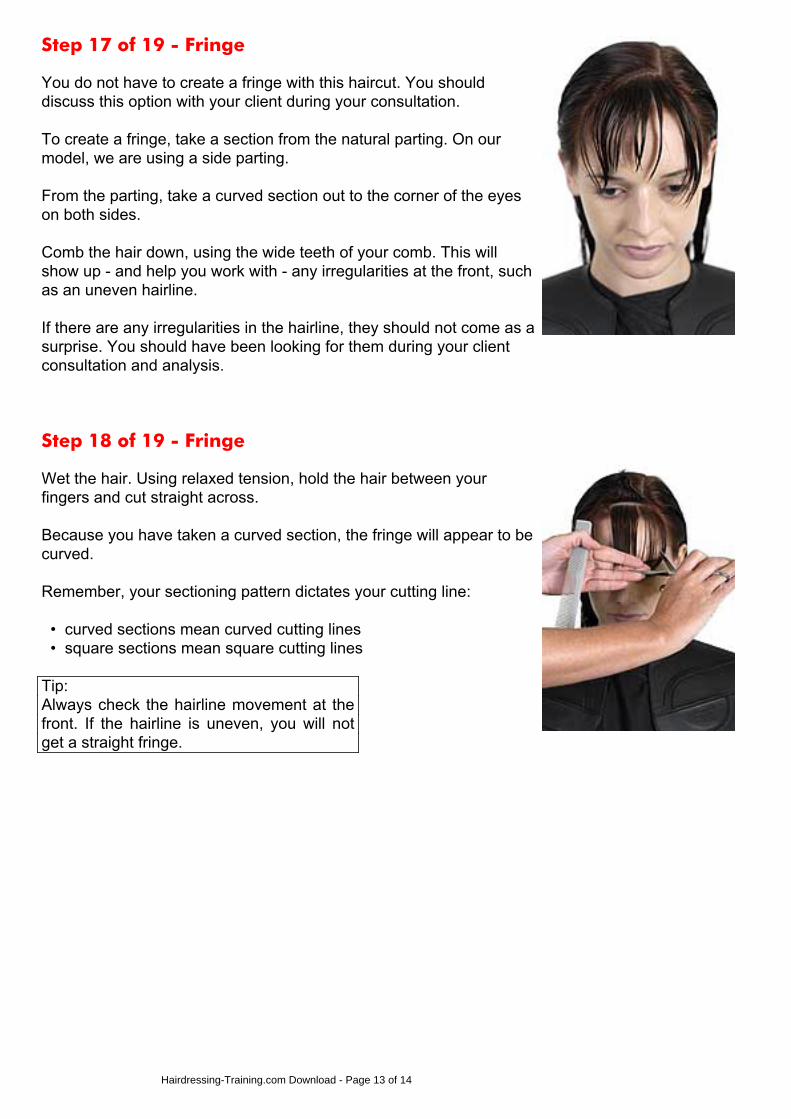
Step 18 of 19 - Fringe
Wet the hair. Using relaxed tension, hold the hair between yourfingers and cut straight across.
Because you have taken a curved section, the fringe will appear to becurved.
Remember, your sectioning pattern dictates your cutting line:
• curved sections mean curved cutting lines • square sections mean square cutting lines
Tip:Always check the hairline movement at thefront. If the hairline is uneven, you will notget a straight fringe.
Hairdressing-Training.com Download - Page 13 of 14
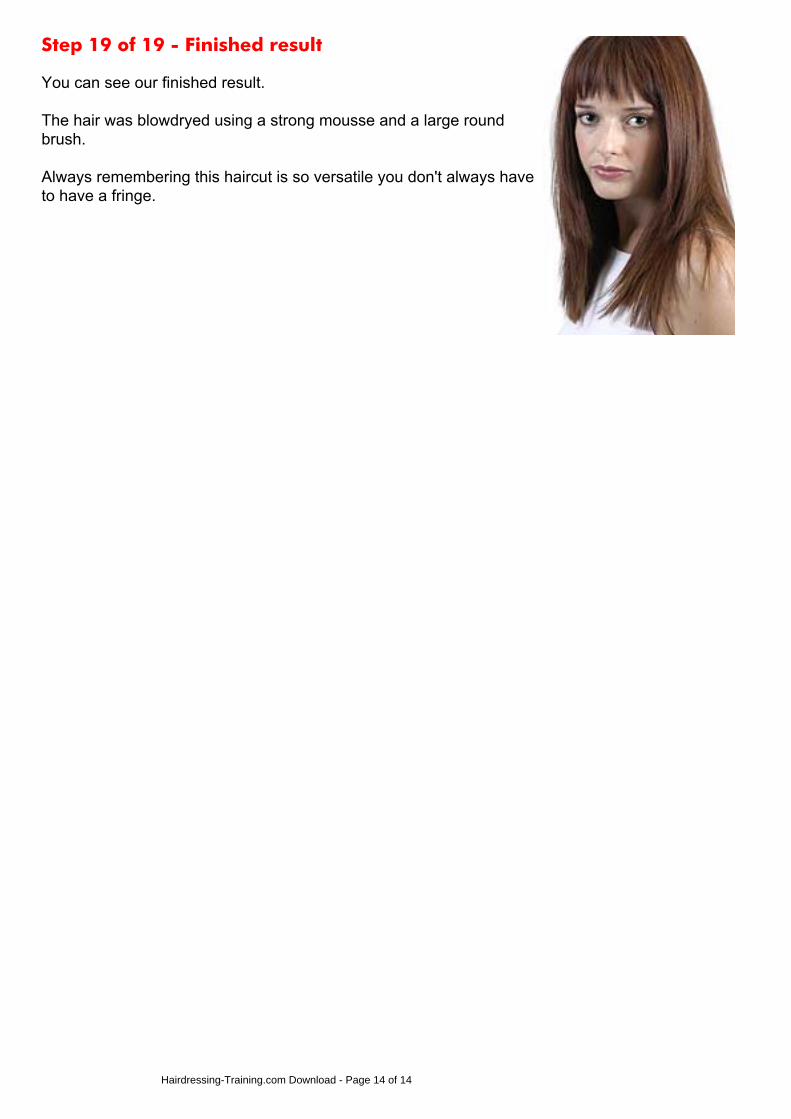
Step 19 of 19 - Finished result
You can see our finished result.
The hair was blowdryed using a strong mousse and a large roundbrush.
Always remembering this haircut is so versatile you don't always haveto have a fringe.
Hairdressing-Training.com Download - Page 14 of 14