Embed Size (px)
Citation preview

Agent Installation Guide
Foglight® Performance Analysis for Oracle

© 2011 Quest Software, Inc. ALL RIGHTS RESERVED.
This guide contains proprietary information protected by copyright. The software described in this guide is furnished under a software license or nondisclosure agreement. This software may be used or copied only in accordance with the terms of the applicable agreement. No part of this guide may be reproduced or transmitted in any form or by any means, electronic or mechanical, including photocopying and recording for any purpose other than the purchaser’s personal use without the written permission of Quest Software, Inc.
The information in this document is provided in connection with Quest products. No license, express or implied, by estoppel or otherwise, to any intellectual property right is granted by this document or in connection with the sale of Quest products. EXCEPT AS SET FORTH IN QUEST'S TERMS AND CONDITIONS AS SPECIFIED IN THE LICENSE AGREEMENT FOR THIS PRODUCT, QUEST ASSUMES NO LIABILITY WHATSOEVER AND DISCLAIMS ANY EXPRESS, IMPLIED OR STATUTORY WARRANTY RELATING TO ITS PRODUCTS INCLUDING, BUT NOT LIMITED TO, THE IMPLIED WARRANTY OF MERCHANTABILITY, FITNESS FOR A PARTICULAR PURPOSE, OR NON-INFRINGEMENT. IN NO EVENT SHALL QUEST BE LIABLE FOR ANY DIRECT, INDIRECT, CONSEQUENTIAL, PUNITIVE, SPECIAL OR INCIDENTAL DAMAGES (INCLUDING, WITHOUT LIMITATION, DAMAGES FOR LOSS OF PROFITS, BUSINESS INTERRUPTION OR LOSS OF INFORMATION) ARISING OUT OF THE USE OR INABILITY TO USE THIS DOCUMENT, EVEN IF QUEST HAS BEEN ADVISED OF THE POSSIBILITY OF SUCH DAMAGES. Quest makes no representations or warranties with respect to the accuracy or completeness of the contents of this document and reserves the right to make changes to specifications and product descriptions at any time without notice. Quest does not make any commitment to update the information contained in this document.
If you have any questions regarding your potential use of this material, contact: Quest Software World Headquarters LEGAL Dept 5 Polaris Way Aliso Viejo, CA 92656 www.quest.com email: [email protected]
Refer to our Web site for regional and international office information.
Patents
This product includes patent pending technology.
Trademarks
Quest, Quest Software, the Quest Software logo, Foglight, IntelliProfile, PerformaSure, Spotlight, StealthCollect, TOAD, Tag and Follow, Vintela Single Sign-on for Java, and vFoglight are trademarks and registered trademarks of Quest Software, Inc in the United States of America and other countries. For a complete list of Quest Software’s trademarks, please see http://www.quest.com/legal/trademark-information.aspx. Other trademarks and registered trademarks are property of their respective owners.
Third Party Contributions
Foglight Performance Analysis contains some third party components. For a complete list, see the License Credits page in Foglight Performance Analysis online help.
Agent Installation Guide
Version 7.0

Table of Contents
Foglight Performance Analysis for Oracle: Agent Installation Guide
About the Foglight Performance Analysis Agent............................................................................................................1
Installation Prerequisites...................................................................................................................................................3
General............................................................................................................................................................................................ 3
Oracle Host ............................................................................................................................................................................. 4
Monitored Instance.................................................................................................................................................................. 4
Middle-tier Host ....................................................................................................................................................................... 4
Supported Platforms and Additional Information........................................................................................................................... 13
Getting Support and the Latest Software Downloads ........................................................................................................... 13
Handling Oracle 32-bit Instances .......................................................................................................................................... 14
Foglight Performance Analysis Users ........................................................................................................................................... 14
Further Information................................................................................................................................................................ 15
Architecture Overview......................................................................................................................................................16
Multi-tier vs. Single-tier Architecture.............................................................................................................................................. 17
Single-tier Topology .............................................................................................................................................................. 17
Multi-tier Topology................................................................................................................................................................. 18
Performance Repository................................................................................................................................................................ 19
Performance Repository Benefits.......................................................................................................................................... 19
Repository Placement ........................................................................................................................................................... 19
The quest_launcher Component ................................................................................................................................................... 19
Installing on RAC........................................................................................................................................................................... 20
Active/Passive Cluster................................................................................................................................................................... 22
Active/Passive Cluster........................................................................................................................................................... 22
Active/Passive Agent Solution............................................................................................................................................... 23
Additional UNIX/Linux Configuration ..................................................................................................................................... 25
Additional Windows Configuration......................................................................................................................................... 25
Active/Active Cluster ..................................................................................................................................................................... 30
Active/Active Cluster Agent Solution ..................................................................................................................................... 30
Agent Installation Wizard.................................................................................................................................................31
Agent Installation Wizard Preface ......................................................................................................................................... 31
Introduction screen................................................................................................................................................................ 31
Installing Agent Components ................................................................................................................................................ 31
Uninstalling an Existing Agent............................................................................................................................................... 32

Foglight Performance Analysis for Oracle: Agent Installation Guide
Table of Contents
Upgrading Agent Components to the Latest Version............................................................................................................. 32
Installing Repository Support for an Existing Agent Installation............................................................................................. 32
Agent Architecture Screen............................................................................................................................................................. 32
Multi-tier ................................................................................................................................................................................. 33
Single Tier.............................................................................................................................................................................. 33
Repository Installation ................................................................................................................................................................... 33
Multi-tier - Middleware Component................................................................................................................................................ 34
Middle-tier Port Selection Screen .......................................................................................................................................... 34
Agent Communication Port .................................................................................................................................................... 35
Minimal/Demo Installation...................................................................................................................................................... 35
Middleware Component Settings Screen............................................................................................................................... 36
Firewall Setting ...................................................................................................................................................................... 37
Middleware Installation Completed ........................................................................................................................................ 39
Multi-tier - Oracle Server Component ............................................................................................................................................ 40
Agent Port Selection Screen.................................................................................................................................................. 40
Agent Communication Port .................................................................................................................................................... 40
Minimal/Demo Installation...................................................................................................................................................... 40
Oracle Collector Component Settings Screen ....................................................................................................................... 43
Installation Directory .............................................................................................................................................................. 43
Default Directory .................................................................................................................................................................... 43
User Specified........................................................................................................................................................................ 43
Firewall Settings..................................................................................................................................................................... 43
Middleware Specification ............................................................................................................................................................... 46
Middle-tier Host...................................................................................................................................................................... 46
Middle-tier Communication Port............................................................................................................................................. 46
Single Tier .................................................................................................................................................................................... 47
Port Selection......................................................................................................................................................................... 48
Agent Communication Port .................................................................................................................................................... 48
Minimal/Demo Installation...................................................................................................................................................... 48
Agent Components Settings Screen...................................................................................................................................... 51
Installation Directory .............................................................................................................................................................. 51
Default Directory .................................................................................................................................................................... 51
User Specified........................................................................................................................................................................ 51
Firewall Settings..................................................................................................................................................................... 51
Monitored Instance Settings .......................................................................................................................................................... 53
Oracle SID ............................................................................................................................................................................. 53
TNS Listener Port .................................................................................................................................................................. 53
Oracle Username and Password ........................................................................................................................................... 53
Cluster Specification .............................................................................................................................................................. 53
Oracle Home on the Middle-tier Host..................................................................................................................................... 53
ERP Specification Screen.............................................................................................................................................................. 56

Foglight Performance Analysis for Oracle: Agent Installation Guide
Table of Contents
None ...................................................................................................................................................................................... 57
Oracle Applications ................................................................................................................................................................ 57
PeopleSoft ............................................................................................................................................................................. 57
Resource Savings Options ............................................................................................................................................................ 57
Oracle User Privileges - DBA User................................................................................................................................................ 63
Oracle User Privileges - SYSDBA User......................................................................................................................................... 65
Operating System Privileges ......................................................................................................................................................... 67
Foglight Performance Analysis Agent Installation Completed ....................................................................................................... 68
Monitored Instance Selection ........................................................................................................................................................ 68
Performance Repository Installation.............................................................................................................................................. 69
Performance Repository Screen............................................................................................................................................ 69
Oracle Host Details Screen.................................................................................................................................................... 70
Host........................................................................................................................................................................................ 70
Agent Communication Port .................................................................................................................................................... 70
Monitored Oracle Instance..................................................................................................................................................... 72
Monitored Instance Objects Installation ................................................................................................................................. 73
Repository Instance ............................................................................................................................................................... 75
Repository Upgrade............................................................................................................................................................... 78
Repository Manager Upgrade................................................................................................................................................ 79
Repository Instance Object Installation.................................................................................................................................. 80
Repository Configuration ....................................................................................................................................................... 81
Agent Uninstallation ............................................................................................................................................................... 82
Oracle Host Details........................................................................................................................................................................ 83
Monitored Instance Selection ........................................................................................................................................................ 84
Agent Upgrade ................................................................................................................................................................. 85
Oracle Host Details........................................................................................................................................................................ 85
Middle-tier Host Details.................................................................................................................................................................. 87
Monitored Instance Selection ........................................................................................................................................................ 87
Middleware Upgrade Required ...................................................................................................................................................... 88
Oracle User Privileges - DBA User................................................................................................................................................ 89
Oracle User Privileges - SYSDBA User......................................................................................................................................... 90
Monitored Instance Objects Installation......................................................................................................................................... 92
Repository Owner Privileges ......................................................................................................................................................... 93
Repository Upgrade....................................................................................................................................................................... 94
Repository Manager Upgrade........................................................................................................................................................ 95
Post-Installation Tasks .................................................................................................................................................... 97
Setting Collector OS Privileges (AIX) ............................................................................................................................................ 97
Configuring ERP Support .............................................................................................................................................................. 98
ERP Views ............................................................................................................................................................................. 98
Configuring PeopleSoft .......................................................................................................................................................... 99

Foglight Performance Analysis for Oracle: Agent Installation Guide
Table of Contents
Configuring Oracle Applications........................................................................................................................................... 100
Index................................................................................................................................................................................ 108

1
About the Foglight Performance Analysis Agent
Foglight Performance Analysis for Oracle has a server-based agent (Foglight Performance Analysis Agent) that monitors databases and workloads of all scales: from small environments up to intensive databases hosting thousands of concurrent sessions. The agent samples and collects (multiple times per second) performance data from Oracle's System Global Area (SGA) and from the operating system APIs. The collected metrics are made available as data, either as a present activity stream or as historical activity.
By directly accessing Oracle's SGA and the operating system APIs, the Foglight Performance Analysis agent gathers session data samples from Oracle in a non-intrusive manner, without incurring the overhead of using queries against V$ tables and without affecting the currently running Oracle processes. The raw samples are combined into high-level performance data. The data and statistics are made available in several easily navigable formats for efficient analysis, troubleshooting, and tuning of both historical and current session activities.

Foglight Performance Analysis for Oracle: Agent Installation Guide 2
The Foglight Performance Analysis Agent technology can operate non-intrusively 24 hours a day, seven days a week and collect every bit of the database, thereby enabling users to find out what happened on a particular day at a particular time (for example, two days ago at 2:00 P.M.).
Related Topics
“Architecture Overview” on page 16
Foglight Performance Analysis for Oracle: Agent Installation Guide 3
Installation Prerequisites
The following actions must be performed prior to installing the Foglight Performance Analysis agent. These prerequisites also apply for each instance installed using the silent installer.
Notes:
• For single-tier installations, all prerequisites apply to the Oracle Host.
• The latest information about prerequisites and supported Oracle versions is available in on the Release Information page:
http://www.quest.com/Foglight-Performance-Analysis-for-Oracle.
General• Verify that your Oracle version is supported. For details, see section “Supported Platforms
and Additional Information” on page 13.
• Verify that your operating system is supported. For details, see section Supported Platforms and Additional Information.
• Verify using the Foglight Performance Analysis user type requested for the installation. For details, see section “Foglight Performance Analysis Users” on page 14.
• Select the agent architecture that best matches your business needs. For more information see section“Multi-tier vs. Single-tier Architecture” on page 17.
• Ensure that all Hosts and Clients involved in the installation are visible to one another through the network.
• Verify that the agent communication port is not being used by another program or Foglight Performance Analysis agent instance.
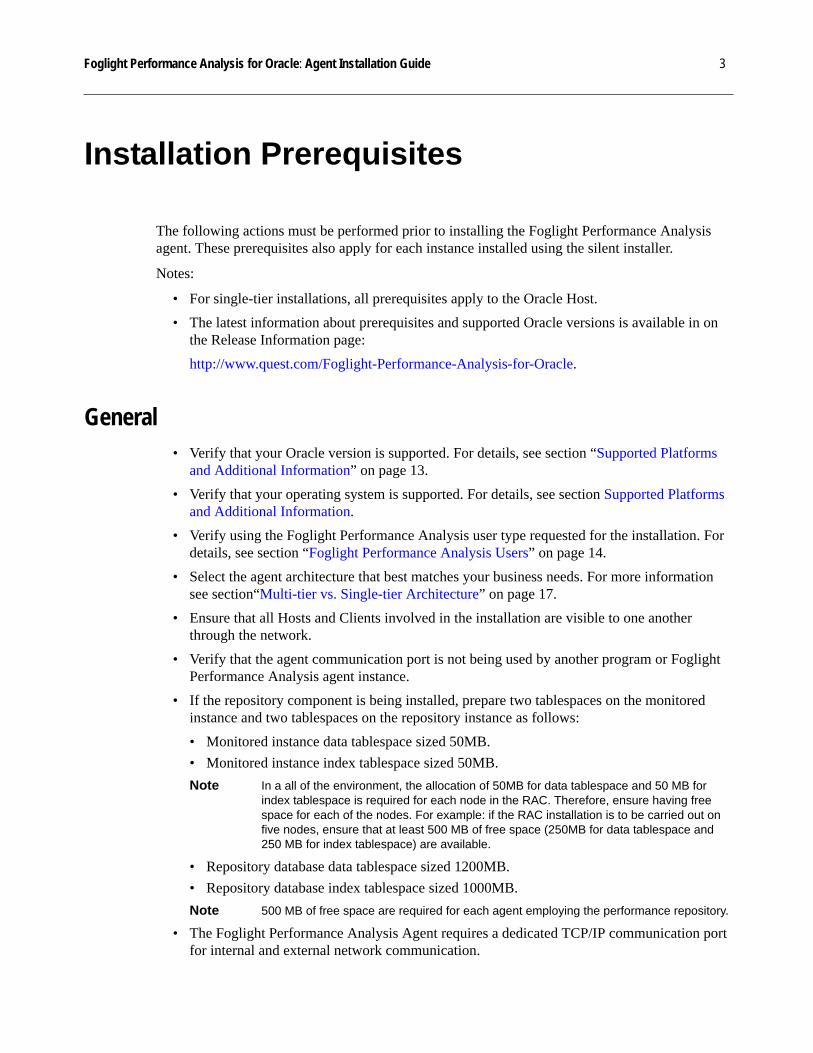
• If the repository component is being installed, prepare two tablespaces on the monitored instance and two tablespaces on the repository instance as follows:
• Monitored instance data tablespace sized 50MB.
• Monitored instance index tablespace sized 50MB.
Note In a all of the environment, the allocation of 50MB for data tablespace and 50 MB for index tablespace is required for each node in the RAC. Therefore, ensure having free space for each of the nodes. For example: if the RAC installation is to be carried out on five nodes, ensure that at least 500 MB of free space (250MB for data tablespace and 250 MB for index tablespace) are available.
• Repository database data tablespace sized 1200MB.
• Repository database index tablespace sized 1000MB.
Note 500 MB of free space are required for each agent employing the performance repository.
• The Foglight Performance Analysis Agent requires a dedicated TCP/IP communication port for internal and external network communication.

Foglight Performance Analysis for Oracle: Agent Installation Guide 4
Verify that the agent communication port that you intend to use is not already used by another program. Quest recommended using the default port 3566. It is recommended that multiple Foglight Performance Analysis Agents installed on the same host will share the same communication port.
• In Active/Passive Cluster environments, run the agent installation wizard on the shared disk. The agent should be installed only once per Oracle instance.
Oracle Host • On UNIX computers, verify that the OS user running the installation is the Oracle owner.
• Verify that the Oracle account used for installing the Foglight Performance Analysis agent has the following privileges:
• Create session (grant create session to <user>) - additional privileges will be granted during the installation.
• Verify that the target installation directory has at least 300 MB of free disk space for a multi-tier installation or 4 GB of disk space for a single-tier installation.
• Verify for UNIX installations, that the target instance has a corresponding entry in the oratab file.
Note For UNIX installations, the oratab file is usually located in either of the following directories: /var/opt/oracle/oratab or /etc/oratab. The entry should be in the following format: {SID}:{Oracle Home}:Y For example: ORCL:/export/home/oracle/product/9.2.0.2:Y
• Ensure that the Oracle instance is running and is accessible through SQL*Net from other Hosts.
• For AIX platform, grant read permission for everyone on the /dev/kmem file (on AIX version 6.x and higher, grant read permission for everyone on the /dev/pmem file as well). See section“Setting Collector OS Privileges (AIX)” on page 97 for additional information.
Monitored Instance• Verify that the monitored instance is running.
Middle-tier Host• Ensure that the target installation directory has at least 4 GB of free disk space, which are
required for each agent employing this middle-tier host.
Note It is recommended to reserve additional space beyond initial planning to allow future growth.
• Verify that the Oracle Client version is at least 8.0.5.

Foglight Performance Analysis for Oracle: Agent Installation Guide 5
• Verify that the OS user owning the installation has execute privileges on the Oracle Home directory (for example: the OS user must be able to run SQL*PLUS from the specified Oracle Home).
• Verify that the installation OS user account has WRITE privileges to the installation directory.
• Required Privileges
• Installation of the agent components requires that a variety of privileges and roles be granted on the monitored and (optional) repository instances. During the agent installation, if the quest user lacks the required privileges to perform these grants, you will be required to grant them, automatically or manually, as follows:
• On the monitored instance
• automatically by specifying a DBA or SYSDBA user which will be temporarily used by installation wizard -or-
• manually by running the quest_pa_grant_mon_user.sql script as a SYSDBA user (and providing the <quest user> when prompted). The installation will copy this script to a temporary location only after detecting that the required privileges are not available. The script will be located in the following directory:
• Windows: %TEMP%\pa_mon_sqls_<##>
• UNIX: /tmp/pa_mon_sqls_<##>
• On the repository instance
• Automatically by specifying a DBA user which will be used by installation wizard -or-
• Manually by running the quest_pa_grant_rep_user.sql script as a dba user (and providing the <quest user> when prompted). The installation will copy this script to a temporary location only after detecting that the required privileges are not available. The script will be located in the following directory:
• Windows: %TEMP%\pa_rep_sqls_<##>
• UNIX: /tmp/pa_rep_sqls_<##>
• Privileges List
• Monitored instance
• Privileges/Roles on the Monitored Instance
• Oracle Applications
• Privileges/Roles on the Repository Instance
• Privileges/Roles on the Monitored Instance
• select ANY TABLE
• alter SESSION
• create PROCEDURE
• create SEQUENCE

Foglight Performance Analysis for Oracle: Agent Installation Guide 6
• create SESSION
• create SYNONYM
• create TABLE
• create VIEW
• unlimited tablespace
• select_CATALOG_ROLE
Grant select on the following objects:
TAB$ V_$ROLLNAME V_$PQ_TQSTAT
FET$ V_$ROLLSTAT V_$ACTIVE_INSTANCES
SEG$ V_$UNDOSTAT V_$SQL_CURSOR
UNDO$ V_$SGA V_$SQL_BIND_METADATA
TS$ V_$PARAMETER V_$SQL_BIND_DATA
FILE$ V_$PARAMETER2 V_$SQL_SHARED_MEMORY
OBJ$ V_$OBSOLETE_PARAMETER
V_$GLOBAL_TRANSACTION
IND$ V_$SYSTEM_PARAMETER
V_$SESSION_OBJECT_CACHE
ICOL$ V_$SYSTEM_PARAMETER2
V_$SESSION_OBJECT_CACHE
COL$ V_$SPPARAMETER V_$LOCK_ACTIVITY
USER$ V_$ROWCACHE V_$AQ1
CON$ V_$ROWCACHE_PARENT
V_$HS_AGENT
CDEF$ V_$ROWCACHE_SUBORDINATE
V_$HS_SESSION
CCOL$ V_$ENABLEDPRIVS V_$HS_PARAMETER
SEQ$ V_$NLS_PARAMETERS
V_$RSRC_CONSUMER_GROUP_CPU_MTH

Foglight Performance Analysis for Oracle: Agent Installation Guide 7
HIST_HEAD$ V_$NLS_VALID_VALUES
V_$RSRC_PLAN_CPU_MTH
TABPART$ V_$LIBRARYCACHE V_$RSRC_CONSUMER_GROUP
TABSUBPART$ V_$TYPE_SIZE V_$RSRC_PLAN
EXTERNAL_TAB$ V_$ARCHIVE V_$PX_SESSION
AUX_STATS$ V_$CIRCUIT V_$PX_SESSTAT
V_$MAP_LIBRARY V_$DATABASE V_$BACKUP_SYNC_IO
V_$MAP_FILE V_$INSTANCE V_$BACKUP_ASYNC_IO
V_$MAP_FILE_EXTENT V_$DISPATCHER V_$TEMPORARY_LOBS
V_$MAP_ELEMENT V_$DISPATCHER_RATE
V_$PX_PROCESS
V_$MAP_EXT_ELEMENT V_$LOGHIST V_$PX_PROCESS_SYSSTAT
V_$MAP_COMP_LIST V_$SQLAREA V_$LOGMNR_CONTENTS
V_$MAP_SUBELEMENT V_$SQLTEXT V_$LOGMNR_PARAMETERS
V_$MAP_FILE_IO_STACK V_$SQLTEXT_WITH_NEWLINES
V_$LOGMNR_DICTIONARY
V_SQL_REDIRECTION V_$SQL V_$LOGMNR_LOGS
V_$SQL_PLAN V_$SQL_SHARED_CURSOR
V_$GLOBAL_BLOCKED_LOCKS
V_$SQL_PLAN_STATISTICS V_$DB_PIPES V_$AW_OLAP
V_$SQL_PLAN_STATISTICS_ALL
V_$DB_OBJECT_CACHE
V_$AW_CALC
V_$SQL_WORKAREA V_$OPEN_CURSOR V_$AW_SESSION_INFO
V_$SQL_WORKAREA_ACTIVE
V_$OPTION V_$MAX_ACTIVE_SESS_TARGET_MTH
V_$SQL_WORKAREA_HISTOGRAM
V_$VERSION V_$ACTIVE_SESS_POOL_MTH

Foglight Performance Analysis for Oracle: Agent Installation Guide 8
V_$PGA_TARGET_ADVICE V_$PQ_SESSTAT V_$PARALLEL_DEGREE_LIMIT_MTH
V_$PGA_TARGET_ADVICE_HISTOGRAM
V_$PQ_SYSSTAT V_$QUEUEING_MTH
V_$PGASTAT V_$PQ_SLAVE V_$RESERVED_WORDS
V_$DLM_MISC V_$QUEUE V_$ARCHIVE_DEST_STATUS
V_$DLM_LATCH V_$SHARED_SERVER_MONITOR
V_$DB_CACHE_ADVICE
V_$DLM_CONVERT_LOCAL V_$DBLINK V_$SEGMENT_STATISTICS
V_$DLM_CONVERT_REMOTE
V_$PWFILE_USERS V_$SEGSTAT_NAME
V_$DLM_ALL_LOCKS V_$REQDIST V_$SEGSTAT
V_$DLM_LOCKS V_$SGASTAT V_$LIBRARY_CACHE_MEMORY
V_$DLM_RESS V_$WAITSTAT V_$SHARED_POOL_ADVICE
V_$HVMASTER_INFO V_$SHARED_SERVER V_$SGA_CURRENT_RESIZE_OPS
V_$GCSHVMASTER_INFO V_$TIMER V_$SGA_RESIZE_OPS
V_$GCSPFMASTER_INFO V_$RECOVER_FILE V_$SGA_DYNAMIC_COMPONENTS
V_$DLM_TRAFFIC_CONTROLLER
V_$BACKUP V_$SGA_DYNAMIC_FREE_MEMORY
V_$GES_ENQUEUE V_$BACKUP_SET V_$RESUMABLE
V_$GES_BLOCKING_ENQUEUE
V_$BACKUP_PIECE V_$TIMEZONE_NAMES\
V_$GC_ELEMENT V_$BACKUP_DATAFILE
V_$ENQUEUE_STAT
V_$CR_BLOCK_SERVER V_$BACKUP_SPFILE V_$RMAN_CONFIGURATION

Foglight Performance Analysis for Oracle: Agent Installation Guide 9
V_$FILE_CACHE_TRANSFER V_$BACKUP_REDOLOG
V_$LOGMNR_STATS
V_$TEMP_CACHE_TRANSFER
V_$BACKUP_CORRUPTION
V_$DATABASE_INCARNATION
V_$CLASS_CACHE_TRANSFER
V_$COPY_CORRUPTION
GV_$SYSSTAT
V_$BH V_$DATABASE_BLOCK_CORRUPTION
GV_$INSTANCE
V_$LOCK_ELEMENT V_$MTTR_TARGET_ADVICE
V_$LOGMNR_LOGFILE
V_$LOCKS_WITH_COLLISIONS
V_$STATISTICS_LEVEL
V_$LOGMNR_PROCESS
V_$FILE_PING V_$DELETED_OBJECT
V_$LOGMNR_TRANSACTION
V_$TEMP_PING V_$PROXY_DATAFILE
V_$LOGMNR_REGION
V_$CLASS_PING V_$PROXY_ARCHIVEDLOG
V_$LOGMNR_CALLBACK
V_$BUFFER_POOL V_$CONTROLFILE_RECORD_SECTION
V_$LOGMNR_SESSION
V_$BUFFER_POOL_STATISTICS
V_$ARCHIVED_LOG V_$VPD_POLICY
V_$INSTANCE_RECOVERY V_$OFFLINE_RANGE DBA_ROLES
V_$CONTROLFILE V_$DATAFILE_COPY DBA_PROFILES
V_$LOG V_$LOG_HISTORY DBA_DB_LINKS
V_$STANDBY_LOG V_$RECOVERY_LOG DBA_INDEXES
V_$DATAGUARD_STATUS V_$ARCHIVE_GAP DBA_OBJECTS
V_$THREAD V_$DATAFILE_HEADER
DBA_ROLLBACK_SEGS
V_$PROCESS V_$DATAFILE DBA_ROLE_PRIVS
V_$BGPROCESS V_$TEMPFILE DBA_SYS_PRIVS
V_$SESSION V_$TABLESPACE DBA_SEQUENCES

Foglight Performance Analysis for Oracle: Agent Installation Guide 10
V_$LICENSE V_$BACKUP_DEVICE DBA_SYNONYMS
V_$TRANSACTION V_$MANAGED_STANDBY
DBA_TABLES
V_$BSP V_$ARCHIVE_PROCESSES
DBA_TAB_COLUMNS
V_$FAST_START_SERVERS V_$ARCHIVE_DEST DBA_TAB_PRIVS
V_$FAST_START_TRANSACTIONS
V_$FIXED_TABLE DBA_USERS
V_$LOCKED_OBJECT V_$FIXED_VIEW_DEFINITION
DBA_VIEWS
V_$LATCH V_$INDEXED_FIXED_COLUMN
DBA_CONSTRAINTS
V_$LATCH_CHILDREN V_$SESSION_CURSOR_CACHE
DBA_CONS_COLUMNS
V_$LATCH_PARENT V_$SESSION_WAIT V_$LOADPSTAT
V_$LATCHNAME V_$SESSION_EVENT V_$LOADISTAT
V_$LATCHHOLDER V_$SESSION_CONNECT_INFO
V_$LOGSTDBY
V_$LATCH_MISSES V_$SYSTEM_EVENT V_$LOGSTDBY_STATS
V_$SESSION_LONGOPS V_$EVENT_NAME DBA_JOBS
V_$RESOURCE V_$EXECUTION DBA_SEGMENTS
V_$_LOCK V_$SYSTEM_CURSOR_CACHE
DBA_EXTENTS
V_$LOCK V_$SESS_IO DBA_FREE_SPACE
V_$SESSTAT V_$COMPATIBILITY DBA_DATA_FILES
V_$MYSTAT V_$COMPATSEG DBA_TABLESPACES
V_$SUBCACHE V_$RECOVERY_STATUS
DBA_TEMP_FILES
V_$SYSSTAT V_$RECOVERY_FILE_STATUS
V_$TEMP_EXTENT_MAP

Foglight Performance Analysis for Oracle: Agent Installation Guide 11
Oracle Applications
For Oracle Applications installations, grant select on the following objects
• FND_APPLICATION
• FND_APPLICATION_VL
• FND_CONCURRENT_PROCESSES
• FND_CONCURRENT_PROGRAMS_TL
• FND_CONCURRENT_PROGRAMS_VL
• FND_CONCURRENT_QUEUES
• FND_CONCURRENT_QUEUES_TL
• FND_CONCURRENT_REQUESTS
V_$STATNAME V_$RECOVERY_PROGRESS
V_$TEMP_EXTENT_POOL
V_$ACCESS V_$SHARED_POOL_RESERVED
V_$TEMP_SPACE_HEADER
V_$OBJECT_DEPENDENCY V_$SORT_SEGMENT V_$CONTEXT
V_$DBFILE V_$SORT_USAGE V_$GLOBALCONTEXT
V_$FILESTAT V_$RESOURCE_LIMIT V_$REPLQUEUE
V_$TEMPSTAT V_$ENQUEUE_LOCK V_$REPLPROP
V_$LOGFILE V_$TRANSACTION_ENQUEUE
V_$MVREFRESH
X_$KCBFWAIT X_$KSPPI X_$KSQST
V_$STREAMS_CAPTURE V_$STREAMS_APPLY_COORDINATOR
V_$STREAMS_APPLY_SERVER
V_$STREAMS_APPLY_READER
V_$GC_ELEMENTS_WITH_COLLISIONS
V_$_LOCK1
V_$_SEQUENCES X_$KSLES X_$BH
X_$KSMSS X_$KSMSP X_$KSLED
X_$KSUSE X_$KSUSECST X_$KTCXB
X_$KGLCURSOR X_$KSPPCV X_$KTFBUE
X_$KTURD X_$KQLFXPL QUEST_ADV_V_OBJECT_USAGE

Foglight Performance Analysis for Oracle: Agent Installation Guide 12
• FND_CONC_PP_ACTIONS
• FND_EXCLUDE_TABLE_STATS
• FND_LANGUAGES
• FND_LOBS
• FND_LOGINS
• FND_LOGIN_RESPONSIBILITIES
• FND_LOGIN_RESP_FORMS
• FND_LOG_MESSAGES
• FND_LOOKUPS
• FND_NODES
• FND_ORACLE_USERID
• FND_PRODUCT_GROUPS
• FND_PRODUCT_INSTALLATIONS
• FND_PROFILE_OPTIONS
• FND_PROFILE_OPTIONS_TL
• FND_PROFILE_OPTIONS_VL
• FND_PROFILE_OPTION_VALUES
• FND_RESPONSIBILITY_TL
• FND_UNSUCCESSFUL_LOGINS
• FND_USER
• FND_USER_RESP_GROUPS
• HR_OPERATING_UNITS
• ICX_SESSIONS
• ICX_TEXT
• OE_PROCESSING_MSGS
• WF_ITEMS
• WF_ITEM_ACTIVITY_STATUSES
• WF_ITEM_TYPES
• WF_ITEM_TYPES_TL
• WF_NOTIFICATIONS
Privileges/Roles on the Repository Instance
• create SESSION
• create TABLE
• create PROCEDURE

Foglight Performance Analysis for Oracle: Agent Installation Guide 13
• create SEQUENCE
• create DIMENSION
• create VIEW
• create TRIGGER
• query REWRITE
• create TYPE
• unlimited TABLESPACE
• alter SYSTEM
• select_catalog_role
Related Topics
“Installation Prerequisites” on page 3
“Oracle User Privileges - DBA User” on page 63
“Oracle User Privileges - SYSDBA User” on page 65
Supported Platforms and Additional InformationThis help system is designed to provide you with all of the required information for installing, upgrading or uninstalling the Foglight Performance Analysis Agent.
Additional information is available on the Installation DVD and the Foglight Performance Analysis for Oracle page on the Quest web site, on the following address:
http://www.quest.com/Foglight-Performance-Analysis-for-Oracle/
This page provides access to the Document Library, general product information including features and benefits and other helpful information.
Supported Platforms and Versions
For the latest information about supported platforms and versions, refer to the Foglight Performance Analysis for Oracle release notes, available on the Quest Software website (http://www.quest.com).
Note The current version of Foglight Performance Analysis does not support Oracle 32-bit instances on Solaris, HP-UX or AIX platforms. For further information, see section “Architecture Overview” on page 16.
Getting Support and the Latest Software DownloadsQuest Support is available to customers who have a trial version of a Quest product or who have purchased a commercial version and have a valid maintenance contract. Quest Support provides around the clock coverage with SupportLink, our web self-service.

Foglight Performance Analysis for Oracle: Agent Installation Guide 14
Visit SupportLink at http://support.quest.com
Registered Quest SupportLink users can consult the following link to view and download the latest support patch updates (log in to the support first):
https://support.quest.com/Search/SearchDownloads.aspx
From SupportLink, you can do the following:
• Quickly find thousands of solutions (Knowledgebase articles/documents).
• Download patches and upgrades.
• Seek help from a Support engineer.
• Log and update your case, and check its status.
Handling Oracle 32-bit InstancesThe current version of Foglight Performance Analysis Agent does not support Oracle 32-bit instances on Solaris, HP-UX or AIX platforms.
Installing or upgrading Foglight Performance Analysis Agent on a port on which at least one Oracle 32-bit instance is currently installed will disable the monitoring of this instance. Therefore, whenever the installer detects an existing Foglight Performance Analysis 32-bit instance on the port provided, the installation process stops and a warning message appears.
In such a case, the following scenarios are possible:
• If only 32-bit instances are configured, Quest recommends upgrading to the latest version of the Foglight Performance Analysis installer that supports Oracle 32-bit instances (Version 6.3).
• If both 32-bit and 64-bit instances are configured on the same port, and upgrading to the current version of Foglight Performance Analysis is required, separate the 32-bit and the 64-bit instances to different ports.
Foglight Performance Analysis UsersFoglight Performance Analysis has the following types of users:
• OS user:
• Installation OS user—the OS user that runs the installation. This OS user must have WRITE privileges to the target agent installation directory.
• Collector OS user—when installing on UNIX platform, this OS user must be a member of a DBA group, in order to enable the Collector to access the monitored instance’s SGA memory.
Note If the installation OS user is a member of a DBA group, this account will also be used by the Collector to access the monitored instance's SGA memory.
• DB User:

Foglight Performance Analysis for Oracle: Agent Installation Guide 15
• Monitored Instance DB User—during the installation, this DB user must be defined as owner of the monitored schema, and granted several privileges and roles.
The required privileges can be granted either automatically, by specifying a DBA or SYSDBA user, or manually, by running a script. For details, see section “Required Privileges” on page 5.
• Repository DB User—required if the Foglight Performance Analysis repository is configured for this monitored instance. This DB user should be defined as the owner of the monitored schema.
Note For details about privileges and roles granted to the owner of the monitored schema and the repository schema, as well as the objects created in each schema, see the document Performance Analysis 6.X for Oracle Objects and Privileges.
• Performance Analysis Agent User—by default, Performance Analysis agent users are defined with quest as both password and username.
Any customers who modified their default password will have to enter their log-in details when connecting to the Foglight Performance Analysis agent communication port.
Further InformationAbout the Foglight Performance Analysis Agent
Installation Prerequisites
In addition, information about current and upcoming product releases is available at the website:
http://www.quest.com/Foglight-Performance-Analysis-for-Oracle
General product information including features and benefits can be found at:
http://www.quest.com/foglight-performance-analysis-for-oracle

Foglight Performance Analysis for Oracle: Agent Installation Guide 16
Architecture Overview
Foglight Performance Analysis consists of a server agent and a Client component. The Client component queries the Foglight Performance Analysis Agent for Oracle performance data and presents it to the user in an intuitive manner.
The server agent component consists of the following key components, each performing an operational function of the product:
• quest_launcher—the component responsible for: starting, connecting to, and stopping processes. This component also manages authentication.
• Oracle Collector—the component responsible for reading performance data directly from Oracle's SGA.
• Middleware—the component responsible for the aggregation and storage of performance data to satisfy both short-term and long-term queries. Short-term performance data is stored and managed in an internal database, allocated on raw operating system files. The Middleware handles all data processing, advisories management and Client communications.
• Monitored Schema Objects—database objects installed on the Oracle server required to support the Advisory features.
• Long-term Performance Repository—an Oracle Server performance warehouse instance which contains the long-term performance data collected, aggregated and controlled by the Middleware.
• The Performance Repository enables a set of advanced features including:
• Long-term historical data retention
• Performance and deviation advisories
• A powerful Change tracking mechanism that captures all the database related and execution plan changes
Related Topics
“About the Foglight Performance Analysis Agent” on page 1

Foglight Performance Analysis for Oracle: Agent Installation Guide 17
Multi-tier vs. Single-tier ArchitectureThe Foglight Performance Analysis Agent can be installed using a single - or multi-tiered architecture. The configuration chosen affects both the product installation and the hardware requirements.
In a single-tier installation, all processes, except for the repository database, run on the Oracle host. In a multi-tier installation only the Collector runs on the Oracle host while all the other processes run on the middle-tier host. The multi-tier installation is the preferred architecture, as it offloads the processing load from the Oracle host to the middle-tier host, leaving the production system as sterile as and unaffected as possible.
Notes:
• In case the middle-tier uses a Windows X86 operating system, Quest Software recommends installing up to 20 agent instances per port. If Window x64 operating system is used, Quest Software recommends installing up to 50 agent instances per port
• Regardless of the chosen server architecture, Quest Software recommends placing the Performance Repository on a host other than that of the monitored Oracle instance.
The following sections describe the single-tier and multi-tier installations.
Single-tier Topology
Multi-tier Topology
Single-tier Topology

Foglight Performance Analysis for Oracle: Agent Installation Guide 18
The single-tier topology is simple but can impose additional overhead on the host and the Oracle Server instance.
Select this configuration under any of the following circumstances:
• You are monitoring a non-critical environment (for example, test or non-production environments).
• Your production host can handle additional resource demands.
• An additional middle-tier host is not available.
Multi-tier Topology
In a multi-tier installation, the middle-tier layer is installed on a host other than that of the Oracle Server instance, providing for optimal performance. The middle-tier and Oracle host platforms are independent of one another. For example, a middle tier can be running on Windows 2000 and an Oracle instance running on Windows 2003.
The advantages of such a configuration include the following:
• The CPU and I/O load on the Oracle host are reduced and moved onto the . The middle-tier computer capacity should be adjusted according to the number of instances it is designed to serve.
• A site monitoring several instances can employ a single middle-tier host to serve as Middleware for all of the monitored Oracle Server instances. Choosing this configuration lightens the administrative and maintenance burdens, as the Middleware is installed only once. The repository can reside on the middle-tier host or on another host in the network, depending on your configuration and business needs.

Foglight Performance Analysis for Oracle: Agent Installation Guide 19
For a full discussion on the implications of Foglight Performance Analysis architecture topology, access the Foglight Performance Analysis for Oracle page on the Quest web site, at the address below:
http://www.quest.com/foglight-performance-analysis-for-oracle/
Performance RepositoryThe Performance Repository is an Oracle instance serving as a data warehouse for long-term performance data collected and aggregated by the Middleware.
Performance Repository Benefits• Stores unlimited amounts of data that would otherwise be discarded after a short time period
(up to 90 days).
• Offloads data from the short-term storage area and enables the middle-tier to perform more efficiently while still allowing ready access to long-term historical data.
• Enables the change tracking and the performance advisories features.
A single performance repository is capable of handling several monitored instances and it can reside on any Host which is accessible from the middle-tier Host using SQL*Net. The instance must be Oracle 8.1.7 or later Enterprise edition with Bitmap indexes supported.
Repository PlacementFor performance considerations, Quest recommends that the Performance Repository be placed on a host other than the monitored Oracle host.
Placing the Performance Repository on a host other than the middle-tier host improves the agent’s scalability and is highly recommended for environments in which the same middle-tier host serves more than 10 monitored Oracle instances.
Related Topics
“Performance Repository Installation” on page 69
The quest_launcher ComponentThe quest_launcher is the Foglight Performance Analysis agent component used for connecting to the Foglight Performance Analysis agent (StealthCollect) processes on the Oracle Host or on the middle-tier Host. This component runs as a service on Windows servers and as a daemon on UNIX servers.
If the quest_launcher is not running on the Oracle Host, Foglight Performance Analysis will not be able to display the instance activity and will display an error message when trying to connect to the

Foglight Performance Analysis for Oracle: Agent Installation Guide 20
Foglight Performance Analysis agent. This error might also occur if a firewall prevents communication between Foglight Performance Analysis and the Host.
Start and stop the quest_launcher as follows:
To start the Quest launcher:
• UNIX - run the command: <Agent installation directory>/bin/quest_launcher_daemon start
• Windows:
a Open the Services window as follows: click Start > Run, in the Open field enter services.msc, and then click OK.
b Navigate to the quest_launcher service, also known as QAM Launcher <port>.
c Right-click the service name and select Start.
To stop the Quest launcher:
• UNIX - run the command: <Agent installation directory>/bin/quest_launcher_daemon stop
• Windows:
a Open the Services window as follows: click Start > Run, enter services.msc, and then click OK.
b Navigate to the quest_launcher service, also known as QAM Launcher <port>.
c Right-click the service name and select Stop.
Installing on RACReal Application Cluster (RAC) allows sharing a single physical database across multiple servers, each running a corresponding Oracle instance. All of the nodes taken together constitute a single logical entity.
For sites including RAC systems, Foglight Performance Analysis simplifies cluster performance management by consolidating the activity originating in all individual cluster nodes into a single logical cluster view. In this encapsulation of the physical structure, the grid conception is fully maximized and articulated.
For more details about the Foglight Performance Analysis RAC solution, please consult the Foglight Performance Analysis online help.
To enable RAC support:
• Install the Foglight Performance Analysis agent on each RAC member (node).
• To enable the node merging, each agent must have the same installation settings on the Server side:
• Port
• Dimensions used
• Storage periods (time pyramid settings)
Foglight Performance Analysis for Oracle: Agent Installation Guide 21
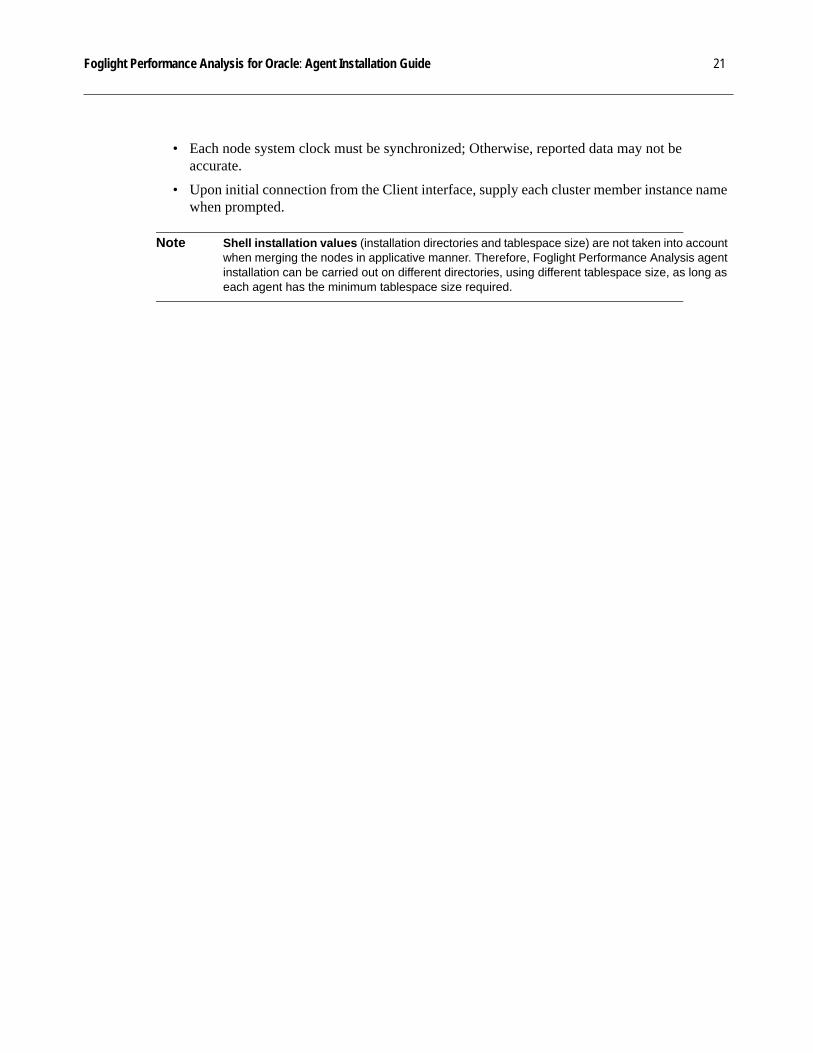
• Each node system clock must be synchronized; Otherwise, reported data may not be accurate.
• Upon initial connection from the Client interface, supply each cluster member instance name when prompted.
Note Shell installation values (installation directories and tablespace size) are not taken into account when merging the nodes in applicative manner. Therefore, Foglight Performance Analysis agent installation can be carried out on different directories, using different tablespace size, as long as each agent has the minimum tablespace size required.

Foglight Performance Analysis for Oracle: Agent Installation Guide 22
Active/Passive ClusterThe following sections describe how to configure an active/passive cluster:
“Active/Passive Cluster” on page 22
“Active/Passive Agent Solution” on page 23
“Additional UNIX/Linux Configuration” on page 25
“Additional Windows Configuration” on page 25
Active/Passive ClusterOracle Active/Passive clustering refers to a group of two or more servers (generally called nodes) that:
• Work together
• Represent themselves as a single virtual server
• Can be connected by using a virtual name
• Share a common storage subsystem (shared drive)
The cluster environment can be represented as follows:
• Node A, Node B - Physical (Actual) names of the participating nodes in the fail-over cluster environment.
• Oracle Instance - The monitored instance.
• Shared Disk - The disk where the Oracle data files reside.
• Virtual IP Address, Virtual Host name - A virtual IP or name used by the end user when connecting to the Oracle instance.

Foglight Performance Analysis for Oracle: Agent Installation Guide 23
Active/Passive Agent Solution1 Run the agent installation locally on the Active node using
PA_Agent_Installer_<version>_<platform>.bin file (available from http://www.quest.com/foglight-performance-analysis-for-oracle > Download).
During the installation, note the following.
a Enter the Virtual IP Address/Virtual Host name for the monitored Host name, as follows:
Console mode installation:
+++++++++++++++++++++++++++++++++++++++++++++++++++++++++++++++++++++++++++++++
+ Cluster specification
+
+ =====================
+
+ Specify whether this host participates in an active/passive Oracle +
+ cluster. +
+ Note: RAC installations do not require this specification. +
+++++++++++++++++++++++++++++++++++++++++++++++++++++++++++++++++++++++++++++++
Does this host participate in an active/passive Oracle cluster?
(Y/N)
: y
Please specify the virtual cluster hostname (DEFAULT: morag)
: 10.10.60.76
GUI mode installation:

Foglight Performance Analysis for Oracle: Agent Installation Guide 24
b Installation must reside on the shared disk where the instance data files reside.
Console mode installation:
+++++++++++++++++++++++++++++++++++++++++++++++++++++++++++++++++++++++++++++++
+ Agent Components Settings
+
+ =========================
+
+ Specify the agent component installation directory and firewall
+
+ settings.
+
+ All agent components will be placed in the installation directory, +
+ consuming 4.0 GB of disk space.
+++++++++++++++++++++++++++++++++++++++++++++++++++++++++++++++++++++++++++++++
Specify the installation directory (DEFAULT:): <shared disk>/quest/
GUI mode installation:

Foglight Performance Analysis for Oracle: Agent Installation Guide 25
2 Validate that the installation has completed successfully by running Foglight Performance Analysis and connecting to the agent.
Additional UNIX/Linux Configuration1 Add the following command to the script that runs when a node fails:
su -l <PA Agent installer user> -c “<PA Agent installation directory>/agents/bin/quest_launcher_daemon stop”
2 Add the following command to the script that runs when a node starts:
su -l <PA Agent installer user> -c “<PA Agent installation directory>/agents/bin/quest_launcher_daemon start"
The quest_launcher_daemon script can be found in the following directory:
<installation directory>/agents/bin.
Additional Windows Configuration1 Create an artificial QAM Launcher service on the passive node as follows:
a Copy the quest_launcher.exe file from the <installation directory>\agents\bin\ directory to the passive node.
b Run the following command using a DOS prompt:
quest_launcher.exe <port> "+<installation_directory>\agents" -register
2 Specify the installation directory as the path to the existing Foglight Performance Analysis Agent directory on the shared drive.
3 Add the QAM Launcher service to the Oracle cluster group as a new resource.
a From within the Cluster Administrator, right-click the relevant group. In the displayed pop-up menu, select New > Resource.

Foglight Performance Analysis for Oracle: Agent Installation Guide 26
b In the displayed New Resource dialog box, enter a name of your choice in the Name field and select Generic Service as the Resource type.
The participating nodes should already appear as Possible owners:

Foglight Performance Analysis for Oracle: Agent Installation Guide 27
c Select the shared drive as the resource dependency.
d Enter QuestLauncher<port> as the Service name (you can verify the name in the services window under the service name field, as seen below).

Foglight Performance Analysis for Oracle: Agent Installation Guide 28
e Click Finish (no Registry Replication is required):
f Click OK.
g Return to the Cluster Administrator and right-click the created generic service. From the pop-up menu select Bring Online to complete the process.

Foglight Performance Analysis for Oracle: Agent Installation Guide 29
The Cluster configuration is completed.

Foglight Performance Analysis for Oracle: Agent Installation Guide 30
Active/Active ClusterOracle Active/Active clustering refers to multiple groups of Active/Passive clusters, graphically represented as follows:
• Node 1, Node 2 - Physical (Actual) names of the participating nodes in the fail-over cluster environment.
• Oracle Instances A, B - The monitored instances.
• Shared Disks X, Y - The disks where the Oracle data files reside.
• Virtual IP Address, Virtual Host name - A virtual IP or name used by the end user when connecting to the oracle instance.
Active/Active Cluster Agent Solution1 Identify each of the participating Active/Passive groups clusters.
2 Install Foglight Performance Analysis agent for each of participating Active/Passive cluster, as detailed in section “Active/Passive Cluster” on page 22.
Note The agent installation for each of the Active/Passive clusters must use a different communication port.

Foglight Performance Analysis for Oracle: Agent Installation Guide 31
Agent Installation Wizard
The Agent Installation Wizard section details the steps required for using the installation wizard to set up and administer the Foglight Performance Analysis Agent.
This section includes the following topics:
• Agent Installation Wizard Preface
• Introduction screen - allows selecting one of the following options:
• Installing Agent Components
• Uninstalling an Existing Agent
• Upgrading Agent Components to the Latest Version
• Installing Repository Support for an Existing Agent Installation
Agent Installation Wizard PrefaceThe agent installation wizard installs and administers the Foglight Performance Analysis agent components and repository objects for a specific Oracle instance.
This wizard should be run locally on the Host where the components are to be installed or uninstalled, except for the Performance Repository, which can be installed remotely.
Please verify that your system meets the Installation Prerequisites, to ensure a smooth and successful installation.
Introduction screenUse the Introduction screen to select one of the following options:
“Installing Agent Components” on page 31
“Uninstalling an Existing Agent” on page 32
“Upgrading Agent Components to the Latest Version” on page 32
“Installing Repository Support for an Existing Agent Installation” on page 32
Installing Agent ComponentsUse this option as follows:
• Install Oracle collector and/or Middleware agent components on this server.
• Configure the Performance Repository component for an existing agent installation. A repository schema will be created if it does not yet exist. This option is required only if you decide not to install the repository during the initial installation.

Foglight Performance Analysis for Oracle: Agent Installation Guide 32
Uninstalling an Existing AgentRemove an existing agent installation from this server.
Upgrading Agent Components to the Latest VersionUpgrade a previously installed agent to the current version.
Installing Repository Support for an Existing Agent InstallationUse this option to configure the repository component for an existing agent installation. A repository database will be created if it does not yet exist. This option is required only if you choose not to install the repository during the initial installation.
Related Topics
“About the Foglight Performance Analysis Agent” on page 1
“Installation Prerequisites” on page 3
“Architecture Overview” on page 16
Agent Architecture ScreenThe Agent Architecture screen allows you to choose the agent architecture and the components to be installed on the local Host. The default selection is the Quest recommendation of a multi-tier deployment.
If you have not decided on architecture type yet, please read through the Architecture Overview section.
Note After the agent has been installed, its architecture cannot be changed.
Error Workaround
The current logged-in OS user has no permission to write in the current running directory. Please enable the WRITE permission on the current directory and restart the installation.
Please ensure the current logged-in OS user has WRITE privileges on the current directory or move the installation file to another directory and restart the installation.
Foglight Performance Analysis for Oracle: Agent Installation Guide 33
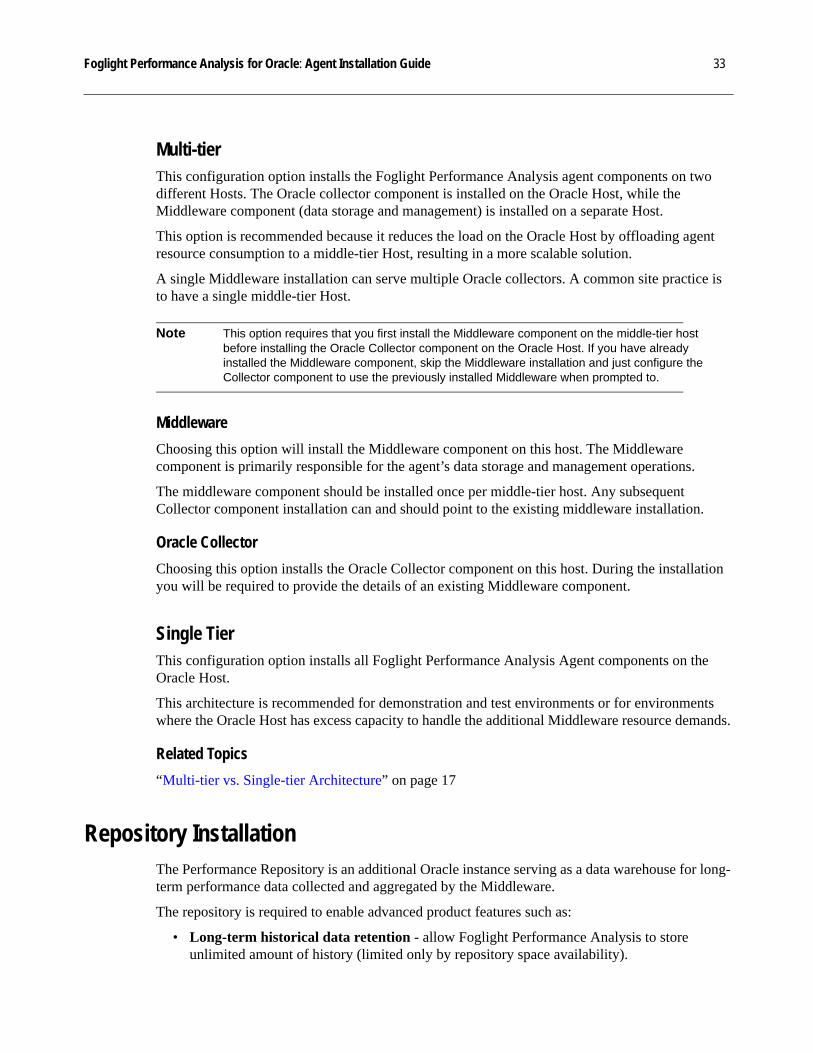
Multi-tierThis configuration option installs the Foglight Performance Analysis agent components on two different Hosts. The Oracle collector component is installed on the Oracle Host, while the Middleware component (data storage and management) is installed on a separate Host.
This option is recommended because it reduces the load on the Oracle Host by offloading agent resource consumption to a middle-tier Host, resulting in a more scalable solution.
A single Middleware installation can serve multiple Oracle collectors. A common site practice is to have a single middle-tier Host.
Note This option requires that you first install the Middleware component on the middle-tier host before installing the Oracle Collector component on the Oracle Host. If you have already installed the Middleware component, skip the Middleware installation and just configure the Collector component to use the previously installed Middleware when prompted to.
Middleware
Choosing this option will install the Middleware component on this host. The Middleware component is primarily responsible for the agent’s data storage and management operations.
The middleware component should be installed once per middle-tier host. Any subsequent Collector component installation can and should point to the existing middleware installation.
Oracle Collector
Choosing this option installs the Oracle Collector component on this host. During the installation you will be required to provide the details of an existing Middleware component.
Single TierThis configuration option installs all Foglight Performance Analysis Agent components on the Oracle Host.
This architecture is recommended for demonstration and test environments or for environments where the Oracle Host has excess capacity to handle the additional Middleware resource demands.
Related Topics
“Multi-tier vs. Single-tier Architecture” on page 17
Repository InstallationThe Performance Repository is an additional Oracle instance serving as a data warehouse for long-term performance data collected and aggregated by the Middleware.
The repository is required to enable advanced product features such as:
• Long-term historical data retention - allow Foglight Performance Analysis to store unlimited amount of history (limited only by repository space availability).

Foglight Performance Analysis for Oracle: Agent Installation Guide 34
• Performance Advisories - automatic detection of performance problems and anomalies.
• Change Tracking - automatic detection of system, instance and SQL changes that impact application and database performance.
The repository is designed to serve multiple installations, monitoring multiple Oracle instances. As such, it can scale for large amounts of data, given optimal environmental factors.
The Foglight Performance Analysis Middleware component controls and maintains the repository.
Partition-enabled Performance Repository
To monitor many instances, and improve the scalability of long-term repository, it is recommended to create partition-enabled Performance Repository.
The partition-enabled Performance Repository is configured to distribute monitored instance data automatically, thereby balancing the monitoring workload. Configuring Performance Repository partitioning is done only manually. Therefore, please contact Quest Support prior to configuring Performance Repository partitioning.
Repository Component Installation
The repository installation installs the performance repository for a single monitored Oracle instance, as follows:
• Installs the performance repository schema objects upon first monitored Oracle instance repository configuration.
• Configures the agent to store monitored Oracle instance data in the performance repository.
Related Topics
“Performance Repository” on page 19
Multi-tier - Middleware ComponentThe following sections refer to the middleware component:
“Middle-tier Port Selection Screen” on page 34
“Middleware Component Settings Screen” on page 36
“Middleware Installation Completed” on page 39
Middle-tier Port Selection ScreenThe agent’s Middleware component requires a dedicated TCP/IP communication port for communicating with the Collector component and the Foglight Performance Analysis Client.
Use the Middle-tier Port Selection screen to specify an available TCP/IP communication port on the middle-tier host.

Foglight Performance Analysis for Oracle: Agent Installation Guide 35
Agent Communication PortThe agent communication port is used for communicating with the Foglight Performance Analysis agent on this middle-tier Host. You may specify a port in the range from 1024 to 65536. Quest recommends using the same port, 3566, on both the Oracle server and middle-tier Hosts, if available.
Ensure that this port is not being used by another program and is not blocked by a firewall.
Note If the password for the default Foglight Performance Analysis agent logon account has been changed since the agent was installed, the Agent Login dialog box appears, requiring to specify the login username and password. Enter the user-defined username and password and click OK.
Minimal/Demo InstallationThe minimal/demo installation will create a minimal historical data collection model which requires 1 GB of disk space for each monitored Oracle instance. This option is not recommended.
A standard installation requires 4 GB for each monitored Oracle instance.
Note After the agent is installed, additional disk space may be allocated to the historical collection in order to accommodate future needs.
Troubleshooting
Error Workaround
The installation wizard has identified a corrupted agent installation on host: <host> using port <port>Please select a different port.
The installation wizard has identified a corrupted agent installation on the selected port.Possible solutions:• Specify a different port to trigger a fresh
Middleware installation.• Uninstall the existing agent and re-initiate
the Middleware installation process.
The specified port <port> is invalid.Please ensure that the port number is between 1024 and 65536.
Specify an available port in the range: 1024–65536.
Port <port> is being used by another program. Please select a different port.
Specify an available port in the range: 1024-65536.

Foglight Performance Analysis for Oracle: Agent Installation Guide 36
Middleware Component Settings ScreenUse the Middleware Component Settings screen to specify the installation directory on the middle-tier host to which the Middleware component is to be installed. Ensure that the specified installation directory has sufficient free disk space.
A firewall might exist between the Middleware component and the Collector component depending on the customer environment. If it exists, ensure that you select Yes in the “Is <hostname> protected by a firewall?” question in the bottom of the screen.
There is insufficient free space in <host> <directory>.The installation requires <amount> of free space, while only <available value> is available.Please free at least <required space> of space.
The specified installation directory lacks sufficient free space.Possible solutions:• Free sufficient disk space in the
installation directory.Specify a different port to trigger a fresh installation and select a different installation directory with sufficient available disk space (not recommended).
The Foglight Performance Analysis agent user name or password is invalid.
Enter a valid user name and password to log in to the Foglight Performance Analysis agent.
The existing agent installation on the specified port is obsolete and upgrading it is not supported by this installer version. Please obtain the latest installer.
The installation wizard has detected an obsolete installation on the specified port. Possible solutions:• Upgrade the obsolete installation using
Quest Central 5.x and then upgrade to the latest Foglight Performance Analysis agent version.
• Install using a different port without upgrading the installation.
• Uninstall the obsolete installation and install the Foglight Performance Analysis agent.
The installer has found that the following Oracle 32-bit instance(s) are already configured:<instances>.Note that this agent version does not support Oracle 32-bit on this platform.
The current Foglight Performance Analysis Agent version does not support Oracle 32-bit on this platform. For details, see section Architecture Overview.
Error Workaround

Foglight Performance Analysis for Oracle: Agent Installation Guide 37
Installation Directory
Specify the installation directory on the middle-tier host. This directory will contain the agent executable files and the short-term historical data files (storing up to 90 days of history. This directory requires at least 4GB of free disk space for every monitored Oracle instance.
The installation directory should have sufficient extra disk space capacity to allow for potential future growth.
Note The operation system user account running the installer must have write privileges on the installation directory.
Default Directory
Choosing this option will install the Middleware component in the Quest specified default directory.
User Specified
To specify your own installation directory location, choose this option and enter your directory of choice. The Middleware component will then be installed on this host in the specified directory.
Firewall SettingThe firewall setting affects the way in which the agent communicates through the port that was specified in the previous Middle-tier Port Selection screen.
Select this option if the middle-tier host is protected by a firewall.
• Select the check box if this host is protected by a firewall, causing the Foglight Performance Analysis agent to use only the specified port for incoming communication. In such a case, ensure that this port is not blocked by the firewall.
• Leave the check box cleared if the host is not protected by a firewall. In such a case, the communication port is used for the initial handshake process, and additional ports are used upon subsequent user connections.
Note Ensure that the Middleware communication port specified in the Middle Port Selection screen is open for bi-directional access in the firewall.
• By default, every agent connection attempt is established by performing an initial connection handshake to the specified port followed by a permanent connection using a random port that is decided upon in the handshake process. This protocol is efficient but cannot function in a firewall protected environment.
• Selecting this option will change the connection protocol so every Client performs a permanent connection to the specified communication port. All network traffic from all Client connections is multiplexed on this communication port.

Foglight Performance Analysis for Oracle: Agent Installation Guide 38
Related Topics
“Installation Prerequisites” on page 3
Troubleshooting
Error Workaround
Failed to install the Foglight Performance Analysis agent.Please validate that the current, logged-in OS user account has WRITE privileges on <directory>.
The logged-in user account is not authorized to read/write in the installation directory. Possible solutions:• Grant read/write permissions on the
installation directory to the installation user.
• Select a different installation directory with read/write permissions.
There is insufficient free space in <host> <directory>.The installation requires <amount> of free space, while only <available value> is available.Please free at least <required space> of space.
The specified installation directory lacks sufficient free space.Possible solutions:• Free sufficient disk space in the
installation directory.• Specify a different port to trigger a fresh
installation and select a different installation directory with sufficient available disk space (not recommended).
Failed to access directory <directory>. Please verify that the specified directory exists and that the current logged-in OS user has read/write permission on it.
The logged-in user account is not authorized to read/write in the installation directory. Possible solutions:• Grant read/write permissions on the
installation directory to the installation user
• Select a different installation directory with read/write permissions
The Foglight Performance Analysis Agent binaries are corrupted. Please obtain a new installer and restart the installation.
Obtain a newer installer and run the installation again.

Foglight Performance Analysis for Oracle: Agent Installation Guide 39
Middleware Installation CompletedThe Middleware component has been successfully installed.
Completing the Foglight Performance Analysis Agent installation requires installing now the Oracle Server Collector component by running the Installation Wizard on the Oracle Host.
When installing the Oracle Server Collector component, please note the following:
• Select multi-tier and choose Oracle Collector component when prompted for the agent architecture.
• Specify this middle-tier Host when prompted.
• Specify the middle-tier’s communication port that you specified during the Middleware installation when prompted.
Note Multiple Oracle collector components can share a single Middleware installation.
An internal issue has occurred. Please retry the last operation to continue the installation process. If this attempt also fails, please contact Quest Support.
This is a general error message. It can appear in this window when installer encounters problems when configuring Firewall Setting.• Read, carefully, the Firewall Setting topic
of this page and ensure you make the proper configurations.
• If you chose to enable the firewall setting, ensure that the port that you chose for communication is not blocked by the firewall.
• Please contact Quest Support.
Error Workaround

Foglight Performance Analysis for Oracle: Agent Installation Guide 40
Multi-tier - Oracle Server ComponentThe following sections describe the various steps needed for configuring the Oracle server component.
Agent Port Selection Screen
Agent Communication Port
Minimal/Demo Installation
Troubleshooting
Agent Port Selection ScreenUse the Agent Port Selection screen to specify the TCP/IP communication port that will be used for communication with the Foglight Performance Analysis Agent processes on the Oracle Host, as well as to specify the historical data collection type.
Agent Communication PortThe agent communication port is used for communicating with the Foglight Performance Analysis Agent processes. You may specify a port ranging from 1024 to 65536. Quest recommends that all Foglight Performance Analysis Agents on this host use same port (3566, if available).
Ensure that this port is not being used by another program and is not blocked by a firewall.
Note If the password for the default Foglight Performance Analysis agent logon account has been changed since the agent was installed, the Agent Login dialog box appears, requiring to specify the login username and password. Enter the user-defined username and password and click OK.
Minimal/Demo Installation The minimal/demo installation will create a minimal historical data collection model which requires only 1 GB of disk space for each monitored Oracle instance.
This option is not recommended.
A standard installation requires 4 GB for each monitored Oracle instance.
Note After the agent is installed, additional disk space may be allocated to the historical collection in order to accommodate future needs.

Foglight Performance Analysis for Oracle: Agent Installation Guide 41
Troubleshooting
Error Workaround
The specified port <port> is invalid.Please ensure that the port number is between 1024 and 65536.
Specify an available port in the range: 1024–65536.
Port <port> is being used by another program. Please select a different port.
Specify an available port in the range: 1024-65536.
There is insufficient free space in Host <host> <directory>.The installation requires <amount> of free space, while only <available value> is available.Please free at least <required space> of space.
The specified installation directory lacks sufficient free space.Possible solutions:• Free sufficient disk space in the
installation directory.• Specify a different port to trigger a fresh
installation and select a different installation directory with sufficient available disk space (not recommended).
The installation wizard has identified a corrupted agent installation on host: <host> using port <port>Please select a different port.
The installation wizard has identified a corrupted agent installation on the selected port.Possible solutions:• Specify a different port to trigger a fresh
installation.• Uninstall the existing agent and re-initiate
the installation process.
The Foglight Performance Analysis agent user name or password is invalid.
Enter a valid user name and password to login to the Foglight Performance Analysis agent.

Foglight Performance Analysis for Oracle: Agent Installation Guide 42
The existing agent installation on the specified port is obsolete and upgrading it is not supported by this installer version. Please obtain the latest installer.
The installation wizard has detected an obsolete installation on the specified port. Possible solutions:• Upgrade the obsolete installation using
Quest Central 5.x and then upgrade to the latest Foglight Performance Analysis agent version.
• Install using a different port without upgrading the installation.
• Uninstall the obsolete installation and install the Foglight Performance Analysis agent.
The installer has found that the following Oracle 32-bit instance(s) are already configured:<instances>.Note that this agent version does not support Oracle 32-bit on this platform.
The current Foglight Performance Analysis Agent version does not support Oracle 32-bit on this platform. For details, see section Architecture Overview.
Error Workaround

Foglight Performance Analysis for Oracle: Agent Installation Guide 43
Oracle Collector Component Settings ScreenUse the Oracle Collector Component Settings screen to specify the installation directory on the Oracle Host to which the Collector component will be installed. Ensure that the specified installation directory specified has sufficient free disk space.
A firewall might exist between the Collector component and the Middleware component depending on the customer environment. In case it does exist ensure that you check Yes in the “is <hostname> protected by a firewall?” question in the bottom of the screen.
Note This step does not occur if an agent already exists on the chosen installation port
Installation DirectorySpecify the installation directory on the Oracle Host. This directory, which will contain the Collector executable files, requires at least 300 MB of free disk space.
Note The operation system user account running the installer must have write privileges on the installation directory.
Default DirectoryThe components installed on this host will be installed in the default directory.
User SpecifiedTo specify your own installation directory location, choose this option and enter your directory of choice. The Collector component will then be installed on this host in the specified directory.
Firewall SettingsThe firewall setting affects the way in which the agent communicates through the port specified in the previous Oracle Server Port Selection window.
Select this check box if this Host is protected by a firewall, causing the Foglight Performance Analysis agent to use only the specified port for incoming communication. In such a case, ensure that this port is not blocked by the firewall.
If the Host is not protected by a firewall, leave the check box cleared. In such a case, the communication port is used for the initial handshake process, and additional ports are used upon subsequent user connections.
Note Ensure that the Agent communication port specified in the Oracle Agent Port Selection screen is open for bi-directional access in the firewall.
By default, every agent connection attempt is established by performing an initial connection handshake to the specified port followed by a permanent connection using a random port that is

Foglight Performance Analysis for Oracle: Agent Installation Guide 44
decided upon in the handshake process. This protocol is efficient but cannot function in a firewall protected environment.
Selecting this option will change the connection protocol so every Client performs a permanent connection to the specified communication port. All network traffic from all Client connections is multiplexed on this communication port.
Related Topics
“Installation Prerequisites” on page 3
Troubleshooting
Error Workaround
The Foglight Performance Analysis Agent binaries are corrupted. Please obtain a new installer and restart the installation.
Obtain a newer installer and run the installation again.
Failed to install the Foglight Performance Analysis Agent.Please validate that the current, logged-in OS user account has WRITE privileges on <directory>.
The logged-in user account is not authorized to write in the installation directory. Possible solutions:Grant read/write permissions on the installation directory to the installation user.Select a different installation directory with write permissions.
There is insufficient free space in <host> <directory>.The installation requires <amount> of free space, while only <available value> is available.Please free at least <required space> of space.
The specified installation directory lacks sufficient free space.Possible solutions:Free sufficient disk space in the installation directory. Specify a different port to trigger a fresh installation and select a different installation directory with sufficient available disk space (not recommended).
Failed to access directory <directory>. Please verify that the specified directory exists and that the current logged-in OS user has read/write permission on it.
The logged-in user account is not authorized to read/write in the installation directory. Possible solutions:Grant read/write permissions on the installation directory to the installation user.Select a different installation directory with read/write permissions.

Foglight Performance Analysis for Oracle: Agent Installation Guide 45
An internal issue has occurred. Please retry the last operation to continue the installation process. If this attempt also fails, please contact Quest Support.
This is a general error message. It can appear in this window when installer encounters problems when configuring Firewall Setting.• Read, carefully, the Firewall Setting topic
of this page and ensure you make the proper configurations.
• If you chose to enable the firewall setting, ensure that the port that you chose for communication is not blocked by the firewall.
Please contact Quest Support.
Error Workaround

Foglight Performance Analysis for Oracle: Agent Installation Guide 46
Middleware SpecificationThe Middleware component is responsible for maintaining, aggregating, and administering the data received from the Oracle Collector component.
The multi-tier architecture installation flow requires that the Middleware component be installed prior to installing the Collector component and the Performance repository configuration (optional).
Use the Middle-tier Specification screen to provide the location of the Middleware component that was previously installed by specifying the middle-tier hostname and its communication port.
The Collector and Middleware components functional relationship is not alterable without loss of data. After the agent installation is completed, replacing the Middleware component for this monitored Oracle instance requires uninstalling the agent, thereby losing historical data.
If the Middleware component has not yet been installed, install it on the middle-tier host now, and then continue this installation.
Note You are not required to exit this installation while installing the Middleware component.
Middle-tier HostSpecify the host on which the Middleware component was installed.
Middle-tier Communication PortSpecify the middle-tier’s communication port that was provided during the Middleware component’s installation.
Related Topics
“Multi-tier vs. Single-tier Architecture” on page 17

Foglight Performance Analysis for Oracle: Agent Installation Guide 47
Troubleshooting
Single TierThe following sections describe the installation on a single tier:
Port Selection
Agent Components Settings Screen
Error Workaround
The installer failed to connect to the Middleware component on the middle-tier host <host> using port <port>. Please validate that the Middleware was installed correctly.
The installation cannot connect to the Middleware component on the middle-tier host using port <Port>.Possible solutions:• Verify that a firewall is not blocking the
communication between the middle-tier host and the Oracle Host and that the communication port is not being used by another program usage.
• Reinstall the Middleware component on the middle-tier host
The agent component on the middle-tier host failed to connect to the Oracle Host.Please verify connectivity between the middle-tier host and the Oracle Host using port <port>.
The installation cannot connect from the middle-tier host to the Oracle Host using port <Port>.Verify that a firewall is not blocking the communication between the middle-tier host and the Oracle Host and that the communication port is not being used by another program
The Middleware component should be upgraded prior to upgrading the Oracle Server Collector component. Please run this installation wizard on the middle-tier host to upgrade the Middleware component, before proceeding.
Please upgrade the Middleware component by running this installer on the middle-tier host before proceeding.
The specified port <port> is invalid.Please ensure that the port number is between 1024 and 65536
Specify an available port in the range: 1024–65536.

Foglight Performance Analysis for Oracle: Agent Installation Guide 48
Port SelectionThe agent requires a dedicated TCP/IP communication port for internal and Foglight Performance Analysis Client communication.
Use the Port Selection screen to specify the TCP/IP communication port to be used for communication between the Foglight Performance Analysis Agent processes on the Oracle Host as well as to specify the historical data collection type.
Agent Communication PortThe agent communication port is used for communicating between and with the Foglight Performance Analysis Agent processes. You may specify a port ranging from 1024 to 65536. Quest recommends that all Foglight Performance Analysis Agents on this host use same port (3566, if available).
Ensure that this port is not being used by another program and is not blocked by a firewall.
Minimal/Demo InstallationThe minimal/demo installation will create a minimal historical data collection model which requires only 1 GB of disk space for each instance. This option is not recommended for non-demo environment.
A standard installation requires 4 GB for each instance.
Note After the agent is installed, additional disk space may be allocated to the historical collection in order to accommodate future needs.
Troubleshooting
Error Workaround
The specified port <port> is invalid.Please ensure that the port number is between 1024 and 65536.
Specify an available port in the range: 1024–65536.
Port <port> is being used by another program. Please select a different port.
Specify an available port in the range: 1024–65536.

Foglight Performance Analysis for Oracle: Agent Installation Guide 49
There is insufficient free space in Host <host> <directory>.The installation requires <amount> of free space, while only <available value> is available.Please free at least <required space> of space.
The specified installation directory lacks sufficient free space.Possible solutions:• Free sufficient disk space in the
installation directory.• Specify a different port to trigger a fresh
installation and select a different installation directory with sufficient available disk space (not recommended).
The installation wizard has identified a corrupted agent installation on host: <host> using port <port>Please select a different port.
The installation wizard has identified a corrupted agent installation on the selected port.Possible solutions:• Specify a different port to trigger a fresh
middleware installation.• Uninstall the existing agent and re-initiate
the middleware installation process.
The Foglight Performance Analysis agent username or password is invalid.
Enter a valid username and password to login to the Agent.
The existing agent installation on the specified port is obsolete and upgrading it is not supported by this installer version. Please obtain the latest installer.
The installation wizard has detected an obsolete installation on the specified port. Possible solutions:• Upgrade the obsolete installation using
Quest Central 5.x and then upgrade to the latest Foglight Performance Analysis agent version.
• Install using a different port without upgrading the installation.
• Uninstall the obsolete installation and install the Foglight Performance Analysis agent.
The specified agent version is obsolete. Please contact Quest Support.
Please contact Quest Support.
Error Workaround

Foglight Performance Analysis for Oracle: Agent Installation Guide 50
The installer has detected that host <host> is part of a cluster environment but its cluster service is down. Please start the cluster service on the following host and retry.
Please start the cluster service on the following host and retry.
The cluster operation failed and generated the following error: <error> Error Code
Please contact Quest Support.
The installer has found that the following Oracle 32-bit instance(s) are already configured:<instances>.Note that this agent version does not support Oracle 32-bit on this platform.
The current Foglight Performance Analysis Agent version does not support Oracle 32-bit on this platform. For details, see section Architecture Overview.
Error Workaround

Foglight Performance Analysis for Oracle: Agent Installation Guide 51
Agent Components Settings ScreenUse the Agent Components Settings screen to specify the installation directory on the Oracle Host to which the agent is to be installed. Ensure that the specified has sufficient free disk.
A firewall might exist between the Collector component and the Middleware component depending on the customer environment. In case it does not exist, ensure clearing the checkbox the bottom of the screen, near the sentence <AgentName> is protected by a firewall.
Note This step does not occur, if an agent already exists on the chosen installation port.
Installation DirectorySpecify the installation directory on the Oracle Host. This directory, which will contain the agent executable and the short-term historical files, requires at least 4 GB of free disk space.
Quest recommends that the installation directory has sufficient extra free disk space capacity to allow for potential future growth.
Note The operation system user account running the installer must have write privileges on the installation directory.
Default DirectoryChoose this option to install the agent in the Quest specified default directory.
User SpecifiedTo specify your own installation directory location, choose this option enter your directory of choice. The agent will then be installed on this host in the specified directory.
Firewall SettingsThe firewall setting affects the way in which the agent communicates through the port specified in the previous Port Selection screen.
Leave this check box selected if this Host is protected by a firewall, causing the Foglight Performance Analysis agent to use only the specified port for incoming communication. In such a case, ensure that this port is not blocked by the firewall.
If the Host is not protected by a firewall, clear the check box. In such a case, the communication port is used for the initial handshake process, and additional ports are used upon subsequent user connections.
Note Ensure that the agent communication port specified in the Port selection screen is open for bi-directional access in the firewall.

Foglight Performance Analysis for Oracle: Agent Installation Guide 52
Related Topics
“Installation Prerequisites” on page 3
Troubleshooting
Error Workaround
The Foglight Performance Analysis Agent binaries are corrupted. Please obtain a new installer and restart the installation.
Obtain a newer installer and run the installation again.
Failed to install the Foglight Performance Analysis Agent.Please validate that the current, logged-in OS user account has WRITE privileges on <directory>.
The logged-in user account is not authorized to write in the installation directory.Possible solutions:• Grant read/write permissions on the
installation directory to the installation user.
• Select a different installation directory with write permissions.
There is insufficient free space in <host> <directory>.The installation requires <amount> of free space, while only <available value> is available.Please free at least <required space> of space.
The specified installation directory lacks sufficient free space.Possible solutions:• Free sufficient disk space in the
installation directory.• Specify a different port to trigger a fresh
installation and select a different installation directory with sufficient available disk space (not recommended).
Failed to access directory <directory>. Please verify that the specified directory exists and that the current logged-in OS user has read/write permission on it.
The logged-in user account is not authorized to read/write in the installation directory. Possible solutions:• Grant read/write permissions on the
installation directory to the installation user.
• Select a different installation directory with read/write permissions

Foglight Performance Analysis for Oracle: Agent Installation Guide 53
Monitored Instance SettingsUse this window to specify the Oracle-related details.
The Foglight Performance Analysis agent will monitor and query the Oracle instance based on the connection details specified in this window.
Oracle SIDThe SID of the monitored Oracle instance. Ensure that this Oracle instance and the associated Oracle Listener process are active and running.
TNS Listener PortThe TNS port (default 1521) used for SQL*Net communication with the monitored Oracle instance.
Oracle Username and PasswordOracle account credentials on the monitored Oracle instance which are used for low rate queries sent by the Middleware processes. This account must have the create session privilege (grant create session to <user>).
Further privileges will be granted for this account during the next stages of this installation.
Note The installation will create several objects in the specified user's schema. Quest highly recommends that a dedicated account is used.
Cluster SpecificationSelect this check box if this Host participates in an active/passive operating system cluster configuration and specify the virtual cluster name. The Active/Passive Agent Solution requires additional steps as per platform (see “Additional Windows Configuration” on page 25 or “Additional UNIX/Linux Configuration” on page 25).
In such environments, Oracle is installed on a shared device and the instance fails over from the active node to the passive node.
Note This setting refers to an operating system cluster. RAC installations do not require any special settings for the agent installation. For more information, see “Installing on RAC” on page 20.
Oracle Home on the Middle-tier HostAn existing Oracle home (an Oracle Client installation) on the middle-tier Host used to communicate with the monitored Oracle instance. This setting is automatically detected on single-tier installations.

Foglight Performance Analysis for Oracle: Agent Installation Guide 54
Related Topics
“Required Privileges” on page 5
“Active/Passive Cluster” on page 22
Troubleshooting
Error Workaround
Failed to connect to the monitored instance <sid>.Possible reasons:Invalid Oracle home <ORACLE_HOME> specified for the communication.Invalid Oracle user <user> or passwordTNS listener is not running on port: <port>.The Oracle instance is down.
The connection to the Oracle instance failed. Follow the supplied Oracle error to address the root problem and try again.Possible solutions:• For a multi-tier architecture validate that
the middle-tier Host can connect to the monitored instance using the supplied details.
• For active/passive cluster installations, verify that the supplied virtual cluster name is correct.
The agent has failed to connect to Oracle instance <sid>. Please ensure that the Oracle instance is running.
The agent has failed to connect to Oracle instance <sid>. Ensure that the Oracle instance is running.Ensure that the Oracle instance is up and that the specified Oracle SID is correct.
The TNS port <port> is invalid.Please specify a valid TNS port.
The TNS port is invalid; Specify a valid TNS port. The TNS port should be a number between 1024 and 65536.Ports 1521 and 1526 are typically used for SQL*Net communication.
The specified cluster hostname <host> is invalid. Please enter a valid virtual cluster hostname.
Validate that the cluster hostname as entered in the cluster specification is correct.

Foglight Performance Analysis for Oracle: Agent Installation Guide 55
The database operation failed.Connection Details: Host: <host>Instance: <sid>User: <user>TNS Listener Port: <port>.Generated the following exception: <Database Error>
The connection to the Oracle instance failed. Follow the displayed Oracle error to address the root problem and try again.Possible solutions:• For multi-tier installations validate that the
middle-tier Host can connect to the monitored instance using the supplied details.
• Verify that the TNS Listener is running on the Oracle Host.
• For multi-tier installations, verify that the ORACLE_HOME supplied for the middle-tier Host is correct.
• For active/passive cluster installations, verify that the supplied virtual cluster name is correct.
There is insufficient free space in <host> <directory>.The installation requires <amount> of free space, while only <available value> is available.Please free at least <required space> of space.
The specified installation directory lacks sufficient free space.Possible solutions:• Free sufficient disk space in the
installation directory.• Specify a different port to trigger a fresh
installation and select a different installation directory with sufficient available disk space (not recommended).
The installer failed to connect to the Middleware component on the middle-tier host <host> using port <port>.
Verify that the agent quest_launcher process is running on the middle-tier Host.For Windows, verify that the QAM Launcher <port> service is up and running.For UNIX:• Run <installation_directory>/ agents/bin/quest_launcher_daemon
status to see the agent version.• Run <installation_directory>/ agents/bin/quest_launcher_daemon
start to start the agent.
Error Workaround

Foglight Performance Analysis for Oracle: Agent Installation Guide 56
ERP Specification ScreenUse the ERP Specification screen to indicate whether the Foglight Performance Analysis Agent should monitor the PeopleSoft application database activity.
The Foglight Performance Analysis Agent incorporates Enterprise Resource Planning (ERP) advanced analytic features. These features allow database activity generated by the ERP application to be associated with the corresponding ERP context (for example: ERP Users, Forms and Applications), as well as advanced ERP performance advisories.
Quest highly recommends that you choose to monitor your ERP system and use these features for enhancing the control over your Oracle Server ERP derived transactions.
The middleware agent component failed to initiate a database connection to the monitored instance <instance>. Please verify that OS user running the middleware can initiate a SQL*PLUS connection from the middle-tier host to the monitored Oracle instance using Oracle Home <Oracle Home >.If this attempt fails, please contact Quest Support.
Verify that the OS user owning the agent installation has execute privileges on the Oracle Home <ORACLE_HOME> directory (for example: the OS user must be able to run SQL*PLUS from the specified Oracle Home).
The agent component on the middle-tier Host <host> failed to connect to the Oracle Host <host>.
Verify that the middle-tier Host can ping the Oracle Host and that no firewall is blocking the communication between these Hosts.
The current version of Foglight Performance Analysis agent does not support 32-bit instances on Solaris, AIX and HP platforms. Are you sure that <instance> is an Oracle 64-bit instance?
To monitor Oracle 32-bit instances on Solaris, AIX and HP platforms, ensure using the latest version of the Foglight Performance Analysis installer that supports Oracle 32-bit instances (Version 6.3).
Error Workaround

Foglight Performance Analysis for Oracle: Agent Installation Guide 57
ERP support is available for PeopleSoft version 8.0 or later and Oracle Applications version 11.0.x, 11i or 12.
Note Several post-installation tasks are required after the Foglight Performance Analysis agent installation to enable the ERP views.
NoneAn ERP application is not installed on the monitored Oracle instance.
Oracle ApplicationsConfigure the Foglight Performance Analysis agent to collect Oracle Applications (version 11.0.x, 11i or 12) related information.
PeopleSoftSelect this option to configure the Foglight Performance Analysis Agent to collect PeopleSoft (version 8.0 or later) related information.
Important Note on Supported Platforms and Versions
For the latest information about supported platforms and versions, refer to the Supported Platform Matrix section of the Foglight Performance Analysis for Oracle release notes, available on the Quest Software website (http://www.quest.com).
Related Topics
“Configuring ERP Support” on page 98
Resource Savings OptionsResource savings options control data collection, aggregation and display. Determine the preferred trade-off between more complete data collection, and reduced resource consumption on the Middleware host that best meets your organization's needs.
Note After completion of the installation process, resource savings options on an existing agent can be later modified using the Agent Administration module.
Resource Saving Options (Presets) Screen
Use the Resource Saving Options screen to select a resource saving option preset and click Next. Explanations of the presets and the individual options appear below.
Foglight Performance Analysis for Oracle: Agent Installation Guide 58
Recommended Resource Consumption
This preset provides the recommended frequency of data sampling and level of resource consumption on the Middleware host. This preset is selected by default.
Increased Resource Consumption
This preset provides the most complete data sampling while consuming additional resources on the Middleware host. Choosing this preset results in agent behavior similar to the previous version.
Minimal Resource Consumption
This preset consumes the fewest system resources in expense of data collection completeness. Choose this option to allow the same Middleware host to serve more database instances.
Custom
All individual resource saving options appear under Custom. Advanced users can tweak individual options to customize data collection. Selecting Custom and clicking Next opens the following screen to enable customization of resource saving options.
Resource Saving Options (Custom) Screen
Selecting Custom and clicking Next in the previous (Presets) screen opens the resource saving options customization screen.
The following table displays the benefits and trade-offs of each Resource Saving option. The Recommended Resource Consumption, Increased Resource Consumption, and Minimal Resource Consumption columns indicate the behavior implied by each configuration option. The check

Foglight Performance Analysis for Oracle: Agent Installation Guide 59
status (checked/unchecked) indicates whether the corresponding behavior takes place when the configuration option is enabled or disabled.
Option Recommended Resource Consumption
Increased Resource Consumption
Minimal Resource Consumption
Force “Remove Literals” on all data collections
Cleared - Individual SQL statements will be traced and displayed in the original manner (without replacing constants with bind variables). User Defined Collections (configured in the Foglight Performance Analysis Client) can be created independently with different “Remove Literal” settings.
Cleared - Individual SQL statements will be traced and displayed in the original manner (without replacing constants with bind variables). User Defined Collections (configured in the Foglight Performance Analysis Client) can be created independently with different “Remove Literal” settings.
Checked - The agent replaces constant literals in SQL statements with artificial bind variables, so that statements differing only in constants are treated and displayed as the same statement. This setting will apply to both statements presented in the Foglight Performance Analysis Client Real-Time view and statements presented in the Historical View (including all User Defined Collections).

Foglight Performance Analysis for Oracle: Agent Installation Guide 60
Group executions of identical SQL statements within a session
(Real-Time view only)
Checked - The agent groups all executions of the same SQL statement into a single presentation with the aggregated metric values and count of SQL Executions referred to.The result is a loss of individual SQL statement execution granularity in the Foglight Performance Analysis Client Real-Time view's Traced SQL tab.
Cleared - Individual SQL statement executions are traced independently and statistics of individual statements are displayed as separate occurrences.
Checked - The agent groups all executions of the same SQL statement into a single presentation with the aggregated metric values and count of SQL Executions referred to.The result is a loss of individual SQL statement execution granularity in the Foglight Performance Analysis Client Real-Time view's Traced SQL tab.
Collect wait event states and parameters
Checked - The agent collects Oracle wait events. The wait events are displayed under the Foglight Performance Analysis Client Real-Time and History Resource Breakdown pie chart.
Checked - The agent collects Oracle wait events. The wait events are displayed under the Foglight Performance Analysis Client Real-Time and History Resource Breakdown pie chart.
Cleared - The agent does not collect the granular Oracle wait events.
Option Recommended Resource Consumption
Increased Resource Consumption
Minimal Resource Consumption

Foglight Performance Analysis for Oracle: Agent Installation Guide 61
Collect Blocking Locks
Checked - The agent collects detailed lock information which is displayed in the Foglight Performance Analysis Client Real-Time and History views. This information includes lock trees (blocked and blockers).
Checked - The agent collects detailed lock information which is displayed in the Foglight Performance Analysis Client Real-Time and History views. This information includes lock trees (blocked and blockers).
Cleared - The agent will not collect detailed lock information. The product will indicate that a lock contention has occurred but will not offer insight into the corresponding lock tree (blocked and blockers).
Use _seconds as minimal resolution for real-Time data aggregation
Data is collected at longer intervals (15 sec), saving resources at the expense of lower granularity in the Foglight Performance Analysis Client Real-Time display.
Data is collected at short intervals (5 sec) and providing high granularity in the Foglight Performance Analysis Client Real-Time display.
Data is collected at longer intervals (15 sec), saving resources at the expense of lower granularity in the Foglight Performance Analysis Client Real-Time display.
Option Recommended Resource Consumption
Increased Resource Consumption
Minimal Resource Consumption

Foglight Performance Analysis for Oracle: Agent Installation Guide 62
Stop tracking inactive SQL Cursors
The default option for Minimal Resource consumption is after 20 minutes, which sets a timeout for the agent to stop tracking open SQL cursors. This option can be customized by choosing a higher value (up to 60 minutes).Use this option if your application does not close SQL cursors after execution.
The default option for Typical Resource consumption is never. The agent will continue tracking SQL cursors until they are explicitly closed in Oracle.A custom timeout can be set by selecting after __ minutes and then choosing a high value (up to 60 minutes). This will instruct the agent to ignore open cursors (stop tracking them) after a specified period of inactivity.Use this option if your application explicitly holds open cursors for long periods of time.
The default option for Minimal Resource consumption is after 5 minutes which sets a timeout for the agent to stop tracking open SQL cursors. This option can be customized by choosing a higher value (up to 60 minutes).Use this option if your application does not close SQL cursors after execution.
Option Recommended Resource Consumption
Increased Resource Consumption
Minimal Resource Consumption

Foglight Performance Analysis for Oracle: Agent Installation Guide 63
Oracle User Privileges - DBA UserThe previously specified Oracle user lacks required privileges on the Oracle data dictionary and performance views. Such privileges can be granted by a DBA role user.
Use this window to grant the required privileges to the specified Oracle user.
Automatically grant Privileges to the Oracle User
This option automatically grants the required privileges to the Oracle user by using a specified DBA user.
Note The DBA account credentials will not be used or stored by the agent.
Manually grant Privileges to the Oracle User
This option allows manually granting of required privileges to the Oracle user by running quest_pa_grant_mon_user.sql. The installation will only validate the granted privileges when this option is chosen. Use this option in case the site's security policy does not allow providing DBA accounts to the wizard.
To perform the manual granting sequence (do not exit the installation wizard):
1 Navigate to the following directory
• Windows: %TEMP%\pa_mon_sqls_<##>
• UNIX: /tmp/pa_mon_sqls_<##>
2 Verify that the ORACLE SID variable is correctly set to the monitored instance.
3 Log on to the monitored Oracle instance as a SYSDBA account, by running:
sqlplus sys/<PASSWD> as sysdba
4 Run the quest_pa_grant_mon_user.sql script available in the above directory as a SYSDBA user and provide the <quest user> when prompted.
On the installation wizard, click Next to continue.
Related Topics
“Required Privileges” on page 5

Foglight Performance Analysis for Oracle: Agent Installation Guide 64
Troubleshooting
Error Workaround
The database operation failed.Connection Details: Host: <host> Instance: <sid>User: <user>TNS Listener Port: <port>.Generated the following exception: <Database Error>
The connection to the Oracle instance failed. Follow the displayed Oracle error to address the root problem and try again.Possible solutions:• For multi-tier installations validate that the
middle-tier Host can connect to the monitored instance using the supplied details.
• Verify that the TNS Listener is running on the Oracle Host.
• For multi-tier installations, verify that the ORACLE_HOME supplied for the middle-tier Host is correct.
• For active/passive cluster installations, verify that the supplied virtual cluster name is correct.
Oracle version <sid> is not supported by this installer. Are you sure you want to continue with this installation?
Continue with the installation only if you are sure that this installer supports your Oracle instance version. Contact Quest support for more details.
The specified user, <user>, has insufficient privileges. Please enter a valid user with enough privileges.
Supply a user with the DBA or SYSDBA role to grant the necessary privileges to the agent user. If required, the grant scripts can be run manually by selecting the manual option.
The DBA role does not contain sufficient privileges on the data dictionary views.A valid User with a SYSDBA role on instance <sid> is required in order to grant the required privileges for user <user>.
Supply a user with SYSDBA role to grant the necessary privileges to the agent user. If required, the grant scripts can be run manually by selecting the manual option.

Foglight Performance Analysis for Oracle: Agent Installation Guide 65
Oracle User Privileges - SYSDBA UserThe previously specified Oracle user lacks required privileges on the Oracle data dictionary and performance views. Such privileges can be granted by a SYSDBA role user.
Use this window to grant the required privileges to the specified Oracle user.
Automatically grant Privileges to the Oracle User
This option automatically grants the required privileges to the Oracle user by using a specified SYSDBA user.
Note The SYSDBA account credentials will not be used or stored by the agent.
Manually grant Privileges to the Oracle User
This option allows manually granting of required privileges to the Oracle user by running quest_pa_grant_mon_user.sql. The installation will only validate the granted privileges when this option is chosen. Use this option in case the site's security policy does not allow providing DBA accounts to the wizard.
To perform the manual granting sequence (do not exit the installation wizard):
1 Navigate to the following directory
• Windows: %TEMP%\pa_mon_sqls_<##>
• UNIX: /tmp/pa_mon_sqls_<##>
2 Verify that the ORACLE SID variable is correctly set to the monitored instance.
3 Log on to the monitored Oracle instance as a SYSDBA account, by running:
sqlplus sys/<PASSWD> as sysdba
4 Run the quest_pa_grant_mon_user.sql script available in the above directory as a SYSDBA user and provide the <quest user> when prompted.
On the installation wizard, click Next to continue.
Related Topics
“Required Privileges” on page 5

Foglight Performance Analysis for Oracle: Agent Installation Guide 66
Troubleshooting
Error Workaround
The database operation failed.Connection Details: Host: <host>Instance: <sid>User: <user>TNS Listener Port: <port>.Generated the following exception: <Database Error>
The connection to the Oracle instance failed. Follow the displayed Oracle error to address the root problem and try again.Possible solutions:• For multi-tier installations validate that the
middle-tier Host can connect to the monitored instance using the supplied details.
• Verify that the TNS Listener is running on the Oracle Host.
• For multi-tier installations, verify that the ORACLE_HOME supplied for the middle-tier Host is correct.
• For active/passive cluster installations, verify that the supplied virtual cluster name is correct.
Oracle version <sid> is not supported by this installer. Are you sure you want to continue with this installation?
Continue with the installation only if you are sure that this installer supports your Oracle instance version. Contact Quest support for more details.
The specified user, <user>, has insufficient privileges. Please enter a valid user with enough privileges.
Supply a user with the DBA or SYSDBA role to grant the necessary privileges to the agent user. If required, the grant scripts can be run manually by selecting the manual option.
The DBA role does not contain sufficient privileges on the data dictionary views.A valid User with a SYSDBA role on instance <sid> is required in order to grant the required privileges for user <user>.
Supply a user with SYSDBA role to grant the necessary privileges to the agent user. If required, the grant scripts can be run manually by selecting the manual option.

Foglight Performance Analysis for Oracle: Agent Installation Guide 67
Operating System PrivilegesSeveral operating systems require some specific operating system privileges to allow the Oracle Collector component to function. These privileges include reading the database memory and some operating system statistics.
Note Only READ privileges are being granted.
The installer requires a specific operating system user (privileged to administer the Oracle instance) to be temporarily used in order to grant the Oracle Collector component with the above privileges. This user information will not be stored or used by the agent.
This window appears if the installer has identified that the Oracle Collector component lacks one or more operating system privileges to monitor the Oracle instance.
OS User
A user privileged to administer the Oracle instance.
OS Password
The password associated with the above operating system user.
Troubleshooting
Error Workaround
The specified operating system password is invalid. Please specify a valid password.
Specify a valid operating system user and password.
The specified OS user <user> is not a member of the OS group <group>. Please specify a valid user.
Specify a valid user member in the <dba> group or the Oracle owner.

Foglight Performance Analysis for Oracle: Agent Installation Guide 68
Foglight Performance Analysis Agent Installation CompletedThe Foglight Performance Analysis agent has been successfully installed.
Some post-installation tasks may be required to enable full product functionality.
Please follow the instructions displayed on the screen to complete the installation.
Related Topics
“Performance Repository” on page 19
“Configuring PeopleSoft” on page 99
“Configuring Oracle Applications” on page 100
“Setting Collector OS Privileges (AIX)” on page 97
“Active/Passive Cluster” on page 22
Monitored Instance SelectionThis window displays all Oracle Host instances for which a valid Foglight Performance Analysis agent is configured.
Use this window to select an agent instance to be upgraded to the current version.
For an obsolete agent version for which upgrading is not supported, contact Quest support.

Foglight Performance Analysis for Oracle: Agent Installation Guide 69
Performance Repository InstallationConfiguring the Foglight Performance Analysis Agent to work with a Performance repository requires entering the requested parameters in the Performance Repository Screen.
Performance Repository ScreenThe Performance Repository is an additional Oracle instance, serving as a data warehouse for long-term performance data that is collected by the Collector component and aggregated by the Middleware component.
The repository is required to enable advanced product features such as:
• Long-term Historical Data Retention: allow Foglight Performance Analysis to store unlimited amount of history (limited only by repository space availability).
• Performance Advisories: automatic detection of performance problems and anomalies that are presented in an intuitive manner to the user, including background information, best practices and workarounds.
• Change Tracking: automatic detection of system, instance and SQL changes that impact application and database performance.
The repository is designed to serve multiple agent installations, monitoring multiple Oracle instances. As such, it can scale for large amounts of data, given optimal environmental factors.
The Foglight Performance Analysis Middleware component controls and maintains the repository.
Partition-enabled Performance Repository
To monitor many instances, and improve the scalability of long-term repository, it is recommended to create partition-enabled Performance Repository.
The partition-enabled Performance Repository is configured to distribute monitored instance data automatically, thereby balancing the monitoring workload. Configuring Performance Repository partitioning is done only manually. Therefore, please contact Quest Support prior to configuring Performance Repository partitioning.
Repository Component Installation
The repository installation installs the performance repository for a single monitored Oracle instance, as follows:
• Installs the performance repository schema objects upon first monitored Oracle instance repository configuration.
• Configures the agent to store monitored Oracle instance data in the performance repository.
Related Topics
“Performance Repository” on page 19

Foglight Performance Analysis for Oracle: Agent Installation Guide 70
Oracle Host Details ScreenThe first step of configuring the Foglight Performance Analysis Agent to work with a Performance repository is to specify a specific Monitored Oracle host that has existing agent installations which you would like to configure to use the Performance Repository.
Use the Oracle Host Details screen to specify the Oracle host details of the monitored Oracle instance and the agent communication port.
HostSpecify the Oracle Host name. The wizard will detect the Foglight Performance Analysis Agents running on the specified host.
Note The host name should be the name of the Monitored Oracle instance and not the name of the Performance Repository host.
Agent Communication PortThe agent communication port is used for communicating with the Foglight Performance Analysis agent processes on this Host.
Note If the password for the default Foglight Performance Analysis agent logon account has been changed since the agent was installed, the Agent Login dialog box appears, requiring to specify the login username and password. Enter the user-defined username and password and click OK.
Troubleshooting
Error Workaround
• The installer has failed to connect to agent on <host> using port <port>.
• Error: <error>
Verify that the agent quest_launcher process is running on the Oracle Host.For Windows, verify that the QAM Launcher <port> service is up and running.For UNIX:• Run <installation_directory>/ agents/bin/
quest_launcher_daemon status to see the agent version.
• Run <installation_directory>/ agents/bin/quest_launcher_daemon start to start the agent.

Foglight Performance Analysis for Oracle: Agent Installation Guide 71
The existing agent installation on port <port> is obsolete and upgrading it is not supported by this installer version. Please obtain the latest installer.
The installation wizard has detected an obsolete installation on the specified port. Possible solutions:• Upgrade the obsolete installation using
Quest Central 5.x and then upgrade to the latest Foglight Performance Analysis agent version.
• Install using a different port without upgrading the installation.
• Uninstall the obsolete installation and install the Foglight Performance Analysis agent.
The agent installed on the specified Host is a Middleware component.Please specify an agent on a monitored Oracle instance Host.
Run the installer on the monitored Host and specify the Foglight Performance Analysis agent port when required.
The installer has found that the following Oracle 32-bit instance(s) are already configured:<instances>.Note that this agent version does not support Oracle 32-bit on this platform.
The current Foglight Performance Analysis Agent version does not support Oracle 32-bit on this platform. For details, see section Architecture Overview.
Error Workaround

Foglight Performance Analysis for Oracle: Agent Installation Guide 72
Monitored Oracle InstanceUse this window to select the monitored Oracle instance whose Foglight Performance Analysis agent you want to configure.
If the performance repository is already configured, you will be prompted to specify whether you want to override this configuration.
To remove a Performance Repository schema that is no longer in use:
1 Verify that all instances which previously used this repository no longer do so, as follows:
a Connect to the repository instance as the performance repository owner.
b Run the following SQL statement:
Select INSTANCE_KEY, DB_NAME, INSTANCE_NAME, HOST from QUEST_INSTANCE_DIM;
Note If any rows are returned, except for the removed Oracle instance, the schema is in use and should not be dropped.
2 Run the quest_pa_drop_rep.sql script to drop the associated objects. The script will be located in:
UNIX: /tmp/pa_drop_rep_schema/
Windows: %TEMP%\pa_drop_rep_schema\
Troubleshooting
Error Workaround
Failed to retrieve agent setup information.Connection Details Host: <host>Instance: <sid>Agent Port: <port> Please verify that the agent is up.
Verify that the agent quest_launcher process is running on the Oracle Host and that the quest_launcher process is also running on the middle-tier Host. For Windows, verify that the QAM Launcher <port> service is up and running.For UNIX:• Run <installation_directory>/ agents/bin/quest_launcher_daemon
status to see the agent version.• Run <installation_directory>/ agents/bin/quest_launcher_daemon
start to start the agent.
The Foglight Performance Analysis agent is down and failed to start automatically. Please start the agent and continue with the uninstall process.
Run the installer on the monitored Host and specify the Foglight Performance Analysis agent port when required.

Foglight Performance Analysis for Oracle: Agent Installation Guide 73
Monitored Instance Objects InstallationThe agent requires the creation of several tables and indexes on the monitored Oracle instance. These objects are used for the process of performance advisories evaluation and generation.
Use this window to specify a data tablespace and an index tablespaces (each requiring 50 MB of available space) on the monitored Oracle instance. The database objects will be created in these tablespaces accordingly.
If the required tablespaces do not exist, manually create them and refresh the list.
Quest recommends using different tablespaces for the data and index objects.
Note This window appears only when configuring the repository.
Data Tablespace
Specify a tablespace with at least 50 MB of free space available. This tablespace will be used to store advisories-related tables.
Index Tablespace
Specify a tablespace with at least 50 MB of free space available. This tablespace will be used to store advisories-related indexes.
Related Topics
“Performance Repository” on page 19
Troubleshooting
Error Workaround
There is insufficient free space in tablespace <tablespace>.The tablespace requires <Required space> MB of free space, while only <available value> is available.Please free at least <extra space> of space.
Specify a data tablespace and an index tablespace with at least 50 MB of free space on the monitored instance. For Windows, verify that the QAM Launcher <port> service is up and running.

Foglight Performance Analysis for Oracle: Agent Installation Guide 74
The database operation failed.Connection Details: Host: <host>Instance: <sid>User: <user>TNS Listener Port: <port>.Generated the following exception: <Database Error>.
The connection to the Oracle instance failed. Follow the displayed Oracle error to address the root problem and try again.Possible solutions:• For multi-tier installations validate that the
middle-tier Host can connect to the monitored instance using the supplied details.
• Verify that the TNS Listener is running on the Oracle Host.
• For multi-tier installations, verify that the ORACLE_HOME supplied for the middle-tier Host is correct.
• For active/passive cluster installations, verify that the supplied virtual cluster name is correct.
Error Workaround

Foglight Performance Analysis for Oracle: Agent Installation Guide 75
Repository InstanceUse this window to specify the repository instance details.
The agent will be configured to use the specified Oracle instance as its performance repository. A single repository instance is capable of serving multiple monitored instances.
If the specified instance already contains the repository schema, it will be reused. If the schema does not exist, it will be created.
Ensure that the specified instance is active and the associated Listener process is running.
Note The Performance repository instance must be version 8.1.7 or later with bitmap indexes supported.
Install on a Dedicated Instance
Install the repository on a dedicated instance (recommended for production environments). This instance can serve multiple monitored Oracle instance.
Host
The Host on which the repository instance is located.
TNS Listener Port
The port (default 1521) used for communication with the repository instance.
Instance SID)
The Oracle instance on which the repository schema is to be (or already is) installed.
Schema Owner User
The DB user (with associated rights) that will own (or already owns) the repository instance schema objects.
Quest highly recommends that a dedicated account be used.
Schema Owner Password
The password associated with the repository owner user
Install on the Monitored Oracle Instance
Install the repository schema on the monitored Oracle instance. The schema will be of reduced size and scalability. This option will impose additional overhead on the monitored Oracle instance and should not be used for production environments.
Granting Privileges to the Oracle User
This section appears in case the specified repository Schema Owner User does not have sufficient privileges on the repository instance, you are required to either automatically or manually grant these privileges.
Automatically grant privileges to the Repository Schema Owner User
Foglight Performance Analysis for Oracle: Agent Installation Guide 76
Specify a DBA account on the repository instance which will be temporarily used to grant the required privileges to the designated schema owner.
Note The DBA account credentials will not be used or stored by the agent.
Manually grant privileges to the Repository Schema Owner User
This option allows manual granting of required privileges to the Oracle user by running quest_pa_grant_rep_user.sql. The installation will only validate the granted privileges when this option is chosen. Use this option in case the site's security policy does not allow providing DBA accounts to the wizard.
Clear the check box to allow the manual granting and perform the manual granting sequence by (do not exit the installation wizard):
1 Navigate to the following directory
a Windows: %TEMP%\pa_rep_sqls_<##>
b UNIX: /tmp/pa_rep_sqls_<##>
2 Log on to the repository Oracle instance using a DBA account.
3 Run the quest_pa_grant_rep_user.sql script available in the above directory and provide the repository schema owner when prompted.
4 On the installation wizard, click Next to continue.
Related Topics
“Performance Repository” on page 19
“Required Privileges” on page 5
Troubleshooting
Error Workaround
The database operation failed.Connection Details: Host: <host>Instance: <sid>User: <user>TNS Listener Port: <port>.Generated the following exception: <Database Error>
The connection to the Oracle instance failed. Follow the displayed Oracle error to address the root problem and try again.Possible solutions:• For multi-tier installations validate that the
middle-tier Host can connect to the performance repository instance using the supplied details.
• Verify that the TNS Listener is running on the repository Host.

Foglight Performance Analysis for Oracle: Agent Installation Guide 77
The specified user, <user>, does not have the required privileges.Please enter a valid user with the required privileges.
Supply a user with the DBA or SYSDBA role to grant the necessary privileges to the agent performance repository user. If required, the grant scripts can be run manually by selecting the manual option.
The repository version is obsolete and cannot be upgraded by this installer.Please contact Quest support.
The installation wizard has detected an obsolete repository schema on the repository instance. Possible solutions:• Upgrade the obsolete schema using Quest
Central 5.x and then continue this upgrade.• Install using a different schema owner
without upgrading the repository data.• Uninstall the obsolete repository schema
and continue the installation.
Error Workaround

Foglight Performance Analysis for Oracle: Agent Installation Guide 78
Repository UpgradeThe existing Performance Repository is of an older version and requires an upgrade.
The repository upgrade requires 150 MB of available space on the data and index tablespaces (300 MB total). If the data or index tablespaces lack sufficient available space, you are required to make additional space available before proceeding.
The repository is backwards compatible so older agent versions will not be adversely affected by the repository schema upgrade.
Note The repository upgrade may take several minutes but is required only once for every repository instance
Related Topics
“Architecture Overview” on page 16
Troubleshooting
Error Workaround
There is insufficient free space in repository tablespace <tablespace> to perform the upgrade.The repository tablespace requires <required space> of free space, while only <available value> is available.Please free at least <space> MB of space.
Free the required space on the Performance Repository tablespace in order to allow the Performance Repository upgrade to proceed.
The database operation failed.Connection Details: Host: <host>Instance: <sid>User: <user>TNS Listener Port: <port>.Generated the following exception: <Database Error>
The connection to the Oracle instance failed. Follow the displayed Oracle error to address the root problem and try again.Possible solutions:• For multi-tier installations validate that the
middle-tier Host can connect to the performance repository instance using the supplied details.
• Verify that the TNS Listener is running on the repository Host.

Foglight Performance Analysis for Oracle: Agent Installation Guide 79
Repository Manager UpgradeThe installation wizard is configuring the agent to use the upgraded repository.
• The advisory functionality requires that the timed_statistics parameter on the Oracle Host be set to TRUE. If the parameter is set to FALSE, please perform one of the following:
• If spfile is being used, issue the command alter system set timed_statistics=true scope=both.
• If spfile is not being used, change the parameter timed_statistics in your init.ora file from FALSE to TRUE and issue the command alter system set timed_statistics=true from a DBA account.
Troubleshooting
Error Workaround
The Oracle initialization parameter “timed_statistics” on host <host> instance <sid> is set to false.Please set it to true in order to enable the Foglight Performance Analysis advisories functionality.In order to set this parameter to true please perform one of the following:If spfile is being used issue the command alter system set timed_statistics=true scope=both
If spfile is not being used change the parameter timed_statistics in your init.ora file from false to true and issue the command alter system set
timed_statistics=true from a DBA account.
To set this parameter to true perform one of the following:• If spfile is being used, issue the command alter system set
timed_statistics=true scope=both.• If spfile is not being used, change the
parameter timed_statistics in your init.ora file from false to true and issue the command alter system set timed_statistics=true from a DBA account.

Foglight Performance Analysis for Oracle: Agent Installation Guide 80
Repository Instance Object InstallationUse this window to specify a data tablespace and an index tablespaces (requiring 1,200 and 1,000 MB, respectively, of available space) on the Performance Repository instance. The database objects will be created in these tablespaces.
If the required tablespaces do not exist, manually create them and refresh the list.
Quest recommends using different tablespaces for the data and index objects.
Note This window appears only when installing the performance repository.
Data Tablespace
A tablespace on the repository Host with at least 1,200 MB of available space in which you wish to install the repository tables.
Index Tablespace
A tablespace on the repository Host with at least 1,000 MB available for storage in which you wish to install the repository indexes.
Related Topics
“Performance Repository” on page 19
Troubleshooting
Error Workaround
There is insufficient free space in the repository tablespace <tablespace>. The tablespace requires <required> MB of free space while only <available> MB is available.Please free at least <extra space> MB of space.
Specify a data tablespace with 1200 MB of free space and an index tablespace with 1000 MB of free space on the performance repository instance.

Foglight Performance Analysis for Oracle: Agent Installation Guide 81
Repository ConfigurationThis window is displayed when configuring the Performance Repository.
If no configuration exists, you are informed to that effect and that file deployment will occur.
If the repository option is already configured for this agent, but the existing configuration is not functional, select the check box to override the configuration.

Foglight Performance Analysis for Oracle: Agent Installation Guide 82
Troubleshooting
Agent UninstallationThe uninstallation procedure removes a Foglight Performance Analysis agent (StealthCollect)
Error Workaround
The database operation failed.
Connection Details:
Host: <host>
Instance: <sid>
User: <user>
TNS Listener Port: <port>.
Generated the following exception: <Database Error>.
The connection to the Oracle instance failed. Follow the displayed Oracle error to address the root problem and try again.Possible solutions:• For a multi-tier architecture, validate that
the middle-tier Host can connect to the monitored instance using the supplied details.
• Verify that the TNS Listener is running on the Oracle Host.
• Verify the ORACLE_HOME supplied for the middle-tier Host, for multi-tier installations.
• For active/passive cluster installations, verify that the supplied virtual cluster name is correct.
The Oracle initialization parameter timed_statistics on Host <host> instance <sid> is set to false.
Please set it to true in order to enable the Foglight Performance Analysis advisories functionality.
In order to set this parameter to true please perform one of the following:
If spfile is being used, issue the command alter system set timed_statistics=true scope=both
If spfile is not being used change the parameter timed_statistics in your init.ora file from false to true and issue the command alter system set timed_statistics=true from a DBA account.
In order to set this parameter to true perform one of the following:• If spfile is being used, issue the command alter system set timed_statistics=true scope=both
• If spfile is not being used, change the parameter timed_statistics in your init.ora file from false to true and issue the command alter system set timed_statistics=true from a DBA account.

Foglight Performance Analysis for Oracle: Agent Installation Guide 83
installation which was configured for a specific instance.
Oracle Host DetailsUse this window to specify the monitored Oracle Host details and the agent communication port.
Host
Specify the Oracle Host. The wizard will detect the Foglight Performance Analysis agents running on the specified Host.
Agent Communication Port
The agent communication port is used to communicate with the Foglight Performance Analysis agent processes on this Oracle Host.
Note If the password for the default Foglight Performance Analysis agent logon account has been changed since the agent was installed, the Agent Login dialog box appears, requiring to specify the login username and password. Enter the user-defined username and password and click OK.
Troubleshooting
Error Workaround
The installer has failed to connect to agent on <host> using port <port>.Error: <error>
Verify that the agent quest_launcher process is running on the Oracle Host.For Windows, verify that the QAM Launcher <port> service is up and running.For UNIX:• Run <installation_directory>/ agents/bin/quest_launcher_daemon
status to see the agent version.• Run <installation_directory>/ agents/bin/quest_launcher_daemon
start to start the agent.
The agent installed on the specified Host is a Middleware component.Please specify an agent on a monitored Oracle instance Host.
Run the installer on the monitored Host and specify the Foglight Performance Analysis agent port when required.
Foglight Performance Analysis for Oracle: Agent Installation Guide 84
Monitored Instance SelectionThis window displays all Oracle instances monitored by the agent installed on the specified server.
Use this window to select an instance whose agent you want to uninstall.
Leave this check box selected to remove the historical data stored in the repository. This option will be ignored in case the agent is not configured to use a repository. Clear the check box if you want the data in the repository to be retained.
Notes:
• A later installed agent will detect the existence of retained repository data and will reuse it. Retaining the data is advised if a subsequent agent deployment is intended.
• Removing the repository data deletes the entire monitored instance corresponding data from the repository schema tables, therefore the operation may take some time to complete.
Troubleshooting
Error Workaround
Failed to retrieve agent setup information.Connection Details Host: <host>Instance: <sid>Agent Port: <port> Please verify that the agent is up.
Verify that the agent quest_launcher process is running on the Oracle Host and that the quest_launcher process is also running on the middle-tier Host.
The Foglight Performance Analysis agent is down and failed to start automatically. Please start the agent and continue with the uninstall process.
Connect to the agent using Foglight Performance Analysis before specifying the monitored instance.(This error is unlikely, but if it occurs, connecting to the GUI and clicking Next might resolve it.)

Foglight Performance Analysis for Oracle: Agent Installation Guide 85
Agent Upgrade
The wizard upgrades a selected agent instance installed on this Host to the current version.
Use this window to select the agent component that is to be upgraded. For a multi-tier agent architecture, the Middleware upgrade must be performed first, before that of the monitored Host.
Note The Middleware component needs only to be upgraded once, even if it monitors multiple Oracle instances.
Oracle Host DetailsUse this window to specify the Foglight Performance Analysis Agent port.
Agent Communication Port
The agent communication port is used to communicate with the Foglight Performance Analysis agent processes on this Host.
Troubleshooting
Error Workaround
The installer has failed to connect to agent on <host> using port <port>.Error: <error>.
Verify that the agent quest_launcher process is running on the Oracle Host.
For Windows, verify that the QAM Launcher <port> service is up and running.
For UNIX:
• Run <installation_directory>/ agents/bin/quest_launcher_daemon status to see the agent version.
• Run <installation_directory>/ agents/bin/quest_launcher_daemon start to start the agent.

Foglight Performance Analysis for Oracle: Agent Installation Guide 86
The existing agent installation on port <port> is obsolete and upgrading it is not supported by this installer version. Please obtain the latest installer.
The installation wizard has detected an obsolete installation on the specified port, for the specified instance.Possible solutions:• Upgrade the obsolete installation using
Quest Central 5.x and then upgrade to the latest Foglight Performance Analysis agent version.
• Install using a different port without upgrading the installation.
• Uninstall the obsolete installation and install the latest Foglight Performance Analysis agent version.
The agent installed on the specified Host is a Middleware component.Please specify an agent on a monitored Oracle instance Host.
Run the installer on the monitored Host and specify the Foglight Performance Analysis agent port when required.
Error Workaround

Foglight Performance Analysis for Oracle: Agent Installation Guide 87
Middle-tier Host Details
Agent Communication Port
The agent communication port is used for communicating with the Foglight Performance Analysis agent processes on this Host.
Troubleshooting
Monitored Instance SelectionThis window displays all Oracle Host instances for which a valid Foglight Performance Analysis agent is configured.
Use this window to select an agent instance to be upgraded to the current version.
For an obsolete agent version for which upgrading is not supported, contact Quest support.
Error Workaround
No instance selected for upgrade.
Select an instance to be upgraded.
The instance <sid> is of version <version> which is obsolete and upgrading it is not supported by the current installer version.Please contact Quest support.
The installation wizard has detected an obsolete installation on the specified port, for the specified instance.Possible solutions:• Upgrade the obsolete installation using
Quest Central 5.x and then upgrade to the latest Foglight Performance Analysis agent version.
• Install using a different port without upgrading the installation.
• Uninstall the obsolete installation and install the latest Foglight Performance Analysis agent version.
The instance <sid> is of version <version> which is up-to-date.Please choose another instance.
Select another instance to be upgraded.

Foglight Performance Analysis for Oracle: Agent Installation Guide 88
Middleware Upgrade RequiredThis screen appears in case the Middleware component of the specified monitored Oracle instance requires an upgrade. If so, you must first perform the Middleware upgrade before proceeding.
Important As the middleware component currently requires 4GB of disk space, whereas previously it required 2GB, ensure having 2GB free disk space before carrying out the upgrade.
To upgrade the middleware:
1 Run the installation wizard locally from the middle-tier host.
2 Select the Upgrade agent components option.
3 In the Upgrade Introduction window, select Multi-tier > Middleware.
4 Perform any required steps.
Troubleshooting
Error Workaround
The Middleware component was not upgraded to the current version <version>. Please first run the installer on the middle-tier Host <host> port <port> to upgrade the Middleware to the current version, before proceeding.
Upgrade the Middleware by running this installer on the middle-tier Host before proceeding with this installation.

Foglight Performance Analysis for Oracle: Agent Installation Guide 89
Oracle User Privileges - DBA UserThe previously specified Oracle user lacks required privileges to access Oracle data dictionary views and performance views. Such privileges can be granted by a DBA role user.
Use this window to specify a DBA user, which will be temporarily used to grant sufficient privileges to the Oracle user.
Automatically grant Privileges to the Oracle User
This option grants the required privileges to the Oracle user by using the specified dba user.
Manually grant Privileges to the Oracle User
This option allows manually granting of required privileges to the Oracle user by running quest_pa_grant_mon_user.sql. The installation will only validate the granted privileges when this option is chosen. Use this option in case the site's security policy does not allow providing SYSDBA/DBA accounts to the wizard.
To perform the manual granting sequence (do not exit the installation wizard):
1 Navigate to the following directory
• Windows: %TEMP%\pa_mon_sqls_<##>
• UNIX: /tmp/pa_mon_sqls_<##>
2 Verify that the ORACLE SID variable is correctly set to the monitored instance.
3 Log on to the monitored Oracle instance as a SYSDBA account, by running:
4 sqlplus sys/<PASSWD> as sysdba
5 Run the quest_pa_grant_mon_user.sql script available in the above directory as a SYSDBA user and provide the <quest user> when prompted.
6 On the installation wizard, click Next to continue.
Related Topics
“Required Privileges” on page 5

Foglight Performance Analysis for Oracle: Agent Installation Guide 90
Troubleshooting
Oracle User Privileges - SYSDBA UserThe previously specified Oracle user lacks required privileges to access Oracle data dictionary views and performance views. Such privileges can be granted by a SYSDBA role user.
Automatically grant Privileges to the Oracle User
This option grants the required privileges to the Oracle user by using the specified SYSDBA user.
Error Workaround
The database operation failed.Connection Details: Host: <host>Instance: <sid>User: <user>TNS Listener Port: <port>.Generated the following exception: <Database Error>
The connection to the Oracle instance failed. Follow the displayed Oracle error to address the root problem and try again.Possible solutions:• For a multi-tier architecture validate that
the middle-tier Host can connect to the monitored instance using the supplied details.
• Verify that the TNS Listener is running on the Oracle Host.
• Verify the ORACLE_HOME supplied for the middle-tier Host, for multi-tier installations.
• For active/passive cluster installations, verify that the supplied virtual cluster name is correct.
The specified user, <user>, has insufficient privileges. Please enter a valid user with enough privileges.
Supply a user with the DBA or SYSDBA role to grant the necessary privileges to the agent user. If required, the grant scripts can be run manually by selecting the manual option.
The DBA role does not contain sufficient privileges on the data dictionary views.A valid User with a SYSDBA role on instance <sid> is required in order to grant the required privileges for user <user>.
Supply a user with SYSDBA role to grant the necessary privileges to the agent user. If required, the grant scripts can be run manually by selecting the manual option.

Foglight Performance Analysis for Oracle: Agent Installation Guide 91
Manually grant Privileges to the Oracle User
This option allows manually granting of required privileges to the Oracle user by running quest_pa_grant_mon_user.sql. The installation will only validate the granted privileges when this option is chosen.
To perform the manual granting sequence (do not exit the installation wizard):
1 Navigate to the following directory
• Windows: %TEMP%\pa_mon_sqls_<##>
• UNIX: /tmp/pa_mon_sqls_<##>
2 Verify that the ORACLE SID variable is correctly set to the monitored instance.
3 Log on to the monitored Oracle instance as a SYSDBA account, by running:
4 sqlplus sys/<PASSWD> as sysdba
5 Run the quest_pa_grant_mon_user.sql script available in the above directory as a SYSDBA user and provide the <quest user> when prompted.
6 On the installation wizard, click Next to continue.
Related Topics
“Required Privileges” on page 5

Foglight Performance Analysis for Oracle: Agent Installation Guide 92
Troubleshooting
Monitored Instance Objects InstallationThe agent requires the creation of several tables and indexes on the monitored Oracle instance. These objects are used for the process of performance advisories evaluation and generation.
Use this window to specify a data tablespace and an index tablespaces (requiring 50 MB of available space, each) on the monitored Oracle instance. The database objects will be created in these tablespaces accordingly.
If the required tablespaces do not exist, manually create them and refresh the list.
Error Workaround
The database operation failed.Connection Details: Host: <host>Instance: <sid>User: <user>TNS Listener Port: <port>.Generated the following exception: <Database Error>
The connection to the Oracle instance failed. Follow the displayed Oracle error to address the root problem and try again.Possible solutions:• For a multi-tier architecture validate that
the middle-tier Host can connect to the monitored instance using the supplied details.
• Verify that the TNS Listener is running on the Oracle Host.
• Verify the ORACLE_HOME supplied for the middle-tier Host, for multi-tier installations.
• For active/passive cluster installations, verify that the supplied virtual cluster name is correct.
The specified user, <user>, has insufficient privileges. Please enter a valid user with enough privileges.
Supply a user with the DBA or SYSDBA role to grant the necessary privileges to the agent user. If required, the grant scripts can be run manually by selecting the manual option.
The DBA role does not contain sufficient privileges on the data dictionary views.A valid User with a SYSDBA role on instance <sid> is required in order to grant the required privileges for user <user>.
Supply a user with SYSDBA role to grant the necessary privileges to the agent user. If required, the grant scripts can be run manually by selecting the manual option.

Foglight Performance Analysis for Oracle: Agent Installation Guide 93
Quest recommends using different tablespaces for the data and index objects.
Note This window appears only when configuring the repository.
Data Tablespace
Specify a tablespace with at least 50 MB of free space available. This tablespace will be used to store advisories-related tables.
Index Tablespace
Specify a tablespace with at least 50 MB of free space available. This tablespace will be used to store advisories-related indexes.
Note In a RAC environment, the allocation of 50MB for data tablespace and 50 MB for index tablespace is required for each node in the RAC. Therefore, ensure having free space for each of the nodes. For example: if the RAC installation is to be carried out on five nodes, ensure that at least 500 MB of free space (250MB for data tablespace and 250 MB for index tablespace) are available.
Related Topics
“Performance Repository” on page 19
Repository Owner PrivilegesThis section appears in case the specified repository Schema Owner User does not have sufficient privileges on the repository instance. If so, you are required to either automatically or manually grant these privileges.
Use this window to grant privileges to the repository instance owner.
Automatically grant Privileges to the Repository Schema Owner
Specify a DBA account on the repository instance which will be temporarily used to grant the required privileges to the designated schema owner.
Note The DBA account credentials will not be used or stored by the agent.
Manually granting Privileges to the Repository Schema Owner
This option allows manual granting of required privileges to the Foglight Performance Analysis user by running quest_pa_grant_mon_user.sql. The installation will validate the granted privileges only when this option is chosen. Use this option in case the site's security policy does not allow providing DBA accounts to the wizard.
Follow the manual granting sequence (do not exit the installation wizard):
1 Navigate to the following directory
• Windows: %TEMP%\pa_rep_sqls_<##>

Foglight Performance Analysis for Oracle: Agent Installation Guide 94
• UNIX /tmp/pa_rep_sqls_<##>
2 Log on to the repository Oracle instance using a DBA account.
3 Run the quest_pa_grant_rep_user.sql script available in the above directory and provide the repository schema owner when prompted.
4 On the installation wizard, click Next to continue.
Related Topics
“Required Privileges” on page 5
“Performance Repository” on page 19
Troubleshooting
Repository UpgradeThe existing Performance Repository is of an older version and requires an upgrade.
The repository upgrade requires 150 MB of available space on the data and index tablespaces (300 MB total). If the data or index tablespaces lack sufficient available space, you are required to make additional space available before proceeding.
The repository is backwards compatible so older agent versions will not be adversely affected by the repository schema upgrade.
Note The repository upgrade may take several minutes but is required only once for every repository instance.
Error Workaround
The database operation failed.Connection Details: Host: <host>Instance: <sid>User: <user>TNS Listener Port: <port>.Generated the following exception: <Database Error>
The connection to the Oracle instance failed. Follow the displayed Oracle error to address the root problem and try again.Possible solutions:• For multi-tier installations validate that the
middle-tier Host can connect to the performance repository instance using the supplied details.
• Verify that the TNS Listener is running on the repository Host.
The specified user, <user>, has insufficient privileges. Please enter a valid user with enough privileges.
Supply a user with the DBA or SYSDBA role to grant the necessary privileges to the agent user. If required, the grant scripts can be run manually by selecting the manual option.

Foglight Performance Analysis for Oracle: Agent Installation Guide 95
Related Topics
“Architecture Overview” on page 16
Troubleshooting
Repository Manager UpgradeThe installation wizard is configuring the agent to use the upgraded repository.
The advisory functionality requires that the timed_statistics parameter on the Oracle Host be set to TRUE. If the parameter is set to FALSE, please perform one of the following:
• If spfile is being used, issue the command alter system set timed_statistics=true scope=both.
• If spfile is not being used, change the parameter timed_statistics in your init.ora file from FALSE to TRUE and issue the command alter system set timed_statistics=true from a DBA account
Error Workaround
There is insufficient free space in repository tablespace <tablespace> to perform the upgrade.The repository tablespace requires <required space> of free space, while only <available value> is available.Please free at least <space> MB of space.
Free the required space on the Performance Repository tablespace in order to allow the Performance Repository upgrade to proceed.
The database operation failed.Connection Details: Host: <host>Instance: <sid>User: <user>TNS Listener Port: <port>.Generated the following exception: <Database Error>
The connection to the Oracle instance failed. Follow the displayed Oracle error to address the root problem and try again.Possible solutions:• For multi-tier installations validate that the
middle-tier Host can connect to the performance repository instance using the supplied details.
• Verify that the TNS Listener is running on the repository Host.

Foglight Performance Analysis for Oracle: Agent Installation Guide 96
Troubleshooting
Error Workaround
The Oracle initialization parameter “timed_statistics” on host <host> instance <sid> is set to false.Please set it to true in order to enable the Foglight Performance Analysis advisories functionality.In order to set this parameter to true please perform one of the following:If spfile is being used issue the command alter system set timed_statistics=true scope=both
If spfile is not being used change the parameter timed_statistics in your init.ora file from false to true and issue the command alter system set
timed_statistics=true from a DBA account.
In order to set this parameter to true perform one of the following:• If spfile is being used, issue the command alter system set
timed_statistics=true scope=both.• If spfile is not being used, change the
parameter timed_statistics in your init.ora file from false to true and issue the command alter system set timed_statistics=true from a DBA account.

Foglight Performance Analysis for Oracle: Agent Installation Guide 97
Post-Installation Tasks
When installing on the AIX operating system, you have to set the collector OS privileges on this system after completing the installation.
Setting Collector OS Privileges (AIX)For the AIX operating system, a special granting of privileges must be performed in order for the collector process to be able to collect operating system indicators, such as CPU Usage, memory usage, I/O load and network traffic.
Without the necessary operating system privileges, no operating system indicators are available on AIX.
Granting Operating System Privileges
In order for the collector to be able to collect system indicators, a read permission must be granted on the /dev/kmem device (on AIX 6.x and higher, the read permission must be granted also on the /dev/pmem device). Enabling a read permission poses little risk, as it only allows the collector a read-only access to the information.
Note Perform the granting procedure only once per installation Host.
To grant a read permission:
1 Log on to the Oracle Host as the root account, or any other account which is a member of the system group.
2 Enter the following command:
chmod o+r /dev/kmem
On AIX 6.x and higher, enter also the following command:
chmod o+r /dev/pmem
3 Restart the Foglight Performance Analysis agent Collector as follows:
a Access the Agent Administration dialog, Agent node from: start | Programs | Quest Software | Foglight Performance Analysis | Agent Administration | Agent Administration.
b Click Shutdown StealthCollect. The Foglight Performance Analysis agent will be closed as the agent processes shut down.
c Restart Foglight Performance Analysis, thereby automatically restarting the agent.

Foglight Performance Analysis for Oracle: Agent Installation Guide 98
Configuring ERP SupportThis section contains information regarding ERP views and the configuration of PeopleSoft.
• ERP Views
• Configuring PeopleSoft
• Configuring Oracle Applications
ERP ViewsThe Foglight Performance Analysis agent incorporates Enterprise Resource Planning (ERP) product views for Oracle Applications and PeopleSoft. ERP views associate SQL statements from specific programs, forms, and usernames with the Oracle session's Action and Module columns in Oracle Applications, or with the Client Info column in PeopleSoft. ERP product forms can be useful because both the Oracle Applications and PeopleSoft products categorize all system users under a super username such as APPS.
Notes:
• ERP product views are available for Oracle Applications versions 11.0.x and 11i or later and for PeopleSoft version 8.0 or later.
The latest information about supported platforms and versions is available on Foglight Performance Analysis for Oracle release notes, available on the Quest Software website (http://www.quest.com).
Related Topics
“Configuring PeopleSoft” on page 99
“Configuring Oracle Applications” on page 100

Foglight Performance Analysis for Oracle: Agent Installation Guide 99
Configuring PeopleSoftIn a PeopleSoft environment when slowdowns, performance problems, or errors occur, it is difficult to know with which PeopleSoft users are experiencing problems.
When reviewing performance metrics collected in V$SESSION and related tables, it is difficult to associate those metrics with the appropriate PeopleSoft user session. The absence of specific user information makes tracking PeopleSoft user and program activity for problem resolution, historical performance consumption, and trend analysis reporting complicated and time-consuming.
To configure PeopleSoft for the Foglight Performance Analysis agent, set the EnableDbMonitoring flag to '1' in the PeopleSoft configuration file for each of the application server domains.
After this change, PeopleSoft will populate the CLIENT_INFO column in V$SESSION. This allows the Foglight Performance Analysis agent to monitor Clients connected via multi-tier workstations.
Sample Manual Procedure
1 Log in as the PeopleSoft user administrator.
2 Run psadmin - PeopleSoft Server Administration
3 Select 1) Application Server.
4 From the PeopleSoft Application Server Administration menu, select option 1) Administer a domain.
5 From the Tuxedo domain list, select the domain which you want to administer.
6 From the PeopleSoft Domain Administration menu, select option 6), edit configuration/log files menu.
7 From the PeopleSoft Edit Configuration/Log Files Menu, select option 1), Edit psappsrv.cfg (current configuration file).
8 In the displayed file, set EnableDBMonitoring=1.
9 Re-run step 4 to step 8 for each domain you want the Foglight Performance Analysis agent to monitor.
Restoring Original PeopleSoft Configuration
To remove the Foglight Performance Analysis agent's PeopleSoft configuration, set the EnableDbMonitoring flag to '0' in the PeopleSoft configuration file for each of the application server domains. In accordance with the above sample procedure:
1 Re-run step 1 to step 7 of the Sample Manual Procedure section.
2 In the displayed file, set EnableDBMonitoring=0.
3 Re-run the previous steps for each domain that you no longer want to monitor using the Foglight Performance Analysis agent.

Foglight Performance Analysis for Oracle: Agent Installation Guide 100
Configuring Oracle ApplicationsIn an Oracle Applications’ environment, when slowdowns, performance bottlenecks, or errors occur, it is difficult to know which Oracle Applications user is causing the problems.
When reviewing performance metrics collected in V$SESSION and related tables, it is difficult to associate those metrics with the appropriate Oracle Applications user session.
This makes it difficult to track Oracle Application user and program activity for problem resolution, historical performance consumption, and trend analysis reporting.
The Foglight Performance Analysis agent ERP module stores the current Oracle Applications user, module, and responsibility in its V$SESSION.MODULE column and the form and block name in its V$SESSION.ACTION column making it possible to associate database activity with the appropriate application user. The MODULE and ACTION values then display in Foglight Performance Analysis.
Note Using the Foglight Performance Analysis agent component will overwrite any previously set value in the MODULE and ACTION columns of the V$SESSION view. If you are already populating these columns and would like your existing values displayed in the Foglight Performance Analysis agent, do not install this component and the Foglight Performance Analysis agent will automatically display your values in the GUI. (Foglight Performance Analysis Oracle Applications support will not be active.)
The Oracle Applications configuration process can be performed manually on both UNIX and Windows platforms or automatically on a UNIX platform.
UNIX - Automatic Installation
Note the following:
• The automatic install procedure can be used only for Oracle Applications versions 11 and 11i. Use the Manual Installation procedure for version 12.
• The latest information about supported platforms and versions is available on the the Foglight Performance Analysis for Oracle release notes, available on the Quest Software website (http://www.quest.com).
• The Automatic install is designed to install the ERP kit even if you have made changes to your CUSTOM library. However, if you have made many changes or have changed the original format of the CUSTOM library, you may want to use the Manual Installation procedure below. If you have not made any changes to your CUSTOM library, then use this Automatic installation procedure.
To carry out an automatic installation on UNIX:
1 Untar the qscust.tar file in the application manager directory tree where the CUSTOM.pll file is located. This is usually the $AU_TOP/resource directory.
a Log into the applmgr account
b Type cd $AU_TOP/resource
c Type tar -xvf qscust.tar
2 Change the directory to the qscust sub-directory that was just created.

Foglight Performance Analysis for Oracle: Agent Installation Guide 101
3 Run ./install to complete the installation.
4 Follow these substeps, which are required for the StealthCollect agent to report the Oracle Application module name:
a Use the APPS account to log on to the Oracle Applications database instance.
b Issue the following SQL command:
grant select on fnd_application_vl to public;
UNIX - Manual Installation
Notes
• This manual installation procedure is for Oracle Applications version 11, 11i or 12.
• The latest information about supported platforms and versions is available on the Foglight Performance Analysis for Oracle release notes, available on the Quest Software website (http://www.quest.com).
• For versions 11 replace all references of f60gen with f45gen.
• For versions 12 replace all references of f60gen with frmcmp_batch.sh
• In the userid qualifier, enter the apps user with its appropriate password.
• If you cannot execute the f45gen or f60gen, you may need to run: . $APPL_TOP/APPSORA.env in order to assign the environment variable to the appropriate values.
To carry out manual installation on UNIX:
1 Untar the qscust.tar file in the application manager directory tree where the CUSTOM.pll file is located. This is usually the $AU_TOP/resource directory.
a Log into the applmgr account.
b Type cd $AU_TOP/resource
c Type tar -xvf qscust.tar
2 Change directory to the qscust sub-directory that was just created.
3 Compile QSCUST by running the following command sequence:
f60gen module_type=LIBRARY module=QSCUST parse=YES userid=apps/<apps password>
f60gen module_type=LIBRARY module=QSCUST userid=apps/<apps password>
4 Copy the QSCUST.pld, QSCUST.pll and QSCUST.plx files from the current directory to its parent directory containing the CUSTOM.pll file.
5 Back up your original CUSTOM.pll file to another directory.
6 Edit your CUSTOM.pld file:
a Insert the following lines at the beginning of the file:
--Below line inserted by StealthCollect install, Quest Software Inc.
.attach LIBRARY QSCUST END NOCONFIRM

Foglight Performance Analysis for Oracle: Agent Installation Guide 102
b Go to the event procedure. Add the following lines to the procedure, immediately after the begin:
--Below line inserted by StealthCollect install, Quest Software Inc.
quest.setAppInfo(event_name);
c If the CUSTOM.pld file does not exist, create it, by entering the following:
f60gen module_type=LIBRARY module=CUSTOM script=YES userid=apps/<apps password>
7 Recompile the CUSTOM library, by entering the following commands:
f60gen module_type=LIBRARY module=CUSTOM parse=YES userid=apps/<apps password>
f60gen module_type=LIBRARY module=CUSTOM userid=apps/<apps password>
8 This step enables the reporting of the Oracle Application module name by the StealthCollect agent.
a Log on to the Oracle Applications database instance using the APPS account
b Issue the following SQL command:
grant select on fnd_application_vl to public;
Windows - Manual Installation
This automatic installation procedure applies for Oracle Applications version 11, 11i or 12.
The latest information about supported platforms and versions is available on the Release Information page, under the Sys Reqs tab:
http://www.quest.com//Foglight-Performance-Analysis-for-Oracle
To run a Windows manual installation:
1 Untar the qscust.tar file in the application manager directory containing the CUSTOM.pll file. This is usually the $AU_TOP/resource directory.
a Log into the applmgr account.
b Change the directory to $AU_TOP\resource
c Unzip qscust.tar
2 Change directory to the qscust sub-directory that was just created.
3 Compile QSCUST library by running the program IFCMP60.EXE as follows:
a Choose the module type: LIBRARY.
b Check the check box Parse script file.
c Enter the QSCUST.pld library. Ensure that this is the pld and not the pll file.
d Specify the Userid, Password, and Database in the appropriate fields.
e Check logon to database.
f Click OK.
4 Rerun IFCMP60.EXE as follows:

Foglight Performance Analysis for Oracle: Agent Installation Guide 103
a Choose the module type: LIBRARY
b Enter the QSCUST.pll library. Be sure this time it is the pll and not the pld file.
c Specify the Userid, Password, and Database in the appropriate fields.
d Check Logon to database.
e Click OK.
5 Copy the QSCUST files up to the parent directory containing the CUSTOM.pll file.
6 Backup the CUSTOM.pll file to another directory.
7 Edit the CUSTOM.pld file as follows:
a Insert the following lines at the beginning of the file:
--Below line inserted by StealthCollect install, Quest Software Inc.
.attach LIBRARY QSCUST END NOCONFIRM
b Go to the event procedure. Add the following lines to the procedure, immediately after the begin:
--Below line inserted by StealthCollect install, Quest Software Inc.
quest.setAppInfo(event_name);
8 If you need to create your CUSTOM.pld file first, run the IFCMP60.EXE program:
• Select the CUSTOM.pll and check the check box write script file.
9 Recompile the CUSTOM library, by entering the following commands:
f60gen module_type=LIBRARY module=CUSTOM parse=YES userid=apps/<apps password>
f60gen module_type=LIBRARY module=CUSTOM userid=apps/<apps password>
10 This step enables the reporting of the Oracle Application module name by the StealthCollect agent.
a Log on to the Oracle Applications database instance as the APPS account.
b Carry out the following SQL command:
grant select on fnd_application_vl to public;
Sample Configured custom.pld File
The code snippets below in blue are to be entered by the user.
[At the beginning of the file]
--Below line inserted by StealthCollect install, Quest Software Inc.
.attach LIBRARY QSCUST END NOCONFIRM
.attach LIBRARY FNDSQF END NOCONFIRM
[At the beginning of the event procedure]

Foglight Performance Analysis for Oracle: Agent Installation Guide 104
procedure event(event_name varchar2) is
.
.
.
begin
--Below line inserted by StealthCollect install, Quest Software Inc.
quest.setAppInfo(event_name);
.
.
.
null;
end event;
Concurrent Manager - Manual Installation
Notes:
• This procedure is for Oracle Application versions 11i and 12.
• For earlier versions please contact Quest support.
• The latest information about supported platforms and versions is available on the Release Information page, under the Sys Reqs tab:
http://www.quest.com/Foglight-Performance-Analysis-for-Oracle
Follow these steps:
1 Use the APPS account to log into the database and run the script: qs_currmgr_install.sql
This script will create a procedure in the APPS account that will store the current Oracle Application user and responsibility in its V$SESSION.MODULE column and the program name in its V$SESSION.ACTION column making it possible to associate database activity to the appropriate application user. The MODULE and ACTION value will then be displayed in the Foglight Performance Analysis console.
2 Change to the directory containing the AFCPUTLB.pls file (usually $FND_TOP/patch/115/sql).
3 Back up the AFCPUTLB.pls file to another directory.
4 Edit the file AFCPUTLB.pls as follows:
a Locate the procedure init_request
b Find the line:
dbms_application_info.set_module(program_name,'Concurrent Request');
c Below that line insert the following code:

Foglight Performance Analysis for Oracle: Agent Installation Guide 105
-- Added by Foglight Performance Analysis ERP Module, Quest Software Inc.
QUEST_SC_FND_REQ(fnd_global.conc_request_id);
5 Log into the database using the APPS account and run the AFCPUTLB.pls file.
Self Service Manual Install
Before carrying out self service manual installation, please note:
• This procedure is for Oracle Application versions 11i and 12. For earlier versions please contact Quest support.
• The latest information about supported platforms and versions is available on the Release Information page, under the Sys Reqs tab:
http://www.quest.com/Foglight-Performance-Analysis-for-Oracle
To carry out self service manual install:
1 Log into the database using the APPS account and run the script: quest_self_service.sql
This script will create a procedure in the APPS account that will store the current Oracle Application user, responsibility in its V$SESSION.MODULE column and the program name in its V$SESSION.ACTION column making it possible to associate database activity to the appropriate application user. The MODULE and ACTION value will then be displayed in the Quest Central / Foglight Performance Analysis console.
2 Change to the directory containing the AFICXSMB.pls file (usually $FND_TOP/patch/115/sql).
3 Back up the AFICXSMB.pls file to another directory.
4 Edit the file AFICXSMB.pls as follows:
a Locate function validateSessionPrivate
b find the line:
p_session_id :=
fnd_session_management.g_session_id;
c Below that line insert the following code:
-- Added by Foglight Performance Analysis ERP Module, Quest Software Inc.
BEGIN
quest_fw_sessions(fnd_session_management.g_user_id,
fnd_session_management.g_resp_appl_id,
fnd_session_management.g_responsibility_id,
fnd_session_management.g_function_id);
EXCEPTION
WHEN OTHERS THEN
NULL;
END;

Foglight Performance Analysis for Oracle: Agent Installation Guide 106
5 Log into the database using the APPS account and run the AFICXSMB.pls file.
Restoring Original Oracle Applications
For Installations Performed Automatically:
Run ./uninstall from the qscust directory (the directory that was created by opening the qscust.tar)
For Installations Performed Manually:
1 Go to the application manager directory tree (same directory where the CUSTOM.pll file exists. Restore the original CUSTOM files by copying the original CUSTOM.pll, CUSTOM.pld and CUSTOM.plx into this directory.
2 If you cannot restore the original CUSTOM files, edit the existing CUSTOM.pld:
3 Delete the lines that were added by StealthCollect:
--Below line inserted by StealthCollect install, Quest Software Inc.
.attach LIBRARY QSCUST END NOCONFIRM
-and-
--Below line inserted by StealthCollect install, Quest Software Inc.
quest.setAppInfo(event_name);
4 Recompile CUSTOM library, by entering the following commands:
f60gen module_type=LIBRARY module=CUSTOM parse=YES userid=apps/<apps password>
f60gen module_type=LIBRARY module=CUSTOM userid=apps/<apps password>
For Concurrent Manager Installed Manually:
1 Log into the database using the APPS account and run the script: qs_currmgr_install.sql
This script will create a procedure in the APPS account that will store the current Oracle Application user and responsibility in its V$SESSION.MODULE column and the program name in its V$SESSION.ACTION column making it possible to associate database activity to the appropriate application user. The MODULE and ACTION value will then be displayed in the Foglight Performance Analysis console.
2 Change to the directory containing the AFCPUTLB.pls file (usually the directory: $FND_TOP/patch/115/sql).
3 Back up the AFCPUTLB.pls file to another directory.
4 Edit the file AFCPUTLB.pls as follows:
a Locate procedure "init_request"
b Find the line "dbms_application_info.set_module(program_name, 'Concurrent Request'); "
c Below that line insert the following code:
-- Added by Foglight Performance Analysis ERP Module, Quest Software Inc.
:QUEST_SC_FND_REQ(fnd_global.conc_request_id);

Foglight Performance Analysis for Oracle: Agent Installation Guide 107
Log into the database as user APPS and run the AFCPUTLB.pls file.

Foglight Performance Analysis for Oracle: Agent Installation Guide 108
Index
Miscellaneous32-bit Instances
Handling Oracle 32-bit Instances 14
Aactive/active cluster 30active/passive cluster 22Agent Communication Port
Middle-tier Port Selection Screen 34Agent’s Middleware 34Architecture Overview 16
Cclusters
active/passive 22cluster environment figure 22
Collected,aggregated 16Collector
Architecture Overview 16Middle-tier Port Selection Screen 34Multi-tier vs. Single-tier Architecture 17Performance Repository Screen 40
FFoglight Performance Analysis
installing 3upgrade 15
Foglight Performance Analysis AgentInstalling
Middle-tier Port Selection Screen 34queries 16uninstalling 15
Foglight Performance Analysis agent componentslong-term performance repository 16middleware 16monitored schema objects 16Oracle collector 16quest_launcher 16
Foglight Performance Analysis Middleware 40Further Information
Acquiringfor support and downloads 15
Hhistorical data
creation of a minimal historical data collection model 48enabling long-term historical data retention 16, 69removing the historical data stored in the repository 84specifying the historical data collection type 48
IInstall
Foglight Performance Analysisinstallation prerequisites 3
Foglight Performance Analysis AgentMiddle-tier Port Selection Screen 34
Performance Repositoryinstallation prerequisites 3
installation prerequisitesAIX platform
read permission 4middle-tier host
installation OS user account 5Oracle client version 4
prior to installing the Foglight Performance Analysis agent 3
required privilegesrunning the quest_pa_grant_mon_user.sql script 5
UNIX installationslocation of the oratab file 4target instance installation 4
MMiddle-tier Host
Installation Prerequisites 3Middle-tier Port Selection Screen 34

Foglight Performance Analysis for Oracle Agent Installation Guide 109
Index
Middleware Component Settings Screen 36Minimal/Demo Installation
Middle-tier Port Selection Screen 34Monitored Instance
Installation Prerequisites 3Multi-tier Topology 17
Multi-tier vs. Single-tier Architecture 17multi-tier topology 18
OOracle 32-bit Instances
not supported on Solaris, HP-UX and AIX platforms 14Oracle 32-bit instances
monitoring via Performance Analysis version 6.3 56
PPeopleSoft
monitoring 57specifying monitoring via the ERP specification screen 56
Performance Analysis version 6.3the latest version that supports Oracle 32-bit instances 56
Performance RepositoryCreating 40Host 3Install
Installation Prerequisites 3Performance Repository Instance 3performance repository schema
removing if no longer in use 72
RRepository Component Configuration 40repository database data tablespace
installation prerequisites 3repository database index tablespace
installation prerequisites 3
SSingle-tier Architecture 3
Multi-tier vs. Single-tier Architecture 17single-tier topology 17
Ttopology
multi-tier 18
single-tier 17
Uuninstalling
Foglight Performance Analysis agent 32upgrading
Foglight Performance Analysis agent 32