Embed Size (px)
Citation preview
1 Getting Started with JS
Robotics
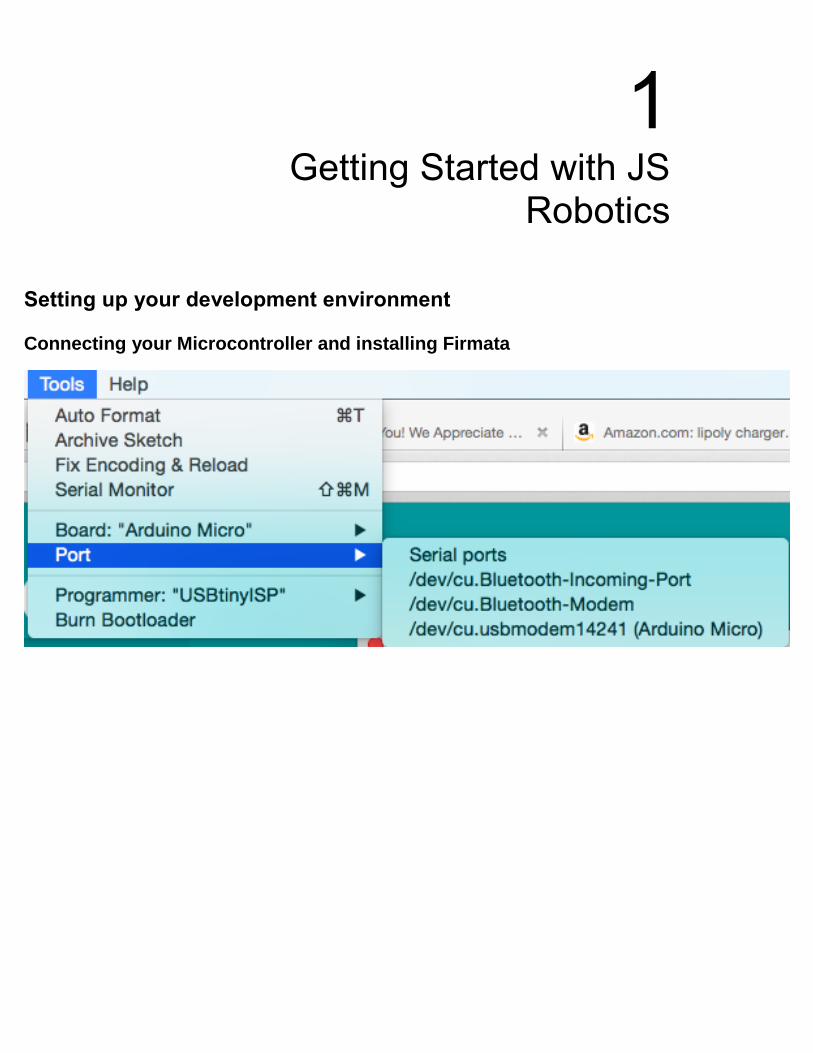
Setting up your development environment
Connecting your Microcontroller and installing Firmata

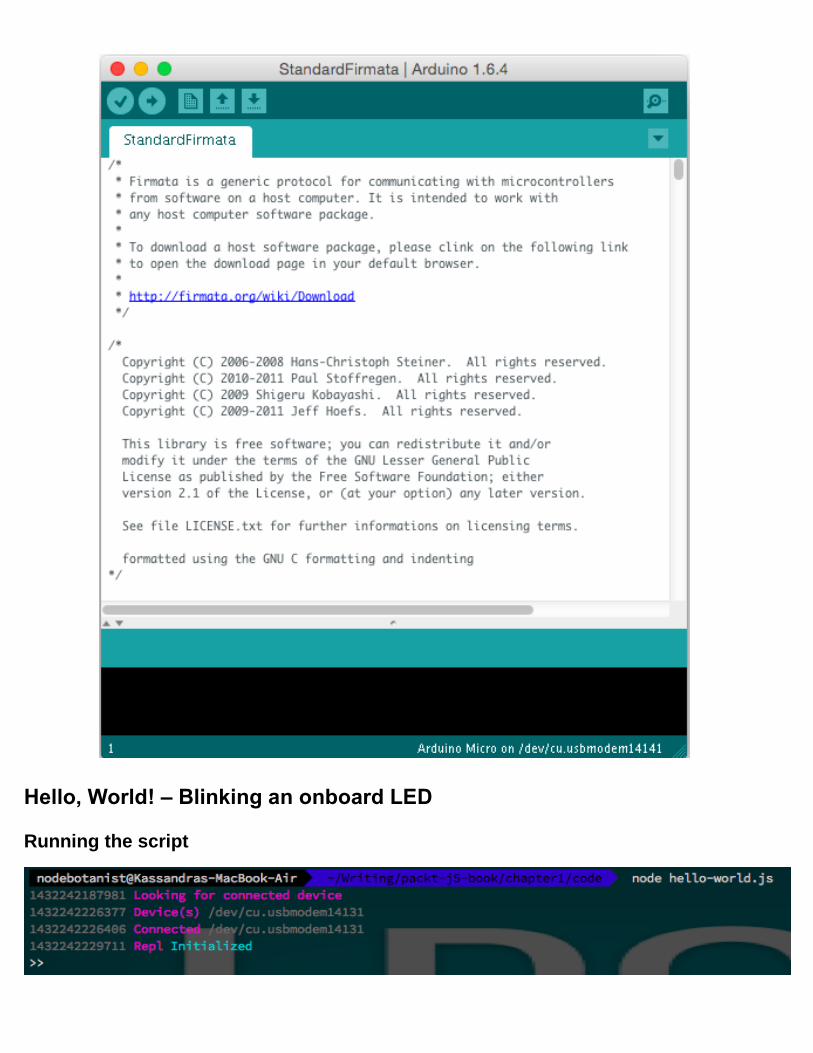
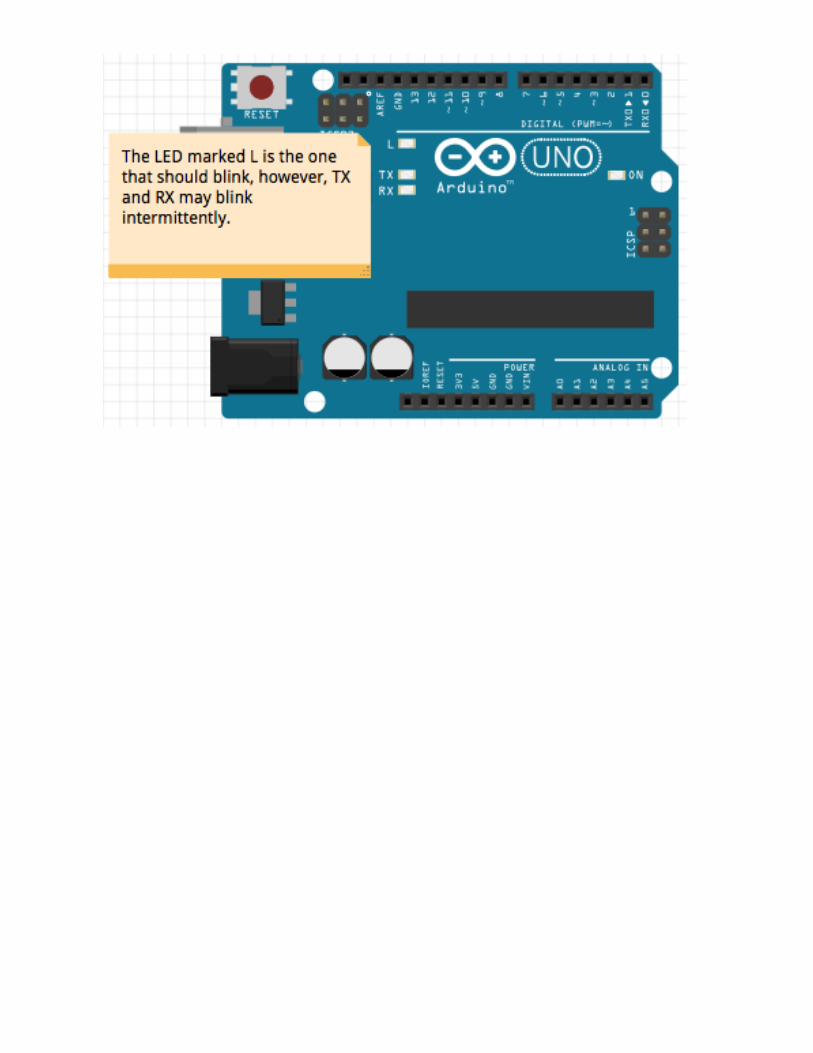
Hello, World! – Blinking an onboard LED
Running the script

2 Working with Johnny-Five
Wiring up an external LED
Setting up the hardware
Determining the positive and negative ends of an LED
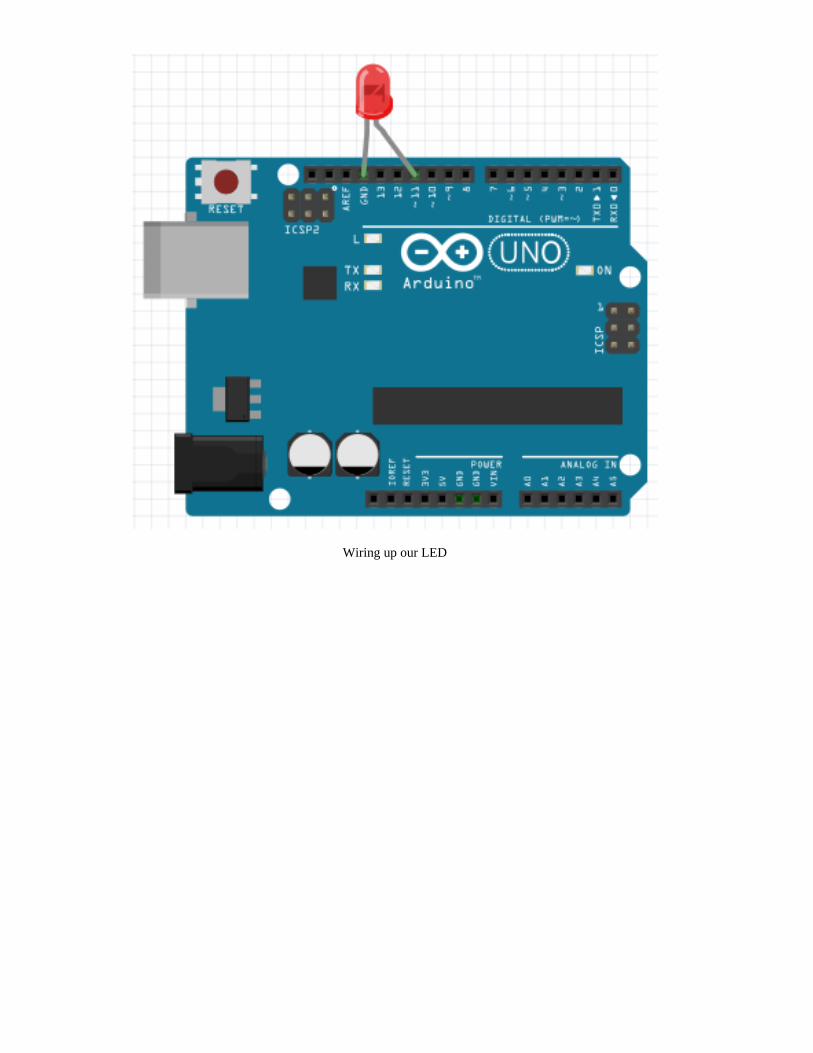
Wiring up our LED

Wiring an LED with a breadboard
Using the Read-Eval-Print-Loop (REPL)
Using the REPL
Terminal setup for Johnny-Five REPL prompt
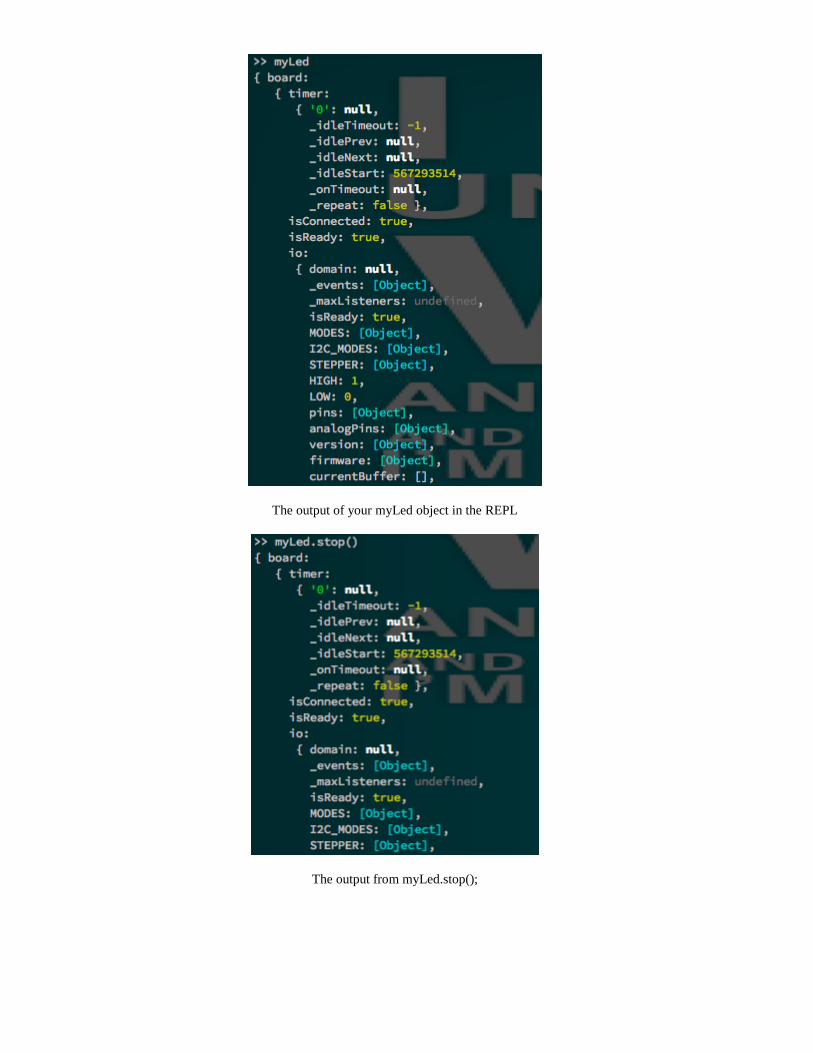
The output of your myLed object in the REPL
The output from myLed.stop();
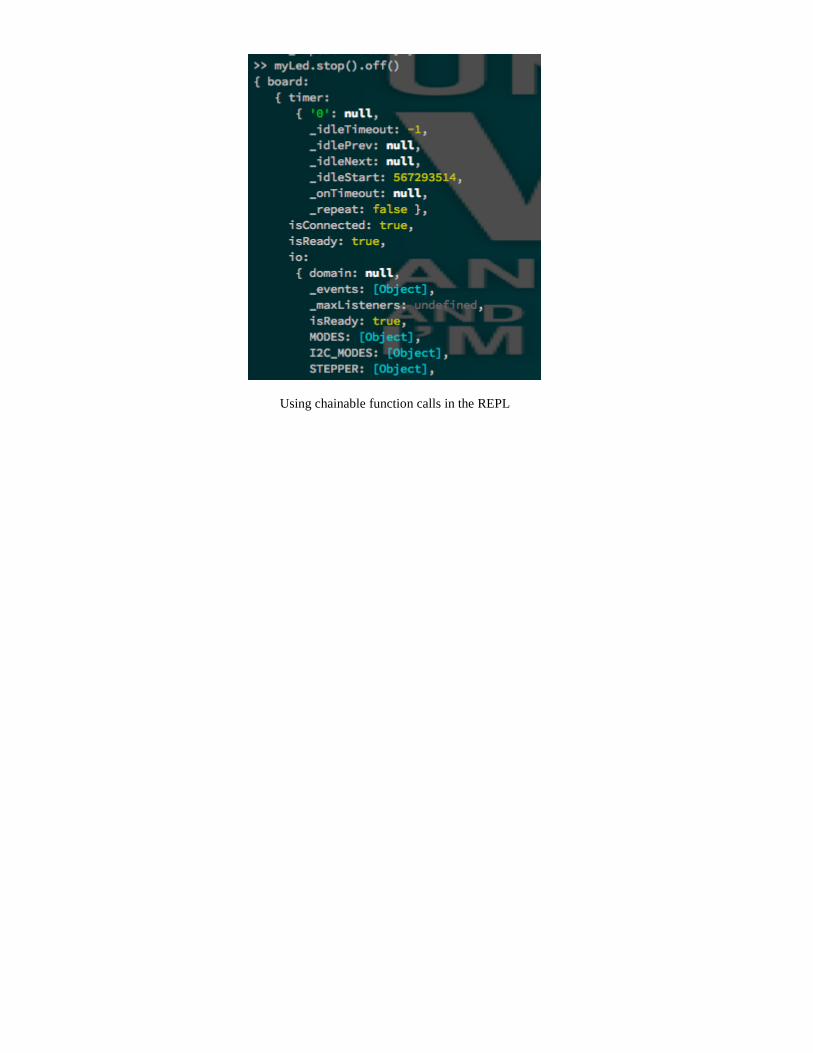
Using chainable function calls in the REPL

3 Using Digital and PWM Output
Pins
How GPIO pins work
How to tell the difference between Digital and PWM pins
Determining the PWM pins on an Arduino Uno
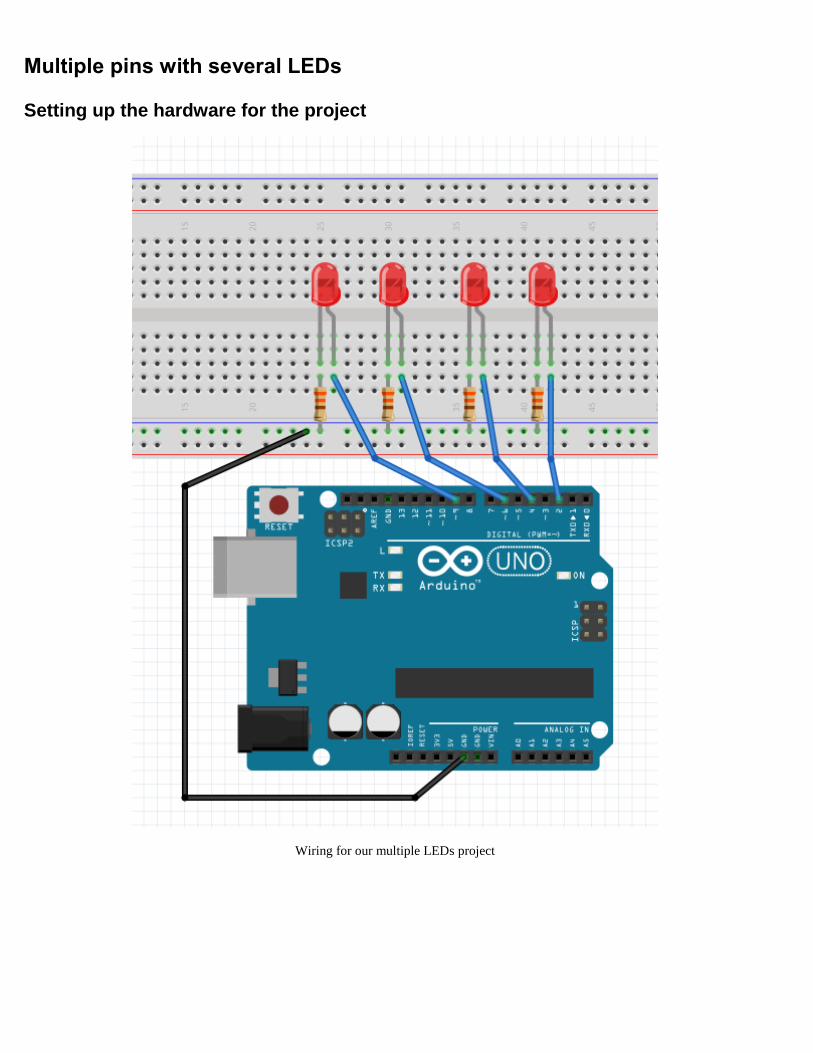
Multiple pins with several LEDs
Setting up the hardware for the project
Wiring for our multiple LEDs project
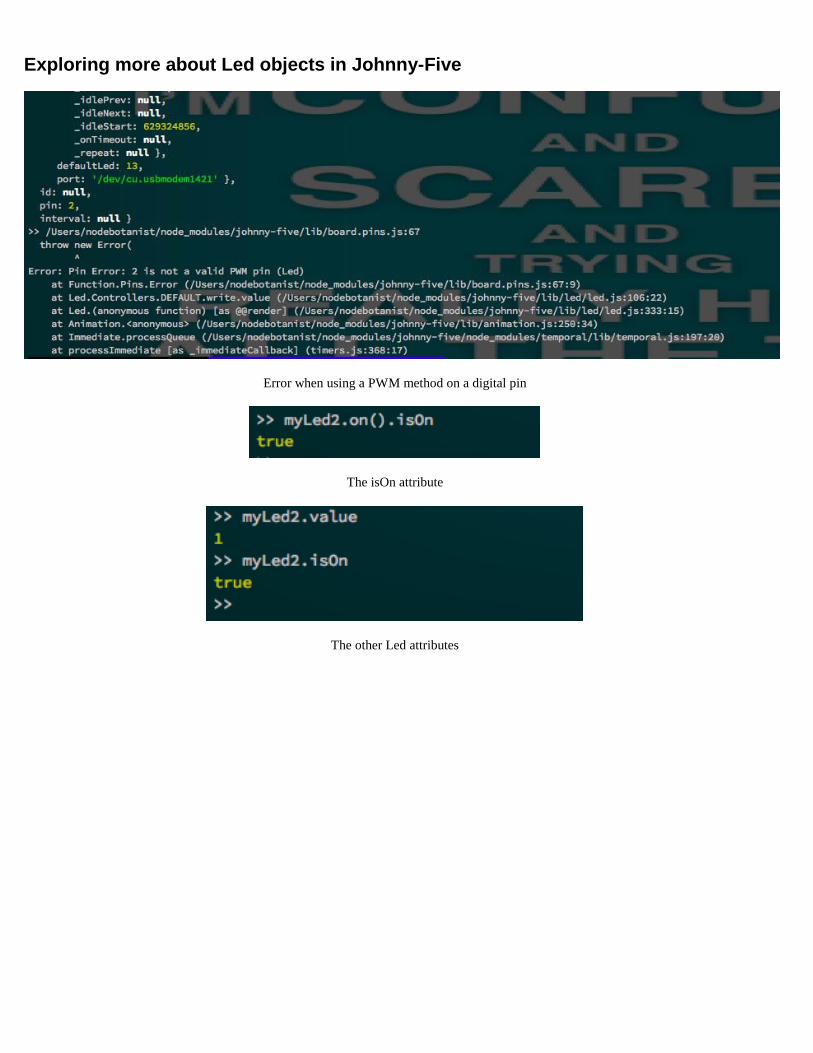
Exploring more about Led objects in Johnny-Five
Error when using a PWM method on a digital pin
The isOn attribute
The other Led attributes
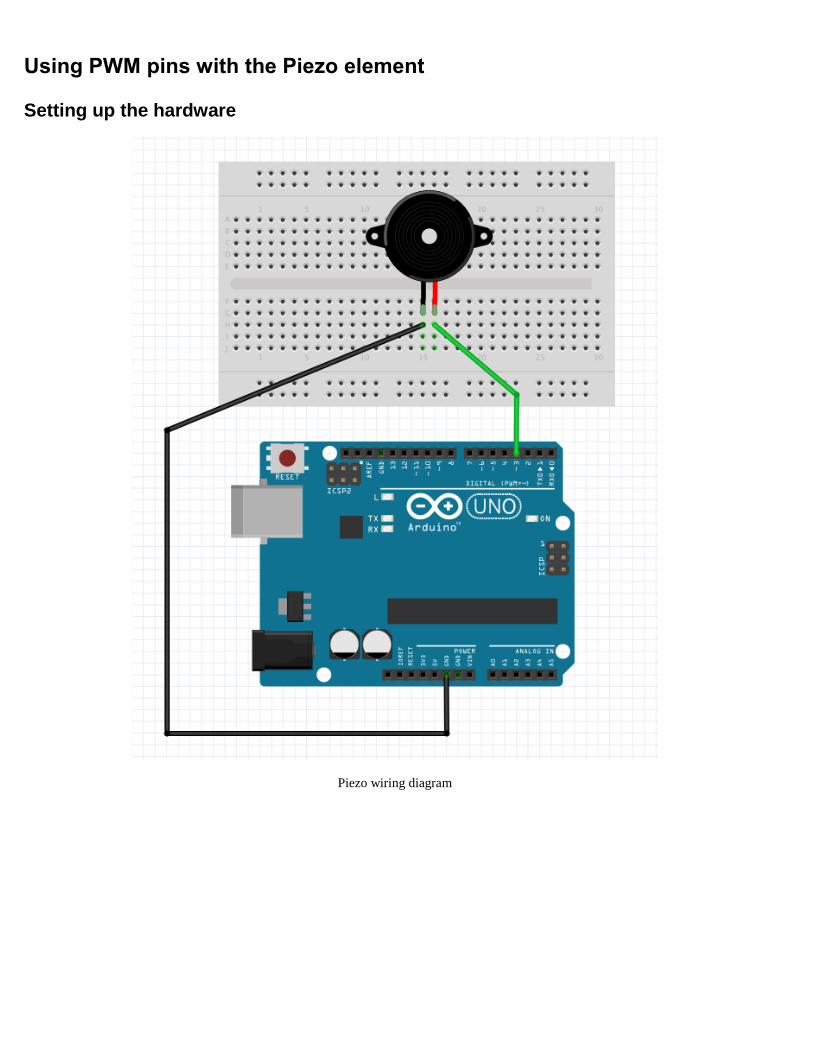
Using PWM pins with the Piezo element
Setting up the hardware
Piezo wiring diagram
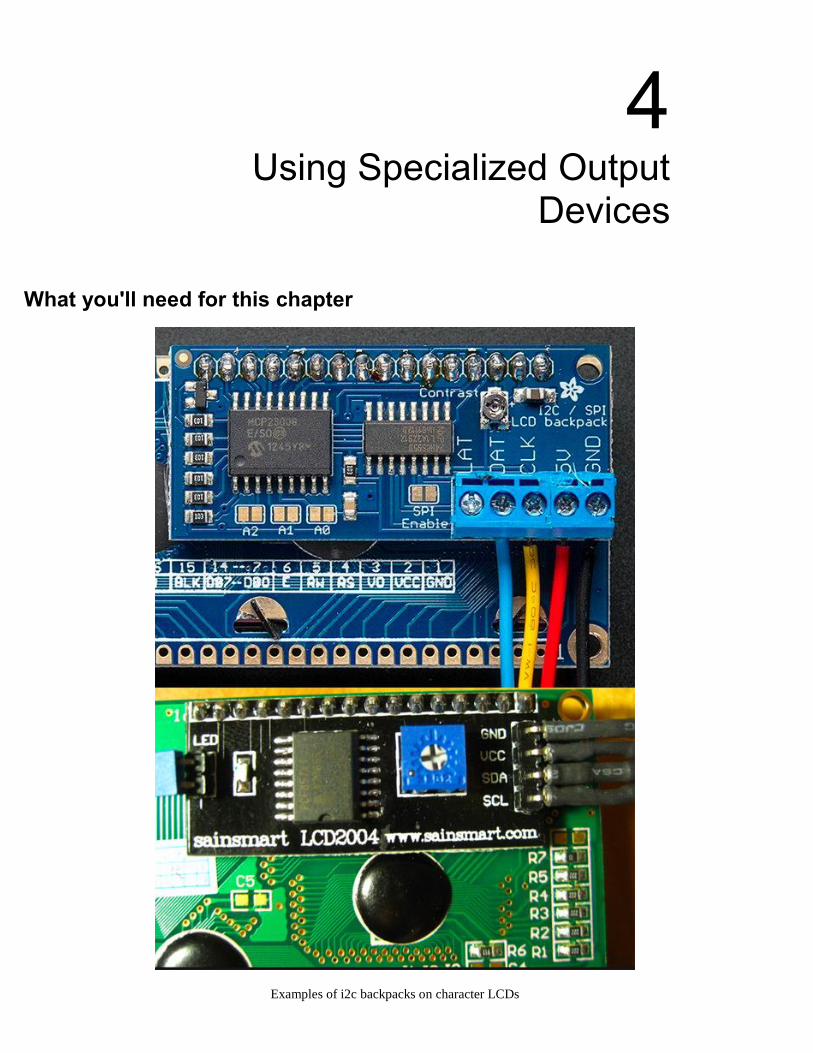
4 Using Specialized Output
Devices
What you'll need for this chapter
Examples of i2c backpacks on character LCDs
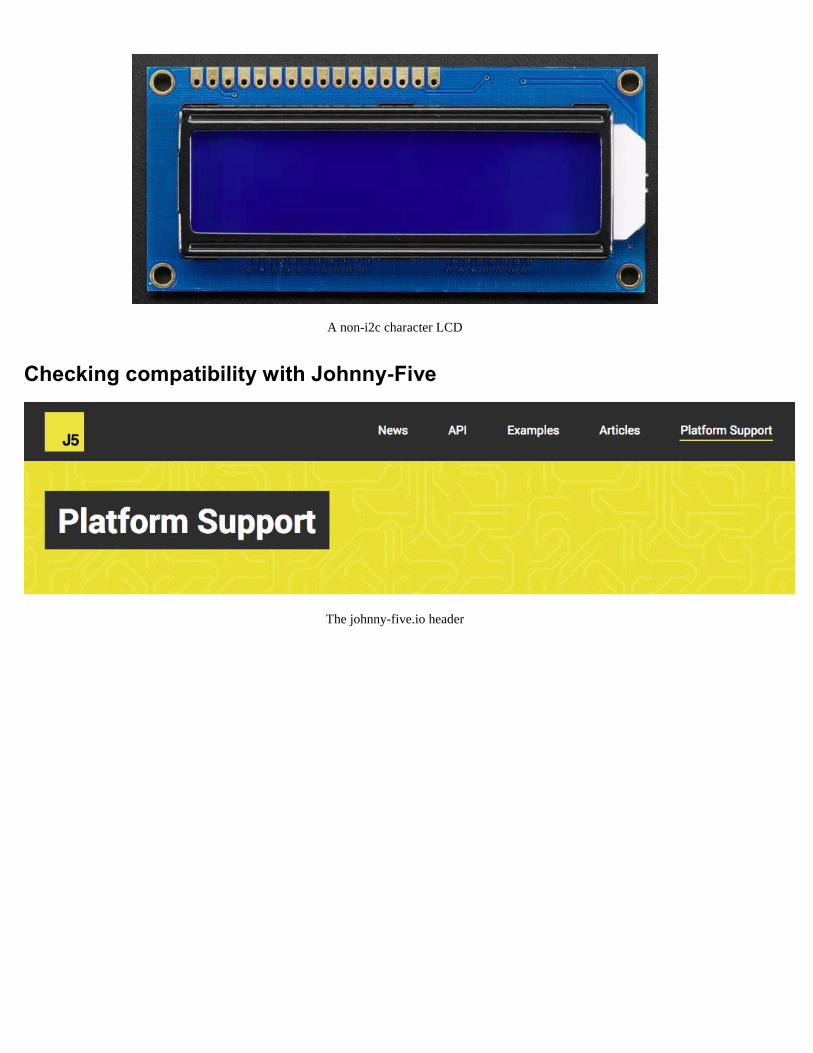
A non-i2c character LCD
Checking compatibility with Johnny-Five
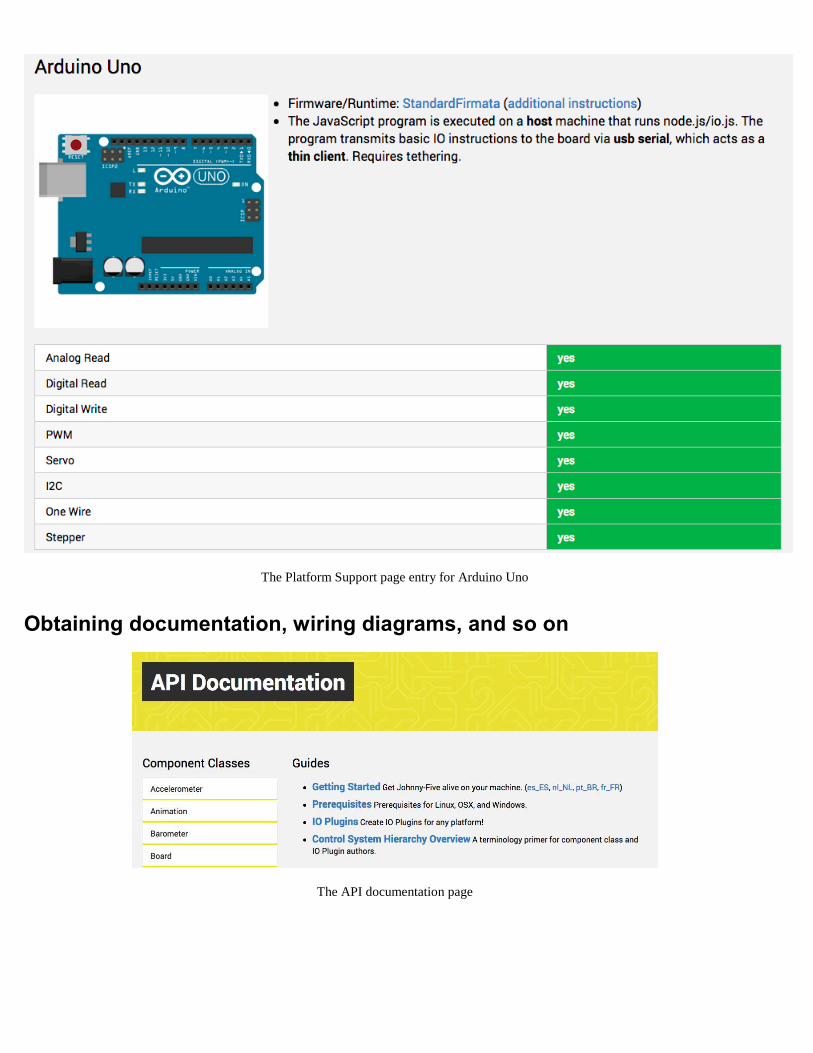
The johnny-five.io header
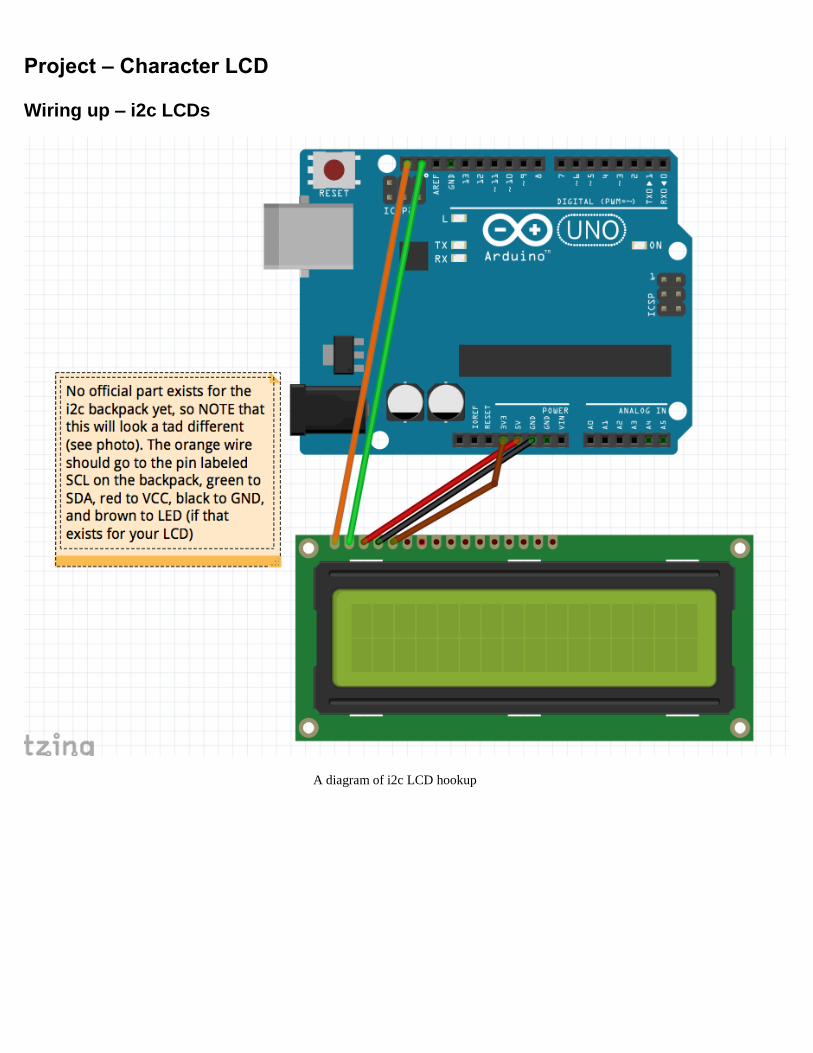
The Platform Support page entry for Arduino Uno
Obtaining documentation, wiring diagrams, and so on
The API documentation page
Project – Character LCD
Wiring up – i2c LCDs
A diagram of i2c LCD hookup
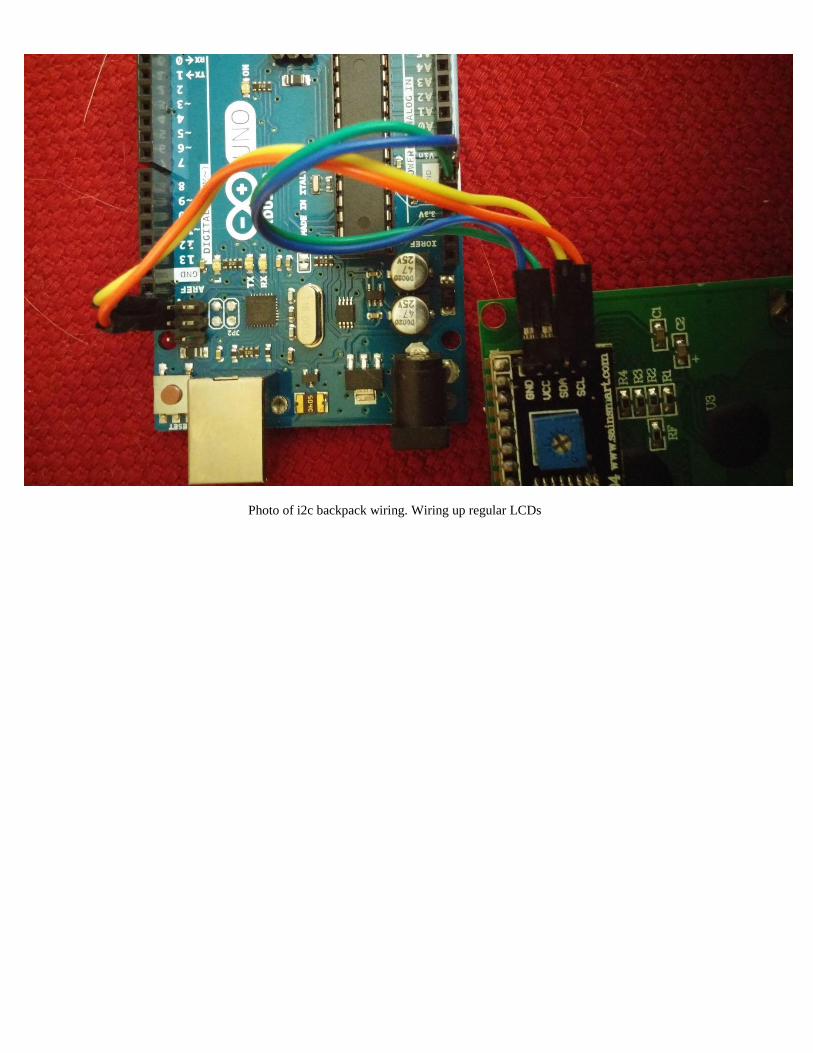
Photo of i2c backpack wiring. Wiring up regular LCDs
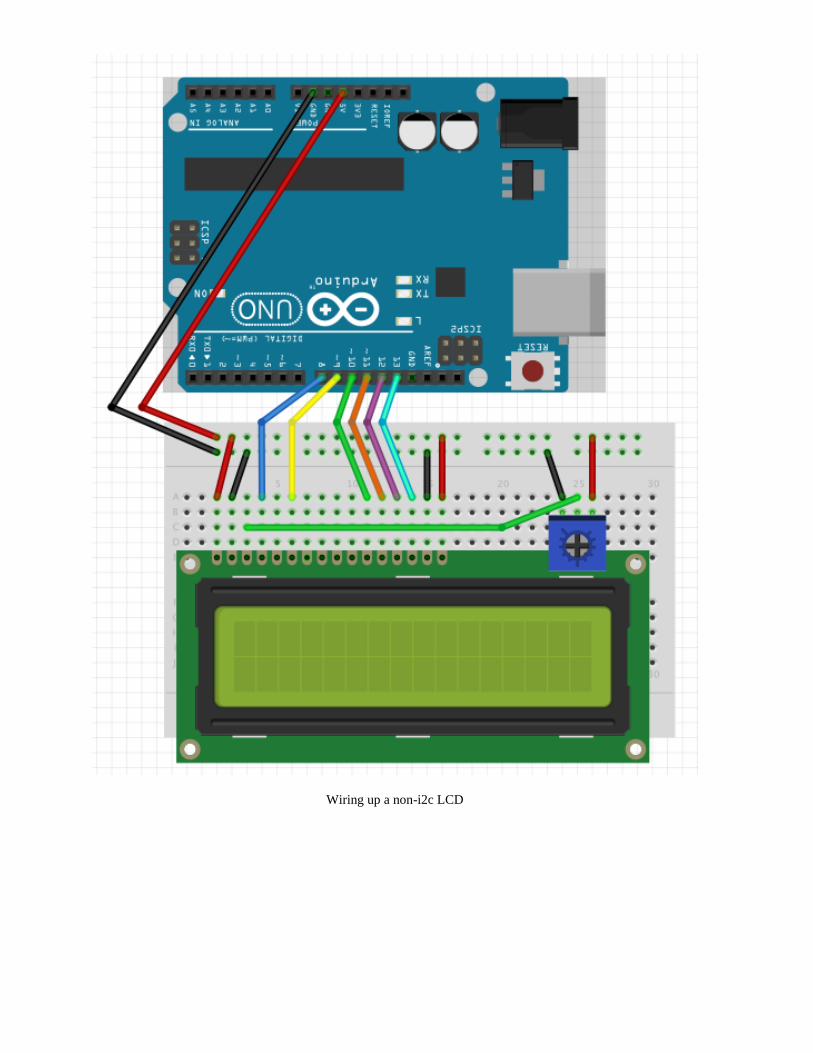
Wiring up a non-i2c LCD
5 Using Input Devices and
Sensors
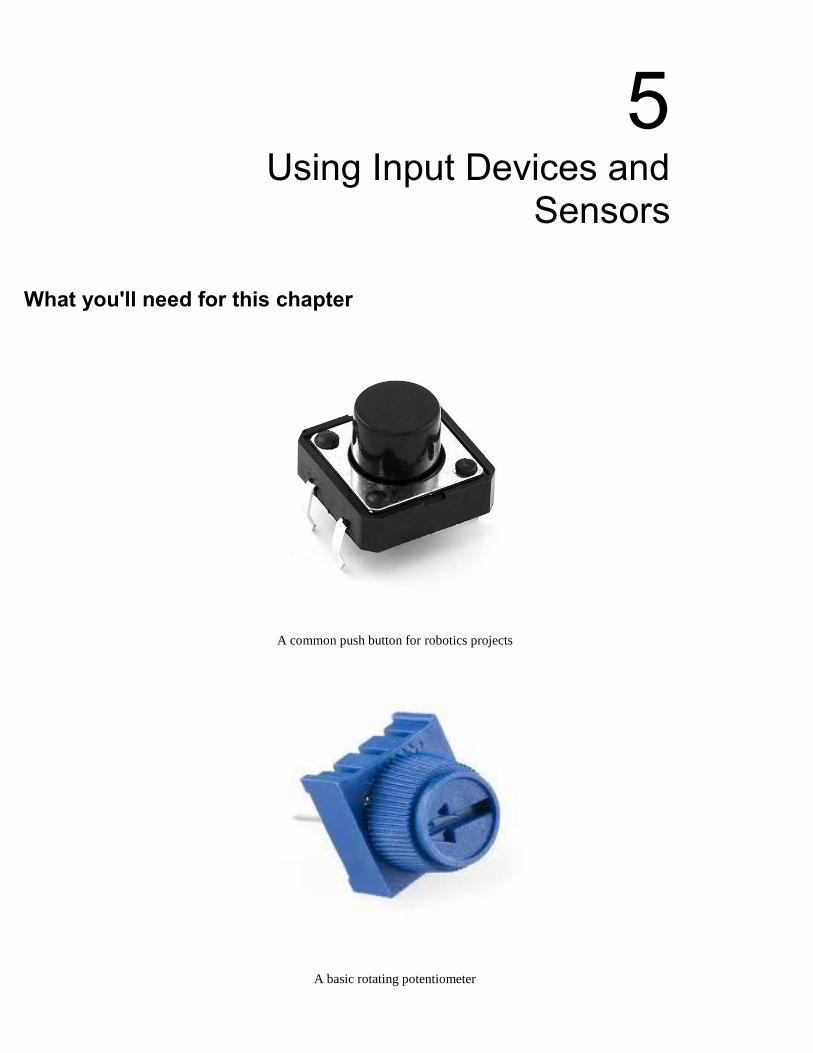
What you'll need for this chapter
A common push button for robotics projects
A basic rotating potentiometer
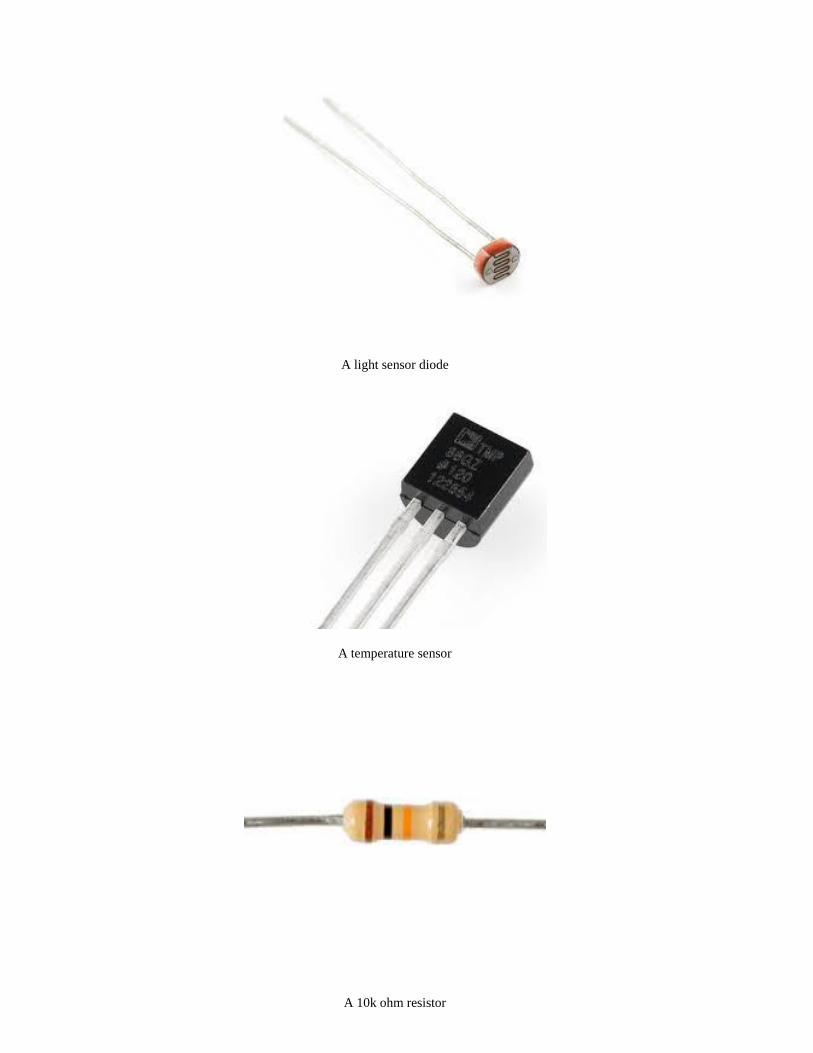
A light sensor diode
A temperature sensor
A 10k ohm resistor

Using basic inputs – buttons and potentiometers
Wiring up our button and LED
Wiring diagram for a button and an LED
Coding button-led.js
The output from led-button.js
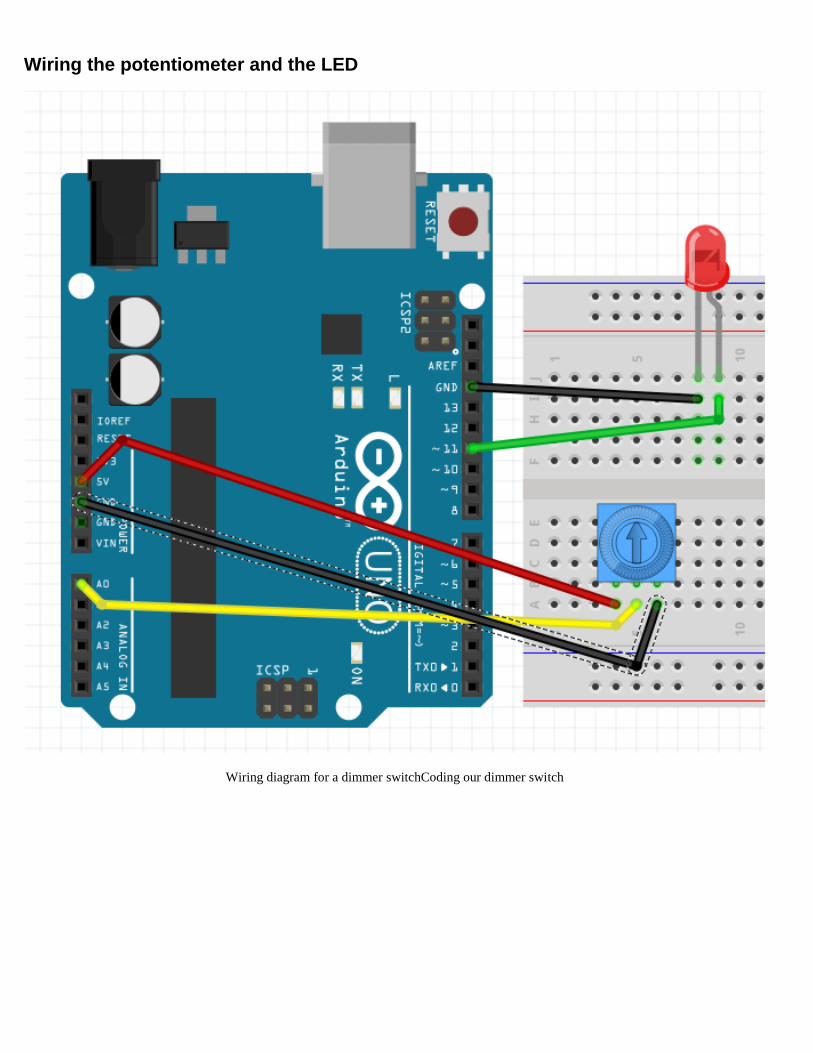
Wiring the potentiometer and the LED
Wiring diagram for a dimmer switchCoding our dimmer switch
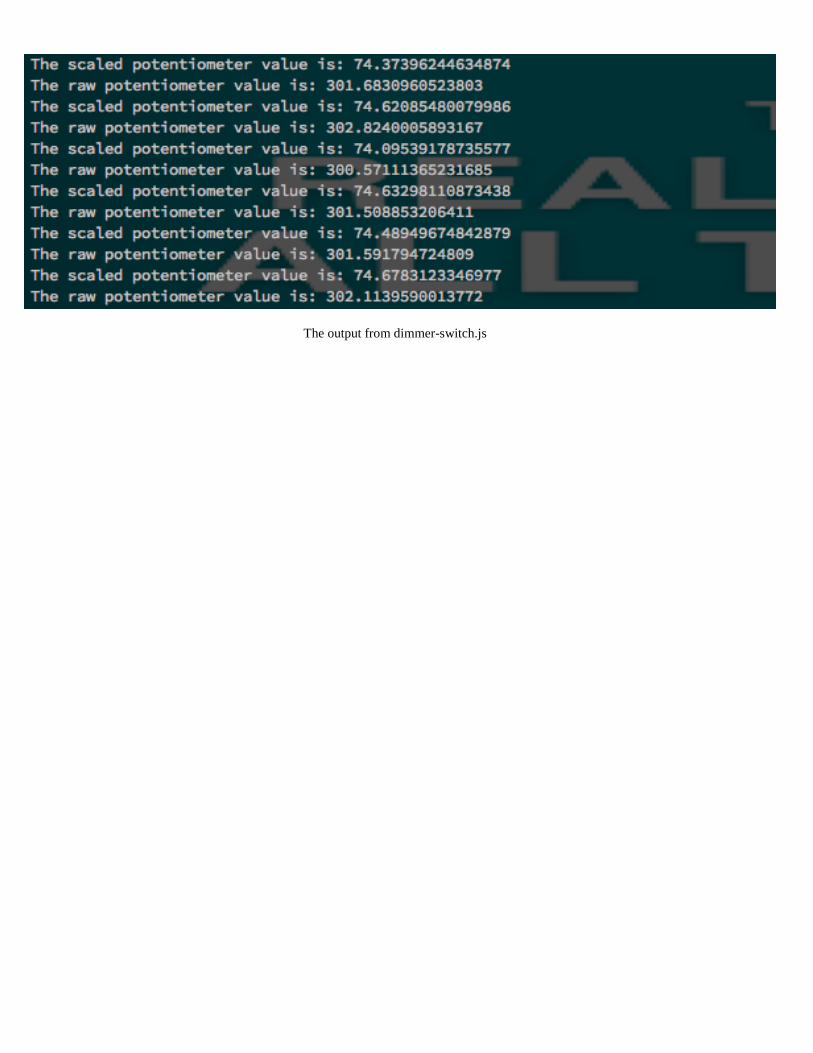
The output from dimmer-switch.js
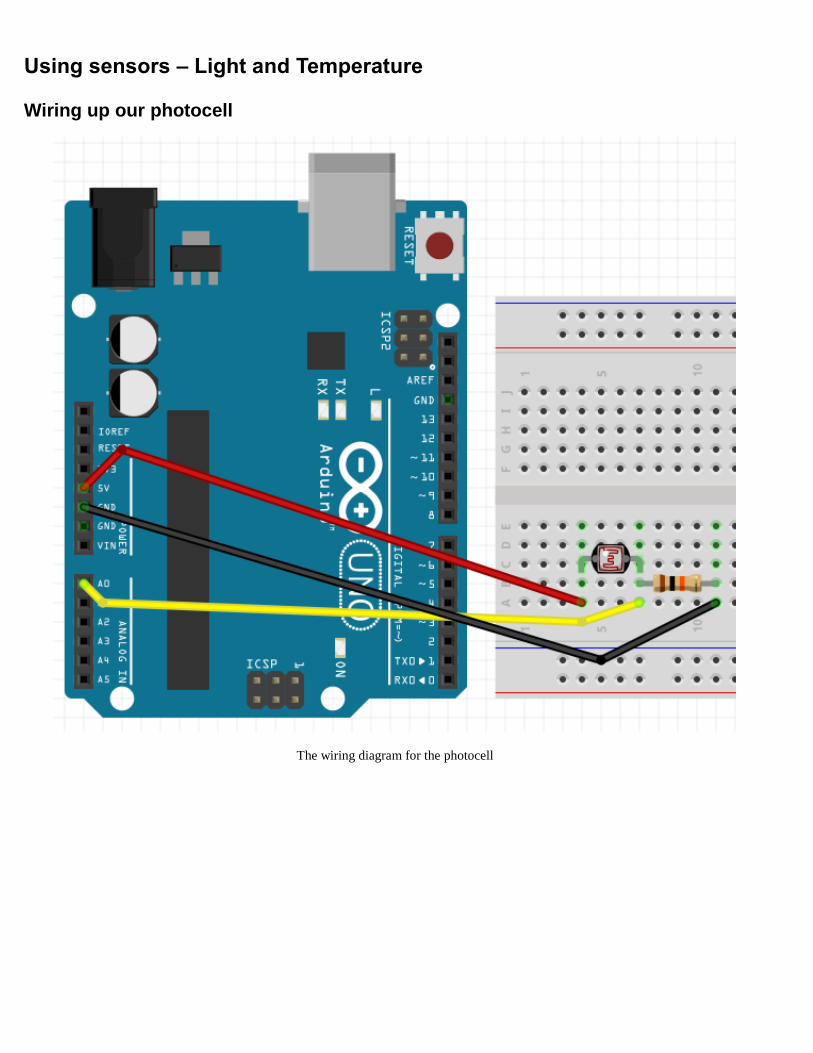
Using sensors – Light and Temperature
Wiring up our photocell
The wiring diagram for the photocell
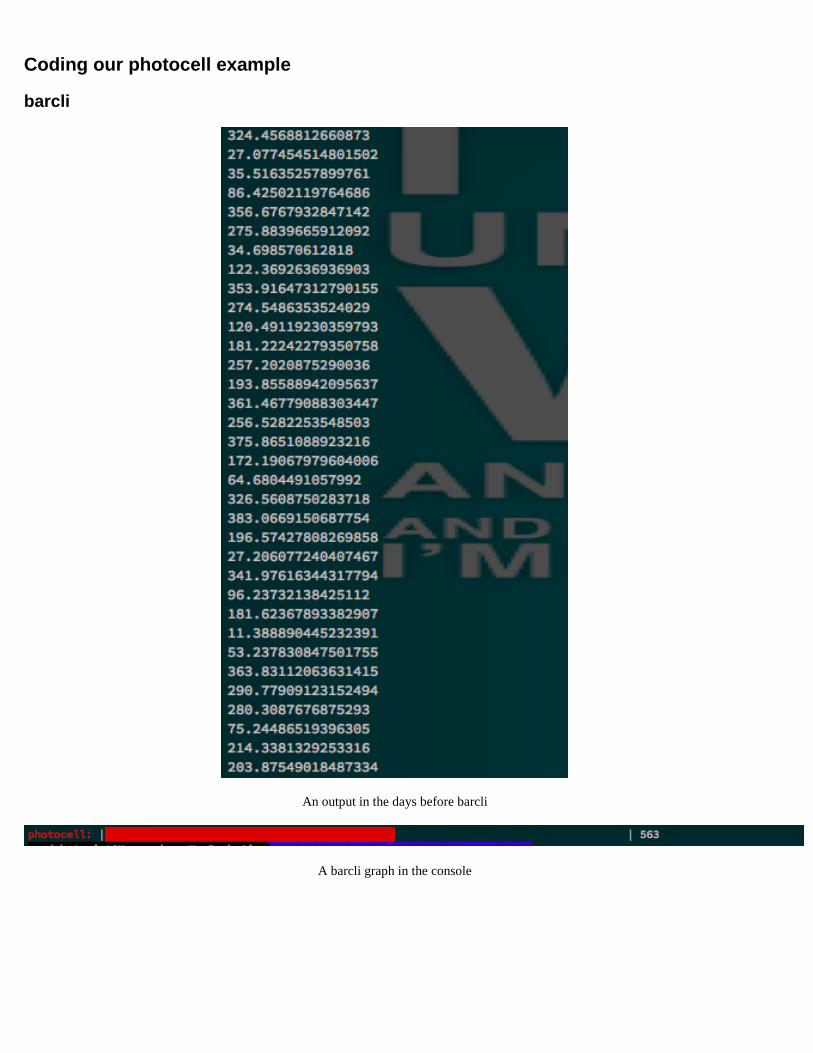
Coding our photocell example
barcli
An output in the days before barcli
A barcli graph in the console
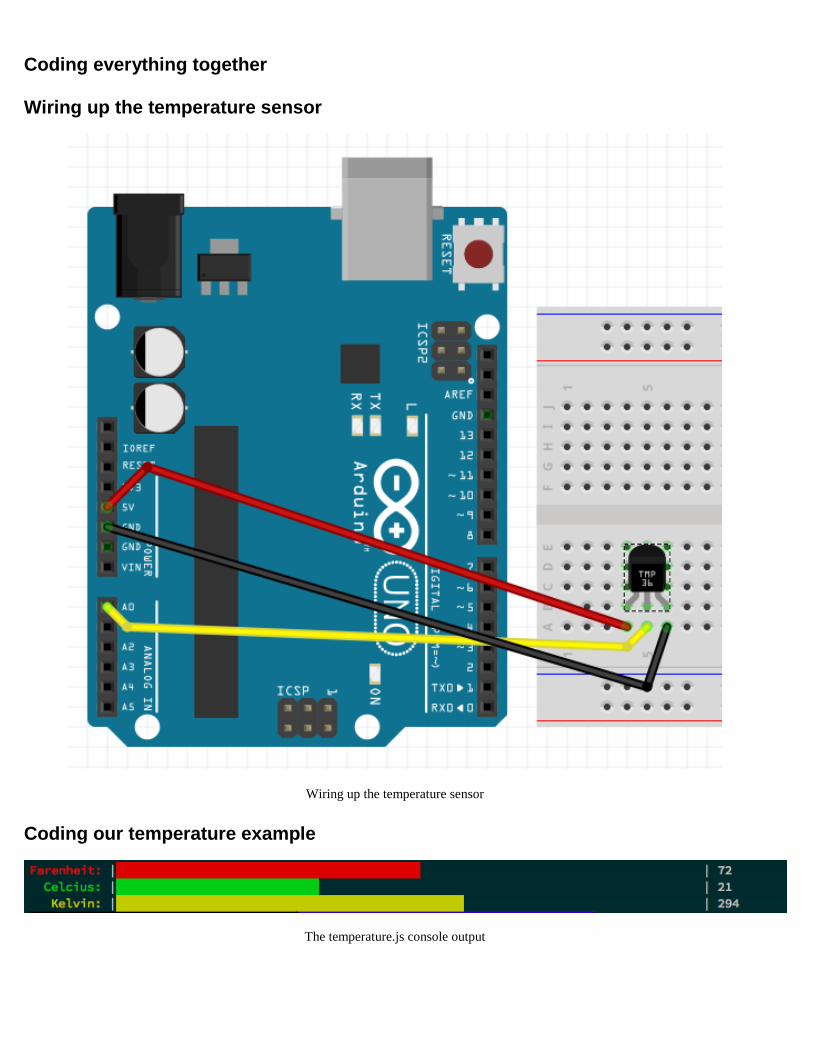
Coding everything together
Wiring up the temperature sensor
Wiring up the temperature sensor
Coding our temperature example
The temperature.js console output
6 Moving Your Bot
The different kinds of servos and motors
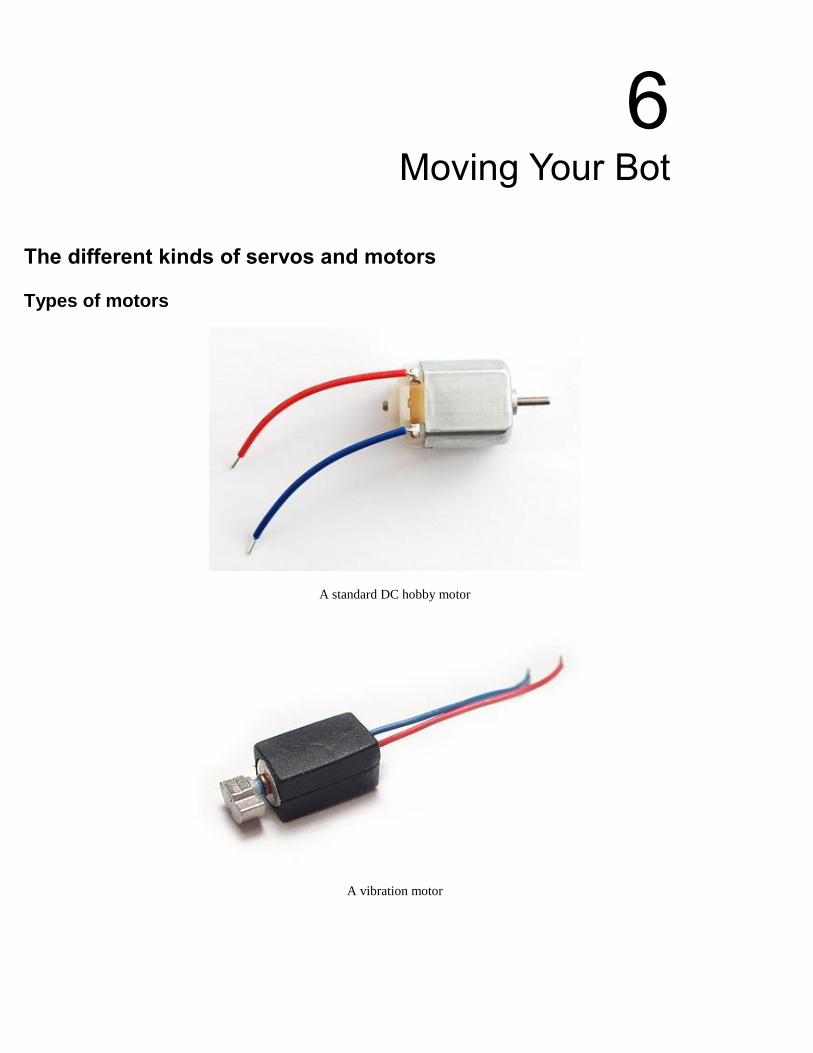
Types of motors
A standard DC hobby motor
A vibration motor
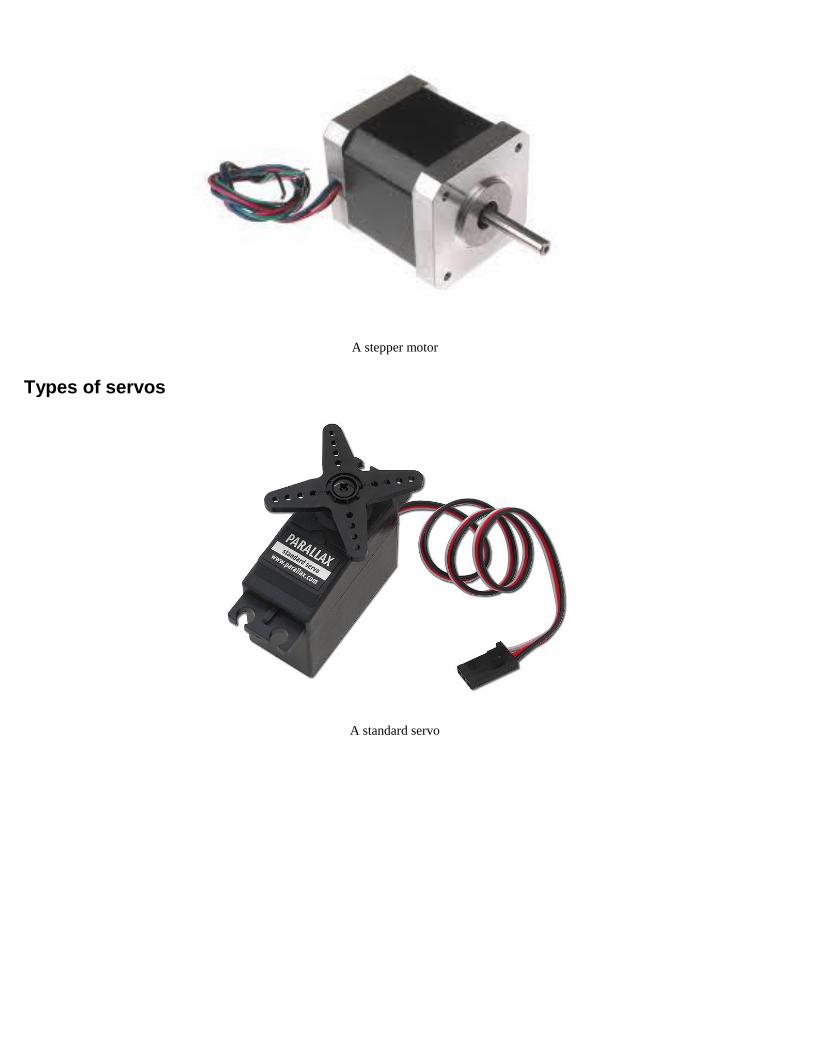
A stepper motor
Types of servos
A standard servo
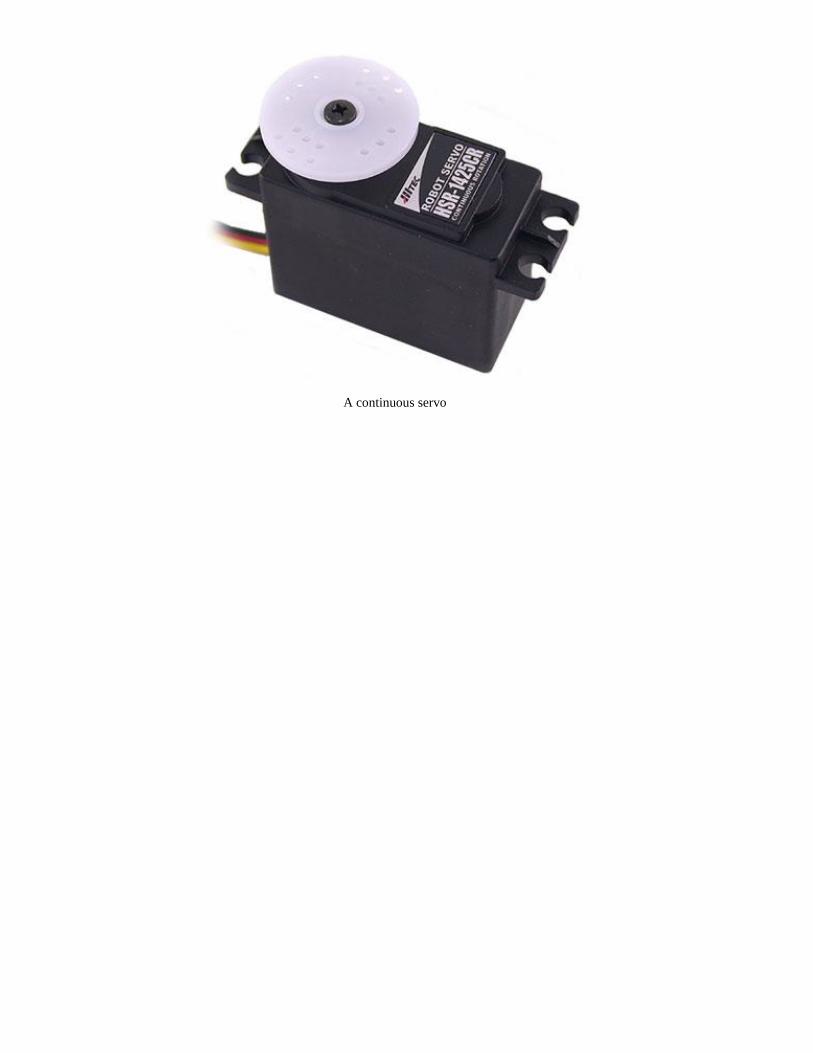
A continuous servo

Servo and motor controllers
An example of a servo controller with an I2C interface
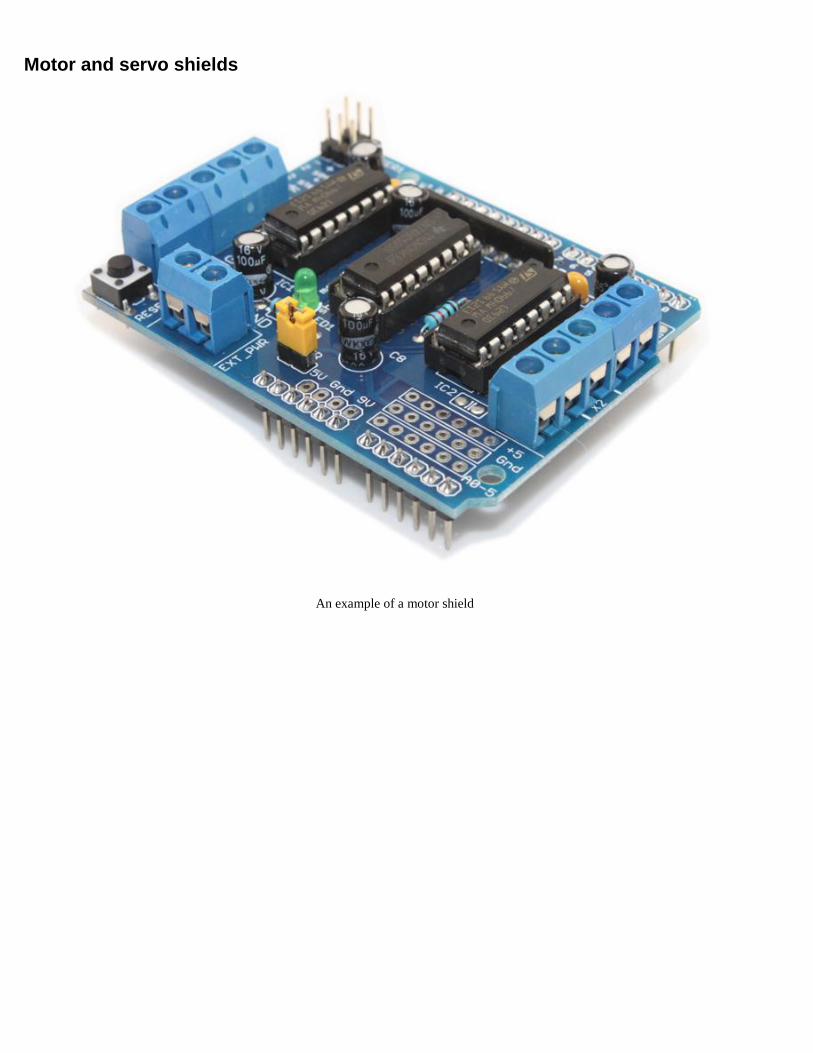
Motor and servo shields
An example of a motor shield
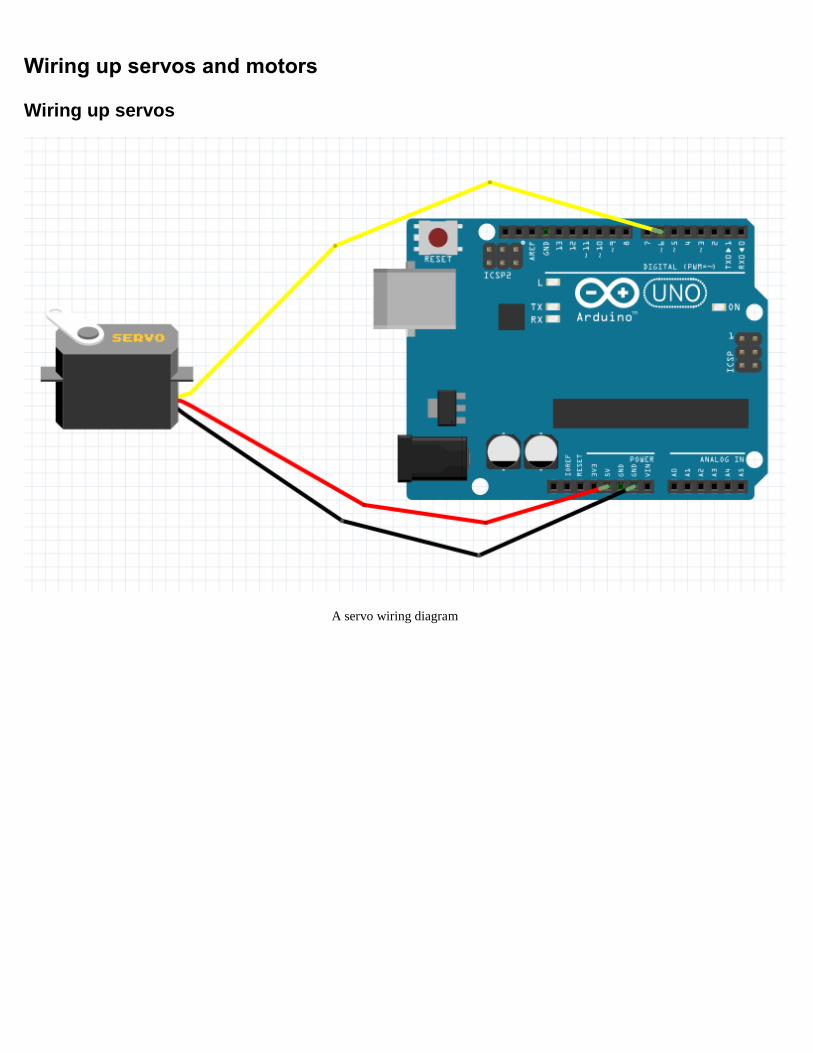
Wiring up servos and motors
Wiring up servos
A servo wiring diagram
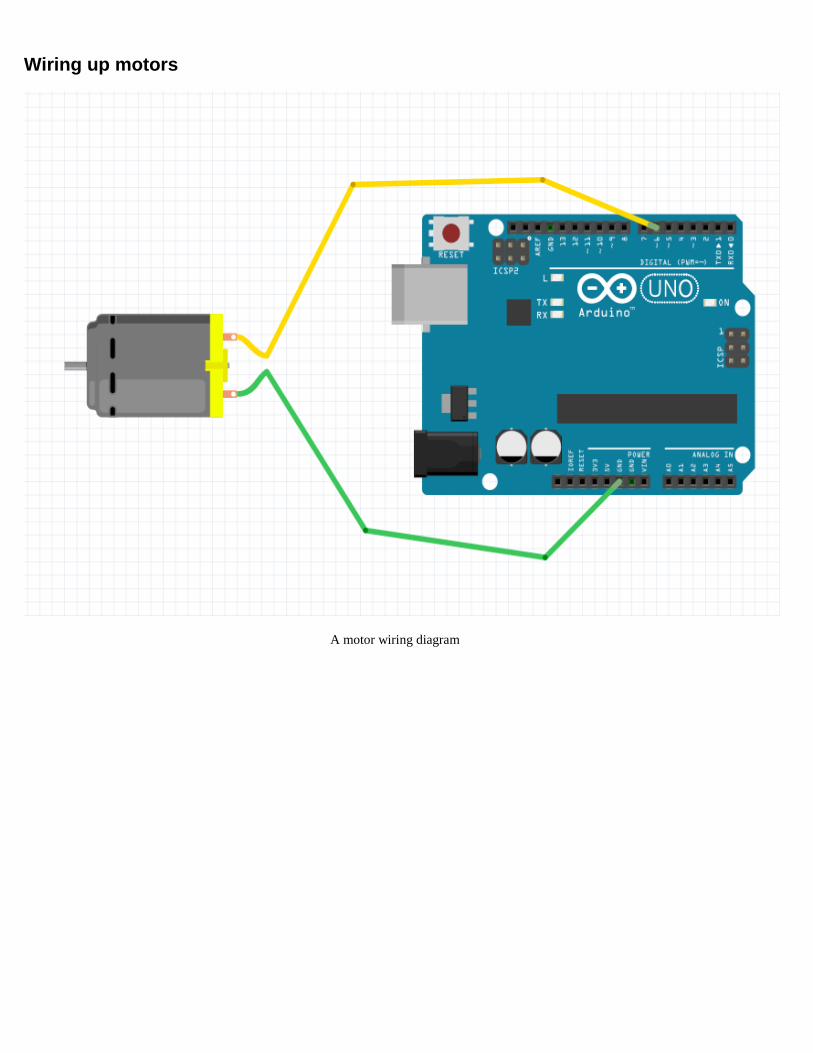
Wiring up motors
A motor wiring diagram
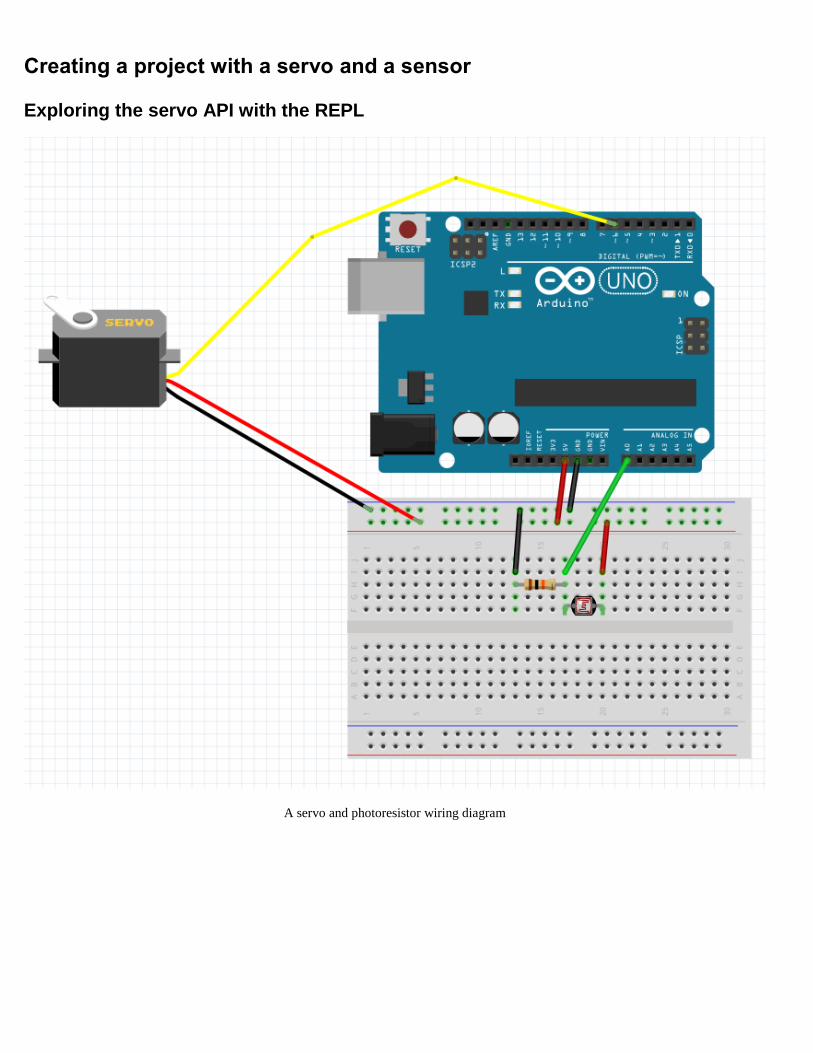
Creating a project with a servo and a sensor
Exploring the servo API with the REPL
A servo and photoresistor wiring diagram
7 Advanced Movement with
Animation Library
Looking at the Animation API
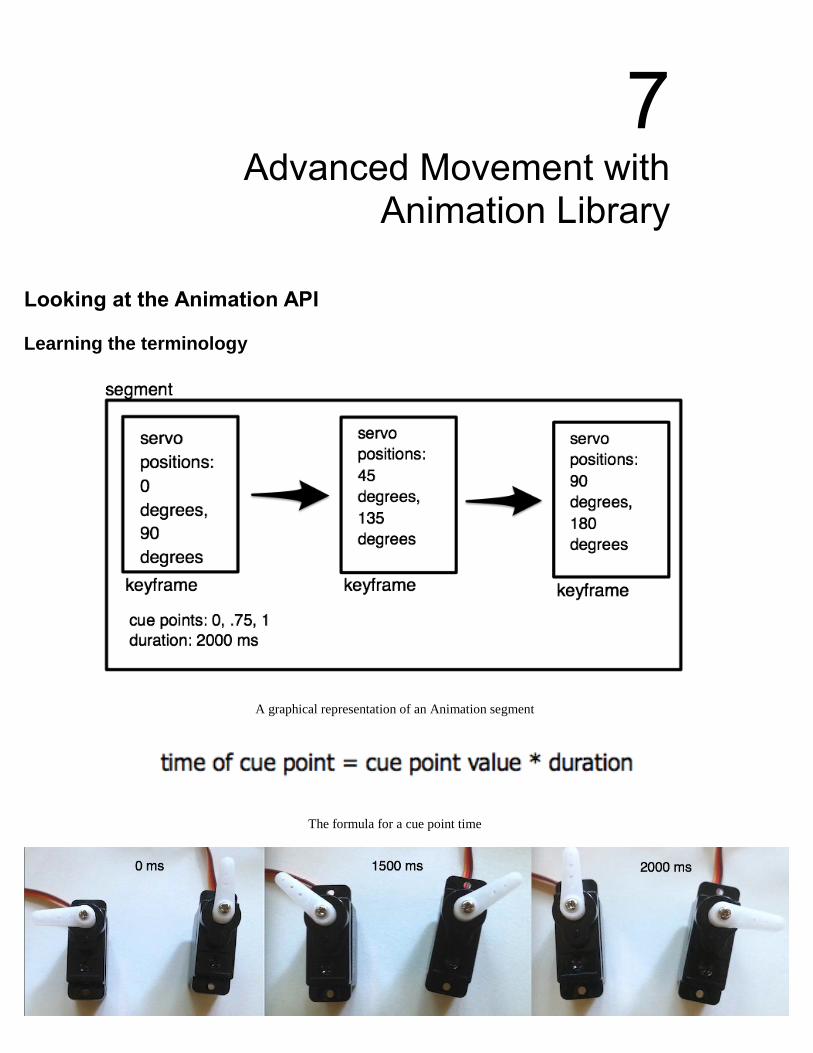
Learning the terminology
A graphical representation of an Animation segment
The formula for a cue point time
The pictures of the servo movement from the segment
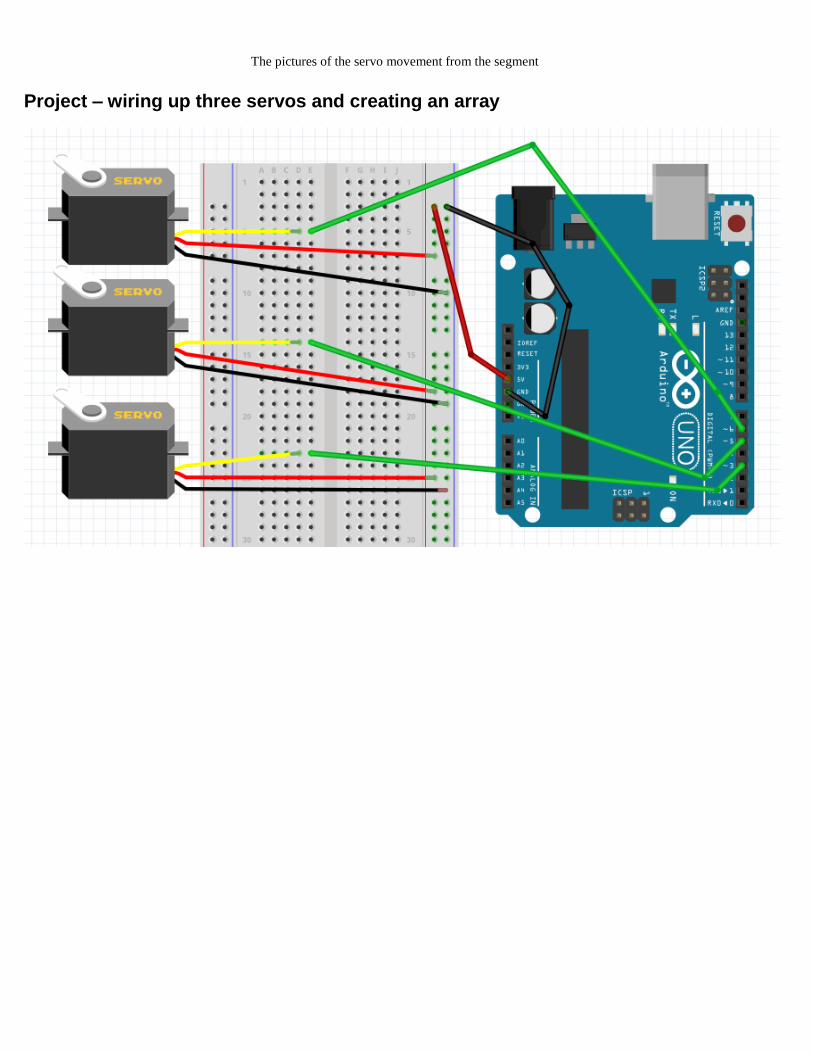
Project – wiring up three servos and creating an array
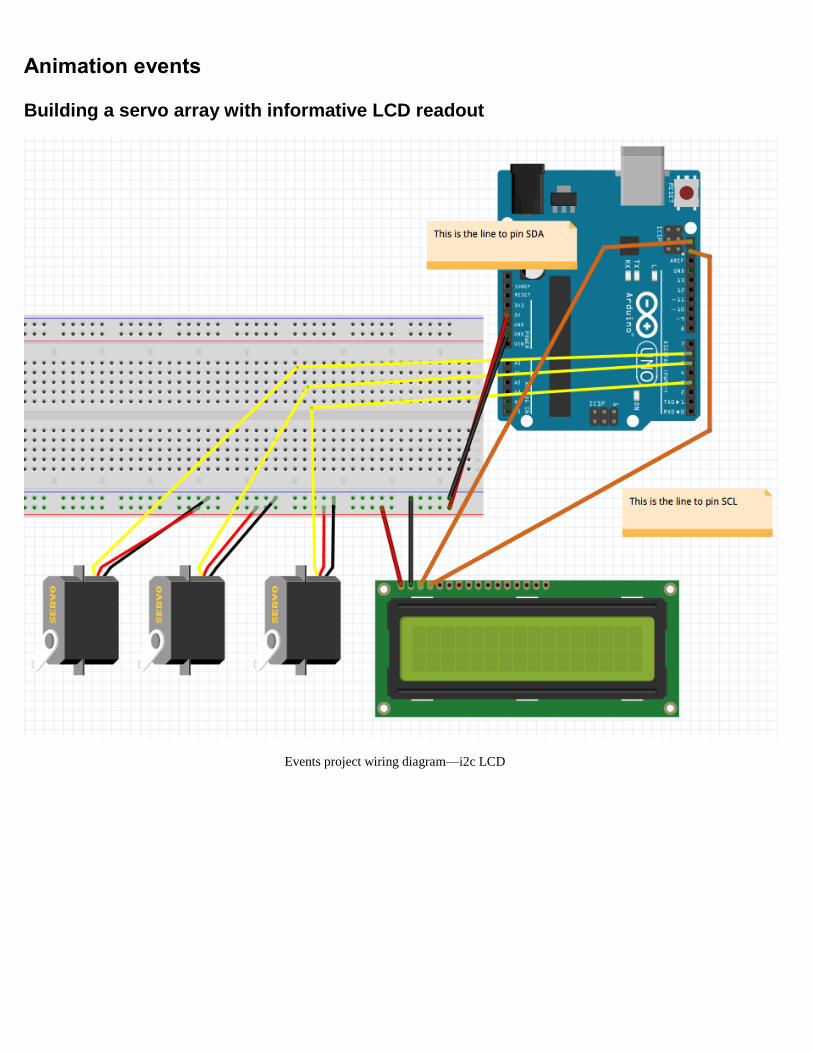
Animation events
Building a servo array with informative LCD readout
Events project wiring diagram—i2c LCD
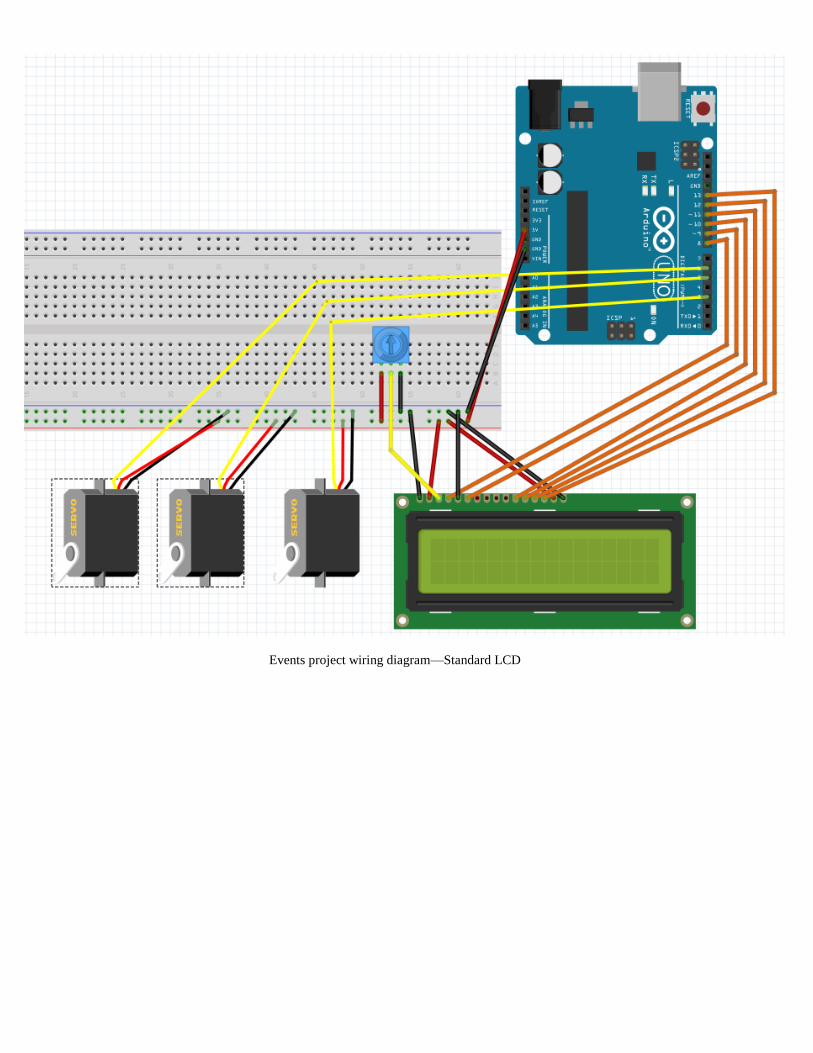
Events project wiring diagram—Standard LCD
8 Advanced Components –SPI,
I2C, and Other Devices
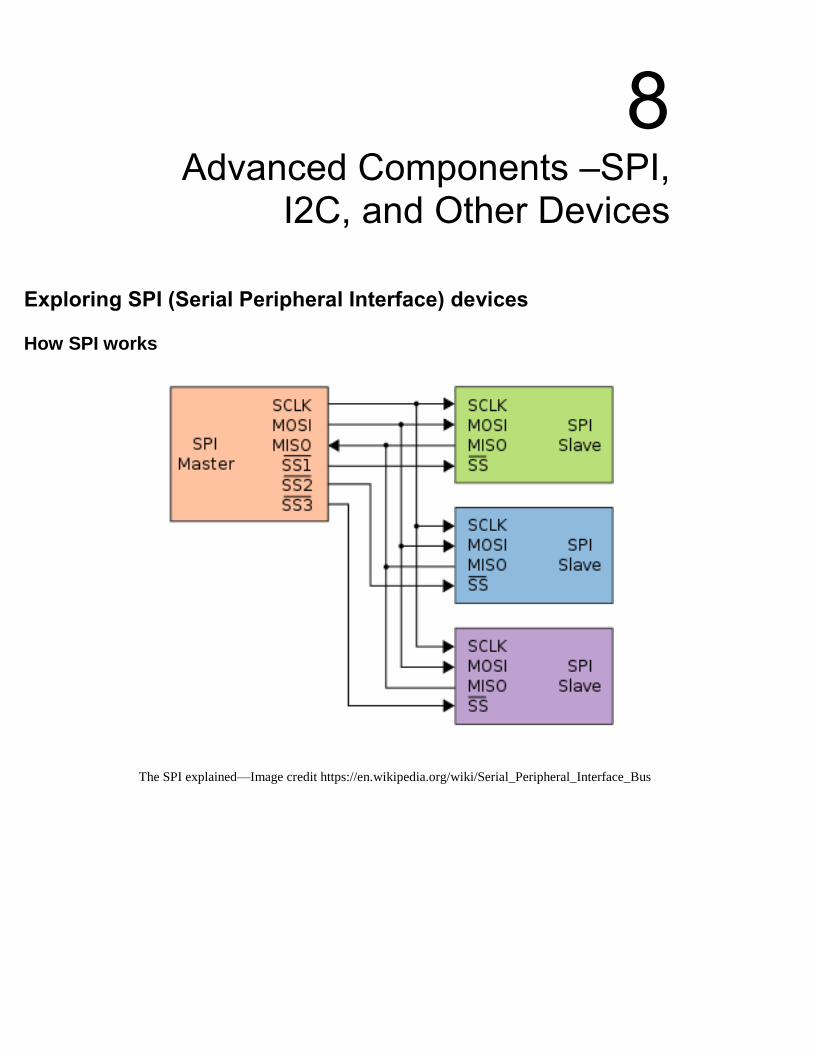
Exploring SPI (Serial Peripheral Interface) devices
How SPI works
The SPI explained—Image credit https://en.wikipedia.org/wiki/Serial_Peripheral_Interface_Bus
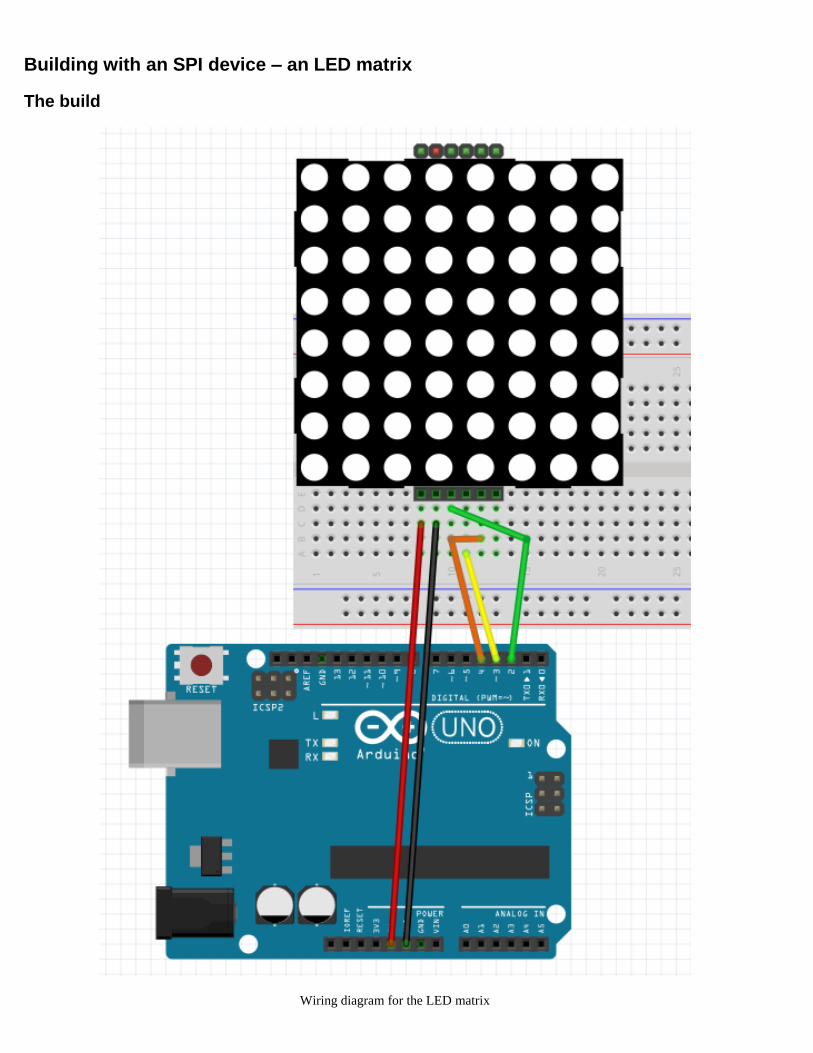
Building with an SPI device – an LED matrix
The build
Wiring diagram for the LED matrix

The API
The Code
A matrix example with checkbox character
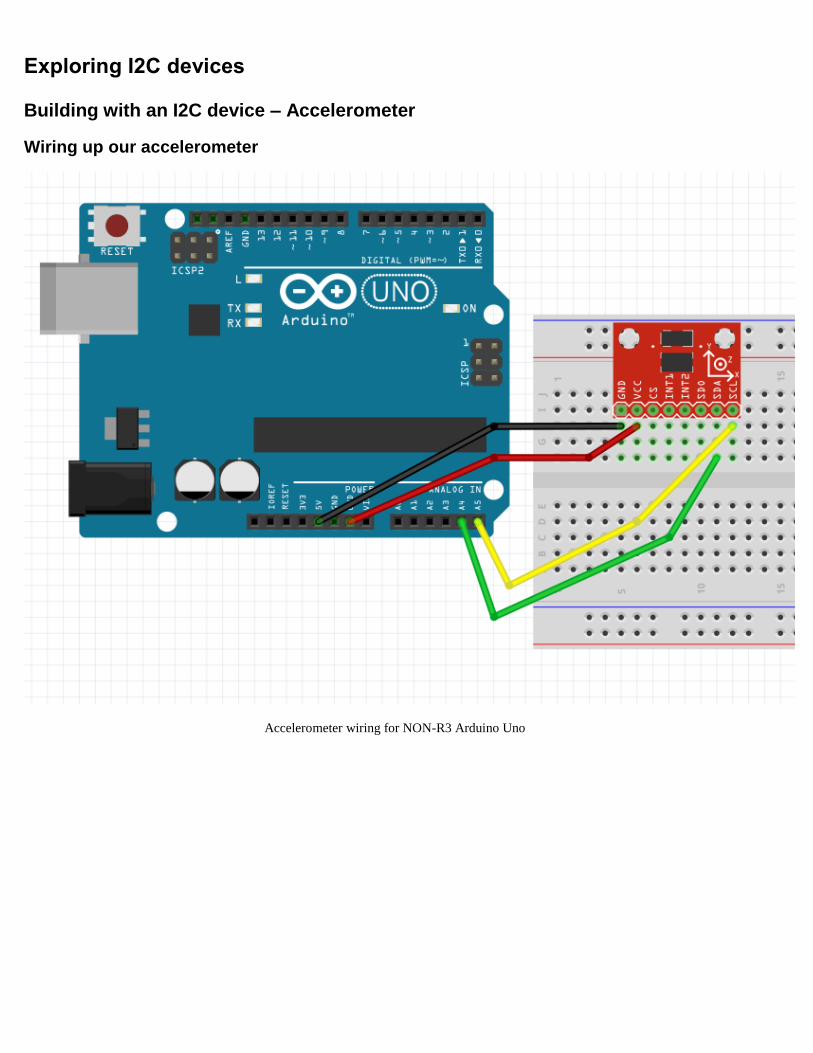
Exploring I2C devices
Building with an I2C device – Accelerometer
Wiring up our accelerometer
Accelerometer wiring for NON-R3 Arduino Uno
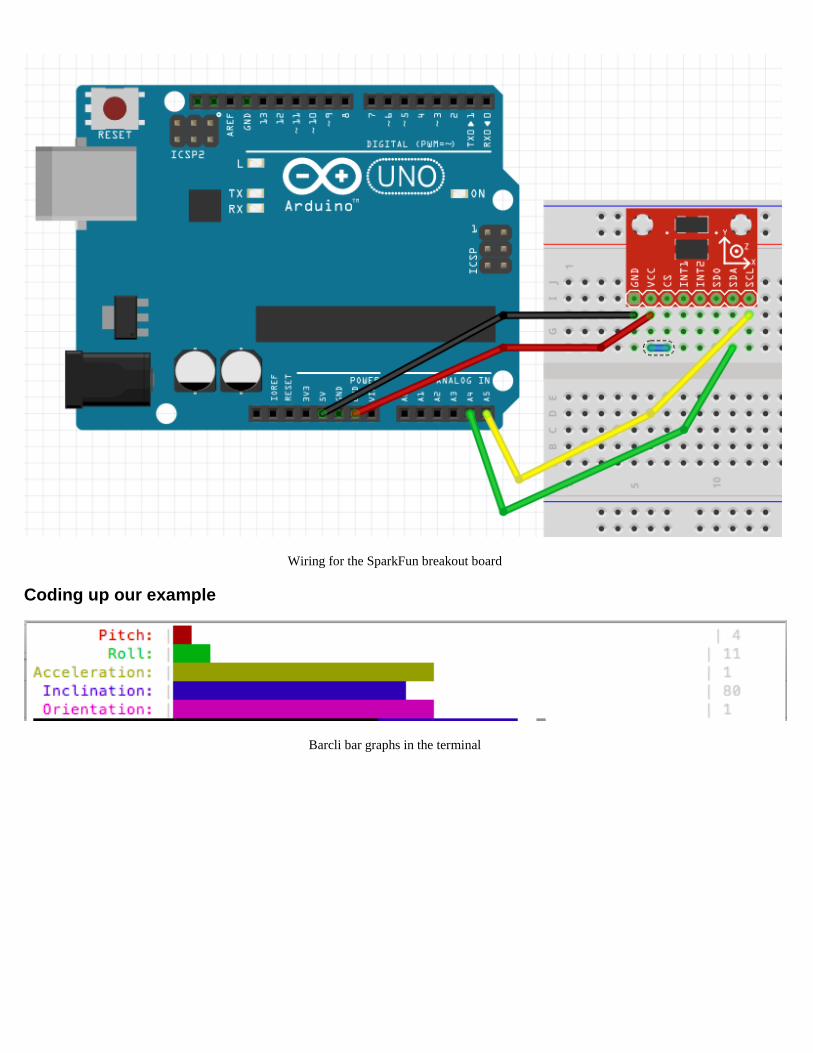
Wiring for the SparkFun breakout board
Coding up our example
Barcli bar graphs in the terminal
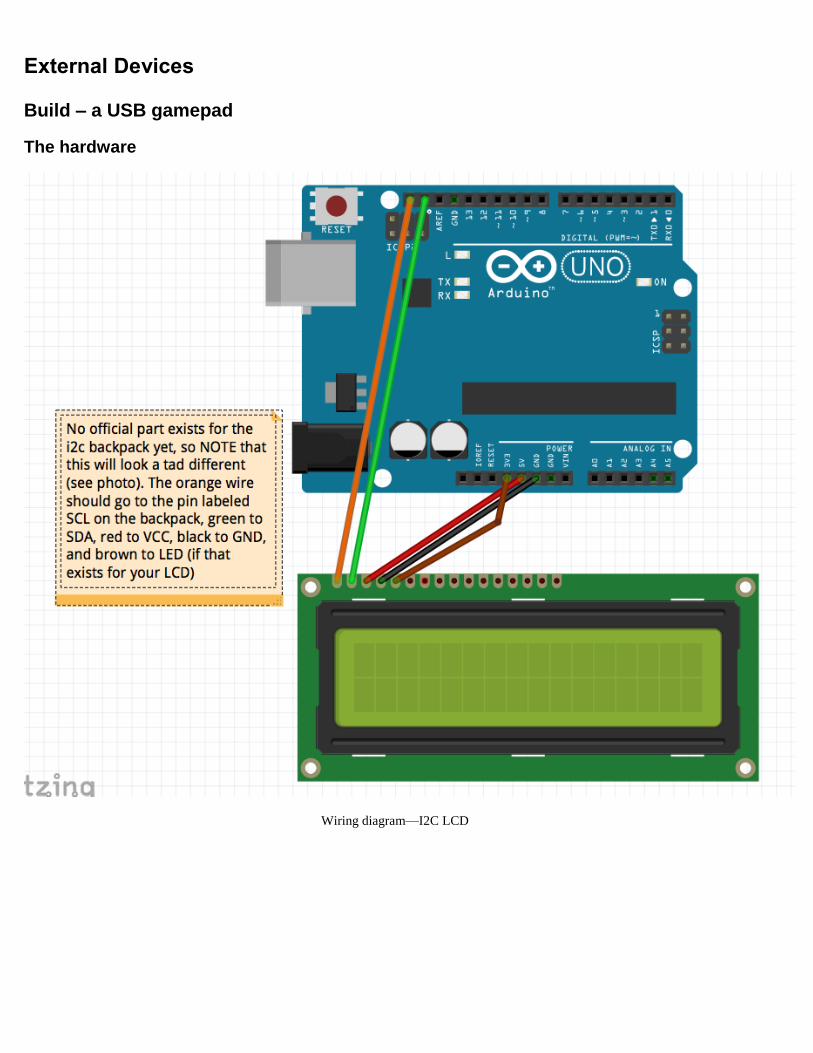
External Devices
Build – a USB gamepad
The hardware
Wiring diagram—I2C LCD
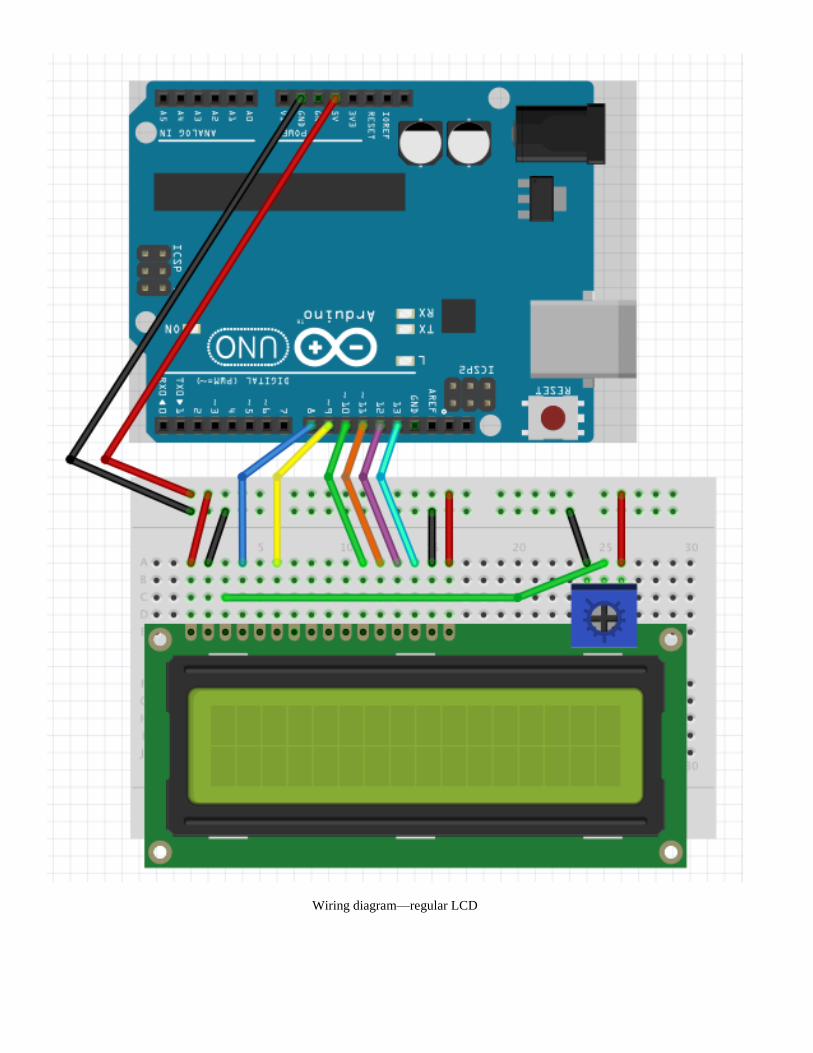
Wiring diagram—regular LCD
9 Connecting NodeBots to the
World, and Where to Go Next
Connecting NodeBots to the Web
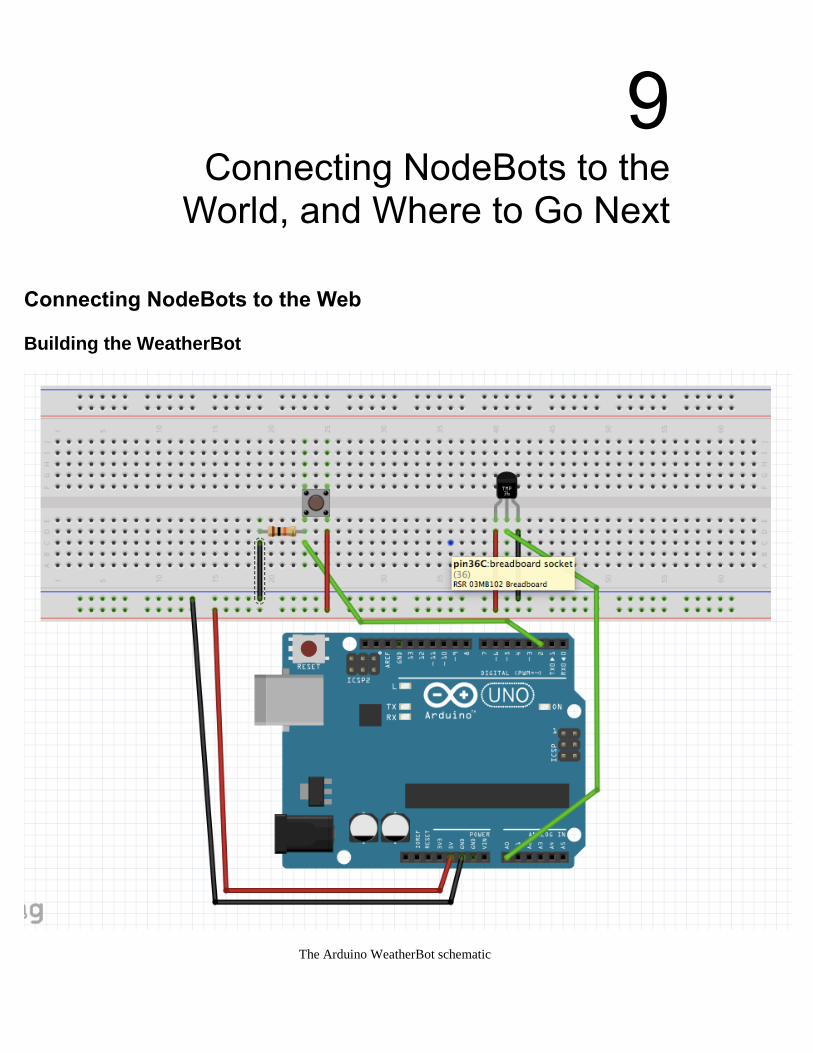
Building the WeatherBot
The Arduino WeatherBot schematic
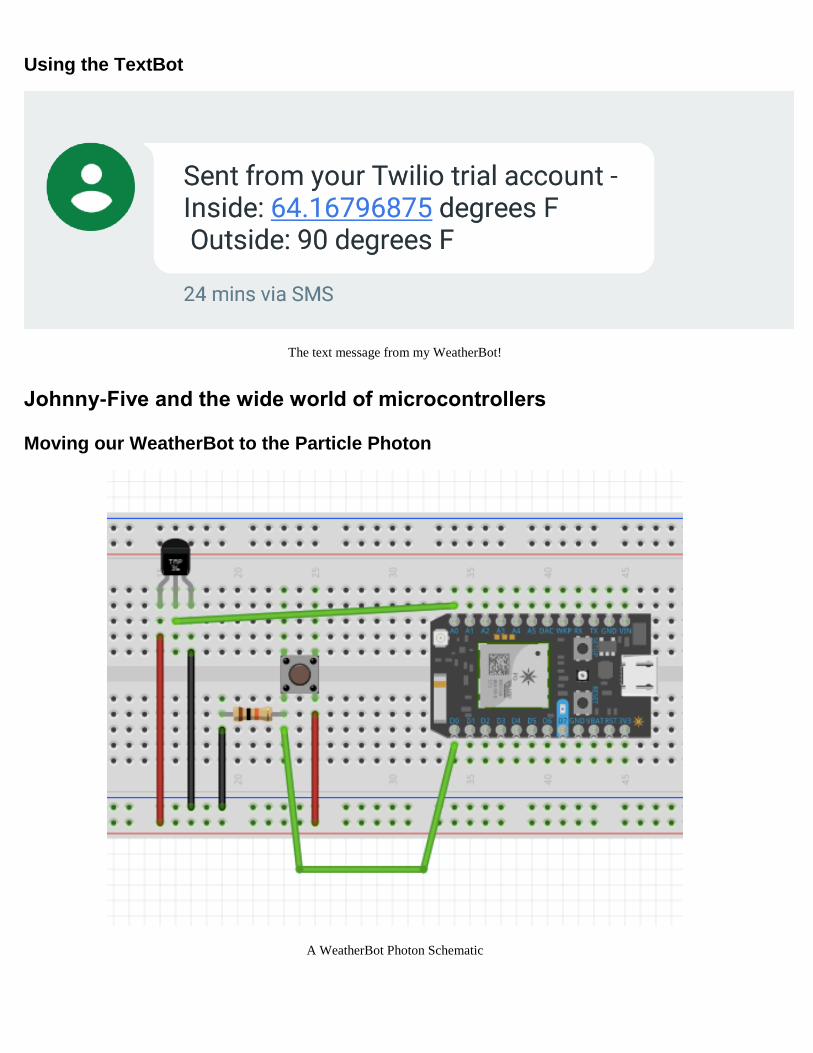
Using the TextBot
The text message from my WeatherBot!
Johnny-Five and the wide world of microcontrollers
Moving our WeatherBot to the Particle Photon
A WeatherBot Photon Schematic