Embed Size (px)
Citation preview
7/25/2019 Grimrock Walkthrough
http://slidepdf.com/reader/full/grimrock-walkthrough 1/117
Legend of Grimrock II
+------------------------------------------------------------------------------+
| Contents
+------------------------------------------------------------------------------+
$$hidden chests and items - Introduction
- The Basics
- Character Creation - LOG01 - Portrait and Name
- Races
- Classes
- Attributes
- Traits
- Skills
- &Spell List - LOG02
- Air Magic - Earth Magic - Fire Magic
- Water Magic
- Utility Spells
- Alchemy - LOG03 &potions
- Ingredients
- Recipes
- Main Walkthrough
- Starting Team - LOG04 - Part 01: Welcome to Nex - LOG05
- Shipwreck Beach - Dead Sailor's Cave
- Part 02: Playing With Fire - LOG06
- Twigroot Forest
- Twigroot Tunnels
- Twigroot Depths
- Part 03: Getting Your Feet Wet - LOG07 - Forgotten River
- River Tunnels
- Part 04: Down and Dirty - LOG08
- Keelbreach Bog
- Herder's Den
- Part 05: Further Up, Further In - LOG09
- Sleet Island
- Part 06: Break on Through - LOG10
- Ruins of Desarune - Archives
- Lexiconary
7/25/2019 Grimrock Walkthrough
http://slidepdf.com/reader/full/grimrock-walkthrough 2/117
- Part 07: A Breath of Fresh Air - LOG11 - Hamlet of Stormbreach
- Sewers
- Part 08: No Crafting Here - LOG12
- Crystal Mine Entrance
- Crystal Mine Core - Crystal Mine Abyss
- Part 09: Among the Dead - LOG13
- Cemetery - Wormbound Catacombs
- Orul's Crypt
- Flooded Dungeon
- Part 10: Up and Out - LOG14
- Pyramid of Umas
- Tomb Underground
- Tomb of Rites
- Ceremonial Chamber - Barren Desert - Part 11: Storming the Castle - LOG15
- Castle Nex
- Library
- Twisted Passage
- Test Chamber
- Void
- Castle Roof
- Part 12: Finale - LOG16 - Trickster's Lair
- Monster List - LOG17 - Achievements - LOG18
- End - LOG19
+------------------------------------------------------------------------------+
| Main Walkthrough |+------------------------------------------------------------------------------+
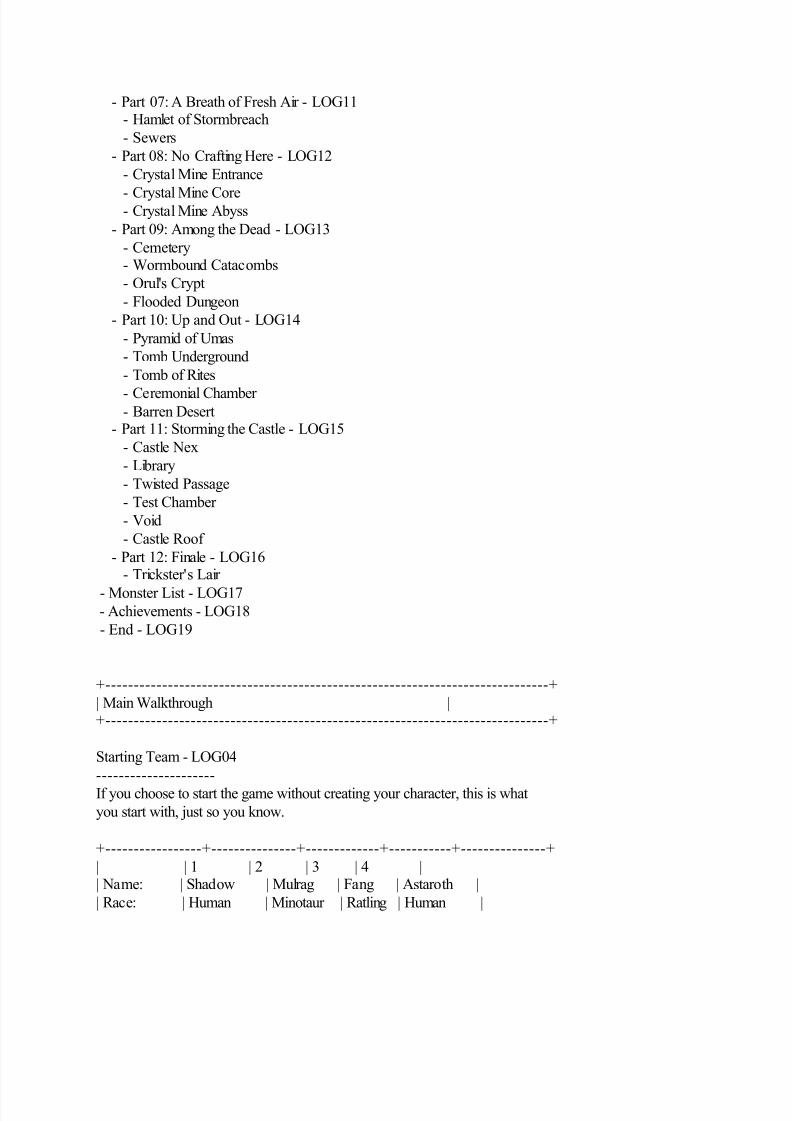
Starting Team - LOG04
---------------------
If you choose to start the game without creating your character, this is what
you start with, just so you know.
+-----------------+---------------+-------------+-----------+---------------+
| | 1 | 2 | 3 | 4 || Name: | Shadow | Mulrag | Fang | Astaroth |
| Race: | Human | Minotaur | Ratling | Human |

7/25/2019 Grimrock Walkthrough
http://slidepdf.com/reader/full/grimrock-walkthrough 3/117
| Class: | Fighter | Barbarian | Alchemist | Wizard |+-----------------+---------------+-------------+-----------+---------------+
| Health: | 90 | 140 | 80 | 45 |
| Energy: | 30 | 15 | 60 | 140 |
| Protection: | 0 | 0 | 0 | 0 |
| Evasion: | 5 | 3 | 8 | 2 |+-----------------+---------------+-------------+-----------+---------------+
| Strength: | 15 | 21 | 8 | 10 |
| Dexterity: | 15 | 7 | 16 | 12 || Vitality: | 12 | 18 | 12 | 12 |
| Willpower: | 10 | 7 | 12 | 20 |
+-----------------+---------------+-------------+-----------+---------------+
| Resist Fire: | 10 | 22 | 0 | 0 |
| Resist Shock: | 10 | 0 | 12 | 4 |
| Resist Poison: | 4 | 16 | 4 | 4 |
| Resist Cold: | 0 | 0 | 4 | 20 |
+-----------------+---------------+-------------+-----------+---------------+| Unarmed Damage: | 3-6 | 8-16 | 1-1 | -- || Accuracy: | 10 | -6 | 12 | -- |
| Critical: | 5% | 5% | 5% | -- |
+-----------------+---------------+-------------+-----------+---------------+
| Skill Point 1: | Light Weapons | Athletics | Alchemy | Concentration |
| Skill Point 2: | Armour | Dodge | Firearms | Fire Magic |
+-----------------+---------------+-------------+-----------+---------------+
| Trait 1: | Tough | Aggressive | Mutation | Aura |
| Trait 2: | Agile | Head Hunter | Tough | Strong Mind |+-----------------+---------------+-------------+-----------+---------------+
Part 01: Welcome To Nex - LOG05
-------------------------------
~~~ Shipwreck Beach ~~~
So, the game starts simply enough with your group still trapped in the cage. Using the
mouse-pointer, pick up the BRANCH just outside the bars and give it to one of your front
characters. Then you can give the door to the cage a good whacking, and it'll fly open.
Walk forward and into the little alcove to your right and you'll find a ROCK on the floor.
Useful for puzzles and causing some a little bit of distance-damage in the early game, it's best to
hoard these as much as possible. Under the tree you'll find a HORNED FRUIT, one of many food
items that you'll need to keep your character going in your rather extended time on the island.
Head to the left and next to the tall reeds you can find some TORN BREECHES, which
you should give to you one of your people. Turn around and walk all the way down into the water and then around the rocks to your right. You'll then find a BONE CLUB on the floor. Give that to
the other front-runner of your group.
7/25/2019 Grimrock Walkthrough
http://slidepdf.com/reader/full/grimrock-walkthrough 4/117
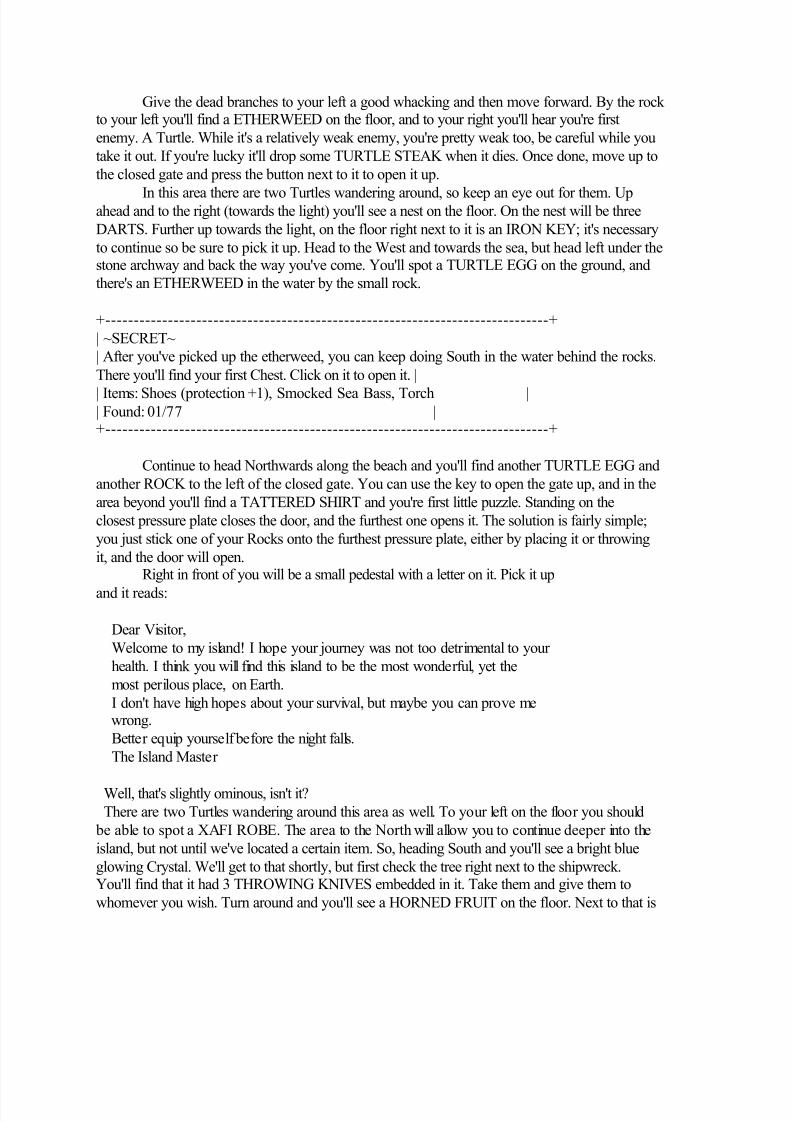
Give the dead branches to your left a good whacking and then move forward. By the rock to your left you'll find a ETHERWEED on the floor, and to your right you'll hear you're first
enemy. A Turtle. While it's a relatively weak enemy, you're pretty weak too, be careful while you
take it out. If you're lucky it'll drop some TURTLE STEAK when it dies. Once done, move up to
the closed gate and press the button next to it to open it up.
In this area there are two Turtles wandering around, so keep an eye out for them. Upahead and to the right (towards the light) you'll see a nest on the floor. On the nest will be three
DARTS. Further up towards the light, on the floor right next to it is an IRON KEY; it's necessary
to continue so be sure to pick it up. Head to the West and towards the sea, but head left under thestone archway and back the way you've come. You'll spot a TURTLE EGG on the ground, and
there's an ETHERWEED in the water by the small rock.
+------------------------------------------------------------------------------+
| ~SECRET~
| After you've picked up the etherweed, you can keep doing South in the water behind the rocks.
There you'll find your first Chest. Click on it to open it. |
| Items: Shoes (protection +1), Smocked Sea Bass, Torch || Found: 01/77 |+------------------------------------------------------------------------------+
Continue to head Northwards along the beach and you'll find another TURTLE EGG and
another ROCK to the left of the closed gate. You can use the key to open the gate up, and in the
area beyond you'll find a TATTERED SHIRT and you're first little puzzle. Standing on the
closest pressure plate closes the door, and the furthest one opens it. The solution is fairly simple;
you just stick one of your Rocks onto the furthest pressure plate, either by placing it or throwing
it, and the door will open.Right in front of you will be a small pedestal with a letter on it. Pick it up
and it reads:
Dear Visitor,
Welcome to my island! I hope your journey was not too detrimental to your
health. I think you will find this island to be the most wonderful, yet the
most perilous place, on Earth.
I don't have high hopes about your survival, but maybe you can prove me wrong.
Better equip yourself before the night falls.
The Island Master
Well, that's slightly ominous, isn't it?
There are two Turtles wandering around this area as well. To your left on the floor you should
be able to spot a XAFI ROBE. The area to the North will allow you to continue deeper into the
island, but not until we've located a certain item. So, heading South and you'll see a bright blue
glowing Crystal. We'll get to that shortly, but first check the tree right next to the shipwreck.You'll find that it had 3 THROWING KNIVES embedded in it. Take them and give them to
whomever you wish. Turn around and you'll see a HORNED FRUIT on the floor. Next to that is
7/25/2019 Grimrock Walkthrough
http://slidepdf.com/reader/full/grimrock-walkthrough 5/117
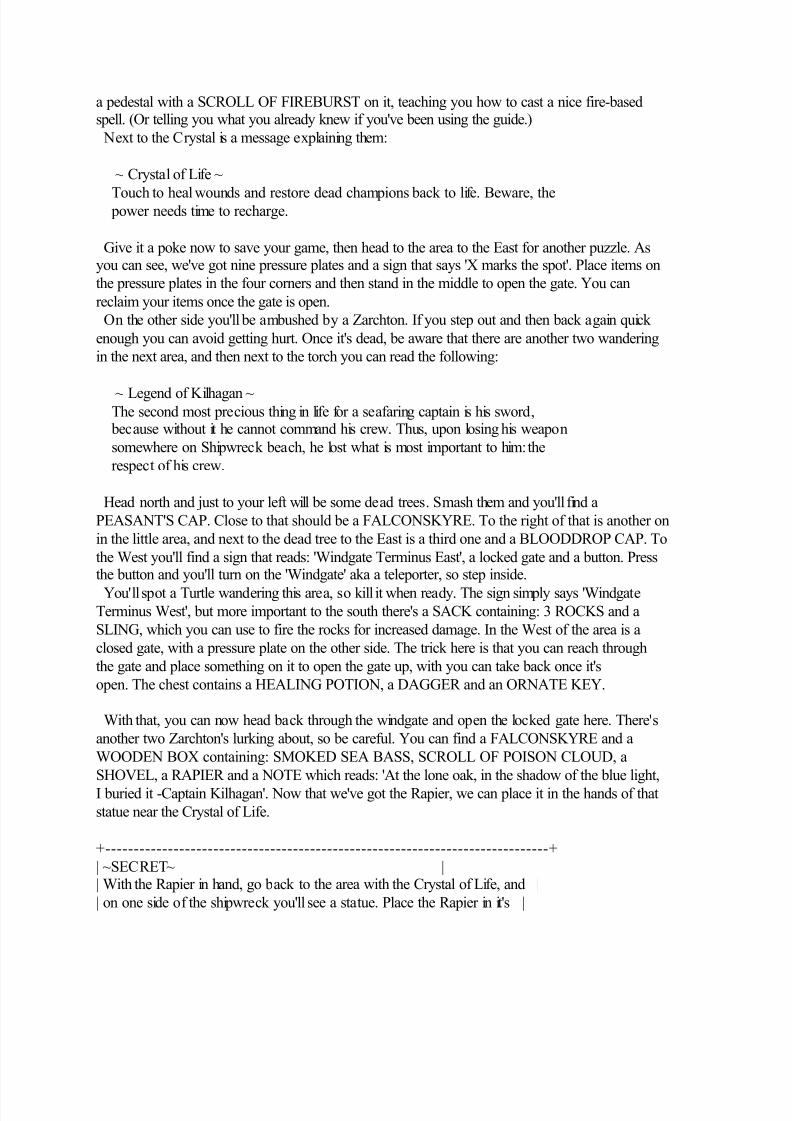
a pedestal with a SCROLL OF FIREBURST on it, teaching you how to cast a nice fire-basedspell. (Or telling you what you already knew if you've been using the guide.)
Next to the Crystal is a message explaining them:
~ Crystal of Life ~
Touch to heal wounds and restore dead champions back to life. Beware, the power needs time to recharge.
Give it a poke now to save your game, then head to the area to the East for another puzzle. Asyou can see, we've got nine pressure plates and a sign that says 'X marks the spot'. Place items on
the pressure plates in the four corners and then stand in the middle to open the gate. You can
reclaim your items once the gate is open.
On the other side you'll be ambushed by a Zarchton. If you step out and then back again quick
enough you can avoid getting hurt. Once it's dead, be aware that there are another two wandering
in the next area, and then next to the torch you can read the following:
~ Legend of Kilhagan ~ The second most precious thing in life for a seafaring captain is his sword, because without it he cannot command his crew. Thus, upon losing his weapon
somewhere on Shipwreck beach, he lost what is most important to him: the
respect of his crew.
Head north and just to your left will be some dead trees. Smash them and you'll find a
PEASANT'S CAP. Close to that should be a FALCONSKYRE. To the right of that is another on
in the little area, and next to the dead tree to the East is a third one and a BLOODDROP CAP. To
the West you'll find a sign that reads: 'Windgate Terminus East', a locked gate and a button. Pressthe button and you'll turn on the 'Windgate' aka a teleporter, so step inside.
You'll spot a Turtle wandering this area, so kill it when ready. The sign simply says 'WindgateTerminus West', but more important to the south there's a SACK containing: 3 ROCKS and a
SLING, which you can use to fire the rocks for increased damage. In the West of the area is a
closed gate, with a pressure plate on the other side. The trick here is that you can reach through
the gate and place something on it to open the gate up, with you can take back once it's
open. The chest contains a HEALING POTION, a DAGGER and an ORNATE KEY.
With that, you can now head back through the windgate and open the locked gate here. There's
another two Zarchton's lurking about, so be careful. You can find a FALCONSKYRE and a
WOODEN BOX containing: SMOKED SEA BASS, SCROLL OF POISON CLOUD, a
SHOVEL, a RAPIER and a NOTE which reads: 'At the lone oak, in the shadow of the blue light,
I buried it -Captain Kilhagan'. Now that we've got the Rapier, we can place it in the hands of that
statue near the Crystal of Life.
+------------------------------------------------------------------------------+
| ~SECRET~ || With the Rapier in hand, go back to the area with the Crystal of Life, and |
| on one side of the shipwreck you'll see a statue. Place the Rapier in it's |

7/25/2019 Grimrock Walkthrough
http://slidepdf.com/reader/full/grimrock-walkthrough 6/117
| hands to open the wall nearby and find a chest. || Items: Gold Key |
| Found: 02/77 |
+------------------------------------------------------------------------------+
+------------------------------------------------------------------------------+
| ~TREASURE~ || With the spade in hand, stand on the other side of the tree to the Crystal |
| of Life, leaving a space between you and the tree, and use the Shovel to dig |
| up a Chest. || Items: Healing potion, Embalmer's Robes |
| Found: 01/11 |
+------------------------------------------------------------------------------+
+---------------------------
Secret
?? There is a energy potion near a lit brazier by the optional statue. It is not in a chest.
+----------------------------------
Go to the statue near the wooden door. Placing the Rapier in the statues hand will open the door and allow you to go down underground.
~~~ Dead Sailor Cave ~~~
Head to the right. Feel free to remove any torches you feel like from the wall as you pass them.
You're going to need them more then the wall will. At the end of the path, open the door and
inside the room you'll find a HEALING POTION, a SCROLL OF SHOCK, and some LOCK
PICKS.Head back, past the stairs and open the door to the areas labeled 'Halls of the Dead'.
Inside you'll find three Mummy's walking around, so fry them with some Fire. You can also findsome LEATHER BOOTS, and a WOODEN CHEST containing a FLINTLOCK and 20
PELLETS.
+------------------------------------------------------------------------------+
| ~SECRET~ |
| The southern part of this area has two little alcoves with a light in each. || There's a button hidden in the West-most one, although it's not that hard to |
| spot. Pressing it opens a wall in the other Alcove. Go up the stairs to find |
| the secret area, which has two Turtles wandering around in it. |
| Items: Etherweed x2, and a Locked Chest containing: a Healing Potion and |
| Thraelm Tribal Mask |
| Found: 03/77 |
+------------------------------------------------------------------------------+
Go back into the dungeon. You can place an item on the pressure plate to the west side of theroom. This will close the gate in the hallway, but you can open it again with the button to the
right, and step forward without it closing. In the next area (There's a good chance one of the
7/25/2019 Grimrock Walkthrough
http://slidepdf.com/reader/full/grimrock-walkthrough 7/117
previous area Mummy's might have ended up in here), there's an IRON KEY on the far side of the room you can use it to open the nearby door.
There are two more Mummies behind the door, so kill them before taking the HORN OF
SUMMONING. Once you've got it, head up the stairs.
~~~ Shipwreck Beach ~~~
Press the obvious button in this area to open up a hidden door, then go back into the area with
the Crystal of Life. Use it if you need to as there is a tricky fight coming up. Head north and intothe open area with the circle of stones.
Next to the lock door is a sign that reads:
Welcome to the location of your first challenge. When you are ready stand in
the circle and call out the guardians.
~ The Island Master ~
To your right will be a locked door that needs a Gold Key to open; if you happened to find oneearlier, you can use it. Inside the chest is: BACKBITER, 10 PELLETS and a POTION OF
STRENGTH.
Whenever you're ready, stand in the circle of stones and use the Horn of
Summoning.
+------------------------------------------------------------------------------+
| ~ BOSS BATTLE! ~ |
| Vs Viper Root (x2) || |
| While this boss shouldn't present too much of a challenge, it can overwhelm || you if you're not careful. The best trick is to keep moving. |
| Their attacks only hurt for the first moment of their attacking animation, |
| so you can step back and then forward to give them a good whacking. Fire |
| attacks will obviously work the best. You can equip a torch and use that to attack them. Keep in
mind that they have a nasty |
| habit of flinging a Poison Bolt your way if you stand at a distance from them. || Just keep moving, avoid their attacks as best you can, and use those healing |
| potions whenever you need to. You'll eventually claim victory! |
+------------------------------------------------------------------------------+
Once the beasts are dead, the last one to die will drop a POWER GEM. The first of many! Pick
it up and you'll notice that the gate to the north is open. Head on through...
+------------------------------+
| ~ End of Section Checklist ~ || |
| Secrets Found ---- 03/77 |
7/25/2019 Grimrock Walkthrough
http://slidepdf.com/reader/full/grimrock-walkthrough 8/117
| Epic Items Found - 00/17 || Power Gems Found - 01/20 |
| Essences Found --- 0/5 |
| Treasures Found -- 01/11 |
| Level Visited ---- 03/34 |
+------------------------------+
Part 02: Playing With Fire - LOG06
----------------------------------
~~~ Twigroot Forest ~~~
A few steps ahead you'll see a sign, telling you the place is called Twigroot Forest. Next to it
will be a SACK that contains a MORTAR & PESTLE, which you should immediately give to
your Alchemist. There's also a RECIPE SCROLL that tells you how to make a Healing Potion (1
Blooddrop Cap) and an Energy Potion (1 Etherweed). Both of which will be vital to your time on
the island. And there's also a LETTER that reads:
I see you have made some minor progress. Good, good. But don't let it get to
your head. This is just the beginning. Or is could be almost the end, it all
depends entirely on you!
Here is a tool you might find useful. Surly you can figure it out!
The Island Master
To the left of the sign is a BORRA, then head to the right of the sign. Go around to corner to the
north and then take a right, heading East. In the little area here, you'll see a patch of dead branches ahead of you. If you look carefully, nestled inside is a Twigroot. Get used to spotting
these annoying little monsters hidden inside those patches of branches, as they love to jump out
and surprise you. Draw it out of the branches, either by getting in a quick attack or just walking
past a few times and kill it. On the ground next to the dead branches will be the Light armor
SANDMOLE HIDE VEST, and next to that is a FROSTBITE NECKLACE. Even if you don't
plan to use it, take it as you'll need it for an up-coming Secret.
Once you've got it, head back West and then North a little. In another small area there'll be
another hidden Twigroot to the West, a BLOODDROP CAP to the south, and a small path to the
East where you can find a SACK containing a SCROLL OF POISON BOLT, a BAKED
MAGGOT, and a HEALING POTION.
Head back West, past what is a dead-end to the North and keep going. You'll see a
BORRA on the floor here. Take it and turn south, and several steps down you'll find a
BLOODDROP CAP on the floor to your left. Just beyond that is two patches of branches with a
Twigroot each. A few steps back North and there's a path heading West that you can take.Around the corner is another hidden Twigroot. Once it's dead, smash the dead branches where it
was and you can find 10 PELLETS. Turn around from picking up those and follow the path
7/25/2019 Grimrock Walkthrough
http://slidepdf.com/reader/full/grimrock-walkthrough 9/117
down the stairs...
~~~ Twigroot Tunnels ~~~
Follow the only path available to you until you come to a gate and a hole in the floor. Now,
much like in the previous game, you'll want to explore down certain holes in the floor to findSecrets and other such wonders. However, without a special item that allows you to drop down
without hurting yourself, you'll likely do just that, often injuring your legs, which obviously isn't
a good thing. This hole however doesn't contain anything special or useful down there, so don'tworry about it. Just throw something over the hole and onto the pressure plate to close it.
Follow the now available path all the way to the end and you'll run into a Skeleton Trooper.
Either keep your distance and slowly back up while you pelt it with spells and thrown objects, or
quickly move into the small room to deal with it. Once it's dead, you'll find a TATTERED
CLOAK and a IRON KEY on the floor, both of which you should take.
Lug the Iron Key all the way back to the gate and open it up. Aside from the obvious chest in
front of you, there's also a LIZARD ON A STICK that you can pick up. Inside the chest you'll
find: a FROST BOMB, a SCROLL OF ICE SHARDS, and a ROUND KEY.
+------------------------------------------------------------------------------+
| ~SECRET~ |
| To the right of the chest is a fairly obvious button on the wall. Press it |
| to open the wall next to you. Be careful of the Skeleton Trooper that comes |
| out. |
| Items: Whitewood Wand |
| Found: 04/77 |
+------------------------------------------------------------------------------+
With the round Key in hand, you can now head back the way you came and back upstairs.
~~~ Twigroot Forest ~~~
Follow the path North, East and then north again into the path that I told you to avoid earlier.
There, you'll find a BLOODDROP CAP, and a locked gate, that you can use your Round Key to
open for you. Around the corner and you'll be able to properly see the huge structure in front of you. Welcome to your first Elemental Shrine!
Wander on over, press the crystal by the door to open it up, and have a look inside. You'll see a
table and three heads on the wall. These heads are important and will pop up all over the island to
give you hints and clues, as well as other information.
The one on the left says:
This is the elemental shrine of fire.
Fire is the rune of strength, magma and heat. Northwest is whence the forces of fire are strongest.
7/25/2019 Grimrock Walkthrough
http://slidepdf.com/reader/full/grimrock-walkthrough 10/117
The one at the back says:
Hear ye, hear ye oh traveler of the dark.
Be aware of the elemental shrines. Once houses of light, now refurbished by
the masters of the island, the shrines hold the keys to thy survival.
Visit all of them and do what the stone philosophers demand and thee may be granted a way out, if that is what thee most desire.
And the one on the right says:
Bring forth four power gems to fuse them into the essence of the element.
Not all of the gems lay under the skies, some of them are buried deep
underground.
You already have one Power Gem. Leave it on the table area for safe keeping, and leave the
Shrine. First, head East, or to you're left. Over there you'll see a closed gate and a tangle of vines.
Smash your way through the vines and then through the dead branches to find 10 PELLETS.Turn right around and one step to the North you'll spot a path. Follow it to find a BORRA, andfurther on a Twigroot hiding away near a Locked Chest. At this point you probably don't have
any Lock Picks to open it, so for now just remember it contains a LIGHTNING ROD and some
EMBALMERS SHOES. You can come back later if you decide you want it.
Head back to where you found the pellets and continue East. You'll see a tree next to two
torches.
+------------------------------------------------------------------------------+
| ~TREASURE~ || In the area with the tree and two torches, get out your shovel and dig in |
| the square next to the tree that sits between those two torches. || Technically the clue that leads you here is found later, but I don't like to |
| waste time. Bear in mind that the Treasure Chest is Locked and will need a |
| Lock Pick to open. |
| Items: Tome of Leadership. (Gives all party members a stat boost if the |
| Leader is alive.) |
| Found: 02/11 |+------------------------------------------------------------------------------+
From the tree with the torches, head down South. Follow the U-shaped path around, being sure
to snag the LOCK PICK in the little alcove area, and you'll eventually find a Lever. Pull it to
allow you to access another power gem. Walk all the way back around, and you'll find two
Twigroots. Once they're dead, you can grab the POWER GEM (02/20). Not only that, but there's
also a LEATHER CUISSE next to it as well.
With a second power Gem now found, head back to the Shrine, placing the Gem there if you
don't want to carry it around, and then head to the tangle of vines to the West. Destroy them andthen in the next area you'll encounter your first Wargs. which you should promptly kill for their
lovely meat when you run into them.
7/25/2019 Grimrock Walkthrough
http://slidepdf.com/reader/full/grimrock-walkthrough 11/117
Taking the left path after the vines and you'll come to a sign that reads: AR E. UHU KO.
AR E. UHU E.
What the heck, right?
Don't worry, all will be clear much later in the game. To the left of this are some branches youcan destroy to find a BORRA.
+------------------------------------------------------------------------------+| ~TREASURE~ |
| When reading the sign you get what seems to amount to just gibberish. However |
| it is in fact a code that you get given the clues to later on. What is |
| actually says is: 'Left 1. Up 3. left 1. Up 1.' So, let's do that. From |
| standing in front of the sign, follow the directions and then dig! |
| Items: Steel Armband, Shield Potion, Gold Key
|
| Found: 03/11 |+------------------------------------------------------------------------------+
To the North of the sign is a talking head that says 'This is another way out.' but we can't do
anything about that at the moment. Head East and a little south and then north when you see the
torch. Here you'll see a hidden Twigroot, and some more vines. Destroy both and beyond that
you can find a BLOODDROP CAP, a XAFI ROBE, a XAFI SHEMAGH and a BATON.
Continue north and eventually you'll find some stairs leading down...
~~~ Twigroot Tunnels ~~~
Head forward and next to the door you'll find some BREAD on the floor. Open the door usingthe pulley next to it, and continue forward. As you round the third corner, you'll see someone
standing at the end of the corridor from you. He certainly looks...intimidating.
Before you can do anything, he'll teleport away. Probably for the best. Walk forward to where
he was, ignore the door to your right for now and head left. The passage to your right will have
you first Ratling at the end of it, who'll throw knives at you. Attack him as quickly as possible,
and you'll hopefully get him before he does any damage. There's another one beyond him, so killhim too. In the area they were hanging around in, you can find a SCROLL OF SHIELD and
destroying the barrels will allow you to access a SALTED SAUSAGE and a LEATHER CAP.
Head back to that door you passed earlier. The sign next to it say 'There is no turning back',
we'll we've got nowhere else to go, so open the gate and walk forward. When you step on the
pressure plate the hole will open up behind you and ahead of you. Now I've got some bad news
for you. You're going to need to drop down one of those holes if you want to get the Secret that's
down there. If you'd rather not risk getting yourself hurt, you can always come back later once
you get a rope, but that could well be some time. [cheat code spawn “rope”]. Drop down the holehere and you'll find a small area with a HEALING POTION, a windgate and a sign that reads:
'Remember, sometimes things are hidden in plain sight.
7/25/2019 Grimrock Walkthrough
http://slidepdf.com/reader/full/grimrock-walkthrough 12/117
+------------------------------------------------------------------------------+| ~SECRET~ |
| One step to the left of the sign on the wall you'll be able to spot a secret |
| button on the wall. Pressing it will turn off the windgate and open the wall |
| beyond it. There'll be a Mummy wandering around there for the record. |
| Items: Pellets x30, Fire Bomb x3 || Found: 05/77 |
+------------------------------------------------------------------------------+
Press the secret button again to reactivate the windgate and get yourself back up to the previous
room. Next to the torch on the wall, you'll find a button that will close the hole behind you,
allowing you to continue. Head left at the junction and follow the path until you get to the door.
Open it up and in this room you'll find a BLOODDROP CAP and 10 PELLETS.
+------------------------------------------------------------------------------+
| ~SECRET~ |
| Just back from the room you're in you'll have seen an area labeled 'The || Four Plagues'. This room has four shelves labeled with four signs: || 'Battle', 'Famine', 'Cold' and 'Disease'. Obviously you have to place items |
| that can cure those four plagues. Battle needs any Weapon that you've got, |
| Famine needs a piece of Food, Cold need that Frostbite Necklace that I told |
| you to keep earlier, and Disease need an Antidote. It's doubtful that you |
| have one at this point, but you should have the ingredients to brew one, |
| assuming you haven't got too overboard with brewing. Just mix together an |
| Etherweed and a Falconskyre. Place those items on the relevant shelves and |
| the gate will open. Also, don't forget to retrieve your items before you || leave. [cheat spawn “potion_cure_disease”] |
| Items: Potion of Willpower, Spidersilk Cloak || Found: 06/77 |
+------------------------------------------------------------------------------+
Head back the way you've come and take the other path and you'll eventually see a Crystal of
Life in a side room, which you are of course welcome to use. Continue following the path and
you'll eventually see...a Leprechaun? Well, technically not, but let's be honest, all he's missing is a bleedin' Shamrock!
He'll run off and seal a gate behind him. We'll get to the gate, and out little giggling follow,
later. Follow the only path available to you and you'll reach a room with a door on the north side
and a Ratling to the south. Kill it and follow the path. We'll come back to the door later.
Follow the path South and you'll reach a door and a sign that reads 'Philosopher's Stone'. Open
the door and to the right you'll find a BLOODDROP CAP on the floor. Head West and you'll find
some cells, one contains some BREAD, another contains a MACHETE, one contains a Potion
that you can't reach yet, and the forth contains a pressure plate, which you should drop an item
onto. This activates the floor tiles in the previous area, allowing you to push the large black stonearound.
First, push it East (click on it), and then South, which you can actually do through the bars, and
7/25/2019 Grimrock Walkthrough
http://slidepdf.com/reader/full/grimrock-walkthrough 13/117
then finally push it West and onto the orange tile to open the nearby gate.
+------------------------------------------------------------------------------+
| ~SECRET~ |
| In the north part of the room, which you'll be able to access after you've |
| pushed the large black stone East. Here, you'll spot a large button on the || wall. Press it to open the nearby wall allowing you to kill the Ratling |
| inside and claim the goodies. |
| Items: Lock Pick, Leather Brigandine || Found: 07/77 |
+------------------------------------------------------------------------------+
+------------------------------------------------------------------------------+
| ~SECRET~ |
| Right next to the windgate (SW of the large movable block) there's a hidden button on the wall.
Press it to |
| open the wall next to you, releasing a group of Mummies, and allowing you to || access that potion you saw earlier. || Items: Energy Potion, Potion of Vitality |
| Found: 08/77 |
+------------------------------------------------------------------------------+
Head through the windgate and into a new area. In this area you can find 10 PELLETS, a
BLOODDROP CAP and a BRASS KEY. However, note that while you're going to need the Key,
picking it up locks off the windgate and releases four Skeleton Troopers. Once they're dead, you
can check the places they came from to find some LEATHER PANTS, a BLOWPIPE, threeDARTS and a SACK that contains BREAD, a LOCK PICK, a COMPASS and a NOTE that
reads 'I had more equipment then I could carry for I buried some of it right between the twolanterns in eastern Twigroot Forest.' Fortunately we already know about this, so flip the Level
next to the flap to open the gate blocking the windgate.
Before you go however, a quick word in regard to the hole in the North part of the room. You
are welcome to drop down there and collect the items, or ignore them as you wish. If you do drop
down, you'll find three Ratlings to deal with, as well as a BLOODDROP CAP in the immediatearea. Off down the tunnel you'll find a FIRE BOMB and two BROADHEAD ARROWS, and
behind the gate there's two HEALING POTIONS and a lever. Pulling it will open the gate
blocking the windgate and allowing you back up to the previous room.
+------------------------ ------------------------------------------------------+
| ~SECRET~ |
| Back at the level where you fought the 4 skeleton troopers, there's an area that opened up where
two of the Skeleton Troopers emerged. The room has a torch on the wall in it. In this area on the
wall || opposite the torch, is a hidden button that will open up the wall. |
| Items: Torch, Reed Helmet |
7/25/2019 Grimrock Walkthrough
http://slidepdf.com/reader/full/grimrock-walkthrough 14/117
| Found: 09/77 |+------------------------------------------------------------------------------+
Pull the lever to open the windgate and head back to the room with the closed door labeled 'The
Nest'. Flip the lever and the area beyond will contain a total of five Ratlings wandering around.
Feel free to pop back and use the Crystal of Life if you feel the need. In the area to the right of the door you can find a CUDGEL, and to the left you can find a MUDWORT on the floor. Keep
moving forward and you can spy an ENERGY POTION on the floor at the end of a corridor. In
the room with the large head on the wall, you need to solve a small puzzle to get through the door as the sign saying 'Be Quick' seems to hint at.
What you have to do is press the button on the wall and then quickly sidestep out of the way of
not only the floor opening up under you but also the Poison Bolt the face is going to fire at you.
Once it's past you can quickly follow it into the room before the gate closes again. Take the
Power Gem and then open the door with the button on the wall. When the door opens, the
trapdoor will open momentarily and the Face will fire a bolt. Wait for the bolt to pass and the
trapdoor to close. Be aware that the first time you press the button, if you make it in theresuccessfully or not, it will open up several gates in the area, releasing four Field Wargs into thearea. From the areas they're released, you can find a SALTED SAUSAGE, a TURTLE EGG, and
two SMOKED SEA BASS.
You can also drop down the hole to the area beneath and find a few things, mostly being
four Wargs to kill and a BLOWPIPE, a DART, a BLOODDROP CAP, and a RAGE POTION.
To get back up, flip the level behind the pillar, opening the gate, getting you another
BLOODDROP CAP and allowing you to take the windgate back up. Solving the little puzzle will
of course net you another POWER GEM (03/20). Press the button on the wall to get back out of
the room, although you'll have to wait for the Poison Bolt again.
+------------------------------------------------------------------------------+| ~SECRET~ |
| Back towards the center of the area, there are some stones tied |
| up with chains. To the SE of the chained stones there was a gate that was opened to release a
|| Warg. On the wall of the Warg hallway, there is a hidden button on the wall that you can |
| press to open a secret area. |
| Items: Rogue Vest || Found: 10/77 |
+------------------------------------------------------------------------------+
From the previous room, head west, south, then east to return to the door where you saw the
leprechaun. Heal up with the Crystal of Life if you need to. Use your previously acquired Brass
Key to open the gate. Follow the path and eventually a gate will slam shut behind you, and you'll
hear the little guy's cackling laughter in the distance. Off to one side you can see a lever and a
hole in the floor. There's some good stuff down there, if you're interested. Down below there's 6
Mummies wandering around, two separately and four in a group. Item-wise, there's someCHEESE and a LOCK PICK.
+------------------------------------------------------------------------------+
7/25/2019 Grimrock Walkthrough
http://slidepdf.com/reader/full/grimrock-walkthrough 15/117
| ~SECRET~ || In the area below the hole, there's also a small shelf labeled 'Shrine of the Glutton'. If you place
|| three food items onto the shelf the wall will open up. The area beyond has |
| eleven Mummy's wondering around, two groups of four and three singles. Also, |
| don't forget to pick your food back up once you're done. |
| Items: Speed Potion, Tome of Health, Leather Gloves || Found 11/77 |
+------------------------------------------------------------------------------+
Once you're done down here, take the windgate back up and flip the lever to close the hole in
the floor. Be sure to be headed up once you're done, as when you approach the gate ahead, the
little guy from earlier will show up and unlock the door.
It's time for the fight!
Whack him with everything you've got, while he wanders around the area. He'll flip levers on
the walls to open up walls and release up to five Turtles into the area to give you more stuff to
deal with. He'll occasionally throw Rocks at you for some moderate damage, so be careful with
those. Keep moving and be sure not to fall down the holes in the area. After you've dealt himenough damage, he's eventually just disappear, leaving an BRASS KEY and a NOTE that reads'The Trickster comes and goes but the pain stays. Hahahahaha!'
Well, at least we've got a name to put to this little nuisance. Finish off dealing with any Turtles
that he released and have a look around the area to find a QUARTERSTAFF, a
FALCONSKYRE and 10 PELLETS.
+------------------------------------------------------------------------------+
| ~SECRET~ || In the room that's opened up in the South-East corner of the whole area |
| there's an obvious button on the wall. Press it and the hole to the West || will close, allowing you to access another obvious button on the wall there. |
| This in turn will open up the nearby wall. |
| Items: Potion of Dexterity, 10 Pellets |
| Found: 12/77 |
+------------------------------------------------------------------------------+
Once you've got all this stuff, you can then pick up the POWER GEM (04/20), bringing your
total up to four and allowing you to get that first Element. With the Trickster gone and the Brass
Key he dropped in hand, head to the East side of the area and smash the barrels to gain access to
the door here, using the Brass Key on the nearby lock to open it up. Go forward and you'll find a
LIZARD ON A STICK and two SHURIKENS. Continue following the path and go past the gate
you'll eventually see. In the area with the rubble, the north path has a lever that will open a wall,
allowing you to get back to the Crystal of Life. To the south in this area is some BREAD, a
BLOODDROP CAP and a NOTE that reads 'I can see the shrine beneath here. I wish I had
packed more provisions...'
Head back to the gate I told you to go past earlier and open it up. Opposite where you walk in
7/25/2019 Grimrock Walkthrough
http://slidepdf.com/reader/full/grimrock-walkthrough 16/117
are two Scrolls, one being a SCROLL OF FORCE FIELD and the other being a RECIPE, tellingyou how to make a Shield Potion (1 Etherweed and 1 Mudwort).
+------------------------------------------------------------------------------+
| ~SECRET~ |
| Right where you find the two Scrolls, there's a secret button on the wall. || Press it to open the wall nearby. |
| Items: 10 Pellets, Reed Cuirass |
| Found: 13/77 |+------------------------------------------------------------------------------+
Would you believe that we're finally done down here! Head up the nearby set of stairs...
~~~ Twigroot Forest ~~~
Head forward and off to your left. There'll be two Twigroots wandering around here, so kill
them and then you can access the Chest. You should have enough Lock Picks now. Inside you'llfind 10 PELLETS, and a BUCKLER. Head back and flip the lever to open the gate, allowing you back into the main area and right next to the Shrine too, which is very handy. Head on inside and
you can now place the other two Power Gems down onto the table. With a rumble spreading
through the ground, the four gems will fly into the air, spin around and with a blinding flash
combine in the ESSENCE OF FIRE. Pick it up and stash it away for now.
With nothing else left to do around here, head East as far as you can go and you'll find your way
into the next area...
+------------------------------+| ~ End of Section Checklist ~ |
| || Secrets Found ---- 13/77 |
| Epic Items Found - 00/17 |
| Power Gems Found - 04/20 |
| Essences Found --- 1/5 |
| Treasures Found -- 03/11 |
| Level Visited ---- 05/34 |+------------------------------+
Part 03: Getting Your Feet Wet - LOG07
--------------------------------------
~~~ Forgotten River ~~~
Follow the path forward until you get to turn to your left. You'll see some vines in the distance.Wander over, whack them, and them beyond you'll find a Locked Chest. Inside you'll find a
TORCH and a THRAELM TRIBAL CHESTPLATE.
7/25/2019 Grimrock Walkthrough
http://slidepdf.com/reader/full/grimrock-walkthrough 17/117
Head back and then take the first left and in the little zig-zag path you'll fine a HORNEDFRUIT. Continue on and you'll come to a clearing. Have a gander at the huge Castle in front of
you. You'll also probably notice that the guy in the robe from earlier, who I think it's safe to
assume is the mysterious Island Master we've been hearing from. He seems to be sitting atop a
very large-looking dragon. Thankfully, they fly off, but I think it's also safe to assume that we're
gonna have to deal with that eventually, yeah?
At the base of the tree next to the water there'll be a HORNED FRUIT, and the nearby sign
reads 'N: Sleet Island, E: Twigroot Forest, S: Keelbreach Bog'. We'll be heading South soonenough, but we've got some things to do in this area first. Now, it probably hasn't escaped your
attention that there are quite a few Crowern wander around the area, six in total. Due to their
wandering nature I can't give you exact locations, but you'll see them easily enough.
%% The nearby bridge is out, which means we'll need to find another way across. Swimming,
something that is actually possible now, isn't really an option due to their being no ladders on the
other side. If you do decide to take a plunge into the water to have a look around, be aware that
there are Turtles down there, and without any underwater weapons currently available, you can'tattack them. However, if you look around the area immediately near the ladder you can find threePOISON BOMBS, two CROSSBOW QUARRELS and three ETHERWEEDS to the north and a
WOODEN BOX containing a GOLD KEY, a TORCH and a LEATHER CUISSE under where
there bridge would have been. There is also an ETHERWEED in the long path of water to points
West, however because you can't attack, it's easy to get blocked in there by an enemy and drown,
so be careful!
Anyway, head south from the sign and stop right before you step on the bridge here. Turn to
your right, facing West and you'll see a pressure plate in the distance. Throw a rock onto it toopen the gate ahead. The sign you pass by says 'And with a keen eye and a sharp aim, they
entered...' but we already know that don't we. A little further on and a sign will say 'Shrine of Entanglement’.
Just before that, there's a talking head nearby that says 'There are four sides to everything.'
which I want to point out isn't strictly speaking true.
To solve this puzzle, you need to step on the four pressure plates in front of you that raise/lower the spike gates. First step on the right of the two plates you can get to. Then go around and step
on the left one. Now, rather then stepping back, step off the pressure plate towards the
evil-looking face on the wall, and then onto the other pressure plate at the back of the area. Step
off that one, and the back onto it, and then go around to step on the final pressure plate.
Assuming you did everything correctly, only one set of spikes, a set running east to west, to your
left will be up. You can also find some LEATHER BOOTS here. Press the button to deactivate
the windgate. It's only down for a moment, so quickly step past it and go past the wall at the far
end.
+------------------------------------------------------------------------------+
| ~SECRET~ |
7/25/2019 Grimrock Walkthrough
http://slidepdf.com/reader/full/grimrock-walkthrough 18/117
| Once you're past the windgate and the wall, one step left and then one step right, you'll find asmall little stone-walled |
| area to the side. On the East wall is an obvious button. Press it to turn on |
| a new windgate that you can take to the secret area. The secret area has a peice of cheese and a
level to lower the gate. |
| Items: Rogue Gloves, Thraelm Tribal Legplates (in the Locked Chest), || Cheese (on the floor) |
| Found: 14/77 |
+------------------------------------------------------------------------------+
+------------------------------------------------------------------------------+
| ~SECRET~ |
| In the area with the Chest from the previous secret, there's another obvious |
| button on the East wall. Press it and quickly go back through the windgate |
| and you'll see the wall open to a new area. It'll quickly close again |
| however, so head through and back into a hidden area of the Twigroot Forest. |
| Here you'll see a familiar circle of stones in the middle of the area. Yes, || this Secret has a Boss Battle in it, and it's a pretty tough one too I hate || to say. If you feel up to it, stand in the circle and use the Horn of |
| Summoning. |
| +---------------------------------- ------------------------------------- ---+ |
| | ~ BOSS BATTLE! ~ | |
| | Vs Summon Stones x4 | |
| | | |
| | This battle is going to test you quite a bit unless you decide to leave | |
| | it until you're at a higher level. Summon Stones, as their name implies, | || | are as hard as rock, so physical attacks don't do too much damage. Magic | |
| | is a little better, but can still be weak depending on your current | || | level. With four of them to deal with, moving around can sometimes be a | |
| | big problem, especially if they trap you in a corner, so be careful. | |
| | They can attack from their side, so when you do go in for an attack, be | |
| | quick and be sure to back away again afterwards. Keep yourself healed, | |
| | your magic-user energized and just keep moving. With perseverance, and | |
| | a little luck, you can eventually triumph against them, especially | || | as it gets easier once you start reducing their numbers. | |
| +---------------------------------- ------------------------------------- ---+ |
| Once they're all dead, you can claim your treasures! |
| Items: Blackmoss x2 (on floor), Tome of Knowledge |
| Found: 15/77 |
+------------------------------------------------------------------------------+
Return to the entrance area. Proceed to the east and south. In this lower area you might run into a
few Wargs, so be aware of them. More food though, so that's good. Move around East and onceyou past under the stone arch, turn to your left and you'll see some dead bushes. Go over and
whack them and you can find a HEALING POTION, a SCROLL OF INVISIBILITY and a
7/25/2019 Grimrock Walkthrough
http://slidepdf.com/reader/full/grimrock-walkthrough 19/117
LONGSWORD. Once you've got them, continue East over the bridge.%%
+------------------------------------------------------------------------------+
| ~SECRET~ |
| Once you've reached the long bridge here, you're right above a secret. |
| Technically easy to get to, it's also a bit long-winded. First, drop down || into the water on the North side of the bridge. Under it you'll see a Lever |
| that when pulled will open a gate on the other side of the bridge. Quickly |
| head north before you drown and climb up the ladder next to the broken || bridge. Follow the path you've just taken, going |
| south, through the gate puzzle (The quick way now is to step on the middle |
| tile, back off and then step on it again. And then step on to, off of and |
| back onto the plate ahead. Then you can press the button again to get past |
| the windgate.) Follow the path to get back to the bridge and you can drop |
| into the water on the South side to get to the secret. |
| Items: Reed Legmail, Frost Bomb x3 |
| Found: 16/77 |+------------------------------------------------------------------------------+
Once on the other side of the bridge you can find an ETHERWEED, a BLOODDROP CAP, and
a SKULL. Useful if you have the Headhunter Trait, but otherwise not. Also, there's another
ETHERWEED in the water opposite the ladder that you can get without having to worry about
enemies.
Head to the south area and on a little pedestal you can find a SHORT BOW and three
BROADHEAD ARROWS. Just beyond that to the East is a Crystal of Life. Bet you're eager to
use that, huh? Past the fountain, you can step on the pressure plate to open the gates. We'll beheading that way soon, but first turn around and flip the lever to open up the gate.
+------------------------------------------------------------------------------+
| ~SECRET~ |
| Three steps to the West of the pressure plate is an obvious button on the |
| wall. Press it to lower the nearby gate. |
| Items: Falconskyre (on floor), a Firebomb, Rogue Hood |
| Found: 17/77 |+------------------------------------------------------------------------------+
Head North through the gate, keeping in mind there are two pairs of Wargs around there
somewhere, and on your left, on the other side of a rock is an are labeled 'The Cache'. Sound fun,
let's go have a look.
~~~ River Tunnels ~~~
In this small area you'll run into three Ratlings and a Rat Swarm. Deal with them in the usualmanner, and then you can find two MUDWORT, BREAD, and you'll find that one of the
Ratlings will drop a GOLD KEY. This is good, considering that this area has four different locks,
7/25/2019 Grimrock Walkthrough
http://slidepdf.com/reader/full/grimrock-walkthrough 20/117
all of which require a Gold Key to open. Now I'm not going to suggest that you use all the Keysyou have on you, as there are plenty of others that you can find later on. However, I can list what
you can find in each and let you choose...
Thief's Cache: Lock Picks x2, Crookhorn Longbow, Broadhead Arrows x4, Speed
Potion Conjurer's Cache: Orb of Radiance, Energy Potion, Archmage's Mantle
Paladin's Cache: Fireblade, Healing Potion, Heavy Shield
Snake Charmer's Cache: Antivenom, Serpent Bracer, Scroll of Poison Shield, Rope
My personal recommendation? The Snake Charmer's Cache. Without any doubt, the
Rope is the most useful item you'll get down here, as it allows you to drop
down any pitfall without hurting yourself, opening your ability to explore wide
open. Whatever choice you make, head back on upstairs.
~~~ Forgotten River ~~~
+------------------------------------------------------------------------------+
| ~TREASURE~ |
| As soon as you come back to the surface, look ahead and slightly to the |
| right and you'll see a tree with a large rock in front of it. In front of |
| that rock is a buried chest that you can dig up. |
| Items: Cheese, Shuriken x3, Reed Sabatons |
| Found: 04/11 |
+------------------------------------------------------------------------------+
Now that you're back on the surface, let's go and have a look at the big castle shall we. In thesmall courtyard here you'll see four statues, each with a little pedestal in front of it and each
pedestal has a symbol on that. Do those symbols look familiar? They should, as they're the same
as on your mage's magic runes he uses to cast his spells. There's one for each of the four main
elements; Fire, Earth, Air and Water. Don't we already have the Essence of Fire? Place it before
the appropriate statue (Hint: it's the one with the fire symbol). Well, that's one down where it
needs to be, only three more left.
Also, you can use this place as a kind of hub, dropping any items that you don't want to have to
lug about with you such as excess food and the like.
With that out of the way, head North. It's around here that you'll likely encounter a Viper Root.
While it hasn't changed since you last encounter it, this one is on it's own and you should be at a
higher level and better equipped, so it should be easier for you to deal with. You can backtrack
into the large area in front of the castle if you need to.
Once it's dead you'll be free to explore the northern area. If you take the right path, going aroundthe area counter-clockwise you'll fire find a LOCK PICK and some LEATHER GLOVES. Keep
going and you'll then see the shielded area. You'll need a Gold Key to unlock the item inside,
7/25/2019 Grimrock Walkthrough
http://slidepdf.com/reader/full/grimrock-walkthrough 21/117
which is a NECTARBRANCH WAND. Decide if you want it and head North to some stairslabeled 'The Hub', so head on down...
~~~ River Tunnels ~~~
Inside here you'll find a closed door in front of you, but there's one you can open to your left.The door opens up to reveal a large room with four signs reading: 'Cemetery', 'Keelbreach Bog',
'Shipwreck Beach' and 'Hamlet of Stormbreach'. Taking the windgate next to the 'Shipwreck
beach' sign takes you back to that area, right next to the Crystal of Life. So, once all foundwindgates are activated, you can use them as a shortcut to get to those found locations all over
the island.
This is useful.
This is also all there is to see down here for now, so head on back up.
~~~ Forgotten River ~~~
Head South and then West and over the bridge. Here you can find a WARHAMMER, aSMOKED SEA BASS and 10 PELLETS. There's also a lever that, once pulled, will open a gateto the south, allowing easy(er) access to either side of the river. Now it's time to take a little
swim. If you stand on the bridge that you just crossed over and look north you'll see a ladder a
few spaces ahead. Drop down and walk forward and climb the ladder. In front of you will be a
TATTERED CLOAK and REED GAUNTLETS. But, far more importantly than that is the
POWER GEM (05/20) just sitting there waiting to be collected.
We're done in this area, for now at least, so go back into the water and climb up the ladder that's
to the South-West. Cross back over the nearby bridge and then head south, back to the giant door
that you opened earlier near the non-functional fountain. With the gate open, head on through...
+------------------------------+| ~ End of Section Checklist ~ |
| |
| Secrets Found ---- 17/77 |
| Epic Items Found - 00/17 |
| Power Gems Found - 05/20 |
| Essences Found --- 1/5 || Treasures Found -- 04/11 |
| Level Visited ---- 07/34 |
+------------------------------+
Part 04: Down and Dirty - LOG08
-------------------------------
~~~ Keelbreach Bog ~~~
The path will turn to the right, then keep going straight ahead and you'll reach a dead-end, that
7/25/2019 Grimrock Walkthrough
http://slidepdf.com/reader/full/grimrock-walkthrough 22/117
has a TORCH and two ROCKS on the ground, and in the dead-looking tree you can find aLETTER that reads:
Dead Visitor,
Are you getting frustrated yet? Does an undebatable foe stand on your way? Can't make heads or tails of one of my devious riddles?
Why not go explore somewhere else for a while and seek new challenges? See if it clears your mind a bit. Perhaps you will find magical artefacts to aid
in your quest, or encounter a beast that cleaves your head right off?
My bet is on the latter.
The Island Master
I think this guy is starting to get on my nerves! Anyway, head back and take the path going South that you past earlier. You'll past by a closedgate and then find a set of fast-moving windgates. Just beyond this you can find a BLOODDROP
CAP and a talking head that says 'Don't let the rocks fall short of their target.' Seems simple
enough. Go and stand right next to the windgates. The trick here is to time the throwing of your
rock so that it flies past all of them without hitting one of the windgates. Otherwise it'll get
teleported behind you and hit your back-row characters! Hold the rock in your hand and then
click right after the second windgate shows up. All things being equal and you'll hear the sound
of the gate opening up, otherwise you'll get whacked in the behind.
Head through the gate and follow the path, sticking to the left and you'll find a small little path
with some BLACKMOSS on the floor and a stone head that says 'Generations before you havetrodden these paths. Only he and they had the patience to follow them to the end.' At this point I
should probably mention there are a couple of Mosquito Swarms buzzing around the area that
might run up to you. They shouldn't be an issue though, so just whack them when they show up.
After that, head south, and you'll see a lower area of the ground to your right.
+------------------------------------------------------------------------------+| ~SECRET~ |
| If you stand in the spot right next to the lower area and look West you'll |
| see some dead bushes on the other side of the hole. Throw over three rocks |
| and you'll eventually destroy the bushes and hit a pressure plate that turns |
| on a windgate in the hole below. Drop down and head on through to find it. |
| Items: Shaman's Cloak |
| Found: 18/77 |
+------------------------------------------------------------------------------+
Drop down into the lower area, don't worry the fall won't hurt you as it's not going down into a
new area. Down here you can find a BORRA and a VENOM EDGE. Climb up the ladder to the
7/25/2019 Grimrock Walkthrough
http://slidepdf.com/reader/full/grimrock-walkthrough 23/117
south and to your right you'll see a closed gate. Press the button to open it up and head through.
On this new side of the gate, you can head North and you'll run into a very annoying enemy.
The Swamp Toad. They'll steal your items and take ages to kill, the only up-side being that they
do drop a good food item once you're dead.
Now, it's time to go for a little swim. There's a ladder into the water nearby, you can find a
ETHERWEED a little to the South of it if you fancy getting it, but what you need to do is head to
the ladder that's to the North-West. When under the water, you'll notice there's a lower area downthere. DO NOT fall down there or you'll likely drown trying to get back out. Follow the small
path to the ladder on the other side of the river and climb up.
There's another Swamp Toad lurking around here, so kill him quickly. There's a bunch of items
for you to grab here such as the FLACONSKYRE to the north, some LEATHER BOOTS just
South of that, and even further south are 10 PELLETS. You'll find the Pellets next to an area
labeled 'The Hub'. This is the location of the windgate that can take you back to the Forgotten
River. It's not active at the moment though, and needs a Key that we don't have yet. Don't worry,
we'll come back here later. To the west of that you'll find some BLACKMOSS on the floor.Finally, there's a stone face that says 'The serpents can be awakened.'
Time for another puzzle I think. There are twelve Levers in the area near to the Gem that's
locked behind the Gate. The nearby sign say 'Reflexus', which doesn't really help all that much.
The trick is that all the levers need to be pointing Down. However some of the levers will effect
the position of the others around them. Thankfully, it's far simpler then it seems and only the four
level on the ends will effect the two on either side. So what you need to do is make sure that the
levers on the North/South facing sides match the ones on the East/West facing sides. Then you
can toggle the East/West levers with ease. So, here's what to do: North two levers should be leftalone. Of the four in the middle, flip only the two on the Eastern side. Of the two South ones, just
flip the West-most one. With all those levers flipped, you can now flip the East/West facinglevers so that they all point down. With that done, the gate will open and you can grab another
POWER GEM (06/20).
With that Gem now in your possession, head back across the river and climb up the ladder
there. Head North and just before the little area with the Dome on top, there's a
FALCONSKYRE on the left. To the right is another lower area with a ladder leading down. Dropdown and you can find a BLOODDROP CAP. Down another ladder and you can find a LOCK
PICK.
Head back up both ladders and then go north, smashing you way through the vines up ahead.
There's two Swamp Toads in this area for you to have fun dealing with. In the North of this area
you'll see a windgate, and to the side of that some water. Follow the edge of the water around and
you'll see two ROCKS on the ground.
+------------------------------------------------------------------------------+| ~TREASURE~ |
| From right where you picked up the rocks, if you look to the South you'll |
7/25/2019 Grimrock Walkthrough
http://slidepdf.com/reader/full/grimrock-walkthrough 24/117
| see a ledge down below that you can get to. Drop down onto it and you'll see || a sign that say 'Underneath'. Ok then, take a step back from the sign and |
| have a good ol' dig with the Shovel to find a Locked Chest. The chest is a Mimic and will
attacked once it's opened. You can get back by dropping down and going up the two ladders to
get back to the previous area. |
| Items: Torch, Crystal Shard of Recharging || Found: 05/11 |
+------------------------------------------------------------------------------+
If you want to try it, you can drop down into the water at the location you found the two rocks
near the windgate. There's a bunch of stuff you can get, but some is harder to get then others. If
you go north, you can find three ETHERWEEDS scattered around. There's another
ETHERWEED to the south, and in the little path to the South-West you can find a LOCK PICK.
The tricky part is the lower area that's underwater. Dropping down here you can find an
ETHERWEED and a WOODEN BOX containing SHOES, a BROADHEAD ARROW and two
POISON BOMBS. Just be quick when grabbing them, or you'll start drowning. Once you're
done, come back to dry land.
+------------------------------------------------------------------------------+
| ~SECRET~ |
| South west of the windgate is a locked gate with a chest behind it. To unlock the gate, you have
to place an item on that underwater pressure plate that is 2 steps north of the chest. Just drop
something into the water and the gate will be opened. The easy |
| way to find it, assuming you don't use your map to spot it, it to stand in |
| front of the chest and take two steps North. Then, while facing North, drop |
| something into the water and it'll open up for you. || Items: Lightning Bombs x3, Torch, Crossbow Quarrel |
| Found: 19/77 |+------------------------------------------------------------------------------+
Whenever you're ready, take the windgate in the north part of this area. When you arrive at the
new destination, on your left will be 10 PELLETS next to the head, that says 'He and they are
more concerned with who are allowed to enter then who are left out.'
By now you'll have spotted the Gem on the far side of the area. Before you go and pick it up, go
to the area where it's sitting, and then go near to the water you can find an ETHERWEED
bloodwort and blackmoss. When you wander over to pick the Gem up, eight Zarchtons will jump
out of the water to attack you. This will be a tough fight if you're not careful, just take them one
at a time. Once they're all dead you can safely claim the POWER GEM (07/20).
+------------------------------------------------------------------------------+
| ~TREASURE~ |
| In this area, there is a buried chest. Walk 5 steps north of the windgate, 1 step east, 3 steps northand then turn to your east. Dig here to find the chest.|
| Items: Crystal Shard of Recharging, Horned Fruit, Thraelm Tribal Buckler |
7/25/2019 Grimrock Walkthrough
http://slidepdf.com/reader/full/grimrock-walkthrough 25/117
| Found: 06/11 |+------------------------------------------------------------------------------+
Now that we've got the Gem, head back through the windgate. Now, head south a far as you can
go and take a left through the open gate. Once across turn right when you can and on the floor
ahead of you you'll see a BLOODDROP CAP. Smash the nearby vines and follow the path to getto an area you've already been to. Now head South, as far South as you can. You'll pass by an
Elemental Shrine on your left, but keep going, we'll get to that later. You should run into a small
alcove on the left with a FALCONSKYRE in it. To the right of this is a path leading further South. Behind the dead bushes here is a head that says 'I am the right eye. I saw where the meteor
fell.'
How mysterious!
Back a few steps you should see a ladder going down. Drop down, and you can find a TORCH,
an ANTIVENOM, a ROUND SHIELD and a BLOODDROP CAP. Climb up the ladder on the
opposite side of the pit from where you entered. Head down the stairs...
~~~ Herder Den ~~~
As the name implies, this area is full of Herders of all three kinds, keep an eye out for them.
Head forward, past the first door is locked for now, but the other door isn't. Open it and head into
the area beyond. In this open area you can find two FALCONSKYRES and a PICKAXE. The
Chest holds a MINE KEY, a BATTLE AXE and a MAP. The map shows you the location of a
Treasure that you have already gotten, so it's pretty useless now.
+------------------------------------------------------------------------------+
| ~SECRET~ || You'll see a closed door in this area. Two steps to the right and you'll see |
| a secret switch to open it up. Easy. || Items: Antivenom, Iron Basinet |
| Found: 20/77 |
+------------------------------------------------------------------------------+
&&
The Key we got in the chest will be useful as it let's us open the door we just past. Head back
and unlock the door. To the South you can find a Crystal of Life and a TIMEPIECE. Now, you'lllikely have noticed the nearby collection of pressure plates. A sign nearby says 'Runemaster's
Trial'. The key here is to think about Magic and how you cast it. Right now there's a fireball spell
firing off in the back area. To cast a Fireball spell we'd have to draw an L-like shape along the
top of the runes, right? So let's try that here. Assuming that the pressure plates along the top are
1, 2 and 3 from left to right, and then 4, 5, 6 on the next and then 7, 8, 9 on the bottom one. Place
an item on 1, 2, 3 and 6 for the fireball. Next is Ice Spikes, which is 7, 8 and 9. Finally is
Lightning Bolt, which is 2, 3, 4 and 5.
Finally the gate will open up, allowing you to get a MUDWORT, some BREAD and mostimportantly the SERPENT STAFF. While it might not seem like much, it will very much come
in handy later on, so be sure to keep it on you until I say otherwise.
7/25/2019 Grimrock Walkthrough
http://slidepdf.com/reader/full/grimrock-walkthrough 26/117
Now, you might want to use the Crystal of Life again, as you’re about to fight a Boss. You'llalso need the usual array of Healing and Energy Potions, but also several Antivenoms in supply,
as there's a good chance of getting Poisoned up ahead. Once you're read, head North and follow
the path into the Bosses area.
+------------------------------------------------------------------------------+| ~ BOSS BATTLE! ~ |
| Vs Spore Mushroom (x6) |
| || I'd like to tell you to take your time here, but doing so can be a bad idea. |
| See, there's Six of those Spore Mushrooms in this area, and they just love |
| to spawn random types of Herders to cause you trouble, and they will do this |
| until you kill them. While they can't attack directly themselves, their |
| spawning ability being their only real attack, they have just enough health |
| to be annoying, and as there's six of them the Herders will keep coming |
| until they're all gone. So, the best trick is to move careful and try to |
| kill the Spore Mushrooms as quickly as possible, but be sure to take care of || each Herder that you run into as well, or you'll quickly get overwhelmed. || Everything here is of course weak against Fire, as they're all plants. |
+------------------------------------------------------------------------------+
The area here is full of items for you to collect; three BLOODDROP CAPS, one MUDWORT,
one BLACKMOSS, one LOCK PICK, 30 PELLETS, a SKULL, a SACK containing 3 FIRE
BOMBS, one CRYSTAL SHARD OF HEALING and a HUB KEY, and a second SACK
containing, a MUDWORT, a ETHERWEED and a RECIPE for the Transmuter's Potion. The
final item, on top of all that is a POWER GEM (08/20). There's also a sign here that says:
~ Legend of Kilhagan ~
With his ship lost and his crew perished, Kilhagan had ceased to be a pilot.
Alone, hopeless and utterly lost he almost ended his life at this spot. But
then came the rage and with it n new purpose for his existence: revenge.
With all this done, it's time to leave this dark, depressing place. Swing by the Crystal of Life on
your way out, I'm willing to bet that you'll need it, and then head back up the stairs to the surface.
~~~ Keelbreach Bog ~~~
We now have four Gems, we can head to the Elemental Shrine and get another Essence. There's
one very near, so drop down the ladder and then climb up the one on the other side. Go left and
then right to get to the door, which you should promptly open. There's another three faces here to
listen to. The one on the Right says the same as the last one, but the one on the left says:
This is the elemental shrine of earth.

7/25/2019 Grimrock Walkthrough
http://slidepdf.com/reader/full/grimrock-walkthrough 27/117
Earth if the rune of vitality, mountains and plants. Southwest is whence the forces of earth and strongest.
And the one at the back says:
All matter is made from four basic elements: fire, earth, air and water. Fire opposes water like air opposes earth.
But without a fifth element there would be non, as the four elements would
cancel each other out. The fifth element is hidden somewhere on this island. Seek it and you may
gain illumination.
Oh, illumination sounds fun, doesn't it?
There's 10 PELLETS hidden in this shrine. Once you've got them, place the four Gems on the
table and you get the ESSENCE OF EARTH. Now we can return to the Forgotten River.
However, we'll take a slightly less-then-direct route I think, if only for the sake of completion.
Remember that we picked up the Hub Key whilst underground, so now we can open thewindgate to the hub. From the Shrine, head West until you reach the water and you should benear the ladder down. Drop into the water and walk over to the ladder on the other side and climb
on up. Now, head South and at the Southern part of this area and use the Hub Key on the Hub
Lock, and then take the windgate.
~~~ River Tunnels ~~~
You'll find yourself back in The Hub room from earlier. Head out and back up the stairs.
~~~ Forgotten River ~~~
Head South and place the Essence of Earth in it's rightful place. Once you reach the castle
courtyard area, place the Essence of Earth opposite the Essence of Fire. Again, you'll know if it's
right as it'll float. Take a few moments to sort out your inventory and leave anything you don't
want. It's time to head deeper into the Island...
+------------------------------+| ~ End of Section Checklist ~ |
| |
| Secrets Found ---- 20/77 |
| Epic Items Found - 00/17 |
| Power Gems Found - 08/20 |
| Essences Found --- 2/5 |
| Treasures Found -- 06/11 |
| Level Visited ---- 09/34 |
+------------------------------+&&
Part 05: Further Up, Further In - LOG09
7/25/2019 Grimrock Walkthrough
http://slidepdf.com/reader/full/grimrock-walkthrough 28/117
---------------------------------------
~~~ Forgotten River ~~~
With two Essences under our belt, it's time to head deeper into the island. Our next stop is the
area to the North, but to get there we've got to solve a little puzzle first. Head North from thecastle courtyard and the over the bridges to the other side of the river. In the little alcove in front
of you is a LIZARD ON A STICK. Head North from here and you'll see an area with a lot of
moving Spikes, the nearby sign labeling it as the 'Shrine of Pain'. No kidding, right? If you watch the spikes carefully, you'll see that they move in a rough S-shape, going back and
forth constantly. You'll have to move quick, but what you need to do is wait on the right-hand
side, and wait for the spikes to come and go from the two squares in front of you. Step forward,
wait again for the spikes to pass, and then go left. Once the spikes have hit the area with the
lever, step there and flip it. Wait for the spikes to pass and then quickly head through the now
open gate.
+------------------------------------------------------------------------------+| ~SECRET~ || There's a very well hidden button on the wall at the end of the path through |
| the spikes. The south wall in the area on the West side. It has vines all |
| over it, and the button is just to the right of them, and about two-thirds |
| of the way down the wall. Press it quickly before the spikes get you and |
| once the wall is open you can access the Locked Chest. |
| Items: Shield Potion, Bearclaw Gauntlets |
| Found: 21/77 |
+------------------------------------------------------------------------------+
Once you're through the spikes you'll find a LETTER on a pedestal:
Oh, I'm so sorry! I'm hopeful that my little trap only broke a few bones and
you are still able to proceed on your heroic journey.
The Island Master
I've said it before and I'll say it again; I hate this guy! Anyway, follow the path and you'll likely get attacked by a Viper Root. Hopefully you'll be
stronger now and able to deal with it without too much fuss, so take care of it in your own time.
There's a BLOODDROP CAP on the floor here, and standing on the pressure plate will open the
wall, allowing you to bypass the spikes altogether in the future. Yay for shortcuts!
With that, you can head through into a new area...
~~~ Sleet Island ~~~
You'll be able to see another Shrine right in front of you, but you won't be able to reach it for some time yet, so don't worry about it. There's a ROCK on the floor right in front of you, and just
to you left, in the dead tree is an island MAP that shows the immediate area, and a LETTER that
7/25/2019 Grimrock Walkthrough
http://slidepdf.com/reader/full/grimrock-walkthrough 29/117
reads:
Dear Visitor,
Please find the attached Map of the Island useful. I'd like to point out a
few key locations, to get you accustomed to your new home, although I'm
afraid your stay on the island will be brief...my pets are awfully hungry as always.
If you glance north, you should see the Great Pyramid of Umas above the
treetops, and in west you can find the ruins of Desarune, a huge dungeon I've repurposed just for you. Beyond Desarune there are even older places
but you don't need to concern yourself with them because the challenges
ahead will be way over your head.
Finally, in the east you can find the burial ground where some very
interesting character are buried. It's up to you to decide which one of
these location will be your grave.
The Island Master
He really doesn't have a high opinion of us, does he? Anyway, head West over the bridge.
+------------------------------------------------------------------------------+
| ~SECRET~ |
| On this little island, you'll see a ladder going into the water. Drop down |
| here and you'll see a pressure plate under the water and a sign that says |
| 'Hold your Breath'. What this means is that you have to stand still on the |
| pressure plate for 30 seconds. At your current level you may have trouble |
| doing this without drowning, so you can always come back later. || Items: Skull, Antidote |
| Found: 22/77 |+------------------------------------------------------------------------------+
As you might have guessed, there are some items dotted about in the water. There's a
ETHERWEED to the West of the nearby ladder if you wish to drop down and get it, but be aware
of the enemies in the water. Over the small little bridge and to the south and you'll see the
ARQUEBUS resting on a small pedestal. However when you pick it up, you'll get teleported to a
small area down in the flooded Dungeon with several Mummies around you. Kill one then stepinto where it was to be able to take them on one at the time. You can then use the windgate to get
you back to where you were.
Continue East and you'll see a sign saying 'Mind and Matter' next to a lever. Flip it and in the
new are you can find a BLOODDROP CAP in the dead bushes and a LEATHER CAP. Flip the
lever near the Leather Cap and you'll turn on the floor, allowing the large black rocks to be
pushed around. Push the nearby one East twice to get into the next area. Head to the right, past
the button, and follow the path around this place. After you've turned left for the second time,
there'll be an obvious button on the wall. Push it to bring the wall ahead down. Just ahead turn
left and push both stones to the West once each. You can then press the button you walked pastearlier, being sure to move out of the way of the energy ball that will head your way and it will
open the gate. Before we finish off the puzzle, there's also a LOCK PICK on the floor by the
7/25/2019 Grimrock Walkthrough
http://slidepdf.com/reader/full/grimrock-walkthrough 30/117
wall-face, and a WOODEN BOX containing a SALTED SAUSAGE, a SMOKED SEA BASS, aHORNED FRUIT, some BREAD and a RECIPE for the Rage Potion (1 Blooddrop Cap, 1
Falconskyre).
Now that we've got all the items here, we can finish off the puzzle. Push the first stone East
until it stops, and then go around to the south through the now open gate and push it North until
it's on the orange square. For the second one, push the stone West through the bars first, then goaround and push it south, and then East three times. Go around and push it North, and then East
one last time. With that the gate will open! In this are there are four Summon Stones wandering
around, so be careful and take then out one at a time. Near the water, you'll see a ladder, and if you fancy dropping into the water you can find an ETHERWEED and a WOODEN BOX
CONTAINING EMBALMER'S PANTS to the West of the ladder.
+------------------------------------------------------------------------------+
| ~SECRET~ |
| Standing at the square at the top of the ladder, looking South you can see a |
| pressure plate. Throw a rock onto it and you'll get teleported to a new |
| area. There's a stone face here that says 'Here, even the winds are guided |
| by him and them. To get back, there's a button on the wall where the Scroll || is. Quickly get to the nearest windgate. || Items: Skull, Pellets x10, Lock Pick, Scroll of Shock Shield |
| Found: 23/77 |
+------------------------------------------------------------------------------+
+------------------------------------------------------------------------------+
| ~SECRET~ |
| To get to this secret you have to use the previous one. When you throw the |
| get and get teleported to the new area, three windgates will appear in front |
| of you. The right one leads back next to the trees, and the middle one takes || you right back to where you were. The left one however leads to a small |
| island in the middle of the water. || Items: Stormseed Orb |
| Found: 24/77 |
+------------------------------------------------------------------------------+
From the top of the ladder, you can take a step North, and then go West and then South into a
little alcove for a SACK containing a PITROOT BREAD and a RAGEPOTION. North of here,
you can find a Crystal of Life, and next to that RECIPE FOR the Antivenom (1 Blooddrop Cap, 1Mudwort) and the Antidote (1 Etherweed, 1Falconskyre).
West of the Crystal of Life there's a stone face that simply says '...'.
That's unusual. Also, you'll see a destroyed bridge nearby. In the water under here you can find an
ETHERWEED.
+------------------------------------------------------------------------------+
| ~SECRET~ |
| Time to go digging. Standing in front of the silent stone face, turn to face |
| East and take two steps forward. Dig here. This item will come in handy |
| later. Much later. || Items: Meteorite |
| Found: 25/77 |
7/25/2019 Grimrock Walkthrough
http://slidepdf.com/reader/full/grimrock-walkthrough 31/117
+------------------------------------------------------------------------------+ Further West of here and you'll have found the entrance to the Pyramid. While we can enter the
Pyramid now, it's best to save it for later. We've got other area to explore first. You can however
read a LETTER placed on the shelf by the door:
Dear, Visitor, Unfortunately the gate to the great pyramid was locked a long time ago with a
strange kind of key. I'm afraid the key might be unrecoverable by now.
The Island Master
The key to open this door is actually the Serpent Staff that we found earlier. Place it on the shelf
so that we know where it is for later on. On the West side of the island you'll find a tiny little
button on the wall that will turn on an energy bridge, allowing you to cross to the other island
where you can find a BLOODDROP CAP and a CRYSTAL FLOWER. The stone face here say
'The gate to the fifth shrine is hidden from sight.'
+------------------------------------------------------------------------------+
| ~SECRET~ || One of the stone walls here has vines growing over it, and a button hidden || next to them. Pressing it deactivates a forcefield in an area in the water. |
| Items: Mirror Cuisse, Pellets x20, Runestone Necklace |
| Found: 26/77 |
+------------------------------------------------------------------------------+
To the south-east of this little bit of land is a small island. You should seethe ladder up to it
easily enough, so head over and up. There you can find a BLOODDROP CAP, and a speaking
face that says 'The silent one has a friend who is more willing to speak. Head towards the sunrise,
beyond the gate, to find him.' To the South-West of this island is another one, and you should also be able to see the ladder up
to it from here. Also, while you're in the water, there are three ETHERWEEDS around these twoislands. On the island you can find a TRIBAL SHIELD and a NOTE that reads 'A treasure chest
long lost, guarded by the four fallen spirits in the bog.' We've already got this one, so it's another
useless note.
If you look to the south, in the distance you can see a ladder. That's where you need to go next.
If you're lucky you can get there without running into any enemies. In front of you when you're
back on dry land is a ROCK, and to the West is a sign reading 'I am the guardian of the bridge,wake me up.' Throw a rock at the fact to activate the bridge.
In this are you can find a ETHERWEED and a HORNED FRUIT.
+------------------------------------------------------------------------------+
| ~TREASURE~ |
| Next to the locked gate there's a tree, then South of that a space, and then |
| South of that a rock. Dig in the space to find a Locked Chest. |
| Items: Zarchton Harpoon, Shield Potion |
| Found: 07/11 |
+------------------------------------------------------------------------------+ Whenever you're ready, head through the open passageway into the next area...
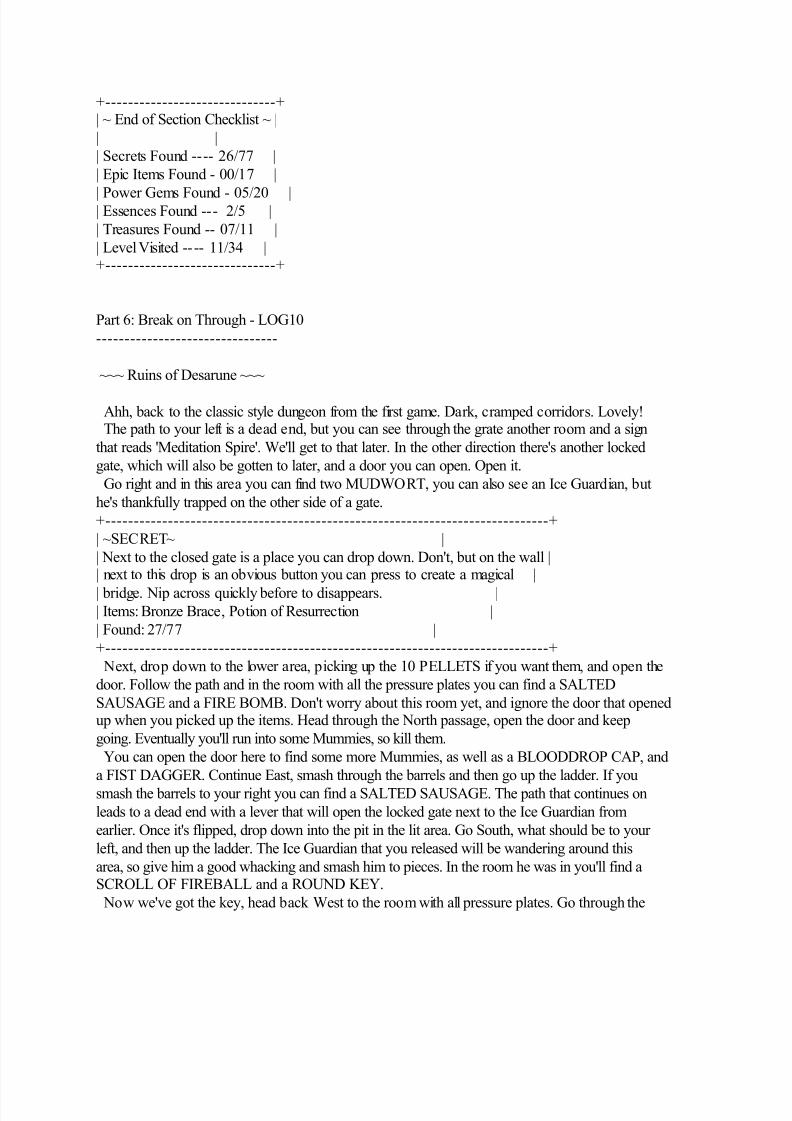
7/25/2019 Grimrock Walkthrough
http://slidepdf.com/reader/full/grimrock-walkthrough 32/117
+------------------------------+| ~ End of Section Checklist ~ |
| |
| Secrets Found ---- 26/77 |
| Epic Items Found - 00/17 |
| Power Gems Found - 05/20 || Essences Found --- 2/5 |
| Treasures Found -- 07/11 |
| Level Visited ---- 11/34 |+------------------------------+
Part 6: Break on Through - LOG10
--------------------------------
~~~ Ruins of Desarune ~~~
Ahh, back to the classic style dungeon from the first game. Dark, cramped corridors. Lovely! The path to your left is a dead end, but you can see through the grate another room and a sign
that reads 'Meditation Spire'. We'll get to that later. In the other direction there's another locked
gate, which will also be gotten to later, and a door you can open. Open it.
Go right and in this area you can find two MUDWORT, you can also see an Ice Guardian, but
he's thankfully trapped on the other side of a gate.
+------------------------------------------------------------------------------+
| ~SECRET~ |
| Next to the closed gate is a place you can drop down. Don't, but on the wall || next to this drop is an obvious button you can press to create a magical |
| bridge. Nip across quickly before to disappears. || Items: Bronze Brace, Potion of Resurrection |
| Found: 27/77 |
+------------------------------------------------------------------------------+
Next, drop down to the lower area, picking up the 10 PELLETS if you want them, and open the
door. Follow the path and in the room with all the pressure plates you can find a SALTED
SAUSAGE and a FIRE BOMB. Don't worry about this room yet, and ignore the door that openedup when you picked up the items. Head through the North passage, open the door and keep
going. Eventually you'll run into some Mummies, so kill them.
You can open the door here to find some more Mummies, as well as a BLOODDROP CAP, and
a FIST DAGGER. Continue East, smash through the barrels and then go up the ladder. If you
smash the barrels to your right you can find a SALTED SAUSAGE. The path that continues on
leads to a dead end with a lever that will open the locked gate next to the Ice Guardian from
earlier. Once it's flipped, drop down into the pit in the lit area. Go South, what should be to your
left, and then up the ladder. The Ice Guardian that you released will be wandering around this
area, so give him a good whacking and smash him to pieces. In the room he was in you'll find aSCROLL OF FIREBALL and a ROUND KEY.
Now we've got the key, head back West to the room with all pressure plates. Go through the

7/25/2019 Grimrock Walkthrough
http://slidepdf.com/reader/full/grimrock-walkthrough 33/117
now open gate to the south and climb up the ladder. Now we have to drop some Rocks onto the pressure plate in front of you to turn on the magical bridge. Just move forward one step at a time
around the area. On the other side of the room, keep going to reach the Lock on the fall wall and
use the Round Key to open the gate and go on through. For the record, if you fall off, or drop
something that you decide you want, you'll have to pick up all the items on the plates to open the
Southern gate to get back up. Follow the path and you can find a LIZARD ON A STICK in the alcove to your right. Take the
right when you can and flip the lever to open the door. Oh joy, it's the Island Master standing
ominously at the far side of the room. The door will close before you can do anything though.Don't worry, he'll get what’s coming to him in time. Ignore this room for now, you just needed to
open the door, and backtrack the other door. In this room you'll find a Crystal of life and the
SCROLL OF LIGHT. However, what you really need here is to drop down that hole that's next to
the Crystal.
(For the record, I'm not going to keep switching level names for a moment as this is gonna
require a lot of up and downing.)
You can find a FALCONSKYRE down here, and there's a hidden switch on the middle of the
Southern Wall that opens the wall into a new area. There's a BLOODDROP CAP in front of you,and two BROADHEAD ARROWS in the middle-North area. You'll have no doubt noticed thevery large Spider waiting behind the bars. Don't worry, this one doesn't get loose to attack you. In
fact it's part of the puzzle you need to solve. Step on the nearby pressure plate and it'll warp back
to the area above. Before we go and check that out, to the West of the pressure plate, on the
corner, you can spot an obvious button on the wall. Press it to open a wall to the West to find a
SCROLL that simply says 'Follow the light.' Now we can head back up.
Wander up either set of stairs and into the central room. Don't step on the pressure plate just yet.
You can see the Spider that you warped up wandering around that little area. Now, when you step
on the pressure plate the three trapdoors there will open, dropping the Spider down a level. Whatyou need to do is to get it in the middle trapdoor, so that it drops down onto the pressure plate in
the room below. Give it a go and then head downstairs to check. If you got it right, you'll see theSpider in the middle area, and also the sealed off section at the back will have lights in the area.
If the lights are on, DO NOT STEP on the pressure plate down here as it will just warp the Spider
back upstairs. If you got it wrong, then you can step on the pressure plate and try again.
Anyway, now that we've got the light that we have to follow, we can clearly see which pressure
plates need Rocks dropped on them. From left to right it's number 1, 2 and 4. Now that we know
this, head back upstairs and go to the grates at the far side of the room. Drop rocks down therelative holes, being numbers 1, 2 and 4 from left-to-right. Once you've done that wait about
5seconds and the door will open.
+------------------------------------------------------------------------------+
| ~SECRET~ |
| Before continuing on, head back downstairs to the area here, and on the West |
| side you'll see that a wall has opened up into the area with the pressure |
| plates. |
| Items: Full Helmet |
| Found: 28/77 |+------------------------------------------------------------------------------+
+------------------------------------------------------------------------------+
7/25/2019 Grimrock Walkthrough
http://slidepdf.com/reader/full/grimrock-walkthrough 34/117
| ~SECRET~ || Now that the door is open, in front of you will be a Torch at the end of the |
| corridor. Walk right up to it and, whilst facing it, take two steps |
| backwards, and then two steps to the right. You' should see a hidden button |
| on the wall. Press it to open a wall by the Torch. Getting the secret also |
| opens the gate here, creating a handy shortcut through the level. || Items: Leg Plate |
| Found: 29/77 |
+------------------------------------------------------------------------------+ With the door open, head down the right path and open the door. In this large room, you can
find two FIRE BOMBS and some BREAD in the pit around this room.
+------------------------------------------------------------------------------+
| ~SECRET~ |
| This room was labeled as 'Mediation Spire' earlier, so as you might have |
| guessed you should climb up to the top of the spire and just stand there for |
| about 20 seconds. Just a heads up that the area you get warped to has three |
| Ice Guardians wandering around in it, and they can cause you some problems || if you're not careful. If you get in real trouble, drop down into the bit || around the area in the North-East part of the area. There's an alcove here |
| with a ladder that the Ice Guardians tend not to follow you up. Or even if |
| they do, it means you can deal with them one at a time. Once all three of |
| them are dead you can loot the area. Just wait at the top again to warp |
| back. |
| Items: Scroll of Dispel, Crystal Shard of Healing, Fire Bomb x3, Cheese, |
| Skull, Lock Pick, Plate Cuirass |
| Found: 30/77 |+------------------------------------------------------------------------------+
Head South and then go left and then left again and at the end of this area you’ll find a HEAVYSHIELD and three SHURIKENS. Turn around, head back and take another left. You'll see two
closed gates with some Crabs behind them and a level. Flipping it will open the gates, so only do
so when you're ready and takeout the two Crabs. In the area they were guarding you can find 10
PELLETS and three BROADHEAD ARROWS.
+------------------------------------------------------------------------------+
| ~SECRET~ || There a hidden button in this little maze of paths/ From the little bridge |
| that leads into this area at the North, Go forward, then left and then |
| forward and you'll see it in front of you. The wall that it opens is only |
| open for a short amount of time to the West. Quickly head around, either |
| north or south and you should make it in time. Simply press the button on |
| the wall to re-open the wall to get out. |
| Items: Serpent Bracer, Tribal Spear |
| Found: 31/77 |
+------------------------------------------------------------------------------+ To the East in a little open area where you'll run into a Shrakk Torr. Kill it and in the pit you can
find a SMOCKED SEA BASS. You might like to know that another Crab just got released in the
7/25/2019 Grimrock Walkthrough
http://slidepdf.com/reader/full/grimrock-walkthrough 35/117
area you just came out of if you want to kill it. Anyway, continue on and you'll find yourself onthe other side of the crystal of Life. There's a SCROLL OF DARKNESS here, and if you wish to
use a Gold Key you can get an Axe. Flip the lever to close the trapdoor to allow easy access in
the future.
The path straight ahead leads to a dead-end with a BLOODDROP CAP. The other path leads to
an open room with two locked doors, two openable doors and a collapsed corridor labeled'Hamlet of Stormbreach.' Doesn't look like we’re getting through this way though. We can now
go either North or South to get two keys. Let's go North first.
Open the door and wander into the area here. You'll find a FALCONSKYRE on the floor andnext to that is a hidden button on the wall you should push. The wall to your left will open, so go
through and head up the stairs.
+------------------------------------------------------------------------------+
| ~SECRET~ |
| Once on the raised area, follow the path around to the ladder going up and |
| climb it. You'll see a Locked Chest, but to reach it you have to be a little |
| tricky. Facing East you'll see nothing but darkness in the distance. Throw |
| over a Rock and it'll hit an otherwise hidden pressure plate and allow you || across. || Items: Zarchton Harpoon, Rage potion |
| Found: 32/77 |
+------------------------------------------------------------------------------+
Follow the raised path and go down the ladder in front of you and keep moving forward. Take a
right to find some BREAD and two FROST BOMBS in the dead-end. The other path leads you
to a room with an obvious lever. You may also notice several Skeleton Troopers and Skeleton
Archers on either side of the room behind the bars. As you might imagine flipping the level will
have them appear and attack. Three behind you and three in front of you. Deal with them whenyou’re ready.
You can then use the activated windgate that appeared behind you to get into the area wherethey were and find a BLOODDROP CAP. With the gate open you can also claim the IRON
KEY. We're not Quite done in this area however, as the holes near where the Skeletons were can
be descended for some extra goodies.
~~~ Archives ~~~
Yes, giving it it's own section this time.
When you drop down you'll find yourself in water, so find a nearby ladder. On this side will be
two Green Slimes for you to deal with, so take care with them. On the other side of the water
there are also some Skeleton Archers. You can either deal with them at a distance, or wait until
we go there. On the platform with the slimes you can find a BLOODDROP CAP and two
CROSSBOW QUARRELS, and in the water there's an ETHERWEED.
+------------------------------------------------------------------------------+
| ~SECRET~ |
| Drop into the water and in the South part you'll find a path. Follow it and || about half-way you can turn right and climb up a ladder. Press the button |
| you can see here and drop back into the water. Head back the way you've come |
7/25/2019 Grimrock Walkthrough
http://slidepdf.com/reader/full/grimrock-walkthrough 36/117
| and a new path will have opened up on your left. || Items: Broadhead Arrow x3, Frost Bomb x2, Pearl Shield. |
| Found: 33/77 |
+------------------------------------------------------------------------------+
Drop into the water and take the path to the south all the way to the end and you’ll climb up a
ladder to the area with the Skeleton Archers, or where they were if you've already killed them.You can find the ROUGE PANTS here and then take the windgate back up.
~~~ Ruins of Desarune ~~~
Now that you've got the Iron Key, you can flip the lever again to turn the windgates off. We can
now head back to that central room with the two locked doors, The route is simple so I hope I
don't have to guide you, and then you can open one of the doors here. Open the North one to get
two THROWING KNIVES, and you can also flip the lever.
Head to the South get, open it up and head through. Follow the corridor and when you can drop
down on your right, do so. At your feet here will be a SMOKED SEA BASS. Head forward and
left and open the door here. There's a Green Slime inhere for you to kill and a SPEED POTIONand JEWEL PENDANT for you to pick up. Head back and follow the path and climb the ladder.To your left is a button on the wall, so push it to open the door and release a Green Slime and an
Ice Guardian.
The door that the green slime comes out of has 10 PELLETS at the end of the path. The other
door, with the Ice Guardian, has a path that you can follow to go forward. Eventually you'll find a
locked door. Beyond that is a Green Slime and a MUDWORT on the floor. Climb the ladder and
an Ice Guardian will attack you from behind, so quickly move out of the way and then kill him.
+------------------------------------------------------------------------------+
| ~SECRET~ || In the place you found the Mudwort, you can press a button on the wall and |
| turn on the magical bridge above you. || Items: Lock Picks, Tome of Earth |
| Found: 34/77 |
+------------------------------------------------------------------------------+
You can flip the lever up here to open the gate down below. There's a MUDWORT to your
right, then head down to the end of the area. In the pit here you can find some CHEESE. Next to
the closed gate is a switch that you can press. Doing so will briefly open the gate on the other side of the pit, so quickly move around the throw a Rock onto the pressure plate. Doing so will
open the nearby gate, but it will also open two walls behind you, releasing a total of four green
Slimes for you to deal with. If you're quick you can back out of the area and deal with them one
at a time, or you can drop into the pit to take a break.
Once they're all dead, go into the area beyond the gate you opened. Here you can find a
MUDWORT and an IRON KEY. You can now head back, however in the previous are two
Green Slimes and an Ice Guardian will have been released. But there's also some new items in
the areas where they came from. The first right has an alcove with two HEALING POTIONS,
and the far area has a BLOODDROP CAP. You can now open the South lock here, allowing youto get a BEAR SKULL HELMET AND to flip the lever in there.
Not only will this open that locked gate, it will also bring up three walls, releasing a collection
7/25/2019 Grimrock Walkthrough
http://slidepdf.com/reader/full/grimrock-walkthrough 37/117
of Skeleton Troopers and some Skeleton Archers into the area for you to deal with. The Southernof these open area contains a POWER GEM(09/20). Yay! You can now head through the newly
opened gate and down the stairs...
~~~ Archive ~~~
Follow the path and you'll be in a small room. There's some BREAD in the corner, and placing
something on the pressure plate will open all three gates here. To the West is the 'Hamlet of
Stormbreach Sewer access', to the North a 'Windgate to Surface' and to the East is 'The Archives'. For now, take the Windgate to the North. Flip the lever in front of you to open the gate,
allowing a shortcut for later use if you need it. Then go back through the Windgate.
Time to head into 'The Archives' first. Follow the path and take a right when you can. You'll be
in a room full of pressure plates. The two doors at the end of the area are labeled ' The Storage'
and 'The Archives' followed by a string of seemingly random text. But it's not random, it's a code.
Here's a Translation for you:
UHU – Forward E – Once PALA – Turn Left LAM – Backwards NA – Twice FAAM – Turn Right AR – Left KO – Thrice
TE – Right
So, to open up 'The Archives' simply stand on the place without a pressure plate and follow the
instructions: Forward Twice, Left Once, Right Twice, Backwards Once, Left Twice. The gate
will then open and you can access the area. There's a CRYSTAL FLOWER on the floor for you
to snag, but most importantly are the four LETTERS in this room:
Dear Visitor,
Made is this far already? Splendid! Sealed in this vault are the fragments of a tale that tells of a pilgrim
from Xafi. My father passes the story to me and now it is my time to pass it
forwards.
The Island Master
~ He began traveling towards the frozen tundras ~ ~ The sun was setting ~
~ Then he looked at the path leading to the burning hot desert he called
home ~
~ Finally, the star of the north came to lead the way ~
~ And he continued walking along the path ~
These are all clues about one of the most obtuse puzzles in the game, but we’ll get to that later.On a slight side-note, if you're not planning to keep these clues (and can I just say if that's the
case thanks for putting so much faith in my guiding abilities) keep at least one of these Letters for
7/25/2019 Grimrock Walkthrough
http://slidepdf.com/reader/full/grimrock-walkthrough 38/117
an upcoming puzzle.+------------------------------------------------------------------------------+
| ~SECRET~ |
| To open the other door there's a more complex series of steps you need to |
| take: Right, Forward Twice, Turn Left, Forward Twice, Turn Left Twice, Left |
| Once, Turn Right Thrice, Backwards Thrice. The gate will then open. || Items: Potion of Strength, Lock Pick x2, Dragonbreath Revolver |
| Found: 35/77 |
+------------------------------------------------------------------------------+ Head back and take the path you haven't been down yet, go past the stairs and to the end of the
corridor. There you'll see an obvious trapdoor, a TOME OF ENERGY on a shelf and a sign that
says 'I dare you'. Obviously you're gonna want the book. Now, you can pull an Indiana Jones and
place something on the shelf before taking the book, but if you want to explore the area down
below, then you’re gonna need to get yourself hurt I'm afraid.
If you do drop down you'll find several Ratings around you. There's six in total, although some
might be down in the pit area. Down here there's a CRYSTAL SHARD OF HEALING, and a
SACK containing two CHEESE and 10 PELLETS. The Crystal alone makes it worth the trip.There's a lever in the pit that opens the gate, allowing access to the windgate back to where youwere before. Now, you can head back and go down the stairs...
~~~ Lexiconary ~~~
Take the path to the left and you can find a bunch of items; BLACKMOSS, 10PELLETS, three
SHURIKENS and a WOODEN BOX with BREAD, CHEESE, PITROOT BREAD, and a
LIZARD ON A STICK. Head back and flip the lever to open the door. This room will act as a
hub for this level. As you walk into the room, you'll likely be attacked by two Ice Guardians fromyour right. Once they're dead go into the area they were hiding in and you can find a ROCK. This
will actually come in handy later, so be sure to keep it. Aside from the two doors that arecurrently closed, there's an area to the North with four shelves labeled 'I'm alive','I'm the
strongest', 'I can't fly' and 'I can walk'. There's also a heavily locked door labeled 'The Lexiconary'
We can now either go North or South. Let's go South, so open the Southern door and go
through. In the small room, open the door here, and you'll find another two. Open the one on your
left, heading North, and follow the path. The sign says 'The Crossing'. Take the path on the right
and follow it to the end. Place a Rock onto the pressure plate though the bars. Head back and takethe other path, following the stone path to another pressure plate behind bars. Place another Rock
on this and a light will turn on the other side of the room.
Where this light is you can see another pressure plate that you need to throw a rock onto. Drop
down and have a look at the black stones. Two of them are floating, but one of them isn't active
at the moment. We'll have to work with the other two. Push both stones down to the Southern
part of the area, so that they go East from the little bridge. This will allow you to stand on them
and throw a Rock onto the far pressure plate. Doing so will activate the final black stone,
allowing you to move all three into a single bridge to get across the gap.
Near the East-most pressure plate you can find GREAT AXE. You can also pick up the Rocksyou dropped down before if you want to keep them. Finally on the shelf is the SKELETON
FIGURINE. Picking it up will release three Shrakk Torr into the area for you to fight. On the Eat
7/25/2019 Grimrock Walkthrough
http://slidepdf.com/reader/full/grimrock-walkthrough 39/117
side of the room, one of the open walls will have a BLACKMOSS.Head back to the previous area and open the other closed door. Drop down the ladder here and
follow the path.
+------------------------------------------------------------------------------+
| ~SECRET~ |
| At the end of this little corridor is a hidden button on the Southern wall. || It opens the wall behind you, and you'll need to smash the barrels to get |
| your items. |
| Items: Bread, Cheese x2, Torch || Found: 36/77 |
+------------------------------------------------------------------------------+
In the large room here you'll see three Wyverns, and when you drop down into the pit in this
room there will be three Green Slimes wandering around. Once they're all dead, from in the pit
you can see an open gate and then climb up two ladders on the other side. Once at the top, if you
drop off the first left-most place to fall down and follow the raised area you can find three
SHURIKENS.
From the raised area at the top of the room you can read the sign that says 'The Path of theEagle'. The trick here is to look down. The path you have to take is the path where the groundisn't raised up, and a magical bridge will appear before you. Just in case you can't get it, from one
square to the left of the wooden bridge: forward twice, right thrice, forward thrice, left twice,
backwards once, left twice, forward thrice. Once you're on the other side you can pick up the
SNAIL FIGURINE.
Two down, two to go.
With the previously opened gate now closed, the only way back with via 'The Disguised Path'.
Before that though, if you drop down onto the platform below you can find a SMOKED SEA
BASS. You can then get back up in a similar manner to before. Now, to get across you againhave to look down, but you're not looking for the pit in the floor. Instead you're looking for the
floor that looks different; it looks like bricks rather then cobblestone. The exact route is, fromone step to the left of the sign: forward twice, left once, forward twice, right twice, backwards
once, right twice, forward twice, left once, forward twice. Once you're back on solid ground, you
can drop down to the ledge below and leave the area.
Head back, up the ladder and through to open door straight ahead. Turn left and you'll find two
Ice Guardians in this area. If you go forward after turning the corner and into the little square
room here you can find a SHURIKEN on the floor. If you leave this area and go South down the path without the barrels, at the end on the left you'll see some more barrels. Smash then to find
two more SHURIKENS on the floor. Then head West, where you might run into a Crab that
wanders around the area.
+------------------------------------------------------------------------------+
| ~SECRET~ |
| While heading east you'll pass a closed wooden door. Open it up and the room |
| beyond will be seemingly empty. There is however a hidden switch next to the |
| Torch on the wall. Press it to open up the wall opposite. |
| Items: Crossbow Quarrel x3, Mirror Chestplate || Found: 37/77 |
+------------------------------------------------------------------------------+
7/25/2019 Grimrock Walkthrough
http://slidepdf.com/reader/full/grimrock-walkthrough 40/117
Continue heading West and when you can turn right do so to find a BLOODDROP CAP. Whenyou flip the nearby lever, the door will open and you'll see a fireball flying at you. Move out of
it's way and once it's past quickly move into the room. Drop down into the pit, kill the Crab and
grab the FALCONSKYRE. Flip the lever to turn off the windgate up top and stop the fireball
from being such an annoyance. You then have plenty of time to get to the Locked Chest and open
it up for some PLATE GAUNTLETS and three DARTS. We're don here now, so head North.+------------------------------------------------------------------------------+
| ~SECRET~ |
| When going North you'll round a corner and can go either right or forward. || Go forward and in the dead-end you'll see a hidden switch. Pressing it will |
| teleport you to a new area with three Mimics wandering around. Kill then as |
| quickly as possible; they don't do too much damage, but can be annoying if |
| you get cornered. Once they're all dead you can grab all the loot. You can |
| use the ORNATE KEY that you find to open the gate and access the windgate |
| back. |
| Items: Lock Pick, Healing Potion, Fire Bomb, Torch, Neck Chain, Shoes, Rock |
| Broadhead Arrow, Tattered Shirt, Blooddrop Cap x2, Shield Potion, || Energy Potion || Found: 38/77 |
+------------------------------------------------------------------------------+
In the room to the North there'll be a Crab wandering around. Once you kill it will drop a
ROUND KEY. Time for a small puzzle I think. The windgate in the middle of the room with
only teleport objects relative to the windgate on the other side of the grates. Given it's currently
position in the middle next to the gate that isn't really good for anything. Pressing the button on
the wall and it'll move to the middle of the room. Just place a Rock into the windgate to the get
the middle Pressure plate, and then throw a Rock into the windgate from the South to get thesecond one. Press the button on the wall again and now throw a Rock into the windgate from the
North side to get the third pressure plate and the nearby gate will open. Inside you can find theCROWERN FIGURINE.
In this little area there's also a button on the wall that you can press. Head North and take a
Right, picking up the ROCK on the floor as you go into the little room here, where you can also
get a BLOODDROP CAP.
+------------------------------------------------------------------------------+
| ~SECRET~ || On the same square where you got the Blooddrop Cap, there's a hidden switch. |
| Pressing it will close the way in and open two walls, releasing two Skeleton |
| Troopers and two Skeleton Archers for you to fight before you can claim the |
| prize. To get out, just press the button again. |
| Items: Lizard on a Stick, Morning Star |
| Found: 39/77 |
+------------------------------------------------------------------------------+
Continue Northwards into a new area where you'll see a Crystal of Life on the far side of the
room. Before doing that, drop down into the pit and you can get 10 PELLETS, and aLONGSWORD. If you stand on the pressure plate here the face on the wall will fire a Lightning
Bolt at you, so place something on the plate before you step on it to avoid the attack, allowing
7/25/2019 Grimrock Walkthrough
http://slidepdf.com/reader/full/grimrock-walkthrough 41/117
you to claim the LIGHTNING ROD. Also, you might need the Sword if you don't already haveone up ahead, so bear that in mind.
You can now head back up and around to use the Crystal of Life. Continue on and take the first
left you find. This little area has three shelves, each labeled 'Scroll', 'Rock' and 'Sword'. I'll admit
that I didn't get this one outright, but what game can you play with items like a Rock, a Scroll and
a Sword? Any ideas?
Yes! Rock, Paper, Scissors!
Place a Rock into the Sword shelf, a Scroll (or anything papery) into the Rock shelf and aSword (or something sword-like) into the Scroll shelf. The door will them open, but when you
step beyond it a Shrakk Torr will zip around the corner to attack you. No real problem there, but
beyond you a wall ill open to and release an Ice Guardian, so watch out. Once they're dead you
can claim the OGRE FIGURINE.
The final one!
With all four Figurines in hand it's time to head back to the central area. Leave the little puzzle
area and head right and follow the corridor South.
+------------------------------------------------------------------------------+| ~SECRET~ || When you get to the area that's a little circle, standing on the Eastern |
| side you'll see a hidden button on the wall. Press it to open the nearby |
| wall. |
| Items: Crystal Shard of Protection |
| Found: 40/77 |
+------------------------------------------------------------------------------+
When the path turns East you'll see two doors. Use your Round key to unlock them, and kill the
two Shrakk Torr inside the Left one and the Crab in the Right one. In the left room you'll find aLOCK PICK down the ladder.
+------------------------------------------------------------------------------+| ~SECRET~ |
| In the right room there's a hidden switch on the wall where the barrels are, |
| so you'll need to whack them first. |
| Items: Tome of Fire, Crystal Shard of Recharging |
| Found: 41/77 |
+------------------------------------------------------------------------------+ Just beyond the two doors heading East you can find an ENERGY POTION and a HEALING
POTION on the floor with the lava grate. Head South and open the door to find yourself back
where you started. We've gone full circle!
Head into 'The Lexiconary' room with the found shelves and place the four Figurines as follows:
'I'm alive' = Crowern
'I'm the strongest' = Ogre
'I can't fly' = Snail
'I can walk' = Skeleton
The door will open allow you to finally access a CRYSTAL FLOWER, a BEAR PELT, aSCROLL which tells you the code to The Archive, but I've already told you that, so it's useless.
Finally there's also another POWER GEM (10/20).
7/25/2019 Grimrock Walkthrough
http://slidepdf.com/reader/full/grimrock-walkthrough 42/117
Woo! Halfway there! With the Gem now in our possession, there's no reason to remain here, so head back up the
stairs...
~~~ The Archive ~~~
Take the left up ahead and back into the small room. Keeping going forward, through the door
ahead and take the stairs down. It's time to check out Stormbreach...
+------------------------------+
| ~ End of Section Checklist ~ |
| |
| Secrets Found ---- 41/77 |
| Epic Items Found - 00/17 |
| Power Gems Found - 10/20 |
| Essences Found --- 2/5 |
| Treasures Found -- 07/11 || Level Visited ---- 14/34 |+------------------------------+
Part 7: A Breath of Fresh Air - LOG11
-------------------------------------
~~~ Sewers ~~~
In this little area you can find a BLOODDROP CAP. Up the ladder is a Crystal of Life, and a
RECIPE on the other side of it that tells you how to make Bomb (1 Blackmoss, 1 Any 4Elemental ingredients). There's a ladder and a sign saying 'Sewer Exit East'. We'll be using that
shortly, but first there just one thing we need to do down here. Follow the path West all the way
to the end, you'll find a BLOODDROP CAP and a Lever. When you pull it the two nearby gates
will open. As soon as they do, head back the way you've come to the Crystal. We just needed the
gates open for later on, we'll explore the Sewers more later. Climb up the ladder and head
outside...
~~~ Hamlet of Stormbreach ~~~
In this immediate area you'll find six Turtles wandering around. Remember how hard they were
when we first go to Nex? After all our adventuring you'll find them MUCH easier. You might
also attract the attention of a Sand Warg that wanders around the area to the West, but if you do
just deal with it. Once they're all dead and you've collected all the yummy food they're dropped,
you'll be happy to know that there's also four TURTLE EGGS around, a HEALING POTION in a
little alcove, and two ETHERWEED down in the water. There's also 10 PELLETS in the areawith the locked gate.
+------------------------------------------------------------------------------+
7/25/2019 Grimrock Walkthrough
http://slidepdf.com/reader/full/grimrock-walkthrough 43/117
| ~SECRET~ || You'll see the locked gate with a Chest inside it and three buttons, Just |
| press them in this order: Right, Left, Forwards, Forwards, Right, Left, |
| Left. |
| Items: Map (with clue to as-yet-unsolved puzzle), Tome of Energy |
| Found: 42/77 |+------------------------------------------------------------------------------+
Head West under the arch and you can find four ETHERWEED in the water, one near the arch
and the other three at the far West end in the water. There's a talking face that says 'For everyforce there is an opposing force. There are two sides to everything. This duality permeates the
whole universe.' There's also a TURTLE EGG in a little nest near where you found the three
Etherweed.
+------------------------------------------------------------------------------+
| ~SECRET~ |
| Right where the Turtle Egg is there's a button on the wall, press it to open |
| a nearby rock-wall and release a Forest Ogre. This will be a tough fight, so |
| be careful! || Items: Tome of Knowledge || Found: 43/77 |
+------------------------------------------------------------------------------+
There two ways south from the beach area. Taking the Western-most one will allow you to grab
a MUDWORT on the floor. When you reach the little area, lake the East path and on your left
will be a BLOODDROP CAP and a sign:
~ Legend of KILHAGAN ~
On his way to ascension Kilhagan roamed the island in search of the hidden shrine. A year passed and then. After a very long time did the old
Kilhagan finally understand the nature of his error. The gate was revealed not by the most complex but the most balanced spell of them all.
Continue South into the open area. Be aware that Sand Wargs like to wander around here, so
keep an eye out for them. But even more so keep an eye out for the Forest Ogre that is also
wandering around. This formidable enemy is going to be one of the toughest fights you'll have
outside of a Boss encounter. Just take it carefully, be sure to keep your distance until you canattack and you'll eventually whittle down his formidable amount of HP.
Sticking to the Eastern side of the area, you can find a little dead end with a BLOODDROP
CAP and the other side of the cave-in that stopped you from using the standard entrance to
Stormbreach earlier. South of here you can find another BLOODDROP CAP, and to the West of
that a path with several pressure plates in it labeled as 'Crystal Mines'. Ignore that for now, we'll
come back here much later.
To the West of the sign in a little open area, and a path at the end of it will have a
BLOODDROP CAP, three BROADHEAD ARROWS and a GOLD KEY in it. Head back to the
large area, you should see a large fountain, similar to one you saw earlier in the game.+------------------------------------------------------------------------------+
| ~TREASURE~ |
7/25/2019 Grimrock Walkthrough
http://slidepdf.com/reader/full/grimrock-walkthrough 44/117
| If you stand in the square to the South-East of the fountain and look East. || Dig here. |
| Items: Jeweled Scepter of Ruling, Crystal Shard of Protection |
| Found: 08/11 |
+------------------------------------------------------------------------------+
To the West of the fountain, you'll find another sign saying 'The Hub'. Another windgate back tothe Forgotten River, assuming we can find the Key for it. To the South of The Hub, there's an
area called 'House of Braids'. It's a bit of a tricky one, you have to move around the close
trapdoors and flip all four levers in the area, but the trapdoors alternate when you move, so youhave to find the right path.
As follows from the pressure-plate at the beginning, all directions based on facing South, so
turn to flip the lever and then turn back: Forwards, forward, left, flip lever, backwards, right,
forward, left, forward, flip lever, forward, right, pick up IRON KEY, right, right, backwards, left,
backwards, backwards, right, forwards, right, flip lever, backwards, left, forward, right, forward,
flip lever, forward, left, forward.
Inside the chest here you'll find the MAUL (Epic Item). To get out of the area without falling
down, facing North and standing next to the chest: Forward, right, right, right, forward, left, backwards, left, forward, forward, left, forward, right, backwards, backwards, backwards, right,forward, forward, forward, forward.
Phew!
North-West of The Hub area and you'll find the 'House of Needles'. The spikes move through
the area quickly in waves. There are safe areas inside though, so stick to them and you won't get
hurt. Go West and flip the lever and the keep going West to a safe area. You can smash the
bushes here to make a handy shortcut. To the South is a little safe area with a BLOODDROP
CAP in it. Back to the area with the bushes, on the other side is another lever to flip. From that
lever go North and then East to a safe area with a LOCK PICK in it. To the West of here is aGold Lock that you can use your Gold Key on if you wish, getting you the ROUGE BOOTS in
the area to the South-East. From the Gold Lock, head North-West to find a safe area with anAntivenom and a head that says 'I am the left eye. I saw where the meteor fell.' We've already got
that though, so yay for us!
North-East of the head is the final lever, but there's some bushes in front of it that you need to
destroy first. It'll likely take you two trips to avoid the spikes. A word of warning here, when
you've pulled all three levers, while it will open the gate it'll also spawn an Air Elemental into the
maze of spikes, so be careful. East of the talking face you can find a safe area with someBLACKMOSS, and at the very north of the area you can find a POTION OF RESURRECTION
in a safe area. Finally, near the Blackmoss and Potion, there's some more dead bushes guarding a
SPIRIT MIRROR PENDANT.
Once you've got all of that, head to the East and into the now open area you can find a
GREATER HEALING POTION, a GREATER ENERGY POTION and a POWER GEM
(11/20).
Head back out of the House of Needles and head South, between the wall and the rock. You
might run into another two Sand Wargs here. To your right will be a MUDWORT and a
BLOODDROP CAP. From there go West and are you turn to the area on your right, you'll see theIsland Master, who seems to be activating the Crystal of Life.
Well, that's...handy...
7/25/2019 Grimrock Walkthrough
http://slidepdf.com/reader/full/grimrock-walkthrough 45/117
In this little area you can find two THROWING AXES, 10 PELLETS, the HUB KEY and of course the Crystal of Life. You can use it just fine, so don't worry that he might've done
something to it. Head West to the beach area here and you can find an ETHERWEED and in the
water, surreally, the ORB OF VILSON. I'll let you draw your own conclusions about that item...
To the North of that is another ETHERWEED, then head East and to your right will be a
MUDWORT when you turn into the little area. You can now head East and activate the windgateto The Hub. Once it's going, head back West to where you were and next to the statue here you'll
find some stairs going down labeled 'Sewer Access West'. Let's head back down...
~~~ Sewer ~~~
This area has a lot of Ratlings wandering around, as well as a lot of other dangerous enemies, so
be careful and save often. Down the ladder and to your right is a door. Ignore that for now and go
left into a small room. There's 10 PELLETS of the floor, and the METEOR SHIELD (Epic Item)
on the shelf. However, as soon as you pick up the Shield the way in will close and The Trickster
will show his annoying little face. This can be a tricky fight if you're not careful, as while his
patterns of movement haven't changed, he now throws Fire Bombs at you, which do a hell of alot more damage then the Rocks he used previous. Just keep you wits about you, and whack himwith everything you can as quickly as possible, and stay away from his Bombs.
Once he's gone, he'll drop a FIRE BOMB, and a ORNATE KEY. You can use the Key to open
the gate out. However bear in mind that this will open several walls throughout the area,
unleashing several Fire Elementals into the area, so be careful of their kamikaze attack. Now that
you're released into the main area of the Sewer, you'll run into three Fire Elementals, a Swamp
Toad, and eleven Ratlings.
Cross the bridge ahead, turn left and follow the path. To your right will be a grating, where you
can grab two pieces of CHEESE and a NOTE that simply reads 'DO NOT DISTURB' from theother side. Cross over the bridge a little further East back to the other side and follow the path
NORTH and then West. You'll find a closed door here you can open, but this is just the door Itold you to ignore earlier, as the sign says. Cross the bridge here and in the little alcove you'll find
a GREATER HEALING POTION. Go East, over the larger bridge and the open door nearby is
one of the ones that you opened when you first entered the Sewer. You can check the area out
again to see if any Ratlings escaped, or use the Crystal of Life if you need it.
South of this area you'll see two LIGHTNING BOMBS on the other side of the water. Around
the corner to the West and heading South you'll see a closed gate that you can open to get aTWO-HANDED SWORD. South again and around the corner is the 'Reservoir Access', but the
door is locked. The Large bridge will lead to a 'Shortcut'. Use the Iron Key you got from earlier
and the wall will reveal a windgate that takes you back to the 'House of Braids'. The idea being
that you can use it if you make a mistake, but thanks to my help that will never happen!
Next to that is the 'Sewer Exit South'. We'll use that later though, we need to do more stuff first.
If you drop into the water here and turn right, you can find an ETHERWEED and beyond that a
HEALING POTION. Swim north and you can find a LIGHTNING BOMB on the floor, and to
the North of that there's a little pit with a DIVINER'S CLOAK and a SHAMAN STAFF at the
bottom of it. West of there, down the thin corridor you can find some LEATHER BOOTS.Continue North under the water and there's another ETHERWEED next to the ladder on your
left. Next to this is a small path that goes West and at the end there's a ladder down with a SACK
7/25/2019 Grimrock Walkthrough
http://slidepdf.com/reader/full/grimrock-walkthrough 46/117
in the small room down here, containing a POTION OF VITALITY, and three POISONBOMBS.
+------------------------------------------------------------------------------+
| ~SECRET~ |
| In this underwater room there's an obvious lever on the wall that will open |
| the door here and lead you to a room that's is the secret. Doing all this in || one go can take time, so head back after getting the Sack from earlier for |
| some air and then doing the secret run is much easier. You'll need a Gold |
| Key to get the main item here. || Items: Lock Pick, Etherweed x3 (in water), Crystal Shield (Epic Item) |
| Found: 44/77 |
+------------------------------------------------------------------------------+
The water continues North under the bars, allowing you to access a whole new area. There's two
Fire Elementals, as well as six Zarchtons for you to deal with. Staying in the water for now, in
front of you when you walk in is a CROSSBOW QUARREL, then head East along the Southern
wall to find a ETHERWEED. Head around the edge of the water anti-clockwise to find another
two ETHERWEEDS. If you look at the map you'll see there are five little islands in the water. The one on theSouth-West has three CROSSBOW QUARRELS on it, 10 PELLETS on the South-East island.
+------------------------------------------------------------------------------+
| ~SECRET~ |
| Each of these items has a distinctive shape that relates to a Map that you |
| picked up earlier. You have to stand on each platform in the right order to |
| unlock the secret. As follows: South-East (Random Shape), South-West |
| (L-Shaped), North-East (Zig-Zag), North-West (Plus Shaped), Middle |
| (T-Shaped). This will open a windgate, allowing you to get to a Chest. || Items: Throwing Axe x3, Crystal Gauntlets (Epic Item) |
| Found: 45/77 |+------------------------------------------------------------------------------+
Head back into the water and go South through the gate and back into the main area. There's
only a few things left to do down here now and sadly the next thing is tough.
And that's an understatement!
Climb out of the water and head as far South as you can. Down here there's a path you can take.
On the floor you'll see a NOTE that reads 'ENTER AT YOUR OWN RISK' and just beyond thatis a Pressure Plate. When you stand on that, there's no going back, so make sure you're totally
ready. Have lots of healing and energy potions and the best equipment you can. When you're
ready, step forward...
+------------------------------------------------------------------------------+
| ~ BOSS BATTLE! ~ |
| Vs Ratling Boss and Minions |
| |
| Oh boy! You're gonna have a lot of fun trying to beat this guy. What you've |
| got here is six Ratlings, which are annoying enough to deal with in such an || enclosed space, and the Ratling Boss, who wields a giant cannon that can |
| deal such a powerful whack it'll knock you back a space! In terms of |
7/25/2019 Grimrock Walkthrough
http://slidepdf.com/reader/full/grimrock-walkthrough 47/117
| strategy, the Force Field can come in handy to seal the Ratling Boss away || while you try to take out some of him Minions. Keep your health and energy |
| up, and just focus on avoiding the Boss while you take out the Ratlings |
| around him. Once you've reduced this numbers, you can focus on the boss as |
| he's a lot easier once he's alone. Try not to get blocked into a corner or a |
| dead-end, as this will quickly finish you off. The Ratling Boss can also be || frozen with a Frost Bomb if you want to stop him that way. |
+------------------------------------------------------------------------------+
Once it's dead you can scavenge around the area to find two CHEESE, a LEATHER BRIGANDINE, a POTION OF RESURRECTION, some SHOES, a POTION OF VITALITY,
four CANNON BALLS, a SKULL, a THROWING AXE, two BRASS KEYS, and the HAND
CANNON that the Ratling Boss dropped. Use one of the Brass Keys to open the door back out of
the area. Head right along the water and cross the bridge using the second Brass Key to open the
door here.
Follow the corridor and on your right you'll find a SMOKED SEA BASS and an
ANTIVENOM. Further down the corridor is a lever that will open the gate here, allowing easier
access to the Crystal of Life if you wish. When you reach the open room, you'll see a whole bunch of spikes moving around the pit in arough S-shape. If you cross over to the other side of the room you can find a SCROLL on the
other side of the door that you can grab a read 'Follow the leader'. What this basically means is
that you have to drop down into the pit and hit all the buttons, following after the spikes so that
you don't get hit. Drop down one space to the right of the ladder and go forward and then right.
Press the button and follow the path around, pressing another one. Take a right and go forward
right to the end and press the button here. Then follow the path around pressing another two
buttons and then climb up the ladder. The door should be open.
+------------------------------------------------------------------------------+| ~SECRET~ |
| In the pit with the spikes is a secret button, two steps East of the ladder || on the North wall. Press it and a wall above will open on the East side of |
| the pit. |
| Items: Crystal Shard of Protection, Archmage's Cap |
| Found: 46/77 |
+------------------------------------------------------------------------------+
In this area are six Mosquito Swarms, and you can easily see the POWER GEM (12/20) sittingfor you to pick up. That's another four gotten, but no Shrine just yet. We'll get to that. Follow the
bridges to the end and you'll find a Locked Chest containing three BLOODDROP CAP and a
BURROW RAT SHANK. In the North-West corner of the area is a little bit of land that you can
find a LOCK PICK on. In the water near that is an ETHERWEED, and there's another
ETHERWEED in the South-East next to the closed door. Still underwater, near the ladder in the
middle of the room is a CANNON BALL.
+------------------------------------------------------------------------------+
| ~SECRET~ |
| There's a closed door in the South-East corner of the area. If you stand || facing it and then turn around, walking forward until you hit the wall and |
| you will see a hidden button no the wall. Press it to open the door. |
7/25/2019 Grimrock Walkthrough
http://slidepdf.com/reader/full/grimrock-walkthrough 48/117
| Items: Etherweed x2, Blooddrop Cap x2, Falconskyre x3, Mortar and Pestle || Found: 47/77 |
+------------------------------------------------------------------------------+
Time to head back. Leave this room and head through the room with the spikes and follow the
corridor to the Southern exit. Cross over the bridge, head left and climb up the ladder here.
Around the corner are some stairs, so climb on up...
~~~ Hamlet of Stormbreach ~~~
You'll find yourself in a new area of Stormbreach that you haven't been to before. And there's a
Forest Ogre wandering around. The area is relatively small, so be careful as you take him out.
Once it's dead, you can find a BLOODDROP CAP, an ETHERWEED, and a talking face that
says 'If you wish to enter Crystal mines, you must take the Way of the Snail.'
Finally though, we've found the next Shrine, the Shrine of Air. Head on inside and listen to the
Left and back faces. The one of the left says:
This is the elemental shrine of air. Air if the rune of dexterity, storms and flight. Northwest is whence the forces of air are the strongest.
And the one at the back say:
Follow the footsteps of KILHAGAN the Wise.
Place the found Power Gems onto the table and you'll get the ESSENCE OF AIR.
Three down, one to go! Let's go place it where it needs to be! Head back and go down the stairs...
(too short of a section to bother with a new section) Go around the corner and drop down theladder. Turn right and then right again and step into the Windgate. This will take you right next
to The Hub windgate, which you can take back to the Forgotten River...
~~~ Forgotten River ~~~
Head up the stairs to get outside and then go South. You'll find that the area is now populatedwith three Wyverns and two Air Elements. Once they're dead you can head into the Castle
courtyard and place the Essence of Air on the relevant statue. Take the opportunity to sort out
your inventory of anything you don't want to keep long-term, and we'll start working towards
getting the fourth Essence...
+------------------------------+
| ~ End of Section Checklist ~ |
| |
| Secrets Found ---- 47/77 || Epic Items Found - 04/17 |
| Power Gems Found - 12/20 |
7/25/2019 Grimrock Walkthrough
http://slidepdf.com/reader/full/grimrock-walkthrough 49/117
| Essences Found --- 3/5 || Treasures Found -- 08/11 |
| Level Visited ---- 16/34 |
+------------------------------+
Part 08: No Crafting Here - LOG12
---------------------------------
~~~ Forgotten River ~~~
Simply head North and go back to The Hub area and take the Windgate back to the Hamlet of
Stormbreach.
~~~ Hamel of Stormbreach ~~~
Head South-East to the area labeled 'Crystal Mines'. You may remember earlier that one of thetalking heads say that to get in there we have to take 'The Way of the Snail'. This basically meansthat you have to go very slowly over each pressure plate. It's around about three second per
pressure plate. Move forward slowly and, assuming you weren't too impatient, the gate will stay
closed and the faces as the end won't spew poison gas at you. There's a BLOODDROP CAP to
your left in this area, but aside from that there's nothing stopping you from entering the next
area...
~~~ Crystal Mine Entrance ~~~
Head in inside.
+------------------------------------------------------------------------------+| ~SECRET~ |
| Right at the beginning of this area there's a hidden button on the wooden |
| wall to the South. Pressing it will open the nearby wall. There's a Sack at |
| the bottom of the pit, but the actual secret is up on the other side of the |
| pit. Head up the stairs and you'll find yourself back in the Twigroot Forest |
| near a Crystal of Life. You can press the button here to open the wall || allowing you back into the area if you wish, however this will also wake up |
| three Summon Stones. Once you're ready head back into the Crystal Mine. |
| Items: (Crystal Mine) Sack containing: Blooddrop Cap x4, Etherweed. |
| (Twigroot Forest) Xafi Khakis, Xafi Robe, Wooden Box containing: |
| Pellets x20, Cannon Ball x5, Smoked Sea Bass, Sabre |
| Found: 48/77 |
+------------------------------------------------------------------------------+
Head forward and then turn left. There's a FULL HELMET behind the barrels and a
BLOODDROP CAP next to that. There's a Gold lock here that needs a Gold Key if you haveone. If not, we'll get one later so you can come back if you want 50 PELLETS and 10 CANNON
BALLS. Head back and go North to the area with the trapdoors and if you fancy it, drop down
7/25/2019 Grimrock Walkthrough
http://slidepdf.com/reader/full/grimrock-walkthrough 50/117
the holes here...
~~~ Crystal Mine Core ~~~
You'll hear the chittering of Spiders, but don't worry, they can't get you were you are. Nearby
will be a BOILED CRAG BEETLE on the floor, and to the South is a place you can drop down.There's a BLOODDROP CAP and a SACK containing a LOCK PICK and an ANTIVENOM.
Then use the Windgate to get back up.
~~~ Crystal Mine Entrance ~~~
Now that we're back, time for a small puzzle. Walk onto the closed trapdoors, and press the
South button. Now you can press the East button, then head North and flip the Lever. Go around
and press the West Button, to access the gate.
Head South, you'll see a BLOODDROP CAP here and then pass by the locked door that you
can't open yet. Next to the barrels on your left is a FALCONSKYRE, and then to the South and
you go left or right, so head Left and the after that go right to an area called 'Simulacrum'. Another puzzle! one side of this area will be four Black Stones, and on the other side a smallarea with four Force Fields. As you might guess, the two are connected and mirror each others
movements. Here's what you have to do: Assume that the sixteen glowing squares are numbered
1-16, with 1 being in the North-West, 4 being in the North-East, 13 being in the South-West, and
16 being the South-East. The four squares that the black stones have to go into are: 1, 3, 9 and
16.
Assuming that everything is done correctly, on the other side of the area you'll be able to get to
the button in the North-East corner of the area to press it. You can now go through the two open
gates to flip the lever in the South-East of this side of the area. Doing so allows you to grab theMINE KEY from between the two halves.
If you mess up when pushing the black stones around, there's a button on both side of the stonesto reset them. Once you've got the Key head back north and then go East and follow the path to
get an area with some more trapdoors and a sign that says 'Only the Fearless May Pass.' Before
that though, walk to the open pits and climb down...
~~~ Crystal Mine Core ~~~
This is the upper area from when you dropped down before. Which means that those Spiders
you saw before will be able to directly attack you. Hope you've got some Antivenoms on hand, as
there's six of them wandering around here. Once they're all dead, you can find some
MUDWORT, a BLOODDROP CAP and 10 PELLETS to the South of the little bridge. To the
North there's another MUDWORT, a BURROR RAT SHANK, a POTION OF
RESURRECTION, another BLOODDROP CAP, and finally a GOLD KEY. With that, you can
take the Windgate back up.
~~~ Crystal Mine Entrance ~~~
Once back, stand in the middle of the room, on the flood that isn't a trap door. Throw a rock
7/25/2019 Grimrock Walkthrough
http://slidepdf.com/reader/full/grimrock-walkthrough 51/117
onto the pressure plate and just stand there. A Fireball with fly towards you, but you'll getteleported away just before it hits! If you're too chicken, you can create a Force Field in front of
you to stop it.
You'll be teleported to the other side of the open trapdoors. Walk forward into the corridor
ahead of you and you'll see The Island Master up ahead, once again watching you. He'll teleport
away in the end. Where he was you'll see a pressure plate on the floor. Standing on it and thelittle metal face will shoot and harmless magical ball at you. Clearly we need to get out of it's
way.
From standing on the pressure plate, facing North, take seven steps backwards and then throw arock at the pressure plate. As soon as you do, take four more steps backwards and then one to the
side to let the magical ball go flying past. When it hits the other side the nearby trapdoors with
close. Pick up the Rock from the pressure plate here and all the trap doors will close allowing
you back across.
The magical ball will have opened two gates here, allowing three Spiders to wander around.
Kill them and in the now open area you can find CRYSTAL BOOTS (Epic Item), a LOCK
PICK, and the SCROLL OF METEOR STORM, the most powerful magical spell in the game!
Now it's time to head West, and open the door to a new area. In the pit here you can find 10PELLETS and on the upper area to the North there's a button on the wall that will turn on amagical bridge over to the Crystal of Life. Before you go running over there though, once you
hit the middle part of the bridge that will spawn two Eyctopus and two Xeloroids, both of which
are highly annoying creatures. Able to blind you and paralyze you respectively, they'll give you a
run for your money if you're not careful. It also doesn't help that the magical bridge will shut
itself off when they warp in. Once they're all dead, head back up and press the button again,
allowing you proper access to the Crystal of Life and 5 CANNON BALLS sitting there.
+------------------------------------------------------------------------------+
| ~SECRET~ || Cross the bridge and to the right of the Crystal is a secret button on the |
| boards. Pressing it will turn on a second bridge allowing you to grab an || item, but when you do you'll get warped to an area with two Fire Elementals |
| and an Ice Guardian. You can use the Windgate to get back. |
| Items: Crystal Shard of Protection, Pellets x20, Blooddrop Cap, Poison Bomb, |
| Broadhead Arrow x2 |
| Found: 49/77 |
+------------------------------------------------------------------------------+ Head East and then north to get to the locked door you passed earlier and use the Mine Key to
unlock it. Turn left and head South, opening the gate to find an ENERGY POTION, three
CROSSBOW QUARRELS, a CROSSBOW and 5 CANNON BALLS in the small room there.
Turn around and head North, past the bridge and to the top of the area. Here you'll find eight
Spiders wandering around for you to kill, as well as a FALCONSKYRE, a BLACKMOSS, a
SMOKED SEA BASS and a SACK containing a SALTED SAUSAGE, a TORCH, and two
ANTIVENOM.
+------------------------------------------------------------------------------+
| ~SECRET~ || In the middle of the Northern area here, there's a little cul-de-sac going |
| South from which you can see a Chest. There's a hidden button on the wooden |
7/25/2019 Grimrock Walkthrough
http://slidepdf.com/reader/full/grimrock-walkthrough 52/117
| wall nearby that turns on a magical bridge for you to reach it. || Items: Meteor Gauntlets (Epic Item) |
| Found: 50/77 |
+------------------------------------------------------------------------------+
Head back to the door into this section, and cross over the bridge here. There's some
BLACKMOSS, 10 PELLETS, and a RECIPE for the stat-increasing potions. You can then headdown the stairs...
~~~ Crystal Mine Core ~~~
Wandering around this area are two Spiders and two Eyctopus to cause you trouble. At the
bottom of the stairs turn go right and then left straight away across the long bridge. You can find
a CRYSTAL FLOWER here. Look to the East and on the other side of the pit you should just
make out a pressure plate. Throw a rock over and the gate next to the plate will open.
Head back over the bridge and turn left, past the stairs and cross another one. Turn left again
and head North. To your right is a ROPE if you don't already have one. You can head through the
door you opened earlier here and beyond the pressure plate you can find a THROWING AXE.Take the Rock off the pressure plate to open the other door, and a section of the wall will open.Beyond the wall will be two Spiders for you to kill. Beyond the door is an FALCONSKYRE, a
BEAR PELT, and a MINE KEY.
Once you pick up the Mine Key, another wall will open releasing two Spiders and an Eyctopus.
If you check the area they came from, you'll find a SACK which contains a SMOKED SEA
BASS, a LIZARD ON A STICK and some BREAD. Place the Rock back on the Pressure Plate
to open the door and let you out of the area. Head back South and keep going South over the
bridge.
+------------------------------------------------------------------------------+| ~SECRET~ |
| In this little area is a button on the wall. Press it to open the nearby || wall and into a new area. This isn't quite the Secret though, you need to |
| take the windgate inside to find that. |
| Items: Throwing Axe, Antivenom, Crystal Amulet |
| Found: 51/77 |
+------------------------------------------------------------------------------+
Use the Mine Key to open the door and follow the path. You'll reach an area with trapdoor,alternating between open and closed, based on the ball of energy being fired across the room.
First you have to flip the lever on the other side, so step over each trapdoor when it's closed to get
over to it. Pull it and the bars will open, allowing you to quickly move away and over the third
trapdoor.
+------------------------------------------------------------------------------+
| ~SECRET~ |
| If you drop down one of the next set of trapdoors you'll find yourself in an |
| area with spikes all over the floor that will hit you if you stand still for |
| too long. As you move around the area to avoid getting hit, you'll see a || closed gate with your items behind it. The button to open it is opposite |
| this gate and the South wall. You can flip the lever to access the windgate |
7/25/2019 Grimrock Walkthrough
http://slidepdf.com/reader/full/grimrock-walkthrough 53/117
| back up. || Items: Archmage's Loafers, Crystal Shard of Healing |
| Found: 52/77 |
+------------------------------------------------------------------------------+
Now comes a tricky bit. You can see a new area with a lot of trapdoors in it, also alternating
with the magical ball of energy. There's a lever two steps in that you need to flip, so wait for the ball to hit you and then quickly step in to flip it. This opens the gate and you can very quickly
move around to it before the trapdoors open again.
+------------------------------------------------------------------------------+| ~SECRET~ |
| Wait for the trapdoors to close and you can press a hidden button on the |
| wooden wall that sticks out. This opens the wall back near where the energy |
| ball shoots out. |
| Items: Tome of Health |
| Found: 53/77 |
+------------------------------------------------------------------------------+
Once beyond all those trapdoors, you'll be in an area with two Spiders wandering around. Becareful as if they, or you for that matter, stand in the pressure plate in the next room a Fireballand a Poison Bolt will get fired towards it. In the area with that troublesome pressure plate is a
LIGHTNING BOMB, and there's the METEOR HELM (Epic Item) on a shelf. Beyond the
barrels is another three Spiders and a LIGHTNING BOW. Flip the lever to open the door for
later and then head up the stairs.
~~~ Crystal Mine Entrance ~~~
Open the door here and follow the path, picking up the SALTED SAUSAGE and SPEEDPOTION from the dead end to your right. Follow the path further and you'll find a POWER GEM
(13/20). Nearby there's also a Gold Lock, that can get you a REPEATER. Flip the lever on thenearby wall to turn on a bridge back across the gap.
+------------------------------------------------------------------------------+
| ~SECRET~ |
| This is a tricky one, you have to drop down exactly the right place to get |
| to the secret. Just South of the stairs down, which you should be near after |
| crossing the magic bridge, is a one-square sized bridge. Standing on the || North side of the bridge and facing South, take one step Left/East. There |
| should be a hole in front of you and rock beyond that. Drop down here. And |
| once you've gotten the items, drop down again. |
| Items: Lock Pick, Crystal Greaves (Epic Item) |
| Found: 54/77 |
+------------------------------------------------------------------------------+
If you didn't do the previous Secret, we've still got to go down to the bottom of the Mines. First
go down the stairs to the Crystal Mine Core, and then drop down anywhere you like to get to the
next area...
~~~ Crystal Mine Abyss ~~~
7/25/2019 Grimrock Walkthrough
http://slidepdf.com/reader/full/grimrock-walkthrough 54/117
This is a wide open cave with a couple of Spiders running around in it. I'll try to describe items places as best I can. Starting in the North-East corner, there's an area here with a light in it
labeled 'Forge of the Fallen Stars'.
+------------------------------------------------------------------------------+
| ~SECRET~ |
| If you place the Meteorite on the little plinth, it'll transform into a || weapon! |
| Items: Meteor Hammer (Epic Item) |
| Found: 55/77 |+------------------------------------------------------------------------------+
South of here you'll find a locked door which we'll get to later and a MUDWORT, and in the
South-East corner is a Crystal of Life, a CRYSTAL FLOWER and two more MUDWORTS.
Heading West and you'll find a FALCONSKYRE and a talking face that says 'The twenty power
gem lie on the path to enlightenment.' West of that behind one of those glowing egg things is a
WOODEN BOX containing two BLOODDROP CAPS, two FALCONSKYRE and two
ETHERWEED.
North is a closed gate with a windgate behind it, but we'll open that soon, and opposite that alittle area with three LIGHTNING BOMBS, an ANTIVENOM and a LIGHTNING BLADE. North of this area is a FALCONSKYRE and just beyond that a BLOODDROP CAP.
Still North is an area with a sign saying 'Power Me up'. If you take one step back from here and
use the basic Lightning spell, an energy ball will fire and open the door, allowing you to get yet
another MINE KEY. East of there are two BROADHEAD ARROWS on the floor, and directly
South of them is a lever on the wall, that allows access to the windgate when you flip it.
In the North-East corner is the locked door, that you can now open with the Mine Key. Beware,
as beyond that are four Fire Elementals. Once you've dealt with them however you see fit, head
North in that area and you can find a MUDWORT, but there's also a hidden button on the wall,that opens the nearby wall and lets you listen to the face say 'The master holds the key to all
mysteries.' There's also a CRYSTAL FLOWER and CRYSTAL SHARD OF HEALING heretoo.
Now head South and there'll be some PITROOT BREAD in the alcove to your left, and beyond
that a BLOODDROP CAP at the corner. Keep going and you'll end up in a room with a pit
seemingly covered by a magical floor and a nearby NOTE that says simply 'Watch your step'.
However if you stand on the middle tile it will turn off and you'll fall down in with the Spider
and two Xeloroids. That said, there's also a GOLD KEY down there, so it's up to you. If you dofall down, there a button up the ladder to the East that turns the floor back on.
North of the pit is a BLOODDROP CAP and you can open the door for another POWER GEM
(14/20). You can now head back to the main room, but when you do ten Spiders will decent from
the ceiling for you to deal with.
You didn't think it was going to be that easy, did you?
You can either kill then or just run, but you need to get back to the windgate to the South-West
on the other side of the central pillar of rock. This'll warp you back up to the Crystal Mine Core
right next to the stairs up, so take them.
~~~Crystal Mine Entrance ~~~

7/25/2019 Grimrock Walkthrough
http://slidepdf.com/reader/full/grimrock-walkthrough 55/117
We're done here in the Mines, so now we need to head to the next new area. But first we've gotto get back to Sleet Island. I'll lead you one way, but if you want to go another to avoid a
little...complication that's coming up, you are of course free to.
Head East and then North. You'll likely run into a few Spiders wandering around, but you
should be able to deal with them. Exit this area to the North-East
~~~ Hamlet of Stormbreach ~~~
Walk forward and over the pressure plates and you should immediately notice that the area isnow full of Ratlings. Fifteen to be precise, some one of them even teamed up with Field Wargs!
Not only that, but there's another Ratling Boss wandering around. On the plus side, you've got a
much more open area to deal with them all this time. There is of course a downside though; The
Trickster is also wandering around and will throw Fire Bombs at you. Kill or ignore them as you
wish. The Ratling Boss will drop a LETTER that reads:
'To the mightiest and most vicious beast of them all!
Be it known that the trespassers are responsible for the death of your twin brother. They came to the island not long ago and already they have become a nuisance.
Gather your kin and deal with them.
The Island Master'
Of course, if you're reading it, it means he wasn't so tough after all!
Whenever you're ready, use the windgate back to The Hub.
~~~Forgotten River ~~~
Head up the stairs. If you want to nip back to the Castle courtyard are to shuffle your inventory,isn't not a bad idea. But bear in mind that three Viper Roots will likely show up to bother you. By
now of course, they shouldn't cause you any real trouble at all, so have at them. When you're
ready, head West across the river and the North.
~~~Sleet Island ~~~
Head East and then North. Just South of the Crystal of Life is an entrance to a new area to the
East. Head on through.
I hope you've got strong nerves...
+------------------------------+
| ~ End of Section Checklist ~ |
| |
| Secrets Found ---- 55/77 |
| Epic Items Found - 09/17 || Power Gems Found - 14/20 |
| Essences Found --- 3/5 |
7/25/2019 Grimrock Walkthrough
http://slidepdf.com/reader/full/grimrock-walkthrough 56/117
| Treasures Found -- 08/11 || Level Visited ---- 19/34 |
+------------------------------+
Part 09: Among the Dead - LOG13-------------------------------
~~~ Cemetery ~~~
Welcome to the your grave! Well, technically it's someone else's, but I'm sure there'll be
creatures trying to make it yours too.
Good job I'm here, huh?
Anyway, there'll be five Twigroots wandering around this area, but by this stage on the game
they won't give you any real trouble. Head a few steps north and then East and you'll see a
Gravestone labeled 'Pummelface the Stonemason. Born in the frozen Tundras of the north. Lived
a long life and died on Nex.' If you dig on the square of this grave an Undead will crawl out andattack! Also note that one of the graves in this area will give you a SKULL, but it's chosen atrandom, so I can't give you an exactly location, but I'll mention all the graves for you so you can
dig them all.
Head back North and find a BLOODDROP CAP and another grave for 'Tarael Felltree. Brought
here by the ships from Northampton. A worthy servant to the master.' Digging here will get you 8
PELLETS. Smash the nearby bushes and then the ones beyond that to find another talking head
saying 'Knowledge flourishes on the island. Decay and death have fed it's growth.'
Around the corner you can find a CRYSTAL FLOWER and a Locked Chest containing 30
PELLETS. If you dig the Grave here 'Three unknown slaves were laid to rest here. Freedom atlast!' Digging in here will get you another Undead to kill.
Head back South, past the entrance to the area and you'll see a large closed gate, a black stoneand a talking head that says 'The orders can and the gates closed. The answers were sealed in the
Archives.' South of here is another Grave 'Ganmon the Ironwill. A sage and an engineer. May his
towers never fall.' Digging here won't get you anything. There's also a Gold Lock that can get you
a BONEBLADE if you want it.
+------------------------------------------------------------------------------+
| ~TREASURE~ || The the South of the closed gate are some dead bushes near the Gold Lock. |
| Smash them to pieces and then dig where they were to find a Locked Chest. |
| Items: Cannon Balls x5, Bracelet of Tirin |
| Found: 09/11 |
+------------------------------------------------------------------------------+
Head back to the black stone in the middle of the area. Time for one of the most obtuse puzzles
in the game! Or at least it would be, if you didn't have my help, right?
The three Letters you got back in the Archives are the clues, but they're rather obscure in whatthey mean. So here's what you to do: you have to push the black stone onto the orange tiles at the
North, South, East and West directions. The order is: North, West, South, North, North.
7/25/2019 Grimrock Walkthrough
http://slidepdf.com/reader/full/grimrock-walkthrough 57/117
Assuming you do it correctly, the gates will swing open. Right in front of you is The Hub area, but it's currently deactivated as you might imagine. Go
North and on your Left is a Grave 'An unknown shaman lies here. Swept on the shore by the
waves. Too weak to talk but powerful enough to curse us all.' Digging gets you an
ANTIVENOM. You'll likely run into a Twigroot around here.
Continuing North there's another Grave on your Right through the archway. 'Kalma. Anobedient servant. Never spoke a word.' Digging here get's you some LEATHER GLOVES. West
of here is a BLOODDROP CAP and yet another Grave 'Miriel Riddle. Ended her life in the Red
Hills in the town of Ediamon. Puzzle and mysteries meant everything to her.' Digging will getyou a FROST BOMB.
To the North and around the corner is a FALCONSKYRE, and to the East is an area with a
BLOODDROP CAP and two buttons. First, if you drop down the holes you can find another
FALCONSKYRE and some CHEESE before warping back up. Now, this little puzzle is a bit
tricky to explain, but simple if you can wrap around head around it. The six trapdoors here are
connected two the two buttons and each button controls how the closed trapdoors move. They go
around clock-wise, and can even overlap. Let's called the closed trapdoors A and B. A is
currently in the middle on the South side and B is in the middle on the North. The West buttoncontrols B and the East controls A. Press the East button twice and the West button four times, sothat A is next to the new button and B let's you get to it. This new button controls B, so press it
twice to move the trapdoor and get to the other side.
That's only half the job though. There's another Grave here 'Basahn of Xafi. Exiled from the
Tomb. Digging will bring up an Undead. The button opposite the grave also effects B, so press it
once, and then the final button will effect A, so press it three times. After all that, you'll finally be
able to get to the Lever and pull it to open the nearby gate. Of course, now we've got to the get.
Press the final button three times again, and then press the button opposite the grave five times.
This will allow you to press the third button four times and allow you back over! PHEW! Talk about demanding descriptions!
Anyway, head into the new area to get a FALCONSKYRE, a SACK containing an ANTIDOTE,a SCROLL OF LIGHTNING BOLT, and the HUB KEY. And, of course, after all that, you can
get another POWER GEM (15/20). You can now head back South and unlock The Hub
windgate. It's on your way, so you might as well.
Head South from here, you'll likely run into another Twigroot, go right when you can and then
keep going South. At the end of this area you'll find two Graves. The East one 'Haaro the Scribe.
The esteemed writer of the Annals of Theraen I-VII.' contains a SACK with some BREAD,CHEESE and a BURROW RAT SHANK inside. The West Grave 'Erhep the Master Carpenter
rests here.' contains a HEALING POTION.
+------------------------------------------------------------------------------+
| ~TREASURE~ |
| If you dig between the two Graves here, you'll find a Locked Chest. The |
| Letter inside reads 'As my last will and testament, here are my most priced |
| possessions for whomever solves my final puzzle. - Jakon Riddle.' Now, a |
| word on the 'Rites of the moon' book. What it seems to do is give whomever |
| uses it a kinda of Vampirism, although noting is added to the Trait list. || This will raise that character Vitality by 5 points during the Night, and |
| lower it by 5 during the Day, which in tern alters your Health and Health |
7/25/2019 Grimrock Walkthrough
http://slidepdf.com/reader/full/grimrock-walkthrough 58/117
| Regeneration. Whether you use it and who you use it on I leave to you. || Items: Gold Key, Letter, Rites of the Moon |
| Found: 10/11 |
+------------------------------------------------------------------------------+
To the East of the two Graves is a BLOODDROP CAP and North of that are two
BROADHEAD ARROWS. North-East of here is the next area, with another Grave at theentrance 'Ludiar Munmunfar. A slave from Uttermost. A blacksmith like no other.' containing an
Undead. South of here is a little pit with a FALCONSKYRE, a SMOKED SEA BASS, and a
SHOVEL.Back up and heading East will cause a whole bunch of Undead to climb out of the ground. Oh
dear. Turn South when you can and then East into an area with a pit. If you drop down three
Undead will show up for you to kill. There's also a SACK down here containing two BREAD
and a HORNED FRUIT.
Climb back up and look North. You'll see a pressure plate and three closed gates. Now, what
you have to do is stand on the pressure plate and then very quickly throw Rocks into the
windgates on the other side. However, timing is tight and the order the gates open in is random
each time. The best idea is to line three separate Rocks up in someone's inventory and justclick-throw them, facing North as default, so you only have to turn once before you throw. Witha bit of practice you can get it to work.
Head through the news area and follow it around, over the pressure plate which you can ignore,
and into the next area. There are some pot you can smash and to the North a BLASSMOSS and
another Grave 'Ronar Riddle. Hallowed woods of Arn Awen claimed another victim. Remaining
puzzles designed by him were lost in the burned library of Ormund.' and digging here just get's
you an Undead to kill. To the South is a BLOODDROP CAP and beyond that a RECIPE for the
Necromancer's Potion (2 Blackmoss). Finally here, that's a talking head that says 'Every night the
silent one sees something. Look where he looks and be patient.' So, that's what we need to do!
As you leave the area, four Undead will raise up and attack, but they shouldn't be a problem.Cross over the bridge with the puzzle from earlier and when you can turn right. There's a Grave
here 'Jakon Riddle. Banished from Etolla, the famous puzzlewright traveled to the Tavern of
Wyrmflight to start a new life. Efforts were in vain for in the inn he was slain, by the river of Eel
near the town of Needle.' and there's a Undead if you dig it up.
Follow the path to yet another Grave 'Rangel Fjordwalker. He might have been spared of this
fate if his promises were as strong as his back.' with an Undead inside. Just beyond that isanother small puzzle, but first drop down the hole. You'll find yourself in a small area, so drop
down, kill the Wyvern and pick up the LOCK Pick before using the windgate to get back.
Back up top, there's another Grave nearby 'Nameless. He refused to die.' You can dig him up if
you want to kill him. Now, you can see three sets of pots on the other side of the holes. Using
throwing weapons to destroy the right and middle ones first. The one of the left however is more
problematic. Stand on the East side of the pressure plate, and place something on it. You then
have to throw something North into the windgate, and once it's gone through, take the items off
the pressure plate to switch the windgate positions and get the thrown items to hit the pots and
smash them. You can them press the button to the West to close the trapdoor and cross torecollect your throw items.
As you move through the windgate some more Undead will show up. Head North and you can
7/25/2019 Grimrock Walkthrough
http://slidepdf.com/reader/full/grimrock-walkthrough 59/117
find an ETHEREAL BLADE. Drop down in the nearby pit and you can find a SKULL and a NOTE saying 'There is a fountain with an ancient oak by it's side. From the oak, take four steps
to the east. And then two steps to the south shall you stride. The treasure now lies beneath you
feet.' But we've already got that, so it's useless. Also an Undead will show up behind you when
you go to grab the Skull.
Head South and you an open the gate here. There's a BLACKMOSS beyond it, and if you walk past the stairs you can find a ROUND SHIELD and a MACHETE, as well as a sign that reads:
~ Legend of Kilhagan ~Trying as hard as be could Kilhagan could not avenge his crew. With time,
and with the words of the stone philosophers echoing in his mind, he
finally let his wrath go. In the following years he gradually gained the
illumination and he became a seeker of Nex.
With all that down, it's time to head down the stairs...
~~~ Wormbound Catacombs ~~~
Right in front of you is 'The Bridge', which you can see if you drop into the small pit under it.
Go South first and around and past the dead-end on your left and beyond that is an small area.
The writing on the wall says:
'These catacombs were built as the final resting place for the Wormbound
family who, for countless generations, acted as envoys and ambassadors
between the dragons and the other sentient species of the realm.
The long lasting truce was broken when Xarant and Orul Wormbound stole an egg from the nest and escaped to the Isle of nex with the hatchling on
board their airship. The master rarely grants wishes, but for their great services, he granted
the Wormbounds the gift of immortality.'
Opposite is a lever that will open the door, allowing you to access the Crystal of Life. However,
about 10 seconds later, the walls on either side of the writing will raise up, allowing four
Skeleton Troopers to wander out. Kill them and you can find a MUDWORT and twoLIGHTNING BOMBS in the North of the two. Go North around the corner and then North again
and open the door. Turn right here, drop down and deal with the Xeloroid, before grabbing the
LEG PLATE on the shelf and 10 PELLETED in the dead end.
+------------------------------------------------------------------------------+
| ~SECRET~ |
| Opposite the Torch on the wall is a hidden button, that opens the wall to |
| the secret area on the other side of the door. |
| Items: Tribal Spear, Blooddrop Cap x2, Hardstone Bracelet |
| Found: 56/77 |+------------------------------------------------------------------------------+
Head back up the ladder and opposite is a place to drop down. When to do drop down, there'll
7/25/2019 Grimrock Walkthrough
http://slidepdf.com/reader/full/grimrock-walkthrough 60/117
be a Skeleton Trooper behind you, so kill him and grab the LOCK PICK where he was standing.There's another Skeleton Trooper further on, and then after the pots open the door on your right.
Go forward, through the door and right. You'll find a series of pressure plates, five on your side
on the bars and five on the other side. If you look through the bars you can see items places on
three of the pressure plates. If you mirror that on your side with three Rocks, the door will open,
allowing you to get to a CROSSBOW, a FROST BOMB and a FULL HELMET. Just remember that if you take one of these items to put something in it's place or the door will close.
Head back and go South, picking up the FLAIL on your right if you want it, and then there's
also some PLATE GAUNTLETS to your left. You'll likely run into a Skeleton Trooper and aXeloroid in this area. Just past the ladder is a FALCONSKYRE on the floor.
+------------------------------------------------------------------------------+
| ~SECRET~ |
| If you climb up that ladder you just past and take the windgate here, it'll |
| warp you to an area with twelve trapdoors, one of which will be closed. If |
| you drop down the whole, there's no items to get, but you'll hear a constant |
| ticking noise, giving you a clue. The trapdoors above close depending on the |
| current time in the game. If you kept the Timepiece from earlier, solving || this puzzle is east, just set the time to 6 allowing you to grab GEAR KEY || and then to 12 to open the door. If you don't have to the Timepiece, you'll |
| just have to use your best guess, using Resting in small jumps. Once you've |
| gotten the Key and opened the door, you'll find a seemingly empty area, but |
| there's a weapon on the self at the back of the area. Picking it up will |
| raise the nearby walls, releasing four Summon Stones in this area and four |
| Fire Elementals in the clock area. You can head back once you're done here. |
| Items: Bane (Epic Item) |
| Found: 57/77 |+------------------------------------------------------------------------------+
Climb up the ladder to the East and pick up the SCROLL on the shelf. It reads 'Under and under and over and all over again and over.'
Well, that makes sense!
When you pick up the Scroll, the two doors behind you will open up, releasing a Skeleton
Archer and two Skeleton Troopers. When they're dead, go through the first open door, turn left
and then go right. You'll find yourself back the 'The Bridge' but now we know what to do. As the
Scroll says go: Under, under, over, under, under, over, over. The door will open, allowing you tocontinue.
In the next area there are three Xeloroids flying around and a Skull Lock on the wall. Drop
down into the pit ahead and you'll find a FALCONSKYRE, a HUNTSMAN CLOAK and two
THROWING AXES. Back up the ladder and follow the path around and another Xeloroid will
drop down and attack.
In the next area there's another Xeloroid. Open the Eastern door and inside you'll find a
GREATER HEALING POTION, and a SACK containing three BLOODDROP CAPS. The other
door in the area has a pressure plate in front of it and a sign next to it reading 'Chamber of Xarant
Wormbound. Immortal champion of Nex.' As you might imagine, this is a boss battle, so getyourself as ready as you can and step on inside...
+------------------------------------------------------------------------------+
7/25/2019 Grimrock Walkthrough
http://slidepdf.com/reader/full/grimrock-walkthrough 61/117
| ~ BOSS BATTLE! ~ || Vs Xarant Wormbound (and summoned Undead) |
| |
| This battle can be a little overwhelming if you're not careful. While he can |
| see rather easy on his own, his has an annoying habit of summoning Undead to |
| help him in the battle. As such, you can quickly find yourself trapped with || people attacking you from all sides. It's best to focus your attacks on him |
| as much as you can and retreat only when you have to. His attacks can be |
| quite strong, but you should be able to tackle most of them, and you can || always seal him away in a Force Field to deal with the Undead first. |
+------------------------------------------------------------------------------+
Once everything is dead you can loot the area and find a MUDWORT, a CRYSTAL SHARD
OF HEALING, as well as a Gold key lock with 10 PELLETS and METEOR GREAVES (Epic
Item). Xarant himself will drop two LONGSWORDS and a AMULET OF NERGAL. Finally
there's a SKULL KEY on the coffin. Once you've got that, you can head back to the previous area
and use the Key on the Skull Lock to open the door.
To door to your right, labeled 'The Silver Scepter of Isochronos'. Inside you'll find a ENERGYPOTION, a SHOVEL and a NOTE that says 'Where there is nowhere to hide from the sunlight,the loneliest of all threes resides. The missing limb will point you to the right direction. Just walk
as far as the eye can see.' A clue for a Treasure we'll find later.
Keep following the path and go North to smash some pots and find some CHEESE. Now turn
around and head South and into the next area. Here, a Fireball will be regularly flying around the
area, so be careful where you stand. If you drop into the pit and wander around either Undead
will spawn and you can pick up three CROSSBOW QUARRELS.
If you climb up the ladder out of the pit, be careful of the fireball. Follow the path all the way
around the room, crossing the first bridge but don't cross the second bridge. Instead, stick to thestone floor and in the two windgates at the end of the path there's a hidden button on the wall.
Press it to turn off the windgates, and allowing you to safely go over the bridge you didn't go over before. There's a button on the wall here and will turn on a very short-lived magical bridge
behind you. Step backwards quickly to me it to the other side. Here you can find a CRYSTAL
HELMET (Epic Item).
+------------------------------------------------------------------------------+
| ~SECRET~ |
| Where you pick up the Crystal Helmet there is also an Ice Guardian Figurine. || Take this little guy North and into the previous area. Drop down into the |
| pit and to the South down here is a magical bridge sealing off an area. With |
| a sign that says 'With icicles from beneath, I strike at thee.' Place the |
| Figurine on the self to turn it off. |
| Items: Tome of Water |
| Found: 58/77 |
+------------------------------------------------------------------------------+
You can open the door using the Lever near the Helmet, and then head West. Eventually you'll
find a windgate you can walk through. The room beyond is split into two levels. The upper with a button which fires off an energy ball and the lower with a lever that swaps the open/closed
positions of the doors above. What you have to do is press the button and then step backwards to
7/25/2019 Grimrock Walkthrough
http://slidepdf.com/reader/full/grimrock-walkthrough 62/117
drop down and get to the lever quickly. Once you see the light of the energy ball above you, flipthe lever so the doors will toggle. It will fly over and into the windgate beyond the door you just
opened and then bounce back, meaning that you need to flip the lever again once you see the
light above you again. Assuming you do it right, the third door in the room will open, allowing
you to continue.
Take a right and you'll find a BLOODDROP CAP and a CRYSTAL FLOWER. The other direction will take you to a large open room. Nine Undead will appear in the pit ahead, so you
need to drop down in there and deal with them. Once they're all dead you can pick up two
MUDWORT, a CROSSBOW QUARREL, a FALCONSKYRE, a FULL HELMET, 5 CANNONBALLS and a TATTERED SHIRT.
Flip all four levers down where to open four gates. One of which will allow you to access the
POWER GEM (16/20), one will allow you to access the windgate back up, and the other two
open the doors to the stairs leading down...
~~~ Orul's Crypt ~~~
Go forward and take the right path, and then turning right again can get you a SHIELDPOTION and the Crystal of Life up the ladder. The left path here leads to a closed door and asign that reads 'Crypt of Orul Wormbound. Fallen in numerous battles but rises again with the
power of the crystals.'
Ulp!
Flip the lever to open the door and inside you'll find three BLACKMOSS scattered about on the
floor. This area acts as a sort of hub, with three windgates labeled 'The Sanctuary' in the north,
'The Mausoleum' in the East and 'The Laboratory' to the South. As the order we do these in
doesn't really matter, let's start in the North, so take the windgate here.
+------------------------------------------------------------------------------+| ~SECRET~ |
| Once through the windgate, immediately turn left and you'll see a button on || the wall. Press it to turn the windgate off, and allow you access to another |
| button. Press that to bring the wall up, releasing the Skeleton Trooper |
| inside. It will also raise up a wall to the West with a Xeloroid inside. Be |
| sure to turn the windgate back on when you're done as you'll need it later. |
| Items: Scythe |
| Found: 59/77 |+------------------------------------------------------------------------------+
Walk forward and open the door here, there'll be three Xeloroids flying around this area for you
to deal with. Drop down into the pit to find a GREATER ENERGY POTION, a SCROLL OF
FIRE SHIELD and if you climb up the Southern ladder you can find a RAGE POTION.
Follow the path west, past the closed door and step into the windgate. Here you'll find a
HORNED FRUIT and a NOTE that reads 'I decided to drop my trusted axe into the teleporter to
see if it is safe. I wish I would know where it went.' Flip the lever to open the wall and go back to
the windgate. This time however throw a Rock into it to open the closed door. You can take the
GREAT AXE here if you want it. Time for a puzzle I think. This one's a different twist on a classic puzzle. You have to move
across all the magical bridge squares in front of you, without leaving any and end up by the exit
7/25/2019 Grimrock Walkthrough
http://slidepdf.com/reader/full/grimrock-walkthrough 63/117
door all in one go. Here's what to do: Stand on the Middle pressure plate and always face North,then go: Forward, Left twice, Forward five times, Right three times, Backwards, Left,
Backwards, Left, Backwards, Right, Backwards, Right, Backwards, Right, Forwards twice, Left,
Forward, Right, Forwards, Left.
When you reach the other side the gate will open. If you're interested the sign just says 'When
the room is void of light the door will open.' But we already knew that! In the room you'll find aSKULL KEY. Drop down the ladder and follow the path along to find a SACK with three
BLOODDROP CAPS, a ETHERWEED and a FALCONSKYRE inside. Drop down again and
follow the path, flipping the lever when you come to it and climbing back up find yourself back where you started.
Take the windgate back and use the Skull Key on one of the Skull Locks in the room. It doesn't
matter which. Then take the windgate to the East. There's a FALCONSKYRE on the floor here
for you to pick up, and then down the corridor you'll see The Trickster on the other side of a
grate.
Oh joy!
When you enter the room he's in he'll step off the pressure plate, releasing a whole bunch of
creatures into the area, including five Skeleton Troopers, two Skeleton Archers and a Xeloriod.He'll still be throwing Fire Bombs at you, so watch out! If you wish, you can retreat back to thewindgate quickly and stay in the smaller room here, as it's easier to deal with the creatures and
you can retreat through the windgate to the Crystal of Life if things to get too deadly.
Once they've all been dealt with, you can find a BLOODDROP CAP and two LIGHTNING
BOMBS in the little alcoves near the pressure plate. Go through either of the two Southern doors,
they both lead to the same place. In this room it's another puzzle. First, stand by the East-most of
the grates, and when the forcefield on the other side disappears, drop of Rock onto the pressure
plate below. This opens the nearby gate. The next thing you have to do is to stand on the pressure
plate to deactivate the forcefield on the other side of the room, however it only does so for a bouta second. This then requires timing. Stand next to the pressure plate and wait for the alternating
forcefield to drop in front of you and then step forward and throw a Rock. If you get the timingright the rock will land on the Pressure plate over there and open the gate.
Now that the gate is open, you can drop into the area below if you wish to reclaim the Rock you
dropped as well as three CROSSBOW QUARRELS before taking the windgate back up. Go
through the now open door and turn left into a large room. Another puzzle now. You'll notice an
energy ball bouncing back and forth across the room. If you stand in front of it to stop it, another
forcefield appears at the far side. To the left of where you walked in is a button on the wall thatturns on four energy balls and deactivates the forcefields. This means that, will all the energy
balls active, you have to make your way across the room without letting them hit you. As you
might expect timing is everything. Getting past the first one is easy, as there's a space on the
other side, but the other three are all next to each other and very tricky to get past. Now, I want to
point out that you can let one of them hit you and still continue, but you need all four of them left
to be able to access the Locked Chest on the other side. Inside is a HORNED FRUIT, some
BREAD and a DIVINER'S CLOAK. So it's your choice if you want them or not.
Once you get past, the room beyond contains the KNUCKLES OF STEEL and a SKULL KEY.
The path West has a lever at the end. Flip it to open the wall back to where this area started. Takethe windgate back and use the second Skull Key on another Skull Lock. Head through the South
windgate and into the final area.
7/25/2019 Grimrock Walkthrough
http://slidepdf.com/reader/full/grimrock-walkthrough 64/117
Follow the path and be prepared for a shock. The area ahead will contain 16 different types of Enemy! Thankfully they're all sealed in Forcefields, but if you mess up with the puzzle in this
room, they'll be released, so take care.
Aside from all the enemies, there are also found forcefield along the Northern wall with things
inside and a sign that says 'I differ. Who am I?' In other word you have to pull the chain on the
one that is the odd one out, as follows: - the Branch, West-most
- the Potion, Middle-West
- the Helmet, East-most - the Wizards Hat, West-most
- the Turtle, Middle-East
- the Wyvern, East-most
Also, if you pull the wrong one, not only will you get hit by a blast of fire, but the enemies will
be released in waves of 1, 2, 3, 4 and 4, although the exact order is random. Here's what you'll be
facing: a Slime, a Summon Stone, two Skeleton Archers, a Mosquito Swarm, a Wyvern, a
Shrakk Torr, a Turtle, a Sand Warg, a Rat Swarm and Four Mummies, an Undead, an Adult
Herder, a Ice Guardian, two Skeleton Troopers, a Xeloriod.Once you've opened the gate with the correct answers, in the next room you'll see a massive pit
of spikes. There's some LEATHER GLOVES on the floor and a LETTER on the shelf that reads:
'Dear Visitor,
What can never be observed, but it's presence prevents everything from being
seen?
Answer me this and you shall be guided to the other side.
The Island Master'
Worked it out?
The answer is: Darkness. Take the torch off the wall up here and then drop down to take the onefrom in the pit, quickly climbing back up the ladder afterwards. With the two Torches out, you'll
see light appearing in the spike pit, telling you where the next safe area is going to be. You might
also want to turn whatever light you're using off, as to can lead to problems finding them when
you drop down into the pit. Whenever you're ready, follow the light across the area to the other
side. Whilst down there, you can find some CHEESE, 10 PELLETS, a CROSSBOW
QUARREL, and a LIGHTNING BOMB. On the far side you'll find the SKULL KEY.+------------------------------------------------------------------------------+
| ~SECRET~ |
| About two-thirst of the way along this room you might spot an open area up |
| above the spike. Right below this is a hidden button on the wall. Getting to |
| it can be very tricky, but if you're patient enough to wait for a light to |
| get close, you can press it in safety. This opens a wall near where you |
| picked up the Skull Key, allowing you to access the Chest. |
| Items: Lock pick, Fire Torch, Fireblade |
| Found: 60/77 |+------------------------------------------------------------------------------+
Now that you've got the final Skull key, head back across the spike pit, sticking to the lit areas,
7/25/2019 Grimrock Walkthrough
http://slidepdf.com/reader/full/grimrock-walkthrough 65/117
and then through the room with the monsters back to the windgate. You can use the final SkullKey on the final lock, however when you do, you'll find yourself trapped in a Boss Battle, so be
sure you're ready before you use it!
+------------------------------------------------------------------------------+
| ~ BOSS BATTLE! ~ |
| Vs Orul Wormbound (and Minions) || |
| While this boss is quite similar to the last one, there's a few difference |
| that need to be addressed. Firstly, As well as Orul and the Undead he || summons, there's also a Xeloroid that get released into the area, and it's |
| ability to paralyze one of you party can be a killer if you're not careful. |
| The area is also slightly smaller, with some places where you can get |
| trapped in you're not careful. For the most part though, if you beat the |
| last boss, this one should be ok too. |
+------------------------------------------------------------------------------+
Orul will drop two LONGSWORDS once he'd dead. The Southern of the two gates opened
allows you to get at a Locked Chest containing a POTION OF WILLPOWER, and a BRACE OFFORTITUDE. The other door of course allows you to get to a POWER GEM (17/20). The littleare that opened up in the North-West and released the Xeloriod during the Boss Battle also
contains a button that you can press to open the door.
Use the Crystal of Life if you need it and then walk West past the stairs and you'll find a locked
door and a Sign that says 'Windgate to the Surface'. Open the door and step through...
~~~Cemetery ~~~
Flip the lever here to open the gate, allowing you access back into the main area. We're totallydone here so head North and then West and back into Sleet Island...
~~~ Sleet Island ~~~
It's time to gain access to the Fourth Shrine. Go West and a little North to get to the talking face
that just says '…'. You may remember the head in the Cemetery told us that looking where he
looks at night well show us a secret. So, go and stand in front of it and looks South. If it isn't
night, Rest until it is and when you're watching The Trickster will show up, activating a magical bridge across to the central island. Quickly run around there and walk over the new bridge; Don't
worry about The Trickster, let him run off.
Now that we have access to the island, we can find a bunch of stuff. To the South-West of the
island there is a VENOMFANG PICK and an ETHERWEED. There's also stairs that lead
down...
~~~ Flooded Dungeon ~~~
You'll find yourself underwater right from the off. Ahead and on your right will be anETHERWEED, and ahead there's a lever. Flip it to open the gate and there's another two
ETHERWEED in here and a ladder out of the water, which I'm sure you'll need. There's also a
7/25/2019 Grimrock Walkthrough
http://slidepdf.com/reader/full/grimrock-walkthrough 66/117
BLOODDROP CAP up here.+------------------------------------------------------------------------------+
| ~SECRET~ |
| Opposite the lever you pulled to get into this area is a little alcove with |
| a button in it. |
| Items: Crystal Cuirass || Found: 61/77 |
+------------------------------------------------------------------------------+
Drop back down into the water and flip the lever here to open the door opposite. In that area aretwo Zarchtons swimming around. You can find an ETHERWEED here, and a GOLD KEY
hidden in the weeds on the floor. Go West and then North into a little alcove to find another two
ETHERWEEDS.
+------------------------------------------------------------------------------+
| ~SECRET~ |
| East of those two Etherweeds is a ladder, climbing up will net you one of |
| the easiest secrets in the game, and access to four Gold Locks. You can use |
| the Ley you just found to open one of them up, which one I leave to you. || Items: Ring of a String, Note 'Blasted. I was prepared to crack open one of || the vaults but the key slipped from my hands. There's no way I'm |
| getting back to the Zarchton infested waters!' |
| The Floral Vault: Leafbond Bracelet, Shaman's Cloak, a Sack |
| containing Falconskyre x3, Mudwort x2 and a Crystal Flower |
| The Golden Vault: Acolyte Staff |
| The Steel Vault: Frost bomb x3, Cutlass, Shield of the Elements |
| The Glass Vault: Potion of Dexterity, Spirit Mirror Pendant, Greater |
| Energy Potion || Found: 62/77 |
+------------------------------------------------------------------------------+ Once you've done everything you need to down here, just head on back up the stairs...
~~~ Sleet Island ~~~
Head around to the East side of the Island and open the door into the Shrine. Inside you'll find a
SCROLL OF FROST SHIELD on the table. As ever, the faces on the wall have things to say:
'This is the elemental shrine of water.
Water is the rune of willpower and frost.
Southeast is whence the forces of water are strongest.'
'Oh thee seeker of the hidden shrine. Only by standing on the place with
perfect elemental equilibrium shalt thou summon forth the gate to the
hidden one.'
Place Four Power Gems onto the table and you'll get the ESSENCE OF WATER. When you
walk back outside you'll find that four Ice Guardians have spawned for you to deal with. Cross
7/25/2019 Grimrock Walkthrough
http://slidepdf.com/reader/full/grimrock-walkthrough 67/117
back over the bridge and head South and back to the Forgotten River.
~~~ Forgotten River ~~~
Head East across the river ad the South to the Castle Courtyard. You can place the final Essence
in it's rightful place. The Castle doors will open now if you stand in front of it, but we'll enter thatCastle later. We've got other areas to explore first. Take the opportunity to sort out your
inventory and prepare to head out again...
+------------------------------+
| ~ End of Section Checklist ~ |
| |
| Secrets Found ---- 62/77 |
| Epic Items Found - 13/17 |
| Power Gems Found - 17/20 |
| Essences Found --- 4/5 |
| Treasures Found -- 10/11 || Level Visited ---- 22/34 |+------------------------------+
Part 10: Up and Out - LOG14
---------------------------
~~~ Forgotten River ~~~
Head North from the Castle Courtyard, then West across the river and the North again into the
next area...
~~~ Sleet Island ~~~
Go East and then all the way north to the top of the area. Then you can head West to the
entrance to the Pyramid. As you do five Zarchtons will jump out of the water, but they shouldn't
be a problem. Now, assuming you were listening to me earlier when you dropped the Serpent Staff outside the
door here. If you didn't, you'd better hope that it's either still in your inventory or you know where
you put it, as if you've lost it, you're not getting in. Pick it up and place it in someone's hands,
holding the right-mouse button to charge up the secondary attack and fire it off at the door to
open it up.
Once the door is open, keep the Serpent Staff on you in your inventory, as we'll be needing it
again soon enough, and head on inside...
~~~ Pyramid of Umas ~~~
Walk forward and on the other side of the pillar in the middle is a RECIPE for the Speed Potion

7/25/2019 Grimrock Walkthrough
http://slidepdf.com/reader/full/grimrock-walkthrough 68/117
(1 Etherweed, 2 Falconskyre) on a shelf. Continue North, past the two locked door to find twowindgates you can get to. The one of the East being labeled 'Tomb of the Highborn' and the one
on the West being the 'Tomb of the Forgotten'. Let's start with the one of the West.
You'll find yourself warped just a little South. As you wander around this area you'll see Torch
on the walls. Pick a few up as you'll need them in this Pyramid. Follow the path, and you'll see a
pressure plate. Stand on it to permanently close the first hole nearby, and then turn around andtake the path to your right that goes West and then North. Here you can find an EMBALMER'S
HEADPIECE and another pressure plate to stand on. This will open a nearby wall releasing a Rat
Swarm and four Mummies, as well as a door that released two Giant Snakes.Head South and you'll see another pressure plate to stand on. Follow the path there around to
find 10 PELLETS and two SHURIKEN on the floor to your right. Head back North and to the
East of the first Pressure plate is a path North. Follow it, killing the Mummies down here, and
you can find a FALCONSKYRE on your right before opening the door. There's a THROWING
KNIFE to your left, and the path leads to a room with two rat Swarms wandering around. Stand
on the pressure plate and the wall in will close and another one will open releasing a Giant Snake
and four Mummies. A second wall will then open, releasing another Giant Snake and then a third
wall will open with yet another Giant Snake. Once they're all dead you can claim 10 PELLETS and two SHURIKEN from the area where theenemies came from. To leave this place, stand by the wall that closed where you came in, and
there's a button on the wall. Press it to open it back up again, and head back South to the
trapdoors where all four will now be closed so you can cross safely.
+------------------------------------------------------------------------------+
| ~SECRET~ |
| You'll pass by a hole on your left that you should drop down. There's two |
| Giant Snakes wandering around down here for the record. As you wander around |
| you'll find a Torch holder without a Torch. Place it inside to open both || gates in this area. The Map is for something we've already got. Take the |
| windgate to get back up. || Items: Speed Potion, Crossbow Quarrel x3, Torch, Map |
| Found: 63/77 |
+------------------------------------------------------------------------------+
Follow the path ahead and you'll eventually reach a little area with a stone face, and a button.
Press the button and quickly step out of the way of the energy ball to open the gate to find the
TOMB KEY beyond.+------------------------------------------------------------------------------+
| ~SECRET~ |
| When you pressed the button to open the gate you probably notice the sound |
| of a wall closing nearby. This hides your secret. To get to it you have to |
| press the button again to close the gate, but be on the other side of it |
| before it closes. Timing is tight, but a little practice will get you |
| through. You can then access a new area here which is the Secret. Flip the |
| lever to get back out. |
| Items: Mirror Greaves || Found: 64/77 |
+------------------------------------------------------------------------------+
7/25/2019 Grimrock Walkthrough
http://slidepdf.com/reader/full/grimrock-walkthrough 69/117
Head back South and then East to get back to the windgate back to the central area. Time totake the windgate to the 'Tomb of the Highborn'. Follow the path to an area with a Crystal of
Life. To the North is a closed door you can't yet open, and to the East is a door labeled 'Burial
Chambers' that you can open, so go through.
Go left and as far North as you can to get to a locked door. On Each side is a little shelf with an
item and a note. The left has the WAND OF FEAR and a NOTE the reads 'Wand of Fear. A giftfor Hamon the merchant. Gold was his only company. The eternity welcomes him.' The right one
has a MOONBLADE and a NOTE that reads 'Moonblade. A gift for Numum the warrior, his
companion and their child. The eternity welcomes them.' We have to return these items to their rightful owners to open the door here. Head back South
and the first room has some PITROOT BREAD, a GREATER HEALING POTION, and a
NOTE on the coffin that reads 'Here rests Tehep the architect, his companion and their two loyal
servants. The eternity welcomes them.' South of this room is a room with a lone coffin in it. As
you might expect, place the Wand Of Fear on the coffin.
+------------------------------------------------------------------------------+
| ~SECRET~ |
| The room to the South of here, with two coffins in it, is seemingly empty. || There's a hidden button on the wall that opens a wall to a secret area. || Items: Storm Amulet, Lock Pick |
| Found: 65/77 |
+------------------------------------------------------------------------------+
To the West there's a room with a BLACKMOSS inside it, and three coffins. Place the
Moonblade here and the door all the way to the North will open. Head on up and go through,
bearing in mind there's three Giant Snakes in the area beyond.
+------------------------------------------------------------------------------+
| ~SECRET~ || As you go through the now open door, there's a little alcove just to your |
| left with a secret button it. This opens a wall to the South beyond the || pots. You can then press the button in here to release three Giant Snakes |
| from the now open area. The note reads 'Mirror Gauntlets. A gift for Burul |
| the Hedonist. His bloated remains needed six vessels. The eternity welcomes |
| him.' Please note that even if you don't want to use the Mirror Gauntlets, |
| take them with you to access another Secret later. |
| Items: Lock Pick, Mirror Gauntlets, Note || Found: 66/77 |
+------------------------------------------------------------------------------+
Go North and you can find a FALCONSKYRE, and then go West through the door. In this
room, drop down one of the two holes down here.
~~~ Tomb Underground ~~~
There'll be six Mummies wandering around down here, so kill them and you can then pick up
the SHORT BOW, two BROADHEAD ARROWS, and an ANTIVENOM. Flip the Lever here toopen the door on the other side, and then step into the windgate to get back up.
7/25/2019 Grimrock Walkthrough
http://slidepdf.com/reader/full/grimrock-walkthrough 70/117
~~~ Pyramid of Umas ~~~
Throw a rock across the two pits onto the two pressure plates to close them up.
+------------------------------------------------------------------------------+
| ~SECRET~ |
| With both pressure plates pressed and the lever below flipped, head back the || way you've come and you'll see a newly opened way down. Climb down and deal |
| with the mummies down here and you can take the second windgate that you |
| opened the door to with the lever. Walk forward and press the button on your || right to open the door and also release three Skeleton Troopers and a |
| Skeleton Archer. You can then collect all the goodies. Take both windgates |
| to get back to where you were before. |
| Items: Gold Key (In first room), Healing Potion, Antivenom, Lock Pick, |
| Tome of Air |
| Found: 67/77 |
+------------------------------------------------------------------------------+
Standing on the Southern of the two closed trapdoors you can place an items through the barsonto the pressure plate. Go around to the other side and place an item on this side on the same pressure plate, before going back and picking the first items back up. You can then go around to
the far side and take the second item back to open the gate. You can then claim the second
TOMB KEY, as well as 4 CANNON BALLS in this room.
Go through the now open door, picking up the two Darts on your right, and go forwards back to
the Crystal of Life if you need it. From there just head West back into the windgate. You can now
use your two Tomb Keys to open the two Tomb Locks here and open the doors. First thing to do
is to place a rock on both of the accessible pressure plates inside to allows you access, and then
throw a rock onto all three of the pressure plates that is in each room. They mirror each other, sodo the same in both to allow you to fully access the rooms. The East room has a SHURIKEN and
10 PELLETS in it.+------------------------------------------------------------------------------+
| ~SECRET~ |
| There's a hidden button on the South wall of the West of the two rooms. |
| Press it and then go to the East room to find a area on the North. |
| Items: Mirror Tagelmust |
| Found: 68/77 |+------------------------------------------------------------------------------+
When you've gotten the items, drop down one of the holes in either room.
~~~ Tomb Underground ~~~
On the West side you can find two SHURIKENS and there's a TORCH on the East side. You
can take the windgate to get back up.
~~~ Pyramid of Umas ~~~
Now to solve the puzzle here. The quick way is to place a Rocks on the pressure plates are
7/25/2019 Grimrock Walkthrough
http://slidepdf.com/reader/full/grimrock-walkthrough 71/117
follows: in the East room place one on the North, South and East and in the West room place oneon the North, South and West. If you do it right the trapdoors in the long room will be set up
allowing you to access all four of the buttons here.
+------------------------------------------------------------------------------+
| ~SECRET~ |
| If you drop down the very North-most of the trapdoors in this long room || you'll be in a small corridor. South from here is the actual secret. Flip |
| the lever to open a wall to a new area with a windgate back up. You'll also |
| run into three Skeleton Troopers, a Skeleton Archer and a Medusa. The note || reads 'Is my measuring cord cursed? I go back and forth between this room |
| and the one above but I can't get my measurement to match. - Thaalpi the |
| Surveyor' |
| Items: Crystal Shard of Healing, Spiritwalker Pendant, Note |
| Found: 69/77 |
+------------------------------------------------------------------------------+
Now you can access all four of the buttons in this room, press them to open the gates. There's no
timer or anything, so don't worry about it. Once they're all open, head on through and you'll find aBOILED CRAG BEETLE and a POLEAXE. Follow the path and head up the stairs...
~~~ Tomb of Rites ~~~
All the way at the far enough of this room is some BREAD on the floor for you.
+------------------------------------------------------------------------------+
| ~SECRET~ |
| You'll notice that there are four light beaming down into the area here, two |
| on either side of the pillar in the middle of the area. If you step into || them in the right order they'll turn off. The order is: South-most, |
| Middle-North, North-most, Middle-South. This opens two walls on either side || of the pillar, containing two Giant Snakes and twelve Mummies. |
| Items: Scroll, Sickle Sword |
| Found: 70/77 |
+------------------------------------------------------------------------------+
In the North have of this room are two closed doors labeled 'Tomb of Offerings' to the East and
'Tomb of Sacrifice' to the West. Let's go East first. Open the door here and you'll likely run into aMedusa around here somewhere. To the South there's a Crystal of Life. Follow the winding path
and you'll reach a room with some pots., so smash them to get two POISON BOMBS.
+------------------------------------------------------------------------------+
| ~SECRET~ |
| Open the nearby door with the lever. Inside, place the Mirror Gauntlets on |
| the coffin to open the wall. |
| Items: Salted Sausage, Bread x2, Lizard on a Stick, Cheese, |
| Potion of Vitality x2, Blueberry Pie |
| Found:71/77 |+------------------------------------------------------------------------------+
Continue following the path and you'll find a BLOODDROP CAP in a little alcove, and then the
7/25/2019 Grimrock Walkthrough
http://slidepdf.com/reader/full/grimrock-walkthrough 72/117
next room there'll be a Medusa floating around. When it's dead, drop down the hole here to find aPOISON BOMB before using the windgate to get back up.
Time for an annoying little puzzle. Well, annoying for the one who had to solve it and work out
that it's the place where the items cross that changes the trapdoors! For you it'll be easy. There's
are six tables in this room, three on the North and three to the East. Place a Rock on all three of
the North ones, and the middle and South of the East ones. This will then allow you into the areawith the trapdoors. Take the rock off the middle of the North ones, and this lets you get to the
Lever, so flip it. Place the rock back once you're done to allow you to leave the area.
Go through the open door and you can find four CANNON BALLS and a TOMB KEY. Takingthe key will raise the door here, releasing two Medusa and a Mummy and allowing you to pick
up a PEARL SHIELD if you want it. Head back and you'll find that eight mummies have been
released, and there's a POTION in the North-West corner of this room. Head all the way back to
the middle room, you'll likely run into a Giant Snake along the way. Once back at the middle area
take the West door opposite.
Go forward and open the door here. You can find 10 PELLETS on the floor in this room, which
is split into two halves. There's 'Campion of Sun' to the South and 'Guardian of Moon' to the
North. Take the Torch out of the holder on the wall on the Moon side and place it on the Sunside, along with another Torch that you've hopefully he carrying around since I told you to. Thisopens the nearby door, likely letting a Medusa out, if not you'll run into it as you head down the
corridor.
There'll be a Giant Snake beyond that, and 10 PELLETS in a little alcove. Open the door here
and before you do anything else drop down the hole.
~~~ Pyramid of Umas ~~~
There's two mummies wandering around down here for you to kill as and when. To the East of where you dropped down is a windgate that you can use later, but there's also a hidden button in
the little alcove nearby to open the wall back to the main area. In the other direction is a path thathas a TORCH and some MOLE JERKY, and there' a puzzle at the end labeled 'Tomb of the
Guardians'.
+------------------------------------------------------------------------------+
| ~SECRET~ |
| Place an item on the closed trapdoor here and then go and stand on the |
| pressure plate to the West. Once that's done, go back and drop down the || hole. Use the Windgate to get back up. |
| Items: Mole Jerky (outside Secret area), Potion of Willpower, Poison Bomb x3 |
| Found: 72/77 |
+------------------------------------------------------------------------------+
To solve this puzzle, place an item on the pressure plate to the West, but do so at the back of the
pressure plate so it's next to the bars. Step into the windgate that it creates and turn around to
pick the item from the other side of the grating. Go around and stand next to the door and then
throw a rock over the pit to the pressure plate there and the door will open. In the room with the
forcefield holding the Sword, there's a LIZARD ON A STICK. Taking the windgate warps you yo a room with two Medusa's and three Giant Snakes. This can
be a tricky battle if you're not careful. Focus on the Giant Snakes first, as they've got lower HP,
7/25/2019 Grimrock Walkthrough
http://slidepdf.com/reader/full/grimrock-walkthrough 73/117
and be careful with the spikes in the corner of the room. Once they're all dead the door will open.+------------------------------------------------------------------------------+
| ~SECRET~ |
| With the enemies dead, and the door open you can go back to the room with |
| the sword and pick it up. |
| Items: Ancient Claymore (Epic Item) || Found: 73/77 |
+------------------------------------------------------------------------------+
Head all the way back and take the windgate back up, although be aware it places you in the path of a fireball, so move quickly.
~~~ Tomb of Rites ~~~
Smash the pot when you can safely avoid the fireball, and move through the room to the far
side. Once you reach as far as you can go, you'll see a door that looks like the one at the entrance
to the Pyramid. I hope you listened and kept the Serpent Staff on you. Stick it in someone's hand,
charge up a bolt and fire it off at the door. Once it's open, on the wall where the fireball hitsthere's a hidden button to press. The fireballs will now fly through the open door and this will open the nearby gate as well as
bring up the wall releasing two Medusa's and a Giant Snake into the area. In the area where they
were you can find the ARCHMAGE'S SCAPULAR, some BLACKMOSS and a SCROLL that
reads 'Three steps x and south from xx' but we've already got this. Through the open gate you can
find another TOMB KEY. Now, head back to that central room again.
On your way you'll find a Medusa and four Mummies wandering around, and on your right will
be a little area that's now opened where they came from containing a LIZARD ON A STICK.
Once back in the main middle area, head South though the corridor here and follow the path tofind a LIZARD ON A STICK and a LOCK PICK in the dead end. Then drop down one of the
holes.
~~~ Pyramid of Umas ~~~
Down here you'll run into a Medusa and four Giant Snakes. In the little area to the East there's a
SHURIKEN, and to the South there's a GREATER ENERGY POTION, 10 PELLETS, and some
XAFI KHAKIS. Finally, to the North you'll see a Lever. If you check the little alcove nearbyyou'll see a hidden button to open the wall back into the central entrance. Flip the lever to turn on
a windgate back to the room above to the East.
~~~Tomb of Rites ~~~
Another little puzzle to solve. The windgate on your side is connected to the one that's moving
around. So when you step through it you'll appear on whatever square it currently sits in. First,
equip the Serpent Staff for the final time and wait for the windgate to appear on the East of the
two solid platforms. Fire off a charge at the door to the East and, if you have time before thewindgate loops back around, throw a Rock through the open door. If not, just wait for your
chance when the windgate moves into the right position. When you throw the Rock the gate near

7/25/2019 Grimrock Walkthrough
http://slidepdf.com/reader/full/grimrock-walkthrough 74/117
the West of the two platforms will open. Wait for the windgate again and head on through. Hereyou can find a POWER GEM (18/20) and the stairs going up...
~~~ Ceremonial Chamber ~~~
There's two LIGHTNING BOMBS, a BROADHEAD ARROW and a FALCONSKYRE in thisroom. Flip the lever to open the door. In the area ahead you'll see two fireballs zooming around
the room via the windgates, but a Forcefield spell can stop them in their tracks without any
danger. In the area here you can find the METEOR LEG PLATE (Epic Item) on the shelf and theBRONZE BRACE on the floor.
Head into the main room and you can find three CRYSTAL FLOWERS scattered around. To
the south is a closed gate with a pressure plate in front of it. Place something on the pressure
plate and inside you'll find 10 PELLETS and the SCROLL OF DARKBOLT. The other Southern
room has a HUNTSMAN CLOAK and a FALCONSKYRE and a sign labeling the room
'Arrival', which is what the pictures on the wall show.
To the North is another room, this one called 'Betrayal' again based on the pictures on the wall.
You can also find a ROCK, two FROST BOMBS and three CANNON BALLS. Place the Rock on the nearby Pressure plate and the gate opposite will open. If you go around and into that roomyou can find an ENERGY POTION and a GEAR NECKLACE.
With all that done you can head to the West of the large central room. You'll see the statue there
with two Tomb Locks on either side. Using your two Tomb Keys will turn on a windgate in the
middle of the room and Mummies will walk through it so kill them.
Now, I'm going to give you a warning here that when you step through the windgate you'll be in
a large area that is totally full of Mummies, and a few other nasty creatures. It's also rather tricky
yo leave this pace once you've entered, so be sure you're well prepared before you go though.
~~~ Barren Desert ~~~
Brown Trousers time, right?
In this vast open area you'll run into 60 single Mummies and 30 quadruple mummy groups. Oh,
and there's two...I'm gonna repeat that TWO Magma Golems wandering around in the North,
although once they spot you they will follow you relentlessly so be damn careful, especially as
attacks have a wide area and do a bit of damage. Oh yes, and other thing; once you've been here a
while, and believe me you will, The Trickster will show up to cause you even more problems!Isn't that nice of him!
The best strategy I can give you is just to focus on killing the Mummies and slowly whittling
down their numbers. Stay to the South at first until the Magma Golems start getting close to you,
and then keep moving around the island. If things get too bad, there's a Crystal of Life in the
North-East corner, although be careful not to get trapped in the loop there. To the North-West is
a windgate out of the area, but try not to take that unless it's a massive emergency. Just keep
attacking the Mummies and staying out of the way of the Magma Golems.
When The Trickster shows up, hopefully you'll have reduced their numbers somewhat and will
be able to deal with him easily enough. He'll still be throwing Fire Bombs at you, so just avoidthem and attack when you can.
After a long while the numbers of Mummies will eventually drop to nothing and you can focus
7/25/2019 Grimrock Walkthrough
http://slidepdf.com/reader/full/grimrock-walkthrough 75/117
on the two Magma Golems. Once they're dead you'll see that they've dropped some goodies. Onewill drop the METEOR PLATE (Epic Item) and a GOLD KEY, and the other will drop a
POWER GEM (19/20).
With all the enemies gone, it's time to start exploring and looting the area. Starting in the
North-East corner with the Crystal of Life, here's a CRYSTAL FLOWER on the floor right next
to it. South from here are 10 PELLETS, and then further South is a SCALED CLOAK and atalking face that says 'You have been mislead. Not everything is composed of four sides. Six is
the most powerful figure.'
Oh, mysterious! South of here in a little alcove there's some PLATE GREAVES and an ENERGY POTION.
Wander to the South-West corner to find another CRYSTAL FLOWER, and a SERPENT
BLADE on a little pedestal. If you now head into the middle of the area you can pick up three
FALCONSKYRE and another 10 PELLETS slightly to the North.
+------------------------------------------------------------------------------+
| ~TREASURE~ |
| In the North-East part of the area is a very dead-looking tree. On the West |
| side of the tree is an open hole where a branch would've been. Turn so the || tree is behind you and walk forward all the way to the other side of the || area. When you hit the wall at the far end (it should take 20 steps) take a |
| step back and dig up a Locked Chest. |
| Items: Potion of Dexterity, Silver Scepter of Isochronos, |
| Potion of Resurrection |
| Found: 11/11 |
+------------------------------------------------------------------------------+
Whenever you're ready and everything been killed/collected you can use the windgate in the
North-West corner to get back...
~~~ Sleet island ~~~
Yes, this is where this windgate led to the whole time!
Flip the lever here and the gate will open allowing you back into the main area. Drop into the
water to the North and climb up the ladder ahead of you and then head around the East side of the
area to get back to the South and head down...
~~~ Forgotten River ~~~
Head East across the river and then South to the Castle Courtyard. Take some time to sort out
your inventory and prepare yourself for the final push through the last areas of the game!
+------------------------------+
| ~ End of Section Checklist ~ |
| |
| Secrets Found ---- 73/77 || Epic Items Found - 16/17 |
| Power Gems Found - 19/20 |

7/25/2019 Grimrock Walkthrough
http://slidepdf.com/reader/full/grimrock-walkthrough 76/117
| Essences Found --- 4/5 || Treasures Found -- 11/11 |
| Level Visited ---- 27/34 |
+------------------------------+
Part 11: Storming the Castle - LOG15
------------------------------------
~~~Castle Nex ~~~
Walk forward and in front of you is a pedestal with a CURSED COMPASS, which you must
bring with you for a later room, and a LETTER that reads:
My dearest visitor,
I would never have expected you to get this far. Very well, it is my duty to welcome my guests to my humble abode. Meet me at the top of the castle.
The Island Master
Beyond the pedestal is a button on the wall to open the gates.
+------------------------------------------------------------------------------+
| ~SECRET~ |
| When you press that button, it'll open a wall back near the stairs into this |
| area. Follow the path to a windgate to warp to a Chest. Just drop down to || get back. |
| Items: Greater Healing Potion, Potion of Resurrection, Potion of Strength || Found: 74/77 |
+------------------------------------------------------------------------------+
Head through either of the gates and you'll be in a large room with a strange locked gate in front
of you. Ignore this for now and look right to the South wall to see two sets of writing that read:
The Fifth Element All matter in the universe is made from four basic elements; fire, earth,
air and water. Fire opposes water like air opposes earth.
But without a fifth spiritual element, there would be only void as all
matter would fall apart when the four basic elements cancel each other out.
We call the fifth element “balance! Although perhaps the breaker of balance
would be a more fitting name.
And the other one say:
Creation Myth
For near a infinity the basic elements were in equilibrium and there was
7/25/2019 Grimrock Walkthrough
http://slidepdf.com/reader/full/grimrock-walkthrough 77/117
only void. Then came the spirits and the creation spell was cast. With the spell the fifth element was created and thus the equilibrium of the
elements was disrupted. The universe exploded into existence.
The spirits left but the words of the creation spell remained in the
universe. Should they ever be lost, it would undo all creation. Hence the
words of the creation spell are forever guarded in Nexus.
Well now, that is interesting...
+------------------------------------------------------------------------------+| ~SECRET~ |
| Around that strange door is a pool of water. If you drop inside and check |
| the North West corner you'll find a little alcove with a button in it. When |
| you press it, it opens a wall up above. It's on a timer, so you'll have to |
| be very quick to get to it. It's best to not bother with turning around and |
| just focus on moving backwards after you've climbed out of the water. A few |
| tries and you'll get it easily enough. |
| Items: Tome of knowledge, Skull, Throwing Axe x2, Cannon Ball x5 || Found: 75/77 |+------------------------------------------------------------------------------+
Press the button on the opposite side of the room to where you walked in to open the door here
and go around the edge of this room to find the stairs up...
~~~ Library ~~~
Head forward and open the door ahead. Ahead now is a locked door that we can't yet open, to
the left a closed door and an open path to the right, so let's go right. Up ahead you'll find aGREATER HEALING POTION. Open the nearby door to find three BROADHEAD ARROWS
inside. The next room is seemingly empty, bu to the West is a little alcove with a POTION OFRESURRECTION and a NOTE that reads 'Around the lone pillars. Don't let tired feet stop you.'
There's a pillar nearby, so if you walk around it you'll eventually hear two clicks. Once you hear
the second, check the East side of the pillar to find some magical text has appeared that reads
'Two V'. However, doing this will also have spawned two Dark Acolytes for you to fight
throughout the area, which is going to cause you a lot of problems, so have plenty of Antivenoms
on hand. Open the door here and at the junction go Right into the little alcove to find an ANCIENT MAP
on the books, which shows you the map of the whole of the Isle of Nex, which we've pretty much
explored all of. Although the fact that the Docks seem to be beyond the Castle is interesting. To
the south is an open area with four BLOODDROP CAPS and three ETHERWEEDS for you to
collect.
There's another pillar here for you talk walk around. Again, listen for the two clicks and on the
West side you'll see writing that says 'One II'. This will spawn another two Dark Acolytes to deal
with. Head East now and the area here has two PELLETS behind the pillar, which you can also
walk around to get 'Three III' on the south side and another two Dark Acolytes. Open the door nearby and we'll be right back where we started. Now that we know how to open
the locked door, head there and you'll see three levers and a button. How this works is that each
7/25/2019 Grimrock Walkthrough
http://slidepdf.com/reader/full/grimrock-walkthrough 78/117
of the levers represents a number. The left one is 4, the middle one is 2 and the right one is 1.You have to match the levers with the numbers you were given earlier.
So, first flip the middle lever down and then press the button. You'll hear two clicks. Next flip
the middle lever up and the other two levers down and press the button. You'll head five clicks.
Finally flip the left lever up and the right lever down and press the button to hear three clicks and
the gate will open, allowing you to head up...
~~~ Twisted Passage ~~~
You'll walk into a seemingly empty room. If you walk around a bit you'll quickly find yourself
warped back to the entrance of the room by invisible windgates. And as they seem to move and
randomize themselves each time, it seems impossible. Actually, it's very easy. Open up your
inventory and look at the Cursed Compass from earlier. As you walk into the room you'll see the
needle start moving around. The red half of the needle points to where the invisible windgates
are, so move forward one step at a time and keep an eye on where the red needle is pointing.
As I said, it's random, so I can't guide you exactly, but eventually you'll reach a door you can
open. Once on the other side you don't have to worry about the hidden windgates anymore. Openthe next door here to get to a Crystal of Life and a SACK on the far wall containing a BAKEDMAGGOT, some BREAD, a HORNED FRUIT and a BURROW RAT SHANK. Head back and
you can reach the stairs to the next level...
~~~ Test Chamber ~~~
I guess now we're thinking with windgates, huh?
Head Right and then right again into a little dead enough with a grating at the end of it, but you
can reach through and drop an item down onto the pressure plate below. Turn around and the previous active magical floor will have turned off. Drop down and deal with the Crab down here.
Place a rock on the pressure plate down here, it's the round circle thing next to the torch, and thenuse the nearby windgate to get back up.
Go forward and then right and climb up the two ladders here. Up here there are two Xeloroids
and a Eyctopus to deal with, and you can pick up 10 PELLETS and a VENOMFANG PICK.
There's also three CANNON BALLS if you drop down into the little pit nearby.
Puzzle time! First place something on three of the four corner pressure plates here, leaving the
North-West one black. That's the one nearest to the stone face on the wall. Also, when you placeon the one next to the ladder and the receptacle on the wall, be sure to place the item as close to
the ladder as you can so you can grab it shortly.
Now, press the button on the wall and once the energy ball has gone past quickly place an item
on the corner pressure plate there. This should have the energy ball running around in circles.
Use the now active magical bridge to get around the area and stand where the ladder is. Once the
energy ball has passed, grab the item you placed and quickly step to the left and forward onto the
solid floor. To door will then open.
If you drop down where the ladder is here you'll find a lever that'll turn on a windgate shortcut.
Go back up and wait for the magical bridge to appear and follow it around. If you want to dropdown to the get the POTION OF DEXTERITY you can. Just use the now active windgate near
the stairs down to get back up. Once across the bridge you can flip the lever to open the door
7/25/2019 Grimrock Walkthrough
http://slidepdf.com/reader/full/grimrock-walkthrough 79/117
here.+------------------------------------------------------------------------------+
| ~SECRET~ |
| When you flip the lever to open the door here you'll also open a wall back |
| in the previous area. Head back and drop down, and get back to the area with |
| all those pressure plates. You'll have to reactive the magical bridge here || to get to the open wall. |
| Items: Potion of Resurrection x2 |
| Found: 76/77 |+------------------------------------------------------------------------------+
With the door open you can now go up the stairs...
~~~ Void ~~~
Take the right ahead of you and you'll find a SACK with a SALTED SAUSAGE, some
BREAD, and a BORRA inside. The other path leads to a ladder, so climb up. On this ground
floor you can find 10 PELLETS and five CANNON BALLS by the South wall, and another SACK with four BLOODDROP CAPS, two FALCONSKYRES and seven ETHERWEEDS inthe North-East of the area.
Head up either ladder on this floor to get to the next, where two Spiders are creeping around.
Kill them and press the button on the wall to the South-West. This turns on a bridge and spawns
three Fire Elementals so be careful. Cross the new bridge and you can find a GREATER
HEALING POTION before the ladder and then climb up it. There's two Green Slimes in this
floor, so kill them and then head up again for another two Spiders and another two Green Slimes.
To get to the next button, from the ladder up to this floor go North into the little area and look
West over the ledge. You'll see a platform you can drop onto here, so drop down and press the button. This will again release three Fire Elementals into the area. You can now drop down onto
the lower platform, and them climb back up to the top level. On the highest level of this room, at the South-East part is a ladder going down. Place that
behind you can fall down. You'll get hurt, but also find a Locked Chest containing four FROST
BOMBS and four FIRE BOMBS. Stand to the side of the chest to turn on a bridge to get back.
Once on the top floor, cross the now active magical bridge to get to the door and open it up. First,
go left and you'll find four CROSSBOW QUARRELS on the floor. Continue around and you'll
find five CANNON BALLS and a button to activate a warp back to the ground floor of theCastle. If you use it, just press the button on the wall to open the wall out.
Continue around and you'll find the Crystal of Life you saw earlier and you can also find three
POISON BOMBS, a SICKLE SWORD, 20 PELLETS, a SCALED CLOAK and two POTIONS
OF RESURRECTION. Go South and around to find a GREATER ENERGY POTION and the
stairs up...
~~~ Castle Roof ~~~
Ready for a big battle? I hope so! Behind the stairs you just walked up are three LIGHTNING BOMBS, which might some in
handy for the fight. Whenever you're ready, step into the large open area.
7/25/2019 Grimrock Walkthrough
http://slidepdf.com/reader/full/grimrock-walkthrough 80/117
+------------------------------------------------------------------------------+| ~ BOSS BATTLE! ~ |
| Vs Lyndworm |
| |
| Well, as this is one of the final bosses in the game, it's gonna be a tough |
| nut to crack. With The Island Master riding around on his back, he'll often || summon creatures for you to have to deal with, which will be the biggest |
| problem you'll have to face. Starting with ten Undead right from the outset, |
| then you'll get five Ratlings and four warg. That's then followed by three || Snakes, a Medusa, and a Dark Acolytes, the Medusa dropping an ANTIVENOM and |
| an ANTIDOTE and the Dark Acolyte will drop a CRYSTAL SHARD OF HEALING. After |
| that you'll get four Uggardians and two Magma Golems, the latter of which |
| will drop three FIRE BOMBS each. Then it's an easy set of four Mosquito |
| Swarms. The next set is four Mimics and three Xeloroids, which will drop |
| five LIGHTNING BOMBS, three RAGE POTIONS, three PELLETS, an ENERGY POTION, |
| and two HEALING POTIONS. Then you get a round of twenty seven Mummies. After |
| that it's three Turtles. Then it's four Skeleton Troopers, three undead and || even one of the Wormbound Brothers! After that it's three Spore Mushrooms, || three Adult Herders, five Herders, four Child Herders, and two Frogs. |
| You'll get five POISON BOMBS from the Adult Herders. After that you get |
| thirteen Spiders. Then it's five Ice Guardians, followed by ten Wyverns. |
| After that it's three Fire Elementals, and three Wind Elementals. This is |
| followed by ten Zarchton, and three Giant Crabs. This list could actually |
| continue, but by this point either you'll be dead or the boss will. In |
| fact, realistically, you'll hopefully have killed the boss before the |
| Magma Golems show up. Also, sometimes when it summons something, it'll || create an impenetrable barrier over itself, so when this happen, focus on |
| attacking the creatures. Once all but one of them is left, the shield will || drop and you can attack the dragon again. In terms of the dragons attack, |
| obviously it can attack you physically if you stand too close to it and it |
| will sometimes charge at you, doing multiple attacks which can be deadly if |
| you're not careful. Also, The Island Master has a habit of sending out three |
| rows of ice Spikes at you, so watch out for those. As with all bosses, keep |
| yourself healed and full of energy with your potions, only use the Crystal || Shard of Healing in a major emergency. |
+------------------------------------------------------------------------------+
Once it's dead, it'll drop a POWER GEM (20/20).
Yes the final one of the game!
If you haven't already, you can collect any of the dropped items from the area. You'll also notice
that on the West side of the area, now open having beaten the Boss, is a glowing archway.
If you're happy with what you've so far accomplished, if you're satisfied and feel that the few
remaining mysteries of the Island are of no consequence, then by all means step through and
experience the first ending to Grimrock 2...
+------------------------------+
7/25/2019 Grimrock Walkthrough
http://slidepdf.com/reader/full/grimrock-walkthrough 81/117
| ~ End of Section Checklist ~ || |
| Secrets Found ---- 76/77 |
| Epic Items Found - 16/17 |
| Power Gems Found - 20/20 |
| Essences Found --- 4/5 || Treasures Found -- 11/11 |
| Level Visited ---- 33/34 |
+------------------------------+
Part 12: Finale - LOG16
-----------------------
~~~ Castle Nex ~~~
If however you want to solve that final mystery. To find the final Essence, finished exploringthe Island and uncover the truth to why you're hear. Well, to do that we must give up our chanceto leave and explore deeper into the island. Walk away from the glowing gate and back down the
stairs.
Go around to the left and use the Crystal of Life, I imagine you'll need it after the fight, and then
keep going. If you haven't already, turn on the windgate here and use it to get back down, and
then around to the exit for the castle.
~~~ Forgotten River ~~~
Up ahead of you you'll see The Trickster briefly before he runs off. You didn't think he'd leave
you alone now did you? Take the time to sort out your inventory in preparation for the final battle. Make sure you're fully fed, have lots of potions and weapons to use. We do one course
have something missing. The Fifth Essence, which was can only get from the Shrine of Balance,
which is hidden somewhere on the Island. We've been given clues about it's location of course:
- It's in the place where the four elements are in totally equilibrium.
- Fire is in the North-west, Earth is in the South-west, Air is in the
North-east and Water is in the South-east. - We need to cast the simplest of all spells to access it.
It's a tricky one, and I'll admit that it took me some time to notice. Here's a few more clues if
you want to solve this one by yourself:
- The directions of the Elements seems the same as they placement of the four
Essences in the Castle Courtyard.
- Balance is the name of the central rune on your Magicians rune-grid.
- One of the tiles on the floor of the courtyard looks a little different.
+------------------------------------------------------------------------------+| ~SECRET~ |
| The final secret will also gain you access to the Fifth and final Shrine. |
7/25/2019 Grimrock Walkthrough
http://slidepdf.com/reader/full/grimrock-walkthrough 82/117
| Standing in the center of the courtyard and looking at your feet you'll see || an hexagonal symbol on the floor that is exactly the same as the central |
| symbol on the Rune-Grid. Using your Magic user, highlight that rune and cast |
| the spell 'Balance'. You'll be teleported to the final shine. |
| Items: Essence of balance |
| Found: 77/77 (WOO!) |+------------------------------------------------------------------------------+
The heads here still have things to say:
'This is the shrine of balance.
Balance if the invisible force that binds everything together.
Without it the universe could not exist.
You are well on the way to ascension. With it comes a great price. You
still have the choice to turn back.
As before, place your four Power Gems onto the table, and in a flash of light they'll have turnedinto the ESSENCE OF BALANCE. Pick it up and take the windgate back out. Back in thecourtyard, finalize everything you need to. When you're ready, follow after The Trickster by
heading North and go down the stairs to The Hub area. The door that was closed here the whole
time will now be standing open, so follow the path and head on down...
~~~ Trickster's Lair ~~~
Right in front of you will be a Crystal of Life. While you likely won't need it's healing ability,
using it to save now is a good idea. You can explore the area are here to get the lay of the land, just be careful with the pits as you can clearly see that they're full of spikes, so if you do fall
down, climb out quickly. There's a lonely 10 PELLETS in the Large pit in the South room.Whenever you're ready head to the Statue on the South of the room and place the Essence of
Balance there to begin the final battle...
+------------------------------------------------------------------------------+
| ~ BOSS BATTLE! ~ |
| Vs The Trickster |
| || Technically this battle won't be too different from the times your fought |
| him before. He'll still run around and set of tricks and traps for you to |
| have to deal with. The biggest different this time is that he's packing |
| Lightning Bombs, which do more damage. He'll follow a certain pattern that |
| can help you to predict what's going to happen. After taking a bit of damage |
| he'll leave that first room and locks the doors on you, sealing you in as |
| the face on the wall shoots out fireballs. Dodge them or stick up a Force |
| Field to stop them. After a few the gates will open. He'll then wander the |
| area opening up walls and releasing creatures. To the North-West is a room || with three Mosquito Swarms and 10 PELLETS. The South-West room has two |
| Mosquito Swarms in it. To the North-East is a Xeloroid, a GREATER HEALING |
7/25/2019 Grimrock Walkthrough
http://slidepdf.com/reader/full/grimrock-walkthrough 83/117
| POTION and a GREATER ENERGY POTION. And finally to the South are two || Zeloriods and 5 CANNON BALLS. If you're quick, you can actually stop The |
| Trickster from opening some of these areas. |
+------------------------------------------------------------------------------+
When you finally defeat him, you'll uncover the startling truth!
...
The Trickster was The Island Master all along! Clearly this guy has been mess with us from the second we got here!
And now it's come to a final climatic battle between you and him.
Let's go kick his ass!
+------------------------------------------------------------------------------+
| ~ BOSS BATTLE! ~ |
| Vs The Island Master |
| |
| Are you ready to finish this? || If you took a big beating during The Trickster fight use a Shard of Healing || to recover, as you don't get a break in between these fights. All the |
| standard Rules apply; keep moving, keep healed and hit him with everything |
| you've got. Of course, that can be harder then it seems, especially as one |
| of his most common moves is creating weak clones of himself, capable of |
| casting all the spells and stuff that he can. Due to their weak nature, |
| focusing on them can be helpful. However don't focus solely on them or you |
| won't have time to attack the real guy. He has a standard array of magical |
| spells, including the Fireball, Lightning Bolt, Poison Bolt and Ice Shards. || He also has a push ability that will knock you back one tile, which can be |
| deadly if he pushes you into one of the spike pits. About halfway through || the fight he'll cast a protective shield on himself that stops him taking |
| damage, but you still have to attack in order to destroy it. For the record, |
| you can always tell the real one because the health met| er at the top of |
| the screen decreases as he takes damage, the clones don't affect that. |
+------------------------------------------------------------------------------+
When the fight is over he'll drop the WIZARD'S VIRGE (Epic Item), which is a great weapon, but also kinda moot as we've reached the end of the game, the MASTER KEY, which as you'd
expect can open any lock still left closed on the whole island, and finally the TESTAMENT.
Reading it might provide some answers:
Island Master's Testament
Eons ago when the world was still new but intelligence had born, the
ancestor spirits determined their work in this world was done. Before
leaving this world they gave the words of creation to the people and among them to the first guardian of Nexus.
7/25/2019 Grimrock Walkthrough
http://slidepdf.com/reader/full/grimrock-walkthrough 84/117
For the entire history of the world the words have been kept in several secret places, always guarded by uninterrupted chain of guardians. When the
previous guardian got weak and tired, a new one stepped up. But how to choose
a strong and wise successor for this monumental task?
Five thousand years ago my predecessors found the Isle of Nex and determined it to be the safest place on earth to keep the words of creation. A series
of trails were invented to test the physical and mental abilities of
randomly chosen individuals. Since then countless men and woman have been tested by the trials of the island and now my time has come to step aside.
I congratulate you for passing the final test. You are now ready to enter
Nexus.
Jonander of Malan Yera
Island Master 1325 - 1487
So that explains it! I think...
Anyway, use the Master Key to open the lock by the door and you can head out of the area,
using the Crystal of Life on your way if you want.
~ The Isle of Nex ~
With your new access-all-areas key, you can now pretty much do whatever you like. You're the
master of the Island and are can wander freely and pick up any items you might have missed.Although, if you've been using the guide I doubt that's going to be many.
Whenever you're ready, head back to the Castle Nex area and use the Mater Key to open the
glowing archway there and you will see the true ending for this game...
+------------------------------+
| ~ End of Section Checklist ~ |
| || Secrets Found ---- 77/77 |
| Epic Items Found - 17/17 |
| Power Gems Found - 20/20 |
| Essences Found --- 5/5 |
| Treasures Found -- 11/11 |
| Level Visited ---- 34/34 |
+------------------------------+
+------------------------------------------------------------------------------+| Introduction |
+------------------------------------------------------------------------------+
7/25/2019 Grimrock Walkthrough
http://slidepdf.com/reader/full/grimrock-walkthrough 85/117
This is a full written guide for Legend of Grimrock 2.
I went into as much detail as I could to describe how to complete the game and find all the
Secrets and Treasures while you're doing it. As well as including hopefully useful strategies for
the bosses, and a whole slew of other info about the game, such as Magic, Alchemy, Character
Creation and more.
+------------------------------------------------------------------------------+
| The Basics |+------------------------------------------------------------------------------+
+---------------------------+
|Character Creation - LOG01 |
+---------------------------+
There are a lot of options for you to select from if you decide to create your own characters. From
their Race, to their Class and their Skills, all the choices you make here will effect how you canuse the character during the game and how their skills will grow. Here's a quick rundown of what's what, which could also be useful to your if you want to know what stats to increase when
playing the game.
Portrait and Name
-----------------
You can customise both the portrait used for your characters and the name of the characters. Each
race comes with a selection of pre-made pictures for you to pick from, or you can upload one of
your own design to use in the game. If you have trouble coming up with names for your characters, you can have the game select one at random for you.
Races
-----
Your race doesn't just effect which portrait you can pick from, but also determines certain
strengths and weaknesses that a character will possess.
* Human *As a human you belong to the most populous sentient race in the known world. You’re very
adaptable and can excel in all professions.
- You gain experience points 10% faster.
* Insectoid *
As an insectoid, your thoughts are completely alien to other races. Your knowledge of the arcane
is unrivalled. Insectoids come in many shapes and sizes but most often their bodies are covered
with a thick shell.
- Strength +1, Dexterity -2, Vitality -1, Willpower +2. - Your chance of getting body parts injured is reduced by 50%.
7/25/2019 Grimrock Walkthrough
http://slidepdf.com/reader/full/grimrock-walkthrough 86/117
* Lizardman *As a lizardman you are a social outcast and are mistrusted by other races because of your
capricious and deceitful mature. What you lack in social skills you greatly make up for in stealth
and dexterity.
- Dexterity +2, Willpower -2.
- Resist All +25%.
* Minotaur *
As a minotaur your are bulky, simple and quick to anger. Your incredible stubbornness istolerated by others only because of your incredible prowess in combat.
- Strength +5, Dexterity -4, Vitality +4, Willpower -3.
- Your food consumption rate is 25% higher than normal.
* Ratling *
As a ratling you may seem weak and disease ridden on the surface, but your are actually one of
the most adaptable and hardy creatures in the world. You are a hoarder by mature and greatly
enjoy fiddling with mechanical contraptions. - Strength -4, Dexterity +2. - Evasion +2.
- Max Load +15kg.
- You are immune to diseases.
Classes
-------
With 8 classes to choose from, there's a lot more variety this time around. Here's a brief overveiw
of each one.
* Alchemist *As an alchemist your brew potions and defend yourself in combat by wielding firearms.
- Health 50 (+6 per level), Energy 50 (+4 per level).
- Herbs in your inventory multiply. The growth rate is determined by the number of steps taken.
- Firearms have 50% less chance to malfunction.
* Barbarian *As a barbarian you do not care about finesse in combat. Instead you rely on raw power and speed.
- Health 80 (+10 per level), Energy 30 (+3 per level).
- Strength +1 per level.
* Battle Mage *
As a battle mage you are comfortable with fighting in the front row as well as blasting with spells
from the back row.
- Health 50 (+5 per level), Energy 50 (+5 per level).
- Weight of equipped armour is reduced by 50% - You can cast spells with bare hands.
- Your gain Protection +10 and Resist All +10 when equipped with a magical
7/25/2019 Grimrock Walkthrough
http://slidepdf.com/reader/full/grimrock-walkthrough 87/117
staff or an orb.
* Farmer *
As a farmer you do not command great powers and do not know how to wield a sword. Instead
you are familiar with digging ditches for irrigation and the growth cycles of pitroot plants,
basically everything a successful adventurer would ever need. - Health 30 (+5 per level), Energy 30 (+5 per level).
- You receive no skillpoints at first level.
- Instead of slaying monsters you gain experience points by eating food.
* Fighter *
As a fighter you are a master of close combat. You are trained to use a wide variety of weapons.
- Health 60 (+7 per level), Energy 30 (+3 per level).
- Special attacks with melee weapons take half the time to build up and cost
25% less energy.
* Knight *As a knight you believe that good preparation is the key to triumph in combat. Your arespecialized in wielding armour and using the shield.
- Health 60 (+7 per level), Energy 30 (+3 per level).
- Protection +1 per level.
- Weight of equipped armour is reduced by 50.
- Evasion bonus of equipped shields is increased by 50%.
* Rouge *
As a rough you are a stealthy warrior who prefers to use ranged weapons or light melee weapons. - Health 45 (+5 per level), Energy 40 (+5 per level).
- When duel wielding your suffer only 25% penalty to weapon damage (normally 40%).
- +1% chance per level to score a critical hit with missile or throwing
weapons.
* Wizard *
As a wizard you use enchanted staves and orbs to command great mystal powers that can be usedto cause harm or to protect.
- Health 35 (+3 per level), Energy 50 (+7 per level).
- Willpower +2
- You can cast spells with bare hands.
Attributes
----------
These are your main stats that effect all other aspects of your character. By default, they're set to
10, however your choice of race can alter this initial setting. It's worth noting that only once theattribute has reached 11 will it start effecting other aspects of your character, so those stats below
10 will need to be leveled up before they start to have an effect.
7/25/2019 Grimrock Walkthrough
http://slidepdf.com/reader/full/grimrock-walkthrough 88/117
* Strength *Strength increases your carrying capacity, fire resistance and damage you deal with most melee
and throwing weapons.
- Increases per point: Resist Fire +2, Damage +1, Max Load +3kg.
* Dexterity *Dexterity affects your Accuracy, Evasion, shock resistance and damage your deal with many
missile weapons.
- Increases per point: Resist Shock +2, Evasion +1, Accuracy +2.
* Vitality *
Vitality affects the amount of Health points you have and your health regeneration rate. Vitality
also increases your poison resistance.
- Increases per point: Resist Poison +2, Health +5.
* Willpower *
Willpower affects the amount of Energy points you have and your energy regeneration rate.Willpower also increases your cold resistance. - Increases per point: Resist Cold +2, Energy +5.
Traits
------
Traits are special little boosts or abilities that a character can be given to aid them in the game.
Pairing the right traits with the right character can make them work even better at what you want
them to do. You can pick 2 traits per character out of a total of 24, although some are specific to
certain races.
* Aggressive *You are full of rage. Damage +4.
* Agile *
Your reflexes are exception. Dexterity +2.
* Aura *You have a potent Aura. Energy +20.
* Chitin Armour (Insectoid) *
Your body is covered by a thick chitin shell. You gain Protection +10.
* Cold-Blooded *
You are naturally resistant to cold. Resist Cold +25.
* Daemon Ancestor *Your Great Grandfather had fiery eyes. Resist Fire +25.
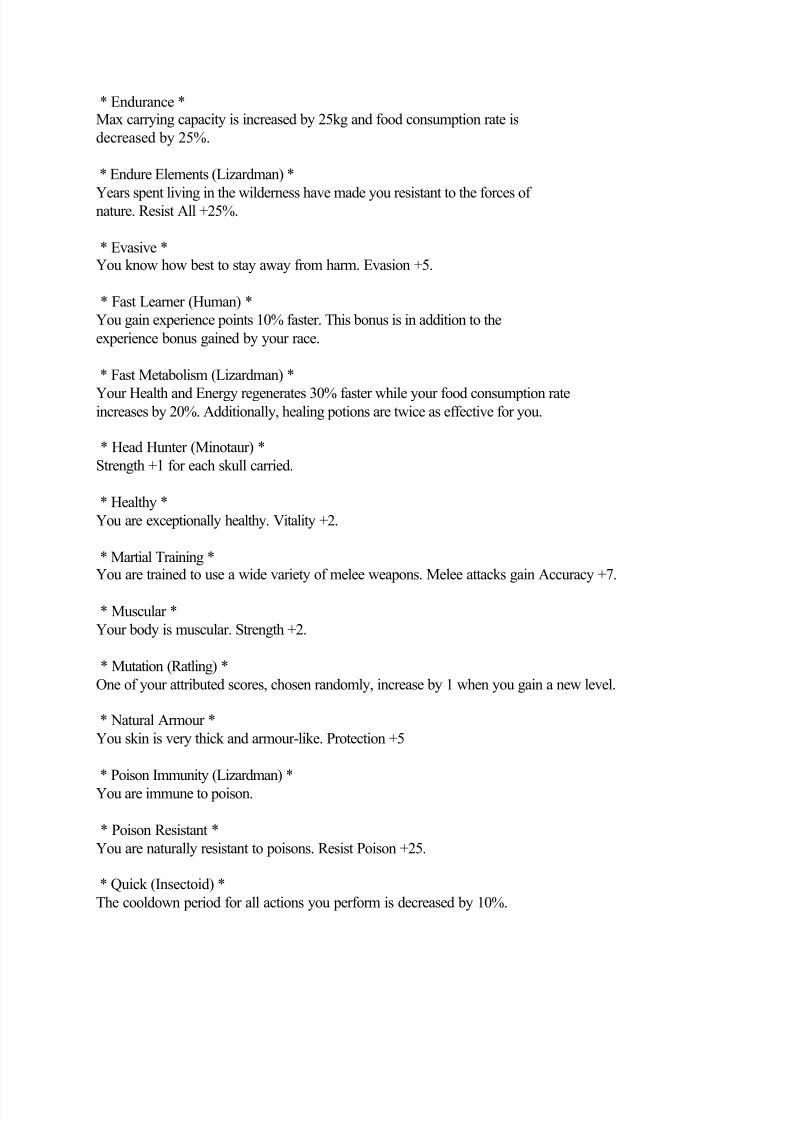
7/25/2019 Grimrock Walkthrough
http://slidepdf.com/reader/full/grimrock-walkthrough 89/117
* Endurance *Max carrying capacity is increased by 25kg and food consumption rate is
decreased by 25%.
* Endure Elements (Lizardman) *
Years spent living in the wilderness have made you resistant to the forces of nature. Resist All +25%.
* Evasive *You know how best to stay away from harm. Evasion +5.
* Fast Learner (Human) *
You gain experience points 10% faster. This bonus is in addition to the
experience bonus gained by your race.
* Fast Metabolism (Lizardman) *
Your Health and Energy regenerates 30% faster while your food consumption rateincreases by 20%. Additionally, healing potions are twice as effective for you.
* Head Hunter (Minotaur) *
Strength +1 for each skull carried.
* Healthy *
You are exceptionally healthy. Vitality +2.
* Martial Training *You are trained to use a wide variety of melee weapons. Melee attacks gain Accuracy +7.
* Muscular *
Your body is muscular. Strength +2.
* Mutation (Ratling) *
One of your attributed scores, chosen randomly, increase by 1 when you gain a new level.
* Natural Armour *
You skin is very thick and armour-like. Protection +5
* Poison Immunity (Lizardman) *
You are immune to poison.
* Poison Resistant *
You are naturally resistant to poisons. Resist Poison +25.
* Quick (Insectoid) *
The cooldown period for all actions you perform is decreased by 10%.
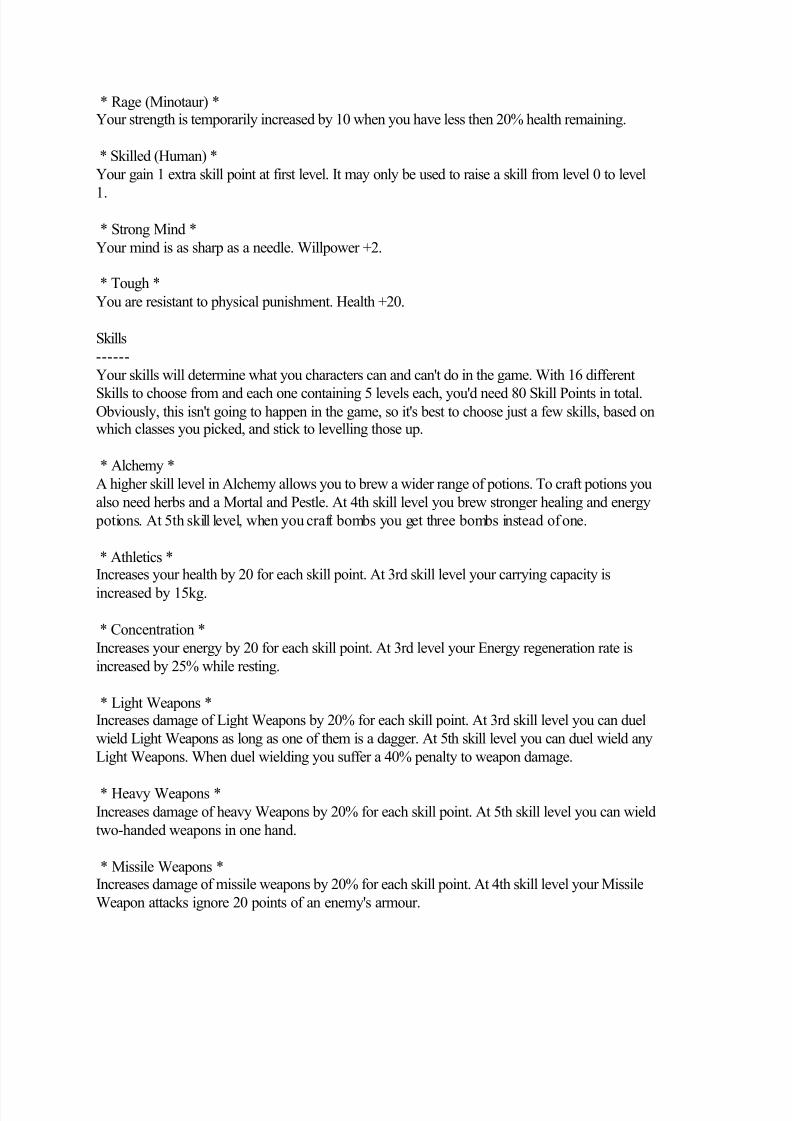
7/25/2019 Grimrock Walkthrough
http://slidepdf.com/reader/full/grimrock-walkthrough 90/117
* Rage (Minotaur) *Your strength is temporarily increased by 10 when you have less then 20% health remaining.
* Skilled (Human) *
Your gain 1 extra skill point at first level. It may only be used to raise a skill from level 0 to level
1.
* Strong Mind *
Your mind is as sharp as a needle. Willpower +2.
* Tough *
You are resistant to physical punishment. Health +20.
Skills
------
Your skills will determine what you characters can and can't do in the game. With 16 different
Skills to choose from and each one containing 5 levels each, you'd need 80 Skill Points in total.Obviously, this isn't going to happen in the game, so it's best to choose just a few skills, based onwhich classes you picked, and stick to levelling those up.
* Alchemy *
A higher skill level in Alchemy allows you to brew a wider range of potions. To craft potions you
also need herbs and a Mortal and Pestle. At 4th skill level you brew stronger healing and energy
potions. At 5th skill level, when you craft bombs you get three bombs instead of one.
* Athletics *Increases your health by 20 for each skill point. At 3rd skill level your carrying capacity is
increased by 15kg.
* Concentration *
Increases your energy by 20 for each skill point. At 3rd level your Energy regeneration rate is
increased by 25% while resting.
* Light Weapons *Increases damage of Light Weapons by 20% for each skill point. At 3rd skill level you can duel
wield Light Weapons as long as one of them is a dagger. At 5th skill level you can duel wield any
Light Weapons. When duel wielding you suffer a 40% penalty to weapon damage.
* Heavy Weapons *
Increases damage of heavy Weapons by 20% for each skill point. At 5th skill level you can wield
two-handed weapons in one hand.
* Missile Weapons *Increases damage of missile weapons by 20% for each skill point. At 4th skill level your Missile
Weapon attacks ignore 20 points of an enemy's armour.
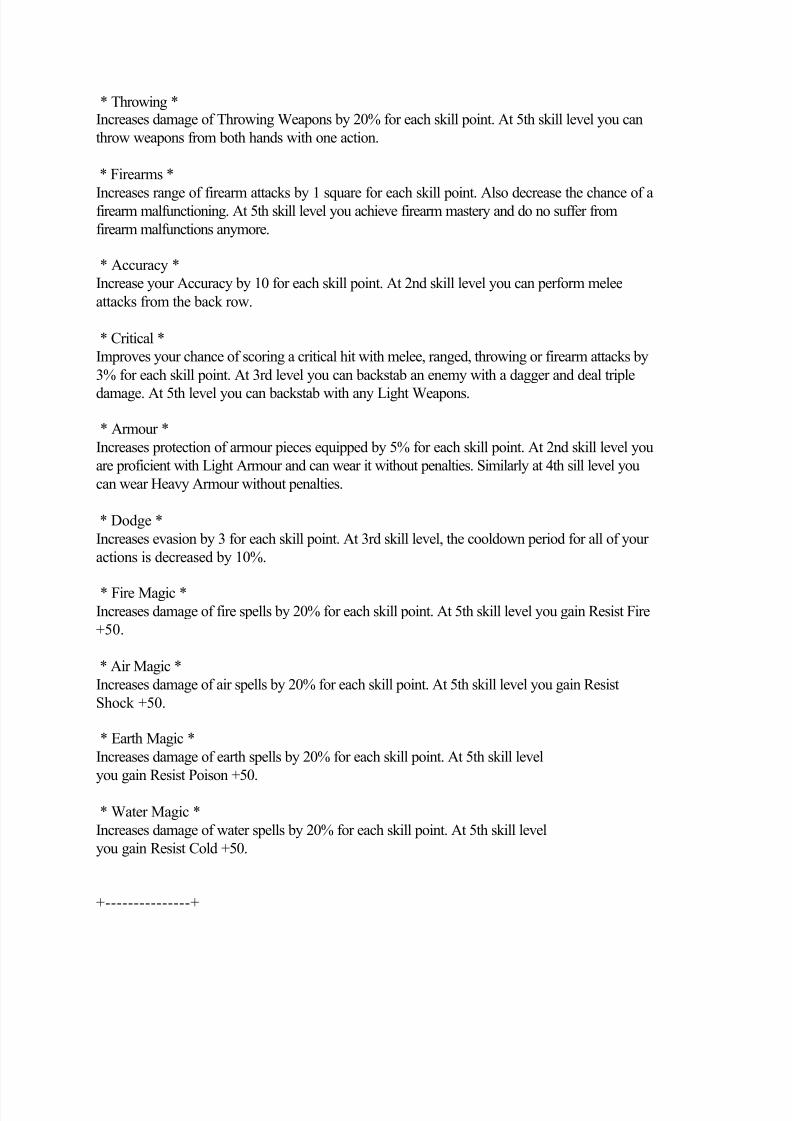
7/25/2019 Grimrock Walkthrough
http://slidepdf.com/reader/full/grimrock-walkthrough 91/117
* Throwing *Increases damage of Throwing Weapons by 20% for each skill point. At 5th skill level you can
throw weapons from both hands with one action.
* Firearms *
Increases range of firearm attacks by 1 square for each skill point. Also decrease the chance of afirearm malfunctioning. At 5th skill level you achieve firearm mastery and do no suffer from
firearm malfunctions anymore.
* Accuracy *
Increase your Accuracy by 10 for each skill point. At 2nd skill level you can perform melee
attacks from the back row.
* Critical *
Improves your chance of scoring a critical hit with melee, ranged, throwing or firearm attacks by
3% for each skill point. At 3rd level you can backstab an enemy with a dagger and deal triple
damage. At 5th level you can backstab with any Light Weapons.
* Armour *
Increases protection of armour pieces equipped by 5% for each skill point. At 2nd skill level you
are proficient with Light Armour and can wear it without penalties. Similarly at 4th sill level you
can wear Heavy Armour without penalties.
* Dodge *
Increases evasion by 3 for each skill point. At 3rd skill level, the cooldown period for all of your
actions is decreased by 10%.
* Fire Magic *Increases damage of fire spells by 20% for each skill point. At 5th skill level you gain Resist Fire
+50.
* Air Magic *
Increases damage of air spells by 20% for each skill point. At 5th skill level you gain Resist
Shock +50.
* Earth Magic *
Increases damage of earth spells by 20% for each skill point. At 5th skill level
you gain Resist Poison +50.
* Water Magic *
Increases damage of water spells by 20% for each skill point. At 5th skill level
you gain Resist Cold +50.
+---------------+
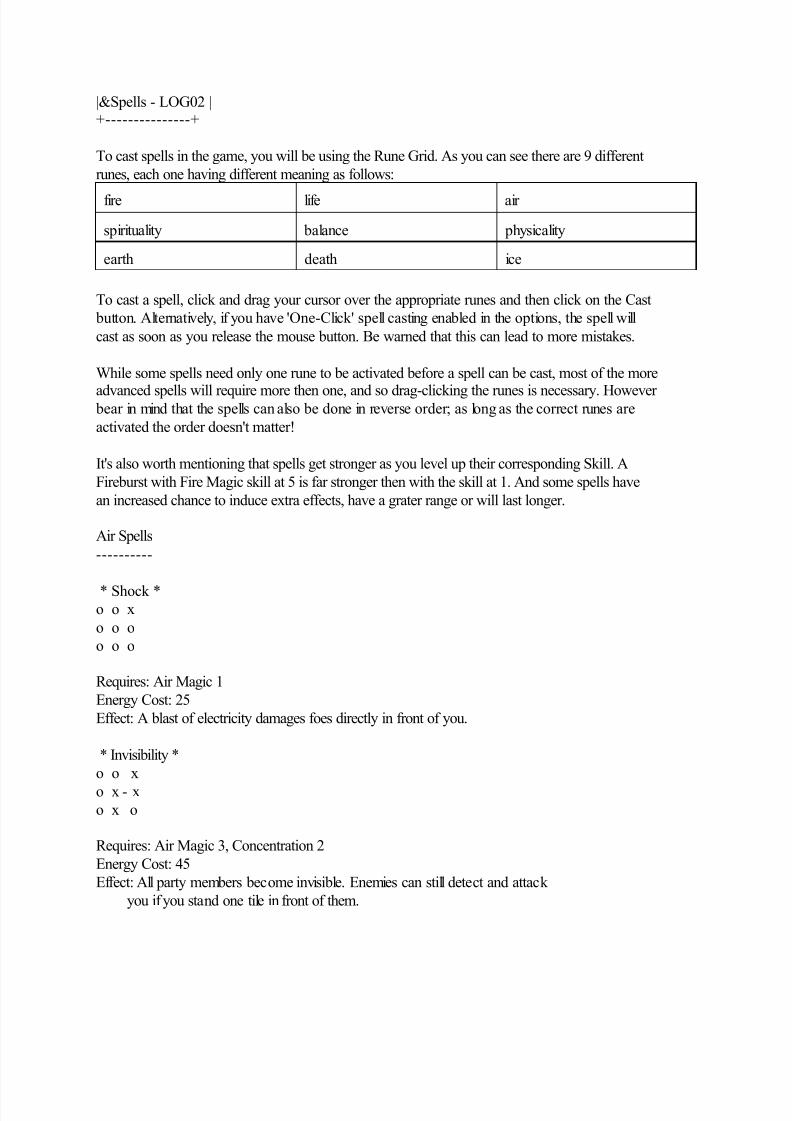
7/25/2019 Grimrock Walkthrough
http://slidepdf.com/reader/full/grimrock-walkthrough 92/117
|&Spells - LOG02 |+---------------+
To cast spells in the game, you will be using the Rune Grid. As you can see there are 9 different
runes, each one having different meaning as follows:
fire life air
spirituality balance physicality
earth death ice
To cast a spell, click and drag your cursor over the appropriate runes and then click on the Cast
button. Alternatively, if you have 'One-Click' spell casting enabled in the options, the spell will
cast as soon as you release the mouse button. Be warned that this can lead to more mistakes.
While some spells need only one rune to be activated before a spell can be cast, most of the more
advanced spells will require more then one, and so drag-clicking the runes is necessary. However bear in mind that the spells can also be done in reverse order; as long as the correct runes are
activated the order doesn't matter!
It's also worth mentioning that spells get stronger as you level up their corresponding Skill. A
Fireburst with Fire Magic skill at 5 is far stronger then with the skill at 1. And some spells have
an increased chance to induce extra effects, have a grater range or will last longer.
Air Spells
----------
* Shock *o o x
o o o
o o o
Requires: Air Magic 1
Energy Cost: 25
Effect: A blast of electricity damages foes directly in front of you.
* Invisibility *
o o x
o x - xo x o
Requires: Air Magic 3, Concentration 2
Energy Cost: 45
Effect: All party members become invisible. Enemies can still detect and attack
you if you stand one tile in front of them.
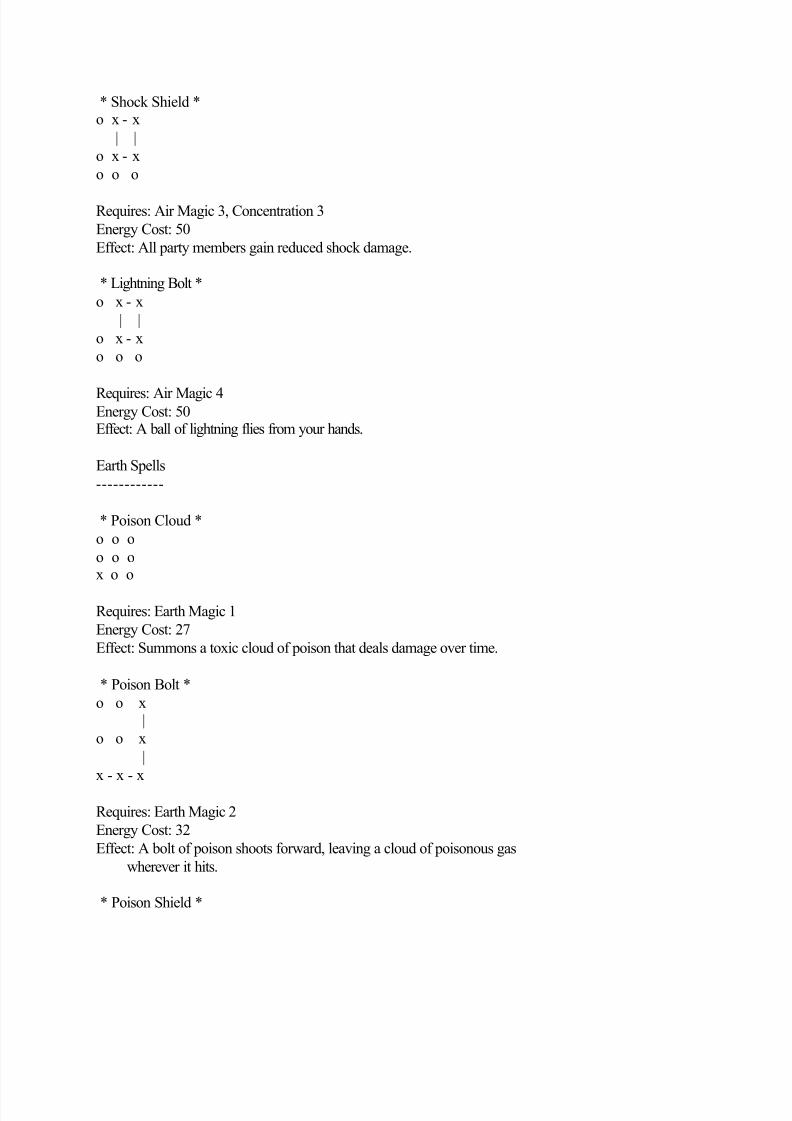
7/25/2019 Grimrock Walkthrough
http://slidepdf.com/reader/full/grimrock-walkthrough 93/117
* Shock Shield *o x - x
| |
o x - x
o o o
Requires: Air Magic 3, Concentration 3
Energy Cost: 50
Effect: All party members gain reduced shock damage.
* Lightning Bolt *
o x - x
| |
o x - x
o o o
Requires: Air Magic 4Energy Cost: 50Effect: A ball of lightning flies from your hands.
Earth Spells
------------
* Poison Cloud *
o o o
o o ox o o
Requires: Earth Magic 1
Energy Cost: 27
Effect: Summons a toxic cloud of poison that deals damage over time.
* Poison Bolt *
o o x |
o o x
|
x - x - x
Requires: Earth Magic 2
Energy Cost: 32
Effect: A bolt of poison shoots forward, leaving a cloud of poisonous gas
wherever it hits.
* Poison Shield *
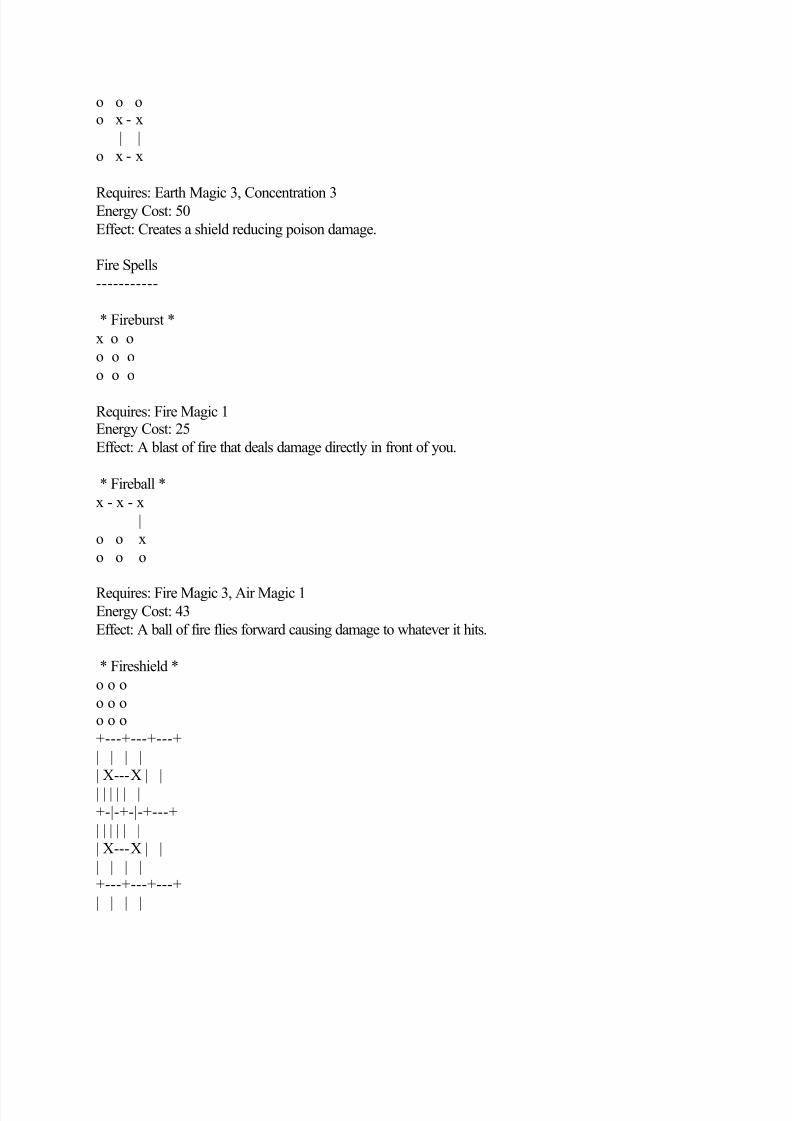
7/25/2019 Grimrock Walkthrough
http://slidepdf.com/reader/full/grimrock-walkthrough 94/117
o o oo x - x
| |
o x - x
Requires: Earth Magic 3, Concentration 3Energy Cost: 50
Effect: Creates a shield reducing poison damage.
Fire Spells
-----------
* Fireburst *
x o o
o o o
o o o
Requires: Fire Magic 1Energy Cost: 25
Effect: A blast of fire that deals damage directly in front of you.
* Fireball *
x - x - x
|
o o x
o o o
Requires: Fire Magic 3, Air Magic 1Energy Cost: 43
Effect: A ball of fire flies forward causing damage to whatever it hits.
* Fireshield *
o o o
o o oo o o
+---+---+---+
| | | |
| X---X | |
| | | | | |
+-|-+-|-+---+
| | | | | |
| X---X | |
| | | |+---+---+---+
| | | |
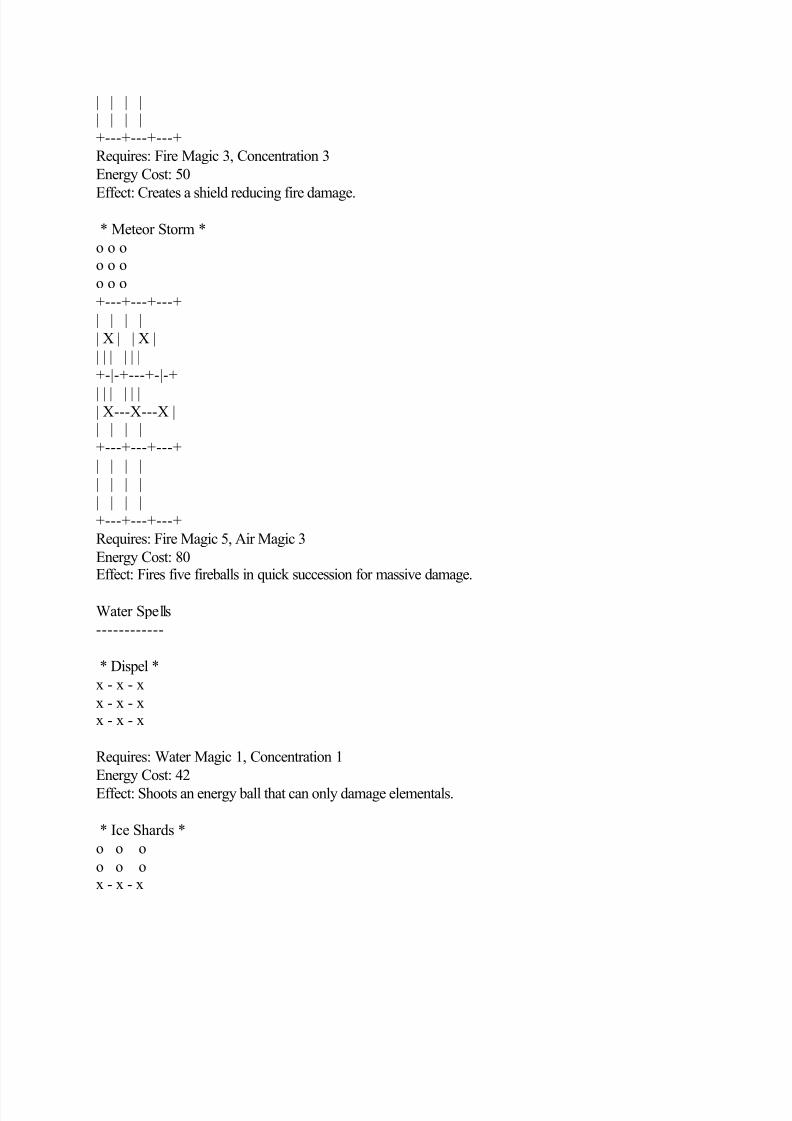
7/25/2019 Grimrock Walkthrough
http://slidepdf.com/reader/full/grimrock-walkthrough 95/117
| | | || | | |
+---+---+---+
Requires: Fire Magic 3, Concentration 3
Energy Cost: 50
Effect: Creates a shield reducing fire damage.
* Meteor Storm *
o o oo o o
o o o
+---+---+---+
| | | |
| X | | X |
| | | | | |
+-|-+---+-|-+
| | | | | || X---X---X || | | |
+---+---+---+
| | | |
| | | |
| | | |
+---+---+---+
Requires: Fire Magic 5, Air Magic 3
Energy Cost: 80Effect: Fires five fireballs in quick succession for massive damage.
Water Spells
------------
* Dispel *
x - x - x
x - x - xx - x - x
Requires: Water Magic 1, Concentration 1
Energy Cost: 42
Effect: Shoots an energy ball that can only damage elementals.
* Ice Shards *
o o o
o o ox - x - x
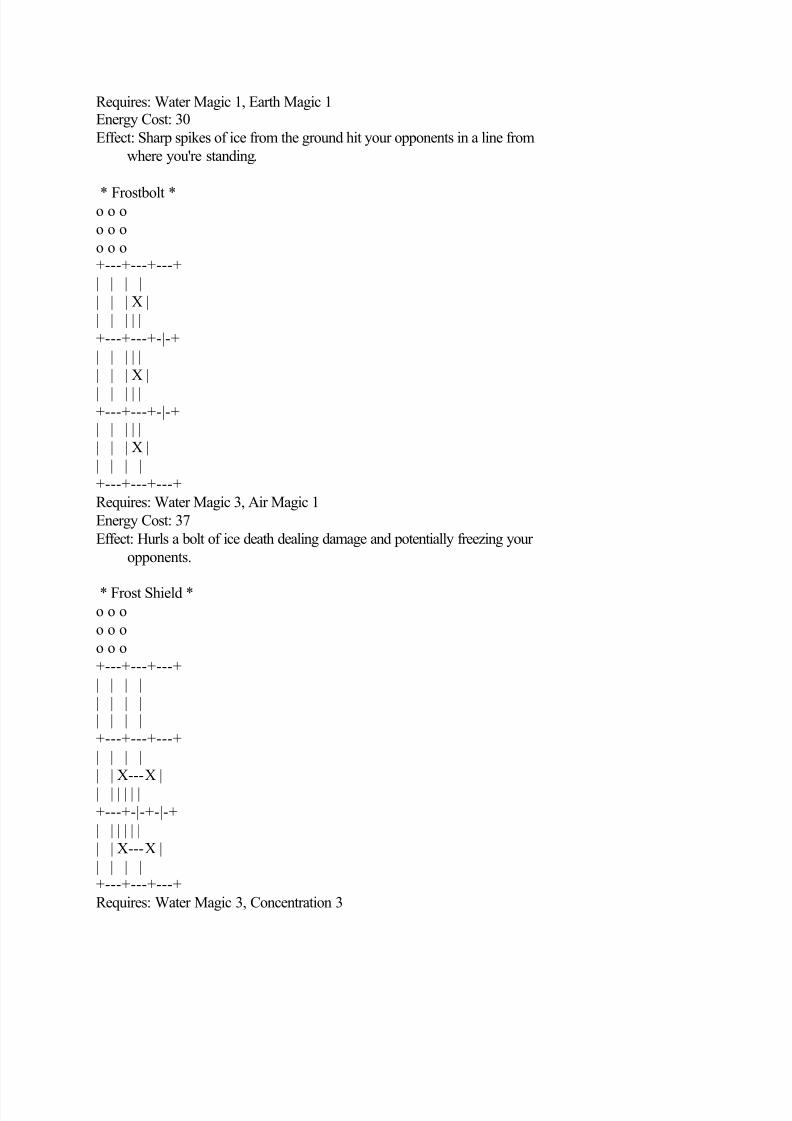
7/25/2019 Grimrock Walkthrough
http://slidepdf.com/reader/full/grimrock-walkthrough 96/117
Requires: Water Magic 1, Earth Magic 1Energy Cost: 30
Effect: Sharp spikes of ice from the ground hit your opponents in a line from
where you're standing.
* Frostbolt *o o o
o o o
o o o+---+---+---+
| | | |
| | | X |
| | | | |
+---+---+-|-+
| | | | |
| | | X |
| | | | |+---+---+-|-+| | | | |
| | | X |
| | | |
+---+---+---+
Requires: Water Magic 3, Air Magic 1
Energy Cost: 37
Effect: Hurls a bolt of ice death dealing damage and potentially freezing your
opponents.
* Frost Shield *o o o
o o o
o o o
+---+---+---+
| | | |
| | | || | | |
+---+---+---+
| | | |
| | X---X |
| | | | | |
+---+-|-+-|-+
| | | | | |
| | X---X |
| | | |+---+---+---+
Requires: Water Magic 3, Concentration 3
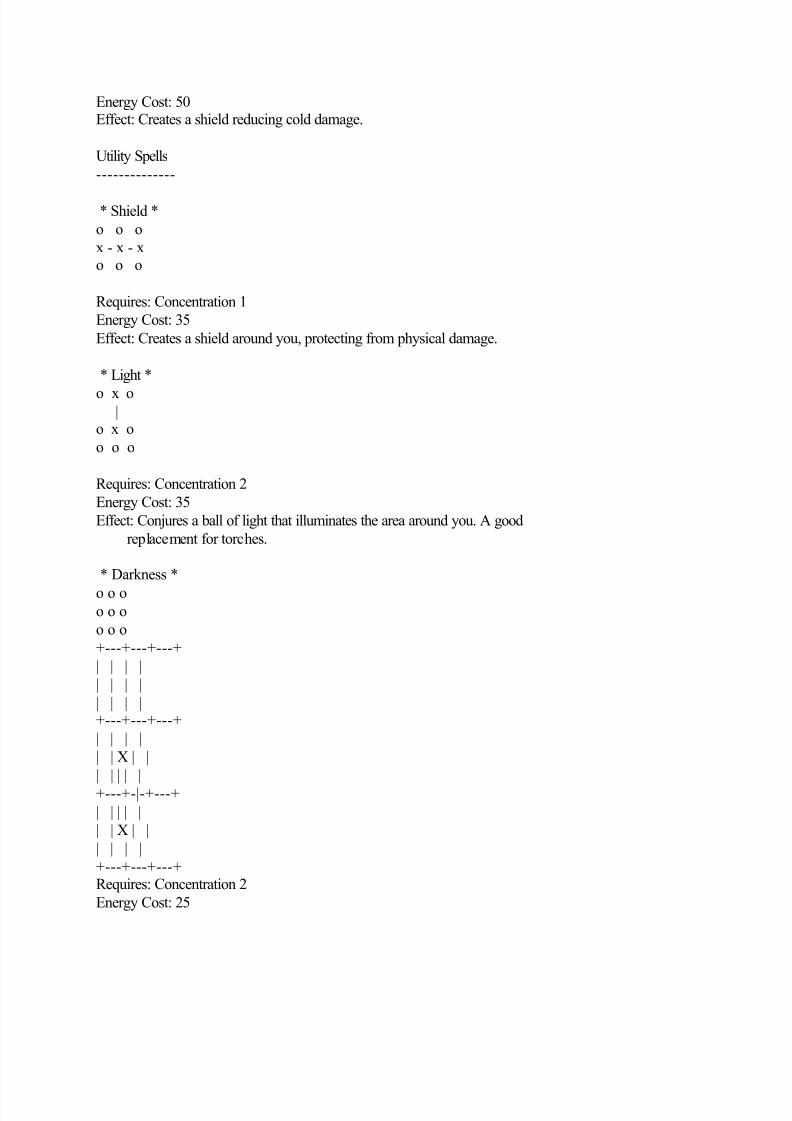
7/25/2019 Grimrock Walkthrough
http://slidepdf.com/reader/full/grimrock-walkthrough 97/117
Energy Cost: 50Effect: Creates a shield reducing cold damage.
Utility Spells
--------------
* Shield *
o o o
x - x - xo o o
Requires: Concentration 1
Energy Cost: 35
Effect: Creates a shield around you, protecting from physical damage.
* Light *
o x o |o x o
o o o
Requires: Concentration 2
Energy Cost: 35
Effect: Conjures a ball of light that illuminates the area around you. A good
replacement for torches.
* Darkness *
o o oo o o
o o o
+---+---+---+
| | | |
| | | |
| | | |+---+---+---+
| | | |
| | X | |
| | | | |
+---+-|-+---+
| | | | |
| | X | |
| | | |
+---+---+---+Requires: Concentration 2
Energy Cost: 25

7/25/2019 Grimrock Walkthrough
http://slidepdf.com/reader/full/grimrock-walkthrough 98/117
Effect: Negates all magical and non-magical light sources, meaning the Light spell and any Torches (although they will still burn down).
* Force Field *
x - x - x
| |x o x
| |
x - x - x
Requires: Concentration 2
Energy Cost: 35
Effect: Creates a magical barrier that blocks movement. You can stop enemies
from reaching you or even seal them inside to deal with later.
* Darkbolt *
o o oo o oo o o
+---+---+---+
| | | |
| | | |
| | | |
+---+---+---+
| | | |
| X---X | || | | | |
+---+-|-+---+| | | | |
| | X | |
| | | |
+---+---+---+
Requires: Concentration 3
Energy Cost: 25Effect: Shoots a ball of darkness that prevents an enemy from seeing you unless
you stand directly in front of them.
+----------------+
|Alchemy - LOG03 | &potions
+----------------+
Alchemy has been both simplified and expanded this time around. You no longer need a Flask to
put the potion in, as they come in one already. But the number of different things you can create
is vastly improved, now no longer just potions! Also, at Level 4 in Alchemy you well brewstronger variants of several potions, their increased effects are also listed below.
7/25/2019 Grimrock Walkthrough
http://slidepdf.com/reader/full/grimrock-walkthrough 99/117
Ingredients-----------
Blooddrop Cap – A potent ingredient often used in many kinds of healing potions.
Etherweed – A delicate underwater plant, often found of shores and riverbeds.
Mudwort – Often used to treat snake bites, this uncommon herb is often found
underground and in damp, shadowy places.
Falconskyre – Associated with the element of Air and dexterity, this plant
often likes to grow in large open spaces.
Blackmoss – An almost cancerous-like mass of darkness that will feed on living
things. Known for it's explosive properties.
Crystal Flower – Part Crystal and part Plant, these plants are extremely rare and finding one is considered extremely fortuitous.
Recipes
-------
* Healing Potion *
- Requirement: Level 1 Alchemy
- Ingredients: Blooddrop Cap
- Effect: Heals 75 Health - Enhanced Effect: Heals 150 Health
* Energy Potion *
- Requirement: Level 1 Alchemy
- Ingredients: Etherweed
- Effect: Heals 75 Energy
- Enhanced Effect: Heals 150 Energy
* Antidote *
- Requirement: Level 2 Alchemy
- Ingredients: Etherweed, Falconskyre
- Effect: Cures Disease
* Antivenom *
- Requirement: Level 2 Alchemy
- Ingredients: Blooddrop Cap, Mudwort
- Effect: Cures Poison
* Shield Potion *
7/25/2019 Grimrock Walkthrough
http://slidepdf.com/reader/full/grimrock-walkthrough 100/117
- Requirement: Level 2 Alchemy - Ingredients: Etherweed, Mudwort
- Effect: +25 Protection for 40 seconds
* Speed Potion *
- Requirement: Level 3 Alchemy - Ingredients: Etherweed, Falconskyre x2
- Effect: Doubles Speed for 50 Seconds
* Poignant Potion *
- Requirement: Level 3 Alchemy
- Ingredients: Mudwort
- Effect: Poisons drinker. (Do Not Use!)
* Transmuter's Potion *
- Requirement: Level 4 Alchemy
- Ingredients: Mudwort, Falconskyre - Effect: Turns user into a Bear until Energy runs out.
* Rage Potion *
- Requirement: Level 4 Alchemy
- Ingredients: Blooddrop Cap, Falconskyre
- Effect: +5 Strength and -20 Accuracy for 200 Seconds
* Frost Bomb *
- Requirement: Level 4 Alchemy - Ingredients: Etherweed, Blackmoss
- Effect: Creates a Frost Bomb - Enhanced Effect: Creates 3 Frost Bombs instead of 1 at Level 5 Alchemy
* Fire Bomb *
- Requirement: Level 4 Alchemy
- Ingredients: Blooddrop Cap, Blackmoss
- Effect: Creates a Fire Bomb - Enhanced Effect: Creates 3 Fire Bombs instead of 1 at Level 5 Alchemy
* Poison Bomb *
- Requirement: Level 4 Alchemy
- Ingredients: Mudworth, Blackmoss
- Effect: Creates a Poison Bomb
- Enhanced Effect: Creates 3 Poison Bombs instead of 1 at Level 5 Alchemy
* Lightning Bomb *- Requirement: Level 4 Alchemy
- Ingredients: Falconskyre, Blackmoss
7/25/2019 Grimrock Walkthrough
http://slidepdf.com/reader/full/grimrock-walkthrough 101/117
- Effect: Creates a Lightning Bomb - Enhanced Effect: Creates 3 Lightning Bombs instead of 1 at Level 5 Alchemy
* Necromancer's Potion *
- Requirement: Level 5 Alchemy
- Ingredients: Blackmoss x2 - Effect: Resurrects fallen party member.
* Potion of Strength *- Requirement: Level 5 Alchemy
- Ingredients: Blooddrop Cap, Crystal Flower
- Effect: Permanent +1 to Strength
* Potion of Dexterity *
- Requirement: Level 5 Alchemy
- Ingredients: Falconskyre, Crystal Flower
- Effect:Permanent +1 to Dexterity
* Potion of Vitality *
- Requirement: Level 5 Alchemy
- Ingredients: Mudworth, Crystal Flower
- Effect:Permanent +1 to Vitality
* Potion of Willpower *
- Requirement: Level 5 Alchemy
- Ingredients: Etherweed, Crystal Flower - Effect:Permanent +1 to Willpower
The Steps of Alchemy
--------------------
If you have an Alchemist in your party, they have the ability to gain new Ingredients randomly in
their inventory. There are however a few requirements to this. Firstly, and most obviously, youhave to have at least 1 of an Ingredient type before it'll start appearing. Secondly, you have to
have a space in your inventory for it to appear. If everything is full, nothing will happen. The
final thing you need to do it take a certain number of steps, as follows:
Blooddrop Cap duplicates every 850 steps
Etherweed duplicates every 930 steps
Mudwort duplicates every 1950 steps
Falconskyre duplicates every 2500 steps
Blackmoss duplicates every 3700 stepsCrystal Flower duplicates 4500 steps
7/25/2019 Grimrock Walkthrough
http://slidepdf.com/reader/full/grimrock-walkthrough 102/117
So you have to take this many steps for each Ingredient to appear.
+------------------------------------------------------------------------------+
| Monster List - LOG17 |
+------------------------------------------------------------------------------+
Air Elemental
HP: 170
Being an Elemental creature, only magical attacks will effect this creature, or a specific weapon designed for damaging Elemental Creatures. This variant isn't
too hard to deal with thankfully, as long as you don't stand in it's direct
line of fire.
Difficulty: 5/10
Common Locations: Hamlet of Stormbreach, Forgotten River
Crab
HP: 650Returning from the dungeons of Mount Grimrock, these large crabs haven'tchanged much, able to move sideways and attack with their pincers. Relatively
easy to deal with, but their high HP will take you a while to knock down.
Difficulty: 4/10
Common Locations: Ruins of Desarune, Lexiconary, Test Chamber
Crowern
HP: 120
These flying annoyances aren't as hard as some of the other flyers, but theycan still be quite tricky if you get them a chance. Just whack them as quickly
as possible.Difficulty: 5/10
Common Locations: Forgotten River,
Dark Acolyte
HP: 800
These creepy-looking multi-snake creatures will be the bane of your tripthrough Castle Nex. With high HP, the ability to Poison your characters, and
the annoying habit of firing off half-a-dozen Poison Bolts at you in one go,
they're tricky to deal with. Keep moving and have plenty of Antivemon on hand.
Difficulty: 9/10
Common Locations: Library
Eyctopus
HP: 500
These are flying squids that have an annoying habit of firing off a ball of darkness at you, reducing your visibility by quite a bit. They can also use a
similar attack from their rear too, so don't get behind them.
7/25/2019 Grimrock Walkthrough
http://slidepdf.com/reader/full/grimrock-walkthrough 103/117
Difficulty: 7/10Common Locations: Crystal Mine Entrance, Crystal Mine Core, Test Chamber
Fire Elemental
HP: 60
As with all elemental cretures these can only be heart with Magic. The annoyingthing about these ones is they tend to kamakaze you, rushing at you before you
can kill them and exploding in your face, doing a lot of damage. Be careful
when they're around.Difficulty: 9/10
Common Locations: Sewer, Crystal Mine Entrance, Crystal Mine Abyss,
Wormbound Catacombs, Void
Field Warg
HP: 150
Quick moving and quick attacking, these creature can do a bit of damage if
you're unprepared. They can come alone or in pairs, and can sometimes be teamedup with Ratlings. They also are a good source of food.Difficulty: 4/10
Common Locations: Twigroot Forest, Twigroot Tunnels, Forgotten River,
Hamlet of Stormbreach
Forest Ogre
HP: 1000
These hulking brutes can almost be a mini-boss they're so tough. They pack a
punch, able to attack sideways, and charge at you from a distance. They alsomove quicker then their Mount Grimrock cousins. Have plenty of healing stuff on
hand, and pent it with everything you've got, and above all else, try not toget trapped in a dead-end.
Difficulty: 10/10
Common Locations: Hamlet of Stormbreach
Giant Snake
HP: 300Able to poison you, as you might expect, they have fairly decent HP, but are
relatively quite weak, so just wailing on them until they die usually works.
They also are a good source of food.
Difficulty: 4/10
Common Locations: Pyramid of Umas, Tomb Underground, Tomb of Rites
Green Slime
HP: 500
Still knocking about from the previous game, these giant blobs haven't changedat all, still able to inflict Disease on you and attack through gratings.
Difficulty: 5/10

7/25/2019 Grimrock Walkthrough
http://slidepdf.com/reader/full/grimrock-walkthrough 104/117
Common Locations: Archives, Lexiconary, Void
Herder (Small)
HP: 80
Being quite weak, these little guys aren't too much of a problem, but they can
throw a Poison bolt at you, so be aware. They can also come in pairs.Difficulty: 3/10
Common Locations: Herder's Den
Herder
HP: 250
Thankfully lacking any Poison abilities, these guys are barely any trouble at
all. Weak against Fire, they're not all the strong and shouldn't care you any
real trouble.
Difficulty: 1/10
Common Locations: Herder's Den
Herder (Big)HP: 350
These guys can be tricky if they get too close, able to spray out toxic gas at
you if you're standing next to them. Keep you distance and fire off with fire
and ranged attacks. If you do have to get close, be sure to keep moving.
Difficulty: 4/10
Common Locations: Herder's Den
Ice GuardianHP: 400
Of a similar variety to the Uggardian, these icy foes will use all theice-based magic that you can use back at you. However defeating them is the
same as the Uggardian too; stay out of their direct line-of-sight and you
should be fine. If necessary, have your wizard shield you from ice-based
attacks.
Difficulty: 7/10
Common Locations: Ruins of Desarune, Crystal Mine Entrance
Magma Golem
HP: 1000
There are thankfully very few of these hulking monstrosities in the game.
Easily being the hardest non-boss enemy you'll face, they'll take a long time
to whittle down their sizeable health. Distance magic works ok, although they
are totally immune to any kind of fire-based attack. They themselves are about
to fling a fireball at you, setting fire to all the squares around where it
lands, or if you get too close they'll punch the ground setting fire at all thesquares around it in a two-square area! Best thing to do is to charge up an
attack, wait for them to move and then run past, whacking them as you go.
7/25/2019 Grimrock Walkthrough
http://slidepdf.com/reader/full/grimrock-walkthrough 105/117
Difficulty: 10/10Common Locations: Barren Desert
Medusa
HP: 500
These floating snake-ladies can be quite a nuisance if you're unprepared for them. About to shoot arrows at you from a distance, they can also raise up
their snake-hair and zap your party members with petrification, which you then
need to cure! Just stay out of their direct line-of-sight and hit them from theside as they have no side attacks.
Difficulty: 6/10
Common Locations: Tomb Underground, Tomb of Rites
Mimic
HP: 400
The first time you run into these it can be quite a surprise, especially if
you're not expecting it. You'll greedily go to open a chest and instead of somegoodies all you see are lots of very sharp teeth! Dealing with them isthankfully not too hard though, just sticking to the usual tricks of attacking.
Also, their locations appear to be randomised, so you'll find 'em in one
location one time and then somewhere totally different the next.
Difficulty: 4/10
Common Locations: Anywhere!
Mosquito Swarm
HP: 55These guys are only barely a danger. With their extremely low HP, a simple
fire-blast should take them out, maybe two if you're on lower levels.Difficulty: 1/10
Common Locations: Keelbreach Bog, Sleet Island, Sewer
Mummy
HP: 120
These come in several different styles, but all are fundamentally the same.Being generally very weak and with a weakness to fire, they're really only a
danger if they attack you en masse. They also show up in groups of two or four,
as well as individuals.
Difficulty: 2/10
Common Locations: Dead Sailor Cave, Twigroot Tunnels, Twigroot Basement,
Ruins of Desarune, Pyramid of Umas, Tomb of Rites,
Ceremonial Chamber, Barren Desert
Rat SwarmHP: 150
These surprisingly rare creatures are relatively easy to deal with, as long as
7/25/2019 Grimrock Walkthrough
http://slidepdf.com/reader/full/grimrock-walkthrough 106/117
you make sure to remember that magic works best.Difficulty: 2/10
Common Locations: River Tunnels, Pyramid of Umas
Ratling
HP: 250As well as being a possible party member, these guys show up as enemies as
well! Some will wield swords, some will wield throwing knives, and some others
will wield pistols. The basic idea is the same as usual. Stay out of their direct sight and do what you can to kill them quickly. Also, they can sometimes
team up with Wargs.
Difficulty: 5/10
Common Locations: Twigroot Tunnels, Lexiconary, Sewer, Hamlet of Stormbreach
Sand Warg
HP: 400
While essentially the same of their Field-based variants, this lot have higher HP and more attack power. They can however be dealt with in the same way.Difficulty: 5/10
Common Locations: Hamlet of Stormbreach
Shrakk Torr
HP: 180
A relatively easy to deal with creature, with a weak attack and low HP.
Shouldn't be too much of a problem as long as you keep up the attacks.
Difficulty: 4/10Common Locations: Ruins of Desarune, Lexiconary
Skeleton Archer
HP: 120
With their ability to fit you from a distance, and the fact that they sometimes
come in pairs, their low health is what stops these guys from being overly
annoying.
Difficulty: 4/10Common Locations: Ruins of Desarune, Archives, Lexiconary,
Wormbound Catacombs, Orul's Crypt, Tomb Underground
Skeleton Trooper
HP: 150
They can often be quite trick during early game, with a strong attack and
enough defence to cover their small-ish HP, they'll get easier as the game goes
on. Just stick to the usual rules about dodging attacks.
Difficulty: 5/10Common Locations: Twigroot Tunnels, Ruins of Desarune, Lexiconary,
Wormbound Catacombs, Orul's Crypt, Tomb Underground
7/25/2019 Grimrock Walkthrough
http://slidepdf.com/reader/full/grimrock-walkthrough 107/117
Spider HP: 450
Just annoying as in pretty much any other game they show up in; their high HP
and ability to poison you, they'll be the bane of your life while you wander
around the Crystal Mines.
Difficulty: 7/10Common Locations: Crystal Mine Entrance, Crystal Mine Core,
Crystal Mine Abyss, Void
Summon Stone
HP: 140
Being made of stone, these guys can be rather difficult to damage in the first
place. Often springing up out of seemingly innocent piles of rocks, they do at
least drop rocks for you to throw when you kill them.
Difficulty: 6/10
Common Locations: Twigroot Forest, Sleet Island, Wormbound Catacombs
Swamp ToadHP: 450
Their most annoying habit is their ability to actually eat whatever
weapons/items you happen to be holding at the time, sometimes leaving you
unable to attack properly. While you do get the item back when you kill them,
their ability to jump over your head and appear behind you will make them one
of the most annoying enemies in the game.
Difficulty: 6/10
Common Locations: Keelbreach Bog, Sewer
TurtleHP: 90
You're starting enemy that will be a little tricky at first, but will quickly
become very easy to deal with, as well as being an excellent source of food.
They can also appear underwater, which will be quite annoying until you get a
weapon that works underwater.
Difficulty: 2/10Common Locations: Shipwreck Beach, Twigroot Tunnels, Forgotten River,
Hamlet of Stormbreach
Twigroot
HP: 120
With an obvious weakness to fire these little guys will only really bother you
in the early stages of the game. Be aware that they often like to hide
themselves in similar looking areas of bushes, they can come in pairs, and also
have a rather nifty sideways jumping ability.Difficulty: 3/10
Common Locations: Twigroot Forest, Cemetery
7/25/2019 Grimrock Walkthrough
http://slidepdf.com/reader/full/grimrock-walkthrough 108/117
UndeadHP: 475
Unlike the Mummies, which are slow and weak, these guys are surprisingly fast
and vicious. With a decent amount of health and a fairly strong attack, it's
best to stick to the side if you can help it and stay out of their direct
attack path and just wail on them with your strongest attacks.Difficulty: 6/10
Common Locations: Cemetery, Wormbound Catacombs
Viper Root
HP: 500
As well as being a Boss at the beginning of the game, they also show up in
non-boss for at several point throughout the game, although the strategy is
pretty much the same.
Difficulty: 6/10
Common Locations: Shipwreck Beach, Forgotten River
WyvernHP: 290
Another returnee from the previous game, these flying foes have a nasty habit
of firing lightning at you. Approach from the side if possible.
Difficulty: 6/10
Common Locations: Lexiconary, Forgotten River, Wormbound Catacombs
Xeloroid
HP: 400If you thought that Wyverns were annoying, wait until you run into these guys.
Not only can they fling off lightning in your direction, but when they attack you there's a chance that one of your characters will be Paralysed when they
attack. Just stick to their sides as best you can.
Difficulty: 7/10
Common Locations: Crystal Mine Entrance, Crystal Mine Abyss,
Wormbound Catacombs, Orul's Crypt, Test Chamber
Zarchton
HP: 90
An amphibious creature that has a lunging ranged attack that goes over two
tiles. For the most part, they're fairly easy to deal with, but you can
sometimes encounter them underwater, so that can be far more annoying as you
can't attack them until you have the right kind of weapon.
Difficulty: 4/10
Common Locations: Shipwreck Beach, Keelbreach Bog, Sleet Island, Sewer,
Flooded Dungeon
7/25/2019 Grimrock Walkthrough
http://slidepdf.com/reader/full/grimrock-walkthrough 109/117
+------------------------------------------------------------------------------+| Achievements - LOG18 |
+------------------------------------------------------------------------------+
Most the the achievements speak for themselves and you'll likely fulfil them
during the course of the game, but some are a little more complex, so there'sadded information where it's necessary.
* Apprentice Alchemist *- Mix a total of 10 potions
* Apprentice Wizard *
- Cast 25 spells
* Archmage *
- Cast 500 spells
* Backstabber *- Defeat a monster with a backstab attack
Tips: In order to Backstab an enemy, your character need to be at Level 3 in
Critical. Then it's just a case of moving around an enemy, or finding one
that's facing away from you.
* Booty Addict *
- Dig up three treasure chests
* Cartographer *
- Visit all levels
* Castle Crasher *
- Enter the Castle
* Chop Chop *
- Find BaneTips: Bane can be found in Wormbound Catacombs, in the area that acts like a
Clock. See Secret 57.
* Code Cracker *
- Open the door to the Archives
* Doin’ It Old School *
- Complete the game with old school mode
* Dragon Slayer *
- Defeat the Lindworm
7/25/2019 Grimrock Walkthrough
http://slidepdf.com/reader/full/grimrock-walkthrough 110/117
* Elementary *- Collect an elemental essence
* Enlightenment *
- Enter the Shrine of Balance
* Expert *
- Max out a skill
* Explorer *
- Visit 10 levels
* Extreme Gardening *
- Defeat the Viper Roots
* Fist Fighter *
- Deal a killing blow with unarmed attack
* Full Monty *
- Kill a monster by throwing pants at it
* Fumigation *
- Defeat Herder's Den
* Gluttony *
- Reach level 10 with a farmer
* Go the Extra Mile *- Travel 10000 tiles
* Golden Boy *
- Open 5 gold locks
* Gotta Go Fast *- Summon the Viper Roots in under 6 minutes
Tips: The trick with this is to ignore as many enemies as you can. Grab items
and solve puzzles as quickly as possible.
* Guru *
- Max out three skills
* Hallowed Ground *
- Open the gate to the Cemetery
* Hard as a Rock *
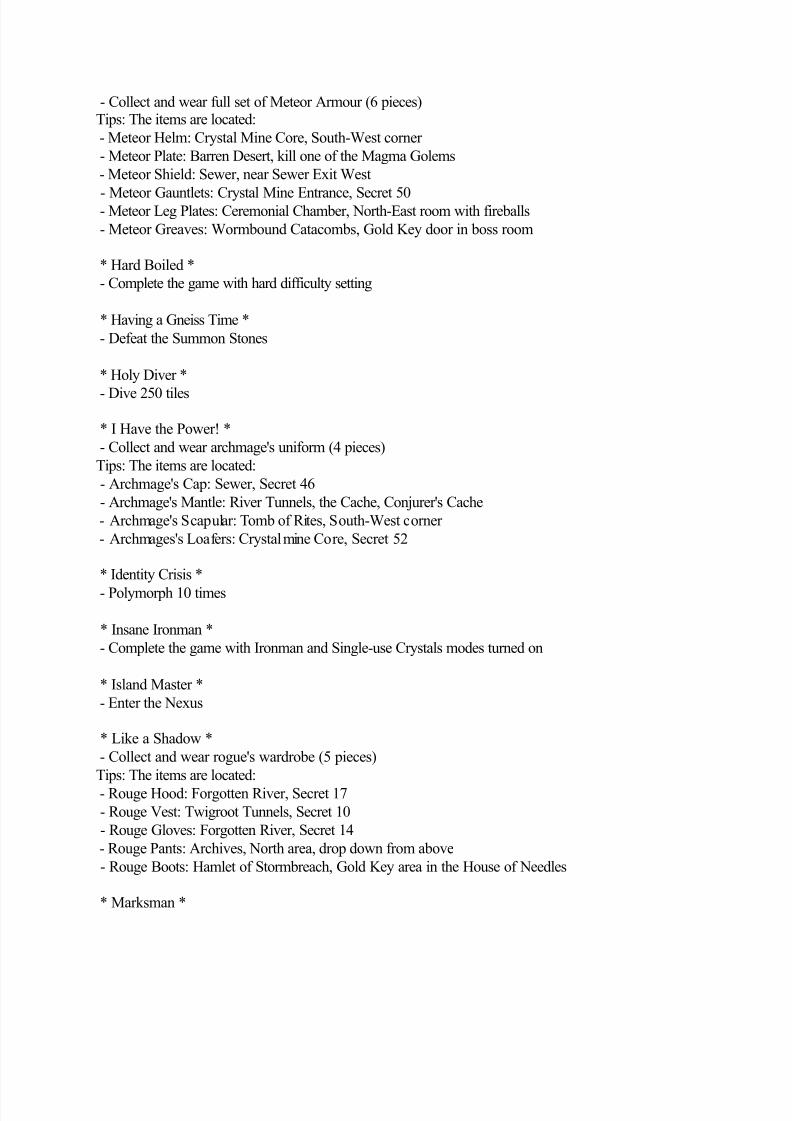
7/25/2019 Grimrock Walkthrough
http://slidepdf.com/reader/full/grimrock-walkthrough 111/117
- Collect and wear full set of Meteor Armour (6 pieces)Tips: The items are located:
- Meteor Helm: Crystal Mine Core, South-West corner
- Meteor Plate: Barren Desert, kill one of the Magma Golems
- Meteor Shield: Sewer, near Sewer Exit West
- Meteor Gauntlets: Crystal Mine Entrance, Secret 50 - Meteor Leg Plates: Ceremonial Chamber, North-East room with fireballs
- Meteor Greaves: Wormbound Catacombs, Gold Key door in boss room
* Hard Boiled *
- Complete the game with hard difficulty setting
* Having a Gneiss Time *
- Defeat the Summon Stones
* Holy Diver *
- Dive 250 tiles
* I Have the Power! *
- Collect and wear archmage's uniform (4 pieces)
Tips: The items are located:
- Archmage's Cap: Sewer, Secret 46
- Archmage's Mantle: River Tunnels, the Cache, Conjurer's Cache
- Archmage's Scapular: Tomb of Rites, South-West corner
- Archmages's Loafers: Crystal mine Core, Secret 52
* Identity Crisis *
- Polymorph 10 times
* Insane Ironman *
- Complete the game with Ironman and Single-use Crystals modes turned on
* Island Master *
- Enter the Nexus
* Like a Shadow *
- Collect and wear rogue's wardrobe (5 pieces)
Tips: The items are located:
- Rouge Hood: Forgotten River, Secret 17
- Rouge Vest: Twigroot Tunnels, Secret 10
- Rouge Gloves: Forgotten River, Secret 14
- Rouge Pants: Archives, North area, drop down from above
- Rouge Boots: Hamlet of Stormbreach, Gold Key area in the House of Needles
* Marksman *
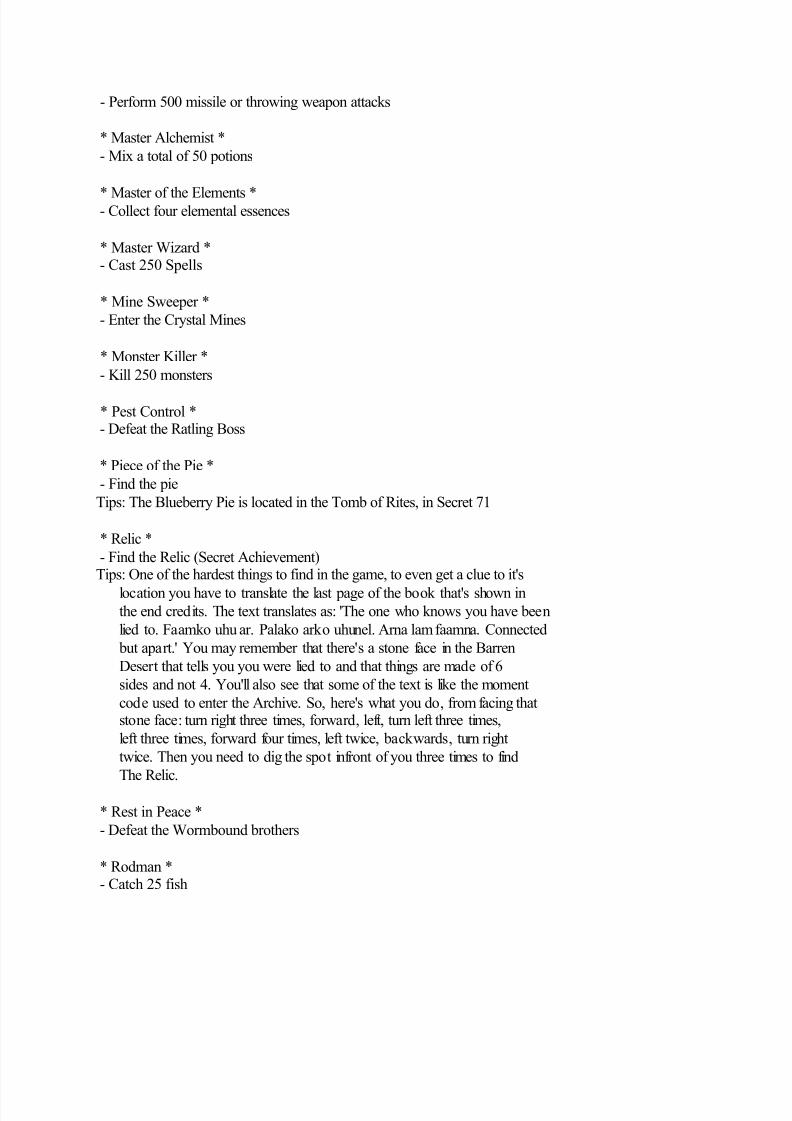
7/25/2019 Grimrock Walkthrough
http://slidepdf.com/reader/full/grimrock-walkthrough 112/117
- Perform 500 missile or throwing weapon attacks
* Master Alchemist *
- Mix a total of 50 potions
* Master of the Elements *- Collect four elemental essences
* Master Wizard *- Cast 250 Spells
* Mine Sweeper *
- Enter the Crystal Mines
* Monster Killer *
- Kill 250 monsters
* Pest Control *- Defeat the Ratling Boss
* Piece of the Pie *
- Find the pie
Tips: The Blueberry Pie is located in the Tomb of Rites, in Secret 71
* Relic *
- Find the Relic (Secret Achievement)Tips: One of the hardest things to find in the game, to even get a clue to it's
location you have to translate the last page of the book that's shown in the end credits. The text translates as: 'The one who knows you have been
lied to. Faamko uhu ar. Palako arko uhunel. Arna lam faamna. Connected
but apart.' You may remember that there's a stone face in the Barren
Desert that tells you you were lied to and that things are made of 6
sides and not 4. You'll also see that some of the text is like the moment
code used to enter the Archive. So, here's what you do, from facing that stone face: turn right three times, forward, left, turn left three times,
left three times, forward four times, left twice, backwards, turn right
twice. Then you need to dig the spot infront of you three times to find
The Relic.
* Rest in Peace *
- Defeat the Wormbound brothers
* Rodman *- Catch 25 fish
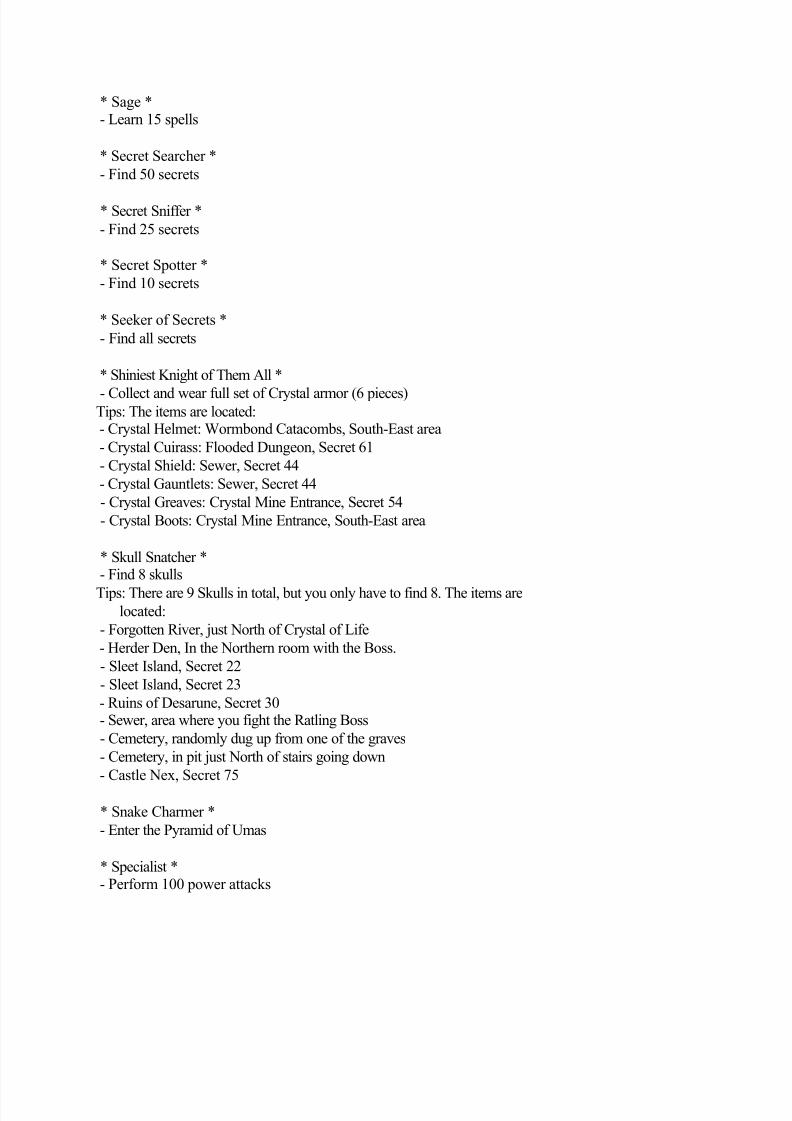
7/25/2019 Grimrock Walkthrough
http://slidepdf.com/reader/full/grimrock-walkthrough 113/117
* Sage *- Learn 15 spells
* Secret Searcher *
- Find 50 secrets
* Secret Sniffer *
- Find 25 secrets
* Secret Spotter *
- Find 10 secrets
* Seeker of Secrets *
- Find all secrets
* Shiniest Knight of Them All *
- Collect and wear full set of Crystal armor (6 pieces)Tips: The items are located: - Crystal Helmet: Wormbond Catacombs, South-East area
- Crystal Cuirass: Flooded Dungeon, Secret 61
- Crystal Shield: Sewer, Secret 44
- Crystal Gauntlets: Sewer, Secret 44
- Crystal Greaves: Crystal Mine Entrance, Secret 54
- Crystal Boots: Crystal Mine Entrance, South-East area
* Skull Snatcher *- Find 8 skulls
Tips: There are 9 Skulls in total, but you only have to find 8. The items are located:
- Forgotten River, just North of Crystal of Life
- Herder Den, In the Northern room with the Boss.
- Sleet Island, Secret 22
- Sleet Island, Secret 23
- Ruins of Desarune, Secret 30 - Sewer, area where you fight the Ratling Boss
- Cemetery, randomly dug up from one of the graves
- Cemetery, in pit just North of stairs going down
- Castle Nex, Secret 75
* Snake Charmer *
- Enter the Pyramid of Umas
* Specialist *- Perform 100 power attacks
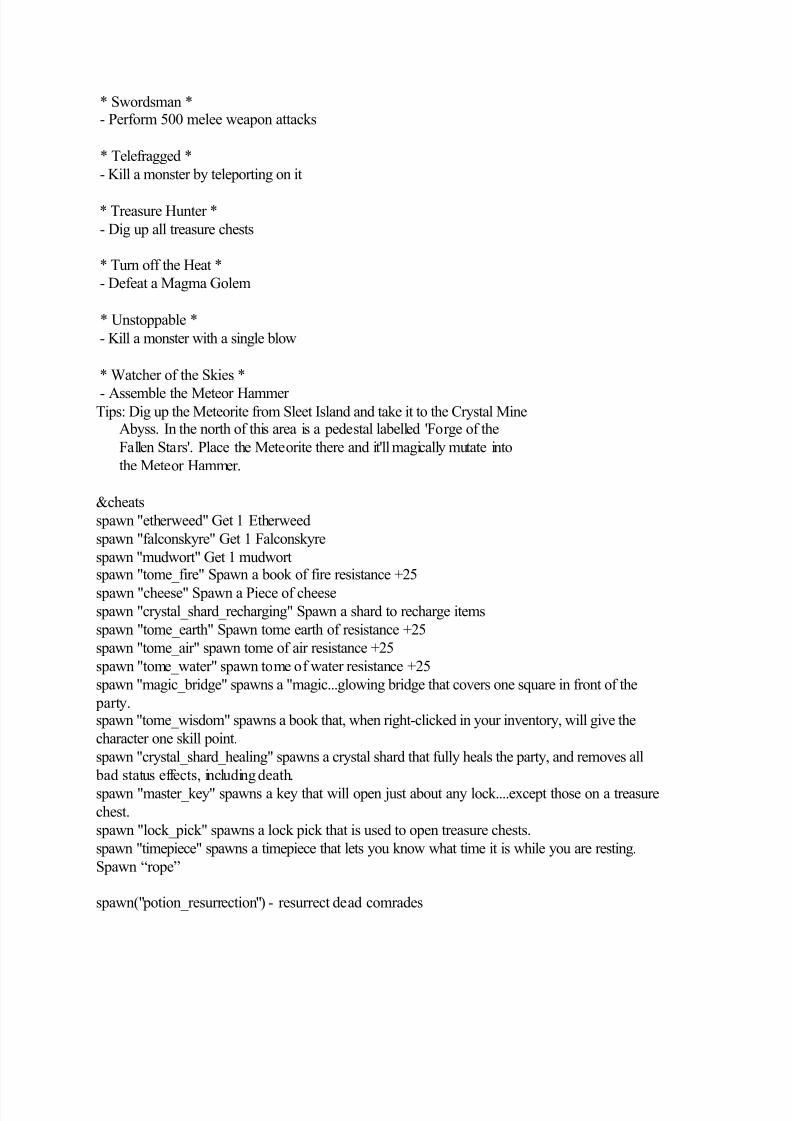
7/25/2019 Grimrock Walkthrough
http://slidepdf.com/reader/full/grimrock-walkthrough 114/117
* Swordsman *- Perform 500 melee weapon attacks
* Telefragged *
- Kill a monster by teleporting on it
* Treasure Hunter *
- Dig up all treasure chests
* Turn off the Heat *
- Defeat a Magma Golem
* Unstoppable *
- Kill a monster with a single blow
* Watcher of the Skies *
- Assemble the Meteor Hammer Tips: Dig up the Meteorite from Sleet Island and take it to the Crystal Mine Abyss. In the north of this area is a pedestal labelled 'Forge of the
Fallen Stars'. Place the Meteorite there and it'll magically mutate into
the Meteor Hammer.
&cheats
spawn "etherweed" Get 1 Etherweed
spawn "falconskyre" Get 1 Falconskyre
spawn "mudwort" Get 1 mudwortspawn "tome_fire" Spawn a book of fire resistance +25
spawn "cheese" Spawn a Piece of cheesespawn "crystal_shard_recharging" Spawn a shard to recharge items
spawn "tome_earth" Spawn tome earth of resistance +25
spawn "tome_air" spawn tome of air resistance +25
spawn "tome_water" spawn tome of water resistance +25
spawn "magic_bridge" spawns a "magic...glowing bridge that covers one square in front of the
party.spawn "tome_wisdom" spawns a book that, when right-clicked in your inventory, will give the
character one skill point.
spawn "crystal_shard_healing" spawns a crystal shard that fully heals the party, and removes all
bad status effects, including death.
spawn "master_key" spawns a key that will open just about any lock....except those on a treasure
chest.
spawn "lock_pick" spawns a lock pick that is used to open treasure chests.
spawn "timepiece" spawns a timepiece that lets you know what time it is while you are resting.
Spawn “rope”
spawn("potion_resurrection") - resurrect dead comrades
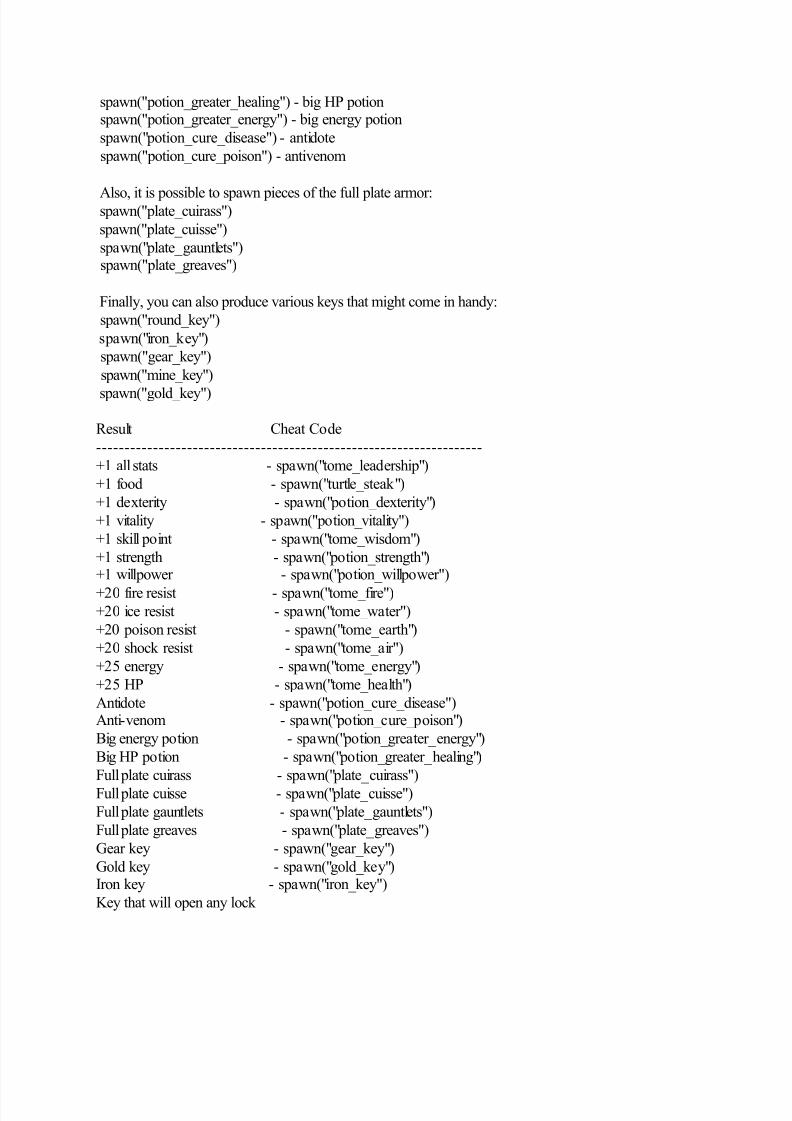
7/25/2019 Grimrock Walkthrough
http://slidepdf.com/reader/full/grimrock-walkthrough 115/117
spawn("potion_greater_healing") - big HP potion spawn("potion_greater_energy") - big energy potion
spawn("potion_cure_disease") - antidote
spawn("potion_cure_poison") - antivenom
Also, it is possible to spawn pieces of the full plate armor: spawn("plate_cuirass")
spawn("plate_cuisse")
spawn("plate_gauntlets") spawn("plate_greaves")
Finally, you can also produce various keys that might come in handy:
spawn("round_key")
spawn("iron_key")
spawn("gear_key")
spawn("mine_key")
spawn("gold_key")
Result Cheat Code
--------------------------------------------------------------------
+1 all stats - spawn("tome_leadership")
+1 food - spawn("turtle_steak")
+1 dexterity - spawn("potion_dexterity")
+1 vitality - spawn("potion_vitality")
+1 skill point - spawn("tome_wisdom")
+1 strength - spawn("potion_strength")+1 willpower - spawn("potion_willpower")
+20 fire resist - spawn("tome_fire")+20 ice resist - spawn("tome_water")
+20 poison resist - spawn("tome_earth")
+20 shock resist - spawn("tome_air")
+25 energy - spawn("tome_energy")
+25 HP - spawn("tome_health")
Antidote - spawn("potion_cure_disease")Anti-venom - spawn("potion_cure_poison")
Big energy potion - spawn("potion_greater_energy")
Big HP potion - spawn("potion_greater_healing")
Full plate cuirass - spawn("plate_cuirass")
Full plate cuisse - spawn("plate_cuisse")
Full plate gauntlets - spawn("plate_gauntlets")
Full plate greaves - spawn("plate_greaves")
Gear key - spawn("gear_key")
Gold key - spawn("gold_key")Iron key - spawn("iron_key")
Key that will open any lock

7/25/2019 Grimrock Walkthrough
http://slidepdf.com/reader/full/grimrock-walkthrough 116/117
except treasure chests - spawn ("master_key")Lockpick to open closed chests - spawn("lock_pick")
Magic bridge that covers one square
in front of the party - spawn ("magic_bridge")
Mine key - spawn("mine_key")
Resurrect dead comrades - spawn("potion_resurrection")Round key - spawn("round_key")
Timepiece that tells time while resting - spawn ("timepiece")
Crystal shard that fully heals party,removes bad statuses, including death - spawn ("crystal_shard_healing")
Get 1 Etherweed - spawn("etherweed")
Get 1 Falconskyre - spawn("falconskyre")
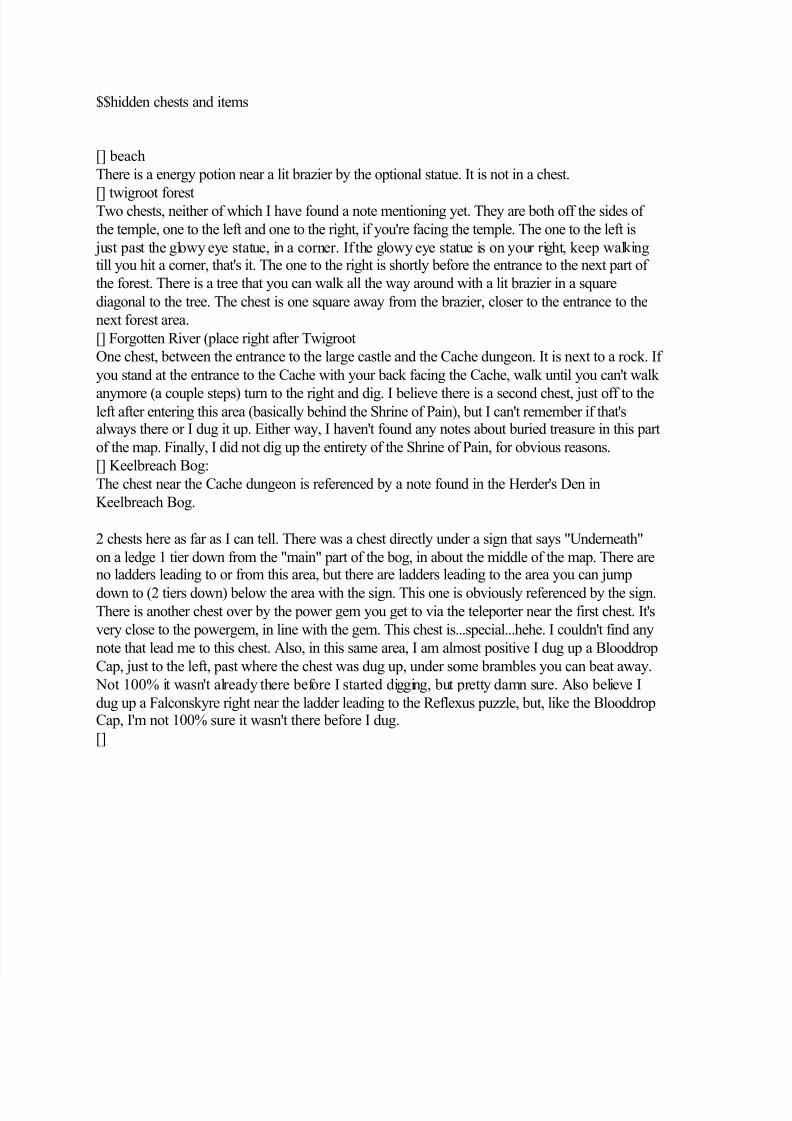
7/25/2019 Grimrock Walkthrough
http://slidepdf.com/reader/full/grimrock-walkthrough 117/117
$$hidden chests and items
[] beach
There is a energy potion near a lit brazier by the optional statue. It is not in a chest.
[] twigroot forestTwo chests, neither of which I have found a note mentioning yet. They are both off the sides of
the temple, one to the left and one to the right, if you're facing the temple. The one to the left is
just past the glowy eye statue, in a corner. If the glowy eye statue is on your right, keep walkingtill you hit a corner, that's it. The one to the right is shortly before the entrance to the next part of
the forest. There is a tree that you can walk all the way around with a lit brazier in a square
diagonal to the tree. The chest is one square away from the brazier, closer to the entrance to the
next forest area.
[] Forgotten River (place right after Twigroot
One chest, between the entrance to the large castle and the Cache dungeon. It is next to a rock. If
you stand at the entrance to the Cache with your back facing the Cache, walk until you can't walk
anymore (a couple steps) turn to the right and dig. I believe there is a second chest, just off to theleft after entering this area (basically behind the Shrine of Pain), but I can't remember if that'salways there or I dug it up. Either way, I haven't found any notes about buried treasure in this part
of the map. Finally, I did not dig up the entirety of the Shrine of Pain, for obvious reasons.
[] Keelbreach Bog:
The chest near the Cache dungeon is referenced by a note found in the Herder's Den in
Keelbreach Bog.
2 chests here as far as I can tell. There was a chest directly under a sign that says "Underneath"
on a ledge 1 tier down from the "main" part of the bog, in about the middle of the map. There areno ladders leading to or from this area, but there are ladders leading to the area you can jump
down to (2 tiers down) below the area with the sign. This one is obviously referenced by the sign.There is another chest over by the power gem you get to via the teleporter near the first chest. It's
very close to the powergem, in line with the gem. This chest is...special...hehe. I couldn't find any
note that lead me to this chest Also in this same area I am almost positive I dug up a Blooddrop