Embed Size (px)
Citation preview
Harvest of the
MonthDeveloped by students of Lycoming College’s Teacher Certification Program
in partnership with STEP Head Start.
Lycoming College Edition
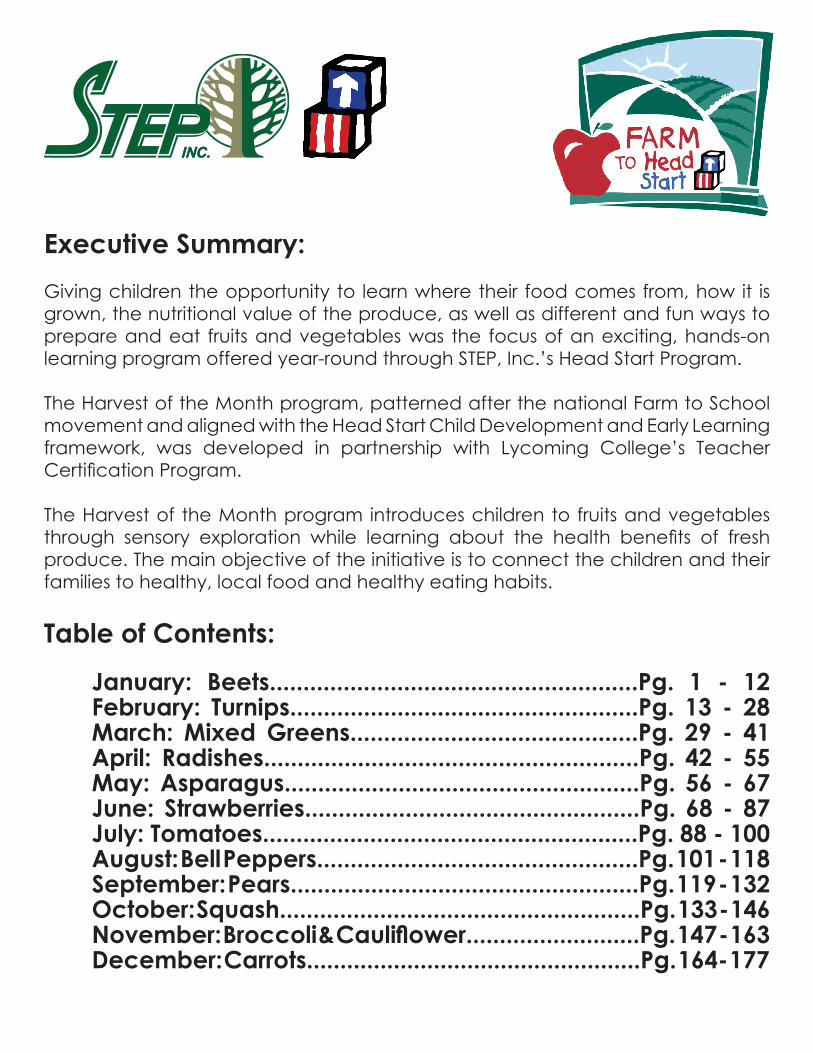
Executive Summary:Giving children the opportunity to learn where their food comes from, how it is grown, the nutritional value of the produce, as well as different and fun ways to prepare and eat fruits and vegetables was the focus of an exciting, hands-on learning program offered year-round through STEP, Inc.’s Head Start Program.
The Harvest of the Month program, patterned after the national Farm to School movement and aligned with the Head Start Child Development and Early Learning framework, was developed in partnership with Lycoming College’s Teacher Certification Program.
The Harvest of the Month program introduces children to fruits and vegetables through sensory exploration while learning about the health benefits of fresh produce. The main objective of the initiative is to connect the children and their families to healthy, local food and healthy eating habits.
Table of Contents:
January: Beets.......................................................Pg. 1 - 12 February: Turnips....................................................Pg. 13 - 28 March: Mixed Greens...........................................Pg. 29 - 41 April: Radishes........................................................Pg. 42 - 55 May: Asparagus.....................................................Pg. 56 - 67 June: Strawberries..................................................Pg. 68 - 87 July: Tomatoes........................................................Pg. 88 - 100 August: Bell Peppers................................................Pg. 101 - 118 September: Pears....................................................Pg. 119 - 132 October: Squash......................................................Pg. 133 - 146 November:Broccoli&Cauliflower..........................Pg.147-163 December: Carrots..................................................Pg. 164- 177
BEETS
Farm to Head Start Initiative | STEP, Inc. | STEP Head Start | Emily Feld and Paisley Simmons—Student in Lycoming College’s Teacher Certification Program
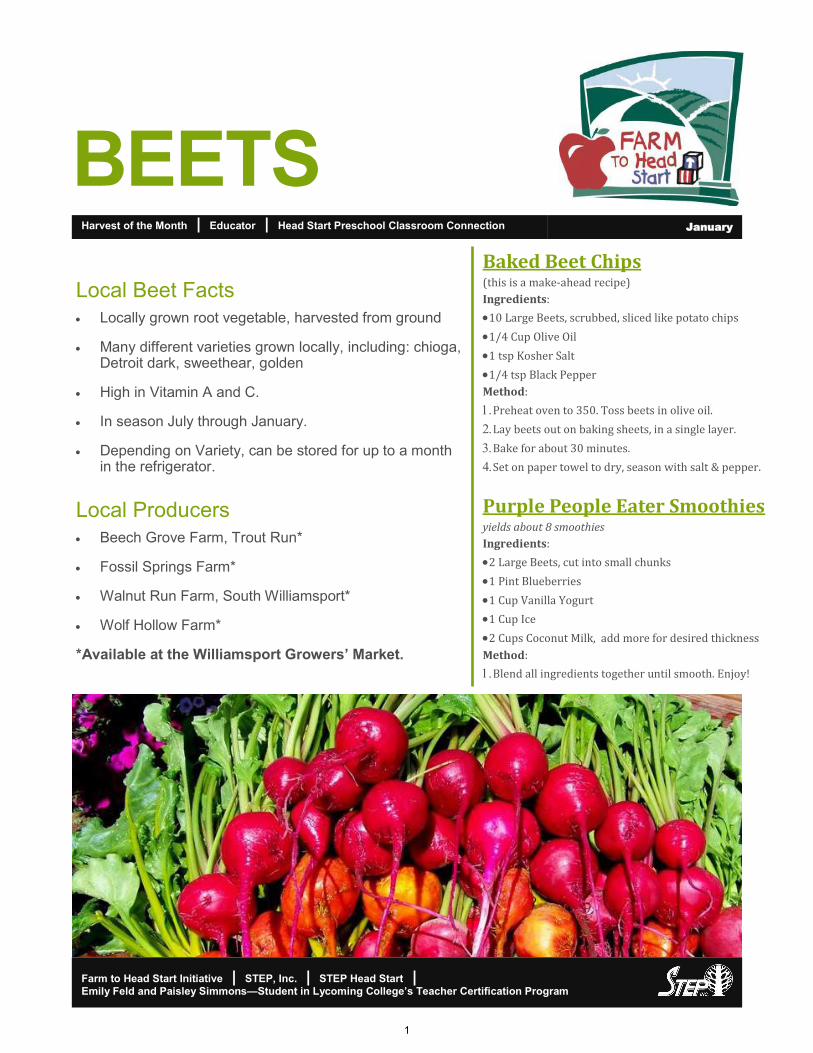
Local Beet Facts
Locally grown root vegetable, harvested from ground
Many different varieties grown locally, including: chioga, Detroit dark, sweethear, golden
High in Vitamin A and C.
In season July through January.
Depending on Variety, can be stored for up to a month in the refrigerator.
Local Producers
Beech Grove Farm, Trout Run*
Fossil Springs Farm*
Walnut Run Farm, South Williamsport*
Wolf Hollow Farm*
*Available at the Williamsport Growers’ Market.
Harvest of the Month | Educator | Head Start Preschool Classroom Connection January
Baked Beet Chips (this is a make-ahead recipe)
Ingredients:
10 Large Beets, scrubbed, sliced like potato chips
1/4 Cup Olive Oil
1 tsp Kosher Salt
1/4 tsp Black Pepper
Method:
Preheat oven to 350. Toss beets in olive oil.
Lay beets out on baking sheets, in a single layer.
Bake for about 30 minutes.
Set on paper towel to dry, season with salt & pepper.
Purple People Eater Smoothies yields about 8 smoothies
Ingredients:
2 Large Beets, cut into small chunks
1 Pint Blueberries
1 Cup Vanilla Yogurt
1 Cup Ice
2 Cups Coconut Milk, add more for desired thickness
Method:
Blend all ingredients together until smooth. Enjoy!
1
Harvest of the Month | Educator | Head Start Preschool Classroom Connection January
Language and Literacy
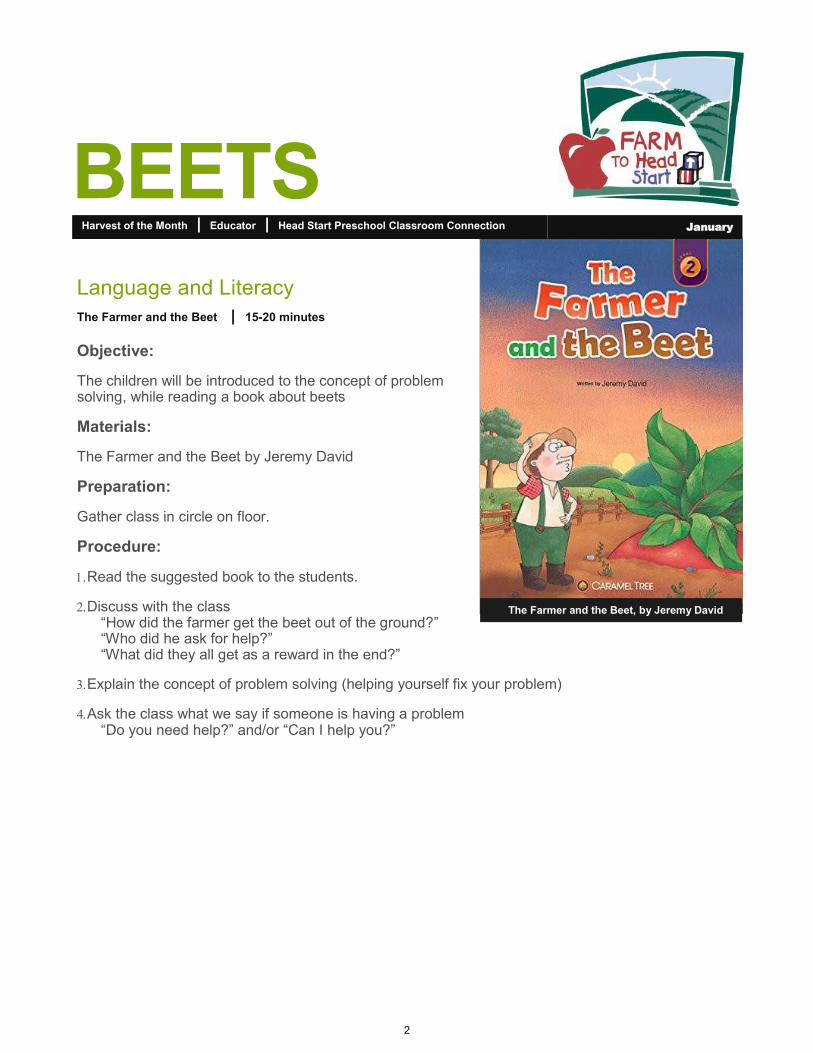
The Farmer and the Beet | 15-20 minutes
Objective:
The children will be introduced to the concept of problem solving, while reading a book about beets
Materials:
The Farmer and the Beet by Jeremy David
Preparation:
Gather class in circle on floor.
Procedure:
Read the suggested book to the students.
Discuss with the class “How did the farmer get the beet out of the ground?” “Who did he ask for help?” “What did they all get as a reward in the end?”
Explain the concept of problem solving (helping yourself fix your problem)
Ask the class what we say if someone is having a problem “Do you need help?” and/or “Can I help you?”
BEETS
The Farmer and the Beet, by Jeremy David
2
Harvest of the Month | Educator | Head Start Preschool Classroom Connection January
Perceptual, Motor, and Physical Development
Beet Search | 15-20 minutes
Objective:
Students will use gross motor skills to find the beet hidden in the room
Materials:
One whole beet in a plastic bag
Preparation:
Hide the beet in a location around the room
Procedure:
1.Have the students get in partners or assign the children partners.
2.Take two students out of the room, or have them put their heads down and close their eyes. These students will be the “detectives.”
3.Have two students hide the beet somewhere inside the room.
4.The two students who are the “detectives” can begin searching.
5.The rest of the class makes “shivering” sounds when the two searching are far away (cold) and pat their hands on their legs when the children are close (hot) .
6.When the students find the beet, choose two different students to be the next “detectives” and have the two who were just searching hide the beet.
BEETS
3
Harvest of the Month | Educator | Head Start Preschool Classroom Connection January
Social & Emotional Development
Pretending Problem Solving | 5-10 minutes
Objective:
The children will act out the process of helping someone solve a problem
Materials:
Your imagination!
Preparation:
None
Procedure:
1.Ask the class what tasks they think they could help with on the beet farm.
2.Have the class practice asking, “Can I help you?” .
3. The teacher should model acting out helping someone with a problem . Ask, “Can I help you?”
Act out helping the person with the problem they are having.
Practice having the student being helped say “thank you”.
4. Have the students turn to a neighbor or get into partners. One student can be the farmer and the other can be the farmer’s helper. Then they can switch.
5. . Have them act out helping on a beet farm; planting seeds, pulling beets out of the ground, cleaning the beets, etc.
6. After they act out the helpful tasks, ask the class to:
Raise their hand if the help was appreciated.
Wiggle their shoulders if they should help someone in the future.
Nod their heads if they helped nicely.
Give a thumbs up if they said “thank you” for the help.
BEETS
4
Harvest of the Month | Educator | Head Start Preschool Classroom Connection January
Cognitive: Math
Comparing Beet Amounts | 10-15 minutes
Objective:
Students will identify which groups have more than, less than, or the same amount of beets in their own group
Materials:
3-5 beets, 3-5 plates
Preparation:
Pre-cut beets, separated into different amounts on plates and in bags
Procedure:
1.Split the children into groups of 3-5.
2.Instruct each group to sit at one table.
3.Have one bag of beets on the table.
4.Ask students to count the number of beet slices in the bag.
5.Walk around with plates of beet slices.
6.Ask students to identify if their bag has more, less or the same as the number of beet slices on the plate (the amounts on the plate should be obviously more or obviously less).
7.Once every group has said, have the students:
Raise their hands if their amount was bigger than the amount on the plate.
Touch their nose if their amount was smaller than the amount on the plate.
Give a thumbs up if their amount was the same as the amount on the plate.
**the students may eat the beet slices after the activity is concluded.
BEETS
5
Harvest of the Month | Educator | Head Start Preschool Classroom Connection January
Cognitive: Math
Counting beets | 5-10 minutes
Objective:
Students will count beets verbally to at least 20
Materials:
3-5 beets, 7-10 plastic sandwich bags
Preparation:
Pre-cut beets separated into different amounts per sandwich bag
Procedure:
1.Split the children into groups of 3-5.
2.Instruct each group to sit at one table.
3.Hand one bag of beets to each group.
4.Ask students to count the number of slices in each bag verbally.
5.Ask each group how many slices their bag contained.
Extension activity: write the numeral to represent how many in their bag for each group on paper or a white board.
**the students may eat the beet slices after the activity is concluded
BEETS
6
Harvest of the Month | Educator | Head Start Preschool Classroom Connection January
Cognitive: Science
Learning about Beets through 5 Senses | 20-30 minutes
Objective:
Students will learn the differences in beets through the five senses
Materials:
5 senses template found at worksheetplace.com under Science tab. Use the ones that have the pictures of each sense that says the sense and then has 4 boxes to draw what 4 things can be looked at using that specific sense (using hear would not make sense for this activity so skip that sense)
Preparation:
Hand out the worksheets to each student
Procedure:
1.Split the children into groups.
2.Instruct each group to sit at one table and assign each group a sense.
3.Give the students a work sheet and tell them to use their particular sense to draw in the 4 boxes.
4.Ask them “what do you see/touch/smell/taste” depending on their assigned sense.
5.Have the students draw (or write) in the boxes what they are experiencing.
6.Have the students share their experience with their sense at the end.
7.Eat the beets when the activity is concluded.
**the students may eat the beet slices after the activity is concluded.
BEETS
7
BEETS
Farm to Head Start Initiative | STEP, Inc. | STEP Head Start | Emily Feld and Paisley Simmons—Student in Lycoming College’s Teacher Certification Program
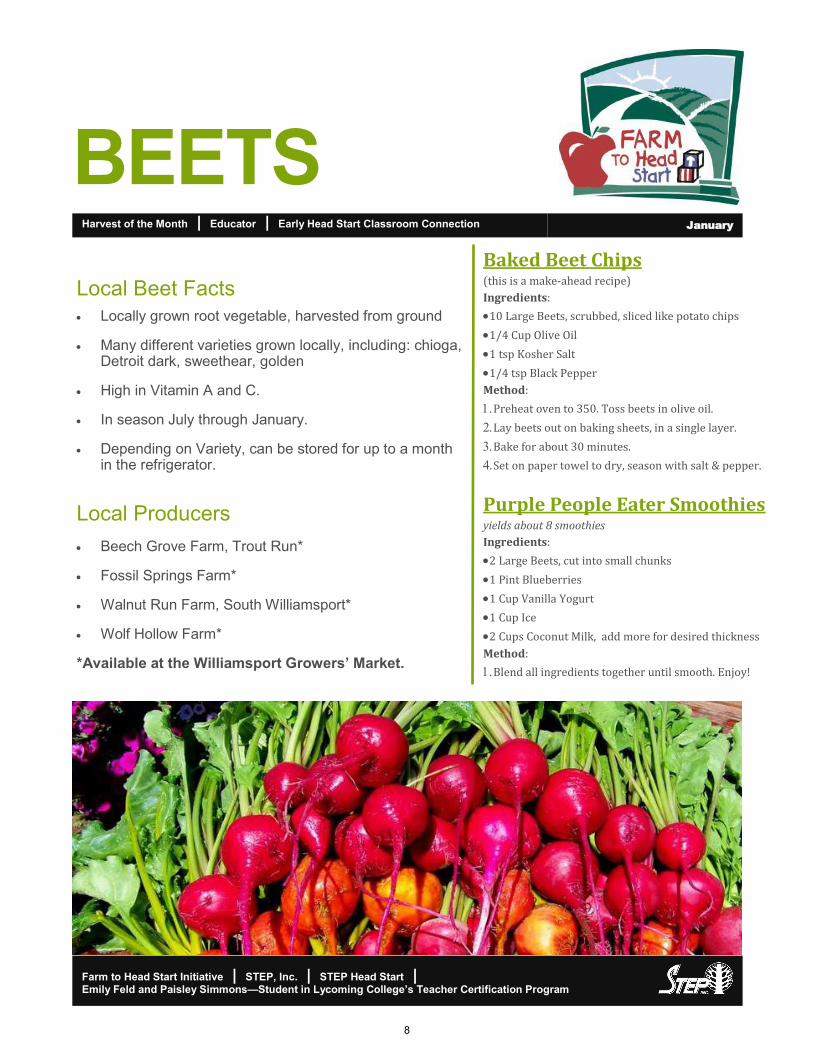
Local Beet Facts
Locally grown root vegetable, harvested from ground
Many different varieties grown locally, including: chioga, Detroit dark, sweethear, golden
High in Vitamin A and C.
In season July through January.
Depending on Variety, can be stored for up to a month in the refrigerator.
Local Producers
Beech Grove Farm, Trout Run*
Fossil Springs Farm*
Walnut Run Farm, South Williamsport*
Wolf Hollow Farm*
*Available at the Williamsport Growers’ Market.
Harvest of the Month | Educator | Early Head Start Classroom Connection January
Baked Beet Chips (this is a make-ahead recipe)
Ingredients:
10 Large Beets, scrubbed, sliced like potato chips
1/4 Cup Olive Oil
1 tsp Kosher Salt
1/4 tsp Black Pepper
Method:
Preheat oven to 350. Toss beets in olive oil.
Lay beets out on baking sheets, in a single layer.
Bake for about 30 minutes.
Set on paper towel to dry, season with salt & pepper.
Purple People Eater Smoothies yields about 8 smoothies
Ingredients:
2 Large Beets, cut into small chunks
1 Pint Blueberries
1 Cup Vanilla Yogurt
1 Cup Ice
2 Cups Coconut Milk, add more for desired thickness
Method:
Blend all ingredients together until smooth. Enjoy!
8
Harvest of the Month | Educator | Early Head Start Classroom Connection January
Language and Literacy
Eat the Rainbow | 10-15 minutes
Objective:
Children will listen to the poem, “Eat the Rainbow”, and learn about beets
Materials:
Eat the Rainbow by Mark J. Halliday**
Preparation:
Have one teacher initiate the reading. Teacher should sit in the area on the floor with a lot of space
Procedure:
1.Read the poem to the children who have decided to participate
2.Once having read the poem, explain to the children that words with the same ending sounds are rhyming words
3.Give an example of rhyming words
4.Have the children give examples of rhyming words
5.Read the ending words in the poem that rhyme and have the children echo respond.
**Eat the Rainbow By Mark J. Halliday: http://www.poemzoom.com/poem/eat_the_rainbow_566790
BEETS
9
Harvest of the Month | Educator | Early Head Start Classroom Connection January
Perceptual, Motor, & Physical Development
Beet Art | 20-25 minutes
Objective:
Children will create pictures with beet coloring
Materials:
5 beets, paint brushes, paper
Preparation:
The beets must be steamed and the juice from steaming should be cooled and poured in cups for children to be able to dip brushes into
Procedure:
1.Have each child in their own space, either at a table or an easel
2.Ask the children what it would look like to paint a beet. Some prompts are:
“What does the stem look like?”
“What shape is a beet?”
“Where does the stem go?”
”How big is a beet?”
3.Show them a model of a painted beet
4.Give them a cup of beet juice
5.Share the artwork from each child at the end
**Allow the children to eat the steamed beets after they have cooled.
BEETS
10
Harvest of the Month | Educator | Early Head Start Classroom Connection January
Social & Emotional Development
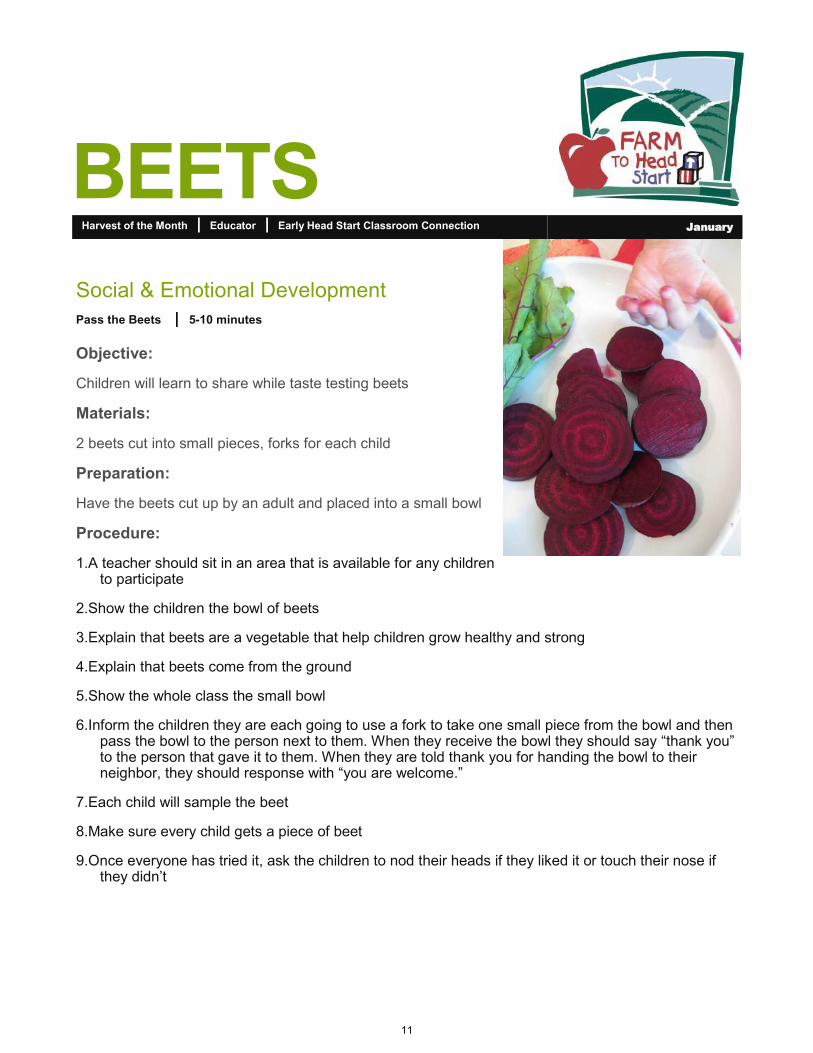
Pass the Beets | 5-10 minutes
Objective:
Children will learn to share while taste testing beets
Materials:
2 beets cut into small pieces, forks for each child
Preparation:
Have the beets cut up by an adult and placed into a small bowl
Procedure:
1.A teacher should sit in an area that is available for any children to participate
2.Show the children the bowl of beets
3.Explain that beets are a vegetable that help children grow healthy and strong
4.Explain that beets come from the ground
5.Show the whole class the small bowl
6.Inform the children they are each going to use a fork to take one small piece from the bowl and then pass the bowl to the person next to them. When they receive the bowl they should say “thank you” to the person that gave it to them. When they are told thank you for handing the bowl to their neighbor, they should response with “you are welcome.”
7.Each child will sample the beet
8.Make sure every child gets a piece of beet
9.Once everyone has tried it, ask the children to nod their heads if they liked it or touch their nose if they didn’t
BEETS
11

Harvest of the Month | Educator | Early Head Start Classroom Connection January
Cognitive
Beet Comparison Using the 5 Senses | 15-20 minutes
Objective:
Children will compare the shapes, colors, and textures of local beets
Materials:
2-3 varieties of beets that are different in color, shape, and texture
2-3 beets of each variety cut into pieces
Preparation:
Cut a beet in half for each group to compare and explore
Procedure:
1.Instruct the children to sit at the table with their assigned group
2.Give each table a different type of beet
3.Tell the children to look with their eyes and describe what they see
4.Have each group explain what color and shape their beet is out loud to the class
5.The teacher should make a chart to record the words the children are using in relation to each sense
6.Then have the children smell, touch, taste and hear the beet
7.With each sense, the teacher should record the responses from the children
8.When all of the senses have been completed, the teacher should show the chart to the students and as a class go over what each sense tells them
9.At the end, have the children taste all the varieties of beets and state which they liked best
** worksheetplace.com has a graphic organizer called My Five Senses with a picture of every sense in the middle and a circle to write the responses from the children. The teacher could have one big one or the children could all have their own. It is under the science worksheets tab called The Five Senses Worksheet.
BEETS
12

TURNIPS
Farm to Head Start Initiative | STEP, Inc. | STEP Head Start | Mackenzie Bilger and Baleigh Dunkleberger—Students in Lycoming College’s Teacher Certification Program
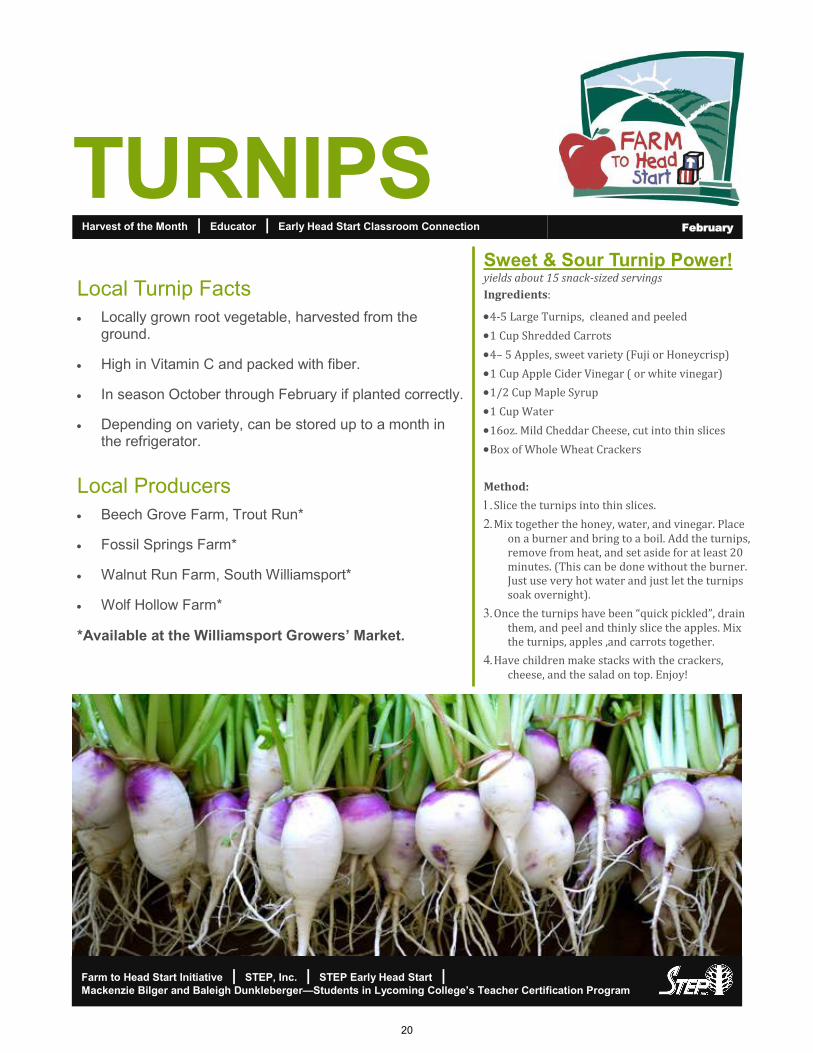
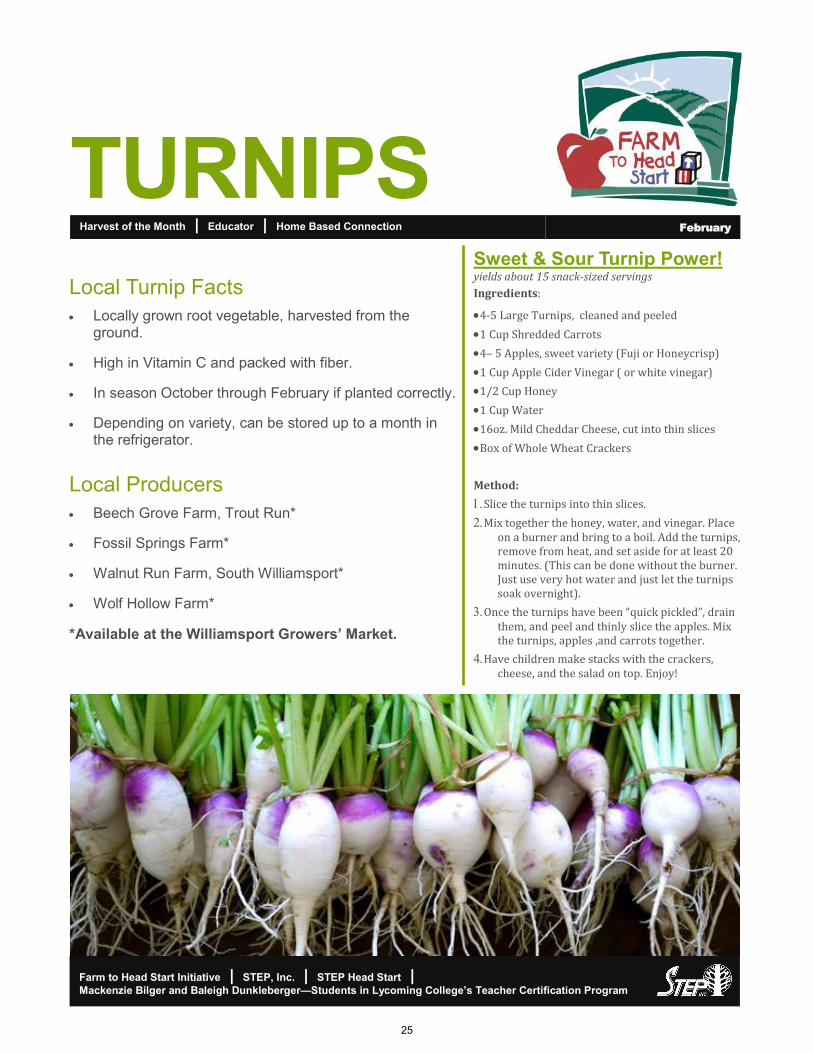
Local Turnip Facts
• Locally grown root vegetable, harvested from the ground.
• High in Vitamin C and packed with fiber.
• In season October through February if planted correctly.
• Depending on variety, can be stored up to a month in the refrigerator.
Local Producers
• Beech Grove Farm, Trout Run*
• Fossil Springs Farm*
• Walnut Run Farm, South Williamsport*
• Wolf Hollow Farm*
*Available at the Williamsport Growers’ Market.
Harvest of the Month | Educator | Head Start Preschool Classroom Connection February
Sweet & Sour Turnip Power!
yields about 15 snack-sized servings
Ingredients:
•4-5 Large Turnips, cleaned and peeled
•1 Cup Shredded Carrots
•4– 5 Apples, sweet variety (Fuji or Honeycrisp)
•1 Cup Apple Cider Vinegar ( or white vinegar)
•1/2 Cup Maple Syrup
•1 Cup Water
•16oz. Mild Cheddar Cheese, cut into thin slices
•Box of Whole Wheat Crackers
Method:
Slice the turnips into thin slices.
Mix together the honey, water, and vinegar. Place on a burner and bring to a boil. Add the turnips, remove from heat, and set aside for at least 20 minutes. (This can be done without the burner. Just use very hot water and just let the turnips soak overnight).
Once the turnips have been “quick pickled”, drain them, and peel and thinly slice the apples. Mix the turnips, apples ,and carrots together.
Have children make stacks with the crackers, cheese, and the salad on top. Enjoy!
13
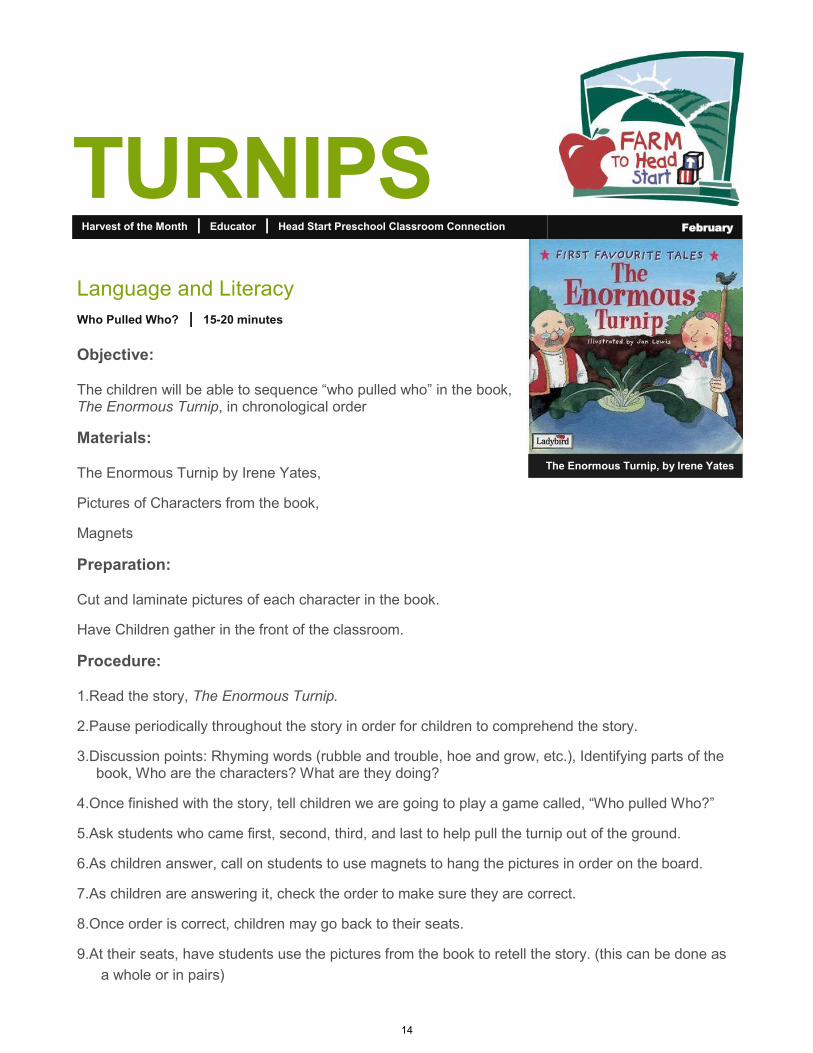
The Enormous Turnip, by Irene Yates
TURNIPS Harvest of the Month | Educator | Head Start Preschool Classroom Connection February
Language and Literacy
Who Pulled Who? | 15-20 minutes
Objective:
The children will be able to sequence “who pulled who” in the book, The Enormous Turnip, in chronological order
Materials:
The Enormous Turnip by Irene Yates,
Pictures of Characters from the book,
Magnets
Preparation:
Cut and laminate pictures of each character in the book.
Have Children gather in the front of the classroom.
Procedure:
1.Read the story, The Enormous Turnip.
2.Pause periodically throughout the story in order for children to comprehend the story.
3.Discussion points: Rhyming words (rubble and trouble, hoe and grow, etc.), Identifying parts of the book, Who are the characters? What are they doing?
4.Once finished with the story, tell children we are going to play a game called, “Who pulled Who?”
5.Ask students who came first, second, third, and last to help pull the turnip out of the ground.
6.As children answer, call on students to use magnets to hang the pictures in order on the board.
7.As children are answering it, check the order to make sure they are correct.
8.Once order is correct, children may go back to their seats.
9.At their seats, have students use the pictures from the book to retell the story. (this can be done as
a whole or in pairs)
14
TURNIPS Harvest of the Month | Educator | Head Start Preschool Classroom Connection February
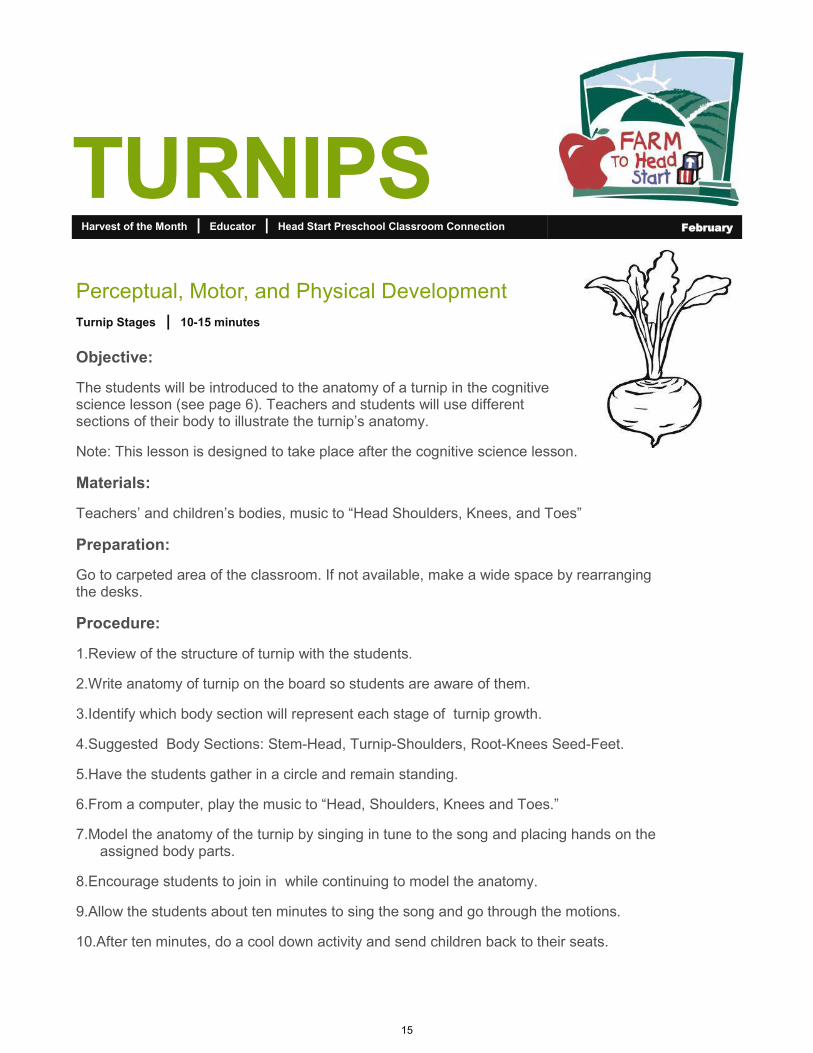
Perceptual, Motor, and Physical Development
Turnip Stages | 10-15 minutes
Objective:
The students will be introduced to the anatomy of a turnip in the cognitive science lesson (see page 6). Teachers and students will use different sections of their body to illustrate the turnip’s anatomy.
Note: This lesson is designed to take place after the cognitive science lesson.
Materials:
Teachers’ and children’s bodies, music to “Head Shoulders, Knees, and Toes”
Preparation:
Go to carpeted area of the classroom. If not available, make a wide space by rearranging the desks.
Procedure:
1.Review of the structure of turnip with the students.
2.Write anatomy of turnip on the board so students are aware of them.
3.Identify which body section will represent each stage of turnip growth.
4.Suggested Body Sections: Stem-Head, Turnip-Shoulders, Root-Knees Seed-Feet.
5.Have the students gather in a circle and remain standing.
6.From a computer, play the music to “Head, Shoulders, Knees and Toes.”
7.Model the anatomy of the turnip by singing in tune to the song and placing hands on the assigned body parts.
8.Encourage students to join in while continuing to model the anatomy.
9.Allow the students about ten minutes to sing the song and go through the motions.
10.After ten minutes, do a cool down activity and send children back to their seats.
15
Would You Like Turnips?
TURNIPS Harvest of the Month | Educator | Head Start Preschool Classroom Connection February
Social & Emotional Development
Would You Like to Order Turnips Today? | 20 minutes
Objective:
The children will act out the steps in asking politely for food while acting as waiters and waitresses at a restaurant
Materials:
Notepads
Preparation:
Have students sit in groups. Make sure they have already learned about the variety of colors of tur-nips.
Procedure:
1.Ask students to recall the different turnip colors.
2.Remind students of the turnip colors if they cannot recall them all.
3.Have students role play, taking turns playing waiter/waitress and customers.
4.Instruct the student who is the waiter/waitress to ask the other students politely what color turnip they would like today.
5.Instruct the children who are the customers to politely ask for a turnip.
6.Encourage students to write the orders down on the notepad (depending on the child, this may involve inventive spelling, scribbling, or conventional spelling).
7.Once every order has been taken, have students switch turns so everybody has a turn.
8.Instruct students to share the notepad with each waiter/waitress.
9.Once every student has played the role of customer and waiter/waitress, activity is done.
16
TURNIPS Harvest of the Month | Educator | Head Start Preschool Classroom Connection February
Cognitive—Math
Which Turnip Comes Next? | 10-15 minutes
Objective:
The children will be able to identify the next turnip in a simple set of patterns, as well as count how many turnips are present and sort them by color within their group.
Materials:
Purple, yellow, green, and white turnips (two of each), table to do demonstrations
Preparation:
Create a simple pattern of turnips that will be easy for children to duplicate. Make the pattern an alter-nating two color pattern.
Procedure:
1.Instruct children to wash their hands.
2.Call children up to the table to see the pattern they need to duplicate.
3.Divide the children into pairs.
4.Have groups sit at designated tables with other members.
5.Give each group an equal amount of eight turnips.
6.Instruct the children to show the same pattern that was demonstrated or ask the students what color is first, what color is second, and what color is last.
7.Once pattern is shown correctly, have children count the turnips and sort them by color within their group.
8.Confirm that each child has four groups of two turnips (two purple, two green, two yellow, and two white).
9.Have children wash their hands again while explaining importance of washing hands before and after touching food.
17
TURNIPS Harvest of the Month | Educator | Head Start Preschool Classroom Connection February
Cognitive—Science
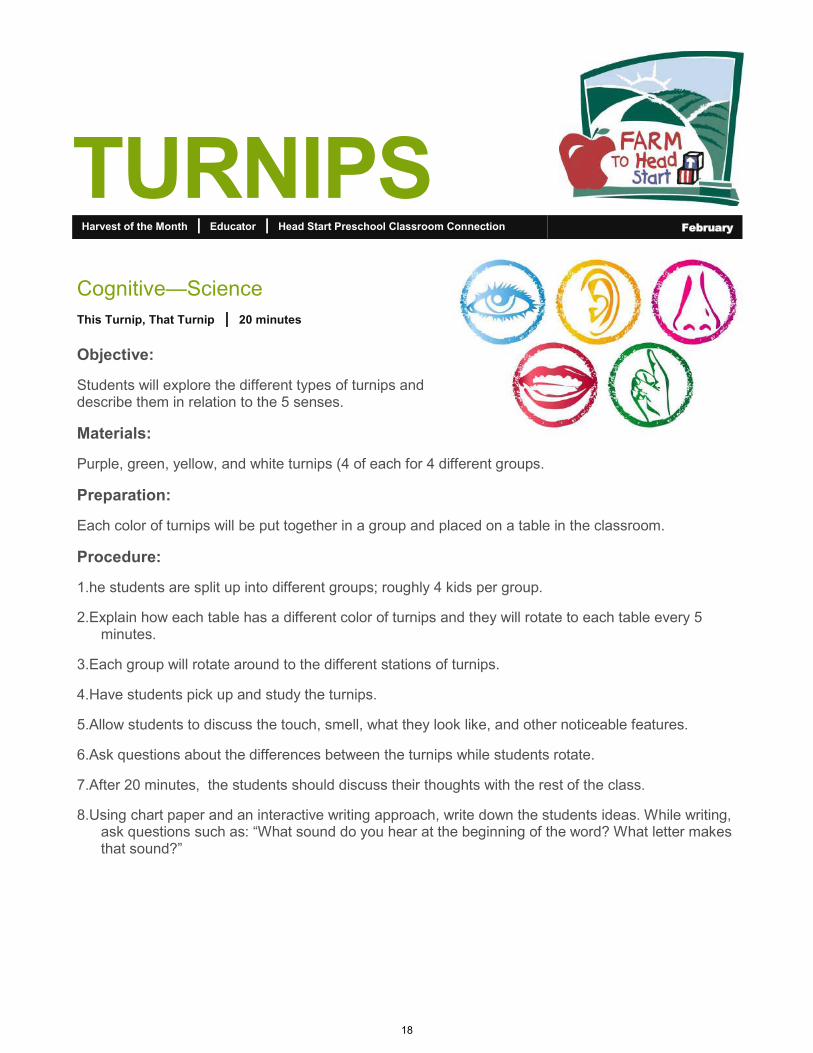
This Turnip, That Turnip | 20 minutes
Objective:
Students will explore the different types of turnips and describe them in relation to the 5 senses.
Materials:
Purple, green, yellow, and white turnips (4 of each for 4 different groups.
Preparation:
Each color of turnips will be put together in a group and placed on a table in the classroom.
Procedure:
1.he students are split up into different groups; roughly 4 kids per group.
2.Explain how each table has a different color of turnips and they will rotate to each table every 5 minutes.
3.Each group will rotate around to the different stations of turnips.
4.Have students pick up and study the turnips.
5.Allow students to discuss the touch, smell, what they look like, and other noticeable features.
6.Ask questions about the differences between the turnips while students rotate.
7.After 20 minutes, the students should discuss their thoughts with the rest of the class.
8.Using chart paper and an interactive writing approach, write down the students ideas. While writing, ask questions such as: “What sound do you hear at the beginning of the word? What letter makes that sound?”
18
TURNIPS Harvest of the Month | Educator | Head Start Preschool Classroom Connection February
Cognitive—Science
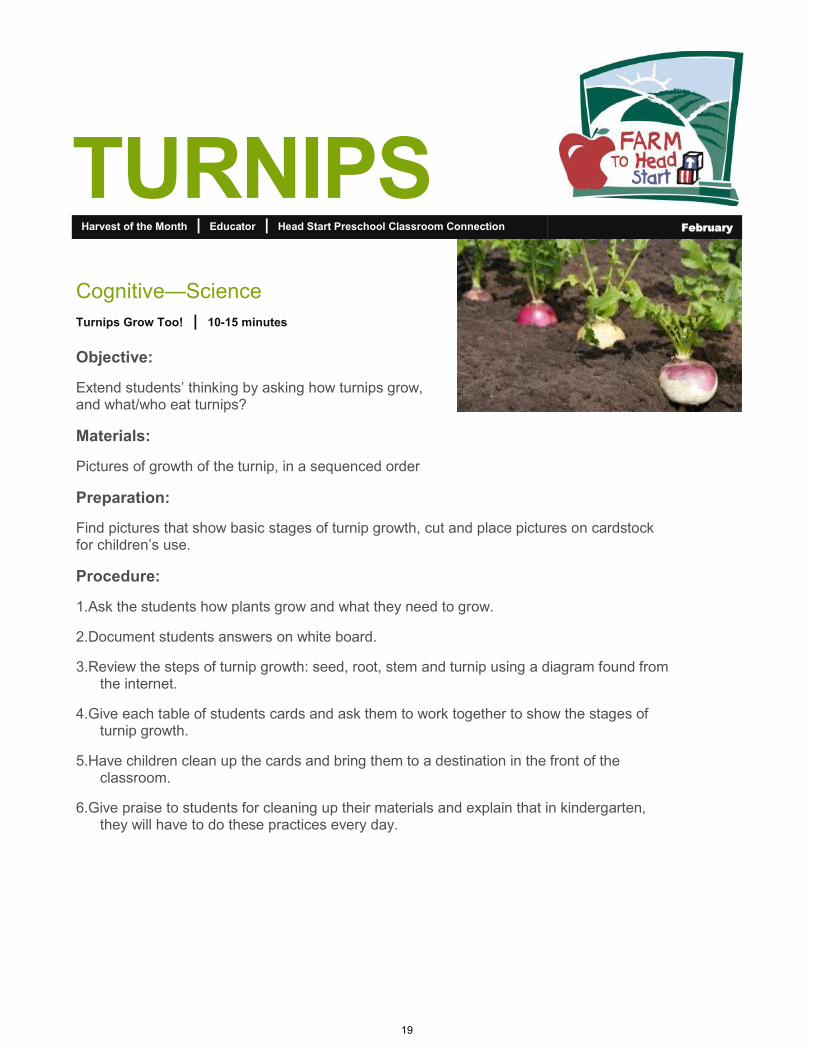
Turnips Grow Too! | 10-15 minutes
Objective:
Extend students’ thinking by asking how turnips grow, and what/who eat turnips?
Materials:
Pictures of growth of the turnip, in a sequenced order
Preparation:
Find pictures that show basic stages of turnip growth, cut and place pictures on cardstock for children’s use.
Procedure:
1.Ask the students how plants grow and what they need to grow.
2.Document students answers on white board.
3.Review the steps of turnip growth: seed, root, stem and turnip using a diagram found from the internet.
4.Give each table of students cards and ask them to work together to show the stages of turnip growth.
5.Have children clean up the cards and bring them to a destination in the front of the classroom.
6.Give praise to students for cleaning up their materials and explain that in kindergarten, they will have to do these practices every day.
19
TURNIPS Harvest of the Month | Educator | Early Head Start Classroom Connection February
Farm to Head Start Initiative | STEP, Inc. | STEP Early Head Start | Mackenzie Bilger and Baleigh Dunkleberger—Students in Lycoming College’s Teacher Certification Program
Local Turnip Facts
• Locally grown root vegetable, harvested from the ground.
• High in Vitamin C and packed with fiber.
• In season October through February if planted correctly.
• Depending on variety, can be stored up to a month in the refrigerator.
Local Producers
• Beech Grove Farm, Trout Run*
• Fossil Springs Farm*
• Walnut Run Farm, South Williamsport*
• Wolf Hollow Farm*
*Available at the Williamsport Growers’ Market.
Sweet & Sour Turnip Power!
yields about 15 snack-sized servings
Ingredients:
•4-5 Large Turnips, cleaned and peeled
•1 Cup Shredded Carrots
•4– 5 Apples, sweet variety (Fuji or Honeycrisp)
•1 Cup Apple Cider Vinegar ( or white vinegar)
•1/2 Cup Maple Syrup
•1 Cup Water
•16oz. Mild Cheddar Cheese, cut into thin slices
•Box of Whole Wheat Crackers
Method:
Slice the turnips into thin slices.
Mix together the honey, water, and vinegar. Place on a burner and bring to a boil. Add the turnips, remove from heat, and set aside for at least 20 minutes. (This can be done without the burner. Just use very hot water and just let the turnips soak overnight).
Once the turnips have been “quick pickled”, drain them, and peel and thinly slice the apples. Mix the turnips, apples ,and carrots together.
Have children make stacks with the crackers, cheese, and the salad on top. Enjoy!
20
The Enormous Turnip, by Irene Yates
TURNIPS Harvest of the Month | Educator | Early Head Start Classroom Connection February
Language and Literacy
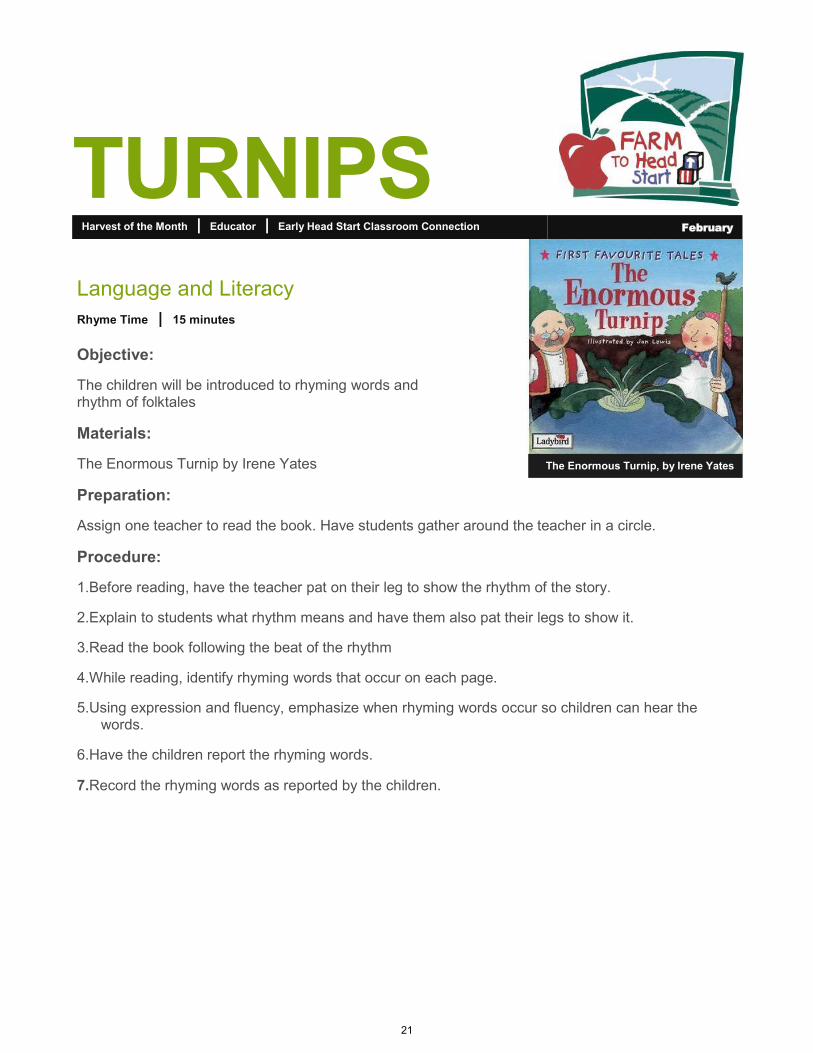
Rhyme Time | 15 minutes
Objective:
The children will be introduced to rhyming words and rhythm of folktales
Materials:
The Enormous Turnip by Irene Yates
Preparation:
Assign one teacher to read the book. Have students gather around the teacher in a circle.
Procedure:
1.Before reading, have the teacher pat on their leg to show the rhythm of the story.
2.Explain to students what rhythm means and have them also pat their legs to show it.
3.Read the book following the beat of the rhythm
4.While reading, identify rhyming words that occur on each page.
5.Using expression and fluency, emphasize when rhyming words occur so children can hear the words.
6.Have the children report the rhyming words.
7.Record the rhyming words as reported by the children.
21
TURNIPS Harvest of the Month | Educator | Early Head Start Classroom Connection February
Perceptual, Motor, and Physical Development
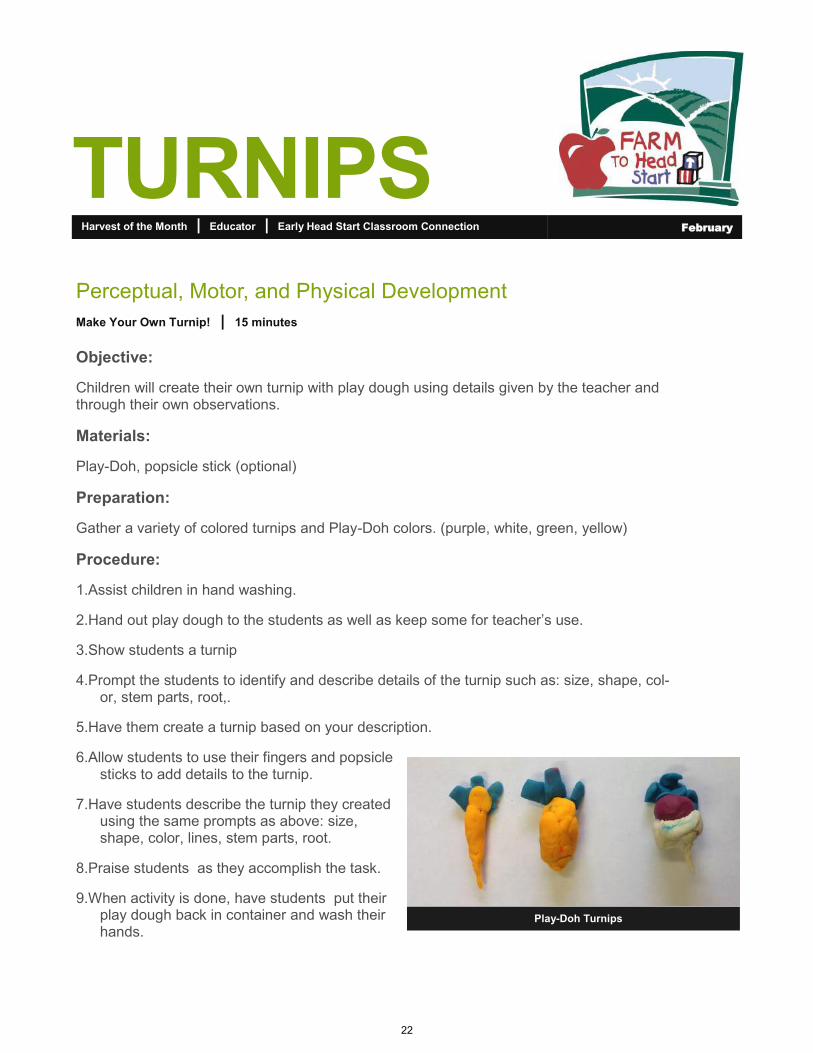
Make Your Own Turnip! | 15 minutes
Objective:
Children will create their own turnip with play dough using details given by the teacher and through their own observations.
Materials:
Play-Doh, popsicle stick (optional)
Preparation:
Gather a variety of colored turnips and Play-Doh colors. (purple, white, green, yellow)
Procedure:
1.Assist children in hand washing.
2.Hand out play dough to the students as well as keep some for teacher’s use.
3.Show students a turnip
4.Prompt the students to identify and describe details of the turnip such as: size, shape, col-or, stem parts, root,.
5.Have them create a turnip based on your description.
6.Allow students to use their fingers and popsicle sticks to add details to the turnip.
7.Have students describe the turnip they created using the same prompts as above: size, shape, color, lines, stem parts, root.
8.Praise students as they accomplish the task.
9.When activity is done, have students put their play dough back in container and wash their hands.
Play-Doh Turnips
22
TURNIPS Harvest of the Month | Educator | Early Head Start Classroom Connection February
Social and Emotional Development
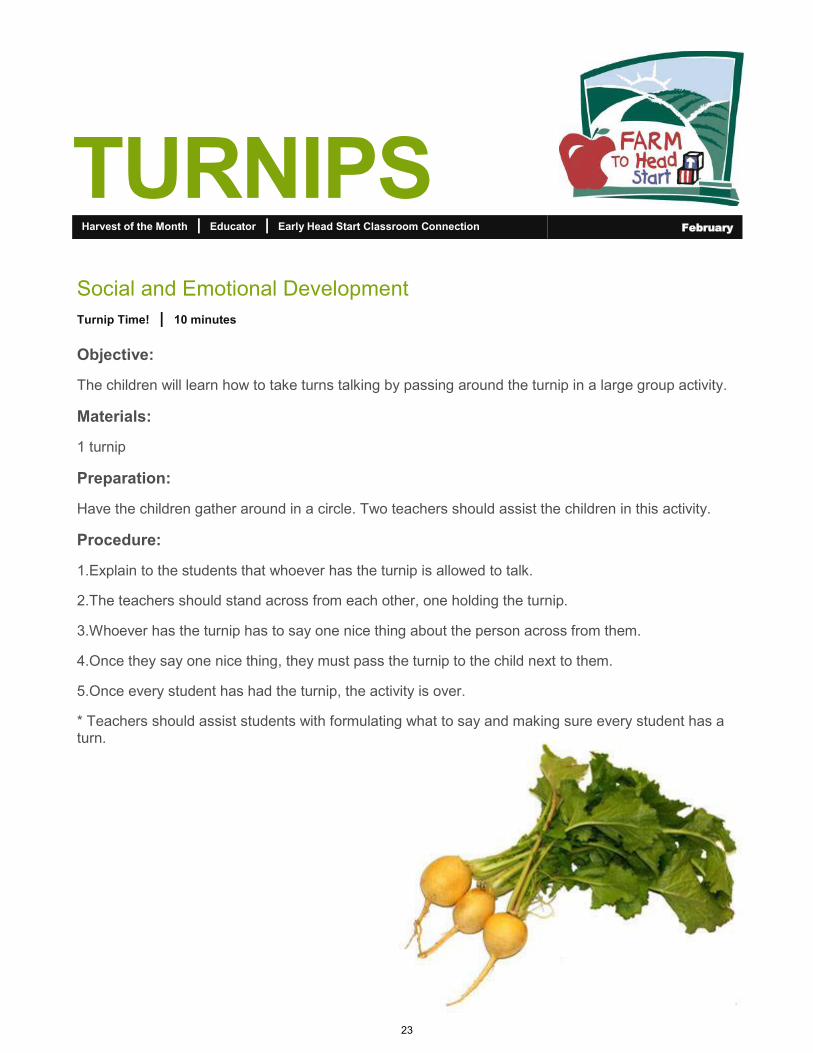
Turnip Time! | 10 minutes
Objective:
The children will learn how to take turns talking by passing around the turnip in a large group activity.
Materials:
1 turnip
Preparation:
Have the children gather around in a circle. Two teachers should assist the children in this activity.
Procedure:
1.Explain to the students that whoever has the turnip is allowed to talk.
2.The teachers should stand across from each other, one holding the turnip.
3.Whoever has the turnip has to say one nice thing about the person across from them.
4.Once they say one nice thing, they must pass the turnip to the child next to them.
5.Once every student has had the turnip, the activity is over.
* Teachers should assist students with formulating what to say and making sure every student has a turn.
23
TURNIPS Harvest of the Month | Educator | Early Head Start Classroom Connection February
Cognitive
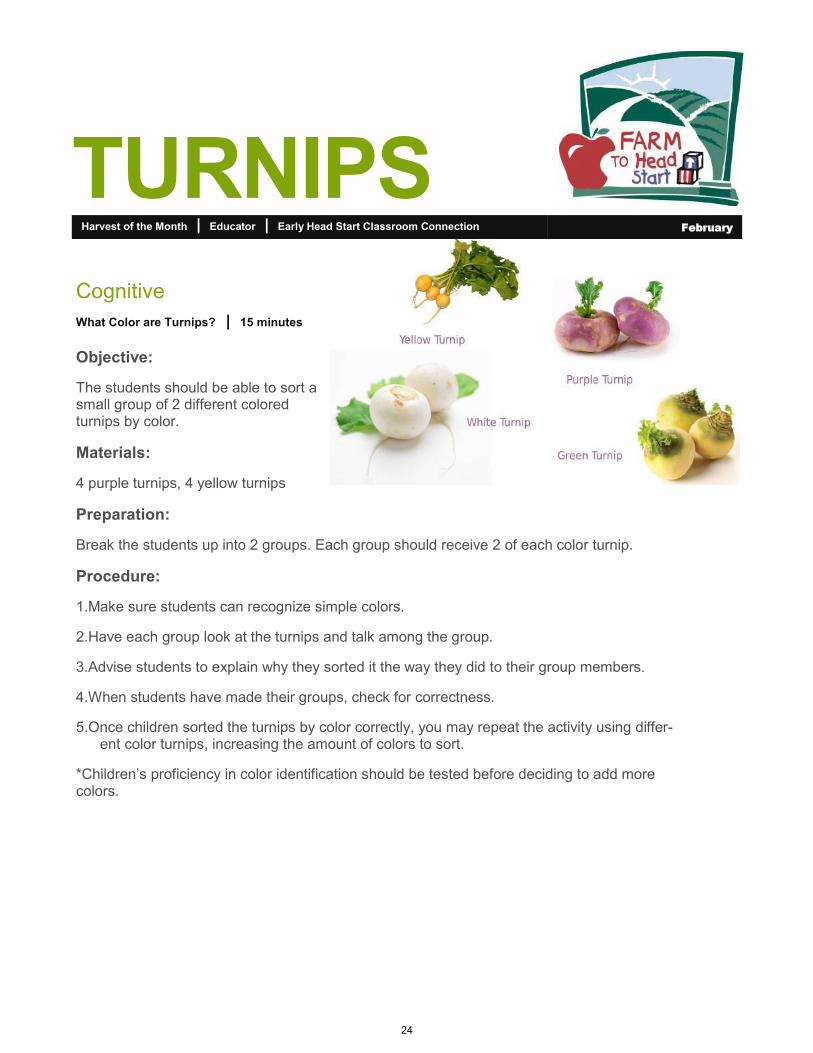
What Color are Turnips? | 15 minutes
Objective:
The students should be able to sort a small group of 2 different colored turnips by color.
Materials:
4 purple turnips, 4 yellow turnips
Preparation:
Break the students up into 2 groups. Each group should receive 2 of each color turnip.
Procedure:
1.Make sure students can recognize simple colors.
2.Have each group look at the turnips and talk among the group.
3.Advise students to explain why they sorted it the way they did to their group members.
4.When students have made their groups, check for correctness.
5.Once children sorted the turnips by color correctly, you may repeat the activity using differ-ent color turnips, increasing the amount of colors to sort.
*Children’s proficiency in color identification should be tested before deciding to add more colors.
24
TURNIPS Harvest of the Month | Educator | Home Based Connection February
Farm to Head Start Initiative | STEP, Inc. | STEP Head Start | Mackenzie Bilger and Baleigh Dunkleberger—Students in Lycoming College’s Teacher Certification Program
Local Turnip Facts
• Locally grown root vegetable, harvested from the ground.
• High in Vitamin C and packed with fiber.
• In season October through February if planted correctly.
• Depending on variety, can be stored up to a month in the refrigerator.
Local Producers
• Beech Grove Farm, Trout Run*
• Fossil Springs Farm*
• Walnut Run Farm, South Williamsport*
• Wolf Hollow Farm*
*Available at the Williamsport Growers’ Market.
Sweet & Sour Turnip Power!
yields about 15 snack-sized servings
Ingredients:
•4-5 Large Turnips, cleaned and peeled
•1 Cup Shredded Carrots
•4– 5 Apples, sweet variety (Fuji or Honeycrisp)
•1 Cup Apple Cider Vinegar ( or white vinegar)
•1/2 Cup Honey
•1 Cup Water
•16oz. Mild Cheddar Cheese, cut into thin slices
•Box of Whole Wheat Crackers
Method:
Slice the turnips into thin slices.
Mix together the honey, water, and vinegar. Place on a burner and bring to a boil. Add the turnips, remove from heat, and set aside for at least 20 minutes. (This can be done without the burner. Just use very hot water and just let the turnips soak overnight).
Once the turnips have been “quick pickled”, drain them, and peel and thinly slice the apples. Mix the turnips, apples ,and carrots together.
Have children make stacks with the crackers, cheese, and the salad on top. Enjoy!
25
TURNIPS Harvest of the Month | Educator | Head Start Preschool Classroom Connection February
Edible Experience
Farmer Says | 5-10 minutes
Objective:
Children will act out the entire lifecycle of the featured local harvest (similar to “Simon Says”)
Materials:
None
Preparation:
Familiarize yourself with the growing/harvesting process of the featured produce item. Ex-ample: Pears grow on trees, so they are picked from trees and from the ground, placed in a container, etc.
Procedure:
1.After learning about the farmers who grew the featured produce, have the class gather on the carpet
2.Introduce yourself as the featured local farmer and begin to act out the life cycle of the produce (together as a class)
•Example: Farmer Eck says…. find a baby seed, dig a hole, plant the seed and sprinkle some love in the ground, pat the soil on top of the seed, pretend to rain on the seed, give the seed some sunshine rays, pretend to be the baby seed in the ground, grow into a version of that seed, pick your fruit/vegetable, have the class all help pull/pick a HUGE one together on the count of 3, put it in a basket, drive it to the farmers market/store, pretend to sell it to families, take a mindful bite of the produce, give a thumbs up, and applause!
•Suggestions:
•For fruit, act out the flower blossoms and pollinator roles before acting out harvesting
•Do this activity right before each taste testing experience, to allow children to fully understand the process behind the featured food
26
TURNIPS Harvest of the Month | Educator | Head Start Preschool Classroom Connection February
Edible Experience
Taste Test | 10-15 minutes
Objective:
Children will have the opportunity to taste test raw, locally grown turnip varieties
Materials:
Locally grown turnips, plates, napkins
Preparation:
Wash and dry turnips
Procedure:
1.Cut the turnips in quarters so it easier for the children to handle.
2.Have students wash hands before eating.
3.Give children a quarter of each colored turnip.
4.Encourage students to try the turnip while demonstrating how to properly eat it.
5.While the students eat, have them describe the taste of the turnip.
6.Once they are done, use tally marks on a T-chart to track who liked the turnip and who did not.
7.Have students wash their hands when they are done eating.
27
TURNIPS Harvest of the Month | Educator | Head Start Preschool Classroom Connection February
Edible Experience
Taste Test Results | 10-15 minutes
“For me!” or “I like it!” “Not for me” or “I don’t like it”
28

MIXED GREENS
Farm to Head Start Initiative | STEP, Inc. | STEP Head Start | Alyssa Godshall and Jennifer Grove—Students in Lycoming College’s Teacher Certification Program
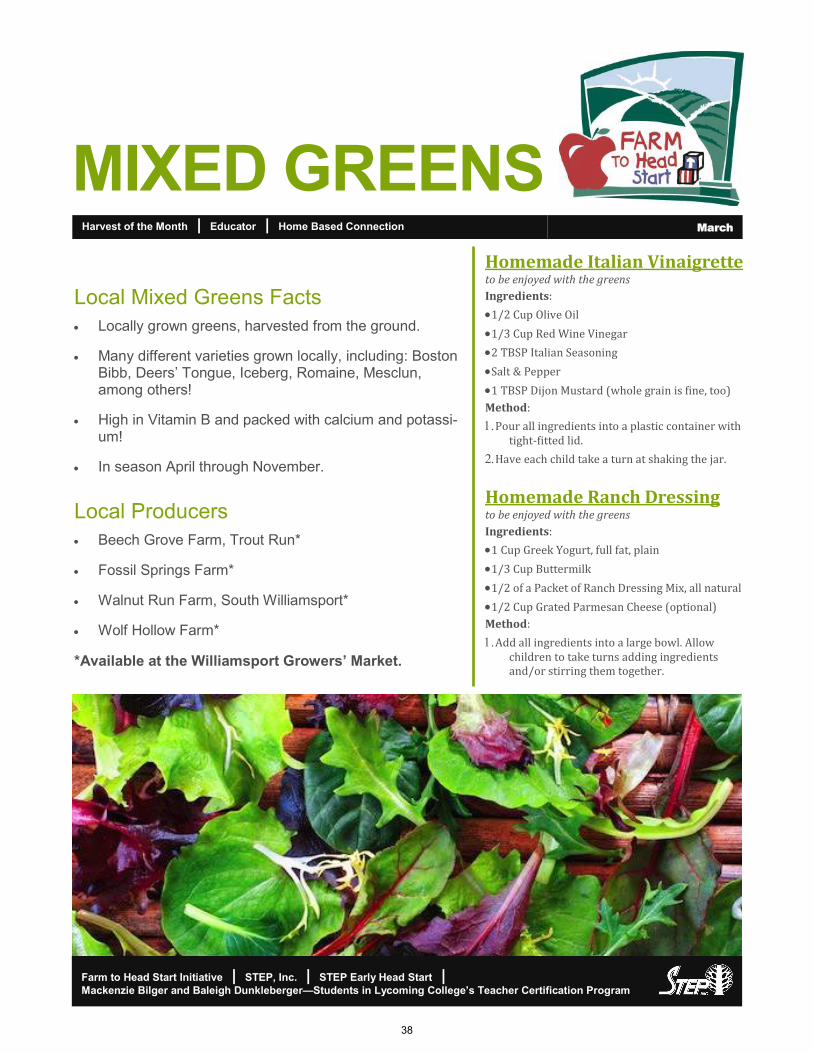
Local Mixed Greens Facts
• Locally grown greens, harvested from the ground.
• Many different varieties grown locally, including: Boston Bibb, Deers’ Tongue, Iceberg, Romaine, Mesclun, among others!
• High in Vitamin B and packed with calcium and potassi-um!
• In season April through November.
Local Producers
• Beech Grove Farm, Trout Run*
• Fossil Springs Farm*
• Walnut Run Farm, South Williamsport*
• Wolf Hollow Farm*
*Available at the Williamsport Growers’ Market.
Harvest of the Month | Educator | Head Start Preschool Classroom Connection March
Homemade Italian Vinaigrette to be enjoyed with the greens
Ingredients:
•1/2 Cup Olive Oil
•1/3 Cup Red Wine Vinegar
•2 TBSP Italian Seasoning
•Salt & Pepper
•1 TBSP Dijon Mustard (whole grain is fine, too)
Method:
Pour all ingredients into a plastic container with tight-fitted lid.
Have each child take a turn at shaking the jar.
Homemade Ranch Dressing to be enjoyed with the greens
Ingredients:
•1 Cup Greek Yogurt, full fat, plain
•1/3 Cup Buttermilk
•1/2 of a Packet of Ranch Dressing Mix, all natural
•1/2 Cup Grated Parmesan Cheese (optional)
Method:
Add all ingredients into a large bowl. Allow children to take turns adding ingredients and/or stirring them together.
29

Harvest of the Month | Educator | Head Start Preschool Classroom Connection March
Language and Literacy
Lettuce! | 15 minutes
Objective:
The students will discuss the concepts related to the book
Materials:
Lettuce by Diana Kizlauskas
Preparation:
Have one teacher initiate the reading. Teacher should sit in an area made widely available to the kids (i.e.– on the floor, with plenty of space around him/her for the kids to join).
Procedure:
1.Ask students if they have ever planted something and watched it grow before.
2.Read the suggested book to the students.
3.Point out different parts of the book to individual children to help engage them in the reading.
4.When pointing to a certain part of the book, explain to the child what is going on.
Example: Page 3– Point out the word Grew and say that this means the lettuce was once small
and is now very big.
Page 23– Ask how you know that the owl is sick
5.At the end of the book, point out that Rabbit shares all his lettuce with his friends to make them
happy. Discuss how rabbit feels and why.
6.Ask students if they have ever shared something that they cared about and how they felt.
MIXED GREENS
Lettuce, by Diana Kizlauskas
30
Harvest of the Month | Educator | Head Start Preschool Classroom Connection March
Perceptual, Motor, & Physical Development
Rabbit Says | 10-15 minutes
Objective:
The students will perform activities that combine and coordinate large muscle movements
Materials:
See preparation
Preparation:
Have a list of different directions for modified Simon Says game
“Take one big hop”
Rabbit says “Take one big hop”
Procedure:
After reading “Lettuce” by Diana Kizlauskas, students will participate in a modified game of
Simon Says called Rabbit Says.
Direct students to an open area in the classroom and tell them to spread out facing you
(the teacher).
Explain how Rabbit Says works:
“Rabbit says take one big hop” and the students will take one big hop. Emphasize if you
say “take one big hop”, but rabbit does not say it, students are not allowed to hop.
MIXED GREENS
31

Harvest of the Month | Educator | Head Start Preschool Classroom Connection March
Social & Emotional Development/Creative Arts Expression
Build a Salad | 10-15 minutes
Objective:
The students will take turns in conversations and interactions with others and practice manners such and please and thank you.
Materials:
Chalk board or white board, paper cut-out of vegetables, tape, list of guided questions, white printer paper, and markers
Preparation:
Have a list of guided questions you want students to discuss.
Procedure:
1.Give each student a piece of paper and makers.
2.Tell the class you’re feeling hungry and get their ideas about what you should eat.
3.Tell the class you are in the mood for something green and healthy– ask student what food is green and healthy.
4.Once students have the idea of lettuce in their minds, ask them what kind of meals they can make with lettuce.
5.Tell the children you want to build a salad.
6.Draw a bowl on the board.
7.Students practice taking turns by having each student share an ingredient to add to the salad.
8.Have different students take a paper cut out of ingredients and stick it to the board in the bowl.
9.As a student places a paper cut-out on the board, have the other students draw it independently at their seats.
10.When students come up to take ingredients, have them practice manners by asking for their ingre-dients from you by saying please and thank you.
MIXED GREENS
32
Harvest of the Month | Educator | Head Start Preschool Classroom Connection March
Cognitive: Mathematics Knowledge & Skills/Science Knowledge & Skills
Sorting your Leafy Greens | 10-15 minutes
Objective:
The students will be able to identify similarities and differences and sort different kinds of lettuce. Students will also be able to count and identify how many pieces of lettuce they have.
Materials:
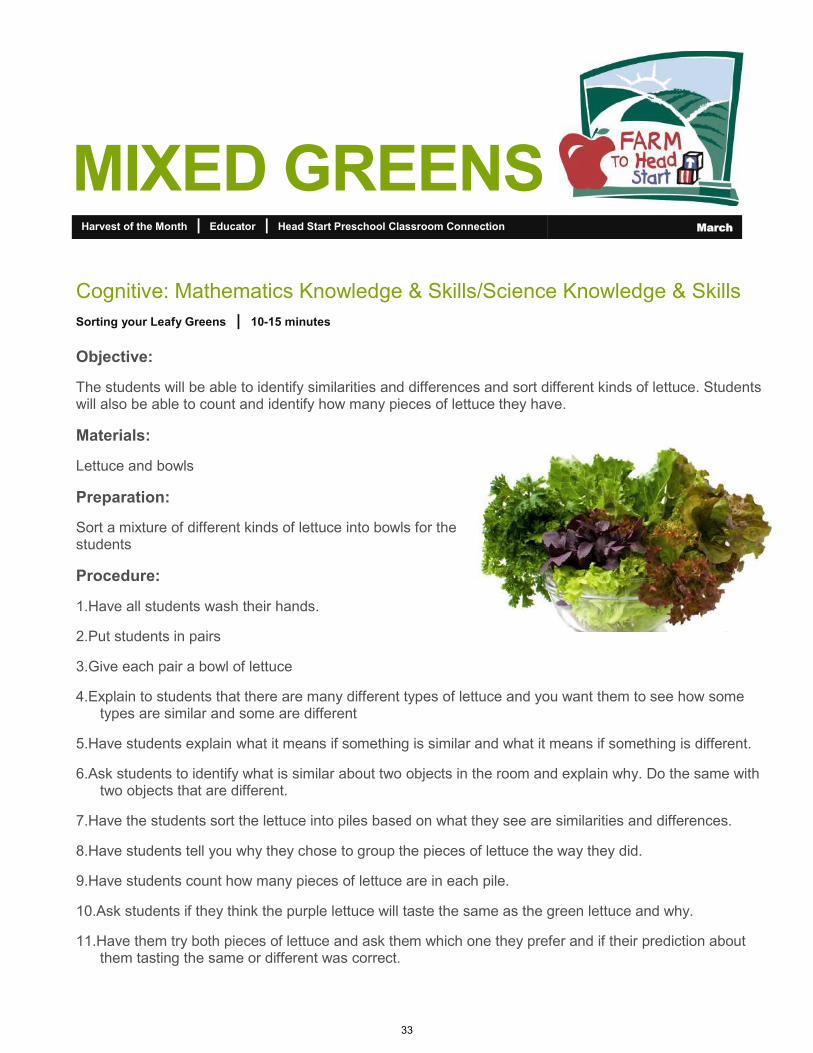
Lettuce and bowls
Preparation:
Sort a mixture of different kinds of lettuce into bowls for the students
Procedure:
1.Have all students wash their hands.
2.Put students in pairs
3.Give each pair a bowl of lettuce
4.Explain to students that there are many different types of lettuce and you want them to see how some types are similar and some are different
5.Have students explain what it means if something is similar and what it means if something is different.
6.Ask students to identify what is similar about two objects in the room and explain why. Do the same with two objects that are different.
7.Have the students sort the lettuce into piles based on what they see are similarities and differences.
8.Have students tell you why they chose to group the pieces of lettuce the way they did.
9.Have students count how many pieces of lettuce are in each pile.
10.Ask students if they think the purple lettuce will taste the same as the green lettuce and why.
11.Have them try both pieces of lettuce and ask them which one they prefer and if their prediction about them tasting the same or different was correct.
MIXED GREENS
33
Harvest of the Month | Educator | Early Head Start Classroom Connection March
Farm to Head Start Initiative | STEP, Inc. | STEP Early Head Start | Mackenzie Bilger and Baleigh Dunkleberger—Students in Lycoming College’s Teacher Certification Program
MIXED GREENS
Homemade Italian Vinaigrette to be enjoyed with the greens
Ingredients:
•1/2 Cup Olive Oil
•1/3 Cup Red Wine Vinegar
•2 TBSP Italian Seasoning
•Salt & Pepper
•1 TBSP Dijon Mustard (whole grain is fine, too)
Method:
Pour all ingredients into a plastic container with tight-fitted lid.
Have each child take a turn at shaking the jar.
Homemade Ranch Dressing to be enjoyed with the greens
Ingredients:
•1 Cup Greek Yogurt, full fat, plain
•1/3 Cup Buttermilk
•1/2 of a Packet of Ranch Dressing Mix, all natural
•1/2 Cup Grated Parmesan Cheese (optional)
Method:
Add all ingredients into a large bowl. Allow children to take turns adding ingredients and/or stirring them together.
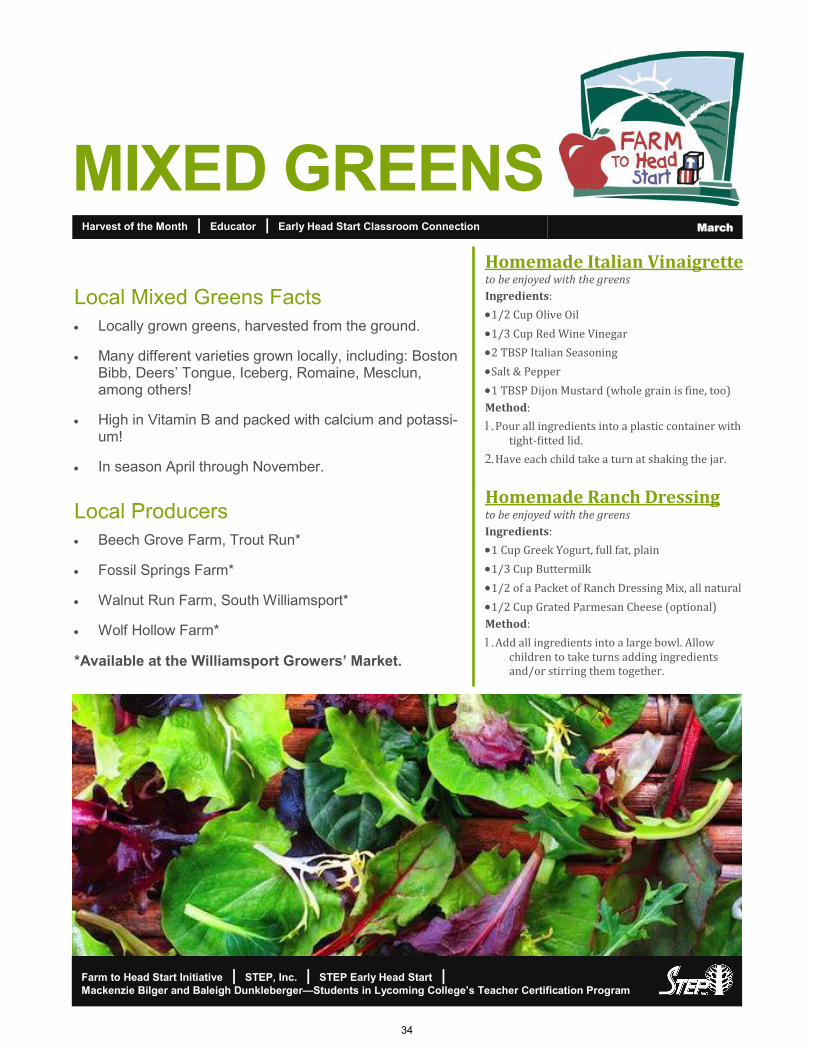
Local Mixed Greens Facts
• Locally grown greens, harvested from the ground.
• Many different varieties grown locally, including: Boston Bibb, Deers’ Tongue, Iceberg, Romaine, Mesclun, among others!
• High in Vitamin B and packed with calcium and potassi-um!
• In season April through November.
Local Producers
• Beech Grove Farm, Trout Run*
• Fossil Springs Farm*
• Walnut Run Farm, South Williamsport*
• Wolf Hollow Farm*
*Available at the Williamsport Growers’ Market.
34
Harvest of the Month | Educator | Early Head Start Classroom Connection March
Language and Literacy
Lettuce Read | 15 minutes
Objective:
The students will participate in joint attention with an adult by looking back and forth between the adult and the book. The children point or gesture when an adult is pointing.
Materials:
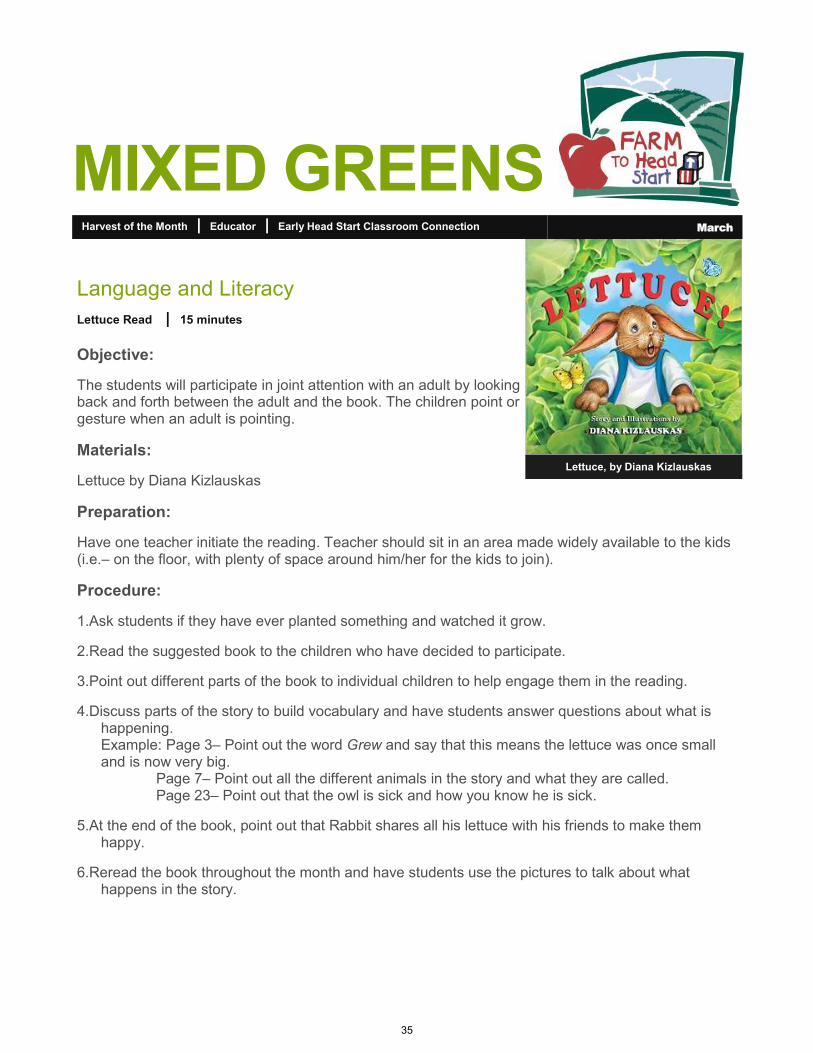
Lettuce by Diana Kizlauskas
Preparation:
Have one teacher initiate the reading. Teacher should sit in an area made widely available to the kids (i.e.– on the floor, with plenty of space around him/her for the kids to join).
Procedure:
1.Ask students if they have ever planted something and watched it grow.
2.Read the suggested book to the children who have decided to participate.
3.Point out different parts of the book to individual children to help engage them in the reading.
4.Discuss parts of the story to build vocabulary and have students answer questions about what is happening. Example: Page 3– Point out the word Grew and say that this means the lettuce was once small and is now very big. Page 7– Point out all the different animals in the story and what they are called. Page 23– Point out that the owl is sick and how you know he is sick.
5.At the end of the book, point out that Rabbit shares all his lettuce with his friends to make them happy.
6.Reread the book throughout the month and have students use the pictures to talk about what happens in the story.
MIXED GREENS
Lettuce, by Diana Kizlauskas
35
Harvest of the Month | Educator | Early Head Start Classroom Connection March
MIXED GREENS
Perceptual, Motor & Physical Development Social & Emotional Development Creative Arts Expression
Build a Garden | 10-15 minutes
Objective:
The students will plan to use hands for various activities, such as drawing.
Students will practice sharing materials.
Materials:
Plain white paper, crayons, markers
Preparation:
Have materials out ahead of time
Procedure:
1.After reading the book Lettuce, tell children that they will now draw a garden of their own.
2.Discuss what gardens look like and use the book and other pictures to prompt the students.
3.Give each student a piece of paper and give each group drawing materials so they have to practice sharing.
4.Tell students to add certain things to their garden pictures Examples: Draw carrots in a row Draw a big head of lettuce Draw corn Draw colorful flowers
5.Another option is to have them choose a particular vegetable to draw or to just draw and color a head of lettuce.
6.Allow students to draw and ask them questions about what they are drawing in their garden.
36
Harvest of the Month | Educator | Early Head Start Classroom Connection March
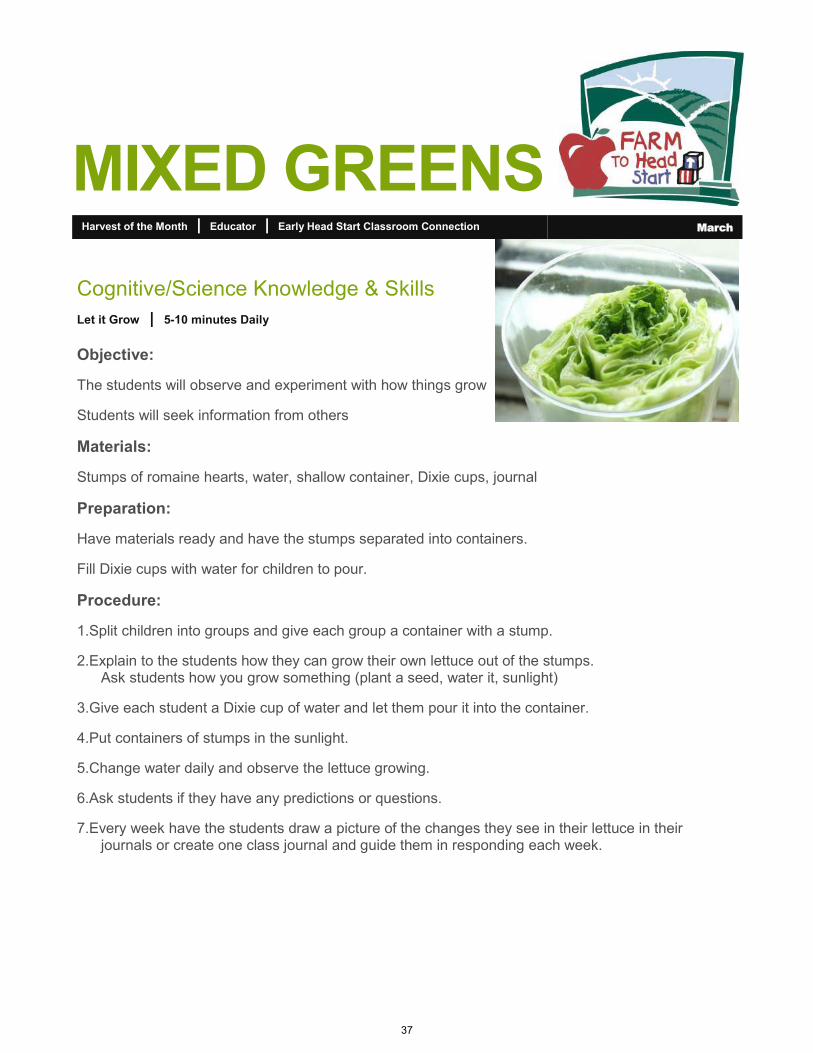
Cognitive/Science Knowledge & Skills
Let it Grow | 5-10 minutes Daily
Objective:
The students will observe and experiment with how things grow
Students will seek information from others
Materials:
Stumps of romaine hearts, water, shallow container, Dixie cups, journal
Preparation:
Have materials ready and have the stumps separated into containers.
Fill Dixie cups with water for children to pour.
Procedure:
1.Split children into groups and give each group a container with a stump.
2.Explain to the students how they can grow their own lettuce out of the stumps. Ask students how you grow something (plant a seed, water it, sunlight)
3.Give each student a Dixie cup of water and let them pour it into the container.
4.Put containers of stumps in the sunlight.
5.Change water daily and observe the lettuce growing.
6.Ask students if they have any predictions or questions.
7.Every week have the students draw a picture of the changes they see in their lettuce in their journals or create one class journal and guide them in responding each week.
MIXED GREENS
37
Harvest of the Month | Educator | Home Based Connection March
Farm to Head Start Initiative | STEP, Inc. | STEP Early Head Start | Mackenzie Bilger and Baleigh Dunkleberger—Students in Lycoming College’s Teacher Certification Program
MIXED GREENS
Homemade Italian Vinaigrette to be enjoyed with the greens
Ingredients:
•1/2 Cup Olive Oil
•1/3 Cup Red Wine Vinegar
•2 TBSP Italian Seasoning
•Salt & Pepper
•1 TBSP Dijon Mustard (whole grain is fine, too)
Method:
Pour all ingredients into a plastic container with tight-fitted lid.
Have each child take a turn at shaking the jar.
Homemade Ranch Dressing to be enjoyed with the greens
Ingredients:
•1 Cup Greek Yogurt, full fat, plain
•1/3 Cup Buttermilk
•1/2 of a Packet of Ranch Dressing Mix, all natural
•1/2 Cup Grated Parmesan Cheese (optional)
Method:
Add all ingredients into a large bowl. Allow children to take turns adding ingredients and/or stirring them together.
Local Mixed Greens Facts
• Locally grown greens, harvested from the ground.
• Many different varieties grown locally, including: Boston Bibb, Deers’ Tongue, Iceberg, Romaine, Mesclun, among others!
• High in Vitamin B and packed with calcium and potassi-um!
• In season April through November.
Local Producers
• Beech Grove Farm, Trout Run*
• Fossil Springs Farm*
• Walnut Run Farm, South Williamsport*
• Wolf Hollow Farm*
*Available at the Williamsport Growers’ Market.
38
Harvest of the Month | Educator | Home Based Connection March
Edible Experience
Farmer Says! | 5-10 minutes
Objective:
Children will act out the entire lifecycle of the featured local harvest (similar to “Simon Says”)
Materials:
None
Preparation:
Familiarize yourself with the growing/harvesting process of the featured produce item. Example: Pears grow on trees, so they are picked from trees and from the ground, placed in a container, etc.
Procedure:
1.After learning about the farmers who grew the featured produce, have the class gather on the carpet
2.Introduce yourself as the featured local farmer and begin to act out the life cycle of the produce (together as a class)
Example: Farmer Eck says…. find a baby seed, dig a hole, plant the seed and sprinkle some love in the ground, pat the
soil on top of the seed, pretend to rain on the seed, give the seed some sunshine rays, pretend to be the baby seed in the
ground, grow into a version of that seed, pick your fruit/vegetable, have the class all help pull/pick a HUGE one together
on the count of 3, put it in a basket, drive it to the farmers market/store, pretend to sell it to families, take a mindful bite
of the produce, give a thumbs up, and applause!
Suggestions:
For fruit, act out the flower blossoms and pollinator roles before acting out harvesting
Do this activity right before each taste testing experience, to allow children to fully understand the process
behind the featured food
MIXED GREENS
39
Harvest of the Month | Educator | Home Based Connection March
Edible Experience
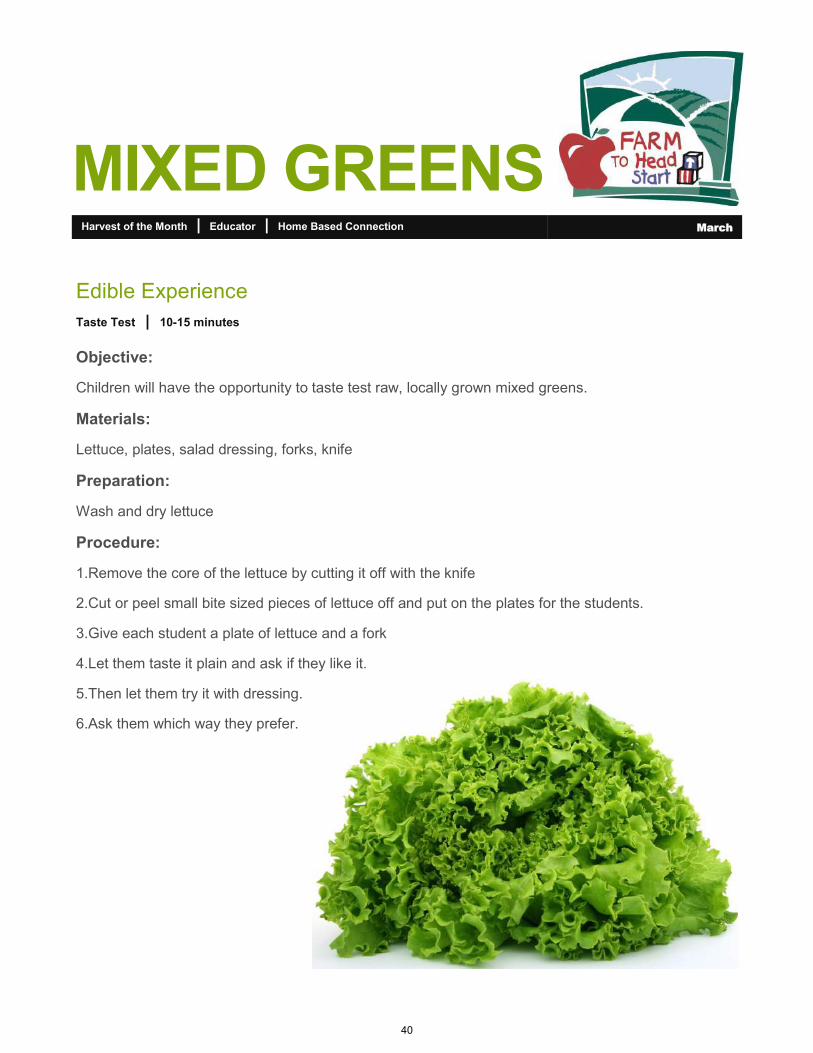
Taste Test | 10-15 minutes
Objective:
Children will have the opportunity to taste test raw, locally grown mixed greens.
Materials:
Lettuce, plates, salad dressing, forks, knife
Preparation:
Wash and dry lettuce
Procedure:
1.Remove the core of the lettuce by cutting it off with the knife
2.Cut or peel small bite sized pieces of lettuce off and put on the plates for the students.
3.Give each student a plate of lettuce and a fork
4.Let them taste it plain and ask if they like it.
5.Then let them try it with dressing.
6.Ask them which way they prefer.
MIXED GREENS
40
Harvest of the Month | Educator | Home Based Connection March
Edible Experience
Taste Test Results | 10-15 minutes
“For me!” or “I like it!” “Not for me” or “I don’t like it”
MIXED GREENS
41

RADISHES
Farm to Head Start Initiative | STEP, Inc. | STEP Head Start | Emily Feld—Student in Lycoming College’s Teacher Certification Program
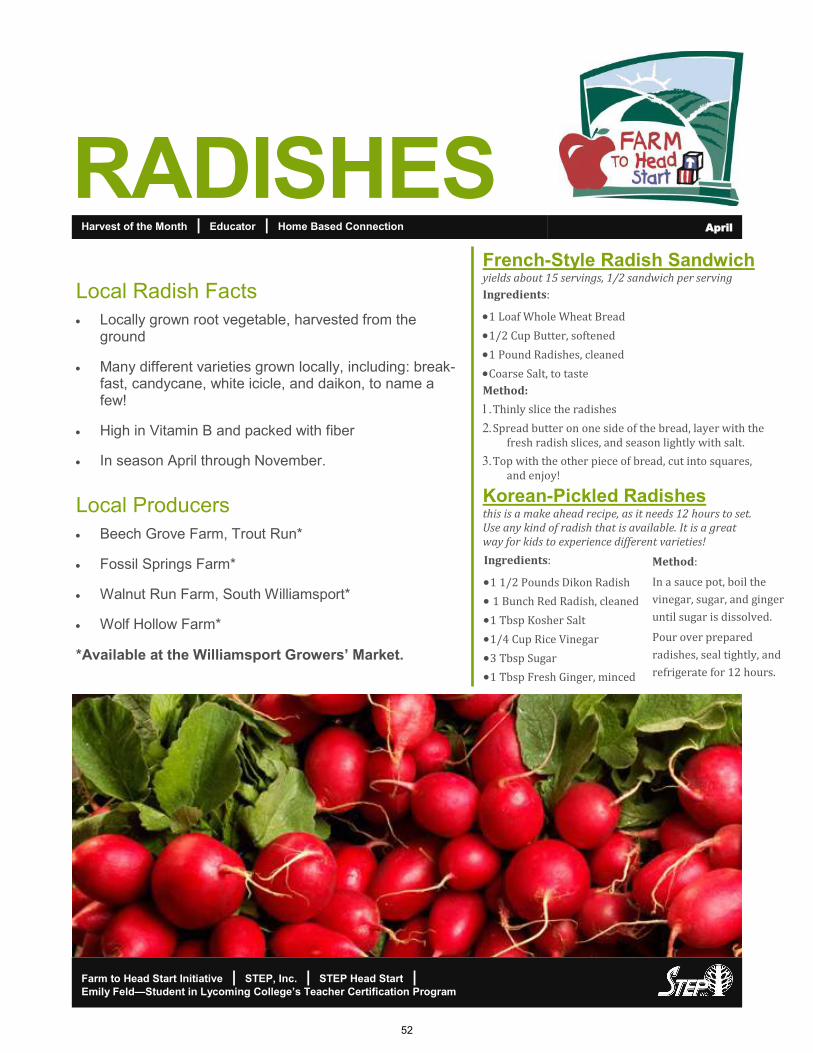
Local Radish Facts
• Locally grown root vegetable, harvested from the ground
• Many different varieties grown locally, including: break-fast, candycane, white icicle, and daikon, to name a few!
• High in Vitamin B and packed with fiber
• In season April through November.
Local Producers
• Beech Grove Farm, Trout Run*
• Fossil Springs Farm*
• Walnut Run Farm, South Williamsport*
• Wolf Hollow Farm*
Harvest of the Month | Educator | Head Start Preschool Classroom Connection April
French-Style Radish Sandwich
yields about 15 servings, 1/2 sandwich per serving
Ingredients:
•1 Loaf Whole Wheat Bread
•1/2 Cup Butter, softened
•1 Pound Radishes, cleaned
•Coarse Salt, to taste
Method:
Thinly slice the radishes
Spread butter on one side of the bread, layer with the fresh radish slices, and season lightly with salt.
Top with the other piece of bread, cut into squares, and enjoy!
Korean-Pickled Radishes
this is a make ahead recipe, as it needs 12 hours to set. Use any kind of radish that is available. It is a great way for kids to experience different varieties!
Ingredients:
•1 1/2 Pounds Dikon Radish
• 1 Bunch Red Radish, cleaned
•1 Tbsp Kosher Salt
•1/4 Cup Rice Vinegar
•3 Tbsp Sugar
•1 Tbsp Fresh Ginger, minced
Method:
In a sauce pot, boil the
vinegar, sugar, and ginger
until sugar is dissolved.
Pour over prepared
radishes, seal tightly, and
refrigerate for 12 hours.
42
RADISHES Harvest of the Month | Educator | Head Start Preschool Classroom Connection April
Language and Literacy
Growing Plants | 15-20 minutes
Objective:
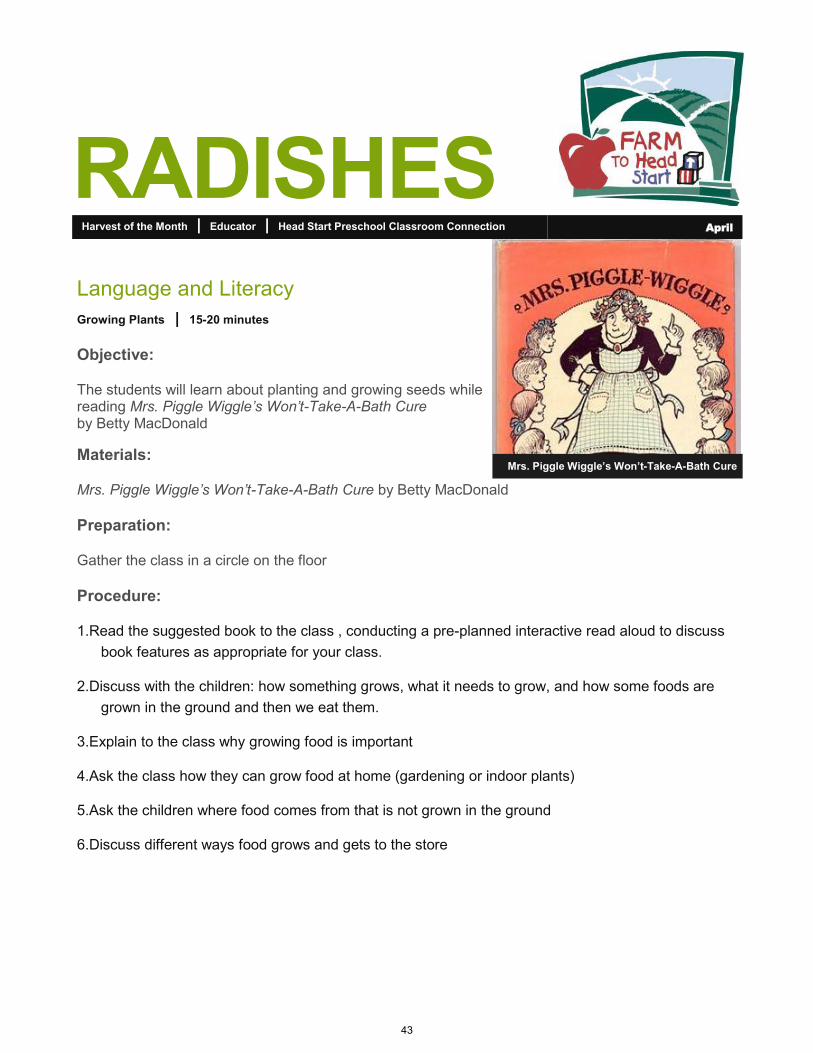
The students will learn about planting and growing seeds while reading Mrs. Piggle Wiggle’s Won’t-Take-A-Bath Cure by Betty MacDonald
Materials:
Mrs. Piggle Wiggle’s Won’t-Take-A-Bath Cure by Betty MacDonald
Preparation:
Gather the class in a circle on the floor
Procedure:
1.Read the suggested book to the class , conducting a pre-planned interactive read aloud to discuss
book features as appropriate for your class.
2.Discuss with the children: how something grows, what it needs to grow, and how some foods are
grown in the ground and then we eat them.
3.Explain to the class why growing food is important
4.Ask the class how they can grow food at home (gardening or indoor plants)
5.Ask the children where food comes from that is not grown in the ground
6.Discuss different ways food grows and gets to the store
Mrs. Piggle Wiggle’s Won’t-Take-A-Bath Cure
43
RADISHES Harvest of the Month | Educator | Head Start Preschool Classroom Connection April
Perceptual, Motor, and Physical Development
The Farmer in the Dell | 5-10 minutes
Objective:
The children will sing and dance along to The Farmer in the Dell adapted by Jolanda Garcia and KidSoup Inc
Materials:
The Farmer in the Dell adapted by Jolanda Garcia and KidSoup Inc. **
Preparation:
Be familiar with how The Farmer in the Dell song goes
Procedure:
1.Gather the children in a circle.
2.Make sure they are an arms-length away from each other.
3.Sing The Farmer in the Dell to the children.
4.Act out planting the seed.
5.Act out the seed growing.
6.Act out the radish getting bigger.
7.Act out pulling out the radish.
8.Act out eating the radish.
9.Have the children sing the song with you.
10.Do the song and movement several times.
**https://www.kidssoup.com/craft-and-resource/the-red-radish-story-and-activities
44
RADISHES Harvest of the Month | Educator | Head Start Preschool Classroom Connection April
Social & Emotional Development
Check Yes or No | 5-10 minutes
Objective:
The children will practice using manners and taking turns
Materials:
2 or 3 radishes cut up in slices
Chart paper (or white board) with yes or no written across the top
Preparation:
Cut the radishes in slices and separate into bowls on each table
Have the chart paper labeled with yes or no
Procedure:
1.Instruct the children to sit at the table with their group
2.Hand the bowl to one child and have them take one slice of radish
3.Tell them to pass the bowl to the child on their right
4.Remind the child receiving the bowl to always say thank you
5.After everyone at the table has a radish slice, tell the children to try it
6.Call the children up one at a time to put a check mark under yes or no to represent if they liked the
radish slice or not
7.At the end, have the whole class say “thank you farmers” for growing the radishes
45
RADISHES Harvest of the Month | Educator | Head Start Preschool Classroom Connection April
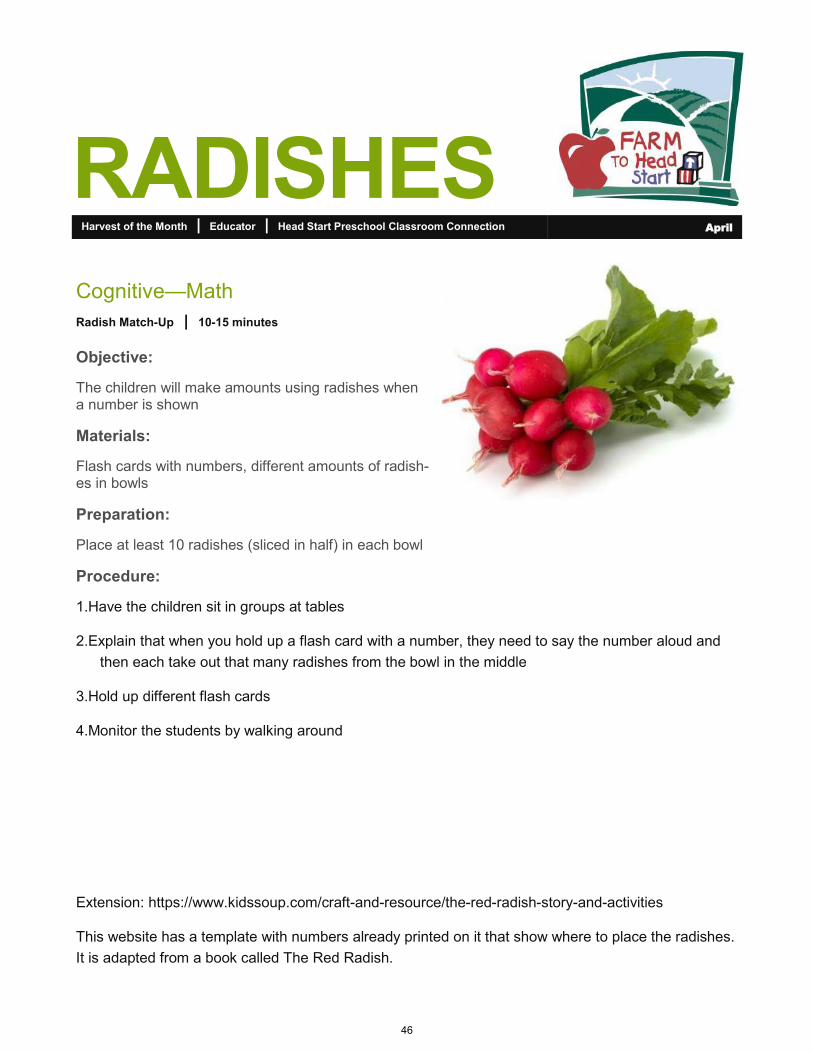
Cognitive—Math
Radish Match-Up | 10-15 minutes
Objective:
The children will make amounts using radishes when a number is shown
Materials:
Flash cards with numbers, different amounts of radish-es in bowls
Preparation:
Place at least 10 radishes (sliced in half) in each bowl
Procedure:
1.Have the children sit in groups at tables
2.Explain that when you hold up a flash card with a number, they need to say the number aloud and
then each take out that many radishes from the bowl in the middle
3.Hold up different flash cards
4.Monitor the students by walking around
Extension: https://www.kidssoup.com/craft-and-resource/the-red-radish-story-and-activities
This website has a template with numbers already printed on it that show where to place the radishes.
It is adapted from a book called The Red Radish.
46

RADISHES Harvest of the Month | Educator | Early Head Start Classroom Connection April
Farm to Head Start Initiative | STEP, Inc. | STEP Head Start | Emily Feld—Student in Lycoming College’s Teacher Certification Program
Local Radish Facts
• Locally grown root vegetable, harvested from the ground
• Many different varieties grown locally, including: break-fast, candycane, white icicle, and daikon, to name a few!
• High in Vitamin B and packed with fiber
• In season April through November.
Local Producers
• Beech Grove Farm, Trout Run*
• Fossil Springs Farm*
• Walnut Run Farm, South Williamsport*
• Wolf Hollow Farm*
*Available at the Williamsport Growers’ Market.
French-Style Radish Sandwich
yields about 15 servings, 1/2 sandwich per serving
Ingredients:
•1 Loaf Whole Wheat Bread
•1/2 Cup Butter, softened
•1 Pound Radishes, cleaned
•Coarse Salt, to taste
Method:
Thinly slice the radishes
Spread butter on one side of the bread, layer with the fresh radish slices, and season lightly with salt.
Top with the other piece of bread, cut into squares, and enjoy!
Korean-Pickled Radishes
this is a make ahead recipe, as it needs 12 hours to set. Use any kind of radish that is available. It is a great way for kids to experience different varieties!
Ingredients:
•1 1/2 Pounds Dikon Radish
• 1 Bunch Red Radish, cleaned
•1 Tbsp Kosher Salt
•1/4 Cup Rice Vinegar
•3 Tbsp Sugar
•1 Tbsp Fresh Ginger, minced
Method:
In a sauce pot, boil the
vinegar, sugar, and ginger
until sugar is dissolved.
Pour over prepared
radishes, seal tightly, and
refrigerate for 12 hours.
47
RADISHES Harvest of the Month | Educator | Early Head Start Classroom Connection April
Language & Literacy
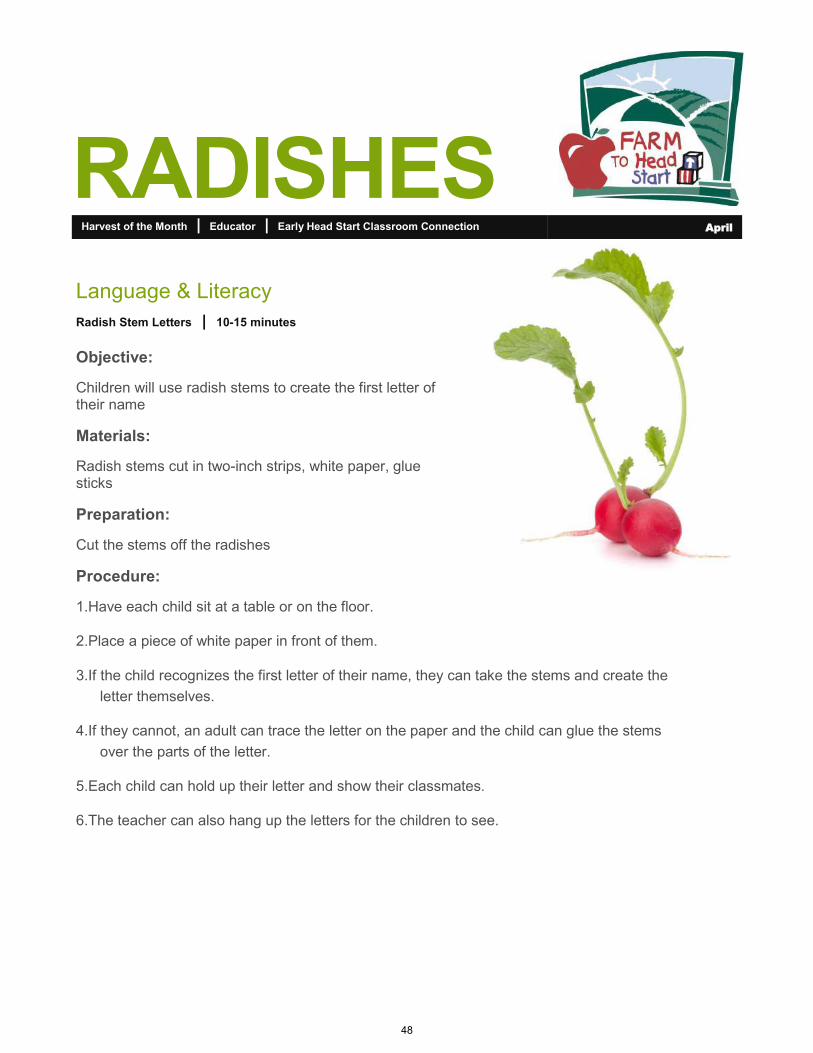
Radish Stem Letters | 10-15 minutes
Objective:
Children will use radish stems to create the first letter of their name
Materials:
Radish stems cut in two-inch strips, white paper, glue sticks
Preparation:
Cut the stems off the radishes
Procedure:
1.Have each child sit at a table or on the floor.
2.Place a piece of white paper in front of them.
3.If the child recognizes the first letter of their name, they can take the stems and create the
letter themselves.
4.If they cannot, an adult can trace the letter on the paper and the child can glue the stems
over the parts of the letter.
5.Each child can hold up their letter and show their classmates.
6.The teacher can also hang up the letters for the children to see.
48
RADISHES Harvest of the Month | Educator | Early Head Start Classroom Connection April
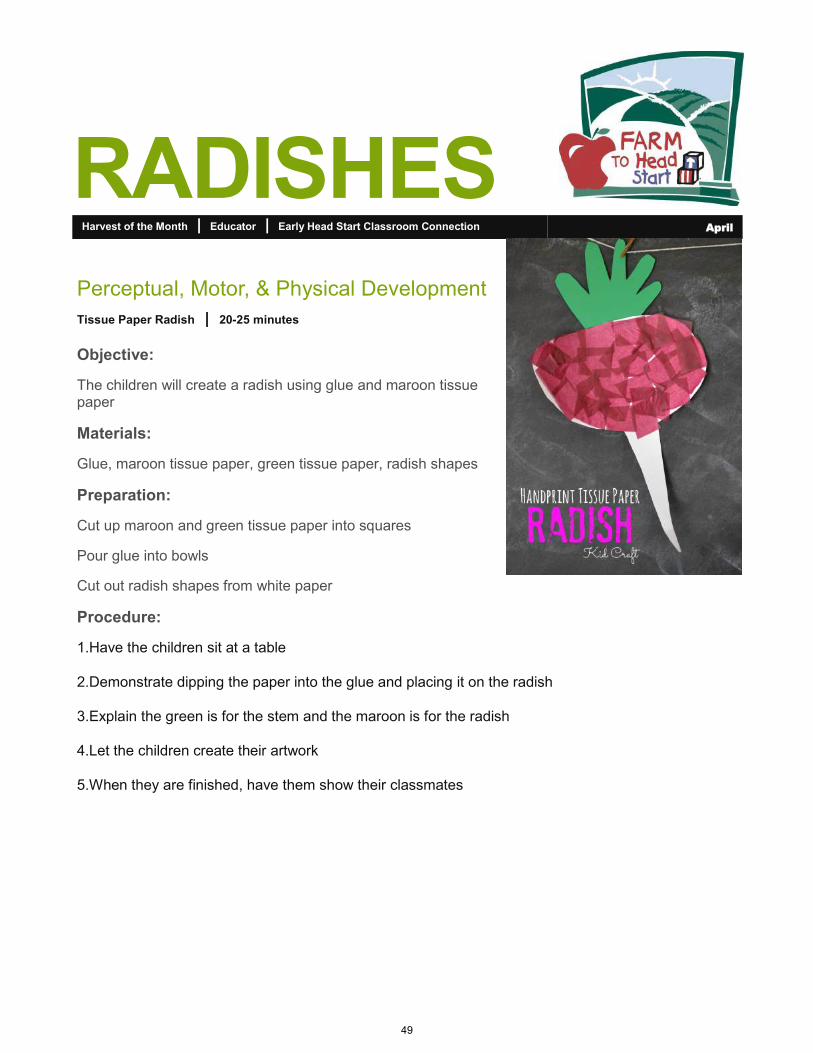
Perceptual, Motor, & Physical Development
Tissue Paper Radish | 20-25 minutes
Objective:
The children will create a radish using glue and maroon tissue paper
Materials:
Glue, maroon tissue paper, green tissue paper, radish shapes
Preparation:
Cut up maroon and green tissue paper into squares
Pour glue into bowls
Cut out radish shapes from white paper
Procedure:
1.Have the children sit at a table
2.Demonstrate dipping the paper into the glue and placing it on the radish
3.Explain the green is for the stem and the maroon is for the radish
4.Let the children create their artwork
5.When they are finished, have them show their classmates
49
RADISHES Harvest of the Month | Educator | Early Head Start Classroom Connection April
Social & Emotional Development
Radish Restaurant | 10-15 minutes
Objective:
The children will say “please” and “thank you” and use manners while pretending to eat in a restaurant and try radishes.
Materials:
Radish slices, plates or napkins
Preparation:
Cut radishes into slices
Procedure:
1.Have the children sit at a table or if they prefer, on the ground.
2.Pass out plates or napkins.
3.Have one student act as the waiter or waitress and pass out radish slices.
4.Remind students to say “thank you” to their waiter/waitress.
5.Have the students eat their radishes.
6.If they liked their radishes, ask them if they would like more.
7.Remind them to say “please”, “thank you”, and “you’re welcome”.
8.If they did not like the radishes, have them practice saying “no thank you” to the waiter/waitress.
50
RADISHES Harvest of the Month | Educator | Early Head Start Classroom Connection April
Cognitive: Math
Smiley Face Radish | 15-20 minutes
Objective:
The children will count out loud how many radish slices they used to make their smiley face and have a teacher write the number below the smiley face.
Materials:
Paper plates (One per child)
Radish slices separated in bowls on table
Marker (for the teacher to write the number)
Preparation:
Slice the radishes and place them in bowls on the tables
Procedure:
1.Have the children sit at a table or on the floor.
2.Smile at them.
3.Explain that this is a smiley face.
4.Have them smile at you. Discuss reasons why people smile.
5.Have them use two radish slices to make eyes on their paper plate.
6.Have them use radish slices to make a smiley face (do not give them a specific number).
7.Count orally with each child on how many radish slices they used.
8.Write the number on their paper plate below the smiley face.
9.Allow them to eat the radish slices when they are finished. “Radishes make us smile!”
51
RADISHES
Farm to Head Start Initiative | STEP, Inc. | STEP Head Start | Emily Feld—Student in Lycoming College’s Teacher Certification Program
Local Radish Facts
• Locally grown root vegetable, harvested from the ground
• Many different varieties grown locally, including: break-fast, candycane, white icicle, and daikon, to name a few!
• High in Vitamin B and packed with fiber
• In season April through November.
Local Producers
• Beech Grove Farm, Trout Run*
• Fossil Springs Farm*
• Walnut Run Farm, South Williamsport*
• Wolf Hollow Farm*
*Available at the Williamsport Growers’ Market.
Harvest of the Month | Educator | Home Based Connection April
French-Style Radish Sandwich
yields about 15 servings, 1/2 sandwich per serving
Ingredients:
•1 Loaf Whole Wheat Bread
•1/2 Cup Butter, softened
•1 Pound Radishes, cleaned
•Coarse Salt, to taste
Method:
Thinly slice the radishes
Spread butter on one side of the bread, layer with the fresh radish slices, and season lightly with salt.
Top with the other piece of bread, cut into squares, and enjoy!
Korean-Pickled Radishes
this is a make ahead recipe, as it needs 12 hours to set. Use any kind of radish that is available. It is a great way for kids to experience different varieties!
Ingredients:
•1 1/2 Pounds Dikon Radish
• 1 Bunch Red Radish, cleaned
•1 Tbsp Kosher Salt
•1/4 Cup Rice Vinegar
•3 Tbsp Sugar
•1 Tbsp Fresh Ginger, minced
Method:
In a sauce pot, boil the
vinegar, sugar, and ginger
until sugar is dissolved.
Pour over prepared
radishes, seal tightly, and
refrigerate for 12 hours.
52
RADISHES Harvest of the Month | Educator | Home Based Connection April
Edible Experience
Farmer Says | 5-10 minutes
Objective:
Children will act out the entire lifecycle of the featured local harvest (similar to “Simon Says”)
Materials:
None
Preparation:
Familiarize yourself with the growing/harvesting process of the featured produce item. Example: Pears grow on trees, so they are picked from trees and from the ground, placed in a container, etc.
Procedure:
1.After learning about the farmers who grew the featured produce, have the class gather on the carpet
2.Introduce yourself as the featured local farmer and begin to act out the life cycle of the produce (together as a class)
•Example: Farmer Eck says…. find a baby seed, dig a hole, plant the seed and sprinkle some love in the ground, pat the soil on top of the seed, pretend to rain on the seed, give the seed some sunshine rays, pretend to be the baby seed in the ground, grow into a version of that seed, pick your fruit/vegetable, have the class all help pull/pick a HUGE one together on the count of 3, put it in a basket, drive it to the farmers market/store, pretend to sell it to families, take a mindful bite of the produce, give a thumbs up, and applause!
•Suggestions:
•For fruit, act out the flower blossoms and pollinator roles before acting out harvesting
•Do this activity right before each taste testing experience, to allow children to fully understand the process behind the featured food
53
RADISHES Harvest of the Month | Educator | Home Based Connection April
Edible Experience
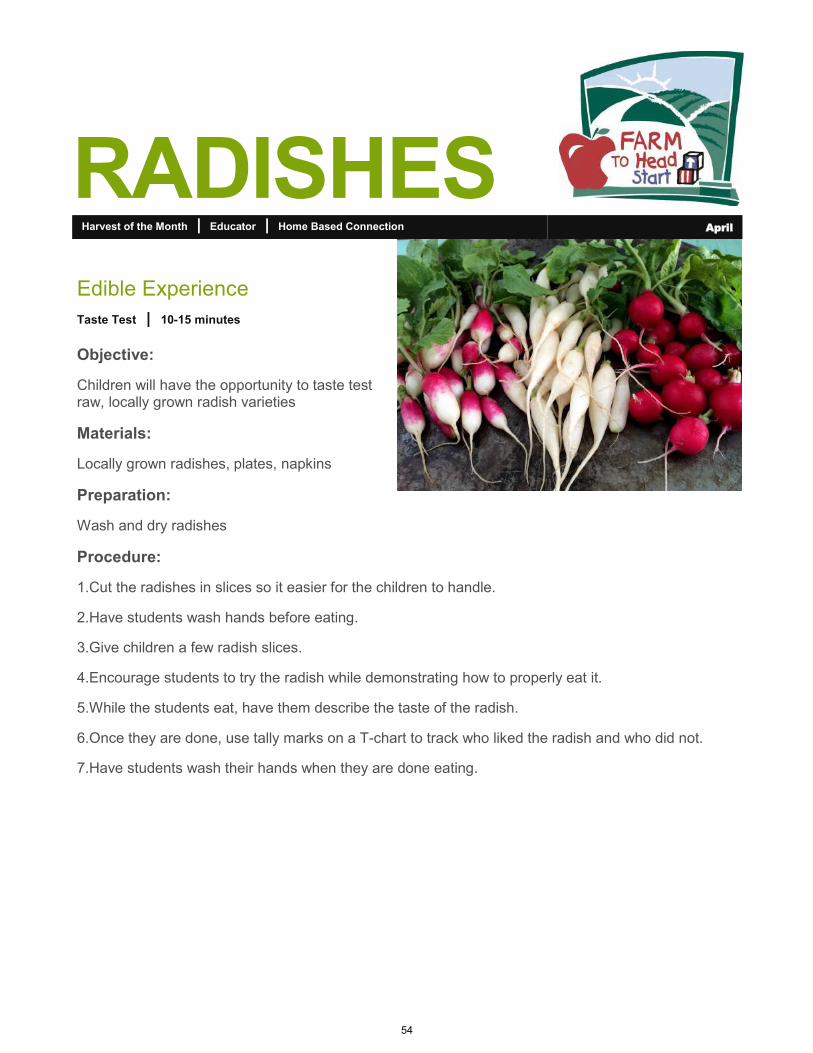
Taste Test | 10-15 minutes
Objective:
Children will have the opportunity to taste test raw, locally grown radish varieties
Materials:
Locally grown radishes, plates, napkins
Preparation:
Wash and dry radishes
Procedure:
1.Cut the radishes in slices so it easier for the children to handle.
2.Have students wash hands before eating.
3.Give children a few radish slices.
4.Encourage students to try the radish while demonstrating how to properly eat it.
5.While the students eat, have them describe the taste of the radish.
6.Once they are done, use tally marks on a T-chart to track who liked the radish and who did not.
7.Have students wash their hands when they are done eating.
54
RADISHES Harvest of the Month | Educator | Home Based Connection April
Edible Experience
Taste Test Results | 10-15 minutes
“For me!” or “I like it!” “Not for me” or “I don’t like it”
55

ASPARAGUS
Farm to Head Start Initiative | STEP, Inc. | STEP Head Start | Clara Grube—Student in Lycoming College’s Teacher Certification Program
Local Asparagus Facts
Locally grown vegetable, harvested from the ground.
Many different varieties grown locally, including: purple, white, and green.
High in Vitamin A, C, E, and K!
In season May into beginning of June.
Local Producers
Beech Grove Farm, Trout Run*
Fossil Springs Farm*
Walnut Run Farm, South Williamsport*
Wolf Hollow Farm*
*Available at the Williamsport Growers’ Market.
Harvest of the Month | Educator | Head Start Preschool Classroom Connection May
Asparagus “Sushi” yields about 10—15 snack-sized servings
Ingredients:
8 Stalks Asparagus, cut into ribbons using a peeler
1 Pound Deli-Style Chicken, thin sliced
1 Pound American Cheese, thin sliced
2 Cups Shredded Carrots
3 Large Cucumbers, peeled, seeded, and cut into slices
3 TBSP Mayonnaise
1 TBSP Dijon or Whole Grain Mustard
Method:
Mix together the mayo and mustard. Set aside.
Allow the children to create their own wraps; layer the ham and cheese on top of each other, then the shredded carrots and cucumbers, lined up the center of the ham/cheese. Roll it all up, “glue” it with the mayo mixture to make sure it stays in a roll.
Wrap the asparagus ribbons around the outside.
Enjoy!
56
Harvest of the Month | Educator | Head Start Preschool Classroom Connection May
Language and Literacy
The Mighty Asparagus | 10-15 minutes
Objective:
Students will put events in the appropriate sequence and explain how these events relate
Materials:
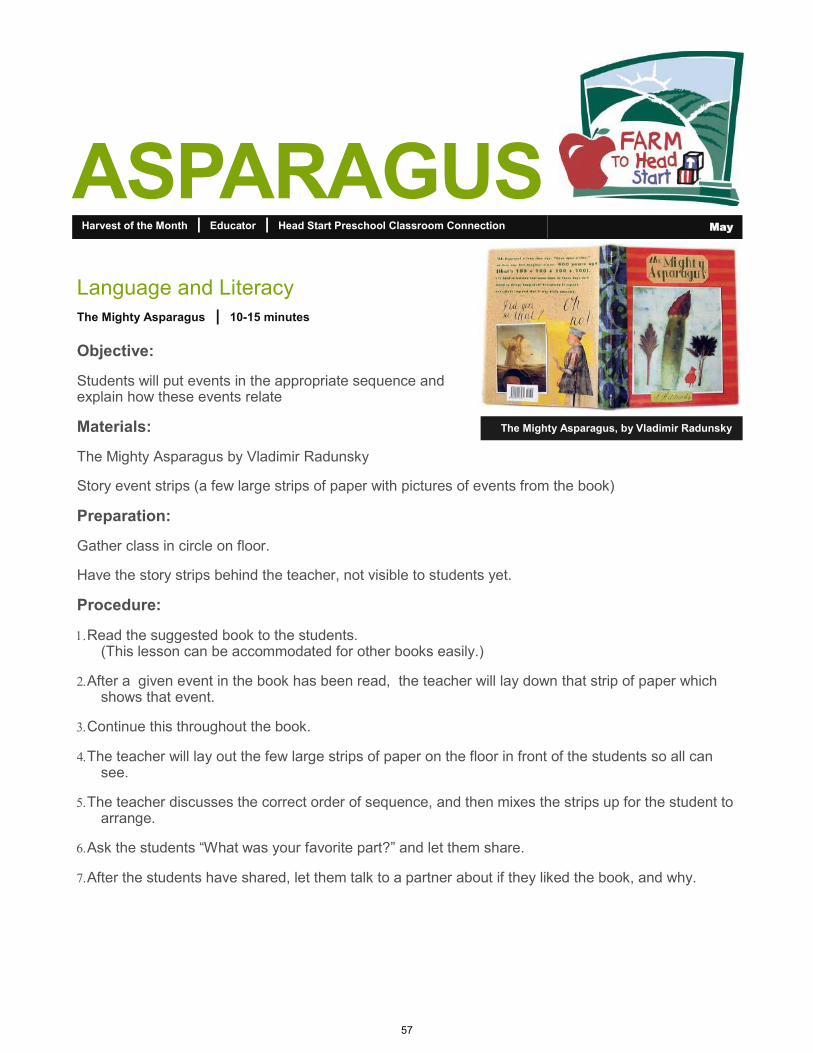
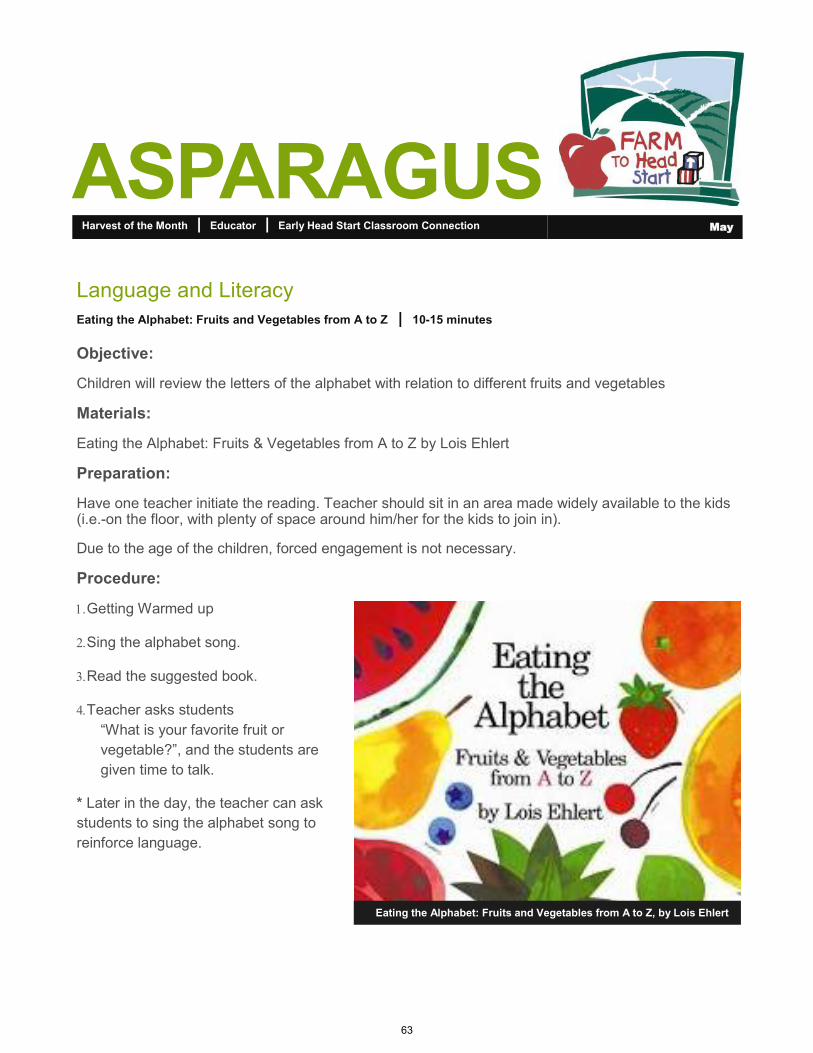
The Mighty Asparagus by Vladimir Radunsky
Story event strips (a few large strips of paper with pictures of events from the book)
Preparation:
Gather class in circle on floor.
Have the story strips behind the teacher, not visible to students yet.
Procedure:
Read the suggested book to the students. (This lesson can be accommodated for other books easily.)
After a given event in the book has been read, the teacher will lay down that strip of paper which shows that event.
Continue this throughout the book.
The teacher will lay out the few large strips of paper on the floor in front of the students so all can see.
The teacher discusses the correct order of sequence, and then mixes the strips up for the student to arrange.
Ask the students “What was your favorite part?” and let them share.
After the students have shared, let them talk to a partner about if they liked the book, and why.
ASPARAGUS
The Mighty Asparagus, by Vladimir Radunsky
57

Harvest of the Month | Educator | Head Start Preschool Classroom Connection May
Mathematics Knowledge and Skills/Creativity
Asparagus Triangles | 5-10 minutes
Objective:
Explore shapes and colors with vegetables
Materials:
Raw asparagus stalks (include purple, green, and white asparagus)
Paper with outline of triangles printed (colored and white paper)
Preparation:
Students will sit at tables together while sharing
Procedure:
Distribute asparagus.
Teacher explains how asparagus comes in three colors: green, white, and purple.
Teacher asks the students to observe that on the top of the stalk, there are leaves that look like triangles.
Teacher asks the students to count the triangles they see on one piece. This can be shown as an example with counters.
Distribute handout.
The handout contains pictures of triangles which the students will color in using only green, white, or purple.
If a student chooses to color with white, they can be given colored paper.
If students could also be allowed to color with all three on a lightly colored paper, or white and have students leave some triangles blank.
ASPARAGUS
58

Harvest of the Month | Educator | Head Start Preschool Classroom Connection May
Science, Knowledge, and Skills
Comparing Vegetables | 5-10 minutes
Objective:
Students will describe vegetables using their attributes and compare them to others.
Materials:
Raw broccoli and asparagus
*Optional: other vegetables for further comparisons
Preparation:
Gather children at tables
Procedure:
1.Distribute broccoli and asparagus.
2.Teacher demonstrates to students how both broccoli and asparagus look very different, but they
both look like trees.
3.Teacher will then ask students to compare their two vegetables in their size, shape, etc.
4.For further exploration, teacher can then distribute even more vegetables that are very different and
ask the students to describe how the others are similar or different.
ASPARAGUS
59
Harvest of the Month | Educator | Head Start Preschool Classroom Connection May
Perceptual, Motor, and Physical Development
Vegetable Song for Kids | 5-10 minutes
Objective:
Students will play “Freeze Dance” to a song about vegetables
Materials:
Device capable of playing a video on YouTube (screen availability optional)
Preparation:
Gather the students together, but far enough apart that the students will not hurt each other
Procedure:
Listen to the song “Vegetable Song for Kids” on YouTube once through.
https://www.youtube.com/watch?v=nd-2j_1_6vY
Listen to the song again the second time around.
This time, let the students dance until they hear the word asparagus where they will freeze.
Students will then continue dancing until the word appears the second time.
ASPARAGUS
60
Harvest of the Month | Educator | Head Start Preschool Classroom Connection May
Social & Emotional Development
Vegetable Emotions | 5-10 minutes
Objective:
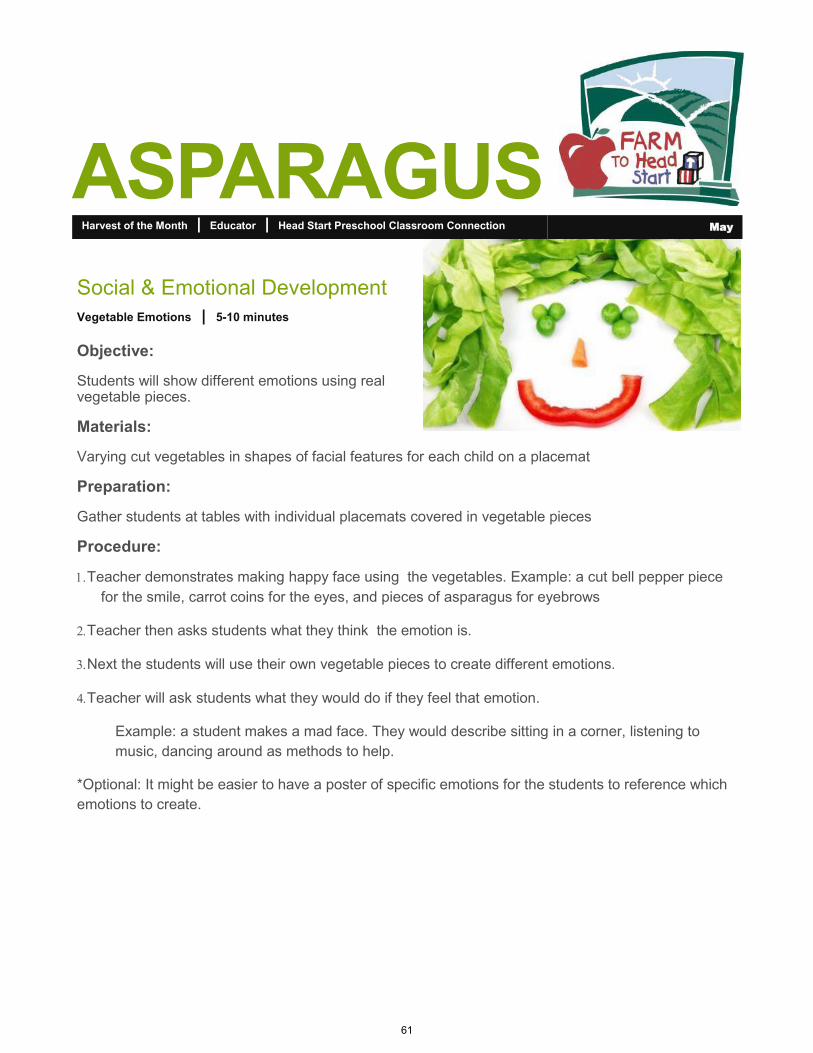
Students will show different emotions using real vegetable pieces.
Materials:
Varying cut vegetables in shapes of facial features for each child on a placemat
Preparation:
Gather students at tables with individual placemats covered in vegetable pieces
Procedure:
Teacher demonstrates making happy face using the vegetables. Example: a cut bell pepper piece
for the smile, carrot coins for the eyes, and pieces of asparagus for eyebrows
Teacher then asks students what they think the emotion is.
Next the students will use their own vegetable pieces to create different emotions.
Teacher will ask students what they would do if they feel that emotion.
Example: a student makes a mad face. They would describe sitting in a corner, listening to
music, dancing around as methods to help.
*Optional: It might be easier to have a poster of specific emotions for the students to reference which
emotions to create.
ASPARAGUS
61
ASPARAGUS
Farm to Head Start Initiative | STEP, Inc. | STEP Early Head Start | Clara Grube—Student in Lycoming College’s Teacher Certification Program
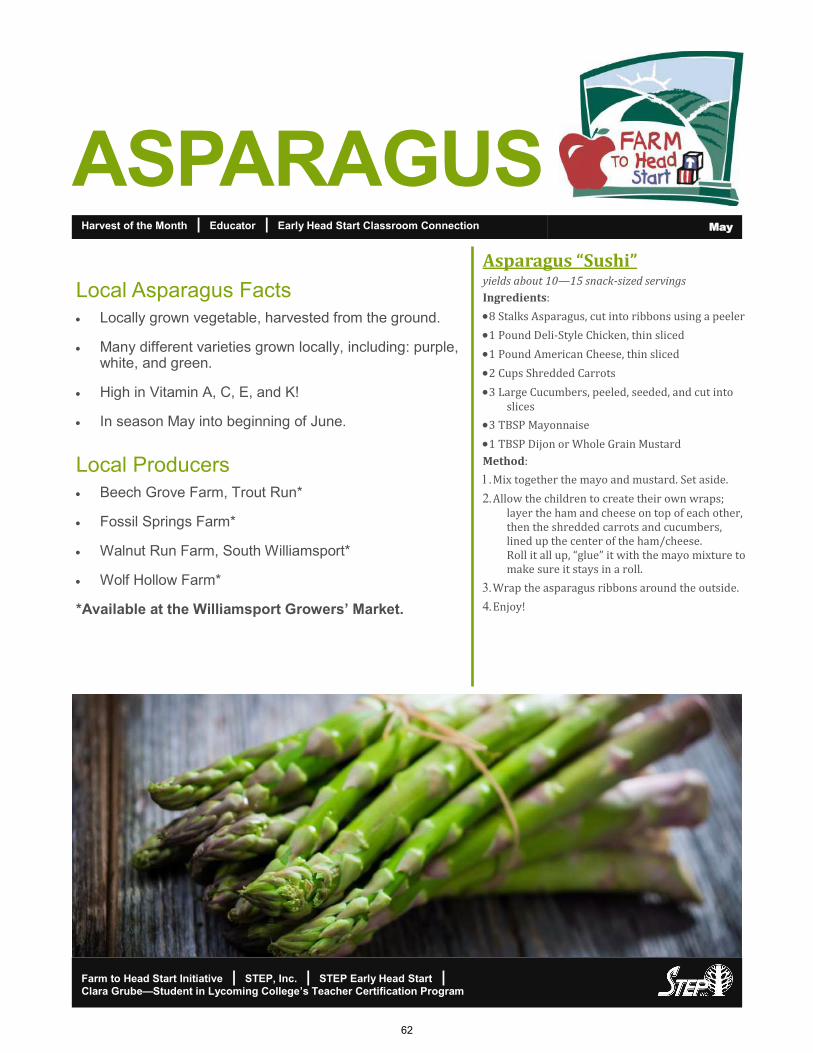
Local Asparagus Facts
Locally grown vegetable, harvested from the ground.
Many different varieties grown locally, including: purple, white, and green.
High in Vitamin A, C, E, and K!
In season May into beginning of June.
Local Producers
Beech Grove Farm, Trout Run*
Fossil Springs Farm*
Walnut Run Farm, South Williamsport*
Wolf Hollow Farm*
*Available at the Williamsport Growers’ Market.
Harvest of the Month | Educator | Early Head Start Classroom Connection May
Asparagus “Sushi” yields about 10—15 snack-sized servings
Ingredients:
8 Stalks Asparagus, cut into ribbons using a peeler
1 Pound Deli-Style Chicken, thin sliced
1 Pound American Cheese, thin sliced
2 Cups Shredded Carrots
3 Large Cucumbers, peeled, seeded, and cut into slices
3 TBSP Mayonnaise
1 TBSP Dijon or Whole Grain Mustard
Method:
Mix together the mayo and mustard. Set aside.
Allow the children to create their own wraps; layer the ham and cheese on top of each other, then the shredded carrots and cucumbers, lined up the center of the ham/cheese. Roll it all up, “glue” it with the mayo mixture to make sure it stays in a roll.
Wrap the asparagus ribbons around the outside.
Enjoy!
62
Harvest of the Month | Educator | Early Head Start Classroom Connection May
ASPARAGUS
Language and Literacy
Eating the Alphabet: Fruits and Vegetables from A to Z | 10-15 minutes
Objective:
Children will review the letters of the alphabet with relation to different fruits and vegetables
Materials:
Eating the Alphabet: Fruits & Vegetables from A to Z by Lois Ehlert
Preparation:
Have one teacher initiate the reading. Teacher should sit in an area made widely available to the kids (i.e.-on the floor, with plenty of space around him/her for the kids to join in).
Due to the age of the children, forced engagement is not necessary.
Procedure:
Getting Warmed up
Sing the alphabet song.
Read the suggested book.
Teacher asks students
“What is your favorite fruit or
vegetable?”, and the students are
given time to talk.
* Later in the day, the teacher can ask
students to sing the alphabet song to
reinforce language.
Eating the Alphabet: Fruits and Vegetables from A to Z, by Lois Ehlert
63
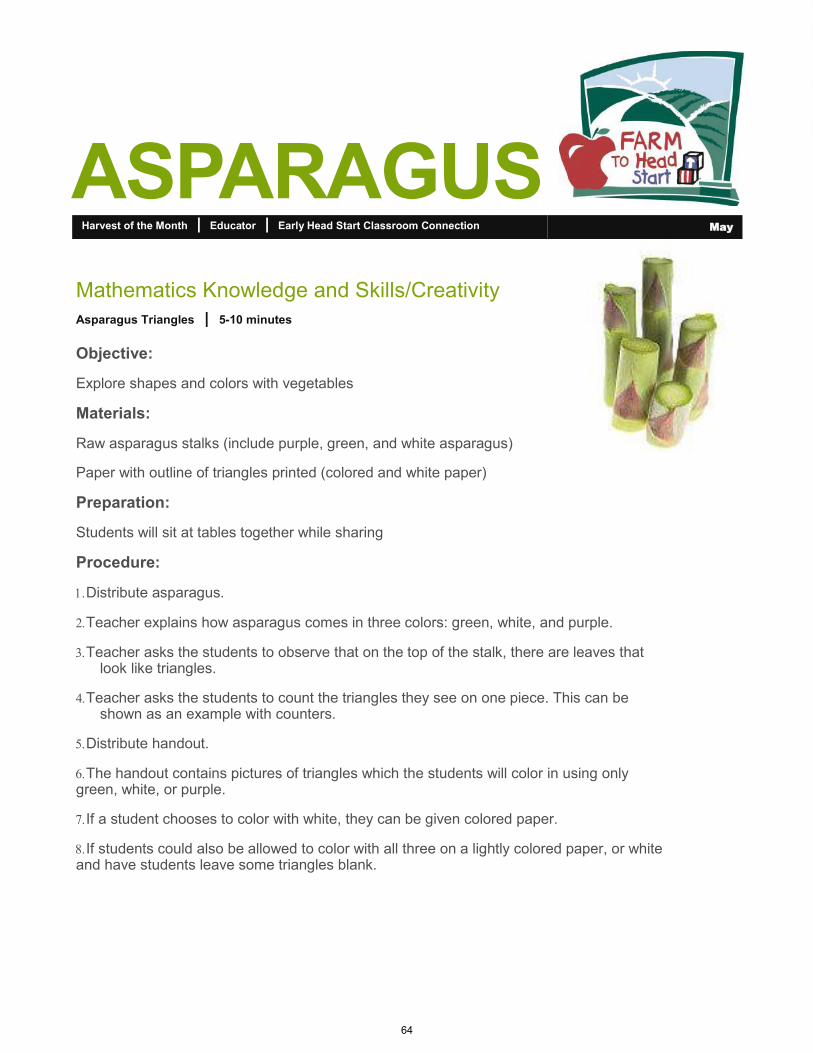
Harvest of the Month | Educator | Early Head Start Classroom Connection May
ASPARAGUS
Mathematics Knowledge and Skills/Creativity
Asparagus Triangles | 5-10 minutes
Objective:
Explore shapes and colors with vegetables
Materials:
Raw asparagus stalks (include purple, green, and white asparagus)
Paper with outline of triangles printed (colored and white paper)
Preparation:
Students will sit at tables together while sharing
Procedure:
Distribute asparagus.
Teacher explains how asparagus comes in three colors: green, white, and purple.
Teacher asks the students to observe that on the top of the stalk, there are leaves that look like triangles.
Teacher asks the students to count the triangles they see on one piece. This can be shown as an example with counters.
Distribute handout.
The handout contains pictures of triangles which the students will color in using only green, white, or purple.
If a student chooses to color with white, they can be given colored paper.
If students could also be allowed to color with all three on a lightly colored paper, or white and have students leave some triangles blank.
64
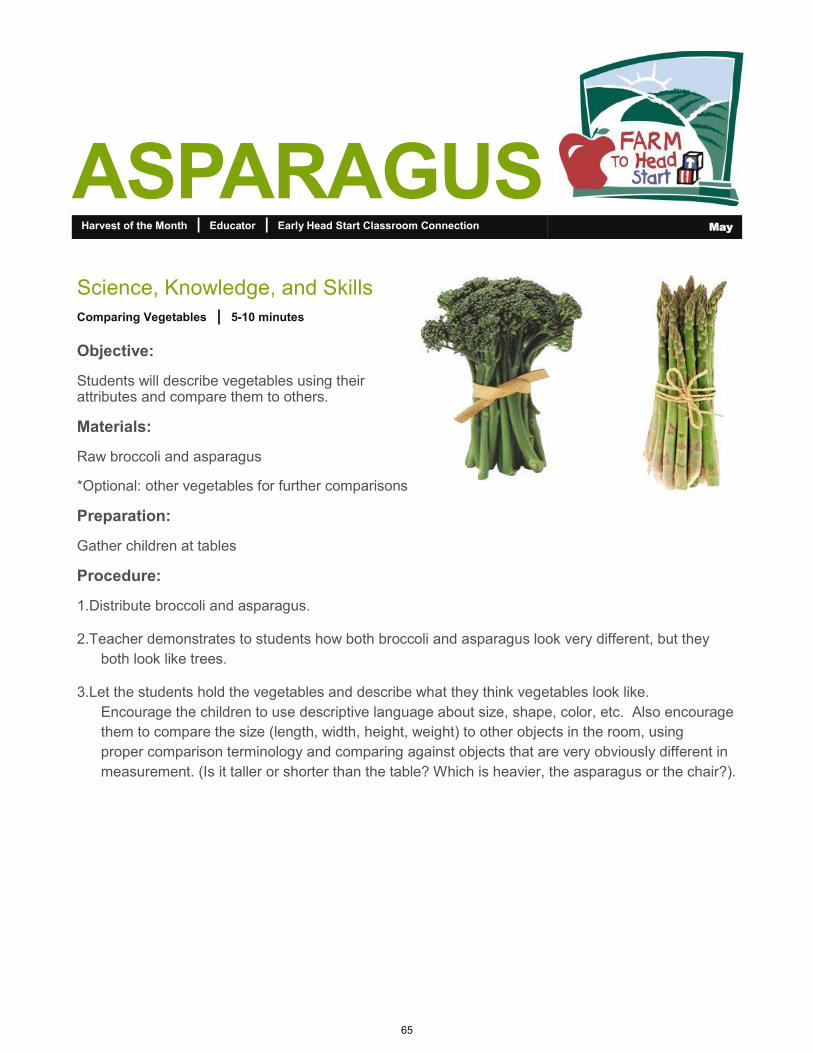
Harvest of the Month | Educator | Early Head Start Classroom Connection May
ASPARAGUS
Science, Knowledge, and Skills
Comparing Vegetables | 5-10 minutes
Objective:
Students will describe vegetables using their attributes and compare them to others.
Materials:
Raw broccoli and asparagus
*Optional: other vegetables for further comparisons
Preparation:
Gather children at tables
Procedure:
1.Distribute broccoli and asparagus.
2.Teacher demonstrates to students how both broccoli and asparagus look very different, but they
both look like trees.
3.Let the students hold the vegetables and describe what they think vegetables look like.
Encourage the children to use descriptive language about size, shape, color, etc. Also encourage
them to compare the size (length, width, height, weight) to other objects in the room, using
proper comparison terminology and comparing against objects that are very obviously different in
measurement. (Is it taller or shorter than the table? Which is heavier, the asparagus or the chair?).
65
Harvest of the Month | Educator | Early Head Start Classroom Connection May
ASPARAGUS
Perceptual, Motor, and Physical Development
Vegetable Song for Kids | 5-10 minutes
Objective:
Students will play “Freeze Dance” to a song about vegetables
Materials:
Device capable of playing a video on YouTube (screen availability optional)
Preparation:
Gather the students together, but far enough apart that the students will not hurt each other
Procedure:
Listen to the song “Vegetable Song for Kids” on YouTube once through.
https://www.youtube.com/watch?v=nd-2j_1_6vY
Make sure they hear the word “asparagus” within the song by having the teacher say it out loud
along with the song.
66

Harvest of the Month | Educator | Early Head Start Classroom Connection May
Social & Emotional Development
Vegetable Emotions | 5-10 minutes
Objective:
Students will show different emotions using real vegetable pieces.
Materials:
Varying cut vegetables in shapes of facial features for each child on a placemat
Preparation:
Gather students at tables with individual placemats covered in vegetable pieces
Procedure:
Teacher demonstrates making happy face using the vegetables. Example: a cut bell pepper piece
for the smile, carrot coins for the eyes, and pieces of asparagus for eyebrows
Teacher then asks students what they think the emotion is.
Next the students will share what they think the emotion on their placemat is.
*Optional: It might be easier to have a poster of specific emotions for the students to reference which
emotions to create.
ASPARAGUS
67

STRAWBERRIES
Farm to Head Start Initiative | STEP, Inc. | STEP Head Start | Chris Wallace—Student in Lycoming College’s Teacher Certification Program
Local Strawberry Facts
• Locally grown fruit, harvested from the strawberry plant.
• High in Vitamin C and packed with antioxidants.
• In season June, into beginning of July.
Local Producers
• Beech Grove Farm, Trout Run*
• Fossil Springs Farm*
• Walnut Run Farm, South Williamsport*
• Wolf Hollow Farm*
*Available at the Williamsport Growers’ Market.
Harvest of the Month | Educator | Head Start Preschool Classroom Connection June
Chocolate-Covered
Strawberry Smoothies
yields 15, 4-oz servings
Ingredients:
•2 Pints Strawberries
•5 Tbsp Cocoa Powder, unsweetened
•1/4 Cup Maple Syrup
•3 Cups Ice
•3 to 4 Cups Coconut milk (or any milk product)
Method:
Blend all ingredients together until smooth.
Add more milk for a thinner consistency, as desired.
Strawberry Stacks
yields 15 servings (1 full cracker per child)
Ingredients:
•2 boxes Graham Crackers, plain
•1 8-oz Package Cream Cheese, low-fat
•4 Pints Strawberries, cleaned and sliced
Method:
Break all crackers in half, give each child 2 halves
and a small plate with a couple tablespoons of cream
cheese. Allow them to build “stacks”, layering the
cracker, cream cheese, and the strawberries on top.
Enjoy! *add vanilla extract to the cream cheese for added flavor!
68
Harvest of the Month | Educator | Head Start Preschool Classroom Connection June
Creative Arts Expression
Old MacDonald Song | 5-10 minutes
Objective:
Students will sing the Old MacDonald song, modified for strawberries
Materials:
Song lyrics
Preparation:
Learn the song lyrics (provided on the next page)
Procedure:
1.Ask the kids if they know the song Old MacDonald has a farm the strawberry style.
2.Sing the song from them to hear it.
3.Then play the song again having the students sing.
Source: The USDA Food and Nutrition Service: Grow It, Try It, Like It! Nutrition Education Kit
STRAWBERRIES
69
STRAWBERRIES Harvest of the Month | Educator | Head Start Preschool Classroom Connection June
1st Verse
Old MacDonald had a farm, EIEIO! (Skip in place)
On this farm he grew some strawberries, EIEIO! (Pretend to hoe ground around plants
With a plant, plant here and plant, plant there, using large, vigorous motions)
Here a plant, there a plant, everywhere (Pretend to hoe ground around plants
a strawberry plant! using large, vigorous motions)
Old MacDonald had a farm, EIEIO! (Skip in place)
2nd Verse
Old MacDonald had a farm, EIEIO! (Skip in place)
On this farm he grew some strawberries, EIEIO! (Pretend to carry a flat of strawberries)
With a berry, berry here and a berry, berry there, (Squat to the ground and pretend to point
Here a berry, there a berry, everywhere a strawberry at strawberries)
Old MacDonald had a farm, EIEIO! (Skip in place)
3rd Verse
Old MacDonald had a farm, EIEIO! (Skip in place)
On this farm he grew some strawberries, EIEIO! (Pretend to carry a flat of strawberries)
With a pick, pick here, and a pick, pick there, (Pretend to pick and carry strawberries)
Here a pick, there a pick, everywhere a strawberry pick
Old MacDonald had a farm, EIEIO! (Skip in place)
4th Verse
Old MacDonald had a farm, EIEIO! (Skip in place)
On this farm he grew some strawberries, EIEIO! (Pretend to carry a flat of strawberries)
With a sweet bite here, and a sweet bite there, (Pretend to eat strawberries)
Here a bite, there a bite, everywhere a strawberry bite. (Pretend to eat strawberries)
Source: The USDA Food and Nutrition Service: Grow It, Try It, Like It! Nutrition Education
Kit Featuring MyPlate, Book 7: http://www.fns.usda.gov/tn/grow-it-try-it-it
70
Harvest of the Month | Educator | Head Start Preschool Classroom Connection June
Perceptual, Motor, and Physical Development
Healthy food vs. junk food | 10-15 minutes
Objective:
Students will discuss the differences between junk food and healthy food.
Materials:
Strawberries, bananas, vanilla yogurt, blender, and pictures of healthy and unhealthy foods.
Preparation:
Prepare the ingredients for the students to help make smoothies.
Find pictures of healthy and unhealthy foods
Procedure:
1. Ask the kids if they know what junk food is and what healthy food is.
2. If needed, explain to the students what the difference is.
3. Show pictures of examples of junk and healthy foods.
4. Ask the kids what their favorite junk and healthy foods are.
5. Pass out the smoothie ingredients to each group.
6. Have students separately come put their ingredients in the blinder.
7. Enjoy !
STRAWBERRIES
71
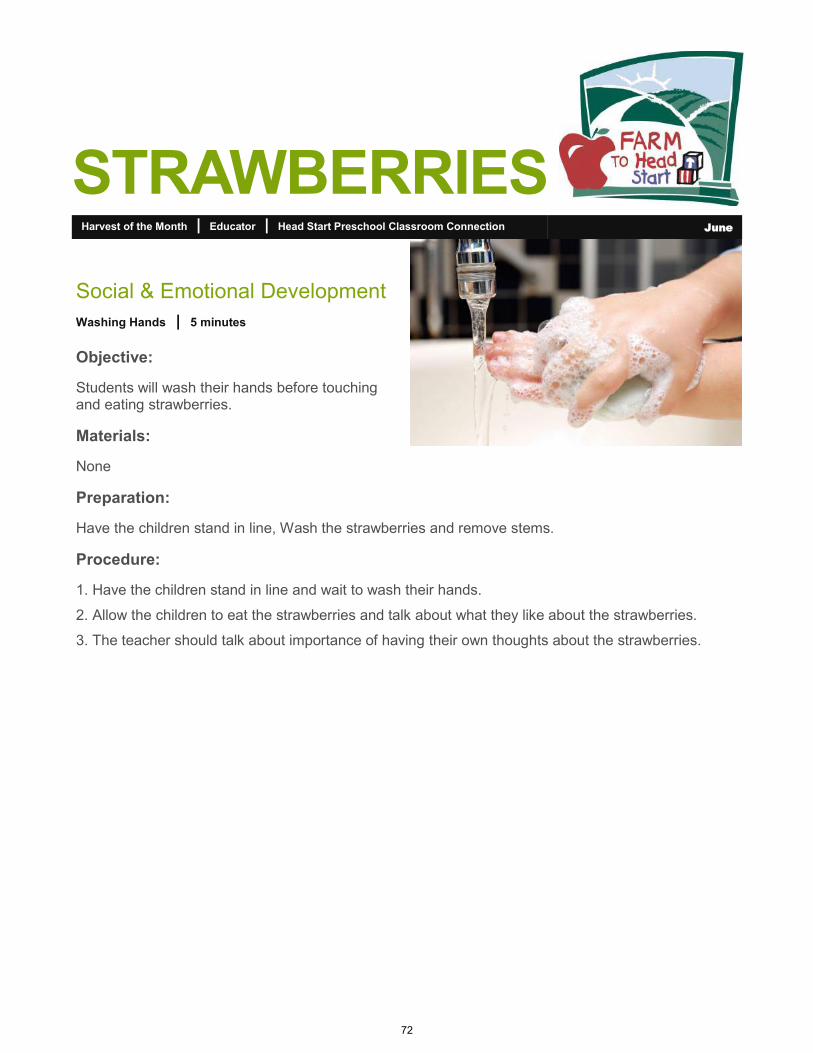
Harvest of the Month | Educator | Head Start Preschool Classroom Connection June
Social & Emotional Development
Washing Hands | 5 minutes
Objective:
Students will wash their hands before touching and eating strawberries.
Materials:
None
Preparation:
Have the children stand in line, Wash the strawberries and remove stems.
Procedure:
1. Have the children stand in line and wait to wash their hands.
2. Allow the children to eat the strawberries and talk about what they like about the strawberries.
3. The teacher should talk about importance of having their own thoughts about the strawberries.
STRAWBERRIES
72
Harvest of the Month | Educator | Head Start Preschool Classroom Connection June
Scientific Reasoning
Tasting Strawberries | 15-20 minutes
Objective:
Students will identify the color, texture, weight, taste, and the smell of strawberries.
Students will compare and contrast the characteristics of the strawberries to other known items.
Materials:
Diced strawberries
Preparation:
Cut the strawberries in half, prepare a chart of each response the students say.
Procedure:
1. Ask the kids if they ever had strawberries.
2. Have the students predict the color, texture, weight, taste, and smell the strawberry.
3. Record their responses .
4. Have the students go to their seats and guide them in exploring the strawberries. Ask questions
about color, texture, size, weight, taste, and smell. Prompt them to use compare and contrast words.
Some ideas are: What is the strawberry smaller than? What is the strawberry larger than? What is the
strawberry heavier than? What is the strawberry lighter than? Is the strawberry smooth or rough?
What is more smooth than the strawberry? What is more rough than the strawberry?
5. Record their responses.
STRAWBERRIES
73
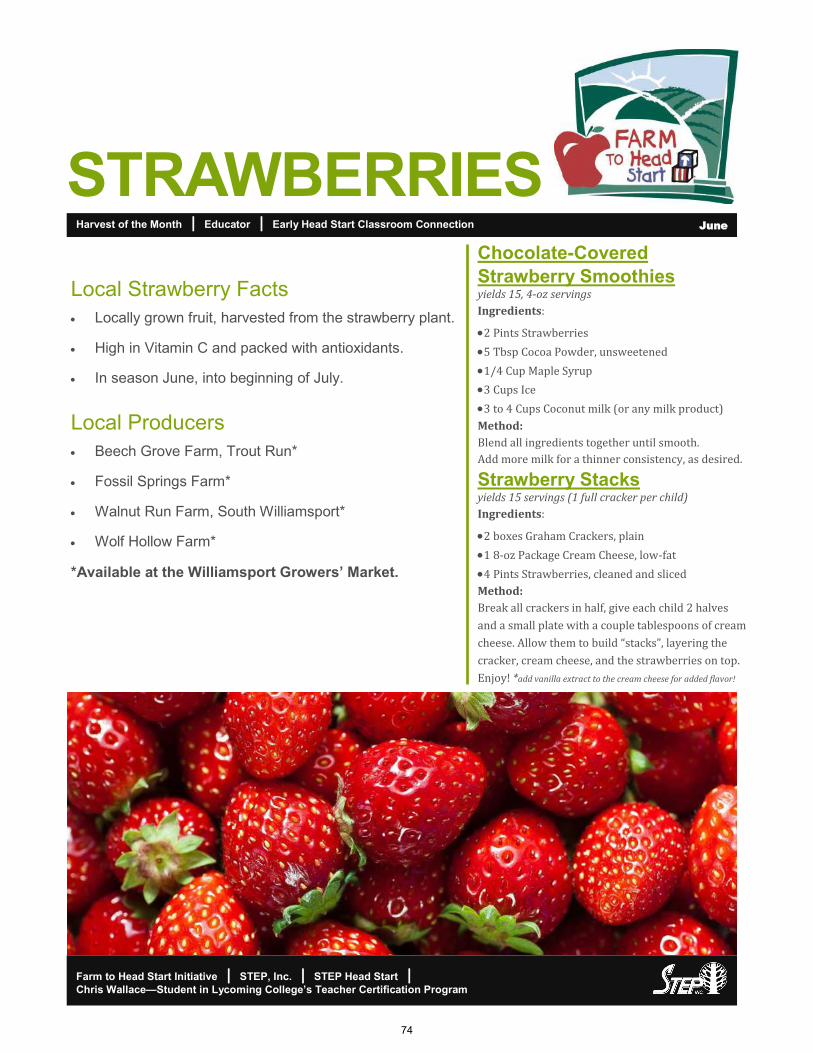
STRAWBERRIES
Farm to Head Start Initiative | STEP, Inc. | STEP Head Start | Chris Wallace—Student in Lycoming College’s Teacher Certification Program
Local Strawberry Facts
• Locally grown fruit, harvested from the strawberry plant.
• High in Vitamin C and packed with antioxidants.
• In season June, into beginning of July.
Local Producers
• Beech Grove Farm, Trout Run*
• Fossil Springs Farm*
• Walnut Run Farm, South Williamsport*
• Wolf Hollow Farm*
*Available at the Williamsport Growers’ Market.
Harvest of the Month | Educator | Early Head Start Classroom Connection June
Chocolate-Covered
Strawberry Smoothies
yields 15, 4-oz servings
Ingredients:
•2 Pints Strawberries
•5 Tbsp Cocoa Powder, unsweetened
•1/4 Cup Maple Syrup
•3 Cups Ice
•3 to 4 Cups Coconut milk (or any milk product)
Method:
Blend all ingredients together until smooth.
Add more milk for a thinner consistency, as desired.
Strawberry Stacks
yields 15 servings (1 full cracker per child)
Ingredients:
•2 boxes Graham Crackers, plain
•1 8-oz Package Cream Cheese, low-fat
•4 Pints Strawberries, cleaned and sliced
Method:
Break all crackers in half, give each child 2 halves
and a small plate with a couple tablespoons of cream
cheese. Allow them to build “stacks”, layering the
cracker, cream cheese, and the strawberries on top.
Enjoy! *add vanilla extract to the cream cheese for added flavor!
74
Harvest of the Month | Educator | Early Head Start Classroom Connection June
STRAWBERRIES
Mathematics Knowledge and Skills
Counting Strawberries | 15-20 minutes
Objective:
The students will count pieces of strawberries.
Materials:
Plastic plates and strawberries cut into pieces
Preparation:
Cut the strawberries into pieces and place on two different plates. Make sure the plates have an obviously different amount of strawberry pieces.
Procedure:
1.Ask the children to identify which plate has more and which plate has less.
2.Distribute plates to the children. Begin to distribute strawberry pieces to each child.
As you place the pieces on each child’s plate, ask all of the children to chorally count the
number of pieces. An extension activity to this would be to write the children’s names on
chart paper in advance and then write the number of strawberry pieces he/she has after
you all count.
3.Ask the children about the number of pieces they each have compared to the number of
pieces their classmates have. Discuss the word equal.
4.Allow the children to eat the strawberry pieces.
75
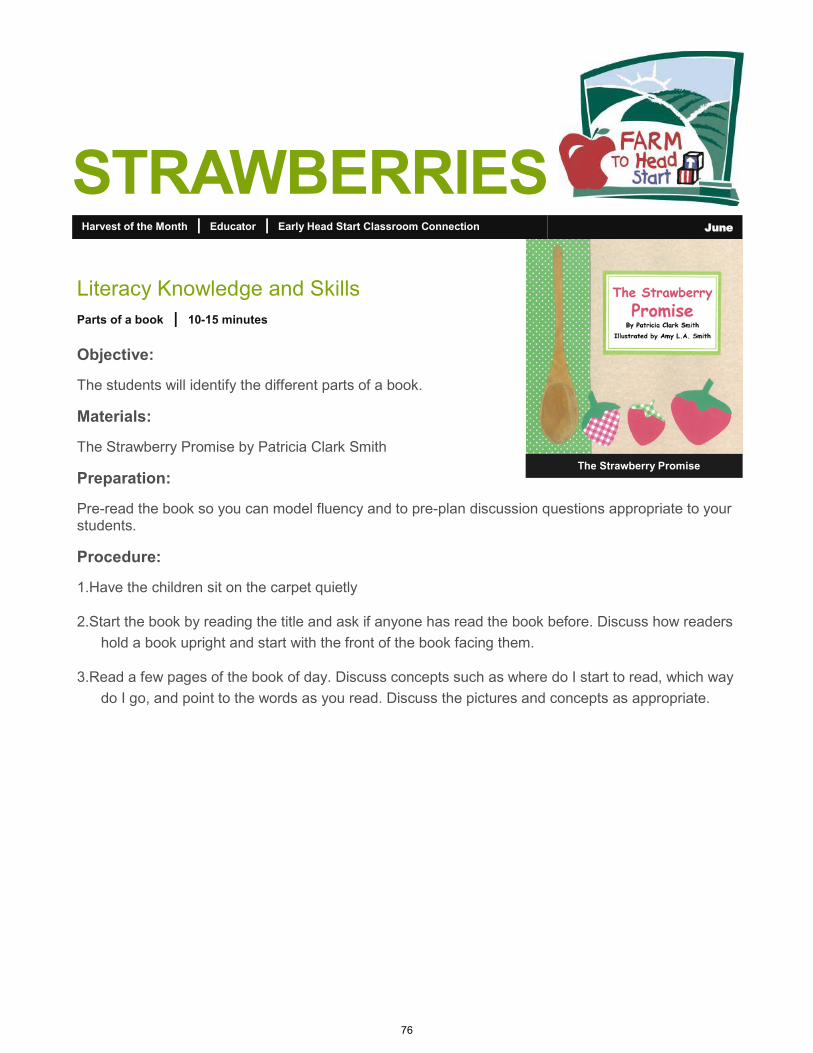
Harvest of the Month | Educator | Early Head Start Classroom Connection June
Literacy Knowledge and Skills
Parts of a book | 10-15 minutes
Objective:
The students will identify the different parts of a book.
Materials:
The Strawberry Promise by Patricia Clark Smith
Preparation:
Pre-read the book so you can model fluency and to pre-plan discussion questions appropriate to your students.
Procedure:
1.Have the children sit on the carpet quietly
2.Start the book by reading the title and ask if anyone has read the book before. Discuss how readers
hold a book upright and start with the front of the book facing them.
3.Read a few pages of the book of day. Discuss concepts such as where do I start to read, which way
do I go, and point to the words as you read. Discuss the pictures and concepts as appropriate.
STRAWBERRIES
The Strawberry Promise
76
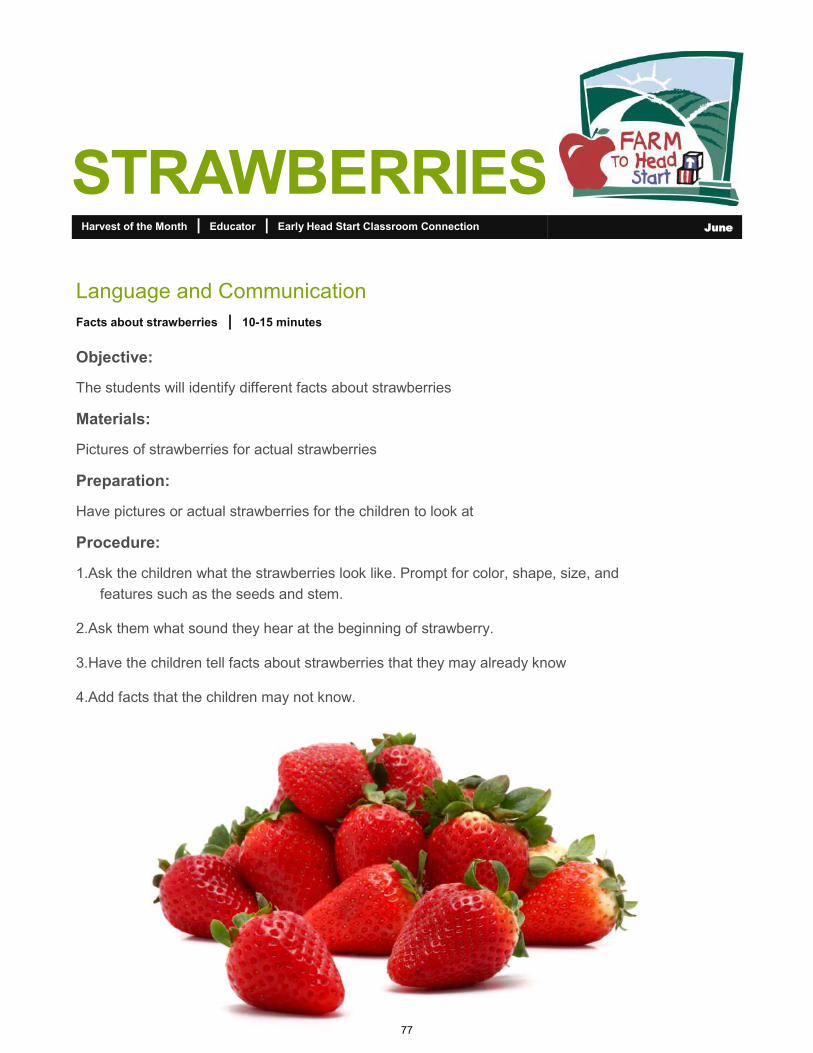
Harvest of the Month | Educator | Early Head Start Classroom Connection June
Language and Communication
Facts about strawberries | 10-15 minutes
Objective:
The students will identify different facts about strawberries
Materials:
Pictures of strawberries for actual strawberries
Preparation:
Have pictures or actual strawberries for the children to look at
Procedure:
1.Ask the children what the strawberries look like. Prompt for color, shape, size, and
features such as the seeds and stem.
2.Ask them what sound they hear at the beginning of strawberry.
3.Have the children tell facts about strawberries that they may already know
4.Add facts that the children may not know.
STRAWBERRIES
77
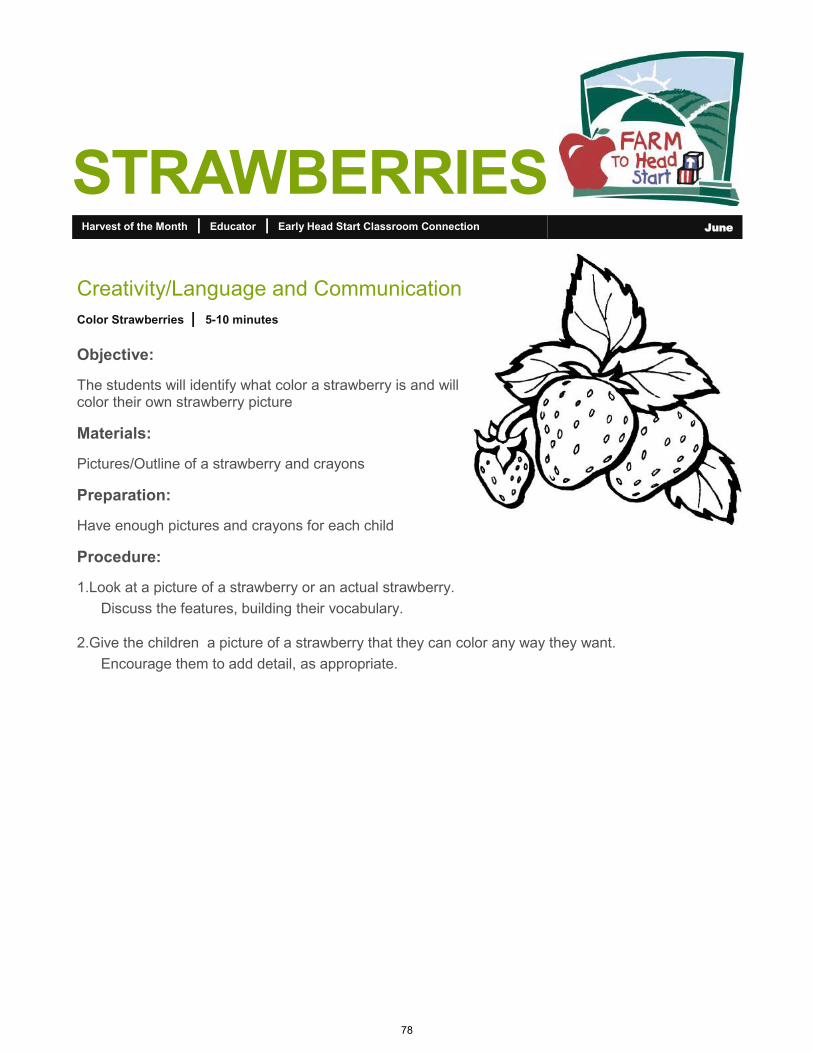
Harvest of the Month | Educator | Early Head Start Classroom Connection June
Creativity/Language and Communication
Color Strawberries | 5-10 minutes
Objective:
The students will identify what color a strawberry is and will color their own strawberry picture
Materials:
Pictures/Outline of a strawberry and crayons
Preparation:
Have enough pictures and crayons for each child
Procedure:
1.Look at a picture of a strawberry or an actual strawberry.
Discuss the features, building their vocabulary.
2.Give the children a picture of a strawberry that they can color any way they want.
Encourage them to add detail, as appropriate.
STRAWBERRIES
78
Harvest of the Month | Educator | Early Head Start Classroom Connection June
Perceptual, Motor, and Physical Development
Tasting Strawberries | 15-20 minutes
Objective:
The students will taste and describe strawberries, and learn that strawberries are healthy.
Materials:
Fresh strawberries
Preparation:
Knowing if the children have any specific allergies to strawberries.
Procedure:
1. Ask the children if they know what the food is.
2. Tell them that strawberries are healthy for them and explain what that means.
3. Get children to wash their hands.
4. Allow the children to pass out the strawberries.
5. Explain to the children how to hold the strawberries.
6. Explain what might happen if they drop the strawberry and if they squeeze it.
7. Allow the children to eat the strawberries
STRAWBERRIES
79
Harvest of the Month | Educator | | Early Head Start Classroom Connection June
STRAWBERRIES
Social & Emotional/Perceptual, Motor, & Physical Development
Singing Old MacDonald | 5-10 minutes
Objective:
The students will dance, sing, and interact with their classmates by singing Old MacDonald, the strawberry version
Materials:
Old MacDonald song (Lyrics included on the following page)
Preparation:
Knowing the Old MacDonald song
Procedure:
1.Have the children stand
2.Sing the song and get the children to dance in their spots on the floor
80
Harvest of the Month | Educator | | Early Head Start Classroom Connection June
STRAWBERRIES
1st Verse
Old MacDonald had a farm, EIEIO! (Skip in place)
On this farm he grew some strawberries, EIEIO! (Pretend to hoe ground around plants
With a plant, plant here and plant, plant there, using large, vigorous motions)
Here a plant, there a plant, everywhere (Pretend to hoe ground around plants
a strawberry plant! using large, vigorous motions)
Old MacDonald had a farm, EIEIO! (Skip in place)
2nd Verse
Old MacDonald had a farm, EIEIO! (Skip in place)
On this farm he grew some strawberries, EIEIO! (Pretend to carry a flat of strawberries)
With a berry, berry here and a berry, berry there, (Squat to the ground and pretend to point
Here a berry, there a berry, everywhere a strawberry at strawberries)
Old MacDonald had a farm, EIEIO! (Skip in place)
3rd Verse
Old MacDonald had a farm, EIEIO! (Skip in place)
On this farm he grew some strawberries, EIEIO! (Pretend to carry a flat of strawberries)
With a pick, pick here, and a pick, pick there, (Pretend to pick and carry strawberries)
Here a pick, there a pick, everywhere a strawberry pick
Old MacDonald had a farm, EIEIO! (Skip in place)
4th Verse
Old MacDonald had a farm, EIEIO! (Skip in place)
On this farm he grew some strawberries, EIEIO! (Pretend to carry a flat of strawberries)
With a sweet bite here, and a sweet bite there, (Pretend to eat strawberries)
Here a bite, there a bite, everywhere a strawberry bite. (Pretend to eat strawberries)
Source: The USDA Food and Nutrition Service: Grow It, Try It, Like It! Nutrition Education
Kit Featuring MyPlate, Book 7: http://www.fns.usda.gov/tn/grow-it-try-it-it
81
Harvest of the Month | Educator | Early Head Start Classroom Connection June
Cognitive
Scavenger Hunt | 15-20 minutes
Objective:
The students will search to find the missing strawberry in the classroom
Materials:
Stuffed strawberry or strawberry toy
Preparation:
Have a stuffed strawberry or strawberry toy
Procedure:
1.Discuss the rules of the game with the children. Explain how they will each have a chance to work
with a partner to hide the strawberry and they will each have a chance to work with a partner to
find the strawberry, When they don’t have the job of finding or hiding, they will have the job of
giving clues. Explain they will be able to say “hot” when the finders are close and “cold” when
the finders are not close.” Hide the strawberry and model for them how to respond.
STRAWBERRIES
82

Harvest of the Month | Educator | Head Start Preschool Classroom Connection June
STRAWBERRIES
Perceptual, Motor, and Physical Development
Strawberry Promise | 10-15 minutes
Objective:
The students will listen to the Strawberry Promise by Patricia Clark Smith
Materials:
The Strawberry Promise by Patricia Clark Smith
Preparation:
Pre-read the book so you can model fluency and to pre-plan discussion questions to ask your students
Procedure:
1. Have the children sit on their correct spot on the carpet
2. Read the book to the class, add discussion questions appropriate to your students, with a
focus on building vocabulary.
The Strawberry Promise
83
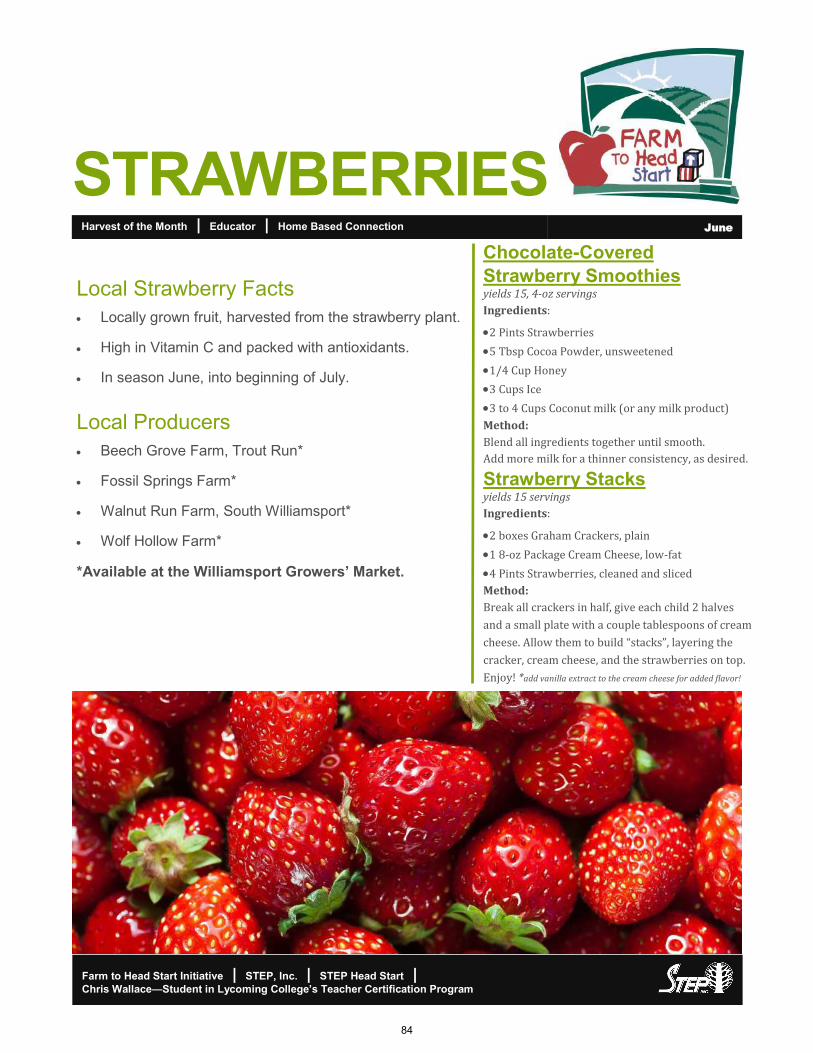
Harvest of the Month | Educator | Home Based Connection June
STRAWBERRIES
Farm to Head Start Initiative | STEP, Inc. | STEP Head Start | Chris Wallace—Student in Lycoming College’s Teacher Certification Program
Local Strawberry Facts
• Locally grown fruit, harvested from the strawberry plant.
• High in Vitamin C and packed with antioxidants.
• In season June, into beginning of July.
Local Producers
• Beech Grove Farm, Trout Run*
• Fossil Springs Farm*
• Walnut Run Farm, South Williamsport*
• Wolf Hollow Farm*
*Available at the Williamsport Growers’ Market.
Chocolate-Covered
Strawberry Smoothies
yields 15, 4-oz servings
Ingredients:
•2 Pints Strawberries
•5 Tbsp Cocoa Powder, unsweetened
•1/4 Cup Honey
•3 Cups Ice
•3 to 4 Cups Coconut milk (or any milk product)
Method:
Blend all ingredients together until smooth.
Add more milk for a thinner consistency, as desired.
Strawberry Stacks
yields 15 servings
Ingredients:
•2 boxes Graham Crackers, plain
•1 8-oz Package Cream Cheese, low-fat
•4 Pints Strawberries, cleaned and sliced
Method:
Break all crackers in half, give each child 2 halves
and a small plate with a couple tablespoons of cream
cheese. Allow them to build “stacks”, layering the
cracker, cream cheese, and the strawberries on top.
Enjoy! *add vanilla extract to the cream cheese for added flavor!
84
Harvest of the Month | Educator | Home Based Connection June
STRAWBERRIES
Edible Experience
Farmer Says | 5-10 minutes
Objective:
Children will act out the entire lifecycle of the featured local harvest (similar to “Simon Says”)
Materials:
None needed.
Preparation:
Familiarize yourself with the growing/harvesting process of the featured produce item. Example: Strawberries grow above the ground, are picked from plants, and placed in a container.
Procedure:
1.After learning about the farmers who grew the featured produce, have the class gather on
the carpet
2.Introduce yourself as the featured local farmer and begin to act out the life cycle of the
produce
Example:
Farmer Eck says…. find a baby seed, dig a hole, plant the seed and sprinkle some love in
the ground, pat the soil on top of the seed, pretend to rain on the seed, give the seed some
sunshine rays, pretend to be the baby seed in the ground, grow into a version of that seed,
pick your fruit/vegetable, have the class all help pull/pick a HUGE one together on the count
of 3, put it in a basket, drive it to the farmers market/store, pretend to sell it to families, take
a mindful bite of the produce, give a thumbs up, and applause!
Suggestions:
For fruit, act out the flower blossoms and pollinator roles before acting out harvesting
Do this activity right before each taste testing experience, to allow children to fully
understand the process behind the featured food
85
Harvest of the Month | Educator | Home Based Connection June
STRAWBERRIES
Edible Experience
Taste Test | 5-10 minutes
Objective:
Children will have the opportunity to taste test raw, locally grown strawberries
Materials:
Locally grown strawberries, paring knife, cutting board, melon baller or spoon with fine edges
Preparation:
Wash and dry strawberries
Procedure:
1.Leaving the skin on, cut the strawberries in half, length wise.
2.Take the melon baller or spoon and place over the seeds in one half of the strawberries
3.With one scoop, scoop out the circle of seeds inside
4.Next, place the melon baller underneath the stem on top of the strawberries, scoop this part out,
making a small dent in the top of the strawberry
5.Just like that, the strawberry is ready to eat with no distractions and very little waste!
Suggestions:
Demonstrate on one strawberry and help the children do their own
Hand out “I tried something new today!” stickers
86
Harvest of the Month | Educator | Home Based Connection June
STRAWBERRIES
Edible Experience
Taste Test Results | 10-15 minutes
“For me!” or “I like it!” “Not for me” or “I don’t like it”
87

TOMATOES
Farm to Head Start Initiative | STEP, Inc. | STEP Head Start | Sydney Mackey—Student in Lycoming College’s Teacher Certification Program
Local Tomato Facts
Locally grown fruit, harvested from tomato plants.
Many different varieties grown locally, including: Cherry/Grape—Sakura Honey, Red Pearl, Five Star, Maglia Rosa, Sun Gold. Slicers—Brandy Boy, Scarlet Red.
Heirloom varieties: Pineapple, Marianna’s Peace.
High in Vitamin C and packed with potassium.
In season Summer, June—September.
Local Producers
Beech Grove Farm, Trout Run*
Fossil Springs Farm*
Walnut Run Farm, South Williamsport*
Wolf Hollow Farm*
*Available at the Williamsport Growers’ Market.
Harvest of the Month | Educator | Head Start Preschool Classroom Connection July
Homemade Salsa yields approximately 1 cup of salsa
Ingredients:
3 Medium Tomatoes (or 1 - 14oz. Can of chopped tomatoes)
1 Bell Pepper
1/4 Cup Red Onion, chopped (optional)
2 TBSP Taco Seasoning
3 TBSP Lime Juice
1 TBSP Fresh Parsley and/or Cilantro, chopped
1 TBSP Fresh Basil, chopped
Method:
Dice the tomatoes into small pieces. Add the tomato and any juice into a mixing bowl.
Dice the bell pepper into small pieces, discarding the seeds. Add to the tomatoes. Add the onions, if using, and mix well.
Sprinkle the taco seasoning on top and add the lime juice. Mix well. Let set for 10 to 30 minutes, as time allows.
Taste the salsa and add more taco seasoning or lime juice as needed.
Mix in the fresh herbs and enjoy!
Store, tightly sealed, in the fridge for up to 3 days.
88
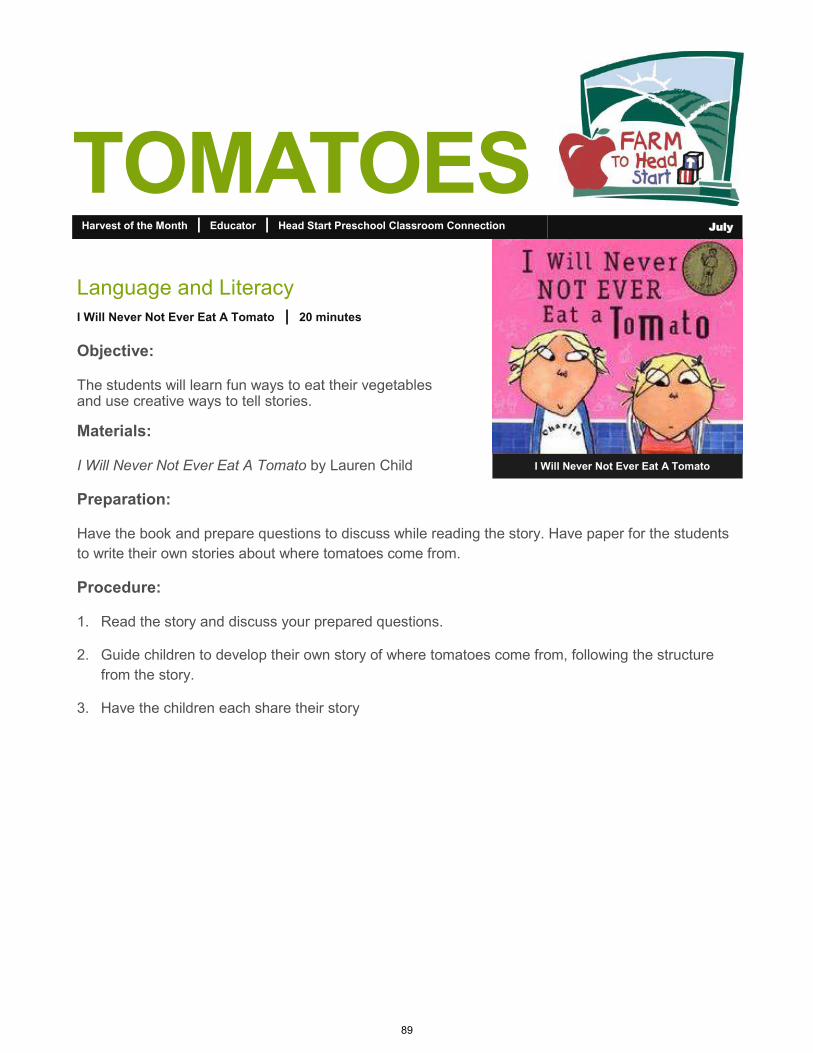
TOMATOES Harvest of the Month | Educator | Head Start Preschool Classroom Connection July
Language and Literacy
I Will Never Not Ever Eat A Tomato | 20 minutes
Objective:
The students will learn fun ways to eat their vegetables and use creative ways to tell stories.
Materials:
I Will Never Not Ever Eat A Tomato by Lauren Child
Preparation:
Have the book and prepare questions to discuss while reading the story. Have paper for the students
to write their own stories about where tomatoes come from.
Procedure:
1. Read the story and discuss your prepared questions.
2. Guide children to develop their own story of where tomatoes come from, following the structure
from the story.
3. Have the children each share their story
I Will Never Not Ever Eat A Tomato
89
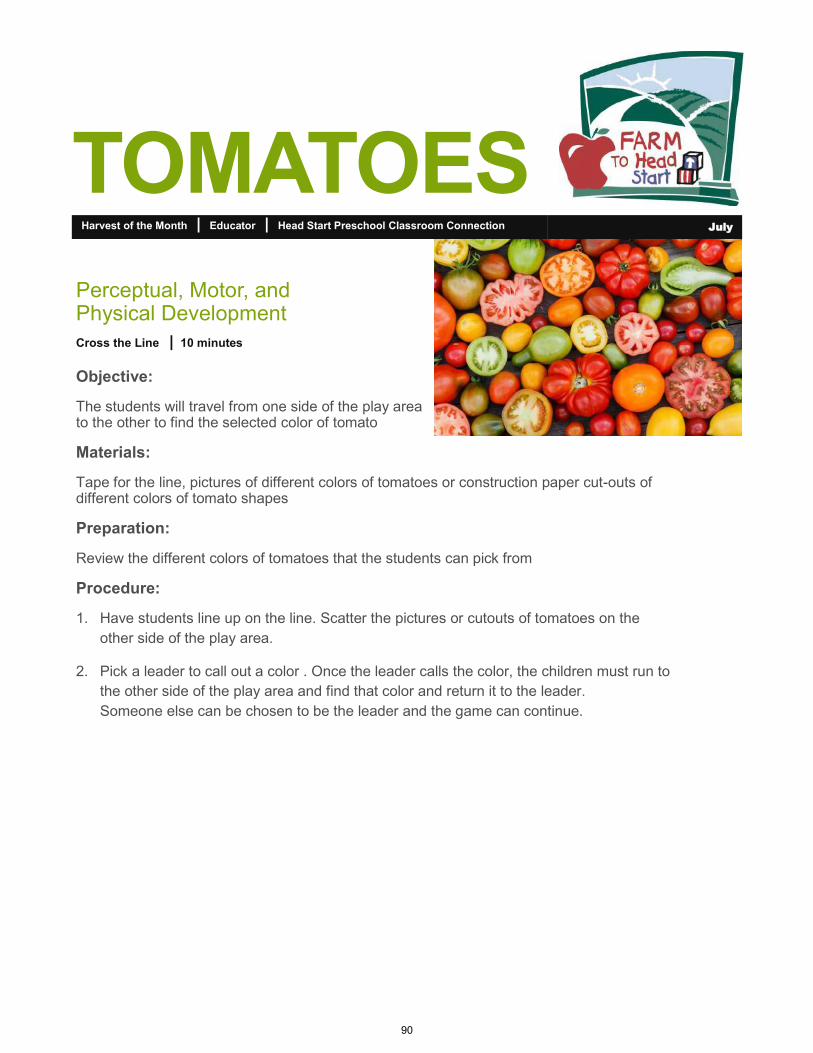
TOMATOES Harvest of the Month | Educator | Head Start Preschool Classroom Connection July
Perceptual, Motor, and Physical Development
Cross the Line | 10 minutes
Objective:
The students will travel from one side of the play area to the other to find the selected color of tomato
Materials:
Tape for the line, pictures of different colors of tomatoes or construction paper cut-outs of different colors of tomato shapes
Preparation:
Review the different colors of tomatoes that the students can pick from
Procedure:
1. Have students line up on the line. Scatter the pictures or cutouts of tomatoes on the
other side of the play area.
2. Pick a leader to call out a color . Once the leader calls the color, the children must run to
the other side of the play area and find that color and return it to the leader.
Someone else can be chosen to be the leader and the game can continue.
90
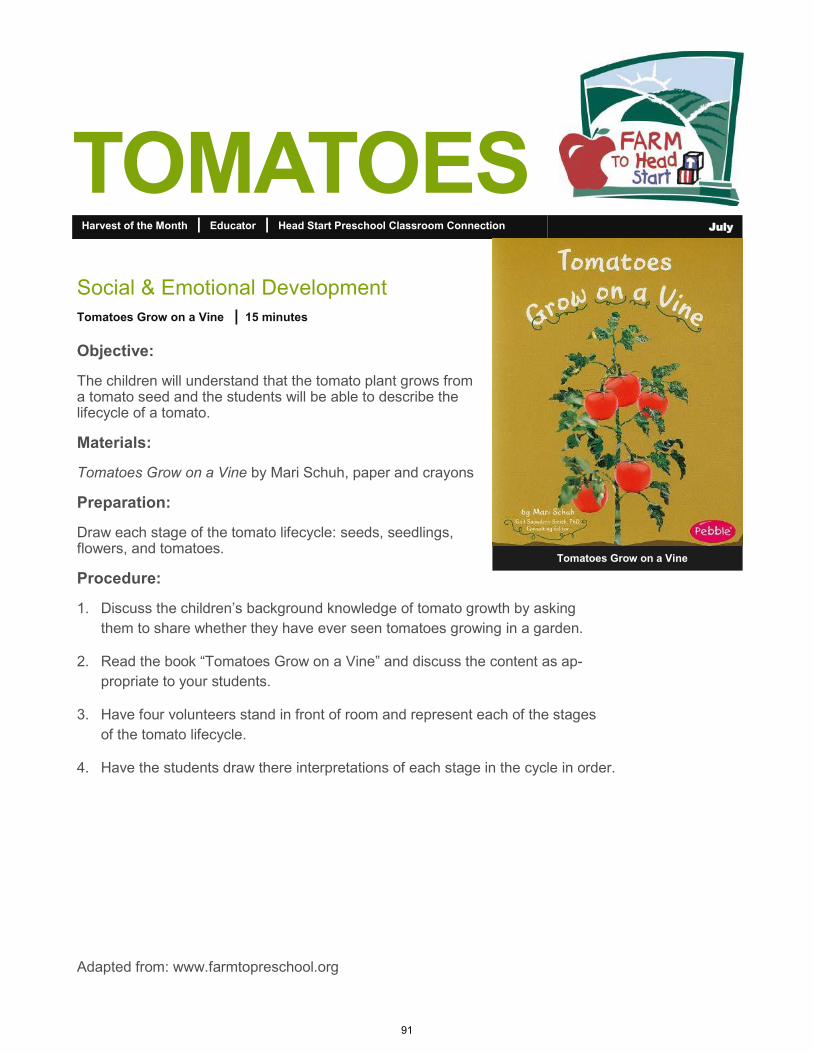
TOMATOES Harvest of the Month | Educator | Head Start Preschool Classroom Connection July
Social & Emotional Development
Tomatoes Grow on a Vine | 15 minutes
Objective:
The children will understand that the tomato plant grows from a tomato seed and the students will be able to describe the lifecycle of a tomato.
Materials:
Tomatoes Grow on a Vine by Mari Schuh, paper and crayons
Preparation:
Draw each stage of the tomato lifecycle: seeds, seedlings, flowers, and tomatoes.
Procedure:
1. Discuss the children’s background knowledge of tomato growth by asking
them to share whether they have ever seen tomatoes growing in a garden.
2. Read the book “Tomatoes Grow on a Vine” and discuss the content as ap-
propriate to your students.
3. Have four volunteers stand in front of room and represent each of the stages
of the tomato lifecycle.
4. Have the students draw there interpretations of each stage in the cycle in order.
Adapted from: www.farmtopreschool.org
Tomatoes Grow on a Vine
91
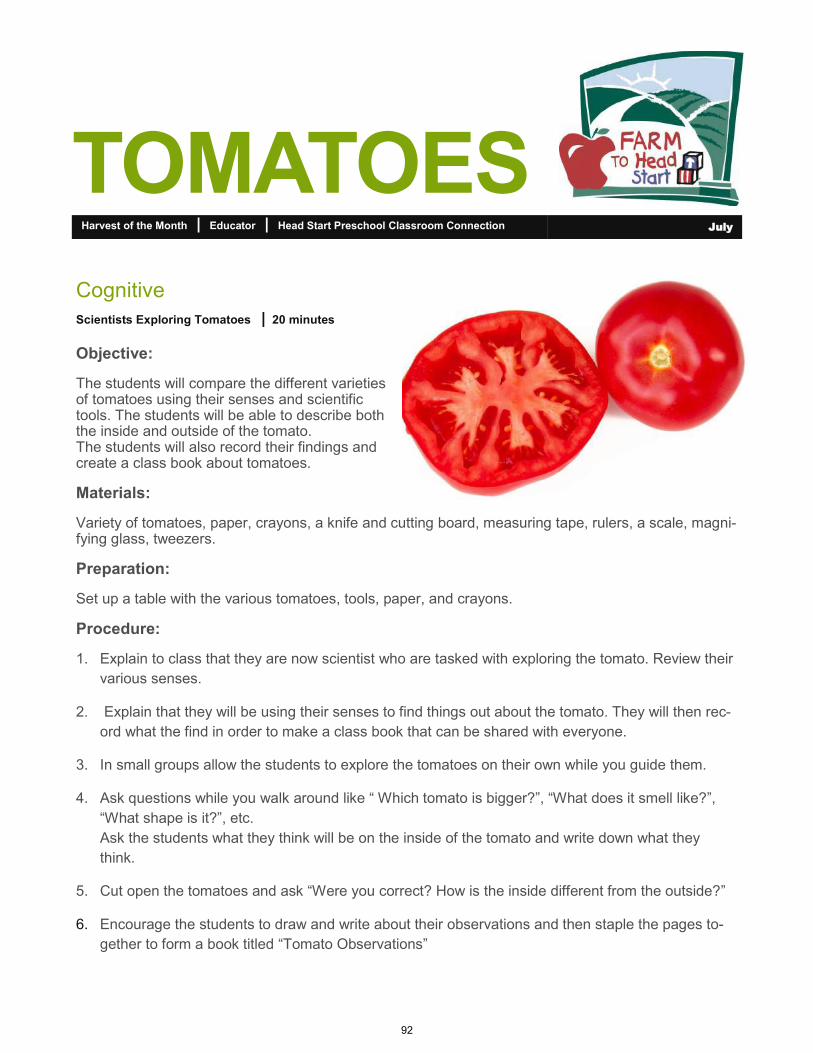
TOMATOES Harvest of the Month | Educator | Head Start Preschool Classroom Connection July
Cognitive
Scientists Exploring Tomatoes | 20 minutes
Objective:
The students will compare the different varieties of tomatoes using their senses and scientific tools. The students will be able to describe both the inside and outside of the tomato. The students will also record their findings and create a class book about tomatoes.
Materials:
Variety of tomatoes, paper, crayons, a knife and cutting board, measuring tape, rulers, a scale, magni-fying glass, tweezers.
Preparation:
Set up a table with the various tomatoes, tools, paper, and crayons.
Procedure:
1. Explain to class that they are now scientist who are tasked with exploring the tomato. Review their
various senses.
2. Explain that they will be using their senses to find things out about the tomato. They will then rec-
ord what the find in order to make a class book that can be shared with everyone.
3. In small groups allow the students to explore the tomatoes on their own while you guide them.
4. Ask questions while you walk around like “ Which tomato is bigger?”, “What does it smell like?”,
“What shape is it?”, etc.
Ask the students what they think will be on the inside of the tomato and write down what they
think.
5. Cut open the tomatoes and ask “Were you correct? How is the inside different from the outside?”
6. Encourage the students to draw and write about their observations and then staple the pages to-
gether to form a book titled “Tomato Observations”
92

TOMATOES
Farm to Head Start Initiative | STEP, Inc. | STEP Head Start | Sydney Mackey—Student in Lycoming College’s Teacher Certification Program
Local Tomato Facts
Locally grown fruit, harvested from tomato plants.
Many different varieties grown locally, including: Cherry/Grape—Sakura Honey, Red Pearl, Five Star, Maglia Rosa, Sun Gold. Slicers—Brandy Boy, Scarlet Red.
Heirloom varieties: Pineapple, Marianna’s Peace.
High in Vitamin C and packed with potassium.
In season Summer, June—September.
Local Producers
Beech Grove Farm, Trout Run*
Fossil Springs Farm*
Walnut Run Farm, South Williamsport*
Wolf Hollow Farm*
*Available at the Williamsport Growers’ Market.
Harvest of the Month | Educator | Early Head Start Classroom Connection July
Homemade Salsa yields approximately 1 cup of salsa
Ingredients:
3 Medium Tomatoes (or 1 - 14oz. Can of chopped tomatoes)
1 Bell Pepper
1/4 Cup Red Onion, chopped (optional)
2 TBSP Taco Seasoning
3 TBSP Lime Juice
1 TBSP Fresh Parsley and/or Cilantro, chopped
1 TBSP Fresh Basil, chopped
Method:
Dice the tomatoes into small pieces. Add the tomato and any juice into a mixing bowl.
Dice the bell pepper into small pieces, discarding the seeds. Add to the tomatoes. Add the onions, if using, and mix well.
Sprinkle the taco seasoning on top and add the lime juice. Mix well. Let set for 10 to 30 minutes, as time allows.
Taste the salsa and add more taco seasoning or lime juice as needed.
Mix in the fresh herbs and enjoy!
Store, tightly sealed, in the fridge for up to 3 days.
93

TOMATOES Harvest of the Month | Educator | Early Head Start Classroom Connection July
Language & Literacy / Creativity
I Will Never Not Ever Eat A Tomato | 20 minutes
Objective:
The students will respond to simple questions about the book.
Materials:
I Will Never Not Ever Eat A Tomato by Lauren Child
Preparation:
Have the book and prepare questions to discuss while reading the story. Have paper for the
students to draw their own tomato or an outline of a tomato for them to color.
Procedure:
1. Read the story and discuss your prepared questions.
2. Discuss what they notice about a tomato (use a real tomato if possible).
Prompt for color, shape, etc. Have them draw or color a tomato and encourage them to
remember the details you discussed.
I Will Never Not Ever Eat A Tomato
94
TOMATOES Harvest of the Month | Educator | Early Head Start Classroom Connection July
Perceptual, Motor, & Physical Development
Cross the Line | 10 minutes
Objective:
The students will travel from one side of the play area to the other to find the selected color of tomato.
Materials:
tape for the line, pictures of different colors of tomatoes or construction paper cut-outs of different colors of tomato shapes.
Preparation:
Review the different colors of tomatoes that the students can pick from
Procedure:
1. Have students line up on the line. Scatter the pictures or cutouts of tomatoes on the other side of
the play area.
2. Say a color of tomato . Guide the children to travel to the other side of the play area and find that
color and return it to the line. Repeat several times.
95
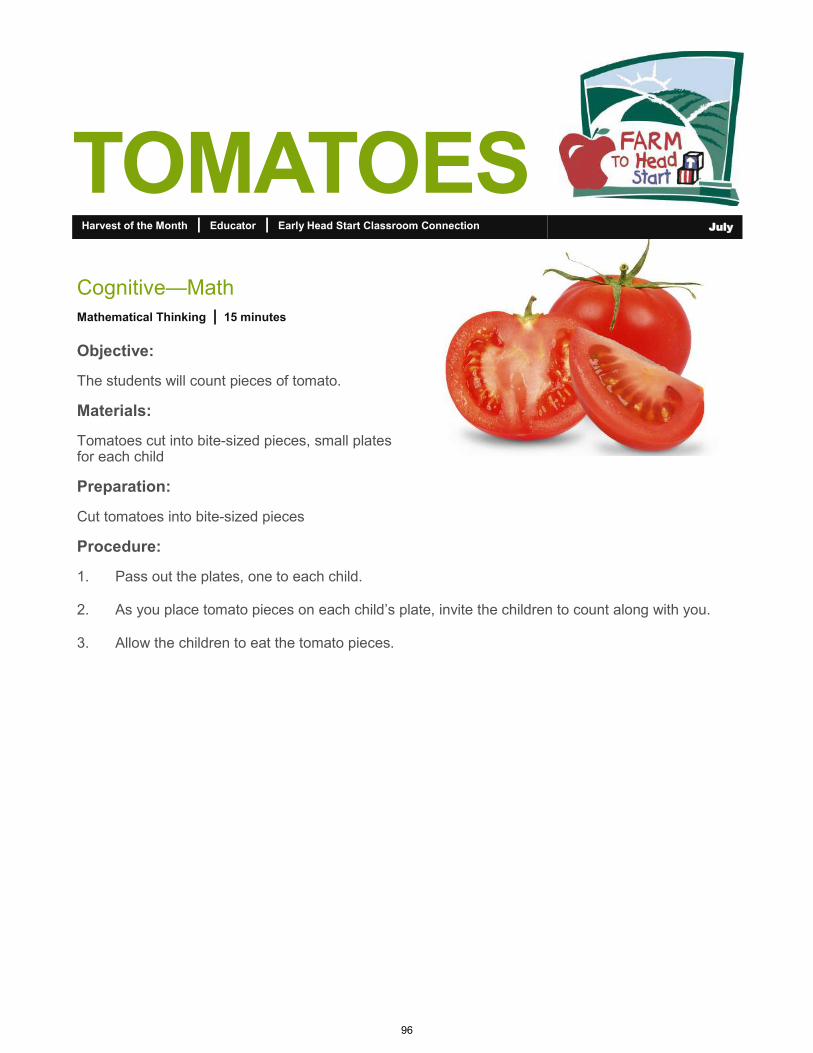
TOMATOES Harvest of the Month | Educator | Early Head Start Classroom Connection July
Cognitive—Math
Mathematical Thinking | 15 minutes
Objective:
The students will count pieces of tomato.
Materials:
Tomatoes cut into bite-sized pieces, small plates for each child
Preparation:
Cut tomatoes into bite-sized pieces
Procedure:
1. Pass out the plates, one to each child.
2. As you place tomato pieces on each child’s plate, invite the children to count along with you.
3. Allow the children to eat the tomato pieces.
96
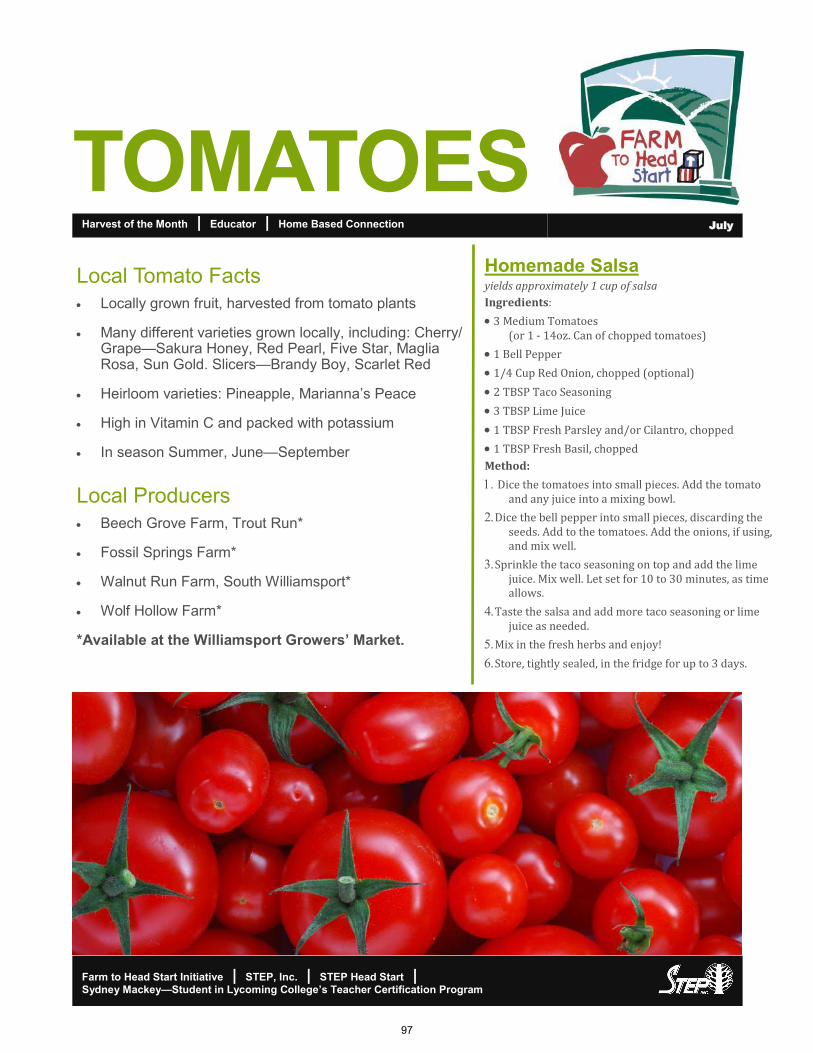
TOMATOES
Farm to Head Start Initiative | STEP, Inc. | STEP Head Start | Sydney Mackey—Student in Lycoming College’s Teacher Certification Program
Local Tomato Facts
Locally grown fruit, harvested from tomato plants
Many different varieties grown locally, including: Cherry/Grape—Sakura Honey, Red Pearl, Five Star, Maglia Rosa, Sun Gold. Slicers—Brandy Boy, Scarlet Red
Heirloom varieties: Pineapple, Marianna’s Peace
High in Vitamin C and packed with potassium
In season Summer, June—September
Local Producers
Beech Grove Farm, Trout Run*
Fossil Springs Farm*
Walnut Run Farm, South Williamsport*
Wolf Hollow Farm*
*Available at the Williamsport Growers’ Market.
Harvest of the Month | Educator | Home Based Connection July
Homemade Salsa yields approximately 1 cup of salsa
Ingredients:
3 Medium Tomatoes (or 1 - 14oz. Can of chopped tomatoes)
1 Bell Pepper
1/4 Cup Red Onion, chopped (optional)
2 TBSP Taco Seasoning
3 TBSP Lime Juice
1 TBSP Fresh Parsley and/or Cilantro, chopped
1 TBSP Fresh Basil, chopped
Method:
Dice the tomatoes into small pieces. Add the tomato and any juice into a mixing bowl.
Dice the bell pepper into small pieces, discarding the seeds. Add to the tomatoes. Add the onions, if using, and mix well.
Sprinkle the taco seasoning on top and add the lime juice. Mix well. Let set for 10 to 30 minutes, as time allows.
Taste the salsa and add more taco seasoning or lime juice as needed.
Mix in the fresh herbs and enjoy!
Store, tightly sealed, in the fridge for up to 3 days.
97

TOMATOES Harvest of the Month | Educator | Home Based Connection July
Edible Experience
Farmer Says | 5-10 minutes
Objective:
Children will act out the entire lifecycle of the featured local harvest (similar to “Simon Says”)
Materials:
None
Preparation:
Familiarize yourself with the growing/harvesting process of the featured produce item. Example: Pears grow on trees, so they are picked from trees and from the ground, placed in a container, etc.
Procedure:
1.After learning about the farmers who grew the featured produce, have the class gather on the carpet
2.Introduce yourself as the featured local farmer and begin to act out the life cycle of the produce (together as a class)
Example: Farmer Eck says…. find a baby seed, dig a hole, plant the seed and sprinkle some love in the ground, pat the soil on top of the seed, pretend to rain on the seed, give the seed some sunshine rays, pretend to be the baby seed in the ground, grow into a version of that seed, pick your fruit/vegetable, have the class all help pull/pick a HUGE one together on the count of 3, put it in a basket, drive it to the farmers market/store, pretend to sell it to families, take a mindful bite of the produce, give a thumbs up, and applause!
Suggestions:
For fruit, act out the flower blossoms and pollinator roles before acting out harvesting
Do this activity right before each taste testing experience, to allow children to fully understand the process behind the featured food
98
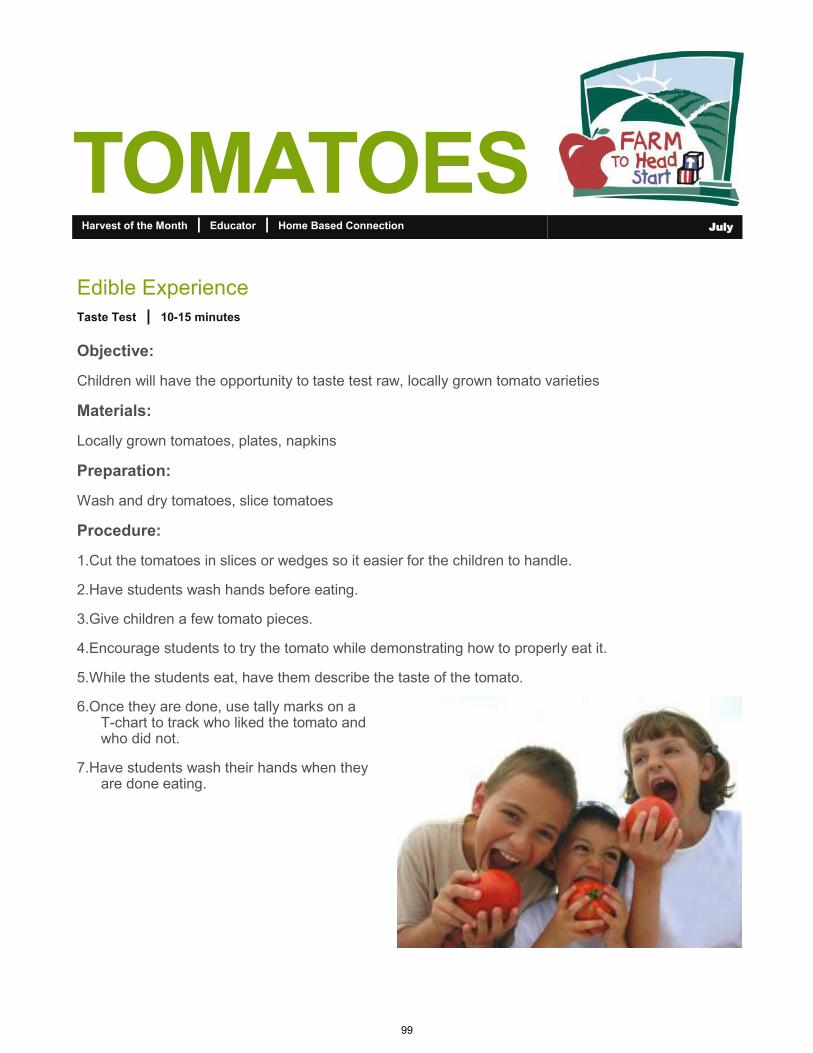
TOMATOES Harvest of the Month | Educator | Home Based Connection July
Edible Experience
Taste Test | 10-15 minutes
Objective:
Children will have the opportunity to taste test raw, locally grown tomato varieties
Materials:
Locally grown tomatoes, plates, napkins
Preparation:
Wash and dry tomatoes, slice tomatoes
Procedure:
1.Cut the tomatoes in slices or wedges so it easier for the children to handle.
2.Have students wash hands before eating.
3.Give children a few tomato pieces.
4.Encourage students to try the tomato while demonstrating how to properly eat it.
5.While the students eat, have them describe the taste of the tomato.
6.Once they are done, use tally marks on a T-chart to track who liked the tomato and who did not.
7.Have students wash their hands when they are done eating.
99
TOMATOES Harvest of the Month | Educator | Home Based Connection July
Edible Experience
Taste Test Results | 10-15 minutes
“For me!” or “I like it!” “Not for me” or “I don’t like it”
100

BELL PEPPERS
Farm to Head Start Initiative | STEP, Inc. | STEP Head Start | Kelcie Crabb—Student in Lycoming College’s Teacher Certification Program
Local Bell Pepper Facts
• Locally grown fruit, harvested from the pepper plant.
• Many different varieties grown locally, including: green, purple, red, orange, and plenty of hot chilies too!
• High in Vitamin C and packed with carotene (good for your eyes!).
• In season July through October
Local Producers
• Beech Grove Farm, Trout Run*
• Fossil Springs Farm*
• Walnut Run Farm, South Williamsport*
• Wolf Hollow Farm*
*Available at the Williamsport Growers’ Market.
Harvest of the Month | Educator | Head Start Preschool Classroom Connection August
Bell Pepper Pizzas
Ingredients:
• 1 Block Low-Fat Cream Cheese, room temp.
• 1/2 Cup Greek Yogurt
• 3 Tbsp Italian Seasoning
• Salt & Pepper to taste
• 6 Bell Peppers, assorted colors, cut into various shapes & sizes (long slices, small squares, zig-zags)
• Whole Wheat Bagel Thins or flatbread (enough for 1 or 2 per child)
Method:
In a mixing bowl, combine the cream cheese,
yogurt, and seasonings.
Spread the cream cheese mixture on top of the bagels
or flatbreads.
Give each child a small bowl of pepper pieces and one
of the bagels with cream cheese spread on top
Let the children make fun designs or faces with the
peppers, using the various shapes and colors.
Enjoy!
101
Harvest of the Month | Educator | Head Start Preschool Classroom Connection August
Creative Arts Expression
Shamrocks | 25-30 minutes
Objective:
Students will be introduced to the different varieties and colors of bell peppers. The children will also construct bell pepper shamrocks to be displayed in the classroom.
Materials:
3-4 different color bell peppers, one or two sheets of paper for each student, different color cut-outs of pepper ring shapes, soap and water, space for shamrocks to dry, plates
Preparation:
Slice the bell peppers into rings; trace the bell pepper rings on card stock and cut them out to be traced by children or by the teacher
Procedure:
1.Place the bell peppers in front of the students and explain that they are all bell peppers
2.Allow students to describe characteristics of the bell peppers
3.Explain that although they may look different in appearance they are all still the same kind of vegetables, bell peppers!
4.Show the students the bell pepper rings you cut in advance. Discuss their shape. Explain to students that they will be using bell pepper-shaped paper to make shamrocks. Students can either color in the shapes or paint it.
5.Demonstrate how to trace the card stock bell pepper rings on the paper. Also demonstrate how to use a crayon or marker to draw a stem.
6.Compare the created shamrock to what an actual shamrock (picture) looks like.
7.Each student will create their own shamrocks; they may use a variety of colors.
8.Set the finished products to the side to dry if needed.
9.Cleanup
10.Hang finished products around the room to display students’ works of art!
BELL PEPPERS
102
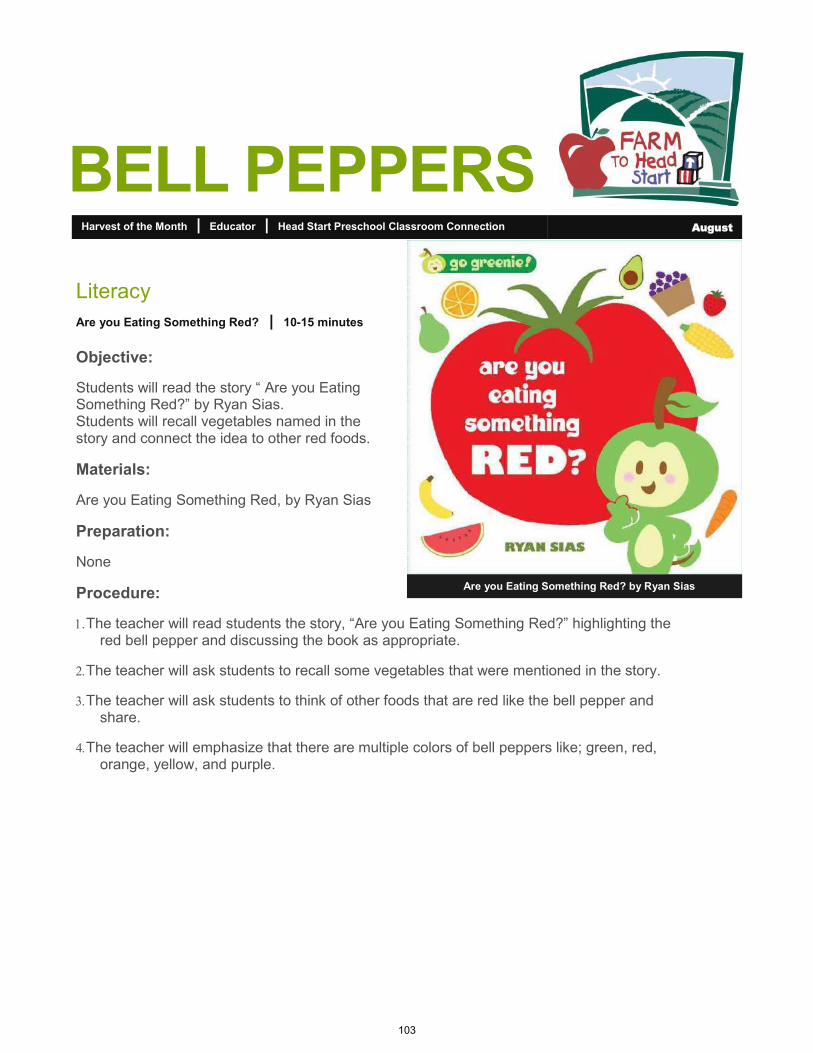
Harvest of the Month | Educator | Head Start Preschool Classroom Connection August
Literacy
Are you Eating Something Red? | 10-15 minutes
Objective:
Students will read the story “ Are you Eating Something Red?” by Ryan Sias. Students will recall vegetables named in the story and connect the idea to other red foods.
Materials:
Are you Eating Something Red, by Ryan Sias
Preparation:
None
Procedure:
The teacher will read students the story, “Are you Eating Something Red?” highlighting the red bell pepper and discussing the book as appropriate.
The teacher will ask students to recall some vegetables that were mentioned in the story.
The teacher will ask students to think of other foods that are red like the bell pepper and share.
The teacher will emphasize that there are multiple colors of bell peppers like; green, red, orange, yellow, and purple.
BELL PEPPERS
Are you Eating Something Red? by Ryan Sias
103
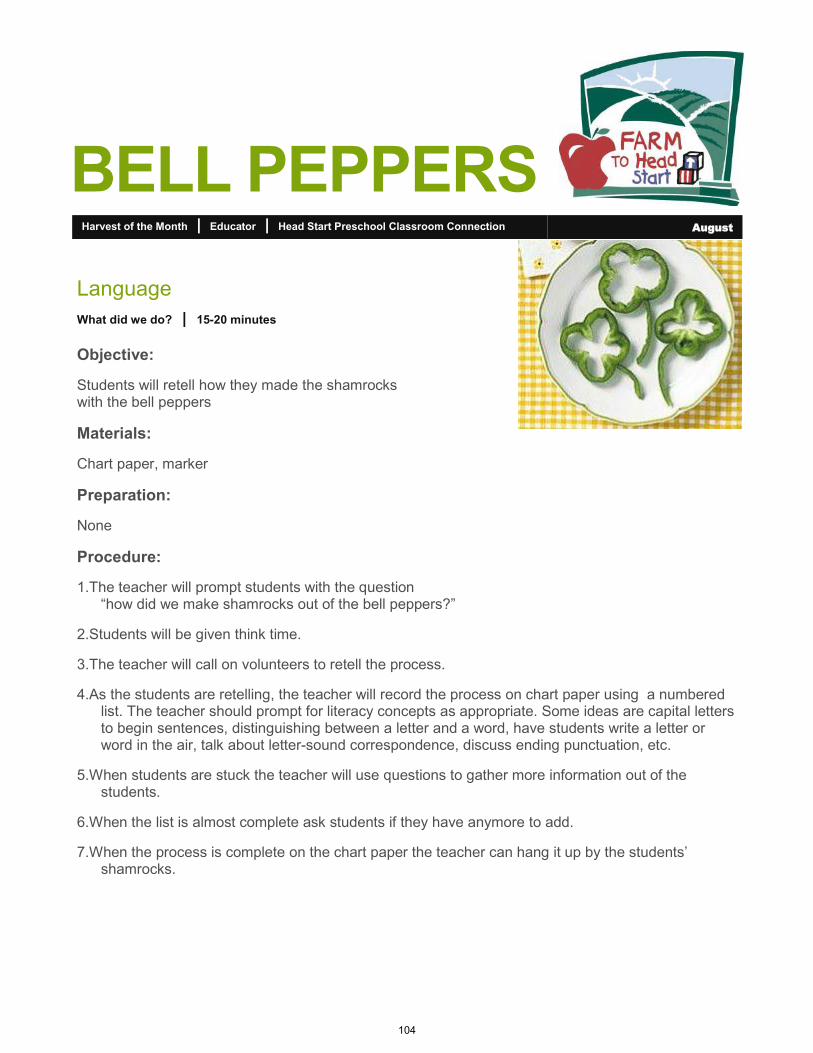
Harvest of the Month | Educator | Head Start Preschool Classroom Connection August
Language
What did we do? | 15-20 minutes
Objective:
Students will retell how they made the shamrocks with the bell peppers
Materials:
Chart paper, marker
Preparation:
None
Procedure:
1.The teacher will prompt students with the question “how did we make shamrocks out of the bell peppers?”
2.Students will be given think time.
3.The teacher will call on volunteers to retell the process.
4.As the students are retelling, the teacher will record the process on chart paper using a numbered list. The teacher should prompt for literacy concepts as appropriate. Some ideas are capital letters to begin sentences, distinguishing between a letter and a word, have students write a letter or word in the air, talk about letter-sound correspondence, discuss ending punctuation, etc.
5.When students are stuck the teacher will use questions to gather more information out of the students.
6.When the list is almost complete ask students if they have anymore to add.
7.When the process is complete on the chart paper the teacher can hang it up by the students’ shamrocks.
BELL PEPPERS
104
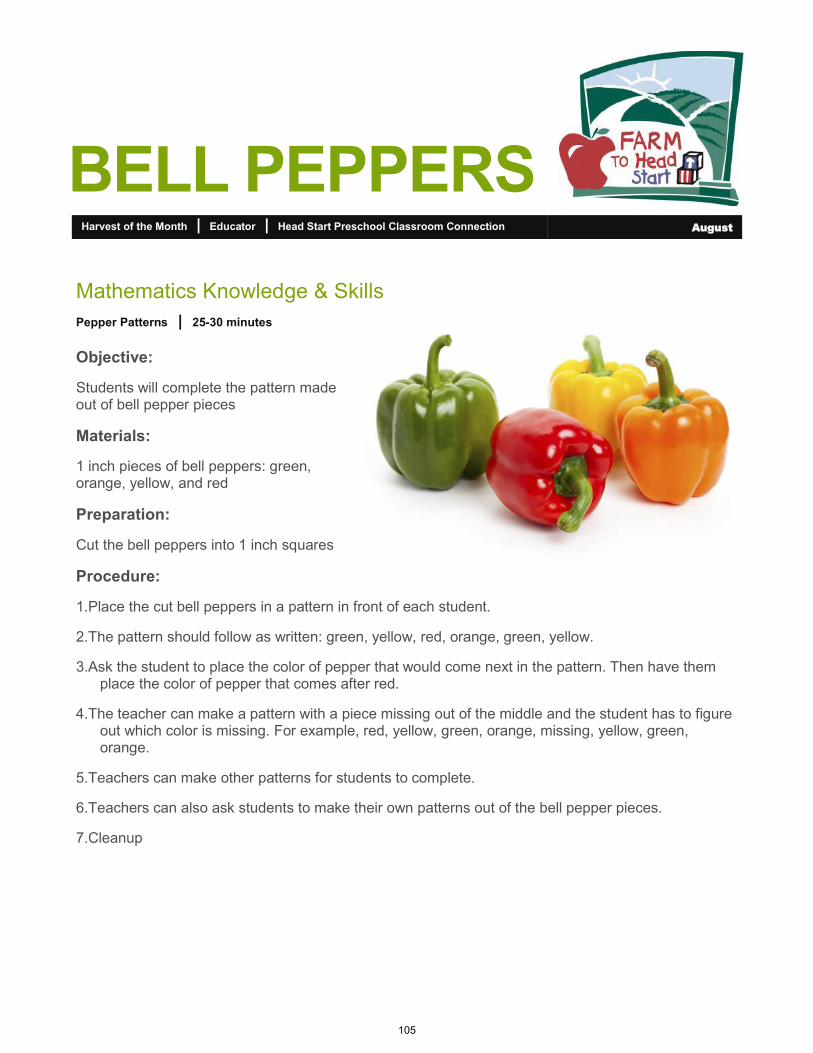
Harvest of the Month | Educator | Head Start Preschool Classroom Connection August
Mathematics Knowledge & Skills
Pepper Patterns | 25-30 minutes
Objective:
Students will complete the pattern made out of bell pepper pieces
Materials:
1 inch pieces of bell peppers: green, orange, yellow, and red
Preparation:
Cut the bell peppers into 1 inch squares
Procedure:
1.Place the cut bell peppers in a pattern in front of each student.
2.The pattern should follow as written: green, yellow, red, orange, green, yellow.
3.Ask the student to place the color of pepper that would come next in the pattern. Then have them place the color of pepper that comes after red.
4.The teacher can make a pattern with a piece missing out of the middle and the student has to figure out which color is missing. For example, red, yellow, green, orange, missing, yellow, green, orange.
5.Teachers can make other patterns for students to complete.
6.Teachers can also ask students to make their own patterns out of the bell pepper pieces.
7.Cleanup
BELL PEPPERS
105
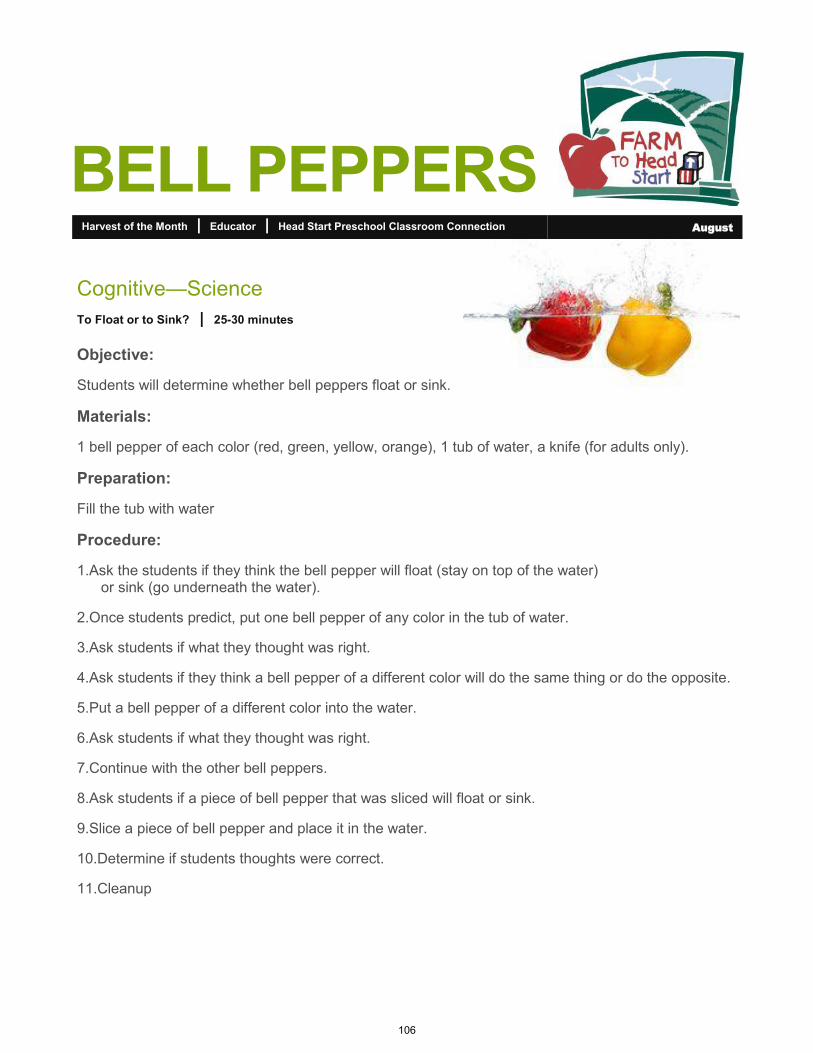
Harvest of the Month | Educator | Head Start Preschool Classroom Connection August
Cognitive—Science
To Float or to Sink? | 25-30 minutes
Objective:
Students will determine whether bell peppers float or sink.
Materials:
1 bell pepper of each color (red, green, yellow, orange), 1 tub of water, a knife (for adults only).
Preparation:
Fill the tub with water
Procedure:
1.Ask the students if they think the bell pepper will float (stay on top of the water) or sink (go underneath the water).
2.Once students predict, put one bell pepper of any color in the tub of water.
3.Ask students if what they thought was right.
4.Ask students if they think a bell pepper of a different color will do the same thing or do the opposite.
5.Put a bell pepper of a different color into the water.
6.Ask students if what they thought was right.
7.Continue with the other bell peppers.
8.Ask students if a piece of bell pepper that was sliced will float or sink.
9.Slice a piece of bell pepper and place it in the water.
10.Determine if students thoughts were correct.
11.Cleanup
BELL PEPPERS
106
Harvest of the Month | Educator | Head Start Preschool Classroom Connection August
Perceptual, Motor, & Physical Development Social & Emotional Development
Feed the Animal! | 30-40 minutes
Objective:
Students will play a game that will work on their gross motor skills and hand-eye coordination. Students will stand in line and take turns with their peers.
Materials:
Stuffed animal of any type, bean bags (either green, yellow, red, orange, or a mixture) with a number written on (1 through how many students are in the class), tape
Preparation:
Place tape on the floor about 10 feet away from the stuffed animal.
Procedure:
Students will form a line behind the tape line.
Each student will get a bean bag (representing bell peppers) with a number on them (this is the bean bag they will keep for the entire game).
Students will take turns, going one at a time, and toss their bean bag underhand at the stuffed animal. This is like feeding bell peppers to the animals.
When students are finished with their turn they will walk to the back of the line.
Students will try to get their bean bag as close to the stuffed animal as possible.
The student who gets their bean bag the closest wins the round.
When the round is over students will be asked to walk and pick up their bean bag.
Continue the process for five or six rounds.
Cleanup
BELL PEPPERS
107
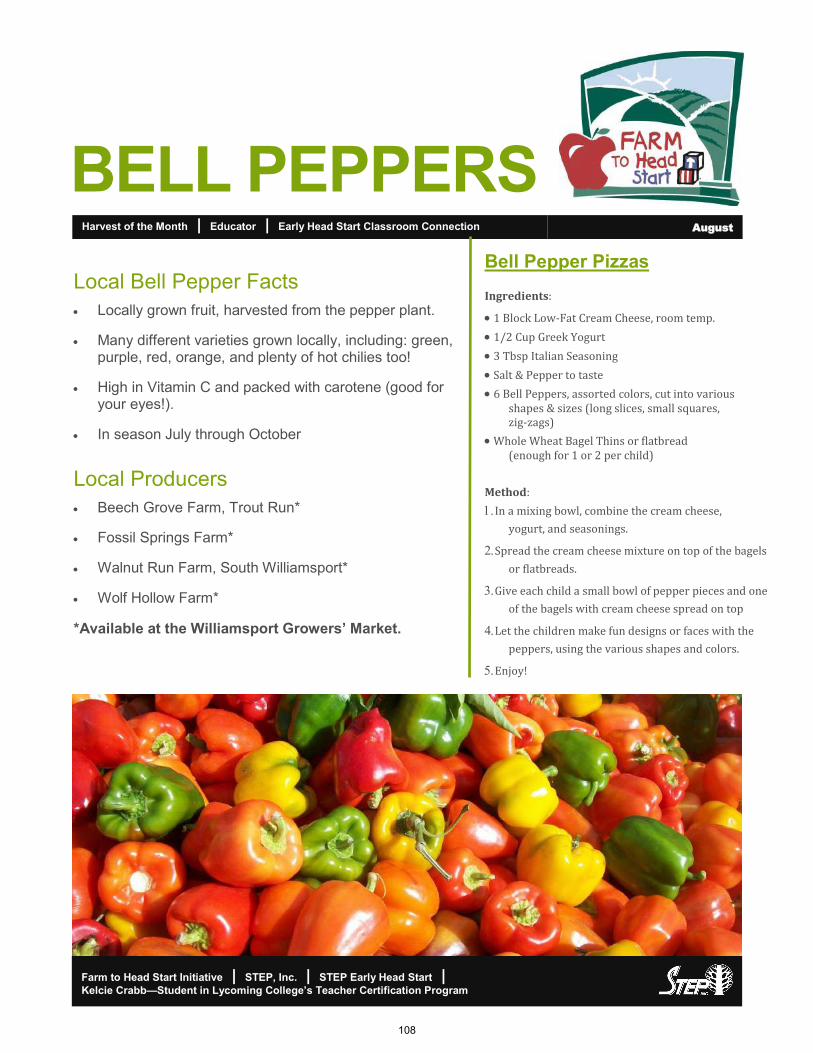
Harvest of the Month | Educator | Early Head Start Classroom Connection August
Farm to Head Start Initiative | STEP, Inc. | STEP Early Head Start | Kelcie Crabb—Student in Lycoming College’s Teacher Certification Program
BELL PEPPERS
Local Bell Pepper Facts
• Locally grown fruit, harvested from the pepper plant.
• Many different varieties grown locally, including: green, purple, red, orange, and plenty of hot chilies too!
• High in Vitamin C and packed with carotene (good for your eyes!).
• In season July through October
Local Producers
• Beech Grove Farm, Trout Run*
• Fossil Springs Farm*
• Walnut Run Farm, South Williamsport*
• Wolf Hollow Farm*
*Available at the Williamsport Growers’ Market.
Bell Pepper Pizzas
Ingredients:
• 1 Block Low-Fat Cream Cheese, room temp.
• 1/2 Cup Greek Yogurt
• 3 Tbsp Italian Seasoning
• Salt & Pepper to taste
• 6 Bell Peppers, assorted colors, cut into various shapes & sizes (long slices, small squares, zig-zags)
• Whole Wheat Bagel Thins or flatbread (enough for 1 or 2 per child)
Method:
In a mixing bowl, combine the cream cheese,
yogurt, and seasonings.
Spread the cream cheese mixture on top of the bagels
or flatbreads.
Give each child a small bowl of pepper pieces and one
of the bagels with cream cheese spread on top
Let the children make fun designs or faces with the
peppers, using the various shapes and colors.
Enjoy!
108
Harvest of the Month | Educator | Early Head Start Classroom Connection August
Creative Arts Expression Social & Emotional Development
Coloring Time | 10-15 minutes
Objective:
Students will color in the shape of a bell pepper. Students will use their sharing abilities and cooperate with others while working in close proximities.
Materials:
Bell pepper coloring page, crayons
Preparation:
Print out bell pepper templates (one for each student and a few extra)
Procedure:
1.The teacher will gather students at a single table.
2.The teacher will pass out one bell pepper coloring page to each student.
3.The teacher will discuss the different colors of bell peppers.
4.The students will choose a desired color of crayon and begin coloring the bell pepper. (The color does not actually have to be a color of real bell peppers.)
5.Students will have to share crayons out of a single bin.
6.Students will begin coloring their bell pepper coloring page.
7.When students are finished coloring the teacher can hang the finished pieces around the classroom.
8.Cleanup
BELL PEPPERS
109
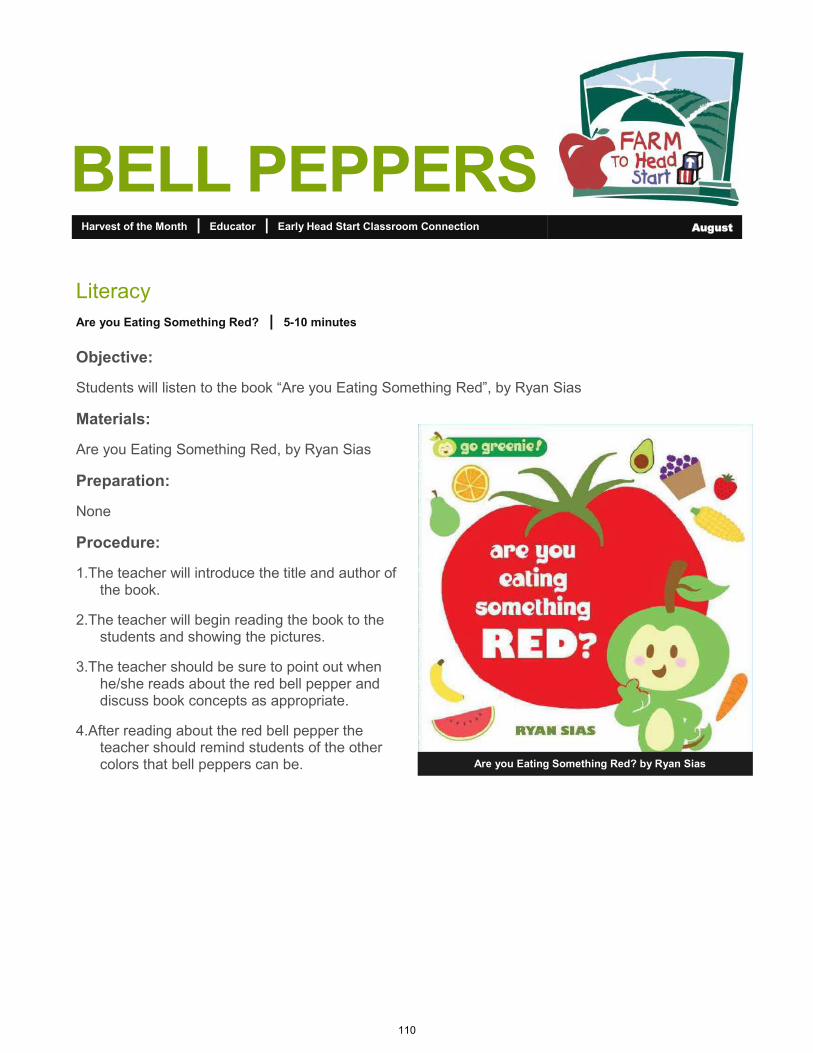
Harvest of the Month | Educator | Early Head Start Classroom Connection August
Literacy
Are you Eating Something Red? | 5-10 minutes
Objective:
Students will listen to the book “Are you Eating Something Red”, by Ryan Sias
Materials:
Are you Eating Something Red, by Ryan Sias
Preparation:
None
Procedure:
1.The teacher will introduce the title and author of the book.
2.The teacher will begin reading the book to the students and showing the pictures.
3.The teacher should be sure to point out when he/she reads about the red bell pepper and discuss book concepts as appropriate.
4.After reading about the red bell pepper the teacher should remind students of the other colors that bell peppers can be.
BELL PEPPERS
Are you Eating Something Red? by Ryan Sias
110
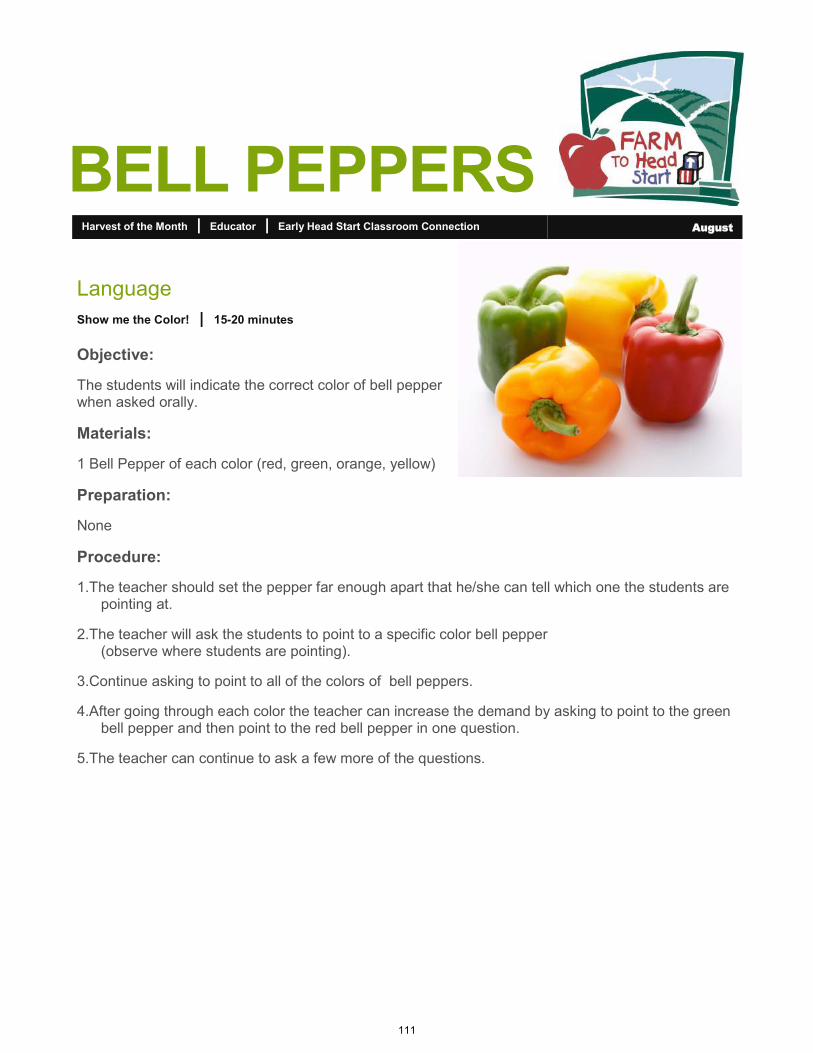
Harvest of the Month | Educator | Early Head Start Classroom Connection August
Language
Show me the Color! | 15-20 minutes
Objective:
The students will indicate the correct color of bell pepper when asked orally.
Materials:
1 Bell Pepper of each color (red, green, orange, yellow)
Preparation:
None
Procedure:
1.The teacher should set the pepper far enough apart that he/she can tell which one the students are pointing at.
2.The teacher will ask the students to point to a specific color bell pepper (observe where students are pointing).
3.Continue asking to point to all of the colors of bell peppers.
4.After going through each color the teacher can increase the demand by asking to point to the green bell pepper and then point to the red bell pepper in one question.
5.The teacher can continue to ask a few more of the questions.
BELL PEPPERS
111
Harvest of the Month | Educator | Early Head Start Classroom Connection August
Mathematics Knowledge & Skills
Pepper Sort | 20-25 minutes
Objective:
The students will sort bell pepper pieces by color
Materials:
Bell pepper pieces cut into 1 inch squares (red, green, orange, yellow) knife (for adults only)
Preparation:
Cut each bell pepper into 1 inch squares, mix pieces up
Procedure:
1.Place a handful of the bell pepper pieces in front of each student making sure that they have at least one piece of each color.
2.Tell students that they are going to be asked to sort the pieces by color. The colors they have are red, green, yellow, and orange.
3.Tell students they should have 4 different piles when they are finished.
4.Instruct the students to start sorting their pieced by color.
5.When finished ask students to count their number of piles.
6.Have students say the color of their piles.
7.Cleanup
BELL PEPPERS
112
Harvest of the Month | Educator | Early Head Start Classroom Connection August
Science Knowledge & Skills
What is a Pepper? | 25-30 minutes
Objective:
Students will use their senses to explore bell peppers.
Materials:
1 Bell Pepper of each color (red, green, orange, yellow) knife (for adult use only)
Preparation:
None
Procedure:
1.The teacher will gather students around a table after they have washed their hands.
2.Students will first observe the pepper to describe what it looks like. (color, shiny or not, etc. ) The teacher may prompt students with questions.
3.Students will take turns feeling the pepper passing the peppers around. The teacher will ask the students what the bell peppers feel like.
4.Students will then take turns smelling the bell peppers. Remind them not to get their noses too close to the pepper. Ask students what the bell pepper smells like.
5.Students will take turns listening to the bell peppers. Ask students if the bell pepper is making any sounds.
6.Students will then have a chance to taste the bell peppers.
7.Wash the bell peppers off with water.
8.Cut the bell peppers into appropriate sizes for students to taste.
9.Pass peppers around for students to try and ask students what the different colors of peppers taste like and if they like them or not.
10.Mark down which student liked and did not like the taste of the pepper.
11.Cleanup
BELL PEPPERS
113
Harvest of the Month | Educator | Early Head Start Classroom Connection August
Perceptual, Motor, & Physical Development
Vegetable Song | 10-15 minutes
Objective:
Student will listen to the “Vegetables for Kids” song and perform a finger play.
Materials:
Computer with access to YouTube.
Preparation:
Practice the finger play so it is fluent to teach students.
When the song says me– point thumbs toward self
When song says munch– make a biting motion with mouth
When the song says us– palms faced up and arms outstretched in front of body, make motion of widening arms.
When song says great– give two thumbs up
When the song ends– give jazz hands
Procedure:
1.Introduce the song to the students.
2.Instruct students to listen to the song and watch your motions.
3.Listen to the song once with just the teacher doing the motions.
4.Listen to the song again and encourage the student to do the same motions as the teacher.
5.Listen to the song two or three more times until the students pick up on the motions.
Song Link: https: //www.youtube.com/watch?v=nd-2j_1_6vY
BELL PEPPERS
114

BELL PEPPERS
Farm to Head Start Initiative | STEP, Inc. | STEP Head Start | Kelcie Crabb—Student in Lycoming College’s Teacher Certification Program
Local Bell Pepper Facts
• Locally grown fruit, harvested from the pepper plant.
• Many different varieties grown locally, including: green, purple, red, orange, and plenty of hot chilies too!
• High in Vitamin C and packed with carotene (good for your eyes!).
• In season July through October
Local Producers
• Beech Grove Farm, Trout Run*
• Fossil Springs Farm*
• Walnut Run Farm, South Williamsport*
• Wolf Hollow Farm*
*Available at the Williamsport Growers’ Market.
Harvest of the Month | Educator | Home Based Connection August
Bell Pepper Pizzas
Ingredients:
• 1 Block Low-Fat Cream Cheese, room temp.
• 1/2 Cup Greek Yogurt
• 3 Tbsp Italian Seasoning
• Salt & Pepper to taste
• 6 Bell Peppers, assorted colors, cut into various shapes & sizes (long slices, small squares, zig-zags)
• Whole Wheat Bagel Thins or flatbread (enough for 1 or 2 per child)
Method:
In a mixing bowl, combine the cream cheese,
yogurt, and seasonings.
Spread the cream cheese mixture on top of the bagels
or flatbreads.
Give each child a small bowl of pepper pieces and one
of the bagels with cream cheese spread on top
Let the children make fun designs or faces with the
peppers, using the various shapes and colors.
Enjoy!
115
Harvest of the Month | Educator | Home Based Connection August
BELL PEPPERS
Edible Experience
Farmer Says | 5-10 minutes
Objective:
Children will act out the entire lifecycle of the featured local harvest (similar to “Simon Says”)
Materials:
None
Preparation:
Familiarize yourself with the growing/harvesting process of the featured produce item. Example: Pears grow on trees, so they are picked from trees and from the ground, placed in a container, etc.
Procedure:
1.After learning about the farmers who grew the featured produce, have the class gather on the carpet
2.Introduce yourself as the featured local farmer and begin to act out the life cycle of the produce (together as a class)
Example: Farmer Eck says…. find a baby seed, dig a hole, plant the seed and sprinkle some love in the ground, pat the soil on top of the seed, pretend to rain on the seed, give the seed some sunshine rays, pretend to be the baby seed in the ground, grow into a version of that seed, pick your fruit/vegetable, have the class all help pull/pick a HUGE one together on the count of 3, put it in a basket, drive it to the farmers market/store, pretend to sell it to families, take a mindful bite of the produce, give a thumbs up, and applause!
Suggestions:
For fruit, act out the flower blossoms and pollinator roles before acting out harvesting
Do this activity right before each taste testing experience, to allow children to fully understand the process behind the featured food
116
Harvest of the Month | Educator | Home Based Connection August
BELL PEPPERS
Edible Experience
Taste Test | 10-15 minutes
Objective:
Children will have the opportunity to taste test raw, locally grown bell pepper varieties
Materials:
Locally grown bell peppers, plates, napkins
Preparation:
Wash and dry bell peppers
Procedure:
1.Cut the peppers in slices so it easier for the children to handle.
2.Have students wash hands before eating.
3.Give children a few pepper slices.
4.Encourage students to try the pepper while demonstrating how to properly eat it.
5.While the students eat, have them describe the taste of the pepper.
6.Once they are done, use tally marks on a T-chart to track who liked the pepper and who did not.
7.Have students wash their hands when they are done eating.
117
Harvest of the Month | Educator | Home Based Connection August
Edible Experience
Taste Test Results | 10-15 minutes
“For me!” or “I like it!” “Not for me” or “I don’t like it”
BELL PEPPERS
118

PEARS
Farm to Head Start Initiative | STEP, Inc. | STEP Head Start | Students in Lycoming College’s Teacher Certification Program
Local Pear Facts
Locally grown fruit, harvested from pear trees
Many different varieties grown locally, including: Anjou, Bartlett, Bosc, and Seckel
High in Vitamin C and packed with fiber
In season August through December
Local Producers
Dries Orchard, Milton, PA
Eck’s Orchards, South Williamsport, PA*
Marshalek’s Fruit Farm, Montoursville, PA*
Sidehill Orchard, Williamsport, PA
Steinbacher’s Orchard, South Williamsport, PA
Wentzler’s Fruit Farm, Muncy, PA
*Available at the Williamsport Growers’ Market.
Harvest of the Month | Educator | Head Start Preschool Classroom Connection September
Pear Roll Ups
Ingredients:
1 pound Deli-style Chicken
Breast or Turkey, thin
sliced
1 pound Sharp Cheddar,
thin sliced
1/2 Cup Dijon Mustard
2 TBSP Maple Syrup
15 Whole Wheat Wraps,
8-inch
5 Large Pears, thin sliced
Method:
Mix together the mustard
and maple syrup.
Give each child a wrap,
piece of meat and
cheese.
Then spread a little bit of
honey mustard on top.
Top it off with pears and
carrots.
Wrap it up and enjoy!
Pear Soda
Ingredients:
4 Pears, pureed
1/4 TBSP Maple Syrup
(more if pears are not
very sweet)
2 Liters Seltzer Water
(Club Soda), plain
4 Lemons, cut into wedges
Method:
1.Mix together the pear
puree and syrup.
2.Pour about 2 TBSP into a
small cup with ice.
3.Top with the seltzer
water and serve with
a lemon wedge. Enjoy!
119
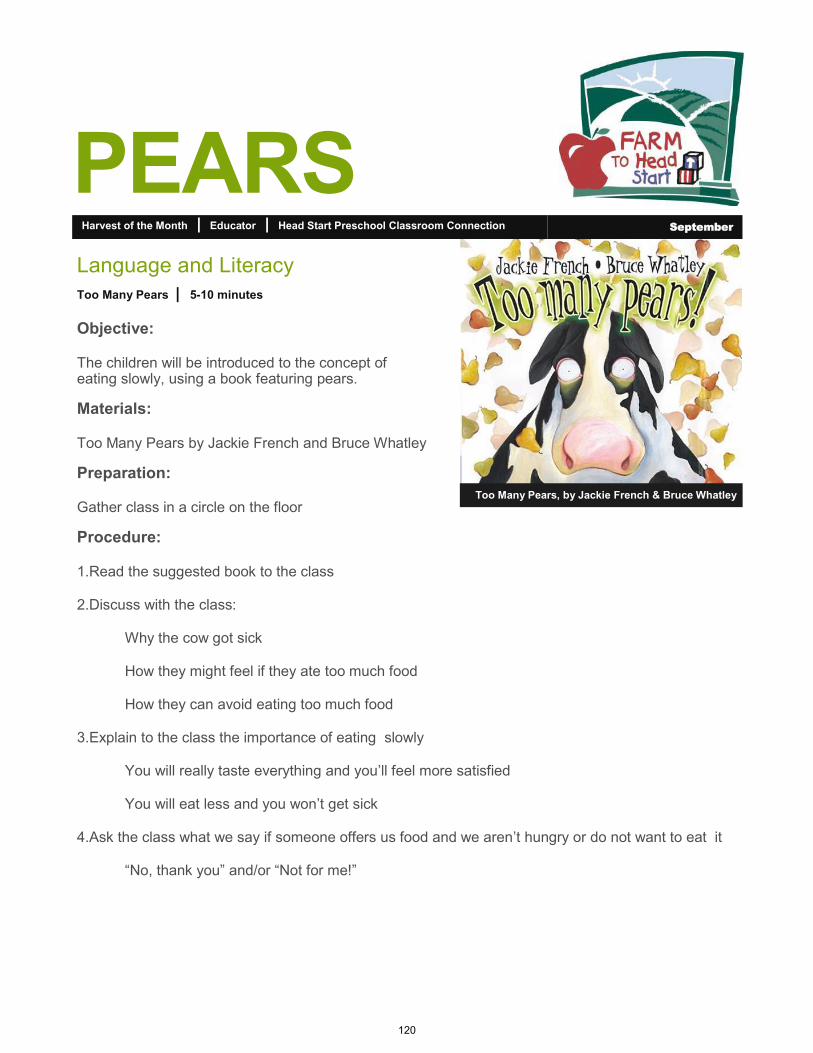
PEARS Harvest of the Month | Educator | Head Start Preschool Classroom Connection September
Language and Literacy
Too Many Pears | 5-10 minutes
Objective:
The children will be introduced to the concept of eating slowly, using a book featuring pears.
Materials:
Too Many Pears by Jackie French and Bruce Whatley
Preparation:
Gather class in a circle on the floor
Procedure:
1.Read the suggested book to the class
2.Discuss with the class:
Why the cow got sick
How they might feel if they ate too much food
How they can avoid eating too much food
3.Explain to the class the importance of eating slowly
You will really taste everything and you’ll feel more satisfied
You will eat less and you won’t get sick
4.Ask the class what we say if someone offers us food and we aren’t hungry or do not want to eat it
“No, thank you” and/or “Not for me!”
Too Many Pears, by Jackie French & Bruce Whatley
120
PEARS Harvest of the Month | Educator | Head Start Preschool Classroom Connection September
Perceptual, Motor, and Physical Development
Pear Garland | 20-30 minutes
Objective:
The children will be introduced to the different varieties and health benefits of locally grown pears. Children will also work together to help construct a pear garland for their classroom.
Materials:
3-5 different pear varieties to show the class, 3-5 medium sized pear shaped cut outs, tissue paper (brown, red, yellow, and green), glue, hole puncher, string/jute, scissors, any other decorations of choice, hat to pick names from, 3-5 pieces of paper with the name of the pear varieties and colors (ex: Bosc pears, Brown)
Preparation:
Pre-cut the pear shapes out of paper for the children, rip the tissue paper into manageable pieces for the children to craft with (*optional, the children could help tear tissue paper!)
Procedure:
Introduce each variety of pear to the class one by one
Allow the children to explore the different colors, sizes, and textures of the pears
Explain that it’s great to eat a rainbow of colors every day and that each different color of pear helps our bodies grow strong and healthy in different ways!
Separate the class into the 3-5 groups, each group having one pear cut out
In a hat, put the name of each pear (with it’s color) written on a little piece of paper
Instruct children do a soft drum roll on their legs, as you pick each groups pear name/color
Once each group has an assigned pear/color, allow the children to take turns decorating their groups pear
Each child should have the opportunity to decorate, including ripping and gluing tissue paper (if available) and coloring
Afterwards, instruct each group to introduce the name of their pear and it’s color
String each pear onto the garland string once each group is done sharing their pear
Instruct the class to give themselves a pat on the back and a round of applause to their classmates for doing such a great job with the garland
121
PEARS Harvest of the Month | Educator | Head Start Preschool Classroom Connection September
Social & Emotional Development
Pairs Eating Pretend Pears | 20 minutes
Objective:
The children will act out the process of eating pretend pears slowly and mindfully
Materials:
Your imagination!
Preparation:
None
Procedure:
1.Ask the class what they should do if they are hungry?
Tell an adult “ I am hungry” and say “Thank you” for any help they give
Have the class practice saying “I am hungry” and “Thank you!” out loud
2.Ask the class what we do if someone offers us food and we aren’t hungry?
Tell that person “No, thank you” and/or “Not for me!”
3.Ask the children to turn to their neighbor (or put them into pairs)
4.Sitting, ask each child to reach up and pretend to pick a pear from a tree and hand it to their partner
5.Instruct the class to say “Thank you!” to their partner for handing them a pretend pear to eat
6.Ask the children to take 3-5, slow, mindful bites of their pretend pears
7.As the class slowly eats their pretend pears, ask them to:
Raise their hand if their pretend pear is red, green, brown, or yellow; Wiggle their shoulders if their pear is sweet; Nod their heads if their pear is juicy; Flex their feet if their pear is crunchy.
8.Once everyone is done eating their pretend pears, ask the children to pat their stomachs and smile!
9.Ask the class to say “Thank you fruit farmers!” out loud with you, on the count of three
*Optional: Repeat actions with another healthy food item if desired!
122
PEARS Harvest of the Month | Educator | Head Start Preschool Classroom Connection September
Cognitive
Sorting Your Seasonal Harvest | 10-15 minutes
Objective:
The children will be able to identify and sort different sized produce, which are in season
Materials:
3-5 bins, different types and sizes of in-season fruits and vegetables
Preparation:
Fill bins with a variety of different sized fruits and vegetables
Procedure:
Split the children into groups of 3-5 children per table
Hand each table 1 basket with of different types and sizes of fruit (pears included)
Explain that the bins are filled with different healthy fruits and vegetables being grown by farmers around here (or the world, if appropriate)
Demonstrate how to sort the bins for the class
Allow the children to work within their groups to sort their produce from smallest to biggest
Once done sorting from biggest to smallest, ask the children to arrange the produce from smallest to biggest
After ensuring that everyone has their produce in the correct order, count out loud how many produce items you have
Then, go through each item and share with the class. or ask the class to tell you: The name of produce item, is it a fruit or vegetable, what shape and size it is
9.Explain to the class that all of these produce items grow locally, which means farmers around here grow it for us to eat
10.Instruct the class to say “Thank you farmers!” out loud, on the count of three
*Optional: Ask each child to say their name and which produce item they like the most and why
123
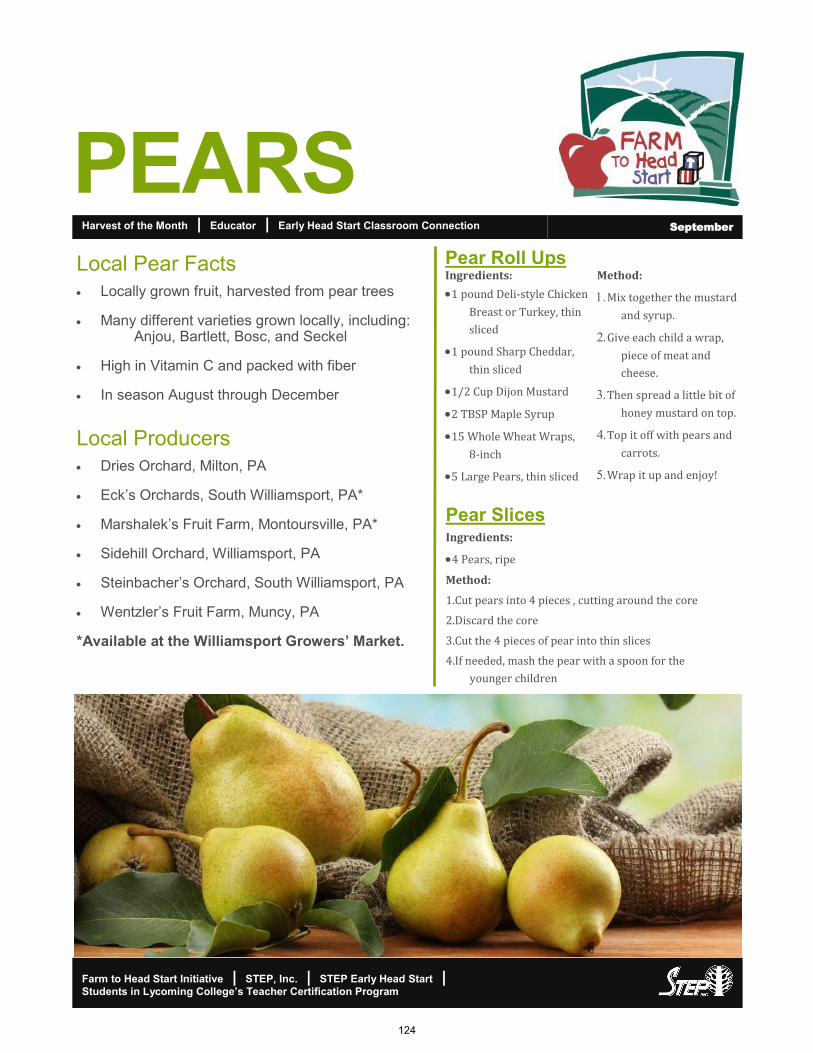
PEARS Harvest of the Month | Educator | Early Head Start Classroom Connection September
Farm to Head Start Initiative | STEP, Inc. | STEP Early Head Start | Students in Lycoming College’s Teacher Certification Program
Local Pear Facts
Locally grown fruit, harvested from pear trees
Many different varieties grown locally, including: Anjou, Bartlett, Bosc, and Seckel
High in Vitamin C and packed with fiber
In season August through December
Local Producers
Dries Orchard, Milton, PA
Eck’s Orchards, South Williamsport, PA*
Marshalek’s Fruit Farm, Montoursville, PA*
Sidehill Orchard, Williamsport, PA
Steinbacher’s Orchard, South Williamsport, PA
Wentzler’s Fruit Farm, Muncy, PA
*Available at the Williamsport Growers’ Market.
Pear Roll Ups
Ingredients:
1 pound Deli-style Chicken
Breast or Turkey, thin
sliced
1 pound Sharp Cheddar,
thin sliced
1/2 Cup Dijon Mustard
2 TBSP Maple Syrup
15 Whole Wheat Wraps,
8-inch
5 Large Pears, thin sliced
Method:
Mix together the mustard
and syrup.
Give each child a wrap,
piece of meat and
cheese.
Then spread a little bit of
honey mustard on top.
Top it off with pears and
carrots.
Wrap it up and enjoy!
Pear Slices
Ingredients:
4 Pears, ripe
Method:
1.Cut pears into 4 pieces , cutting around the core
2.Discard the core
3.Cut the 4 pieces of pear into thin slices
4.If needed, mash the pear with a spoon for the
younger children
124
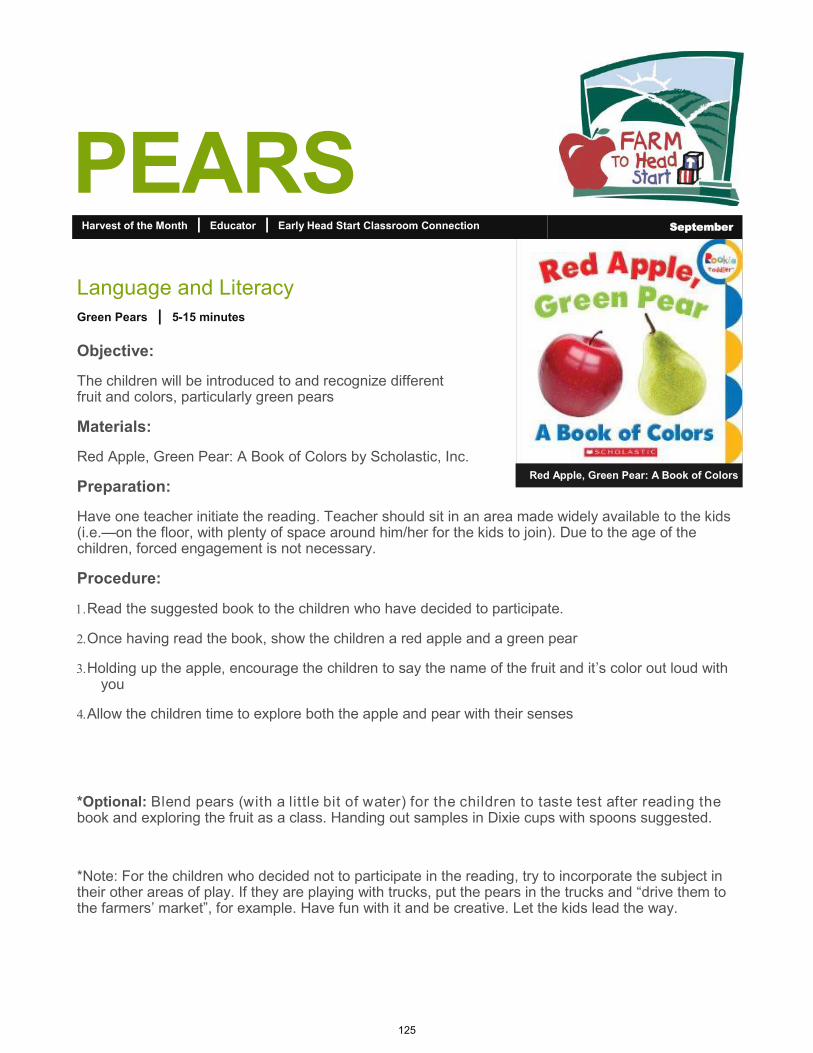
PEARS Harvest of the Month | Educator | Early Head Start Classroom Connection September
Language and Literacy
Green Pears | 5-15 minutes
Objective:
The children will be introduced to and recognize different fruit and colors, particularly green pears
Materials:
Red Apple, Green Pear: A Book of Colors by Scholastic, Inc.
Preparation:
Have one teacher initiate the reading. Teacher should sit in an area made widely available to the kids (i.e.—on the floor, with plenty of space around him/her for the kids to join). Due to the age of the children, forced engagement is not necessary.
Procedure:
Read the suggested book to the children who have decided to participate.
Once having read the book, show the children a red apple and a green pear
Holding up the apple, encourage the children to say the name of the fruit and it’s color out loud with you
Allow the children time to explore both the apple and pear with their senses
*Optional: Blend pears (with a little bit of water) for the children to taste test after reading the book and exploring the fruit as a class. Handing out samples in Dixie cups with spoons suggested.
*Note: For the children who decided not to participate in the reading, try to incorporate the subject in their other areas of play. If they are playing with trucks, put the pears in the trucks and “drive them to the farmers’ market”, for example. Have fun with it and be creative. Let the kids lead the way.
Red Apple, Green Pear: A Book of Colors
125
PEARS Harvest of the Month | Educator | Early Head Start Classroom Connection September
Perceptual, Motor, & Physical Development
Farmer Says | 5-10 minutes
Objective:
Children will act out the entire lifecycle of the featured local harvest (similar to “Simon Says”)
Materials:
None
Preparation:
Familiarize yourself with the growing/harvesting process of pears. Example: Pears grow on trees, they
are picked from trees, picked up from ground, and placed in a container, etc.
Procedure:
1.After learning about the farmers who grew the featured produce, have a teacher sit on the carpet, allowing children to join.
2.Teacher: Introduce yourself as the featured local farmer and begin to act out the life cycle of the produce (together as a class)
Example: Farmer Eck says…. find a baby seed, dig a hole, plant the seed and sprinkle some love in the ground, pat the soil on top of the seed, pretend to rain on the seed, give the seed some sunshine rays, pretend to be the baby seed in the ground, grow into a version of that seed, pick your fruit/vegetable, have the class all help pull/pick a HUGE one together on the count of 3, put it in a basket, drive it to the farmers market/store, pretend to sell it to families, take a mindful bite of the produce, give a thumbs up, and applause
Suggestions:
For fruit, act out the flower blossoms and pollinator roles before acting out harvesting . Do this activity right before each taste testing experience, to allow children to fully understand the process behind the featured food.
126
PEARS Harvest of the Month | Educator | Early Head Start Classroom Connection September
Social & Emotional Development
Pass the Pear | 10-15 minutes
Objective:
The children will work together, while exploring pears and recognizing colors.
Materials:
1-3 pears, differing in color; 8 x 11 sheets of colored paper matching the colors of the pears
Preparation:
None
Procedure:
1.Teacher sits in an area that is available for any children who would like to participate
2.Show the pear and explain: Pears are a sweet, healthy treat! Pears grow on trees and farmers pick them for us to eat! Pears come in different shapes, sizes and colors.
3.Show the class the different colors of pears, hold up the coordinating color of paper
4.Inform the children that we’re going to play Pass the Pear
5.Begin by holding up one pear and it’s matching color 8 x 11 sheet
6.Share with the class the name of the color, so they can make that connection between the pear and the color
7.Still holding the color sheet of paper, hand one child the matching pear
8.Instruct the children to pass the pear around the circle, allowing the children a brief moment to explore the pear then gently pass it to the next person.
9.Once the pear has started to make it’s way around, hold up a new colored sheet
10.Pass that matching pear around. There should now be two pears of different colors rotating through the circle of children
11.Continue to do this until all the colors of the pears have been passed around.
12.Once done, go through the colors and the matching pears once more in front of the class
127
PEARS Harvest of the Month | Educator | Early Head Start Classroom Connection September
Cognitive
Pear Exploration | 15 minutes
Objective:
The children will explore and compare different shapes, sizes, textures, and colors of pears
Materials:
3-5 varieties of pears that are different in color, shape, texture, and size
2-3 of each pear variety you choose to feature
Preparation:
Cut a pear in half for each group, separate pears into bins for each group
Procedure:
1.Instruct the children to sit at a table with their assigned group
2.Provide bins of at least one of each pear variety for the children to explore and experience
3.Explain that all pears are healthy, delicious fruits for us to eat but not all pears look alike
4.Explain that today they are going to get to explore some different types of pears together
5.Have each group pass around and explore one pear at a time.
6.Encourage the children to use their senses to explore and compare the pears
Example: Is this pear hard or soft? Is it bumpy or smooth?
7.Once each pear has been explored, pass around the pear that has been cut in half
8.Allow the children to touch and smell the inside of the pear.
9.Encourage the children to compare the inside of the pear to the outside of a pear
Example: Is the inside of the pear dry or wet? Which smells stronger/better, the outside
or inside of the pear?
10.Allow the children to express themselves freely with what they are experiencing
Suggestion: Encourage sensory engaging conversations and actions, while redirecting
words like “ew”, “yuck”, or “gross” to the phrase “not for me”.
128
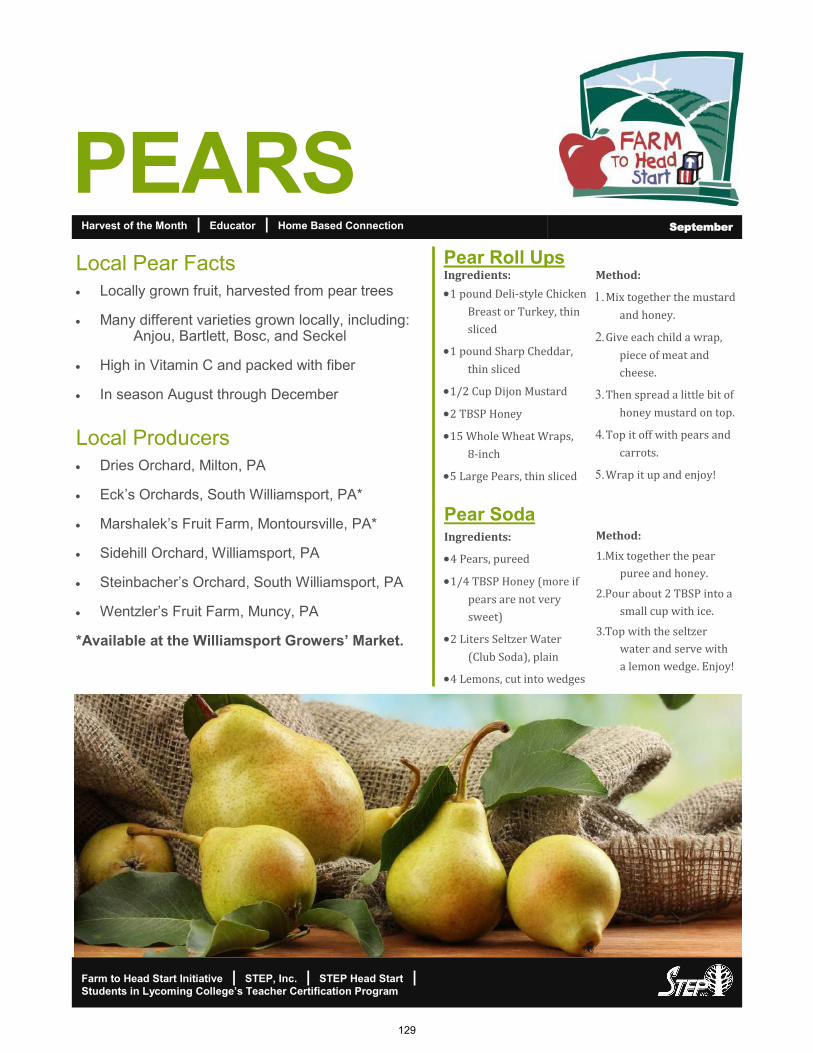
PEARS
Farm to Head Start Initiative | STEP, Inc. | STEP Head Start | Students in Lycoming College’s Teacher Certification Program
Local Pear Facts
Locally grown fruit, harvested from pear trees
Many different varieties grown locally, including: Anjou, Bartlett, Bosc, and Seckel
High in Vitamin C and packed with fiber
In season August through December
Local Producers
Dries Orchard, Milton, PA
Eck’s Orchards, South Williamsport, PA*
Marshalek’s Fruit Farm, Montoursville, PA*
Sidehill Orchard, Williamsport, PA
Steinbacher’s Orchard, South Williamsport, PA
Wentzler’s Fruit Farm, Muncy, PA
*Available at the Williamsport Growers’ Market.
Harvest of the Month | Educator | Home Based Connection September
Pear Roll Ups
Ingredients:
1 pound Deli-style Chicken
Breast or Turkey, thin
sliced
1 pound Sharp Cheddar,
thin sliced
1/2 Cup Dijon Mustard
2 TBSP Honey
15 Whole Wheat Wraps,
8-inch
5 Large Pears, thin sliced
Method:
Mix together the mustard
and honey.
Give each child a wrap,
piece of meat and
cheese.
Then spread a little bit of
honey mustard on top.
Top it off with pears and
carrots.
Wrap it up and enjoy!
Pear Soda
Ingredients:
4 Pears, pureed
1/4 TBSP Honey (more if
pears are not very
sweet)
2 Liters Seltzer Water
(Club Soda), plain
4 Lemons, cut into wedges
Method:
1.Mix together the pear
puree and honey.
2.Pour about 2 TBSP into a
small cup with ice.
3.Top with the seltzer
water and serve with
a lemon wedge. Enjoy!
129
PEARS Harvest of the Month | Educator | Home Based Connection September
Edible Experience
Farmer Says | 5-10 minutes
Objective:
Children will act out the entire lifecycle of the featured local harvest (similar to “Simon Says”)
Materials:
None
Preparation:
Familiarize yourself with the growing/harvesting process of pears. Example: Pears grow on
trees, they are picked from trees, picked up from ground, and placed in a container, etc.
Procedure:
1.After learning about the farmers who grew the featured produce, have a teacher sit on the carpet, allowing children to join.
2.Teacher: Introduce yourself as the featured local farmer and begin to act out the life cycle of the produce (together as a class)
Example: Farmer Eck says…. find a baby seed, dig a hole, plant the seed and sprinkle some love in the ground, pat the soil on top of the seed, pretend to rain on the seed, give the seed some sunshine rays, pretend to be the baby seed in the ground, grow into a version of that seed, pick your fruit/vegetable, have the class all help pull/pick a HUGE one together on the count of 3, put it in a basket, drive it to the farmers market/store, pretend to sell it to families, take a mindful bite of the produce, give a thumbs up, and applause
Suggestions:
For fruit, act out the flower blossoms and pollinator roles before acting out harvesting . Do this activity right before each taste testing experience, to allow children to fully understand the process behind the featured food.
130

PEARS Harvest of the Month | Educator | Home Based Connection September
Edible Experience
Taste Test | 10-15 minutes
Objective:
Children will have the opportunity to taste test raw, locally grown pears
Materials:
Locally grown pears, paring knife, cutting board, melon baller or spoon with fine edges
Preparation:
Wash and dry pears
Procedure:
1.Leaving the skin on, cut the pear in half, length wise.
2.Take the melon baller or spoon and place over the seeds in one half of the pear
3.With one scoop, scoop out the circle of seeds inside
4.Next, place the melon baller underneath the stem on top of the pear. Scoop this part out, making a
small dent in the top of the pear
5.Just like that, the pear is ready to eat with no distractions and very little waste!
Suggestions:
Demonstrate on one pear for the class and help the children do their own.
Hand out “I tried something new today!” stickers for the class to wear/
131
PEARS Harvest of the Month | Educator | Home Based Connection September
Edible Experience
Taste Test Results | 10-15 minutes
“For me!” or “I like it!” “Not for me” or “I don’t like it”
132

WINTER SQUASH
Farm to Head Start Initiative | STEP, Inc. | STEP Head Start | Billie Strickler and Megan Moore—Students in Lycoming College’s Teacher Certification Program
Local Winter Squash Facts
Locally grown fruit, harvested as a ground plant.
Many different varieties grown locally, including: butternut, acorn, kabocha, delicata, and pumpkin, among others!
High in Vitamims C, E, and B and packed with calcium and iron.
In season July into November.
Local Producers
Beech Grove Farm, Trout Run*
Fossil Springs Farm*
Walnut Run Farm, South Williamsport*
Wolf Hollow Farm*
*Available at the Williamsport Growers’ Market.
Harvest of the Month | Educator | Head Start Preschool Classroom Connection October
Roasted Squash Taste Testing
Make ahead, yields 51 small servings
Ingredients:
2 Pounds Squash
1/4 Cup Olive Oil
Salt & Pepper
Method:
Preheat oven to 375 degrees. Cut the squash in half
and drizzle the olive oil on the flesh of the squash.
Season with salt and pepper. Roast on a baking
sheet, flesh side down, for about 30—45 minutes, or
until very tender. This time will vary, depending on
the size of the squash. Let cool and scoop the flesh
out. Cut into bite-sized pieces. Serve with salt,
pepper, and a little cinnamon, allowing the kids to
season it themselves. Vote on their favorite!
Roasted Squash Soup
yields about 8 6-oz. servings
Ingredients:
3 Cups Roasted Squash (above recipe)
2 Cups Stock (beef or veggie)
2 Tbsp Maple Syrup
Salt & Pepper to taste
Method: Place all ingredients into blender, blend until very smooth, add more stock as needed.
133

Harvest of the Month | Educator | Head Start Preschool Classroom Connection October
Language & Literacy
The Big Squash | 15 minutes
Objective:
Children will listen to “Pumpkin Pumpkin” by Jeanne Titherington, while the teacher engages the students with questions
Materials:
Sequencing cards, book
Procedure:
1.Call children one by one to come sit in a circle around the teacher.
2.Introduce the book by stating the title and author.
A.The person that writes a story is called an author. Everyone say the word author. In this story the author is Jeanne Titherington. What is Jeanne Titherington?
B.The person who draws the pictures for a story is called an illustrator. Everyone say illustrator. In this story the illustrator is Jeanne Titherington.
3. 1st read aloud: The teacher will read the book Pumpkin Pumpkin by Jeanne Titherington.
4. 2nd read aloud: As the teacher reads the book another adult will hold up a pumpkin life cycle card according to the sequence of the book. Discuss the life cycle of a pumpkin.
5. Small group: During the exploratory children can re-read the book and put the pumpkin life cycle cards in order.
WINTER SQUASH
Pumpkin Pumpkin
134
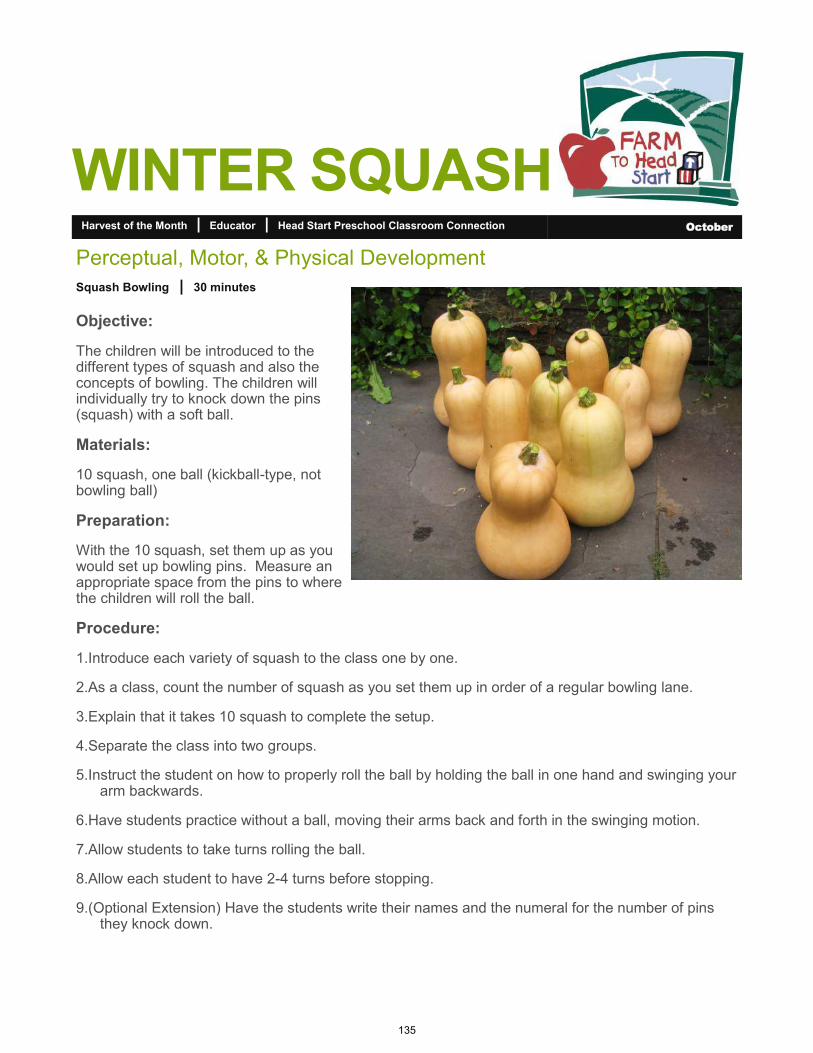
WINTER SQUASH Harvest of the Month | Educator | Head Start Preschool Classroom Connection October
Perceptual, Motor, & Physical Development
Squash Bowling | 30 minutes
Objective:
The children will be introduced to the different types of squash and also the concepts of bowling. The children will individually try to knock down the pins (squash) with a soft ball.
Materials:
10 squash, one ball (kickball-type, not bowling ball)
Preparation:
With the 10 squash, set them up as you would set up bowling pins. Measure an appropriate space from the pins to where the children will roll the ball.
Procedure:
1.Introduce each variety of squash to the class one by one.
2.As a class, count the number of squash as you set them up in order of a regular bowling lane.
3.Explain that it takes 10 squash to complete the setup.
4.Separate the class into two groups.
5.Instruct the student on how to properly roll the ball by holding the ball in one hand and swinging your arm backwards.
6.Have students practice without a ball, moving their arms back and forth in the swinging motion.
7.Allow students to take turns rolling the ball.
8.Allow each student to have 2-4 turns before stopping.
9.(Optional Extension) Have the students write their names and the numeral for the number of pins they knock down.
135
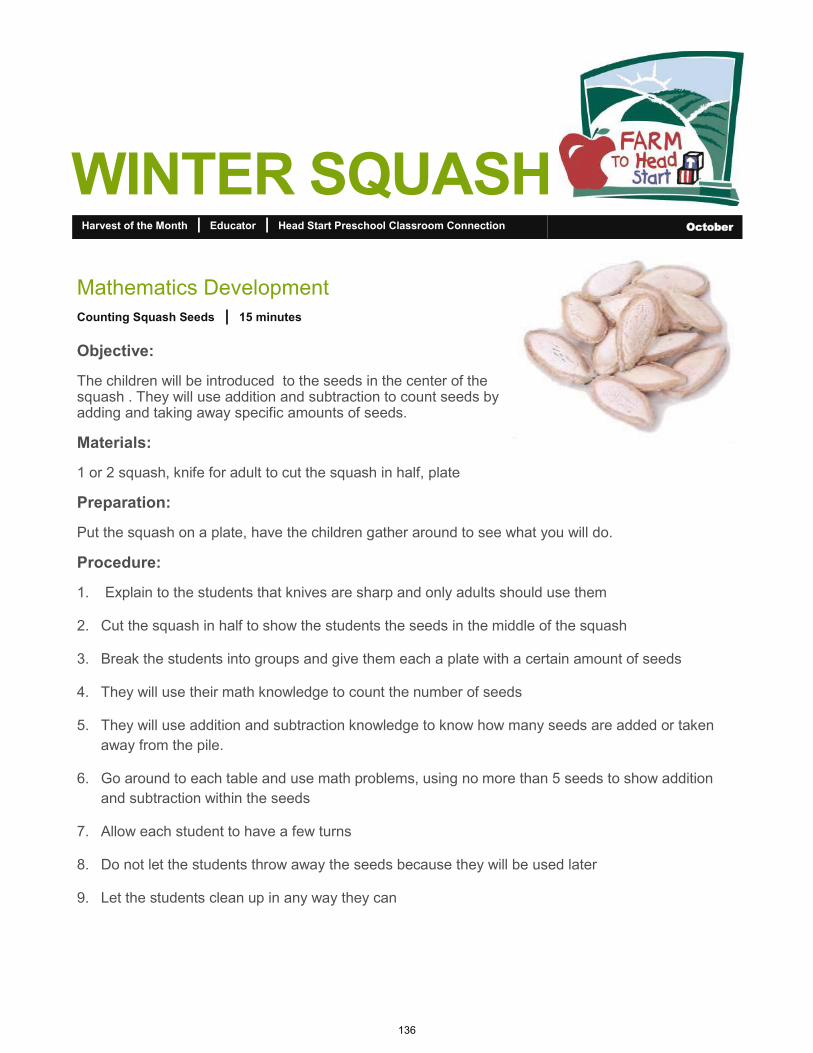
Harvest of the Month | Educator | Head Start Preschool Classroom Connection October
Mathematics Development
Counting Squash Seeds | 15 minutes
Objective:
The children will be introduced to the seeds in the center of the squash . They will use addition and subtraction to count seeds by adding and taking away specific amounts of seeds.
Materials:
1 or 2 squash, knife for adult to cut the squash in half, plate
Preparation:
Put the squash on a plate, have the children gather around to see what you will do.
Procedure:
1. Explain to the students that knives are sharp and only adults should use them
2. Cut the squash in half to show the students the seeds in the middle of the squash
3. Break the students into groups and give them each a plate with a certain amount of seeds
4. They will use their math knowledge to count the number of seeds
5. They will use addition and subtraction knowledge to know how many seeds are added or taken
away from the pile.
6. Go around to each table and use math problems, using no more than 5 seeds to show addition
and subtraction within the seeds
7. Allow each student to have a few turns
8. Do not let the students throw away the seeds because they will be used later
9. Let the students clean up in any way they can
WINTER SQUASH
136
Harvest of the Month | Educator | Head Start Preschool Classroom Connection October
Creative Arts & Expression
Washing Hands | 5 minutes
Objective:
Have the students use their own idea and creativeness to draw and color a picture of a squash and add their own details.
Materials:
Drawing paper, crayons or markers
Preparation:
Make sure to have coloring utensils for each child and have enough drawing paper. An option is to have students color the attached template. Have the children go to their desks to prepare to draw or color.
Procedure:
1.Introduce squash as a vegetable and healthy food
2.Prompt the children to identify features and detail of the squash, such as size, shape, color, texture,
lines, etc.
3.Handout drawing paper (or coloring page, see next page for sample) to each student, along with
markers or crayons
4.While students are working, prompt them to look at the squash, examine the details, and replicate
them in their drawing. Give the students an allotted time to finish their coloring and display their
own creative expressions.
5.When the students are done have them describe ways they can stay strong and be healthy
6.Have the students help clean up supplies
WINTER SQUASH
137
Harvest of the Month | Educator | Head Start Preschool Classroom Connection October
WINTER SQUASH
138
Harvest of the Month | Educator | Early Head Start Classroom Connection October
Science Knowledge & Skills/Social Emotional Development
Squash Science | 30 minutes
Objective:
The children will be introduced to a variety of squash from local farms. As a group, the children will work together to observe a variety of squash using their 5 senses.
Materials:
2-3 different types of squash (cooked and raw), Graphic Organizer for Senses (can be found online,
hat to pick names from, gloves, napkins, plates, forks.
Preparation:
Cut the squash in half and place each squash separately into a container so that the children can view the inside and outside of the squash. Before class, cook a sample of each of the types of squash. In each group, place a piece of squash on each plate for the children to try.
Procedure:
Introduce 3 types of squash; Acorn, Butternut, and Delicata
Explain to the children that they will be observing the squash several ways. Using their eyes, ears, nose, mouth and hands.
Introduce senses to the class if they have not yet learned it. If already learned, review the senses that will be used.
Split the class into groups and assign each group to their squash and provide each student with the Senses Worksheet. Or, take several days and do each squash as a whole group.
Explain the process of the worksheet
Explain that when touching the squash, they must wear a glove for sanitary purposes.
Allow the children to go to their assigned tables and begin their activity with the squash and assist when needed.
After everyone has completed their activity on their assigned squash, switch groups so that each group has a chance to view each different kind of squash.
Afterwards, gather back together as a class and discuss the similarities and differences between the squash.
Allow students to give their opinions of each one and what they observed.
Allow students to help clean up the squash as necessary when finished.
WINTER SQUASH
139
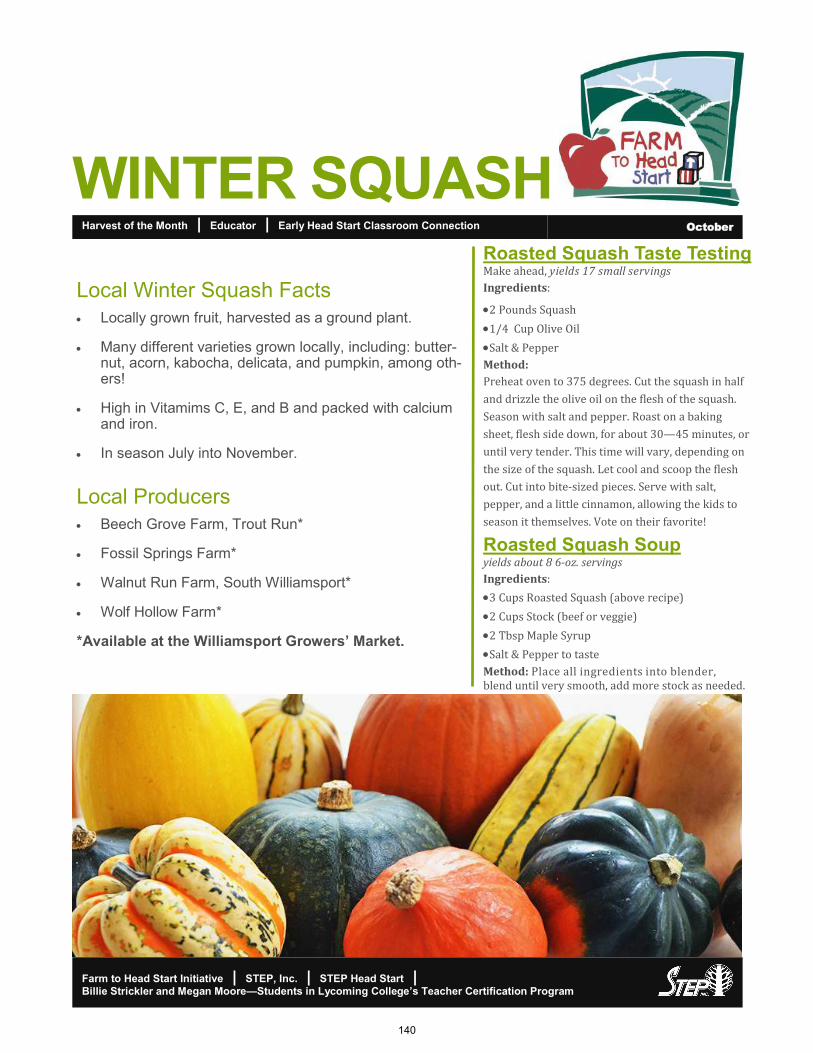
WINTER SQUASH
Farm to Head Start Initiative | STEP, Inc. | STEP Head Start | Billie Strickler and Megan Moore—Students in Lycoming College’s Teacher Certification Program
Local Winter Squash Facts
Locally grown fruit, harvested as a ground plant.
Many different varieties grown locally, including: butter-nut, acorn, kabocha, delicata, and pumpkin, among oth-ers!
High in Vitamims C, E, and B and packed with calcium and iron.
In season July into November.
Local Producers
Beech Grove Farm, Trout Run*
Fossil Springs Farm*
Walnut Run Farm, South Williamsport*
Wolf Hollow Farm*
*Available at the Williamsport Growers’ Market.
Harvest of the Month | Educator | Early Head Start Classroom Connection October
Roasted Squash Taste Testing
Make ahead, yields 51 small servings
Ingredients:
2 Pounds Squash
1/4 Cup Olive Oil
Salt & Pepper
Method:
Preheat oven to 375 degrees. Cut the squash in half
and drizzle the olive oil on the flesh of the squash.
Season with salt and pepper. Roast on a baking
sheet, flesh side down, for about 30—45 minutes, or
until very tender. This time will vary, depending on
the size of the squash. Let cool and scoop the flesh
out. Cut into bite-sized pieces. Serve with salt,
pepper, and a little cinnamon, allowing the kids to
season it themselves. Vote on their favorite!
Roasted Squash Soup
yields about 8 6-oz. servings
Ingredients:
3 Cups Roasted Squash (above recipe)
2 Cups Stock (beef or veggie)
2 Tbsp Maple Syrup
Salt & Pepper to taste
Method: Place all ingredients into blender, blend until very smooth, add more stock as needed.
140

Harvest of the Month | Educator | Early Head Start Classroom Connection October
WINTER SQUASH
Language & Literacy
The Big Squash | 15 minutes
Objective:
Children will listen to “Pumpkin Pumpkin” by Jeanne Titherington, while the teacher engages the students with questions
Materials:
Sequencing cards, book
Procedure:
1.Call children one by one to come sit in a circle around the teacher.
2.Introduce the book by stating the title and author.
A.The person that writes a story is called an author. Everyone say the word author. In this story the author is Jeanne Titherington. What is Jeanne Titherington?
B.The person who draws the pictures for a story is called an illustrator. Everyone say illustrator. In this story the illustrator is Jeanne Titherington.
3. 1st read aloud: The teacher will read the book Pumpkin Pumpkin by Jeanne Titherington.
4. 2nd read aloud: As the teacher reads the book another adult will hold up a pumpkin life cycle card according to the sequence of the book. Discuss the life cycle of a pumpkin.
5. Small group: During the exploratory children can re-read the book and put the pumpkin life cycle cards in order.
Pumpkin Pumpkin
141
Harvest of the Month | Educator | Early Head Start Classroom Connection October
Perceptual, Motor, & Physical Development
Make Your Own Fall Friend | 15-20 minutes
Objective:
Students will use their own creativity and imagination to draw their own squash or color in a color page of a squash. Younger kids, below age 2 may finger-paint. The child will coordinate hand and eye movements to perform actions.
Materials:
Print out color pages or blank white pages ( See next page)
crayons, markers, or colored pencils
Finger-paint for younger children-kids below age 2
Procedure:
1.Prompt the children to identify features and detail of the squash, such as size, shape, color, texture, lines, etc.
2.Children will take their seats by a table and get passed out their preference of a coloring page or a blank page to make their squash
3.They will have the option of markers, crayons, colored pencils, or finger-paint and then they will be passed out.
4.They will use their hand eye coordination to color and draw. Help the children if needed.
5.Have the students talk about the squash they created, describing the colors and shape of the squash they colored.
WINTER SQUASH
142

Harvest of the Month | Educator | Early Head Start Classroom Connection October
WINTER SQUASH
143
Harvest of the Month | Educator | Early Head Start Classroom Connection October
Social & Emotional Development
Musical Squash | 10-15 minutes
Objective:
Students will learn how to engage with others by playing a game of musical squash and engaging in simple cooperative play with other children.
Materials:
One squash to pass around, rug for children to sit on, prize for winner
Preparation:
Knowing if the children have any specific allergies to strawberries.
Procedure:
1. Gather the students in a circle on a mat
2.Pick children's music to play during “musical squash”
3.Pick one student to start with the squash
4.Explain the rules and how to play
5.Start the music and have the children pass around the squash until the music stops and whoever
still has the squash is out
6.Whoever is left last wins musical squash and gets a prize
WINTER SQUASH
144
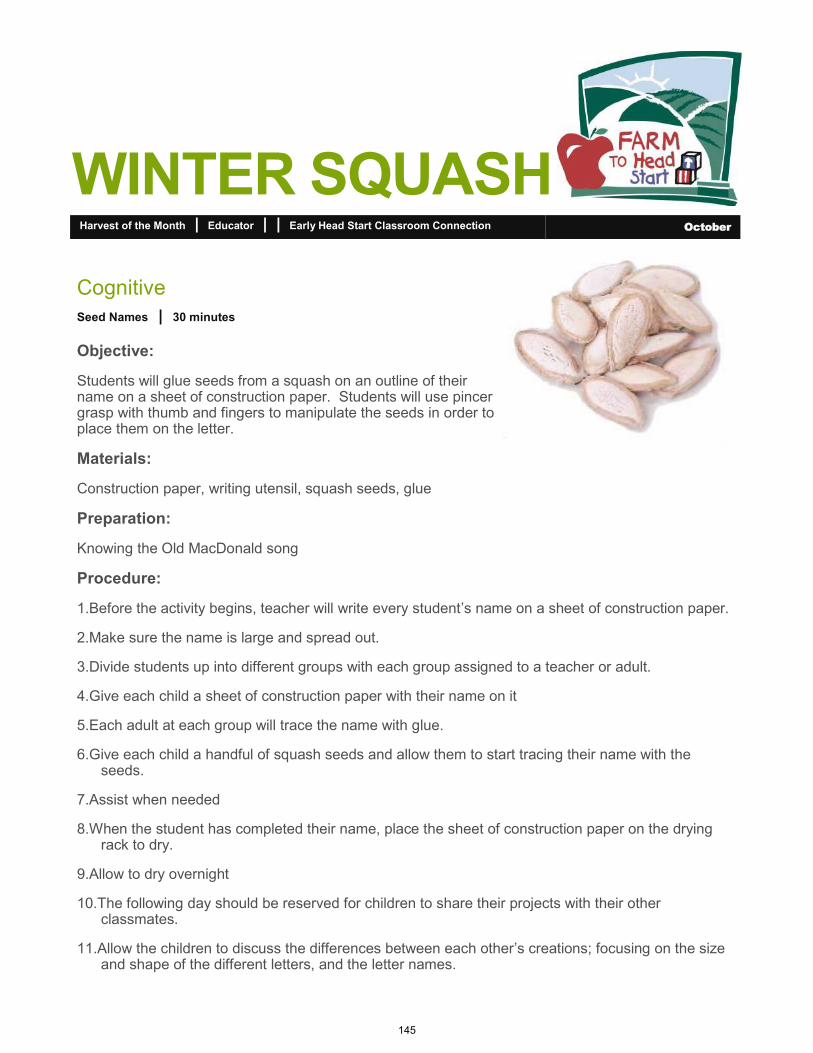
Harvest of the Month | Educator | | Early Head Start Classroom Connection October
WINTER SQUASH
Cognitive
Seed Names | 30 minutes
Objective:
Students will glue seeds from a squash on an outline of their name on a sheet of construction paper. Students will use pincer grasp with thumb and fingers to manipulate the seeds in order to place them on the letter.
Materials:
Construction paper, writing utensil, squash seeds, glue
Preparation:
Knowing the Old MacDonald song
Procedure:
1.Before the activity begins, teacher will write every student’s name on a sheet of construction paper.
2.Make sure the name is large and spread out.
3.Divide students up into different groups with each group assigned to a teacher or adult.
4.Give each child a sheet of construction paper with their name on it
5.Each adult at each group will trace the name with glue.
6.Give each child a handful of squash seeds and allow them to start tracing their name with the seeds.
7.Assist when needed
8.When the student has completed their name, place the sheet of construction paper on the drying rack to dry.
9.Allow to dry overnight
10.The following day should be reserved for children to share their projects with their other classmates.
11.Allow the children to discuss the differences between each other’s creations; focusing on the size and shape of the different letters, and the letter names.
145
Harvest of the Month | Educator | October
October Tasting
Taste Test | 10-15 minutes
Pumpkin Parfait
Materials:
1/4 Cup of Vanilla Yogurt per child, 1 Tablespoon of pumpkin puree per child, cups, spoons, granola cereal
Preparation:
Children wash hands
Procedure:
Allow children to scoop yogurt and pumpkin in a bowl or cup and stir. Let them top their yogurt with
granola cereal and enjoy!
WINTER SQUASH
146
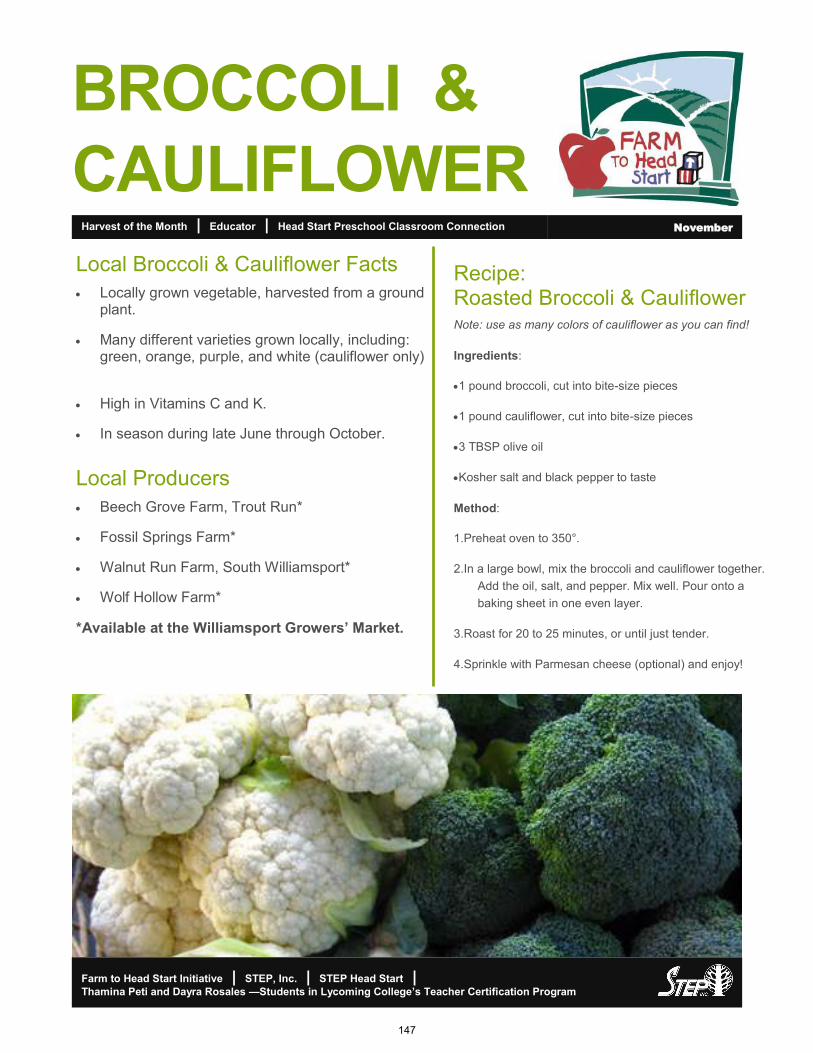
BROCCOLI &
CAULIFLOWER
Farm to Head Start Initiative | STEP, Inc. | STEP Head Start | Thamina Peti and Dayra Rosales —Students in Lycoming College’s Teacher Certification Program
Local Broccoli & Cauliflower Facts
• Locally grown vegetable, harvested from a ground plant.
• Many different varieties grown locally, including: green, orange, purple, and white (cauliflower only)
• High in Vitamins C and K.
• In season during late June through October.
Local Producers
• Beech Grove Farm, Trout Run*
• Fossil Springs Farm*
• Walnut Run Farm, South Williamsport*
• Wolf Hollow Farm*
*Available at the Williamsport Growers’ Market.
Harvest of the Month | Educator | Head Start Preschool Classroom Connection November
Recipe: Roasted Broccoli & Cauliflower Note: use as many colors of cauliflower as you can find!
Ingredients:
•1 pound broccoli, cut into bite-size pieces
•1 pound cauliflower, cut into bite-size pieces
•3 TBSP olive oil
•Kosher salt and black pepper to taste
Method:
1.Preheat oven to 350°.
2.In a large bowl, mix the broccoli and cauliflower together.
Add the oil, salt, and pepper. Mix well. Pour onto a
baking sheet in one even layer.
3.Roast for 20 to 25 minutes, or until just tender.
4.Sprinkle with Parmesan cheese (optional) and enjoy!
147
Harvest of the Month | Educator | Head Start Preschool Classroom Connection November
Language and Literacy
ABC Cauliflower | 15-20 minutes
Objective:
Children will identify letters of the alphabet and sound-symbol relationships.
Materials:
White and green card stock or construction paper, popsicle sticks, cardboard box or plastic bin, a little bucket for every number of students in classroom, potting soil, marker, glue or tape.
Preparation:
Cut out cauliflower and broccoli shapes from the green and white paper. Write letters of the alphabet on each one. Paste or tape the cut-outs to the top of the popsicle sticks. Fill a cardboard box with potting soil and place it by the window. Place the popsicle sticks in the soil with the broccoli and cauliflower shapes sticking upwards.
Procedure:
1.Sing the alphabet song together
2.The students will come up one by one with their buckets to pick cauliflower or broccoli from the garden. After selecting their “vegetable” the student will look at their broccoli or cauliflower and say the letter name and the sound, with support from the teacher as needed. The class will repeat the letter name and the sound.
3.The children can count how many cauliflower and how many broccoli they have in their buckets after all “vegetables” have been picked.
4.Finally, end the class by having every student repeat to the whole entire class the letters they have picked and the sounds each letter makes.
This idea was modified from:
Gardening For Letters - Alphabet For Starters - No Time For Flash Cards. (2012, June 18). Retrieved March 27, 2016, from http://www.notimeforflashcards.com/2012/06/letter-gardening-alphabet-for-starters.html
BROCCOLI &
CAULIFLOWER
148
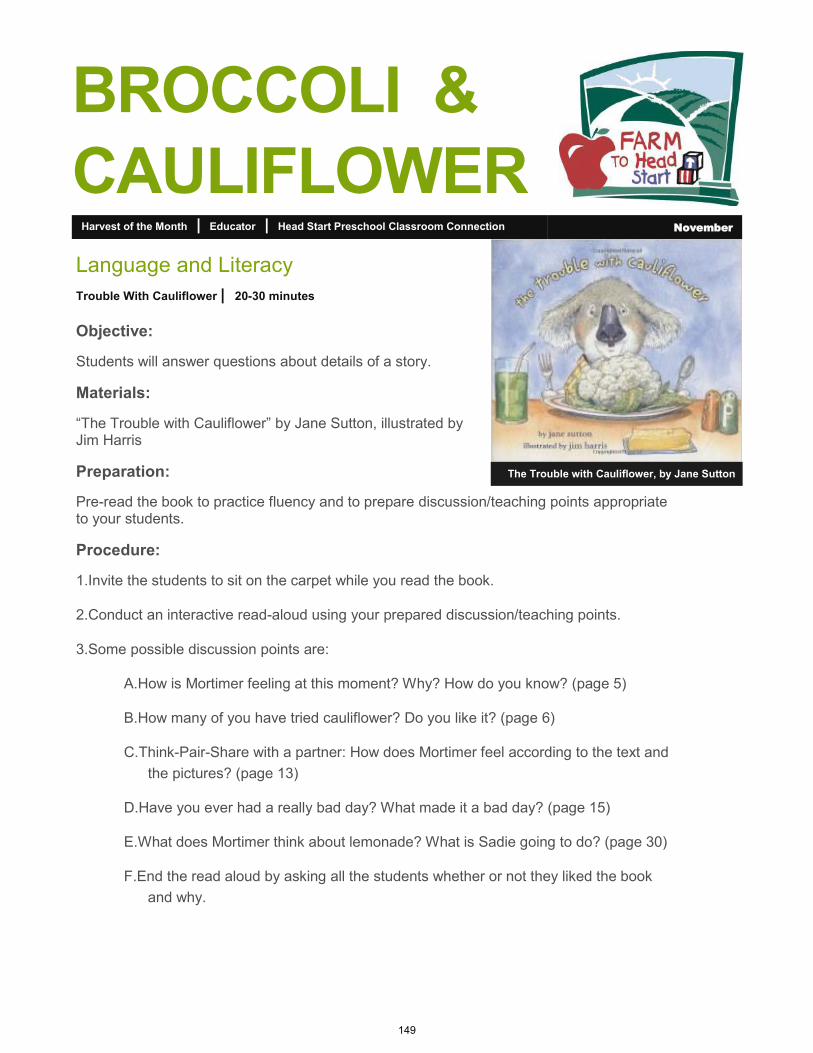
Harvest of the Month | Educator | Head Start Preschool Classroom Connection November
Language and Literacy
Trouble With Cauliflower | 20-30 minutes
Objective:
Students will answer questions about details of a story.
Materials:
“The Trouble with Cauliflower” by Jane Sutton, illustrated by Jim Harris
Preparation:
Pre-read the book to practice fluency and to prepare discussion/teaching points appropriate to your students.
Procedure:
1.Invite the students to sit on the carpet while you read the book.
2.Conduct an interactive read-aloud using your prepared discussion/teaching points.
3.Some possible discussion points are:
A.How is Mortimer feeling at this moment? Why? How do you know? (page 5)
B.How many of you have tried cauliflower? Do you like it? (page 6)
C.Think-Pair-Share with a partner: How does Mortimer feel according to the text and
the pictures? (page 13)
D.Have you ever had a really bad day? What made it a bad day? (page 15)
E.What does Mortimer think about lemonade? What is Sadie going to do? (page 30)
F.End the read aloud by asking all the students whether or not they liked the book
and why.
BROCCOLI &
CAULIFLOWER
The Trouble with Cauliflower, by Jane Sutton
149
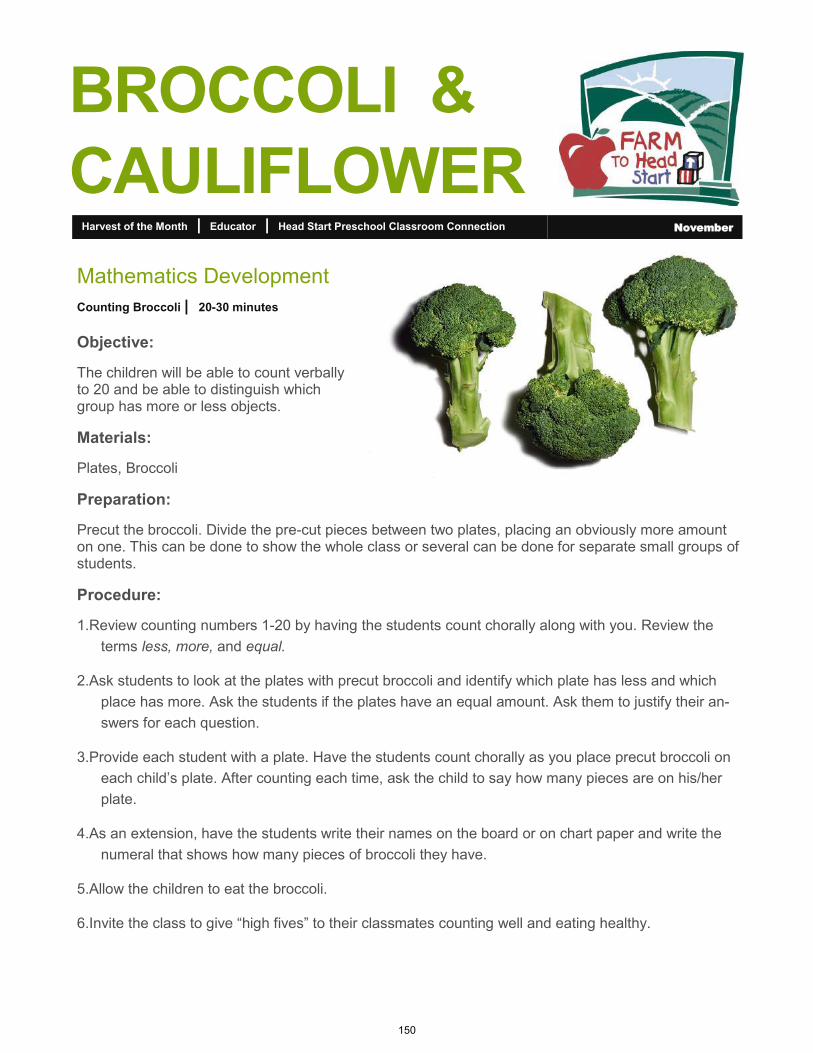
Harvest of the Month | Educator | Head Start Preschool Classroom Connection November
Mathematics Development
Counting Broccoli | 20-30 minutes
Objective:
The children will be able to count verbally to 20 and be able to distinguish which group has more or less objects.
Materials:
Plates, Broccoli
Preparation:
Precut the broccoli. Divide the pre-cut pieces between two plates, placing an obviously more amount on one. This can be done to show the whole class or several can be done for separate small groups of students.
Procedure:
1.Review counting numbers 1-20 by having the students count chorally along with you. Review the
terms less, more, and equal.
2.Ask students to look at the plates with precut broccoli and identify which plate has less and which
place has more. Ask the students if the plates have an equal amount. Ask them to justify their an-
swers for each question.
3.Provide each student with a plate. Have the students count chorally as you place precut broccoli on
each child’s plate. After counting each time, ask the child to say how many pieces are on his/her
plate.
4.As an extension, have the students write their names on the board or on chart paper and write the
numeral that shows how many pieces of broccoli they have.
5.Allow the children to eat the broccoli.
6.Invite the class to give “high fives” to their classmates counting well and eating healthy.
BROCCOLI &
CAULIFLOWER
150
Harvest of the Month | Educator | Head Start Preschool Classroom Connection November
Language & Literacy/Scientific Reasoning
The Amazing Broccoli and Cauliflower | 20-30 minutes
Objective:
The children will discuss their experiences eating broccoli and/or cauliflower. The children will use words to describe broccoli and cauliflower.
Materials:
Plates, broccoli, cauliflower
Preparation:
Precut the broccoli and cauliflower for the children and have plates ready
Procedure:
1.Invite students to sit on the carpet in a circle
2.Ask the class “Is broccoli/ cauliflower a fruit or vegetable?”
3.Hold up a piece of broccoli and cauliflower
4.Ask the students “Has anyone ever eaten broccoli or cauliflower?”
5.Have the students share stories about their encounter with either one of the vegetables.
(Discuss whether it was raw or cooked, what else did they eat with it, etc.).
6.Guide the students in describing the color, shape, texture, size, and other features of the
vegetables. Guide the students in discussing how the features compare to other items or
vegetables with which they are familiar. For example, “Is it lighter or heavier than ___?”;
“Is it rough or smooth compared to ___?”).
7.Discuss why it is good to eat vegetables and the specific nutrients in broccoli and cauliflower.
8.Have the students try the vegetables.
9.After everyone is done eating ask them whether or not they liked the vegetable and ask why.
BROCCOLI &
CAULIFLOWER
151
Harvest of the Month | Educator | Early Head Start Classroom Connection November
Social & Emotional Development
Paper Veggies | 20-30 minutes
Objective:
Students will use various material to create broccoli or cauliflower artwork.
Materials:
plates, crayons, markers, construction paper (different broccoli and cauliflower colors), glue and paper plates
Preparation:
Before class cut a few pieces of construction paper that look like broccoli and cauliflower florets, glue the florets to the plate to look like real vegetables on a plate. Make sure you have enough materials for each child.
Procedure:
1.Show the students your model of the vegetables on the plate. Also, show students real broccoli and cauliflower. Introduce each part of the broccoli and cauliflower and have the students describe each of the parts (stalk, florets, and leaves). Prompt them to discuss details about size, shape, color, texture, etc.
2.Give instructions on how to cut paper to make it look like florets.
3.Distribute scissors and construction paper, let the children choose the color of broccoli or cauliflower they want.
4.When done, teach the children how to paste the paper florets to the paper plate.
5.Pass the paper plates and crayons around and let the children color the paper plates
6.Let the children finish gluing the parts of the broccoli or cauliflower.
7.After everyone is done have the children explain to you what they did to make the paper broccoli/cauliflower.
BROCCOLI &
CAULIFLOWER
152
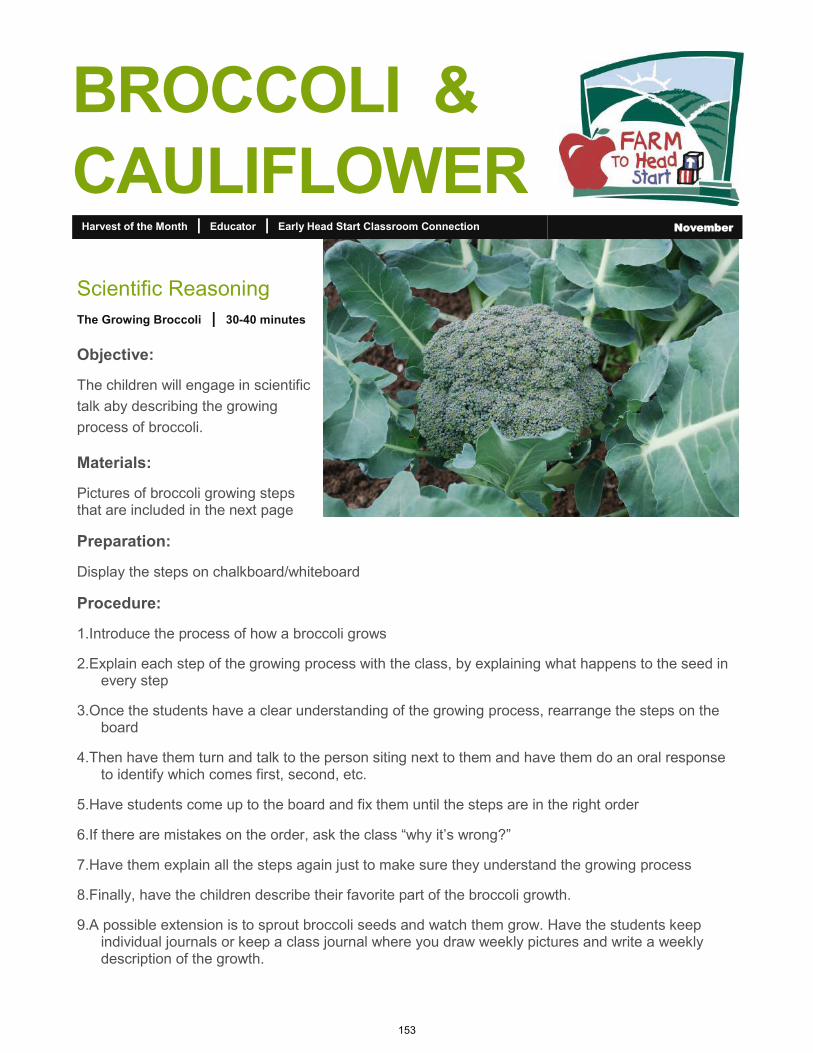
Harvest of the Month | Educator | Early Head Start Classroom Connection November
Scientific Reasoning
The Growing Broccoli | 30-40 minutes
Objective:
The children will engage in scientific
talk aby describing the growing
process of broccoli.
Materials:
Pictures of broccoli growing steps that are included in the next page
Preparation:
Display the steps on chalkboard/whiteboard
Procedure:
1.Introduce the process of how a broccoli grows
2.Explain each step of the growing process with the class, by explaining what happens to the seed in every step
3.Once the students have a clear understanding of the growing process, rearrange the steps on the board
4.Then have them turn and talk to the person siting next to them and have them do an oral response to identify which comes first, second, etc.
5.Have students come up to the board and fix them until the steps are in the right order
6.If there are mistakes on the order, ask the class “why it’s wrong?”
7.Have them explain all the steps again just to make sure they understand the growing process
8.Finally, have the children describe their favorite part of the broccoli growth.
9.A possible extension is to sprout broccoli seeds and watch them grow. Have the students keep individual journals or keep a class journal where you draw weekly pictures and write a weekly description of the growth.
BROCCOLI &
CAULIFLOWER
153
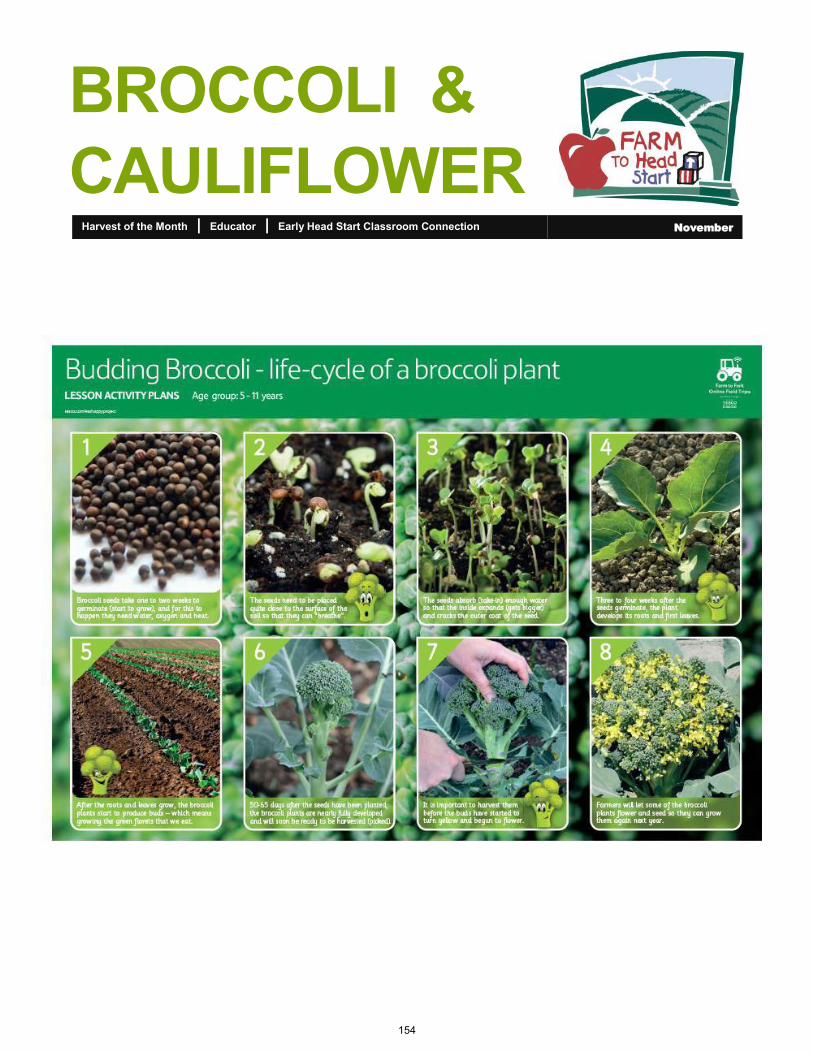
Harvest of the Month | Educator | Early Head Start Classroom Connection November
BROCCOLI &
CAULIFLOWER
154

BROCCOLI &
CAULIFLOWER
Farm to Head Start Initiative | STEP, Inc. | STEP Head Start | Thamina Peti and Dayra Rosales —Students in Lycoming College’s Teacher Certification Program
Local Broccoli & Cauliflower Facts
• Locally grown vegetable, harvested from a ground plant.
• Many different varieties grown locally, including: green, orange, purple, and white (cauliflower only)
• High in Vitamins C and K.
• In season during late June through October.
Local Producers
• Beech Grove Farm, Trout Run*
• Fossil Springs Farm*
• Walnut Run Farm, South Williamsport*
• Wolf Hollow Farm*
*Available at the Williamsport Growers’ Market.
Harvest of the Month | Educator | Early Head Classroom Connection November
Recipe: Roasted Broccoli & Cauliflower Note: use as many colors of cauliflower as you can find!
Ingredients:
•1 pound broccoli, cut into bite-size pieces
•1 pound cauliflower, cut into bite-size pieces
•3 TBSP olive oil
•Kosher salt and black pepper to taste
Method:
1.Preheat oven to 350°.
2.In a large bowl, mix the broccoli and cauliflower together.
Add the oil, salt, and pepper. Mix well. Pour onto a
baking sheet in one even layer.
3.Roast for 20 to 25 minutes, or until just tender.
4.Sprinkle with Parmesan cheese (optional) and enjoy!
155
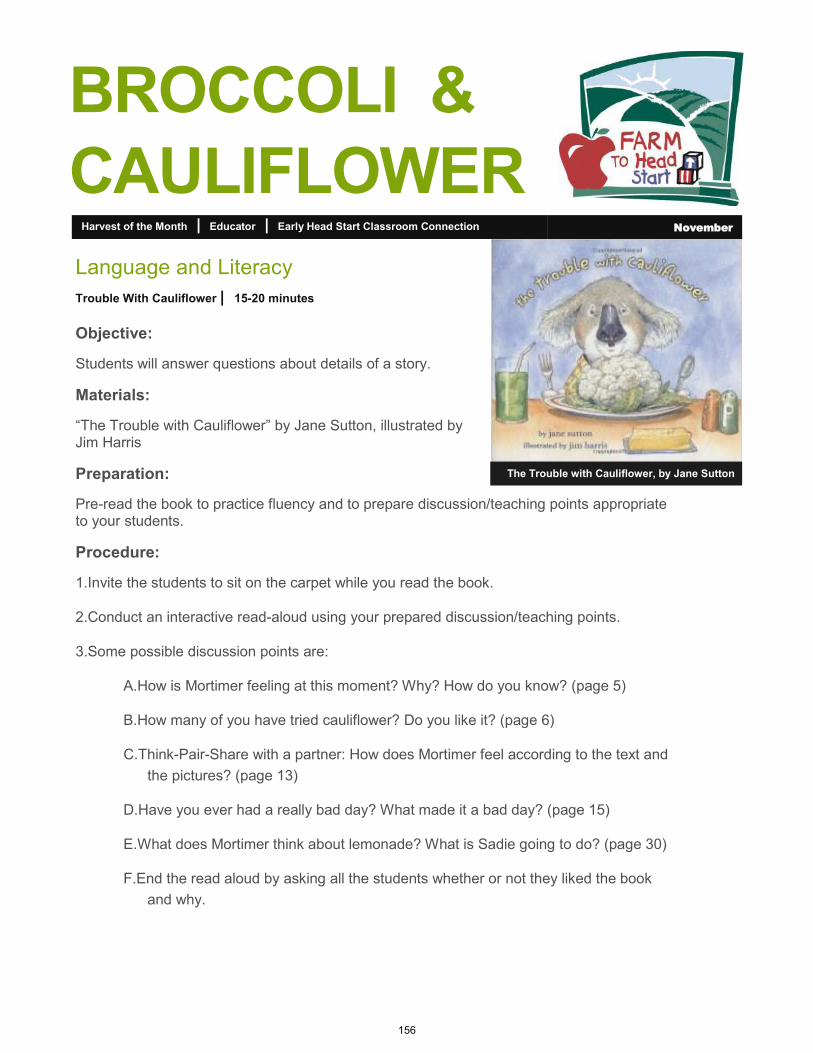
Harvest of the Month | Educator | Early Head Start Classroom Connection November
BROCCOLI &
CAULIFLOWER
Language and Literacy
Trouble With Cauliflower | 15-20 minutes
Objective:
Students will answer questions about details of a story.
Materials:
“The Trouble with Cauliflower” by Jane Sutton, illustrated by Jim Harris
Preparation:
Pre-read the book to practice fluency and to prepare discussion/teaching points appropriate to your students.
Procedure:
1.Invite the students to sit on the carpet while you read the book.
2.Conduct an interactive read-aloud using your prepared discussion/teaching points.
3.Some possible discussion points are:
A.How is Mortimer feeling at this moment? Why? How do you know? (page 5)
B.How many of you have tried cauliflower? Do you like it? (page 6)
C.Think-Pair-Share with a partner: How does Mortimer feel according to the text and
the pictures? (page 13)
D.Have you ever had a really bad day? What made it a bad day? (page 15)
E.What does Mortimer think about lemonade? What is Sadie going to do? (page 30)
F.End the read aloud by asking all the students whether or not they liked the book
and why.
The Trouble with Cauliflower, by Jane Sutton
156
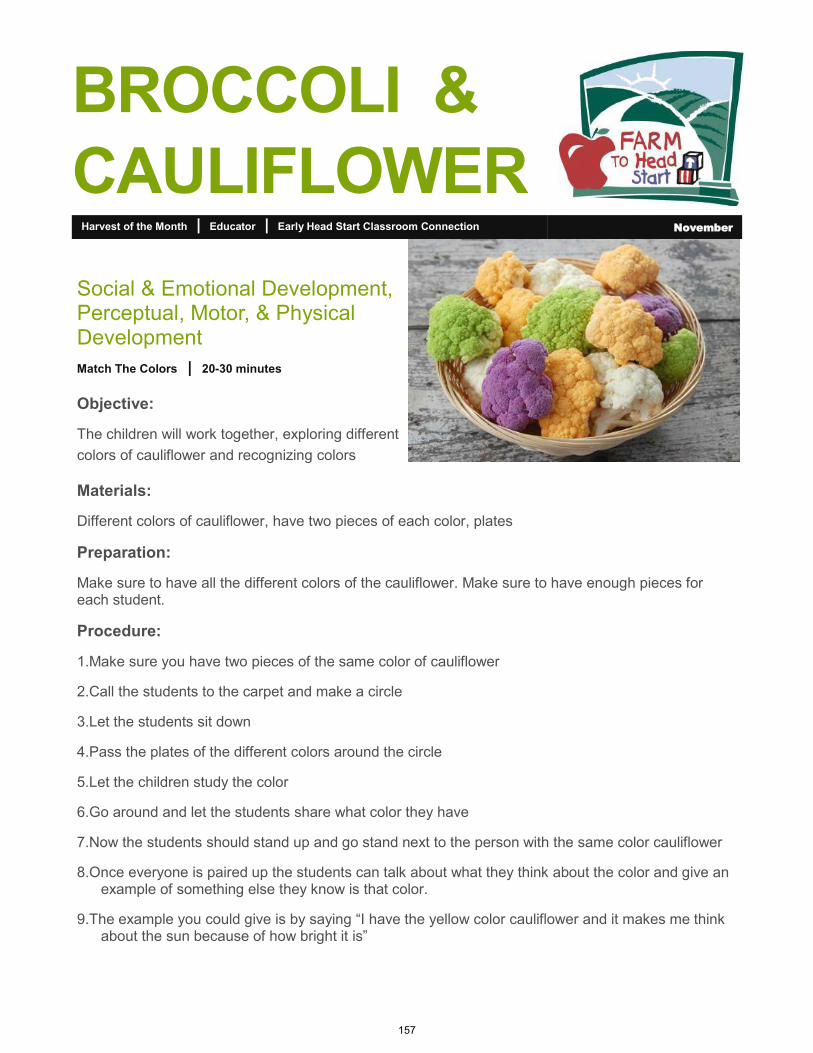
Harvest of the Month | Educator | Early Head Start Classroom Connection November
BROCCOLI &
CAULIFLOWER
Social & Emotional Development, Perceptual, Motor, & Physical Development
Match The Colors | 20-30 minutes
Objective:
The children will work together, exploring different
colors of cauliflower and recognizing colors
Materials:
Different colors of cauliflower, have two pieces of each color, plates
Preparation:
Make sure to have all the different colors of the cauliflower. Make sure to have enough pieces for each student.
Procedure:
1.Make sure you have two pieces of the same color of cauliflower
2.Call the students to the carpet and make a circle
3.Let the students sit down
4.Pass the plates of the different colors around the circle
5.Let the children study the color
6.Go around and let the students share what color they have
7.Now the students should stand up and go stand next to the person with the same color cauliflower
8.Once everyone is paired up the students can talk about what they think about the color and give an example of something else they know is that color.
9.The example you could give is by saying “I have the yellow color cauliflower and it makes me think about the sun because of how bright it is”
157
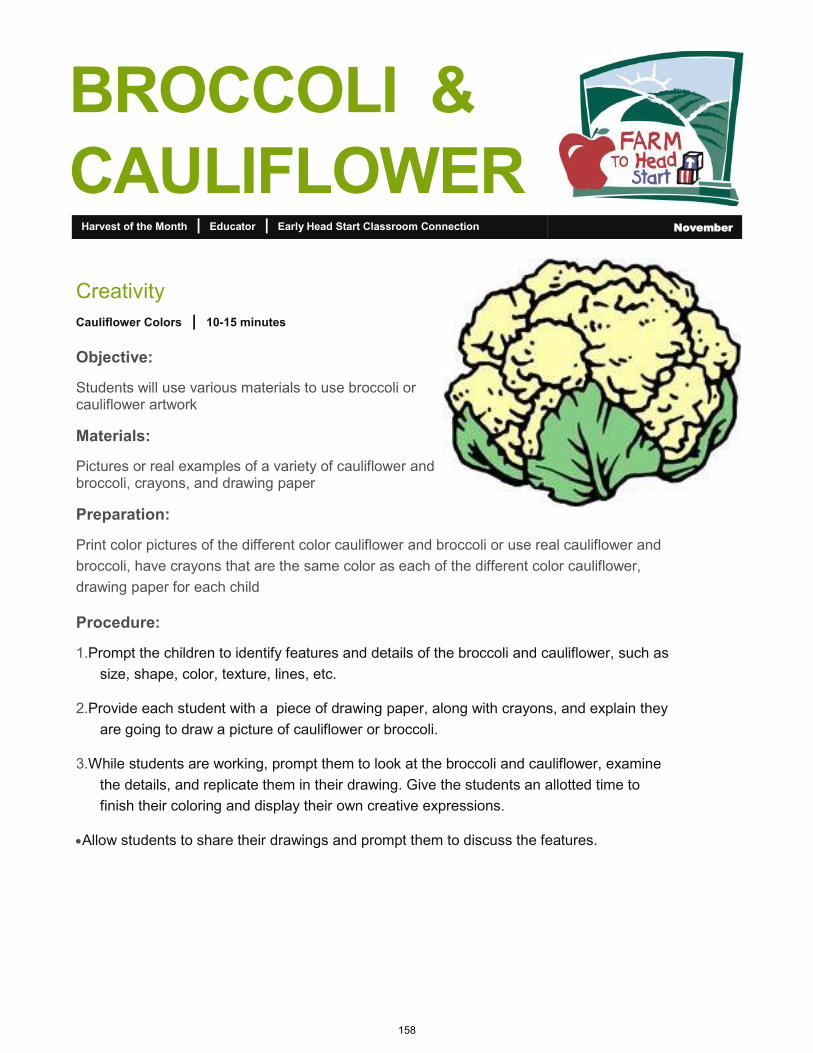
Harvest of the Month | Educator | Early Head Start Classroom Connection November
Creativity
Cauliflower Colors | 10-15 minutes
Objective:
Students will use various materials to use broccoli or cauliflower artwork
Materials:
Pictures or real examples of a variety of cauliflower and broccoli, crayons, and drawing paper
Preparation:
Print color pictures of the different color cauliflower and broccoli or use real cauliflower and
broccoli, have crayons that are the same color as each of the different color cauliflower,
drawing paper for each child
Procedure:
1.Prompt the children to identify features and details of the broccoli and cauliflower, such as
size, shape, color, texture, lines, etc.
2.Provide each student with a piece of drawing paper, along with crayons, and explain they
are going to draw a picture of cauliflower or broccoli.
3.While students are working, prompt them to look at the broccoli and cauliflower, examine
the details, and replicate them in their drawing. Give the students an allotted time to
finish their coloring and display their own creative expressions.
•Allow students to share their drawings and prompt them to discuss the features.
BROCCOLI &
CAULIFLOWER
158
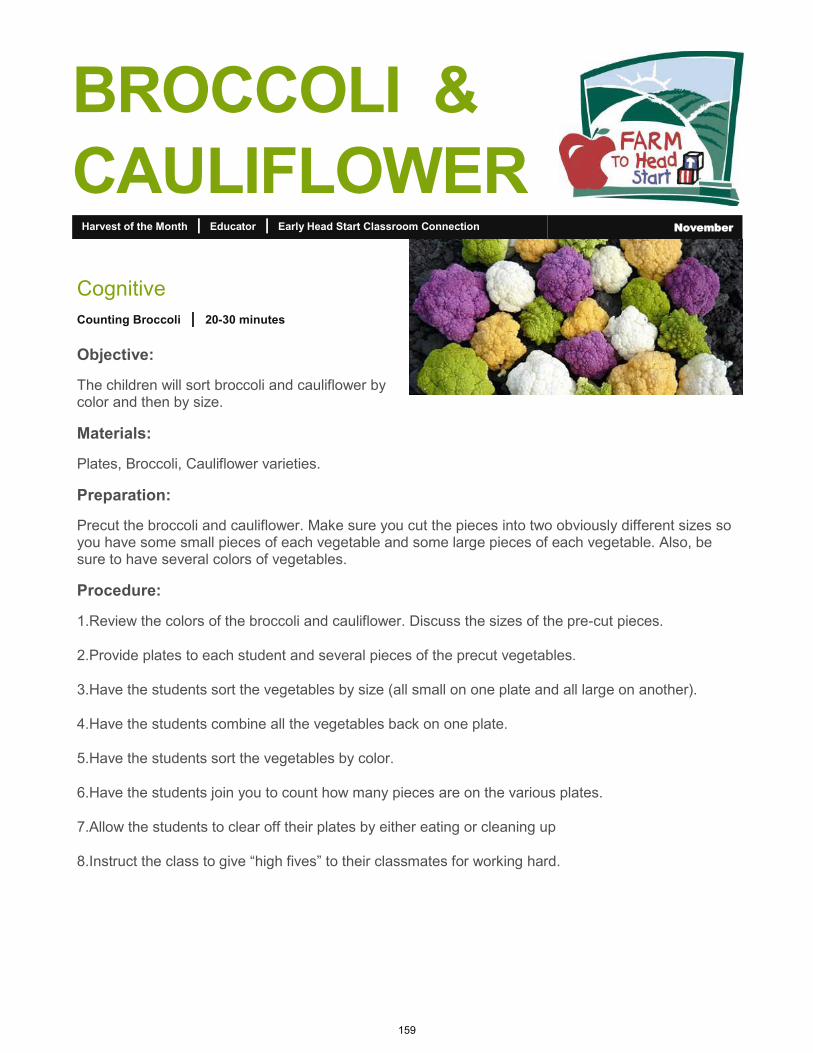
Harvest of the Month | Educator | Early Head Start Classroom Connection November
Cognitive
Counting Broccoli | 20-30 minutes
Objective:
The children will sort broccoli and cauliflower by color and then by size.
Materials:
Plates, Broccoli, Cauliflower varieties.
Preparation:
Precut the broccoli and cauliflower. Make sure you cut the pieces into two obviously different sizes so you have some small pieces of each vegetable and some large pieces of each vegetable. Also, be sure to have several colors of vegetables.
Procedure:
1.Review the colors of the broccoli and cauliflower. Discuss the sizes of the pre-cut pieces.
2.Provide plates to each student and several pieces of the precut vegetables.
3.Have the students sort the vegetables by size (all small on one plate and all large on another).
4.Have the students combine all the vegetables back on one plate.
5.Have the students sort the vegetables by color.
6.Have the students join you to count how many pieces are on the various plates.
7.Allow the students to clear off their plates by either eating or cleaning up
8.Instruct the class to give “high fives” to their classmates for working hard.
BROCCOLI &
CAULIFLOWER
159

BROCCOLI &
CAULIFLOWER
Farm to Head Start Initiative | STEP, Inc. | STEP Head Start | Thamina Peti and Dayra Rosales —Students in Lycoming College’s Teacher Certification Program
Local Broccoli & Cauliflower Facts
• Locally grown vegetable, harvested from a ground plant.
• Many different varieties grown locally, including: green, orange, purple, and white (cauliflower only)
• High in Vitamins C and K.
• In season during late June through October.
Local Producers
• Beech Grove Farm, Trout Run*
• Fossil Springs Farm*
• Walnut Run Farm, South Williamsport*
• Wolf Hollow Farm*
*Available at the Williamsport Growers’ Market.
Harvest of the Month | Educator | Home Based Connection November
Recipe: Roasted Broccoli & Cauliflower Note: use as many colors of cauliflower as you can find!
Ingredients:
•1 pound broccoli, cut into bite-size pieces
•1 pound cauliflower, cut into bite-size pieces
•3 TBSP olive oil
•Kosher salt and black pepper to taste
Method:
1.Preheat oven to 350°.
2.In a large bowl, mix the broccoli and cauliflower together.
Add the oil, salt, and pepper. Mix well. Pour onto a
baking sheet in one even layer.
3.Roast for 20 to 25 minutes, or until just tender.
4.Sprinkle with Parmesan cheese (optional) and enjoy!
160

Harvest of the Month | Educator | Home Based Connection November
Edible Experience
Farmer Says | 5-10 minutes
Objective:
Children will act out the entire lifecycle of the featured local harvest (similar to “Simon Says”)
Materials:
None needed
Preparation:
Familiarize yourself with the growing/harvesting process of the featured produce item. Example: Pears grow on trees, so they are picked from trees and from the ground, placed in a container, etc.
Procedure:
•After learning about the farmers who grew the featured produce, have the class gather on the carpet
•Introduce yourself as the featured local farmer and begin to act out the life cycle of the produce
(together as a class)
•Example: Farmer Eck says…. find a baby seed, dig a hole, plant the seed and sprinkle some
love in the ground, pat the soil on top of the seed, pretend to rain on the seed, give the
seed some sunshine rays, pretend to be the baby seed in the ground, grow into a version
of that seed, pick your fruit/vegetable, have the class all help pull/pick a HUGE one togeth-
er on the count of 3, put it in a basket, drive it to the farmers market/store, pretend to sell it
to families, take a mindful bite of the produce, give a thumbs up, and applause!
•Suggestions:
•For fruit, act out the flower blossoms and pollinator roles before acting out harvesting
•Do this activity right before each taste testing experience, to allow children to fully un-
derstand the process behind the featured food
BROCCOLI &
CAULIFLOWER
161
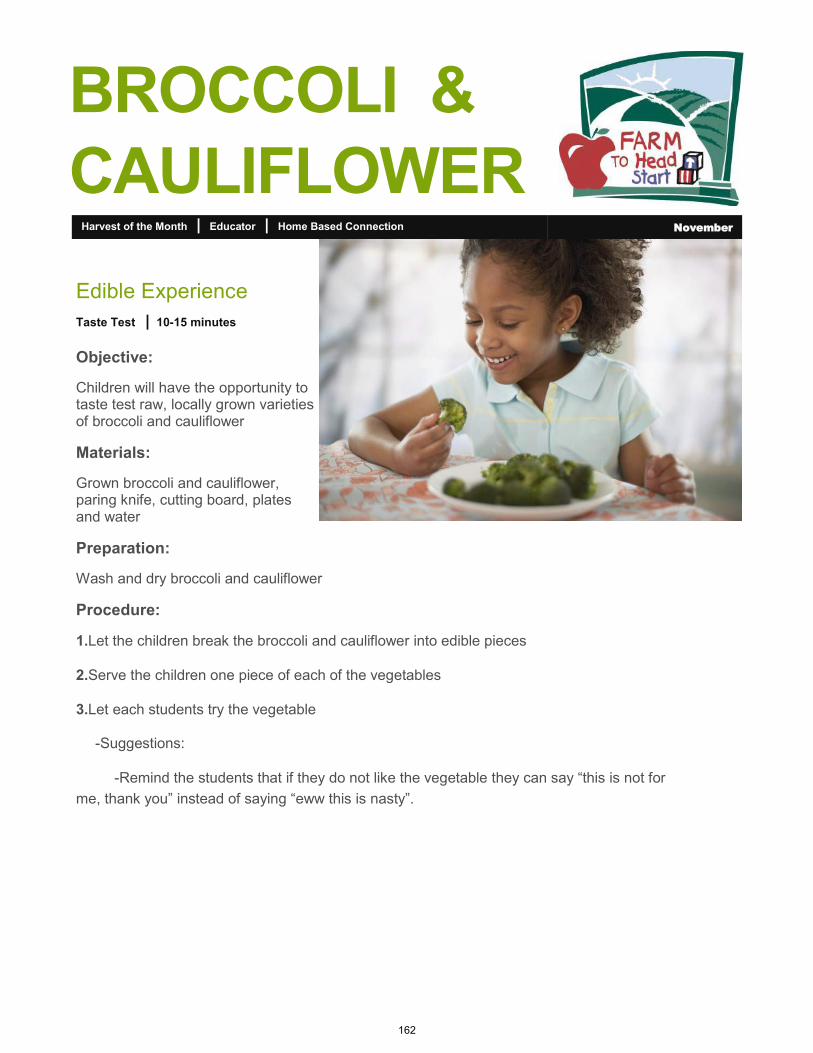
Harvest of the Month | Educator | Home Based Connection November
Edible Experience
Taste Test | 10-15 minutes
Objective:
Children will have the opportunity to taste test raw, locally grown varieties of broccoli and cauliflower
Materials:
Grown broccoli and cauliflower, paring knife, cutting board, plates and water
Preparation:
Wash and dry broccoli and cauliflower
Procedure:
1.Let the children break the broccoli and cauliflower into edible pieces
2.Serve the children one piece of each of the vegetables
3.Let each students try the vegetable
-Suggestions:
-Remind the students that if they do not like the vegetable they can say “this is not for
me, thank you” instead of saying “eww this is nasty”.
BROCCOLI &
CAULIFLOWER
162
Harvest of the Month | Educator | Home Based Connection November
Edible Experience
Taste Test Results | 10-15 minutes
“For me!” or “I like it!” “Not for me” or “I don’t like it”
BROCCOLI &
CAULIFLOWER
163
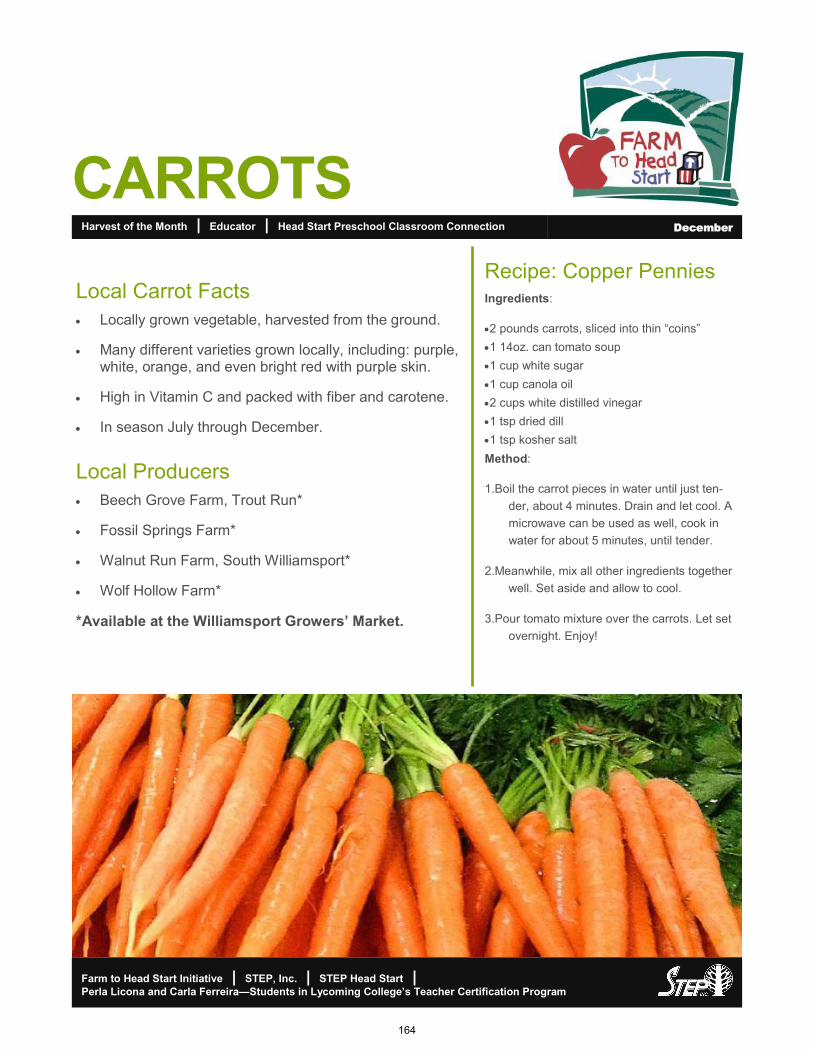
CARROTS
Farm to Head Start Initiative | STEP, Inc. | STEP Head Start | Perla Licona and Carla Ferreira—Students in Lycoming College’s Teacher Certification Program
Local Carrot Facts
• Locally grown vegetable, harvested from the ground.
• Many different varieties grown locally, including: purple, white, orange, and even bright red with purple skin.
• High in Vitamin C and packed with fiber and carotene.
• In season July through December.
Local Producers
• Beech Grove Farm, Trout Run*
• Fossil Springs Farm*
• Walnut Run Farm, South Williamsport*
• Wolf Hollow Farm*
*Available at the Williamsport Growers’ Market.
Harvest of the Month | Educator | Head Start Preschool Classroom Connection December
Recipe: Copper Pennies Ingredients:
•2 pounds carrots, sliced into thin “coins”
•1 14oz. can tomato soup
•1 cup white sugar
•1 cup canola oil
•2 cups white distilled vinegar
•1 tsp dried dill
•1 tsp kosher salt
Method:
1.Boil the carrot pieces in water until just ten-
der, about 4 minutes. Drain and let cool. A
microwave can be used as well, cook in
water for about 5 minutes, until tender.
2.Meanwhile, mix all other ingredients together
well. Set aside and allow to cool.
3.Pour tomato mixture over the carrots. Let set
overnight. Enjoy!
164
Harvest of the Month | Educator | Head Start Preschool Classroom Connection December
Language & Literacy
The Carrot Seed | 10 minutes
Objective:
The children will be introduced to the sequence of events based on how carrots grow.
Materials:
The Carrot Seed by Ruth Krauss
Preparation:
Gather class in a circle on the floor
Procedure:
1.Read “The Carrot Seed” to class.
Discuss with class:
1. Who told the little boy the seed would not come up?
2. How many people told him that?
3. What two things did the little boy do everyday to take care of the seed?
4. Did a carrot come up? How?
5. Have you ever grown something by yourself? Tell us about it.
Explain the class the importance of sequence of events:
1. Ask the class what the carrot seed looked like in the beginning of the book.
` 2. Ask the class what did the carrot look like at the end of the book?
3. Ask the class if anyone has watched something grow over time.
CARROTS
The Carrot Seed by Ruth Krauss
165
CARROTS Harvest of the Month | Educator | Head Start Preschool Classroom Connection December
Perceptual, Motor, & Physical Development
Cut Out Carrots | 15-20 minutes
Objective:
The children will be introduced to the basic characteristics of a carrot and how it carrots. The children will also construct their own personalized carrot. As well as the ability to use hand eye coordination to carry out tasks like cutting, gluing, and painting.
Materials:
Medium or large sized cutouts of a carrot, green tissue paper, scissors, paint, paint brushes, glue.
Preparation:
Pre cut the carrot shapes and pre rip green tissue paper into manageable pieces.
Procedure:
1. Have students identify/describe what a carrot looks like, assist in guidance if needed.
2. Allow students to explore the different colors of a carrot, as well as the size and shape.
3. Explain that carrots are not always the same size such as, baby carrots and explain the
sequence of sizes when a carrot is growing.
4. Explain to the class we’ll be making a harvest of the month carrot cut out today
5. Each child will have the opportunity to paint their carrot orange, glue the small pieces of tissue
paper on top of the carrot.
6. Guide each child if needed.
7. Afterwards hang up each carrot so all of the children can see everybody else’s.
8. Instruct the class to give themselves a round of applause and praise their work individually through
this process.
166
Harvest of the Month | Educator | Head Start Preschool Classroom Connection December
Cognitive, General Knowledge, Physical Development, & Health
Counting Carrots | 15 minutes
Objective:
Math: The children will understand addition as adding to and understand subtraction as taking away
from by using carrots to solve addition and subtraction problems with numerals one to five.
Cognitive: The children will maintain focus and sustain attention with minimal support by following
along, interacting and participating in the lesson.
Health: The children will demonstrate personal hygiene and self-care skills by washing their hands
before touching the food and after eating it.
Materials:
Baby carrots (5 per student), paper plates (1 per student)
Preparation:
Wash baby carrots, place 5 baby carrots on each plate
Procedure:
1.Have children wash their hands with soap and water, then return to their tables
2.Distribute one plate with 5 carrots to every student
3.Have the teacher and students count together the number of carrots on the plate
4.Teacher tells students to add or subtract from the 5 carrots
- Count together after addition and subtraction and the teacher will write the numeral answer on the board
-call on students to make sure they are following along
5. Continue adding or subtracting to the 5 carrots
6. Once they are done, the children are allowed to eat their carrots
7. Clean up and wash hands
CARROTS
167
Harvest of the Month | Educator | Head Start Preschool Classroom Connection December
Social & Emotional Development, General Knowledge, Self-Regulation & Communication
Planting Carrots | 45-60 minutes
Objective:
Science: The children will observe and describe observable phenomena (objects, materials, organ-
isms, and events) by using magnifying glasses to observe carrots.
The students will ask a question, gather information, and make predictions based on their
observations of the carrot.
Social/ Emotional Development: The children will engage in and maintain positive interactions and
relationships with other children by working in partners to share their observations.
Self– Regulation: The students will appropriately handle and take care of classroom materials by
using an appropriate amount of materials for their plants.
Communication: The children will attend to communication and language from others by
listening to directions and sharing their observation with their partners.
Materials:
Baby Carrots, Magnifying glass, clear cups, carrot seeds, dirt, water, 2 buckets, 1 small shovel, jour-nals, book “The Carrot Seed” by Ruth Krauss
Preparation:
1.Wash baby carrots and have ready for children
2.Set up “Garden Station”
-Place dirt inside bucket and set the shovel next to it
-Place a clear cup with all the seeds inside of it
-Place a bucket with water and a cup next to it to get water
3. Write names on clear cups to distribute in class
CARROTS
168
Harvest of the Month | Educator | Head Start Preschool Classroom Connection December
CARROTS
Continued from page 5
Procedure:
1. Have students wash their hands and sit at their tables.
2. Distribute one carrot and one magnifying glass per student.
3. Have children observe the carrot using the magnifying glass.
4. Pair the students up and have them share with each other what they observe.
- Have some pairs share aloud with class and make a list of observations on chart paper
5. Students are allowed to eat carrots.
6. Talk about what a plant needs in order to grow.
-take volunteers to answer and have class do thumbs up or thumbs down to the answers
-Refer to book “The Carrot Seed” if necessary
7. Pass out cups to students.
8. Have students make a line, they will add dirt to the cup and move to the next station
9. Add seeds and water to the cup.
10. Set cups near a window to obtain sunlight.
11. Have students collect material and clean up.
12. Continue to add water to plants until the carrots grow
13. Have students keep a journal where they draw what they observe with the plant and have them
write a sentence about it. They should journal at least once per week with the support of the teacher
as needed.
169

Harvest of the Month | Educator | Early Head Start Classroom Connection December
CARROTS
Perceptual, Motor, & Physical Development
Play Doh Carrots | 45 minutes
Objective:
The children will use their perceptual and motor skills by pressing, patting, rolling, and shaping play dough into a carrot shape.
Materials:
Rolling pins, recipe for non-cook homemade play doh
Preparation:
Prepare playdoh ingredients, place rolling pins on table
Procedure:
1.Tell the class we are making carrots out of play dough today, but first we have to make the play
dough
2.Ask, the class what sequence of events are, and then tell the class that our play dough recipe will
following a sequence of events.
3.Guide the children in reading the directions and let them do basic mixing. You may need to assist.
4.Review characteristics carrots (size, color, shape)
5.Have a discussion about features of carrots: size, shape, stem, lines on a carrot, what the stem
looks like.
6.Let them choose what size, texture, and shape they want their carrot to be.
7.Guide children through the process of shaping the carrot.
8.Teacher should help children to put the green stem on carrot.
9.Then go around class and ask each child to describe their carrot.
170
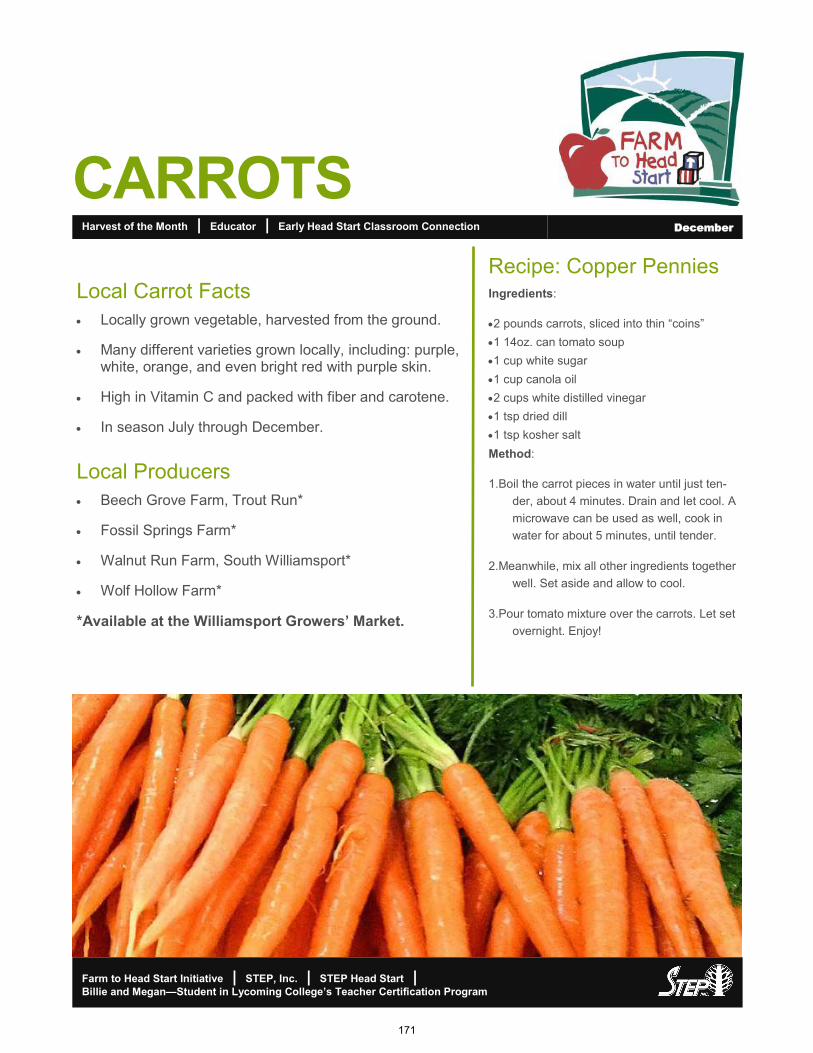
CARROTS
Farm to Head Start Initiative | STEP, Inc. | STEP Head Start | Billie and Megan—Student in Lycoming College’s Teacher Certification Program
Local Carrot Facts
• Locally grown vegetable, harvested from the ground.
• Many different varieties grown locally, including: purple, white, orange, and even bright red with purple skin.
• High in Vitamin C and packed with fiber and carotene.
• In season July through December.
Local Producers
• Beech Grove Farm, Trout Run*
• Fossil Springs Farm*
• Walnut Run Farm, South Williamsport*
• Wolf Hollow Farm*
*Available at the Williamsport Growers’ Market.
Harvest of the Month | Educator | Early Head Start Classroom Connection December
Recipe: Copper Pennies Ingredients:
•2 pounds carrots, sliced into thin “coins”
•1 14oz. can tomato soup
•1 cup white sugar
•1 cup canola oil
•2 cups white distilled vinegar
•1 tsp dried dill
•1 tsp kosher salt
Method:
1.Boil the carrot pieces in water until just ten-
der, about 4 minutes. Drain and let cool. A
microwave can be used as well, cook in
water for about 5 minutes, until tender.
2.Meanwhile, mix all other ingredients together
well. Set aside and allow to cool.
3.Pour tomato mixture over the carrots. Let set
overnight. Enjoy!
171
Harvest of the Month | Educator | Early Head Start Classroom Connection December
Cognitive
I am the Carrot | 10-15 minutes
Objective:
The children will act out how carrots grow
Materials:
None needed
Preparation:
Memorize different positions for the growth of the seed
- When they plant the seed they squat on the floor
-Hands represent leafs
-They are slowly standing
- When the students are fully standing it means the carrot has grown and is ready
Procedure:
1.Have all children spread arm length apart.
2.Teacher can refers back to the story “ The Carrot Seed” to talk about planting carrots..
3.Then the teacher can tell the story about planting a carrot seeds
- start with “One day Ms.___ planted a carrot seed”
4. The students will squat down to be the seed.
5. The teacher will say she waters the plant and the students will slowly start to stand up with their hands slowly coming up and rising about their head.
6. The teacher will keep watering and the plants keep growing
7. Once they are fully standing up with their hands all the way up, the teacher can mention they that have grown into a carrot.
8. The students can take turns being the one to grow the carrots.
CARROTS
172
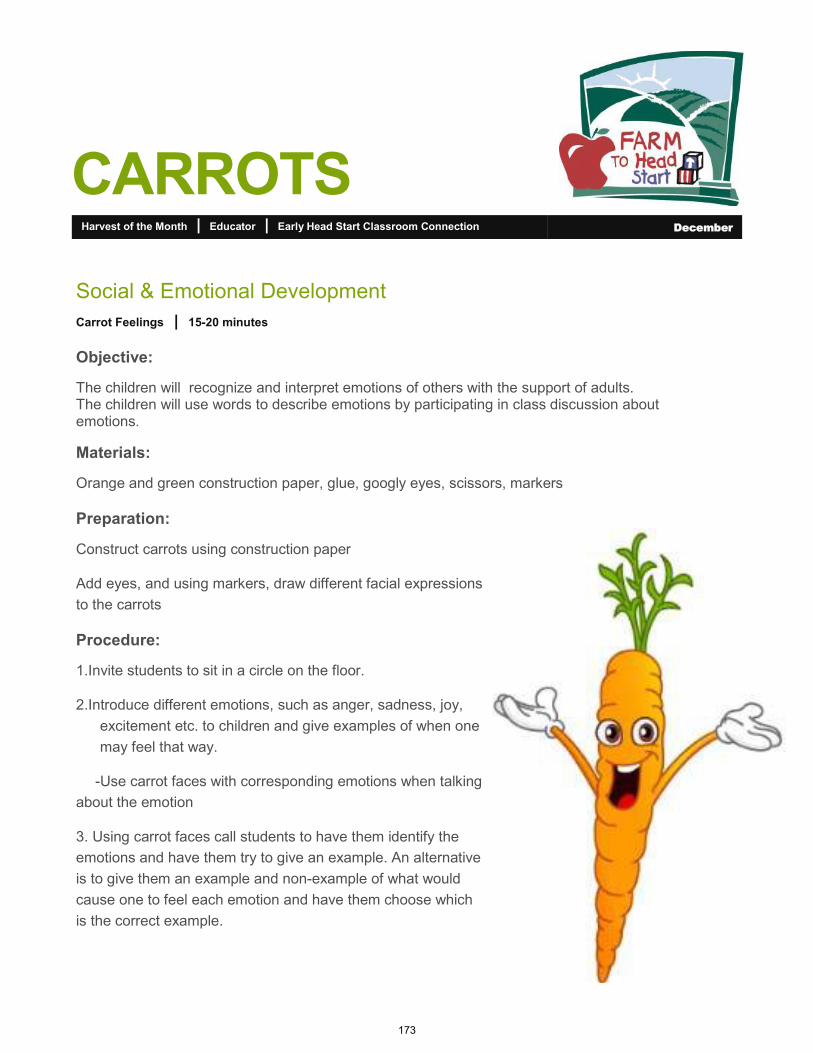
Harvest of the Month | Educator | Early Head Start Classroom Connection December
Social & Emotional Development
Carrot Feelings | 15-20 minutes
Objective:
The children will recognize and interpret emotions of others with the support of adults. The children will use words to describe emotions by participating in class discussion about emotions.
Materials:
Orange and green construction paper, glue, googly eyes, scissors, markers
Preparation:
Construct carrots using construction paper
Add eyes, and using markers, draw different facial expressions
to the carrots
Procedure:
1.Invite students to sit in a circle on the floor.
2.Introduce different emotions, such as anger, sadness, joy,
excitement etc. to children and give examples of when one
may feel that way.
-Use carrot faces with corresponding emotions when talking
about the emotion
3. Using carrot faces call students to have them identify the
emotions and have them try to give an example. An alternative
is to give them an example and non-example of what would
cause one to feel each emotion and have them choose which
is the correct example.
CARROTS
173
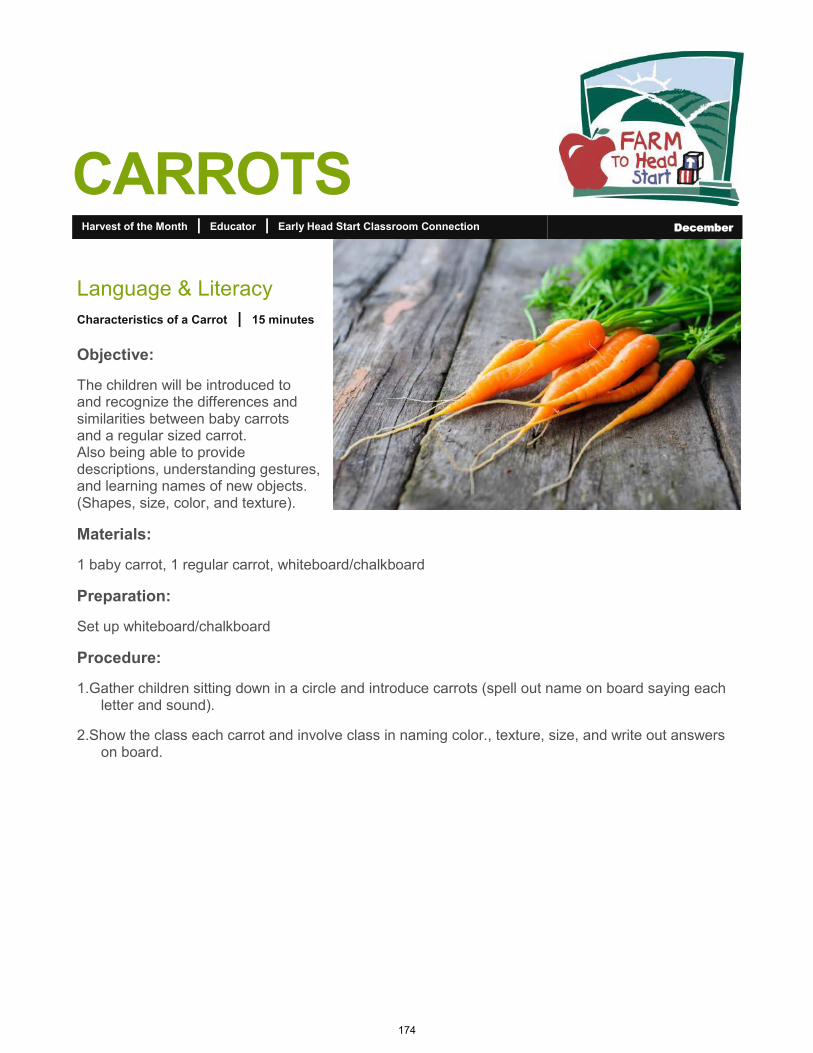
Harvest of the Month | Educator | Early Head Start Classroom Connection December
CARROTS
Language & Literacy
Characteristics of a Carrot | 15 minutes
Objective:
The children will be introduced to and recognize the differences and similarities between baby carrots and a regular sized carrot. Also being able to provide descriptions, understanding gestures, and learning names of new objects. (Shapes, size, color, and texture).
Materials:
1 baby carrot, 1 regular carrot, whiteboard/chalkboard
Preparation:
Set up whiteboard/chalkboard
Procedure:
1.Gather children sitting down in a circle and introduce carrots (spell out name on board saying each letter and sound).
2.Show the class each carrot and involve class in naming color., texture, size, and write out answers on board.
174
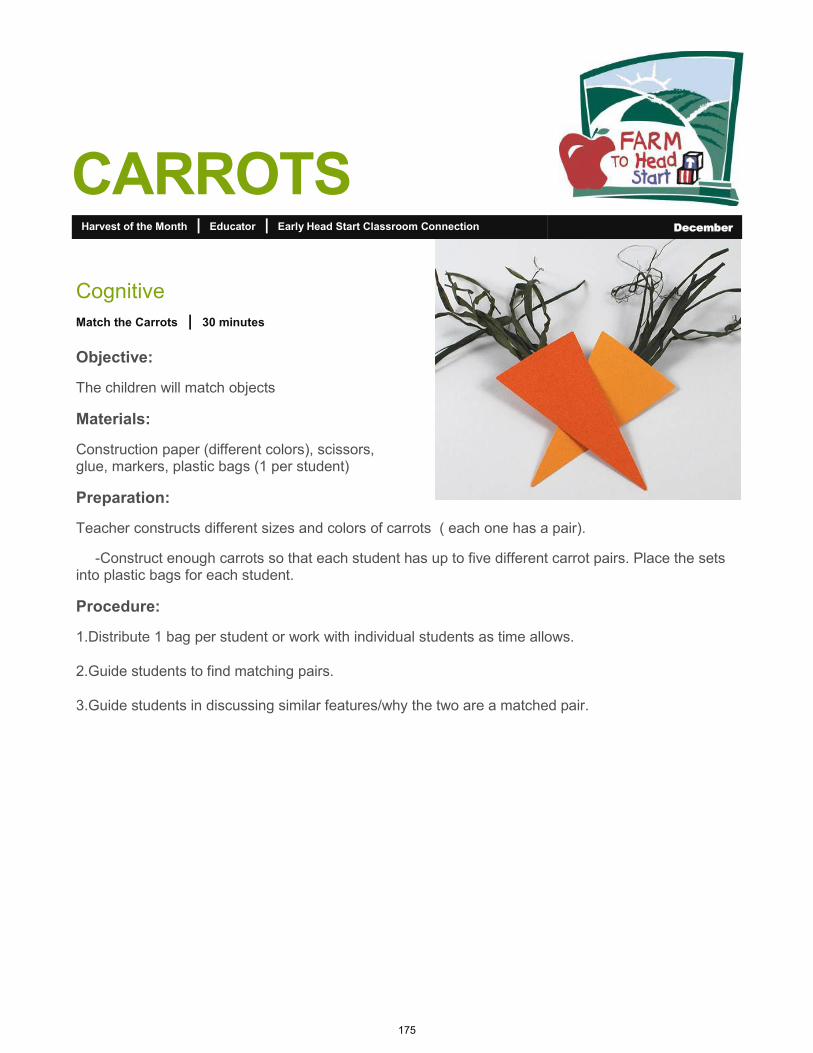
Harvest of the Month | Educator | Early Head Start Classroom Connection December
Cognitive
Match the Carrots | 30 minutes
Objective:
The children will match objects
Materials:
Construction paper (different colors), scissors, glue, markers, plastic bags (1 per student)
Preparation:
Teacher constructs different sizes and colors of carrots ( each one has a pair).
-Construct enough carrots so that each student has up to five different carrot pairs. Place the sets into plastic bags for each student.
Procedure:
1.Distribute 1 bag per student or work with individual students as time allows.
2.Guide students to find matching pairs.
3.Guide students in discussing similar features/why the two are a matched pair.
CARROTS
175
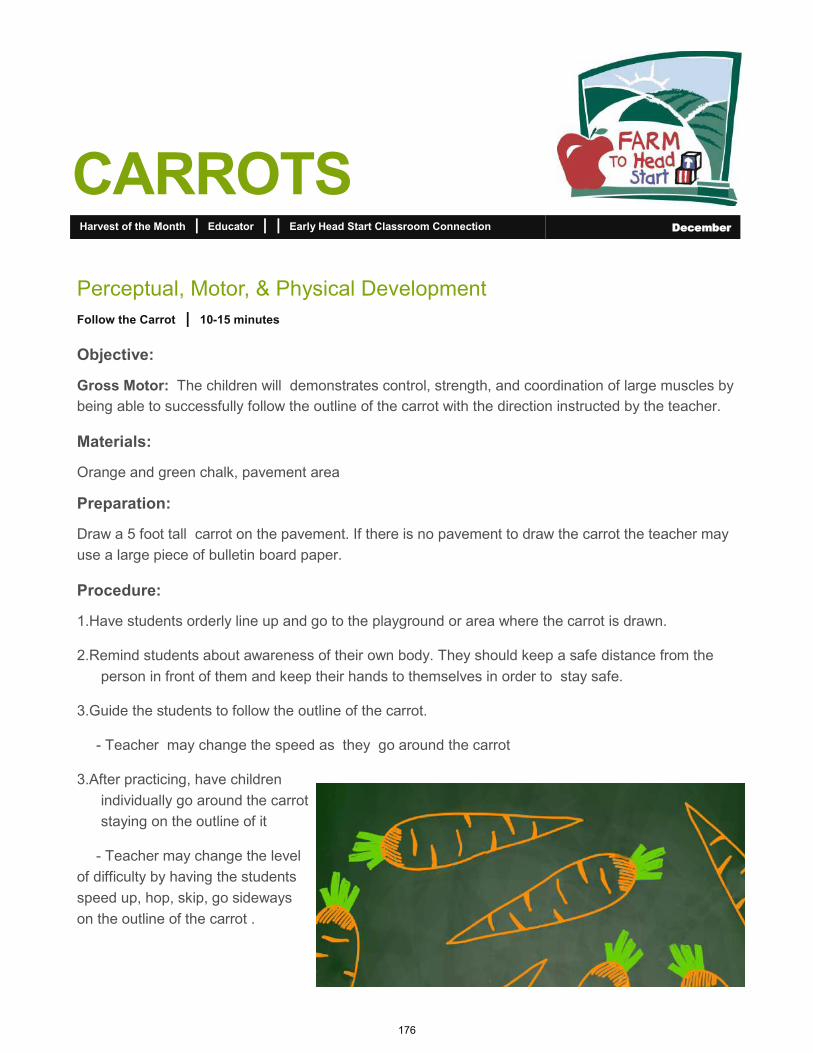
Harvest of the Month | Educator | | Early Head Start Classroom Connection December
CARROTS
Perceptual, Motor, & Physical Development
Follow the Carrot | 10-15 minutes
Objective:
Gross Motor: The children will demonstrates control, strength, and coordination of large muscles by
being able to successfully follow the outline of the carrot with the direction instructed by the teacher.
Materials:
Orange and green chalk, pavement area
Preparation:
Draw a 5 foot tall carrot on the pavement. If there is no pavement to draw the carrot the teacher may
use a large piece of bulletin board paper.
Procedure:
1.Have students orderly line up and go to the playground or area where the carrot is drawn.
2.Remind students about awareness of their own body. They should keep a safe distance from the
person in front of them and keep their hands to themselves in order to stay safe.
3.Guide the students to follow the outline of the carrot.
- Teacher may change the speed as they go around the carrot
3.After practicing, have children
individually go around the carrot
staying on the outline of it
- Teacher may change the level
of difficulty by having the students
speed up, hop, skip, go sideways
on the outline of the carrot .
176
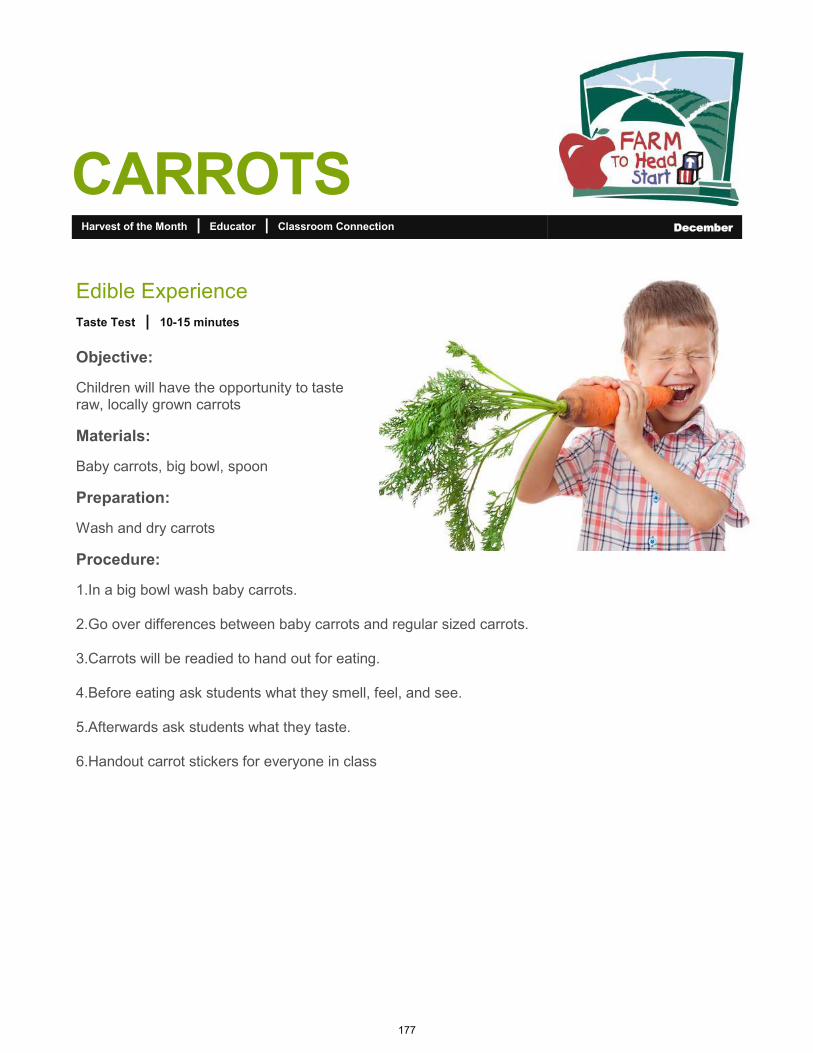
Harvest of the Month | Educator | Classroom Connection December
Edible Experience
Taste Test | 10-15 minutes
Objective:
Children will have the opportunity to taste raw, locally grown carrots
Materials:
Baby carrots, big bowl, spoon
Preparation:
Wash and dry carrots
Procedure:
1.In a big bowl wash baby carrots.
2.Go over differences between baby carrots and regular sized carrots.
3.Carrots will be readied to hand out for eating.
4.Before eating ask students what they smell, feel, and see.
5.Afterwards ask students what they taste.
6.Handout carrot stickers for everyone in class
CARROTS
177
2138 Boyd Street, Williamsport, PA 17701
David Spring, Director of STEP Head Startphone: 570-601-9601 e-mail: [email protected] website: www.stepcorp.org