Embed Size (px)
Citation preview

© Gaia Technologies PLC 2018
Helpsheet
Using the Gaia 3D Viewer
1. Setting up your 3D system To view content in 3D you will need:
1. A PC or laptop with an appropriate 3D graphics card
(quad buffered) and active shutter glasses or
2. A passive system (projector, special screen & 3d
glasses) or
3. A 3D Monitor/TV linked to your PC
There is a full help document available within in the 3D Viewer. Click ?
Gaia’s 3D view provides a simple user interface through which you can manage access to 3D learning material. This includes:
1. Environments, models & objects created by Gaia and
included in your 3D Viewer license
2. Models that you have downloaded from another source
3. Other media (videos & images) that you have attached to the ‘lessons’.

© Gaia Technologies PLC 2018
2. Top Tips 1. Maximise screen area – especially for experiencing the environments
2. Use in a darkened room – when using projection, the darker the room the better
3. View without objects in line of view – e.g. furniture
4. Connect up your audio system – the soundtracks add atmosphere
5. Keep your 3D glasses charged and clean – glasses may have batteries or be rechargeable
6. Use a wireless mouse – allows you to move away from the control PC and better position yourself to view the big screen, teacher screen and students.
3. Navigating the 3D Viewer Double clicker on the 3D Viewer icon to open the program. The
software opens in two stages
You will need to click load once to complete. Be
aware that it takes some time to load as it is a
large package. If you are used to double clicking
things be aware that double clicking load can
load the program twice which slows your
machine right down. If that happens close one.
Navigate the content by scrolling and clicking on
the folders.

© Gaia Technologies PLC 2018
The lesson content consists of:
1. Models or objects – these items load up more quickly and will feature one or more control menus on screen. These are all click buttons or sliders.
2. Environments such as the pond, the rainforest and the Blue Mosque – these items load up with a progress bar in front of the image
When looking at models you may have controls that allow you do things like labelling, revealing or animating. These are accessed via the blue tap to the left of
your screen. You can also see the controls across the bottom.
The lower controls work on an interactive screen when enabled in settings. They are left to
right:
1. Home screen
2. Switch eyes – you need to do this sometimes to optimize the image
3. Pan and rotate toggle switch (replicates mouse action when on a touchscreen)
4. Reset – resets to the original image
5. Multimedia – add multimedia (images and videos to your lesson)
6. Search
7. Zoom slider
To control your model with the mouse:
• Left mouse button controls rotation
• Right mouse button controls
• Scroll wheel controls zoom
In the environments, the mouse control is different. Hold both mouse buttons down together to move forward and use the right button to pan (left-right-up-
down).
Some environments are set up for navigation by clicking a target circle e.g. the cotton textile mill.
© Gaia Technologies PLC 2018
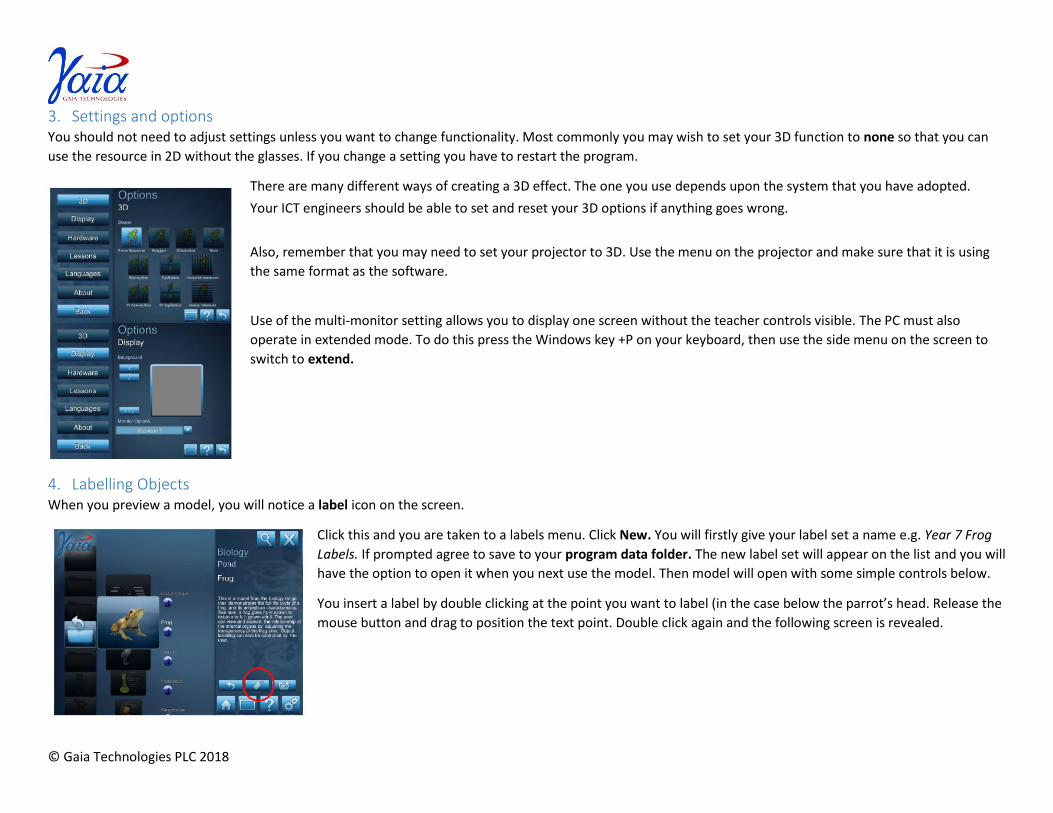
3. Settings and options You should not need to adjust settings unless you want to change functionality. Most commonly you may wish to set your 3D function to none so that you can
use the resource in 2D without the glasses. If you change a setting you have to restart the program.
There are many different ways of creating a 3D effect. The one you use depends upon the system that you have adopted.
Your ICT engineers should be able to set and reset your 3D options if anything goes wrong.
Also, remember that you may need to set your projector to 3D. Use the menu on the projector and make sure that it is using
the same format as the software.
Use of the multi-monitor setting allows you to display one screen without the teacher controls visible. The PC must also
operate in extended mode. To do this press the Windows key +P on your keyboard, then use the side menu on the screen to
switch to extend.
4. Labelling Objects When you preview a model, you will notice a label icon on the screen.
Click this and you are taken to a labels menu. Click New. You will firstly give your label set a name e.g. Year 7 Frog
Labels. If prompted agree to save to your program data folder. The new label set will appear on the list and you will
have the option to open it when you next use the model. Then model will open with some simple controls below.
You insert a label by double clicking at the point you want to label (in the case below the parrot’s head. Release the
mouse button and drag to position the text point. Double click again and the following screen is revealed.

© Gaia Technologies PLC 2018
Type your label into the box. You can now select its colour, language and size (using the slider).
Labels remain red during editing but will show in your chosen colours when viewed later.
You can delete a label with the delete button.
Once you have fully labelled your model save it.
5. Importing models from the 3D Warehouse It is possible to put free content directly in to Gaia 3D. for example you can find models in the 3D Warehouse (powered by Google). Go https://3dwarehouse.sketchup.com 1. Find the model you want and click on the 'Download Model' 2. Most models are available as a Collada file (within a .zip) or .kmz file. Either format will work.
3. By default the content will save into the Gaia 3D Viewer Folder.
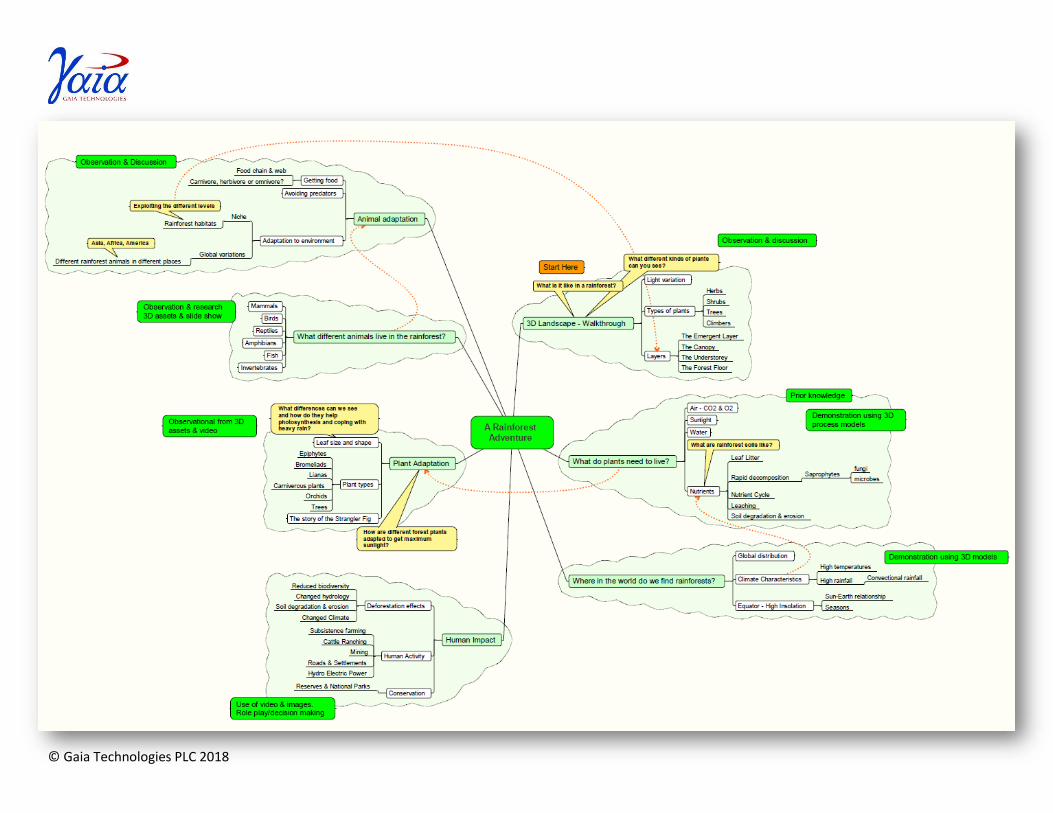
6. Pedagogic approach
1. Map out the various learning pathways that can be used with the resource.
2. Map out the questions that facilitate observational learning.
3. Use the resource as stimulus for enquiry, research or product production.
4. Use the resource as tool as pupils respond e.g. use of screen grab images.
5. Use the resource as a tool for assessment.
Stimulus Response Feedback
© Gaia Technologies PLC 2018