Embed Size (px)
Citation preview

Kindergarten—Unit 2The Five Senses
As young children actively explore their environment, they use all the sensesGod has given them. When something happens to one of our senses, God providesus with other ways of exploring. In this unit, children will participate in activitiesthat help them appreciate the senses they have.
LESSONS1. We Use Eyes to See2. We Use Ears to Hear3. We Use Noses to Smell4. We Feel with Fingers and Skin5. We Use Tongues to Taste
Unit 2 / The Five Senses: Unit Overview69
Unit 2: The Five Senses
Unit InformationSUMMARY
This experience-oriented unit is designed to help students understand howGod created us with senses to explore the world. It also focuses on ways studentscan use their senses the way God wants them to.
KEY BIBLE TEXTS• 1 Corinthians 12:12-31• Ephesians 4:7-8, 11-16• Matthew 6:22, 13:16• Psalm 141:8, 119:103, 34:8• Proverbs 8:33, 18:15• Mark 10:13-16• Mark 10:46-52• Mark 7:31-37• Matthew 26:6-13• Luke 8:40-42, 49-56• Luke 14:15-24
BIBLICAL BACKGROUNDWe Use Eyes to See
How we use our eyes is important. Matthew said, “If your eyes are good, yourwhole body will be full of light,” 6:22b. We are exhorted to practice a way of seeingthat leads to wholeness. This refers to more than just the physical act of seeing.We need to guard against prejudice and cultural biases. Jesus said, “Blessed areyour eyes, for they see,” Matthew 13:16a.
We Use Ears to HearScripture tells us that the things we hear with our ears should be things that
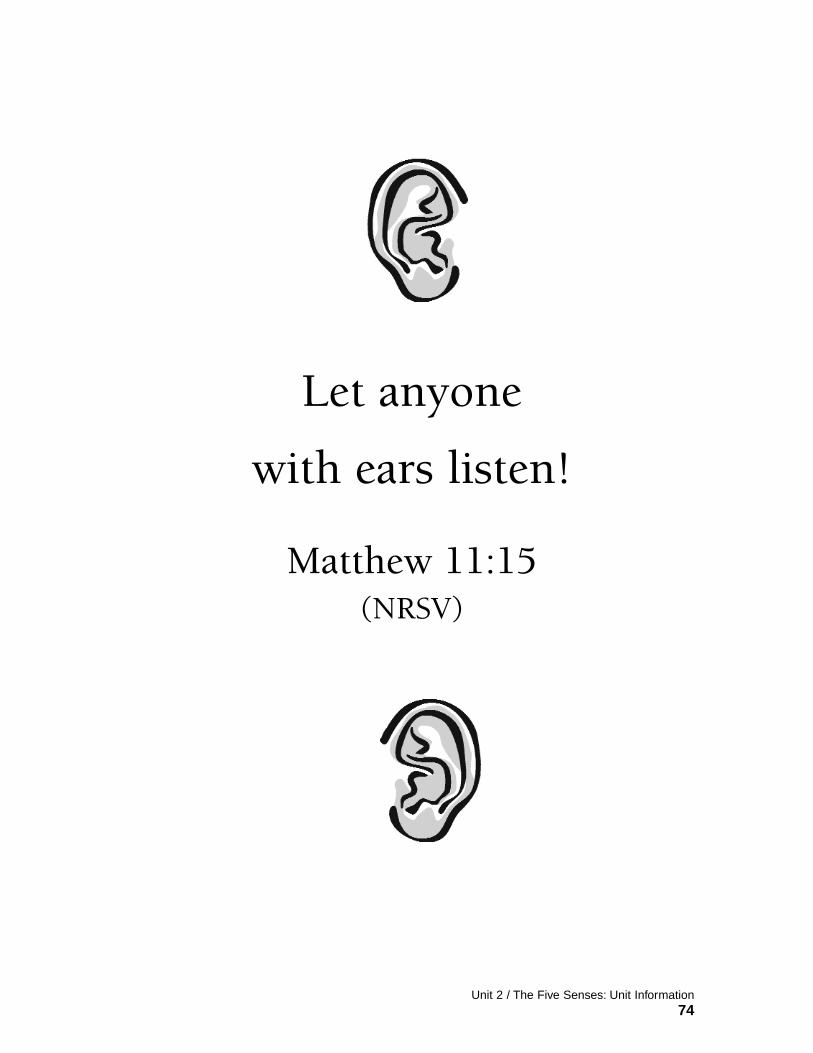
direct us towards wisdom. We need to listen to God’s commands, not simply hearthem. “Let anyone with ears listen!” Matthew 11:15.
We Use Noses to SmellFrom the days of Moses, people used all their senses to worship God. The
sense of smell was evoked by the use of incense. Incense was likened to theprayers of the saints: “May my prayer be set before you like incense,” Psalm141:2a. Incense is still an integral part of worship in Orthodox churches. It isused to symbolize prayers rising to God.
We Feel with Fingers and SkinThroughout the Old Testament, blessings were given by touch. The Levites
were blessed by the laying-on of hands when they became priests (Numbers 8:10).Isaac laid hands on Jacob and Esau when he blessed them (Genesis 27). Touch ispowerful. That message was evident when Jesus took Jairus’ daughter by thehand and brought her back to life.
Unit 2 / The Five Senses: Unit Information70
We Use Tongues to TasteMost references to tongues in scripture are warnings to guard the words that
come from one’s mouth. The Bible also teaches that God’s words are desirable.Psalm 34:8a invites us to “taste and see that the Lord is good.” Another deliciousexhortation is found in Psalm 119:103 where the psalmist writes: “How sweet areyour words to my taste, sweeter than honey to my mouth!”
ESSENTIAL UNDERSTANDINGS• God gave us senses to learn about and enjoy the world.• Everybody is important to God. No matter who we are, what we look like, or how
healthy we are, God cares about us.• We need to use our senses in ways that honor God.
WORSHIP / BIBLE MEMORYBefore each lesson in this unit, light a candle or lamp and lead the children in atime of worship.
1. Introduce the Bible memory text:
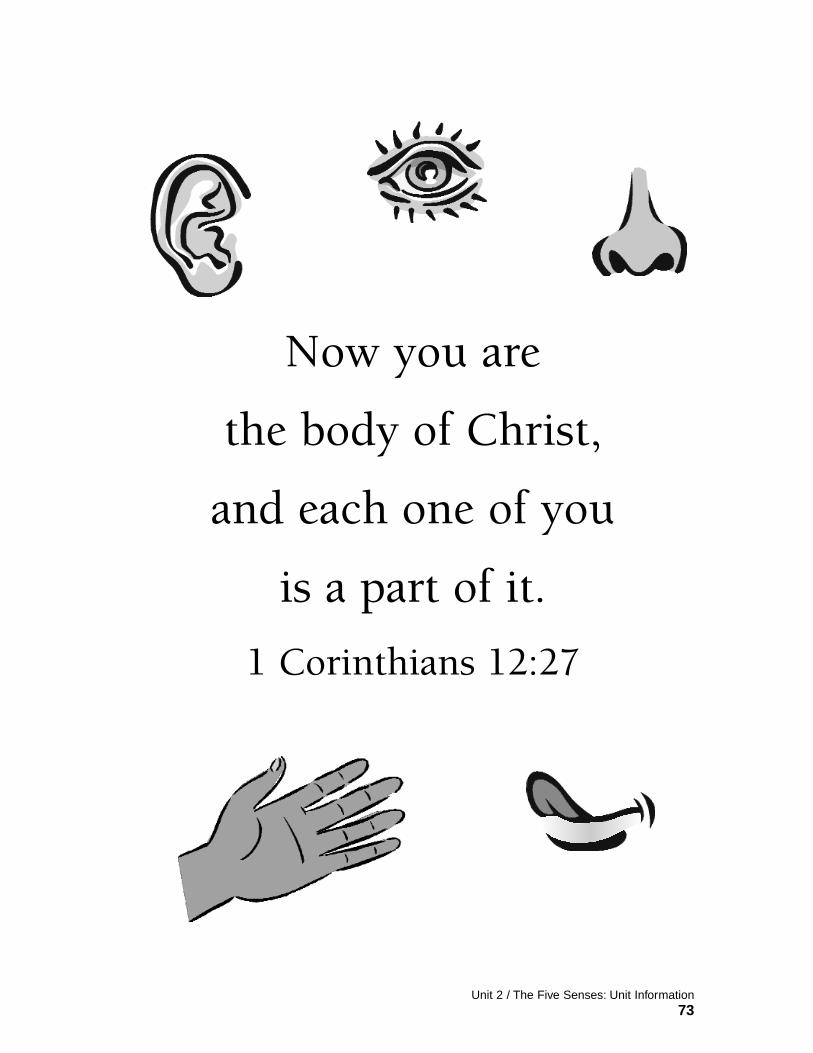
Now you are the body of Christ, and each one of you is a part of it.1 Corinthians 12:27
2. Learn the verse with these motions that include elements of American SignLanguage:
Now you (Hold out right hand and sweep from left to right to indicate group)
Are the body (Place hands in front of you and clasp them; first place left handon top of right, then switch)
Of Christ (Touch center of left palm with middle finger of right hand, then repeatwith lefthand middle finger on right palm, to symbolize Christ’s wounds)
And each one of you (Point to others)
Is a part of it. (Place hands in front of you with palms facing upward and elbowsbent slightly. Cross arms over body, placing hands near shoulders.)
3. Sing “Hands, Hands, Hands” (Jubilee Songbook, p. 58), but add these verses:
Hands, hands, handsThank you God for hands
Eyes, eyes, eyes . . .Ears, ears, ears . . .Noses, noses, noses . . .Fingers, fingers, fingers . . .
4. Prayer. Each day thank God for the gift of the sense focused on in that lesson.
Unit 2 / The Five Senses: Unit Information71

ASSESSING TEACHING / LEARNINGWhile students are at centers, observe their actions and listen to their comments.
Do they show an increased awareness of how our senses help us learn about theworld? Keeping anecdotal records will provide you with needed information as youfollow the child.
Reflection upon student interaction and discoveries will provide the basis foryour planning in the coming days. Monitoring children’s responses will help yousee where further clarification is needed.
MEMORY PASSAGESThis unit offers the following verses for students to memorize: 1 Corinthians
12:27 and bonus verses Matthew 11:15 and Psalm 119:103. You will find them inlarge format on pages 73-75, to copy as take-home sheets for students.
Unit 2 / The Five Senses: Unit Information72
Unit 2 / The Five Senses: Unit Information73
Now you are
the body of Christ,
and each one of you
is a part of it.
1 Corinthians 12:27
Let anyone
with ears listen!
Matthew 11:15 (NRSV)
Unit 2 / The Five Senses: Unit Information74
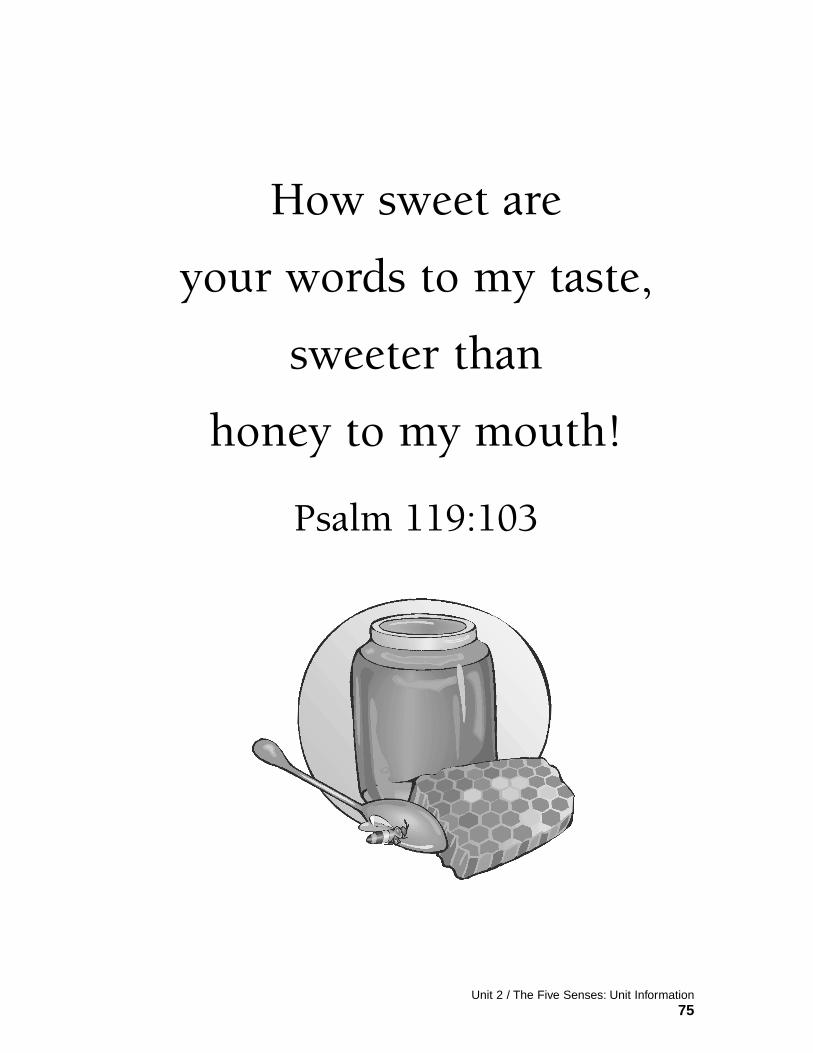
How sweet are
your words to my taste,
sweeter than
honey to my mouth!
Psalm 119:103
Unit 2 / The Five Senses: Unit Information75
The Five SensesLESSON 1: WE USE EYES TO SEEObjectiveChildren will value their ability to see with their eyes. They will learn about waysthey can use their eyes in God’s way.
Key Concepts• God gave us eyes to see.• People who cannot see with their eyes have other ways of seeing.
Text: Mark 10:46-52
Estimated Lesson Time: 40-50 minutes
Materials• Jubilee Songbook• Hairbrush or comb, spoon, pair of mittens, blindfold, picture of child in the class• Materials for activity centers:
—1-3 trays with 10-12 objects on each (scissors, ruler, cup, paper clip,pencil, etc.)
—Masks with eyeholes covered with layers of plastic wrap, OR gogglessmeared with petroleum jelly
—Alphabet letters (p. 81), cardstock, heavy cardboard, sharpened pencils—Magnifying glasses, prisms, sunglasses, colored plastic, old prescription
glasses, cracked mirrors, microscopes—Paper bag (large enough to fit over child’s head), post-it notes
• For closing activity: index cards, tape • For Extend the Lesson, option one: “I see ____” handout (p. 82), magazines,
scissors, glue, pencils, stapler
Teacher Preparation• Prepare activity centers according to instructions on page 80.• Practice telling the Bible story.• Make “feeling cards” for closing activity by writing the following words on index
cards: sad, angry, scared, shy.• For “Braille” letters center, make copies of alphabet letters (p. 81). • If using Extend the Lesson, option one, make copies of the “I see _____” handout,
enough for several pages per child.• If using Extend the Lesson, option three, invite a blind person to visit your class.
INTRODUCING THE LESSON1. Worship and Bible memory. See Unit Information, page 71.
2. Blindfold one child in front of the group. (If your group volunteers readily, drawa name out of a jar.) One at a time, place the following objects (or objects of your
Unit 2 / Lesson 1: We Use Eyes to See76
choice) in the blindfolded child’s hand and let the child guess what it is: hairbrushor comb, spoon, pair of mittens. Instruct the other children to be very quiet.
When you remove the blindfold, ask the group how they think the blindfoldedchild could tell what the object was. (The child had used the item before or had seenit before.) Ask, Could you use these things without seeing them?
Now blindfold the child again and place a picture of a child in the class in hisor her hands. Ask the child to tell you who is in the picture. Then remove theblindfold and talk about how we use our eyes. (To read, to know where to walk, tolook at people’s faces to see how they are feeling, to know what we’re eating, etc.)
LESSON STEPS1. Tell the story of blind Bartimaeus by acting it out with the children. Choose onechild to be Blind Bartimaeus and another to be Jesus. (If children argue about turns,draw names out of a jar.)
Lay a blanket on the floor where there is room for everyone to stand. HaveBartimaeus recline on the blanket, wrapped in another blanket. He/she may beblindfolded or have eyes closed. Move the rest of the class to another part of theroom. They will walk past the place where Bartimaeus is lying.
Narrate the story in the following way. You may choose to simply read theparts where Bartimaeus, Jesus, and the crowd speak, or have them repeat theselines.
One day, Jesus, his disciples, and a large crowd of people were traveling.They were on their way to Jerusalem. (Instruct class to walk around room slowly.)The crowd had to walk through a city named Jericho. They probably boughtsome food for their journey and maybe even slept in Jericho overnight. AsJesus and the crowd were leaving the city of Jericho, they passed by a blindbeggar sitting beside the road. (Have crowd walk until they come to whereBartimaeus is lying.) A beggar is someone who cannot work and asks otherpeople to give him money or food. (Instruct Bartimaeus to hold out hand, as ifasking for something.)
Bartimaeus could hear the noisy group coming. He wondered who wouldtravel with such a large crowd! Someone whispered to Bartimaeus. (Have achild pretend to whisper to Bartimaeus.) “It’s Jesus of Nazareth! You know, thatman who heals sick people!”
Barimaeus shouted, “Jesus, Son of David, have mercy on me!” (Ask childwho is playing Bartimaeus to shout words.) He kept on shouting. (Have childrepeat words over and over.) Some people in the crowd told Bartimaeus to bequiet. (Have crowd make shushing sounds.) But that made Bartimaeus cry outeven louder. “Jesus, Son of David, have mercy on me!”
Jesus heard Bartimaeus. He stopped walking and said, “Ask that man tocome here.” So the people in the crowd told Bartimaeus, “Get up! Jesus is call-ing you!”
So Bartimaeus jumped up, threw off his blanket, and came to Jesus. ThenJesus asked him, “What do you want me to do for you?” Bartimaeus replied, “Myteacher, let me see again!” Jesus answered, “Go, your faith has made you well.”
Right away, Bartimaeus could see! He followed Jesus and the crowd as theytraveled to Jerusalem. (Have whole class “travel” back to story area.)
Unit 2 / Lesson 1: We Use Eyes to See77
2. Wonder about the story, using the following statements:• I wonder how Bartimaeus knew who Jesus was and what he could do.• I wonder why the crowd told Bartimaeus to be quiet.• I wonder why Jesus said, “Go, your faith has made you well.”• I wonder what Bartimaeus told his friends about Jesus.Then pray, “You are a caring God. You care about people like Bartimaeus, who
are blind and poor. We know that you can heal people. Thank you for givingBartimaeus his sight back. Thank you for all the things you do for us too. Amen.”
3. Activity centers. Divide children into five groups and send each group to oneof the centers described on page 80. When they begin to lose focus (5-10 minutes),move the groups to the next center. Note: You will need to explain and possiblydemonstrate each of the centers. Explain each one to the whole group, then dismisseach group of 3-6 children one at a time, waiting to dismiss the next group until theprevious one is settled and doing the activity. This will give the waiting groups anadditional demonstration of what to do at the center.
4. Discuss the activities. Gather students together again to talk about the fol-lowing questions:
• Which center was the hardest to do? The easiest?• What are some hard things for real blind people to do?• How do you think they learn to do things like walk, eat, or read?
5. A different way to see. Introduce the final activity by saying, “None of us areblind. We can see what we’re eating and where we’re walking. But sometimes weare blind in other ways. Sometimes we look at people and think we know whatthey’re like. But God wants us to learn to know people before we decide what theyare like.”
Call one student to come forward. Tape a card to the child’s back that says“Sad,” making sure none of the children can see it. (Also be sure to use childrenwho don’t really represent the emotions on the cards. The children should know youare pretending.) Now describe a situation:
“Maria comes to school one morning and takes a teddy bear out of herbackpack. She carries it to her seat and puts her head down on her desk. Shedoesn’t talk to anyone. What would your eyes tell you about how Maria is feel-ing?”Show the class the card. Discuss how their eyes can help them see importantthings, like how people are feeling. “At first you might think Maria is being a‘baby.’ Do you think your eyes need to look close to know that Maria might besad about something?”
Continue with the next situation, taping the word “Angry” onto a child’s back:
“Joseph runs into the school and hits another child with his backpack.When he comes into the classroom, the teacher asks Joseph to take his seatquietly. Instead he goes to the chalkboard and breaks a piece of chalk intopieces. What would your eyes tell you about how Joseph is feeling?” Show thechildren the card. “At first, you might think that Joseph is mean or bad. Doyou think your eyes need to look close to know that Joseph might be angryabout something that happened that morning?”
Unit 2 / Lesson 1: We Use Eyes to See78
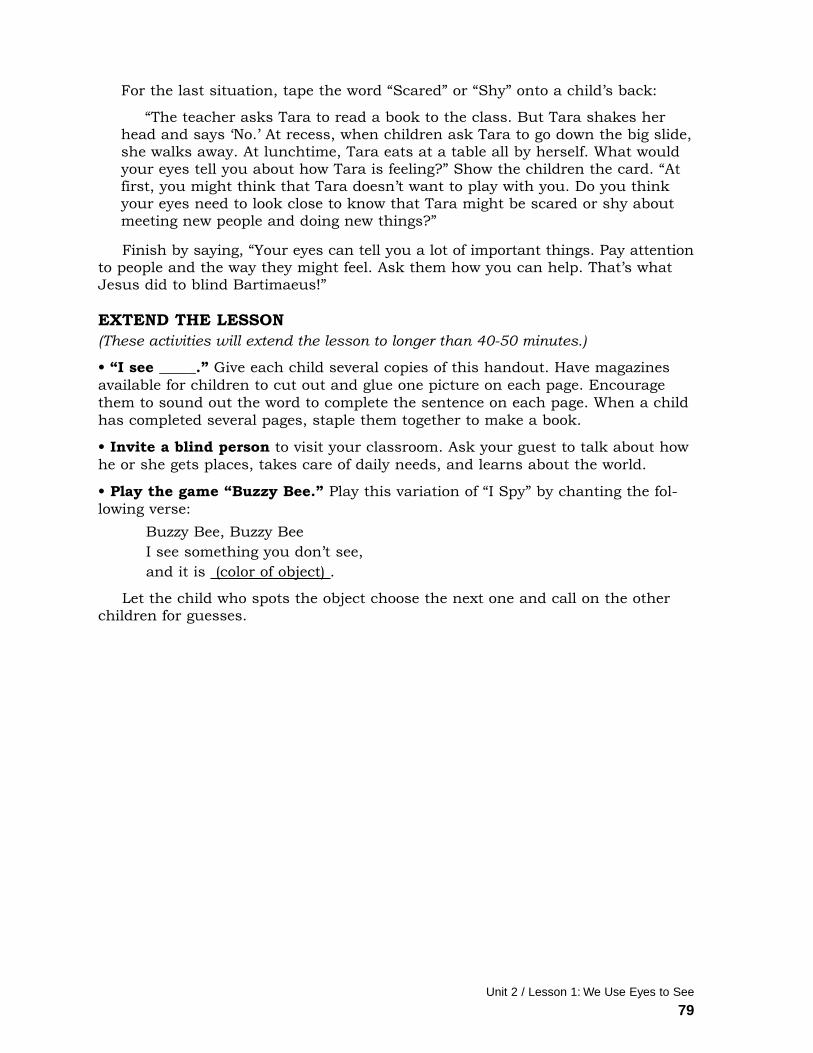
For the last situation, tape the word “Scared” or “Shy” onto a child’s back:
“The teacher asks Tara to read a book to the class. But Tara shakes herhead and says ‘No.’ At recess, when children ask Tara to go down the big slide,she walks away. At lunchtime, Tara eats at a table all by herself. What wouldyour eyes tell you about how Tara is feeling?” Show the children the card. “Atfirst, you might think that Tara doesn’t want to play with you. Do you thinkyour eyes need to look close to know that Tara might be scared or shy aboutmeeting new people and doing new things?”
Finish by saying, “Your eyes can tell you a lot of important things. Pay attentionto people and the way they might feel. Ask them how you can help. That’s whatJesus did to blind Bartimaeus!”
EXTEND THE LESSON(These activities will extend the lesson to longer than 40-50 minutes.)
• “I see _____.” Give each child several copies of this handout. Have magazinesavailable for children to cut out and glue one picture on each page. Encouragethem to sound out the word to complete the sentence on each page. When a childhas completed several pages, staple them together to make a book.
• Invite a blind person to visit your classroom. Ask your guest to talk about howhe or she gets places, takes care of daily needs, and learns about the world.
• Play the game “Buzzy Bee.” Play this variation of “I Spy” by chanting the fol-lowing verse:
Buzzy Bee, Buzzy BeeI see something you don’t see,and it is (color of object) .
Let the child who spots the object choose the next one and call on the otherchildren for guesses.
Unit 2 / Lesson 1: We Use Eyes to See
79
Centers for “We Use Eyes to See”1. Memory trays. Place 10-15 familiar items on a tray: scissors, ruler, cup, paperclip, pencil, shell, etc. (Prepare 2 trays if groups have 4 people, 3 trays if group has6, etc.) Invite students to work in pairs. One student looks at the tray, while theother student quietly counts to 30. The “counter” takes the tray away and the“looker” tries to name as many objects as possible, from memory. Keep trading offuntil it is time to change centers. If the group has an uneven number, have twochildren be the “lookers” with one “counter.”
2. Smeary goggles. Provide masks with eyeholes covered with several layers ofplastic wrap, OR goggles smeared with petroleum jelly. Also provide paper andpencils at the center. Have students wear masks or goggles and try to write or draw.
3. “Braille” letters. On a table, place copied alphabet letters from page 81, piecesof cardstock, thick cardboard on which to lay papers, and sharpened pencils.Have children lay alphabet paper on top of the cardstock and then on top of thecardboard. They may use the paper as a pattern to poke holes into the cardstockwith a pencil, in the shape of a letter. When they finish punching the holes, havechildren turn over the cardstock over to feel the “Braille” letter they have created.Explain that blind people learn a special alphabet of raised bumps, but their let-ters look different from ours. Ask children if they can “read” the letter with theireyes closed.
4. Vision tools. Display tools that alter our vision: magnifying glasses, prisms,sunglasses, colored plastic, old prescription glasses, cracked mirrors, or micro-scopes. Let children use these tools to explore things in the room. They will bemuch more content to find their own things to explore than to be limited to only afew things displayed on a table. Warn them what will happen if they get silly ormisuse the tools. (That's up to you!)
5. Game. Play a version of “Pin the Tail on the Donkey.” Rather than using ablindfold, provide a large paper bag to put over one child’s head. (You may need tocut it off so child can move arms.) Have another child hand the blindfolded child apost-it note and see if s/he can place it inside a circle drawn on the chalkboard.Encourage the other children to keep the blindfolded child safe. Don’t let the childbump into anything.
These centers seem like a lot of work for just one Bible session! Store them inshallow boxes or baskets and get them out again, for other sessions in this Bibleunit or at another time in your kindergarten day. You may find that you need torotate as a whole group or that you need adult or older students to come in andhelp with the stations.
Unit 2 / Lesson 1: We Use Eyes to See80
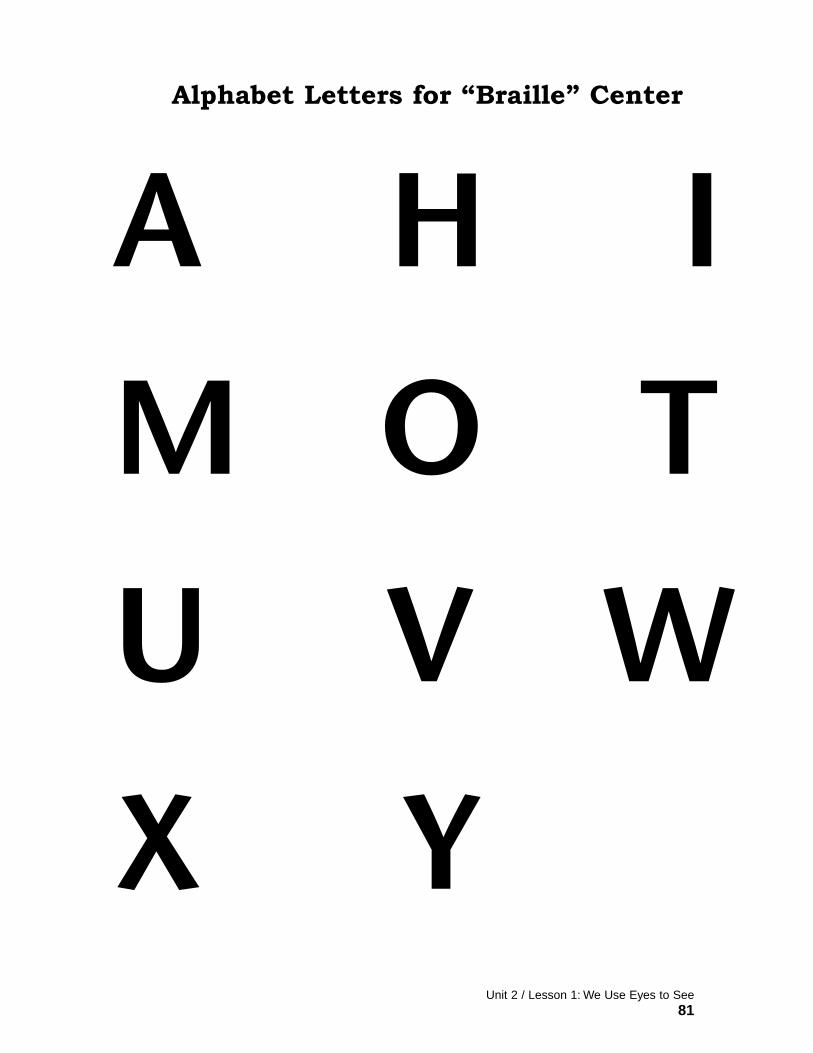
Alphabet Letters for “Braille” Center
A H I
M O T
U V W
X YUnit 2 / Lesson 1: We Use Eyes to See
81

I see
________________.
Unit 2 / Lesson 1: We Use Eyes to See82

The Five Senses
LESSON 2: WE USE EARS TO HEAR
ObjectiveChildren will value their ability to hear. They will learn about how to use theirears and voices in God’s way.
Key Concepts• God gave us ears to hear.• Those who cannot hear with their ears have other ways of hearing.
Text: Mark 7:31-37
Estimated Lesson Time: 40-50 minutes
Materials• Blindfold, small bell• Jubilee Songbook• Materials for activity centers:
—Musical instruments—Empty toilet tissue tubes, dry rice or beans, small squares waxed paper,
tape—Sandpaper, glue, wooden blocks—Empty cereal boxes, rubber bands—Tape player with headphones, tape of book or music—Empty oatmeal boxes—Paper and markers—Small glass jars, pitcher of water and spoons—Tape recorder with blank tape and microphone—Paper or plastic disposable cups, string, tape—Ear protectors (such as those used by construction workers)
• For closing activity: poster board and marker• For Extend the Lesson, option one: “I hear ___” handout (p. 87), magazines,
scissors, glue, markers, stapler
Teacher Preparation• Prepare activity centers according to instructions on page 86.• Practice telling the Bible story.• If using Extend the Lesson, option one, make copies of the “I hear _____”
handout, enough for several pages per child.• If using Extend the Lesson, option three, invite a deaf person to visit your class.
INTRODUCING THE LESSON1. Worship and Bible memory. See Unit Information, page 71.
2. Blindfold one child at a time. Let children take turns carrying a small bell tovarious parts of the room. Have them ring the bell and let the blindfolded child
Unit 2 / Lesson 2: We Use Ears to Hear83
point to where the sound comes from. Take the blindfold off and let them see ifthey were right. Continue until all children have had a chance to be blindfolded orto ring the bell. Brainstorm about all the ways we use our ears and voices. (Listento music, listen to and talk to our friends, sing a song, hear instructions, hear ababy cry, etc.)
LESSON STEPS1. Tell the story of Jesus healing the deaf man. Act out the story for the children,playing the part of Jesus. Recruit a child to play the role of the deaf man. The rest ofthe class can be the crowd surrounding the deaf man, and the disciples travelingwith Jesus. Wrap a blanket around yourself to represent a robe.
One day, I was walking along with my disciples, traveling to the Sea ofGalilee. On our way, a crowd of people brought a deaf man to me. (Invite half ofgroup to crowd around deaf man and walk toward you. The other half maystand with you.) They said, “. . . (Have students call out things like “Heal ourfriend!” and “This man needs your help, Jesus!”)
I went over to the crowd and spoke to the man. (Walk close to deaf man andsay something to him.) I could tell he couldn’t hear me. When he tried to speakto me, his voice sounded funny. His friends were determined to get help forhim. They begged me to lay my hands on him and heal him.
I asked the deaf man to come with me. (Take hand of deaf man and walk alittle apart from rest of group, but where they can still see what you say and do.)We went away from the crowd. I put my fingers into his ears (put fingers in oron child’s ears), spit on the ground, and touched his tongue. (You can pretendto do these things.) I looked up into heaven and said, “Be opened.”
Right away, the deaf man could hear and speak. (Have deaf man say some-thing to crowd.) I told the crowd, “Don't tell anyone about this.” But they didn’tlisten to me. They went off and told everyone they could find about my healingpowers. They said, “Jesus can do everything so well! He can even make deafpeople hear and speak!” (Have crowd run around room, shouting these words.)
2. Wonder about the story. Explain that Jesus told this story to show peoplewhat God is like. God always loves us, no matter what we do. Then wonder aboutthe following statements:
• I wonder how the crowd knew that Jesus could heal the deaf man.• I wonder what the deaf man said the first time he spoke clearly.• I wonder why Jesus didn’t want the crowd to tell anyone what he had done.• I wonder how I can use my ears in the way God wants me to.
Pray, “We are glad that we can hear and speak. Thank you for caring aboutthe deaf man and healing him. Help us to use our ears to hear good things andour voices to say kind words. Amen.”
3. Activity centers. Divide children into five groups, and send each group to oneof the centers described on page 86. When they begin to lose focus (5-10 minutes),move the groups to the next center. Note: You will need to explain and possiblydemonstrate each of the centers. Explain each one to the whole group, then dismisseach group of 3-6 children one at a time, waiting to dismiss the next group until theprevious one is settled and doing the activity. This will give the waiting groups anadditional demonstration of what to do at the center.
Unit 2 / Lesson 2: We Use Ears to Hear84
4. Using our ears. Finish the lesson by cleaning up the centers and calling thechildren back together. Ask which centers they enjoyed a lot. Say, “We use ourears and voices every day. God wants us listen to and say things that help theworld be a better place. Let’s think together about what words we could say thatwould be pleasing to God.
Can you think of some words that make the world a better place? Let me giveyou an example: ‘I love you, Mom.’ Now you think of some phrases that peoplelike to hear.” (Examples might be: I’m sorry; Will you play with me?; I can be yourfriend; Please; Thank you.) Write down the phrases to hang in poster form some-where in the room. The children can refer to these phrases when they write notes.
EXTEND THE LESSON(These activities will extend the lesson to longer than 40-50 minutes.)
• “I hear _____.” Give each child several copies of this handout. Have magazinesavailable for children to cut out and glue one picture on each page. Encouragethem to sound out the word to complete the sentence on each page. When a childhas completed several pages, staple them together to make a book.
• Invite a deaf person to visit your class. Also invite a hearing person who canuse sign language to translate your visitor’s words. Ask your guest to describeways they get along in the world.
Unit 2 / Lesson 2: We Use Ears to Hear85
Centers for “We Use Ears to Hear”1. Play musical instruments. Display several kinds of musical instruments for thechildren to play. If you want, include a music recording for children to accompany.
2. Make musical instruments. Provide materials for the children to make someinstruments of their own. Have examples made for them to copy. Here are somesuggestions:
• Tube shakers—You will need toilet tissue tubes, dry rice or beans, smallsquares of waxed paper, and tape. Tape waxed paper over ends of tube afterputting beans inside. Children can decorate tubes with markers.
• Rubber band guitars—Cover empty cereal boxes with paper, decorate, andput different-sized rubber bands around outside of box. The difference in ten-sion in the rubber bands will create different tones.
• Sandpaper blocks—Glue pieces of sandpaper onto wooden blocks. See if aparent or grandparent will cut blocks to size.
• Oatmeal box drums—Provide empty oatmeal boxes, paper, and markers.Children can cover and decorate the outside of their “drums.”
3. Listening center. Have a short book and tape available for a simple listeningcenter. Or create a tape or CD with familiar sounds and have children guess whatthe source of the sound is. (You will need a CD or tape player.)
4. Experiment with tones. Provide several glass jars, a small pitcher of water,and several spoons. Children can experiment with making different tones, based onthe amount of water in a jar. Encourage them to pour different amounts of waterinto each jar and gently tap the side of the jar. How do they sound different? (Beprepared for spills!)
5. Hear yourself talk. Provide a tape recorder with a microphone. Invite childrento take turns recording their voices and listening to them. (Children love to hearthemselves speak.) Introduce the Record, Rewind, and Play buttons with the wholegroup beforehand.
6. Create a “telephone.” Provide paper or plastic cups with small holes punchedin the ends, cotton string cut into 8-10 ft. lengths, and tape. Show children howto make a telephone by threading string through the holes of two cups, tying aknot (if they can) and taping the string inside the bottoms of each cup. Let chil-dren go out in the hallway to try out their telephones. One child speaks into a cupwhile the other child listens with the other cup.
7. Communicate without hearing. Provide several sets of ear protectors likethose construction workers wear. Let the children take turns wearing the protectorswhile other children try to communicate a message by sign language.
Unit 2 / Lesson 2: We Use Ears to Hear86
I hear
________________.
Unit 2 / Lesson 2: We Use Ears to Hear87
The Five Senses
LESSON 3: WE USE NOSES TO SMELLObjectiveChildren will value their ability to smell and the joy that good smells bring to life.
Key Concepts• God gave us noses with which to smell.• We can enhance other people’s lives by sharing good smells.
Text: Matthew 26:6-13
Estimated Lesson Time: 40-50 minutes
Materials• Jubilee Songbook• Something that smells strong, such as aged cheese or burned food• Something that smells pleasant, such as chocolate or cinnamon• Paper, drawing/writing supplies• Props for Bible story: head cloth; small, beautiful jar with scent of perfume• Materials for activity centers:
—Small containers (such as film canisters) with scents inside—Play dough (purchased or homemade) with scented oils kneaded in—Colored paper, cotton swabs or brushes, small cups of scented baby oil —“Match the Nose” handout (p. 92), scissors, glue—Clothespins, strong-smelling snack—Scented markers, paper, scented stickers (optional)
• For Extend the Lesson, option one: “I smell ____” handout (p. 93), magazines,scissors, glue, stapler, markers or pencils
• For Extend the Lesson, option two: small jars with lids, baby oil, extract or scented oil, stickers, permanent markers
• For Extend the Lesson, option three: sandpaper, cinnamon stick, scissors, hole punch, yarn, crayons
• For Extend the Lesson, option four: small paper cups, scented lotion• For Extend the Lesson, option five: Gramma’s Walk by Anna Grossnickle Hines
(Greenwillow Books, 1993) OR A Sweet Smell of Roses by Angela Johnson (Simonand Schuster, 2004)
Teacher Preparation• Prepare activity centers according to instructions on page 91. You will need to
make enough copies of the “Match the Nose” handout for each child to have one.• Practice telling the Bible story.• If using Extend the Lesson, option one, make copies of the “I smell _____”
handout, enough for several pages per child.
INTRODUCING THE LESSON1. Worship and Bible memory. See Unit Information, page 71.2. Pass around a small bowl holding something that smells strong. Ask children
Unit 2 / Lesson 3: We Use Noses to Smell88
if they like the smell. Then pass around another bowl, with something that smellspleasant. Ask if the children like this smell. “Does it remind you of somethinggood?” Together, make a list of smells the children like and smells they don’t like.Prompt them to think about outdoor smells, food smells, and smells of health andbeauty care products, such as lotion, shampoo, and toothpaste.
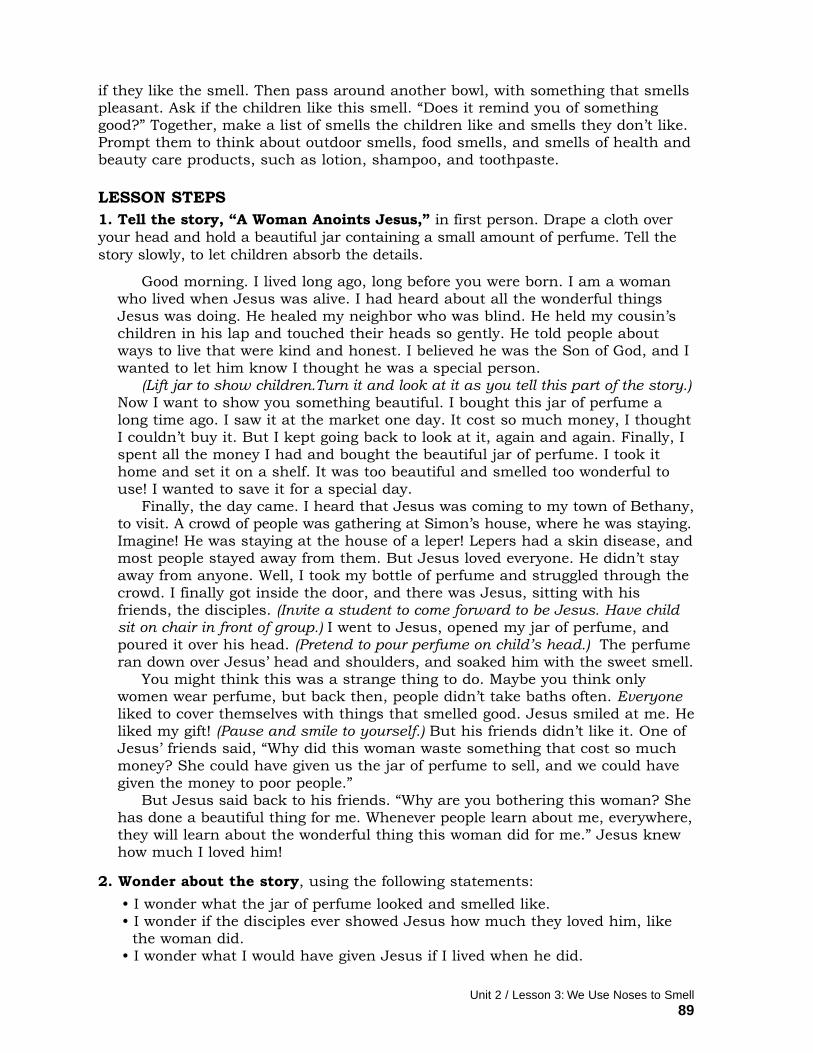
LESSON STEPS1. Tell the story, “A Woman Anoints Jesus,” in first person. Drape a cloth overyour head and hold a beautiful jar containing a small amount of perfume. Tell thestory slowly, to let children absorb the details.
Good morning. I lived long ago, long before you were born. I am a womanwho lived when Jesus was alive. I had heard about all the wonderful thingsJesus was doing. He healed my neighbor who was blind. He held my cousin’schildren in his lap and touched their heads so gently. He told people aboutways to live that were kind and honest. I believed he was the Son of God, and Iwanted to let him know I thought he was a special person.
(Lift jar to show children.Turn it and look at it as you tell this part of the story.)Now I want to show you something beautiful. I bought this jar of perfume along time ago. I saw it at the market one day. It cost so much money, I thoughtI couldn’t buy it. But I kept going back to look at it, again and again. Finally, Ispent all the money I had and bought the beautiful jar of perfume. I took ithome and set it on a shelf. It was too beautiful and smelled too wonderful touse! I wanted to save it for a special day.
Finally, the day came. I heard that Jesus was coming to my town of Bethany,to visit. A crowd of people was gathering at Simon’s house, where he was staying.Imagine! He was staying at the house of a leper! Lepers had a skin disease, andmost people stayed away from them. But Jesus loved everyone. He didn’t stayaway from anyone. Well, I took my bottle of perfume and struggled through thecrowd. I finally got inside the door, and there was Jesus, sitting with hisfriends, the disciples. (Invite a student to come forward to be Jesus. Have childsit on chair in front of group.) I went to Jesus, opened my jar of perfume, andpoured it over his head. (Pretend to pour perfume on child’s head.) The perfumeran down over Jesus’ head and shoulders, and soaked him with the sweet smell.
You might think this was a strange thing to do. Maybe you think onlywomen wear perfume, but back then, people didn’t take baths often. Everyoneliked to cover themselves with things that smelled good. Jesus smiled at me. Heliked my gift! (Pause and smile to yourself.) But his friends didn’t like it. One ofJesus’ friends said, “Why did this woman waste something that cost so muchmoney? She could have given us the jar of perfume to sell, and we could havegiven the money to poor people.”
But Jesus said back to his friends. “Why are you bothering this woman? Shehas done a beautiful thing for me. Whenever people learn about me, everywhere,they will learn about the wonderful thing this woman did for me.” Jesus knewhow much I loved him!
2. Wonder about the story, using the following statements: • I wonder what the jar of perfume looked and smelled like.• I wonder if the disciples ever showed Jesus how much they loved him, like
the woman did.• I wonder what I would have given Jesus if I lived when he did.
Unit 2 / Lesson 3: We Use Noses to Smell89
Pray, “Thank you God, for noses to smell wonderful smells. We love you like thewoman in the story loved you. Help us to show people how much we love them. Amen.”
3. Activity centers. Divide children into five groups, and send each group to oneof the centers described on page 91. When they begin to lose focus (5-10 minutes),move the groups to the next center. Note: You will need to explain and possiblydemonstrate each of the centers. Explain each one to the whole group, then dismisseach group of 3-6 children one at a time, waiting to dismiss the next group until theprevious one is settled and doing the activity. This will give the waiting groups anadditional demonstration of what to do at the center.
4. What smells would you give? End the lesson by cleaning up the centers andcalling the children back together. Ask which centers they enjoyed a lot. Say, “Thewoman in the story gave Jesus an expensive jar of perfume. She loved Jesus verymuch, and she thought Jesus would like the smell of the perfume. If you couldgive someone you love something good to smell, what would you give them?”
Invite children to share what they might give: chocolate chip cookies, Mom’sperfume, bubble gum, flowers from the garden, etc. Then give them pieces of paperto draw picture of themselves giving their good-smelling gifts. Encourage them totake their time drawing and writing on their paper.
As children finish their drawings, invite them to put them in their take-homeboxes to give to someone they love. Children who finish before others may returnto one of the centers until all are done with their drawings.
EXTEND THE LESSON(These activities will extend the lesson to longer than 40-50 minutes.)
• “I smell _____.” Give each child several copies of this handout. Have magazinesavailable for children to cut out and glue one picture on each page. Encouragethem to sound out the word to complete the sentence on each page. When a childhas completed several pages, staple them together to make a book.
• Make a gift of perfumed oil to give to someone special. Collect baby food jarswith lids or purchase fancy, small jars. Give a jar filled with unscented baby oil toeach child. Add a few drops of extract or scented oil. Help children fasten the lidsTIGHTLY. Instruct them to shake the jar, to mix the scent with the baby oil. If youwish, let children decorate the jars with small stickers or permanent markers.They could also make cards to accompany their gifts.
• Make a spicy necklace. Give each child a small square of sandpaper and smallpiece of cinnamon stick. Instruct them to rub the sandpaper with the cinnamonstick until it smells really good! Then have them cut their sandpaper pieces intoshapes. (They can draw a shape on the back of the paper before cutting.) Punch ahole in each shape and give the child a piece of yarn to thread through the hole.Tie a knot to form a necklace. Children could also decorate the shapes with crayons.
• “Anoint” each other. Pair off children (boys with boys, girls with girls), givingeach pair a small amount of perfumed lotion in a paper cup. Invite them to“anoint,” rub lotion onto, their partners’ hands. When they are done, switch roles.
• Read a book about smells: Gramma’s Walk or A Sweet Smell of Roses.
Unit 2 / Lesson 3: We Use Noses to Smell90
Centers for “We Use Noses to Smell”1. Smelling jars. Make a set of “smelling jars” from empty film canisters or smalljars. Put pinholes or nail holes in the lid of each container. Then put a scenteditem or scented cotton ball in each container. Some suggestions are: onion, vanillaextract, vinegar, cinnamon, rubbing alcohol, coffee grounds, chocolate chips orcocoa, perfume, peanut butter, a banana chunk, lemon oil, peppermint extract,mothballs. Invite children to identify what is in each container. Let them separatethe containers into smells they like and smells they don’t like, or sort themaccording to food smells or other smells.
2. Scented play dough. Knead scented oils or extracts such as peppermint,almond, or lemon, into different colors of play dough. Let children play with thedough, with instructions to keep colors (and scents) separate.
3. Scented drawings. You will need colored paper, cotton swabs or paintbrushes,and bowls of baby oil scented with perfume. Cover table with newspapers. Havechildren dip the brush or swab in the baby oil and draw on the paper with it.After the oil soaks in, have children lift up their pictures to the light, to see theirworks of art.
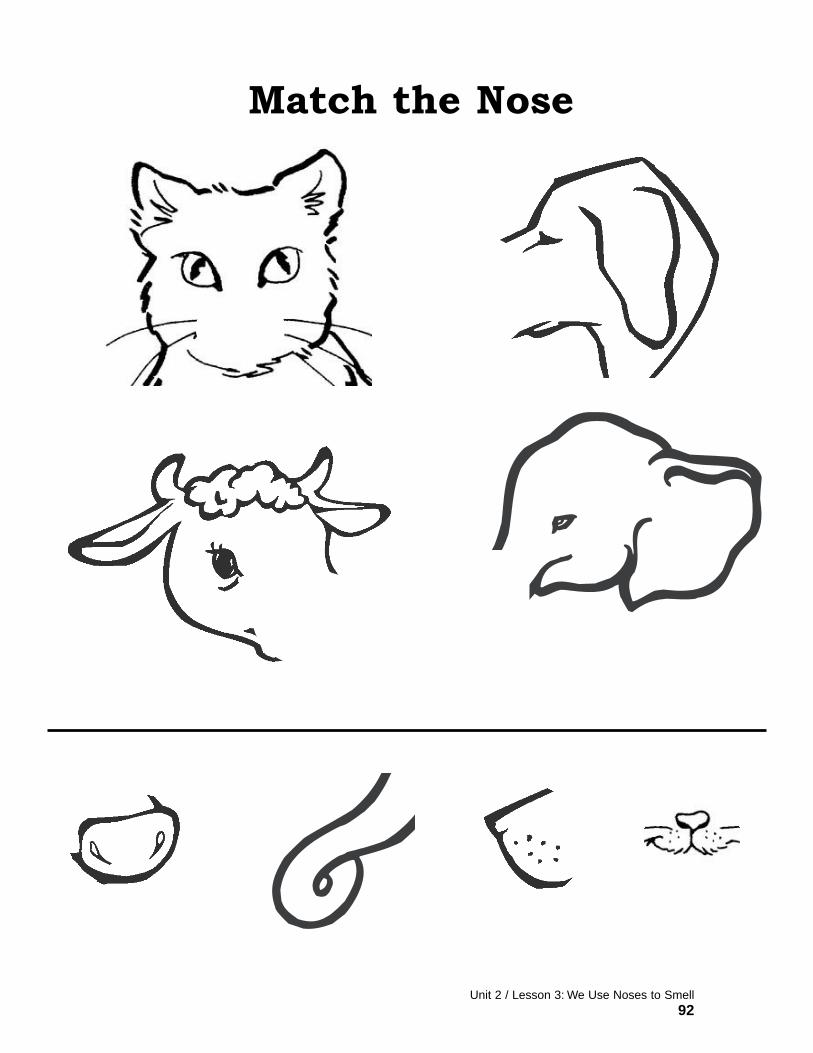
4. Match the nose. Have children cut out the noses on the “Match the Nose”handout (p. 92). Tell them to match the nose to the correct animal and glue it inplace. Or let them draw a nose, serious or silly, on the animal.
5. Smell and taste. Have children clip a clothespin on their noses and eatpeanut-butter crackers or other strong-smelling snacks. Ask if they can taste thesnack just as well when they cannot smell it.
6. Scented markers. Invite children to write words or letters they know with a setof scented markers. They can also decorate their papers with scented stickers.
(You may also want to display the centers from “We Use Eyes to See” and “We UseEars to Hear.”)
Unit 2 / Lesson 3: We Use Noses to Smell91
Match the Nose
Unit 2 / Lesson 3: We Use Noses to Smell92
I smell
________________.
Unit 2 / Lesson 3: We Use Noses to Smell93
The Five Senses
LESSON 4: WE FEEL WITH FINGERS AND SKINObjectiveChildren will value their ability to feel. They will learn ways that touch heals.
Key Concepts• God gave us fingers and skin with which to touch.• Good touch helps people feel better and can even help heal them.
Text: Luke 8:40-42, 49-56
Estimated Lesson Time: 40-50 minutes
Materials• Jubilee Songbook• Bible story drama script (p. 97)• Materials for activity centers:
—Tempera or finger paints with textures added (sand, coffee, spices, starch, salt, corn meal)
—Brushes, paper, paint shirts—Stiff paper or cardstock, white glue—Texture items (cotton, velvet, foil, sandpaper, burlap, etc.)—Play dough with small items kneaded in (popcorn, rice, beans, sand, etc.)—5-7 large socks, small objects to put in them (spoon, ball, block, sponge,
apple, rock, cotton, leaf, pinecone, feather, etc.)—5 different grades of sandpaper
• Large sheet of paper, marker• For Extend the Lesson, option one: “I feel ______” handout (p. 99), magazines,
scissors, glue, stapler, markers or pencils• For Extend the Lesson, option two: pieces of cardboard with mazes or alphabet
letters drawn on them (1 per child), white glue• For Extend the Lesson, options three and four: Jubilee Songbook and CD• For Extend the Lesson, option five: hand lotion, small paper cups (optional)
Teacher Preparation• Ask a group of older students to perform the Bible story as a play. Make enough
copies of the script (p. 97) for each reader/actor to have one.• Prepare activity centers according to instructions on page 98. • If using Extend the Lesson, option one, make copies of the “I feel _____”
handout, enough for several pages per child.
INTRODUCING THE LESSON1. Worship and Bible memory. See Unit Information, page 71.2. Guess the drawing. Invite a student forward and have him or her face awayfrom the group of children. Draw a simple shape (triangle, circle, square) on thechild’s back with your finger. See if he or she can guess what shape you drew.
Unit 2 / Lesson 4: We Feel with Fingers and Skin94
Have the child sit down and pair up the children to take turns “drawing” shapes,letters, or numbers on each other’s backs. After a few minutes, talk about how itfelt to have someone touch their backs. Did it tickle? Did it feel good or not good tobe touched? Sit quietly and prompt children to remember a good touch (Mom’shand on your head, your friend’s hand in yours, the soft fur of your cat). Invite themto share about a good touch experience, either when they touched something orwhen someone touched them.
LESSON STEPS1. Tell the story of Jesus healing Jairus’ daughter. Give the script on page 97to a group of older students and invite them to perform it as a play for your stu-dents. (If you are unable to find older students to help, you might use story figuresinstead.)
2. Wonder about the story, using the following statements: • I wonder how it felt to hold Jesus’ hand.• I wonder why the crowd didn’t believe that Jesus could heal the girl.• I wonder what the girl did after she ate.
Pray, “Dear Jesus, you brought the girl back to life with the touch of yourhand. Touch us with an invisible hand and heal us where we hurt. Amen.”
3. Activity centers. Divide children into five groups, and send each group to oneof the centers described on page 98. When they begin to lose focus (5-10 minutes),move the groups to the next center. Note: You will need to explain and possiblydemonstrate each of the centers. Explain each one to the whole group, then dismisseach group of 3-6 children one at a time, waiting to dismiss the next group until theprevious one is settled and doing the activity. This will give the waiting groups anadditional demonstration of what to do at the center.
4. Discuss the activities. Gather the students together again to talk about thefollowing questions:
• Which textures did you like to feel?• What if we had no fingers? How would we find out about things?• How could you use your hands in good touch ways?
5. Go on a “feeling walk.” Tell the children that you are going to walk withouttalking around the school, touching things to feel their textures. Explain that youwon’t be able to stay in a line, because you will want to investigate different things.When you return to the classroom, you want everyone to share about one thingthey felt. They will need to use describing words like cool, smooth, prickly, or rough.
Spend a few minutes roaming hallways, empty classrooms, playground, etc.(Or, if you don’t want to leave the room, just spend a few minutes roaming yourclassroom, feeling the textures in it.) When you return, have each child share onething they touched and how it felt. Record the list on a large sheet of paper. Writeat the top of the paper, “Thank you, God, for fingers to touch our world.”
EXTEND THE LESSON(These activities will extend the lesson to longer than 40-50 minutes.)
• “I feel _____.” Give each child several copies of this handout. Have magazinesavailable for children to cut out and glue one picture on each page. Encourage
Unit 2 / Lesson 4: We Feel with Fingers and Skin95
them to sound out the word to complete the sentence on each page. When a childhas completed several pages, staple them together to make a book.
• Make tactile mazes. Give each child a piece of cardboard or cardstock with amaze pattern (or alphabet letter) drawn on it. OR, they may create their own lines.Have children apply white glue to the pattern. When it dries, have them applyanother coat, to raise the maze or letter and make it easier to feel. After the glueis dry, have children close their eyes and navigate the maze by moving their fingersover the ridges.
• Sing “I Need a Friend,” page 51 in the Jubilee Songbook. Emphasize the words,“Come hold my hand; I’ll hold yours too,” to show how much touch is a part of love.
• Snacktime song. Before your snack, teach the song “Hands, Hands, Hands”from Jubilee Songbook, page 58. After singing the hands verse substitute noses,ears, mouths, eyes, in subsequent verses.
• Rubbing lotion. This activity was included in the smell lesson, but would alsobe good for touch: Invite children to rub small amounts of lotion onto each other’shands. OR, rub lotion onto each child’s hand yourself. Have them think abouthow good it feels to have someone touch them in a kind way.
Unit 2 / Lesson 4: We Feel with Fingers and Skin96
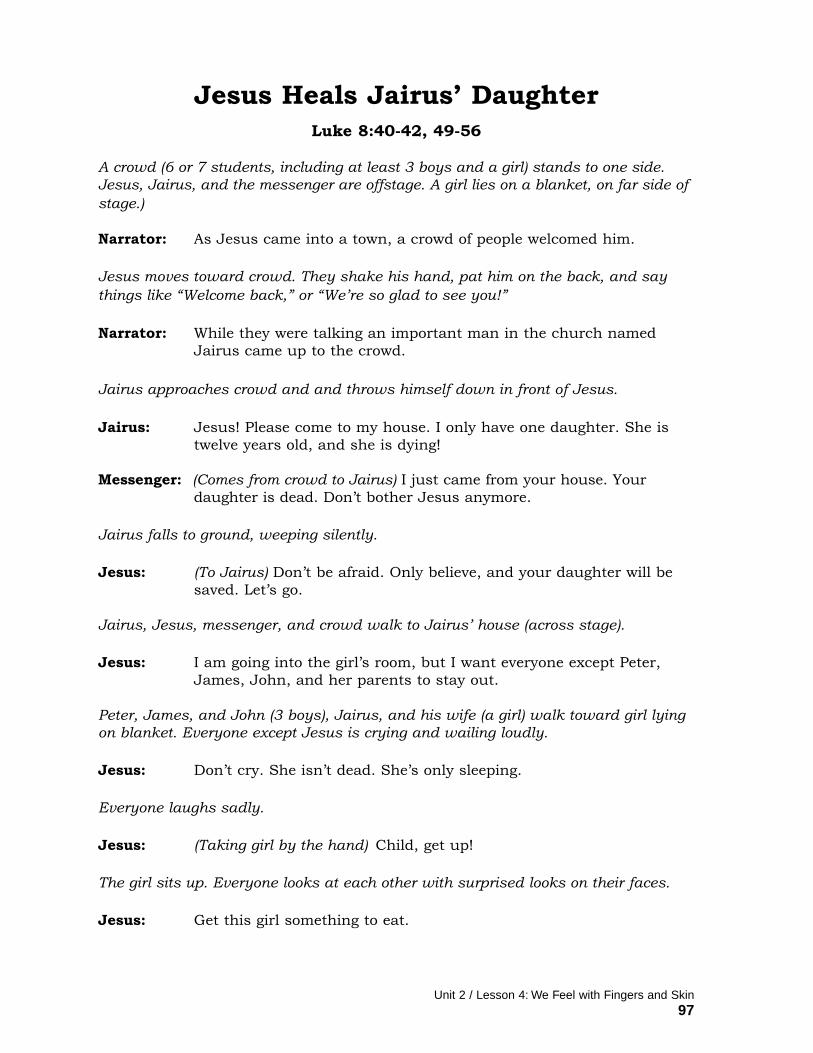
Jesus Heals Jairus’ DaughterLuke 8:40-42, 49-56
A crowd (6 or 7 students, including at least 3 boys and a girl) stands to one side.Jesus, Jairus, and the messenger are offstage. A girl lies on a blanket, on far side ofstage.)
Narrator: As Jesus came into a town, a crowd of people welcomed him.
Jesus moves toward crowd. They shake his hand, pat him on the back, and saythings like “Welcome back,” or “We’re so glad to see you!”
Narrator: While they were talking an important man in the church namedJairus came up to the crowd.
Jairus approaches crowd and and throws himself down in front of Jesus.
Jairus: Jesus! Please come to my house. I only have one daughter. She istwelve years old, and she is dying!
Messenger: (Comes from crowd to Jairus) I just came from your house. Yourdaughter is dead. Don’t bother Jesus anymore.
Jairus falls to ground, weeping silently.
Jesus: (To Jairus) Don’t be afraid. Only believe, and your daughter will besaved. Let’s go.
Jairus, Jesus, messenger, and crowd walk to Jairus’ house (across stage).
Jesus: I am going into the girl’s room, but I want everyone except Peter, James, John, and her parents to stay out.
Peter, James, and John (3 boys), Jairus, and his wife (a girl) walk toward girl lyingon blanket. Everyone except Jesus is crying and wailing loudly.
Jesus: Don’t cry. She isn’t dead. She’s only sleeping.
Everyone laughs sadly.
Jesus: (Taking girl by the hand) Child, get up!
The girl sits up. Everyone looks at each other with surprised looks on their faces.
Jesus: Get this girl something to eat.
Unit 2 / Lesson 4: We Feel with Fingers and Skin97
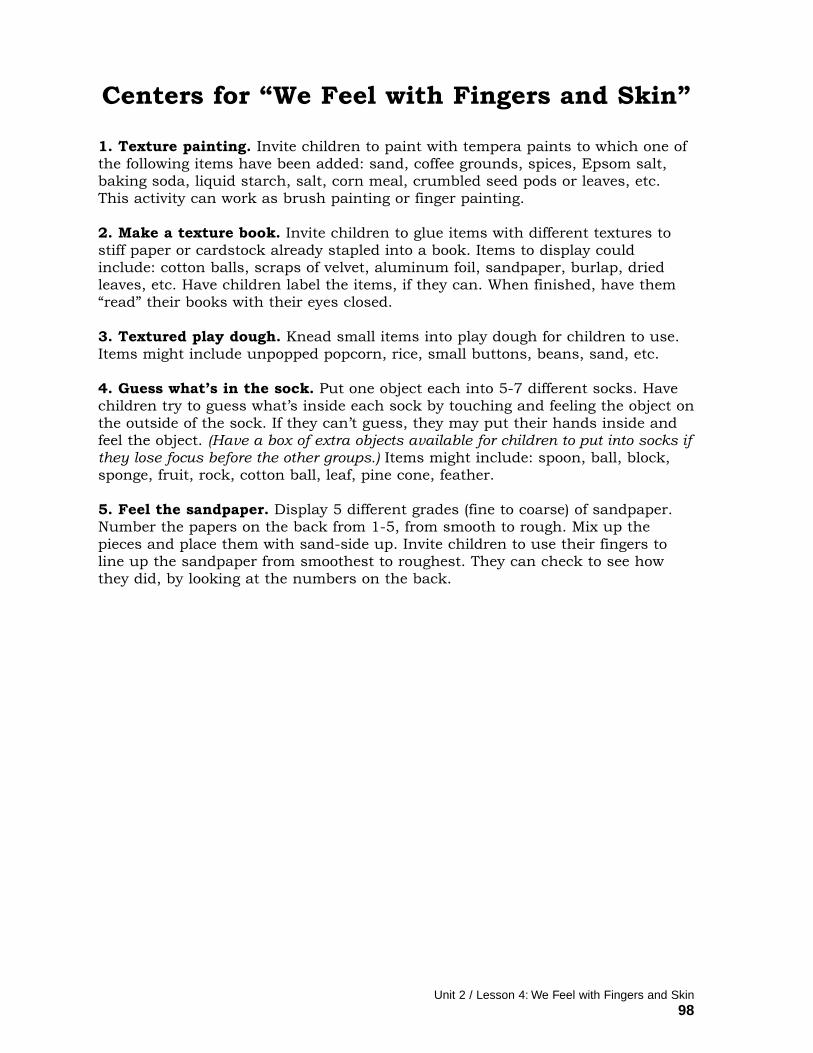
Centers for “We Feel with Fingers and Skin”
1. Texture painting. Invite children to paint with tempera paints to which one ofthe following items have been added: sand, coffee grounds, spices, Epsom salt,baking soda, liquid starch, salt, corn meal, crumbled seed pods or leaves, etc.This activity can work as brush painting or finger painting.
2. Make a texture book. Invite children to glue items with different textures tostiff paper or cardstock already stapled into a book. Items to display couldinclude: cotton balls, scraps of velvet, aluminum foil, sandpaper, burlap, driedleaves, etc. Have children label the items, if they can. When finished, have them“read” their books with their eyes closed.
3. Textured play dough. Knead small items into play dough for children to use.Items might include unpopped popcorn, rice, small buttons, beans, sand, etc.
4. Guess what’s in the sock. Put one object each into 5-7 different socks. Havechildren try to guess what’s inside each sock by touching and feeling the object onthe outside of the sock. If they can’t guess, they may put their hands inside andfeel the object. (Have a box of extra objects available for children to put into socks ifthey lose focus before the other groups.) Items might include: spoon, ball, block,sponge, fruit, rock, cotton ball, leaf, pine cone, feather.
5. Feel the sandpaper. Display 5 different grades (fine to coarse) of sandpaper.Number the papers on the back from 1-5, from smooth to rough. Mix up thepieces and place them with sand-side up. Invite children to use their fingers toline up the sandpaper from smoothest to roughest. They can check to see howthey did, by looking at the numbers on the back.
Unit 2 / Lesson 4: We Feel with Fingers and Skin98

I feel
________________.
Unit 2 / Lesson 4: We Feel with Fingers and Skin99
The Five Senses
LESSON 5: WE USE TONGUES TO TASTEObjectiveStudents will value their sense of taste and be reminded to bring joy to others’sense of taste with hospitality.
Key Concepts• God gave us tongues with which to taste food.• We can bring joy to others by giving them foods that taste good.
Text: Luke 14:15-24
Estimated Lesson Time: 40-50 minutes
Materials• Jubilee Songbook• Props for Bible story: bathrobe, index cards with words Come, Yes, and No• Sweet, salty, sour, and bitter foods (see Introducing the Lesson, step 2)• Crackers• Chart paper, markers• Electric popcorn maker (one where you can see the corn popping)• Vegetable oil, popcorn, salt• Large bowl• M & Ms or other candy• Lemonade, cups• For Extend the Lesson, option one: “I taste _____” handout (p. 104), magazines,
scissors, glue, stapler, markers or pencils• For Extend the Lesson, option two: cotton swabs, salt water, sugar water, lemon
juice, bitter food or liquid, small cups• For Extend the Lesson, option three: Peeled potato and apple (put in water and
lemon water to prevent browning)• For Extend the Lesson, option four: paper plates, women’s magazines, scissors, glue
Teacher Preparation• Practice telling the Bible story.• Invite another class to join you for a feast.• If using Extend the Lesson, option one, make copies of the “I taste _____”
handout, enough for several pages per child.
INTRODUCING THE LESSON1. Worship and Bible memory. See Unit Information, page 71.2. Learning different tastes. On a tray, display some candy or cookies (sweet),pretzels or peanuts (salty), and pickles (sour). Invite children to taste the foodsand discuss which are their individual favorites. Make a bar graph on a largepiece of chart paper to record each child’s favorite food from the tray. (Be sure to
Unit 2 / Lesson 5: We Use Tongues to Taste100
leave enough space for the sweet item!) After finishing the graph, ask children toname other sweet, salty, or sour foods. Introduce a fourth category of taste: bitterfoods. Give each child a tiny piece of unsweetened chocolate or orange peel totaste. Provide crackers to eat afterwards, to take away the unpleasant taste. Talkabout how some foods taste good to us and some do not.
LESSON STEPS1. Tell The Parable of the Great Dinner, as if you are the person who is givingthe dinner. You will call on students to be your servants and guests. Ahead oftime, print the words Come, No, and Yes on three cards.
Practice reading the three words with the children. Tell them you will usethese words in the story. For your role, put on a robe to capture the children’sattention.
One time when Jesus was at a party, he told the story I’m going to tell you.I will pretend to be someone who decided to give a dinner party.
(Put on robe and wait a few moments for children to understand that you areplaying a role. Act as if you are thinking and then make a decision.) I would liketo have a dinner at my house. I will have my servants prepare a great feast formy friends and relatives.
(Point to several students and ask them to be your servants.) Go and pre-pare a wonderful meal to serve to my guests. Roast a lamb. Cook some veni-son stew. Bake the finest bread. Pick the ripest grapes. Everything must beperfect for my guests! (Chosen servants pretend to cook.)
Now, I must let my guests know that everything is ready. (Point to anotherchild to be your messenger. Choose someone who will embrace this important role.)Messenger! Go and tell everyone I have invited that the food is ready. The houseis clean. I have on my finest robe. I am ready for them to come to the dinner.
(Divide remaining students into two groups, giving one group the No card andthe other the Yes card. Messenger goes from one student to another in onegroup, holding up Come card and saying, “Come!” Instruct students to hold upNo card and tell messenger, “No.”)
(Messenger returns to you.) Messenger, what did my friends and relativessay? Are they ready to come to my party? (Let messenger tell you they said no.)What do you mean, they cannot come! They’ve just bought land and need togo look at it? That’s not a good excuse! They’ve just bought oxen and need totry them out? That’s not a good excuse! They’ve just been married? That’s nota good excuse! That makes me really angry. (With emotion in voice) If myfriends and relatives don’t want to come, then go out to the poorest parts oftown. Invite all the poorest, crippled, blind, and lame people to come to myparty. My table must be filled with people!
(Messenger goes to second group of students, holds up Come card and tellsthem, “Come!” This time, students hold up Yes card and say “Yes!” They get upand walk with messenger to you.)
Welcome! Welcome! I’m so glad you came to my party. We have some deli-cious food to eat! We’re going to have a wonderful time together.
2. Wonder about the story, using the following statements: • I wonder why Jesus told this story.• I wonder why the people didn’t come to the party.• I wonder how the poor, blind, and lame people felt when they were invited to
the great dinner.
Unit 2 / Lesson 5: We Use Tongues to Taste101
Pray, “God, you care about making people feel welcome. Help us to make otherpeople feel welcome. Help us to know when you are inviting us to join in your joy.Amen.”
3. Talk about hospitality. Explain that hospitality means making old and newfriends, and even strangers, feel welcome in your home, school, or church. Ask,“When people invite you to their house, do you expect them to offer you food? Is itusually food that tastes good, or yucky old leftovers? Our Bible story todayreminds us that food is an important part of friendship. When we want people tofeel welcome, we offer them good food to eat.”
Explain that today you are going to show hospitality to another class in theschool. You are going to offer them some good food to eat. Say, “At the beginningof the lesson, we talked about foods that taste sweet, salty, sour, and bitter. Weare going to offer some sweet, salty, and sour foods to our friends.”
4. Prepare for the feast. Get out an electric corn popper, some oil, and unpoppedpopcorn. Explain that you are going to make some popcorn to share with yourguests. Pass around a cup of unpopped popcorn to let children feel the kernelsbefore it is popped. Then let them watch as the kernels pop. Ask the followingquestions:
• What do you see? • What do you hear? • What do you smell? • How did the popcorn feel before? How will it feel different after it pops?When the corn is done popping (you may need to make several batches), let the
children taste it before you put salt on it. Then have them taste it again, with thesalt. Which do they like better?
Note: If you cannot find an electric popper, simply make or buy popcorn ahead oftime and ask questions that reasonably fit.)
5. Enjoy the feast. Invite another class to join you for your feast of popcorn, M & Ms,and lemonade. When your guests arrive, have several children explain what youlearned about different kinds of tastes and retell the Bible story of the great feast.Sing songs together, read books, experience the centers from previous lessons, orsimply enjoy the food and talk.
If you prefer, have the class bag the popcorn and candy and deliver it toanother classroom as a gift, rather than inviting them to your room. Explain thatthis is another kind of hospitality.
EXTEND THE LESSON(These activities will extend the lesson to longer than 40-50 minutes.)
• “I taste _____.” Give each child several copies of this handout. Have magazinesavailable for children to cut out and glue one picture on each page. Encouragethem to sound out the word to complete the sentence on each page. When a childhas completed several pages, staple them together to make a book.
• Tastes and tongues. Extend the science learning in this lesson to “map” thetaste buds on the tongue and their ability to sense different types of taste. Providechildren with cotton swabs; bowls of sugar water, salt water, lemon juice; andbanana or orange peel. Demonstrate how we taste sweet foods using the taste
Unit 2 / Lesson 5: We Use Tongues to Taste102
buds at the tips of our tongues. We taste sour foods with the sides of our tongues.We taste bitter foods using the backs of our tongues. And we taste salty foods allover our tongues.
• Taste without smell. Let children taste peeled potatoes and crisp apples. Havethem close their eyes and hold their noses, then taste a piece of apple and a pieceof potato. If they can’t smell the food, can they taste the difference between anapple and potato? Talk about the importance of smell in tasting.
• Create a “feast.” Provide paper plates, scissors, glue, and women’s magazinesfor children to create a feast of their own. Encourage them to cut out pictures ofsome of their favorite foods and glue them to a paper plate, creating a “feast.”
Unit 2 / Lesson 5: We Use Tongues to Taste103
I taste
________________.
Unit 2 / Lesson 5: We Use Tongues to Taste104