Embed Size (px)
Citation preview
Building the Death Star: The Autodesk® Way!Lee Mullin – Autodesk
CR2165-P A long time ago in a galaxy far, far away, Autodesk didn't exist, but if it did then the fate of the Death Star and the Empire would not have been determined by those pesky rebels. Using Autodesk Revit®, Autodesk® Navisworks®, and Autodesk® BIM 360 software, as well as Microsoft® Project, Darth Vader and his project team could have built the Death Star more quickly, more safely, and with more information for important decision making, such as whether to destroy Tattooine and just be done with it. This class will cover advanced workflows and tips for using Autodesk products for more than just the basics, turning you from a naive Jedi padawan to an efficient Sith overlord in just an hour.
Learning ObjectivesAt the end of this class, you will be able to:
Using Revit Construction Parts to build an accurate schedule..................................................2
Contingency planning using Navisworks and Microsoft Project.................................................7
Creating Time Based Clashes for temporary works................................................................13
Linking Animations to Timeliner for powerful presentations.....................................................18
About the SpeakerLee Mullin is the Navisworks Subject Matter Expert for Product Support in Autodesk Global Services. Working with Navisworks for over seven years, Lee has worked in support, contributed towards Documentation and QA. Following Autodesk’s acquisition of Navisworks in 2007, Lee took on the role of leading the Navisworks support effort, training the growing worldwide team and ensuring the customer’s voice is heard by everyone from Product Design, Product Management, QA and Development. Currently studying Construction Project Management and running the Autodesk 'Beyond Design' blog, Lee’s current role in Global Services is multi-faceted, requiring understanding of interoperability workflows across the Autodesk portfolio; working with development to help prioritize features and defects; working with QA to improve test coverage of common workflows; creating and delivering training; and helping build up the Autodesk Construction user [email protected]
Building the Death Star: The Autodesk® Way!
Using Revit Construction Parts to build an accurate schedule
Use constructionparts_tractorbeam.zip
Export Navisworks file from Revit and create NWF1. Open tractor_beam.rvt in Revit2. Select 'For Navisworks' view3. On the Properties panel change ‘Parts Visibility’ setting in View to 'Show Parts'4. Click Add-ins > External Tools > Navisworks 2013 > Navisworks Settings > File Readers
> Revit a. Check ‘Convert Construction Parts’b. Check ‘Divide File into Levels’c. Change ‘Export’ to ‘Current View’
5. Export NWC, load into Navisworks 6. Create some suitable views7. Save as TractorBeam.NWF
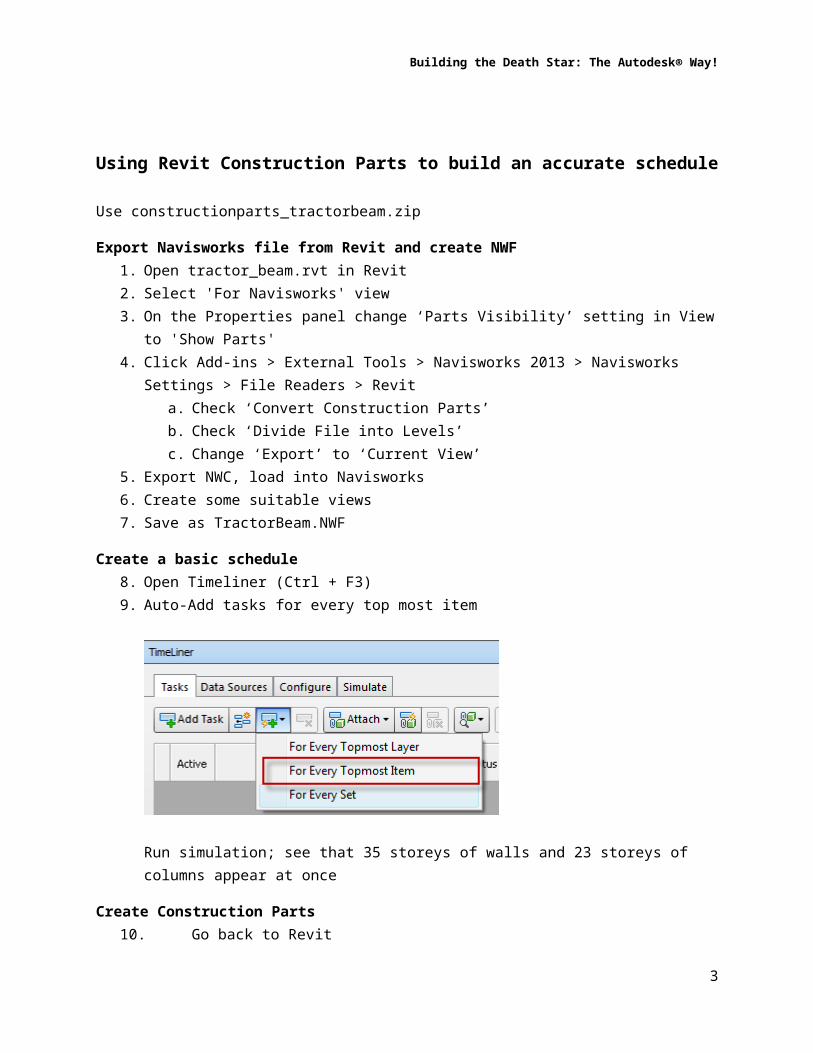
Create a basic schedule8. Open Timeliner (Ctrl + F3)9. Auto-Add tasks for every top most item
Run simulation; see that 35 storeys of walls and 23 storeys of columns appear at once
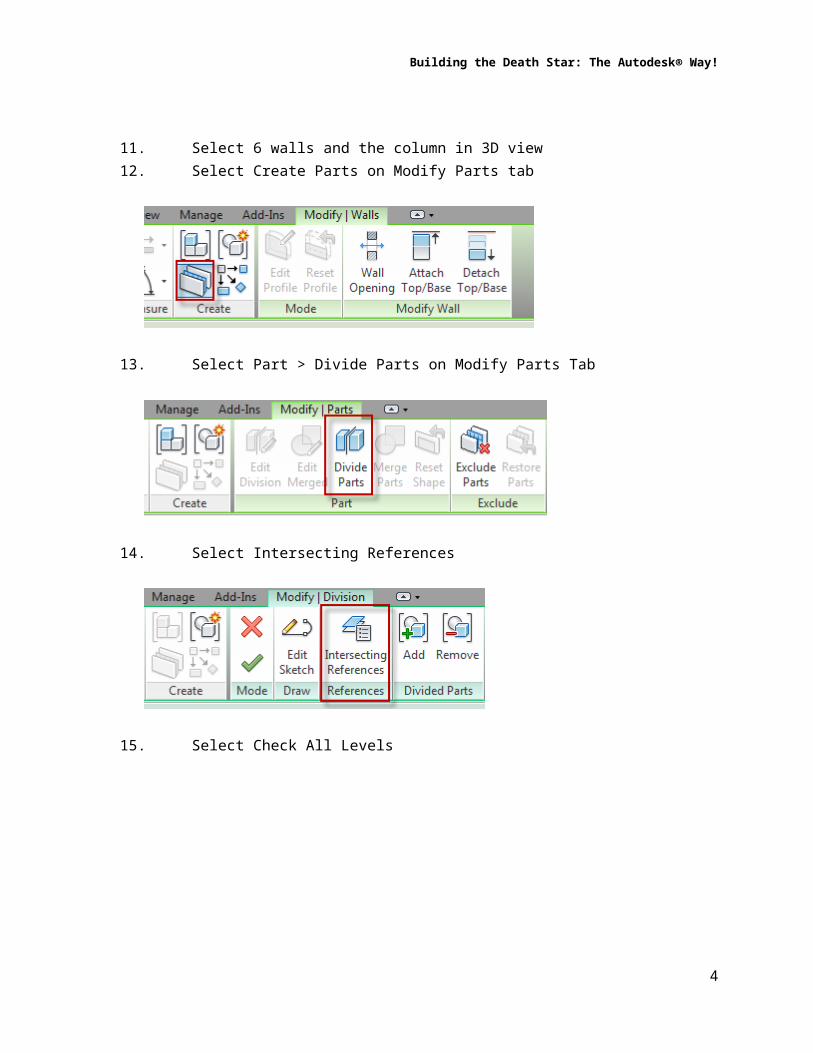
Create Construction Parts10. Go back to Revit11. Select 6 walls and the column in 3D view12. Select Create Parts on Modify Parts tab
2
Building the Death Star: The Autodesk® Way!
13. Select Part > Divide Parts on Modify Parts Tab
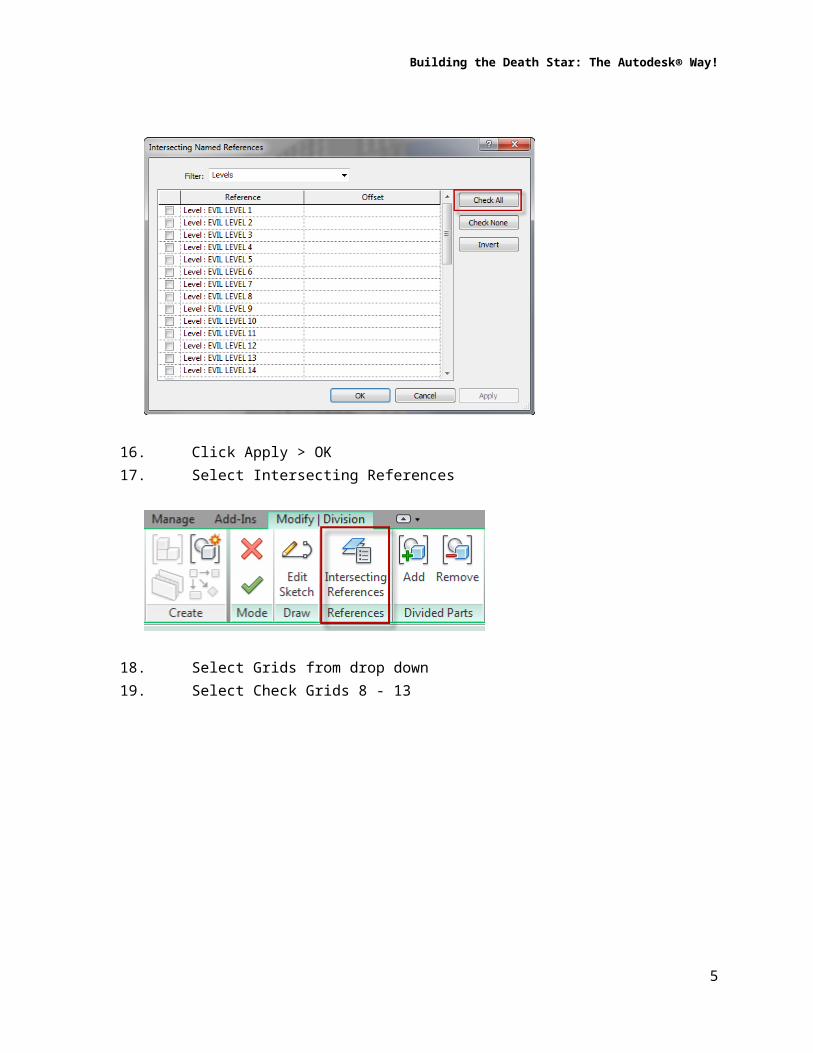
14. Select Intersecting References
15. Select Check All Levels
3
Building the Death Star: The Autodesk® Way!
16. Click Apply > OK17. Select Intersecting References
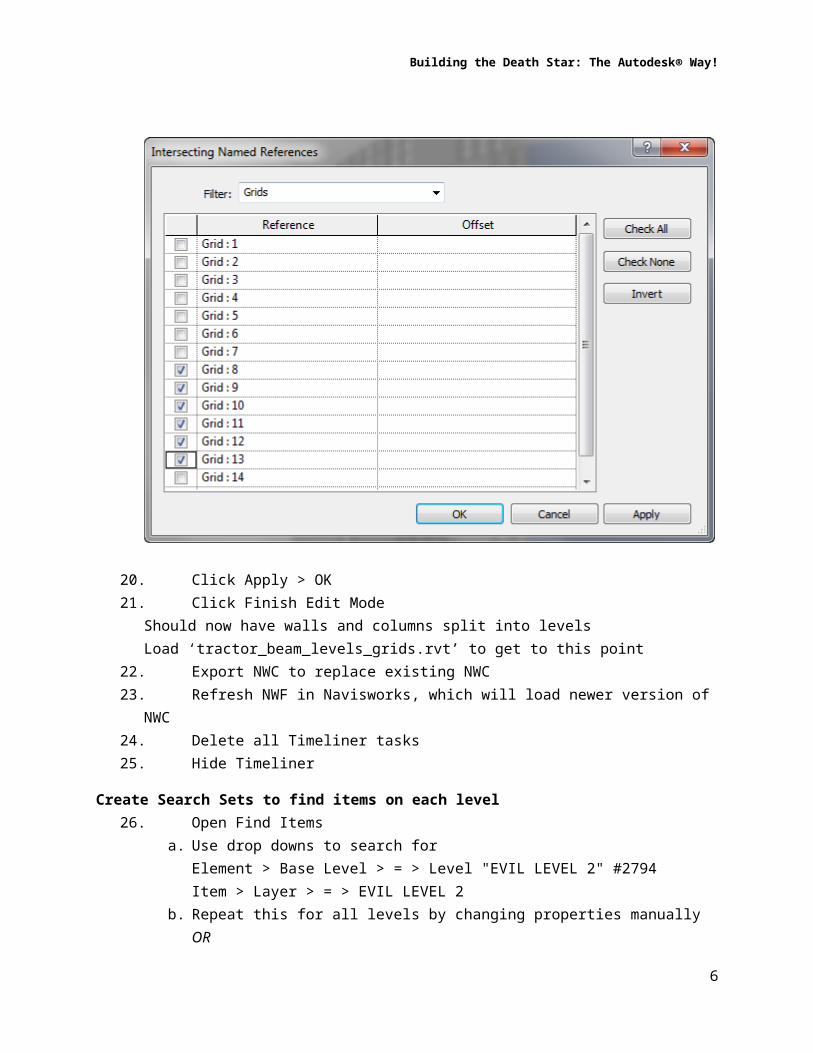
18. Select Grids from drop down 19. Select Check Grids 8 - 13
20. Click Apply > OK21. Click Finish Edit Mode
Should now have walls and columns split into levelsLoad ‘tractor_beam_levels_grids.rvt’ to get to this point
22. Export NWC to replace existing NWC23. Refresh NWF in Navisworks, which will load newer version of NWC24. Delete all Timeliner tasks25. Hide Timeliner
4
Building the Death Star: The Autodesk® Way!
Create Search Sets to find items on each level26. Open Find Items
a. Use drop downs to search for Element > Base Level > = > Level "EVIL LEVEL 2" #2794Item > Layer > = > EVIL LEVEL 2
b. Repeat this for all levels by changing properties manuallyORDuplicate Search 33 times, Export the XML, modify the XML to include new search set name, and modify the search, make sure you include the correct unique identifiersORload ‘tractor_beam.xml’ provided
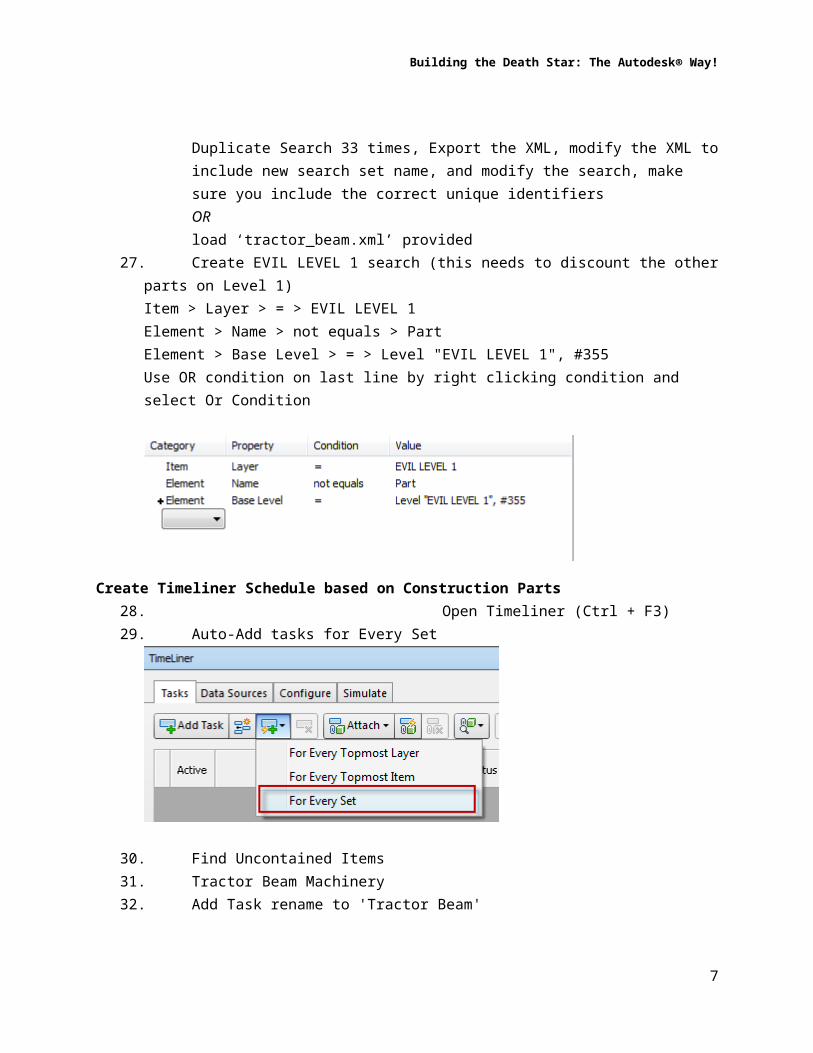
27. Create EVIL LEVEL 1 search (this needs to discount the other parts on Level 1)Item > Layer > = > EVIL LEVEL 1Element > Name > not equals > PartElement > Base Level > = > Level "EVIL LEVEL 1", #355Use OR condition on last line by right clicking condition and select Or Condition
Create Timeliner Schedule based on Construction Parts28. Open Timeliner (Ctrl + F3)29. Auto-Add tasks for Every Set
30. Find Uncontained Items31. Tractor Beam Machinery32. Add Task rename to 'Tractor Beam'33. Change Planned Start Date and End date to after the column is complete
5
Building the Death Star: The Autodesk® Way!
34. Change task type to ‘Construct’35. Either right click 'Attach Current Selection'
ORCreate a Search Set looking for Item > Name > = > EVIL TRACTOR BEAMthen drag and drop Search Set onto Task
Run Simulation on Simulate task, it should show the walls build up level by level
6
Building the Death Star: The Autodesk® Way!
Contingency planning using Navisworks and Microsoft Project
Use contingency_deathstarstructure.zipMicrosoft Project 2007 or 2010 required
Create and Export file from Revit1. Open structure.rvt in Revit 20132. Open Navisworks 3D view3. In Revit go to Add-ins > External Tools > Navisworks 2013
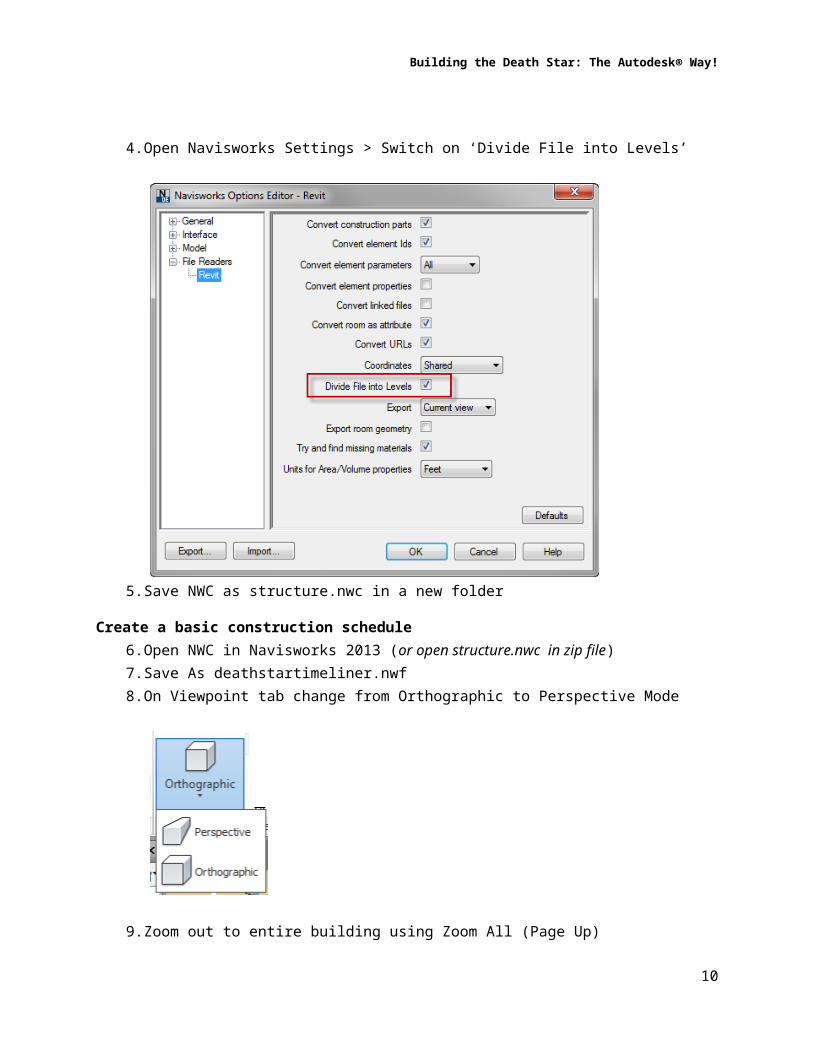
4. Open Navisworks Settings > Switch on ‘Divide File into Levels’
7

Building the Death Star: The Autodesk® Way!
5. Save NWC as structure.nwc in a new folder
Create a basic construction schedule6. Open NWC in Navisworks 2013 (or open structure.nwc in zip file)7. Save As deathstartimeliner.nwf8. On Viewpoint tab change from Orthographic to Perspective Mode
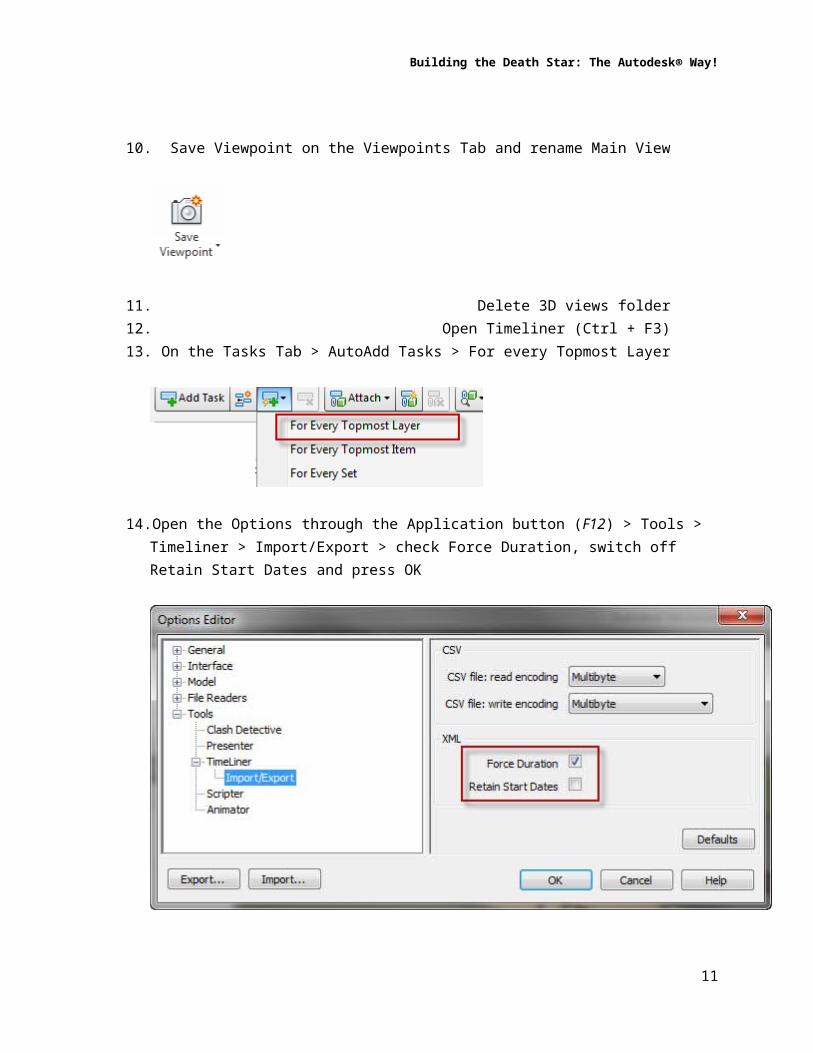
9. Zoom out to entire building using Zoom All (Page Up)10. Save Viewpoint on the Viewpoints Tab and rename Main View
11. Delete 3D views folder12. Open Timeliner (Ctrl + F3)13. On the Tasks Tab > AutoAdd Tasks > For every Topmost Layer
14. Open the Options through the Application button (F12) > Tools > Timeliner > Import/Export > check Force Duration, switch off Retain Start Dates and press OK
8

Building the Death Star: The Autodesk® Way!
15. On the Task tab of Timeliner at the right hand side Export the schedule > Microsoft Project XML
16. Save the file as deathstar.xml 17. Save your Navisworks session.
Add detail to the schedule in Microsoft Project18. Open Microsoft Project 19. Load deathstar.xml, if asked open ‘As a New Project’20. Go to ‘Add New Column’ go to the drop down and select one of the text fields (Text 1
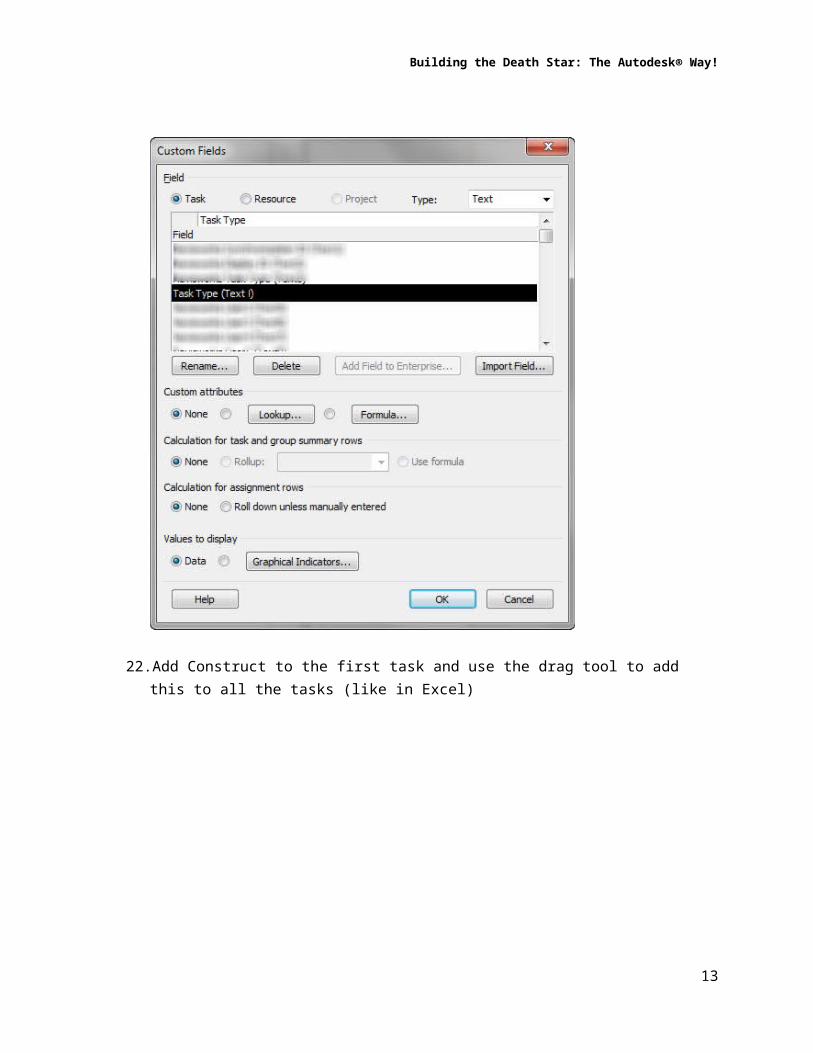
for example)21. Right click in the column header and select custom fields, rename the field ‘Task Type’
9
Building the Death Star: The Autodesk® Way!
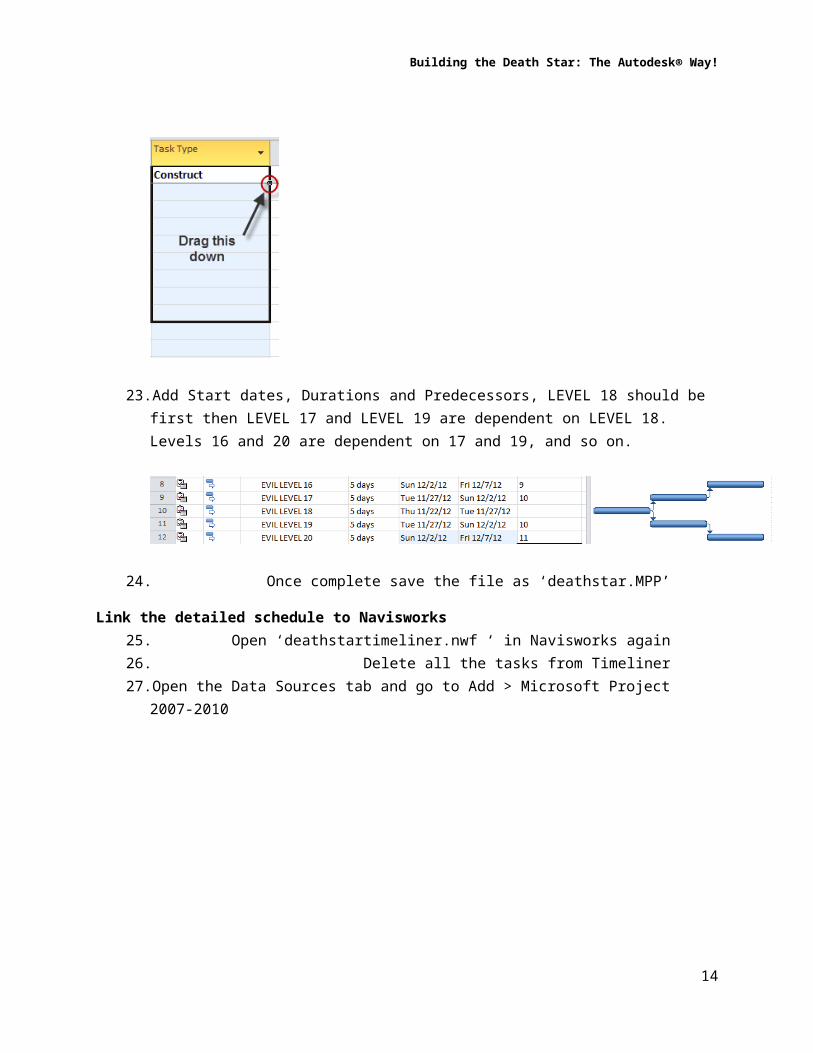
22. Add Construct to the first task and use the drag tool to add this to all the tasks (like in Excel)
10
Building the Death Star: The Autodesk® Way!
23. Add Start dates, Durations and Predecessors, LEVEL 18 should be first then LEVEL 17 and LEVEL 19 are dependent on LEVEL 18. Levels 16 and 20 are dependent on 17 and 19, and so on.
24. Once complete save the file as ‘deathstar.MPP’
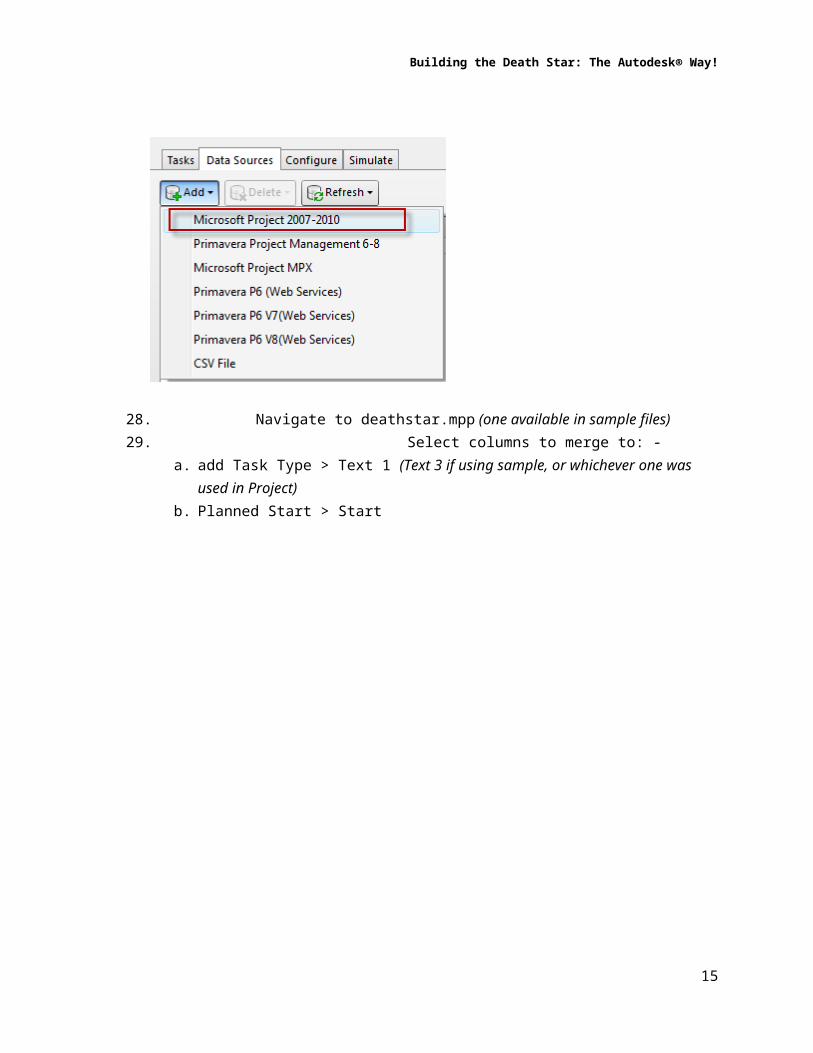
Link the detailed schedule to Navisworks25. Open ‘deathstartimeliner.nwf ‘ in Navisworks again26. Delete all the tasks from Timeliner27. Open the Data Sources tab and go to Add > Microsoft Project 2007-2010
28. Navigate to deathstar.mpp (one available in sample files)29. Select columns to merge to: -
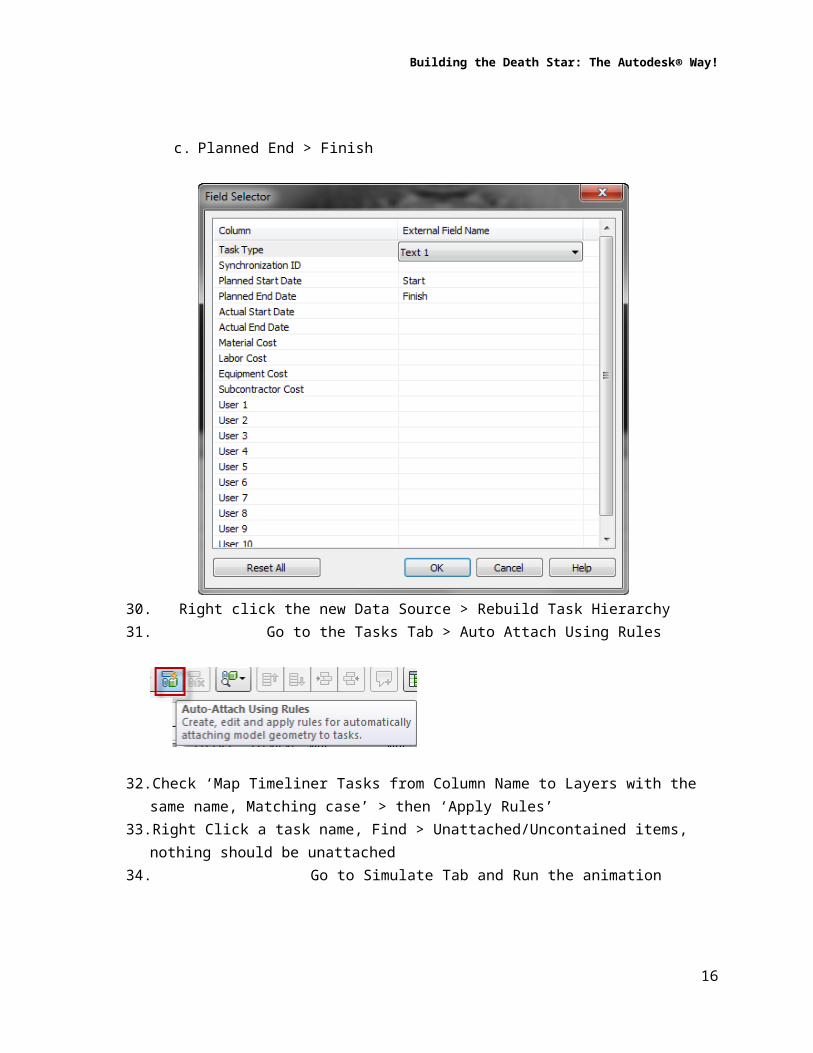
a. add Task Type > Text 1 (Text 3 if using sample, or whichever one was used in Project)
b. Planned Start > Start
11

Building the Death Star: The Autodesk® Way!
c. Planned End > Finish
30. Right click the new Data Source > Rebuild Task Hierarchy31. Go to the Tasks Tab > Auto Attach Using Rules
32. Check ‘Map Timeliner Tasks from Column Name to Layers with the same name, Matching case’ > then ‘Apply Rules’
33. Right Click a task name, Find > Unattached/Uncontained items, nothing should be unattached
34. Go to Simulate Tab and Run the animation
If you want to make changes to the schedule in Project, Save the file then right click the data source in Navisworks and Synchronize, this will update the task dates
12
Building the Death Star: The Autodesk® Way!
Creating Time Based Clashes for temporary works
Use timebasedclash_dockingbay.zip
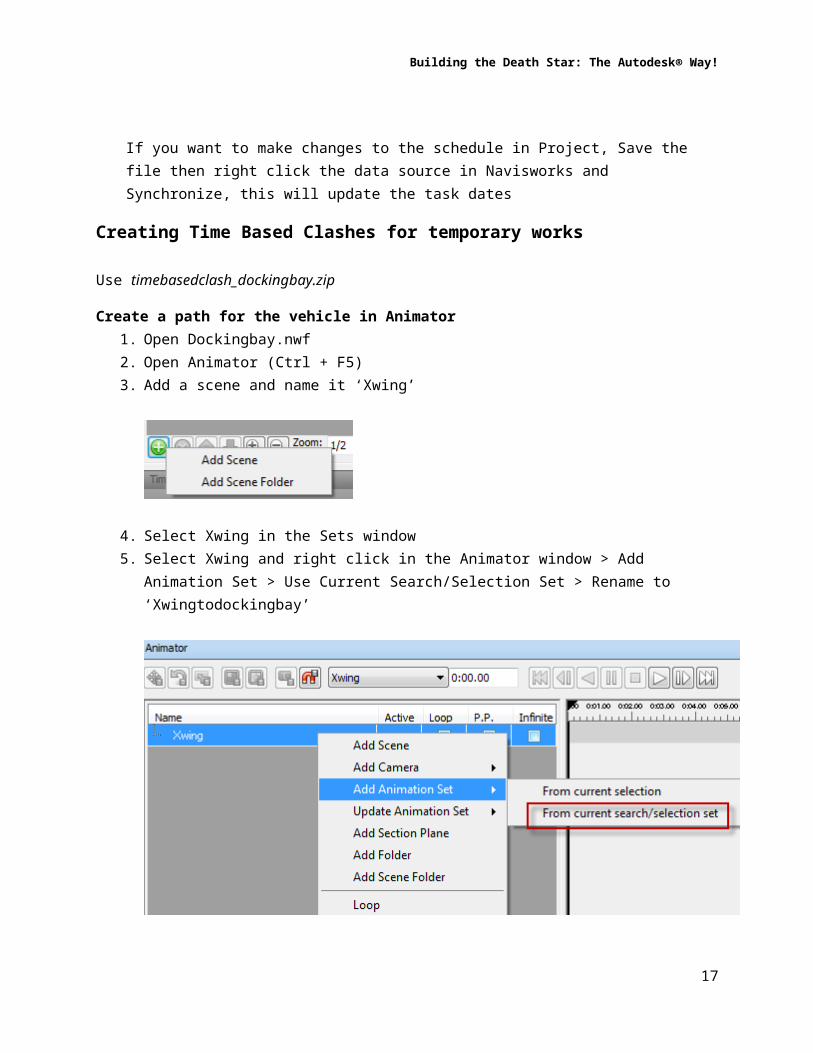
Create a path for the vehicle in Animator1. Open Dockingbay.nwf2. Open Animator (Ctrl + F5)3. Add a scene and name it ‘Xwing’
4. Select Xwing in the Sets window5. Select Xwing and right click in the Animator window > Add Animation Set > Use Current
Search/Selection Set > Rename to ‘Xwingtodockingbay’
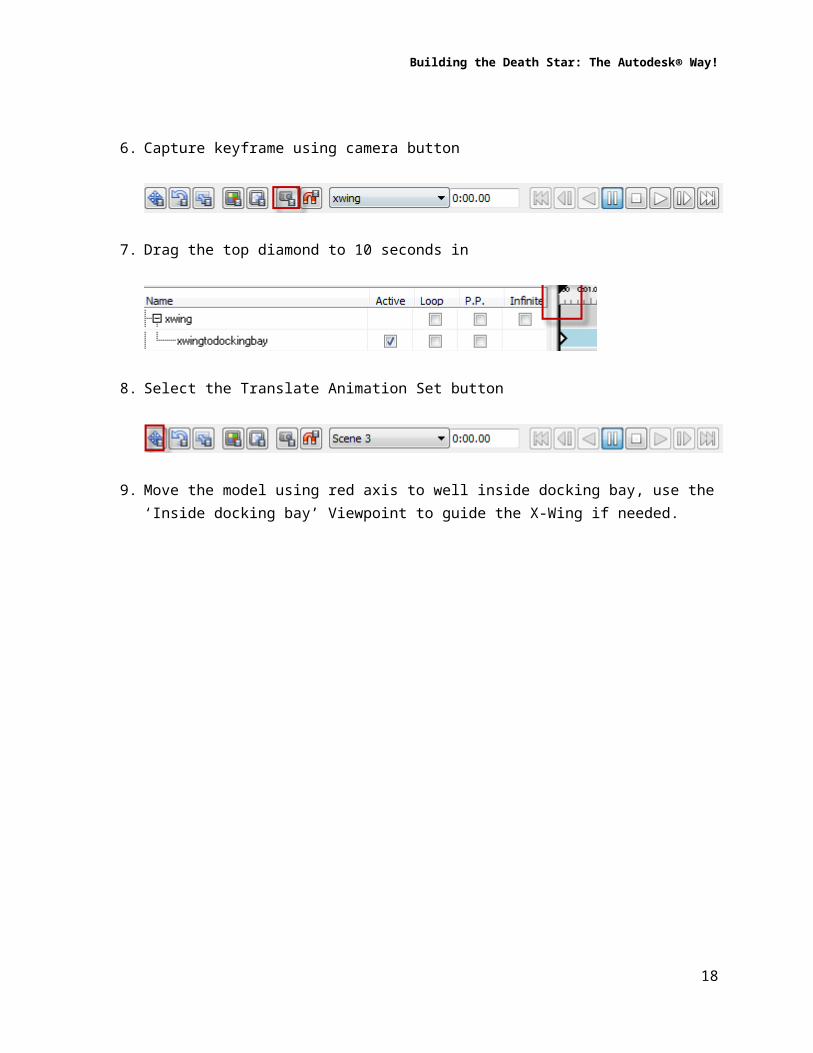
6. Capture keyframe using camera button
7. Drag the top diamond to 10 seconds in
13
Building the Death Star: The Autodesk® Way!
8. Select the Translate Animation Set button
9. Move the model using red axis to well inside docking bay, use the ‘Inside docking bay’ Viewpoint to guide the X-Wing if needed.
10. Capture a new keyframe, a diamond should appear at the new location
14
Building the Death Star: The Autodesk® Way!
11. Rewind animation and run to be sure this is working
Clash detect path against surrounding building12. Open Clash Detective (Ctrl + F2)13. Add a test, and rename to ‘xwingvsdockingbay’14. Open Rules tab, ensure 'Ignore items in previously found pair of composite objects' is
checked15. Open the Sets tab for Selections A and B, select 'Death Star' on left, and 'xwing' on the
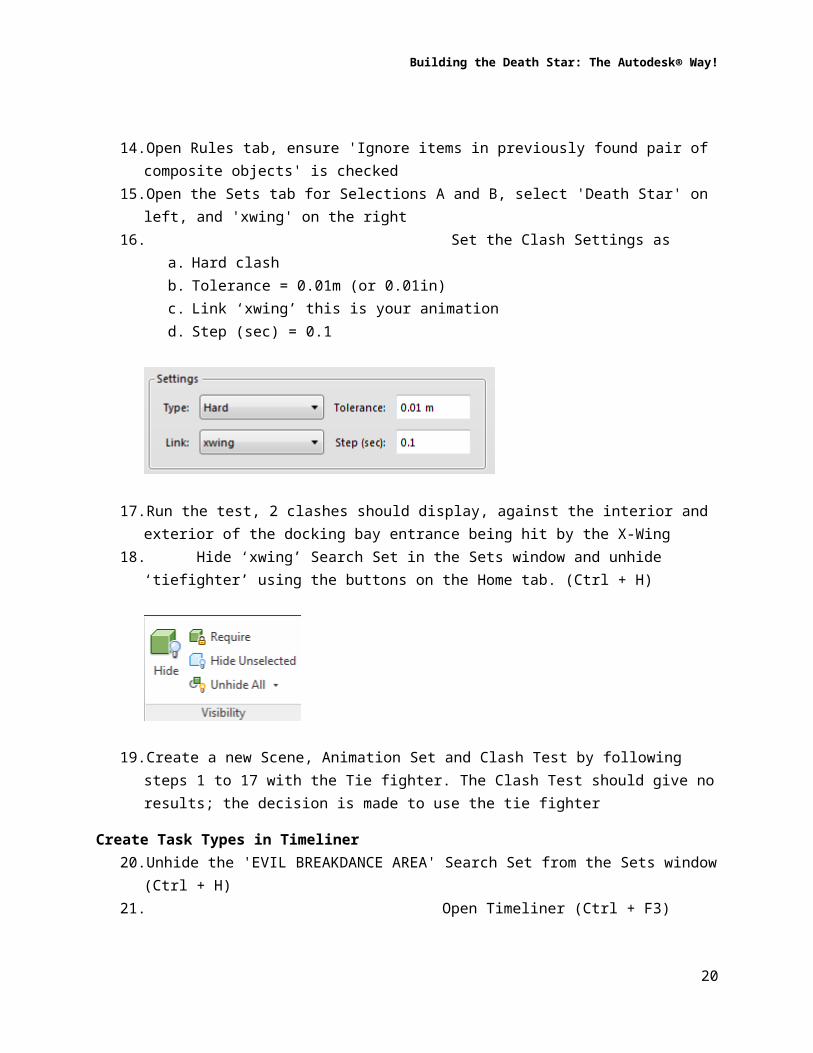
right16. Set the Clash Settings as
a. Hard clashb. Tolerance = 0.01m (or 0.01in)c. Link ‘xwing’ this is your animationd. Step (sec) = 0.1
17. Run the test, 2 clashes should display, against the interior and exterior of the docking bay entrance being hit by the X-Wing
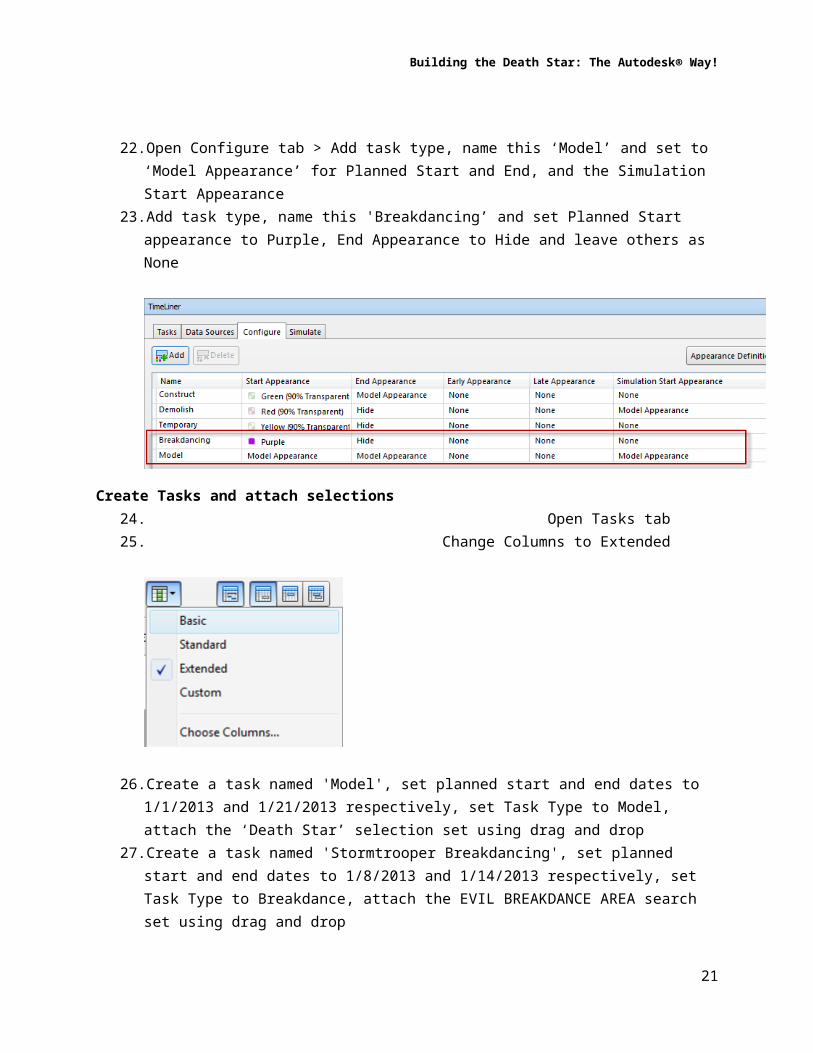
18. Hide ‘xwing’ Search Set in the Sets window and unhide ‘tiefighter’ using the buttons on the Home tab. (Ctrl + H)
19. Create a new Scene, Animation Set and Clash Test by following steps 1 to 17 with the Tie fighter. The Clash Test should give no results; the decision is made to use the tie fighter
Create Task Types in Timeliner20. Unhide the 'EVIL BREAKDANCE AREA' Search Set from the Sets window (Ctrl + H)21. Open Timeliner (Ctrl + F3)
15
Building the Death Star: The Autodesk® Way!
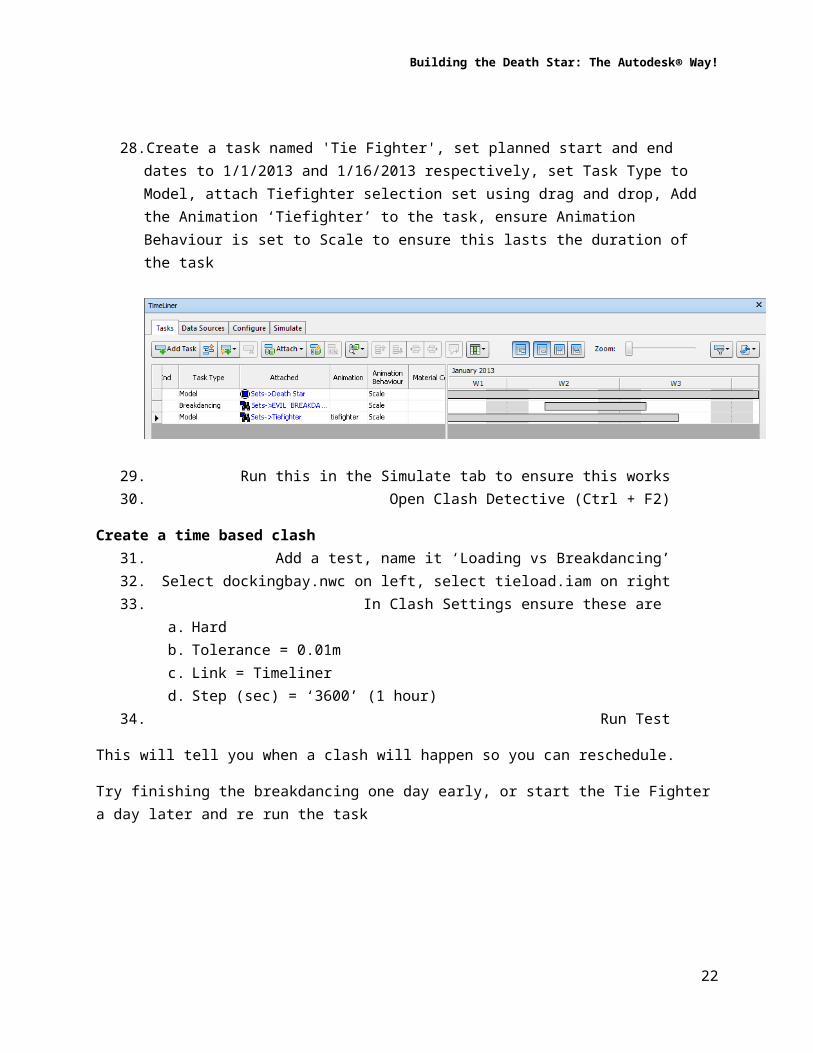
22. Open Configure tab > Add task type, name this ‘Model’ and set to ‘Model Appearance’ for Planned Start and End, and the Simulation Start Appearance
23. Add task type, name this 'Breakdancing’ and set Planned Start appearance to Purple, End Appearance to Hide and leave others as None
Create Tasks and attach selections24. Open Tasks tab25. Change Columns to Extended
26. Create a task named 'Model', set planned start and end dates to 1/1/2013 and 1/21/2013 respectively, set Task Type to Model, attach the ‘Death Star’ selection set using drag and drop
27. Create a task named 'Stormtrooper Breakdancing', set planned start and end dates to 1/8/2013 and 1/14/2013 respectively, set Task Type to Breakdance, attach the EVIL BREAKDANCE AREA search set using drag and drop
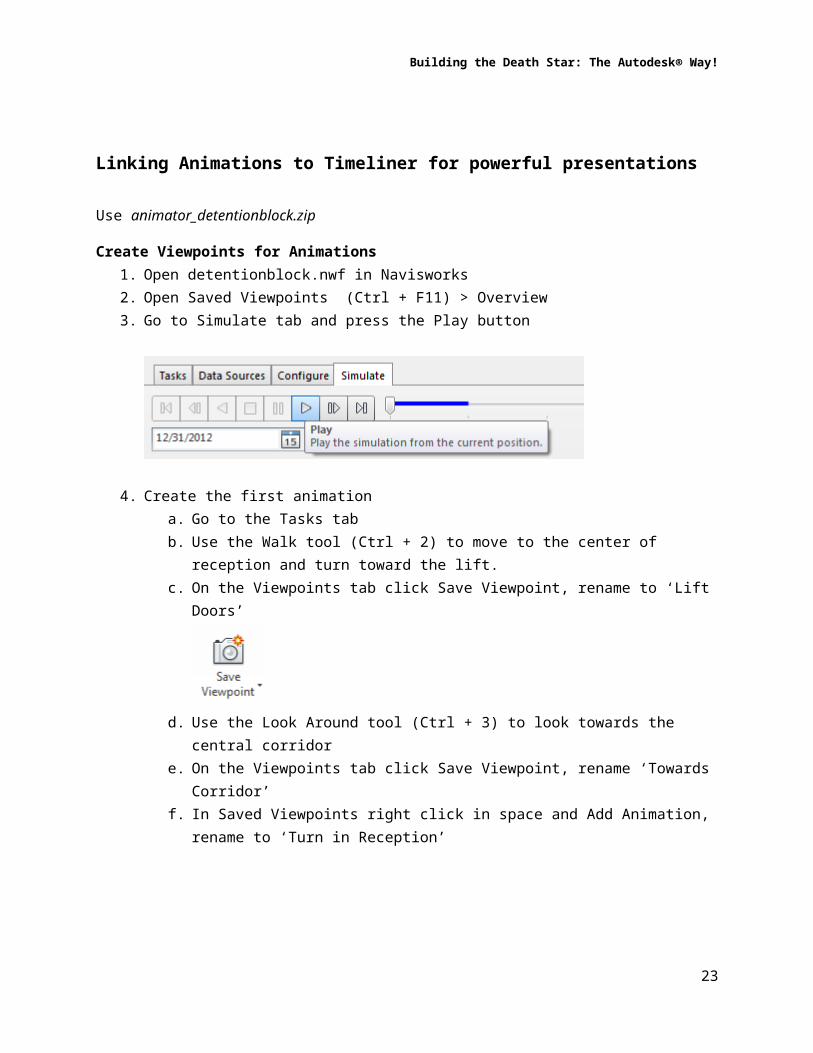
28. Create a task named 'Tie Fighter', set planned start and end dates to 1/1/2013 and 1/16/2013 respectively, set Task Type to Model, attach Tiefighter selection set using drag and drop, Add the Animation ‘Tiefighter’ to the task, ensure Animation Behaviour is set to Scale to ensure this lasts the duration of the task
16
Building the Death Star: The Autodesk® Way!
29. Run this in the Simulate tab to ensure this works30. Open Clash Detective (Ctrl + F2)
Create a time based clash31. Add a test, name it ‘Loading vs Breakdancing’32. Select dockingbay.nwc on left, select tieload.iam on right33. In Clash Settings ensure these are
a. Hardb. Tolerance = 0.01mc. Link = Timeliner d. Step (sec) = ‘3600’ (1 hour)
34. Run Test
This will tell you when a clash will happen so you can reschedule.
Try finishing the breakdancing one day early, or start the Tie Fighter a day later and re run the task
17
Building the Death Star: The Autodesk® Way!
Linking Animations to Timeliner for powerful presentations
Use animator_detentionblock.zip
Create Viewpoints for Animations1. Open detentionblock.nwf in Navisworks2. Open Saved Viewpoints (Ctrl + F11) > Overview3. Go to Simulate tab and press the Play button
4. Create the first animationa. Go to the Tasks tabb. Use the Walk tool (Ctrl + 2) to move to the center of reception and turn toward
the lift.c. On the Viewpoints tab click Save Viewpoint, rename to ‘Lift Doors’
d. Use the Look Around tool (Ctrl + 3) to look towards the central corridore. On the Viewpoints tab click Save Viewpoint, rename ‘Towards Corridor’f. In Saved Viewpoints right click in space and Add Animation, rename to ‘Turn in
Reception’
18

Building the Death Star: The Autodesk® Way!
g. Drag ‘Lift Doors’ into the new animation, then drag ‘Towards Corridor’ into the animation
h. Play the Animation in the Viewpoints tab (Ctrl + Right Arrow) to ensure the view turns round towards corridor
5. Create the second animationa. Select the new ‘Lift Doors’ Viewpointb. Use the Walk tool (Ctrl + 2) to move backwards until you are slightly in the
corridor (2 or 3 blocks in)c. On the Viewpoints tab click Save Viewpoint, rename to ‘In corridor’d. Use the Walk tool to move backwards until you are about halfway downe. On the Viewpoints tab click Save Viewpoint, rename ‘Halfway down corridor’f. In Saved Viewpoints right click in space and Add Animation, rename to ‘Walk
back through corridor’g. Drag ‘In corridor’ into the new animation, then drag ‘Halfway down Corridor’ into
the animationh. Play the Animation in the Viewpoints tab (Ctrl + Right Arrow) to ensure the view
turns round towards corridor
Use Animator to animate objects6. Select Overview viewpoint in Saved Viewpoints
19
Building the Death Star: The Autodesk® Way!
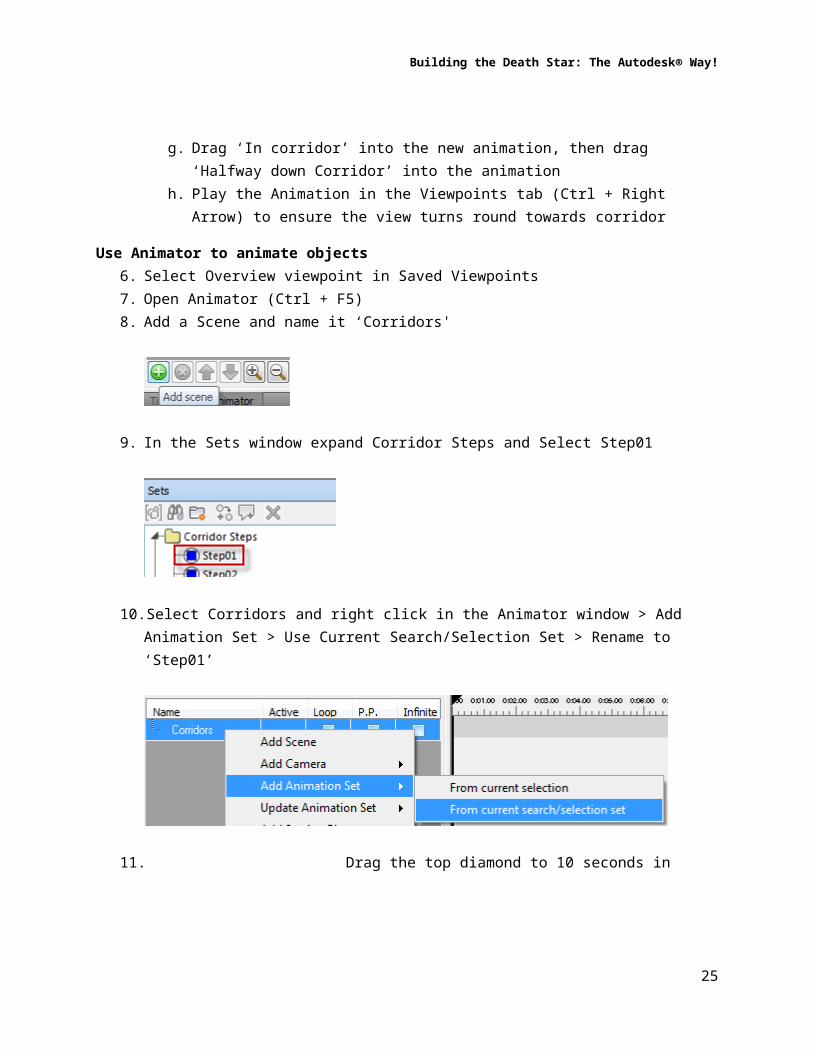
7. Open Animator (Ctrl + F5)8. Add a Scene and name it ‘Corridors'
9. In the Sets window expand Corridor Steps and Select Step01
10. Select Corridors and right click in the Animator window > Add Animation Set > Use Current Search/Selection Set > Rename to ‘Step01’
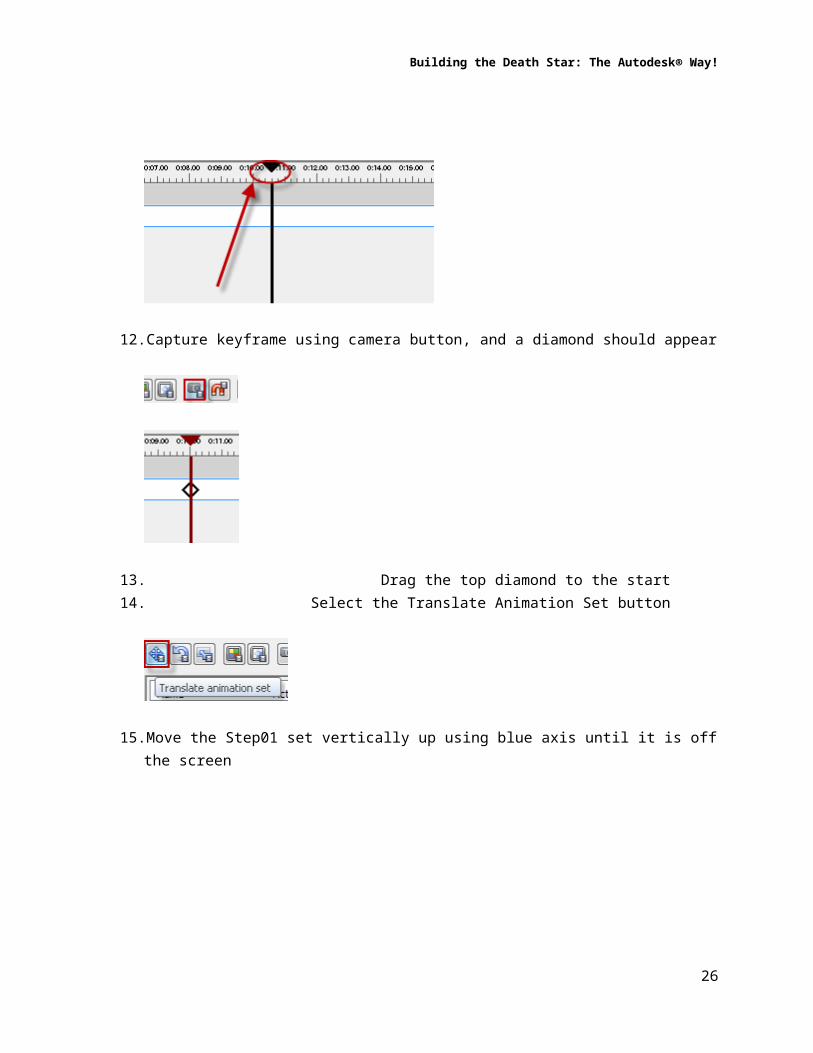
11. Drag the top diamond to 10 seconds in
12. Capture keyframe using camera button, and a diamond should appear
20
Building the Death Star: The Autodesk® Way!
13. Drag the top diamond to the start14. Select the Translate Animation Set button
15. Move the Step01 set vertically up using blue axis until it is off the screen
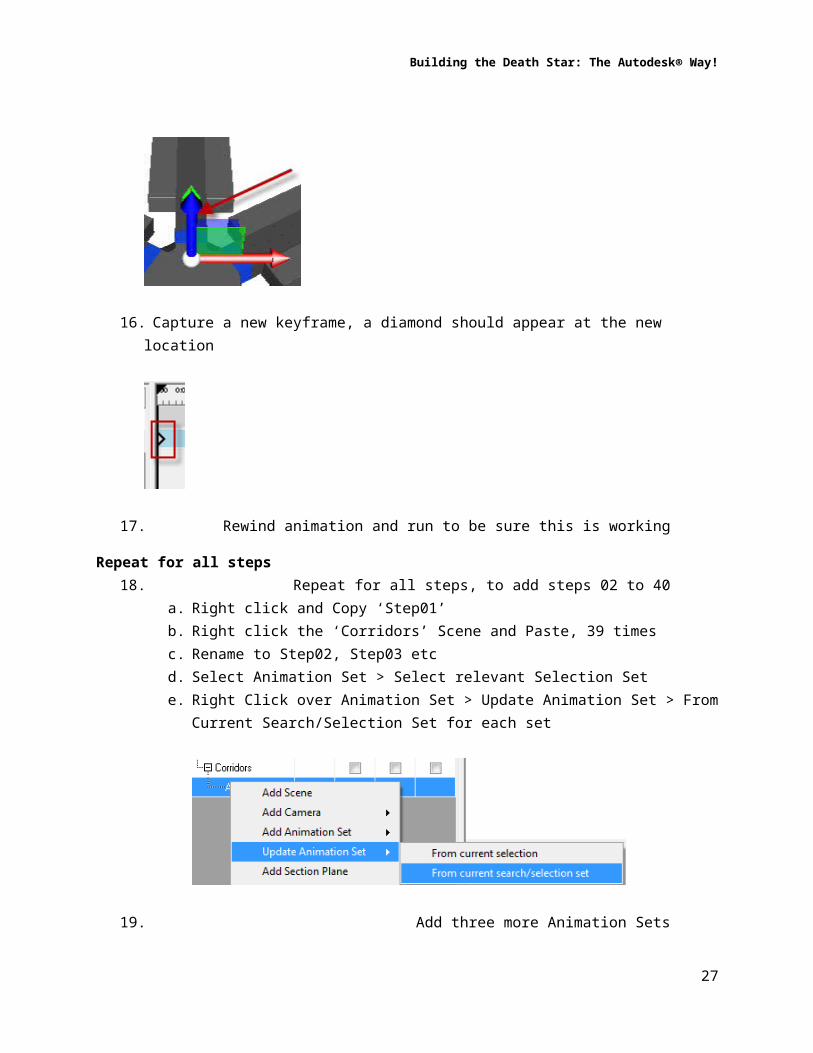
16. Capture a new keyframe, a diamond should appear at the new location
17. Rewind animation and run to be sure this is working
Repeat for all steps18. Repeat for all steps, to add steps 02 to 40
a. Right click and Copy ‘Step01’b. Right click the ‘Corridors’ Scene and Paste, 39 timesc. Rename to Step02, Step03 etcd. Select Animation Set > Select relevant Selection Set
21
Building the Death Star: The Autodesk® Way!
e. Right Click over Animation Set > Update Animation Set > From Current Search/Selection Set for each set
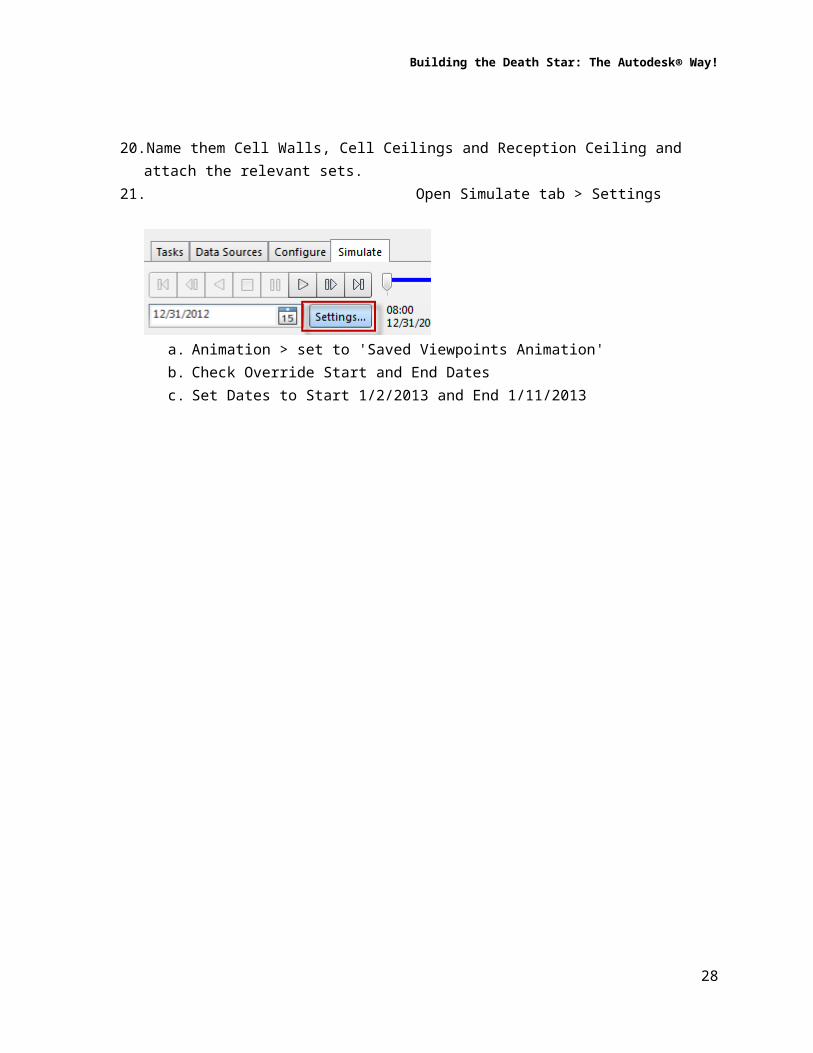
19. Add three more Animation Sets20. Name them Cell Walls, Cell Ceilings and Reception Ceiling and attach the relevant sets.21. Open Simulate tab > Settings
a. Animation > set to 'Saved Viewpoints Animation'b. Check Override Start and End Datesc. Set Dates to Start 1/2/2013 and End 1/11/2013
22
Building the Death Star: The Autodesk® Way!
d. Set Playback Duration to 20 seconds
22. Select Overlay Text > Edita. Delete current text and paste
DETENTION BLOCK SCHEDULE%A %X %x Day=$DAY Week=$WEEK$TASKS
b. Select a suitable Font c. If you want to change the color, put the cursor before the text, then select a color
23

Building the Death Star: The Autodesk® Way!
d. Press OK23. Press OK again24. Select ‘Turn In Reception’ Animation in Saved Viewpoints25. Run in Simulate to ensure that the simulation displays at the same time as the animation
turning round in the corridor runs26. Click Animation Export (Ctrl + Shift + A) and use the following settings
a. Source – Timeliner Simulationb. Renderer – Viewport (Presenter takes a lot long and has no progress update)c. Format – JPG (in Options set to uncompressed)d. Size – Explicit 1600 x 900 for widescreen 16:9 movie, 1200 x 900 for 4:3e. FPS – 25f. Anti-aliasing – 64x
24
Building the Death Star: The Autodesk® Way!
27. Save to a new folder named ‘Detention Block 1’28. This exported animation will be the first part of your animation
29. Open Simulate tab > Settings > Animation > set to 'Saved Viewpoints Animation'30. Check Override Start and End Dates31. Set Dates to Start 1/11/2013 and End 2/1/201332. Set Playback Duration to 40 seconds33. Select ‘Walk back through corridor’ Animation in Saved Viewpoints34. Run in Simulate to ensure it works35. Click Animation Export (Ctrl + Shift + A) and use the following settings
a. Source – Timeliner Simulationb. Renderer – Viewport (Presenter takes a lot long and has no progress update)c. Format – JPG (in Options set to uncompressed)d. Size – Explicit 1600 x 900 for widescreen 16:9 movie, 1200 x 900 for 4:3e. FPS – 25f. Anti-aliasing – 64x
36. Save to a new folder named ‘Detention Block 2’
Create a smooth camera view through Animator
25
Building the Death Star: The Autodesk® Way!
37. Use the Navigation Tools to create 4 viewpoints that would create a sweep over the Detention Block
38. Drag into to a new Animation in Saved Viewpoints as before39. Play the Animation40. In Animator add a Scene and rename this to Sweep
41. Add a Camera using the button, Using the Current Viewpoint Animation42. Drag the diamonds to make the animation run more smoothly
43. Add intermediate framesa. Move the playhead (the red triangle at the top) to between two keyframes
b. Using the Navigation tools move to smooth the animation, you may want to walk backwards or look around to make the transition between frames less jerky
c. Capture a new keyframe
d. Play the animation to look where you need more intermediate frames, drag them on the timeline appropriately
26
Building the Death Star: The Autodesk® Way!
44. Change the Columns in View to Extended if it isn’t already
45. Add a Timeliner Task, rename to Sweepa. Set Planned Start to 2/1/2013 and Planned End to 2/21/2013b. Set Animation to 'Sweep > Camera' and ensure behavior is set to Scale
46. Open Simulate tab > Settingsa. Change Animation to 'Sweep > Camera'b. Check Override Start and End Dates and Set Dates to Start 2/1/2013 and End
2/21/2013c. Set Playback Duration to 40 seconds
47. Run in Simulate tab to ensure the Animation you created highlights the key areas, adjust the Camera Scene in Animator if not.
48. Click Animation Export (Ctrl + Shift + A) and use the following settingsa. Source – Timeliner Simulationb. Renderer – Viewport (Presenter takes a lot long and has no progress update)c. Format – JPG (in Options set to uncompressed)d. Size – Explicit 1600 x 900 for widescreen 16:9 movie, 1200 x 900 for 4:3e. FPS – 25f. Anti-aliasing – 64x
49. Save to a new folder named ‘Detention Block 3’
Create a video from the images50. Use something like Quicktime Pro to splice the frames for all three animations together.
Where possible keep uncompressed up until the final video is ready51. Extra tips
a. Add an opening slide with brandingb. Use cuts between videosc. Use the last frame as a closing slide so the animation doesn’t end prematurely
27
Building the Death Star: The Autodesk® Way!
d. Use sounds and musice. Use Appearance Profiler to add more colorf. Add materials and lights in Presenter
Switch to Full Render and Full Lights in Viewpoints tab if exporting as ‘Viewport’ g. Export as a Presenter render (no progress is provided this way), will take much
longer, export as many small animations on multiple machines to save time
Find more tips on Beyond Design Blog
28