Embed Size (px)
Citation preview
Level A
Teaching Tip
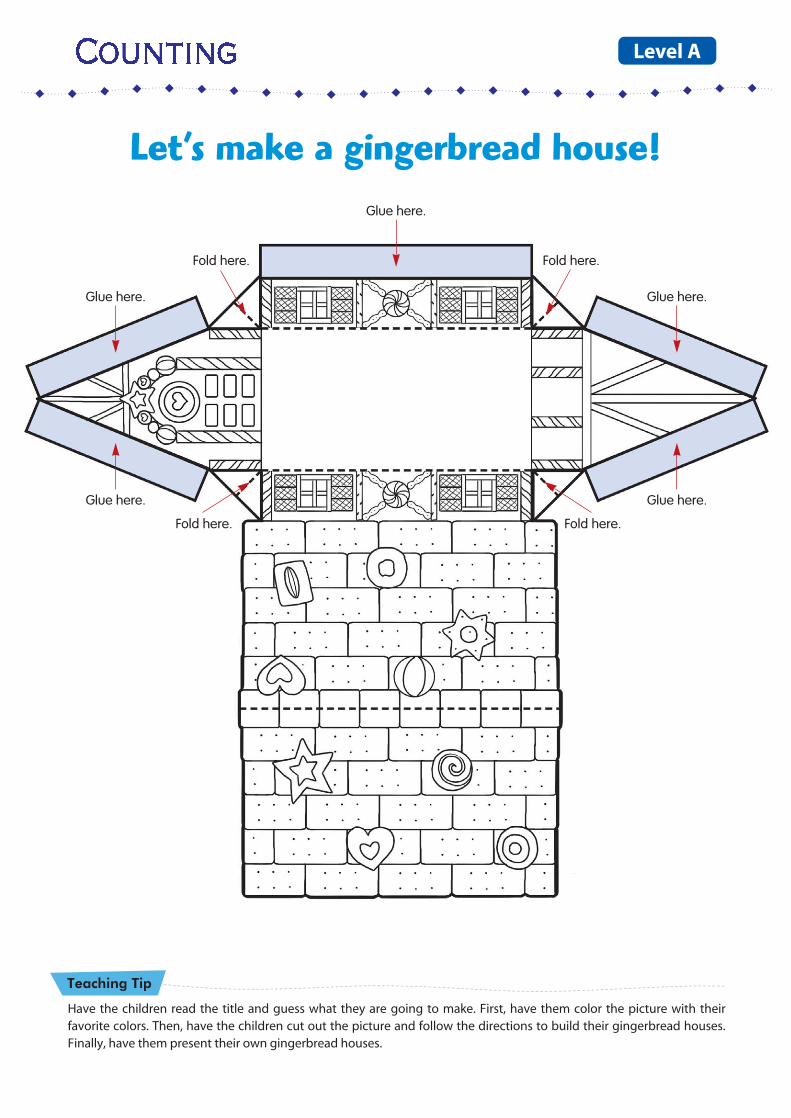
Let’s make a gingerbread house!
Have the children read the title and guess what they are going to make. First, have them color the picture with theirfavorite colors. Then, have the children cut out the picture and follow the directions to build their gingerbread houses.Finally, have them present their own gingerbread houses.
Fold here.
Glue here.
Fold here. Fold here.
Fold here.
Glue here.
Glue here. Glue here.
Glue here.
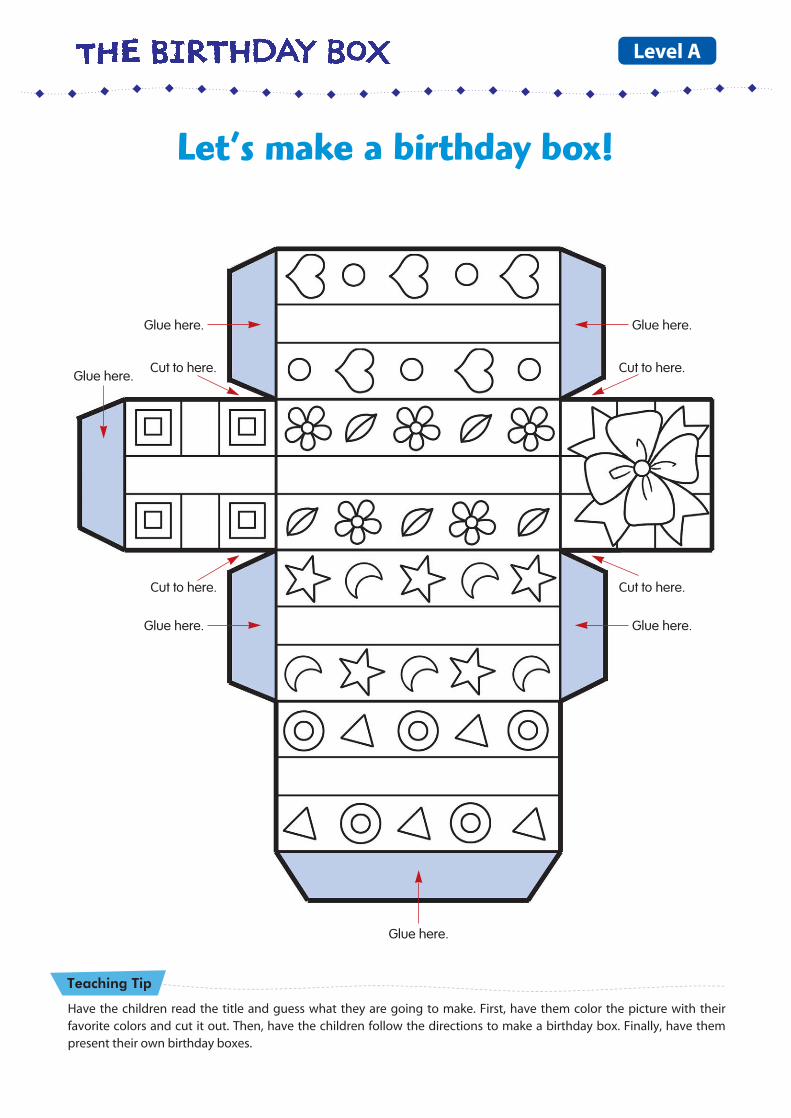
Have the children read the title and guess what they are going to make. First, have them color the picture with theirfavorite colors and cut it out. Then, have the children follow the directions to make a birthday box. Finally, have thempresent their own birthday boxes.
Glue here.
Cut to here.
Cut to here. Cut to here.
Cut to here.Glue here.
Glue here.
Glue here.
Glue here. Glue here.
Let’s make a birthday box!
Teaching Tip
Level A
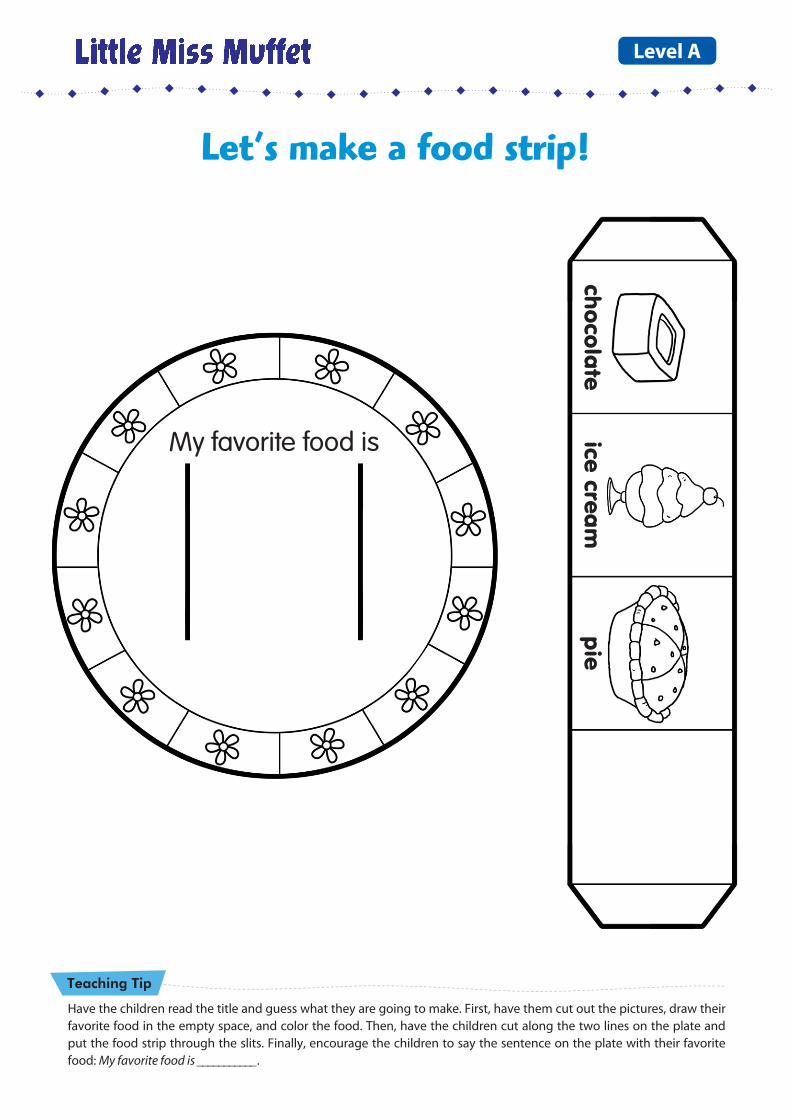
Have the children read the title and guess what they are going to make. First, have them cut out the pictures, draw theirfavorite food in the empty space, and color the food. Then, have the children cut along the two lines on the plate andput the food strip through the slits. Finally, encourage the children to say the sentence on the plate with their favoritefood: My favorite food is ___________.
My favorite food is
chocola
tepie
ice cream
Let’s make a food strip!
Teaching Tip
Level A
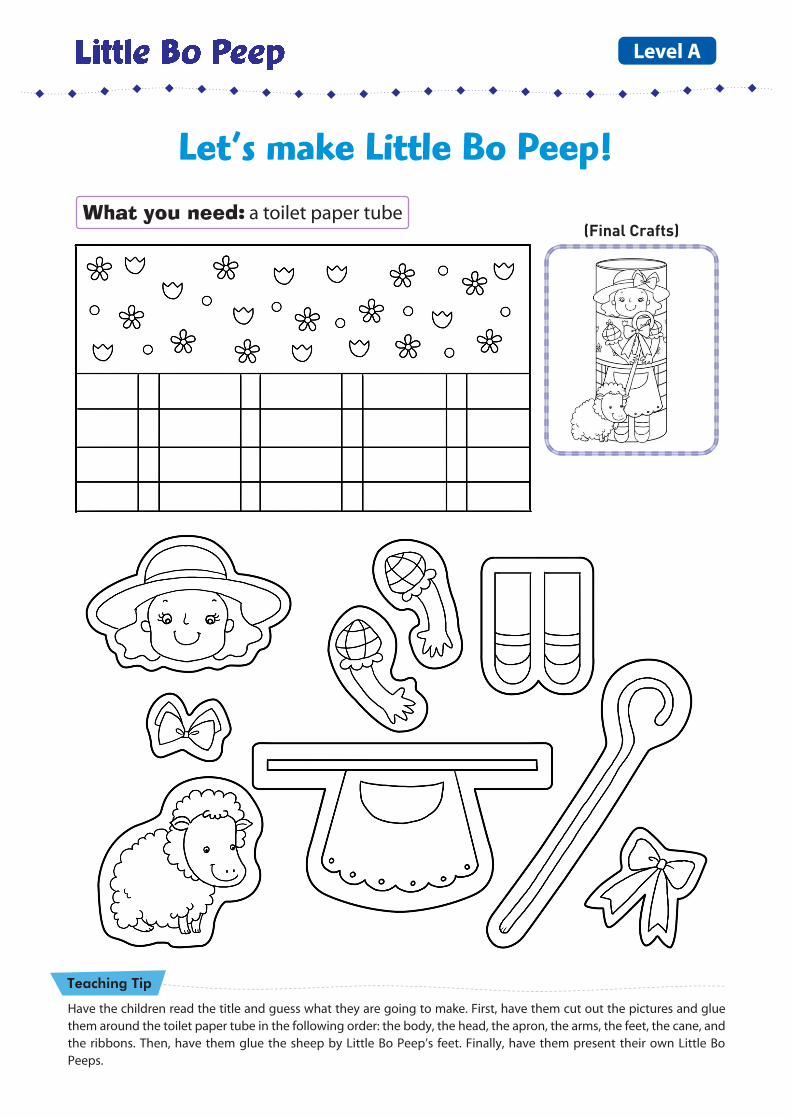
Have the children read the title and guess what they are going to make. First, have them cut out the pictures and gluethem around the toilet paper tube in the following order: the body, the head, the apron, the arms, the feet, the cane, andthe ribbons. Then, have them glue the sheep by Little Bo Peep’s feet. Finally, have them present their own Little BoPeeps.
Let’s make Little Bo Peep!
Teaching Tip
Level A
What you need: a toilet paper tube(Final Crafts)
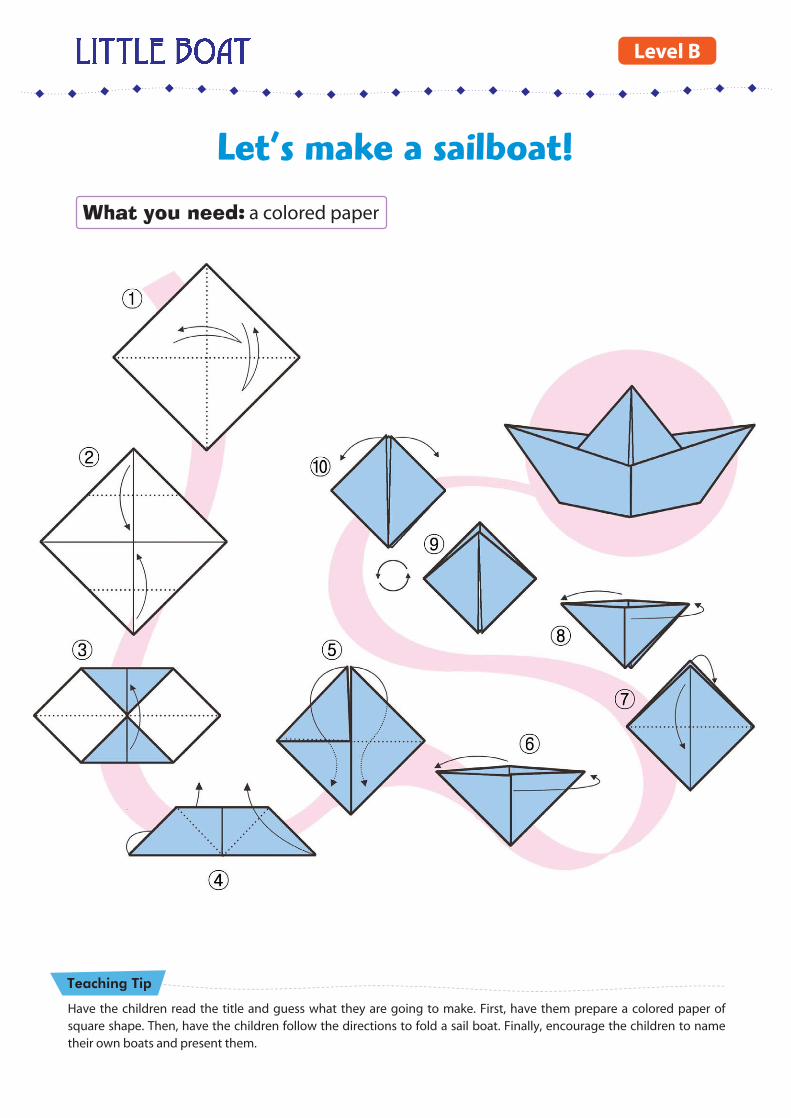
Have the children read the title and guess what they are going to make. First, have them prepare a colored paper ofsquare shape. Then, have the children follow the directions to fold a sail boat. Finally, encourage the children to nametheir own boats and present them.
Let’s make a sailboat!
Teaching Tip
Level B
What you need: a colored paper
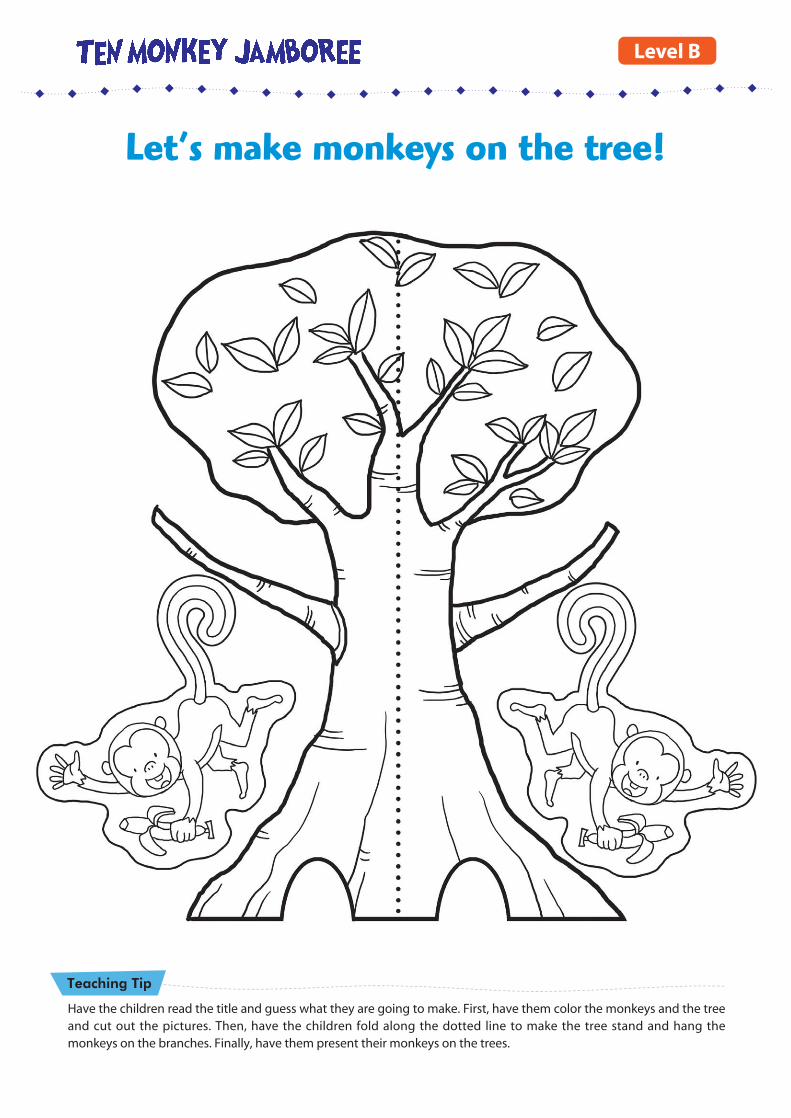
Have the children read the title and guess what they are going to make. First, have them color the monkeys and the treeand cut out the pictures. Then, have the children fold along the dotted line to make the tree stand and hang themonkeys on the branches. Finally, have them present their monkeys on the trees.
Let’s make monkeys on the tree!
Teaching Tip
Level B
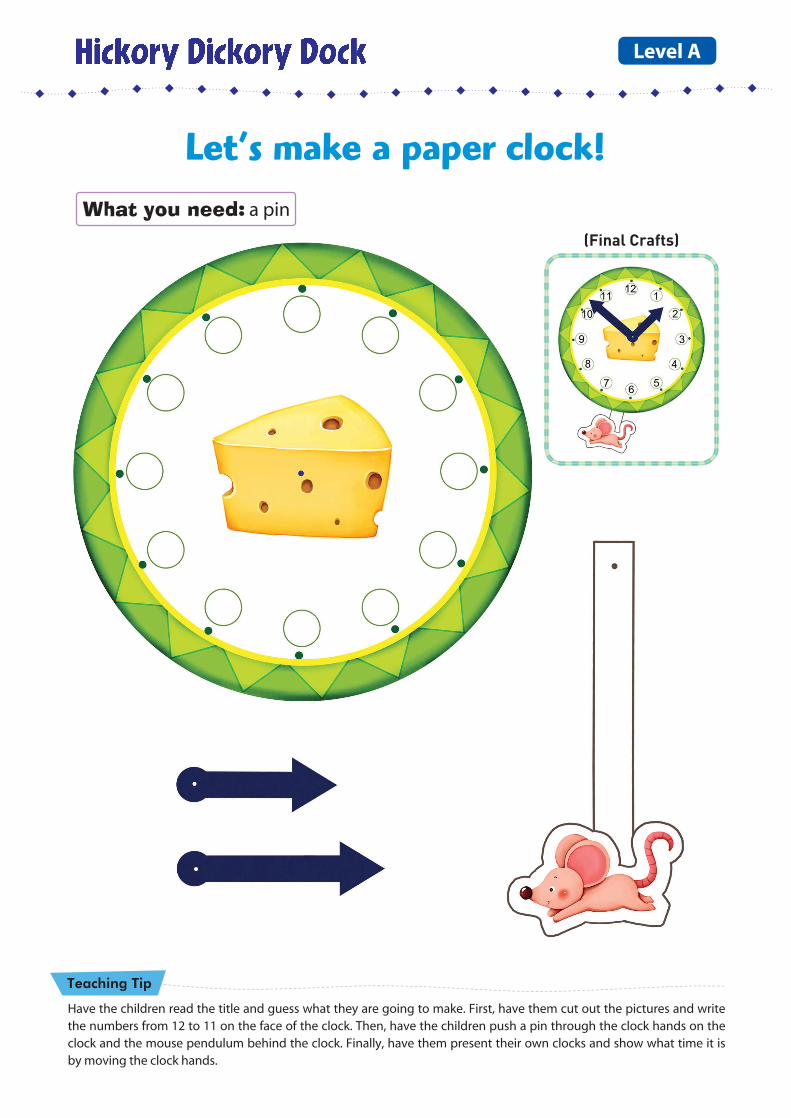
Have the children read the title and guess what they are going to make. First, have them cut out the pictures and writethe numbers from 12 to 11 on the face of the clock. Then, have the children push a pin through the clock hands on theclock and the mouse pendulum behind the clock. Finally, have them present their own clocks and show what time it isby moving the clock hands.
Let’s make a paper clock!
Teaching Tip
Level A
What you need: a pin
(Final Crafts)
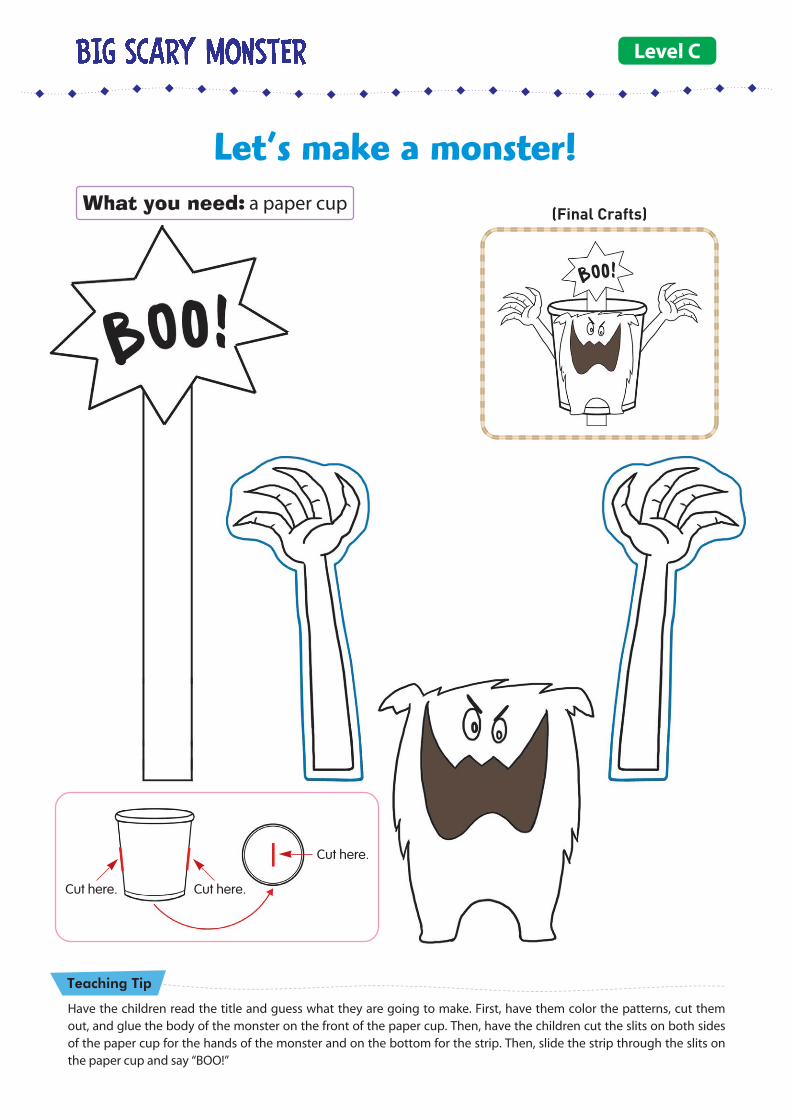
Have the children read the title and guess what they are going to make. First, have them color the patterns, cut themout, and glue the body of the monster on the front of the paper cup. Then, have the children cut the slits on both sidesof the paper cup for the hands of the monster and on the bottom for the strip. Then, slide the strip through the slits onthe paper cup and say “BOO!”
Let’s make a monster!
Teaching Tip
Level C
Cut here. Cut here.
Cut here.
What you need: a paper cup(Final Crafts)
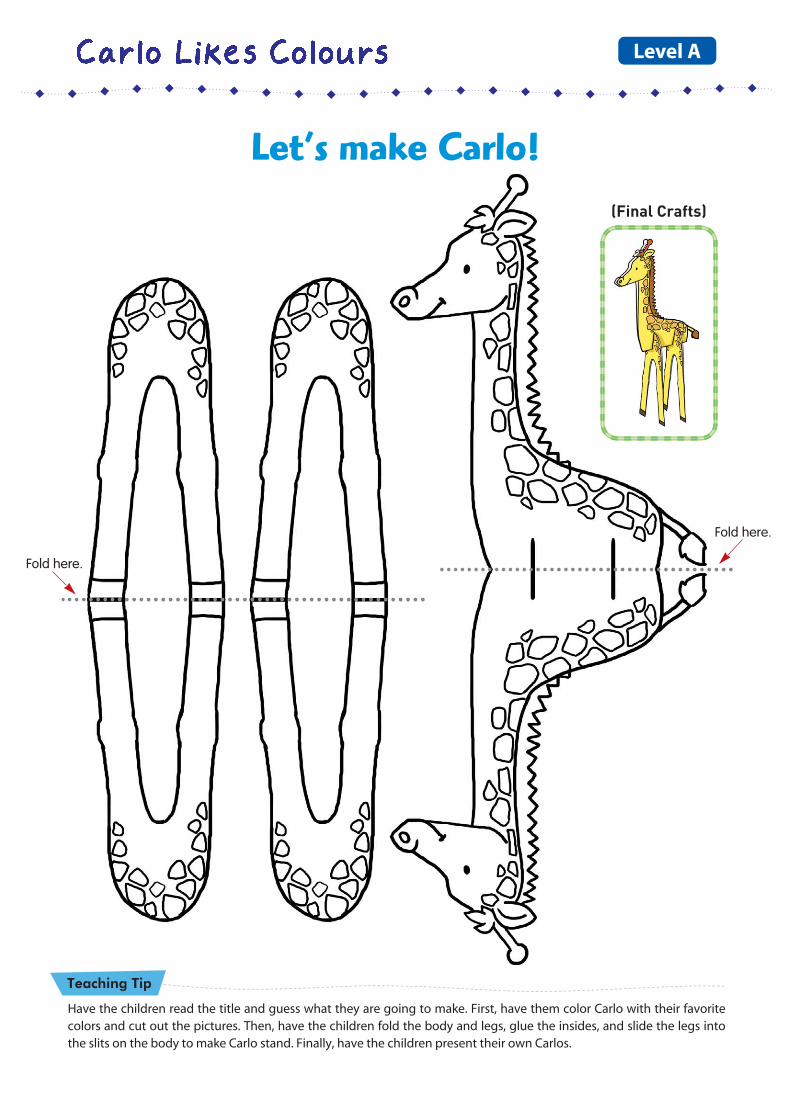
Have the children read the title and guess what they are going to make. First, have them color Carlo with their favoritecolors and cut out the pictures. Then, have the children fold the body and legs, glue the insides, and slide the legs intothe slits on the body to make Carlo stand. Finally, have the children present their own Carlos.
Teaching Tip
Level A
Let’s make Carlo!
Fold here.
Fold here.
(Final Crafts)
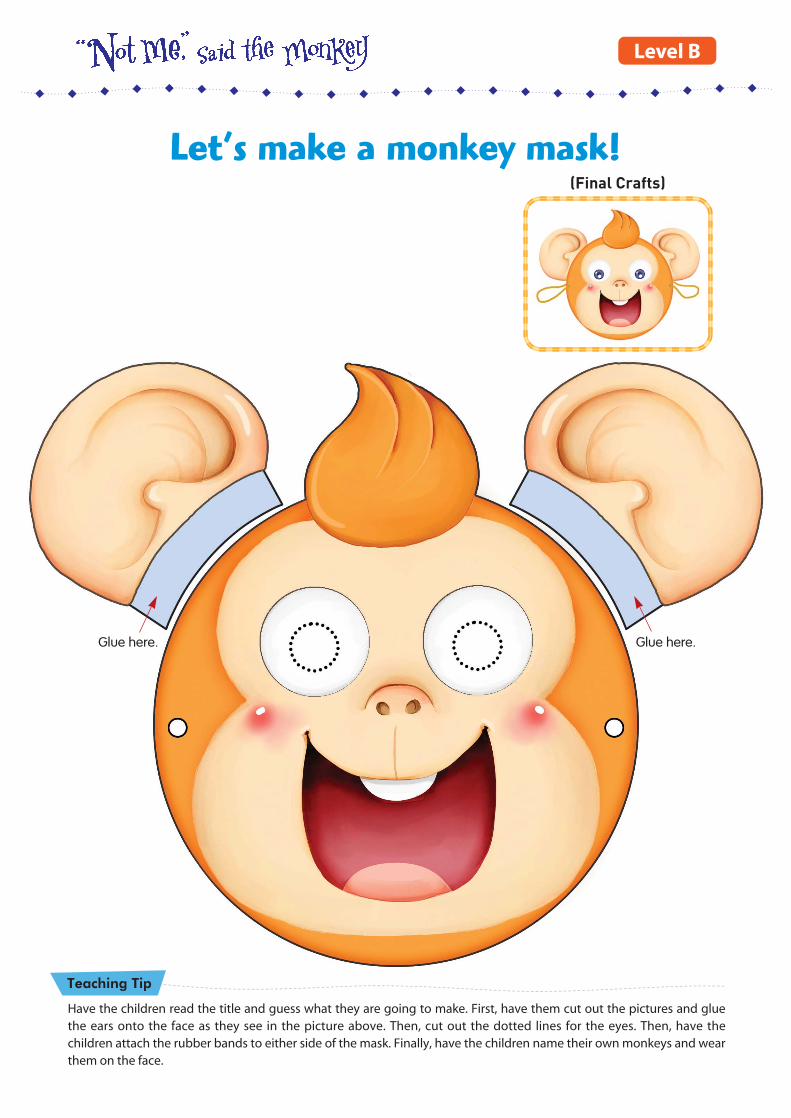
Have the children read the title and guess what they are going to make. First, have them cut out the pictures and gluethe ears onto the face as they see in the picture above. Then, cut out the dotted lines for the eyes. Then, have thechildren attach the rubber bands to either side of the mask. Finally, have the children name their own monkeys and wearthem on the face.
Let’s make a monkey mask!
Teaching Tip
Level B
Glue here. Glue here.
(Final Crafts)
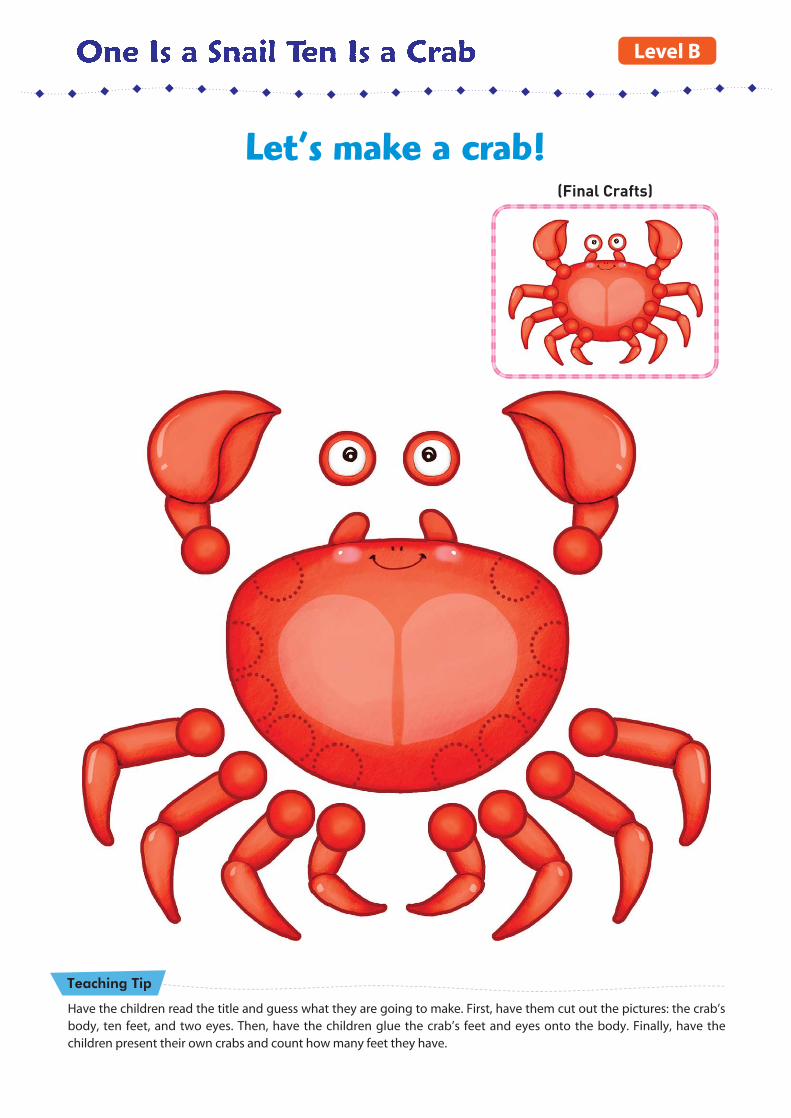
Have the children read the title and guess what they are going to make. First, have them cut out the pictures: the crab’sbody, ten feet, and two eyes. Then, have the children glue the crab’s feet and eyes onto the body. Finally, have thechildren present their own crabs and count how many feet they have.
Let’s make a crab!
Teaching Tip
Level B
(Final Crafts)
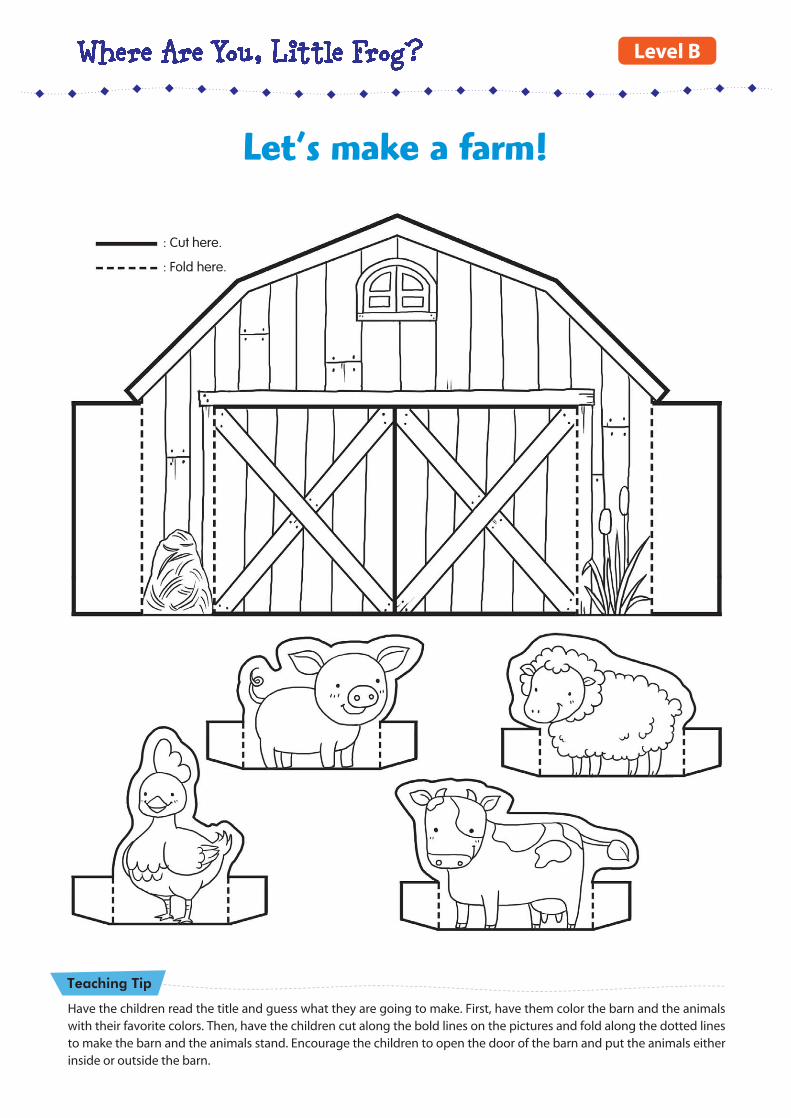
Have the children read the title and guess what they are going to make. First, have them color the barn and the animalswith their favorite colors. Then, have the children cut along the bold lines on the pictures and fold along the dotted linesto make the barn and the animals stand. Encourage the children to open the door of the barn and put the animals eitherinside or outside the barn.
Let’s make a farm!
Teaching Tip
Level B
: Cut here.
: Fold here.
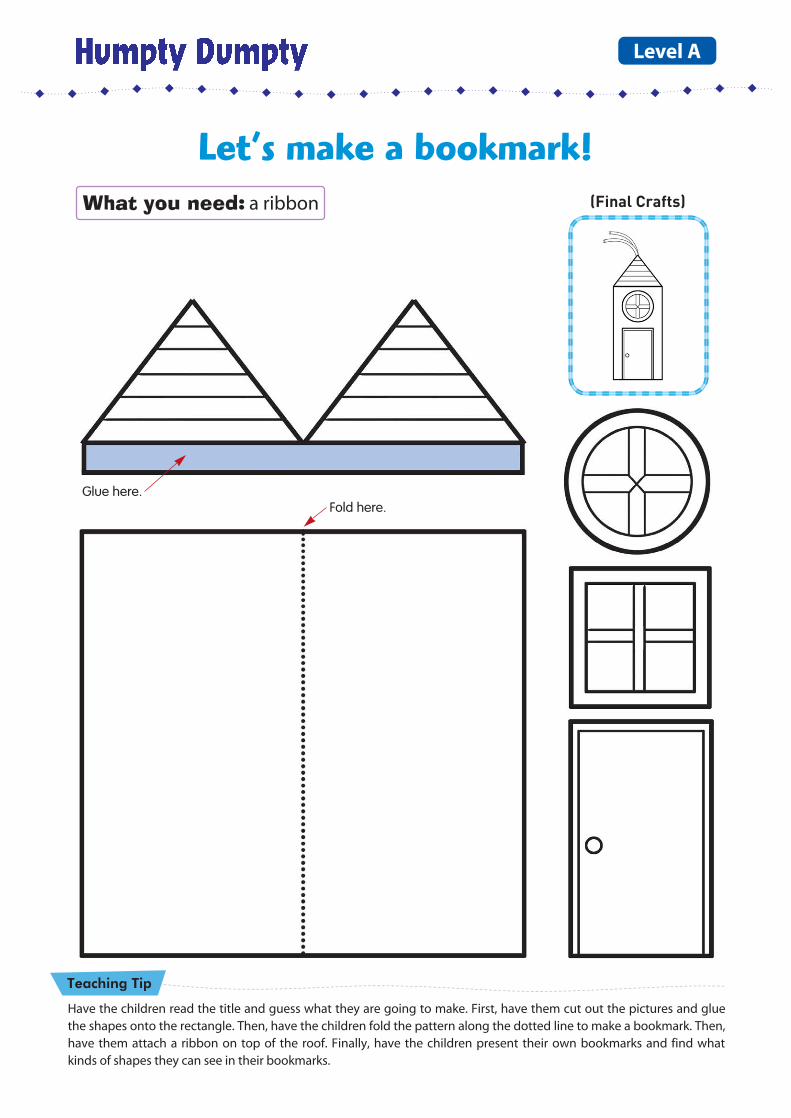
Glue here.Fold here.
Have the children read the title and guess what they are going to make. First, have them cut out the pictures and gluethe shapes onto the rectangle. Then, have the children fold the pattern along the dotted line to make a bookmark. Then,have them attach a ribbon on top of the roof. Finally, have the children present their own bookmarks and find whatkinds of shapes they can see in their bookmarks.
Teaching Tip
Level A
Let’s make a bookmark!What you need: a ribbon (Final Crafts)
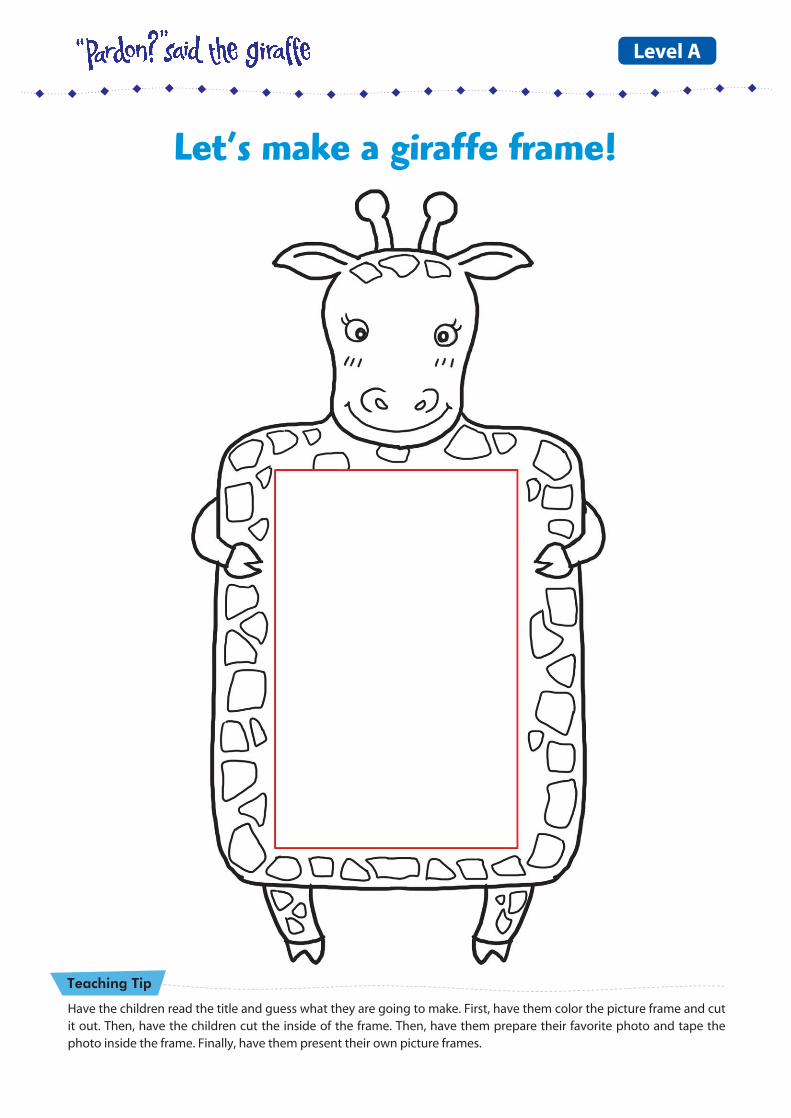
Have the children read the title and guess what they are going to make. First, have them color the picture frame and cutit out. Then, have the children cut the inside of the frame. Then, have them prepare their favorite photo and tape thephoto inside the frame. Finally, have them present their own picture frames.
Teaching Tip
Level A
Let’s make a giraffe frame!
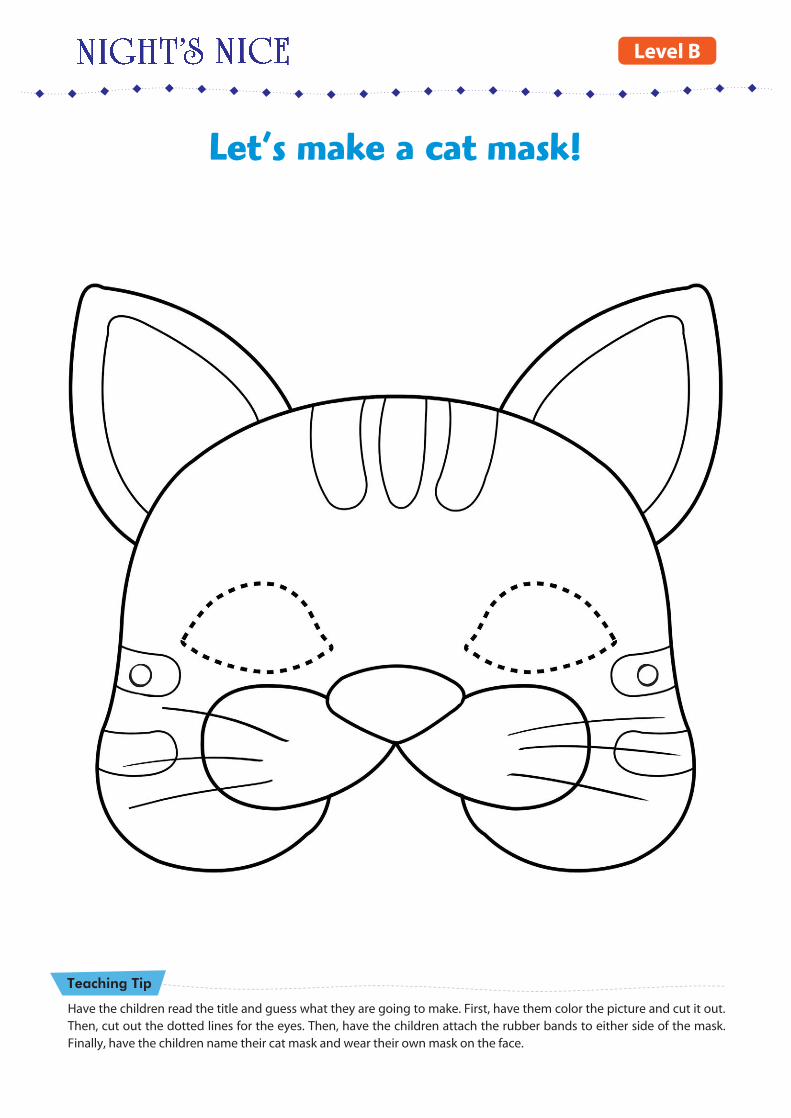
Have the children read the title and guess what they are going to make. First, have them color the picture and cut it out.Then, cut out the dotted lines for the eyes. Then, have the children attach the rubber bands to either side of the mask.Finally, have the children name their cat mask and wear their own mask on the face.
Let’s make a cat mask!
Teaching Tip
Level B
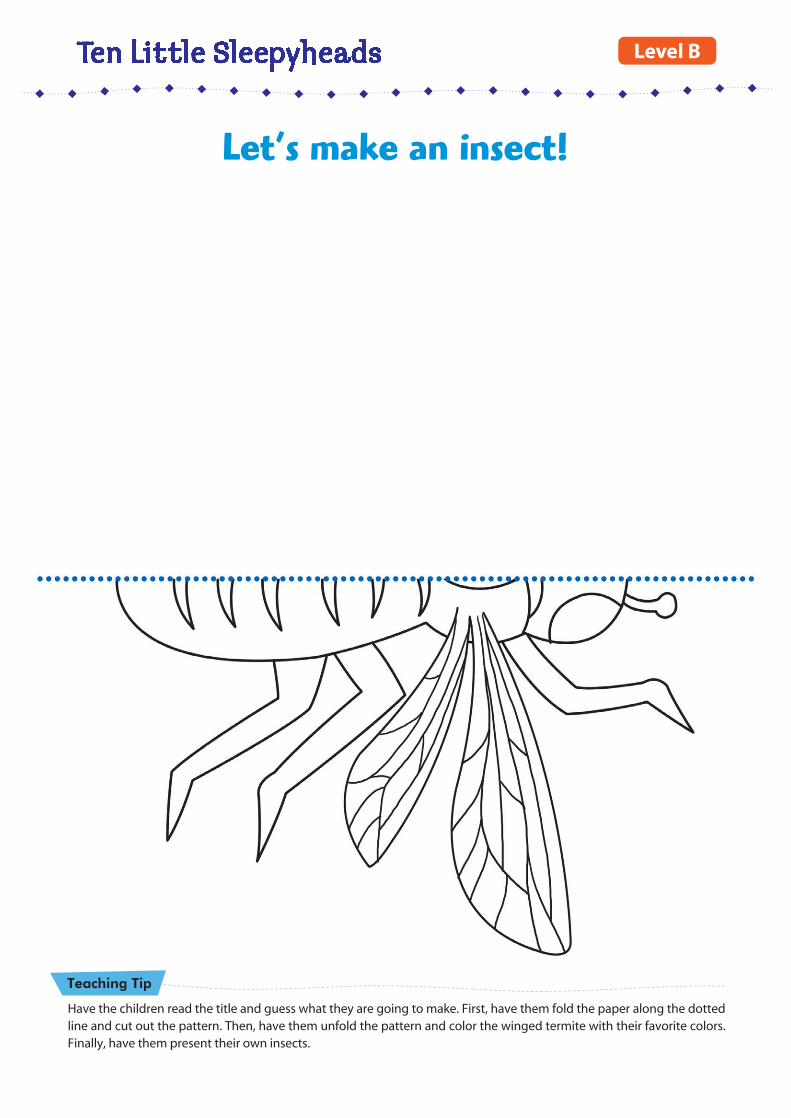
Have the children read the title and guess what they are going to make. First, have them fold the paper along the dottedline and cut out the pattern. Then, have them unfold the pattern and color the winged termite with their favorite colors.Finally, have them present their own insects.
Let’s make an insect!
Teaching Tip
Level B