Embed Size (px)
Citation preview

Geology Level 2
Purdue extension4-H-986
M177
INDIANA UNIVERSITYIndiana Geological Survey

�
4-H Geology Project Manual
Note to 4-H Member: Learning about geology is fun. “Geology” exists all around you, wherever you live. The Indiana 4-H Geology curriculum was written for youth that enjoy studying rocks, fossils, and minerals, and for those who want to learn more. The first manual introduced you to rocks, fossils, and minerals. Level 2 continues this study in more detail. Level 3 introduces more advanced topics. The key to learning with any 4-H project is for you to enjoy your studies and to learn at your own pace. We hope this study is just the start of a lifetime enjoyment of geology. You can enhance your learning experience by using other resources from the Internet, school, or a local library. See the “Resources” section at the back of the manual for recommended publications.
Authors: Natalie Carroll, George Aldred, Wanda Aldred, Wes Beck, Trish Brutus, Kenneth Eck, Dale Fadely, Catherine Maddox, and Todd Thompson.
Reviewers: Joseph Bliss, Ben Moulton, Tracy Branam, and Carolyn Estell.
Editor: Rebecca J. Goetz.
Designers: Cassi Halsema, Nicholas Peetz, Barbara Hill, Kimberly Sowder, and Jessica Seiler.
When you see this icon, you’ll find a Fun Fact about Geology.
�
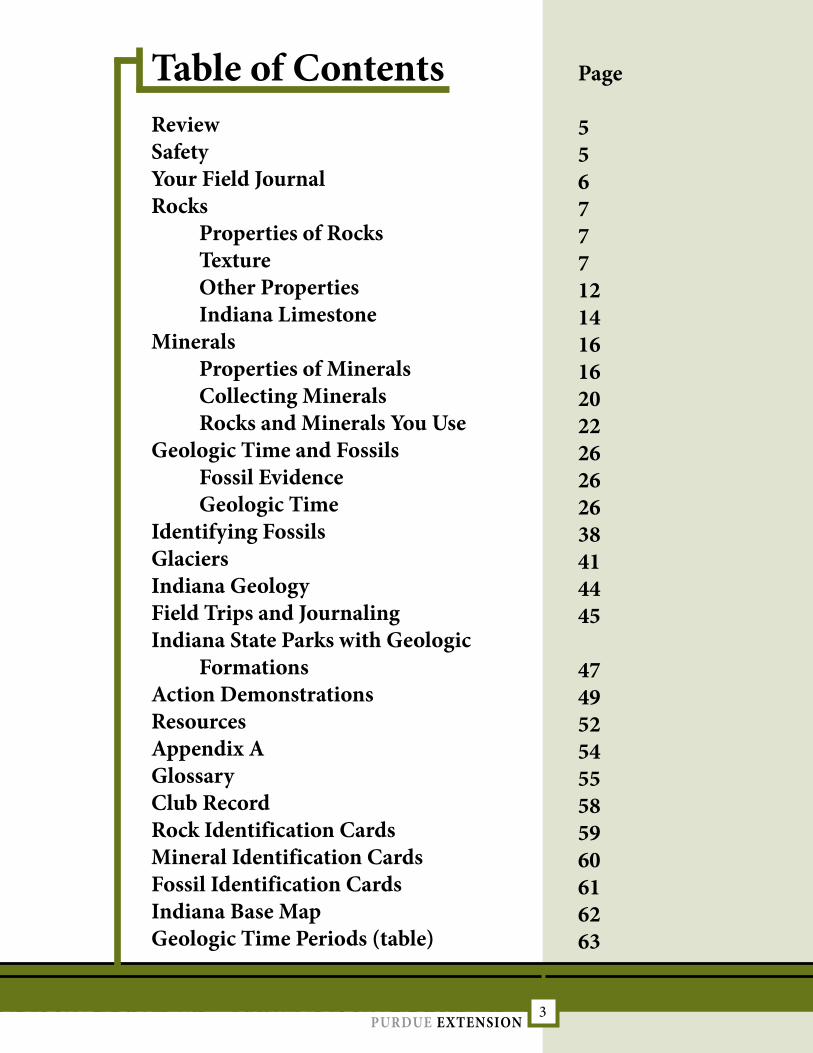
Page 55677712141616202226262638414445
4749525455 58 59 60 61 62 63
table of Contentsreview safety Your Field Journal rocks Properties of rocks texture other Properties indiana Limestone Minerals Properties of Minerals Collecting Minerals rocks and Minerals You use Geologic time and Fossils Fossil evidence Geologic time identifying Fossils Glaciers indiana Geology Field trips and Journalingindiana state Parks with Geologic Formations Action demonstrations resources Appendix AGlossary Club record rock identification Cards Mineral identification Cards Fossil identification Cards indiana Base MapGeologic time Periods (table)

�
Note to Parents and Project Leaders: The 4-H Geology curriculum
offers many educational experiences, from collecting and identifying
rocks to learning how the Earth was formed. Parents and project leaders
can be a big help if they are involved with their children’s learning,
especially for younger 4-H members. As they mature, youth should take
on more responsibility. The helper’s guide has a variety of information to
help adults work much more effectively with youth. These include:
• Ages & Stages – This article gives a summary of the general youth
developmental stages and gives ideas of what to expect.
• Learning Styles for Youth – This article discusses how kids learn by
different methods.
• Experiential Learning – This article gives tips on how to make the
most of any activity by teaching to a variety of learning styles.
Parent involvement is still important with youth in grades 6-8. Kids will
be more interested in learning if parents show interest in what they
are doing. Your interest will reinforce what they learn at meetings and
workshops. Youth will also learn more if you take them to collection
sites, museums, and other special events. Field trips to collection sites,
museums, and shows allow youth to speak with professionals, have
hands-on experiences, and obtain specimens for their collection.
Goals of this publication: The 4-H Geology, Level 2 manual encourages
youth to
• learn more about minerals and fossils,
• learn about the importance of keeping records (field notes, journal),
• develop an understanding of and an appreciation of Earth science,
and
• do an action demonstration to teach others about geology.
Experiential learning distinguishes 4–H youth development education from many formal educational methods. Activities are designed so youth experience a learning activity, reflect on what they did (explore the meaning of the activity), generalize what they learned (to test comprehension and appreciation of the activity), and then think about how they can apply what they learned to other situations (generalize). You can help guide youth as they explore each activity by discussing each section.

�
Level 1 reviewThe 4-H Geology, Level 1 manual introduced you to rocks, fossils, and minerals. You should remember the basic concepts described below. Review the Level 1 manual if you don’t remember these topics or if you did not take 4-H Geology, Level 1.
The rock cycle – The rock cycle describes how the three major types of rocks are formed. Igneous rocks form from melted earth materials and have interlocking crystals. Sedimentary rocks form from weathered and transported particles of pre-existing rock, or by chemical precipitation from waters. Metamorphic rocks form from rocks or sediments that have been subjected to heat and pressure. One kind of rock can be transformed into any of the others by geologic processes.
equipment for rockhounds – There is a variety of equipment that you will need for collecting rocks, minerals, and fossils. You will probably need a weak acid, a chisel, a collecting bag, gloves, a hammer, a personal journal, a magnifying glass, possibly a microscope, newspaper, a pocket knife, protective glasses, a safety kit, and a specimen box.
Minerals – Minerals are solid elements or compounds, are inorganic, and have a definite chemical composition.
Fossils – Fossils are the remains of a plant or animal, or evidence of plants or animals (footprints, leaf outlines, etc.). They are formed as molds and casts, and by replacement.
The best place to study geology is outside. Look for field trip ideas when you see this icon.
Field trip
safety Always be aware of possible hazards when you are collecting rocks, fossils, and minerals. Safety suggestions:
• Always collect with a friend or parent.
• If you are not collecting on your own property, you must get permission from the property owner or manager before collecting specimens.
• Wear safety glasses or goggles when breaking specimens.
• If you are collecting on a hillside, make sure there is no one below you.
• Be aware of where you are, what you are doing, and what others around you are doing.
• Always be conscious of your surroundings and potential dangers.
• Think Safely, Think Safety – at all times!

�
Your journal is your personal geology diary. Create the journal that you can use and want to keep.
Your Field JournalA field journal is a great place to record what you learn and where you find specific specimens. Notes that are carefully recorded let you recall things you see and hear years after the occurrence. Developing the habit of writing down your observations takes effort, but it is worth the work.
Purchase a notebook or bound journal. An inexpensive spiral-bound school notebook can be used, but will not last as long as a more expensive book. A spiral notebook might be the best choice as you begin, however, particularly if you are not sure that geology is something you are really interested in.
Size and durability are important if you plan to keep your journal over the years. You may prefer a smaller (between 3x5 and 9x11 inches) notebook since they are small enough to be easily carried in the field and have plenty of space for writing. A three-ring binder or bound notebook may be used. You may be able to find a field notebook with waterproof pages. Polyethylene pages are available with some notebooks and are washable, resist chemicals, and accept virtually all writing devices.
Notes should be recorded in waterproof ink using a fine-point Sharpie® or other similar pen. Pencils may also be used, but may smudge and make it too easy to change your notes. Do not change your notes. They are a record of what you noticed the day that you were in the field.
Enter your personal information in the front so your book can be returned if it is misplaced. Your notes can be recorded in any style, as long as they are clear to you. If you are not using a bound book, you should put your name on each page.
Report the date and location of your observations. Also include the field conditions, map, and any additional information that you need for identification and future visits. Be as specific as you can with the location, including the distance and direction to the nearest crossroads. A global positioning system (GPS) unit can be a great help in defining the exact location where you found a particular specimen. Record as much information as you can. Search the literature to find the period, time, formation, etc. The Indiana Geological Survey and most public libraries have resources that can help you find this information.

�
Igneous
Sedimentary
Metamorphic
rocksProperties of rocksIdentifying rocks can be challenging for beginners. Although it can be difficult at first, the more you learn the better you will become at identifying rocks. A good way to start is to separate your rocks according to their origin and the way they were formed. Use the classifications igneous, sedimentary, and metamorphic, which you read about in 4-H Geology, Level 1. You may find it useful to review the “Types of Rocks” section in the Level 1 manual. After you separate your rocks into these three categories, you’ll need to look at rock properties to identify your rock. The major properties are texture, layering, color, and mineral content. As you learn more about these properties, you will become better at rock identification.
textureProbably the most important property to understand about rocks is the texture. Texture describes the size, shape, and pattern of the mineral grains in a rock. A rock’s texture shows the conditions under which it was formed. For example:
• The texture of an igneous rock tells whether it is intrusive or extrusive.
• The texture of a sedimentary rock tells whether it is an accumulation of particles, as shale and sandstone, or a precipitate, as some limestone.
• The texture of a metamorphic rock tells what changes the rock has undergone, but not necessarily what the original rock may have been.
One of the most important things to note about rock texture is whether you can see the individual particles with your eyes and how big they are. Some rocks have mineral fragments and grains too small to be seen without a lens or microscope.

�
dig deeper Study the Grain Size Chart, inside the back cover (page 45) in Let’s Look at Rocks. This
chart shows the grain sizes of different rocks.
Igneous rocks were discussed in 4-H Geology, Level 1 (Three Types of Rock), where you learned that intrusive and extrusive have different textures based on how quickly the magma cools. Intrusive rocks have a coarse texture, because individual minerals have time to grow to a considerable size. Extrusive rocks have small grains, because they cool before grains have time to develop. In extreme cases of sudden chilling, no minerals are visible at all and we may have obsidian, a smooth, glassy rock. If gasses escape from a rock while it is cooling, it will have a porous texture.
Activity 1. typing by textureBelow we list four types of igneous rock. See if you can guess the type of igneous rock (intrusive or extrusive), based on the explanation of its texture.
• Granite – individual minerals have time to grow large enough to see without a magnifying lens. Circle one: intrusive extrusive.
• Pumice – the texture is porous due to gas bubbling into the air from cooling magma. Circle one: intrusive extrusive.
• Basalt – individual grains of minerals are small because magma cools fairly rapidly. Circle one: intrusive extrusive.
• Obsidian – no minerals are visible; a smooth, glassy rock. Circle one: intrusive extrusive.

�
Try collecting rocks with different textures. If you have started a collection, separate your rocks by texture and keep a record of the rocks.
Field trip
The table below lists some common rocks by texture.
Texture Light-Colored Rock
Dark-Colored Rock
Glassy
Individual grains absent
Quartz – clear
Calcite – clear
Obsidian – dark, smooth, glass-like
Scoria – cinder-like, red-brown
Fine
Grains too small to be seen with eye
Felsites – light, very fine-grained; can contain large grains of quartz or feldspar
Basalt – smooth, dark, lava flows
Coarse
Large grains of different colors, easy to see with eye
Granite – very large grains
Pegmatite – very large grains
Pumice – gray frothy looking
Gabbro – dark, large grains
think about it!Did this activity help you understand the difference between intrusive and extrusive rocks?
List the difference between the texture of an intrusive rock and an extrusive rock.
How does the texture of a rock help determine its use?

10
Activity 2. A rock’s storyFind gravel and sand and compare the textures of these materials (pieces of rock). Use the knowledge you have gained in your study of rocks to write a short story about how these two types of materials came to be. Be sure to discuss the similarities and differences.
Story title:
My story:
think about it!Read your story to someone and then ask them to explain why gravel and sand have different textures.
Write your own “life story” that tells how your parents met, where you were born, and how you came to live where you do now.

11
dig deeperFind rocks with different textures to study. You might
want to look for: siltstone, sandstone, a conglomerate (southern Indiana), shale, basalt, and gabbro (northern Indiana, on a beach). Note: some rocks may be difficult to find in parts of Indiana.
Activity 3. Can You Feel the difference?A good way to start understanding the concept of texture is to compare different sandpapers. Compare coarse (60-grit), medium (220-grit), and fine (600-grit) sandpaper. What differences do you notice (see and feel)?
coarse (60-grit) sandpaper:
medium (220-grit) sandpaper:
fine (600-grit) sandpaper:
think about it!Try to identify the different sandpapers with your eyes closed.
Why are different textures of sandpaper needed?
How will understanding different textures help you identify rocks?
Activity 4. rocks with different texturesFind three different rocks that have textures similar to the texture of the sandpaper you used in the previous activity (60-, 220-, and 600-grit). Compare your rocks and the sandpaper by both feel and look. Use a magnifying glass to study the rocks, too. Use the table on the next page to describe what you feel and sketch what you see.

1�
Rock Texture Feel Look
coarse
(like 60-grit sandpaper)
medium
(like 220-grit sandpaper)
fine
(like 600-grit sandpaper)
think about it!Where did you find rocks with the different textures that you needed?
What did you see when you looked through the magnifying glass? To whom did you describe your findings?
Imagine that you are building a stone walkway. What type of texture do you think would be best?
other PropertiesAlthough the texture of a rock is very important, it usually does not give enough information for identifying rocks. The additional properties listed in the next activity can help you identify the type of rock you have found.
Activity 5. rock Property scrambleUnscramble the letters in parentheses and write them in the blank on the left. The text below each word will give you some clues. You can also refer to the glossary or look ahead in this book for help.

1�
Fun FactLimestone and marble are sometimes
called the carbonate rocks, because they will fizz like a carbonated drink when a drop of weak acid (such as vinegar) is dropped on them.
Find rocks with different properties and add them to your collection. Get permission to remove rocks from private property.
Field trip
safety reminder
Always wear safety goggles when testing rocks, especially when performing an acid test.
____________________________ (G R I N E L A Y)
The banded appearance of many rocks is called __________. This may be caused by:
• successive deposits of sediment
• repeated flows of lava
• a streaked effect caused by cooling magma
• metamorphism, which squeezes and stretches the minerals until they take on a ribboned or banded appearance
This _________ may make a rock split more easily. You can determine if a rock is cleavable (can be split along a naturally occurring plane) by tapping the rock with a geologist’s rock hammer.
____________________________ (O O R L C)
This is used to identify fine-textured igneous rocks. Fine-textured igneous rocks have small mineral grains, so a rock may present an over all _______ that is easy to describe and compare. Remember that _______ is not a reliable guide for most rocks, however, because many minerals (each with quite a different ________ ) may compose one rock.
____________________________ (Z I F Z)
Rocks containing lime (calcium) will effervesce when a drop of a weak acid falls on them. The acid is reacting with the calcium in the rock to give off carbon dioxide gas. You will learn how to test rocks using the acid test. Acid will react with rocks containing calcium carbonate, but will not react with rocks not containing calcium carbonate.
__________________________ _________________________
(two words: A M N R L I E T T C N O E N)
Rocks can be identified best when you can see and recognize the individual minerals in them. This requires knowledge of the physical properties of the minerals. Most rocks get their scientific names from this property. Once you can identify the main mineral in a rock, you can identify the rock.

1�
internet MiningBedford, Indiana, is famous for its limestone industry. You can find out more at:
• www.limestonecountry.com/, (see Limestone History, Attractions, Tours and Maps, and Photos)
• www.bedford.in.us (read “About Our City”)
Fun Fact Many gravel
roads are really crushed stone roads. Gravel is small rounded pebbles, whereas crushed stone has angular facets.
think about it!Name three rock properties from this activity.
Name a rock that shows layering.
Make a word scramble using your geology equipment list.
Activity 6. LayeringRocks must be soft and pliable to become layered. You can show how layering occurs using modeling clay. Take three different colors of modeling compound, flatten them, and place one on top of the other. Any of the following events will show different ways that layers can be exposed when the rock is moved:
• cut through the three layers, or
• push the ends toward each other, or
• cut and push the ends toward each other.
How does the modeling compound act like the Earth? If you buried a small object between the layers, how might you find it? How does your modeling compound example allow you to show what can happen to the Earth when there is an earthquake, buildup of pressures, or weathering?
Think about it! How did the clay show how the Earth’s layers are formed and deformed?
Where can you see rock layers?
Discuss the other questions in this activity with a friend or adult.
indiana LimestoneSeveral hundred million years before glaciers covered Indiana, the state was inundated by a shallow sea that was 5 meters or less in depth. Shells and other body parts of invertebrates (such as crinoids, bryozoans, and brachiopods) that lived in this sea accumulated on the sea floor. Through time and with continued deposition of other sediment on top of these carbonate grains, the grains compacted and cemented together into a rock called limestone.

1�
internet Mining See the Indiana Geological Survey Web site for more information on Indiana Limestone. http://igs.indiana.edu/geology/minRes/indianaLimestone
Today this limestone is exposed in the south-central part of the state and is known as “Salem Limestone” by geologists; however, it is quarried, milled, and sold for buildings and sculptures as “Indiana Limestone” or “Bedford Limestone.” The limestone is uniform in texture and cement, so that blocks 2 to 5 meters in size can be quarried without structural defects. The limestone is also soft enough that it can be easily milled and carved. Consequently, Indiana Limestone is one of the premiere dimension and sculpting stones of North American and has been exported worldwide.
Activity 7. A Little of indiana, All over the united statesSee how many pictures you can find of the following buildings, sculptures, or monuments. Note that Indiana Limestone is the rock that is used in these structures. • Empire State Building, New York City, New York • The National Cathedral, Washington, D.C. • Pentagon, Washington, D.C. • Tribune Tower, Chicago, Illinois • Indiana State Capitol, Indianapolis, Indiana • The National Archives, Washington, D.C. • Soldiers and Sailors Monument, Indianapolis, Indiana
Think about it! How many of the buildings listed were you able to find? What resources did you use?
How many of these buildings have you actually seen in person?
Activity 8. Find indiana Limestone around YouSee how many other limestone buildings, sculptures, or monuments you can find. If you actually go see a structure, take a photograph or make a sketch, and note the location and date you saw it. If you find a picture of a limestone building or sculpture, note when and where you found it.
Think about it!Make an Indiana Limestone booklet that shows your pictures, gives the addresses where the structures can be found, and lists any additional information that you were able to find.

1�
Plan a trip to see a building that is made with Indiana Limestone. List the roads that you would need to take and the time involved to get there.
Field trip
How can you use your booklet to tell others about limestone?
List the properties of Indiana Limestone that make it such a desirable material for buildings and sculptures.
MineralsProperties of Minerals A mineral is an inorganic, naturally occuring substance with definite chemical formula and crystal structure. Some minerals may have other properties, including magnetism, optical variations, electrical conductivity, chemical reactions, taste, or reactivity to heat or flames. The classification of minerals even puzzles the experts sometimes. Experts may use special equipment, such as ultraviolet light and chemical tests to classify minerals, so don’t feel discouraged if you have trouble. However, many of the common minerals can be identified easily with a few simple tests.
Classify your minerals by using the following physical properties.
Appearance – Color is one of the physical characteristics that describes the way a mineral looks. In most metallic ores, it is a safe clue in identification. But in quartz, calcite, fluorite, and others, color is often due to impurities and may vary greatly and be quite misleading. Luster is an important component of a mineral’s appearance. The luster of a mineral describes how the surface of a mineral appears in the daylight. No particular color is implied for any given luster. There are two major kinds of luster – metallic and non-metallic. A metallic luster is usually brilliant and looks like metal.
Cleavage – Cleavage is the tendency a mineral has to break in a definite direction along smooth, flat surfaces. It is actually breaking along rows of atoms and leaving a shiny, flat fracture. Some minerals, such as mica, have only one cleavage direction, so the mineral breaks apart in sheets. Others, such as salt and calcite, may have cleavage in three directions so that the broken piece has flat surfaces on all sides of a square, rectangular, or parallelogram shape. Still other minerals, such as feldspar, may only cleave along two

1�
Table 1: Mohs Hardness Scale (from softest to hardest)
1 Talc (softest)
2 Gypsum
3 Calcite
4 Fluorite
5 Apatite
6 Feldspar
7 Quartz
8 Topaz
9 Corundum
10 Diamond (hardest)
directions or four sides. Figure 1 (page 18) shows cleavage.
Crystal form (shape) – Look at your mineral and note the symmetry (repeated patterns), form, habit (general shape and ways crystals grow together), and twinning (symmetrical intergrowths of two or more crystals). For example, quartz has a six-sided crystal.
Density – The density of a mineral is its weight relative to an equal volume of water.
Hardness – Hardness is measured by a mineral’s resistance to scratching. The hardness of a mineral is one of the best physical properties for classification. Mineral A is harder than a mineral B, if A will scratch B. Mohs hardness scale relates the relative hardness of minerals from 1 to 10, with 1 being the softest and 10 the hardest.
To determine the hardness of a mineral, try to scratch a fresh surface of one of the scale minerals or other known materials with the unknown mineral. If there is a definite scratch (make sure the scratch is not a powder left by the unknown mineral by trying to rub the powder away with your finger) the unknown mineral is harder than the scale mineral. Repeat the test on different scale minerals until you have determined the hardness of the unknown mineral.
Table 1 lists common minerals and their Mohs hardness values. These minerals can be used to perform the hardness test. If you can not find these minerals, you may use the following common items for testing hardness: fingernail (2.5), copper wire (heavy gauge) (3.0), window glass (5.5), steel file (6.5+). Minerals under 2.5 will leave a mark on paper; those under 5.5 can be scratched by a knife; those over 5.5 will scratch glass.
Streak – Streak is the color of a mineral when it is powdered. This color is often lighter than that of large chunks of the same mineral. For example, hematite may be either dark red or black in color, but it always has a dark, reddish-brown streak. The color is easily seen by scratching the mineral across the surface of a streak plate, a piece of unglazed porcelain, or the back of a piece of plaster tile.

1�
Figure 1.
A. Cleavage in one direction. Example: Muscovite.
B. Cleavage in two directions at right angles. Example: Feldspar.
C. Cleavage in two directions not at right angles. Example: Amphibole.
D. Cleavage in three directions at right angles. Example: Galena.
E. Cleavage in three directions not at right angles. Example: Calcite.
F. Cleavage in four directions. Example: Diamond.
G. Cleavage in six directions. Example: Sphalerite.

1�
Figure 1.
Activity 9. Making Crystal ModelsMake a crystal model out of something other than paper (such as cardboard, foam board, or paper mache). You can use a diagram from your Level 1 manual (Appendix A) or construct your own. Can you find minerals that have the different crystalline shapes?
Think about it!What did you learn by making your crystal models?
Describe some different crystal shapes (using your models) to a friend or adult.
Make a mobile of your crystal models to hang in your room.
Activity 10. Mineral scrambleSee if you can identify the common mineral described below by unscrambling the letters in its name. (See Appendix A if you need help.)
Luster Description Common Mineral (name scrambled)
Earthy powdery, dull EIIOLMNT
Vitreous glassy AUQRTZ
Resinous waxy AEEILHPRST
Vitreous iridescent like pearl AEDFLPRS
Greasy as if coated with oil ACLT
Vitreous to pearly
soft (in appearance) and fibrous
UYGMPS
Adamantine hard and brilliant AIODDMN
Think about it!Name four terms that describe mineral luster.
Make a “flash card” study guide to learn the luster names, definitions, and common minerals using 3x5 inch index cards.
Did anyone else use your flash card study guide?
Did you enjoy making a study guide that others can use to learn?

�0
Mica
Pyrite
Quartz
Talc
Calcite
Feldspar
Gypsum
Hematite
Collecting MineralsCollecting minerals is a lot of fun. It will help you to know the following common minerals. For example:
Calcite – Sub-vitreous luster. Leaves white mark on streak plate. Cannot be scratched by fingernail, but can be scratched by copper coin. Color: white, yellow, blue, colorless. Fizzes in acid. Has excellent cleavage on all sides of a parallelogram-shaped piece.
Feldspar – Vitreous luster. Leaves no mark on a streak plate. Shows good cleavages (2 cleavages). Hardness of 6 to 6.5. Colors: pink, gray, and white – pastels.
Gypsum – Silky luster. Leaves white mark on streak plate. Shows good cleavage in clear variety, no cleavage in the massive white variety. Can be scratched with fingernail. Color: white, gray.
Hematite – Metallic to earthy luster. May or may not scratch glass depending upon the variety. Reddish brown color. Streak: reddish brown. Fracture: uneven.
Mica – Non-metallic luster. Leaves white mark or scratch on streak plate. Shows good cleavage in one direction, giving elastic, transparent sheets. Can be scratched by fingernail. Color: white (muscovite variety); black, dark-brown (biotite variety); green (chlorite variety).
Pyrite – Metallic luster. Can scratch copper wire (heavy gauge). Will scratch fingernail and glass. Brass color. Streak: greenish to greenish black. Often found as small cubes or pyramids.
Quartz – Vitreous luster. Can scratch glass or a knife blade easily. Conchoidal fractures. Does not show good cleavage. Color: colorless, white, gray, black, pink, etc.
Talc – Pearly luster. Leaves white mark or scratch on streak plate. Shows good cleavage. Can be scratched with fingernail. Color: green, white.

�1
Activity 11. How Hard is this Mineral?Choose five minerals and fill in the following table with hardness and streak for each one. (You may refer to Appendix A, if you need help.)
Mineral Hardness Streak
1.
2.
3.
4.
5.
think about it!What mineral was the hardest?
How many streak colors are listed?
Explain to a friend how you can use streak and hardness to help you identify a mineral.
Were you surprised by any of the results of the streak test?
Why are diamond chips used to cut some materials?
Activity 12. Comparing Mineral HardnessChoose five minerals from Appendix A and graph their hardness using the Mohs ranking on the Y-axis. (Make a bar graph.)
Mo
hs R
anki
ng
Mineral
1
5
10

��
think about it!Explain the Mohs scale to a friend.
Compare mineral hardness using another type of graph or chart.
Name three other types of scales that are used to compare things.
rocks and Minerals You useYou probably don’t realize how many minerals you use each year. Table 2 lists common minerals and the average weight used per person in the United States each year.
Mineral Weight Used (pounds)
Mineral Weight Used (pounds)
Stone 12,456 Sand and gravel
9,718
Iron and Steel
957 Cement 965
Clays 263 Salt 410
Phosphate rock
237 Aluminum 70
Copper 18 Lead 12
Manganese 6 Zinc 10
Table 2. Average weight of minerals used per person each year in the United States. (Source: U.S. Bureau of the Census; data retrieved 6/1/2007.)

��
It can be very difficult to find minerals, so you will probably need to attend a rock show or visit a rock and mineral shop or club to collect minerals. Remember to fill out the Field Trip form when you travel to collect your minerals. You may be able to find some minerals at road cuts suggested by knowledgeable rock hounds. Use caution when collecting to avoid rock slides and falling debris. Parental help is suggested! Remember to get permission to collect specimens if you are not on your own property.
Field trip
Activity 13. Mineral PieMake a pie chart that shows the relative use of the following minerals: stone, cement, clays, aluminum, copper, and zinc. Label each mineral.
Think about it!Which mineral has the largest “slice” of the pie?
Which mineral has the smallest “slice” of the pie?
What mineral is used in construction most often in the United States?
Make a pie chart to show how you spent your time yesterday. (List between 5 and 10 things that you did by grouping activities rather than showing each thing. For example, use “eating” to include breakfast, lunch, and dinner.)
How do we use these minerals? Table 3 lists minerals that are used in common household items. If you purchased the booklet, Let’s Look at Rocks, for 4-H Geology, Level 1, you can see a picture of a house and school on page 22 that shows “Materials mined for your home...and school.”

��
Visit a hardware or department store to see how many of these items you can find.
Field trip
Table 3. Minerals used in common household items.
item Mineral componentAsphalt roof shingles Silicate and petroleum
products
Baby powder Talc
Cake/Bread Gypsum, phosphates
Carpet Calcium carbonate
Caulking Calcium carbonate, gypsum
Counter tops Titanium dioxide, calcium carbonate, aluminum hydrate
Electric wiring Copper
Fiberglass roofing Silica, borates, limestone, soda ash, feldspar
Fireplace Brick or stone, lined with a steel (iron) box
Galvanized steel gutters Steel (iron and zinc)
Glass/Ceramics Silica sand, limestone, talc, lithium, borates, soda ash, feldspar
Glossy paper Kaolin clay, limestone, sodium sulfate, lime, soda ash, titanium dioxide
Household cleaners Silica, pumice, diatomite, feldspar, limestone
Insulation Vermiculite or silica and feldspar
Jewelry Precious and semiprecious stones
Kitty litter Attapulgite, montmorillonite, zeolites, diatomite, pumice, volcanic ash
Lipstick Calcium carbonate, talc

��
Paint Titanium dioxide, kaolin clays, calcium carbonate, mica, talc, silica
Plant fertilizer Potash, phosphates, nitrogen, sulfur
Plumbing Plastic, copper, and zinc or stainless steel (iron, nickel, and chromite; clay or iron)
Potting soil Vermiculite, perlite, gypsum, zeolites, peat
Roof nails and screws Iron and steel
Toilets Porcelain (clay)
Toothpaste Calcium carbonate, sodium carbonate, fluorite
Vinyl flooring Calcium carbonate, clay, wollastonite
Wallboard/Drywall Gypsum
Activity 14. Minerals in Your HomeList six things you have in your home that contain minerals.
Item Mineral
1.
2.
3.
4.
5.
6.
Think about it!Ask a friend how many things they have in their home that contain minerals. Were they able to think of many things?
List how minerals are used in your school.
Find out where the minerals in the six items that you listed came from.
Name some minerals that are found in food, make-up, and non-food items in your home.

��
Geologic time and FossilsFossil evidenceFossils are the remains of plants or animals, or evidence such as footprints, tracks, etc., preserved as imprints. They are usually found in sedimentary rock material. It is important to understand geologic time if you are going to study fossils and learn to identify them.
Geologic time The age of fossils can best be understood by thinking in terms of geologic eras. Fossils can be classified by the type and age of the rocks in which they are found. Similarly, the type and age of a rock can be determined by the identity of the fossils it contains. Just as with classifying animals and plants, the age of rocks and the fossils they contain can be grouped. Groupings of the ages of geologic time, from greatest to smallest periods of time, are: eon, era, period, and age.
The names of the groupings of geologic time are often based on specific rocks first found to represent these groupings. Names of these groupings may be based on location (for example, Devonian, which is named after Devon in the United Kingdom), geologic formations (Jurassic, named for the Jura Mountains in eastern France), groups of people (Silurian, after early European tribes), or other arbitrary names decided on by geologists.
the Precambrian eraThe Precambrian era includes all the geologic time from the beginning of the Earth, about 4.6 billion years ago, to the beginning of the Paleozoic era, some 540 million years ago. This includes about 90 percent of the geologic history of the world. After the Earth had formed and cooled, and rain started to fall, life probably started from the chemicals that were found in the water that collected in the ocean basins. Life at that time was probably very similar to the green algae and amoebas we find in ponds and lakes today. Fossils of this era are rare. They are usually found as traces of carbon

��
or a fossil burrow that tells us that a worm crawled there. Do not expect to find much evidence from this era.
the Paleozoic era (PAY-Lee-o-Zo’-iK)The Paleozoic era lasted for about 290 million years and ended 250 million years ago when large mountain chains such as the Appalachians were formed. Paleozoic means ancient life. This era is known as the Age of the Invertebrates because it was a time when animals without backbones were the most abundant type of animal. Trilobites lived and became extinct during this era. There were thousands of kinds of brachiopods that also became extinct. Clams, snails, and corals were also plentiful.
This was an important period of time for the state of Indiana. Lush forests, seed ferns, and giant scouring rushes were present. These plants formed the peat, which under pressure and some heat formed the coal and oil deposits we use today.
The Paleozoic era is divided into seven time periods. These are the Cambrian, the Ordovician, the Silurian, the Devonian, the Mississippian, the Pennsylvanian, and the Permian (listed from oldest to youngest). Five of these seven periods are visible on the Earth’s surface in Indiana. Only the oldest (Cambrian) and the youngest (Permian) cannot be seen anywhere in the state. The Paleozoic time periods are shown in Table 4.

��
Table 4. Paleozoic time periods.
Period Began (million
years ago)
Notes
Cambrian 540
Ordovician 500 • Oldest surface-exposed time period in Indiana. • It began with warm seas covering 70% of North America and teeming with animals of many different kinds, sizes, and shapes. • This period has provided collectors with the finest fossil specimens.
Silurian 439 • This period had the largest invertebrates (creatures without backbones) that ever lived on the Earth. • The largest variety of invertebrates are found from this period. • Fish began to appear, but had no scales.
Devonian 409 • Explosion of life occurred on land and in the water. • The first boned fish appeared. Sharks grew to 30 ft. • Reptiles appeared. Vertebrates (creatures with backbones) flourished on land. • Plants and trees grew into lush vegetation (the beginning of our coal reserves). • Trees began to appear.
Mississippian 360 • Shallow, warm seas contained many diversified corals and expansions of animals that began during the Devonian period. • Amphibians appeared. • Constant reef building provided prolific developments in the crinoids, brachiopods, cephalopods, and corals. • Amphibians, plants, trees, and land animals spread into vast moist areas on land.
Pennsylvanian 314 • This was the coal age. • Great trees and expanses of vegetation grew in wet, swampy lowlands (which formed the massive coal-forest resources we mine today). • Major groups of all the land and marine animals dominated the Earth. • It was the last geologic period that can be seen in Indiana.
Permian 290 • Mass extinction happened during this period. • Plants shifted from fern-like to coniferous (plants that have cones instead of seeds). • Rocks from this period were eroded by the glaciers, wind, and water so they are not seen in Indiana today.

��
Paleozoic era in indiana
Pennsylvanian period
Phylums • brachiopods • horsetail plants • fern stems and leaves • annularia • gymnosperms
Mississippian period
Phylums • blastoids • brachiopods • bryozoans • crinoids • gastropods
internet MiningVisit the Indiana Geological Survey’s Web site, http://igs.indiana.edu, and click on the “GIS/ Maps” and then “Maps” to see areas and names for Indiana bedrock geology, Indiana surficial materials geology, Indiana surficial materials thickness, and much more!

�0
Devonian period
Phylums • coral animals • bryozoans • stromatoporoids • brachiopods • crinoids • ammonites • nautiloids • gastropods • pelecypods • trilobites • gymnosperm trees • horsetail plants
Silurian period
Phylums • corals • brachiopods • bryozoans • crinoids

�1
Ordovician period
Phylums • bryozoans • brachiopods • corals • trilobites • crinoids • cephalopods
Activity 15. indiana’s time PeriodsYou can get an idea of how rock layers are created by making your own model. Make a five-layer model out of clay, gelatin, sand, or some other substance to represent different time periods. Add shells or other small objects to represent fossils. Label the time periods.
Think about it!Describe your layer model and what you used in it.
Explain your model to another person.
Close your 4-H manual and see if you can write the names of Indiana’s five visible time periods.
Describe to a friend where you could find the five visible time periods.
Many fossils may be found from the Ordovician, Mississippian, Silurian, Devonian, and Pennsylvanian periods (during the

��
Paleozoic era). The maps on previous pages identify areas where fossil materials are located throughout Indiana. The types of fossils you might expect to find are also given, but don’t be surprised if you find others, because there is a great deal of overlap.
Activity 16. Where in indiana?Complete the chart for each of the fossils listed.
Fossil Period(s) Part of Indiana Where Found
brachiopods
corals
early plants
trilobites
Think about it!Describe where you would expect to find brachiopods and corals in Indiana.
What parts of Indiana have a higher concentration of plant fossils?
Explain how geologists can date a specific location by studying fossils.
the Mesozoic era (Mess-o-Zo’-iK)The Mesozoic era began approximately 251 million years ago and is known as the Age of Reptiles. The Mesozoic era is divided into three periods. They are the Triassic (beginning 251 million years ago), the Jurassic (beginning 206 million years ago), and the Cretaceous (beginning 144 million years ago). The first mammals appeared during this era.
Mesozoic means the middle of life; it is also called the Age of Dinosaurs. It was a time when the giant Tyrannosaurus and Apatosaurus were the kings of the Earth. Some reptiles learned to fly and became the kings of the air. Then suddenly the record stopped. It seems that there was an abrupt change in the Earth. Fossil records do not fully explain what happened. All they do show is a greatly changed world after the Mesozoic era.

��
internet MiningLearn more about geologic time at the U.S. Geological Survey Web site: www.usgs.gov.
Enter http://vulcan.wr.usgs.gov/Glossary/geo_time_scale.html or, if that does not work, start at www.usgs.gov
• click on “geology” • click on “Ask the USGS” • click on “Search” • enter text: “geologic time”
There are many different theories about what caused dinosaurs to become extinct in North America. Evidence from a deep sea core drilled off the coast of Florida suggests that an asteroid hit the Earth at the end of the Mesozoic era, which caused the dinosaur extinction. Most dinosaur specialists are willing to accept that an asteroid hit the Earth, but do not think that it was the sole cause of the Mesozoic extinctions. Instead, the fossil record reveals that dinosaurian diversity was already in decline by the end of the Cretaceous. The asteroid impact may have been “the straw that broke the camel’s back.” Of the approximately 900 named species of Mesozoic dinosaurs, only two to three dozen species faced the final extinction. (Reference: http://paleobiology.si.edu, Smithsonian National Museum of Natural History)
the Cenozoic era (see no Zo’ iK)The Cenozoic era began approximately 65 million years ago and is known as the Age of Mammals. The Cenozoic era contains two periods: the Tertiary (beginning 65 million years ago) and the Quaternary (beginning about 2.6 million years ago). The Tertiary period has four epochs: Eocene (“older recent”), Oligocene (“early recent”), Miocene (“less recent”), and the Pliocene (“most recent”). The Quaternary period has two epochs: Pleistocene and Holocene.
Cenozoic means recent life. It was at this time that many different kinds of mammals developed: the herbivores (plant eaters), such as horses, deer, and camels; and the carnivores (flesh eaters), such as dogs, raccoons, bears, tigers, and lions. Life during the Cenozoic era was very much like life today. Some of the mammals returned to the sea, as did the reptiles in the Mesozoic era. Near the end of the Cenozoic era the first fossil bones of man were found and age-dated to the end of the Cenozoic era; recent evidence shows that man’s relatives lived at least one million years ago.

��
Activity 17. era timelineMake a timeline showing how long each of the following eras lasted, relative to the others. Start with the shortest era, calculate how much longer the next time period was, and then the next, and so on. You may find that you need to use a football field!
• The Precambrian era
• The Paleozoic era
• The Mesozoic era
• The Cenozoic era
Think about it!Close your book and write the names of the four eras listed in this activity.
What is the shortest era? What is the longest era?
Create an action demonstration (see pg. 49) to show the Era Timeline and present it at your county fair.
Make a pie chart that shows the eras listed in this activity.
Make a timeline of your life. Mark at least five important times for you (for example, your birth, when you started school, and when any younger siblings were born).
Activity 18. Matching Geologic PeriodsMatch the geologic period based on the description of the period. You may refer to the glossary if you need help.
Trees began to appear. This was the coal age.
This is the oldest surface-exposed time period in Indiana. Amphibians appeared. Vertebrates (creatures with backbones) flourished on land.
The largest variety of invertebrates are found from this period.
Ordovician
Silurian
Devonian
Mississippian
Pennsylvanian

��
N C V N Q N M P N D N F S C Q
A J I M A L A A S A R U H R U
I W Y S U I I I I O O I B E A
M F N J S R R C N R O C X T T
R Y R Q B A I B E O C N X A E
E Z Y M Q V I F M Z V Y O C R
P H A T O U I R W A A E P E N
D C P D C N Y B T F C K D O A
R N R N O M R P M N C E I U R
U O N B R Y A C F X R Y R S Y
X G R K Q N I R R Q L M T P C
X A Q C W J T C I S S A R U J
C E Y I L X R N A I R U L I S
D V U I K M E Z S K Q T Z B H
C K S W C I T K Q L V T M R F
Word Bank
CAMBRIAN
CARBONIFEROUS
CRETACEOUS
DEVONIAN
JURASSIC
ORDOVICIAN
PERMIAN
PRECAMBRIAN
QUATERNARY
SILURIAN
TERTIARY
TRIASSIC
Think about it!Create a picture that shows the five Paleozoic-era geologic periods from this activity and their identifying features.
Why is the Silurian Period important to us today?
How does listing the periods and their descriptions help you to understand the Earth’s development?
Why don’t we see evidence of the Permian Period in the state of Indiana?
Activity 19. Geologic time Word searchSee if you can find all the words listed in the Word Bank in the letters below. Then, list them by age – oldest first.
Think about it!See how many of the words in the Word Bank you can explain to a friend.
Make your own word search using the geologic eras and periods.

��
Activity 20. – Geology Crossword Puzzle

��
See if you can complete the crossword puzzle using these clues.
Across2. Rock with porous texture formed from lava
5.
6.
7.
10. Rocks formed above the Earth’s surface from cooled magma
15.
16.
17.
19.
20. Most recent Indiana glaciation
21.
down1. Rocks formed under Earth’s surface from cooled magma
3.
4.
8.
9.
11. Size, shape, and pattern of the mineral grains in a rock
12.
13.
14. Oldest Indiana Glacier 18. Second Indiana Glacier
19.
Note: If you need additional help or if these rock pictures don’t look familiar to you, refer to pages 19-21 in your 4-H Geology, Level 1 manual.

��
Think about it!Make a list of all the rocks that you named and one identifying characteristic of each.
Make your own crossword puzzle using names of at least eight fossil and/or geologic periods.
identifying Fossilsidentify by Comparing To identify fossils, you need to compare the fossil you have with those shown in a book. Fossils (A Golden Guide from St. Martin’s Press) is a good reference to help you identify your fossils. If you have a mollusk, you also need to determine the class (pelecypod, gastropod, etc.). For this level of geology, do not go further than phylum and class for your 4-H exhibit. (You may explore further for your own knowledge.)
The major phyla are:
Animal Kingdom
• Porifera – sponges
• Coelenterata – corals
• Brachiopoda – bivalved invertebrates (lampshells)
• Bryozoa – moss animals
• Echinodermata – animals with five-fold radial symmetry (crinoids, blastoids, and sand dollars)
• Mollusca – pelecypods (clams and oysters), gastropods (snails and slugs), cephalopods (squids, octopus, nautiloids, and ammonoids)
• Arthropoda – invertebrate animals with jointed legs (trilobites)
• Vertebrata – animals with notocords and articulated backbones (fish, reptiles, and amphibians)
Plant Kingdom
• Pteridophyta – ferns, horsetails, club mosses
• Spermatophyta – cycads, conifers, and angiosperms (wood)

��
Crinoid
Blastoid
Horn coral
Bryozoan
Brachiopod
Cephalopods
Trilobite
Fossil FormsThere are many different types of fossils you can collect. Try to collect as many types as you can. As you continue with your study, you may want to begin to specialize with your favorites. Some of the general forms of fossils are:
There are several types of fossil preservation. Some fossils are unaltered and include such things as shells, teeth, bones, insects in amber, and mummies. Most invertebrate fossils, however, are preserved in an altered state by calcite or silica replacing or adding to fossil hard parts. Another type of fossil preservation is impression and infilling of the fossil by minerals or sediments that produce molds and casts of the organism. A final type of preservation is traces that include tracks, trails, and borings showing the types of activities that organisms performed while they were alive.
Activity 21. Make a Fossil You can make a “fossil” yourself. Pour a layer of gelatin (i.e., Jell-O) in a clear plastic cup and let it become firm. Then put a dead insect or leaf on top of the gelatin and pour more gelatin on top of the “fossil.” You can use different colors of gelatin to show different layers. Do not use plaster of Paris, because you won’t be able to see the “fossil” in it when you are done.
Think about it! Show a younger 4-H member or friend your fossil and use it to explain how real fossils are made.
If you used different colors to show different layers, describe how this models layers of different types of rock layers.
Animals
• cephalopod • bryozoan
• columns and calyx – crinoid • brachiopod
• columns and calyx – blastoids • gastropods (snails)
• horn coral • trilobites
Plants
• stems and leaves
Note: Calyx is another name for head.

�0
Dig Deeper
Use sand or other similar materials to show how the Indiana geology we see today was created. You might want to bury items to represent fossils and rocks that might have been buried over time.
Bury some items (fossils, bones, small toys, etc.) in sand and let a friend find them. Be sure to keep track of the items you buried so you are sure to find them all.
What conditions help make and preserve a real fossil?
Activity 22. Collecting FossilsSome fossil hunters like to look for fossils in the same places or sites where they look for minerals. Others prefer to look for fossils in sandstone and limestone. Sedimentary rocks often contain fossils, so are a good place to look. Collect 10 fossils and determine the periods of time from which your fossils came. Try to determine the periods yourself. You can’t always depend upon someone else to correctly identify them.
Think about it!How many time periods are your fossils from?
Order your fossils by their age (estimated) and describe any differences that you can see between the older and younger fossils.
What time periods do your fossils come from?
Which ones did you find yourself? How did you identify them? What resources did you use?
For the fossils you purchased, double check the seller’s identification. What resources did you use?
Notes:
• Use phylum level to identify your fossil. (Class or family can be very difficult to determine and are not necessary at this point.)
• You can purchase fossils at shows or rock shops or from dealers. Be sure the identification is correct by checking it yourself.

�1
1
2
3
(1) Kansan
(2) Illinoian
(3) Wisconsin -------------
GlaciersIndiana was partially covered by three major glaciers (deep sheets of ice) thousands of years ago. The three glaciating periods in Indiana were the Wisconsin (youngest), the Illinoian, and the Kansan (oldest Indiana glacier). The lines on the state map show southern boundaries of these three glaciers in Indiana.

��
internet Mining Search the Internet to find where you can see glaciers today. Try the United States National Park Service Web site http://www.nps.gov/ and expand your search using a search engine (like Google).
Glaciers carried great masses of sand, gravel, dirt, and even large boulders. This changed the landscape and transported rocks far from where they would occur naturally. Many of the stones you may find, especially in northern Indiana, may have come from Minnesota, Michigan, or Canada.
The ice-age glaciers were very large. They covered many states and are believed to have been up to two miles deep in some places!
Activity 23: Glaciers in indianaShow the extent of each of the Indiana glaciers on the three Indiana maps below by drawing in the boundary lines using different colored pencils or markers.
Wisconsin Illinoian

��
Kansan
Activity 24. Glacier national ParkResearch and write a report about Glacier National Park. Include information about the average temperatures (summer and winter), how many glaciers there were 150 years ago, and how many glaciers you can see today. Include pictures if possible.
Activity 25. Glacier research Research and write a report about glaciers. Explain how they were formed, what terms are used to describe glaciers, etc.
Think about it! Which glacier traveled furthest south?
How did the glaciers change the Indiana landscape?
Where in the United States could you see a glacier today?

��
indiana GeologyActivity 26. indiana GeologyDraw a line from the geologic formation to the county where it is found. If there is more than one county listed, just draw a line to the first county listed. Use a road map or the Indiana Base Map included on page 62 of this manual to identify the counties.
Think about it!List the geologic formations that you are aware of, that are near you. Visit the Indiana Geologic Survey (Web site or in person) to find more.
Plan a trip to an Indiana geologic formation that you have not seen.
Plan a trip outside Indiana to see a geologic formation that you have not seen.
• Wyandott Caves (dry) – Crawford County
• Marengo Cave (dry) – Crawford County
• Blue Spring Cave (wet) – Lawrence County
• Lost River – Washington, Orange, and Martin counties
• Jug Rock – Martin County
• Clifty Falls – Jefferson County
• Portland Arch – Warren County
• Falls of the Ohio – Clark County
• Mill Race Arch – Jennings County
• Karst – Lawrence, Monroe, Orange, Crawford, and other counties.
• Kentland Dome – Benton County
• Wetlands (Kankakee) – LaPorte, Starke, S. Porter, N. Jasper, Lake, Newton, and Pulaski counties
• Indiana Dunes – Lake and Porter counties
• Natural Bridge – Warren County
• Highest free falling Indiana waterfall – Warren County
• Hanging Rock – Wabash County

��
Activity 27. Chip Mining
Procedure
Imagine that the chips are nuggets of gold and the cookie is the Earth. Using the toothpicks, “mine” the chips out of the cookie. Try to break as little of the cookie as you can.
Think about it!How difficult was it to dig out the chips?
How many chips were you able to remove from the cookie before it broke?
List other ways, besides digging, that people use to mine minerals.
Activity 28. Plate tectonicsResearch Tectonic Plate Theory, the cornerstone of our understanding of geologic processes. Include a sketch of the continents or make a Pangaea “jigsaw” puzzle.
Field trips and JournalingLearning about geology is more than just collecting and identifying rocks. You can expand your knowledge by talking to experts, attending rock shows and exhibits, reading, and taking field trips. Carefully note what you see and hear. Review the guidelines for keeping a journal at the front of this manual. One of your best resources is a local rock club. Look for one near you at www.amfed.org/mwf/, then click on “Indiana” in the Member Societies section. Contact an officer to find out more about a society and any show dates a society will be holding.
Supplies
Toothpicks Chocolate chip cookies

��
Annual shows The Midwest Federation of Mineralogical and Geological Societies Calendar of Events is at www.amfed.org/mwf/. Some shows that you might look for are given below. There may be other shows that you can attend in the Midwest.
• GeoFest at the Indiana State Museum, Indianapolis, October
• Gem, Mineral, Fossil Show & Swap, Lawrence County, June
• Wabash Valley Gem and Mineral Society, W. Lafayette, May
exhibits• Nature center geology exhibits
• Falls of the Ohio (Clarksville, Exit 0 on I-65 in Indiana)
• Indiana Geological Survey, 611 N. Walnut Grove Ave., Bloomington, IN 47405 (on the Indiana University campus)
• Indiana State Museum, Indianapolis, www.in.gov/ism/, Exhibits and Collections, Geology
• Indiana Children’s Museum, Indianapolis, www.childrensmuseum.org/
Activity 29. Field tripTake a field trip to a rock show or exhibit. Record your trip in your journal, including where you went, what you saw, what you learned, and who you spoke with.
Think about it!Where did you go on your field trip?
What did you collect?
Did you interview anyone? If so, what did you learn from him/her?
Did you use the Internet to plan your trip? If so, what Web sites were the most helpful?
What will you do differently if you take another field trip?
Plan and take as many field trips as you can. Record your observations in your journal.
Plan a trip outside Indiana to visit a museum, university, or geology survey office to learn about a geology topic that is not discussed in your 4-H geology manual.

��
Dig DeeperVisit the U.S. Geological Survey Geologic Map of North
America (new in February 2005) http://esp.cr.usgs.gov/info/gmna/. Follow the link “Comparisons of map areas shown in boxes 1-4” and then scroll down to the comparison maps showing Indiana. Write a report that explains what the 2005 map shows and how this map differs from the 1965 map.
internet Mining Visit the Web site www.in.gov/dnr/parklake/properties/parkres.html
indiana state Parks with Geologic Formations
Charleston State Park (Clarke County) P.O. Box 38 Charlestown, IN 47111 812-256-5600 What you will see: Devonian fossil outcrops
Clifty Falls State Park 1501 Green Road (Note: use address 2221 Clifty Drive for online mapping) Madison, IN 47250 812-273-8885 What you will see: narrow valley, sheer cliffs, waterfalls
Falls of the Ohio State Park (Clarke County) 201 W. Riverside Dr. Clarksville, IN 47129 812-280-9970 What you will see: 386-million-year-old fossil beds exposing Devonian fossils
McCormick’s Creek State Park (Owen County) 250 McCormick’s Creek Park Road Spencer, IN 47460 812-829-2235 What you will see: limestone formations
Shades State Park Route 1, Box 72 Waveland, IN 47989 765-435-2810 What you will see: sandstone cliffs
Spring Mill State Park Box 376, 3333 State Road 60 East Mitchell, IN 47446 812-849-4129 What you will see: Donaldson Cave, Mitchell Plateau
Turkey Run State Park (Parke County) 8121 East Park Rd. Marshall, IN 47859 765-597-2635 What you will see: sandstone ravines

��
Activity 30. start Your own Geology reference LibraryBegin your own geology reference library. You may find books that interest you in a local bookstore, at a rock show, or online. Choose books that look interesting to you and are written for kids.
Think about it!Keep track of the information in each book as you begin to build your own reference library. Record the book title, author, publication date, the general topics in the book, and any special reminders (e.g., book received as a gift). You can do this in the back of your journal or on index cards placed in an index card holder.
Keep a list of geology topics and books that you would like to get. Use this list
when someone wants an idea of a gift you might like, or offer to do some extra chores around your house in exchange for the book.
What books, magazines, and newsletters have you collected?
Have your taken your journal to the library to copy down possible sources?
Have you found useful and understandable information online? If so, where?
Start a list in your journal of topics that you would like to study, places you would like to visit, and careers and hobbies you think you might enjoy. Use this list when you need a reminder.
Did you share your information with another person?

��
Action demonstrationsWhat is an action demonstration (action demo)?An action demo is a fun way to share what you have learned in your 4-H project with others. It’s a kind of “Show and Tell” but with more action. Action means that you need to get the audience involved in what you are doing, not just show them. An action demo is not like a regular demonstration where the audience sits and listens to a prepared talk. An action demo gets the audience involved. Action demos can be given anywhere there are a lot of people, such as a county or state fair, shopping mall, street fair, or any 4-H event. Your job as a demonstrator is to interest the audience in your topic so that they stop and learn something new or try their hand at what you are doing. How do i choose a topic for my action demo?Your action demo should be related to this project. Consider the following questions when choosing a topic:
• Can you complete the action demonstration in 3 to 5 minutes?
• Is your action demo showing something that would interest the general public?
• Is there a good way to involve your audience in your action demo (“hands-on” or answering questions)?
• If you will be doing it multiple times: Can the supplies for the “hands-on” section be used over and over again, or will they need to be replaced? (Remember – if the materials must be replaced, it will cost more to do the demonstration.)
How can i get the audience involved?The first thing you need to do is be enthusiastic and attract people’s attention as they walk by your table. You might have a colorful tablecloth or poster to spark their interest. You might ask them a question, “Can you tell what mineral this is?” or “How old do you think this fossil is?” Many people

�0
enjoy hands-on activities, so once you get a few people at your table, they will attract others. Some ideas for getting your audience involved include:
• Show how you would identify a fossil or mineral. • Use your audience to make a geologic timeline. • Judge the quality of various items. • Play a game. • Answer questions.
How long does my action demo have to be?Action demos vary in length. The demonstration itself should last only 3-5 minutes, because most people do not like to stop to watch very long presentations. If you do your action demo at the Indiana State Fair, be prepared to repeat your action demo over and over again with different people during your assigned time.

�1
Action demo Checklist Topic Yes No
Was the topic interesting to the general public, causing them to stop, watch, or participate?
Did the topic stimulate questions from the audience?
Was the topic of suitable length?
Did the topic include something “hands-on” for the audience to do?
Organizing the Content Yes No
Was the topic organized into short “show and tell” segments, which were done repeatedly?
Were segments presented in logical order?
Were segments explained so that the audience understands “why?”
Was it evident that the 4-H member was knowledgeable about their subject and could answer questions?
Did visuals, pictures, posters, or actual objects clarify the important ideas?
Presenting the Demonstration Yes No
Did the 4-H member seem enthusiastic?
Did the 4-H member encourage the audience to become involved in the demonstration?
Did the 4-H member speak directly to the audience?
Did the 4-H member show evidence of practice and experience?
Did the 4-H member show that she/he enjoys talking to the audience?
Did the 4-H member show friendliness and a business-like manner?
Did the 4-H member tell about what they learned through this 4-H project?
Comments:

��
resources PublicationsFossils (A Golden Guide from St. Martin’s Press), ISBN 1-58238-142-9 by Frank H. T. Rhodes, Paul R. Shaffer, Herbert S. Zim, Raymond Perlman
Publications from the Indiana Geological Survey (IGS)
The Indiana Geological Survey has many Indiana geology resources. You can learn about any of the following topics, and more:
• Roadside geology • Glacial geology of Indiana • Topography • Bedrock • Indiana caves • Surface terrain of Indiana • Physiographic divisions • Quarternary maps • Teacher resources • And much more!
Visit the Web site, http://igs.indiana.edu/, or call (812) 855-7636 for a publication list.
internet Learning tripsVisit some Web sites to learn more about rocks, minerals, fossils, or any of the other topics in this book. Note that the U.S. Geological Survey site (www.usgs.gov) has geologic information for every state and a current geologic map of North America showing the “grand architecture” of the continent as we understood it in the closing years of the 20th century.
• U.S. Geological Survey, www.usgs.gov/; geology, http://geology.usgs.gov/; Ask USGS, http://ask.usgs.gov/
• American Geological Institute, www.agiweb.org
• Midwest Federation of Mineralogical and Geological Societies, www.amfed.org/mwf/

��
• Indiana Geological Survey, http://igs.indiana.edu/
• Kentucky Geological Survey, www.uky.edu/KGS/
• Illinois State Geological Survey, www.isgs.uiuc.edu/
• Dino Russ’s Lair, dinosaur and vertebrate paleontology information, www.dinoruss.org/dinos_home.html
• Smithsonian National Museum of Natural History, Department of Paleobiology, www.nmnh.si.edu/paleo/blast/
• Indiana Geographic Information Council: www.in.gov/ingisi/
• Views of the National Parks, www2.nature.nps.gov/views/
• NASA’s Life on Earth, www.nasa.gov/vision/earth/features/index.html
• Earth Science World, www.earthscienceworld.org/
• Department of Earth & Atmospheric Sciences, Purdue University, www.purdue.edu/eas/
• Indiana State Museum, Indianapolis, www.in.gov/ism/ Exhibits and Collections, Collection Geology
• Indiana Children’s Museum, Indianapolis, www.childrensmuseum.org/
• St. Louis Science Center, www.slsc.org/
• Geology Experiments, http://wow.osu.edu/experiments/geology/geolist.html
• Mid-America Paleontology Society (MAPS), sponsor of the Annual National Fossil Exposition, www.midamericapaleo.org/
• Friends of Mineralogy, www.friendsofmineralogy.org/ and www.indiana.edu/~minerals/
Geology societiesVisit the Midwest Federation of Mineralogical and Geological Societies Web site www.amfed.org/mwf/. Contact an officer to find out more about their meetings, show dates, and other information.

��
Appendix A Mineral Streak Luster Hardness Cleavage Fracture
Anhydrite White Vitreous 3.5 Perfect in 1 direction Good in 2 directions
Very brittle
Barite White Vitreous 3-3.5 Perfect in 1 direction Uneven
Calcite White Vitreous to resinous 3.0 Perfect in 3 directions Brittle
Celestite White Vitreous 3-3.5 Perfect in 1 direction Uneven
Chalcopyrite Greenish black Metallic 3.5-4 Poor Brittle
Copper Copper to red Metallic 2.5-3 None Hackly
Diamonds White Adamantine 10 Perfect in 4 directions Conchoidal
Dolomite White Vitreous to dull 3.5-4 Perfect in 3 directions Subconchoidal
Epsomite White Vitreous; silky to
earthy
2-2.5 Perfect in 1 direction Conchoidal
Feldspar White Vitreous 6.0-6.5 Good in 2 directions Conchoidal
Fluorite White Vitreous 4.0 Perfect in 4 directions, forming octahedrons
Flat conchoidal
Galena Lead-gray Metallic to dull 2-3 Perfect in 4 directions Uneven
Garnet White Vitreous to resinous 6-7.5 None Conchoidal, brittle
Goethite Yellow to brown Earthy to dull 5-5.5 None Splintery
Gold Golden yellow Metallic 2.5-3 None Hackly
Gypsum White Vitreous to pearly 2 Good in 1 direction; distinct in 2 others
Splintery
Hematite Red, reddish brown
Metallic, sometimesdull
5-6 None Uneven, brittle
Kaolinite White Dull, earthy 1.5-2 Perfect basal Earthy
Limonite Yellow, brown Earthy to dull 4-5.5 None Crumbly
Magnetite Black Metallic to dull 6 None Conchoidal
Marcasite Greenish brown Metallic 6-6.5 Poor in 2 directions Uneven
Mica White Vitreous to pearly 2.5-3 Basal, perfect Brittle
Millerite Greenish black Metallic 3-3.5 Good in 2 directions Uneven
Pyrite Grayish black Metallic 6-6.5 None Uneven
Quartz White Vitreous 7 None Conchoidal
Siderite White Vitreous to dull 3.5-4.5 Perfect in 3 directions Conchoidal
Silver Silver-white Metallic 2.5-3 None Hackly
Sphalerite Yellow, brown Adamantine, resinous 3.5-4 Perfect in 6 directions Conchoidal rarely seen
Sulphur White or yellow Resinous to greasy 2.0 Very poor Conchoidal
Talc White Pearly, greasy 1 Perfect in 1 direction, basal Uneven to lamellar

��
Glossary Adamantine – a mineral “luster” that has a hard and brilliant appearance
Cambrian period – approximately 540-500 million years ago; Latin word for Wales, where Cambrian fossils were first studied
Cenozoic era – the Age of Mammals, contains two periods: the Tertiary and the Quaternary
Cleavage – the plane that a rock will naturally split along when broken
Color – used to identify fine-textured igneous rocks but not generally a reliable guide
Cretaceous period – 144-65 million years ago, during the Mesozoic era
Cryptozoic era – ended about 540 million years ago, the only life was probably algae and amoebas, fossils are rare; also known as the Precambrian era
Crystal form – a group of symmetrically equivalent crystal faces in which the constituent atoms and molecules are packed in a regularly ordered, repeating pattern
Devonian period – approximately 409-360 million years ago when the first boned fish and reptiles appeared on Earth
Extrusive - rocks formed above the Earth’s surface from magma
Faces – the outer planar, often shiny boundaries of crystals (Faces reflect the internal arrangement of a mineral and have constant interfacial angles regardless of location and habitat. Faces can show special features of growth or dissolution.)
Fizz – the effervescent quality that rocks containing lime (calcium) exhibit
Habit – the general shape of a crystal [Habit includes the ways in which crystals grow together. Examples include acicular (needle-like), fibrous, platey, bladed, massive, concretionary, dendritic, radiating, and other shapes.]
Intrusive - rocks formed under the Earth’s surface from cooled magma
Jurassic period – 206-144 million years ago, during the Mesozoic era
Mineral content – gives a rock identifiable properties

��
Mesozoic era – the Age of Reptiles, it is divided into three periods: the Triassic, the Jurassic, and the Cretaceous
Mississippian period – approximately 360-314 years ago when trees began to appear on Earth
Ordovician period – approximately 500-439 million years ago and the oldest surface-exposed time period in Indiana
Paleozoic era – lasted for about 289 million years and ended 251 million years ago; large mountain chains such as the Appalachians were formed during this time (This era is known as the Age of the Invertebrates. The Paleozoic era is divided into seven time periods. These are the Cambrian, the Ordovician, the Silurian, the Devonian, the Mississippian, the Pennsylvanian, and the Permian.)
Pangaea – the landform that existed during the Paleozoic and Mesozoic eras before the continents separated.
Pennsylvanian period – approximately 314-290 million years ago – the coal age; earliest reptiles appeared
Permian period – approximately 290-251 million years ago, but not visible in Indiana because glaciers eroded the formations
Physiographic divisions — separate areas with similar physical features (climate, plant, and animal) and Earth processes (rainfall, atmospheric conditions, etc.)
Precambrian era – all the time that existed before the Cambrian period, about 4.6 billion years
Quartz – silicon dioxide SiO2 component of sandstone and granite; pure crystals in agate, chert, flint, etc.
Quaternary – the last 2.6 million years, has two epochs: the Pleistocene and Holocene
Resinous – a mineral “luster” that has a waxy appearance
Rockhound – a person who enjoys collecting and studying rocks
Silurian period – approximately 439-409 million years ago [This period had the largest invertebrates (both size and number) ever to live on the earth.]
Symmetry – the repeated pattern of similar crystal faces that indicate the internal arrangement of any crystalline material [Faces can repeat upon rotation (turn 180, 90, 60, or 45 degrees), inversion, or reflection (as in mirror)]

��
Tertiary – 65-2.6 million years ago, divided into four epochs: Eocene (“older recent”), Oligocene (“early recent”), Miocene (“little recent”), and the Pliocene (“most recent”)
Texture – describes the size, shape, and pattern of the mineral grains in a rock
Triassic – 251-206 million years ago, during the Mesozoic era
Twin – a symmetrical intergrowth of two or more crystals of the same mineral along mathematically defined planes (The lattice of one mineral has certain restricted possibilities.)

��
4-H-986a-W
Geology Level 2
indiana 4-H Club recordName ______________________________ Grade ________ Year ________
Name of Club ______________________________ Year in Club Work ______
County ________________________ Township________________________
1. What did you enjoy most about the geology project? Why?
2. What were the most interesting things that you learned by taking the
geology project?
3. What activities did you enjoy doing? Why?
4. How will knowing about geology help you in other areas (school,
home, etc.)?
Did you give an action demonstration about geology? ____yes _____no
If yes, where did you give the demonstration and what was the title?
Signature of 4-H member ___________________________ Date __________
I have reviewed this record and made comments about the individual’s
progress and project completion.
Signature of Helper/Leader __________________________ Date __________

rock identification Cards
��Copy this page.
Specimen Name
Date Collected
Location where found (Area* and State)
Characteristics:
*Examples: Red Lodge, Montana; Beartooth Mountains, Wyoming; or Lafayette, Indiana (its native location
— not where it was transferred by people). If it is purchased, record its native location.
Specimen Name
Date Collected
Location where found (Area* and State)
Characteristics:
Specimen Name
Date Collected
Location where found (Area* and State)
Characteristics:
Specimen Name
Date Collected
Location where found (Area* and State)
Characteristics:
Specimen Name
Date Collected
Location where found (Area* and State)
Characteristics:
Specimen Name
Date Collected
Location where found (Area* and State)
Characteristics:
Specimen Name
Date Collected
Location where found (Area* and State)
Characteristics:
Specimen Name
Date Collected
Location where found (Area* and State)
Characteristics:

�0 Copy this page.
Specimen Name ____________________________
Date Collected _____________________________
Location where found (Area* and State) _______
___________________________________________
Hardness _____________ Luster ______________
Specimen Name ____________________________
Date Collected _____________________________
Location where found (Area* and State) _______
___________________________________________
Hardness _____________ Luster ______________
Specimen Name ____________________________
Date Collected _____________________________
Location where found (Area* and State) _______
___________________________________________
Hardness _____________ Luster ______________
Specimen Name ____________________________
Date Collected _____________________________
Location where found (Area* and State) _______
___________________________________________
Hardness _____________ Luster ______________
Specimen Name ____________________________
Date Collected _____________________________
Location where found (Area* and State) _______
___________________________________________
Hardness _____________ Luster ______________
Specimen Name ____________________________
Date Collected _____________________________
Location where found (Area* and State) _______
___________________________________________
Hardness _____________ Luster ______________
Specimen Name ____________________________
Date Collected _____________________________
Location where found (Area* and State) _______
___________________________________________
Hardness _____________ Luster ______________
Specimen Name ____________________________
Date Collected _____________________________
Location where found (Area* and State) _______
___________________________________________
Hardness _____________ Luster ______________
Specimen Name ____________________________
Date Collected _____________________________
Location where found (Area* and State) _______
___________________________________________
Hardness _____________ Luster ______________
Mineral identification Cards
*Examples: Red Lodge, Montana; Beartooth Mountains, Wyoming; or Lafayette, Indiana (its native location
— not where it was transferred by people). If it is purchased, record its native location.
Specimen Name ____________________________
Date Collected _____________________________
Location where found (Area* and State) _______
___________________________________________
Hardness _____________ Luster ______________

�1Copy this page.
Specimen Name ____________________________
Date Collected _____________________________
Location where found (Area* and State) _______
___________________________________________
Era/Period found in: _________________________
Specimen Name ____________________________
Date Collected _____________________________
Location where found (Area* and State) _______
___________________________________________
Era/Period found in: _________________________
Specimen Name ____________________________
Date Collected _____________________________
Location where found (Area* and State) _______
___________________________________________
Era/Period found in: _________________________
Specimen Name ____________________________
Date Collected _____________________________
Location where found (Area* and State) _______
___________________________________________
Era/Period found in: _________________________
Specimen Name ____________________________
Date Collected _____________________________
Location where found (Area* and State) _______
___________________________________________
Era/Period found in: _________________________
Specimen Name ____________________________
Date Collected _____________________________
Location where found (Area* and State) _______
___________________________________________
Era/Period found in: _________________________
Specimen Name ____________________________
Date Collected _____________________________
Location where found (Area* and State) _______
___________________________________________
Era/Period found in: _________________________
Specimen Name ____________________________
Date Collected _____________________________
Location where found (Area* and State) _______
___________________________________________
Era/Period found in: _________________________
Specimen Name ____________________________
Date Collected _____________________________
Location where found (Area* and State) _______
___________________________________________
Era/Period found in: _________________________
Specimen Name ____________________________
Date Collected _____________________________
Location where found (Area* and State) _______
___________________________________________
Era/Period found in: _________________________
Fossil identification Cards
*Examples: Red Lodge, Montana; Beartooth Mountains, Wyoming; or Lafayette, Indiana (its native location
— not where it was transferred by people). If it is purchased, record its native location.

indiana Base Map
��
LAKE
JAY
ALLEN
KNOX
VIGO
WHITE CASS
PIKE
JASPER
RUSH
CLAY
PARKE
LAPORTE
MIAMI
GREENE
GIBSON
RIPLEY
PORTER
OWEN
NOBLE
POSEY
GRANT
BOONE
PUTNAM
DUBOIS
CLARK
HENRY
PERRY
WAYNE
WELLS
JACKSON
SHELBY
PULASKI
ELKHART
MARION
DAVIESS
BENTON
WABASH
MADISON
ADAMS
ORANGE
SULLIVAN
KOSCIUSKO
FULTON
CLINTON
DEKALB
HARRISON
MONROE
MORGAN
NE
WT
ON
MARTIN
MARSHALL
ST JOSEPH
SPENCERWARRICK
BROWN
WARREN
RANDOLPH
LAWRENCE
CARROLL
FRANKLIN
TIPPECANOE
STARKE
HAMILTON
FOUNTAIN
DECATUR
WHITLEY
WASHINGTON
JENNINGS
TIPTON
DELAWARE
LAGRANGE
HENDRICKS
MONT-GOMERY
STEUBEN
JOHNSON
HOWARD
HANCOCK
JEFFERSON
HUNTING-TON
SCOTT
DEAR-BORN
CRAWFORD
BARTHOL-OMEW
UNIONFAY-ETTE
FLOYD
VE
RM
ILLIO
N
OHIO
SWITZER-LAND
VAN-DER-
BURGH
BLACK-FORD
Base Map of Indiana
10 0 10 20 30 405Miles
10 0 10 20 30 40 50 605Kilometers
Lake Michigan

Quaternary (Pleistocene epoch)
2.6 Million
Glacial till, sand, gravel, silt, marl, clay, and peat deposited during and after continental glaciation 0-400 ft.
Tertiary 65 Million No deposits in Indiana 0-35 ft.
Cretaceous Jurassic Triassic
144 Million 206 Million 251 Million
Permian 290 Million
Pennsylvanian 314 Million
Shale, sandstone, mudstone, clay, coal, limestone, and conglomerate; not present in northeastern Indiana, but extensive in nearby parts of Michigan 1,000 ft.
Mississipian 360 Million
Shale, mudstone, sandstone, limestone, and gypsum; extensive deposits in northeastern Indiana north and west of Allen County 1,000-1,500 ft.
Devonian 409 Million
Upper part: Carbonate Shale 100 ft.
Lower part: limestone, dolomite, shale, and gypsum 70-140 ft.
Silurian 439 Million
Dolomite, limestone, siltstone, and shale deposited in regionally extensive reef platform (the Fort Wayne Bank) 400-600 ft.
Ordovician 500 MillionShale and limestone
Limstone, dolomite, and sandstone
Cambrian 540 Million Sandstone and dolomite
4.6 BillionGranite, marble, gneiss, and other igneous and metamorphic rock types
Eras
Ceno
zoic
Mes
o-zo
icPa
leoz
oic
Precambrian Era
Period Began (Years Ago)
Rock Types in Indiana
Geologic time Periods

Revised 8/07it is the policy of the Purdue University Cooperative
extension service that all persons have equal opportu-nity and access to its educational programs, services,
activities, and facilities without regard to race, religion, color, sex, age, national origin or ancestry, marital
status, parental status, sexual orientation, disability or status as a veteran. Purdue University is an Affirmative
Action institution. This material may be available in alternative formats.
4-H-986