Embed Size (px)
Citation preview
MacBook Unibody Model A1278 Hard DriveReplacement
Written By: Andrew Bookholt
MacBook Unibody Model A1278 Hard Drive Replacement
© iFixit — CC BY-NC-SA www.iFixit.com Page 1 of 6

INTRODUCTION
When replacing your hard drive, you must transfer the Torx screws from the old drive to the newone.
TOOLS:Phillips #00 Screwdriver (1)
Spudger (1)
T6 Torx Screwdriver (1)
PARTS:MacBook and MacBook Pro (Non-
Retina) SSD Upgrade Bundle (1)250 GB SSD (1)
500 GB SSD (1)
1 TB SSD (1)
500 GB SSD Hybrid 2.5" Hard Drive (1)
500 GB 5400 RPM 2.5" Hard Drive (1)
1 TB 5400 RPM 2.5" Hard Drive (1)
MacBook Unibody (Model No. A1278)Hard Drive Bracket (1)
Universal Drive Adapter (1)
MacBook Unibody Model A1278 Hard Drive Replacement
© iFixit — CC BY-NC-SA www.iFixit.com Page 2 of 6
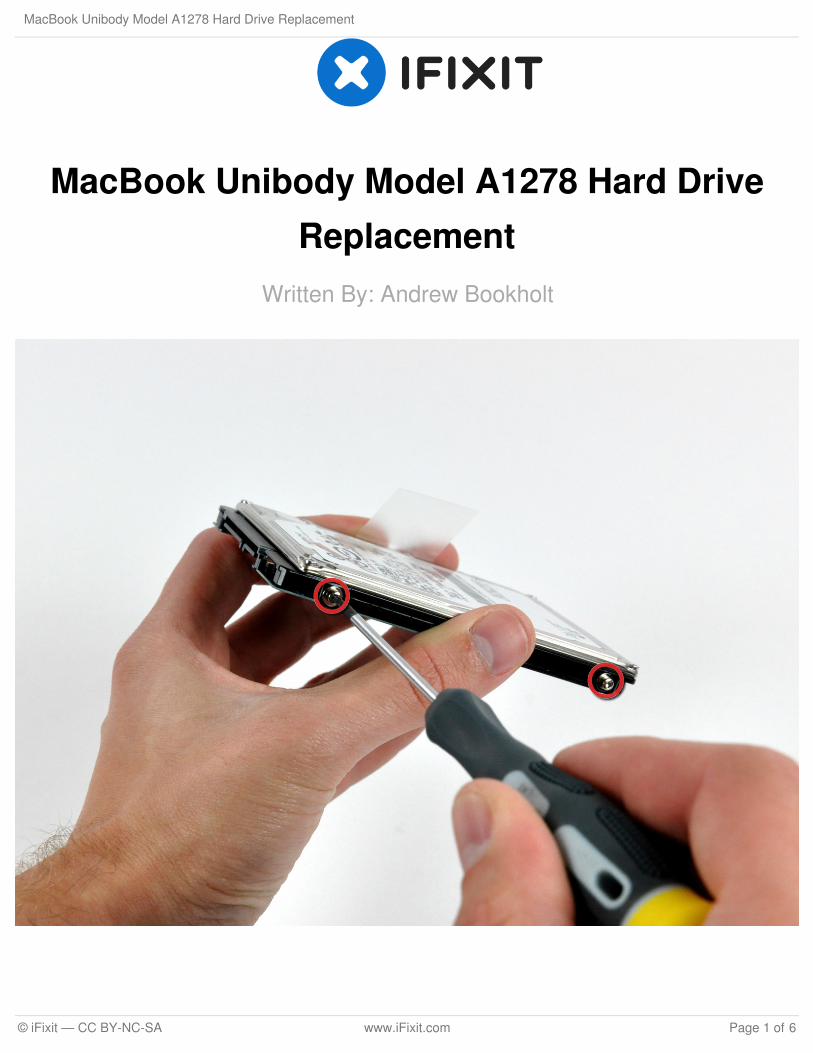
Step 1 — Access Door
With the case closed, place theUnibody top-side down on a flatsurface.
Depress the grooved side of theaccess door release latch enough tograb the free end. Lift the releaselatch until it is vertical.
Step 2
The access door should now beraised enough to lift it up and out ofthe Unibody.
MacBook Unibody Model A1278 Hard Drive Replacement
© iFixit — CC BY-NC-SA www.iFixit.com Page 3 of 6
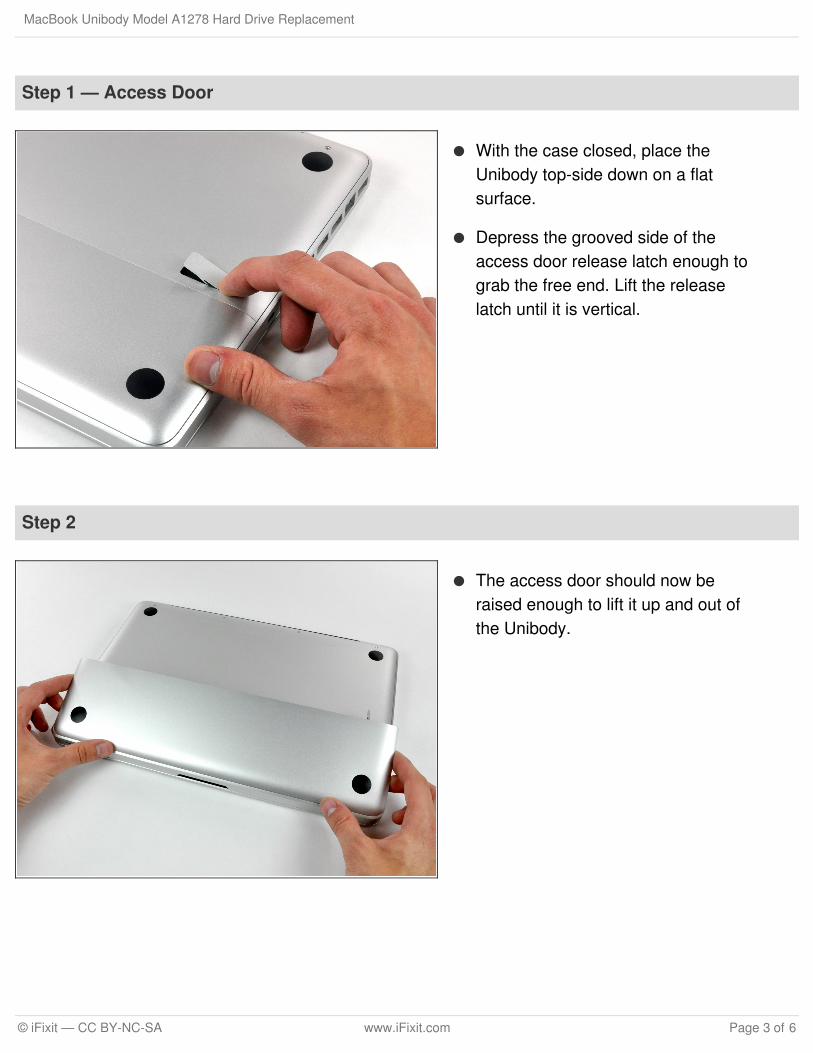
Step 3 — Battery
Be sure the access door releaselatch is vertical before proceeding.
Grab the white plastic tab and pullthe battery up and out of theUnibody.
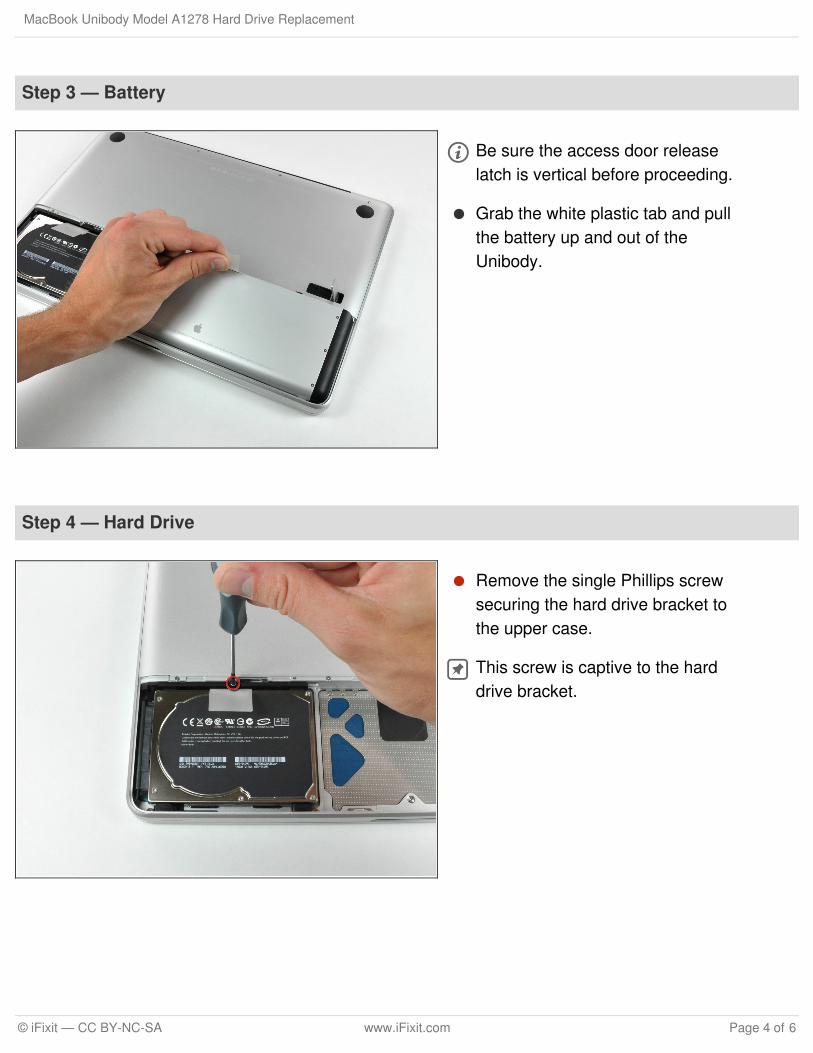
Step 4 — Hard Drive
Remove the single Phillips screwsecuring the hard drive bracket tothe upper case.
This screw is captive to the harddrive bracket.
MacBook Unibody Model A1278 Hard Drive Replacement
© iFixit — CC BY-NC-SA www.iFixit.com Page 4 of 6

Step 5
Lift the hard drive by its pull tabenough to grab and remove theretaining bracket.
Lift the hard drive out of the chassis,minding the cable attaching it to thecomputer.
Step 6
Remove the hard drive from itscable by pulling the cable connectorstraight away from the drive.
Hard drive remains.
MacBook Unibody Model A1278 Hard Drive Replacement
© iFixit — CC BY-NC-SA www.iFixit.com Page 5 of 6

To reassemble your device, follow these instructions in reverse order.
This document was last generated on 2018-03-28 09:02:56 AM.
Step 7 — Hard Drive
Remove the two T6 Torx screwsfrom each side of the hard drive(four screws total).
You'll need to transfer these screwsto your new hard drive if you'rechanging drives.
If you are installing a new hard drive,we have an OS X install guide to getyou up and running.
MacBook Unibody Model A1278 Hard Drive Replacement
© iFixit — CC BY-NC-SA www.iFixit.com Page 6 of 6