Embed Size (px)
Citation preview

MASTERING YOUR KITCHEN
Countertop OvenTechniques, Recipes, and More

MASTERING YOUR KITCHEN
Countertop OvenTechniques, Recipes, and More

5 Welcome to Wolf Gourmet
7 The WOLF GOURMET Countertop Oven
8 Start Here: Mise en Place
B A K E : G O O D F O R E V E RY T H I N G , F R O M B R E A K FA S T T O D E S S E R T 1 012 Baked Eggs with Herbs and Cream
14 Whole Salt-Baked Fish with Lemon and Dill
17 Zucchini-Fennel Gratin
19 French Toast Bread Pudding with Crunchy Almond Streusel
21 Pavlova with Berries
24 Chocolate Cake with Cocoa Buttercream Frosting
Contents

R O A S T: I T ’ S A L L A B O U T H I G H H E AT 2 629 Roast Chicken with Garlic and Lemon Pan Gravy
31 Beef Tenderloin with Herb-Horseradish Crust and Red Wine Pan Sauce
34 Braised Pork Shoulder
37 Roasted Cauliflower with Cumin and Lemon
38 Roasted Grape Sundae
B R O I L : A S U R P R I S I N G LY V E R S AT I L E WAY T O C O O K 4 042 Broiled Feta with Roasted Tomatoes and Warm Pita Triangles
44 Baked Rice with Sausage and Peppers
46 Smoky Lime-Glazed Salmon
49 Broiled Lamb Chops with Rosemary and Garlic
50 Macaroni and Cheese with Bread Crumbs
P R O O F : L I K E A S PA F O R B R E A D D O U G H 5 253 Multigrain Bread
55 Parker House Rolls
T O A S T: I T ’ S F O R M O R E T H A N J U S T B R E A K FA S T 5 860 Roasted Pear and Shaved Pecorino Crostini
62 Roasted Tomato Soup with Cheesy Garlic-Parmesan Crostini
M E N U S 6 4

WELCOME TO WOLF GOURMET

WELCOME TO WOLF GOURMET
7
Since joining Sub-Zero, a third-generation
family-owned company, in 2000, Wolf has
brought its professional-quality ranges to people
like you: passionate home cooks. We know that
you can think of no better way to spend a day
than preparing a meal for your friends and family.
With Wolf Gourmet, we’re thrilled to bring our
trademark level of workmanship, attention
to detail, and sleek design to other parts of your
kitchen. Through relentless testing and tweaking
by designers and engineers who love to cook
as much as you do, we have created a line of
knives, cookware, and countertop appliances that
will help you cook better and more joyfully than
you ever thought possible.

THE WOLF GOURMET COUNTERTOP OVEN

I N T R O D U C T I O N | 9
Bronzed, juicy roast chicken;
spoon-tender pulled pork;
decadent and comforting mac and
cheese; dinner party-worthy
chocolate layer cake. These are
just a few of the many things
you can make in your new
countertop oven. Oh—and
of course, let’s not forget about
toast, too, but really, this oven
is so much more than a toaster.
Like a standard oven, the countertop oven
bakes, roasts, and broils. Because it is smaller
than a standard oven, it preheats faster and
doesn’t heat up your kitchen the way an
ordinary oven does. It has a sturdy, adjustable
rack so you can better control your cooking.
It includes a warming function to help keep
your dinner rolls hot until they’re ready to serve
and a proofing mode, which provides a warm,
draft-free environment for yeast dough to rise. It
also has an integrated temperature probe to let
you know when your chicken or beef tenderloin
is roasted to perfection (no more constantly
opening the oven to check!) and a convection
feature to help you create richly browned meats
and evenly baked cakes.
The oven’s sleek brushed stainless-steel and
professional-inspired design will fit right into any
kitchen, and it looks good from every angle.
We added large, flat, clearly labeled buttons; an
easy-to-read digital display, and Wolf Gourmet’s
signature red knobs for controlling time and
temperature. All these features are attractive,
of course, but they also work together to make
the oven so intuitive to use, you barely need
to think about it. Once you start using this
oven, you may start to wonder how you ever
cooked without it.

1 0 | C O U N T E R T O P O V E N
S TA R T H E R E : M I S E E N P L A C E
Simply put, mise en place
is French for “put into place.”
Practically speaking, it means to chop and measure all the ingredients that you’ll be cooking with before you start cooking. This helps streamline your prep and maximizes the pleasure of making a meal.
The first step to mise en place is an easy one: read the recipe prior to cooking it. Recipes are road maps, designed to help you go from a set of disparate ingredients to a stellar, perfectly prepared dish. A great way to learn how ingredients and the cooking method work together is to follow the recipe to the letter the first time you make it. The second time you make the recipe, you can veer from the instructions, making ingredient substitutions and other changes that reflect your preferences and tastes. Since you have already made the recipe once, you’ll be able to anticipate how the changes you make will influence the overall dish.

S T A R T H E R E : M I S E E N P L A C E | 1 1
Here are a few more tips that can help you cook smarter, more confidently, and more efficiently.
1. Before you begin, read the recipe all the
way through. (It actually doesn’t hurt to read it
through twice!)
2. Mise en place everything you can before you
start cooking. Have your ingredients sliced, diced,
and portioned before you start cooking to ensure
that everything is where you need it, when you
need it.
3. Work cleanly. If you have multiple cutting
boards, use each of them for a different type of
food—for example, cut meats on a dishwasher-
safe plastic board, bread and fruit on a wood or
cork board, and vegetables on another wood or
plastic board. (And if using one cutting board for
all your chopping needs, start with the vegetables
and end with raw meats so you don’t have to wash
the board between ingredients.) Always wipe down
your cutting board and wash your hands between
prep tasks, and wash your board in hot soapy
water when you’re finished. To remove the tough-
est odors, give the board a scrub with a lemon half
or some distilled white vinegar, then rinse with hot
soapy water. Stand the board on its edge and allow
it to air-dry between uses. Never return cooked
food to a dirty cutting board. When doing dishes,
wash your cutting board in an empty sink so you
don’t contaminate other dishes or dishwater.
4. Work neatly. If your workspace is cluttered, so
is your mind. Stop every once in a while to clear
the onion skins, carrot peels, and beef trimmings
from your cutting board. (To make this super easy,
place a bowl for trimmings at the top of the cutting
board.) Wipe down the countertops and clean up
any spills as you go. The minute or so it takes to
clear the board and reset your workspace will reset
your brain as well. If you can wash a couple of
dishes while the roast is in the oven and one or two
more while the sauce reduces, even better. When
you clean as you go, you’ll find you have little to do
at the end of the day but wash a wineglass or two.

1 2 | C O U N T E R T O P O V E N
GOOD FOR EVERYTHING, FROM BREAKFAST TO DESSERT
When you need gentle, even heat and you’re not looking for
deep browning, BAKE will be your go-to mode.
This mode is for so much more than baked goods. You’ll choose BAKE when intense
browning isn’t a priority. For example, BAKE mode works well when cooking whole fish or
making gratins, bread puddings, and other casseroles (until, perhaps, you broil the top).
Use the BAKE mode as is, or activate the convection feature for extra fast and even cooking. With either mode, the integrated probe comes in handy to monitor internal temperatures.
And don’t forget, this oven isn’t just for small batches. We designed the countertop oven with cooks in mind—not only can it hold a 12-cup muffin tin, a 10-inch pie plate, and two 9-by-5-inch loaf pans, but it can also accommodate a Bundt pan and even a 9-by-13-inch baking dish. Some Dutch ovens, including the WOLF GOURMET Dutch oven, fit as well.
BAKE


1 4 | C O U N T E R T O P O V E N
BAKED EGGS WITH HERBS AND CREAM
Serves 4
Oven setting: CONVECTION/BAKE
Baked eggs, sometimes called shirred eggs, look impressive and are simple to prepare.
If you don’t have ramekins, you can use small oven-safe bowls. If your ramekins or bowls happen
to be smaller than six ounces, just add one egg and one tablespoon of cream to each.
1 tablespoon plus 1 teaspoon unsalted
butter, softened
1 tablespoon finely chopped fresh tarragon
8 large eggs
1⁄2 cup heavy cream
Kosher salt
Freshly ground black pepper
2 teaspoons finely chopped fresh chives
1. Preheat the oven to CONVECTION/BAKE
450°F. Grease four 6-ounce ramekins with the
softened butter and sprinkle a little of the tarra-
gon into the bottom of each ramekin. Carefully
crack 2 eggs into each ramekin, being careful
not to break the yolks. Drizzle 2 tablespoons
of cream over each serving, and season with a
few pinches of salt and pepper.
2. Place the ramekins on the WOLF GOURMET
baking pan and bake the eggs until the
whites are set but the yolks are still runny,
9 to 10 minutes. (The eggs go from runny
to hard-cooked very quickly so check them
often to prevent overcooking.) Remove
the baking pan from the oven. Sprinkle each
ramekin with chives and serve.
• VARIATION: PROVENÇAL BAKED EGGSSubstitute chopped fresh basil for the tarragon
and divide 1⁄4 cup chopped roasted red bell
peppers among the bottom of the ramekins.
Crack the eggs over the roasted peppers and
bake as instructed. Omit the chives and
sprinkle with 1 teaspoon grated Parmigiano-
Reggiano cheese.
• VARIATION: SMOKY HAM AND CHEDDAR Omit the tarragon. Divide 1⁄4 cup finely chopped
Black Forest ham and 1⁄4 cup shredded sharp
cheddar among the bottom of the ramekins.
Crack the eggs over the ham and cheese and
proceed with the recipe as instructed.
PRO TIP
Making baked eggs is a great way to use up
the odds and ends you have in the fridge, like
leftover roasted or steamed vegetables or that
last cup of baby spinach. Just make sure that
the vegetables you use are cooked before you
add them to the ramekins, and crack the eggs
over the top.


WHOLE SALT-BAKED FISH WITH LEMON AND DILL
Serves 2
Oven setting: CONVECTION/BAKE
In this recipe, salt seals in moisture to gently steam a whole fish and season it ever so gently.
This recipe can be used to cook any smaller whole fish you find at the market, too. The integrated
probe (read more about the probe on page 27) will tell you when the fish is cooked perfectly.

B A K E | 1 7
One whole 11⁄2-pound fish, such as branzino,
trout, or red snapper, cleaned
16 fresh dill sprigs
1 lemon, half sliced into rounds and
half cut into wedges
8 cups kosher salt
4 large egg whites
1. Preheat the oven to CONVECTION/BAKE
375°F. Stuff the cavity of the fish with 4 dill
sprigs and the lemon slices and set aside.
2. Stir the salt, egg whites, and 3⁄4 cup water
together in a large bowl until the salt is moist-
ened and feels like wet sand. Spread out about
2 cups of the wet salt mixture onto the bottom
of a 9-by-13-inch baking dish (an oval casserole
dish also works nicely), packing it down into a
solid, even layer. Lay 6 dill sprigs on top of the
salt. Gently lay the fish on top of the dill and
cover the fish with the remaining 6 dill sprigs.
3. Insert the temperature probe into the fish just
behind the head, then cover the fish with the
remaining salt mixture, packing it down firmly
so that the fish is completely encased from
head to tail. Adjust the probe, being careful not
to crack the salt crust, so it lies horizontal with
the fish, its sharp end pointing toward the tail.
4. Place the fish in the oven and insert the probe’s
plug into the probe jack. Set the probe tem-
perature for 140°F and bake until the probe
temperature chime sounds, about 20 minutes.
5. Remove the fish from the oven and remove
the probe. Immediately use a serrated knife to
carefully cut away the salt crust from the fish,
discarding the salt crust as you go. Remove
and discard the dill and lemon slices. Transfer
the fish to a serving platter and brush away any
salt still adhering to the skin. Serve with the
lemon wedges.
• VARIATION: TARRAGON AND FENNELSubstitute fresh tarragon sprigs for the dill
and 1 small trimmed, sliced fennel bulb for the
lemon slices. If the fennel has fronds, use the
feathery parts along with the tarragon.
• VARIATION: SALT-BAKED POTATOESSubstitute 12 small potatoes or 4 medium
potatoes (russet and Yukon Gold potatoes
work best) for the fish. Substitute 12 fresh
thyme or rosemary sprigs for the dill. Proceed
with the recipe as instructed (you don’t use the
temperature probe here). Bake the potatoes at
400°F for 40 minutes for small potatoes and
1 hour for medium ones.
WHAT ELSE CAN YOU
BAKE IN SALT?
The method works wonders with whole fish
and potatoes, but you can also try it with thick
fish fillets, a whole chicken, and other firm root
vegetables, like beets and parsnips.


ZUCCHINI-FENNEL GRATIN
Serves 4
Oven setting: CONVECTION/BAKE
As they gently bake in heavy cream, zucchini and fennel become silky soft before
they’re topped with a layer of crispy panko. If you close your eyes as you eat
this luscious gratin, you’ll swear you’re in France.
4 teaspoons extra-virgin olive oil
2 medium zucchini, thinly sliced into rounds
1 small fennel bulb, trimmed, cored, halved
lengthwise, and thinly sliced
1 small red onion, halved and thinly sliced1⁄2 teaspoon kosher salt
1⁄2 teaspoon freshly ground black pepper
11⁄4 cups heavy cream1⁄4 teaspoon ground nutmeg
1 cup shredded Gruyère cheese
1 cup panko crumbs1⁄2 cup grated Parmigiano-Reggiano cheese
1. Preheat the oven to CONVECTION/BAKE
425°F. Place the oil, zucchini, fennel, onion,
salt, and pepper in a 21⁄2-quart casserole dish
and toss to combine. Bake until the vegeta-
bles are just tender and begin to brown, about
25 minutes.
2. Whisk together the cream and nutmeg in a
small bowl and pour over the vegetables.
Sprinkle the Gruyère evenly over the top and
bake until the cream begins to bubble, about
15 minutes. In another small bowl, combine
the panko and the Parmigiano-Reggiano.
Remove the baking dish from the oven and
sprinkle the panko mixture evenly over the top.
Bake until the crumbs are golden brown, about
10 minutes. Remove from the oven and let
stand for about 15 minutes before serving.
• VARIATION: SWEET POTATO GRATINWhisk together the cream, 1 teaspoon ground
cinnamon, and 1⁄4 teaspoon ground cloves in a
large bowl. Substitute 2 pounds peeled, very
thinly sliced sweet potatoes for the zucchini,
fennel, and onion. Add the sweet potatoes to
the cream and toss to coat. Turn the sweet
potato mixture into a small baking dish (omit
the Gruyère). Cover the baking dish tightly
with foil and bake until the sweet potatoes are
tender, about 30 minutes. In another small
bowl, stir together the panko and 2 table-
spoons melted unsalted butter, then sprinkle
it evenly over the potatoes and bake until the
potatoes are golden brown, about 20 minutes.
Remove from the oven and let stand for about
15 minutes before serving.
• VARIATION: CRISPY BROCCOLI GRATINSubstitute 1 pound broccoli florets and stems
and 1 minced garlic clove for the zucchini and
fennel. Substitute 1⁄2 teaspoon chopped fresh
thyme for the nutmeg.
B A K E | 1 9


FRENCH TOAST BREAD PUDDING WITH CRUNCHY ALMOND STREUSEL
Serves 8
Oven setting: CONVECTION/BAKE
Talk about a brunch dish worthy of company! This over-the-top bread pudding is
the perfect item to impress friends coming over for breakfast; that said, it’s just as fantastic
savored on an indulgent, lazy morning with the family. If you prefer, you can cut the recipe
in half and bake the bread pudding in an 8- or 9-inch square baking dish.
S T R E U S E L
1 cup all-purpose flour
1 cup sliced almonds 1⁄2 cup lightly packed light brown sugar1⁄4 cup granulated sugar
1 teaspoon ground cinnamon1⁄2 teaspoon kosher salt
1 stick (8 tablespoons) unsalted butter, melted
B U T T E R E D M A P L E S Y R U P
1 cup maple syrup
3 tablespoons unsalted butter
2 tablespoons light brown sugar1⁄2 teaspoon kosher salt
B R E A D P U D D I N G
1 tablespoon unsalted butter, softened
1 loaf challah or brioche (about 12 ounces),
torn into uneven chunks
3 cups whole milk
2 cups heavy cream
8 large eggs1⁄4 cup maple syrup1⁄4 cup lightly packed light brown sugar
1 tablespoon vanilla extract
2 teaspoons ground cinnamon
1 teaspoon ground allspice
1 teaspoon kosher salt1⁄2 teaspoon ground nutmeg1⁄4 teaspoon almond extract (optional)
1. Make the streusel: In a large bowl, stir together
the flour, almonds, brown sugar, granulated
sugar, cinnamon, and salt. Stir in the butter and
then use your fingertips to blend the streusel
until it forms uneven clumps. Set aside.
2. Make the bread pudding: Preheat the oven to
CONVECTION/BAKE 350°F. Grease a 9-by-13-
inch baking dish with the softened butter. Place
the bread chunks in the baking dish in an even
layer and set aside.
continued...
B A K E | 2 1

2 2 | C O U N T E R T O P O V E N
3. Whisk together the milk, cream, eggs, maple
syrup, brown sugar, vanilla extract, cinnamon,
allspice, salt, nutmeg, and almond extract (if
using) in a large bowl, then pour it over the
bread. Gently press the challah down until sub-
merged, then let the mixture stand for about
10 minutes. Sprinkle the streusel evenly over
the top. Bake until puffed and golden brown,
about 40 minutes. Remove from the oven and
set aside for 10 minutes before serving.
4. Make the buttered maple syrup: While the
bread pudding cools, combine the maple
syrup, butter, brown sugar, and salt in a 2-cup
heat-safe measuring cup. Microwave on high
for 15-second intervals, stirring in between,
until the butter is melted. Serve the bread pud-
ding with the buttered maple syrup.
PRO TIP
Like most bread puddings, you can also
assemble this one the night before, then just
sprinkle it with streusel before baking.
• VARIATION: RASPBERRYOmit the streusel. Omit the nutmeg and
almond extract. Just before baking, sprinkle
2 cups fresh raspberries over the top of the
bread pudding, pressing some of them into
the custard. Sprinkle 3⁄4 cup coarse raw sugar
(such as turbinado) over the berries before
baking. Increase the baking time to 50 min-
utes. For the syrup, substitute 1 cup seedless
raspberry jam for the maple syrup and omit the
brown sugar.
• VARIATION: VANILLA-ORANGEOmit the streusel. Increase the vanilla extract
to 4 teaspoons and omit the cinnamon,
allspice, and nutmeg. Substitute 1 tablespoon
finely grated orange zest and 1⁄4 teaspoon
orange oil for the almond extract. Sprinkle 3⁄4 cup coarse raw sugar (such as turbinado)
over the top before baking.
PRO TIP
For the best results when baking, be sure the
rack is in the middle position. If you’re working
with a tall pan, such as a Bundt pan, use the
bottom position.

continued...
PAVLOVA WITH BERRIES
Serves 6
Oven setting: BAKE
Pavlova, a crackly, large, circular meringue, is a beautiful, elegant, and naturally
gluten-free dessert that’s delicious topped with whipped cream, pastry cream, custard, or curd,
and just about any kind of fruit. The meringue’s crackly outside yields to an almost
marshmallowy center; it’s a true showstopper. Using superfine sugar here ensures that the
sugar crystals completely dissolve into the meringue; if you can’t find it, you can blitz one cup
plus two teaspoons of granulated sugar in a food processor for about 30 seconds.
M E R I N G U E
1 cup superfine sugar
1 tablespoon cornstarch
1 teaspoon distilled white vinegar1⁄2 teaspoon vanilla extract
4 large egg whites
F O R F I N I S H I N G
1 cup heavy cream
2 tablespoons granulated sugar1⁄2 cup store-bought lemon curd
4 cups strawberries, hulled (and halved or
quartered if large), or mixed berries
1. Make the meringue: Draw a 7-inch circle on a
piece of parchment paper. Turn the paper over
and place it on a 12-by-14-inch rimless baking
sheet (or a rimmed baking sheet with its flat,
bottom side facing up).
2. Preheat the oven to BAKE 300°F. In a small
bowl, stir together the superfine sugar and
cornstarch and set aside. In another small
bowl, combine the vinegar and vanilla extract
and set aside.
3. Using an electric mixer, beat the whites on
medium-low speed until frothy, then gradually
increase the speed to high and continue to beat
until the egg whites begin to hold soft peaks.
Slowly sprinkle in the sugar mixture, a little at a
time, beating until soft to medium peaks form.
Pour in the vinegar mixture and continue to beat
until the whites hold stiff peaks.
4. Use a spatula to gently transfer the meringue
to the parchment paper, carefully spreading it
so that it just reaches the edge of the circle.
Place the meringue in the oven and immedi-
ately lower the oven to 250°F. Bake until pale
brown in spots, about 50 minutes (cracks may
appear on the surface). Turn off the oven and
let the meringue cool inside the oven—don’t
open the oven door!—for 11⁄2 hours (this is the
secret to the crisp exterior and marshmallowy
interior). Remove the meringue from the oven
and set aside.
B A K E | 2 3


5. Make the whipped cream: Using an electric
mixer, whip the cream and granulated sugar
on medium-high speed until soft peaks form.
Place the lemon curd in a medium bowl and
whisk in 3⁄4 cup of the whipped cream.
6. Carefully peel the parchment paper off the
meringue and transfer the meringue to a plat-
ter. Spread the lemon curd mixture over the
meringue in big, loose swirls, followed by the
remaining whipped cream. Mound the berries
on top of the whipped cream. Use a serrated
knife to cut into wedges and serve.
PRO TIP
The baked meringue can be stored at room
temperature in an airtight container for up
to 2 days. Meringue is best made on days
with low humidity so the exterior maintains its
crisp texture.
• VARIATION: TOASTED COCONUTLine a 12-by-14-inch baking sheet with
parchment paper. Add 1 teaspoon coconut
extract to the meringue mixture along with
the vinegar and vanilla extract. Fold 1 cup
toasted unsweetened coconut flakes into
the whipped egg whites. Fit a pastry bag
with a star tip and fill with the meringue. Pipe
the meringue onto the paper in 2-inch swirls.
Bake as directed until just golden brown,
50 to 60 minutes. Remove from the oven,
slide the parchment onto a wire cooling rack,
and cool completely before removing the
meringues from the parchment.
• CHOCOLATE-STRAWBERRY SWIRLLine a 12-by-14-inch baking sheet with
parchment paper. Add 4 drops of red food
coloring to the meringue mixture along with
the vinegar and vanilla extract. Fold 1⁄2 cup
seedless strawberry or raspberry jam and
4 ounces grated semisweet chocolate into
the whipped egg whites; the meringue
should be streaked with pink swirls and
specks of chocolate. Fit a pastry bag with
a star tip and fill with the meringue. Pipe the
meringue onto the paper in 2-inch swirls.
Bake as directed until just golden brown,
50 to 60 minutes. Remove from the oven,
slide the parchment onto a wire cooling rack,
and cool completely before removing the
meringues from the parchment.
WHEN SHOULD YOU SKIP
CONVECTION BAKING?
Meringues are one of the few baked goods
that cook better without the convection
feature. Why? Meringues rely on low and slow
heat to dry out the exterior while leaving the
center chewy. The convection fan will actually
dry the outside of the meringues too quickly,
leaving the inside too wet (or worse, they will
cause the egg whites to brown too much).
When baking soufflés, angel food cake, and
popovers, you’ll also want to skip convection
and use the traditional BAKE mode.
B A K E | 2 5

2 6 | C O U N T E R T O P O V E N
CHOCOLATE CAKE WITH COCOA BUTTERCREAM FROSTING
Makes one 9-by-13-inch cake
Oven setting: CONVECTION/BAKE
Dark and rich, this cake (see the photo of the Mocha-Cream Layer Cake variation on page 11)
is as chocolaty as a classic devil’s food layer cake but comes together like the easiest
quick bread. It’s a simple single-layer cake that you can frost right in the 9-by-13-inch pan
and bring to picnics, potlucks, and other parties.
C A K E
1 tablespoon unsalted butter, softened
2 cups all-purpose flour
1 cup unsweetened natural cocoa powder
11⁄2 teaspoons baking powder
11⁄2 teaspoons baking soda1⁄2 teaspoon table salt
2 cups whole milk
1 cup granulated sugar
1 cup lightly packed light brown sugar1⁄4 cup canola oil
4 ounces unsweetened chocolate, melted
and cooled
2 large eggs
1 tablespoon instant espresso powder
2 teaspoons vanilla extract
F R O S T I N G
2 cups confectioners’ sugar1⁄3 cup unsweetened natural cocoa powder
1 stick (8 tablespoons) unsalted butter,
softened
6 tablespoons heavy cream (or whole milk)
11⁄2 teaspoons vanilla extract1⁄4 teaspoon table salt
1. Make the cake: Preheat the oven to CONVEC-
TION/BAKE 350°F. Grease a 9-by-13-inch cake
pan with the softened butter and set aside. In a
large bowl, sift together the flour, cocoa powder,
baking powder, baking soda, and salt. In another
large bowl, whisk together the milk, granulated
sugar, brown sugar, oil, chocolate, eggs, instant
espresso, and vanilla extract until smooth. Pour
the liquid ingredients into the dry ingredients and
whisk together until completely combined.
2. Pour the batter into the prepared pan and
bake until a cake tester inserted into the center
comes out clean, 25 to 30 minutes. Transfer
the pan to a wire rack to let the cake cool.

3. Make the frosting: In a medium bowl, sift
together the confectioners’ sugar and cocoa
powder. Using an electric mixer, beat the butter
in a large bowl on medium-high speed until
light and airy, about 3 minutes. Scrape down
the bowl and add the sifted confectioners’
sugar and cocoa powder, the cream, vanilla
extract, and salt. Beat on low speed until the
dry ingredients are moistened, then increase
the speed to medium-high and continue to
beat, scraping down the sides of the bowl as
necessary, until the frosting is very airy, about
2 minutes.
4. Spread the frosting over the cooled cake. Cut
into squares and serve.
NATURAL COCOA POWDER
VS. DUTCH-PROCESSED COCOA
For this cake, be sure to buy natural cocoa
powder instead of Dutch-processed.
Dutch-processed cocoa has a darker color
and a richer, less acidic taste. It reacts with
baking powder and baking soda differently
than natural cocoa powder, so the cocoa
powders are not interchangeable in recipes
that rely on these leaveners.
• VARIATION: PEANUT BUTTER–FROSTED CUPCAKESLine a 12-cup muffin tin with cupcake liners.
Divide the cake batter among the muffin cups
and bake until the cupcakes spring back when
pressed lightly and a cake tester inserted into
the center of a cupcake comes out clean,
15 to 20 minutes. Transfer the pan to a wire
rack to let the cupcakes cool for 10 minutes,
then remove them from the pan.
Make the frosting: Substitute ⅔ cup smooth
peanut butter for the cocoa powder.
• VARIATION: MOCHA-CREAM LAYER CAKELine the cake pan with parchment paper and
then lightly grease the paper with the softened
butter. Bake the cake as instructed. Let the
cake cool in the pan for 30 minutes, then invert
it onto a wire rack to cool completely.
Make the mocha whipped cream: In a large
bowl, combine 2 cups heavy cream, 1⁄2 cup
unsweetened natural cocoa powder, 1⁄2 cup
confectioners’ sugar, 2 tablespoons instant
espresso powder, 1 teaspoon vanilla extract,
and 1⁄4 teaspoon salt. Using an electric mixer,
beat on low speed until frothy, about 30 sec-
onds, then gradually increase the speed to
high and continue to beat until stiff peaks form,
11⁄2 to 2 minutes.
Transfer the cooled cake to a work surface so
that the long side faces you. With a serrated
knife, cut the cake into 2 even layers. Place
1 cake layer on a rimless platter or cake plate.
To keep the platter (or plate) neat while you
frost the cake, place 4 strips of waxed or
parchment paper under the 4 sides of the
cake. Spread 11⁄2 cups of the mocha whipped
cream on top of the cake layer, then place the
second cake layer gently on top. Spread the
top and sides of the cake with the remaining
mocha whipped cream. Remove the waxed
paper strips, cut into wedges, and serve.
B A K E | 2 7

2 8 | C O U N T E R T O P O V E N
I T ’S ALL ABOUT HIGH HEAT
Your parties and Sunday dinners
will come together more easily than you thought
was possible with the ROAST mode.
The oven’s BAKE mode and ROAST mode might seem similar. They both range from
170°F to 450°F (with 350°F as the default) and can work with convection or the inte-
grated probe. ROAST mode, however, also uses technology that maximizes browning.
When cooking a chicken, a beef tenderloin, or most other large cuts of meat, ROAST mode is a given. Coupled with the integrated probe feature, you’ll get a delicious crust and a perfectly cooked interior. But ROAST mode is also great when you want to make golden, caramelized roasted vegetables and even blistered-brown fruit, like roasted grapes for an ice cream sundae.
The included WOLF GOURMET baking pan works with any of the modes, but you’ll probably use it most often when roasting. It has a nice-sized lip to keep meat juices and vegetable pieces from spilling over into the oven. The included rack can be used to elevate a roast so the bottom cooks as evenly as the top.
ROAST

IS IT DONE YET?
Sure, an instant-read thermometer inserted into the meat can tell you the internal temperature of a roast, but the countertop oven’s integrated probe is even better: It allows you to see when meat is done without even having to open the oven door. When the probe is inserted into the food, the oven’s LED display panel will show you the exact temperature of the roast, and once it reaches your desired temperature, the oven chimes so you can take it out exactly when you need to. Here are just a few tips to keep in mind when using the probe.
1. The probe works in BAKE or ROAST mode. To set it up, just insert the plug end of the probe into the jack on the right side of the oven. (We designed the jack so you can do this with one hand.) Press the probe button and adjust the desired temperature by turning the TEMP/DARKNESS knob; the number will flash for 3 seconds and then become solid so you know the temperature is set. You can then set the oven temperature and preheat.
2. Carefully insert the probe while the protein is raw. You want the tip to hit the last part of the meat to cook. For meat roasts, that would be the center; it’s best to insert the probe horizon-tally from one of the ends. For chicken, insert the probe into the inner thigh, without touching the bone.
3. If you want to cook a steak, chicken, or a roast to a certain doneness, set the probe to about 5°F to 10°F less than your ideal tempera-ture. Then pull out the meat, loosely tent it with foil, and let it rest; a few minutes of carry-over cooking will bring the temperature right where you want it to be.
160°F. French recipes often call for this temperature, at which your chicken is properly cooked but might
still show some pinkness in the thigh, even after it rests. It’s safe to eat the chicken at this temperature,
as long as the thermometer is accurate.
165°F to 170°F. The USDA, and thus, many American recipes, call for chicken to be cooked to at
least 165°F. At this temperature, the meat will be less pink but still be juicy.
180°F and higher. Some recipes call for poultry to be cooked to 180°F; you should only roast your meat
to this temperature if you like your breast meat very well done.
If you’re roasting a free-range bird or one you get from the farmers’ market, don’t be alarmed if the
meat looks a little more pink than usual, even when it’s fully cooked. It’s normal with these types of
chickens because their muscles get more exercise and are naturally more pigmented.


ROAST CHICKEN WITH GARLIC AND LEMON PAN GRAVY
Serves 4
Oven setting: CONVECTION/ROAST
A whole roast chicken is easy to cook to moist and juicy perfection with the integrated probe.
Plus, the convection fans help the skin become extra crispy. The garlic cloves that are roasted
alongside the chicken not only flavor the pan juices, they thicken it as well.
2 tablespoons extra-virgin olive oil
1 (3- to 31⁄2-pound) whole chicken, patted dry
1 tablespoon garlic powder
Kosher salt
Freshly ground black pepper
2 lemons, halved
4 fresh parsley sprigs
14 peeled garlic cloves
1. Adjust the oven rack to the lowest position
and preheat the oven to CONVECTION/
ROAST 375°F. Rub the oil all over the chicken,
followed by the garlic powder. Season gener-
ously with salt and pepper. Place the chicken
in a 9-by-13-inch baking dish or rimmed sheet
pan. Stuff the chicken’s cavity with 1 lemon
half and the parsley sprigs. Tuck the wings
under the chicken and use butcher’s twine to
tie the bony ends of the legs together.
2. Insert the temperature probe into the thickest
part of the chicken between the leg and the
thigh. Scatter the garlic around the chicken and
place the remaining 3 lemon halves cut side
down in the pan. Pour in 1⁄2 cup water around
(but not over) the chicken.
3. Place the chicken in the oven and insert the
probe’s plug into the probe jack. Set the
probe temperature for 170°F, and roast until
the probe temperature chime sounds, about
1 hour.
4. Remove the chicken from the oven and remove
the probe. Lift the chicken and tilt it over the
pan to pour off any juices that collected in the
cavity, then transfer the chicken to a cutting
board and loosely tent with foil for 10 min-
utes. Remove the parsley from the cavity and
discard. Transfer the roasted lemons from the
roasting pan and the cavity to a fine-mesh
sieve set over the baking dish. Mash down on
the lemons to extract their juices; discard the
lemons. Use a fork to smash the garlic cloves
into the pan juices, taste, and add more salt or
pepper if needed. Transfer the pan juices to a
gravy dish, carve the chicken, and serve with
the pan gravy.
continued...
R O A S T | 3 1

3 2 | C O U N T E R T O P O V E N
• VARIATION: HONEY-THYME GLAZEOmit the lemons and garlic. Set the probe
temperature for 150°F and roast the chicken
until the temperature chime sounds, about
40 minutes. About 40 minutes after the
chicken goes into the oven, make the honey-
thyme glaze: Heat 1⁄2 cup honey and 1 tea-
spoon chopped fresh thyme leaves in a small
saucepan over medium-low heat. Turn off the
heat and cover the pan to keep the honey
warm. Use several fresh thyme sprigs to brush
the warm honey mixture over the chicken and
reset the probe temperature for 170°F. Baste
the chicken every 10 minutes with the warm
honey mixture until the probe temperature
chime sounds, about 20 minutes longer. Pro-
ceed with the recipe as instructed, serving the
pan juices alongside the chicken.
• VARIATION: SMOKED PAPRIKA AND GARLICSubstitute 2 navel oranges for the lemons.
Rub the chicken with 2 tablespoons smoked
paprika along with the garlic powder. Proceed
with the recipe as instructed.
CONVECTION RULE OF
THUMB
When adapting a recipe to use the con-vection setting, you should either decrease the usual temperature by 25°F or cook the food for about 25 percent less time.
The countertop oven has multiple vents placed
on the sides of the oven. When in convec-
tion mode, these vents circulate air uniformly
and indirectly around food. Using convection
ensures that there are no hot spots in the
oven, and thus, baking is incredibly (almost
impossibly) even.

BEEF TENDERLOIN WITH HERB-HORSERADISH CRUST AND RED WINE PAN SAUCE
Serves 6
Oven setting: BROIL /CONVECTION ROAST
Beef tenderloin is a lean, luxurious, and tender roast from which the ever-popular
filet mignon steaks are cut. The countertop oven easily holds this 3-pound roast, and, in fact,
you can even fit a larger roast diagonally in the WOLF GOURMET baking pan.
The oven’s convection feature helps you get the meat and horseradish crust beautifully
browned while the probe will tell you when the meat is done to your liking.
B E E F T E N D E R L O I N
2 garlic cloves, 1 minced and 1 smashed
1 tablespoon minced fresh thyme
1 tablespoon minced fresh rosemary
1 tablespoon plus 1 teaspoon
extra-virgin olive oil
1 tablespoon kosher salt
2 teaspoons freshly ground black pepper
1 (3-pound) beef tenderloin, trimmed of
fat and silver skin and tied with
butcher’s twine
1 small yellow onion, thinly sliced
1 medium carrot, thinly sliced
H O R S E R A D I S H C R U S T
6 tablespoons store-bought grated white
horseradish, rinsed and squeezed dry
2 tablespoons plain bread crumbs
1 tablespoon extra-virgin olive oil
1 tablespoon Dijon mustard
1 tablespoon minced fresh thyme
1 tablespoon minced fresh rosemary
1 tablespoon minced fresh parsley1⁄2 teaspoon kosher salt
R E D W I N E J U S
2 cups low-sodium beef broth
1 cup dry red wine
2 teaspoons unsalted butter, softened
1. Season the tenderloin: Adjust the oven rack to
the highest position and set the oven to BROIL/
HI. In a small bowl, stir together the minced
garlic, thyme, rosemary, 1 tablespoon of the oil,
the salt, and pepper. Rub the tenderloin with
the herb mixture and set aside while the oven
heats up.
2. Make the horseradish crust: In a medium bowl,
stir together the ingredients for the horseradish
crust and set aside.
3. Broil the tenderloin: Toss the onion, carrot, and
smashed garlic clove with the remaining 1 tea-
spoon olive oil in the WOLF GOURMET baking
continued...
R O A S T | 3 3

3 4 | C O U N T E R T O P O V E N
pan. Nestle the tenderloin directly onto the
baking pan. Broil the tenderloin until it begins to
brown, about 10 minutes.
4. Remove the pan from the oven. Adjust the
oven rack to the middle position and set the
oven to CONVECTION/ROAST 425°F. Press
the horseradish mixture evenly over the top.
Insert the temperature probe into one end of
the tenderloin so that it runs horizontally. Place
the pan in the oven and insert the probe’s plug
into the oven jack. Set the probe temperature
to 125°F (for medium-rare), and roast until
the probe temperature chime sounds, about
15 minutes. Remove the probe, then transfer
the tenderloin to a cutting board and loosely
tent with foil for 15 minutes.
5. Make the red wine jus: Adjust the oven rack
to the highest position and set the oven to
BROIL/HI. Pour the broth and wine over the
roasted vegetables. Place the pan in the oven
and simmer until the liquid is reduced slightly,
about 10 minutes. Strain the jus through a fine-
mesh sieve set over a small bowl (discard the
vegetables) and whisk in the softened butter.
6. Cut and remove the twine (if the crust is dis-
turbed, use a spoon to press it back in place)
and cut the tenderloin crosswise into 1⁄4-inch
slices. Serve with the jus.
• VARIATION: CRISPY MUSTARD CRUSTTo make the crust, add 6 tablespoons panko
to the plain bread crumbs (omit the horserad-
ish). Increase the Dijon mustard to 3 table-
spoons and add 2 tablespoons mayonnaise
along with the mustard.
• VARIATION: TENDERLOIN AU POIVREOmit the thyme and rosemary from the meat.
Rub the 1 tablespoon olive oil, minced garlic,
and salt all over the tenderloin. Substitute
2 tablespoons crushed black peppercorns for
the ground black pepper and roll the tenderloin
in the crushed peppercorns to coat on all sides.
Omit the horseradish crust. Substitute 1⁄2 cup
balsamic vinegar and 2 tablespoons pome-
granate syrup for the red wine.
MEAT PERFECTLY DONE
Here is a temperature guide for cooking meat
roasts. Remember that the larger the cut, the
more the meat’s temperature will rise after you
pull it from the oven. The ends of a roast will be
more well-done than the center, so if you want
your meat to be medium-rare, you’ll have a few
slices of medium-cooked meat at the ends.
• 115°F to 124°F: The minimum temperature for cooking larger pieces of beef or lamb. After a few minutes of resting, the meat will be rare.
• 125°F to 130°F: For medium-rare beef and lamb.
• 131°F to 140°F: Beef and lamb are cooked to medium in this range. You can pull large pork roasts at 140°F so they carry over cook to the USDA recommended 145°F.
• 141°F to 150°F: The USDA recommends all meat be cooked to 145°F at a minimum. This would leave you with medium-well beef and lamb, which you may or may not prefer. Pork retains a little pinkness and juiciness when cooked to this range.
• 151°F to 160°F: Approaching 160°F, all meat is well-done, with no pinkness left.


3 6 | C O U N T E R T O P O V E N
BRAISED PORK SHOULDER
Serves 6
Oven setting: CONVECTION/ROAST
This Latin-inspired pork shoulder is excellent pulled and wrapped in tortillas for
tacos or served on a platter with rice and beans. The best part? You can brown the meat
right in the oven before you add liquid to braise until tender.
1 teaspoon canola oil
4 pounds skin-on boneless pork shoulder,
cut into 4 or 5 equal pieces
11⁄2 tablespoons kosher salt
1 large yellow onion, halved and thinly sliced
4 garlic cloves, smashed
4 fresh thyme sprigs
2 fresh or dried bay leaves
2 cups low-sodium chicken broth1⁄2 cup orange juice
3 tablespoons apple cider vinegar
2 teaspoons ground cumin1⁄2 teaspoon ground coriander1⁄2 teaspoon coarsely ground black pepper
1. Adjust the oven rack to the lowest position and
preheat the oven to CONVECTION/ROAST
450°F. Lightly grease a 9-by-13-inch baking
dish with the oil. Rub the pork pieces with the
salt and place them in the baking dish. Place
the baking dish in the oven and roast until the
pork pieces are nicely browned on top, about
20 minutes. Remove the pork from the oven,
and place the onion, garlic, thyme, and bay
leaves around the pork.
2. In a large bowl, stir together the chicken broth,
orange juice, vinegar, cumin, coriander, and
pepper. Pour the broth mixture around the
pork. Cover the baking dish with a double layer
of foil, tightly crimping it around the edges so
steam doesn’t escape during cooking. Return
the covered baking dish to the oven and lower
the oven to 325°F. Cook until a fork slips into
the pork with no resistance, about 2 hours.
3. Remove the baking dish from the oven and dis-
card the foil. Transfer the pork to a cutting board
(reserve the braising liquid). Let the pork cool
slightly before removing skin and shredding.
Use tongs to remove and discard the skin and
fat from the meat. Gently pull the pork apart into
smaller pieces, then transfer them to a rimmed
heat-safe serving platter. Cover the serving plat-
ter loosely with foil and then place in the oven to
keep warm while making the sauce.
4. Use a spoon to skim off any fat from the top
of the braising liquid, then strain the remaining
defatted liquid through a fine-mesh sieve set
over a small saucepan (discard the onion,
garlic, thyme, and bay leaves). Simmer over
medium-high heat until slightly reduced, about
10 minutes. Remove the pork from the oven,
discard the foil, pour the sauce over the pork,
and serve.

• VARIATION: QUICK PULLED PORKCook the pork and reduce the braising liquid
as instructed, then stir in 3 cups of store-
bought barbecue sauce and continue to cook
until hot. Use 2 forks to shred the pork. Stir
the shredded pork into the sauce and cook
until warmed through. Place the pork on
potato rolls. Serve with coleslaw and bread
and butter pickles.
• VARIATION: PORK ENCHILADASCook the pork and skim and strain the braising
liquid as instructed. In a large saucepan, com-
bine 3⁄4 cup of the braising liquid (freeze the rest
to use another time) with three (15-ounce) cans
of your favorite enchilada sauce. Simmer over
medium-high heat until the sauce has thickened
slightly, about 10 minutes. Remove 2 cups of
the sauce from the pan and set it aside. Use
2 forks to shred the pork and add 3 cups of the
shredded pork to the enchilada sauce in the
pan and toss to combine (save the rest of the
pork to use another time). Place eight 6-inch
corn tortillas on a work surface, spread one-
eighth of the shredded pork down the center of
each tortilla, and roll. Place the enchiladas seam
side down in a lightly greased 9-by-13-inch
baking dish and pour the reserved enchilada
sauce evenly over the top. Cover with shredded
pepper jack or cheddar cheese and bake at
CONVECTION/BAKE 350°F until golden brown
and bubbling, about 30 minutes. Let stand for
10 minutes. Serve with sour cream, chopped
R O A S T | 3 7

3 8 | C O U N T E R T O P O V E N

ROASTED CAULIFLOWER WITH CUMIN AND LEMON
Serves 4
Oven setting: CONVECTION/ROAST
When it’s roasted, cauliflower becomes so sweet that it’s almost like candy.
With the Eastern Mediterranean flavors here, a sprinkle of feta cheese or toasted pistachios
would be a great addition.
1 large cauliflower, cut into florets
3 tablespoons extra-virgin olive oil
1 tablespoon fresh lemon juice
1 garlic clove, minced1⁄2 teaspoon ground cumin
1⁄2 teaspoon Aleppo pepper flakes (see below)1⁄2 teaspoon kosher salt1⁄4 teaspoon freshly ground black pepper
1 tablespoon finely chopped fresh parsley
1. Preheat the oven to CONVECTION/ROAST
375°F. Place the cauliflower florets in a
9-by-13-inch baking dish. In a medium bowl,
whisk together the oil, lemon juice, garlic,
cumin, Aleppo pepper, salt, and black pepper.
Add the cauliflower and toss to combine.
2. Bake the cauliflower, stirring halfway through
cooking, until the florets are golden brown and
tender, 20 to 25 minutes. Sprinkle with parsley
and serve hot or room temperature.
• VARIATION: SPINACH SALAD WITH PUMPKIN SEEDSCook the cauliflower as instructed. Set the
oven to the TOAST/LIGHT 2-bar setting.
Place 1 cup pumpkin seeds, 1 tablespoon
extra-virgin olive oil, 1⁄2 teaspoon chili powder,
and ⅛ teaspoon cayenne pepper on a
rimmed baking sheet and toss to combine.
Toast until fragrant, about 6 minutes. Remove
from the oven, cool, and toss with the
cauliflower, 4 cups baby spinach, and your
favorite vinaigrette.
• VARIATION: ROASTED BRUSSELS SPROUTSSubstitute 4 cups trimmed small Brussels
sprouts for the cauliflower. Add 1⁄4 cup
minced shallots along with the garlic and
substitute 2 teaspoons chopped fresh thyme
for the cumin. Sprinkle with 2 tablespoons
minced chives.
HOW TO USE ALEPPO PEPPER
Aleppo pepper is popular in the Middle East
and Eastern Mediterranean for adding subtle
heat and bright fruity flavor to vegetables and
meat. You can find it in specialty food shops.
R O A S T | 3 9

4 0 | C O U N T E R T O P O V E N
ROASTED GRAPE SUNDAE
Serves 4
Oven setting: CONVECTION/ROAST
Roasting grapes with a little dessert wine creates a fantastic grown-up topping for ice cream
sundaes. Biscotti sprinkled on top add a great crunch.
2 teaspoons unsalted butter, softened
11⁄2 pounds seedless red grapes
3 tablespoons port or Marsala wine
2 tablespoons dark brown sugar
1 tablespoon finely grated orange zest
1⁄8 teaspoon kosher salt
1 pint rum raisin, ginger, or vanilla ice cream
Sweetened whipped cream (optional)1⁄2 cup crushed biscotti
1. Preheat the oven to CONVECTION/ROAST
375°F. Grease a shallow 3-quart baking dish
with the softened butter, then add the grapes.
In a medium bowl, whisk together the port,
brown sugar, orange zest, and salt, then pour
over the grapes.
2. Roast until the grapes soften and just begin to
burst, about 20 minutes. Let cool for 10 min-
utes in the baking dish.
3. Meanwhile, divide the ice cream among
4 glasses or dessert bowls. Spoon the warm
grapes and their pan juices over the ice cream
and top with whipped cream (if using). Sprinkle
with the biscotti and serve.
• VARIATION: CIDER APPLE SUNDAESubstitute 11⁄2 pounds peeled apples (such
as Honey Crisp), cored and cut into 1-inch
pieces, for the grapes. Substitute 1⁄4 cup hard
apple cider for the port and add 1 teaspoon
ground cinnamon, 1⁄2 teaspoon allspice,
1⁄4 teaspoon ground cloves, and 2 star anise
pods along with the orange zest. Cover the
baking dish with foil and roast until the apples
are just tender, about 15 minutes. Remove
the foil and continue to roast until the apples
soften and the juices reduce and slightly
caramelize, about 20 minutes. Discard star
anise pods. Substitute crushed gingersnaps
for the biscotti.
• VARIATION: APRICOTS AND HONEY Lower the oven to 350°F. Substitute 1⁄2 pounds
apricots, halved and pitted, for the grapes
and place in a single layer, cut side up, in the
baking dish. Substitute 1⁄4 cup honey for the
brown sugar and add 1⁄2 split vanilla bean,
6 crushed cardamom pods (or 1⁄4 teaspoon
ground cardamom), and 1⁄2 teaspoon ground
cinnamon along with the orange zest. Roast
until the apricots soften and the juices
caramelize, 20 to 30 minutes. Discard vanilla
bean. Serve with chopped toasted pistachios
instead of biscotti.


4 2 | C O U N T E R T O P O V E N
A SURPRIS INGLY VERSATILE WAY TO COOK
The secret to luscious, browned casserole toppings
and juicy lamb chops? It’s BROIL mode.
Like grilling, broiling is a hot, direct source of heat that can quickly brown or even char
food. This is why broiling can be an easy way to “grill” indoors. The method works best
for cooking fish fillets or thin, tender cuts of meat like steaks or chops. You can also use
the broiler to char vegetables you’d often grill, like peppers or eggplant.
When you’re broiling, the heat comes from the top, so it’s also a terrific way to finish off a dish. For example, after you bake a casserole or gratin, you can flip on the broiler to create a delicious crust, browning any bread crumbs and melting any cheese that is scattered on top. (Secretly, you just might want to pull off that crust and save it for yourself.) Similarly, for a dish like braised chicken thighs, you can pop the chicken pieces under the broiler to crisp the skin, or you can add a little extra carameliza-tion to a sweet sauce–brushed protein, like glazed chicken wings.
Using the broiler is also a classic way to finish a frittata, which you start on the stovetop. Not only will the broiler help cook the center but it also puffs up the frittata beautifully so it looks extra impressive. (Yes, the oven can hold a skillet! Depending on the length of the handle, a 8-inch ovenproof skillet can easily fit.)
BROIL

You can control how fast and how intensely food broils, too, by adjusting the oven setting as well as the rack’s position. To create the best crusts, you’ll usually want to turn the oven to BROIL/HI.
BROIL/LO works well if you have especially thick chops and you want to brown the exterior while also cooking the interior. It’s also a good setting for egg dishes, like frittatas, which taste better when cooked under more delicate heat.
The higher the rack is in the oven, the closer the food is to the heat source and the faster it browns (and can eventually burn). By trying the recipes here, you’ll get a feel for where you should place the rack for different types of food.
B R O I L | 4 3

4 4 | C O U N T E R T O P O V E N
BROILED FETA WITH ROASTED TOMATOES AND WARM PITA TRIANGLES
Serves 4
Oven setting: BROIL
Warm feta is a simple, unexpected starter to set on the table for your guests to enjoy
while you finish preparing the rest of the meal. If you can’t find fresh oregano, just leave it out
or substitute fresh thyme, fresh parsley, or a pinch of dried oregano.
4 pita breads
8 ounces feta cheese, patted dry1⁄4 teaspoon red pepper flakes
Coarsely ground black pepper
1⁄2 cup Slow-Roasted Tomatoes (page 63),
coarsely chopped
1 tablespoon chopped fresh oregano
1 tablespoon chopped fresh rosemary
3 tablespoons extra-virgin olive oil
1. Wrap each pita in foil and set aside. Adjust the
oven rack to the top position and set the oven
to BROIL/HI.
2. Break the feta into large pieces and place
in a shallow, small baking dish. Sprinkle the
red pepper flakes and a few grinds of black
pepper over the feta, followed by the tomatoes,
oregano, and rosemary. Drizzle the oil over the
top. Place the baking dish and the foil-wrapped
pitas in the oven. Broil until the feta is soft and
warm and the oil sizzles, about 8 minutes.
Remove the baking dish from the oven and let
cool slightly. Remove the pitas from the oven,
discard the foil, and cut into triangles. Serve the
feta with the pita triangles for dipping.
• VARIATION: OLIVES AND PEPPERSSubstitute 1⁄2 cup chopped roasted bell
peppers and 1⁄4 cup coarsely chopped pitted
kalamata olives for the tomatoes.
• VARIATION: SHRIMP AND DILLSubstitute 8 small peeled deveined shrimp
for the tomatoes. Substitute 2 tablespoons
chopped fresh dill for the rosemary and
oregano. Use a shallow 4-cup baking dish.
PRO TIP
Pita rounds aren’t the only breads that you can
heat up in the oven. You can also wrap tortillas
or slices of good country-style bread in foil,
and bake or broil until heated through.

C H A P T E R N A M E | 4 5

BAKED RICE WITH SAUSAGE AND PEPPERS
Serves 4
Oven setting: BROIL; CONVECTION/BAKE
This recipe showcases how you can use two different oven functions to make one
delicious casserole. First, the sausage and peppers are broiled until beautifully browned.
Then, you add the rice and broth and bake everything together.
3 sweet Italian sausages, casings removed,
roughly crumbled
1 tablespoon extra-virgin olive oil
1 medium yellow onion, finely chopped
1 medium red bell pepper, seeded and finely
chopped
2 garlic cloves, minced
1⁄2 teaspoon dried oregano1⁄2 teaspoon kosher salt1⁄2 teaspoon freshly ground black pepper
13⁄4 cups low-sodium chicken broth
11⁄4 cups long-grain white rice
2 tablespoons chopped fresh parsley

1. Adjust the oven rack to the highest position
and set the oven to BROIL/HI. Place the
sausage and oil in a 21⁄2-quart casserole dish
and toss to combine. Broil until the sausage
sizzles and begins to brown, about 15 minutes.
Remove the baking dish from the oven and stir
in the onion, bell pepper, garlic, oregano, salt,
and black pepper. Continue to broil, stirring
halfway through cooking, until the vegetables
begin to soften and brown, about 15 minutes.
RICE SWAP
If you would like to make this with brown rice,
add 1 cup long-grain brown rice and 21⁄2 cups
broth and cook for about 1 hour total.
2. Remove the dish from the oven and stir in the
broth and rice. Cover the dish with a double
layer of foil, tightly crimping it around the edges
so steam doesn’t escape during cooking. (If
steam escapes, the rice won’t cook through.)
Adjust the oven rack to the middle position and
set the oven to CONVECTION/BAKE 450°F.
Return the covered casserole dish to the oven
and bake until the rice has absorbed all the
broth and is fully cooked, about 35 minutes. If
the rice is still soupy, continue to bake until all
the broth is absorbed and the rice is tender for
a few minutes longer. Remove the casserole
dish from the oven and let cool, covered, for
10 minutes. Discard the foil, stir in the parsley,
and serve.
• VARIATION: CHICKEN-ARTICHOKE RICESubstitute 3⁄4 pound boneless, skinless chicken
thighs or breasts, cut into 2-inch pieces, for
the sausages. Substitute 1 (15-ounce) can
drained artichoke hearts for the bell pepper
and substitute dried thyme for the oregano.
Serve with lemon wedges.
• VARIATION: BLACK BEANS AND RICEOmit the sausage and bell pepper. Increase the
chopped onion to 1 large onion and add 1⁄4 cup
chopped fresh cilantro and 1⁄2 jalapeño chile,
finely minced, along with the onion. Broil, stirring
halfway through cooking, until the vegetables
begin to soften and brown, about 15 minutes.
Stir in 1 (15-ounce) can of rinsed black beans
along with the rice and broth. (For a vegetarian
dish, substitute low-sodium vegetable broth for
the chicken broth.) Serve with chopped fresh
cilantro, sour cream, and lime wedges.
REHEAT YOUR LEFTOVERS
Reheating food in the microwave is fast but you
tend to sacrifice crisp crusts and other textures
that made the food delicious the first time. When
reheating in the countertop oven, use BAKE
mode. Most baked dishes, like lasagna and
casseroles, can be reheated at 350°F for about
20 minutes. If you want the food to retain
moisture, cover with an oven-safe lid or foil.
For sliced roasted meats, like turkey, add a little
broth to the pan first, which will prevent the
meat from drying out.
B R O I L | 4 7

4 8 | C O U N T E R T O P O V E N
SMOKY LIME-GLAZED SALMON
Serves 4
Oven setting: BROIL
With a mixture of chipotle chile powder and smoked paprika in the spice rub,
this broiled salmon mimics the grill’s smoky flavor.
1 tablespoon canola oil
1 tablespoon light brown sugar
1 tablespoon smoked paprika
1 tablespoon chipotle chile powder
1 teaspoon kosher salt1⁄2 teaspoon ground cumin
1⁄4 teaspoon ground black pepper
4 (6-ounce) salmon fillets
3 tablespoons fresh lime juice
2 tablespoons agave nectar or honey
1 tablespoon finely grated lime zest
1. Grease a 9-by-13-inch baking dish with the oil.
In a small bowl, stir together the sugar, paprika,
chile powder, salt, cumin, and pepper. Rub the
salmon fillets with the spices, place them flesh
side down in the baking dish, and set aside. In
another small bowl, stir together the lime juice,
agave nectar, and lime zest.
2. Adjust the oven rack to the middle position
and set the oven to BROIL/HI. Place the
baking dish in the oven and broil until the
salmon’s skin is crisp and sizzling and the flesh
is about halfway cooked, about 12 minutes.
Remove the baking dish and flip the fillets.
Return to the oven and broil until the salmon is
nearly cooked through and begins to brown,
6 to 7 minutes. Brush the lime glaze over the
fillets, then pour any remaining glaze around
the fish. Broil until the salmon is still a bit soft
in the center, 3 to 4 minutes longer. Transfer
the fillets to plates and serve drizzled with
accumulated pan juices.
• VARIATION: GINGER-SOY GLAZEOmit the rub and season the salmon with salt
and pepper. Coat fish in a mixture of 1 table-
spoon white sesame seeds and 1 tablespoon
black sesame seeds. For the glaze, substitute
3 tablespoons soy sauce, 3 tablespoons
minced fresh ginger, and 1 tablespoon dark
brown sugar for the lime juice, agave nectar
(or honey), and lime zest.
• VARIATION: POMEGRANATE-HONEY GLAZEOmit the rub and season the salmon with
salt and pepper. For the glaze, substitute
3 tablespoons pomegranate syrup, 2 table-
spoons honey, and 1 tablespoon finely grated
orange zest for the lime juice, agave nectar,
(or honey) and lime zest.


BROILED LAMB CHOPS WITH ROSEMARY AND GARLIC
Serves 4
Oven setting: BROIL
It’s the dead of winter and you’re craving grilled meat—time to fire up the broiler!
In 15 minutes, you’ll have perfect medium-rare chops. Serve with a salad or the Roasted
Cauliflower with Cumin and Lemon (page 37), which is delicious at room temperature.
1⁄2 cup extra-virgin olive oil
2 garlic cloves, minced
1 tablespoon minced fresh rosemary
1 teaspoon lightly crushed pink peppercorns
1 teaspoon kosher salt1⁄2 teaspoon freshly ground black pepper1⁄4 teaspoon red pepper flakes (optional)
8 lamb rib chops, each about 1-inch thick
1. In a small bowl, stir together the oil, garlic,
rosemary, pink peppercorns, salt, black pepper,
and red pepper flakes (if using). Rub the lamb
chops, including the bones, with the spices and
place them on a plate. (The lamb chops can be
covered in plastic wrap and refrigerated for up
to 1 day.)
2. Adjust the oven rack to the highest position.
Place the WOLF GOURMET broil rack in the
baking pan and set the oven to BROIL/HI. Place
the lamb chops on the broil rack and broil the
lamb chops until brown and sizzling, about
10 minutes. Flip the chops and continue to broil
until the fat along the bone is rendered and
crisp, about 5 minutes longer for medium-rare.
Remove the chops from the broiler and serve.
• VARIATION: OREGANO, MINT, AND LEMONSubstitute 2 tablespoons chopped fresh
oregano, 2 tablespoons chopped fresh mint,
1 tablespoon lemon juice, and 1 tablespoon
finely grated lemon zest for the rosemary.
• VARIATION: POMEGRANATE- GLAZED CHOPSFor the rub, reduce the oil to 1⁄4 cup and
omit the rosemary. Whisk together 1⁄3 cup
pomegranate syrup and 1⁄3 cup red pepper
jelly (or apricot jam). Broil the lamb chops for
8 minutes, then remove the WOLF GOURMET
baking pan from the oven and brush the chops
with half of the glaze. Broil for 2 minutes,
then flip the chops and continue to broil for
6 minutes longer. Remove the pan and brush
the chops with the remaining glaze. Broil until
caramelized, 3 to 4 minutes. Remove the
chops from the broiler and serve.
PRO TIP
Meat needs a few minutes to rest after being
broiled to let the juices redistribute. A few
minutes of patience definitely pays off with the
juiciest chops.
B R O I L | 5 1

MACARONI AND CHEESE WITH BREAD CRUMBS
Serves 6
Oven setting: CONVECTION/BAKE; BROIL
What sets this recipe apart from the others is the fact that you don’t have to
precook the pasta or make a cheese sauce; you just toss everything together and pop it in
the oven. To be sure the pasta cooks through, use elbow macaroni.

M A C A R O N I A N D C H E E S E
1 tablespoon unsalted butter, softened
2 cups whole milk
1 cup heavy cream1⁄2 teaspoon dry mustard powder1⁄2 teaspoon hot pepper sauce (optional)1⁄2 teaspoon kosher salt1⁄2 teaspoon freshly ground black pepper
2 cups shredded sharp cheddar cheese
1 cup shredded fontina or mozzarella cheese
8 ounces elbow macaroni, uncooked
B R E A D C R U M B S
2 tablespoons unsalted butter, melted
3 cups panko bread crumbs
11⁄2 cups grated Parmigiano-Reggiano
cheese
2 tablespoons finely chopped fresh parsley
1. Adjust the oven rack to the lowest position
and preheat the oven to CONVECTION/BAKE
375°F. Lightly grease a baking dish with the
softened butter.
2. Make the bread crumbs: In a medium bowl,
stir together the melted butter, panko, 3⁄4 cup
of the Parmigiano-Reggiano, and the parsley
and set aside.
3. Make the macaroni and cheese: In a large
bowl, whisk together the milk, cream, mustard
powder, hot pepper sauce (if using), salt,
and pepper. Stir in the cheddar and fontina
cheeses, then mix in the macaroni.
4. Pour the macaroni mixture into the baking dish.
Cover with a double layer of foil, tightly crimping
it around the edges so steam doesn’t escape
during cooking. (If steam escapes, the pasta
won’t cook through.) Bake for 30 minutes.
5. Remove the baking dish from the oven, discard
the foil, and stir the macaroni and cheese.
Sprinkle the bread crumbs evenly over the top
and continue to bake until golden brown, about
30 minutes longer. Sprinkle the remaining 3⁄4 cup
Parmigiano-Reggiano over the top and set the
oven to BROIL/HI. Broil until the top is golden
brown, 2 to 4 minutes. Remove the dish from
the oven and let stand for 5 minutes. Serve.
• VARIATION: THREE-CHEESE AND TRUFFLEAdd 1 cup of your favorite crumbled blue
cheese and as many shaved truffles or as
much truffle oil as you like to the milk and
cheese mixture.
• VARIATION: SPICY MAC WITH BACON CRUMBSIncrease the hot pepper sauce to 2 teaspoons
and whisk 1 tablespoon (or more to taste)
chopped chipotle chiles in adobo sauce into
the milk and cheese mixture. For the bread
crumbs, add 2 teaspoons smoked paprika
(pimentón) and substitute 11⁄2 cups finely
chopped and cooked bacon for 3⁄4 cup of
the Parmigiano-Reggiano. (You’ll still sprinkle 3⁄4 cup Parmigiano-Reggiano over the macaroni
and cheese before broiling.)
B R O I L | 5 3

5 4 | C O U N T E R T O P O V E N
L IKE A SPA FOR BREAD DOUGH
Bread recipes often state: “Let the dough rise in a warm,
draft-free spot.” Now, you have that perfect place.
The default temperature for the PROOF mode is 80°F, the optimal temperature for a
yeasted dough to rise. Why? Yeast, when added to flour and water, starts to eat the
sugars in the flour and releases carbon dioxide, which makes the dough grow in bulk.
The yeast cells are most active when it’s warm and move more slowly when it’s cool
(their activity nearly shuts down at about 40°F, just above refrigerator temperature).
While bread bakers often use the word proof to talk about bread dough’s last rise after a loaf is shaped, the PROOF mode can be used for any of the rises. A long, slow rise encourages the dough to develop a lot of flavor, so for some recipes, like artisan-style bread loaves, you’ll often let the dough rise at a cool temperature first, and then do the last rise with the PROOF mode.
For more simply flavored yeast doughs, like the sandwich bread (page 53) and Parker House Rolls (page 55) here, as well as focaccia, pizza, and sticky buns, you can use PROOF both times.
A good rule of thumb: Whenever you see something akin to that “warm, draft-free spot” called for in a yeast dough recipe, use the PROOF mode. After you proof, you can of course use the oven to bake the bread.
PROOF

MULTIGRAIN BREAD
Makes 1 loaf
Oven setting: PROOF/BAKE
This soft, wholesome bread is perfect for sandwiches. It will hold up at room temperature
for at least three days or you can slice it and freeze it for up to one month. To thaw, just set
the oven to BAKE 350°F and warm the slices for a few minutes.
1⁄2 cup unsweetened multigrain cereal (such
as a five-grain or seven-grain blend)
2 cups boiling water
1 packet (21⁄4 teaspoons) active dry yeast
4 tablespoons molasses or honey
11⁄2 cups whole-wheat flour
1 cup all-purpose flour
1 tablespoon canola oil plus extra for
the bowl
2 teaspoons kosher salt
3 tablespoons chia seeds or flax seeds
3 tablespoons sunflower seeds
1. Place the multigrain cereal in the bowl of a
stand mixer and add the boiling water. Let
the mixture stand until cooled to about 110°F,
about 15 minutes. Sprinkle in the yeast and
whisk in 1 tablespoon of the molasses. Cover
the bowl with plastic wrap and let stand until
the yeast is foamy, about 5 minutes.
2. Adjust the oven rack to the lowest position and
set the oven to PROOF. Attach the dough hook
to the stand mixer and add the whole-wheat
flour, all-purpose flour, the remaining 3 table-
spoons molasses, the oil, salt, 2 tablespoons
of the chia (or flax) seeds, and 2 tablespoons of
the sunflower seeds. Mix on low speed until the
flour is nearly incorporated. Increase the speed
to medium and knead the dough until smooth
and elastic, about 10 minutes.
3. Grease a large bowl with a little oil. Scrape
the dough into the greased bowl and turn the
dough to coat. Cover the bowl with plastic
wrap and place in the oven to proof until the
dough doubles in size, 1 to 11⁄4 hours.
4. Turn the dough out onto a very lightly greased
surface and roll into an 8-inch-long cylinder.
Lightly grease an 8- or 9-inch loaf pan and
place the dough in the pan. Lightly brush the
top of the dough with water and sprinkle the
remaining 1 tablespoon chia (or flax) seeds and
the remaining 1 tablespoon sunflower seeds
over the top, pressing down gently so they
stick. Cover loosely with plastic wrap and place
in the oven to proof until the dough doubles in
size, about 30 minutes.
continued...
P R O O F | 5 5

5 6 | C O U N T E R T O P O V E N
5. Remove the pan from the oven and discard
the plastic wrap. Use a sharp knife to cut
1 lengthwise slash down the center of the loaf.
Set the oven to CONVECTION/BAKE 350°F.
Place the pan in the oven and bake until the
bread is golden brown, 35 to 45 minutes.
Transfer to a wire rack to cool until warm,
then turn the loaf out of the pan and let cool
completely before slicing.
PRO TIP
If you like, you can play around with the grains
and seeds in this mix. For example, instead
of a multigrain cereal, try rolled oats or quinoa
flakes. Instead of sunflower seeds, try
pumpkin seeds.
• VARIATION: MULTIGRAIN ROLLSMake the dough as instructed. Lightly oil
a 9-by-13-inch baking pan. After the first
proofing, turn the dough out onto a lightly
greased surface and divide the dough into
4 equal pieces. Cut each piece into 6 smaller
pieces to yield 24 pieces of dough. Working
with 1 piece at a time, pull and fold the dough
ball under itself and then pinch it closed on
the bottom. Roll with the palm of your hand to
seal the seams and then, starting in 1 corner
of the pan, place the rolled dough ball seam
side down in the prepared pan. Repeat until all
the dough balls are in the pan. Brush the tops
lightly with water and sprinkle with the remain-
ing seeds. Use kitchen shears (or a sharp
knife) to snip an X into the top of each dough
ball. Proceed with the recipe as instructed.
• VARIATION: MULTIGRAIN BÂTARDMake the dough as instructed. After the first
proofing, turn the dough out onto a lightly
greased surface and shape into a 12-by-
4-inch free-form loaf. Lightly grease the WOLF
GOURMET baking pan and place the dough
loaf diagonally in the pan. Just before baking,
use a sharp knife to make 3 diagonal slashes
in the top of the dough. Proceed with the
recipe as instructed.

PARKER HOUSE ROLLS
Makes about 32 rolls
Oven setting: PROOF/BAKE
Bring these pillowy pull-apart rolls to a dinner party or a winter potluck and they’ll be gone
before you know it! If 32 rolls seem like too many (which is hard to believe considering how fast
they tend to disappear), you can halve the recipe and bake them in a 9-inch square pan.
13 tablespoons unsalted butter1⁄4 cup warm water (100°F to 110°F)
1 packet (21⁄4 teaspoons) active dry yeast
3 tablespoons sugar
1 cup whole milk
3 large eggs, beaten
2 teaspoons kosher salt
41⁄2 cups all-purpose flour, plus more for
shaping the dough
1. Set aside 1 tablespoon of the butter in a small
bowl to soften. Stir together the water, yeast,
and 1⁄4 teaspoon of the sugar in the bowl of a
stand mixer. Cover the bowl with plastic wrap
and let stand until the yeast is foamy, about
5 minutes.
2. Meanwhile, heat 8 tablespoons of the butter
and the milk in a saucepan over medium heat
or in the microwave until the butter is melted
(be careful not to let the milk simmer; it should
just be hot enough to melt the butter).
3. Add the milk-butter mixture to the yeast
mixture, followed by the remaining sugar, eggs,
and salt. Add 41⁄2 cups of the flour and use a
wooden spoon to stir everything together until
the flour is moistened. Attach the dough hook
to the stand mixer and mix on medium-low
speed until the dough becomes sticky, about
1 minute. Increase the speed to medium and
knead the dough until smooth and it just comes
away from the sides of the bowl. (If the dough
doesn’t come together, add the remaining flour,
1 tablespoon at a time, up to 1⁄4 cup.)
4. Adjust the oven rack to the lowest position
and set the oven to PROOF. Turn the dough
out onto a lightly floured surface and knead
by hand a few times until the dough is smooth
and supple. Use 1⁄2 tablespoon of the softened
butter to grease a large bowl. Place the dough
in the greased bowl and then lightly pat the top
of the dough with the remaining 1⁄2 tablespoon
softened butter. Cover the bowl loosely with
plastic wrap and place in the oven to proof until
the dough doubles in size, 11⁄4 to 11⁄2 hours.
5. Melt the remaining 4 tablespoons butter.
Generously brush a 9-by-13-inch baking pan
with some of the melted butter. Turn the dough
out onto a lightly floured surface (the dough
will be very soft and will deflate as soon as you
touch it). Roll the dough into a 12-by-16-inch
continued...
P R O O F | 5 7


rectangle, then generously brush the dough
with the melted butter. Use a sharp knife to cut
the dough lengthwise into 4 strips, then cut the
strips crosswise into 8 strips. You should have
32 rectangles (it’s okay if some of the corners
are uneven, they will rise again during the sec-
ond proofing).
6. Working with 1 piece at a time, fold the rectan-
gle in half lengthwise, leaving the bottom half
about 1⁄4 inch longer than the top half, then fold
the longer piece up over the seam to close the
roll, like an envelope. Starting in 1 corner of
the pan, place the folded rectangle seam side
down in the prepared pan. Repeat until all the
dough rectangles are in the pan. Brush the
tops lightly with the remaining melted butter.
Cover loosely with plastic wrap and place in the
oven to proof until puffed, about 20 minutes.
7. Remove the pan from the oven and discard the
plastic wrap. Set the oven to CONVECTION/
BAKE 350°F. Place the pan in the oven and
bake until the rolls are golden brown, about
20 minutes. Transfer to a wire rack to cool
slightly. Serve warm or at room temperature,
brushing with more melted butter (if you like).
• VARIATION: BUTTERY ROLLS WITH FLAKY SALTMake the dough and bake the rolls as
instructed. While the rolls are baking, melt
2 tablespoons of butter. Remove the rolls from
the oven and brush the melted butter on the
hot rolls. Sprinkle 2 teaspoons Maldon sea salt
flakes over the hot buttered rolls, crushing the
flakes slightly between your fingers as you go.
Serve warm or at room temperature.
• VARIATION: PARKER HOUSE PULLMAN LOAFTo make 2 Pullman loaves, make the dough
as instructed. After the first proofing, turn
the dough out onto a lightly floured surface
and cut the dough in half. Brush two 9-inch
loaf pans with melted butter. Roll out 1 of the
pieces of dough into a 6-by-10-inch rectangle.
With the short end facing you, brush the top
with melted butter. Starting with the bottom
end, fold the dough up to the middle then fold
down the top end like a business letter. Using
both hands, gently turn the dough over seam
side down in the greased loaf pan. Brush
the top with melted butter and cover loosely
with plastic wrap. Repeat with the remaining
dough. Place the loaf pans in the oven to
proof about 20 minutes. Proceed with the
recipe as instructed.
PRO TIP
Try sprinkling the Parker House Rolls with
chopped fresh herbs, like rosemary or thyme,
or spices, like cumin or caraway seeds. You
can also flavor them with garlic by adding one
smashed clove to the melted butter and letting
it steep for a few minutes before brushing.
P R O O F | 5 9

6 0 | C O U N T E R T O P O V E N
I T ’S FOR MORE THAN JUST BREAKFAST
Yes, the countertop oven is much more than
a toaster, but it still makes stellar toast.
Since the countertop oven cavity is so large, the TOAST mode works especially
well when you’re toasting large pieces of bread (like two 13-inch-long pieces of split
baguette for a sandwich or garlic bread) or a lot of pieces (up to six standard bread
slices) to serve a crowd.
Like any good toaster oven, this one is simple to use. (Who wants to futz with too many options for toast?) When you turn the bezel to TOAST mode, you don’t have to think about temperature or time. Instead, you can use the TEMP/DARKNESS knob to adjust to your preferred shade of toast. Then, use the TIME/SLICE knob to choose the number of pieces you’re putting in the oven.
Because the oven uses both the bottom and top heating elements in TOAST mode, you’ll usually want to set the oven rack to the middle position.
TOAST


ROASTED PEAR AND SHAVED PECORINO CROSTINI
Serves 6
Oven setting: CONVECTION/ROAST; TOAST
Tossed in a sweet and tangy mixture of cranberry juice, balsamic vinegar, and honey,
pears become beautifully glazed as they roast in the oven. They’re absolutely delicious
on this crostini or served in an arugula and Pecorino salad.

R O A S T E D P E A R S1⁄4 cup cranberry juice or grape juice
2 tablespoons balsamic vinegar
1 tablespoon extra-virgin olive oil
1 tablespoon honey
Kosher salt
Freshly ground black pepper
2 large pears, halved, cored, and cut into 1⁄4-inch wedges
C R O S T I N I
1 baguette, thinly sliced on the bias1⁄2 cup extra-virgin olive oil
11⁄2 cups shaved Pecorino Romano cheese
1. Make the pears: Adjust the oven rack to
the lowest position and preheat the oven to
CONVECTION/ROAST 375°F. In a large bowl,
whisk together the cranberry (or grape) juice,
balsamic vinegar, oil, and honey. Season with a
few pinches of salt and pepper. Add the pears
and toss to coat.
2. Arrange the pears in a single layer on a rimmed
9-by-13-inch baking sheet and cover with foil.
Roast the pears until they just begin to soften,
about 12 minutes. Discard the foil and continue
to roast until the pears are tender and golden
brown, 10 to 15 minutes longer. Transfer the
baking sheet to a wire rack and let the pears
cool to room temperature. (Transfer to an air-
tight container and refrigerate for up to 4 days.)
3. Make the crostini: Set the oven to TOAST.
Brush both sides of each baguette slice with
oil, then arrange them on the oven rack.
Toast the bread until golden brown (no need
to flip the bread).
4. Remove the bread from the oven. Top each
piece of bread with some of the Pecorino
Romano (a vegetable peeler works great for
shaving the cheese), followed by 1 or 2 slices of
roast pear. Serve at room temperature or toast
until the pears are just warm, about 2 minutes.
• VARIATION: FIG AND GORGONZOLASubstitute 10 ripe figs, halved, for the pears.
Omit the cranberry (or grape) juice. Roast the
figs, cut side up and uncovered, until they are
warm, about 15 minutes. Substitute crumbled
Gorgonzola Dolce for the Pecorino Romano.
• VARIATION: PEACH AND RICOTTASubstitute 2 medium peaches for the pears.
Omit the black pepper. Substitute 3⁄4 cup fresh
ricotta for the Pecorino Romano. Drizzle more
honey over the crostini just before serving.
PRO TIP
For a more generous appetizer, you can turn
your crostini into larger pieces simply by slicing
your baguette on a sharp angle. To cut some-
thing “on the bias” means to slice it at an angle
(usually about 45 degrees). Your crostini will
have more surface area for toppings and will
have a more dramatic appearance on a platter.
T O A S T | 6 3

6 4 | C O U N T E R T O P O V E N
ROASTED TOMATO SOUP WITH CHEESY GARLIC-PARMESAN CROSTINI
Serves 4
Oven setting: CONVECTION/ROAST; TOAST; BROIL
Roasting vegetables, especially tomatoes, concentrates their flavors so they become incredibly
sweet. You can serve the roasted tomatoes as is in a salad or tossed in pasta, but
they really add an incredible depth of flavor to this pureed soup served with toasted crostini.
T O M AT O S O U P
4 pounds plum tomatoes, halved1⁄4 cup extra-virgin olive oil, plus more for
serving
2 small shallots, thinly sliced
2 garlic cloves, minced
2 teaspoons finely chopped fresh thyme
1 tablespoon light brown sugar or honey
2 teaspoons kosher salt1⁄2 teaspoon freshly ground black pepper
1 tablespoon chopped fresh basil
21⁄2 to 3 cups low-sodium chicken broth or
vegetable broth
C R O S T I N I1⁄2 baguette, thinly sliced on the bias
6 tablespoons extra-virgin olive oil
1 garlic clove, peeled3⁄4 cup grated Parmigiano-Reggiano cheese
2 tablespoons chopped fresh parsley
1. Make the soup: Adjust the oven rack to the
lowest position and preheat the oven to
CONVECTION/ROAST 375°F. Place the toma-
toes, oil, shallots, garlic, thyme, brown sugar
(or honey), salt, and pepper on the WOLF
GOURMET baking pan and toss to combine.
Arrange the tomatoes into a single layer and
roast until very soft and the pan juices begin to
caramelize, 1 to 11⁄4 hours. Remove from the
oven and let cool.
2. Working in batches if necessary, scrape the
tomatoes and their juices into a blender or food
processor along with the basil. Add 1 cup of
the chicken (or vegetable) broth and puree,
adding more broth, 1⁄2 cup at a time, until the
soup reaches the desired thickness. Transfer
the soup to a medium saucepan and warm
over low heat while making the crostini.
3. Make the crostini: Set the oven to TOAST.
Brush both sides of each bread slice with oil,
then arrange on the oven rack. Toast until
golden brown (no need to flip the bread).

4. Remove the bread from the oven and, working
quickly, rub 1 side of each baguette slice with
the garlic clove and sprinkle with Parmigiano-
Reggiano. Set the baguette slices on the
WOLF GOURMET baking pan and broil until
the cheese is just golden, about 2 minutes.
Remove from the oven and sprinkle with pars-
ley. Ladle the soup into bowls and serve with
the crostini and drizzled with a little olive oil.
• VARIATION: SLOW-ROASTED TOMATOESSubstitute 2 pounds grape or cherry tomatoes
for the plum tomatoes. Reduce the oil to
2 tablespoons and omit the shallots and brown
sugar. Roast the tomatoes at CONVECTION/
ROAST 325°F until shriveled and browned
and the pan juices are concentrated and nicely
caramelized, 11⁄2 to 2 hours.
• VARIATION: CURRIED SQUASH SOUP Substitute 2 butternut squash, halved length-
wise and seeded, for the tomatoes. Increase
the shallots to 1 cup and add 2 cups apple
cider (or water) and 2 tablespoons curry
powder to a baking dish. Roast the squash
cut side down, covered with foil, until soft,
about 45 minutes. Uncover and continue to
roast until the squash is very soft and begins to
brown on top, about 20 minutes longer. Scoop
out the flesh, discarding the peel, and place in
the blender or food processor along with the
pan’s contents. Add the chicken (or vegetable
broth) as directed. Serve.
T O A S T | 6 5
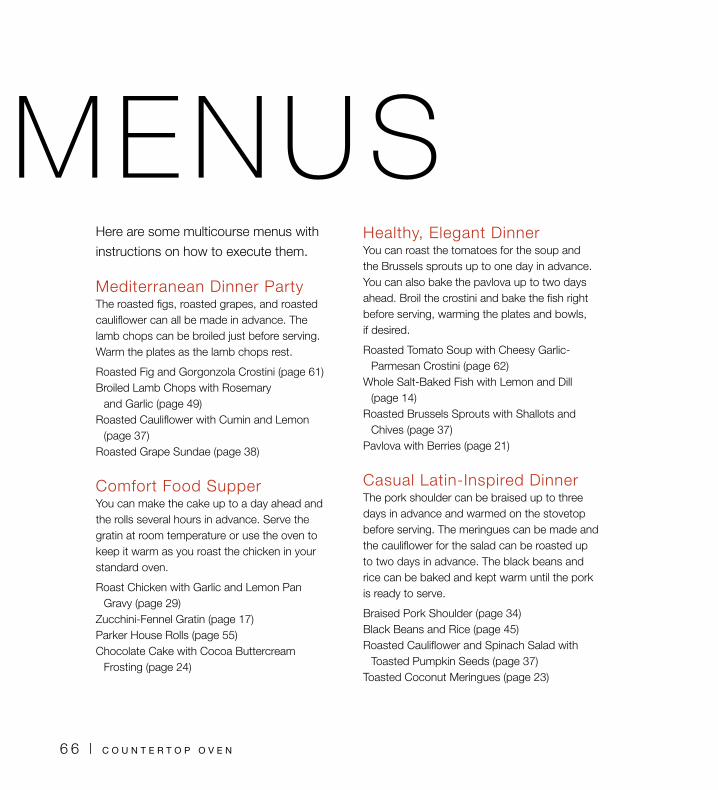
6 6 | C O U N T E R T O P O V E N
Here are some multicourse menus with
instructions on how to execute them.
Mediterranean Dinner PartyThe roasted figs, roasted grapes, and roasted cauliflower can all be made in advance. The lamb chops can be broiled just before serving. Warm the plates as the lamb chops rest.
Roasted Fig and Gorgonzola Crostini (page 61)Broiled Lamb Chops with Rosemary
and Garlic (page 49)Roasted Cauliflower with Cumin and Lemon
(page 37)Roasted Grape Sundae (page 38)
Comfort Food SupperYou can make the cake up to a day ahead and the rolls several hours in advance. Serve the gratin at room temperature or use the oven to keep it warm as you roast the chicken in your standard oven.
Roast Chicken with Garlic and Lemon Pan Gravy (page 29)
Zucchini-Fennel Gratin (page 17)Parker House Rolls (page 55)Chocolate Cake with Cocoa Buttercream
Frosting (page 24)
Healthy, Elegant DinnerYou can roast the tomatoes for the soup and the Brussels sprouts up to one day in advance. You can also bake the pavlova up to two days ahead. Broil the crostini and bake the fish right before serving, warming the plates and bowls, if desired.
Roasted Tomato Soup with Cheesy Garlic- Parmesan Crostini (page 62)
Whole Salt-Baked Fish with Lemon and Dill (page 14)
Roasted Brussels Sprouts with Shallots and Chives (page 37)
Pavlova with Berries (page 21)
Casual Latin-Inspired Dinner The pork shoulder can be braised up to three days in advance and warmed on the stovetop before serving. The meringues can be made and the cauliflower for the salad can be roasted up to two days in advance. The black beans and rice can be baked and kept warm until the pork is ready to serve.
Braised Pork Shoulder (page 34)Black Beans and Rice (page 45)Roasted Cauliflower and Spinach Salad with
Toasted Pumpkin Seeds (page 37)Toasted Coconut Meringues (page 23)
MENUS

880023800