Embed Size (px)
Citation preview

7/28/2019 Phlebotomy for Healthcare Providers 2012
http://slidepdf.com/reader/full/phlebotomy-for-healthcare-providers-2012 1/119
PHLEBOTOMYFOR
HEALTHCARE
PROVIDERS
By
KLINS B. OLIVER, RP-RN,KU-RN,UAE-RN,IVTN CCRN, CRNS, CPS

7/28/2019 Phlebotomy for Healthcare Providers 2012
http://slidepdf.com/reader/full/phlebotomy-for-healthcare-providers-2012 2/119
By the end of this training, we are to:
Ю To learn the foundation of
Phlebotomy practice.-History
-Anatomy and Physiology
Ю To know what specific skills
and ability we are to have in the
course of our practice.
Ю Indications and Limitations of
Phlebotomy Practice

7/28/2019 Phlebotomy for Healthcare Providers 2012
http://slidepdf.com/reader/full/phlebotomy-for-healthcare-providers-2012 3/119
By the end of this training, we are to:Ю To learn the 4 Basic
Procedural Approaches inPhlebotomy and their Scopes
-Venipuncture
-Finger Prick
-Heel Prick-Arterial Blood Gas Sampling-Smearing – Microscopical Scope-Order of the Draw
Ю To learn and master Safetyand Infection Protocols along
with the Legal Aspects of the
Practice

7/28/2019 Phlebotomy for Healthcare Providers 2012
http://slidepdf.com/reader/full/phlebotomy-for-healthcare-providers-2012 4/119
Overview of
Phlebotomy

7/28/2019 Phlebotomy for Healthcare Providers 2012
http://slidepdf.com/reader/full/phlebotomy-for-healthcare-providers-2012 5/119
• Phlebotomists – they draw blood for
laboratory analysis and monitoring. They
also handle a wide range of specimens
from blood – other body fluids.
• An allied collaborative health
provision.

7/28/2019 Phlebotomy for Healthcare Providers 2012
http://slidepdf.com/reader/full/phlebotomy-for-healthcare-providers-2012 6/119
Skills Required
• Ability to insert needles quickly and
accurately
• Maintain sterility of the sample
• Adheres to safety standards anddeals with different emergent
situations
• Good bedside attitude
• Maintains good and accurate
records.

7/28/2019 Phlebotomy for Healthcare Providers 2012
http://slidepdf.com/reader/full/phlebotomy-for-healthcare-providers-2012 7/119
History of Phlebotomy
-An in-depth view of the
foundations of practice

7/28/2019 Phlebotomy for Healthcare Providers 2012
http://slidepdf.com/reader/full/phlebotomy-for-healthcare-providers-2012 8/119
5th Century B.C.
HIPPOCRATES
4 HUMORS
• Blood,
• Phlegm,
• Yellow Bile
(Chole)
• Black Bile(Melan Chole)

7/28/2019 Phlebotomy for Healthcare Providers 2012
http://slidepdf.com/reader/full/phlebotomy-for-healthcare-providers-2012 9/119
Middle Ages
• Surgeons and
Barbers are
sought after for
Blood Lettingservices
whenever they
feel something
not good in their body.
7/28/2019 Phlebotomy for Healthcare Providers 2012
http://slidepdf.com/reader/full/phlebotomy-for-healthcare-providers-2012 10/119
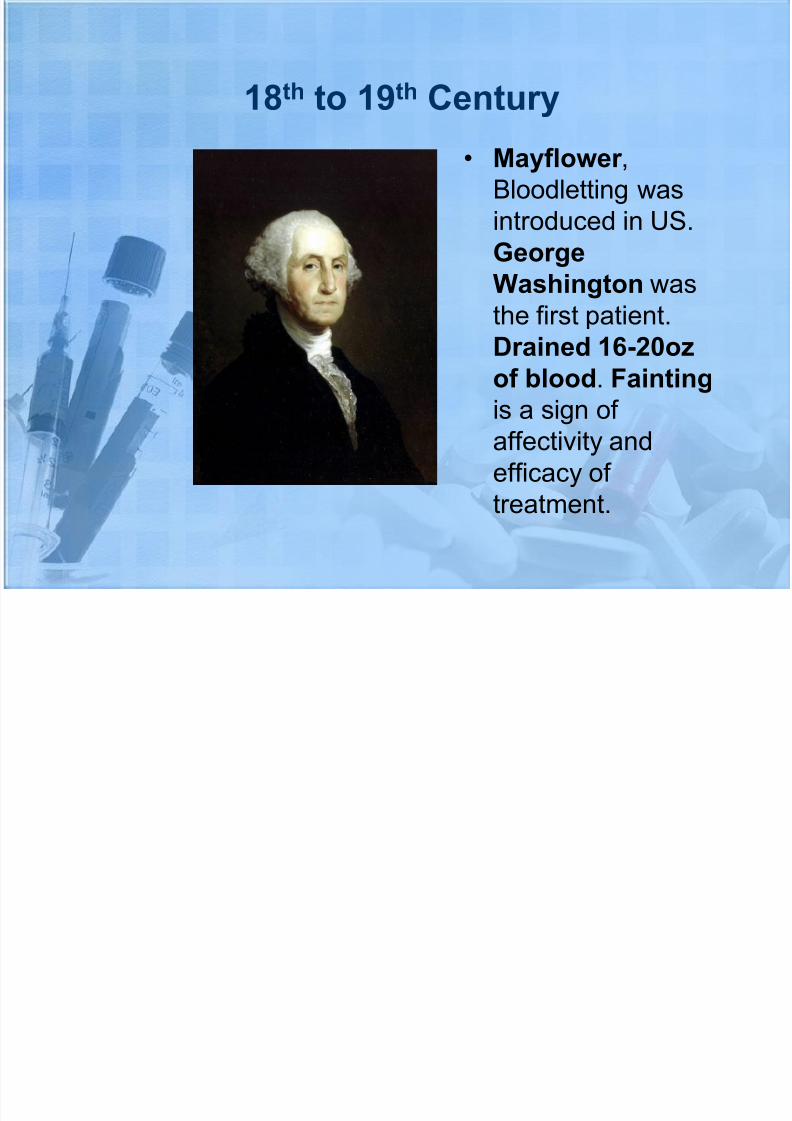
18th to 19th Century
• Mayflower ,
Bloodletting was
introduced in US.
George
Washington wasthe first patient.
Drained 16-20oz
of blood. Fainting
is a sign of affectivity and
efficacy of
treatment.

7/28/2019 Phlebotomy for Healthcare Providers 2012
http://slidepdf.com/reader/full/phlebotomy-for-healthcare-providers-2012 11/119
1875 – 1900’s Dark Ages
• phlebotomy
was declared
witchcraft and
quackery.• Collection and
draining of
blood was
considered as agrave offense
payable with
life.
7/28/2019 Phlebotomy for Healthcare Providers 2012
http://slidepdf.com/reader/full/phlebotomy-for-healthcare-providers-2012 12/119

7/28/2019 Phlebotomy for Healthcare Providers 2012
http://slidepdf.com/reader/full/phlebotomy-for-healthcare-providers-2012 13/119
ANATOMY AND PHYSIOLOGY

7/28/2019 Phlebotomy for Healthcare Providers 2012
http://slidepdf.com/reader/full/phlebotomy-for-healthcare-providers-2012 14/119
Vein and Artery
Anatomy and Physiology
• Veins are unlike arteriesin that they are• 1)superficial,
• 2) display dark red blood at
skin surface and• 3) have no pulsation
• Vein Anatomy
-Tunica Adventitia
- Tunica Media
- Tunica Intima
- Valves

7/28/2019 Phlebotomy for Healthcare Providers 2012
http://slidepdf.com/reader/full/phlebotomy-for-healthcare-providers-2012 15/119
Tunica Adventitia
-the outer layer of the vessel
• Connective tissue
• Contains the arteries
and veins supplyingblood to vessel wall

7/28/2019 Phlebotomy for Healthcare Providers 2012
http://slidepdf.com/reader/full/phlebotomy-for-healthcare-providers-2012 16/119
Tunica Media
-the middle layer of the vessel
• Contains nerve
endings and muscle
fibers
• The vasoconstrictive
response occurs at
this layer

7/28/2019 Phlebotomy for Healthcare Providers 2012
http://slidepdf.com/reader/full/phlebotomy-for-healthcare-providers-2012 17/119
Tunica Intima
the inner layer of the vessel
One layer of endothelial
No nerve endings
Surface for plateletaggregation w/traumaand recognition of foreign object at thislevel

7/28/2019 Phlebotomy for Healthcare Providers 2012
http://slidepdf.com/reader/full/phlebotomy-for-healthcare-providers-2012 18/119
Valves
present in MOST veins
• Prevent backflow and
pooling
• More in lower extremities and longer
vessels
• Vein dilates at valve
attachment

7/28/2019 Phlebotomy for Healthcare Providers 2012
http://slidepdf.com/reader/full/phlebotomy-for-healthcare-providers-2012 19/119
Arteries
• Walls contains
smooth and hard
muscles that
withstand bloodpressure.
• Transports clean
blood away from the
heart.(in exemption tothe function of the
pulmonary artery.

7/28/2019 Phlebotomy for Healthcare Providers 2012
http://slidepdf.com/reader/full/phlebotomy-for-healthcare-providers-2012 20/119
Vein and Artery Cross-section

7/28/2019 Phlebotomy for Healthcare Providers 2012
http://slidepdf.com/reader/full/phlebotomy-for-healthcare-providers-2012 21/119

7/28/2019 Phlebotomy for Healthcare Providers 2012
http://slidepdf.com/reader/full/phlebotomy-for-healthcare-providers-2012 22/119
Vein and Artery
ARTERIES
• Transport blood away
from the heart.
• Have relativelynarrow lumens and
more muscle elastic
tissue.
• Transports blood at
higher pressure.
• Do not have valves.
VEINS
• Transports blood
towards the heart.
• Have relatively widelumens and less
muscle elastic tissue.
• Transports blood atlower pressure.
• Contains valves.

7/28/2019 Phlebotomy for Healthcare Providers 2012
http://slidepdf.com/reader/full/phlebotomy-for-healthcare-providers-2012 23/119
BLOOD AND
COMPARTMENTALIZATION

7/28/2019 Phlebotomy for Healthcare Providers 2012
http://slidepdf.com/reader/full/phlebotomy-for-healthcare-providers-2012 24/119
FUNCTIONS OF THE BLOOD
• Transportation of gases, nutrients and
waste products
• Transport of processed molecules
• Transport of regulatory molecules
• Regulation of Ph and osmosis
• Maintenance of body temperature• Protection against foreign substances
• Clot formation

7/28/2019 Phlebotomy for Healthcare Providers 2012
http://slidepdf.com/reader/full/phlebotomy-for-healthcare-providers-2012 25/119
THE SYSTEMIC CIRCULATION

7/28/2019 Phlebotomy for Healthcare Providers 2012
http://slidepdf.com/reader/full/phlebotomy-for-healthcare-providers-2012 26/119
COMPOSITION AND COMPONMENTS
PLASMAIs a pale yellow fluid that consists of about 91% water,
7% proteins and 2% other substances.
Water – acts as solvent, medium of suspension
Proteins – maintains osmotic pressure
Ions – maintains acid-base balance

7/28/2019 Phlebotomy for Healthcare Providers 2012
http://slidepdf.com/reader/full/phlebotomy-for-healthcare-providers-2012 27/119
COMPOSITION AND COMPONMENTS
PLASMAIons – maintains acid-base balance
Nutrients – source of energy and “the building blocks” of
more complex moleculesGases – involves in aerobic respiration
Waste products –breakdown of protein metabolism
(UREA/AMMONIA SALTS) erythrocytes (BILIRUBIN) and
anaerobic respiration (LACTIC ACID)Regulatory substances – catalyze chemical reactions.

7/28/2019 Phlebotomy for Healthcare Providers 2012
http://slidepdf.com/reader/full/phlebotomy-for-healthcare-providers-2012 28/119
COMPOSITION AND COMPONMENTS
FORMED
ELEMENTS

7/28/2019 Phlebotomy for Healthcare Providers 2012
http://slidepdf.com/reader/full/phlebotomy-for-healthcare-providers-2012 29/119

7/28/2019 Phlebotomy for Healthcare Providers 2012
http://slidepdf.com/reader/full/phlebotomy-for-healthcare-providers-2012 30/119
SITES FOR PHLEBOTOMY
Digital Vessels
-Along lateral aspects
fingers, infiltrate easily,
painful, difficult toimmobilize and should be
your LAST RESORT
Metacarpal Vessels
-Located between joints &metacarpal bones (act as
natural splint). Formed by
union of digital veins.

7/28/2019 Phlebotomy for Healthcare Providers 2012
http://slidepdf.com/reader/full/phlebotomy-for-healthcare-providers-2012 31/119
SITES FOR PHLEBOTOMY
• Cephalic (Intern’s Vein)
-Starts at radial aspect of
wrist
-Access anywhere along
entire length (BEWAREof radial artery/nerve)
• Medial Cephalic (“On
ramp” to Cephalic Vein)
-Joins the Cephalic belowthe elbow bend
-Accepts larger gauge
catheters, but may be a
difficult angle to hit and
maintain

7/28/2019 Phlebotomy for Healthcare Providers 2012
http://slidepdf.com/reader/full/phlebotomy-for-healthcare-providers-2012 32/119

7/28/2019 Phlebotomy for Healthcare Providers 2012
http://slidepdf.com/reader/full/phlebotomy-for-healthcare-providers-2012 33/119
SITES FOR PHLEBOTOMY
• Medial Basilic
- Empties into the Basilic
vein running parallel to
tendons, so it is not
always well defined. Accepts larger gauge
catheters.
- BEWARE of Brachial
Artery/Nerve

7/28/2019 Phlebotomy for Healthcare Providers 2012
http://slidepdf.com/reader/full/phlebotomy-for-healthcare-providers-2012 34/119
Certain areas are to be avoided when
choosing a site:
Extensive scars fromburns and surgery - itis difficult to puncturethe scar tissue and
obtain a specimen.The upper extremity
on the side of aprevious mastectomy
- test results may beaffected because of lymphedema.

7/28/2019 Phlebotomy for Healthcare Providers 2012
http://slidepdf.com/reader/full/phlebotomy-for-healthcare-providers-2012 35/119

7/28/2019 Phlebotomy for Healthcare Providers 2012
http://slidepdf.com/reader/full/phlebotomy-for-healthcare-providers-2012 36/119
Certain areas are to be avoided when
choosing a site:
Cannula/fistula/heparinlock - hospitals havespecial policies regardingthese devices. In general,
blood should not bedrawn from an arm with afistula or cannula withoutconsulting the attendingphysician.
Edematous extremities -tissue fluid accumulationalters test results.

7/28/2019 Phlebotomy for Healthcare Providers 2012
http://slidepdf.com/reader/full/phlebotomy-for-healthcare-providers-2012 37/119
INDICATIONS FOR PHLEBOTOMY

7/28/2019 Phlebotomy for Healthcare Providers 2012
http://slidepdf.com/reader/full/phlebotomy-for-healthcare-providers-2012 38/119
INDICATIONS
CBC
To differentiate bacterial or viral infection
LFT’s: to determine liver function
: to differentiate between diagnosis of cholecystitis & pancreatitis
Renal function
BUN Creatinine: before giving drugs. Ex. Contrast
dye, Gentamycin Cultures
To assess Coagulation status
Blood typing/RH status

7/28/2019 Phlebotomy for Healthcare Providers 2012
http://slidepdf.com/reader/full/phlebotomy-for-healthcare-providers-2012 39/119
FOUR BASIC PROCEDURAL
APPROACHES IN PHLEBOTOMY
-Venipuncture
-Finger Pricking
-Heel Pricking
-Arterial Blood Gas Sampling

7/28/2019 Phlebotomy for Healthcare Providers 2012
http://slidepdf.com/reader/full/phlebotomy-for-healthcare-providers-2012 40/119
Venipuncture

7/28/2019 Phlebotomy for Healthcare Providers 2012
http://slidepdf.com/reader/full/phlebotomy-for-healthcare-providers-2012 41/119
• Other name: Blood-Draw/ Phlebotomy
• is the process of obtaining intravenous access for the
purpose of intravenous therapy or obtaining a sample
of venous blood.
• is one of the most routinely performed invasive
procedures and is carried out for two reasons, to obtain
blood for diagnostic purposes or to monitor levels of
blood components
7/28/2019 Phlebotomy for Healthcare Providers 2012
http://slidepdf.com/reader/full/phlebotomy-for-healthcare-providers-2012 42/119

7/28/2019 Phlebotomy for Healthcare Providers 2012
http://slidepdf.com/reader/full/phlebotomy-for-healthcare-providers-2012 43/119

7/28/2019 Phlebotomy for Healthcare Providers 2012
http://slidepdf.com/reader/full/phlebotomy-for-healthcare-providers-2012 44/119
Needles - The gaugenumber indicates the boresize: the larger the gaugenumber, the smaller theneedle bore. Needles areavailable for evacuated
systems and for use witha syringe, single draw or butterfly system.
Holder/Adapter - usewith the evacuatedcollection system.
Tourniquet - Wipe off with alcohol and replacefrequently
7/28/2019 Phlebotomy for Healthcare Providers 2012
http://slidepdf.com/reader/full/phlebotomy-for-healthcare-providers-2012 45/119
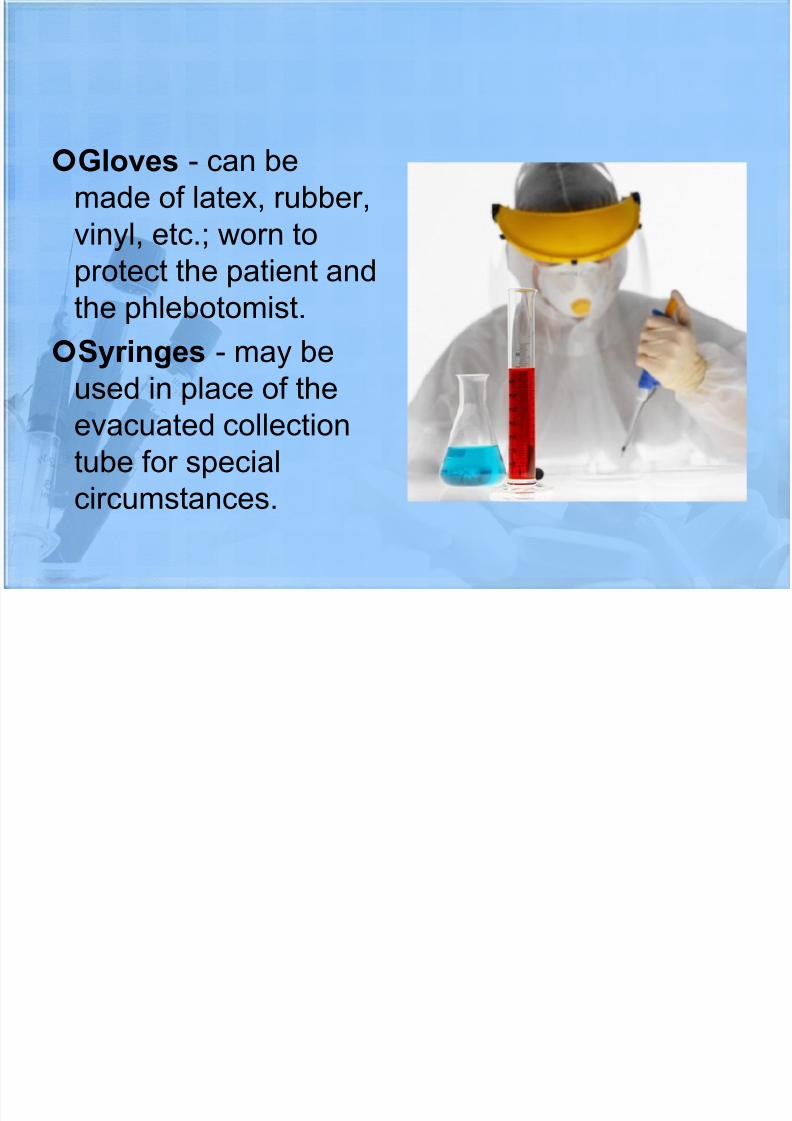
Gloves - can be
made of latex, rubber,
vinyl, etc.; worn to
protect the patient andthe phlebotomist.
Syringes - may be
used in place of the
evacuated collectiontube for special
circumstances.

7/28/2019 Phlebotomy for Healthcare Providers 2012
http://slidepdf.com/reader/full/phlebotomy-for-healthcare-providers-2012 46/119
ORDER FORM / REQUISITION A requisition form must accompany each sample
submitted to the laboratory. This requisition form mustcontain the proper information in order to process thespecimen. The essential elements of the requisition formare:
1. Patient's surname, first name, and middle initial.2. Patient's ID number.
3. Patient's date of birth and sex. (NOTE NEWGUIDELINES)
4. Requesting physician's complete name.5. Source of specimen. This information must be given
when requesting microbiology, cytology, fluid analysis,
or other testing where analysis and reporting is sitespecific.6. Date and time of collection.7. Initials of phlebotomist.8. Indicating the test(s) requested.

7/28/2019 Phlebotomy for Healthcare Providers 2012
http://slidepdf.com/reader/full/phlebotomy-for-healthcare-providers-2012 47/119
An example of a simple requisition form with
the essential elements is shown below:

7/28/2019 Phlebotomy for Healthcare Providers 2012
http://slidepdf.com/reader/full/phlebotomy-for-healthcare-providers-2012 48/119

7/28/2019 Phlebotomy for Healthcare Providers 2012
http://slidepdf.com/reader/full/phlebotomy-for-healthcare-providers-2012 49/119
Collect the sample in the appropriate
container. Recognize complications associated
with the phlebotomy procedure.
Assess the need for samplerecollection and/or rejection.
Label the collection tubes at thebedside or drawing area.
Promptly send the specimens with therequisition to the laboratory.

7/28/2019 Phlebotomy for Healthcare Providers 2012
http://slidepdf.com/reader/full/phlebotomy-for-healthcare-providers-2012 50/119

7/28/2019 Phlebotomy for Healthcare Providers 2012
http://slidepdf.com/reader/full/phlebotomy-for-healthcare-providers-2012 51/119

7/28/2019 Phlebotomy for Healthcare Providers 2012
http://slidepdf.com/reader/full/phlebotomy-for-healthcare-providers-2012 52/119
PROCEDURE FOR SITE SELECTION
Palpate and trace the path of veins with the
index finger . Arteries pulsate, are most elastic, and
have a thick wall. Thrombosed veins lack resilience,
feel cord-like, and roll easily.
If superficial veins are not readily apparent, youcan force blood into the vein by massaging the
arm from wrist to elbow, tap the site with index
and second finger, apply a warm, damp washcloth
to the site for 5 minutes, or lower the extremity over the bedside to allow the veins to fill.
7/28/2019 Phlebotomy for Healthcare Providers 2012
http://slidepdf.com/reader/full/phlebotomy-for-healthcare-providers-2012 53/119
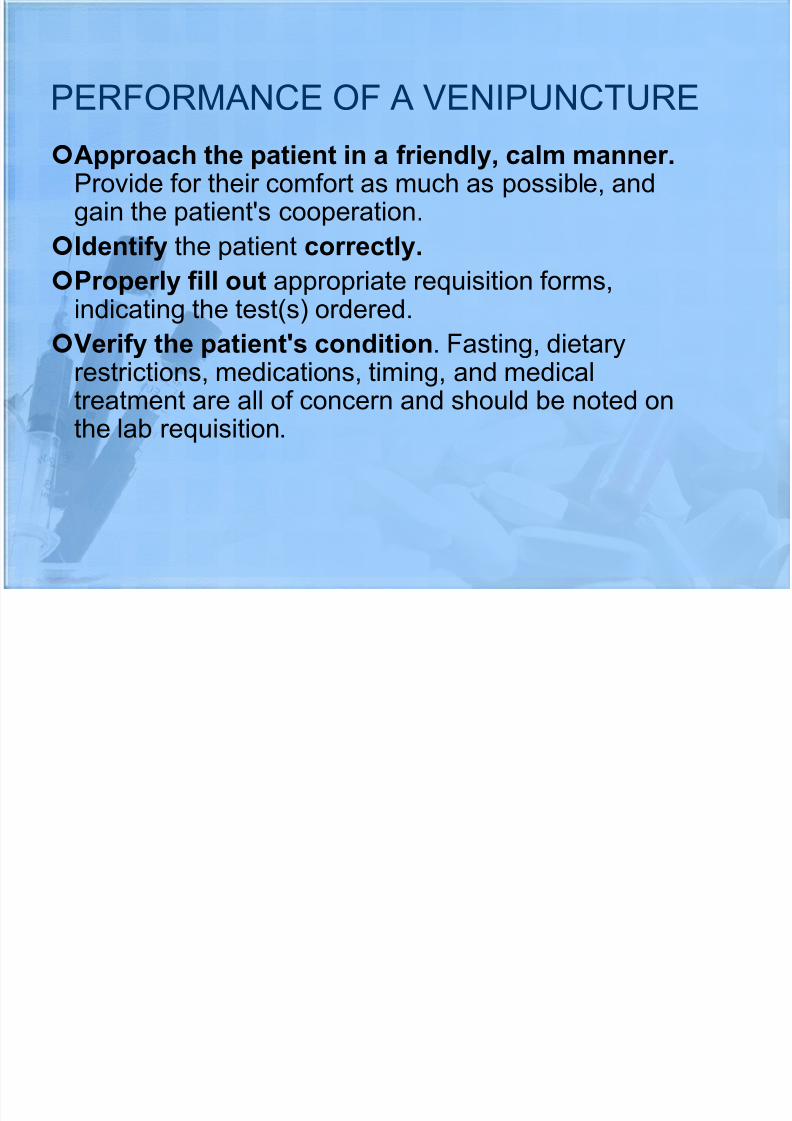
PERFORMANCE OF A VENIPUNCTURE
Approach the patient in a friendly, calm manner.Provide for their comfort as much as possible, andgain the patient's cooperation.
Identify the patient correctly.
Properly fill out appropriate requisition forms,indicating the test(s) ordered.
Verify the patient's condition. Fasting, dietaryrestrictions, medications, timing, and medicaltreatment are all of concern and should be noted on
the lab requisition.

7/28/2019 Phlebotomy for Healthcare Providers 2012
http://slidepdf.com/reader/full/phlebotomy-for-healthcare-providers-2012 54/119
Check for any allergies to antiseptics, adhesives,or latex by observing for armbands and/or byasking the patient.
Position the patient. The patient should either sitin a chair, lie down or sit up in bed. Hyperextend
the patient's arm.Apply the tourniquet 3-4 inches above the
selected puncture site. Do not place too tightly or leave on more than 2 minutes.

7/28/2019 Phlebotomy for Healthcare Providers 2012
http://slidepdf.com/reader/full/phlebotomy-for-healthcare-providers-2012 55/119

7/28/2019 Phlebotomy for Healthcare Providers 2012
http://slidepdf.com/reader/full/phlebotomy-for-healthcare-providers-2012 56/119
When the last tube to be drawn is filling, removethe tourniquet.
Remove the needle from the patient's arm usinga swift backward motion.
Press down on the gauze once the needle is outof the arm, applying adequate pressure to avoidformation of a hematoma.
Dispose of contaminated materials/supplies indesignated containers.
Mix and label all appropriate tubes at the patientbedside.
Deliver specimens promptly to the laboratory

7/28/2019 Phlebotomy for Healthcare Providers 2012
http://slidepdf.com/reader/full/phlebotomy-for-healthcare-providers-2012 57/119
FINGERSTICK

7/28/2019 Phlebotomy for Healthcare Providers 2012
http://slidepdf.com/reader/full/phlebotomy-for-healthcare-providers-2012 58/119
WHY PERFORM FINGER PRICKS?
• Fingersticks (or fingerpricks) are small
superficial wounds that provide venous blood for
some blood tests. Various methods are used to open the
wound, which produces no more than a few drops
of blood. The procedure can be painful, but is typicallyquicker and less distressing than venipuncture.
• After a droplet has formed, venous blood is sucked up in
a capillary tube, usually relying on surface tension, butsometimes by indirect suction.

7/28/2019 Phlebotomy for Healthcare Providers 2012
http://slidepdf.com/reader/full/phlebotomy-for-healthcare-providers-2012 59/119

7/28/2019 Phlebotomy for Healthcare Providers 2012
http://slidepdf.com/reader/full/phlebotomy-for-healthcare-providers-2012 60/119

7/28/2019 Phlebotomy for Healthcare Providers 2012
http://slidepdf.com/reader/full/phlebotomy-for-healthcare-providers-2012 61/119
EQUIPMENT
Lancets – for pricking
either manually or
automatically.
Lancing Device –
automatic pricking.
Gauze/Cotton balls
Gloves
Capillary tubes or micro containers

7/28/2019 Phlebotomy for Healthcare Providers 2012
http://slidepdf.com/reader/full/phlebotomy-for-healthcare-providers-2012 62/119
PERFORMANCE OF A
FINGERSTICK:Follow the procedure as outlined above for
greeting and identifying the patient. As always,
properly fill out appropriate requisition forms,
indicating the test(s) ordered.
Verify the patient's condition. Fasting, dietaryrestrictions, medications, timing, and medical
treatment are all of concern and should be noted on
the lab requisition.

7/28/2019 Phlebotomy for Healthcare Providers 2012
http://slidepdf.com/reader/full/phlebotomy-for-healthcare-providers-2012 63/119

7/28/2019 Phlebotomy for Healthcare Providers 2012
http://slidepdf.com/reader/full/phlebotomy-for-healthcare-providers-2012 64/119
7/28/2019 Phlebotomy for Healthcare Providers 2012
http://slidepdf.com/reader/full/phlebotomy-for-healthcare-providers-2012 65/119
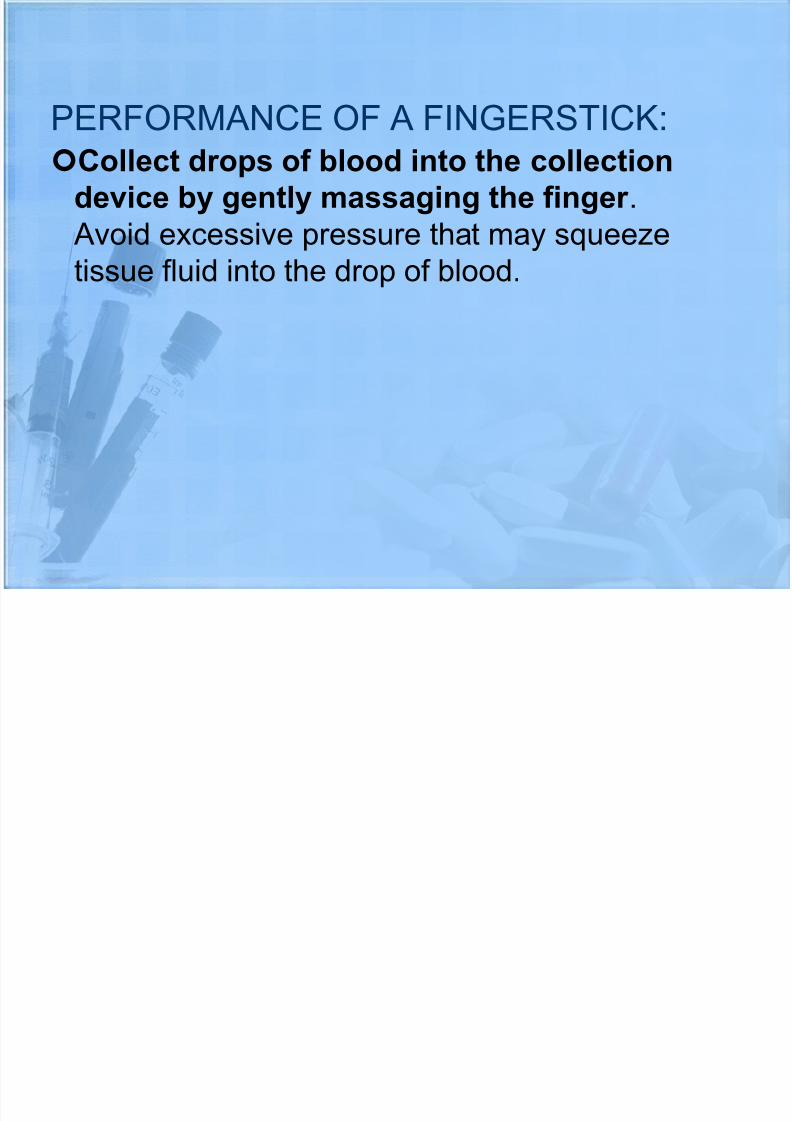
PERFORMANCE OF A FINGERSTICK:
Collect drops of blood into the collection
device by gently massaging the finger .
Avoid excessive pressure that may squeeze
tissue fluid into the drop of blood.
PERFORMANCE OF A

7/28/2019 Phlebotomy for Healthcare Providers 2012
http://slidepdf.com/reader/full/phlebotomy-for-healthcare-providers-2012 66/119
PERFORMANCE OF A
FINGERSTICK:Cap, rotate and invert the collection device to
mix the blood collected.
Have the patient hold a small gauze pad
over the puncture site for a couple of minutes
to stop the bleeding.
Dispose of contaminated materials/supplies
in designated containers.
Label all appropriate tubes at the patientbedside.
Deliver specimens promptly to the laboratory.

7/28/2019 Phlebotomy for Healthcare Providers 2012
http://slidepdf.com/reader/full/phlebotomy-for-healthcare-providers-2012 67/119
HEEL PRICKING

7/28/2019 Phlebotomy for Healthcare Providers 2012
http://slidepdf.com/reader/full/phlebotomy-for-healthcare-providers-2012 68/119

7/28/2019 Phlebotomy for Healthcare Providers 2012
http://slidepdf.com/reader/full/phlebotomy-for-healthcare-providers-2012 69/119

7/28/2019 Phlebotomy for Healthcare Providers 2012
http://slidepdf.com/reader/full/phlebotomy-for-healthcare-providers-2012 70/119
CONTRAINDICATION
Edema – Notify physician for medical treatment
Injury or anomalies that preclude putting pressure
on the foot – May cause osteomyelitis
Areas that are bruised or injured by multiple
previous heel sticks – Do not attempt to extract
Poor perfusion – Use heel warmer
Local infection – Notify physician for antibiotic
treatment

7/28/2019 Phlebotomy for Healthcare Providers 2012
http://slidepdf.com/reader/full/phlebotomy-for-healthcare-providers-2012 71/119
MATERIALS
Stillete ( lancet
device)
Alcohol swabsCotton wool balls
Capillary blood
tubes
Blood spot card
Gloves
PERFORMANCE OF A HEEL

7/28/2019 Phlebotomy for Healthcare Providers 2012
http://slidepdf.com/reader/full/phlebotomy-for-healthcare-providers-2012 72/119
PERFORMANCE OF A HEEL
STICK: Check physician’s order. Ensure the correct
specimen obtained for correct children.
Check if child allergic to any material usesuch as to iodine.
Prepare the child and the family by explainabout the procedure. We could ask for assistant to comfort the child.
PERFORMANCE OF A HEEL
7/28/2019 Phlebotomy for Healthcare Providers 2012
http://slidepdf.com/reader/full/phlebotomy-for-healthcare-providers-2012 73/119
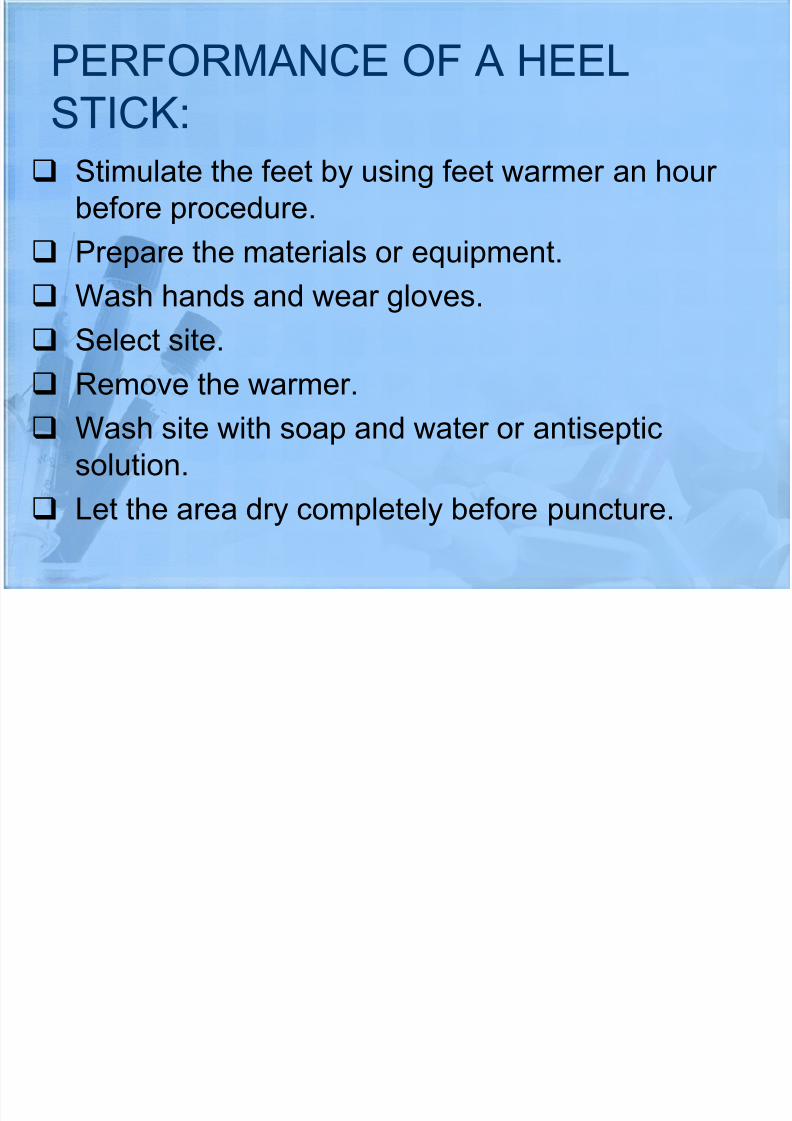
PERFORMANCE OF A HEEL
STICK:
Stimulate the feet by using feet warmer an hour
before procedure.
Prepare the materials or equipment.
Wash hands and wear gloves.
Select site.
Remove the warmer.
Wash site with soap and water or antisepticsolution.
Let the area dry completely before puncture.
PERFORMANCE OF A HEEL

7/28/2019 Phlebotomy for Healthcare Providers 2012
http://slidepdf.com/reader/full/phlebotomy-for-healthcare-providers-2012 74/119
PERFORMANCE OF A HEEL
STICK: Using dominant hand puncture the site with 90°
angel with quick and forceful motion.
Remove the lancet immediately.
Apply pressure to leg with counter pressure toball of foot and allow blood drop to form.
Wipe away the 1st blood using a sterile cottonball.
PERFORMANCE OF A HEEL

7/28/2019 Phlebotomy for Healthcare Providers 2012
http://slidepdf.com/reader/full/phlebotomy-for-healthcare-providers-2012 75/119
PERFORMANCE OF A HEEL
STICK:
Wipe the puncture site with sterile cotton ball and
apply pressure for 2-3 mins.
If needed apply bandage
Discard equipment in the appropriate container.
Label the specimen and put in appropriate bag
or container along with laboratory form or slip.
Remove gloves and wash hand. Send specimen to laboratory.

7/28/2019 Phlebotomy for Healthcare Providers 2012
http://slidepdf.com/reader/full/phlebotomy-for-healthcare-providers-2012 76/119

7/28/2019 Phlebotomy for Healthcare Providers 2012
http://slidepdf.com/reader/full/phlebotomy-for-healthcare-providers-2012 77/119
S i h dli

7/28/2019 Phlebotomy for Healthcare Providers 2012
http://slidepdf.com/reader/full/phlebotomy-for-healthcare-providers-2012 78/119
Specimen handling
Ensure that blood gas samples are free of air bubbles.
Place the tube horizontally so that the blood is
drawn by capillary action and does not collect air
bubbles that can alter results. Apply caps to ends of
tube.
Capillary blood gas samples should be analyzed
within 10 minutes or should be kept horizontally on
ice for up to 1 hour, and the tube must be rolledprior to analysis.

7/28/2019 Phlebotomy for Healthcare Providers 2012
http://slidepdf.com/reader/full/phlebotomy-for-healthcare-providers-2012 79/119

7/28/2019 Phlebotomy for Healthcare Providers 2012
http://slidepdf.com/reader/full/phlebotomy-for-healthcare-providers-2012 80/119

7/28/2019 Phlebotomy for Healthcare Providers 2012
http://slidepdf.com/reader/full/phlebotomy-for-healthcare-providers-2012 81/119
Why do ABGs
• Precise measurement of acid – base balance of the blood
• Check lungs’ ability to oxygenate blood and to
remove CO2
• Assess respiratory function
• O2 and CO2 levels determined primarily by
the lungs

7/28/2019 Phlebotomy for Healthcare Providers 2012
http://slidepdf.com/reader/full/phlebotomy-for-healthcare-providers-2012 82/119

7/28/2019 Phlebotomy for Healthcare Providers 2012
http://slidepdf.com/reader/full/phlebotomy-for-healthcare-providers-2012 83/119

7/28/2019 Phlebotomy for Healthcare Providers 2012
http://slidepdf.com/reader/full/phlebotomy-for-healthcare-providers-2012 84/119
Puncture Procedure
Introduce yourself and explain what isordered
a. Patient cooperation needed to help
simplify and minimize painb. if patient refuses, notify physician
Make positive patient I.D.
a. Ask patient their name
b. Check patient I.D. wristband
Put on gloves

7/28/2019 Phlebotomy for Healthcare Providers 2012
http://slidepdf.com/reader/full/phlebotomy-for-healthcare-providers-2012 85/119

7/28/2019 Phlebotomy for Healthcare Providers 2012
http://slidepdf.com/reader/full/phlebotomy-for-healthcare-providers-2012 86/119
Oth P t Sit
7/28/2019 Phlebotomy for Healthcare Providers 2012
http://slidepdf.com/reader/full/phlebotomy-for-healthcare-providers-2012 87/119
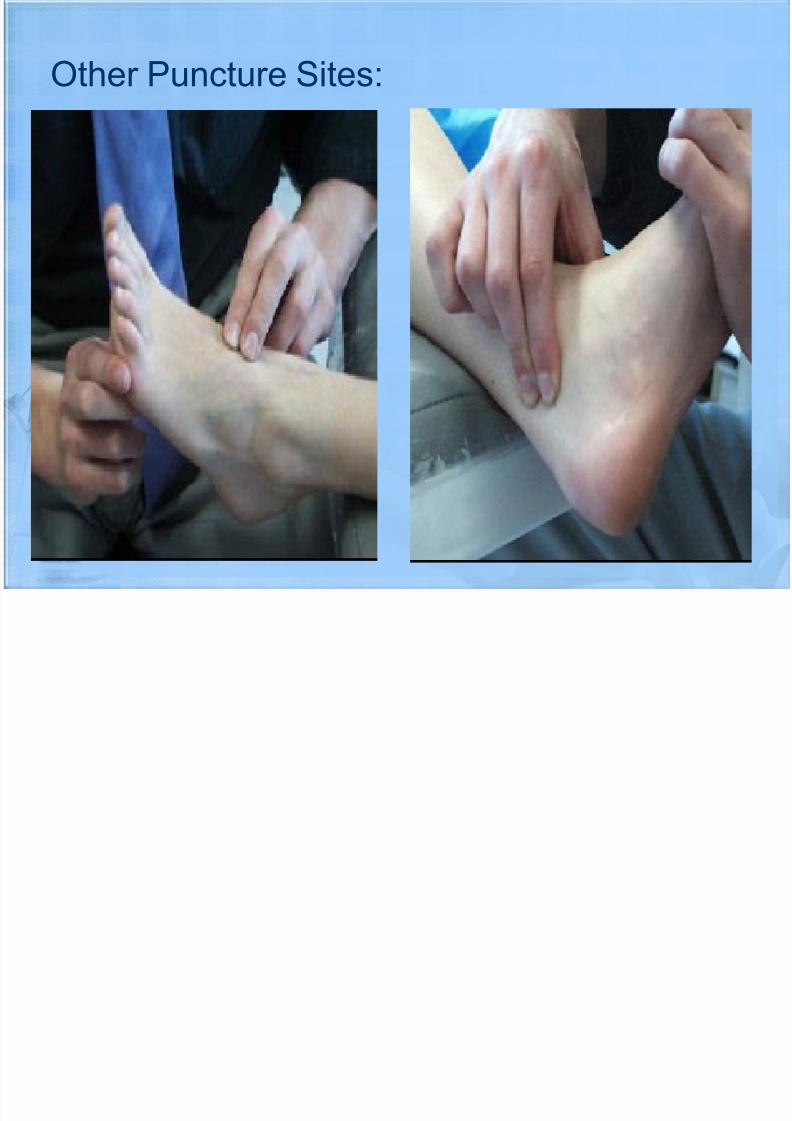
Other Puncture Sites:

7/28/2019 Phlebotomy for Healthcare Providers 2012
http://slidepdf.com/reader/full/phlebotomy-for-healthcare-providers-2012 88/119
Puncture Procedure: Allen’s Test
• When using radials, perform Allen's Test for collateral circulation
A. In a conscious and cooperative patient:
1. compress ulnar and radial arteries at wrist to
obliterate pulse2. have patient clench and release pulse until hand
blanches
3. with radial still compressed, release pressure onulnar artery
4. watch for pinkness to return should “pink up” within10 – 15 second

7/28/2019 Phlebotomy for Healthcare Providers 2012
http://slidepdf.com/reader/full/phlebotomy-for-healthcare-providers-2012 89/119

7/28/2019 Phlebotomy for Healthcare Providers 2012
http://slidepdf.com/reader/full/phlebotomy-for-healthcare-providers-2012 90/119
Performing Allen’s Test
The idea here is to figure out if there is adequate collateral circulationfrom the ulnar artery to perfuse the hand.

7/28/2019 Phlebotomy for Healthcare Providers 2012
http://slidepdf.com/reader/full/phlebotomy-for-healthcare-providers-2012 91/119
Puncture Procedure
• Drape the bed and stabilize the wrist in theposition that gives maximal pulse
• (hyper -extended, using a rolled up towel if
necessary)
• Prepare the site
• Cleanse the chosen area with a alcohol and/or
iodine
• Secure needle to syringe and remove cap from
needle

7/28/2019 Phlebotomy for Healthcare Providers 2012
http://slidepdf.com/reader/full/phlebotomy-for-healthcare-providers-2012 92/119
Puncture Procedure

7/28/2019 Phlebotomy for Healthcare Providers 2012
http://slidepdf.com/reader/full/phlebotomy-for-healthcare-providers-2012 93/119

7/28/2019 Phlebotomy for Healthcare Providers 2012
http://slidepdf.com/reader/full/phlebotomy-for-healthcare-providers-2012 94/119
Angle of Entry

7/28/2019 Phlebotomy for Healthcare Providers 2012
http://slidepdf.com/reader/full/phlebotomy-for-healthcare-providers-2012 95/119
Puncture Procedure
• Slowly advance in one plane
• When the artery is punctured, blood will enter the
syringe –“flash”

7/28/2019 Phlebotomy for Healthcare Providers 2012
http://slidepdf.com/reader/full/phlebotomy-for-healthcare-providers-2012 96/119
Puncture Procedure
• Slowly allow blood to fill syringe
• if no blood appears, remove, change needles, and start
again

7/28/2019 Phlebotomy for Healthcare Providers 2012
http://slidepdf.com/reader/full/phlebotomy-for-healthcare-providers-2012 97/119
Puncture Procedure
• Upon removal of the needle, hold pressure on thepuncture site for at least 5 minutes.
• • Pressure may need to be held longer (> 5 mins) if the
patient is on anticoagulant therapy

7/28/2019 Phlebotomy for Healthcare Providers 2012
http://slidepdf.com/reader/full/phlebotomy-for-healthcare-providers-2012 98/119
Puncture Procedure
• Check for:
• Bleeding
• movement of fingers and tingling sensation
• pulse distal to puncture• if pulse not palpable, notify physician STAT

7/28/2019 Phlebotomy for Healthcare Providers 2012
http://slidepdf.com/reader/full/phlebotomy-for-healthcare-providers-2012 99/119
Post Puncture Procedure
• Remove any air bubbles from sample and cap syringe• • Dispose of needle in sharps container
• Roll syringe to mix heparin with sample
• Immerse in ice
• On lab slip indicate:
• a. FIO2
• b. patient temperature
• c. ventilator parameters
• Deliver to lab

7/28/2019 Phlebotomy for Healthcare Providers 2012
http://slidepdf.com/reader/full/phlebotomy-for-healthcare-providers-2012 100/119
Complications of Arterial Punctures:

7/28/2019 Phlebotomy for Healthcare Providers 2012
http://slidepdf.com/reader/full/phlebotomy-for-healthcare-providers-2012 101/119
Technical Causes of Abnormal

7/28/2019 Phlebotomy for Healthcare Providers 2012
http://slidepdf.com/reader/full/phlebotomy-for-healthcare-providers-2012 102/119
Results:
• Delay in running sample• O2 consumption will continue as will CO2 production –
pH does what CO2 tells it to do
• Iced, sample will last an hour without a change in the
results – un-iced, ABG's can be significantly changed after 10 min
• Venous sample drawn
• Usually this in shocky patient that you expect lowpressures and dark blood
• Should doubt when PO2 is significantly lower thanexpected
• draw venous blood to check comparison or
• redraw sample
Technical Causes of Abnormal

7/28/2019 Phlebotomy for Healthcare Providers 2012
http://slidepdf.com/reader/full/phlebotomy-for-healthcare-providers-2012 103/119
Results:
• Capillary samples• From infants warmed heel
• CAUTION – pay attention to puncture site and sample
type
• ONLY diagnostic values are pH and PaCO2
• PaO2 value is NOT diagnostic
• Heparin
• Sodium Heparin 1% solution should be use ammonium
heparin will alter pH dry lithium heparin is OK• • All unnecessary heparin should be ejected from syringe, excess can
effect results
Technical Causes of Abnormal

7/28/2019 Phlebotomy for Healthcare Providers 2012
http://slidepdf.com/reader/full/phlebotomy-for-healthcare-providers-2012 104/119
Results:
Patient pain a. Can cause hyperventilation or breath holding
b. An anesthetic may be injected prior to stick for
pain, although this hurts probably as much
• Usually 2% lidocaine
• CAUTION – some people allergic to “caines”
Machine errors
a. Improper calibration
b. Air bubbles in electrodes
c. Torn membranes

7/28/2019 Phlebotomy for Healthcare Providers 2012
http://slidepdf.com/reader/full/phlebotomy-for-healthcare-providers-2012 105/119
SMEARING
ANDORDER OF THE DRAW

7/28/2019 Phlebotomy for Healthcare Providers 2012
http://slidepdf.com/reader/full/phlebotomy-for-healthcare-providers-2012 106/119
Indication
1. A blood film or peripheral bloodsmear is a thin layer of blood smeared
on a microscope slide and then stained
in such a way to allow the various bloodcells to be examined microscopically.
Blood films are usually examined to
investigate hematological problems(disorders of the blood) and,
occasionally, to look for parasites within
the blood such as malaria and filaria.

7/28/2019 Phlebotomy for Healthcare Providers 2012
http://slidepdf.com/reader/full/phlebotomy-for-healthcare-providers-2012 107/119
Indication
• Blood films are made by placing adrop of blood on one end of a
slide, and using a spreader
slide to disperse the blood over
the slide's length. The aim is to get
a region where the cells are
spaced far enough apart to becounted and differentiated.
• The slide is left to air dry, after
which the blood is fixed to the
slide by immersing it briefly
in methanol. The fixative is
essential for good staining and
presentation of cellular detail.
After fixation, the slide
is stained to distinguish the cells
from each other.

7/28/2019 Phlebotomy for Healthcare Providers 2012
http://slidepdf.com/reader/full/phlebotomy-for-healthcare-providers-2012 108/119
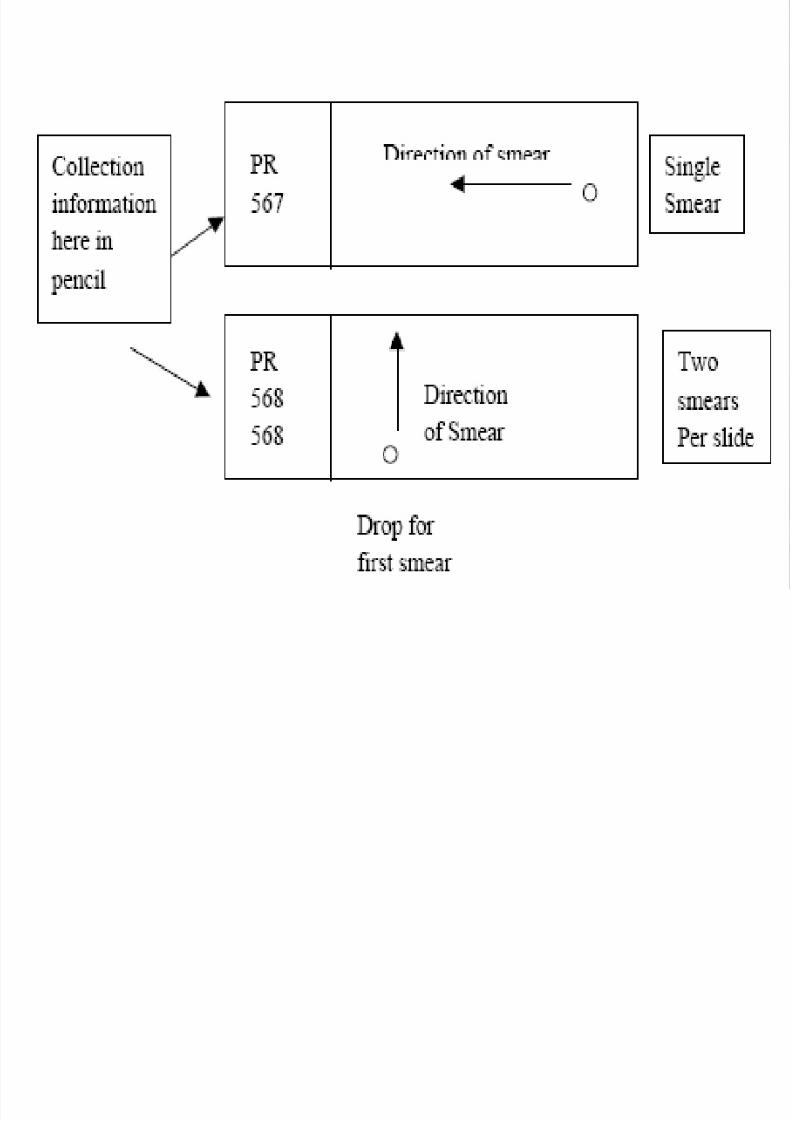
Blood Smearing
1. A single smear can be made per slide (smear running
the length of the slide) or two (or even three) smears
can share a slide, with the smears running the width of
the slide. Putting two smears per slide saves on weight
(glass is heavy) for field trips, and storage space.
2. It is easiest to use microscope slides with a frostedend, so that identifying information can be writtenthere with pencil. Compare different pencils
to find one that does not yield labels that rub off orwash off in the methanol dip.
Warning:
7/28/2019 Phlebotomy for Healthcare Providers 2012
http://slidepdf.com/reader/full/phlebotomy-for-healthcare-providers-2012 109/119
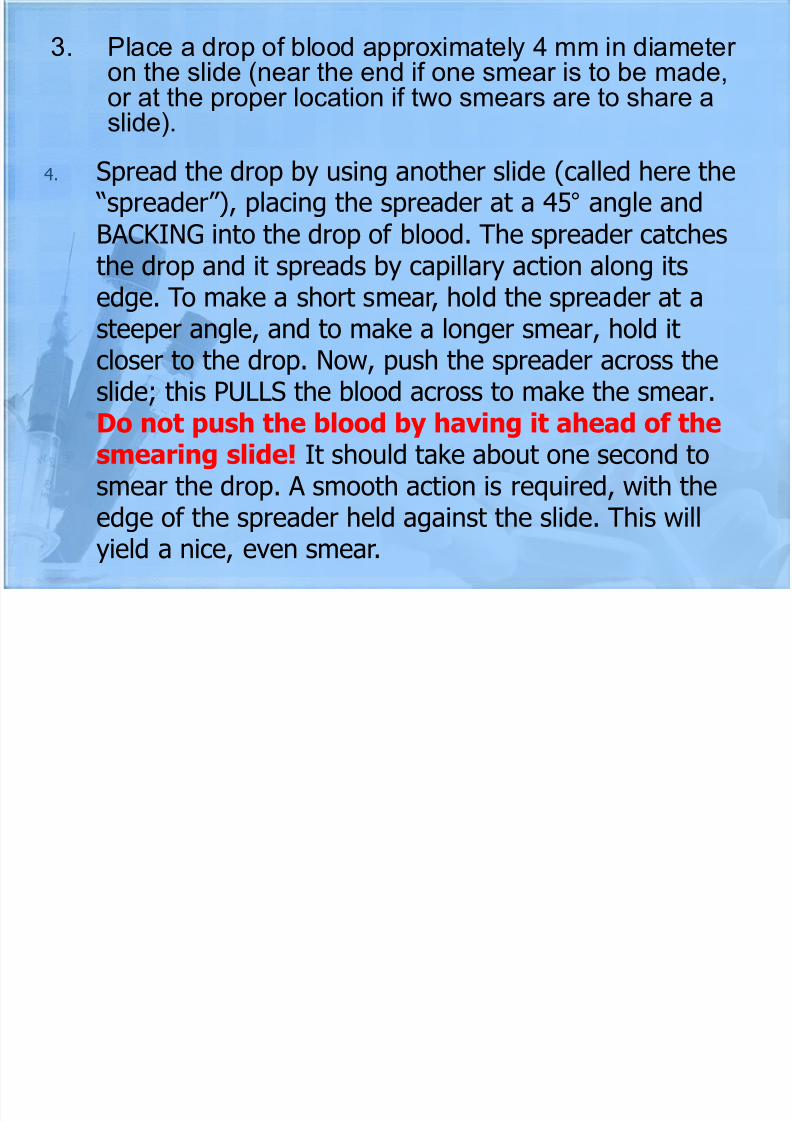
3. Place a drop of blood approximately 4 mm in diameter on the slide (near the end if one smear is to be made,
7/28/2019 Phlebotomy for Healthcare Providers 2012
http://slidepdf.com/reader/full/phlebotomy-for-healthcare-providers-2012 110/119
on the slide (near the end if one smear is to be made,or at the proper location if two smears are to share aslide).
4. Spread the drop by using another slide (called here the “spreader”), placing the spreader at a 45° angle andBACKING into the drop of blood. The spreader catchesthe drop and it spreads by capillary action along its
edge. To make a short smear, hold the spreader at asteeper angle, and to make a longer smear, hold itcloser to the drop. Now, push the spreader across theslide; this PULLS the blood across to make the smear.
Do not push the blood by having it ahead of thesmearing slide! It should take about one second tosmear the drop. A smooth action is required, with theedge of the spreader held against the slide. This willyield a nice, even smear.

7/28/2019 Phlebotomy for Healthcare Providers 2012
http://slidepdf.com/reader/full/phlebotomy-for-healthcare-providers-2012 111/119

7/28/2019 Phlebotomy for Healthcare Providers 2012
http://slidepdf.com/reader/full/phlebotomy-for-healthcare-providers-2012 112/119
SAFETY AND
INFECTION CONTROL
LEGAL JURISPRUDENCE
SAFETY AND INFECTION

7/28/2019 Phlebotomy for Healthcare Providers 2012
http://slidepdf.com/reader/full/phlebotomy-for-healthcare-providers-2012 113/119
CONTROL
Because of contacts with sick
patients and their specimens, it is
important to follow safety and
infection control procedures.

7/28/2019 Phlebotomy for Healthcare Providers 2012
http://slidepdf.com/reader/full/phlebotomy-for-healthcare-providers-2012 114/119
SAFETY AND INFECTION CONTROL
PROTECT YOURSELF
Practice universal precautions:
Wear gloves and a lab coat or gown whenhandling blood/body fluids.
Change gloves after each patient or when
contaminated.
Wash hands frequently.
Dispose of items in appropriate
containers.
SAFETY AND INFECTION

7/28/2019 Phlebotomy for Healthcare Providers 2012
http://slidepdf.com/reader/full/phlebotomy-for-healthcare-providers-2012 115/119
CONTROL
Dispose of needles immediately uponremoval from the patient's vein. Do not
bend, break, recap, or resheath needles to
avoid accidental needle puncture or
splashing of contents.
Clean up any blood spills with a disinfectant
such as freshly made 10% bleach.
SAFETY AND INFECTION

7/28/2019 Phlebotomy for Healthcare Providers 2012
http://slidepdf.com/reader/full/phlebotomy-for-healthcare-providers-2012 116/119
CONTROL
If you stick yourself with a contaminatedneedle:
1. Remove your gloves and dispose of them properly.
2. Squeeze puncture site to promote bleeding.
3. Wash the area well with soap and water.
4. Record the patient's name and ID number.
5. Follow institution's guidelines regarding treatment
and follow-up.6. NOTE: The use of prophylactic zidovudine following
blood exposure to HIV has shown effectiveness (about
79%) in preventing seroconversion

7/28/2019 Phlebotomy for Healthcare Providers 2012
http://slidepdf.com/reader/full/phlebotomy-for-healthcare-providers-2012 117/119
PROTECT THE PATIENT
Place blood collection equipment away from
patients, especially children and psychiatric
patients.
Practice hygiene for the patient's protection.
When wearing gloves, change them between
each patient and wash your hands frequently.
Always wear a clean lab coat or gown.
LEGAL IMPLICATIONS ON

7/28/2019 Phlebotomy for Healthcare Providers 2012
http://slidepdf.com/reader/full/phlebotomy-for-healthcare-providers-2012 118/119
PRACTICE
Maintain principles of Phlebotomy Practice Avoid untoward circumstances that may hover any
untoward implications on both health provider andthe patient.
Maintain adequate health provider – patientinteraction.
Maintain confidentiality.
Defer from any deleterious acts that can
compromise patient, health provider and institution. Follow guidelines set and practiced by the
institution and state/country where you areworking.

7/28/2019 Phlebotomy for Healthcare Providers 2012
http://slidepdf.com/reader/full/phlebotomy-for-healthcare-providers-2012 119/119
THANK YOU