Embed Size (px)
Citation preview
Spooled-Up Kit Nytro Head Shim Installation Instructions
Clean off all gasket material from block and head using brake cleaner and a rag. Use great caution whenever handling the head to prevent the valve caps/shims from coming out. This can cause a catastrophic engine failure. Re installing cams in the head whenever handling it will prevent this from happening.
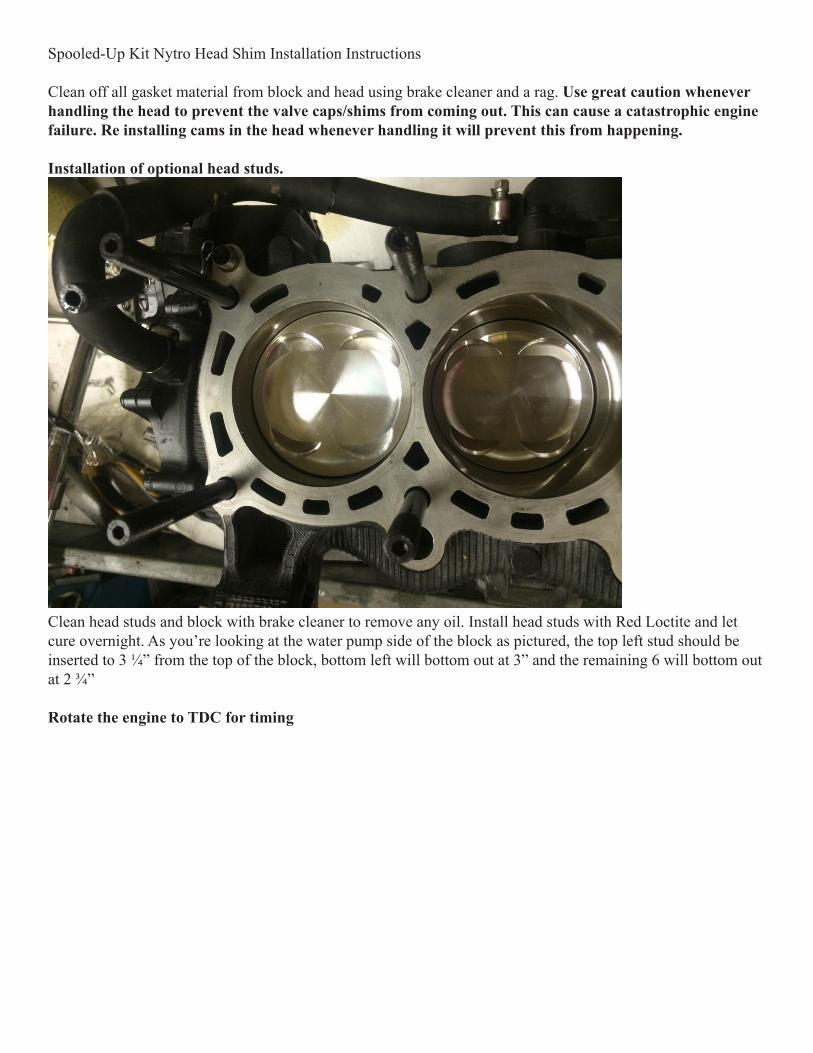
Installation of optional head studs.
Clean head studs and block with brake cleaner to remove any oil. Install head studs with Red Loctite and let cure overnight. As you’re looking at the water pump side of the block as pictured, the top left stud should be inserted to 3 ¼” from the top of the block, bottom left will bottom out at 3” and the remaining 6 will bottom out at 2 ¾”
Rotate the engine to TDC for timing
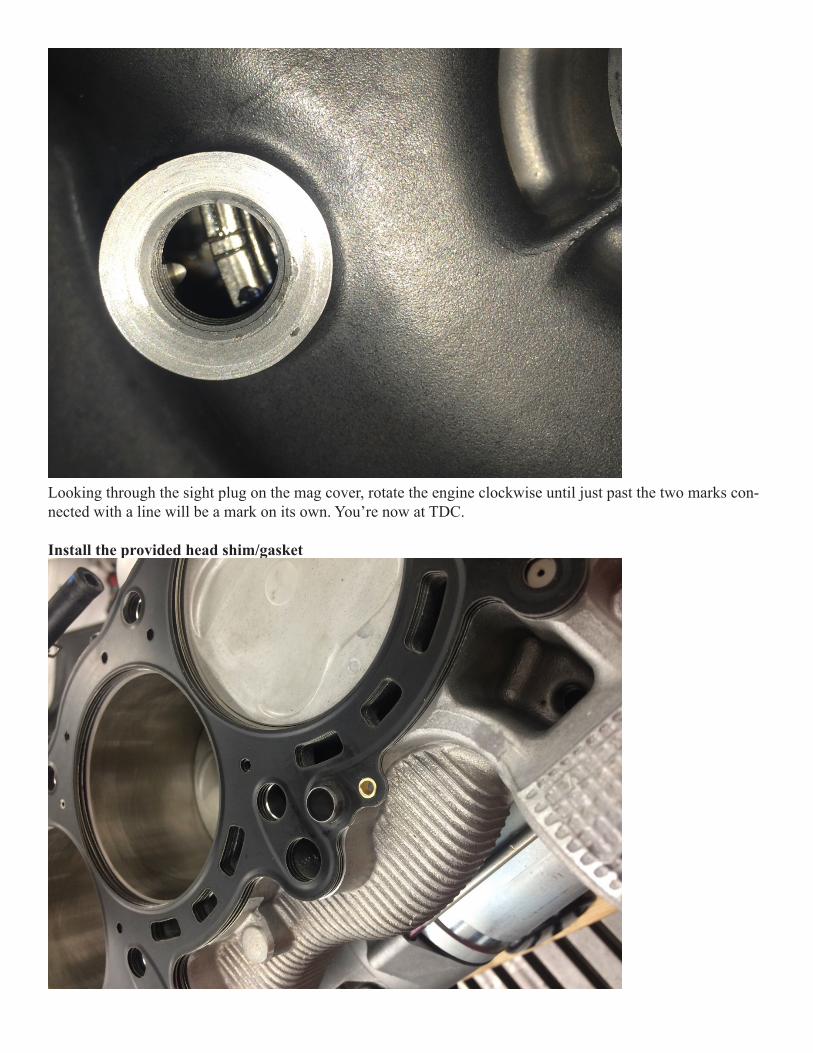
Looking through the sight plug on the mag cover, rotate the engine clockwise until just past the two marks con-nected with a line will be a mark on its own. You’re now at TDC.
Install the provided head shim/gasket
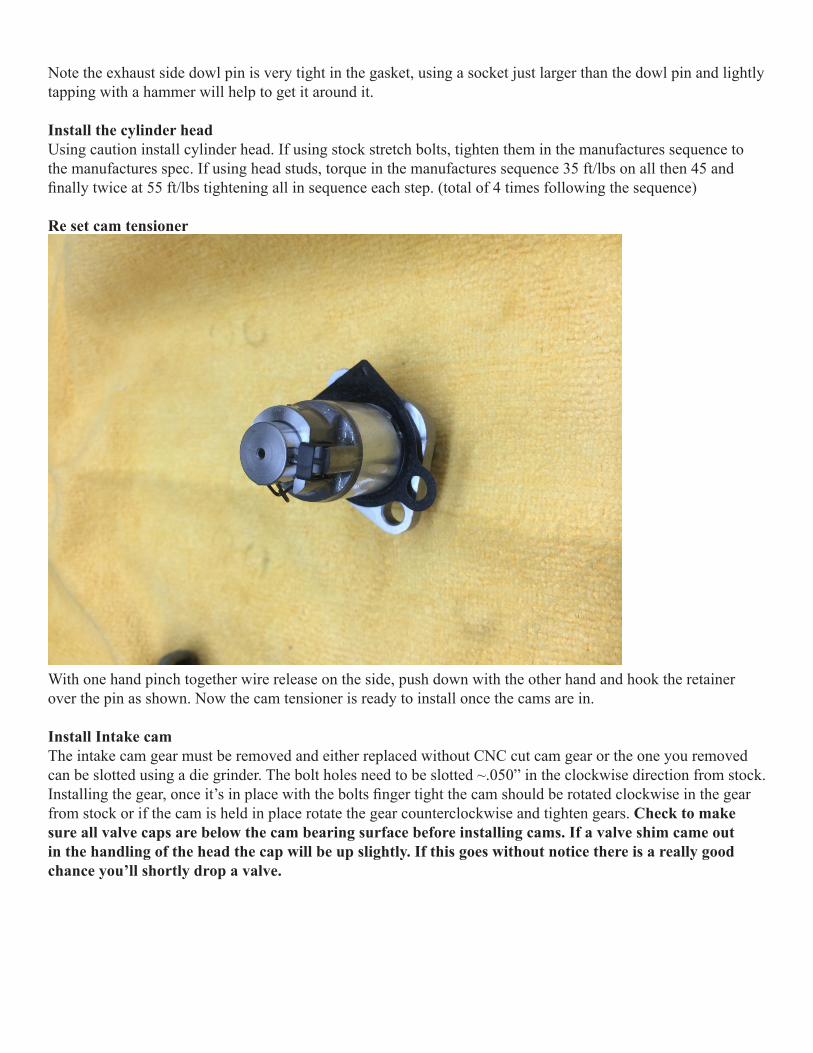
Note the exhaust side dowl pin is very tight in the gasket, using a socket just larger than the dowl pin and lightly tapping with a hammer will help to get it around it.
Install the cylinder headUsing caution install cylinder head. If using stock stretch bolts, tighten them in the manufactures sequence to the manufactures spec. If using head studs, torque in the manufactures sequence 35 ft/lbs on all then 45 and finally twice at 55 ft/lbs tightening all in sequence each step. (total of 4 times following the sequence)
Re set cam tensioner
With one hand pinch together wire release on the side, push down with the other hand and hook the retainer over the pin as shown. Now the cam tensioner is ready to install once the cams are in.
Install Intake camThe intake cam gear must be removed and either replaced without CNC cut cam gear or the one you removed can be slotted using a die grinder. The bolt holes need to be slotted ~.050” in the clockwise direction from stock. Installing the gear, once it’s in place with the bolts finger tight the cam should be rotated clockwise in the gear from stock or if the cam is held in place rotate the gear counterclockwise and tighten gears. Check to make sure all valve caps are below the cam bearing surface before installing cams. If a valve shim came out in the handling of the head the cap will be up slightly. If this goes without notice there is a really good chance you’ll shortly drop a valve.
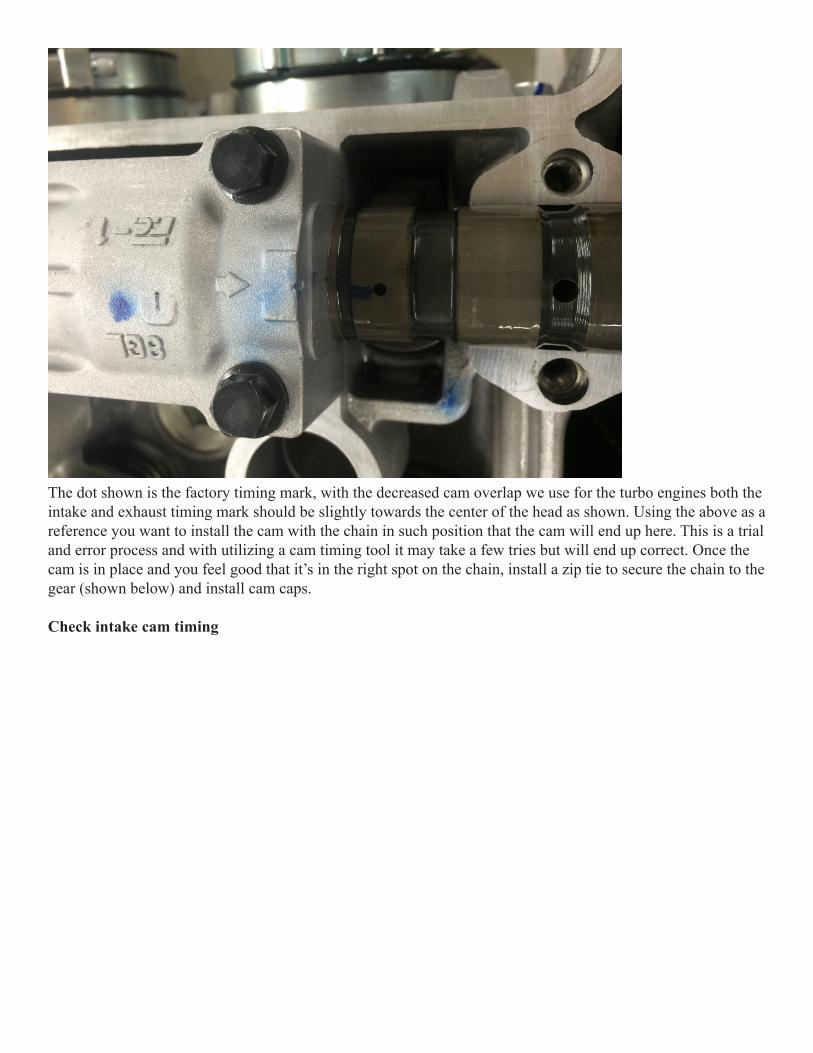
The dot shown is the factory timing mark, with the decreased cam overlap we use for the turbo engines both the intake and exhaust timing mark should be slightly towards the center of the head as shown. Using the above as a reference you want to install the cam with the chain in such position that the cam will end up here. This is a trial and error process and with utilizing a cam timing tool it may take a few tries but will end up correct. Once the cam is in place and you feel good that it’s in the right spot on the chain, install a zip tie to secure the chain to the gear (shown below) and install cam caps.
Check intake cam timing
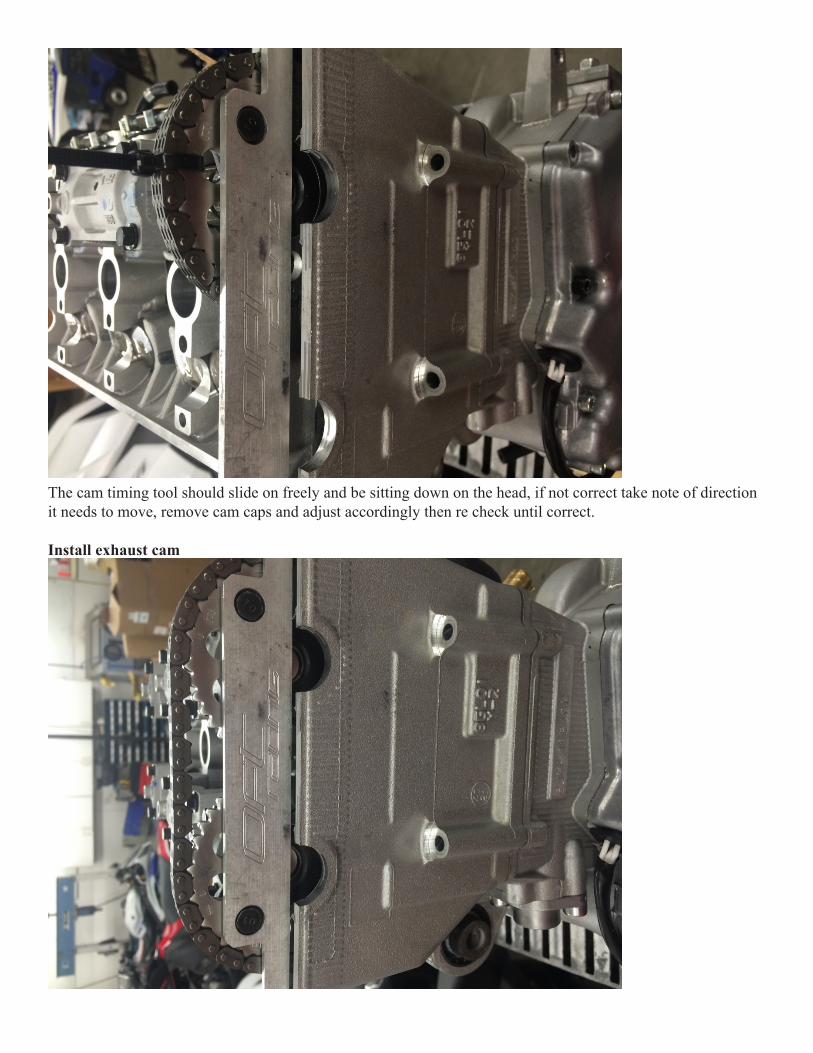
The cam timing tool should slide on freely and be sitting down on the head, if not correct take note of direction it needs to move, remove cam caps and adjust accordingly then re check until correct.
Install exhaust cam

Once again the timing dot on the cam can be useful in getting the timing on. Once you feel like the timing is correct, install cam chain tensioner (arrow up), cut the zip tie on your intake cam gear and rotate the engine over 2 revolutions until you’re back at TDC and your cam timing dots are up. Now everything is set where it will be and you can check timing with the timing tool as shown above. The tool should slide on freely and rest against the head. If it does not, adjust accordingly and try the whole process again until it fits properly.
Once you have rotated the engine and you’re confident your timing is right you can now install the valve cover and re install the engine.


![2008 Fx Nytro Servis Manual[1]](https://img.pdfslide.net/doc/110x75/577cde411a28ab9e78aebbe6/2008-fx-nytro-servis-manual1.jpg)