Embed Size (px)
DESCRIPTION
This is my step by step guide of Photoshop for my front cover of my magazine.
Citation preview
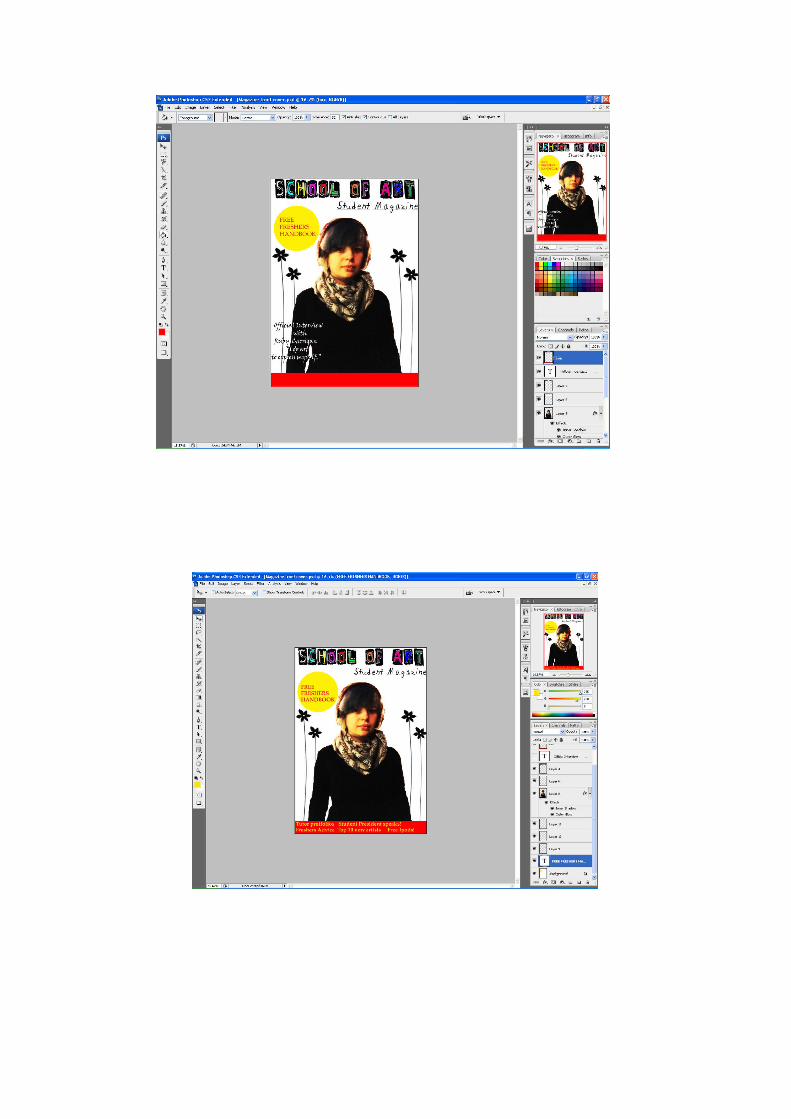
Step by Step Guide for PhotoshopStudent Magazine Project (Front Cover)
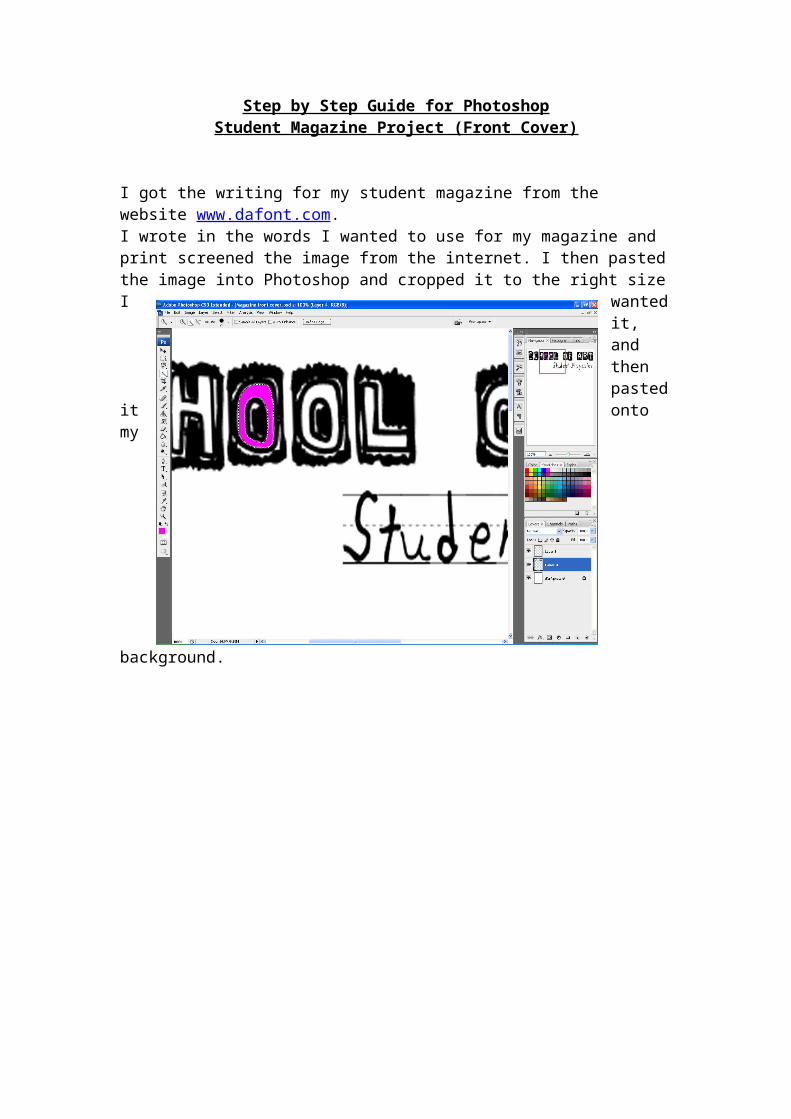
I got the writing for my student magazine from the website www.dafont.com. I wrote in the words I wanted to use for my magazine and print screened the image from the internet. I then pasted the image into Photoshop and cropped it to the right size I wanted it, and then pasted it onto my background.
To colour in the letters I clicked on the ‘quick selection tool’, I then zoomed in with the zoom in tool and filled the letters with different colours using the paint bucket tool.
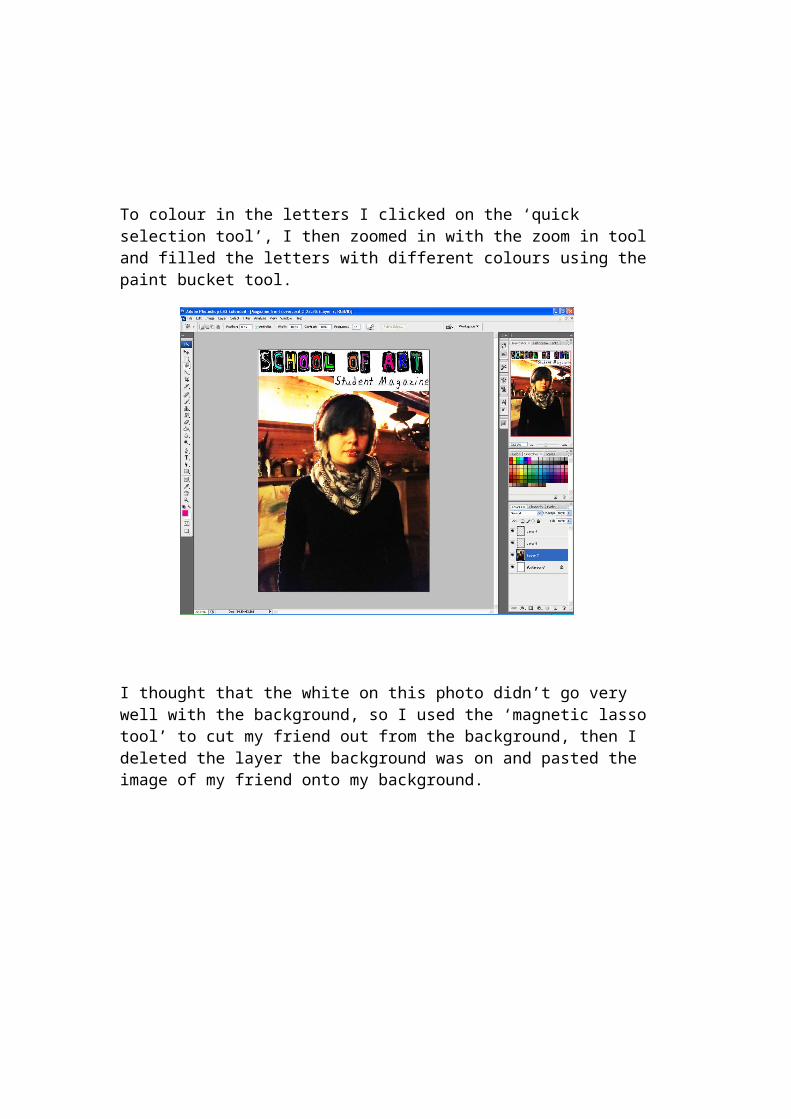
I thought that the white on this photo didn’t go very well with the background, so I used the ‘magnetic lasso tool’ to cut my friend out from the background, then I deleted the layer the background was on and pasted the image of my friend onto my background.
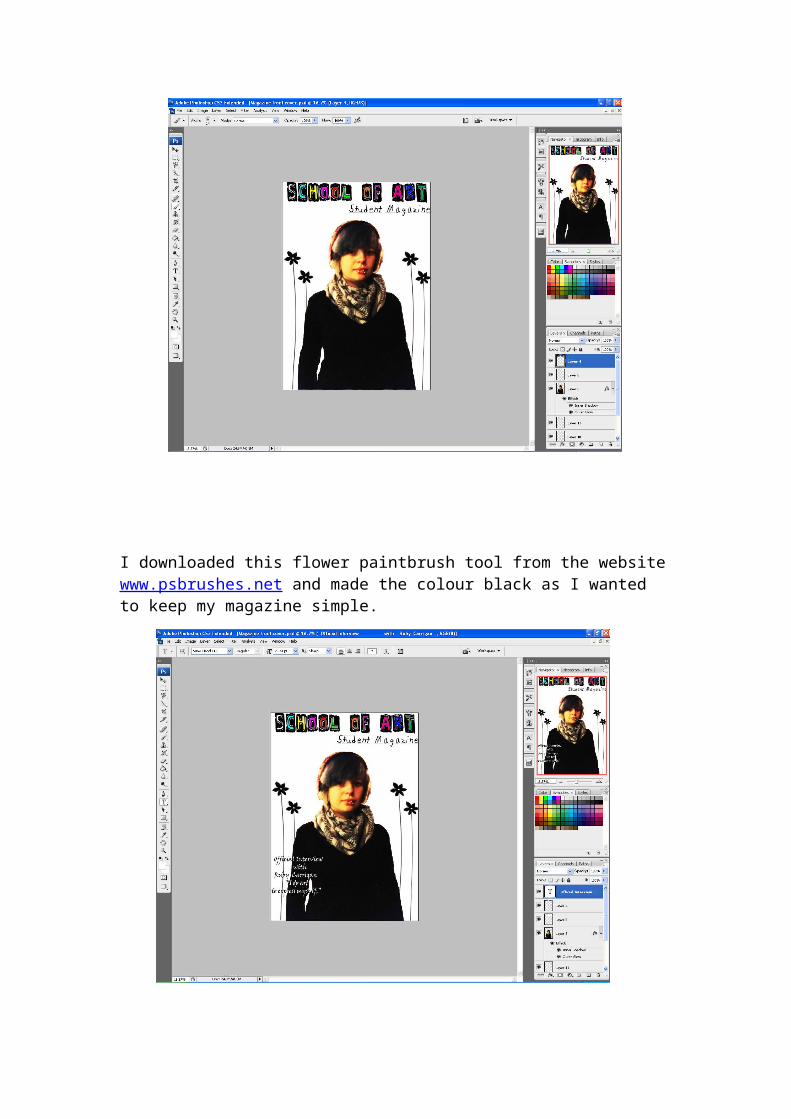
I downloaded this flower paintbrush tool from the website www.psbrushes.net and made the colour black as I wanted to keep my magazine simple.
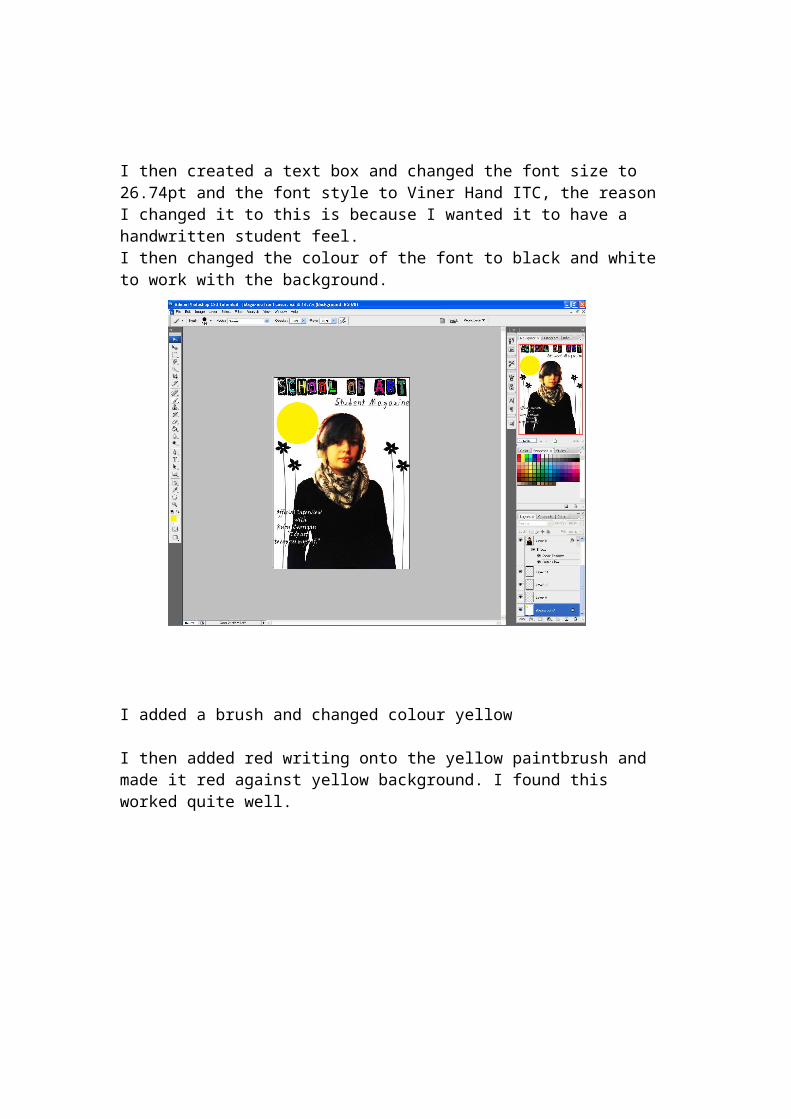
I then created a text box and changed the font size to 26.74pt and the font style to Viner Hand ITC, the reason I changed it to this is because I wanted it to have a handwritten student feel.I then changed the colour of the font to black and white to work with the background.
I added a brush and changed colour yellow
I then added red writing onto the yellow paintbrush and made it red against yellow background. I found this worked quite well.
I then made a box and filled it in red, then dragged the layer to the top of the screen so it would appear above the shot of Ruby and the background.
I then added some writing on top of the text box using the text tool.
To make the writing stand out a little more I made the writing bold.