Embed Size (px)
Citation preview
Mark Wemyss-HoldenDirector (and teacher)
The Drawing Tool Company Ltd.
Teaching Sketching in D&T(a neat little collection of thoughts and ideas..!)

Mark Wemyss-HoldenDirector (and teacher)
The Drawing Tool Company
Digital technology is incredible. It’s the future,but that doesn’t mean drawing is the past.It’s as relevant now as it was 500 years ago.
If 3D printing is the wedding, a hand sketch isthe first date; an essential part of the journey.

© The Drawing Tool Company Ltd 2015. All rights reserved, not for public broadcasting.All content remains intellectual property of The Drawing Tool Company.
1. D&T is not about being good at drawing. Being good at drawing is not about being an artist. Such views need addressing, as many pupils arrive with these misconceptions. IsoSketch can help you set the record straight from the outset. Learning to draw in 3D is just like learning to write!
2. Teach them how to draw using IsoSketch before you ask them to design by drawing. It wouldn’t be fair to ask a non-English speaker to write a poem in English and then assess them on the quality of the poem, so make sure they’ve got the tools they need before asking them to use them. 3. Pitch designing as ‘putting your thoughts on paper’, rather than ‘drawing’ – this phrase is so often associated with artistic ability, can strike fear into young hearts and is so far from the truth. Pupils should realise that designing through sketching is just a method of communicating thoughts, not producing artwork.
4. Remember sketching IS something that can be taught, so don’t give up on the “can’t draw” kids. IsoSketch has been developed with this exact purpose, so invest in the right kit and give sketching skills the time needed to be learned properly. Just think about how much time is required to learn how to write... Why should sketching be any different?
5. Sketching should be FUN! Make it accessible to every child in the room with simple step-by-step techniques. If they can see immediate results from their efforts, one of the biggest barriers to enjoying designing is gone! Happy sketcher = happy designer.
Mark’s Top Teaching Tips for sketching in D&T

© The Drawing Tool Company Ltd 2015. All rights reserved, not for public broadcasting.All content remains intellectual property of The Drawing Tool Company.
1. Start from scratch - don’t assume they can all draw. So often we forget this is a skill to be developed; treat ‘communication’ as a specific subject skill that you can focus on in lessons.
2. Is sketching HELPING them to design? If sketching itself is the challenge, start by allowing them to model their ideas, then use the physical objects produced to help teach them HOW to sketch ‘like a designer’. Set clear, communication-based standards so they can understand what you expect to see in D&T, rather than let them assume they have to be some sort of mini-Monet.
3. Are you giving them the right tools? Designing isn’t fun or easy with crap pencils and a pile of set squares, grid paper, masking tape and hefty drawing boards. It’s so simple with IsoSketch.
4. Don’t rely too heavily on sketching as a method of designing – it can get repetitive, so don’t do it to death. Let them model; use CAD and workshop processes, sketching shouldn’t be exhausted as the only way to create ideas. It has it’s place, usually at the beginning more than the end.
5. Designing looks like thoughts, not a presentation sheet for a scientific convention – let them be messy! Encourage them to concentrate on the quality of the idea to begin with, NOT the presentation. Then assess them accordingly! If design is the task, why penalise for messy presentation? This will come with time, plus you can create tasks purely for the purpose of assessing presentation. It makes so much more sense to everyone when you break down tasks based on what you actually want to see.
What are you asking of your students?

© The Drawing Tool Company Ltd 2015. All rights reserved, not for public broadcasting.All content remains intellectual property of The Drawing Tool Company.
Techniques for simple, effective design presentation - IsoSketch®
For video tutorials and more, visit www.thedrawingtoolcompany.com
Look what else IsoSketch can do for YOUR pupils...
• 120° isometric guide to allow accurate 3D sketches• Approved for exam use by AQA, OCR, Edexcel and WJEC• Replaces drawing boards, T and Set squares for 3D sketching• Range of easy-to-use stencils to draw detailed 3D shapes• Builds pupil confidence and improves sketching outcomes• Fully supported by FREE library of online videos tutorials• Learning aid – promotes freehand sketching skills• Universal aid – suitable for any ability / age
EXAMSAFE!

© The Drawing Tool Company Ltd 2015. All rights reserved, not for public broadcasting.All content remains intellectual property of The Drawing Tool Company.
Techniques for simple, effective design presentation - crating
Isometric stencils to add details in perfect 3D...

© The Drawing Tool Company Ltd 2015. All rights reserved, not for public broadcasting.All content remains intellectual property of The Drawing Tool Company.
IsoSketch® design sketch examples
© The Drawing Tool Company Ltd 2015. All rights reserved, not for public broadcasting.All content remains intellectual property of The Drawing Tool Company.
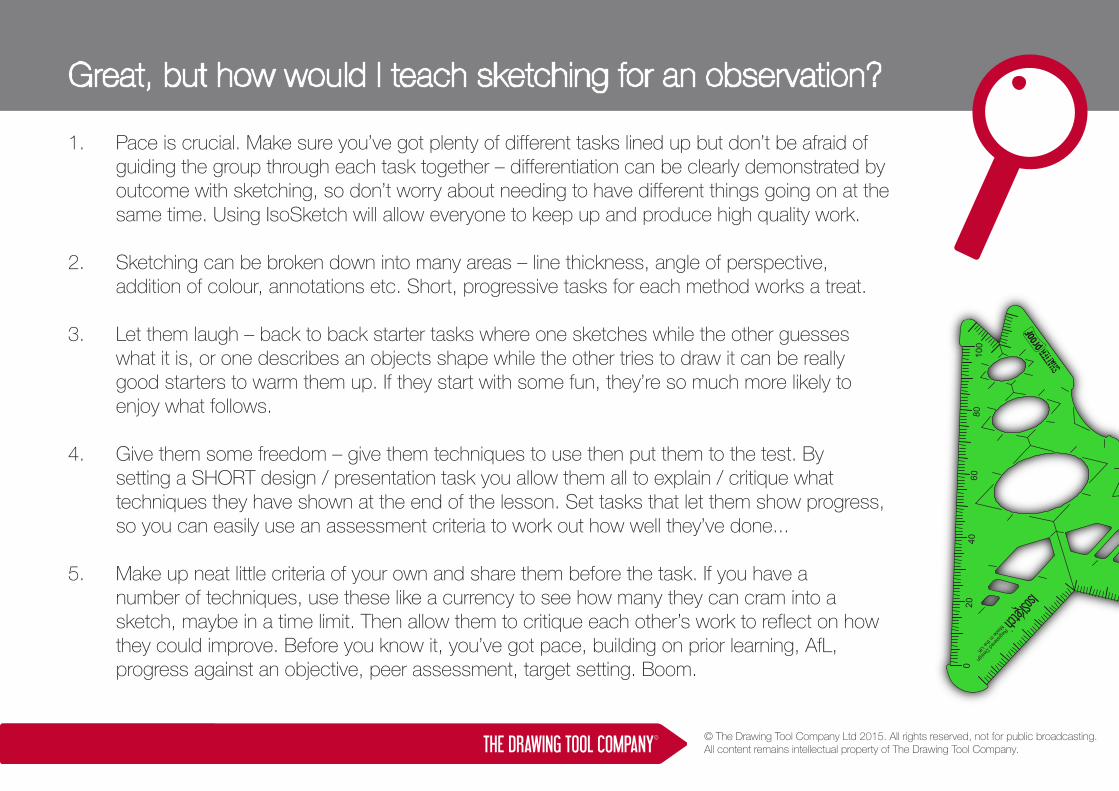
Great, but how would I teach sketching for an observation?
1. Pace is crucial. Make sure you’ve got plenty of different tasks lined up but don’t be afraid of guiding the group through each task together – differentiation can be clearly demonstrated by outcome with sketching, so don’t worry about needing to have different things going on at the same time. Using IsoSketch will allow everyone to keep up and produce high quality work.
2. Sketching can be broken down into many areas – line thickness, angle of perspective, addition of colour, annotations etc. Short, progressive tasks for each method works a treat.
3. Let them laugh – back to back starter tasks where one sketches while the other guesses what it is, or one describes an objects shape while the other tries to draw it can be really good starters to warm them up. If they start with some fun, they’re so much more likely to enjoy what follows.
4. Give them some freedom – give them techniques to use then put them to the test. By setting a SHORT design / presentation task you allow them all to explain / critique what techniques they have shown at the end of the lesson. Set tasks that let them show progress, so you can easily use an assessment criteria to work out how well they’ve done...
5. Make up neat little criteria of your own and share them before the task. If you have a number of techniques, use these like a currency to see how many they can cram into a sketch, maybe in a time limit. Then allow them to critique each other’s work to reflect on how they could improve. Before you know it, you’ve got pace, building on prior learning, AfL, progress against an objective, peer assessment, target setting. Boom.

© The Drawing Tool Company Ltd 2015. All rights reserved, not for public broadcasting.All content remains intellectual property of The Drawing Tool Company.
1. IsoSketch® Classpack - of course! A great way of starting pupils off on a level playing field. Allows independant learning of drawing skills and promotes differentiation by outcome. The IsoSketch® Classpack has been developed as a way of giving the pupils the tools to be able to create accurate 3D objects to then apply ‘designer’ techniques.
2. GOOD pencils. Drawing isn’t fun or easy with crap pencils. The value of a decent pencil cannot be underrated in it’s importance to designing. I went through hundreds of cheap pencils that seemed better at snapping and cracking than they were at transferring graphite to paper. Don’t let bad pencils stifle good design – invest in quality gear and save the pennies by not buying hundreds of pencil crayons. Pro designers use marker pens for a reason.
3. Different thickness black pens – have a class set of stock black fineliners and add some thicker black pens for doing outline and spider techniques – the contrast of line thicknesses is what really makes these methods work
4. Crayola broadline water makers – versatile and great for the above techniques. Lighter than average grey makes for an effective shading tool too.
5. 3D shape underlays – for the beginners, or as a good starter if you’re up against time in a lesson, underlays with a range of 3D objects can be a real life saver. Giving pupils shapes to copy or trace as a starting point to allow them to practise adding design presentation techniques should be quick – so this is a way to give them a hand without just giving them templates to colour in.
Kit list: Essential tools to invest in (or make)
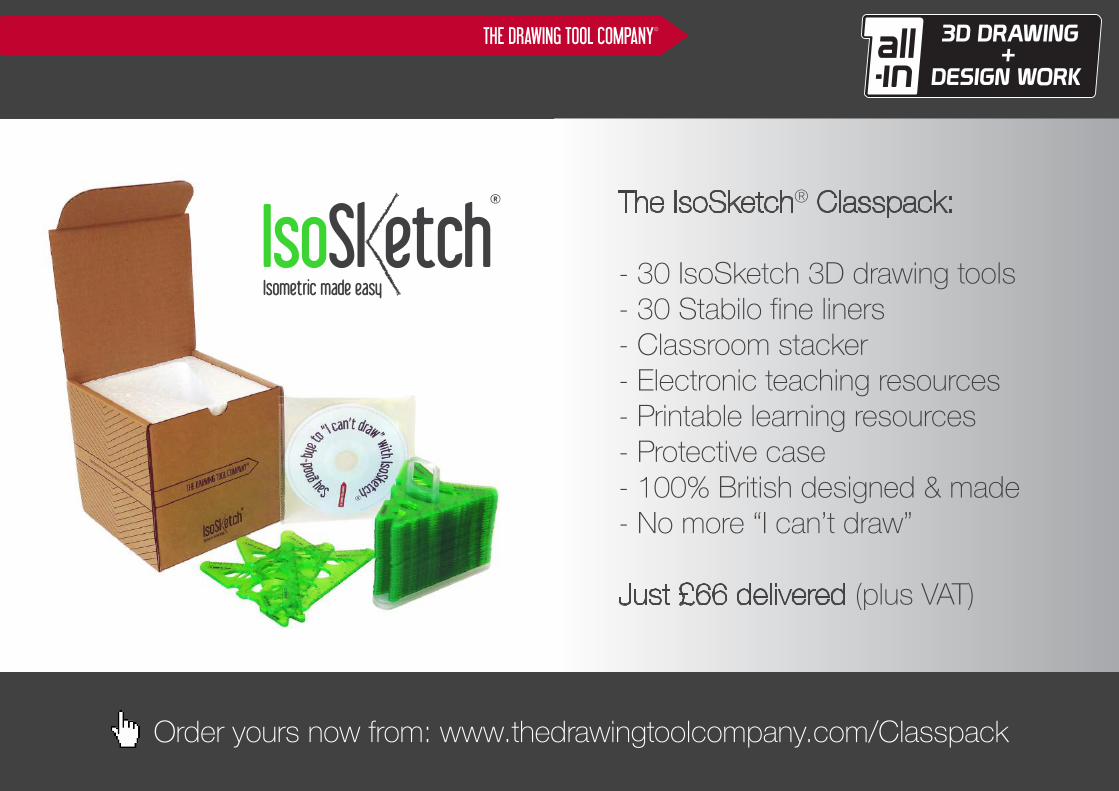
The IsoSketch® Classpack:
- 30 IsoSketch 3D drawing tools- 30 Stabilo fine liners- Classroom stacker- Electronic teaching resources- Printable learning resources- Protective case- 100% British designed & made- No more “I can’t draw”
Just £66 delivered (plus VAT)
Order yours now from: www.thedrawingtoolcompany.com/Classpack
DESIGN WORK
3D DRAWING+

Still looking for more? Book a ‘How to Sketch like a Designer’ CPD session with us to get practical, time-saving methodsfor tooling-up your pupils. For more information and priceshave a look online or just drop us an email.
If you have any general questions or feedback, feel free toget in touch and we’ll be happy to help. Thank you.
Email: [email protected]: /DrawingToolCoFacebook: /TheDrawingToolCo