Embed Size (px)
Citation preview

Machining Lothar Walther barrel blank to fit Weihrauch HW100S
The blank is 16mm dia X 605mm long with choke - Twist Rate 1 in 450mm/18"
1. Make a silencer thread length guage using slips from the OE barrel; the thread needs to be 1/16” longer than
the gauge at this stage . Screwcut the ½” UNF thread. The choke is always the other end from the stampings
on the barrel blank. Double check that the stamped end is in the chuck!

2. The blank is nominally 16mm o/d; this one is actually .633” which is .008” up on the OE barrel’s .625”. Set up
the breech end of the barrel in th efour jaw chuck to run true. Set the travelling steady jaws to the 16mm
diameter and take .003” depth of cut, .016” feed per rev using an insert tool. Lock the cross slide and use the
offset tailstock live centre to keep barrel hard against the travelling steady pads at the beginning of the cut.
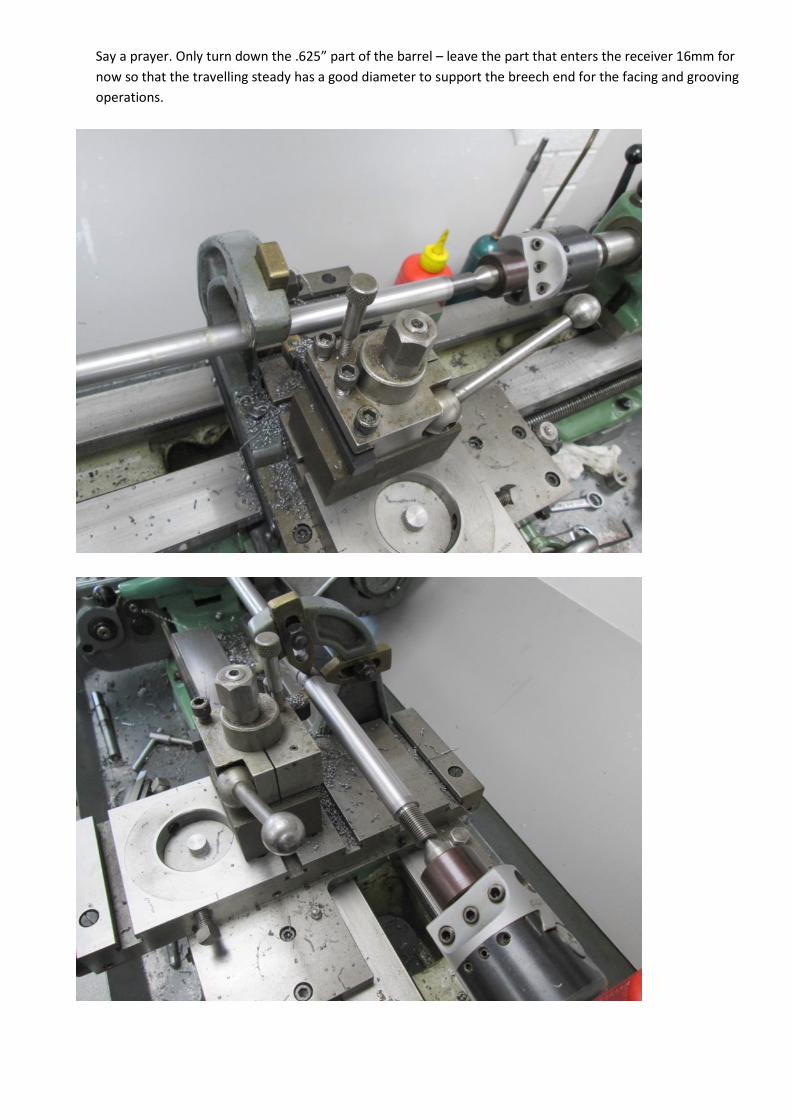
Say a prayer. Only turn down the .625” part of the barrel – leave the part that enters the receiver 16mm for
now so that the travelling steady has a good diameter to support the breech end for the facing and grooving
operations.
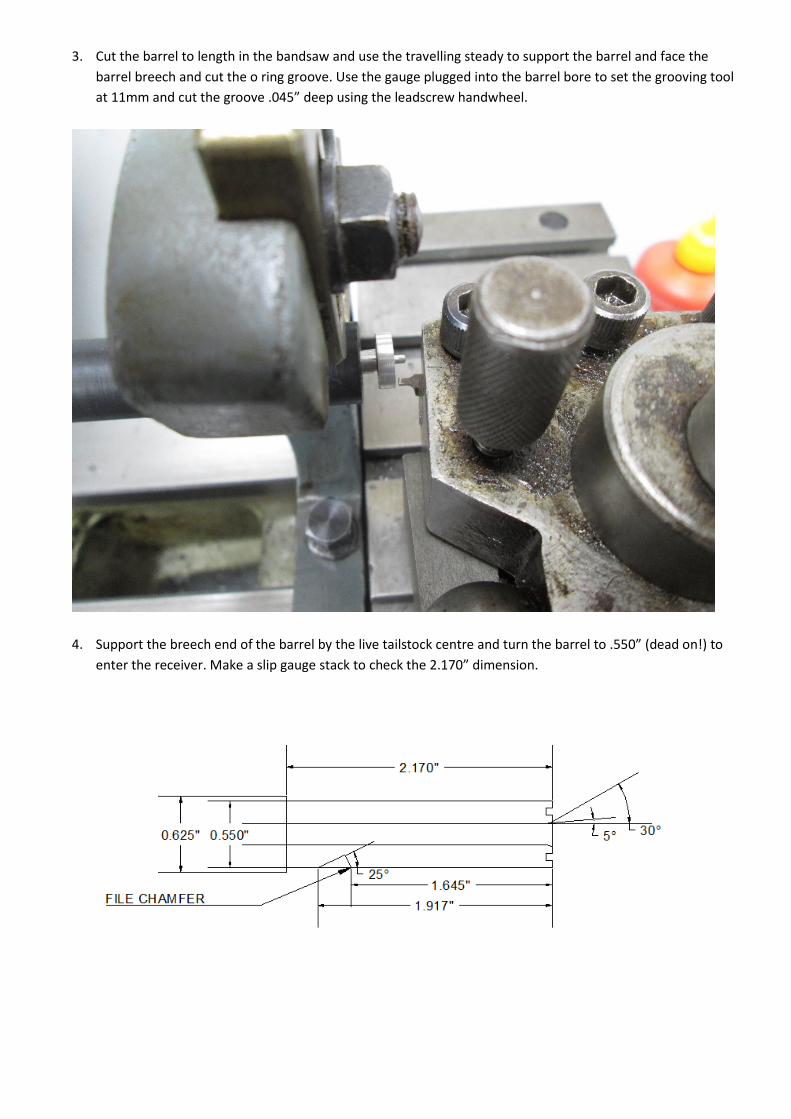
3. Cut the barrel to length in the bandsaw and use the travelling steady to support the barrel and face the
barrel breech and cut the o ring groove. Use the gauge plugged into the barrel bore to set the grooving tool
at 11mm and cut the groove .045” deep using the leadscrew handwheel.
4. Support the breech end of the barrel by the live tailstock centre and turn the barrel to .550” (dead on!) to
enter the receiver. Make a slip gauge stack to check the 2.170” dimension.

5. Use the travelling steady to support the barrel and cut the 60o and 10
o lead in chamfers – the 10
o should only
cut away the rifling lands.
6. Set the milling vice to 25o and mill the barrel clamping slot. Fit the receiver front piece onto the barrel before
removing it from the vice to check that the grub screw is just pushing the barrel through the end of the
receiver block. File a small chamfer at the breech end of the cut-out so that any burr will not damage the
receiver if the barrel is removed.

7. Chuck the .550” diameter in the lathe with the muzzle in the live tailstock centre and the threaded collar on
the silencer thread. Turn the collar o/d true and then support the barrel using the travelling steady. Remove
the live centre and cut the 11o crown.

8. Polish the .625” diameter for blueing.
9. Blueing set up: ½kg of salts to ½ litre of water using the small tank.

10. Rub boiled linseed oil into the fresh blueing.
11. Refit the valve body and air cylinder to the receiver front piece and immerse in water to check for leaks.
Avoid immersing the pressure gauge – it will fog. If no leaks are found, remove the cylinder and fit the barrel
and receiver rear piece.
12. Re-assemble gun.