Embed Size (px)
Citation preview

We love that.
Thinking about a Plungie, hey?

Over the following pages, we dive right into our process and everything you need to know before getting your Plungie.
As Australia’s largest manufacturer and supplier of precast concrete swimming pools, we work directly with builders, pool builders, and landscapers across the country to help our customers achieve an amazing outcome with their Plungie.
Certification is required to have a pool installed in Australia, which is why every Plungie must be installed by an appropriately qualified tradesperson.
Thousands of Australians have successfully completed their Plungie project by engaging a builder, pool builder, or even a structural landscaper. In some states, they’ve even completed it themselves as an owner-builder.
Below are our recommended installation solutions:
» Bring Your Own Builder (BYOB) Any qualified home builder or pool builder can manage the certification, site preparation, and installation of a Plungie. Some states and territories also allow for a structural landscaper or plumber to install one.
» Owner Builder Installing a Plungie as an owner-builder is an available option in some states across Australia - we recommend checking the required processes and permits with your local government to see whether this is viable for you.

It’s important to know that no two projects or installations are exactly the same. We provide comprehensive and straightforward pre-engineered specifications, how-to documentation, and videos to help you and your builder complete your project with ease.

The process of getting a Plungie follows the 10 steps below:
1. Choose your Plungie
This is the easy part. We can quote you for the supply and delivery of your Plungie, as well as the supply and plumbing services for your chosen equipment.

2. Understand your project
Once you know which Plungie is right for you, we’ll issue you a formal quote for its supply and delivery. At this point you’ll also need to have considered:
» Extras - do you need an equipment package, heating, or a spa jet solution? We can quote you on these.
» Placement - where do you want the Plungie? The location of your Plungie, whether in your front yard, back yard, side yard, or even rooftop, will play a leading role in the overall ease and cost of your installation.
» Installation depth - do you want the pool in-ground, above-ground or semi-recessed? Like placement, the depth of your install plays a role in the overall ease and cost of your site preparation and includes factors like excavation, soil removal, and backfill.
» Finishings - how do you want to finish your project? This can include things like coping tiles, fencing, and the finishing of your surroundings with paving, decking, and landscaping.
3. Building approval/certification
Certification must be submitted to the local council or via a private certifier—and is generally handled by the installer.
We provide the required pre-engineered specifications package that covers the pool shell and prescribed standard footings, covering A, S, M, H1, and H2 site classifications.
State requirement compliance certificates:
» QLD - Form 15
» VIC - REG 126
» NSW - General Design & Engineering Certificate
» ACT - General Design & Engineering Certificate

» SA - REG 88
You/your installer will be required to submit the proposed pool plan along with the building approvals. This generally includes:
» Compliance certificate, covering pool construction and prescribed footing per site classification
» Pre-engineered specifications referenced in your compliance certificate, covering pool and footings
» Site plan showing the location of the pool with reference to boundaries and structures
» Proposed fence/gate plan - this will need to comply with state pool carrier regulations
» Home warranty insurance policy noting pool installation works within the proposed building plan
4. Site preparation
Every Plungie must sit on a concrete slab footing, specific to the particular soil type of the site. Additional site works include the earth excavation and soil removal if the pool is going in-ground or semi-recessed.
We will provide you with the standardised base preparation requirements covering the slab specification and excavation plan.
You/your installer will need to complete the site preparation in accordance with the standardised engineering requirements, per site classification.
Upon completion of the concrete slab, the concrete contractor should supply certification to confirm the slab footings have been prepared in accordance with the pre-engineered specifications.

5. Crane hire
Understanding the access you have plays a crutial role in determining the overall ease, speed, and cost of your installation. This is because no two sites are exactly alike, which means no two installations are exactly alike.
In order to get a Plungie into your yard, a crane is required to lift the pool from our delivery truck and place it onto the footing on your property.
Crane hire is one of the most variable factors when installing a Plungie, influenced by a number of elements, such as:
» Access from the road
» The desired Plungie location
» Crane set up position
» Reach distance
» Whether road closure is required.
Depending on the above, crane hire can range from $1,000 for easy access to upwards of $15,000 when there is a larger reach distance (30+m) over a house, structure, or terrain. Any lift is possible, but the more comprehensive the lift or restricted the access, the higher the crane cost may be.
We will provide you with the required lifting specifications for your preferred Plungie.
You/your installer will need to engage a local crane company for an accurate lifting quote. Most reputable crane hire companies offer a free site assessment and quote.
We encourage you to do a little homework to better understand your access as well. Take a walk around your property or check it out using satellite imagery to gauge the type of access you have. Google Maps is often sufficient, but there are online alternatives available should Google Maps not have the most up to date imagery.

The access points outlined below may also extend to neighbouring properties as they could have access you aren’t aware of.
Vacant block / clear access
A vacant block provides the easiest and most straightforward point of access as a franna crane can drive the pool straight onto the site and place it in place. A vacant neighbouring property may also provide easy and straightforward access, depending on the desired pool placement location.
Side access
Access down the side of a property can also allow for a franna crane to drive the pool straight onto
site and place it in place. Slewing cranes may also be used in properties with side access, to allow for a closer vantage point to minimise the required reach distance. Any protruding objects, such as eaves, guttering, gas and water infrastructure, or overhanging trees and powerlines may affect your access and must be considered. A neighbouring property may also provide side access, depending on the desired pool placement location.
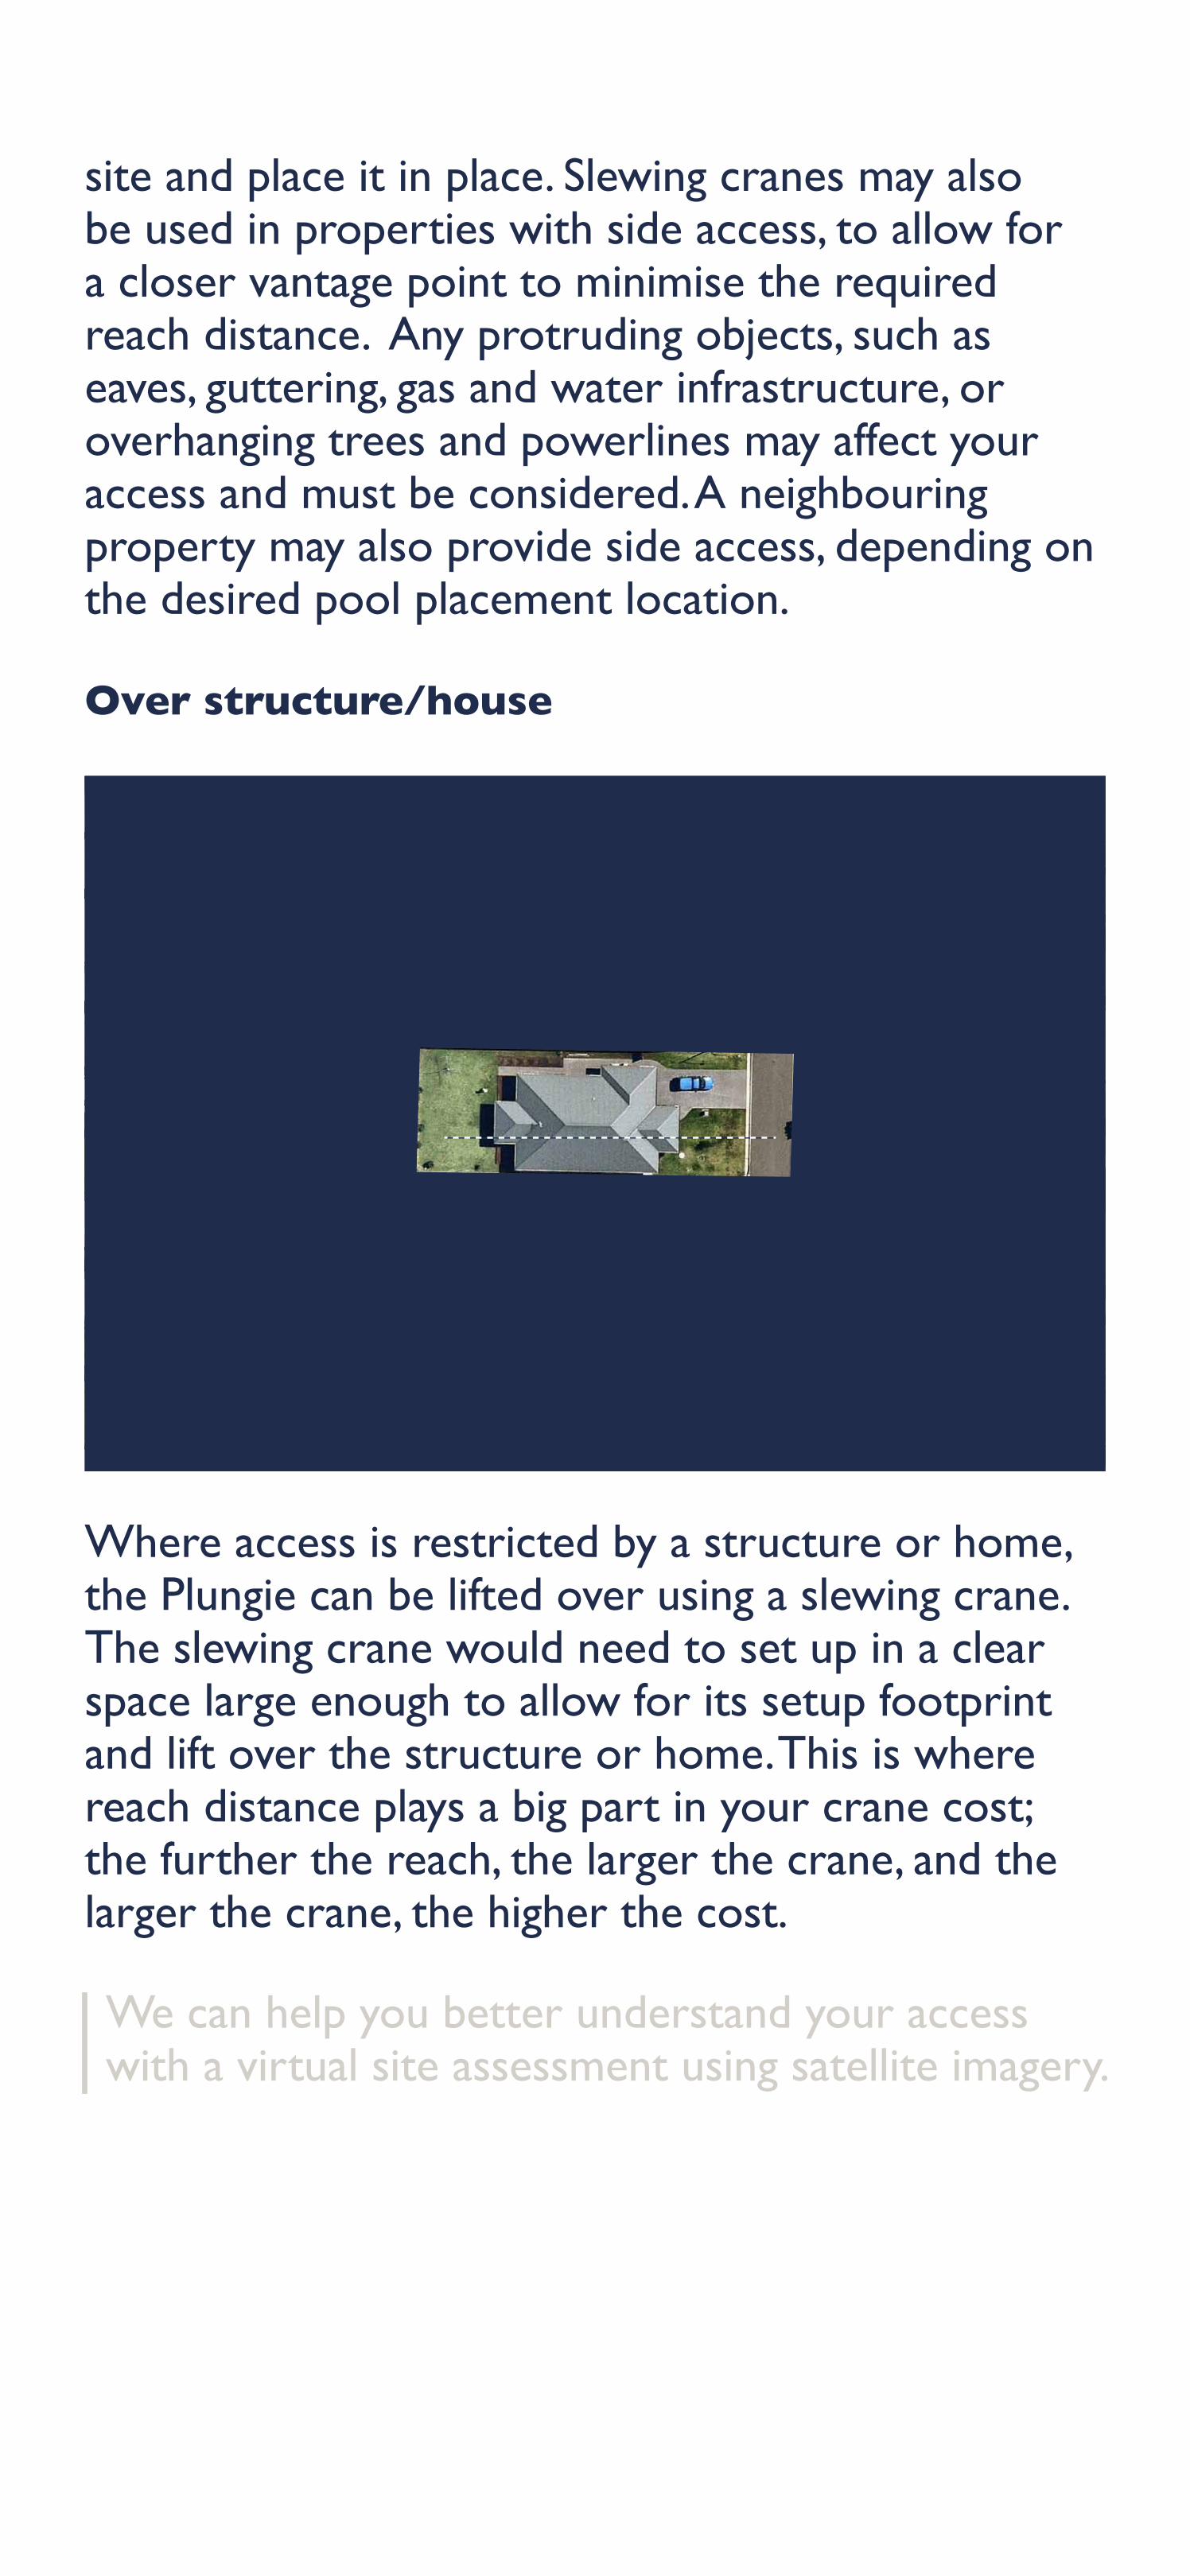
Over structure/house
Where access is restricted by a structure or home, the Plungie can be lifted over using a slewing crane. The slewing crane would need to set up in a clear space large enough to allow for its setup footprint and lift over the structure or home. This is where reach distance plays a big part in your crane cost; the further the reach, the larger the crane, and the larger the crane, the higher the cost.
We can help you better understand your access with a virtual site assessment using satellite imagery.
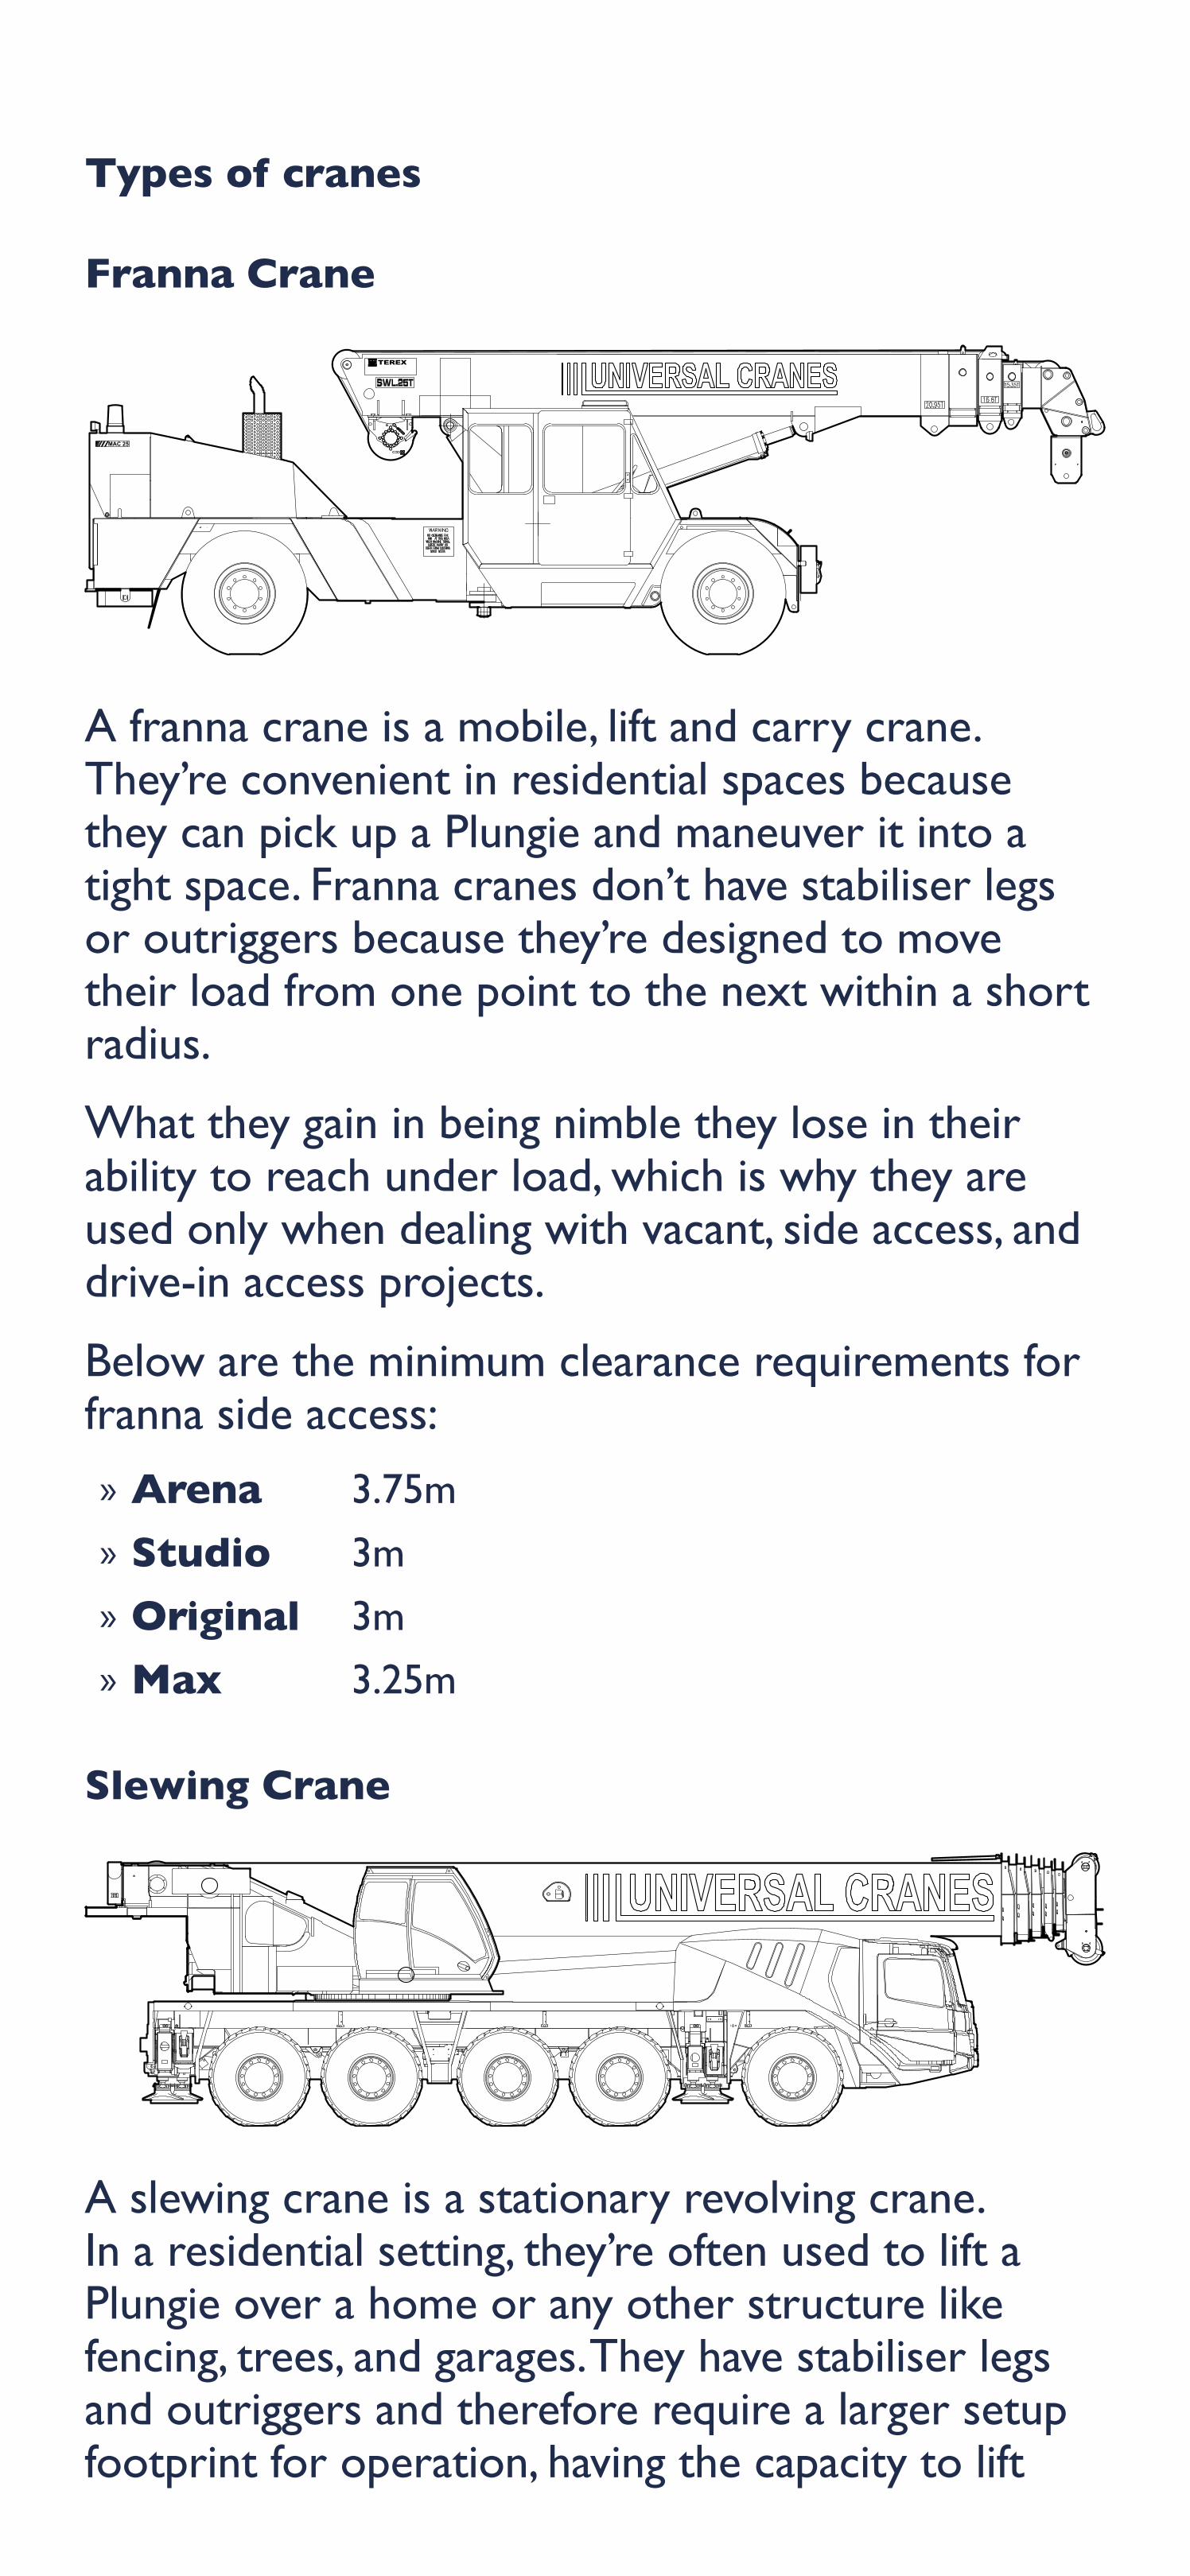
Types of cranes
Franna Crane
MAC 25
TEREX
A franna crane is a mobile, lift and carry crane. They’re convenient in residential spaces because they can pick up a Plungie and maneuver it into a tight space. Franna cranes don’t have stabiliser legs or outriggers because they’re designed to move their load from one point to the next within a short radius.
What they gain in being nimble they lose in their ability to reach under load, which is why they are used only when dealing with vacant, side access, and drive-in access projects.
Below are the minimum clearance requirements for franna side access:
» Arena 3.75m
» Studio 3m
» Original 3m
» Max 3.25m
Slewing Crane
A slewing crane is a stationary revolving crane. In a residential setting, they’re often used to lift a Plungie over a home or any other structure like fencing, trees, and garages. They have stabiliser legs and outriggers and therefore require a larger setup footprint for operation, having the capacity to lift

great distances up to 40m or more. Once under load, a slewing crane will pick up a Plungie, reach, and rotate it to a specific point to place it in position.
6. Plumb up
Every Plungie is supplied with its primary plumbing fixtures pre-fitted. This includes the skimmer box, hydro-static valve, and the provisions for general filtration and safety suction and spare lines.
The pool requires a plumb-up service to connect the general filtration equipment to these pre-fitted provisions. Depending on the chosen equipment, this can be completed by a pool service professional, builder, pool builder, or a plumber.
A standard plumb-up service is included in our Poolwerx equipment package. The equipment requires a suitable location for the equipment to be set up; generally installed on top of a concrete slab or concrete paver of 1m x 1m. If additional hardware is purchased, additional space may be required. The provisioning of this equipment pad is not covered in the Poolwerx scope of work.
7. Electrical
Every Plungie must be earthed by a trade-qualified electrician. Earthing, or grounding as it’s also known, is a process where the bonded pool components are connected to the earth, to direct and dissipate any electrical current to the ground and away from the pool.
Every Plungie has eight precast ferrules throughout the pool shell that are connected directly to the steel reinforcement. The pools can be earthed directly from any of these points.
Our standard Poolwerx equipment package requires access to two 10amp general power outlets, one general power outlet for the Chlorinator (your pump will plug into the Chlorinator) and another for the LED light. Both the light and the chlorinator have

a simple powerpoint plug connection.
If you purchase add on equipment like a heater additional electrical provisioning is required.
8. Backfill
If the Plungie is being installed in-ground or semi-recessed, the over-excavated area of the footing will need to be backfilled with a granular material that will allow for drainage away from the footings. Builders most commonly use low-cost options such as recycled drainage gravel or recycled concrete aggregate.
9. Finishings
One of the many advantages of a Plungie is its ability to be finished to any project design or aesthetic.
Once the pool has been installed, the following elements can be completed to personalise any project:
» Coping tiles
» Waterline tiles
» Fencing
» Decking
» Paving
» Landscaping
10. Fill + startup
Once the Plungie has been finished to the desired standard, the pool requires fencing certification and/or a final inspection by the local council or a private certifier, prior to filling.
Once certified, the pool can then be filled and chemically balanced; ready for swimming.
A start-up service is included in our Poolwerx Equipment Package.