Embed Size (px)
Citation preview
TruVision Device Manager User Manual
P/N 1073380-EN • REV A • ISS 15NOV17

Copyright © 2017 United Technologies Corporation, Interlogix is part of UTC Climate, Controls & Security, a unit of United Technologies Corporation. All rights reserved.
Trademarks and patents
Trade names used in this document may be trademarks or registered trademarks of the manufacturers or vendors of the respective products.
Manufacturer Interlogix, 2955 Red Hill Avenue, Costa Mesa, CA 92626-5923, USA Authorized EU manufacturing representative: UTC Fire & Security B.V. Kelvinstraat 7, 6003 DH Weert, The Netherlands
Contact information For contact information, go to: www.interlogix.com or www.firesecurityproducts.com.
Customer support www.interlogix.com/support
Content
Description 2
Installation prerequisites 2
Installation 2
Activate an inactive device 3
Device discovery 4 Search for active devices online 4 Add device 5
Device Manager tools 5 Change IP address 5 Reset password 6 Manual firmware update 7 Storage calculator 8 Device configuration backup and restore 8 Upload camera information 9 Change password 10
Storage calculator 10
Access the user manual online 11
TruVision Device Manager User Manual 1
Description The TruVision® Device Manager is standalone software that can discover Interlogix IP devices such as IP cameras, DVRs, NVRs, encoders, decoders, IFS switches, and TruPortal access panels on a network.
This manual explains how to use the TruVision Device Manager to find and configure network-related settings of TruVision devices, and to upgrade the firmware of individual devices or perform a bulk upgrade.
Installation prerequisites For each Windows computer running Microsoft Windows XP Pro or later operating systems: Download the latest operating system service pack from the Microsoft
Download Center.
Check for Windows updates at http://update.microsoft.com.
Download the latest video driver.
Installation To install TruVision Device Manager: 1. Double-click the TruVision Device Manager Setup.exe installer to begin the
installation.
2. If necessary, click Yes in the User Account Control window to make changes to the computer.
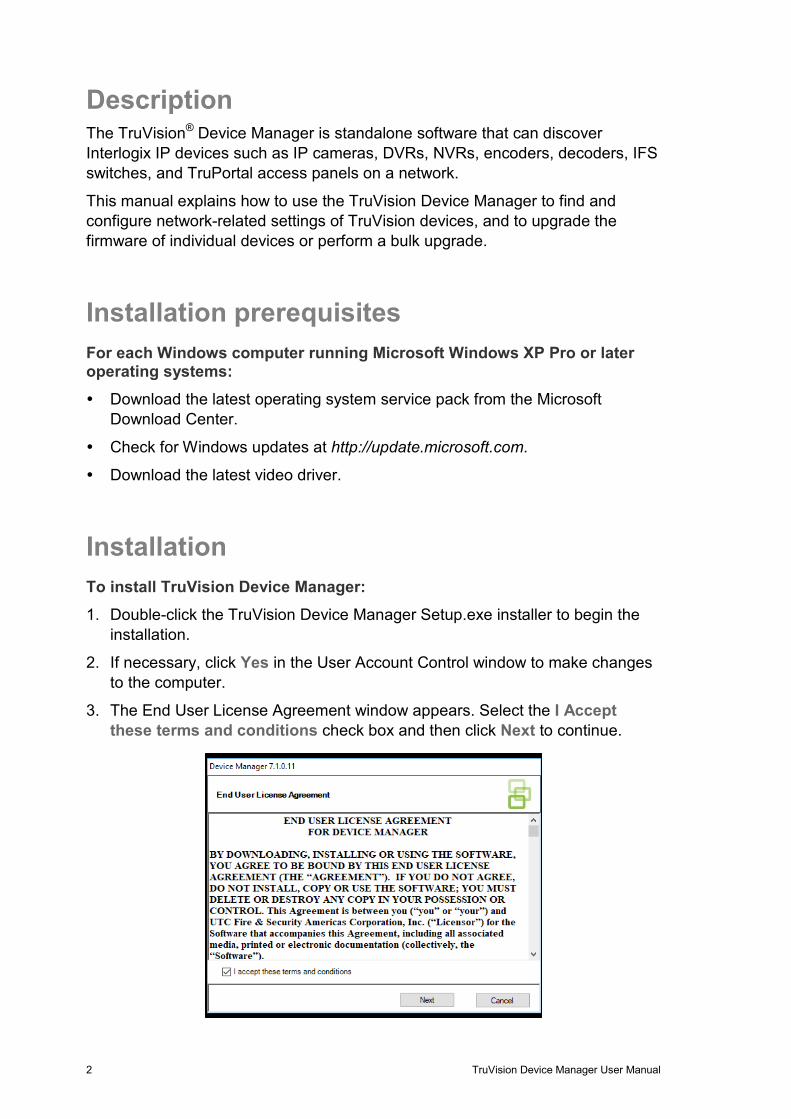
3. The End User License Agreement window appears. Select the I Accept these terms and conditions check box and then click Next to continue.
2 TruVision Device Manager User Manual
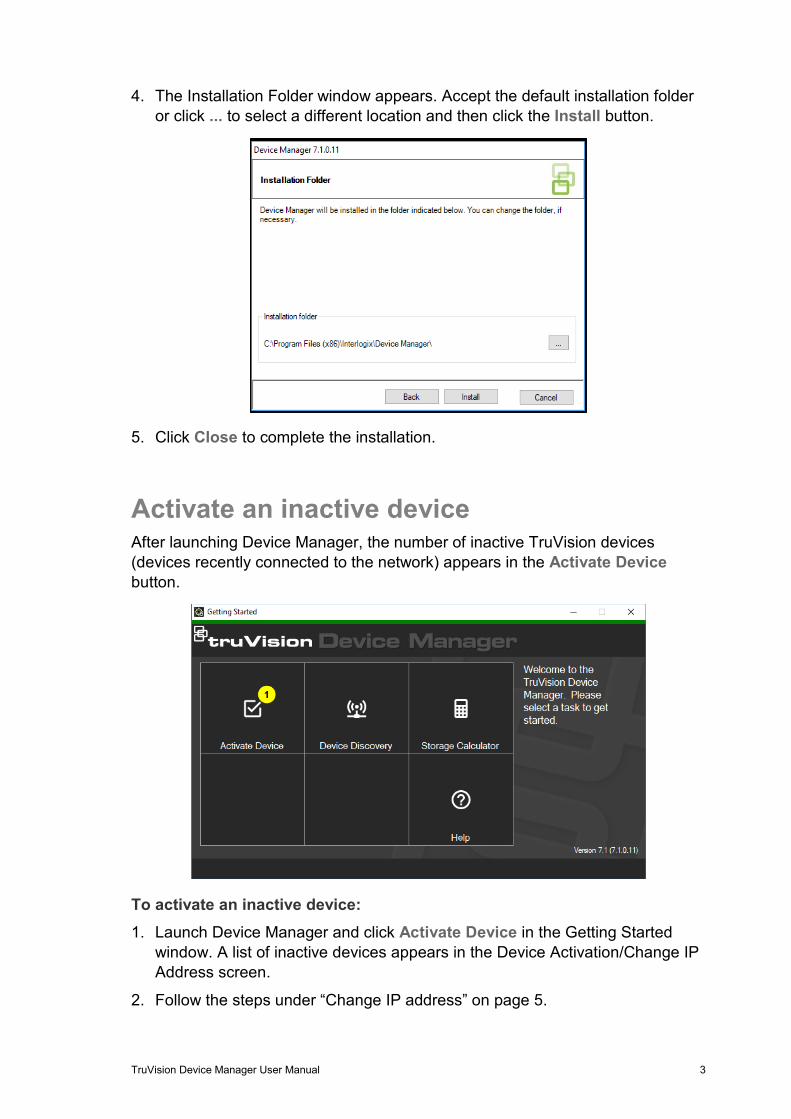
4. The Installation Folder window appears. Accept the default installation folder or click ... to select a different location and then click the Install button.
5. Click Close to complete the installation.
Activate an inactive device After launching Device Manager, the number of inactive TruVision devices (devices recently connected to the network) appears in the Activate Device button.
To activate an inactive device: 1. Launch Device Manager and click Activate Device in the Getting Started
window. A list of inactive devices appears in the Device Activation/Change IP Address screen.
2. Follow the steps under “Change IP address” on page 5.
TruVision Device Manager User Manual 3
3. An activate device success message appears.
Device discovery Device Manager searches for online devices within the local network and displays network information for the devices. It automatically searches every 15 seconds for the online devices in the computer’s local network and then displays the information for the found devices.
Note: Unmanaged devices do not support the discovery feature.
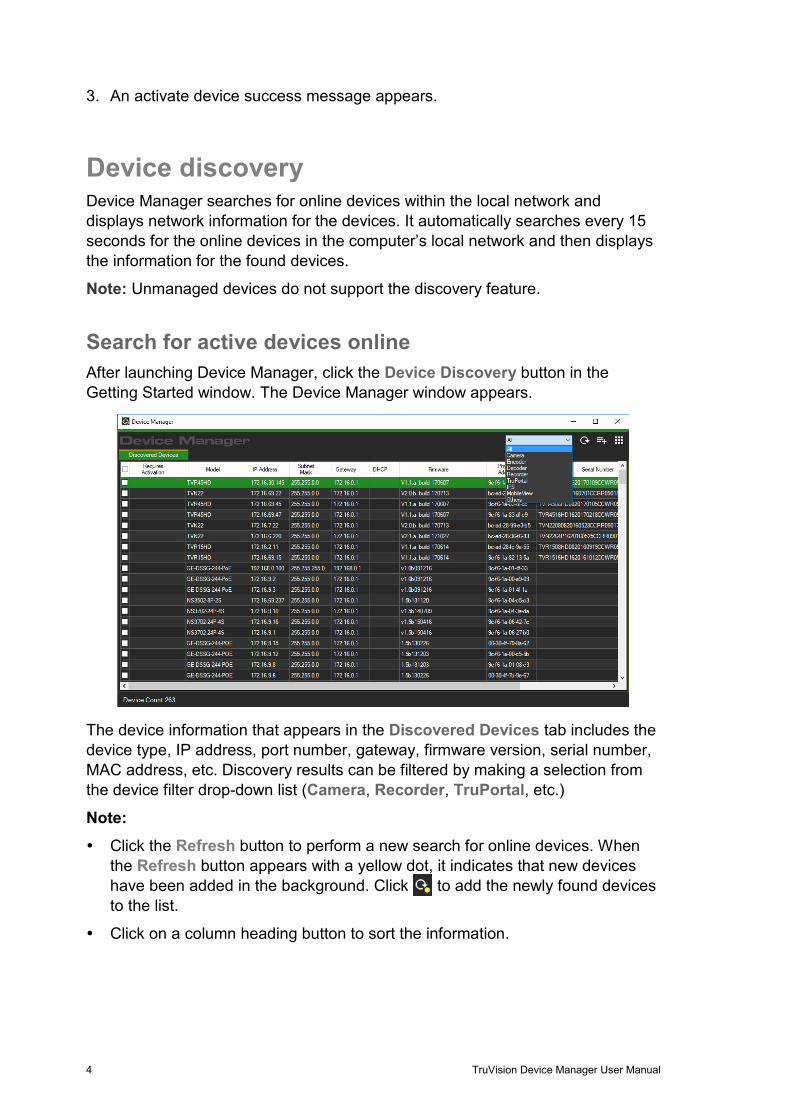
Search for active devices online After launching Device Manager, click the Device Discovery button in the Getting Started window. The Device Manager window appears.
The device information that appears in the Discovered Devices tab includes the device type, IP address, port number, gateway, firmware version, serial number, MAC address, etc. Discovery results can be filtered by making a selection from the device filter drop-down list (Camera, Recorder, TruPortal, etc.)
Note:
Click the Refresh button to perform a new search for online devices. When the Refresh button appears with a yellow dot, it indicates that new devices have been added in the background. Click to add the newly found devices to the list.
Click on a column heading button to sort the information.
4 TruVision Device Manager User Manual
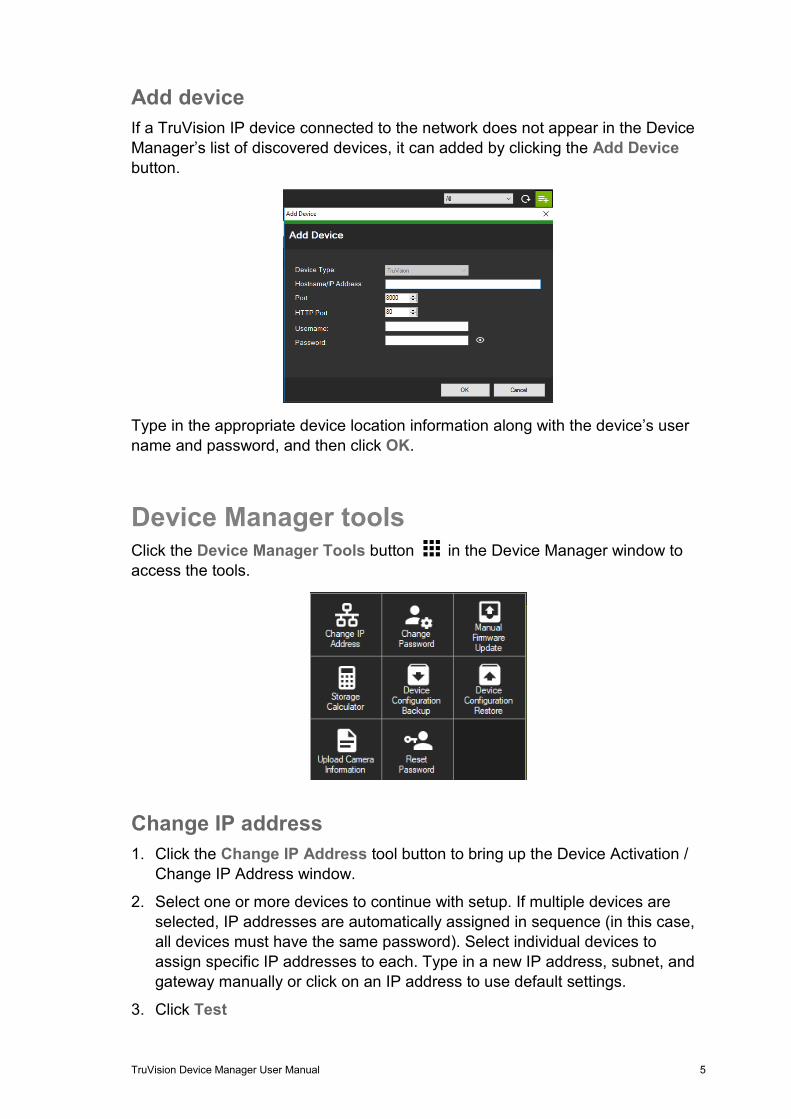
Add device If a TruVision IP device connected to the network does not appear in the Device Manager’s list of discovered devices, it can added by clicking the Add Device button.
Type in the appropriate device location information along with the device’s user name and password, and then click OK.
Device Manager tools Click the Device Manager Tools button in the Device Manager window to access the tools.
Change IP address 1. Click the Change IP Address tool button to bring up the Device Activation /
Change IP Address window.
2. Select one or more devices to continue with setup. If multiple devices are selected, IP addresses are automatically assigned in sequence (in this case, all devices must have the same password). Select individual devices to assign specific IP addresses to each. Type in a new IP address, subnet, and gateway manually or click on an IP address to use default settings.
3. Click Test
TruVision Device Manager User Manual 5
4. If the IP addresses were recognized as available, click Apply.
5. Click Yes to change the IP address for the selected devices.
Reset password If an admin (not a specific user) device password is lost, contact Technical Support to restore the password. There are two ways to restore the password. The method to be used depends on the device and its currently installed firmware.
To restore the default password (method 1): 1. Select the device for password reset in the main Device Manager window.
2. Click Device Manager Tools, and then click the Reset Password tool button.
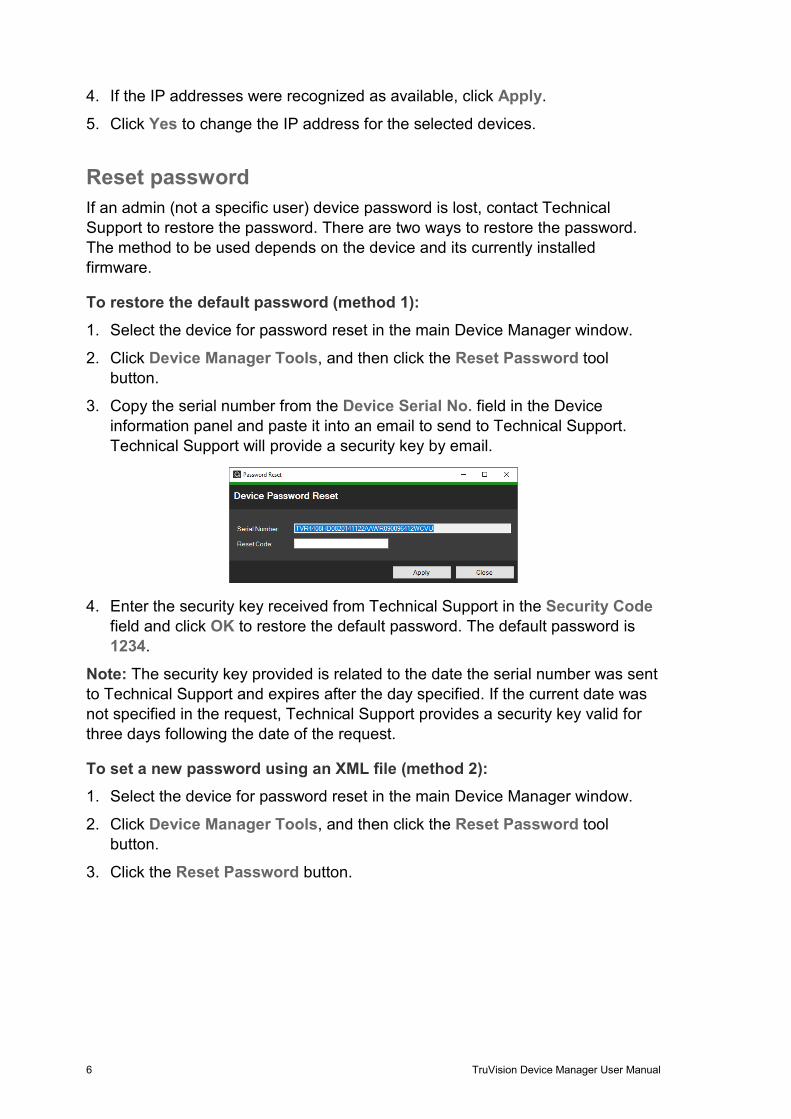
3. Copy the serial number from the Device Serial No. field in the Device information panel and paste it into an email to send to Technical Support. Technical Support will provide a security key by email.
4. Enter the security key received from Technical Support in the Security Code field and click OK to restore the default password. The default password is 1234.
Note: The security key provided is related to the date the serial number was sent to Technical Support and expires after the day specified. If the current date was not specified in the request, Technical Support provides a security key valid for three days following the date of the request.
To set a new password using an XML file (method 2): 1. Select the device for password reset in the main Device Manager window.
2. Click Device Manager Tools, and then click the Reset Password tool button.
3. Click the Reset Password button.
6 TruVision Device Manager User Manual
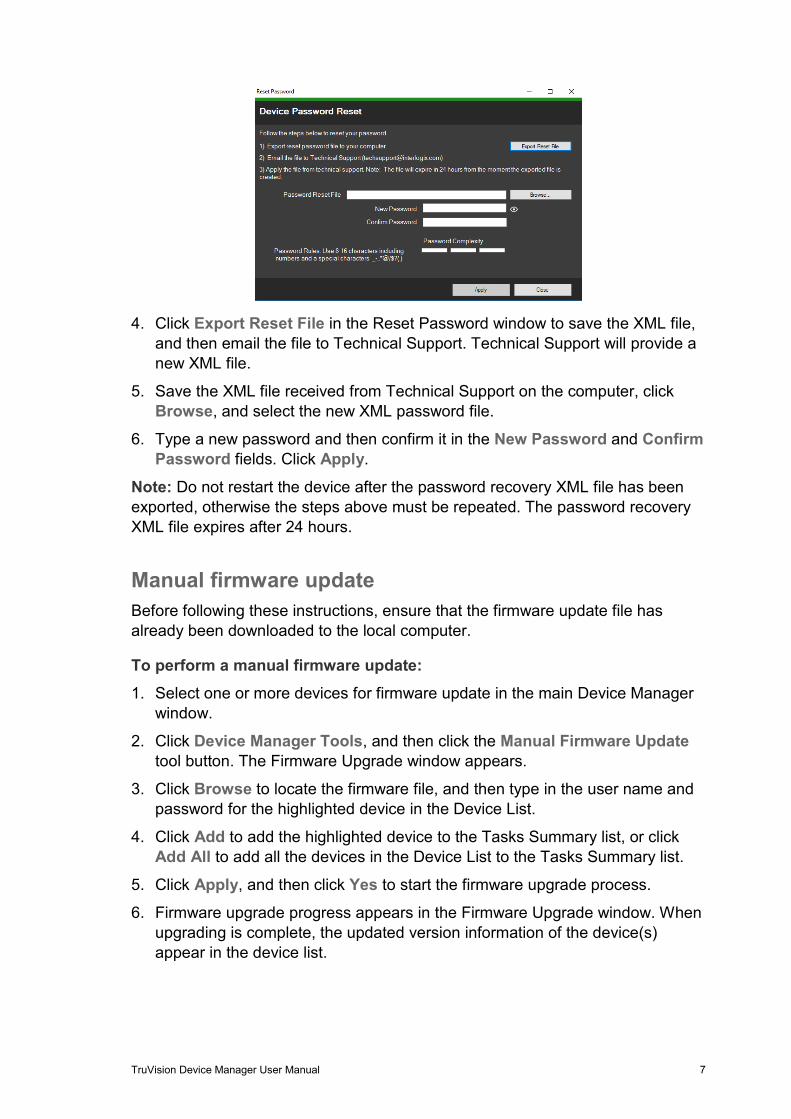
4. Click Export Reset File in the Reset Password window to save the XML file, and then email the file to Technical Support. Technical Support will provide a new XML file.
5. Save the XML file received from Technical Support on the computer, click Browse, and select the new XML password file.
6. Type a new password and then confirm it in the New Password and Confirm Password fields. Click Apply.
Note: Do not restart the device after the password recovery XML file has been exported, otherwise the steps above must be repeated. The password recovery XML file expires after 24 hours.
Manual firmware update Before following these instructions, ensure that the firmware update file has already been downloaded to the local computer.
To perform a manual firmware update: 1. Select one or more devices for firmware update in the main Device Manager
window.
2. Click Device Manager Tools, and then click the Manual Firmware Update tool button. The Firmware Upgrade window appears.
3. Click Browse to locate the firmware file, and then type in the user name and password for the highlighted device in the Device List.
4. Click Add to add the highlighted device to the Tasks Summary list, or click Add All to add all the devices in the Device List to the Tasks Summary list.
5. Click Apply, and then click Yes to start the firmware upgrade process.
6. Firmware upgrade progress appears in the Firmware Upgrade window. When upgrading is complete, the updated version information of the device(s) appear in the device list.
TruVision Device Manager User Manual 7
Storage calculator Select one or more devices in the main Device Manager window, click Device Manager Tools, and then click the Storage Calculator tool button. See “Storage calculator” on page 10 for details about the storage calculator.
Device configuration backup and restore Use these tools to backup and restore device configurations.
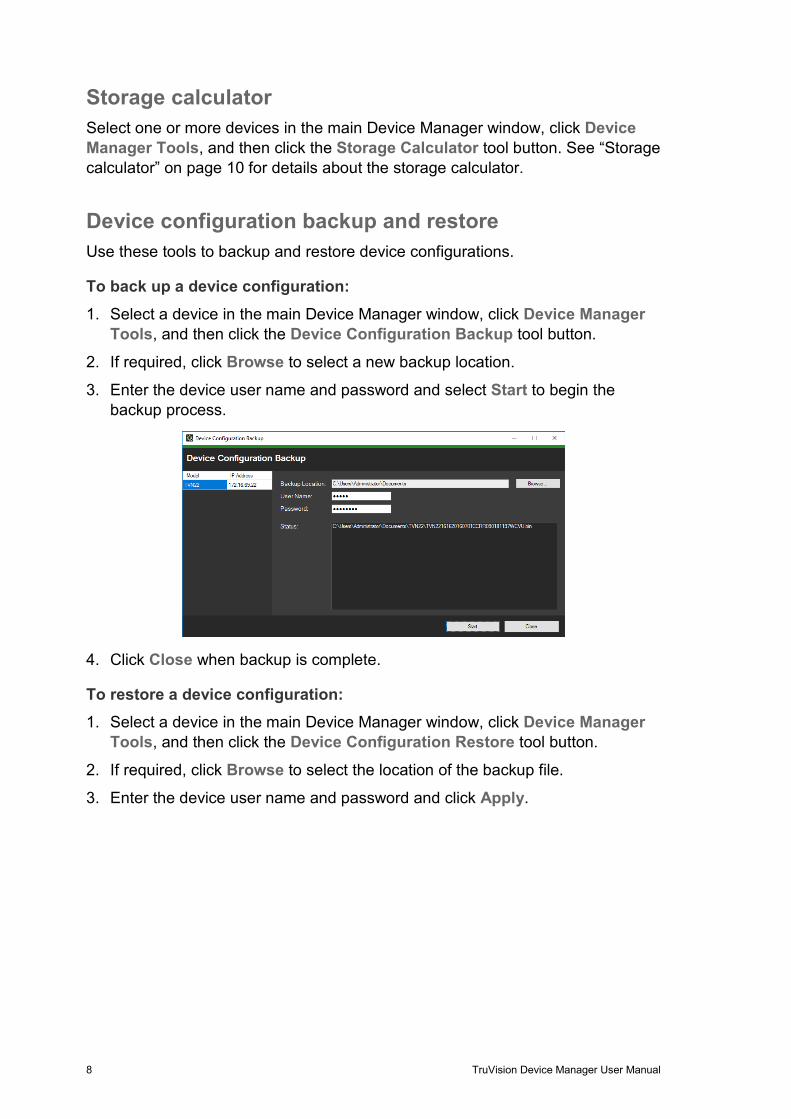
To back up a device configuration: 1. Select a device in the main Device Manager window, click Device Manager
Tools, and then click the Device Configuration Backup tool button.
2. If required, click Browse to select a new backup location.
3. Enter the device user name and password and select Start to begin the backup process.
4. Click Close when backup is complete.
To restore a device configuration: 1. Select a device in the main Device Manager window, click Device Manager
Tools, and then click the Device Configuration Restore tool button.
2. If required, click Browse to select the location of the backup file.
3. Enter the device user name and password and click Apply.
8 TruVision Device Manager User Manual

4. Click Yes to restore the device configuration.
Upload camera information Use this tool to restore the device configuration for cameras only.
Note: Not all cameras support this feature.
The list of recorders that can upload camera information is as follows:
TVN21
TVN22
TVN70
TVN71
TVR15HD
TVR45HD
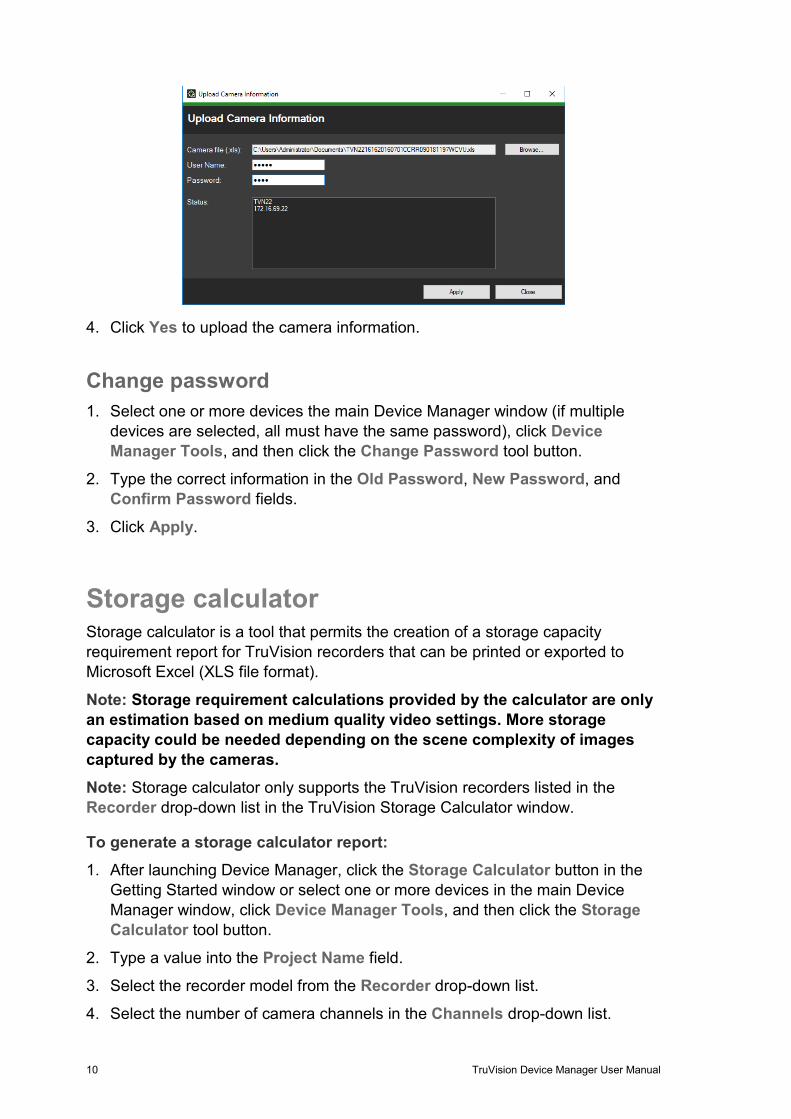
To upload camera information: 1. Select a supported recorder in the main Device Manager window, click
Device Manager Tools, and then click the Upload Camera Information tool button.
2. Click Browse to select the location of the configuration file.
3. Type in the recorder user name and password and click Apply.
TruVision Device Manager User Manual 9
4. Click Yes to upload the camera information.
Change password 1. Select one or more devices the main Device Manager window (if multiple
devices are selected, all must have the same password), click Device Manager Tools, and then click the Change Password tool button.
2. Type the correct information in the Old Password, New Password, and Confirm Password fields.
3. Click Apply.
Storage calculator Storage calculator is a tool that permits the creation of a storage capacity requirement report for TruVision recorders that can be printed or exported to Microsoft Excel (XLS file format).
Note: Storage requirement calculations provided by the calculator are only an estimation based on medium quality video settings. More storage capacity could be needed depending on the scene complexity of images captured by the cameras.
Note: Storage calculator only supports the TruVision recorders listed in the Recorder drop-down list in the TruVision Storage Calculator window.
To generate a storage calculator report: 1. After launching Device Manager, click the Storage Calculator button in the
Getting Started window or select one or more devices in the main Device Manager window, click Device Manager Tools, and then click the Storage Calculator tool button.
2. Type a value into the Project Name field.
3. Select the recorder model from the Recorder drop-down list.
4. Select the number of camera channels in the Channels drop-down list.
10 TruVision Device Manager User Manual
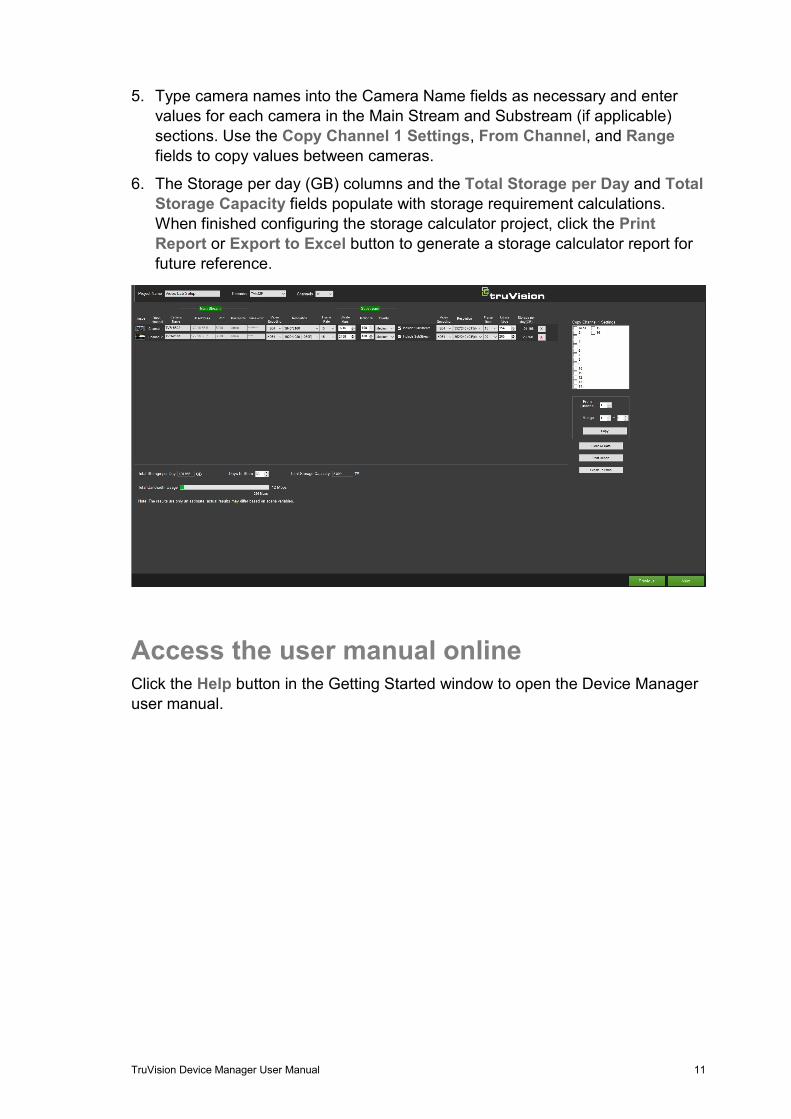
5. Type camera names into the Camera Name fields as necessary and enter values for each camera in the Main Stream and Substream (if applicable) sections. Use the Copy Channel 1 Settings, From Channel, and Range fields to copy values between cameras.
6. The Storage per day (GB) columns and the Total Storage per Day and Total Storage Capacity fields populate with storage requirement calculations. When finished configuring the storage calculator project, click the Print Report or Export to Excel button to generate a storage calculator report for future reference.
Access the user manual online Click the Help button in the Getting Started window to open the Device Manager user manual.
TruVision Device Manager User Manual 11