Embed Size (px)
Citation preview

O-50
TV, fi lm and special effects make-up (B16) (B17)
(B18) (B19)
4
Learning objectivesFor learning objectives covering these units, see under each section, pages O-48, O-54,
O-61 and O-69.
I am currently
working on the
Harry Potter 7
fi lm (Deathly Hallows I & II) for Make-up Effects Designer Nick
Dudman.
My role includes – Make-up effects artist, wigmaker, hair
puncher and art-fi nisher, lifecaster.
Short CV:
FilmsHarry Potter 7 – Deathly Hallows, Stardust, Children of Men
Harry Potter 5 – Order of the Phoenix
Harry Potter 4 – Goblet of Fire
Harry Potter 3 – Prisoner of Azkaban
Harry Potter 2 – Chamber of Secrets.
TV – as a make-up artist and effects artistHotel Babylon
Moving Wallpaper
Sarah Jane Adventures
Trial and Retribution.
ROLE MODEL
“Adrian RigbySpecial make-up effects artist
AD
RIA
N R
IGB
Y
IST
OC
K/©
BJO
NE
S2
7
B16 Unit Learning Objectives
This section covers Unit B16 Prepare to change the performer’s appearance.
This unit outlines the preparation methods undertaken
to safely change the performer’s appearance. To achieve
competence in this unit, you must show a satisfactory level
of personal presentation and hygiene. You must organize
and arrange your workstation, materials and equipment
for easy access by all users and keep workstations clean,
hygienic and tidy.
You must ensure that you make full use of lighting and
ventilation of the workarea and surrounding environment,
including using materials and equipment safely. You are
required to recognize infectious and contagious skin and hair
conditions, and deal correctly with contamination of materi-
als and equipment to prevent cross-infection.
You must advise performers of any possible discomfort
and possible contra-actions and encourage them to ask
questions about make-up and/or hair work to minimize
their concerns.
Unit B16 describes the competencies to enable you to:
● prepare to change the performer’s appearance.
Your assessor will observe your performance on at least three separate occasions.
(continued on the next page)(continued on the next page)
CH
AP
TER 4 (B
16
) (B1
7) (B
18
) (B1
9) T
V, F
ILM
AN
D S
PE
CIA
L E
FF
EC
TS
MA
KE
-UP
O-51
IntroductionWhen preparing to change a performer’s appearance, there are several things to take
into consideration before you start. You must be very organized and set up your working
area with the relevant kit for the day, and organize the kit to take on set. You must work
safely and hygienically and provide on-going information, advice and support to your
performer.
In the area of television and fi lm make-up, times will vary according to the demands of
the production and performers. More time is allowed for fi lm as it is viewed on a magni-
fi ed screen so has to be perfect in extreme close-up. More time should also be allowed
for high defi nition television (HDTV). The following can, therefore, only be used as a
rough guide.
● Straight corrective make-up for men – maximum 15 minutes
● Straight corrective make-up – 15–30 minutes
● Glamorous make-up – 30–40 minutes
● Ageing make-up with highlight and shadow – 30 minutes
● Special effects/casualty/prosthetic make-up – 10 minutes to 3 hours or more.
This will all depend on the complexity of the required effects.
Outcome: Prepare to change the performer’s appearanceUnit B16 Prepare to change the performer’s appearance by:
1 preparing and organizing work stations, materials and equipment to ensure easy
access and use throughout the make-up and/or hair process
2 maintaining a satisfactory level of personal dress and hygiene to avoid
transmitting infection to performers
3 keeping work station materials, equipment and on-set kit fully stocked, tidy and
hygienic throughout the production and in all working environments
4 cleaning make-up and/or hair materials using approved cleaning materials and
methods
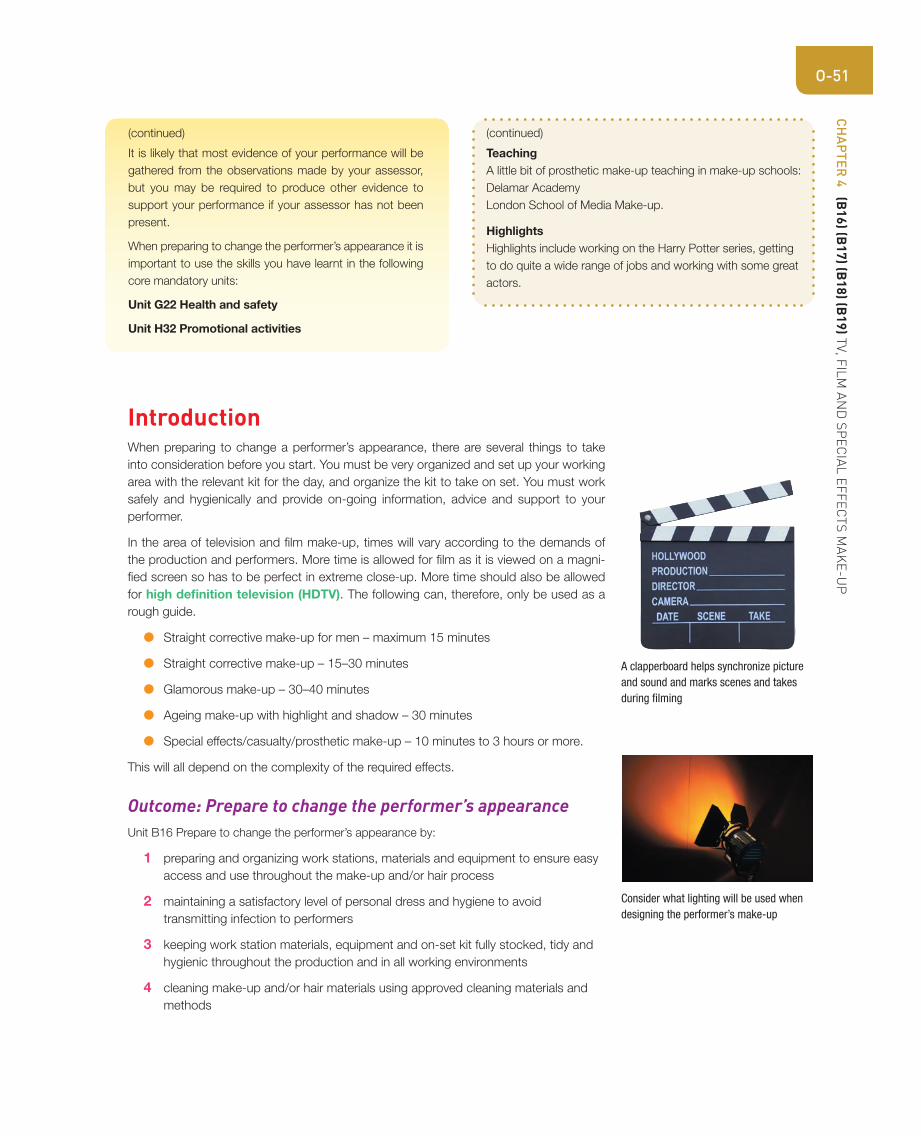
A clapperboard helps synchronize picture and sound and marks scenes and takes during fi lming
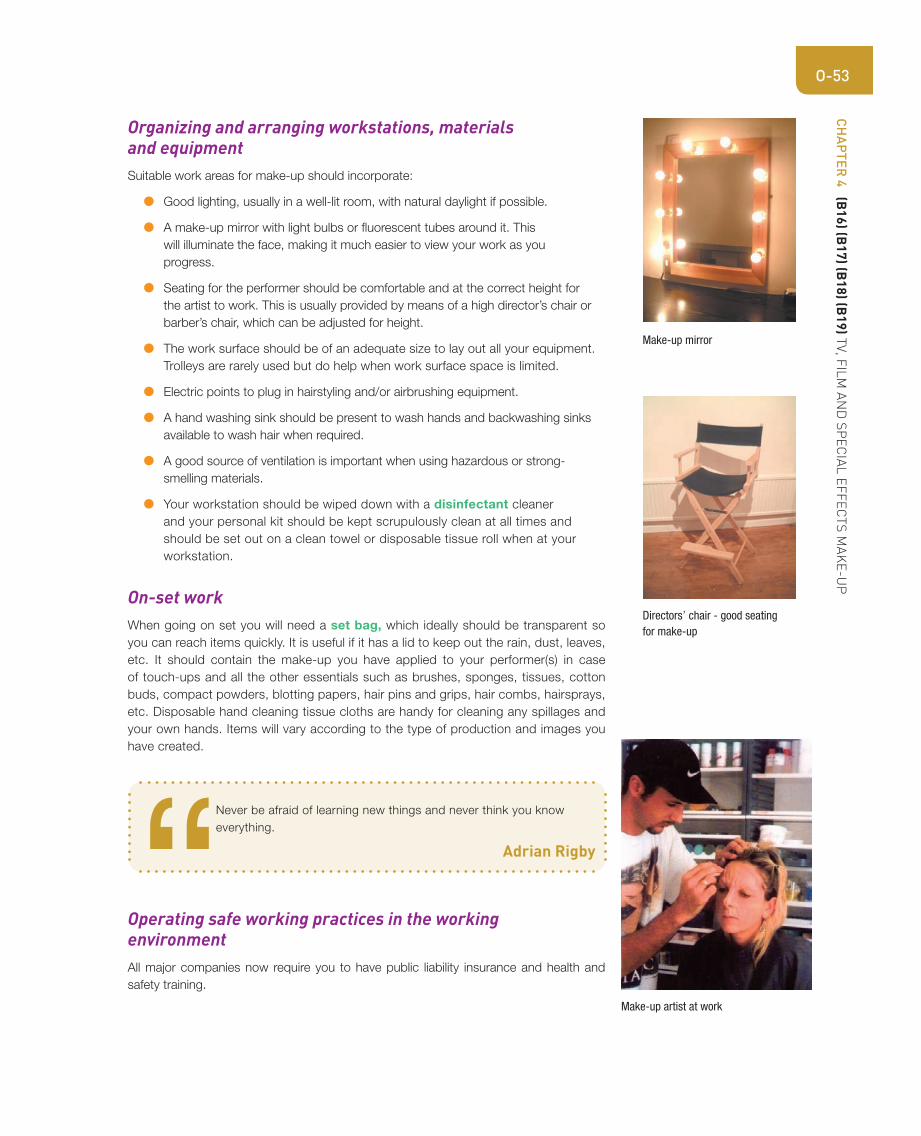
Consider what lighting will be used when designing the performer’s make-up
It is likely that most evidence of your performance will be
gathered from the observations made by your assessor,
but you may be required to produce other evidence to
support your performance if your assessor has not been
present.
When preparing to change the performer’s appearance it is
important to use the skills you have learnt in the following
core mandatory units:
Unit G22 Health and safety
Unit H32 Promotional activities
(continued)
TeachingA little bit of prosthetic make-up teaching in make-up schools:
Delamar Academy
London School of Media Make-up.
HighlightsHighlights include working on the Harry Potter series, getting
to do quite a wide range of jobs and working with some great
actors.
(continued)

LEVEL 3 PR
OF
ES
SIO
NA
L B
EA
UT
Y T
HE
RA
PY
O-52
5 labelling material containers clearly with complete information necessary for safe
use
6 handling, storing and disposing of the following in a safe and hygienic manner:
� make-up and/or hair materials
� tools
� equipment
� hazardous substances
7 recognizing infectious or contagious skin and/or hair conditions that could
contaminate make-up and/or hair materials and equipment
8 dealing with contamination of make-up and/or hair materials and equipment
effectively and taking the necessary steps to avoid passing contamination on to
other performers
9 advising performers about:
� potential adverse reactions or discomfort that could be caused by make-up
and/or hair processes
� steps that will be taken to minimize the possibility of adverse reactions or
discomfort
10 being ready to answer questions about the make-up and/or hair processes which
performers will undergo
Good lightingNatural light and/or make-up mirror with
bulbs or fl uorescent lights around it
Set bagWith all supplies including make-up,
clips, pins, brushes, sponges, hair
products, make-up remover, etc.
Electric plug-in pointTo plug in hairstyling and/or airbrushing
equipment
SeatingHigh director’s chair/barber’s chair
Work surfaceTo display and organise equipment and
materials
Can include but not limited to a trolley
SinkA handwashing sink is essential; a
backwash sink will be required if styling
hair
YOU WILL ALSO NEED:
Ventilation If using hazardous or strong-smelling materials
Disinfectant cleanser
Towels Disposable hand cleaning tissues/cloths
Hand sanitizer Protective disposable gloves
Water sprays
EQUIPMENT AND MATERIALS LIST
CH
AP
TER 4 (B
16
) (B1
7) (B
18
) (B1
9) T
V, F
ILM
AN
D S
PE
CIA
L E
FF
EC
TS
MA
KE
-UP
O-53
Organizing and arranging workstations, materials and equipmentSuitable work areas for make-up should incorporate:
● Good lighting, usually in a well-lit room, with natural daylight if possible.
● A make-up mirror with light bulbs or fl uorescent tubes around it. This
will illuminate the face, making it much easier to view your work as you
progress.
● Seating for the performer should be comfortable and at the correct height for
the artist to work. This is usually provided by means of a high director’s chair or
barber’s chair, which can be adjusted for height.
● The work surface should be of an adequate size to lay out all your equipment.
Trolleys are rarely used but do help when work surface space is limited.
● Electric points to plug in hairstyling and/or airbrushing equipment.
● A hand washing sink should be present to wash hands and backwashing sinks
available to wash hair when required.
● A good source of ventilation is important when using hazardous or strong-
smelling materials.
● Your workstation should be wiped down with a disinfectant cleaner
and your personal kit should be kept scrupulously clean at all times and
should be set out on a clean towel or disposable tissue roll when at your
workstation.
On-set workWhen going on set you will need a set bag, which ideally should be transparent so
you can reach items quickly. It is useful if it has a lid to keep out the rain, dust, leaves,
etc. It should contain the make-up you have applied to your performer(s) in case
of touch-ups and all the other essentials such as brushes, sponges, tissues, cotton
buds, compact powders, blotting papers, hair pins and grips, hair combs, hairsprays,
etc. Disposable hand cleaning tissue cloths are handy for cleaning any spillages and
your own hands. Items will vary according to the type of production and images you
have created.
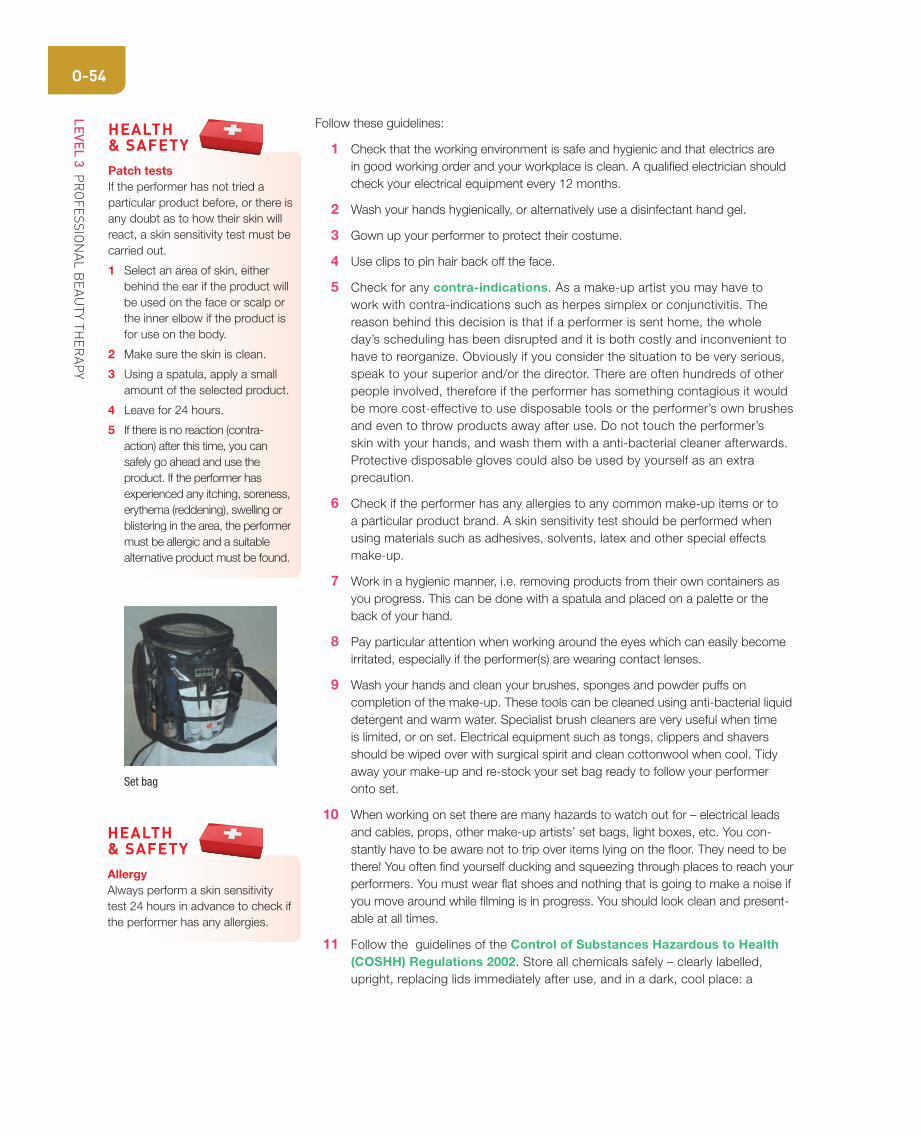
Make-up mirror
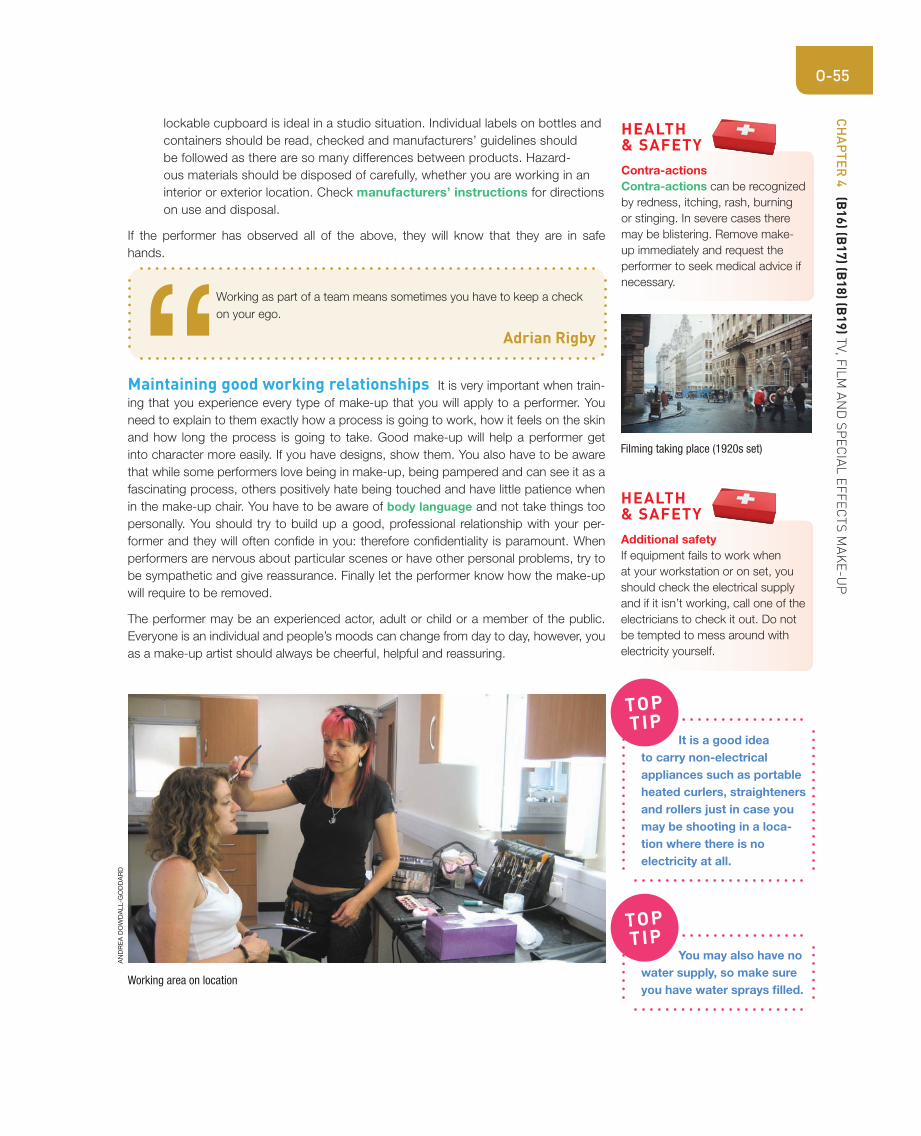
Directors’ chair - good seating for make-up
Make-up artist at work
“ Never be afraid of learning new things and never think you know
everything.
Adrian Rigby
Operating safe working practices in the working environmentAll major companies now require you to have public liability insurance and health and
safety training.
LEVEL 3 PR
OF
ES
SIO
NA
L B
EA
UT
Y T
HE
RA
PY
O-54
Follow these guidelines:
1 Check that the working environment is safe and hygienic and that electrics are
in good working order and your workplace is clean. A qualifi ed electrician should
check your electrical equipment every 12 months.
2 Wash your hands hygienically, or alternatively use a disinfectant hand gel.
3 Gown up your performer to protect their costume.
4 Use clips to pin hair back off the face.
5 Check for any contra-indications. As a make-up artist you may have to
work with contra-indications such as herpes simplex or conjunctivitis. The
reason behind this decision is that if a performer is sent home, the whole
day’s scheduling has been disrupted and it is both costly and inconvenient to
have to reorganize. Obviously if you consider the situation to be very serious,
speak to your superior and/or the director. There are often hundreds of other
people involved, therefore if the performer has something contagious it would
be more cost-effective to use disposable tools or the performer’s own brushes
and even to throw products away after use. Do not touch the performer’s
skin with your hands, and wash them with a anti-bacterial cleaner afterwards.
Protective disposable gloves could also be used by yourself as an extra
precaution.
6 Check if the performer has any allergies to any common make-up items or to
a particular product brand. A skin sensitivity test should be performed when
using materials such as adhesives, solvents, latex and other special effects
make-up.
7 Work in a hygienic manner, i.e. removing products from their own containers as
you progress. This can be done with a spatula and placed on a palette or the
back of your hand.
8 Pay particular attention when working around the eyes which can easily become
irritated, especially if the performer(s) are wearing contact lenses.
9 Wash your hands and clean your brushes, sponges and powder puffs on
completion of the make-up. These tools can be cleaned using anti-bacterial liquid
detergent and warm water. Specialist brush cleaners are very useful when time
is limited, or on set. Electrical equipment such as tongs, clippers and shavers
should be wiped over with surgical spirit and clean cottonwool when cool. Tidy
away your make-up and re-stock your set bag ready to follow your performer
onto set.
10 When working on set there are many hazards to watch out for – electrical leads
and cables, props, other make-up artists’ set bags, light boxes, etc. You con-
stantly have to be aware not to trip over items lying on the fl oor. They need to be
there! You often fi nd yourself ducking and squeezing through places to reach your
performers. You must wear fl at shoes and nothing that is going to make a noise if
you move around while fi lming is in progress. You should look clean and present-
able at all times.
11 Follow the guidelines of the Control of Substances Hazardous to Health (COSHH) Regulations 2002. Store all chemicals safely – clearly labelled,
upright, replacing lids immediately after use, and in a dark, cool place: a
HEALTH& SAFETY
AllergyAlways perform a skin sensitivity
test 24 hours in advance to check if
the performer has any allergies.
HEALTH& SAFETY
Patch testsIf the performer has not tried a
particular product before, or there is
any doubt as to how their skin will
react, a skin sensitivity test must be
carried out.
1 Select an area of skin, either
behind the ear if the product will
be used on the face or scalp or
the inner elbow if the product is
for use on the body.
2 Make sure the skin is clean.
3 Using a spatula, apply a small
amount of the selected product.
4 Leave for 24 hours.
5 If there is no reaction (contra-
action) after this time, you can
safely go ahead and use the
product. If the performer has
experienced any itching, soreness,
erythema (reddening), swelling or
blistering in the area, the performer
must be allergic and a suitable
alternative product must be found.
Set bag
CH
AP
TER 4 (B
16
) (B1
7) (B
18
) (B1
9) T
V, F
ILM
AN
D S
PE
CIA
L E
FF
EC
TS
MA
KE
-UP
O-55
HEALTH& SAFETY
Contra-actionsContra-actions can be recognized
by redness, itching, rash, burning
or stinging. In severe cases there
may be blistering. Remove make-
up immediately and request the
performer to seek medical advice if
necessary.
HEALTH& SAFETY
Additional safetyIf equipment fails to work when
at your workstation or on set, you
should check the electrical supply
and if it isn’t working, call one of the
electricians to check it out. Do not
be tempted to mess around with
electricity yourself.
Filming taking place (1920s set)
Working area on location
lockable cupboard is ideal in a studio situation. Individual labels on bottles and
containers should be read, checked and manufacturers’ guidelines should
be followed as there are so many differences between products. Hazard-
ous materials should be disposed of carefully, whether you are working in an
interior or exterior location. Check manufacturers’ instructions for directions
on use and disposal.
If the performer has observed all of the above, they will know that they are in safe
hands.
“ Working as part of a team means sometimes you have to keep a check
on your ego.
Adrian Rigby
Maintaining good working relationships It is very important when train-
ing that you experience every type of make-up that you will apply to a performer. You
need to explain to them exactly how a process is going to work, how it feels on the skin
and how long the process is going to take. Good make-up will help a performer get
into character more easily. If you have designs, show them. You also have to be aware
that while some performers love being in make-up, being pampered and can see it as a
fascinating process, others positively hate being touched and have little patience when
in the make-up chair. You have to be aware of body language and not take things too
personally. You should try to build up a good, professional relationship with your per-
former and they will often confi de in you: therefore confi dentiality is paramount. When
performers are nervous about particular scenes or have other personal problems, try to
be sympathetic and give reassurance. Finally let the performer know how the make-up
will require to be removed.
The performer may be an experienced actor, adult or child or a member of the public.
Everyone is an individual and people’s moods can change from day to day, however, you
as a make-up artist should always be cheerful, helpful and reassuring.
AN
DR
EA
DO
WD
ALL-G
OD
DA
RD
It is a good idea to carry non-electrical appliances such as portable heated curlers, straighteners and rollers just in case you may be shooting in a loca-tion where there is no electricity at all.
TOP
TIP
You may also have no water supply, so make sure you have water sprays fi lled.
TOP
TIP
LEVEL 3 PR
OF
ES
SIO
NA
L B
EA
UT
Y T
HE
RA
PY
O-56
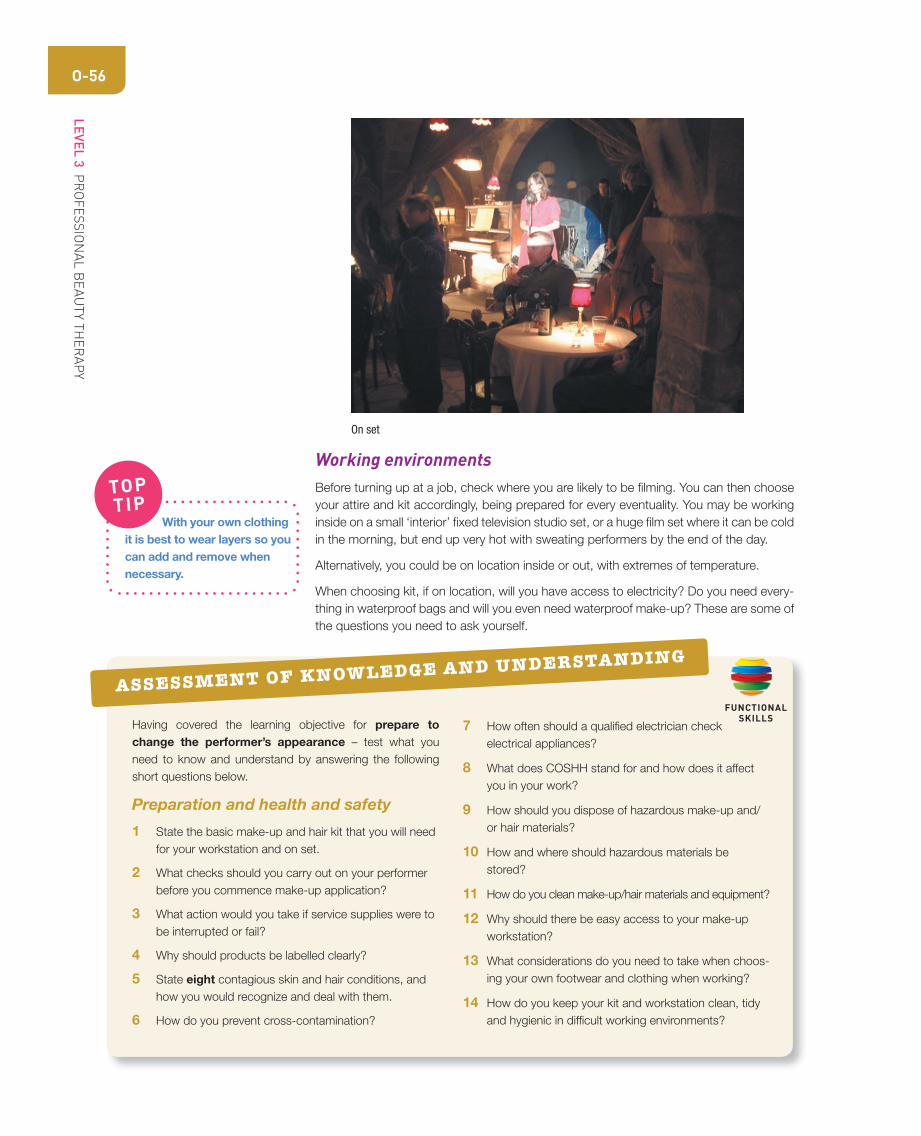
Working environmentsBefore turning up at a job, check where you are likely to be fi lming. You can then choose
your attire and kit accordingly, being prepared for every eventuality. You may be working
inside on a small ‘interior’ fi xed television studio set, or a huge fi lm set where it can be cold
in the morning, but end up very hot with sweating performers by the end of the day.
Alternatively, you could be on location inside or out, with extremes of temperature.
When choosing kit, if on location, will you have access to electricity? Do you need every-
thing in waterproof bags and will you even need waterproof make-up? These are some of
the questions you need to ask yourself.
On set
Having covered the learning objective for prepare to change the performer’s appearance – test what you
need to know and understand by answering the following
short questions below.
Preparation and health and safety
1 State the basic make-up and hair kit that you will need
for your workstation and on set.
2 What checks should you carry out on your performer
before you commence make-up application?
3 What action would you take if service supplies were to
be interrupted or fail?
4 Why should products be labelled clearly?
5 State eight contagious skin and hair conditions, and
how you would recognize and deal with them.
6 How do you prevent cross-contamination?
ASSESSMENT OF KNOWLEDGE AND UNDERSTANDING
7 How often should a qualifi ed electrician check
electrical appliances?
8 What does COSHH stand for and how does it affect
you in your work?
9 How should you dispose of hazardous make-up and/
or hair materials?
10 How and where should hazardous materials be
stored?
11 How do you clean make-up/hair materials and equipment?
12 Why should there be easy access to your make-up
workstation?
13 What considerations do you need to take when choos-
ing your own footwear and clothing when working?
14 How do you keep your kit and workstation clean, tidy
and hygienic in diffi cult working environments?
With your own clothing it is best to wear layers so you can add and remove when necessary.
TOP
TIP
FUNCTIONALSKILLS

CH
AP
TER 4 (B
16
) (B1
7) (B
18
) (B1
9) T
V, F
ILM
AN
D S
PE
CIA
L E
FF
EC
TS
MA
KE
-UP
O-57
B17 Unit Learning Objectives
This section covers Unit B17 Assist with the continuity of the performer’s appearance.
This unit outlines what is required to assist with the conti-
nuity of the performer’s appearance.
You must ensure that your performer’s make-up and/or
hair meet the design specifi cation at the start of shoot-
ing and, where appropriate, at the end of the previous se-
quential take. You must be able to workout the developing
effects presented in the script.
You must also keep complete and accurate continuity
records and make sure that your presence on set is not
intrusive or disruptive.
Unit B17 describes the competencies that enable you to:
● assist with the continuity of the performer’s
appearance.
Your assessor will observe your performance on at least three separate occasions.
It is likely that most evidence of your performance will be
gathered from the observations made by your assessor,
but you may be required to produce other evidence to
support your performance if your assessor has not been
present.
This unit was developed by Skillset, the Sector Skills
Council for the Audio Visual Industries.
When assisting with continuity of the performer’s appear-
ance it is important to use the skills you have learnt in the
following core mandatory units:
Unit G22 Health and safety
Unit H32 Promotional activities
IntroductionContinuity is the maintenance of continuous action, and consistency of detail in the
scenes of the fi lm or programme. You could be fi lming on one day and shoot several
scenes which are not in the order in which they appear in the fi nal fi lm. For instance,
you may shoot outdoor scenes one week then interior ones the next. In the fi nal fi lm
you may see the performer in the street entering a house but they must look identical
inside and out, even though they are shot at different times. You cannot rely on your
memory when trying to recreate the look, so you refer to worksheets, make-up notes,
digital camera photos, Polaroids and even video as well as your own eyes. Note that
at the time of writing, digital photography has superseded the use of Polaroids and
LEVEL 3 PR
OF
ES
SIO
NA
L B
EA
UT
Y T
HE
RA
PY
O-58
some make-up artists are also carrying a portable printer. On worksheets you can add
colour samples of the make-up and attach hair colour samples. Continuity is of the
utmost importance when fi lming and if something is wrong it will be incredibly obvious
to the viewer.
You constantly refer to your reference material throughout the day to check that the make-
up and hair is as it should be and to check facial hair, wigs and prosthetics are still secure.
Lipstick will need retouching and performers will need powdering. You may also have to
add tears, dirt or sweat to the performer.
Your story may follow a character over a period of several years, and you would therefore
need to consider the effects of ageing, change of hair colour, style and growth, healing of
wounds, the progress of disease and the effect of the environment on hair and skin. Skin tones and colours of make-up can change depending on locations, time of day and the
general environment that they are placed in. With experience you can anticipate these
changes.
Outcome: Assist with the continuity of the performer's appearanceUnit B17 Assist with the continuity of the performer’s appearance by:
1 confi rming the design specifi cation requirements with the relevant person(s)
2 making sure that suffi cient materials and equipment for recording information are
available and in good working order, prior to the start of the shoot
3 maintaining continuity of the performer’s appearance throughout the production
as requested by the relevant person(s)
4 check and agree with the relevant person that the performer’s make-up and/or
hair meets the design specifi cation for the production
5 checking the hair and make-up implications of developing effects suggested
within the script with the relevant person
6 minimizing disruption of the production when making continuity make-up and/or
hair changes and agreeing changes with the relevant person(s)
7 compiling the sources of continuity detail that are available
8 ensuring that you keep records of hair and skin continuity detail and ensure that
such records are:
● accurate
● easily accessible to the relevant person(s) who require them
Pre-productionWhen a make-up designer is asked to work on a production, the fi rst real piece of
information they will receive is the script, which is then broken down, highlighting any
areas which will affect make-up and hair. The designer will also receive a character list to
include background artistes, and a shooting schedule. A meeting will initially take place
with the producer, director and costume designer about the design specifi cation for the
production, and the budget required. Using this information, the make-up and hair are
CH
AP
TER 4 (B
16
) (B1
7) (B
18
) (B1
9) T
V, F
ILM
AN
D S
PE
CIA
L E
FF
EC
TS
MA
KE
-UP
O-59
BEST PRACTICE
Make sure you always keep a good
stock of continuity reference materi-
als and equipment.
BEST PRACTICE
Remember and consider time
factors in the script – how make-up
would wear naturally throughout
the day, action and environmen-tal conditions. Overall you must
achieve realism and credibility on
screen.
Positioning yourselfYou must position yourself on set carefully.
1 Ideally you should be able to see the monitor and not be standing in the performer’s eye line or in the way of fi lming.
2 Check which way the camera(s) are pointing and make sure you are somewhere behind them.
3 Do not stand in anyone else’s way or cause an obstruction to colleagues or fi lming equipment.
TOP
TIP
researched and designed onto the continuity character sheet, details fi lled in and photos
added as the shoot progresses. Test shots can be carried out to check that the make-up
and hair is going to work on screen. The director must approve the overall appearance,
and the make-up artists take their instructions from the make-up designer. Performers
will need to be checked for any allergic reactions, and pre-production make-up is carried
out on the main performers, especially when the script calls for more complicated looks,
including prosthetics, wigs, hairpieces and casualty effects. Wigs etc. will need to be
pre-ordered or even made from scratch, depending on the length of preparation time
and budget.
Lighting effectsIn a television studio, the lighting is already fi xed before you arrive on set, giving set
lighting effects. If you have done the best make-up job you can with the performer, but
they do not look good on the monitor, you can speak nicely about your concerns with the
director of photography or the lighting crew, and they may just be able to alter the lighting
to make your performer look a bit better.
For exterior shots the lighting will vary depending on the weather and time of day. Often
‘fi ll-in’ lighting is used, and silver or gold refl ector boards. Interior lighting on location is
usually set up for a shorter period, and your make-up can look different inside and out
due to different colour temperatures.
On a fi lm set the performers’ rather than the set, are lit, so you will fi nd it much more
fl attering for the overall look of your performer. Much more time is allowed, and there will
be lighting changes for close-up, middle and long distance shots.
The keeping and storage of continuity referencesContinuity records for the scenes you are fi lming, and where appropriate, previous
sequential ones should be kept on set while fi lming, then stored in the make-up room
and indexed in scene order for easy reference when needed. Occasionally a scene may
need to be re-shot at a later date. You may have to recreate a make-up that you did 6
months previously.
Good working relationships and checking your performerGood working relationships with performers and colleagues should be maintained at all
times. You should always be friendly, calm and professional. When fi lming you work long
hours which can be both tiring and stressful. The make-up room should be a safe envi-
ronment and always have a good atmosphere. One diffi cult performer or crew member
can cause feelings of animosity and cause problems, which in turn can cause ill-feeling in
many others. Teamwork and the support of colleagues are very important.
During fi lming, when you need to check a performer you need to be as quick, unobtrusive
and effi cient as possible, so as not to hold up fi lming.
Frequency and length of checks will depend on the performers’ needs and/or the direc-
tor. Wait for checks to be called before a take, and go in quickly. You should limit con-
versation and try not to distract the performer as it can break their concentration. Some Continuity aids
LEVEL 3 PR
OF
ES
SIO
NA
L B
EA
UT
Y T
HE
RA
PY
O-60
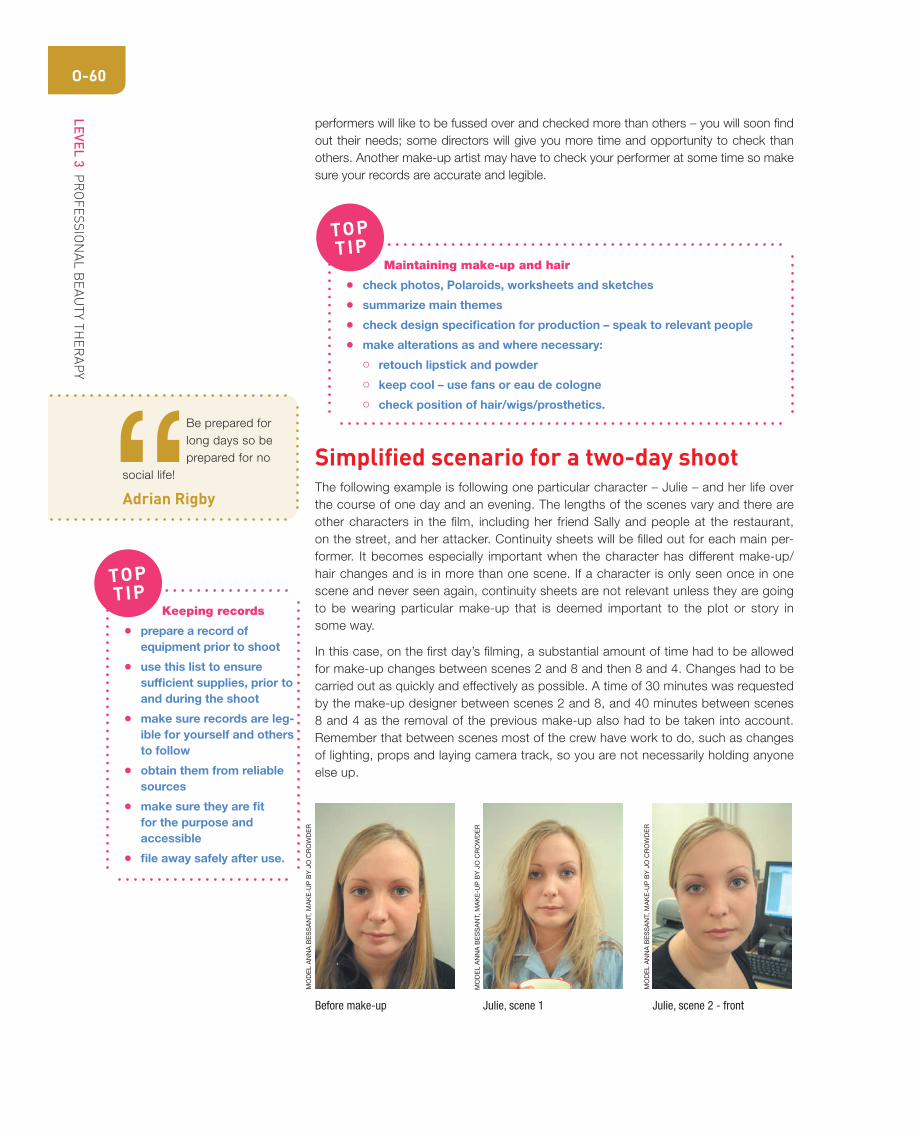
Simplifi ed scenario for a two-day shootThe following example is following one particular character – Julie – and her life over
the course of one day and an evening. The lengths of the scenes vary and there are
other characters in the fi lm, including her friend Sally and people at the restaurant,
on the street, and her attacker. Continuity sheets will be fi lled out for each main per-
former. It becomes especially important when the character has different make-up/
hair changes and is in more than one scene. If a character is only seen once in one
scene and never seen again, continuity sheets are not relevant unless they are going
to be wearing particular make-up that is deemed important to the plot or story in
some way.
In this case, on the fi rst day’s fi lming, a substantial amount of time had to be allowed
for make-up changes between scenes 2 and 8 and then 8 and 4. Changes had to be
carried out as quickly and effectively as possible. A time of 30 minutes was requested
by the make-up designer between scenes 2 and 8, and 40 minutes between scenes
8 and 4 as the removal of the previous make-up also had to be taken into account.
Remember that between scenes most of the crew have work to do, such as changes
of lighting, props and laying camera track, so you are not necessarily holding anyone
else up.
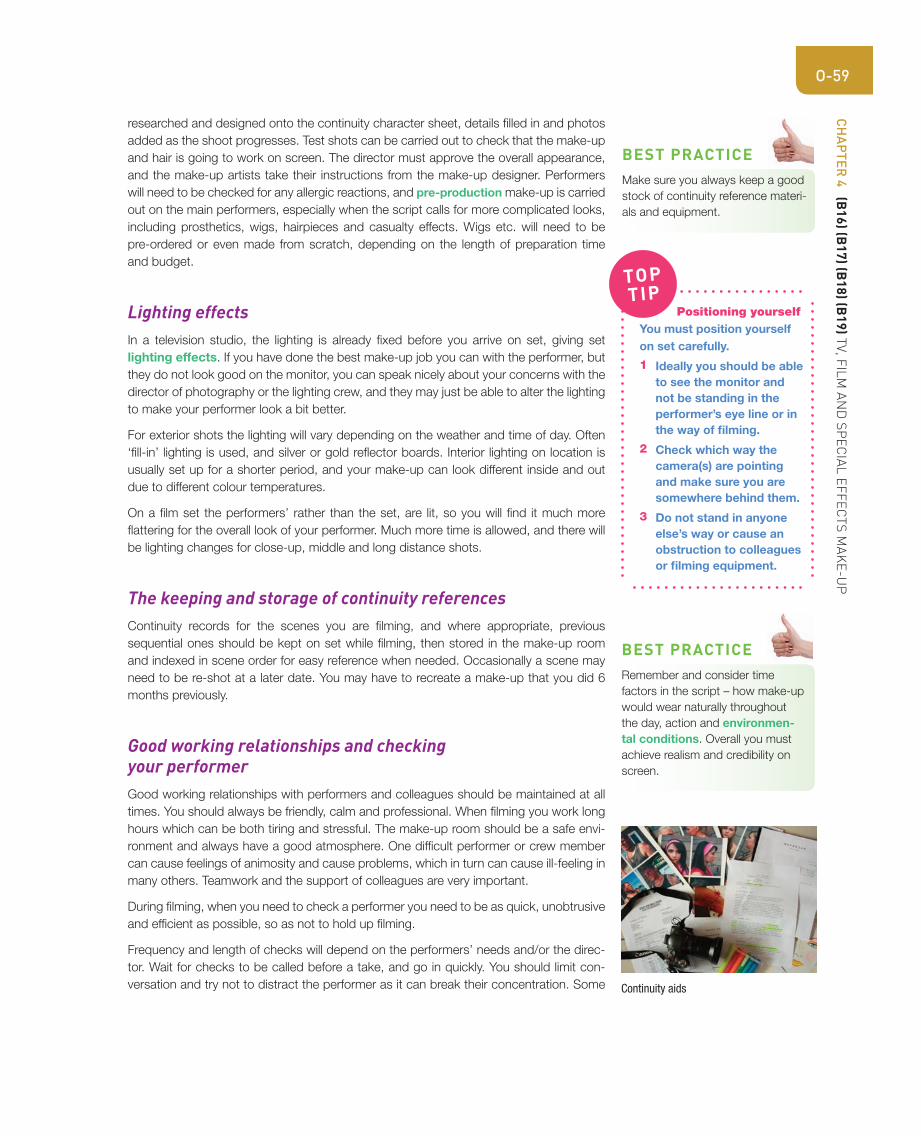
Keeping records
● prepare a record of equipment prior to shoot
● use this list to ensure suffi cient supplies, prior to and during the shoot
● make sure records are leg-ible for yourself and others to follow
● obtain them from reliable sources
● make sure they are fi t for the purpose and accessible
● fi le away safely after use.
TOP
TIP
Before make-up Julie, scene 1 Julie, scene 2 - front
Maintaining make-up and hair
● check photos, Polaroids, worksheets and sketches
● summarize main themes
● check design specifi cation for production – speak to relevant people
● make alterations as and where necessary:
� retouch lipstick and powder
� keep cool – use fans or eau de cologne
� check position of hair/wigs/prosthetics.
TOP
TIP
“ Be prepared for
long days so be
prepared for no
social life!
Adrian Rigby
performers will like to be fussed over and checked more than others – you will soon fi nd
out their needs; some directors will give you more time and opportunity to check than
others. Another make-up artist may have to check your performer at some time so make
sure your records are accurate and legible.
MO
DE
L A
NN
A B
ES
SA
NT,
MA
KE
-UP
BY
JO
CR
OW
DE
R
MO
DE
L A
NN
A B
ES
SA
NT,
MA
KE
-UP
BY
JO
CR
OW
DE
R
MO
DE
L A
NN
A B
ES
SA
NT,
MA
KE
-UP
BY
JO
CR
OW
DE
R

CH
AP
TER 4 (B
16
) (B1
7) (B
18
) (B1
9) T
V, F
ILM
AN
D S
PE
CIA
L E
FF
EC
TS
MA
KE
-UP
O-61
Shooting schedule
Filming day one – interior shots
Ep/Sc Set/Time Characters Synopsis Story day
1/1 Julie’s house
8 am
Julie Julie getting up
Having breakfast
Day 1
1/2 Julie’s offi ce
(home) 12 am
Julie Julie working on computer
Telephone conversations
Day 1
1/8 Julie’s house
6 pm
Julie
Sally
Sally visits Julie
Julie distressed and crying
Eve 2
1/4 Int. restaurant
8.30–10.30 pm
Julie
Sally
Waiter
20 × other diners
Meal scene. Discussing men and life in general
Having lovely time
Eve 1
Ep/Sc Set/Time Characters Synopsis Story day
1/3 Ext. street outside
Julie’s house 7.45 pm
Julie
Sally
2 × passers-by
Julie leaving house with Sally to go for dinner Eve 1
1/5 Ext. restaurant
10.45 pm
Julie
Sally
Attacker
1 × passer-by
Julie and Sally leave restaurant a bit tiddly
Friends say goodnight
Eve 1
1/6 Ext. restaurant/street
10.50 pm
Julie
Attacker
Julie gets attacked Eve 1
1/7 Ext. street outside
Julie’s house
Julie
2 × passers-by
Julie stumbles home
Passers by offer to help
Julie refuses
Eve 1
Filming day two – exterior shots
Julie, scene 2 – backJulie, scene 2 – side
MO
DE
L A
NN
A B
ES
SA
NT,
MA
KE
-UP
BY
JO
CR
OW
DE
R
MO
DE
L A
NN
A B
ES
SA
NT,
MA
KE
-UP
BY
JO
CR
OW
DE
R
LEVEL 3 PR
OF
ES
SIO
NA
L B
EA
UT
Y T
HE
RA
PY
O-62
Sally, scenes 3 and 4 Julie, scenes 3 and 4 – left side
MA
KE
-UP
BY
S. F
OY, M
OD
EL G
EM
MA
HA
RR
IS
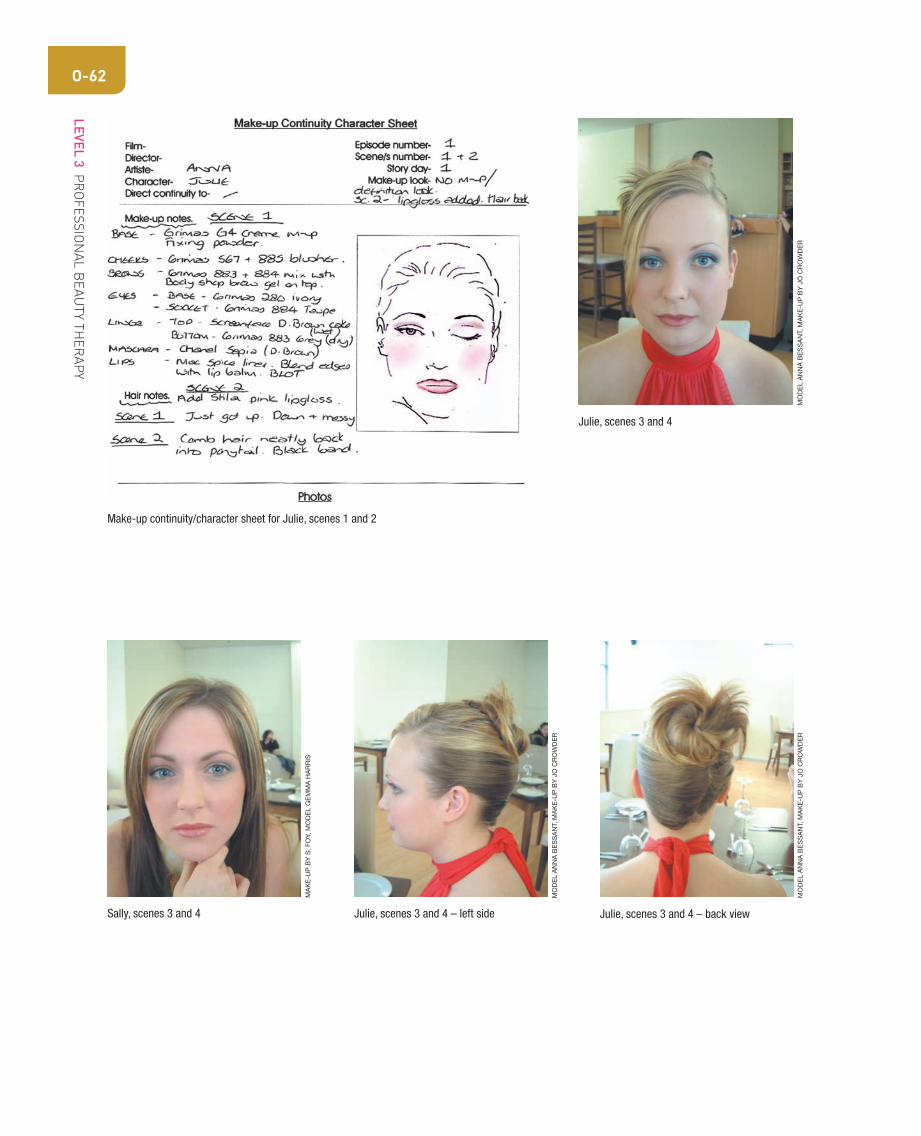
Make-up continuity/character sheet for Julie, scenes 1 and 2
Julie, scenes 3 and 4
MO
DE
L A
NN
A B
ES
SA
NT,
MA
KE
-UP
BY
JO
CR
OW
DE
R
MO
DE
L A
NN
A B
ES
SA
NT,
MA
KE
-UP
BY
JO
CR
OW
DE
R
Julie, scenes 3 and 4 – back view
MO
DE
L A
NN
A B
ES
SA
NT,
MA
KE
-UP
BY
JO
CR
OW
DE
R

CH
AP
TER 4 (B
16
) (B1
7) (B
18
) (B1
9) T
V, F
ILM
AN
D S
PE
CIA
L E
FF
EC
TS
MA
KE
-UP
O-63
Julie, scenes 3 and 4 - right side
Make-up continuity/character sheet for Julie, scenes 3, 4 and 5
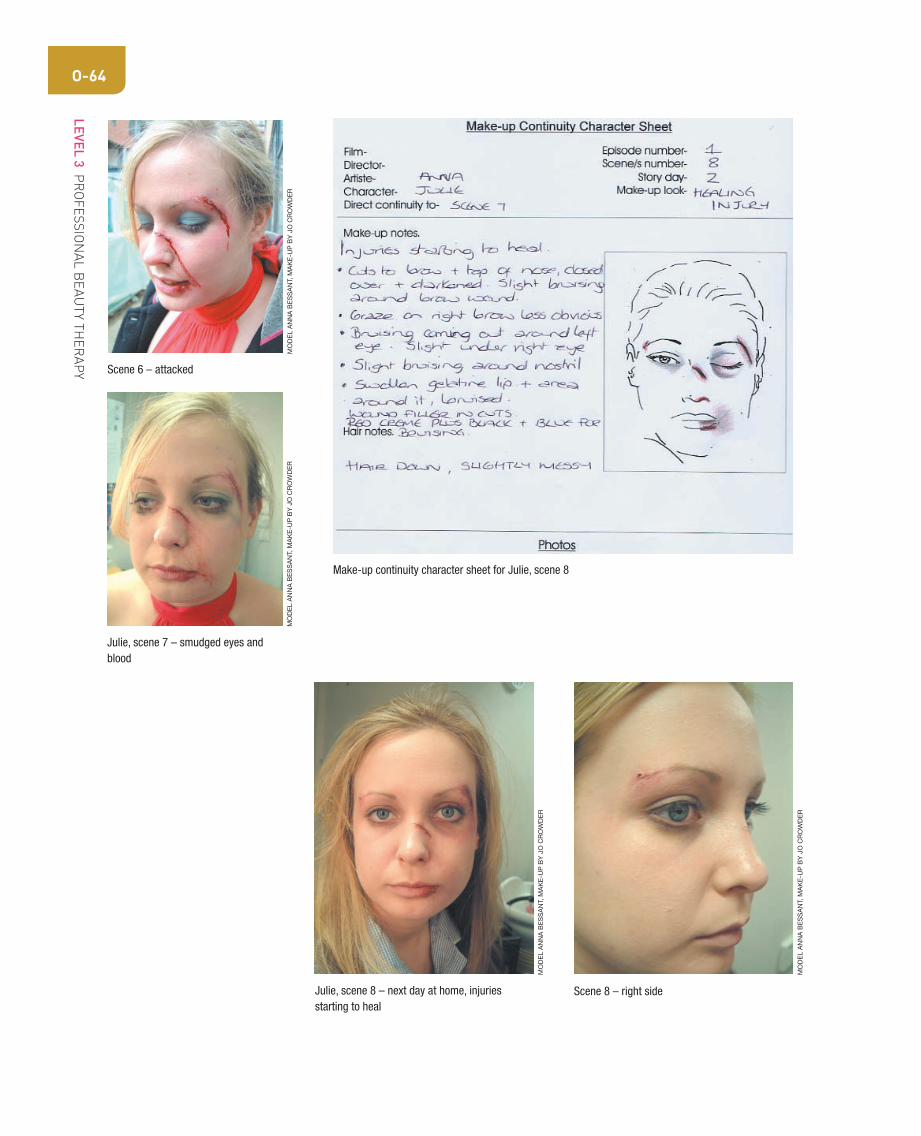
Make-up continuity character sheet for Julie, scenes 6 and 7
MO
DE
L A
NN
A B
ES
SA
NT,
MA
KE
-UP
BY
JO
CR
OW
DE
R
Julie and sally – after meal
JU
LIE
: M
OD
EL A
NN
A B
ES
SA
NT,
MA
KE
-UP
BY
JO
CR
OW
DE
R.
SA
LLY
: M
AK
E-U
P B
Y S
. F
OY,
MO
DE
L G
EM
MA
HA
RR
IS
LEVEL 3 PR
OF
ES
SIO
NA
L B
EA
UT
Y T
HE
RA
PY
O-64
Scene 6 – attacked
Make-up continuity character sheet for Julie, scene 8
Julie, scene 7 – smudged eyes and blood
MO
DE
L A
NN
A B
ES
SA
NT,
MA
KE
-UP
BY
JO
CR
OW
DE
RM
OD
EL A
NN
A B
ES
SA
NT,
MA
KE
-UP
BY
JO
CR
OW
DE
R
Julie, scene 8 – next day at home, injuries starting to heal
MO
DE
L A
NN
A B
ES
SA
NT,
MA
KE
-UP
BY
JO
CR
OW
DE
R
Scene 8 – right side
MO
DE
L A
NN
A B
ES
SA
NT,
MA
KE
-UP
BY
JO
CR
OW
DE
R

CH
AP
TER 4 (B
16
) (B1
7) (B
18
) (B1
9) T
V, F
ILM
AN
D S
PE
CIA
L E
FF
EC
TS
MA
KE
-UP
O-65
Having covered the learning objective for Assist with the continuity of the performer’s appearance, – test what
you need to know and understand by answering the follow-
ing short questions below.
Continuity
1 Why is it so important to maintain the continuity
of the performer’s appearance throughout the
production?
2 How do you ensure that the performer’s make-up
and hair meets the design specifi cation for the
production?
ASSESSMENT OF KNOWLEDGE AND UNDERSTANDING
3 Who are the decision-makers, and how do you
check that they approve of your changes?
4 How do you record continuity detail?
5 Why is it important to have a good supply of continuity
materials and equipment?
6 How do you store continuity details, and how do you
ensure that they are available and accessible to those
that may need them?
7 Where should you stand on set?
8 How do you minimize disruption of the production
when making continuity changes?
Scene 8 – left side Scene 8 – crying
FUNCTIONALSKILLS
MO
DE
L A
NN
A B
ES
SA
NT,
MA
KE
-UP
BY
JO
CR
OW
DE
R
MO
DE
L A
NN
A B
ES
SA
NT,
MA
KE
-UP
BY
JO
CR
OW
DE
R
LEVEL 3 PR
OF
ES
SIO
NA
L B
EA
UT
Y T
HE
RA
PY
O-66
B18 Unit Learning Objectives
This section covers Unit B18 Apply make-up to change the performer’s appearance.
This unit describes how to apply make-up to change the
performer’s appearance.
To achieve this unit you must show that you are able to en-
sure that your performer is comfortable and fully informed
about the make-up process. You must check that the
make-up is compatible with the performer’s skin, taking
appropriate action if there is an adverse (unwanted) skin
reaction. You must apply the selected make-up to achieve
the desired effect ‘on camera’.
Unit B18 describes the competencies to enable you to:
● apply make-up to change the performer’s appearance.
Your assessor will observe your performance on at least three separate occasions.
It is likely that most evidence of your performance will be
gathered from the observations made by your assessor, but
you may be required to produce other evidence to support
your performance if your assessor has not been present.
When applying make-up to change the performer’s
appearance it is important to use the skills you have learnt
in the following core mandatory units:
Unit G22 Health and safety
Unit H32 Promotional activities
IntroductionWhen applying make-up to a performer, fi rst carry out all the health and safety checks
mentioned above in unit B16 Prepare to change the performers appearance, refer to
your make-up and continuity notes, and make sure your performer is comfortable in the
make-up chair.
1 If there is a headrest, make sure it is in a suitable position, height and angle to
minimize any discomfort. Do not assume that they are comfortable: ask!
2 Inform your performer of the process you are going to carry out on them and
encourage them to ask questions.
3 Check the performer’s skin type so suitable skincare, make-up and removers
can be chosen.
4 Ask them if they have allergies to any make-up products. It is useful to carry more
than one brand just in case this occurs, and choose brands that are known to
CH
AP
TER 4 (B
16
) (B1
7) (B
18
) (B1
9) T
V, F
ILM
AN
D S
PE
CIA
L E
FF
EC
TS
MA
KE
-UP
O-67
be good for use on sensitive skins. Remind them that they can suddenly become
allergic to a substance that has been previously harmless. Note that latex product
allergy is on the increase.
5 If you are using any special effects products, carry out a skin compatibility test 24
hours before.
6 Choose products that are compatible with your performer’s skin type so maxi-
mum durability can be obtained. For example, if they have oily skin, use anti-shine
products and do not use a heavily moisturising foundation for dry skin as it will
need powdering much more frequently and cause a build up, appearing ‘cakey’
by the end of the day.
7 Consider the durability of all products you use so you can limit the number of
times you have to retouch your performer.
8 Some products work better in certain environmental conditions. For example, do
not use a liquid foundation and other non-waterproof cosmetics for a scene shot
outside in the rain where the make-up could run, unless it is deemed necessary
to the plot.
9 If the above does happen you will have to take immediate action to rectify it, so
make sure you have all the relevant products in your set bag, ready to retouch
your performer.
10 If a performer does have a reaction to a particular make-up product, remove it
immediately with an appropriate cleanser for sensitive skin, splash the face with
cold water and ask them to seek medical assistance if necessary.
11 Use your products in an economical way. Do not remove more than you are
going to need from a container, as this causes wastage. Place lids back on
containers to prevent evaporation and spillage.
12 Make sure you apply make-up in the required sequence, using appropriate
techniques to get the best results.
13 Ensure that the image you have created matches the design brief, and make sure
you have checked the result on camera.
14 Complete the make-up in the time stated on the call sheet, which will have been
approved by the designer.
Outcome: Apply make-up to change the performer’s appearanceUnit B18 Apply make-up to change the performer’s appearance by:
1 clarifying and agreeing the design requirements with the relevant person(s)
2 positioning performer in the most appropriate position to minimize personal
discomfort
3 evaluating the types of make-up best suited to different shooting conditions and
make your selection accordingly
4 checking that the selected make-up is compatible with performer’s skin type and
test for potential adverse reactions

LEVEL 3 PR
OF
ES
SIO
NA
L B
EA
UT
Y T
HE
RA
PY
O-68
5 applying selected make-up using the appropriate sequence and techniques as
stipulated by the design requirements and the relevant person(s)
6 taking appropriate action where make-up:
causes adverse skin reactions
deteriorates
7 ensuring that the fi nished make-up achieves the design criteria on camera
8 completing make-up in accordance with the production schedule
9 ensuring that performer’s make-up is removed as required
Make-up effectsCorrective This refers to the type of make-up effect that is almost invisible to the
eye. It is very useful for ‘no make-up looks’, which the male performer will generally
always have, unless there is special character make-up involved. The corrective make-
up is applied to the female performer if she is the type of character who does not wear
any make-up, or for that type of scene, but still needs to look her best, or for when she
has just got up out of bed. Defi nition is needed for the camera, as the face can look fl at
without it. We need to cover blemishes, give defi nition to the eyes and lips and sometimes
to strengthen cheekbones and jaw lines, and basically make the performer look more
presentable. To apply corrective make-up, follow these basic steps.
How to apply corrective make-up for a male performer
1 Apply a light wash of liquid foundation or concealer in the places where it is
needed. It should look natural.
2 Apply powder to set.
3 Neaten up eyebrows.
4 Add some lip balm if the lips look dry.
How to apply corrective make-up for a female performer After using suitable skincare products on your performer:
1 Apply colour corrector under the foundation if necessary.
2 Apply foundation with a brush or sponge to even out the skin tone.
3 Apply concealer over any blemishes, areas of redness and under the eyes if
necessary.
4 Apply powder to set the base.
5 Brush on a natural pink/peach colour to the apples of the cheeks. If using a
crème blusher, apply it before the powder.
6 Check eyebrows; add colour and/or an eyebrow gel to set them in place.
7 Brush on a pale matt shade as a base over the whole eye area.
8 Using a sable brown shade, apply colour to the socket, softly blending upwards.
9 Brush on pale grey dry shadow under the lower eyelashes, to create a subtle
shadow.
BEST PRACTICE
The male performer may have a very
good skin and you may just need
powder or an anti-shine skincare
product rather than foundation. It is
very rare that you will need to apply
any colour to the cheeks, eyes or
lips. The overall image to the pro-
gramme or fi lm may also have some
bearing on your decision.
Use your judgement and check with
your line manager if unsure.
CH
AP
TER 4 (B
16
) (B1
7) (B
18
) (B1
9) T
V, F
ILM
AN
D S
PE
CIA
L E
FF
EC
TS
MA
KE
-UP
O-69
10 Apply a very thin line of dark brown to the upper skin of the eyelid next to the eye-
lashes. Soften if necessary.
11 Apply dark brown mascara, or black if the performer’s eyelashes are naturally very
dark.
12 Use a neutral lip pencil to outline and defi ne the lips.
13 Brush on a clear lip base or balm to the lips. Blend in the lip liner so there is no
hard line. Do not use a gloss.
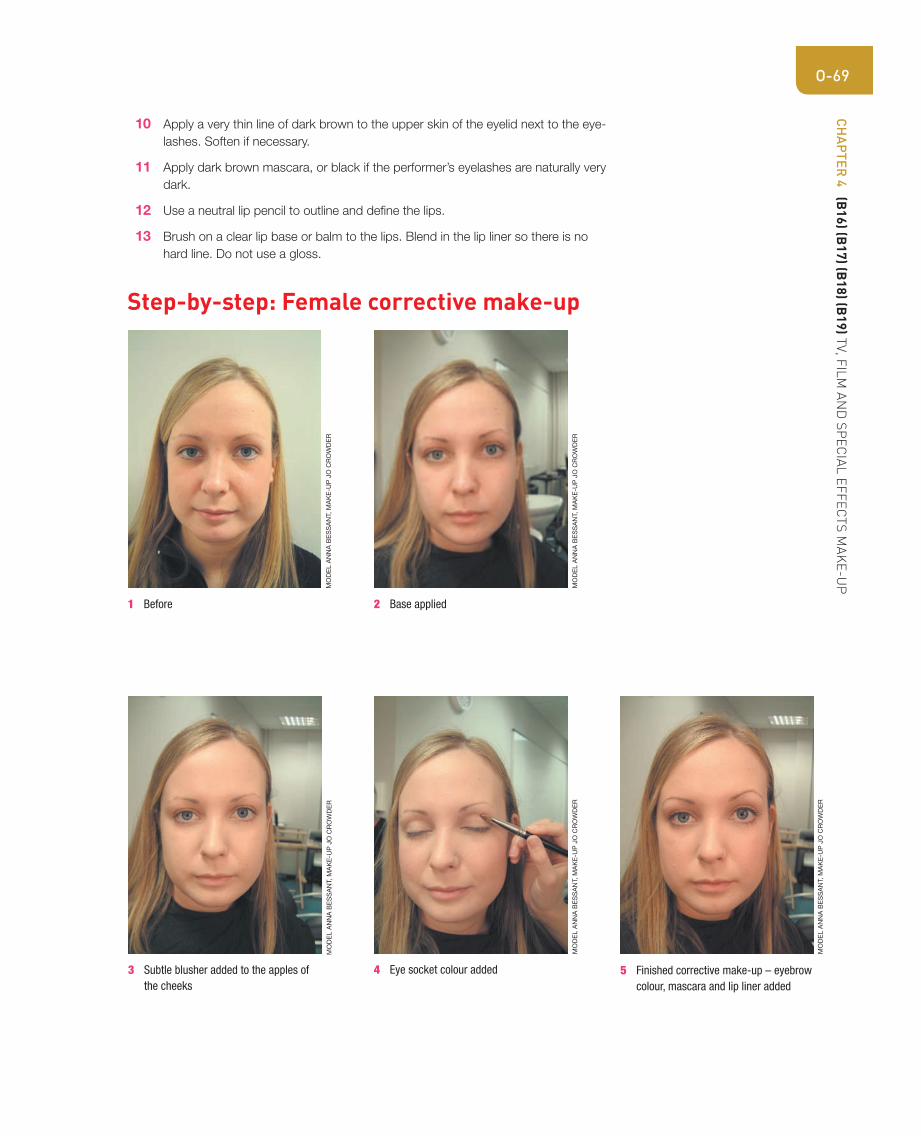
Step-by-step: Female corrective make-up
1 Before 2 Base applied
3 Subtle blusher added to the apples of the cheeks
4 Eye socket colour added 5 Finished corrective make-up – eyebrow colour, mascara and lip liner added
MO
DE
L A
NN
A B
ES
SA
NT,
MA
KE
-UP
JO
CR
OW
DE
RM
OD
EL A
NN
A B
ES
SA
NT,
MA
KE
-UP
JO
CR
OW
DE
R
MO
DE
L A
NN
A B
ES
SA
NT,
MA
KE
-UP
JO
CR
OW
DE
R
MO
DE
L A
NN
A B
ES
SA
NT,
MA
KE
-UP
JO
CR
OW
DE
R
MO
DE
L A
NN
A B
ES
SA
NT,
MA
KE
-UP
JO
CR
OW
DE
R
LEVEL 3 PR
OF
ES
SIO
NA
L B
EA
UT
Y T
HE
RA
PY
O-70
GlamourGlamorous make-up on a female performer could result in many different looks. Follow
the same formula as above but add more product and colour so it is obvious the per-
former is wearing make-up.
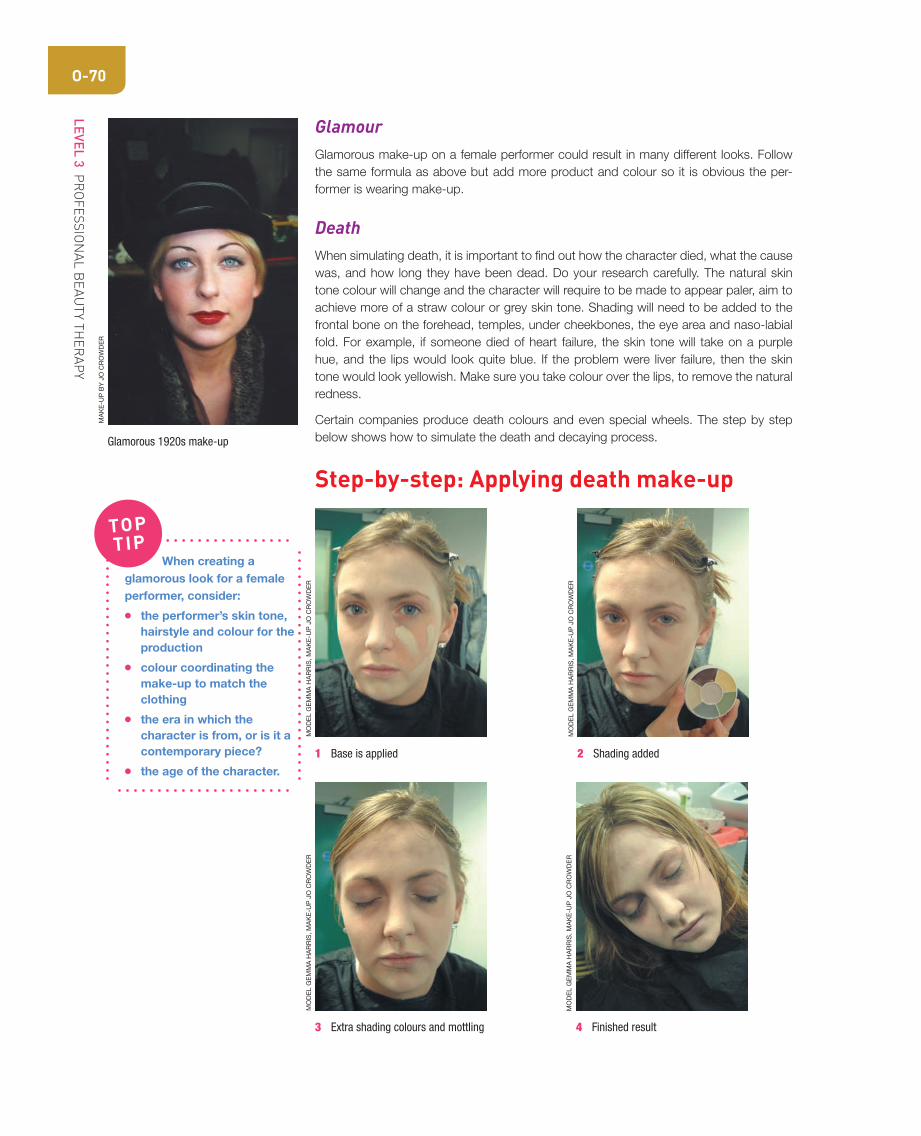
DeathWhen simulating death, it is important to fi nd out how the character died, what the cause
was, and how long they have been dead. Do your research carefully. The natural skin
tone colour will change and the character will require to be made to appear paler, aim to
achieve more of a straw colour or grey skin tone. Shading will need to be added to the
frontal bone on the forehead, temples, under cheekbones, the eye area and naso-labial
fold. For example, if someone died of heart failure, the skin tone will take on a purple
hue, and the lips would look quite blue. If the problem were liver failure, then the skin
tone would look yellowish. Make sure you take colour over the lips, to remove the natural
redness.
Certain companies produce death colours and even special wheels. The step by step
below shows how to simulate the death and decaying process.
Step-by-step: Applying death make-up
Glamorous 1920s make-up
When creating a glamorous look for a female performer, consider:
● the performer’s skin tone, hairstyle and colour for the production
● colour coordinating the make-up to match the clothing
● the era in which the character is from, or is it a contemporary piece?
● the age of the character.
TOP
TIP
1 Base is applied 2 Shading added
4 Finished result3 Extra shading colours and mottling
MA
KE
-UP
BY
JO
CR
OW
DE
R
MO
DE
L G
EM
MA
HA
RR
IS,
MA
KE
-UP
JO
CR
OW
DE
R
MO
DE
L G
EM
MA
HA
RR
IS,
MA
KE
-UP
JO
CR
OW
DE
RM
OD
EL G
EM
MA
HA
RR
IS, M
AK
E-U
P J
O C
RO
WD
ER
MO
DE
L G
EM
MA
HA
RR
IS, M
AK
E-U
P J
O C
RO
WD
ER
CH
AP
TER 4 (B
16
) (B1
7) (B
18
) (B1
9) T
V, F
ILM
AN
D S
PE
CIA
L E
FF
EC
TS
MA
KE
-UP
O-71
AgeingWhen ageing a performer, you need to fi nd out how old they should look. It is possible
that you may need to age them throughout the production, which is a real challenge along
with continuity.
As we age, the skin tone will become greyer. We need to apply a shader or darker colour
into all the wrinkles and natural indentations of the face, and then to give a three-dimen-
sional effect, apply a highlighter or paler colour to all the protruding areas of the face and
on the opposite side to the wrinkles and folds of the face. You can successfully age a
performer by about 20 years with highlight and shading; after that you need to work with
latex or old age stipple to visibly wrinkle the skin, or prosthetics which will create three-
dimensional eye pouches, jowls and so on.
How to apply facial ageing with highlight and shadow
1 Determine how old your performer needs to appear.
2 Mix an old age cream-based make-up and the performer’s natural shade
together with this. This also applies to black skins. Apply all over the face and
hands. If more of the body area requires covering, use the same colours in a
cake or liquid body make-up. Cake make-up is a water-based make-up, which
is used for body make-up. Apply using a damp sponge; once dry it can be
buffed with a soft cloth or chamois leather to give a slight sheen, making it look
very realistic.
3 Examine the natural folds and wrinkles in your performer’s skin. Starting at the
forehead, paint the shader colour, which will be a dark grey/brown, into any lines
where wrinkles would appear.
4 Continue down the face, shade the inner eye sockets and draw the colour down
the sides of the nose.
5 Sink in the temples at the sides of the face and under the cheekbones.
6 Going back to the eyes, paint in the lines in between the eyebrows, then the eye
pouches under the eyes, and any laughter lines at the outer corners.
7 Apply shader around the edges of the nose and into the naso-labial fold which
runs from the lower side of the nose to the outer edge of the mouth. Feather the
colour outwards.
8 Draw down the corners of the mouth.
9 Shade the indentation above the top lip.
10 Shade under the lower lip, bringing the colour outwards around the fl eshy part of
the chin.
11 Add some shading to the jowl area if the character needs it.
12 Continue down the neck, following lines and indentations.
13 Add highlighter to the opposite sides of the forehead wrinkles, laughter lines and
the folds of the face. Also apply it to any protruding parts such as the centre of
the nose, chin, apples of the cheeks and top of the cheekbones.
14 Finally, blend to soften the edges, taking care not to blend everything away or one
line into another!
Changing looks
● For male performers, facial hair and spectacles can be a great help along with changes to their own hair and make-up.
● For the female performer, the emphasis will be on the make-up, hairstyle and possibly spectacles.
● Along with the make-up artist’s work, costume and acting will play a big part in creating realism.
TOP
TIP
Ageing make-up
● After completing the ageing make-up, powder should be applied to set it.
● If you are working on a female performer, standard beauty make-up can then be applied over the top.
● Make sure every area of visible skin is covered with the same skin tone. Pay particular attention to the ears, back of neck and areas where the clothing starts and fi nishes.
TOP
TIP

LEVEL 3 PR
OF
ES
SIO
NA
L B
EA
UT
Y T
HE
RA
PY
O-72
Types of camera fi lmIt is always better to check your make-up on the monitor to see the fi nal effect on fi lm, but
it is also a good idea to know what sort of camera fi lm is involved in the production. You
may come across the following.
Electronic This is basically videotape. It is much cheaper than fi lm and produces a
hard clinical look in its natural form. Lighting, camera lenses and fi lters can alter the effect.
It is widely used in television for soap operas, documentaries, sport, news, game shows,
other studio-based work and many series/productions.
Also included are home video and the use of digital camcorders, which are used on home
and garden make-over programmes.
8 mm This is now just about obsolete. It has been used in recent years for special
effects to produce an old home movie effect.
16 mm This has been superseded by super 16 mm.
Super 16 mm This is fairly standard in the industry and widely used for better quality
projects. It is more expensive than shooting on video, and used on the top end high-
quality drama series and also for most commercials.
35 mm This is the best quality. It is used for all movies plus many American-produced
series and better quality projects in general, especially those that are aiming to achieve
worldwide sales. It produces a much more fl attering effect on the performer, picking up
more detail and being more forgiving on skin tones.
High Defi nition TelevisionHigh defi nition television (HDTV) is the technical term for high-resolution image quality
for advanced digital camera technology. This innovative technology produces a new
Before Ageing – front view Ageing – side view
CH
AP
TER 4 (B
16
) (B1
7) (B
18
) (B1
9) T
V, F
ILM
AN
D S
PE
CIA
L E
FF
EC
TS
MA
KE
-UP
O-73
visual experience for television screens, creating brilliant visual sharpness that approaches
cinema quality. Make-up artists throughout the world are now being challenged to adapt
their art to HDTV.
Its higher overall quality appears to magnify every pore, wrinkle and blemish, which in
turn means that the make-up must be absolutely perfect as HDTV is very unforgiving to
badly blended and applied cosmetics. Wig and facial hair lace will be more diffi cult to hide
and consideration should be given when using red shades as they are interpreted more
vividly than for fi lm or other mediums. Blood and special effects can appear overdone and
too glossy. Overall, more time should be given to application and on-set maintenance for
HDTV.
As more programmes are being produced in HDTV, make-up artists must refi ne their work
and product usage. Base colours need to match the skin’s undertones precisely and be
micro-fi ne and lightweight in application while delivering the coverage to make the actor
look natural. This medium requires even greater attention to detail and coverage to face
and body, as in fi lm make-up.
Airbrush e technique (see online Chapter 3 Airbrush make-up), works well with HDTV
as the airbrush provides a way of depositing the base onto the skin through a conical
spray pattern of thousands of tiny dots or pixels at a low pressure that gently overlaps on
the skin. From a distance, it gives a smoother more natural appearance. It is particularly
good if working on badly blemished skins as the make-up can look like part of the skin
tone rather than a layer of unwanted texture sitting on top.
Having covered the learning objective for apply make-up to change the performer’s appearance, – test what you
need to know and understand by answering the following
short questions below.
Performer care and product choice and usage
1 State how you would carry out a skin compatibility
test.
2 State how you would use make-up products
economically.
3 What are skin types, and how would you recognize
each one?
ASSESSMENT OF KNOWLEDGE AND UNDERSTANDING
4 Which products are most likely to be
incompatible with your performer’s skin?
5 How are make-up products likely to deteriorate when
subjected to different shooting conditions?
6 What are the health and safety precautions you should
carry out before and during application and removal of
products?
7 What types of make-up products would be suited
to different shooting conditions, e.g. windy and
rainy?
8 How should you position your performer to alleviate
discomfort when applying make-up?
“ The potential employer will be looking for skills so the more you can
do the more you get to do.
Adrian Rigby
FUNCTIONALSKILLS
LEVEL 3 PR
OF
ES
SIO
NA
L B
EA
UT
Y T
HE
RA
PY
O-74
B19 Unit Learning Objectives
This section covers Unit B19 Apply special effects.
This unit describes how to apply special effects make-up,
bald caps and apply, fi x and dress facial hair to change the
performer’s appearance. You must ensure that your per-
former is comfortable and fully informed about the process
beforehand and you must be able to select special effects
materials, bald caps and adhesives that are skin and
scalp compatible, prepare the skin/scalp and take action
if there is an adverse skin/scalp reaction. You must apply
special effects make-up and bald caps to achieve the
desired effect ‘on camera’, maintain and remove them
safely afterwards. You must also fi x facial hair to achieve
the desired effect ‘on camera’ and dress facial hair using
styling and fi nishing techniques that achieve the required
design. In addition you will also need to select and attach
loose hair to achieve the desired design effect.
Unit B19 describes the competencies to enable you to:
● apply special effects.
Your assessor will observe your performance on at least three separate occasions.
It is likely that most evidence of your performance will be
gathered from the observations made by your assessor,
but you may be required to produce other evidence to
support your performance if your assessor has not been
present.
When applying special effects it is important to use the
skills you have learnt in the following core mandatory
units:
Unit G22 Health and safety
Unit H32 Promotional activities
Outcome: Apply special effectsUnit B19 Apply special effects by:
1 positioning performers appropriately for special effects application to minimize
personal discomfort
2 informing performers fully of the special effects application stages and invite their
questions
3 testing special effects to be applied to performers’ skin and scalp for adverse
reactions
CH
AP
TER 4 (B
16
) (B1
7) (B
18
) (B1
9) T
V, F
ILM
AN
D S
PE
CIA
L E
FF
EC
TS
MA
KE
-UP
O-75
4 preparing the skin and scalp appropriately for the type of contact material used
5 ensuring that the special effects make-up and bald caps are sustained under
different shooting conditions
6 taking appropriate action in the eventuality that special effects:
cause adverse skin or scalp reactions
disintegrate under different shooting conditions
7 preparing hair and scalp for the fi tting of bald caps
8 applying bald caps ensuring that the fi t, tension and texture is correct as advised
by the relevant person
9 airbrushing skin caps to the required colour and skin tone
10 airbrushing other skin areas to the required colour and skin tone
11 applying selected special effects make-up in the appropriate sequence, using
appropriate techniques as advised by the relevant person(s)
12 ensuring that fi nished special effects attain the design criteria on camera
13 removing the special effects make-up and bald caps carefully to reduce
performers’ discomfort.
Special effects make-upThis is an area of make-up that covers injuries, diseases, three-dimensional work and
some character effects. It can be especially challenging for the make-up artist and can
involve extensive research.
ResearchResearch must be carried out thoroughly. Sources may include medical publications
and forensic pathology books, subject-knowledgeable people and the Internet, so
you need to be able to switch off and have a strong stomach. Injuries may need to
be created fresh then recreated at various stages of the healing process. Remember
continuity!
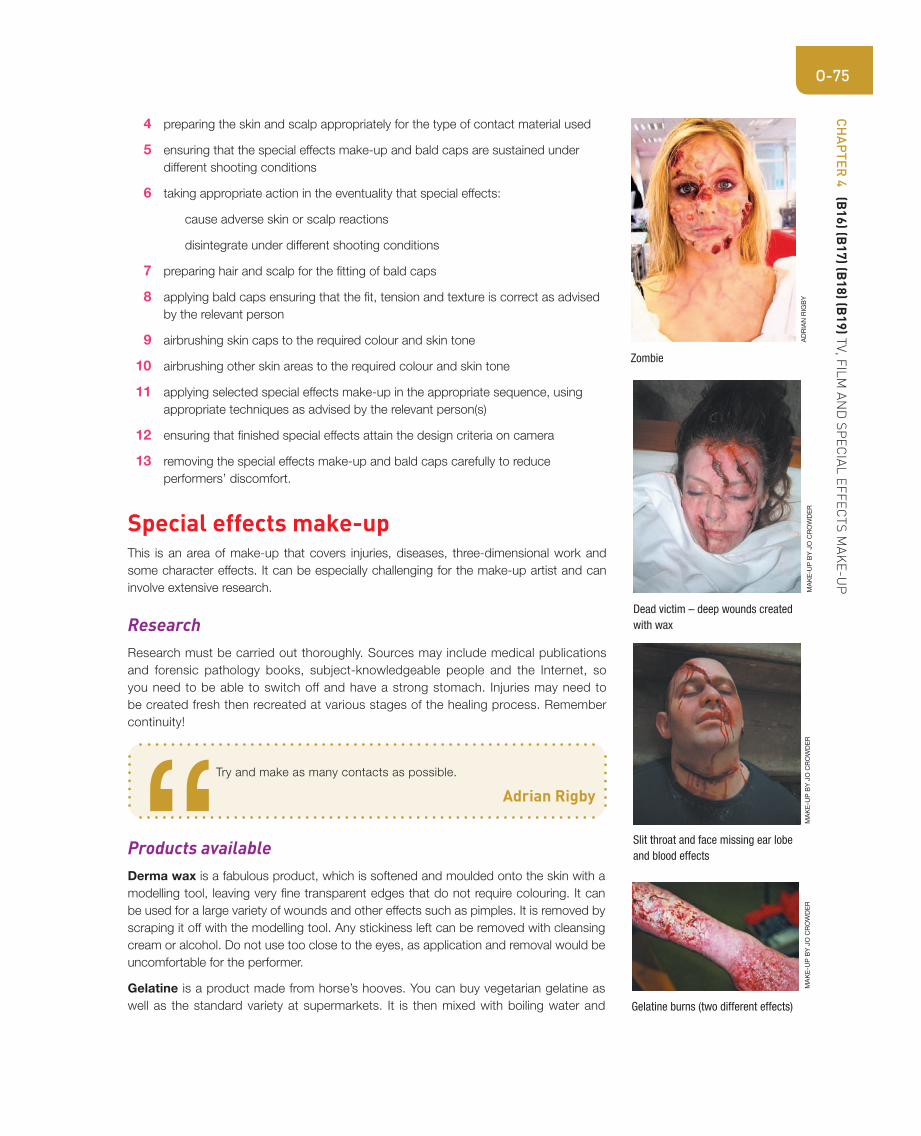
Zombie
AD
RIA
N R
IGB
Y
Dead victim – deep wounds created with wax
MA
KE
-UP
BY
JO
CR
OW
DE
R
Slit throat and face missing ear lobe and blood effects
MA
KE
-UP
BY
JO
CR
OW
DE
R
“ Try and make as many contacts as possible.
Adrian Rigby
Products availableDerma wax is a fabulous product, which is softened and moulded onto the skin with a
modelling tool, leaving very fi ne transparent edges that do not require colouring. It can
be used for a large variety of wounds and other effects such as pimples. It is removed by
scraping it off with the modelling tool. Any stickiness left can be removed with cleansing
cream or alcohol. Do not use too close to the eyes, as application and removal would be
uncomfortable for the performer.
Gelatine is a product made from horse’s hooves. You can buy vegetarian gelatine as
well as the standard variety at supermarkets. It is then mixed with boiling water and Gelatine burns (two different effects)
MA
KE
-UP
BY
JO
CR
OW
DE
R

LEVEL 3 PR
OF
ES
SIO
NA
L B
EA
UT
Y T
HE
RA
PY
O-76
glycerine. If you are limited for time it can be purchased ready-made in a block and
heated in a microwave or a bowl full of boiling water. It is useful in the creation of burns
and three-dimensional applications such as eye bags and split lips, as it is removed very
easily with warm water.
Liquid latex has a variety of uses such as ageing and as a false skin. It can be painted
on and left to dry, or used with a hairdryer to accelerate the drying process. It is use-
ful in the creation of burns, and skin diseases if combined with food ingredients. It is
removed from the skin by peeling it off. Avoid hairy areas, as it would be very painful
to remove.
Green marble is an alcohol-based plastic sealer and can also be used for ageing
effects. A powder called Attagel can be mixed into the liquid to slightly thicken the mix
and then applied in a similar way as liquid latex to create a wrinkling effect. Be extra
careful when working around the eyes. The skin is stretched and dried with a hand-
held fan and then powdered before releasing in order for the wrinkles to form. More
layers are added for greater effect. It has the added advantage in that the edges do
not lift as easily as liquid latex for the same effect. If it does happen, the edge can be
dissolved back into place with a little alcohol. It is removed gently with a prosthetic
make-up remover such as Supersolve or Pro-clean.
Scar material is available in a tube such as Tuplast, which is like semi-liquid glue
and makes excellent blisters, pimples, chicken-pox and other raised scars. Liquid
scar material in a bottle, such as Collodian, is painted on and leaves indented scars
by contracting and drawing in the skin. It is removed by gently peeling it from the
skin.
Food ingredients such as porridge oats, rice crispies, cornfl akes and other cereals,
treacle, food colourings, coffee granules and tea can be used in combination with
adhesives and any of the above to create effects where texture is needed. For example,
to create eczema, you could apply a red tint to the area fi rst, then some latex with some
porridge oats on top, then a fi nal layer of latex to seal. Add more colour if necessary for
the effect you require.
Colours for bruising and other effects are usually achieved by means of cream or oil-
based make-up, as they are the most realistic. There are also gel bruise shades available,
which have a transparent effect and palettes such as skin illustrator, which require alcohol
to activate them, and are extremely waterproof and durable.
Blood, depending on the brand, is available in liquid form for fresh wounds, as a gel and
more solid forms, like wound fi llers, to simulate older and dried-out blood effects and
scabs. Be aware that some bloods can stain skin and clothing.
Grazes and split lip created with wax and latex
MA
KE
-UP
BY
JO
CR
OW
DE
R
Scar material and bruising
MA
KE
-UP
BY
JO
CR
OW
DE
RM
AK
E-U
P B
Y J
O C
RO
WD
ER
Ageing of hands using green marble
MA
KE
-UP
BY
AN
DR
EA
DO
WD
ALL-
GO
DD
AR
D A
ND
JO
CR
OW
DE
R
Waterproof injury make-up (injuries occurred at different times)
HEALTH& SAFETY
1 Carry out skin compatibility tests on your performer 24 hours before using the product.
2 Remove the products gently with the correct remover.
3 Make sure you have experienced the products on your own skin so that you can tell
your performer what they feel like.
4 Check that your performer is comfortable during application and retouching. You may
be doing a leg or back injury and need them in a reclined or upright position. Make sure
you keep them warm and protect their privacy. They may be required to lie down for long
durations outside which could bring on hypothermia, so keep an eye on them.

CH
AP
TER 4 (B
16
) (B1
7) (B
18
) (B1
9) T
V, F
ILM
AN
D S
PE
CIA
L E
FF
EC
TS
MA
KE
-UP
O-77
Ice effects are available in gel which has adhesive properties, crystals in different sizes
and a powder which replicates snow. They are ideal for winter scenes and designed for
use on the skin or hair.
Other useful items● glycerine – for shine, tears or to mix with gelatine for fl exibility
● petroleum and KY jelly – for blisters and oozing or shiny effects
● tear stick – menthol stick to help produce tears
● spray bottles – for water and glycerine mix to simulate perspiration
● eye/ear dropper – for placing tears and blood
● sealer – hardens wax products and seals edges
● spirit gum/mastix adhesives and appropriate remover
● scissors
● hair pins – for adding colour by dotting and dragging
● black cotton – for simulating stitches
● modelling tools – for sculpting wounds, creating scratches and texture
● stipple sponges – for texturizing and creating grazes
● tooth enamel – for creating missing, chipped and rotten teeth and bleeding gums:
available in black, nicotine, white, ivory, red and gold
● barrier cream – helps to protect the skin – fi nd one that is not greasy.
You should refer back to B16 Prepare to change the performer’s appearance and
B17 Assist with the continuity of the performer’s appearance, for other health and
safety aspects and care of your performer.
Suitability to skin, environment and durabilityThe products should have now been tested for use on the performer’s skin and/or scalp,
by means of the skin compatibility test. You also have to consider the durability of the
product. You may have been asked to produce an old scar down a performer’s cheek and
be trying to decide whether to use Collodian or latex. A performer may be slightly more
likely to react to Collodian, but if it has to be in place 12 hours a day, you may fi nd latex
would have peeled off by then. You may have to reapply the scar halfway through the day.
Also the product may deteriorate more quickly on a certain area such as near joints and
creases and need reapplying more often.
Facial hairFacial hair is an important part of changing a performer’s appearance. It is used widely
in period productions, is useful in the ageing process of males, and great for the creation
of certain characters. Facial hair includes beards, moustaches, sideburns, whiskers and
eyebrows. Colours and pieces need to be chosen carefully to create a realistic effect.
Lace-backed facial hair takes about 5 to 15 minutes to apply; loose hair averages 30
minutes. Time taken to dress facial hair will vary depending on the complexity of the style
and the size of the piece involved.
HEALTH& SAFETY
Skin compatibility testsThese are of the utmost importance
when carrying out special effects
make-up, as performers are much
more likely to react to the chemicals
in these products and removers.
Carry out the tests 24 hours before
on an area of skin preferably close to
the area where you are planning on
using the product. The best place is
behind the ear, so it is fairly hidden by
the hair. Do not apply it on the face
itself just in case there is a reaction.
If a contra-action occurs, you would
recognize it by redness, rash, itching,
burning, and stinging sensations. Re-
move the make-up immediately in a
careful manner and ask them to seek
medical assistance if it looks serious.
It is important to note that a slight
redness is quite normal after peeling
off latex and Collodian and even after
scraping off wax. Please inform your
performer that this is quite likely to
happen to prevent any unnecessary
panicking.
Bruising
MA
KE
-UP
AD
RIA
N R
IGB
Y

LEVEL 3 PR
OF
ES
SIO
NA
L B
EA
UT
Y T
HE
RA
PY
O-78
Lace-backed facial hair Ready-made lace-backed beards and moustaches
can be ordered from specialist wigmakers and require a sample of the performer’s
own hair or the colour of the wig they may be wearing. They take a considerable
amount of time, skill and patience to make, as each hair is hand-knotted onto fine
lace. The finest of lace is used for film work. Measurements of the area should be
given if possible, as ill-fitting facial hair can cause great discomfort to the performer,
affecting their performance and speech. Cheaper ready-made facial hairpieces can
be purchased from outlets such as professional make-up and fancy dress suppli-
ers. All facial hair will generally require dressing before application to the performer’s
face.
How to apply and fi x hair to change performer’s appearance
1 Position your performer in a comfortable upright position for easy access and to
minimize discomfort. You will need them to turn their head and raise their chin as
necessary throughout the process.
2 Gown up your performer and inform them of the application process and any
potential discomfort.
3 Carry out skin compatibility tests. See B18 Apply make-up to change the performer’s appearance for details.
4 Prepare the skin for adhesion, checking that it is free from any grease.
5 Position facial hair correctly to meet design specifi cation. Check the size, overall
look and positioning for comfort and mobility.
6 Apply adhesive to the performer’s skin using a brush. Wait until tacky.
7 Press the piece in place. A pin tail comb or dampened powder puff is useful for
this. Take care not to get adhesive all over your fi ngers!
8 Check the positioning again, while looking at the performer in the make-up
mirror.
9 Make sure all the edges are secured down properly and that the performer can
move their face comfortably. Dress the hair further if necessary.
10 Know what action to take in case of durability problems or adverse skin
reaction.
11 Ensure that you complete the application to meet time schedules and the desired
effect is achieved on camera.
12 Use cleansing methods to keep hair and performer’s skin in good condition.
13 Ensure hair is correctly and safely removed and stored.
Dressing facial hair to the design brief You may be working on a con-
temporary (present day), or a period production. Moustaches and beards may come
as standard but you will need to adapt them to the performer’s face and the era.
Research well and get the look right. Use reference pictures and check the image
achieves the design criteria specifi ed on camera. Facial hair may be trimmed with
scissors or a beard trimmer, and styled using hot irons and styling products, just as
you would on natural hair. Wherever possible style the facial hair on a block before
applying it to the performer’s face. It can be styled while on the performer’s face but
Lace-backed facial hair
MA
KE
-UP
BY
JO
CR
OW
DE
RB
AR
NE
Y N
IKO
LIC
Hand-knotted lace backed moustaches
BEST PRACTICE
Large pieces of facial hair
If you are working with a large facial
hairpiece, glue the middle fi rst and
work outwards to the edges. Explain
to your performer that the area will
feel a bit tight where the adhesive
has been applied. If applying a full
beard or sideburns, and no bald cap,
lift up the performer’s own hair in
front of the ears, and place the piece
under their natural hair to hide the
join. Cake mascara, or colours from a
Skin Illustrator or Reel Creations pal-
ette can be used to blend the colour
of the facial hair in with the actor’s
own hair.
CH
AP
TER 4 (B
16
) (B1
7) (B
18
) (B1
9) T
V, F
ILM
AN
D S
PE
CIA
L E
FF
EC
TS
MA
KE
-UP
O-79
take great care to have your performer steady and comfortable, and do not touch the
face with the tongs.
1 Pin the facial hairpiece to the block.
2 Heat the tongs and test the temperature on a tissue.
3 Starting at the top of the hairpiece, take a section at a time, lifting and tonging
the hair from the roots. This is so that the hairpiece does not look fl at and
unnatural.
4 Comb into place.
5 Dressing aids such as moustache wax and hairsprays can be used to keep
elaborate styles in place.
How to apply and dress facial hair to the design brief
1 Block facial hair appropriately without causing damage.
2 Select products, tools and equipment to achieve design specifi cation.
3 Effectively control, style and fi nish to achieve the required design.
4 Ensure the dressed facial hair style is sustained under shooting conditions and
maintained throughout the production.
Removing and cleaning the facial hair Make sure you place a towel
around the shoulders of your performer in case of any drips. Using a clean brush, ap-
ply remover fi rst to loosen the edges of the facial hair, then over the whole area until it
is easily released from the skin. On no account should you pull at it. This can harm the
performer’s skin as well as the delicate lace edges. Clean any remaining adhesive from
the skin using a little more remover on some cotton wool until the area no longer feels
sticky.
To clean the facial hair, place it on a clean tissue or lint-free towel and using a fi rm stipple
brush, or toothbrush, dab and stipple remover onto the lace which displaces it onto the
towel, taking great care not to cause any damage to the lace. Remove and reposition as
the towel or tissue gets loaded with adhesive. Be patient when cleaning as it can take
quite a bit of time. More stubborn adhesive can be cleaned with acetone, but remember
it is more harsh than other removers. Facial hair will not last forever, so it must be looked
after and treated with care. After cleaning, the hairpieces should be allowed to dry and
stored pinned to a board or chin block.
Attaching loose hair to change a performer’s appearanceLoose hair can come from various sources – yak, acrylic, human hair – but more com-
monly crepe hair/wool is used. Crepe hair, the cheapest option, comes braided, and is
most commonly used in theatre as it is not as realistic as human hair lace-backed pieces.
However, it can be used for distance shots and for background characters. It also has the
advantage of no observable edges like a lace-backed facial hairpiece and is a great back-
up when you suddenly need to produce a beard and there is no time to order one. It can
also be used to blend an obvious lace edge. The process from preparation to application
can seem quite complicated at fi rst, but is in fact easy when you have done it a couple
of times.
BEST PRACTICE
Attaching loose hair
● Position performer for ease of
access and comfort.
● Inform performer of application
sequence.
● Carry out skin compatibility test.
● Select hair, colour, length and
position to meet
design specifi cation.
● Check the skin or other surfaces
are in good condition.
● Select adhesives for skin
compatibility and durability under
shooting conditions.
● Remove safely and correctly.
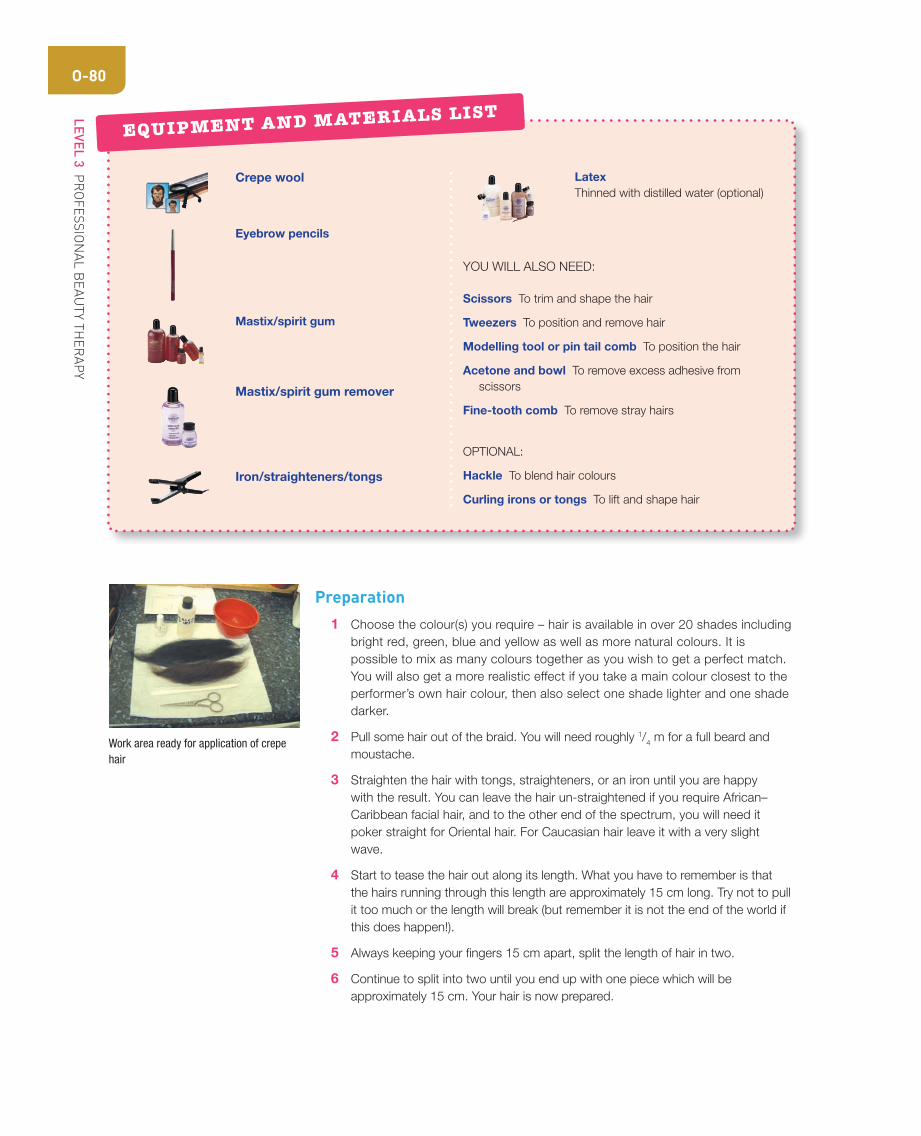
LEVEL 3 PR
OF
ES
SIO
NA
L B
EA
UT
Y T
HE
RA
PY
O-80
Crepe wool
Eyebrow pencils
Mastix/spirit gum
Mastix/spirit gum remover
Iron/straighteners/tongs
LatexThinned with distilled water (optional)
YOU WILL ALSO NEED:
Scissors To trim and shape the hair
Tweezers To position and remove hair
Modelling tool or pin tail comb To position the hair
Acetone and bowl To remove excess adhesive from
scissors
Fine-tooth comb To remove stray hairs
OPTIONAL:
Hackle To blend hair colours
Curling irons or tongs To lift and shape hair
EQUIPMENT AND MATERIALS LIST
Preparation
1 Choose the colour(s) you require – hair is available in over 20 shades including
bright red, green, blue and yellow as well as more natural colours. It is
possible to mix as many colours together as you wish to get a perfect match.
You will also get a more realistic effect if you take a main colour closest to the
performer’s own hair colour, then also select one shade lighter and one shade
darker.
2 Pull some hair out of the braid. You will need roughly 1/4 m for a full beard and
moustache.
3 Straighten the hair with tongs, straighteners, or an iron until you are happy
with the result. You can leave the hair un-straightened if you require African–
Caribbean facial hair, and to the other end of the spectrum, you will need it
poker straight for Oriental hair. For Caucasian hair leave it with a very slight
wave.
4 Start to tease the hair out along its length. What you have to remember is that
the hairs running through this length are approximately 15 cm long. Try not to pull
it too much or the length will break (but remember it is not the end of the world if
this does happen!).
5 Always keeping your fi ngers 15 cm apart, split the length of hair in two.
6 Continue to split into two until you end up with one piece which will be
approximately 15 cm. Your hair is now prepared.
Work area ready for application of crepe hair
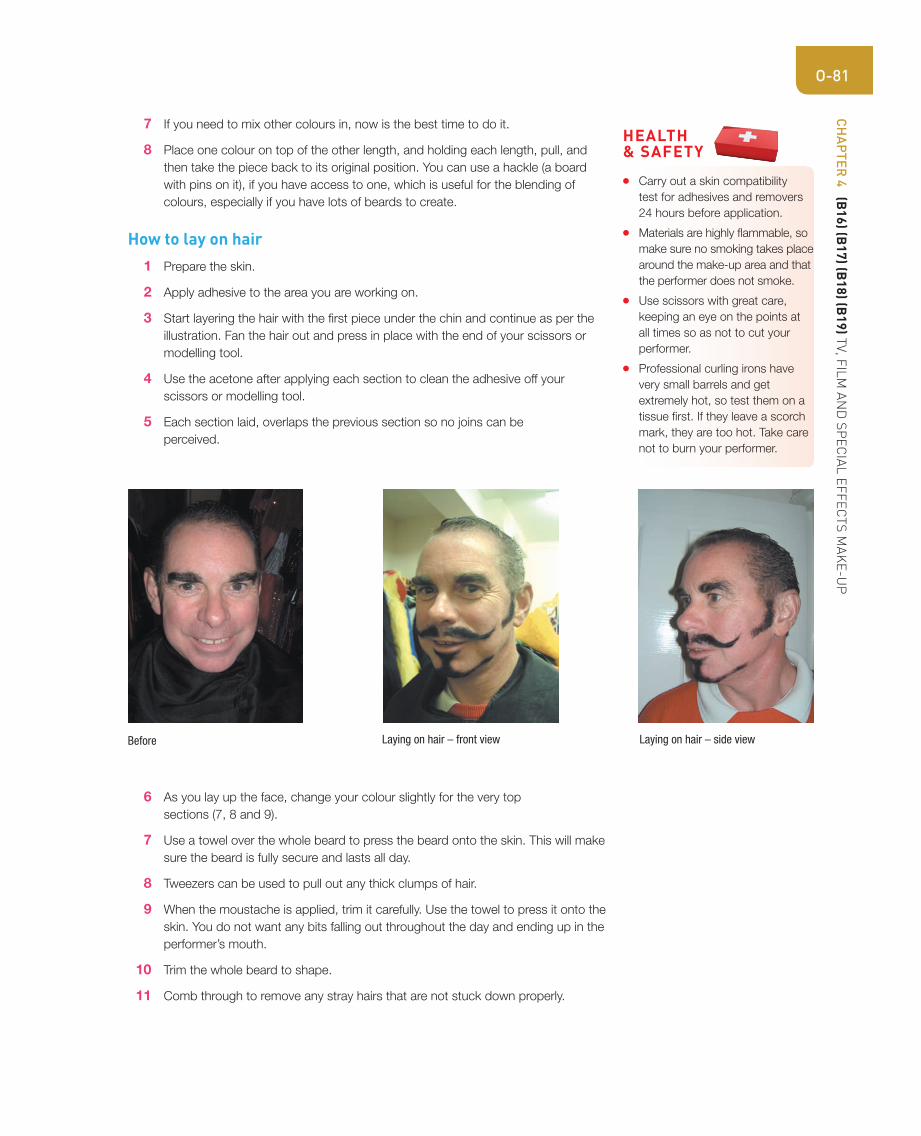
CH
AP
TER 4 (B
16
) (B1
7) (B
18
) (B1
9) T
V, F
ILM
AN
D S
PE
CIA
L E
FF
EC
TS
MA
KE
-UP
O-81
7 If you need to mix other colours in, now is the best time to do it.
8 Place one colour on top of the other length, and holding each length, pull, and
then take the piece back to its original position. You can use a hackle (a board
with pins on it), if you have access to one, which is useful for the blending of
colours, especially if you have lots of beards to create.
How to lay on hair
1 Prepare the skin.
2 Apply adhesive to the area you are working on.
3 Start layering the hair with the fi rst piece under the chin and continue as per the
illustration. Fan the hair out and press in place with the end of your scissors or
modelling tool.
4 Use the acetone after applying each section to clean the adhesive off your
scissors or modelling tool.
5 Each section laid, overlaps the previous section so no joins can be
perceived.
HEALTH& SAFETY
● Carry out a skin compatibility
test for adhesives and removers
24 hours before application.
● Materials are highly fl ammable, so
make sure no smoking takes place
around the make-up area and that
the performer does not smoke.
● Use scissors with great care,
keeping an eye on the points at
all times so as not to cut your
performer.
● Professional curling irons have
very small barrels and get
extremely hot, so test them on a
tissue fi rst. If they leave a scorch
mark, they are too hot. Take care
not to burn your performer.
Before Laying on hair – front view Laying on hair – side view
6 As you lay up the face, change your colour slightly for the very top
sections (7, 8 and 9).
7 Use a towel over the whole beard to press the beard onto the skin. This will make
sure the beard is fully secure and lasts all day.
8 Tweezers can be used to pull out any thick clumps of hair.
9 When the moustache is applied, trim it carefully. Use the towel to press it onto the
skin. You do not want any bits falling out throughout the day and ending up in the
performer’s mouth.
10 Trim the whole beard to shape.
11 Comb through to remove any stray hairs that are not stuck down properly.
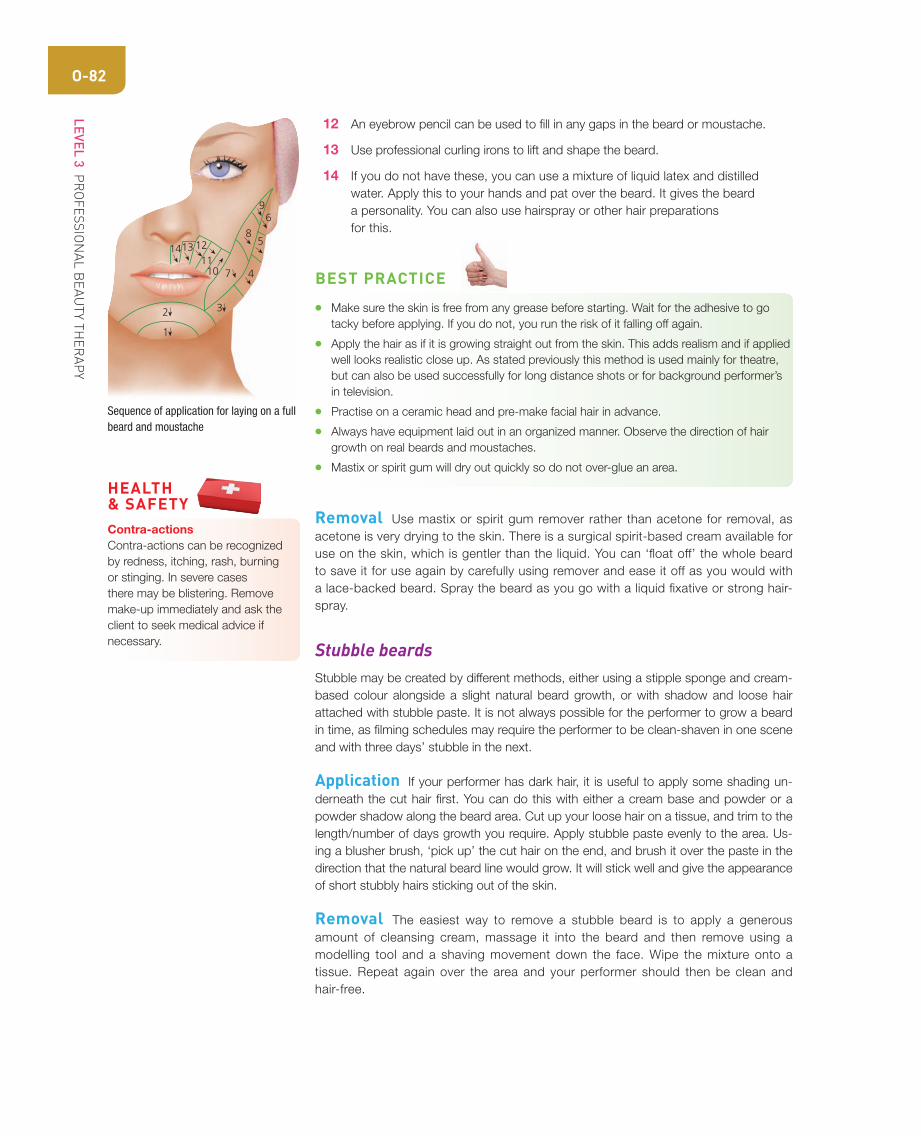
LEVEL 3 PR
OF
ES
SIO
NA
L B
EA
UT
Y T
HE
RA
PY
O-82
12 An eyebrow pencil can be used to fi ll in any gaps in the beard or moustache.
13 Use professional curling irons to lift and shape the beard.
14 If you do not have these, you can use a mixture of liquid latex and distilled
water. Apply this to your hands and pat over the beard. It gives the beard
a personality. You can also use hairspray or other hair preparations
for this.
1
2 3
4
5
6
7
138
9
1011
1214
Sequence of application for laying on a full beard and moustache
Removal Use mastix or spirit gum remover rather than acetone for removal, as
acetone is very drying to the skin. There is a surgical spirit-based cream available for
use on the skin, which is gentler than the liquid. You can ‘fl oat off’ the whole beard
to save it for use again by carefully using remover and ease it off as you would with
a lace-backed beard. Spray the beard as you go with a liquid fi xative or strong hair-
spray.
Stubble beardsStubble may be created by different methods, either using a stipple sponge and cream-
based colour alongside a slight natural beard growth, or with shadow and loose hair
attached with stubble paste. It is not always possible for the performer to grow a beard
in time, as fi lming schedules may require the performer to be clean-shaven in one scene
and with three days’ stubble in the next.
Application If your performer has dark hair, it is useful to apply some shading un-
derneath the cut hair fi rst. You can do this with either a cream base and powder or a
powder shadow along the beard area. Cut up your loose hair on a tissue, and trim to the
length/number of days growth you require. Apply stubble paste evenly to the area. Us-
ing a blusher brush, ‘pick up’ the cut hair on the end, and brush it over the paste in the
direction that the natural beard line would grow. It will stick well and give the appearance
of short stubbly hairs sticking out of the skin.
Removal The easiest way to remove a stubble beard is to apply a generous
amount of cleansing cream, massage it into the beard and then remove using a
modelling tool and a shaving movement down the face. Wipe the mixture onto a
tissue. Repeat again over the area and your performer should then be clean and
hair-free.
HEALTH& SAFETY
Contra-actionsContra-actions can be recognized
by redness, itching, rash, burning
or stinging. In severe cases
there may be blistering. Remove
make-up immediately and ask the
client to seek medical advice if
necessary.
BEST PRACTICE
● Make sure the skin is free from any grease before starting. Wait for the adhesive to go
tacky before applying. If you do not, you run the risk of it falling off again.
● Apply the hair as if it is growing straight out from the skin. This adds realism and if applied
well looks realistic close up. As stated previously this method is used mainly for theatre,
but can also be used successfully for long distance shots or for background performer’s
in television.
● Practise on a ceramic head and pre-make facial hair in advance.
● Always have equipment laid out in an organized manner. Observe the direction of hair
growth on real beards and moustaches.
● Mastix or spirit gum will dry out quickly so do not over-glue an area.
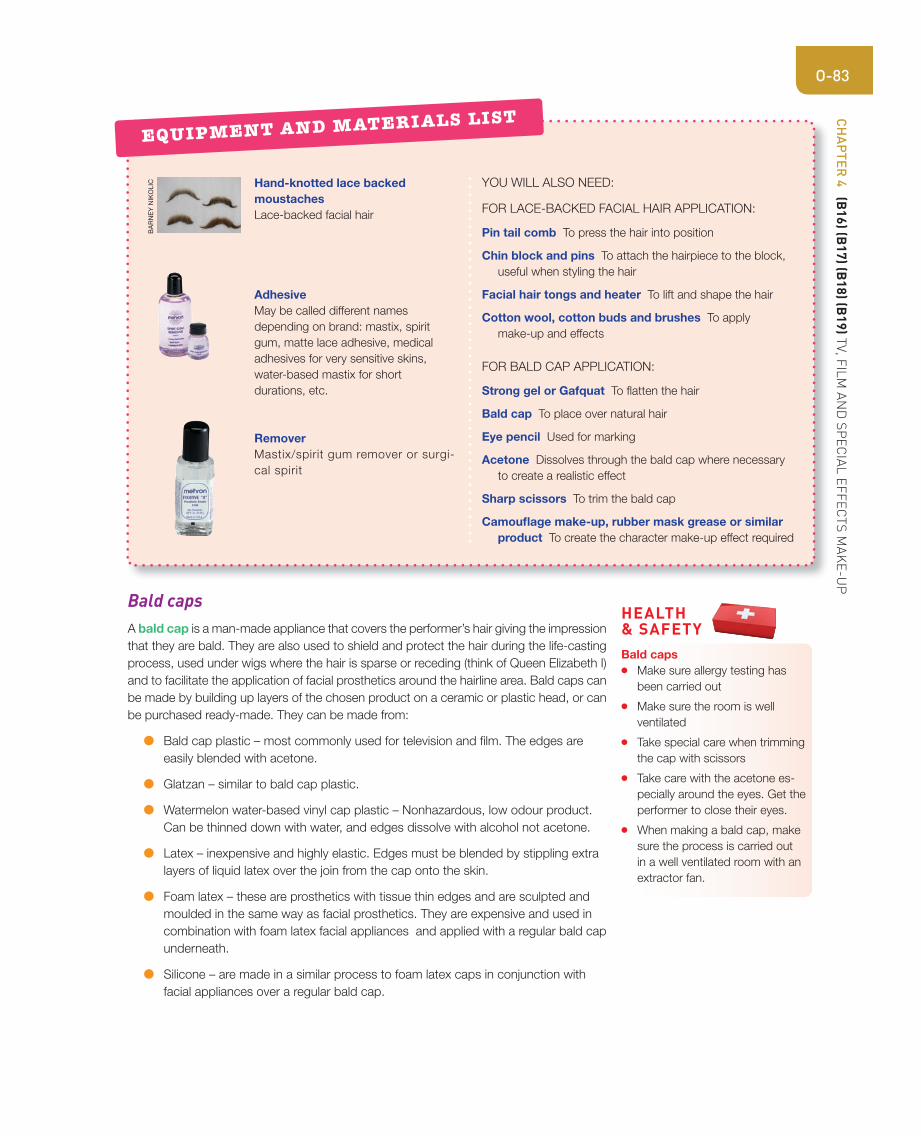
CH
AP
TER 4 (B
16
) (B1
7) (B
18
) (B1
9) T
V, F
ILM
AN
D S
PE
CIA
L E
FF
EC
TS
MA
KE
-UP
O-83(
)(
)(
)(
),
Hand-knotted lace backed moustachesLace-backed facial hair
AdhesiveMay be called different names
depending on brand: mastix, spirit
gum, matte lace adhesive, medical
adhesives for very sensitive skins,
water-based mastix for short
durations, etc.
RemoverMastix/spirit gum remover or surgi-
cal spirit
YOU WILL ALSO NEED:
FOR LACE-BACKED FACIAL HAIR APPLICATION:
Pin tail comb To press the hair into position
Chin block and pins To attach the hairpiece to the block,
useful when styling the hair
Facial hair tongs and heater To lift and shape the hair
Cotton wool, cotton buds and brushes To apply
make-up and effects
FOR BALD CAP APPLICATION:
Strong gel or Gafquat To fl atten the hair
Bald cap To place over natural hair
Eye pencil Used for marking
Acetone Dissolves through the bald cap where necessary
to create a realistic effect
Sharp scissors To trim the bald cap
Camoufl age make-up, rubber mask grease or similar product To create the character make-up effect required
EQUIPMENT AND MATERIALS LIST
Bald capsA bald cap is a man-made appliance that covers the performer’s hair giving the impression
that they are bald. They are also used to shield and protect the hair during the life-casting
process, used under wigs where the hair is sparse or receding (think of Queen Elizabeth I)
and to facilitate the application of facial prosthetics around the hairline area. Bald caps can
be made by building up layers of the chosen product on a ceramic or plastic head, or can
be purchased ready-made. They can be made from:
● Bald cap plastic – most commonly used for television and fi lm. The edges are
easily blended with acetone.
● Glatzan – similar to bald cap plastic.
● Watermelon water-based vinyl cap plastic – Nonhazardous, low odour product.
Can be thinned down with water, and edges dissolve with alcohol not acetone.
● Latex – inexpensive and highly elastic. Edges must be blended by stippling extra
layers of liquid latex over the join from the cap onto the skin.
● Foam latex – these are prosthetics with tissue thin edges and are sculpted and
moulded in the same way as facial prosthetics. They are expensive and used in
combination with foam latex facial appliances and applied with a regular bald cap
underneath.
● Silicone – are made in a similar process to foam latex caps in conjunction with
facial appliances over a regular bald cap.
HEALTH& SAFETY
Bald caps● Make sure allergy testing has
been carried out
● Make sure the room is well
ventilated
● Take special care when trimming
the cap with scissors
● Take care with the acetone es-
pecially around the eyes. Get the
performer to close their eyes.
● When making a bald cap, make
sure the process is carried out
in a well ventilated room with an
extractor fan.
BA
RN
EY
NIK
OL
IC

LEVEL 3 PR
OF
ES
SIO
NA
L B
EA
UT
Y T
HE
RA
PY
O-84
How to apply a plastic or Glatzan cap
1 Position, gown up and inform the performer of the process.
2 Carry out skin and scalp compatibility tests for any reactions.
3 Assess the suitability of materials on the skin and scalp. Consider time restraints,
shooting conditions and budgets.
4 Prepare the hair by fl attening short hair using a strong gel or Gafquat, or wrap-
ping long hair evenly around the head, ensuring there are no bumps. Do not use
clips, as they will puncture the cap.
5 Holding the cap at centre front, pull it back over the hair. Make sure all hair is away
from the hairline. Poke stray hairs up with the end of a brush or modelling tool.
6 Using an eye pencil, mark the centre of the ear.
7 Using a cotton bud dipped in acetone, carefully dissolve through the point where
the ear hole is.
8 Carefully trim upwards to the hole using sharp scissors.
9 Release the ear from under the cap. Dissolve further if necessary.
10 Start to stick down the perimeters of the cap using Mastix extra/spirit gum adhesive.
11 Dissolve all edges using acetone on a cotton bud in order to conceal the join.
12 Make up cap using camoufl age make-up, PAX, rubber mask grease or similar
product. This should be stippled or airbrushed over the edge of the man-made
cap and blended into the performer’s skin, merging into the facial make-up so the
join becomes invisible.
13 Complete character make-up as required. Powder well, especially over the cap.
Facial hair can be added for female-to-male conversions.
Airbrushing over bald caps You can airbrush colour over bald caps with any
product that can be diluted enough to pass through the airbrush. ‘Premier Products
Skin Illustrator’ liquids are one of the most frequently used materials used to spray caps.
A PAX wash if diluted enough can be used to do the same. PAX is Prosaide mixed with
Liquitex acrylic paint; usually 40 per cent paint and 60 per cent Prosaide. Water can also
be added to dilute. Regular care must taken so as to keep the airbrush clean and prevent
it from clogging.
Once the cap is blended and the edge appears fairly invisible to the naked eye, the colour
can then be applied. A PAX base can be applied with a brush or sponge to the whole cap
using a shade mixed to match the desired skin tone. PAX is a good base as it is highly
pigmented, fl exible and will not come off. Grease-based products may be used although
there is the possibility of them sliding on the cap. The airbrushing can then start. Spat-
tering is a good technique to use. This is created using the airbrush and by altering the
airfl ow through the brush itself. Colour is slowly built up using the spattering effect over
the cap and blending edge using visible colours already seen in the surrounding skin tone
(reds, yellows, browns, blues, greens, etc.), until the edge is hidden.
RemovalDepending on the type of cap and adhesive used, choose an appropriate remover on a
cotton bud or brush to gently and carefully remove the cap a section at a time. Take great
care not to pull any hairs as you go. Once all edges are loosened, the cap can be lifted off.
Old age prosthetic make-up with bald cap
BEST PRACTICE
Bald caps
● Ensure the tension and fi t of
the bald cap is correct and
comfortable for the performer.
● Position the performer to
minimize personal discomfort
and invite questions regarding
the process.
● Prepare the skin and scalp
appropriately for the type of
contact material used.
● Ensure the texture from the cap
to the skin is as similar as pos-
sible to achieve a near invisible
edge, as advised by the relevant
people.
● During removal, work gently and
with caution so as not to pull any
facial or scalp hair.
BA
LD
CA
P A
ND
SIL
ICO
NE
AP
PLIA
NC
E M
AK
E-U
P
FO
R A
DA
M A
ND
SH
ELLE
Y S
HO
W C
OU
RT
ES
Y O
F
GR
AN
AD
A T
ELE
VIS
ION
/BB
C
“ Using your
initiative can
help, especially
if you are working on a tight
budget and have to cut
corners to get the job done.
Adrian Rigby
CH
AP
TER 4 (B
16
) (B1
7) (B
18
) (B1
9) T
V, F
ILM
AN
D S
PE
CIA
L E
FF
EC
TS
MA
KE
-UP
O-85
Having covered the learning objectives for applying and removing special effects make-up, bald caps plus applying, fi xing and dressing facial hair, test what you
need to know and understand by answering the following
short questions below.
Special effects make-up and bald caps
1 How should you position your performer to alleviate
discomfort when applying bald caps and special
effects make-up?
2 What products could you use to create an indented
scar?
3 Why is the researching of injuries so important?
4 Name two materials that could be used in the creation
of a burn.
5 Describe how to remove wax from the performer’s skin.
6 State how time and budget constraints of a production
schedule could affect your choices of bald caps and
special effects make-up.
7 Describe how to remove a bald cap and special effects
make-up.
8 Demonstrate that you understand the technique
of airbrushing and how to apply to the skin and
man-made fabrics.
9 What is meant by ‘the on camera requirements of the
design specifi cation’, and ‘time constraints’?
10 How can different shooting conditions affect bald caps
and special effects make-up?
ASSESSMENT OF KNOWLEDGE AND UNDERSTANDING
11 Describe what action to take if bald caps or
special effects make-up deteriorate or cause adverse
skin or scalp reactions.
Facial hair
1 What products and tools do you need to clean facial hair?
2 Which products would you use to:
a Clean adhesive from the face, and
b Clean stubborn adhesive from the lace?
3 Where would you source facial hair and what details may
the company need in order to carry out your requests?
4 Name the different types of adhesives available and
when you are likely to use them?
5 How would you go about dressing facial hair?
6 What should you test the tongs on before applying to
the hair?
7 When may you decide to lay on a beard with loose hair
and what are its advantages?
8 What types of loose hair are available when laying a
beard directly onto the face?
9 How do you prepare the hair before applying to the face?
10 How would you mix different colours of hair?
11 Where on the face would you start to lay a beard?
12 Describe how you would carry out a skin test.
13 What other safety precautions should you observe
when laying facial hair?
With special thanks to the following who have generously provided their images:
Sheila McKenna/Kett Cosmetics (www.kettcosmetics.com)
Make-up artists: Andrea Perry-Bevan, Diana Estrada, Angela DiCarlo, Roque Cozzette, Sarah Perry,
Alison Smith, Bridget Taylor ([email protected]), Barney Nikolic, Rachel Harper, Adrian
Rigby
Photographers: Zhang Jingna (www.zhangjingna.com), Steve Collinson (www.stevecollinson.com),
Lucy Cartwright (www.lucyphotography.com), Rob McGrory (www.robmcgrory.com), Diana Estrada, Lynsey
Roberts, Adrian Rigby, Steve Azzarra, Ian Lea, Spike
Models: Lanie Wilson (www.bossmodelmanagement.com), Anne Van Sittern, Marcelle Skilton, Martina
Goodin, Carla Gugino, Gemma Harris, Anna Bessant
Every effort has been made to trace all copyright holders, but if any have been inadvertently overlooked
the publisher will be pleased to make the necessary arrangements at the fi rst opportunity. Please contact
the publisher directly.
FUNCTIONALSKILLS


![07718 907386 for viewing/info. UPRIGHT PIANO. ... SPANGLISH [12A] Thu: 12.20, 3.00, ... OU Film Foundation’s annual short fi lm fi nals](https://img.pdfslide.net/doc/110x75/5b0c91c67f8b9a2f788c6adf/07718-907386-for-viewinginfo-upright-piano-spanglish-12a-thu-1220-300.jpg)