Embed Size (px)
Citation preview

ALL NEW DIGITAL FORMAT LETSYOU DEFEND RORKE’S DRIFT
ANYTIME, ANYWHERE!
• Historical turn based strategy!• All new animated graphics and combatants!• Carry 139 British troops and over 4,500 Zulus in your pocket!
&
"SOME GAMES ARE OF THE 'ONE AND DONE' VARIETY BUT I CAN HAPPILY SAY THAT
“ZULUS ON THE RAMPARTS” ISN’T ONE OF THEM. THIS IS SIMPLY ONE OF THE BEST SOLITAIRE GAMES
I’VE EVER HAD THE PLEASURE OF PLAYING!" - JEFF MCALEER (THE GAMING GANG)
(BOARD GAME VERSION)
Second Edition Rules v1.0 1
© 2012 Joseph Miranda and Victory Point Games
The Battle of Rorke’s Drift, 22-23 January 1879
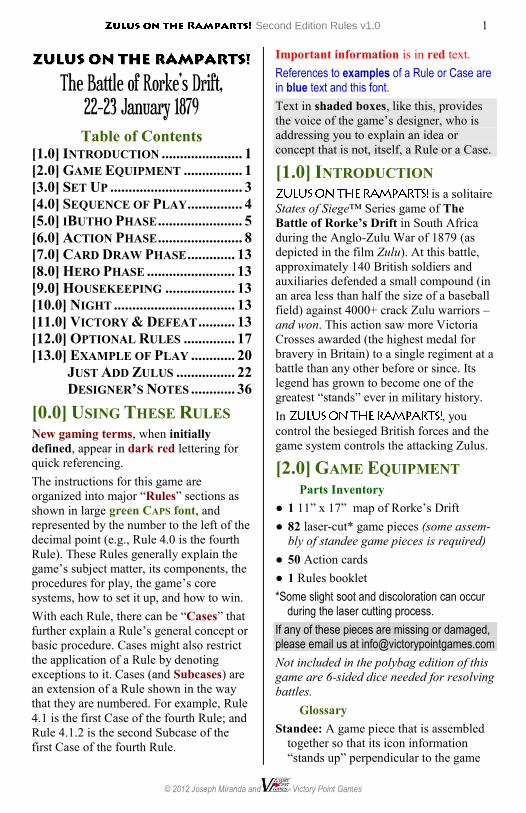
Table of Contents [1.0] INTRODUCTION ...................... 1 [2.0] GAME EQUIPMENT ................ 1 [3.0] SET UP .................................... 3 [4.0] SEQUENCE OF PLAY ............... 4 [5.0] IBUTHO PHASE ....................... 5 [6.0] ACTION PHASE ....................... 8 [7.0] CARD DRAW PHASE ............. 13 [8.0] HERO PHASE ........................ 13 [9.0] HOUSEKEEPING ................... 13 [10.0] NIGHT ................................. 13 [11.0] VICTORY & DEFEAT .......... 13 [12.0] OPTIONAL RULES .............. 17 [13.0] EXAMPLE OF PLAY ............ 20
JUST ADD ZULUS ................ 22 DESIGNER’S NOTES ............ 36
[0.0] USING THESE RULES New gaming terms, when initially defined, appear in dark red lettering for quick referencing. The instructions for this game are organized into major “Rules” sections as shown in large green CAPS font, and represented by the number to the left of the decimal point (e.g., Rule 4.0 is the fourth Rule). These Rules generally explain the game’s subject matter, its components, the procedures for play, the game’s core systems, how to set it up, and how to win. With each Rule, there can be “Cases” that further explain a Rule’s general concept or basic procedure. Cases might also restrict the application of a Rule by denoting exceptions to it. Cases (and Subcases) are an extension of a Rule shown in the way that they are numbered. For example, Rule 4.1 is the first Case of the fourth Rule; and Rule 4.1.2 is the second Subcase of the first Case of the fourth Rule.
Important information is in red text. References to examples of a Rule or Case are in blue text and this font.
Text in shaded boxes, like this, provides the voice of the game’s designer, who is addressing you to explain an idea or concept that is not, itself, a Rule or a Case.
[1.0] INTRODUCTION is a solitaire
States of Siege™ Series game of The Battle of Rorke’s Drift in South Africa during the Anglo-Zulu War of 1879 (as depicted in the film Zulu). At this battle, approximately 140 British soldiers and auxiliaries defended a small compound (in an area less than half the size of a baseball field) against 4000+ crack Zulu warriors – and won. This action saw more Victoria Crosses awarded (the highest medal for bravery in Britain) to a single regiment at a battle than any other before or since. Its legend has grown to become one of the greatest “stands” ever in military history. In , you control the besieged British forces and the game system controls the attacking Zulus.
[2.0] GAME EQUIPMENT Parts Inventory
● 1 11” x 17” map of Rorke’s Drift ● 82 laser-cut* game pieces (some assem-
bly of standee game pieces is required) ● 50 Action cards ● 1 Rules booklet *Some slight soot and discoloration can occur
during the laser cutting process.
If any of these pieces are missing or damaged, please email us at [email protected]
Not included in the polybag edition of this game are 6-sided dice needed for resolving battles.
Glossary Standee: A game piece that is assembled
together so that its icon information “stands up” perpendicular to the game
2 Second Edition Rules v1.0
Game Development by Alan Emrich
map (as opposed to lying flat and parallel to the game map).
Some Zulu words are used in these rules: iButho: A troop of Zulu warriors that
roughly equates to a “Regiment” (or “guild”) based on age-group and marital status. Although the plural of iButho is “amaButho,” we’ll call them “iButhos.” The four iButhos in this game comprise the Zulu uNdi corps. This corps formed the Zulu reserve at Isandlwana earlier that day, but because that battle was won so quickly, these iButhos did not get to share in the glory. They impetuously advanced across the Buffalo River into Natal to Rorke’s Drift spoiling for a fight and another easy victory.
iMpi: A Zulu army, consisting of several iButhos. Also the Zulu word for “war.”
Components [2.1] The Game Map: The game map depicts the Mission Station at Rorke’s Drift on 22-23 January 1879 with the “interior” of the encampment as the central hub of the game’s action and four tracks emanating outward from it like spokes.
Each of these tracks represent a military approach vector used by the Zulu battle formation known as “the fighting bull-buffalo.” It consists of four units of maneuver: the Chest, the two Horns, and the Loins. The map also includes various holding boxes and other data to facilitate and organize play. [2.2] Action Cards: These cards are used to provide the activities and heroics that help you defend Rorke’s Drift and narrate the story of this battle.
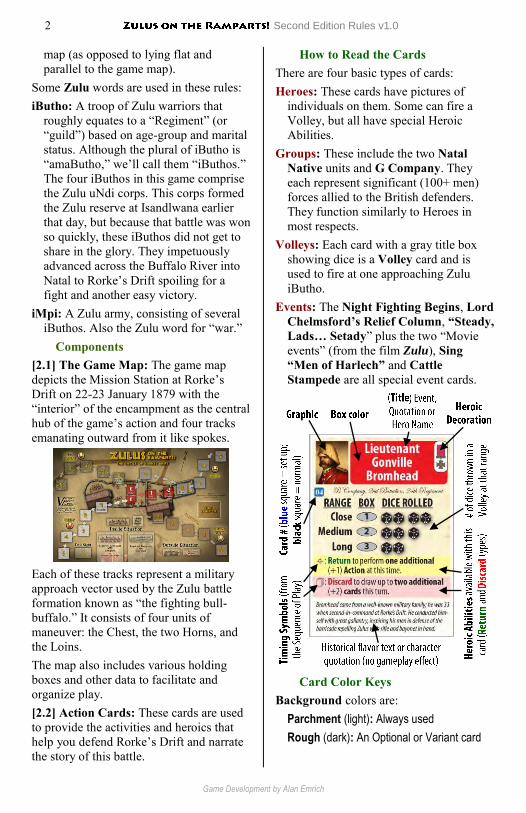
How to Read the Cards There are four basic types of cards: Heroes: These cards have pictures of
individuals on them. Some can fire a Volley, but all have special Heroic Abilities.
Groups: These include the two Natal Native units and G Company. They each represent significant (100+ men) forces allied to the British defenders. They function similarly to Heroes in most respects.
Volleys: Each card with a gray title box showing dice is a Volley card and is used to fire at one approaching Zulu iButho.
Events: The Night Fighting Begins, Lord Chelmsford’s Relief Column, “Steady, Lads… Setady” plus the two “Movie events” (from the film Zulu), Sing “Men of Harlech” and Cattle Stampede are all special event cards.
Card Color Keys
Background colors are: Parchment (light): Always used
Rough (dark): An Optional or Variant card
Second Edition Rules v1.0 3
© 2012 Joseph Miranda and Victory Point Games
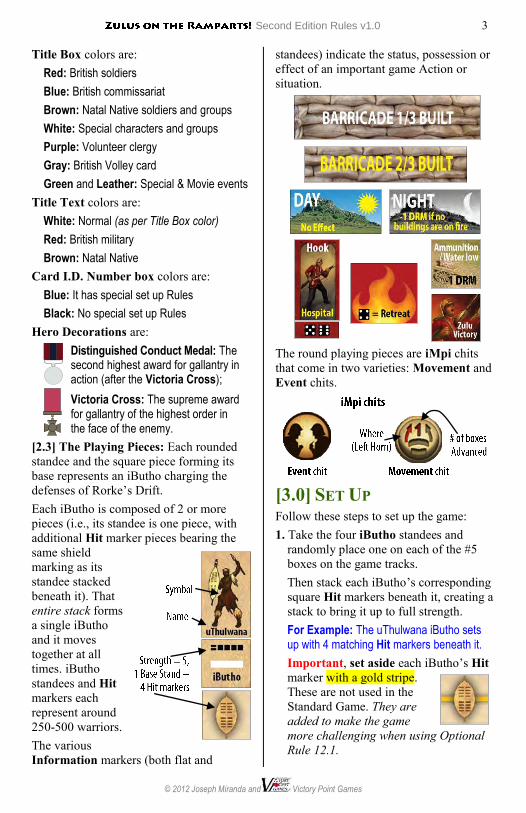
Title Box colors are: Red: British soldiers
Blue: British commissariat
Brown: Natal Native soldiers and groups
White: Special characters and groups
Purple: Volunteer clergy
Gray: British Volley card
Green and Leather: Special & Movie events
Title Text colors are: White: Normal (as per Title Box color)
Red: British military
Brown: Natal Native
Card I.D. Number box colors are: Blue: It has special set up Rules
Black: No special set up Rules
Hero Decorations are:
[2.3] The Playing Pieces: Each rounded standee and the square piece forming its base represents an iButho charging the defenses of Rorke’s Drift. Each iButho is composed of 2 or more pieces (i.e., its standee is one piece, with additional Hit marker pieces bearing the same shield marking as its standee stacked beneath it). That entire stack forms a single iButho and it moves together at all times. iButho standees and Hit markers each represent around 250-500 warriors. The various Information markers (both flat and
standees) indicate the status, possession or effect of an important game Action or situation.
The round playing pieces are iMpi chits that come in two varieties: Movement and Event chits.
[3.0] SET UP Follow these steps to set up the game: 1. Take the four iButho standees and
randomly place one on each of the #5 boxes on the game tracks. Then stack each iButho’s corresponding square Hit markers beneath it, creating a stack to bring it up to full strength. For Example: The uThulwana iButho sets up with 4 matching Hit markers beneath it.
Important, set aside each iButho’s Hit marker with a gold stripe. These are not used in the Standard Game. They are added to make the game more challenging when using Optional Rule 12.1.
Distinguished Conduct Medal: The second highest award for gallantry in action (after the Victoria Cross);
Victoria Cross: The supreme award for gallantry of the highest order in the face of the enemy.
4 Second Edition Rules v1.0
Game Development by Alan Emrich
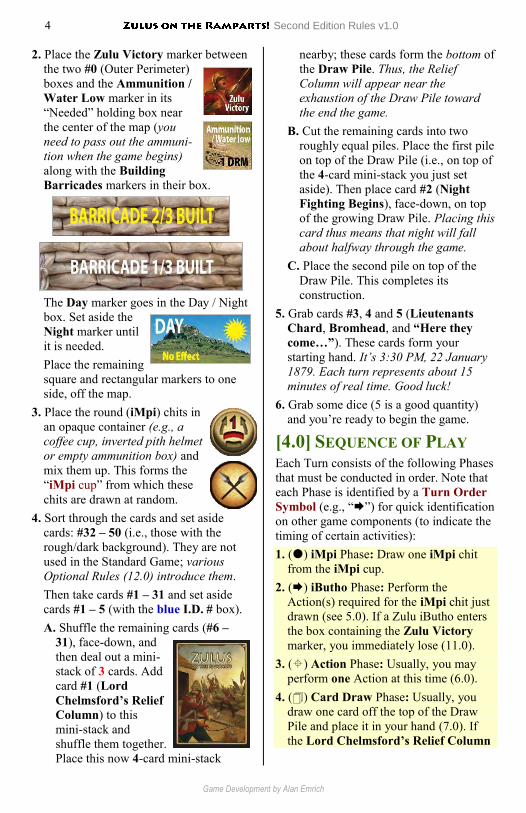
2. Place the Zulu Victory marker between the two #0 (Outer Perimeter) boxes and the Ammunition / Water Low marker in its “Needed” holding box near the center of the map (you need to pass out the ammuni-tion when the game begins) along with the Building Barricades markers in their box.
The Day marker goes in the Day / Night box. Set aside the Night marker until it is needed. Place the remaining square and rectangular markers to one side, off the map.
3. Place the round (iMpi) chits in an opaque container (e.g., a coffee cup, inverted pith helmet or empty ammunition box) and mix them up. This forms the “iMpi cup” from which these chits are drawn at random.
4. Sort through the cards and set aside cards: #32 – 50 (i.e., those with the rough/dark background). They are not used in the Standard Game; various Optional Rules (12.0) introduce them. Then take cards #1 – 31 and set aside cards #1 – 5 (with the blue I.D. # box). A. Shuffle the remaining cards (#6 –
31), face-down, and then deal out a mini-stack of 3 cards. Add card #1 (Lord Chelmsford’s Relief Column) to this mini-stack and shuffle them together. Place this now 4-card mini-stack
nearby; these cards form the bottom of the Draw Pile. Thus, the Relief Column will appear near the exhaustion of the Draw Pile toward the end the game.
B. Cut the remaining cards into two roughly equal piles. Place the first pile on top of the Draw Pile (i.e., on top of the 4-card mini-stack you just set aside). Then place card #2 (Night Fighting Begins), face-down, on top of the growing Draw Pile. Placing this card thus means that night will fall about halfway through the game.
C. Place the second pile on top of the Draw Pile. This completes its construction.
5. Grab cards #3, 4 and 5 (Lieutenants Chard, Bromhead, and “Here they come…”). These cards form your starting hand. It’s 3:30 PM, 22 January 1879. Each turn represents about 15 minutes of real time. Good luck!
6. Grab some dice (5 is a good quantity) and you’re ready to begin the game.
[4.0] SEQUENCE OF PLAY Each Turn consists of the following Phases that must be conducted in order. Note that each Phase is identified by a Turn Order Symbol (e.g., “”) for quick identification on other game components (to indicate the timing of certain activities): 1. () iMpi Phase: Draw one iMpi chit
from the iMpi cup. 2. () iButho Phase: Perform the
Action(s) required for the iMpi chit just drawn (see 5.0). If a Zulu iButho enters the box containing the Zulu Victory marker, you immediately lose (11.0).
3. () Action Phase: Usually, you may perform one Action at this time (6.0).
4. () Card Draw Phase: Usually, you draw one card off the top of the Draw Pile and place it in your hand (7.0). If the Lord Chelmsford’s Relief Column
Second Edition Rules v1.0 5
© 2012 Joseph Miranda and Victory Point Games
card is drawn, the game ends immediately (11.0).
5. () Hero Phase: You may “Put Forth” one Hero card (for ‘free’), thus making it ‘available (6.2 and 8.0).’
6. () Housekeeping Phase: If you have more than five (5) cards in your hand at this point, discard down to five (9.0). If no iButhos remain in play, you immediately win the game (11.0).
A complete game of consists of as many turns as
required until either victory is achieved or defeat occurs.
[5.0] THE IBUTHO PHASE During this Phase, the iMpi chit drawn during the immediately preceding iMpi Phase () is implemented as listed below. Discarded markers are removed from play and not returned to the iMpi cup after being implemented.
iMpi chit Explanations [5.1] Advance Marker: the iButho of the fighting bull-buffalo formation (Chest, Horn(s) or Loins) shown in red on that iMpi chit is moved the indicated number of boxes along its track toward the Zulu Victory marker; i.e., the next consecutively lower-numbered box(es). If that iButho is routed / eliminated (6.7.4), ignore any Advance results for it. (Do not draw another iMpi chit in this case.) For Example: The Advance marker illustrated here shows that the Loins advance 2 boxes. Note that the Loins have the fewest Advance markers, but move more boxes at a time, on average, representing Zulu military tactics.
Discard this marker after implementing it. [5.1.1] iButho Integrity: An iButho unit and all of its remaining Hit markers are
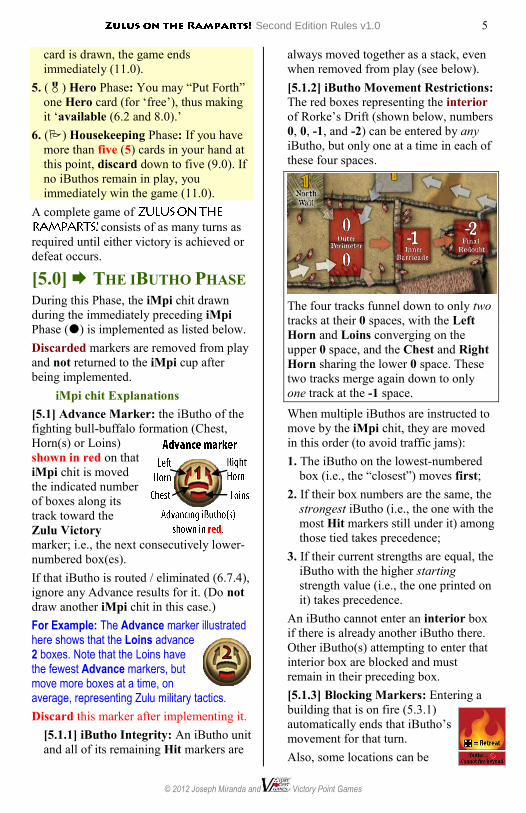
always moved together as a stack, even when removed from play (see below). [5.1.2] iButho Movement Restrictions: The red boxes representing the interior of Rorke’s Drift (shown below, numbers 0, 0, -1, and -2) can be entered by any iButho, but only one at a time in each of these four spaces.
The four tracks funnel down to only two tracks at their 0 spaces, with the Left Horn and Loins converging on the upper 0 space, and the Chest and Right Horn sharing the lower 0 space. These two tracks merge again down to only one track at the -1 space. When multiple iButhos are instructed to move by the iMpi chit, they are moved in this order (to avoid traffic jams): 1. The iButho on the lowest-numbered
box (i.e., the “closest”) moves first; 2. If their box numbers are the same, the
strongest iButho (i.e., the one with the most Hit markers still under it) among those tied takes precedence;
3. If their current strengths are equal, the iButho with the higher starting strength value (i.e., the one printed on it) takes precedence.
An iButho cannot enter an interior box if there is already another iButho there. Other iButho(s) attempting to enter that interior box are blocked and must remain in their preceding box. [5.1.3] Blocking Markers: Entering a building that is on fire (5.3.1) automatically ends that iButho’s movement for that turn. Also, some locations can be
6 Second Edition Rules v1.0
Game Development by Alan Emrich
defended by certain Heroic Defense markers (tall, rectangular standees). Before an iButho can enter a defended box, a die is rolled and compared to the Heroic Defense marker there. If one of that Heroic Defense marker’s numbers is rolled, the defense succeeds and the advancing iButho is stopped; it does not enter that defended box and ends its movement that turn in the next higher-numbered box adjacent to it. If the roll is lower than the Heroic Defense numbers, the defense fails and the advancing iButho enters that box normally; place the Heroic Defense marker back into the stock and its associated Hero or Group card is returned to your hand. (A skillful fighting withdrawal preserves that card.) Example: Currently available (6.2.1) is Private Hook, and so his Heroic Defense marker (pictured below) is automatically placed in the Hospital box. If an iButho attempts to enter the defended Hospital box, it is stopped on a roll of 5 or 6, and succeeds in
occupying the Hospital on any other die roll. [5.1.4] Movement Sequencing: When multiple iButhos are instructed to advance, move each one box at a time until all have completed their movement either by pressing forward that many boxes, or being stopped by a blocking marker. [5.1.5] Zulu Victory: If an iButho moves into the box occupied by the Zulu Victory marker, the game immediately ends in defeat (see 11.0).
[5.2] “R” Marker: When an “R” iMpi chit is drawn, perform all of the following Steps in this exact order:
A. iButhos Regroup: Each iButho unit on the map in a #3, 4 or 5 box that has lost any of its Hit markers recovers one of them. Remove that Hit marker from the Zulu Casualty box and replace it under its iButho standee.
B. iButho Rally: iButho units that have Routed (6.7.4) are returned to play. Stand them back up in their #5 box (stacked atop whatever Hit markers they have left). Note that they don’t recover a Hit marker as per A, above).
C. Retreat iButho Markers: Each iButho unit on the map in a #2 or lower box is retreated back to the next consecutively higher-numbered box on its track.
D. Rest the Lads: This turn, you cannot fire any Volleys. The Zulus have “gone to ground,” laying low in the grass, and not presenting themselves as targets.
Discard this marker after implementing it. There are three of them in the mix. [5.3] Event Markers: Event markers are ones that do not show the fighting bull-buffalo formation on them. These are explained below:
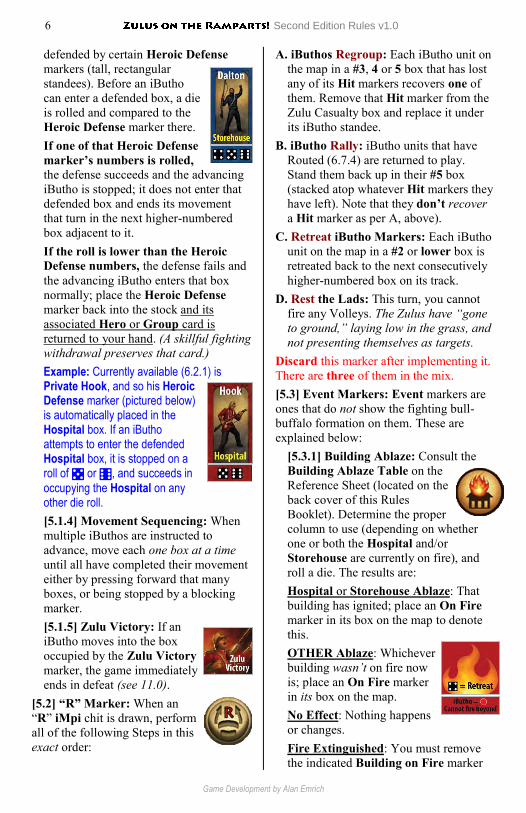
[5.3.1] Building Ablaze: Consult the Building Ablaze Table on the Reference Sheet (located on the back cover of this Rules Booklet). Determine the proper column to use (depending on whether one or both the Hospital and/or Storehouse are currently on fire), and roll a die. The results are: Hospital or Storehouse Ablaze: That building has ignited; place an On Fire marker in its box on the map to denote this. OTHER Ablaze: Whichever building wasn’t on fire now is; place an On Fire marker in its box on the map. No Effect: Nothing happens or changes. Fire Extinguished: You must remove the indicated Building on Fire marker
Second Edition Rules v1.0 7
© 2012 Joseph Miranda and Victory Point Games
(“One Fire Extinguished” means that it is your choice should both buildings be currently ablaze). Place the appropriate Hero marker back in that box, if that Hero is currently available. Note that buildings can be reignited during the game!
Return this marker to the iMpi cup after implementing it if it is Day. If it is Night, Discard this marker after implementing it. There are two of them in the mix.
Burning Building Effects While a building’s box is on fire, apply the following effects: If there is currently a
Heroic Defense marker there, place it back into the stock and that Hero’s card is returned to your hand. An orderly withdrawal is made.
A Zulu iButho entering that box must stop and can advance no further that turn (5.1.3). It can advance from that space normally on a future turn.
You can fire Volleys into but not through the fire. That is, you can fire Volleys into box #1 on that track, but not higher-numbered boxes while that track’s building is on fire.
A Zulu iButho that is attacked while in a burning building box retreats on rolls of 4 and 5 (not just 5; 6.7.4).
The -1 DRM Night penalty is not applied.
All of these points are summarized on the On Fire marker’s standee and base. The fires illuminated the Zulus at night, denying them much of the benefits of the cover of darkness. Because it had been raining for some days prior to this battle (although the weather was clear on January 22-23), the thatched roofs were still damp when ignited. Thus they slowly smoldered and burned for a very long time.
[5.3.2] inDluyengwe Forward!: Move the inDluyengwe iButho forward two (2) boxes. This Zulu iButho was comprised of younger, unmarried men who were eager to prove themselves and advanced boldly in the fight.
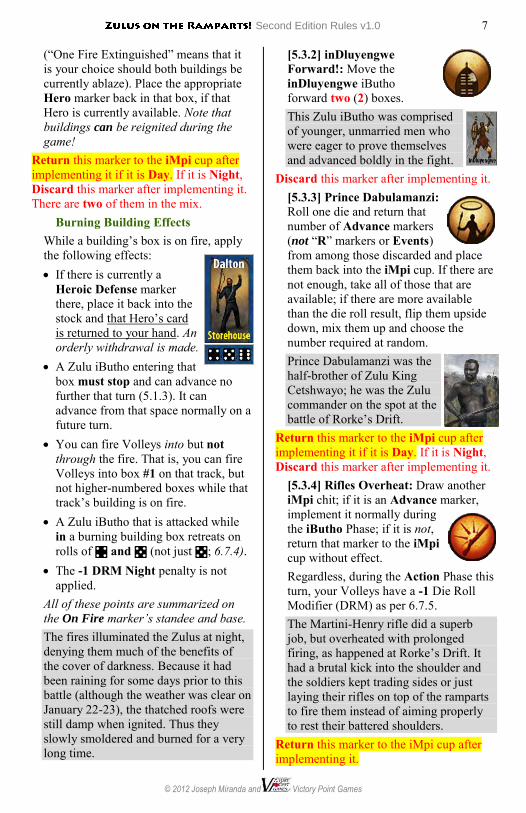
Discard this marker after implementing it. [5.3.3] Prince Dabulamanzi: Roll one die and return that number of Advance markers (not “R” markers or Events) from among those discarded and place them back into the iMpi cup. If there are not enough, take all of those that are available; if there are more available than the die roll result, flip them upside down, mix them up and choose the number required at random. Prince Dabulamanzi was the half-brother of Zulu King Cetshwayo; he was the Zulu commander on the spot at the battle of Rorke’s Drift.
Return this marker to the iMpi cup after implementing it if it is Day. If it is Night, Discard this marker after implementing it.
[5.3.4] Rifles Overheat: Draw another iMpi chit; if it is an Advance marker, implement it normally during the iButho Phase; if it is not, return that marker to the iMpi cup without effect. Regardless, during the Action Phase this turn, your Volleys have a -1 Die Roll Modifier (DRM) as per 6.7.5. The Martini-Henry rifle did a superb job, but overheated with prolonged firing, as happened at Rorke’s Drift. It had a brutal kick into the shoulder and the soldiers kept trading sides or just laying their rifles on top of the ramparts to fire them instead of aiming properly to rest their battered shoulders.
Return this marker to the iMpi cup after implementing it.
8 Second Edition Rules v1.0
Game Development by Alan Emrich
[5.3.5] Seniority Debate: If they are currently available (i.e., not currently assigned to building a barricade or formed into the Reserve Platoon), both of the Lieutenants Chard and Bromhead, Commissary Dalton, and Sergeants Bourne and Windridge cards must be returned to your hand (they can re-enter play normally). Skip the remainder of this turn (including the Housekeeping Phase and proceed with the iMpi Phase of next turn. You will have to sort out your hand size next turn. Lieutenant Chard, an engineer, was the senior officer present (and, therefore, in command) at Rorke’s Drift, although Bromhead commanded the infantry company there.
Discard this marker after implementing it. [5.3.6] Washing of the Spears: Look at the lowest numbered box occupied by any iButho. Retreat every iButho on that same-numbered box by one box along its track (but not beyond its #5 box). When this occurs in the # -1 box, it might cause an additional iButho unit to Retreat if there is a traffic jam at the 0 box (see 6.7.4 re: displacement). When a Zulu iButho made a kill, they stopped for a ritual purification. Example: The inDlondo and uThulwana iButhos are in their respective ‘1’ boxes, while the other two Zulu iButhos are in their ‘3’ and ‘4’ Boxes. For this Event, both the inDlondo and uThulwana iButhos would move one box back to their respective ‘2’ boxes.
Discard this marker after implementing it. [5.3.7] Zulu Snipers: Draw another iMpi chit; if it is an Advance marker stop drawing; if it is not, return it to the cup and draw again until you draw
an Advance marker, and then implement it normally during the iButho Phase. If there is no Advance marker in the cup, Advance all iButhos 1 space. During the Action Phase this turn, your Volleys have a -1 Die Roll Modifier (DRM) as per 6.7.5. The Zulus had a good many men with rifles and muskets up on the nearby hills. They fired into the British defenses with some effect, mostly forcing the British to keep their heads down.
Return this marker to the iMpi cup after implementing it.
[6.0] THE ACTION PHASE During this Phase, you can perform one Action (possibly more, e.g., see 6.1) using your cards and the defenders of Rorke’s Drift. [6.1] “Free” Actions: In addition to the one Action allowed each turn (although certain Hero cards award additional Actions) during this Phase, any number of “free” Actions can be also be performed.
Which Actions are “Free?” 1. Every Hero or Group card’s special
abilities occurring during the Action Phase (), including their Volleys, are always free Actions.
2. Some specific cards award a “free” Action (e.g., #05, “Here they come…”)
3. Every Action that occurs during any other Phase is also a free Action
[6.2] “Put Forth” a Hero or Group: To use its Abilities (i.e., to fire its Volley or perform one of its listed special abilities), a Hero or Group card must first be “Put Forth.” This Action consists of taking that Hero card from your hand and placing it, face-up, on the Tableau (that area of table directly in front of you). Putting Forth a Hero or Group card costs one Action
Second Edition Rules v1.0 9
© 2012 Joseph Miranda and Victory Point Games
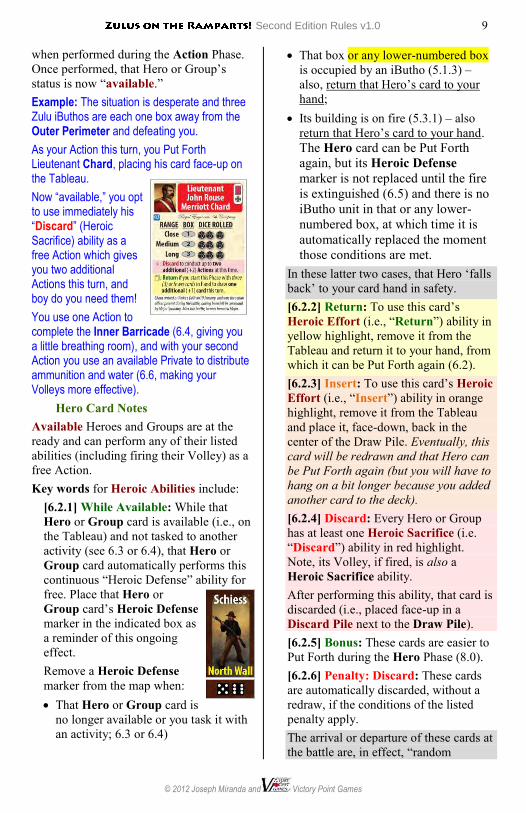
when performed during the Action Phase. Once performed, that Hero or Group’s status is now “available.” Example: The situation is desperate and three Zulu iButhos are each one box away from the Outer Perimeter and defeating you.
As your Action this turn, you Put Forth Lieutenant Chard, placing his card face-up on the Tableau.
Now “available,” you opt to use immediately his “Discard” (Heroic Sacrifice) ability as a free Action which gives you two additional Actions this turn, and boy do you need them!
You use one Action to complete the Inner Barricade (6.4, giving you a little breathing room), and with your second Action you use an available Private to distribute ammunition and water (6.6, making your Volleys more effective).
Hero Card Notes Available Heroes and Groups are at the ready and can perform any of their listed abilities (including firing their Volley) as a free Action. Key words for Heroic Abilities include:
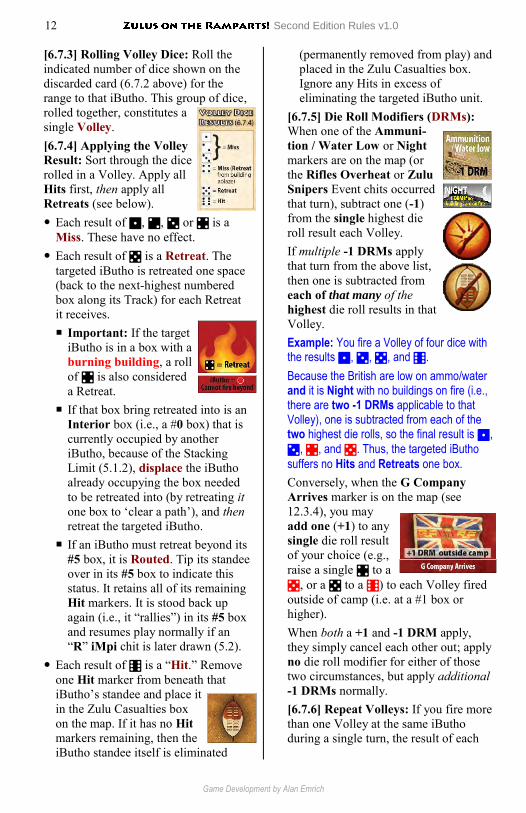
[6.2.1] While Available: While that Hero or Group card is available (i.e., on the Tableau) and not tasked to another activity (see 6.3 or 6.4), that Hero or Group card automatically performs this continuous “Heroic Defense” ability for free. Place that Hero or Group card’s Heroic Defense marker in the indicated box as a reminder of this ongoing effect. Remove a Heroic Defense marker from the map when: That Hero or Group card is
no longer available or you task it with an activity; 6.3 or 6.4)
That box or any lower-numbered box is occupied by an iButho (5.1.3) – also, return that Hero’s card to your hand;
Its building is on fire (5.3.1) – also return that Hero’s card to your hand. The Hero card can be Put Forth again, but its Heroic Defense marker is not replaced until the fire is extinguished (6.5) and there is no iButho unit in that or any lower-numbered box, at which time it is automatically replaced the moment those conditions are met.
In these latter two cases, that Hero ‘falls back’ to your card hand in safety. [6.2.2] Return: To use this card’s Heroic Effort (i.e., “Return”) ability in yellow highlight, remove it from the Tableau and return it to your hand, from which it can be Put Forth again (6.2). [6.2.3] Insert: To use this card’s Heroic Effort (i.e., “Insert”) ability in orange highlight, remove it from the Tableau and place it, face-down, back in the center of the Draw Pile. Eventually, this card will be redrawn and that Hero can be Put Forth again (but you will have to hang on a bit longer because you added another card to the deck). [6.2.4] Discard: Every Hero or Group has at least one Heroic Sacrifice (i.e. “Discard”) ability in red highlight. Note, its Volley, if fired, is also a Heroic Sacrifice ability. After performing this ability, that card is discarded (i.e., placed face-up in a Discard Pile next to the Draw Pile). [6.2.5] Bonus: These cards are easier to Put Forth during the Hero Phase (8.0). [6.2.6] Penalty: Discard: These cards are automatically discarded, without a redraw, if the conditions of the listed penalty apply. The arrival or departure of these cards at the battle are, in effect, “random
10 Second Edition Rules v1.0
Game Development by Alan Emrich
events.” Thus, if their timing is off, these cards are automatically removed. [6.2.7] Restriction: The prerequisite condition must be met before you can play this Event card.
Actions Requiring an Available Hero Most other Actions require the use of one (or more) available Hero or Group cards on the Tableau to perform them, as explained in Cases 6.3 through 6.6. Important: cards with their titles in white boxes cannot be used to perform any of these Actions (6.3 to 6.6). These heroes were either in the camp and busy, such as Surgeon Reynolds and his dog, or these groups were outside the camp completely. [6.3] Form Reserve Platoon: As seen along the bottom of the map, one available Lieutenant and one available Sergeant or another Lieutenant (i.e., two cards total) are required to perform this Action. Move those two Heroes’ cards to that part of the map to indicate their committed status; they are no longer available and cannot perform other duties while they are standing in the Reserve Platoon. Place the Reserve Platoon marker inside the compound on the map to show that the two decisive Commit Reserve Platoon cards are a step closer to being played. You may “break up” the Reserve Platoon at any time for free (and reforming it would require another Action). Simply return the Reserve Platoon marker to the stock and place the two Hero cards used to form it back into your hand.
[6.4] Construct a Barricade: By constructing barricades, you move the Zulu Victory marker backward to the interior boxes: -1 (Inner Barricade) and -2 (Final Redoubt). One available Lieutenant or Sergeant is required to perform this Action. Move that Hero’s card to the bottom map area indicating his committed status; he is no longer available and cannot perform other duties while organizing construction. You may cease building barricades at any time for free (to recommence would again require an Action and an available Lieutenant or Sergeant). Simply place the Hero card used back into your hand.
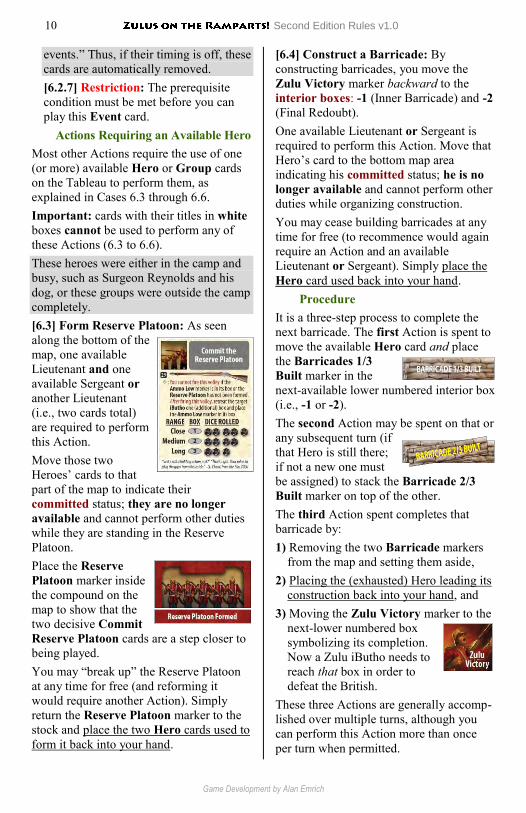
Procedure It is a three-step process to complete the next barricade. The first Action is spent to move the available Hero card and place the Barricades 1/3 Built marker in the next-available lower numbered interior box (i.e., -1 or -2). The second Action may be spent on that or any subsequent turn (if that Hero is still there; if not a new one must be assigned) to stack the Barricade 2/3 Built marker on top of the other. The third Action spent completes that barricade by: 1) Removing the two Barricade markers
from the map and setting them aside, 2) Placing the (exhausted) Hero leading its
construction back into your hand, and 3) Moving the Zulu Victory marker to the
next-lower numbered box symbolizing its completion. Now a Zulu iButho needs to reach that box in order to defeat the British.
These three Actions are generally accomp-lished over multiple turns, although you can perform this Action more than once per turn when permitted.
Second Edition Rules v1.0 11
© 2012 Joseph Miranda and Victory Point Games
[6.5] Fight a Building Fire: If there is a building on fire, you can attempt to extinguish it (i.e., remove the Building on Fire marker from play).
Procedure One available Hero card is required to perform this Action. Place that Hero card back into your hand, roll a die on the Fire Fighting Action column of the Building Ablaze Table, and apply the result as per 5.3.1. [6.6] Distribute Ammunition / Water: While the Ammunition / Water Low marker is on the map (where it sets up and is returned after using the “Volley Fire by Ranks” and “Commit Reserve Platoon” cards), all player Volleys (6.7) have a -1 Die Roll Modifier (DRM) penalty (see 6.7.5). To remove this penalty, you must spend an Action and have one available Hero (of any rank or type) perform this task. Place that Hero card back in your hand, and remove this marker from play.
Attacking the Zulus [6.7] Fire a Volley: When you fire a Volley (the generic term we use here for “shooting the guns” as opposed to the title of any specific card), you’re discarding a card to perform an Action against a single, targeted iButho in an effort to eliminate and/or retreat it. You can fire more than one Volley per turn. Volleys fired on the same turn do not have to be fired at the same iButho. To fire a Volley, perform these Steps:
1) Target one Zulu iButho within range 2) Discard one card showing a Volley of
dice and different ranges 3) Roll the indicated number of dice for
the range to the targeted iButho 4) Apply the results to the target iButho [6.7.1] Targeting an iButho: To be an eligible target, an iButho must be on the
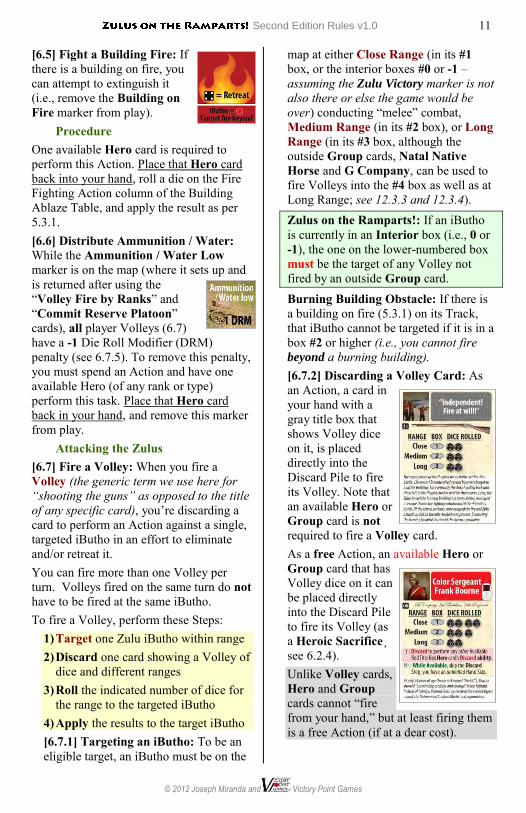
map at either Close Range (in its #1 box, or the interior boxes #0 or -1 – assuming the Zulu Victory marker is not also there or else the game would be over) conducting “melee” combat, Medium Range (in its #2 box), or Long Range (in its #3 box, although the outside Group cards, Natal Native Horse and G Company, can be used to fire Volleys into the #4 box as well as at Long Range; see 12.3.3 and 12.3.4). Zulus on the Ramparts!: If an iButho is currently in an Interior box (i.e., 0 or -1), the one on the lower-numbered box must be the target of any Volley not fired by an outside Group card. Burning Building Obstacle: If there is a building on fire (5.3.1) on its Track, that iButho cannot be targeted if it is in a box #2 or higher (i.e., you cannot fire beyond a burning building). [6.7.2] Discarding a Volley Card: As an Action, a card in your hand with a gray title box that shows Volley dice on it, is placed directly into the Discard Pile to fire its Volley. Note that an available Hero or Group card is not required to fire a Volley card. As a free Action, an available Hero or Group card that has Volley dice on it can be placed directly into the Discard Pile to fire its Volley (as a Heroic Sacrifice¸ see 6.2.4). Unlike Volley cards, Hero and Group cards cannot “fire from your hand,” but at least firing them is a free Action (if at a dear cost).
12 Second Edition Rules v1.0
Game Development by Alan Emrich
[6.7.3] Rolling Volley Dice: Roll the indicated number of dice shown on the discarded card (6.7.2 above) for the range to that iButho. This group of dice, rolled together, constitutes a single Volley. [6.7.4] Applying the Volley Result: Sort through the dice rolled in a Volley. Apply all Hits first, then apply all Retreats (see below). Each result of 1, 2, 3 or 4 is a
Miss. These have no effect. Each result of 5 is a Retreat. The
targeted iButho is retreated one space (back to the next-highest numbered box along its Track) for each Retreat it receives. Important: If the target
iButho is in a box with a burning building, a roll of 4 is also considered a Retreat.
If that box bring retreated into is an Interior box (i.e., a #0 box) that is currently occupied by another iButho, because of the Stacking Limit (5.1.2), displace the iButho already occupying the box needed to be retreated into (by retreating it one box to ‘clear a path’), and then retreat the targeted iButho.
If an iButho must retreat beyond its #5 box, it is Routed. Tip its standee over in its #5 box to indicate this status. It retains all of its remaining Hit markers. It is stood back up again (i.e., it “rallies”) in its #5 box and resumes play normally if an “R” iMpi chit is later drawn (5.2).
Each result of 6 is a “Hit.” Remove one Hit marker from beneath that iButho’s standee and place it in the Zulu Casualties box on the map. If it has no Hit markers remaining, then the iButho standee itself is eliminated
(permanently removed from play) and placed in the Zulu Casualties box. Ignore any Hits in excess of eliminating the targeted iButho unit.
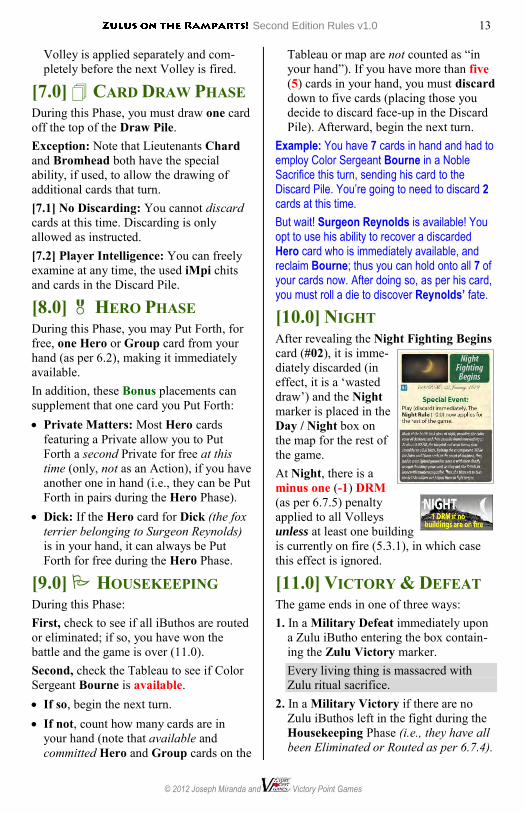
[6.7.5] Die Roll Modifiers (DRMs): When one of the Ammuni-tion / Water Low or Night markers are on the map (or the Rifles Overheat or Zulu Snipers Event chits occurred that turn), subtract one (-1) from the single highest die roll result each Volley. If multiple -1 DRMs apply that turn from the above list, then one is subtracted from each of that many of the highest die roll results in that Volley. Example: You fire a Volley of four dice with the results 1, 3, 5, and 6.
Because the British are low on ammo/water and it is Night with no buildings on fire (i.e., there are two -1 DRMs applicable to that Volley), one is subtracted from each of the two highest die rolls, so the final result is 1,
3, 4, and 5. Thus, the targeted iButho
suffers no Hits and Retreats one box. Conversely, when the G Company Arrives marker is on the map (see 12.3.4), you may add one (+1) to any single die roll result of your choice (e.g., raise a single 4 to a 5, or a 5 to a 6) to each Volley fired outside of camp (i.e. at a #1 box or higher). When both a +1 and -1 DRM apply, they simply cancel each other out; apply no die roll modifier for either of those two circumstances, but apply additional -1 DRMs normally. [6.7.6] Repeat Volleys: If you fire more than one Volley at the same iButho during a single turn, the result of each
Second Edition Rules v1.0 13
© 2012 Joseph Miranda and Victory Point Games
Volley is applied separately and com-pletely before the next Volley is fired.
[7.0] CARD DRAW PHASE During this Phase, you must draw one card off the top of the Draw Pile. Exception: Note that Lieutenants Chard and Bromhead both have the special ability, if used, to allow the drawing of additional cards that turn. [7.1] No Discarding: You cannot discard cards at this time. Discarding is only allowed as instructed. [7.2] Player Intelligence: You can freely examine at any time, the used iMpi chits and cards in the Discard Pile.
[8.0] HERO PHASE During this Phase, you may Put Forth, for free, one Hero or Group card from your hand (as per 6.2), making it immediately available. In addition, these Bonus placements can supplement that one card you Put Forth: Private Matters: Most Hero cards
featuring a Private allow you to Put Forth a second Private for free at this time (only, not as an Action), if you have another one in hand (i.e., they can be Put Forth in pairs during the Hero Phase).
Dick: If the Hero card for Dick (the fox terrier belonging to Surgeon Reynolds) is in your hand, it can always be Put Forth for free during the Hero Phase.
[9.0] HOUSEKEEPING During this Phase: First, check to see if all iButhos are routed or eliminated; if so, you have won the battle and the game is over (11.0). Second, check the Tableau to see if Color Sergeant Bourne is available. If so, begin the next turn. If not, count how many cards are in
your hand (note that available and committed Hero and Group cards on the
Tableau or map are not counted as “in your hand”). If you have more than five (5) cards in your hand, you must discard down to five cards (placing those you decide to discard face-up in the Discard Pile). Afterward, begin the next turn.
Example: You have 7 cards in hand and had to employ Color Sergeant Bourne in a Noble Sacrifice this turn, sending his card to the Discard Pile. You’re going to need to discard 2 cards at this time.
But wait! Surgeon Reynolds is available! You opt to use his ability to recover a discarded Hero card who is immediately available, and reclaim Bourne; thus you can hold onto all 7 of your cards now. After doing so, as per his card, you must roll a die to discover Reynolds’ fate.
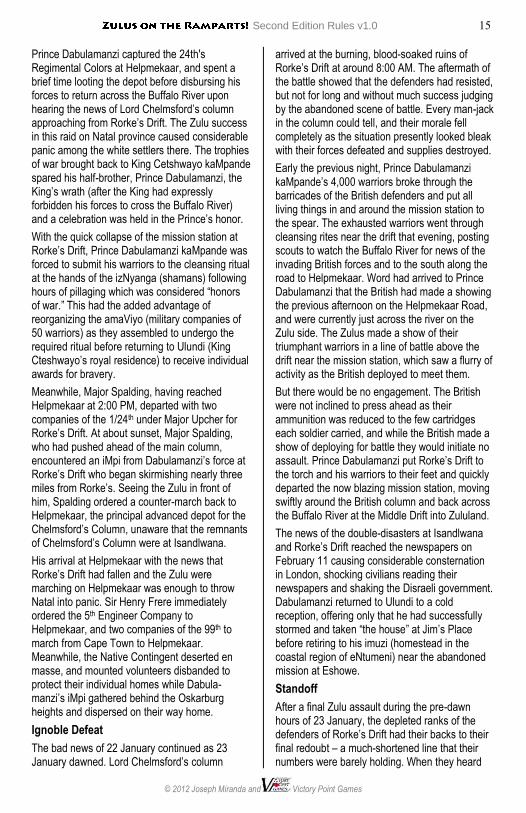
[10.0] NIGHT After revealing the Night Fighting Begins card (#02), it is imme-diately discarded (in effect, it is a ‘wasted draw’) and the Night marker is placed in the Day / Night box on the map for the rest of the game. At Night, there is a minus one (-1) DRM (as per 6.7.5) penalty applied to all Volleys unless at least one building is currently on fire (5.3.1), in which case this effect is ignored.
[11.0] VICTORY & DEFEAT The game ends in one of three ways: 1. In a Military Defeat immediately upon
a Zulu iButho entering the box contain-ing the Zulu Victory marker. Every living thing is massacred with Zulu ritual sacrifice.
2. In a Military Victory if there are no Zulu iButhos left in the fight during the Housekeeping Phase (i.e., they have all been Eliminated or Routed as per 6.7.4).
14 Second Edition Rules v1.0
Game Development by Alan Emrich
Legitimately, you have good news to send back to London that offsets the disaster that morning at Isandlwana.
3. In Political Face-Saving immediately upon revealing the Lord Chelmsford’s Relief Column card (#01). Lord Chelmsford makes it back on the morning after the disastrous defeat at Isandlwana to find that you’ve held out. Much is made back home of this suc-cess and many medals and citations are awarded as a result, but it has little strategic significance on the course of the Anglo-Zulu War. This is the historical outcome.
When one of these game-ending events takes place, tally your score to determine the final Victory Level.
Victory Point (VP) Schedule +1 VP for each available or committed Hero
or Group card without a medal symbol by his name; such cards in hand or the Discard Pile are worth 0.
+2 VPs for each available or committed Hero or Group card with a medal symbol by his name; such cards in hand or the Discard Pile are worth 0.
+3 VPs for each Zulu Hit marker in the Zulu Casualties box.
+4 VPs each for the Hospital and Storehouse if it is not currently burning.
+6 VPs for each Zulu iButho unit in the Zulu Casualties box for wiping it out to the last man. (You score +0 VPs for Routed iButhos.)
+10 VPs if the Relief Column card (#1) is drawn (i.e., a Zulu iButho never reached the Zulu Victory marker to end the game).
-X VPs for each Heroic Support banner marker (NNC [-7], NNH [-5], and G Co. [-10]) in play on the map.
Whether the game ends in Military or Political Victory or Defeat, your Victory Level is determined by how this battle will
be remembered in the pages of history according to the following schedule: VP Total Historical Victory Level
24 or less Tragic Defeat (Zulu Major Victory)
25 – 34 Ignoble Defeat (Zulu Minor Victory)
35 – 39 Standoff (a Draw; Inconclusive)
40 – 49 Minor Victory (Zulu Setback)
50 – 59 Major Victory (Zulu Defeat; The historical result)
60+ Epic Victory (Zulu Debacle)
Epilogues Tragic Defeat
With the quick collapse of the mission station at Rorke’s Drift, Prince Dabulamanzi kaMpande maintained the momentum of his 4,000 warriors, pressing further into Natal province. After feeding and resting his warriors around Rorke’s Drift on the night of 22-23 January, in the morning just before dawn he pressed them forward once again, this time the 12 kilometers to Helpmekaar, where another engagement with a small British force ensued.
The hour-long Battle of Helpmekaar on the morning of 23 January saw the remnants of the Natal Native Horse, regrouped and hastily deployed to the south to screen the road to Greytown, hardly participate as they were still reeling from the previous day’s encounter at Isandlwana. As they had at Rorke’s Drift the previous day, the Natal Native Contingent once again fled, this time northwards toward Dundee (where their British officers would eventually face court-martial for cowardice). All that remained to defend Helpmekaar’s two isolated stone houses and five storage sheds filled with reserve stocks of ammunition, biscuits, grain and forage was G company of the 24th Regiment under the leadership of Major Spalding and Captain Rainforth. Without the benefit of even the improvised fortifications that defenders at Rorke’s Drift enjoyed, the Zulus pressed forward to repeat in miniature their victory at Isandlwana of the morning before, with the remnants of G Company falling back to the north. A clutch of men led by Captain Rainforth made a last stand at a small chapel some distance away, but the Zulus did not press further.
Second Edition Rules v1.0 15
© 2012 Joseph Miranda and Victory Point Games
Prince Dabulamanzi captured the 24th's Regimental Colors at Helpmekaar, and spent a brief time looting the depot before disbursing his forces to return across the Buffalo River upon hearing the news of Lord Chelmsford’s column approaching from Rorke’s Drift. The Zulu success in this raid on Natal province caused considerable panic among the white settlers there. The trophies of war brought back to King Cetshwayo kaMpande spared his half-brother, Prince Dabulamanzi, the King’s wrath (after the King had expressly forbidden his forces to cross the Buffalo River) and a celebration was held in the Prince’s honor.
With the quick collapse of the mission station at Rorke’s Drift, Prince Dabulamanzi kaMpande was forced to submit his warriors to the cleansing ritual at the hands of the izNyanga (shamans) following hours of pillaging which was considered “honors of war.” This had the added advantage of reorganizing the amaViyo (military companies of 50 warriors) as they assembled to undergo the required ritual before returning to Ulundi (King Cteshwayo’s royal residence) to receive individual awards for bravery.
Meanwhile, Major Spalding, having reached Helpmekaar at 2:00 PM, departed with two companies of the 1/24th under Major Upcher for Rorke’s Drift. At about sunset, Major Spalding, who had pushed ahead of the main column, encountered an iMpi from Dabulamanzi’s force at Rorke’s Drift who began skirmishing nearly three miles from Rorke’s. Seeing the Zulu in front of him, Spalding ordered a counter-march back to Helpmekaar, the principal advanced depot for the Chelmsford’s Column, unaware that the remnants of Chelmsford’s Column were at Isandlwana.
His arrival at Helpmekaar with the news that Rorke’s Drift had fallen and the Zulu were marching on Helpmekaar was enough to throw Natal into panic. Sir Henry Frere immediately ordered the 5th Engineer Company to Helpmekaar, and two companies of the 99th to march from Cape Town to Helpmekaar. Meanwhile, the Native Contingent deserted en masse, and mounted volunteers disbanded to protect their individual homes while Dabula-manzi’s iMpi gathered behind the Oskarburg heights and dispersed on their way home.
Ignoble Defeat
The bad news of 22 January continued as 23 January dawned. Lord Chelmsford’s column
arrived at the burning, blood-soaked ruins of Rorke’s Drift at around 8:00 AM. The aftermath of the battle showed that the defenders had resisted, but not for long and without much success judging by the abandoned scene of battle. Every man-jack in the column could tell, and their morale fell completely as the situation presently looked bleak with their forces defeated and supplies destroyed.
Early the previous night, Prince Dabulamanzi kaMpande’s 4,000 warriors broke through the barricades of the British defenders and put all living things in and around the mission station to the spear. The exhausted warriors went through cleansing rites near the drift that evening, posting scouts to watch the Buffalo River for news of the invading British forces and to the south along the road to Helpmekaar. Word had arrived to Prince Dabulamanzi that the British had made a showing the previous afternoon on the Helpmekaar Road, and were currently just across the river on the Zulu side. The Zulus made a show of their triumphant warriors in a line of battle above the drift near the mission station, which saw a flurry of activity as the British deployed to meet them.
But there would be no engagement. The British were not inclined to press ahead as their ammunition was reduced to the few cartridges each soldier carried, and while the British made a show of deploying for battle they would initiate no assault. Prince Dabulamanzi put Rorke’s Drift to the torch and his warriors to their feet and quickly departed the now blazing mission station, moving swiftly around the British column and back across the Buffalo River at the Middle Drift into Zululand.
The news of the double-disasters at Isandlwana and Rorke’s Drift reached the newspapers on February 11 causing considerable consternation in London, shocking civilians reading their newspapers and shaking the Disraeli government. Dabulamanzi returned to Ulundi to a cold reception, offering only that he had successfully stormed and taken “the house” at Jim’s Place before retiring to his imuzi (homestead in the coastal region of eNtumeni) near the abandoned mission at Eshowe.
Standoff
After a final Zulu assault during the pre-dawn hours of 23 January, the depleted ranks of the defenders of Rorke’s Drift had their backs to their final redoubt – a much-shortened line that their numbers were barely holding. When they heard
16 Second Edition Rules v1.0
Game Development by Alan Emrich
the sounds of another Zulu assault massing around them in the darkness, the British soldiers tried to muster their last ounce of courage as they counted their few remaining rounds, and steeled themselves like their bayonets for the final defense of their seemingly hopeless position.
But the rustling in the distance proved to be Prince Dabulamanzi’s Zulu iMpi taking their leave of the battlefield. Unbeknownst to the British defenders, who were dry-mouthed thirsty and sorely bruised on both shoulders from the constant kick of their Martini-Henry rifles firing through the night, just as they were accepting that the next assault would finish them, it never came.
The Zulu warriors, who were tired when they had arrived for battle the previous afternoon, were now completely spent after repeated assaults against the British ramparts, and departed under the remaining cover of darkness with little to show for their exertions. When news of this stalemate reached King Cetshwayo, he was very displeased that his iMpi had disobeyed his directions not to attack fortified positions and that this disobedience had cost the lives of so many warriors despite the tempting near-victory they almost achieved.
Back in London, news of the British debacle at Isandlwana could not be ameliorated by any particular good news from this engagement at the mission station. Although Prime Minister Disraeli and his cabinet were not ready to charge Chelmsford with incompetence, British popular opinion decidedly turned against him, and with him Sir Henry Frere who had initiated the hostilities on his own initiative.
Minor Victory
When the Zulu charges finally subsided after midnight on 23 January, the defenders at Rorke’s Drift hastily took stock of their situation in antici-pation of another attack. In their tight confines, the fire-illuminated darkness was enough to estimate their losses, killed and wounded, at about 40 men; water was critically short and the Zulus were still thick between the British soldiers and the Buffalo River below them at the drift. Ammunition was all but gone, and the sergeants organized groups to ferret among their fallen comrades to scrape together every live round they could find among them. Other details were formed under the direction of Acting Commissariat Officer Dalton to rebuild the inner rampart of ammunition boxes, where the British still had enough soldiers to make
a proper stand to greet the next attack they expected would come.
But the Zulu officers could tell that these soldiers were going to stand together and fight to the last man and Prince Dabulamanzi knew that he could push his exhausted warriors no farther against them. Zulu losses had mounted and still the red-coated soldiers remained. It wasn’t long after he’d ceased launching assaults to rest his warriors and consider his situation that scouts brought back word of the British column returning from Zululand – and there were many British soldiers not killed at Isandlwana the day before who approached. That decided matters for the prince, and he ordered his iMpi to retreat from Jim’s Place (the mission station at Rorke’s Drift) and return to Zululand. His half-brother, King Cetshwayo, would not be happy about his iMpi invading Natal, and unhappier still that his half-brother had disobeyed the King’s most important directions to not cross the Buffalo River or attack a fortified position.
Back in London, the news of the minor victory at Rorke’s Drift was a little sop to a public reading of the disaster at Isandlwana. While trying to salvage the reputation of British forces in the central column, dispatches from London with praise for the defenders of Rorke’s Drift were faint, with only a few citations among the survivors; it was not enough of a victory to be either particularly helpful in the war or worth celebrating back home, and many summed up the situation saying that “it could have been worse.” Eventually, it would lead to the disgrace of Lord Chelmsford in the newspapers, and he would be replaced, after much political maneuvering in London.
Major Victory (the historical outcome)
The Zulu attacks lost momentum between 10:00 and 11:00 PM on the night of January 22 when Prince Dabulamanzi realized that the British would not be overrun and were still secure behind their barricades. The exchange of rifle fire continued with some intensity for a few hours after the assaults died down. The last shots were fired by 4:00 AM on January 23, and it became clear as dawn rose that the Zulus had withdrawn. Witnesses of their retreat saw these fierce Zulu warriors so exhausted that they were dragging their shields in their departure, which was still a better fate than the 351 dead Zulu warriors counted at Rorke’s Drift. (Fallen Zulu bodies along the line of retreat would turn up for days after the
Second Edition Rules v1.0 17
© 2012 Joseph Miranda and Victory Point Games
battle, while many more warriors were maimed, or died at home).
By 8:00 AM, Lord Chelmsford’s column beheld an unexpected sight – the retreating Zulus from the battle at Rorke’s Drift, but since each soldier had only the ammunition he could carry, the British did not wish to engage them and so watched them cross their front as they withdrew back to Zululand. Neither side was interested in attacking at this juncture, so much so that the Native Contingent among Lord Chelmsford’s force engaged the retreating Zulus in shouted conversation as they passed. But the aftermath of the disaster at Isandlwana was still to be reckoned with, and the British War Office and Colonial Office went through extraordinary efforts to trumpet this rather inconsequential, if clear, victory at Rorke’s Drift to help ameliorate the shocking and more significant defeat of 1,200 men the previous day.
The exaggeration of this victory at Rorke’s Drift resulted in the issuing of 11 Victoria Crosses, a record number for a single regiment at a single battle, with Lord Chelmsford violating protocol by adding Lieutenants Bromhead and Chard as an afterthought, to the list of those recommended for citation. A further 4 Silver Medals for Distinguished Conduct were also issued from this engagement.
For their part, the Zulu attackers returned home from Rorke’s Drift to national ridicule, making themselves a laughing stock for trying to capture some of the glory of Isandlwana on their own. These brave warriors were mocked as “women who ran away for no reason at all, like the wind.” Prince Dabulamanzi pointed out that they did burn down the hospital, but that was too little and he was sent home until called upon later to command another iMpi later in this war.
Epic Victory
The decisive victory at Rorke’s Drift proved greatly beneficial to the morale of the British forces relieving them from Lord Chelmsford’s retreating column, and the news also bolstered the frayed nerves of the white residents of Natal who were in near-panic at the prospect of a Zulu invasion. Capitalizing on this small triumph to show the army “the way it was done,” Lord Chelmsford regrouped his forces again in the vicinity of Rorke’s Drift and once more crossed the Buffalo River in February, deliberately not seeking
reinforcements from Great Britain. This helped play down his disgraceful loss at Isandlwana which appeared less significant than the truth bore out.
The British War Office sent fresh supplies and some reinforcements anyway, and they arrived just in time to renew the vigor of Chelmsford’s far more cautious and stalled second incursion. The lessons of the drift were not lost on the British Army during the Zulu War, and each column would advance and fortify its camp in enemy territory, awaiting Zulu attacks against it. Eventually, the Zulu citizen-army wore itself out repeatedly storming these ramparts, much as they had at Rorke’s Drift.
In the great traditions of the British Army, soldiers have long looked back to events at Rorke’s Drift as a shining moment of gallantry and bravery in the face of impossible odds, and how the stalwart British soldier can overcome all obstacles. In future wars, when British soldiers were in battle surrounded and outnumbered, the commander would encourage the beleaguered men to “Remember Rorke’s Drift!”
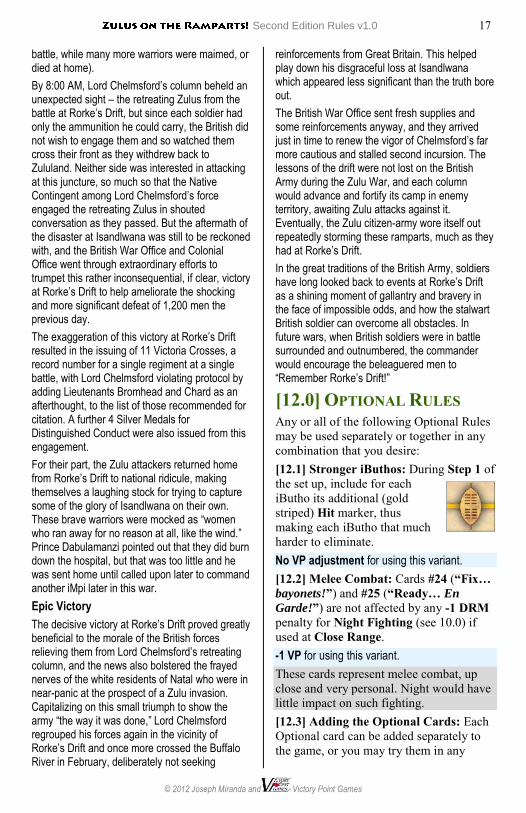
[12.0] OPTIONAL RULES Any or all of the following Optional Rules may be used separately or together in any combination that you desire: [12.1] Stronger iButhos: During Step 1 of the set up, include for each iButho its additional (gold striped) Hit marker, thus making each iButho that much harder to eliminate. No VP adjustment for using this variant.
[12.2] Melee Combat: Cards #24 (“Fix… bayonets!”) and #25 (“Ready… En
Garde!”) are not affected by any -1 DRM penalty for Night Fighting (see 10.0) if used at Close Range. -1 VP for using this variant.
These cards represent melee combat, up close and very personal. Night would have little impact on such fighting. [12.3] Adding the Optional Cards: Each Optional card can be added separately to the game, or you may try them in any
18 Second Edition Rules v1.0
Game Development by Alan Emrich
combination (including using them all). These optional cards, #32 – 50, have a distinctive rough/dark background. -1 VP for each card added to the deck using
this variant.
Note: Each card added enriches the narrative and decision-making, but lengthens the game (thus making it more challenging to hang on and win, but also adding potentially more Victory Points).
Deck Balancing There is a designed ratio of Hero to Volley cards in the game. To help maintain that ratio when adding optional cards, include one of the five additional Volley cards (#s 44 to 48) when you add each of: Reverend Smith (#32) Corporal Allen (#33) Each complete pair of Privates or the
dog, Dick (#s 34 to 39) To use these Hero plus Volley cards in your game, simply add the desired ones (above) to the deck at the beginning of set up Step 4. The Random Event cards (#s 40 to 42) and the Movie cards (#s 49 and 50) do not require balancing out with a Volley card when added to the deck.
The Movie Cards The Movie cards (#s 49 and 50) did not happen at the actual battle, but they recreate very stirring scenes from the epic blood-and-thunder film, Zulu, which introduced actor Michael Caine. To use these Movie cards in your game, just add the desired ones to the deck at the beginning of set up Step 4.
The Random Event Cards The Random Event cards (#s 40 to 43) are so named because, even when added to play, their respective Penalty: Discard texts often precludes their participation.
They represent the “what ifs” of the Battle of Rorke’s Drift, and including them allows you to explore these possibilities. Each card has its own special Rules:
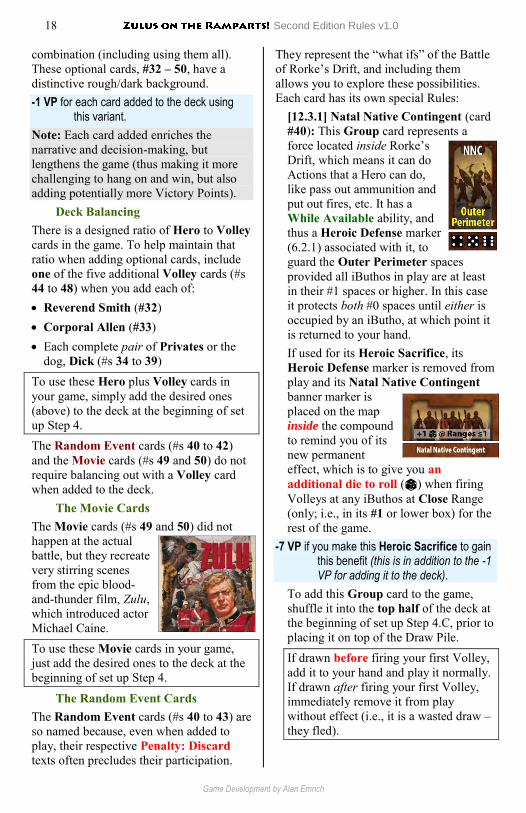
[12.3.1] Natal Native Contingent (card #40): This Group card represents a force located inside Rorke’s Drift, which means it can do Actions that a Hero can do, like pass out ammunition and put out fires, etc. It has a While Available ability, and thus a Heroic Defense marker (6.2.1) associated with it, to guard the Outer Perimeter spaces provided all iButhos in play are at least in their #1 spaces or higher. In this case it protects both #0 spaces until either is occupied by an iButho, at which point it is returned to your hand. If used for its Heroic Sacrifice, its Heroic Defense marker is removed from play and its Natal Native Contingent banner marker is placed on the map inside the compound to remind you of its new permanent effect, which is to give you an additional die to roll (z) when firing Volleys at any iButhos at Close Range (only; i.e., in its #1 or lower box) for the rest of the game.
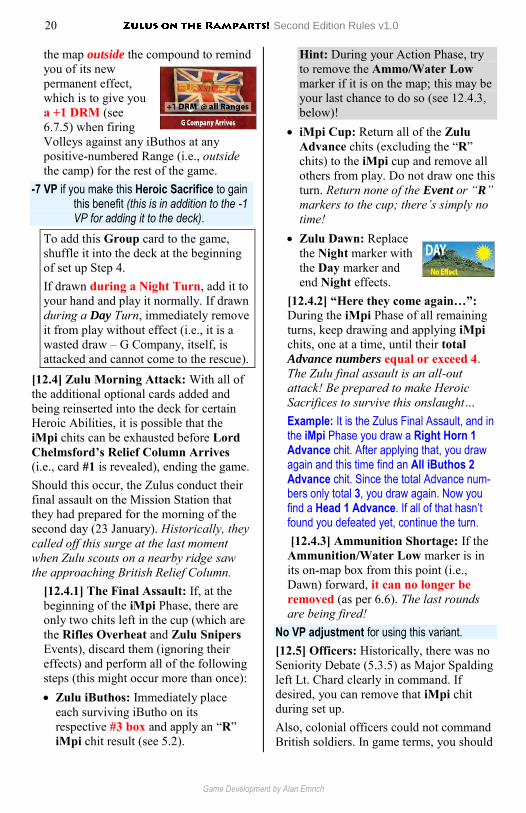
-7 VP if you make this Heroic Sacrifice to gain this benefit (this is in addition to the -1 VP for adding it to the deck).
To add this Group card to the game, shuffle it into the top half of the deck at the beginning of set up Step 4.C, prior to placing it on top of the Draw Pile. If drawn before firing your first Volley, add it to your hand and play it normally. If drawn after firing your first Volley, immediately remove it from play without effect (i.e., it is a wasted draw – they fled).
Second Edition Rules v1.0 19
© 2012 Joseph Miranda and Victory Point Games
Historically, these native levies helped for some time building the barricades of the outer defenses, but then fled en masse when the Zulus arrived. [12.3.2] Major Spalding (card #41): This Hero card represents the officer commanding inside Rorke’s Drift. While in play (i.e., in your hand, available, or committed to a task) he: Can serve any function
that a lieutenant can (he actually outranks them).
Allows you to ignore the effects of the Seniority Debate Event chit (5.3.5). Do not redraw; nothing happens.
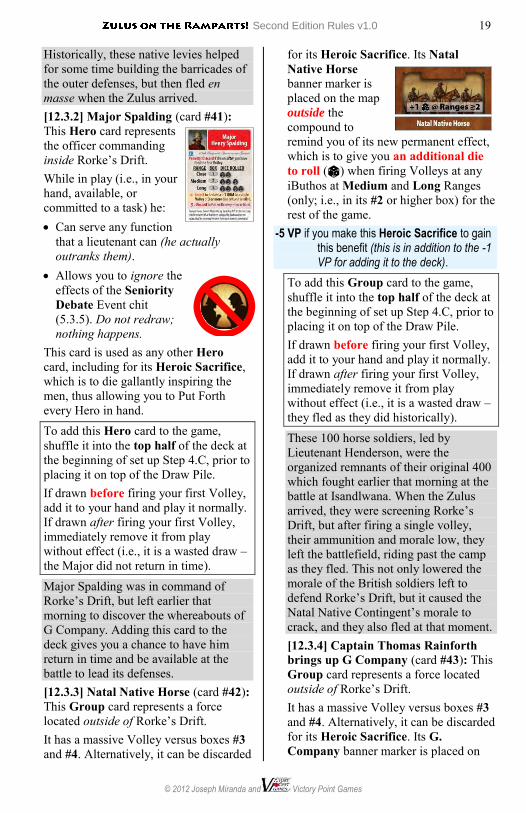
This card is used as any other Hero card, including for its Heroic Sacrifice, which is to die gallantly inspiring the men, thus allowing you to Put Forth every Hero in hand. To add this Hero card to the game, shuffle it into the top half of the deck at the beginning of set up Step 4.C, prior to placing it on top of the Draw Pile. If drawn before firing your first Volley, add it to your hand and play it normally. If drawn after firing your first Volley, immediately remove it from play without effect (i.e., it is a wasted draw – the Major did not return in time). Major Spalding was in command of Rorke’s Drift, but left earlier that morning to discover the whereabouts of G Company. Adding this card to the deck gives you a chance to have him return in time and be available at the battle to lead its defenses. [12.3.3] Natal Native Horse (card #42): This Group card represents a force located outside of Rorke’s Drift. It has a massive Volley versus boxes #3 and #4. Alternatively, it can be discarded
for its Heroic Sacrifice. Its Natal Native Horse banner marker is placed on the map outside the compound to remind you of its new permanent effect, which is to give you an additional die to roll (z) when firing Volleys at any iButhos at Medium and Long Ranges (only; i.e., in its #2 or higher box) for the rest of the game.
-5 VP if you make this Heroic Sacrifice to gain this benefit (this is in addition to the -1 VP for adding it to the deck).
To add this Group card to the game, shuffle it into the top half of the deck at the beginning of set up Step 4.C, prior to placing it on top of the Draw Pile. If drawn before firing your first Volley, add it to your hand and play it normally. If drawn after firing your first Volley, immediately remove it from play without effect (i.e., it is a wasted draw – they fled as they did historically). These 100 horse soldiers, led by Lieutenant Henderson, were the organized remnants of their original 400 which fought earlier that morning at the battle at Isandlwana. When the Zulus arrived, they were screening Rorke’s Drift, but after firing a single volley, their ammunition and morale low, they left the battlefield, riding past the camp as they fled. This not only lowered the morale of the British soldiers left to defend Rorke’s Drift, but it caused the Natal Native Contingent’s morale to crack, and they also fled at that moment. [12.3.4] Captain Thomas Rainforth brings up G Company (card #43): This Group card represents a force located outside of Rorke’s Drift. It has a massive Volley versus boxes #3 and #4. Alternatively, it can be discarded for its Heroic Sacrifice. Its G. Company banner marker is placed on
20 Second Edition Rules v1.0
Game Development by Alan Emrich
the map outside the compound to remind you of its new permanent effect, which is to give you a +1 DRM (see 6.7.5) when firing Volleys against any iButhos at any positive-numbered Range (i.e., outside the camp) for the rest of the game.
-7 VP if you make this Heroic Sacrifice to gain this benefit (this is in addition to the -1 VP for adding it to the deck).
To add this Group card to the game, shuffle it into the deck at the beginning of set up Step 4. If drawn during a Night Turn, add it to your hand and play it normally. If drawn during a Day Turn, immediately remove it from play without effect (i.e., it is a wasted draw – G Company, itself, is attacked and cannot come to the rescue).
[12.4] Zulu Morning Attack: With all of the additional optional cards added and being reinserted into the deck for certain Heroic Abilities, it is possible that the iMpi chits can be exhausted before Lord Chelmsford’s Relief Column Arrives (i.e., card #1 is revealed), ending the game. Should this occur, the Zulus conduct their final assault on the Mission Station that they had prepared for the morning of the second day (23 January). Historically, they called off this surge at the last moment when Zulu scouts on a nearby ridge saw the approaching British Relief Column.
[12.4.1] The Final Assault: If, at the beginning of the iMpi Phase, there are only two chits left in the cup (which are the Rifles Overheat and Zulu Snipers Events), discard them (ignoring their effects) and perform all of the following steps (this might occur more than once): Zulu iButhos: Immediately place
each surviving iButho on its respective #3 box and apply an “R” iMpi chit result (see 5.2).
Hint: During your Action Phase, try to remove the Ammo/Water Low marker if it is on the map; this may be your last chance to do so (see 12.4.3, below)!
iMpi Cup: Return all of the Zulu Advance chits (excluding the “R” chits) to the iMpi cup and remove all others from play. Do not draw one this turn. Return none of the Event or “R” markers to the cup; there’s simply no time!
Zulu Dawn: Replace the Night marker with the Day marker and end Night effects.
[12.4.2] “Here they come again…”: During the iMpi Phase of all remaining turns, keep drawing and applying iMpi chits, one at a time, until their total Advance numbers equal or exceed 4. The Zulu final assault is an all-out attack! Be prepared to make Heroic Sacrifices to survive this onslaught… Example: It is the Zulus Final Assault, and in the iMpi Phase you draw a Right Horn 1 Advance chit. After applying that, you draw again and this time find an All iButhos 2 Advance chit. Since the total Advance num-bers only total 3, you draw again. Now you find a Head 1 Advance. If all of that hasn’t found you defeated yet, continue the turn.
[12.4.3] Ammunition Shortage: If the Ammunition/Water Low marker is in its on-map box from this point (i.e., Dawn) forward, it can no longer be removed (as per 6.6). The last rounds are being fired!
No VP adjustment for using this variant.
[12.5] Officers: Historically, there was no Seniority Debate (5.3.5) as Major Spalding left Lt. Chard clearly in command. If desired, you can remove that iMpi chit during set up. Also, colonial officers could not command British soldiers. In game terms, you should
Second Edition Rules v1.0 21
© 2012 Joseph Miranda and Victory Point Games
not allow Lt. Adendorff to perform the duties of a Lieutenant during play. -2 VPs for using this variant.
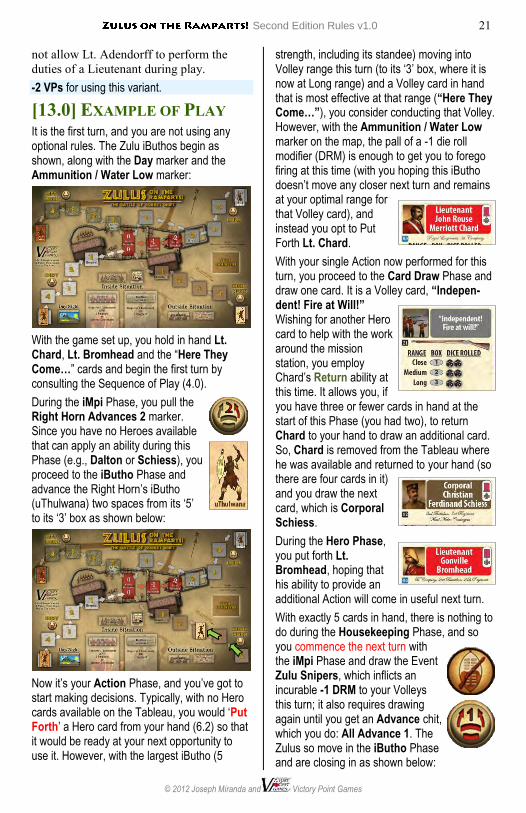
[13.0] EXAMPLE OF PLAY It is the first turn, and you are not using any optional rules. The Zulu iButhos begin as shown, along with the Day marker and the Ammunition / Water Low marker:
With the game set up, you hold in hand Lt. Chard, Lt. Bromhead and the “Here They Come…” cards and begin the first turn by consulting the Sequence of Play (4.0).
During the iMpi Phase, you pull the Right Horn Advances 2 marker. Since you have no Heroes available that can apply an ability during this Phase (e.g., Dalton or Schiess), you proceed to the iButho Phase and advance the Right Horn’s iButho (uThulwana) two spaces from its ‘5’ to its ‘3’ box as shown below:
Now it’s your Action Phase, and you’ve got to start making decisions. Typically, with no Hero cards available on the Tableau, you would ‘Put Forth’ a Hero card from your hand (6.2) so that it would be ready at your next opportunity to use it. However, with the largest iButho (5
strength, including its standee) moving into Volley range this turn (to its ‘3’ box, where it is now at Long range) and a Volley card in hand that is most effective at that range (“Here They Come…”), you consider conducting that Volley. However, with the Ammunition / Water Low marker on the map, the pall of a -1 die roll modifier (DRM) is enough to get you to forego firing at this time (with you hoping this iButho doesn’t move any closer next turn and remains at your optimal range for that Volley card), and instead you opt to Put Forth Lt. Chard.
With your single Action now performed for this turn, you proceed to the Card Draw Phase and draw one card. It is a Volley card, “Indepen-dent! Fire at Will!” Wishing for another Hero card to help with the work around the mission station, you employ Chard’s Return ability at this time. It allows you, if you have three or fewer cards in hand at the start of this Phase (you had two), to return Chard to your hand to draw an additional card. So, Chard is removed from the Tableau where he was available and returned to your hand (so there are four cards in it) and you draw the next card, which is Corporal Schiess.
During the Hero Phase, you put forth Lt. Bromhead, hoping that his ability to provide an additional Action will come in useful next turn.
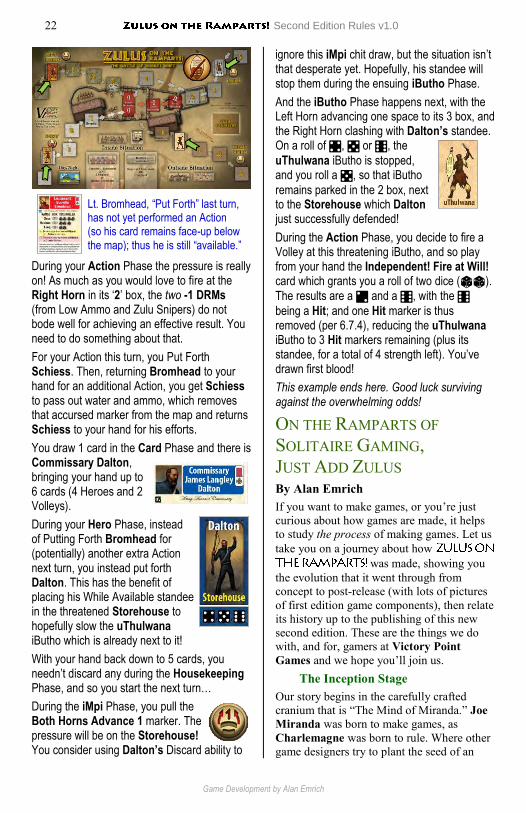
With exactly 5 cards in hand, there is nothing to do during the Housekeeping Phase, and so you commence the next turn with the iMpi Phase and draw the Event Zulu Snipers, which inflicts an incurable -1 DRM to your Volleys this turn; it also requires drawing again until you get an Advance chit, which you do: All Advance 1. The Zulus so move in the iButho Phase and are closing in as shown below:
22 Second Edition Rules v1.0
Game Development by Alan Emrich
During your Action Phase the pressure is really on! As much as you would love to fire at the Right Horn in its ‘2’ box, the two -1 DRMs (from Low Ammo and Zulu Snipers) do not bode well for achieving an effective result. You need to do something about that.
For your Action this turn, you Put Forth Schiess. Then, returning Bromhead to your hand for an additional Action, you get Schiess to pass out water and ammo, which removes that accursed marker from the map and returns Schiess to your hand for his efforts.
You draw 1 card in the Card Phase and there is Commissary Dalton, bringing your hand up to 6 cards (4 Heroes and 2 Volleys).
During your Hero Phase, instead of Putting Forth Bromhead for (potentially) another extra Action next turn, you instead put forth Dalton. This has the benefit of placing his While Available standee in the threatened Storehouse to hopefully slow the uThulwana iButho which is already next to it!
With your hand back down to 5 cards, you needn’t discard any during the Housekeeping Phase, and so you start the next turn…
During the iMpi Phase, you pull the Both Horns Advance 1 marker. The pressure will be on the Storehouse! You consider using Dalton’s Discard ability to
ignore this iMpi chit draw, but the situation isn’t that desperate yet. Hopefully, his standee will stop them during the ensuing iButho Phase.
And the iButho Phase happens next, with the Left Horn advancing one space to its 3 box, and the Right Horn clashing with Dalton’s standee. On a roll of 4, 5 or 6, the
uThulwana iButho is stopped, and you roll a 5, so that iButho
remains parked in the 2 box, next to the Storehouse which Dalton just successfully defended!
During the Action Phase, you decide to fire a Volley at this threatening iButho, and so play from your hand the Independent! Fire at Will! card which grants you a roll of two dice (zz).
The results are a 2 and a 6, with the 6
being a Hit; and one Hit marker is thus removed (per 6.7.4), reducing the uThulwana iButho to 3 Hit markers remaining (plus its standee, for a total of 4 strength left). You’ve drawn first blood!
This example ends here. Good luck surviving against the overwhelming odds!
ON THE RAMPARTS OF SOLITAIRE GAMING, JUST ADD ZULUS By Alan Emrich If you want to make games, or you’re just curious about how games are made, it helps to study the process of making games. Let us take you on a journey about how
was made, showing you the evolution that it went through from concept to post-release (with lots of pictures of first edition game components), then relate its history up to the publishing of this new second edition. These are the things we do with, and for, gamers at Victory Point Games and we hope you’ll join us.
The Inception Stage Our story begins in the carefully crafted cranium that is “The Mind of Miranda.” Joe Miranda was born to make games, as Charlemagne was born to rule. Where other game designers try to plant the seed of an
Lt. Bromhead, “Put Forth” last turn, has not yet performed an Action (so his card remains face-up below the map); thus he is still “available.”
Second Edition Rules v1.0 23
© 2012 Joseph Miranda and Victory Point Games
idea in the rocky or barren soil that is their busy, chaotic life, The Mind of Miranda is more fertile than most other game designers will ever know. With scores of published titles to his credit, and adding about ten more per year, The Mind of Miranda is a primordial soup of game progeny; it is a constantly-evolving world surrounded by an atmosphere of brainstorms that engender ideas that strike like lightning to beget the miracle of game creation... Now, most game ideas are not that original. They are inspired by some aspect of other games and then are re-seen in the mind’s eye of their designer to create a new hybrid idea for an original game design. In this case, Joe was inspired by Darin Leviloff’s States of
SiegeTM series games, Israeli Independence and Soviet Dawn.
“When I played Darin Leviloff’s Israeli Independence game, I realized it could be used for similar situations: a beleaguered defender winning against seemingly impossible odds. And so I decided to tackle the battle of Rorke’s Drift.” - Joe Miranda
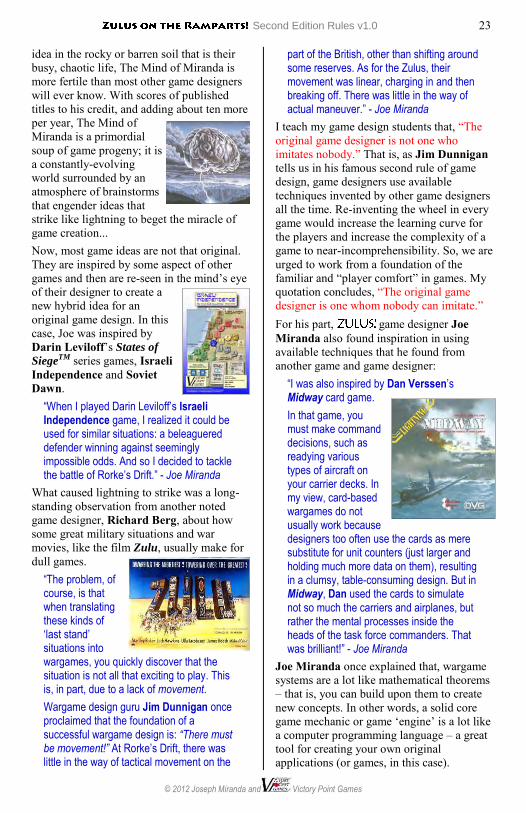
What caused lightning to strike was a long-standing observation from another noted game designer, Richard Berg, about how some great military situations and war movies, like the film Zulu, usually make for dull games.
“The problem, of course, is that when translating these kinds of ‘last stand’ situations into wargames, you quickly discover that the situation is not all that exciting to play. This is, in part, due to a lack of movement.
Wargame design guru Jim Dunnigan once proclaimed that the foundation of a successful wargame design is: “There must be movement!” At Rorke’s Drift, there was little in the way of tactical movement on the
part of the British, other than shifting around some reserves. As for the Zulus, their movement was linear, charging in and then breaking off. There was little in the way of actual maneuver.” - Joe Miranda
I teach my game design students that, “The original game designer is not one who imitates nobody.” That is, as Jim Dunnigan tells us in his famous second rule of game design, game designers use available techniques invented by other game designers all the time. Re-inventing the wheel in every game would increase the learning curve for the players and increase the complexity of a game to near-incomprehensibility. So, we are urged to work from a foundation of the familiar and “player comfort” in games. My quotation concludes, “The original game designer is one whom nobody can imitate.” For his part, game designer Joe Miranda also found inspiration in using available techniques that he found from another game and game designer:
“I was also inspired by Dan Verssen’s Midway card game.
In that game, you must make command decisions, such as readying various types of aircraft on your carrier decks. In my view, card-based wargames do not usually work because designers too often use the cards as mere substitute for unit counters (just larger and holding much more data on them), resulting in a clumsy, table-consuming design. But in Midway, Dan used the cards to simulate not so much the carriers and airplanes, but rather the mental processes inside the heads of the task force commanders. That was brilliant!” - Joe Miranda
Joe Miranda once explained that, wargame systems are a lot like mathematical theorems – that is, you can build upon them to create new concepts. In other words, a solid core game mechanic or game ‘engine’ is a lot like a computer programming language – a great tool for creating your own original applications (or games, in this case).
24 Second Edition Rules v1.0
Game Development by Alan Emrich
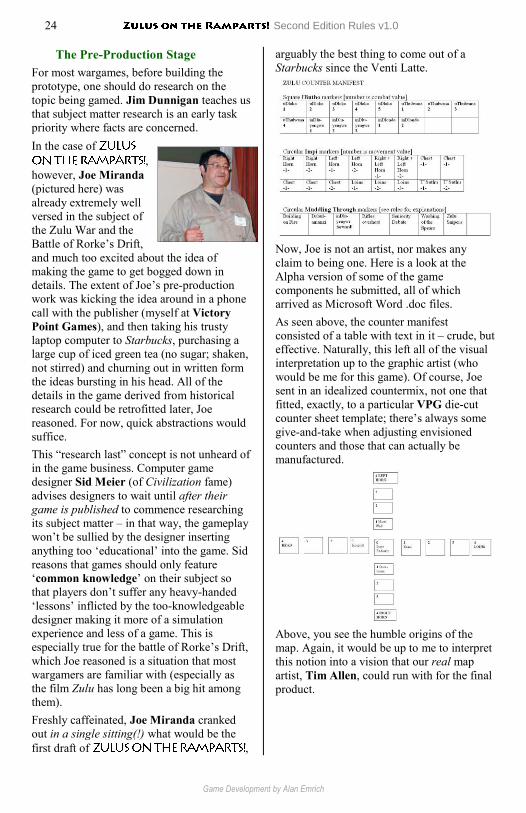
The Pre-Production Stage For most wargames, before building the prototype, one should do research on the topic being gamed. Jim Dunnigan teaches us that subject matter research is an early task priority where facts are concerned. In the case of
, however, Joe Miranda (pictured here) was already extremely well versed in the subject of the Zulu War and the Battle of Rorke’s Drift, and much too excited about the idea of making the game to get bogged down in details. The extent of Joe’s pre-production work was kicking the idea around in a phone call with the publisher (myself at Victory Point Games), and then taking his trusty laptop computer to Starbucks, purchasing a large cup of iced green tea (no sugar; shaken, not stirred) and churning out in written form the ideas bursting in his head. All of the details in the game derived from historical research could be retrofitted later, Joe reasoned. For now, quick abstractions would suffice. This “research last” concept is not unheard of in the game business. Computer game designer Sid Meier (of Civilization fame) advises designers to wait until after their game is published to commence researching its subject matter – in that way, the gameplay won’t be sullied by the designer inserting anything too ‘educational’ into the game. Sid reasons that games should only feature ‘common knowledge’ on their subject so that players don’t suffer any heavy-handed ‘lessons’ inflicted by the too-knowledgeable designer making it more of a simulation experience and less of a game. This is especially true for the battle of Rorke’s Drift, which Joe reasoned is a situation that most wargamers are familiar with (especially as the film Zulu has long been a big hit among them). Freshly caffeinated, Joe Miranda cranked out in a single sitting(!) what would be the first draft of ,
arguably the best thing to come out of a Starbucks since the Venti Latte.
Now, Joe is not an artist, nor makes any claim to being one. Here is a look at the Alpha version of some of the game components he submitted, all of which arrived as Microsoft Word .doc files. As seen above, the counter manifest consisted of a table with text in it – crude, but effective. Naturally, this left all of the visual interpretation up to the graphic artist (who would be me for this game). Of course, Joe sent in an idealized countermix, not one that fitted, exactly, to a particular VPG die-cut counter sheet template; there’s always some give-and-take when adjusting envisioned counters and those that can actually be manufactured.
Above, you see the humble origins of the map. Again, it would be up to me to interpret this notion into a vision that our real map artist, Tim Allen, could run with for the final product.
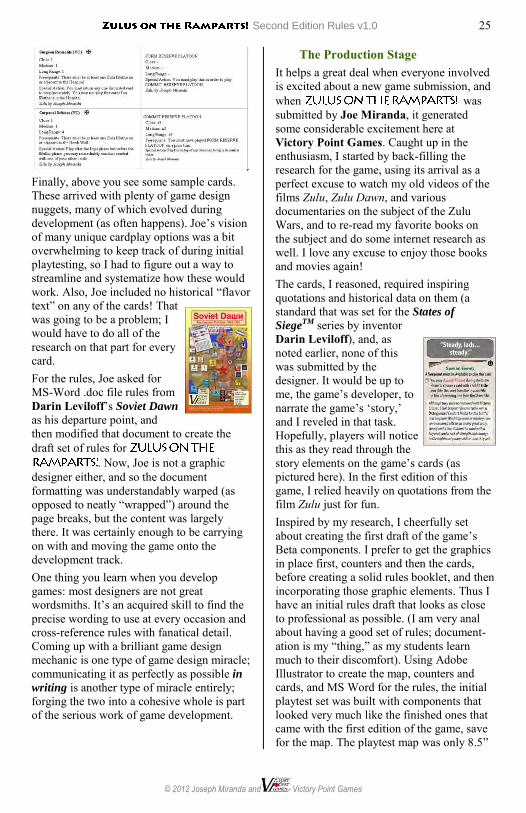
Second Edition Rules v1.0 25
© 2012 Joseph Miranda and Victory Point Games
Finally, above you see some sample cards. These arrived with plenty of game design nuggets, many of which evolved during development (as often happens). Joe’s vision of many unique cardplay options was a bit overwhelming to keep track of during initial playtesting, so I had to figure out a way to streamline and systematize how these would work. Also, Joe included no historical “flavor text” on any of the cards! That was going to be a problem; I would have to do all of the research on that part for every card. For the rules, Joe asked for MS-Word .doc file rules from Darin Leviloff’s Soviet Dawn as his departure point, and then modified that document to create the draft set of rules for
. Now, Joe is not a graphic designer either, and so the document formatting was understandably warped (as opposed to neatly “wrapped”) around the page breaks, but the content was largely there. It was certainly enough to be carrying on with and moving the game onto the development track. One thing you learn when you develop games: most designers are not great wordsmiths. It’s an acquired skill to find the precise wording to use at every occasion and cross-reference rules with fanatical detail. Coming up with a brilliant game design mechanic is one type of game design miracle; communicating it as perfectly as possible in
writing is another type of miracle entirely; forging the two into a cohesive whole is part of the serious work of game development.
The Production Stage It helps a great deal when everyone involved is excited about a new game submission, and when was submitted by Joe Miranda, it generated some considerable excitement here at Victory Point Games. Caught up in the enthusiasm, I started by back-filling the research for the game, using its arrival as a perfect excuse to watch my old videos of the films Zulu, Zulu Dawn, and various documentaries on the subject of the Zulu Wars, and to re-read my favorite books on the subject and do some internet research as well. I love any excuse to enjoy those books and movies again! The cards, I reasoned, required inspiring quotations and historical data on them (a standard that was set for the States of
SiegeTM series by inventor Darin Leviloff), and, as noted earlier, none of this was submitted by the designer. It would be up to me, the game’s developer, to narrate the game’s ‘story,’ and I reveled in that task. Hopefully, players will notice this as they read through the story elements on the game’s cards (as pictured here). In the first edition of this game, I relied heavily on quotations from the film Zulu just for fun. Inspired by my research, I cheerfully set about creating the first draft of the game’s Beta components. I prefer to get the graphics in place first, counters and then the cards, before creating a solid rules booklet, and then incorporating those graphic elements. Thus I have an initial rules draft that looks as close to professional as possible. (I am very anal about having a good set of rules; document-ation is my “thing,” as my students learn much to their discomfort). Using Adobe Illustrator to create the map, counters and cards, and MS Word for the rules, the initial playtest set was built with components that looked very much like the finished ones that came with the first edition of the game, save for the map. The playtest map was only 8.5”

26 Second Edition Rules v1.0
Game Development by Alan Emrich
x 11” in size, created for playtest functionality only, not for looks, thus:
I wasn’t worried too much about the look of the map, for VPG map artist Tim Allen had indicated his interest in doing the final artwork. That meant that it all would come together at the end of the process. In the meantime, I created an Alpha playtest kit and we played the game several times at the VPG offices that weekend. We gained a lot of insights watching each other win gloriously while defending the ramparts, and made several tweaks to the game to increase its challenge based upon this in-house (Alpha) testing. One thing about solitaire games, you don’t want the players winning too easily, or it can get boring very quickly. Consequently, there was a great deal of pressure added (and, in the end, a bit removed to get it all “just right”) to balance the game such that you will be narrowly defeated most times the game is played (and that will be many times, given the short time required to finish a complete playing session). During the following week, Joe and I exchanged several emails and I revised and updated the playtest kit as a result. One thing the game greatly benefited from was my development work in really nailing down the gameplay sequencing (i.e., its Sequence of Play) and using graphic elements (icons) to make sure that players did things at the proper times. With Joe’s design of how
the Hero cards functioned, each with a nearly-unique ability in the game, timing of their Actions was crucial, so I had to be very careful to craft the exacting words and symbols in the game onto the cards (and then again in the game’s rules and tables to synchronize the entire package). The color schemes, symbols (including the medals and using dice on the cards), quotations, etc. are all pure Emrich. I am really a fanatic about good ergonomics and ease of use for the players of a game.
“Teamwork is critical; no one can do an entire game by themselves. It’s like making a movie – you need a producer, director, writers, camera operators, special effects folks, etc. In this analogy, the game players are the actors; the game developers design and set the stage, write the story, etc. and the players act out the drama.” – Joe Miranda
It was also at this time that I posted a Playtesters Wanted ad on the VPG Forum of ConsimWorld to see who might be interested in receiving a playtest kit and assisting in polishing the game. Among the playtester names that started arriving in the VPG email box were veterans of VPG’s recent solitaire game releases – and one name in particular that I recognized, Dennis Bishop. This was a very welcome addition to the team, as Dennis is quite a wargaming authority on the history of the Zulu Wars, and he would go on to offer some fine suggestions and insights. Many little things “went right” in the game’s story and presentation thanks to Dennis’ specialized knowledge on the topic. Playtest kits went out, feedback came in, and new iterations of the game evolved. Perhaps the best part about the playtesting process is exchanging emails about design philosophy and how we are telling the game’s ‘story’ through gameplay. Conversations about historical “what ifs?,” what characters should be included given the component limitations, and what constituted balanced victory levels are always exciting for the good-natured, fun-loving game geeks who help playtest games like these. During playtesting, we added some cards to the mix and removed others. Those removed
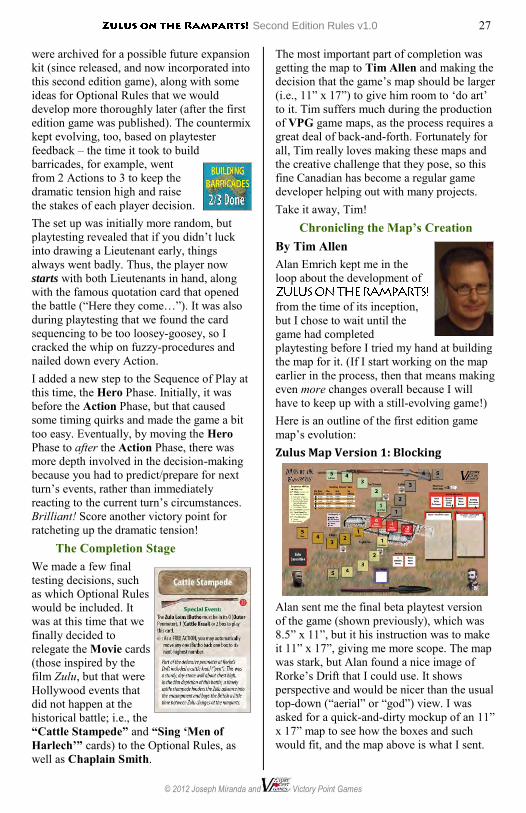
Second Edition Rules v1.0 27
© 2012 Joseph Miranda and Victory Point Games
were archived for a possible future expansion kit (since released, and now incorporated into this second edition game), along with some ideas for Optional Rules that we would develop more thoroughly later (after the first edition game was published). The countermix kept evolving, too, based on playtester feedback – the time it took to build barricades, for example, went from 2 Actions to 3 to keep the dramatic tension high and raise the stakes of each player decision. The set up was initially more random, but playtesting revealed that if you didn’t luck into drawing a Lieutenant early, things always went badly. Thus, the player now starts with both Lieutenants in hand, along with the famous quotation card that opened the battle (“Here they come…”). It was also during playtesting that we found the card sequencing to be too loosey-goosey, so I cracked the whip on fuzzy-procedures and nailed down every Action. I added a new step to the Sequence of Play at this time, the Hero Phase. Initially, it was before the Action Phase, but that caused some timing quirks and made the game a bit too easy. Eventually, by moving the Hero Phase to after the Action Phase, there was more depth involved in the decision-making because you had to predict/prepare for next turn’s events, rather than immediately reacting to the current turn’s circumstances. Brilliant! Score another victory point for ratcheting up the dramatic tension!
The Completion Stage We made a few final testing decisions, such as which Optional Rules would be included. It was at this time that we finally decided to relegate the Movie cards (those inspired by the film Zulu, but that were Hollywood events that did not happen at the historical battle; i.e., the “Cattle Stampede” and “Sing ‘Men of Harlech’” cards) to the Optional Rules, as well as Chaplain Smith.
The most important part of completion was getting the map to Tim Allen and making the decision that the game’s map should be larger (i.e., 11” x 17”) to give him room to ‘do art’ to it. Tim suffers much during the production of VPG game maps, as the process requires a great deal of back-and-forth. Fortunately for all, Tim really loves making these maps and the creative challenge that they pose, so this fine Canadian has become a regular game developer helping out with many projects. Take it away, Tim!
Chronicling the Map’s Creation By Tim Allen Alan Emrich kept me in the loop about the development of
from the time of its inception, but I chose to wait until the game had completed playtesting before I tried my hand at building the map for it. (If I start working on the map earlier in the process, then that means making even more changes overall because I will have to keep up with a still-evolving game!) Here is an outline of the first edition game map’s evolution: Zulus Map Version 1: Blocking
Alan sent me the final beta playtest version of the game (shown previously), which was 8.5” x 11”, but it his instruction was to make it 11” x 17”, giving me more scope. The map was stark, but Alan found a nice image of Rorke’s Drift that I could use. It shows perspective and would be nicer than the usual top-down (“aerial” or “god”) view. I was asked for a quick-and-dirty mockup of an 11” x 17” map to see how the boxes and such would fit, and the map above is what I sent.
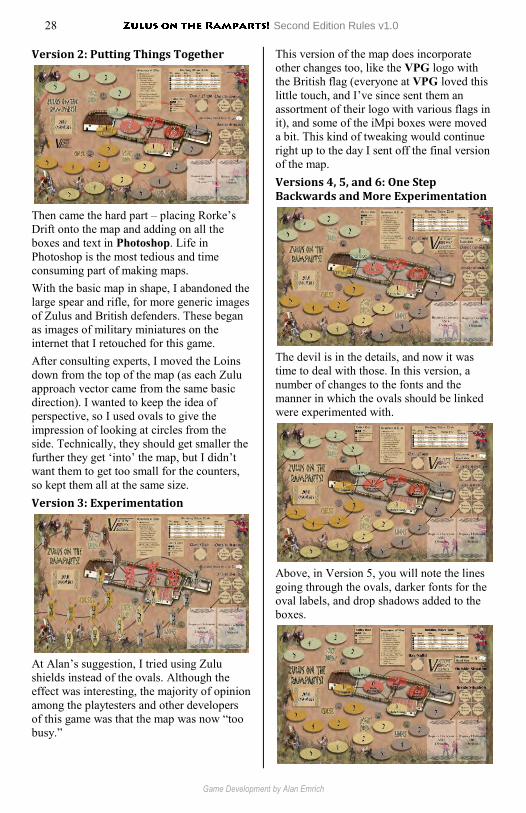
28 Second Edition Rules v1.0
Game Development by Alan Emrich
Version 2: Putting Things Together
Then came the hard part – placing Rorke’s Drift onto the map and adding on all the boxes and text in Photoshop. Life in Photoshop is the most tedious and time consuming part of making maps. With the basic map in shape, I abandoned the large spear and rifle, for more generic images of Zulus and British defenders. These began as images of military miniatures on the internet that I retouched for this game. After consulting experts, I moved the Loins down from the top of the map (as each Zulu approach vector came from the same basic direction). I wanted to keep the idea of perspective, so I used ovals to give the impression of looking at circles from the side. Technically, they should get smaller the further they get ‘into’ the map, but I didn’t want them to get too small for the counters, so kept them all at the same size. Version 3: Experimentation
At Alan’s suggestion, I tried using Zulu shields instead of the ovals. Although the effect was interesting, the majority of opinion among the playtesters and other developers of this game was that the map was now “too busy.”
This version of the map does incorporate other changes too, like the VPG logo with the British flag (everyone at VPG loved this little touch, and I’ve since sent them an assortment of their logo with various flags in it), and some of the iMpi boxes were moved a bit. This kind of tweaking would continue right up to the day I sent off the final version of the map. Versions 4, 5, and 6: One Step Backwards and More Experimentation
The devil is in the details, and now it was time to deal with those. In this version, a number of changes to the fonts and the manner in which the ovals should be linked were experimented with.
Above, in Version 5, you will note the lines going through the ovals, darker fonts for the oval labels, and drop shadows added to the boxes.
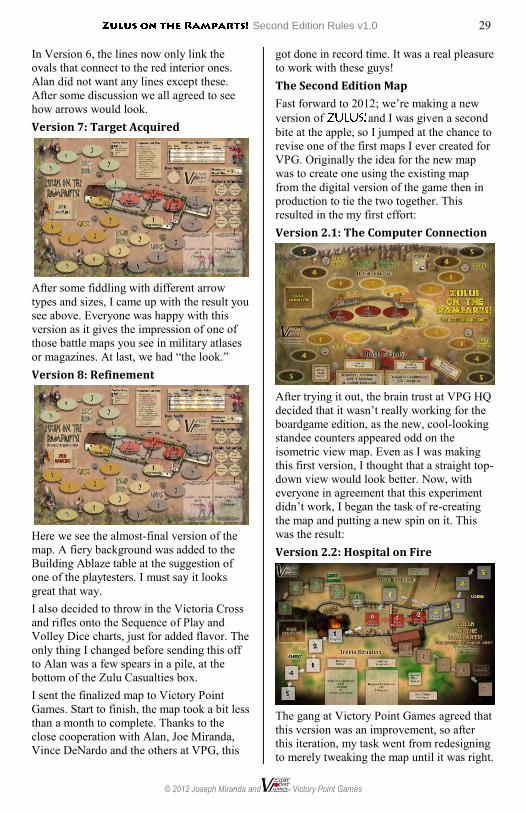
Second Edition Rules v1.0 29
© 2012 Joseph Miranda and Victory Point Games
In Version 6, the lines now only link the ovals that connect to the red interior ones. Alan did not want any lines except these. After some discussion we all agreed to see how arrows would look. Version 7: Target Acquired
After some fiddling with different arrow types and sizes, I came up with the result you see above. Everyone was happy with this version as it gives the impression of one of those battle maps you see in military atlases or magazines. At last, we had “the look.” Version 8: Refinement
Here we see the almost-final version of the map. A fiery background was added to the Building Ablaze table at the suggestion of one of the playtesters. I must say it looks great that way. I also decided to throw in the Victoria Cross and rifles onto the Sequence of Play and Volley Dice charts, just for added flavor. The only thing I changed before sending this off to Alan was a few spears in a pile, at the bottom of the Zulu Casualties box. I sent the finalized map to Victory Point Games. Start to finish, the map took a bit less than a month to complete. Thanks to the close cooperation with Alan, Joe Miranda, Vince DeNardo and the others at VPG, this
got done in record time. It was a real pleasure to work with these guys! The Second Edition Map
Fast forward to 2012; we’re making a new version of and I was given a second bite at the apple, so I jumped at the chance to revise one of the first maps I ever created for VPG. Originally the idea for the new map was to create one using the existing map from the digital version of the game then in production to tie the two together. This resulted in the my first effort: Version 2.1: The Computer Connection
After trying it out, the brain trust at VPG HQ decided that it wasn’t really working for the boardgame edition, as the new, cool-looking standee counters appeared odd on the isometric view map. Even as I was making this first version, I thought that a straight top-down view would look better. Now, with everyone in agreement that this experiment didn’t work, I began the task of re-creating the map and putting a new spin on it. This was the result: Version 2.2: Hospital on Fire
The gang at Victory Point Games agreed that this version was an improvement, so after this iteration, my task went from redesigning to merely tweaking the map until it was right.
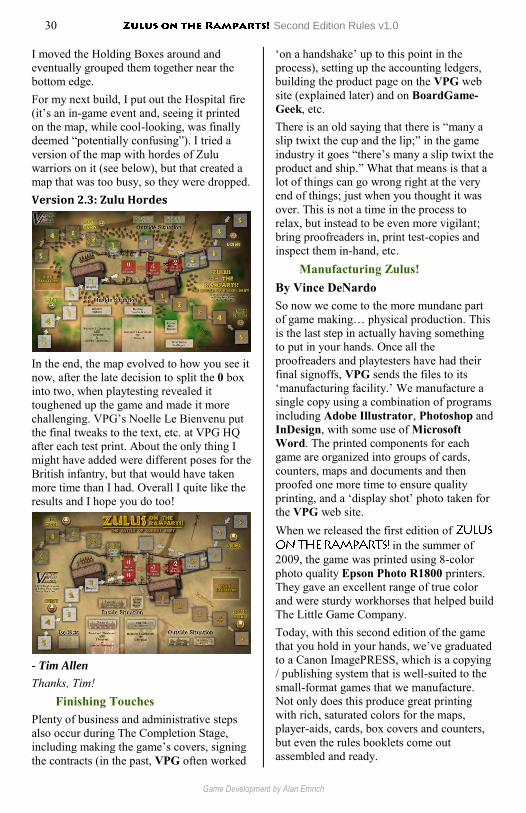
30 Second Edition Rules v1.0
Game Development by Alan Emrich
I moved the Holding Boxes around and eventually grouped them together near the bottom edge. For my next build, I put out the Hospital fire (it’s an in-game event and, seeing it printed on the map, while cool-looking, was finally deemed “potentially confusing”). I tried a version of the map with hordes of Zulu warriors on it (see below), but that created a map that was too busy, so they were dropped. Version 2.3: Zulu Hordes
In the end, the map evolved to how you see it now, after the late decision to split the 0 box into two, when playtesting revealed it toughened up the game and made it more challenging. VPG’s Noelle Le Bienvenu put the final tweaks to the text, etc. at VPG HQ after each test print. About the only thing I might have added were different poses for the British infantry, but that would have taken more time than I had. Overall I quite like the results and I hope you do too!
- Tim Allen Thanks, Tim!
Finishing Touches Plenty of business and administrative steps also occur during The Completion Stage, including making the game’s covers, signing the contracts (in the past, VPG often worked
‘on a handshake’ up to this point in the process), setting up the accounting ledgers, building the product page on the VPG web site (explained later) and on BoardGame-Geek, etc. There is an old saying that there is “many a slip twixt the cup and the lip;” in the game industry it goes “there’s many a slip twixt the product and ship.” What that means is that a lot of things can go wrong right at the very end of things; just when you thought it was over. This is not a time in the process to relax, but instead to be even more vigilant; bring proofreaders in, print test-copies and inspect them in-hand, etc.
Manufacturing Zulus! By Vince DeNardo So now we come to the more mundane part of game making… physical production. This is the last step in actually having something to put in your hands. Once all the proofreaders and playtesters have had their final signoffs, VPG sends the files to its ‘manufacturing facility.’ We manufacture a single copy using a combination of programs including Adobe Illustrator, Photoshop and InDesign, with some use of Microsoft Word. The printed components for each game are organized into groups of cards, counters, maps and documents and then proofed one more time to ensure quality printing, and a ‘display shot’ photo taken for the VPG web site. When we released the first edition of
in the summer of 2009, the game was printed using 8-color photo quality Epson Photo R1800 printers. They gave an excellent range of true color and were sturdy workhorses that helped build The Little Game Company. Today, with this second edition of the game that you hold in your hands, we’ve graduated to a Canon ImagePRESS, which is a copying / publishing system that is well-suited to the small-format games that we manufacture. Not only does this produce great printing with rich, saturated colors for the maps, player-aids, cards, box covers and counters, but even the rules booklets come out assembled and ready.
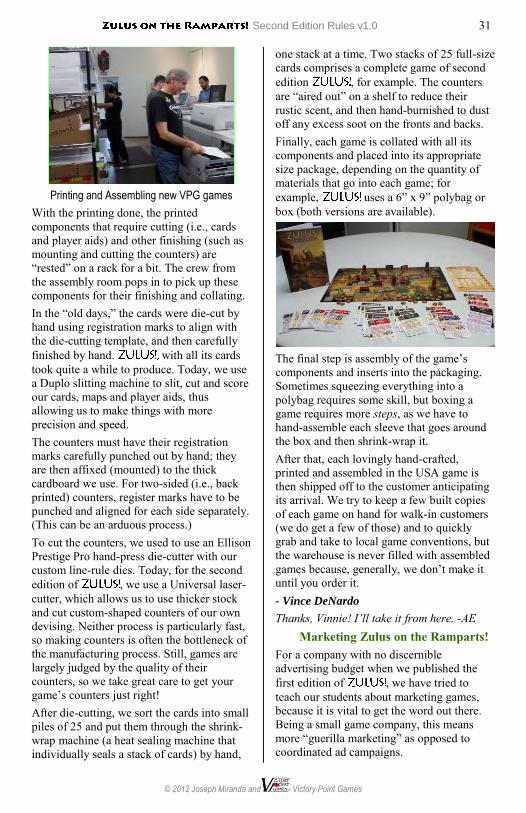
Second Edition Rules v1.0 31
© 2012 Joseph Miranda and Victory Point Games
Printing and Assembling new VPG games
With the printing done, the printed components that require cutting (i.e., cards and player aids) and other finishing (such as mounting and cutting the counters) are “rested” on a rack for a bit. The crew from the assembly room pops in to pick up these components for their finishing and collating. In the “old days,” the cards were die-cut by hand using registration marks to align with the die-cutting template, and then carefully finished by hand. with all its cards took quite a while to produce. Today, we use a Duplo slitting machine to slit, cut and score our cards, maps and player aids, thus allowing us to make things with more precision and speed. The counters must have their registration marks carefully punched out by hand; they are then affixed (mounted) to the thick cardboard we use. For two-sided (i.e., back printed) counters, register marks have to be punched and aligned for each side separately. (This can be an arduous process.) To cut the counters, we used to use an Ellison Prestige Pro hand-press die-cutter with our custom line-rule dies. Today, for the second edition of , we use a Universal laser-cutter, which allows us to use thicker stock and cut custom-shaped counters of our own devising. Neither process is particularly fast, so making counters is often the bottleneck of the manufacturing process. Still, games are largely judged by the quality of their counters, so we take great care to get your game’s counters just right! After die-cutting, we sort the cards into small piles of 25 and put them through the shrink-wrap machine (a heat sealing machine that individually seals a stack of cards) by hand,
one stack at a time. Two stacks of 25 full-size cards comprises a complete game of second edition , for example. The counters are “aired out” on a shelf to reduce their rustic scent, and then hand-burnished to dust off any excess soot on the fronts and backs. Finally, each game is collated with all its components and placed into its appropriate size package, depending on the quantity of materials that go into each game; for example, uses a 6” x 9” polybag or box (both versions are available).
The final step is assembly of the game’s components and inserts into the packaging. Sometimes squeezing everything into a polybag requires some skill, but boxing a game requires more steps, as we have to hand-assemble each sleeve that goes around the box and then shrink-wrap it. After that, each lovingly hand-crafted, printed and assembled in the USA game is then shipped off to the customer anticipating its arrival. We try to keep a few built copies of each game on hand for walk-in customers (we do get a few of those) and to quickly grab and take to local game conventions, but the warehouse is never filled with assembled games because, generally, we don’t make it until you order it. - Vince DeNardo
Thanks, Vinnie! I’ll take it from here. -AE Marketing Zulus on the Ramparts!
For a company with no discernible advertising budget when we published the first edition of , we have tried to teach our students about marketing games, because it is vital to get the word out there. Being a small game company, this means more “guerilla marketing” as opposed to coordinated ad campaigns.
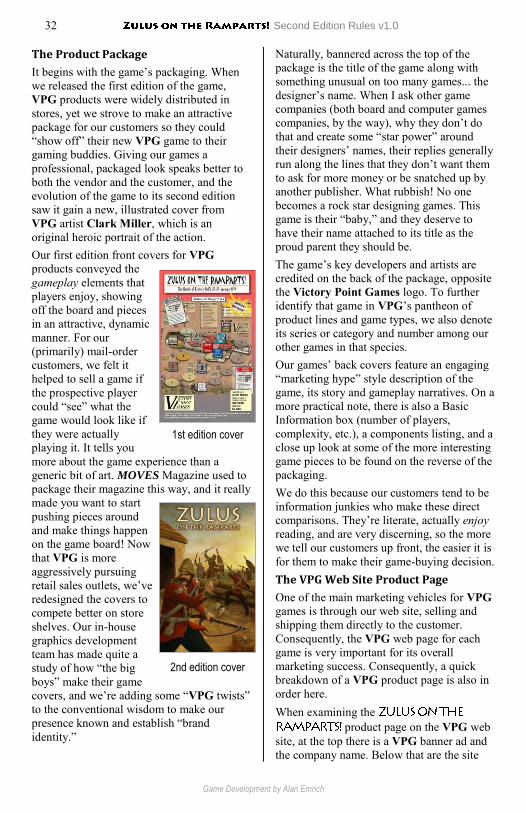
32 Second Edition Rules v1.0
Game Development by Alan Emrich
The Product Package
It begins with the game’s packaging. When we released the first edition of the game, VPG products were widely distributed in stores, yet we strove to make an attractive package for our customers so they could “show off” their new VPG game to their gaming buddies. Giving our games a professional, packaged look speaks better to both the vendor and the customer, and the evolution of the game to its second edition saw it gain a new, illustrated cover from VPG artist Clark Miller, which is an original heroic portrait of the action. Our first edition front covers for VPG products conveyed the gameplay elements that players enjoy, showing off the board and pieces in an attractive, dynamic manner. For our (primarily) mail-order customers, we felt it helped to sell a game if the prospective player could “see” what the game would look like if they were actually playing it. It tells you more about the game experience than a generic bit of art. MOVES Magazine used to package their magazine this way, and it really made you want to start pushing pieces around and make things happen on the game board! Now that VPG is more aggressively pursuing retail sales outlets, we’ve redesigned the covers to compete better on store shelves. Our in-house graphics development team has made quite a study of how “the big boys” make their game covers, and we’re adding some “VPG twists” to the conventional wisdom to make our presence known and establish “brand identity.”
Naturally, bannered across the top of the package is the title of the game along with something unusual on too many games... the designer’s name. When I ask other game companies (both board and computer games companies, by the way), why they don’t do that and create some “star power” around their designers’ names, their replies generally run along the lines that they don’t want them to ask for more money or be snatched up by another publisher. What rubbish! No one becomes a rock star designing games. This game is their “baby,” and they deserve to have their name attached to its title as the proud parent they should be. The game’s key developers and artists are credited on the back of the package, opposite the Victory Point Games logo. To further identify that game in VPG’s pantheon of product lines and game types, we also denote its series or category and number among our other games in that species. Our games’ back covers feature an engaging “marketing hype” style description of the game, its story and gameplay narratives. On a more practical note, there is also a Basic Information box (number of players, complexity, etc.), a components listing, and a close up look at some of the more interesting game pieces to be found on the reverse of the packaging. We do this because our customers tend to be information junkies who make these direct comparisons. They’re literate, actually enjoy reading, and are very discerning, so the more we tell our customers up front, the easier it is for them to make their game-buying decision. The VPG Web Site Product Page
One of the main marketing vehicles for VPG games is through our web site, selling and shipping them directly to the customer. Consequently, the VPG web page for each game is very important for its overall marketing success. Consequently, a quick breakdown of a VPG product page is also in order here. When examining the
product page on the VPG web site, at the top there is a VPG banner ad and the company name. Below that are the site
2nd edition cover
1st edition cover
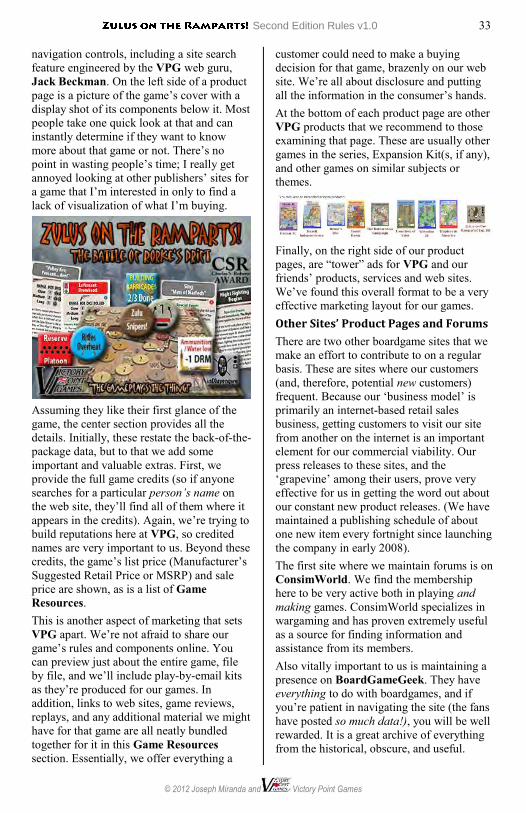
Second Edition Rules v1.0 33
© 2012 Joseph Miranda and Victory Point Games
navigation controls, including a site search feature engineered by the VPG web guru, Jack Beckman. On the left side of a product page is a picture of the game’s cover with a display shot of its components below it. Most people take one quick look at that and can instantly determine if they want to know more about that game or not. There’s no point in wasting people’s time; I really get annoyed looking at other publishers’ sites for a game that I’m interested in only to find a lack of visualization of what I’m buying.
Assuming they like their first glance of the game, the center section provides all the details. Initially, these restate the back-of-the-package data, but to that we add some important and valuable extras. First, we provide the full game credits (so if anyone searches for a particular person’s name on the web site, they’ll find all of them where it appears in the credits). Again, we’re trying to build reputations here at VPG, so credited names are very important to us. Beyond these credits, the game’s list price (Manufacturer’s Suggested Retail Price or MSRP) and sale price are shown, as is a list of Game Resources. This is another aspect of marketing that sets VPG apart. We’re not afraid to share our game’s rules and components online. You can preview just about the entire game, file by file, and we’ll include play-by-email kits as they’re produced for our games. In addition, links to web sites, game reviews, replays, and any additional material we might have for that game are all neatly bundled together for it in this Game Resources section. Essentially, we offer everything a
customer could need to make a buying decision for that game, brazenly on our web site. We’re all about disclosure and putting all the information in the consumer’s hands. At the bottom of each product page are other VPG products that we recommend to those examining that page. These are usually other games in the series, Expansion Kit(s, if any), and other games on similar subjects or themes.
Finally, on the right side of our product pages, are “tower” ads for VPG and our friends’ products, services and web sites. We’ve found this overall format to be a very effective marketing layout for our games. Other Sites’ Product Pages and Forums
There are two other boardgame sites that we make an effort to contribute to on a regular basis. These are sites where our customers (and, therefore, potential new customers) frequent. Because our ‘business model’ is primarily an internet-based retail sales business, getting customers to visit our site from another on the internet is an important element for our commercial viability. Our press releases to these sites, and the ‘grapevine’ among their users, prove very effective for us in getting the word out about our constant new product releases. (We have maintained a publishing schedule of about one new item every fortnight since launching the company in early 2008). The first site where we maintain forums is on ConsimWorld. We find the membership here to be very active both in playing and making games. ConsimWorld specializes in wargaming and has proven extremely useful as a source for finding information and assistance from its members. Also vitally important to us is maintaining a presence on BoardGameGeek. They have everything to do with boardgames, and if you’re patient in navigating the site (the fans have posted so much data!), you will be well rewarded. It is a great archive of everything from the historical, obscure, and useful.
34 Second Edition Rules v1.0
Game Development by Alan Emrich
Web Advertising
We also advertise on various web sites, rotating different ads for our myriad games to keep them from “fossilizing” at any one location. The VPG Sales Brochures
The flyers that insert into each of our games are there, primarily, for new customers, to make them aware of our broader product line. Occasionally, you will find these placed in other game companies’ products as part of a “flyer swap” (ours for theirs), which helps people who buy our games discover the wider hobby as supported by other publishers. After Shipping Support
Then, of course, there’s the follow-up. After the game has shipped, we don’t stop supporting it. In addition to maintaining our presence on the ConsimWorld and BoardgameGeek discussion boards, you will also find us posting additional resources on the game’s product page. These “archives” might include house rules, strategy notes, game reviews, etc. that are submitted to us (or that we can link to via the internet) about that game. Why, this very article that you’ve been reading about “The Making of”
is a perfect example! And if anything is wrong with your game, we will take care of that, too, and make sure that every customer is satisfied as best we’re able. We are even offering accessories through our web site to help customize your gaming experience.
Zulus Game History, Part II Thus, was released in its first edition in 2009 and it became an immediate hit. That it was a solitaire game which players associated with a classic film were two huge advantages. That a renowned game designer, Joseph Miranda, and a crack developer in Alan
Emrich teamed up so famously, ensuring “the goods” were delivered in terms of action, story and great gameplay, sealed the deal.
won the coveted Charles S. Roberts award in 2009 and, over the years, went on to become VPG’s best-selling game of all time. It was VPG’s first game to top 1,000 unit sales, and for The Little Game Company, that’s a big number. Years later, in the spring of 2012, VPG upgraded its printing and publishing facilities and, later still in autumn of 2012, made the leap to publish boxed games for distribu-tion to retail stores. This meant taking a hard look at our back-catalog of games to devise a plan for their re-release in an improved, “Gold Banner” format (with thick, mounted counters, full-size cards, etc.). Naturally, cried out for early adaption to this improved format. We went with a complete “second edition” makeover, adding some new cards to the mix, upgrading the art throughout, refining the rules, adding more depth to the historical notes on the cards and epilogues to the victory conditions, an extended example of play, and including this in-depth story behind the game. Interestingly, this Gold Banner edition of
was developed in parallel with an app game version! Stephanie Newland, the lead programmer on the game, worked with developer Alan Emrich to make sure that both games were rowing in the same direction. This worked to both games’ benefit as some key smoothing and improved structuring of the game’s sequences ensued.
Stroke of Genius: an Art Attack Sharing duties on both versions of the game was VPG illustrator Clark Miller. Knowing that he was going to be making art for both versions (each with their own separate art requirements), Clark still sought to create a unified look for both the
Second Edition Rules v1.0 35
© 2012 Joseph Miranda and Victory Point Games
board and app game versions of , and has really delivered. He began by working on the app game while Alan was developing the new boardgame edition. With Stephanie, the two of them devised a vision for the main game screen and Clark had it looking very good, with animated British and Zulu soldiers moving about. The displays, menus and sub-screens also look wonderful, and the play is smooth through the app game’s user interface. The next thing we needed was a glorious cover illustration that evoked the game’s title. Clark not only caught that scene at sunset as seen here, but also picked the new font for the game’s title. Note that the dog, Dick, is included. Everyone seems to love pets… While finishing up the art for the app game, Clark set to polishing up the graphics for the counters in this version, as Tim Allen started working on a new map. Clark added more character and personality to the pieces, while Tim was given more room on the Gold Banner map, as the charts and tables from the first edition map were moved to the back cover of this Rules booklet as a Reference sheet. What you see above is a picture of the Gold Banner edition playtest kit before and after these artists have worked their magic on the pieces and the map.
Zulus Game History, Part III This Gold Banner second edition of
saw the return of noted gamer/historian Dennis Bishop to the project. Dennis pitched in his expertise with the historical notes on the cards and the game epilogues, in particular. Playtest kits went out to veterans of the first edition game, plus some new players were
brought in to give this game a thorough examination through new eyes. Fortunately, we were starting with a game with solid core mechanics, so we could stay focused on all of the new content in the second edition during playtesting. We received a lot of great feedback, but special mention must go out to Wes Erni, who really looked for the extreme case possibilities and “broke the game” a few times so that we might fix it. One of the big changes he brought to the game was the division of the 0 box into two 0 boxes, which really kept the pressure up on the player and added considerable drama to the Zulu surges after the ramparts had been improved. Just before publishing this edition, VPG launched a line of boxed Gold Banner games, and of course became a boxed version, too. Whereas the (cheaper) polybag version includes a paper map and a gift of small dice, the boxed version adds a mounted (jigsaw-cut) map (along with the paper map), plus larger dice. It is nice that our all-time best-selling game can, at last, find itself in a boxed format and available on store shelves. We’ve come a long way, baby!
That’s Not All, Folks! We hope that you’ve enjoyed this backstage look at what it takes to bring a Victory Point Games game to life and to your game table. Improving our design, development and publishing methods are ongoing processes here. We are constantly seeking ways to improve everything about our games. Consequently, while this story was complete when we published the game you’re holding, the last page of the story of
is yet to be written… And these processes in game making are exactly what we teach here at Victory Point Games. We love working with new game designers, artists, playtesters and game developers of every skill and talent, and if you’re interested in trying your hand at actually making a game, you just might want to reach out to us and see if there’s something you can do!
36 Second Edition Rules v1.0
Game Development by Alan Emrich
DESIGNER’S NOTES Originally, I was going to call this game “Rorke’s Drift Syndrome.” This was a term coined by game design legend Richard Berg for situations that make great “reads” in military history (or action in the movies), but just do not play out well as games. I was inspired to design
after playing Darin Leviloff’s Israeli Independence game, also published by Victory Point Games. It features a game system (and launched VPG’s “States of SiegeTM” game series) that includes two particular elements that neatly fit the action at the battle of Rorke’s Drift. First, the player is placed in the position of defending a central position against several enemies coming in from multiple directions. Second, there is card play that not only allows for the usual game randomization, but also “tells a story,” as game developer Alan Emrich so eloquently (and often) puts it to his students and game designers. My contribution to the States of Siege game series was to (literally) put cards in the player’s hand, thus affording the opportunity to make real command decisions while trying to thwart myriad foes. To do this, the enemy’s maneuver (and other) events were separated into chits picked from a cup. The game becomes one not so much of fire and maneuver, but rather of sorting through options and making tough decisions. The player must trade off various advantages, as represented by the Heroic Abilities on the cards. In development, a whole game-within-the-game of card hand management evolved as Heroes had to “rest and recover” (return to the player’s hand) after certain actions, and were “wounded” (discarded) after others (including leading
a desperate volley of urgent fire). Players must make these choices and live (or die) with the consequences. Zulu forces are shown in their tactical employment of chest, horns and loins of the “fighting bull buffalo,” a formation where the center pins the enemy, the flanks move for envelopment, and at the decisive moment the reserve is committed. In game terms, the loins have a lower chance of moving than the other parts, but often once they have been committed they will come in very quickly. This places the player in a situation to guess not only where the next threat is coming from, but how fast it will be moving! Zulu tactics worked against a larger British force at Isandlwana on the morning of the battle of Rorke’s Drift, but failed at this battle. One of the reasons for its failure was the much higher level of leadership and initiative at Rorke’s Drift. Indeed, there is a temptation here to do another game on Isandlwana, where the British have a much larger force but, in game terms, fewer cards to play. If this game proves popular, there are future designs in the works, some giving you a chance where the original defender was wiped out: Custer’s Last Stand, Gordon at Khartoum, Dien Bien Phu, and Khe Sanh.
Joseph Miranda
GAME CREDITS
Game Design: Joseph Miranda
Graphic Design, Documentation & Game Development: Alan Emrich
Game Map: Tim Allen
Illustrations: Clark Miller
Special Thanks: Stanley Baker, Cy Endfield
Playtesting: Dennis Bishop, Jeff Cherpeski,
Wes Erni, Lance McMillan, Kim Meints, Stephanie Newland, Richard Pardoe, Petra Schlunk
Proofreading: Bill Barrett, Leigh Toms, and
Ian Wakeham
Napoleonic 20 Optional Game Rules v1.0 1
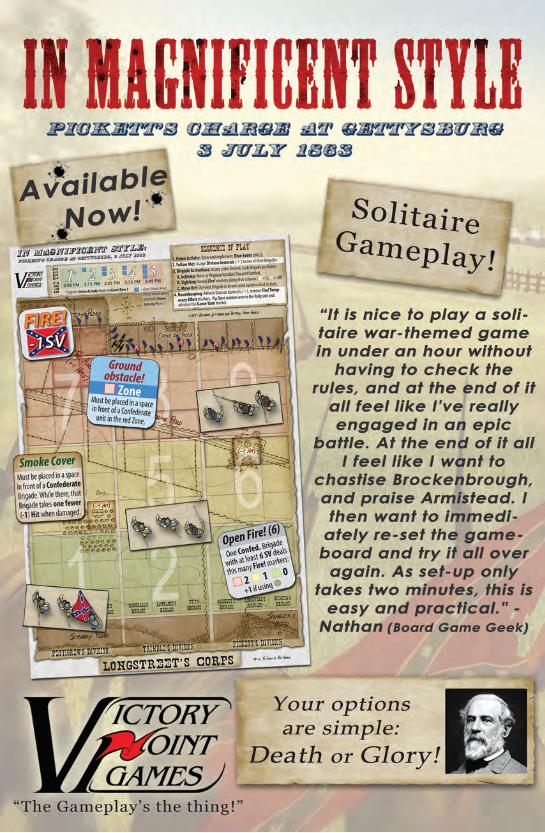
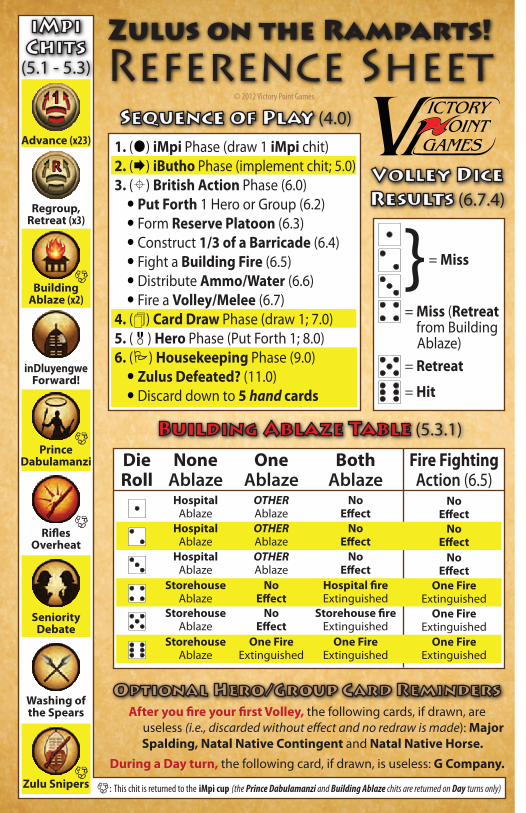
Zulus on the Ramparts!Reference Sheet
© 2012 Victory Point Games
1. () iMpi Phase (draw 1 iMpi chit)2. () iButho Phase (implement chit; 5.0)3. () British Action Phase (6.0) Put Forth 1 Hero or Group (6.2) Form Reserve Platoon (6.3) Construct 1/3 of a Barricade (6.4) Fight a Building Fire (6.5) Distribute Ammo/Water (6.6) Fire a Volley/Melee (6.7)4. () Card Draw Phase (draw 1; 7.0)5. () Hero Phase (Put Forth 1; 8.0)6. () Housekeeping Phase (9.0) Zulus Defeated? (11.0) Discard down to 5 hand cards
After you �re your �rst Volley, the following cards, if drawn, are useless (i.e., discarded without e�ect and no redraw is made): Major Spalding, Natal Native Contingent and Natal Native Horse.
Sequence of Play (4.0)
Building Ablaze Table (5.3.1)
Optional Hero/Group Card Reminders
Volley DiceResults (6.7.4)
1234
56
= Miss
= Miss (Retreat from Building Ablaze)= Retreat
= Hit
}
1
2
3
4
5
6
DieRoll
NoneAblaze
OneAblaze
BothAblaze
Fire FightingAction (6.5)
HospitalAblaze
HospitalAblaze
HospitalAblaze
StorehouseAblaze
StorehouseAblaze
StorehouseAblaze
OTHERAblazeOTHERAblazeOTHERAblaze
NoE�ect
NoE�ect
One FireExtinguished
NoE�ect
NoE�ect
NoE�ect
Hospital �reExtinguished
Storehouse �reExtinguished
One FireExtinguished
One FireExtinguished
One FireExtinguished
One FireExtinguished
NoE�ect
NoE�ect
NoE�ect
Advance (x23)
BuildingAblaze (x2)
Ri�esOverheat
SeniorityDebate
Washing ofthe Spears
Zulu Snipers
PrinceDabulamanzi
inDluyengweForward!
Regroup,Retreat (x3)
iMpiChits
(5.1 - 5.3)
During a Day turn, the following card, if drawn, is useless: G Company.
7: This chit is returned to the iMpi cup (the Prince Dabulamanzi and Building Ablaze chits are returned on Day turns only)
7
7
7
7