Embed Size (px)
Citation preview


AdvAnce PrAise for Absolute openbsD, 2nD eDition
“Michael W. Lucas’s books are good enough to raise national productivity statistics. Every copy of OpenBSD should be bundled with this book.”—richard bejtlich, cso of mandiant, taosecurity blogger, and author of the practice of network security monitoring
“After 13 years of using OpenBSD, I learned something new and useful!”—peter hessler, openbsd journal (undeadly.org)
“The OpenBSD world, myself included, has been waiting for an update to Absolute OpenBSD for years. Michael W. Lucas tackles OpenBSD topics in ways that are bound to inspire the learner and warm the hearts of Unix greybeards.”—peter n.m. hansteen, author of the book of pf
“Michael W. Lucas is a layperson’s tutor, sitting next to you in front of an OpenBSD box and working through the same issues the average sysadmin does.”—george rosamond, founding member of the nyc*bsd user group
“Whether you are an experienced OpenBSD user seeking a functional desk reference or a new OpenBSD user seeking to gain the knowledge necessary to become an expert, then Absolute OpenBSD is the book you have to have.”—chris sanders, author of practical packet analysis
“The second edition of Absolute OpenBSD delivers an updated tour of OpenBSD with great attention to detail and zero handwaving. Mr. Lucas and No Starch Press have once again demonstrated exemplary respect and loyalty to OpenBSD and the BSD community.” —michael dexter, callfortesting.org

A b s o l u t e o p e n b s D
2 n D e D i t i o n
u n i x f o r t h e p r a c t i c a l p a r a n o i d
San Francisco
by Michae l W. Lucas
Absolute openbsD, 2nD eDition Copyright © 2013 by Michael W. Lucas.
All rights reserved. No part of this work may be reproduced or transmitted in any form or by any means, electronic or mechanical, including photocopying, recording, or by any information storage or retrieval system, without the prior written permission of the copyright owner and the publisher.
Printed in USA
First printing
17 16 15 14 13 1 2 3 4 5 6 7 8 9
ISBN10: 1593274769ISBN13: 9781593274764
Publisher: William PollockProduction Editor: Alison LawCover Illustration: Charlie WylieInterior Design: Octopod StudiosDevelopmental Editor: William PollockTechnical Reviewer: Peter N.M. HansteenCopyeditor: Marilyn SmithCompositor: Susan Glinert StevensProofreader: Elaine MerrillIndexer: Nancy Guenther
For information on distribution, translations, or bulk sales, please contact No Starch Press, Inc. directly:
No Starch Press, Inc.38 Ringold Street, San Francisco, CA 94103phone: 415.863.9900; fax: 415.863.9950; [email protected]; www.nostarch.com
Library of Congress has cataloged the first edition as follows:
Lucas, Michael W., 1967- Absolute OpenBSD: UNIX for the practical paranoid / Michael W. Lucas. p. cm.Includes index. ISBN: 1-886411-99-91. OpenBSD (Electronic resource). 2. Operating systems (Computers) 3. UNIX (Computer file) I. Title. QA76.9.063L835 2003 005.4'32--dc21 2003000473
No Starch Press and the No Starch Press logo are registered trademarks of No Starch Press, Inc. Other product and company names mentioned herein may be the trademarks of their respective owners. Rather than use a trademark symbol with every occurrence of a trademarked name, we are using the names only in an editorial fashion and to the benefit of the trademark owner, with no intention of infringement of the trademark.
The information in this book is distributed on an “As Is” basis, without warranty. While every precaution has been taken in the preparation of this work, neither the author nor No Starch Press, Inc. shall have any liability to any person or entity with respect to any loss or damage caused or alleged to be caused directly or indirectly by the information contained in it.

For Liz
About the AuthorMichael W. Lucas is a network/security engineer who keeps getting stuck with the problems nobody else wants to touch. He’s been using BSD since the days it came from Berkeley, and today uses OpenBSD for mission-critical infrastructure. You can find Lucas roaming around Detroit, Michigan, or teaching tutorials at tech conferences. He’s the author of the critically acclaimed Absolute FreeBSD, Network Flow Analysis, Cisco Routers for the Desperate, and PGP & GPG, all from No Starch Press.
Find his website and blog at http://www.michaelwlucas.com/, or follow @mwlauthor on Twitter.
About the Technical ReviewerPeter N.M. Hansteen is a consultant, sysadmin, and writer from Bergen, Norway. During recent years he has been a frequent lecturer and tutor with emphasis on OpenBSD and FreeBSD, as well as the author of sev-eral articles and The Book of PF (No Starch Press, 2010). He writes about OpenBSD and rants about other IT topics at http://bsdly.blogspot.com/.
B r i e f C o n t e n t s
Foreword by Henning Brauer . . . . . . . . . . . . . . . . . . . . . . . . . . . . . . . . . . . . . . . . . . . . .xxv
Acknowledgments . . . . . . . . . . . . . . . . . . . . . . . . . . . . . . . . . . . . . . . . . . . . . . . . . . . xxvii
Introduction . . . . . . . . . . . . . . . . . . . . . . . . . . . . . . . . . . . . . . . . . . . . . . . . . . . . . . . . xxix
Chapter 1: Getting Additional Help . . . . . . . . . . . . . . . . . . . . . . . . . . . . . . . . . . . . . . . . . 1
Chapter 2: Installation Preparations . . . . . . . . . . . . . . . . . . . . . . . . . . . . . . . . . . . . . . . . 15
Chapter 3: Installation Walk-Through . . . . . . . . . . . . . . . . . . . . . . . . . . . . . . . . . . . . . . . 37
Chapter 4: Post-Install Setup . . . . . . . . . . . . . . . . . . . . . . . . . . . . . . . . . . . . . . . . . . . . . 57
Chapter 5: The Boot Process . . . . . . . . . . . . . . . . . . . . . . . . . . . . . . . . . . . . . . . . . . . . . 69
Chapter 6: User Management . . . . . . . . . . . . . . . . . . . . . . . . . . . . . . . . . . . . . . . . . . . . 85
Chapter 7: Root, and How to Avoid It . . . . . . . . . . . . . . . . . . . . . . . . . . . . . . . . . . . . . 105
Chapter 8: Disks and Filesystems . . . . . . . . . . . . . . . . . . . . . . . . . . . . . . . . . . . . . . . . . 125
Chapter 9: More Filesystems . . . . . . . . . . . . . . . . . . . . . . . . . . . . . . . . . . . . . . . . . . . . 147
Chapter 10: Securing Your System . . . . . . . . . . . . . . . . . . . . . . . . . . . . . . . . . . . . . . . . 169
Chapter 11: Overview of TCP/IP . . . . . . . . . . . . . . . . . . . . . . . . . . . . . . . . . . . . . . . . . 183
Chapter 12: Connecting to the Network . . . . . . . . . . . . . . . . . . . . . . . . . . . . . . . . . . . . 209
Chapter 13: Software Management . . . . . . . . . . . . . . . . . . . . . . . . . . . . . . . . . . . . . . . 225
Chapter 14: Everything /etc . . . . . . . . . . . . . . . . . . . . . . . . . . . . . . . . . . . . . . . . . . . . 255
Chapter 15: System Maintenance . . . . . . . . . . . . . . . . . . . . . . . . . . . . . . . . . . . . . . . . 277
Chapter 16: Network Servers . . . . . . . . . . . . . . . . . . . . . . . . . . . . . . . . . . . . . . . . . . . 303
Chapter 17: Desktop OpenBSD . . . . . . . . . . . . . . . . . . . . . . . . . . . . . . . . . . . . . . . . . . 323
Chapter 18: Kernel Configuration . . . . . . . . . . . . . . . . . . . . . . . . . . . . . . . . . . . . . . . . 339

viii Brief Contents
Chapter 19: Building Custom Kernels . . . . . . . . . . . . . . . . . . . . . . . . . . . . . . . . . . . . . . 355
Chapter 20: Upgrading . . . . . . . . . . . . . . . . . . . . . . . . . . . . . . . . . . . . . . . . . . . . . . . 367
Chapter 21: Packet Filtering . . . . . . . . . . . . . . . . . . . . . . . . . . . . . . . . . . . . . . . . . . . . 395
Chapter 22: Advanced PF . . . . . . . . . . . . . . . . . . . . . . . . . . . . . . . . . . . . . . . . . . . . . . 421
Chapter 23: Customizing OpenBSD . . . . . . . . . . . . . . . . . . . . . . . . . . . . . . . . . . . . . . . 449
Afterword . . . . . . . . . . . . . . . . . . . . . . . . . . . . . . . . . . . . . . . . . . . . . . . . . . . . . . . . . 461
Index . . . . . . . . . . . . . . . . . . . . . . . . . . . . . . . . . . . . . . . . . . . . . . . . . . . . . . . . . . . . 465

C o n t e n t s i n D e t a i l
Foreword by Henning Brauer xxv
Acknowledgments xxvii
introduction xxixWhat Is Security? . . . . . . . . . . . . . . . . . . . . . . . . . . . . . . . . . . . . . . . . . . . . . . . . . . xxxWhat Is BSD? . . . . . . . . . . . . . . . . . . . . . . . . . . . . . . . . . . . . . . . . . . . . . . . . . . . .xxxi
The BSD License . . . . . . . . . . . . . . . . . . . . . . . . . . . . . . . . . . . . . . . . . . . xxxiiAT&T vs . the World . . . . . . . . . . . . . . . . . . . . . . . . . . . . . . . . . . . . . . . . . xxxii
The Birth of OpenBSD . . . . . . . . . . . . . . . . . . . . . . . . . . . . . . . . . . . . . . . . . . . . . . xxxiiiThe OpenBSD Community . . . . . . . . . . . . . . . . . . . . . . . . . . . . . . . . . . . . . . . . . . . xxxiv
OpenBSD Users . . . . . . . . . . . . . . . . . . . . . . . . . . . . . . . . . . . . . . . . . . . xxxivOpenBSD Contributors . . . . . . . . . . . . . . . . . . . . . . . . . . . . . . . . . . . . . . . xxxivOpenBSD Committers . . . . . . . . . . . . . . . . . . . . . . . . . . . . . . . . . . . . . . . xxxvOpenBSD Coordinator . . . . . . . . . . . . . . . . . . . . . . . . . . . . . . . . . . . . . . . xxxv
OpenBSD’s Strengths . . . . . . . . . . . . . . . . . . . . . . . . . . . . . . . . . . . . . . . . . . . . . . xxxvPortability . . . . . . . . . . . . . . . . . . . . . . . . . . . . . . . . . . . . . . . . . . . . . . . . xxxviPower . . . . . . . . . . . . . . . . . . . . . . . . . . . . . . . . . . . . . . . . . . . . . . . . . . xxxviDocumentation . . . . . . . . . . . . . . . . . . . . . . . . . . . . . . . . . . . . . . . . . . . . xxxviFree . . . . . . . . . . . . . . . . . . . . . . . . . . . . . . . . . . . . . . . . . . . . . . . . . . xxxviiCorrectness . . . . . . . . . . . . . . . . . . . . . . . . . . . . . . . . . . . . . . . . . . . . . xxxviiiSecurity . . . . . . . . . . . . . . . . . . . . . . . . . . . . . . . . . . . . . . . . . . . . . . . . xxxviii
OpenBSD and Your Security . . . . . . . . . . . . . . . . . . . . . . . . . . . . . . . . . . . . . . . . . xxxixOpenBSD’s Uses . . . . . . . . . . . . . . . . . . . . . . . . . . . . . . . . . . . . . . . . . . . . . . . . . . . xl
Desktop . . . . . . . . . . . . . . . . . . . . . . . . . . . . . . . . . . . . . . . . . . . . . . . . . . . xlServer . . . . . . . . . . . . . . . . . . . . . . . . . . . . . . . . . . . . . . . . . . . . . . . . . . . . xlNetwork Management . . . . . . . . . . . . . . . . . . . . . . . . . . . . . . . . . . . . . . . . . xl
About This Book . . . . . . . . . . . . . . . . . . . . . . . . . . . . . . . . . . . . . . . . . . . . . . . . . . . . xlContents Overview . . . . . . . . . . . . . . . . . . . . . . . . . . . . . . . . . . . . . . . . . . . . . . . . . . xli
1 getting AdditionAl Help 1OpenBSD’s Support Model . . . . . . . . . . . . . . . . . . . . . . . . . . . . . . . . . . . . . . . . . . . . 2The Code Is Fine . What’s Wrong with You? . . . . . . . . . . . . . . . . . . . . . . . . . . . . . . . . 2Sources of Information . . . . . . . . . . . . . . . . . . . . . . . . . . . . . . . . . . . . . . . . . . . . . . . 3
Man Pages . . . . . . . . . . . . . . . . . . . . . . . . . . . . . . . . . . . . . . . . . . . . . . . . . 3The OpenBSD Website . . . . . . . . . . . . . . . . . . . . . . . . . . . . . . . . . . . . . . . . 7OpenBSD Mailing Lists . . . . . . . . . . . . . . . . . . . . . . . . . . . . . . . . . . . . . . . . 8
Using OpenBSD Problem-Solving Resources . . . . . . . . . . . . . . . . . . . . . . . . . . . . . . . 10Using the OpenBSD Website . . . . . . . . . . . . . . . . . . . . . . . . . . . . . . . . . . . 10Using Man Pages . . . . . . . . . . . . . . . . . . . . . . . . . . . . . . . . . . . . . . . . . . . 10Using Internet Searches . . . . . . . . . . . . . . . . . . . . . . . . . . . . . . . . . . . . . . . 11Using Mailing Lists . . . . . . . . . . . . . . . . . . . . . . . . . . . . . . . . . . . . . . . . . . 11
x Contents in Detail
2 instAllAtion prepArAtions 15OpenBSD Hardware . . . . . . . . . . . . . . . . . . . . . . . . . . . . . . . . . . . . . . . . . . . . . . . 16
Supported Hardware . . . . . . . . . . . . . . . . . . . . . . . . . . . . . . . . . . . . . . . . . 17Proprietary Hardware, Blobs, and Firmware . . . . . . . . . . . . . . . . . . . . . . . . . 17Processors . . . . . . . . . . . . . . . . . . . . . . . . . . . . . . . . . . . . . . . . . . . . . . . . 18Memory (RAM) . . . . . . . . . . . . . . . . . . . . . . . . . . . . . . . . . . . . . . . . . . . . . 18Hard Drives . . . . . . . . . . . . . . . . . . . . . . . . . . . . . . . . . . . . . . . . . . . . . . . 18Virtualization . . . . . . . . . . . . . . . . . . . . . . . . . . . . . . . . . . . . . . . . . . . . . . 19Multiple Operating Systems . . . . . . . . . . . . . . . . . . . . . . . . . . . . . . . . . . . . 19
Getting OpenBSD . . . . . . . . . . . . . . . . . . . . . . . . . . . . . . . . . . . . . . . . . . . . . . . . . 19Official CDs . . . . . . . . . . . . . . . . . . . . . . . . . . . . . . . . . . . . . . . . . . . . . . . 20Internet Downloads . . . . . . . . . . . . . . . . . . . . . . . . . . . . . . . . . . . . . . . . . . 20Mirror Site Layout . . . . . . . . . . . . . . . . . . . . . . . . . . . . . . . . . . . . . . . . . . . 20Release Directories . . . . . . . . . . . . . . . . . . . . . . . . . . . . . . . . . . . . . . . . . . 21Boot Media . . . . . . . . . . . . . . . . . . . . . . . . . . . . . . . . . . . . . . . . . . . . . . . 22Choosing Install Media . . . . . . . . . . . . . . . . . . . . . . . . . . . . . . . . . . . . . . . 22Local Installation Servers . . . . . . . . . . . . . . . . . . . . . . . . . . . . . . . . . . . . . . 23
File Sets . . . . . . . . . . . . . . . . . . . . . . . . . . . . . . . . . . . . . . . . . . . . . . . . . . . . . . . . 23Partitioning . . . . . . . . . . . . . . . . . . . . . . . . . . . . . . . . . . . . . . . . . . . . . . . . . . . . . . 25
Standard OpenBSD Partitions . . . . . . . . . . . . . . . . . . . . . . . . . . . . . . . . . . . 26Creating Other Partitions . . . . . . . . . . . . . . . . . . . . . . . . . . . . . . . . . . . . . . 29
Partition Filesystems . . . . . . . . . . . . . . . . . . . . . . . . . . . . . . . . . . . . . . . . . . . . . . . . 29Multiple Hard Drives . . . . . . . . . . . . . . . . . . . . . . . . . . . . . . . . . . . . . . . . . . . . . . . . 29Understanding Partitions . . . . . . . . . . . . . . . . . . . . . . . . . . . . . . . . . . . . . . . . . . . . . 30
MBR Partitions . . . . . . . . . . . . . . . . . . . . . . . . . . . . . . . . . . . . . . . . . . . . . 30Disklabel Partitions . . . . . . . . . . . . . . . . . . . . . . . . . . . . . . . . . . . . . . . . . . 31
Understanding Disklabels . . . . . . . . . . . . . . . . . . . . . . . . . . . . . . . . . . . . . . . . . . . . 31Sectors and Lies . . . . . . . . . . . . . . . . . . . . . . . . . . . . . . . . . . . . . . . . . . . . 31Sectors and Disklabels . . . . . . . . . . . . . . . . . . . . . . . . . . . . . . . . . . . . . . . . 32
Other Information . . . . . . . . . . . . . . . . . . . . . . . . . . . . . . . . . . . . . . . . . . . . . . . . . . 35
3 instAllAtion wAlk-tHrougH 37Hardware Setup . . . . . . . . . . . . . . . . . . . . . . . . . . . . . . . . . . . . . . . . . . . . . . . . . . 38BIOS Configuration . . . . . . . . . . . . . . . . . . . . . . . . . . . . . . . . . . . . . . . . . . . . . . . . 38Making Boot Media . . . . . . . . . . . . . . . . . . . . . . . . . . . . . . . . . . . . . . . . . . . . . . . . 38
Making Boot Floppies . . . . . . . . . . . . . . . . . . . . . . . . . . . . . . . . . . . . . . . . 39Making Boot CDs . . . . . . . . . . . . . . . . . . . . . . . . . . . . . . . . . . . . . . . . . . . 40
Installing OpenBSD . . . . . . . . . . . . . . . . . . . . . . . . . . . . . . . . . . . . . . . . . . . . . . . . 41Running the Installation Program . . . . . . . . . . . . . . . . . . . . . . . . . . . . . . . . . 41Multiple Network Cards . . . . . . . . . . . . . . . . . . . . . . . . . . . . . . . . . . . . . . . 43Setting Up Services and the First User . . . . . . . . . . . . . . . . . . . . . . . . . . . . . 44Setting the Time Zone . . . . . . . . . . . . . . . . . . . . . . . . . . . . . . . . . . . . . . . . 45Setting Up the Disk . . . . . . . . . . . . . . . . . . . . . . . . . . . . . . . . . . . . . . . . . . 46Choosing File Sets . . . . . . . . . . . . . . . . . . . . . . . . . . . . . . . . . . . . . . . . . . . 47Finishing the Installation . . . . . . . . . . . . . . . . . . . . . . . . . . . . . . . . . . . . . . . 49
Custom Disk Layout . . . . . . . . . . . . . . . . . . . . . . . . . . . . . . . . . . . . . . . . . . . . . . . . 49Viewing Disklabels . . . . . . . . . . . . . . . . . . . . . . . . . . . . . . . . . . . . . . . . . . 50Deleting Partitions . . . . . . . . . . . . . . . . . . . . . . . . . . . . . . . . . . . . . . . . . . . 51Erasing Existing Disklabels . . . . . . . . . . . . . . . . . . . . . . . . . . . . . . . . . . . . . 51
Contents in Detail xi
Creating Disklabel Partitions . . . . . . . . . . . . . . . . . . . . . . . . . . . . . . . . . . . . 51Writing the New Disklabel . . . . . . . . . . . . . . . . . . . . . . . . . . . . . . . . . . . . . 53Adding More Disks . . . . . . . . . . . . . . . . . . . . . . . . . . . . . . . . . . . . . . . . . . 54
Advanced Disklabel Commands . . . . . . . . . . . . . . . . . . . . . . . . . . . . . . . . . . . . . . . . 54Changing Basic Drive Parameters . . . . . . . . . . . . . . . . . . . . . . . . . . . . . . . . 54Modifying Existing Partitions . . . . . . . . . . . . . . . . . . . . . . . . . . . . . . . . . . . . 55Entering Expert Mode . . . . . . . . . . . . . . . . . . . . . . . . . . . . . . . . . . . . . . . . 55Getting More Help . . . . . . . . . . . . . . . . . . . . . . . . . . . . . . . . . . . . . . . . . . 55
4 post-instAll setup 57First Steps . . . . . . . . . . . . . . . . . . . . . . . . . . . . . . . . . . . . . . . . . . . . . . . . . . . . . . . 58
Checking the System Errata . . . . . . . . . . . . . . . . . . . . . . . . . . . . . . . . . . . . 58Setting the Root Password . . . . . . . . . . . . . . . . . . . . . . . . . . . . . . . . . . . . . 58
Software Configuration . . . . . . . . . . . . . . . . . . . . . . . . . . . . . . . . . . . . . . . . . . . . . . 59Time and Date . . . . . . . . . . . . . . . . . . . . . . . . . . . . . . . . . . . . . . . . . . . . . . . . . . . . 60
Setting the Time Zone . . . . . . . . . . . . . . . . . . . . . . . . . . . . . . . . . . . . . . . . 60Setting the Date and Time . . . . . . . . . . . . . . . . . . . . . . . . . . . . . . . . . . . . . 60
Hostname . . . . . . . . . . . . . . . . . . . . . . . . . . . . . . . . . . . . . . . . . . . . . . . . . . . . . . . 61Networking . . . . . . . . . . . . . . . . . . . . . . . . . . . . . . . . . . . . . . . . . . . . . . . . . . . . . . 62
Configuring Ethernet Interfaces . . . . . . . . . . . . . . . . . . . . . . . . . . . . . . . . . . 62Setting a Default Gateway . . . . . . . . . . . . . . . . . . . . . . . . . . . . . . . . . . . . . 64Setting Name Service Servers . . . . . . . . . . . . . . . . . . . . . . . . . . . . . . . . . . . 65
Mail Aliases and Status Mail . . . . . . . . . . . . . . . . . . . . . . . . . . . . . . . . . . . . . . . . . . 65Keyboard Mapping . . . . . . . . . . . . . . . . . . . . . . . . . . . . . . . . . . . . . . . . . . . . . . . . 66Installing Ports and Source Code . . . . . . . . . . . . . . . . . . . . . . . . . . . . . . . . . . . . . . . 66Booting to a Graphic Console . . . . . . . . . . . . . . . . . . . . . . . . . . . . . . . . . . . . . . . . . 67Onward! . . . . . . . . . . . . . . . . . . . . . . . . . . . . . . . . . . . . . . . . . . . . . . . . . . . . . . . . 67
5 tHe Boot process 69Power-On and the Boot Loader . . . . . . . . . . . . . . . . . . . . . . . . . . . . . . . . . . . . . . . . 70Booting in Single-User Mode . . . . . . . . . . . . . . . . . . . . . . . . . . . . . . . . . . . . . . . . . . 71
Mounting Disks in Single-User Mode . . . . . . . . . . . . . . . . . . . . . . . . . . . . . . 71Starting the Network in Single-User Mode . . . . . . . . . . . . . . . . . . . . . . . . . . 72
Booting an Alternate Kernel . . . . . . . . . . . . . . . . . . . . . . . . . . . . . . . . . . . . . . . . . . . 72Booting a Different Kernel File . . . . . . . . . . . . . . . . . . . . . . . . . . . . . . . . . . 72Booting from an Alternate Hard Disk . . . . . . . . . . . . . . . . . . . . . . . . . . . . . . 73
Making Boot Loader Settings Permanent . . . . . . . . . . . . . . . . . . . . . . . . . . . . . . . . . . 74Serial Consoles . . . . . . . . . . . . . . . . . . . . . . . . . . . . . . . . . . . . . . . . . . . . . . . . . . . 75
Other Platform Serial Consoles . . . . . . . . . . . . . . . . . . . . . . . . . . . . . . . . . . 75Serial Console Physical Setup . . . . . . . . . . . . . . . . . . . . . . . . . . . . . . . . . . . 75Serial Console Configuration . . . . . . . . . . . . . . . . . . . . . . . . . . . . . . . . . . . 76Changing the Serial Console Speed . . . . . . . . . . . . . . . . . . . . . . . . . . . . . . 77Changing the Client Serial Port . . . . . . . . . . . . . . . . . . . . . . . . . . . . . . . . . . 78Serial Logins . . . . . . . . . . . . . . . . . . . . . . . . . . . . . . . . . . . . . . . . . . . . . . . 79
Multiuser Startup . . . . . . . . . . . . . . . . . . . . . . . . . . . . . . . . . . . . . . . . . . . . . . . . . . 79Startup System Scripts . . . . . . . . . . . . . . . . . . . . . . . . . . . . . . . . . . . . . . . . 80Software Startup Scripts . . . . . . . . . . . . . . . . . . . . . . . . . . . . . . . . . . . . . . . 82Third-Party rc .d Scripts . . . . . . . . . . . . . . . . . . . . . . . . . . . . . . . . . . . . . . . . 83Force-Starting Software . . . . . . . . . . . . . . . . . . . . . . . . . . . . . . . . . . . . . . . 83
xii Contents in Detail
6 user mAnAgement 85The Root Account . . . . . . . . . . . . . . . . . . . . . . . . . . . . . . . . . . . . . . . . . . . . . . . . . . 86Adding Users . . . . . . . . . . . . . . . . . . . . . . . . . . . . . . . . . . . . . . . . . . . . . . . . . . . . 86
Adding Users Interactively . . . . . . . . . . . . . . . . . . . . . . . . . . . . . . . . . . . . . 87Adding Users Noninteractively . . . . . . . . . . . . . . . . . . . . . . . . . . . . . . . . . . 89User Account Restrictions . . . . . . . . . . . . . . . . . . . . . . . . . . . . . . . . . . . . . . 92
Removing User Accounts . . . . . . . . . . . . . . . . . . . . . . . . . . . . . . . . . . . . . . . . . . . . . 92Editing User Accounts . . . . . . . . . . . . . . . . . . . . . . . . . . . . . . . . . . . . . . . . . . . . . . . 93Login Classes . . . . . . . . . . . . . . . . . . . . . . . . . . . . . . . . . . . . . . . . . . . . . . . . . . . . . 94
Login Class Definitions . . . . . . . . . . . . . . . . . . . . . . . . . . . . . . . . . . . . . . . . 94Changing login .conf . . . . . . . . . . . . . . . . . . . . . . . . . . . . . . . . . . . . . . . . . 95Legal Values for login .conf Variables . . . . . . . . . . . . . . . . . . . . . . . . . . . . . . 95Setting Resource Limits . . . . . . . . . . . . . . . . . . . . . . . . . . . . . . . . . . . . . . . . 96Modifying the Shell Environment . . . . . . . . . . . . . . . . . . . . . . . . . . . . . . . . . 97Password and Login Options . . . . . . . . . . . . . . . . . . . . . . . . . . . . . . . . . . . 98Changing Authentication Methods . . . . . . . . . . . . . . . . . . . . . . . . . . . . . . . 99Using Login Classes for RADIUS Authentication . . . . . . . . . . . . . . . . . . . . . . 100
Unprivileged User Accounts . . . . . . . . . . . . . . . . . . . . . . . . . . . . . . . . . . . . . . . . . . 102The nobody Account . . . . . . . . . . . . . . . . . . . . . . . . . . . . . . . . . . . . . . . . 103_username . . . . . . . . . . . . . . . . . . . . . . . . . . . . . . . . . . . . . . . . . . . . . . . 103Creating Unprivileged Users . . . . . . . . . . . . . . . . . . . . . . . . . . . . . . . . . . . 104
7 root, And How to Avoid it 105The Root Password . . . . . . . . . . . . . . . . . . . . . . . . . . . . . . . . . . . . . . . . . . . . . . . . 106Using Groups . . . . . . . . . . . . . . . . . . . . . . . . . . . . . . . . . . . . . . . . . . . . . . . . . . . 106
The /etc/group File . . . . . . . . . . . . . . . . . . . . . . . . . . . . . . . . . . . . . . . . . 107Creating Groups . . . . . . . . . . . . . . . . . . . . . . . . . . . . . . . . . . . . . . . . . . . 107Groups, Unprivileged Users, and Group Permissions . . . . . . . . . . . . . . . . . . 108
Hiding Root with sudo . . . . . . . . . . . . . . . . . . . . . . . . . . . . . . . . . . . . . . . . . . . . . 109Why Use sudo? . . . . . . . . . . . . . . . . . . . . . . . . . . . . . . . . . . . . . . . . . . . 109sudo Disadvantages . . . . . . . . . . . . . . . . . . . . . . . . . . . . . . . . . . . . . . . . 109An Overview of the sudo Software . . . . . . . . . . . . . . . . . . . . . . . . . . . . . . 110The visudo(8) Command . . . . . . . . . . . . . . . . . . . . . . . . . . . . . . . . . . . . . 110The /etc/sudoers File . . . . . . . . . . . . . . . . . . . . . . . . . . . . . . . . . . . . . . . 111/etc/sudoers Aliases . . . . . . . . . . . . . . . . . . . . . . . . . . . . . . . . . . . . . . . . 113Changing sudo’s Default Behavior . . . . . . . . . . . . . . . . . . . . . . . . . . . . . . 117sudo and the Environment . . . . . . . . . . . . . . . . . . . . . . . . . . . . . . . . . . . . 119
Using sudo . . . . . . . . . . . . . . . . . . . . . . . . . . . . . . . . . . . . . . . . . . . . . . . . . . . . . 120sudo Password Caching . . . . . . . . . . . . . . . . . . . . . . . . . . . . . . . . . . . . . . 120Running Commands Under sudo . . . . . . . . . . . . . . . . . . . . . . . . . . . . . . . . 121Running Commands as Other Users . . . . . . . . . . . . . . . . . . . . . . . . . . . . . . 121
sudoedit . . . . . . . . . . . . . . . . . . . . . . . . . . . . . . . . . . . . . . . . . . . . . . . . . . . . . . . 121The Biggest sudo Mistake: Exclusions . . . . . . . . . . . . . . . . . . . . . . . . . . . . . . . . . . . 122sudo Logs . . . . . . . . . . . . . . . . . . . . . . . . . . . . . . . . . . . . . . . . . . . . . . . . . . . . . . 123
Contents in Detail xiii
8 disks And Filesystems 125Device Nodes . . . . . . . . . . . . . . . . . . . . . . . . . . . . . . . . . . . . . . . . . . . . . . . . . . . 126
Raw and Block Devices . . . . . . . . . . . . . . . . . . . . . . . . . . . . . . . . . . . . . . 126Device Attachment vs . Device Name . . . . . . . . . . . . . . . . . . . . . . . . . . . . . 127
DUIDs and /etc/fstab . . . . . . . . . . . . . . . . . . . . . . . . . . . . . . . . . . . . . . . . . . . . . . 128MBR Partitions and fdisk(8) . . . . . . . . . . . . . . . . . . . . . . . . . . . . . . . . . . . . . . . . . . 129
Viewing MBR Partitions . . . . . . . . . . . . . . . . . . . . . . . . . . . . . . . . . . . . . . 130Adding and Removing Partitions . . . . . . . . . . . . . . . . . . . . . . . . . . . . . . . . 130Making a Partition Bootable . . . . . . . . . . . . . . . . . . . . . . . . . . . . . . . . . . . 131Exiting fdisk . . . . . . . . . . . . . . . . . . . . . . . . . . . . . . . . . . . . . . . . . . . . . . 131
Labeling Disks . . . . . . . . . . . . . . . . . . . . . . . . . . . . . . . . . . . . . . . . . . . . . . . . . . . 132Viewing Labels . . . . . . . . . . . . . . . . . . . . . . . . . . . . . . . . . . . . . . . . . . . . 132Creating Disklabel Partitions . . . . . . . . . . . . . . . . . . . . . . . . . . . . . . . . . . . 132Backing Up and Restoring Disklabels . . . . . . . . . . . . . . . . . . . . . . . . . . . . . 133
The Fast File System . . . . . . . . . . . . . . . . . . . . . . . . . . . . . . . . . . . . . . . . . . . . . . . 133FFS Versions . . . . . . . . . . . . . . . . . . . . . . . . . . . . . . . . . . . . . . . . . . . . . . 133Blocks, Fragments, and Inodes . . . . . . . . . . . . . . . . . . . . . . . . . . . . . . . . . 134Creating FFS Filesystems . . . . . . . . . . . . . . . . . . . . . . . . . . . . . . . . . . . . . 134FFS Mount Options . . . . . . . . . . . . . . . . . . . . . . . . . . . . . . . . . . . . . . . . . 135Filesystem Integrity . . . . . . . . . . . . . . . . . . . . . . . . . . . . . . . . . . . . . . . . . 138
What’s Currently Mounted? . . . . . . . . . . . . . . . . . . . . . . . . . . . . . . . . . . . . . . . . . . 140Mounting and Unmounting Partitions . . . . . . . . . . . . . . . . . . . . . . . . . . . . . . . . . . . 140
Mounting Standard Filesystems . . . . . . . . . . . . . . . . . . . . . . . . . . . . . . . . . 141Mounting at Nonstandard Locations . . . . . . . . . . . . . . . . . . . . . . . . . . . . . 141Unmounting Partitions . . . . . . . . . . . . . . . . . . . . . . . . . . . . . . . . . . . . . . . 141Mounting with Options . . . . . . . . . . . . . . . . . . . . . . . . . . . . . . . . . . . . . . 142
How Full Is That Partition? . . . . . . . . . . . . . . . . . . . . . . . . . . . . . . . . . . . . . . . . . . . 142What’s All That Stuff? . . . . . . . . . . . . . . . . . . . . . . . . . . . . . . . . . . . . . . . 143Setting $BLOCKSIZE . . . . . . . . . . . . . . . . . . . . . . . . . . . . . . . . . . . . . . . . 143
Adding New Hard Disks . . . . . . . . . . . . . . . . . . . . . . . . . . . . . . . . . . . . . . . . . . . . 144Creating an MBR Partition . . . . . . . . . . . . . . . . . . . . . . . . . . . . . . . . . . . . 144Creating a Disklabel . . . . . . . . . . . . . . . . . . . . . . . . . . . . . . . . . . . . . . . . 144Moving Partitions . . . . . . . . . . . . . . . . . . . . . . . . . . . . . . . . . . . . . . . . . . 145Adding New Filesystems . . . . . . . . . . . . . . . . . . . . . . . . . . . . . . . . . . . . . 146Stackable Mounts . . . . . . . . . . . . . . . . . . . . . . . . . . . . . . . . . . . . . . . . . . 146
9 more Filesystems 147Backing Up to the /altroot Partition . . . . . . . . . . . . . . . . . . . . . . . . . . . . . . . . . . . . 148Memory Filesystems . . . . . . . . . . . . . . . . . . . . . . . . . . . . . . . . . . . . . . . . . . . . . . . 148
Creating MFS Partitions . . . . . . . . . . . . . . . . . . . . . . . . . . . . . . . . . . . . . . 149Mounting an MFS at Boot . . . . . . . . . . . . . . . . . . . . . . . . . . . . . . . . . . . . 149
Foreign Filesystems . . . . . . . . . . . . . . . . . . . . . . . . . . . . . . . . . . . . . . . . . . . . . . . . 150Inodes vs . Vnodes . . . . . . . . . . . . . . . . . . . . . . . . . . . . . . . . . . . . . . . . . . 150Common Foreign Filesystems . . . . . . . . . . . . . . . . . . . . . . . . . . . . . . . . . . 151Foreign Filesystem Ownership . . . . . . . . . . . . . . . . . . . . . . . . . . . . . . . . . 152
xiv Contents in Detail
Removable Media . . . . . . . . . . . . . . . . . . . . . . . . . . . . . . . . . . . . . . . . . . . . . . . . 153Mounting Filesystem Images . . . . . . . . . . . . . . . . . . . . . . . . . . . . . . . . . . . . . . . . . 153
Attaching Vnode Devices to Disk Images . . . . . . . . . . . . . . . . . . . . . . . . . . 154Detaching Vnode Devices from Images . . . . . . . . . . . . . . . . . . . . . . . . . . . 154
Basic NFS Setup . . . . . . . . . . . . . . . . . . . . . . . . . . . . . . . . . . . . . . . . . . . . . . . . . 154The OpenBSD NFS Server . . . . . . . . . . . . . . . . . . . . . . . . . . . . . . . . . . . . . . . . . . . 155
Exporting Filesystems . . . . . . . . . . . . . . . . . . . . . . . . . . . . . . . . . . . . . . . . 156Read-Only Mounts . . . . . . . . . . . . . . . . . . . . . . . . . . . . . . . . . . . . . . . . . . 157NFS and Users . . . . . . . . . . . . . . . . . . . . . . . . . . . . . . . . . . . . . . . . . . . . 157Permitted Clients . . . . . . . . . . . . . . . . . . . . . . . . . . . . . . . . . . . . . . . . . . . 158Multiple Exports for One Partition . . . . . . . . . . . . . . . . . . . . . . . . . . . . . . . 159
NFS Clients . . . . . . . . . . . . . . . . . . . . . . . . . . . . . . . . . . . . . . . . . . . . . . . . . . . . . 159Software RAID . . . . . . . . . . . . . . . . . . . . . . . . . . . . . . . . . . . . . . . . . . . . . . . . . . . 160
RAID Types . . . . . . . . . . . . . . . . . . . . . . . . . . . . . . . . . . . . . . . . . . . . . . . 161Preparing Disks for softraid . . . . . . . . . . . . . . . . . . . . . . . . . . . . . . . . . . . 162Creating softraid Devices . . . . . . . . . . . . . . . . . . . . . . . . . . . . . . . . . . . . . 163softraid Status . . . . . . . . . . . . . . . . . . . . . . . . . . . . . . . . . . . . . . . . . . . . . 164Identifying Failed softraid Volumes . . . . . . . . . . . . . . . . . . . . . . . . . . . . . . 164Rebuilding Failed softraid Volumes . . . . . . . . . . . . . . . . . . . . . . . . . . . . . . 164Deleting softraid Devices . . . . . . . . . . . . . . . . . . . . . . . . . . . . . . . . . . . . . 165Reusing softraid Disks . . . . . . . . . . . . . . . . . . . . . . . . . . . . . . . . . . . . . . . 166Booting from a softraid Device . . . . . . . . . . . . . . . . . . . . . . . . . . . . . . . . . 166
Encrypted Disk Partitions . . . . . . . . . . . . . . . . . . . . . . . . . . . . . . . . . . . . . . . . . . . . 166Creating Encrypted Partitions . . . . . . . . . . . . . . . . . . . . . . . . . . . . . . . . . . 166Using Encrypted Partitions . . . . . . . . . . . . . . . . . . . . . . . . . . . . . . . . . . . . 167Automatic Decryption . . . . . . . . . . . . . . . . . . . . . . . . . . . . . . . . . . . . . . . 168
10 securing your system 169Who Is the Enemy? . . . . . . . . . . . . . . . . . . . . . . . . . . . . . . . . . . . . . . . . . . . . . . . 170
Script Kiddies . . . . . . . . . . . . . . . . . . . . . . . . . . . . . . . . . . . . . . . . . . . . . 170Botnets . . . . . . . . . . . . . . . . . . . . . . . . . . . . . . . . . . . . . . . . . . . . . . . . . . 170Disaffected Users . . . . . . . . . . . . . . . . . . . . . . . . . . . . . . . . . . . . . . . . . . 171Skilled Attackers . . . . . . . . . . . . . . . . . . . . . . . . . . . . . . . . . . . . . . . . . . . 171
OpenBSD Security Announcements . . . . . . . . . . . . . . . . . . . . . . . . . . . . . . . . . . . . 172OpenBSD Memory Protection . . . . . . . . . . . . . . . . . . . . . . . . . . . . . . . . . . . . . . . . 172
W^X . . . . . . . . . . . . . . . . . . . . . . . . . . . . . . . . . . . . . . . . . . . . . . . . . . . 173 .rodata Segments . . . . . . . . . . . . . . . . . . . . . . . . . . . . . . . . . . . . . . . . . . 173Guard Pages . . . . . . . . . . . . . . . . . . . . . . . . . . . . . . . . . . . . . . . . . . . . . 174Address Space Layout Randomization . . . . . . . . . . . . . . . . . . . . . . . . . . . . 174ProPolice . . . . . . . . . . . . . . . . . . . . . . . . . . . . . . . . . . . . . . . . . . . . . . . . 174And More! . . . . . . . . . . . . . . . . . . . . . . . . . . . . . . . . . . . . . . . . . . . . . . . 174
File Flags . . . . . . . . . . . . . . . . . . . . . . . . . . . . . . . . . . . . . . . . . . . . . . . . . . . . . . 175File Flag Types . . . . . . . . . . . . . . . . . . . . . . . . . . . . . . . . . . . . . . . . . . . . 175Setting, Viewing, and Removing File Flags . . . . . . . . . . . . . . . . . . . . . . . . . 176
Securelevels . . . . . . . . . . . . . . . . . . . . . . . . . . . . . . . . . . . . . . . . . . . . . . . . . . . . 177Setting the System Securelevel . . . . . . . . . . . . . . . . . . . . . . . . . . . . . . . . . 178Securelevel Definitions . . . . . . . . . . . . . . . . . . . . . . . . . . . . . . . . . . . . . . . 178
Contents in Detail xv
What Securelevel Do You Need? . . . . . . . . . . . . . . . . . . . . . . . . . . . . . . . 180Securelevel Weaknesses . . . . . . . . . . . . . . . . . . . . . . . . . . . . . . . . . . . . . 180
Keeping Secure . . . . . . . . . . . . . . . . . . . . . . . . . . . . . . . . . . . . . . . . . . . . . . . . . . 181
11 overview oF tcp/ip 183Network Layers . . . . . . . . . . . . . . . . . . . . . . . . . . . . . . . . . . . . . . . . . . . . . . . . . . 184
The Physical Layer . . . . . . . . . . . . . . . . . . . . . . . . . . . . . . . . . . . . . . . . . . 184The Datalink Layer . . . . . . . . . . . . . . . . . . . . . . . . . . . . . . . . . . . . . . . . . . 185The Network Layer . . . . . . . . . . . . . . . . . . . . . . . . . . . . . . . . . . . . . . . . . 185The Transport Layer . . . . . . . . . . . . . . . . . . . . . . . . . . . . . . . . . . . . . . . . . 186Applications . . . . . . . . . . . . . . . . . . . . . . . . . . . . . . . . . . . . . . . . . . . . . . 186
The Life and Times of a Network Request . . . . . . . . . . . . . . . . . . . . . . . . . . . . . . . . 187Network Stacks . . . . . . . . . . . . . . . . . . . . . . . . . . . . . . . . . . . . . . . . . . . . . . . . . . 188IPv4 Addresses and Subnets . . . . . . . . . . . . . . . . . . . . . . . . . . . . . . . . . . . . . . . . . 189
Calculating a Decimal IPv4 Netmask . . . . . . . . . . . . . . . . . . . . . . . . . . . . . 190Viewing IPv4 Addresses . . . . . . . . . . . . . . . . . . . . . . . . . . . . . . . . . . . . . . 191Unusable IPv4 Addresses . . . . . . . . . . . . . . . . . . . . . . . . . . . . . . . . . . . . . 191Special IPv4 Addresses . . . . . . . . . . . . . . . . . . . . . . . . . . . . . . . . . . . . . . 192IPv4 Addressing Pitfalls . . . . . . . . . . . . . . . . . . . . . . . . . . . . . . . . . . . . . . 192
IPv6 Addresses and Subnets . . . . . . . . . . . . . . . . . . . . . . . . . . . . . . . . . . . . . . . . . 192IPv6 Basics . . . . . . . . . . . . . . . . . . . . . . . . . . . . . . . . . . . . . . . . . . . . . . . 193Understanding IPv6 Addresses . . . . . . . . . . . . . . . . . . . . . . . . . . . . . . . . . 193Viewing IPv6 Addresses . . . . . . . . . . . . . . . . . . . . . . . . . . . . . . . . . . . . . . 194IPv6 Subnets . . . . . . . . . . . . . . . . . . . . . . . . . . . . . . . . . . . . . . . . . . . . . . 194Special IPv6 Addresses . . . . . . . . . . . . . . . . . . . . . . . . . . . . . . . . . . . . . . 194Assigning IPv6 Addresses . . . . . . . . . . . . . . . . . . . . . . . . . . . . . . . . . . . . . 195
Remedial TCP/IP . . . . . . . . . . . . . . . . . . . . . . . . . . . . . . . . . . . . . . . . . . . . . . . . . 196ICMP . . . . . . . . . . . . . . . . . . . . . . . . . . . . . . . . . . . . . . . . . . . . . . . . . . . 196UDP . . . . . . . . . . . . . . . . . . . . . . . . . . . . . . . . . . . . . . . . . . . . . . . . . . . 196TCP . . . . . . . . . . . . . . . . . . . . . . . . . . . . . . . . . . . . . . . . . . . . . . . . . . . 197How Protocols Fit Together . . . . . . . . . . . . . . . . . . . . . . . . . . . . . . . . . . . . 198Transport Protocol Ports . . . . . . . . . . . . . . . . . . . . . . . . . . . . . . . . . . . . . . 198Reserved Ports . . . . . . . . . . . . . . . . . . . . . . . . . . . . . . . . . . . . . . . . . . . . 199Which Ports Are Open? . . . . . . . . . . . . . . . . . . . . . . . . . . . . . . . . . . . . . . 200
IP Routing . . . . . . . . . . . . . . . . . . . . . . . . . . . . . . . . . . . . . . . . . . . . . . . . . . . . . . 202IPv4 Routed Network Example . . . . . . . . . . . . . . . . . . . . . . . . . . . . . . . . . 203Managing Routing with route(8) . . . . . . . . . . . . . . . . . . . . . . . . . . . . . . . . 204
12 connecting to tHe network 209DNS Resolution . . . . . . . . . . . . . . . . . . . . . . . . . . . . . . . . . . . . . . . . . . . . . . . . . . 210
The /etc/resolv .conf File . . . . . . . . . . . . . . . . . . . . . . . . . . . . . . . . . . . . . 210The /etc/hosts File . . . . . . . . . . . . . . . . . . . . . . . . . . . . . . . . . . . . . . . . . 212Resolver vs . Dynamic Configuration . . . . . . . . . . . . . . . . . . . . . . . . . . . . . . 212
Ethernet . . . . . . . . . . . . . . . . . . . . . . . . . . . . . . . . . . . . . . . . . . . . . . . . . . . . . . . 213Protocol and Hardware . . . . . . . . . . . . . . . . . . . . . . . . . . . . . . . . . . . . . . 213
xvi Contents in Detail
Configuring Ethernet . . . . . . . . . . . . . . . . . . . . . . . . . . . . . . . . . . . . . . . . . . . . . . . 215Using ifconfig(8) . . . . . . . . . . . . . . . . . . . . . . . . . . . . . . . . . . . . . . . . . . . 216Configuring Default Routes . . . . . . . . . . . . . . . . . . . . . . . . . . . . . . . . . . . . 219Using Dynamic Configuration . . . . . . . . . . . . . . . . . . . . . . . . . . . . . . . . . . 219Configuring the Network at Boot . . . . . . . . . . . . . . . . . . . . . . . . . . . . . . . . 219
Trunking . . . . . . . . . . . . . . . . . . . . . . . . . . . . . . . . . . . . . . . . . . . . . . . . . . . . . . . 221Link Aggregation Protocols . . . . . . . . . . . . . . . . . . . . . . . . . . . . . . . . . . . . 221Trunk Configuration . . . . . . . . . . . . . . . . . . . . . . . . . . . . . . . . . . . . . . . . . 221Trunks at Boot . . . . . . . . . . . . . . . . . . . . . . . . . . . . . . . . . . . . . . . . . . . . . 222
VLANs . . . . . . . . . . . . . . . . . . . . . . . . . . . . . . . . . . . . . . . . . . . . . . . . . . . . . . . . 223Configuring Switches . . . . . . . . . . . . . . . . . . . . . . . . . . . . . . . . . . . . . . . . 223Configuring VLAN Devices . . . . . . . . . . . . . . . . . . . . . . . . . . . . . . . . . . . . 223Configuring VLANs at Boot . . . . . . . . . . . . . . . . . . . . . . . . . . . . . . . . . . . 224
IPv6 Over Tunnels . . . . . . . . . . . . . . . . . . . . . . . . . . . . . . . . . . . . . . . . . . . . . . . . 224
13 soFtwAre mAnAgement 225Making Software . . . . . . . . . . . . . . . . . . . . . . . . . . . . . . . . . . . . . . . . . . . . . . . . . 226Source Code and Software . . . . . . . . . . . . . . . . . . . . . . . . . . . . . . . . . . . . . . . . . . 226The Ports and Packages System . . . . . . . . . . . . . . . . . . . . . . . . . . . . . . . . . . . . . . . 227Using Packages . . . . . . . . . . . . . . . . . . . . . . . . . . . . . . . . . . . . . . . . . . . . . . . . . . 228
Package Files and $PKG_PATH . . . . . . . . . . . . . . . . . . . . . . . . . . . . . . . . 228Finding Packages . . . . . . . . . . . . . . . . . . . . . . . . . . . . . . . . . . . . . . . . . . 229Installing Packages . . . . . . . . . . . . . . . . . . . . . . . . . . . . . . . . . . . . . . . . . 230Identifying Where Files Originate . . . . . . . . . . . . . . . . . . . . . . . . . . . . . . . 232Uninstalling Packages . . . . . . . . . . . . . . . . . . . . . . . . . . . . . . . . . . . . . . . 234Package Limitations . . . . . . . . . . . . . . . . . . . . . . . . . . . . . . . . . . . . . . . . . 235
Using Ports . . . . . . . . . . . . . . . . . . . . . . . . . . . . . . . . . . . . . . . . . . . . . . . . . . . . . 235The Ports Tree . . . . . . . . . . . . . . . . . . . . . . . . . . . . . . . . . . . . . . . . . . . . . 236Secondary Ports . . . . . . . . . . . . . . . . . . . . . . . . . . . . . . . . . . . . . . . . . . . 237Read-Only Ports Tree . . . . . . . . . . . . . . . . . . . . . . . . . . . . . . . . . . . . . . . . 238Finding Software . . . . . . . . . . . . . . . . . . . . . . . . . . . . . . . . . . . . . . . . . . . 239
Building Ports . . . . . . . . . . . . . . . . . . . . . . . . . . . . . . . . . . . . . . . . . . . . . . . . . . . . 241What a Port Installation Does . . . . . . . . . . . . . . . . . . . . . . . . . . . . . . . . . . 242Port Build Stages . . . . . . . . . . . . . . . . . . . . . . . . . . . . . . . . . . . . . . . . . . . 243
Customizing Ports . . . . . . . . . . . . . . . . . . . . . . . . . . . . . . . . . . . . . . . . . . . . . . . . . 246Local Distfile Mirrors . . . . . . . . . . . . . . . . . . . . . . . . . . . . . . . . . . . . . . . . 246Flavors . . . . . . . . . . . . . . . . . . . . . . . . . . . . . . . . . . . . . . . . . . . . . . . . . . 249
Subpackages . . . . . . . . . . . . . . . . . . . . . . . . . . . . . . . . . . . . . . . . . . . . . . . . . . . . 251Packages and rc .d Scripts . . . . . . . . . . . . . . . . . . . . . . . . . . . . . . . . . . . . . . . . . . . 252
14 everytHing /etc 255/etc Across Unix Variants . . . . . . . . . . . . . . . . . . . . . . . . . . . . . . . . . . . . . . . . . . . 256The /etc Files . . . . . . . . . . . . . . . . . . . . . . . . . . . . . . . . . . . . . . . . . . . . . . . . . . . . 256
/etc/adduser .conf . . . . . . . . . . . . . . . . . . . . . . . . . . . . . . . . . . . . . . . . . . 256/etc/amd . . . . . . . . . . . . . . . . . . . . . . . . . . . . . . . . . . . . . . . . . . . . . . . . 256/etc/authpf . . . . . . . . . . . . . . . . . . . . . . . . . . . . . . . . . . . . . . . . . . . . . . 256

Contents in Detail xvii
/etc/bgpd .conf . . . . . . . . . . . . . . . . . . . . . . . . . . . . . . . . . . . . . . . . . . . 257/etc/boot .conf . . . . . . . . . . . . . . . . . . . . . . . . . . . . . . . . . . . . . . . . . . . . 257/etc/changelist . . . . . . . . . . . . . . . . . . . . . . . . . . . . . . . . . . . . . . . . . . . . 257/etc/chio .conf . . . . . . . . . . . . . . . . . . . . . . . . . . . . . . . . . . . . . . . . . . . . 257/etc/csh .* . . . . . . . . . . . . . . . . . . . . . . . . . . . . . . . . . . . . . . . . . . . . . . . 257/etc/daily and /etc/daily .local . . . . . . . . . . . . . . . . . . . . . . . . . . . . . . . . 257/etc/dhclient .conf . . . . . . . . . . . . . . . . . . . . . . . . . . . . . . . . . . . . . . . . . . 257/etc/dhcpd .conf . . . . . . . . . . . . . . . . . . . . . . . . . . . . . . . . . . . . . . . . . . . 257/etc/disklabels/ . . . . . . . . . . . . . . . . . . . . . . . . . . . . . . . . . . . . . . . . . . . 257/etc/disktab . . . . . . . . . . . . . . . . . . . . . . . . . . . . . . . . . . . . . . . . . . . . . . 258/etc/dumpdates . . . . . . . . . . . . . . . . . . . . . . . . . . . . . . . . . . . . . . . . . . . 258/etc/dvmrpd .conf . . . . . . . . . . . . . . . . . . . . . . . . . . . . . . . . . . . . . . . . . . 258/etc/exports . . . . . . . . . . . . . . . . . . . . . . . . . . . . . . . . . . . . . . . . . . . . . . 258/etc/fbtab . . . . . . . . . . . . . . . . . . . . . . . . . . . . . . . . . . . . . . . . . . . . . . . 258/etc/firmware . . . . . . . . . . . . . . . . . . . . . . . . . . . . . . . . . . . . . . . . . . . . 258/etc/fonts/ . . . . . . . . . . . . . . . . . . . . . . . . . . . . . . . . . . . . . . . . . . . . . . 259/etc/fstab . . . . . . . . . . . . . . . . . . . . . . . . . . . . . . . . . . . . . . . . . . . . . . . 259/etc/ftpchroot . . . . . . . . . . . . . . . . . . . . . . . . . . . . . . . . . . . . . . . . . . . . . 259/etc/ftpusers . . . . . . . . . . . . . . . . . . . . . . . . . . . . . . . . . . . . . . . . . . . . . 259/etc/gettytab . . . . . . . . . . . . . . . . . . . . . . . . . . . . . . . . . . . . . . . . . . . . . 259/etc/group . . . . . . . . . . . . . . . . . . . . . . . . . . . . . . . . . . . . . . . . . . . . . . . 260/etc/hostapd .conf . . . . . . . . . . . . . . . . . . . . . . . . . . . . . . . . . . . . . . . . . . 260/etc/hostname .* . . . . . . . . . . . . . . . . . . . . . . . . . . . . . . . . . . . . . . . . . . . 260/etc/hosts . . . . . . . . . . . . . . . . . . . . . . . . . . . . . . . . . . . . . . . . . . . . . . . 260/etc/hosts .equiv . . . . . . . . . . . . . . . . . . . . . . . . . . . . . . . . . . . . . . . . . . . 260/etc/hosts .lpd . . . . . . . . . . . . . . . . . . . . . . . . . . . . . . . . . . . . . . . . . . . . 260/etc/hotplug/ . . . . . . . . . . . . . . . . . . . . . . . . . . . . . . . . . . . . . . . . . . . . . 261/etc/ifstated .conf . . . . . . . . . . . . . . . . . . . . . . . . . . . . . . . . . . . . . . . . . . 261/etc/iked/, /etc/iked .conf, /etc/ipsec .conf, and /etc/isakmpd . . . . . . . . . . 261/etc/inetd .conf . . . . . . . . . . . . . . . . . . . . . . . . . . . . . . . . . . . . . . . . . . . . 261/etc/kbdtype . . . . . . . . . . . . . . . . . . . . . . . . . . . . . . . . . . . . . . . . . . . . . 261/etc/kerberosV/ . . . . . . . . . . . . . . . . . . . . . . . . . . . . . . . . . . . . . . . . . . . 262/etc/ksh .kshrc . . . . . . . . . . . . . . . . . . . . . . . . . . . . . . . . . . . . . . . . . . . . 262/etc/ldap/ and /etc/ldapd .conf . . . . . . . . . . . . . . . . . . . . . . . . . . . . . . . 262/etc/localtime . . . . . . . . . . . . . . . . . . . . . . . . . . . . . . . . . . . . . . . . . . . . 262/etc/locate .rc . . . . . . . . . . . . . . . . . . . . . . . . . . . . . . . . . . . . . . . . . . . . . 262/etc/login .conf . . . . . . . . . . . . . . . . . . . . . . . . . . . . . . . . . . . . . . . . . . . . 262/etc/lynx .cfg . . . . . . . . . . . . . . . . . . . . . . . . . . . . . . . . . . . . . . . . . . . . . 262/etc/magic . . . . . . . . . . . . . . . . . . . . . . . . . . . . . . . . . . . . . . . . . . . . . . 262/etc/mail/ . . . . . . . . . . . . . . . . . . . . . . . . . . . . . . . . . . . . . . . . . . . . . . . 263/etc/mail .rc . . . . . . . . . . . . . . . . . . . . . . . . . . . . . . . . . . . . . . . . . . . . . . 263/etc/mailer .conf . . . . . . . . . . . . . . . . . . . . . . . . . . . . . . . . . . . . . . . . . . . 263/etc/man .conf . . . . . . . . . . . . . . . . . . . . . . . . . . . . . . . . . . . . . . . . . . . . 264/etc/master .passwd, /etc/passwd, /etc/spwd .db, and /etc/pwd .db . . . . . 265/etc/mixerctl .conf . . . . . . . . . . . . . . . . . . . . . . . . . . . . . . . . . . . . . . . . . . 268/etc/mk .conf . . . . . . . . . . . . . . . . . . . . . . . . . . . . . . . . . . . . . . . . . . . . . 268/etc/moduli . . . . . . . . . . . . . . . . . . . . . . . . . . . . . . . . . . . . . . . . . . . . . . 268/etc/monthly and /etc/monthly .local . . . . . . . . . . . . . . . . . . . . . . . . . . . . 268/etc/motd . . . . . . . . . . . . . . . . . . . . . . . . . . . . . . . . . . . . . . . . . . . . . . . 269/etc/mrouted .conf . . . . . . . . . . . . . . . . . . . . . . . . . . . . . . . . . . . . . . . . . 269

xviii Contents in Detail
/etc/mtree/ . . . . . . . . . . . . . . . . . . . . . . . . . . . . . . . . . . . . . . . . . . . . . . 269/etc/mygate . . . . . . . . . . . . . . . . . . . . . . . . . . . . . . . . . . . . . . . . . . . . . . 269/etc/myname . . . . . . . . . . . . . . . . . . . . . . . . . . . . . . . . . . . . . . . . . . . . . 269/etc/netstart . . . . . . . . . . . . . . . . . . . . . . . . . . . . . . . . . . . . . . . . . . . . . . 269/etc/networks . . . . . . . . . . . . . . . . . . . . . . . . . . . . . . . . . . . . . . . . . . . . 269/etc/newsyslog .conf . . . . . . . . . . . . . . . . . . . . . . . . . . . . . . . . . . . . . . . . 269/etc/nginx/ . . . . . . . . . . . . . . . . . . . . . . . . . . . . . . . . . . . . . . . . . . . . . . 269/etc/nsd .conf . . . . . . . . . . . . . . . . . . . . . . . . . . . . . . . . . . . . . . . . . . . . . 270/etc/ntpd .conf . . . . . . . . . . . . . . . . . . . . . . . . . . . . . . . . . . . . . . . . . . . . 270/etc/ospf6d .conf and /etc/ospfd .conf . . . . . . . . . . . . . . . . . . . . . . . . . . . 270/etc/pf .conf and /etc/pf .os . . . . . . . . . . . . . . . . . . . . . . . . . . . . . . . . . . . 270/etc/ppp/ . . . . . . . . . . . . . . . . . . . . . . . . . . . . . . . . . . . . . . . . . . . . . . . 270/etc/printcap . . . . . . . . . . . . . . . . . . . . . . . . . . . . . . . . . . . . . . . . . . . . . 270/etc/protocols . . . . . . . . . . . . . . . . . . . . . . . . . . . . . . . . . . . . . . . . . . . . 270/etc/rbootd .conf . . . . . . . . . . . . . . . . . . . . . . . . . . . . . . . . . . . . . . . . . . . 271/etc/rc .* . . . . . . . . . . . . . . . . . . . . . . . . . . . . . . . . . . . . . . . . . . . . . . . . 271/etc/relayd .conf . . . . . . . . . . . . . . . . . . . . . . . . . . . . . . . . . . . . . . . . . . . 271/etc/remote . . . . . . . . . . . . . . . . . . . . . . . . . . . . . . . . . . . . . . . . . . . . . . 271/etc/resolv .conf and /etc/resolv .conf .tail . . . . . . . . . . . . . . . . . . . . . . . . . 271/etc/ripd .conf . . . . . . . . . . . . . . . . . . . . . . . . . . . . . . . . . . . . . . . . . . . . 271/etc/rmt . . . . . . . . . . . . . . . . . . . . . . . . . . . . . . . . . . . . . . . . . . . . . . . . 271/etc/rpc . . . . . . . . . . . . . . . . . . . . . . . . . . . . . . . . . . . . . . . . . . . . . . . . 272/etc/sasyncd .conf . . . . . . . . . . . . . . . . . . . . . . . . . . . . . . . . . . . . . . . . . . 272/etc/sensorsd .conf . . . . . . . . . . . . . . . . . . . . . . . . . . . . . . . . . . . . . . . . . 272/etc/services . . . . . . . . . . . . . . . . . . . . . . . . . . . . . . . . . . . . . . . . . . . . . 272/etc/shells . . . . . . . . . . . . . . . . . . . . . . . . . . . . . . . . . . . . . . . . . . . . . . . 272/etc/skel/ . . . . . . . . . . . . . . . . . . . . . . . . . . . . . . . . . . . . . . . . . . . . . . . 272/etc/sliphome/ . . . . . . . . . . . . . . . . . . . . . . . . . . . . . . . . . . . . . . . . . . . . 272/etc/snmpd .conf . . . . . . . . . . . . . . . . . . . . . . . . . . . . . . . . . . . . . . . . . . . 273/etc/ssh/ . . . . . . . . . . . . . . . . . . . . . . . . . . . . . . . . . . . . . . . . . . . . . . . . 273/etc/ssl/ . . . . . . . . . . . . . . . . . . . . . . . . . . . . . . . . . . . . . . . . . . . . . . . . 273/etc/sudoers . . . . . . . . . . . . . . . . . . . . . . . . . . . . . . . . . . . . . . . . . . . . . 273/etc/sysctl .conf . . . . . . . . . . . . . . . . . . . . . . . . . . . . . . . . . . . . . . . . . . . . 273/etc/syslog .conf . . . . . . . . . . . . . . . . . . . . . . . . . . . . . . . . . . . . . . . . . . . 273/etc/systrace/ . . . . . . . . . . . . . . . . . . . . . . . . . . . . . . . . . . . . . . . . . . . . 273/etc/termcap . . . . . . . . . . . . . . . . . . . . . . . . . . . . . . . . . . . . . . . . . . . . . 274/etc/ttys . . . . . . . . . . . . . . . . . . . . . . . . . . . . . . . . . . . . . . . . . . . . . . . . 274/etc/weekly and /etc/weekly .local . . . . . . . . . . . . . . . . . . . . . . . . . . . . . . 276/etc/wsconsctl .conf . . . . . . . . . . . . . . . . . . . . . . . . . . . . . . . . . . . . . . . . . 276/etc/X11 . . . . . . . . . . . . . . . . . . . . . . . . . . . . . . . . . . . . . . . . . . . . . . . . 276/etc/ypldap .conf . . . . . . . . . . . . . . . . . . . . . . . . . . . . . . . . . . . . . . . . . . 276
15 system mAintenAnce 277Scheduled Tasks . . . . . . . . . . . . . . . . . . . . . . . . . . . . . . . . . . . . . . . . . . . . . . . . . 277
Daily Maintenance . . . . . . . . . . . . . . . . . . . . . . . . . . . . . . . . . . . . . . . . . 278Weekly Maintenance . . . . . . . . . . . . . . . . . . . . . . . . . . . . . . . . . . . . . . . 282Monthly Maintenance . . . . . . . . . . . . . . . . . . . . . . . . . . . . . . . . . . . . . . . 282Custom Maintenance Scripts . . . . . . . . . . . . . . . . . . . . . . . . . . . . . . . . . . . 282
Contents in Detail xix
System Logs . . . . . . . . . . . . . . . . . . . . . . . . . . . . . . . . . . . . . . . . . . . . . . . . . . . . . 282Facilities . . . . . . . . . . . . . . . . . . . . . . . . . . . . . . . . . . . . . . . . . . . . . . . . . 283Priority . . . . . . . . . . . . . . . . . . . . . . . . . . . . . . . . . . . . . . . . . . . . . . . . . . 284Sorting Messages via syslogd(8) . . . . . . . . . . . . . . . . . . . . . . . . . . . . . . . . 284Log Actions . . . . . . . . . . . . . . . . . . . . . . . . . . . . . . . . . . . . . . . . . . . . . . 287Customizing syslogd . . . . . . . . . . . . . . . . . . . . . . . . . . . . . . . . . . . . . . . . 288Syslog and Embedded Systems . . . . . . . . . . . . . . . . . . . . . . . . . . . . . . . . . 289
Log File Maintenance . . . . . . . . . . . . . . . . . . . . . . . . . . . . . . . . . . . . . . . . . . . . . . 289newsyslog .conf Fields . . . . . . . . . . . . . . . . . . . . . . . . . . . . . . . . . . . . . . . 290Monitoring Logs . . . . . . . . . . . . . . . . . . . . . . . . . . . . . . . . . . . . . . . . . . . 293Adding a PID File . . . . . . . . . . . . . . . . . . . . . . . . . . . . . . . . . . . . . . . . . . 293Signal Name . . . . . . . . . . . . . . . . . . . . . . . . . . . . . . . . . . . . . . . . . . . . . 293Command to Execute . . . . . . . . . . . . . . . . . . . . . . . . . . . . . . . . . . . . . . . . 294
System Time . . . . . . . . . . . . . . . . . . . . . . . . . . . . . . . . . . . . . . . . . . . . . . . . . . . . 294Configuring ntpd(8) . . . . . . . . . . . . . . . . . . . . . . . . . . . . . . . . . . . . . . . . . 294Using ntpd(8) . . . . . . . . . . . . . . . . . . . . . . . . . . . . . . . . . . . . . . . . . . . . . 296
Hardware Sensors . . . . . . . . . . . . . . . . . . . . . . . . . . . . . . . . . . . . . . . . . . . . . . . . 296Device Drivers . . . . . . . . . . . . . . . . . . . . . . . . . . . . . . . . . . . . . . . . . . . . 297Sensor Configuration . . . . . . . . . . . . . . . . . . . . . . . . . . . . . . . . . . . . . . . . 298
16 network servers 303The inetd Small-Server Handler . . . . . . . . . . . . . . . . . . . . . . . . . . . . . . . . . . . . . . . 304
Configuring inetd . . . . . . . . . . . . . . . . . . . . . . . . . . . . . . . . . . . . . . . . . . 304Restricting Incoming Connections . . . . . . . . . . . . . . . . . . . . . . . . . . . . . . . 305
The lpd Printing Daemon . . . . . . . . . . . . . . . . . . . . . . . . . . . . . . . . . . . . . . . . . . . . 306The DHCP Server dhcpd . . . . . . . . . . . . . . . . . . . . . . . . . . . . . . . . . . . . . . . . . . . . 307
How DHCP Works . . . . . . . . . . . . . . . . . . . . . . . . . . . . . . . . . . . . . . . . . 307Configuring dhcpd(8) . . . . . . . . . . . . . . . . . . . . . . . . . . . . . . . . . . . . . . . 308Static IP Address Assignments . . . . . . . . . . . . . . . . . . . . . . . . . . . . . . . . . . 309Enabling dhcpd . . . . . . . . . . . . . . . . . . . . . . . . . . . . . . . . . . . . . . . . . . . 309dhcpd and Firewalls . . . . . . . . . . . . . . . . . . . . . . . . . . . . . . . . . . . . . . . . 309
The TFTP Daemon tftpd . . . . . . . . . . . . . . . . . . . . . . . . . . . . . . . . . . . . . . . . . . . . . 310Specifying a tftpd Directory . . . . . . . . . . . . . . . . . . . . . . . . . . . . . . . . . . . 310tftpd and Files . . . . . . . . . . . . . . . . . . . . . . . . . . . . . . . . . . . . . . . . . . . . . 311tftpd Logging . . . . . . . . . . . . . . . . . . . . . . . . . . . . . . . . . . . . . . . . . . . . . 311Testing the TFTP Server . . . . . . . . . . . . . . . . . . . . . . . . . . . . . . . . . . . . . . . 311
The SNMP Agent snmpd . . . . . . . . . . . . . . . . . . . . . . . . . . . . . . . . . . . . . . . . . . . . 312SNMP MIBs . . . . . . . . . . . . . . . . . . . . . . . . . . . . . . . . . . . . . . . . . . . . . . 312SNMP Security . . . . . . . . . . . . . . . . . . . . . . . . . . . . . . . . . . . . . . . . . . . . 314Configuring snmpd . . . . . . . . . . . . . . . . . . . . . . . . . . . . . . . . . . . . . . . . . 314Debugging snmpd . . . . . . . . . . . . . . . . . . . . . . . . . . . . . . . . . . . . . . . . . . 315Getting snmpd Information . . . . . . . . . . . . . . . . . . . . . . . . . . . . . . . . . . . . 316
The SSH Server sshd . . . . . . . . . . . . . . . . . . . . . . . . . . . . . . . . . . . . . . . . . . . . . . . 317Disabling sshd . . . . . . . . . . . . . . . . . . . . . . . . . . . . . . . . . . . . . . . . . . . . 318SSH Host Keys . . . . . . . . . . . . . . . . . . . . . . . . . . . . . . . . . . . . . . . . . . . . 318sshd Network Options . . . . . . . . . . . . . . . . . . . . . . . . . . . . . . . . . . . . . . . 318chrooting Users . . . . . . . . . . . . . . . . . . . . . . . . . . . . . . . . . . . . . . . . . . . . 319
xx Contents in Detail
17 desktop openBsd 323Configuring Your Console with wscons . . . . . . . . . . . . . . . . . . . . . . . . . . . . . . . . . . 324
Screen Blanking . . . . . . . . . . . . . . . . . . . . . . . . . . . . . . . . . . . . . . . . . . . 324Setting wscons Variables at Boot . . . . . . . . . . . . . . . . . . . . . . . . . . . . . . . . 325
Running Virtual Terminals with tmux . . . . . . . . . . . . . . . . . . . . . . . . . . . . . . . . . . . . 325The tmux Status Bar and Window Names . . . . . . . . . . . . . . . . . . . . . . . . . 326tmux Commands and Window Management . . . . . . . . . . . . . . . . . . . . . . . 326Getting Online Help . . . . . . . . . . . . . . . . . . . . . . . . . . . . . . . . . . . . . . . . 327Disconnecting, Reconnecting, and Managing Sessions . . . . . . . . . . . . . . . . 327Using tmux Commands . . . . . . . . . . . . . . . . . . . . . . . . . . . . . . . . . . . . . . 328Setting tmux Options . . . . . . . . . . . . . . . . . . . . . . . . . . . . . . . . . . . . . . . . 329Configuring tmux . . . . . . . . . . . . . . . . . . . . . . . . . . . . . . . . . . . . . . . . . . 329
Setting Up X . . . . . . . . . . . . . . . . . . . . . . . . . . . . . . . . . . . . . . . . . . . . . . . . . . . . 330Configuring X . . . . . . . . . . . . . . . . . . . . . . . . . . . . . . . . . . . . . . . . . . . . . 330Starting X Manually . . . . . . . . . . . . . . . . . . . . . . . . . . . . . . . . . . . . . . . . . 330Booting into X . . . . . . . . . . . . . . . . . . . . . . . . . . . . . . . . . . . . . . . . . . . . . 330Emulating a Three-Button Mouse . . . . . . . . . . . . . . . . . . . . . . . . . . . . . . . . 331
Using the cwm Window Manager . . . . . . . . . . . . . . . . . . . . . . . . . . . . . . . . . . . . . 331Configuring cwm . . . . . . . . . . . . . . . . . . . . . . . . . . . . . . . . . . . . . . . . . . 331Creating cwm Windows . . . . . . . . . . . . . . . . . . . . . . . . . . . . . . . . . . . . . 332Managing Windows . . . . . . . . . . . . . . . . . . . . . . . . . . . . . . . . . . . . . . . . 333Locking the Screen . . . . . . . . . . . . . . . . . . . . . . . . . . . . . . . . . . . . . . . . . 333Connecting to Other Machines with SSH . . . . . . . . . . . . . . . . . . . . . . . . . . 334Creating an Application Menu . . . . . . . . . . . . . . . . . . . . . . . . . . . . . . . . . 334Using Keyboard Navigation . . . . . . . . . . . . . . . . . . . . . . . . . . . . . . . . . . . 335Decorating cwm . . . . . . . . . . . . . . . . . . . . . . . . . . . . . . . . . . . . . . . . . . . 335Unmapping and Remapping Keys . . . . . . . . . . . . . . . . . . . . . . . . . . . . . . . 336
18 kernel conFigurAtion 339What Is the Kernel? . . . . . . . . . . . . . . . . . . . . . . . . . . . . . . . . . . . . . . . . . . . . . . . 340
Kernel Messages . . . . . . . . . . . . . . . . . . . . . . . . . . . . . . . . . . . . . . . . . . . 340Startup Messages . . . . . . . . . . . . . . . . . . . . . . . . . . . . . . . . . . . . . . . . . . 340Device Attachments . . . . . . . . . . . . . . . . . . . . . . . . . . . . . . . . . . . . . . . . . 341Connections and Numbering . . . . . . . . . . . . . . . . . . . . . . . . . . . . . . . . . . 342Using dmassage to View Installed Devices . . . . . . . . . . . . . . . . . . . . . . . . . 343
Viewing and Adjusting Sysctls . . . . . . . . . . . . . . . . . . . . . . . . . . . . . . . . . . . . . . . . 343Sysctl MIBs . . . . . . . . . . . . . . . . . . . . . . . . . . . . . . . . . . . . . . . . . . . . . . . 343Viewing Sysctls . . . . . . . . . . . . . . . . . . . . . . . . . . . . . . . . . . . . . . . . . . . . 344Changing Sysctl Values . . . . . . . . . . . . . . . . . . . . . . . . . . . . . . . . . . . . . . 345Types of Sysctl Values . . . . . . . . . . . . . . . . . . . . . . . . . . . . . . . . . . . . . . . 345Setting Sysctls at Boot . . . . . . . . . . . . . . . . . . . . . . . . . . . . . . . . . . . . . . . 346
Altering the Kernel with config(8) . . . . . . . . . . . . . . . . . . . . . . . . . . . . . . . . . . . . . . 348Making a Backup of the Default Kernel . . . . . . . . . . . . . . . . . . . . . . . . . . . 349Device Drivers and the Kernel . . . . . . . . . . . . . . . . . . . . . . . . . . . . . . . . . . 349Enabling Drivers . . . . . . . . . . . . . . . . . . . . . . . . . . . . . . . . . . . . . . . . . . . 350Editing the Kernel with config . . . . . . . . . . . . . . . . . . . . . . . . . . . . . . . . . . 350
Boot-Time Kernel Configuration . . . . . . . . . . . . . . . . . . . . . . . . . . . . . . . . . . . . . . . 353
Contents in Detail xxi
19 Building custom kernels 355Kernel Cautions . . . . . . . . . . . . . . . . . . . . . . . . . . . . . . . . . . . . . . . . . . . . . . . . . . 355
Don’t Build Custom Kernels . . . . . . . . . . . . . . . . . . . . . . . . . . . . . . . . . . . . 356Why Build Custom Kernels? . . . . . . . . . . . . . . . . . . . . . . . . . . . . . . . . . . . 356Problems Building Custom Kernels . . . . . . . . . . . . . . . . . . . . . . . . . . . . . . . 357Problems Running Custom Kernels . . . . . . . . . . . . . . . . . . . . . . . . . . . . . . . 358
Preparing for Kernel Customization . . . . . . . . . . . . . . . . . . . . . . . . . . . . . . . . . . . . 358Kernel Configuration . . . . . . . . . . . . . . . . . . . . . . . . . . . . . . . . . . . . . . . . . . . . . . 359
Configuration Entries . . . . . . . . . . . . . . . . . . . . . . . . . . . . . . . . . . . . . . . . 359Configuring GENERIC . . . . . . . . . . . . . . . . . . . . . . . . . . . . . . . . . . . . . . . 360Your Kernel Configuration . . . . . . . . . . . . . . . . . . . . . . . . . . . . . . . . . . . . 362Testing Your Kernel Configuration with config(8) . . . . . . . . . . . . . . . . . . . . . 364
Building a Kernel . . . . . . . . . . . . . . . . . . . . . . . . . . . . . . . . . . . . . . . . . . . . . . . . . 365Kernel Build Errors . . . . . . . . . . . . . . . . . . . . . . . . . . . . . . . . . . . . . . . . . . 365
Installing Your Kernel . . . . . . . . . . . . . . . . . . . . . . . . . . . . . . . . . . . . . . . . . . . . . . 366Identifying the Running Kernel . . . . . . . . . . . . . . . . . . . . . . . . . . . . . . . . . . . . . . . . 366
20 upgrAding 367Why Upgrade? . . . . . . . . . . . . . . . . . . . . . . . . . . . . . . . . . . . . . . . . . . . . . . . . . . 368OpenBSD Versions . . . . . . . . . . . . . . . . . . . . . . . . . . . . . . . . . . . . . . . . . . . . . . . . 368
OpenBSD-current . . . . . . . . . . . . . . . . . . . . . . . . . . . . . . . . . . . . . . . . . . 368OpenBSD Snapshots . . . . . . . . . . . . . . . . . . . . . . . . . . . . . . . . . . . . . . . . 369OpenBSD Releases . . . . . . . . . . . . . . . . . . . . . . . . . . . . . . . . . . . . . . . . . 369OpenBSD-stable . . . . . . . . . . . . . . . . . . . . . . . . . . . . . . . . . . . . . . . . . . . 370Which Version Should You Use? . . . . . . . . . . . . . . . . . . . . . . . . . . . . . . . . 370
The OpenBSD Upgrade Process . . . . . . . . . . . . . . . . . . . . . . . . . . . . . . . . . . . . . . . 371Following the Upgrade Guide . . . . . . . . . . . . . . . . . . . . . . . . . . . . . . . . . . 371Customizing Upgrades . . . . . . . . . . . . . . . . . . . . . . . . . . . . . . . . . . . . . . 373
Upgrading from Official Media . . . . . . . . . . . . . . . . . . . . . . . . . . . . . . . . . . . . . . . 373Upgrading Over the Network . . . . . . . . . . . . . . . . . . . . . . . . . . . . . . . . . . 374Choosing File Sets . . . . . . . . . . . . . . . . . . . . . . . . . . . . . . . . . . . . . . . . . . 375
Updating /etc . . . . . . . . . . . . . . . . . . . . . . . . . . . . . . . . . . . . . . . . . . . . . . . . . . . 375Mounting Filesystems . . . . . . . . . . . . . . . . . . . . . . . . . . . . . . . . . . . . . . . . 376Using sysmerge(8) to Compare /etc Files . . . . . . . . . . . . . . . . . . . . . . . . . . 376
Updating Installed Packages . . . . . . . . . . . . . . . . . . . . . . . . . . . . . . . . . . . . . . . . . 380Updating the Package Repository . . . . . . . . . . . . . . . . . . . . . . . . . . . . . . . 380Using the Upgrade Command . . . . . . . . . . . . . . . . . . . . . . . . . . . . . . . . . 381
Why Build Your Own OpenBSD? . . . . . . . . . . . . . . . . . . . . . . . . . . . . . . . . . . . . . . 382Preparations for Building Your Own OpenBSD . . . . . . . . . . . . . . . . . . . . . . . . . . . . 383
Preparing the Base Operating System . . . . . . . . . . . . . . . . . . . . . . . . . . . . 383Getting Source Code . . . . . . . . . . . . . . . . . . . . . . . . . . . . . . . . . . . . . . . . 384Updating Source Code . . . . . . . . . . . . . . . . . . . . . . . . . . . . . . . . . . . . . . 385
Building OpenBSD-stable . . . . . . . . . . . . . . . . . . . . . . . . . . . . . . . . . . . . . . . . . . . 388Upgrading the Kernel . . . . . . . . . . . . . . . . . . . . . . . . . . . . . . . . . . . . . . . 388Building the Userland . . . . . . . . . . . . . . . . . . . . . . . . . . . . . . . . . . . . . . . 389Building Xenocara . . . . . . . . . . . . . . . . . . . . . . . . . . . . . . . . . . . . . . . . . . 389Building a Release . . . . . . . . . . . . . . . . . . . . . . . . . . . . . . . . . . . . . . . . . . 389Using the Release . . . . . . . . . . . . . . . . . . . . . . . . . . . . . . . . . . . . . . . . . . 392
xxii Contents in Detail
Building OpenBSD-current . . . . . . . . . . . . . . . . . . . . . . . . . . . . . . . . . . . . . . . . . . . 392Following -current . . . . . . . . . . . . . . . . . . . . . . . . . . . . . . . . . . . . . . . . . . 392Merging /etc . . . . . . . . . . . . . . . . . . . . . . . . . . . . . . . . . . . . . . . . . . . . . 393
Upgrading Ports . . . . . . . . . . . . . . . . . . . . . . . . . . . . . . . . . . . . . . . . . . . . . . . . . . 393
21 pAcket Filtering 395Firewalls . . . . . . . . . . . . . . . . . . . . . . . . . . . . . . . . . . . . . . . . . . . . . . . . . . . . . . . 396Enabling and Configuring PF . . . . . . . . . . . . . . . . . . . . . . . . . . . . . . . . . . . . . . . . . 397Packet-Filtering Basics . . . . . . . . . . . . . . . . . . . . . . . . . . . . . . . . . . . . . . . . . . . . . . 398
Packet-Filtering Concepts . . . . . . . . . . . . . . . . . . . . . . . . . . . . . . . . . . . . . 398“My Network Can Do No Wrong” . . . . . . . . . . . . . . . . . . . . . . . . . . . . . . 400What Packet Filtering Doesn’t Do . . . . . . . . . . . . . . . . . . . . . . . . . . . . . . . 400
PF Components . . . . . . . . . . . . . . . . . . . . . . . . . . . . . . . . . . . . . . . . . . . . . . . . . . 401Packet Filter Control and Configuration . . . . . . . . . . . . . . . . . . . . . . . . . . . 401Interface Groups . . . . . . . . . . . . . . . . . . . . . . . . . . . . . . . . . . . . . . . . . . . 401PF Configuration . . . . . . . . . . . . . . . . . . . . . . . . . . . . . . . . . . . . . . . . . . . 402
Filtering Rules . . . . . . . . . . . . . . . . . . . . . . . . . . . . . . . . . . . . . . . . . . . . . . . . . . . 403Default Permit or Default Deny . . . . . . . . . . . . . . . . . . . . . . . . . . . . . . . . . 404Packet Pattern Matching . . . . . . . . . . . . . . . . . . . . . . . . . . . . . . . . . . . . . . 404A Complete Ruleset . . . . . . . . . . . . . . . . . . . . . . . . . . . . . . . . . . . . . . . . . 409Activating Rules . . . . . . . . . . . . . . . . . . . . . . . . . . . . . . . . . . . . . . . . . . . 409Viewing Active Rules . . . . . . . . . . . . . . . . . . . . . . . . . . . . . . . . . . . . . . . . 410
Filtering Rules and the State Table . . . . . . . . . . . . . . . . . . . . . . . . . . . . . . . . . . . . . 411TCP States . . . . . . . . . . . . . . . . . . . . . . . . . . . . . . . . . . . . . . . . . . . . . . . 411UDP States . . . . . . . . . . . . . . . . . . . . . . . . . . . . . . . . . . . . . . . . . . . . . . . 412ICMP States . . . . . . . . . . . . . . . . . . . . . . . . . . . . . . . . . . . . . . . . . . . . . . 413
Packet Filtering with Lists and Macros . . . . . . . . . . . . . . . . . . . . . . . . . . . . . . . . . . . 413Using Lists . . . . . . . . . . . . . . . . . . . . . . . . . . . . . . . . . . . . . . . . . . . . . . . 413Using Macros . . . . . . . . . . . . . . . . . . . . . . . . . . . . . . . . . . . . . . . . . . . . . 414A Common Error: List Exclusions and Negations . . . . . . . . . . . . . . . . . . . . . 415
Sanitizing Traffic . . . . . . . . . . . . . . . . . . . . . . . . . . . . . . . . . . . . . . . . . . . . . . . . . 415Illegal Packets . . . . . . . . . . . . . . . . . . . . . . . . . . . . . . . . . . . . . . . . . . . . . 415Packet Reassembly . . . . . . . . . . . . . . . . . . . . . . . . . . . . . . . . . . . . . . . . . 416Packet Modification . . . . . . . . . . . . . . . . . . . . . . . . . . . . . . . . . . . . . . . . . 416Blocking Spoofed Packets . . . . . . . . . . . . . . . . . . . . . . . . . . . . . . . . . . . . . 416
PF Options . . . . . . . . . . . . . . . . . . . . . . . . . . . . . . . . . . . . . . . . . . . . . . . . . . . . . 417The set block-policy Option . . . . . . . . . . . . . . . . . . . . . . . . . . . . . . . . . . . 417The set limit Option . . . . . . . . . . . . . . . . . . . . . . . . . . . . . . . . . . . . . . . . . 417The set optimization Option . . . . . . . . . . . . . . . . . . . . . . . . . . . . . . . . . . . 419The set skip Option . . . . . . . . . . . . . . . . . . . . . . . . . . . . . . . . . . . . . . . . . 420
22 AdvAnced pF 421Packet Filtering with Tables . . . . . . . . . . . . . . . . . . . . . . . . . . . . . . . . . . . . . . . . . . 422
Defining Tables . . . . . . . . . . . . . . . . . . . . . . . . . . . . . . . . . . . . . . . . . . . . 422Using Tables . . . . . . . . . . . . . . . . . . . . . . . . . . . . . . . . . . . . . . . . . . . . . . 423Viewing Tables . . . . . . . . . . . . . . . . . . . . . . . . . . . . . . . . . . . . . . . . . . . . 423Searching Tables . . . . . . . . . . . . . . . . . . . . . . . . . . . . . . . . . . . . . . . . . . 424
Contents in Detail xxiii
Changing Tables . . . . . . . . . . . . . . . . . . . . . . . . . . . . . . . . . . . . . . . . . . . 424Tables and Automation . . . . . . . . . . . . . . . . . . . . . . . . . . . . . . . . . . . . . . 425
Using NAT . . . . . . . . . . . . . . . . . . . . . . . . . . . . . . . . . . . . . . . . . . . . . . . . . . . . . 426Private NAT Addresses . . . . . . . . . . . . . . . . . . . . . . . . . . . . . . . . . . . . . . 426Configuring NAT . . . . . . . . . . . . . . . . . . . . . . . . . . . . . . . . . . . . . . . . . . 427How NAT Works . . . . . . . . . . . . . . . . . . . . . . . . . . . . . . . . . . . . . . . . . . 427Multiple or Specific Public Addresses . . . . . . . . . . . . . . . . . . . . . . . . . . . . . 428Bidirectional NAT . . . . . . . . . . . . . . . . . . . . . . . . . . . . . . . . . . . . . . . . . . 429Redirection . . . . . . . . . . . . . . . . . . . . . . . . . . . . . . . . . . . . . . . . . . . . . . . 431Multiple Addresses and Interface Groups . . . . . . . . . . . . . . . . . . . . . . . . . . 432Port Manipulation and Ranges . . . . . . . . . . . . . . . . . . . . . . . . . . . . . . . . . 432Transparent Interception . . . . . . . . . . . . . . . . . . . . . . . . . . . . . . . . . . . . . . 433
Anchors . . . . . . . . . . . . . . . . . . . . . . . . . . . . . . . . . . . . . . . . . . . . . . . . . . . . . . . 434Adding Rules to Anchors . . . . . . . . . . . . . . . . . . . . . . . . . . . . . . . . . . . . . 434Viewing and Flushing Anchors . . . . . . . . . . . . . . . . . . . . . . . . . . . . . . . . . 436Conditional Filtering . . . . . . . . . . . . . . . . . . . . . . . . . . . . . . . . . . . . . . . . 436Nested Anchors: /* . . . . . . . . . . . . . . . . . . . . . . . . . . . . . . . . . . . . . . . . 436
FTP and PF . . . . . . . . . . . . . . . . . . . . . . . . . . . . . . . . . . . . . . . . . . . . . . . . . . . . . 437Configuring ftp-proxy(8) . . . . . . . . . . . . . . . . . . . . . . . . . . . . . . . . . . . . . . 438PF Configuration and the FTP Proxy . . . . . . . . . . . . . . . . . . . . . . . . . . . . . . 438
Bandwidth Management . . . . . . . . . . . . . . . . . . . . . . . . . . . . . . . . . . . . . . . . . . . . 439Queues for Bandwidth Management . . . . . . . . . . . . . . . . . . . . . . . . . . . . . 440Parent Queue Definitions . . . . . . . . . . . . . . . . . . . . . . . . . . . . . . . . . . . . . 441Child Queue Definitions . . . . . . . . . . . . . . . . . . . . . . . . . . . . . . . . . . . . . . 442Queue Options . . . . . . . . . . . . . . . . . . . . . . . . . . . . . . . . . . . . . . . . . . . . 442A CBQ Ruleset . . . . . . . . . . . . . . . . . . . . . . . . . . . . . . . . . . . . . . . . . . . . 443Assigning Traffic to Queues . . . . . . . . . . . . . . . . . . . . . . . . . . . . . . . . . . . 444Using the match Keyword . . . . . . . . . . . . . . . . . . . . . . . . . . . . . . . . . . . . 444Viewing Queues . . . . . . . . . . . . . . . . . . . . . . . . . . . . . . . . . . . . . . . . . . . 445
PF Edges . . . . . . . . . . . . . . . . . . . . . . . . . . . . . . . . . . . . . . . . . . . . . . . . . . . . . . . 445Using Include Files . . . . . . . . . . . . . . . . . . . . . . . . . . . . . . . . . . . . . . . . . 445Skipping Matches with quick . . . . . . . . . . . . . . . . . . . . . . . . . . . . . . . . . . 446
Logging PF . . . . . . . . . . . . . . . . . . . . . . . . . . . . . . . . . . . . . . . . . . . . . . . . . . . . . 446Reading PF Logs . . . . . . . . . . . . . . . . . . . . . . . . . . . . . . . . . . . . . . . . . . . 447Real-Time Log Access . . . . . . . . . . . . . . . . . . . . . . . . . . . . . . . . . . . . . . . . 447Filtering tcpdump . . . . . . . . . . . . . . . . . . . . . . . . . . . . . . . . . . . . . . . . . . 447Ruleset Tracing . . . . . . . . . . . . . . . . . . . . . . . . . . . . . . . . . . . . . . . . . . . . 448
23 customizing openBsd 449Virtualizing OpenBSD . . . . . . . . . . . . . . . . . . . . . . . . . . . . . . . . . . . . . . . . . . . . . . 450Diskless Installation . . . . . . . . . . . . . . . . . . . . . . . . . . . . . . . . . . . . . . . . . . . . . . . . 450
Diskless Hardware . . . . . . . . . . . . . . . . . . . . . . . . . . . . . . . . . . . . . . . . . 451DHCP Server Setup . . . . . . . . . . . . . . . . . . . . . . . . . . . . . . . . . . . . . . . . . 452TFTP Server Setup . . . . . . . . . . . . . . . . . . . . . . . . . . . . . . . . . . . . . . . . . . 453Completing Diskless Installation . . . . . . . . . . . . . . . . . . . . . . . . . . . . . . . . . 454
Running Diskless . . . . . . . . . . . . . . . . . . . . . . . . . . . . . . . . . . . . . . . . . . . . . . . . . 454Using rarpd(8) for Reverse ARP . . . . . . . . . . . . . . . . . . . . . . . . . . . . . . . . . 454Running bootparamd(8) . . . . . . . . . . . . . . . . . . . . . . . . . . . . . . . . . . . . . . 455Setting Up the NFS Root Directory . . . . . . . . . . . . . . . . . . . . . . . . . . . . . . . 455Power On! . . . . . . . . . . . . . . . . . . . . . . . . . . . . . . . . . . . . . . . . . . . . . . . 456

xxiv Contents in Detail
USB Installation Media . . . . . . . . . . . . . . . . . . . . . . . . . . . . . . . . . . . . . . . . . . . . . 457Using a Virtual Machine . . . . . . . . . . . . . . . . . . . . . . . . . . . . . . . . . . . . . 457Running a Diskless Installation . . . . . . . . . . . . . . . . . . . . . . . . . . . . . . . . . . 457Converting ISO Images . . . . . . . . . . . . . . . . . . . . . . . . . . . . . . . . . . . . . . 457Customizing OpenBSD Installations . . . . . . . . . . . . . . . . . . . . . . . . . . . . . . 458Custom File Sets . . . . . . . . . . . . . . . . . . . . . . . . . . . . . . . . . . . . . . . . . . . 458Post-Install Shell Scripts . . . . . . . . . . . . . . . . . . . . . . . . . . . . . . . . . . . . . . 459
Customizing Upgrades . . . . . . . . . . . . . . . . . . . . . . . . . . . . . . . . . . . . . . . . . . . . . 460
AFterword 461
index 465
F o r e w o r d
I got my OpenBSD account as a developer in 2002, more than 10 years ago. Over this time, quite a num-ber of OpenBSD-related books have been published. Some were actually good, but many were not and were full of factual errors. I kept asking myself (and oth-ers) why these authors never approached us for fact-checking before publishing.
I have known Michael for a long time as well—many, many years. Both of us frequently visit BSD-related conferences, and we often end up having a beer together, which is always fun. I did read the first edition of Absolute OpenBSD when it was published, a long time ago, and quite frankly, I don’t remember anything from it. That’s a good thing in this case, because I would have remembered if it had been bad. I have recommended it as an introduction to OpenBSD a couple of times.
So when Michael approached me asking whether I would be willing to fact-check the second edition of Absolute OpenBSD and provide feedback, I happily agreed.
xxvi Foreword
I have done the reading on airplanes almost exclusively, and one day when I had to fly to Helsinki, I had no chapters left to read. That ended quite badly, with a WWII bomb leading to Frankfurt Airport being closed for a while, the aircraft I was supposed to fly in being identified as defective, and, of course, bad weather causing massive delays. While that was coin-cidence, of course, the rumor was out that I couldn’t fly without a chapter from Michael.
Now that I am long done with reviewing, I have survived many flights without chapters to read over, but Absolute OpenBSD made long hours up in the sky much more enjoyable for me. Michael has a writing style that I really like—snatchy, funny, and still precise and to the point. Don’t skip the footnotes!
In the end, I contributed only a tiny share to this book, but I enjoyed doing so a lot. I hope you enjoy reading it as much.
Henning BrauerOpenBSD PF developer
A c k n o w l e d g m e n t s
The world has changed in the 10 years since the first edition of Absolute OpenBSD came out. I used to have hair, for one thing. In 2003 OpenBSD was somewhere on the edge of open source software, known mainly for an uncompromising, fanatical view of computingsecurity and correctness. So uncompromising that other open source projects didn’t want to work with it. But a funny thing happened in the following decade: The uncompromising fanatics turned out to be right. More than once I’ve heard “That’s fixed in the latest Linux, and in OpenBSD 3.2.” OpenBSD code trickled into other BSDs, Linux, and even some commercial operating systems. Apple and BlackBerry products include the OpenBSD packet filter. Lots of BSDs support the OpenBSD wireless utilities. And everyone runs OpenSSH. So, the first people I have to thank are those who wrote all this code. It’s one thing to give a gift to the world, but when everybody and their pet orangutan has posted their code online, it’s another thing when your code is picked up and used dang near everywhere. Well done, guys.
xxviii Acknowledgments
I specifically want to thank Peter Hansteen and Henning Brauer. Henning read the early drafts of this book and pointed out innumerable errors and opportunities for improvement. Peter, the official tech reviewer, had the job of doublechecking all the facts and finding what I’d broken when trying to incorporate Henning’s suggestions. While all the OpenBSD folks were friendly and open, these two sank deep into this book and didn’t come up for air until it was done. When you see either of them, please buy them a beer. They’ve earned it.
As always, No Starch Press does a great job producing books. Their indefatigable quest for making everything both correct and pleasing has made this book more than I thought it would be—as usual. Someday I’ll consider that excellence routine and, as a result, will be much less impressed when they retain their high standards. But the day their quest for perfection bores me has not yet come.
iXsystems provided me with hardware for testing this book. The way to really test an operating system is to push it to its limits. The only way to really find those limits is to exceed them. Preferably as greatly as possible. I used and abused that poor server, folded and spindled and mutilated it, and the blasted thing still ran. (The machine did finally fail, mind you, when I ripped out the hard drives as it was running. That’s probably considered cheating, but I had to test the software RAID chapter.) I greatly appreciate iX’s support. When iXsystems says their hardware runs BSD, they mean that they’ve actually used it. In production. For real work. Not just my puny little website and blog.
My blog readers and Twitter followers made researching this book much easier than it could have been. When I throw out a question, someone knows the answer. I try to reward them by throwing out facts, tutorials, observations, and random ranting as well as questions. Check http://www.michaelwlucas.com/ for links to these and more.
I considered dropping the haiku from this edition, but overwhelming reader feedback demanded that I not only retain them, but include more and better ones. As an experiment, I solicited haiku on my blog and used some in this book. Ludovic Simpson wrote the haiku for Chapter 7; Justin Sherrill, Chapter 12; and the relentless Josh Grosse, Chapters 1, 3, and 16. As a reward, each of them gets their name on the page you’re reading right now. Here’s your moment of glory, guys. Enjoy it before it—whoops, it’s gone. Sorry.
I wanted this book to come out in 2010. Life happened. It happens. Then life kept happening, apparently with malice aforethought, for four years. My fans waited. The publisher waited. The OpenBSD folks waited. And my longsuffering wife has waited—specifically, for me to quit grumbling that I had to take time away from the crisis du jour and finish this dang book.
Thanks to everyone for your patience and support. There’s a certain rightness in having this second edition come out almost exactly ten years to the day after the first edition. But six years would have done nicely, too.
Thanks, everyone.

I n t r o d u c t I o n
I asked a psychiatric nurse practitioner about paranoia, and was told that “para-
noiais the feeling that people are after you.” A medical dictionary would give you a slightly
different definition, but this one is actually terribly use-ful for any system administrator. It’s not that everyoneon the Internet is trying to attack you, but there’s always someone who wants to break into your system. Even if you think you have nothing of value, someone wants to own your computer. And you won’t realize the value of what you have until someone else has it. That’s just human nature.
If you’re not paranoid on the Internet, you’re in trouble. That’s where OpenBSD comes in.This book is an introduction to the OpenBSD operating system. OpenBSD
is a member of the BSD family of operating systems. It is widely regarded as the most secure operating system available anywhere, under any licens-ing terms. It’s widely used by Internet service providers, embedded systems
xxx Introduction
manufacturers, and anyone who needs security and stability. If you’re an experienced Unix system administrator who wants to add OpenBSD to your repertoire, this book is for you.
When you finish this book, you should be comfortable working with OpenBSD. You will understand how to configure, troubleshoot, and upgrade computers running OpenBSD and have a basic understanding of OpenBSD’s software, security, and network management features.
What Is Security?We bandy the word security around a whole lot, so it’s worth taking a moment to talk about security itself. We all have a vague idea of what it means. “Security” means your stuff is safe, and other folks can’t get it. That’s fine, as far as it goes, but it doesn’t go far enough. In information technology, security has three parts:
ConfidentialityThis means that secret data should remain secret. Your private infor-mation must not get into the public eye. That Eastern European kiddie porn syndicate should not get your credit card number.
IntegrityThis means that data on the system should not be changed without authorization. Your records should remain intact. That intruder should not change the shipping address on an order, making your staff ship a crate of really expensive stuff to an abandoned warehouse in Detroit.
AvailabilityThis means that the system keeps running. If your business depends on your website, losing the website means losing business. Someone who can take your website down can starve your company. And all kinds of people are willing to shut you down, either to compete or just for laughs.
Having been a system administrator for longer than some of you have been alive, I have a less formal idea of security. Security means eliminating bad days caused by computer problems. Spending a day getting a piece of software to compile is not a bad day. Is it an annoying day? Sure, but it’s not bad. A day when I need to get intruders out of my systems is bad. A day when I have a meeting due to computer intrusions is bad. A day when I realize that I cannot trust any computer on the network, and I must reinstall every blasted piece of gear I own, is really bad.1
While OpenBSD cannot change the fact that some of my servers are old enough to leave elementary school, it can fix the software aspects of security.
1. I still have bad days due to people, mind you, but I largely solve them by other means. Don’t ask about the mounds of dirt in my backyard.
Introduction xxxi
What Is BSD?In the 1970s, AT&T needed a lot of specialized, custom-written computer software to run its business. The company was forbidden to compete in the computer industry, so it could not sell this software. Instead, AT&T licensed its software and the related source code to universities for nominal sums. Universities saved money by using this software instead of commercial equivalents with pricey licenses, and university students got access to this nifty technology and could learn how everything worked. In return, AT&T got exposure, some pocket change, and a generation of computer scientists who had cut their teeth on AT&T technology. Everyone got something out of the deal.
The best-known software distributed under this plan was UNIX.Compared with modern operating systems, the original UNIX had a lot
of problems. Thousands of students had access to its source code, however, and hundreds of teachers needed interesting projects for their students. If a program behaved oddly, or the operating system itself had a problem, the people who lived with the system had the tools and the motivation to fix it. Their efforts quickly improved UNIX and created many features we now take for granted. Students added the ability to control running pro-cesses, also known as job control. The UNIX S51K filesystem made system administrators wail and gnash their teeth, so they replaced it with the Fast File System (FFS), which introduced a whole host of features that have crept into every modern filesystem. Over the years, many small, useful programs were added to UNIX, and entire subsystems were replaced.
The Computer Science Research Group (CSRG) at the University of California, Berkeley, acted as a central clearinghouse for UNIX code improvements from 1979 to 1994. The group collected changes from other universities, evaluated them, packaged them, and distributed the compila-tion for free to anyone with a valid AT&T UNIX license. The CSRG also contracted with the Defense Advanced Research Projects Agency (DARPA) to implement various features in UNIX, such as TCP/IP. The resulting soft-ware collection came to be known as the Berkeley Software Distribution, or BSD. Users took the CSRG’s software, improved it further, and fed their improvements back into the CSRG. Today, we consider this a fairly standard way to run an open source project, but in 1979, it was revolutionary.
Fifteen years of work is a lifetime in software development. For compar-ison, Microsoft went from Windows 95 to Windows 7 in 15 years. The CSRG members collected so many enhancements and improvements to UNIX that they replaced almost all of the original UNIX with code created by the CSRG and its contributors. You had to look hard to find any original AT&T code.
Eventually, the CSRG’s funding ebbed, and it became clear that the BSD project would end. After some political wrangling within the University of California, in 1992, the BSD code was released to the general public under what became known as the BSD license.
xxxii Introduction
The BSD LicenseBSD code is available for anyone to use under what is probably the most permissive license in the history of software development. The license can be summarized as follows:
• Don’t claim you wrote this.
• Don’t blame us if it breaks.
• Don’t use our name to promote your product.
Taken as a whole, this means that you can do almost anything you want with BSD code. (The original BSD license did require that users be notified if a software product included BSD-licensed code, but that requirement was later dropped.) You don’t even need to share any changes with the original authors! People could take BSD and include it in proprietary, open source, or free products.
Instead of a restrictive copyright, or the more permissive but still restricted copyleft, the BSD license is sometimes referred to as copycenter, as in “take this down to the copy center and run off a few for yourself.” Not surpris-ingly, companies such as Sun Microsystems jumped right on BSD. It was free, it worked, and plenty of new graduates had experience with the tech-nology. One company, BSDi, was formed specifically to take advantage of BSD Unix.
AT&T vs. the WorldBack in AT&T-land, UNIX development continued. AT&T took parts of the BSD Unix distribution and integrated them with official UNIX, and then relicensed the results back to the universities that provided those improve-ments. This worked well for everyone until the US government broke up AT&T, and the resulting companies were permitted to compete in the com-puter software business.
AT&T had one particularly valuable software property: a high-end operating system that had been extensively debugged by thousands of people and had powerful features, such as a variety of small but mighty commands, a modern filesystem, job control, and TCP/IP. AT&T started a subsidiary, Unix Systems Laboratories (USL), which happily started selling UNIX to enterprises and charging very high fees for it, all the while main-taining the university relationship that had given it such an advanced oper-ating system in the first place.
The University of California, Berkeley’s public release of the BSD code met with great displeasure from USL. Almost immediately, USL sued the university and the software companies that had taken advantage of BSD. The University of California claimed that the CSRG had compiled BSD from thousands of third-party contributors unrelated to AT&T, and that it was the CSRG’s intellectual property to dispose of as it saw fit. Oddly enough, the lawsuit promoted BSD to thousands of people who never would have heard of it otherwise, spawning open source BSD variants such as 386BSD, FreeBSD, and NetBSD.
Introduction xxxiii
In 1994, after two years of legal wrangling, the University of California lawyers proved that the majority of AT&T UNIX was actually taken from BSD, rather than the other way around. To add insult to injury, AT&T had violated the BSD license by stripping the CSRG copyright from the files it had appropriated
Only about a half-dozen files remained as the source of contention. Bruised and broken in court, USL donated some of those files to BSD while retaining others as proprietary information. BSD 4.4-Lite was released, containing everything except the proprietary files. Due to those missing files, BSD 4.4-Lite was the only formal operating system release ever that was known to not be usable or even compilable as delivered. Everyone knew this, and bought it anyway—a historic feat that modern vendors probably wish they could replicate.
A subsequent update, BSD 4.4-Lite2, is the grandfather of OpenBSD, as well as all other BSD code in use today, such as that in FreeBSD, NetBSD, and Mac OS X.
The Birth of OpenBSDTheo de Raadt was a NetBSD developer. After many strong, broad, and long-running disagreements with other NetBSD team members on how the project should be run, he went out on his own and founded the OpenBSD Project, attracting like-minded developers. The OpenBSD team quickly established an identity as a security-focused group, and it is now one of the best-known BSD descendants.
The OpenBSD team developers have introduced several ideas into the open source operating system world that are now taken for granted, such as public read-only access to the CVS repository and commit logs. They’ve also created several pieces of software that have become industry standards across many operating systems, such as sudo and the ubiquitous OpenSSH.
Today, many major companies rely on OpenBSD as a reliable, secure operating system with fanatical attention to security, correctness, usability, and freedom. OpenBSD runs on many different sorts of hardware, includ-ing the standard 32-bit and 64-bit “Intel PC” (i386 and amd64), Apple’s PowerPC Macintoshes (macppc), Sparc (sparc and sparc64), and obscure platforms such as the Sharp Zaurus PDA, the Lemote Yeeloong, and antedi-luvian VAXes. OpenBSD puts almost all of its effort into security features, security debugging, and code correctness, and has demonstrated in the process that correct code has a much lower failure rate, and hence greater security. OpenBSD strives to be the ultimate secure operating system.
The OpenBSD team continually improves the operating system. New features are added only once they meet the team’s code and documentation standards. Even if new software is added before it is feature-complete, it is expected to have full documentation and correct code.
xxxiv Introduction
The OpenBSD CommunityOpenBSD is more than just a collection of bits. It’s a community of users, developers, and contributors, with a single central dictator—er, coordina-tor. And this community can be a bit of a shock for anyone who doesn’t know what to expect.
How can individuals scattered all over the world create, maintain, and develop an operating system, let alone build a community? Almost all dis-cussion occurs through email and online chat. The process is slower than talking face-to-face, but it’s the only cost-effective way for a large group of people in every time zone to communicate in a reasonable fashion. Email and chat also offer written records of discussions. If you want to participate in OpenBSD development, you must be comfortable with email. (There are OpenBSD-dedicated web forums, but they’re outside the main community.)
The OpenBSD community has four tiers: users, contributors, commit-ters, and the coordinator.
OpenBSD UsersMany open source operating systems put a lot of effort into growing their user base, evangelizing, and bringing new people into the Unix fold. OpenBSD does not.
Most open source Unix-like operating system groups do a lot of pro-Unix advocacy. Again, OpenBSD does not.
The communities surrounding other operating systems actively encour-age new users and try to make newbies feel welcome. OpenBSD specifically and deliberately does not.
The OpenBSD community is not trying to be the most popular operat-ing system—just the best at it what it does. The developers know exactly who their target market is: themselves. If you can use their work, that’s great. If not, go away until you can.
The OpenBSD community generally expects newcomers to be advanced computer users. The members have written extensive OpenBSD documen-tation, and expect newcomers to be willing to read it. They’re not interested in coddling new Unix users and, if pressed, will say so—often bluntly and forcefully. They will not hold your hand. They will not develop new features to please users. OpenBSD exists to meet the needs of the developers, and while others are welcome to ride along, the needs of the passengers do not steer the project.
OpenBSD ContributorsContributors are OpenBSD users who have the skills necessary to add features to the operating system, fix problems, write documentation, or accurately report problems. Problems range from typographical errors in the documentation to system crashes. Almost anyone can be a contributor. In fact, the community has even accepted problem reports from me, and resolved them within hours.
Introduction xxxv
Every OpenBSD feature is present because some contributor took the time to write the code for it. Contributors who submit careful, correct fixes, or who provide useful problem reports, are welcome in the OpenBSD com-munity. And if a contributor submits enough fixes of sufficient quality, he might be offered the role of committer.
OpenBSD CommittersCommitters have write access to the main OpenBSD source code repository. They can make whatever changes they deem necessary for their OpenBSD projects, but are answerable to each other and to the project coordinator. Most committers are skilled programmers who work on OpenBSD during their own time.
While being a committer seems glamorous, the role carries a lot of responsibility. If a committer breaks the operating system or changes some-thing so that it conflicts with OpenBSD’s driving “vision,” he must fix it. Committers try to avoid breaking things, and frequently make their work available on websites and mailing lists before it’s integrated into the main OpenBSD source code collection, allowing interested people to preview, test, and double-check their work.
Many committers have very specific coordination roles within OpenBSD. For example, quite a few hardware architectures have a point man for issues that affect that hardware, the compiler has a maintainer, and so on. These committers have earned that position of trust in the community.
OpenBSD CoordinatorTheo de Raadt started OpenBSD in 1995 and still coordinates the project. He is the final word on how the system should work, what is included in the system, and who gets direct access to the repository. He resolves all disputes that contributors and committers cannot resolve among themselves. Theo takes whatever actions necessary to keep the OpenBSD Project running smoothly. If something should ever happen to Theo, the project does have plans for replacing him.
Building the OpenBSD organization around a central benevolent dicta-tor avoids a lot of the management problems other large open source proj-ects have.
If you decide to work on OpenBSD, you must accept Theo’s decisions as final. A contributor who doesn’t accept the project’s leader won’t remain with the community for long. Theo might have a big stick, but as he is the acknowledged project leader, he doesn’t need to use it nearly as often as you might think.
OpenBSD’s StrengthsWhat makes OpenBSD OpenBSD? Why bother with yet another Unix-like operating system when there are so many out there, several closely related to OpenBSD? What makes this operating system worth a computer, let alone worthy of protecting your company’s assets?
xxxvi Introduction
PortabilityOpenBSD is designed to run on a wide variety of popular processors and hardware platforms, including Intel-compatible (both 32-bit and 64-bit), Alpha, Macintosh (both PowerPC and Intel systems), and almost anything from Sun. It runs on tiny devices such as the Sharp Zaurus, hefty Hewlett-Packard HP 9000 systems, certain Silicon Graphics workstations, and whatever else grabs the developers’ attention. The OpenBSD team wants to support as many interesting hardware architectures as it has the hard-ware and skills to maintain, so more are added regularly, and chances are most computers you encounter can run OpenBSD.
That said, when a hardware platform becomes too obscure, OpenBSD stops supporting it. A few MIPS systems, 68K Macintosh hardware, and Amiga systems are examples of systems that run older versions of OpenBSD but are not supported by new releases.
PowerAs a matter of legacy, OpenBSD will run on hardware that has been obso-lete for decades because the hardware was in popular use when OpenBSD started, and the developers try to maintain compatibility and performance when possible. This includes platforms such as the VAX and Alpha, which were considered powerful in the 1980s and 1990s. While someone running OpenBSD on a dual-core 64-bit system might not notice a programming change in OpenBSD that increases the amount of CPU time needed to process network packets, people running OpenBSD on VAX systems will quickly notice that same change.
Of course, some performance-impacting changes cannot be avoided. For example, systems must support IPv6 in the very near future, and I sus-pect that decades-old hardware will struggle to keep up. OpenBSD cannot turn back the clock, but it will leave every scrap of computing power pos-sible for your applications. And after all, that’s what’s important—people use applications, not operating systems. This focus on performance means that a system running OpenBSD with a 1GB disk and a 486 CPU can still support real applications, such as a DNS or web server.
DocumentationMany free software projects are satisfied when they release code. Some think that they go above and beyond by including a help function in the program itself, available by typing some command-line flag. Others really go wild and offer a grammatically incorrect and technically vague manual page.
The OpenBSD community expects the documentation to be both com-plete and accurate. The manual pages for system and library calls are exten-sive, even when compared to other BSDs, and include discussions on usage and security.
Documentation errors are considered serious bugs, and are treated as harshly as any other serious bug. This might sound extreme, but in its own internal audits, the OpenBSD team has found any number of instances
Introduction xxxvii
where programmers used a library interface exactly as recommended in the manual page, but errors in the manual page made the usage dangerous or insecure. Documentation is important.
FreeIn the spirit of the original BSD license, OpenBSD is free for use in any way, by anyone, for any purpose. You can use it with any tool you like, on any computer.
Most of today’s free software is licensed under terms that require software distributors to return any changes to the project’s owner, but OpenBSD doesn’t even carry that requirement. You can use OpenBSD in your pro-prietary system, ship that system everywhere in the world, and not pay the developers a dime.
OpenBSD is perhaps the freest of the free operating systems. Like every other free Unix-like operating system, the source code inherited from BSD originally contained a wide variety of programs that shipped under condi-tional licenses. Some were free for noncommercial use. Some were free if you changed the name once you changed the code. Others had a variety of obscure licensing terms, such as indemnifying a third party against law-suits. These programs have either been relicensed (with the permission of the original author) or ripped out and replaced with free alternatives.
The word freedom has been given a lot of different twists by people in the programming community. Some believe that software is free if you can download it and use it. Some believe that software is only free if the end user gets the source code. The OpenBSD idea of freedom is that its code can be used for any purpose, by anyone.
Consider this: During a discussion on an OpenBSD mailing list regard-ing licensing terms,2 Theo de Raadt said:
We know what a free license should say. It should say Copyright foo I give up my rights and permit others to: distribute sell give modify use I retain the right to be known as the author/owner When it says something else, ask this: - is it 100% guaranteed fluff which cannot ever affect anyone? - is it giving away even more rights (the author right)? If not, then it must be giving someone more rights, or by the same token—taking more rights away from someone else! Then it is _less_ free than our requirements state!
2. This is from October 24, 2002, on the openbsd-misc mailing list. It’s more than a decade old, but still pretty much says it all.
xxxviii Introduction
The OpenBSD team works hard to ensure that every line of code it sup-ports is licensed in this manner.
n o t e The source code tree does include code under different licenses, such as the GNU C compiler gcc, binutils, and so on. OpenBSD runs fine without them—you just can’t compile OpenBSD without them.
This is pretty straightforward. OpenBSD is a gift. You’re free to use it or not. As with any gift, you can do whatever you want with it. But you’re not free to bug the developers for features or support.
CorrectnessEvery skilled programmer knows that programs written correctly are more reliable, predictable, and secure. However, many free software producers are satisfied if their code compiles and simply seems to work, and quite a few commercial software companies don’t give their programmers time to write their code correctly.
OpenBSD developers strive to implement solutions correctly. They make it a strict rule to write programs in a reliable and secure manner, following best current programming practices. And exposing the code to “weird” environments such as ancient VAXes is part of the discipline; OpenBSD developers insist that some subtle bugs (and a few less subtle ones) have been pinpointed only during testing on one of OpenBSD’s less mainstream architectures. Fixing those bugs benefits all users, of course.
OpenBSD implementations follow UNIX standards, such as the Portable Operating System Interface (POSIX) and the American National Standards Institute (ANSI), but they are less concerned about extensions to these stan-dards created by third parties. For example, many Linux extensions do not appear in OpenBSD. When those extensions are added to standards, the OpenBSD team will add them.
OpenBSD code has been repeatedly audited for correctness through a lot of hard work. Anyone who tries to introduce incorrect code will be turned away—generally politely, and often with constructive criticism, but turned away nonetheless. And that brings us to OpenBSD’s most well-known claim to fame.
SecurityOpenBSD strives to be the most secure operating system in the world. While it can reasonably make that claim today, maintaining that position requires constant effort. Intruders constantly try new ways to penetrate computers, which means that today’s feature might be tomorrow’s security problem. As OpenBSD developers learn of new classes of programming errors and security holes, they scan the entire source tree for that type of problem and make fixes before anyone even knows how these issues might be exploited.

Introduction xxxix
Additionally, OpenBSD takes advantage of any security features offered by hardware. For example, AMD’s 64-bit Intel-compatible CPUs can mark a page of memory as either executable or writable, but not both. (Intel later copied this feature.) This alleviates many buffer overflow attacks, but the operating system must use this facility. OpenBSD supported this feature in 2003, shortly after the hardware was released. In fact, OpenBSD gener-ally supports all hardware security features offered on a platform.
The history of computing shows that users cannot be expected to patch or maintain their own systems. Systems must be secure against existing and future attacks out of the box. OpenBSD’s goal is to eliminate problems before they exist.
OpenBSD and Your SecurityEven though OpenBSD is tightly secured, intruders still break into OpenBSD systems. This might seem contradictory, but in truth, it means that the person running the computer didn’t understand computer security.
OpenBSD has many integrated security features, but you cannot assume that these features secure everything running on the system. That’s just not possible. No operating system can defend itself against operator error. An operating system can protect itself from software problems to a limited extent, but ultimately, the responsibility for security is the administrator’s.
Consider a web server—even OpenBSD’s integrated Apache server—running on OpenBSD. OpenBSD provides the web server with a stable, reli-able platform, and will provide services as the web server requests, within the limits assigned by the system administrator. If the system administrator has configured the web server correctly, a web server failure will not endan-ger the operating system. If the system administrator configures the web server to run with unlimited privileges, the web server can inflict almost unrestricted damage on the underlying system.
Or consider a less extreme case. The web server might be configured correctly, but suppose you install insecure forum software. An intruder can break into the forum and edit its data—maybe grab the username and pass-word the forum software uses to access the local database. If that account information matches a system-level username and password, the intruder might be able to leverage them to gain access to the system. Or perhaps he can use that username and password to get administrator-level access to the database and penetrate other applications. What if those applications have elevated privileges?
Only careful, consistent, thoughtful work by a system administrator can prevent intrusions. Throughout this book, we’ll discuss some basic security precautions you should take when installing and running software. We’ll also discuss the advanced security features OpenBSD offers in order to pro-tect itself.
xl Introduction
OpenBSD’s UsesWhere does OpenBSD fit into your computing strategy? That ultimately depends on your strategy and your needs. OpenBSD can be used anywhere you need a solid, reliable, and secure system. I recommend OpenBSD for any of three different roles: a desktop, a server, or network management.
DesktopIf you need a powerful desktop system with all the features you would expect from a complete Unix-like workstation, OpenBSD will do nicely. Graphic interfaces, office suites, web browsers, and other desktop software are available in the ports collection, OpenBSD also supports a variety of development tools, application environments, network servers, and other features that programmers and web developers need. If you’re a network administrator, you’ll find that OpenBSD supports packet sniffers, traffic analyzers, and all the other programs you rely on.
ServerIf you’re serving web pages, handling email, providing Lightweight Directory Access Protocol (LDAP) or database services, or offering any other sort of network service to clients, OpenBSD can help you. It’s a cheap and reliable platform. Once it’s set up, it just works. And, of course, it’s secure, which you cannot underestimate on the Internet.
Network ManagementOpenBSD makes an excellent firewall, bridge, or traffic shaper. You can use it to support intrusion detection software, web proxies, and traffic monitors. The integrated packet-filtering firewall and supporting software provides state-of-the-art network connection management and control, and can strip out many dangerous types of traffic before it reaches your servers. And its load-balancer features are competitive, with many commercial offerings that cost thousands of dollars more.
About This BookThis book is written for experienced Unix users or system administrators who want to add OpenBSD to their repertoire. I assume you’re familiar with basic commands, such as tail(1), chmod(1), ping(8), and so on, and that you know why each command in this list includes a number in parentheses after the name. We’ll discuss many programs that you might already be familiar with, but that might be slightly different in OpenBSD.
Introduction xli
For maximum benefit, you should install OpenBSD on a dedicated machine. OpenBSD can coexist with other operating systems or run in a virtual machine, but if you’re going to use OpenBSD in a production envi-ronment, you should run it on its own.
Many people believe that OpenBSD is not the easiest Unix-like operat-ing system, or the easiest version of BSD, or even the easiest open source BSD. OpenBSD doesn’t have handy wizards that walk you through each stage of the configuration process, although it does has a few menu-driven front ends. Once you’re familiar with how the system works, though, such wizards would only get in the way.
To truly understand OpenBSD, you must be willing to learn, experiment, and spend time accumulating understanding. Much of this knowledge can be directly applied to other versions of BSD, other Unix-like operating systems, and even completely foreign operating systems, such as Microsoft’s Windows.
Contents OverviewWhile this book is designed to be read from front to back, here’s a brief description of each chapter, in case you would rather skip around randomly.
Chapter 1: Getting Additional Support Discusses the OpenBSD docu-mentation available both in the installed system and on the Web. You need to understand what you’re getting into before installing OpenBSD.
Chapter 2: Installation Preparations Discusses installation on a standard amd64 (also known as the 64-bit Intel-compatible) system. Making some decisions before you install OpenBSD will ensure that you don’t need to reinstall it later.
Chapter 3: Installation Walk-Through Carries you through every step of a real OpenBSD installation. The OpenBSD installer assumes a cer-tain level of knowledge about computer hardware and OpenBSD that you might not yet possess. This walk-through will guide you through the rough spots.
Chapter 4: Post-Install Setup Discusses the basic steps you should take after installing OpenBSD to make your system secure, stable, and usable.
Chapter 5: The Boot Process Covers system startup. Different situa-tions require different startup methods, and we’ll cover them all. We’ll also discuss how OpenBSD starts its component software.
Chapter 6: User Management Discusses how to add, remove, and restrict OpenBSD user accounts.
xlii Introduction
Chapter 7: Root, and How to Avoid It Discusses controlling user privileges and permissions. OpenBSD includes powerful tools such as classes and limits, as well as the privilege management tool sudo(8).
Chapter 8: Disks and Filesystems Covers disk management with the standard OpenBSD filesystems.
Chapter 9: More Filesystems Covers advanced filesystem topics such as the Network File System (NFS), working with disk images, software RAID, and encrypted disks.
Chapter 10: Securing Your System Considers how to maintain security using tools such as file flags, securelevels, OpenBSD security announce-ments, and some basic cryptographic tools.
Chapter 11: Overview of TCP/IP Reviews the basics of TCP/IP ver-sions 4 and 6, and covers some of OpenBSD’s tools for examining and troubleshooting the network.
Chapter 12: Connecting to the Network Takes you through configur-ing OpenBSD’s network stack for Ethernet, trunks, and virtual local area networks (VLANs).
Chapter 13: Software Management Describes OpenBSD’s add-on software tools. You’ll learn how to install precompiled software, com-pile your own software, and verify and remove software.
Chapter 14: Everything /etc Describes each major file in /etc that isn’t covered elsewhere, and discusses how you might want to use those files.
Chapter 15: System Maintenance Covers the various ways OpenBSD maintains itself and how you can make those processes fit your environ-ment and workflow.
Chapter 16: Network Servers Covers configuring software integrated with OpenBSD. You’ll learn about the system logger and log file man-agement, the DHCP server, the web server, and more.
Chapter 17: Desktop OpenBSD Covers software useful to OpenBSD as a desktop, such as the window manager cwm(1) and Xenocara. This chapter includes coverage of important software that makes using OpenBSD with a desktop easier, such as SSH keys and tmux.
Chapter 18: Kernel Configuration Discusses the various tools avail-able to configure a standard kernel. Unlike many other free Unix-like operating systems, OpenBSD does not expect or require the system administrator to compile a kernel. You can tune the standard kernels without recompiling.
Chapter 19: Building Custom Kernels Discusses how to recompile a kernel in those rare instances when you must.
Chapter 20: Upgrading Covers how to upgrade OpenBSD, either from a snapshot or from source.
Introduction xliii
Chapter 21: Packet Filtering Documents OpenBSD’s integrated packet-filtering engine, PF. It includes discussions of real-world situa-tions and how to handle them.
Chapter 22: Advanced PF Introduces things that the packet filter can do beyond just filtering packets.
Chapter 23: Customizing OpenBSD Includes tidbits that didn’t fit anywhere else but are not large enough topics to merit their own chap-ters. This includes diskless OpenBSD, building bootable USB installation media, and making custom OpenBSD installation sets.
This book won’t cover everything OpenBSD can do, but it will get your feet firmly under the table. To learn the rest, you’ll need to access OpenBSD’s information resources, which is the subject of the first chapter.

1G e t t i n G A d d i t i o n A l H e l p
Mailing lists are rough; homework is mandatory.
Love it or leave it.
You’ve bought this book, so you now pos-sess all the information you will ever need
about OpenBSD. You hold in your hands the ultimate repository of all OpenBSD wis-
dom and acumen, and once you complete it, you will be lord and master of all that OpenBSD offers. Right?
Sorry, no. No one book can possibly contain everything there is to know about OpenBSD. UNIX is pushing 40 years old, and BSD operating systems have been around for more than 30 years. OpenBSD itself is over 15 years old, and is built on decades of tradition, knowledge, and community devel-opment. You won’t master it with any single book. You might master it with a room full of books and a few years of study, if you stop wasting time on trivialities like having a family and avoiding scurvy.
The OpenBSD community maintains a wide variety of information sources. Some, such as the manual, are integrated with the OpenBSD operating system. The OpenBSD team maintains additional resources, such as the main OpenBSD website and the official OpenBSD mailing lists. Users and devotees maintain additional websites, mailing lists, and
2 Chapter 1
documentation. The flood of information can overwhelm experienced users and intimidate new users so badly that they don’t even try to sort through it. That’s why this chapter will take your hand and lead you through some of the other resources available.1
OpenBSD’s Support ModelIf you’ve worked with only commercial UNIX, you might find OpenBSD’s support structure a little surprising. There is no toll-free number to call and no vendor to guide you. No, you may not speak to the manager of the sup-port team. There isn’t one. The management is you.
Many commercial operating systems conceal their inner workings, and the only access you get is through the programs, application programming interfaces (APIs), and application binary interfaces (ABIs) they provide. If you want to learn more about how your operating system works, you can’t (unless you reverse-engineer it). When something breaks, you either live with it or pay the vendor to solve the problem.
OpenBSD, on the other hand, is completely open. You can view the source code, the compiler, and the resulting binaries. You have the official manual and a whole bunch of ancillary documentation. You have access to the developers’ logs—logs that describe every change ever made to every part of the system—through the same tools the developers use. You can back out of changes, understand the motivation behind the changes, and even contact the people who have most recently worked on a component you’re interested in and ask them what they were thinking. You can add your own features. In other words, you have the opportunity to understand OpenBSD in exquisite, excruciating detail.
If you want to learn about OpenBSD, you must jump from eating what you’re served to reading the cookbook and creating your own meals. If you’re willing to learn using the information provided, you will develop skills, and you’ll probably even make some friends in the OpenBSD community along the way. If you want to use OpenBSD and don’t have the time or inclination to learn, invest in a commercial support contract. Many companies and con-sultants around the world support OpenBSD. The OpenBSD website lists dozens.
If you don’t want to learn and don’t want to buy a support contract, then OpenBSD is simply not for you.
The Code Is Fine. What’s Wrong with You?Systems administrators rarely have trouble with OpenBSD itself; the soft-ware runs, and it runs well. Most problems arise from their own under-standing, or lack thereof.
When a program behaves unexpectedly, the problem is usually a gap in your expectations or understanding, and the OpenBSD community expects
1. Yes, the first chapter in this book is about getting help outside the book. I am aware of the irony; you don’t need to tell me.
Getting Additional Help 3
that you will work to improve your own knowledge so that you can make the system meet your needs. Other people make OpenBSD work correctly, and you can, too.
That said, you may still find that a problem is quite real, but you can’t be certain that it was caused by OpenBSD itself until you understand correct behavior—not just how you think the system works, but how it really does work. The problem could be an OpenBSD bug, bad hardware, or an errant third-party tool. To correctly identify bugs, you must learn how the system should behave and why.
For example, before writing the first edition of this book. I had never used an OpenBSD machine to display a serial console. All of my Unix-like boxes had connections to a rusty old terminal server. Most people don’t have that many serial consoles, and they want to use a null modem cable between two OpenBSD machines and have each serve as the terminal for the others’ console. (We’ll cover serial consoles in Chapter 5.) From read-ing the manual page (discussed in the next section), this common configu-ration seemed simple enough: Attach the cables, configure one machine to dump its console to the serial port, become root on the display machine, and enter tip tty00. The other machine’s console should have appeared in the terminal window, but that didn’t happen.
The next question is, “What’s wrong?” It might have been an OpenBSD bug, a hardware failure, or a gap in my comprehension. Swapping systems around demonstrated that the command worked on other OpenBSD machines, just not my particular test box. Further tests with a serial mouse and modem showed that the serial port on the test machine was bad.
Had the serial port been in working order, I might have actually found an OpenBSD bug, but probably not.
Sources of InformationOpenBSD provides information through three primary channels: manual (man) pages, websites, and mailing lists. To understand why your system behaves in a particular way in your environment, you might need to check all three.
Man PagesMan pages are the original format for presenting documentation on Unix-like systems. While man pages have a reputation for being obtuse, difficult to read, or incomplete, the OpenBSD team expects its man pages to be readable, correct, and complete.
When man pages were first created, the average system administrator was a C programmer. As a result, man pages were written by programmers for programmers. The OpenBSD developers are programmers and con-sider man pages the final word in OpenBSD documentation. Even docu-mentation errors are considered serious bugs and are dealt with as quickly as possible. Man pages should be your first line of attack in learning how OpenBSD works.
4 Chapter 1
That said, a man page is not a tutorial. The manual explains how things work, not what to type to achieve particular effects. You must be able to assemble the knowledge offered by the man page into the tool that you need. If you want tutorials, read articles on third-party websites, the FAQ, and this book. If you find a tutorial that tells you how to do exactly what you want, read the relevant man pages along with the tutorial. Just remember that anyone can write a tutorial, and there’s no guarantee of any particular tutorial’s effectiveness or security.
Manual Sections
The OpenBSD manual has nine sections, and each man page appears in only one section. These sections are sometimes called volumes, a name from the days when the manual was small enough to print and distribute. Each section covers a single topic. The sections are as follows:
1: General commands
2: System calls and error numbers
3: C libraries
3p: Perl libraries
4: Device drivers
5: File formats
6: Games
7: Miscellaneous
8: System maintenance and management commands
9: Kernel internals
Man pages often appear with the section number in parentheses after the command, such as ping(8) or ed(1). This gives you the name of the com-mand (ping) and the section where the command is documented (8, on system maintenance). Almost every part of OpenBSD has a man page.
Viewing Man Pages
View man pages with man(1). If you know the section number, enter it before the program name, but the section number isn’t mandatory. For example, to see the man page for the standard network utility ping(8), enter this:
$ man ping
You’ll get something like this in response.
PING(8) OpenBSD System Manager's Manual PING(8)
NAME ping - send ICMP ECHO_REQUEST packets to network hosts
Getting Additional Help 5
SYNOPSIS ping [-DdEefLnqRrv] [-c count] [-I ifaddr] [-i wait] [-l preload] [-p pattern] [-s packetsize] [-T tos] [-t ttl] [-V rtable] [-w maxwait] host
DESCRIPTION ping uses the ICMP protocol's mandatory ECHO_REQUEST datagram to elicit an ICMP ECHO_REPLY from a host or gateway. ECHO_REQUEST datagrams (``pings'') have an IP and ICMP header, followed by a "struct timeval" and then an arbitrary number of "pad" bytes used to fill out the packet. The options are as follows:
-c count Stop sending after count ECHO_REQUEST packets have been sent. If count is 0, send an unlimited number of packets.
-D Set the Don't Fragment bit....
You can learn more than you ever wanted to know about the lowly trouble-shooting tool ping just by reading this document. If you need more infor-mation, look at the other man pages referenced by ping(8). Read enough pages, and you’ll develop an in-depth understanding of OpenBSD.
Once you’re in a man page, pressing the spacebar or pgdn takes you forward one full screen. If you don’t want to go that far, press enter or the down arrow to scroll down one line. Typing B or pressing pgup takes you back one screen. To search within a man page, type / followed by the word you’re searching for, and then press enter. You’ll jump to the first appear-ance of the search term. Subsequently, typing N takes you to the next occur-rence of the word.
n o t e The man page navigation discussed here assumes that you’re using the default BSD pager, more(1). If you’re using a different pager, use that pager’s syntax. If you know enough about Unix-like systems that you’ve already set your preferred default pager, you can probably skip this part of the book.
Finding Man Pages
New users often say that they would be happy to read the man pages, if they could find the right ones. You can perform basic keyword searches on the manual with apropos(1) and whatis(1). The command apropos searches for any man page name or description that includes the word you specify. The command whatis does the same search, but matches only whole words. For example, if you’re interested in the vi text editor, you might try the following:
$ apropos vi...vmware (4) - VMware SVGA video driver
6 Chapter 1
voodoo (4) - Voodoo video driverwsudl (4) - video driver for DisplayLink USB display devicesxcmsdb (1) - Device Color Characterization utility for X Color Management System...
On my system, this generates 686 entries, most of which have nothing to do with vi(1). The random selection of entries shown here includes device drivers and user utilities, but no text editors. If you examine them closely, you’ll see that the letters vi appear in each of them, encapsulated within words like video or device. Depending on what you’re looking for, apropos can offer you far too much information.
Try a similar search with whatis:
$ whatis viex, vi, view (1) - text editors
Matching only whole words can be more useful. Experiment with apropos and whatis until you’re comfortable with them, and you should be able to find just about any topic you like.
Overlapping Man Page Names
Some man pages have a name in common with a man page in another sec-tion. For example, suppose someone mentions sysctl and you want to learn about it, so you search the man pages.
$ whatis sysctlsysctl (3) - get or set system informationsysctl (8) - get or set kernel statesysctl.conf (5) - sysctl variables to set at system startup
We have a sysctl.conf file and two different man pages called sysctl. Manual section 3 is for C libraries. If you’re just learning about sysctl, you might find this man page intimidating.
By default, man displays the first matching page it finds. It searches commands first, then games, then programming libraries, then add-on programs such as Perl. You can change this search order in /etc/man.conf (see Chapter 14).
In this situation, manual section 3 is before manual section 8. Without specifying a section number, you’ll read about the programming interface. To see the man page for the system administrator command sysctl, you must run man 8 sysctl.
Man Page Contents
Manual authors try to arrange their content meaningfully, although mean-ingful varies depending on what it documents. A man page for a common
Getting Additional Help 7
user command will probably be much easier to understand than a man page for a kernel-programming interface. Even so, most man pages are divided into sections. Some of the common sections include the following:
• NAME tells you the names of a program or utility. Some programs have multiple names; for example, the vi(1) text editor is also available as view(1) or ex(1). The man page lists all of these names.
• SYNOPSIS lists the possible command-line options and their arguments, or gives examples for how programmers can call a library or interface. Once you’ve read the man page and used the command a few times, the synopsis might be enough to remind you of what you need.
• DESCRIPTION contains a brief synopsis of the program or feature. You’ll also find detailed discussions of the command-line options.
• BUGS describes known failure conditions and weird behavior, and gen-erally discusses when a feature doesn’t work as you might expect. Always look at the BUGS section; it can save you a lot of time. I’ve frequently had a problem with a command only to find that the behavior, and sometimes a work-around, is listed here. Honesty is a wonderful thing in computing products.
• SEE ALSO is traditionally the last section in a man page. OpenBSD is an interrelated whole, and every command has ties to other commands. In an ideal world, you would read every man page and be able to hold an integrated image of the system in your head. Because most of us can’t do this, this section directs you to related man pages.
Man Pages on the Web
The man pages are also available on http://www.OpenBSD.org/ and its vari-ous online mirrors. One of the interesting things about the web-based man pages is that you can look at them for both previous releases and for other architectures. Do you want to know if there’s a difference between the sysctl command for i386 and Loongson hardware? The web versions will let you compare two different man pages. (You can also do this with the integrated manual, but the web version makes it easier.)
The OpenBSD WebsiteThe OpenBSD website (http://www.OpenBSD.org/) contains a lot of information—from administration, installation, and management to where to find hardware. The front page links you to a general discussion about OpenBSD’s goals and support, where you can get OpenBSD, available resources, and ways you can support OpenBSD. Project members keep the website updated. If you have an OpenBSD problem or question, check this website first.

8 Chapter 1
Mirrors
Many people across the world mirror the OpenBSD website. The main web-site is quite heavily accessed, and mirrors will often respond more quickly. You’ll see links at the bottom of the main website. I recommend you pick and bookmark an official mirror that responds quickly for you. The mirror sites are generally underused and hence faster than the official site.
The OpenBSD FAQ
The OpenBSD FAQ is OpenBSD’s repository of answers to frequently asked questions. While much of the information in the FAQ duplicates the man pages, the FAQ presents this information in a question-and-answer format that’s often easier to understand.
Unlike many other FAQs, the OpenBSD FAQ includes extensive tutori-als. For example, Chapter 4 of the FAQ contains the full, detailed installa-tion process. If you’re having a problem, or want to know how some major part of OpenBSD works, check the FAQ first!
Non-Project Websites
Many people maintain websites dedicated to OpenBSD content, related to OpenBSD, or generally useful to OpenBSD users. Any time you have a problem or are trying to understand something, your search engine might lead you to articles on these sites. Read third-party documentation care-fully and skeptically, however. Tutorials and articles outside the OpenBSD Project might contain erroneous information, violate OpenBSD’s best prac-tices, or work only in the author’s particular environment.2
The only third-party website I can unconditionally recommend is http://www.undeadly.org/, an OpenBSD news aggregator. When a website posts worthwhile OpenBSD-related content, the undeadly.org maintainers link to it.
If you want a web forum to discuss OpenBSD, you might try DaemonForums (http://www.daemonforums.org/). DaemonForums has discussion groups for all of the major BSD variants, including OpenBSD.
OpenBSD Mailing ListsThe OpenBSD Project primarily communicates through mailing lists. All mailing lists are accessible to the public, but some welcome new users more than others. Many hardware platforms have dedicated mailing lists, but they welcome only platform-specific discussions and specifically reject prob-lem reports. The OpenBSD website contains a complete list of mailing lists. Here, I’ll cover only the mailing lists useful to average users.
[email protected] low-volume, moderated list includes only important OpenBSD news. This list receives at least one message every six months, when a new version of OpenBSD comes out.
2. Of course, this doesn’t apply to anything on my blog. Everything I post is the one word of truth.
Getting Additional Help 9
[email protected] the OpenBSD team learns of an OpenBSD security flaw, it posts a bulletin to this list. If you are running an OpenBSD machine on the Internet, you must subscribe to this list. I’ll say more about security-announce in Chapter 10.
[email protected] list contains general OpenBSD discussions. While this is the “miscellaneous” list, it still has strict rules, and the community firmly enforces its etiquette. I’ll cover how to usefully post to an OpenBSD mailing list in “Using Mailing Lists” on page 11.
[email protected] list is for in-depth technical discussions, such as code reviews and protocol analysis. If you want to know what the OpenBSD folks are working on, read this list. It’s not for support requests. As a good rule of thumb, if your email doesn’t include a code diff, don’t send it to this list.
[email protected] list is for promoting OpenBSD. If you want to talk about OpenBSD’s inherent awesomeness in a nontechnical manner, use this list.
You’ll find other lists that might interest you, such as www@ (discussions about the website) and ports@ (discussing the OpenBSD ports system, which we’ll cover in Chapter 13), but those lists require more OpenBSD expertise than most beginners have.
The easiest way to access the mailing lists is the web interface at http://lists.OpenBSD.org/. The OpenBSD team manages its mailing lists with Majordomo (http://www.greatcircle.com/majordomo/). If you’re familiar with that package, you can access the mailing lists at [email protected].
Unofficial Mailing Lists
You can find a fairly complete list of all OpenBSD-related mailing lists hosted by third parties at http://www.OpenBSD.org/mail.html. This includes lists in languages other than English.
One unofficial list, run by an OpenBSD developer, is the PF mailing list, for users of the OpenBSD packet filter. This list is for all PF packet filter users, not only OpenBSD, but OpenBSD users dominate the list. If you want to learn more about PF, subscribe to this list. You can find more at http://www.benzedrine.cx/.
Read-Only Mailing Lists
So [email protected] looks like the mailing list for you, and you subscribe. If you race ahead and ask all your questions, you’ll immediately accomplish a couple things: You’ll alienate the community, and you’ll be told to shut up and go away; you certainly won’t make friends. That’s mainly because the mailing lists exist to be read more than posted to.
10 Chapter 1
Unless you’re in a truly unique situation or really on the bleeding edge of OpenBSD development, more likely than not, someone has struggled with your problem previously. That person probably got an answer, and that answer probably hasn’t changed. The quickest and least intrusive way to answer your question is to find that previous message. That’s where the mailing list archives come in.
Your favorite search engine has already indexed the OpenBSD mailing list. Always ask the search engine your question before going anywhere near the mailing lists. If you’ve looked around and found that your question is truly unique, send a message to the mailing list. But when you’re first start-ing out, you’re better off treating the OpenBSD mailing lists as read-only.
Using OpenBSD Problem-Solving ResourcesLet’s pick a common question and use the OpenBSD resources to solve it, without resorting to sending mail. One of the things OpenBSD is known for is its support for cryptography in hardware. How does that work, and what does OpenBSD do to support it? Here’s how I would search for infor-mation on this topic from each information source the OpenBSD Project provides.
Using the OpenBSD WebsiteLook at http://www.OpenBSD.org/ and you’ll see a link to Crypto. This takes you to the Cryptography page, which covers OpenBSD’s cryptography sup-port. It includes algorithms and discusses how the team has integrated OpenSSL into hardware cryptographic accelerators. Read, learn, and enjoy.
Using Man PagesLet’s try running apropos cryptography:
$ apropos cryptographyRSA_public_encrypt, RSA_private_decrypt (3) - RSA public key cryptography
This man page isn’t terribly useful as a general overview, and whatis cryptography doesn’t return anything.
Cryptography is often referred to as crypto. apropos crypto gives too many results. whatis crypto gives more reasonable results:
$ whatis cryptocrypto (3) - OpenSSL cryptographic librarycrypto (4) - hardware crypto access drivercrypto (9) - API for cryptographic services in the kernel
This is a fairly short list, and all the entries look promising. Manual section 3 is for programmer interfaces, section 4 is for device drivers,
Getting Additional Help 11
and section 9 is for the kernel. If you’re specifically looking for hardware cryptographic accelerators, section 4 should jump out at you, but start wher-ever you feel most comfortable.
Using Internet SearchesGo to your favorite search engine and search for “OpenBSD crypto hardware support.” On the day I wrote this, the first result led me to the official page on the OpenBSD website. The second hit was a paper on the OpenBSD cryptographic framework. You’ll find old articles, archived mailing list dis-cussions, man pages, tutorials, and innumerable blog posts. You’ll probably need to add the model number of a particular cryptographic accelerator card to reduce the results to a manageable number.
Using Mailing ListsIf the mailing list archives, a web search, the OpenBSD FAQ, the OpenBSD website, the integrated manual, and other assorted resources do not answer your question, you can ask for help. A variety of highly knowledgeable and very skilled computing professionals read the OpenBSD mailing lists. Many of these people enjoy working with OpenBSD and want to help intelligent new users. In their minds, “intelligent” equates to “not asking a question that has been asked before.”
Have another look at all the ways we gathered information on OpenBSD’s cryptographic hardware accelerator support in the previous section. Information about most other topics is just as readily available. People who take the time to read and answer questions on the OpenBSD mailing lists have already spent considerable time and energy creating this content and ensuring its accuracy. Now imagine their reaction when some-one asks about cryptographic accelerator support on the public mailing list. Most OpenBSD experts will assume any of the following:
• The person wants their hand held.
• The person is unwilling to read the documentation.
• The person has nothing but contempt for the OpenBSD developers.
• The person has the intelligence of a brick.
Most OpenBSD experts would conclude that the person asking the question simply isn’t ready to run OpenBSD. At best, the questioner will be ignored. At worst, some experienced OpenBSD person who wrote all this documentation will take offense at his hard work being so thoroughly dis-counted and flame the questioner badly enough that his monitor will need three months in the Mayo Clinic burn unit.
Keep this in mind before you send an email. Have you really checked everywhere for an answer? Are there any other search terms you haven’t tried? Performing a few extra searches with different keywords is much faster than composing a useful email, and there’s an excellent chance you’ll find the answer to your question.
12 Chapter 1
If you’re familiar with other free Unix-like operating systems, OpenBSD’s mailing lists might give you a bit of a culture shock. OpenBSD users are advanced computer users almost by definition. If an experienced systems administrator tries to debug a piece of software, that administrator is expected to know enough to ask the responsible party. If you go to a Linux forum, you’ll find people discussing server and client programs, desktop environments, and dang near any other piece of software that runs on that platform. Those forums are manned by volunteers dedicated to providing around-the-clock support and extreme efforts to help their operating sys-tem conquer the world.
The OpenBSD folks don’t care if they take over the world or not. They don’t really care if you use their software. If other people can get use out of it, that’s great. If not, oh well. They will happily assist you with OpenBSD-specific problems, but they don’t really care about your database issues or your website. If you’re having trouble porting your preferred window manager to OpenBSD because of some subtle bug in OpenBSD’s libc, the OpenBSD people would love to talk to you. If you can’t configure your win-dow manager the way you like, then you should talk to the window manager support group instead.
Creating a Good Help Request
Before you send an email, think carefully about the problem you’re trying to solve. What question should you actually be asking? Define the issue as narrowly as possible. Suppose you cannot connect to a virtual private net-work (VPN) server with OpenBSD’s IPsec client. Is the problem that you can’t actually reach the IPsec server? Does the connection work when you turn off your OpenBSD firewall, but return when you re-enable filtering? Does isakmpd(8) crash and leave a core file every time you try to start the VPN? Each of these is a very different problem. Including the precise prob-lem in your email will get you a better reception.
The first paragraph of your email should state your problem briefly and succinctly. If your first paragraph doesn’t contain enough to interest people, they’ll probably delete the email before getting to anything relevant.
After that important first paragraph, gather any and all information related to the problem. Include this information in your email. This should include the following:
• The version of OpenBSD you are running
• Your hardware platform
• Any error output (be sure to check /var/log/messages as well as your terminal)
• The contents of /var/run/dmesg.boot
• A complete but narrow problem description
Give your email message an appropriate subject. A subject like “Problem with OpenBSD” will get ignored. A subject like “Reproducible isakmpd
Getting Additional Help 13
crash on newest OpenBSD snapshot” will immediately attract attention. Many OpenBSD people decide which messages to read based entirely on the subject line. Moderately advanced email-reading programs allow the recipient to delete an entire thread of discussion based on the subject line or message headers.
How to Be Ignored
Many senior OpenBSD users use a text-based email reader such as Mutt (although quite a few do use more graphic email readers, mind you.) Text-based email programs are very powerful programs for handling thousands of emails a day, but they show only text, and they do not display HTML mes-sages well. If you are using a graphic mail client such as Mozilla Thunderbird or Microsoft Outlook, wrap your text at 72 columns. Sending mail in pure HTML or without readable line wrapping invites experienced recipients to discard it unread.
This might seem harsh, and it’s definitely different from mailing lists run by other open source operating systems. But most email clients are not suited to handle thousands of messages in a day, scattered across dozens of mailing lists, with several parallel discussion threads each, in a manner accessible to the human mind. I receive thousands of email messages a day, and I know many OpenBSD developers get—and process—even more. We simply cannot cope without mail tools that address our problems. HTML support is not nearly as necessary as the ability to manage, present, and pro-cess a large number of messages in a sensible manner.
On a similar note, most email attachments are unnecessary (and several of the OpenBSD mailing lists will unceremoniously strip them from incom-ing messages). You do not need to PGP sign your email, and those business card attachments just demonstrate that you really shouldn’t be running OpenBSD. If you include a signature in your email, it should be no longer than four lines. Long ASCII art signatures, even really nifty ones featuring the OpenBSD blowfish, are right out.
It’s easy to let frustration turn a simple request into a rabid demand for immediate assistance. Remember to be polite; the people who receive your message might decide to help you, but they’re under no obligation to do so. If you want someone to be obliged to help you, buy a support contract.
Sending Your Email
Before sending your email, double-check your search engine. Are you sure this hasn’t been asked before?
Send all of your information and your narrow, specific, documented question about the OpenBSD core system to [email protected]. Yes, OpenBSD has many other mailing lists, and some of them might look more appropri-ate for your problem, but people who post to them are almost always told to go ask on misc@ instead. People on misc@ might refer you to another mailing list, but it’s much better to post a message to a specific list if that message starts with “So-and-so on misc@ recommended that I ask this here.”
14 Chapter 1
If you have a narrow, specific, well-documented question about a piece of add-on software (or package, as discussed in Chapter 13), you can send it to [email protected] instead.
Responding to Email
The response you receive might be a brief note with a URL, or even just the words “man such-and-such.” If that’s what you get, that’s where you need to go. Remember that you’re asking because you don’t understand something, and these responses tell you where to learn the answer to your question. Don’t just email back asking someone to hold your hand.
If you don’t understand the reference you’re given, treat that as another problem. Narrow down the source of your confusion. Man pages and tutori-als are not perfect, and some parts might seem mutually exclusive or contra-dictory if you don’t fully comprehend them.
Finally, follow through. If you’re asked for more information, provide it. If you don’t know how to provide it, treat that as another problem. Go back to the beginning of this chapter and try to figure it out. If you develop a reputation as someone who doesn’t follow up on requests for more informa-tion, you won’t even get a first reply.
Now let’s get ready to actually install OpenBSD.
2I n s t a l l a t I o n P r e P a r a t I o n s
I am script kiddie. Windows is warm and tasty;
blowfish goes down hard.
It’s not enough to install OpenBSD and get the machine running; you want a successful
installation. A successful installation means that the system is configured to perform the
job you intend it to do. A developer’s laptop has very different requirements than those of a dedicated firewall, which might look very different from a web server. Proper planning will make your OpenBSD installation quick, easy, and successful. We’ll spend a great deal of time on installation planning. Once you understand what you’re doing, the actual installation process is pretty simple. Many of the problems people have with OpenBSD come from not understanding their many choices.
The guidelines in this chapter cover most situations, but the final word on installing OpenBSD is the install document included in the release. For example, before installing OpenBSD on an i386 system, read i386/INSTALL.i386 for your release.
16 Chapter 2
OpenBSD HardwareOpenBSD supports a wide variety of different hardware architectures. Some platforms, such as i386 and amd64, have extensive support, and their web pages and release notes list pages and pages of supported hardware. Others, such as SGI, support only very specific hardware models.
OpenBSD’s currently supported hardware platforms include i386 (stan-dard PC), amd64 (64-bit PC-style hardware), sparc64 (Sun-style hardware), SGI (Silicon Graphics), and others. It also supports old platforms such as the VAX and tiny computers like the Zaurus. The platforms that I find interesting include the following:
i386 the Intel-compatible computer that has been popular for the past couple of decades
amd64 AMD’s 64-bit extensions to the 32-bit i386, copied by Intel as EM64T, and sometimes called x64, x86_64, or x86-64 (this hardware can run both the 32-bit i386 and 64-bit amd64 versions of OpenBSD)
sparc64 64-bit Sun UltraSPARC and compatibles
macppc PowerPC-based Macintosh computers, from the iMac up until Apple switched to amd64 hardware
Zaurus Sharp Zaurus personal digital assistants (PDAs)
This chapter covers installing on the i386 and amd64 platforms. These are the standard 32-bit and 64-bit PC systems available from most vendors, and are what you’re most likely to find on the secretary’s desk while he is at lunch. They’re architecturally close and install in exactly the same way.
Old systems can run OpenBSD quite well. I’ve run OpenBSD/i386 quite nicely on a 166 MHz processor with 128MB of memory. You probably have some old system lying around that’s perfectly adequate for learning OpenBSD.
In this book, I assume that your equipment is PCI bus or newer. I do not cover EISA hardware, or ISA other than the onboard chips in modern hardware. If you have an EISA SCSI card or network interface card (NIC) that still works, OpenBSD probably supports it. I assume that you still have the original hardware configuration floppy and remember how to set the IRQ and interrupt to match that assumed by the OpenBSD kernel. If you don’t, recycle that card and buy something built this millennium.
Note that the hardware must be in working condition. If your old Pentium machine kept crashing because its RAM is bad, using OpenBSD won’t fix that problem. Also, OpenBSD will be most useful if the hardware meets certain minimum levels. I make recommendations based on my own experience, but again, the documentation gives the current and definitive requirements.
Installation Preparations 17
You can find a full list of supported hardware platforms at http://www .OpenBSD.org/plat.html. This page links to a page for each hardware platform, where you can get details on support for that hardware.
Supported HardwareThe good news is that OpenBSD supports most hardware. The bad news is that it doesn’t support everything. Generally speaking, OpenBSD supports the most common nonproprietary hardware. It might not support the very newest hardware, as the OpenBSD team doesn’t get much access to hard-ware before it’s released. Hardware that’s a few months old has better sup-port than bleeding-edge gear.
To verify if OpenBSD supports your hardware, read the release notes for your platform or just give it a try.
Proprietary Hardware, Blobs, and FirmwareSome hardware vendors want to keep the inner workings of their equip-ment secret so that competitors can’t copy their designs. They hide their hardware designs in two common ways: proprietary hardware and binary object device drivers.
Some vendors will not provide documentation for their hardware. The vendor expects that the user will use the vendor-provided driver, and they provide drivers only for the most widely used commodity operating systems (such as Windows) or for a specific target market (Apple). Without docu-mentation, writing device drivers is tedious and difficult. Some hardware can be supported well without complete documentation, but much cannot. For example, OpenBSD’s sparc64 platform didn’t support newer Sparc pro-cessors for several years, until Sun released documentation.
Some vendors don’t want to provide documentation, but do want users of open source operating systems to buy their hardware. These vendors provide drivers for their hardware in the form of binary objects, or blobs. This might sound reasonable at first, but the operating system must load these blobs into the kernel. The OpenBSD team has several objections to this. First, the code is not available for audit. If the blob has a security issue, or has some subtle interaction with the kernel that destabilizes the system, there’s no way for the developers to resolve the problem. The blob might only be inefficient or wasteful, but it could negatively impact other kernel subsystems or even include backdoors. Lastly, OpenBSD’s philosophy requires that all code be covered under a strict BSD license. In-kernel blobs are not free, and so OpenBSD will not support them.
Note that blobs are not the same as firmware. Firmware is a binary object a piece of hardware needs in order to run, and is loaded into the hardware itself, rather than into the operating system. You’ll find firmware in almost every computer component: CPUs, motherboards, NICs, disk controllers, and so on. Firmware is never loaded into the kernel; the kernel loads the firm-ware into the card. The OpenBSD team considers this acceptable. The firmware lets the hardware provide its documented interface to the operat-ing system, and if it wasn’t on the disk, it would be on the hardware itself.
18 Chapter 2
Generally speaking, if OpenBSD developers have a piece of hardware, documentation for that hardware, and any use for the hardware, they will probably implement support for it. If not, that hardware won’t work. In most cases, unsupported proprietary or blob-driven hardware can be replaced with more effective (and less expensive) open hardware.
ProcessorsProcessor brand is irrelevant. OpenBSD doesn’t care if it’s running on a CPU from Intel, AMD, Cyrix, or any other Intel-compatible processor. OpenBSD probes the CPU on boot and uses whatever chip features it recog-nizes. I’ve run very effective multimegabit firewalls on 486-class processors, but you’ll be happiest with a 1 GHz or faster processor.
OpenBSD’s multiprocessor support is not as broad as some other oper-ating systems, however. The OpenBSD kernel mostly runs with the Big Giant Lock method, so the kernel can run on only one processor at a time. (Some small chunks of the kernel are not under the Big Giant Lock.) In practical terms, this means that the OpenBSD kernel won’t make effective use of more than two processors or cores.
Does this mean you shouldn’t use OpenBSD on your dual-eight-core-processor server? That depends on your expected server load. User processes scale well as long as they don’t go into the kernel. Most web log analysis soft-ware, for example, runs almost entirely in user space, and you run massively parallel analysis jobs that scale quite well with the number of processors. Tasks such as forwarding packets, however, pass through the kernel. The hardware you need depends entirely on your expected workload.
Memory (RAM)Memory is good. The more memory you have, the happier you will be. Adding RAM accelerates your system more than any other generic improvement. You should have at least 256MB of RAM, and preferably at least 512MB. If you can get a couple of gigabytes in your system, OpenBSD will take full advantage of that memory.
If you keep adding memory, you will hit a point where your system has all the memory it needs, and more memory won’t further improve perfor-mance. This could be as low as 128MB for a small firewall, a couple of giga-bytes for a desktop machine, or more for a large database server.
Most weird crashes and inexplicable, irreproducible problems can be traced back to bad memory, so be certain that the memory you are using is good. Memory is a common failure point in an old machine.
Hard DrivesThe smallest new hard drive you can buy today will run OpenBSD with vast amounts of space to spare. On older systems, I recommend at least 40GB of disk space—not because OpenBSD won’t fit in less, but because you’ll want room for additional files and software. The smaller your disk, the
Installation Preparations 19
more closely you’ll need to monitor its use. It’s easy to fill a small disk when building a desktop environment from source, and disks are cheap these days. If you’re running a small firewall from a flash drive, I recommend at least 512MB.1
VirtualizationMany people run new operating systems in a virtual environment while they become accustomed to those systems. Some companies even have firm poli-cies mandating that all systems be run as virtual servers. OpenBSD runs fine in common virtual environments, and even has specific device drivers for virtualization systems such as VMware.
The hardware requirements for running OpenBSD on a virtual server are similar to the requirements for running OpenBSD on real hardware. Note that no operating system running in a virtual environment is as secure as that same operating system running on real hardware. Virtual environ-ments do not precisely replicate real hardware. Emulated CPUs have their own new and interesting bugs, virtual NICs have unique errors, and so on. Additionally, the environment providing the virtual server is itself an oper-ating system. An intruder can attack that underlying operating system, and once an intruder controls the virtualization server, clients running on that machine are much more vulnerable. No operating system can protect itself against its hardware. You must consider this risk when planning OpenBSD’s role in your environment.
For learning about OpenBSD, however, a virtual environment is per-fectly adequate. I run OpenBSD machines in VirtualBox, on ESXi, and on Linux’s KVM hypervisor without difficulty.
Multiple Operating SystemsFor many years, I ran multiple operating systems on a single computer. I remember being thrilled by my new 6GB hard drive because I could run FreeBSD, OpenBSD, Windows, and Linux on one computer with plenty of space for each operating system. This was the only way to run multiple operating systems on a single desktop, but advances in virtualization tech-nology have made this approach obsolete.
Rather than carefully dividing your desktop hard disk to run multiple operating systems and hoping that some proprietary disk-partitioning pro-gram won’t munch its neighbor, I recommend running one operating system that supports a virtualization server and running your secondary operating systems as guests. OpenBSD supports running virtual guests with qemu.
Getting OpenBSDOnce you have hardware, you need OpenBSD. You can get OpenBSD on CD and over the Internet.
1. Yes, that’s megabytes—you know, the unit below gigabytes. Yes, megabytes can apply to disks.
20 Chapter 2
Official CDsWhy would you buy an official CD in the 21st century?
The OpenBSD project is funded largely by sales of official CDs, along with related books, clothing, and so on. You can download a disk image from the Internet and burn your own installation disk, but purchasing an official set helps improve OpenBSD. The OpenBSD team tries to make the official CD sets interesting pieces in and of themselves, and usually packages them in some sort of geek-themed art. To get an official CD, go to the OpenBSD website and look for the Getting OpenBSD link. You can also find a whole bunch of OpenBSD-related merchandise.
You can download installation images from the Internet, but they’re not the same as the official CD set. The downloaded disk images don’t contain any packages, lack the fancy physical packaging, and work on only one hardware architecture. You cannot download the images used for the official disks.
The main OpenBSD distribution point is in Canada, which increases delivery costs for those living on other continents. The OpenBSD website lists a variety of resellers that offer official OpenBSD CDs. Pick a vendor in your country and save on customs duties. If that option isn’t available to you, you can at least pick a vendor on your same continent and save on shipping.
Internet DownloadsThe other OpenBSD installation methods require network access, either to download a complete image or to download files during the installation. Start by selecting an OpenBSD mirror site close to you. You can find a full list of mirrors at http://www.OpenBSD.org/ftp.html.
You can install the operating system files from an ISO image, FTP, HTTP, rsync, or even the Andrew File System (AFS) or Network File System (NFS) on some platforms. We will break the task into two parts: getting the target system to boot and getting the operating system files on the machine.
Mirror Site LayoutAll of the OpenBSD mirrors contain files and directories much like these:
5.1, 5.2, 5.3, and 5.4 The numbered directories contain OpenBSD releases. Most mirrors contain the last four releases. This particular server contains OpenBSD releases 5.1, 5.2, 5.3, and 5.4.
Changelogs This directory contains collated OpenBSD Concurrent Version System (CVS) logs for those interested in OpenBSD’s develop-ment. The casual user would probably find the web-based CVS browser more useful.
distfiles This directory contains the files for building third-party soft-ware included in the OpenBSD ports collection (see Chapter 13). Not all mirror sites carry this very large directory.
Installation Preparations 21
doc This directory contains the OpenBSD FAQ and the PF FAQ, as well as translated and obsolete versions of the documentation.
ftplist This file documents the official FTP and HTTP installation mir-rors. When you install via FTP or HTTP, the installer grabs this file to allow you to choose a mirror site close to you.
OpenBGPD, OpenNTPD, and OpenSSH These three directories contain software that originated in the OpenBSD Project, but has been ported to other operating systems. OpenBGPD and OpenNTPD are newer projects aimed at creating OpenBSD-style Border Gateway Protocol (BGP) and Network Time Protocol (NTP) daemons. OpenSSH is the most widely deployed Secure Shell (SSH) client and server in the world, and is ported to all major operating systems.
patches This directory contains patches for each earlier OpenBSD release. These patches address critical security and stability issues.
snapshots This directory contains recent experimental OpenBSD ver-sions, snapshots of development between releases. If you want an early preview of the next version of OpenBSD, install a snapshot. These are works in progress; the developers provide them so that users can help test new code and catch any bugs before a release. If you want to be helpful, use a snapshot, but be warned: A snapshot might work beauti-fully, or it might savage your hardware and subtly corrupt your data. See Chapter 20 for more information about snapshots.
songs Each version of OpenBSD includes a song written for the release. The songs directory contains each of these soundtracks.
timestamp This file contains the time this mirror was last updated.
tools This directory contains add-on tools useful for the OpenBSD Project’s internal workings.
Release DirectoriesLook within any given release directory on an OpenBSD FTP site or on a CD, and you’ll see the following:
• A directory for each architecture OpenBSD supports: amd64, i386, sparc64, and so on (on the CD, these directories are scattered among different disks as space permits)
• A packages directory containing precompiled software for this release (see Chapter 13)
• A ports.tar.gz file containing the compressed ports tree (see Chapter 13)
• A src.tar.gz file containing the operating system source code (see Chapter 20)
• A sys.tar.gz file containing the OpenBSD kernel source code (see Chapter 19)
22 Chapter 2
• A xenocara.tar.gz file containing the OpenBSD version of the X Window System (see Chapter 19)
• A tools directory with software to help installation
• Several documents such as the release announcement (ANNOUNCEMENT), the basic instructions (README), and notes on OpenBSD’s support for third-party software and different hardware
Look through your CD or the mirror site and find the directory for your hardware architecture. The architecture directories contain fairly similar files for every hardware platform.
First, find the installation instructions for your hardware. These are named INSTALL followed by the platform name (such as INSTALL.i386, INSTALL.amd64, and so on). Always read the installation instructions for your platform. While I’ve made every effort for accuracy in this book, OpenBSD continually changes, and the install document for your release is the last word on installation instructions.
Boot MediaThe OpenBSD boot media varies by hardware platform, and each hard-ware item has its own boot media requirements. You can’t expect to boot a Zaurus or a VAX from a CD.
To easily boot the OpenBSD installer on i386 or amd64 hardware, use either a floppy disk or a CD (I usually recommend the latter). You can boot the installer from a USB disk, but the standard method requires bootstrap-ping from an OpenBSD machine, and nonstandard methods vary widely depending on available equipment.
If you cannot boot from a CD, use a floppy disk. OpenBSD provides one amd64 floppy image and three different i386 floppy disk images. If you’re booting i386 from a floppy, I suggest downloading all floppy images.
If you cannot boot using either method, you must use the Preboot eXecution Environment (PXE) diskless booting method, as described in Chapter 23. This method works well but requires a bit more preparation.
Choosing Install MediaThe boot disk can format your hard drive, configure your network, and copy installation files to disk. Boot media don’t include those installation files, however. Installation files for i386 and amd64 machines come on an ISO image and over the network via FTP or HTTP.
If you intend to install this release on multiple OpenBSD machines, you might download the CD image that includes the installation files. It’s much larger than the boot-only installer ISO image, however, so downloading it will require some sort of broadband connection.
If you’re doing a single OpenBSD installation, or you don’t have a CD drive, I recommend an HTTP installation. If you install from a reasonably close mirror site and have sufficient bandwidth, OpenBSD installs from

Installation Preparations 23
HTTP quickly and reliably, and uses only about half as much bandwidth as downloading the installation ISO image. If you prefer, you can install from FTP as well.
Advanced users can install OpenBSD via the PXE method, as men-tioned in the previous section and covered in detail in Chapter 23.
Local Installation ServersOne reason CDs are so popular is that you need to download files from the Internet only once, but can reuse your downloads to install OpenBSD on many machines. But CDs are physically fragile, and not every machine has a CD drive. If you want to install OpenBSD on several machines without using up bandwidth for each installation, download all of the installation files for your architecture. If you copy these files to a local FTP or web server, you can install OpenBSD on any number of machines from these files. To install from the local FTP server, you’ll need a username and password for the FTP server.
To help save the OpenBSD Project on bandwidth costs, download only the directories for the architectures you need. If you know exactly what you want to install, download just those file sets. You might have no respect for your own bandwidth, but please respect others’ bandwidth.
File SetsThe release directory for each architecture contains several compressed files with names like comp52.tgz, base52.tgz, and so on. These file sets contain compressed OpenBSD installation files. By choosing to install particular file sets, you can pick how much functionality your OpenBSD system will have out of the box. For example, the documentation is kept in a separate distribution set. If you have documentation elsewhere, you might choose to not install it on a particular system. Also, intruders often make use of com-pilers, so you might not want them on a system you want to protect. But if this is your experimental “learning OpenBSD” machine, install everything.
Each file set has a name and a version number. For example, one distri-bution set of OpenBSD in release 5.2 is base52.tgz. These are the base files of release 5.2. In the next release, this same file set will be called base53.tgz.
All architectures include all file sets, unless otherwise noted in the architecture’s release notes. If this is your first OpenBSD installation, take a moment to decide which distribution sets you need. If at all possible, install them all on your test machine. You can always trim them down later for dedicated-purpose machines.
The following file sets are available:
bsd, bsd.mp, and bsd.rdThese file sets contain only OpenBSD kernels. The kernel is the heart of the operating system, containing the device drivers and basic system functions. Without a kernel, the system will not boot. The bsd kernel is for single-processor machines, while the bsd.mp kernel supports multiple
24 Chapter 2
processors. The bsd.rd kernel contains the OpenBSD installer, basic user-land utilities, and the live system kernel. You can run only one kernel at a time.
baseXX.tgzThis contains OpenBSD’s core programs—all the things that make OpenBSD Unix-like. The contents of /bin, /sbin, /usr/bin, and /usr/sbin; the system libraries; and all the miscellaneous programs you expect to find on a minimal Unix-like system are in this file set. You must install this file set.
etcXX.tgzYou might guess that this file set contains the files from /etc, but it also contains other required files and directories, such as /var/log and the root user’s home directory. You must install this file set.
manXX.tgzIf you need the man pages for the programs in the base and etc file sets, install this distribution set. The man pages for other sets are installed with their respective file sets.
compXX.tgzThis file set contains C and C++ compilers, the assembler, libraries, tools, manuals, and the toolchain for each. You need this file set to develop or compile software, or use the ports collection (see Chapter 13). You do not need this file set if you plan to use only precompiled software pack-ages. At roughly 60MB, it is the largest file set for most platforms, but it’s trivial compared to the size of modern hard disks. You might choose to not install it on a secure machine.
gameXX.tgzThis file set contains several simple games, based on games originally distributed in BSD 4.4. Some of these, such as fortune(1), are considered UNIX classics, and old farts won’t be happy unless they’re installed. Others, such as /usr/games/wargames, assume that you’re familiar with early 1980s films. You don’t need the games file set (unless you want to see what passed for “computer games” back when I was in high school).
xbaseXX.tgzThis contains the core of Xenocara, the OpenBSD version of the X Window System. If you want to use X, you need this. Although you might not have a console or monitor on this computer, remember that X allows programs on this server to display remotely.
Most OpenBSD packages assume that you have installed this file set. If you find that a package crashes with errors about missing X libraries, you need this file set.
Installation Preparations 25
xetcXX.tgzThis contains the X configuration files. If you’re using X for more than its libraries, you need this file set.
xfontXX.tgzThis contains X fonts. If you plan to use X on this machine’s console, install this file set.
xservXX.tgzThis file set contains all the X video card drivers. If you plan to use X on this machine’s console, install this file set.
xshareXX.tgzThis contains the X documentation. If you plan to use X on this machine’s console, install this file set.
PartitioningPartitions are logical subsections of a hard drive. OpenBSD can handle different partitions with their own unique privileges. You might make some partitions read-only so that files on them cannot be added, moved, or changed.
OpenBSD might refuse to run programs on a specified partition, and it knows that device nodes should appear only on certain partitions. User files should not have setuid or setgid permissions, so the operating system won’t recognize those privileges on files on the user data partition. While many operating systems support these sorts of privilege controls, OpenBSD uses them by default.
The most difficult part of installing OpenBSD is partitioning. When you don’t know how partitions work, choosing partitioning can be troublesome.
If you’re familiar with other Unix-like operating systems (such as some distributions of Linux), you might be accustomed to using a single large root partition and putting everything on it. This is a bad idea for several reasons. OpenBSD uses partitions as a security tool. A single large partition eliminates per-partition security and privileges. With your log files safely contained on one partition, a process or user gone amok cannot fill your entire drive. While it could fill a partition, you could still create and edit files on other partitions, giving you the flexibility you need to address the problem.
Unlike many installers that have fancy menus and graphic tools, OpenBSD’s installer expects you to know how to use low-level disk manage-ment tools such as disklabel(8). Unlike with those operating systems, how-ever, OpenBSD can be installed in a much wider variety of ways on a wider variety of systems, all with a single installer.
26 Chapter 2
If this is your first OpenBSD installation, use the default partitioning offered by the installer. OpenBSD will provide all its standard partitions, but adjust their sizes based on the size of your disk. The discussion here is based on a standard i386 installation on a fairly small disk.
If you’ve previously installed OpenBSD and you’re installing it on a special-purpose machine, you might want special partitioning. In that case, get a piece of paper and a pencil, and write down the size of your hard disk, each partition you need, and each partition’s desired size. Your special-purpose OpenBSD machine should almost certainly have all the same partitions as a default installation, but their sizes will differ. A web server has very different disk space requirements than a desktop machine, which in turn has different requirements than those of a firewall.
If you have a large disk, leave some space unallocated. Having partitions the size you need accelerates filesystem integrity checks; fsck(8) doesn’t spend cycles integrity-checking unused disk space. On solid-state disks, unused space gives wear-leveling algorithms more cells to play with, increasing the life span of the disk and decreasing the odds of failure. It’s better to have spare disk space you never need than to need disk space you don’t have.
Standard OpenBSD PartitionsThe standard OpenBSD partitions are / (root), swap space, /tmp, /var, /usr, /usr/X11R6, /usr/local, /usr/src, /usr/obj, and /home. If you create a custom layout and don’t include one of these partitions, the installer will put files that go into that partition into either your root or /usr partition, quickly fill-ing them. If you want to create a partition after installation, you must find space on your disk for it. Unless you left unallocated space on your disk, you’re better off reinstalling the whole system.
Root Partition
The root partition holds the main OpenBSD configuration files and the most essential software needed to get the computer into single-user mode and on the network. Your system needs fast access to the root filesystem, so if you have multiple disks, put the root partition on the fastest (or smallest) one.
The root partition is the only one whose placement on disk is vitally important. Over the years, i386 systems have been repeatedly expanded to surpass their own limits—they’re based on an architecture that could origi-nally handle only up to 640KB of RAM, after all! All modern operating system kernels work around these limits in a manner mostly transparent to users, but when the system is first booting, you’re trapped within the hard-ware’s limits.
Many old i386 systems have limits on hard drive size. They only recognize 128GB drives, 2TB drives, or some other number. The hardware BIOS can-not access anything beyond that limit. If you’re using a computer that has a 128GB limit on hard drive size, and you put the kernel somewhere beyond the first 128GB of disk space, the computer will be unable to find the kernel
Installation Preparations 27
and thus unable to boot the system. Check your hardware manual before you get started. If the manual refers to a disk size limit, your entire root par-tition must fit within that limit.
If you violate this limit, your system will probably appear to work. The second you change the file /bsd, however, it’s likely that your computer will refuse to boot. Save yourself much pain by putting the root partition first on the disk, and making sure it’s small enough to fit within the hardware’s limits.
Swap Space
Swap space is used for virtual memory. When your computer runs low on RAM, it starts to move information that has been sitting idle in memory into swap space. When the computer needs that information, it’s loaded from virtual memory into real memory. This isn’t necessarily bad for per-formance. Many programs spend the vast majority of their time executing only a small fraction of their code. OpenBSD is pretty good about figuring out which sections of memory can be moved into swap space and which are used too frequently to be swapped. If things go well, your computer will almost never need swap space.
OpenBSD also uses swap space during system failures. If the kernel panics, the computer writes the contents of system memory to the swap par-tition. This means that the swap partition must be, at its smallest, slightly larger than the amount of physical RAM in the system.
How much swap space do you need? The short answer is, “It depends on the system.” OpenBSD defaults to allocating twice as much swap space as you have physical RAM. This isn’t a bad rule, as long as you understand it’s very general. A swap space three or four times the size of your physical memory won’t hurt. If your computer uses more swap space than that, it’s overloaded and will perform poorly.
If you find yourself using swap space often, consider increasing your physical memory instead. RAM is cheap.
Also consider future upgrades. If your system has 2GB of RAM when you install OpenBSD, but you intend to increase that to 8GB, assigning 16GB of swap space is a good idea. Adding a swap partition later is difficult, unless you leave unallocated disk space when you install the software. (Note that, while you can swap to a file, OpenBSD can write only crash dumps to an actual swap partition.)
/tmp Directory
The /tmp directory is temporary space for all users on the system. Space requirements for /tmp are generally a matter of opinion—after all, you can always use a chunk of space in your /home directory for scratch space. Automated software installers frequently extract files into /tmp. I usually recommend at least 3GB in /tmp, but I do horrible things to my temp space. Many people use a /tmp directory of 256MB or 512MB and get along just fine.
28 Chapter 2
/var Partition
The /var partition contains frequently changing data, such as logs, data-bases, mail spools, temporary run files, websites, and so on. OpenBSD allo-cates about 5GB to /var by default. This should be plenty for an educational installation. If you’re building a web, database, or logging server, however, /var should get the majority of your disk space. If you’re on a really tiny sys-tem, you could use as little as 10MB for /var.
/usr Partition
The /usr partition holds the operating system programs, compilers, libraries, and add-on programs. The majority of /usr changes only when you upgrade your system. OpenBSD assigns /usr 2GB by default, which is more than suf-ficient, even on a desktop system.
/usr/X11R6 Partition
The /usr/X11R6 partition contains the X Window System programs and documentation. OpenBSD does package software linked against the X Window System, and a lot of software you might expect to find on servers (such as ImageMagick) requires X libraries.
If you are not going to install any X software, and plan to build all your own software without X, you don’t need this partition. If you’re in doubt, or if this is your first installation, keep this partition.
/usr/local Partition
The /usr/local partition contains add-on OpenBSD software, usually from packages (see Chapter 13). This can be much larger than the /usr partition containing the core OpenBSD software. OpenBSD allocates 5GB of disk space to /usr/local by default, and I’ve never needed more than that.
/usr/src Partition
The /usr/src partition is dedicated to the OpenBSD source code. On a dedicated-purpose machine that doesn’t have a compiler, such as a fire-wall or a secure web server, you probably don’t need a local copy of the source code. If you don’t plan to upgrade this machine from source code, and you don’t plan to use the source code as a reference on the local machine, you don’t need this partition. If you’re in doubt, keep it.
/usr/obj Partition
The /usr/obj partition is where OpenBSD builds new versions of the oper-ating system and Xenocara. The files in here are temporary; once you’ve installed a new OpenBSD version, you don’t need these files any longer. Creating a new filesystem is faster than erasing the individual files in this kind of filesystem, so /usr/obj is configured as its own partition.
Installation Preparations 29
If you don’t intend to build a new OpenBSD from source code, you don’t need /usr/obj. If you find that you do need this partition later, you can either create it from unused space or mount it via NFS.
/home Partition
The /home partition can be described as “everything else.” User directories go into /home, as well as any random data that’s meant for users. The fam-ily MP3 and photo collections should go in /home, as well as your personal source code, email, and anything else you want to keep.
Creating Other PartitionsOpenBSD supports up to 16 partitions per disk. If you want other parti-tions, you can create them using the installer. Does your company have a policy that all add-on software must go in /opt or /usr/companyname? Fine, create that partition. The OpenBSD standards are not a straitjacket, but rather a starting point. You own the system. Make it behave according to your needs.
Partition FilesystemsThe words filesystem and partition are often used interchangeably. They are closely related, but two different things. A filesystem is a method of allocat-ing and tracking files that are on a partition. You can back up and restore a filesystem, but if a partition is damaged, you’re in much worse trouble.
OpenBSD uses the standard Fast File System (FFS) by default. FFS has been around for decades, and is both well debugged and well understood. Unfortunately, with its default settings, it can handle partitions only up to slightly less than 1TB in size. Modern disks make partitions of that size common.
If a partition is 1TB or more in size, the installer automagically formats it with FFS version 2 (FFS2). In Chapter 8, we’ll cover how to adjust your filesystems to exactly fit your needs.
Multiple Hard DrivesDisk input/output is usually the slowest part of a computer. If you have more than one hard drive, you can use those drives to accelerate your system performance.
First, make sure that each drive is on its own port. SCSI and SATA drives usually accommodate one drive per port (unless you specifically use a port multiplier), but IDE drives usually attach two devices per port. Each port has a maximum throughput. It does no good to attach two fast drives to one port, as the drives compete for the one port’s throughput.
In general, when you have multiple drives, you want to split the read and write activity between the drives. I usually put the data I’m serving on
30 Chapter 2
one disk and the important system files on another. If I’m building a data-base server, I might dedicate one disk to swap space and /var, while assign-ing all other partitions to the other disk.
Split your swap space between the drives. Be sure that at least one par-tition is large enough to hold the contents of your physical RAM, so that OpenBSD can do a crash dump if needed. OpenBSD cannot split a crash dump between two different swap partitions.
If you’re a more experienced OpenBSD user, you can use multiple hard drives to create a redundant disk with software RAID. We’ll cover how to do that in Chapter 9.
If your second drive is much slower than your main system drive, don’t bother using it. A computer runs only as fast as its slowest component, so adding that old IDE drive to your SATA system will drag down the whole machine. Not only will its presence degrade performance for the whole sys-tem, but it’s also probably much older than your main drive and far more likely to fail.
Understanding PartitionsAs a historical accident, i386 and amd64 systems have two different types of partitions. OpenBSD refers to the first as MBR partitions and the second as disklabel partitions (or just partitions).
MBR PartitionsMBR partitions, also known as primary partitions, are universally understood by operating systems that run on i386 hardware. Every hard drive has four MBR partitions. In most cases, only one partition has any space allocated to it; the other three partitions have zero size. If you want to install multiple operating systems on a single disk, then each operating system needs its own MBR partition.
Most operating systems manage MBR partitions with a program called fdisk. It’s not the same program, mind you—OpenBSD’s fdisk(8) is not the same as Microsoft’s Fdisk, which is different from the program for Linux, FreeBSD, OpenSolaris, and so on. Any operating system’s fdisk can see MBR partitions that belong to other operating systems, and while they might not recognize what’s on the MBR partition, they will recognize that space has been allocated for something and will warn you about overwriting it. Unfortunately, not all fdisk programs play nicely with each other. Do not partition disks for one operating system with another operating system’s tools.2
With the advent of cheap virtualization, installing multiple operating systems on a single disk is no longer advisable. Assign each disk a single MBR partition that fills the entire disk, and give the other three MBR parti-tions zero size. You will see an example of how to do this in Chapter 3.
2. I’m assured by OpenBSD developers that any fdisk should suffice for any operating system. Having been repeatedly savaged by buggy fdisk programs, I find myself unable to give you carte blanche to try this.
Installation Preparations 31
Disklabel PartitionsBSD did not originate on i386 hardware; it had its own disk-partitioning system, based on labeling the disk’s partitions. When BSD was ported to i386, the disklabel was nailed up inside an MBR partition. When someone speaks of “partitions” in OpenBSD, they almost certainly mean disklabel partitions.
One disklabel can support 16 partitions. If you need more than 16 par-titions, you must create a second MBR partition and add more disklabels. I would suggest that if you need more than 16 partitions on a single disk, you took a wrong turn somewhere in your decision-making process. Step back and reassess what you want to accomplish and how you’re going about it.
Foreign operating systems do not recognize OpenBSD disklabels. BSD-based operating systems might appear to understand them, but the disklabel formats used on the various BSD-derived systems have diverged in the past 20 years. Use only OpenBSD disk tools to manage OpenBSD partitions.
Understanding DisklabelsThe OpenBSD installer expects you to understand disklabels. You can avoid learning about disklabels by blindly accepting the default partition-ing OpenBSD offers, but that won’t take you very far. Disklabels might look intimidating to the new user and require some basic math, but they aren’t that difficult once you walk through them slowly. You need to understand disk geometry first.
Sectors and LiesOnce upon a time, disk drives had clearly defined geometry. Each disk was actually round, and it spun inside the hard drive. The manufacturer divided each disk into tiny sections, called sectors. Each sector had a num-ber, with sector 0 at the beginning of the disk and the sectors numbered sequentially until the end of the disk. Sectors were gathered into rings, or tracks. Stacks of tracks were aggregated into cylinders. Each disk drive had a number of heads—data-reading devices that read information from the disk as the disk spun beneath them. Taken as a whole, sectors, tracks, and cylin-ders described the disk geometry.
This all seems simple enough, but today you can’t actually count on disk sectors to actually map to anything useful. Over the years, both hard drive manufacturers and operating systems have set and broken limits. This applies to all aspects of machine design, from the 640KB memory limit to the 504MB disk limit. Hard drive manufacturers avoided these limits by tricking the system BIOS and/or the operating system.
If you’re a hard drive manufacturer making a hard drive with 126 sectors per track, but the most popular operating system can accept only 63 sectors per track, you have a problem. The easy solution is to teach your hard drive to lie. If you claim you have half as many sectors per track
32 Chapter 2
but twice as many platters, the numbers still add up, and you can still provide unique sector numbers. Every hard drive manufacturer chooses to lie in a slightly different way. The most obvious examples are flash drives (which still report cylinders, sectors, and tracks, even though they’re not round and don’t spin3) and hardware RAID (which reports the same information about several disks as if they were one). If you read about the history of hard drives, you’ll discover all sorts of interesting lies.
By the time disk geometry information reaches the operating system, it has been through one or more translations. Reach into your head, find the button that says “Accept What You’re Told,” and press it as you repeat the following: Disks are divided into sequentially numbered sectors. Partitions fill a number of consecutive sectors. Sectors are grouped into cylinders, based on the number of heads in the drive. Partitions end on cylinder boundaries.
Sectors and DisklabelsThe installer will display your disk’s disklabel. (You can also see the disklabel once the system is installed and running, as discussed in Chapter 8.)
We’ll look at the disk’s physical information first. While the physical information doesn’t usually directly impact the installation, you need to know how to read it if something goes wrong.
u # /dev/rsd0c:v type: SCSIw disk: SCSI diskx label: DSA2CW120G3y duid: adb697598fa0a010
flags:z bytes/sector: 512
sectors/track: 63tracks/cylinder: 255sectors/cylinder: 16065cylinders: 14593
{ total sectors: 234441648| boundstart: 64} boundend: 234436545
drivedata: 0
Except for the device unique identifier (DUID), you cannot change any of these entries without changing the underlying hardware.
The first entry is the device name, /dev/rsd0c u. The leading /dev means that this is a device node. The rsd0c is the disk name. sd means that this drive uses the sd(4) device driver, and the 0 means that this is the first drive OpenBSD found and attached. (This is usually, but not always, BIOS drive 0.) The leading r means that we’re addressing the disk in raw mode, while the tailing c means that we’re examining disklabel partition c. Disklabel
3. Yes, you can make flash drives spin. But a flash drive doing 5400 RPM has a whole set of problems beyond the scope of normal systems administration.
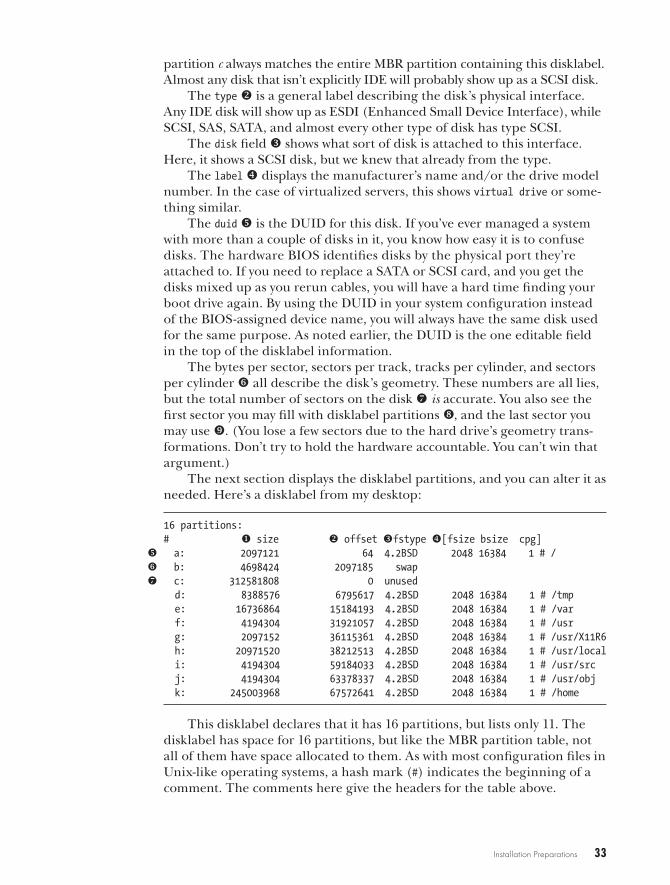
Installation Preparations 33
partition c always matches the entire MBR partition containing this disklabel. Almost any disk that isn’t explicitly IDE will probably show up as a SCSI disk.
The type v is a general label describing the disk’s physical interface. Any IDE disk will show up as ESDI (Enhanced Small Device Interface), while SCSI, SAS, SATA, and almost every other type of disk has type SCSI.
The disk field w shows what sort of disk is attached to this interface. Here, it shows a SCSI disk, but we knew that already from the type.
The label x displays the manufacturer’s name and/or the drive model number. In the case of virtualized servers, this shows virtual drive or some-thing similar.
The duid y is the DUID for this disk. If you’ve ever managed a system with more than a couple of disks in it, you know how easy it is to confuse disks. The hardware BIOS identifies disks by the physical port they’re attached to. If you need to replace a SATA or SCSI card, and you get the disks mixed up as you rerun cables, you will have a hard time finding your boot drive again. By using the DUID in your system configuration instead of the BIOS-assigned device name, you will always have the same disk used for the same purpose. As noted earlier, the DUID is the one editable field in the top of the disklabel information.
The bytes per sector, sectors per track, tracks per cylinder, and sectors per cylinder z all describe the disk’s geometry. These numbers are all lies, but the total number of sectors on the disk { is accurate. You also see the first sector you may fill with disklabel partitions |, and the last sector you may use }. (You lose a few sectors due to the hard drive’s geometry trans-formations. Don’t try to hold the hardware accountable. You can’t win that argument.)
The next section displays the disklabel partitions, and you can alter it as needed. Here’s a disklabel from my desktop:
16 partitions:# u size v offset wfstype x[fsize bsize cpg]
y a: 2097121 64 4.2BSD 2048 16384 1 # /z b: 4698424 2097185 swap{ c: 312581808 0 unused
d: 8388576 6795617 4.2BSD 2048 16384 1 # /tmp e: 16736864 15184193 4.2BSD 2048 16384 1 # /var f: 4194304 31921057 4.2BSD 2048 16384 1 # /usr g: 2097152 36115361 4.2BSD 2048 16384 1 # /usr/X11R6 h: 20971520 38212513 4.2BSD 2048 16384 1 # /usr/local i: 4194304 59184033 4.2BSD 2048 16384 1 # /usr/src j: 4194304 63378337 4.2BSD 2048 16384 1 # /usr/obj k: 245003968 67572641 4.2BSD 2048 16384 1 # /home
This disklabel declares that it has 16 partitions, but lists only 11. The disklabel has space for 16 partitions, but like the MBR partition table, not all of them have space allocated to them. As with most configuration files in Unix-like operating systems, a hash mark (#) indicates the beginning of a comment. The comments here give the headers for the table above.
34 Chapter 2
The first column is the partition letter. A unique letter identifies each disklabel partition. The first partition in our example is a y, the second is b z, the third is c {, and so on.
The size u is the number of sectors the drive uses. In this example, partition a fills 2097121 sectors, partition b 4698424 sectors, and partition c 312581808 sectors.
The offset v is the number of sectors from the beginning of the MBR partition where the disklabel partition begins. If a disk is bootable, it has a master boot record (MBR) flagging it as such. The MBR record takes the first 63 disk sectors, numbers 0 through 62. The first sector available for a disklabel partition is sector number 63. Partition a begins on sector 64 in order to correctly align with the memory cells in solid-state disks.
Take a look at partition b. It has an offset of 2097185, meaning it starts in sector 2097185. How do we get there? Well, partition a starts in sector 64 and has a size of 2097121. 2097121+64=2097185, or the first free sector after partition a ends. This seems perfectly sensible until you look at partition c. Disklabel partition c is magical. On every disklabel partition, c represents the entire disk. It has an offset of 0 and a size equal to the number of sec-tors on the disk. You cannot put a filesystem on partition c; it’s there only for reference. Partition d picks up where partition b left off.
The fstype w marks the type of filesystem on this partition. OpenBSD filesystems, such as partition a, are labeled as 4.2BSD. (The OpenBSD filesystem is no longer exactly the same as that from BSD 4.2, mind you.) Partition b is swap space.
The next two columns x display the fragmentation behavior of the file-system on this partition. These values are set by the filesystem creation tool when putting the filesystem on the partition, and should not be changed by hand. If you’re curious, read newfs(8) and its related man pages. The fsize is the fragment size for any file fragments on the partition. The b is the size of a block on disk, in bytes. We talk about FFS fragmentation in Chapter 8. All you really need to know at this point is that FFS and FFS2 are both highly fragmentation-resistant, and neither requires any sort of defragmentation process.
The last column shows the number of cylinders per cylinder group. This is almost always 1 for modern disks.
One interesting thing is that the disklabel can be considered a configu-ration file for formatting a disk. You could save this disklabel to a file, get an identical hard drive, write this label to that new disk, and perfectly dupli-cate the partitioning of the old disk on the new.
If at any time you feel confused about your partitioning, print out your current disklabel and compare it to how you would like your system to look.

Installation Preparations 35
Other InformationIf this machine is going to be on the Internet, you must know its network configuration before starting. If your network has DHCP, you’re all set. If not, you need a valid IP address, netmask, default gateway, and name server IP addresses.
Decide in advance if this machine will run the X Window System. Generally, desktops run X and servers do not.
At this point, you have all the background you need to install OpenBSD on i386 or amd64 hardware. Break out your equipment, and let’s get started.

3I n s t a l l a t I o n W a l k- t h r o u g h
Straightforward questions. Will you take the default prompts?
Think before you choose.
Armed with your OpenBSD software and a computer with supported hardware, you
are now ready to start an actual installation. This chapter takes you through a full instal-
lation on amd64 and i386 systems via CD and FTP, booting from a CD or floppy disk.
In this chapter, I assume that you’re dedicating your computer to OpenBSD. You can install multiple operating systems on a single computer, of course, but that’s a less common use case. If you want to install mul-tiple operating systems on your computer, follow the instructions in the OpenBSD FAQ. (When installing multiple operating systems on a single computer, it’s easy to accidentally damage one of those operating systems, so proceed with caution.)
Before you begin OpenBSD installation, make sure the data on your machine is backed up! When you dedicate your machine to OpenBSD, you’ll overwrite the entire hard drive.
38 Chapter 3
Hardware SetupBefore you begin, verify that OpenBSD supports your hardware. You’ll find the supported hardware list for the most recent version of OpenBSD on the platform-specific pages of the OpenBSD website (http://www.OpenBSD.org/i386.html for i386 and http://www.OpenBSD.org/amd64.html for amd64), list-ing hardware that has been verified to work by the OpenBSD team.
If you find that your hardware isn’t listed, it might still run OpenBSD. In fact, a lot of unsupported hardware will run OpenBSD perfectly, but not all hardware has been tested, simply because the OpenBSD team doesn’t have access to all hardware ever manufactured. If you’re worried about a particular device, search the mailing list archives to see if it’s supported.
The hardware compatibility lists frequently identify devices by chip-set, not by vendor or model. The chipset is the actual hardware name, not the model name, which can cause a bit of confusion because, after all, when you buy a computer, the network card is frequently listed as a “giga-bit Ethernet,” not as an “Intel PRO/1000MT Dual Port Server Adapter model PWLA8492MT.” To make matters worse, many vendors use identical hardware under a separate brand or model name or use different hard-ware under the same brand or model name. For example, Linksys sold many different network card models under the model name EtherLink. (Fortunately, this issue mostly applies to the lower end of the market, and OpenBSD almost always supports these older chipsets.)
Even if you’re not sure that you hardware is supported, you can still try installing OpenBSD to see what happens. The boot messages will offer a lot of information about the hardware you have.
BIOS ConfigurationBe sure to evaluate your system’s Basic Input/Output System (BIOS) before installing OpenBSD. Because every BIOS differs, I can’t offer exact instruc-tions on configuring yours. Your best bet is to consult your motherboard’s manual or the Internet.
Also, if your BIOS needs updating, take care of that before installing OpenBSD. Finally, check the boot device order, and be sure that it makes sense for how you plan to install your system.
With your hardware set up, get the boot media.
Making Boot MediaWe’ll cover booting the OpenBSD installer from a CD or floppy disk. Generally, booting via CD is preferable because all amd64 systems can boot from CD, as can most functioning i386 systems. We’ll start by making floppies for installation on old i386 hardware and then move on to CDs. While installing from USB and into virtual systems is possible, neither is supported. We’ll cover both of those installation types later in the book, in Chapter 23.
Installation Walk-Through 39
Making Boot FloppiesYou need to make boot floppies only if your hardware does not boot from CD, or if you have a floppy but not a CD drive. The OpenBSD boot floppies contain a very limited subset of OpenBSD—just enough to recognize your hardware, format your disk, and download and extract the file sets. In addition to the floppies themselves, you’ll also need a working Internet connection via Ethernet.1 Because the full kernel is larger than a single floppy can hold, OpenBSD provides three floppy images for i386 hardware, each targeting a specific type of hardware. Each image name includes the release number. For example, the floppy images for release 5.3 are named floppy53.fs, floppyB53.fs, and floppyC53.fs. Download the image that most closely describes your system, as follows:
floppyXX.fs This is the image for the most common i386 hardware. It will boot the average workstation or low-end server.
floppyBXX.fs This image includes drivers for gigabit Ethernet cards, SCSI, and RAID. It’s meant for higher-end i386 servers.
floppyCXX.fs This image supports PCMCIA and CardBus. It’s meant for laptops.
OpenBSD provides only one floppy image for amd64 hardware: floppyXX.fs. (The amd64 platform doesn’t carry around 20 years of legacy drivers as baggage, so everything fits on a single disk.) Be sure to use the floppy image found in the amd64 directory. The amd64 image uses the same name as the standard i386 floppy.
Once you have the appropriate image file, you must copy it onto a floppy disk. You cannot use basic filesystem-level copying, such as Windows drag-and-drop, because the image files include not only files but also a file-system. You must use appropriate tools to copy the images to a floppy.
Creating Floppies on Unix-like Systems
If you’re already running a Unix-like system, create your floppy with dd(1). You’ll need to know your floppy drive’s device name, which is probably /dev/fd0, /dev/floppy, /dev/rfd0, or /dev/rsd0 (for USB floppy drives). Once you know the device name, tell dd to copy the image to that disk device with a command like this:
# dd if=filename of=full-path-to-floppy-device
For example, to create a disk from image floppyB52.fs with the floppy device name /dev/fd0c, enter the following:
# dd if=floppyB52.fs of=/dev/fd0c
1. Yes, some of us have half-suppressed memories of i386 hardware that couldn’t boot OpenBSD from a CD, but would let you fetch the install sets from one once you had it boot from a floppy. But seriously, if your hardware is that aged and picky, please save yourself some pain. Go back to the dumpster you found that computer in. Find something more recent.
40 Chapter 3
If dd gives you an error immediately or exits silently without writing to the floppy disk, try specifying a different floppy disk device.
Creating Floppies on Microsoft Systems
If you need to create a floppy on a descendant of Windows NT (including all modern Windows desktop operating systems), you’ll need an image-writing program. In the tools directory of your OpenBSD release, you’ll find a pro-gram named ntrw.exe. This program copies disk images to a disk. Download the program, open a command prompt, navigate to the folder containing ntrw.exe, put your blank floppy in the drive, and run this command:
C:> ntrw floppyB53.fs a:
If you get a permissions error, you might need to run your command prompt as Administrator. If the command still fails, chances are good that you’re using the bad floppy disk you tucked away in a drawer 15 years ago. Try another one.
Making Boot CDsOpenBSD provides three ISO images for i386 and two for amd64, as follows:
cdXX.iso This image contains the kernel and installer, but no file sets. It’s used to boot a system into the minimal state where the installer can run. Once the system has booted, it fetches the file sets over the network.
installXX.iso This image contains everything in the cdXX.iso image, as well as the file sets. Use it to install this version of OpenBSD on mul-tiple systems.
cdemuXX.iso Some older i386 systems have a BIOS that makes CD drives emulate floppy drives. If you have a system like this, use cdemuXX.iso. If you’re unsure whether you need this image, you don’t. If you’ve ever owned one of these CD drives, you’ve probably replaced it by now. If you haven’t, maybe you should.
n o t E Remember that you can save yourself the trouble of selecting an ISO by buying an official CD set, which will Just Work and will also contain precompiled packages.
The process of getting the ISO onto a physical disk varies widely from operating system to operating system. On a Microsoft Windows system, right-click the ISO and select Burn to Disc. Unix-like systems use several different programs, such as burncd and cdrecord. Different Linux versions have innumerable ISO-burning front ends integrated into their desktop environments. Check online for instructions on burning a CD on your par-ticular operating system.
Installation Walk-Through 41
Installing OpenBSDOnce you boot from your chosen media, you should see something like this:
> OpenBSD/amd64 BOOT 3.18boot>
If you need to interrupt the boot process for any reason, you can do so at this point. We’ll discuss how to interrupt the boot process in Chapter 5, and reasons for doing so throughout the book.
If you wait five seconds, OpenBSD should boot. The kernel will then introduce itself and begin identifying your hardware.
booting ucd0a:/5.3/amd64/bsd.rd: 2986868+913996+2861496+0+504624 [89+318288+205653]=0xb6f578entry point at 0x1001e0 [7205c766, 34000004, 24448b12, 1608a304]Copyright (c) 1982, 1986, 1989, 1991, 1993 The Regents of the University of California. All rights reserved.Copyright (c) 1995-2012 OpenBSD. All rights reserved. http://www.OpenBSD.org
v OpenBSD 5.3 (RAMDISK_CD) #23: Sun Feb 12 09:45:07 MST 2012 [email protected]:/usr/src/sys/arch/amd64/compile/RAMDISK_CDreal mem = 1072627712 (1022MB)avail mem = 1032290304 (984MB)...
In this output, you can tell at u from which device the system is booting—CD drive 0 in this case. Next, you see the copyright information, followed by the directory in which your kernel was compiled at v. You can see that this is an OpenBSD snapshot kernel, compiled by user deraadt on host amd64.openbsd.org.
At this point, OpenBSD should probe your hardware and display the results as it attaches device drivers.
Running the Installation ProgramOnce the boot messages pass, you should see the following text:
Welcome to the OpenBSD/amd64 5.3 installation program.(I)nstall, (U)pgrade or (S)hell? i
As you can see, there are three options: Install, Upgrade, and Shell. The OpenBSD installer is a shell script that calls programs to download files, format disks, and otherwise prepare your system. It might not be pretty, but it is extremely fast and, in educated hands, extremely powerful.
The Shell option will drop you into an OpenBSD command line, where you have access to the commands on the installation disk. These minimal commands might suffice to repair a damaged system. We’ll examine the Upgrade option in Chapter 20.
42 Chapter 3
Enter i to choose Install. You should see a welcome message and a few basic instructions:
At any prompt except password prompts you can escape to a shell bytyping '!'. Default answers are shown in []'s and are selected bypressing RETURN. You can exit this program at any time by pressingControl-C, but this can leave your system in an inconsistent state.
u Terminal type? [vt220]v System hostname? (short form, e.g. 'foo') caddis
The installer shows default answers in square brackets. To use the default, just press enter.
If your system has a standard keyboard and monitor, OpenBSD will use it as the standard VT220 terminal, as shown at u. If you have an unusual terminal connected to your system, you’re probably an old geezer who knows exactly what terminal type it is. If you’re a young kid using some ancient, unidentified, dust-covered terminal found in a disused labora-tory at the back of an abandoned fireworks factory because you thought it would be nifty, stop now and get a standard monitor and keyboard. While OpenBSD probably supports that antediluvian console, this is not the time to try it.
Next, the installer should prompt you for the system’s short hostname at v, which will be a single word to identify your system. This particular computer is named caddis; you can name yours whatever you like.
Now to configure the network:
u Available network interfaces are: em0 em1 vlan0.v Which one do you wish to configure? (or 'done') [em0]w IPv4 address for em0? (or 'dhcp' or 'none') [dhcp] 192.0.2.85x Netmask? [255.255.255.0] 255.255.255.128y IPv6 address for em0? (or 'rtsol' or 'none') [none]
Available network interfaces are: em0 em1 vlan0.z Which one do you wish to configure? (or 'done') [done]{ Default IPv4 route? (IPv4 address, 'dhcp' or 'none') 192.0.2.1
add net default: gateway 192.0.2.1| DNS domain name? (e.g. 'bar.com') [my.domain] blackhelicopters.org} DNS nameservers? (IP address list or 'none') [none] 192.0.2.2 192.0.2.10
At u, the installer lists the network interfaces it recognizes on your machine. It has found three: em0, em1, and vlan0. The first two, em0 and em1, are network cards. I chose em0 at v, the installer’s default, by press-ing enter. Avoid configuring a virtual local area network (VLAN) during installation if possible, especially on your first installation. If you need a VLAN to connect to the Internet, see Chapter 12.
When asked at w if you want to give a static IP address, you can choose to use DHCP by pressing enter. I chose to enter a static address because I’ll be using this machine as a server. (If you don’t need a static address, you can just let DHCP automatically assign you an IP address.)

Installation Walk-Through 43
When you use a static address, you must also enter a netmask at x and (if desired) an IPv6 address at y. Now, having configured one network card, OpenBSD asks at z if you’ve finished configuring the network. If you wanted the installer to walk you through configuring the second network card, you would enter em1 instead of accepting the default of done.
If you assign a static IP address, you must also configure a static route if you want to access the Internet, as shown at {. Similarly, you need to tell your host its domain name at | and the IP address of at least one name server at }.
At this point, you should be on your local network. If you can’t access the network, you probably entered something incorrectly. If nothing else, you can use an exclamation point (!) to interrupt the installation and get a shell prompt. (Chapter 12 discusses OpenBSD’s network configuration in greater depth.)
Multiple Network CardsOur example server has multiple network interfaces. I chose to configure interface em0 because that machine was in front of me, and if I chose the wrong network card, I could move the cable. But what if you don’t have physical access to your machine? If you had two different network cards (say, an Intel and a 3Com), you would have a better idea which card is which, but having two identical cards leaves you guessing which card has a cable plugged into which network.
Luckily, the OpenBSD installer lets you escape to a command prompt to do a little investigating. How is this useful here? Network interfaces that are plugged in will tell you what kind of connection they have, and discon-nected or otherwise failed interfaces will report that they have no media. Here’s how you can interrupt the installer to identify the live interface:
Available network interfaces are: em0 em1 vlan0.u Which one do you wish to configure? (or 'done') [em0] !
Type 'exit' to return to install.v # ifconfig
lo0: flags=8008<LOOPBACK,MULTICAST> mtu 33152em0: flags=8802<BROADCAST,SIMPLEX,MULTICAST> mtu 1500 lladdr 00:0c:29:aa:09:21
w media: Ethernet autoselect (1000baseT full-duplex,master) status: unknownem1: flags=8802<BROADCAST,SIMPLEX,MULTICAST> mtu 1500 lladdr 00:0c:29:aa:09:2b
x media: Ethernet autoselect (none) status: unknownvlan0: flags=0<> mtu 1500 lladdr 00:00:00:00:00:00
Rather than choosing an interface, escape to a command prompt at u by entering an exclamation point (!). Then ask OpenBSD at v to tell you about its network interfaces by running ifconfig. You can see interfaces em0 and em1 in the output. While em0 reports at w that it’s running 1000baseT
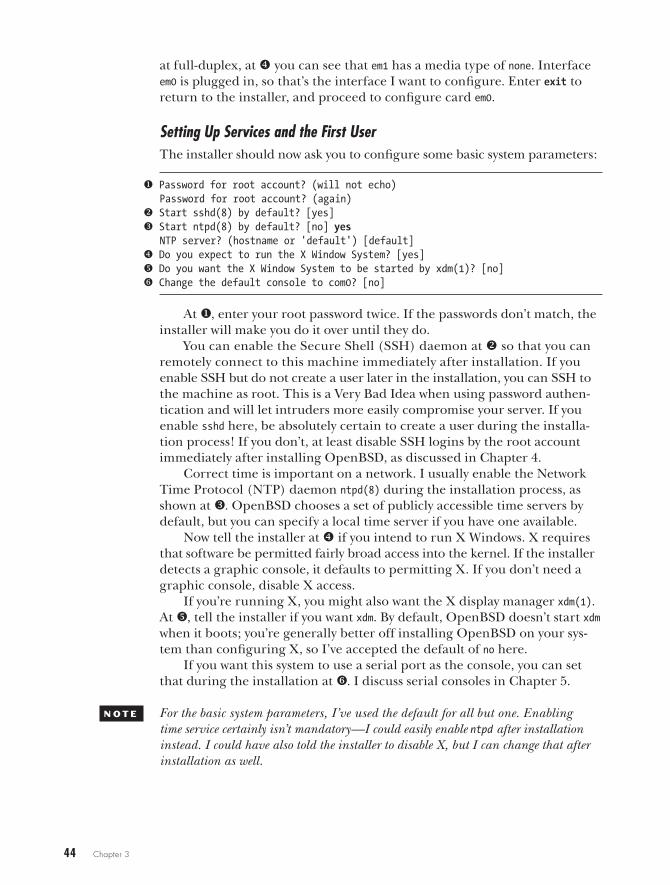
44 Chapter 3
at full-duplex, at x you can see that em1 has a media type of none. Interface em0 is plugged in, so that’s the interface I want to configure. Enter exit to return to the installer, and proceed to configure card em0.
Setting Up Services and the First UserThe installer should now ask you to configure some basic system parameters:
u Password for root account? (will not echo)Password for root account? (again)
v Start sshd(8) by default? [yes]w Start ntpd(8) by default? [no] yes
NTP server? (hostname or 'default') [default]x Do you expect to run the X Window System? [yes]y Do you want the X Window System to be started by xdm(1)? [no]z Change the default console to com0? [no]
At u, enter your root password twice. If the passwords don’t match, the installer will make you do it over until they do.
You can enable the Secure Shell (SSH) daemon at v so that you can remotely connect to this machine immediately after installation. If you enable SSH but do not create a user later in the installation, you can SSH to the machine as root. This is a Very Bad Idea when using password authen-tication and will let intruders more easily compromise your server. If you enable sshd here, be absolutely certain to create a user during the installa-tion process! If you don’t, at least disable SSH logins by the root account immediately after installing OpenBSD, as discussed in Chapter 4.
Correct time is important on a network. I usually enable the Network Time Protocol (NTP) daemon ntpd(8) during the installation process, as shown at w. OpenBSD chooses a set of publicly accessible time servers by default, but you can specify a local time server if you have one available.
Now tell the installer at x if you intend to run X Windows. X requires that software be permitted fairly broad access into the kernel. If the installer detects a graphic console, it defaults to permitting X. If you don’t need a graphic console, disable X access.
If you’re running X, you might also want the X display manager xdm(1). At y, tell the installer if you want xdm. By default, OpenBSD doesn’t start xdm when it boots; you’re generally better off installing OpenBSD on your sys-tem than configuring X, so I’ve accepted the default of no here.
If you want this system to use a serial port as the console, you can set that during the installation at z. I discuss serial consoles in Chapter 5.
n o t E For the basic system parameters, I’ve used the default for all but one. Enabling time service certainly isn’t mandatory—I could easily enable ntpd after installation instead. I could have also told the installer to disable X, but I can change that after installation as well.
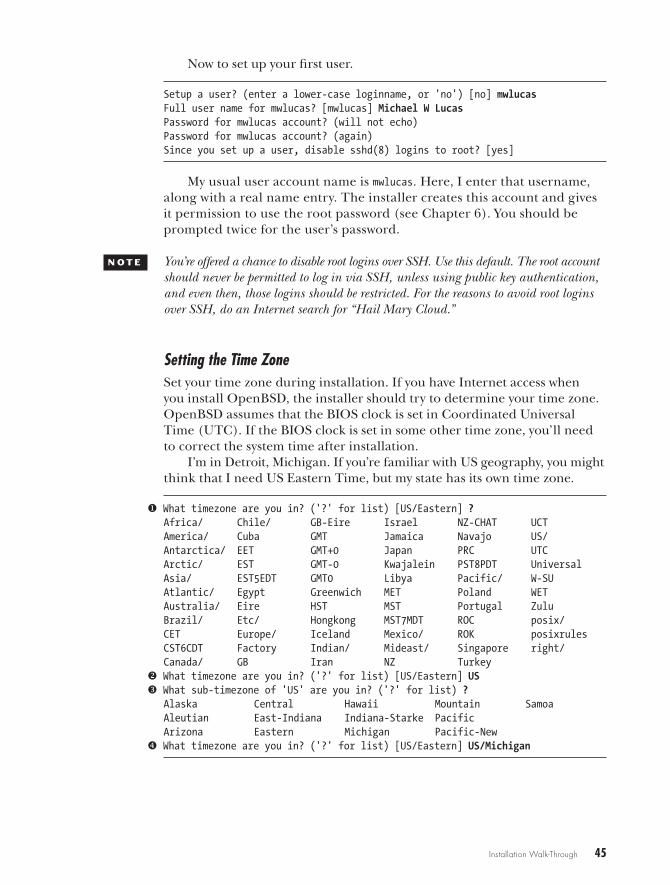
Installation Walk-Through 45
Now to set up your first user.
Setup a user? (enter a lower-case loginname, or 'no') [no] mwlucasFull user name for mwlucas? [mwlucas] Michael W LucasPassword for mwlucas account? (will not echo)Password for mwlucas account? (again)Since you set up a user, disable sshd(8) logins to root? [yes]
My usual user account name is mwlucas. Here, I enter that username, along with a real name entry. The installer creates this account and gives it permission to use the root password (see Chapter 6). You should be prompted twice for the user’s password.
n o t E You’re offered a chance to disable root logins over SSH. Use this default. The root account should never be permitted to log in via SSH, unless using public key authentication, and even then, those logins should be restricted. For the reasons to avoid root logins over SSH, do an Internet search for “Hail Mary Cloud.”
Setting the Time ZoneSet your time zone during installation. If you have Internet access when you install OpenBSD, the installer should try to determine your time zone. OpenBSD assumes that the BIOS clock is set in Coordinated Universal Time (UTC). If the BIOS clock is set in some other time zone, you’ll need to correct the system time after installation.
I’m in Detroit, Michigan. If you’re familiar with US geography, you might think that I need US Eastern Time, but my state has its own time zone.
u What timezone are you in? ('?' for list) [US/Eastern] ?Africa/ Chile/ GB-Eire Israel NZ-CHAT UCTAmerica/ Cuba GMT Jamaica Navajo US/Antarctica/ EET GMT+0 Japan PRC UTCArctic/ EST GMT-0 Kwajalein PST8PDT UniversalAsia/ EST5EDT GMT0 Libya Pacific/ W-SUAtlantic/ Egypt Greenwich MET Poland WETAustralia/ Eire HST MST Portugal ZuluBrazil/ Etc/ Hongkong MST7MDT ROC posix/CET Europe/ Iceland Mexico/ ROK posixrulesCST6CDT Factory Indian/ Mideast/ Singapore right/Canada/ GB Iran NZ Turkey
v What timezone are you in? ('?' for list) [US/Eastern] USw What sub-timezone of 'US' are you in? ('?' for list) ?
Alaska Central Hawaii Mountain SamoaAleutian East-Indiana Indiana-Starke PacificArizona Eastern Michigan Pacific-New
x What timezone are you in? ('?' for list) [US/Eastern] US/Michigan
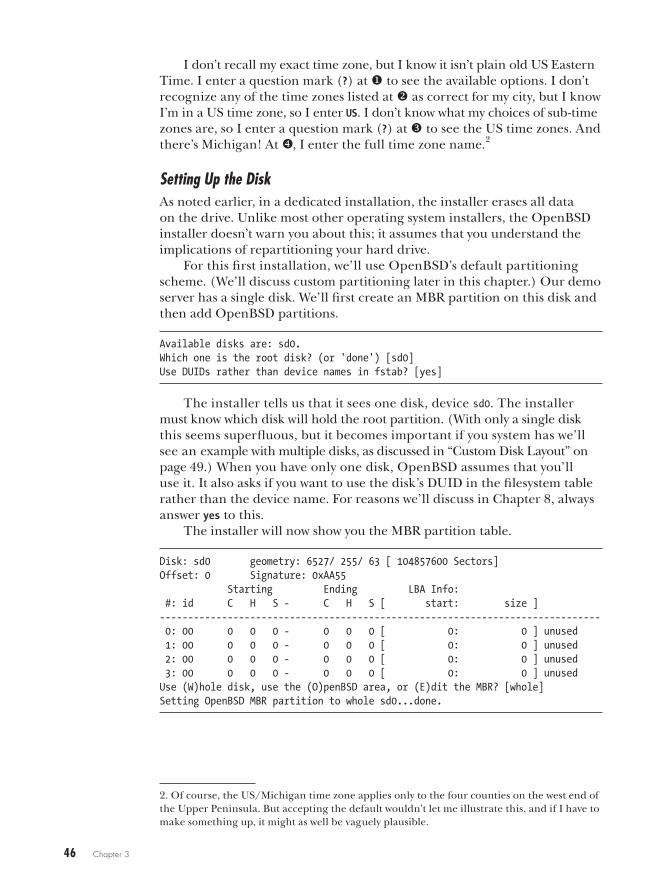
46 Chapter 3
I don’t recall my exact time zone, but I know it isn’t plain old US Eastern Time. I enter a question mark (?) at u to see the available options. I don’t recognize any of the time zones listed at v as correct for my city, but I know I’m in a US time zone, so I enter US. I don’t know what my choices of sub-time zones are, so I enter a question mark (?) at w to see the US time zones. And there’s Michigan! At x, I enter the full time zone name.2
Setting Up the DiskAs noted earlier, in a dedicated installation, the installer erases all data on the drive. Unlike most other operating system installers, the OpenBSD installer doesn’t warn you about this; it assumes that you understand the implications of repartitioning your hard drive.
For this first installation, we’ll use OpenBSD’s default partitioning scheme. (We’ll discuss custom partitioning later in this chapter.) Our demo server has a single disk. We’ll first create an MBR partition on this disk and then add OpenBSD partitions.
Available disks are: sd0.Which one is the root disk? (or 'done') [sd0]Use DUIDs rather than device names in fstab? [yes]
The installer tells us that it sees one disk, device sd0. The installer must know which disk will hold the root partition. (With only a single disk this seems superfluous, but it becomes important if you system has we’ll see an example with multiple disks, as discussed in “Custom Disk Layout” on page 49.) When you have only one disk, OpenBSD assumes that you’ll use it. It also asks if you want to use the disk’s DUID in the filesystem table rather than the device name. For reasons we’ll discuss in Chapter 8, always answer yes to this.
The installer will now show you the MBR partition table.
Disk: sd0 geometry: 6527/ 255/ 63 [ 104857600 Sectors]Offset: 0 Signature: 0xAA55 Starting Ending LBA Info: #: id C H S - C H S [ start: size ]------------------------------------------------------------------------------ 0: 00 0 0 0 - 0 0 0 [ 0: 0 ] unused 1: 00 0 0 0 - 0 0 0 [ 0: 0 ] unused 2: 00 0 0 0 - 0 0 0 [ 0: 0 ] unused 3: 00 0 0 0 - 0 0 0 [ 0: 0 ] unusedUse (W)hole disk, use the (O)penBSD area, or (E)dit the MBR? [whole]Setting OpenBSD MBR partition to whole sd0...done.
2. Of course, the US/Michigan time zone applies only to the four counties on the west end of the Upper Peninsula. But accepting the default wouldn’t let me illustrate this, and if I have to make something up, it might as well be vaguely plausible.
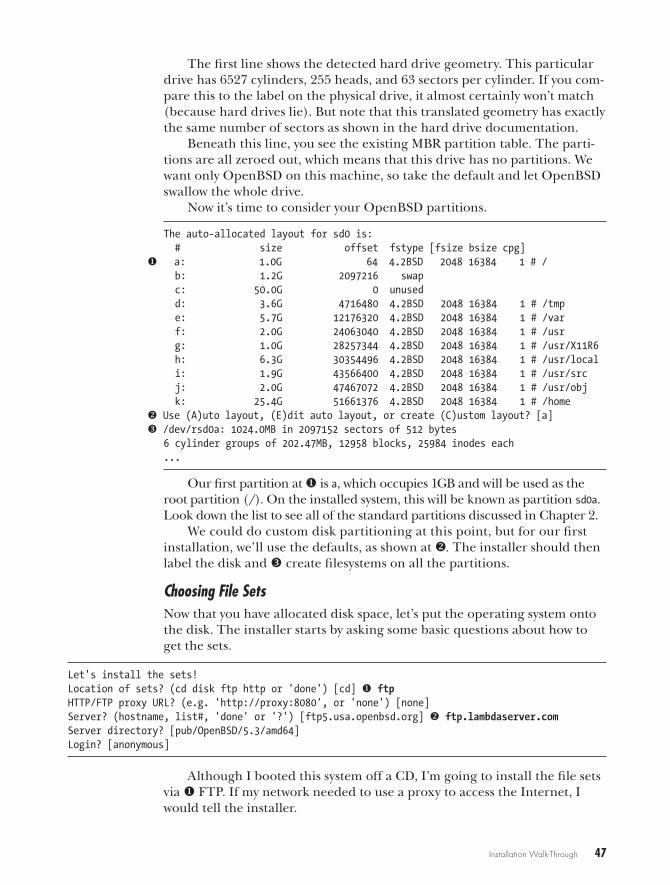
Installation Walk-Through 47
The first line shows the detected hard drive geometry. This particular drive has 6527 cylinders, 255 heads, and 63 sectors per cylinder. If you com-pare this to the label on the physical drive, it almost certainly won’t match (because hard drives lie). But note that this translated geometry has exactly the same number of sectors as shown in the hard drive documentation.
Beneath this line, you see the existing MBR partition table. The parti-tions are all zeroed out, which means that this drive has no partitions. We want only OpenBSD on this machine, so take the default and let OpenBSD swallow the whole drive.
Now it’s time to consider your OpenBSD partitions.
The auto-allocated layout for sd0 is: # size offset fstype [fsize bsize cpg]
u a: 1.0G 64 4.2BSD 2048 16384 1 # / b: 1.2G 2097216 swap c: 50.0G 0 unused d: 3.6G 4716480 4.2BSD 2048 16384 1 # /tmp e: 5.7G 12176320 4.2BSD 2048 16384 1 # /var f: 2.0G 24063040 4.2BSD 2048 16384 1 # /usr g: 1.0G 28257344 4.2BSD 2048 16384 1 # /usr/X11R6 h: 6.3G 30354496 4.2BSD 2048 16384 1 # /usr/local i: 1.9G 43566400 4.2BSD 2048 16384 1 # /usr/src j: 2.0G 47467072 4.2BSD 2048 16384 1 # /usr/obj k: 25.4G 51661376 4.2BSD 2048 16384 1 # /home
v Use (A)uto layout, (E)dit auto layout, or create (C)ustom layout? [a]w /dev/rsd0a: 1024.0MB in 2097152 sectors of 512 bytes
6 cylinder groups of 202.47MB, 12958 blocks, 25984 inodes each...
Our first partition at u is a, which occupies 1GB and will be used as the root partition (/). On the installed system, this will be known as partition sd0a. Look down the list to see all of the standard partitions discussed in Chapter 2.
We could do custom disk partitioning at this point, but for our first installation, we’ll use the defaults, as shown at v. The installer should then label the disk and w create filesystems on all the partitions.
Choosing File SetsNow that you have allocated disk space, let’s put the operating system onto the disk. The installer starts by asking some basic questions about how to get the sets.
Let's install the sets!Location of sets? (cd disk ftp http or 'done') [cd] u ftpHTTP/FTP proxy URL? (e.g. 'http://proxy:8080', or 'none') [none]Server? (hostname, list#, 'done' or '?') [ftp5.usa.openbsd.org] v ftp.lambdaserver.comServer directory? [pub/OpenBSD/5.3/amd64]Login? [anonymous]
Although I booted this system off a CD, I’m going to install the file sets via u FTP. If my network needed to use a proxy to access the Internet, I would tell the installer.
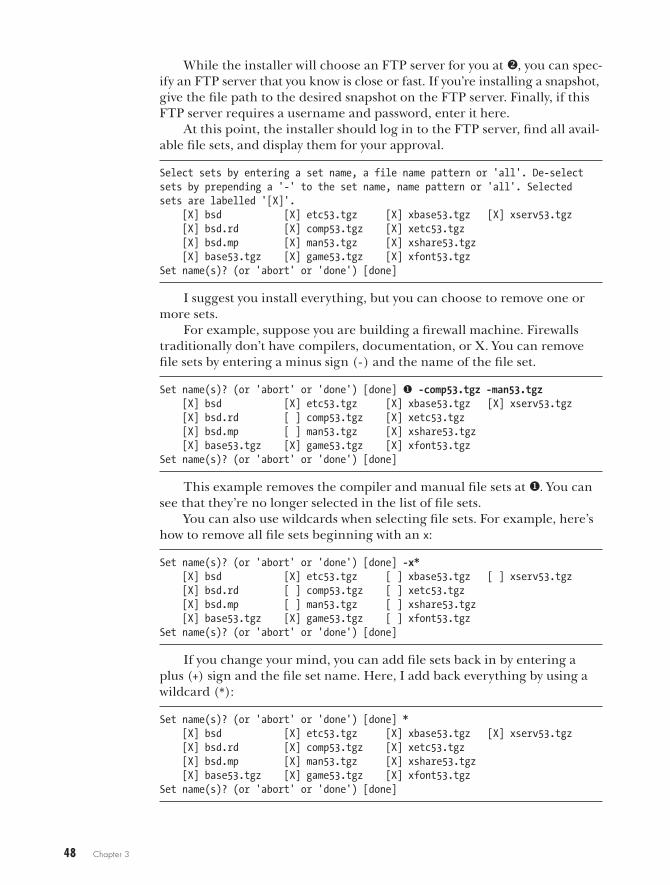
48 Chapter 3
While the installer will choose an FTP server for you at v, you can spec-ify an FTP server that you know is close or fast. If you’re installing a snapshot, give the file path to the desired snapshot on the FTP server. Finally, if this FTP server requires a username and password, enter it here.
At this point, the installer should log in to the FTP server, find all avail-able file sets, and display them for your approval.
Select sets by entering a set name, a file name pattern or 'all'. De-selectsets by prepending a '-' to the set name, name pattern or 'all'. Selectedsets are labelled '[X]'. [X] bsd [X] etc53.tgz [X] xbase53.tgz [X] xserv53.tgz [X] bsd.rd [X] comp53.tgz [X] xetc53.tgz [X] bsd.mp [X] man53.tgz [X] xshare53.tgz [X] base53.tgz [X] game53.tgz [X] xfont53.tgzSet name(s)? (or 'abort' or 'done') [done]
I suggest you install everything, but you can choose to remove one or more sets.
For example, suppose you are building a firewall machine. Firewalls traditionally don’t have compilers, documentation, or X. You can remove file sets by entering a minus sign (-) and the name of the file set.
Set name(s)? (or 'abort' or 'done') [done] u -comp53.tgz -man53.tgz [X] bsd [X] etc53.tgz [X] xbase53.tgz [X] xserv53.tgz [X] bsd.rd [ ] comp53.tgz [X] xetc53.tgz [X] bsd.mp [ ] man53.tgz [X] xshare53.tgz [X] base53.tgz [X] game53.tgz [X] xfont53.tgzSet name(s)? (or 'abort' or 'done') [done]
This example removes the compiler and manual file sets at u. You can see that they’re no longer selected in the list of file sets.
You can also use wildcards when selecting file sets. For example, here’s how to remove all file sets beginning with an x:
Set name(s)? (or 'abort' or 'done') [done] -x* [X] bsd [X] etc53.tgz [ ] xbase53.tgz [ ] xserv53.tgz [X] bsd.rd [ ] comp53.tgz [ ] xetc53.tgz [X] bsd.mp [ ] man53.tgz [ ] xshare53.tgz [X] base53.tgz [X] game53.tgz [ ] xfont53.tgzSet name(s)? (or 'abort' or 'done') [done]
If you change your mind, you can add file sets back in by entering a plus (+) sign and the file set name. Here, I add back everything by using a wildcard (*):
Set name(s)? (or 'abort' or 'done') [done] * [X] bsd [X] etc53.tgz [X] xbase53.tgz [X] xserv53.tgz [X] bsd.rd [X] comp53.tgz [X] xetc53.tgz [X] bsd.mp [X] man53.tgz [X] xshare53.tgz [X] base53.tgz [X] game53.tgz [X] xfont53.tgzSet name(s)? (or 'abort' or 'done') [done]
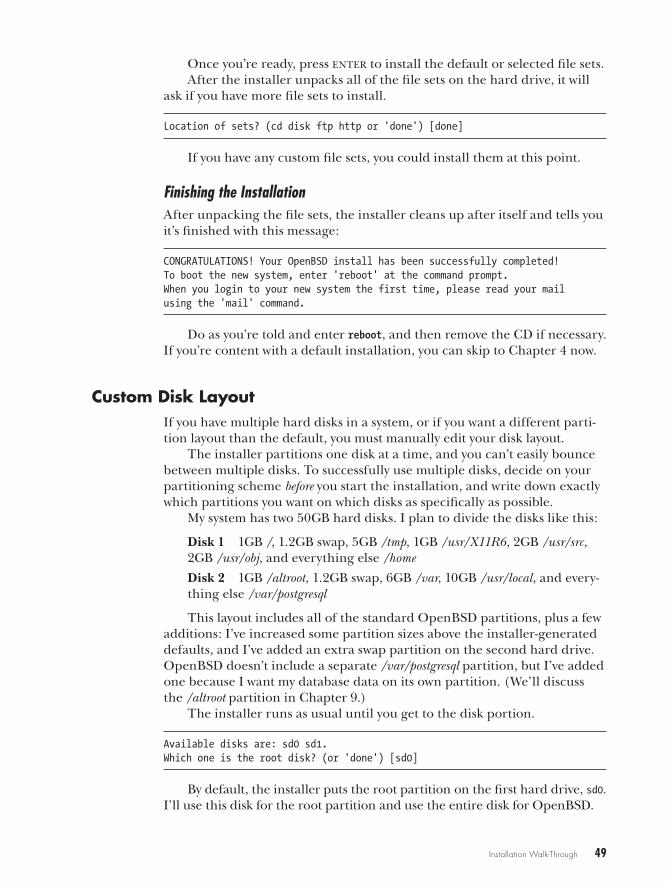
Installation Walk-Through 49
Once you’re ready, press enter to install the default or selected file sets.After the installer unpacks all of the file sets on the hard drive, it will
ask if you have more file sets to install.
Location of sets? (cd disk ftp http or 'done') [done]
If you have any custom file sets, you could install them at this point.
Finishing the InstallationAfter unpacking the file sets, the installer cleans up after itself and tells you it’s finished with this message:
CONGRATULATIONS! Your OpenBSD install has been successfully completed!To boot the new system, enter 'reboot' at the command prompt.When you login to your new system the first time, please read your mailusing the 'mail' command.
Do as you’re told and enter reboot, and then remove the CD if necessary. If you’re content with a default installation, you can skip to Chapter 4 now.
Custom Disk LayoutIf you have multiple hard disks in a system, or if you want a different parti-tion layout than the default, you must manually edit your disk layout.
The installer partitions one disk at a time, and you can’t easily bounce between multiple disks. To successfully use multiple disks, decide on your partitioning scheme before you start the installation, and write down exactly which partitions you want on which disks as specifically as possible.
My system has two 50GB hard disks. I plan to divide the disks like this:
Disk 1 1GB /, 1.2GB swap, 5GB /tmp, 1GB /usr/X11R6, 2GB /usr/src, 2GB /usr/obj, and everything else /home
Disk 2 1GB /altroot, 1.2GB swap, 6GB /var, 10GB /usr/local, and every-thing else /var/postgresql
This layout includes all of the standard OpenBSD partitions, plus a few additions: I’ve increased some partition sizes above the installer-generated defaults, and I’ve added an extra swap partition on the second hard drive. OpenBSD doesn’t include a separate /var/postgresql partition, but I’ve added one because I want my database data on its own partition. (We’ll discuss the /altroot partition in Chapter 9.)
The installer runs as usual until you get to the disk portion.
Available disks are: sd0 sd1.Which one is the root disk? (or 'done') [sd0]
By default, the installer puts the root partition on the first hard drive, sd0. I’ll use this disk for the root partition and use the entire disk for OpenBSD.

50 Chapter 3
The installer then presents a list of automatically generated disklabel partitions. We don’t want to use these partitions; we want to create our own from scratch.
Use (A)uto layout, (E)dit auto layout, or create (C)ustom layout? [a] c
We want a custom layout, so enter c.The installer should now drop us to the disklabel(8) command prompt,
indicated here by the > symbol:
You will now create an OpenBSD disklabel inside the OpenBSD MBRpartition. The disklabel defines how OpenBSD splits up the MBR partitioninto OpenBSD partitions in which filesystems and swap space are created.You must provide each filesystem's mountpoint in this program.
The offsets used in the disklabel are ABSOLUTE, i.e. relative to thestart of the disk, NOT the start of the OpenBSD MBR partition.
Label editor (enter '?' for help at any prompt)>
We can now use the interactive disklabel editor to create OpenBSD par-titions within the MBR partition, as discussed in the following sections.
Viewing DisklabelsThe p command prints the partition’s existing disklabel:
> pOpenBSD area: 64-104856255; size: 104856191; free: 32# size offset fstype [fsize bsize cpg] a: 2104448 64 4.2BSD 2048 16384 1 b: 2506143 2104512 swap c: 104857600 0 unused d: 10490432 4610656 4.2BSD 2048 16384 1...>
This is exactly the same information discussed in “Understanding Disklabels” on page 31. This hard drive previously had an OpenBSD installation, and the disklabel has those old partitions.
To display partition sizes in megabytes, enter p m:
> p mOpenBSD area: 64-104856255; size: 51199.3M; free: 0.0M# size offset fstype [fsize bsize cpg] a: 1027.6M 64 4.2BSD 2048 16384 1 b: 1223.7M 2104512 swap c: 51200.0M 0 unused d: 5122.3M 4610656 4.2BSD 2048 16384 1...
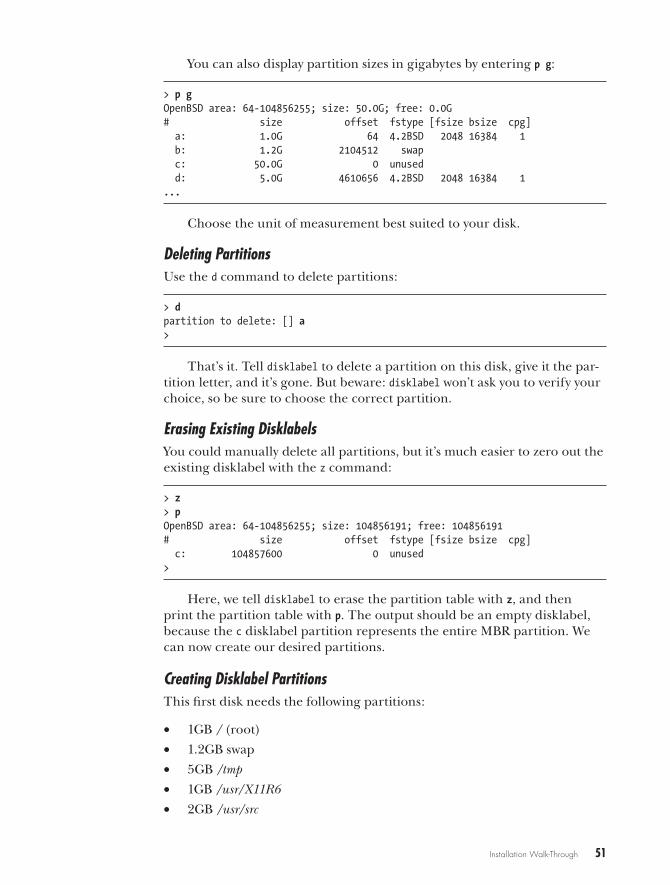
Installation Walk-Through 51
You can also display partition sizes in gigabytes by entering p g:
> p gOpenBSD area: 64-104856255; size: 50.0G; free: 0.0G# size offset fstype [fsize bsize cpg] a: 1.0G 64 4.2BSD 2048 16384 1 b: 1.2G 2104512 swap c: 50.0G 0 unused d: 5.0G 4610656 4.2BSD 2048 16384 1...
Choose the unit of measurement best suited to your disk.
Deleting PartitionsUse the d command to delete partitions:
> dpartition to delete: [] a>
That’s it. Tell disklabel to delete a partition on this disk, give it the par-tition letter, and it’s gone. But beware: disklabel won’t ask you to verify your choice, so be sure to choose the correct partition.
Erasing Existing DisklabelsYou could manually delete all partitions, but it’s much easier to zero out the existing disklabel with the z command:
> z> pOpenBSD area: 64-104856255; size: 104856191; free: 104856191# size offset fstype [fsize bsize cpg] c: 104857600 0 unused>
Here, we tell disklabel to erase the partition table with z, and then print the partition table with p. The output should be an empty disklabel, because the c disklabel partition represents the entire MBR partition. We can now create our desired partitions.
Creating Disklabel PartitionsThis first disk needs the following partitions:
• 1GB / (root)
• 1.2GB swap
• 5GB /tmp
• 1GB /usr/X11R6
• 2GB /usr/src
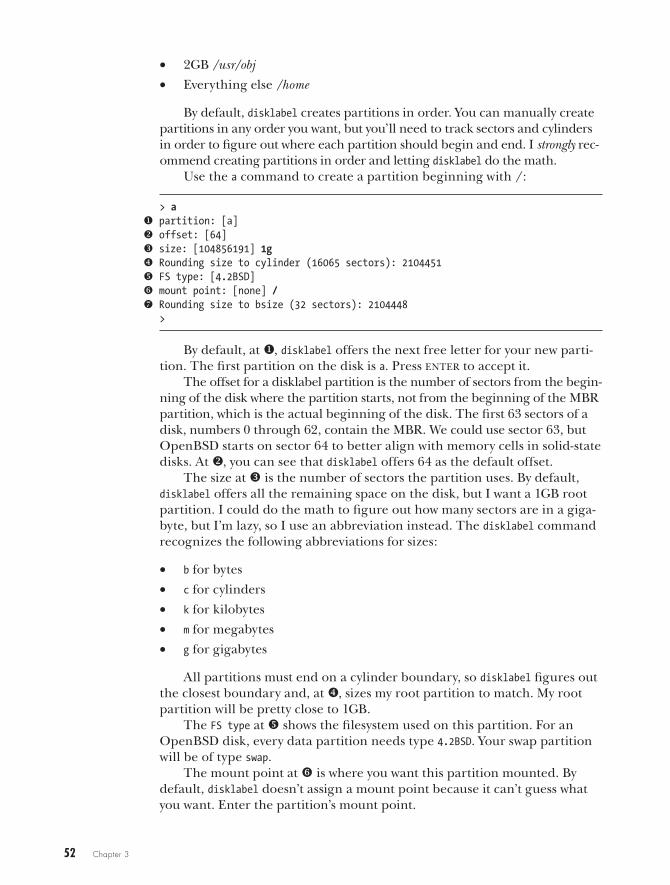
52 Chapter 3
• 2GB /usr/obj
• Everything else /home
By default, disklabel creates partitions in order. You can manually create partitions in any order you want, but you’ll need to track sectors and cylinders in order to figure out where each partition should begin and end. I strongly rec-ommend creating partitions in order and letting disklabel do the math.
Use the a command to create a partition beginning with / :
> au partition: [a]v offset: [64]w size: [104856191] 1gx Rounding size to cylinder (16065 sectors): 2104451y FS type: [4.2BSD]z mount point: [none] /{ Rounding size to bsize (32 sectors): 2104448
>
By default, at u, disklabel offers the next free letter for your new parti-tion. The first partition on the disk is a. Press enter to accept it.
The offset for a disklabel partition is the number of sectors from the begin-ning of the disk where the partition starts, not from the beginning of the MBR partition, which is the actual beginning of the disk. The first 63 sectors of a disk, numbers 0 through 62, contain the MBR. We could use sector 63, but OpenBSD starts on sector 64 to better align with memory cells in solid-state disks. At v, you can see that disklabel offers 64 as the default offset.
The size at w is the number of sectors the partition uses. By default, disklabel offers all the remaining space on the disk, but I want a 1GB root partition. I could do the math to figure out how many sectors are in a giga-byte, but I’m lazy, so I use an abbreviation instead. The disklabel command recognizes the following abbreviations for sizes:
• b for bytes
• c for cylinders
• k for kilobytes
• m for megabytes
• g for gigabytes
All partitions must end on a cylinder boundary, so disklabel figures out the closest boundary and, at x, sizes my root partition to match. My root partition will be pretty close to 1GB.
The FS type at y shows the filesystem used on this partition. For an OpenBSD disk, every data partition needs type 4.2BSD. Your swap partition will be of type swap.
The mount point at z is where you want this partition mounted. By default, disklabel doesn’t assign a mount point because it can’t guess what you want. Enter the partition’s mount point.
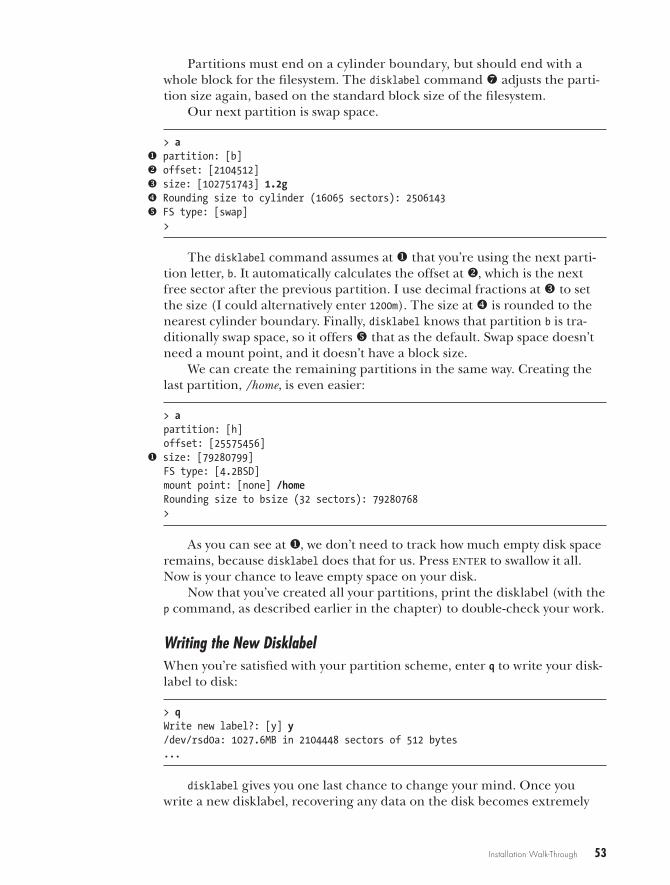
Installation Walk-Through 53
Partitions must end on a cylinder boundary, but should end with a whole block for the filesystem. The disklabel command { adjusts the parti-tion size again, based on the standard block size of the filesystem.
Our next partition is swap space.
> au partition: [b]v offset: [2104512]w size: [102751743] 1.2gx Rounding size to cylinder (16065 sectors): 2506143y FS type: [swap]
>
The disklabel command assumes at u that you’re using the next parti-tion letter, b. It automatically calculates the offset at v, which is the next free sector after the previous partition. I use decimal fractions at w to set the size (I could alternatively enter 1200m). The size at x is rounded to the nearest cylinder boundary. Finally, disklabel knows that partition b is tra-ditionally swap space, so it offers y that as the default. Swap space doesn’t need a mount point, and it doesn’t have a block size.
We can create the remaining partitions in the same way. Creating the last partition, /home, is even easier:
> apartition: [h]offset: [25575456]
u size: [79280799]FS type: [4.2BSD]mount point: [none] /homeRounding size to bsize (32 sectors): 79280768>
As you can see at u, we don’t need to track how much empty disk space remains, because disklabel does that for us. Press enter to swallow it all. Now is your chance to leave empty space on your disk.
Now that you’ve created all your partitions, print the disklabel (with the p command, as described earlier in the chapter) to double-check your work.
Writing the New DisklabelWhen you’re satisfied with your partition scheme, enter q to write your disk-label to disk:
> qWrite new label?: [y] y/dev/rsd0a: 1027.6MB in 2104448 sectors of 512 bytes...
disklabel gives you one last chance to change your mind. Once you write a new disklabel, recovering any data on the disk becomes extremely
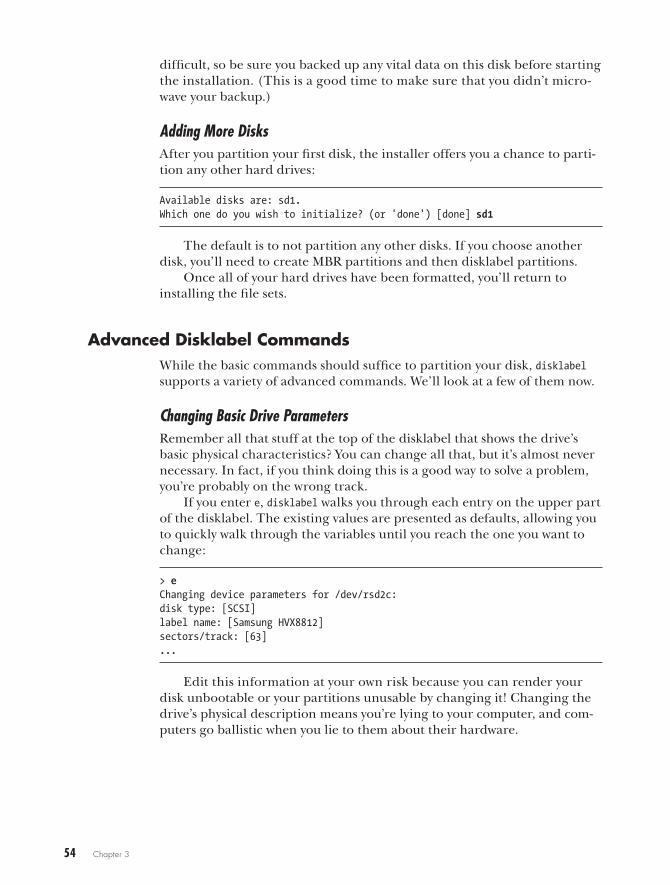
54 Chapter 3
difficult, so be sure you backed up any vital data on this disk before starting the installation. (This is a good time to make sure that you didn’t micro-wave your backup.)
Adding More DisksAfter you partition your first disk, the installer offers you a chance to parti-tion any other hard drives:
Available disks are: sd1.Which one do you wish to initialize? (or 'done') [done] sd1
The default is to not partition any other disks. If you choose another disk, you’ll need to create MBR partitions and then disklabel partitions.
Once all of your hard drives have been formatted, you’ll return to installing the file sets.
Advanced Disklabel CommandsWhile the basic commands should suffice to partition your disk, disklabel supports a variety of advanced commands. We’ll look at a few of them now.
Changing Basic Drive ParametersRemember all that stuff at the top of the disklabel that shows the drive’s basic physical characteristics? You can change all that, but it’s almost never necessary. In fact, if you think doing this is a good way to solve a problem, you’re probably on the wrong track.
If you enter e, disklabel walks you through each entry on the upper part of the disklabel. The existing values are presented as defaults, allowing you to quickly walk through the variables until you reach the one you want to change:
> eChanging device parameters for /dev/rsd2c:disk type: [SCSI]label name: [Samsung HVX8812]sectors/track: [63]...
Edit this information at your own risk because you can render your disk unbootable or your partitions unusable by changing it! Changing the drive’s physical description means you’re lying to your computer, and com-puters go ballistic when you lie to them about their hardware.
Installation Walk-Through 55
Modifying Existing PartitionsThe m command modifies existing partitions. The disklabel tool walks you through each of the values you entered when creating the disk, offering your original values as defaults and allowing you to change them. But most of the time, it’s easier to just delete the partition and re-create it.
Entering Expert ModeExpert mode gives the advanced user access to some rarely used options in disklabel. Most people don’t need these and find them simply clutter. (It’s not as if disklabel isn’t complicated enough already.)
To access expert mode, use the X command. You won’t immediately see all of the options available, but entering other commands will produce more options and more output.
Getting More HelpYou can enter a single question mark (?) at the disklabel prompt for a brief list of all available commands. If you want more detailed help, the M com-mand displays the disklabel(8) man page.
You’ve now installed OpenBSD. Let’s see what to do next.

4P o s t - I n s t a l l s e t u P
Installation first, now configure the software.
Server is ready.
You’ve installed OpenBSD and rebooted into a bare-bones system. Of course, a min-
imal Unix-like system is actually pretty bor-ing. While it makes for a powerful foundation,
it doesn’t actually do much of anything.To get you started, this chapter covers some of the basic steps you should
take after installing OpenBSD to establish a firm platform for later work. We’ll jump right into basic tasks such as correcting the time zone, setting a default gateway, and setting an email alias for the root account.
But a bit of forewarning: You can change a surprising amount of OpenBSD’s configuration when the system is up and running. You can reconfigure the hostname, network configuration, and time and date, as well as stop, start, or reset daemons as you see fit. But just because you can doesn’t mean that you should.
While playing arbitrarily with a desktop or laptop machine might be fine, if you’re running a server, you should test your configuration by rebooting. Make sure that the system boots exactly as desired before adding services.
58 Chapter 4
If you find that OpenBSD boots fine but you must poke the network card before it works, fix that before proceeding.
n o t e The afterboot(8) man page has up-to-date advice for systems administrators who have just installed their first OpenBSD system. Much of this advice overlaps material that we’ll cover in this book (in a much more exciting fashion, I’m sure), while some of it applies only to specific use cases. Read the afterboot documentation on your system for the very latest information.
All of the tasks in this chapter must be performed as root. We’ll discuss creating additional users in Chapter 6 and ways to avoid using the root account in Chapter 7, but you don’t need to do that on a newly installed sys-tem. Configure the system properly before you start letting people log on, or you’ll wish you had.1
First StepsThe first two things you should do after installing a new system are check for any operating system patches or errata and change the root administra-tive password. These steps are critical, so don’t skip them.
Checking the System ErrataBelieve it or not, OpenBSD isn’t perfect. Releases sometimes have bugs. Some of these are serious problems; others not so much.
When the OpenBSD team learns of a serious problem with a release, it issues an errata list, and whenever you build a new server, you should check the errata list at http://www.OpenBSD.org/errata.html. Critical errata are also announced on [email protected], so if you’re on that mailing list, you’ll get notifications of new errata. You’ll also see errata notices on http://www.undeadly.org/.
Errata won’t always affect your use case. For example, as I write this, OpenBSD 5.0 has one errata notice: a problem in the BIND name server. If this server won’t run BIND, don’t worry about this errata. If you’re build-ing a name server, however, you need this information before going into production.
If you’re in doubt, correct your system as recommended in the errata, which may require building one or more parts of OpenBSD from source. (I’ll discuss errata and building OpenBSD at length in Chapter 20.)
Setting the Root PasswordYou needed to choose a root password during installation. To change it, use the passwd(1) command. Of course, you must be root to change root’s password.
1. Saying “Sorry about the timestamps errors in your vital data, but I hadn’t set the system clock yet” is roughly equivalent to saying “I don’t care about you or your data.” If you feel that way, I’m not going to argue, but at least have the confidence to tell the user what you really think.
Post-Install Setup 59
Software ConfigurationWhen the OpenBSD kernel finishes its initial system setup and hands con-trol of the system over to userland, init(8) runs the shell script /etc/rc. This script starts all of the programs integrated with the system and performs general system configuration, such as configuring network interfaces and starting server software. To enable, disable, or otherwise configure inte-grated software, modify the files /etc/rc.conf and /etc/rc.conf.local. (I’ll cover the OpenBSD boot process in detail in Chapter 5, but for now, this section will get you started.)
The files rc.conf and rc.conf.local contain shell script variable assignments that control what /etc/rc runs and the command-line options for the various programs. Keep in mind that any entries in rc.conf.local override rc.conf state-ments. Most variable assignments have three legitimate values: an uppercase NO, command-line flags in quotation marks ("-D"), or double quotes (""), which are equivalent to empty. Each variable looks something like this entry from rc.conf:
ntpd_flags=NO # for normal use: ""
The variable ntpd_flags controls the command-line flags that /etc/rc uses when starting ntpd(8).
A NO disables this particular piece of functionality. In the preceding example, the NTP daemon ntpd(8) is disabled.
If the variable is empty, /etc/rc starts the program without any command-line arguments. For example, this ntpd_flags entry means that ntpd is to be started without any arguments.
ntpd_flags=""
Anything within quotes is used as a command-line argument to the program. (If a program has typical default flags, they’ll usually appear in rc.conf.) The following example assigns the variable ntpd_flags the value -s. When the system boots, rather than running ntpd, it will run ntpd -s:
ntpd_flags="-s"
Some variables have additional possible values. For example, the PF packet filter (see Chapter 21) is enabled with a YES. To enable the NFS auto-mounter daemon, you’ll need to use a path to the master map. (If you don’t know what the automounter is, that’s fine—not many do these days.) Just realize that weird values for rc.conf variables do exist. You’ll see these values listed in rc.conf.
n o t e OpenBSD defaults appear in /etc/rc.conf, but do not edit this file! This is a core system file, and will be replaced during an upgrade. Put your local changes in /etc/rc.conf.local. Entries in rc.conf.local will override the defaults in rc.conf.

60 Chapter 4
Time and DateCorrect system time is not only a convenience, but also a security issue, because many attacks rely on changing the system clock. However, if your system clock is wrong to start with, you won’t notice a change. Without coherent time across all your servers, you’ll never be able to correlate your logs when troubleshooting. What’s the solution? Fix your time settings before you do anything else. Correcting the time requires both setting a time zone and the clock.
Setting the Time ZoneThe installer tries really hard to guess your time zone, using geolocation tricks and a script at the OpenBSD website. If these didn’t work for you, or if you weren’t on the Internet when you installed OpenBSD, or if your com-pany policy says that all servers will run in time zone X, fix your time zone before anyone notices.
The directory /usr/share/zoneinfo contains all of the time zones, as well as several subdirectories for countries or continents with various time zones. For example, Western Siberia runs on Omsk time (found in the file /usr/share/zoneinfo/Asia/Omsk). Presumably, you have some idea of your local time zone and where it might be filed.
To set the system time zone, create a symbolic link to it from /etc/localtime. Use date(1) to make sure that the time zone has been set correctly:
# ln -fs /usr/share/zoneinfo/Asia/Omsk /etc/localtime# dateThu Mar 14 06:02:56 OMST 2013
OpenBSD also supports POSIX time zones found in /usr/share/zoneinfo/Etc. POSIX time zones have their own rules. Do not use them unless you are absolutely sure you understand them. (Hint: You don’t.)
Setting the Date and TimeNow that you have set a time zone, set the correct time and date. OpenBSD includes OpenNTPD, a BSD-licensed simplified NTP daemon. If at all pos-sible, use ntpd(8) to manage the time. If you can’t access NTP servers (say, if you’re on a private network without them), set up your own. And if you can’t set up time servers, set the system time manually.
Setting the Time with ntpd(8)
Configure OpenNTPD in /etc/ntpd.conf. The syntax should be familiar to you if you’ve managed any other NTP daemon.
For basic time, you need time servers, ideally three or more. If you don’t have local time servers, use publicly accessible time servers, such as the hosts available at http://pool.ntp.org/.
Post-Install Setup 61
List your servers in /etc/ntpd.conf:
servers pool.ntp.org
Then enable ntpd in /etc/rc.conf.local:
ntpd_flags=
By default, ntpd slowly adjusts system time by skewing the system clock. If the system time is a few seconds off, slow adjustment will usually suffice, but if it’s off by minutes or more, have ntpd correct the system time on startup and then adjust the time as needed. To enable time correction at startup, use the -s flag:
ntpd_flags="-s"
Time skews most badly on heavily used hardware, lousy hardware, and virtual machines.
Setting the Date Manually
To set the date and time manually, use date(1). First, make sure that you know the current year, month, day of the month, and time (in 24-hour format). Then set the date and time using this format:
# date YYYYmmDDhhMM
For example, to set the date to February 3, 2013 and the time to 1:17 pm, run this:
# date 201302031317Sun Feb 3 13:17:00 GMT 2013
That said, date(1) will not correct your clock on an ongoing basis, and on some hardware with poor clocks, the time will slowly skew. A virtual machine on heavily loaded hardware will almost certainly lose time. Use NTP to deal with that.
HostnameSet the system’s hostname in /etc/myname. My test system is called caddis .blackhelicopters.org.
$ cat /etc/mynamecaddis.blackhelicopters.org
To change the hostname, edit /etc/myname. The new hostname takes effect after the next reboot.
62 Chapter 4
To change the hostname until the next boot, use hostname -s and the new hostname, like this:
# hostname -s treble.blackhelicopters.org# hostnametreble.blackhelicopters.org
You can edit /etc/myname and run hostname -s to make a change take effect immediately and persist after the next boot.
NetworkingIf you installed OpenBSD over the Internet, at least one Ethernet card should be configured and working. But if you installed from CD, you didn’t need to configure the network to install OpenBSD. If you installed OpenBSD on one network and want to move the machine to another network, you’ll need to reconfigure the network on your system.
I cover network principles in Chapter 11 and configuration in Chap-ter 12, but this brief entry will attach valid network addresses to your sys-tem, install a default route, and get DNS resolution working. If you’re not sure what to do here, don’t do anything until you read the later chapters.
To make network changes take effect, you can either reboot or run the network startup script /etc/netstart, like this:
# sh /etc/netstart
To configure only one interface, give the interface’s name as an argument:
# sh /etc/netstart em0
Again, if your system is a server, reboot before you declare the server ready for production.
Configuring Ethernet InterfacesFor a complete list of network interfaces recognized by your host, run ifconfig(8). You should see a bunch of entries, like this:
u em0: flags=8843<UP,BROADCAST,RUNNING,SIMPLEX,MULTICAST> mtu 1500 lladdr 00:0c:29:d2:37:be priority: 0 groups: egress media: Ethernet autoselect (1000baseT full-duplex,master) status: active
v inet 192.0.2.36 netmask 0xffffffe0 broadcast 192.0.2.63 inet6 fe80::20c:29ff:fed2:37be%em0 prefixlen 64 scopeid 0x1
Post-Install Setup 63
Every OpenBSD system comes with the default interfaces lo0 (loop-back), enc0 (encapsulating interface), and pflog0 (PF logging, discussed in Chapter 21). These are virtual interfaces that don’t actually attach your sys-tem to the local Ethernet. Other interfaces will be physical network ports, like the Ethernet interface em0 at u.
Every Ethernet card has its own configuration file, /etc/hostname .interfacename. The em0 interface in the example is configured in the file /etc/hostname.em0. If the file doesn’t exist, create it.
At v, you see the IP address. The format of static IP addresses depends on the IP version in use.
Static IP Addresses
For IP version 4 (IPv4) addresses, the common format is as follows:
inet ipaddress netmask broadcastaddress options
This format includes these elements:
• The inet keyword indicates this is an IPv4 address.
• The IP address (ipaddress) appears in standard dotted-quad notation.
• The netmask can appear in dotted-quad format (255.255.255.224) or in hexadecimal (0xffffffe0).
• The broadcast address (broadcastaddress) gives you the option to hard-code the broadcast address on this network. If you leave this blank or use the word NONE, OpenBSD computes the correct broadcast address from the IP address and netmask given earlier. If you use ifconfig(8) options, you must use the word NONE to provide spacing. (You can also provide the netmask in “slash” notation directly after the IP address, as in 192.0.2.2/24.)
• The options space is where you should put any specific ifconfig(8) com-mands needed for this interface, like hardcoded speed or duplex. (See Chapters 11 and 12 for examples, and the hostname.if(5) man page for the full details.)
When working with IP version 6 (IPv6) addresses, the format is as follows:
inet6 address prefixlength options
This format includes these elements:
• The inet6 keyword tells the system that this is an IPv6 address.
• The address space is for the IPv6 address, without a prefix length.
• The prefix length (prefixlength) appears separately, without a slash.
• As with IPv4, you can use ifconfig(8) options as needed.
64 Chapter 4
Even a very simple configuration will get a machine on the network. The following configures em0 with the IPv4 address 192.0.2.2 and netmask 255.255.255.224. It also has the IPv6 address of 2001:DB8:7700::2/64.
$ cat /etc/hostname.em0inet 192.0.2.2 255.255.255.224inet6 2001:DB8::2 64
Anything that doesn’t follow these IPv4 and IPv6 formats is passed directly to ifconfig. However, if you don’t know if a particular configuration will work, try it at the command line first.
Dynamic Configuration
When performing dynamic configuration, if the machine is an IPv4 DHCP client, use the string dhcp in hostname.if. For IPv6 autoconfiguration, use the string rtsol, by itself on a single line, to tell OpenBSD to use the rtsol(8) IPv6 autoconfiguration program.
$ cat /etc/hostname.em0dhcprtsol
In order for IPv6 autoconfiguration to work, you must disable IPv6 routing with these two entries in /etc/sysctl.conf:
net.inet6.ip6.forwarding=0net.inet6.ip6.accept_rtadv=1
These values already exist in /etc/sysctl.conf, but they’re commented out.
Setting a Default GatewayTo set either the IPv4 or IPv6 default gateway, place the gateway IP address on a single line in /etc/mygate, with no other entries in the file. You can con-figure default gateways for both protocols, each on its own line. The change should take place on your next reboot, or use route(8) to manually change the default gateway. The following sets both an IPv4 and an IPv6 default gateway.
192.0.2.12001:DB8::1
Dynamic configuration requires setting a default route. If your /etc/hostname.if file contains a dynamic configuration statement, /etc/mygate will not be used for that IP protocol.
Post-Install Setup 65
Setting Name Service ServersIf you want to contact other machines by hostname, you need to set Domain Name Service (DNS) servers.
Chapter 12 covers DNS resolution in detail, but /etc/resolv.conf contains the basic client settings. Its first line defines the local domain with the domain keyword and a domain name. Name servers appear on subsequent lines, defined with the keyword nameserver and an IP address, as shown here:
domain blackhelicopters.orgnameserver 192.0.2.1nameserver 192.0.2.3
Mail Aliases and Status MailEvery OpenBSD system runs maintenance tasks daily, weekly, and monthly, and sends email messages with the results to the local root account. I dis-cuss these maintenance jobs in Chapter 15. If you have more than a couple of servers, you should probably forward these email messages to a single central account.
The OpenBSD system redirects email messages addressed to local users to other users or remote email addresses, as configured in /etc/mail/aliases. Here are a few entries:
...# Basic system aliases -- these MUST be presentMAILER-DAEMON: postmasterpostmaster: root...
The original recipient appears on the left, followed by a colon, and a list of people to forward the messages to. If you have multiple recipients separate them with commas. Mail addressed to MAILER-DAEMON on the local system is forwarded to the postmaster account, which, in turn, is for-warded to the root account.
You should create an alias for root, directing mail sent to root to your systems administration team:
root: [email protected], [email protected]
After changing /etc/mail/aliases, run newaliases(8) to update email forwarding.
66 Chapter 4
Keyboard MappingOpenBSD tries to guess your correct keyboard mapping. USB keyboards have mechanisms to declare their country code. If autodetection doesn’t work, you can change the keyboard layout with kbd(8), and set it at boot with /etc/kbdtype.
Before touching the keyboard layout, use kbd to find your current key-board map. kbd -l lists the more than 100 keyboard encodings OpenBSD supports. Browse the list for your supported keyboard layout, or use grep to reduce the list. I’m a Dvorak user, so I search for it like this:
# kbd -l | grep dvorakfr.dvorakus.dvorak...
My preferred layout is us.dvorak. I enter us.dvorak in /etc/kbdtype, and after my next reboot, the console should use the Dvorak layout.
To set the keymap immediately to Dvorak, I could use kbd:
# kbd us.dvorakkbd: keyboard mapping set to us.dvorak
Read more about changing the console in Chapter 17.
Installing Ports and Source CodeIf you intend to build your own OpenBSD releases or heavily customize OpenBSD, you’ll need the operating system source code (see Chapters 18, 19, and 20). If you intend to build your own packages (covered in Chapter 13), you’ll need the ports tree. Both the ports tree and the system source code are specific to an OpenBSD release, and if you need them, install them when you install the system.
The ports tree is the compressed file ports.tar.gz in the release directory where you stored OpenBSD—either on the mirror site or the CD. All archi-tectures share one ports tree. Download this file to your home directory and extract it in /usr.
# cd /usr/# tar -xzvf $HOME/ports.tar.gz
This extracts the ports tree to /usr/ports.The system source code is found in three files in the release directory:
the kernel source code sys.tar.gz (see Chapter 19), userland source code src.tar.gz (see Chapter 20), and the Xenocara xenocara.tar.gz (see Chapter 20). Extract Xenocara to /usr, and the others to /usr/src.

Post-Install Setup 67
Booting to a Graphic ConsoleOpenBSD boots into a text console by default. To boot into an X-based graphic console, use the xdm(1) command in /etc/rc.conf.local. The default xdm setting is NO, so by changing it to empty quotes you enable it.
xdm_flags=""
If you need a more complicated xdm setup, put any command-line argu-ments inside the quotes.
Onward!Armed with the information in this chapter, you should be able to get your system on your local network and make it at least minimally comfortable to work with. Next, let’s take a look at the OpenBSD boot process.

5T h e B o o T P r o c e s s
Single-user mode unscheduled in the nighttime? Something just went “boom”!
In order to properly manage any comput-ing platform, you must understand the
boot process. Many systems administration tasks cannot be done while the system is run-
ning. OpenBSD specifically requires that certain tasks be done before the boot process has completed. And, of course, on any operating system, sometimes a process starting up prevents the system from completing its boot. The only way to fix these problems is to interrupt the boot partway through.
First, we’ll look at the key to OpenBSD’s booting process: the boot loader. Then we’ll move on to single-user mode, and finally multiuser startup. You can perform useful work at any of these stages.
I recommend playing with the OpenBSD boot process on a test machine before one of your machines won’t boot. That way, when something breaks in the wee hours of the morning, you can spend your time fixing the problem instead of fumbling around with unfamiliar commands.
70 Chapter 5
Power-On and the Boot LoaderIn general, when a PC-style computer first boots, it starts the BIOS. The BIOS is a small piece of software that figures out things like which drives are attached and what they’re attached to, what sort of CPU is installed, and how much memory is available. After getting that information, the BIOS loads a minimal boot loader from some kind of storage device.1
The boot loader is a small program that handles initial system configu-ration and boots the kernel. It finds and starts the kernel, which in turn detects hardware, attaches device drivers, and performs other core setup. Finally, the kernel calls init(8), which starts processes and enables user pro-grams, network interfaces, server software, and so on.
While most of this process cannot be managed—no one actually con-figures init!—there’s plenty you can do before the system finishes booting and dumps you at the login screen.
The OpenBSD boot loader lets you interrupt the boot process, con-figure the system before it boots, adjust kernel settings, and even boot an alternate kernel.
When the hardware hands control of the boot process over to the OpenBSD partition, you’ll see the boot loader prompt, which looks some-thing like this:
>> OpenBSD/amd64 BOOT 3.18boot>
The boot loader’s main purpose is to find the kernel, load it into mem-ory, and start it. Because it runs before the kernel starts, the boot loader can pass instructions to the kernel itself.
Here are some of the things you can do before booting is complete:
Use built-in helpUse the help function to print a brief list of commands that the boot loader supports.
boot> helpcommands: # boot echo env help ls machine reboot set stty timemachine: boot diskinfo memory
Delay the boot processBy default, the loader waits five seconds for instructions, and then boots the kernel. To pause the boot at the prompt, press the spacebar.
Set the boot timeoutTo set a new boot idle timeout, specify a number of seconds with the set timeout command.
1. On i386 and amd64 systems, this is where the MBR comes in.
The Boot Process 71
boot> set timeout 10
After the boot prompt is idle for 10 seconds, the system should boot.
Boot the systemIf you’ve paused the boot process, the system won’t boot until you tell it to. When you’re ready to boot, use the boot command:
> boot
We’ll use various permutations of boot to configure the kernel, boot single-user mode, and so on. I’ll cover other boot commands in the appropriate sections. For full details on what you can do at the boot loader prompt, read the boot(8) man page.
Booting in Single-User ModeSingle-user mode is the earliest point when OpenBSD can give you a Unix-style shell prompt. At this point, the kernel has probed all the hardware, attached drivers to all the hardware that it’s going to acknowledge, and started init. The system hasn’t mounted any filesystems except for the root partition, which is mounted in read-only mode. The network isn’t started, no services are running, security is not implemented, and filesystem permis-sions are ignored.
To boot OpenBSD in single-user mode, enter boot -s at the loader prompt.
boot> boot -s
Why would you want to boot into single-user mode? If your computer has a problem that is preventing it from booting, you should be able to access single-user mode and fix the problem. Suppose a failed disk is pre-venting the system from booting during a multiuser boot, or you changed your terminal settings in /etc/ttys and now you can’t log on to the system. Or maybe you put a daft setting in rc.conf.local, and the boot process hangs because it’s trying to do something impossible. At times like these, single-user mode is your best friend.
Also, some system administration tasks, such as clearing filesystem flags (see Chapter 8), can be done only in single-user mode.
Mounting Disks in Single-User ModeUsually, you should have a fully functional filesystem before doing anything in single-user mode. If your system crashed, be sure to check the integrity of your filesystems before mounting them:
# fsck -p/dev/sd0a (e4bf0318329fe596.a): file system is clean; not checking
72 Chapter 5
/dev/sd0h (e4bf0318329fe596.h): file system is clean; not checking...# mount -a
fsck and mount have many more options. We’ll cover them in more detail in Chapter 8.
Once you’ve mounted all of your filesystems, all usual command-line software should be available. You should be able to edit configuration files, start and stop programs, and generally do whatever you like to the system (including destroy it).
Starting the Network in Single-User ModeUse the shell script /etc/netstart to configure the network while in single-user mode. (You could run all the appropriate commands by hand, but /etc/netstart will read your system’s configuration files and do the grunt work for you.) You must explicitly run this script through sh:
# sh /etc/netstart
If you’re booting into single-user mode because of network problems, this script will conveniently reproduce the issue for you.
Booting an Alternate KernelAs we’ll cover in tedious detail in Chapter 18, you can configure the OpenBSD kernel, but before you do so, be sure that you can boot alternate kernels. You’ll need to be able to boot a different kernel if, say, you hose your file-system so badly that it won’t even boot to single-user mode, and you need to recover using the installation kernel.
Booting a Different Kernel FileAn OpenBSD installation includes three kernels out of the box: the single-processor kernel /bsd, the multiprocessor kernel /bsd.mp, and the upgrade and install kernel /bsd.rd. (If your machine has multiple processors, the installer renames /bsd to /bsd.sp and /bsd.mp to /bsd.)
To boot a nonstandard kernel, first reboot and interrupt the boot pro-cess at the boot loader prompt. Run boot, and give the full path to the kernel you want to boot:
boot> boot /bsd.rd
This will start the system using your chosen kernel. You can use other boot options as well, such as booting the alternate kernel in single-user mode:
boot> boot -s /bsd.sp
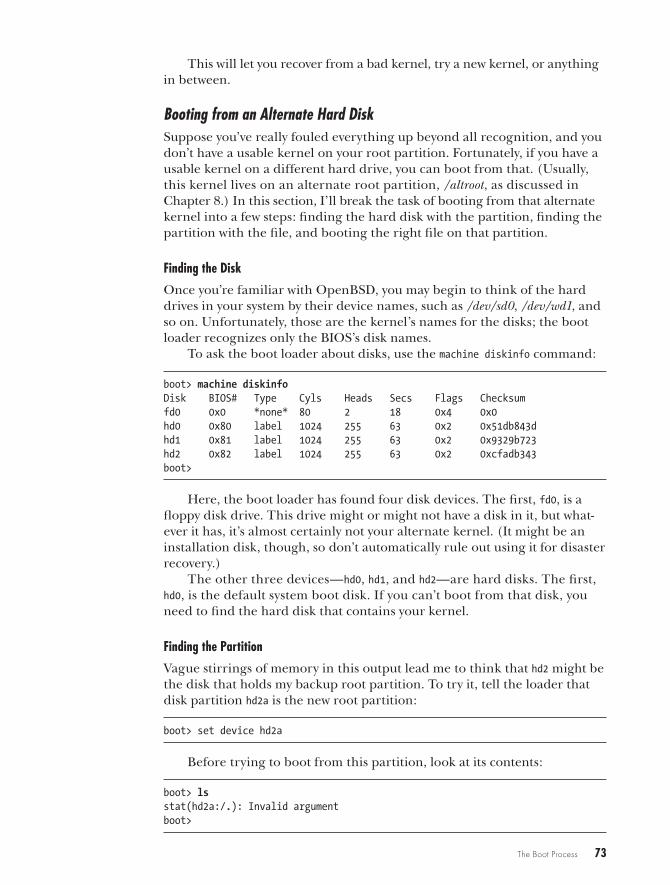
The Boot Process 73
This will let you recover from a bad kernel, try a new kernel, or anything in between.
Booting from an Alternate Hard DiskSuppose you’ve really fouled everything up beyond all recognition, and you don’t have a usable kernel on your root partition. Fortunately, if you have a usable kernel on a different hard drive, you can boot from that. (Usually, this kernel lives on an alternate root partition, /altroot, as discussed in Chapter 8.) In this section, I’ll break the task of booting from that alternate kernel into a few steps: finding the hard disk with the partition, finding the partition with the file, and booting the right file on that partition.
Finding the Disk
Once you’re familiar with OpenBSD, you may begin to think of the hard drives in your system by their device names, such as /dev/sd0, /dev/wd1, and so on. Unfortunately, those are the kernel’s names for the disks; the boot loader recognizes only the BIOS’s disk names.
To ask the boot loader about disks, use the machine diskinfo command:
boot> machine diskinfoDisk BIOS# Type Cyls Heads Secs Flags Checksumfd0 0x0 *none* 80 2 18 0x4 0x0hd0 0x80 label 1024 255 63 0x2 0x51db843dhd1 0x81 label 1024 255 63 0x2 0x9329b723hd2 0x82 label 1024 255 63 0x2 0xcfadb343boot>
Here, the boot loader has found four disk devices. The first, fd0, is a floppy disk drive. This drive might or might not have a disk in it, but what-ever it has, it’s almost certainly not your alternate kernel. (It might be an installation disk, though, so don’t automatically rule out using it for disaster recovery.)
The other three devices—hd0, hd1, and hd2—are hard disks. The first, hd0, is the default system boot disk. If you can’t boot from that disk, you need to find the hard disk that contains your kernel.
Finding the Partition
Vague stirrings of memory in this output lead me to think that hd2 might be the disk that holds my backup root partition. To try it, tell the loader that disk partition hd2a is the new root partition:
boot> set device hd2a
Before trying to boot from this partition, look at its contents:
boot> lsstat(hd2a:/.): Invalid argumentboot>
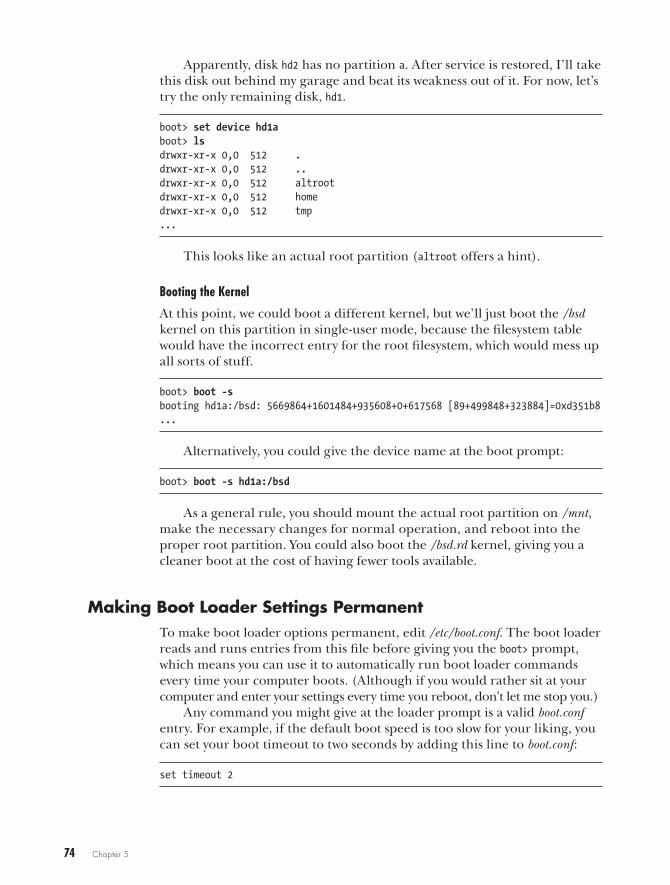
74 Chapter 5
Apparently, disk hd2 has no partition a. After service is restored, I’ll take this disk out behind my garage and beat its weakness out of it. For now, let’s try the only remaining disk, hd1.
boot> set device hd1aboot> lsdrwxr-xr-x 0,0 512 .drwxr-xr-x 0,0 512 ..drwxr-xr-x 0,0 512 altrootdrwxr-xr-x 0,0 512 homedrwxr-xr-x 0,0 512 tmp...
This looks like an actual root partition (altroot offers a hint).
Booting the Kernel
At this point, we could boot a different kernel, but we’ll just boot the /bsd kernel on this partition in single-user mode, because the filesystem table would have the incorrect entry for the root filesystem, which would mess up all sorts of stuff.
boot> boot -sbooting hd1a:/bsd: 5669864+1601484+935608+0+617568 [89+499848+323884]=0xd351b8...
Alternatively, you could give the device name at the boot prompt:
boot> boot -s hd1a:/bsd
As a general rule, you should mount the actual root partition on /mnt, make the necessary changes for normal operation, and reboot into the proper root partition. You could also boot the /bsd.rd kernel, giving you a cleaner boot at the cost of having fewer tools available.
Making Boot Loader Settings PermanentTo make boot loader options permanent, edit /etc/boot.conf. The boot loader reads and runs entries from this file before giving you the boot> prompt, which means you can use it to automatically run boot loader commands every time your computer boots. (Although if you would rather sit at your computer and enter your settings every time you reboot, don’t let me stop you.)
Any command you might give at the loader prompt is a valid boot.conf entry. For example, if the default boot speed is too slow for your liking, you can set your boot timeout to two seconds by adding this line to boot.conf:
set timeout 2
The Boot Process 75
You can also tell the system to boot a different kernel with the correct boot.conf command.
set image /bsd.mp
By far, boot.conf is most often used to configure a serial console.
Serial ConsolesAll of these nifty boot functions let you do useful stuff when your system is in trouble, but how can you use them when your computer isn’t right in front of you? If your computer is in a data center on the other side of the country, or sitting in the basement behind the last decade of payroll records, a serial console will make your life far more pleasant.
A hardware serial console allows you to run a serial cable between a computer and a terminal server (on another computer) to access BIOS messages and operating system boot and startup messages which simplifies managing remote systems. Serial consoles are invaluable when debugging system crashes, too; error messages come over the serial port, where you can easily capture them.2
True UNIX hardware has serial console capabilities, as does most server-grade i386 and amd64 hardware. Most desktop-grade hardware, however, does not. But fortunately, even if you don’t have a hardware serial console, you can access all of OpenBSD’s startup messages with a serial port and a software serial console. While OpenBSD’s software serial console won’t give you access to the hardware BIOS, it will let you interface with the boot loader and remotely access the system console, even when the network is down.
Other Platform Serial ConsolesEvery hardware platform has its own standards for serial consoles. If you’re running a less common platform, check your hardware’s documentation.
If your hardware supports a real serial console, you should usually con-figure it in the BIOS. OpenBSD supports whatever the hardware supports, so your Sparc64 hardware will support OpenBSD’s serial console just as well as it supports any other operating system’s serial console.
Serial Console Physical SetupA serial console requires a null modem cable, which you should be able to get from any computer store or an online vendor. While gold-plated cables aren’t worth the money, don’t buy the cheapest cable you can find either. If you have an emergency and need the serial console right now, you won’t be in the mood to deal with a defective cable.
2. Granted, a remote keyboard-video-mouse (KVM) system can give you all of this, but very few KVM applications let you copy and paste text from the remote console. That means you’ll need to copy error messages by hand.
76 Chapter 5
Plug one end of the null modem cable into your OpenBSD machine’s first serial port. (The serial console is supported on only the first serial port, or com0 on i386 and amd64 hardware.) Plug the null modem cable’s other end into an open serial port on another system. (For simplicity’s sake, use either another OpenBSD or Unix-like system.)
If you have two OpenBSD machines at a remote location and you want to use serial consoles on both, you can have each machine act as the console client for the other. Attach the first serial port on each server to the second serial port on the other. If you have three machines, you can daisy-chain them in a loop. If you have four or more machines, pick up a used terminal server from your favorite auction site.
You can also use two DB9-to-RJ45 converters, one standard and one crossover, which will allow you to run your console connections over a stan-dard CAT5 cable. If you have a lights-out data center where human beings are forbidden unless they are installing or removing equipment, you can stretch your serial console cables about 12 meters, which should reach into your warm room. (Most modern data facilities are better equipped to handle CAT5 cables than serial cables.)
Serial Console Configuration Now that you have the console physically ready, the next step is to config-ure your client to access the serial console. Then you can set up the serial console.
Configuring the Serial Console Client
The following are the default settings for an OpenBSD i386 or amd64 system:
• 9600 baud
• 8 bits
• No parity
• 1 stop bit
Enter these values into any terminal emulator on the client computer, and the serial console should Just Work. You can find terminal emulators for Microsoft platforms (I recommend PuTTY), OS X, and just about any other operating system.
OpenBSD includes the terminal emulator tip(1), which reads its config-uration from /etc/remote. The configuration tty00 in /etc/remote matches the default OpenBSD serial console configuration for i386 and amd64 systems (as well as several other platforms). If you’ve attached your null modem cable to the first serial port on the client, connect with this command:
# tip tty00connected
The Boot Process 77
If it doesn’t say connected, your serial client is misconfigured. Fix your client before enabling your serial console on the server. You want your serial client ready before configuring the console.
Setting Up the Serial Console
OpenBSD normally uses the local physical keyboard, video, and mouse as the console, but it can also use the first serial port as a serial console.
To set the console, use the boot loader. You must know the loader’s device name for your preferred console: com0 for the first serial port or pc0 for the physically attached video and keyboard.
The first time you try to use a serial console, use a local test machine. Set up your client beforehand and start your terminal emulator, and then boot your test machine. At the boot loader prompt, enter this command:
boot> set tty com0
Your server’s monitor and keyboard should stop responding, and if you’ve set up everything correctly, you should see the boot loader prompt in your terminal emulator.
To switch back to the physical console, tell the boot loader to use the pc0 device:
boot> set tty pc0
Poof! The server’s keyboard and monitor should work again.To have your machine use the serial console at every boot, add this
statement in /etc/boot.conf:
set tty com0
Be sure to test your serial console after the machine is installed in its permanent location, and always screw the serial cables to the server. A loose serial cable provides only a comforting illusion that betrays you when it will hurt the most.
Testing the Serial Configuration
After configuring your serial console, return to your serial client and press enter. You should see something like this:
OpenBSD/amd64 (caddis.blackhelicopters.org) (tty00)
login:
Changing the Serial Console SpeedNewer serial ports (meaning anything made within the past 10 years) can run at speeds far above 9600 baud. I have servers with serial consoles that
78 Chapter 5
run only at 115,200 baud. The BIOS messages display at 115,200 baud, but then the OpenBSD console runs at 9600 baud. My client displays one or the other as gibberish. (A lot of OpenBSD folks think that anything that won’t do serial at 9600 baud is broken, but you won’t always have control over the hardware you work with.)
To use these ports, I can either change my connection speed in my serial console client when switching between the BIOS messages and the OpenBSD messages, or change the speed of my OpenBSD console to match the hardware.
At the boot loader, tell the serial console to run at 115,200 baud:
boot> stty com0 115200boot> set tty com0
If these settings work, copy them to /etc/boot.conf.Now configure your serial client. Modify tip to use the higher speed.
First, find the entry for tty00 in /etc/remote :
tty00|For hp300,i386,mac68k,macppc,vax:\ :dv=/dev/tty00:tc=direct:tc=unixhost:
But don’t modify this entry! We’ll use it to illustrate the style of /etc/remote entries.
N o T e /etc/remote is designed much like a termcap(5) database. If you ever need to write your own termcap entries from scratch, you’re living your life wrong. But you can rec-ognize the contents and modify existing entries without much pain. If you really want to learn everything about these entries, read the remote(5) man page.
Backslashes (\) in this entry mean “continued on the next line.” Colons separate fields. Each line after the first must start with a colon, and each field is a key/value pair.
Now, to create a console entry that runs at 115,200 baud, use the following:
console:br#115200:tc=tty00:
The first field in an /etc/remote entry is the name, and every entry must have a unique name. I named this entry console. The second field is the br value. According to remote(5), br stands for bit rate. I’ve set the bit rate to 115,200 baud. The third field is tc, for “table continues,” which is equal to tty00. This means that the description of this entry continues in entry tty00.
Taken as a whole, this entry means “copy the tty00 entry, and add a bit rate of 115,200.”
Changing the Client Serial PortIf you have two OpenBSD machines, each sending its serial console out its first serial port to the other machine’s second serial port, you must tell tip
The Boot Process 79
to connect to the second serial port. The command tip tty00 doesn’t actually connect to the serial port named tty00—it connects to a port defined by the /etc/remote entry named tty00. That means that you can’t run, say, tip tty03 and connect to serial port tty03 unless you have an /etc/remote entry named tty03. By default, there isn’t one, but you can define one easily, as follows:
tty03:dv=/dev/tty03:tc=tty00:
This entry is named tty01. The dv setting tells /etc/remote the physical device to use. Other than this, all settings are copied from the entry called tty00.
With these examples, you should be able to use OpenBSD’s tip to con-nect to almost any serial console.
Serial LoginsThe serial console lets you interact with the boot process. Once your machine is fully multiuser, however, a default serial console will not let you actually log in to OpenBSD. In multiuser mode, OpenBSD uses getty(8) to initialize terminals and handle logins, and in order to log in to your machine over a serial port, you will need to tell getty to take charge of the serial line by configuring /etc/ttys.
We’ll discuss /etc/ttys further in Chapter 14, but for now, here’s how to allow logins over the first serial port. Find the entry for tty00, which should look like this:
tty00 "/usr/libexec/getty std.9600" unknown off
Remove the last two words, and replace them to match the following:
tty00 "/usr/libexec/getty std.9600" vt220 on secure
Now run kill -1 1, and you should get a login prompt over your serial line.
Multiuser StartupWhen the kernel finishes its core setup and hands control over to userland, init(8) runs the shell script /etc/rc. This script handles all system setup, including mounting filesystems, configuring device nodes, identifying shared libraries, and any other task required to make the system usable. Some tasks are delegated to separate scripts; for example, /etc/netstart is used to configure the network.
In this section, we’ll cover how /etc/rc and other startup scripts function, and the flow of the startup process. Armed with this understanding, you should be able to easily configure your OpenBSD machine to start exactly what you need—no more, no less.
80 Chapter 5
Startup System ScriptsThe startup system includes the scripts /etc/rc, /etc/rc.conf, /etc/rc.conf.local, /etc/netstart, /etc/rc.securelevel, /etc/rc.local, /etc/rc.shutdown, /etc/rc.firsttime, /etc/fastboot, and the contents of the /etc/rc.d directory.
The /etc/rc Script
On OpenBSD, everything outside the kernel is configured with a shell com-mand, from setting the hostname to starting server daemons. The master script is /etc/rc, and it runs all of these commands in the correct order, ensuring that the system is configured exactly the same way at every boot. As a final step, /etc/rc runs getty(8) to present login prompts on all the appropriate terminals.
Never edit /etc/rc unless you’re a very experienced systems administrator with truly unique needs. This is one of the several files in /etc that is techni-cally editable, but mere mortals are well advised to treat as binary. Instead, whenever you need to disable functions, deactivate them in /etc/rc.conf.local. To add new functionality to the startup process, use the shell scripts /etc/rc.securelevel and /etc/rc.local, or write a shell script for /etc/rc.d.
The /etc/rc.conf Script
The /etc/rc.conf file contains nothing but the default values for all other startup scripts. Read this file to see the configuration options for different system services. Here’s a small snippet of what you’ll find in rc.conf:
...bgpd_flags=NO # for normal use: ""rarpd_flags=NO # for normal use: "-a"bootparamd_flags=NO # for normal use: ""rbootd_flags=NO # for normal use: ""sshd_flags="" # for normal use: ""named_flags=NO # for normal use: ""...
If a variable is set to NO, the associated service is disabled by default. As you can see, OpenBSD turns off almost everything by default, with
one exception: the SSH daemon. Setting the variable to a pair of quotes, as shown after each entry in the preceding snippet, is enough to enable most daemons, and most daemons will run just fine without any command-line flags. However, if a daemon requires a command-line argument in order to run, that argument will be shown as it is in the -a attached to rarpd_flags.
N o T e At the risk of beating my dead server senseless, never edit /etc/rc.conf (treat as binary—remember?). It will be replaced wholesale during a system upgrade. Instead, place your local values in /etc/rc.conf.local.
The Boot Process 81
The /etc/rc.conf.local Script
I’ve mentioned this before, but I’m going to beat you over the head with it: Place your changes to rc.conf in rc.conf.local. Entries in rc.conf.local override the defaults in rc.conf.
For example, say that on a particular machine, you want to run sshd(8) with extra debugging, and you also want to run named(8). Additionally, you want to run the time server ntpd(8), and have it correct the time at boot by using the -s flag. After consulting the documentation for those programs, you add the following lines to rc.conf.local:
sshd_flags="-D"ntpd_flags="-s"named_flags=""
OpenBSD will start the programs with the flags specified here. If you specify invalid, incorrect, or incompatible flags, the daemon will print error messages to the console.
The /etc/netstart Script
While its name differs from the other scripts, /etc/netstart is definitely a system startup script. It reads /etc/mygate, /etc/myname, and all the /etc/hostname.if files, and uses the information in them to configure all net-work interfaces, bridges, routing, and so forth. The file /etc/rc runs this script before starting any server daemons, network filesystems, and so on. In single-user mode, you’ll run this script by hand to bring up the network.
The /etc/rc.securelevel Script
The /etc/rc.securelevel shell script runs early in the boot process, before /etc/rc raises the system securelevel, but after starting the network. Many programs, particularly those that touch the kernel or intimately affect the filesystem, will not run once the securelevel is raised. If you run such a program, you can add the command to start it to this script. If your local program doesn’t need to run before the system securelevel is raised, you’re better off starting it from rc.local or writing a proper rc.d script for it.
One important entry in rc.securelevel is the definition of the system securelevel. We’ll discuss securelevels in Chapter 10. For now, don’t touch the line that sets the securelevel unless you’re already familiar with BSD-based systems and know exactly which toe you’re shooting off.
The /etc/rc.local Script
After /etc/rc does just about everything else, it runs /etc/rc.local. You can put commands to start local daemons in rc.local, but you’re better off writing an rc.d script to start local daemons so you can easily and consistently restart them later. Of course, if you’re lazy, you can get by with rc.local.
82 Chapter 5
The /etc/rc.shutdown Script
Whenever you use reboot(8) or halt(8), OpenBSD runs the /etc/rc.shutdown script, which you can count on to run extra commands needed to safely shut down your server. Most server software shuts down cleanly without any spe-cial intervention, but software that requires data integrity (like databases) may need help shutting down without losing data. Again, if at all possible, write an rc.d script to manage your software.
The /etc/rc.firsttime Script
/etc/rc runs the script /etc/rc.firsttime once, mails the output to root, and deletes rc.firsttime. The installer uses rc.firsttime for tasks such as fetching firmware that can’t be legally redistributed. While you won’t normally use rc.firsttime, you should know that it exists and that you can use it to perform one-time tasks when a machine boots.
The /etc/fastboot Script
If the /etc/fastboot file exists, OpenBSD assumes that all filesystems are clean (see Chapter 8), and the boot process skips checking filesystem integrity.
The /etc/rc.d Directory
The /etc/rc.d directory contains shell scripts for managing software, as dis-cussed in the next section. While the system comes with scripts for software included in OpenBSD, add-on packages can provide their own scripts (see Chapter 13).
Software Startup ScriptsOpenBSD uses shell scripts to start, stop, restart, check, and reconfigure server software. These scripts are found in the directory /etc/rc.d. Every piece of server software that comes with OpenBSD has a script in this directory, as do most ports and packages that need scripts for proper startup and shutdown. Use these scripts to manage integrated software without rebooting the server.
The rc.d scripts read their configuration from rc.conf and rc.conf.local. Most servers run the SSH daemon sshd, which can be enabled by adding the line sshd_enable="" to rc.conf.local. Look in /etc/rc.d, and you’ll find the shell script sshd.
If you change your sshd configuration, you must restart the daemon. Use the shell script to do this consistently.
# cd /etc/rc.d/# ./sshd restartsshd(ok)sshd(ok)
Of course, you could do the same thing without the shell script simply by identifying the currently running sshd(8) process, reading the man page
The Boot Process 83
to see how to shut it down properly, and then restarting it with the same command-line flags. In the case of sshd, that’s easy: Running pkill -1 sshd would tell the daemon to reread its configuration file. But restarting a dae-mon that requires all sorts of flags is a big deal. Automating these system administration tasks ensures that your daemons run consistently.
To see if a daemon is running, use the check command to check your shell for the return value. The script will return a 0 if the daemon is run-ning and a 1 if it isn’t, as shown here:
# ./nfsd check# echo $?1
As you can see by the 1, nfsd is not running. The most common use for check is in shell scripts. You can start the
daemon with the argument start and terminate it with stop. Use the restart argument to tell the daemon to reload its configuration.
In OpenBSD, rc.d scripts run when the system boots and again when it shuts down. (Something needs to unmount all those hard drives, shut down daemons, and clean up.) At shutdown, every script in the /etc/rc.d folder is called with the stop argument.
Third-Party rc.d ScriptsOpenBSD packages for third-party software include rc.d scripts as neces-sary. For example, the popular database server MySQL mysql-server package installs the script /etc/rc.d/mysqld. To use the package, you must enable it in rc.conf.local:
mysqld_flags=""
Once the package is enabled, you can manage your MySQL server just like any other OpenBSD daemon. However, packaged software will still not start automatically at boot, so you must tell OpenBSD to run this particular rc.d script at boot and shut down with the pkg_scripts variable in rc.conf.local:
pkg_scripts="mysqld"
The startup process runs the scripts in this variable, in the order given, at boot. The order is important for certain daemons. For example, if you have a database-driven website, you should start the database before the web server. At shutdown, it runs these scripts in reverse order.
Force-Starting SoftwareSometimes you don’t want to enable software globally; you just want to run a certain daemon for a short time or to address a specific situation. You can use rc.d scripts to manage this software using the -f flag to force the soft-ware to run.

84 Chapter 5
Now for a real-life example. I previously ran PostgreSQL on my server, but someone kidnapped my pet rats and blackmailed me into using MySQL in exchange for their safe return. I needed to check some data in the old database, however, so I force-started the disabled PostgreSQL server:
# ./postgresql -f startpostgresql(ok)
If you package or install your own software, I strongly recommend writ-ing your own rc.d script. A few minutes spent reading the existing scripts will tell you most of what you need to know. For the rest, read the rc.d(8) and rc.subr(8) man pages.
Now that you can start OpenBSD, let’s set up some user accounts.
6U s e r M a n a g e M e n t
This one can log in, this other can get email;
never give out root.
While computer intrusions over the Internet make headlines, a system administrator’s
greatest security threats often come from a system’s own users. Maybe they won’t ship
your data to a crime syndicate, but disgruntled and incompetent users will crash your servers given thechance—sometimes out of malice, but more often out of ignorance. Think about security as the combination of confidentiality, integrity, and availabil-ity, and it will immediately become clear how users with unrestricted system access can damage security.
Despite what you might have learned from the Bastard Operator from Hell, the system exists for the users, and proper management of those users’ accounts is absolutely necessary. In this chapter, we’ll cover one of the systems administrator’s most common tasks: managing users by adding, removing, configuring, and modifying user accounts.
86 Chapter 6
The Root AccountIn recent years, there has been a trend toward using the privileged root account for everyday tasks on systems that have only a single user.1 Using a privileged account to read your email and browse the Web increases your risks from both user errors and malicious attacks. While a careless key-stroke by a regular user will generate only a permission denied error, that same keystroke by root might render your system unusable and destroy all your data. Even if you’re the only person using your OpenBSD system, you must use an unprivileged user account for day-to-day tasks.
If an intruder compromises an unprivileged account, the potential damage is limited only by that user’s permissions. If the compromised account handles your email and web bookmarks, you might suffer only per-sonal embarrassment. But if that account handles system administration tasks, your intruder can inflict unlimited system damage and send you scur-rying for your backup. Using a regular account for day-to-day tasks means that you can take extra steps to restrict the root account.
Perform all tasks with the minimum level of privilege necessary. If you don’t need root access to perform a task, don’t use it! For example, OpenBSD’s web server runs as the specific user www, rather than as root. If an intruder breaks into your web server and gains access your system as the www user, he can damage only the files the www user has permission to write to. Likewise, if the web server software goes into an error state and starts deleting files at random, this same principle limits the files it can delete. The least privilege approach protects the system from both intruders and its own software.
Operating systems that give every user privileged access have more problems as a result. Virus effectiveness, unexpected misconfiguration, and even crashes can be traced back to unnecessary privileged access. OpenBSD might be the most secure operating system in the world, but all those fancy security features can’t protect you from poor system administra-tion practices.
Using the root account for routine tasks also creates bad habits. People under pressure perform what they practice. If you use root on your desktop for routine work, you’ll need to fight your habits to perform routine tasks when you work on a production server. This sort of sloppiness inevitably breeds security problems. Even on my OpenBSD desktop, where I’m the only user, I do everything as a regular user specifically to develop and main-tain good sysadmin habits.
Adding UsersOpenBSD uses many of the standard UNIX user- and password-management programs, such as passwd(1) and vipw(8). It also includes
1. This probably leaked through from the Microsoft culture, where for many years, every user had administrative access.
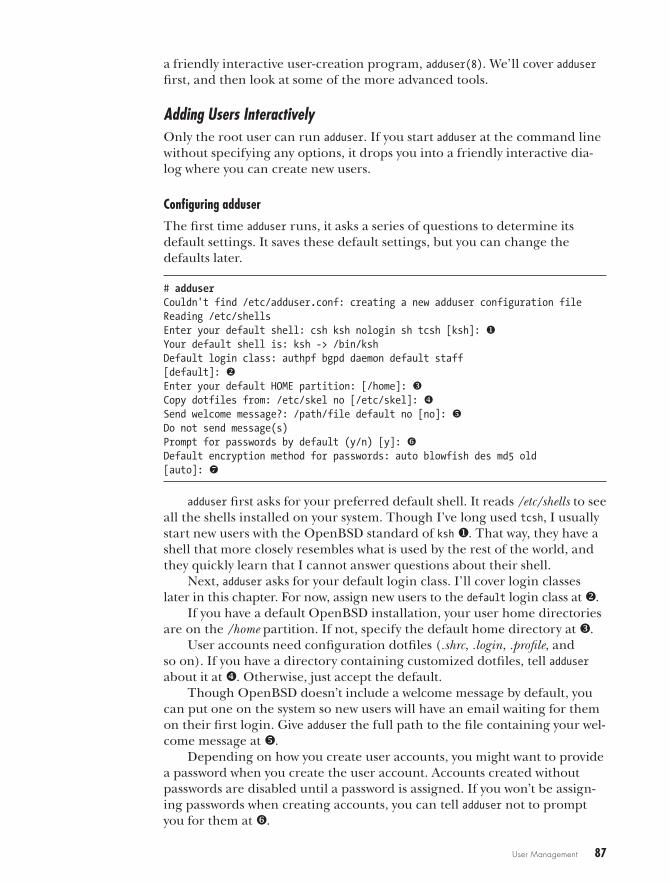
User Management 87
a friendly interactive user-creation program, adduser(8). We’ll cover adduser first, and then look at some of the more advanced tools.
Adding Users InteractivelyOnly the root user can run adduser. If you start adduser at the command line without specifying any options, it drops you into a friendly interactive dia-log where you can create new users.
Configuring adduser
The first time adduser runs, it asks a series of questions to determine its default settings. It saves these default settings, but you can change the defaults later.
# adduserCouldn't find /etc/adduser.conf: creating a new adduser configuration fileReading /etc/shellsEnter your default shell: csh ksh nologin sh tcsh [ksh]: uYour default shell is: ksh -> /bin/kshDefault login class: authpf bgpd daemon default staff[default]: vEnter your default HOME partition: [/home]: wCopy dotfiles from: /etc/skel no [/etc/skel]: xSend welcome message?: /path/file default no [no]: yDo not send message(s)Prompt for passwords by default (y/n) [y]: zDefault encryption method for passwords: auto blowfish des md5 old[auto]: {
adduser first asks for your preferred default shell. It reads /etc/shells to see all the shells installed on your system. Though I’ve long used tcsh, I usually start new users with the OpenBSD standard of ksh u. That way, they have a shell that more closely resembles what is used by the rest of the world, and they quickly learn that I cannot answer questions about their shell.
Next, adduser asks for your default login class. I’ll cover login classes later in this chapter. For now, assign new users to the default login class at v.
If you have a default OpenBSD installation, your user home directories are on the /home partition. If not, specify the default home directory at w.
User accounts need configuration dotfiles (.shrc, .login, .profile, and so on). If you have a directory containing customized dotfiles, tell adduser about it at x. Otherwise, just accept the default.
Though OpenBSD doesn’t include a welcome message by default, you can put one on the system so new users will have an email waiting for them on their first login. Give adduser the full path to the file containing your wel-come message at y.
Depending on how you create user accounts, you might want to provide a password when you create the user account. Accounts created without passwords are disabled until a password is assigned. If you won’t be assign-ing passwords when creating accounts, you can tell adduser not to prompt you for them at z.
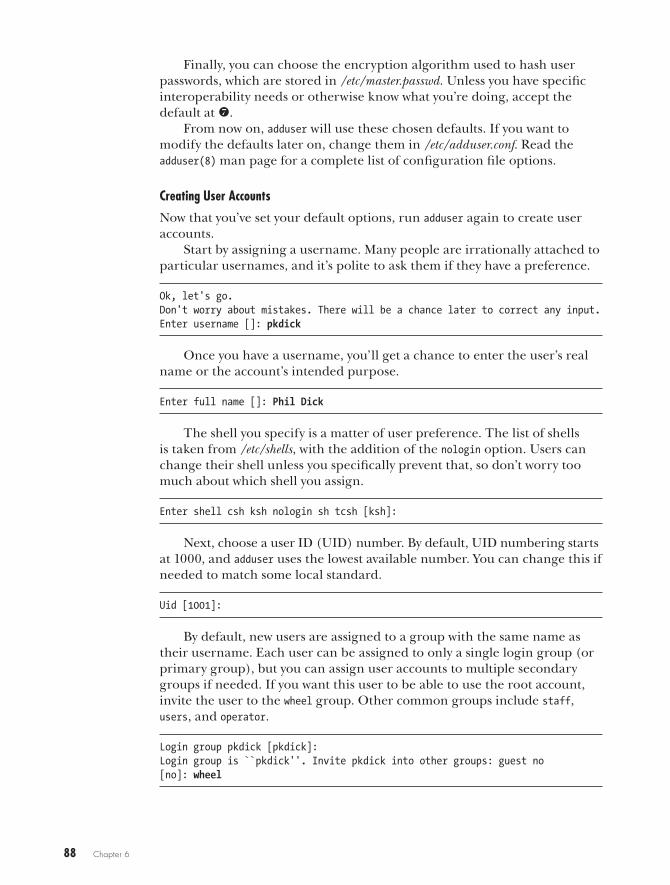
88 Chapter 6
Finally, you can choose the encryption algorithm used to hash user passwords, which are stored in /etc/master.passwd. Unless you have specific interoperability needs or otherwise know what you’re doing, accept the default at {.
From now on, adduser will use these chosen defaults. If you want to modify the defaults later on, change them in /etc/adduser.conf. Read the adduser(8) man page for a complete list of configuration file options.
Creating User Accounts
Now that you’ve set your default options, run adduser again to create user accounts.
Start by assigning a username. Many people are irrationally attached to particular usernames, and it’s polite to ask them if they have a preference.
Ok, let's go.Don't worry about mistakes. There will be a chance later to correct any input.Enter username []: pkdick
Once you have a username, you’ll get a chance to enter the user’s real name or the account’s intended purpose.
Enter full name []: Phil Dick
The shell you specify is a matter of user preference. The list of shells is taken from /etc/shells, with the addition of the nologin option. Users can change their shell unless you specifically prevent that, so don’t worry too much about which shell you assign.
Enter shell csh ksh nologin sh tcsh [ksh]:
Next, choose a user ID (UID) number. By default, UID numbering starts at 1000, and adduser uses the lowest available number. You can change this if needed to match some local standard.
Uid [1001]:
By default, new users are assigned to a group with the same name as their username. Each user can be assigned to only a single login group (or primary group), but you can assign user accounts to multiple secondary groups if needed. If you want this user to be able to use the root account, invite the user to the wheel group. Other common groups include staff, users, and operator.
Login group pkdick [pkdick]: Login group is ``pkdick''. Invite pkdick into other groups: guest no[no]: wheel
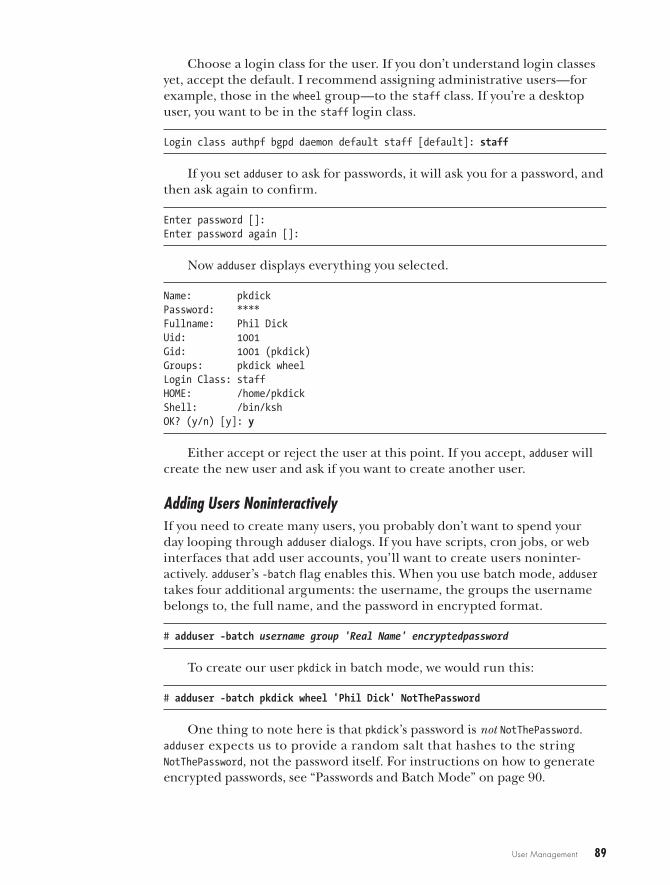
User Management 89
Choose a login class for the user. If you don’t understand login classes yet, accept the default. I recommend assigning administrative users—for example, those in the wheel group—to the staff class. If you’re a desktop user, you want to be in the staff login class.
Login class authpf bgpd daemon default staff [default]: staff
If you set adduser to ask for passwords, it will ask you for a password, and then ask again to confirm.
Enter password []:Enter password again []:
Now adduser displays everything you selected.
Name: pkdickPassword: ****Fullname: Phil DickUid: 1001Gid: 1001 (pkdick)Groups: pkdick wheelLogin Class: staffHOME: /home/pkdickShell: /bin/kshOK? (y/n) [y]: y
Either accept or reject the user at this point. If you accept, adduser will create the new user and ask if you want to create another user.
Adding Users NoninteractivelyIf you need to create many users, you probably don’t want to spend your day looping through adduser dialogs. If you have scripts, cron jobs, or web interfaces that add user accounts, you’ll want to create users noninter-actively. adduser’s -batch flag enables this. When you use batch mode, adduser takes four additional arguments: the username, the groups the username belongs to, the full name, and the password in encrypted format.
# adduser -batch username group 'Real Name' encryptedpassword
To create our user pkdick in batch mode, we would run this:
# adduser -batch pkdick wheel 'Phil Dick' NotThePassword
One thing to note here is that pkdick’s password is not NotThePassword. adduser expects us to provide a random salt that hashes to the string NotThePassword, not the password itself. For instructions on how to generate encrypted passwords, see “Passwords and Batch Mode” on page 90.
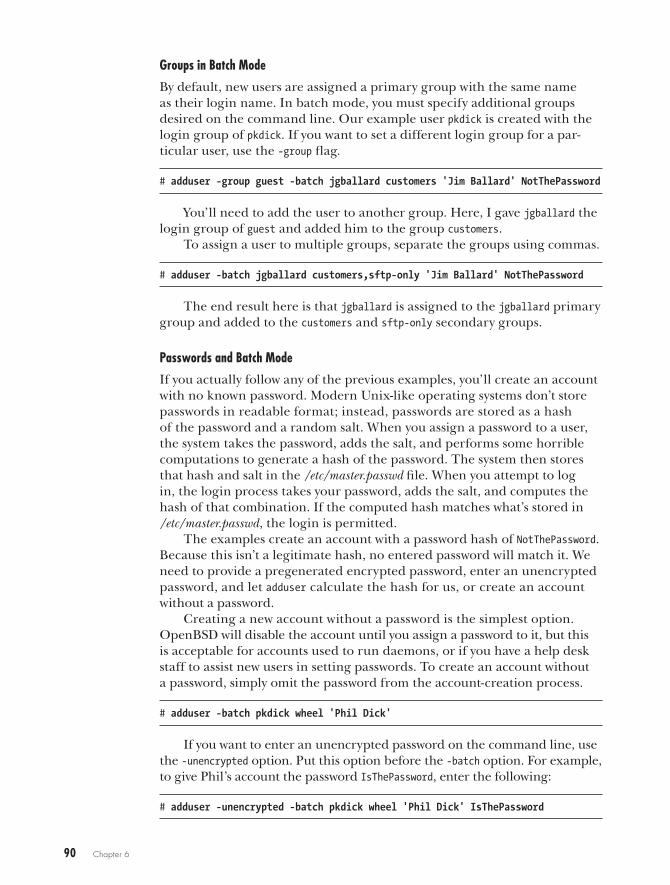
90 Chapter 6
Groups in Batch Mode
By default, new users are assigned a primary group with the same name as their login name. In batch mode, you must specify additional groups desired on the command line. Our example user pkdick is created with the login group of pkdick. If you want to set a different login group for a par-ticular user, use the -group flag.
# adduser -group guest -batch jgballard customers 'Jim Ballard' NotThePassword
You’ll need to add the user to another group. Here, I gave jgballard the login group of guest and added him to the group customers.
To assign a user to multiple groups, separate the groups using commas.
# adduser -batch jgballard customers,sftp-only 'Jim Ballard' NotThePassword
The end result here is that jgballard is assigned to the jgballard primary group and added to the customers and sftp-only secondary groups.
Passwords and Batch Mode
If you actually follow any of the previous examples, you’ll create an account with no known password. Modern Unix-like operating systems don’t store passwords in readable format; instead, passwords are stored as a hash of the password and a random salt. When you assign a password to a user, the system takes the password, adds the salt, and performs some horrible computations to generate a hash of the password. The system then stores that hash and salt in the /etc/master.passwd file. When you attempt to log in, the login process takes your password, adds the salt, and computes the hash of that combination. If the computed hash matches what’s stored in /etc/master.passwd, the login is permitted.
The examples create an account with a password hash of NotThePassword. Because this isn’t a legitimate hash, no entered password will match it. We need to provide a pregenerated encrypted password, enter an unencrypted password, and let adduser calculate the hash for us, or create an account without a password.
Creating a new account without a password is the simplest option. OpenBSD will disable the account until you assign a password to it, but this is acceptable for accounts used to run daemons, or if you have a help desk staff to assist new users in setting passwords. To create an account without a password, simply omit the password from the account-creation process.
# adduser -batch pkdick wheel 'Phil Dick'
If you want to enter an unencrypted password on the command line, use the -unencrypted option. Put this option before the -batch option. For example, to give Phil’s account the password IsThePassword, enter the following:
# adduser -unencrypted -batch pkdick wheel 'Phil Dick' IsThePassword
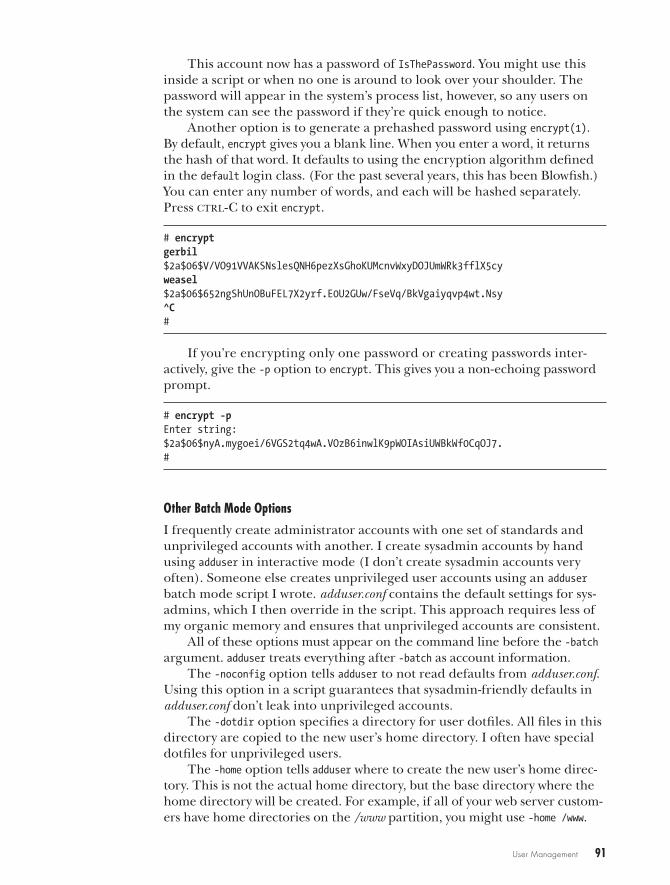
User Management 91
This account now has a password of IsThePassword. You might use this inside a script or when no one is around to look over your shoulder. The password will appear in the system’s process list, however, so any users on the system can see the password if they’re quick enough to notice.
Another option is to generate a prehashed password using encrypt(1). By default, encrypt gives you a blank line. When you enter a word, it returns the hash of that word. It defaults to using the encryption algorithm defined in the default login class. (For the past several years, this has been Blowfish.) You can enter any number of words, and each will be hashed separately. Press ctrl-C to exit encrypt.
# encryptgerbil$2a$06$V/VO91VVAKSNslesQNH6pezXsGhoKUMcnvWxyDOJUmWRk3fflX5cyweasel$2a$06$652ngShUnOBuFEL7X2yrf.E0U2GUw/FseVq/BkVgaiyqvp4wt.Nsy^C#
If you’re encrypting only one password or creating passwords inter-actively, give the -p option to encrypt. This gives you a non-echoing password prompt.
# encrypt -pEnter string:$2a$06$nyA.mygoei/6VGS2tq4wA.VOzB6inwlK9pWOIAsiUWBkWf0CqOJ7.#
Other Batch Mode Options
I frequently create administrator accounts with one set of standards and unprivileged accounts with another. I create sysadmin accounts by hand using adduser in interactive mode (I don’t create sysadmin accounts very often). Someone else creates unprivileged user accounts using an adduser batch mode script I wrote. adduser.conf contains the default settings for sys-admins, which I then override in the script. This approach requires less of my organic memory and ensures that unprivileged accounts are consistent.
All of these options must appear on the command line before the -batch argument. adduser treats everything after -batch as account information.
The -noconfig option tells adduser to not read defaults from adduser.conf. Using this option in a script guarantees that sysadmin-friendly defaults in adduser.conf don’t leak into unprivileged accounts.
The -dotdir option specifies a directory for user dotfiles. All files in this directory are copied to the new user’s home directory. I often have special dotfiles for unprivileged users.
The -home option tells adduser where to create the new user’s home direc-tory. This is not the actual home directory, but the base directory where the home directory will be created. For example, if all of your web server custom-ers have home directories on the /www partition, you might use -home /www.
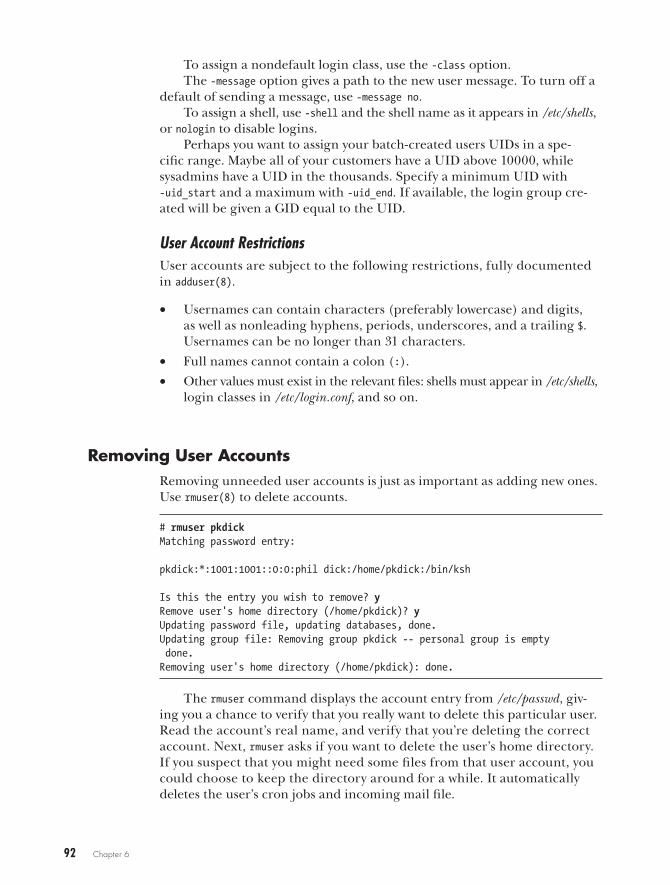
92 Chapter 6
To assign a nondefault login class, use the -class option.The -message option gives a path to the new user message. To turn off a
default of sending a message, use -message no.To assign a shell, use -shell and the shell name as it appears in /etc/shells,
or nologin to disable logins.Perhaps you want to assign your batch-created users UIDs in a spe-
cific range. Maybe all of your customers have a UID above 10000, while sys admins have a UID in the thousands. Specify a minimum UID with -uid_start and a maximum with -uid_end. If available, the login group cre-ated will be given a GID equal to the UID.
User Account RestrictionsUser accounts are subject to the following restrictions, fully documented in adduser(8).
• Usernames can contain characters (preferably lowercase) and digits, as well as nonleading hyphens, periods, underscores, and a trailing $. Usernames can be no longer than 31 characters.
• Full names cannot contain a colon (:).
• Other values must exist in the relevant files: shells must appear in /etc/shells, login classes in /etc/login.conf, and so on.
Removing User AccountsRemoving unneeded user accounts is just as important as adding new ones. Use rmuser(8) to delete accounts.
# rmuser pkdickMatching password entry:
pkdick:*:1001:1001::0:0:phil dick:/home/pkdick:/bin/ksh
Is this the entry you wish to remove? yRemove user's home directory (/home/pkdick)? yUpdating password file, updating databases, done.Updating group file: Removing group pkdick -- personal group is empty done.Removing user's home directory (/home/pkdick): done.
The rmuser command displays the account entry from /etc/passwd, giv-ing you a chance to verify that you really want to delete this particular user. Read the account’s real name, and verify that you’re deleting the correct account. Next, rmuser asks if you want to delete the user’s home directory. If you suspect that you might need some files from that user account, you could choose to keep the directory around for a while. It automatically deletes the user’s cron jobs and incoming mail file.
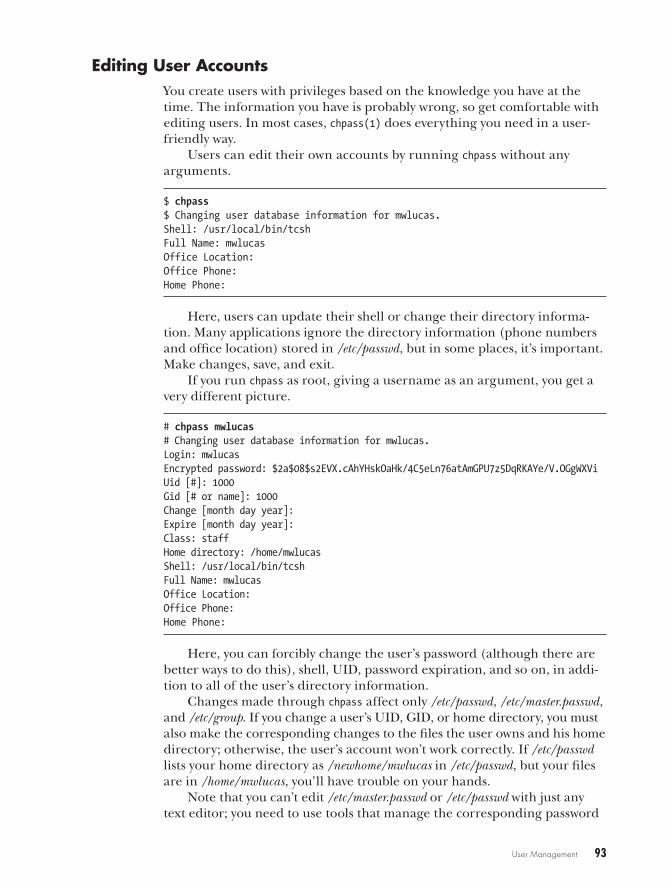
User Management 93
Editing User AccountsYou create users with privileges based on the knowledge you have at the time. The information you have is probably wrong, so get comfortable with editing users. In most cases, chpass(1) does everything you need in a user-friendly way.
Users can edit their own accounts by running chpass without any arguments.
$ chpass$ Changing user database information for mwlucas.Shell: /usr/local/bin/tcshFull Name: mwlucasOffice Location:Office Phone:Home Phone:
Here, users can update their shell or change their directory informa-tion. Many applications ignore the directory information (phone numbers and office location) stored in /etc/passwd, but in some places, it’s important. Make changes, save, and exit.
If you run chpass as root, giving a username as an argument, you get a very different picture.
# chpass mwlucas# Changing user database information for mwlucas.Login: mwlucasEncrypted password: $2a$08$s2EVX.cAhYHskOaHk/4C5eLn76atAmGPU7z5DqRKAYe/V.OGgWXViUid [#]: 1000Gid [# or name]: 1000Change [month day year]:Expire [month day year]:Class: staffHome directory: /home/mwlucasShell: /usr/local/bin/tcshFull Name: mwlucasOffice Location:Office Phone:Home Phone:
Here, you can forcibly change the user’s password (although there are better ways to do this), shell, UID, password expiration, and so on, in addi-tion to all of the user’s directory information.
Changes made through chpass affect only /etc/passwd, /etc/master.passwd, and /etc/group. If you change a user’s UID, GID, or home directory, you must also make the corresponding changes to the files the user owns and his home directory; otherwise, the user’s account won’t work correctly. If /etc/passwd lists your home directory as /newhome/mwlucas in /etc/passwd, but your files are in /home/mwlucas, you’ll have trouble on your hands.
Note that you can’t edit /etc/master.passwd or /etc/passwd with just any text editor; you need to use tools that manage the corresponding password
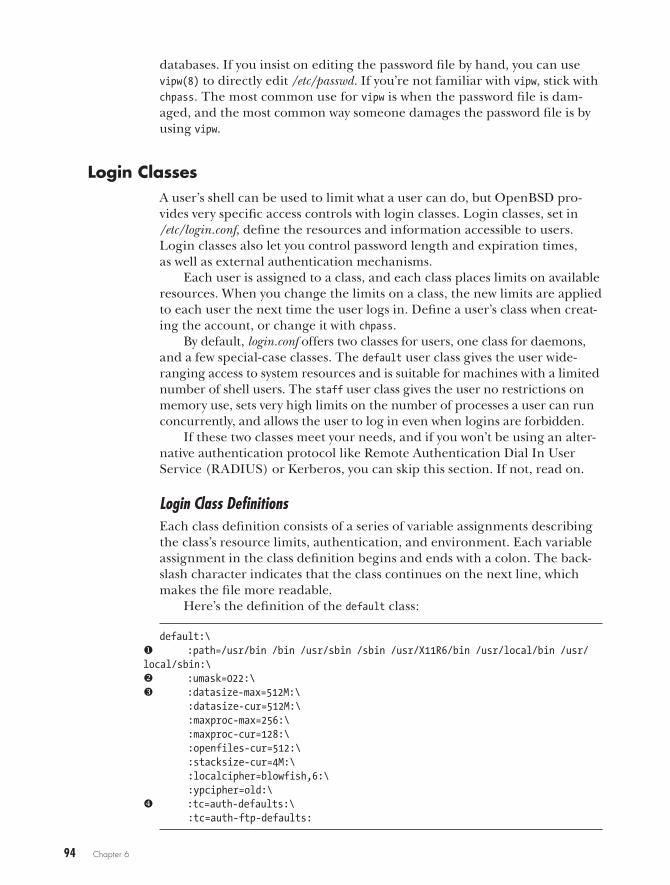
94 Chapter 6
databases. If you insist on editing the password file by hand, you can use vipw(8) to directly edit /etc/passwd. If you’re not familiar with vipw, stick with chpass. The most common use for vipw is when the password file is dam-aged, and the most common way someone damages the password file is by using vipw.
Login ClassesA user’s shell can be used to limit what a user can do, but OpenBSD pro-vides very specific access controls with login classes. Login classes, set in /etc/login.conf, define the resources and information accessible to users. Login classes also let you control password length and expiration times, as well as external authentication mechanisms.
Each user is assigned to a class, and each class places limits on available resources. When you change the limits on a class, the new limits are applied to each user the next time the user logs in. Define a user’s class when creat-ing the account, or change it with chpass.
By default, login.conf offers two classes for users, one class for daemons, and a few special-case classes. The default user class gives the user wide-ranging access to system resources and is suitable for machines with a limited number of shell users. The staff user class gives the user no restrictions on memory use, sets very high limits on the number of processes a user can run concurrently, and allows the user to log in even when logins are forbidden.
If these two classes meet your needs, and if you won’t be using an alter-native authentication protocol like Remote Authentication Dial In User Service (RADIUS) or Kerberos, you can skip this section. If not, read on.
Login Class DefinitionsEach class definition consists of a series of variable assignments describing the class’s resource limits, authentication, and environment. Each variable assignment in the class definition begins and ends with a colon. The back-slash character indicates that the class continues on the next line, which makes the file more readable.
Here’s the definition of the default class:
default:\u :path=/usr/bin /bin /usr/sbin /sbin /usr/X11R6/bin /usr/local/bin /usr/local/sbin:\v :umask=022:\w :datasize-max=512M:\
:datasize-cur=512M:\ :maxproc-max=256:\ :maxproc-cur=128:\ :openfiles-cur=512:\ :stacksize-cur=4M:\ :localcipher=blowfish,6:\ :ypcipher=old:\
x :tc=auth-defaults:\ :tc=auth-ftp-defaults:
User Management 95
The default class has several variables. Some of these have fairly obvious interpretations. For example, the path variable at u assigns a default com-mand search path to the user’s shell, usually visible to the user as $PATH. The umask setting at v assigns a default umask to the user’s shell. The user can override both of these.
Other settings, such as datasize-max and maxproc-max at w, are harder to define by guesswork. We’ll go through some of the more commonly used values in the next section.
Similar in behavior to the termcap tc variables at x used to configure serial console clients in Chapter 5, the default class copies settings from the entries auth-defaults and auth-ftp-defaults elsewhere in login.conf.
Some variables don’t require a value to trigger behavior; these values trigger a specified behavior simply by adding them to login.conf. For example, the presence of requirehome means that the user must have a valid home directory to log in.
Changing login.confOn many BSD systems, you must transform the login.conf file to a program-friendly database file, login.conf.db, with cap_mkdb(8). OpenBSD doesn’t require this. Programs that check login classes first look for the login class database, and if they don’t find it, they directly parse login.conf. You can use cap_mkdb to create such a database, which will very slightly improve the per-formance of software that checks login.conf.
# cap_mkdb /etc/login.conf
Note that once you create this database, you must rebuild it every time you edit login.conf. Database values in login.conf.db will always override your login.conf settings. Alternatively, you can remove login.conf.db and force pro-grams to always parse login.conf.
I recommend skipping cap_mkdb on modern hardware.
Legal Values for login.conf VariablesThe login.conf variables accept only very specific values, including the following:
• A full path to a text file or a program
• A comma-separated list of environment variables
• A comma-separated list of values
• A number (put a 0x in front of the number for hexadecimal, or a 0 in front for octal)
• A space-separated list of pathnames
• A size, in bytes (default), kilobytes (K), megabytes (M), gigabytes (G), or 512-byte blocks (T)
• A time in some combination of seconds (assumed if no unit is given), minutes (m), hours (h), days (d), weeks (w), or years (y)
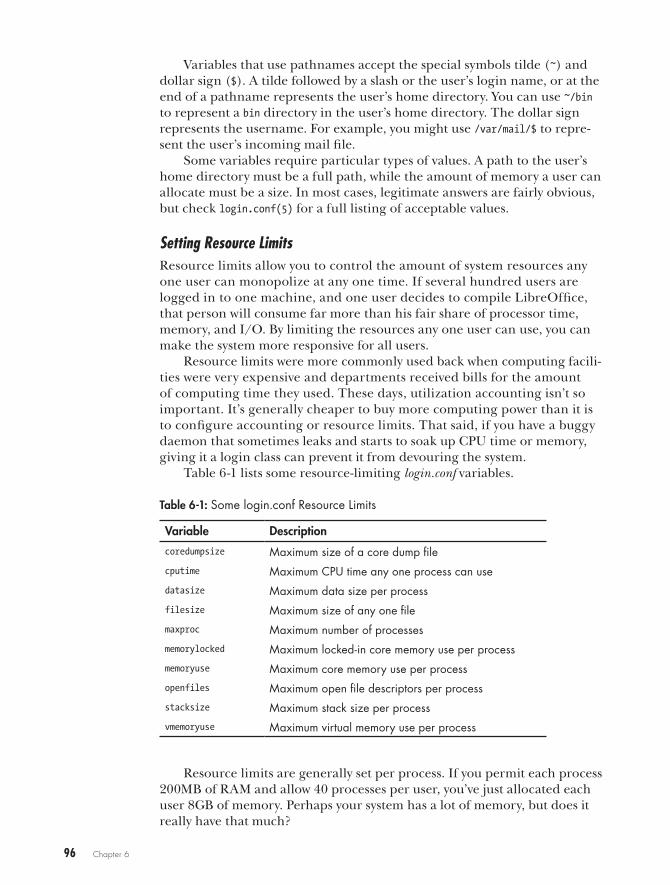
96 Chapter 6
Variables that use pathnames accept the special symbols tilde (~) and dollar sign ($). A tilde followed by a slash or the user’s login name, or at the end of a pathname represents the user’s home directory. You can use ~/bin to represent a bin directory in the user’s home directory. The dollar sign represents the username. For example, you might use /var/mail/$ to repre-sent the user’s incoming mail file.
Some variables require particular types of values. A path to the user’s home directory must be a full path, while the amount of memory a user can allocate must be a size. In most cases, legitimate answers are fairly obvious, but check login.conf(5) for a full listing of acceptable values.
Setting Resource LimitsResource limits allow you to control the amount of system resources any one user can monopolize at any one time. If several hundred users are logged in to one machine, and one user decides to compile LibreOffice, that person will consume far more than his fair share of processor time, memory, and I/O. By limiting the resources any one user can use, you can make the system more responsive for all users.
Resource limits were more commonly used back when computing facili-ties were very expensive and departments received bills for the amount of computing time they used. These days, utilization accounting isn’t so important. It’s generally cheaper to buy more computing power than it is to configure accounting or resource limits. That said, if you have a buggy daemon that sometimes leaks and starts to soak up CPU time or memory, giving it a login class can prevent it from devouring the system.
Table 6-1 lists some resource-limiting login.conf variables.
Table 6-1: Some login.conf Resource Limits
Variable Descriptioncoredumpsize Maximum size of a core dump filecputime Maximum CPU time any one process can usedatasize Maximum data size per processfilesize Maximum size of any one filemaxproc Maximum number of processesmemorylocked Maximum locked-in core memory use per processmemoryuse Maximum core memory use per processopenfiles Maximum open file descriptors per processstacksize Maximum stack size per processvmemoryuse Maximum virtual memory use per process
Resource limits are generally set per process. If you permit each process 200MB of RAM and allow 40 processes per user, you’ve just allocated each user 8GB of memory. Perhaps your system has a lot of memory, but does it really have that much?
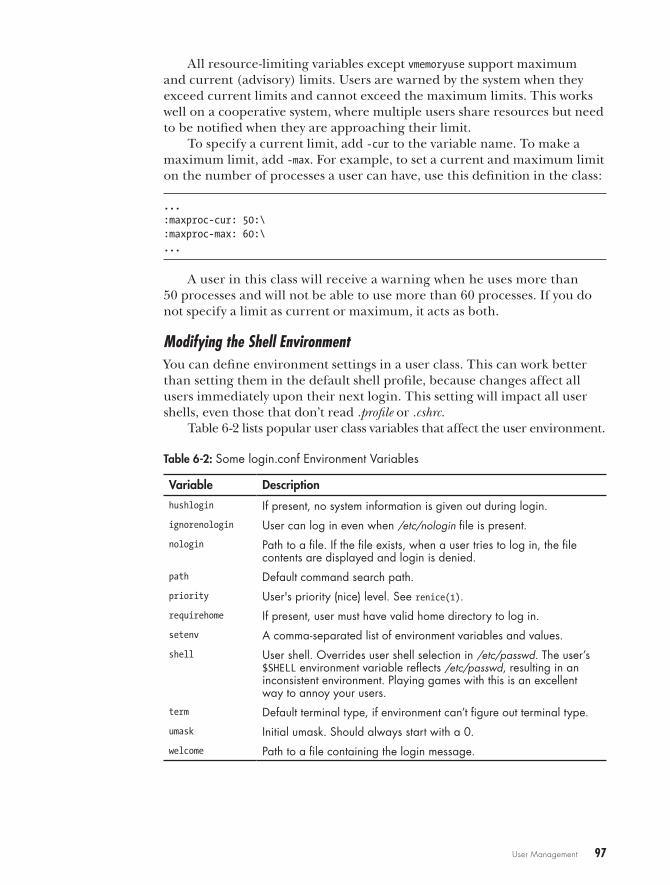
User Management 97
All resource-limiting variables except vmemoryuse support maximum and current (advisory) limits. Users are warned by the system when they exceed current limits and cannot exceed the maximum limits. This works well on a cooperative system, where multiple users share resources but need to be notified when they are approaching their limit.
To specify a current limit, add -cur to the variable name. To make a maximum limit, add -max. For example, to set a current and maximum limit on the number of processes a user can have, use this definition in the class:
...:maxproc-cur: 50:\:maxproc-max: 60:\...
A user in this class will receive a warning when he uses more than 50 processes and will not be able to use more than 60 processes. If you do not specify a limit as current or maximum, it acts as both.
Modifying the Shell EnvironmentYou can define environment settings in a user class. This can work better than setting them in the default shell profile, because changes affect all users immediately upon their next login. This setting will impact all user shells, even those that don’t read .profile or .cshrc.
Table 6-2 lists popular user class variables that affect the user environment.
Table 6-2: Some login.conf Environment Variables
Variable Descriptionhushlogin If present, no system information is given out during login.ignorenologin User can log in even when /etc/nologin file is present.nologin Path to a file. If the file exists, when a user tries to log in, the file
contents are displayed and login is denied.path Default command search path.priority User's priority (nice) level. See renice(1).requirehome If present, user must have valid home directory to log in.setenv A comma-separated list of environment variables and values.shell User shell. Overrides user shell selection in /etc/passwd. The user’s
$SHELL environment variable reflects /etc/passwd, resulting in an inconsistent environment. Playing games with this is an excellent way to annoy your users.
term Default terminal type, if environment can’t figure out terminal type.umask Initial umask. Should always start with a 0.welcome Path to a file containing the login message.
98 Chapter 6
Password and Login OptionsUnlike the user environment, which can be configured in several differ-ent places, many password controls can be configured only via the user class. The password controls affect only the local password database, not Lightweight Directory Access Protocol (LDAP), Kerberos, RADIUS, or other remote password databases.
Let’s have a look at some commonly used password controls.
localcipher
This controls the password hashing method used in /etc/master.passwd. The default is Blowfish. Don’t change the password hashing method unless you’re trying to be compatible with a specific foreign Unix-like operating system. See login.conf(5) for the list of supported hashing algorithms.
login-backoff
This controls how quickly a user can struggle to remember his pass-word. After this many unsuccessful login attempts, login(1) slows down how quickly it offers a new username and password prompt.
passwordcheck
This gives the full path to an external program that checks new pass-words for quality. OpenBSD passes the password to the program on standard input. The program is expected to return a 0 if the password is adequate and a 1 if the password is inadequate. OpenBSD includes a very simple and limited password-quality checker; if you need a password-quality checker, check out passwdqc (/usr/ports/security/passwdqc).
passwordtries
This is the number of times passwd(1) uses the password-quality checker. If the user cannot come up with a sufficiently complicated password in this many tries, the new password is accepted anyway. If this is set to 0, a new password is accepted only when it passes the quality check.
minpasswordlen
This is the minimum length of a new password. Password length is not a measure of quality—a stream of 128 A characters is still a lousy pass-word, but it might help you meet site requirements.
passwordtime
This is the maximum age of a password, in seconds. Use this to require regular password changes.
password-warn
This is the length of time, in seconds, before login(1) begins warning the user of an expiring password.
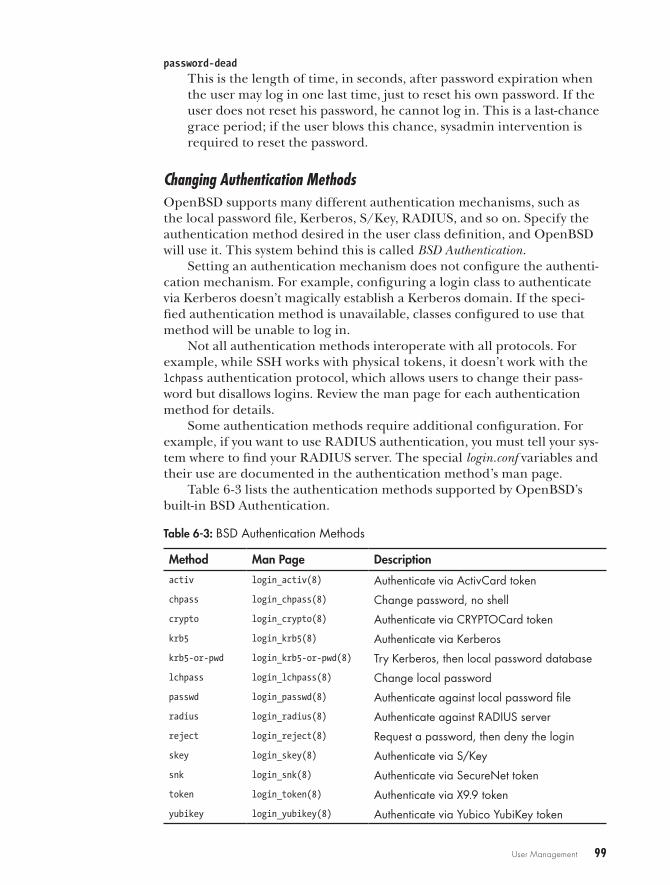
User Management 99
password-dead
This is the length of time, in seconds, after password expiration when the user may log in one last time, just to reset his own password. If the user does not reset his password, he cannot log in. This is a last-chance grace period; if the user blows this chance, sysadmin intervention is required to reset the password.
Changing Authentication MethodsOpenBSD supports many different authentication mechanisms, such as the local password file, Kerberos, S/Key, RADIUS, and so on. Specify the authentication method desired in the user class definition, and OpenBSD will use it. This system behind this is called BSD Authentication.
Setting an authentication mechanism does not configure the authenti-cation mechanism. For example, configuring a login class to authenticate via Kerberos doesn’t magically establish a Kerberos domain. If the speci-fied authentication method is unavailable, classes configured to use that method will be unable to log in.
Not all authentication methods interoperate with all protocols. For example, while SSH works with physical tokens, it doesn’t work with the lchpass authentication protocol, which allows users to change their pass-word but disallows logins. Review the man page for each authentication method for details.
Some authentication methods require additional configuration. For example, if you want to use RADIUS authentication, you must tell your sys-tem where to find your RADIUS server. The special login.conf variables and their use are documented in the authentication method’s man page.
Table 6-3 lists the authentication methods supported by OpenBSD’s built-in BSD Authentication.
Table 6-3: BSD Authentication Methods
Method Man Page Descriptionactiv login_activ(8) Authenticate via ActivCard tokenchpass login_chpass(8) Change password, no shellcrypto login_crypto(8) Authenticate via CRYPTOCard tokenkrb5 login_krb5(8) Authenticate via Kerberoskrb5-or-pwd login_krb5-or-pwd(8) Try Kerberos, then local password databaselchpass login_lchpass(8) Change local passwordpasswd login_passwd(8) Authenticate against local password fileradius login_radius(8) Authenticate against RADIUS serverreject login_reject(8) Request a password, then deny the loginskey login_skey(8) Authenticate via S/Keysnk login_snk(8) Authenticate via SecureNet tokentoken login_token(8) Authenticate via X9.9 tokenyubikey login_yubikey(8) Authenticate via Yubico YubiKey token
100 Chapter 6
The ports collection (discussed in Chapter 13) contains a few additional login methods, such as fingerprint scanners (sysutils/login_ fingerprint), OATH one-time passwords (sysutils/login_oath), and LDAP integration (sysutils/login_ldap). You can also create your own custom authentication methods; see login.conf(5) for details.
Set the authentication method using the auth variable in login.conf :
:auth=token,passwd:\
Users in a class with this set try to authenticate via an X9.9 token. If that’s not possible, the system falls back on the local password database.
BSD Authentication supports different authentication methods for dif-ferent daemons. You can specify a service name after the auth keyword, indi-cating that this set of authentication methods applies to only that particular service. You’ll frequently see login classes like auth-ssh and auth-su.
Here are a couple of sample entries from the default login.conf file:
# Default allowed authentication stylesauth-defaults:auth=passwd,skey:
# Default allowed authentication styles for authentication type ftpauth-ftp-defaults:auth-ftp=passwd:
This defines the class auth-defaults, with only one entry. By default, users in this class first use password authentication, and then S/Key authen-tication. The auth-ftp-defaults class defines auth-ftp as using the password database, and only the password database.
Earlier in this chapter, I mentioned that the default class included two other classes. These are the auth-defaults and auth-ftp-defaults classes. Every other login class in the default login.conf file includes them by refer-ence. If you change the authentication methods used by the auth-defaults class, that change will apply to every other login class.
Using Login Classes for RADIUS AuthenticationI have a long-running love/hate relationship with RADIUS. It’s the lowest common denominator of authentication protocols. Just about every operat-ing system and hardware device supports it, but it’s a finicky protocol with innumerable edge cases. Luckily, configuring OpenBSD as a RADIUS cli-ent is simple. Any RADIUS server can provide authentication services for OpenBSD.
I encourage you to use another login service, such as LDAP or Kerberos, rather than RADIUS. But in certain cases, for certain users, RADIUS is ade-quate. RADIUS combined with Microsoft’s Internet Authentication Service gives you easy password synchronization with the local Windows domain and reduces your support load.
User Management 101
First, read login_radius(8), and then configure your RADIUS server to permit access from your OpenBSD host. To configure RADIUS authentica-tion, you need the RADIUS server’s IP address, the port RADIUS runs on, and a shared secret. (For historical reasons, it’s best to specify the RADIUS port explicitly rather than relying on /etc/services.) In our example, the RADIUS server is 192.0.2.2, the port is 1812, and the secret is the string Insubordination88.
First, create a directory to hold the server configuration file and set its permissions appropriately, as per login_radius(8).
# mkdir /etc/raddb# chgrp _radius /etc/raddb/# chmod 755 /etc/raddb/
Now create the file /etc/raddb/servers. This file should contain a server and its secret, each on one line. Our servers file has only one line:
192.0.2.2 Insubordination88
Now change login.conf to use RADIUS by default.
auth-defaults:\ :auth=radius:\ :radius-port=1812:\ :radius-server=192.0.2.2:
The auth-defaults class is OpenBSD’s default authentication class. If we change it, we change how every other class authenticates. We set the auth type to radius, and set the port and the server.
Immediately upon saving the file, OpenBSD will try to authenticate all user accounts against the RADIUS server. You might want to change the auth-ftp class to match.2
Until you confirm everything is working, keep an SSH session logged in as root so you can change login.conf. Otherwise, you might lock yourself out of the system, or at least out of the root account. If you can’t get into the sys-tem, you’ll need to reboot into single-user mode and edit login.conf.
Changing the authentication scheme for all users might not be desirable, either. You might want authpf(8) users to authenticate against RADIUS, but have users in the staff class authenticate against the local password database. Perhaps you don’t want your root account to authenticate via RADIUS, so you need an auth-su login class that points at the local pass-word database. Using login classes, you can configure user authentication to fit your specific needs.
2. Or you might not want to make this change. FTP transmits passwords in clear text, so you might want to use a separate password source for FTP connections. Why transmit passwords securely over one protocol, while transmitting them insecurely on a neighboring port?
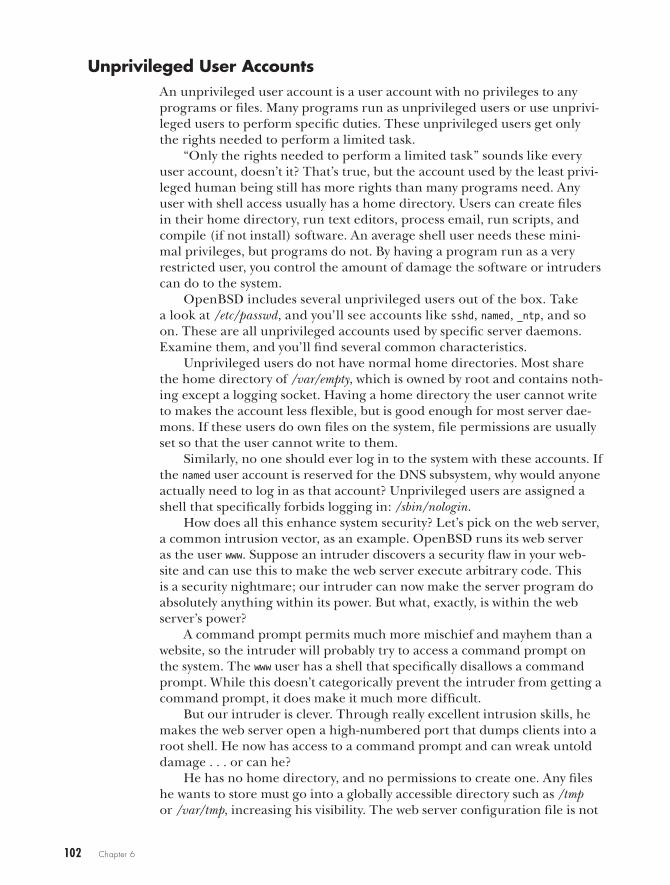
102 Chapter 6
Unprivileged User AccountsAn unprivileged user account is a user account with no privileges to any programs or files. Many programs run as unprivileged users or use unprivi-leged users to perform specific duties. These unprivileged users get only the rights needed to perform a limited task.
“Only the rights needed to perform a limited task” sounds like every user account, doesn’t it? That’s true, but the account used by the least privi-leged human being still has more rights than many programs need. Any user with shell access usually has a home directory. Users can create files in their home directory, run text editors, process email, run scripts, and compile (if not install) software. An average shell user needs these mini-mal privileges, but programs do not. By having a program run as a very restricted user, you control the amount of damage the software or intruders can do to the system.
OpenBSD includes several unprivileged users out of the box. Take a look at /etc/passwd, and you’ll see accounts like sshd, named, _ntp, and so on. These are all unprivileged accounts used by specific server daemons. Examine them, and you’ll find several common characteristics.
Unprivileged users do not have normal home directories. Most share the home directory of /var/empty, which is owned by root and contains noth-ing except a logging socket. Having a home directory the user cannot write to makes the account less flexible, but is good enough for most server dae-mons. If these users do own files on the system, file permissions are usually set so that the user cannot write to them.
Similarly, no one should ever log in to the system with these accounts. If the named user account is reserved for the DNS subsystem, why would anyone actually need to log in as that account? Unprivileged users are assigned a shell that specifically forbids logging in: /sbin/nologin.
How does all this enhance system security? Let’s pick on the web server, a common intrusion vector, as an example. OpenBSD runs its web server as the user www. Suppose an intruder discovers a security flaw in your web-site and can use this to make the web server execute arbitrary code. This is a security nightmare; our intruder can now make the server program do absolutely anything within its power. But what, exactly, is within the web server’s power?
A command prompt permits much more mischief and mayhem than a website, so the intruder will probably try to access a command prompt on the system. The www user has a shell that specifically disallows a command prompt. While this doesn’t categorically prevent the intruder from getting a command prompt, it does make it much more difficult.
But our intruder is clever. Through really excellent intrusion skills, he makes the web server open a high-numbered port that dumps clients into a root shell. He now has access to a command prompt and can wreak untold damage . . . or can he?
He has no home directory, and no permissions to create one. Any files he wants to store must go into a globally accessible directory such as /tmp or /var/tmp, increasing his visibility. The web server configuration file is not
User Management 103
owned by the www user. Even if the intruder has a path into the web server, he cannot reconfigure it. He can’t change the website files, as the www user doesn’t own them. The www user doesn’t have access to anything on the system, actually. Additionally, OpenBSD’s built-in web server chroots itself. Having broken into the web server program, the intruder now must escape the chroot and penetrate a privileged program.
Can he penetrate your system? Possibly, but it will be much more dif-ficult. If he is specifically targeting you or your company, he might go to the trouble. If he is just looking for easy meat, however, he will probably give up and go bother someone running a Linux or Windows system.
Using unprivileged users doesn’t solve all security problems, mind you. The compromised www user can view web application source files. If your application is badly written or has database passwords hardcoded into hid-den files, you’re still in trouble. But if you don’t use poorly written applica-tions and you’ve kept your system updated and patched, the intruder will have a very hard time penetrating the rest of your server.
The nobody AccountThe first unprivileged account was nobody. It was created for use by the Network File System (NFS, discussed in Chapter 9) to map files owned by root on foreign systems. Decades ago, people started using nobody as a generic unprivileged user, running web servers, proxy servers, and other daemons as nobody. While this was better than running those programs as root, it’s still poor practice. If an intruder penetrated one of those pro-grams, he would gain access to all processes owned by nobody. Our hypo-thetical web server intruder would suddenly have access not only to the web server, but also to the database, NFS, or anything else running as nobody!
Every daemon that needs to run as a user needs its own unprivileged accounts—the whole point of using unprivileged users is to minimize the damage one piece of software can inflict. Use them liberally. OpenBSD pro-vides discrete unprivileged users for services as small as finger(1) and the audio system. Follow this example.
_usernameIf you take a look at /etc/passwd, you’ll see that many unprivileged users have an underscore before their name, such as _syslogd, _ldapd, and _dhcp. This is an OpenBSD convention for identifying unprivileged users. Most add-on software also uses unprivileged usernames beginning with an underscore, such as _mysql and _postgresql.
Not all unprivileged usernames start with an underscore, however. Some of these are legacy users that OpenBSD retains for compatibility reasons, such as nobody. Others have a long history or support inflexible software, and changing them would be more annoyance than it’s worth.
The presence of an underscore means that a user is unprivileged. The absence of an underscore means nothing; the user might be a normal
104 Chapter 6
account or it might be unprivileged. If you create your own unprivileged users, you don’t need to include a leading underscore, but doing so will help other system administrators understand what the user does.
Creating Unprivileged UsersHere are common settings used for unprivileged users. You can change any of these as needed for your application.
username Assign a username related to the user’s functions, so that you’ll easily recognize it. Giving an unprivileged user a username like _fgcrl might seem like a good way to conceal its purpose, but it will con-fuse your sysadmins and an intruder will quickly figure it out.
home directory /var/empty is a common setting for unprivileged users.
shell /sbin/nologin is a common setting for unprivileged users.
UID/GID Choose a specific range of UIDs and GIDs for your custom unprivileged users. OpenBSD reserves all UIDs below 1000 for system-assigned unprivileged users.
full name Assign a name describing the user’s role.
password Use chpass(1) to assign the user a single asterisk as their encrypted password. This disables the account password.
These settings make your unprivileged user very unprivileged indeed. You can set all of these options except the password using adduser(8).
Now that you understand how to create, manage, and use user accounts, let’s discuss how to manage privileged users.
7R o o t, a n d H o w t o a v o i d i t
The root of all evil is never far from your touch.
sudo saves your life.
The security of most Unix-like operating systems has long been considered coarsely
grained. One superuser, root, can do any-thing. Other users are lowly sharecroppers
who endure the shackles root places upon them. Theproblem is that root doesn’t have many shackles and it can’t individualize the ones that it has very well. Some operating systems use POSIX access control lists (ACLs) to provide more fine-grained access controls, but these are difficult to configure correctly.1
While it’s true that Unix-like operating systems don’t have detailed access controls, the fact is that most people don’t bother using the controls that do exist. Fortunately, you can combine groups and permissions to handle almost any problem securely.
1. I could just say that “I have never seen POSIX ACLs configured correctly,” but personal anecdotal evidence is not proof. Even the dozens of horrifying personal anecdotes I’ve gathered over decades in this business are not proof. Feel free to prove me wrong, but please, do it on your server.

106 Chapter 7
The Root PasswordThe root user owns the system and has absolute power over every piece of hardware as well as certain actions that require absolute control, such as manipulating the kernel and changing authentication sources. You need root permissions to perform these tasks. You can log in as root, use su(1) to become root, or use sudo(8) (discussed later this chapter) to get certain root-level privileges without actually using the root account.
To use the root password, you can either log in as root at a console login prompt or, if you belong to the group wheel, log in as yourself and use the switch user command su(1). Of the two, I recommend using su; it logs who uses it and can be used when you are logged in from a remote system. To use su, run the following:
$ suPassword:#
When prompted, enter the root password. Now check your current user ID with id(1).
# iduid=0(root) gid=0(wheel) groups=0(wheel), 2(kmem), 3(sys), 4(tty), 5(operator), 20(staff), 31(guest)
As you can see, the UID is 0, which means that you now own the system, and I do mean own it. Consider every keystroke carefully. Carelessness could return your hard drive to its primordial, unformatted state.
Only users in the group wheel can use the root password to become root via su. If you give the root password to users without physical console access and who are in the wheel group, they can enter su and the root password as many times as they want, and it won’t work. (But anyone can use the root account and password at the system console, so don’t make a habit of blab-bing the root password all around the office.)
Requiring group membership to use the root password leads to the question, “Who needs root access?” Root is required to configure many parts of OpenBSD, but once the system is running properly, you can greatly decrease or discontinue your use of root. For any remaining tasks that abso-lutely require root, use sudo.
Using GroupsOne of the simplest ways to reduce the need for root is with groups. Unix-like operating systems classify users into groups, which consist of accounts of users who perform similar administrative functions. You can, for example, define a group named dnsadmins and add the accounts of every user who edits DNS zone files to that group. Then, by setting the permissions of the zone files and their directory appropriately, members of that group can
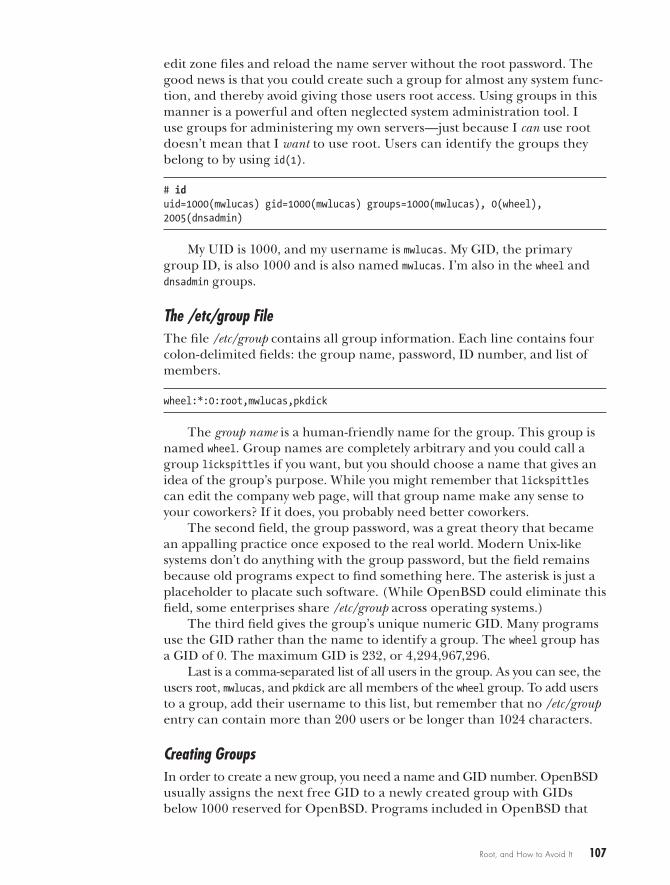
Root, and How to Avoid It 107
edit zone files and reload the name server without the root password. The good news is that you could create such a group for almost any system func-tion, and thereby avoid giving those users root access. Using groups in this manner is a powerful and often neglected system administration tool. I use groups for administering my own servers—just because I can use root doesn’t mean that I want to use root. Users can identify the groups they belong to by using id(1).
# iduid=1000(mwlucas) gid=1000(mwlucas) groups=1000(mwlucas), 0(wheel), 2005(dnsadmin)
My UID is 1000, and my username is mwlucas. My GID, the primary group ID, is also 1000 and is also named mwlucas. I’m also in the wheel and dnsadmin groups.
The /etc/group FileThe file /etc/group contains all group information. Each line contains four colon-delimited fields: the group name, password, ID number, and list of members.
wheel:*:0:root,mwlucas,pkdick
The group name is a human-friendly name for the group. This group is named wheel. Group names are completely arbitrary and you could call a group lickspittles if you want, but you should choose a name that gives an idea of the group’s purpose. While you might remember that lickspittles can edit the company web page, will that group name make any sense to your coworkers? If it does, you probably need better coworkers.
The second field, the group password, was a great theory that became an appalling practice once exposed to the real world. Modern Unix-like systems don’t do anything with the group password, but the field remains because old programs expect to find something here. The asterisk is just a placeholder to placate such software. (While OpenBSD could eliminate this field, some enterprises share /etc/group across operating systems.)
The third field gives the group’s unique numeric GID. Many programs use the GID rather than the name to identify a group. The wheel group has a GID of 0. The maximum GID is 232, or 4,294,967,296.
Last is a comma-separated list of all users in the group. As you can see, the users root, mwlucas, and pkdick are all members of the wheel group. To add users to a group, add their username to this list, but remember that no /etc/group entry can contain more than 200 users or be longer than 1024 characters.
Creating GroupsIn order to create a new group, you need a name and GID number. OpenBSD usually assigns the next free GID to a newly created group with GIDs below 1000 reserved for OpenBSD. Programs included in OpenBSD that
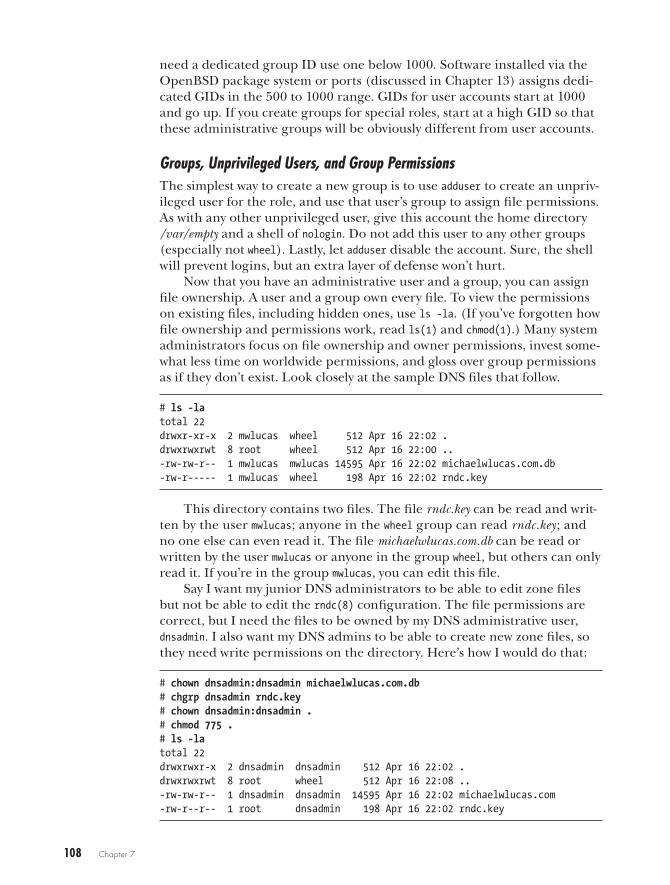
108 Chapter 7
need a dedicated group ID use one below 1000. Software installed via the OpenBSD package system or ports (discussed in Chapter 13) assigns dedi-cated GIDs in the 500 to 1000 range. GIDs for user accounts start at 1000 and go up. If you create groups for special roles, start at a high GID so that these administrative groups will be obviously different from user accounts.
Groups, Unprivileged Users, and Group PermissionsThe simplest way to create a new group is to use adduser to create an unpriv-ileged user for the role, and use that user’s group to assign file permissions. As with any other unprivileged user, give this account the home directory /var/empty and a shell of nologin. Do not add this user to any other groups (especially not wheel). Lastly, let adduser disable the account. Sure, the shell will prevent logins, but an extra layer of defense won’t hurt.
Now that you have an administrative user and a group, you can assign file ownership. A user and a group own every file. To view the permissions on existing files, including hidden ones, use ls -la. (If you’ve forgotten how file ownership and permissions work, read ls(1) and chmod(1).) Many system administrators focus on file ownership and owner permissions, invest some-what less time on worldwide permissions, and gloss over group permissions as if they don’t exist. Look closely at the sample DNS files that follow.
# ls -latotal 22drwxr-xr-x 2 mwlucas wheel 512 Apr 16 22:02 .drwxrwxrwt 8 root wheel 512 Apr 16 22:00 ..-rw-rw-r-- 1 mwlucas mwlucas 14595 Apr 16 22:02 michaelwlucas.com.db-rw-r----- 1 mwlucas wheel 198 Apr 16 22:02 rndc.key
This directory contains two files. The file rndc.key can be read and writ-ten by the user mwlucas; anyone in the wheel group can read rndc.key; and no one else can even read it. The file michaelwlucas.com.db can be read or written by the user mwlucas or anyone in the group wheel, but others can only read it. If you’re in the group mwlucas, you can edit this file.
Say I want my junior DNS administrators to be able to edit zone files but not be able to edit the rndc(8) configuration. The file permissions are correct, but I need the files to be owned by my DNS administrative user, dnsadmin. I also want my DNS admins to be able to create new zone files, so they need write permissions on the directory. Here’s how I would do that:
# chown dnsadmin:dnsadmin michaelwlucas.com.db# chgrp dnsadmin rndc.key# chown dnsadmin:dnsadmin .# chmod 775 .# ls -latotal 22drwxrwxr-x 2 dnsadmin dnsadmin 512 Apr 16 22:02 .drwxrwxrwt 8 root wheel 512 Apr 16 22:08 ..-rw-rw-r-- 1 dnsadmin dnsadmin 14595 Apr 16 22:02 michaelwlucas.com-rw-r--r-- 1 root dnsadmin 198 Apr 16 22:02 rndc.key
Root, and How to Avoid It 109
As you can see, these files are now owned by the user dnsadmin and the group dnsadmin. Anyone in the group dnsadmin should be able to edit michaelwlucas.com.db without using the root password. The user named—the unprivileged user for the DNS server—should be able to read both files. Add your DNS administrators to the dnsadmin group in /etc/group, and they should no longer need the root password to do their jobs.
This model has limitations, however. While your junior admins can’t accidentally edit rndc.conf, they can delete and replace it. It would be better to put that file in a directory they can read but not edit. And while our DNS administrators might think that they need the root password to restart the name server, they’re wrong. Use rndc(8) to manage the DNS server; other tasks can be managed via cron(8) or through sudo.
Hiding Root with sudoWhile the proper use of groups can almost eliminate the need for root access to edit files, that won’t help with commands that can be run only by root. You could set up a cron job to reload the name server each day at midnight, but every piece of software occasionally needs a manual restart. Because root is an all-or-nothing affair, people who have one minor task to perform have traditionally needed the root password.
OpenBSD includes sudo(8) and its associated tools, which implement fine-grained access control for commands that can be run only by particu-lar users. When configured properly, sudo lets normal users run specific pro-grams as other users, including root. Configured improperly, sudo permits full root access. I’ll explain a basic sudo setup that covers almost all uses, but remember that many more combinations are possible. And don’t be afraid to read sudo(8), sudoers(5), and the documentation at the sudo home page (http://www.gratisoft.us/sudo/).
Why Use sudo?The sudo tool provides benefits beyond fine-grained privilege control. Every command run via sudo is logged, making it very easy to track who did what. The senior sysadmin can change the root password and not give it out, even to people who have root-level access.
The sudo configuration file is designed to be shared across multiple sys-tems, so one sudo policy can cover your entire network and every operating system. Admittedly, you’ll have trouble using a single sudo configuration on operating systems with wildly unique directory layouts, such as Mac OS X, but you can easily share one configuration among OpenBSD, other BSDs, Linux, and even OpenSolaris or AIX.
sudo DisadvantagesThe most common problem with sudo is getting your users to accept it. People who have historically had access to the root account think they “lose some-thing” by working through sudo.
110 Chapter 7
The key to overcoming this is to give users access only to what’s required to perform the tasks for which they’re responsible. A junior administrator who complains about insufficient privileges has either overreached his responsibilities or needs more privileges. One sure way to discover what people actually do is to implement a minimal sudo permissions scheme and wait for complaints. If no one complains, they’re not working very hard.
The configuration syntax for sudo can be confusing because its con-figuration doesn’t closely resemble any other configuration file, and getting everything right can be difficult at first. The configuration file is actually well suited to its purpose, however. Once you understand it, adjusting privi-leges is quick and easy.
n o t e More seriously, a faulty sudo setup can create the appearance of security while leaving gaps for a user to become root. Be sure to test sudo every time you make a change, and avoid the common configuration mistakes I document here.
Some users will do their best to push the limits of their access, for no other reason than to see if they can outsmart you. These users are best managed with a combination of careful configuration, administrative pol-icy, and a cricket bat.
An Overview of the sudo SoftwareThe sudo program is a setuid root wrapper that can run commands as any other user. Use sudo by giving it the command you want to run.
$ sudo /etc/rc.d/named restart
The sudo software compares the desired command (in this case, /etc/rc.d/named restart) to its internal list of permissions and privileges. If the configuration file allows that particular user to run that command as root, sudo runs it as root. And, because root can run any command as any user, sudo can also run commands as any arbitrary system user. You can use this fact to grant any user the ability to run specific commands as chosen users; for example, administrators of certain database servers must frequently run commands as the database user.
The sudo software is a suite with four pieces. The first piece is the actual sudo(8) command, the setuid root wrapper. The second is the configuration file /etc/sudoers, which describes who may run which commands as what user. (/etc/sudoers is fully documented in sudoers(5).) Third is the visudo(8) command that opens /etc/sudoers in an editor and checks the configuration file syntax before exiting. Finally, the sudoedit(8) program is specifically for editing files as another user.
The visudo(8) CommandIf /etc/sudoers contains incorrect syntax, sudo will not run. If you rely on sudo to provide root-level access to the system and you break your sudoers file,
Root, and How to Avoid It 111
you’ll lock yourself out of the root account and lose the ability to correct your error. That is bad.
Fortunately, the visudo(8) program provides some protection against this sort of error by locking /etc/sudoers so that only one person can edit the configuration at a time. It then opens /etc/sudoers in a text editor (vi by default, but it respects the $EDITOR environment variable). Make your changes and save your work. When you exit the editor, visudo should parse the file for syntactic correctness.
If visudo detects an error, it prints out the offending line number and asks what you want to do.
>>> /etc/sudoers: syntax error near line 34 <<<What now?
Here, I’ve made an error near line 34. I can reedit the file to fix the error, quit without saving any changes, or force visudo to accept this file.
Press the E key, and visudo should return you to the editor. Go to the offending line, fix your error, save the file, and exit the editor again.
Enter the X key, and visudo should quit and revert the configuration file to its original state. Your changes will be lost, but that might be acceptable. It’s better to have an old, working configuration than a new, broken one.
Pressing Q forces visudo to accept the file, busted syntax and all. If sudo can’t parse /etc/sudoers, it will immediately exit. Essentially, you’re telling visudo to break sudo until you log in as root to fix the problem. If you think you understand /etc/sudoers better than visudo does, you’re probably wrong. Even if you’re right, you’re wrong.
The visudo program doesn’t guarantee that the configuration will do what you desire, only that the configuration parses and is valid. A properly formatted configuration that declares “No one may do anything via sudo” is perfectly acceptable to visudo.
The /etc/sudoers FileThe /etc/sudoers file determines who may run which commands as which users. Never edit /etc/sudoers directly, even if you think you know exactly what change you want to make. Always use visudo to change /etc/sudoers.
The various sudoers sample configurations you’ll find are usually very complicated, as they demonstrate all the nifty things sudo can do. At this point, however, you want to do only simple, boring things, like giving par-ticular users access to run specific commands. And the bare syntax is very simple. Every sudoers rule follows this format:
Username host=command
• The username is the username of the user who may execute the command, an alias for usernames, or a system group.
• The host is the hostname of the system this rule applies to. You can share /etc/sudoers across multiple systems. This entry permits per-host rules.
112 Chapter 7
• The command space lists the commands this rule applies to. You must list the full path to each command, or sudo will not recognize it. If this weren’t a requirement, some untrustworthy soul could just adjust his $PATH to access renamed versions of commands.
For example, suppose I trust user sbaxter to run any command, on any system, as root. I use the keyword ALL to match all possible options for host and command:
sbaxter ALL=ALL
As the lead sysadmin, I should know which duties I have assigned sbaxter, and exactly which commands he needs. Suppose sbaxter is my DNS minion. I control the actual editing of zone files with group permissions, but there are many legitimate occasions for him to stop, restart, or otherwise slap around the name server program. I want him to use the system script /etc/rc.d/named for this task, and this sudoers entry gives him permission to use the script on all machines.
sbaxter ALL=/etc/rc.d/named
If I share this file across several machines, it’s likely that many of those machines don’t even run a name server. To restrict my minion’s access to only the DNS server, I’ll change the host field.
sbaxter dns1=/etc/rc.d/named
Then again, sbaxter is the administrator of the email server mail1. This server is his responsibility, so he needs to run any command. I can set entirely different privileges for him on the mail server and still use the same sudoers file on all the systems.
sbaxter dns1=/etc/rc.d/namedsbaxter mail1=ALL
Yes, sbaxter can use visudo on mail1, but he already has full privileges on that machine. I’m comfortable with this, as he knows I’ll hold him respon-sible for any downtime.
Multiple Entries in a sudoers Field
Separate multiple entries in a single field with commas. For example, after a while, I get tired of sbaxter asking me to mount NFS shares on the DNS server, so I add mount_nfs to his privileges.
sbaxter dns1=/etc/rc.d/named,/sbin/mount_nfs
He can now mount his own blasted NFS shares and leave me alone.
Root, and How to Avoid It 113
Running Commands As Non-root Users
Specify a username in parentheses before a command to say that the user can use sudo to run commands as a particular user. For example, my user dwsmith is a database administrator and needs to run any command as the user _postgresql on the database server db1.
dwsmith db1 = (_postgresql) ALL
The _postgresql user can’t successfully run critical system programs like fdisk and newfs, but it can restart the database, back it up, and perform other database-administration tasks. By choosing a specific user, a specific machine, and a specific command, you can define arbitrarily complex sudoers policies.
Long Lines
If you have several commands, usernames, or hosts on a line, that line might become uncomfortably long. Use a backslash (\) to indicate that a rule continues on the next line.
sbaxter dns1=/etc/rc.d/named,/sbin/mount_nfs, \ /sbin/reboot, /sbin/dump
Use as many lines as you like to make your sudoers file easier to manage.
/etc/sudoers AliasesTake several machines with different roles, add multiple sysadmins with differing privilege levels, and your /etc/sudoers file will quickly become com-plicated. When you have a few users with identical privileges and long lists of commands that you would like them to access, maintaining consistency in each user’s privilege list becomes tedious. Aliases simplify these tasks and make /etc/sudoers much more comprehensible, which makes your life easier.
An alias is a group of users, hosts, or commands. You can use aliases anywhere you would normally use users, hosts, or commands. You might, for example, create an alias called DATABASE_COMMANDS that contains all of the commands your database administrators need to run using sudo.
Let’s take database administrator dwsmith and use an alias to specify his commands.
dwsmith db1 = (_postgresql) DATABASE_COMMANDS
This alias might not seem to save us much, but suppose we have several database administrators. We could create an alias called DBAs that includes all of them.
DBAs db1 = (_postgresql) DATABASE_COMMANDS
Suddenly, this one line represents multiple rules. All of the database admins have identical sudo privileges, and when you discover that you need
114 Chapter 7
to give them access to an additional command, add the command to the alias, and it immediately becomes available to every database admin. There’s no tedious and error-prone copying of entries between users.
You must define an alias before you can use it, so aliases normally appear at the top of the file. Each alias is made up of a label identifying its type, a name, and a list of its items. Alias types include user aliases, run as aliases, host aliases, and command aliases.
User Aliases
A user alias is a group of users, and it is labeled with the string User_Alias. Put only usernames in this alias.
User_Alias DBAs = dwsmith, kkrusch
Here, the user alias DBAs contains the users dwsmith and kkrusch. By using the alias in my sudoers rules instead of the usernames, I ensure that these users receive exactly the same sudo privileges.
You can use system groups in user aliases by prefacing them with a per-cent sign (%). I might create a group in /etc/groups called databaseteam, and make dwsmith and kkrusch part of that team.
%databaseteam db1 = (_postgresql) DATABASE_COMMANDS
Perhaps the most common usage of this is giving the wheel group unlim-ited sudo access.
%wheel ALL = ALL
This rule permits the wheel group to run any command as root through sudo. It doesn’t change the group members’ privileges, but gives them access via sudo. This is convenient for running single commands.
Run as Aliases
A run as alias is a list of users that other users can run commands as. For example, on certain application servers, the database admins need to run commands both as the database owner _postgresql and as the web server owner www. If the user must run commands as multiple users, however, you would need a separate sudoers entry for each target user.
A run as alias lets you group these accounts:
Runas_Alias APPOWNER = _postgresql, www
You can now write a single rule allowing users to run commands as either _postgresql or www.
Root, and How to Avoid It 115
Host Aliases
A host alias is a list of hosts, defined as hostnames, IP addresses, or network blocks. Label host aliases with the string Host_Alias. Here are examples of all host alias types:
Host_Alias DB = db1, db2, db3Host_Alias DMZ = 192.0.2.0/24Host_Alias FIREWALL = 192.0.2.1, 192.0.2.2, 192.0.2.3
n o t e I warn elsewhere in this book about how security rules based on a hostname are vulnerable to DNS spoofing attacks. An intruder can’t spoof the machine’s local host-name, however, so you can safely use the hostname from /etc/myname in sudoers.
Command Aliases
A command alias is a list of commands. For example, you might have a com-mand alias that includes all of the commands needed to back up the system or restore from a backup. They’re labeled with the string Cmnd_Alias.
Cmnd_Alias BACKUPS = /bin/mt, /sbin/restore, /sbin/dump
You can tell a command alias to include everything in a particular directory by using a wildcard.
Cmnd_Alias APPCOMMANDS = /home/appuser/bin/*
You can also list partial command names. For example, most of PostgreSQL’s commands begin with the pg_ prefix. To give a user access to these commands, use a wildcard like so:
Cmnd_Alias APPCOMMANDS = /home/appuser/bin/*,/usr/local/bin/pg_*
If you find yourself writing command aliases that include paths like /sbin/*, stop and reconsider, because you’re essentially giving the user unlimited root access.
Using Aliases in /etc/sudoers
Use an alias exactly as you would normally list the user, command, or host-name. In the previous examples, I defined the user alias DBAs, the run as alias APPOWNER, the host alias DB, and the command alias APPCOMMANDS. Here’s how they might be used:
DBAs DB = ALL
116 Chapter 7
Here, the user group DBAs can run any command on any server in the DB group, as any user. The members of the group own the servers, and if they screw them up, it’s not my problem.
Well, this attitude sounds good, but the truth is that when they destroy the server, I must get involved. Even if it’s not my fault that they drove the database server into the ditch, it is my problem. I must lock down the commands that they can run, restricting them to only the commands in the APPCOMMANDS alias. So, the DBAs group can now run any command in APPCOMMANDS on the DB servers.
DBAs DB = APPCOMMANDS
Then I discover that my database admins are either cleverer or dafter than I thought. They run certain database commands as root, creating log files owned by root. The unprivileged database user _postgresql cannot write to these log files, and so the application server crashes. Fixing this requires changing the permissions on those log files, but the database admins do not have permission to run chown. If I give them the ability to change the permissions on arbitrary files, I might as well just give them root access.
To keep this from happening again, I restrict their privileges so they can run their commands only as the application unprivileged users.
DBAs DB = (APPOWNER) APPCOMMANDS
Everyone in the DBAs group can run any command in APPCOMMANDS, as any user in APPOWNER, on any server in DB. I can change their access by adding entries to the various aliases.
Without aliases, what would this rule look like?
dwsmith,kkrusch db1,db2,db3 = (_postgresql,www) \ /home/appowner/bin/*,/usr/local/bin/pg_*
That’s ugly, and it does exactly the same thing.If you name your aliases well, you’ll find rules easier to understand.
While these example aliases are fairly short, I’ve used aliases with up to 20 members. The resulting rules are appalling without aliases.
n o t e Some of the permissions granted by sudo in this case are unnecessary. For example, the unprivileged web server user doesn’t need to run the various PostgreSQL utilities, and if www did try to run the database, nothing much would happen. If you don’t like this, make two separate rules. Either way, it’s tighter security than giving database administrators the root password.
Nesting Aliases
You can include aliases in aliases. Here, I combine two user aliases into a single alias for my application administrators:
User_Alias APPADMINS = DBAs, WEBMASTERS

Root, and How to Avoid It 117
Alias Naming Conventions
It’s traditional, but not mandatory, to give aliases names in all capital let-ters to help differentiate them from users, hosts, and so on. And though it’s valid syntax, it’s best to avoid naming aliases after users or hosts. Here’s an example:
User_Alias MWLUCAS = mwlucas,pkdick,sbaxter,dwsmith
This would quickly drive me batty.2
You can also reuse alias names if they are for different types of aliases. For example, the following is perfectly legal, but perfectly offensive.
User_Alias DB = dwsmith,kkruschRunas_Alias DB = _postgresql,wwwHost_Alias DB = db1, db2, db3Cmnd_Alias DB = /usr/local/bin/pg_*, /home/appowner/bin/*DB DB = (DB) DB
If you do this, anyone who must debug your sudo configuration will curse your name. Even if you consider being cursed a job perk, this naming scheme makes your phone ring at inconvenient times.
Changing sudo’s Default BehaviorYou can customize sudo’s behavior, or its behavior for certain users, hosts, or aliases, with the Defaults field. For example, one feature of sudo is that if you enter the wrong password, it insults you.
$ sudo -lPassword:My pet rat can type better than you!Password:
I typed my password incorrectly. sudo insulted me and offered me a chance to enter my password again. If I enter the wrong password three times, sudo exits.
Insulting the user is just fine in an open source environment, but if you’re in a company, someone will complain to management. You can either go to sensitivity training or proactively disable insults by adding the following line to sudoers:
Defaults !insults
The Defaults statement indicates that the following item affects one or more sudo defaults. The insults option controls insulting the user. The exclamation point (!) is a negation symbol. By putting an exclamation
2. Oh, all right—battier. Happy?
118 Chapter 7
point in front of the option, you turn off the feature. The system will no longer insult users when they demonstrate that they cannot type as well as my pet rat.
$ sudo -lPassword:Sorry, try again.Password:
You can override defaults globally or on a per-alias basis.
Overriding Defaults per Host
To override the defaults on a per-host basis, use an @ symbol after Defaults and give either a host or a host alias. Here, I want to insult users who can’t type their password on caddis or on a machine in the alias APPSERVERS, while leaving insults disabled for all other servers:
Defaults !insultsDefaults@caddis insultsDefaults@APPSERVERS insults
This lets me enable or disable functions for any combination of servers.
Overriding Defaults per User
To change sudo defaults on a per-user basis, use a % and the user or user alias.
Defaults !insultsDefaults%lasnyder insultsDefaults%DBAs insults
It doesn’t matter where lasnyder logs in—I’m going to insult him, as well as the users in the DBAs alias. But database administrators are used to poor treatment by their software, and to not insult them would confuse and dis-appoint them.
Overriding Defaults per Command
You can also change how sudo behaves on a command-by-command basis by putting an exclamation point between Defaults and the command list.
Defaults !insultsDefaults!/sbin/newfs,/sbin/fsck insultsDefaults%APPCOMMANDS insults
Anyone who tries to use newfs(8) or fsck(8) (discussed in Chapter 8) and cannot type their password needs insulting. The application adminis-tration commands might not merit insults, but I can always claim it was an oversight.
Root, and How to Avoid It 119
Overriding Defaults per Run As
Lastly, you can change the defaults based on who the command is being run as. Use a right angle bracket (<) to indicate changing behavior for a run as alias.
Defaults !insultsDefaults<_postgresql insultsDefaults<APPOWNER insults
If a user runs a command as _postgresql, or as any user in the APPOWNER run as alias, and types his password incorrectly, he gets insulted.
n o t e In the rest of this chapter, we’ll use Default widely. Please assume that each section includes the text “Restrict this as necessary by user, host, command, or run as.”
sudo and the EnvironmentCertain environment variables can cause problems. For example, $HOME is an obvious one—a user cannot create files in another user’s home directory. Others, such as LD_LIBRARY_PATH, can cause endless annoyance as well as secu-rity issues, as applications try to link against the wrong libraries. The sudo program can remove suspicious environment variables, completely reset the user’s environment, or be configured to preserve the original user’s environment.
The env_reset sudoers option is set by default. It purges all environment variables except LOGNAME, SHELL, USER, USERNAME, and anything beginning with SUDO_. You can change this behavior by disabling env_reset, but I strongly rec-ommend against disabling environment purging.
Instead of letting users blindly carry all the random garbage in their environment along with them, create a list of necessary and safe environ-ment variables that they can retain. You’ll see examples in OpenBSD’s default sudoers file using the env_keep option.
Defaults env_keep +="DESTDIR DISTDIR EDITOR FETCH_CMD FLAVOR FTPMODE GROUP MAKE"Defaults env_keep +="MAKECONF MULTI_PACKAGES NOMAN OKAY_FILES OWNER PKG_CACHE"Defaults env_keep +="PKG_DBDIR PKG_DESTDIR PKG_PATH PKG_TMPDIR PORTSDIR"Defaults env_keep +="RELEASEDIR SHARED_ONLY SSH_AUTH_SOCK SUBPACKAGE VISUAL"Defaults env_keep +="WRKOBJDIR"
The OpenBSD team deems these environment variables safe to pass into a new user account. The += means “add these to the existing list of items to keep.” The environment variables themselves are in quotation marks.
If you need to pass your SSH environment around your servers, you can use scp(1) and sftp(1) to move files to other servers. Read the documenta-tion, create a list of approved environment variables, and add an entry.
Defaults env_keep += "SSH_CLIENT SSH_CONNECTION SSH_TTY SSH_AUTH_SOCK"
120 Chapter 7
n o t e The ability to copy files to other servers probably should be restricted to people in a cer-tain group. Sysadmins might need to copy files to other servers, but many other users don’t need this access.
Using sudoNow that you know how to set sudo permissions, let’s see how to actually use it. First, let’s tell sudo that your account has permission to run any com-mand. (You should have root access on your test machine, at least, so this won’t be a security issue.)
The easy way to accomplish this is to uncomment the sudoers entry allowing wheel members access to all commands.
%wheel ALL=(ALL) SETENV: ALL
As a user in wheel, check your sudo permissions.
$ sudo -lPassword:Matching Defaults entries for mwlucas on this host: env_keep+="DESTDIR DISTDIR EDITOR FETCH_CMD FLAVOR FTPMODE GROUP MAKE", env_keep+="MAKECONF MULTI_PACKAGES NOMAN OKAY_FILES OWNER PKG_CACHE", env_keep+="PKG_DBDIR PKG_DESTDIR PKG_PATH PKG_TMPDIR PORTSDIR", env_keep+="RELEASEDIR SHARED_ONLY SSH_AUTH_SOCK SUBPACKAGE VISUAL", env_keep+=WRKOBJDIR
User mwlucas may run the following commands on this host: (ALL) SETENV: ALL
When sudo asks for a password, enter your own password, not the root password.
The -l flag tells sudo to show you which privileges and settings you have. In response, sudo parses /etc/sudoers and spits out all of the settings that apply to your account on this system. Any host-specific limitations are already evaluated and do not appear.
sudo Password CachingWhen you enter your password correctly, sudo records the time, and for the next five minutes, it remembers that you’ve recently entered your password and will work without requiring you to enter it again. After five minutes, you must reauthenticate. This simplifies work when entering a series of sudo commands, but it times out reasonably quickly.
You can tell sudo to forget your cached password by running sudo -k. You can control the number of minutes before sudo asks for the password again with the timestamp_timeout option in sudoers. Here, we tell sudo to not time out the password for 10 minutes:
Defaults timestamp_timeout 10
Root, and How to Avoid It 121
If you set the timeout to 0, sudo always asks for a password. If you set it to a negative value, sudo caches the password throughout this login session. You must run sudo -k to make sudo forget that you entered your password.
Running Commands Under sudoTo run commands via sudo, just put the command name after the sudo com-mand. For example, here’s how you would run tcpdump via sudo:
$ sudo tcpdump
The sudo command should prompt for your password. Enter it correctly, and tcpdump should run as root.
You can also run commands that include arguments under sudo. For example, I use tail -f to view the end of a log file and show new entries as they appear. But some log files are accessible only to root, such as the authentication log and the log that contains detailed sudo logs. You can view these logs without becoming root by using sudo.
$ sudo tail -f /var/log/authlog
You can configure sudoers to permit any combination of commands and arguments.
Running Commands as Other UsersEarlier, you saw how to give some users permission to run commands as users other than root. Specify the user with the -u flag.
$ sudo -u _postgresql pg_dump
If you don’t have permission to run that command as that user, you’ll get an error.
sudoeditMy flunky sbaxter needs to edit the named configuration file, /etc/named.conf. Consider this sudo configuration:
sbaxter dns1=/etc/rc.d/named,/sbin/mount_nfs,/usr/bin/vi /etc/named.conf
Looks good, right?Uh, no.The first problem is that I’m requiring sbaxter to use a specific editor.
Minimal competence in vi is required for system administrators, but I don’t want to force him to use a specific editor to do his day-to-day job. Also, many editors offer shell escapes. While most people are aware of escaping
122 Chapter 7
to a shell in vi, emacs has a shell escape as well. If my flunky can escape to a shell while running an editor as root, he gains root access. This is exactly what I want to avoid.
The sudoedit feature lets users edit specific files with their preferred edi-tor, or a default chosen by the sysadmin, without working as root.
sbaxter dns1=/etc/rc.d/named,/sbin/mount_nfs, \ sudoedit /etc/named.conf, /etc/rndc.key
The keyword sudoedit is followed by a list of the files that the user can edit, thereby permitting the user to change those files without root privileges.
The user edits the file by passing a filename to sudoedit.
$ sudoedit /etc/named.conf
Technically, the user doesn’t edit the actual file; instead, sudoedit copies the file to a temporary file owned by the user, and when the user closes the editor, it copies the temporary file to the original location. The user never runs the editor as root.
The sudoedit keyword uses the editor given by the environment variable $SUDO_EDITOR, $VISUAL, or $EDITOR. Users can set that variable in their shell if they don’t like what the system offers them.
The Biggest sudo Mistake: ExclusionsNow that you know the basics of sudo, let’s consider a configuration that trips up even experienced system administrators. Sometimes you want to prevent users from executing specific commands but give them access to every other command. The sudoers documentation says that you can do this using the exclamation point (!) as a negation character, but that’s not entirely effective. Because this is a popular method, however, I’ll discuss how it works, and then demonstrate how your users automatically get root if you use it.
Start by defining command aliases that contain the forbidden com-mands. One popular exclusion is su. Another common exclusion is user shells, because if you execute a shell as a user, you become that user.
Cmnd_Alias SHELLS = /bin/sh,/bin/csh,/usr/local/bin/tcshCmnd_Alias SU = /usr/bin/su
Now configure a command alias that excludes those commands.
pkdick ALL = ALL, !SHELLS,!SU
Looks sensible, doesn’t it? And it seems to work.
$ sudo shPassword:Sorry, user pkdick is not allowed to execute '/usr/bin/su' as root.
Root, and How to Avoid It 123
Here’s the catch: Commands are defined by full paths. You’re allowing the user to run any command except for a few specified by full path. All this user needs to do is copy the command to another location and run it.
$ cp /bin/sh /tmp/sh$ sudo /tmp/sh#
Welcome to root!Negating commands can be bypassed by anyone who understands even
the basics of sudo, as you’ll find well documented in the sudo manual and other literature. People still insist on using it to protect production systems. Don’t be one of those people.
sudo LogsEvery sudo command is logged to /var/log/secure by syslogd. Each log message contains a timestamp, a username, a terminal, the directory where the com-mand was run, the user the command was run as, and the command used.
Apr 30 14:16:50 treble sudo: mwlucas : TTY=ttyp8 ; PWD=/home/mwlucas ; USER=root ; COMMAND=/usr/bin/su -m
By checking the file secure, you can track exactly who did what and when. (Send your syslog messages to a logging server that your users cannot access to prevent those who screw up from deleting the logs of their screwup.)
May 15 09:14:55 treble sudo: lasnyder : TTY=ttyp4 ; PWD=/etc ; USER=root ; COMMAND=/bin/rm pf.conf
I know exactly who broke this system and when. The log entry transforms what’s about to happen from “homicide” to “ justifiable manslaughter.” That alone makes sudo worth using properly.
This chapter has given you some tips on how to avoid screwing up your system accidentally. Now let’s look at ways to really mess up your system, by mucking with disks and filesystems.

8D i s k s a n D F i l e s y s t e m s
Oh, my head hurts bad. Rings of ones and zeros, ouch!
Filesystems hide them.
Proper data management is perhaps a sys-tems administrator’s most vital duty. You
can replace almost every computer compo-nent, but the data on your disk is irreplace-
able. Perhaps that data isn’t important or it’s backed up, but losing files will ruin your day. As a sysadmin, you must protect important data by carefully manag-ing your disks and filesystems.
We covered the basics of disklabels and MBR partitions in Chapter 2, but OpenBSD lets you use and abuse disks and filesystems in any number of ways. You’ll learn how in this chapter.
126 Chapter 8
Device NodesA device node is a file that provides a logical interface to a piece of hardware. By reading from a device node, sending data to it, or using a command on it, you’re telling the operating system to perform an action on a piece of hardware or, in some cases, a logical device.
Different devices behave differently when data is sent to them. For example, writing to the console makes text appear on the screen or termi-nal, while writing to a disk device puts data on that disk. (OpenBSD puts device nodes in /dev and disallows device nodes on other filesystems.)
Many disk management programs expect to be given a device name as an argument. Unfortunately, device node names are frequently cryptic and vary widely among operating systems—even on closely related operat-ing systems that run on the same hardware. To simplify your life just a bit, Table 8-1 lists the device node names for common OpenBSD disk devices.
Table 8-1: Common Disk Device Node Names
Device Node Description
/dev/fd* Floppy disk (block)/dev/rfd* Floppy disk (raw)/dev/wd* IDE and some SATA disks (block)/dev/rwd* IDE and some SATA disks (raw)/dev/sd* SCSI/SAS/SATA/USB/RAID/non-IDE disk (block)/dev/rsd* SCSI/SAS/SATA/USB/RAID/non-IDE disk (raw)/dev/cd* CD/DVD drive (block)
Device names also have a number that tells you which instance of that device it refers to. The numbering starts at 0. The first IDE hard drive is /dev/wd0, /dev/wd1 is the second, and /dev/cd1 is the second CD drive.
Every partition is assigned a letter. For example, the root partition is a, the swap area is b, the whole disk is c, and so on. Each partition also has a separate device node, the result of appending the partition letter to your disk device name. For example, if you install to a single IDE drive, your root partition is /dev/wd0a.
Raw and Block DevicesNotice in Table 8-1 that devices are listed in either block or raw (character) mode. This refers to how the devices are accessed.
Block Devices
Hard disks are usually accessed using a block device node (sometimes called a cooked device node). When accessing a device as a block, data transmitted to or from the device is buffered, or collected until there is sufficient data to
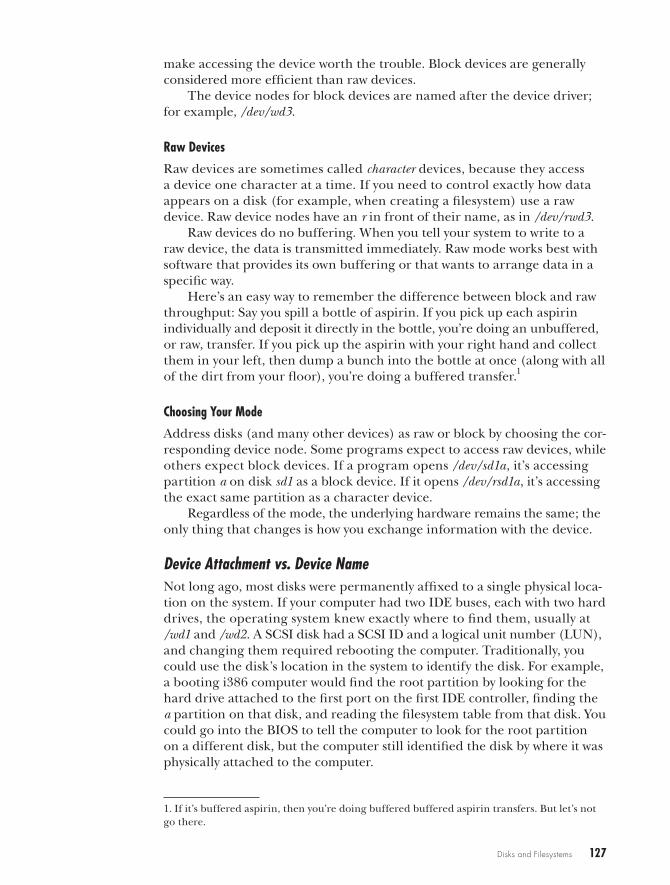
Disks and Filesystems 127
make accessing the device worth the trouble. Block devices are generally considered more efficient than raw devices.
The device nodes for block devices are named after the device driver; for example, /dev/wd3.
Raw Devices
Raw devices are sometimes called character devices, because they access a device one character at a time. If you need to control exactly how data appears on a disk (for example, when creating a filesystem) use a raw device. Raw device nodes have an r in front of their name, as in /dev/rwd3.
Raw devices do no buffering. When you tell your system to write to a raw device, the data is transmitted immediately. Raw mode works best with software that provides its own buffering or that wants to arrange data in a specific way.
Here’s an easy way to remember the difference between block and raw throughput: Say you spill a bottle of aspirin. If you pick up each aspirin individually and deposit it directly in the bottle, you’re doing an unbuffered, or raw, transfer. If you pick up the aspirin with your right hand and collect them in your left, then dump a bunch into the bottle at once (along with all of the dirt from your floor), you’re doing a buffered transfer.1
Choosing Your Mode
Address disks (and many other devices) as raw or block by choosing the cor-responding device node. Some programs expect to access raw devices, while others expect block devices. If a program opens /dev/sd1a, it’s accessing partition a on disk sd1 as a block device. If it opens /dev/rsd1a, it’s accessing the exact same partition as a character device.
Regardless of the mode, the underlying hardware remains the same; the only thing that changes is how you exchange information with the device.
Device Attachment vs. Device NameNot long ago, most disks were permanently affixed to a single physical loca-tion on the system. If your computer had two IDE buses, each with two hard drives, the operating system knew exactly where to find them, usually at /wd1 and /wd2. A SCSI disk had a SCSI ID and a logical unit number (LUN), and changing them required rebooting the computer. Traditionally, you could use the disk’s location in the system to identify the disk. For example, a booting i386 computer would find the root partition by looking for the hard drive attached to the first port on the first IDE controller, finding the a partition on that disk, and reading the filesystem table from that disk. You could go into the BIOS to tell the computer to look for the root partition on a different disk, but the computer still identified the disk by where it was physically attached to the computer.
1. If it’s buffered aspirin, then you’re doing buffered buffered aspirin transfers. But let’s not go there.
128 Chapter 8
Today, disks can appear and disappear from multiple locations on the system. For example, you might attach and remove several flash drives as needed, or hot swap Serial Attached SCSI (SAS) or Serial ATA (SATA) drives from bus to bus. Physical location is no longer a safe way to identify a disk. While /dev/sd0 is the device node for the first SCSI disk, you cannot assume that the disk currently attached to the first SCSI port is the same disk that was plugged in there the last time the system booted. OpenBSD labels actual disks with unique IDs, as discussed in the next section.
DUIDs and /etc/fstabAll OpenBSD platforms use the disklabel to identify partitions and other information about a disk. When you label a disk (as we did in Chapter 3 and will do by hand later this chapter), disklabel adds a disklabel unique identifier, or DUID, to the disk label. The DUID is a unique hexadecimal number that lets OpenBSD identify a specific disk.
To find a disk’s DUID, pass the device name to disklabel and look for the duid entry:
# disklabel sd0...duid: 55128c3700af5491...
The disk currently attached as sd0 has a DUID of 55128c3700af5491. Even if you physically move the disk so that it becomes sd9 or sd18, OpenBSD can use the DUID to uniquely identify this disk.
OpenBSD uses the filesystem table /etc/fstab to map filesystems on a disk to mount points using either the disk location or the DUID. Each file-system appears on its own line in /etc/fstab, as shown here:
u 55128c3700af5491.b vnone wswap xsw55128c3700af5491.a / ffs rw 1 155128c3700af5491.k /home ffs rw,nodev,nosuid 1 255128c3700af5491.d /tmp ffs rw,nodev,nosuid 1 2...
We’ll focus on the first entry to explore what’s going on here. The first field, 55128c3700af5491.b u, is the location of the partition. Whereas older systems used the disk device name and the partition letter (such as /dev/sd0a), newer systems can use the DUID, a period, and the partition letter (as in 55128c3700af5491.a). By using DUIDs in the filesystem table, OpenBSD can always mount the same disk at the same location, no mat-ter how it’s attached.
The second field, none v, lists the mount point, which is the directory where the filesystem is attached to the directory tree. Every partition you can write files to is attached to a mount point (such as /usr, /var, and so on), with one partition being the root partition (/). Swap space uses a mount point of none.
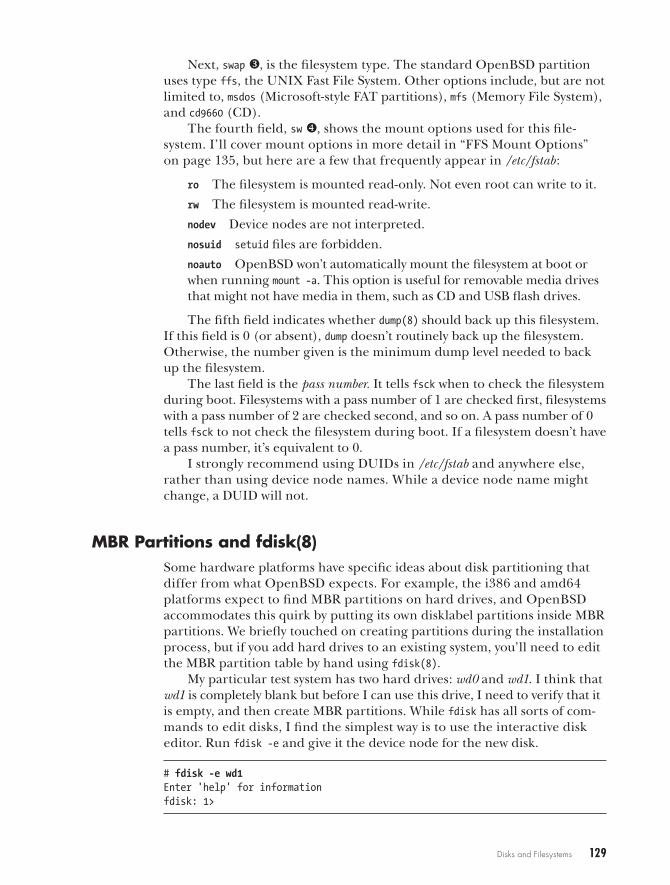
Disks and Filesystems 129
Next, swap w, is the filesystem type. The standard OpenBSD partition uses type ffs, the UNIX Fast File System. Other options include, but are not limited to, msdos (Microsoft-style FAT partitions), mfs (Memory File System), and cd9660 (CD).
The fourth field, sw x, shows the mount options used for this file-system. I’ll cover mount options in more detail in “FFS Mount Options” on page 135, but here are a few that frequently appear in /etc/fstab :
ro The filesystem is mounted read-only. Not even root can write to it.
rw The filesystem is mounted read-write.
nodev Device nodes are not interpreted.
nosuid setuid files are forbidden.
noauto OpenBSD won’t automatically mount the filesystem at boot or when running mount -a. This option is useful for removable media drives that might not have media in them, such as CD and USB flash drives.
The fifth field indicates whether dump(8) should back up this filesystem. If this field is 0 (or absent), dump doesn’t routinely back up the filesystem. Otherwise, the number given is the minimum dump level needed to back up the filesystem.
The last field is the pass number. It tells fsck when to check the filesystem during boot. Filesystems with a pass number of 1 are checked first, filesystems with a pass number of 2 are checked second, and so on. A pass number of 0 tells fsck to not check the filesystem during boot. If a filesystem doesn’t have a pass number, it’s equivalent to 0.
I strongly recommend using DUIDs in /etc/fstab and anywhere else, rather than using device node names. While a device node name might change, a DUID will not.
MBR Partitions and fdisk(8)Some hardware platforms have specific ideas about disk partitioning that differ from what OpenBSD expects. For example, the i386 and amd64 platforms expect to find MBR partitions on hard drives, and OpenBSD accommodates this quirk by putting its own disklabel partitions inside MBR partitions. We briefly touched on creating partitions during the installation process, but if you add hard drives to an existing system, you’ll need to edit the MBR partition table by hand using fdisk(8).
My particular test system has two hard drives: wd0 and wd1. I think that wd1 is completely blank but before I can use this drive, I need to verify that it is empty, and then create MBR partitions. While fdisk has all sorts of com-mands to edit disks, I find the simplest way is to use the interactive disk editor. Run fdisk -e and give it the device node for the new disk.
# fdisk -e wd1Enter 'help' for informationfdisk: 1>
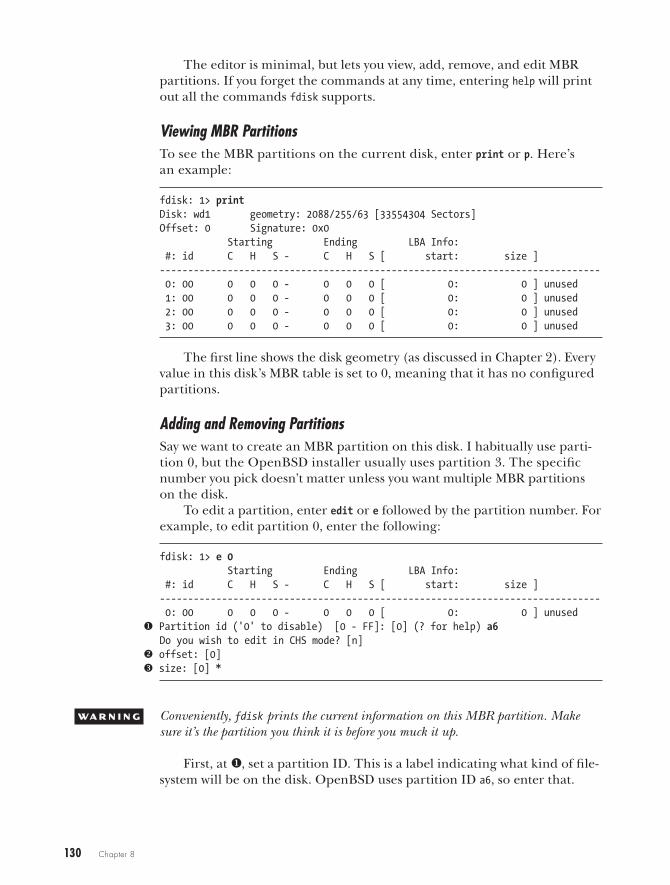
130 Chapter 8
The editor is minimal, but lets you view, add, remove, and edit MBR partitions. If you forget the commands at any time, entering help will print out all the commands fdisk supports.
Viewing MBR PartitionsTo see the MBR partitions on the current disk, enter print or p. Here’s an example:
fdisk: 1> printDisk: wd1 geometry: 2088/255/63 [33554304 Sectors]Offset: 0 Signature: 0x0 Starting Ending LBA Info: #: id C H S - C H S [ start: size ]------------------------------------------------------------------------------ 0: 00 0 0 0 - 0 0 0 [ 0: 0 ] unused 1: 00 0 0 0 - 0 0 0 [ 0: 0 ] unused 2: 00 0 0 0 - 0 0 0 [ 0: 0 ] unused 3: 00 0 0 0 - 0 0 0 [ 0: 0 ] unused
The first line shows the disk geometry (as discussed in Chapter 2). Every value in this disk’s MBR table is set to 0, meaning that it has no configured partitions.
Adding and Removing PartitionsSay we want to create an MBR partition on this disk. I habitually use parti-tion 0, but the OpenBSD installer usually uses partition 3. The specific number you pick doesn’t matter unless you want multiple MBR partitions on the disk.
To edit a partition, enter edit or e followed by the partition number. For example, to edit partition 0, enter the following:
fdisk: 1> e 0 Starting Ending LBA Info: #: id C H S - C H S [ start: size ]------------------------------------------------------------------------------ 0: 00 0 0 0 - 0 0 0 [ 0: 0 ] unused
u Partition id ('0' to disable) [0 - FF]: [0] (? for help) a6Do you wish to edit in CHS mode? [n]
v offset: [0]w size: [0] *
W a r n i n g Conveniently, fdisk prints the current information on this MBR partition. Make sure it’s the partition you think it is before you muck it up.
First, at u, set a partition ID. This is a label indicating what kind of file-system will be on the disk. OpenBSD uses partition ID a6, so enter that.
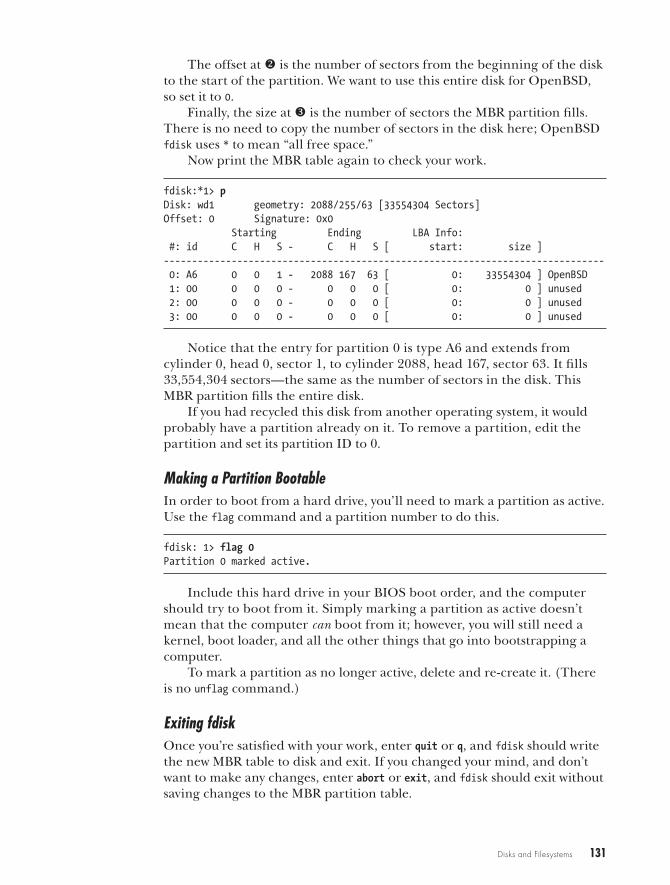
Disks and Filesystems 131
The offset at v is the number of sectors from the beginning of the disk to the start of the partition. We want to use this entire disk for OpenBSD, so set it to 0.
Finally, the size at w is the number of sectors the MBR partition fills. There is no need to copy the number of sectors in the disk here; OpenBSD fdisk uses * to mean “all free space.”
Now print the MBR table again to check your work.
fdisk:*1> pDisk: wd1 geometry: 2088/255/63 [33554304 Sectors]Offset: 0 Signature: 0x0 Starting Ending LBA Info: #: id C H S - C H S [ start: size ]------------------------------------------------------------------------------ 0: A6 0 0 1 - 2088 167 63 [ 0: 33554304 ] OpenBSD 1: 00 0 0 0 - 0 0 0 [ 0: 0 ] unused 2: 00 0 0 0 - 0 0 0 [ 0: 0 ] unused 3: 00 0 0 0 - 0 0 0 [ 0: 0 ] unused
Notice that the entry for partition 0 is type A6 and extends from cylinder 0, head 0, sector 1, to cylinder 2088, head 167, sector 63. It fills 33,554,304 sectors—the same as the number of sectors in the disk. This MBR partition fills the entire disk.
If you had recycled this disk from another operating system, it would probably have a partition already on it. To remove a partition, edit the partition and set its partition ID to 0.
Making a Partition BootableIn order to boot from a hard drive, you’ll need to mark a partition as active. Use the flag command and a partition number to do this.
fdisk: 1> flag 0Partition 0 marked active.
Include this hard drive in your BIOS boot order, and the computer should try to boot from it. Simply marking a partition as active doesn’t mean that the computer can boot from it; however, you will still need a kernel, boot loader, and all the other things that go into bootstrapping a computer.
To mark a partition as no longer active, delete and re-create it. (There is no unflag command.)
Exiting fdiskOnce you’re satisfied with your work, enter quit or q, and fdisk should write the new MBR table to disk and exit. If you changed your mind, and don’t want to make any changes, enter abort or exit, and fdisk should exit without saving changes to the MBR partition table.
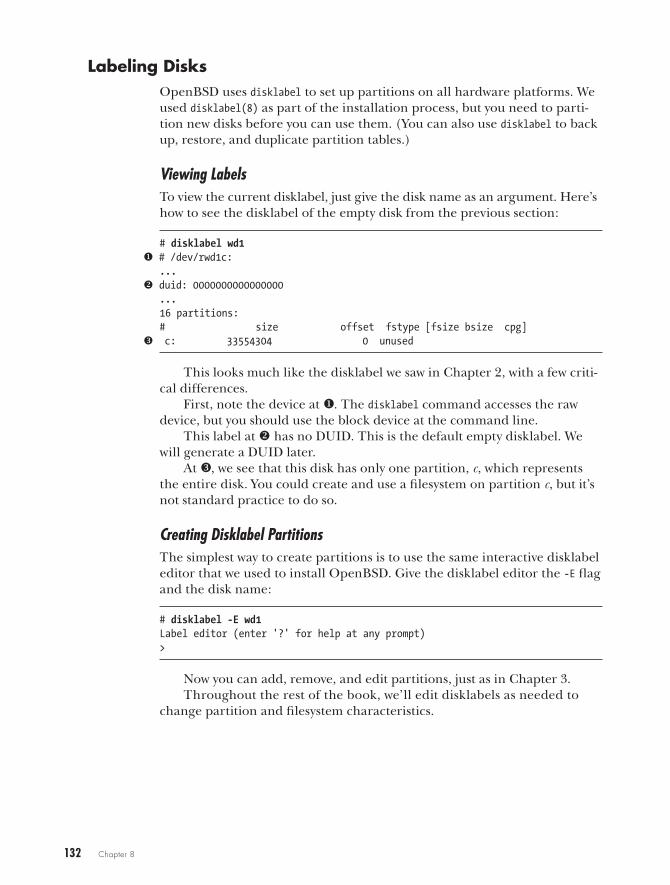
132 Chapter 8
Labeling DisksOpenBSD uses disklabel to set up partitions on all hardware platforms. We used disklabel(8) as part of the installation process, but you need to parti-tion new disks before you can use them. (You can also use disklabel to back up, restore, and duplicate partition tables.)
Viewing LabelsTo view the current disklabel, just give the disk name as an argument. Here’s how to see the disklabel of the empty disk from the previous section:
# disklabel wd1u # /dev/rwd1c:
...v duid: 0000000000000000
...16 partitions:# size offset fstype [fsize bsize cpg]
w c: 33554304 0 unused
This looks much like the disklabel we saw in Chapter 2, with a few criti-cal differences.
First, note the device at u. The disklabel command accesses the raw device, but you should use the block device at the command line.
This label at v has no DUID. This is the default empty disklabel. We will generate a DUID later.
At w, we see that this disk has only one partition, c, which represents the entire disk. You could create and use a filesystem on partition c, but it’s not standard practice to do so.
Creating Disklabel PartitionsThe simplest way to create partitions is to use the same interactive disklabel editor that we used to install OpenBSD. Give the disklabel editor the -E flag and the disk name:
# disklabel -E wd1Label editor (enter '?' for help at any prompt)>
Now you can add, remove, and edit partitions, just as in Chapter 3. Throughout the rest of the book, we’ll edit disklabels as needed to
change partition and filesystem characteristics.
Disks and Filesystems 133
Backing Up and Restoring DisklabelsBefore messing with a disk, back up its disklabel so that you can fall back to the old label if you screw up. You can back up the disklabel with this command:
# disklabel wd1 > wd1.disklabel.saved
To apply a saved disklabel to a disk, give disklabel the -R flag, the disk device, and the label file:
# disklabel -R wd1 wd1.disklabel.saved
This writes the saved label to the disk. You can use saved disklabels to duplicate partitioning across identical disks.
Now that you have partitions, let’s put a filesystem on them.
The Fast File SystemOpenBSD’s filesystem, FFS, is an improved version of the filesystem shipped with BSD 4.4. FFS is sometimes called UFS (for Unix File System), and many system utilities still use UFS.2
FFS is designed to be fast, reliable, and able to handle the most common situations effectively while still supporting weird configurations. By default, OpenBSD tunes FFS for general use, but you can optimize it to fit your needs—whether you need to hold trillions of tiny files or a half dozen 30GB files. You don’t need to know much about FFS internals, but you should at least understand blocks, fragments, and inodes.
FFS VersionsThe original FFS was written in the 1980s and included hard-coded limits that were ample for the day. Filesystems could have up to 231-1 blocks, or just under a terabyte (TB). In 1983, a 1TB filesystem was unthinkable. In 2013, 1TB drives are cheap.
For larger file systems, we have FFS version 2. FFS2 can support file-systems up to 8 zettabytes—unthinkable by 2013 standards. (FFS2 is likely to reach other limits before hitting the filesystem size limit, mind you.) OpenBSD supports both FFS and FFS2.
The i386 and amd64 boot floppies support only FFS, not FFS2. The installation CD, however, supports both. Most machines that need to boot from floppy don’t need FFS2, and probably don’t have a BIOS that can sup-port 2TB drives anyway. The filesystem creation program newfs(1) is smart
2. OpenBSD is not the only operating system that still uses the BSD 4.4 filesystem or a descendant thereof. If a Unix vendor doesn’t specifically tout its “improved and advanced” filesystem, it’s almost certainly running a derivative of FFS.
134 Chapter 8
enough to use FFS2 on filesystems large enough to need it, so for most installations, you don’t need to worry about the difference between FFS and FFS2.
n o t e In the exceedingly unlikely event that you actually require FFS2 on a machine that must be installed via floppy, be sure to format the critical system partitions of root (/), /var, and /usr as FFS, not FFS2. Use FFS2 only for partitions that are not critical to the system. Otherwise, you won’t be able to use the installation disk for upgrades or emergency repairs.
Blocks, Fragments, and InodesBoth FFS and FFS2 are managed through blocks, fragments, and inodes. This arrangement isn’t unique to FFS and FFS2; filesystems such as NTFS use data blocks and index nodes, too. The indexing system used by each filesystem is largely unique, however.
Blocks
Blocks are sections of disk that contain data. Files are placed in one or more blocks. OpenBSD’s FFS uses a default block size of 16KB, or eight times the fragment size, whichever is smaller. Not all files are even multiples of 16KB, so leftover bits go in fragments. A fragment is one-eighth of the block size, or 2KB by default. A 20KB file fills one block and two fragments.
Inodes
Inodes, or index nodes, contain basic data about files, such as the file’s size, permissions, and the list of blocks that contain the file. Collectively, the data in an inode is known as metadata, or data about data.
Superblocks
You’ll also see references to superblocks, which are blocks that contain vital information about the filesystem’s size and specifications. Superblocks are so important that FFS makes many backup copies of them. If you need to meddle with superblocks, you’ve probably done something wrong or your filesystem is FUBAR.
Creating FFS FilesystemsUse newfs(8) to create FFS and FFS2 filesystems and make sure that the disk has a disklabel. The newfs command takes one argument: the partition device node.
# newfs wd1a/dev/rwd1a: 16383.9MB in 33554304 sectors of 512 bytes81 cylinder groups of 202.47MB, 12958 blocks, 25984 inodes eachsuper-block backups (for fsck -b #) at:
Disks and Filesystems 135
32, 414688, 829344, 1244000, 1658656, 2073312, 2487968, 2902624, 3317280, 3731936, ...
You’ll see details about the filesystem size, how many blocks it includes, and so on. The location of each superblock backup is printed as newfs pro-ceeds. (When computers and disks were much slower, this told the operator that the computer was actually doing something and hadn’t seized up.)
The partition size determines which filesystem newfs uses. Partitions smaller than 1TB are formatted with FFS; larger partitions with FFS2. If you want to specify a particular filesystem format (yes, you can even specify the old-fashioned 4.3BSD format if you like), use the -O flag. It makes no sense to demand an FFS filesystem on a large partition, but you might have a rea-son to use FFS2 on a small partition.
# newfs -O 2 wd1a
If you think you need to specify which filesystem format to use on a new filesystem, you’re probably wrong.
FFS Mount OptionsOpenBSD can handle FFS partitions in several special ways, controlling what sorts of changes the filesystem supports and what sorts of files may exist. These are called mount options. You can specify mount options either when you mount partitions on the command line, as we’ll discuss in “Mounting and Unmounting Partitions” on page 140, or in /etc/fstab.
Mount Options and /etc/fstab
Specify a filesystem’s mount options in a comma-separated list in the fourth field of the filesystem’s /etc/fstab entry. For example, here’s an /etc/fstab entry for the partition that contains my /home directory:
244f6d3acd6374ad.k /home ffs rw,nodev,nosuid,softdep 1 2
I’ve specified the options rw (read-write), nodev (device nodes forbidden), nosuid (setuid programs forbidden), and softdep (soft updates). I’ll cover these and other common mount options, and explain why you might want to use them.
Read-Only Mounts
If you only want to read the contents of a partition, and never write to it, you can mount the partition as read-only. In most cases, this is the safest way to mount a disk because you cannot alter the data on the disk or write any new data. If a filesystem should never change, mounting it read-only might make sense.
Read-only mounts are especially valuable when a particular filesystem is damaged. While OpenBSD won’t let you perform a standard read-write
136 Chapter 8
mount on a damaged or dirty filesystem, it can often mount those filesystems read-only. This gives you a chance to recover some data from the partition. (Not a large chance, but a chance.)
To mount a filesystem read-only, use the option rdonly or ro.
Read-Write Mounts
If you want to both read from and write to the disk, you’ll want to mount the partition as read-write. By default, OpenBSD mounts all partitions as read-write.
Use the option rw to explicitly configure read-write mounts. On modern hardware, I recommend using soft updates in conjunction
with read-write mounts.
Synchronous Mounts
Using a synchronous mount is the safest way to mount a filesystem. OpenBSD can read data from a synchronous-mounted partition as fast as the hard-ware permits. Whenever you write to the disk, however, the kernel feeds a chunk of data to the disk, waits to receive confirmation that the disk has accepted the data and written it to disk, and then tells the program that requested the write that the data is now on disk.
You should know that even if you’re using a synchronous mount, most hard drives lie about whether they have actually written the data to disk. These drives perform write caching, where writes are cached in a small flash or RAM buffer on the disk itself before the drive actually writes the data. This raises the question: Is a synchronous mount really synchronous? Hard drive vendors usually claim that in the event of a power failure, these disks retain just enough power to write the cache to disk.
Although they provide the greatest data integrity in the case of a crash, synchronous mounts are slow. You might use synchronous mounts when data integrity is crucial, but in most cases, it’s overkill and you have little ability to verify that the mount is truly synchronous.
Activate synchronous mounts with the sync keyword.
Asynchronous Mounts
To write data quickly, but with a higher risk of data loss, mount partitions asynchronously. When using asynchronous mounts, the kernel informs software that all disk writes are successful before the disk confirms that the data was written. This is fast, but a system failure can leave inconsistent data on your disk.
Asynchronous mounts are useful when restoring a filesystem from backup, because if you get a power failure halfway through the restore procedure, you’ll need to start over anyway. Don’t use asynchronous mounts in production if you care about your data or would object to re-creating the filesystem.
Activate asynchronous mounts with the async keyword.
Disks and Filesystems 137
Soft Update Mounts
Soft update mounts organize and arrange disk writes so that filesystem metadata remains consistent at all times. This gives performance similar to that of an asynchronous mount with the reliability of a synchronous mount. While that doesn’t mean that all data will be written to disk—a power failure at the wrong moment will result in lost data—using soft updates prevents a lot of filesystem integrity problems caused by that lost data. It’s not the default because some older, smaller hardware doesn’t have enough memory to support it, but if you’re using modern i386 and amd64 hardware, I rec-ommend enabling soft updates for all FFS partitions.
To mount a filesystem with soft updates, use the softdep option.
“Don’t Track Access Time” Mounts
FFS records the last time a file was read, executed, or otherwise viewed. Updating these access times consumes a small but measurable amount of disk I/O and performance. You can use the noatime mount option to tell OpenBSD to not update the access time on any file.
Using noatime makes sense on laptops, where minimizing power usage is critical. If you’re tempted to use this option on your server to squeeze out a little extra performance, you should buy a faster disk instead. Some soft-ware, such as the Mutt mail client, will break if run on filesystems mounted noatime.
No Device Nodes Permitted Mount
By using the nodev mount option, you can tell OpenBSD to not interpret any device nodes on any given filesystem. Intruders can try to create “rogue” device nodes and use them to write files or attack the network, but if the kernel won’t recognize those device nodes, it cuts off this whole category of attacks.
This type of mount is also useful if you have hard drives from mul-tiple operating systems on your computer. For example, if you dual-boot OpenBSD and Linux on your computer, but you don’t want to accidentally access a Linux device node when using OpenBSD, the nodev option will prevent you from doing so. (You might think you would notice that you had typed /linux/dev/hda rather than /dev/wd1, but never underestimate your ability to screw up.) In most cases, the partition containing /dev is the only one that should contain device nodes.
Execution Forbidden Mounts
The noexec mount option prevents any binaries on the partition from being executed. Mounting /home with the noexec option helps prevent users from installing and running their own programs, but for it to be effective, you’ll need to make sure users can’t install binaries in any shared areas, such as /tmp and /var/tmp.
138 Chapter 8
Note that forbidding execution of binaries doesn’t prevent users from running interpreted scripts from that partition. Maybe the users can’t run a compiled C program, but if they can run perl $HOME/rootkit.pl, then noexec won’t slow them down very much.
setuid Forbidden
The nosuid option disallows setuid behavior from programs on this filesystem. Many partitions should not have setuid files, and setting this is an easy way to disrupt them. OpenBSD sets this on partitions such as /home and /tmp by default. You must carefully place this option on all user-writable filesystems for it to prevent undesired behavior.
Do Not Automatically Mount This Filesystem
noauto isn’t actually a mount option, but rather a way of telling OpenBSD to not mount a given partition listed in /etc/fstab at boot. I frequently make /etc/fstab entries for removable media drives, but the system should not try to mount these at boot. The boot will hang if a partition required by /etc/fstab is not available, and I don’t want my computer to refuse to boot just because I unplugged a flash drive.
Filesystem IntegrityBoth versions of FFS go to a great deal of trouble to ensure that the data on disk is correct and intact. The blocks that contain a file should be recorded in an inode, the inodes should all be referenced by directory entries, and so on. When you remove a file, all references to that file should be removed.
After a system failure, however, data might not be consistent. Metadata might reference blocks that were previously erased; a file might be in a dif-ferent location than the inode record specifies; and the filesystem might have all kinds of references pointing to things that have moved, changed, or disappeared. These inconsistent, or dirty, filesystems cannot be trusted and must be rationalized, or cleaned, before you can mount them read-write. If you mount a dirty filesystem read-only, it might only panic your system, but if you force OpenBSD to mount a dirty filesystem read-write, you will dam-age the dirty filesystem even more.
At boot, OpenBSD performs a minimal inspection and cleaning, or preening, of the filesystems and will automatically correct any minor prob-lems found. If preening cannot fully clean the filesystem, the boot will hang until you intervene.
When confronted with a dirty filesystem, you have a few options: use the filesystem checking tool fsck(8), debug the filesystem with fsdb(8) and clri(8), or throw the filesystem away and run newfs(8). Most of the time, you’ll attempt to repair the filesystem with fsck. Using fsdb successfully requires more knowledge about FFS innards than I possess, so I recommend it to only those who really want to develop an in-depth knowledge of FFS and have
Disks and Filesystems 139
a whole bunch of time to devote to it. Rebuilding the filesystem with newfs destroys everything on the filesystem, but it’s a decent choice for partitions that contain only ephemeral data, such as /usr/obj.
You can use dump(8) to copy the damaged filesystem before trying any of the repairs. This gives you the option to fall back to the current state if attempts at repairing the disk fail. (If you have to do this, though, you should probably reevaluate your backup strategy.)
Running fsck
If you try to mount a dirty filesystem either at boot time or during routine operation, you’ll see a message that looks like this:
/dev/rwd1a: UNEXPECTED INCONSISTENCY; RUN fsck_ffs MANUALLY
The fsck(8) program is a frontend for several filesystem-specific integrity-checking programs. When you run it, fsck identifies the type of filesystem and calls the correct integrity checker for you. Run fsck by giving it the device name of the filesystem you want to check:
# fsck /dev/wd1a
You can use either the raw or cooked device name; fsck is smart enough to use the raw node even if you give the cooked device name.
Examining the filesystem can take quite a while, so be patient.When run on a dirty filesystem, fsck will probably find a number of
problems: blocks that have become disassociated from their inodes, inodes that reference empty blocks, and so on. It can often make a good guess as to how everything fits together.
When fsck finds a problem that it isn’t absolutely sure about, it will suggest a fix and ask if you want to make the change. If you answer y, fsck makes the change. If you answer n, fsck leaves the filesystem unchanged. If you tell fsck not to make the change it suggests, the filesystem will still be dirty, and you’ll need to fire up fsdb or clri and make the change you think more appropriate.
Sometimes, fsck can’t identify the name or directory of a file recovered from a damaged filesystem. These files go into the partition’s lost+found directory (for example, /usr/lost+found). You’ll need to use programs such as grep and strings to try to identify these files by their contents.
Blindly Trusting fsck
Those of us who lack the skills to debug a filesystem find ourselves in a difficult situation, where we can either accept that fsck(8) knows what’s best or just restore from backup. If your filesystem was performing a lot of disk I/O just before system failure, fsck might need to make dozens or hun-dreds of changes. You could spend an hour sitting at the console pressing y repeatedly.
140 Chapter 8
If you decide to trust fsck and hope it’s right, run fsck -y. This means “answer y to every question.” You might wind up with the entire contents of the filesystem in the lost+found directory, or you might lose every file on the filesystem. But unless you’re intimately familiar with the innards of FFS, you would need to restore from backup anyway.
If you run fsck and realize partway through that you would like to answer y to all the questions that follow, enter F. That tells fsck to answer y to all remaining questions.
At the end of the procedure, you’ve either recovered your system or need to restore from backup.
What’s Currently Mounted?While performing routine work, inevitably you’ll need to check which disks are currently mounted and which are not. To see a list of all mounted file-systems and their mount options, run mount(8) without any options:
$ mount/dev/wd0a on / type ffs (local)/dev/wd0k on /home type ffs (local, nodev, nosuid)/dev/wd0d on /tmp type ffs (local, nodev, nosuid)/dev/wd0f on /usr type ffs (local, nodev)/dev/wd0g on /usr/X11R6 type ffs (local, nodev)/dev/wd0h on /usr/local type ffs (local, nodev)/dev/wd0j on /usr/obj type ffs (local, nodev, nosuid)/dev/wd0i on /usr/src type ffs (local, nodev, nosuid)/dev/wd0e on /var type ffs (local, nodev, nosuid)
Both FFS and FFS2 partitions show up as type ffs. The word local means that the partition is on a physical drive attached to this machine. We covered the various mount options (nodev, nosuid, and so on) earlier in this chapter.
Note that mount displays the device node mounted at each partition, not the DUID. If you want to see the DUID of a disk, check the disklabel.
Mounting and Unmounting PartitionsTo attach filesystems to your directory tree, or mount them, use mount(8). If you’ve never manually mounted filesystems before, boot your OpenBSD machine into single-user mode (see Chapter 5) and follow along.
In single-user mode, OpenBSD mounts only one partition: the root par-tition, which it mounts read-only. The root partition contains just enough of the system to perform basic setup, establish core services, and find the other filesystems.
Because filesystems other than the root are not mounted, their content is not accessible. Look in, say, /usr on a system in single-user mode, and you’ll find that it’s empty. OpenBSD hasn’t lost the files; it just hasn’t mounted the partition containing those files.
To get any real work done in single-user mode, you probably need to mount other filesystems.
Disks and Filesystems 141
Mounting Standard FilesystemsTo manually mount a single filesystem listed in /etc/fstab, give mount(8) the name of the filesystem you want to mount. Here, we’ll mount our /usr partition:
# mount /usr
This mounts the partition exactly as described in /etc/fstab, with all the options specified therein.
To mount all of the partitions listed in /etc/fstab, give mount the -a flag:
# mount -a
All of your filesystems (except those not listed in /etc/fstab and those with the noauto option) should now be mounted.
Mounting at Nonstandard LocationsPerhaps you must mount a filesystem at a location not specified in /etc/fstab. I do this most commonly when adding a disk to a machine. To mount a partition at a location other than that specified in /etc/fstab, or to mount a partition without an /etc/fstab entry, give the partition device name and the mount point.
# mount /dev/sd0d /mnt
You must use the full path for the device node, not just the brief device node name.
Instead of the path to the device node, you could use the DUID, a period, and the partition letter, but on the command line, that’s more painful than using the path to the device node.
Unmounting PartitionsTo disconnect a filesystem from the directory tree, use umount(8) on a mount point. (Note that there is only one n in this command.) Here, we’ll use umount to unmount our /usr partition:
# umount /usr
You cannot unmount filesystems that are in use by any program. Even a command prompt in the mounted directory will prevent you from unmounting the partition.
To unmount all partitions except the root partition, pass umount the -a flag:
# umount -a
142 Chapter 8
As programs almost certainly have files open on every partition, this probably works only in single-user mode. Note that you don’t need to unmount all partitions to leave single-user mode.
Mounting with OptionsSuppose you pull a disk from a decommissioned OpenBSD machine and you need to retrieve some files from it. You want to mount the disk read-only so that you don’t change any of the files on the disk. To manually mount a partition with options not specified in /etc/fstab, use the -o flag.
For example, if the disk shows up as /dev/sd0 and you want to mount partition a, run this command:
# mount -o ro /dev/sd0a /mnt
To prevent old software from running on your newer system, it might be a good idea to use some of the options we covered earlier, such as noexec, nodev, and nosuid.
How Full Is That Partition?To get an idea how much free space remains on your partitions, use df(1). This program displays the total number of filesystem blocks on each parti-tion, how many blocks are in use, and how many blocks are free. It also gives you the percent in use.
One annoying thing about df is that it offers this information in 512-byte blocks by default. This was fine when disks were much smaller, but today, it’s like measuring the distance of an airplane flight in yards. Some people have done this for so long that they automatically perform block transfor-mations in the back of their mind. 3 For the rest of us, the -h flag tells df to provide human-readable output, such as megabytes or gigabytes, giving us something like this:
# df -hFilesystem Size Used Avail Capacity Mounted on/dev/sd0a 1005M 39.1M 916M 4% //dev/sd0k 26.9G 27.0G -104M -1% /home/dev/sd0d 3.5G 12.0K 3.3G 0% /tmp...
You might wonder why the /home partition in this example has negative free space. How is that possible? By default, FFS reserves 5 percent of each partition for moving files and reducing fragmentation. When you exceed 100 percent disk utilization, you begin tapping into this reserved space.
FFS performance degrades quickly when the partition is overfull. It’s best to keep some free space on your disk so that FFS can defragment itself.
3. Hi, Henning!
Disks and Filesystems 143
You can reduce the amount of space FFS reserves, but doing so will impact performance. See tunefs(8) for instructions on how to shoot yourself in the foot.
What’s All That Stuff?When you see a partition is full, the obvious question is “What’s filling up my disk?” Every hard drive I’ve ever owned has gradually filled up for no apparent reason. You can identify individual large files with ls -l, but recursively examining every directory in the filesystem is impractical and tedious (not to mention annoying).
To check the number of filesystem blocks used within each directory below the current directory, use du(1).
$ du164 ./.ssh2 ./old6 ./.mozilla/firefox/bcpuv16e.default/chrome80 ./.mozilla/firefox/bcpuv16e.default/Cache/0/B0354 ./.mozilla/firefox/bcpuv16e.default/Cache/0/3128 ./.mozilla/firefox/bcpuv16e.default/Cache/0/7A...
When I run du in my home directory, I get 700 entries; of those, 563 are related to some Mozilla tool. This kind of list intimidates the new sysadmin and makes the experienced sysadmin work too hard. Rather than cull through this list manually, tell du to show only the total for directories in the current directory, and then sort the output so that the largest directories appear first.
$ du -s * | sort -rnk 125224805 Dark_Shadows_Complete_Series141104 mibs14948 tarballs4668 work1864 pix...
I now know why my /home partition is full.You can tell du to display human-readable values with the -h flag, but
doing so will show values in a mix of gigabytes, megabytes, and kilobytes, making sort far less useful.
Setting $BLOCKSIZEMany disk tools—including, but not limited to, du(1) and df(1)—display information in 512-byte blocks. If you’re accustomed to working in blocks, you probably won’t mind seeing them. If you’re not used to working in blocks, however, they’ll probably make you want to tear out your hair.
144 Chapter 8
The environment variable BLOCKSIZE tells these programs to display information using blocks of a different size. If you set BLOCKSIZE to K, df and du will display totals in kilobytes. If you set it to M, these tools will show megabytes instead. Check your shell manual page or the dotfiles in your home directory for examples of setting environment variables.
Adding New Hard DisksThe OpenBSD installer walks you through formatting and partitioning your initial hard disks. If you need to add a disk to an existing system, how-ever, you must run these commands yourself. The good news is that if you can install OpenBSD, you already know how to use the commands, and the only hard part is learning which commands to run.
I’ll show you how to move /home to a new disk as an example. You could create a new partition on your existing disk if you have some empty space, but that would eliminate the need for this example, so I’m going to pretend I never gave you that advice. (Also, moving partitions to a separate disk con-troller channel will improve performance.)
W a r n i n g Before touching anything involving disk partitioning or filesystems, back up your sys-tem. Verify that backup before starting. You have been warned.
Creating an MBR PartitionThe i386 and amd64 platforms require disks to have MBR partitions as well as OpenBSD partitions. A standard new disk needs a single OpenBSD MBR partition covering the entire disk. Passing the -i argument to fdisk does exactly this. Let’s create a new MBR partition on wd1, our new disk:
# fdisk -i wd1Do you wish to write new MBR and partition table? [n] yWriting MBR at offset 0.
Once you have an MBR partition on your disk, you can create disklabel partitions.
Creating a DisklabelAll OpenBSD platforms use disklabel partitions. To activate the same disk-label editor we used during the install process, give disklabel the -E flag and the disk name:
# disklabel -E wd1
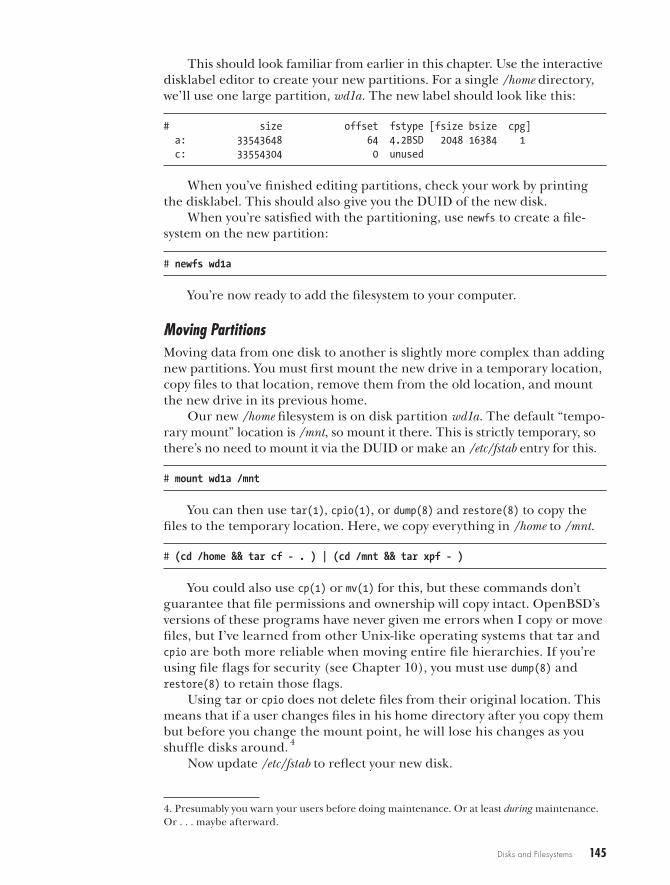
Disks and Filesystems 145
This should look familiar from earlier in this chapter. Use the interactive disklabel editor to create your new partitions. For a single /home directory, we’ll use one large partition, wd1a. The new label should look like this:
# size offset fstype [fsize bsize cpg] a: 33543648 64 4.2BSD 2048 16384 1 c: 33554304 0 unused
When you’ve finished editing partitions, check your work by printing the disklabel. This should also give you the DUID of the new disk.
When you’re satisfied with the partitioning, use newfs to create a file-system on the new partition:
# newfs wd1a
You’re now ready to add the filesystem to your computer.
Moving PartitionsMoving data from one disk to another is slightly more complex than adding new partitions. You must first mount the new drive in a temporary location, copy files to that location, remove them from the old location, and mount the new drive in its previous home.
Our new /home filesystem is on disk partition wd1a. The default “tempo-rary mount” location is /mnt, so mount it there. This is strictly temporary, so there’s no need to mount it via the DUID or make an /etc/fstab entry for this.
# mount wd1a /mnt
You can then use tar(1), cpio(1), or dump(8) and restore(8) to copy the files to the temporary location. Here, we copy everything in /home to /mnt.
# (cd /home && tar cf - . ) | (cd /mnt && tar xpf - )
You could also use cp(1) or mv(1) for this, but these commands don’t guarantee that file permissions and ownership will copy intact. OpenBSD’s versions of these programs have never given me errors when I copy or move files, but I’ve learned from other Unix-like operating systems that tar and cpio are both more reliable when moving entire file hierarchies. If you’re using file flags for security (see Chapter 10), you must use dump(8) and restore(8) to retain those flags.
Using tar or cpio does not delete files from their original location. This means that if a user changes files in his home directory after you copy them but before you change the mount point, he will lose his changes as you shuffle disks around. 4
Now update /etc/fstab to reflect your new disk.
4. Presumably you warn your users before doing maintenance. Or at least during maintenance. Or . . . maybe afterward.
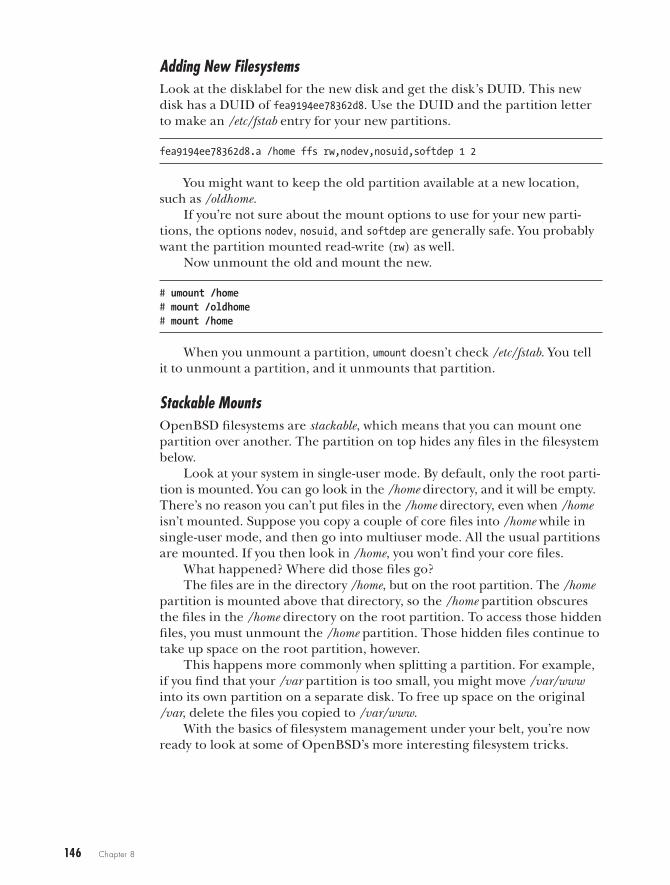
146 Chapter 8
Adding New FilesystemsLook at the disklabel for the new disk and get the disk’s DUID. This new disk has a DUID of fea9194ee78362d8. Use the DUID and the partition letter to make an /etc/fstab entry for your new partitions.
fea9194ee78362d8.a /home ffs rw,nodev,nosuid,softdep 1 2
You might want to keep the old partition available at a new location, such as /oldhome.
If you’re not sure about the mount options to use for your new parti-tions, the options nodev, nosuid, and softdep are generally safe. You probably want the partition mounted read-write (rw) as well.
Now unmount the old and mount the new.
# umount /home# mount /oldhome# mount /home
When you unmount a partition, umount doesn’t check /etc/fstab. You tell it to unmount a partition, and it unmounts that partition.
Stackable MountsOpenBSD filesystems are stackable, which means that you can mount one partition over another. The partition on top hides any files in the filesystem below.
Look at your system in single-user mode. By default, only the root parti-tion is mounted. You can go look in the /home directory, and it will be empty. There’s no reason you can’t put files in the /home directory, even when /home isn’t mounted. Suppose you copy a couple of core files into /home while in single-user mode, and then go into multiuser mode. All the usual partitions are mounted. If you then look in /home, you won’t find your core files.
What happened? Where did those files go?The files are in the directory /home, but on the root partition. The /home
partition is mounted above that directory, so the /home partition obscures the files in the /home directory on the root partition. To access those hidden files, you must unmount the /home partition. Those hidden files continue to take up space on the root partition, however.
This happens more commonly when splitting a partition. For example, if you find that your /var partition is too small, you might move /var/www into its own partition on a separate disk. To free up space on the original /var, delete the files you copied to /var/www.
With the basics of filesystem management under your belt, you’re now ready to look at some of OpenBSD’s more interesting filesystem tricks.

9M o r e F i l e s y s t e M s
Encrypt your hard drive? Software RAID can save your day,
or ruin your life.
Disk management isn’t complicated, but there’s enough material that it gets
two chapters. Lucky you! In this chapter, we’ll start with how to automatically back up
your vital root partition to a second disk. Then we’ll explore how OpenBSD can use additional memory as
disk space via a memory filesystem and how to set that up. Next, we’ll access disks formatted for other operating systems, such as NTFS, ext2, and FAT. Removable media isn’t difficult to work with, but has its own concerns. If you don’t need the actual media, but can work with disk images, you can access those. Both topics are covered in this chapter. We’ll also discuss using NFS, as both a server and a client. Our final topic is OpenBSD’s disk redundancy and disk encryption features.

148 Chapter 9
Backing Up to the /altroot PartitionYou can lose most of your partitions and still hope to recover the rest of the system. If you lose your root filesystem, however, recovery becomes a much more difficult task. While you could back up critical files from /etc and use them to restore your system, OpenBSD provides the /altroot partition as an easy way to automatically duplicate the root partition on a second disk.
An emergency root partition on a second disk gives you an easier path to recovery in the event of a disk failure. Booting to the second disk lets you pull any data off that disk, and possibly even from undamaged partitions on the first disk, before replacing the failed disk. There’s no reason to back up your root partition to the same disk, however, as the whole disk will probably be unusable.
This backup requires a free disk partition the same size as your root partition, located on a different disk. The OpenBSD installer defaults assume that you have only one disk. If you have a second disk during installation, you need to use a custom install process to create the /altroot partition, as we did in the multiple disk installation in Chapter 3. While configuring partitions is easiest during the installation, you can add more disks later if needed, as discussed in Chapter 8.
Your /altroot partition needs an /etc/fstab entry. If you created the parti-tion during the install process, that /etc/fstab entry already exists but has the wrong mount type. If you created this partition after installation, you’ll need to create an /etc/fstab entry yourself. The /altroot partition needs a mount type of xx, as shown here:
a914f9a264fa64e6.a /altroot ffs xx 0 0
You cannot mount this partition from its /etc/fstab entry, as xx is not a valid mount type. (You could run, say, mount /dev/sd1a /altroot if you want to manually mount this partition.) The daily system maintenance job /etc/daily uses this mount option to identify the root backup partition.
To enable the /altroot backup, add ROOTBACKUP=1 to your /etc/daily.local file.
Memory FilesystemsIn addition to creating partitions on raw disk, OpenBSD lets you create partitions in system memory. A memory filesystem (MFS), or memory disk, lives in your machine’s RAM, rather than on a physical disk. Reading and writ-ing files to and from such a filesystem is much faster than accessing those same files on a spinning disk, which makes a memory-backed filesystem a huge optimization for certain applications.
If MFSs sound too good to be true for high-performance environments, that’s because they are. Understand their limits before you implement them everywhere. First, RAM does not persist across reboots or shutdowns, so either will erase the contents of an MFS. While this might seem obvious,
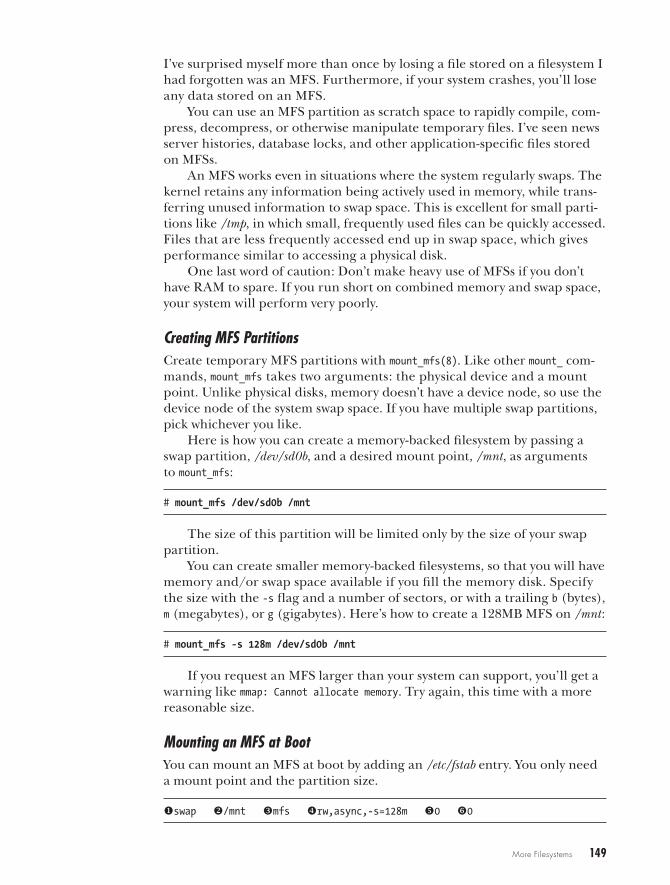
More Filesystems 149
I’ve surprised myself more than once by losing a file stored on a filesystem I had forgotten was an MFS. Furthermore, if your system crashes, you’ll lose any data stored on an MFS.
You can use an MFS partition as scratch space to rapidly compile, com-press, decompress, or otherwise manipulate temporary files. I’ve seen news server histories, database locks, and other application-specific files stored on MFSs.
An MFS works even in situations where the system regularly swaps. The kernel retains any information being actively used in memory, while trans-ferring unused information to swap space. This is excellent for small parti-tions like /tmp, in which small, frequently used files can be quickly accessed. Files that are less frequently accessed end up in swap space, which gives performance similar to accessing a physical disk.
One last word of caution: Don’t make heavy use of MFSs if you don’t have RAM to spare. If you run short on combined memory and swap space, your system will perform very poorly.
Creating MFS PartitionsCreate temporary MFS partitions with mount_mfs(8). Like other mount_ com-mands, mount_mfs takes two arguments: the physical device and a mount point. Unlike physical disks, memory doesn’t have a device node, so use the device node of the system swap space. If you have multiple swap partitions, pick whichever you like.
Here is how you can create a memory-backed filesystem by passing a swap partition, /dev/sd0b, and a desired mount point, /mnt, as arguments to mount_mfs:
# mount_mfs /dev/sd0b /mnt
The size of this partition will be limited only by the size of your swap partition.
You can create smaller memory-backed filesystems, so that you will have memory and/or swap space available if you fill the memory disk. Specify the size with the -s flag and a number of sectors, or with a trailing b (bytes), m (megabytes), or g (gigabytes). Here’s how to create a 128MB MFS on /mnt:
# mount_mfs -s 128m /dev/sd0b /mnt
If you request an MFS larger than your system can support, you’ll get a warning like mmap: Cannot allocate memory. Try again, this time with a more reasonable size.
Mounting an MFS at BootYou can mount an MFS at boot by adding an /etc/fstab entry. You only need a mount point and the partition size.
uswap v/mnt wmfs xrw,async,-s=128m y0 z0
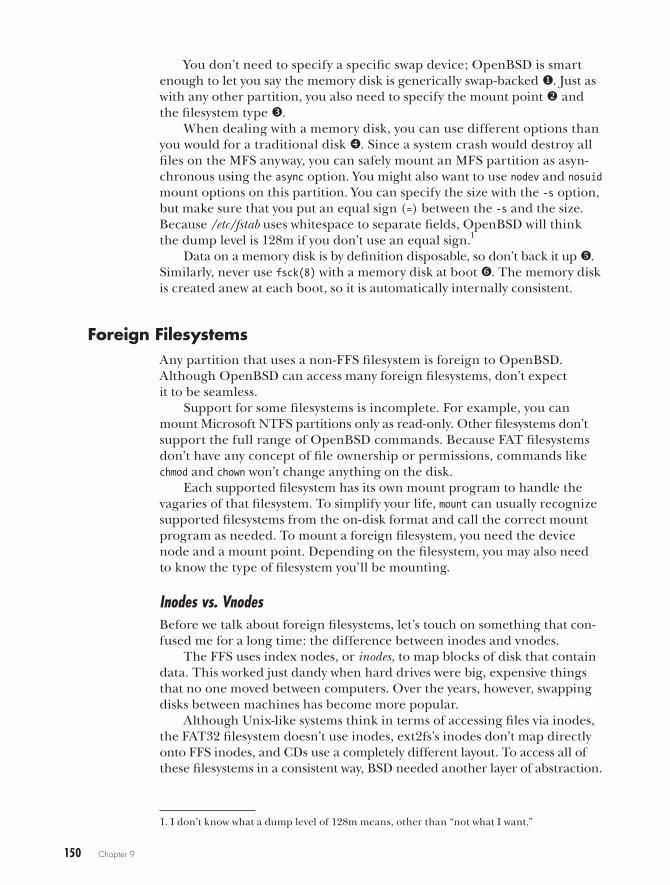
150 Chapter 9
You don’t need to specify a specific swap device; OpenBSD is smart enough to let you say the memory disk is generically swap-backed u. Just as with any other partition, you also need to specify the mount point v and the filesystem type w.
When dealing with a memory disk, you can use different options than you would for a traditional disk x. Since a system crash would destroy all files on the MFS anyway, you can safely mount an MFS partition as asyn-chronous using the async option. You might also want to use nodev and nosuid mount options on this partition. You can specify the size with the -s option, but make sure that you put an equal sign (=) between the -s and the size. Because /etc/fstab uses whitespace to separate fields, OpenBSD will think the dump level is 128m if you don’t use an equal sign.1
Data on a memory disk is by definition disposable, so don’t back it up y. Similarly, never use fsck(8) with a memory disk at boot z. The memory disk is created anew at each boot, so it is automatically internally consistent.
Foreign FilesystemsAny partition that uses a non-FFS filesystem is foreign to OpenBSD. Although OpenBSD can access many foreign filesystems, don’t expect it to be seamless.
Support for some filesystems is incomplete. For example, you can mount Microsoft NTFS partitions only as read-only. Other filesystems don’t support the full range of OpenBSD commands. Because FAT filesystems don’t have any concept of file ownership or permissions, commands like chmod and chown won’t change anything on the disk.
Each supported filesystem has its own mount program to handle the vagaries of that filesystem. To simplify your life, mount can usually recognize supported filesystems from the on-disk format and call the correct mount program as needed. To mount a foreign filesystem, you need the device node and a mount point. Depending on the filesystem, you may also need to know the type of filesystem you’ll be mounting.
Inodes vs. VnodesBefore we talk about foreign filesystems, let’s touch on something that con-fused me for a long time: the difference between inodes and vnodes.
The FFS uses index nodes, or inodes, to map blocks of disk that contain data. This worked just dandy when hard drives were big, expensive things that no one moved between computers. Over the years, however, swapping disks between machines has become more popular.
Although Unix-like systems think in terms of accessing files via inodes, the FAT32 filesystem doesn’t use inodes, ext2fs’s inodes don’t map directly onto FFS inodes, and CDs use a completely different layout. To access all of these filesystems in a consistent way, BSD needed another layer of abstraction.
1. I don’t know what a dump level of 128m means, other than “not what I want.”
More Filesystems 151
The virtual node, or vnode, is an abstraction layer the kernel uses to access all filesystems. Users never manipulate vnodes directly, but you’ll see references to them throughout OpenBSD’s documentation. Every tool that reads or writes to disks does so through vnodes, which map the requests to the filesystem. When you write to an FFS block or inode, the kernel addresses data to a vnode, which in turn maps to an inode. When you write to a FAT32 filesystem, the kernel addresses data to a vnode mapped to a point in the FAT32 filesystem. You use inodes only when dealing with FFS systems, but your data will pass through a vnode when accessing any filesystem.
Don’t let references to vnodes on non-FFS systems confuse you. They’re part of OpenBSD, not the filesystem.
Common Foreign FilesystemsCommon foreign filesystems include MS-DOS, NTFS, ext2fs, and CD. We’ll look at how to access disks formatted for those operating systems with OpenBSD.
MS-DOS
OpenBSD supports the FAT, FAT16, and FAT32 filesystems. These formats are commonly found on flash media, old Microsoft operating systems, and floppy disks.
To mount a filesystem with a FAT filesystem partition, use mount_msdos(8).
# mount_msdos /dev/sd3i /mnt
Not sure which partition on the disk is the FAT filesystem? Run disklabel(8) on the drive and see. FAT filesystems are often located on the i partition. And even if you try inserting your USB drive and mounting its i partition, OpenBSD will probably figure out that it’s a FAT system.
If you work with FAT disks often, you might investigate /usr/ports/sysutils/mtools, a collection of software for working with FAT filesystems without mounting them. While mount_msdos is quite reliable, mtools offers a more elegant interface.
NTFS
To mount disks formatted for modern Microsoft operating systems, use mount_ntfs(8).
# mount_ntfs /dev/sd3k /mnt
As I write this, OpenBSD supports NTFS4 (from Windows NT) and NTFS5 (in Windows 2000 and XP). Windows Vista and newer systems are not yet supported, but they might be by the time you read this.
If you need to view file attributes specific to the NTFS filesystem, check the mount_ntfs man page for details.
152 Chapter 9
ext2fs
To mount ext2fs and ext3fs filesystems, use mount_ext2fs(8). (The one pro-gram mounts both types of filesystem.)
# mount_ext2fs /dev/sd3l /mnt
Owing to their shared Unix heritage, the Linux ext2fs and ext3fs filesystems support many FFS-like features. Unlike with NTFS, you can safely read and write ext2fs and ext3fs disks in OpenBSD. You cannot, however, read ext4fs partitions using OpenBSD.
CD
Compact discs formatted for data use the ISO-9660 filesystem. To mount a CD, use mount_cd9660(8).
# mount_cd9660 /dev/cd0a /mnt
Mount CDs using either the a or c partition on the device. If you would like to save yourself a few keystrokes, mount(8) is very good at automatically detecting ISO-9660 filesystems. The device node for a CD is tied to the CD drive, not the disk itself, so the node shouldn’t change unless you add another drive.
If you’re interested in burning a CD, look at mkhybrid(8) and cdio(1).
Foreign Filesystem OwnershipMost foreign filesystems either have no concept of file ownership or have an ownership scheme incompatible with that of Unix-like operating systems. (Notable among these filesystems are FAT and NTFS.) The programs that mount these kinds of filesystems thoughtfully allow you to specify the own-ership of files on the filesystem. The -u flag lets you specify a file owner, and the -g flag lets you specify the group.
For example, here’s how I would mount a FAT filesystem as owned by my account:
# mount_msdos -u mwlucas -g mwlucas /dev/sd3c /mnt
Some other filesystems use permissions schemes compatible with OpenBSD’s permissions. For example, all of the information OpenBSD needs to assign permissions to files and directories is contained within an ext2fs filesystem. That doesn’t mean that an ext2fs filesystem will perform seamlessly on OpenBSD, however. Though OpenBSD will respect the ext2fs disk’s permissions, the user ID numbers probably won’t match up between the operating systems.
More Filesystems 153
Removable MediaThese days, the removable media you’ll most likely deal with are external hard drives, flash drives, and CDs. The CD is the simplest, because you know how to use mount(8) and umount(8), and you know its device node and filesystem type will always be the same. But how do you identify the device name of a removable hard drive?
When you attach a drive to your machine, OpenBSD automatically assigns your drive a device node to your console and prints a message to the console. You can check the console as you attach the drive, or you can watch your messages log by running tail -f /var/log/messages before attaching the drive.
If you frequently use a particular removable disk, you can simplify your routine by making an /etc/fstab entry for it. Here are some sample /etc/fstab entries for a CD and a FAT flash drive.
/dev/cd0c /cdrom cd9660 ro,noauto/dev/sd3i /mnt msdos rw,noauto
You can’t use DUIDs for removable media, because the actual media might change.
Now you can mount your CD on /cdrom by entering mount /cdrom, and your FAT flash drive on /mnt by entering mount /mnt.
Note that OpenBSD does not create a /cdrom directory by default; you’ll need to create it yourself. You could point both of these at /mnt, but I like having a dedicated CD mount point on my systems, and having two devices share a mount point risks concealing one of the filesystems. (Remember that OpenBSD has stackable mounts, as discussed in Chapter 8.)
Mounting Filesystem ImagesYou can mount a disk image and access the image just as you would a disk partition. This is very useful for those times you want to extract a few files from an ISO but don’t want to bother burning the image to physical media. The trick to mounting a disk image is attaching the image to a device node so that you can use the proper mount command.
OpenBSD uses the vnconfig(8) program to attach disk images to device nodes. (Remember that a vnode is an abstraction layer between the ker-nel and a filesystem.) Use vnconfig to “wire” vnodes between a file and a device node, and then access them through OpenBSD’s /dev/svnd devices. Depending on the disk image type, the image might have MBR partitions, disklabel partitions, or just a filesystem.
The default kernel has four vnode devices. If you need to mount more than four disk images simultaneously, edit your kernel binary using config(8)’s -e option, as discussed in Chapter 18.
154 Chapter 9
Attaching Vnode Devices to Disk ImagesThe vnconfig(8) command takes two arguments: the device node you want to use and the disk image you want to mount.
# vnconfig /dev/svndXc /path/to/file
Note that this example uses the c partition of the device. This allows you to treat the disk image as a whole disk.
Suppose you have an ISO image named install52.iso that you would like to mount. First, use vnconfig to attach this image to vnode device 0.
# vnconfig /dev/vnd0c install52.iso
You can then use mount to attach the vnode to an /mnt directory.
# mount /dev/vnd0c /mnt/
OpenBSD’s mount(8) is smart enough to recognize this as a CD file-system and mount it as such. If you’re mounting a disk image that uses a less detectable filesystem, you need to use the specific mount command for that filesystem.
Detaching Vnode Devices from ImagesVnode devices attached to a file remain attached until specifically discon-nected, and you can attach a vnode device to only one file at a time. To disconnect the vnode device from the file, use the -u flag with vnconfig. For example, to disconnect the vnode device located at vnd0c, run this command:
# vnconfig -u vnd0c
You can now attach this vnode device to another file.Using the full path to the device is optional in vnconfig. If you know the
device name, you can use it without the leading /dev, as in the preceding example.
Basic NFS SetupNFS allows one machine to access files on another machine. NFS has its ori-gins in UNIX, but today appears in most operating systems, including those from Microsoft and Apple. OpenBSD supports NFS versions 1 through 3 as both a client and a server.
Entire books can be—and have been—written about NFS. We won’t go into the intimate details of NFS, but rather focus on getting a basic NFS share working on OpenBSD. Configuring NFS the first time can be intimi-dating, but after setting up a file share or two, you’ll find it straightforward.
More Filesystems 155
If you have a complicated NFS environment—involving multiple versions of multiple operating systems—or if you want to share a directory among hundreds of active clients, you should do further research, but even a basic setup will help to simplify parts of your job.
NFS works on the client/server model. One computer, the server, offers filesystems to other computers. The server is exporting a filesystem, and the filesystems on offer are called exports. NFS clients can mount exports in a manner almost identical to that used to mount local filesystems.
One important thing to remember about NFS is that it is stateless, which means that NFS does not track the condition of a connection. You can reboot an NFS server, and the client won’t throw a fit. The client cannot access files on the server while the server is down, but once the server returns, the client will pick up right where things left off. Other network filesystems are not always so resilient. Statelessness causes its own problems as well. For example, clients cannot know when a file they are currently reading has been modified by another client.
If you’re just learning NFS (or OpenBSD’s implementation of NFS), check /var/log/messages for NFS-related error messages. If you’ve repeatedly reconfigured your NFS server as part of learning, and things just don’t work correctly, reboot your NFS server and/or client. NFS is complicated, and sometimes starting with a clean stack clears up a lot of problems. Once you understand how all the pieces fit together, a reboot to resolve problems should never be necessary.
N o t e The NFS protocol has evolved over the years, and every operating system has imple-mented a slightly different version of NFS. Other BSDs, Illumos, Linux, Apple, Microsoft, and most other operating systems can work with OpenBSD’s NFS support, but each may require an occasional tweak for specific environments. If you’re having trouble getting NFS to work with OpenBSD and another operating system, read mount_nfs(8) and feed the details to your favorite search engine. The odds that some-one else has experienced this problem before are good.
The OpenBSD NFS ServerBy default, OpenBSD includes all the programs necessary to act as an NFS server, but you must turn it on. The NFS server requires three daemons:
portmap(8) Maps requests for remote procedure call (RPC) services to TCP/IP port numbers.
mountd(8) Listens for incoming NFS mount requests.
nfsd(8) Processes requests for filesystem actions.
The portmap(8) daemon has its own rc.conf flag, as it can be used by many other RPC services. The mountd(8) and nfsd(8) daemons are controlled by a single rc.conf flag.
156 Chapter 9
Add the following entries to rc.conf.local to start all three processes at boot time:
portmap=YESnfs_server=YES
You can start these three daemons from scripts in /etc/rc.d. If you try to start these daemons now, however, they won’t run. You must configure at least one export before the NFS server daemons will start.
Exporting FilesystemsTo export filesystems, define which clients may mount which filesystems and/or directories in /etc/exports. This file takes a separate line for each disk device on the server and each client or group of clients that can access that disk device. Each line has up to three parts:
• Directories or partitions to be exported
• Options on that export
• Clients permitted to connect
Of the three components of an /etc/exports entry, only the directory is mandatory. The directory path cannot contain symlinks, double dots, or single dots.
If I wanted to export my home directory as read-write to every host on the Internet, I could use an exports line containing only the path to my /home folder:
/home/mwlucas
This perfectly valid (but perfectly foolish) entry contains no options and no host restrictions.
To export multiple directories that reside on the same partition, sepa-rate them with a single space.
/home/mwlucas /home/lasnyder
You can list any number of directories on one line, as long as they exist on the same partition.
NFS clients can mount only exactly the directory specified in /etc/exports. If you export /home/mwlucas, clients can attach only /home/mwlucas to a mount point. They cannot mount, say, /home/mwlucas/bin instead. If you would like to export an entire partition, you can do that, too. If you want to let clients mount any directories beneath that mount point, specify the mount point and the -alldirs option. You cannot use -alldirs with a subdirectory; it must be the actual mount point. This next entry lets anyone mount any directory in /home :
/home -alldirs
More Filesystems 157
To export multiple partitions, or directories from multiple partitions, specify them on separate lines.
/home -alldirs/var/log
Any time you change /etc/exports, you must signal mountd to reread its configuration. You can do this by passing the reload argument to the mountd startup script:
# /etc/rc.d/mountd reload
While these simple mounts give you an idea of how NFS works, they’re very insecure. To make an intelligent export, you need a few options and an access list. Let’s take a look at some of NFS’s more commonly used options.
Read-Only MountsYou might want to share files without worrying about whether your under-lings will delete, modify, or otherwise undo your hard work. You can share files as read-only by using the -ro option. Here, I offer my home directory to all the computers in the world, but as a read-only share:
/home/mwlucas -ro
This is slightly more intelligent than offering my NFS exports to the entire world read-write, but only slightly.
NFS and UsersYou already know that file ownership and permissions are tied to UID num-bers. Unlike many other file-sharing protocols, NFS also uses UIDs to identify file ownership. For example, on my test server, my account mwlucas uses the UID 1000; on my client, my mwlucas account also uses the UID 1000. This simplifies my life, as I don’t need to worry too much about file ownership; files owned by mwlucas on the server are owned by mwlucas on the client.
On a small network with only a few users and machines,2 you can prob-ably keep UID numbers synchronized without a problem by assigning the same UID to the same user on all of your systems. But on a large network, with more than one user and where users have root on their own machines, file ownership can quickly become a serious problem. The best way around this is to maintain a central repository of authorized users via LDAP or Kerberos.
Regardless of how you manage your users, NFS handles the root account differently. An NFS server cannot trust root on client machines to execute commands or write files as root on the server; if that were the case, a breach
2. How many users do I mean by “a few?” When synchronizing UIDs across all of your systems begins to really, really annoy you, you no longer have a few users.
158 Chapter 9
on one NFS client would mean a breach on the NFS server. By default, requests from root on the client are mapped to UID and GID 32767 (also known as nobody).
If you want to map root to a specific user rather than the generic UID nobody, use the -maproot option and specify either a username or UID. Here, we map incoming requests from root on the client to the user nfsroot on the server:
/home/mwlucas -maproot=nfsroot
You can give the mapped root user a list of groups that the remote root account can access by specifying them after the username, separated by colons. Here, we give the client’s root user access to the server as the user nfsroot and the groups customers and webmasters:
/home/mwlucas -maproot=nfsroot:customers:webmasters
If you want to explicitly remove the mapped root user from all groups, put a colon after the username or UID, as in this example:
/home/mwlucas -maproot=nfsroot:
Suppose you want all the NFS clients, regardless of username on the client system, to use a single user ID on the NFS server. The -mapall option allows you to do this. This option uses the same format as the -maproot option. Here, we map all NFS users to the username nfsuser on the server:
/home/mwlucas -mapall=nfsuser
Correct control of user access will help protect your NFS server.
Permitted ClientsBy default, every host can access your NFS server. For many reasons, that’s not a great idea. You can restrict the clients permitted to access your NFS server by listing their IP addresses at the end of the export entry.
/home/mwlucas 192.0.2.1
You can also specify clients by their hostname, but if the server has a DNS failure, it won’t allow any clients access.
/home/mwlucas treble.blackhelicopters.org
To permit access to an entire network, use the -network and -mask options. The next example permits access to the addresses 192.0.2.0 through 192.0.2.15, using a subnet mask. (If you’re not familiar with subnet masks, read Chapter 11.)
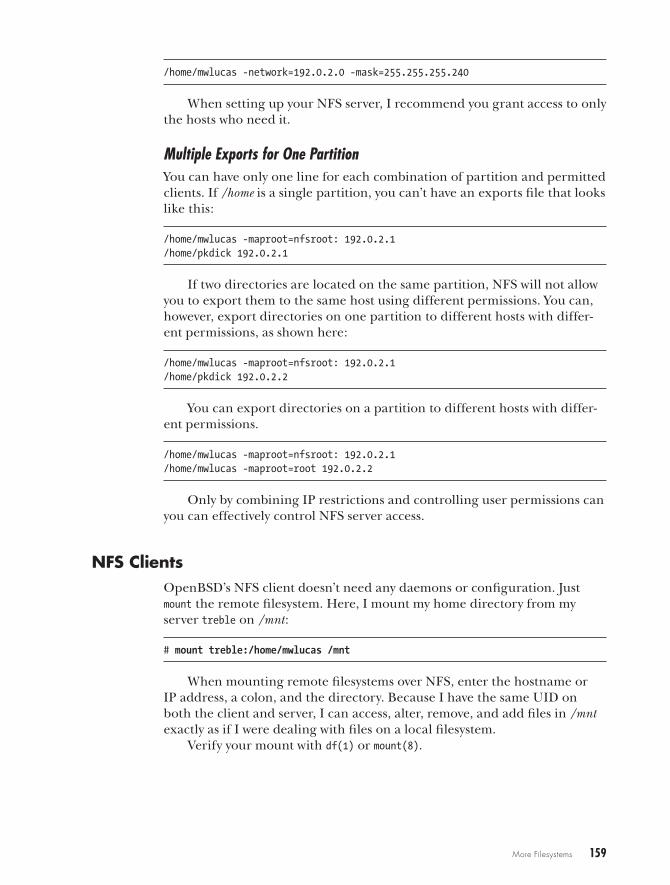
More Filesystems 159
/home/mwlucas -network=192.0.2.0 -mask=255.255.255.240
When setting up your NFS server, I recommend you grant access to only the hosts who need it.
Multiple Exports for One PartitionYou can have only one line for each combination of partition and permitted clients. If /home is a single partition, you can’t have an exports file that looks like this:
/home/mwlucas -maproot=nfsroot: 192.0.2.1/home/pkdick 192.0.2.1
If two directories are located on the same partition, NFS will not allow you to export them to the same host using different permissions. You can, however, export directories on one partition to different hosts with differ-ent permissions, as shown here:
/home/mwlucas -maproot=nfsroot: 192.0.2.1/home/pkdick 192.0.2.2
You can export directories on a partition to different hosts with differ-ent permissions.
/home/mwlucas -maproot=nfsroot: 192.0.2.1/home/mwlucas -maproot=root 192.0.2.2
Only by combining IP restrictions and controlling user permissions can you can effectively control NFS server access.
NFS ClientsOpenBSD’s NFS client doesn’t need any daemons or configuration. Just mount the remote filesystem. Here, I mount my home directory from my server treble on /mnt:
# mount treble:/home/mwlucas /mnt
When mounting remote filesystems over NFS, enter the hostname or IP address, a colon, and the directory. Because I have the same UID on both the client and server, I can access, alter, remove, and add files in /mnt exactly as if I were dealing with files on a local filesystem.
Verify your mount with df(1) or mount(8).
160 Chapter 9
$ df -hFilesystem Size Used Avail Capacity Mounted on/dev/sd0a 1005M 266M 689M 28% /...treble:/home/mwlucas 26.9G 21.5M 25.5G 0% /mnt
The NFS-mounted directory shows up like any other mount point.To mount an NFS share automatically at boot, or just record it for future
convenience, you may use an /etc/fstab entry. If your system might not have DNS available to it at boot time, use an IP address for the NFS server. The following example specifies two fstab entries: one using a hostname and one using an IP address:
treble:/home/mwlucas /mnt nfs,noauto rw 0 0192.0.2.88:/usr/ports /usr/ports nfs,noauto ro 0 0
Give all NFS partitions dump and fsck numbers of 0. Do not run fsck or dump on an NFS mount, as those programs require raw disk access that NFS doesn’t provide.
Use any other mount options you like. The OpenBSD folks recommend using noexec, nodev, and nosuid “when applicable.” I recommend noauto on NFS partitions that aren’t required for normal server operation, so that an unavailable NFS server does not hang your machine’s boot process.
NFS performance depends a great deal on your hardware, your local network, the clients and servers involved, the phase of the moon, and any number of other factors. If you’re not happy with your NFS performance, read mount_nfs(8) and experiment with using TCP or UDP, the read and write sizes, and perhaps the timeout. If you need a complicated NFS envi-ronment, you should definitely invest some time in learning more about NFS.
Software RAIDThe Redundant Array of Independent Disks (RAID) technology has become the standard way of mirroring hard drives within a machine or combining multiple hard drives to form one giant partition. In many types of RAID arrays, if one disk fails, the system can continue to run without data loss until you replace the failed disk or a second disk fails.
You can get RAID from the hardware or have the operating system per-form the RAID operations. Hardware RAID controllers seem nice, but are in reality just decent disk controllers that run special software. Using the softraid(4) driver, OpenBSD can do the same thing, letting you build RAID arrays out of plain disks. You can do just about everything you can with a hardware RAID controller with a bunch of disks and OpenBSD’s RAID management program bioctl(8) and the softraid(4) software RAID driver.
N o t e In addition to managing software RAID, OpenBSD’s bioctl(8) can manage most sorts of hardware RAID controllers. If you’re planning to use hardware RAID, read-ing the bioctl manual is definitely worth your time.
More Filesystems 161
RAID TypesOpenBSD supports the following RAID configurations:
RAID-0, or stripingThis type is not redundant. It requires at least two disks of the same size, and data is shared between the disks to increase partition size and throughput. You can use RAID-0 to combine five 4TB disks into a 20TB virtual disk, but be warned: If one hard drive in the array fails, you’ll lose all your data. RAID-0 is useful when you need a really big filesystem, but it’s more vulnerable than a single disk because it pro-vides multiple points of failure (or as one of my quasi-literary, quasi-humorous friends once said, “RAID-0 gives a whole new meaning to the phrase one disk to rule them all”). The size of a RAID-0 array is the size of all the hard drives combined.
RAID-1, or mirroringWith this type, the contents of one disk are duplicated on another. Mirroring requires at least two disks of the same size, and the size of a RAID-1 array is equal to the size of the smallest drive in the array. I use mirroring to protect all vital data, as it gives even a cheap desktop-chassis server some measure of data protection. OpenBSD’s software RAID fully supports this level.
RAID-4, or striping data across disks, with a dedicated parity diskThis type requires at least three disks of the same size. Parity data lets a RAID array recover data on missing disks, and RAID-4 stores that parity data on a specific disk. This means that you can lose any one of the disks without losing data. As I write this, bioctl’s RAID-4 support is experimental. Hopefully this support will be complete before the book reaches you, but if not, you’ll need to use a hardware RAID card to get RAID-4.
RAID-5, or striping with parity shared across all drivesThis is the current industry standard for redundancy. Parity data pro-vides data redundancy—the loss of a single drive doesn’t destroy any data. It requires at least three disks of the same size. Unlike RAID-4, RAID-5 shares the parity data across all the drives simultaneously. While throughput isn’t as good as that of RAID-0, a RAID-5 array can simultaneously serve multiple I/O requests. The size of your RAID-5 array is the combined size of all but one of your hard drives. If you have five 4TB drives, the array will be 16TB ((5 – 1) × 4TB). Like RAID-4, RAID-5 support in bioctl is incomplete and experimental. I hope it will be complete before you read this, but if not, you’ll need to use a hard-ware RAID card for RAID-5.
According to the RAID standards, each of these levels requires disks of the same size. That said, OpenBSD’s softraid uses partitions rather than disks. You can use disks of different sizes, but your RAID array will use only
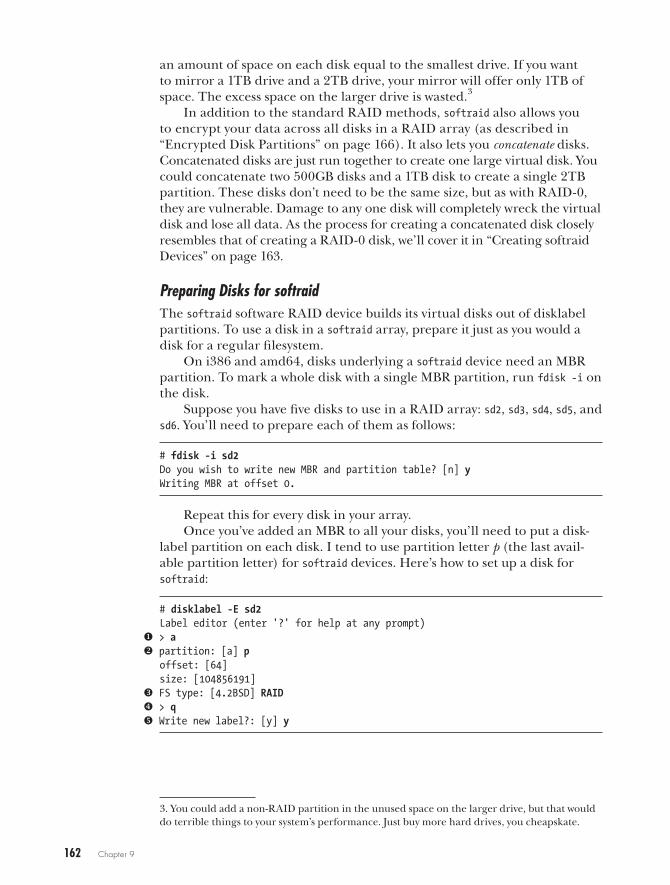
162 Chapter 9
an amount of space on each disk equal to the smallest drive. If you want to mirror a 1TB drive and a 2TB drive, your mirror will offer only 1TB of space. The excess space on the larger drive is wasted.3
In addition to the standard RAID methods, softraid also allows you to encrypt your data across all disks in a RAID array (as described in “Encrypted Disk Partitions” on page 166). It also lets you concatenate disks. Concatenated disks are just run together to create one large virtual disk. You could concatenate two 500GB disks and a 1TB disk to create a single 2TB partition. These disks don’t need to be the same size, but as with RAID-0, they are vulnerable. Damage to any one disk will completely wreck the virtual disk and lose all data. As the process for creating a concatenated disk closely resembles that of creating a RAID-0 disk, we’ll cover it in “Creating softraid Devices” on page 163.
Preparing Disks for softraidThe softraid software RAID device builds its virtual disks out of disklabel partitions. To use a disk in a softraid array, prepare it just as you would a disk for a regular filesystem.
On i386 and amd64, disks underlying a softraid device need an MBR partition. To mark a whole disk with a single MBR partition, run fdisk -i on the disk.
Suppose you have five disks to use in a RAID array: sd2, sd3, sd4, sd5, and sd6. You’ll need to prepare each of them as follows:
# fdisk -i sd2Do you wish to write new MBR and partition table? [n] yWriting MBR at offset 0.
Repeat this for every disk in your array.Once you’ve added an MBR to all your disks, you’ll need to put a disk-
label partition on each disk. I tend to use partition letter p (the last avail-able partition letter) for softraid devices. Here’s how to set up a disk for softraid:
# disklabel -E sd2Label editor (enter '?' for help at any prompt)
u > av partition: [a] p
offset: [64]size: [104856191]
w FS type: [4.2BSD] RAIDx > qy Write new label?: [y] y
3. You could add a non-RAID partition in the unused space on the larger drive, but that would do terrible things to your system’s performance. Just buy more hard drives, you cheapskate.
More Filesystems 163
First, we add a partition with a u and assign it partition letter p v. Instead of our usual filesystem type of 4.2BSD, we assign a filesystem type of RAID w. Then we quit x and let disklabel write the changes to the disklabel partition y.
If you have multiple identical disks, you can use disklabel to save this disk’s configuration, as follows:
# disklabel sd2 > disklabel.sd2.raid
This saves the label on disk sd2 to the file disklabel.sd2.raid. You can make disklabel(8) copy this partitioning to other disks, and disklabel will assign each disk a unique DUID as it copies. This saves you from needing to walk through the interactive editor for each disk. Let’s apply this disklabel to each partition:
# disklabel -R sd3 disklabel.sd2.raid# disklabel -R sd4 disklabel.sd2.raid# disklabel -R sd5 disklabel.sd2.raid# disklabel -R sd6 disklabel.sd2.raid
Disks sd2 through sd6 are now ready for assimilation into softraid.
Creating softraid DevicesUse bioctl(8) to drag disks into a software RAID. You’ll need the disk parti-tions you want to include in the RAID. OpenBSD software RAID arrays are named softraid, followed by a number. Use the -c argument to give a RAID type, and -l to give the partitions, and end with the name of the softraid you’re creating.
# bioctl -c raidlevel -l partition1,partition2... softraidX
We have five disk partitions—sd2p, sd3p, sd4p, sd5p, and sd6p—to add to a softraid device. To build a RAID-5 device out of these partitions, run this command:
# bioctl -c 5 -l sd2p,sd3p,sd4p,sd5p,sd6p softraid0softraid0: SR u RAID 5 volume attached as v sd7
The response indicates that we’ve successfully created a RAID-5 device u, and it’s available as device /dev/sd7 v. On a blank RAID disk, which you need to prepare just as you would any other new disk, run fdisk -i sd7 and disklabel to create MBR and OpenBSD partitions, use newfs to create a filesystem on the new partitions, and you’re ready to go. (See the instructions for adding a new disk in Chapter 8 for details.)
164 Chapter 9
You could have made this a RAID-0, RAID-1, or RAID-4 device by choos-ing a different -c option. The tricky one is a concatenated softraid. To dump all the disks together into a single concatenated virtual partition, use -c c.
# bioctl -c c -l sd2p,sd3p,sd4p,sd5p,sd6p softraid0softraid0: SR CONCAT volume attached as sd7
softraid StatusTo check the health of each device in a RAID array, give bioctl the device name of the softraid device.
# bioctl softraid0Volume Status Size Devicesoftraid0 0 Online 214744170496 sd7 RAID5 0 Online 53686099456 0:0.0 noencl <sd2p> 1 Online 53686099456 0:1.0 noencl <sd3p> 2 Online 53686099456 0:2.0 noencl <sd4p> 3 Online 53686099456 0:3.0 noencl <sd5p> 4 Online 53686099456 0:4.0 noencl <sd6p>
We see that the five drives are in use, all assembled into a RAID-5 virtual drive. Everything here is healthy. Anything that doesn’t look roughly like this indicates a problem.
Identifying Failed softraid VolumesIf you have a RAID-1, RAID-4, or RAID-5 softraid volume, you can lose a drive and not lose your data. bioctl tells you if a drive fails. Here, one of the drives in my softraid volume has failed:
# bioctl softraid0Volume Status Size Devicesoftraid0 0 Degraded 214744170496 sd7 RAID5 0 Online 53686099456 0:0.0 noencl <sd2p> 1 Offline 0 0:1.0 noencl <> 2 Online 53686099456 0:2.0 noencl <sd3p> 3 Online 53686099456 0:3.0 noencl <sd4p> 4 Online 53686099456 0:4.0 noencl <sd6p>
Looking closely at this, I can see that drives sd2, sd3, sd4, and sd6 are still available and in use. All my data should still be intact, but I need to replace sd5 before another disk fails.
Rebuilding Failed softraid VolumesAs of this writing, you cannot rebuild a failed softraid RAID-4 or RAID-5 device. You must back up your data, replace the failed drive, delete the softraid device, re-create the filesystem, and restore from backup. You can, however, rebuild a RAID-1 device.
More Filesystems 165
Let’s look at replacing a disk in a RAID-1 device. Here’s what a healthy, three-disk softraid mirror might look like:
# bioctl softraid0Volume Status Size Devicesoftraid0 0 Online 53686099456 sd5u RAID1 0 Online 53686099456 0:0.0 noencl <sd2p>v 1 Online 53686099456 0:1.0 noencl <sd3p> 2 Online 53686099456 0:2.0 noencl <sd4p>
Note that this RAID device has device node sd5 u and includes the par-titions sd2p, sd3p, and sd4p v.
We replace two disks and reboot this machine. Suddenly, the softraid device looks very different.
# bioctl softraid0Volume Status Size Devicesoftraid0 0 Degraded 53686099456 sd5 RAID1 0 Offline 0 0:0.0 noencl <> 1 Offline 0 0:1.0 noencl <> 2 Online 53686099456 0:2.0 noencl <sd2p>
Partitions sd3p and sd4p are missing. That’s because the underlying disks have been replaced.4 Prepare the replacement disks for software RAID, as discussed in “Preparing Disks for softraid” on page 162. Then run bioctl, using the -R flag to specify the disk to replace in the softraid device.
# bioctl -R /dev/sd3p sd5softraid0: rebuild of sd5 started on sd3p
If you check the status of the device using bioctl, you’ll see the disk status now says “Rebuilding.”
If you have a mirror with more than two disks, you must rebuild each disk separately. Rebuild the first disk, and then rebuild the second disk.
Deleting softraid DevicesTo remove a softraid device from your system, pass bioctl the -d flag and the device name for the softraid device. Here’s how to remove the RAID-5 device we just created:
# bioctl -d sd7
W a r N i N g Once you delete the RAID device, you can’t get it back unless you re-create it and restore your data from backup.
4. If you need to force an error on a hard disk, removing the disk from the machine will certainly do it.
166 Chapter 9
Reusing softraid Diskssoftraid writes metadata at the beginning of the disks it uses. You need to overwrite this metadata before you can use the disks in another softraid device. Overwrite the first megabyte or so of the disk with dd(1).
# dd if=/dev/zero of=/dev/sd2c bs=1k count=10241024+0 records in1024+0 records out1048576 bytes transferred in 0.594 secs (1765074 bytes/sec)
This erases the MBR partitions, any initial disklabels, and any filesystem information on the disk. You can now reuse these disks in softraid devices as normal disks.
Booting from a softraid DeviceThe softraid feature is still in development. Eventually, you’ll be able to use the installer to build a software RAID device, install OpenBSD on that device, and run a full RAID configuration out of the box. But as I write this, you’ll need to jump through some hoops to make that happen. Rather than document a specific procedure that will change as OpenBSD com-pletes softraid development, I’m going to tell you to search the Internet and the [email protected] archives for the most recent instructions.
Encrypted Disk PartitionsSometimes I can see the future. When someone says, “I’ve encrypted my hard drive!” I have a psychic vision of them saying “I’ve lost all my data!” While encrypting a hard drive partition is warranted in some cases, most of the time, it’s just pretentious. In this section, I will do you the courtesy of assuming that you understand when you truly need disk encryption if you will do me the courtesy of not complaining to me when you lose your data.5
Creating Encrypted PartitionsOpenBSD includes disk encryption as a bioctl(8) option—specifically, like a RAID discipline. Where disk activity would normally be passed through a RAID discipline, here they pass through an encryption discipline. The encrypted disk even shows up as a softraid device. Much like the support for RAID-5, support for encrypted filesystems is experimental. Although it should work, don’t be shocked if some features are not yet included or if it eats your entire disk. Keep good backups. Reread the previous paragraph. And again—please don’t complain to me when it doesn’t work.
5. Not that I can help you—all I can do is say “I told you so.” On a related note: You can get tired of anything, no matter how pleasant, if you have to do it often enough.
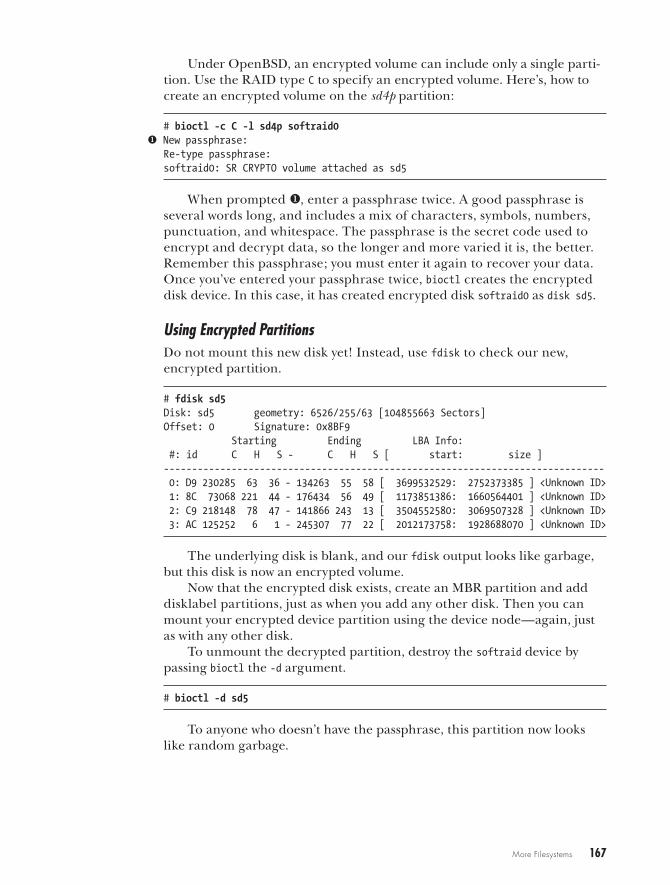
More Filesystems 167
Under OpenBSD, an encrypted volume can include only a single parti-tion. Use the RAID type C to specify an encrypted volume. Here’s, how to create an encrypted volume on the sd4p partition:
# bioctl -c C -l sd4p softraid0u New passphrase:
Re-type passphrase:softraid0: SR CRYPTO volume attached as sd5
When prompted u, enter a passphrase twice. A good passphrase is several words long, and includes a mix of characters, symbols, numbers, punctuation, and whitespace. The passphrase is the secret code used to encrypt and decrypt data, so the longer and more varied it is, the better. Remember this passphrase; you must enter it again to recover your data. Once you’ve entered your passphrase twice, bioctl creates the encrypted disk device. In this case, it has created encrypted disk softraid0 as disk sd5.
Using Encrypted PartitionsDo not mount this new disk yet! Instead, use fdisk to check our new, encrypted partition.
# fdisk sd5Disk: sd5 geometry: 6526/255/63 [104855663 Sectors]Offset: 0 Signature: 0x8BF9 Starting Ending LBA Info: #: id C H S - C H S [ start: size ]------------------------------------------------------------------------------ 0: D9 230285 63 36 - 134263 55 58 [ 3699532529: 2752373385 ] <Unknown ID> 1: 8C 73068 221 44 - 176434 56 49 [ 1173851386: 1660564401 ] <Unknown ID> 2: C9 218148 78 47 - 141866 243 13 [ 3504552580: 3069507328 ] <Unknown ID> 3: AC 125252 6 1 - 245307 77 22 [ 2012173758: 1928688070 ] <Unknown ID>
The underlying disk is blank, and our fdisk output looks like garbage, but this disk is now an encrypted volume.
Now that the encrypted disk exists, create an MBR partition and add disklabel partitions, just as when you add any other disk. Then you can mount your encrypted device partition using the device node—again, just as with any other disk.
To unmount the decrypted partition, destroy the softraid device by passing bioctl the -d argument.
# bioctl -d sd5
To anyone who doesn’t have the passphrase, this partition now looks like random garbage.
168 Chapter 9
Automatic DecryptionIf you have an encrypted partition, presumably you don’t want OpenBSD to automatically decrypt and mount it when the system boots. (The whole point of an encrypted partition is that only a person who has the pass-phrase can access the encrypted data.) Still, I’m not one to tell you not to shoot yourself in the foot, so if you must automatically decrypt the parti-tion, you can do so.
First, create a file containing your passphrase. Give ownership of this file to root and set the permissions to 600 (read-write by owner; no access by other users), and then give this file to bioctl(8) with the -p flag. In this example, the encrypted disk is created as /dev/sd5 and there is a partition on /dev/sd5a. I’ve stored my passphrase in the file /etc/passphrase, so I could run something like this:
# bioctl -c C -l sd4p -p /etc/passphrase softraid0# mount /dev/sd5a /home/mwlucas
Adding this to /etc/rc.securelevel will mount this encrypted partition at boot.
You should now have a good idea of how to manage OpenBSD disks and filesystems. Next, we’ll look at some of OpenBSD’s special security features.
10S e c u r i n g Y o u r S Y S t e m
Hackers at the gates? Puffy the Barbarian
defends against fiends.
Securing your system means ensuring that your computer’s resources are used only by
authorized people and for authorized pur-poses. Even if a system has no important data,
it still has valuable CPU time, memory, storage, and bandwidth. People who think that their systems aretoo unimportant for anyone to bother breaking into risk finding their equipment hosting pornography or relaying attacks against industrial or military sites. If you’re like me, you would rather not discover that your computers took down a government agency by having law enforcement agents kick in your door.
Taking over large numbers of remote computers gets easier all the time. Every year, more and more point-and-click toolkits for penetrating servers crop up. When one bright attacker posts an exploit, anyone can use it. Breaking into computers is big business, and if your computer is left unprotected, it will be penetrated. The only question is how.
170 Chapter 10
Generally speaking, intruders don’t break into operating systems; they break into server programs running on the operating system. Even the most paranoiac, secure-by-default operating system cannot protect poorly written programs from themselves. OpenBSD features like W^X and address space layout randomization do a lot to protect the operating system from the side effects of buggy programs, but programs themselves still crash and burn. OpenBSD has undergone extensive auditing and testing to eliminate the most common security flaws, but there’s no guarantee that every security flaw has been eradicated. New features appear constantly, and can interact with older functions (and each other) in unexpected ways. For more details on the OpenBSD-specific features, check the papers and presentations collec-tion at http://www.OpenBSD.org/papers/.
No single tool can protect your server against all threats, and no single tool is applicable to all environments. Learning about OpenBSD’s security features helps you to understand not only what the tools do, but when they should be used and when they won’t help your particular situation. The best place to start is by understanding the threat.
Who Is the Enemy?Books dedicated to security break attackers down into smaller, more specific groups and include various edge cases, but that’s not what you’re here for. I lump potential attackers into four groups: script kiddies, botnets, disaffected users, and skilled attackers. These categories are easily understood and include 99 percent of all the attackers you’re likely to encounter.
Script KiddiesThe most common type of attackers, script kiddies, are not sysadmins. They are amateurs who download attack scripts and go looking for poorly defended, vulnerable systems.
Script kiddies are easy to defend against: Keep your software up-to-date and follow good computing practices. Like locusts, script kiddies are easy to squash, but there are just so darned many of the little buggers!
BotnetsBotnets are composed of machines compromised by worms or viruses and are controlled from a central point. The botnet’s controllers might use the victim machines to search for more vulnerable hosts, to send spam, or to break into secure sites. Most botnets are composed of Windows or Linux machines, but there’s no reason why such a worm couldn’t target OpenBSD. The virus author would need to work hard, but it’s conceivable—if he finds a suitable security flaw.
Fortunately, botnet defense is much like script kiddie defense. You shouldn’t have much to worry about if you keep your software patched, con-figure your server software securely, and follow good computing practices.
Securing Your System 171
Disaffected UsersSecurity pundits commonly claim that a system’s legitimate users cause the majority of security problems.1 Legitimate users are most likely to know where your security gaps are, to feel that the system rules don’t apply to them, and to have the necessary access and time to experiment with breaking your security. If you tell an employee that company policy forbids him access to a computer resource, and the employee feels that he should have access to it, he is likely to search for a way around the restriction. You can patch all of your servers and protect them with an outright hostile firewall, but if someone has physical access and knows the root password, your protections are useless.
Deal with this problem on two levels. The first is technical: Keep your servers patched and up-to-date. The second is human: Don’t leave projects half finished or half documented. That unsecured modem you installed for emergency incoming access until the VPN is solid? Get rid of it, or put a password on it. Ditto for that telnet server running on a nonstandard port.
Security by obscurity is feeble at best. When a privileged user leaves the company, immediately disable his account, change all administrative passwords, inform employees of the person’s departure, and remind them not to share confidential information with that person. Implement a com-puter security policy with real penalties for violations. If you have a Human Resources department, get the staff members to agree to the policy and insist they enforce it.
What’s the best way to protect yourself against the disaffected user? Don’t be lazy.
Skilled AttackersAs the most dangerous group, skilled attackers are competent system admin-istrators, security researchers, penetration specialists, and criminals who want access to specific resources. Taking over computers is a lucrative busi-ness these days. Sending junk email or launching distributed denial-of-service attacks can bring in large sums of money. These intruders don’t care who they attack, as long as they secure the computing resources they need.
If your company has valuable secrets, however, you might attract an entirely different type of intruder: someone who wants access to your net-work in particular. If your employer creates anything—from software to cast-iron tulips for front-wheel-drive vehicles—there’s likely a market for illicit copies of your product. Someone will find it worthwhile to probe every port on every IP address you expose to the Internet. It might take a long time, but that’s okay. Your data has a price tag, and the scan is cheap. This is often called the advanced persistent threat, or APT.
1. I’ve seen too many botnet or script kiddie intrusions go undetected for months to be comfortable blaming legitimate users for the majority of security problems. I would agree that “insider intrusions” are the most commonly identified intrusions, but frequently, that’s because the guilty user can’t keep his mouth shut.
172 Chapter 10
Security measures that stop the other types of intruders affect the tech-niques used by skilled attackers. If you’ve ditched that unsecured inbound access method, the intruder can’t find it. If your servers and programs are up to date and correctly configured, the intruder will need to find a previ-ously unknown exploit to break into your network. If a skilled intruder really wants your company’s data, he will need to change tactics. Maybe he will try dumpster diving for old sticky notes, or even show up dressed as a telco repairman and try to install a packet sniffer. If an intruder knows everything about your network and his easiest way to break in is still some-thing out of a caper film, your security is pretty good.
n o t e The word hacker has different meanings depending on who is talking. In the techni-cal world, a hacker is someone not only interested in the inner workings of technology but also capable of creating new technology. The media has transformed the word to mean “someone who breaks into computers.” I recommend completely avoiding the word “hacker,” and using terms like “intruder” or “gravy sucking pig-dog” instead. When to use each is up to you, of course.
OpenBSD Security AnnouncementsYour best line of defense against all types of intruders is keeping your com-puter software up to date. This means you need to know when to update your system and what to update. The OpenBSD Project maintains a low-traffic mailing list, [email protected], specifically to broadcast new security alerts to users. Subscribe to this list.
If you don’t feel like subscribing to yet another mailing list, these security alerts are also posted on OpenBSD-specific sites such as http://www.undeadly.org.
Note that this won’t get you security alerts for third-party software running on OpenBSD. You must get updates for those programs sepa-rately. Check the software’s website for details on how to get their security announcements. All the time you’ve spent securing your operating sys-tem will be wasted if someone hijacks the insecure web application you neglected to update.
OpenBSD Memory ProtectionOne of the most common intrusion paths is to attack what’s in the comput-er’s memory. If intruders can access memory that they shouldn’t be able to access, or if they can make a program access memory it shouldn’t, they have any number of ways to get into the system.
OpenBSD includes a whole bunch of security features for system mem-ory that the sysadmin never actually sees. You don’t need to turn on the nonexecutable stack; it’s just there.

Securing Your System 173
Some of these features appear only in OpenBSD. Some appeared first in OpenBSD, and then spread elsewhere. Some came from research papers. Others build on hardware features.
The OpenBSD team takes a more proactive attitude about security features than many other projects. As an example, consider the ProPolice deployment several years ago. ProPolice is a compiler feature that prevents certain classes of buffer overflows. When you enabled ProPolice in the early days, a lot of software could not be built. Even more software could be built, but it crashed when used. These failures were not ProPolice problems. ProPolice simply exposed programming errors in the software. But many users and developers said that “enabling ProPolice breaks all kinds of stuff, so don’t turn it on.”
The OpenBSD team enabled ProPolice by default in a development snapshot. What happened? Stuff—a lot of stuff—broke. Many third-party applications needed by OpenBSD users either could not build or would not run. Third-party application vendors started receiving bug reports from OpenBSD users who were able to say exactly how the software was broken. Software vendors started fixing bugs.
ProPolice didn’t cause these crashes; it merely exposed bugs. By enabling ProPolice by default, OpenBSD gave the free software world incentive to fix those bugs. Eventually, as the type of bugs revealed by ProPolice became less common, other operating systems also enabled ProPolice. OpenBSD’s willingness to take this step improved computer security as a whole.
If you closely follow OpenBSD development, expect to see more of this behavior. The OpenBSD team does what it considers most correct, not what is most convenient or easiest.
The common memory security features you should know about include W^X, .rodata segments, guard pages, randomized memory allocations, ProPolice, and protecting atexit and stdio. We’ll cover each in turn.
W^XW^X stands for Write Xor Execute. Once a program is loaded, that pro-gram’s pages in memory are either writable or executable, but not both.
A common exploit technique is to trick a program into writing infor-mation to memory, and then executing that piece of memory. An attacker might convince a program to write to a chunk of memory, but the kernel will not allow that memory to be executed.
Some hardware platforms (such as amd64) have hardware support for W^X. If that support exists, OpenBSD uses it.
.rodata SegmentsA segment of memory containing program code traditionally had two parts: actual code and read-only data, or .rodata segments. In the past, some operat-ing systems allowed programs to modify read-only memory. OpenBSD pre-vents this by leveraging hardware features when available.
174 Chapter 10
Guard PagesMany pieces of software used to access memory beyond what they allocated. If a program writes to memory that doesn’t belong to it, it’s writing to memory that belongs to a different program. Intruders use this to exploit programs. A guard page is a single page of memory next to the memory allo-cated by a program. The program cannot write to this memory. If the pro-gram tries to write to the guard page, it probably will crash. By enforcing this limit, OpenBSD protects other programs.
Using guard pages everywhere would use a lot of memory, so OpenBSD enables guard pages only in carefully selected places.
Address Space Layout RandomizationTraditionally, computers allocate memory consecutively. This can give intruders certain advantages. If they know that program A usually loads after program B, and they know they can make program B write to memory space outside its allocation, they can guess that they can write to program A’s memory space and make program A fail in a predictable manner. Doing so requires a certain degree of skill, but once one person figures out this exploit, innumerable people can use it.
OpenBSD randomizes where it allocates memory. Two programs started one after the other don’t get consecutive memory blocks. The randomiza-tion is done intelligently, to avoid wasting memory. Intruders cannot use one program against another in this manner.
ProPoliceProPolice protects code against attacks that manipulate the memory stack. When code is compiled, ProPolice adds additional code to keep a program within its own area of memory. If ProPolice determines that specific areas of memory (called canaries) have been changed, it immediately aborts the program. Where other memory protection techniques prevent writing to executable memory, ProPolice terminates a process when writable memory that can be written to, but specifically should not, is changed.
And More!OpenBSD includes a whole bunch of small memory guards scattered throughout. Here’s a small sampling:
• The malloc() and atexit() system calls mark memory nonwritable after updating it.
• File descriptor handling has been carefully audited throughout.
• snprintf is async-signal-safe when no floats are involved.
And the list continues.
Securing Your System 175
Could any of these be exploited in the real world? Some of them have, and some are just theoretical. But I would rather be protected against theo-retical threats than assume no one can break something that has never been broken before.
File FlagsAll Unix-like operating systems share a common permissions scheme, but OpenBSD (and most BSD-based operating systems) extends the permis-sions scheme with file flags. File flags work with permissions to change file security. Flags can make a file unchangeable, make it so that existing data cannot be removed and users can only add to the file, and produce several other effects. Some flags have functions unrelated to security, but we’ll pay special attention to the security flags. File flags are listed and documented in chflags(1).
File Flag TypesMany file flags have different effects depending on the system securelevel, which we’ll cover in the next section. Understanding how securelevels work requires an understanding of file flags, while file flags rely on securelevels. For the moment, just nod and smile when I mention securelevels while dis-cussing file flags. All will become clear, trust me.
OpenBSD’s UFS and UFS2 filesystems support the following file flags:
sappnd
Files with the system-level append-only flag can be added to but cannot be removed or otherwise edited. The sappnd flag is particularly useful for log files. For example, a common intruder tactic is to remove .history or symlink it to /dev/null so that the administrator cannot see what happened. Setting sappnd on a user’s .history file can be interesting if the account is compromised. Using the sappnd flag ensures that intruders cannot cover their tracks in this manner. Only root can set or remove the sappnd flag, and it cannot be removed when the system is running at securelevel 1 or higher.
uappnd
The user-level append-only flag can be set only by the file owner or root. As with sappnd, a file with the uappnd flag can be added to but not otherwise edited or removed. This is most useful for personal logs and files; it primarily adds an extra layer of protection against users acci-dentally deleting their own files. The owner or root can set or remove this flag.
schg
Files with the system-level immutable flag cannot be changed in any way. They cannot be edited, moved, replaced, or overwritten. Basically,
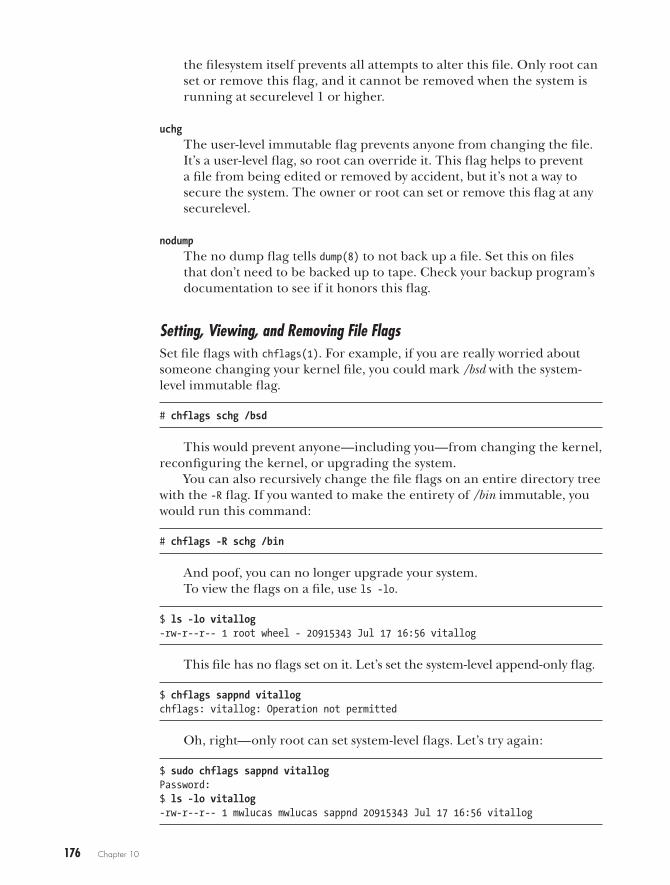
176 Chapter 10
the filesystem itself prevents all attempts to alter this file. Only root can set or remove this flag, and it cannot be removed when the system is running at securelevel 1 or higher.
uchg
The user-level immutable flag prevents anyone from changing the file. It’s a user-level flag, so root can override it. This flag helps to prevent a file from being edited or removed by accident, but it’s not a way to secure the system. The owner or root can set or remove this flag at any securelevel.
nodump
The no dump flag tells dump(8) to not back up a file. Set this on files that don’t need to be backed up to tape. Check your backup program’s documentation to see if it honors this flag.
Setting, Viewing, and Removing File FlagsSet file flags with chflags(1). For example, if you are really worried about someone changing your kernel file, you could mark /bsd with the system-level immutable flag.
# chflags schg /bsd
This would prevent anyone—including you—from changing the kernel, reconfiguring the kernel, or upgrading the system.
You can also recursively change the file flags on an entire directory tree with the -R flag. If you wanted to make the entirety of /bin immutable, you would run this command:
# chflags -R schg /bin
And poof, you can no longer upgrade your system.To view the flags on a file, use ls -lo.
$ ls -lo vitallog-rw-r--r-- 1 root wheel - 20915343 Jul 17 16:56 vitallog
This file has no flags set on it. Let’s set the system-level append-only flag.
$ chflags sappnd vitallogchflags: vitallog: Operation not permitted
Oh, right—only root can set system-level flags. Let’s try again:
$ sudo chflags sappnd vitallogPassword:$ ls -lo vitallog-rw-r--r-- 1 mwlucas mwlucas sappnd 20915343 Jul 17 16:56 vitallog
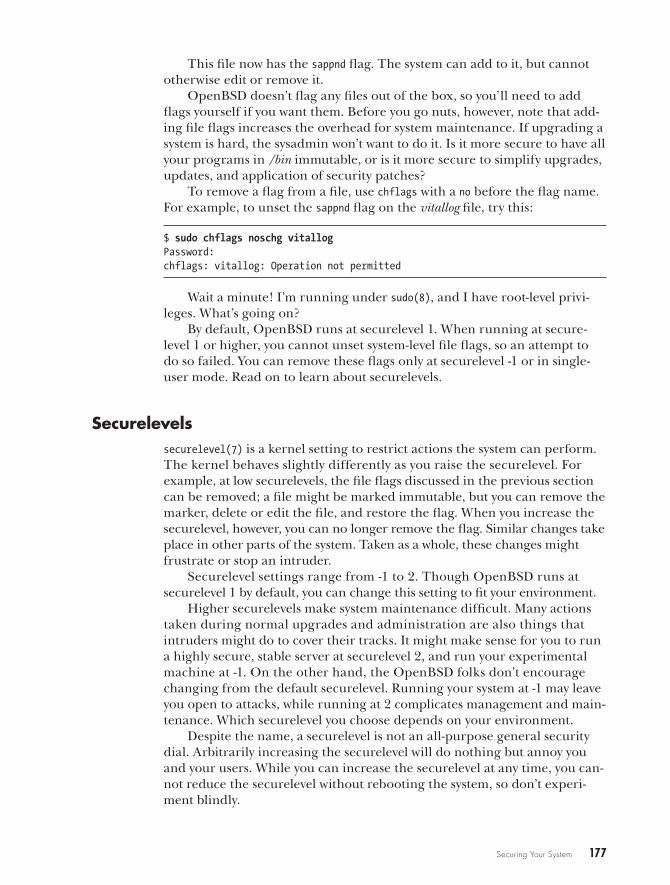
Securing Your System 177
This file now has the sappnd flag. The system can add to it, but cannot otherwise edit or remove it.
OpenBSD doesn’t flag any files out of the box, so you’ll need to add flags yourself if you want them. Before you go nuts, however, note that add-ing file flags increases the overhead for system maintenance. If upgrading a system is hard, the sysadmin won’t want to do it. Is it more secure to have all your programs in /bin immutable, or is it more secure to simplify upgrades, updates, and application of security patches?
To remove a flag from a file, use chflags with a no before the flag name. For example, to unset the sappnd flag on the vitallog file, try this:
$ sudo chflags noschg vitallogPassword:chflags: vitallog: Operation not permitted
Wait a minute! I’m running under sudo(8), and I have root-level privi-leges. What’s going on?
By default, OpenBSD runs at securelevel 1. When running at secure-level 1 or higher, you cannot unset system-level file flags, so an attempt to do so failed. You can remove these flags only at securelevel -1 or in single-user mode. Read on to learn about securelevels.
Securelevelssecurelevel(7) is a kernel setting to restrict actions the system can perform. The kernel behaves slightly differently as you raise the securelevel. For example, at low securelevels, the file flags discussed in the previous section can be removed; a file might be marked immutable, but you can remove the marker, delete or edit the file, and restore the flag. When you increase the securelevel, however, you can no longer remove the flag. Similar changes take place in other parts of the system. Taken as a whole, these changes might frustrate or stop an intruder.
Securelevel settings range from -1 to 2. Though OpenBSD runs at securelevel 1 by default, you can change this setting to fit your environment.
Higher securelevels make system maintenance difficult. Many actions taken during normal upgrades and administration are also things that intruders might do to cover their tracks. It might make sense for you to run a highly secure, stable server at securelevel 2, and run your experimental machine at -1. On the other hand, the OpenBSD folks don’t encourage changing from the default securelevel. Running your system at -1 may leave you open to attacks, while running at 2 complicates management and main-tenance. Which securelevel you choose depends on your environment.
Despite the name, a securelevel is not an all-purpose general security dial. Arbitrarily increasing the securelevel will do nothing but annoy you and your users. While you can increase the securelevel at any time, you can-not reduce the securelevel without rebooting the system, so don’t experi-ment blindly.
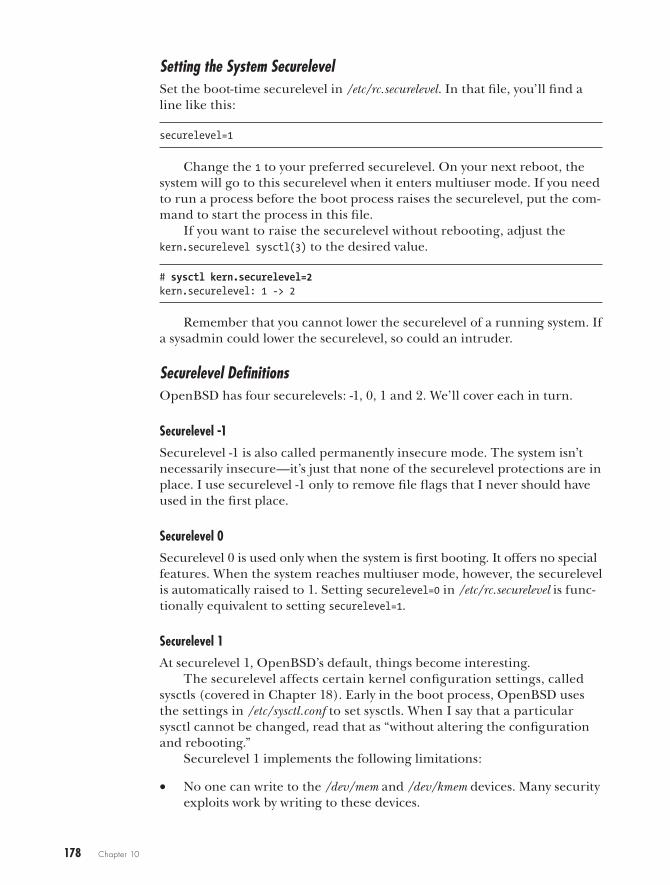
178 Chapter 10
Setting the System SecurelevelSet the boot-time securelevel in /etc/rc.securelevel. In that file, you’ll find a line like this:
securelevel=1
Change the 1 to your preferred securelevel. On your next reboot, the system will go to this securelevel when it enters multiuser mode. If you need to run a process before the boot process raises the securelevel, put the com-mand to start the process in this file.
If you want to raise the securelevel without rebooting, adjust the kern.securelevel sysctl(3) to the desired value.
# sysctl kern.securelevel=2kern.securelevel: 1 -> 2
Remember that you cannot lower the securelevel of a running system. If a sysadmin could lower the securelevel, so could an intruder.
Securelevel DefinitionsOpenBSD has four securelevels: -1, 0, 1 and 2. We’ll cover each in turn.
Securelevel -1
Securelevel -1 is also called permanently insecure mode. The system isn’t necessarily insecure—it’s just that none of the securelevel protections are in place. I use securelevel -1 only to remove file flags that I never should have used in the first place.
Securelevel 0
Securelevel 0 is used only when the system is first booting. It offers no special features. When the system reaches multiuser mode, however, the securelevel is automatically raised to 1. Setting securelevel=0 in /etc/rc.securelevel is func-tionally equivalent to setting securelevel=1.
Securelevel 1
At securelevel 1, OpenBSD’s default, things become interesting.The securelevel affects certain kernel configuration settings, called
sysctls (covered in Chapter 18). Early in the boot process, OpenBSD uses the settings in /etc/sysctl.conf to set sysctls. When I say that a particular sysctl cannot be changed, read that as “without altering the configuration and rebooting.”
Securelevel 1 implements the following limitations:
• No one can write to the /dev/mem and /dev/kmem devices. Many security exploits work by writing to these devices.
Securing Your System 179
• The raw disk devices of all mounted file systems are read-only. (Writing to the raw devices of mounted filesystems would let you change files without regard to permissions.) Programs should access mounted file-systems only through the filesystem anyway, so this won’t change day-to-day operations.
• The system-level file flags schg and sappnd cannot be removed.
• Kernel modules cannot be loaded or unloaded. OpenBSD supports ker-nel modules, but the default kernel is monolithic. There’s no legitimate reason to load a kernel module on a running production system.
• The sysctl fs.posix.setuid cannot be changed. By default, chown(1) clears the setuid and setgid bits on files when changing file permis-sions, as per the POSIX standard. You can override this by setting fs.posix.setuid to 0.
• The sysctl hw.allowpowerdown cannot be changed. This controls the power button’s interaction with the system. When it’s set to 1, briefly pressing the power button shuts down the system cleanly. When it’s set to 0, the power button does not shut down the system. (You can still shut down the system by holding down the power button for several seconds, but that’s not a clean shutdown.) Not all platforms support this kind of shutdown or power management.
• The sysctl net.inet.ip.sourceroute cannot be changed. Source routing is a technique to permit the sender of a packet to control which route the packet takes across the network. It’s caused many security problems, and its use is generally discouraged. OpenBSD ignores source routing by default. Setting net.inet.ip.sourceroute to 1 forces OpenBSD to pay attention to source routing.
• The sysctl machdep.kbdreset cannot be changed. When set to 1, machdep.kbdreset allows the system to be cleanly rebooted using ctrl-alt-delete. When this sysctl is set to 0, the system ignores ctrl-alt-delete.
• The ddb.console and ddb.panic sysctls may not be raised. Raising these sysctls enables certain kernel debugging options. Unauthorized users with physical access could gain unlimited system access through the debugger if they could raise these sysctls.
• The sysctl machdep.allowaperture cannot be raised. If you want to use the X Window System (discussed in Chapter 17), you must allow X access to specific parts of kernel memory by enabling this sysctl early during the boot process. If you’re not running X, no one legitimately needs this access.
• General-purpose input/output (GPIO) controllers cannot be further configured. GPIO controllers support a wide variety of special-purpose hardware. See gpio(4) and gpioctl(8) for details on each.
These limitations have little effect on normal day-to-day operations, but they can interfere with debugging. If you’re trying to discover why your GPIO device isn’t working, you probably want to set your securelevel to -1.
180 Chapter 10
Securelevel 2
Securelevel 2 is the highest securelevel in OpenBSD, and it disables a variety of features that you might need during normal maintenance. Use securelevel 2 only on a stable machine that you don’t expect to change much. If you need to change anything restricted by securelevel 2, you must reboot the machine.
Securelevel 2 includes everything from securelevel 1, plus the following:
• Raw disk devices are always read-only. You cannot format, fdisk, or disk-label disks, even if they’re not in use.
• The system clock cannot be moved backward, nor close to the over-flow point. Make sure your system time is correct before entering multiuser mode!
• You cannot alter packet-filtering rules (covered in Chapters 21 and 22). Packet filters, network address translation (NAT), traffic queues, and so on are immutable.
• Kernel debugger sysctl values (those beginning with ddb) cannot be changed.
So, for example, you don’t want your firewall at securelevel 2 unless you understand that packet filtering rules can change only with a reboot.
What Securelevel Do You Need?The securelevel appropriate for your environment depends entirely on your situation, but the overwhelming majority of the time, the default of secure-level 1 is most suitable.
If you are debugging and testing features and tools, you might find that you need to use securelevel -1 on a development machine. Once you’ve worked out how to configure your GPIO device or the correct debugger settings for your system, however, use securelevel 1 so that you mirror a production environment.
If you have a very stable system, you could try securelevel 2. In all my years of running OpenBSD, though, I’ve had only one system for which securelevel 2 was the right choice, and several cases where securelevel 2 created more trouble than it was worth.
Securelevel WeaknessesWhat can’t securelevels do? Consider a case where someone compromises a web application on your server, uses that to bootstrap himself into a shell, and then uses the shell to bootstrap himself into root access. Securelevels don’t do anything to prevent this.
Unless you’ve made copious use of the schg flag, the intruder can replace system binaries with ones that send your authentication credentials to a free email account registered in a bogus name. So you decide to run around applying the schg flag to the contents of critical directories like /bin and /usr/lib. That will stop the bugger! Well, that will work as long as you make

Securing Your System 181
every file immutable, including the system configuration files in /etc —you know, the ones that you need to change in order to do your job. If you leave one file unprotected, the intruder could add a command like chflags -R noschg / to an early part of the system startup, and poof—the next time you reboot your system, you unlock all your files. How often do you exhaustively audit your /etc files? And you’ll need to undo this tangled morass every time you patch or upgrade your system!
This is only one possible path. There are many ways for an intruder to lever himself into the system. Relying on securelevels to protect you is unwise. Use them and consider them a tool in your kit, but don’t think they are a panacea for every problem.
Keeping SecureThe tools discussed in this chapter are not OpenBSD’s only security fea-tures. The OpenBSD team has put a lot of work into securing every part of the system. But this chapter covers some things that make OpenBSD special and gives you an idea of how those features work.
What’s the best path to security? Keep your system updated and config-ure your server daemons securely. It’s boring, but it works.

11O v e r v i e w O f T C P/ i P
IP version 6: All the pain of version 4, plus brand-new problems!
Securing a computer is easy: Disconnect it from all networks, remove all input and
output, and lock it in a bunker. Oh, wait—did you want the system to do something? Then
you’ll probably want to connect your system to the Internet.
Many system administrators have a vague familiarity with the basics of networking, but to be a truly competent sysadmin, you need a real under-standing of how everything fits together. You don’t need to know when to use rapid spanning trees, how to choose between BGP and OSPF, or even what those acronyms represent. But you must know what an IP address is, how a netmask works, how port numbers differ from protocol numbers, and why you cannot use telnet(1) to test UDP connectivity. Without this basic knowledge, you’ll fumble. Read this chapter and understand it, and you’ll have an easier time convincing your network administrator to give you what you need.
184 Chapter 11
While this chapter offers an overview of TCP/IP, it doesn’t cover the innumerable details, caveats, annoyances, peccadilloes, and blatant outrages present in the protocol. If you find that you need to torture yourself with the finer points of TCP/IP, pick up one of the big, thick books on the sub-ject. The TCP/IP Guide by Charles M. Kozierok (No Starch Press, 2005) is an excellent place to start.
This chapter covers both TCP/IP version 4 (the Internet protocol widely used for the last 30-odd years) and the new version of the protocol, TCP/IP version 6. Despite the different version numbers, the two protocols are more similar than not.
We’ll start with the layers of the network and then delve into how the protocols work.
Network LayersThe network protocol is divided into several layers. Each layer handles a specific task and interacts only with the layers immediately above and below it. At first, you might laugh at the idea that this layer model simplifies the network process, but it really does. The important thing to remember right now is that each layer communicates with only the layer directly above it and the layer directly beneath it (theoretically, anyway).
The classic Open Systems Interconnection (OSI) network protocol stack represents the network as seven layers. It’s an exhaustively complete model and covers almost any situation using any network protocol and any application. Because the Internet is a very specific type of network, and because this isn’t a book about networking or networked applications in general, I’ll limit my discussion of TCP/IP to four specific layers of the net-work: physical, datalink, network, and transport. Don’t worry—these four layers cover the Internet and (almost) all corporate networks.
The Physical LayerWhether it’s copper or fiber-optic cable, or even radio waves, physical wire is a layer of the network. Without some physical media to run over, a network cannot function. Everything from the CAT5 cable plugged into your desk-top to the fiber-optic cable connecting you to Asia is part of the physical layer. If it can be tripped over, backhoed, or interfered with, it’s part of the physical layer. For simplicity’s sake, I’ll refer to the physical layer as the wire, although it can take innumerable forms.
This is the easiest layer to understand. If your wire meets the require-ments of the physical protocol, you’re in business. If not, your network won’t work. One of the functions of Internet routers is to connect one sort of physical layer to another—for example, converting local Ethernet into an OC3 fiber connection.
The physical layer has no decision-making abilities of its own; every-thing that runs over it is dictated by the datalink layer.
Overview of TCP/IP 185
The Datalink LayerThe datalink layer is the protocol that runs over the physical wire. It trans-forms information into the actual signals that are sent over the physical layer, using the appropriate encoding for that physical media, as follows:
• Both Ethernet and Switched Multimegabit Data Service (SMDS) use Media Access Control (MAC) addresses and the Address Resolution Protocol (ARP).
• IPv6 over Ethernet uses Neighbor Discovery (ND).
• Dial-up and wide area networks (WANs) use either the Point-to-Point Protocol (PPP) or High-Level Data Link Control (HDLC).
OpenBSD supports other common datalink protocols, such as PPP over Ethernet (PPPoE). If you have unusual network requirements, check the OpenBSD website, mailing lists, or man pages to see if those requirements are supported.
Some datalink layers have been implemented over many different physi-cal layers. Ethernet, for example, has been implemented over twinax, coax, CAT3, CAT5, CAT6, CAT7, optical fiber, and radio waves. And for true device independence, we have seen TCP/IP implemented with a biological transport layer: carrier pigeon.1
With minor changes to the device drivers, the datalink layer can address any sort of physical layer. This is one of the ways in which layers simplify the network.
Chapter 12 discusses Ethernet in detail, as it’s the most common net-work type for OpenBSD systems. Once you understand how Ethernet works, you’ll have no difficulty adding new datalink protocols as needed.
The datalink layer exchanges information with the physical layer and the network layer.
The Network LayerThe network layer is the part that maps connectivity between network nodes, answering questions like “Where are other hosts?” and “Can I get there from here?” This logical protocol provides a consistent interface to pro-grams that run over the network, no matter what the physical and datalink layers look like.
The network layer used on the Internet is the Internet Protocol, or IP. Both version 4 (IPv4) and version 6 (IPv6) provide each host with one or more unique IP addresses, so that any other host on the network can find it. Okay, IPv4 network address translation munges the whole “unique address” rule, but your network still has a unique IP address somewhere.
1. You laugh, but the technical reviewer for this book was part of the first IP-over-carrier-pigeon implementation team that tackled the practical tests as specified in RFC 1149. That’s how I knew he had the time to review this book in excruciating detail. (If that’s how he spends his time, he couldn’t very well claim he was too busy, now could he?)
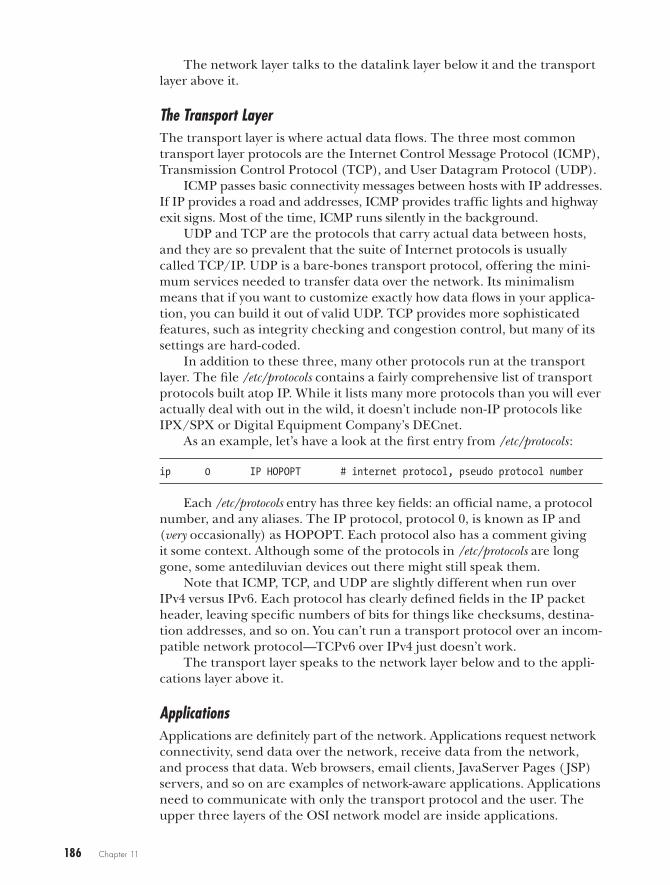
186 Chapter 11
The network layer talks to the datalink layer below it and the transport layer above it.
The Transport LayerThe transport layer is where actual data flows. The three most common transport layer protocols are the Internet Control Message Protocol (ICMP), Transmission Control Protocol (TCP), and User Datagram Protocol (UDP).
ICMP passes basic connectivity messages between hosts with IP addresses. If IP provides a road and addresses, ICMP provides traffic lights and highway exit signs. Most of the time, ICMP runs silently in the background.
UDP and TCP are the protocols that carry actual data between hosts, and they are so prevalent that the suite of Internet protocols is usually called TCP/IP. UDP is a bare-bones transport protocol, offering the mini-mum services needed to transfer data over the network. Its minimalism means that if you want to customize exactly how data flows in your applica-tion, you can build it out of valid UDP. TCP provides more sophisticated features, such as integrity checking and congestion control, but many of its settings are hard-coded.
In addition to these three, many other protocols run at the transport layer. The file /etc/protocols contains a fairly comprehensive list of transport protocols built atop IP. While it lists many more protocols than you will ever actually deal with out in the wild, it doesn’t include non-IP protocols like IPX/SPX or Digital Equipment Company’s DECnet.
As an example, let’s have a look at the first entry from /etc/protocols:
ip 0 IP HOPOPT # internet protocol, pseudo protocol number
Each /etc/protocols entry has three key fields: an official name, a protocol number, and any aliases. The IP protocol, protocol 0, is known as IP and (very occasionally) as HOPOPT. Each protocol also has a comment giving it some context. Although some of the protocols in /etc/protocols are long gone, some antediluvian devices out there might still speak them.
Note that ICMP, TCP, and UDP are slightly different when run over IPv4 versus IPv6. Each protocol has clearly defined fields in the IP packet header, leaving specific numbers of bits for things like checksums, destina-tion addresses, and so on. You can’t run a transport protocol over an incom-patible network protocol—TCPv6 over IPv4 just doesn’t work.
The transport layer speaks to the network layer below and to the appli-cations layer above it.
ApplicationsApplications are definitely part of the network. Applications request network connectivity, send data over the network, receive data from the network, and process that data. Web browsers, email clients, JavaServer Pages ( JSP) servers, and so on are examples of network-aware applications. Applications need to communicate with only the transport protocol and the user. The upper three layers of the OSI network model are inside applications.
Overview of TCP/IP 187
Problems with the user layer are beyond the scope of this book, but I find that many of these issues can be solved with proper application of a large chainsaw.
The Life and Times of a Network RequestSo how do all these layers fit together in the real world? Let’s have a look at a hypothetical network request, and walk through how data traverses the layers and the network.
N O T e Some of this discussion touches on topics covered later this chapter, so you might want to reread this section after finishing the chapter. Purists will notice that I skip a lot of parts of the process, but I’m trying to relay the basics of how TCP/IP works in practice, not model every painful detail of a real network transaction.
Suppose a user connected to your network wants to look at a very important work-related website, such as Scott Meyer’s Basic Instructions (http://www.basicinstructions.net/ ). The user opens his browser, enters the URL, and presses enter. The browser application transforms the user’s request into the proper format and asks the transport layer for a TCP connection to a particular IP address on port 80.
The transport layer inside your computer examines the browser’s request and allocates the appropriate resources for it. The request is broken up into digestible chunks, called segments, and handed down to the network layer.
The network layer doesn’t care about the contents of the request; it’s only concern is where that data is going. The network layer takes the TCP data and attaches the proper addressing information to it. The resulting chunk of data is called a packet. The network layer checks the packet’s desti-nation, chooses the interface closest to the gateway to that destination, and drops packets down into the datalink layer.
The datalink layer doesn’t care about the contents of the packet, and it certainly doesn’t care about IP addresses or routing. It has been given a lump of zeros and ones, and its job is to transmit those zeros and ones to another network node. The datalink layer adds the appropriate header and/or footer information to the packet, creating a frame appropriate for the physical layer. The frame’s header and footer contain the addressing information for the physical layer. On most networks, the datalink layer prepares frames for the local Ethernet. Then the datalink layer hands off the frame to the physical layer for transmission.
The physical layer has no intelligence at all (think carrier pigeons). The datalink layer hands the physical layer a frame, and the physical layer trans-mits that frame to another physical device. For a web browsing client, this is usually the default router for the local Ethernet. The physical layer doesn’t care about the upper-level protocols. Its only job is to make sure the frame gets to the destination without errors.
When the client computer’s router receives the frame, it sends it up to the datalink layer. The datalink layer strips out the frame information and
188 Chapter 11
hands the resulting packet up to the network layer. The router’s network layer examines the packet, looks at its routing table, and decides which interface to send it out on. This might be another Ethernet interface, a T1, a DS3, an OC3, or whatever the router uses for upstream connectivity. Once the router chooses an interface, it hands the packet to the datalink layer for that interface.
The local router’s upstream connection probably goes through a whole series of routers. Each router decides where to send the request based on its routing table. The request probably traverses a variety of datalink layers as it travels. Thanks to layering and abstraction, neither you nor your computer needs to know anything about any of them.
When the request reaches its destination, the computer at the other end of the transaction accepts the frame and sends it all the way back up the protocol stack. The frame is stripped down to packets, which are stripped down to segments, which are reassembled into a data stream. The data stream is then handed to the application (in this case, a web server). The application processes the request and returns an answer, which goes back down through the protocol stack and travels across the network, bouncing up and down through various datalink layers on the way as necessary.
This example shows why the layer model is important: Each layer knows only what it absolutely must about the layers above and below it, making it possible to swap out layers if necessary. When a new datalink protocol is created, the other layers don’t need to change. The network layer just hands a packet to the datalink layer and lets the datalink do its thing. When you install a new network card, you need only a driver that interfaces with the datalink layer and the physical layer; you don’t need to change anything higher in the network stack.
Network StacksA network stack is the software that lets a host communicate with the net-work. A host can run with an IPv4-only network stack, an IPv6-only network stack, or a dual-stacked setup.
You’re already familiar with an IPv4-only stack—it’s what most hosts ran for much of the past 30 years. An IPv4-only stack can communicate only over IPv4. Today, an IPv4-only stack gets you access to the entire Internet, with a few deliberate exceptions. That will not be true in a few years.
Likewise, an IPv6-only stack can communicate with only IPv6 hosts. Because most Internet sites don’t yet support IPv6, running an IPv6-only stack isn’t practical at this point. It is, however, an excellent way to test your IPv6 infrastructure and connectivity.
The most common configuration these days is a dual-stack setup. Client hosts try to use both IPv4 and IPv6, preferring one over the other. I recom-mend configuring hosts with dual stacks, preferring the stack with better connectivity. (If you get IPv6 connectivity through a tunnel, it’s not as fast
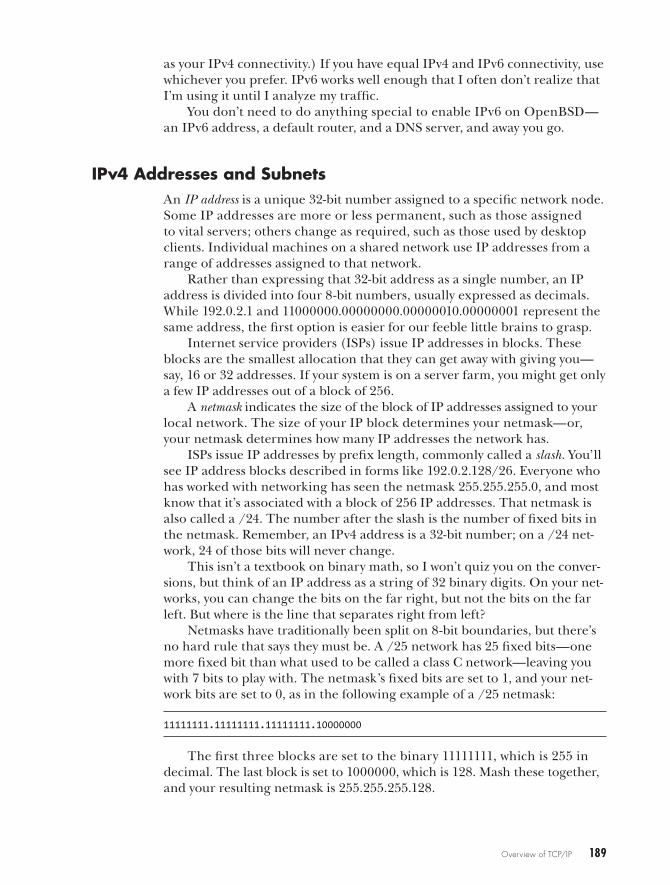
Overview of TCP/IP 189
as your IPv4 connectivity.) If you have equal IPv4 and IPv6 connectivity, use whichever you prefer. IPv6 works well enough that I often don’t realize that I’m using it until I analyze my traffic.
You don’t need to do anything special to enable IPv6 on OpenBSD—an IPv6 address, a default router, and a DNS server, and away you go.
IPv4 Addresses and SubnetsAn IP address is a unique 32-bit number assigned to a specific network node. Some IP addresses are more or less permanent, such as those assigned to vital servers; others change as required, such as those used by desktop clients. Individual machines on a shared network use IP addresses from a range of addresses assigned to that network.
Rather than expressing that 32-bit address as a single number, an IP address is divided into four 8-bit numbers, usually expressed as decimals. While 192.0.2.1 and 11000000.00000000.00000010.00000001 represent the same address, the first option is easier for our feeble little brains to grasp.
Internet service providers (ISPs) issue IP addresses in blocks. These blocks are the smallest allocation that they can get away with giving you—say, 16 or 32 addresses. If your system is on a server farm, you might get only a few IP addresses out of a block of 256.
A netmask indicates the size of the block of IP addresses assigned to your local network. The size of your IP block determines your netmask—or, your netmask determines how many IP addresses the network has.
ISPs issue IP addresses by prefix length, commonly called a slash. You’ll see IP address blocks described in forms like 192.0.2.128/26. Everyone who has worked with networking has seen the netmask 255.255.255.0, and most know that it’s associated with a block of 256 IP addresses. That netmask is also called a /24. The number after the slash is the number of fixed bits in the netmask. Remember, an IPv4 address is a 32-bit number; on a /24 net-work, 24 of those bits will never change.
This isn’t a textbook on binary math, so I won’t quiz you on the conver-sions, but think of an IP address as a string of 32 binary digits. On your net-works, you can change the bits on the far right, but not the bits on the far left. But where is the line that separates right from left?
Netmasks have traditionally been split on 8-bit boundaries, but there’s no hard rule that says they must be. A /25 network has 25 fixed bits—one more fixed bit than what used to be called a class C network—leaving you with 7 bits to play with. The netmask’s fixed bits are set to 1, and your net-work bits are set to 0, as in the following example of a /25 netmask:
11111111.11111111.11111111.10000000
The first three blocks are set to the binary 11111111, which is 255 in decimal. The last block is set to 1000000, which is 128. Mash these together, and your resulting netmask is 255.255.255.128.
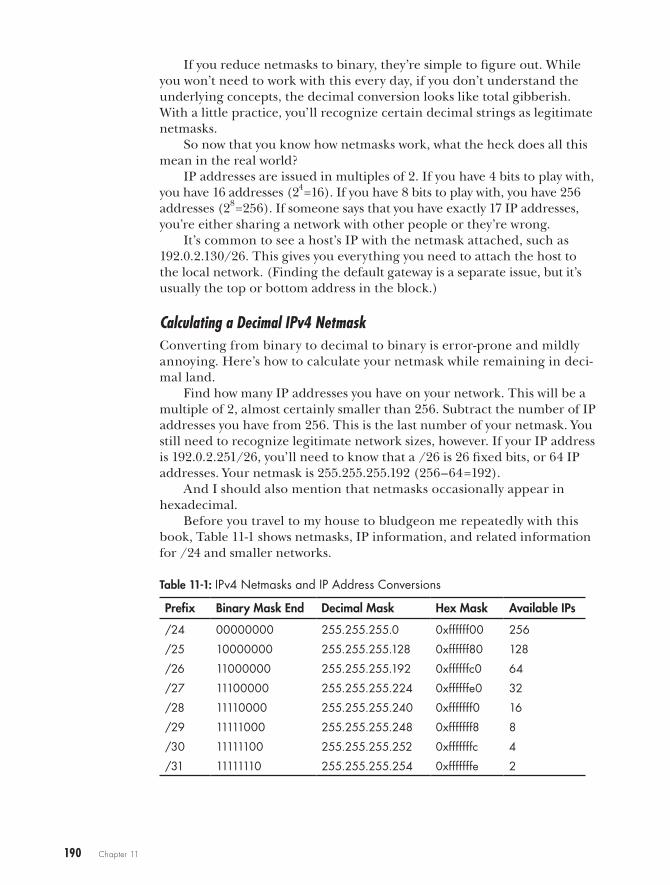
190 Chapter 11
If you reduce netmasks to binary, they’re simple to figure out. While you won’t need to work with this every day, if you don’t understand the underlying concepts, the decimal conversion looks like total gibberish. With a little practice, you’ll recognize certain decimal strings as legitimate netmasks.
So now that you know how netmasks work, what the heck does all this mean in the real world?
IP addresses are issued in multiples of 2. If you have 4 bits to play with, you have 16 addresses (24=16). If you have 8 bits to play with, you have 256 addresses (28=256). If someone says that you have exactly 17 IP addresses, you’re either sharing a network with other people or they’re wrong.
It’s common to see a host’s IP with the netmask attached, such as 192.0.2.130/26. This gives you everything you need to attach the host to the local network. (Finding the default gateway is a separate issue, but it’s usually the top or bottom address in the block.)
Calculating a Decimal IPv4 NetmaskConverting from binary to decimal to binary is error-prone and mildly annoying. Here’s how to calculate your netmask while remaining in deci-mal land.
Find how many IP addresses you have on your network. This will be a multiple of 2, almost certainly smaller than 256. Subtract the number of IP addresses you have from 256. This is the last number of your netmask. You still need to recognize legitimate network sizes, however. If your IP address is 192.0.2.251/26, you’ll need to know that a /26 is 26 fixed bits, or 64 IP addresses. Your netmask is 255.255.255.192 (256–64=192).
And I should also mention that netmasks occasionally appear in hexadecimal.
Before you travel to my house to bludgeon me repeatedly with this book, Table 11-1 shows netmasks, IP information, and related information for /24 and smaller networks.
Table 11-1: IPv4 Netmasks and IP Address Conversions
Prefix Binary Mask End Decimal Mask Hex Mask Available IPs
/24 00000000 255.255.255.0 0xffffff00 256
/25 10000000 255.255.255.128 0xffffff80 128
/26 11000000 255.255.255.192 0xffffffc0 64
/27 11100000 255.255.255.224 0xffffffe0 32
/28 11110000 255.255.255.240 0xfffffff0 16
/29 11111000 255.255.255.248 0xfffffff8 8
/30 11111100 255.255.255.252 0xfffffffc 4
/31 11111110 255.255.255.254 0xfffffffe 2
Overview of TCP/IP 191
When you don’t feel like doing the math, you can refer to Table 11-1 or install the ipcalc package for quick netmask calculations. Don’t say I never take pity on my readers.2
Viewing IPv4 AddressesDisplay IP addresses with ifconfig(8). If you run ifconfig without any argu-ments, it displays all interfaces on the machine.
$ ifconfig fxp0... inet 192.0.2.226 netmask 0xfffffff0 broadcast 192.0.2.239 inet 192.0.2.231 netmask 0xffffffff...
The lines starting with inet are IPv6 addresses. This interface has the primary IPv4 address of 192.0.2.226 and a secondary, or alias, address of 192.0.2.231. You can also see the netmask of each of these addresses and the broadcast address for the subnet.
Unusable IPv4 AddressesEvery block of IPv4 addresses reserves the first and last IP addresses for use by the network:
• The first IP address in a block is the network address, used for separating networks (and on primordial BSD systems, the broadcast address). On a /24 network, this would be an address ending in .0.
• The last IP address in the block is the broadcast address. On a /24 network, the broadcast address ends in .255.
N O T e According to the IP specifications, every machine on a network is supposed to respond to a request to the broadcast address. Unfortunately, in the late 1990s, this feature was used as an attack technique: All you needed to do was ping the broadcast address on any given network, and you would have a list of all IP addresses currently in use. Consequently, this functionality is now disabled by default on most operating systems and network appliances.
You cannot assign the first or the last IP address in a network to a device without risking network problems. Some systems fail gracefully, others fail painfully, and a rare few make it work. Although OpenBSD won’t object if you use the top and bottom network addresses, prepare for mayhem the first time you plug in a commodity printer or other embedded device. It takes only one inflexible device to ruin your whole day.
2. I never do take pity on my readers; I just don’t want you to actually say so.
192 Chapter 11
Special IPv4 AddressesQuite a few blocks of IPv4 addresses are set aside for specific purposes. Although you don’t need to know all of them, there are two groups you’ll see pretty often. For a complete list of IPv4 subnets reserved for special purposes, read RFCs 5735 and 6598.
Localhost
The address range 127.0.0.1/8 is set aside for localhost, a machine’s address for itself. Every Unix-like system—and most other operating systems—attaches 127.0.0.1/8 to a loopback interface. Everything knows that the localhost address is local to the specific machine. Packets to or from 127.0.0.0/8 should never cross the network; likewise, daemons bound only to 127.0.0.1 can be accessed on only the local machine.
Private Networks
Internet standard RFC 1918 sets aside three networks for use on private net-works and behind network address translation (NAT) devices: 10.0.0.0/8, 172.16.0.0/12, and 192.168.0.0/16. While public IP addresses must be issued by an ISP, anyone can use addresses within these three blocks as long as those hosts are not directly exposed to the public Internet. If you have a network where hosts do not have access to the Internet, or if you provide Internet access through a proxy server or NAT, you can use an RFC 1918 network.
IPv4 Addressing PitfallsCommon wisdom dictates that each computer on a network is assigned a single IP address for each of its network interfaces. One computer, one net-work card, one IP address—simple, right?
Not always. Some special-purpose interfaces (such as those dedicated to packet sniffing) function as intended without an IP address, and many operating systems will allow you to assign multiple IP addresses to a single network interface through a process called aliasing. You can also bond mul-tiple physical cards into a single network interface, giving the computer one large virtual interface. While you might not deal with these configurations every day, keep them in mind when troubleshooting.
IPv6 Addresses and SubnetsThere’s a basic problem with IPv4: It provides only 4.29 billion addresses, and that’s just not enough. Without subnetting, that’s fewer than one address for every human being. Eventually, every person will have at least one IP-capable device.
Although IPv4 addresses haven’t run out yet, they’re becoming an increasingly scarce resource. Overly generous allocations in the early days, along with large chunks of address space reservations for special purposes, have accelerated exhaustion. The world is slowly grinding toward IPv4’s replacement: IPv6.
Overview of TCP/IP 193
Some parts of the world already use IPv6 extensively. Even if your network doesn’t use IPv6 today, one day you’ll need it—probably without warning. Prepare yourself now, or one day you’ll discover that you needed it the week before.
IPv6 BasicsLike IPv4, IPv6 is a network layer protocol. IPv4 uses 32-bit addresses, usually expressed as four groups of decimal numbers from 0 to 255 (for example, 192.0.2.13). IPv6 uses 128-bit addresses, expressed as six groups of four hexadecimal characters separated by colons (for example, 2001:db8:0:bad:c0de:cafe). A 128-bit address space gives enough IPv6 addresses for every atom in the Earth to have more than 10 IP addresses. TCP, UDP, ICMP, and other protocols run atop it. IPv6 has its own layer 2 protocol, Neighbor Discovery, which replaces protocols such as Ethernet’s ARP.
The good news is that you don’t need to relearn the basics of network-ing. Hosts still need an IP address and a default gateway, routers still use a routing table, and you can almost—almost—substitute an IPv6 address for an IPv4 address and watch everything work. A web server doesn’t care if it binds to port 80 on 192.0.2.13 or on 2001:db8:a12a:bad:c0de:café. The server just accepts requests sent to it and responds appropriately. That said, software does need to change slightly, because our web server must be able to log connections from both IPv4 and IPv6 addresses. These changes have wide-reaching repercussions, and we’ll be sorting out edge cases for the next decade. But, in general, once you understand the new rules for IPv6, all of your networking knowledge is applicable.
Understanding IPv6 AddressesAs noted, IPv6 addresses are 128 bits, expressed as six colon-delimited groups of four hexadecimal characters each. As with decimal IPv4 addresses, you don’t need to display leading zeros in each group. The address 2001:db8:0 :bad:c0de:cafe could also be written as 2001:db8:0000:0bad:c0de:cafe, but just as we wouldn’t write 192.000.002.013, we strip out the leading zeros in an IPv6 address.3
IPv6 addresses often contain long strings of zeros. This had to do with subnetting, which I’ll describe later in this section. As of this writing, the IPv6 address of Sprint’s website is 2600:0:0:0:0:aaaa. When consecu-tive groups include only zeros, as in this address, they’re replaced with two colons (::). This IP address is usually displayed as 2600::aaaa. You can do this only once per address, however. You can’t, for example, have the address 2600::1::1, because it’s ambiguous. Does 2600::1::1 represent 2600:0:0:1:0:1 or does it represent 2600:0:1:0:0:1? I don’t know, and nei-ther does your server.
You’ve probably seen a port number added to an IPv4 address, such as 192.0.2.13:80. Using a colon to glue a port number to an IPv6 address
3. Some operating systems treat addresses containing numbers that begin with 0 as octal. Don’t actually use addresses like 192.000.002.013, or you might get a base-8 surprise.
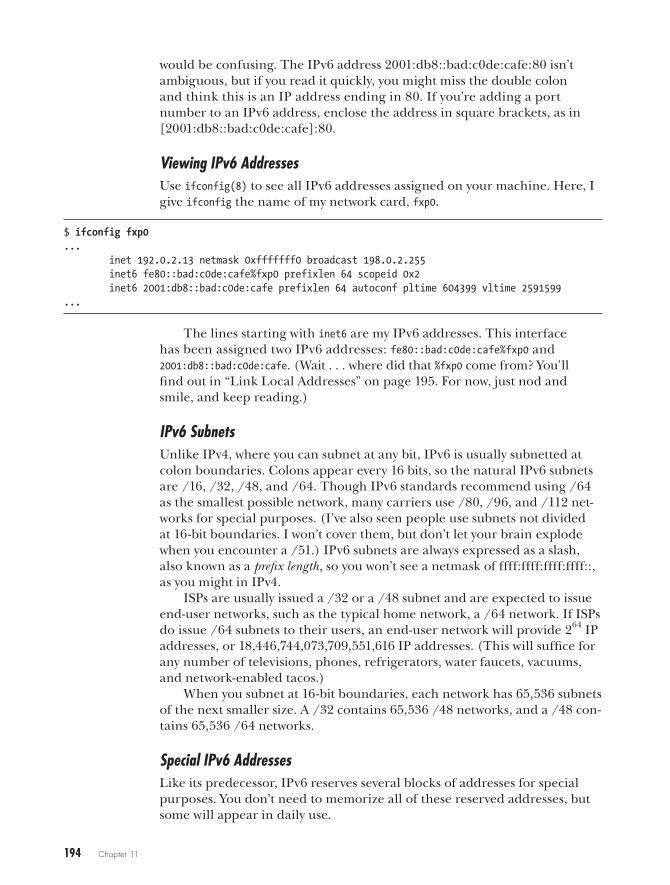
194 Chapter 11
would be confusing. The IPv6 address 2001:db8::bad:c0de:cafe:80 isn’t ambiguous, but if you read it quickly, you might miss the double colon and think this is an IP address ending in 80. If you’re adding a port number to an IPv6 address, enclose the address in square brackets, as in [2001:db8::bad:c0de:cafe]:80.
Viewing IPv6 AddressesUse ifconfig(8) to see all IPv6 addresses assigned on your machine. Here, I give ifconfig the name of my network card, fxp0.
$ ifconfig fxp0... inet 192.0.2.13 netmask 0xfffffff0 broadcast 198.0.2.255 inet6 fe80::bad:c0de:cafe%fxp0 prefixlen 64 scopeid 0x2 inet6 2001:db8::bad:c0de:cafe prefixlen 64 autoconf pltime 604399 vltime 2591599...
The lines starting with inet6 are my IPv6 addresses. This interface has been assigned two IPv6 addresses: fe80::bad:c0de:cafe%fxp0 and 2001:db8::bad:c0de:cafe. (Wait . . . where did that %fxp0 come from? You’ll find out in “Link Local Addresses” on page 195. For now, just nod and smile, and keep reading.)
IPv6 SubnetsUnlike IPv4, where you can subnet at any bit, IPv6 is usually subnetted at colon boundaries. Colons appear every 16 bits, so the natural IPv6 subnets are /16, /32, /48, and /64. Though IPv6 standards recommend using /64 as the smallest possible network, many carriers use /80, /96, and /112 net-works for special purposes. (I’ve also seen people use subnets not divided at 16-bit boundaries. I won’t cover them, but don’t let your brain explode when you encounter a /51.) IPv6 subnets are always expressed as a slash, also known as a prefix length, so you won’t see a netmask of ffff:ffff:ffff:ffff::, as you might in IPv4.
ISPs are usually issued a /32 or a /48 subnet and are expected to issue end-user networks, such as the typical home network, a /64 network. If ISPs do issue /64 subnets to their users, an end-user network will provide 264 IP addresses, or 18,446,744,073,709,551,616 IP addresses. (This will suffice for any number of televisions, phones, refrigerators, water faucets, vacuums, and network-enabled tacos.)
When you subnet at 16-bit boundaries, each network has 65,536 subnets of the next smaller size. A /32 contains 65,536 /48 networks, and a /48 con-tains 65,536 /64 networks.
Special IPv6 AddressesLike its predecessor, IPv6 reserves several blocks of addresses for special purposes. You don’t need to memorize all of these reserved addresses, but some will appear in daily use.
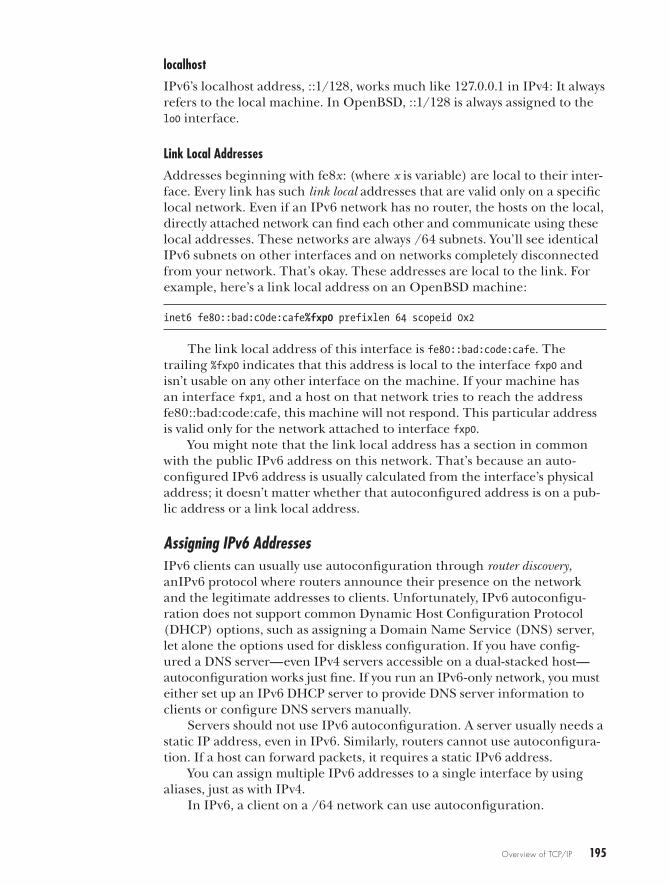
Overview of TCP/IP 195
localhost
IPv6’s localhost address, ::1/128, works much like 127.0.0.1 in IPv4: It always refers to the local machine. In OpenBSD, ::1/128 is always assigned to the lo0 interface.
Link Local Addresses
Addresses beginning with fe8x : (where x is variable) are local to their inter-face. Every link has such link local addresses that are valid only on a specific local network. Even if an IPv6 network has no router, the hosts on the local, directly attached network can find each other and communicate using these local addresses. These networks are always /64 subnets. You’ll see identical IPv6 subnets on other interfaces and on networks completely disconnected from your network. That’s okay. These addresses are local to the link. For example, here’s a link local address on an OpenBSD machine:
inet6 fe80::bad:c0de:cafe%fxp0 prefixlen 64 scopeid 0x2
The link local address of this interface is fe80::bad:code:cafe. The trailing %fxp0 indicates that this address is local to the interface fxp0 and isn’t usable on any other interface on the machine. If your machine has an interface fxp1, and a host on that network tries to reach the address fe80::bad:code:cafe, this machine will not respond. This particular address is valid only for the network attached to interface fxp0.
You might note that the link local address has a section in common with the public IPv6 address on this network. That’s because an auto-configured IPv6 address is usually calculated from the interface’s physical address; it doesn’t matter whether that autoconfigured address is on a pub-lic address or a link local address.
Assigning IPv6 AddressesIPv6 clients can usually use autoconfiguration through router discovery, anIPv6 protocol where routers announce their presence on the network and the legitimate addresses to clients. Unfortunately, IPv6 autoconfigu-ration does not support common Dynamic Host Configuration Protocol (DHCP) options, such as assigning a Domain Name Service (DNS) server, let alone the options used for diskless configuration. If you have config-ured a DNS server—even IPv4 servers accessible on a dual-stacked host—autoconfiguration works just fine. If you run an IPv6-only network, you must either set up an IPv6 DHCP server to provide DNS server information to clients or configure DNS servers manually.
Servers should not use IPv6 autoconfiguration. A server usually needs a static IP address, even in IPv6. Similarly, routers cannot use autoconfigura-tion. If a host can forward packets, it requires a static IPv6 address.
You can assign multiple IPv6 addresses to a single interface by using aliases, just as with IPv4.
In IPv6, a client on a /64 network can use autoconfiguration.
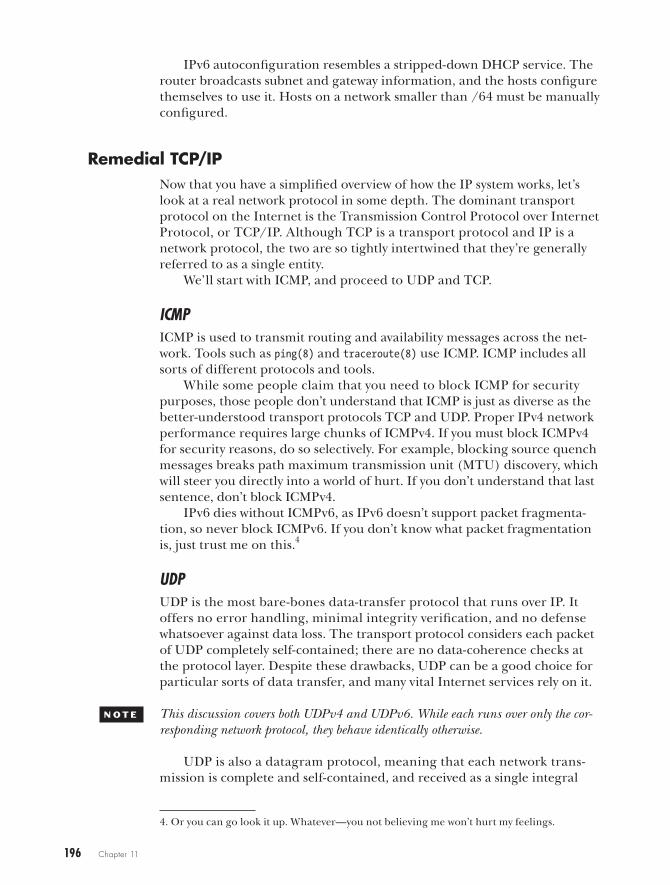
196 Chapter 11
IPv6 autoconfiguration resembles a stripped-down DHCP service. The router broadcasts subnet and gateway information, and the hosts configure themselves to use it. Hosts on a network smaller than /64 must be manually configured.
Remedial TCP/IPNow that you have a simplified overview of how the IP system works, let’s look at a real network protocol in some depth. The dominant transport protocol on the Internet is the Transmission Control Protocol over Internet Protocol, or TCP/IP. Although TCP is a transport protocol and IP is a network protocol, the two are so tightly intertwined that they’re generally referred to as a single entity.
We’ll start with ICMP, and proceed to UDP and TCP.
ICMPICMP is used to transmit routing and availability messages across the net-work. Tools such as ping(8) and traceroute(8) use ICMP. ICMP includes all sorts of different protocols and tools.
While some people claim that you need to block ICMP for security purposes, those people don’t understand that ICMP is just as diverse as the better-understood transport protocols TCP and UDP. Proper IPv4 network performance requires large chunks of ICMPv4. If you must block ICMPv4 for security reasons, do so selectively. For example, blocking source quench messages breaks path maximum transmission unit (MTU) discovery, which will steer you directly into a world of hurt. If you don’t understand that last sentence, don’t block ICMPv4.
IPv6 dies without ICMPv6, as IPv6 doesn’t support packet fragmenta-tion, so never block ICMPv6. If you don’t know what packet fragmentation is, just trust me on this.4
UDPUDP is the most bare-bones data-transfer protocol that runs over IP. It offers no error handling, minimal integrity verification, and no defense whatsoever against data loss. The transport protocol considers each packet of UDP completely self-contained; there are no data-coherence checks at the protocol layer. Despite these drawbacks, UDP can be a good choice for particular sorts of data transfer, and many vital Internet services rely on it.
N O T e This discussion covers both UDPv4 and UDPv6. While each runs over only the cor-responding network protocol, they behave identically otherwise.
UDP is also a datagram protocol, meaning that each network trans-mission is complete and self-contained, and received as a single integral
4. Or you can go look it up. Whatever—you not believing me won’t hurt my feelings.
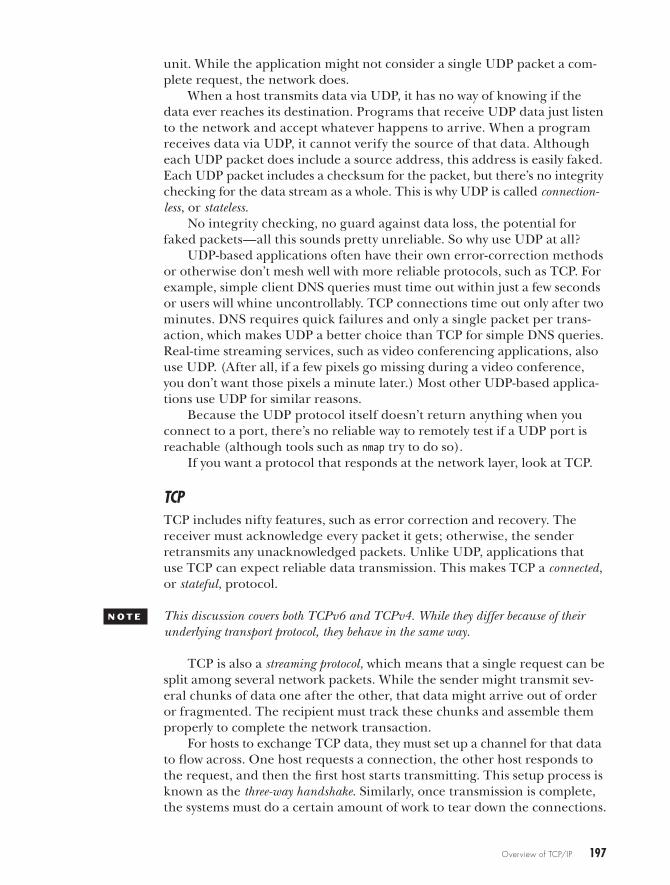
Overview of TCP/IP 197
unit. While the application might not consider a single UDP packet a com-plete request, the network does.
When a host transmits data via UDP, it has no way of knowing if the data ever reaches its destination. Programs that receive UDP data just listen to the network and accept whatever happens to arrive. When a program receives data via UDP, it cannot verify the source of that data. Although each UDP packet does include a source address, this address is easily faked. Each UDP packet includes a checksum for the packet, but there’s no integrity checking for the data stream as a whole. This is why UDP is called connection-less, or stateless.
No integrity checking, no guard against data loss, the potential for faked packets—all this sounds pretty unreliable. So why use UDP at all?
UDP-based applications often have their own error-correction methods or otherwise don’t mesh well with more reliable protocols, such as TCP. For example, simple client DNS queries must time out within just a few seconds or users will whine uncontrollably. TCP connections time out only after two minutes. DNS requires quick failures and only a single packet per trans-action, which makes UDP a better choice than TCP for simple DNS queries. Real-time streaming services, such as video conferencing applications, also use UDP. (After all, if a few pixels go missing during a video conference, you don’t want those pixels a minute later.) Most other UDP-based applica-tions use UDP for similar reasons.
Because the UDP protocol itself doesn’t return anything when you connect to a port, there’s no reliable way to remotely test if a UDP port is reachable (although tools such as nmap try to do so).
If you want a protocol that responds at the network layer, look at TCP.
TCPTCP includes nifty features, such as error correction and recovery. The receiver must acknowledge every packet it gets; otherwise, the sender retransmits any unacknowledged packets. Unlike UDP, applications that use TCP can expect reliable data transmission. This makes TCP a connected, or stateful, protocol.
N O T e This discussion covers both TCPv6 and TCPv4. While they differ because of their underlying transport protocol, they behave in the same way.
TCP is also a streaming protocol, which means that a single request can be split among several network packets. While the sender might transmit sev-eral chunks of data one after the other, that data might arrive out of order or fragmented. The recipient must track these chunks and assemble them properly to complete the network transaction.
For hosts to exchange TCP data, they must set up a channel for that data to flow across. One host requests a connection, the other host responds to the request, and then the first host starts transmitting. This setup process is known as the three-way handshake. Similarly, once transmission is complete, the systems must do a certain amount of work to tear down the connections.
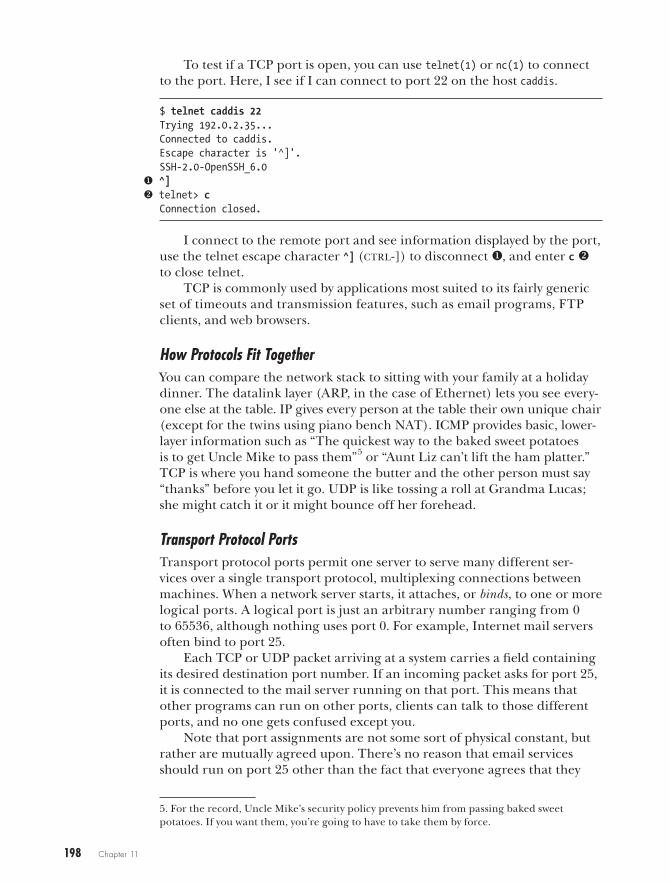
198 Chapter 11
To test if a TCP port is open, you can use telnet(1) or nc(1) to connect to the port. Here, I see if I can connect to port 22 on the host caddis.
$ telnet caddis 22Trying 192.0.2.35...Connected to caddis.Escape character is '^]'.SSH-2.0-OpenSSH_6.0
u ^]v telnet> c
Connection closed.
I connect to the remote port and see information displayed by the port, use the telnet escape character ^] (ctrl-]) to disconnect u, and enter c v to close telnet.
TCP is commonly used by applications most suited to its fairly generic set of timeouts and transmission features, such as email programs, FTP clients, and web browsers.
How Protocols Fit TogetherYou can compare the network stack to sitting with your family at a holiday dinner. The datalink layer (ARP, in the case of Ethernet) lets you see every-one else at the table. IP gives every person at the table their own unique chair (except for the twins using piano bench NAT). ICMP provides basic, lower-layer information such as “The quickest way to the baked sweet potatoes is to get Uncle Mike to pass them” 5 or “Aunt Liz can’t lift the ham platter.” TCP is where you hand someone the butter and the other person must say “thanks” before you let it go. UDP is like tossing a roll at Grandma Lucas; she might catch it or it might bounce off her forehead.
Transport Protocol PortsTransport protocol ports permit one server to serve many different ser-vices over a single transport protocol, multiplexing connections between machines. When a network server starts, it attaches, or binds, to one or more logical ports. A logical port is just an arbitrary number ranging from 0 to 65536, although nothing uses port 0. For example, Internet mail servers often bind to port 25.
Each TCP or UDP packet arriving at a system carries a field containing its desired destination port number. If an incoming packet asks for port 25, it is connected to the mail server running on that port. This means that other programs can run on other ports, clients can talk to those different ports, and no one gets confused except you.
Note that port assignments are not some sort of physical constant, but rather are mutually agreed upon. There’s no reason that email services should run on port 25 other than the fact that everyone agrees that they
5. For the record, Uncle Mike’s security policy prevents him from passing baked sweet potatoes. If you want them, you’re going to have to take them by force.
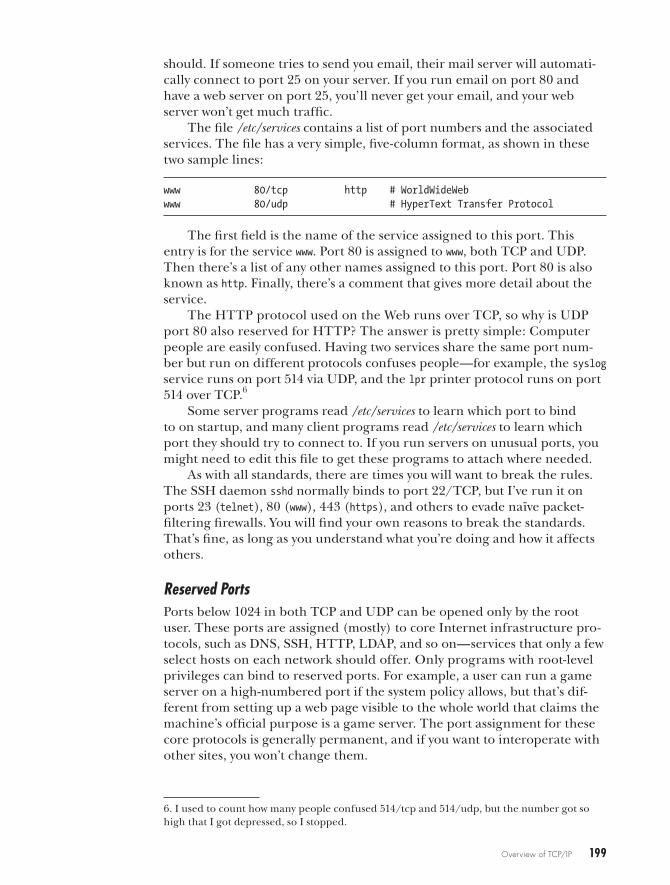
Overview of TCP/IP 199
should. If someone tries to send you email, their mail server will automati-cally connect to port 25 on your server. If you run email on port 80 and have a web server on port 25, you’ll never get your email, and your web server won’t get much traffic.
The file /etc/services contains a list of port numbers and the associated services. The file has a very simple, five-column format, as shown in these two sample lines:
www 80/tcp http # WorldWideWeb www 80/udp # HyperText Transfer Protocol
The first field is the name of the service assigned to this port. This entry is for the service www. Port 80 is assigned to www, both TCP and UDP. Then there’s a list of any other names assigned to this port. Port 80 is also known as http. Finally, there’s a comment that gives more detail about the service.
The HTTP protocol used on the Web runs over TCP, so why is UDP port 80 also reserved for HTTP? The answer is pretty simple: Computer people are easily confused. Having two services share the same port num-ber but run on different protocols confuses people—for example, the syslog service runs on port 514 via UDP, and the lpr printer protocol runs on port 514 over TCP.6
Some server programs read /etc/services to learn which port to bind to on startup, and many client programs read /etc/services to learn which port they should try to connect to. If you run servers on unusual ports, you might need to edit this file to get these programs to attach where needed.
As with all standards, there are times you will want to break the rules. The SSH daemon sshd normally binds to port 22/TCP, but I’ve run it on ports 23 (telnet), 80 (www), 443 (https), and others to evade naïve packet-filtering firewalls. You will find your own reasons to break the standards. That’s fine, as long as you understand what you’re doing and how it affects others.
Reserved PortsPorts below 1024 in both TCP and UDP can be opened only by the root user. These ports are assigned (mostly) to core Internet infrastructure pro-tocols, such as DNS, SSH, HTTP, LDAP, and so on—services that only a few select hosts on each network should offer. Only programs with root-level privileges can bind to reserved ports. For example, a user can run a game server on a high-numbered port if the system policy allows, but that’s dif-ferent from setting up a web page visible to the whole world that claims the machine’s official purpose is a game server. The port assignment for these core protocols is generally permanent, and if you want to interoperate with other sites, you won’t change them.
6. I used to count how many people confused 514/tcp and 514/udp, but the number got so high that I got depressed, so I stopped.
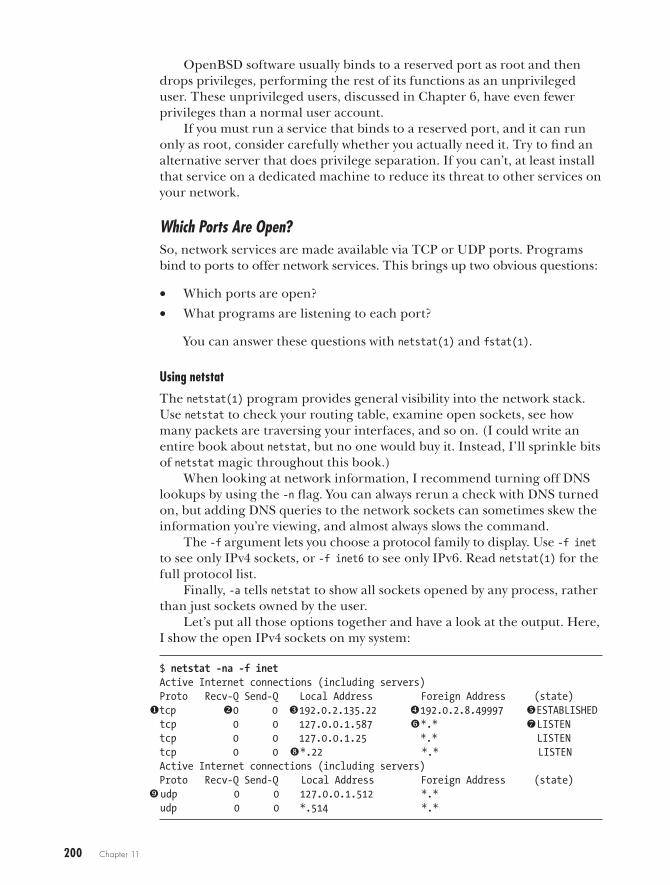
200 Chapter 11
OpenBSD software usually binds to a reserved port as root and then drops privileges, performing the rest of its functions as an unprivileged user. These unprivileged users, discussed in Chapter 6, have even fewer privileges than a normal user account.
If you must run a service that binds to a reserved port, and it can run only as root, consider carefully whether you actually need it. Try to find an alternative server that does privilege separation. If you can’t, at least install that service on a dedicated machine to reduce its threat to other services on your network.
Which Ports Are Open?So, network services are made available via TCP or UDP ports. Programs bind to ports to offer network services. This brings up two obvious questions:
• Which ports are open?
• What programs are listening to each port?
You can answer these questions with netstat(1) and fstat(1).
Using netstat
The netstat(1) program provides general visibility into the network stack. Use netstat to check your routing table, examine open sockets, see how many packets are traversing your interfaces, and so on. (I could write an entire book about netstat, but no one would buy it. Instead, I’ll sprinkle bits of netstat magic throughout this book.)
When looking at network information, I recommend turning off DNS lookups by using the -n flag. You can always rerun a check with DNS turned on, but adding DNS queries to the network sockets can sometimes skew the information you’re viewing, and almost always slows the command.
The -f argument lets you choose a protocol family to display. Use -f inet to see only IPv4 sockets, or -f inet6 to see only IPv6. Read netstat(1) for the full protocol list.
Finally, -a tells netstat to show all sockets opened by any process, rather than just sockets owned by the user.
Let’s put all those options together and have a look at the output. Here, I show the open IPv4 sockets on my system:
$ netstat -na -f inetActive Internet connections (including servers)Proto Recv-Q Send-Q Local Address Foreign Address (state)
utcp v0 0 w 192.0.2.135.22 x 192.0.2.8.49997 y ESTABLISHEDtcp 0 0 127.0.0.1.587 z *.* LISTENtcp 0 0 127.0.0.1.25 *.* LISTENtcp 0 0 *.22 *.* LISTENActive Internet connections (including servers)Proto Recv-Q Send-Q Local Address Foreign Address (state)
} udp 0 0 127.0.0.1.512 *.* udp 0 0 *.514 *.*
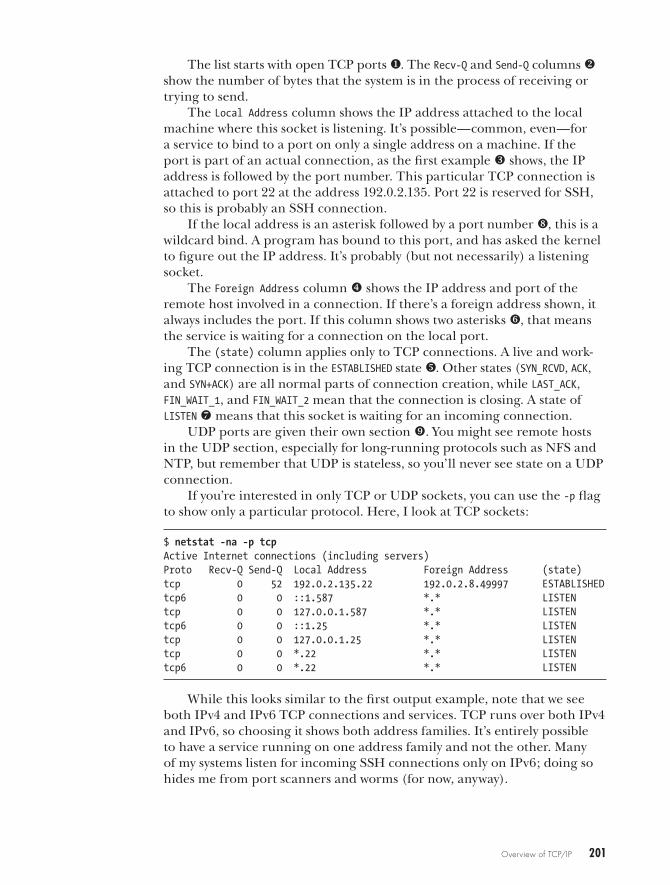
Overview of TCP/IP 201
The list starts with open TCP ports u. The Recv-Q and Send-Q columns v show the number of bytes that the system is in the process of receiving or trying to send.
The Local Address column shows the IP address attached to the local machine where this socket is listening. It’s possible—common, even—for a service to bind to a port on only a single address on a machine. If the port is part of an actual connection, as the first example w shows, the IP address is followed by the port number. This particular TCP connection is attached to port 22 at the address 192.0.2.135. Port 22 is reserved for SSH, so this is probably an SSH connection.
If the local address is an asterisk followed by a port number , this is a wildcard bind. A program has bound to this port, and has asked the kernel to figure out the IP address. It’s probably (but not necessarily) a listening socket.
The Foreign Address column x shows the IP address and port of the remote host involved in a connection. If there’s a foreign address shown, it always includes the port. If this column shows two asterisks z, that means the service is waiting for a connection on the local port.
The (state) column applies only to TCP connections. A live and work-ing TCP connection is in the ESTABLISHED state y. Other states (SYN_RCVD, ACK, and SYN+ACK) are all normal parts of connection creation, while LAST_ACK, FIN_WAIT_1, and FIN_WAIT_2 mean that the connection is closing. A state of LISTEN means that this socket is waiting for an incoming connection.
UDP ports are given their own section }. You might see remote hosts in the UDP section, especially for long-running protocols such as NFS and NTP, but remember that UDP is stateless, so you’ll never see state on a UDP connection.
If you’re interested in only TCP or UDP sockets, you can use the -p flag to show only a particular protocol. Here, I look at TCP sockets:
$ netstat -na -p tcpActive Internet connections (including servers)Proto Recv-Q Send-Q Local Address Foreign Address (state)tcp 0 52 192.0.2.135.22 192.0.2.8.49997 ESTABLISHEDtcp6 0 0 ::1.587 *.* LISTENtcp 0 0 127.0.0.1.587 *.* LISTENtcp6 0 0 ::1.25 *.* LISTENtcp 0 0 127.0.0.1.25 *.* LISTENtcp 0 0 *.22 *.* LISTENtcp6 0 0 *.22 *.* LISTEN
While this looks similar to the first output example, note that we see both IPv4 and IPv6 TCP connections and services. TCP runs over both IPv4 and IPv6, so choosing it shows both address families. It’s entirely possible to have a service running on one address family and not the other. Many of my systems listen for incoming SSH connections only on IPv6; doing so hides me from port scanners and worms (for now, anyway).
202 Chapter 11
Rather than listing every service waiting for an incoming connection, you can show only live connections by dropping the -a flag:
$ netstat -np tcpActive Internet connectionsProto Recv-Q Send-Q Local Address Foreign Address (state)tcp 0 52 192.0.2.135.22 192.0.2.8.49997 ESTABLISHED
Using fstat
Now that you know which TCP and UDP ports are open, how can you tell which programs are listening on them? OpenBSD includes fstat(1), a program that displays all open files and sockets on the system. Network connections are open sockets. Running fstat on an idle system can gener-ate hundreds of lines of output—one entry for each file opened by any process. While that’s educational and useful, it’s not what we’re looking for. Specifically, we want to see which programs are holding network sockets open. The string internet indicates network sockets.
$ fstat | grep internetmwlucas sshd 21403 3* internet stream tcp 0xd5365994 192.0.2.235:22 <-- 192.0.2.8:49997root sendmail 19063 4* internet stream tcp 0xd537e330 127.0.0.1:25root sendmail 19063 5* internet6 stream tcp 0xd537e4c8 [::1]:25root sendmail 19063 6* internet stream tcp 0xd537e660 127.0.0.1:587root sendmail 19063 7* internet6 stream tcp 0xd537e7f8 [::1]:587root sshd 29561 3* internet6 stream tcp 0xd537e000 *:22root sshd 29561 4* internet stream tcp 0xd537e198 *:22_syslogd syslogd 12885 4* internet dgram udp *:514
First, you see an sshd process owned by the user mwlucas. That’s an unprivileged process, tied to a particular SSH session. Further down the list, you see an SSH daemon owned by root listening to the network. When a connection request arrives, the root-owned SSH daemon will hand it off to an unprivileged child process. You can also see that we have a variety of sendmail processes listening to the network.
This system runs the expected SSH and email servers, and no one has bound anything to odd ports. My nasty paranoid suspicions were unfounded (this time, anyway).
Between netstat and fstat, you should be able to get a good idea of what your system is doing on your network at any given time.
IP RoutingMost sysadmins don’t need to understand much about IP routing, because most servers have only one network interface and one default gateway. The network administrator gives you an IPv4 address and a default route, you put them in the appropriate configuration files, and you’re routed.
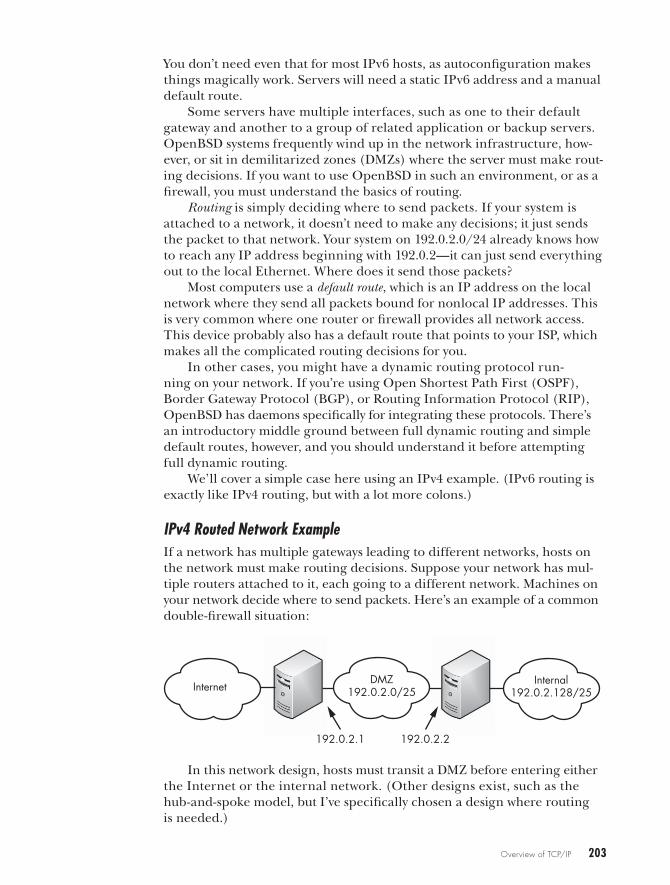
Overview of TCP/IP 203
You don’t need even that for most IPv6 hosts, as autoconfiguration makes things magically work. Servers will need a static IPv6 address and a manual default route.
Some servers have multiple interfaces, such as one to their default gateway and another to a group of related application or backup servers. OpenBSD systems frequently wind up in the network infrastructure, how-ever, or sit in demilitarized zones (DMZs) where the server must make rout-ing decisions. If you want to use OpenBSD in such an environment, or as a firewall, you must understand the basics of routing.
Routing is simply deciding where to send packets. If your system is attached to a network, it doesn’t need to make any decisions; it just sends the packet to that network. Your system on 192.0.2.0/24 already knows how to reach any IP address beginning with 192.0.2—it can just send everything out to the local Ethernet. Where does it send those packets?
Most computers use a default route, which is an IP address on the local network where they send all packets bound for nonlocal IP addresses. This is very common where one router or firewall provides all network access. This device probably also has a default route that points to your ISP, which makes all the complicated routing decisions for you.
In other cases, you might have a dynamic routing protocol run-ning on your network. If you’re using Open Shortest Path First (OSPF), Border Gateway Protocol (BGP), or Routing Information Protocol (RIP), OpenBSD has daemons specifically for integrating these protocols. There’s an introductory middle ground between full dynamic routing and simple default routes, however, and you should understand it before attempting full dynamic routing.
We’ll cover a simple case here using an IPv4 example. (IPv6 routing is exactly like IPv4 routing, but with a lot more colons.)
IPv4 Routed Network ExampleIf a network has multiple gateways leading to different networks, hosts on the network must make routing decisions. Suppose your network has mul-tiple routers attached to it, each going to a different network. Machines on your network decide where to send packets. Here’s an example of a common double-firewall situation:
InternetDMZ
192.0.2.0/25Internal
192.0.2.128/25
192.0.2.1 192.0.2.2
In this network design, hosts must transit a DMZ before entering either the Internet or the internal network. (Other designs exist, such as the hub-and-spoke model, but I’ve specifically chosen a design where routing is needed.)
204 Chapter 11
The external firewall provides one layer of protection. It permits only traffic specifically deemed necessary (we’ll go into the default deny stance in Chapter 21). It does, however, permit incoming connections to hosts in your DMZ.
The hosts in the DMZ are to some extent vulnerable. They are not trusted enough to be on the internal network. Your intrusion-detection systems or your web servers might live here.
The internal firewall, like the external firewall, permits only traffic deemed necessary to organization purposes. It probably doesn’t allow any connections from the outside world, however, and it doesn’t trust the hosts on the DMZ.
Only highly trusted hosts are permitted on the internal network. This is where the organization keeps its most precious data, such as the financial records, customer databases, and movie collections.
Many of the hosts in this network need to make only very simple rout-ing decisions. Anything on the internal network has just one way to reach anything, and any host on the Internet has only one way to reach the inter-nal or DMZ networks.
The external firewall is directly attached to the DMZ network, so it can send packets to those hosts. It needs a default route pointing to the Internet so it can reach the rest of the world. To reach the hosts on the internal net-work, it must send packets to the internal firewall’s external interface. If you don’t configure this on the external firewall, data will never reach the internal firewall. Because the external firewall is responsible for the inter-nal network’s Internet access, losing this route would disconnect the internal network from the Internet; internal systems could send packets, but would never receive any. The external firewall needs routing.
Similarly, you could configure routing on each host inside the DMZ. In that case, ICMP redirects from the firewalls would provide routing for these hosts, but trusting ICMP redirects on a vulnerable network is unwise and messy because it assumes that every host on the DMZ and every firewall accepts and sends ICMP redirects. If you’re using OpenBSD, you want your server to be secure, so configure routing on your DMZ systems.
In this example, I configure routing for the external firewall. Configuring routing for the DMZ hosts is nearly identical to this example.
Managing Routing with route(8)The route(8) command manages all system routing. Like netstat, route has several subfunctions that allow you to view, edit, and monitor the system routing table. While the route(8) man page has complete details, the ability to view, add, and delete routes should be enough to get you started.
Viewing Routes
OpenBSD, like any other network device, keeps routes in a routing table. To view the IPv4 and IPv6 routes, enter route show. Add -n to remove IP-address-to-name translations.
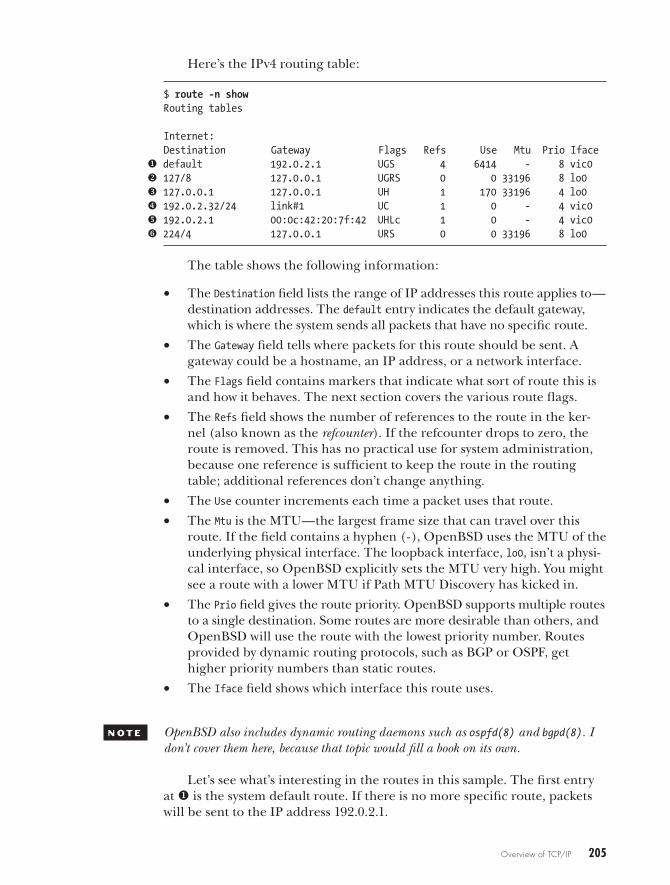
Overview of TCP/IP 205
Here’s the IPv4 routing table:
$ route -n showRouting tables
Internet:Destination Gateway Flags Refs Use Mtu Prio Iface
u default 192.0.2.1 UGS 4 6414 - 8 vic0v 127/8 127.0.0.1 UGRS 0 0 33196 8 lo0w 127.0.0.1 127.0.0.1 UH 1 170 33196 4 lo0x 192.0.2.32/24 link#1 UC 1 0 - 4 vic0y 192.0.2.1 00:0c:42:20:7f:42 UHLc 1 0 - 4 vic0z 224/4 127.0.0.1 URS 0 0 33196 8 lo0
The table shows the following information:
• The Destination field lists the range of IP addresses this route applies to—destination addresses. The default entry indicates the default gateway, which is where the system sends all packets that have no specific route.
• The Gateway field tells where packets for this route should be sent. A gateway could be a hostname, an IP address, or a network interface.
• The Flags field contains markers that indicate what sort of route this is and how it behaves. The next section covers the various route flags.
• The Refs field shows the number of references to the route in the ker-nel (also known as the refcounter). If the refcounter drops to zero, the route is removed. This has no practical use for system administration, because one reference is sufficient to keep the route in the routing table; additional references don’t change anything.
• The Use counter increments each time a packet uses that route.
• The Mtu is the MTU—the largest frame size that can travel over this route. If the field contains a hyphen (-), OpenBSD uses the MTU of the underlying physical interface. The loopback interface, lo0, isn’t a physi-cal interface, so OpenBSD explicitly sets the MTU very high. You might see a route with a lower MTU if Path MTU Discovery has kicked in.
• The Prio field gives the route priority. OpenBSD supports multiple routes to a single destination. Some routes are more desirable than others, and OpenBSD will use the route with the lowest priority number. Routes provided by dynamic routing protocols, such as BGP or OSPF, get higher priority numbers than static routes.
• The Iface field shows which interface this route uses.
N O T e OpenBSD also includes dynamic routing daemons such as ospfd(8) and bgpd(8). I don’t cover them here, because that topic would fill a book on its own.
Let’s see what’s interesting in the routes in this sample. The first entry at u is the system default route. If there is no more specific route, packets will be sent to the IP address 192.0.2.1.
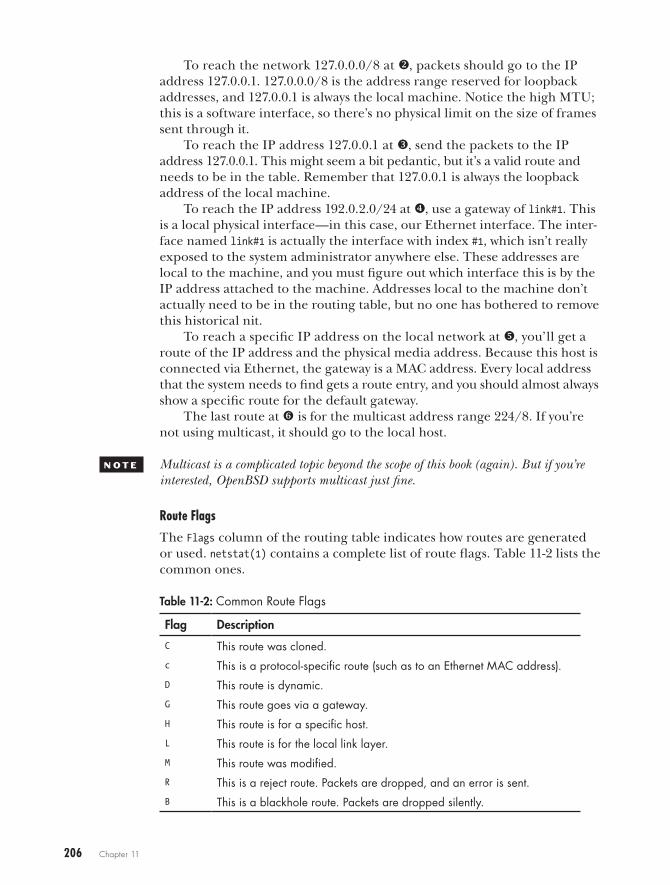
206 Chapter 11
To reach the network 127.0.0.0/8 at v, packets should go to the IP address 127.0.0.1. 127.0.0.0/8 is the address range reserved for loopback addresses, and 127.0.0.1 is always the local machine. Notice the high MTU; this is a software interface, so there’s no physical limit on the size of frames sent through it.
To reach the IP address 127.0.0.1 at w, send the packets to the IP address 127.0.0.1. This might seem a bit pedantic, but it’s a valid route and needs to be in the table. Remember that 127.0.0.1 is always the loopback address of the local machine.
To reach the IP address 192.0.2.0/24 at x, use a gateway of link#1. This is a local physical interface—in this case, our Ethernet interface. The inter-face named link#1 is actually the interface with index #1, which isn’t really exposed to the system administrator anywhere else. These addresses are local to the machine, and you must figure out which interface this is by the IP address attached to the machine. Addresses local to the machine don’t actually need to be in the routing table, but no one has bothered to remove this historical nit.
To reach a specific IP address on the local network at y, you’ll get a route of the IP address and the physical media address. Because this host is connected via Ethernet, the gateway is a MAC address. Every local address that the system needs to find gets a route entry, and you should almost always show a specific route for the default gateway.
The last route at z is for the multicast address range 224/8. If you’re not using multicast, it should go to the local host.
N O T e Multicast is a complicated topic beyond the scope of this book (again). But if you’re interested, OpenBSD supports multicast just fine.
Route Flags
The Flags column of the routing table indicates how routes are generated or used. netstat(1) contains a complete list of route flags. Table 11-2 lists the common ones.
Table 11-2: Common Route Flags
Flag Description
C This route was cloned.c This is a protocol-specific route (such as to an Ethernet MAC address).D This route is dynamic.G This route goes via a gateway.H This route is for a specific host.L This route is for the local link layer.M This route was modified.R This is a reject route. Packets are dropped, and an error is sent.B This is a blackhole route. Packets are dropped silently.
Overview of TCP/IP 207
These flags tell you where a route came from and how it’s used.
Adding Routes
Add routes with the route add command. You must know the destination network, its netmask, and the gateway.
# route add address-block/netmask netmask gateway
In our example network, the outer firewall needs a route to reach the private network, 192.0.2.128/25. To route this network to the inner firewall at 192.0.2.2, run this command:
# route add -net 192.0.2.128/25 192.0.2.2add net 192.0.2.128: gateway 192.0.2.2
Packets will use that route immediately. If you run route show, you’ll see that new route.
To add a default route, run route add default with the IP address of the default gateway, like this:
# route add default 192.0.2.1add net default: gateway 192.0.2.1
To add routes automatically at boot, put the route statement in the /etc/hostname.if file that leads to the destination network. These routes appear when the interface is brought up, before /etc/rc.securelevel runs or any local daemons start. You’ll see examples of using hostname.if for routes in the next chapter.
To add a default route automatically at boot, put the default router IP address in /etc/mygate.
Deleting Routes
To delete a routing table entry, use route delete with the network address and netmask.
# route delete address-block -netmask netmask
To remove the route added in the previous example, run this command:
# route delete -net 192.0.2.128 -netmask 255.255.255.128delete net 192.0.2.128
You should now have a decent idea of how routing works.Now that you know how things are supposed to fit together, let’s see
how to configure Ethernet networks.

12C o n n e C t i n g t o t h e n e t w o r k
My tunnel is now up. I can do IPv6.
Me and three others.
All that theory of IPv4 and IPv6 is fine. Now let’s do something with it, and actu-
ally connect to a network. While dial-up connections work with OpenBSD, they’re not
used much these days, so we’ll focus on Ethernet con-nections. Ethernet is the most common network type today, and the most common network interface on OpenBSD systems.
Most people have IPv4 connectivity, but IPv6 is increasingly important. If you can’t get native IPv6 to your network, you can use a tunnel to reach IPv6 address space and provide IPv6 to your clients. I’ll cover acquiring and configuring such a tunnel in this chapter.
Finally, OpenBSD can combine network connections into trunks or split them into virtual local area networks (VLANs). This chapter covers both approaches.
210 Chapter 12
DNS ResolutionYou’ll probably want to use hostnames rather than IP addresses, so that you’ll be able to browse to http://www.cnn.com/ instead of http://157.166.255.18. Unix-like systems use the resolver to accomplish this feat.
Most hosts use two tools to map between IP addresses and hostnames: the hosts file and DNS. (Different operating systems support additional name services, such as YP, LDAP, NIS, and so on, but dang near every sys-tem supports these two.)
The hosts file is a text file on the local machine that contains static IP address and hostname lists. DNS is a more dynamic service that reaches across the network to find information. You can specify DNS servers by IP address, but we’ll look at the hosts file in a little more detail.
What if you prefer IPv4 or IPv6 addresses? Or you want the hosts file to override DNS? Maybe you have a default domain that your queries should use. The resolver searches until it either finds the first answer or has exhausted its information sources, so these questions matter. Tell your resolver your needs in /etc/resolv.conf.
The /etc/resolv.conf FileYou configure the resolver behavior in /etc/resolv.conf. A system without /etc/resolv.conf can find only hostnames listed in the hosts file. Because the hosts file starts off empty, that’s probably not what you want. Start by specify-ing domain names.
Default Search Domains
If you wanted to ping a host on a remote network, you might expect to need to specify the whole domain. Entering ping www.openbsd.org should work. But if you wanted to ping your company’s web server, it would make more sense to just type ping www. And you can, because OpenBSD allows you to specify default domains, so that when you type in a short hostname, it will try to find the proper host.
For example, if you have only one local domain, you would list the domain keyword in /etc/resolv.conf like this:
domain michaelwlucas.com
Now, when I enter ping ftp, the resolver should get the IP address of the host ftp.michaelwlucas.com.
If you have more than one local domain, use the search keyword and a list of domains, like this:
search michaelwlucas.com openbsd.org
If I enter ping ftp now, the resolver should get the IP of the host ftp.michaelwlucas.com. Once the resolver learns that no such host exists,
Connecting to the Network 211
it will check for ftp.openbsd.org. Because that host exists, ping will start to work. The search keyword can have up to six domains, and can be no longer than 1024 characters.
Using Domain and Search
You can only use either domain or search. If you use both, the last entry in the file wins. If you list multiple search or domain lines, the last one in the file takes effect. Here’s how not to do it:
search cnn.com openbsd.orgsearch sluggy.com michaelwlucas.comdomain blackhelicopters.org
You might as well get rid of the two search statements. The resolver will never go through those domain lists; it will use only the domain list because it’s the last one.
Name Servers
Now that the resolver knows which domains to check by default, tell it which name servers to use. List each name server on its own line, by IP address, in order of preference.
nameserver 192.0.2.5nameserver 198.51.100.5nameserver 2001:db8::5
You can list up to three name servers, by IP address. (Hostnames in a nameserver entry won’t work, for fairly obvious reasons.)
If your resolv.conf doesn’t list a name server, the resolver should check for a name server on the local machine.
Lookup Order
You might get host information from DNS or from the hosts file. The resolver should stop once it finds an answer to a query. If you check the hosts file and then DNS, entries in the hosts file override the name server. If you check the name server before the hosts file, the hosts file is used only when no DNS record is available. Either approach has its uses, but by default, the resolver checks the hosts file, and then checks DNS. To reverse this, use the lookup keyword.
lookup bind file
The file option represents /etc/hosts, while due to a historical accident, bind represents DNS. (The first DNS server software was the Berkeley Internet Name Domain server, or BIND.)The reverse (file bind) is the default, so there’s no need to explicitly specify it.
212 Chapter 12
Preferred IP Protocol
The resolver defaults to searching for IPv4 records first, and then looking for IPv6 records. To reverse this, use the family keyword.
family inet6 inet4
Again, the reverse is the default, so there’s no need to use this keyword in that case.
The /etc/hosts FileThe /etc/hosts file matches IP addresses to hostnames. While the hosts file is very simple, its contents are available only on the local machine. A hosts file is most useful on a small private network, such as in your home or test lab. You can also use a hosts file to override data from the DNS server, such as when you want to test a new system.
Each line in /etc/hosts represents one host. The first entry on each line is an IP address. The second is the fully qualified domain name of the host. Following these two entries, you can have an arbitrary number of aliases for that host. I often add comments at the end of the line, prefixed with a hash mark (#).
There was a time when I had a small network at home with only four machines: the proxy/firewall, the wife’s desktop, my laptop, and the crash machine where I did stupid things. The hosts file looked like this:
192.0.2.1 unat.blackhelicopters.org vnat firewall gateway192.0.2.8 boss.blackhelicopters.org boss wife w#don't crash192.0.2.20 crashbox.blackhelicopters.org crashbox test192.0.10.21 laptop.blackhelicopters.org laptop mwlucas
The machine nat.blackhelicopters.org at u also had the names firewall and gateway at v. I added a note to remind myself at w not to run security scanners against my wife’s desktop. (The machine crashbox is also called test.)
Any machine with this hosts table could find any machine listed in the hosts table by name. For example, I could run ping boss or ssh crashbox and reach the desired machine.
The hosts file works just fine for finding networked hosts, but whenever you add, remove, or change a machine, you must edit /etc/hosts on every computer. And every time you change an IP address, you must edit /etc/hosts on every machine.
n o t e Unfortunately, /etc/hosts does not scale. When I got a fifth machine, I added an internal-only DNS server and emptied the hosts file on all of my systems.
Resolver vs. Dynamic ConfigurationIf your OpenBSD system roams between networks, like a laptop, you prob-ably use DHCP to configure your network connection.
Connecting to the Network 213
DHCP overwrites /etc/resolv.conf with the information for its network. This is appropriate for most users, but if you’re carrying an OpenBSD laptop, you’re not normal. You probably want some of your resolver configuration, such as your domain search list, to remain in effect no matter what network you’re on.
OpenBSD supports permanent resolver configuration in the file /etc/resolv.conf.tail. When OpenBSD’s DHCP client gets /etc/resolv.conf informa-tion from the server, it writes to /etc/resolv.conf and adds /etc/resolv.conf.tail to the end.
Remember how only the last search or domain keyword works? resolv.conf .tail takes advantage of that, allowing you to override your network adminis-trator’s search order.
EthernetEthernet is a shared network, meaning that many different machines can connect to the same Ethernet and can communicate directly with each other. I’m going to assume that you’re using Ethernet as found in an aver-age office or datacenter. Also, although Ethernet has been implemented over many different physical media, I’ll assume you’re working with CAT5 or better cable—today’s most popular choice. If you use some unusual media type, or your card supports multiple media, you might need to manually set your preferred media on your interface.
Protocol and HardwareEthernet is a broadcast protocol, which means that every packet you transmit can be sent to every host on the network (although most Ethernet hardware limits recipients). Either your network card or your device driver separates the data intended for your computer from the data meant for other comput-ers. A section of Ethernet where all hosts can communicate directly with all other hosts, without involving a router, is called a collision domain or segment.
You connect Ethernet segments with hubs, which are hardware items that can physically connect many Ethernet hosts. Network hubs forward all received frames to all other network devices, and each host is responsible for filtering traffic. This is old-school Ethernet, which can be useful for debugging network issues.
Switches have largely supplanted hubs. Every Ethernet connection needs a unique identifier, called a MAC address (or sometimes an Ethernet address), which is a 48-bit number. Switches control the traffic sent to each host by filtering on the MAC and IP address of attached devices and (mostly) for-warding frames only to the devices they are meant for. Switching reduces the amount of traffic and load on each individual system by decreasing the amount of traffic each host must sort through.
On i386 and amd64 hardware, the MAC address is a property of the card. On some other platforms, such as SPARC, the MAC address is a property of the server itself. Both IPv4 and IPv6 use the MAC address to find other hosts on the local network.
214 Chapter 12
IPv4 and ARP
When a system needs to transmit data to another IP-based host on the local Ethernet, it first broadcasts an Ethernet request asking, “Which MAC address is responsible for this IP address?” If a host responds, further data for that IP is transmitted to that MAC address. This process is handled by ARP.
Use arp(8) to view your system’s ARP table, which is the list of hosts that your system knows. Enter arp -a to show all of the MAC addresses and IPv4 hostnames your computer knows.
$ arp -afly.blackhelicopters.org (192.0.2.225) at 00:a0:c8:10:eb:82 on fxp0caddis.blackhelicopters.org (192.0.2.226) at 00:16:36:c0:58:a5 on fxp0 statictreble.blackhelicopters.org (192.0.2.227) at 00:0c:42:5a:58:ae on fxp0salmon.blackhelicopters.org (192.0.2.232) at (incomplete) on fxp0
Here, you see the three hosts on my Ethernet network that this host has communicated with. I have more hosts, but because this machine hasn’t spoken with them lately, they aren’t in the local ARP table.
If a MAC address shows up as incomplete, your machine has attempted to communicate with this host but cannot get its MAC address. In this example, I’ve tried to send data to the host salmon, but my computer can’t reach it. (Turning salmon back on would help.)
IPv6 and Neighbor Discovery
IPv6 hosts also use MAC addresses to find each other through ND, an IPv6 protocol introduced in the previous chapter. Interrogate your ND cache with ndp(8). The command-line flags used for ndp are intentionally similar to those for arp.
$ ndp -aNeighbor Linklayer Address Netif Expire S Flags2001:db8:0:12:20c:29ff:feb5:7565 0:c:29:b5:75:65 vic0 permanent R2001:db8:0:12:5446:fbc:fca0:f2e9 0:c:29:b5:75:65 vic0 permanent R...fe80::20c:29ff:feb5:7565%vic0 0:c:29:b5:75:65 vic0 permanent Rfe80::20c:42ff:fe20:7f42%vic0 0:c:42:20:7f:42 vic0 11h20m47s S Rfe80::1%lo0 (incomplete) lo0 permanent R
Like the ARP cache, the ND cache shows an IPv6 address, a physical address, the interface, and other details for each host. You’ll see more ND entries than ARP entries because all of the link local addresses show up in the ND cache.
If you try to reach a host that is directly attached to your local network and it doesn’t respond, check the ND cache. If an ND cache entry shows up as (incomplete), as with ARP, there’s some sort of basic connectivity issue.

Connecting to the Network 215
Speed and Duplex
Ethernet supports a variety of speeds. The slowest speed you’re likely to find today is 10 megabits per second (Mbps), but it’s quickly disappearing. Most people use either 10/100Mbps or 1 gigabit per second (Gbps), although you’ll see 10Gbps, 40Gbps, and 100Gbps Ethernet emerging.
The hosts and switch it’s connected to on your network must agree on the speed of their connection. If the OpenBSD host thinks that it’s connected at 100Mbps, but the switch thinks that the connection is 1Gbps, the connec-tion will be flaky. While autonegotiation usually makes both sides agree on common settings (and is absolutely required for gigabit connections), you can manually set duplex and speed for 10/100Mbps connections. Although some switch vendors are notorious for poor autonegotiation, you should let your Ethernet configure itself whenever possible.
Duplex determines if a card can both transmit and receive data simul-taneously. A half-duplex connection means that the Ethernet card is either transmitting or receiving at a given instant; it cannot do both. A full-duplex connection can both send and receive simultaneously. As with connection speed, if the switch and host disagree on the duplex setting, the connection will be flaky. Gigabit Ethernet connections involve much more than speed and duplex, and they must be autonegotiated.
Just because a device says that it can use the protocol defined as 10/100Mbps Ethernet doesn’t mean that it can use that protocol with any speed. Also, a card labeled “1Gbps” might not actually pass a gigabit per second. Some network cards will pass their stated amount of traffic, while others will stagger and stumble at a few percent of that. Switch quality varies widely, too.
This may make more sense if you think of an Ethernet’s stated speed as a language. For example, I could claim that I speak Russian and German, but I stopped studying foreign languages in 1985. When I went to Germany in 2007, I managed about three words a minute—with the aid of a transla-tion card and phrase book. If I were an Ethernet card, the manufacturer would claim I spoke German and Russian, and ship me to Siberia.1
Get decent hardware. Don’t ask on the OpenBSD mailing list, though. Someone has asked about hardware recommendations in the past few months. Check the archives. The advice hasn’t changed.
Configuring EthernetWhen configuring Ethernet for client computers, if your IPv4 network offers DHCP, you should be able to plug right in. If you’re using IPv6, you should be able to attach the cable and let autoconfiguration take over.
1. Many people offer to ship me to Siberia. But they all forget to include a return ticket. Strange.
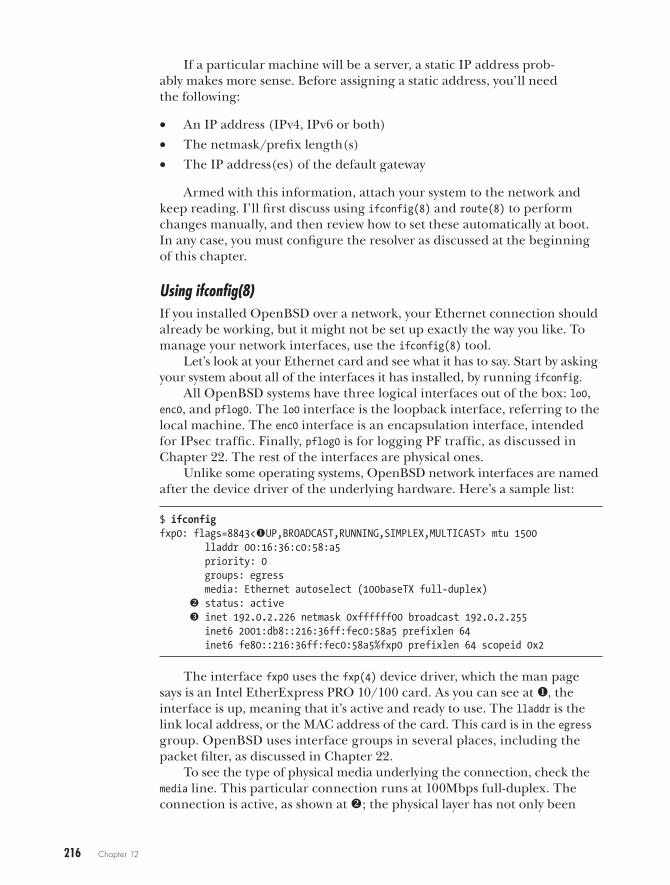
216 Chapter 12
If a particular machine will be a server, a static IP address prob-ably makes more sense. Before assigning a static address, you’ll need the following:
• An IP address (IPv4, IPv6 or both)
• The netmask/prefix length(s)
• The IP address(es) of the default gateway
Armed with this information, attach your system to the network and keep reading. I’ll first discuss using ifconfig(8) and route(8) to perform changes manually, and then review how to set these automatically at boot. In any case, you must configure the resolver as discussed at the beginning of this chapter.
Using ifconfig(8)If you installed OpenBSD over a network, your Ethernet connection should already be working, but it might not be set up exactly the way you like. To manage your network interfaces, use the ifconfig(8) tool.
Let’s look at your Ethernet card and see what it has to say. Start by asking your system about all of the interfaces it has installed, by running ifconfig.
All OpenBSD systems have three logical interfaces out of the box: lo0, enc0, and pflog0. The lo0 interface is the loopback interface, referring to the local machine. The enc0 interface is an encapsulation interface, intended for IPsec traffic. Finally, pflog0 is for logging PF traffic, as discussed in Chapter 22. The rest of the interfaces are physical ones.
Unlike some operating systems, OpenBSD network interfaces are named after the device driver of the underlying hardware. Here’s a sample list:
$ ifconfigfxp0: flags=8843<uUP,BROADCAST,RUNNING,SIMPLEX,MULTICAST> mtu 1500 lladdr 00:16:36:c0:58:a5 priority: 0 groups: egress media: Ethernet autoselect (100baseTX full-duplex) v status: active w inet 192.0.2.226 netmask 0xffffff00 broadcast 192.0.2.255 inet6 2001:db8::216:36ff:fec0:58a5 prefixlen 64 inet6 fe80::216:36ff:fec0:58a5%fxp0 prefixlen 64 scopeid 0x2
The interface fxp0 uses the fxp(4) device driver, which the man page says is an Intel EtherExpress PRO 10/100 card. As you can see at u, the interface is up, meaning that it’s active and ready to use. The lladdr is the link local address, or the MAC address of the card. This card is in the egress group. OpenBSD uses interface groups in several places, including the packet filter, as discussed in Chapter 22.
To see the type of physical media underlying the connection, check the media line. This particular connection runs at 100Mbps full-duplex. The connection is active, as shown at v; the physical layer has not only been
Connecting to the Network 217
configured, but it also has a link light and is ready to go. The connection has been assigned an IPv4 address and netmask, as shown at w. You can see on the two lines that follow that both an IPv6 address and a link local IPv6 address have been assigned.
Use ifconfig to assign, change, or remove IP addresses from a network interface. The OpenBSD installer offers to configure your network cards at boot, but if you didn’t configure all of your interfaces during installation, or if you add or remove network interfaces after installation, you will need to do so manually.
Adding an IP Address
To add an IP address for IPv4, start with the interface’s assigned IP address and netmask.
# ifconfig interface-name IP-address netmask
For example, if your network card is fxp0, your IP address is 192.0.2.55, and the netmask is 255.255.255.128, you would run this:
# ifconfig fxp0 192.0.2.55 255.255.255.128
Specify the netmask in dotted-quad notation, hexadecimal, or even slash notation, like this:
# ifconfig fxp0 192.0.2.55/25
You don’t need to specify a netmask separately if you use a slash.Adding an IP address with IPv6 is a little different. Specify the address,
a slash, and the prefix length, but don’t try to add a separate netmask; just use the slash that’s part of the address. Here’s an example:
# ifconfig fxp0 inet6 2001:db8:0:12::2/64
Removing IP Addresses
If you need to remove an IP address from an interface, use the delete option of ifconfig for both IPv4 and IPv6 addresses.
# ifconfig fxp0 192.0.2.55 delete
The effect is immediate, so be sure you don’t lock yourself out of the system by removing all of its reachable IP addresses, or by removing the only address your SSH daemon is attached to. (In certain rare cases, exist-ing connections to deleted addresses might continue to work, but they prob-ably won’t, so don’t count on it.)
218 Chapter 12
Multiple IP Addresses on One Ethernet Card
One network interface can respond to requests for multiple IP addresses, which is important because a server might support hundreds or thousands of domains and need an IP address for each. (This isn’t so important for plain websites, but it can be important for SSL-based websites and protocols that rely on reverse DNS.)
To add extra IP addresses to an interface, use IP aliases. IP aliases tell a network card to “answer requests for this IP address as well as your own.” To add aliased IP addresses, use ifconfig with the keyword alias after the inter-face name to tell ifconfig this is an alias. Be sure to always use a netmask of 255.255.255.255, or /32, for alias addresses.
# ifconfig fxp0 alias 192.0.2.230/32# ifconfig fxp0... inet 192.0.2.226 netmask 0xfffffff0 broadcast 192.0.2.239 inet 192.0.2.230 netmask 0xffffffff
The interface listed here has a main IP address of 192.0.2.226 and an alias IP address of 192.0.2.230.
When working with IPv6, add the inet6 keyword, like this:
# ifconfig fxp0 inet6 alias 2001:db8:0:12::3/64
It’s important to realize that all outgoing connections on a host with one network connection use the host’s primary IP address. For example, you might have 2000 IP addresses bound to one interface, but when you ssh out, the connection comes from the primary address. Remember this when writing firewall rules and access control lists, because while some programs have an option to set a different source IP address, they’re the exception.
The OpenBSD kernel doesn’t really differentiate between the primary IP addresses and aliases—it just keeps a list of IP addresses—but it will use the first address on its list as the source address unless told otherwise. If a host has multiple network connections, the source address of outgoing con-nections is the main IP address of the network interface on which packets leave the system.
To remove an alias, use the delete option of ifconfig and give the IP address, without the netmask.
# ifconfig fxp0 delete 192.0.2.230
For IPv6, use inet6 delete instead.
# ifconfig fxp0 inet6 delete 2001:db8:0:12::3
n o t e If you delete the main IP address on an interface, the first alias becomes the main IP address. If you have no IP address aliases remaining and you remove the interface’s main IP address, that interface stops passing IP traffic.
Connecting to the Network 219
Configuring Default RoutesUse route(8) to configure the default route for each protocol.
# route add default 192.0.2.1add net default: gateway 192.0.2.1
An IPv6 default route is almost identical, but you must add the -inet6 modifier.
# route add -inet6 default 2001:db8:0:12::1add net default: gateway 2001:db8:0:12::1
Once you add IP addresses and default routes to your host, you should be able to reach the rest of your network and the Internet. Now let’s see how to make those changes across reboots.
Using Dynamic ConfigurationTo have OpenBSD get an IPv4 address from a DHCP server, run dhclient(8) and give it the name of the interface you want to configure.
# dhclient fxp0
dhclient gets an IP address, overwrites /etc/resolv.conf, and configures the default route.
For IPv6, run rtsol(8) instead.
# rtsol fxp0
Remember that IPv6 autoconfiguration will not configure your resolver. You’ll need to piggyback off your IPv4 DNS servers or manually configure /etc/resolv.conf.
Configuring the Network at BootWhile ifconfig(8) is fine for changes on the fly, your system should config-ure its interfaces correctly at boot, including any aliases on the interface, any routes added when the interface comes up, and so on.
Each interface has a configuration file, /etc/hostname.interfacename, generi-cally called hostname.if. The fxp0 interface on my desktop uses a configuration file /etc/hostname.fxp0, my wireless interface wpi0 uses /etc/hostname.wpi0, and so on. At boot, OpenBSD’s /etc/netstart script reads all of the hostname.if files and, if it finds a matching physical interface or can create a matching logical interface, it configures the interface accordingly.
To configure an interface’s IPv4 address, enter a line in hostname.if in this format:
inet ipaddress netmask broadcastaddress ifconfig-options
220 Chapter 12
The broadcast address and options are optional. To use options but not specify a broadcast address, use NONE for the broadcast address. You can also use a slash for the netmask instead of the decimal equivalent.
Similarly, add an IPv6 address with the following:
inet6 ipv6address/prefix ifconfig-options
To give fxp0 the IPv4 address of 192.0.2.226 255.255.255.240 and the IPv6 address of 2001:db8:0:12::2/64 at boot, use the following in /etc/hostname.fxp0 :
inet 192.0.2.226 255.255.255.240 NONE description 'top card'inet6 2001:db8:0:12::2/64
Here, I also define an interface description that will show up in ifconfig output.
To create an IP address alias at boot, use the alias keyword in hostname.if.
inet alias 192.0.2.230/32inet6 alias 2001:db8:0:12::3/64
To run a command when the interface comes up, put an exclamation point in front of the command. Any commands run must be available on the root partition (for example, in /bin or /sbin). This feature is most com-monly used for routing, but you could use other commands as well.
!route add 192.0.2.128/25 192.0.2.2
To configure an interface dynamically, via DHCP (IPv4) or rtsol (IPv6), put the string dhcp or rtsol on a line by itself.
dhcprtsol
Anything that’s not formatted as shown here is passed unedited to ifconfig(8). For example, to run a specific ifconfig command, put the argu-ments on their own line in hostname.if.
description 'lower card'
If you simply want to activate a card, but not configure it, use the word up on a line by itself to activate the interface.
up
And remember, you can test hostname.if changes with /etc/netstart, speci-fying an interface name if appropriate, like so:
# /bin/sh /etc/netstart fxp0
Connecting to the Network 221
Not including the interface name reconfigures all interfaces on the system.
TrunkingServers can have redundant hard drives, power supplies, and so on. OpenBSD supports redundant network connections by combining mul-tiple Ethernet links into a single virtual link, or trunk. You might also know of this as link aggregation, network adapter teaming, or bonding.
n o t e Cisco people know of trunks as Ethernet links that support multiple concurrent VLANs. Most vendors, including OpenBSD, don’t use the word trunk in that way. OpenBSD supports sending multiple VLANs over a single link outside the trunk(4) functionality.
Link Aggregation ProtocolsTo use multiple physical links as a single large link, you need a way to dis-tribute traffic between the links. OpenBSD supports five different ways to distribute frames between trunk members, though not all will work in all environments. For a complete list see trunk(4), but the protocols I recom-mend for real-world use are Link Aggregation Control Protocol (LACP), roundrobin, and failover. LACP is the industry standard for link aggrega-tion. The physical interfaces are bonded into a single virtual interface with roughly the same bandwidth as the sum of the individual interfaces. LACP is very fault-tolerant, and just about every high-end managed switch should support it. If your switch supports LACP, use it, but you must configure LACP on the switch ports before this kind of trunk will pass traffic.
In the roundrobin method, OpenBSD sends frames across the trunk’s active connections using a roundrobin scheduler. The trunk accepts incom-ing packets on any port, and a roundrobin scheduler rotates between the trunk connections, with error and edge handling added on top. Roundrobin trunks don’t need any special switch configuration; they just need two ports in the same VLAN.
In the case of failover, OpenBSD sends and receives all traffic over the first port in the trunk, and if that port fails, it switches to another active port. The failover method doesn’t give you any additional bandwidth, but requires absolutely no support from the switch, and it even works on old-fashioned hubs.
Trunk ConfigurationAs an example, let’s configure ports em0 and em1 into failover trunk trunk0. The underlying ports have never been configured before, so begin by acti-vating these interfaces without any configuration.
# ifconfig em0 up# ifconfig em1 up
222 Chapter 12
Now create the failover trunk with ifconfig(8) and add these ports to it to make the trunk0 interface usable.
# ifconfig trunk0 trunkproto failover# ifconfig trunk0 trunkport em0# ifconfig trunk0 trunkport em1
You could do this all in one long ifconfig command, but I find simpler, shorter commands easier to understand when learning.
Assign the interface an IP address just as you would a physical interface, and add a default gateway to your system.
# ifconfig trunk0 192.0.2.8 netmask 255.255.255.0# route add default 192.0.2.1
You should now have a failover trunk attached to your local network. To configure another trunk protocol, just specify the desired trunk protocol when you create the trunk. You’ll find a complete list of trunk protocols in trunk(4).
Trunks at BootConfigure your trunk in /etc/hostname.if. For example, suppose you need to edit hostname.em0, hostname.em1, and hostname.trunk0. Both of the em files contain only a single word:
up
This activates the interfaces, but does no configuration. hostname.trunk0 is more complicated.
trunkproto failovertrunkport em0trunkport em1192.0.2.8 netmask 255.255.255.0
You can put all of these entries in a single line, just as you can configure the trunk with a single ifconfig command, but again, I find multiple lines easier to read and understand.
Your trunk should now start at boot.Note that trunks do not necessarily need to consist of interfaces that
use the same type of physical medium. If you’re feeling adventurous, you could try to replicate what some OpenBSD developers and users have been known to do: Trunk together a wired and a wireless network interface, and have all your connections survive (graceful failover, remember?) when you yank the plug out of your Ethernet port, or if you plug yourself back in and take your access point down for maintenance.
Connecting to the Network 223
VLANsVLANs are a way to get multiple Ethernet segments on a single piece of wire. You’ll sometimes see this referred to as 802.1q, tagging, or a combina-tion of these terms.
In OpenBSD terms, one wire can carry multiple networks, and by con-figuring an additional interface, you can talk to those additional networks as if they had their own private wire. The wire can still carry only so much data, however, so all VLANs and the regular network (or native VLAN) that share the wire share the same pool of bandwidth.
VLAN frames that arrive at your network card are like regular Ethernet frames, with an additional header before the Ethernet frame that says “This is part of VLAN number such-and-such.” Each VLAN is identified by a num-ber. VLAN number 1 is usually the native VLAN—the VLAN that arrives without any tagging whatsoever. For convenience, I’ll use the word “tagged” to describe how the VLAN is delivered to your host.
How would you use VLANs in OpenBSD? Perhaps you have a network divided into multiple Ethernet segments, such as outside the firewall, server area, and desktop clients. Or you might have one OpenBSD host that needs direct access to all of these segments. You could route all of these networks over a single physical wire. You might eventually hit bandwidth problems, but if you’re pushing more than 1Gpbs through your server, you can afford a second network card.
Configuring SwitchesYou must configure your switch to send the VLANs to your OpenBSD box as 802.1q or tagged, depending on the switch’s syntax. Cisco uses 802.1q, HP’s Procurve switches use tagged, and other vendors use whatever their prejudices dictate. There are dozens of different syntaxes to do this, so I won’t give a specific example. If the switch can’t send tagged VLANs to your server, you cannot use VLANs.
Configuring VLAN DevicesOpenBSD creates vlan(4) interfaces upon request. To create the device, you need to know which physical device you want to attach the VLAN to and the number of the VLAN you’re expecting.
Create the vlan interface with ifconfig.
# ifconfig vlanX vlan vlan# vlandev interface
I number my vlan interfaces after the VLAN number they’re used for. (You could create interface vlan0 and attach it to VLAN 3, but that’s too confusing for my feeble brain.) If you don’t specify the VLAN number, OpenBSD assigns the VLAN number from the number on the interface.
For example, here I create interface vlan3 and use it to access VLAN 3 over interface fxp0.
224 Chapter 12
# ifconfig vlan3 vlandev fxp0
That’s really all there is to it. Now you can use ifconfig to display your new interface:
$ ifconfig vlan3vlan3: flags=48843<UP,BROADCAST,RUNNING,SIMPLEX,MULTICAST,INET6_PRIVACY> mtu 1500 lladdr 00:16:36:c0:58:a5 priority: 0 vlan: 3 parent interface: fxp0 groups: vlan status: active inet6 fe80::216:36ff:fec0:58a5%vlan3 prefixlen 64 scopeid 0x7
This looks exactly like any physical interface, and from your point of view, it is. You can add IP addresses just as you would to any other interface, assign routes, and get on with your life.
Configuring VLANs at BootTo configure a VLAN interface at boot time, create a hostname.if file for it. For example, here’s the contents of a /etc/hostname.vlan3 that creates the vlan3 interface demonstrated in the previous section, assigns it to VLAN 3, and configures it automatically for both IPv4 and IPv6:
vlandev fxp0dhcprtsol
OpenBSD should find this file at boot and create the interface accord-ing to your commands.
IPv6 Over TunnelsLet’s say you’ve taken my badgering to heart and decided to experiment with IPv6, but your ISP doesn’t offer IPv6. How can you play with IPv6 when all you get is an IPv4 feed?
Many companies offer a free IPv6 tunnel service, where they will route you through an IPv6 tunnel over IPv4. They will even give you an IPv6 /64 at no charge, so you can configure your home network for IPv6.
While I generally avoid recommending vendors in this book, I do recom-mend Hurricane Electric’s IPv6 tunnel service at http://www.tunnelbroker .net/. Its web interface is intuitive, and it even provides configurations for OpenBSD clients.
You should now have some understanding of managing IPv4 and IPv6 on OpenBSD. While your brain is recovering from all this stuff, we’ll turn to the topic of managing add-on software in OpenBSD.
13S o f t w a r e M a n a g e M e n t
Blowfish is solid, but the third-party software?
Easy road to ruin.
Most people don’t use an operating sys-tem; they use software, which runs atop an
underlying operating system. No matter how robust an operating system is, it’s useless with-
out applications. Many commercial operating systems include hundreds or thousands of
small programs: games, desktop toys, and everything from fancy-looking clocks to disk scrubbers and web browsers. Most users never touch most of these programs, but the programs take up disk space (and possibly other resources) just the same. Every program drags along some amount of infra-structure, and all of this software can cause any number of problems.
Unlike many other operating systems, OpenBSD deliberately includes relatively little software in the default installation. You get exactly what you need to provide the infrastructure for software, and nothing more. While a traditional UNIX or Unix-like system includes compilers, games, and man pages, you don’t even need to install these when installing OpenBSD! Even
226 Chapter 13
if you install everything included in OpenBSD, it will have far less software than any commercial operating system. That’s because almost everything is considered an add-on package.
The advantage to this sparseness is that you know exactly what’s on the system, which simplifies debugging. A random shared library from a pro-gram you’ve never used won’t break your programs. The downside is that you need to think a bit to decide exactly what you do want to include, and you’ll need to install those programs. OpenBSD makes installing software as easy as possible through the ports and packages system, which is intro-duced in this chapter. But first, let’s take a look at building software.
Making SoftwareBuilding software is complicated because source code must be very specifi-cally processed to create a program that works—let alone a program that works well! The make(1) program makes building software easily reproducible, so that a program can be built exactly as the software author intends. make takes its instructions from a configuration file, or makefile, which tells make exactly how to build a program from source. You don’t need to know the internals of a makefile, so we’re not going to dissect one here.
A makefile includes one or more targets and a set of instructions to carry out. For example, typing make install tells make to check the makefile for a procedure called install and, if found, to execute it. A target’s name usually relates to what make should be doing. The make install process, for example, usually installs the software built by previous steps. You’ll find targets to install, configure, and uninstall most software, and make handles a huge variety of functions, some of which far outstrip the creators’ original intentions.
Source Code and SoftwareSource code is the human-readable instructions for building the actual machine code that makes up a program. You’ve probably already been exposed to some form of source code; if not, go look at a few files under /usr/src (assuming, of course, that you installed the source code as I recom-mended back in Chapter 3). While you don’t have to read source code, you should be able to recognize it.
Once you have a program’s source code, you build (or compile) the program on the type of system on which you want to run it. (Building software for a foreign platform via cross-compiling demands that you know much more about building software, and is not always possible.) If the soft-ware was written for an operating system sufficiently similar to what you’re building it on, you’ll create a working program. If the operating system differs too much, either the build fails or the resulting software won’t run. Once you’ve built the software successfully on your system, you can copy the
Software Management 227
resulting program (or binary) to other systems on the same platform, with the same operating system version and supporting software, and expect it to run.
Some programs are sufficiently well written that you can compile them on many different platforms. A few programs specifically include support for widely divergent platforms. For example, you can compile the Apache web server on Windows, NetWare, and Unix-like platforms by typing make install. This is quite uncommon, however, and takes considerable effort on the part of the software authors. It also makes the code more complex, and supporting all these operating systems means that it cannot easily sup-port all the features that make those operating systems special. (But note that the ability to build software on a variety of platforms doesn’t necessarily mean that it runs well on all of those platforms.)
Generally speaking, if you can build a program from source, it usually runs. A sufficiently experienced sysadmin can use the source code and error messages to learn why a program won’t build, or why it builds but doesn’t run. In many cases, the problem is simple and can be fixed with minimal education.1 This is one reason why access to source code is important.
Back when every sysadmin was a programmer, debugging software builds absorbed major portions of the sysadmin’s time. Every Unix-like platform was slightly (or wildly) different. To build programs, sysadmins needed to understand their platform, the software’s original platform, and the dif-ferences between the two. The duplication of effort to build common programs was truly horrendous. Tools such as autoconf and configure were intended to help simplify this problem, but these programs just paper over the underlying problems. Building many software packages requires much more time running configure scripts than they need to actually compile.
The OpenBSD ports and packages system removes all this pain.
The Ports and Packages SystemPorts are a mechanism for reproducibly and consistently building software on OpenBSD. Packages are precompiled ports for a specific OpenBSD version and platform. Packages install quickly and easily, and are recommended by the OpenBSD folks. Installing from a port takes more time and effort, but can be customized for your environment or server.
The basic idea behind the ports system is that if source code must be modified or tweaked to build or run on OpenBSD, the modification pro-cess should be automated. If you need other software to build this program from source code or run it, those dependencies should be automatically used. If you record exactly which files the software installs, you can easily uninstall it. And if you have all of these things, you can pick up the software and install it on any similar OpenBSD system.
1. In the IT industry, “minimal education” means a willingness to dig in and figure it out, plus a few years of college or professional experience; access to programming textbooks or other educational materials; or a whole lot of youth, stubbornness, and motivation.
228 Chapter 13
Packages are the installable files produced by the ports system. You can install packages over the network, either from your own package repository or from an OpenBSD mirror site. But before you can use a package, you must find it.
Using PackagesPackages are the preferred method to install OpenBSD software. Packages are built by the OpenBSD Project’s ports team, and are expected to work without any special tweaks from the user. You must configure the software, of course, but the software itself should work as expected. Unless you are planning to make modifications to a specific piece of software, you’ll be a lot happier simply installing the package fetched from a nearby mirror rather than building it from the port (or, worse, installing from the source code without the port).
Package Files and $PKG_PATHEvery package is available as a single file named after the port it is found in, a version number, and a .tgz extension. For example, version 2.4.2 of the adsuck software is available in the file adsuck-2.4.2.tgz.
Before you can install packages, you need to find a source for them. Find package files on the official release CDs or on OpenBSD mirror sites.
The packages are on the FTP and HTTP mirrors in the directory /pub/OpenBSD/release/packages/platform. For example, the packages for the amd64 platform for OpenBSD 5.3 are in the directory /pub/OpenBSD/5.3/packages/amd64. Look at the OpenBSD mirror list. Choose a mirror server near you, and verify that it actually has the packages directory for the release and platform you run. My closest mirror is http://ftp10.usa.openbsd.org.2 I find the 5.3 amd64 packages at http://ftp10.usa.openbsd.org/pub/OpenBSD/5.3/packages/amd64.
On the official CD, you’ll find packages in /release/platform/packages. (Downloaded installation CDs do not include packages.) If you mounted the 5.3 CD at /mnt, you would find the packages at /mnt/5.3/amd64/packages.
Once you’ve chosen a package repository, set the $PKG_PATH variable in your shell to it. This tells OpenBSD’s package management tools where to get the packages and gives you quick access to a single authoritative source of packages.
If you set $PKG_PATH to an invalid location, pkg_add (the command for installing a package) won’t work. Using a location with packages for a dif-ferent architecture makes pkg_add give an error that packages are “not for the right architecture.” If you choose an incorrect release, you’ll see “bad major” or other library version errors. Either of these types of errors mean that your $PKG_PATH is wrong.
2. No, it’s not. There is no ftp10.usa.openbsd.org. Follow the instructions. Look at the mirror list and pick a mirror that actually exists and is close to you. Never blindly copy my examples!
Software Management 229
You can also list multiple package repositories. If the package tools don’t find a desired package in the first repository, they try the next one. This lets you use a local package repository for your custom packages, and then fall back to the official OpenBSD repository if you don’t have a local package. I use this when I must build a custom package for my network and want to use it across multiple machines.
Installing packages via FTP or HTTP is not quite as secure as installing them from CD. While the OpenBSD release team has verified all the pack-ages on the CD set, an intruder could have tampered with whatever mirror you choose. These intrusions would be caught comparatively quickly, but it’s possible that you could install packages between the time of the intru-sion and the time the damage is reversed. If you’re deeply concerned about package integrity, get an official CD set.
Finding PackagesAs I write this, the latest OpenBSD/i386 snapshot has 7485 packages on the FTP site. This is a long list to browse through to find the specific package you want. If you have the ports tree installed, you can search it for packages, but if you wanted to use the ports tree, you wouldn’t be using packages, now would you?
Say you need a piece of software that runs only on Apache 2.2. How can you find this? Find packages on the command line, or use a website.
n o t e Most people don’t need an external web server on OpenBSD; the web servers included with OpenBSD are perfectly fine for average users. I would install Apache 2.2 only if I had a specific application written for Apache 2.2. If you want to run, say, a PHP web application, just use OpenBSD’s included nginx web server.
Finding Packages on the Command Line
pkg_info(1) displays information about packages. While you would normally use pkg_info to explore the packages you’ve already installed, you can use -Q to run a case-insensitive search on the packages in your package repository. If you know part of the package name, try the package search.
$ pkg_info -Q apacheapache-ant-1.8.2p3apache-couchdb-1.0.1p2apache-httpd-2.2.22apachetop-0.12.6modsecurity-apache-1.9.3p5p5-Apache-ASP-2.61p0...
From the names, you can guess that the package apache-httpd-2.2.22 contains Apache 2.2.
230 Chapter 13
Finding Packages on the Web
The easiest way to search packages is to use the unofficial OpenBSD Ports website at http://www.openports.se/. While this isn’t an official OpenBSD website, it has provided a good interface into the OpenBSD ports tree for several years. If I search for Apache on this site, the third hit is for “www/apache-httpd, apache HTTP server.”
Once you know the name of the package containing the software you want, you can install it.
Installing PackagesUse pkg_add(1) to install packages. You don’t need the version number—just the package name. Here, I install the Apache package I found earlier:
# pkg_add apache-httpdu apache-httpd-2.2.22:libiconv-1.14: ok
apache-httpd-2.2.22:pcre-8.30: ok...
v apache-httpd-2.2.22: okw The following new rcscripts were installed: /etc/rc.d/httpd2
See rc.d(8) for details.x --- +apache-httpd-2.2.22 -------------------
This is the official httpd distributed by the Apache Server Project,provided as a port for those who, for various reasons, need to runversion 2.
OpenBSD provides a custom Apache server, httpd(8), in the base systemwhich has been audited for security and may run in a chroot(2)environment. Users are STRONGLY encouraged to use the system httpdrather than this port.
A great deal of software requires other software to run, and OpenBSD’s package tools track these dependencies. pkg_add starts my Apache installation by installing the various dependencies of the chosen package, as shown at u. Apache 2.2.22 requires libiconv and pcre, among several other packages. As each package installs, you’ll see a progress bar scroll across the screen. If a dependency cannot be installed, the package installation terminates.
After installing all the dependencies, pkg_add installs the actual Apache 2.2 package, as shown at v. At the end of package installation, you’ll see notices for startup scripts added by the package, as shown at w, and then any notes from the OpenBSD team about the packages, like those at x.
Which Files Are Installed?
Use the -L option to pkg_info to see which files a package installs.
$ pkg_info -L apache-httpdInformation for inst:apache-httpd-2.2.22
Software Management 231
Files:/usr/local/include/apache2/ap_compat.h/usr/local/include/apache2/ap_config.h/usr/local/include/apache2/ap_config_auto.h/usr/local/include/apache2/ap_config_layout.h/usr/local/include/apache2/ap_listen.h...
As you can see, all of these files are installed under /usr/local. OpenBSD installs all packages under /usr/local.
Verbose Installation
If you’re interested in the details of how pkg_add works, use the -v flag to trigger verbose mode. You can specify multiple -v flags for added detail. I recommend trying verbose mode a few times, in varying levels of detail, to get a deeper understanding of what pkg_add actually does.
Ambiguous Packages
Sometimes pkg_add needs an extra hint about what you want to install. For example, everything in my production network is tied together with LDAP, and I need to run an OpenLDAP mirror in each datacenter. (I could use OpenBSD’s integrated LDAP daemon instead, but the master servers run OpenLDAP, and I don’t want to mix LDAP servers.) The following is my attempt to install OpenLDAP.
# pkg_add openldap-serveru Ambiguous: choose package for openldap-server
a 0: <None> 1: openldap-server-2.3.43p10 2: openldap-server-2.4.31p0Your choice: 2
v Ambiguous: choose dependency for openldap-server-2.4.31p0: a 0: cyrus-sasl-2.1.25p3 1: cyrus-sasl-2.1.25p3-db4 2: cyrus-sasl-2.1.25p3-ldap 3: cyrus-sasl-2.1.25p3-mysql 4: cyrus-sasl-2.1.25p3-pgsql 5: cyrus-sasl-2.1.25p3-sqlite3Your choice: 2
w Detected loop, merging sets ok| cyrus-sasl-2.1.25p3-ldap| openldap-client-2.4.31openldap-server-2.4.31p0:cyrus-sasl-2.1.25p3-ldap+openldap-client-2.4.31: okopenldap-server-2.4.31p0:db-4.6.21v0: okopenldap-server-2.4.31p0:icu4c-49.1.2p1: okopenldap-server-2.4.31p0: okThe following new rcscripts were installed: /etc/rc.d/saslauthd /etc/rc.d/slapdSee rc.d(8) for details.
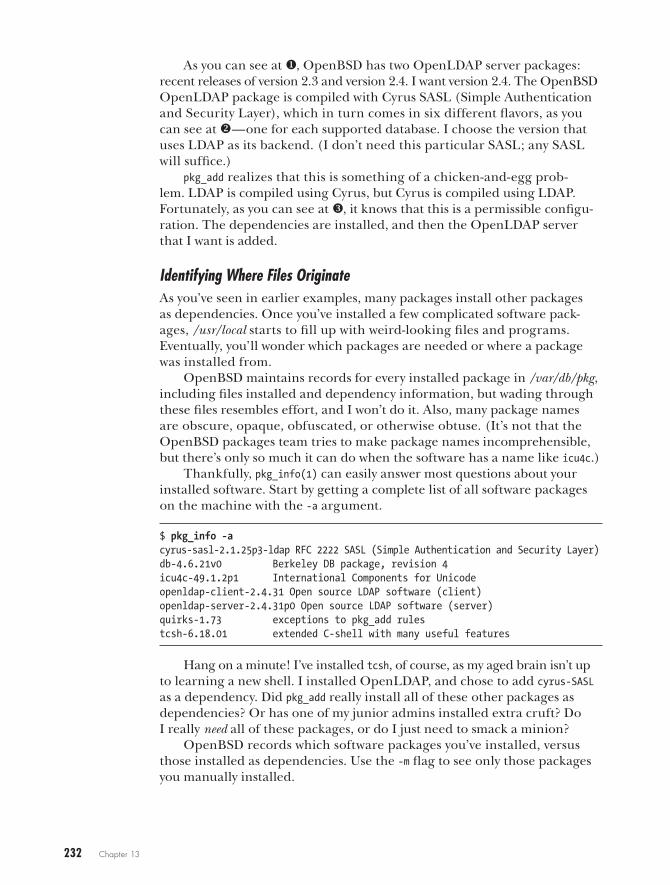
232 Chapter 13
As you can see at u, OpenBSD has two OpenLDAP server packages: recent releases of version 2.3 and version 2.4. I want version 2.4. The OpenBSD OpenLDAP package is compiled with Cyrus SASL (Simple Authentication and Security Layer), which in turn comes in six different flavors, as you can see at v—one for each supported database. I choose the version that uses LDAP as its backend. (I don’t need this particular SASL; any SASL will suffice.)
pkg_add realizes that this is something of a chicken-and-egg prob-lem. LDAP is compiled using Cyrus, but Cyrus is compiled using LDAP. Fortunately, as you can see at w, it knows that this is a permissible configu-ration. The dependencies are installed, and then the OpenLDAP server that I want is added.
Identifying Where Files OriginateAs you’ve seen in earlier examples, many packages install other packages as dependencies. Once you’ve installed a few complicated software pack-ages, /usr/local starts to fill up with weird-looking files and programs. Eventually, you’ll wonder which packages are needed or where a package was installed from.
OpenBSD maintains records for every installed package in /var/db/pkg, including files installed and dependency information, but wading through these files resembles effort, and I won’t do it. Also, many package names are obscure, opaque, obfuscated, or otherwise obtuse. (It’s not that the OpenBSD packages team tries to make package names incomprehensible, but there’s only so much it can do when the software has a name like icu4c.)
Thankfully, pkg_info(1) can easily answer most questions about your installed software. Start by getting a complete list of all software packages on the machine with the -a argument.
$ pkg_info -acyrus-sasl-2.1.25p3-ldap RFC 2222 SASL (Simple Authentication and Security Layer)db-4.6.21v0 Berkeley DB package, revision 4icu4c-49.1.2p1 International Components for Unicodeopenldap-client-2.4.31 Open source LDAP software (client)openldap-server-2.4.31p0 Open source LDAP software (server)quirks-1.73 exceptions to pkg_add rulestcsh-6.18.01 extended C-shell with many useful features
Hang on a minute! I’ve installed tcsh, of course, as my aged brain isn’t up to learning a new shell. I installed OpenLDAP, and chose to add cyrus-SASL as a dependency. Did pkg_add really install all of these other packages as dependencies? Or has one of my junior admins installed extra cruft? Do I really need all of these packages, or do I just need to smack a minion?
OpenBSD records which software packages you’ve installed, versus those installed as dependencies. Use the -m flag to see only those packages you manually installed.
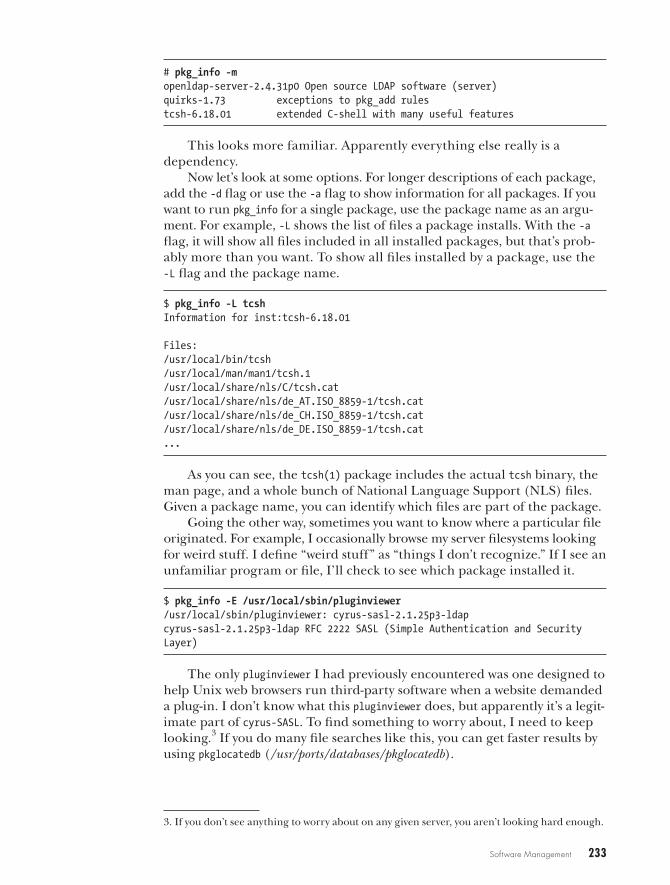
Software Management 233
# pkg_info -mopenldap-server-2.4.31p0 Open source LDAP software (server)quirks-1.73 exceptions to pkg_add rulestcsh-6.18.01 extended C-shell with many useful features
This looks more familiar. Apparently everything else really is a dependency.
Now let’s look at some options. For longer descriptions of each package, add the -d flag or use the -a flag to show information for all packages. If you want to run pkg_info for a single package, use the package name as an argu-ment. For example, -L shows the list of files a package installs. With the -a flag, it will show all files included in all installed packages, but that’s prob-ably more than you want. To show all files installed by a package, use the -L flag and the package name.
$ pkg_info -L tcshInformation for inst:tcsh-6.18.01
Files:/usr/local/bin/tcsh/usr/local/man/man1/tcsh.1/usr/local/share/nls/C/tcsh.cat/usr/local/share/nls/de_AT.ISO_8859-1/tcsh.cat/usr/local/share/nls/de_CH.ISO_8859-1/tcsh.cat/usr/local/share/nls/de_DE.ISO_8859-1/tcsh.cat...
As you can see, the tcsh(1) package includes the actual tcsh binary, the man page, and a whole bunch of National Language Support (NLS) files. Given a package name, you can identify which files are part of the package.
Going the other way, sometimes you want to know where a particular file originated. For example, I occasionally browse my server filesystems looking for weird stuff. I define “weird stuff” as “things I don’t recognize.” If I see an unfamiliar program or file, I’ll check to see which package installed it.
$ pkg_info -E /usr/local/sbin/pluginviewer/usr/local/sbin/pluginviewer: cyrus-sasl-2.1.25p3-ldapcyrus-sasl-2.1.25p3-ldap RFC 2222 SASL (Simple Authentication and Security Layer)
The only pluginviewer I had previously encountered was one designed to help Unix web browsers run third-party software when a website demanded a plug-in. I don’t know what this pluginviewer does, but apparently it’s a legit-imate part of cyrus-SASL. To find something to worry about, I need to keep looking.3 If you do many file searches like this, you can get faster results by using pkglocatedb (/usr/ports/databases/pkglocatedb).
3. If you don’t see anything to worry about on any given server, you aren’t looking hard enough.
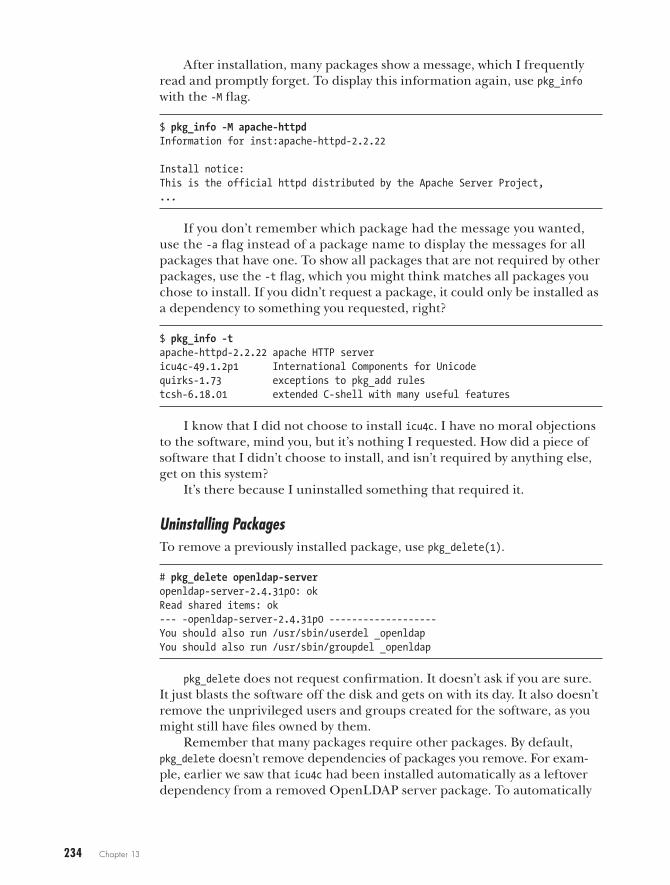
234 Chapter 13
After installation, many packages show a message, which I frequently read and promptly forget. To display this information again, use pkg_info with the -M flag.
$ pkg_info -M apache-httpdInformation for inst:apache-httpd-2.2.22
Install notice:This is the official httpd distributed by the Apache Server Project,...
If you don’t remember which package had the message you wanted, use the -a flag instead of a package name to display the messages for all packages that have one. To show all packages that are not required by other packages, use the -t flag, which you might think matches all packages you chose to install. If you didn’t request a package, it could only be installed as a dependency to something you requested, right?
$ pkg_info -tapache-httpd-2.2.22 apache HTTP servericu4c-49.1.2p1 International Components for Unicodequirks-1.73 exceptions to pkg_add rulestcsh-6.18.01 extended C-shell with many useful features
I know that I did not choose to install icu4c. I have no moral objections to the software, mind you, but it’s nothing I requested. How did a piece of software that I didn’t choose to install, and isn’t required by anything else, get on this system?
It’s there because I uninstalled something that required it.
Uninstalling PackagesTo remove a previously installed package, use pkg_delete(1).
# pkg_delete openldap-serveropenldap-server-2.4.31p0: okRead shared items: ok--- -openldap-server-2.4.31p0 -------------------You should also run /usr/sbin/userdel _openldapYou should also run /usr/sbin/groupdel _openldap
pkg_delete does not request confirmation. It doesn’t ask if you are sure. It just blasts the software off the disk and gets on with its day. It also doesn’t remove the unprivileged users and groups created for the software, as you might still have files owned by them.
Remember that many packages require other packages. By default, pkg_delete doesn’t remove dependencies of packages you remove. For exam-ple, earlier we saw that icu4c had been installed automatically as a leftover dependency from a removed OpenLDAP server package. To automatically
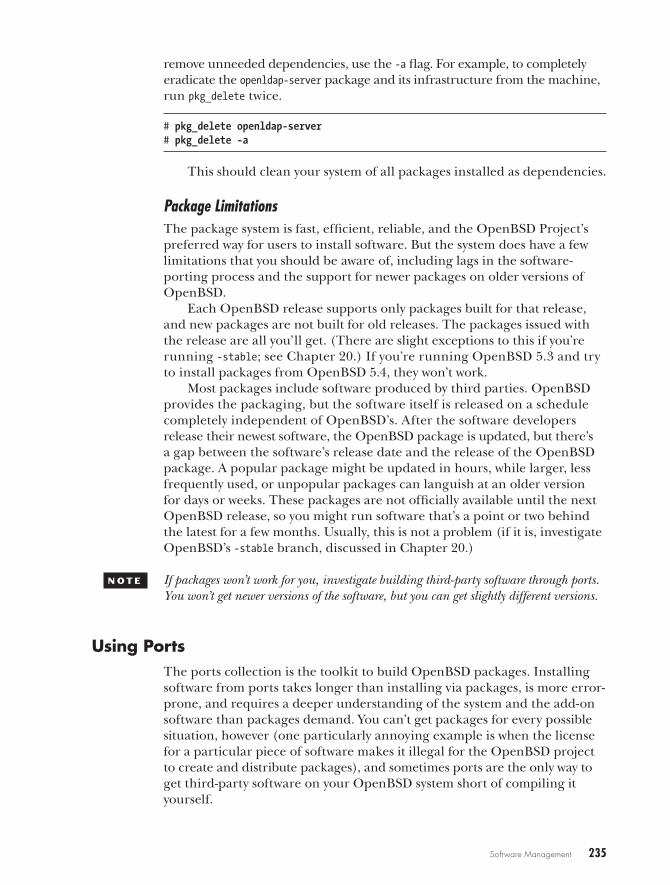
Software Management 235
remove unneeded dependencies, use the -a flag. For example, to completely eradicate the openldap-server package and its infrastructure from the machine, run pkg_delete twice.
# pkg_delete openldap-server# pkg_delete -a
This should clean your system of all packages installed as dependencies.
Package LimitationsThe package system is fast, efficient, reliable, and the OpenBSD Project’s preferred way for users to install software. But the system does have a few limitations that you should be aware of, including lags in the software-porting process and the support for newer packages on older versions of OpenBSD.
Each OpenBSD release supports only packages built for that release, and new packages are not built for old releases. The packages issued with the release are all you’ll get. (There are slight exceptions to this if you’re running -stable; see Chapter 20.) If you’re running OpenBSD 5.3 and try to install packages from OpenBSD 5.4, they won’t work.
Most packages include software produced by third parties. OpenBSD provides the packaging, but the software itself is released on a schedule completely independent of OpenBSD’s. After the software developers release their newest software, the OpenBSD package is updated, but there’s a gap between the software’s release date and the release of the OpenBSD package. A popular package might be updated in hours, while larger, less frequently used, or unpopular packages can languish at an older version for days or weeks. These packages are not officially available until the next OpenBSD release, so you might run software that’s a point or two behind the latest for a few months. Usually, this is not a problem (if it is, investigate OpenBSD’s -stable branch, discussed in Chapter 20.)
n o t e If packages won’t work for you, investigate building third-party software through ports. You won’t get newer versions of the software, but you can get slightly different versions.
Using PortsThe ports collection is the toolkit to build OpenBSD packages. Installing software from ports takes longer than installing via packages, is more error-prone, and requires a deeper understanding of the system and the add-on software than packages demand. You can’t get packages for every possible situation, however (one particularly annoying example is when the license for a particular piece of software makes it illegal for the OpenBSD project to create and distribute packages), and sometimes ports are the only way to get third-party software on your OpenBSD system short of compiling it yourself.
236 Chapter 13
What makes ports interesting is their level of automation. With one command, a port can find the source code for a program, download it, verify its integrity, apply any patches needed to make it run on OpenBSD, toggle any flags needed for any custom features of your system, build the code into actual binaries, produce a package, and install it. If you have com-piled software on other platforms, you’ll quickly realize how ports simplify building software.
Like packages, ports work only on the version of OpenBSD for which they are released. That means that you must use the OpenBSD 5.4 ports col-lection on OpenBSD 5.4; the 5.5 ports collection won’t work. Oh, it might look like it works sometimes, but the software will fail unpredictably, and no one will have sympathy for you (sympathy for your coworkers, perhaps, but not for you).
When you upgrade OpenBSD, the expectation is that you will upgrade your ports collection and all installed packages to the precise matching ver-sion. You might be able to use older packages on a newer OpenBSD, as long as you don’t delete the older shared libraries required by the software.
The Ports TreeThe ports tree is usually installed in /usr/ports. If you want the ports tree, you must manually fetch the ports.tar.gz file from your OpenBSD release and extract it under /usr.
n o t e I suggested this way back in Chapter 4, but you can also get the ports tree and keep the files up to date using cvs(1), as covered in Chapter 20. Look in this directory, and you’ll find a whole bunch of directories and files.
The INDEX file contains a list of every port in the system, in alphabeti-cal order but machine-readable format. You can search this file for ports, but I recommend using one of the tools discussed later to do so.
The Makefile contains the basic machine instructions for making the ports system work. While it’s intended for use by make(1), you can learn a lot by reading the makefile for any port. Most of the really complicated ports code is in the ports/infrastructure directory, and all of the makefiles in the ports system build on that infrastructure.
The remaining directories are software categories. Each category con-tains a further layer of directories, and each directory under a category is a port of a specific piece of software. OpenBSD has more than 7600 ports as of this writing, so this hierarchical organization is vital to keeping them in some sort of manageable order.
For example, the following is a listing of the contents of the news direc-tory, which contains programs for using and managing Usenet news. This is one of the smaller categories. Some categories have hundreds of entries, but they’re arranged in much the same way.
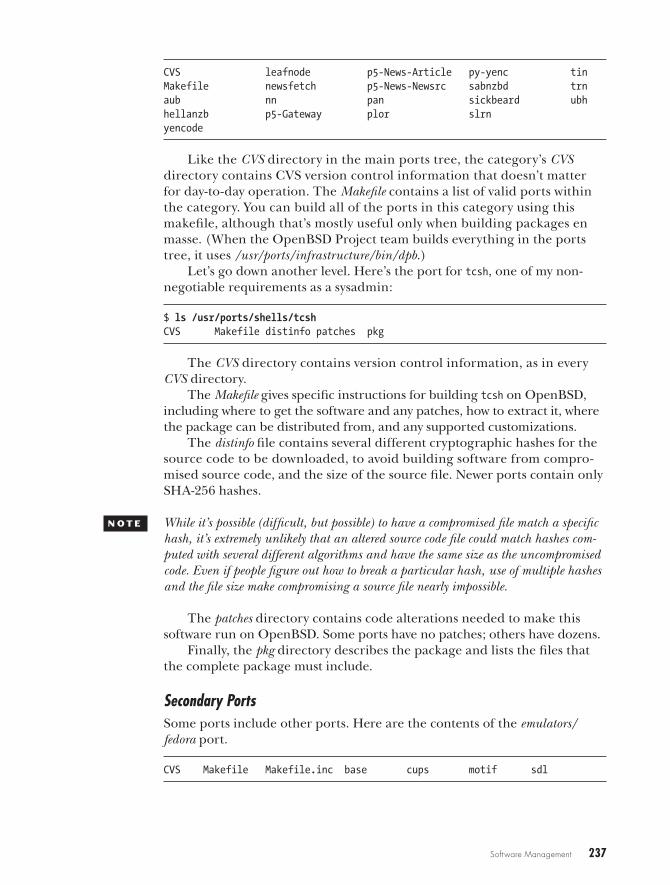
Software Management 237
CVS leafnode p5-News-Article py-yenc tinMakefile newsfetch p5-News-Newsrc sabnzbd trnaub nn pan sickbeard ubhhellanzb p5-Gateway plor slrn yencode
Like the CVS directory in the main ports tree, the category’s CVS directory contains CVS version control information that doesn’t matter for day-to-day operation. The Makefile contains a list of valid ports within the category. You can build all of the ports in this category using this makefile, although that’s mostly useful only when building packages en masse. (When the OpenBSD Project team builds everything in the ports tree, it uses /usr/ports/infrastructure/bin/dpb.)
Let’s go down another level. Here’s the port for tcsh, one of my non-negotiable requirements as a sysadmin:
$ ls /usr/ports/shells/tcshCVS Makefile distinfo patches pkg
The CVS directory contains version control information, as in every CVS directory.
The Makefile gives specific instructions for building tcsh on OpenBSD, including where to get the software and any patches, how to extract it, where the package can be distributed from, and any supported customizations.
The distinfo file contains several different cryptographic hashes for the source code to be downloaded, to avoid building software from compro-mised source code, and the size of the source file. Newer ports contain only SHA-256 hashes.
n o t e While it’s possible (difficult, but possible) to have a compromised file match a specific hash, it’s extremely unlikely that an altered source code file could match hashes com-puted with several different algorithms and have the same size as the uncompromised code. Even if people figure out how to break a particular hash, use of multiple hashes and the file size make compromising a source file nearly impossible.
The patches directory contains code alterations needed to make this software run on OpenBSD. Some ports have no patches; others have dozens.
Finally, the pkg directory describes the package and lists the files that the complete package must include.
Secondary PortsSome ports include other ports. Here are the contents of the emulators/fedora port.
CVS Makefile Makefile.inc base cups motif sdl
238 Chapter 13
The file Makefile.inc is new, as are the subdirectories base, cups, motif, and sdl. The subdirectories are independent ports. These four ports are often installed together, and as a whole, support OpenBSD’s Linux emulation (documented in compat_linux(8)). All four ports call in the common instruc-tions in Makefile.inc. (The ports tree doesn’t include many of these, but don’t be shocked when you find one.)
Read-Only Ports TreeThe process of building a port creates an installable package and uses a whole bunch of temporary files, source files, and status files. By default, all of these files are placed inside the ports tree itself. While this works, I encourage you to treat /usr/ports as a read-only OpenBSD directory tree, just like /usr/bin, /usr/lib, and so on. Doing so simplifies upgrading and identifying local changes, helps identify what you’ve built from ports, and saves space on the /usr partition.
n o t e Build files for ports can range from a few kilobytes to several gigabytes, so it’s best to build ports on a large scratch partition. If you have unpartitioned disk space, create a partition just for building ports. Or use any partition with space, or even an NFS partition.
Configure the ports collection by setting variables in /etc/mk.conf. To use a read-only ports tree, set the variables in these directories:
WRKOBJDIR Directory where the software is extracted from source and compiled. These can be deleted and re-created as needed.
PACKAGE_REPOSITORY Directory where completed packages are stored. The ports collection builds packages, which you can then install.
PLIST_DB Directory where package packing lists are stored.
BULK_COOKIES_DIR Directory for storing status cookies during mass builds of packages.
UPDATE_COOKIES_DIR Directory for storing status cookies during mass updates of packages.
DISTDIR Directory where vendor source code is kept. Source code is usually retained for reuse.
If these directories are owned by your regular user account, you can do a large part of package building without being root.
On one particular test system, I have hundreds of gigabytes free in /home, so I chose to put my package directories there. Here’s my /etc/mk.conf :
WRKOBJDIR=/home/ports/wrkobjdirDISTDIR=/home/ports/distdirPLIST_DB=/home/ports/plistBULK_COOKIES_DIR=/home/ports/bulk_cookiesUPDATE_COOKIES_DIR=/home/ports/update_cookiesPACKAGE_REPOSITORY=/home/ports/pkgrepo
Software Management 239
The ports system will build everything in /home/ports/wrkobjdir. Original source code files go in /home/ports/distdir. The ports system maintains various records in /home/ports/update_cookies and /home/ports/bulk_cookies. Completed packages go into /home/ports/pkgrepo.
n o t e If you have a dedicated port-building machine, consider per-release package reposi-tories. For example, I might have three versions of OpenBSD running at any given time. The package-building machine always runs the latest release, but I don’t want to throw away my old packages, so I use a package repository directory like /home/ports/pkgrepo/5.4 for packages built on a 5.4 system.
Finding SoftwareAs with packages, the first problem with ports is finding software you want. (To randomly poke around the ports tree in a pretty interface, see the http://www.openports.se website.) OpenBSD has several ways to search the ports collection, including the ports index, keywords, and via SQL.
The Ports Index
The file /usr/ports/INDEX lists all software in the ports tree, sorted by category and then alphabetically. If you have a good idea what your port is called, you can search the file for your preferred software. The index describes each port in a single pipe-delimited line, much like this:
gcpio-2.11|archivers/gcpio||GNU copy-in/out (cpio)|archivers/gcpio/pkg/DESCR|The OpenBSD ports mailing-list <[email protected]>|archivers| STEM->=0.10.38:devel/gettext converters/libiconv|STEM->=0.10.38:devel/gettext|STEM->=0.10.38:devel/gettext|any|y|y|y|y
While the ports tree itself finds this a convenient format, it’s not par-ticularly human-readable. To translate this to a human-friendly format, go into /usr/ports and run make print-index. (This process goes on for tens of thousands of lines, so feed it to a pager.) Here’s the same port in the human-readable format:
$ cd /usr/ports$ make print-index | less...Port: gcpio-2.11Path: archivers/gcpioInfo: GNU copy-in/out (cpio)Maint: The OpenBSD ports mailing-list <[email protected]>Index: archiversL-deps: STEM->=0.10.38:devel/gettext converters/libiconvB-deps: STEM->=0.10.38:devel/gettextR-deps: STEM->=0.10.38:devel/gettext...
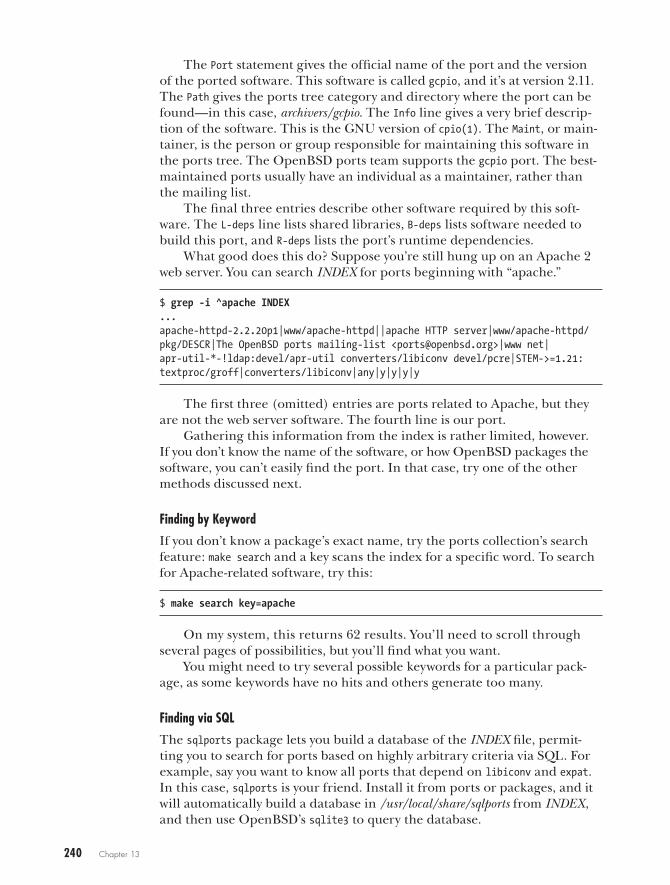
240 Chapter 13
The Port statement gives the official name of the port and the version of the ported software. This software is called gcpio, and it’s at version 2.11. The Path gives the ports tree category and directory where the port can be found—in this case, archivers/gcpio. The Info line gives a very brief descrip-tion of the software. This is the GNU version of cpio(1). The Maint, or main-tainer, is the person or group responsible for maintaining this software in the ports tree. The OpenBSD ports team supports the gcpio port. The best-maintained ports usually have an individual as a maintainer, rather than the mailing list.
The final three entries describe other software required by this soft-ware. The L-deps line lists shared libraries, B-deps lists software needed to build this port, and R-deps lists the port’s runtime dependencies.
What good does this do? Suppose you’re still hung up on an Apache 2 web server. You can search INDEX for ports beginning with “apache.”
$ grep -i ^apache INDEX...apache-httpd-2.2.20p1|www/apache-httpd||apache HTTP server|www/apache-httpd/pkg/DESCR|The OpenBSD ports mailing-list <[email protected]>|www net| apr-util-*-!ldap:devel/apr-util converters/libiconv devel/pcre|STEM->=1.21: textproc/groff|converters/libiconv|any|y|y|y|y
The first three (omitted) entries are ports related to Apache, but they are not the web server software. The fourth line is our port.
Gathering this information from the index is rather limited, however. If you don’t know the name of the software, or how OpenBSD packages the software, you can’t easily find the port. In that case, try one of the other methods discussed next.
Finding by Keyword
If you don’t know a package’s exact name, try the ports collection’s search feature: make search and a key scans the index for a specific word. To search for Apache-related software, try this:
$ make search key=apache
On my system, this returns 62 results. You’ll need to scroll through several pages of possibilities, but you’ll find what you want.
You might need to try several possible keywords for a particular pack-age, as some keywords have no hits and others generate too many.
Finding via SQL
The sqlports package lets you build a database of the INDEX file, permit-ting you to search for ports based on highly arbitrary criteria via SQL. For example, say you want to know all ports that depend on libiconv and expat. In this case, sqlports is your friend. Install it from ports or packages, and it will automatically build a database in /usr/local/share/sqlports from INDEX, and then use OpenBSD’s sqlite3 to query the database.
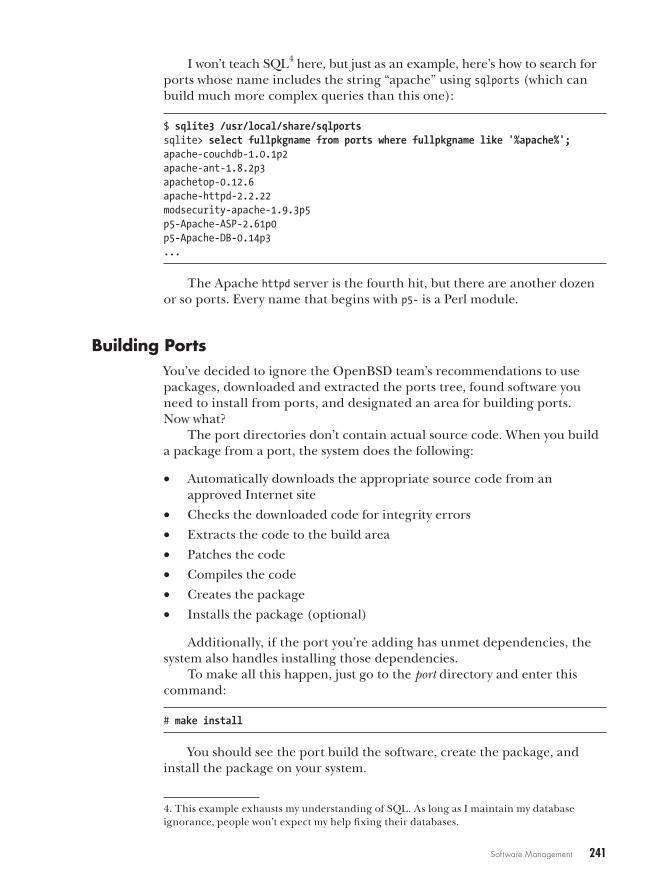
Software Management 241
I won’t teach SQL4 here, but just as an example, here’s how to search for ports whose name includes the string “apache” using sqlports (which can build much more complex queries than this one):
$ sqlite3 /usr/local/share/sqlportssqlite> select fullpkgname from ports where fullpkgname like '%apache%';apache-couchdb-1.0.1p2apache-ant-1.8.2p3apachetop-0.12.6apache-httpd-2.2.22modsecurity-apache-1.9.3p5p5-Apache-ASP-2.61p0p5-Apache-DB-0.14p3...
The Apache httpd server is the fourth hit, but there are another dozen or so ports. Every name that begins with p5- is a Perl module.
Building PortsYou’ve decided to ignore the OpenBSD team’s recommendations to use packages, downloaded and extracted the ports tree, found software you need to install from ports, and designated an area for building ports. Now what?
The port directories don’t contain actual source code. When you build a package from a port, the system does the following:
• Automatically downloads the appropriate source code from an approved Internet site
• Checks the downloaded code for integrity errors
• Extracts the code to the build area
• Patches the code
• Compiles the code
• Creates the package
• Installs the package (optional)
Additionally, if the port you’re adding has unmet dependencies, the system also handles installing those dependencies.
To make all this happen, just go to the port directory and enter this command:
# make install
You should see the port build the software, create the package, and install the package on your system.
4. This example exhausts my understanding of SQL. As long as I maintain my database ignorance, people won’t expect my help fixing their databases.
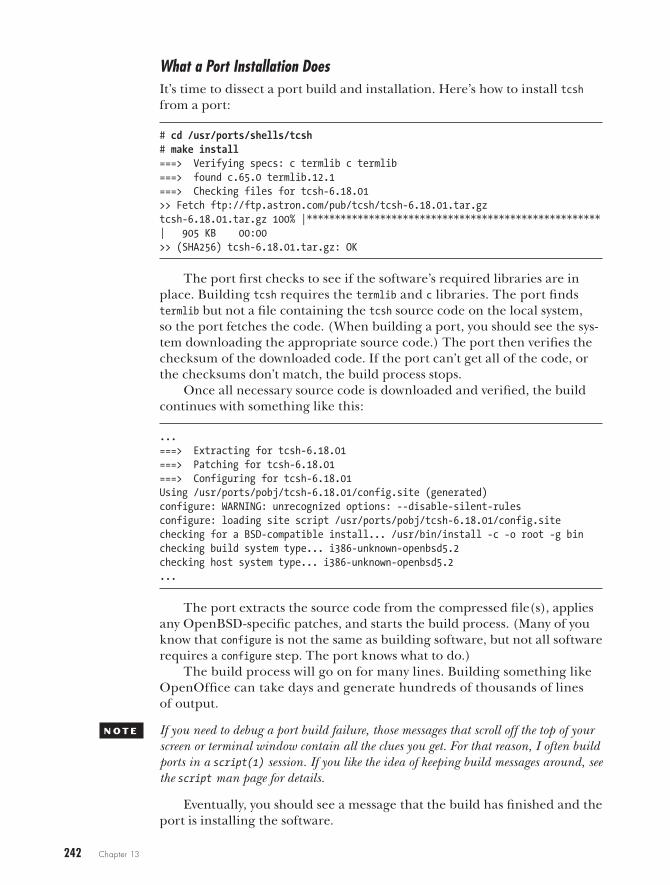
242 Chapter 13
What a Port Installation DoesIt’s time to dissect a port build and installation. Here’s how to install tcsh from a port:
# cd /usr/ports/shells/tcsh# make install===> Verifying specs: c termlib c termlib===> found c.65.0 termlib.12.1===> Checking files for tcsh-6.18.01>> Fetch ftp://ftp.astron.com/pub/tcsh/tcsh-6.18.01.tar.gztcsh-6.18.01.tar.gz 100% |****************************************************| 905 KB 00:00>> (SHA256) tcsh-6.18.01.tar.gz: OK
The port first checks to see if the software’s required libraries are in place. Building tcsh requires the termlib and c libraries. The port finds termlib but not a file containing the tcsh source code on the local system, so the port fetches the code. (When building a port, you should see the sys-tem downloading the appropriate source code.) The port then verifies the checksum of the downloaded code. If the port can’t get all of the code, or the checksums don’t match, the build process stops.
Once all necessary source code is downloaded and verified, the build continues with something like this:
...===> Extracting for tcsh-6.18.01===> Patching for tcsh-6.18.01===> Configuring for tcsh-6.18.01Using /usr/ports/pobj/tcsh-6.18.01/config.site (generated)configure: WARNING: unrecognized options: --disable-silent-rulesconfigure: loading site script /usr/ports/pobj/tcsh-6.18.01/config.sitechecking for a BSD-compatible install... /usr/bin/install -c -o root -g binchecking build system type... i386-unknown-openbsd5.2checking host system type... i386-unknown-openbsd5.2...
The port extracts the source code from the compressed file(s), applies any OpenBSD-specific patches, and starts the build process. (Many of you know that configure is not the same as building software, but not all software requires a configure step. The port knows what to do.)
The build process will go on for many lines. Building something like OpenOffice can take days and generate hundreds of thousands of lines of output.
n o t e If you need to debug a port build failure, those messages that scroll off the top of your screen or terminal window contain all the clues you get. For that reason, I often build ports in a script(1) session. If you like the idea of keeping build messages around, see the script man page for details.
Eventually, you should see a message that the build has finished and the port is installing the software.

Software Management 243
...===> Faking installation for tcsh-6.18.01install -c -s -o root -g bin -m 555 /home/ports/wrkobjdir/tcsh-6.18.01/tcsh-6.18.01/tcsh /home/ports/wrkobjdir/tcsh-6.18.01/fake-i386/usr/local/bin/tcshinstall -c -o root -g bin -m 444 /home/ports/wrkobjdir/tcsh-6.18.01/tcsh-6.18.01/tcsh.man /home/ports/wrkobjdir/tcsh-6.18.01/fake-i386/usr/local/man/man1/tcsh.1install -c -o root -g bin -m 444 /home/ports/wrkobjdir/tcsh-6.18.01/tcsh-6.18.01/nls/C.cat /home/ports/wrkobjdir/tcsh-6.18.01/fake-i386/usr/local/share/nls/C/tcsh.cat...
The port installs the software in a temporary location in the port building directory, but that’s not where we want the software installed! Remember that the ports system builds packages, and then installs from the package. This “fake” installation is for building the package.
...===> Building package for tcsh-6.18.01Create /home/ports/pkgrepo/i386/all/tcsh-6.18.01.tgz...
There’s the package, retained in the package repository specified ear-lier. You might want to grab this file to install on your other machines, or perhaps even share the package repository via NFS.
Now, because we specified make install on the command line, the port installs the created package.
...===> Verifying specs: c termlib===> found c.65.0 termlib.12.1===> Installing tcsh-6.18.01 from /home/ports/pkgrepo/i386/all/...tcsh-6.18.01: ok#
Installing the package requires making some of the same checks as building the package. Yes, the port could not have built the package with-out those libraries, but the ports system doesn’t assume that the package was built on the local system.
Port Build StagesThe package build process actually includes several stages, or smaller chunks of build procedure. Each stage performs all the stages before it. The final stage, make install, calls all of them, which provides several points where you can intervene in the port build process. If you want to make custom changes to a package, you can do it here.
Let’s look at each of the stages called for every port build.
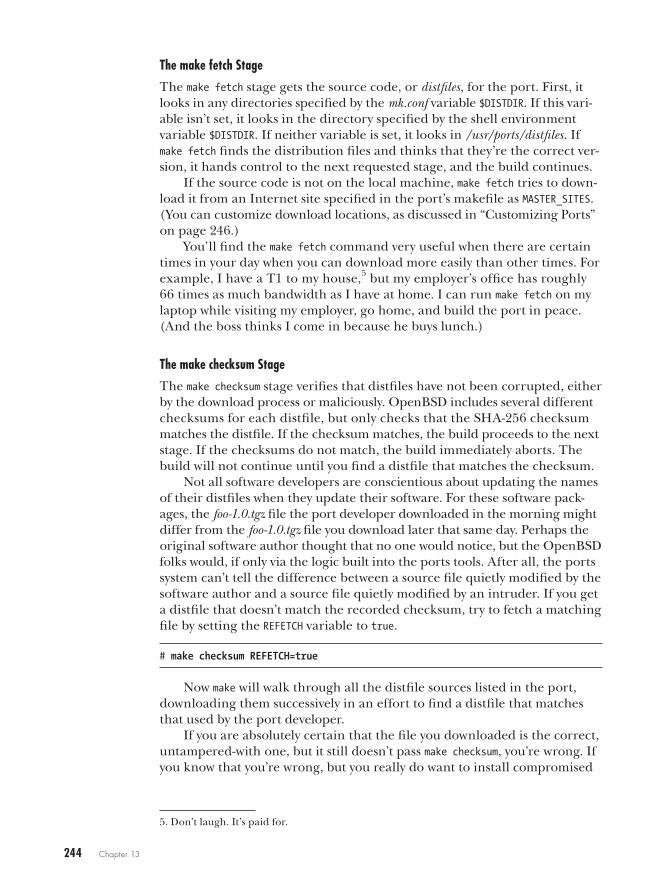
244 Chapter 13
The make fetch Stage
The make fetch stage gets the source code, or distfiles, for the port. First, it looks in any directories specified by the mk.conf variable $DISTDIR. If this vari-able isn’t set, it looks in the directory specified by the shell environment variable $DISTDIR. If neither variable is set, it looks in /usr/ports/distfiles. If make fetch finds the distribution files and thinks that they’re the correct ver-sion, it hands control to the next requested stage, and the build continues.
If the source code is not on the local machine, make fetch tries to down-load it from an Internet site specified in the port’s makefile as MASTER_SITES. (You can customize download locations, as discussed in “Customizing Ports” on page 246.)
You’ll find the make fetch command very useful when there are certain times in your day when you can download more easily than other times. For example, I have a T1 to my house,5 but my employer’s office has roughly 66 times as much bandwidth as I have at home. I can run make fetch on my laptop while visiting my employer, go home, and build the port in peace. (And the boss thinks I come in because he buys lunch.)
The make checksum Stage
The make checksum stage verifies that distfiles have not been corrupted, either by the download process or maliciously. OpenBSD includes several different checksums for each distfile, but only checks that the SHA-256 checksum matches the distfile. If the checksum matches, the build proceeds to the next stage. If the checksums do not match, the build immediately aborts. The build will not continue until you find a distfile that matches the checksum.
Not all software developers are conscientious about updating the names of their distfiles when they update their software. For these software pack-ages, the foo-1.0.tgz file the port developer downloaded in the morning might differ from the foo-1.0.tgz file you download later that same day. Perhaps the original software author thought that no one would notice, but the OpenBSD folks would, if only via the logic built into the ports tools. After all, the ports system can’t tell the difference between a source file quietly modified by the software author and a source file quietly modified by an intruder. If you get a distfile that doesn’t match the recorded checksum, try to fetch a matching file by setting the REFETCH variable to true.
# make checksum REFETCH=true
Now make will walk through all the distfile sources listed in the port, downloading them successively in an effort to find a distfile that matches that used by the port developer.
If you are absolutely certain that the file you downloaded is the correct, untampered-with one, but it still doesn’t pass make checksum, you’re wrong. If you know that you’re wrong, but you really do want to install compromised
5. Don’t laugh. It’s paid for.
Software Management 245
or damaged software, set the environment variable NO_CHECKSUM=yes to skip the make checksum stage.
w a r n i n g Skipping the make checksum stage might be valid for debugging, but it certainly isn’t the way to create a stable, useful, or secure package. You also might invalidate the rest of the port. Perhaps the OpenBSD patches will no longer apply cleanly, the software just won’t run, or you could even be installing a backdoor, inviting scumbags to stash problematic content on your machine. You are utterly on your own if you insist on ignoring a checksum mismatch.
The make prepare Stage
At this point, the ports system gets into recursion. At make prepare, the port checks for any software needed to build or run the software you’re trying to build. If the port lists any of these dependencies, it checks to see if they are installed. If the dependencies are not installed, this stage kicks off make install for those required ports. Once all of the required dependencies are installed, this stage ends.
The make extract Stage
The ports system must extract the source code from the distfile before building the software. Source code is extracted into the directory defined by $WRKOBJDIR, or in a directory under /usr/ports/pobj/ named after the port. By default, my tcsh port would extract under /usr/ports/pobj/tcsh, but because I defined a separate location for building software, it’s built under /home/ports/wrkobjdir/tcsh.
The make patch Stage
Any patches included in the port’s patches directory are applied in the make patch stage. If the patches all apply correctly, this stage ends. If the patches do not apply correctly, the port fails.
To apply your own patches to the port, or to review the code before compiling it, run make patch first. Your patches might conflict with the port patches if you apply them first, cause compilation failures, or bring up any number of other problems. By running make patch first, you get to see the code as OpenBSD can compile it. Anything you break after that is definitely your fault.
The make configure Stage
Many software packages use a configure script to prepare themselves for compilation on a specific platform. The make configure command runs that script. If you want to edit the configure script, do so before running this stage! If there is no configure script, the port silently skips this stage.
246 Chapter 13
The make build Stage
The make build stage compiles the fetched, extracted, patched, and config-ured software. If you type make in a port directory, the port calls make build. This stage doesn’t assemble a package; it just performs the compilation and creates the actual program binaries in the port’s work directory.
The make fake Stage
The make fake stage installs the software in a subdirectory, laid out exactly as it would be under the root directory. This fake root directory is in the work directory, named fake- with the architecture appended, such as fake-amd64. Everything that will be in the package is installed under this directory, with the same ownership and permissions that it will include in the package.
The make package Stage
The make package stage bundles up the port’s fake installation directory, adds in packaging and installation instructions, and ties it all up in a pack-age exactly like those available on the FTP site. The package will be stored under the PKGREPO directory you defined earlier (or in /usr/ports/packages if you didn’t define one), in a subdirectory organized by architecture, and in further subdirectories organized by available distribution locations.
make package means that you can build this port on one machine with-out installing it. You must install the build dependencies to build the port, however.
The make install Stage
The make install stage runs pkg_add(1) to install the package you compiled.
The make clean Stage
Some packages require a lot of disk space. The make clean stage removes all of the build files except the distfile and the completed package.
Customizing PortsOpenBSD includes a variety of hooks to let you easily customize how you get and build ports. If possible, you should use the OpenBSD-provided infra-structure, but there may be cases where that’s not possible. Here, we’ll look at some of the more commonly used customization settings.
Local Distfile MirrorsWhile ports provide several places to get source code, you might want to override those sites. Perhaps you share a network with a major mirror site, or you don’t have unfettered Internet access. OpenBSD lets you set your own preferred mirror sites.
Software Management 247
Preferred Collection Mirrors
Many software sources can be grouped into collections, which tend to be mirrored together. An example is the official GNU software collection. A GNU mirror site probably has everything in the official GNU collection. The Gnu C Compiler Project has its own set of software and mirrors. There are older software collections, such as SunSITE, and newer ones, such as SourceForge.
Each collection is available from a list of mirror sites. OpenBSD maintains lists of these mirror sites in /usr/ports/infrastructure/templates/network.conf.template. Never edit this file; it’s a core ports file, and upgrading changes it.
For example, here’s a list of mirrors for a smaller project, BerliOS:
...MASTER_SITE_BERLIOS+= \ http://download.berlios.de/ \ http://download2.berlios.de/ \ http://spacehopper.org/mirrors/berlios/...
Several ports want to fetch BerliOS-related software from the main BerliOS download site. The OpenBSD port developers have identified three desirable mirrors, as listed in the variable MASTER_SITE_BERLIOS.
But suppose you have a BerliOS mirror much closer to you. Perhaps it’s not an official mirror, or you’ve managed to finagle access to a nonpublic mirror. It’s closer, it’s faster, and you would prefer to use it. OpenBSD looks at /usr/ports/infrastructure/db/network.conf before the default mirror list. You could copy the default mirror list to this file and edit it, but then you would need to manually synchronize changes during upgrades. That’s work, and therefore morally questionable. Instead, add entries only in network.conf, and include the default network.conf.template.
Suppose you have a private BerliOS mirror at http://www.blackhelicopters .org/berlios/. You would create a network.conf file like this:
MASTER_SITE_BERLIOS+= \ http://www.blackhelicopters.org/berlios/
.include "../templates/network.conf.template"
The += used in both network.conf and network.conf.template means “Add this value to variable such-and-such.” More desirable mirrors appear first in the list. This network.conf entry adds the private mirror to the variable MASTER_SITE_BERLIOS, and then calls in network.conf.default, which appends all of the other mirrors. The end result is that the BerliOS mirror list will contain four mirrors: your preferred mirror first and the default OpenBSD-approved mirrors later. If a file does not exist on a mirror, the port will try the other mirrors in order.
248 Chapter 13
I used BerliOS as an example because it has a small mirror list, but the same applies to any other software collection that OpenBSD recognizes. Other collections available at this time are shown in Table 13-1.
Table 13-1: Some Software Collections
Collection Description
MASTER_SITE_GNU Software from the GNU projectMASTER_SITE_GCC Software from the GCC projectMASTER_SITE_XCONTRIB Contributions to the X Window SystemMASTER_SITE_R5CONTRIB Older X Window System contributionsMASTER_SITE_SUNSITE A collection of Sun softwareMASTER_SITE_SOURCEFORGE Software hosted by SourceForgeMASTER_SITE_SOURCEFORGE_JP Japanese SourceForge mirrorsMASTER_SITE_GNOME Software from the Gnome projectMASTER_SITE_PERL_CPAN The biggest Perl module collectionMASTER_SITE_TEX_CTAN Software for TeX typesettingMASTER_SITE_KDE Software related to KDEMASTER_SITE_SAVANNAH Software development hosted by the FSFMASTER_SITE_AFTERSTEP Software related to the AfterStep window managerMASTER_SITE_WINDOWMAKER Software related to the Window Maker window managerMASTER_SITE_FREEBSD_LOCAL Software distributed by the FreeBSD Project, but not
included in FreeBSDMASTER_SITE_PACKETSTORM Security software part of the Packet Storm collectionMASTER_SITE_APACHE Apache Foundation softwareMASTER_SITE_BERLIOS Parts of the BerliOS Linux projectMASTER_SITE_MYSQL Software from the MySQL project (Oracle)MASTER_SITE_PYPI Python softwareMASTER_SITE_RUBYGEMS Modules for RubyMASTER_SITE_NPM JavaScript packagesMASTER_SITE_ISC Software from the Internet Software Consortium
If you have a Debian mirror in your university datacenter, list it in network.conf. If it appears a second time, later in the list, because it’s listed in network.conf.template, so what? Either the distfile is there, in which case you save time and bandwidth, or the distfile isn’t there, in which case you waste 50 milliseconds checking the local mirror a second time.
Fallback Mirrors
OpenBSD supports two fallback mirrors. If all other distfile sources fail, you can check either the OpenBSD or FreeBSD mirrors for the file. Both OpenBSD and FreeBSD tend to mirror distfiles for active ports. This isn’t
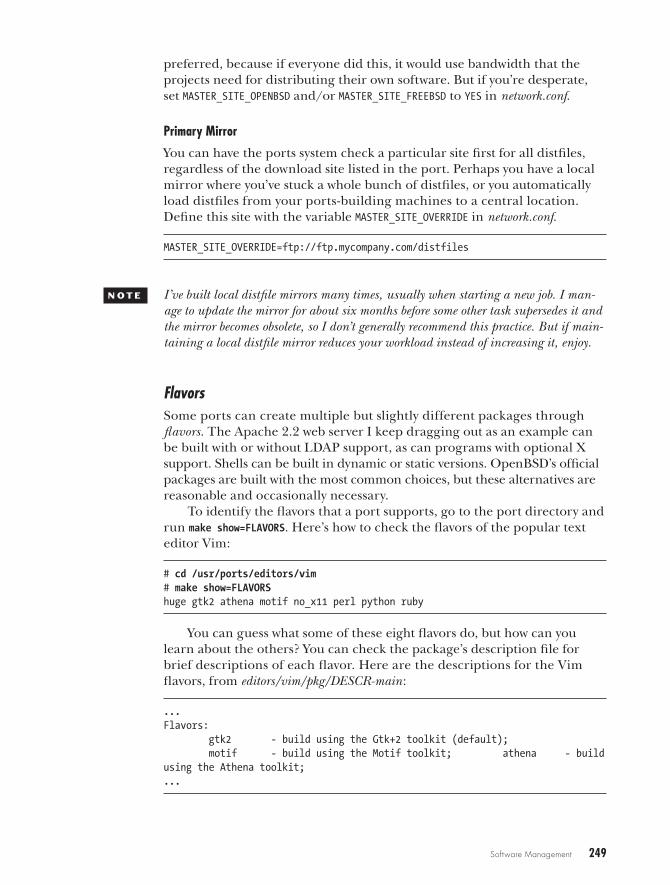
Software Management 249
preferred, because if everyone did this, it would use bandwidth that the projects need for distributing their own software. But if you’re desperate, set MASTER_SITE_OPENBSD and/or MASTER_SITE_FREEBSD to YES in network.conf.
Primary Mirror
You can have the ports system check a particular site first for all distfiles, regardless of the download site listed in the port. Perhaps you have a local mirror where you’ve stuck a whole bunch of distfiles, or you automatically load distfiles from your ports-building machines to a central location. Define this site with the variable MASTER_SITE_OVERRIDE in network.conf.
MASTER_SITE_OVERRIDE=ftp://ftp.mycompany.com/distfiles
n o t e I’ve built local distfile mirrors many times, usually when starting a new job. I man-age to update the mirror for about six months before some other task supersedes it and the mirror becomes obsolete, so I don’t generally recommend this practice. But if main-taining a local distfile mirror reduces your workload instead of increasing it, enjoy.
FlavorsSome ports can create multiple but slightly different packages through flavors. The Apache 2.2 web server I keep dragging out as an example can be built with or without LDAP support, as can programs with optional X support. Shells can be built in dynamic or static versions. OpenBSD’s official packages are built with the most common choices, but these alternatives are reasonable and occasionally necessary.
To identify the flavors that a port supports, go to the port directory and run make show=FLAVORS. Here’s how to check the flavors of the popular text editor Vim:
# cd /usr/ports/editors/vim# make show=FLAVORShuge gtk2 athena motif no_x11 perl python ruby
You can guess what some of these eight flavors do, but how can you learn about the others? You can check the package’s description file for brief descriptions of each flavor. Here are the descriptions for the Vim flavors, from editors/vim/pkg/DESCR-main:
...Flavors: gtk2 - build using the Gtk+2 toolkit (default); motif - build using the Motif toolkit; athena - build using the Athena toolkit;...
250 Chapter 13
Motif? I remember Motif. And now I’m going to try really hard to forget it again. But if you want Motif support in your Vim version, go for it.
To fall back to my ongoing example, here are the flavors for Apache 2:
# cd /usr/ports/www/apache-httpd# make show=FLAVORSldap
I use LDAP to attach websites to my central authentication system. If I can get LDAP authentication on my web server, I want it.
Building a Flavored Port
Define any desired flavors with the $FLAVOR environment variable, but not in your .profile or .cshrc file, as a port will not build if you request an unrecog-nized flavor. Define it when you build the port. For example, while still in the apache-httpd directory, I run this command:
# env FLAVOR="ldap" make package===> Checking files for apache-httpd-2.2.20p1-ldap>> Fetch http://www.reverse.net/pub/apache/httpd/httpd-2.2.20.tar.gz...===> apache-httpd-2.2.20p1-ldap depends on: openldap-client-* - not found===> Verifying install for openldap-client-* in databases/openldap...
By your defining the flavor on the command line, the port knows to check for the OpenLDAP client needed to build Apache. When the build finishes, you should get a package file with the flavor appended—in this case, apache-httpd-2.2.20p1-ldap.tgz.
Flavors and Dependencies
When you build a flavored port, the flavor does not propagate to dependen-cies. You need to check the flavored port’s dependencies to see if they need flavoring as well. For example, my flavored Apache package calls in the OpenLDAP client, which has no flavors, but OpenLDAP calls in cyrus-SASL, and if I check that port, I see this:
# cd /usr/ports/security/cyrus-sasl2# make show=FLAVORSdb4 ldap mysql pgsql sqlite3
Cyrus SASL comes in LDAP flavor, but defining that I want Apache built in LDAP flavor doesn’t mean that cyrus-SASL will also be built with LDAP support. If I need LDAP support in this dependency, I must build it separately. I don’t need it for my environment, so I won’t bother, but check for potential issues like these when building your packages.
Software Management 251
If you decide to rebuild a dependent port with a flavor, be sure to rebuild all the ports that depend on that port afterward. Be sure that your packages have correct dependencies using the targets print-build-depends and print-run-depends. Here, I see which ports I’ll need to build for my fla-vored Apache 2:
# env FLAVOR="ldap" make print-build-dependsThis port requires package(s) "metaauto-1.0 gperf-3.0.4 libiconv-1.14 gettext-0.18.1p1 gmake-3.82p1 groff-1.21p8 pcre-8.30 help2man-1.29p0 autoconf-2.65 autoconf-2.68 cyrus-sasl-2.1.25p3 icu4c-4.8.1.1p0 db-4.6.21v0 openldap-client-2.4.31 apr-1.4.6 apr-util-1.4.1-ldap" to build.
I can check the flavors of each of these ports.
Building Multiple Flavors
You can build multiple flavors of one port on the same system. Each pack-age filename includes the flavor, so you can have packages for both the Motif and GTK2 versions of Vim. Carefully inspect the dependencies to ver-ify that each is built with the correct flavoring. For packages with flavored dependencies, I recommend removing every flavored dependency and rebuilding them all again, so that everything gets the correct flavor.
Uninstalling and Reinstalling Flavored Ports
Flavoring a package changes its name. I can’t run pkg_delete apache-httpd because it’s not installed. Query the system for the packages you’ve manu-ally installed, and you’ll see this:
# pkg_info -mapache-httpd-2.2.20p1-ldap apache HTTP server...
When working with this package, you must specify the flavor.
# pkg_delete apache-httpd-2.2.20p1-ldapapache-httpd-2.2.20p1-ldap: ok...
Similarly, to reinstall a flavored package, specify the flavored package file.
SubpackagesSome ports contain multiple wildly different packages. This isn’t like add-ing LDAP support to Apache or Motif support to Vim—those are changes to the existing package, not wildly different. Some ports create two com-pletely different packages, such as a database client and the associated
252 Chapter 13
database server. I’ve drawn in OpenLDAP through this chapter’s examples, and both the OpenLDAP server and client come from the same port: databases/openldap. Other applications might have plug-ins for access-ing several different database engines. These are called subpackages or multipackages.
Unlike flavors, OpenBSD provides all subpackages of a port. You can install both the server and client versions of OpenLDAP from official pack-ages. When the port is built, all the subpackages are built. The package is split into subpackages at the package-bundling stage.
To see all the subpackages supported by a port, run the following command:
# cd /usr/ports/databases/openldap# make show=MULTI_PACKAGES-main -server
This port has two subpackages: openldap-main and openldap-server.How can you learn what each subpackage includes? As with flavors, you
can check its description file, which is pkg/DESCR . OpenLDAP includes pkg/DESCR-server and pkg/DESCR-main. Reading these shows that the main package is the client, as you would expect.
If you run make install in the port directory, you get the main version of the port—in this case, the OpenLDAP client. OpenLDAP clients out-number the servers, so that’s also what you would expect. To build a different subpackage, set SUBPACKAGE in the environment on the command line, as you did for flavors.
# env SUBPACKAGE="-server" make package
This builds the -server version. Be sure to include the leading dash, as specifying a nonexistent subpackage makes the build fail.
Packages and rc.d ScriptsChapter 5 covered how to have OpenBSD start packaged software, but let’s review it quickly. When you install a package that can be started at boot time, the package also installs a startup script in /etc/rc.d. If I install the OpenLDAP server, the package installation will report:
...The following new rcscripts were installed: /etc/rc.d/slapd
To start the slapd(8) OpenLDAP server at boot, add the script name to the pkg_scripts variable in /etc/rc.conf.local.
pkg_scripts="slapd"

Software Management 253
OpenBSD runs these scripts in order at boot, and in reverse order at shutdown.
To change a package’s command-line arguments from the default, add a command_flags variable to rc.conf.local. Do not edit the startup script.
slapd_flags="-u _openldap -6 -l local0"
You can now manage your add-on software in any way you need. Now let’s move on to configuring OpenBSD’s integrated software,
through the files in /etc.


14E v E r y t h i n g / E t c
You are in a maze of twisty little configs;
no two are alike.
When I get saddled with an unfamiliar server, the first thing I do is look for the
previous sysadmin’s documentation. When I discover there isn’t any, I study the /etc direc-
tory because it contains the basic configuration for aUnix-like system. The fastest way to go from a junior sysadmin to a mid-grade one is to read /etc and the associated man pages—all of the docu-mentation. Yes, that’s a lot of reading.
Once you understand /etc, you understand how the system hangs together. You must learn all this anyhow, but you might as well take the easier route and learn it up front rather than in an unscheduled series of desperate troubleshooting sessions. (I’ve already discussed many /etc files in earlier chapters where relevant, such as /etc/fstab in Chapter 8 and /etc/services in Chapter 11.)
Some files that you’ll find in /etc are of only historical interest or are gradually dying out. I’ll discuss briefly what they do, but I won’t spend much time on obsolete files. I also won’t spend much time on files useful only in
256 Chapter 14
edge cases (where they relate to software that’s not used too often or only in very peculiar circumstances). On the other hand, I will dive deeply into important /etc files that haven’t already found a place elsewhere in this book.
/etc Across Unix VariantsDifferent Unix-like systems use different /etc files. In many commercial variants, these files are simply renamed or restructured files from primordial BSD.
For example, the first time I had to manage an IBM AIX system, I needed to know which disks should be mounted where, but there was no /etc/fstab. A little searching led me to /etc/filesystems, which was IBM’s /etc/fstab. Apparently, the IBM folks felt that a file named for “filesystem table” was confusing, so they gave it a different name. Knowing that this informa-tion existed somewhere in /etc, and knowing which files had an unrelated purpose, greatly shortened my search.
Changes to /etc can dramatically alter how your system performs. While manually recovering a scrambled filesystem can push an adequate sysadmin toward becoming a pretty good one, it’s one of the least pleasant ways to get there.
The /etc FilesNow we will take a look at each of the /etc files, going in alphabetical order. We’ll start with /etc/adduser.conf and end with /etc/ypldap.conf.
/etc/adduser.confThe /etc/adduser.conf file contains the persistent configuration for adduser(8), which Chapter 6 covers in detail. To change adduser’s settings, edit this file. This file is self-documenting, and if you’ve read Chapter 6, you shouldn’t have any trouble with it.
/etc/amdThe automounter daemon automatically loads NFS filesystems upon request. If you’re interested in this function, read the amd(8) man page.
The automounter daemon isn’t as useful as you might think. As the documentation says, “A weird imagination is most useful to gain full advan-tage of all the features.”
/etc/authpfThe /etc/authpf directory contains the authenticating packet filter config-uration. If you’re interested in having user authentication for firewall access, I recommend The Book of PF, 2nd Edition, by Peter Hansteen (No Starch Press, 2010).
Everything /etc 257
/etc/bgpd.confOpenBSD includes a BGP daemon, bgpd(8). Most sysadmins will never go near BGP, but if you need it, see the bgpd.conf(5) man page.
/etc/boot.confThe /etc/boot.conf file controls the system’s booting process, as discussed in Chapter 5.
/etc/changelist/etc/changelist is a text file that contains the list of files to be checked by the daily security check script, /etc/security. We cover these tasks in detail in Chapter 15.
/etc/chio.confThe chio(1) medium changer lets you manage jukebox-style media arrays, such as CD and tape changers. If you have a tape backup unit that can swap between multiple tapes all on its own, chio is your friend. Configure chio in /etc/chio.conf. Most OpenBSD users don’t have media changers, but if you’re interested, see the man page for chio(1).
/etc/csh.*The /etc/csh.* files contain system-wide defaults for csh(1) and tcsh(1). When a user logs in with either of these shells, the shell executes any commands listed in /etc/csh.login. Similarly, when the user logs out, the shell executes any commands in /etc/csh.logout. Put general shell configuration in /etc/csh .cshrc.
/etc/daily and /etc/daily.localThe /etc/daily.local script is run every day to maintain the system. See Chapter 15 for details.
/etc/dhclient.confYou can configure OpenBSD’s DHCP client by using dhclient(8), as discussed in Chapter 12.
/etc/dhcpd.confOpenBSD includes a secure DHCP server. It started life as an Internet Systems Consortium (ISC) DHCP server, but has been repeatedly rewritten and simplified by the OpenBSD team. See Chapter 16 for details.
/etc/disklabels/The /etc/disklabels/ directory traditionally contains backup copies of disk-labels, as discussed in Chapter 8. Very few system administrators actually
258 Chapter 14
use it, because very few system administrators know it’s there. OpenBSD copies the disklabels for all system disks as part of the daily backup of criti-cal files (see Chapter 15).
/etc/disktabA couple of decades ago, hard drives were expensive and precious devices that came in only a few varieties. While modern disks can tell the computer about their geometry, older disks need manual configuration, as do older removable media such as 1.44MB floppy disks and Zip disks. If you want to access one of these ancient disks, you’ll need the information in /etc/disktab. (But if you need to use one of these old disks, you’re almost certainly solv-ing the wrong problem.)
/etc/dumpdatesThe /etc/dumpdates file records the dates of the last successful dump(8) backup. The dump tool backs up a filesystem, rather than just the files on a filesystem, as tar(1) does. A dump includes file flags and other special characteristics of the filesystem.
/etc/dvmrpd.confOpenBSD implements the Distance Vector Multicast Routing Protocol (DVMRP) with dvmrpd(8), configured in dvmrpd.conf. This is another edge case where OpenBSD performs well, but is of interest only to a few users. If you’re interested in DVMRP, see the dvmrpd(8) man pages.
/etc/exportsNFS servers list the filesystems they export, and who may access them, in /etc/exports. See Chapter 9 for information about using NFS as both a client and a server.
/etc/fbtabOpenBSD can change the ownership of system files and devices based on how a user has logged in. When a user logs in via the text console, login(1) changes the ownership of the console, as well as the keyboard and the mouse, to that user. This way, users can then configure the keyboard or mouse to suit their preferences. A user who logs in via an X session needs similar changes.
You could use /etc/fbtab to change permissions on other devices or files for other special needs, but this is really tricky to get right, and usually means you’re making something much more complicated than it needs to be. If you’re considering this approach, rethink your problem.
/etc/firmwareSome hardware needs software to run. In years past, this software would have been loaded onto programmable read-only memory (PROM) chips
Everything /etc 259
on the device itself. Network cards often had boot PROMs that let them get configuration information from the network. PROMs are not expensive these days, but making millions of anything adds up quickly. Hardware vendors now often ask the operating system to load this software, called firmware, onto the hardware for them.
Firmware is usually a closed-source binary object, or blob. While the OpenBSD team members would never accept loading a blob into the ker-nel, they’re willing to hand a file to a piece of hardware. It doesn’t matter if the hardware gets the blob from the operating system or from a PROM chip attached to the hardware—it’s still software that runs only on the device, not in the operating system.
For user convenience, OpenBSD distributes firmware that it’s legally permitted to offer. If OpenBSD cannot distribute firmware on the installa-tion media, the fw_update script uses the package system to fetch it over the Internet. Wherever the firmware comes from, it’s stored in /etc/firmware.
By default, fw_update runs at first boot after an OpenBSD install or upgrade, but you can run it any time you want (it’s stored in /usr/sbin).
/etc/fonts/The /etc/fonts/ directory contains the Xenocara X11 fonts. We’ll discuss Xenocara and X11 in Chapter 17.
/etc/fstabThe filesystem table lists all filesystems that the system knows about, whether they’re automatically mounted at boot or kept in reserve. See Chapter 8 for details.
/etc/ftpchrootUsers listed in /etc/ftpchroot are automatically chrooted into their home direc-tory when they log in via FTP. See ftpd(8) for full details.
Try to avoid FTP, as it transmits usernames and passwords in cleartext. Use scp(1) or sftp(1) instead.
/etc/ftpusersThe /etc/ftpusers file does exactly the opposite of what the filename implies, but it has been this way for decades, so don’t worry about it.
Any user listed in /etc/ftpusers cannot log in via FTP. See ftpd(8) for details, but again, use scp(1) or sftp(1) instead—especially for administrative tasks!
/etc/gettytabThe /etc/gettytab file contains the configuration information for login terminals. Unix-like systems have been traditionally accessed by anything and everything, from innumerable slightly different serial consoles to Secure Shell (SSH) sessions over the network. If you ever need to use a nonstandard terminal type, explore /etc/gettytab.
260 Chapter 14
There’s no reason to get rid of this file. After all, someone out there probably still uses a plugboard 1200-baud terminal. But there’s no longer any reason to modify it either. In any case, the man page is worth reading, especially if you read it to the end.
/etc/groupThe /etc/group file controls to which groups each user account belongs. User groups are covered in Chapters 6 and 7.
/etc/hostapd.confOpenBSD can act as a wireless access point. The host access point daemon (hostapd(8)) lets OpenBSD perform some complicated access point tasks that are useful in larger environments. OpenBSD’s wireless services are interesting if you use wireless; read hostapd(8) and ifconfig(8) for full details.
/etc/hostname.*The /etc/hostname.* files configure network interfaces, as discussed briefly in Chapter 4 and at length in Chapter 12.
/etc/hostsThe /etc/hosts file contains a hand-maintained map of IP addresses and hostnames. See Chapter 12 for details.
/etc/hosts.equivThe /etc/hosts.equiv file is used by the various r-tools, such as rcp(1), rlogin(1), and rsh(1). These tools, and the underlying protocols, are relics of an earlier age, when security on the Internet was not so great a concern. OpenBSD no longer includes an rlogin(1) client. The r-tools are largely replaced by SSH. Today, you should not use the r-protocols under any sen-sible circumstances.
The /etc/hosts.equiv file should not contain any uncommented entries, unless you specifically put them there. This is the only system file I can rea-sonably say every sysadmin should verify is empty and marked immutable (see Chapter 10).
What did I mean by “sensible circumstances” and using the r-protocols? A few years ago, I worked on a network with ancient but mission-critical VMS servers manageable only by r-protocols, but those were not reasonable cir-cumstances. If you find yourself similarly trapped, check out hosts.equiv(5), rshd(8), and rsh(1). And do something about your circumstances.
/etc/hosts.lpdYou can configure an OpenBSD system to accept print requests from other machines and feed them to a locally attached printer. This was vital when
Everything /etc 261
printers were big, expensive beasts, but it’s less important today. This file lists the hostnames or IP addresses of systems that may use the local system’s line printer daemon, lpd(8).
If you’re really interested in having your OpenBSD system print, check out lpd(8) and /etc/printcap.
/etc/hotplug/OpenBSD can automatically take action when a device is plugged into the system through hotplugd(8). For example, if you attach your digital camera to a USB port, hotplugd can run a script that will attach the device node to a directory and make it readable by your user account.
hotplugd runs the script /etc/hotplug/attach when a device is attached, and /etc/hotplug/detach when a device is removed. These scripts must be carefully written to match the devices being attached and detached. For details on how this works, see hotplugd(8).
/etc/ifstated.confThe interface state daemon ifstated(8) monitors network conditions and takes action when specified events occur. For example, you can configure ifstated to watch for another server to go down, and when that server fails, start up the local web server. For more information about using ifstated, see Hansteen’s The Book of PF.
/etc/iked/, /etc/iked.conf, /etc/ipsec.conf, and /etc/isakmpdThe /etc/iked/, /etc/iked.conf, /etc/ipsec.conf, and /etc/isakmpd files manage OpenBSD’s implementation of the IPsec standard for VPNs. OpenBSD has a very robust IPsec implementation, and it is actually used for testing by various interoperability groups.
You can fill entire books with the acronyms used for VPN technologies, let alone instructions for actually configuring them. See the man pages for details.
/etc/inetd.confThe Internet small service listener inetd(8) attaches to multiple network ports for programs that don’t need to run constantly. When a request on one of those ports comes in, inetd activates the correct program to handle the request. Chapter 16 discusses inetd(8) in more detail.
/etc/kbdtypeThe /etc/kbdtype file contains a single line with your preferred terminal key-board mapping. Test your keyboard mapping with kdb(1), and then put that keyboard mapping in /etc/kbdtype.
262 Chapter 14
/etc/kerberosV/The /etc/kerberosV/ directory contains configuration for the Kerberos cen-tralized authentication system. I recommend some kind of centralized logon for every network. Configuring Kerberos properly is a large subject. If you’re interested, peruse kerberos(1).
/etc/ksh.kshrc/etc/ksh.kshrc is the global configuration file for the public domain Korn shell included with OpenBSD. Users must include this file in their personal .kshrc for settings here to take effect. See the ksh(1) man page for details.
/etc/ldap/ and /etc/ldapd.confOpenBSD includes a Lightweight Directory Access Protocol (LDAP) daemon. LDAP is commonly used for centralized authentication, address books, and other database operations that are read more than they write. As of this writing, the features of ldapd(8) are not complete, but it’s good enough to provide a central authentication point.
/etc/localtimeThe /etc/localtime file is a symlink to the actual time zone file. To change the time zone, change the symlink. Chapter 4 covers time zones.
/etc/locate.rcThe /etc/locate.rc file controls creation of the locate(1) database. OpenBSD updates the locate database every week, as discussed in Chapter 15.
/etc/login.confWith /etc/login.conf, you can control user account login behavior, as discussed in Chapter 6.
/etc/lynx.cfgOpenBSD includes the lynx(1) text-mode web browser. Lynx is endlessly configurable, and settings in /etc/lynx.cfg affect all Lynx users on the system. You can save yourself a lot of trouble by configuring your proxy server set-tings here.
/etc/magicMany files include a “magic number” and other characteristics specific to their type. file(1) uses these magic numbers to identify the file type, with /etc/magic as an index of magic numbers. Do not manually edit /etc/magic, as it’s automatically generated by compiling file(1).
Everything /etc 263
/etc/mail/The /etc/mail/ directory contains the configuration files for OpenBSD’s email software. OpenBSD includes two email packages: the old workhorse Sendmail and the OpenBSD-created smptd(8). smptd isn’t quite ready for pro-duction use, but it might be by the time this book hits the shelves.
This directory also contains /etc/mail/aliases, a list of mail redirections. Be sure you set the email alias for your root account to somewhere you’ll actually read your email, as discussed in Chapter 4.
/etc/mail.rcThe /etc/mail.rc file has nothing to do with sending or receiving email as a mail server. It’s the global configuration file for the mail(1) email client. While more advanced email clients have almost completely superseded mail, it’s worth exploring because almost any Unix-like system will have it installed.
/etc/mailer.confTraditionally, the only mail server program available for any Unix-like operating system was Sendmail. As such, a huge amount of add-on software expects to find /usr/sbin/sendmail and expects it to behave in a certain man-ner. It doesn’t matter that, by modern standards, Sendmail and the whole Simple Mail Transfer Protocol (SMTP) are baroque and bizarre; software expects to find it.
Worse, sendmail(8) behaved differently depending on what name it was called with. Programs such as send-mail, mailq, and newaliases are all Sendmail wearing different hats. If you call the Sendmail program by run-ning the mailq command, it runs differently than if you call it by running the newaliases command. They all point to the same binary on disk, how-ever. Third-party software expects to find all these names as well, and that these commands behave as required.
Sendmail is such a standard that writers of newer mail server programs are forced to call them sendmail and to have them behave exactly as Sendmail does, just to maintain compatibility with this vast installed base. This makes using alternate mailers confusing. Also, OpenBSD includes Sendmail as part of the base system. You can’t just remove Sendmail and go on. Upgrades reinstall brand-name Sendmail.
OpenBSD does an end run around all this confusion by eliminating /usr/sbin/sendmail as an actual mail program. Instead, the sendmail program is just a wrapper that calls the real mail-handling software. The entries in /etc/mailer.conf are just a list of classic Sendmail program names, along with the path to the actual program to be run. The mail-handling program sendmail is actually installed as /usr/libexec/sendmail/sendmail, for example.
To run an alternate mail server, give /etc/mailer.conf the expected command name and the full path to all of the appropriate programs. This happens auto-matically when you install a new mail transfer agent from a package.
264 Chapter 14
/etc/man.confThe etc/man.conf file tells man(1) how to find and present man pages. If you install software in nonstandard locations, add the information on the software’s man pages to man.conf so that you can call up those man pages transparently. This file has several types of entries, each of which is set off by keywords or section names.
Why would you do this? If you must install software from a source other than ports or packages, you could place it in a directory tree outside those managed by OpenBSD to reduce confusion when upgrading or adding software.
For example, I occasionally install Wireshark on an OpenBSD desktop. The OpenBSD team decided to remove OpenBSD’s Wireshark package because it has such a shaky security history. If I installed Wireshark as /usr/local/bin, it would be mingled with my packaged software. If I install Wireshark as /usr/local/wireshark/bin, however, it’s clearly distinct from pack-aged software. I can’t access the man pages, however, as man(1) doesn’t know about /usr/local/wireshark/man.1 Let’s walk through how we would add man page access for Wireshark.
Adding to the Search Index
The _whatdb keyword gives the full path to a whatis(1) database, used by apropos(1) and whatis(1), allowing you to easily search and cross-index man pages. The file man.conf has entries for databases in /usr/local/man, /usr/share/man, and /usr/X11R6/man. Here’s how to add an entry for /usr/local/wireshark/man:
_whatdb /usr/local/wireshark/man/whatis.db
Now we create a new database with makewhatis(8). This job runs auto-matically when you install software and during weekly maintenance.
Adding to Man Page Directories
Man pages are scattered in directories all over the system. The _default keyword tells man(1) which directories to search automatically. Use only one _default keyword, but list multiple directories if needed, and group directo-ries using brackets.
Here’s the standard directory list:
_default /usr/{share, X11R6,local,ports/infrastructure}/man/
This is a pretty massive group of directories, and the brackets combine multiple directories associatively. For example, this entry means that we
1. If Wireshark has a shaky security history, why would I install it? Because, sadly, it’s still the easiest way to debug really complicated network problems, especially when you’re working with an unfamiliar protocol.
Everything /etc 265
check /usr/share/man/, /usr/X11R6/man/, /usr/local/man/, and /usr/local/ports/infrastructure/man/. (The entries end with a slash, which means that the final directories contain subdirectories.)
To add /usr/local/wireshark/man/ to the default locations, add local/wireshark into the associative array, like this:
_default /usr/{share, X11R6,local,ports/infrastructure,local/wireshark}/man/
The _subdir keyword lists subdirectories to be searched beneath the main directories, in order, with the first match returned first.
_subdir man1 man8 man6 man2 man3 man5 man7 man4 man9 man3p man3f mann
You can use _subdir to change the order in which man pages are returned. For example, if your job is programming Perl on OpenBSD, you might want to see the Perl man pages by default. In that case, you could move the man3p subdirectory to the front of the list.
Displaying Man Pages
Software vendors distribute their manuals in the format they think best. As a sysadmin, this means you might as well get manuals in random formats, because each format needs a different command to display it. Fortunately, each format has a different filename suffix, which tells man(1) how to display the file. The _build keyword defines a filename suffix and the command used to display the file. (It’s very unlikely that you’ll have a man page that requires a new _build statement.)
Defining Man Sections
The final man.conf function is dividing the manual into sections. We saw in Chapter 1 that you can search the manual by particular sections to get specific man pages. These sections are nothing more than directories iden-tified in /etc/man.conf. Here’s where we define the man pages included in section 1.
1 /usr/{share,X11R6,local}/man/man1
There’s no trailing slash, because we’re not adding any subdirectories. These are the actual directories containing section 1 of the manual.
You can define arbitrary section names in /etc/man.conf. While you should avoid section names beginning with an underscore in order to pre-vent confusion with keywords, you can do just about anything else.
/etc/master.passwd, /etc/passwd, /etc/spwd.db, and /etc/pwd.dbThe /etc/master.passwd, /etc/passwd, /etc/spwd.db, and /etc/pwd.db files con-tain usernames and passwords, along with a few other key items about
266 Chapter 14
locally defined users. When you log in, the password you type is compared with the encrypted and salted hash of your password in this file. As such, /etc/master.passwd is vital to system security.
Editing /etc/master.passwd
If you’re considering editing /etc/master.passwd directly, stop. Go back to Chapter 6. Reread it. See if there’s another way to make your desired change. Damaging /etc/master.passwd can prevent people from logging in at all, and might render your system unusable. To edit a single user account in /etc/master.passwd, run chpass(1) as root.
If you must edit /etc/master.passwd directly—say, to change everyone’s home directory to point to a new filesystem—there’s a program just for that. The program vipw(8) calls up the text editor in $EDITOR, loads the pass-word file, lets you make changes, and checks the file syntax before saving it. vipw also updates /etc/passwd and the password databases /etc/pwd.db and /etc/spwd.db.
Be absolutely sure that this file is synchronized with the password databases. Using vipw prevents many basic mistakes and helps ensure data consistency, but if you’re really bent on corrupting /etc/master.passwd, vipw(8) will make your task more difficult but won’t stop you.
That said, only senior sysadmins should use vipw. How do you know if you qualify? If you’ve made enough horrible mistakes with vipw that you know in your bones not to use it, if your stomach churns at the mere thought of typing those four letters, you may use vipw.
Controlling Account Information Access
Many programs need parts of the information stored in /etc/master.passwd. For example, a program must be able to look up a user’s shell and home directory to properly find the user’s files. Rather than allowing anyone to read this file and the scrambled passwords therein, OpenBSD (and most other Unix-like systems) provide the account information everyone needs to see in /etc/passwd.
Accessing and parsing a text file can be slow, especially if the computer has a slow processor and many user accounts. Text files are not meant for searching. If a program must search a text file for user account number 10631, the search can hold up the program’s activity and even block other programs. Checking a database for an entry is much faster, as the program can just say “Give me account 10631” and get a response from a file store intended for searches.
All Unix-like systems create databases from the password files whenever the account information changes. The database of public account informa-tion, built from /etc/passwd, is /etc/pwd.db. The database file /etc/spwd.db contains private account information built from /etc/master.passwd.
Realistically, very few pieces of software actually use the password file directly. Most programs access pwd.db. I know people who delete /etc/passwd without ill effect, but you do need to keep the password database.

Everything /etc 267
/etc/master.passwd Fields
Each account is a line in /etc/master.passwd and /etc/passwd. Each line has the following nine fields, separated by colons.
UsernameThis field contains either an account created by the sysadmin and used by a human, or a nonprivileged user created for use by a program or service. Chapter 6 covers usernames.
Hashed and Salted PasswordThis field contains the user’s password, hashed and salted. (It’s com-monly called a hash, but you should know it’s more than that.) You cannot derive the password from the hash, but if you have the hash, you can try passwords until you find one that matches the hash. That’s why you must protect your /etc/master.passwd file. In /etc/passwd, the pass-word field is blank.
n o t E One simple way to temporarily disable a user account is to edit the password file with chpass(1) and put an asterisk (*) in front of the hash. While the account will still be active, no one will be able to log in to it. I’ve used this to great effect when a client is behind on a bill. While clients can ignore overdue payment notices, they call quite quickly when they cannot access their account. I can easily route that call to the bill-ing department. Once the matter is resolved, I can re-enable their account by removing the asterisk.
User ID NumberThe third field is the user ID number, or UID. Every user must have a unique UID.
Group ID NumberThis field is the group ID number, or GID. This is the user’s primary group, as discussed in Chapter 6. Usually, this is the same as the UID, and the user’s primary group has the same name as the username. Some sites prefer to use a single group for all unprivileged users.
User ClassWe discuss the user class in Chapter 6. Changing the class can increase or decrease the amount of system resources the user can access.
Password Expiration DateThe expiration date is expressed in the number of seconds since mid-night, January 1, 1970, the UNIX epoch. You can convert dates to seconds with date(1). If you must manually set an expiration date for a password, use chpass(1) and specify a human-readable date.
268 Chapter 14
GecosThis field contains the user’s real name, office number, work phone number, and home phone number, all separated by commas. This information was much more important when computers were big systems with hundreds or thousands of users, and you might need to contact people when their process went completely insane. Today, it’s basically ignored. (Do not use colons here; colons are reserved specifi-cally for separating fields in /etc/master.passwd.)
User’s Home DirectoryThis field is the user’s home directory. While this defaults to a directory with the same name as the username, beneath /home, you can move this directory anywhere you like. Editing the home directory in the password file does not move the actual directory; you need to do that yourself.
User’s ShellThe last field gives the user’s shell. If this field is empty, the user gets boring old /bin/sh.
/etc/mixerctl.confOpenBSD includes solid audio abilities. You can listen to MP3s, mix music, or just about anything else you would like.
Control audio settings with mixectl(8), and set boot-time mixerctl set-tings in /etc/mixerctl.conf.
/etc/mk.confConfigure make(1) with /etc/mk.conf. The most common use for special make settings is while you are building ports (covered in Chapter 13) or while building your own custom OpenBSD release (Chapter 20).
/etc/moduliThe /etc/moduli file contains prime numbers, used for Diffie-Hellman cryp-tography. Never edit this file. Some people may understand cryptography well enough to edit /etc/moduli, but if you’re reading this book, you’re probably not one of them.2
/etc/monthly and /etc/monthly.localThe /etc/monthly.local shell script runs once per month as part of routine system maintenance. Chapter 15 discusses scheduled maintenance jobs.
2. Henning Brauer, OpenBSD developer and point man on packet filtering, comments, “I understand crypto somewhat well. . . . I don’t muck with moduli either tho.” Consider yourself warned.
Everything /etc 269
/etc/motdThe MOTD, or message of the day, is displayed to users upon login. In this file, you might put system notices or announcements that you hope users will notice. Many organizations put legal notices or acceptable use policies in /etc/motd.
Note that the first line of /etc/motd is overwritten at every boot. Start your legal warning in line 2 or below.
/etc/mrouted.confIn addition to dvmrpd(8), OpenBSD supports multicast routing with mrouted(8). The dvmrpd implementation is preferred, but for specific edge cases, you might need mrouted instead.
Configure mrouted in /etc/mrouted.conf. Eventually, mrouted will be removed from OpenBSD.
/etc/mtree/The /etc/mtree/ directory contains a list of most directories on a stock OpenBSD system, with their ownership and permissions. The system upgrade process uses this. While you don’t really need to edit these files, it’s nice to know what the heck they’re for.
/etc/mygateThe /etc/mygate script gives the address of the default gateway for both IPv4 and IPv6, as discussed in Chapter 12.
/etc/mynameThe /etc/myname file contains the hostname of the system, as discussed in Chapter 4.
/etc/netstartThe /etc/netstart script starts the network, as discussed in Chapter 12.
/etc/networks/etc/networks is a list of subnets and their names. Use of a networks database has fallen out of favor, because it’s not terribly useful.
/etc/newsyslog.confThe newsyslog(8) program rotates log files, as discussed in Chapter 15.
/etc/nginx/OpenBSD has imported the nginx web server (http://www.nginx.org/) as a replacement for the older Apache 1.3 server, but as of this writing, it’s not
270 Chapter 14
quite integrated with the rest of the system. You can find the nginx configu-ration files in this directory, and the server is quite usable, but it’s not the official OpenBSD web server—yet.
/etc/nsd.confOpenBSD has imported the name server daemon nsd(8) to eventually par-tially replace the old DNS workhorse server named(8). It’s usable, but as of this writing, it’s not yet integrated with the system.
/etc/ntpd.confThe NTP daemon keeps the system time synchronized with other machines on your network and the Internet. We discuss ntpd(8) in Chapter 15.
/etc/ospf6d.conf and /etc/ospfd.confOSPF is a routing protocol used inside autonomous networks. OpenBSD has two OSPF implementations: one for IPv4 and one for IPv6. If you want to know more about OSPF, read ospfd(8) and ospf6d(8).
/etc/pf.conf and /etc/pf.osConfigure the OpenBSD pf(4) packet filter in /etc/pf.conf. Packet filtering uses /etc/pf.os to fingerprint other operating systems. Chapters 21 and 22 cover packet filtering.
/etc/ppp/You can connect OpenBSD to the Internet via a dial-up modem, which is rarely done these days. If you need to configure a modem on your OpenBSD system, read the ppp(8) man page.
/etc/printcapThe printer capability file describes all printers that this system can access. Making a Unix-like system work with a random printer was long considered to require some sort of sacrifice, a moon in the correct phase, and a team of chanting acolytes in robes. While complicated software such as CUPS has been written to simplify printing, configuring an OpenBSD machine to print to a print server or a network PostScript printer is pretty simple. See Chapter 16 for details on printing.
/etc/protocolsThe /etc/protocols file contains protocol numbers for TCP/IP network proto-cols. Chapter 11 covers TCP/IP versions 4 and 6 in detail.

Everything /etc 271
/etc/rbootd.confrbootd(8) offers boot services for HP workstations—a very narrow subset of obsolete diskless clients. OpenBSD still supports the HP300 machines that need this service. If you’re interested in diskless operations on modern hardware, read the diskless(8) man page instead, or look at Chapter 23.
/etc/rc.*The /etc/rc.* files are used for system booting, as discussed in tortuous detail in Chapter 5.
/etc/relayd.confThe load balancer daemon relayd(8) works with the OpenBSD Packet Filter (PF) system to act as a network load balancer. The relayd daemon requires a good understanding of PF, however, and a very specific network. If you’re interested in load balancing, read Hansteen’s The Book of PF.
/etc/remoteUnix-like systems have extensive support for connecting into the system over serial lines, usually for serial consoles. Many network appliances have management serial ports, and you can use OpenBSD as a client to config-ure these devices. The /etc/remote file contains serial connection configura-tions for most common modern serial connections (covered in Chapter 5).
/etc/resolv.conf and /etc/resolv.conf.tailThe /etc/resolv.conf and /etc/resolv.conf.tail files configure the resolver (covered in Chapter 12), letting the host map names to IP addresses and vice versa.
/etc/ripd.confRIP is an old way to broadcast routing instructions across a network. OpenBSD has a RIP daemon, ripd(8), configured in /etc/ripd.conf.
RIP is generally considered undesirable, like the r-services. Among other shortcomings, it doesn’t even support netmasks, so it’s restricted to old-style class A, B, and C networks. And as with the r-services, sometimes you’re stuck with RIP because some obsolete device on your network can handle nothing else. Use ripd to scrape by until you can arrange a tragic accident for that device.
/etc/rmtThe remote magnetic tape command (rmt) lets a host access a tape drive on another machine. It’s most commonly used to restore a system from backup.
272 Chapter 14
/etc/rpcRPC is a method for executing commands on a remote server. Much like TCP/IP, RPC has service and port numbers. The file /etc/rpc contains a list of these services and port numbers. The most common RPC consumer in OpenBSD is NFS, as discussed in Chapter 9.
/etc/sasyncd.confOpenBSD supports failover between IPsec gateways, using the security asso-ciation synchronization daemon sasyncd(8). This is not a common feature in operating systems, and its presence is a highlight in OpenBSD. To learn about IPsec failover, read sasyncd(8).
/etc/sensorsd.confModern hardware has sensors for detecting items like fan speed, circuit voltage, temperature, and so on. OpenBSD’s sensord(8) reads these sensors and presents the information to the user. Configure which sensors you want to pay attention to, as well as what you want to do when the sensors detect something, in /etc/sensorsd.conf. See Chapter 15 for details on sensorsd.
/etc/servicesThe /etc/services file contains a list of network services and their associated TCP/IP ports. See Chapter 11 for details.
/etc/shellsThe /etc/shells file contains a list of legitimate user shells, as discussed in Chapter 6.
/etc/skel/The /etc/skel/ directory contains standard user environment configuration files. When you create a user account, adduser(8) copies the files in this directory to the new user’s home directory. This directory can be over-written when you upgrade your system.
If you need to customize these files for your users, create a custom dotfile directory and tell adduser(8) to use it instead.
/etc/sliphome/The Serial Line Internet Protocol (SLIP) predated the Point-to-Point Protocol (PPP) commonly used for dial-up lines. OpenBSD still supports it, as someone might need it and there’s no real reason to get rid of it.
Everything /etc 273
/etc/snmpd.confSimple Network Management Protocol (SNMP) is a method for accessing information about a device over the network. Unfortunately, it’s not a ter-ribly secure protocol (one common acronym for SNMP is “Security? Not My Problem!”) The OpenBSD team has written a more secure SNMP daemon, snmpd(8). Configure it in /etc/snmpd.conf, as discussed in Chapter 16.
While OpenBSD’s SNMP daemon might resist intrusions and abuse, it can’t help the fact that SNMP itself, as commonly deployed, isn’t terribly secure.
/etc/ssh/The SSH daemon sshd(8) offers a secure replacement for telnet(1) and the r-protocols. Chapter 16 includes a brief discussion of SSH.
/etc/ssl/The /etc/ssl/ directory is for Secure Sockets Layer (SSL) certificates, as well as the OpenSSL configuration file openssl.cnf. Store system SSL certificates here.
/etc/sudoersThe /etc/sudoers file controls sudo(1) configuration. See Chapter 7 for details about sudo.
/etc/sysctl.confSet kernel runtime tunable options in /etc/sysctl.conf. Sysctls are covered in Chapter 18.
/etc/syslog.confThe logging daemon syslogd(8) reads messages from programs and hosts, and then separates those messages into records based on the configuration in /etc/syslog.conf. See Chapter 15 for details on syslogd.
/etc/systrace/The systrace(4) system call wrapper provides access controls to system calls. You could run a binary “under” systrace(1), and if the program attempted to access any system call beyond those permitted in the application’s systrace policy, systrace would block the access.
Flaws were found in systrace, however, that make it less than effective, and it’s now considered only a partial solution. It still ships with OpenBSD, but its use is discouraged. Today, systrace is mostly used for package-building clusters to make sure that software built doesn’t phone home or write outside the fake installation root.
If you need to use systrace, store policies in /etc/systrace.
274 Chapter 14
/etc/termcapThe /etc/termcap file describes all the different terminals that OpenBSD sup-ports. Pretty much every console device now supports the standard VT220 terminal, however.
/etc/ttysConfigure system terminals in /etc/ttys. You can enable, disable, and change terminals here. A “terminal” could be the keyboard and monitor attached to the computer, a login over a serial line as with a serial console, or a vir-tual terminal as used by telnet or SSH.
A classic UNIX terminal device resembled a teletype; that’s where the tty label comes from. All sorts of UNIX architectural details descend from this historical accident, and Unix-like systems inherited them.
Terminal Types
/etc/ttys lists three different terminal types: the console, serial ports, and pseudo-terminals.
The console is where boot messages display, where single-user mode maintenance can happen, and where error messages directed at the con-sole appear. While the console is usually the keyboard, monitor, and mouse attached to the computer, it doesn’t need to be that. The “console” is an abstraction that usually happens to be aimed at your physical monitor and keyboard. You can direct the console at a serial port instead, for example. The console uses the device /dev/console.
On some platforms, including i386 and amd64, OpenBSD supports multiple virtual consoles attached to your physical console. If you press ctrl-alt-F2 on the physical keyboard, you’ll see a brand-new login screen. ctrl-alt-F1 returns you to the main console. You can have as many virtual consoles as you have function keys, but OpenBSD has five by default. These virtual consoles have device names beginning with /dev/ttyC and ending in a hexadecimal number.
Serial ports can be used as login devices, once you attach either an old-fashioned serial terminal or a null-modem cable and another device with a serial port. They can also be used for outgoing serial connections. Serial ports used as incoming devices start with /dev/tty, while ports used for out-going connections start with /dev/cua, and both end in hexadecimal num-bers. Each serial port can have one terminal attached to it.
Pseudo-terminals support network connections. Even though your remote SSH window has no corresponding physical hardware on the server, OpenBSD treats it in some way as a tty device. Pseudo-terminals have device names beginning with /dev/tty, a letter p through z (either lowercase or uppercase), and ending in a single letter or number. When a user con-nects over the network, such as via SSH, the login session is assigned one of these virtual terminal devices.
Whatever the terminal type is, configure it in /etc/ttys, using the follow-ing procedure.
Everything /etc 275
Configuring Terminals
Each terminal has an /etc/ttys entry, containing at least three entries and possibly up to five.
ttyC0 /usr/libexec/getty std.9600 vt220 on secure
The first entry is the device name, without the leading /dev.The second entry is the name of the program that spawns login requests
on the terminal. Physical terminals and virtual consoles use getty(8), while pseudo-terminals process login requests through whatever daemon the user logs in through.
The third entry is the terminal type. OpenBSD uses a vt220 terminal on the monitor and the virtual consoles. Serial consoles use the unknown termi-nal type, as there’s no way to know in advance what kind of hardware is on the other end of the terminal. (You can switch this to vt220 without issue if you’re using a reasonably modern serial client.) Pseudo-terminals use the network terminal type; the server daemon and client software determine the terminal’s features.
The fourth field determines if the terminal is available for logins. Set this to on to accept login requests, or off to deny them. Pseudo-terminals are activated on demand, so you don’t need to configure them in /etc/ttys.
The root account can log on to only a secure console. The physical terminal and the console are the only devices defined as secure by default. You can log in as a regular user and use su(1) or sudo(1) on an insecure ter-minal; you just can’t directly log on as straight root. This means that anyone who has the root password and physical access to the machine can just walk up to the keyboard and log in as root. To disallow logins directly to root, remove the secure keyword from the virtual console entries in /etc/ttys. Also, on secure terminals, you won’t be asked for the root password when you boot into single-user mode.
If you use serial consoles, you might want to log in to a running multiuser system over the serial cable. By default, you cannot log in on a serial line. Set the serial line with the serial console to on, and you’ll be able to log in. This makes a serial line behave much like being at the physical console, where you can work in multiuser mode and while the machine is running normally.
While all of the defaults use getty(8), there are alternatives. For example, the HylaFAX package lets you connect a fax machine to a serial line, but you need to reconfigure the terminal to support it.
tty0e "/usr/local/sbin/faxgetty" dialup on
The point is that you can use serial ports any way you like, once you get the right software tool for the job.
276 Chapter 14
Making /etc/ttys Changes Take Effect
Offering terminals is a low-level system task handled directly by init(8). Changes to /etc/ttys do not take effect until you tell init to reread its con-figuration. (init is always process ID 1.)
# kill -HUP 1
If you don’t tell init to reread its configuration, changes won’t take effect until you reboot.
/etc/weekly and /etc/weekly.localThe /etc/weekly.local script runs once a week to perform weekly maintenance, as discussed in Chapter 15.
/etc/wsconsctl.confOpenBSD includes hardware-independent access to the physical console through the wscons(4) driver. Configure this console via wsconsctl(8). The boot-time wsconsctl settings are read from /etc/wsconsctl.conf. See Chapter 17 for details on console configuration.
/etc/X11The /etc/X11 directory contains configuration for the X Window System. OpenBSD’s Xenocara integrates X with the base system. Chapter 17 dis-cusses desktop OpenBSD, including some X features.
/etc/ypldap.confIn addition to the LDAP daemon ldapd(8), OpenBSD supports the YP data-base for centralizing passwords, groups, and host filesystems. YP is compat-ible with Sun’s original Network Information System (NIS). OpenBSD uses YP as a gateway to LDAP authentication. If you’re interested in this feature, see yp(8) and ypldap(8).
This takes you through everything in /etc not covered elsewhere. In the next chapter, we’ll discuss how OpenBSD maintains itself, and how you can meddle with the maintenance processes.
15S y S t e m m a i n t e n a n c e
When hardware complains, OpenBSD listens.
You should listen too.
No computer runs itself. If it did, you would be out of a job. Even the best-configured
server generates a constant low burn of maintenance needs.
OpenBSD includes a variety of tools to make maintenance easier, to alert you when maintenance is needed, and to tell you about the system’s status. Every day, week, and month, OpenBSD performs maintenance tasks and notifies you of the results. OpenBSD takes daily backups of critical system features and files, and uses them to monitor system integrity. It can manage its own log files, keep its own time, and alert you when the hard-ware is failing.
All of this starts with scheduled maintenance.
Scheduled TasksOpenBSD includes scheduled tasks that run once a day, week, and month. These jobs run as root and email the results to root. The daily maintenance script is the most complicated; the monthly script is the simplest.
278 Chapter 15
If a server runs well, I might not log in to it for weeks or even months. In fact, I’ve had a few servers run for more than a year without a human being ever logging in to it. I read the daily reports from the machine and say “Yep, it’s okay,” and get on with my day, confident that what the regular status reports don’t tell me the monitoring system will.
The scheduled maintenance jobs email their results to the local root user, but if no one ever logs in to the machine, no one will see those results. Always set an email alias for root in /etc/aliases, so that these messages go to someone who will actually read them.
Reading every email message from every machine every day is annoy-ing, but much less annoying than finding out that I have a bad service by a user telling me about it. These messages often alert me to system prob-lems before anyone (including me) notices them. Sites with hundreds of machines often write scripts to parse incoming email messages and flag interesting details.
You should send maintenance email to the person ultimately respon-sible for the system—whoever is most interested in system changes and most likely to be aware of any day-to-day system changes. If you delegate the job of reading maintenance email to a minion who is less aware of the system, he will either annoy you with endless questions about what you did yester-day or learn to ignore anything actually in the status mail messages.
Here, we’ll take a look at how the daily, weekly, and monthly routines work. Complete documentation of the maintenance jobs appears in daily(8).
Daily MaintenanceThe daily maintenance job starts by running any custom maintenance jobs (covered at the end of this section) from /etc/daily.local. Daily maintenance includes checking partitions, running the reminder service calendar(1), run-ning rdist(1), removing scratch files, and a few other boring things.
OpenBSD can also do a few other interesting things as part of its daily maintenance:
• Create a backup root filesystem, /altroot.
• Perform system security checks.
• Back up vital system files in /var/backup.
• Check for changes in vital system files.
• Check filesystem integrity.
• Run rdist(1).
I discussed /altroot in Chapter 9 because it requires a dedicated filesystem partition. Each of the other tasks can be configured later.
Security Checks
Some things that go wrong don’t necessarily mean your system has expe-rienced an intrusion, but are nonetheless suspicious. The daily security
System Maintenance 279
check looks for a whole slew of misconfigurations and problems that arise from either malice or incompetence. You can read the list of checks in security(8), but they break down into fairly broad categories:
Device node changes and privilegesNew device nodes, changed permissions on device nodes, new software packages, and new or altered disks or partitions might indicate mali-cious activity or might just be normal system management. The security script flags all of these. If you made such changes, you’ll nod and go on with your day. If you requested a minion perform the change and the change doesn’t appear, this is when you ask them what they did all day yesterday. If you didn’t make a change that appears, you want to know about it.
Insecure NFS exportsOpenBSD includes a lot of software to export filesystems and run commands remotely. These services, like printing and NFS, should not allow access from any host just anywhere, but only from hosts you approve. The security job checks for configurations that permit global access.
Misconfigured accountsAnother popular attack route has been the password database and related files. Accounts without passwords, duplicate entries, improperly closed accounts, and so on could all be used to compromise a system. The script checks for these issues.
PermissionsPoor permissions can lead to privilege escalation. For example, is there a new setuid or setgid file on the system? If so, the security script noti-fies you. If you installed that file with those privileges, you’re okay. If it’s unexpected, you should investigate.
User environmentIf you can change a user’s environment, whether that’s root or another account, you can trick him into giving away his authentication creden-tials or running suspect commands. If an intruder can edit a user’s dot-files, like .cshrc or .login, he can change which versions of a command he runs. Perhaps his shell is set to run a program that asks the user for his password and sends it to the intruder’s anonymous email account. By having correct permissions on home directories, dotfiles, mail files, and so on, you make this class of attack more difficult. The security script verifies that permissions are set up correctly.
Note that the security check is not an intrusion-detection system. The changes it checks for are the sort that script kiddies and newbie intruders are most likely to make, but skilled intruders familiar with OpenBSD could get around it. They could even replace the security check with a shell script that sends a daily email message that looks like an innocuous security check.
280 Chapter 15
Fortunately, competent intruders are relatively rare. Just keep in mind that receiving a security check with no mention of problems is encouraging, but it’s not proof that your server is secure.
Vital File Backup and Testing
The daily security check tests for changes in the files listed in /etc/changelist and rotates their backups, since these files are generally critical system files, such as /etc/master.passwd, /etc/boot.conf, and /var/cron/tabs/root. It also checks for changes to disk partitioning and mounted filesystems, as well as changes to device nodes.
Look in /var/backups, and you’ll see files like this:
...etc_fstab.backupetc_fstab.currentetc_ftpchroot.currentetc_ftpusers.current...
The files ending in .current are copies of these files as they existed when the daily maintenance job was last run. The files ending in .backup are the previous version of those files.
The first time the security script runs, it copies all of these files to /var/backup. Following that initial setup, the security script checks the original file against the current copy for changes. If the file changes, the previous version of the file is copied to the .backup filename, and the new version is copied to the .current file.
In the preceding example, the list shows that I edited my /etc/fstab at some time, prompting the security script to move its copy of the old file-system table to a .backup file. I have never edited /etc/ftpchroot or /etc/ftpusers, so there is no .backup version of these files, but only the .current one.
The security script doesn’t copy all of the files that it watches. For example, files containing private keys or that might contain private keys are not copied, but the security script does take a checksum. (Files moni-tored by checksum have a plus sign before their name in /etc/changelist.) There’s no reason to manually edit /etc/ssh/ssh_host_ecdsa_key, and if the file changes, either you know why or you need to restore from a trusted backup.
/etc/changelist is itself listed in /etc/changelist. This seems recursive, but the system backs up the list of files you want backed up, and also notifies you when someone adds or removes a file in /etc/changelist.
Adding Vital Files
You can add files to the change list and even use wildcards to back up all the files in a directory. But note that if you did use wildcards in /etc/changelist, you won’t be notified when a file is removed.
System Maintenance 281
Consider this example of using wildcards. In Chapter 13, I added the apache2 port to one of my machines. I put the configuration files in /etc/apache2. I could add a line like this to the change list:
/etc/apache2/*
This would automatically copy all files in the apache2 configuration directory to /var/backup and test them for changes. However, I would not be notified when files are removed from this directory. If you’re using a con-figuration mechanism that says, “include all the .conf files in such-and-such directory,” this might not be desirable. A better option would be to list each file individually and update the list when you add critical files.
One of the most convenient things about the file-integrity check is that it automatically creates a local backup of critical system files. That means that if you decide to learn how to use vipw(8) and utterly trash your user database in doing so, you can grab yesterday’s copy out of /var/backups, install it, and no one will be the wiser. The same applies to every other criti-cal system file.
Filesystem Integrity Checks
You can’t run a full-on Unix File System (UFS) check while a system is in multiuser mode, but you can have fsck(8) perform filesystem integrity checks to try to identify problems before they’re serious. Doing so won’t fix any problems, but it will notify you that they exist so you can schedule downtime for repairs.
To enable these checks, set CHECKFILESYSTEMS to 1 in /etc/daily.local.
Copying Files with rdist
The rdist(1) program is used to copy files to other servers, letting you main-tain identical copies of critical files on many servers. If you’re interested in using it, see rdistd(8).
Silencing /etc/daily
Some of us have monitoring systems that track a server’s disk, network, and other basic information. If you don’t need this sort of information to appear in your daily status mail, set VERBOSESTATUS to 0 in /etc/daily.local. This turns off these parts of daily maintenance, reducing the amount you need to read.
If the remaining daily maintenance doesn’t generate any output, the server should not send a status email that day. In environments where you don’t trust the monitoring system, you could use the daily status messages to assure you that the system is running as expected. OpenBSD gives you the choice.
282 Chapter 15
Weekly MaintenanceThe weekly script is simpler than the daily script with only three common functions:
• First, it runs the custom weekly script /etc/weekly.local.
• Second, it updates the locate(1) database.
• Finally, it rebuilds the whatis(1) man page database.
Monthly MaintenanceOpenBSD doesn’t need any generic monthly maintenance, but for consis-tency, the /etc/monthly script runs the custom script /etc/monthly.local.
Custom Maintenance ScriptsEach maintenance script runs a custom script before performing any other tasks. You can put any tasks you need in /etc/daily.local, /etc/weekly.local, and /etc/monthly.local. These commands are run by root, so don’t use them for tasks that should be performed by another user. If your database needs to be backed up, create a separate script, and have the unprivileged user run-ning your database run that script via cron(8).
Some sites use the scheduled maintenance jobs to run complex soft-ware that perform site-specific duties. For example, I know of one security firm that collects data from hundreds of machines, and uses the daily jobs to send that data to a central management system. Really, you can use the local scripts any way you choose.
If you have a maintenance task that can run under another user account, but you want to attach it to the scheduled maintenance jobs, you can have the local script call another script. Start that script by using su(1) to switch users and drop privileges.
Custom maintenance scripts may be most useful for altering the way the standard maintenance scripts perform their work. For example, say you have a system with many scratch directories containing temporary files. The weekly maintenance script updates the locate database, but you don’t want these scratch files included in locate results. You could use a custom main-tenance script to remove all the scratch files immediately before /etc/weekly creates the new locate database, and schedule this as a separate task. By adding it to /etc/weekly.local, you would know that it will finish before /etc/weekly runs any other tasks.
System LogsThe system log used by Unix-like operating systems has become the indus-try standard for logging, but that’s not necessarily a good thing, because the log mechanism can be cantankerous. Once you properly configure log collection and rotation, however, OpenBSD’s logging system mostly man-ages itself.
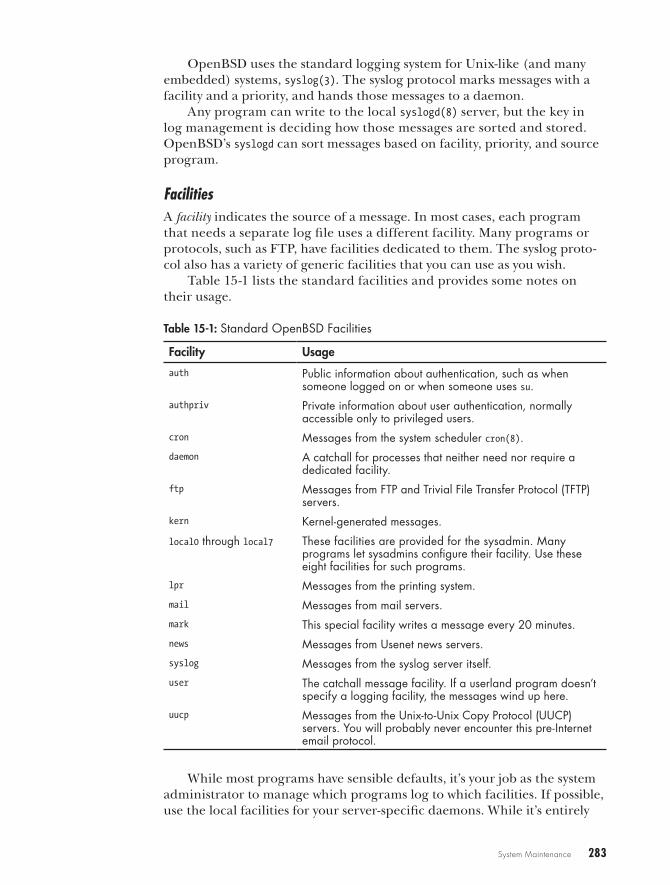
System Maintenance 283
OpenBSD uses the standard logging system for Unix-like (and many embedded) systems, syslog(3). The syslog protocol marks messages with a facility and a priority, and hands those messages to a daemon.
Any program can write to the local syslogd(8) server, but the key in log management is deciding how those messages are sorted and stored. OpenBSD’s syslogd can sort messages based on facility, priority, and source program.
FacilitiesA facility indicates the source of a message. In most cases, each program that needs a separate log file uses a different facility. Many programs or protocols, such as FTP, have facilities dedicated to them. The syslog proto-col also has a variety of generic facilities that you can use as you wish.
Table 15-1 lists the standard facilities and provides some notes on their usage.
Table 15-1: Standard OpenBSD Facilities
Facility Usage
auth Public information about authentication, such as when someone logged on or when someone uses su.
authpriv Private information about user authentication, normally accessible only to privileged users.
cron Messages from the system scheduler cron(8).daemon A catchall for processes that neither need nor require a
dedicated facility.ftp Messages from FTP and Trivial File Transfer Protocol (TFTP)
servers.kern Kernel-generated messages.
local0 through local7 These facilities are provided for the sysadmin. Many programs let sysadmins configure their facility. Use these eight facilities for such programs.
lpr Messages from the printing system.mail Messages from mail servers.mark This special facility writes a message every 20 minutes.news Messages from Usenet news servers.syslog Messages from the syslog server itself.user The catchall message facility. If a userland program doesn’t
specify a logging facility, the messages wind up here.uucp Messages from the Unix-to-Unix Copy Protocol (UUCP)
servers. You will probably never encounter this pre-Internet email protocol.
While most programs have sensible defaults, it’s your job as the system administrator to manage which programs log to which facilities. If possible, use the local facilities for your server-specific daemons. While it’s entirely
284 Chapter 15
possible to use facilities for purposes other than originally intended, try not to reassign the uucp facility to some other daemon unless you really have no other option.
PriorityA log message’s priority represents its importance. Programs usually send their logging data to syslogd, but syslogd decides what to retain and what to discard. You get to decide how much detail you want in your logs. Use the following nine syslog levels to decide what to record and what to discard (in order from most to least important):
emerg System emergency. This message appears on every active termi-nal. The computer might be crashing, or it may have some other error that requires immediate attention.
alert An emergency. The system can continue to function, but attend to this error very soon.
critical Critical problems. These indicate serious errors, such as hard-drive failures.
err Errors. These are in regard to problems that require attention but won’t destroy your system.
warning Miscellaneous warnings. These could be attended to, but will not prevent the process that generated them from running normally.
notice Important information, such as daemon startup and shutdown notifications.
info Basic information. This usually includes transactional data, such as individual messages in a mail server or individual queries to a web server.
debug Trivia. This level is usually of interest only to programmers, but occasionally useful to sysadmins trying to figure out why a program is behaving in a certain way. Debugging logs can contain anything, includ-ing information that violates user privacy, such as plaintext passwords.
none Don’t log anything from this facility here. This is most commonly used to exclude information from log files, as discussed shortly.
By combining levels with priority, you can sort log messages into indi-vidual files or other targets.
Sorting Messages via syslogd(8)syslogd compares received messages to entries in /etc/syslog.conf. This file has two columns: the first (the selector) describes a type of log message, and the second (the action) tells syslogd what to do when a message matches the description. Neither column can have whitespace; whitespace can appear only between the columns. For example, here’s a line from the default syslog.conf :
daemon.info /var/log/daemon
System Maintenance 285
Any log message that has a facility of daemon and a priority of info or higher is appended to the file /var/log/daemon. Of course, if all logs were so easily managed, this would be a short section.
syslogd compares all log messages to all syslog.conf entries. If a log mes-sage matches multiple selectors, it is sent to all matching destinations.
Wildcards
You can use wildcards in either the facility or priority. For example, this line logs every message from the mail facility:
mail.* /var/log/maillog
To capture messages of a given priority or higher from all facilities, use an asterisk (*). Here’s how to send all priority err and higher messages to the console:
*.err /dev/console
You can also use a double-wildcard to send all log messages to one place.
*.* /var/log/all.log
Logging everything to one location isn’t terribly useful or wise. You should not send authpriv debugging to a world-readable file.
Excluding Information
Use the none level to exclude information from a log. For example, the fol-lowing line excludes private authentication information from an otherwise all-inclusive log.
*.*;authpriv.none /var/log/most.log
The semicolon (;) allows you to combine selection criteria on a single line.
W a r n i n g If you combine entries with a semicolon like this, do not put whitespace after the semi-colon. The only whitespace can appear between the selector and the destination.
Combining Facilities
You can combine multiple facilities in a single entry by using commas. Here’s how to capture all messages of info priority or higher from several facilities:
auth,daemon,syslog,user.info @loghost
Any log message from the auth, daemon, syslog, and user facilities, and of priority info or higher, is sent across the network to the host loghost.
286 Chapter 15
Marking Time
While all log messages have a timestamp, you might want a marker in a log file to indicate that time has passed. The special facility mark creates a mes-sage every 20 minutes, letting you add an extra timestamp to a file. Here’s how to add a timestamp to the mail log every 20 minutes:
mail.info;mark.info /var/log/maillog
Local Facilities
The eight facilities local0 through local7 are for your use. Many programs can be configured to use a specific facility, so you can aim them at a par-ticular file. I’ve configured a daemon to use the facility local7. Here, I send messages from that facility to a file:
local7.* /var/log/postgres.log
Some programs have a hard-coded preference for a specific facility. For example, the flow-tools package (see my book Network Flow Analysis, No Starch Press, 2010) has facility local6 hard-wired into the code. Don’t be shocked when you see something like this. Fortunately, OpenBSD’s syslogd can filter based on program name, so you can easily filter your logs despite this sort of daftness.
Selecting by Program Name
If you’re out of facilities, you can use the name of the program generating the syslog messages as a selector. Using a program name requires two lines: The first contains the program name with a leading exclamation mark, and the second sets up logging. OpenBSD offers the following example of sudo(8) logging:
!sudo*.* /var/log/sudo
All log messages from sudo go to the specified log file.You can also select by program name and stop all subsequent selections
of matching messages by using two exclamation points (!!) before the pro-gram name. This example sends all messages from sudo to /var/log/sudo, but prevents sudo messages from going to any other log.
!!sudo *.* /var/log/sudo!*...
System Maintenance 287
The !* after the end of the sudo entry is a way to say “all programs”—in other words, don’t sort by program name anymore. You need this only if you use the double-exclamation-point “stop processing matching messages here” syntax.
Log ActionsNow that you know how to sort your log messages into different buckets, let’s see how to take different actions with those messages. Messages can be writ-ten to a file, piped to a program, sent to another host, or written to users.
Logging to Files
Most of our examples so far send log messages to a file, giving the full path to the file as the action. Here’s how to send all of the messages from facility local6 to a log file:
local6.* /var/log/flowtools
You can also send the messages to a device by giving the full path to the device node, but this will make sense to very few devices, such as the con-sole. This is because writing the log message to the disk device /dev/wd0d will not store the message on disk.
Logging to a Program
To send selected logs to a program, use a pipe (|) and the full path to the program, like this:
*.* |/usr/local/bin/logsurfer
The logging system should start the destination program, and then feed log messages into the program’s standard input.
Notifying Users
You can also direct log messages to logged-in users by listing multiple users in a comma-separated list. For example, to send a message to all users, use an asterisk.
*.emerg **.info lasnyder
This example will notify all logged-in users of real emergencies, but deeply annoy lasnyder.1
1. Hey, I was running out of ways to annoy lasnyder—plausible ways, at least.
288 Chapter 15
Logging to a Remote Host
I usually have a logging host that collects log messages from everywhere—not only from my OpenBSD boxes, but from all my other Unix-like systems, as well as routers, switches, and anything else that speaks syslog. This reduces my maintenance needs and conserves disk space. And, since, every log mes-sage includes a hostname, I can easily sort them out later.
To send messages to another host, use the @ symbol.
*.info @loghost.blackhelicopters.org
This dumps everything of priority info and above to my logging host.Your logging host must accept syslog messages from the network. If your
host is an OpenBSD machine, run syslogd with the -u flag. And be sure to protect your log host with a packet filter, so random hosts can’t write logs to it and fill up your disks.
Customizing syslogdOpenBSD runs syslogd by default, and you can customize how syslogd behaves. Common customizations include adding more log sockets and listening to the network.
Adding Extra Log Sockets
Programs write log messages to the socket /dev/log, but software inside a chroot won’t be able to access that device. To have a program that’s locked inside a chroot send messages to syslogd, you must put an additional log socket at /dev/log inside the chroot.
For example, since the integrated BIND DNS server is chrooted into /var/named, the DNS server expects to find the log socket at /dev/log, which means that the new log socket should be at /var/named/dev/log. To create this log socket, use syslogd’s -a option, and give the full path to the log socket in /etc/rc.conf.local.
syslogd_flags="-a /var/named/dev/log"
You can use about 20 additional logging sockets.
Listening to the Network
If you want your OpenBSD box to act as a log host, accepting logs from remote hosts, use the -u flag.
syslogd_flags="-u"
Because the syslog protocol has no access control, anyone with access to port 514/UDP on the log host can write to your log files.
System Maintenance 289
n o t e Filling a host’s logs with junk to fill the hard disk is an old attack. Use OpenBSD’s packet filtering system (discussed in Chapters 21 and 22) to protect your logging host.
Syslog and Embedded SystemsOpenBSD supports writing log messages to an in-memory buffer, which allows logging on systems that have no writable disk, such as diskless sys-tems and embedded routers and firewalls. syslogd retains these logs in a memory buffer, and clients can connect to syslogd through a reporting socket and read the logs. As you would expect, logs in memory disappear when syslogd is shut down.
To use syslogd for reporting, first provide a reporting socket with the -s option and give it a full path to a reporting socket. Here’s an rc.conf.local entry for a reporting socket in /var/run/syslog :
syslogd_flags="-s /var/run/syslog"
To log to the buffer, make a syslog.conf action. Specify logging to a buffer with a colon (:), the number of kilobytes to give the buffer, another colon, and the name of the memory buffer. (The maximum buffer size is 256KB.)
For example, here we capture all log messages of err priority or higher and write them to the 128KB memory buffer called errors:
*.err :128:errors
Use syslogc(8) to read a memory buffer, and use the -s option to tell syslogc where to find syslogd’s reporting socket, and provide the name of the log buffer. Here’s how to read the reporting socket /var/run/syslog and read the errors buffer:
$ syslogc -s /var/run/syslog errors
If you’ve forgotten the name of the buffer you want to read, ask syslogc to query the list of available memory logs with -q. Be sure to provide the reporting socket.
n o t e Even if you’re not a programmer, you can still use real syslog features. Logging to syslog is available to shell scripts via the logger(1) program. See the logger man page for details.
Log File MaintenanceYou can capture logs. Fantastic! Now just let the log files grow until they fill your hard disk and leave room for nothing else, right? Or you can discard old logs and have the system keep the logs to a manageable size. This is called log rotation.

290 Chapter 15
Look at the system messages log, /var/log/messages, and you should see six messages files: messages, messages.0.gz, messages.1.gz, messages.2.gz, messages.3.gz, and messages.4.gz. The plain messages file is the current log file. The other files are older logs; messages.0.gz is the newest, and messages.4.gz is the oldest.
When the current log file hits either a certain age or a specific size, log rotation discards the oldest log file (messages.4.gz), and the second-oldest file, messages.3.gz, is renamed to messages.4.gz; messages.2.gz is renamed to messages.3.gz; and so on. The existing messages file is renamed to messages.0 and compressed, and a new messages file is created.
The newsyslog(8) program rotates log files, restarts daemons, runs com-mands, shuffles old files into other directories, and handles all routine tasks. root runs newsyslog once per hour via cron(8). When newsyslog starts, it reads /etc/newsyslog.conf and examines each log file listed. If the conditions for rotating the log file are met, the log is rotated and other configured actions are taken.
newsyslog.conf Fieldsnewsyslog.conf uses one line per log file. Each line has seven fields, like this:
/var/log/authlog root:wheel 640 7 * 168 Z
From left to right, the fields are log file, owner, permissions, number of files to retain, size, time, and flags. After the flags field, you might see a number of optional arguments. We’ll look at each of the fields in order.
Log File
The first entry on each line is the full path to the log file to be processed (/var/log/authlog in this example). This must exactly match the current log file.
Owner
The second field (root:wheel in our example) lists the log file’s owner and group, separated by a colon. This field is optional, and is not present in many of the default entries.
By default, log files are owned by the root user and the wheel group, but newsyslog can change the owner of log files. While changing ownership isn’t common, you might want to explicitly declare it for specific files.
You can choose to change only the owner or only the group. In these cases, use a colon with a name on only one side of it, such as :wheel or root:. You must always include the colon if you’re changing ownership.
Permissions
The third field (640 in our example) gives the rotated file’s permissions in standard octal notation, as discussed in chmod(1). This field is optional, and it is not present in many default entries.
System Maintenance 291
Count
The fourth field specifies the number of archived log files that newsyslog keeps. In our example, /var/log/messages has the current log file and five archives, numbered 0 through 4. newsyslog.conf has a count of 5 for /var/log/messages.
Size
The fifth field is a file size in kilobytes. When newsyslog runs, it checks the size of the log file. If the log is larger than the size given here, newsyslog rotates the log. If you don’t want the file size to affect when newsyslog rotates the file, put an asterisk here.
Time
To rotate the log based on time, use the sixth field, which has four possible values: an asterisk, a number, and a time in one of two standard formats. If you rotate the log based on size rather than age, put an asterisk here. If you put a number here, you are specifying a number of hours after which the log will rotate. Our example of /var/log/authlog rotates every 168 hours.
The time formats—ISO 8601 restricted and newsyslog-specific—are a little more complicated.
ISO 8601 restrictedA time entry beginning with an @ symbol is in the ISO 8601 restricted time format. The ISO 8601 restricted time format is used by newsyslog on most Unix-like systems, because it was the time format used in MIT’s primordial newsyslog. The ISO 8601 format is a bit obtuse, but every Unix-like operating system I’m aware of supports it.
A full date in ISO 8601 format is 14 digits with a T in the middle. The first four digits are the year, the next two are the month, and the next two are the day of the month. (The T serves as a sort of decimal point, separating whole days from fractions of a day.) The next two digits are hours, the next two are minutes, and the last two are seconds. For example, the date September 13, 2013, at 3:18 and 58 seconds pm is expressed as 20130913T151858. (Specifying a specific date and time to rotate a log wouldn’t be terribly useful because the log would rotate only once.)
You can choose to specify only the fields near the T, leaving fields farther away blank. Again, if you think of the T as a decimal point, you don’t need to write 5.87 as 005.8700; the leading and trailing zeros are irrelevant.
In the case of newsyslog, empty fields are wildcards. For example, 4T00 matches midnight on the fourth day of every month, and T23 matches the twenty-third hour, or 11 pm, every day. If newsyslog.conf lists the time @T2359, the log rotates at 11:59 pm every day. (Of course, newsyslog runs once an hour, so the log won’t rotate exactly then.)
292 Chapter 15
As with cron(8), specify time units in detail. For example, @9T, the ninth day of the month, rotates the log once an hour, every hour, on the ninth day of the month, which would mean it rotates the log all day on that day. It would probably be better to specify a time of @9T01, which would rotate the log at 1 am on the ninth day of the month. You don’t need to specify times any more closely than the hour, as newsyslog runs only hourly.
newsyslog timesBecause ISO 8601 time doesn’t let you easily specify weekly jobs, and it’s impossible to specify the last day of the month, OpenBSD includes a newsyslog-specific time format that lets you easily specify these common times.
Any entry with a leading dollar sign ($) is written in month week day format.
This particular format uses three identifiers: M (day of month), W (day of week), and H (hour of day). Each identifier is followed by a num-ber indicating the unit you’re using. Hours range from 0 to 23, and days run from 0 (Sunday) to 6 (Saturday). Days of the month start at 1 and go to 31, with L or l representing the last day of the month. For example, to rotate a log on the fifth of each month at noon, use $M5H12. To start the month-end accounting at 11 pm on the last day of the month, use $MLH23.
If you don’t specify an hour, the time defaults to midnight on the chosen day. And if a newsyslog.conf entry lists both a time and a size for file rotation, newsyslog rotates the log if either requirement is met.
Flags
The seventh field, which is optional, instructs newsyslog on special process-ing for the file itself. OpenBSD uses four flags:
Z Compress the file with gzip(1).
B Do not add a “log file turned over” message to the file (for binary files).
F Follow symlinks.
M A user is monitoring this log.
While the B and Z flags are not, strictly speaking, mutually incompatible, most log files need only one of them, and most binary files don’t compress well anyway. (The default newsyslog.conf compresses the packet filtering log file, but that’s something of an oddity.) If you see the Z flag with the M flag, the old log file will be sent to the user before the log is compressed.
System Maintenance 293
Monitoring LogsOpenBSD’s newsyslog can email logs to a user before rotating them. If you carefully control how you sort your logs, this feature can be useful. For example, sudo(8) logs successful uses at priority notice, but failed uses at pri-ority alert. You might split these into separate log files in syslog.conf, like this:
!sudo*.* /var/log/sudo*.alert /var/log/sudofail
The file /var/log/sudofail should now contain only sudo failures, such as users entering incorrect passwords or exceeding their privileges.
Now you could tell newsyslog to check for monitored logs by running it with the -m flag. (newsyslog runs as one of root’s cron jobs.)
To have the sudo failure log emailed to you every time the log rotates, you can put your account in the monitor field.
/var/log/sudofail root:wheel 640 30 * $H06 ZM mwlucas
This assumes that email to the account mwlucas on this machine reaches me. The simplest way to ensure that would be to forward the email in /etc/mail/aliases.
n o t e If you’re serious about watching these kinds of failures, monitor logs on a logging host that end users cannot access. A user who becomes root on the local machine can edit logs before they are emailed and rotated.
Adding a PID FileIf newsyslog tries to rotate and compress a file, but the process writing the file is still writing to the file, the file can become corrupted. Some programs need a right proper slapping before they will let go of their log files. How? Just list a PID file here, and newsyslog will send that process ID a SIGHUP (like a kill -1).
Note that PID files are not a terribly secure way to identify specific pro-cesses because they are subject to race conditions and other attacks. If the server has a command for rotating its logs, that’s probably a wiser choice than signaling a process indicated in a PID file.
Signal NameTo send a signal other than SIGHUP to a process with a PID file, use a dif-ferent signal name. The signal name must begin with SIG and be specified by name. You can find a full list of signals in signal(3), but the software

294 Chapter 15
documentation should tell you which signal the process needs to release in order to restart its log file. This field is optional, but if you use it, you must enter a full path to a PID file immediately before it.
Command to ExecuteRather than signaling a process, you can have newsyslog run a command when rotating logs by giving the full path to the command in double quotes. While this field is optional, it cannot be combined with a PID file. You can use a PID file or a command name, but not both.
System TimeThere’s no excuse for a system having incorrect time. Once you set the time zone, having OpenBSD correct its own clock on an ongoing basis from any number of freely available network time servers is easy. Virtual machines in particular are notorious for skewing clocks, but time correction works on them as well, so as I said, no excuse.
OpenBSD includes its own NTP client, OpenNTPD, which is written to be safe and secure. Before ntpd(8) can do anything though, it needs some configuration.
Configuring ntpd(8)OpenBSD comes with a perfectly acceptable generic ntpd configuration that uses public time servers. If your host is on the public Internet and you only want to set your system time, not provide time to other hosts, use the defaults. Otherwise, you must customize /etc/ntpd.conf by selecting time sources and deciding if ntpd will accept time requests from other machines.
Time Redundancy
NTP gets the time by querying remote servers. If you have a single server, that time is assumed to be correct. However, if you have multiple time servers, the times are not simply averaged. If one time server is wildly off from all of the other time servers, the results from that server are discarded, and a median from the remainder is selected. If you have only two time servers, and the times obtained from them differ, ntpd can’t determine which one is correct. To help ntpd make sensible decisions, always list at least three time servers.
Time Sources
Choose your time sources with the server, servers, and sensor keywords.The server option tells ntpd to get the time from a single server, which
might have multiple IP addresses. If that’s the case, ntpd tries to use the first

System Maintenance 295
IP address. If the first address doesn’t work, it tries the second, and so on, until it gets an answer. Use the server option if you have specific time servers to use, and be sure to list at least three time servers.
server time1.blackhelicopters.orgserver time2.blackhelicopters.orgserver time3.blackhelicopters.org
The servers option tells ntpd to get the time from multiple hosts that share a common hostname. The default ntpd.conf includes this entry:
servers pool.ntp.org
The host pool.ntp.org has four IP addresses, and ntpd will try to get time from all of those hosts.
If you have a hardware time sensor, you can tell ntpd to read time from it. Hardware time sensors include nmea(4), udcf(4), and mbg(4). The sensor option tells ntpd to use a hardware sensor. If you’ve invested in a hardware time sensor, you might be sufficiently concerned about time to measure the distance between the transmitter and the receiver, and adjust the time based on the speed of light delay. The correction keyword lets you specify a number of microseconds that your sensor is behind.
As I wrote this, a 40-millisecond (ms) delay caused a furor in the scien-tific world when researchers thought they might have seen a neutrino go faster than light, so we’ll put a 40 ms correction into our time sensor.
sensor nmea0 correction 40000
n o t e Be warned that OpenBSD is not a real-time operating system. You should not be mea-suring neutrino speed with it anyway!
Serving Time
I run time servers on only closed networks, where very few hosts have access to the public Internet. I would also run time servers if I had hardware time sensors, but most of the time, I just use the public time servers.
To have ntpd answer time queries from other hosts, use the listen on directive. You can either specify an IP address or use an asterisk to say “every IP on the system.”
listen on 192.0.2.87listen on 2001:db8::aaaa
Because ntpd has no access controls, any host that can connect to port 123/UDP can get time from this server. If this worries you, use packet filter-ing (discussed in Chapters 21 and 22) to limit time checks to hosts on your
296 Chapter 15
network. The author of OpenNTP served time to his entire company and to the public on a MicroVAX 3100 with 16MB (yes, that’s an M) of RAM without the NTP process using more than 5 percent of the processor, so the load imposed by NTP is negligible on modern systems.
Now that ntpd is configured, let’s use it.
Using ntpd(8)You can correct time slowly or do it in one fell swoop. I recommend fully correcting time at boot, and then letting ntpd slowly adjust the system clock as the system runs. This corrects time before anything relies on it, but keeps everything synchronized on an ongoing basis.
To correct time when starting ntpd, use the -s flag.
# ntpd -s
You’ll get a command prompt back once ntpd receives a response from a time server and adjusts the clock. At boot, this delays other software start-ing so that it has the correct time, and when you check your clock, you should see the correct time. You can configure this at boot with ntpd_flags in /etc/rc.conf.local.
ntpd_flags='-s'
If the clock is off on a running system and you’re running software that would be corrupted by the clock moving backward or a time jump forward (as with many databases), you might need to tell ntpd to correct the clock more slowly. To do so, run ntpd without any flags, or set it in rc.conf.local to have it run in this mode at boot.
n o t e Your starting time may be so far off that it will be impossible to make a gradual adjustment to the correct time in any reasonable period. To fix the clock, schedule a clock change when you can shut down your sensitive software, and make sure NTP runs afterwards so that the problem remains fixed. It’s better to fix your clock right away and be done with it.
Hardware SensorsSensors are physical probes that check the health and status of hardware. Manufacturers have put more and more sensors in hardware, providing low-level hardware information to the operating systems. OpenBSD sup-ports a wide variety of hardware sensors, and uses the sensorsd daemon to query them and act upon error states.
Resolving many hardware errors requires shutting down the machine, but advance warning that a component has stopped working changes a hardware failure from an unexpected middle-of-the-day catastrophe to an

System Maintenance 297
after-hours annoyance. Some hardware, such as hot-swappable hard drives, can be replaced without interrupting service once you know the hardware has failed.
Device DriversEach physical sensor has a device driver. The device driver extracts informa-tion from the hardware and publishes it in a sysctl (discussed in Chapter 18). sensorsd reads the sysctl values and can act when they change or cross critical values. For example, here are the sensor-related sysctl values from my laptop:
$ sysctl hw.sensorshw.sensors.acpitz0.temp0=67.00 degC (zone temperature)hw.sensors.acpiac0.indicator0=On (power supply)hw.sensors.acpibat0.volt0=11.10 VDC (voltage)hw.sensors.acpibat0.volt1=12.35 VDC (current voltage)hw.sensors.acpibat0.power0=0.00 W (rate)hw.sensors.acpibat0.watthour0=2.61 Wh (last full capacity)hw.sensors.acpibat0.watthour1=0.30 Wh (warning capacity)hw.sensors.acpibat0.watthour2=0.06 Wh (low capacity)hw.sensors.acpibat0.watthour3=9.57 Wh (remaining capacity), OKhw.sensors.acpibat0.raw0=2 (battery full), OKhw.sensors.cpu0.temp0=81.00 degC
This comparatively simple and generic hardware has two temperature sensors and all kinds of power sensors. You can get hundreds of lines of sen-sor output, depending on your hardware.
Many RAID controllers have their own sensors, and will report when an array has failed. Here, we see three virtual disks provided by an AMI RAID controller:
hw.sensors.ami0.drive0=online (sd0), OKhw.sensors.ami0.drive1=degraded (sd1), WARNINGhw.sensors.ami0.drive2=failed (sd2), CRITICAL
If you didn’t have sensors, you would need to look at the blinking lights on the drive enclosure. Or you could listen for the really annoying “beep, beep, beep,” which is so easy to hear over the roar of 5,000 server fans, the air conditioners, and someone else’s hardware that has been beeping every time you’ve come in for the last six months.
n o t e Some sensors require the Intelligent Platform Management Interface (IPMI). This is a kernel feature that’s disabled by default in OpenBSD, because it makes some machines behave really badly. Chapter 18 discusses enabling IPMI.
The device drivers attach to sensors automatically, and the values get into the kernel automatically, but to do anything with these results in any
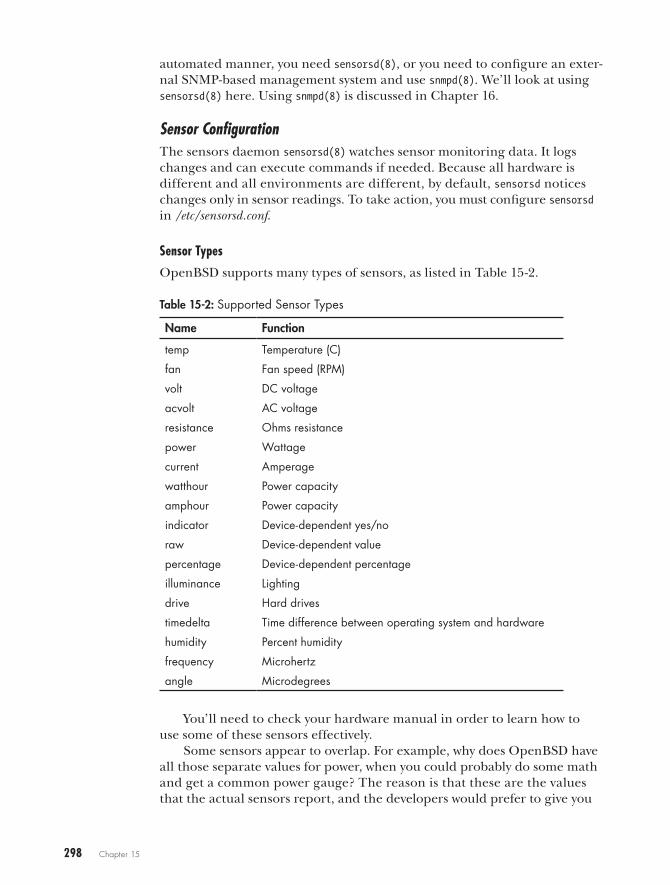
298 Chapter 15
automated manner, you need sensorsd(8), or you need to configure an exter-nal SNMP-based management system and use snmpd(8). We’ll look at using sensorsd(8) here. Using snmpd(8) is discussed in Chapter 16.
Sensor ConfigurationThe sensors daemon sensorsd(8) watches sensor monitoring data. It logs changes and can execute commands if needed. Because all hardware is different and all environments are different, by default, sensorsd notices changes only in sensor readings. To take action, you must configure sensorsd in /etc/sensorsd.conf.
Sensor Types
OpenBSD supports many types of sensors, as listed in Table 15-2.
Table 15-2: Supported Sensor Types
Name Function
temp Temperature (C)
fan Fan speed (RPM)
volt DC voltage
acvolt AC voltage
resistance Ohms resistance
power Wattage
current Amperage
watthour Power capacity
amphour Power capacity
indicator Device-dependent yes/no
raw Device-dependent value
percentage Device-dependent percentage
illuminance Lighting
drive Hard drives
timedelta Time difference between operating system and hardware
humidity Percent humidity
frequency Microhertz
angle Microdegrees
You’ll need to check your hardware manual in order to learn how to use some of these sensors effectively.
Some sensors appear to overlap. For example, why does OpenBSD have all those separate values for power, when you could probably do some math and get a common power gauge? The reason is that these are the values that the actual sensors report, and the developers would prefer to give you
System Maintenance 299
the actual measurements. OpenBSD does perform some data rationaliza-tion, but only for simple data; all temperature sensors are normalized to degrees Celsius, for example.
Now let’s see what you can do with these sensors.
Settings in sensorsd.conf
The file sensorsd.conf has example entries, but because environments differ so widely, they’re all commented out. It uses a termcap-style configuration syntax, much like /etc/remote (see Chapter 5) or /etc/login.access (see Chapter 6), with colons separating the terms in an entry. Each entry starts with the sen-sor to be measured, followed by attribute names and settings.
For example, here’s an entry for a temperature sensor in the default sensorsd.conf:
hw.sensors.lm0.temp0:high=50C
For the sensor lm0.temp0, the attribute high is set to 50C. sensorsd supports four attributes:
high An upper limit
low A lower limit
command A command to run when a limit is crossed or a state changes
istatus Ignore this status
The values reported for a sensor type depend on what makes sense. Where high and low limits make sense for temperature and voltage, some sensors report specific values instead. The RAID controller shown ear-lier reports drives as degraded, failed, or healthy. A hard-drive sensor that reports a scalar value isn’t useful, as you want to know if a RAID container is healthy or if drives have failed. There’s no middle ground.
You can have both high and low values for a single sensor. For example, whereas temperature might not have a low value in most data centers, volt-age certainly will. I work in all sorts of weird places, and not all of them have clean power.
hw.sensors.acpibat0.volt0:low=11.0V:high=13.0V
With a line like this, if the electricity supply to my laptop drops below 11 volts or goes above 13 volts, I will know.
Some systems might have dozens of sensors of a given type, which could make configuration tricky. If my motherboard has 15 temperature sensors, I don’t want to configure each separately. Fortunately, you can configure sensors en masse by type, and since I don’t care which temperature sensor goes above 80 degrees Celsius (if any of them do, I want an alarm), that works.
temp:high=80C
300 Chapter 15
When this rule is applied, sensorsd first looks for a configuration item for a specific sensor. If it doesn’t find that specific rule, it looks for a general rule. You can have one rule for most of your temperature sensors, and then override it for specific sensors, like this:
hw.sensors.lm0.temp5:high=90Ctemp=80C
This rule says that most of my temperature sensors alarm at 80 degrees, but one specific sensor doesn’t alarm until 90 degrees.
I care about temperature, but I don’t care if my fancy keyboard sees that there’s no light and wants to trigger its back lighting. You can ignore a sensor, or a type of sensor, with the istatus keyword.
illuminance:istatus
You should categorically ignore certain types of alarms based on your environment and gear. Make up your own mind.
Sensors Triggering Action
Having an entry in /var/log/daemon for when a hard drive fails is nice, but it would be better if the system would send email, page you, or trigger your monitoring system. It should do something—anything—that doesn’t require you to log in and look at a log file. Fortunately, sensorsd can run arbitrary commands upon detecting a problem or crossing a threshold, using the command attribute.
Thanks to the wide variety of sensors and their possible error states and conditions, sensorsd doesn’t have a fine-grained “run this command for an error, but run that other command for recovery.” There are too many pos-sible error states and conditions for this to make any sense. Instead, sensorsd runs a single command upon crossing any threshold or upon any state change, including when it starts up and the state of an individual sensor goes from “unknown” to whatever it starts at.
Consider this sensorsd.conf entry:
temp:high=80C:command=/sbin/reboot
At first glance, this reads “If the temperature is high, reboot the machine.” You think that will unquestionably kill whatever runaway process is saturat-ing your heat-generating CPU (completely setting aside the fact that other hardware besides CPUs generate heat), but sensorsd will run the command whenever the temperature state changes. The state changes at boot time, when the first temperature reading is taken, which means that your system will boot, and then immediately reboot. Your script needs intelligence.

System Maintenance 301
To make scripting easier, sensorsd has a set of variables it can pass to a script:
%1 Is the value within the limit set in sensorsd.conf ? This can be one of below, above, within, invalid, or uninitialized.
%n Sensor number.
%s Sensor status.
%x Which device the sensor sits on.
%t Sensor type.
%2 Sensor’s current value.
%3 Sensor’s low limit
%4 Sensor’s high limit.
You might run a temperature command like this:
temp:high=80C:command=/usr/local/script/temp %1 %2 %n
Your script /usr/local/script/temp would take three arguments: the error condition, the temperature, and the sensor name. Your script would check these values and see if a reboot is warranted.
With sensorsd, proper timekeeping, and log file management, your OpenBSD system can largely look after itself.
In the next chapter, we’ll look at how OpenBSD can take care of other hosts.

16N e t w o r k S e r v e r S
Working behind scenes, taking care of vital things,
the daemon is here.
The OpenBSD base system includes several servers to support a network.
This chapter covers the following network servers:
• Small-server handler inetd
• Printer daemon lpd
• DHCP daemon dhcpd
• TFTP daemon tftpd
• SNMP agent snmpd
• SSH server sshd
This miscellany of small daemons supports the features covered in upcoming chapters.
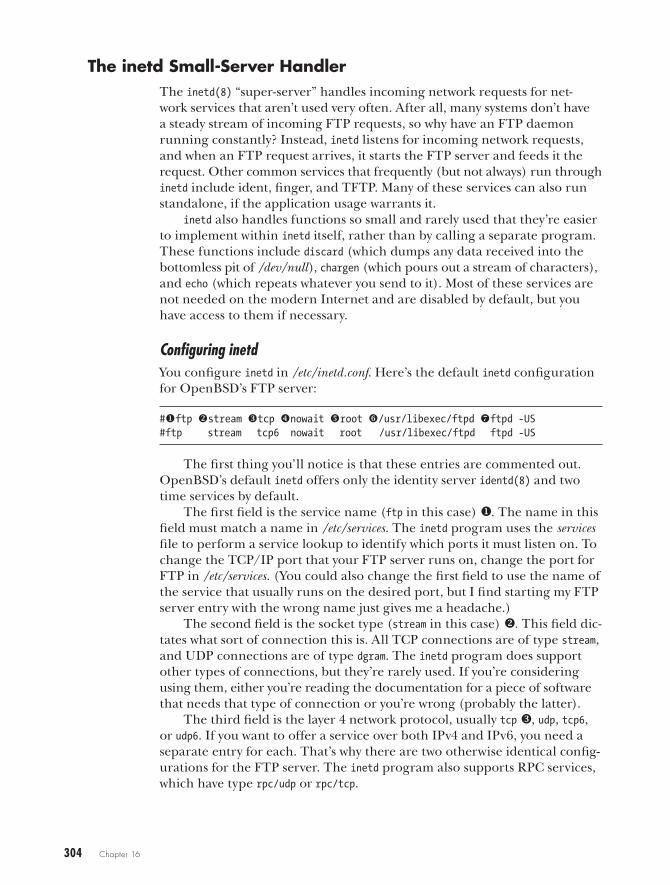
304 Chapter 16
The inetd Small-Server HandlerThe inetd(8) “super-server” handles incoming network requests for net-work services that aren’t used very often. After all, many systems don’t have a steady stream of incoming FTP requests, so why have an FTP daemon running constantly? Instead, inetd listens for incoming network requests, and when an FTP request arrives, it starts the FTP server and feeds it the request. Other common services that frequently (but not always) run through inetd include ident, finger, and TFTP. Many of these services can also run standalone, if the application usage warrants it.
inetd also handles functions so small and rarely used that they’re easier to implement within inetd itself, rather than by calling a separate program. These functions include discard (which dumps any data received into the bottomless pit of /dev/null), chargen (which pours out a stream of characters), and echo (which repeats whatever you send to it). Most of these services are not needed on the modern Internet and are disabled by default, but you have access to them if necessary.
Configuring inetdYou configure inetd in /etc/inetd.conf. Here’s the default inetd configuration for OpenBSD’s FTP server:
#uftp vstream wtcp xnowait yroot z/usr/libexec/ftpd {ftpd -US#ftp stream tcp6 nowait root /usr/libexec/ftpd ftpd -US
The first thing you’ll notice is that these entries are commented out. OpenBSD’s default inetd offers only the identity server identd(8) and two time services by default.
The first field is the service name (ftp in this case) u. The name in this field must match a name in /etc/services. The inetd program uses the services file to perform a service lookup to identify which ports it must listen on. To change the TCP/IP port that your FTP server runs on, change the port for FTP in /etc/services. (You could also change the first field to use the name of the service that usually runs on the desired port, but I find starting my FTP server entry with the wrong name just gives me a headache.)
The second field is the socket type (stream in this case) v. This field dic-tates what sort of connection this is. All TCP connections are of type stream, and UDP connections are of type dgram. The inetd program does support other types of connections, but they’re rarely used. If you’re considering using them, either you’re reading the documentation for a piece of software that needs that type of connection or you’re wrong (probably the latter).
The third field is the layer 4 network protocol, usually tcp w, udp, tcp6, or udp6. If you want to offer a service over both IPv4 and IPv6, you need a separate entry for each. That’s why there are two otherwise identical config-urations for the FTP server. The inetd program also supports RPC services, which have type rpc/udp or rpc/tcp.
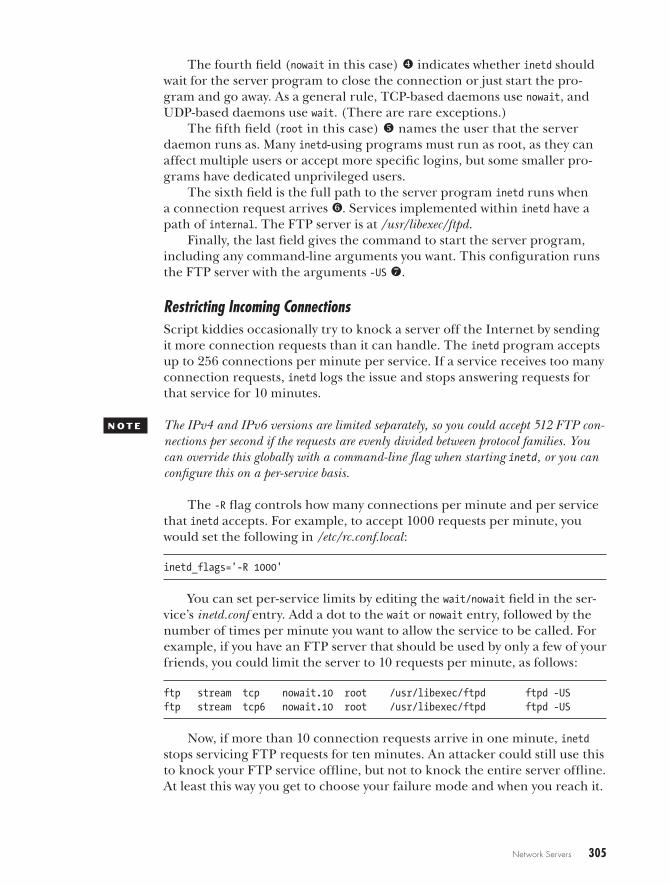
Network Servers 305
The fourth field (nowait in this case) x indicates whether inetd should wait for the server program to close the connection or just start the pro-gram and go away. As a general rule, TCP-based daemons use nowait, and UDP-based daemons use wait. (There are rare exceptions.)
The fifth field (root in this case) y names the user that the server daemon runs as. Many inetd-using programs must run as root, as they can affect multiple users or accept more specific logins, but some smaller pro-grams have dedicated unprivileged users.
The sixth field is the full path to the server program inetd runs when a connection request arrives z. Services implemented within inetd have a path of internal. The FTP server is at /usr/libexec/ftpd.
Finally, the last field gives the command to start the server program, including any command-line arguments you want. This configuration runs the FTP server with the arguments -US {.
Restricting Incoming ConnectionsScript kiddies occasionally try to knock a server off the Internet by sending it more connection requests than it can handle. The inetd program accepts up to 256 connections per minute per service. If a service receives too many connection requests, inetd logs the issue and stops answering requests for that service for 10 minutes.
N o t e The IPv4 and IPv6 versions are limited separately, so you could accept 512 FTP con-nections per second if the requests are evenly divided between protocol families. You can override this globally with a command-line flag when starting inetd, or you can configure this on a per-service basis.
The -R flag controls how many connections per minute and per service that inetd accepts. For example, to accept 1000 requests per minute, you would set the following in /etc/rc.conf.local:
inetd_flags='-R 1000'
You can set per-service limits by editing the wait/nowait field in the ser-vice’s inetd.conf entry. Add a dot to the wait or nowait entry, followed by the number of times per minute you want to allow the service to be called. For example, if you have an FTP server that should be used by only a few of your friends, you could limit the server to 10 requests per minute, as follows:
ftp stream tcp nowait.10 root /usr/libexec/ftpd ftpd -USftp stream tcp6 nowait.10 root /usr/libexec/ftpd ftpd -US
Now, if more than 10 connection requests arrive in one minute, inetd stops servicing FTP requests for ten minutes. An attacker could still use this to knock your FTP service offline, but not to knock the entire server offline. At least this way you get to choose your failure mode and when you reach it.
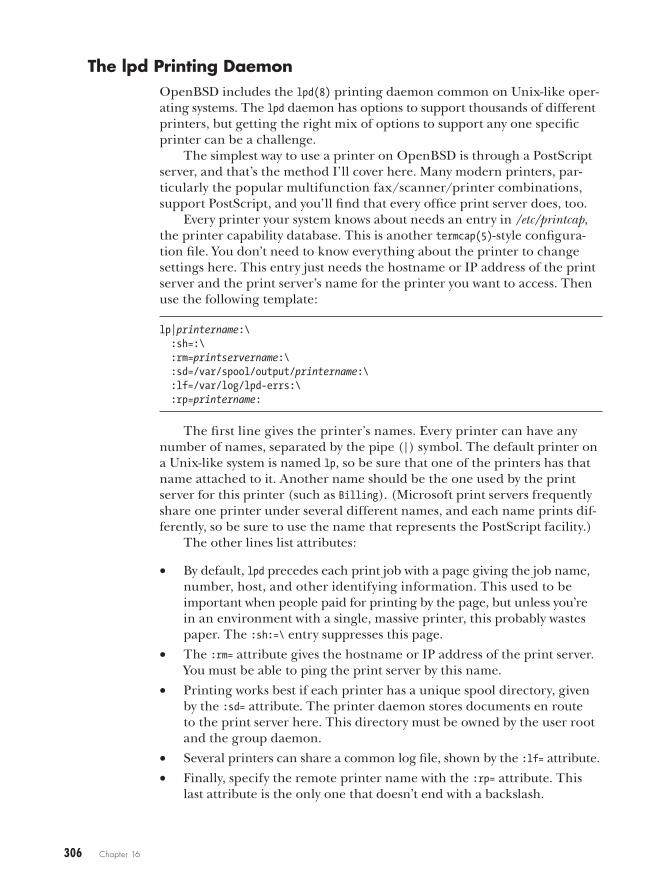
306 Chapter 16
The lpd Printing DaemonOpenBSD includes the lpd(8) printing daemon common on Unix-like oper-ating systems. The lpd daemon has options to support thousands of different printers, but getting the right mix of options to support any one specific printer can be a challenge.
The simplest way to use a printer on OpenBSD is through a PostScript server, and that’s the method I’ll cover here. Many modern printers, par-ticularly the popular multifunction fax/scanner/printer combinations, support PostScript, and you’ll find that every office print server does, too.
Every printer your system knows about needs an entry in /etc/printcap, the printer capability database. This is another termcap(5)-style configura-tion file. You don’t need to know everything about the printer to change settings here. This entry just needs the hostname or IP address of the print server and the print server’s name for the printer you want to access. Then use the following template:
lp|printername:\ :sh=:\ :rm=printservername:\ :sd=/var/spool/output/printername:\ :lf=/var/log/lpd-errs:\ :rp=printername:
The first line gives the printer’s names. Every printer can have any number of names, separated by the pipe (|) symbol. The default printer on a Unix-like system is named lp, so be sure that one of the printers has that name attached to it. Another name should be the one used by the print server for this printer (such as Billing). (Microsoft print servers frequently share one printer under several different names, and each name prints dif-ferently, so be sure to use the name that represents the PostScript facility.)
The other lines list attributes:
• By default, lpd precedes each print job with a page giving the job name, number, host, and other identifying information. This used to be important when people paid for printing by the page, but unless you’re in an environment with a single, massive printer, this probably wastes paper. The :sh:=\ entry suppresses this page.
• The :rm= attribute gives the hostname or IP address of the print server. You must be able to ping the print server by this name.
• Printing works best if each printer has a unique spool directory, given by the :sd= attribute. The printer daemon stores documents en route to the print server here. This directory must be owned by the user root and the group daemon.
• Several printers can share a common log file, shown by the :lf= attribute.
• Finally, specify the remote printer name with the :rp= attribute. This last attribute is the only one that doesn’t end with a backslash.
Network Servers 307
Always end /etc/printcap with a newline. I usually use an entire blank line, just to be certain.
Now that you have a printer configuration, you start lpd at boot with this rc.conf.local entry:
lpd_flags=""
Restart lpd with /etc/rc.d/lpd restart any time you edit /etc/printcap. Finally, view the print queue with lpq(1), and watch /var/log/lpd-errs
for problems.
The DHCP Server dhcpdDHCP is the standard method for dynamically configuring clients on an IP network. You might know DHCP as a way to give computers basic IP infor-mation, but it can also hand out configuration files for embedded devices such as routers and phones, point diskless machines to their kernel and userland, and much more.
OpenBSD includes a heavily modified ISC DHCP server, dhcpd(8). Here, we’ll cover the basics of using dhcpd for configuring dynamic clients in a shared Ethernet system. In Chapter 23, we’ll discuss the details of using DHCP to configure diskless workstations.
How DHCP WorksA client seeking DHCP information broadcasts a request across the local network asking for someone—anyone—to give it a network configuration. If your DHCP server is on that Ethernet segment, it answers directly. If it’s on another network segment, the router for that network segment can for-ward the DHCP request to your server, which will then offer a configuration to the client, maintaining a list of which clients have been assigned which unique configuration values (such as IP addresses). A configuration issued to a client is called a lease. Like all leases, DHCP leases expire and must be renewed in order to be valid.
Clients can request certain DHCP features to support their operations. For example, Microsoft clients request the IP addresses of the network Windows Internet Name Service (WINS) servers, Voice over IP (VoIP) desk-top phones request their configuration file, and diskless systems (discussed in Chapter 23) ask where to find their kernel and userland. The DHCP server can offer this information, or not.
The DHCP server uniquely identifies each client by the MAC address of the network card it uses to connect to the network. To find out what information a client received from the DHCP server, get the client’s MAC address and search for it in the /var/db/dhcpd.lease file.
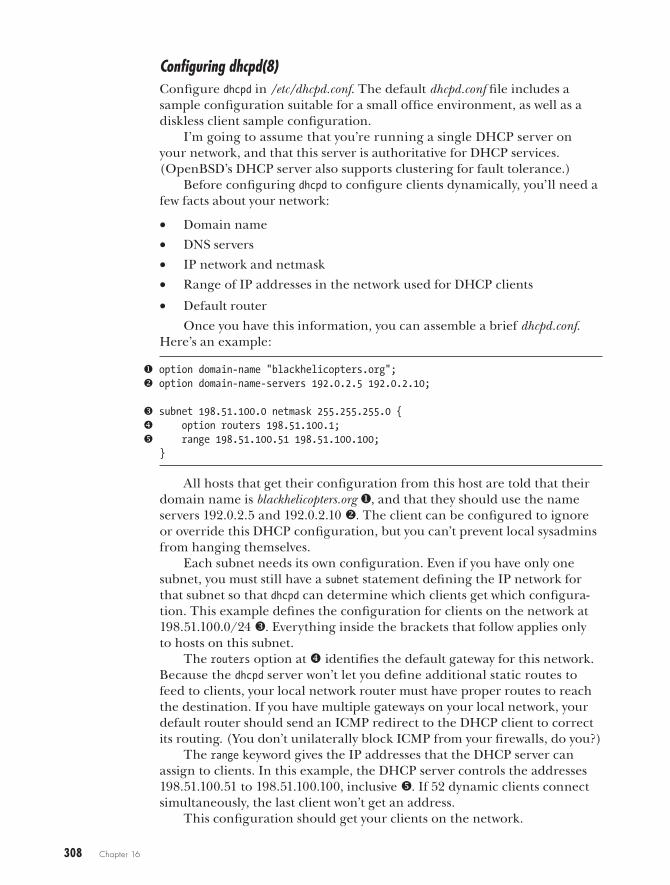
308 Chapter 16
Configuring dhcpd(8)Configure dhcpd in /etc/dhcpd.conf. The default dhcpd.conf file includes a sample configuration suitable for a small office environment, as well as a diskless client sample configuration.
I’m going to assume that you’re running a single DHCP server on your network, and that this server is authoritative for DHCP services. (OpenBSD’s DHCP server also supports clustering for fault tolerance.)
Before configuring dhcpd to configure clients dynamically, you’ll need a few facts about your network:
• Domain name
• DNS servers
• IP network and netmask
• Range of IP addresses in the network used for DHCP clients
• Default router
Once you have this information, you can assemble a brief dhcpd.conf. Here’s an example:
u option domain-name "blackhelicopters.org";v option domain-name-servers 192.0.2.5 192.0.2.10;
w subnet 198.51.100.0 netmask 255.255.255.0 {x option routers 198.51.100.1;y range 198.51.100.51 198.51.100.100;
}
All hosts that get their configuration from this host are told that their domain name is blackhelicopters.org u, and that they should use the name servers 192.0.2.5 and 192.0.2.10 v. The client can be configured to ignore or override this DHCP configuration, but you can’t prevent local sysadmins from hanging themselves.
Each subnet needs its own configuration. Even if you have only one subnet, you must still have a subnet statement defining the IP network for that subnet so that dhcpd can determine which clients get which configura-tion. This example defines the configuration for clients on the network at 198.51.100.0/24 w. Everything inside the brackets that follow applies only to hosts on this subnet.
The routers option at x identifies the default gateway for this network. Because the dhcpd server won’t let you define additional static routes to feed to clients, your local network router must have proper routes to reach the destination. If you have multiple gateways on your local network, your default router should send an ICMP redirect to the DHCP client to correct its routing. (You don’t unilaterally block ICMP from your firewalls, do you?)
The range keyword gives the IP addresses that the DHCP server can assign to clients. In this example, the DHCP server controls the addresses 198.51.100.51 to 198.51.100.100, inclusive y. If 52 dynamic clients connect simultaneously, the last client won’t get an address.
This configuration should get your clients on the network.
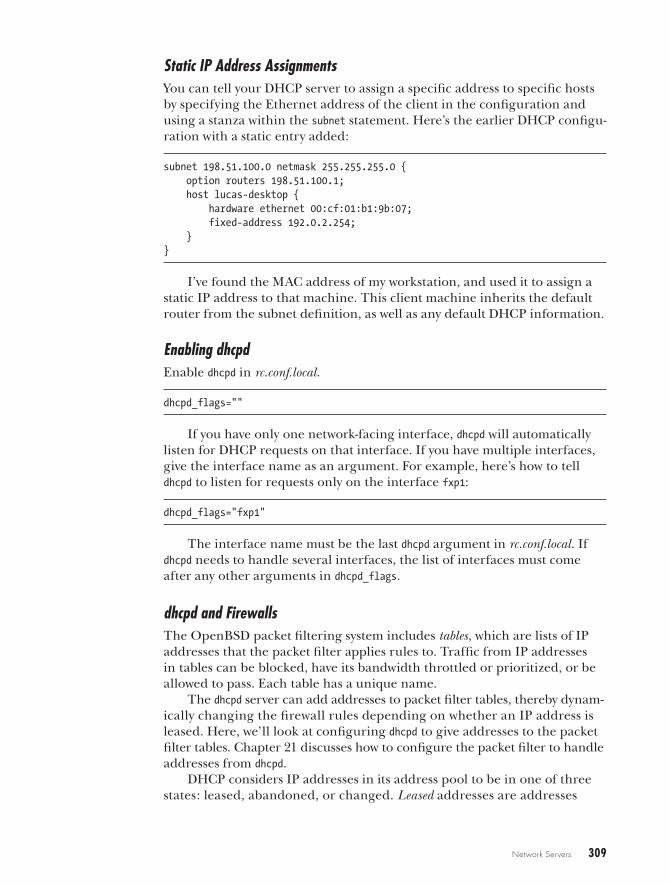
Network Servers 309
Static IP Address AssignmentsYou can tell your DHCP server to assign a specific address to specific hosts by specifying the Ethernet address of the client in the configuration and using a stanza within the subnet statement. Here’s the earlier DHCP configu-ration with a static entry added:
subnet 198.51.100.0 netmask 255.255.255.0 { option routers 198.51.100.1; host lucas-desktop { hardware ethernet 00:cf:01:b1:9b:07; fixed-address 192.0.2.254; }}
I’ve found the MAC address of my workstation, and used it to assign a static IP address to that machine. This client machine inherits the default router from the subnet definition, as well as any default DHCP information.
Enabling dhcpdEnable dhcpd in rc.conf.local.
dhcpd_flags=""
If you have only one network-facing interface, dhcpd will automatically listen for DHCP requests on that interface. If you have multiple interfaces, give the interface name as an argument. For example, here’s how to tell dhcpd to listen for requests only on the interface fxp1:
dhcpd_flags="fxp1"
The interface name must be the last dhcpd argument in rc.conf.local. If dhcpd needs to handle several interfaces, the list of interfaces must come after any other arguments in dhcpd_flags.
dhcpd and FirewallsThe OpenBSD packet filtering system includes tables, which are lists of IP addresses that the packet filter applies rules to. Traffic from IP addresses in tables can be blocked, have its bandwidth throttled or prioritized, or be allowed to pass. Each table has a unique name.
The dhcpd server can add addresses to packet filter tables, thereby dynam-ically changing the firewall rules depending on whether an IP address is leased. Here, we’ll look at configuring dhcpd to give addresses to the packet filter tables. Chapter 21 discusses how to configure the packet filter to handle addresses from dhcpd.
DHCP considers IP addresses in its address pool to be in one of three states: leased, abandoned, or changed. Leased addresses are addresses
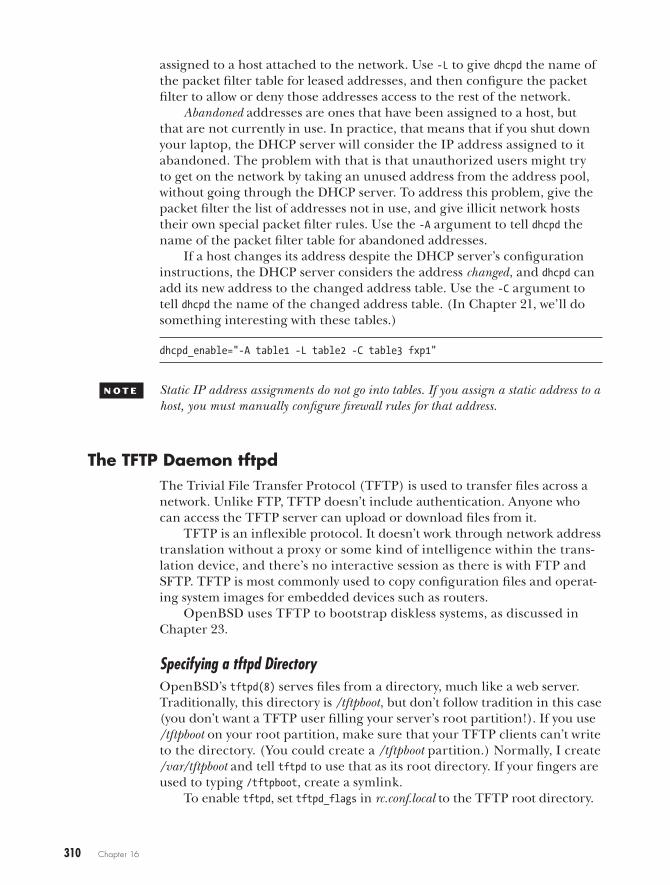
310 Chapter 16
assigned to a host attached to the network. Use -L to give dhcpd the name of the packet filter table for leased addresses, and then configure the packet filter to allow or deny those addresses access to the rest of the network.
Abandoned addresses are ones that have been assigned to a host, but that are not currently in use. In practice, that means that if you shut down your laptop, the DHCP server will consider the IP address assigned to it abandoned. The problem with that is that unauthorized users might try to get on the network by taking an unused address from the address pool, without going through the DHCP server. To address this problem, give the packet filter the list of addresses not in use, and give illicit network hosts their own special packet filter rules. Use the -A argument to tell dhcpd the name of the packet filter table for abandoned addresses.
If a host changes its address despite the DHCP server’s configuration instructions, the DHCP server considers the address changed, and dhcpd can add its new address to the changed address table. Use the -C argument to tell dhcpd the name of the changed address table. (In Chapter 21, we’ll do something interesting with these tables.)
dhcpd_enable="-A table1 -L table2 -C table3 fxp1"
N o t e Static IP address assignments do not go into tables. If you assign a static address to a host, you must manually configure firewall rules for that address.
The TFTP Daemon tftpdThe Trivial File Transfer Protocol (TFTP) is used to transfer files across a network. Unlike FTP, TFTP doesn’t include authentication. Anyone who can access the TFTP server can upload or download files from it.
TFTP is an inflexible protocol. It doesn’t work through network address translation without a proxy or some kind of intelligence within the trans-lation device, and there’s no interactive session as there is with FTP and SFTP. TFTP is most commonly used to copy configuration files and operat-ing system images for embedded devices such as routers.
OpenBSD uses TFTP to bootstrap diskless systems, as discussed in Chapter 23.
Specifying a tftpd DirectoryOpenBSD’s tftpd(8) serves files from a directory, much like a web server. Traditionally, this directory is /tftpboot, but don’t follow tradition in this case (you don’t want a TFTP user filling your server’s root partition!). If you use /tftpboot on your root partition, make sure that your TFTP clients can’t write to the directory. (You could create a /tftpboot partition.) Normally, I create /var/tftpboot and tell tftpd to use that as its root directory. If your fingers are used to typing /tftpboot, create a symlink.
To enable tftpd, set tftpd_flags in rc.conf.local to the TFTP root directory.
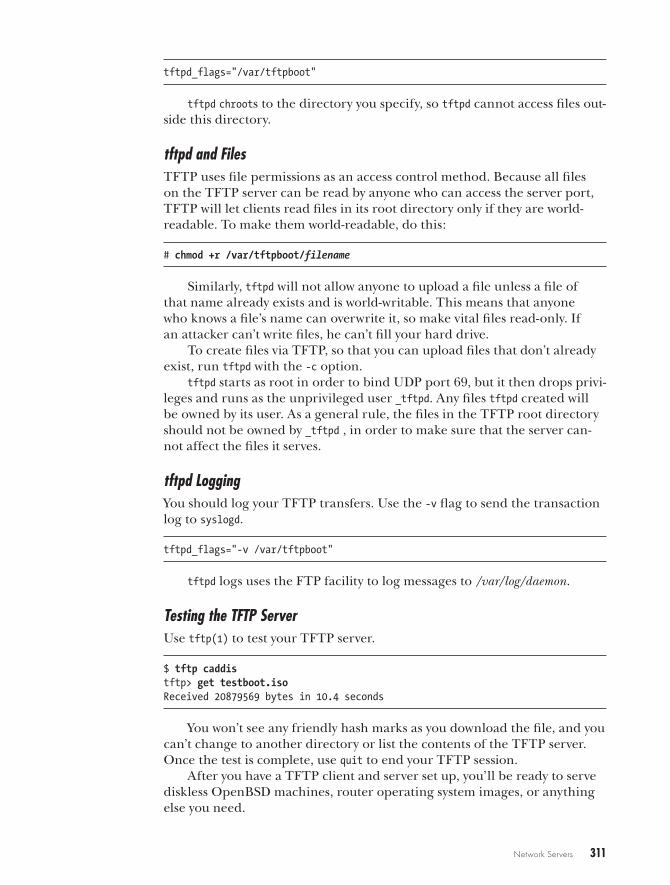
Network Servers 311
tftpd_flags="/var/tftpboot"
tftpd chroots to the directory you specify, so tftpd cannot access files out-side this directory.
tftpd and FilesTFTP uses file permissions as an access control method. Because all files on the TFTP server can be read by anyone who can access the server port, TFTP will let clients read files in its root directory only if they are world-readable. To make them world-readable, do this:
# chmod +r /var/tftpboot/filename
Similarly, tftpd will not allow anyone to upload a file unless a file of that name already exists and is world-writable. This means that anyone who knows a file’s name can overwrite it, so make vital files read-only. If an attacker can’t write files, he can’t fill your hard drive.
To create files via TFTP, so that you can upload files that don’t already exist, run tftpd with the -c option.
tftpd starts as root in order to bind UDP port 69, but it then drops privi-leges and runs as the unprivileged user _tftpd. Any files tftpd created will be owned by its user. As a general rule, the files in the TFTP root directory should not be owned by _tftpd , in order to make sure that the server can-not affect the files it serves.
tftpd LoggingYou should log your TFTP transfers. Use the -v flag to send the transaction log to syslogd.
tftpd_flags="-v /var/tftpboot"
tftpd logs uses the FTP facility to log messages to /var/log/daemon.
Testing the TFTP ServerUse tftp(1) to test your TFTP server.
$ tftp caddistftp> get testboot.isoReceived 20879569 bytes in 10.4 seconds
You won’t see any friendly hash marks as you download the file, and you can’t change to another directory or list the contents of the TFTP server. Once the test is complete, use quit to end your TFTP session.
After you have a TFTP client and server set up, you’ll be ready to serve diskless OpenBSD machines, router operating system images, or anything else you need.
312 Chapter 16
The SNMP Agent snmpdSNMP is the de facto standard for gathering information from network devices. Many different devices from many different vendors support SNMP as a management protocol.
OpenBSD includes an SNMP agent, snmpd(8), which supports all of the usual SNMP functions, and also offers visibility into OpenBSD-specific fea-tures such as packet filtering.
SNMP works according to the standard client/server model. The SNMP client (usually a server performing network management or monitoring) queries the SNMP server (or agent) running on a network device. The SNMP agent, snmpd, gathers information from the local system and returns it to the client.
In traditional SNMP, an SNMP client with the correct privileges can also request that the SNMP agent modify its device. Most Unix-like operating systems are designed to be configured at the command line and generally don’t accept write requests from SNMP. OpenBSD follows this trend, and we will focus specifically on read-only SNMP.
In addition to having an SNMP agent answer requests from an SNMP client, the agent can transmit SNMP traps to a trap receiver somewhere on the network. SNMP traps are much like syslogd(8) messages, except that they follow a specific format required by SNMP.
N o t e OpenBSD does not include an SNMP trap receiver. If you need one, check out snmptrapd in the net-snmp package.
SNMP MIBsSNMP manages information via a Management Information Base (MIB), which is a tree-like structure that contains hierarchical information in ASN.1 format. Each SNMP agent has a list of information it can extract from the local system, arranged in a hierarchical SNMP MIB with very gen-eral main categories, such as network, physical, programs, and so on.
Think of the MIB tree as a well-organized filing cabinet, where individ-ual drawers hold specific information, and files within drawers hold partic-ular facts. Similarly, the uppermost MIB contains a list of MIBs beneath it.
MIB References
MIBs can be referred to by name or number. For example, here’s a MIB pulled from an OpenBSD test machine:
interfaces.ifTable.ifEntry.ifDescr.1 = STRING: "em0"
The first term in this MIB, interfaces, tells us that we’re looking at this machine’s network interfaces. If this machine had no interfaces, this category would not even exist (although an OpenBSD machine will always
Network Servers 313
have at least a loopback interface). The ifTable is the interface table, which is a list of all network interfaces on the system. The field ifEntry shows one particular entry, and ifDescr means that we’re looking at a description of this interface. This MIB could be expressed as “Interface number 1 on this machine is called em0.”
MIBs can also be expressed as numbers, and most SNMP clients do their work natively in numerical MIBs. Your management tool should be able to translate between numbers and names, but just so you’re not terribly surprised, here’s the earlier example in numerical form:
.1.3.6.1.2.1.2.2.1.2.1 = STRING: "em0"
Expressed in words, this MIB has five parts separated by dots. Expressed in numbers, the MIB has 11 parts. Aren’t they supposed to be the same thing? Well, the numerical MIB is longer because it includes the default address .1.3.6.1.2.1, which translates to .iso.org.dod.internet.mgmt.mib-2, the standard subset of MIBs used on the Internet. Most SNMP MIBs start with this string, so the management tools no longer bother printing out this name.
MIB Definitions
OpenBSD supports two groups of MIBs:
• The standard host MIBs, which every network management system understands. This information includes network and disk space utiliza-tion, software running on the system, and so on.
• MIBs for OpenBSD-specific functions, such as the packet filter, network failover, bridging, and so on. Most network management systems will not understand the OpenBSD-specific MIBs out of the box, so you’ll want to teach your management system about OpenBSD’s MIBs.
MIBs are defined according to a very strict syntax documented in MIB files. For example, snmpd includes MIB files for the OpenBSD-specific func-tions in /usr/share/snmp/mibs. These files are written in plaintext, in the very stilted and formal ASN.1 syntax. While you can read and interpret them with nothing more than your brain, I highly recommend copying them to your network management workstation and using an SNMP client to exam-ine them.
MIB browsers interpret MIB files and present them in their full tree-like splendor, complete with definitions of each part of the tree and descrip-tions of each MIB, taken from the MIB files. Generally speaking, you enter a MIB in the MIB browser, which displays its numerical and word descrip-tions, and offers the ability to query an SNMP agent for that MIB.
If you don’t already have a MIB browser on your OpenBSD workstation, use the mbrowse package. If you don’t want a graphical interface, use the net-snmp package for a full assortment of command-line SNMP client tools, but be prepared to type some long command lines.
314 Chapter 16
SNMP SecurityThe most common alternate acronym for SNMP is “Security? Not My Problem!” This is unkind, but true. You should use SNMP only behind fire-walls or on trusted networks. If you must use SNMP on the naked Internet, employ packet filtering to keep the public from querying your SNMP ser-vice. SNMP agents run on UDP port 161, so allow your management hosts access to that port on only your SNMP hosts.
SNMP provides basic security through communities. If you read the SNMP documentation, you’ll see all kinds of explanations of why a community is not the same as a password, but as far as a sysadmin is concerned, a commu-nity is a password.
Most SNMP agents have two communities by default: public (read-only access) and private (read-write access). OpenBSD’s snmpd daemon supports both of these communities by default. One of your first tasks will be to change these community names to something that the whole world doesn’t know. Just like passwords, community names should be hard for intruders to guess and easy for you to remember.
As you might expect, there have been various versions of SNMP. Version 1 was the first attempt. Version 2c (SNMPv2c) is the more com-monly deployed update. Version 3 (SNMPv3) uses encryption to protect data on the wire, and it includes strong authentication. In practice, few vendors actually use it because it’s very complicated. The snmpd daemon has partial support for SNMPv3. Here, we’ll focus on the completely supported SNMPv2c.
Configuring snmpdConfigure snmpd in /etc/snmpd.conf. The configuration format is a series of text statements. Defining new community strings overrides the defaults of public and private.
We start by defining new read-only and read-write community strings, as follows:
read-only community hansteenread-write community henning
In general, most snmpd configuration statements look like these two. The snmpd.conf(5) man page lists all valid snmpd.conf configuration statements.
Every SNMP system is expected to list a contact, a description, and a location, as in this example:
system contact "[email protected]"system description "Web server"system location "Rack Row 9, Cabinet 6, Under the Meal Replacement Bars"
Many network management systems will automatically pull in this infor-mation to populate the database. Here, I’ve defined these values for my sys-tem. Make similar entries for your system.
Network Servers 315
The default snmpd.conf listens to only the localhost IP address, 127.0.0.1, so outside hosts cannot contact the SNMP daemon. If you want to listen on all available addresses, comment out the lines, like the following, that specify an address.
listen_addr="127.0.0.1"listen on $listen_addr
Alternatively, you can give an interface IP address to have snmpd listen to a specific external IP address for those machines with many addresses.
listen_addr="192.0.2.5"
With this configuration, snmpd can provide information about your sys-tem. Enable it in /etc/rc.conf.local.
snmpd_flags=""
This will start snmpd at boot, or you can run /etc/rc.d/snmpd.
Debugging snmpdSNMP can be an annoying protocol to debug. For one, because it’s UDP, there’s no easy way to test connectivity to the agent. Also, it runs fairly silently, in that it doesn’t log queries.
To verify that queries from your network management system are reach-ing your server, try running snmpd in verbose mode and with debugging.
# snmpd -vdstartupsnmpe_bind: binding to address 0.0.0.0:161
When an SNMP query reaches your server, you should see the server parse the requests. By the same token, snmpd is very good about telling you why it can’t provide an answer.
snmpe_parse: 192.0.2.197: wrong read community
Errors, like the following, that arise from requests for a nonexistent MIB are a little more difficult to understand.
snmpe_parse: 192.0.2.197: SNMPv1 'henning' context 1 request 1141724535snmpe_parse: 192.0.2.197: oid iso.org.dod.internet.private.enterprises.2041snmpe_parse: 192.0.2.197: SNMPv1 'henning' context 0 request 1141724536snmpe_parse: 192.0.2.197: oid iso.org.dod.internet.private.enterprises.2041snmpe_parse: 192.0.2.197: invalid varbind element, error index 1
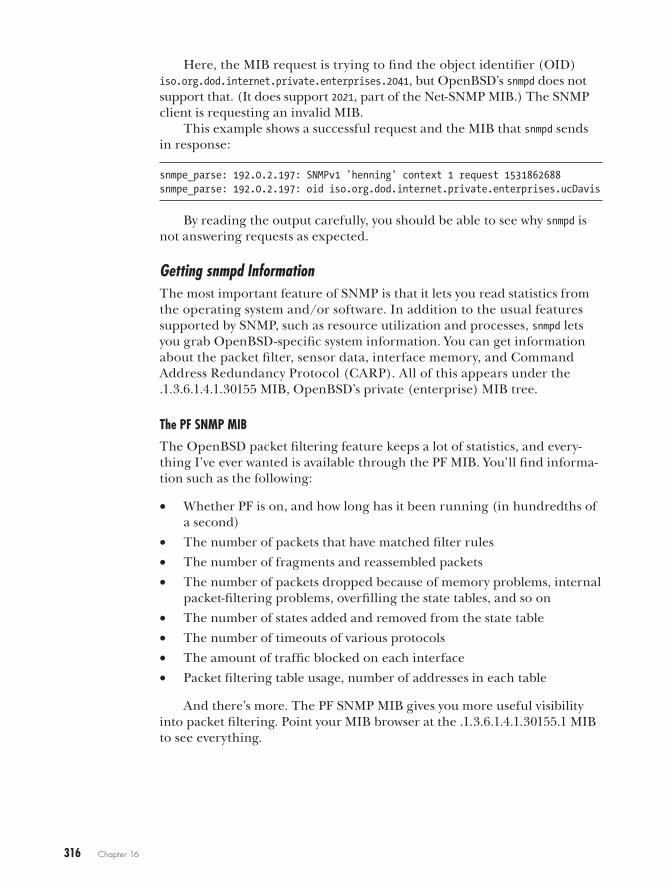
316 Chapter 16
Here, the MIB request is trying to find the object identifier (OID) iso.org.dod.internet.private.enterprises.2041, but OpenBSD’s snmpd does not support that. (It does support 2021, part of the Net-SNMP MIB.) The SNMP client is requesting an invalid MIB.
This example shows a successful request and the MIB that snmpd sends in response:
snmpe_parse: 192.0.2.197: SNMPv1 'henning' context 1 request 1531862688snmpe_parse: 192.0.2.197: oid iso.org.dod.internet.private.enterprises.ucDavis
By reading the output carefully, you should be able to see why snmpd is not answering requests as expected.
Getting snmpd InformationThe most important feature of SNMP is that it lets you read statistics from the operating system and/or software. In addition to the usual features supported by SNMP, such as resource utilization and processes, snmpd lets you grab OpenBSD-specific system information. You can get information about the packet filter, sensor data, interface memory, and Command Address Redundancy Protocol (CARP). All of this appears under the .1.3.6.1.4.1.30155 MIB, OpenBSD’s private (enterprise) MIB tree.
The PF SNMP MIB
The OpenBSD packet filtering feature keeps a lot of statistics, and every-thing I’ve ever wanted is available through the PF MIB. You’ll find informa-tion such as the following:
• Whether PF is on, and how long has it been running (in hundredths of a second)
• The number of packets that have matched filter rules
• The number of fragments and reassembled packets
• The number of packets dropped because of memory problems, internal packet-filtering problems, overfilling the state tables, and so on
• The number of states added and removed from the state table
• The number of timeouts of various protocols
• The amount of traffic blocked on each interface
• Packet filtering table usage, number of addresses in each table
And there’s more. The PF SNMP MIB gives you more useful visibility into packet filtering. Point your MIB browser at the .1.3.6.1.4.1.30155.1 MIB to see everything.
Network Servers 317
Sensors
You can view the same kernel values processed by sensorsd(8) (see Chapter 15) via snmpd, including a list of sensors on this device, the value reported by the sensor, and whether each sensor is in an alarm state. This means you can use snmpd instead of sensorsd to monitor your hardware.
To view sensor data via SNMP, examine the MIB tree .1.3.6.1.4.1.30155.2.
Interface Memory
You can view the amount of memory used by an interface, and how often (if ever) an interface was starved for memory as a result of system load. View the MIB tree .1.3.6.1.4.1.30155.5 to see these values.
CARP
CARP is an OpenBSD invention for sharing one address between two or more machines. It was designed to provide highly available IP services. The snmpd daemon exposes CARP’s innards, including these items:
• The name of each CARP interface
• CARP configuration values (preemption, advskew, and so on)
• The number of IPv4 and IPv6 packets received
• The number of packets discarded for various reasons
• The number of times the host has become master
To see the CARP MIB tree, view .1.3.6.1.4.1.30155.6.
Other MIBs
The snmpd daemon is constantly being expanded. According to the MIB files, they’ve reserved space for IPsec and relayd(8). Check /usr/share/snmp/mibs for additional MIB files, and use your MIB browser to see what your specific version of OpenBSD supports. The OpenBSD team adds MIBs as they’re needed and as code is contributed. If you need IPsec MIBs, feel free to write and submit the code.
The SSH Server sshdSecure Shell (SSH) is a protocol for building encrypted tunnels between hosts. SSH is most commonly used for remote command-line access to a sys-tem, but you can use it as a generic wrapper around other protocols or even to build virtual private networks. One common use for SSH is to support secure file transfer protocol service, or SFTP, which doesn’t give you a shell prompt but does encrypt files and authentication information as they cross the network.
318 Chapter 16
The OpenBSD project supports OpenSSH, a freely licensed client and server. OpenSSH is the most widely deployed SSH server in the world, with roughly 97 percent market share, and is generally considered the standard SSH server. Entire books have been written about OpenSSH, including mine (SSH Mastery, Tilted Windmill Press, 2012).
OpenBSD includes the OpenSSH server sshd(8), the OpenSSH command-line client ssh(1), and the SFTP client sftp(1). We’ll focus on sshd here, since you can use any number of SSH clients. The ones I use most commonly are ssh (for Unix-like systems) and PuTTY (for Windows). For SFTP, I commonly use sftp (for Unix-like systems) and WinSCP (for Windows).
Disabling sshdUnless you specified otherwise during installation, OpenBSD starts sshd by default. If you don’t want sshd to run, disable it in /etc/rc.conf.local.
sshd_flags=NO
SSH Host KeysThe first time you start sshd, OpenBSD creates host keys in /etc/ssh. These are sets of public and private keys that uniquely identify an SSH server. Each key file includes the word key in its name. When your client first connects to the SSH server, it presents a fingerprint summary of the server’s host key. If you tell the client to accept the key, the client will cache the server’s host key. If this key ever changes, the client warns the user that the server’s unique identity has changed, and that the user might be offering his login credentials to a different server. (Anyone who gets copies of the host keys can have another server masquerade as yours.) Be sure to back up your host keys, and protect them from theft.
sshd Network OptionsYou could change sshd’s behavior by adding command-line flags, but the most common way to reconfigure sshd is to edit the files in /etc/ssh.
OpenSSH has many configuration options. The ones that are most commonly changed involve the network settings. You can control the port, IP address, and version of IP sshd listens to by editing the configuration file /etc/ssh/sshd_config. Here’s an example:
Port 22AddressFamily anyListenAddress 0.0.0.0ListenAddress ::
Network Servers 319
The Port keyword specifies the TCP/IP port that sshd attaches to. The default is TCP port 22.
N o t e Some people recommend using a port other than 22 to avoid password-guessing worms. Far better ways to protect your SSH server are to allow only public-key authentication or use a packet filter to allow logins from only selected hosts or networks.
The AddressFamily keyword specifies the version of IP that sshd uses. The default is to use both IPv4 and IPv6, but you can restrict it to a specific pro-tocol with the inet (IPv4) or inet6 (IPv6) keyword.
Lastly, you can attach sshd to a specific IP address with the ListenAddress option.
chrooting UsersOrganizations commonly need to confine users to a particular directory or subset of directories. For example, many websites allow users command-line access over SSH so that they can edit their files and debug problems more easily, or even just SFTP access to their files. Those users should have access to their own directories, but not to other users’ files, or any other part of the system. One solution is to chroot the user in his home directory. If you have several users who need to access a shared directory, you can chroot all of them in that directory.
Locking users in a directory involves three steps: choosing the directory to lock users into, populating that directory, and configuring sshd to chroot those users. To demonstrate, we’ll walk through an example of chrooting the user lasnyder in his home directory, and give him command-line access, so he will be able to access only the programs in his chroot.
Choosing the Directory
First, specify the chroot directory with the ChrootDirectory option.
ChrootDirectory /home/lasnyder
This works well if all of your users need to be locked into the same directory, but if you want users to have their own private directory, or if you want to specify a directory elsewhere on the filesystem, things get more complex.
OpenSSH supports the %%, %h, and %u macros to represent home direc-tories. If your chroot directory includes a literal %, use the %% macro to repre-sent it. The server in this example has home directories on /disk%3/home, so the %% macro is needed to escape the percent sign.
ChrootDirectory /disk%%3/home/lasnyder
320 Chapter 16
The %u macro expands to the user’s username. You could use this to give users a chroot some place other than their home directory (though I don’t know why you wouldn’t just give them a home directory in the desired location). Here, each user has a directory under /var/www:
ChrootDirectory /var/www/%u
Finally, you could lock each user in his home directory with the %h macro.
ChrootDirectory %h
Wherever you lock a user, you must give that directory everything the user needs to function, since the user won’t be able to leave that directory to get a tool that he might need.
Populating the chroot
Most programs, such as a shell, require at least a few device nodes, and the user must have a shell program to be able to run one. If a user has only SFTP access, you don’t need to do any special preparation of the chroot. OpenSSH’s SFTP server includes everything it needs. But if users have shell access, they need basic device nodes and a shell program.
For our example, to give lasnyder what he needs, go to the chroot direc-tory, create a dev directory, and then make the standard device nodes using /dev/MAKEDEV. You can remove the console, klog, kmem, ksyms, mem, and xf86 devices.
# cd /home/lasnyder# /dev/MAKEDEV std# rm console klog kmem ksyms mem xf86
Now we need to get the user a shell. Since programs running inside the shell cannot access any files outside the chroot, including shared libraries, any shell copied into a chroot must be statically linked. The included system shells are statically linked, and most shells in the ports tree can be built in static flavors.
Verify that a shell is statically linked with file(1), and then create a bin directory inside the chroot and copy the shell there.
# file /bin/ksh/bin/ksh: ELF 32-bit LSB executable, Intel 80386, version 1, for OpenBSD, statically linked, stripped# cd /home/lasnyder# mkdir bin# cd bin# cp /bin/ksh .
Lastly, although a chrooted user should not have write access to his own root directory, he needs a real home directory. The user’s home directory in /etc/passwd is relative to the chroot; in other words, if a user’s home directory
Network Servers 321
in /etc/passwd is /home/lasnyder, and the user is chrooted to /home/lasnyder, his personal files and dotfiles actually go in /home/lasnyder/home/lasnyder.
# chown root:wheel /home/lasnyder# mkdir -p /home/lasnyder/home/lasnyder# chown lasnyder:lasnyder /home/lasnyder/home/lasnyder
The user now has a command-line friendly jail cell on the system. Now we need to tell sshd to lock the user in it.
chrooting Specific Users
Applying this chroot strategy to all of your users probably isn’t advisable—if nothing else, your sysadmins need unfettered system access to perform maintenance.
To tell sshd to chroot specific users, either by name or by group, use the Match keyword at the end of sshd_config. Match lets you change sshd’s default behavior based on factors such as user and client IP address. (Match has many more functions; see sshd_config(5) for examples.)
For example, if you wanted to chroot only the user lasnyder, you could use Match to specify his username. Early in the configuration, you would have a ChrootDirectory statement that turns off chroot for most users. Then, at the end of the configuration, you would change the setting based on matching that username.
...ChrootDirectory none...Match User lasnyder ChrootDirectory %h
You could also chroot all users in a group.
...ChrootDirectory none...Match Group webcustomers ChrootDirectory %h
If you have multiple Match terms, separate them with commas.
...ChrootDirectory none...Match User lasnyder, jgballard, pkdick ChrootDirectory %h
Or, if most of your users are chrooted, reverse the default and specifi-cally dechroot your sysadmins.
322 Chapter 16
...ChrootDirectory %h...Match Group wheel ChrootDirectory none
With careful configuration, you can restrict access to only the desired users.
SSH can do a whole lot more, such as securely eliminate passwords from your network. It’s worth your time to fully master this protocol.
OpenBSD’s built-in services can help you hold your network together, and they provide all kinds of useful support infrastructure. Now that you know how to configure some of these built-in programs, let’s see how to use OpenBSD as a desktop.
17D e s k t o p o p e n B s D
Spend summer days with blowfish at your fingertips:
no passwords stolen!
OpenBSD is best known as a server oper-ating system, but it can be a very effec-
tive and powerful desktop system. The X Window System is the standard graphic desk-
top software for Unix-like operating systems, and OpenBSD includes tools for using it. As this book assumes that you have some Unix experience, I won’t cover all the applications that make X Windows comfortable. You’ll need to experiment to find your preferred mail client, web browser, and text editors—most of which aren’t OpenBSD-specific. Instead, this chapter covers items that are unique to OpenBSD, originated with OpenBSD, or require specific configuration.
OpenBSD includes the Xenocara framework for modifying and build-ing X.Org in a manner tightly integrated with OpenBSD. We’ll discuss making OpenBSD boot into a graphical desktop using the cwm desktop envi-ronment, as well as a text console using the tmux terminal multiplexer. But we’ll start by customizing the console.
324 Chapter 17
Configuring Your Console with wsconsThe wscons(4) hardware-independent console driver lets you configure your boring, black-and-white, nongraphical console in many ways.
Start by viewing the current console settings using wsconsctl(8). Run the following on a text console, not in an X session (changes made in wscons can carry over to an X session, but once you start X, you’re mostly stuck with X’s configuration system).
$ wsconsctlkeyboard.type=pc-xtkeyboard.bell.pitch=400keyboard.bell.period=100keyboard.bell.volume=50...
Each line contains a system variable and a setting, many of which you can change. The keyboard.type variable represents the type of keyboard on the system. Because this is an amd64 system, it uses the pc-xt keyboard com-mon to consumer computers, but you’ll see different keyboard types with different hardware.
You can also change these settings with wsconsctl. For example, in the previous listing, the variable keyboard.bell.volume sets the volume of the computer’s beep. Now, I’m a tcsh user, and I frequently use tab completion (type a character or two, press tab, and the shell fills in the name of the command or file you’re about to type). Unfortunately, when tab completion hits an ambiguous spot, it stops. That’s not a problem when I’m logged in over SSH, because I can just type a character or two and press tab again. But when I’m on the local console, each ambiguity is accompanied by a beep (or bell) from the computer. When I’m trying to fix a problem, and the bell rings, shouting “beep WRONG! beep WRONG! beep WRONG!” I have only one thought:
The beep must die.
$ wsconsctl keyboard.bell.volume=0keyboard.bell.volume=0
Now silence reigns and I can resolve the problem without the computer nagging me. (You could choose to turn up the volume, if you’re a masochist. I won’t judge you—at least not in public.)
Here, we’ll look at a couple other things you can do with wscons.
Screen BlankingIf you leave the system alone for a few minutes, the screen should go blank to reduce power usage. Modern monitors often do this on their own, but
Desktop OpenBSD 325
you can also configure this behavior in the operating system, especially for older platforms. OpenBSD turns off the display only once it knows how to reactivate the display.
You have three choices:
display.kbdact Wake on keyboard activity
display.msact Wake on mouse activity
display.outact Wake on monitor output
Set one of these wscons variables to on, and OpenBSD will realize it should start blanking the monitor after the idle timeout. The variable display.screen_off gives the idle timeout in milliseconds; the default, 600000, is 10 minutes.
You can also choose between turning the screen black and putting the monitor into “power-saver” mode, also known as sleep. A monitor showing a black screen reactivates immediately when triggered, but uses more power. A sleeping monitor really is off, and needs a few seconds to reactivate. To set power-saver mode, change the variable display.vblank to on. (Some old monitors don’t believe in saving power, so this won’t work on them.)
Setting wscons Variables at BootUsers can adjust console settings, but those settings will disappear at the next reboot. To set wscons variables at boot, add them to /etc/wsconsctl.conf. The boot process reads this file and applies any variables it finds to the console.
Running Virtual Terminals with tmuxThe terminal multiplexer tmux(1) lets you run multiple virtual terminals inside one OpenBSD terminal window. While standard virtual terminals disappear when you disconnect from the system, tmux virtual terminals con-tinue to run even after you disconnect. tmux is small, fast, easy to use, and written with the same care as the rest of OpenBSD.
Why would you need tmux? One example is for building programs. Just before I leave the office, I use my laptop to make an SSH connection into an OpenBSD server, create a virtual terminal, start building a huge pro-gram (such as OpenOffice.org), and shut down my laptop. Normally, the build on the server would terminate when my session is interrupted, but the tmux virtual terminal continues to run even when I log out. The build continues in the disconnected virtual terminal while I drive home, and when I reconnect to it later, I can see how the build has progressed. Virtual terminal sessions even survive accidental disconnections caused by network or client failures.
This section provides an introduction to tmux. For complete details on the features discussed here, as well as dozens of other features, read tmux(1).
326 Chapter 17
The tmux Status Bar and Window NamesTo start a virtual terminal session, run tmux. Your terminal window will show the command prompt and a green tmux status bar along the bottom, with information like the following:
[0] 0:ksh* "caddis.blackhelicop" 11:55 26-Jun-13
This is a virtual terminal session. The left side of the status bar displays the tmux session number in brackets [0] and the list of tmux windows 0:ksh* (beginning with window number 0). The right side shows the first part of your machine name (caddis.blackhelicopters.org), followed by the time and date. You’ll learn how to customize things in “Setting tmux Options” and “Configuring tmux” on page 329.
The window name defaults to the name of the program running in that tmux(1) window. For example, if you start a command that continues until interrupted, such as iostat -w 5, the session name will change to match the command. Interrupt the command, return to a shell prompt, and the status bar should change its name to match your shell.
The status bar is normally green, but if it turns yellow, tmux is expecting input. When it’s yellow, any typing is interpreted as a tmux command. If you reach this mode accidentally, press enter to return to a green status bar and normal operation.
tmux Commands and Window ManagementPressing ctrl-B tells tmux that the next command is for tmux, not for the pro-gram running in the virtual terminal. (If pressing ctrl-B interferes with another program you use frequently, you can change this key combination, as you’ll see in “Unmapping and Remapping Keys” on page 336.)
The most commonly used tmux commands are single characters. For example, to create a second terminal window in this tmux session, press ctrl-B-C. Your screen will display only a command prompt and a new status bar.
[0] 0:iostat- 1:ksh* "caddis.blackhelicopte" 11:58 26-Jun-13
You have two windows: window 0 shows iostat output, and window 1 displays the ksh prompt. The asterisk next to window 1 means that you’re currently looking at it. Run an ongoing command in your new window, such as top, and the window name should automatically change to the name of that command.
Changing the Current Window
To view another window, use one of the following key combinations:
• To see the next window, press ctrl-B-N.
• To switch to the previous window, press ctrl-B-P.
Desktop OpenBSD 327
n o t e Keep in mind that window ordering wraps. For example, if you are on the last win-dow and press ctrl-B-N, you should see the first window.
• To jump directly to a window by number, press ctrl-B followed by the window number.
• To open a menu of all windows, press ctrl-B-W, and then select a win-dow with the arrow keys.
I find the next and previous sequences sufficient, but if you end up with a dozen windows in one terminal, you might think otherwise.
Renaming Windows
Terminal windows take the name of the currently running program, but that’s not always useful. For example, if I’m compiling the newest source with make build, the window name will continually change to reflect the command running in the build at that moment. The only problem is that the constant flickering change in my status bar drives me nuts.
If you don’t want to see the window name change with each command, use ctrl-B to assign a static name to the window. A yellow [rename-window] prompt will appear in the status bar. Enter your preferred window name, such as upgrade, and then press enter.
Terminating Windows
To kill a window and end any processes running in it, change to that window and press ctrl-B-&. You will get a confirmation prompt.
Getting Online HelpPress ctrl-B-? to see a complete list of all tmux commands.
C-b: send-prefix C-o: rotate-window C-z: suspend-client Space: next-layout !: break-pane ": split-window #: list-buffers...
Now you can easily explore tmux without reading the manual page. You’ll use this list to remap keys in “Unmapping and Remapping Keys” on page 336.
Disconnecting, Reconnecting, and Managing SessionsA collection of tmux windows is called a session. Conveniently, tmux can dis-connect from a running session without interrupting its windows. Press
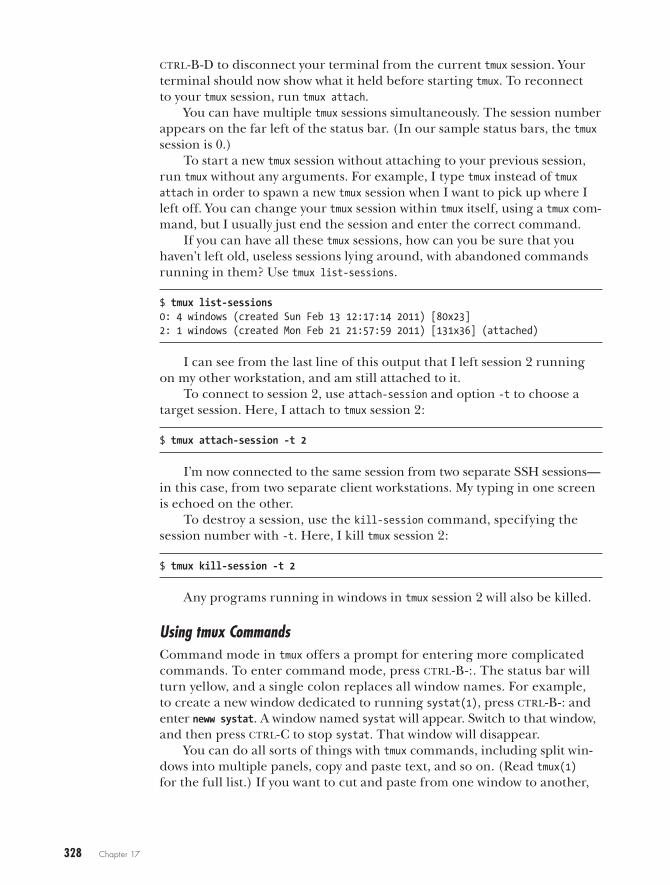
328 Chapter 17
ctrl-B-D to disconnect your terminal from the current tmux session. Your terminal should now show what it held before starting tmux. To reconnect to your tmux session, run tmux attach.
You can have multiple tmux sessions simultaneously. The session number appears on the far left of the status bar. (In our sample status bars, the tmux session is 0.)
To start a new tmux session without attaching to your previous session, run tmux without any arguments. For example, I type tmux instead of tmux attach in order to spawn a new tmux session when I want to pick up where I left off. You can change your tmux session within tmux itself, using a tmux com-mand, but I usually just end the session and enter the correct command.
If you can have all these tmux sessions, how can you be sure that you haven’t left old, useless sessions lying around, with abandoned commands running in them? Use tmux list-sessions.
$ tmux list-sessions0: 4 windows (created Sun Feb 13 12:17:14 2011) [80x23]2: 1 windows (created Mon Feb 21 21:57:59 2011) [131x36] (attached)
I can see from the last line of this output that I left session 2 running on my other workstation, and am still attached to it.
To connect to session 2, use attach-session and option -t to choose a target session. Here, I attach to tmux session 2:
$ tmux attach-session -t 2
I’m now connected to the same session from two separate SSH sessions—in this case, from two separate client workstations. My typing in one screen is echoed on the other.
To destroy a session, use the kill-session command, specifying the session number with -t. Here, I kill tmux session 2:
$ tmux kill-session -t 2
Any programs running in windows in tmux session 2 will also be killed.
Using tmux CommandsCommand mode in tmux offers a prompt for entering more complicated commands. To enter command mode, press ctrl-B-:. The status bar will turn yellow, and a single colon replaces all window names. For example, to create a new window dedicated to running systat(1), press ctrl-B-: and enter neww systat. A window named systat will appear. Switch to that window, and then press ctrl-C to stop systat. That window will disappear.
You can do all sorts of things with tmux commands, including split win-dows into multiple panels, copy and paste text, and so on. (Read tmux(1) for the full list.) If you want to cut and paste from one window to another,
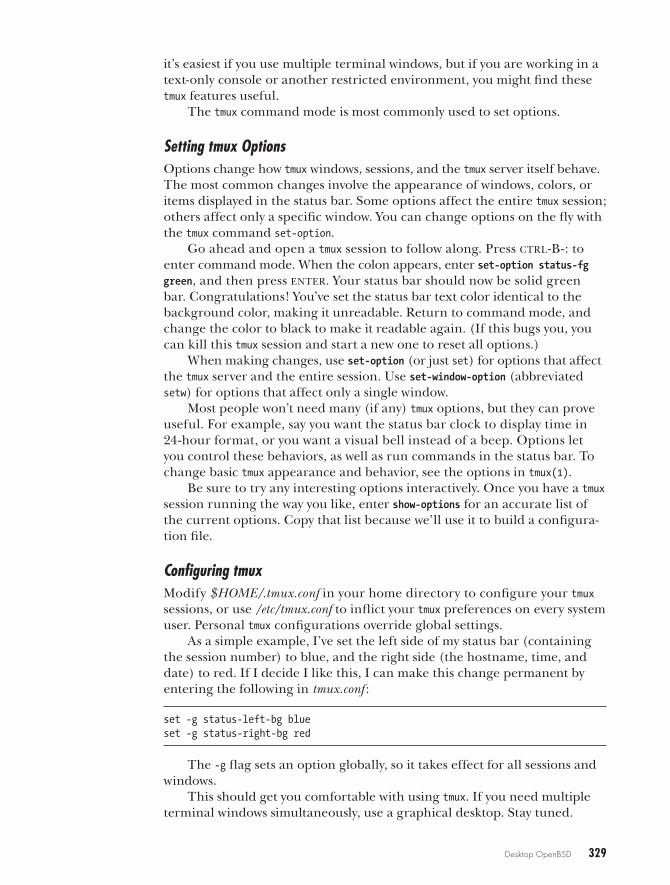
Desktop OpenBSD 329
it’s easiest if you use multiple terminal windows, but if you are working in a text-only console or another restricted environment, you might find these tmux features useful.
The tmux command mode is most commonly used to set options.
Setting tmux OptionsOptions change how tmux windows, sessions, and the tmux server itself behave. The most common changes involve the appearance of windows, colors, or items displayed in the status bar. Some options affect the entire tmux session; others affect only a specific window. You can change options on the fly with the tmux command set-option.
Go ahead and open a tmux session to follow along. Press ctrl-B-: to enter command mode. When the colon appears, enter set-option status-fg green, and then press enter. Your status bar should now be solid green bar. Congratulations! You’ve set the status bar text color identical to the background color, making it unreadable. Return to command mode, and change the color to black to make it readable again. (If this bugs you, you can kill this tmux session and start a new one to reset all options.)
When making changes, use set-option (or just set) for options that affect the tmux server and the entire session. Use set-window-option (abbreviated setw) for options that affect only a single window.
Most people won’t need many (if any) tmux options, but they can prove useful. For example, say you want the status bar clock to display time in 24-hour format, or you want a visual bell instead of a beep. Options let you control these behaviors, as well as run commands in the status bar. To change basic tmux appearance and behavior, see the options in tmux(1).
Be sure to try any interesting options interactively. Once you have a tmux session running the way you like, enter show-options for an accurate list of the current options. Copy that list because we’ll use it to build a configura-tion file.
Configuring tmuxModify $HOME/.tmux.conf in your home directory to configure your tmux sessions, or use /etc/tmux.conf to inflict your tmux preferences on every system user. Personal tmux configurations override global settings.
As a simple example, I’ve set the left side of my status bar (containing the session number) to blue, and the right side (the hostname, time, and date) to red. If I decide I like this, I can make this change permanent by entering the following in tmux.conf :
set -g status-left-bg blueset -g status-right-bg red
The -g flag sets an option globally, so it takes effect for all sessions and windows.
This should get you comfortable with using tmux. If you need multiple terminal windows simultaneously, use a graphical desktop. Stay tuned.
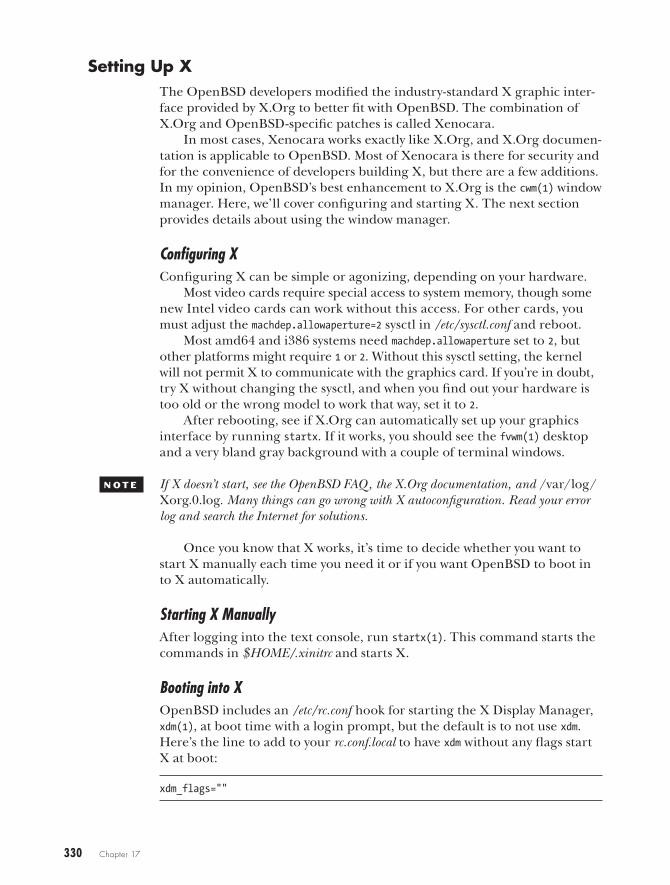
330 Chapter 17
Setting Up XThe OpenBSD developers modified the industry-standard X graphic inter-face provided by X.Org to better fit with OpenBSD. The combination of X.Org and OpenBSD-specific patches is called Xenocara.
In most cases, Xenocara works exactly like X.Org, and X.Org documen-tation is applicable to OpenBSD. Most of Xenocara is there for security and for the convenience of developers building X, but there are a few additions. In my opinion, OpenBSD’s best enhancement to X.Org is the cwm(1) window manager. Here, we’ll cover configuring and starting X. The next section provides details about using the window manager.
Configuring XConfiguring X can be simple or agonizing, depending on your hardware.
Most video cards require special access to system memory, though some new Intel video cards can work without this access. For other cards, you must adjust the machdep.allowaperture=2 sysctl in /etc/sysctl.conf and reboot.
Most amd64 and i386 systems need machdep.allowaperture set to 2, but other platforms might require 1 or 2. Without this sysctl setting, the kernel will not permit X to communicate with the graphics card. If you’re in doubt, try X without changing the sysctl, and when you find out your hardware is too old or the wrong model to work that way, set it to 2.
After rebooting, see if X.Org can automatically set up your graphics interface by running startx. If it works, you should see the fvwm(1) desktop and a very bland gray background with a couple of terminal windows.
n o t e If X doesn’t start, see the OpenBSD FAQ , the X.Org documentation, and /var/log/Xorg.0.log. Many things can go wrong with X autoconfiguration. Read your error log and search the Internet for solutions.
Once you know that X works, it’s time to decide whether you want to start X manually each time you need it or if you want OpenBSD to boot in to X automatically.
Starting X ManuallyAfter logging into the text console, run startx(1). This command starts the commands in $HOME/.xinitrc and starts X.
Booting into XOpenBSD includes an /etc/rc.conf hook for starting the X Display Manager, xdm(1), at boot time with a login prompt, but the default is to not use xdm. Here’s the line to add to your rc.conf.local to have xdm without any flags start X at boot:
xdm_flags=""
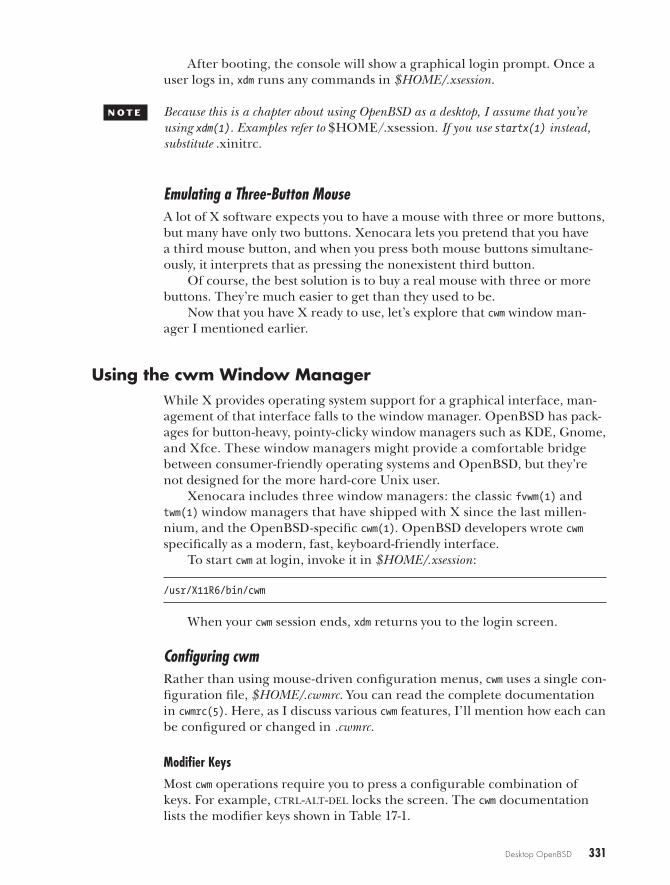
Desktop OpenBSD 331
After booting, the console will show a graphical login prompt. Once a user logs in, xdm runs any commands in $HOME/.xsession.
n o t e Because this is a chapter about using OpenBSD as a desktop, I assume that you’re using xdm(1). Examples refer to $HOME/.xsession. If you use startx(1) instead, substitute .xinitrc.
Emulating a Three-Button MouseA lot of X software expects you to have a mouse with three or more buttons, but many have only two buttons. Xenocara lets you pretend that you have a third mouse button, and when you press both mouse buttons simultane-ously, it interprets that as pressing the nonexistent third button.
Of course, the best solution is to buy a real mouse with three or more buttons. They’re much easier to get than they used to be.
Now that you have X ready to use, let’s explore that cwm window man-ager I mentioned earlier.
Using the cwm Window ManagerWhile X provides operating system support for a graphical interface, man-agement of that interface falls to the window manager. OpenBSD has pack-ages for button-heavy, pointy-clicky window managers such as KDE, Gnome, and Xfce. These window managers might provide a comfortable bridge between consumer-friendly operating systems and OpenBSD, but they’re not designed for the more hard-core Unix user.
Xenocara includes three window managers: the classic fvwm(1) and twm(1) window managers that have shipped with X since the last millen-nium, and the OpenBSD-specific cwm(1). OpenBSD developers wrote cwm specifically as a modern, fast, keyboard-friendly interface.
To start cwm at login, invoke it in $HOME/.xsession:
/usr/X11R6/bin/cwm
When your cwm session ends, xdm returns you to the login screen.
Configuring cwmRather than using mouse-driven configuration menus, cwm uses a single con-figuration file, $HOME/.cwmrc. You can read the complete documentation in cwmrc(5). Here, as I discuss various cwm features, I’ll mention how each can be configured or changed in .cwmrc.
Modifier Keys
Most cwm operations require you to press a configurable combination of keys. For example, ctrl-alt-del locks the screen. The cwm documentation lists the modifier keys shown in Table 17-1.
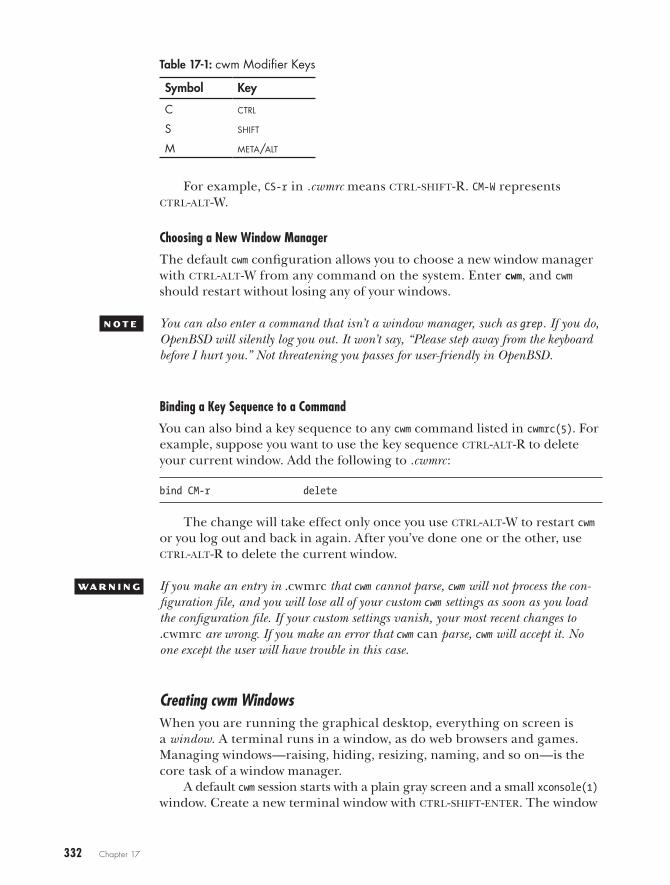
332 Chapter 17
Table 17-1: cwm Modifier Keys
Symbol Key
C ctrl
S shift
M meta/alt
For example, CS-r in .cwmrc means ctrl-shift-R. CM-W represents ctrl-alt-W.
Choosing a New Window Manager
The default cwm configuration allows you to choose a new window manager with ctrl-alt-W from any command on the system. Enter cwm, and cwm should restart without losing any of your windows.
n o t e You can also enter a command that isn’t a window manager, such as grep. If you do, OpenBSD will silently log you out. It won’t say, “Please step away from the keyboard before I hurt you.” Not threatening you passes for user-friendly in OpenBSD.
Binding a Key Sequence to a Command
You can also bind a key sequence to any cwm command listed in cwmrc(5). For example, suppose you want to use the key sequence ctrl-alt-R to delete your current window. Add the following to .cwmrc:
bind CM-r delete
The change will take effect only once you use ctrl-alt-W to restart cwm or you log out and back in again. After you’ve done one or the other, use ctrl-alt-R to delete the current window.
W a r n i n g If you make an entry in .cwmrc that cwm cannot parse, cwm will not process the con-figuration file, and you will lose all of your custom cwm settings as soon as you load the configuration file. If your custom settings vanish, your most recent changes to .cwmrc are wrong. If you make an error that cwm can parse, cwm will accept it. No one except the user will have trouble in this case.
Creating cwm WindowsWhen you are running the graphical desktop, everything on screen is a window. A terminal runs in a window, as do web browsers and games. Managing windows—raising, hiding, resizing, naming, and so on—is the core task of a window manager.
A default cwm session starts with a plain gray screen and a small xconsole(1) window. Create a new terminal window with ctrl-shift-enter. The window
Desktop OpenBSD 333
manager should focus on whatever window your mouse is over. (Press shift-+ to increase the font size of the terminal windows.)
If you press ctrl-shift-enter repeatedly, you won’t see additional ter-minal windows. Oh, the new windows will be created, but on top of one another. Press alt and the left mouse button to move the currently active window, and you should expose another terminal window beneath that one.
I find the default terminal size too small; I want wider terminals with more rows. To resize the terminal window, press alt and the center mouse button (or both buttons simultaneously). The mouse will move to the lower-right corner of the window and change to a right angle bracket. The win-dow will continue to resize as long as you hold down the mouse button.
To maximize windows vertically, press ctrl-alt-=. To maximize win-dows horizontally, press ctrl-alt- shift-=. To destroy a window, focus on it and press ctrl-alt-X. You will not be asked to confirm your decision; cwm will obey and exterminate the window immediately.
To exit cwm and return to the login screen, press ctrl-alt-Q.
Managing WindowsNow that you can create windows, let’s look at ways to manage them.
First, switch between visible windows with alt-tab. The newly active window should rise to the foreground.
To assign a name to a window, press ctrl-alt-N to access the label prompt, and then enter the window’s desired name. Names are useful when you choose to hide a window without destroying it.
To hide a window, focus on it, and then press alt-enter to make it dis-appear. Pressing alt-tab won’t bring it back because it’s hidden. Press the left mouse button for a list of all hidden windows, arranged by name. Any windows you didn’t name will show up as the program name. All terminals show up as xterm. Click the name to unhide the window.
n o t e It’s a good idea to name windows that have a specific purpose, such as a long-running software build. That way, you can minimize the window when it’s not interesting, and quickly find it again when necessary. I name windows created by SSH sessions after the connected server.
You can search for windows by name. Press ctrl-alt-/ to get a window>> prompt, and then start typing the name of the window. cwm will list all matching windows. Hidden windows have an ampersand (&) before their name. Exclamation points indicate the window with focus.
Locking the ScreenDon’t walk away from an active workstation without locking it, especially if you’re logged on to sensitive systems or as root. Press ctrl-alt-del to lock your desktop, and the screen will go blank. Press another key, and cwm will request your password to unlock the workstation.
334 Chapter 17
The default screensaver is a blank screen, provided with xlock(1). To use a different screensaver, set a path to it in .cwmrc, as follows:
command lock path-to-command
For example, to use xlock’s flow mode as a screensaver, add the follow-ing to .cwmrc:
command lock '/usr/X11R6/bin/xlock -mode flow'
If you don’t like any of the screensavers in Xenocara’s xlock(1), try the xscreensaver package.
n o t e xlock is easily bypassed by anyone with console access. You can’t count on it for security, but it does make a decent reminder for your coworkers.
Connecting to Other Machines with SSHOne common task is to connect to remote machines with SSH. To do so, press alt-. to display an ssh>> prompt, and then enter the name of the machine to which you want to make the connection. Conveniently, cwm sup-ports autocompletion, based on entries in known_hosts. As you type a host-name at the ssh prompt, cwm checks for matching names in the system’s and users’ known_hosts. Press the down-arrow key to find your desired hosts, or keep typing the hostname to connect to a new host. (Autocompletion won’t work if you hash known_hosts entries.)
And by the way, if you open multiple SSH sessions, name them, because sorting through multiple sessions labeled ssh is annoying.
Creating an Application MenuClick the right mouse button on the background to bring up the applica-tion menu. The cwm developers have no idea which programs are important to you, so they don’t even try to provide a default application menu. You need to build that yourself with .cwmrc entries. Each command has the fol-lowing format:
command name path-to-command
Yes, this is exactly the same as the format for setting the screensaver. The lock command is actually one of two special command keywords. Here, I’ve created an application menu with two choices, which are my web browser and my PDF reader:
command firefox /usr/local/bin/firefoxcommand xpdf /usr/local/bin/xpdf
When I right-click the desktop background, I’ll see a menu with these two choices.
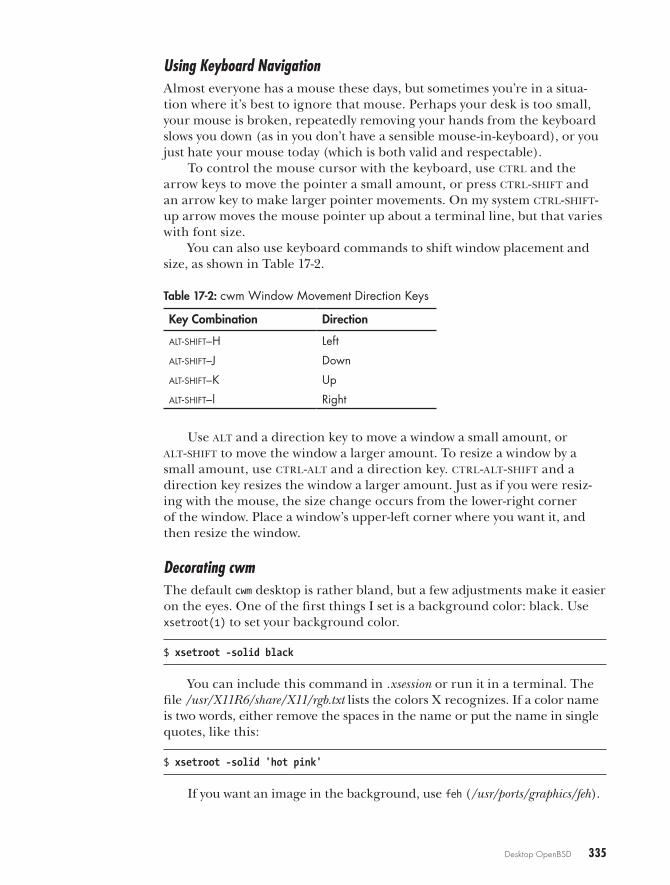
Desktop OpenBSD 335
Using Keyboard NavigationAlmost everyone has a mouse these days, but sometimes you’re in a situa-tion where it’s best to ignore that mouse. Perhaps your desk is too small, your mouse is broken, repeatedly removing your hands from the keyboard slows you down (as in you don’t have a sensible mouse-in-keyboard), or you just hate your mouse today (which is both valid and respectable).
To control the mouse cursor with the keyboard, use ctrl and the arrow keys to move the pointer a small amount, or press ctrl-shift and an arrow key to make larger pointer movements. On my system ctrl-shift-up arrow moves the mouse pointer up about a terminal line, but that varies with font size.
You can also use keyboard commands to shift window placement and size, as shown in Table 17-2.
Table 17-2: cwm Window Movement Direction Keys
Key Combination Direction
alt-shift–H Left
alt-shift–J Down
alt-shift–K Up
alt-shift–l Right
Use alt and a direction key to move a window a small amount, or alt-shift to move the window a larger amount. To resize a window by a small amount, use ctrl-alt and a direction key. ctrl-alt-shift and a direction key resizes the window a larger amount. Just as if you were resiz-ing with the mouse, the size change occurs from the lower-right corner of the window. Place a window’s upper-left corner where you want it, and then resize the window.
Decorating cwmThe default cwm desktop is rather bland, but a few adjustments make it easier on the eyes. One of the first things I set is a background color: black. Use xsetroot(1) to set your background color.
$ xsetroot -solid black
You can include this command in .xsession or run it in a terminal. The file /usr/X11R6/share/X11/rgb.txt lists the colors X recognizes. If a color name is two words, either remove the spaces in the name or put the name in single quotes, like this:
$ xsetroot -solid 'hot pink'
If you want an image in the background, use feh (/usr/ports/graphics/feh).
336 Chapter 17
$ feh --bg-scale /home/mwlucas/galaxies.jpg
To make window edges easier to identify, put borders around them. The default border is 1 pixel wide, in your choice of colors. I prefer 3-pixel borders, blue for the active window and dark blue for the inactive windows. That requires the following entries in .cwmrc:
borderwidth 3color activeborder bluecolor inactiveborder darkblue
As you grow more accustomed to cwm, you might find that you want par-ticular applications—perhaps an MP3 player, a clock, and a fancy graphic system load indicator—to always be visible. Maximizing a window can bury these applications. To address this, define a gap in .cwmrc, which sets the number of pixels to be kept clear even when you maximize a window.
gap top bottom left right
For example, when I must keep track of time, I run xclock(1) on the right side of my screen. Experimentation has shown that my clock is about 175 pixels wide. I leave a gap of 180 pixels, so that even when I maximize a window, it doesn’t cover the clock. Here’s my gap entry in .cwmrc:
gap 0 0 0 180
Now I can no longer use the excuse that I missed work because I lost my clock on my desktop. Fortunately, I have many other handy excuses.
Unmapping and Remapping KeysWhile the cwm authors did their best to choose keyboard shortcuts that wouldn’t conflict with those used by other programs, they could not avoid every possible conflict. If you run into such a conflict, you can solve the problem by modifying entries in .cwmrc to replace conflicting cwm key bindings.
For example, cwm uses ctrl and ctrl-shift with the arrow keys to move the pointer, but OpenOffice also uses these key combinations to move the pointer and highlight within a text document. I’ve used OpenOffice for more than 10 years, and have written millions of words in it. My fingers have been well-trained, and I’m not going to try to retrain them. The cwm key assignments must change.
Use the bind command to remap keys. Start by disconnecting the ctrl and ctrl-shift and arrow key combinations from cwm with the unmap option. Remember that .cwmrc uses C to represent ctrl and S to represent shift (as shown earlier in Table 17-1).
Desktop OpenBSD 337
bind CS-Left unmapbind CS-Right unmapbind CS-Up unmapbind CS-Down unmapbind C-Left unmapbind C-Right unmapbind C-Up unmapbind C-Down unmap
These keystrokes will now pass through to applications, such as OpenOffice.
To determine how to move the pointer with the keyboard, I check cwmrc(5) for the list of commands that can be bound to a key. The manual defines commands with a brief name and a description of their functional-ity. The pointer movement commands begin with ptrmove and bigptrmove, plus a direction. I find them and use the Windows key (also known as modi-fier 4) to replace the functions I removed from the ctrl key.
bind 4-Left ptrmoveleftbind 4-Right ptrmoverightbind 4-Up ptrmoveupbind 4-Down ptrmovedownbind 4S-Left bigptrmoveleftbind 4S-Right bigptrmoverightbind 4S-Up bigptrmoveupbind 4S-Down bigptrmovedown
I can now use both OpenOffice and cwm’s keyboard functions.At this point, I’ve covered everything I’ve used since OpenBSD intro-
duced cwm, which should get you started. For more information, read cwm(1) and cwmrc(5). You’ll see that cwm supports many more features.
Now that we’ve covered OpenBSD’s appearance, let’s dive deep into the operating system core.

18K e r n e l C o n f i g u r a t i o n
Kernel, not colonel! This is blowfish, not chicken. Less grease, more function.
Depending on your systems administration experience and background, the kernel is a
subject of great mystery and speculation. It might be something you reconfigure when the
whim strikes you, or something you know to leave alone.Most commercial operating systems provide only a few basic hooks
for configuring the kernel. Many open source operating systems tell you to rebuild the kernel from source code whenever you change anything.
OpenBSD falls somewhere in the middle. The standard OpenBSD kernel is intended to be perfectly usable with-
out modifications, but you have the tools to perform any tweaks or adjustments necessary for your environment. Additionally, you have the complete source code and kernel-building tools in case you decide to perform wholesale kernel surgery.
340 Chapter 18
OpenBSD lets you adjust kernel behavior even as the system is running, via sysctl(8). Some hardware or protocols require special OpenBSD kernel tweaks to run in specific environments. This chapter will cover both kinds of changes, but first, let’s talk about the kernel in general.
What Is the Kernel?“The file /bsd is OpenBSD’s kernel. Next question?”
That’s technically correct, but not exactly useful. A more general description is that “The kernel is the interface that links applications and the hardware.” That’s not a complete definition, but it’s good enough.
The kernel allows programs to write data to disk drives and to the net-work, and it gives instructions to the CPU and shuffles bits into memory. When you open a web page, the browser application asks the kernel to fetch the data it displays.
Some kernel responsibilities exceed this definition. For example, the ker-nel handles network connectivity, including forwarding packets from one interface to another if needed. The packet-filtering rules run in the ker-nel (although the rules are managed by applications). The kernel handles disk redundancy. And the kernel also handles all sorts of things that don’t impact applications but are integral to a functioning system.
A simplified view is to think of the kernel as the program that handles all the low-level functions, which is close enough to give you an idea of what the kernel does.
Along with kernel, you’ll also hear the term userland. Userland is every-thing in the system that isn’t the kernel. Your shells, libraries, and applications are all part of userland.
Kernel MessagesThe kernel issues messages to userland. These include hardware attaching and detaching alerts, warnings from device drivers, and system boot mes-sages. If you’re logged on to the system console in text mode, you might notice these messages.
To review kernel messages, you can watch the console, check the system logs (as discussed in Chapter 15), or use dmesg(8).
OpenBSD has a system message buffer, where it sends messages from the kernel. These messages are usually copied to the system logger, but they’re also accessible via dmesg.
The system message buffer is circular. As it fills up, the oldest messages are deleted to make room for new ones. Run dmesg to view it.
Startup MessagesOne common question is “What hardware did your kernel find?” If the ker-nel handles all the device drivers and other hardware support, the list of devices found should include all the supported hardware in the system.
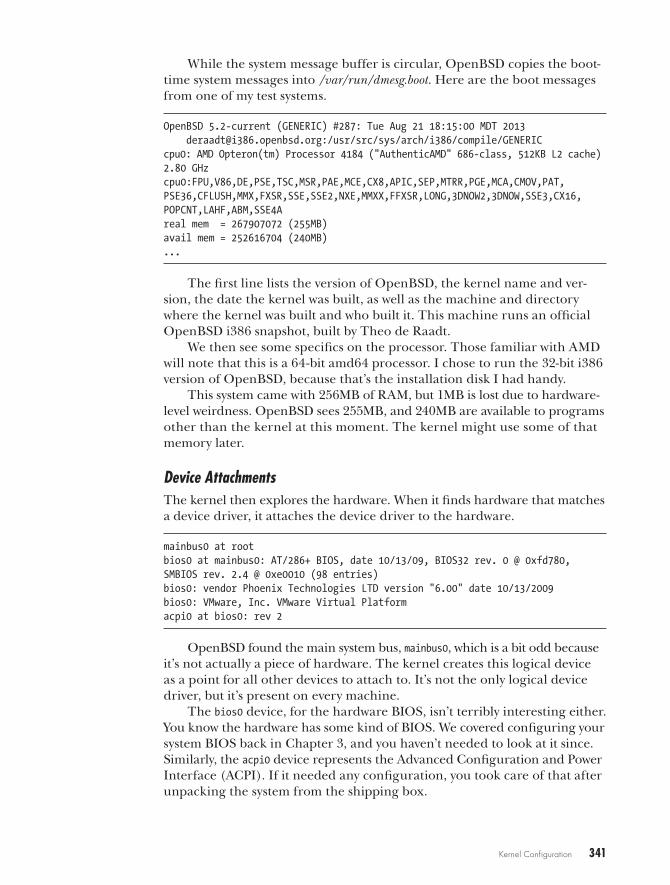
Kernel Configuration 341
While the system message buffer is circular, OpenBSD copies the boot-time system messages into /var/run/dmesg.boot. Here are the boot messages from one of my test systems.
OpenBSD 5.2-current (GENERIC) #287: Tue Aug 21 18:15:00 MDT 2013 [email protected]:/usr/src/sys/arch/i386/compile/GENERICcpu0: AMD Opteron(tm) Processor 4184 ("AuthenticAMD" 686-class, 512KB L2 cache) 2.80 GHzcpu0:FPU,V86,DE,PSE,TSC,MSR,PAE,MCE,CX8,APIC,SEP,MTRR,PGE,MCA,CMOV,PAT, PSE36,CFLUSH,MMX,FXSR,SSE,SSE2,NXE,MMXX,FFXSR,LONG,3DNOW2,3DNOW,SSE3,CX16, POPCNT,LAHF,ABM,SSE4Areal mem = 267907072 (255MB)avail mem = 252616704 (240MB)...
The first line lists the version of OpenBSD, the kernel name and ver-sion, the date the kernel was built, as well as the machine and directory where the kernel was built and who built it. This machine runs an official OpenBSD i386 snapshot, built by Theo de Raadt.
We then see some specifics on the processor. Those familiar with AMD will note that this is a 64-bit amd64 processor. I chose to run the 32-bit i386 version of OpenBSD, because that’s the installation disk I had handy.
This system came with 256MB of RAM, but 1MB is lost due to hardware-level weirdness. OpenBSD sees 255MB, and 240MB are available to programs other than the kernel at this moment. The kernel might use some of that memory later.
Device AttachmentsThe kernel then explores the hardware. When it finds hardware that matches a device driver, it attaches the device driver to the hardware.
mainbus0 at rootbios0 at mainbus0: AT/286+ BIOS, date 10/13/09, BIOS32 rev. 0 @ 0xfd780, SMBIOS rev. 2.4 @ 0xe0010 (98 entries)bios0: vendor Phoenix Technologies LTD version "6.00" date 10/13/2009bios0: VMware, Inc. VMware Virtual Platformacpi0 at bios0: rev 2
OpenBSD found the main system bus, mainbus0, which is a bit odd because it’s not actually a piece of hardware. The kernel creates this logical device as a point for all other devices to attach to. It’s not the only logical device driver, but it’s present on every machine.
The bios0 device, for the hardware BIOS, isn’t terribly interesting either. You know the hardware has some kind of BIOS. We covered configuring your system BIOS back in Chapter 3, and you haven’t needed to look at it since. Similarly, the acpi0 device represents the Advanced Configuration and Power Interface (ACPI). If it needed any configuration, you took care of that after unpacking the system from the shipping box.
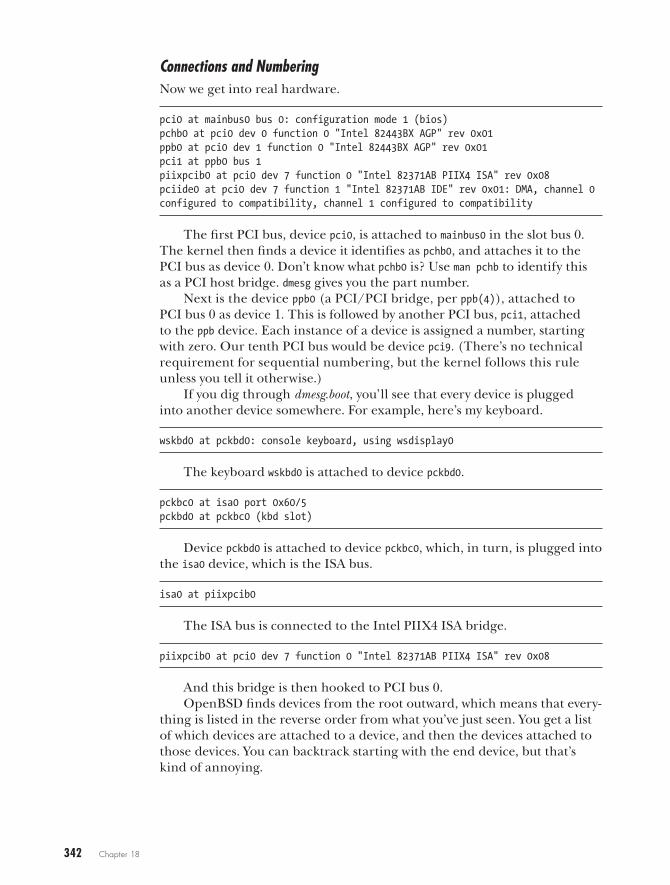
342 Chapter 18
Connections and NumberingNow we get into real hardware.
pci0 at mainbus0 bus 0: configuration mode 1 (bios)pchb0 at pci0 dev 0 function 0 "Intel 82443BX AGP" rev 0x01ppb0 at pci0 dev 1 function 0 "Intel 82443BX AGP" rev 0x01pci1 at ppb0 bus 1piixpcib0 at pci0 dev 7 function 0 "Intel 82371AB PIIX4 ISA" rev 0x08pciide0 at pci0 dev 7 function 1 "Intel 82371AB IDE" rev 0x01: DMA, channel 0 configured to compatibility, channel 1 configured to compatibility
The first PCI bus, device pci0, is attached to mainbus0 in the slot bus 0. The kernel then finds a device it identifies as pchb0, and attaches it to the PCI bus as device 0. Don’t know what pchb0 is? Use man pchb to identify this as a PCI host bridge. dmesg gives you the part number.
Next is the device ppb0 (a PCI/PCI bridge, per ppb(4)), attached to PCI bus 0 as device 1. This is followed by another PCI bus, pci1, attached to the ppb device. Each instance of a device is assigned a number, starting with zero. Our tenth PCI bus would be device pci9. (There’s no technical requirement for sequential numbering, but the kernel follows this rule unless you tell it otherwise.)
If you dig through dmesg.boot, you’ll see that every device is plugged into another device somewhere. For example, here’s my keyboard.
wskbd0 at pckbd0: console keyboard, using wsdisplay0
The keyboard wskbd0 is attached to device pckbd0.
pckbc0 at isa0 port 0x60/5pckbd0 at pckbc0 (kbd slot)
Device pckbd0 is attached to device pckbc0, which, in turn, is plugged into the isa0 device, which is the ISA bus.
isa0 at piixpcib0
The ISA bus is connected to the Intel PIIX4 ISA bridge.
piixpcib0 at pci0 dev 7 function 0 "Intel 82371AB PIIX4 ISA" rev 0x08
And this bridge is then hooked to PCI bus 0.OpenBSD finds devices from the root outward, which means that every-
thing is listed in the reverse order from what you’ve just seen. You get a list of which devices are attached to a device, and then the devices attached to those devices. You can backtrack starting with the end device, but that’s kind of annoying.
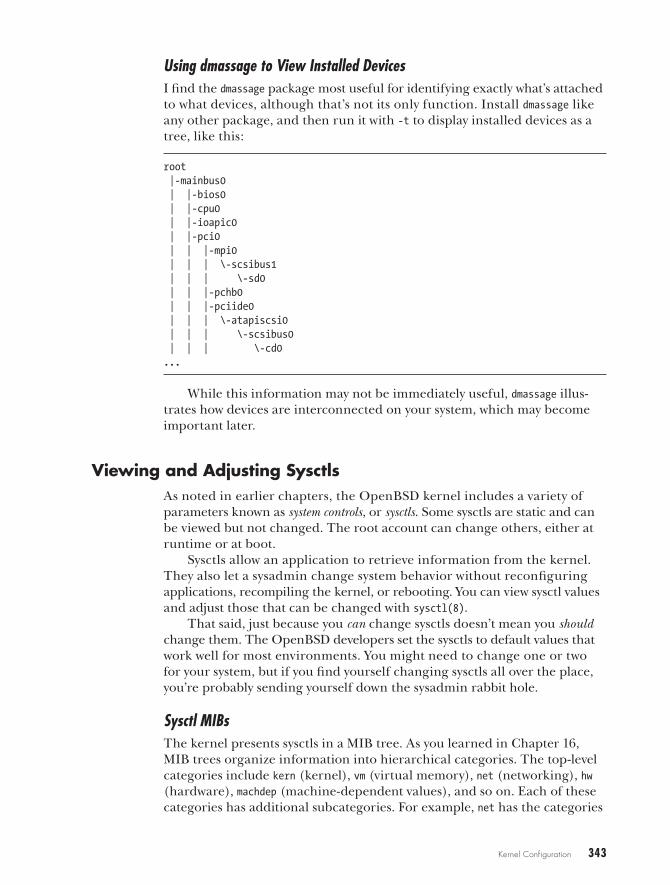
Kernel Configuration 343
Using dmassage to View Installed DevicesI find the dmassage package most useful for identifying exactly what’s attached to what devices, although that’s not its only function. Install dmassage like any other package, and then run it with -t to display installed devices as a tree, like this:
root |-mainbus0 | |-bios0 | |-cpu0 | |-ioapic0 | |-pci0 | | |-mpi0 | | | \-scsibus1 | | | \-sd0 | | |-pchb0 | | |-pciide0 | | | \-atapiscsi0 | | | \-scsibus0 | | | \-cd0...
While this information may not be immediately useful, dmassage illus-trates how devices are interconnected on your system, which may become important later.
Viewing and Adjusting SysctlsAs noted in earlier chapters, the OpenBSD kernel includes a variety of parameters known as system controls, or sysctls. Some sysctls are static and can be viewed but not changed. The root account can change others, either at runtime or at boot.
Sysctls allow an application to retrieve information from the kernel. They also let a sysadmin change system behavior without reconfiguring applications, recompiling the kernel, or rebooting. You can view sysctl values and adjust those that can be changed with sysctl(8).
That said, just because you can change sysctls doesn’t mean you should change them. The OpenBSD developers set the sysctls to default values that work well for most environments. You might need to change one or two for your system, but if you find yourself changing sysctls all over the place, you’re probably sending yourself down the sysadmin rabbit hole.
Sysctl MIBsThe kernel presents sysctls in a MIB tree. As you learned in Chapter 16, MIB trees organize information into hierarchical categories. The top-level categories include kern (kernel), vm (virtual memory), net (networking), hw (hardware), machdep (machine-dependent values), and so on. Each of these categories has additional subcategories. For example, net has the categories
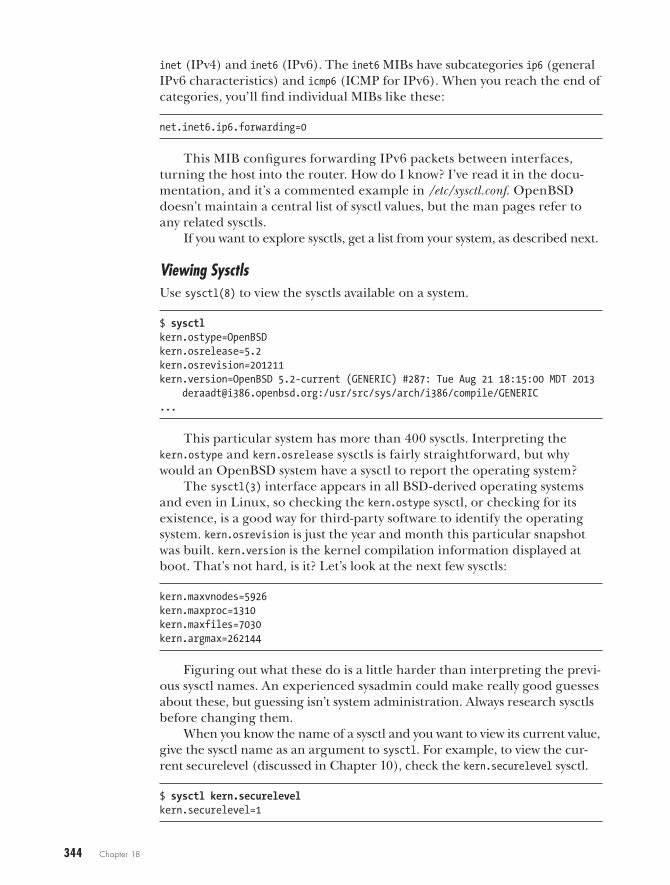
344 Chapter 18
inet (IPv4) and inet6 (IPv6). The inet6 MIBs have subcategories ip6 (general IPv6 characteristics) and icmp6 (ICMP for IPv6). When you reach the end of categories, you’ll find individual MIBs like these:
net.inet6.ip6.forwarding=0
This MIB configures forwarding IPv6 packets between interfaces, turning the host into the router. How do I know? I’ve read it in the docu-mentation, and it’s a commented example in /etc/sysctl.conf. OpenBSD doesn’t maintain a central list of sysctl values, but the man pages refer to any related sysctls.
If you want to explore sysctls, get a list from your system, as described next.
Viewing SysctlsUse sysctl(8) to view the sysctls available on a system.
$ sysctlkern.ostype=OpenBSDkern.osrelease=5.2kern.osrevision=201211kern.version=OpenBSD 5.2-current (GENERIC) #287: Tue Aug 21 18:15:00 MDT 2013 [email protected]:/usr/src/sys/arch/i386/compile/GENERIC...
This particular system has more than 400 sysctls. Interpreting the kern.ostype and kern.osrelease sysctls is fairly straightforward, but why would an OpenBSD system have a sysctl to report the operating system?
The sysctl(3) interface appears in all BSD-derived operating systems and even in Linux, so checking the kern.ostype sysctl, or checking for its existence, is a good way for third-party software to identify the operating system. kern.osrevision is just the year and month this particular snapshot was built. kern.version is the kernel compilation information displayed at boot. That’s not hard, is it? Let’s look at the next few sysctls:
kern.maxvnodes=5926kern.maxproc=1310kern.maxfiles=7030kern.argmax=262144
Figuring out what these do is a little harder than interpreting the previ-ous sysctl names. An experienced sysadmin could make really good guesses about these, but guessing isn’t system administration. Always research sysctls before changing them.
When you know the name of a sysctl and you want to view its current value, give the sysctl name as an argument to sysctl. For example, to view the cur-rent securelevel (discussed in Chapter 10), check the kern.securelevel sysctl.
$ sysctl kern.securelevelkern.securelevel=1
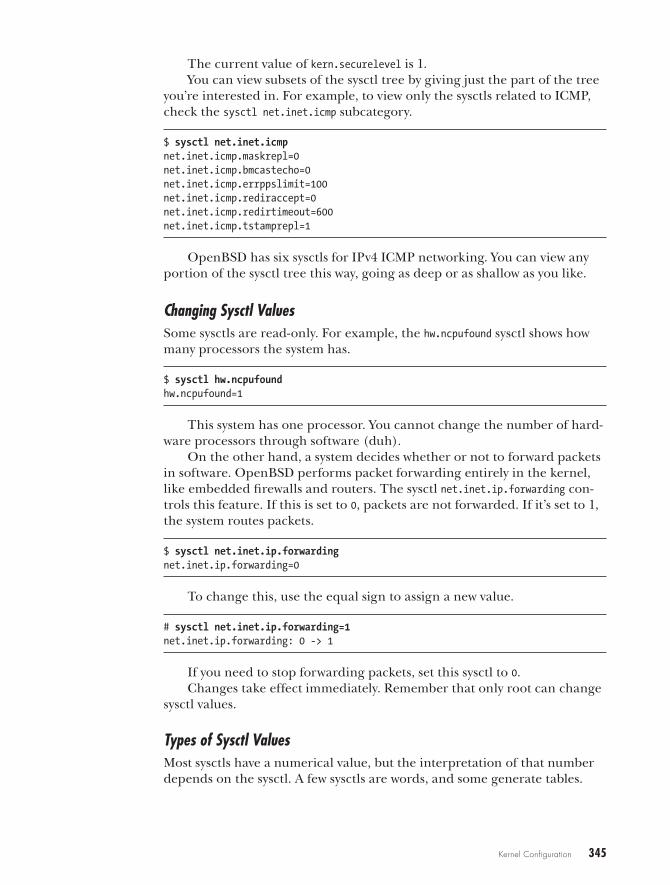
Kernel Configuration 345
The current value of kern.securelevel is 1.You can view subsets of the sysctl tree by giving just the part of the tree
you’re interested in. For example, to view only the sysctls related to ICMP, check the sysctl net.inet.icmp subcategory.
$ sysctl net.inet.icmpnet.inet.icmp.maskrepl=0net.inet.icmp.bmcastecho=0net.inet.icmp.errppslimit=100net.inet.icmp.rediraccept=0net.inet.icmp.redirtimeout=600net.inet.icmp.tstamprepl=1
OpenBSD has six sysctls for IPv4 ICMP networking. You can view any portion of the sysctl tree this way, going as deep or as shallow as you like.
Changing Sysctl ValuesSome sysctls are read-only. For example, the hw.ncpufound sysctl shows how many processors the system has.
$ sysctl hw.ncpufoundhw.ncpufound=1
This system has one processor. You cannot change the number of hard-ware processors through software (duh).
On the other hand, a system decides whether or not to forward packets in software. OpenBSD performs packet forwarding entirely in the kernel, like embedded firewalls and routers. The sysctl net.inet.ip.forwarding con-trols this feature. If this is set to 0, packets are not forwarded. If it’s set to 1, the system routes packets.
$ sysctl net.inet.ip.forwardingnet.inet.ip.forwarding=0
To change this, use the equal sign to assign a new value.
# sysctl net.inet.ip.forwarding=1net.inet.ip.forwarding: 0 -> 1
If you need to stop forwarding packets, set this sysctl to 0.Changes take effect immediately. Remember that only root can change
sysctl values.
Types of Sysctl ValuesMost sysctls have a numerical value, but the interpretation of that number depends on the sysctl. A few sysctls are words, and some generate tables.
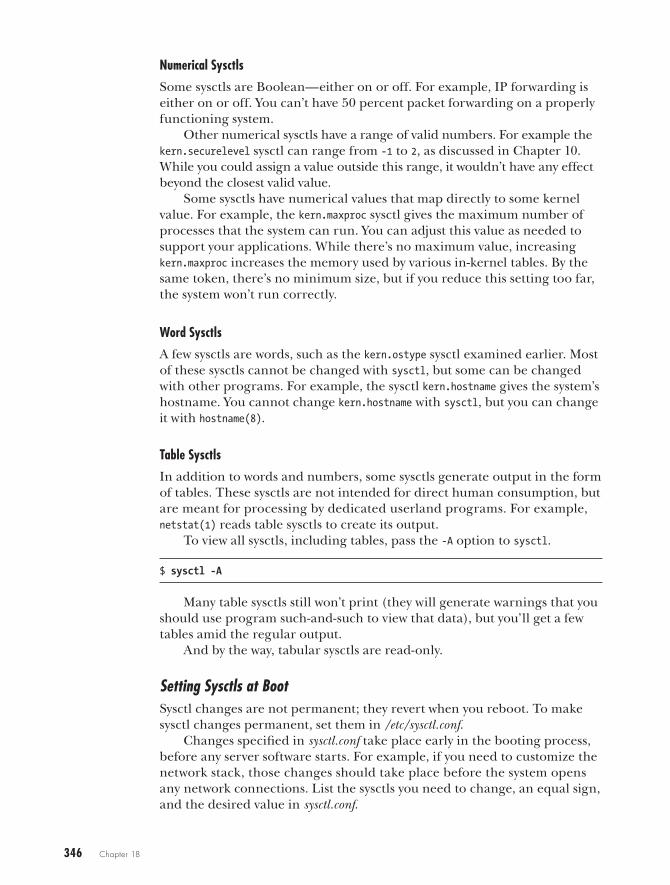
346 Chapter 18
Numerical Sysctls
Some sysctls are Boolean—either on or off. For example, IP forwarding is either on or off. You can’t have 50 percent packet forwarding on a properly functioning system.
Other numerical sysctls have a range of valid numbers. For example the kern.securelevel sysctl can range from -1 to 2, as discussed in Chapter 10. While you could assign a value outside this range, it wouldn’t have any effect beyond the closest valid value.
Some sysctls have numerical values that map directly to some kernel value. For example, the kern.maxproc sysctl gives the maximum number of processes that the system can run. You can adjust this value as needed to support your applications. While there’s no maximum value, increasing kern.maxproc increases the memory used by various in-kernel tables. By the same token, there’s no minimum size, but if you reduce this setting too far, the system won’t run correctly.
Word Sysctls
A few sysctls are words, such as the kern.ostype sysctl examined earlier. Most of these sysctls cannot be changed with sysctl, but some can be changed with other programs. For example, the sysctl kern.hostname gives the system’s hostname. You cannot change kern.hostname with sysctl, but you can change it with hostname(8).
Table Sysctls
In addition to words and numbers, some sysctls generate output in the form of tables. These sysctls are not intended for direct human consumption, but are meant for processing by dedicated userland programs. For example, netstat(1) reads table sysctls to create its output.
To view all sysctls, including tables, pass the -A option to sysctl.
$ sysctl -A
Many table sysctls still won’t print (they will generate warnings that you should use program such-and-such to view that data), but you’ll get a few tables amid the regular output.
And by the way, tabular sysctls are read-only.
Setting Sysctls at BootSysctl changes are not permanent; they revert when you reboot. To make sysctl changes permanent, set them in /etc/sysctl.conf.
Changes specified in sysctl.conf take place early in the booting process, before any server software starts. For example, if you need to customize the network stack, those changes should take place before the system opens any network connections. List the sysctls you need to change, an equal sign, and the desired value in sysctl.conf.
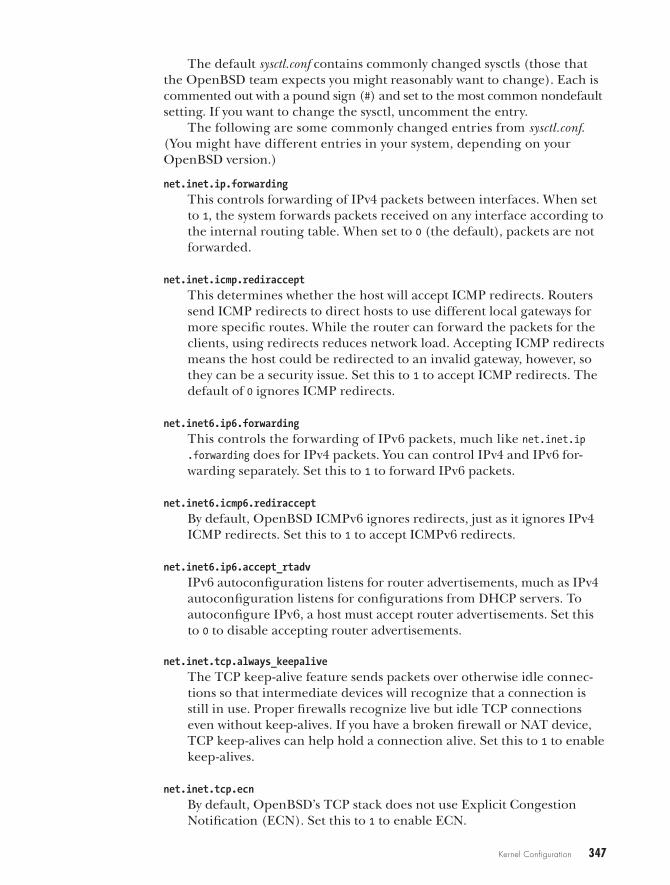
Kernel Configuration 347
The default sysctl.conf contains commonly changed sysctls (those that the OpenBSD team expects you might reasonably want to change). Each is commented out with a pound sign (#) and set to the most common nondefault setting. If you want to change the sysctl, uncomment the entry.
The following are some commonly changed entries from sysctl.conf. (You might have different entries in your system, depending on your OpenBSD version.)
net.inet.ip.forwarding
This controls forwarding of IPv4 packets between interfaces. When set to 1, the system forwards packets received on any interface according to the internal routing table. When set to 0 (the default), packets are not forwarded.
net.inet.icmp.rediraccept
This determines whether the host will accept ICMP redirects. Routers send ICMP redirects to direct hosts to use different local gateways for more specific routes. While the router can forward the packets for the clients, using redirects reduces network load. Accepting ICMP redirects means the host could be redirected to an invalid gateway, however, so they can be a security issue. Set this to 1 to accept ICMP redirects. The default of 0 ignores ICMP redirects.
net.inet6.ip6.forwarding
This controls the forwarding of IPv6 packets, much like net.inet.ip .forwarding does for IPv4 packets. You can control IPv4 and IPv6 for-warding separately. Set this to 1 to forward IPv6 packets.
net.inet6.icmp6.rediraccept
By default, OpenBSD ICMPv6 ignores redirects, just as it ignores IPv4 ICMP redirects. Set this to 1 to accept ICMPv6 redirects.
net.inet6.ip6.accept_rtadv
IPv6 autoconfiguration listens for router advertisements, much as IPv4 autoconfiguration listens for configurations from DHCP servers. To autoconfigure IPv6, a host must accept router advertisements. Set this to 0 to disable accepting router advertisements.
net.inet.tcp.always_keepalive
The TCP keep-alive feature sends packets over otherwise idle connec-tions so that intermediate devices will recognize that a connection is still in use. Proper firewalls recognize live but idle TCP connections even without keep-alives. If you have a broken firewall or NAT device, TCP keep-alives can help hold a connection alive. Set this to 1 to enable keep-alives.
net.inet.tcp.ecn
By default, OpenBSD’s TCP stack does not use Explicit Congestion Notification (ECN). Set this to 1 to enable ECN.
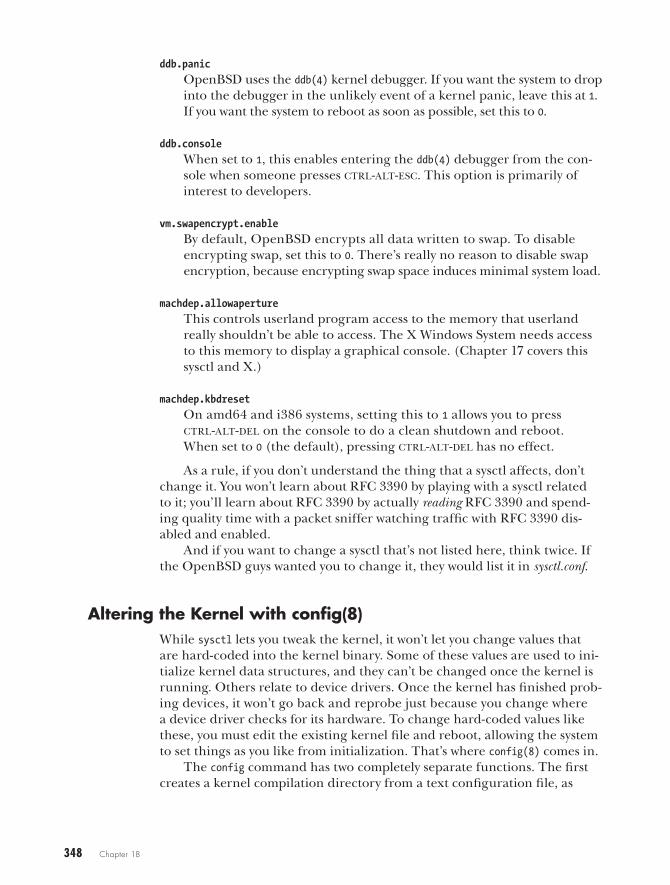
348 Chapter 18
ddb.panic
OpenBSD uses the ddb(4) kernel debugger. If you want the system to drop into the debugger in the unlikely event of a kernel panic, leave this at 1. If you want the system to reboot as soon as possible, set this to 0.
ddb.console
When set to 1, this enables entering the ddb(4) debugger from the con-sole when someone presses ctrl-alt-esc. This option is primarily of interest to developers.
vm.swapencrypt.enable
By default, OpenBSD encrypts all data written to swap. To disable encrypting swap, set this to 0. There’s really no reason to disable swap encryption, because encrypting swap space induces minimal system load.
machdep.allowaperture
This controls userland program access to the memory that userland really shouldn’t be able to access. The X Windows System needs access to this memory to display a graphical console. (Chapter 17 covers this sysctl and X.)
machdep.kbdreset
On amd64 and i386 systems, setting this to 1 allows you to press ctrl-alt-del on the console to do a clean shutdown and reboot. When set to 0 (the default), pressing ctrl-alt-del has no effect.
As a rule, if you don’t understand the thing that a sysctl affects, don’t change it. You won’t learn about RFC 3390 by playing with a sysctl related to it; you’ll learn about RFC 3390 by actually reading RFC 3390 and spend-ing quality time with a packet sniffer watching traffic with RFC 3390 dis-abled and enabled.
And if you want to change a sysctl that’s not listed here, think twice. If the OpenBSD guys wanted you to change it, they would list it in sysctl.conf.
Altering the Kernel with config(8)While sysctl lets you tweak the kernel, it won’t let you change values that are hard-coded into the kernel binary. Some of these values are used to ini-tialize kernel data structures, and they can’t be changed once the kernel is running. Others relate to device drivers. Once the kernel has finished prob-ing devices, it won’t go back and reprobe just because you change where a device driver checks for its hardware. To change hard-coded values like these, you must edit the existing kernel file and reboot, allowing the system to set things as you like from initialization. That’s where config(8) comes in.
The config command has two completely separate functions. The first creates a kernel compilation directory from a text configuration file, as
Kernel Configuration 349
discussed in Chapter 19. The function we’re most interested in now is edit-ing an existing kernel binary, which lets you tweak a kernel to better suit your needs.
n o t e The modern OpenBSD kernel is largely dynamic. If you call for additional virtual interfaces, the kernel creates them. If you need to change the amount of memory for the buffer cache, use a sysctl. Editing the kernel is rarely necessary.
Making a Backup of the Default KernelBefore making any changes to a working kernel, no matter how minor, back up the original kernel! If your minor changes make your machine unbootable, you want to be able to easily fall back to a working kernel.
The kernel is just a file, /bsd. To back it up, copy it to another file. I recommend naming your backup of the default kernel /bsd.GENERIC, for reasons that will become apparent in Chapter 19.
Always keep a known-good kernel on your system. A bad kernel can pre-vent a computer from booting, and if you don’t have a reliable kernel that’s easily bootable, you will need to boot from installation media. (Boot your backup kernel using the instructions in Chapter 5.) And remember that subtle kernel bugs can take weeks or months to show up, so plan to keep your backup kernel forever.
Device Drivers and the KernelMuch of the hard-coded information in the kernel relates to device drivers, especially drivers for ancient ISA cards.
Some of you may remember manually configuring the interrupt request (IRQ) and memory port addresses on a network or SCSI card. The kernel uses the IRQ to identify cards. Essentially, it consults an internal list of IRQs and port numbers, compares it to what it finds on the hardware probe, and assigns the drivers appropriately. “This card answers at IRQ 10 and memory port 0x300? It must be a NE2000-compatible network card. I will assign that driver to it.” The process is more complicated than this, of course, but this probe is a vital part of the process. If you want OpenBSD to recognize such a card, and the card is set to an IRQ and memory port other than what OpenBSD expects, you must tell the kernel the IRQ and memory port the card is using.
Realistically, the best way to deal with ISA cards is to feed them to the recycling plant. Running OpenBSD on a 25-year-old VAX is interesting and educational. Running OpenBSD on 15-year-old Sparc hardware is realistic for very specific applications, and can also be educational and interesting. Running OpenBSD on 10-year-old consumer-grade i386 hardware is either a waste of time or an exercise in masochism—probably both.
n o t e Modern PCI-descended hardware includes hooks for the kernel to identify the hard-ware and assign the proper device driver. You shouldn’t need to edit the kernel to support hardware.
350 Chapter 18
Enabling DriversRather than changing driver IRQs, more realistically, you might need to enable a device driver that’s disabled by default or disable a device that’s on by default.
The kernel includes some device drivers that are disabled because they react badly with certain hardware, such as the IPMI driver. The ipmi(4) driver is known to be buggy, and as I write this, it is badly broken in some use cases. It’s included in the default kernel, but disabled by default.
You can choose to enable ipmi(4). If it works for you, great. If it doesn’t, feel free to submit bug reports, preferably with patches, or at least proper dmesg output and crash dumps.
Editing the Kernel with configWhen using config as a kernel editor, use the command-line options -e and -o. The -e flag tells config you’re editing a kernel binary. The -o flag lets you specify a new file for the edited version of the kernel.
Give the original kernel file path as an argument. For example, here’s how to edit /bsd and write the result to the file /bsd.test:
# config -e -o /bsd.test /bsd
You could use the -f flag instead of -o and a filename. The -f flag tells config to edit the kernel file in place, not to create a new file.
n o t e If you’re editing /bsd and you specified the -f option, your changes are written directly to /bsd. I recommend not doing this. (Unless, of course, you’re absolutely certain you know what you’re doing. You get to keep all the parts.)
Running config will open the kernel editor, which should look much like this:
OpenBSD 5.2-current (GENERIC) #287: Tue Aug 21 18:15:00 MDT 2013 [email protected]:/usr/src/sys/arch/i386/compile/GENERICEnter 'help' for informationukc>
At this point, you need to use kernel editor commands to make changes.
Using the help and list Commands
Start with the two editor commands help and list. The help command shows all the commands available within config and comes in particularly handy at stupid-o’clock am to remind you of the necessary syntax.
The list command displays a complete list of all the devices the kernel supports, one screen at a time.

Kernel Configuration 351
ukc> list 0 video* at uvideo* flags 0x0 1 audio* at uaudio*|sb0|sb*|gus0|gus*|pas0|ess*|wss0|wss*|ym*|eap*|envy*| eso*|sv*|neo*|cmpci*|clcs*|clct*|auacer*|auglx*|auich*|auixp*|autri*|auvia*| azalia*|fms*|maestro*|esa*|yds*|emu* flags 0x0 2 midi* at umidi*|sb0|sb*|ym*|mpu*|mpu*|autri*|eap*|envy* flags 0x0...
On an OpenBSD 5.2 system, the default kernel has 538 entries, most for hardware that isn’t on any particular system but that OpenBSD supports out of the box. Let’s take a closer look at the devices shown.
Line 0 says that this kernel supports the video device. The kernel will look for a video device attached to the uvideo device. The uvideo(4) man page tells us that uvideo is USB video, mainly for webcams and the like, and video(4) says that the video driver is a device-independent video driver. The flags statement gives settings to feed to this device driver. (This kernel sup-ports webcams.)
Line 1 says that this kernel supports an audio device, and it can be attached to any of a long list of device drivers. The online manual says that uaudio, sb0, gus0, and so on are sound cards. We get sound with our video? Truly we live in an age of wonders.
Entries for older ISA gear are more complex.
278 ne0 at isa0 port 0x240 size 0 iomem -1 iosiz 0 irq 9 drq -1 drq2 -1 flags 0x0
This entry for supporting the old-fashioned NE2000 ISA network card includes an IRQ, DRQ, memory port, and a few other settings that I’ve (thankfully) forgotten about. The kernel will check ISA bus number 0 at the stated port and IRQ, in the hope of finding such a device.
504 pflog count 1 (pseudo device)
This is a pseudo-device—a software creation that acts much like an actual device but has no underlying hardware. The pflog(4) pseudo-device is where the packet filter dumps its logs. This kernel creates one instance of the pflog device at boot, but thanks to OpenBSD’s cloneable interfaces, the kernel can create more pflog interfaces as needed.
Finally, notice that several lines declare themselves “free.” You can copy an existing device and add it to the kernel. For example, if you wanted a kernel that supported 10 NE2000 cards, and needed 10 instances of the device driver in the kernel, you could copy and add the devices here. The kernel will autoconfigure any number of device driver instances for modern hardware; it will find 10 PCI Express network cards and give them their own instances of the device without any prodding from you.
352 Chapter 18
Finding and Enabling Devices
One of the disadvantages to the list command is that it shows everything in the kernel. You can’t interrupt it; you must scroll through to the end. It’s also difficult to search through several hundred devices by eye. If you know the device you want, use find to search for it. Here, we’ll use ipmi as an example.
ukc> find ipmi493 ipmi0 at mainbus0 disable bus -1 flags 0x0
The IPMI device is device number 493, and it is attached to the device mainbus0. But note the word disable in the device entry. The ipmi device is disabled. Let’s turn it on.
ukc> enable ipmi493 ipmi0 enabled
The kernel now has an active IPMI driver. Yippee!
Changing Kernel Constants
In addition to the device drivers, the kernel has a few hard-coded values for internal data structures. If you run help in the kernel editor, you’ll see these values as options.
ukc> help... bufcachepercent [number] Show/change BUFCACHEPERCENT nkmempg [number] Show/change NKMEMPAGES
As you can see there are only two values: BUFCACHEPERCENT and NKMEMPAGES. Unless you have a compelling reason to touch these values, leave them alone.
NKMEMPAGES is the number of pages of memory dedicated to the kernel.If your machine starts panicking with error messages of out of space in kmem_map, you can increase this value. If the system boots successfully, how-ever, you’re better off setting the vm.nkmempages sysctl rather than editing the kernel.
BUFCACHEPERCENT is the percentage of physical memory dedicated to the buffer cache. In some fairly rare circumstances, increasing the size of the buffer cache can improve filesystem performance. You could set the sysctl kern.bufcachepercent instead of editing this kernel value, however.
To view a current value, enter its name.
ukc> bufcachepercentbufcachepercent = 20
To change the value, enter its name and the desired value.
ukc> bufcachepercent 50bufcachepercent = 50
Kernel Configuration 353
Again, don’t muck with these numbers arbitrarily. The OpenBSD devel-opers set them to the default values for very good reasons.
Completing Configuration
Once you’ve made all of your changes, enter quit to save your changes and write them to a kernel file. The exit command discards all changes and leaves the editor, making it easy to start over. Do not mix quit and exit unless you like being annoyed and confused.
Installing Your Edited Kernel
Your edited kernel is just a file. Verify that you have a backup of your work-ing kernel, copy your new kernel to /bsd, and reboot.
Boot-Time Kernel ConfigurationThe config kernel editor is great when you know what you’re doing, but many of us aren’t that lucky or educated. When I’m trying to figure out how to fix a problem, I’ll frequently make a change, reboot to test the change, and see if things work.
OpenBSD lets you edit the kernel at boot time. You can try one boot with a kernel change, see if it works, and write your changes to the kernel. At the boot loader prompt, run boot -c.
boot > boot -c
You’ll get a couple lines of boot output, and then the kernel editor prompt.
ukc>
This works just like the config kernel configuration editor. Make any changes you want here, exactly as you would with config. When you quit the editor, the kernel should boot with the changes you’ve chosen.
The nice thing about boot-time edits is that they’re not permanent unless you later declare them so. If your changes don’t result in the desired behavior, reboot and try again. If your changes do solve your issue, however, you can write them to a kernel file.
The kernel remembers the changes you made in it. You can “replay” those changes in config by using the -u flag. Run config as if you were edit-ing the kernel, but add the -u flag to replicate your boot-time changes.
# config -u -e -o /bsd.test /bsd
When you get your command prompt, enter quit to save your changes to your new kernel file.
Between sysctl and config, you should be able to make any OpenBSD-supported changes to the kernel. In the next chapter, we’ll cover how to make wildly unsupported kernel changes by rebuilding the kernel from source.

19B u i l d i n g C u s t o m K e r n e l s
Rewiring the brain? Knowing where the parts plug in
makes it possible.
The OpenBSD team works very hard to provide a high-quality kernel that requires
no tweaking beyond setting the occasional sysctl or perhaps enabling a feature. But if you
want to use an experimental feature or add a device driver to the kernel, or you want to squeeze OpenBSD
into tiny hardware or embedded systems, you’ll need to build a custom ker-nel from source code. The OpenBSD people won’t support you if you ven-ture into custom kernels, but they’ll provide you with everything you need to shoot yourself in the foot, as you’ll learn in this chapter.
Kernel CautionsBefore we get into the details of building custom kernels, we’ll look at why that’s usually a bad idea.
356 Chapter 19
Don’t Build Custom KernelsMany open source operating systems encourage sysadmins to build custom kernels. Mailing lists for these operating systems are full of suggestions on rebuilding, tweaking, and modifying the kernel. Those user communities will walk new users through rebuilding the kernel.
OpenBSD developers take a different approach to rebuilding the kernel. They ship a default kernel, called GENERIC, which you will almost never need to rebuild.
Building a kernel from source doesn’t prove that you’re an alpha geek, and rebuilding the kernel is never a recommended way to solve a problem. The people who build custom kernels are either kernel developers or igno-rant newbies. The OpenBSD Project members feel no particular obligation to help users with customized kernels. If your custom kernel crashes, destroys your filesystem, or starts making threatening calls to the local constabulary, they won’t care. Why? Adding, moving, or changing one kernel option might seem trivial, but each option might represent tens of thousands of lines of source code that you’ve just casually gutted.
That said, the OpenBSD Project is much friendlier than closed source operating systems, in that it provides the source code for the kernel, and gives you the tools and instructions needed to build it. The territory might be dangerous, with rattlesnakes and bears and the occasional bottomless pit, but they give you a map and a flashlight. If you can carve out some new territory for yourself, good for you! If you get eaten by coyotes, well, that’s pretty much what happens.
n o t e These warnings apply only to custom kernels. The OpenBSD team is extremely inter-ested in problems in a provided kernel, whether that’s the GENERIC kernel, the installer kernel, or any other.
When working with kernels, keep in mind that some platforms have multiple GENERIC kernels. For example, the i386 platform has the stan-dard GENERIC kernel, but it provides GENERIC.MP for multiprocessor machines, and it supports both versions. By the same token, the SGI platform has several GENERIC kernels—one for each supported hardware variety. These kernels are all GENERIC, and all supported.
Why Build Custom Kernels?People build custom kernels for various reasons. For example, if you’re a kernel developer, or aspire to be one, you will need to build customized kernels to test new features and new code.
Some people who play with kernels are interested in using experimen-tal features. For example, OpenBSD supports the newly developed but not well-tested multipath SCSI, which is not supported by GENERIC. Not many people have the hardware to use multipath SCSI, but those who do have the hardware, along with programming skills, are encouraged to help improve
Building Custom Kernels 357
this feature. (When running experimental features, be sure that you under-stand that experimental is the Siamese twin of unstable.)
Rarely, remediating a security flaw will require a patch to the kernel source code. But rather than build your own, get the patch from OpenBSD’s stable branch or a snapshot (discussed in Chapter 20).
Finally, some people will build custom kernels to save RAM on a machine with very low memory. Removing features from the kernel reduces its size.
Problems Building Custom KernelsWhen building a custom kernel, you are likely to run into trouble. For one, the interdependencies between kernel modules are quite complex and not thoroughly documented. The developers generally assume that people build-ing custom kernels will read kernel source code and man pages. You are expected to read error messages and sort them out yourself.
OpenBSD’s cross-platform design slightly complicates kernel configu-ration. Some devices run on some architectures, but they fail to run or behave weirdly on others. If you include the wrong device in your kernel or tell the kernel a card is attached to the wrong bus, you’ll be building a busted kernel. Be sure that you understand how your hardware actually fits together.
When mucking around in the source tree, you can corrupt the source code in various ways, such as by applying a patch incorrectly, scrambling a file, or forgetting that you edited a file that is now causing you grief. To test your source code, compile GENERIC. If GENERIC won’t compile, you’ve either mucked up the source code or your system has some deeper problem.
Building a custom kernel usually means including or removing kernel options and features from the configuration file. If you’re trying to use fancy compiler flags, however, stop. Custom compiler options are great for exposing compiler bugs, but the OpenBSD team members make no effort to have their code comply with the demands from these compiler options. Many of these options and higher optimizations break if you’re not running very specific operating systems on very specific architectures. The kernel code assumes that you are using the specified compiler options; if you change them, you’ll get nothing but pain.
If you’ve checked everything, and you still can’t get your kernel to build, you might don your flameproof suit and ask for help on [email protected]. State up front that you’re trying to build a custom kernel, and include the following information:
• Your kernel configuration
• OpenBSD version
• Unedited boot-time messages from booting a GENERIC kernel on your computer
• A full description of the problem
Someone might take pity and try to help you.
358 Chapter 19
Problems Running Custom KernelsCustom kernels can have any number of problems, such as the following:
• Programs might not run as expected.
• The system might not boot.
• The system might crash randomly.
• The kernel might not find all of your hardware.
• The kernel might eat your hard drives or your motherboard (without mustard or even a shot of malt vinegar).
If you have customized your kernel narrowly—say, by adding only the multipath SCSI driver to the GENERIC kernel—the developers working on that feature will probably be interested in your bug reports on that feature.
If you can reproduce that problem when the same system boots with the GENERIC kernel, the OpenBSD team is definitely interested. Report your problem as occurring on the GENERIC kernel, and include debug-ging output only from GENERIC, not from your custom kernel. If you manage to identify, debug, and create a patch for a problem with a custom kernel, send your patch and a problem description to the mailing list. Your problem may be due to running on a custom kernel, but you may also have found a bug that could be triggered in GENERIC.
But most important, if you have a problem running a custom kernel, reboot with GENERIC and get on with your day.
Preparing for Kernel CustomizationBefore customizing the kernel, back up the known-good GENERIC kernel on your system by copying /bsd to /bsd.GENERIC. That way, if your custom kernel doesn’t boot, you can recover by booting the backup kernel.
You’ll need the kernel source code in order to build a custom kernel. You can just grab sys.tar.gz from your OpenBSD installation media. If you installed from an Internet mirror, make sure to get the source code for your version of OpenBSD. The OpenBSD mirror root directory usually contains a snapshot of fairly recent source code, but check the directory for your release for its source code. Expand this directory under /usr/src.
# cd /usr/src# tar -xzvpf sys.tar.gz
Now that you have a backup (you did make a backup of your working kernel when I told you to, right?) and the source code, let’s look at kernel configuration.
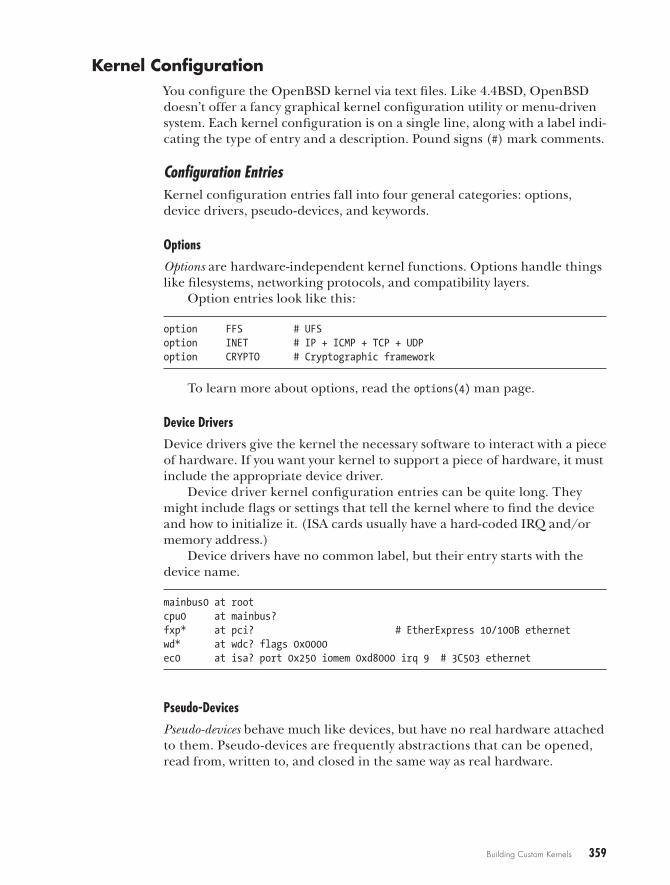
Building Custom Kernels 359
Kernel ConfigurationYou configure the OpenBSD kernel via text files. Like 4.4BSD, OpenBSD doesn’t offer a fancy graphical kernel configuration utility or menu-driven system. Each kernel configuration is on a single line, along with a label indi-cating the type of entry and a description. Pound signs (#) mark comments.
Configuration EntriesKernel configuration entries fall into four general categories: options, device drivers, pseudo-devices, and keywords.
Options
Options are hardware-independent kernel functions. Options handle things like filesystems, networking protocols, and compatibility layers.
Option entries look like this:
option FFS # UFSoption INET # IP + ICMP + TCP + UDPoption CRYPTO # Cryptographic framework
To learn more about options, read the options(4) man page.
Device Drivers
Device drivers give the kernel the necessary software to interact with a piece of hardware. If you want your kernel to support a piece of hardware, it must include the appropriate device driver.
Device driver kernel configuration entries can be quite long. They might include flags or settings that tell the kernel where to find the device and how to initialize it. (ISA cards usually have a hard-coded IRQ and/or memory address.)
Device drivers have no common label, but their entry starts with the device name.
mainbus0 at rootcpu0 at mainbus?fxp* at pci? # EtherExpress 10/100B ethernetwd* at wdc? flags 0x0000ec0 at isa? port 0x250 iomem 0xd8000 irq 9 # 3C503 ethernet
Pseudo-Devices
Pseudo-devices behave much like devices, but have no real hardware attached to them. Pseudo-devices are frequently abstractions that can be opened, read from, written to, and closed in the same way as real hardware.
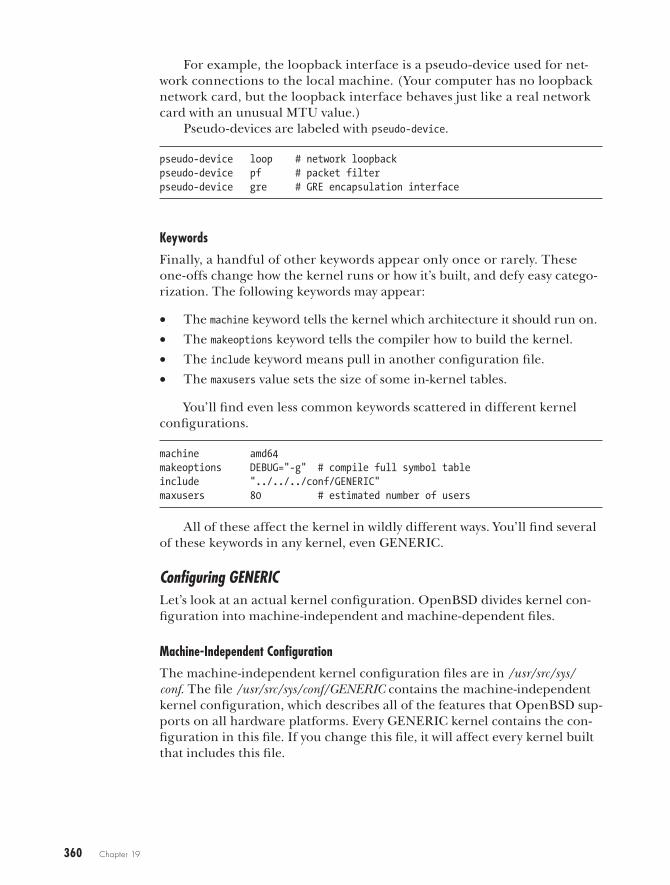
360 Chapter 19
For example, the loopback interface is a pseudo-device used for net-work connections to the local machine. (Your computer has no loopback network card, but the loopback interface behaves just like a real network card with an unusual MTU value.)
Pseudo-devices are labeled with pseudo-device.
pseudo-device loop # network loopbackpseudo-device pf # packet filterpseudo-device gre # GRE encapsulation interface
Keywords
Finally, a handful of other keywords appear only once or rarely. These one-offs change how the kernel runs or how it’s built, and defy easy catego-rization. The following keywords may appear:
• The machine keyword tells the kernel which architecture it should run on.
• The makeoptions keyword tells the compiler how to build the kernel.
• The include keyword means pull in another configuration file.
• The maxusers value sets the size of some in-kernel tables.
You’ll find even less common keywords scattered in different kernel configurations.
machine amd64makeoptions DEBUG="-g" # compile full symbol tableinclude "../../../conf/GENERIC"maxusers 80 # estimated number of users
All of these affect the kernel in wildly different ways. You’ll find several of these keywords in any kernel, even GENERIC.
Configuring GENERICLet’s look at an actual kernel configuration. OpenBSD divides kernel con-figuration into machine-independent and machine-dependent files.
Machine-Independent Configuration
The machine-independent kernel configuration files are in /usr/src/sys/conf. The file /usr/src/sys/conf/GENERIC contains the machine-independent kernel configuration, which describes all of the features that OpenBSD sup-ports on all hardware platforms. Every GENERIC kernel contains the con-figuration in this file. If you change this file, it will affect every kernel built that includes this file.
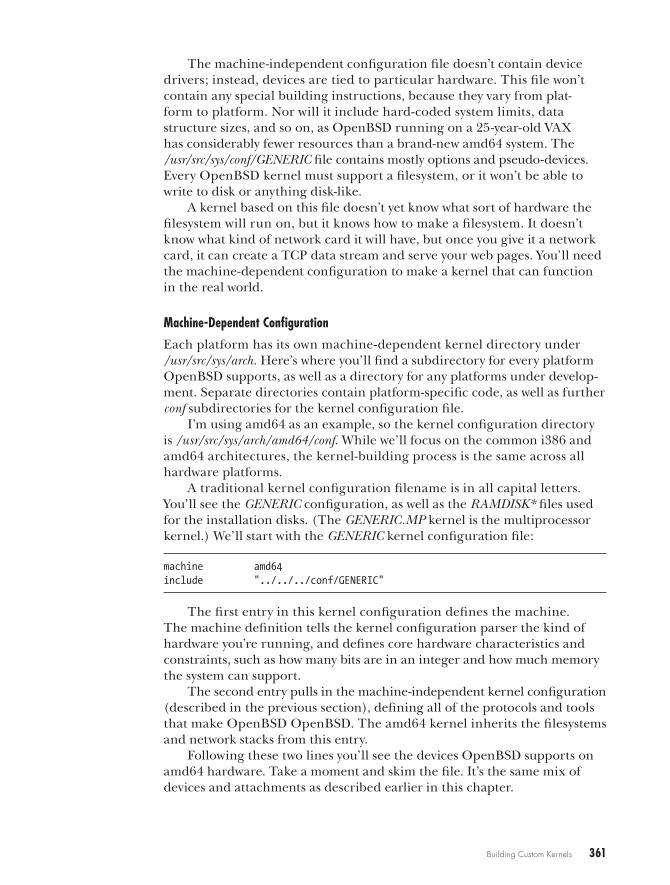
Building Custom Kernels 361
The machine-independent configuration file doesn’t contain device drivers; instead, devices are tied to particular hardware. This file won’t contain any special building instructions, because they vary from plat-form to platform. Nor will it include hard-coded system limits, data structure sizes, and so on, as OpenBSD running on a 25-year-old VAX has considerably fewer resources than a brand-new amd64 system. The /usr/src/sys/conf/GENERIC file contains mostly options and pseudo-devices. Every OpenBSD kernel must support a filesystem, or it won’t be able to write to disk or anything disk-like.
A kernel based on this file doesn’t yet know what sort of hardware the filesystem will run on, but it knows how to make a filesystem. It doesn’t know what kind of network card it will have, but once you give it a network card, it can create a TCP data stream and serve your web pages. You’ll need the machine-dependent configuration to make a kernel that can function in the real world.
Machine-Dependent Configuration
Each platform has its own machine-dependent kernel directory under /usr/src/sys/arch. Here’s where you’ll find a subdirectory for every platform OpenBSD supports, as well as a directory for any platforms under develop-ment. Separate directories contain platform-specific code, as well as further conf subdirectories for the kernel configuration file.
I’m using amd64 as an example, so the kernel configuration directory is /usr/src/sys/arch/amd64/conf. While we’ll focus on the common i386 and amd64 architectures, the kernel-building process is the same across all hardware platforms.
A traditional kernel configuration filename is in all capital letters. You’ll see the GENERIC configuration, as well as the RAMDISK* files used for the installation disks. (The GENERIC.MP kernel is the multiprocessor kernel.) We’ll start with the GENERIC kernel configuration file:
machine amd64include "../../../conf/GENERIC"
The first entry in this kernel configuration defines the machine.The machine definition tells the kernel configuration parser the kind of hardware you’re running, and defines core hardware characteristics and constraints, such as how many bits are in an integer and how much memory the system can support.
The second entry pulls in the machine-independent kernel configuration (described in the previous section), defining all of the protocols and tools that make OpenBSD OpenBSD. The amd64 kernel inherits the filesystems and network stacks from this entry.
Following these two lines you’ll see the devices OpenBSD supports on amd64 hardware. Take a moment and skim the file. It’s the same mix of devices and attachments as described earlier in this chapter.
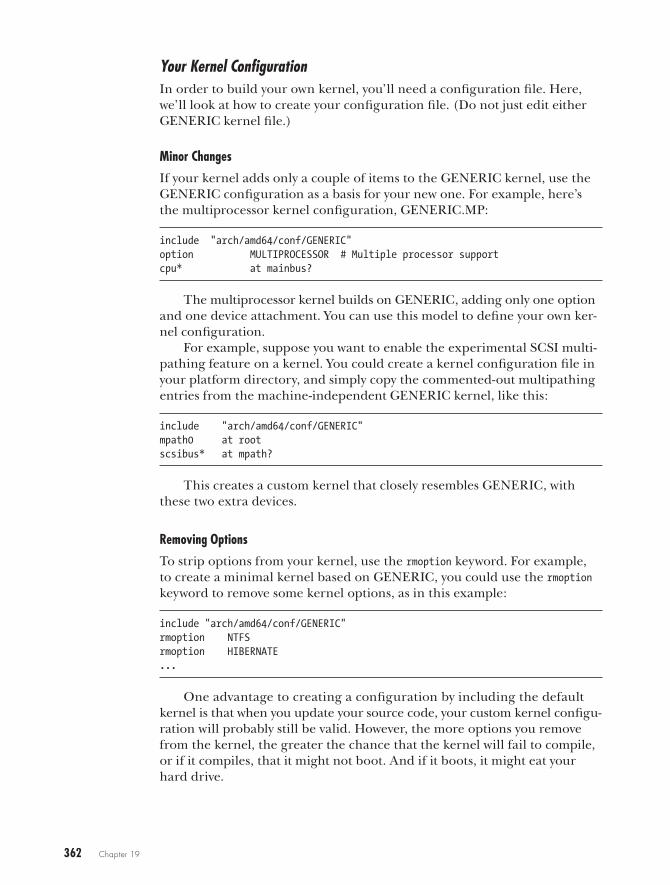
362 Chapter 19
Your Kernel ConfigurationIn order to build your own kernel, you’ll need a configuration file. Here, we’ll look at how to create your configuration file. (Do not just edit either GENERIC kernel file.)
Minor Changes
If your kernel adds only a couple of items to the GENERIC kernel, use the GENERIC configuration as a basis for your new one. For example, here’s the multiprocessor kernel configuration, GENERIC.MP:
include "arch/amd64/conf/GENERIC"option MULTIPROCESSOR # Multiple processor supportcpu* at mainbus?
The multiprocessor kernel builds on GENERIC, adding only one option and one device attachment. You can use this model to define your own ker-nel configuration.
For example, suppose you want to enable the experimental SCSI multi-pathing feature on a kernel. You could create a kernel configuration file in your platform directory, and simply copy the commented-out multipathing entries from the machine-independent GENERIC kernel, like this:
include "arch/amd64/conf/GENERIC"mpath0 at rootscsibus* at mpath?
This creates a custom kernel that closely resembles GENERIC, with these two extra devices.
Removing Options
To strip options from your kernel, use the rmoption keyword. For example, to create a minimal kernel based on GENERIC, you could use the rmoption keyword to remove some kernel options, as in this example:
include "arch/amd64/conf/GENERIC"rmoption NTFSrmoption HIBERNATE...
One advantage to creating a configuration by including the default kernel is that when you update your source code, your custom kernel configu-ration will probably still be valid. However, the more options you remove from the kernel, the greater the chance that the kernel will fail to compile, or if it compiles, that it might not boot. And if it boots, it might eat your hard drive.
Building Custom Kernels 363
When removing options, keep in mind that some options are more important than you might think. For example, removing the INET6 option (aka IPv6) can create a nonfunctional system. Removing options doesn’t save you much memory, and it might cripple any number of programs.
Removing Devices
If you want to remove a lot of stuff from a machine-dependent kernel con-figuration, while retaining the options for base OpenBSD functions, copy the machine-dependent GENERIC configuration file to a new text file and make your changes in that file.
Wholesale Butchery
If you want to commit wholesale butchery on the kernel, you’ll want a configuration that includes both the machine-independent and machine-dependent parts. Start by copying the existing GENERIC kernel configu-rations into one file, in the platform’s kernel configuration. Here, I call my new kernel TREBLE, after the hostname:
# cd /usr/src/sys/arch/amd64/conf# cp ../../../conf/GENERIC TREBLE# cat GENERIC >> TREBLE
Before making any other changes, remove the line that includes the machine-independent kernel configuration file. Then slice out everything that makes the system functional, and try to build the new kernel. Next, add stuff back in until the kernel builds. (Although removing drivers won’t save much memory, doing so will make booting a tiny bit faster.)
n o t e You might be tempted to use the man pages to create your own kernel configuration from scratch. You’re certainly free to do that, if you’re either a Kernel Lord or an irre-mediable doofus. Feel free to try it. Every sysadmin can use such a valuable lesson in humility.
Stripping Down the Kernel
Every device driver and option in the kernel uses memory. If you’re trying to cram OpenBSD onto a tiny computer, or you’re doing any sort of embed-ded development, you might want to build a custom kernel that includes as few device drivers as possible by editing /var/run/dmesg.boot, where every entry matches a line in the kernel configuration.
The simplest way to trim out unnecessary device drivers is to remove everything that’s not in your computer. The kernel includes dozens of net-work card drivers, but you need only one or two. If you’re unsure about a device, keep it in the configuration. (The ACPI and BIOS devices in par-ticular are tightly interrelated, and you’ll probably have a really hard time building a bootable custom kernel without the complete set of ACPI and BIOS devices.)
364 Chapter 19
Gutting the Kernel
If removing device drivers doesn’t create a sufficiently small kernel for you, try removing machine-independent options. Many of these options are interdependent, however, and removing them can create a kernel you can’t compile. If you can compile the kernel, it might not boot, and if it boots, it might not function correctly.
Testing Your Kernel Configuration with config(8)Is your custom kernel configuration internally consistent? To test your kernel and prepare the files needed to compile it, use config(8).
While still in the kernel configuration directory, give config the kernel configuration filename as an argument, like this:
# config TREBLE
If you get any error messages, read them. For example, config might tell you that you need to run make clean before building your new kernel, or that your kernel configuration is internally inconsistent and will not compile. If there’s a problem, config will often give a line number where you made an error. Follow any advice config offers.
The following are some of the more common types of errors.
Orphaned Devices
One common way that config fails is if you’re missing a device that’s needed by another device. Here’s an example:
# config TREBLETREBLE:36: cpu0 at mainbus? is orphaned (nothing matching mainbus? declared)TREBLE:37: bios0 at mainbus0 is orphaned (no mainbus0 declared)TREBLE:38: ioapic* at mainbus? is orphaned (nothing matching mainbus? declared)TREBLE:82: pci* at mainbus0 is orphaned (no mainbus0 declared)*** Stop.
Your configuration attaches various devices to mainbus0, but there’s no mainbus0 entry in your configuration. Kernels that include devices that aren’t attached don’t make sense and cannot compile.
To address this, examine your hardware again. Figure out how these devices are supposed to attach to the system, and fix your kernel configuration.
Bogus Hardware
Another common problem is including nonexistent device drivers, which generates the following error.
Building Custom Kernels 365
# config TREBLETREBLE:36: cpe0: unknown device `cpe'*** Stop.
config shows me the error and the line number where it occurs. There is no cpe device, but there is a cpu device. My bad.
The error checking performed by config does not guarantee that your kernel will compile or run as expected. The only errors it catches are ones where the configuration is either internally inconsistent or flat-out wrong. The first real test comes when you try to actually build your configured kernel.
Building a KernelIf config ran successfully, you will have a kernel compilation directory including a makefile and a whole slew of header files. The traditional place for the compile directory is under the platform directory, which is /usr/src/sys/arch/amd64 for amd64 hardware.
The compile directory contains a subdirectory for each kernel con-figuration processed by config. My amd64 kernel called TREBLE is in the /usr/src/sys/arch/amd64/compile/TREBLE directory, which contains a make-file, as well as all the header files for all included devices and options.
# cd ../compile/TREBLE# make
Now it’s time to wait. A successful compilation will create a kernel file bsd without generating any error messages.
Kernel Build ErrorsIf your kernel fails to build, you probably have a perfectly explicable error. First, read the error message given by the compilation. Most of the time, the error message will explain what the kernel is missing. Generally, you will need to change your kernel configuration in some manner because of an error that config could not catch. A broken kernel compilation will end something like this:
../../../../arch/amd64/pci/pci_machdep.c: In function u'pci_intr_map':
../../../../arch/amd64/pci/pci_machdep.c:641: error: v'PCI_INT_VIA_ISA' undeclared (first use in this function)../../../../arch/amd64/pci/pci_machdep.c:641: error: (Each undeclared identifier is reported only once
w ../../../../arch/amd64/pci/pci_machdep.c:641: error: for each function itappears in.)*** Error code 1
x Stop in /usr/src/sys/arch/amd64/compile/ENVY (line 89 of /usr/share/mk/sys.mk).
366 Chapter 19
This kernel cannot be built because something is missing. When a build fails with statements that something “is undeclared” (as shown in bold), that’s a hint that the kernel is missing a necessary entry.
The name of where it failed might offer you a hint as to what’s missing. In this case, at u, I have a function name where the compilation failed, and then a specific undeclared variable v that caused the compilation to fail.
I would start by figuring out where the pci_intr_map function comes from and what it’s supposed to do. Search the source code and man pages for references to the missing function. Failing that, try the mailing list archives. Be sure to include the function and variable names in any web search. Generic output that says that “there was an error” w or “the compile has stopped” x is less unique, and hence it could be useful. If all else fails, fall back to the GENERIC configuration.
Installing Your KernelYour completed kernel is the file bsd in the compile directory. Before you use your new kernel, verify that you have your current, working, well-behaved kernel backed up to a separate file on the root filesystem, and then copy your new kernel to /bsd. That’s it! The next time you reboot, you’ll come up on your new kernel.
n o t e Some people do not like to copy their custom kernel to /bsd until they’re certain that the kernel will boot. If you’re one of these people, copy your new kernel to the root direc-tory under a different name, such as /bsd.test. Boot into this alternate kernel. Test your system. If everything works, properly install your new kernel.
Identifying the Running KernelIf you build several custom kernels, you might forget which kernel you’re running. The uname(1) command will tell you the name of the kernel con-figuration file used to build the running kernel. The -v flag will tell you the name of your kernel configuration and the number of times you have compiled it.
# uname -vGENERIC.MP#348
This output does not mean that I’ve built a multiprocessor GENERIC kernel 348 times. I use the GENERIC kernel, and I let the OpenBSD release engineers build my kernels for me. They have built 348 official snapshot multi processor kernels without wiping the kernel build directory. Remem-ber that building custom kernels is for advanced programmers and igno-rant newbies. I’m neither.
20U p g r a d i n g
The latest source code? Fugu extraordinary!
Be brave and swallow.
Here’s an ugly truth: If upgrades are hard, sysadmins try their best to avoid them. And
that can cause security problems. Operating system upgrades can cause software that has
worked well for years to develop nervous tics or stop
working altogether. Fixing add-on packages that don’t work on the new operating system version can require days of troubleshooting. Server upgrades can make even seasoned sysadmins wish that they had a simpler job, such as performing as a carnival sideshow, stuffing weasels into their trousers.
While you can probably deal with a bit of odd behavior in a desk-top after an upgrade, your servers and firewalls must behave exactly as expected. It’s common to delay upgrades until the system is so old that it can be replaced with a new machine running the new release, but that’s both terrible system administration practice and completely unacceptable security practice. Computers connected to the Internet must be patched, maintained, and upgraded, or an intruder will almost certainly compro-mise them.
368 Chapter 20
Fortunately, the OpenBSD upgrade process is simpler than those used by many other Unix-like operating systems. With proper preparation, you can upgrade OpenBSD with a minimum of difficulty.
Why Upgrade?Because you don’t have a choice.
Security researchers, programmers, and skilled intruders continu-ously discover new ways to penetrate previously secure systems. Although OpenBSD has suffered only two vulnerabilities in a default installation that permitted an intruder to compromise the system, that doesn’t mean that a two-year-old OpenBSD version is secure.
The OpenBSD Project provides security updates for only the two most recent releases. For example, when OpenBSD 5.3 comes out, OpenBSD 5.1 will be “end-of-lifed” and lose support from developers. If someone figures out how to break into a default OpenBSD 5.1 installation after 5.3 comes out, the developers might not provide fixes. You might adjust new security patches to work on older versions of the code, but you will find that back-porting fixes becomes increasingly difficult.
Software not enabled in the default installation can also have problems. For example, in November 2011, the OpenBSD Project released a patch for a problem in the included BIND named(8) name server. OpenBSD does not ship with named enabled, so this wasn’t a problem in the default installation, but it was certainly a security problem in a function that you might have chosen to enable.
In order to protect your system, you must understand how to apply secu-rity patches, either by applying the patch or by upgrading the entire system. But before we get to the upgrade process itself, let’s look at your choices for OpenBSD versions.
OpenBSD VersionsDevelopers all over the world continually make minor changes to OpenBSD’s source code. If you download the source code in the morning and again in the afternoon, you’ll get two slightly different versions. In fact, at any given time, you can get a few different versions of OpenBSD: -current, snapshots, releases, and -stable.
OpenBSD-currentOpenBSD-current is the most recent development version of OpenBSD, containing code that is making its public debut. Developers test each other’s work and then get approval to commit code to the tree. Eventually, they must put their work out for the public to test, review, and debug.
OpenBSD-current is where the public can access the newest code. If a change would temporarily break web servers, games, database servers, or whatever is running on -current, but the change is for the long-term good,
Upgrading 369
the change will go into -current. Those programs will probably work again before the next OpenBSD release, but there’s no requirement that every third-party program work perfectly at all times on -current.
n o t e The developers expect -current itself to work at all times, and they consider breaks seri-ous problems. You might need to recompile Firefox, or the port maintainer might need to rewrite a makefile, but the core operating system is expected to run at all times.
With these caveats, why would you possibly want to run -current? One excellent reason is to test the new OpenBSD in your environment. If today’s -current panics under certain conditions, but last week’s didn’t, the OpenBSD folks want to know that.
(All the OpenBSD folks run -current on their laptops, and they run firewalls on -current.) If you can exercise -current in the real world, with a real workload, they want you to do so. Having real users run -current is the only way that OpenBSD can be tested before the official releases come out.
OpenBSD SnapshotsEvery few days, the OpenBSD team uploads a release from the latest -current code to the mirror servers. This is an interim release called a snapshot, which is identified only by the date of its release. A snapshot is simply the state of -current at a particular time. While the developers try not to build a snapshot on a day that -current is notably fouled up, guess who’s in charge of the snapshot quality-assurance process. That’s you.
Snapshots are provided for installation and testing convenience. Installing and testing a snapshot is easier than building -current on your own. Also, if you can reproduce a bug on a specific snapshot, the developers know exactly which version of the code you are running. It’s much easier to identify a problem as appeared “in the July 15 2013 snapshot” than in a -current you built yourself from “code downloaded from server X at about 3:17 pm EST on July 15, 2013.”
n o t e Snapshots can contain uncommitted code not in -current. The patches for the changes are not usually available.
You can get snapshots installation media from any mirror site, in the /pub/OpenBSD/snapshots directory. If you want to run -current, the recom-mended way to start is by installing the most recent snapshot you can get your hands on and upgrading from there.
OpenBSD ReleasesEvery six months, the pace of OpenBSD development is deliberately slowed. Developers spend time polishing new features, and Theo makes increas-ingly forceful requests for beta testers of the newest snapshots. When the OpenBSD team is satisfied that the software is of adequate quality, the source code tree is tagged, and a high-quality snapshot is built. This
370 Chapter 20
snapshot is called a release and is issued a number like 5.2, 5.3, and so on. This is almost certainly what you installed on your first OpenBSD machine. A new release appears every May and November.
OpenBSD numbers releases sequentially, starting with 2.0 and incre-menting .1 with every release. Unlike most software products, a .0 release has no special meaning. It’s just another spot along a long path—a mile-stone hit every five years.
The release is the best-supported version of OpenBSD. Everything is expected to work, and the development team stands behind its releases. If a serious security problem is discovered in a release, OpenBSD will release a patch, or errata, for it.
OpenBSD-stableOpenBSD-stable is an OpenBSD release with all errata and very minor patches included. The developers deliberately hold the number of changes to each -stable version to the absolute bare minimum. A stable version is referred to as its base release plus -stable, such as 5.4-stable, 5.5-stable, and so on.
What sort of changes are merged back into -stable? Security fixes and errata go in automatically. Other than security issues, any patches added to -stable must be simple, short, and obviously correct. Patches that dramati-cally affect a small number of users might go in. For example, if all systems with a specific network card panic at random intervals, a patch might go into -stable (accompanied by various developers asking why no one with that network card ran snapshots before the release).
You won’t get new functions in -stable. It won’t come with any new device drivers or packet-filtering features. The API will not change. In general, -stable is expected to never get worse.
The only way to get OpenBSD-stable is to update the system from source.
Which Version Should You Use?OpenBSD’s release system combines the best features of open source devel-opment and commercial releases. Users have access to both the bleeding-edge experimental code and the stable, polished releases. Look at your requirements and choose your poison.
• If you’re running OpenBSD in a production environment, either use a release with the applicable security errata or track -stable. The develop-ers encourage more experienced users to use snapshots or -current, but that choice is up to you.
• If you are evaluating OpenBSD for use in a production environment, install the version you intend to use.
• If you’re just learning about Unix-like systems, or if you want a quiet OpenBSD experience, use a release and apply applicable errata.
Upgrading 371
• If you’re an operating system developer or experienced sysadmin, feel free to jump right in to -current or snapshots. You can either handle any problems you encounter or use those problems as an excuse to expand your knowledge. Many people find that they can use -current in production, if they do not need packages. These are usually more experienced users who want firewalls.
• Hobbyists can run anything they want!
Remember the limitations of your chosen branch. A release is a good place to start, but you can gradually upgrade your system to -stable, and then to -current, as your understanding expands. Many developers started out as interested hobbyists.
The OpenBSD Upgrade ProcessAn OpenBSD upgrade has three distinct phases: installing the newer ver-sions of the operating system files, updating the local configuration, and updating obsolete add-on software packages. Each is a separate part that requires independent handling.
An upgrade requires installation media. The best upgrade media is the new release CD or an Internet mirror. You can also upgrade OpenBSD by building and installing the source code directly on the machine to be upgraded, but doing so is more difficult and risky than upgrading from the official release. Much of the information for upgrading from a network or CD applies to upgrading via source code.
n o t e OpenBSD supports upgrading only one major release at a time. You cannot upgrade directly from, say, 5.3 to 5.5; you must upgrade from 5.3 to 5.4, and then to 5.5. The more releases you need to upgrade through, the more reason to reinstall. You would spend more time serially upgrading three or four releases than you would reinstalling.
Before upgrading, back up any data you actually care about. The upgrade process extracts new files over the existing operating system, and could overwrite something important. The installer generally works, but human beings are fallible. Back up!
Following the Upgrade GuideAs OpenBSD evolves, basic system features change. This wouldn’t be a big issue, except when interdependent changes create a chicken-and-egg or bootstrap problem. If you just blindly run the upgrade process and don’t handle any other required changes, you’ll find that your new system fails in unpredictable ways .1 If you’re building the system from source, these prob-lems might prevent the build from completing.
1. Henning Brauer tells me that many upgrade failures aren’t really unpredictable; they’re merely “unsupported and untested” code paths. To most of us, that’s “unpredictable,” but you’re welcome to predict them yourself.
372 Chapter 20
All of these potential problems should be solvable by anyone building the system from source, but it’s nice to have them documented. Conveniently, OpenBSD provides an Upgrade Guide for each release, documenting the steps needed to take a system from one release to the next.
The Upgrade Guide is divided into chunks by the type of upgrade you are performing. The simplest upgrade is for people using official OpenBSD files, such as a network or CD upgrade. If you’re building from source, the instructions quickly grow in complexity. Follow the instructions in the order in which they appear. Most upgrade prerequisites are typical system admin-istration tasks. The following are the most common requirements.
n o t e Instructions in the Upgrade Guide supersede anything I say in this chapter. I could just sprinkle the words “unless specified otherwise in the Upgrade Guide” in every paragraph for the rest of this section, but then my editor would slap me. The OpenBSD documentation is the final word in OpenBSD system administration, including the upgrade process.
Install Programs
Especially when you are building from source, bootstrap tools such as gcc(1) and perl(1) might need to be built with the upgraded tool. When upgrad-ing from source, you might need to install these bootstrap tools before beginning to compile the new version of OpenBSD. The Upgrade Guide notes these requirements.
If your attempt to build OpenBSD from source fails, reread the Upgrade Guide before troubleshooting. Starting from the closest available binary release or snapshot will probably solve your problem.
Remove Programs and Files
OpenBSD removes programs from the base system when they become obsolete or dangerous, or when their functions are integrated into other programs. When you upgrade, you must manually remove these programs. This is necessary because old software left on an upgraded system can pose a security risk. Also, some files and directories might become superfluous in a new OpenBSD version. You can remove these programs, files, or direc-tories once the upgrade is complete.
Prepare Package Upgrades
When you upgrade OpenBSD, you must upgrade the installed packages as well, because you can’t reliably run packages built for old versions of OpenBSD on newer versions. (Doing so might work, but there’s no guar-antee.) The Upgrade Guide includes notes on upgrading specific installed packages, and you should take some of those actions before beginning the upgrade.
For example, the Upgrade Guide for the newest OpenBSD version says that the PostgreSQL port had a major version upgrade. You must do a database
Upgrading 373
dump and restore as part of the upgrade. The old version of PostgreSQL might not run well on the new OpenBSD, so perform the database dump before starting the system upgrade.
Your packages might not require any pre-upgrade work, but it’s much easier to check beforehand than to finish the operating system upgrade, and then need to fall back because you didn’t prepare some third-party package.
System Configuration
The preceding tasks are the most common requirements for upgrading, but you might need to change other system files before or after the upgrade process itself. Read the Upgrade Guide, or your programs might not run as expected.
Customizing UpgradesThe upgrade script supports the siteXX.tgz file discussed in Chapter 23. If the file exists in the installation media, you can choose to install it dur-ing the upgrade.
You can also run a custom post-upgrade script as part of the upgrade. When the upgrade completes, the script checks for the file /upgrade.site. If the upgrader finds this file, it executes this script as the last step of the upgrade. Copy /upgrade.site to the system before starting the upgrade. Chapter 23 discusses upgrade.site in more detail.
Upgrading from Official MediaAfter reading the Upgrade Guide, get your installation media for the new version of OpenBSD and boot from it. If you plan to upgrade over a net-work, you should need only the new installation kernel bsd.rd. You can just grab this via FTP (or you could grab the entire directory along with it and run the upgrade from your local disk). Here, I grab the newest snapshot kernel from my root directory:
# cd /# ftp ftp://ftp3.usa.openbsd.org/pub/OpenBSD/snapshots/amd64/bsd.rdConnected to plier.ucar.edu....
After you get the snapshot kernel, go to your console and boot into the new kernel.
>> OpenBSD/amd64 BOOT 3.18boot> boot bsd.rdbooting hd0a:bsd.rd: 2993636+916428+2864232+0+531344 [89+320016+207017]=0xb799f0entry point at 0x1001e0 [7205c766, 34000004, 24448b12, a608a304]...
374 Chapter 20
root on rd0a swap on rd0b dump on rd0berase ^?, werase ^W, kill ^U, intr ^C, status ^T
Welcome to the OpenBSD/amd64 5.3 installation program.(I)nstall, (U)pgrade or (S)hell? U
Enter U to upgrade. The upgrade process looks much like the installa-tion process covered in Chapter 3. Defaults appear inside square brackets. Accept the defaults by pressing enter.
Terminal type? [vt220] uAvailable disks are: sd0 sd1 sd2.Which one is the root disk? (or 'done') [sd0] vRoot filesystem? [sd0a] wChecking root filesystem (fsck -fp /dev/sd0a)...OK.Mounting root filesystem (mount -o ro /dev/sd0a /mnt)...OK.Do you want to do any manual network configuration? [no] xForce checking of clean non-root filesystems? [no] yfsck -p e4bf0318329fe596.a...OK....
Always use the default terminal, unless you know exactly when you shouldn’t. Commodity hardware usually uses vt220, as shown here at u, but the default terminal is platform-specific.
The upgrade needs to read your root partition to learn where to install files. It can’t conclusively identify your actual root disk v and partition w unless you tell it to do that.
The upgrade script will configure your network according to the existing settings that you should hope are correct. If you need to adjust the network at every boot, the upgrade script gives you a chance to recon-figure the network at x.
If you shut down the machine via reboot or shutdown, your filesystems should be clean. If you unceremoniously pulled the power plug because you were going to upgrade the machine and no longer cared about your file systems, OpenBSD will notice and clean your filesystems. To deep-check clean filesystems, you can force running fsck(8) at y. The upgrade script preens clean filesystems to check for obvious errors before proceeding.
Upgrading Over the NetworkThe default upgrade method is CD. I want to do this upgrade over the net-work, so here’s how I continue:
Location of sets? (cd disk ftp http or 'done') [cd] ftp uHTTP/FTP proxy URL? (e.g. 'http://proxy:8080', or 'none') [none] vServer? (hostname, list#, 'done' or '?') [ftp5.usa.openbsd.org] ftp3.usa.openbsd.org wServer directory? [pub/OpenBSD/snapshots/amd64] xLogin? [anonymous] y
I choose ftp as the location of the sets at u. I don’t need to go through a proxy server to access the FTP server, so I leave that space blank at v.
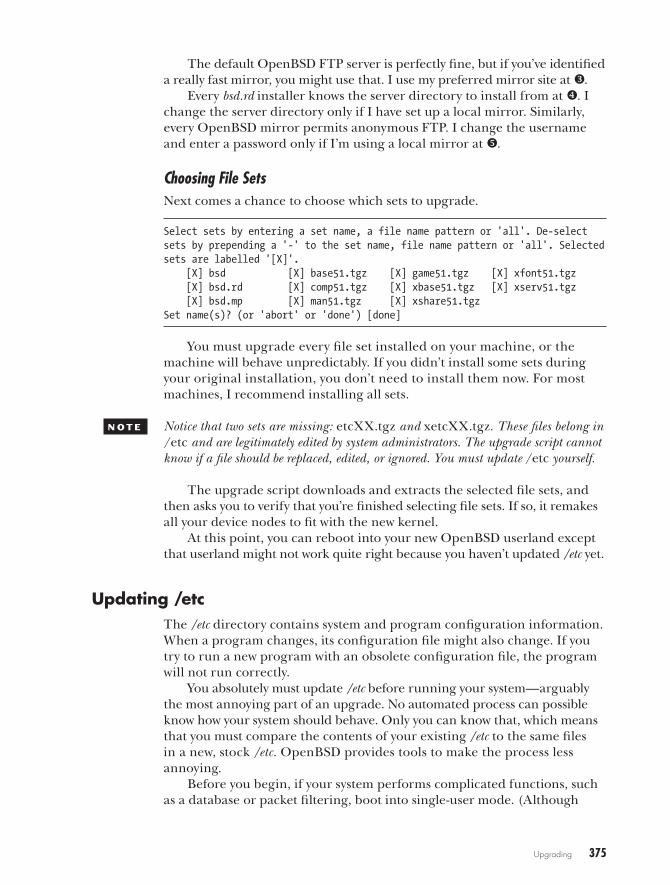
Upgrading 375
The default OpenBSD FTP server is perfectly fine, but if you’ve identified a really fast mirror, you might use that. I use my preferred mirror site at w.
Every bsd.rd installer knows the server directory to install from at x. I change the server directory only if I have set up a local mirror. Similarly, every OpenBSD mirror permits anonymous FTP. I change the username and enter a password only if I’m using a local mirror at y.
Choosing File SetsNext comes a chance to choose which sets to upgrade.
Select sets by entering a set name, a file name pattern or 'all'. De-selectsets by prepending a '-' to the set name, file name pattern or 'all'. Selectedsets are labelled '[X]'. [X] bsd [X] base51.tgz [X] game51.tgz [X] xfont51.tgz [X] bsd.rd [X] comp51.tgz [X] xbase51.tgz [X] xserv51.tgz [X] bsd.mp [X] man51.tgz [X] xshare51.tgzSet name(s)? (or 'abort' or 'done') [done]
You must upgrade every file set installed on your machine, or the machine will behave unpredictably. If you didn’t install some sets during your original installation, you don’t need to install them now. For most machines, I recommend installing all sets.
n o t e Notice that two sets are missing: etcXX.tgz and xetcXX.tgz. These files belong in /etc and are legitimately edited by system administrators. The upgrade script cannot know if a file should be replaced, edited, or ignored. You must update /etc yourself.
The upgrade script downloads and extracts the selected file sets, and then asks you to verify that you’re finished selecting file sets. If so, it remakes all your device nodes to fit with the new kernel.
At this point, you can reboot into your new OpenBSD userland except that userland might not work quite right because you haven’t updated /etc yet.
Updating /etcThe /etc directory contains system and program configuration information. When a program changes, its configuration file might also change. If you try to run a new program with an obsolete configuration file, the program will not run correctly.
You absolutely must update /etc before running your system—arguably the most annoying part of an upgrade. No automated process can possible know how your system should behave. Only you can know that, which means that you must compare the contents of your existing /etc to the same files in a new, stock /etc. OpenBSD provides tools to make the process less annoying.
Before you begin, if your system performs complicated functions, such as a database or packet filtering, boot into single-user mode. (Although
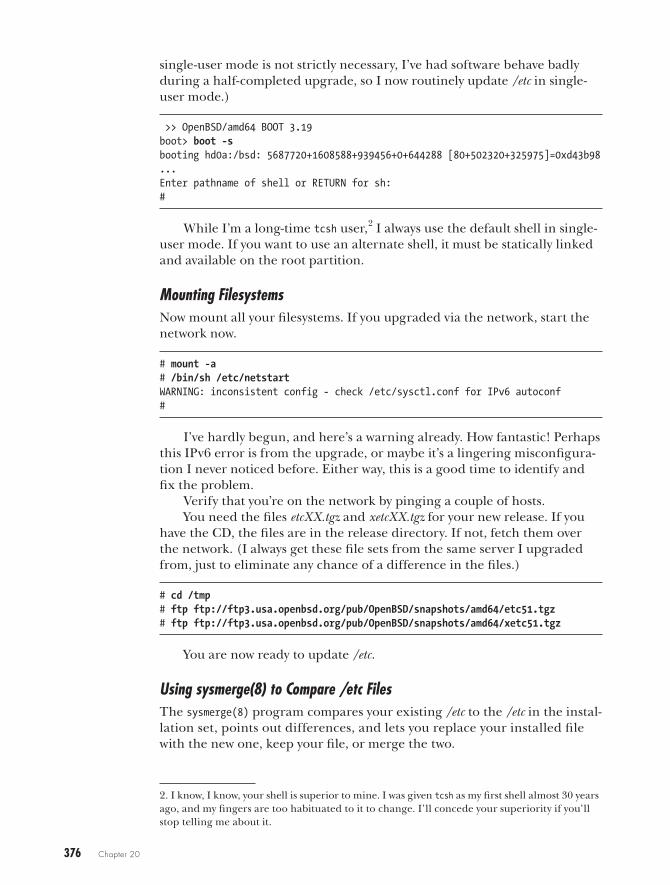
376 Chapter 20
single-user mode is not strictly necessary, I’ve had software behave badly during a half-completed upgrade, so I now routinely update /etc in single-user mode.)
>> OpenBSD/amd64 BOOT 3.19boot> boot -sbooting hd0a:/bsd: 5687720+1608588+939456+0+644288 [80+502320+325975]=0xd43b98...Enter pathname of shell or RETURN for sh:#
While I’m a long-time tcsh user,2 I always use the default shell in single-user mode. If you want to use an alternate shell, it must be statically linked and available on the root partition.
Mounting FilesystemsNow mount all your filesystems. If you upgraded via the network, start the network now.
# mount -a# /bin/sh /etc/netstartWARNING: inconsistent config - check /etc/sysctl.conf for IPv6 autoconf#
I’ve hardly begun, and here’s a warning already. How fantastic! Perhaps this IPv6 error is from the upgrade, or maybe it’s a lingering misconfigura-tion I never noticed before. Either way, this is a good time to identify and fix the problem.
Verify that you’re on the network by pinging a couple of hosts.You need the files etcXX.tgz and xetcXX.tgz for your new release. If you
have the CD, the files are in the release directory. If not, fetch them over the network. (I always get these file sets from the same server I upgraded from, just to eliminate any chance of a difference in the files.)
# cd /tmp# ftp ftp://ftp3.usa.openbsd.org/pub/OpenBSD/snapshots/amd64/etc51.tgz# ftp ftp://ftp3.usa.openbsd.org/pub/OpenBSD/snapshots/amd64/xetc51.tgz
You are now ready to update /etc.
Using sysmerge(8) to Compare /etc FilesThe sysmerge(8) program compares your existing /etc to the /etc in the instal-lation set, points out differences, and lets you replace your installed file with the new one, keep your file, or merge the two.
2. I know, I know, your shell is superior to mine. I was given tcsh as my first shell almost 30 years ago, and my fingers are too habituated to it to change. I’ll concede your superiority if you’ll stop telling me about it.
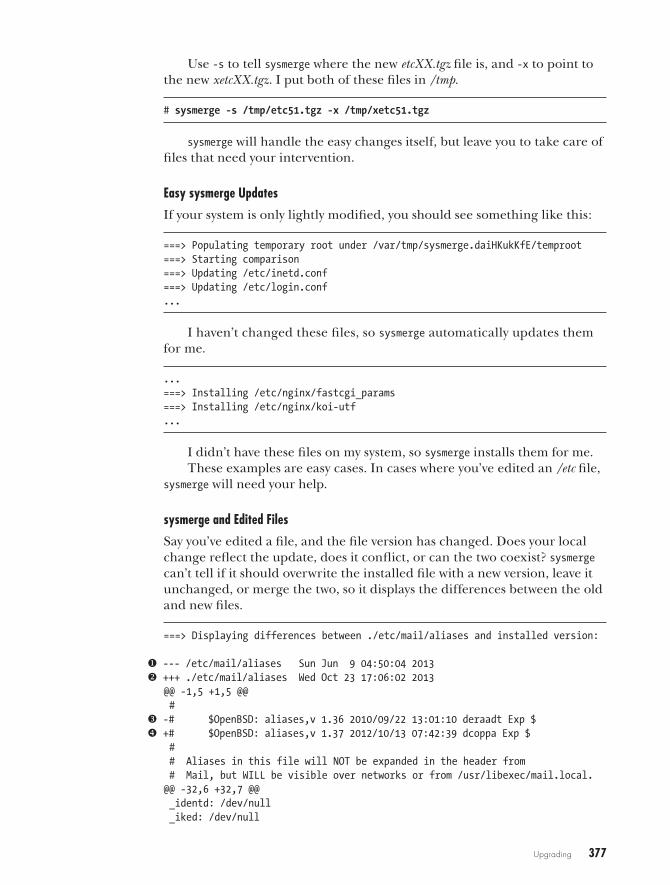
Upgrading 377
Use -s to tell sysmerge where the new etcXX.tgz file is, and -x to point to the new xetcXX.tgz. I put both of these files in /tmp.
# sysmerge -s /tmp/etc51.tgz -x /tmp/xetc51.tgz
sysmerge will handle the easy changes itself, but leave you to take care of files that need your intervention.
Easy sysmerge Updates
If your system is only lightly modified, you should see something like this:
===> Populating temporary root under /var/tmp/sysmerge.daiHKukKfE/temproot===> Starting comparison===> Updating /etc/inetd.conf===> Updating /etc/login.conf...
I haven’t changed these files, so sysmerge automatically updates them for me.
...===> Installing /etc/nginx/fastcgi_params===> Installing /etc/nginx/koi-utf...
I didn’t have these files on my system, so sysmerge installs them for me.These examples are easy cases. In cases where you’ve edited an /etc file,
sysmerge will need your help.
sysmerge and Edited Files
Say you’ve edited a file, and the file version has changed. Does your local change reflect the update, does it conflict, or can the two coexist? sysmerge can’t tell if it should overwrite the installed file with a new version, leave it unchanged, or merge the two, so it displays the differences between the old and new files.
===> Displaying differences between ./etc/mail/aliases and installed version:
u --- /etc/mail/aliases Sun Jun 9 04:50:04 2013v +++ ./etc/mail/aliases Wed Oct 23 17:06:02 2013
@@ -1,5 +1,5 @@ #
w -# $OpenBSD: aliases,v 1.36 2010/09/22 13:01:10 deraadt Exp $x +# $OpenBSD: aliases,v 1.37 2012/10/13 07:42:39 dcoppa Exp $
# # Aliases in this file will NOT be expanded in the header from # Mail, but WILL be visible over networks or from /usr/libexec/mail.local.@@ -32,6 +32,7 @@ _identd: /dev/null _iked: /dev/null

378 Chapter 20
_isakmpd: /dev/nully +_iscsid: /dev/null
_kadmin: /dev/null _kdc: /dev/null _ldapd: /dev/null@@ -69,7 +70,7 @@ sshd: /dev/null
# Well-known aliases -- these should be filled in!z -root: [email protected]{ +# root:
# manager: # dumper:
If you’ve changed the file, sysmerge presents the differences between the old and new files with a few surrounding lines of context. In this example, the /etc/mail/aliases file on my system is dated June 9 at u, and the new ver-sion is from October 23 at v. Lines that exist in the new version of the file but not in the installed one are prefaced with a plus sign (+). Lines that exist in the installed file but not in the new one are prefaced with a minus sign (-).
This example shows that the OpenBSD version of this file changed from 1.36 at w to 1.37 at x. That’s not terribly surprising, and for system admini-stration purposes, not a terribly vital piece of information. But the new ver-sion has a new alias, directing email addressed to the user _iscsid to /dev/null at y. This could be important, so I want the new alias on my system.
Next, we see a difference between the files, where I’ve forwarded email addressed to root to my personal email at z, but the new version of the file has no such redirection at {. I want the old version of this line but the new version of another line, and while I don’t particularly care about the OpenBSD version numbers, I would prefer the newer one. I could hand assemble an aliases file, but after sysmerge prints out the differences, it offers to help.
u Use 'd' to delete the temporary ./etc/mail/aliasesv Use 'i' to install the temporary ./etc/mail/aliasesw Use 'm' to merge the temporary and installed versionsx Use 'v' to view the diff results again
Default is to leave the temporary file to deal with by hand
How should I deal with this? [Leave it for later] m
sysmerge offers the following choices:
• If I delete the temporary aliases file, sysmerge throws away the new file u. This is fine if my existing aliases file is adequate, but in this case, I want part of the new file.
• If I install the temporary aliases file, I overwrite my changes v. Unless I go back in and change the aliases file again, my custom mail forward-ing will stop working. I don’t want this to happen.
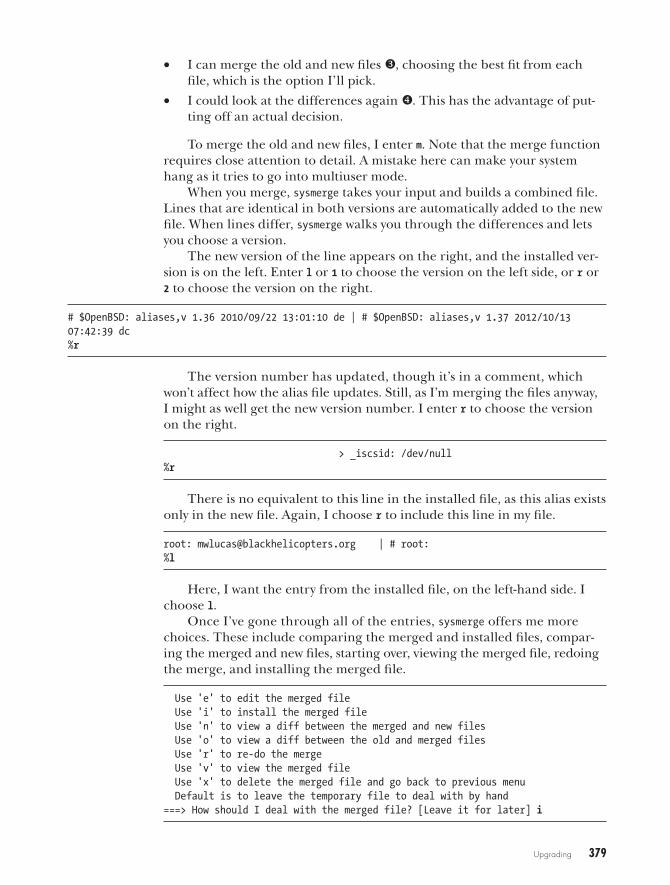
Upgrading 379
• I can merge the old and new files w, choosing the best fit from each file, which is the option I’ll pick.
• I could look at the differences again x. This has the advantage of put-ting off an actual decision.
To merge the old and new files, I enter m. Note that the merge function requires close attention to detail. A mistake here can make your system hang as it tries to go into multiuser mode.
When you merge, sysmerge takes your input and builds a combined file. Lines that are identical in both versions are automatically added to the new file. When lines differ, sysmerge walks you through the differences and lets you choose a version.
The new version of the line appears on the right, and the installed ver-sion is on the left. Enter l or 1 to choose the version on the left side, or r or 2 to choose the version on the right.
# $OpenBSD: aliases,v 1.36 2010/09/22 13:01:10 de | # $OpenBSD: aliases,v 1.37 2012/10/13 07:42:39 dc%r
The version number has updated, though it’s in a comment, which won’t affect how the alias file updates. Still, as I’m merging the files anyway, I might as well get the new version number. I enter r to choose the version on the right.
> _iscsid: /dev/null%r
There is no equivalent to this line in the installed file, as this alias exists only in the new file. Again, I choose r to include this line in my file.
root: [email protected] | # root:%l
Here, I want the entry from the installed file, on the left-hand side. I choose l.
Once I’ve gone through all of the entries, sysmerge offers me more choices. These include comparing the merged and installed files, compar-ing the merged and new files, starting over, viewing the merged file, redoing the merge, and installing the merged file.
Use 'e' to edit the merged file Use 'i' to install the merged file Use 'n' to view a diff between the merged and new files Use 'o' to view a diff between the old and merged files Use 'r' to re-do the merge Use 'v' to view the merged file Use 'x' to delete the merged file and go back to previous menu Default is to leave the temporary file to deal with by hand===> How should I deal with the merged file? [Leave it for later] i
380 Chapter 20
I did everything correctly, so I install the merged file (although I should probably view the merged file first, and then install it).
My biggest difficulty with sysmerge comes in differentiating my left and my right. Worse, the L key is on the right side, and the R key is on the left. (Go ahead now, laugh, but just wait until you mix that up.)
Finishing sysmerge
When sysmerge finishes installing the files, it checks the permissions on the /etc files, and tells you where to find the log and that the system might need a reboot. A purist might tell you that you don’t need to reboot, but usually you should go ahead and do it. Rebooting after changing core system files prevents a variety of problems, and rebooting as part of an upgrade isn’t unreasonable. You can wait to reboot until after you upgrade your pack-ages, as long as everything works.
...===> Comparison complete===> Checking directory hierarchy permissions (running mtree(8))===> Output log available at /var/tmp/sysmerge.daiHKukKfE/sysmerge.log *** WARNING: some new/updated file(s) may require a reboot# reboot
You now have an updated OpenBSD base system. Be aware that new or changed files can change system behavior, but usually you won’t notice. The Upgrade Guide usually notes any changes average users are likely to notice. Still, only you know what your system does and how you want it to behave.
Upgrading your installed packages is a separate task.
Updating Installed PackagesPackages run reliably only on the version of OpenBSD for which they’re compiled. If you’re using packages, then updating your third-party software is very easy. (If you build your own software from the ports collection, you can still update but it won’t be as easy.)
First, check the Upgrade Guide again. It describes any intrusive changes to major software. Take any actions it recommends before continuing.
Updating the Package RepositoryBefore upgrading your packages, check your $PKG_PATH environment vari-able. It almost certainly references the package directory for your previous version of OpenBSD.
# echo $PKG_PATHftp://ftp11.usa.openbsd.org/pub/OpenBSD/5.2/packages/i386/
Upgrading 381
Find the package repository for your new version of OpenBSD. You can probably just update the release number in your shell’s dotfile, but go to the mirror site and make sure that the packages for that release are present.
If you upgrade from release to release, you can use the uname(1) com-mand to set your PKG_PATH in your dotfile. For example, if ftp11.usa.openbsd.org is your favorite mirror site, use a line like this for sh-based dotfiles.
export PKG_PATH=ftp://ftp11.usa.openbsd.org/pub/OpenBSD/`uname -r`/packages/`uname -m'/
Using the Upgrade CommandTo upgrade your installed packages, use pkg_add with the -i and -u flags.
# pkg_add -iuquirks-1.73->1.77: okapr-1.4.6->1.4.6p0: okapr-util-1.4.1-ldap:cyrus-sasl-2.1.25p3->2.1.25p3: okapr-util-1.4.1-ldap:openldap-client-2.4.31->2.4.31: okapr-util-1.4.1-ldap:libiconv-1.14->1.14: ok...
The -i flag tells pkg_add to work in interactive mode and ask you about any ambiguities. The -u flag means “update.”
This upgrader recurses through each of your add-on software packages and its dependencies, uninstalling the old version and installing the new. If you want to see more verbose and detailed messages about the package-updating process, add the -v flag.
Package Options
If the dependencies for a package have changed and you now have multiple options, pkg_add presents your choices.
Ambiguous: choose dependency for foomatic-db-engine-4.0.8p2: a 0: curl-7.26.0 1: wget-1.13.4Your choice: 1
The package foomatic-db-engine can use either curl or wget. Of the two, I prefer wget, so I enter 1. Pressing enter tells pkg_add to use the default.
Package Messages
Once all of the packages have been updated, pkg_add displays any messages from the upgraded packages.
Read shared items: okYou may wish to update your font path for /usr/local/share/ghostscript/fontsLook in /usr/local/share/doc/pkg-readmes for extra documentation....

382 Chapter 20
Some of the installation instructions will tell you to clear out cached files from the older version of the software, as in this CUPS example.
--- -cups-1.5.3p4 -------------------You should also run rm -rf /var/log/cups/*You should also run rm -rf /var/cache/cupsYou should also run rm -rf /var/spool/cups...
Other times, software might jump versions. For example, OpenBSD lets you install multiple versions of PHP, Python, and other scripting languages, but after upgrading, you must decide which is your preferred default.
--- +python-2.7.3p1 -------------------If you want to use this package as your default system python, as rootcreate symbolic links like so (overwriting any previous default): ln -sf /usr/local/bin/python2.7 /usr/local/bin/python ln -sf /usr/local/bin/python2.7-2to3 /usr/local/bin/2to3 ln -sf /usr/local/bin/python2.7-config /usr/local/bin/python-config ln -sf /usr/local/bin/pydoc2.7 /usr/local/bin/pydoc...
You may also need to change some system configuration after an upgrade.
--- +tk-8.5.12 -------------------You may wish to add /usr/local/lib/tcl/tk8.5/man to /etc/man.conf...
The package maintainers put these messages into the package for your benefit. Read them, and if you’re in doubt, follow their instructions.
If all of your software is installed via packages, the upgrade process should be painless and transparent. I would like to tell you about all the problems and edge cases, except I’ve never been able to trigger any. Upgrading packages from the official release media just works. Packages built from the ports tree, however, are more complicated to upgrade, as I discuss in “Upgrading Ports” on page 368.
Why Build Your Own OpenBSD?Building your own upgrade from OpenBSD’s source is intended only for advanced users and those interested in developing OpenBSD and advanced users. You must be comfortable reading and compiling source code, debug-ging problems, and restoring from backup before even trying to build OpenBSD from source. In OpenBSD’s earlier days, I found upgrading from source to be the easiest way to move forward, but now upgrading via snap-shot is much easier and much less error-prone. If there’s any way you can use an official binary release to install what you’re looking for, do so.
Upgrading 383
When you build OpenBSD from source, you are building the distribu-tion sets that you installed via FTP or CD. The files might not be bundled up in distributions, but their contents will be the same. You still must merge your configuration files with sysmerge, and you will still need to update your installed software. The only thing building OpenBSD gets you is the latest version of the branch you’re following.
I know of three reasons to build your own OpenBSD from source: to get OpenBSD-stable, to get the latest OpenBSD-current, or to highly custom-ize OpenBSD. OpenBSD-stable is available only as source code. No official installation media is available for -stable, so if you want to go from 5.4-release to 5.4-stable, you must build it from source. If you want the absolutely latest OpenBSD code—newer than the latest snapshot—you must build it. And if you want to highly customize OpenBSD, you must build it from source.
Preparations for Building Your Own OpenBSDBuilding OpenBSD takes up about 4GB of disk, 2GB in /usr/src and 2GB in /usr/obj. OpenBSD creates these directories as separate partitions by default, but if you designed your own disk-partition scheme, make sure you have enough space.
You must build on your target platform. Don’t try to cross-compile by, for example, building VAX binaries on an amd64 box. OpenBSD develop-ers use cross-compiling to bring up a new hardware platform, but once the platform is up and running, all development happens on the native hard-ware. Code produced by cross-compiling might not be identical to code produced by the compiler running on the native platform.
Preparing the Base Operating SystemYour first step is to prepare the base operating system. You can build OpenBSD on only an OpenBSD installation similar to what you’re trying to build, which means you need to install the closest binary set to your target platform on your build machine. If you’re trying to build OpenBSD 5.4-stable, start by installing 5.4-release on your build machine. If you’re trying to build the latest OpenBSD-current, upgrade your build machine to the newest snapshot first.
Why start from the closest available binary release? For one, that’s how the OpenBSD developers do it; the code is meant to be built from a very recent OpenBSD. Although the system changes only slowly, those changes can add up. OpenBSD-stable is built only on the OpenBSD release it’s based on, or on a -stable release following that base release.
Also, OpenBSD-current occasionally has “flag days,” where a critical system change makes building the source code difficult. These might be compiler or linker upgrades, library or kernel changes, or just about any-thing else. While the OpenBSD team documents what you need to do to get over these humps, those documents are more like notes for people who know what they’re doing than user-friendly instructions.
384 Chapter 20
These flag days are announced on the OpenBSD mailing lists. You can try to follow those notes and build OpenBSD over these barriers, but when you get sick of beating your head against a flag-day change, upgrade to a snapshot to get over the hump. (Many OpenBSD developers also use snap-shots to get over flag-day changes; inability to compile OpenBSD through a flag day is not a threat to your manhood or womanhood.)
Getting Source CodeNow get the OpenBSD source code. If you have already installed these files, and you need to upgrade to a more recent version, see “Updating Source Code” on page 385.
For those installing the source code for the first time, the OpenBSD project provides recent code snapshots in four compressed tar files: the userland (src.tar.gz), kernel (sys.tar.gz), X Windows (xenocara.tar.gz), and ports (ports.tar.gz). All must be kept synchronized, which means that you cannot use a -current ports tree atop a -stable userland and kernel. Get the file that’s closest to what you want to build.
If you’re building -stable, you can grab all four files from the release directory of the binary you installed. For example, if you’re building OpenBSD 5.4-stable, you’ll find src.tar.gz, sys.tar.gz, xenocara.tar.gz, and ports .tar.gz on your CD or on an OpenBSD mirror under /pub/OpenBSD/5.4/.
If you’re building -current, you’re better off starting with a newer snap-shot of the source code. On the OpenBSD mirror sites, under /pub/OpenBSD, you’ll find recent copies of src.tar.gz and sys.tar.gz. Grab the most recent ones of those. You still need the xenocara.tar.gz and ports.tar.gz files from the most recent OpenBSD release, as those files are not updated as frequently.
Verify that the directories /usr/src, /usr/obj, /usr/xenocara, /usr/xobj, and /usr/ports are empty. Then extract src.tar.gz and sys.tar.gz under /usr/src, and Xenocara and ports directly under /usr. Here, I’ve copied all the tarballs to my home directory:
# cd /usr/src# tar -xzpf $HOME/src.tar.gz# tar -xzpf $HOME/sys.tar.gz# cd /usr# tar -xzpf $HOME/ports.tar.gz# tar -xzpf $HOME/xenocara.tar.gz
This gives you a known good base to start from. If you’re looking to build your own OpenBSD, you probably don’t want to build a version that’s available for installation now; you want to build a version that’s not available for installation. This means you want to update the source code to either -current or -stable.
Upgrading 385
Updating Source CodeOpenBSD uses Concurrent Versions System (CVS) for source code manage-ment. CVS is an older, somewhat traditional version control system. While many projects have moved from CVS to newer, shinier, and perhaps more glamorous systems, CVS meets the OpenBSD Project’s needs.
OpenBSD has a single central source-code repository: the master CVS server. Only developers and mirror sites have access to this server. When a developer wants to make new OpenBSD code available, he commits the changes to this central repository, and other developers can see his changes at this point.
The master CVS server tracks all changes ever made to the OpenBSD source, as well as who made those changes. Mirror sites capture these changes and make them available to the users in a matter of hours. As a user, you can use CVS to update your local source code to the latest version from a mirror site.
Source Code Repositories and Tags
OpenBSD’s source code is divided into repositories, or collections of code for particular subsystems. You need to download and synchronize only the col-lections that you want to use.
The OpenBSD CVS repository includes four collections: src (userland and kernel source), ports (the ports collection), xenocara (X Windows), www (the website), and the obsolete X11 and XF4 X Windows collections. While X11 and XF4 are still kept for historical purposes, you should never need to use that code. The www repository is of interest to the website editors and contributors. In order to build a recent OpenBSD, you must update your src, ports, and xenocara collections to the latest versions of your chosen branch.
A tag is a label for a particular version of a repository. OpenBSD uses tags to differentiate between -stable, -release, and -current. For example, the source code of every single OpenBSD release ever made includes the file /usr/src/etc/master.passwd. But the version of master.passwd shipped with OpenBSD 2.0 differs wildly from that shipped with OpenBSD 5.3! CVS uses tags to differentiate the various versions of this and every other file. By using tags, you can ask CVS for the version of any file that shipped with any OpenBSD release.
The tag for any -stable version of OpenBSD is the string OPENBSD and the version number, separated by underscores. For example, the tag for OpenBSD 5.4 is OpenBSD_5_4. Note the two underscores: there is no OPENBSD_54 or OPENBSD5_4. If you use a tag that does not exist, rather than updating your local source code files, you’ll delete them. (While you should download the source code for a release, rather than updating to it via CVS, an OpenBSD release appends the string _BASE to the tag, as in OPENBSD-5_4_BASE.) That said, OpenBSD-current is special in that it has no tag and it includes the latest version of all source code in all repositories.
386 Chapter 20
All of the repositories are designed to be updated synchronously. If, for example, you update the source code repository to -current and leave your ports and Xenocara at their -release or -stable versions, your system will behave unpredictably. As with learning to juggle chainsaws, you’re wel-come to try it, but don’t whine.
CVS Mirrors
You can use anonymous CVS to update your source code to the latest ver-sion. Start by choosing a convenient anonymous CVS server from the list at http://www.OpenBSD.org/anoncvs.html. There are mirrors all over the world, but choose one on your continent for better performance. (I use anoncvs13 .usa.openbsd.org3 in my examples.)
Tracking OpenBSD-current is slightly different than tracking OpenBSD-stable. We’ll start with -stable, and then see how -current differs.
Updating to -stable
The first time you update your source code, you must specify the anony-mous CVS server on the command line.
# cd /usr# cvs -qd anonymous@server:/cvs get -rOPENBSD_tag -P src
CVS is very picky about the order of its command-line arguments, and many flags are position-dependent. Don’t change the order of arguments unless you know what you’re doing.
Substitute your preferred server and the release tag you want to get into this command. For example, to update my OpenBSD 5.1 source tree to the latest stable version from anoncvs13.openbsd.org, I would run the following:
# cd /usr# cvs -qd [email protected]:/cvs get -rOPENBSD_5_1 -P srcThe authenticity of host 'anoncvs13.usa.openbsd.org (192.0.2.217)' can't be established.
u ECDSA key fingerprint is d3:b2:b5:68:87:3b:f6:93:21:fd:28:ea:cc:b6:e1:13.Are you sure you want to continue connecting (yes/no)? yesWarning: Permanently added 'anoncvs1.usa.openbsd.org,149.20.54.217' (ECDSA) to the list of known hosts.
Because OpenBSD runs CVS over SSH the first time you run cvs, it asks you to verify the CVS mirror’s host key. Compare the u key fingerprint given by your client to the fingerprint listed on the CVS mirror list. If they match, you’re talking to the actual CVS server. If the fingerprints don’t match, some-thing is wrong, which could be a problem at the server, a skipped website update, or an actual security problem at the mirror. If the key fingerprints
3. Again, there is no anoncvs13.usa.openbsd.org. Find a server close to you. Stop blindly copying my examples. It’s like you think I know what I’m doing or something!
Upgrading 387
don’t match, choose a different CVS mirror. (SSH will cache this key, and future updates won’t ask you to verify the key unless it changes.)
There’s a pause when CVS starts comparing the source code on your disk to the source code on the server, and just about when you think that something has gone wrong, you’ll probably see actual source code updates, like this:
U bin/systrace/intercept-translate.cU lib/libssl/src/crypto/mem.cU lib/libssl/src/crypto/asn1/a_d2i_fp.cU lib/libssl/src/crypto/buffer/buffer.cU sys/conf/newvers.shU sys/netinet6/ip6_output.cU usr.sbin/nsd/query.c
This is complete CVS update output for updating OpenBSD 5.1 release to -stable. In all, there were seven changes. When the OpenBSD guys say “minimal changes in -stable,” they mean it.
Repeat this for /usr/ports and /usr/xenocara.
# cd /usr# cvs -qd [email protected]:/cvs get -rOPENBSD_5_1 -P ports# cvs -qd [email protected]:/cvs get -rOPENBSD_5_1 -P xenocara
A source tree records the last server updated from, and on subsequent updates, you can drop the server from the command line. The source tree also knows which repository within the server it’s supposed to update from, so you don’t need to specify it.
# cd /usr/src# cvs -q up -rOPENBSD_5_1 -Pd
Run this same command any time you want the latest -stable source code.
Updating to -current
The process for updating your source code to -current is much the same as updating to -stable, but the command line differs slightly. The first time you update your source tree, you must specify the server name.
# cd /usr# cvs -qd anonymous@server:/cvs get -P src
This cvs command gives you the latest -current source code. For example, if I want to update my source code from anoncvs13.openbsd.org, I run this:
# cd /usr# cvs -qd [email protected]:/cvs get -P src
388 Chapter 20
You should get the SSH key fingerprint verification message, and see the same type of messages that you would get updating to -stable.
The first time you run CVS to update a specific set of source code, cvs records which server the source code came from. For subsequent updates to the latest -current source code, you can skip the server name and shorten the command, as follows:
# cd /usr/src# cvs -q up -Pd
Now you need to build the new source code into program code.You build -stable and -current in the same way, but -current has more
potential issues, so we’ll start by building -stable.
Building OpenBSD-stableBuilding OpenBSD-stable requires building and installing a new kernel, building and installing a new userland, and building and installing the new Xenocara.
Upgrading the KernelBuilding an upgraded kernel is like building a custom kernel, as discussed in Chapter 19. Basically, the process boils down to this:
# cd /usr/src/sys/arch/platform/conf/# config GENERIC# cd ../compile/GENERIC# make clean && make# make install
(If I planned to build OpenBSD regularly on this machine, I would script this.)
n o t e Chapter 19 is full of warnings about difficulties compiling a custom kernel. These don’t apply to building the GENERIC kernel on -stable. Remember that -stable includes only security fixes and obviously correct small changes. ABI, API, configu-ration, and syntax changes are absolutely forbidden. If this kernel build fails, you probably corrupted your source tree somehow. Remove everything in /usr/src and start over.
After building and installing the new kernel, reboot. You must run the new kernel to build the new userland.
Upgrading 389
Building the UserlandTo build and install everything outside the kernel, remove any old builds and re-create the object directories. Also, make sure that the installed OpenBSD system has all of the necessary directories. Skipping this step will make the build fail and corrupt your source tree.
# rm -rf /usr/obj/*# cd /usr/src# make obj# cd /usr/src/etc# env DESTDIR=/ make distrib-dirs
Now you can build and install the userland.
# cd /usr/src# make build
Building userland can take several days on an antique system, but should take only an hour or two on more modern hardware. When the process fin-ishes, you should have the new userland installed on the local system.
n o t e Installing -stable simplifies the userland part of the upgrade. There’s no need to merge any new /etc/ files with sysmerge (but there’s no harm in running sysmerge either, just to check that your configuration is indeed valid), or to re-create your device nodes, as they won’t change. OpenBSD-stable contains very minor changes from the release on which it’s based.
Building XenocaraThe X Window System might or might not change during -stable. If your CVS update shows no changes in -stable, you don’t need to rebuild it, but if any of the files in /usr/xenocara have changed, you’re better off rebuilding X. The build process is completely routine for Xenocara-stable.
# cd /usr/xenocara# rm -rf /usr/xobj/*# make bootstrap# make obj# make build
This builds and installs the new X on your system.
Building a ReleaseThis is all very nice if you want to upgrade only one machine. But what if you have several machines to upgrade to your custom OpenBSD build? You don’t want to go building -stable on your firewalls or your web server.
390 Chapter 20
If you need to upgrade multiple machines, build your OpenBSD on one machine, and install that build on multiple machines by building your own release. This will take less time than you needed to build your upgrade and use under a gigabyte of disk space.
A release is what the OpenBSD Project puts on the mirror sites for you to install. It’s a few kernels, tarballs containing the userland files, the index file, and so on. Using these files, you can upgrade your other hosts just as you would perform the official media upgrade discussed earlier this chap-ter. Building a release is the easiest way to upgrade several OpenBSD hosts to identical versions.
Before you can build a release, you must build both the base OpenBSD system and Xenocara. You could skip Xenocara if you don’t want any X on any of your hosts, but a surprising number of third-party programs need the X libraries. It’s easier to build X and not install it on selected hosts than to go back and rebuild the whole release because you didn’t build Xenocara the first time.
The release process installs OpenBSD in a temporary root directory and then bundles that installation into the release tarballs and related files. Next, it repeats the process with the X software. It assumes that you have the OpenBSD source code in /usr/src and a completed build in /usr/obj, as well as the Xenocara source in /usr/xenocara and a completed build in /usr/xobj. You can change the build process to get around these require-ments, as documented in release(8), but you should accept the defaults.
You’ll need to define three directories: one to store your release, one for your temporary OpenBSD root directory, and one for your temporary Xenocara root directory. You can reuse the temporary root directories, but I keep them for reference. I use /home/releasedir as my release directory, /home/destdir as my temporary OpenBSD root, and /home/xdestdir as the Xenocara temporary root.
W a r n i n g You can use any partition with sufficient free space, except for /mnt because the release process uses this partition. Similarly, building a release builds ISO and floppy images using the first vnode device, /dev/vnd0. If you have any disk images mounted using that device (see Chapter 9), the release process will fail. If you must mount a disk image while building a release, use a vnode device other than /dev/vnd0.
The release process has three steps: bundling the base system, bundling Xenocara, and indexing the results.
Bundling the Base System
OpenBSD’s build system includes all of the glue that you need to build a release. First, do a make build of your new OpenBSD so that you’re running the same version you want to build a release for. Next, define the temporary OpenBSD root and the release directory in your environment as $DESTDIR and $RELEASEDIR, respectively.
Upgrading 391
n o t e Verify that the temporary OpenBSD root and the release directories are empty before you start. While the release process can overwrite files from an old build, the directo-ries might have obsolete files that you don’t want included in the new release.
# echo $DESTDIR/home/destdir# echo $RELEASEDIR/home/releasedir
Once you have this ready, building the release involves only a few commands.
# cd /usr/src/etc && make release# cd /usr/src/distrib/sets && sh checkflist
Take a look in your release directory. You should see the following items:
• Three kernels (bsd, bsd.mp, and bsd.rd)
• Three floppy boot images if you’re building for i386, or one if it’s for amd64 (other architectures vary)
• Two ISO images
• Five file sets for the OpenBSD base system
These files are functionally identical to those distributed by the OpenBSD project, except they’re based on your custom build.
Once you’ve finished building releases, be sure to remove the $RELEASEDIR and $DESTDIR variables from your environment because they can mess up other software builds. You can’t successfully build Xenocara with them still set.
Bundling Xenocara
As with bundling the base system, you must first complete a Xenocara build. Confirm that your system has the same version of Xenocara installed that you want included in your release, and then set the RELEASEDIR and DESTDIR environment variables. RELEASEDIR should be identical to that used to bundle the base system, but DESTDIR should differ.
n o t e You could reuse DESTDIR, but that will erase everything from your temporary base sys-tem installation. Leave those files around until you’re sure you have a solid release.
# echo $DESTDIR/home/xdestdir# echo $RELEASEDIR/home/releasedir
Now go into the Xenocara source and bundle the release.
392 Chapter 20
# cd /usr/xenocara# make release
Xenocara isn’t much smaller than the base system. It takes a while to bundle up, so this is a good time to go to lunch. When you get back, you should find five new files in your release directory, all tarballs beginning with x.
Before you quit for the day, remove RELEASEDIR and DESTDIR from your environment.
Indexing the Release
Copy your release to your local FTP or web server, and create an index of the contents. (Only HTTP installs and upgrades need an index file.) The OpenBSD installer and upgrade software will use this index during the installation.
# /bin/ls -l > index.txt
Make the web or FTP site accessible from the machines you want to upgrade.
Using the ReleaseUpgrade or install using this release just as you would use an official release. Copy bsd.rd to a machine to be upgraded, and then boot into that kernel. When the installer asks where to get the file sets, give the location of your release. Extract and reboot!
Building OpenBSD-currentBuilding OpenBSD-current is exactly like building -stable, except when it isn’t. OpenBSD-current can change wildly, and building it from source is considered an advanced activity. The only time I actually build -current is if I need to test some new functionality or a patch offered by an OpenBSD developer.
The two big problems are the radical changes in -current and merg-ing /etc.
Following -currentWhen you follow -current, keep a close eye on OpenBSD’s changes by track-ing the Following -current web page at http://www.OpenBSD.org/faq/current .html. This is where the OpenBSD developers list all of the changes likely to impact people trying to build -current. Not all changes apply to all systems, but any change listed that applies to your system requires special handling.
Upgrading 393
The entries are chronological, and include everything since the last release. Just concern yourself with entries dated on or after the date of the source code used to build your snapshot. For example, if you built a snapshot dated January 30, and you want to build -current on the fol-lowing February 5, check the web page for any entries between those two dates, inclusive. Earlier changes are already incorporated in the installed snapshot.
Some changes will require your intervention before you even try to build the system. For example, if you have new unprivileged usernames, they will need to be in place before a make build can succeed—after all, a program owned by user _fdisk can’t be installed unless that user is in place.
If you don’t understand an entry on this page, do not upgrade!
Merging /etcWhen you upgrade to a new -stable, you can be sure that the files in /etc/ haven’t changed. When you track -current, those critical system files might well change. Any critical changes are usually noted in the Following -current website, but it’s best to use sysmerge(8) to merge in all /etc changes. You can give sysmerge the path to the system source instead of the etc.tgz file set.
# sysmerge -s /usr/src
See the section about sysmerge earlier in this chapter for detailed information.
Upgrading PortsIf you use OpenBSD-provided packages, upgrading your system is as easy as running pkg_add -ui. If you built your third-party packages from source using the ports collection, however, there’s no easy way to upgrade. You must rebuild those packages. There is no automated way to do this, but the make update command in a port can rebuild a specific port.
Presumably, you built your own packages because the OpenBSD-provided packages lacked some option or flavor you needed. In that case, you probably only needed to build one or two packages from source. All of the software required by that package could be installed from official OpenBSD sources. You should upgrade everything possible via packages and rebuild only what is strictly necessary.
Now that you can upgrade OpenBSD any way you want, let’s look at OpenBSD’s packet filter.

21P a c k e t F i l t e r i n g
The name’s Pond, James Pond. My x86 loaded, licensed to filter.
Packet filtering and traffic manipulation are among the most basic tools in network
security. OpenBSD includes a very powerful in-kernel packet filter, pf(4), or PF. This tool
not only performs standard filtering, but it can also inspect, reassemble, redirect, and otherwise abuse packets in several ways; translate addresses in several different directions simultaneously; authenticate users; and manage bandwidth. Along with PF, OpenBSD includes programs that let you turn your system into a load bal-ancer, transparent proxy, or any number of other network devices.
PF is one of the high points of OpenBSD and deserves its own book. That book is The Book of PF, 2nd edition, by Peter Hansteen (No Starch Press, 2010), which goes into detail on many different PF use cases. This chapter covers the basics of PF so that you can protect a small network or an indi-vidual server. If you want to protect a web farm and transparently relay traffic to only the active servers with sufficient free capacity to handle the load, get Peter’s book.
396 Chapter 21
That said, not even Peter’s book covers PF in its entirety. OpenBSD lets you fold, spindle, and mutilate TCP/IP far beyond anything any reasonable person could ever expect to support in the real world. For complete details on PF, read the pf(4), pfctl(8), and pf.conf(5) man pages, and the OpenBSD PF FAQ at http://www.OpenBSD.org/faq/pf/.
n o t e PF is still undergoing active development. While the configuration syntax doesn’t change as often as it used to, check pf.conf(5) for the latest information on your version of OpenBSD.
FirewallsThe word firewall has been tortured beyond recognition over the past 20 or so years, until it has ceased to mean much of anything in particular. In gen-eral, a firewall sits between a private and public network, and controls the traffic between the two.
You can buy a firewall for your cable modem for under $100, and you can purchase an enterprise firewall cluster for $1 million. What’s the dif-ference? They’re all firewalls, much as rats and cats and elephants are all mammals, but some are welcome in your home and most are not.1 Which you permit, of course, is your personal preference. And firewalls are much the same.
Some firewalls filter application-level traffic. Some only filter based on protocol or ports. Some firewalls inspect protocol flags and ensure traffic sanity. Others just pass packets. And some firewalls just translate network addresses and claim that provides security. Worse, the price tag bears no relationship to the feature set.
At their most basic, all firewalls filter packets and can perform network address translation (NAT). OpenBSD can perform those tasks as well or better than most commercial firewalls. If you want application proxies, however, they don’t come with the core OpenBSD system (with the excep-tion of FTP and TFTP proxies, which are necessary for those protocols to function with NAT). Several popular application proxies run quite well on OpenBSD, but they are not part of OpenBSD. For example, I’ve used Squid (/usr/ports/www/squid) and several related packages to build a web proxy and filter on OpenBSD that is comparable to anything the big companies offer, and an assortment of other proxies to manage just about everything else. If you are interested in firewalls, I highly recommend that you assem-ble your own highly featured firewall from available components at least once, for the sake of education if nothing else.
A firewall is what you make it. You can send all your traffic through a simple OpenBSD packet filter and honestly declare that you have a firewall, or you can set up application proxies, authentication, and so on, and still
1. Sorry, cats and elephants, find your own place to live.
Packet Filtering 397
say you have a firewall. A plain packet filter is a firewall just as much as one of those umpteen-integrated-application-proxy, six-figure-price-tag devices. Remember this the next time someone says he has a firewall.
Realistically, a firewall is not a security device. It is a point of policy enforcement.2 The firewall doesn’t secure anything; it prevents access to certain services. But blocking access doesn’t secure inherently insecure services—it just means you can’t access them. If your firewall permits access to a service, the firewall doesn’t add any security to that service.
In order to build an effective firewall, you must understand TCP/IP. If Chapter 11 was a revelation to you, get a copy of The TCP/IP Guide (No Starch Press, 2005). Read it. Mark it up. Highlight it. And read it again.
Many of the examples in this chapter assume that you are building a firewall. This means that your host has two or more network interfaces (including VLAN interfaces) and that you want to protect the network on one side from the network on the other side. While this is a popular appli-cation for OpenBSD, everything covered here works just as well on individ-ual hosts. I filter packets on lone web servers, on desktops, and on any host sitting naked on the Internet.
Enabling and Configuring PFOpenBSD enables PF by default at system boot with these rc.conf variables:
pf=YESpf_rules=/etc/pf.conf
To disable PF at boot, set pf to NO in rc.conf.local.The default configuration file for PF is /etc/pf.conf. There’s nothing spe-
cial about this file—it’s just a standard location. The pf(4) kernel interface doesn’t read the file directly; the PF control program pfctl(8) reads the file and sends the configuration to the kernel.
The default PF configuration (hard-coded in /etc/rc) blocks all network traffic except for ICMP and SSH. During boot, PF replaces those defaults with rules from /etc/pf.conf. If an error in pf.conf renders the file unparsable when the system boots, PF can’t load those rules; instead, it retains the default configuration. You’ll be able to connect to your machine to correct your rules, but that’s about it. (And, as anyone who administers remote fire-walls can tell you, this ability can save you a lot of driving and phone calls.)
Running PF by default, even with a permissive ruleset, cleans up incom-ing traffic before the rest of the kernel has to deal with it. PF reassembles packets before handing them to the kernel, and obviously bogus traffic, such as packets too short to be legitimate, is discarded.
2. Blatantly stolen from Henning Brauer. Thankfully, he’s so sick of this book by now, he won’t notice.
398 Chapter 21
If you want to forward packets between interfaces (that is, act like a “firewall”), tell the kernel to forward packets with the net.inet.ip.forwarding and net.inet6.ip6.forwarding sysctls. (See /etc/sysctl.conf for commented-out examples.)
#net.inet.ip.forwarding=1#net.inet6.ip6.forwarding=1
Remove the pound signs and reboot, or use sysctl(8) to enable and disable packet forwarding on the fly.
Packet-Filtering BasicsPacket filtering is comparing packets to a list of rules and accepting, reject-ing, or altering them as those rules dictate. As a network administrator, you get to decide which packets are naughty and which are nice. When you filter packets for a single host, you can legitimately call that host hardened. (The word hardened means almost exactly what firewall means: nothing.) When you send all packets on your network through a single host that filters packets, you have a basic firewall.
A basic packet filter might allow you to filter based on only the TCP or UDP protocol number. Some don’t even allow you to filter by ICMP type or cannot cope with protocols other than those enumerated in the GUI. PF, however, can cope with almost anything you throw at it. If you need a machine to communicate with another over IP protocol 184, PF will sup-port you. Many commercial firewalls won’t let you pass such traffic, or claim that they do but throw a tantrum if you actually try it.
Packet-Filtering ConceptsChapter 11 described how TCP connections can be in a variety of states. A TCP connection that is just starting goes through a three-way handshake pro-cess. A client requests a connection by sending a synchronization request, or SYN, packet to the server. The server responds by sending the client an acknowledgment of the SYN, as well as its own SYN request, or a SYN+ACK packet. The client responds with its own ACK.
Every part of this three-way handshake must complete for any actual data to transfer between the two machines. Your packet-filtering rules must permit each part of the three-way handshake and the subsequent data transmission. PF automatically recognizes these three-way handshakes and tracks them through stateful inspection.
Stateful Inspection
PF maintains a list of permitted connections that have completed con-nection setup, which is called a state table. When a client sends out a SYN packet, PF records that packet in a table and waits for a corresponding SYN+ACK packet. If a SYN+ACK packet arrives at PF, but PF has no record of a corresponding SYN request, the SYN+ACK packet is rejected.
Packet Filtering 399
PF has a series of built-in timeouts that dictate how long idle connec-tions remain in the state table, how long to wait for each stage of the three-way handshake, and so on. The state table is self-maintaining, and I’ve never had to adjust any of these timeouts. (On occasion, I have needed to increase the maximum size of the state table.)
UDP is technically stateless, but some applications expect a certain amount of state. When your system transmits a UDP packet, the application might well expect a UDP packet or 10 in response, or no packets, depend-ing on the application.
DNS queries are a common example of UDP packets flowing back and forth, and while UDP has no state, DNS certainly does. (ICMP behaves simi-larly.) You can have PF either expect this back-and-forth or not, by adding these flows to the state table as your protocol dictates.
n o t e PF can also operate without stateful inspection, allowing traffic to and from hosts and ports based on individual packet characteristics. Stateless filtering is slower than stateful inspection, harder to correctly configure, and generally considered less secure and less useful than stateful inspection.
Packet Reassembly
Packets can be mangled during transit, usually by fragmentation. Part of a packet filter’s job is to sensibly reassemble those packets. PF can reassemble and rationalize packets in a variety of ways. (Old versions of PF called this scrubbing.)
Default Accept vs. Default Deny
One of the essential concepts in packet filtering is the question of default accept versus default deny:
• A default accept stance means that you allow any type of connection except what you specifically deny. The default PF rules are an example of a default accept stance.
• A default deny stance means that you allow only explicitly permitted con-nections. All other connections are refused.
Once you have chosen your default, you can adjust your rules to hide or reveal network services as needed. In today’s world, I recommend default deny on all systems, because this stance protects new services as they are added to a system. In most environments where I’ve seen a default accept stance used in the past decade, it’s because the system administrators did not understand the network protocol they were using. This is particularly common in VoIP installations (yes, you can packet filter VoIP servers!)
In addition to packet filtering and reassembly, PF offers several other important features, including NAT, connection redirection, and bandwidth management, to name a few. We’ll consider each separately. All are config-ured in pf.conf and managed with pfctl(8).
400 Chapter 21
“My Network Can Do No Wrong”Many network administrators who build a firewall carefully filter and restrict incoming traffic, but only apply minimal restrictions on outgoing traffic. While control of incoming traffic is among the most in-your-face issues of network management, control of outgoing traffic is also important.
Even if you trust your users, malware can convert a skilled engineer’s workstation into a garbage-spewing pest. Do not assume that your network can do no wrong. It can be malicious, and one day it will be, but careful traffic control can minimize the damage you inflict on your neighbors, cli-ents, customers, and reputation.
Is there any reason for your staff desktops to connect to any random remote mail server? If not, block it, and even if a workstation is infected with a spambot, the rest of the world won’t blacklist you. Is there any reason for your users to connect to remote DNS servers, or should they use your company’s? Block outbound DNS, and prevent your users from becoming unwitting amplifiers of denial-of-service attacks. I strongly recommend a default deny stance for outbound as well as inbound traffic, and explicitly allowing desirable traffic.
Some networks might be exceptions, of course. If every system on your network runs OpenBSD, you’re pretty safe from routine malware, but already we see malware targeting televisions, Blu-ray, streaming media players, and other appliances with network connectivity. Protect yourself now.
Anytime that you catch yourself thinking that your network can do no wrong, stop and remind yourself that you are not as smart as the combina-tion of every malware author in the world.
What Packet Filtering Doesn’t DoPacket filtering controls network connections based entirely on TCP/IP protocols and related characteristics, such as port numbers. If you want to block all traffic from certain IP addresses, packet filtering is your friend. If you want to allow only connections to a particular TCP/IP port, packet filtering will work for you. If you want to allow entrance only to packets with the ECN flag set, but no other flags, PF will support you (even though that’s a pretty daft thing to do).
You can filter protocols that operate at a logical protocol layer such as IPsec, SKIP, VINES, and so on, but only on the network protocol. If it’s a different protocol layer, PF can’t help.
n o t e PF can even filter by MAC address. There’s special support for this specific media layer protocol via tags added on bridge(4) interfaces, as documented in ifconfig(4).
Similarly, PF doesn’t know anything about applications or application protocols. If you allow TCP/IP connections to port 25 on a server within your network, you might think that you’re allowing connections to the mail server on that host. Actually, you’re allowing connections to whatever dae-mon happens to be running on port 25 on that host! PF doesn’t recognize
Packet Filtering 401
an SMTP data stream; it sees only that the connection goes to port 25. (I have a system that offers SSH on many ports commonly assigned to other services, just so I can saunter past whatever naïve packet filter I happen to be stuck behind.)
PF ComponentsBefore we dive into PF, let’s look at the basic components of packet filter-ing on OpenBSD. In addition to the pf(4) kernel module, we’ll look at the packet filter control program and the configuration file /etc/pf.conf. Knowledge of interface groups also helps.
Packet Filter Control and ConfigurationUse the packet filter control program pfctl(8) to manage, configure, and extract information from PF. You can see the current packet filter rules and settings, connections being processed, the state of the TCP/IP transactions, debugging information, and all kinds of other details. You can also parse rules files and install them in the actual packet filter.
You’ll see many different options for pfctl, addressing every aspect of packet-filter management. Many of these are rather lengthy, but you need to type only as much of the word arguments to make a command unique. For example, instead of typing pfctl -s rules, you can get away with pfctl -sr because no other argument to pfctl -s begins with an r. That said, I give all examples in their full form, as it’s impossible to guarantee that OpenBSD won’t add some other argument that begins with r in the future.
I focus on using pfctl for viewing PF output, but OpenBSD also includes PF views in systat(1). For a dynamic display of PF activity, somewhat like top(1) for the network, look at systat. Run systat by giving the name of the view as an argument, such as systat pf. And, as always, any time you want more detail from pfctl, add one or two -v arguments for verbose mode.
You configure PF in /etc/pf.conf. The pf.conf file contains statements and rules, whose format varies with the features they configure. You’ll be very good friends with this file before we’re through.
Interface GroupsOpenBSD lets you put interfaces in named groups, which you can refer to in PF rules. This abstracts away the actual physical interface, and lets you build policy-based rulesets. Take a look at this interface:
# ifconfig em0em0: flags=8843<UP,BROADCAST,RUNNING,SIMPLEX,MULTICAST> mtu 1500... groups: egress...
This interface is in the egress group. An interface is assigned to the egress group if a default route is reached over it.
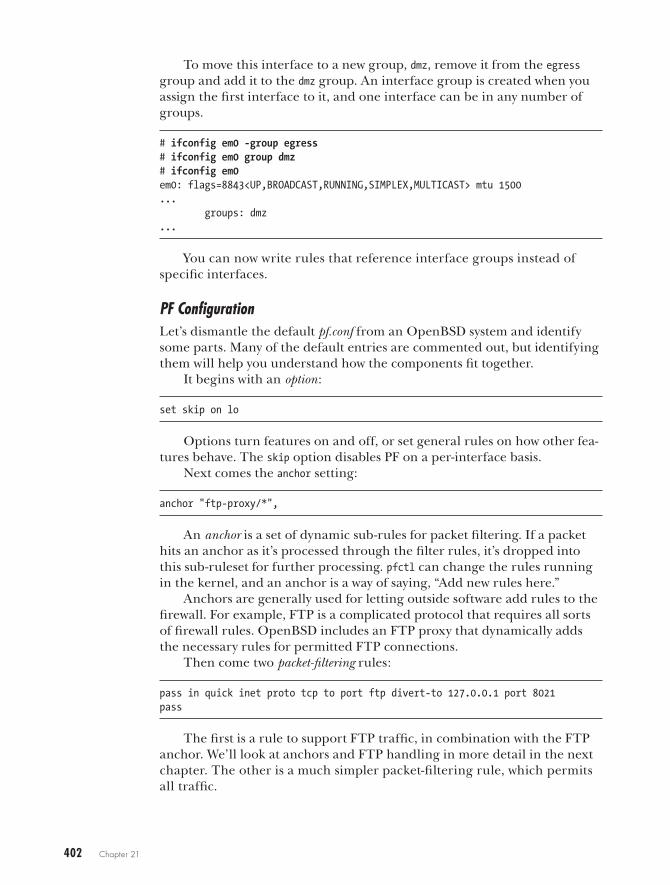
402 Chapter 21
To move this interface to a new group, dmz, remove it from the egress group and add it to the dmz group. An interface group is created when you assign the first interface to it, and one interface can be in any number of groups.
# ifconfig em0 -group egress# ifconfig em0 group dmz# ifconfig em0em0: flags=8843<UP,BROADCAST,RUNNING,SIMPLEX,MULTICAST> mtu 1500... groups: dmz...
You can now write rules that reference interface groups instead of specific interfaces.
PF ConfigurationLet’s dismantle the default pf.conf from an OpenBSD system and identify some parts. Many of the default entries are commented out, but identifying them will help you understand how the components fit together.
It begins with an option:
set skip on lo
Options turn features on and off, or set general rules on how other fea-tures behave. The skip option disables PF on a per-interface basis.
Next comes the anchor setting:
anchor "ftp-proxy/*",
An anchor is a set of dynamic sub-rules for packet filtering. If a packet hits an anchor as it’s processed through the filter rules, it’s dropped into this sub-ruleset for further processing. pfctl can change the rules running in the kernel, and an anchor is a way of saying, “Add new rules here.”
Anchors are generally used for letting outside software add rules to the firewall. For example, FTP is a complicated protocol that requires all sorts of firewall rules. OpenBSD includes an FTP proxy that dynamically adds the necessary rules for permitted FTP connections.
Then come two packet-filtering rules:
pass in quick inet proto tcp to port ftp divert-to 127.0.0.1 port 8021pass
The first is a rule to support FTP traffic, in combination with the FTP anchor. We’ll look at anchors and FTP handling in more detail in the next chapter. The other is a much simpler packet-filtering rule, which permits all traffic.
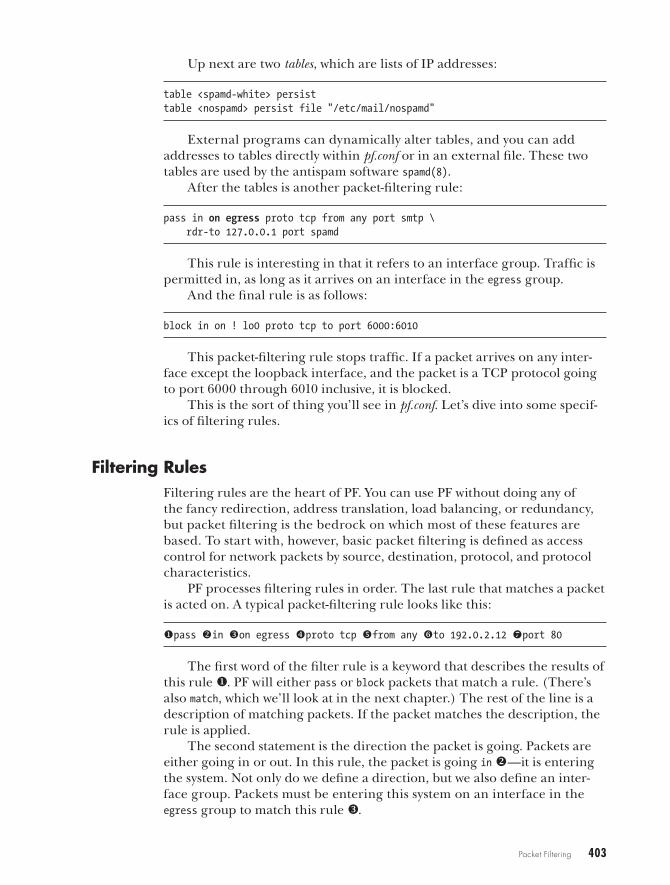
Packet Filtering 403
Up next are two tables, which are lists of IP addresses:
table <spamd-white> persisttable <nospamd> persist file "/etc/mail/nospamd"
External programs can dynamically alter tables, and you can add addresses to tables directly within pf.conf or in an external file. These two tables are used by the antispam software spamd(8).
After the tables is another packet-filtering rule:
pass in on egress proto tcp from any port smtp \ rdr-to 127.0.0.1 port spamd
This rule is interesting in that it refers to an interface group. Traffic is permitted in, as long as it arrives on an interface in the egress group.
And the final rule is as follows:
block in on ! lo0 proto tcp to port 6000:6010
This packet-filtering rule stops traffic. If a packet arrives on any inter-face except the loopback interface, and the packet is a TCP protocol going to port 6000 through 6010 inclusive, it is blocked.
This is the sort of thing you’ll see in pf.conf. Let’s dive into some specif-ics of filtering rules.
Filtering RulesFiltering rules are the heart of PF. You can use PF without doing any of the fancy redirection, address translation, load balancing, or redundancy, but packet filtering is the bedrock on which most of these features are based. To start with, however, basic packet filtering is defined as access control for network packets by source, destination, protocol, and protocol characteristics.
PF processes filtering rules in order. The last rule that matches a packet is acted on. A typical packet-filtering rule looks like this:
upass vin won egress xproto tcp yfrom any zto 192.0.2.12 {port 80
The first word of the filter rule is a keyword that describes the results of this rule u. PF will either pass or block packets that match a rule. (There’s also match, which we’ll look at in the next chapter.) The rest of the line is a description of matching packets. If the packet matches the description, the rule is applied.
The second statement is the direction the packet is going. Packets are either going in or out. In this rule, the packet is going in v—it is entering the system. Not only do we define a direction, but we also define an inter-face group. Packets must be entering this system on an interface in the egress group to match this rule w.
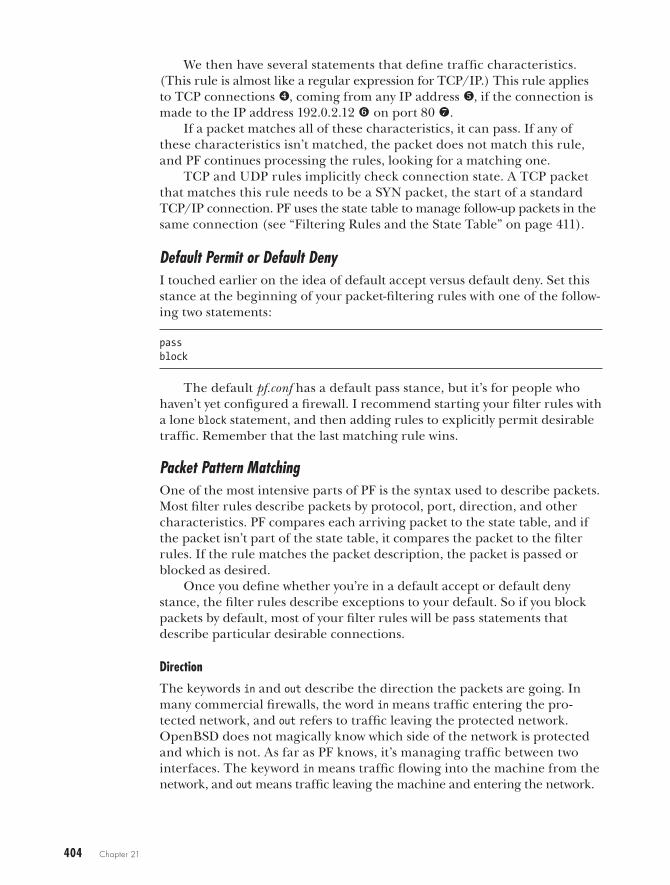
404 Chapter 21
We then have several statements that define traffic characteristics. (This rule is almost like a regular expression for TCP/IP.) This rule applies to TCP connections x, coming from any IP address y, if the connection is made to the IP address 192.0.2.12 z on port 80 {.
If a packet matches all of these characteristics, it can pass. If any of these characteristics isn’t matched, the packet does not match this rule, and PF continues processing the rules, looking for a matching one.
TCP and UDP rules implicitly check connection state. A TCP packet that matches this rule needs to be a SYN packet, the start of a standard TCP/IP connection. PF uses the state table to manage follow-up packets in the same connection (see “Filtering Rules and the State Table” on page 411).
Default Permit or Default DenyI touched earlier on the idea of default accept versus default deny. Set this stance at the beginning of your packet-filtering rules with one of the follow-ing two statements:
passblock
The default pf.conf has a default pass stance, but it’s for people who haven’t yet configured a firewall. I recommend starting your filter rules with a lone block statement, and then adding rules to explicitly permit desirable traffic. Remember that the last matching rule wins.
Packet Pattern MatchingOne of the most intensive parts of PF is the syntax used to describe packets. Most filter rules describe packets by protocol, port, direction, and other characteristics. PF compares each arriving packet to the state table, and if the packet isn’t part of the state table, it compares the packet to the filter rules. If the rule matches the packet description, the packet is passed or blocked as desired.
Once you define whether you’re in a default accept or default deny stance, the filter rules describe exceptions to your default. So if you block packets by default, most of your filter rules will be pass statements that describe particular desirable connections.
Direction
The keywords in and out describe the direction the packets are going. In many commercial firewalls, the word in means traffic entering the pro-tected network, and out refers to traffic leaving the protected network. OpenBSD does not magically know which side of the network is protected and which is not. As far as PF knows, it’s managing traffic between two interfaces. The keyword in means traffic flowing into the machine from the network, and out means traffic leaving the machine and entering the network.
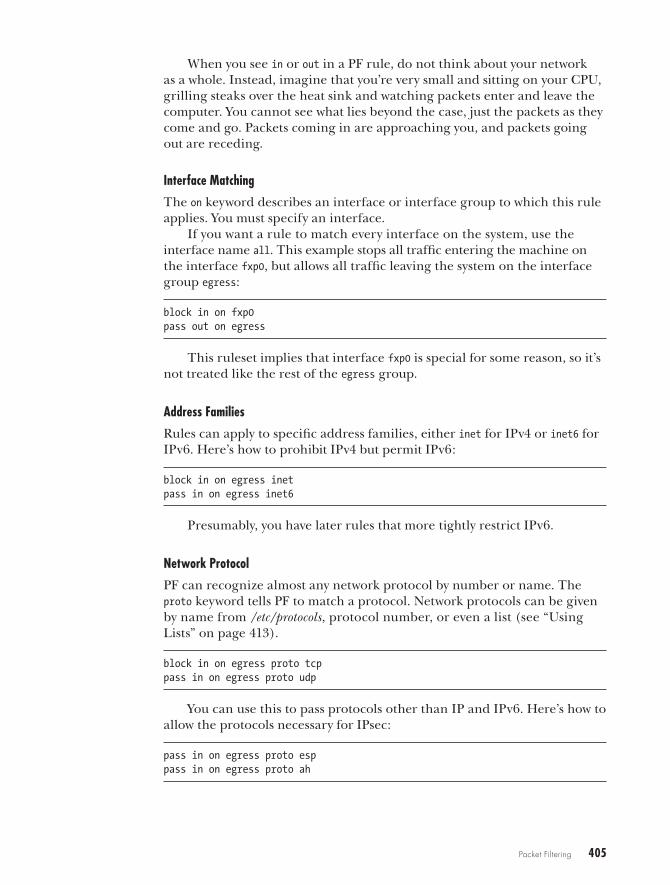
Packet Filtering 405
When you see in or out in a PF rule, do not think about your network as a whole. Instead, imagine that you’re very small and sitting on your CPU, grilling steaks over the heat sink and watching packets enter and leave the computer. You cannot see what lies beyond the case, just the packets as they come and go. Packets coming in are approaching you, and packets going out are receding.
Interface Matching
The on keyword describes an interface or interface group to which this rule applies. You must specify an interface.
If you want a rule to match every interface on the system, use the interface name all. This example stops all traffic entering the machine on the interface fxp0, but allows all traffic leaving the system on the interface group egress:
block in on fxp0pass out on egress
This ruleset implies that interface fxp0 is special for some reason, so it’s not treated like the rest of the egress group.
Address Families
Rules can apply to specific address families, either inet for IPv4 or inet6 for IPv6. Here’s how to prohibit IPv4 but permit IPv6:
block in on egress inetpass in on egress inet6
Presumably, you have later rules that more tightly restrict IPv6.
Network Protocol
PF can recognize almost any network protocol by number or name. The proto keyword tells PF to match a protocol. Network protocols can be given by name from /etc/protocols, protocol number, or even a list (see “Using Lists” on page 413).
block in on egress proto tcppass in on egress proto udp
You can use this to pass protocols other than IP and IPv6. Here’s how to allow the protocols necessary for IPsec:
pass in on egress proto esppass in on egress proto ah
406 Chapter 21
This functionality somewhat overlaps the inet and inet6 statements. If you prefer, you could explicitly allow IP, ICMP, TCP, UDP, and all the vari-ous IPv6 protocols.
Source and Destination Address
Almost every filter rule specifies a source and/or destination address.
pass in on egress from 198.51.100.0/24 to 192.0.2.0/24
IP addresses can appear either as individual addresses or as an address with a netmask (as shown in the preceding example). The keyword any means any IP address. The keyword all is shorthand for “from any to any.”
You can also use hostnames instead of IP addresses. pfctl will check the IP address of the host when loading the rules, and insert the actual IP address into the rules.
pass in on egress from www.michaelwlucas.com
If the IP address of the host changes, PF won’t notice until you reload the rules with pfctl. If the hostname cannot be found, the rules won’t parse, and pfctl will not be able to load them. I recommend not using hostnames in filter rules, much as I recommend not wearing medieval plate armor while swimming, but it is an available option.
To say “anything but this address,” use the exclamation point as a nega-tion character.
block in from !192.0.2.0/24
This says “block everything except the addresses 192.0.2.0/24.” That’s not the same as saying “pass 192.0.2.0/24,” but it can help simplify your rules.
You can also use lists, macros, and tables as IP addresses. Lists and mac-ros are discussed later in this chapter, and tables are covered in the next chapter.
Source and Destination Variants
You can use the name of an interface or interface group instead of an IP address.
pass out on egress from egress
This lets traffic leave via the egress interface group, from any IP address on any interface in that group, to any IP address.
If you put the interface name or group in parentheses, PF updates its rules whenever the IP address on the interface changes. This is useful for dial-up connections, or if you add and remove IP addresses from an interface.
pass out on egress from (egress)
Packet Filtering 407
You can specify a network that is directly attached to an interface or an interface group by following the name with :network.
pass in on egress from egress:network
Suppose the egress group has only one interface, and that interface has an IP address of 192.0.2.88/25. This rule would translate to the following:
pass in on egress from 192.0.2.0/25
This rule means that any host on the local network to an egress interface can communicate anywhere. When you add another interface to the egress group, the rules automatically update to accommodate the new interface’s network.
To filter on broadcast traffic for an interface or group, use the :broadcast modifier.
block in on egress from egress:broadcast
Again, suppose that the egress group has only one interface, and that interface has an IP address of 192.0.2.88/25. This rule would translate to the following, blocking broadcast traffic on the local subnet:
block in on egress from 192.0.2.127
Use the :peer modifier to indicate the IP address of the far side of a point-to-point link, such as a dial-up connection.
pass in on egress from egress:peer
Here, we completely trust our dial-up provider.
Interface Main Address
To use only the first IP address on an interface, add the :0 modifier with an interface or group name.
pass out on egress from (egress:0)
The egress interface group might have 98 IP addresses scattered across three interfaces, but only one address on each interface is the first address. This host can communicate out through the egress interface group, but only from primary IP addresses. The aliased IP addresses cannot initiate out-bound connections.
The problem with the :0 modifier is that the kernel has a very weak idea of what is the “first” address on an interface. The kernel has a list of addresses associated with an interface. The address at the top of this list is the “first” or “main” address at the moment, but this address can change. If this might cause problems, specify an IP address in your rule rather than rely on :0.
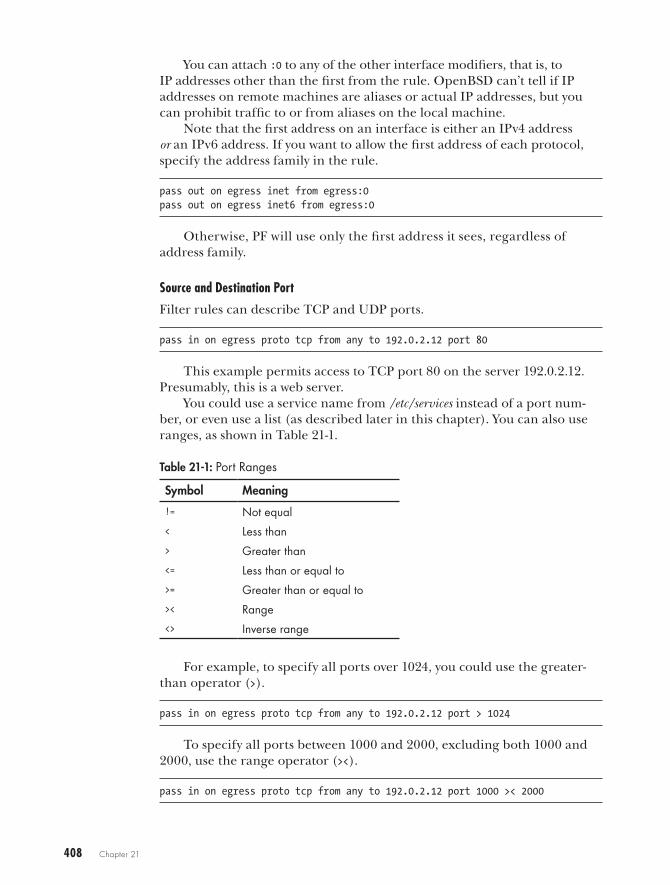
408 Chapter 21
You can attach :0 to any of the other interface modifiers, that is, to IP addresses other than the first from the rule. OpenBSD can’t tell if IP addresses on remote machines are aliases or actual IP addresses, but you can prohibit traffic to or from aliases on the local machine.
Note that the first address on an interface is either an IPv4 address or an IPv6 address. If you want to allow the first address of each protocol, specify the address family in the rule.
pass out on egress inet from egress:0pass out on egress inet6 from egress:0
Otherwise, PF will use only the first address it sees, regardless of address family.
Source and Destination Port
Filter rules can describe TCP and UDP ports.
pass in on egress proto tcp from any to 192.0.2.12 port 80
This example permits access to TCP port 80 on the server 192.0.2.12. Presumably, this is a web server.
You could use a service name from /etc/services instead of a port num-ber, or even use a list (as described later in this chapter). You can also use ranges, as shown in Table 21-1.
Table 21-1: Port Ranges
Symbol Meaning
!= Not equal< Less than> Greater than<= Less than or equal to>= Greater than or equal to>< Range<> Inverse range
For example, to specify all ports over 1024, you could use the greater-than operator (>).
pass in on egress proto tcp from any to 192.0.2.12 port > 1024
To specify all ports between 1000 and 2000, excluding both 1000 and 2000, use the range operator (><).
pass in on egress proto tcp from any to 192.0.2.12 port 1000 >< 2000
Packet Filtering 409
To include ports 1000 and 2000 in your range, use the inclusive range operator (:). (Note that you cannot have space on either side of the colon.)
pass in on egress proto tcp from any to 192.0.2.12 port 1000:2000
To pass traffic on all ports less than 1000 and greater than 2000, use the inverse range operator (<>).
pass in on egress proto tcp from any to 192.0.2.12 port 1000 <> 2000
Ranges let you express large numbers of ports in very few rules.
A Complete RulesetThe following is a complete ruleset for a desktop machine, using many of the features described previously. We’ll look at some more complicated rulesets later, but this illustrates many basic principles of PF rules.
Interface group egress is attached to the public network, and interface group inside is connected to my private network.
u set skip on lov blockw pass in on egress from egress:networkx pass in on inside from inside:networky pass in on egress proto tcp from any to egress:0 port 22z pass out all
The first rule disables packet filtering on the loopback interface u, and the second defines a default deny stance v. The second and third rules per-mit all connections from IP addresses directly connected to the external w and internal interfaces x. If I install a web server on my desktop, I want to be able to view it from any machine on the network I control. Then I permit inbound SSH connections from anywhere in the world to the primary IP address on any egress interface y. Finally, I permit all outbound traffic, so my desktop can freely access the outside world z.
I’ve said before that PF rules are processed in order, and these rules illustrate that. I establish a default, blocking all traffic, and then use indi-vidual rules to carve out exceptions to that global block.
Activating RulesFor your PF rules to take effect, you must load them into the kernel using pfctl -f.
# pfctl -f /etc/pf.conf
First, pfctl reads and parses the rules file. If the file parses correctly, pfctl expands any variables in the file, performs any necessary DNS lookups to transform hostnames into IP addresses, and feeds the complete rules into the kernel. The kernel reads the new rules, and then swaps between
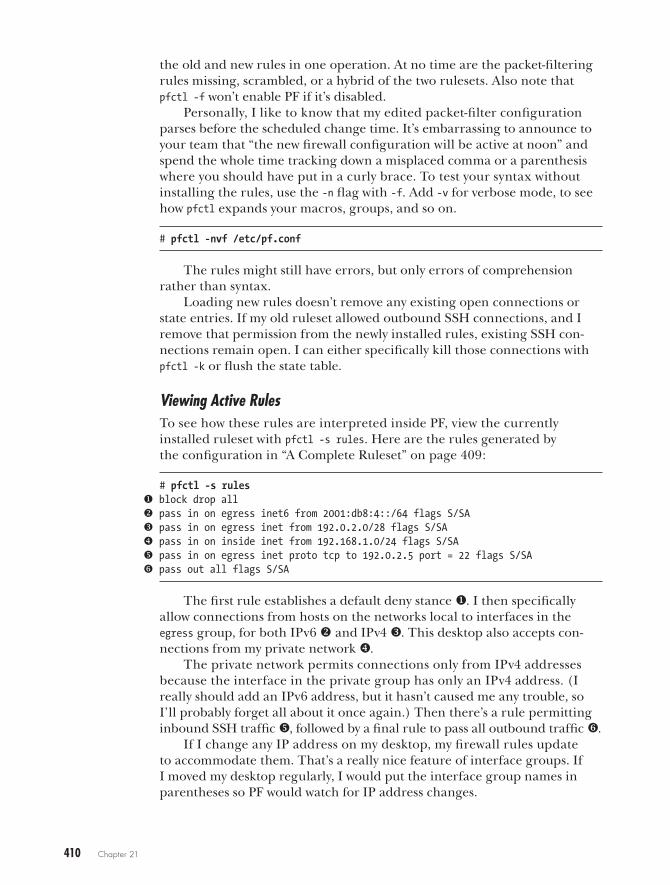
410 Chapter 21
the old and new rules in one operation. At no time are the packet-filtering rules missing, scrambled, or a hybrid of the two rulesets. Also note that pfctl -f won’t enable PF if it’s disabled.
Personally, I like to know that my edited packet-filter configuration parses before the scheduled change time. It’s embarrassing to announce to your team that “the new firewall configuration will be active at noon” and spend the whole time tracking down a misplaced comma or a parenthesis where you should have put in a curly brace. To test your syntax without installing the rules, use the -n flag with -f. Add -v for verbose mode, to see how pfctl expands your macros, groups, and so on.
# pfctl -nvf /etc/pf.conf
The rules might still have errors, but only errors of comprehension rather than syntax.
Loading new rules doesn’t remove any existing open connections or state entries. If my old ruleset allowed outbound SSH connections, and I remove that permission from the newly installed rules, existing SSH con-nections remain open. I can either specifically kill those connections with pfctl -k or flush the state table.
Viewing Active RulesTo see how these rules are interpreted inside PF, view the currently installed ruleset with pfctl -s rules. Here are the rules generated by the configuration in “A Complete Ruleset” on page 409:
# pfctl -s rulesu block drop allv pass in on egress inet6 from 2001:db8:4::/64 flags S/SAw pass in on egress inet from 192.0.2.0/28 flags S/SAx pass in on inside inet from 192.168.1.0/24 flags S/SAy pass in on egress inet proto tcp to 192.0.2.5 port = 22 flags S/SAz pass out all flags S/SA
The first rule establishes a default deny stance u. I then specifically allow connections from hosts on the networks local to interfaces in the egress group, for both IPv6 v and IPv4 w. This desktop also accepts con-nections from my private network x.
The private network permits connections only from IPv4 addresses because the interface in the private group has only an IPv4 address. (I really should add an IPv6 address, but it hasn’t caused me any trouble, so I’ll probably forget all about it once again.) Then there’s a rule permitting inbound SSH traffic y, followed by a final rule to pass all outbound traffic z.
If I change any IP address on my desktop, my firewall rules update to accommodate them. That’s a really nice feature of interface groups. If I moved my desktop regularly, I would put the interface group names in parentheses so PF would watch for IP address changes.
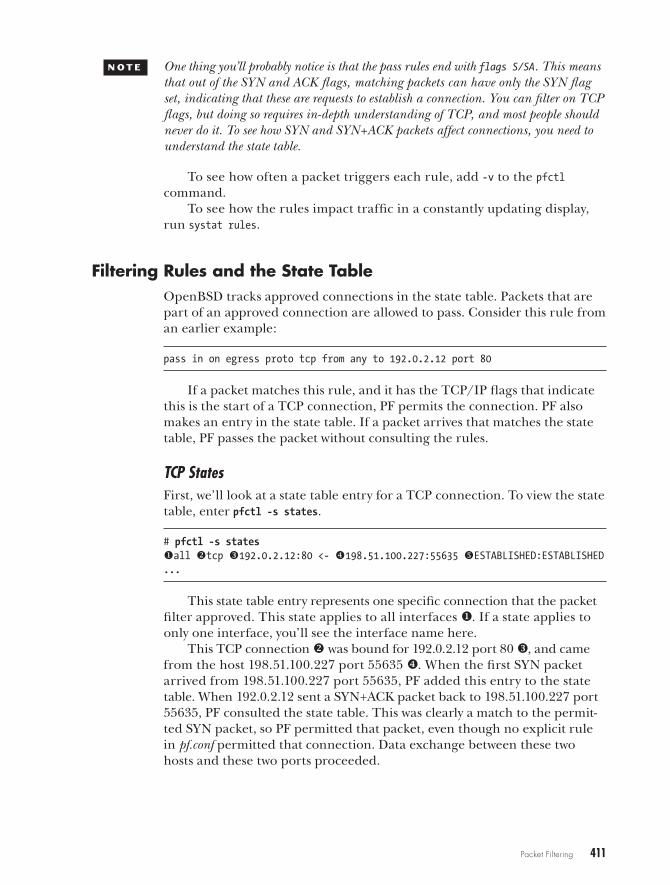
Packet Filtering 411
n o t e One thing you’ll probably notice is that the pass rules end with flags S/SA. This means that out of the SYN and ACK flags, matching packets can have only the SYN flag set, indicating that these are requests to establish a connection. You can filter on TCP flags, but doing so requires in-depth understanding of TCP, and most people should never do it. To see how SYN and SYN+ACK packets affect connections, you need to understand the state table.
To see how often a packet triggers each rule, add -v to the pfctl command.
To see how the rules impact traffic in a constantly updating display, run systat rules.
Filtering Rules and the State TableOpenBSD tracks approved connections in the state table. Packets that are part of an approved connection are allowed to pass. Consider this rule from an earlier example:
pass in on egress proto tcp from any to 192.0.2.12 port 80
If a packet matches this rule, and it has the TCP/IP flags that indicate this is the start of a TCP connection, PF permits the connection. PF also makes an entry in the state table. If a packet arrives that matches the state table, PF passes the packet without consulting the rules.
TCP StatesFirst, we’ll look at a state table entry for a TCP connection. To view the state table, enter pfctl -s states.
# pfctl -s statesuall vtcp w192.0.2.12:80 <- x198.51.100.227:55635 yESTABLISHED:ESTABLISHED...
This state table entry represents one specific connection that the packet filter approved. This state applies to all interfaces u. If a state applies to only one interface, you’ll see the interface name here.
This TCP connection v was bound for 192.0.2.12 port 80 w, and came from the host 198.51.100.227 port 55635 x. When the first SYN packet arrived from 198.51.100.227 port 55635, PF added this entry to the state table. When 192.0.2.12 sent a SYN+ACK packet back to 198.51.100.227 port 55635, PF consulted the state table. This was clearly a match to the permit-ted SYN packet, so PF permitted that packet, even though no explicit rule in pf.conf permitted that connection. Data exchange between these two hosts and these two ports proceeded.

412 Chapter 21
PF knows what an actual TCP/IP data exchange looks like. There’s a three-way handshake in the beginning, and a similar dance when the con-nection is finished and PF tracks the state of the connection. This particu-lar connection is established on both sides y, meaning that the initial setup negotiation succeeded, and data can flow back and forth freely.
If your server is busy enough, and you keep refreshing the state table view, you’ll catch connections in other states. Here’s the same connection as the data exchange ends and is being torn down:
all tcp 192.0.2.12:80 <- 198.51.100.227:55635 FIN_WAIT_2:FIN_WAIT_2
n o t e One possible problem with viewing the state table is that pfctl displays a snapshot. By the time your eyes scroll down the screen, the table has changed. Personally, I find that’s the only way I can cope with the information. If you need to view states in a constantly updating display, in near real time, run systat states.
The state table is very specific. A state table entry permitting 198.51.100.227 port 55635 to 192.0.2.12 port 80 does not permit traffic between other hosts and ports. PF knows how traffic should flow, and it won’t allow traffic that isn’t obviously part of an existing TCP/IP exchange. If a packet arrives from 198.51.100.227 that looks like it’s part of this data exchange, except that it comes from port 55634 instead of 55635, the state table entry won’t match. Similarly, if PF knows that the connection is in a FIN_WAIT_2 state, or almost finished, a subsequent data packet with an ACK flag set won’t match and will be discarded. This is because a SYN request from the same host, from the same port, should not arrive—the client should know that the port is busy closing the previous connection. A new connection should come from a different port on the client and create a new state table entry.
Without stateful inspection, you would need to write firewall rules that not only permitted incoming traffic, but also permitted the responses. Your firewall rules would need to permit outbound connections to thousands of high-numbered ports, instead of just the single ports attached to desirable connections. Filtering based on TCP flags would be nearly impossible.
n o t e As a consultant in the 1990s, I made a couple of rent payments dismantling such rules that had been shoehorned into stateless packet filters because they just aren’t realistic without stateful inspection. Plus, carefully tracking data exchanges not only simplifies rules, but also prevents a whole slew of TCP/IP-based attacks. You don’t hear much about these attacks anymore, thanks to stateful inspection.
UDP StatesThe state entries for UDP connections are similar to those for TCP connections.
all udp 192.0.2.12:53 <- 198.51.100.227:38469 SINGLE:MULTIPLE
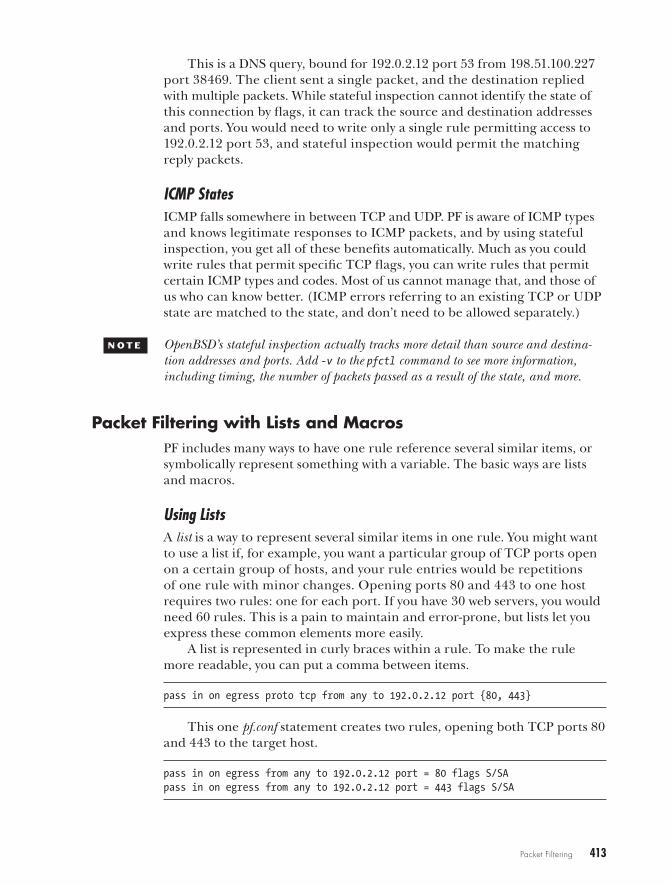
Packet Filtering 413
This is a DNS query, bound for 192.0.2.12 port 53 from 198.51.100.227 port 38469. The client sent a single packet, and the destination replied with multiple packets. While stateful inspection cannot identify the state of this connection by flags, it can track the source and destination addresses and ports. You would need to write only a single rule permitting access to 192.0.2.12 port 53, and stateful inspection would permit the matching reply packets.
ICMP StatesICMP falls somewhere in between TCP and UDP. PF is aware of ICMP types and knows legitimate responses to ICMP packets, and by using stateful inspection, you get all of these benefits automatically. Much as you could write rules that permit specific TCP flags, you can write rules that permit certain ICMP types and codes. Most of us cannot manage that, and those of us who can know better. (ICMP errors referring to an existing TCP or UDP state are matched to the state, and don’t need to be allowed separately.)
n o t e OpenBSD’s stateful inspection actually tracks more detail than source and destina-tion addresses and ports. Add -v to the pfctl command to see more information, including timing, the number of packets passed as a result of the state, and more.
Packet Filtering with Lists and MacrosPF includes many ways to have one rule reference several similar items, or symbolically represent something with a variable. The basic ways are lists and macros.
Using ListsA list is a way to represent several similar items in one rule. You might want to use a list if, for example, you want a particular group of TCP ports open on a certain group of hosts, and your rule entries would be repetitions of one rule with minor changes. Opening ports 80 and 443 to one host requires two rules: one for each port. If you have 30 web servers, you would need 60 rules. This is a pain to maintain and error-prone, but lists let you express these common elements more easily.
A list is represented in curly braces within a rule. To make the rule more readable, you can put a comma between items.
pass in on egress proto tcp from any to 192.0.2.12 port {80, 443}
This one pf.conf statement creates two rules, opening both TCP ports 80 and 443 to the target host.
pass in on egress from any to 192.0.2.12 port = 80 flags S/SApass in on egress from any to 192.0.2.12 port = 443 flags S/SA
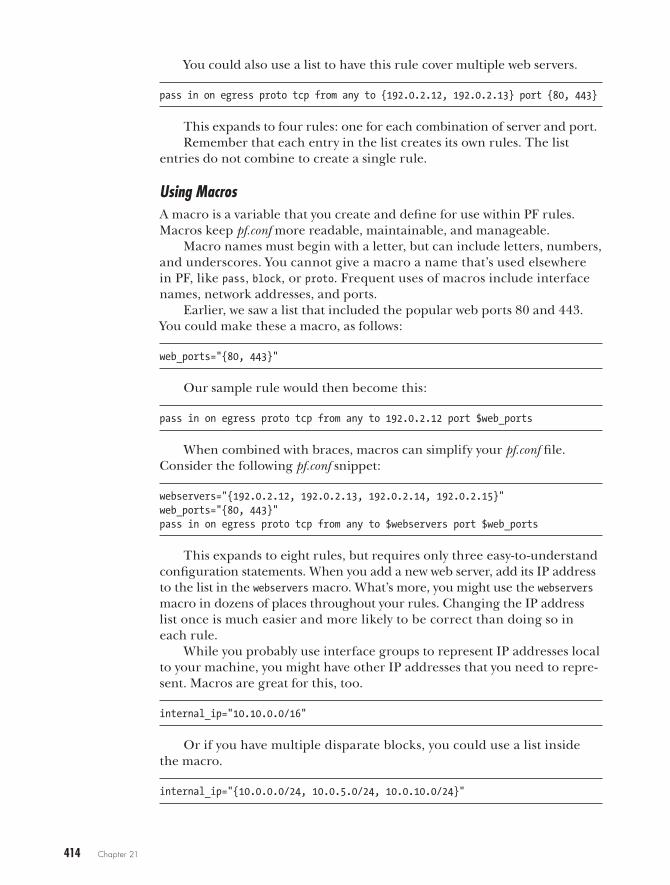
414 Chapter 21
You could also use a list to have this rule cover multiple web servers.
pass in on egress proto tcp from any to {192.0.2.12, 192.0.2.13} port {80, 443}
This expands to four rules: one for each combination of server and port.Remember that each entry in the list creates its own rules. The list
entries do not combine to create a single rule.
Using MacrosA macro is a variable that you create and define for use within PF rules. Macros keep pf.conf more readable, maintainable, and manageable.
Macro names must begin with a letter, but can include letters, numbers, and underscores. You cannot give a macro a name that’s used elsewhere in PF, like pass, block, or proto. Frequent uses of macros include interface names, network addresses, and ports.
Earlier, we saw a list that included the popular web ports 80 and 443. You could make these a macro, as follows:
web_ports="{80, 443}"
Our sample rule would then become this:
pass in on egress proto tcp from any to 192.0.2.12 port $web_ports
When combined with braces, macros can simplify your pf.conf file. Consider the following pf.conf snippet:
webservers="{192.0.2.12, 192.0.2.13, 192.0.2.14, 192.0.2.15}"web_ports="{80, 443}"pass in on egress proto tcp from any to $webservers port $web_ports
This expands to eight rules, but requires only three easy-to-understand configuration statements. When you add a new web server, add its IP address to the list in the webservers macro. What’s more, you might use the webservers macro in dozens of places throughout your rules. Changing the IP address list once is much easier and more likely to be correct than doing so in each rule.
While you probably use interface groups to represent IP addresses local to your machine, you might have other IP addresses that you need to repre-sent. Macros are great for this, too.
internal_ip="10.10.0.0/16"
Or if you have multiple disparate blocks, you could use a list inside the macro.
internal_ip="{10.0.0.0/24, 10.0.5.0/24, 10.0.10.0/24}"
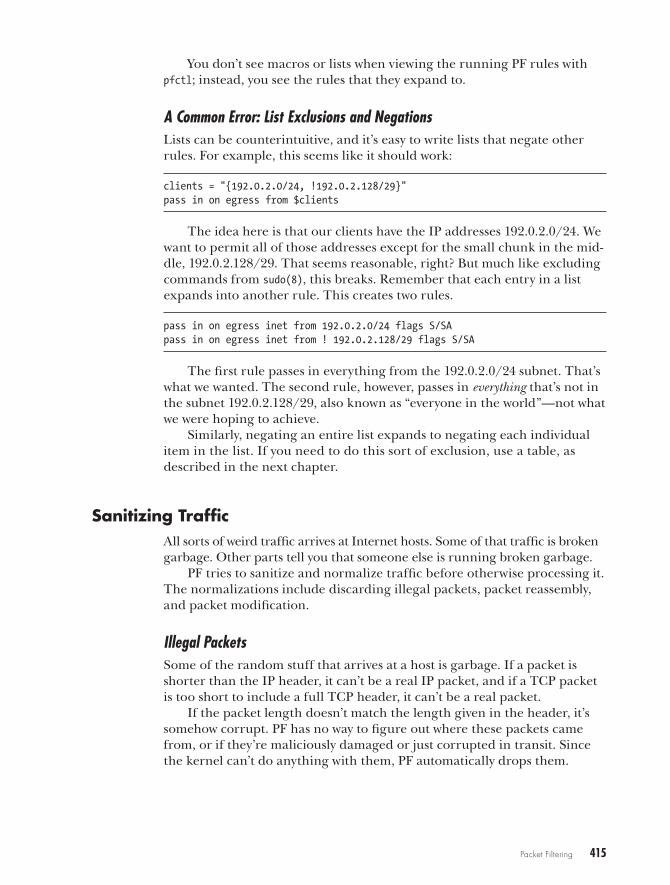
Packet Filtering 415
You don’t see macros or lists when viewing the running PF rules with pfctl; instead, you see the rules that they expand to.
A Common Error: List Exclusions and NegationsLists can be counterintuitive, and it’s easy to write lists that negate other rules. For example, this seems like it should work:
clients = "{192.0.2.0/24, !192.0.2.128/29}"pass in on egress from $clients
The idea here is that our clients have the IP addresses 192.0.2.0/24. We want to permit all of those addresses except for the small chunk in the mid-dle, 192.0.2.128/29. That seems reasonable, right? But much like excluding commands from sudo(8), this breaks. Remember that each entry in a list expands into another rule. This creates two rules.
pass in on egress inet from 192.0.2.0/24 flags S/SApass in on egress inet from ! 192.0.2.128/29 flags S/SA
The first rule passes in everything from the 192.0.2.0/24 subnet. That’s what we wanted. The second rule, however, passes in everything that’s not in the subnet 192.0.2.128/29, also known as “everyone in the world”—not what we were hoping to achieve.
Similarly, negating an entire list expands to negating each individual item in the list. If you need to do this sort of exclusion, use a table, as described in the next chapter.
Sanitizing TrafficAll sorts of weird traffic arrives at Internet hosts. Some of that traffic is broken garbage. Other parts tell you that someone else is running broken garbage.
PF tries to sanitize and normalize traffic before otherwise processing it. The normalizations include discarding illegal packets, packet reassembly, and packet modification.
Illegal PacketsSome of the random stuff that arrives at a host is garbage. If a packet is shorter than the IP header, it can’t be a real IP packet, and if a TCP packet is too short to include a full TCP header, it can’t be a real packet.
If the packet length doesn’t match the length given in the header, it’s somehow corrupt. PF has no way to figure out where these packets came from, or if they’re maliciously damaged or just corrupted in transit. Since the kernel can’t do anything with them, PF automatically drops them.
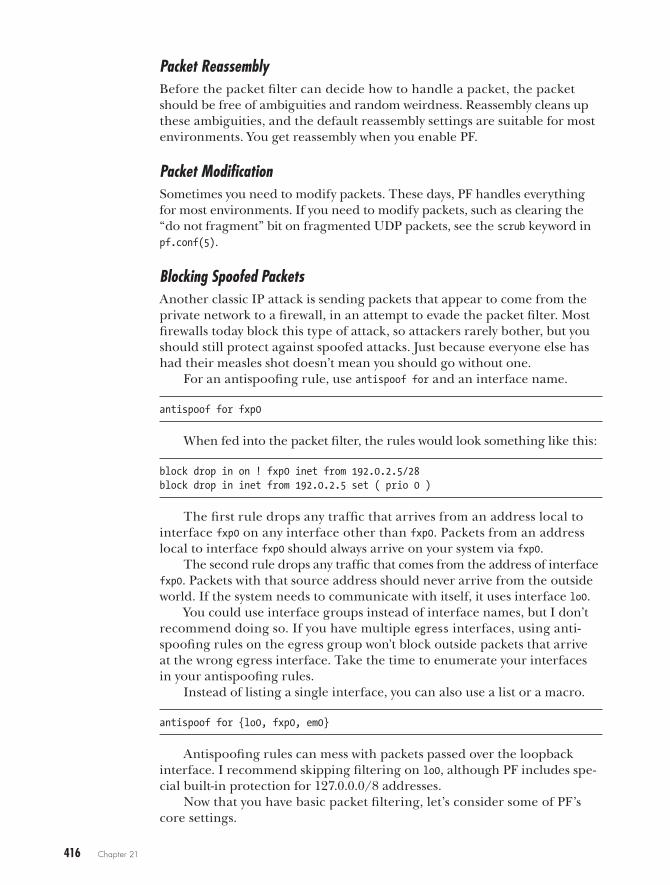
416 Chapter 21
Packet ReassemblyBefore the packet filter can decide how to handle a packet, the packet should be free of ambiguities and random weirdness. Reassembly cleans up these ambiguities, and the default reassembly settings are suitable for most environments. You get reassembly when you enable PF.
Packet ModificationSometimes you need to modify packets. These days, PF handles everything for most environments. If you need to modify packets, such as clearing the “do not fragment” bit on fragmented UDP packets, see the scrub keyword in pf.conf(5).
Blocking Spoofed PacketsAnother classic IP attack is sending packets that appear to come from the private network to a firewall, in an attempt to evade the packet filter. Most firewalls today block this type of attack, so attackers rarely bother, but you should still protect against spoofed attacks. Just because everyone else has had their measles shot doesn’t mean you should go without one.
For an antispoofing rule, use antispoof for and an interface name.
antispoof for fxp0
When fed into the packet filter, the rules would look something like this:
block drop in on ! fxp0 inet from 192.0.2.5/28block drop in inet from 192.0.2.5 set ( prio 0 )
The first rule drops any traffic that arrives from an address local to interface fxp0 on any interface other than fxp0. Packets from an address local to interface fxp0 should always arrive on your system via fxp0.
The second rule drops any traffic that comes from the address of interface fxp0. Packets with that source address should never arrive from the outside world. If the system needs to communicate with itself, it uses interface lo0.
You could use interface groups instead of interface names, but I don’t recommend doing so. If you have multiple egress interfaces, using anti-spoofing rules on the egress group won't block outside packets that arrive at the wrong egress interface. Take the time to enumerate your interfaces in your antispoofing rules.
Instead of listing a single interface, you can also use a list or a macro.
antispoof for {lo0, fxp0, em0}
Antispoofing rules can mess with packets passed over the loopback interface. I recommend skipping filtering on lo0, although PF includes spe-cial built-in protection for 127.0.0.0/8 addresses.
Now that you have basic packet filtering, let’s consider some of PF’s core settings.
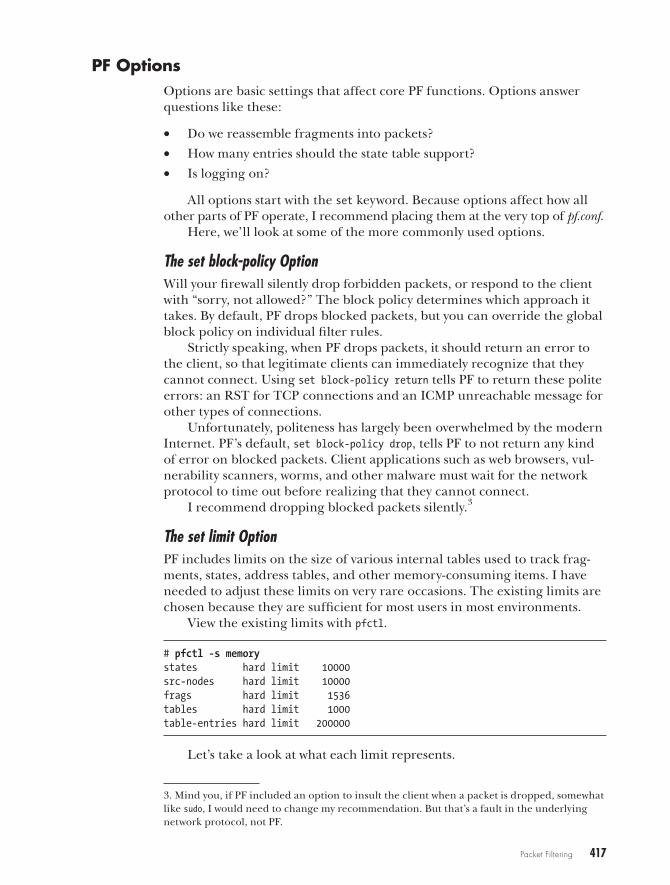
Packet Filtering 417
PF OptionsOptions are basic settings that affect core PF functions. Options answer questions like these:
• Do we reassemble fragments into packets?
• How many entries should the state table support?
• Is logging on?
All options start with the set keyword. Because options affect how all other parts of PF operate, I recommend placing them at the very top of pf.conf.
Here, we’ll look at some of the more commonly used options.
The set block-policy OptionWill your firewall silently drop forbidden packets, or respond to the client with “sorry, not allowed?” The block policy determines which approach it takes. By default, PF drops blocked packets, but you can override the global block policy on individual filter rules.
Strictly speaking, when PF drops packets, it should return an error to the client, so that legitimate clients can immediately recognize that they cannot connect. Using set block-policy return tells PF to return these polite errors: an RST for TCP connections and an ICMP unreachable message for other types of connections.
Unfortunately, politeness has largely been overwhelmed by the modern Internet. PF’s default, set block-policy drop, tells PF to not return any kind of error on blocked packets. Client applications such as web browsers, vul-nerability scanners, worms, and other malware must wait for the network protocol to time out before realizing that they cannot connect.
I recommend dropping blocked packets silently.3
The set limit OptionPF includes limits on the size of various internal tables used to track frag-ments, states, address tables, and other memory-consuming items. I have needed to adjust these limits on very rare occasions. The existing limits are chosen because they are sufficient for most users in most environments.
View the existing limits with pfctl.
# pfctl -s memorystates hard limit 10000src-nodes hard limit 10000frags hard limit 1536tables hard limit 1000table-entries hard limit 200000
Let’s take a look at what each limit represents.
3. Mind you, if PF included an option to insult the client when a packet is dropped, somewhat like sudo, I would need to change my recommendation. But that’s a fault in the underlying network protocol, not PF.
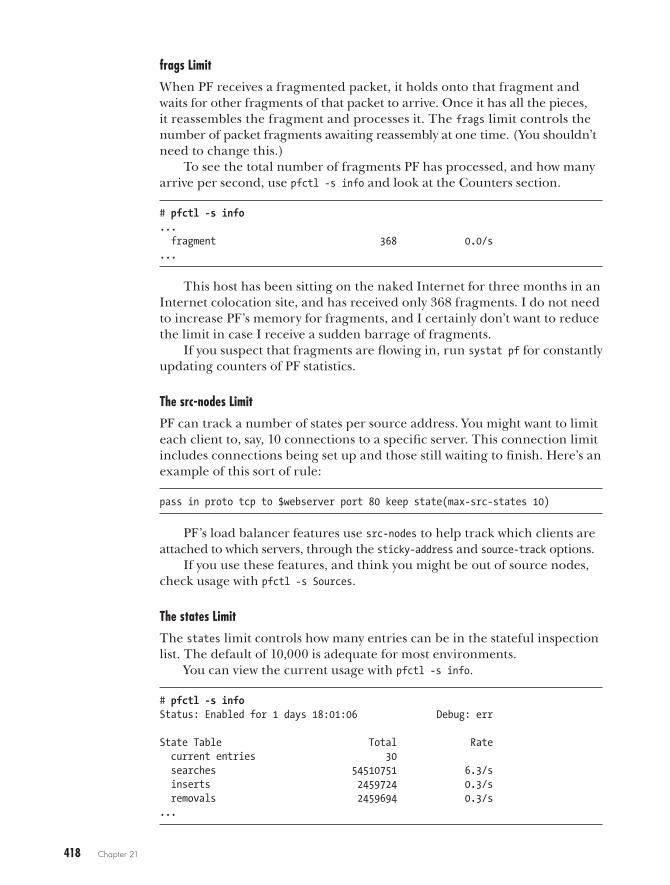
418 Chapter 21
frags Limit
When PF receives a fragmented packet, it holds onto that fragment and waits for other fragments of that packet to arrive. Once it has all the pieces, it reassembles the fragment and processes it. The frags limit controls the number of packet fragments awaiting reassembly at one time. (You shouldn’t need to change this.)
To see the total number of fragments PF has processed, and how many arrive per second, use pfctl -s info and look at the Counters section.
# pfctl -s info... fragment 368 0.0/s...
This host has been sitting on the naked Internet for three months in an Internet colocation site, and has received only 368 fragments. I do not need to increase PF’s memory for fragments, and I certainly don’t want to reduce the limit in case I receive a sudden barrage of fragments.
If you suspect that fragments are flowing in, run systat pf for constantly updating counters of PF statistics.
The src-nodes Limit
PF can track a number of states per source address. You might want to limit each client to, say, 10 connections to a specific server. This connection limit includes connections being set up and those still waiting to finish. Here’s an example of this sort of rule:
pass in proto tcp to $webserver port 80 keep state(max-src-states 10)
PF’s load balancer features use src-nodes to help track which clients are attached to which servers, through the sticky-address and source-track options.
If you use these features, and think you might be out of source nodes, check usage with pfctl -s Sources.
The states Limit
The states limit controls how many entries can be in the stateful inspection list. The default of 10,000 is adequate for most environments.
You can view the current usage with pfctl -s info.
# pfctl -s infoStatus: Enabled for 1 days 18:01:06 Debug: err
State Table Total Rate current entries 30 searches 54510751 6.3/s inserts 2459724 0.3/s removals 2459694 0.3/s...
Packet Filtering 419
n o t e I have needed to change the state table more than once. Each time, it was because of a strangely written application that required clients to make dozens of connections to a single TCP/IP port. I’m certain that the application developers had their reasons for doing so (possible reasons do include ignorance and malice). Multiplied by thousands of simultaneous users, that became a lot of states. As I wasn’t in a position to tell the developers to write their application like normal people, I had to adjust the state table.
If you suspect that the state table is having trouble, use systat pf and/or systat states to view state activity in real time.
The tables and table-entries Limits
The tables and table-entries limits control how many tables PF can create, and how many entries can go into a single table. I have never had to adjust these, and I would suggest that if your filter rules need more than 1000 tables, you should probably reconsider how you’ve designed it. A table might need to hold more than 100,000 addresses, but that’s very much the exception these days.
Setting Limits
To change a limit, use set limit, the name of the limit, and the new value. Here’s how to double the size of the default state table:
set limit states 20000
Again, don’t change these defaults lightly. Increase them only if exist-ing limits cause a specific problem. And don’t decrease them, or you won’t be prepared for problems and spikes.
The set optimization OptionPF includes a variety of timeouts, which default to values reasonable for the modern Internet. Some environments, such as satellite uplinks, do require slightly different timeouts.
You can adjust PF’s timeouts with set optimization. (The name is a left-over from the early days of PF, but has stuck around.) This has four values:
normal
The normal optimization is the default. If you don’t specify an optimiza-tion, the standard timeouts are used.
conservative
The conservative optimization is for environments where you want to be absolutely sure you don’t time out connections. (State table entries will stick around longer.) This setting uses more memory and processor time—possibly much more on a busy network. I use it to ease the minds
420 Chapter 21
of managers of industrial networks who are less concerned about buying more hardware and more concerned about the possibility of a meeting caused by some executive’s idle connection timing out.
high-latency
If you connect over a satellite uplink or carrier pigeon, use the high-latency optimization.
aggressive
If you have a busy firewall, with many connections coming and going, you might try the aggressive optimization. This times out idle connections more quickly, reducing memory and processor use. Many people report that aggressive timeouts work perfectly well in their environments, but if low timeouts cause trouble for you, turn them off.
Configure any of these by using set optimization and the optimiza- tion name.
set optimization conservative
The set skip OptionYou can tell PF to not manage an interface. By default, it watches all inter-faces, but some interfaces don’t really require filtering. Your loopback interface, lo0, passes traffic only from the local machine to itself. Packet filtering on lo0 is an interesting educational exercise, but not terribly use-ful in production.
set skip on lo0
You can also specify multiple interfaces to skip.
set skip on {lo0 fxp0 fxp1}
It’s fairly common to skip filtering on the physical interfaces beneath a trunk in favor of filtering on the trunk itself.
This will get you started with packet filtering. If you have a single server with simple functions, you can protect it quite nicely using the techniques covered in this chapter. But PF can do a lot more than what we’ve talked about here, such as control bandwidth and have applications dynami-cally change rules. In the next chapter, we’ll touch on a few of PF’s more advanced functions.
22A d v A n c e d P F
Office net seems slow thanks to bootleg film swapping.
Let’s stop that right quick!
The previous chapter covered the basics of the OpenBSD packet filter pf(4). But,
as I mentioned, PF can manipulate packets in all kinds of ways beyond just permitting or
denying them, including the following:
• You can dynamically change the list of addresses to pass or block through outside software, such as dhcpd(8) or spamd(8).
• You can dynamically create sub-rulesets that let you set up very specific rules for troublesome protocols without allowing more access than necessary.
• PF can provide NAT, letting you offer an entire network Internet access without public IP addresses.
• You can redirect incoming traffic arbitrarily, and control how much bandwidth you will let a service use.
• You can use PF logging.
This chapter covers each of these topics.
422 Chapter 22
Packet Filtering with TablesA table is a list of IPv4 and/or IPv6 addresses, much like a list. A table is faster than a list, however, and uses less memory. If you have only a few addresses, using a list is fine, but once you have more than a few, use a table.
Interestingly, you can edit tables without reloading the filter rules, and several programs use this feature to dynamically change how a server behaves. Some people load lists of malware-laden computers into a table to block those hosts, or use external programs to generate such lists. (“You’ve tried to send us four invalid emails in a row? Good-bye!”) Tables can be kept permanently in external files, or you can treat them as ephemera. It’s your choice.
Defining TablesYou can create and manipulate tables entirely with pfctl, but that’s not as common as defining the table within pf.conf. Give the table name in angle brackets, and provide the initial members delimited by commas inside braces.
table <management> {192.0.2.5, 192.0.2.8, 192.0.2.81}
In this case, the management table contains three IP addresses.If you want to define a table that pfctl cannot change, use the const key-
word. The following example defines a table for private (RFC 1918) address space. This address space has been well defined for many years, so no one should alter it.
table <private> const {10.0.0.0/8, 172.16.0.0/12, 192.168.0.0/16}
If no rules reference a table, PF drops it. This makes sense for static rules, but if you’re using anchors (discussed later this chapter), you might want to retain the table for when rules reappear. Use the persist keyword to make a table stick around even if it’s not used in a rule.
table <scumbags> persist
Some tables contain enough addresses that you wouldn’t want to list them in your configuration. For convenience, you can populate a table from a file, like this:
table <fullbogons> persist file "/etc/fullbogons.txt"
I have a script that updates the fullbogons.txt file every day. (Bogons are addresses that should never appear in the global Internet routing table.)
The bogons list includes private address space, addresses reserved for experimentation or documentation, addresses not assigned to any network, and addresses assigned to other exotic purposes. Several organizations
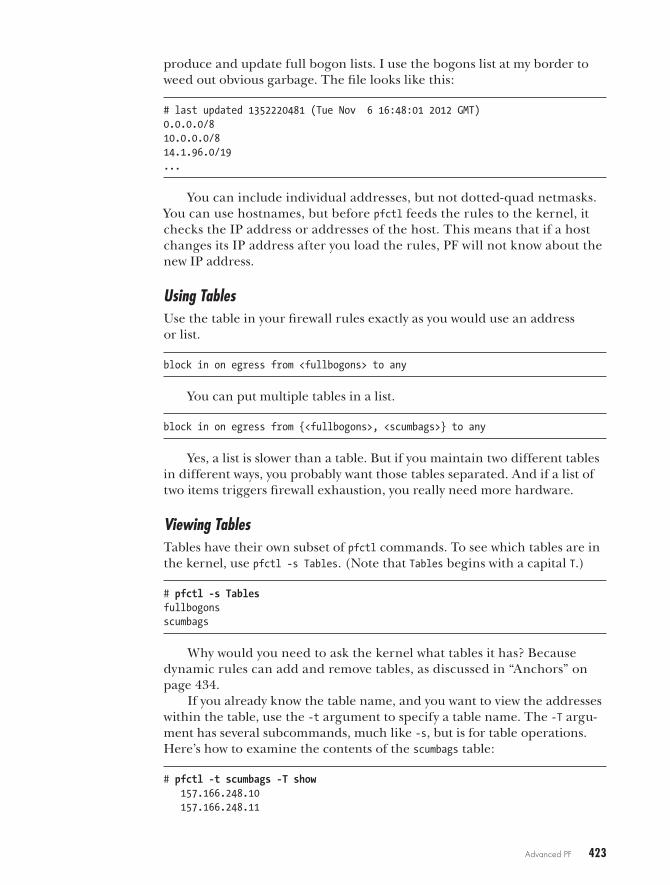
Advanced PF 423
produce and update full bogon lists. I use the bogons list at my border to weed out obvious garbage. The file looks like this:
# last updated 1352220481 (Tue Nov 6 16:48:01 2012 GMT)0.0.0.0/810.0.0.0/814.1.96.0/19...
You can include individual addresses, but not dotted-quad netmasks. You can use hostnames, but before pfctl feeds the rules to the kernel, it checks the IP address or addresses of the host. This means that if a host changes its IP address after you load the rules, PF will not know about the new IP address.
Using TablesUse the table in your firewall rules exactly as you would use an address or list.
block in on egress from <fullbogons> to any
You can put multiple tables in a list.
block in on egress from {<fullbogons>, <scumbags>} to any
Yes, a list is slower than a table. But if you maintain two different tables in different ways, you probably want those tables separated. And if a list of two items triggers firewall exhaustion, you really need more hardware.
Viewing TablesTables have their own subset of pfctl commands. To see which tables are in the kernel, use pfctl -s Tables. (Note that Tables begins with a capital T.)
# pfctl -s Tablesfullbogonsscumbags
Why would you need to ask the kernel what tables it has? Because dynamic rules can add and remove tables, as discussed in “Anchors” on page 434.
If you already know the table name, and you want to view the addresses within the table, use the -t argument to specify a table name. The -T argu-ment has several subcommands, much like -s, but is for table operations. Here’s how to examine the contents of the scumbags table:
# pfctl -t scumbags -T show 157.166.248.10 157.166.248.11
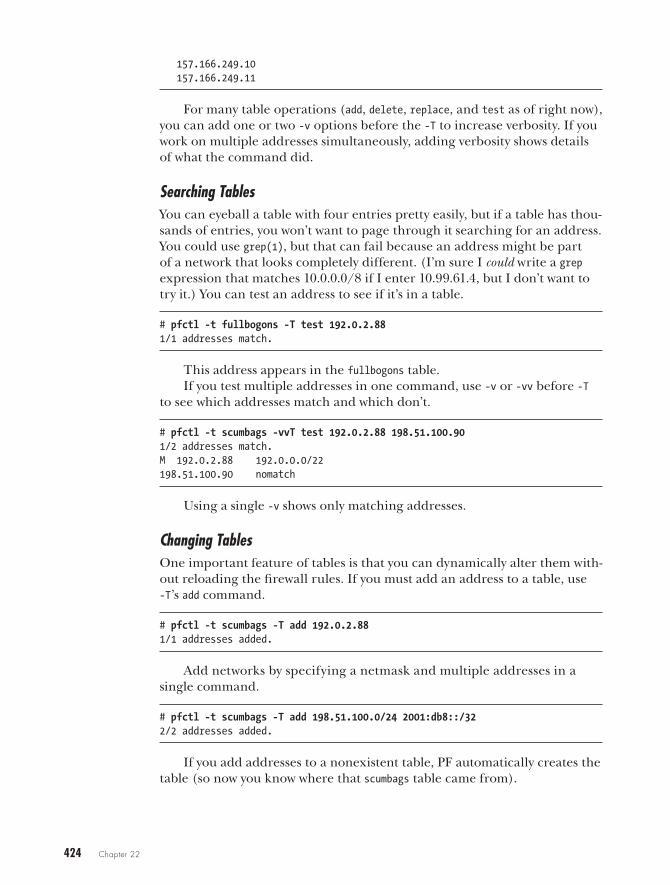
424 Chapter 22
157.166.249.10 157.166.249.11
For many table operations (add, delete, replace, and test as of right now), you can add one or two -v options before the -T to increase verbosity. If you work on multiple addresses simultaneously, adding verbosity shows details of what the command did.
Searching TablesYou can eyeball a table with four entries pretty easily, but if a table has thou-sands of entries, you won’t want to page through it searching for an address. You could use grep(1), but that can fail because an address might be part of a network that looks completely different. (I’m sure I could write a grep expression that matches 10.0.0.0/8 if I enter 10.99.61.4, but I don’t want to try it.) You can test an address to see if it’s in a table.
# pfctl -t fullbogons -T test 192.0.2.881/1 addresses match.
This address appears in the fullbogons table.If you test multiple addresses in one command, use -v or -vv before -T
to see which addresses match and which don’t.
# pfctl -t scumbags -vvT test 192.0.2.88 198.51.100.901/2 addresses match.M 192.0.2.88 192.0.0.0/22198.51.100.90 nomatch
Using a single -v shows only matching addresses.
Changing TablesOne important feature of tables is that you can dynamically alter them with-out reloading the firewall rules. If you must add an address to a table, use -T’s add command.
# pfctl -t scumbags -T add 192.0.2.881/1 addresses added.
Add networks by specifying a netmask and multiple addresses in a single command.
# pfctl -t scumbags -T add 198.51.100.0/24 2001:db8::/322/2 addresses added.
If you add addresses to a nonexistent table, PF automatically creates the table (so now you know where that scumbags table came from).

Advanced PF 425
Add all the addresses in a file to a table with the -f argument.
# pfctl -t scumbags -T add -f scumbags.txt1/1 addresses added.
To remove addresses, use the delete command.
# pfctl -t scumbags -T delete 198.51.100.0/241/1 addresses deleted.
To completely remove all entries from a table, use flush.
# pfctl -t scumbags -T flush6 addresses deleted.
If emptying the table is not enough, and you want to completely remove it from the rules, use kill.
# pfctl -t scumbags -T kill1 table deleted.
Tables and AutomationOpenBSD includes software that can adjust tables algorithmically. In Chapter 16, I mentioned the DHCP server’s ability to assign leased, aban-doned, and changed addresses to tables. You can use PF to assign different rules to each group of addresses.
Assume you have dhcpd(8) add all leased IP addresses to the leased table, abandoned addresses to the abandoned table, and changed addresses to the changed table. Hosts with properly leased addresses can access the network, but hosts with abandoned and changed addresses cannot. Here, interfaces in the office group face the local network:
table <leased> persisttable <abandoned> persisttable <changed> persistpass in on lan from <leased> to anyblock in on lan from {<abandoned>, <changed>} to any
If someone decides to configure an address from the DHCP server as a static address for their computer, they automatically lose access to the rest of the network—problem solved. Other OpenBSD software, such as spamd(8), has similar features.
At first glance, it might seem like this feature is ready for integration with other programs. It’s fairly simple to write a script that parses a log, grabs the IP addresses, and feeds those addresses to a table. Several years ago, I wrote a script to take alerts from the Snort intrusion detection system and automatically block attackers from the network. Without careful and skilled
426 Chapter 22
attention though, Snort generates many false positives. My autoblocking script very effectively created a denial-of-service attack against my own development team.
Be careful with automatically feeding PF tables to block traffic. It’s very easy to harm desirable connectivity.
Using NATOne of the critical functions of a firewall is NAT. Use NAT to provide IPv4 network access to multiple machines but show only one public IPv4 address. Some companies provide Internet access to thousands and thousands of machines via NAT.
NAT is like making soup out of a bone—it stretches what you have so that it covers more. Some protocols won’t work well with NAT. It really con-fuses anyone who is trying to restrict access by IP address. And it can cause nightmares for network forensics and troubleshooters. But NAT is the chosen solution for the IPv4 address shortage.
NAT is not intended as a security mechanism. There are minor security benefits, but they are inadequate against today’s network threats. Relying on NAT for security is chasing 10 boilermakers with a cup of black coffee before staggering out of the pub to drive home. You might get away with it, but only by luck.
IPv6 was designed without NAT, but it was shoehorned in several years later by popular demand. (IPv4 was originally designed without NAT as well, so IPv6 is just following tradition.) Note that an IPv6 address—even a globally unique IPv6 address—does not mean or even imply “reachable from the world.” You can have solid network separation without NAT. Avoiding NAT means using your packet filter to protect your machines, with addi-tional application proxies as needed.
Private NAT AddressesIn theory, you can use any addresses behind your NAT device. If you use some random IP addresses, though, you cannot exchange packets with who-ever uses those IP addresses out in the real world. It’s highly advisable to use some of the IP addresses reserved for private use, generally referred to as “RFC 1918 addresses.” These include the following IP addresses:
• 10.0.0.0/8 (10.0.0.0-10.255.255.255)
• 172.16.0.0/12 (172.16.0.0-172.31.255.255)
• 192.168.0.0/16 (192.168.0.0-192.168.255.255)
You can subnet and rearrange those addresses any way you like, as long as you don’t try to route them on the public Internet.
You can use other IP addresses behind your NAT if you have a really good reason for doing so. For example, RFC 5737 defines IPv4 addresses for use in documentation. Like RFC 1918 addresses, RFC 5737 addresses should never appear on the public Internet. I write documentation, so
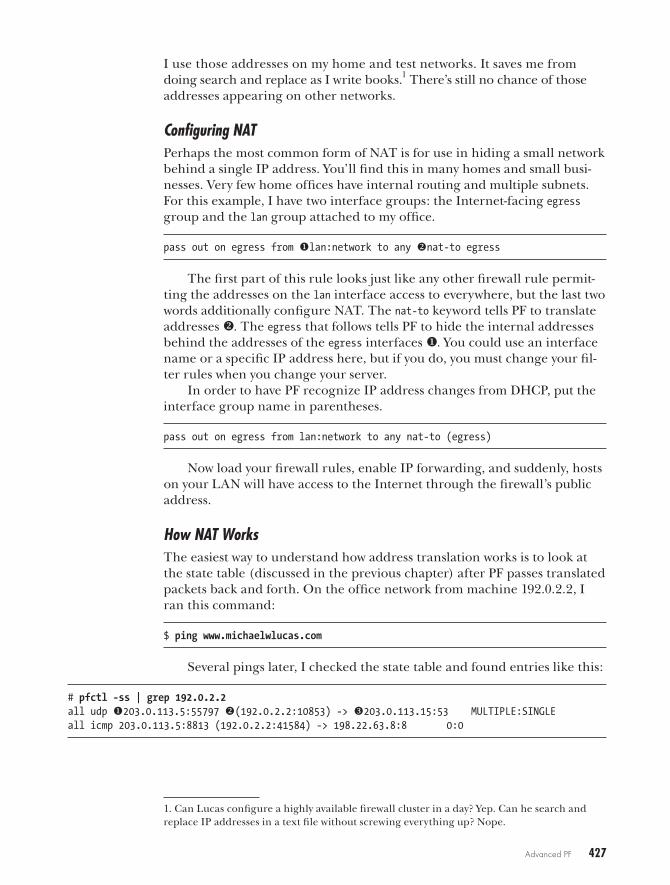
Advanced PF 427
I use those addresses on my home and test networks. It saves me from doing search and replace as I write books.1 There’s still no chance of those addresses appearing on other networks.
Configuring NATPerhaps the most common form of NAT is for use in hiding a small network behind a single IP address. You’ll find this in many homes and small busi-nesses. Very few home offices have internal routing and multiple subnets. For this example, I have two interface groups: the Internet-facing egress group and the lan group attached to my office.
pass out on egress from ulan:network to any vnat-to egress
The first part of this rule looks just like any other firewall rule permit-ting the addresses on the lan interface access to everywhere, but the last two words additionally configure NAT. The nat-to keyword tells PF to translate addresses v. The egress that follows tells PF to hide the internal addresses behind the addresses of the egress interfaces u. You could use an interface name or a specific IP address here, but if you do, you must change your fil-ter rules when you change your server.
In order to have PF recognize IP address changes from DHCP, put the interface group name in parentheses.
pass out on egress from lan:network to any nat-to (egress)
Now load your firewall rules, enable IP forwarding, and suddenly, hosts on your LAN will have access to the Internet through the firewall’s public address.
How NAT WorksThe easiest way to understand how address translation works is to look at the state table (discussed in the previous chapter) after PF passes translated packets back and forth. On the office network from machine 192.0.2.2, I ran this command:
$ ping www.michaelwlucas.com
Several pings later, I checked the state table and found entries like this:
# pfctl -ss | grep 192.0.2.2all udp u203.0.113.5:55797 v(192.0.2.2:10853) -> w203.0.113.15:53 MULTIPLE:SINGLEall icmp 203.0.113.5:8813 (192.0.2.2:41584) -> 198.22.63.8:8 0:0
1. Can Lucas configure a highly available firewall cluster in a day? Yep. Can he search and replace IP addresses in a text file without screwing everything up? Nope.

428 Chapter 22
The first state represents a UDP connection from the firewall’s public address u to the local DNS server w. This state entry includes the client’s private IP address v, as well as the actual ports used by the client, the fire-wall, and the DNS server.
The client initiated this state by sending a request from port 10853 on its IP address to port 53 on the DNS server. When the packet passed through PF, OpenBSD rewrote the packet so that it appeared to come from the address 203.0.113.5 on port 55797 and sent it on to the DNS server. The DNS server sent its response to the firewall’s public IP on port 55797. When the reply arrived, the firewall checked the state table, and found that UDP packets on port 55797 were part of the state for the client. PF rewrote the packet’s destination address and forwarded it to the client.
The second state represents an ICMP connection. The state table encodes the various ICMP codes used for a ping request as port numbers, and forwards responses back to the client based on that information. Otherwise, it’s very similar to the DNS example above it.
In other words, NAT works by lying. PF lies to the client, telling it that it has direct access to the public Internet. It lies to the external servers, giv-ing a false source address and port for client connections. PF uses the state table to track its lies and keep everything consistent. These lies are conve-nient for IPv4 address conservation, but they’re exactly why address transla-tion complicates troubleshooting and intrusion forensics.
Now that you understand the basics of NAT, let’s tell the network even more complicated and interesting lies.
Multiple or Specific Public AddressesYou can use several public IP addresses for address translation. If you use an interface group for the external address in your NAT rule, any addresses in that interface group can become the public address of any connection. If you want to be specific, list particular addresses.
pass out on egress from lan:network to any unat-to 203.0.113.5
I use this configuration when my firewall’s external interface has mul-tiple IP addresses and I want to conceal my desktop clients behind a single address (although I probably would define and use a macro for the external address u).
But how many public addresses do you need? The answer depends on your clients.
Port numbers range from 0 to 65535. The bottom 1024 ports are gener-ally used for services on the localhost. Not all of those ports will be used on the localhost, but a packet filter generally won’t use those ports for trans-lated connections. I’m lazy, so I’ll round off to 64,000 free ports.
Even the most heavily loaded desktop client rarely can use as many as 100 outbound connections simultaneously. Most will use far fewer, but again, I’m lazy, and I want a worst-case scenario, so I’ll call it 100.
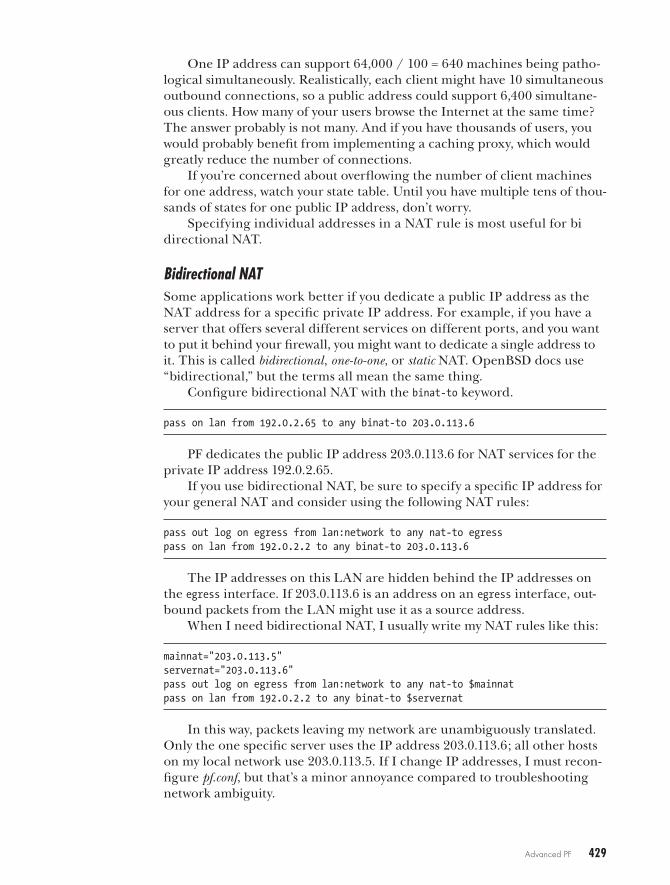
Advanced PF 429
One IP address can support 64,000 / 100 = 640 machines being patho-logical simultaneously. Realistically, each client might have 10 simultaneous outbound connections, so a public address could support 6,400 simultane-ous clients. How many of your users browse the Internet at the same time? The answer probably is not many. And if you have thousands of users, you would probably benefit from implementing a caching proxy, which would greatly reduce the number of connections.
If you’re concerned about overflowing the number of client machines for one address, watch your state table. Until you have multiple tens of thou-sands of states for one public IP address, don’t worry.
Specifying individual addresses in a NAT rule is most useful for bi directional NAT.
Bidirectional NATSome applications work better if you dedicate a public IP address as the NAT address for a specific private IP address. For example, if you have a server that offers several different services on different ports, and you want to put it behind your firewall, you might want to dedicate a single address to it. This is called bidirectional, one-to-one, or static NAT. OpenBSD docs use “bidirectional,” but the terms all mean the same thing.
Configure bidirectional NAT with the binat-to keyword.
pass on lan from 192.0.2.65 to any binat-to 203.0.113.6
PF dedicates the public IP address 203.0.113.6 for NAT services for the private IP address 192.0.2.65.
If you use bidirectional NAT, be sure to specify a specific IP address for your general NAT and consider using the following NAT rules:
pass out log on egress from lan:network to any nat-to egresspass on lan from 192.0.2.2 to any binat-to 203.0.113.6
The IP addresses on this LAN are hidden behind the IP addresses on the egress interface. If 203.0.113.6 is an address on an egress interface, out-bound packets from the LAN might use it as a source address.
When I need bidirectional NAT, I usually write my NAT rules like this:
mainnat="203.0.113.5"servernat="203.0.113.6"pass out log on egress from lan:network to any nat-to $mainnatpass on lan from 192.0.2.2 to any binat-to $servernat
In this way, packets leaving my network are unambiguously translated. Only the one specific server uses the IP address 203.0.113.6; all other hosts on my local network use 203.0.113.5. If I change IP addresses, I must recon-figure pf.conf, but that’s a minor annoyance compared to troubleshooting network ambiguity.

430 Chapter 22
Bidirectional NAT and Security
The use of bidirectional NAT, and allowing the redirection of connections, lets you give people outside your network access to servers behind your fire-wall, and every one of these gaps is a potential security hole. If you allow the world access to your web servers, and an intruder compromises one of your servers, you have a compromised machine inside your firewall. The firewall doesn’t really secure the web servers; it just controls who can try to break into them and limits the available attack vectors.
Packet Filtering, Bidirectional NAT, and Rule Order
When writing packet-filtering rules for bidirectional NAT, the order in which you list rules is important. Consider the following rules:
pass on lan from 192.0.2.2 to any binat-to 203.0.113.6pass in on egress proto tcp from any to 192.0.2.2 port 80
The first rule establishes static NAT for the host 192.0.2.2 on the LAN, hiding it behind the public IP address 203.0.113.6. All is well and good. The second line permits connections to port 80 on the same host, or does it? Packets meant for this server that arrive on the firewall’s egress interface won’t be addressed to 192.0.2.2; they’ll be addressed to the public NAT address, or 203.0.113.6. They won’t match this rule, so they are discarded.
In order to permit connections from the world to the web server behind this firewall, permit packets sent to the proper port on the public address.
pass on lan from 192.0.2.2 to any binat-to 203.0.113.6pass in on egress proto tcp from any to 203.0.113.6 port 80
This translates 192.0.2.2 to the public address 203.0.113.6, and then allows packets with a destination of port 80 on 203.0.113.6 to pass. You’ll see this in the state table, like this:
all tcp 203.0.113.6:80 <- 198.22.63.8:64791 ESTABLISHED:ESTABLISHED
The host 198.22.63.8 has connected to the server’s public IP address on port 80.
Why doesn’t this state entry have the hidden IP address in it? Because this is a bidirectional NAT. PF can send port numbers through unaltered, so it can track a little less information in the state table.
The tricky thing here is that the rule order impacts how you filter, and you must read your filtering rules carefully to see how address translation interacts with packet filtering. I always write my rules so that I do address translation before I filter. I consistently use the public IP address in the filter rules, but sometimes that’s not practical. PF lets you write arbitrarily complex rules mainly because the real world is arbitrarily complex. If you have trouble passing traffic through NAT, read your rules very carefully.
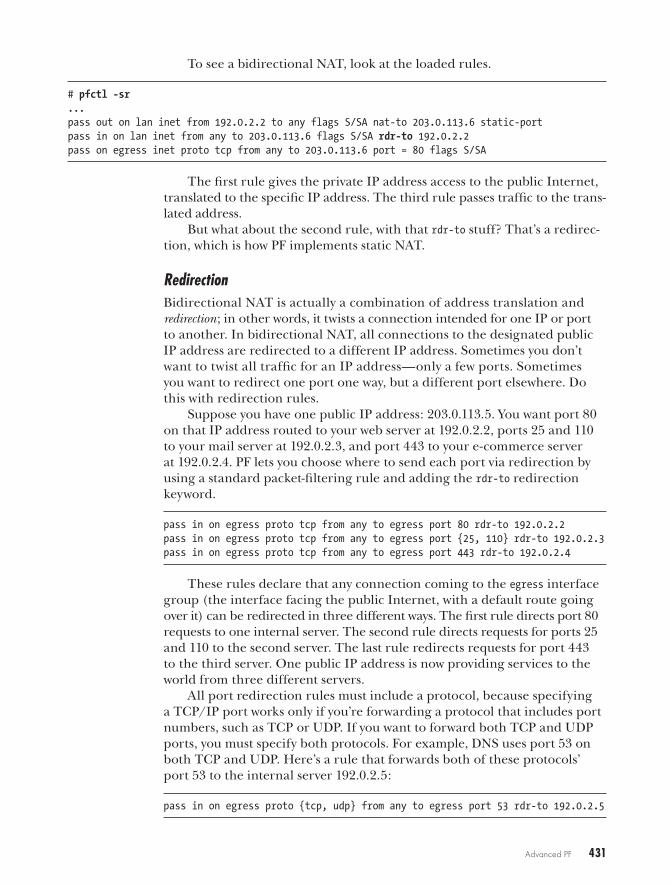
Advanced PF 431
To see a bidirectional NAT, look at the loaded rules.
# pfctl -sr...pass out on lan inet from 192.0.2.2 to any flags S/SA nat-to 203.0.113.6 static-portpass in on lan inet from any to 203.0.113.6 flags S/SA rdr-to 192.0.2.2pass on egress inet proto tcp from any to 203.0.113.6 port = 80 flags S/SA
The first rule gives the private IP address access to the public Internet, translated to the specific IP address. The third rule passes traffic to the trans-lated address.
But what about the second rule, with that rdr-to stuff? That’s a redirec-tion, which is how PF implements static NAT.
RedirectionBidirectional NAT is actually a combination of address translation and re direction; in other words, it twists a connection intended for one IP or port to another. In bidirectional NAT, all connections to the designated public IP address are redirected to a different IP address. Sometimes you don’t want to twist all traffic for an IP address—only a few ports. Sometimes you want to redirect one port one way, but a different port elsewhere. Do this with redirection rules.
Suppose you have one public IP address: 203.0.113.5. You want port 80 on that IP address routed to your web server at 192.0.2.2, ports 25 and 110 to your mail server at 192.0.2.3, and port 443 to your e-commerce server at 192.0.2.4. PF lets you choose where to send each port via redirection by using a standard packet-filtering rule and adding the rdr-to redirection keyword.
pass in on egress proto tcp from any to egress port 80 rdr-to 192.0.2.2pass in on egress proto tcp from any to egress port {25, 110} rdr-to 192.0.2.3pass in on egress proto tcp from any to egress port 443 rdr-to 192.0.2.4
These rules declare that any connection coming to the egress interface group (the interface facing the public Internet, with a default route going over it) can be redirected in three different ways. The first rule directs port 80 requests to one internal server. The second rule directs requests for ports 25 and 110 to the second server. The last rule redirects requests for port 443 to the third server. One public IP address is now providing services to the world from three different servers.
All port redirection rules must include a protocol, because specifying a TCP/IP port works only if you’re forwarding a protocol that includes port numbers, such as TCP or UDP. If you want to forward both TCP and UDP ports, you must specify both protocols. For example, DNS uses port 53 on both TCP and UDP. Here’s a rule that forwards both of these protocols’ port 53 to the internal server 192.0.2.5:
pass in on egress proto {tcp, udp} from any to egress port 53 rdr-to 192.0.2.5
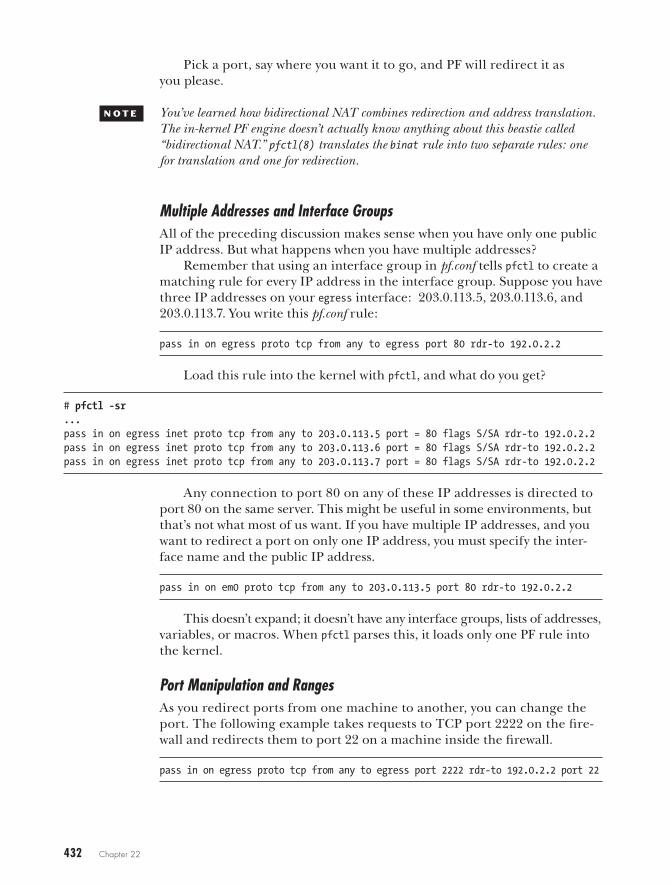
432 Chapter 22
Pick a port, say where you want it to go, and PF will redirect it as you please.
n o t e You’ve learned how bidirectional NAT combines redirection and address translation. The in-kernel PF engine doesn’t actually know anything about this beastie called “bidirectional NAT.” pfctl(8) translates the binat rule into two separate rules: one for translation and one for redirection.
Multiple Addresses and Interface GroupsAll of the preceding discussion makes sense when you have only one public IP address. But what happens when you have multiple addresses?
Remember that using an interface group in pf.conf tells pfctl to create a matching rule for every IP address in the interface group. Suppose you have three IP addresses on your egress interface: 203.0.113.5, 203.0.113.6, and 203.0.113.7. You write this pf.conf rule:
pass in on egress proto tcp from any to egress port 80 rdr-to 192.0.2.2
Load this rule into the kernel with pfctl, and what do you get?
# pfctl -sr...pass in on egress inet proto tcp from any to 203.0.113.5 port = 80 flags S/SA rdr-to 192.0.2.2pass in on egress inet proto tcp from any to 203.0.113.6 port = 80 flags S/SA rdr-to 192.0.2.2pass in on egress inet proto tcp from any to 203.0.113.7 port = 80 flags S/SA rdr-to 192.0.2.2
Any connection to port 80 on any of these IP addresses is directed to port 80 on the same server. This might be useful in some environments, but that’s not what most of us want. If you have multiple IP addresses, and you want to redirect a port on only one IP address, you must specify the inter-face name and the public IP address.
pass in on em0 proto tcp from any to 203.0.113.5 port 80 rdr-to 192.0.2.2
This doesn’t expand; it doesn’t have any interface groups, lists of addresses, variables, or macros. When pfctl parses this, it loads only one PF rule into the kernel.
Port Manipulation and RangesAs you redirect ports from one machine to another, you can change the port. The following example takes requests to TCP port 2222 on the fire-wall and redirects them to port 22 on a machine inside the firewall.
pass in on egress proto tcp from any to egress port 2222 rdr-to 192.0.2.2 port 22
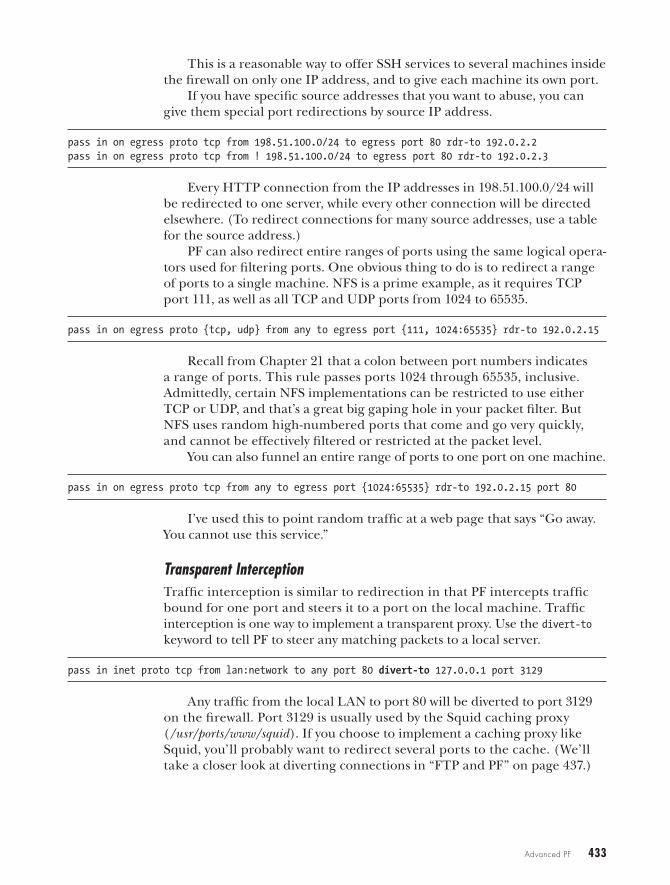
Advanced PF 433
This is a reasonable way to offer SSH services to several machines inside the firewall on only one IP address, and to give each machine its own port.
If you have specific source addresses that you want to abuse, you can give them special port redirections by source IP address.
pass in on egress proto tcp from 198.51.100.0/24 to egress port 80 rdr-to 192.0.2.2pass in on egress proto tcp from ! 198.51.100.0/24 to egress port 80 rdr-to 192.0.2.3
Every HTTP connection from the IP addresses in 198.51.100.0/24 will be redirected to one server, while every other connection will be directed elsewhere. (To redirect connections for many source addresses, use a table for the source address.)
PF can also redirect entire ranges of ports using the same logical opera-tors used for filtering ports. One obvious thing to do is to redirect a range of ports to a single machine. NFS is a prime example, as it requires TCP port 111, as well as all TCP and UDP ports from 1024 to 65535.
pass in on egress proto {tcp, udp} from any to egress port {111, 1024:65535} rdr-to 192.0.2.15
Recall from Chapter 21 that a colon between port numbers indicates a range of ports. This rule passes ports 1024 through 65535, inclusive. Admittedly, certain NFS implementations can be restricted to use either TCP or UDP, and that’s a great big gaping hole in your packet filter. But NFS uses random high-numbered ports that come and go very quickly, and cannot be effectively filtered or restricted at the packet level.
You can also funnel an entire range of ports to one port on one machine.
pass in on egress proto tcp from any to egress port {1024:65535} rdr-to 192.0.2.15 port 80
I’ve used this to point random traffic at a web page that says “Go away. You cannot use this service.”
Transparent InterceptionTraffic interception is similar to redirection in that PF intercepts traffic bound for one port and steers it to a port on the local machine. Traffic interception is one way to implement a transparent proxy. Use the divert-to keyword to tell PF to steer any matching packets to a local server.
pass in inet proto tcp from lan:network to any port 80 divert-to 127.0.0.1 port 3129
Any traffic from the local LAN to port 80 will be diverted to port 3129 on the firewall. Port 3129 is usually used by the Squid caching proxy (/usr/ports/www/squid). If you choose to implement a caching proxy like Squid, you’ll probably want to redirect several ports to the cache. (We’ll take a closer look at diverting connections in “FTP and PF” on page 437.)
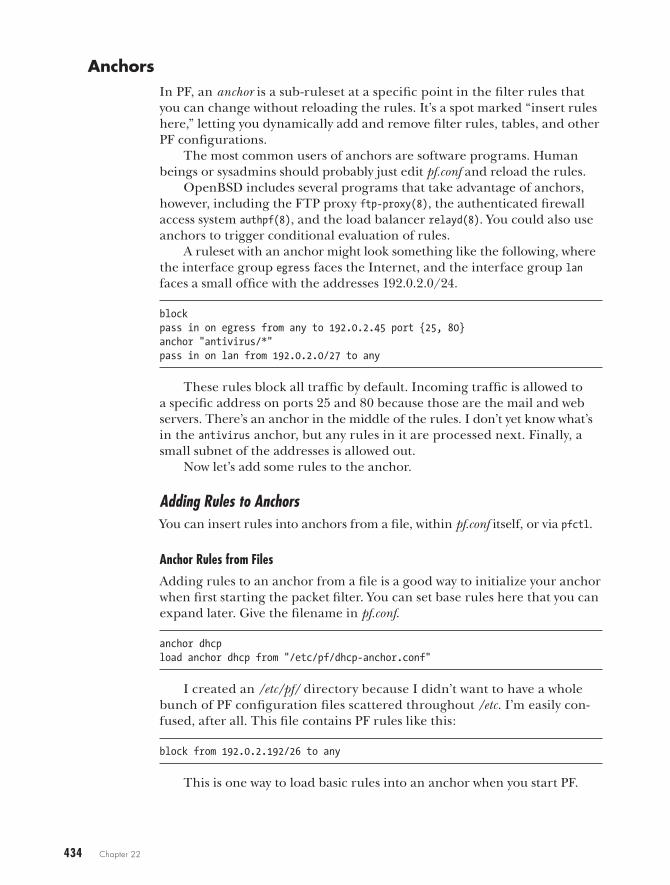
434 Chapter 22
AnchorsIn PF, an anchor is a sub-ruleset at a specific point in the filter rules that you can change without reloading the rules. It’s a spot marked “insert rules here,” letting you dynamically add and remove filter rules, tables, and other PF configurations.
The most common users of anchors are software programs. Human beings or sysadmins should probably just edit pf.conf and reload the rules.
OpenBSD includes several programs that take advantage of anchors, however, including the FTP proxy ftp-proxy(8), the authenticated firewall access system authpf(8), and the load balancer relayd(8). You could also use anchors to trigger conditional evaluation of rules.
A ruleset with an anchor might look something like the following, where the interface group egress faces the Internet, and the interface group lan faces a small office with the addresses 192.0.2.0/24.
blockpass in on egress from any to 192.0.2.45 port {25, 80}anchor "antivirus/*"pass in on lan from 192.0.2.0/27 to any
These rules block all traffic by default. Incoming traffic is allowed to a specific address on ports 25 and 80 because those are the mail and web servers. There’s an anchor in the middle of the rules. I don’t yet know what’s in the antivirus anchor, but any rules in it are processed next. Finally, a small subnet of the addresses is allowed out.
Now let’s add some rules to the anchor.
Adding Rules to AnchorsYou can insert rules into anchors from a file, within pf.conf itself, or via pfctl.
Anchor Rules from Files
Adding rules to an anchor from a file is a good way to initialize your anchor when first starting the packet filter. You can set base rules here that you can expand later. Give the filename in pf.conf.
anchor dhcpload anchor dhcp from "/etc/pf/dhcp-anchor.conf"
I created an /etc/pf/ directory because I didn’t want to have a whole bunch of PF configuration files scattered throughout /etc. I’m easily con-fused, after all. This file contains PF rules like this:
block from 192.0.2.192/26 to any
This is one way to load basic rules into an anchor when you start PF.
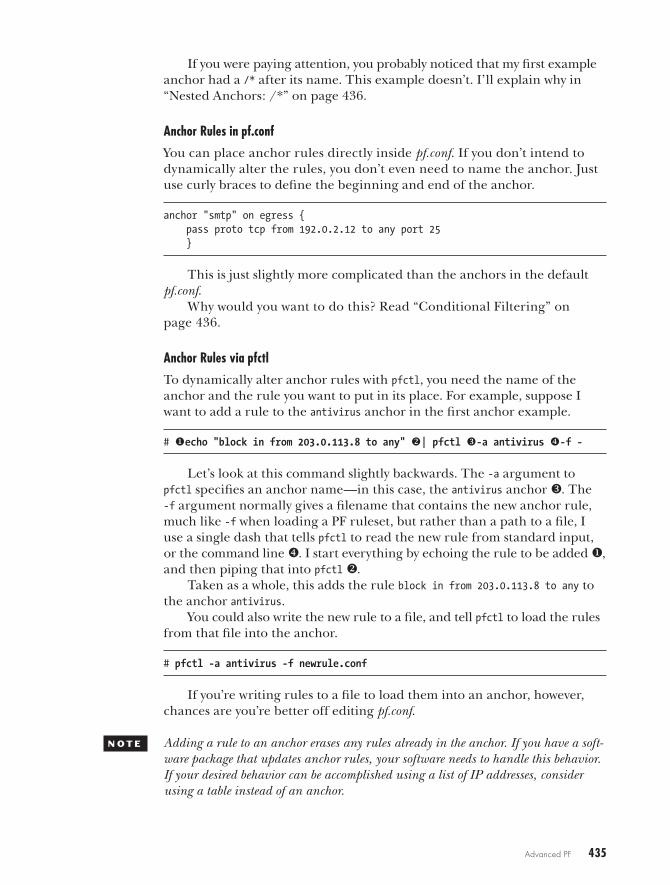
Advanced PF 435
If you were paying attention, you probably noticed that my first example anchor had a /* after its name. This example doesn’t. I’ll explain why in “Nested Anchors: /*” on page 436.
Anchor Rules in pf.conf
You can place anchor rules directly inside pf.conf. If you don’t intend to dynamically alter the rules, you don’t even need to name the anchor. Just use curly braces to define the beginning and end of the anchor.
anchor "smtp" on egress { pass proto tcp from 192.0.2.12 to any port 25 }
This is just slightly more complicated than the anchors in the default pf.conf.
Why would you want to do this? Read “Conditional Filtering” on page 436.
Anchor Rules via pfctl
To dynamically alter anchor rules with pfctl, you need the name of the anchor and the rule you want to put in its place. For example, suppose I want to add a rule to the antivirus anchor in the first anchor example.
# uecho "block in from 203.0.113.8 to any" v| pfctl w-a antivirus x-f -
Let’s look at this command slightly backwards. The -a argument to pfctl specifies an anchor name—in this case, the antivirus anchor w. The -f argument normally gives a filename that contains the new anchor rule, much like -f when loading a PF ruleset, but rather than a path to a file, I use a single dash that tells pfctl to read the new rule from standard input, or the command line x. I start everything by echoing the rule to be added u, and then piping that into pfctl v.
Taken as a whole, this adds the rule block in from 203.0.113.8 to any to the anchor antivirus.
You could also write the new rule to a file, and tell pfctl to load the rules from that file into the anchor.
# pfctl -a antivirus -f newrule.conf
If you’re writing rules to a file to load them into an anchor, however, chances are you’re better off editing pf.conf.
n o t e Adding a rule to an anchor erases any rules already in the anchor. If you have a soft-ware package that updates anchor rules, your software needs to handle this behavior. If your desired behavior can be accomplished using a list of IP addresses, consider using a table instead of an anchor.
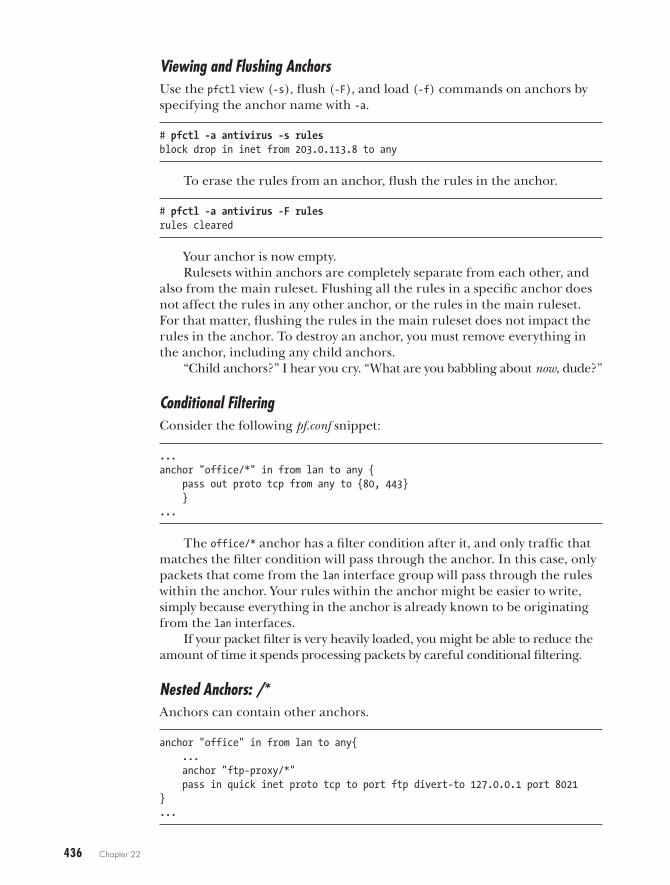
436 Chapter 22
Viewing and Flushing AnchorsUse the pfctl view (-s), flush (-F), and load (-f) commands on anchors by specifying the anchor name with -a.
# pfctl -a antivirus -s rulesblock drop in inet from 203.0.113.8 to any
To erase the rules from an anchor, flush the rules in the anchor.
# pfctl -a antivirus -F rulesrules cleared
Your anchor is now empty.Rulesets within anchors are completely separate from each other, and
also from the main ruleset. Flushing all the rules in a specific anchor does not affect the rules in any other anchor, or the rules in the main ruleset. For that matter, flushing the rules in the main ruleset does not impact the rules in the anchor. To destroy an anchor, you must remove everything in the anchor, including any child anchors.
“Child anchors?” I hear you cry. “What are you babbling about now, dude?”
Conditional FilteringConsider the following pf.conf snippet:
...anchor "office/*" in from lan to any { pass out proto tcp from any to {80, 443} }...
The office/* anchor has a filter condition after it, and only traffic that matches the filter condition will pass through the anchor. In this case, only packets that come from the lan interface group will pass through the rules within the anchor. Your rules within the anchor might be easier to write, simply because everything in the anchor is already known to be originating from the lan interfaces.
If your packet filter is very heavily loaded, you might be able to reduce the amount of time it spends processing packets by careful conditional filtering.
Nested Anchors: /*Anchors can contain other anchors.
anchor "office" in from lan to any{ ... anchor "ftp-proxy/*" pass in quick inet proto tcp to port ftp divert-to 127.0.0.1 port 8021}...
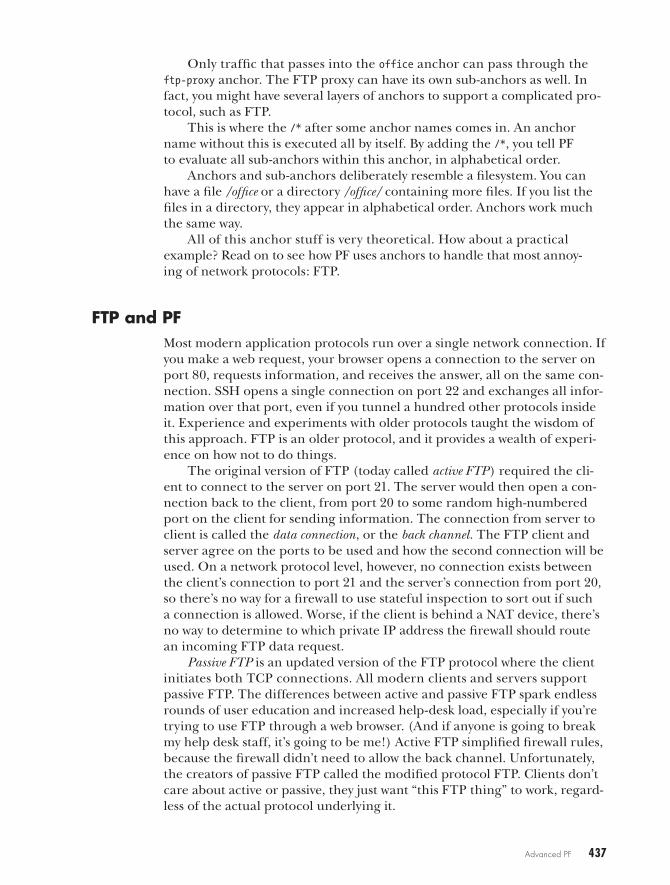
Advanced PF 437
Only traffic that passes into the office anchor can pass through the ftp-proxy anchor. The FTP proxy can have its own sub-anchors as well. In fact, you might have several layers of anchors to support a complicated pro-tocol, such as FTP.
This is where the /* after some anchor names comes in. An anchor name without this is executed all by itself. By adding the /*, you tell PF to evaluate all sub-anchors within this anchor, in alphabetical order.
Anchors and sub-anchors deliberately resemble a filesystem. You can have a file /office or a directory /office/ containing more files. If you list the files in a directory, they appear in alphabetical order. Anchors work much the same way.
All of this anchor stuff is very theoretical. How about a practical example? Read on to see how PF uses anchors to handle that most annoy-ing of network protocols: FTP.
FTP and PFMost modern application protocols run over a single network connection. If you make a web request, your browser opens a connection to the server on port 80, requests information, and receives the answer, all on the same con-nection. SSH opens a single connection on port 22 and exchanges all infor-mation over that port, even if you tunnel a hundred other protocols inside it. Experience and experiments with older protocols taught the wisdom of this approach. FTP is an older protocol, and it provides a wealth of experi-ence on how not to do things.
The original version of FTP (today called active FTP) required the cli-ent to connect to the server on port 21. The server would then open a con-nection back to the client, from port 20 to some random high-numbered port on the client for sending information. The connection from server to client is called the data connection, or the back channel. The FTP client and server agree on the ports to be used and how the second connection will be used. On a network protocol level, however, no connection exists between the client’s connection to port 21 and the server’s connection from port 20, so there’s no way for a firewall to use stateful inspection to sort out if such a connection is allowed. Worse, if the client is behind a NAT device, there’s no way to determine to which private IP address the firewall should route an incoming FTP data request.
Passive FTP is an updated version of the FTP protocol where the client initiates both TCP connections. All modern clients and servers support passive FTP. The differences between active and passive FTP spark endless rounds of user education and increased help-desk load, especially if you’re trying to use FTP through a web browser. (And if anyone is going to break my help desk staff, it’s going to be me!) Active FTP simplified firewall rules, because the firewall didn’t need to allow the back channel. Unfortunately, the creators of passive FTP called the modified protocol FTP. Clients don’t care about active or passive, they just want “this FTP thing” to work, regard-less of the actual protocol underlying it.
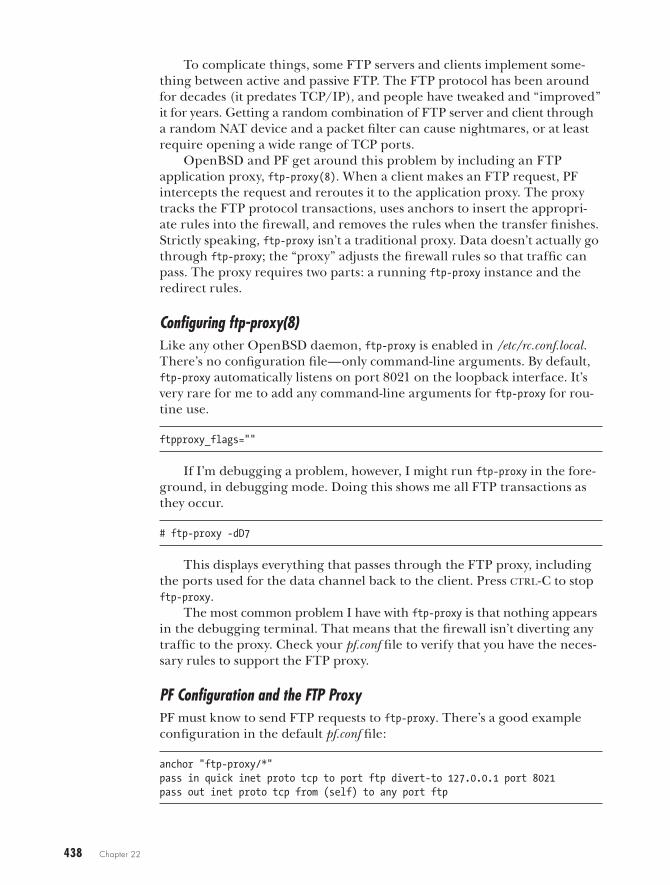
438 Chapter 22
To complicate things, some FTP servers and clients implement some-thing between active and passive FTP. The FTP protocol has been around for decades (it predates TCP/IP), and people have tweaked and “improved” it for years. Getting a random combination of FTP server and client through a random NAT device and a packet filter can cause nightmares, or at least require opening a wide range of TCP ports.
OpenBSD and PF get around this problem by including an FTP application proxy, ftp-proxy(8). When a client makes an FTP request, PF intercepts the request and reroutes it to the application proxy. The proxy tracks the FTP protocol transactions, uses anchors to insert the appropri-ate rules into the firewall, and removes the rules when the transfer finishes. Strictly speaking, ftp-proxy isn’t a traditional proxy. Data doesn’t actually go through ftp-proxy; the “proxy” adjusts the firewall rules so that traffic can pass. The proxy requires two parts: a running ftp-proxy instance and the redirect rules.
Configuring ftp-proxy(8)Like any other OpenBSD daemon, ftp-proxy is enabled in /etc/rc.conf.local. There’s no configuration file—only command-line arguments. By default, ftp-proxy automatically listens on port 8021 on the loopback interface. It’s very rare for me to add any command-line arguments for ftp-proxy for rou-tine use.
ftpproxy_flags=""
If I’m debugging a problem, however, I might run ftp-proxy in the fore-ground, in debugging mode. Doing this shows me all FTP transactions as they occur.
# ftp-proxy -dD7
This displays everything that passes through the FTP proxy, including the ports used for the data channel back to the client. Press ctrl-C to stop ftp-proxy.
The most common problem I have with ftp-proxy is that nothing appears in the debugging terminal. That means that the firewall isn’t diverting any traffic to the proxy. Check your pf.conf file to verify that you have the neces-sary rules to support the FTP proxy.
PF Configuration and the FTP ProxyPF must know to send FTP requests to ftp-proxy. There’s a good example configuration in the default pf.conf file:
anchor "ftp-proxy/*"pass in quick inet proto tcp to port ftp divert-to 127.0.0.1 port 8021pass out inet proto tcp from (self) to any port ftp
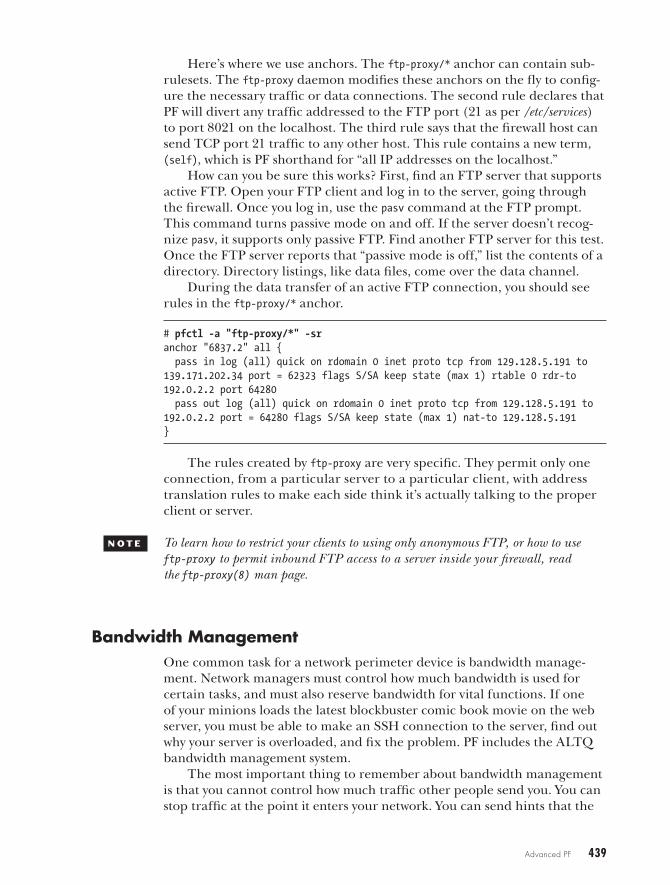
Advanced PF 439
Here’s where we use anchors. The ftp-proxy/* anchor can contain sub-rulesets. The ftp-proxy daemon modifies these anchors on the fly to config-ure the necessary traffic or data connections. The second rule declares that PF will divert any traffic addressed to the FTP port (21 as per /etc/services) to port 8021 on the localhost. The third rule says that the firewall host can send TCP port 21 traffic to any other host. This rule contains a new term, (self), which is PF shorthand for “all IP addresses on the localhost.”
How can you be sure this works? First, find an FTP server that supports active FTP. Open your FTP client and log in to the server, going through the firewall. Once you log in, use the pasv command at the FTP prompt. This command turns passive mode on and off. If the server doesn’t recog-nize pasv, it supports only passive FTP. Find another FTP server for this test. Once the FTP server reports that “passive mode is off,” list the contents of a directory. Directory listings, like data files, come over the data channel.
During the data transfer of an active FTP connection, you should see rules in the ftp-proxy/* anchor.
# pfctl -a "ftp-proxy/*" -sranchor "6837.2" all { pass in log (all) quick on rdomain 0 inet proto tcp from 129.128.5.191 to 139.171.202.34 port = 62323 flags S/SA keep state (max 1) rtable 0 rdr-to 192.0.2.2 port 64280 pass out log (all) quick on rdomain 0 inet proto tcp from 129.128.5.191 to 192.0.2.2 port = 64280 flags S/SA keep state (max 1) nat-to 129.128.5.191}
The rules created by ftp-proxy are very specific. They permit only one connection, from a particular server to a particular client, with address translation rules to make each side think it’s actually talking to the proper client or server.
n o t e To learn how to restrict your clients to using only anonymous FTP, or how to use ftp-proxy to permit inbound FTP access to a server inside your firewall, read the ftp-proxy(8) man page.
Bandwidth ManagementOne common task for a network perimeter device is bandwidth manage-ment. Network managers must control how much bandwidth is used for certain tasks, and must also reserve bandwidth for vital functions. If one of your minions loads the latest blockbuster comic book movie on the web server, you must be able to make an SSH connection to the server, find out why your server is overloaded, and fix the problem. PF includes the ALTQ bandwidth management system.
The most important thing to remember about bandwidth management is that you cannot control how much traffic other people send you. You can stop traffic at the point it enters your network. You can send hints that the
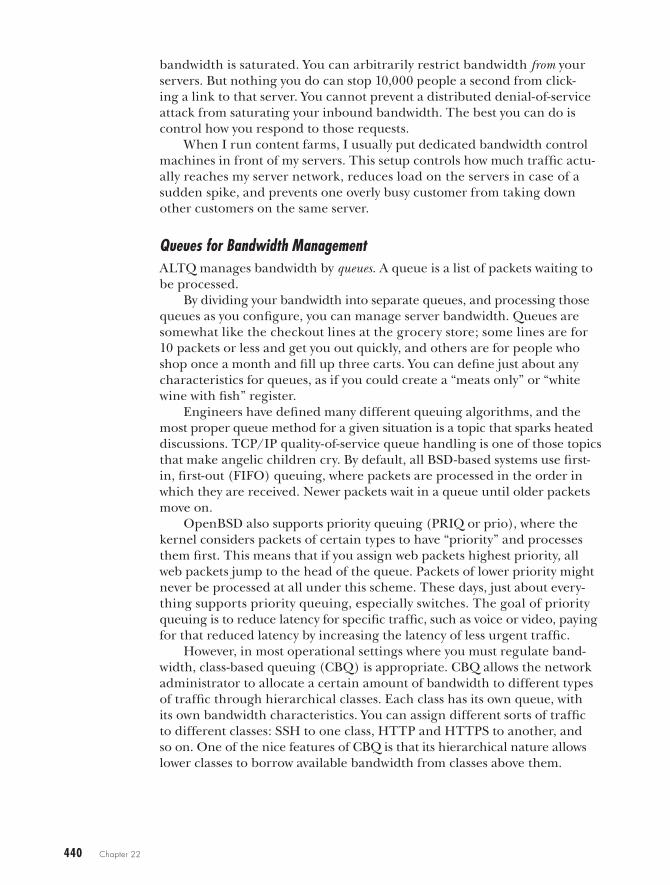
440 Chapter 22
bandwidth is saturated. You can arbitrarily restrict bandwidth from your servers. But nothing you do can stop 10,000 people a second from click-ing a link to that server. You cannot prevent a distributed denial-of-service attack from saturating your inbound bandwidth. The best you can do is control how you respond to those requests.
When I run content farms, I usually put dedicated bandwidth control machines in front of my servers. This setup controls how much traffic actu-ally reaches my server network, reduces load on the servers in case of a sudden spike, and prevents one overly busy customer from taking down other customers on the same server.
Queues for Bandwidth ManagementALTQ manages bandwidth by queues. A queue is a list of packets waiting to be processed.
By dividing your bandwidth into separate queues, and processing those queues as you configure, you can manage server bandwidth. Queues are somewhat like the checkout lines at the grocery store; some lines are for 10 packets or less and get you out quickly, and others are for people who shop once a month and fill up three carts. You can define just about any characteristics for queues, as if you could create a “meats only” or “white wine with fish” register.
Engineers have defined many different queuing algorithms, and the most proper queue method for a given situation is a topic that sparks heated discussions. TCP/IP quality-of-service queue handling is one of those topics that make angelic children cry. By default, all BSD-based systems use first-in, first-out (FIFO) queuing, where packets are processed in the order in which they are received. Newer packets wait in a queue until older packets move on.
OpenBSD also supports priority queuing (PRIQ or prio), where the kernel considers packets of certain types to have “priority” and processes them first. This means that if you assign web packets highest priority, all web packets jump to the head of the queue. Packets of lower priority might never be processed at all under this scheme. These days, just about every-thing supports priority queuing, especially switches. The goal of priority queuing is to reduce latency for specific traffic, such as voice or video, paying for that reduced latency by increasing the latency of less urgent traffic.
However, in most operational settings where you must regulate band-width, class-based queuing (CBQ) is appropriate. CBQ allows the network administrator to allocate a certain amount of bandwidth to different types of traffic through hierarchical classes. Each class has its own queue, with its own bandwidth characteristics. You can assign different sorts of traffic to different classes: SSH to one class, HTTP and HTTPS to another, and so on. One of the nice features of CBQ is that its hierarchical nature allows lower classes to borrow available bandwidth from classes above them.
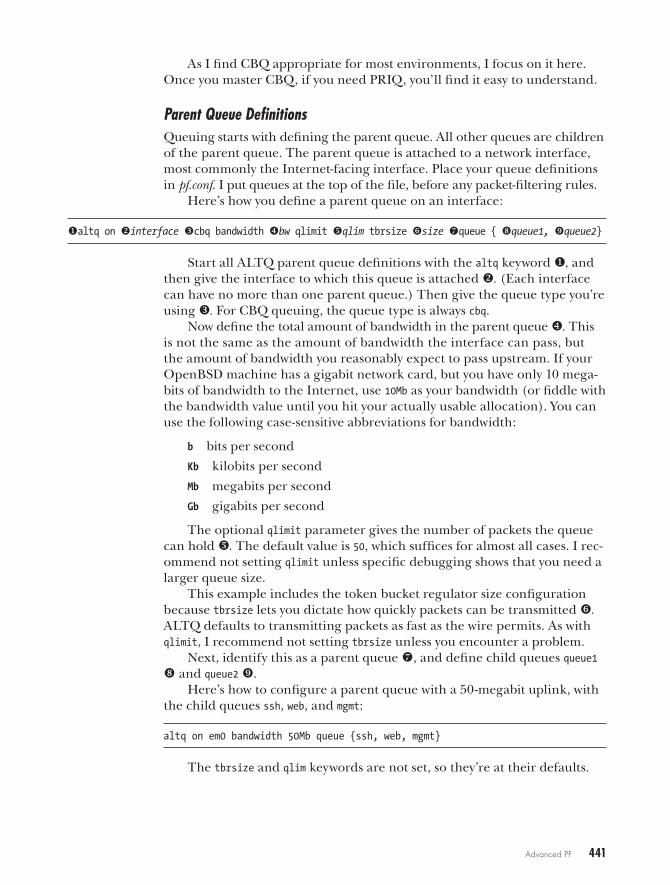
Advanced PF 441
As I find CBQ appropriate for most environments, I focus on it here. Once you master CBQ, if you need PRIQ, you’ll find it easy to understand.
Parent Queue DefinitionsQueuing starts with defining the parent queue. All other queues are children of the parent queue. The parent queue is attached to a network interface, most commonly the Internet-facing interface. Place your queue definitions in pf.conf. I put queues at the top of the file, before any packet-filtering rules.
Here’s how you define a parent queue on an interface:
ualtq on vinterface wcbq bandwidth xbw qlimit yqlim tbrsize zsize {queue { |queue1, }queue2}
Start all ALTQ parent queue definitions with the altq keyword u, and then give the interface to which this queue is attached v. (Each interface can have no more than one parent queue.) Then give the queue type you’re using w. For CBQ queuing, the queue type is always cbq.
Now define the total amount of bandwidth in the parent queue x. This is not the same as the amount of bandwidth the interface can pass, but the amount of bandwidth you reasonably expect to pass upstream. If your OpenBSD machine has a gigabit network card, but you have only 10 mega-bits of bandwidth to the Internet, use 10Mb as your bandwidth (or fiddle with the bandwidth value until you hit your actually usable allocation). You can use the following case-sensitive abbreviations for bandwidth:
b bits per second
Kb kilobits per second
Mb megabits per second
Gb gigabits per second
The optional qlimit parameter gives the number of packets the queue can hold y. The default value is 50, which suffices for almost all cases. I rec-ommend not setting qlimit unless specific debugging shows that you need a larger queue size.
This example includes the token bucket regulator size configuration because tbrsize lets you dictate how quickly packets can be transmitted z. ALTQ defaults to transmitting packets as fast as the wire permits. As with qlimit, I recommend not setting tbrsize unless you encounter a problem.
Next, identify this as a parent queue {, and define child queues queue1 | and queue2 }.
Here’s how to configure a parent queue with a 50-megabit uplink, with the child queues ssh, web, and mgmt:
altq on em0 bandwidth 50Mb queue {ssh, web, mgmt}
The tbrsize and qlim keywords are not set, so they’re at their defaults.
442 Chapter 22
Child Queue DefinitionsOnce you have a parent queue, you can define child queues. Define CBQ queues with the following syntax:
queue uname on vinterface bandwidth wbw [priority xpri] [qlimit yqlim] cbq z(options) {{child_queues}
Each queue needs a name u, defined in the parent queue definition, of 15 characters or less. The names don’t need to be unique—you could use a queue of the same name on a different interface—but I recommend that you use unique names.
The interface is the specific interface to which this queue is applied v. If you don’t define an interface, traffic that passes through any interface can be assigned to this queue.
The bandwidth term uses the same bandwidth labels that the parent queue uses, but the total bandwidth assigned to all child queues cannot exceed the total amount of bandwidth available on the parent queue w. You can also use a percentage value for bandwidth, indicating the percentage of the parent queue that this queue can consume. Bandwidth and queue are the only mandatory terms in a child queue description.
The following defines the ssh child queue and gives it a bandwidth of 2 megabits:
queue ssh bandwidth 2Mb
Here’s a child queue called web, which is allowed to use three-quarters of the parent queue bandwidth:
queue web bandwidth 75%
You can assign a priority to a queue x. CBQ priorities run from 0 to 7, with 7 being the highest. The default priority is 1. A CBQ queue with a higher priority does not run to the exclusion of other queues, but PF processes it more quickly than other queues.
As with a parent queue, you can assign a qlimit to a child queue y, but don’t do this unless you have a specific problem that can be solved with this value.
You can assign options to a CBQ child queue z. We’ll look at these options in the next section.
Finally, child queues can have their own children. Define a queue’s chil-dren in the queue {. You’ll see an example of this in “A CBQ Ruleset” on page 443.
Queue OptionsModify how a child queue processes packets by assigning options to a queue. Options let you decide how the queue should respond to a variety of net-work conditions and bandwidth availability.
Advanced PF 443
Default
Every parent queue must have one and only one default child. If a packet crossing a queued interface is assigned to no other queue, it is assigned to the default queue.
Random Early Detection
Random early detection (RED) is a method for handling packet loss when a queue starts to fill up. As the queue fills up, more and more packets are dropped. RED randomly chooses packets to drop. The net effect is that short transfers, such as HTTP requests and interactive SSH sessions, respond more quickly, while large data transfers become slower.
TCP clients and servers react to dropped packets by reducing their throughput. UDP, ICMP, and other protocols don’t have any built-in reac-tion to packet loss. Using RED on queues expected to carry TCP is sensible, but not on queues for other protocols.
Explicit Congestion Notification
Explicit Congestion Notification (ECN) is a modification to RED that sets flags in the packet rather than dropping the packet. If a device recognizes the ECN flag, it will reduce transmission rates.
Not all platforms understand ECN, however, and many that can recog-nize ECN disable it by default. Microsoft’s Windows Vista and newer, Apple OS X, FreeBSD, and OpenBSD can support ECN, but disable it by default. Newer Linux versions support ECN if the other host requests it. I have suc-cessfully used ECN, in corporate environments where I could make the support guys enable ECN on the desktops.
Unless you know the operating systems in use and can control their set-tings, stick with standard RED.
borrow
The borrow option is available only in CBQ. A queue with borrow set may borrow bandwidth from its parent queue, if the bandwidth is available. For example, you might have a queue that reserves 20 percent of your bandwidth for VoIP. If you don’t have that much VoIP traffic at any particular moment, the parent will have excess bandwidth. Other queues could borrow band-width from that allocation. When your VoIP traffic spikes, however, PF revokes the bandwidth loan, and the VoIP traffic gets what’s reserved for it.
Use the borrow option on the queues that you want to permit to borrow bandwidth, not on the queues whose bandwidth might be borrowed.
A CBQ RulesetBefore configuring queues, figure out how you want to divide your band-width. While you could use bits per second to manage bandwidth, for most of us, percentages are easier to deal with. Here’s how you might divide Internet bandwidth for a company with a 10-megabit link. Start by making
444 Chapter 22
a list of your desired bandwidth reservations, and then assign a name to each category, like this:
• 5 percent for SSH (ssh)
• 50 percent for inbound traffic to our e-commerce server, with RED (web)
• 5 percent for inbound VoIP, high priority (voip)
• 40 percent for other traffic, including DNS, SMTP, and so on
All of these queues can borrow from the parent queue. Start by defining the parent queue.
altq on em0 cbq bandwidth 10Mb queue {ssh, web, voip, other}
This parent queue is attached to interface em0, and has 10 megabits of bandwidth and four child queues. Leave all the other options alone.
Now define the first child queue.
queue ssh bandwidth 5% cbq (borrow)
Start with the queue name and the bandwidth percentage you’ve chosen. This percentage is calculated from the parent of this particular queue, so it’s about 5 percent of 10 megabits, or 500 kilobits per second. That should be plenty to log in remotely and fix any problems. Adding the borrow option lets you use more bandwidth for SSH if it’s available.
Building from this example, you can define the other child queues.
queue web bandwidth 50% cbq (borrow, red)queue voip bandwidth 5% cbq (borrow)queue other bandwidth 5% cbq (borrow, default)
The other queue is your default. Any traffic that isn’t assigned its own queue is assigned to this queue.
Assigning Traffic to QueuesAssign traffic to a queue with the queue keyword at the end of a packet-filtering rule. To allow all SSH (port 22) traffic into the network and assign it to the queue named ssh, use a rule like this:
pass in on egress proto tcp from any to lan:network port 22 queue ssh
Using the match KeywordSometimes you must classify traffic without filtering it. The previous example let you assign inbound SSH traffic to the ssh queue, but what if you want to capture outbound SSH as well? Consider the following rule snippet:
pass in on egress proto tcp from <customers> to <sshservers> port 22pass out on egress from lan:network to any
Advanced PF 445
This allows hosts in the customers table to connect to hosts in the sshservers table on port 22. The second rule allows the local network to send any traffic, or any protocol. Some of that outbound traffic will be SSH traffic. Should you write a separate rule just for queuing traffic?
This is where the match keyword comes in. Using match, you can change how PF classifies traffic without changing how it filters traffic. Here’s how to send all TCP port 22 traffic to the ssh queue, without changing any filtering characteristics:
match proto tcp from any to any port 22 queue sshpass in on egress proto tcp from <customers> to <sshservers> port 22pass out on egress from lan:network to any
The first rule matches all traffic on TCP port 22 and assigns it to the ssh queue. The rules that follow control who can send and receive SSH connections.
Viewing QueuesTo view the queues currently in the packet filter, run pfctl -s queues.
# pfctl -sqqueue root_em0 on em0 bandwidth 10Mb priority 0 cbq( wrr root ) {ssh, web, voip, other}queue ssh on em0 bandwidth 500Kb cbq( borrow )queue web on em0 bandwidth 5Mb cbq( red borrow )queue voip on em0 bandwidth 500Kb priority 7 cbq( borrow )queue other on em0 bandwidth 500Kb cbq( borrow default )
Adding -v gives you a brief snapshot of the state of each queue. For a con-stantly updating view of all queues, including how much traffic is borrowed from each, what gets dropped, and so on, use -vvsq or systat queues instead.
PF EdgesThis section covers a couple tidbits of PF configuration that don’t quite fit anywhere else: include files and the quick keyword.
Using Include FilesSometimes splitting a configuration file into multiple pieces simplifies your work. Do this with an include statement in pf.conf.
include "/etc/pf/management-addresses"
I do this when I need to manage several PF machines with unique configurations, but certain pieces are identical. The management-addresses file defines a table listing all hosts and networks that can connect via SSH, make SNMP queries, as so on. When one of those addresses change, I copy this file to all of my PF hosts and reload the packet-filtering rules.
446 Chapter 22
Skipping Matches with quickPF processes packet-filtering rules in order, and the last matching rule wins, which can complicate designing a ruleset that supports exactly the access you desire. If you find yourself stuck, use the quick keyword to abort process-ing the rest of the rules for matching packets. Here’s an example:
...pass in quick proto tcp from any to $sshserver port 22...block in proto tcp from any to any port 22...
The first rule permits traffic to the host(s) in the macro $sshserver on port 22. The second rule drops all TCP port 22 traffic. The quick keyword in the first rule says, “When a packet matches this rule, follow this rule and do not process any more rules.” In this case, the SSH connection will be permitted.
The quick keyword is especially useful in anchors, where rules added for a special purpose by an automated process like ftp-proxy(8) might be over-ridden by later rules meant for unrelated purposes.
The purist in me wants to insist that all static rulesets be written with-out using quick. While strictly speaking that’s true, sometimes avoiding quick creates rulesets that are difficult to interpret. A ruleset you can easily understand is more secure than something baroque but syntactically pure.
Logging PFTell PF to log packets with the log keyword in a rule.
pass out log on egress from lan:network to any
Without additional setup, however, those logs just go to the PF log device pflog0. To successfully log PF messages, you must run the packet filter logger pflogd(8). If you start PF at boot, pflogd is automatically started with it. Otherwise, you must start it on the command line.
One thing to remember is that if you’re using stateful inspection, only the first packet that triggers a rule is logged. Other packets that are part of the same state are not logged. To log all packets in a stateful connection, give the all modifier to the log keyword, but beware because this can gener-ate very large logs.
pass out log (all) on egress from lan:network to any
Logging is especially useful when troubleshooting connection prob-lems. If packets are being blocked when you think they should be passed, add logging to your block statements to see which rule is stopping the traffic.
I don’t recommend logging everything, especially because logs can grow quite large. Log selectively. For example, perhaps you don’t care which

Advanced PF 447
websites your local users visit, but do want to know about incoming traffic. And be sure to exclude your firewall logging traffic from your packet filter logs, or you’ll quickly find that PF is logging the transmission of the logs of the log transmissions, which are logs of transmitting the logs, from when you transmitted the logs . . . yadda yadda yadda.
Reading PF LogsPF logs in the tcpdump(8) binary format. Use tcpdump to examine the data. To just dump everything in the log, tell tcpdump to read the log file.
# tcpdump -r /var/log/pflog
This can generate a huge amount of output. See “Filtering tcpdump” on page 447 for some hints.
Real-Time Log AccessThe entries in /var/log/pflog are not added in real time; pflogd(8) buffers its records until writing a log message is worthwhile. To see PF logs in real time, attach tcpdump to the pflog0 interface with the -i flag.
# tcpdump -i pflog0
Depending on how much traffic you’re logging, this might also produce an overwhelming amount of information. You must filter tcpdump to make it useful. Or if you pretend you missed my earlier warning about log sizes, you can devise a one-liner that uses logger to send your PF logs as text to syslog.
Filtering tcpdumpEvery system administrator should know how to use tcpdump. Here’s your motivation for doing so.
When troubleshooting a problem with a particular connection, you probably don’t care about every packet passing through the filter. You care about traffic to or from a particular host. Specify an IP address with the ip or ip6 expression.
# tcpdump -i pflog0 ip host 192.0.2.2
This will display only traffic to and from this particular host.To narrow things further and see only the traffic between two hosts,
combine the hosts with the and keyword.
# tcpdump -i pflog0 ip host 192.0.2.2 and ip host 203.0.113.88
Maybe you’re interested in only a specific port, on a specific address. Use the tcp or udp keyword and the port number to filter on that.
# tcpdump -i pflog0 ip host 139.171.199.254 and tcp port 80
448 Chapter 22
Read the tcpdump(8) man page for an exhaustive list of innumerable other filtering options.
If using tcpdump doesn’t appeal to you, consider the pflow(4) NetFlow exporter. Network flow is a complicated topic, but the book Network Flow Analysis (No Starch Press, 2010) might help you.
Ruleset TracingSometimes, knowing whether a packet passed or failed isn’t enough. You know that a packet was blocked, but not why. You want to watch the packet pass through the rules and see which rules affect it.
Suppose an internal host 192.0.2.226 cannot connect to the external host 203.0.113.34. The log would show that the packet is blocked, but not why. You can specifically have PF log matching rules. Add a line like this to the top of your pf.conf file:
match log (matches) from 192.0.2.226 to 203.0.113.34
This is a standard packet-filtering rule. You could use an individual IP address, a port number, or any other legal packet filter terms. Reload your packet-filtering rules.
Turn on tcpdump, and filter based on one of the IP addresses in your match statement. If you’re using NAT, filter on the IP address that doesn’t change.
# tcpdump -n -e -ttt -i pflog0 ip host 203.0.113.34Dec 17 18:05:07.773703 rule 0/(match) match out on fxp0: 192.0.2.226.24916 > 203.0.113.34.22: S 1730871963:1730871963(0) win 16384 <mss 1460,nop,nop, sackOK,nop,wscale 3,nop,nop,timestamp 597858150[|tcp]> (DF)Dec 17 18:05:07.773708 rule 2/(match) block out on fxp0: 192.0.2.226.24916 > 203.0.113.34.22: S 1730871963:1730871963(0) win 16384 <mss 1460,nop,nop, sackOK,nop,wscale 3,nop,nop,timestamp 597858150[|tcp]> (DF)Dec 17 18:05:07.773712 rule 5/(match) pass out on fxp0: 192.0.2.226.24916 > 203.0.113.34.22: S 1730871963:1730871963(0) win 16384 <mss 1460,nop,nop, sackOK,nop,wscale 3,nop,nop,timestamp 597858150[|tcp]> (DF)
While I won’t go through all the annoying details of reading tcpdump output, you can see that PF logs the rule numbers that this data connection matches, and whether the rule passes or blocks the connection. If the con-nection involves NAT, you’ll see the actual and translated IP addresses.
At this point, you know enough about PF to protect a small network. If you need more, definitely check out The Book of PF, 2nd edition (No Starch Press, 2010).
Now let’s look at some of the more exotic edges of OpenBSD.

23C u s t o m i z i n g o p e n B s D
Customize installs with files and DHCP, then run without disk.
This chapter covers different ways to use OpenBSD to customize itself, as well as
how to install OpenBSD in nonstandard situations and debug problems with your sys-
tem. The first task we’ll address is diskless installation. Diskless systems are usually used to install OpenBSDwithout attaching any installation media, but they can also be used to run a system without a hard drive. Next, we’ll create a USB flash drive for use as OpenBSD installation media. Finally, we’ll cover various ways to customize the OpenBSD installation and upgrade processes.
All of these tasks assume that you already have an OpenBSD machine running the version you want to customize. You can accomplish some of these tasks using a virtual machine, as long as the virtual machine software has the necessary support. Because virtualization is such a common choice, let’s tackle it first.
450 Chapter 23
Virtualizing OpenBSDThe OpenBSD developers are pretty clear on virtualization. OpenBSD is written for real hardware. Virtual hardware is not real hardware. While it can be very similar, it’s not exactly the same.
This approach has a number of implications, the most problematic of which is that not all virtualization software can run OpenBSD. As I write this, Oracle’s VirtualBox can’t cleanly run either i386 or amd64 OpenBSD. (Some people report being able to boot some versions of VirtualBox and/or OpenBSD, but OpenBSD software crashes all over the place.) This is not an OpenBSD bug. VirtualBox doesn’t sufficiently emulate real hardware.
That said, OpenBSD does run well on some virtual machines. VMware works well enough that OpenBSD includes specific drivers for VMware inte-gration, including a VMware Tools driver in the kernel. KVM virtualization also works, although KVM requires some tweaks depending on the exact combination of KVM and OpenBSD you’re using. Microsoft’s virtualiza-tion mostly works, although Virtual PC has some commercially motivated limitations.
The main problem with virtualization is that a compromise of the virtu-alization platform automatically gives an intruder hardware-level access to all virtual machines, and OpenBSD cannot possibly secure you against that kind of attack. In fact, no operating system can. And it does you no good to run your database on OpenBSD when any script kiddie can compromise the underlying virtualization server.
In my experience, OpenBSD virtual machines are excellent for experi-mentation and reference. I used them to document the installation process for this book, and I always test software configurations on virtual machines before rolling them out to production. (The real benefit of virtualization might be that there’s no longer any excuse for not testing changes.) But when I want a server that’s actually secure, I put OpenBSD on real hardware.
n o t e If you want to run virtual machines on OpenBSD, you can find qemu, bochs, dosbox, and other packages in the packages collection. Check /usr/ports/emulators for other options.
Diskless InstallationBooting a blank system into the OpenBSD installer without using local media can save you time and energy. A lot of modern hardware doesn’t come with CD or floppy drives. Of course, you could temporarily add a CD drive, but if you have a whole bunch of OpenBSD machines to install, that’s just an annoyance.
You can also use network booting to boot OpenBSD on hardware that lacks an installed operating system, or with a different operating system that you plan to overwrite. This process is called pxebooting, or diskless, oper-ation. Diskless systems can have disks—they just don’t use them to boot the operating system.
Customizing OpenBSD 451
If you’ve never worked with diskless systems before, your first attempts will probably give you a headache. Setting up your first diskless environ-ment can be tricky, and will teach you all sorts of things you didn’t know about your operating system and hardware. But test everything along the way, read the error messages carefully, and soon you’ll wonder why you thought this was hard.
n o t e I’ll cover diskless installations on amd64 and i386 hardware. Other platforms have different requirements that may be very different. Read the diskless(8) man page for your particular architecture to get an overview of your platform.
Diskless systems work because a computer doesn’t need a hard disk to run. It needs an operating system. The easiest way to store a computer’s operating system is on the local hard drive, but a sufficiently smart network card can use information provided by DHCP to find an initial boot loader.
All amd64 and modern i386 hardware use Intel’s Preboot Execution Environment (PXE, pronounced “pixie”). The DHCP server tells the net-work card the name of a file and the IP address where the file can be found, and the server fetches the file via TFTP. This file is usually called pxeboot, but pxeboot files can vary widely among operating systems. A pxeboot file for OpenBSD probably won’t boot a FreeBSD system, let alone anything from Microsoft. It’s specific to each operating system.
Once the computer has loaded pxeboot, it goes back to the TFTP server to look for the appropriate kernel. An OpenBSD pxeboot looks for a file called bsd, assumes that it’s a kernel, loads the kernel into memory, and boots it. To install OpenBSD, you’ll load the install kernel file bsd.rd instead, which you can do automatically.
Diskless HardwareOpenBSD systems installed over diskless systems must have enough smarts to find their boot loader and operating system over the network or they won’t boot. Any machine built in the past several years uses PXE.
You’ve probably seen a computer try to boot from the network more than once, and for most people, those BIOS messages are just an annoyance that they keep forgetting to disable. For diskless installation, you need to make sure that feature is on.
To enable PXE, boot the hardware and go into the BIOS setup. Some-where in the BIOS, you should find an option to set the device boot order. If the machine supports PXE, one of those options will be to boot over a net-work. Enable that option and see if it works. While you’re in the BIOS, make a note of the MAC address of your network card. Your DHCP server will need it. If your BIOS uses the Unified Extensible Firmware Interface (UEFI) by default, disable that.
Save your changes and exit. Your hardware should now be prepared. Let’s ready the server.
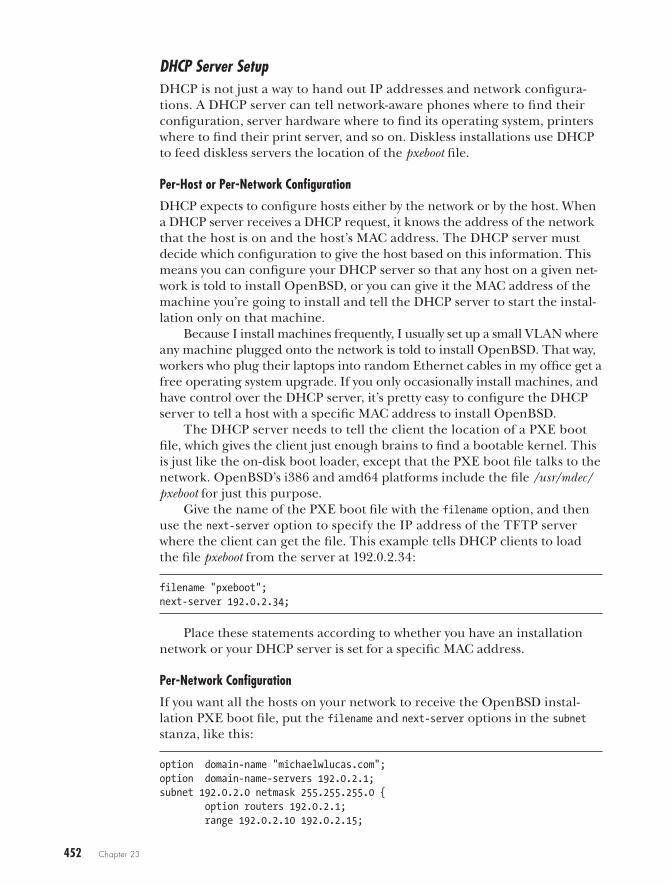
452 Chapter 23
DHCP Server SetupDHCP is not just a way to hand out IP addresses and network configura-tions. A DHCP server can tell network-aware phones where to find their configuration, server hardware where to find its operating system, printers where to find their print server, and so on. Diskless installations use DHCP to feed diskless servers the location of the pxeboot file.
Per-Host or Per-Network Configuration
DHCP expects to configure hosts either by the network or by the host. When a DHCP server receives a DHCP request, it knows the address of the network that the host is on and the host’s MAC address. The DHCP server must decide which configuration to give the host based on this information. This means you can configure your DHCP server so that any host on a given net-work is told to install OpenBSD, or you can give it the MAC address of the machine you’re going to install and tell the DHCP server to start the instal-lation only on that machine.
Because I install machines frequently, I usually set up a small VLAN where any machine plugged onto the network is told to install OpenBSD. That way, workers who plug their laptops into random Ethernet cables in my office get a free operating system upgrade. If you only occasionally install machines, and have control over the DHCP server, it’s pretty easy to configure the DHCP server to tell a host with a specific MAC address to install OpenBSD.
The DHCP server needs to tell the client the location of a PXE boot file, which gives the client just enough brains to find a bootable kernel. This is just like the on-disk boot loader, except that the PXE boot file talks to the network. OpenBSD’s i386 and amd64 platforms include the file /usr/mdec/pxeboot for just this purpose.
Give the name of the PXE boot file with the filename option, and then use the next-server option to specify the IP address of the TFTP server where the client can get the file. This example tells DHCP clients to load the file pxeboot from the server at 192.0.2.34:
filename "pxeboot";next-server 192.0.2.34;
Place these statements according to whether you have an installation network or your DHCP server is set for a specific MAC address.
Per-Network Configuration
If you want all the hosts on your network to receive the OpenBSD instal-lation PXE boot file, put the filename and next-server options in the subnet stanza, like this:
option domain-name "michaelwlucas.com";option domain-name-servers 192.0.2.1;subnet 192.0.2.0 netmask 255.255.255.0 { option routers 192.0.2.1; range 192.0.2.10 192.0.2.15;
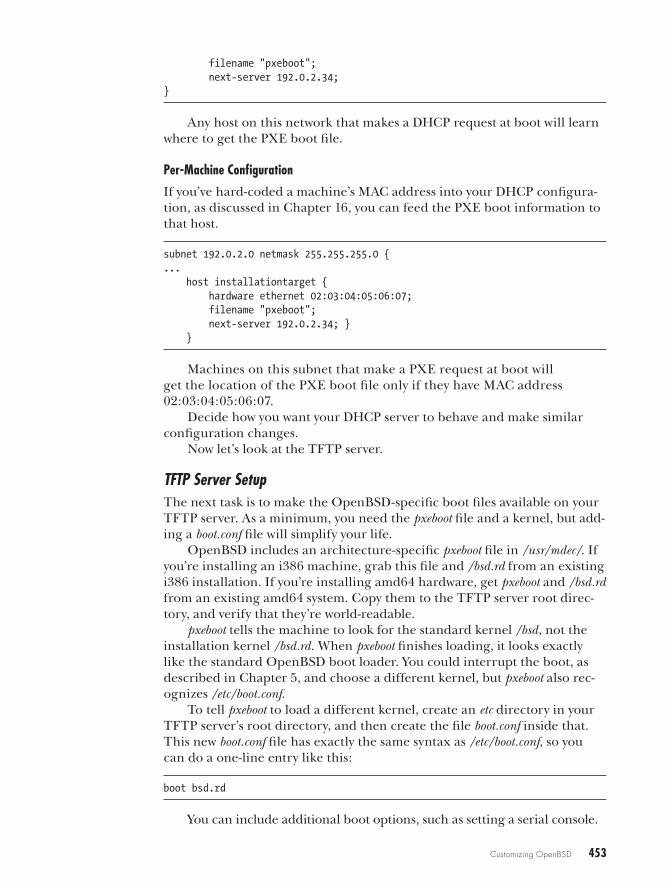
Customizing OpenBSD 453
filename "pxeboot"; next-server 192.0.2.34;}
Any host on this network that makes a DHCP request at boot will learn where to get the PXE boot file.
Per-Machine Configuration
If you’ve hard-coded a machine’s MAC address into your DHCP configura-tion, as discussed in Chapter 16, you can feed the PXE boot information to that host.
subnet 192.0.2.0 netmask 255.255.255.0 {... host installationtarget { hardware ethernet 02:03:04:05:06:07; filename "pxeboot"; next-server 192.0.2.34; } }
Machines on this subnet that make a PXE request at boot will get the location of the PXE boot file only if they have MAC address 02:03:04:05:06:07.
Decide how you want your DHCP server to behave and make similar configuration changes.
Now let’s look at the TFTP server.
TFTP Server SetupThe next task is to make the OpenBSD-specific boot files available on your TFTP server. As a minimum, you need the pxeboot file and a kernel, but add-ing a boot.conf file will simplify your life.
OpenBSD includes an architecture-specific pxeboot file in /usr/mdec/. If you’re installing an i386 machine, grab this file and /bsd.rd from an existing i386 installation. If you’re installing amd64 hardware, get pxeboot and /bsd.rd from an existing amd64 system. Copy them to the TFTP server root direc-tory, and verify that they’re world-readable.
pxeboot tells the machine to look for the standard kernel /bsd, not the installation kernel /bsd.rd. When pxeboot finishes loading, it looks exactly like the standard OpenBSD boot loader. You could interrupt the boot, as described in Chapter 5, and choose a different kernel, but pxeboot also rec-ognizes /etc/boot.conf.
To tell pxeboot to load a different kernel, create an etc directory in your TFTP server’s root directory, and then create the file boot.conf inside that. This new boot.conf file has exactly the same syntax as /etc/boot.conf, so you can do a one-line entry like this:
boot bsd.rd
You can include additional boot options, such as setting a serial console.
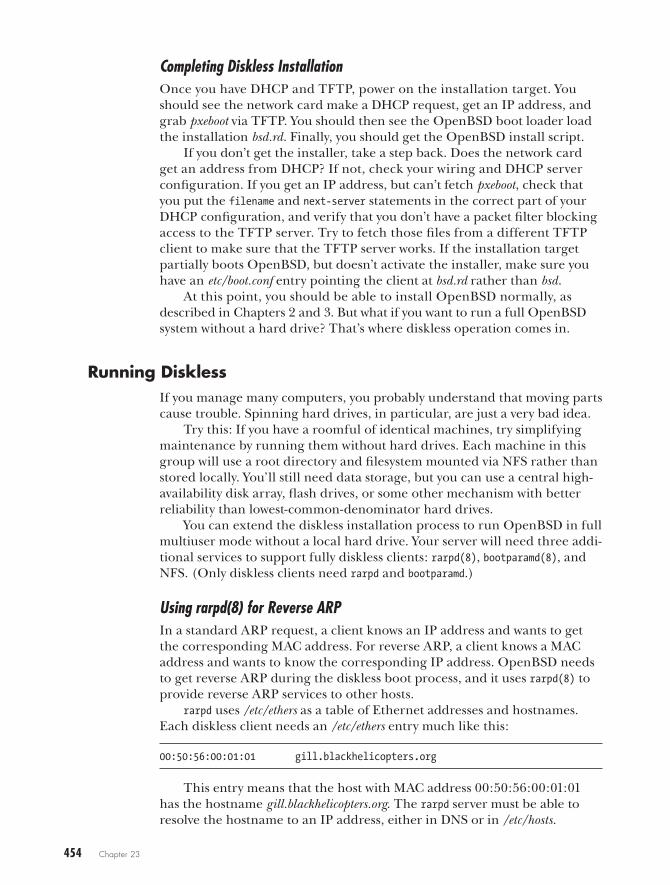
454 Chapter 23
Completing Diskless InstallationOnce you have DHCP and TFTP, power on the installation target. You should see the network card make a DHCP request, get an IP address, and grab pxeboot via TFTP. You should then see the OpenBSD boot loader load the installation bsd.rd. Finally, you should get the OpenBSD install script.
If you don’t get the installer, take a step back. Does the network card get an address from DHCP? If not, check your wiring and DHCP server configuration. If you get an IP address, but can’t fetch pxeboot, check that you put the filename and next-server statements in the correct part of your DHCP configuration, and verify that you don’t have a packet filter blocking access to the TFTP server. Try to fetch those files from a different TFTP client to make sure that the TFTP server works. If the installation target partially boots OpenBSD, but doesn’t activate the installer, make sure you have an etc/boot.conf entry pointing the client at bsd.rd rather than bsd.
At this point, you should be able to install OpenBSD normally, as described in Chapters 2 and 3. But what if you want to run a full OpenBSD system without a hard drive? That’s where diskless operation comes in.
Running DisklessIf you manage many computers, you probably understand that moving parts cause trouble. Spinning hard drives, in particular, are just a very bad idea.
Try this: If you have a roomful of identical machines, try simplifying maintenance by running them without hard drives. Each machine in this group will use a root directory and filesystem mounted via NFS rather than stored locally. You’ll still need data storage, but you can use a central high-availability disk array, flash drives, or some other mechanism with better reliability than lowest-common-denominator hard drives.
You can extend the diskless installation process to run OpenBSD in full multiuser mode without a local hard drive. Your server will need three addi-tional services to support fully diskless clients: rarpd(8), bootparamd(8), and NFS. (Only diskless clients need rarpd and bootparamd.)
Using rarpd(8) for Reverse ARPIn a standard ARP request, a client knows an IP address and wants to get the corresponding MAC address. For reverse ARP, a client knows a MAC address and wants to know the corresponding IP address. OpenBSD needs to get reverse ARP during the diskless boot process, and it uses rarpd(8) to provide reverse ARP services to other hosts.
rarpd uses /etc/ethers as a table of Ethernet addresses and hostnames. Each diskless client needs an /etc/ethers entry much like this:
00:50:56:00:01:01 gill.blackhelicopters.org
This entry means that the host with MAC address 00:50:56:00:01:01 has the hostname gill.blackhelicopters.org. The rarpd server must be able to resolve the hostname to an IP address, either in DNS or in /etc/hosts.
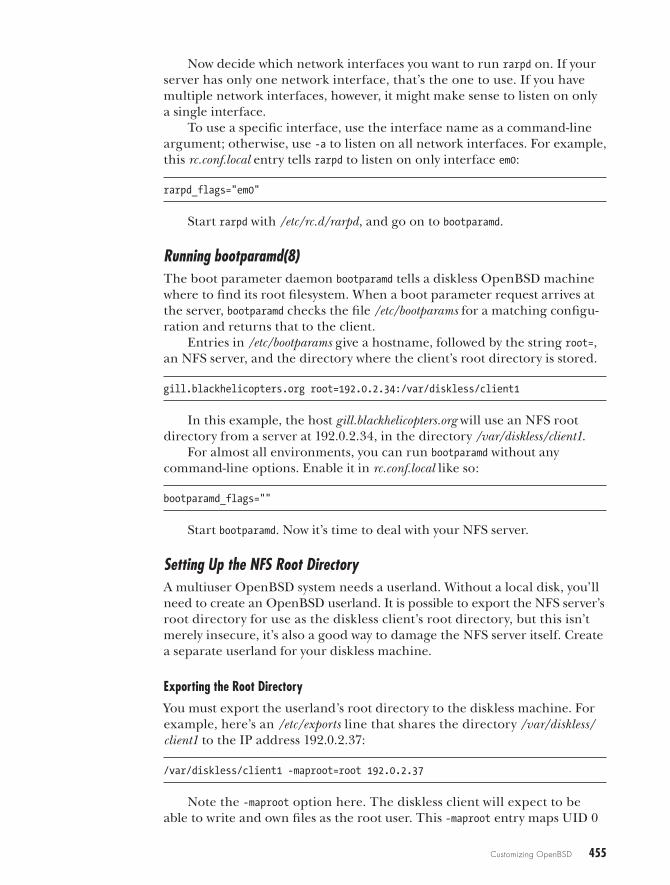
Customizing OpenBSD 455
Now decide which network interfaces you want to run rarpd on. If your server has only one network interface, that’s the one to use. If you have multiple network interfaces, however, it might make sense to listen on only a single interface.
To use a specific interface, use the interface name as a command-line argument; otherwise, use -a to listen on all network interfaces. For example, this rc.conf.local entry tells rarpd to listen on only interface em0:
rarpd_flags="em0"
Start rarpd with /etc/rc.d/rarpd, and go on to bootparamd.
Running bootparamd(8)The boot parameter daemon bootparamd tells a diskless OpenBSD machine where to find its root filesystem. When a boot parameter request arrives at the server, bootparamd checks the file /etc/bootparams for a matching configu-ration and returns that to the client.
Entries in /etc/bootparams give a hostname, followed by the string root=, an NFS server, and the directory where the client’s root directory is stored.
gill.blackhelicopters.org root=192.0.2.34:/var/diskless/client1
In this example, the host gill.blackhelicopters.org will use an NFS root directory from a server at 192.0.2.34, in the directory /var/diskless/client1.
For almost all environments, you can run bootparamd without any command-line options. Enable it in rc.conf.local like so:
bootparamd_flags=""
Start bootparamd. Now it’s time to deal with your NFS server.
Setting Up the NFS Root DirectoryA multiuser OpenBSD system needs a userland. Without a local disk, you’ll need to create an OpenBSD userland. It is possible to export the NFS server’s root directory for use as the diskless client’s root directory, but this isn’t merely insecure, it’s also a good way to damage the NFS server itself. Create a separate userland for your diskless machine.
Exporting the Root Directory
You must export the userland’s root directory to the diskless machine. For example, here’s an /etc/exports line that shares the directory /var/diskless/client1 to the IP address 192.0.2.37:
/var/diskless/client1 -maproot=root 192.0.2.37
Note the -maproot option here. The diskless client will expect to be able to write and own files as the root user. This -maproot entry maps UID 0
456 Chapter 23
(root) on the client to the root account on the NFS server. You can also set up a separate user for the diskless client’s root account, map the client’s root account to that new account, and change the ownership of all files in the diskless userland to that root account. As this is your first diskless host, however, we’ll start off basic.
Populating the Diskless Userland
The easy way to install a minimal userland is to extract the etcXX.tgz and baseXX.tgz file sets from your chosen OpenBSD release into the NFS root directory. In the following example, I’ve copied these file sets into /tmp, and I’m using them to create a userland in /var/diskless/client1.
# cd /var/diskless/client1# tar -xzpf /tmp/etc53.tgz# tar -xzpf /tmp/base53.tgz
Note the use of the -p flag in the tar command, preserving the original permissions on extracted files.
The diskless client also needs device nodes. Go into the new userland’s dev directory and create them.
# cd dev# ./MAKEDEV all
While bootparamd told the kernel where to find the root of the filesystem, userland programs expect to read /etc/fstab for that information. Create an /etc/fstab file that points the root directory to your NFS share.
192.0.2.34:/var/diskless/client1 / nfs rw 0 0
You can also add any other NFS-mounted directories you desire here.This should be everything you need.
Power On!Once you have a basic userland, device nodes, and a filesystem table, you can power on your diskless node, and it should boot. If it doesn’t boot to a login prompt, read the console error messages. Usually, they’re pretty clear.
Because you’ve bypassed the OpenBSD installer, there are no root pass-word or user accounts yet. Immediately, log in as root and change the root password, and then set up a regular user account.
For your first diskless setup, once you have a working userland, back it up right away. Even a tar file containing the entire userland will prove use-ful. You’ll muck up the diskless userland more than once as you’re trying to get things working exactly as you wish, and being able to blow the entire userland away and restore it from the backup file is invaluable.
Once you have a basic system working, expand it. Add additional file sets as needed, set up more users, add packages, and deploy for your users.
Congratulations, you’re now on the cutting edge of OpenBSD users.
Customizing OpenBSD 457
USB Installation MediaFor many people, burning a CD to install an operating system seems like a waste. They prefer to write an image to a USB flash drive and install from that. OpenBSD doesn’t provide such an image, but if you’re willing to do some extra work, you can create a bootable USB device that you can use to install on your target hardware.
The official recommendation is to install OpenBSD on the USB device, copy bsd.rd and the file sets to that device, and use that to install your new hardware. The OpenBSD installer lets you choose the target hard drive. You select the USB device in the installer, and OpenBSD installs to the USB just as it would any other data-storage device. But how do you install OpenBSD on the USB device without burning a CD in the first place? There are a few ways around this, including a couple of approaches already covered in this chapter.
Using a Virtual MachineYour first choice is to perform the USB installation in a virtual machine. Many desktop virtual machine software packages let you attach a physical USB port to a guest virtual machine. (OpenBSD’s virtualization options are discussed in “Virtualizing OpenBSD” on page 450.)
If you have virtualization software that runs OpenBSD and supports USB, choose this option.
Running a Diskless InstallationYour second choice is to run a diskless installation. Most DHCP servers embedded in cheap home hardware will let you send a filename and a TFTP server address to a client. If yours won’t, you can get suitable DHCP servers for any platform. You can find freely available TFTP servers for just about any operating system.
Boot your install target with the USB drive, but load the bsd.rd kernel. You now have the OpenBSD installer running on the target system, and an OpenBSD system that fits in your pocket and that you can run almost anywhere. If you’re already running OpenBSD on something with the right architecture and a USB socket, it’s even easier: You boot the system from the appropriate bsd.rd, choose the disk option, and point the installer to sets in a local directory.
Converting ISO ImagesAs a less official method, you can find software to convert ISO images to bootable USB images. I’ve used Rufus (http://rufus.akeo.ie/) on Windows and UNetbootin (http://unetbootin.sourceforge.net/) on other Unix-like systems. This approach might work, but it’s certainly not OpenBSD-approved.
458 Chapter 23
Customizing OpenBSD InstallationsMany of us follow a set of steps when installing a machine. All freshly installed hosts of a specific operating system revision have a common SSH server configuration. My machines all have tcsh installed and attach to the central authentication system. You probably have your own list. These tasks can be done by hand after installation, but it’s much easier to let OpenBSD do them for you during the installation process.
Installations can be customized by adding files during installation or by running commands after the installation.
Custom File SetsA custom file set includes files that you want copied to your new installation. I use custom file sets to install the default /etc/sudoers, a SSH server con-figuration, my company’s default pf.conf, and similar files. As I’m the lead sysadmin, I also include dotfiles in my home directory and other personal touches to make my life easier. Some people include several home directo-ries, including authorized_keys files for SSH.
Bundle these files together as a siteXX.tgz file, which the installer can extract in the root directory of the new installation. (Be sure to replace the XX with the OpenBSD version you’re installing on; for example, name a siteXX.tgz file for OpenBSD 5.4 site54.tgz.)
Start by installing an OpenBSD machine of the exact same version and platform that you want to customize. Make your changes and add your files to this system, verify that this template system works exactly as you desire, and then copy the changed files to a tar file.
n o t e You could make a directory hierarchy and copy the files you want to it, but I find that to be more error-prone. A small virtual machine will let you build a siteXX.tgz file more reliably.
The following example creates a site54.tar file containing one file, /etc/ssh/sshd_config. Note that I start by creating a plain tar file. Since I can’t easily add files to a compressed tar file, I’ll need to compress the file after it’s complete.
# cd /# tar -cf site54.tar etc/ssh/sshd_config
Now that I have the initial file, I can add additional files. I’ve custom-ized a few files on the system, as well as added new ones, all of which I add to the site54.tar file. The -r flag tells tar to add a file to an archive.
# tar -rf site54.tar etc/sudoers# tar -rf site54.tar etc/pf/mgmt-hosts.conf# tar -rf site54.tar etc/pf.conf
Customizing OpenBSD 459
Here’s how to compress the tar file:
# gzip site54.tar# mv site54.tar.gz site54.tgz
I’ve built my own custom release of OpenBSD, so I have a local FTP server that contains all of the release files. If you’re using the official OpenBSD release, but you’re installing enough OpenBSD machines to warrant making a siteXX.tgz file, you can copy the official release to a local FTP or HTTP mir-ror. Copy your siteXX.tgz file to this directory and update the index.txt file.
# ls -l > index.txt
Now start your installation. Tell the installer to use your local release mirror rather than an official OpenBSD mirror. You should see the follow-ing sets:
Select sets by entering a set name, a file name pattern or 'all'. De-selectsets by prepending a '-' to the set name, file name pattern or 'all'. Selectedsets are labelled '[X]'. [X] bsd [X] etc54.tgz [X] xbase54.tgz [X] xserv54.tgz [X] bsd.rd [X] comp54.tgz [X] xetc54.tgz [ ] site54.tgz [ ] bsd.mp [X] man54.tgz [X] xshare54.tgz [X] base54.tgz [X] game54.tgz [X] xfont54.tgzSet name(s)? (or 'abort' or 'done') [done] site52.tgz
Your site54.tgz file should now be available as a file set. Add it because the installer won’t automatically include it. Once the installation finishes, you should find your customized and added files on the new system.
Post-Install Shell ScriptsSome tasks can be accomplished by copying files, but that’s annoying. For example, I want the shell tcsh installed on all of my OpenBSD serv-ers. I could put all the files in the tcsh package, as well as the contents of /var/db/pkg/tcsh, in siteXX.tgz, but I know I’m likely to mess that up some-how. It would be much easier to run pkg_add tcsh after the installation, and let OpenBSD do what it’s supposed to do. That’s where the install.site script comes in.
After completing the installation, but before giving you the final command prompt, OpenBSD checks for /install.site. If this file exists, the installer runs it. The script is run chrooted into the new installed system, so you don’t need to worry about changing any paths. The script does need to run on a minimal kernel, however, so it’s best to wait for low-level kernel twiddling until the first real boot.
Here’s a sample install.site script that installs the two packages tcsh and python:
#/bin/shexport PKG_PATH=ftp://ftp13.usa.openbsd.org/pub/OpenBSD/snapshots/packages/i386/
460 Chapter 23
pkg_add -v tcshpkg_add -v python-2.7.3p1
When working with install.site scripts, if a package’s name could be ambiguous, be sure to give the full package name. There’s only one tcsh package, but Python comes in several versions. I specify the full package name, rather than using plain python.
Also note that while you’re running in a chroot that contains a full user-land, that userland isn’t fully initialized. When dropping into the chroot, OpenBSD doesn’t do a full multiuser startup of that chroot. The environ-ment is roughly equivalent to single-user mode. The install.site script is not where you initialize your database.
When you have a real userland ready to go, to automatically run commands on the system’s first real boot, append the commands to /etc/rc.firsttime. This file runs once, at the system’s first boot after instal-lation, and then deletes itself.
Customizing UpgradesOpenBSD lets you use custom file sets and shell scripts during binary upgrades. If you have a lot of machines to upgrade, run these to ensure that your systems are as identical after the upgrade as they were before. I highly recommend automating known changes during an upgrade.
The siteXX.tgz file works for upgrades exactly as for installations. Put the files you want on this system in siteXX.tgz, and the install program should copy those files to the system as it installs the upgraded files. Rather than install.site, however, the upgrade software looks for the script upgrade.site. Any install.site file is ignored during an upgrade, so you can use the same siteXX.tgz for upgrades and for new installations.
I find the upgrade.site script especially useful in conjunction with the OpenBSD Upgrade Guide for that release. The Upgrade Guide includes tasks that must be performed during an upgrade, many of which are very suitable for scripting. For example, the common tasks of deleting files, programs, and libraries removed from the new OpenBSD release are easily added to upgrade.site.
One convenient thing about upgrade.site is that you can copy the script to the target machine before running the upgrade. It doesn’t need to be part of siteXX.tgz. That said, I don’t recommend running pkg_add -u in upgrade.site. While the idea of automatically upgrading all your packages sounds good, remember that you’re running on a limited kernel with a less than completely initialized userland. Have your upgrade.site script add any commands that need to run on a fully multiuser system to /etc/rc.firsttime, so that they run when the system boots the first time.
With the hints in this chapter, you can customize OpenBSD any way you need. And with the information throughout this book, you should know where OpenBSD fits into your network. Remember that they really are out to get you, and you’ll achieve practical paranoia.
A f t e r w o r dFailure’s bad enough;
add the human element and things really suck.
Back around 2000, my employer’s main business was designing web applications,
but once those applications were built, our clients would turn around and ask, “Where
should we host this?” That’s where I came in, building and running a small but professional-grade datacenter for custom applications.
As with any new business, our hosting operation needed to make the most of existing resources. Hardware was strictly limited to cast-off equip-ment from the web developers, and we used only software that was free. The only major expense was a big-name commercial firewall, purchased for marketing rather than technical reasons.
With a whole mess of open source software, we built a reliable network management system that provided our clients with more insight into their equipment than their in-house people could offer. The clients paid for their own hardware, and so had fancy high-end rackmount servers with
462 Afterword
their chosen applications, platforms, and operating systems. As the business grew, we upgraded the hardware (it’s nice to have disk drives that are less than five years old), but we saw no need to replace the software.
One Monday morning, a customer who had expected to use very little bandwidth found that he had sufficient requests to devour twice the band-width we had for the entire datacenter. This affected every customer. If your $9.95 per month web page is slow, you have little to complain about; if your $50,000 per month web application is slow, you pick up the phone and scream until the problem stops.
To make life worse, my grandmother had died only a couple days before. Visitation was on Tuesday, and the funeral was Wednesday morn-ing. I handed the problem to a minion and said, “Here, do something about this.” I knew the network could manage bandwidth at many points. The web servers themselves, the load balancer in front of them, the commercial fire-wall, and even the router claimed to have traffic-management capacity.
Tuesday, after visitation, my cell phone voicemail was full. Our version of Internet Information Server (IIS) could manage bandwidth—in 8MB increments, and only if the content was static HTML and JPEG files. With several web servers behind the load balancer, that fell somewhere between useless and laughable. The load balancer would support traffic shaping, if we bought the new feature set. If we plopped down a credit card, we could have that feature set installed by next Sunday. Our big-name commercial firewall also had traffic-shaping features available, if we upgraded our ser-vice level and paid an additional (and quite hefty) fee for the feature set. That left the router, which I had previously investigated and found would support traffic shaping with only an IOS upgrade.
I was on the phone until midnight Tuesday night, making arrange-ments to do an emergency router IOS upgrade on Wednesday night. I had planned to go to the funeral Wednesday morning, give a eulogy, go home and take a nap, and arrive at work at midnight ready to rock.
Unfortunately, the funeral was more dramatic than I had expected, and I showed up at work at midnight sleepless, bleary-eyed, and upright only courtesy of the twin blessings of caffeine and adrenaline. In my email, I found a note that several big clients had threatened to leave unless the problems were resolved by Thursday morning. If I hadn’t already been stressed out, the prospect of choosing a minion to lay off would have done the trick. (I work hard training my minions, and prefer not to replace them once they are beaten into shape.)
Still, only a simple router flash upgrade and some basic configuration stood between me and relief. What could possibly go wrong?
The upgrade went smoothly, but the router behaved oddly when I enabled traffic shaping. Over the next few hours, I discovered that the router didn’t have enough memory to simultaneously support all of our BGP feeds and the traffic-shaping functionality. Worse, it wouldn’t accept more memory. At about 6:00 am, I finally got an admission from the router vendor that it could not help me.
Afterword 463
I hung up the phone. The first client who had threatened departure would be checking in at 7:30 am. I had slept 4 hours of the last 48, and had spent most of that time under fiendish levels of emotional stress. I had already emptied my stash of quarters for the soda machine, and had pil-laged my coworkers’ desks for more change. The caffeine and adrenaline that had gotten me to the office had long since worn off, and further doses of each merely slowed my collapse. We had support contracts on every piece of equipment, and they were all useless. All the hours of work I had put in, and my team before me, left me with absolutely nothing.
I made myself sit still for two minutes simply focusing on breathing, making my head stop sliding around loose on my shoulders, and ignoring the loud ticking of the clock. What could be done in 90 minutes—no, now only 88?
I really had one only option. If it didn’t work, I would either lay off someone or file for unemployment.
At 6:05 am, I started downloading the OpenBSD install floppy image, and then I grabbed a spare desktop machine, selecting it from among many similar machines by virtue of it being on top of the pile. The next few min-utes, I alternated between hitting the few required installation commands and dismantling every unused machine unlucky enough to be in reach to find two decent network cards.
By 6:33 am, I had two Intel EtherExpress cards in my hands and a virgin OpenBSD system. I logged in long enough to shut down the system so I could wrench the case off, slam the cards into place, and boot again. Even early versions of PF included all sorts of nifty filtering abilities, all of which I ignored in favor of the newly released traffic-shaping functions. By 6:37 am, I was wheeling a cart with a monitor, keyboard, and my new traffic shaper over to the rack.
Then things got hard. I didn’t have a spare switch that could handle our Internet bandwidth. The router rack was jammed to overflowing, leav-ing me no place to put the new shaper. I lost almost half an hour finding a crossover cable, and when I discovered one, it was only two feet long. The router, of course, was mounted in the top of the rack. About 7:10 am, I discovered that if I put the desktop PC on end, set it on an empty shipping box, and put the box on the cart, the cable just reached the router. I stacked everything so it would reach, and began rewiring the network and reconfig-uring subnets.
I vaguely recall my manager coming in about 7:15 am, asking with taut calmness if he could help. If I remember correctly, as I typed madly at the router console, I said, “Yes. Go away.”
At 7:28 am, we had an OpenBSD traffic shaper between the hosting area and our router. All the client applications were reachable from the Internet. I collapsed in my chair and stared blankly at the wall.
While everything seemed to work, the proof would be in what happened as our offending site started its daily business. I watched with growing ten-sion as that client’s network traffic climbed toward the red line that indicated

464 Afterword
trouble. The traffic grew to just short of the danger line, and then flatlined. Other clients called, happy that their service was restored to its usual qual-ity. One client complained that his site was still slow, but it turned out that bandwidth problem had masked a problem with his application. The client said that his website now ran even slower than before, to which we offered to provide more bandwidth if they would agree to pay for it.
Shortly afterward, I had two new routers and new DS3s. The racks were again clean. The decrepit desktop machine was replaced by two OpenBSD boxes in a live-failover configuration, protecting our big-name commercial firewall as well as shaping traffic. And I now stock crossover cables in a vari-ety of lengths.
If I had started with OpenBSD, I would have had a much better night.
Symbols* (asterisk), as wildcard, 285@ symbol, to send messages to
another host, 288\ (backslash), for line continuation,
78, 113$ (dollar sign), in pathnames, 96! (exclamation point)
to escape to command prompt, 43as negation symbol, 117–118
in filter rule, 406> symbol, for disklabel(8) command
prompt, 50# (hash mark), for comments, 33% (percent sign), for groups in user
aliases, 114/ (root) partition. See root (/) partition~ (tilde), in pathnames, 96_ (underscore), for unprivileged user
names, 103–104
Aa command, 52abandoned IP addresses, 310abbreviations, for disk sizes, 52ABIs (application binary interfaces), 2abort (fdisk), 131account information access,
controlling, 266ACPI (Advanced Configuration and
Power Interface), 341acpi0 device, 341activ method for BSD authentication, 99active FTP, 437active partition, marking, 131address families, in packet filtering, 405Address Resolution Protocol (ARP), 185
IPv4 addresses and, 214address space layout randomization, 174adduser(8), 87–89
-batch flag, 89configuring default settings, 87–88options, 91–92
administrator accounts, creating, 91–92
Advanced Configuration and Power Interface (ACPI), 341
advanced persistent threat (APT), [email protected], 9afterboot(8) man page, 57aggressive optimization for PF, 420aliases, 113–117
naming conventions, 117nesting, 116
-alldirs option, for mount point in partition, 156
ALTQ bandwidth management system, 439
/altroot partition, 73backup to, 148
amd64 platform, 16boot floppies, FFS support by,
133–134floppy image for, 39Intel Preboot Execution Environment
on, 451kernel configuration directory, 361
anchors in PF, 434, 439adding rules, 434–435conditional filtering, 436nested, 436–437viewing and flushing, 436
[email protected], 8anonymous CVS, 386antispoofing rule, 416Apache web server, 227APIs (application programming
interfaces), 2application binary interfaces (ABIs), 2application menu, creating in X Windows
System, 334application programming interfaces
(APIs), 2applications. See also software
PF and, 400–401preventing coverage by window, 336
applications layer (OSI), 186–187apropos(1), 5–6APT (advanced persistent threat), 171archives, of mailing lists, 10
I n d e x
466 Index
ARP (Address Resolution Protocol), 185IPv4 addresses and, 214
arp(8), 214asking questions, OpenBSD experts
reaction to, 11asterisk (*), as wildcard, 285asynchronous mounts, in FFS, 136AT&T, xxxi, xxxiiatexit(), 174audio, 268audio device, 351auth facility, 283auth-defaults class, 100, 101authenticating packet filter
configuration, 256authentication methods for user
accounts, 99–100auth-ftp-defaults class, 100authorized users, repository of, 157authpf(8), 101
anchors for, 434authpriv facility, 283automation
packet filtering tables and, 425–426of ports, 236
automounter daemon, 256autonegotiation, in Ethernet network, 215availability, xxx
Bback channel in FTP, 437background color of desktop, 335backslash (\), for line continuation,
78, 113backup
to /altroot partition, 148in daily maintenance, 280–281of default kernel, 349of GENERIC kernel, 358before install, 37of userland for diskless station, 456
bandwidth management in PF, 439–445assigning traffic to queues, 444child queues, 442for parent queue, 441queue options, 442–443
base operating system, preparing for your own OpenBSD, 383–384
baseXX.tgz file set, 24, 456Basic Input/Output System. See BIOS
(Basic Input/Output System)beep of computer, 324Berkeley Internet Name Domain
server (BIND), 211
BerliOS, mirrors for, 247BGP (Border Gateway Protocol), 203BGP daemon, 257bgpd(8), 205, 257bidirectional NAT, 429–432
and packet filter rule order, 430–431redirection, 431–432and security, 430
Big Giant Lock method, 18bigptrmove, 337binary objects (blobs), 17–18binary object device drivers, 17binat-to keyword, 429BIND (Berkeley Internet Name Domain
server), 211bind command, for mapping keys, 336binding, key sequence to cwm
command, 332bioctl(8), 160
-d flag, 165BIOS (Basic Input/Output System)
in boot process, 70clock, 45configuration, 38
bios0 device, 341blanking screen, 324–325blobs (binary objects), 17–18block devices, 126–127block statement, 404blocks in FFS, 134
number of used, 143$BLOCKSIZE environment variable, 143–144bogons, 422–423bonding, 221The Book of PF (Hansteen), 256, 395, 448Boolean sysctls, 346boot command, 70boot loader, 69, 70
information on disk devices, 73making settings permanent, 74–75prompt, 70
boot media, 22creating, 38–40
boot CDs, 40boot floppies, 39–40
boot process, 69–84from alternate hard disk, 73–74in alternate kernel, 72–74configuring VLANs, 224delaying, 70Ethernet network configuration at,
219–220to graphic console, 67interrupting, 41, 70for kernel, 74

Index 467
kernel configuration in, 353multiuser startup, 79–84options before completing, 70–71serial consoles, 75–79setting sysctls at, 346–348setting wscons variables, 325in single-user mode, 71–72from softraid(4) devices, 166trunks at, 222and X Windows System, 330–331
bootable partition, 131bootparamd(8) daemon, running, 454bootstrap tools, installing, 372boot-time securelevel, 178Border Gateway Protocol (BGP), 203borders for windows, 336botnets, 170Brauer, Henning, xxv–xxvi, 268n, 371nbridge(4) interfaces, 400broadcast address, 191broadcast protocol, Ethernet as, 213BSD, xxxi
license, xxxi, xxxiiBSD authentication, 99/bsd file, 349bsd file set, 23–24bsd.mp file set, 23–24bsd.rd file set, 23–24BUFCACHEPERCENT value in kernel, 351bugs
identifying, 3in releases, 58
BUGS section, in man pages, 7build files for ports, 238_build keyword, 265building
custom kernels, 365–366troubleshooting errors in,
365–366programs, virtual terminal SSH
connections for, 325your own OpenBSD
getting source code, 384preparations for, 383–388reasons for, 382–383
burncd (Unix), 40business card attachments, 13
CC compiler, 24C++ compiler, 24canaries, 174cap_mkdb(8), 95
CARP (Command Address Redundancy Protocol), 316, 317
CAT5 cable, 76CBQ (class-based queuing), 440
borrow option, 443ruleset, 443–444
CD drives, emulating floppies, 40cdemuXX.iso image, 40cdio(1), 152cdrecord (Unix), 40CDs (compact discs), 153
booting from, 38, 40mounting, 152obtaining official, 20
cdXX.iso image, 40Changelogs directory, 20character devices, 127chargen function (inetd), 317check command, 83chflags(1), 176child queue, definitions, 442chio(1) medium changer, 257chpass(1), 93, 99, 266chroot, 460chrooting users, 319–322class-based queuing (CBQ), 440
borrow option, 443ruleset, 443–444
cleaning filesystems, 138, 374client for serial console, 76–77
port, 78–79clock in BIOS, 45
correcting, 294clri(8), for dirty filesystem, 138collision domain, 213Command Address Redundancy Protocol
(CARP), 316, 317command alias, 115command prompt. See promptcomments, hash mark (#) for, 33committers, xxxvcommunities in SNMP, 314compact discs. See CDs (compact discs)compilers, /usr partition for, 28compressed tar files, for code
snapshots, 384Computer Science Research Group
(CSRG), xxxicompXX.tgz file set, 24concatenated disks, 162Concurrent Versions System (CVS), 385
mirrors, 386conditional filtering, anchors for, 436confidentiality, xxx
468 Index
config(8)
for kernel changes, 348–353backup of default kernel, 349changing constants, 352–353help and list commands, 350–351
for testing custom kernel, 364–365configuration, testing by rebooting, 57connectionless protocol, 197conservative optimization for PF, 419–420console, 274
configuration with wscons, 324–325const keyword (PF), for table, 422content farms, bandwidth control
machines for, 440contributors to OpenBSD, xxxivconverting ISO images, 456cooked device node, 126Coordinated Universal Time (UTC), 45coordinator for OpenBSD, xxxvcopycenter, xxxiicopying
disk images to disk, 40files to other servers, 281
copyleft, xxxiicore programs, 24coredumpsize variable, 96country code, for USB keyboards, 66cp(1), copying files with, 145cpio(1), copying files with, 145cputime variable, 96cron facility, 283cron(8), 109cross-compiling, 383crypto method for BSD authentication, 99cryptography, OpenBSD support for, 10csh(1), system-wide defaults for, 257CSRG (Computer Science Research
Group), xxxi
ctrl-alt-del, effect of, 348current resource limit, specifying, 97-current version of OpenBSD, 368–369
building, 392–393source code for, 384updating to, 387–388
cursor, controlling with keyboard, 335custom kernels, 355–366
building, 365–366cautions, 355–358configuration, 359–365
device drivers, 359keywords, 360pseudo-devices, 359–360
configuration file, 362–364identifying running, 366installing, 366
preparations for, 358problems building, 357problems running, 358reasons for, 356–357removing devices, 363removing options, 362–363stripping down, 363testing, 364–365
CVS (Concurrent Versions System), 385mirrors, 386
CVS directory, 237cwm(1) window manager, 330, 331–337
configuration file loss, 332configuring, 331–332
modifier keys, 331–332creating windows, 332–333decorating, 335–336exiting, 333locking screen, 333–334resizing terminal window, 333
.cwmrc file, 331mapping keys in, 336
cylinders, 31
Dd command, 51daemon
checking for running, 83instructed to reread
configuration file, 83unprivileged account for each, 103
daemon facility, 283DaemonForums, 8daily maintenance, 278–281daily(8), 278damaged filesystem, recovering, 139data connection for FTP, 437data integrity, synchronous
mounts for, 136datalink layer (OSI), 185, 187datasize variable, 96date, setting, 60–61date(1), 60, 61DB9-to-RJ45 converters, 76dd(1), 39–40ddb.console sysctl, 348ddb.panic sysctl, 348de Raadt, Theo, xxxiii, xxxv, xxxviidecrypted partition
automatic, 168unmounting, 167
default accept, vs. default deny, 399default answers, for installer, 42default BSD pager, 5

Index 469
default gateway, 64_default keyword, 264–265default login class, for user, 87default partitioning, by installer, 26default permit or default deny, 404default route, 203
adding to routing table, 207on Ethernet, configuring, 219
default screensaver in cwm, 334default search domains, 210–211default shell for user, 87default user class, 94
definition, 94–95Defaults statement, 117delete command (pfctl), 425deleting
partitions, 51routes, 207softraid(4) devices, 165user accounts, 92
dependenciesfor packages, 232, 234–235, 381ports and, 241, 250–251
DESCRIPTION section, in man pages, 7desktop OpenBSD, 323–337
background color, 335console configuration with wscons,
324–325cwm(1) window manager for, 331–337tmux for virtual terminals, 325–329X graphical interface setup, 330–331
$DESTDIR environment variable, 390, 391destination address, in filter rule, 406destination port, in filter rule, 408–409detaching vnode devices from images, 154/dev/console file, 274developers’ logs, 2device drivers
attachment to hardware, 341binary object, 17custom kernel configuration for, 359enabling, 350, 352finding, 352for hardware sensors, 297–298kernel and, 340, 349minimizing number in custom
kernel, 363in OpenBSD, 41for physical sensors, 297–298
device namesdevice attachment vs., 127–128for floppy drives, 39–40for hard drives, 73
device nodes, 126–128df(1), 142
dhclient(8), 219DHCP, 212–213
getting IPv4 address from, 219server setup for diskless install,
452–453static IP address and, 42–43, 309
dhcpd (DHCP daemon), 307–310enabling, 309
dial-up modem, 270Diffie-Hellman cryptography, 268directories
locking users in, 319–320for new releases, 390number of used filesystem blocks, 143for tftpd, 310–311
dirty filesystems, 138discard function (inetd), 317disk drives. See also hard drives
CD drives emulating floppies, 40changing basic parameters, 54device names, 32mounting, in single-user mode, 71–72setup when installing OpenBSD,
46–47custom layout, 49–54
disk images, attaching vnode devices to, 154
disklabel partitions, 31, 50creating, 51–53, 132for softraid device, 162
disklabel unique identifier (DUID), 33and /etc/fstab filesystem table,
128–129disklabel(8), 25
command prompt, 50expert mode for, 55help for, 55
disklabels, 31–34advanced commands, 54–55backing up and restoring, 133creating, 144–145erasing, 51printing, 50, 53viewing, 50–51, 132writing new, 53–54writing to disk, 53–54
diskless installation, 450–454DHCP server setup, 452–453power for, 456running, 454–456TFTP server setup, 453
display. See screendisplay.kbdact variable, 325display.msact variable, 325display.outact variable, 325

470 Index
display.screen_off variable, 325Distance Vector Multicast Routing
Protocol (DVMRP), 258$DISTDIR variable, 244distfiles directory, 20distfiles, for ports, 244divert-to keyword (PF), 433dmassage package, 343dmesg(8), 340DMZ, hosts in, 204DNS (Domain Name Service) servers, 65DNS queries, 399DNS resolution, 210–213
/etc/hosts file, 212resolver vs. dynamic configuration,
212–213DNS spoofing attacks, 115doc directory, 21documentation, xxxvi–xxxvii
distribution set for, 23man pages, 3–7not provided by vendors, 17
dollar sign ($), in pathnames, 96domain, 210Domain Name Service (DNS) servers, 65“Don’t Track Access Time” mounts,
in FFS, 137du(1), 143dual-stacked setup, 188DUID (disklabel unique identifier), 33
and /etc/fstab filesystem table, 128–129
dump(8), 128, 139avoiding for NFS mount, 160backup, 258copying files with, 145
DVMRP (Distance Vector Multicast Routing Protocol), 258
dvmrpd(8), 258Dvorak layout, 66dynamic clients, dhcpd for
configuring, 307dynamic configuration, vs. resolver,
212–213dynamic network configuration, 64
Ee command, 54echo function (inetd), 317ECN (Explicit Congestion Notification),
347, 443$EDITOR environment variable, 110, 122EISA hardware, 16
emailattachments, 13for help request, 12–13maintenance tasks results to local
root account, 65responding to, 14sending, 13–14
email software, configuration files for, 263embedded systems, and sylogd(8), 289emergency root partition, 148emulated CPUs, 19enc0 (encapsulating interface), 63, 216encrypt(1), 91encrypted partitions, 166–168
automatic decryption, 168encryption algorithm, for user
passwords, 88Enhanced Small Device Interface
(ESDI), 33environment variables
in /etc/login.conf file, 97and sudo(8), 119–120
erasing. See also deletingdisklabels, 51
error messagesmmap: Cannot allocate memory, 149NFS-related, 155from snmpd, 315
errors, from custom kernel, 364ESDI (Enhanced Small Device
Interface), 33ESXi, 19/etc/adduser.conf file, 256/etc/aliases file, 278/etc/amd file, 256/etc/authpf directory, 256/etc/bgpd.conf file, 257/etc/boot.conf file, 74–75, 257/etc/bootparams file, 455/etc/changelist file, 257, 280/etc/chio.conf file, 257/etc/csh.* files, 257/etc/daily file, VERBOSESTATUS, 281/etc/daily.local file, 148, 257, 278/etc/dhclient.conf file, 257/etc/dhcpd.conf file, 257, 308/etc directory, 255
files in, 256–276merging changes, 393across Unix variants, 256updating, 375–380
sysmerge(8) to compare files, 376–378
/etc/disklabels/ directory, 257–258

Index 471
/etc/disktab file, 258/etc/dumpdates file, 258/etc/dvmrpd.conf file, 258/etc/ethers file, 454/etc/exports file, 156, 258, 455/etc/fastboot script, 82/etc/fbtab file, 258/etc/firmware file, 258–259/etc/fonts/ directory, 259/etc/fstab file, 135, 149–150, 259
CD and FAT flash drive entry, 153for mounting NFS share, 160
/etc/fstab filesystem table, and DUID for disk, 128–129
/etc/ftpchroot file, 259/etc/ftpusers file, 259/etc/gettytab file, 259/etc/group file, 107, 260
editing, 93–94/etc/hostapd.conf file, 260/etc/hostname. files, 260/etc/hostname.if file, route statement in, 207/etc/hostname.interfacename file, 219/etc/hosts file, 212, 260/etc/hosts.equiv file, 260/etc/hosts.lpd file, 260–261/etc/hotplug/ file, 261/etc/ifstated.conf file, 261/etc/iked/ file, 261/etc/iked.conf file, 261/etc/inetd.conf file, 261, 317/etc/ipsec.conf file, 261/etc/isakmpd file, 261/etc/kbdtype file, 66, 261/etc/kerberosV/ directory, 262/etc/ksh.kshrc file, 262/etc/ldap/ file, 262/etc/ldapd.conf file, 262/etc/localtime file, 59, 262/etc/locate.rc file, 262/etc/login.conf file, 94, 262
changing, 95environment variables, 97legal values for variables, 95–96sample entries from default, 100
/etc/lynx.cfg file, 262/etc/magic file, 262/etc/mail/ directory, 263/etc/mail/aliases file, 65, 263/etc/mailer.conf file, 263/etc/mail.rc file, 263/etc/man.conf file, 264–265/etc/master.passwd file, 88, 90
editing, 93–94, 266fields, 267–268
/etc/mixerctl.conf file, 268/etc/mk.conf file, 238, 268/etc/moduli file, 268/etc/monthly file, 268/etc/monthly.local file, 268/etc/motd file, 269/etc/mrouted.conf file, 269/etc/mtree/ directory, 269/etc/mygate script, 269/etc/myname file, 61, 269/etc/named.conf file, 121–122/etc/netstart script, 62, 81, 219, 269/etc/networks file, 269/etc/newsyslog.conf file, 269, 290–292/etc/nginx/ file, 269–270/etc/nsd.conf file, 270/etc/ntpd.conf file, 60, 270, 294, 295/etc/ospf6d.conf file, 270/etc/ospfd.conf file, 270/etc/passwd file, editing, 93–94/etc/pf.conf file, 270, 397, 401, 422
anchor rules in, 435anchor setting, 402and FTP proxy, 438–439options, 402
/etc/pf.os file, 270/etc/ppp/ file, 270/etc/printcap file, 270, 306/etc/protocols file, 186, 270/etc/pwd.db file, 266/etc/raddb/servers file, 101/etc/rbootd.conf file, 271/etc/rc script, 59, 79, 80–82, 271/etc/rc.conf file, 59
OpenBSD defaults in, 59/etc/rc.conf script, 80/etc/rc.conf.local script, 59, 81, 296
deactivating functions in, 80to disable PF, 397to disable sshd, 318enabling dhcpd, 309ftp-proxy enabled in, 438snmpd to enable, 315
/etc/rc.d directory, 82/etc/rc.firsttime script, 82/etc/rc.local script, 81/etc/rc.securelevel script, 81, 178/etc/rc.shutdown script, 82/etc/relayd.conf file, 271/etc/remote file, 76, 78–79, 271/etc/resolv.conf file, 210–212, 271/etc/resolv.conf.tail file, 213, 271/etc/ripd.conf file, 271/etc/rmt file, 271/etc/rpc file, 272

472 Index
/etc/sasyncd.conf file, 272/etc/sensorsd.conf file, 272, 298–300/etc/services file, 199, 272, 317, 408/etc/shells file, 88, 272/etc/skel/ file, 272/etc/sliphome/ file, 272/etc/snmpd.conf file, 273, 314–315/etc/spwd.db file, 266/etc/ssh/ file, 273/etc/ssh/sshd_config file, 318–319/etc/ssl/ file, 273/etc/sudoers file, 110, 111–113, 115–116, 273
aliases, 113–117multiple entries in one field, 112running commands as non-root
users, 113/etc/sysctl.conf file, 63, 178, 273, 344,
346–348machdep.allowaperture=2 sysctl in, 330
/etc/syslog.conf file, 273, 284–287/etc/systrace/ directory, 273/etc/termcap file, 274/etc/tmux.conf file, 329/etc/ttys file, 274–276/etc/weekly.local script, 276/etc/wsconsctl.conf file, 276/etc/X11 directory, 276etcXX.tgz file set, 24, 456/etc/ypldap.conf file, 276Ethernet, 209, 213–215
configuring, 215–220default routes, 219dynamic network, 219network at boot, 219–220
multiple IP addresses on one card, 218speed and duplex, 215
Ethernet cards, configuration file, 63Ethernet interfaces, 62–64ex2fs filesystem, 152ex3fs filesystem, 152exclamation point (!)
to escape to command prompt, 43as negation symbol, 117–118
in filter rule, 406exclusions to packet filtering lists, 415execution forbidden mounts, 137–138exit command (config), 352exit command (fdisk), 131exiting, cwm, 333expert mode, for disklabel, 55Explicit Congestion Notification (ECN),
347, 443exporting filesystems, 155exports, NFS client mounting of, 155
Ffacilities for system logs, 283–284
combining, 285failover, 221fallback mirrors, 248–249family keyword, 212Fast File System (FFS), 29, 133–140
blocks, fragments, and inodes, 134filesystems
creating, 134–135integrity, 138–140
mount options, 135–138versions, 133–134
FAT filesystems, 150–151fdisk(8), 30
exiting, 131and MBR partitions, 129–131, 144
feh, 335–336FFS. See Fast File System (FFS)FIFO (first-in, first-out) queuing, 440file flags, 175–177file sets, 23–25
custom, 458selecting when installing OpenBSD,
47–49for upgrade, 375
File Transport Protocol. See FTP (File Transport Protocol)
filesassigning ownership of, 108copying to other servers, 281identifying origin of, 232–234logging to, 287removing during upgrade, 372
filesize variable, 96filesystems
adding new, 146cleaning, 138, 374exporting, 155, 156–157foreign, 150–152impact of block size on
partition size, 53integrity checks, 71–72, 281
partition size and, 26integrity in FFS, 138–140memory, 148–150mounting at nonstandard
locations, 141mounting for upgrade, 376mounting images, 153–154mounting remote, 159mounting standard, 141partition, 29

Index 473
recovering damaged, 139type on partition, 34
filtering, tcpdump, 447–448finding. See searchfingerprint scanners, 100firewall, 204, 396–397
avoiding install of unneeded file sets, 48
dhcpd and, 309–310NAT and, 426
firmware, 17–18, 259first-in, first-out (FIFO) queuing, 440flag command (fdisk), 131flash drives, 153$FLAVOR environment variable, 250floppy disk
boot loader information on drive, 73booting installer from, 22, 38–40
floppyBXX.fs image, 39floppyCXX.fs image, 39floppyXX.fs image, 39flush command (pfctl), 425force-starting software, 83–84foreign filesystems, 150–152fragmentation behavior of filesystem, 34fragmented packets, 399
frags limit and, 418fragments in FFS, 134frame in datalink layer, 187free lines, in kernel, 351free use of OpenBSD, xxxvii–xxxviiifsck(8), 71–72, 374
avoiding for NFS mount, 160for dirty filesystem, 138running, 139trusting, 139–140
fsdb(8), for dirty filesystem, 138fstat, 202fstype, 34FTP (File Transport Protocol)
password source for connections, 101npf(4) and, 437–439proxy, PF configuration and,
438–439ftp facility, 283FTP server, installing OpenBSD from,
23, 48ftplist file, 21ftp-proxy(8), 438–439
anchors for, 434full-duplex connection, 215fvwm(1), 331fw_update script, 259
GgameXX.tgz file set, 24gateway, default, 64GENERIC kernel, 356
backup of, 358configuration file, 361configuring, 360–361
geometry of disks, 31getty(8), 79, 80GID (group unique number), 107gigabytes, for displaying partition size, 51global settings in tmux, 329Gnome, 331Gnu C Compiler Project, 247GNU mirror site, 247graphic console, 44
booting to, 67group unique number (GID), 107groups, 106–109
creating, 107–108unprivileged user accounts and
group permissions, 108–109in user aliases, 114user assignment to, 88
in batch mode, 90guard pages, 174
Hhacker, definition of, 172half-duplex connection, 215Hansteen, Peter, The Book of PF, 256,
395, 448hard drives, 18–19. See also disk drives
adding new, 144–146booting from alternate, 73–74finding for booting, 73multiple, 29–30partitioning additional, 54
hardened host, 398hardware, 16–19
connection to kernel, 342device driver attachment to, 341diskless, for OpenBSD, 451dmassage to view installed devices, 343setup for installing OpenBSD, 38
hardware sensors, 296–301configuring, 298–301device drivers for, 297–298time, 295triggering action, 300–301
hardware serial console, 75hash mark (#), for comments, 33

474 Index
HDLC (High-Level Data Link Control), 185
heads on disk drives, 31help
creating good request, 12–13for disklabel prompt, 55
help command (config), 350–351help function, 70hiding cwm windows, 333high-latency optimization for PF, 420High-Level Data Link Control
(HDLC), 185mapping keys in, 336
home directoriesconfiguring for user, 87macros to represent, 319–320for unprivileged users, 102
/home partition, 29, 87creating, 53
$HOME/.cwmrc file, 331$HOME/.tmux.conf file, 329$HOME/.xsession file, 331host access point daemon, 260host aliases, 115host MIBs, 313hostapd(8), 260hosting operation, 461hostname, 62hostname.if file, 219hostnames, 210
setting, 61–62of system, 42
hosts file, 210HTML, avoiding for email help
request, 13HTTP protocol, 199
installation, 22–23hubs, in Ethernet network, 213Hurricane Electric, IPv6 tunnel
service, 224hushlogin variable, 97hw.allowpowerdown sysctl, 179hw.ncpufound sysctl, 345
Ii386 platform, 16
boot floppies, FFS support by, 133–134
floppy images for, 39hard drive size limitations, 26–27Intel Preboot Execution
Environment on, 451
ICMP (Internet Control Message Protocol), 186, 196
redirects, sysctl to control, 347states, 413
id(1), 107IDE drives, 29ifconfig(8), 62, 63, 191, 194, 216–218,
219–220delete option, 217to display VLAN interface, 224
ifstated(8) (interface state daemon), 261ifTable (interface table), 313ignorenologin variable, 97illegal packets, 415in keyword, for direction in packet
filtering, 404–405include statement
in kernel configuration, 360in pf.conf, 445
incoming connections, restricting, 305INDEX file, 236
building database of, 240index nodes. See inodes (index nodes)indexing OpenBSD release, 392inet, 219–220inetd(8) (small-server handler), 261,
304–305init(8), 59, 70inodes (index nodes), 134
vs. vnodes, 150–151install document, in OpenBSD
release, 15installation preparations, 15–35
customizing, 458–460disklabels, 31–34file sets, 23–25getting OpenBSD, 19–23multiple hard drives, 29–30OpenBSD hardware, 16–19partition filesystems, 29partitions, 25–29, 30–31
installingcustom kernel, 366multiple operating systems on
computer, 37packages, 230–232ports and source code, 66
installing OpenBSD. See also installation preparations; setup after install
BIOS configuration, 38boot media creation, 38–40
boot CDs, 40boot floppies, 39–40
Index 475
disk drivecustom layout, 49–54setup, 46–47
file sets selection, 47–49hardware setup, 38multiple network cards and, 43–44running installation program, 41–43setting time zone, 45–46setting up services, 44
installXX.iso image, 40integrity, xxx
of packages, 229Intelligent Platform Management
Interface (IPMI), 297interface groups, 401–402interface main address, in filter rule,
407–408interface state daemon (ifstated(8)), 261interfaces
dynamic configuration, 220setting PF to not manage, 420
interim releases of OpenBSD, 369Internet, finding packages on, 230Internet connection, 183. See also TCP/IPInternet Control Message Protocol
(ICMP), 186, 196redirects, sysctl to control, 347states, 413
Internet downloads of OpenBSD, 20Internet Protocol (IP), 185Internet searches, on OpenBSD crypto
hardware, 11Internet small service listener
(inetd(8)), 261interrupt request (IRQ), 349interrupting boot process, 41IP addresses, 185, 189–192
abandoned, 310adding, 217multiple, on one Ethernet card, 218private NAT, 426removing, 217static, 63–64table in pf.conf file, 403
IP aliases, 218IP routing, 202–207
deleting routes, 207IPv4, 203–204route flags, 206–207route(8) for managing, 204–207
ipcalc package, 191IPMI (Intelligent Platform Management
Interface), 297ipmi(4) driver, 349IPsec standard for VPNs, 261
IPv4 addressesand ARP, 214netmask calculation, 190–191network stacks, 188pitfalls, 192search for records, 212special, 192static, 63unusable, 191viewing, 191
IPv4 packets, sysctl to control forwarding, 347
IPv6 addresses, 43, 192–196assigning, 195–196format for, 63NAT and, 426and neighbor discovery, 214network stacks, 188special, 194–195subnets, 194over tunnels, 224
IPv6 packets, forwarding, sysctl to control, 347
IRQ (interrupt request), 349ISA hardware, 16, 349ISO 8601 restricted time format, 291–292ISO images, converting, 456ISO-9660 filesystem, 152istatus keyword, to ignore sensor, 300
Jjob control, xxxi
Kkbd(8), 66KDE, 331Kerberos, 157kern facility, 283kernel, 23, 70. See also custom kernels;
sysctls (system controls)basics, 340–343boot-time configuration, 353booting, 74booting alternate, 72code snapshot for, 384config(8) for changing, 348–353
backup of default kernel, 349changing constants, 352–353help and list commands, 350–351
device drivers, 349enabling, 350, 352finding, 352
476 Index
kernel (continued)GENERIC, 356
backup, 358identifying running, 366messages to userland, 340modules, 179startup messages, 340–341upgrading, 388
kern.hostname sysctl, 346kern.maxproc sysctl, 346kern.ostype sysctl, 344, 346kern.osversion sysctl, 344kern.version sysctl, 344keyboard
mapping, 66modifer keys in cwm window manager,
331–332unmapping and remapping, 336for X Windows navigation, 335
keyboard-video-mouse (KVM) system, 75nkeyboard.type variable, 324keywords
in custom kernel configuration, 360for man page searches, 5–6
kill command (pfctl), 425kill -session command (tmux), 328Kozierok, Charles M., The TCP/IP Guide,
184, 397krb5 method for BSD authentication, 99krb5-or-pwd method for BSD
authentication, 99KVM (keyboard-vide-mouse) system, 75nKVM hypervisor (Linux), 19KVM virtualization, 450
LLACP (Link Aggregation Control
Protocol), 221lchpass method for BSD authentication, 99LDAP (Lightweight Directory Access
Protocol) daemon, 157, 262integration, 100
LD_LIBRARY_PATH environment variable, 119leases in DHCP, 307least privilege approach, 86libraries, /usr partition for, 28Lightweight Discovery Access Protocol
(LDAP) daemon, 157, 262Link Aggregation Control Protocol
(LACP), 221link aggregation protocols, 221link local addresses, for IPv6, 195Linux, KVM hypervisor, 19
list command (config), 350–351lists, packet filtering with, 413–414
exclusions and negations, 415lladdr (link local address), 216lo0 (loopback) interface, 63, 216load balancer, 271, 462local distfile mirrors, 246–249local installation server, install from, 23local0 facility, 283localcipher password control, 98localhost
for IPv4, 192for IPv6, 195
locking users, in directory, 319–320log files
maintenance, 289–294adding PID file, 293monitoring, 293newsyslog.conf fields, 290–292signal name, 293–294
for PF, 446–448reading, 447
log rotation, 289–290log sockets, 288logging daemon (syslogd(8)), 273
customizing, 288logging host, 288logical interfaces, in OpenBSD, 216logical port, 198login classes, 94–101
definitions, 94–95for RADIUS authentication, 100–101for user, 89
login-backoff password control, 98login_radius(8), 101logins
default class for user, 87to serial consoles, 79
logsmonitoring, 293for system maintenance, 282–289
actions, 287–288customizing syslogd, 288and embedded systems, 289facilities, 283–284priority, 284sorting messages with syslogd(8),
284–287of TFTP transfers, 311
lookup keyword, for DNS resolution, 211loopback address, 206lost+found directory, 139lpd (printer daemon), 306–307lpr facility, 283

Index 477
ls
-la, 108-lo, 176
lynx(1) text-mode web browser, 262
Mm command, 55MAC (Media Access Control) addresses,
185, 213for DHCP server client identity, 307
machdep.allowaperture sysctl, 179, 330, 348machdep.kbdreset sysctl, 179, 348machine diskinfo command, 73machine keyword, in kernel
configuration, 360machine-dependent kernel configuration
files, 361machine-independent kernel
configuration files, 360–361macppc (PowerPC-based Macintosh
computers), 16macros, packet filtering with, 414–415magic number, 262mail aliases, setup after install, 65mail facility, 283mail server program, 263mailing lists on OpenBSD, 8–10, 11–14
archives of, 10read-only, 9–10
mailq, 263mainbus0, 341Maint (maintainer), for software, 240maintenance tasks, emailing results to
local root account, 65make build stage, 390
in port build, 246make checksum stage in port build, 244–245make clean stage in port build, 246make configure stage in port build, 245make extract stage in port build, 245make fake stage in port build, 246make fetch stage in port build, 244make install stage, 241
in port build, 246make package stage in port build, 246make patch stage in port build, 245make prepare stage in port build, 245make print-index, 239make update command, in port, 393make(1) program, 226
configuring, 268makefile, 226, 236–237Makefile.inc, 238
makeoptions keyword, in kernel configuration, 360
makewhatis(8), 264making software, 226malloc(), 174malware, 400man (manual) pages, xxxvi–xxxvii, 3–7,
264–265adding to directories, 264–265contents, 6–7defining sections, 265for disklabel(8), 55displaying, 265finding, 5–6moving through, 5overlapping names, 6search for cryptography, 10–11viewing, 4–5on web, 7
Management Information Base. See MIBs (Management Information Base)
management-addresses file, 445manual pages. See man (manual) pagesmanXX.tgz file set, 24mapping
filesystems to mount points, 128keyboard, 336
mark facility, 283marker in logs, 286MASTER_SITE_BERIOS variable, 247MASTER_SITE_OVERRIDE variable, 249Match keyword, 320match keyword, for bandwidth
management, 444–445maximizing cwm windows, 333maxproc variable, 96maxusers keyword, in kernel
configuration, 360MBR partitions, 30
creating, 46, 130–131, 144and fdisk(8), 129–131for softraid device, 162viewing, 130
mbrowse package, 313Media Access Control (MAC) addresses,
185, 213for DHCP server client identity, 307
megabytes, for displaying partition size, 50
memory (RAM), 18interface use by, 317log messages to, 289protection, 172–175

478 Index
memory filesystems (MFS), 148–150mounting at boot, 149–150partitions, creating, 149
memorylocked variable, 96memoryuse variable, 96merging /etc file changes during upgrade,
379, 393message of the day (MOTD), 269messages
displaying for packages, 234at kernel startup, 340–341from kernel to userland, 340from upgraded packages, 381–382
metadata, 134from softraid, 166
Meyer, Scott, 187MFS. See memory filesystems (MFS)MIBs (Management Information Base)
PF SNMP, 316for SNMP, 312–313sysctl, 343–344
Microsoft systemsBurn to Disc command, 40floppy creation on, 40NTFS partitions, 150virtualization, 450
minpasswordlen password control, 98mirroring (RAID-1), 161mirrors
CVS, 386fallback, 248–249local distfile, 246–249of OpenBSD website, 8preferred collection, 247–248primary, 249site layout for obtaining OpenBSD
copy, 20–[email protected], 9, 13–14
help for building custom kernel, 357mixectl(8), 268mkhybrid(8), 152monthly maintenance, 282more(1), 5MOTD (message of the day), 269mount command, 154mount point
mapping filesystems to, 128–129for partition, 52
mount(8), 140mount_cd9660(8), 152mountd startup script, reload argument, 157mountd(8) daemon, 155mounted files, listing all, 140mount_ext2fs(8), 152
mountingdisks
in FFS, 135–138in single-user mode, 71–72
filesystem images, 153–154filesystems, for upgrade, 376filesystems at nonstandard
locations, 141memory filesystems, at boot, 149–150with options, 142partitions, 140–142standard filesystems, 141
mount_mfs(8), 149mount_msdos(8), 151mount_ntfs(8), 151mounts, stackable, 146mouse, emulating three-button in X, 331moving, partitions, 145. See also
navigationmrouted(8), 269MS-DOS filesystem, 151multicast routing, 269multipackages, 252multiple hard drives, 29–30multiple network cards, installing
OpenBSD and, 43–44multiprocessor kernel, 72multiprocessor support, 18multiuser startup, 79–84Mutt mail client, noatime mount option
and, 137mv(1), copying files with, 145
NNAME section, in man pages, 7name service servers, 65, 211named user account, 102names
for aliases, 117for default kernel backup, 349for disk device nodes, 126for groups, 107for man pages, overlapping, 6for user accounts, 92for windows
in cwm, 333in tmux, 327
NAT (network address translation), 396bidirectional, 429–432
redirection, 431–432and rule order, 430–431and security, 430
configuring, 427how it works, 427–428

Index 479
multiple addresses and interface groups, 432
multiple or specific public addresses, 428–429
packet filtering with, 426–433port manipulation and ranges,
432–433transparent interception, 433
nat-to keyword, 427navigation, through man pages, 5ND (Neighbor Discovery), 185
IPv6 addresses and, 214ndp(8), 214negation symbol, exclamation point (!)
as, 117–118in filter rule, 406
negations in packet filtering lists, 415Neighbor Discovery (ND), 185
IPv6 addresses and, 214nested anchors in PF, 436–437nesting aliases, 116net.inet6.icmp6.rediraccept sysctl, 347net.inet6.ip6.accept_rtadv sysctl, 347net.inet6.ip6.forwarding sysctl, 347net.inet.icmp.rediraccept sysctl, 347net.inet.ip.forwarding sysctl, 345, 347net.inet.ip.sourceroute sysctl, 179net.inet.tcp.always_keepalive sysctl, 347netmask, 43
for alias addresses, 218for IP addresses, 189–190
net-snmp package of command-line tools, 313
netstat, for determining open TCP ports, 200–202
network adapter teaming, 221network address, 191network address translation. See NAT
(network address translation)network cards, multiple, installing
OpenBSD and, 43–44network connection, 209–224
DNS resolution, 210–213Ethernet, 213–215trunking, 221–222upgrading over, 374–375VLANs, 223–224
network devices, gathering information on, 312
Network File System. See NFS (Network File System)
network interfacesinterrupting installer to
identifying, 43list of recognized, 62recognition during install, 42
network layers (OSI), 184–187applications layer, 186–187datalink layer, 185, 187network layer, 185–186, 187physical layer, 184, 187transport layer, 186, 187
network protocol, for packet filtering, 405–406
network request, data transmission for, 187–188
network servers, 303–322DHCP daemon (dhcpd), 307–310printer daemon (lpd), 306–307small-server handler (inetd), 304–305SNMP agent (snmpd), 312–317SSH daemon (sshd), 317–322TFTP daemon (tftpd), 310–311
network stacks, 188–189Network Time Protocol (NTP) daemon
(ntpd(8)), 44configuring, 294using, 296
network.conf file, 247, 248MASTER_SITE_OVERRIDE variable, 249
networkingsetup after install, 62–65
default gateway, 64dynamic configuration, 64Ethernet interfaces, 62–64name service servers, 65
starting in single-user mode, 72newaliases(8), 65, 263newcomers, in OpenBSD community,
xxxivnewfs(1), 133newfs(8), 134–135, 139, 145news facility, 283newsyslog(8), 269, 290NFS (Network File System)
clients, 159–160permitted, 158–159
multiple exports for one partition, 159read-only mounts, 157root directory setup, 455–456setup, 154–155and users, 157–158
NFS server, 155–159nfsd(8) daemon, 155nginx web server, 229NKMEMPAGES value in kernel, 351noatime mount option, in FFS, 137noauto mount option, 128
in FFS, 138nobody account, 103, 158nodev mount option, 128
in FFS, 137
480 Index
nodump file flag, 176noexec mount option, in FFS, 137–138nologin variable, 97normal optimization for PF, 419nosuid mount option, 128NTFS filesystem, 151NTFS partitions (Microsoft), 150ntpd(8) (NTP [Network Time Protocol]
daemon), 44, 60configuring, 294using, 296
ntpd_flags variable, 59ntrw.exe program, 40null modem cable, for serial console,
75–76numerical sysctls, 346
OOATH one-time passwords, 100official CDs, 20, 40
package files on, 228upgrading from, 371, 373–375
offsetfor disklabel partition, 52for MBR partition, 34
on keyword, for packet filtering interface matching, 405
one-to-one NAT, 429open code, 2open ports, testing for TCP, 198Open Shortest Path First (OSPF), 203Open Systems Interconnection (OSI)
protocol stack, 184–187Applications layer, 186–187Datalink layer, 185, 187Network layer, 185–186, 187Physical layer, 184, 187Transport layer, 186, 187
OpenBGPD directory, 21OpenBSD. See also desktop OpenBSD
birth of, xxxiiibuild your own
preparations for, 383–388reasons to, 382–383
choosing install media, 22–23community, xxxiv
information sources, 1–2customizing, 449–460
diskless installation, 450–454installations, 458–460running diskless, 454–456upgrades, 460USB installation media, 457virtualization, 450
FAQ, 8, 37information sources, 3–10
mailing lists, 8–10man pages, 3–7manual, 4
obtaining a copy of, 19–23boot media, 22Internet downloads, 20mirror site layout, 20–21official CDs, 20, 40release directories, 21–22
problem-solving resources, 10–14security announcements, 172security flaws, 170source of problems, 2strengths, xxxv–xxxixsupport model, 2upgrade process, 371–373uses, xlversions, 368–371website, 7–8
for hardware compatibility lists, 38
OpenBSD Ports website, 230OpenBSD-specific functions,
MIBs for, 313OpenBSD Upgrade Guide, 371–373, 460openfiles variable, 96OpenNTPD daemon, 60, 294OpenNTPD directory, 21OpenOffice, 336OpenSSH directory, 21operating systems
/usr partition for programs, 28installing multiple on one
computer, 37multiple, 19source code for, installing, 66
Oracle VirtualBox, 450orphaned devices, custom kernels
and, 364OSI. See Open Systems Interconnection
(OSI) protocol stackOSPF (Open Shortest Path First), 203ospfd(8), 205out keyword, for direction in packet
filtering, 404–405outgoing traffic, control of, 400overlapping names, for man pages, 6ownership, foreign filesystems and, 152
Pp command, 50package respository, updating, 380–381

Index 481
packagesambiguous, 231–232dependencies for, 232, 234–235, 381descriptions of, 233finding, 229–232
with command prompt, 229on Web, 230
installing, 230–232for installing OpenBSD software, 227,
228–232limitations, 235listing files installed, 230–231preparing upgrades, 372–373and rc.d scripts, 252uninstalling, 234–235updating installed, 380–382
packages directory, 21packet filtering, 395. See also /etc/pf.conf
file; firewall; pf(4)activating rules, 409–410basics, 398–401blocking spoofed packets, 416complete ruleset, 409components, 401–403
control and configuration, 401interface groups, 401–402
default accept vs. default deny, 399as firewall, 397limitations, 400–401with lists, 413–414with macros, 414–415with NAT, 426–433PF MIB for statistics, 316reassembling packet, 416rules, 403–411
default permit or default deny, 404
packet pattern matching, 404–409
and state table, 411–413sanitizing traffic, 415–416
packets, 187fragmentation, 399
parent queue, defining, 441partition filesystems, 29partitioning hard drive, data
deleted for, 46partitioning scheme, for multiple
disks, 49partitions, 25–29, 30–31
bootable, 131cylinder boundary to end, 52deleting, 51disklabel, 31. See also disklabel
partitions
displaying size in gigabytes, 51displaying size in megabytes, 50encrypted, 166–168exporting, 156finding for booting, 73–74free space on, 142–144MBR, 30
creating, 46, 130–131, 144and fdisk(8), 129–131viewing, 130
MFS, creating, 149modifying existing, 55mount point for, 52mounting and unmounting, 140–142multiple exports for one, 159–160removing, 131setting not to mount, 138unmounting, 141–142viewing contents, 73–74
pass number, 128passive FTP, 437passphrase, for encrypted partition,
167, 168passwd method for BSD authentication, 99passwd(1) command, 58passwordcheck password control, 98password-dead password control, 99passwords
files for, 265–268for groups, 107non-echoing prompt, 91root, 44–45sudo caching, 120–121for user account, 87, 89
and batch mode, 90–92options, 98–99
passwordtime password control, 98passwordtries password control, 98password-warn password control, 98patches directory, 21path variable, 97
in default class, 95pathnames, tilde (~) in, 96pausing boot process, 70percent sign (%), for groups in user
aliases, 114per-host basis, @ symbol to override sudo
defaults, 118permanently insecure mode, 178permission denied error, 86permissions
error from ntrw, 40setuid or setgid, 25TFTP use of, 311viewing for existing files, 108

482 Index
permissions scheme, file flags in, 175persist keyword (PF), for table, 422per-user basis, @ symbol to override sudo
defaults, 118PF mailing list, 9pf(4) (PF), 270, 395
anchors, 434adding rules, 434–435
bandwidth management, 439–445queues for, 440–441
configuration, and FTP proxy, 438–439
enabling and configuring, 397–398FTP and, 437–439include files, 445logging, 446–448options, 417–420
fragmented packets, 418set block-policy, 417set limit, 417–419set optimization, 419–420set skip, 420src-nodes limit, 418states limit, 418–419
packet management, 421–448with tables, 422–426
quick keyword, 446ruleset tracing, 448viewing active rules, 410–411
pf.conf(5), scrub keyword, 416pfctl(8), 401, 409–410, 445
for anchor rule changes, 435commands for tables, 423–424to view state table, 411–412viewing and flushing anchors
with, 436pflog0 (PF logging), 63pflog(4) pseudo-device, 351pflogd(8), 446pflow(4) NetFlow exporter, 448physical interface for disk drive, 33physical layer (OSI), 184, 187PID file, adding, 293ping(8), 191, 196, 210–211pkg_add(1), 228, 230, 246, 381
verbose mode, 231pkg_delete(1), 234–235pkg_info(1), 229pkglocatedb, 233$PKG_PATH environment variable, 228, 380pkill command, 83Point-to-Point Protocol (PPP), 185pointer movement commands, 337
portability of OpenBSD, xxxviportmap(8) daemon, 155ports
build stages, 243–246code snapshot for, 384customizing, 246–251
local distfile mirrors, 246–249preferred collection mirrors,
247–248flavors, 249
and dependencies, 250–251uninstalling, 251
installing, 66subpackages, 251–252troubleshooting build failure, 242upgrading, 393
ports (TCP), 198–199determining which are open, 200–202
with fstat, 202with netstat, 200–202
filtering tcpdump on, 447reserved, 199–200
ports and packages system, 227–228ports collection, 235–241, 385
automation, 236building ports, 241–246finding software, 239–241secondary ports, 237–238
ports index, 239–240ports tree, 66, 236–237
read-only, 238–239ports.tar.gz file, 21, 66, 236, 384POSIX time zones, 60PostgreSQL port, 372–373PostScript, 306power button, 179power of Open BSD, xxxvipower sensors, 297PPP (Point-to-Point Protocol), 185Preboot eXecution Environment (PXE)
diskless booting method, 22, 450–451
preening of filesystems, 138preferred collection mirrors, 247–248primary mirror, 249primary partitions, 30print (fdisk), 130printer capability file, 270printer daemon (lpd), 306–307printing disklabels, 50, 53priority
for log message, 284for queue, 442

Index 483
priority queuing (PRIQ), 440priority variable, 97PRIQ (priority queuing), 440private communities in SNMP agents, 314private NAT addresses, 426–427private networks, IP addresses for, 192privilege, minimum level of, 86privileged account, risks from
regular use, 86processors, 18program name, sorting syslog
messages by, 286programs. See softwareprompt
boot loader, 70for disklabel(8), 50escaping to, 43for finding packages, 229in tmux, 328–329ukc> for kernel editor, 353
ProPolice, 173, 174proprietary hardware, 17–18proto keyword, for packet filtering, 405pseudo-devices, 351
custom kernel configuration for, 359–360
pseudo-terminals, 274ptrmove, 337public communities in SNMP agents, 314PuTTY, 76PXE (Preboot eXecution Environment)
diskless booting method, 22, 450–451
Qq command, to write disklabel to disk,
53–54qemu, 19queues for bandwidth management,
440–441assigning traffic to, 444child queue, 442match keyword, 444–445options, 442–443parent queue, 441priority for, 442viewing, 445
quit commandwith config, 353with fdisk, 131
RRADIUS authentication, 99
login classes for, 100–101radius method for BSD authentication, 99RAID (Redundant Array of Independent
Disks)checking health status of devices in
array, 164sensors for controllers, 297software, 160–166types, 161–162
RAM. See memory (RAM)random early detection, of packet loss, 443ranges of ports, pf(4) redirection of, 433rarpd(8), for reverse ARP, 454–455raw devices, 127rbootd(8), 271rc.d scripts, 82
for third-party software, 83rdist(1) program, 281read-only mailing lists, 9–10read-only mount (ro), 128read-only mounts
in FFS, 135–136in NFS, 157
read-only ports tree, 238–239read-write (rw) mount option, 128read-write mounts, in FFS, 136reboot, 49rebooting
as part of upgrade, 380to test configuration, 57
redirecting email messages, 65Redundant Array of Independent Disks.
See RAID (Redundant Array of Independent Disks)
reinstalling OpenBSD, vs. upgrade, 371reject method for BSD authentication, 99relayd(8), 271
anchors for, 434release directories, 21–22
contents after build, 391$RELEASEDIR environment variable, 390, 391releases of OpenBSD, 369–370
building, 389–392bundling base system, 390–391
indexing, 392using, 392
remote filesystem, mounting, 159remote host, logging to, 288remote machines, connecting
with SSH, 334

484 Index
remote magnetic tape command (rmt), 271removable media, 153removing. See deletingrepositories, for source code, 385–386Request for Comments. See RFC
(Request for Comments)requirehome variable, 97reserved ports (TCP), 199–200resolver, 210
vs. dynamic configuration, 212–213resource limits, for user account, 96–97responding to email, 14restore(8), copying files with, 145reverse ARP, rarpd(8) for, 454–455RFC (Request for Comments)
1918 on private networks, 192, 4265737 on IPv4 addresses, 426
RIP (Routing Information Protocol), 203RIP daemon, 271ripd(8), 271rmoption keyword, 362–363rmt (remote magnetic tape command), 271rmuser(8), 92rndc(8), 109ro (read-only) mount option, 128.rodata segments, 173root (/) partition, 26–27, 46
duplicating, 148multiple disks and, 49–50password, 44–45, 106
setting, 58preparing for upgrade, 374
root account, 86, 105disallowing logins directly to, 275email alias for, 278emailing maintenance tasks results to
local, 65hiding with sudo, 109–120for initial setup, 57secure console for, 275
roundrobin method, 221route add command, 207route delete command, 207route(8), 204–207, 219router advertisements, sysctl to
control, 347router discovery, 195routing, 203Routing Information Protocol (RIP), 203routing table, 204–205RPC, 272Rufus, 457run as alias, 114
override sudo defaults, 119rw (read-write) mount option, 128
Ssalt for password, 90sanitizing packet filtering traffic,
415–416sappnd file flag, 175, 179sasyncd(8) (security association
synchronization daemon), 272
SATA drives, 29/sbin/nologin shell, 102scheduled tasks, 277–282
custom scripts, 282daily maintenance, 278–281monthly maintenance, 282weekly maintenance, 282
schg file flag, 175, 179screen
blanking, 324–325locking in cwm, 333–334turning off display, 325
script kiddies, 170script man page, 242scripts
for maintenance, 282startup system, 80–82
scrub keyword, 416scrubbing, 399SCSI drives, 29SCSI multipathing feature,
experimental, 362search, 210–211search domains, default, 210–211search index, adding to routing table, 264searching
Internet, 11within man page, 5
for cryptography, 10–11for man pages, 5–6for packages, 229–232
with command prompt, 229on Web, 230
for software, 239–241by keyword, 240with SQL, 240–241
tables for packet filtering, 424secondary ports, 237–238sections in OpenBSD manual, 4sectors, 31–32
and disklabels, 32–34number for drive, 34
secure file transfer protocol (SFTP), 317Secure Shell daemon. See SSH (Secure
Shell) daemon (sshd),Secure Sockets Layer (SSL)
certificates, 273

Index 485
securelevel(7), 177–181determining appropriate, 180in rc.securelevel, 81weaknesses, 180–181
security, xxx, xxxviii–xxxix, 169–181attackers, 170–172bidirectional NAT and, 430faulty sudo setup impact, 110file flags, 175–177memory protection, 172–175partitions for, 25for SNMP, 314system clock and, 60updates for, 368user damage to, 85
security association synchronization daemon (sasyncd(8)), 272
security checks, in daily maintenance, 278–280
[email protected], 9, 172SEE ALSO section, in man pages, 7segments, 187Sendmail, 263sensors in hardware, 272. See also
hardware sensorssensorsd(8), 298, 317
variables, 301sensorsd.conf file, 299–300serial connection, configuration, 271serial consoles, 75–79
client serial port, 78–79logins, 79setup, 77testing configuration, 77
Serial Line Internet Protocol (SLIP), 272serial ports, 274services, setup when installing
OpenBSD, 44sessions, in tmux, 327–328set block-policy drop (PF), 417set block-policy return (PF), 417set keyword, 417set limit option (PF), 417–419set optimization option (PF) , 419–420set skip option (PF), 420set timeout command, 70setenv variable, 97setgid permissions, 25set-option command (tmux), 329setuid behavior, nosuid option
disallowing, 138setuid permissions, 25setuid root wrapper, 110
setup after install, 57–84booting to graphic console, 67checking system errata, 58hostname, 61–62installing ports and source code, 66keyboard mapping, 66mail aliases and status mail, 65networking, 62–65
default gateway, 64dynamic configuration, 64Ethernet interfaces, 62–64name service servers, 65
root password setting, 58software configuration, 59time and date, 60–61
set-window-option command (tmux), 329SFTP (secure file transfer protocol), 317SGI (Silicon Graphics), 16Shell option, in OpenBSD installer, 41shell script
OpenBSD installer as, 41variable assignments in, 59
shell variable, 97shells
login forbidden for unprivileged users, 102
modifying environment, 97for user account, 88, 92
configuring default, 87shutdown, 179
of server software, 82SIGHUP, 293signal name, 293–294signature in email, 13Silicon Graphics (SGI), 16Simple Mail Transfer Protocol
(SMTP), 263Simple Network Management Protocol
(SNMP), 273single-user mode
boot process in, 71–72mounting disks in, 71–72root partition mounting as
read-only, 140stackable mounts, 146starting network in, 72
siteXX.tgz file, 373, 460creating, 458–459
skey method for BSD authentication, 99skilled attackers, 171–172sleep, of screen, 325SLIP (Serial Line Internet Protocol), 272small-server handler (inetd), 304–305

486 Index
SMDS (Switched Multimegabit Data Service), 185
SMTP (Simple Mail Transfer Protocol), 263
snapshots directory, 21snapshots versions of OpenBSD, 369
compressed tar files for, 384snk method for BSD authentication, 99SNMP client, net-snmp package of
command-line tools, 313SNMP (Simple Network Management
Protocol), 273snmpd (SNMP agent), 312–317
configuring, 314–315debugging, 315–316getting information, 316–317
soft update mounts, in FFS, 137softraid(4) devices, 160
booting from, 166creating, 163–164deleting, 165failed volumes
identifying, 164rebuilding, 164–165
preparing disks for, 162–163reusing, 166status, 164
softwarecollections, 248configuration, 59force-starting, 83–84logging to, 287making, 226management, 225–253removing during upgrade, 372source code for, 226–227startup scripts, 82–83
software RAID, 160–166software serial console, 75songs directory, 21sorting
du output, 143messages, sylogd(8) for, 284–287
source address, in filter rule, 406source code, 226–227
to build custom kernel, 358for OpenBSD, 28for operating system, installing, 66for ports, 241updating, 385–388for your own OpenBSD, 384
source port, in filter rule, 408–409source routing, 179sparc64, 16
spoofed packets, blocking, 416sqlports package, 240src (userland) collection, 385src-nodes limit (PF), 418src.tar.gz file, 21, 384SSH (Secure Shell) daemon (sshd),
82–83, 273, 317–322connecting to remote machines
with, 334disabling, 318disabling root logins over, 45enabling, 44host keys, 318network options, 318–319
sshd_config file, 321SSL (Secure Sockets Layer)
certificates, 273-stable version of OpenBSD, 370
building, 387–388source code for, 384tag for, 385updating to, 386–387
stackable mounts, 146stacksize variable, 96staff user class, 94startup
enabling time correction at, 61multiuser, 79–84
startup scripts, 80–82for packages, 252–253software, 82–83
startx command, 330state table, 398–399
filtering rules and, 411–413stateful inspection, 398–399stateful protocol, 197stateless filtering, 399stateless protocol, 197statelessness of NFS, 155states per source address, PF
tracking of, 418static IP address, 63–64, 216, 310
DHCP vs., 42–43static NAT, 429statistics
from operating system, SNMP for, 316of PF, 418
status bar in tmux, 326options for, 329
status mail, setup after install, 65stop argument, for scripts at shutdown, 83streaming protocol, TCP as, 197striping (RAID-0), 161striping data across disks (RAID-4), 161

Index 487
striping with parity across drives (RAID-5), 161
su(1), 106_subdir keyword, 265subject, for email help request, 12–13subnets, for IPv6 addresses, 194subpackages, 251–252sudo(8), 106, 109–120
changing default behavior, 117–119configuring, 273disadvantages, 109–110and environment, 119–120exclusions, 122–123logs, 123, 293overview, 110password caching, 120–121reason to use, 109running commands, 121
sudoedit(8), 110, 121–122$SUDO_EDITOR environment variable, 122superblocks, in FFS, 134swap partition, 52–53swap space, 27
encrypting data written to, 348mount point, 128splitting between drives, 30
Switched Multimegabit Data Service (SMDS), 185
switches, 213configuring for VLANS, 223
switching between visible cwm windows, 333
sylogd(8)
and embedded systems, 289for sorting messages, 284–287
SYN (synchronization) request, 398SYN+ACK packet, 398synchronous mounts, in FFS, 136SYNOPSIS section, in man pages, 7sysadmin accounts, creating, 91sysctl MIBs, 343–344sysctl(8), 343
for adjusting kernel, 340sysctls (system controls), 178, 343–348
changing values, 345setting at boot, 346–348sysctl MIBs, 343–344value types, 345–346viewing list of, 344–345
syslog facility, 283syslog(3), 283syslogd(8) (logging daemon), 273
customizing, 288
sysmerge(8)
to compare /etc files, 376–378finishing, 380userland upgrade and, 389
sys.tar.gz file, 21, 384systat pf, 418systat states, 412system controls. See sysctls (system
controls)system errata, checking after install, 58system failures, swap space use in, 27system groups, in user aliases, 114system logs
actions, 287–288adding timestamp, 286customizing syslogd, 288and embedded systems, 289excluding information from, 285facilities, 283–284priority, 284sorting messages with syslogd(8),
284–287system maintenance, 277–301
hardware sensors, 296–301configuring, 298–301device drivers for, 297–298triggering action, 300–301
log file maintenance, 289–294adding PID file, 293monitoring, 293newsyslog.conf fields, 290–292signal name, 293–294
scheduled tasks, 277–282custom scripts, 282daily maintenance, 278–281monthly maintenance, 282weekly maintenance, 282
system logs, 282–289actions, 287–288customizing syslogd, 288and embedded systems, 289facilities, 283–284priority, 284sorting messages with syslogd(8),
284–287system time, 294–296
system message buffer, 340system time, 294–296system-level append-only flag, 175system-level immutable flag, 175–176systems administration team, directing
mail sent to root to, 65systrace(4) system, 273

488 Index
Ttable sysctl, 346tables for packet filtering, 422–426
and automation, 425–426changing, 424–425defining table, 422–423searching, 424using, 423viewing, 423–424
tag for repository version, 385tar files, creating, 458–459tar(1), copying files with, 145tasks. See scheduled tasksTCP (Transmission Control Protocol),
186, 197–198keep-alive feature, sysctl to
control, 347open ports, 200–202ports, 198–199reserved ports, 199–200states, 411–412
tcpdump(8)
binary format for PF logs, 447filtering, 447–448
TCP/IP, 183–207. See also IP addressesICMP (Internet Control Message
Protocol), 196IP routing, 202–207
deleting routes, 207IPv4, 203–204route flags, 206–207route(8) for managing, 204–207
network layers, 184–187network request, data transmission
for, 187–188network stacks, 188–189TCP. See TCP (Transmission Control
Protocol) UDP, 196–197
The TCP/IP Guide (Kozierok), 184, 397tcsh(1)
port for, 237system-wide defaults for, 257
[email protected], 9temperature sensors, 297temporary root directories, 390term variable, 97termcap(5) database, 78terminal emulator (tip(1)), 76terminals, 274–276
configuring, 275initializing, 79running virtual with tmux, 325–329
terminating windows in tmux, 327
testingconfiguration by rebooting, 57custom kernels, 364–365packet filtering rules, 410serial configuration, 77TFTP server, 311
text-based email reader, OpenBSD users, 13
TFTP (Trivial File Transfer Protocol), 310server setup for diskless install, 453testing server, 311
tftpd (TFTP daemon), 310–311third parties, mailing lists, 9third-party software, rc.d scripts for, 83three-button mouse, emulating in X, 331three-way handshake, 197, 398thrsize for ALTQ, 441tilde (~), in pathnames, 96time and date, setting, 60–61time formats, in log file, 291time sensors, 295time zone, setting, 45–46, 60timeout
boot idle, 70in PF, 399, 419setting for boot, 74
timestamp, adding to log file, 286timestamp file, 21timestamp_timeout option, for sudo password
caching, 120tip(1) (terminal emulator), 76/tmp directory, 27tmux attach, 328tmux list-sessions, 328tmux(1), 325–329
command mode, 328–329commands, 326–327configuring, 329help for, 327sessions in, 327–328setting options, 329status bar and window names, 326
token bucket regulator size configuration, 441
token method for BSD authentication, 99tools directory, 21, 22traceroute(8), 196tracing, pf ruleset, 448tracks, on disk drives, 31traffic interception, 433Transmission Control Protocol. See
TCP (Transmission Control Protocol)
transport layer (OSI), 186, 187Trivial File Transfer Protocol. See TFTP
(Trivial File Transfer Protocol)

Index 489
troubleshootingcustom kernel build errors, 365–366fsck for, 139port build failure, 242single-user mode for, 71
trunking, 221–222tsch, installing from port, 242tunnels, IPv6 addresses over, 224tutorials, 4
in OpenBSD FAQ, 8twm(1), 331
Uuappnd file flag, 175uchg file flag, 176UDP (User Datagram Protocol), 186,
196–197, 399ports in netstat output, 201states, 412–413
UFS (Unix File System), 133UID (user ID), 88
NFS use of, 157ukc> prompt (kernel editor), 353umask setting, for user, 95umask variable, 97umount(8), 141–142uname(1) command, 366, 381undeadly.org, 8underscore (_), for unprivileged user
names, 103–104UNetbootin, 457uninstalling
flavored ports, 251packages, 234–235
University of California, xxxii–xxxiiiUNIX, xxxi
development, xxxiiUnix File System (UFS), 133Unix Systems Laboratories (USL), xxxiiUnix-like systems, boot floppies, 39–40unmapping keyboard, 336unmounting
decrypted partition, 167partitions, 141–142
unprivileged user accounts, 102–104creating, 104uninstall packages and, 234
upgrade and install kernel, 72upgrade.site script, 460upgrading
customizing, 373, 460installed packages update, 380–382mounting filesystems, 376from official media, 373–375
over network, 374–375process for, 371–373reasons for, 368
USB diskbooting installer from, 22customizing media for
installation, 457USB keyboards, country code for, 66user accounts
for administrators, creating, 91–92authentication methods, 99–100creating, 88–89editing, 93–94identifying group membership, 107named, 102nobody account, 103password for, 87–88, 89removing, 92resource limits for, 96–97restrictions, 92temporarily disabling, 267unprivileged, 102–104
user aliases, 114user data partition, 25User Datagram Protocol. See UDP (User
Datagram Protocol)user facility, 283user ID (UID), 88
NSF use of, 157user management, 85–104
root account, 86user shells, as sudo exclusions, 122userland, 340
building, 389code snapshot for, 384for diskless machine, 455populating diskless, 456
user-level append-only flag, 175user-level immutable flag, 176usernames, 88
files for, 265–268users
adding, 86–92interactively, 87–89noninteractively, 89–92
chrooting, 319–322directing log messages to, 287NFS and, 157–158security problems from, 171as security risk, 85setting up first, 45
USL (Unix Systems Laboratories), xxxii/usr partition, 28/usr/local directory, 231/usr/local partition, 28

490 Index
/usr/mdec/ directory, 453/usr/obj directory, for build, 384/usr/obj partition, 28–29/usr/ports directory, 66, 236
for build, 384/usr/ports/emulators file, 450/usr/ports/INDEX file, 239/usr/ports/sysutils/mtools, 151/usr/share/zoneinfo directory, 60/usr/src directory, for build, 384/usr/src partition, 28/usr/src/sys/arch file, 361/usr/src/sys/arch/amd64 file, 365/usr/src/sys/conf file, 360–361/usr/X11R6 partition, 28/usr/X11R6/share/X11/rgb.txt file, 335–336/usr/xenocara directory, for build, 384/usr/xobj directory, for build, 384UTC (Coordinated Universal Time), 45uucp facility, 283uvideo(4), 351
V/var partition, 28/var/backups file, 280/var/db/pkg file, 232/var/log/daemon file, 300/var/log/pflog file, 447/var/log/secure file, 123/var/run/dmesg.boot file, 340/var/www directory, 320variables
for login.conf, 95–96for ports collection, 238
verbose modefor pkg_add(1), 231for snmpd, 315
versions of OpenBSD, 368–371-current, 368–369
building, 392–393source code for, 384updating to, 387–388
releases, 369–370snapshots, 369-stable, 370
building, 387–388source code for, 384tag for, 385updating to, 386–387
use decision, 370–371video device, kernel support for, 351vipw(8), 94, 266virtual consoles, 274
virtual local area network (VLAN), 223–224
and OpenBSD install, 42virtual memory, 27virtual node. See vnode (virtual node)Virtual PC, 450virtual terminals, running with tmux,
325–329VirtualBox (Oracle), 19, 450virtualization, 19, 450
USB installation for, 456$VISUAL environment variable, 122visudo(8) command, 110–111VLAN (virtual local area network),
223–224and OpenBSD install, 42
vmemoryuse variable, 96vm.swapencrypt.enable sysctl, 348VMware, 19, 450vnconfig(8), 153, 154vnode (virtual node). 151
attaching to disk images, 154detaching from images, 154vs. inodes, 150–151
volumes in OpenBSD manual, 4
Wweb applications, 461web browser, lynx(1) text-mode, 262web server
installing OpenBSD from, 23on OpenBSD, 229
websites, on OpenBSD content, 8weekly maintenance, 282welcome message, default for user, 87welcome variable, 97_whatdb keyword, 264whatis(1), 5–6, 10
database, 264wheel group, 88–89, 106
unlimited sudo access for, 114wildcard, in command alias, 115windows in cwm
creating, 332–333managing, 333
windows in tmuxchanging current, 326–327names, 326, 327terminating, 327
Windows NT operating systems, disk images for, 40
word sysctls, 346write caching, 136

Index 491
Write Xor Execute (W^X), 173writing, disklabel to disk, 53–54wsconsctl(8), configuring console with,
324–325www (website) collection, 385W^X (Write Xor Execute), 173
XX command, for disklabel expert mode, 55X display manager. See xdm(1) (X display
manager)X Windows System, 24, 323
application menu creation, 334booting into, 330–331building, 389code snapshot for, 384connecting to remote machines
with SSH, 334installer and, 44keyboard navigation, 335setting up, 330–331
X11 X Windows collection, 385X-based graphic console, 67xbaseXX.tgz file set, 24xclock(1), 336xdm(1) (X display manager), 44, 67
/etc/rc.conf hook for starting, 330–331Xenocara, 24, 323
building, 389, 391–392setting up, 330–331window managers in, 331
xenocara X Windows collection, 385xenocara.tar.gz file, 22, 384xetcXX.tgz file set, 25XF4 X Windows collection, 385Xfce, 331xfontXX.tgz file set, 25xlock(1), 334X.Org, 323xscreensaver package, 334xservXX.tgz file set, 25xsetroot(1), 335xshareXX.tgz file set, 25
YYP database, 276yubikey method for BSD authentication, 99
Zz command, 51Zaurus personal digital assistants, 16

phone:800.420.7240 or
415.863.9900
email:[email protected]
web:www.nostarch.com
Absolute FreebsD®, 2nD eDitionthe Complete Guide to FreebsDby michael w. lucas
the linux CommAnD lineA Complete introductionby william e. shotts, jr.
FreebsD® DeviCe DriversA Guide for the intrepidby joseph kong
the linux ProGrAmminG interFACeA linux and unix® system Programming handbookby michael kerrisk
network Flow AnAlysis by michael w. lucas
the book oF PF, 2nD eDitionA no-nonsense Guide to the openbsD Firewallby peter n.m. hansteen
More no-nonsense books from no stArCh Press
uPDAtesVisit http://nostarch.com/openbsd2e/ for updates, errata, and other information.
The Electronic Frontier Foundation (EFF) is the leading organization defending civil liberties in the digital world. We defend free speech on the Internet, fight illegal surveillance, promote the rights of innovators to develop new digital technologies, and work to ensure that the rights and freedoms we enjoy are enhanced — rather than eroded — as our use of technology grows.
EFF has sued telecom giant AT&T for giving the NSA unfettered access to the private communications of millions of their customers. eff.org/nsa
EFF’s Coders’ Rights Project is defending the rights of programmers and security researchers to publish their findings without fear of legal challenges. eff.org/freespeech
EFF's Patent Busting Project challenges overbroad patents that threaten technological innovation. eff.org/patent
EFF is fighting prohibitive standards that would take away your right to receive and use over-the-air television broadcasts any way you choose. eff.org/IP/fairuse
EFF has developed the Switzerland Network Testing Tool to give individuals the tools to test for covert traffic filtering. eff.org/transparency
EFF is working to ensure that international treaties do not restrict our free speech, privacy or digital consumer rights. eff.org/global
PRIVACY
FREE SPEECH
INNOVATION
FAIR USE
TRANSPARENCY
INTERNATIONAL
EFF is a member-supported organization. Join Now! www.eff.org/support
NFA_03.book Page 205 Thursday, May 27, 2010 5:35 PM


![Extensile Exposure (2nd Edition) [Section 04] - Global HELP](https://img.pdfslide.net/doc/110x75/633c7f1d861869c59a0cf672/extensile-exposure-2nd-edition-section-04-global-help.jpg)


