Embed Size (px)
Citation preview
Preservation Brief 1: The Cleaning and Waterproof Coating of Masonry Buildings
http://www.cr.nps.gov/hps/tps/briefs/brief01.htm[8/17/2011 4:33:29 PM]
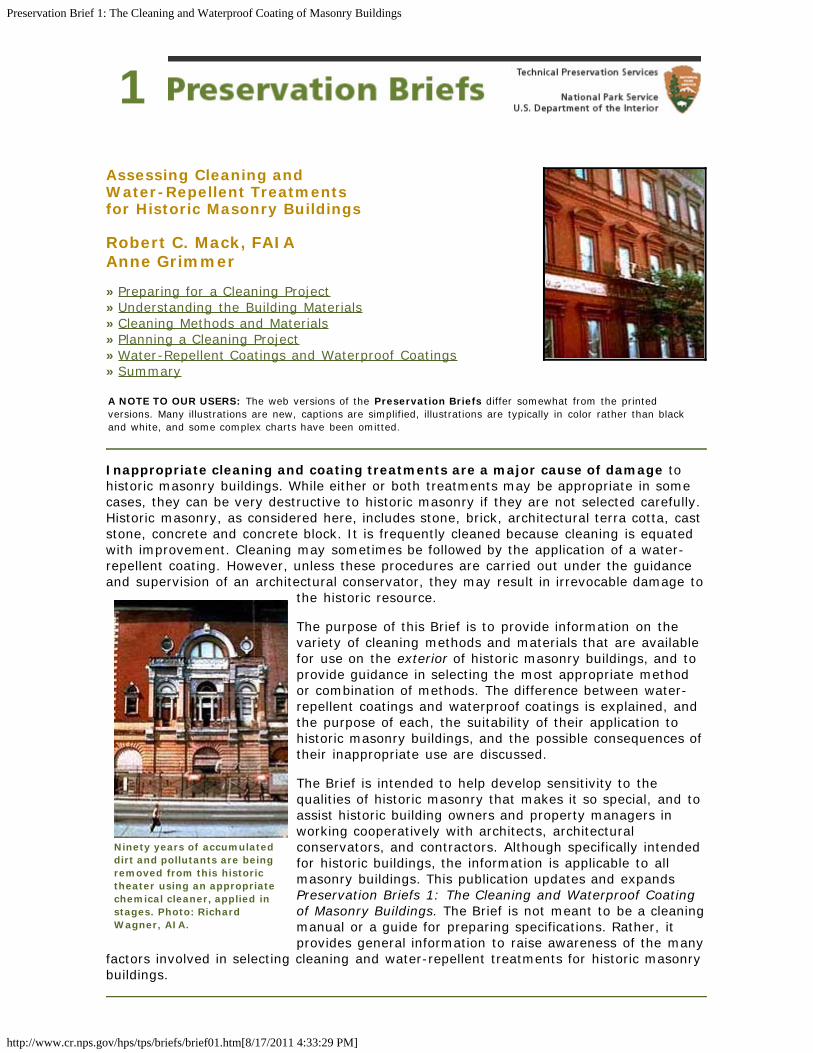
Ninety years of accumulateddirt and pollutants are beingremoved from this historictheater using an appropriatechemical cleaner, applied instages. Photo: RichardWagner, AIA.
1
Assessing Cleaning and Water-Repellent Treatmentsfor Historic Masonry Buildings
Robert C. Mack, FAIAAnne Grimmer
»Preparing for a Cleaning Project»Understanding the Building Materials »Cleaning Methods and Materials»Planning a Cleaning Project»Water-Repellent Coatings and Waterproof Coatings»Summary
A NOTE TO OUR USERS: The web versions of the Preservation Briefs differ somewhat from the printedversions. Many illustrations are new, captions are simplified, illustrations are typically in color rather than blackand white, and some complex charts have been omitted.
Inappropriate cleaning and coating treatments are a major cause of damage tohistoric masonry buildings. While either or both treatments may be appropriate in somecases, they can be very destructive to historic masonry if they are not selected carefully.Historic masonry, as considered here, includes stone, brick, architectural terra cotta, caststone, concrete and concrete block. It is frequently cleaned because cleaning is equatedwith improvement. Cleaning may sometimes be followed by the application of a water-repellent coating. However, unless these procedures are carried out under the guidanceand supervision of an architectural conservator, they may result in irrevocable damage to
the historic resource.
The purpose of this Brief is to provide information on thevariety of cleaning methods and materials that are availablefor use on the exterior of historic masonry buildings, and toprovide guidance in selecting the most appropriate methodor combination of methods. The difference between water-repellent coatings and waterproof coatings is explained, andthe purpose of each, the suitability of their application tohistoric masonry buildings, and the possible consequences oftheir inappropriate use are discussed.
The Brief is intended to help develop sensitivity to thequalities of historic masonry that makes it so special, and toassist historic building owners and property managers inworking cooperatively with architects, architecturalconservators, and contractors. Although specifically intendedfor historic buildings, the information is applicable to allmasonry buildings. This publication updates and expandsPreservation Briefs 1: The Cleaning and Waterproof Coatingof Masonry Buildings. The Brief is not meant to be a cleaningmanual or a guide for preparing specifications. Rather, itprovides general information to raise awareness of the many
factors involved in selecting cleaning and water-repellent treatments for historic masonrybuildings.

Preservation Brief 1: The Cleaning and Waterproof Coating of Masonry Buildings
http://www.cr.nps.gov/hps/tps/briefs/brief01.htm[8/17/2011 4:33:29 PM]
Preparing for a Cleaning Project
Reasons for cleaning. First, it is important to determine whether it is appropriate toclean the masonry. The objective of cleaning a historic masonry building must beconsidered carefully before arriving at a decision to clean. There are several majorreasons for cleaning a historic masonry building: improve the appearance of thebuilding by removing unattractive dirt or soiling materials, or non-historic paint from themasonry; retard deterioration by removing soiling materials that may be damaging themasonry; or provide a clean surface to accurately match repointing mortars orpatching compounds, or to conduct a condition survey of the masonry.
Identify what is to be removed. The general nature and source of dirt or soilingmaterial on a building must be identified to remove it in the gentlest means possible--that is, in the most effective, yet least harmful, manner. Soot and smoke, for example,require a different cleaning agent to remove than oil stains or metallic stains. Othercommon cleaning problems include biological growth such as mold or mildew, andorganic matter such as the tendrils left on masonry after removal of ivy.
Consider the historic appearance of the building. If the proposed cleaning is toremove paint, it is important in each case to learn whether or not unpainted masonry ishistorically appropriate. And, it is necessary to consider why the building was painted.Was it to cover bad repointing or unmatched repairs? Was the building painted to protectsoft brick or to conceal deteriorating stone? Or, was painted masonry simply afashionable treatment in a particular historic period? Many buildings were painted at thetime of construction or shortly thereafter; retention of the paint, therefore, may be moreappropriate historically than removing it. And, if the building appears to have beenpainted for a long time, it is also important to think about whether the paint is part ofthe character of the historic building and if it has acquired significance over time.
Consider the practicalities of cleaning or paint removal. Some gypsum or sulfatecrusts may have become integral with the stone and, if cleaning could result in removingsome of the stone surface, it may be preferable not to clean. Even where unpaintedmasonry is appropriate, the retention of the paint may be more practical than removal interms of long range preservation of the masonry. In some cases, however, removal ofthe paint may be desirable. For example, the old paint layers may have built up to suchan extent that removal is necessary to ensure a sound surface to which the new paintwill adhere.
Study the masonry. Although not always necessary, in some instances it can bebeneficial to have the coating or paint type, color, and layering on the masonryresearched before attempting its removal. Analysis of the nature of the soiling or of thepaint to be removed from the masonry, as well as guidance on the appropriate cleaningmethod, may be provided by professional consultants, including architecturalconservators, conservation scientists, and preservation architects. The State HistoricPreservation Office (SHPO), local historic district commissions, architectural reviewboards, and preservation-oriented websites may also be able to supply useful informationon masonry cleaning techniques.
Understanding the Building Materials
The construction of the building must be considered whendeveloping a cleaning program because inappropriate cleaningcan have a deleterious effect on the masonry as well as on otherbuilding materials. The masonry material or materials must becorrectly identified. It is sometimes difficult to distinguish onetype of stone from another; for example, certain sandstones canbe easily confused with limestones. Or, what appears to benatural stone may not be stone at all, but cast stone orconcrete. Historically, cast stone and architectural terra cottawere frequently used in combination with natural stone,
Preservation Brief 1: The Cleaning and Waterproof Coating of Masonry Buildings
http://www.cr.nps.gov/hps/tps/briefs/brief01.htm[8/17/2011 4:33:29 PM]
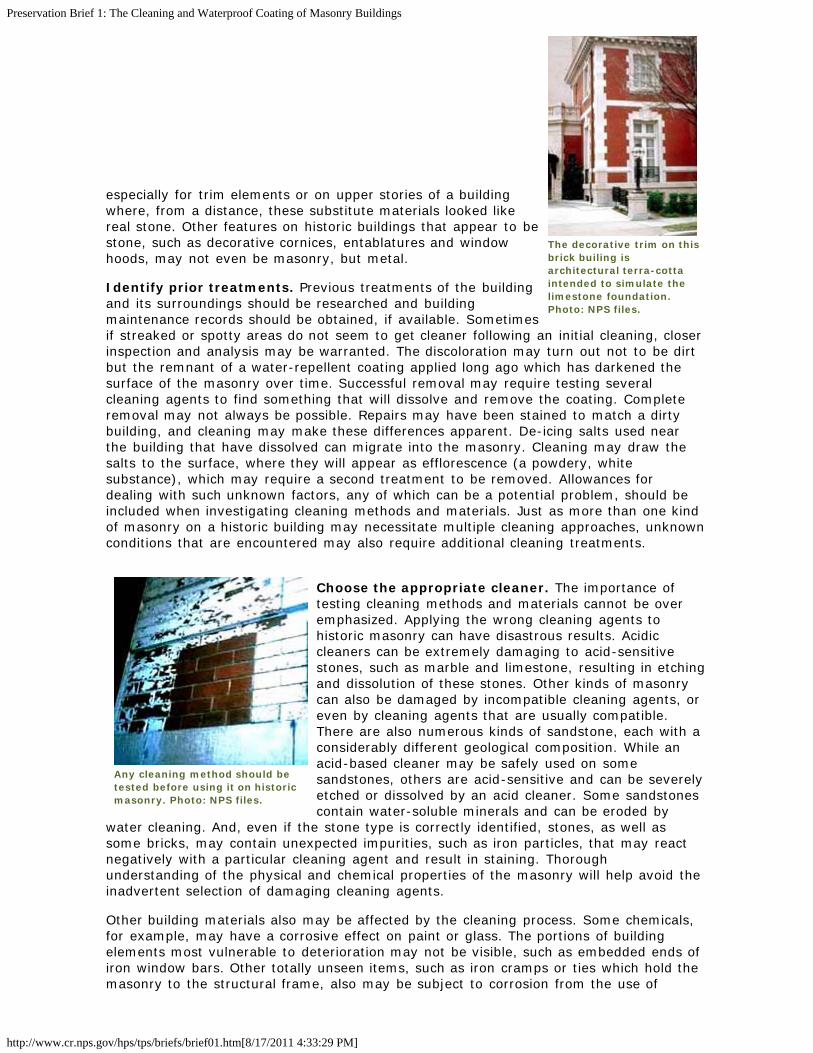
The decorative trim on thisbrick builing isarchitectural terra-cottaintended to simulate thelimestone foundation.Photo: NPS files.
Any cleaning method should betested before using it on historicmasonry. Photo: NPS files.
especially for trim elements or on upper stories of a buildingwhere, from a distance, these substitute materials looked likereal stone. Other features on historic buildings that appear to bestone, such as decorative cornices, entablatures and windowhoods, may not even be masonry, but metal.
Identify prior treatments. Previous treatments of the buildingand its surroundings should be researched and buildingmaintenance records should be obtained, if available. Sometimesif streaked or spotty areas do not seem to get cleaner following an initial cleaning, closerinspection and analysis may be warranted. The discoloration may turn out not to be dirtbut the remnant of a water-repellent coating applied long ago which has darkened thesurface of the masonry over time. Successful removal may require testing severalcleaning agents to find something that will dissolve and remove the coating. Completeremoval may not always be possible. Repairs may have been stained to match a dirtybuilding, and cleaning may make these differences apparent. De-icing salts used nearthe building that have dissolved can migrate into the masonry. Cleaning may draw thesalts to the surface, where they will appear as efflorescence (a powdery, whitesubstance), which may require a second treatment to be removed. Allowances fordealing with such unknown factors, any of which can be a potential problem, should beincluded when investigating cleaning methods and materials. Just as more than one kindof masonry on a historic building may necessitate multiple cleaning approaches, unknownconditions that are encountered may also require additional cleaning treatments.
Choose the appropriate cleaner. The importance oftesting cleaning methods and materials cannot be overemphasized. Applying the wrong cleaning agents tohistoric masonry can have disastrous results. Acidiccleaners can be extremely damaging to acid-sensitivestones, such as marble and limestone, resulting in etchingand dissolution of these stones. Other kinds of masonrycan also be damaged by incompatible cleaning agents, oreven by cleaning agents that are usually compatible.There are also numerous kinds of sandstone, each with aconsiderably different geological composition. While anacid-based cleaner may be safely used on somesandstones, others are acid-sensitive and can be severelyetched or dissolved by an acid cleaner. Some sandstonescontain water-soluble minerals and can be eroded by
water cleaning. And, even if the stone type is correctly identified, stones, as well assome bricks, may contain unexpected impurities, such as iron particles, that may reactnegatively with a particular cleaning agent and result in staining. Thoroughunderstanding of the physical and chemical properties of the masonry will help avoid theinadvertent selection of damaging cleaning agents.
Other building materials also may be affected by the cleaning process. Some chemicals,for example, may have a corrosive effect on paint or glass. The portions of buildingelements most vulnerable to deterioration may not be visible, such as embedded ends ofiron window bars. Other totally unseen items, such as iron cramps or ties which hold themasonry to the structural frame, also may be subject to corrosion from the use of
Preservation Brief 1: The Cleaning and Waterproof Coating of Masonry Buildings
http://www.cr.nps.gov/hps/tps/briefs/brief01.htm[8/17/2011 4:33:29 PM]
chemicals or even from plain water. The only way to prevent problems in these cases isto study the building construction in detail and evaluate proposed cleaning methods withthis information in mind. However, due to the very likely possibility of encounteringunknown factors, any cleaning project involving historic masonry should be viewed asunique to that particular building.
Cleaning Methods and Materials
Masonry cleaning methods generally are divided into three major groups: water,chemical, and abrasive. Water methods soften the dirt or soiling material and rinse thedeposits from the masonry surface. Chemical cleaners react with dirt, soiling material orpaint to effect their removal, after which the cleaning effluent is rinsed off the masonrysurface with water. Abrasive methods include blasting with grit, and the use of grindersand sanding discs, all of which mechanically remove the dirt, soiling material or paint(and, usually, some of the masonry surface). Abrasive cleaning is also often followedwith a water rinse. Laser cleaning, although not discussed here in detail, is anothertechnique that is used sometimes by conservators to clean small areas of historicmasonry. It can be quite effective for cleaning limited areas, but it is expensive andgenerally not practical for most historic masonry cleaning projects.
Although it may seem contrary to common sense, masonry cleaning projects should becarried out starting at the bottom and proceeding to the top of the building alwayskeeping all surfaces wet below the area being cleaned. The rationale for this approach isbased on the principle that dirty water or cleaning effluent dripping from cleaning inprogress above will leave streaks on a dirty surface but will not streak a clean surface aslong as it is kept wet and rinsed frequently.
Water Cleaning
Water cleaning methods are generally the gentlest means possible, and they can be usedsafely to remove dirt from all types of historic masonry.* There are essentially four kindsof water-based methods: soaking; pressure water washing; water washing supplementedwith non-ionic detergent; and steam, or hot-pressurized water cleaning. Once watercleaning has been completed, it is often necessary to follow up with a water rinse towash off the loosened soiling material from the masonry.____________ * Water cleaning methods may not be appropriate to use on some badly deteriorated masonry because water mayexacerbate the deterioration, or on gypsum or alabaster, which are very soluble in water.
Soaking. Prolonged spraying or misting with water is particularly effective for cleaninglimestone and marble. It is also a good method for removing heavy accumulations ofsoot, sulfate crusts or gypsum crusts that tend to form in protected areas of a buildingnot regularly washed by rain. Water is distributed to lengths of punctured hose or pipewith non-ferrous fittings hung from moveable scaffolding or a swing stage thatcontinuously mists the surface of the masonry with a very fine spray. A timed on-offspray is another approach to using this cleaning technique. After one area has beencleaned, the apparatus is moved on to another. Soaking is often used in combinationwith water washing and is also followed by a final water rinse. Soaking is a very slowmethod--it may take several days or a week--but it is a very gentle method to use onhistoric masonry.
Water Washing. Washing with low-pressure ormedium-pressure water is probably one of themost commonly used methods for removing dirtor other pollutant soiling from historic masonrybuildings. Starting with a very low pressure (100psi or below), even using a garden hose, andprogressing as needed to slightly higher pressure--generally no higher than 300-400 psi--is alwaysthe recommended way to begin. Scrubbing with
Preservation Brief 1: The Cleaning and Waterproof Coating of Masonry Buildings
http://www.cr.nps.gov/hps/tps/briefs/brief01.htm[8/17/2011 4:33:29 PM]
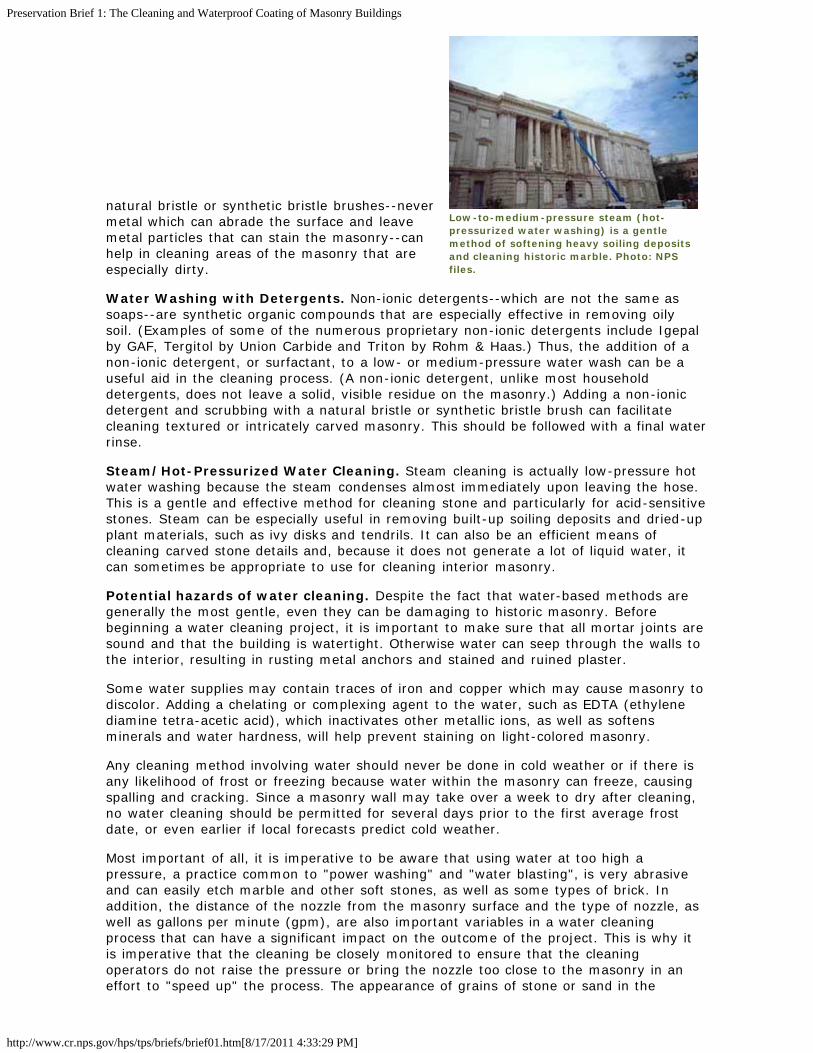
Low-to-medium-pressure steam (hot-pressurized water washing) is a gentlemethod of softening heavy soiling depositsand cleaning historic marble. Photo: NPSfiles.
natural bristle or synthetic bristle brushes--nevermetal which can abrade the surface and leavemetal particles that can stain the masonry--canhelp in cleaning areas of the masonry that areespecially dirty.
Water Washing with Detergents. Non-ionic detergents--which are not the same assoaps--are synthetic organic compounds that are especially effective in removing oilysoil. (Examples of some of the numerous proprietary non-ionic detergents include Igepalby GAF, Tergitol by Union Carbide and Triton by Rohm & Haas.) Thus, the addition of anon-ionic detergent, or surfactant, to a low- or medium-pressure water wash can be auseful aid in the cleaning process. (A non-ionic detergent, unlike most householddetergents, does not leave a solid, visible residue on the masonry.) Adding a non-ionicdetergent and scrubbing with a natural bristle or synthetic bristle brush can facilitatecleaning textured or intricately carved masonry. This should be followed with a final waterrinse.
Steam/Hot-Pressurized Water Cleaning. Steam cleaning is actually low-pressure hotwater washing because the steam condenses almost immediately upon leaving the hose.This is a gentle and effective method for cleaning stone and particularly for acid-sensitivestones. Steam can be especially useful in removing built-up soiling deposits and dried-upplant materials, such as ivy disks and tendrils. It can also be an efficient means ofcleaning carved stone details and, because it does not generate a lot of liquid water, itcan sometimes be appropriate to use for cleaning interior masonry.
Potential hazards of water cleaning. Despite the fact that water-based methods aregenerally the most gentle, even they can be damaging to historic masonry. Beforebeginning a water cleaning project, it is important to make sure that all mortar joints aresound and that the building is watertight. Otherwise water can seep through the walls tothe interior, resulting in rusting metal anchors and stained and ruined plaster.
Some water supplies may contain traces of iron and copper which may cause masonry todiscolor. Adding a chelating or complexing agent to the water, such as EDTA (ethylenediamine tetra-acetic acid), which inactivates other metallic ions, as well as softensminerals and water hardness, will help prevent staining on light-colored masonry.
Any cleaning method involving water should never be done in cold weather or if there isany likelihood of frost or freezing because water within the masonry can freeze, causingspalling and cracking. Since a masonry wall may take over a week to dry after cleaning,no water cleaning should be permitted for several days prior to the first average frostdate, or even earlier if local forecasts predict cold weather.
Most important of all, it is imperative to be aware that using water at too high apressure, a practice common to "power washing" and "water blasting", is very abrasiveand can easily etch marble and other soft stones, as well as some types of brick. Inaddition, the distance of the nozzle from the masonry surface and the type of nozzle, aswell as gallons per minute (gpm), are also important variables in a water cleaningprocess that can have a significant impact on the outcome of the project. This is why itis imperative that the cleaning be closely monitored to ensure that the cleaningoperators do not raise the pressure or bring the nozzle too close to the masonry in aneffort to "speed up" the process. The appearance of grains of stone or sand in the
Preservation Brief 1: The Cleaning and Waterproof Coating of Masonry Buildings
http://www.cr.nps.gov/hps/tps/briefs/brief01.htm[8/17/2011 4:33:29 PM]
cleaning effluent on the ground is an indication that the water pressure may be too high.
Chemical Cleaning
Chemical cleaners, generally in the form of proprietary products, are another materialfrequently used to clean historic masonry. They can remove dirt, as well as paint andother coatings, metallic and plant stains, and graffiti. Chemical cleaners used to removedirt and soiling include acids, alkalies and organic compounds. Acidic cleaners, ofcourse, should not be used on masonry that is acid sensitive. Paint removers arealkaline, based on organic solvents or other chemicals.
Chemical Cleaners to Remove Dirt
Both alkaline and acidic cleaning treatments include the use of water. Both cleaners arealso likely to contain surfactants (wetting agents), that facilitate the chemical reactionthat removes the dirt. Generally, the masonry is wet first for both types of cleaners,then the chemical cleaner is sprayed on at very low pressure or brushed onto thesurface. The cleaner is left to dwell on the masonry for an amount of time recommendedby the product manufacturer or, preferably, determined by testing, and rinsed off with alow- or moderate-pressure cold, or sometimes hot, water wash.
More than one application of the cleaner may be necessary, and it is always a goodpractice to test the product manufacturer’s recommendations concerning dilution ratesand dwell times. Because each cleaning situation is unique, dilution rates and dwell timescan vary considerably. The masonry surface may be scrubbed lightly with natural orsynthetic bristle brushes prior to rinsing. After rinsing, pH strips should be applied to thesurface to ensure that the masonry has been neutralized completely.
Acidic Cleaners. Acid-based cleaning products may be used on non-acid sensitivemasonry, which generally includes: granite, most sandstones, slate, unglazed brick andunglazed architectural terra cotta, cast stone and concrete. Most commercial acidiccleaners are composed primarily of hydrofluoric acid, and often include some phosphoricacid to prevent rust-like stains from developing on the masonry after the cleaning. Acidcleaners are applied to the pre-wet masonry which should be kept wet while the acid isallowed to "work", and then removed with a water wash.
Alkaline Cleaners. Alkaline cleaners should be used on acid-sensitive masonry,including: limestone, polished and unpolished marble, calcareous sandstone, glazed brickand glazed architectural terra cotta, and polished granite. (Alkaline cleaners may also beused sometimes on masonry materials that are not acid sensitive--after testing, ofcourse--but they may not be as effective as they are on acid-sensitive masonry.)Alkaline cleaning products consist primarily of two ingredients: a non-ionic detergent orsurfactant; and an alkali, such as potassium hydroxide or ammonium hydroxide. Likeacidic cleaners, alkaline products are usually applied to pre-wet masonry, allowed todwell, and then rinsed off with water. (Longer dwell times may be necessary with alkalinecleaners than with acidic cleaners.) Two additional steps are required to remove alkalinecleaners after the initial rinse. First the masonry is given a slightly acidic wash--oftenwith acetic acid--to neutralize it, and then it is rinsed again with water.
Chemical Cleaners to Remove Paint and Other Coatings, Stains and Graffiti
Removing paint and some other coatings, stains and graffiti can best be accomplishedwith alkaline paint removers, organic solvent paint removers, or other cleaningcompounds. The removal of layers of paint from a masonry surface usually involvesapplying the remover either by brush, roller or spraying, followed by a thorough waterwash. As with any chemical cleaning, the manufacturer’s recommendations regardingapplication procedures should always be tested before beginning work.
Alkaline Paint Removers. These are usually of much the same composition as otheralkaline cleaners, containing potassium or ammonium hydroxide, or trisodium phosphate.They are used to remove oil, latex and acrylic paints, and are effective for removing
Preservation Brief 1: The Cleaning and Waterproof Coating of Masonry Buildings
http://www.cr.nps.gov/hps/tps/briefs/brief01.htm[8/17/2011 4:33:29 PM]
multiple layers of paint. Alkaline cleaners may also remove some acrylic water-repellentcoatings. As with other alkaline cleaners, both an acidic neutralizing wash and a finalwater rinse are generally required following the use of alkaline paint removers.
Organic Solvent Paint Removers. The formulation of organic solvent paint removersvaries and may include a combination of solvents, including methylene chloride,methanol, acetone, xylene and toluene.
Other Paint Removers and Cleaners. Other cleaning compounds that can be used toremove paint and some painted graffiti from historic masonry include paint removersbased on N-methyl-2-pyrrolidone (NMP), or on petroleum-based compounds. Removingstains, whether they are industrial (smoke, soot, grease or tar), metallic (iron or copper),or biological (plant and fungal) in origin, depends on carefully matching the type ofremover to the type of stain. Successful removal of stains from historic masonry oftenrequires the application of a number of different removers before the right one is found.The removal of layers of paint from a masonry surface is usually accomplished byapplying the remover either by brush, roller or spraying, followed by a thorough waterwash.
Potential hazards of chemical cleaning. Since most chemical cleaning methodsinvolve water, they have many of the potential problems of plain water cleaning. Likewater methods, they should not be used in cold weather because of the possibility offreezing. Chemical cleaning should never be undertaken in temperatures below 40degrees F (4 degrees C), and generally not below 50 degrees F. In addition, manychemical cleaners simply do not work in cold temperatures. Both acidic and alkalinecleaners can be dangerous to cleaning operators, and clearly, there are environmentalconcerns associated with the use of chemical cleaners.
If not carefully chosen, chemical cleaners can react adversely with many types ofmasonry. Obviously, acidic cleaners should not be used on acid-sensitive materials;however, it is not always clear exactly what the composition is of any stone or othermasonry material. For, this reason, testing the cleaner on an inconspicuous spot on thebuilding is always necessary. While certain acid-based cleaners may be appropriate ifused as directed on a particular type of masonry, if left too long or if not adequatelyrinsed from the masonry they can have a negative effect. For example, hydrofluoric acidcan etch masonry leaving a hazy residue (whitish deposits of silica or calcium fluoridesalts) on the surface. While this efflorescence may usually be removed by a secondcleaning--although it is likely to be expensive and time-consuming--hydrofluoric acidcan also leave calcium fluoride salts or a colloidal silica deposit on masonry which maybe impossible to remove. Other acids, particularly hydrochloric (muriatic) acid, whichis very powerful, should not be used on historic masonry, because it can dissolve lime-based mortar, damage brick and some stones, and leave chloride deposits on themasonry.
Alkaline cleaners can stain sandstones that contain a ferrous compound. Before using analkaline cleaner on sandstone it is always important to test it, since it may be difficult toknow whether a particular sandstone may contain a ferrous compound. Some alkalinecleaners, such as sodium hydroxide (caustic soda or lye) and ammoniumbifluoride, can also damage or leave disfiguring brownish-yellow stains and, in mostcases, should not be used on historic masonry. Although alkaline cleaners will not etch amasonry surface as acids can, they are caustic and can burn the surface. In addition,alkaline cleaners can deposit potentially damaging salts in the masonry which can bedifficult to rinse thoroughly.
Poulticing to Remove Stains and Graffiti
Graffiti and stains, which have penetrated into the masonry, often are best removed byusing a poultice. A poultice consists of an absorbent material or clay powder (such askaolin or fuller’s earth, or even shredded paper or paper towels), mixed with a liquid (asolvent or other remover) to form a paste which is applied to the stain. The poultice iskept moist and left on the stain as long as necessary for it to draw the stain out of the
Preservation Brief 1: The Cleaning and Waterproof Coating of Masonry Buildings
http://www.cr.nps.gov/hps/tps/briefs/brief01.htm[8/17/2011 4:33:29 PM]
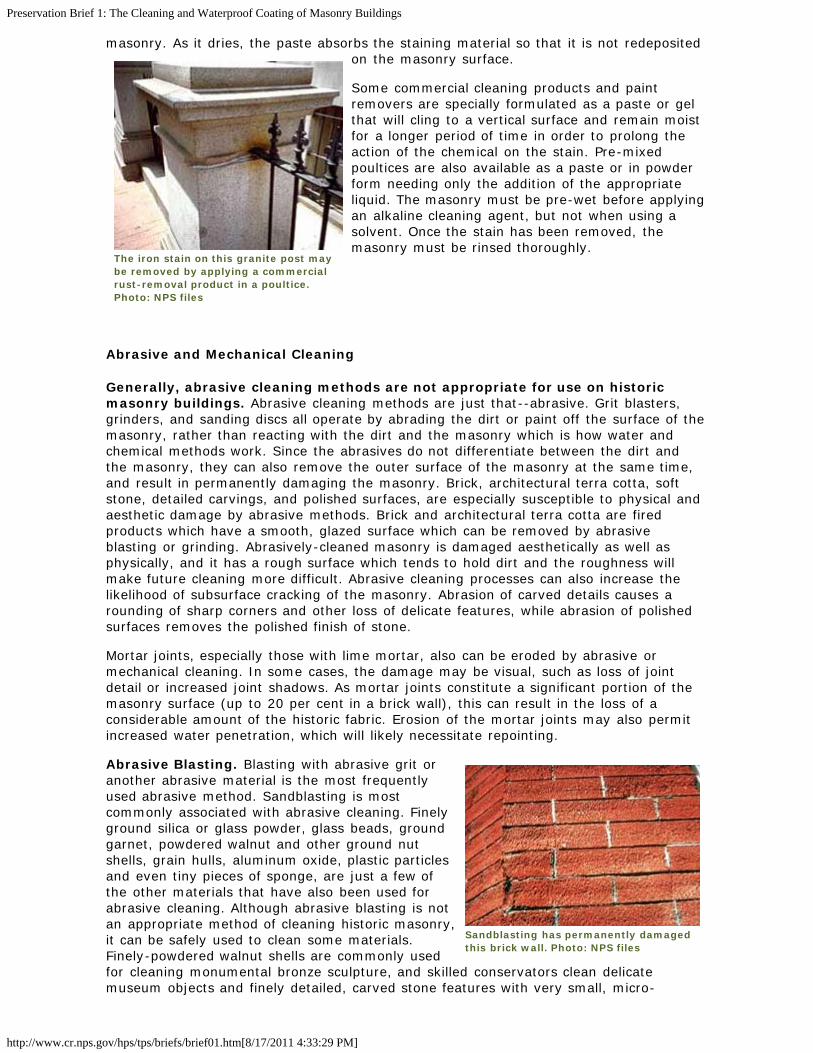
Sandblasting has permanently damagedthis brick wall. Photo: NPS files
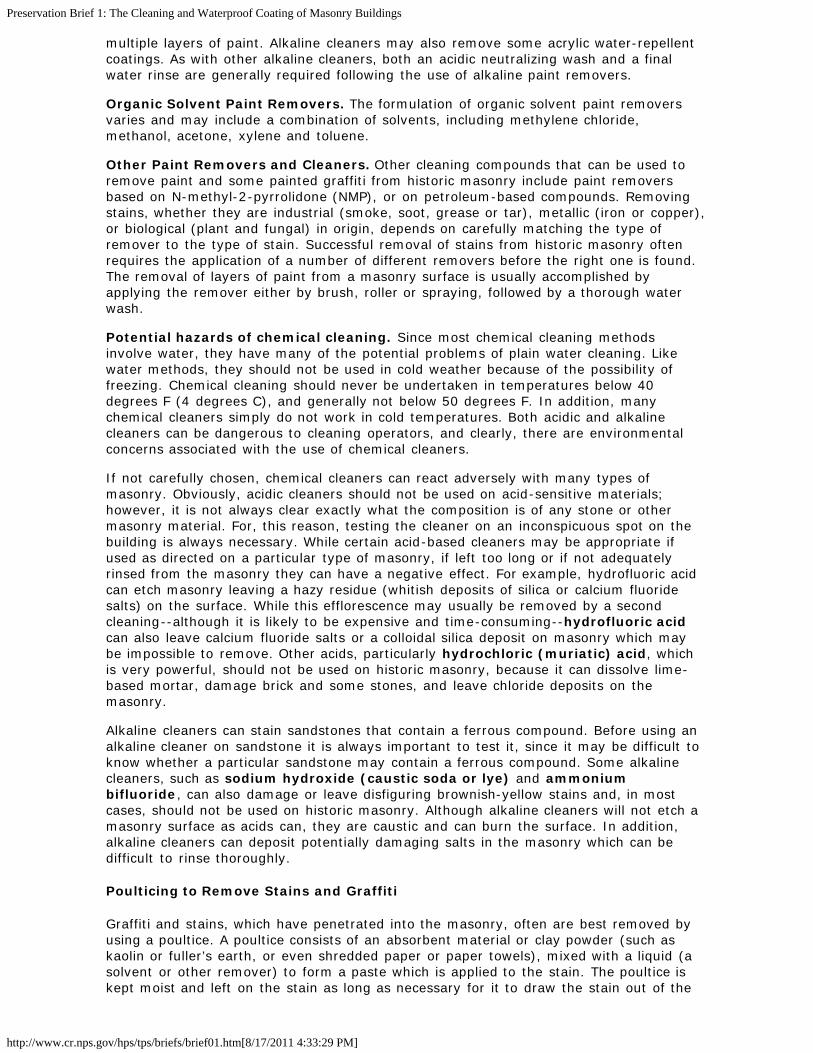
The iron stain on this granite post maybe removed by applying a commercialrust-removal product in a poultice.Photo: NPS files
masonry. As it dries, the paste absorbs the staining material so that it is not redepositedon the masonry surface.
Some commercial cleaning products and paintremovers are specially formulated as a paste or gelthat will cling to a vertical surface and remain moistfor a longer period of time in order to prolong theaction of the chemical on the stain. Pre-mixedpoultices are also available as a paste or in powderform needing only the addition of the appropriateliquid. The masonry must be pre-wet before applyingan alkaline cleaning agent, but not when using asolvent. Once the stain has been removed, themasonry must be rinsed thoroughly.
Abrasive and Mechanical Cleaning
Generally, abrasive cleaning methods are not appropriate for use on historicmasonry buildings. Abrasive cleaning methods are just that--abrasive. Grit blasters,grinders, and sanding discs all operate by abrading the dirt or paint off the surface of themasonry, rather than reacting with the dirt and the masonry which is how water andchemical methods work. Since the abrasives do not differentiate between the dirt andthe masonry, they can also remove the outer surface of the masonry at the same time,and result in permanently damaging the masonry. Brick, architectural terra cotta, softstone, detailed carvings, and polished surfaces, are especially susceptible to physical andaesthetic damage by abrasive methods. Brick and architectural terra cotta are firedproducts which have a smooth, glazed surface which can be removed by abrasiveblasting or grinding. Abrasively-cleaned masonry is damaged aesthetically as well asphysically, and it has a rough surface which tends to hold dirt and the roughness willmake future cleaning more difficult. Abrasive cleaning processes can also increase thelikelihood of subsurface cracking of the masonry. Abrasion of carved details causes arounding of sharp corners and other loss of delicate features, while abrasion of polishedsurfaces removes the polished finish of stone.
Mortar joints, especially those with lime mortar, also can be eroded by abrasive ormechanical cleaning. In some cases, the damage may be visual, such as loss of jointdetail or increased joint shadows. As mortar joints constitute a significant portion of themasonry surface (up to 20 per cent in a brick wall), this can result in the loss of aconsiderable amount of the historic fabric. Erosion of the mortar joints may also permitincreased water penetration, which will likely necessitate repointing.
Abrasive Blasting. Blasting with abrasive grit oranother abrasive material is the most frequentlyused abrasive method. Sandblasting is mostcommonly associated with abrasive cleaning. Finelyground silica or glass powder, glass beads, groundgarnet, powdered walnut and other ground nutshells, grain hulls, aluminum oxide, plastic particlesand even tiny pieces of sponge, are just a few ofthe other materials that have also been used forabrasive cleaning. Although abrasive blasting is notan appropriate method of cleaning historic masonry,it can be safely used to clean some materials.Finely-powdered walnut shells are commonly usedfor cleaning monumental bronze sculpture, and skilled conservators clean delicatemuseum objects and finely detailed, carved stone features with very small, micro-
Preservation Brief 1: The Cleaning and Waterproof Coating of Masonry Buildings
http://www.cr.nps.gov/hps/tps/briefs/brief01.htm[8/17/2011 4:33:29 PM]
abrasive units using aluminum oxide.
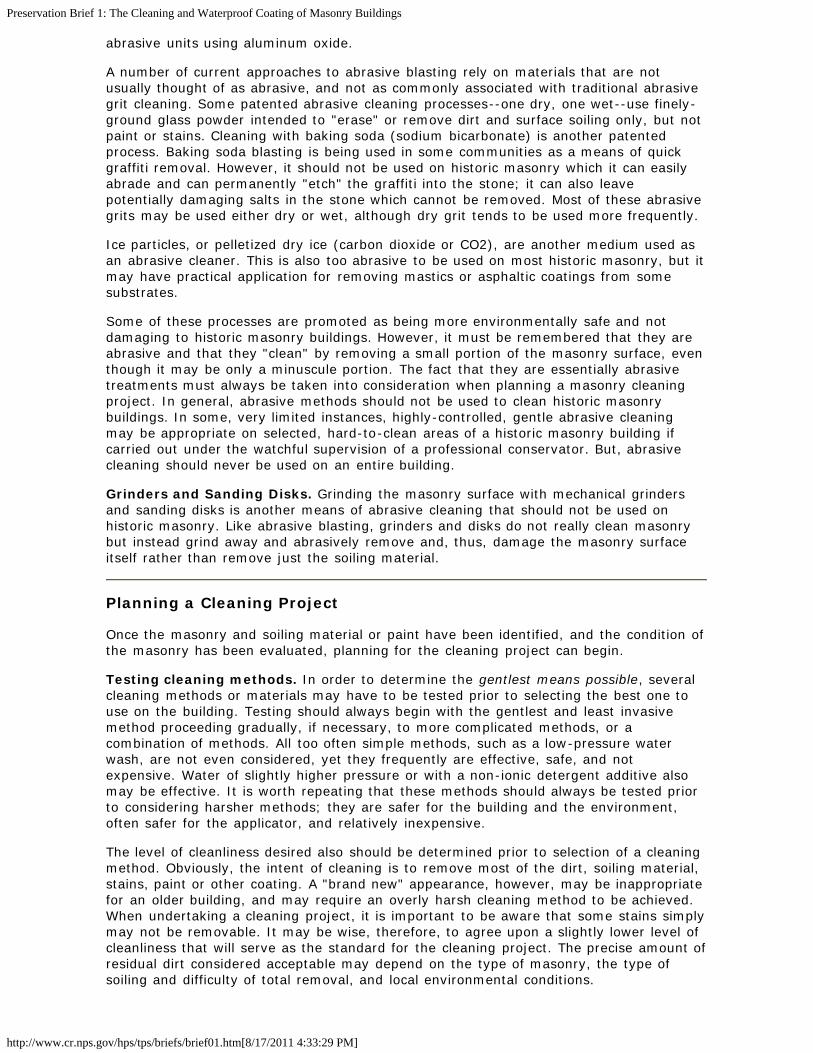
A number of current approaches to abrasive blasting rely on materials that are notusually thought of as abrasive, and not as commonly associated with traditional abrasivegrit cleaning. Some patented abrasive cleaning processes--one dry, one wet--use finely-ground glass powder intended to "erase" or remove dirt and surface soiling only, but notpaint or stains. Cleaning with baking soda (sodium bicarbonate) is another patentedprocess. Baking soda blasting is being used in some communities as a means of quickgraffiti removal. However, it should not be used on historic masonry which it can easilyabrade and can permanently "etch" the graffiti into the stone; it can also leavepotentially damaging salts in the stone which cannot be removed. Most of these abrasivegrits may be used either dry or wet, although dry grit tends to be used more frequently.
Ice particles, or pelletized dry ice (carbon dioxide or CO2), are another medium used asan abrasive cleaner. This is also too abrasive to be used on most historic masonry, but itmay have practical application for removing mastics or asphaltic coatings from somesubstrates.
Some of these processes are promoted as being more environmentally safe and notdamaging to historic masonry buildings. However, it must be remembered that they areabrasive and that they "clean" by removing a small portion of the masonry surface, eventhough it may be only a minuscule portion. The fact that they are essentially abrasivetreatments must always be taken into consideration when planning a masonry cleaningproject. In general, abrasive methods should not be used to clean historic masonrybuildings. In some, very limited instances, highly-controlled, gentle abrasive cleaningmay be appropriate on selected, hard-to-clean areas of a historic masonry building ifcarried out under the watchful supervision of a professional conservator. But, abrasivecleaning should never be used on an entire building.
Grinders and Sanding Disks. Grinding the masonry surface with mechanical grindersand sanding disks is another means of abrasive cleaning that should not be used onhistoric masonry. Like abrasive blasting, grinders and disks do not really clean masonrybut instead grind away and abrasively remove and, thus, damage the masonry surfaceitself rather than remove just the soiling material.
Planning a Cleaning Project
Once the masonry and soiling material or paint have been identified, and the condition ofthe masonry has been evaluated, planning for the cleaning project can begin.
Testing cleaning methods. In order to determine the gentlest means possible, severalcleaning methods or materials may have to be tested prior to selecting the best one touse on the building. Testing should always begin with the gentlest and least invasivemethod proceeding gradually, if necessary, to more complicated methods, or acombination of methods. All too often simple methods, such as a low-pressure waterwash, are not even considered, yet they frequently are effective, safe, and notexpensive. Water of slightly higher pressure or with a non-ionic detergent additive alsomay be effective. It is worth repeating that these methods should always be tested priorto considering harsher methods; they are safer for the building and the environment,often safer for the applicator, and relatively inexpensive.
The level of cleanliness desired also should be determined prior to selection of a cleaningmethod. Obviously, the intent of cleaning is to remove most of the dirt, soiling material,stains, paint or other coating. A "brand new" appearance, however, may be inappropriatefor an older building, and may require an overly harsh cleaning method to be achieved.When undertaking a cleaning project, it is important to be aware that some stains simplymay not be removable. It may be wise, therefore, to agree upon a slightly lower level ofcleanliness that will serve as the standard for the cleaning project. The precise amount ofresidual dirt considered acceptable may depend on the type of masonry, the type ofsoiling and difficulty of total removal, and local environmental conditions.
Preservation Brief 1: The Cleaning and Waterproof Coating of Masonry Buildings
http://www.cr.nps.gov/hps/tps/briefs/brief01.htm[8/17/2011 4:33:29 PM]
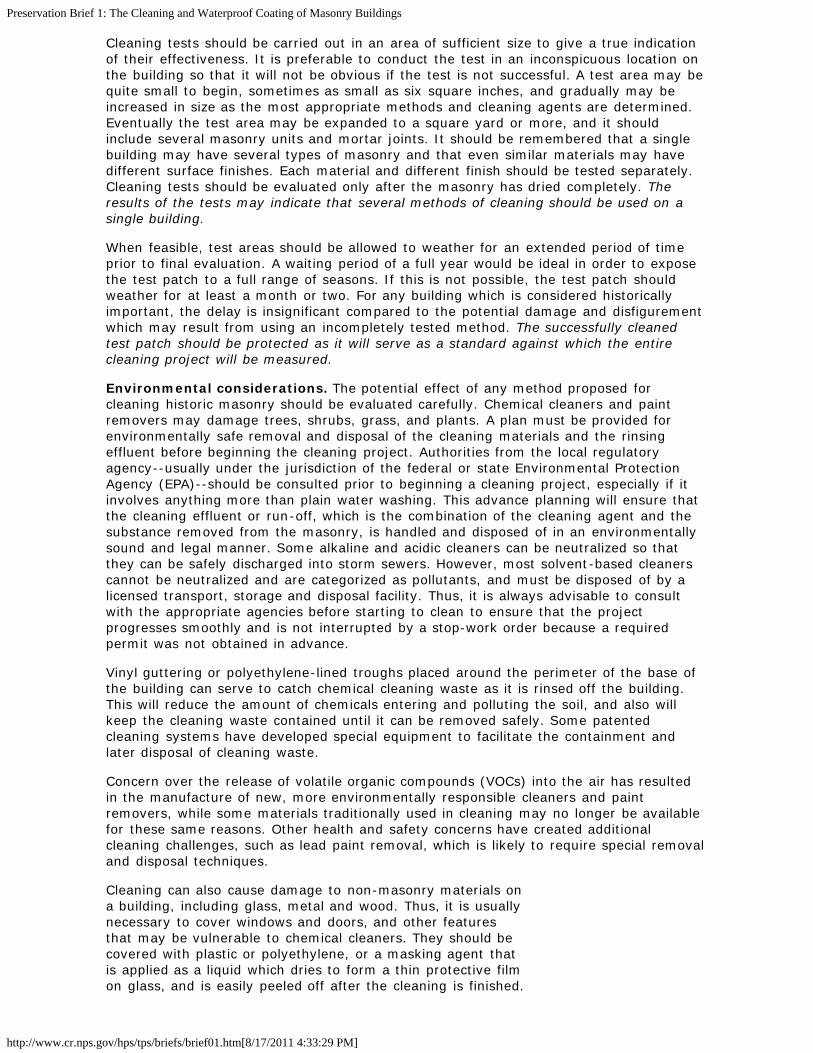
Cleaning tests should be carried out in an area of sufficient size to give a true indicationof their effectiveness. It is preferable to conduct the test in an inconspicuous location onthe building so that it will not be obvious if the test is not successful. A test area may bequite small to begin, sometimes as small as six square inches, and gradually may beincreased in size as the most appropriate methods and cleaning agents are determined.Eventually the test area may be expanded to a square yard or more, and it shouldinclude several masonry units and mortar joints. It should be remembered that a singlebuilding may have several types of masonry and that even similar materials may havedifferent surface finishes. Each material and different finish should be tested separately.Cleaning tests should be evaluated only after the masonry has dried completely. Theresults of the tests may indicate that several methods of cleaning should be used on asingle building.
When feasible, test areas should be allowed to weather for an extended period of timeprior to final evaluation. A waiting period of a full year would be ideal in order to exposethe test patch to a full range of seasons. If this is not possible, the test patch shouldweather for at least a month or two. For any building which is considered historicallyimportant, the delay is insignificant compared to the potential damage and disfigurementwhich may result from using an incompletely tested method. The successfully cleanedtest patch should be protected as it will serve as a standard against which the entirecleaning project will be measured.
Environmental considerations. The potential effect of any method proposed forcleaning historic masonry should be evaluated carefully. Chemical cleaners and paintremovers may damage trees, shrubs, grass, and plants. A plan must be provided forenvironmentally safe removal and disposal of the cleaning materials and the rinsingeffluent before beginning the cleaning project. Authorities from the local regulatoryagency--usually under the jurisdiction of the federal or state Environmental ProtectionAgency (EPA)--should be consulted prior to beginning a cleaning project, especially if itinvolves anything more than plain water washing. This advance planning will ensure thatthe cleaning effluent or run-off, which is the combination of the cleaning agent and thesubstance removed from the masonry, is handled and disposed of in an environmentallysound and legal manner. Some alkaline and acidic cleaners can be neutralized so thatthey can be safely discharged into storm sewers. However, most solvent-based cleanerscannot be neutralized and are categorized as pollutants, and must be disposed of by alicensed transport, storage and disposal facility. Thus, it is always advisable to consultwith the appropriate agencies before starting to clean to ensure that the projectprogresses smoothly and is not interrupted by a stop-work order because a requiredpermit was not obtained in advance.
Vinyl guttering or polyethylene-lined troughs placed around the perimeter of the base ofthe building can serve to catch chemical cleaning waste as it is rinsed off the building.This will reduce the amount of chemicals entering and polluting the soil, and also willkeep the cleaning waste contained until it can be removed safely. Some patentedcleaning systems have developed special equipment to facilitate the containment andlater disposal of cleaning waste.
Concern over the release of volatile organic compounds (VOCs) into the air has resultedin the manufacture of new, more environmentally responsible cleaners and paintremovers, while some materials traditionally used in cleaning may no longer be availablefor these same reasons. Other health and safety concerns have created additionalcleaning challenges, such as lead paint removal, which is likely to require special removaland disposal techniques.
Cleaning can also cause damage to non-masonry materials ona building, including glass, metal and wood. Thus, it is usuallynecessary to cover windows and doors, and other featuresthat may be vulnerable to chemical cleaners. They should becovered with plastic or polyethylene, or a masking agent thatis applied as a liquid which dries to form a thin protective filmon glass, and is easily peeled off after the cleaning is finished.
Preservation Brief 1: The Cleaning and Waterproof Coating of Masonry Buildings
http://www.cr.nps.gov/hps/tps/briefs/brief01.htm[8/17/2011 4:33:29 PM]
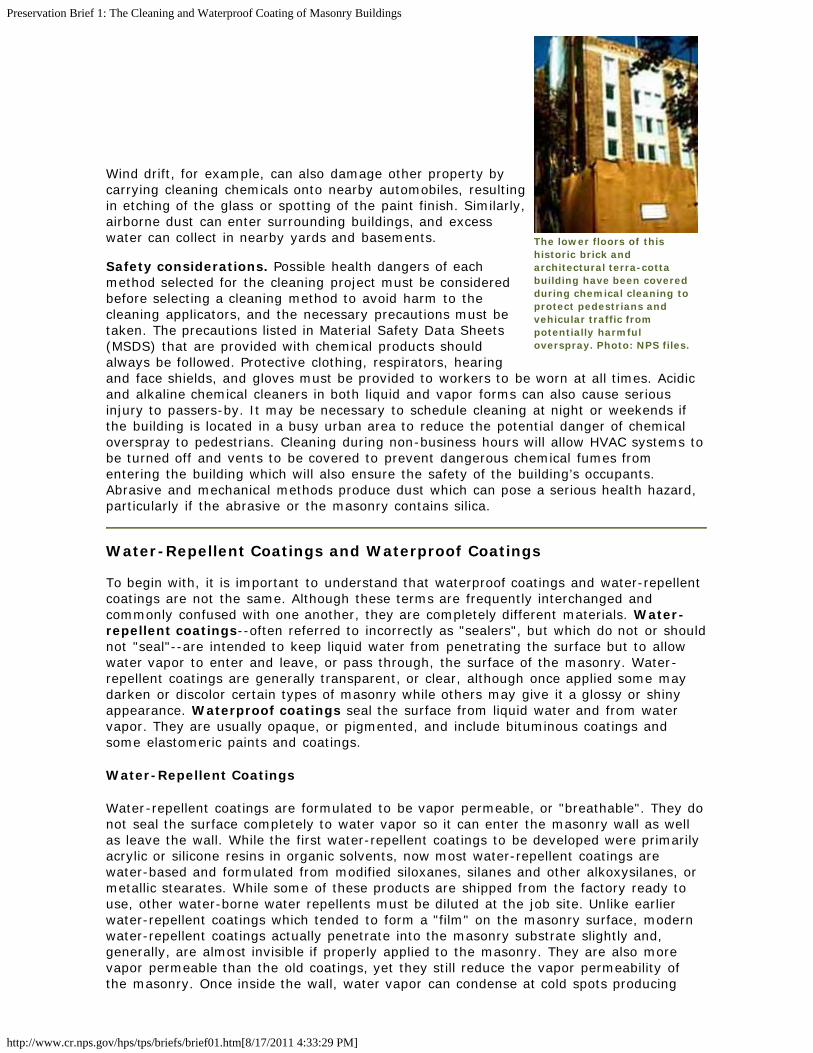
The lower floors of thishistoric brick andarchitectural terra-cottabuilding have been coveredduring chemical cleaning toprotect pedestrians andvehicular traffic frompotentially harmfuloverspray. Photo: NPS files.
Wind drift, for example, can also damage other property bycarrying cleaning chemicals onto nearby automobiles, resultingin etching of the glass or spotting of the paint finish. Similarly,airborne dust can enter surrounding buildings, and excesswater can collect in nearby yards and basements.
Safety considerations. Possible health dangers of eachmethod selected for the cleaning project must be consideredbefore selecting a cleaning method to avoid harm to thecleaning applicators, and the necessary precautions must betaken. The precautions listed in Material Safety Data Sheets(MSDS) that are provided with chemical products shouldalways be followed. Protective clothing, respirators, hearingand face shields, and gloves must be provided to workers to be worn at all times. Acidicand alkaline chemical cleaners in both liquid and vapor forms can also cause seriousinjury to passers-by. It may be necessary to schedule cleaning at night or weekends ifthe building is located in a busy urban area to reduce the potential danger of chemicaloverspray to pedestrians. Cleaning during non-business hours will allow HVAC systems tobe turned off and vents to be covered to prevent dangerous chemical fumes fromentering the building which will also ensure the safety of the building’s occupants.Abrasive and mechanical methods produce dust which can pose a serious health hazard,particularly if the abrasive or the masonry contains silica.
Water-Repellent Coatings and Waterproof Coatings
To begin with, it is important to understand that waterproof coatings and water-repellentcoatings are not the same. Although these terms are frequently interchanged andcommonly confused with one another, they are completely different materials. Water-repellent coatings--often referred to incorrectly as "sealers", but which do not or shouldnot "seal"--are intended to keep liquid water from penetrating the surface but to allowwater vapor to enter and leave, or pass through, the surface of the masonry. Water-repellent coatings are generally transparent, or clear, although once applied some maydarken or discolor certain types of masonry while others may give it a glossy or shinyappearance. Waterproof coatings seal the surface from liquid water and from watervapor. They are usually opaque, or pigmented, and include bituminous coatings andsome elastomeric paints and coatings.
Water-Repellent Coatings
Water-repellent coatings are formulated to be vapor permeable, or "breathable". They donot seal the surface completely to water vapor so it can enter the masonry wall as wellas leave the wall. While the first water-repellent coatings to be developed were primarilyacrylic or silicone resins in organic solvents, now most water-repellent coatings arewater-based and formulated from modified siloxanes, silanes and other alkoxysilanes, ormetallic stearates. While some of these products are shipped from the factory ready touse, other water-borne water repellents must be diluted at the job site. Unlike earlierwater-repellent coatings which tended to form a "film" on the masonry surface, modernwater-repellent coatings actually penetrate into the masonry substrate slightly and,generally, are almost invisible if properly applied to the masonry. They are also morevapor permeable than the old coatings, yet they still reduce the vapor permeability ofthe masonry. Once inside the wall, water vapor can condense at cold spots producing
Preservation Brief 1: The Cleaning and Waterproof Coating of Masonry Buildings
http://www.cr.nps.gov/hps/tps/briefs/brief01.htm[8/17/2011 4:33:29 PM]
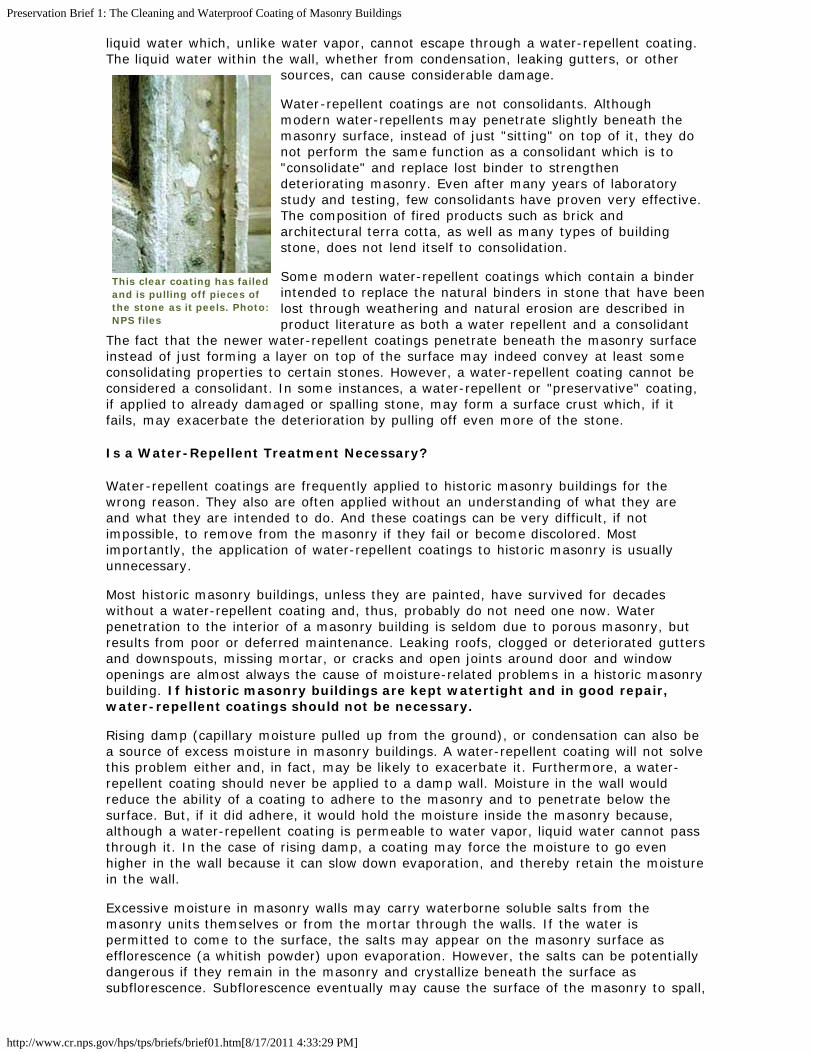
This clear coating has failedand is pulling off pieces ofthe stone as it peels. Photo:NPS files
liquid water which, unlike water vapor, cannot escape through a water-repellent coating.The liquid water within the wall, whether from condensation, leaking gutters, or other
sources, can cause considerable damage.
Water-repellent coatings are not consolidants. Althoughmodern water-repellents may penetrate slightly beneath themasonry surface, instead of just "sitting" on top of it, they donot perform the same function as a consolidant which is to"consolidate" and replace lost binder to strengthendeteriorating masonry. Even after many years of laboratorystudy and testing, few consolidants have proven very effective.The composition of fired products such as brick andarchitectural terra cotta, as well as many types of buildingstone, does not lend itself to consolidation.
Some modern water-repellent coatings which contain a binderintended to replace the natural binders in stone that have beenlost through weathering and natural erosion are described inproduct literature as both a water repellent and a consolidant
The fact that the newer water-repellent coatings penetrate beneath the masonry surfaceinstead of just forming a layer on top of the surface may indeed convey at least someconsolidating properties to certain stones. However, a water-repellent coating cannot beconsidered a consolidant. In some instances, a water-repellent or "preservative" coating,if applied to already damaged or spalling stone, may form a surface crust which, if itfails, may exacerbate the deterioration by pulling off even more of the stone.
Is a Water-Repellent Treatment Necessary?
Water-repellent coatings are frequently applied to historic masonry buildings for thewrong reason. They also are often applied without an understanding of what they areand what they are intended to do. And these coatings can be very difficult, if notimpossible, to remove from the masonry if they fail or become discolored. Mostimportantly, the application of water-repellent coatings to historic masonry is usuallyunnecessary.
Most historic masonry buildings, unless they are painted, have survived for decadeswithout a water-repellent coating and, thus, probably do not need one now. Waterpenetration to the interior of a masonry building is seldom due to porous masonry, butresults from poor or deferred maintenance. Leaking roofs, clogged or deteriorated guttersand downspouts, missing mortar, or cracks and open joints around door and windowopenings are almost always the cause of moisture-related problems in a historic masonrybuilding. If historic masonry buildings are kept watertight and in good repair,water-repellent coatings should not be necessary.
Rising damp (capillary moisture pulled up from the ground), or condensation can also bea source of excess moisture in masonry buildings. A water-repellent coating will not solvethis problem either and, in fact, may be likely to exacerbate it. Furthermore, a water-repellent coating should never be applied to a damp wall. Moisture in the wall wouldreduce the ability of a coating to adhere to the masonry and to penetrate below thesurface. But, if it did adhere, it would hold the moisture inside the masonry because,although a water-repellent coating is permeable to water vapor, liquid water cannot passthrough it. In the case of rising damp, a coating may force the moisture to go evenhigher in the wall because it can slow down evaporation, and thereby retain the moisturein the wall.
Excessive moisture in masonry walls may carry waterborne soluble salts from themasonry units themselves or from the mortar through the walls. If the water ispermitted to come to the surface, the salts may appear on the masonry surface asefflorescence (a whitish powder) upon evaporation. However, the salts can be potentiallydangerous if they remain in the masonry and crystallize beneath the surface assubflorescence. Subflorescence eventually may cause the surface of the masonry to spall,
Preservation Brief 1: The Cleaning and Waterproof Coating of Masonry Buildings
http://www.cr.nps.gov/hps/tps/briefs/brief01.htm[8/17/2011 4:33:29 PM]
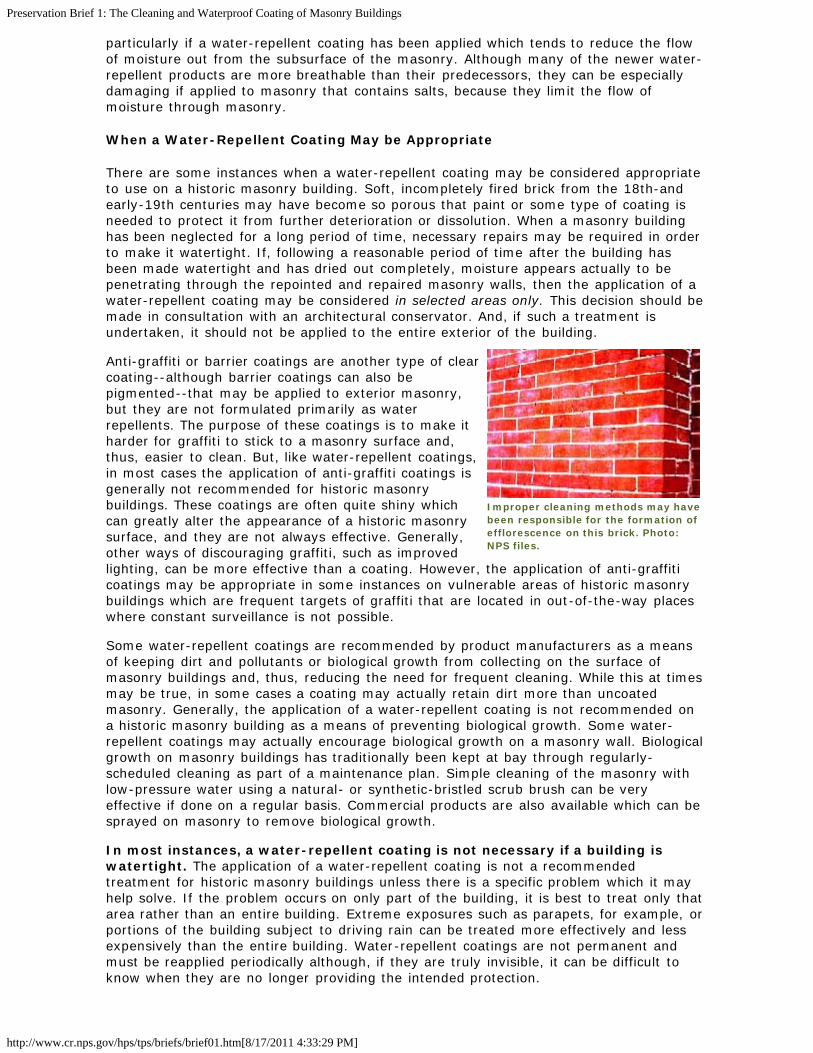
Improper cleaning methods may havebeen responsible for the formation ofefflorescence on this brick. Photo:NPS files.
particularly if a water-repellent coating has been applied which tends to reduce the flowof moisture out from the subsurface of the masonry. Although many of the newer water-repellent products are more breathable than their predecessors, they can be especiallydamaging if applied to masonry that contains salts, because they limit the flow ofmoisture through masonry.
When a Water-Repellent Coating May be Appropriate
There are some instances when a water-repellent coating may be considered appropriateto use on a historic masonry building. Soft, incompletely fired brick from the 18th-andearly-19th centuries may have become so porous that paint or some type of coating isneeded to protect it from further deterioration or dissolution. When a masonry buildinghas been neglected for a long period of time, necessary repairs may be required in orderto make it watertight. If, following a reasonable period of time after the building hasbeen made watertight and has dried out completely, moisture appears actually to bepenetrating through the repointed and repaired masonry walls, then the application of awater-repellent coating may be considered in selected areas only. This decision should bemade in consultation with an architectural conservator. And, if such a treatment isundertaken, it should not be applied to the entire exterior of the building.
Anti-graffiti or barrier coatings are another type of clearcoating--although barrier coatings can also bepigmented--that may be applied to exterior masonry,but they are not formulated primarily as waterrepellents. The purpose of these coatings is to make itharder for graffiti to stick to a masonry surface and,thus, easier to clean. But, like water-repellent coatings,in most cases the application of anti-graffiti coatings isgenerally not recommended for historic masonrybuildings. These coatings are often quite shiny whichcan greatly alter the appearance of a historic masonrysurface, and they are not always effective. Generally,other ways of discouraging graffiti, such as improvedlighting, can be more effective than a coating. However, the application of anti-graffiticoatings may be appropriate in some instances on vulnerable areas of historic masonrybuildings which are frequent targets of graffiti that are located in out-of-the-way placeswhere constant surveillance is not possible.
Some water-repellent coatings are recommended by product manufacturers as a meansof keeping dirt and pollutants or biological growth from collecting on the surface ofmasonry buildings and, thus, reducing the need for frequent cleaning. While this at timesmay be true, in some cases a coating may actually retain dirt more than uncoatedmasonry. Generally, the application of a water-repellent coating is not recommended ona historic masonry building as a means of preventing biological growth. Some water-repellent coatings may actually encourage biological growth on a masonry wall. Biologicalgrowth on masonry buildings has traditionally been kept at bay through regularly-scheduled cleaning as part of a maintenance plan. Simple cleaning of the masonry withlow-pressure water using a natural- or synthetic-bristled scrub brush can be veryeffective if done on a regular basis. Commercial products are also available which can besprayed on masonry to remove biological growth.
In most instances, a water-repellent coating is not necessary if a building iswatertight. The application of a water-repellent coating is not a recommendedtreatment for historic masonry buildings unless there is a specific problem which it mayhelp solve. If the problem occurs on only part of the building, it is best to treat only thatarea rather than an entire building. Extreme exposures such as parapets, for example, orportions of the building subject to driving rain can be treated more effectively and lessexpensively than the entire building. Water-repellent coatings are not permanent andmust be reapplied periodically although, if they are truly invisible, it can be difficult toknow when they are no longer providing the intended protection.
Preservation Brief 1: The Cleaning and Waterproof Coating of Masonry Buildings
http://www.cr.nps.gov/hps/tps/briefs/brief01.htm[8/17/2011 4:33:29 PM]
Testing a water-repellent coating by applying it in one small area may not be helpful indetermining its suitability for the building because a limited test area does not allow anadequate evaluation of a treatment. Since water may enter and leave through thesurrounding untreated areas, there is no way to tell if the coated test area is"breathable." But trying a coating in a small area may help to determine whether thecoating is visible on the surface or if it will otherwise change the appearance of themasonry.
Waterproof Coatings
In theory, waterproof coatings usually do not cause problems as long as they exclude allwater from the masonry. If water does enter the wall from the ground or from the insideof a building, the coating can intensify the damage because the water will not be able toescape. During cold weather this water in the wall can freeze causing serious mechanicaldisruption, such as spalling.
In addition, the water eventually will get out by the path of least resistance. If this pathis toward the interior, damage to interior finishes can result; if it is toward the exterior,it can lead to damage to the masonry caused by built-up water pressure.
In most instances, waterproof coatings should not be applied to historic masonry.The possible exception to this might be the application of a waterproof coating to below-grade exterior foundation walls as a last resort to stop water infiltration on interiorbasement walls. Generally, however, waterproof coatings, which includeelastomeric paints, should almost never be applied above grade to historicmasonry buildings.
Summary
A well-planned cleaning project is an essential step in preserving, rehabilitating orrestoring a historic masonry building. Proper cleaning methods and coating treatments,when determined necessary for the preservation of the masonry, can enhance theaesthetic character as well as the structural stability of a historic building. Removingyears of accumulated dirt, pollutant crusts, stains, graffiti or paint, if done withappropriate caution, can extend the life and longevity of the historic resource. Cleaningthat is carelessly or insensitively prescribed or carried out by inexperienced workers canhave the opposite of the intended effect. It may scar the masonry permanently, and mayactually result in hastening deterioration by introducing harmful residual chemicals andsalts into the masonry or causing surface loss. Using the wrong cleaning method or usingthe right method incorrectly, applying the wrong kind of coating or applying a coatingthat is not needed can result in serious damage, both physically and aesthetically, to ahistoric masonry building. Cleaning a historic masonry building should always be doneusing the gentlest means possible that will clean, but not damage the building. It shouldalways be taken into consideration before applying a water-repellent coating or awaterproof coating to a historic masonry building whether it is really necessary andwhether it is in the best interest of preserving the building.
Selected Reading
Architectural Ceramics: Their History, Manufacture and Conservation. A Joint Symposiumof English Heritage and the United Kingdom Institute for Conservation, September 22-25,1994. London: English Heritage, 1996.
Ashurst, Nicola. Cleaning Historic Buildings. Volume One: Substrates, Soiling &Investigation. Volume Two: Cleaning Materials & Processes. London: Donhead PublishingLtd., 1994.
Association for Preservation Technology. Special Issue: Preservation of Historic Masonry.Papers from the Symposium on Preservation Treatments for Historic Masonry:
Preservation Brief 1: The Cleaning and Waterproof Coating of Masonry Buildings
http://www.cr.nps.gov/hps/tps/briefs/brief01.htm[8/17/2011 4:33:29 PM]
Consolidants, Coatings, and Water Repellents, New York, New York, November 11-12,1994. APT Bulletin. Vol. XXVI, No. 4 (1995).
Grimmer, Anne E. Preservation Brief 6: Dangers of Abrasive Cleaning to HistoricBuildings. Washington, DC: Preservation Assistance Division, National Park Service, U.S.Department of the Interior, 1979.
Grimmer, Anne E. Keeping it Clean: Removing Exterior Dirt, Paint, Stains and Graffitifrom Historic Masonry Buildings. Washington, DC: Preservation Assistance Division,National Park Service, U.S. Department of the Interior, 1988.
Park, Sharon C., AIA. Preservation Brief 39: Holding the Line: Controlling UnwantedMoisture in Historic Buildings. Washington, DC: Heritage Preservation Services, NationalPark Service, U.S. Department of the Interior, 1996.
Powers, Robert M. Preservation Tech Note, Masonry No. 3, "Water Soak Cleaning ofLimestone". Washington, DC: Preservation Assistance Division, National Park Service, U.S.Department of the Interior, 1992.
Sinvinski, Valerie. "Gentle Blasting." Old-House Journal. Vol. XXIV, No. 4 (July-August1996), pp. 46-49.
Weaver, Martin E. Conserving Buildings: A Guide to Techniques and Materials. New York:John Wiley & Sons, Inc., 1993.
Weaver, Martin E. Preservation Brief 38: Removing Graffiti from Historic Masonry.Washington, DC: Preservation Assistance Division, National Park Service, U.S.Department of the Interior, 1995.
Winkler, E.M. Stone in Architecture: Properties, Durability. Third, completely revised andextended edition. Berlin, Germany: Springer-Verlag, 1997.
Acknowledgements
Robert C. Mack, FAIA, is a principal in the firm of MacDonald & Mack Architects, Ltd., an architectural firm thatspecializes in historic buildings in Minneapolis, Minnesota. Anne Grimmer is a Senior Architectural Historian in theTechnical Preservation Services Branch, Heritage Preservation Services Program, National Park Service, Washington,D.C.
The original version of Preservation Brief 1: The Cleaning and Waterproof Coating of Masonry Buildings was writtenby Robert C. Mack, AIA. It inaugurated the Preservation Briefs series when it was published in 1975.
The following historic preservation specialists provided technical review of this publication: Frances Gale, TrainingDirector, National Center for Preservation Technology and Training, National Park Service, Natchitoches, LA; JudithM. Jacob, Architectural Conservator, Building Conservation Branch, Northeast Cultural Resources Center, NationalPark Service, N.Y., NY; Robert M. Powers, Architectural Conservator, Powers and Company, Inc., Philadelphia, PA;Antonio Aguilar, Kaaren Dodge, JoEllen Hensley, Gary Sachau, John Sandor and Audrey T. Tepper, TechnicalPreservation Services Branch, Heritage Preservation Services Program, National Park Service, Washington, DC; andKay D. Weeks, Heritage Preservation Services Program, National Park Service, Washington, DC.
Washington, DC November, 2000
Home page logo: Approriate cleaning of historic masonry. Photo: NPS files.
This publication has been prepared pursuant to the National Historic Preservation Act of 1966, as amended, whichdirects the Secretary of the Interior to develop and make available information concerning historic properties.Technical Preservation Services (TPS), Heritage Preservation Services Division, National Park Service preparesstandards, guidelines, and other educational materials on responsible historic preservation treatments to a broadpublic.
Preservation Briefs | Questions
KDW

Preservation Brief 1: The Cleaning and Waterproof Coating of Masonry Buildings
http://www.cr.nps.gov/hps/tps/briefs/brief01.htm[8/17/2011 4:33:29 PM]
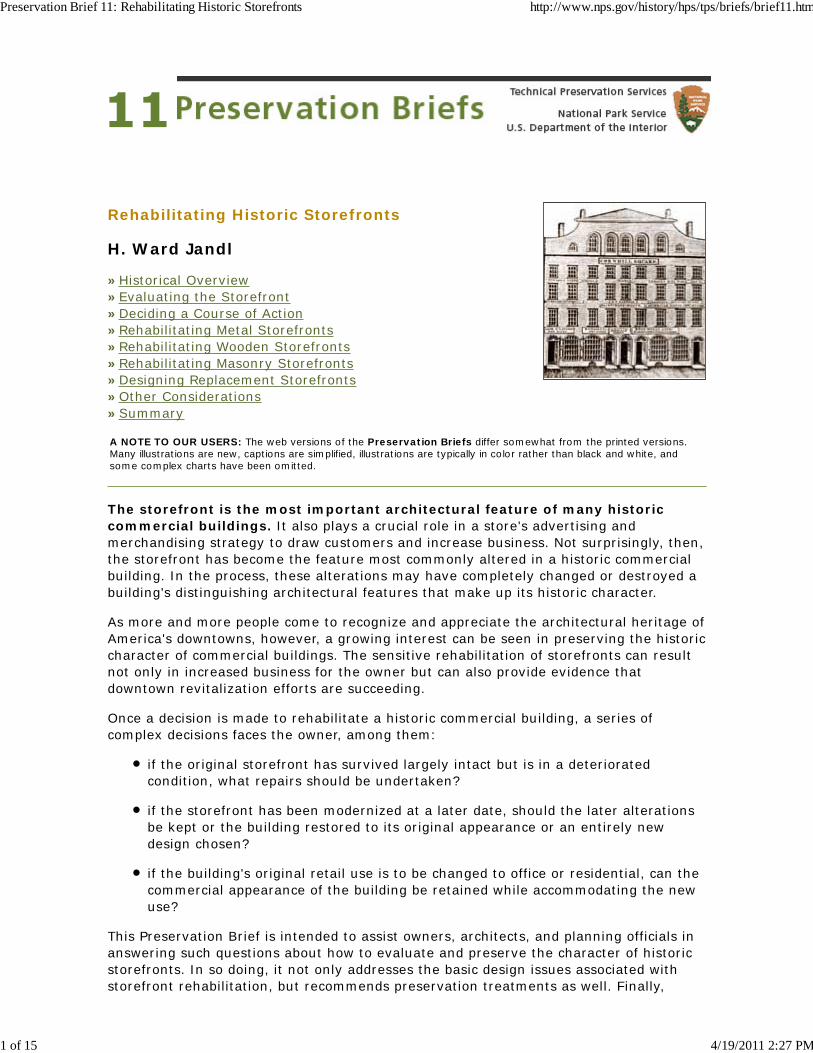
Rehabilitating Historic Storefronts
H. Ward Jandl
»Historical Overview»Evaluating the Storefront»Deciding a Course of Action»Rehabilitating Metal Storefronts»Rehabilitating Wooden Storefronts»Rehabilitating Masonry Storefronts»Designing Replacement Storefronts»Other Considerations»Summary
A NOTE TO OUR USERS: The web versions of the Preservation Briefs differ somewhat from the printed versions.Many illustrations are new, captions are simplified, illustrations are typically in color rather than black and white, andsome complex charts have been omitted.
The storefront is the most important architectural feature of many historiccommercial buildings. It also plays a crucial role in a store's advertising andmerchandising strategy to draw customers and increase business. Not surprisingly, then,the storefront has become the feature most commonly altered in a historic commercialbuilding. In the process, these alterations may have completely changed or destroyed abuilding's distinguishing architectural features that make up its historic character.
As more and more people come to recognize and appreciate the architectural heritage ofAmerica's downtowns, however, a growing interest can be seen in preserving the historiccharacter of commercial buildings. The sensitive rehabilitation of storefronts can resultnot only in increased business for the owner but can also provide evidence thatdowntown revitalization efforts are succeeding.
Once a decision is made to rehabilitate a historic commercial building, a series ofcomplex decisions faces the owner, among them:
if the original storefront has survived largely intact but is in a deterioratedcondition, what repairs should be undertaken?
if the storefront has been modernized at a later date, should the later alterationsbe kept or the building restored to its original appearance or an entirely newdesign chosen?
if the building's original retail use is to be changed to office or residential, can thecommercial appearance of the building be retained while accommodating the newuse?
This Preservation Brief is intended to assist owners, architects, and planning officials inanswering such questions about how to evaluate and preserve the character of historicstorefronts. In so doing, it not only addresses the basic design issues associated withstorefront rehabilitation, but recommends preservation treatments as well. Finally,
Preservation Brief 11: Rehabilitating Historic Storefronts http://www.nps.gov/history/hps/tps/briefs/brief11.htm
1 of 15 4/19/2011 2:27 PM
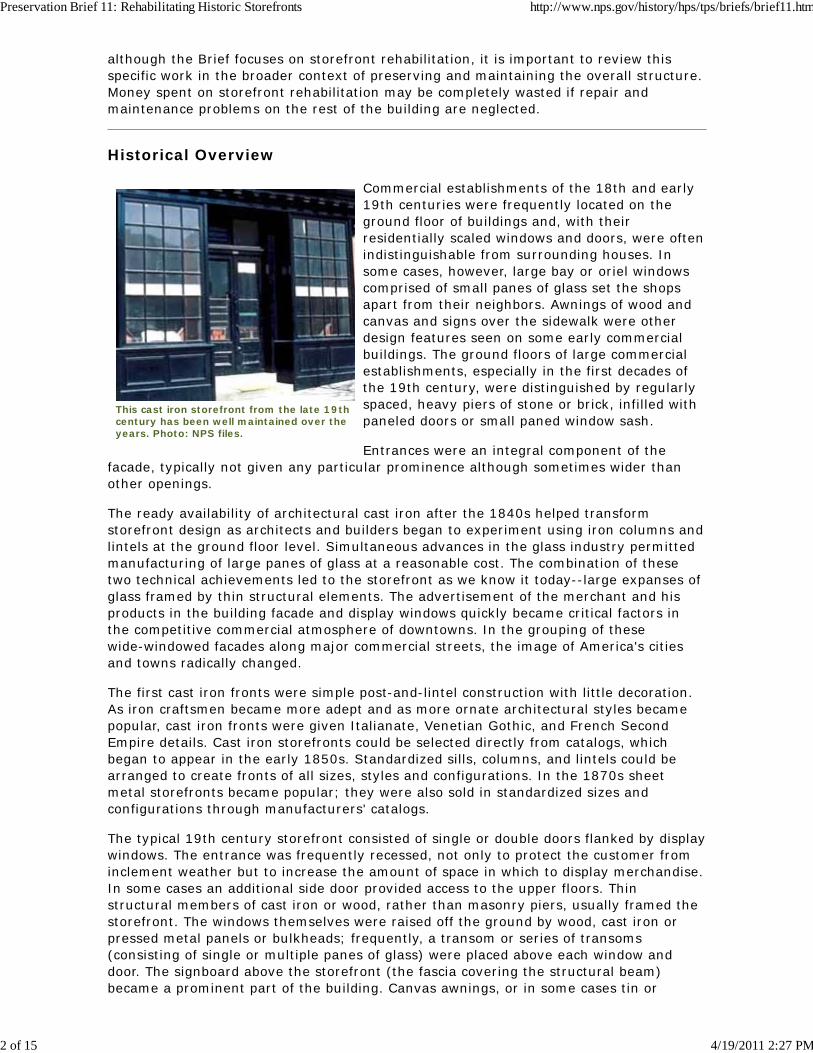
This cast iron storefront from the late 19thcentury has been well maintained over theyears. Photo: NPS files.
although the Brief focuses on storefront rehabilitation, it is important to review thisspecific work in the broader context of preserving and maintaining the overall structure.Money spent on storefront rehabilitation may be completely wasted if repair andmaintenance problems on the rest of the building are neglected.
Historical Overview
Commercial establishments of the 18th and early19th centuries were frequently located on theground floor of buildings and, with theirresidentially scaled windows and doors, were oftenindistinguishable from surrounding houses. Insome cases, however, large bay or oriel windowscomprised of small panes of glass set the shopsapart from their neighbors. Awnings of wood andcanvas and signs over the sidewalk were otherdesign features seen on some early commercialbuildings. The ground floors of large commercialestablishments, especially in the first decades ofthe 19th century, were distinguished by regularlyspaced, heavy piers of stone or brick, infilled withpaneled doors or small paned window sash.
Entrances were an integral component of thefacade, typically not given any particular prominence although sometimes wider thanother openings.
The ready availability of architectural cast iron after the 1840s helped transformstorefront design as architects and builders began to experiment using iron columns andlintels at the ground floor level. Simultaneous advances in the glass industry permittedmanufacturing of large panes of glass at a reasonable cost. The combination of thesetwo technical achievements led to the storefront as we know it today--large expanses ofglass framed by thin structural elements. The advertisement of the merchant and hisproducts in the building facade and display windows quickly became critical factors inthe competitive commercial atmosphere of downtowns. In the grouping of thesewide-windowed facades along major commercial streets, the image of America's citiesand towns radically changed.
The first cast iron fronts were simple post-and-lintel construction with little decoration.As iron craftsmen became more adept and as more ornate architectural styles becamepopular, cast iron fronts were given Italianate, Venetian Gothic, and French SecondEmpire details. Cast iron storefronts could be selected directly from catalogs, whichbegan to appear in the early 1850s. Standardized sills, columns, and lintels could bearranged to create fronts of all sizes, styles and configurations. In the 1870s sheetmetal storefronts became popular; they were also sold in standardized sizes andconfigurations through manufacturers' catalogs.
The typical 19th century storefront consisted of single or double doors flanked by displaywindows. The entrance was frequently recessed, not only to protect the customer frominclement weather but to increase the amount of space in which to display merchandise.In some cases an additional side door provided access to the upper floors. Thinstructural members of cast iron or wood, rather than masonry piers, usually framed thestorefront. The windows themselves were raised off the ground by wood, cast iron orpressed metal panels or bulkheads; frequently, a transom or series of transoms(consisting of single or multiple panes of glass) were placed above each window anddoor. The signboard above the storefront (the fascia covering the structural beam)became a prominent part of the building. Canvas awnings, or in some cases tin or
Preservation Brief 11: Rehabilitating Historic Storefronts http://www.nps.gov/history/hps/tps/briefs/brief11.htm
2 of 15 4/19/2011 2:27 PM
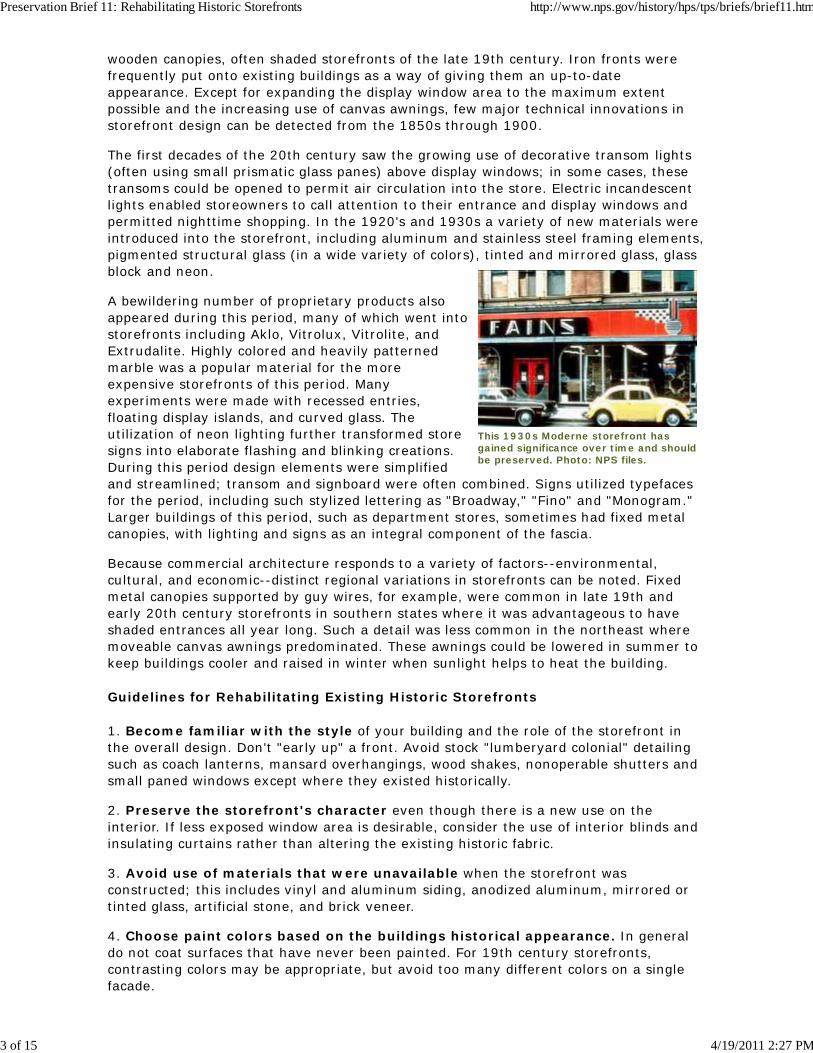
This 1930s Moderne storefront hasgained significance over time and shouldbe preserved. Photo: NPS files.
wooden canopies, often shaded storefronts of the late 19th century. Iron fronts werefrequently put onto existing buildings as a way of giving them an up-to-dateappearance. Except for expanding the display window area to the maximum extentpossible and the increasing use of canvas awnings, few major technical innovations instorefront design can be detected from the 1850s through 1900.
The first decades of the 20th century saw the growing use of decorative transom lights(often using small prismatic glass panes) above display windows; in some cases, thesetransoms could be opened to permit air circulation into the store. Electric incandescentlights enabled storeowners to call attention to their entrance and display windows andpermitted nighttime shopping. In the 1920's and 1930s a variety of new materials wereintroduced into the storefront, including aluminum and stainless steel framing elements,pigmented structural glass (in a wide variety of colors), tinted and mirrored glass, glassblock and neon.
A bewildering number of proprietary products alsoappeared during this period, many of which went intostorefronts including Aklo, Vitrolux, Vitrolite, andExtrudalite. Highly colored and heavily patternedmarble was a popular material for the moreexpensive storefronts of this period. Manyexperiments were made with recessed entries,floating display islands, and curved glass. Theutilization of neon lighting further transformed storesigns into elaborate flashing and blinking creations.During this period design elements were simplifiedand streamlined; transom and signboard were often combined. Signs utilized typefacesfor the period, including such stylized lettering as "Broadway," "Fino" and "Monogram."Larger buildings of this period, such as department stores, sometimes had fixed metalcanopies, with lighting and signs as an integral component of the fascia.
Because commercial architecture responds to a variety of factors--environmental,cultural, and economic--distinct regional variations in storefronts can be noted. Fixedmetal canopies supported by guy wires, for example, were common in late 19th andearly 20th century storefronts in southern states where it was advantageous to haveshaded entrances all year long. Such a detail was less common in the northeast wheremoveable canvas awnings predominated. These awnings could be lowered in summer tokeep buildings cooler and raised in winter when sunlight helps to heat the building.
Guidelines for Rehabilitating Existing Historic Storefronts
1. Become familiar with the style of your building and the role of the storefront inthe overall design. Don't "early up" a front. Avoid stock "lumberyard colonial" detailingsuch as coach lanterns, mansard overhangings, wood shakes, nonoperable shutters andsmall paned windows except where they existed historically.
2. Preserve the storefront's character even though there is a new use on theinterior. If less exposed window area is desirable, consider the use of interior blinds andinsulating curtains rather than altering the existing historic fabric.
3. Avoid use of materials that were unavailable when the storefront wasconstructed; this includes vinyl and aluminum siding, anodized aluminum, mirrored ortinted glass, artificial stone, and brick veneer.
4. Choose paint colors based on the buildings historical appearance. In generaldo not coat surfaces that have never been painted. For 19th century storefronts,contrasting colors may be appropriate, but avoid too many different colors on a singlefacade.
Preservation Brief 11: Rehabilitating Historic Storefronts http://www.nps.gov/history/hps/tps/briefs/brief11.htm
3 of 15 4/19/2011 2:27 PM
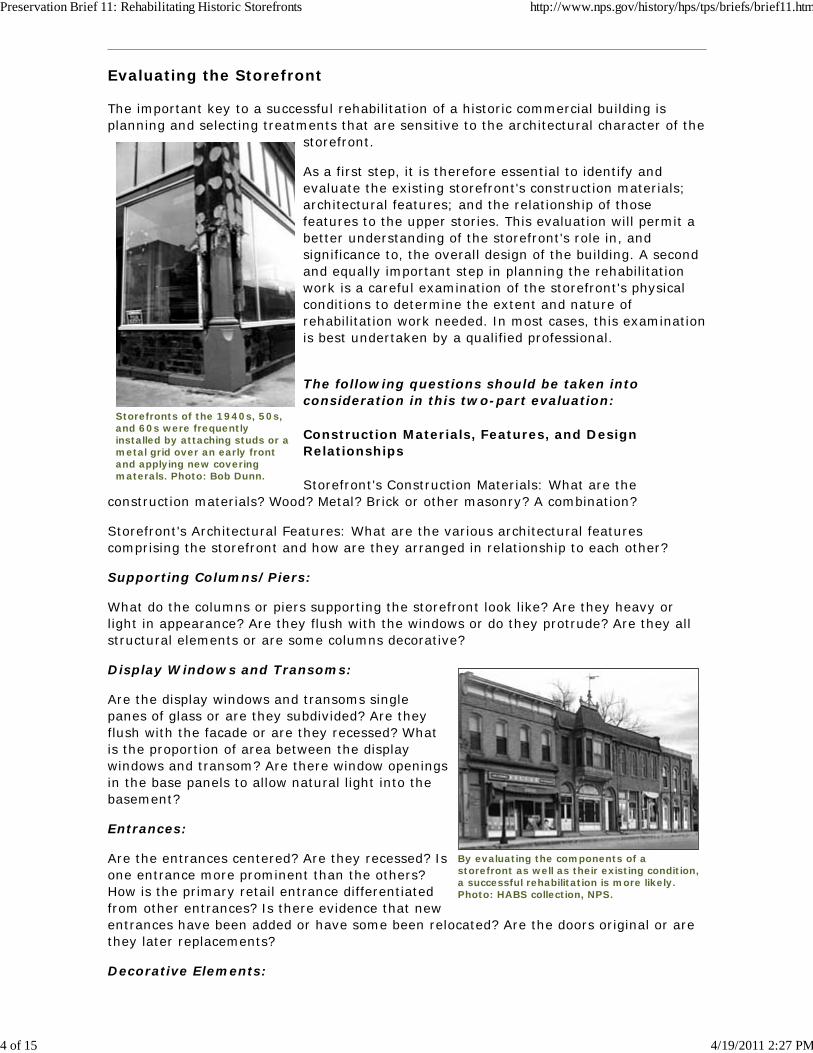
Storefronts of the 1940s, 50s,and 60s were frequentlyinstalled by attaching studs or ametal grid over an early frontand applying new coveringmaterals. Photo: Bob Dunn.
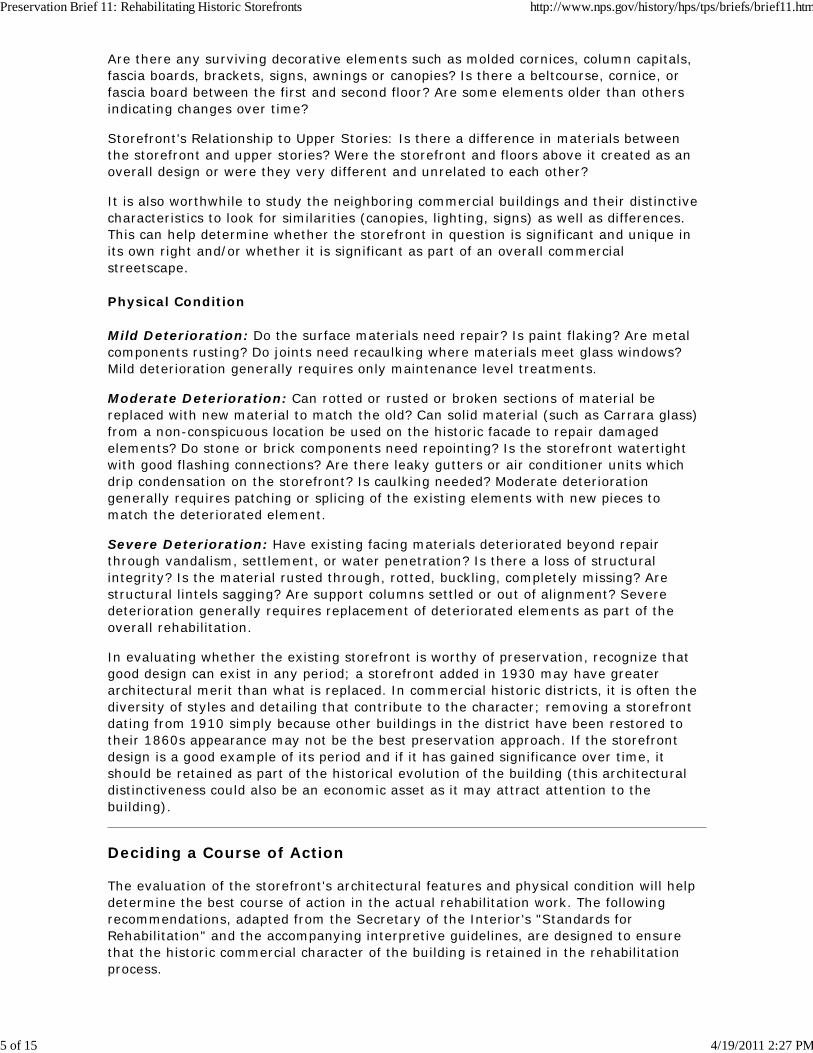
By evaluating the components of astorefront as well as their existing condition,a successful rehabilitation is more likely.Photo: HABS collection, NPS.
Evaluating the Storefront
The important key to a successful rehabilitation of a historic commercial building isplanning and selecting treatments that are sensitive to the architectural character of the
storefront.
As a first step, it is therefore essential to identify andevaluate the existing storefront's construction materials;architectural features; and the relationship of thosefeatures to the upper stories. This evaluation will permit abetter understanding of the storefront's role in, andsignificance to, the overall design of the building. A secondand equally important step in planning the rehabilitationwork is a careful examination of the storefront's physicalconditions to determine the extent and nature ofrehabilitation work needed. In most cases, this examinationis best undertaken by a qualified professional.
The following questions should be taken intoconsideration in this two-part evaluation:
Construction Materials, Features, and DesignRelationships
Storefront's Construction Materials: What are theconstruction materials? Wood? Metal? Brick or other masonry? A combination?
Storefront's Architectural Features: What are the various architectural featurescomprising the storefront and how are they arranged in relationship to each other?
Supporting Columns/Piers:
What do the columns or piers supporting the storefront look like? Are they heavy orlight in appearance? Are they flush with the windows or do they protrude? Are they allstructural elements or are some columns decorative?
Display Windows and Transoms:
Are the display windows and transoms singlepanes of glass or are they subdivided? Are theyflush with the facade or are they recessed? Whatis the proportion of area between the displaywindows and transom? Are there window openingsin the base panels to allow natural light into thebasement?
Entrances:
Are the entrances centered? Are they recessed? Isone entrance more prominent than the others?How is the primary retail entrance differentiatedfrom other entrances? Is there evidence that newentrances have been added or have some been relocated? Are the doors original or arethey later replacements?
Decorative Elements:
Preservation Brief 11: Rehabilitating Historic Storefronts http://www.nps.gov/history/hps/tps/briefs/brief11.htm
4 of 15 4/19/2011 2:27 PM
Are there any surviving decorative elements such as molded cornices, column capitals,fascia boards, brackets, signs, awnings or canopies? Is there a beltcourse, cornice, orfascia board between the first and second floor? Are some elements older than othersindicating changes over time?
Storefront's Relationship to Upper Stories: Is there a difference in materials betweenthe storefront and upper stories? Were the storefront and floors above it created as anoverall design or were they very different and unrelated to each other?
It is also worthwhile to study the neighboring commercial buildings and their distinctivecharacteristics to look for similarities (canopies, lighting, signs) as well as differences.This can help determine whether the storefront in question is significant and unique inits own right and/or whether it is significant as part of an overall commercialstreetscape.
Physical Condition
Mild Deterioration: Do the surface materials need repair? Is paint flaking? Are metalcomponents rusting? Do joints need recaulking where materials meet glass windows?Mild deterioration generally requires only maintenance level treatments.
Moderate Deterioration: Can rotted or rusted or broken sections of material bereplaced with new material to match the old? Can solid material (such as Carrara glass)from a non-conspicuous location be used on the historic facade to repair damagedelements? Do stone or brick components need repointing? Is the storefront watertightwith good flashing connections? Are there leaky gutters or air conditioner units whichdrip condensation on the storefront? Is caulking needed? Moderate deteriorationgenerally requires patching or splicing of the existing elements with new pieces tomatch the deteriorated element.
Severe Deterioration: Have existing facing materials deteriorated beyond repairthrough vandalism, settlement, or water penetration? Is there a loss of structuralintegrity? Is the material rusted through, rotted, buckling, completely missing? Arestructural lintels sagging? Are support columns settled or out of alignment? Severedeterioration generally requires replacement of deteriorated elements as part of theoverall rehabilitation.
In evaluating whether the existing storefront is worthy of preservation, recognize thatgood design can exist in any period; a storefront added in 1930 may have greaterarchitectural merit than what is replaced. In commercial historic districts, it is often thediversity of styles and detailing that contribute to the character; removing a storefrontdating from 1910 simply because other buildings in the district have been restored totheir 1860s appearance may not be the best preservation approach. If the storefrontdesign is a good example of its period and if it has gained significance over time, itshould be retained as part of the historical evolution of the building (this architecturaldistinctiveness could also be an economic asset as it may attract attention to thebuilding).
Deciding a Course of Action
The evaluation of the storefront's architectural features and physical condition will helpdetermine the best course of action in the actual rehabilitation work. The followingrecommendations, adapted from the Secretary of the Interior's "Standards forRehabilitation" and the accompanying interpretive guidelines, are designed to ensurethat the historic commercial character of the building is retained in the rehabilitationprocess.
Preservation Brief 11: Rehabilitating Historic Storefronts http://www.nps.gov/history/hps/tps/briefs/brief11.htm
5 of 15 4/19/2011 2:27 PM
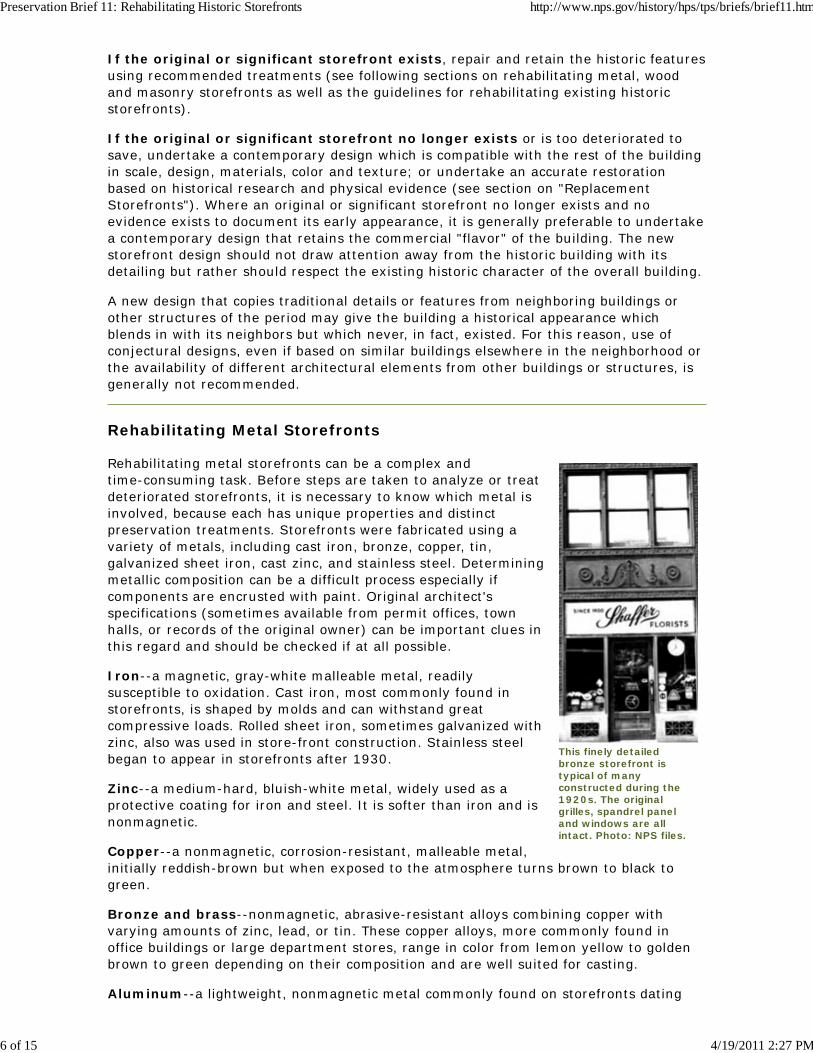
This finely detailedbronze storefront istypical of manyconstructed during the1920s. The originalgrilles, spandrel paneland windows are allintact. Photo: NPS files.
If the original or significant storefront exists, repair and retain the historic featuresusing recommended treatments (see following sections on rehabilitating metal, woodand masonry storefronts as well as the guidelines for rehabilitating existing historicstorefronts).
If the original or significant storefront no longer exists or is too deteriorated tosave, undertake a contemporary design which is compatible with the rest of the buildingin scale, design, materials, color and texture; or undertake an accurate restorationbased on historical research and physical evidence (see section on "ReplacementStorefronts"). Where an original or significant storefront no longer exists and noevidence exists to document its early appearance, it is generally preferable to undertakea contemporary design that retains the commercial "flavor" of the building. The newstorefront design should not draw attention away from the historic building with itsdetailing but rather should respect the existing historic character of the overall building.
A new design that copies traditional details or features from neighboring buildings orother structures of the period may give the building a historical appearance whichblends in with its neighbors but which never, in fact, existed. For this reason, use ofconjectural designs, even if based on similar buildings elsewhere in the neighborhood orthe availability of different architectural elements from other buildings or structures, isgenerally not recommended.
Rehabilitating Metal Storefronts
Rehabilitating metal storefronts can be a complex andtime-consuming task. Before steps are taken to analyze or treatdeteriorated storefronts, it is necessary to know which metal isinvolved, because each has unique properties and distinctpreservation treatments. Storefronts were fabricated using avariety of metals, including cast iron, bronze, copper, tin,galvanized sheet iron, cast zinc, and stainless steel. Determiningmetallic composition can be a difficult process especially ifcomponents are encrusted with paint. Original architect'sspecifications (sometimes available from permit offices, townhalls, or records of the original owner) can be important clues inthis regard and should be checked if at all possible.
Iron--a magnetic, gray-white malleable metal, readilysusceptible to oxidation. Cast iron, most commonly found instorefronts, is shaped by molds and can withstand greatcompressive loads. Rolled sheet iron, sometimes galvanized withzinc, also was used in store-front construction. Stainless steelbegan to appear in storefronts after 1930.
Zinc--a medium-hard, bluish-white metal, widely used as aprotective coating for iron and steel. It is softer than iron and isnonmagnetic.
Copper--a nonmagnetic, corrosion-resistant, malleable metal,initially reddish-brown but when exposed to the atmosphere turns brown to black togreen.
Bronze and brass--nonmagnetic, abrasive-resistant alloys combining copper withvarying amounts of zinc, lead, or tin. These copper alloys, more commonly found inoffice buildings or large department stores, range in color from lemon yellow to goldenbrown to green depending on their composition and are well suited for casting.
Aluminum--a lightweight, nonmagnetic metal commonly found on storefronts dating
Preservation Brief 11: Rehabilitating Historic Storefronts http://www.nps.gov/history/hps/tps/briefs/brief11.htm
6 of 15 4/19/2011 2:27 PM
from the 1920s and 30s. Its brightness and resistance to corrosion has made it apopular storefront material in the 20th century.
Repair and Replacement of Metal
Simply because single components of a storefront need repair or replacement should notbe justification for replacing an entire storefront. Deteriorated metal architecturalelements can be repaired by a variety of means, although the nature of the repair willdepend on the extent of the deterioration, the type of metal and its location, and theoverall cost of such repairs. Patches can be used to mend, cover or fill a deterioratedarea. Such patches should be a close match to the original material to prevent galvaniccorrosion. Splicing--replacement of a small section with new material--should beundertaken on structural members only when temporary bracing has been constructedto carry the load. Reinforcing--or bracing the damaged element with additional newmetal material--can relieve fatigue or overloading in some situations.
If metal components have deteriorated to a point where they have actually failed (or aremissing), replacement is the only reasonable course of action. If the components aresignificant to the overall design of the storefront, they should be carefully removed andsubstituted with components that match the original in material, size and detailing.
Before going to the expense of reproducing the original, it may be useful to checksalvage yards for compatible components. Missing parts of cast iron storefronts can bereplaced by new cast iron members that are reproductions of the original. New woodenpatterns, however, usually need to be made if the members are large. This proceduretends to be expensive (it is usually impossible to use existing iron components aspatterns to cast large elements because cast iron shrinks 1/5 inch per foot as it cools).In some situations, less expensive substitute materials such as aluminum, wood,plastics, and fiberglass, painted to match the metal, can be used without compromisingthe architectural character of the resource.
Cleaning and Painting
Cast iron storefronts are usually encrusted with layers of paint which need to beremoved to restore crispness to the details. Where paint buildup and rust are not severeproblems, handscraping and wire-brushing are viable cleaning methods. While it isnecessary to remove all rust before repainting, it is not necessary to remove all paint.For situations involving extensive paint buildup and corrosion, mechanical methods suchas low-pressure gentle dry grit blasting (80-100 psi) can be effective and economical,providing a good surface for paint. Masonry and wood surfaces adjacent to the cleaningarea, however, should be protected to avoid inadvertent damage from the blasting. Itwill be necessary to recaulk and putty the heads of screws and bolts after grit blasting toprevent moisture from entering the joints. Cleaned areas should be painted immediatelyafter cleaning with a rust-inhibiting primer to prevent new corrosion. Before anycleaning is undertaken, local codes should be checked to ensure compliance withenvironmental safety requirements.
Storefronts utilizing softer metals (lead, tin), sheet metals (sheet copper), and platedmetals (tin and terneplate) should not be cleaned mechanically (grit blasting) becausetheir plating or finish can be easily abraded and damaged. It is usually preferable toclean these softer metals with a chemical (acid pickling or phosphate dipping) method.Once the surface of the metal has been cleaned of all corrosion, grease, and dirt, arustinhibiting primer coat should be applied. Finish coats especially formulated formetals, consisting of lacquers, varnishes, enamels or special coatings, can be appliedonce the primer has dried. Primer and finish coats should be selected for chemicalcompatibility with the particular metal in question.
Bronze storefronts, common to large commercial office buildings and major department
Preservation Brief 11: Rehabilitating Historic Storefronts http://www.nps.gov/history/hps/tps/briefs/brief11.htm
7 of 15 4/19/2011 2:27 PM
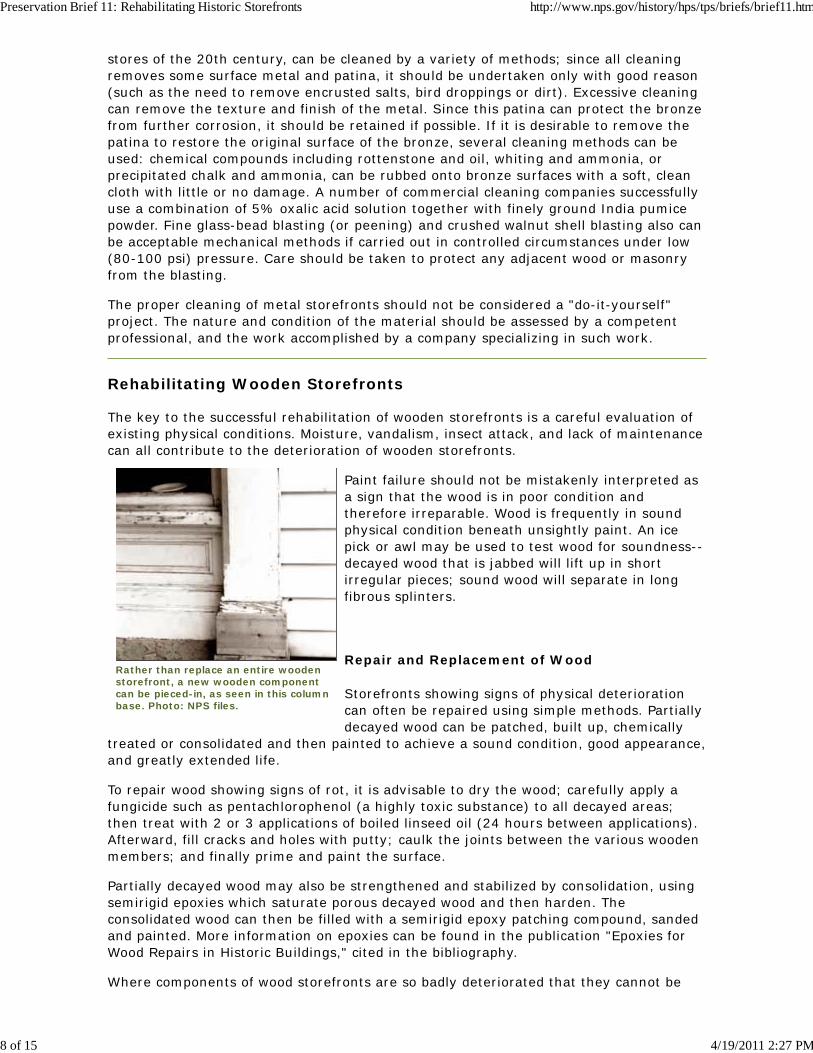
Rather than replace an entire woodenstorefront, a new wooden componentcan be pieced-in, as seen in this columnbase. Photo: NPS files.
stores of the 20th century, can be cleaned by a variety of methods; since all cleaningremoves some surface metal and patina, it should be undertaken only with good reason(such as the need to remove encrusted salts, bird droppings or dirt). Excessive cleaningcan remove the texture and finish of the metal. Since this patina can protect the bronzefrom further corrosion, it should be retained if possible. If it is desirable to remove thepatina to restore the original surface of the bronze, several cleaning methods can beused: chemical compounds including rottenstone and oil, whiting and ammonia, orprecipitated chalk and ammonia, can be rubbed onto bronze surfaces with a soft, cleancloth with little or no damage. A number of commercial cleaning companies successfullyuse a combination of 5% oxalic acid solution together with finely ground India pumicepowder. Fine glass-bead blasting (or peening) and crushed walnut shell blasting also canbe acceptable mechanical methods if carried out in controlled circumstances under low(80-100 psi) pressure. Care should be taken to protect any adjacent wood or masonryfrom the blasting.
The proper cleaning of metal storefronts should not be considered a "do-it-yourself"project. The nature and condition of the material should be assessed by a competentprofessional, and the work accomplished by a company specializing in such work.
Rehabilitating Wooden Storefronts
The key to the successful rehabilitation of wooden storefronts is a careful evaluation ofexisting physical conditions. Moisture, vandalism, insect attack, and lack of maintenancecan all contribute to the deterioration of wooden storefronts.
Paint failure should not be mistakenly interpreted asa sign that the wood is in poor condition andtherefore irreparable. Wood is frequently in soundphysical condition beneath unsightly paint. An icepick or awl may be used to test wood for soundness--decayed wood that is jabbed will lift up in shortirregular pieces; sound wood will separate in longfibrous splinters.
Repair and Replacement of Wood
Storefronts showing signs of physical deteriorationcan often be repaired using simple methods. Partiallydecayed wood can be patched, built up, chemically
treated or consolidated and then painted to achieve a sound condition, good appearance,and greatly extended life.
To repair wood showing signs of rot, it is advisable to dry the wood; carefully apply afungicide such as pentachlorophenol (a highly toxic substance) to all decayed areas;then treat with 2 or 3 applications of boiled linseed oil (24 hours between applications).Afterward, fill cracks and holes with putty; caulk the joints between the various woodenmembers; and finally prime and paint the surface.
Partially decayed wood may also be strengthened and stabilized by consolidation, usingsemirigid epoxies which saturate porous decayed wood and then harden. Theconsolidated wood can then be filled with a semirigid epoxy patching compound, sandedand painted. More information on epoxies can be found in the publication "Epoxies forWood Repairs in Historic Buildings," cited in the bibliography.
Where components of wood storefronts are so badly deteriorated that they cannot be
Preservation Brief 11: Rehabilitating Historic Storefronts http://www.nps.gov/history/hps/tps/briefs/brief11.htm
8 of 15 4/19/2011 2:27 PM
stabilized, it is possible to replace the deteriorated parts with new pieces. Thesetechniques all require skill and some expense, but are recommended in cases wheredecorative elements, such as brackets or pilasters, are involved. In some cases, missingedges can be filled and rebuilt using wood putty or epoxy compounds. When the epoxycures, it can be sanded smooth and painted to achieve a durable and waterproof repair.
Repainting of Wood
Wooden storefronts were historically painted to deter the harmful effects of weathering(moisture, ultraviolet rays from the sun, wind, etc.) as well as to define and accentarchitectural features. Repainting exterior woodwork is thus an inexpensive way toprovide continued protection from weathering and to give a fresh appearance to thestorefront.
Before repainting, however, a careful inspection of all painted wood surfaces needs to beconducted in order to determine the extent of surface preparation necessary, that is,whether
the existing layers of paint have deteriorated to the point that they will need to bepartially or totally removed prior to applying the new paint.
As a general rule, removing paint from historic exterior woodwork should be avoidedunless absolutely essential. Once conditions warranting removal have been identified,however, paint can be removed to the next sound layer using the gentlest methodpossible, then the woodwork repainted. For example, such conditions as mildewing,excessive chalking, or staining (from the oxidization of rusting nails or metal anchoragedevices) generally require only thorough surface cleaning prior to repainting. Intercoatpeeling, solvent blistering, and wrinkling require removal of the affected layer usingmild abrasive methods such as hand scraping and sanding. In all of these cases oflimited paint deterioration, after proper surface preparation the exterior woodwork maybe given one or more coats of a high quality exterior oil finish paint.
On the other hand, if painted wood surfaces display continuous patterns of deep cracksor if they are extensively blistering and peeling so that bare wood is visible, the oldpaint should be completely removed before repainting. (It should be emphasized thatbecause peeling to bare wood--the most common type of paint problem--is most oftencaused by excess interior or exterior moisture that collects behind the paint film, thefirst step in treating peeling is to locate and remove the source or sources of moisture.If this is not done, the new paint will simply peel off.)
There are several acceptable methods for total paint removal, depending on theparticular wooden element involved. They include such thermal devices as an electricheat plate with scraper for flat surfaces such as siding, window sills, and doors or anelectric hot-air gun with profiled scraper for solid decorative elements such asgingerbread or molding. Chemical methods play a more limited, supplemental role inremoving paint from historic exterior woodwork; for example, caustic or solvent-basestrippers may be used to remove paint from window muntins because thermal devicescan easily break the glass. Detachable wooden elements such as exterior shutters,balusters and columns, can probably best be stripped by means of immersion incommercial dip tanks because other methods are too laborious. Care must be taken inrinsing all chemical residue off the wood prior to painting or the new paint will notadhere.
Finally, if the exterior woodwork has been stripped to bare wood, priming should takeplace within 48 hours (unless the wood is wet, in which case it should be permitted todry before painting). Application of a high quality oil type exterior primer will provide asurface over which either an oil or latex top coat can be successfully used.
Preservation Brief 11: Rehabilitating Historic Storefronts http://www.nps.gov/history/hps/tps/briefs/brief11.htm
9 of 15 4/19/2011 2:27 PM

Rehabilitating Masonry Storefronts
Some storefronts are constructed of brick or stone, and like their metal and woodencounterparts, also may have been subjected to physical damage or alterations overtime. Although mortar may have disintegrated, inappropriate surface coatings applied,and openings reduced or blocked up, careful rehabilitation will help restore the visualand physical integrity of the masonry storefront.
Repair and Replacement of Masonry
If obvious signs of deterioration--disintegrating mortar, spalling bricks or stone--arepresent, the causes (ground moisture, leaky downspouts, etc.) should be identified andcorrected. Some repointing may be necessary on the masonry surface, but should belimited to areas in which so much mortar is missing that water accumulates in themortar joints, causing further deterioration. New mortar should duplicate thecomposition, color, texture, and hardness, as well as the joint size and profile of theoriginal. Badly spalling bricks may have to be replaced. Deteriorated stone may bereplaced in kind, or with a matching substitute material; in some cases where notvisually prominent, it may be covered with stucco, possibly scored to resemble blocks ofstone.
Cleaning Masonry
Inappropriate cleaning techniques can be a major source of damage to historic masonrybuildings. Historic masonry should be cleaned only when necessary to halt deteriorationor to remove graffiti and stains, and always with the gentlest means possible, such aswater and a mild detergent using natural bristle brushes, and/or a non-harmful chemicalsolution, both followed by a low-pressure water rinse.
It is important to remember that many mid-19th century brick buildings were paintedimmediately or soon after construction to protect poor quality brick or to imitate stone.Some historic masonry buildings not originally painted were painted at a later date tohide alterations or repairs, or to solve recurring maintenance or moisture problems.Thus, whether for reasons of historical tradition or practicality, it may be preferable toretain existing paint. If it is readily apparent that paint is not historic and is a later,perhaps unsightly or inappropriate treatment, removal may be attempted, but only ifthis can be carried out without damaging the historic masonry. Generally, paint removalfrom historic masonry may be accomplished successfully only with the use of speciallyformulated chemical paint removers. No abrasive techniques, such as wet or drysandblasting should be considered. If nonhistoric paint cannot be removed without usingabrasive methods, it is best to leave the masonry painted, although repainting in acompatible color may help visually.
Removing unsightly mastic from masonry presents a similarly serious problem. Itsremoval by mechanical means may result in abrading the masonry, and chemical andheat methods may prove ineffective, although solvents like acetone will aid in softeningthe hardened mastic. If the mastic has become brittle, a flat chisel may be used to pop itoff; but this technique, if not undertaken with care, may result in damaging themasonry. And even if total removal is possible, the mastic may have permanentlystained the masonry. Replacement of these masonry sections marred by masticapplication may be one option in limited situations; individual pieces of stone or bricksthat have been damaged by inappropriate alterations may be cut out and replaced withnew pieces that duplicate the original. However, since an exact match will be nearlyimpossible to achieve, it may be necessary to paint the repaired masonry in order tocreate a harmonious facade. Replacement of a large area with new materials may not beacceptable as it may give the building a new, nonhistoric appearance inappropriate tothe building style and period.
Preservation Brief 11: Rehabilitating Historic Storefronts http://www.nps.gov/history/hps/tps/briefs/brief11.htm
10 of 15 4/19/2011 2:27 PM
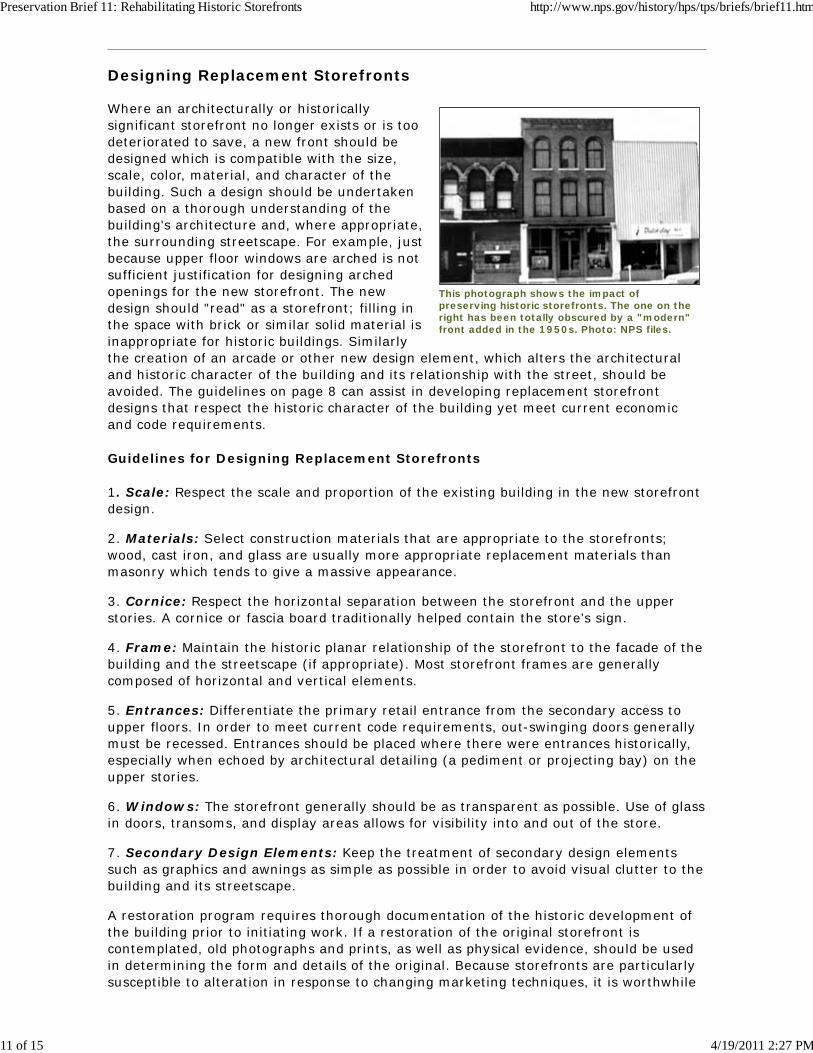
This photograph shows the impact ofpreserving historic storefronts. The one on theright has been totally obscured by a "modern"front added in the 1950s. Photo: NPS files.
Designing Replacement Storefronts
Where an architecturally or historicallysignificant storefront no longer exists or is toodeteriorated to save, a new front should bedesigned which is compatible with the size,scale, color, material, and character of thebuilding. Such a design should be undertakenbased on a thorough understanding of thebuilding's architecture and, where appropriate,the surrounding streetscape. For example, justbecause upper floor windows are arched is notsufficient justification for designing archedopenings for the new storefront. The newdesign should "read" as a storefront; filling inthe space with brick or similar solid material isinappropriate for historic buildings. Similarlythe creation of an arcade or other new design element, which alters the architecturaland historic character of the building and its relationship with the street, should beavoided. The guidelines on page 8 can assist in developing replacement storefrontdesigns that respect the historic character of the building yet meet current economicand code requirements.
Guidelines for Designing Replacement Storefronts
1. Scale: Respect the scale and proportion of the existing building in the new storefrontdesign.
2. Materials: Select construction materials that are appropriate to the storefronts;wood, cast iron, and glass are usually more appropriate replacement materials thanmasonry which tends to give a massive appearance.
3. Cornice: Respect the horizontal separation between the storefront and the upperstories. A cornice or fascia board traditionally helped contain the store's sign.
4. Frame: Maintain the historic planar relationship of the storefront to the facade of thebuilding and the streetscape (if appropriate). Most storefront frames are generallycomposed of horizontal and vertical elements.
5. Entrances: Differentiate the primary retail entrance from the secondary access toupper floors. In order to meet current code requirements, out-swinging doors generallymust be recessed. Entrances should be placed where there were entrances historically,especially when echoed by architectural detailing (a pediment or projecting bay) on theupper stories.
6. Windows: The storefront generally should be as transparent as possible. Use of glassin doors, transoms, and display areas allows for visibility into and out of the store.
7. Secondary Design Elements: Keep the treatment of secondary design elementssuch as graphics and awnings as simple as possible in order to avoid visual clutter to thebuilding and its streetscape.
A restoration program requires thorough documentation of the historic development ofthe building prior to initiating work. If a restoration of the original storefront iscontemplated, old photographs and prints, as well as physical evidence, should be usedin determining the form and details of the original. Because storefronts are particularlysusceptible to alteration in response to changing marketing techniques, it is worthwhile
Preservation Brief 11: Rehabilitating Historic Storefronts http://www.nps.gov/history/hps/tps/briefs/brief11.htm
11 of 15 4/19/2011 2:27 PM
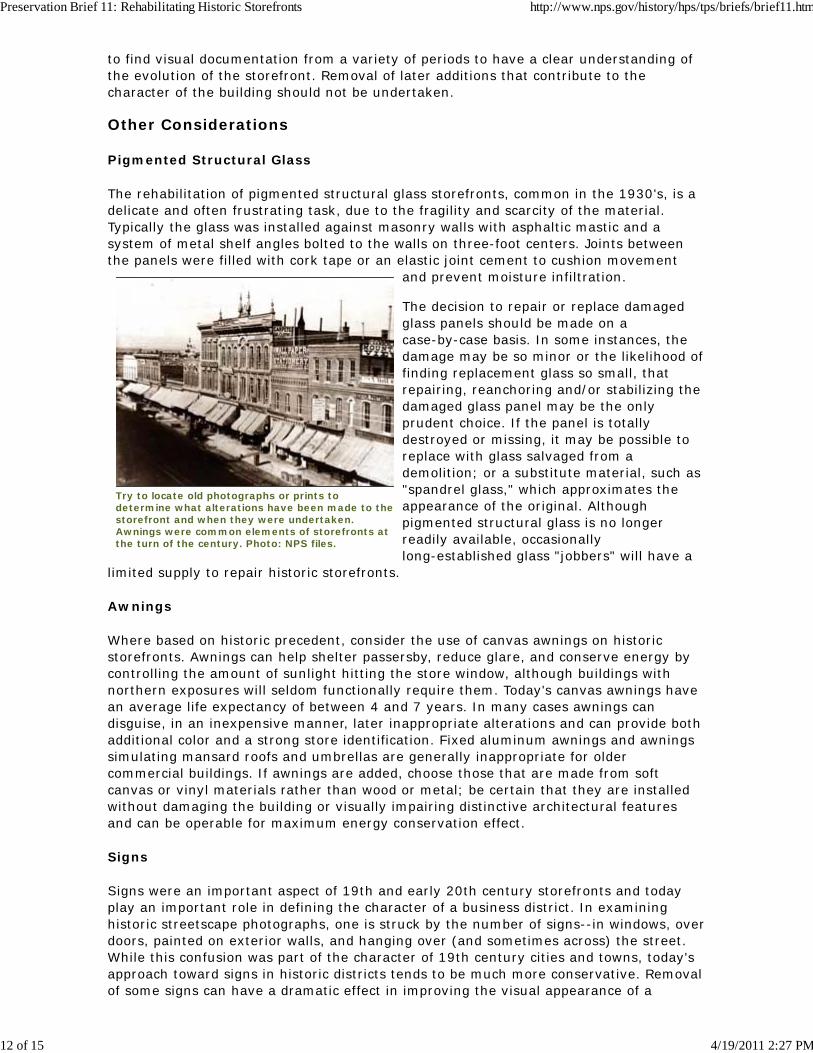
Try to locate old photographs or prints todetermine what alterations have been made to thestorefront and when they were undertaken.Awnings were common elements of storefronts atthe turn of the century. Photo: NPS files.
to find visual documentation from a variety of periods to have a clear understanding ofthe evolution of the storefront. Removal of later additions that contribute to thecharacter of the building should not be undertaken.
Other Considerations
Pigmented Structural Glass
The rehabilitation of pigmented structural glass storefronts, common in the 1930's, is adelicate and often frustrating task, due to the fragility and scarcity of the material.Typically the glass was installed against masonry walls with asphaltic mastic and asystem of metal shelf angles bolted to the walls on three-foot centers. Joints betweenthe panels were filled with cork tape or an elastic joint cement to cushion movement
and prevent moisture infiltration.
The decision to repair or replace damagedglass panels should be made on acase-by-case basis. In some instances, thedamage may be so minor or the likelihood offinding replacement glass so small, thatrepairing, reanchoring and/or stabilizing thedamaged glass panel may be the onlyprudent choice. If the panel is totallydestroyed or missing, it may be possible toreplace with glass salvaged from ademolition; or a substitute material, such as"spandrel glass," which approximates theappearance of the original. Althoughpigmented structural glass is no longerreadily available, occasionallylong-established glass "jobbers" will have a
limited supply to repair historic storefronts.
Awnings
Where based on historic precedent, consider the use of canvas awnings on historicstorefronts. Awnings can help shelter passersby, reduce glare, and conserve energy bycontrolling the amount of sunlight hitting the store window, although buildings withnorthern exposures will seldom functionally require them. Today's canvas awnings havean average life expectancy of between 4 and 7 years. In many cases awnings candisguise, in an inexpensive manner, later inappropriate alterations and can provide bothadditional color and a strong store identification. Fixed aluminum awnings and awningssimulating mansard roofs and umbrellas are generally inappropriate for oldercommercial buildings. If awnings are added, choose those that are made from softcanvas or vinyl materials rather than wood or metal; be certain that they are installedwithout damaging the building or visually impairing distinctive architectural featuresand can be operable for maximum energy conservation effect.
Signs
Signs were an important aspect of 19th and early 20th century storefronts and todayplay an important role in defining the character of a business district. In examininghistoric streetscape photographs, one is struck by the number of signs--in windows, overdoors, painted on exterior walls, and hanging over (and sometimes across) the street.While this confusion was part of the character of 19th century cities and towns, today'sapproach toward signs in historic districts tends to be much more conservative. Removalof some signs can have a dramatic effect in improving the visual appearance of a
Preservation Brief 11: Rehabilitating Historic Storefronts http://www.nps.gov/history/hps/tps/briefs/brief11.htm
12 of 15 4/19/2011 2:27 PM
building; these include modern backlit fluorescent signs, large applied signs withdistinctive corporate logos, and those signs attached to a building in such a way as toobscure significant architectural detailing. For this reason, their removal is encouragedin the process of rehabilitation. If new signs are designed, they should be of a size andstyle compatible with the historic building and should not cover or obscure significantarchitectural detailing or features. For many 19th century buildings, it was common tomount signs on the lintel above the first story. Another common approach, especially atthe turn of the century, was to paint signs directly on the inside of the display windows.Frequently this was done in gold leaf. New hanging signs may be appropriate for historiccommercial buildings, if they are of a scale and design compatible with the historicbuildings. Retention of signs and advertising painted on historic walls, if of historic orartistic interest (especially where they provide evidence of early or original occupants),is encouraged.
Paint Color
Paint analysis can reveal the storefront's historic paint colors and may be worthundertaking if a careful restoration is desired. If not, the paint color should be, at aminimum, appropriate to the style and setting of the building. This also means that ifthe building is in a historic district, the color selection should complement the building inquestion as well as other buildings in the block. In general, color schemes for wall andmajor decorative trim or details should be kept simple; in most cases the color or colorschosen for a storefront should be used on other painted exterior detailing (windows,shutter, cornice, etc.) to unify upper and lower portions of the facade.
Windows
Glass windows are generally the most prominent features in historic storefronts, andcare should be taken to ensure that they are properly maintained. For smaller panedwindows with wooden frames, deteriorated putty should be removed manually, takingcare not to damage wood along the rabbet. To reglaze, a bead of linseed oil-based puttyshould be laid around the perimeter of the rabbet; the glass pane pressed into place;glazing points inserted to hold the pane; and a final seal of putty beveled around theedge of the glass. For metal framed windows, glazing compound and special glazing clipsare used to secure the glass; a final seal of glazing compound then is often applied. Ifthe glass needs replacing, the new glass should match the original in size, color andreflective qualities. Mirrored or tinted glass are generally inappropriate replacements forhistoric storefronts. The replacement of cracked or missing glass in large windowsshould be undertaken by professional glaziers.
Code Requirements
Alterations to a storefront called for by public safety, handicapped access, and fire codescan be difficult design problems in historic buildings. Negotiations can be undertakenwith appropriate officials to ensure that all applicable codes are being met whilemaintaining the historic character of the original construction materials and features. If,for instance, doors opening inward must be changed, rather than replace them with newdoors, it may be possible to reverse the hinges and stops so that they will swingoutward.
Summary
A key to the successful rehabilitation of historic commercial buildings is the sensitivetreatment of the first floor itself. Wherever possible, significant storefronts (be theyoriginal or later alterations), including windows, sash, doors, transoms, signs anddecorative features, should be repaired in order to retain the historic character of the
Preservation Brief 11: Rehabilitating Historic Storefronts http://www.nps.gov/history/hps/tps/briefs/brief11.htm
13 of 15 4/19/2011 2:27 PM
building. Where original or early storefronts no longer exist or are too deteriorated tosave, the commercial character of the building should nonetheless be preserved--eitherthrough an accurate restoration based on historic research and physical evidence or acontemporary design which is compatible with the scale, design, materials, color andtexture of the historic building. The sensitive rehabilitation of historic storefronts willnot only enhance the architectural character of the overall building but will contribute torejuvenating neighborhoods or business districts as well.
Additional Reading
Bryan, John M. and the Triad Architectural Associates. Abbeville, South Carolina: UsingGrant-in-Aid Funds for Rehabilitation Planning and Project Work in the Commercial TownSquare. Washington, D.C.: Technical Preservation Services Division, U.S. Department ofthe Interior, 1980.
Gayle, Margot and Edmund V. Gillon, Jr. Cast Iron Architecture in New York. New York:Dover Publications, Inc., 1971.
Gayle, Margot and David W. Look and John G. Waite. Metals in America's HistoricBuildings: Uses and Preservation Treatments. Washington, D.C.: Technical PreservationServices Division, U.S. Department of the Interior, 1980.
Gelbloom, Mara. "Old Storefronts." The Old House Journal VI, No. 3 (March 1978), pp.2534.
Grimmer, Anne E. "Dangers of Abrasive Cleaning to Historic Buildings." (PreservationBriefs 6), Washington, D.C.: Technical Preservation Services Division, U.S. Departmentof the Interior, 1979.
Guthrie, Susan. Main Street Historic District, Van Buren, Arkansas: Using Grant-in-AidFunds for Storefront Rehabilitation. Washington, D.C.: Technical Preservation ServicesDivision, U.S. Department of the Interior, 1980.
Hartmann, Robert R. "Design for the Business District, Part I." Racine, Wisconsin: RacineUrban Aesthetics, Inc., 1979.
Hensley, Tom. "The Preservation of Historic Pigmented Structural Glass (Vitrolite andCarrara Glass)." Denver: Rocky Mountain Regional Office, National Park Service, 1981.
Marsh, Ellen. "An Introduction to Storefront Rehabilitation." Conserve Neighborhoods,No. 7 (Summer 1979).
Mintz, Norman. "A Practical Guide to Storefront Rehabilitation." Technical Series No. 2.:Albany, N.Y.: Preservation League of New York State, 1977.
Myers, John H. "The Repair of Historic Wooden Windows." (Preservation Briefs 9).Washington, D.C.: Technical Preservation Services Division, U.S. Department of theInterior, 1980.
Park, Sharon C. Storefront Rehabilitation: A 19th Century Commercial Building.Washington, D.C.: Technical Preservation Services Division, U.S. Department of theInterior, 1980.
Phillips, Morgan W. and Dr. Judith E. Selwyn. "Epoxies for Wood Repairs in HistoricBuildings." Washington, D.C.: Technical Preservation Services Division, U.S. Departmentof the Interior, 1978.
Rifkind, Carole. Main Street: The Face of Urban America. New York: Harper and Row,1977.
Preservation Brief 11: Rehabilitating Historic Storefronts http://www.nps.gov/history/hps/tps/briefs/brief11.htm
14 of 15 4/19/2011 2:27 PM

The Secretary of the Interior's Standards for Rehabilitation and Guidelines forRehabilitating Historic Buildings. Washington, D.C.: Technical Preservation ServicesDivision, U.S. Department of the Interior, 1980.
Weeks, Kay D. and David W. Look. "Exterior Paint Problems on Historic Woodwork."(Preservation Briefs 10). Washington, D.C.: Technical Preservation Services, U.S.Department of the Interior, 1982.
Acknowledgements
Special thanks go to Kay D. Weeks and Sharon C. Park, AIA, for providing technical and editorial direction in thedevelopment of this Preservation Brief. The following individuals are also to be thanked for reviewing the manuscript andmaking suggestions: Norman Mintz, New York, N Y.: Judith Kitchen, Columbus, Ohio: Jim Vaseff, Atlanta, Georgia,: andTom Moriarity, Washington, D C. Finally thanks go to Technical Preservation Service Branch staff members, especiallyMartha A. Gutrick, Michael J. Auer and Anne E. Grimmer, whose valuable comments were incorporated into the final textand who contributed to the publication of the brief.
Washington, D.C. September, 1982
Home page logo: The Joy Building from "Early Illustrations and Views of American Architecture" by Edmund V.Gillon, Jr. Photo: Courtesy, Dover Publications, Inc.
This publication has been prepared pursuant to the National Historic Preservation Act of1966, as amended, which directs the Secretary of the Interior to develop and makeavailable information concerning historic properties. Technical Preservation Services(TPS), Heritage Preservation Services Division, National Park Service prepares standards,guidelines, and other educational materials on responsible historic preservationtreatments for a broad public.
Order Brief | Technical Preservation Services | Preservation Briefs | Search | Questions/Answers
KDW
Preservation Brief 11: Rehabilitating Historic Storefronts http://www.nps.gov/history/hps/tps/briefs/brief11.htm
15 of 15 4/19/2011 2:27 PM
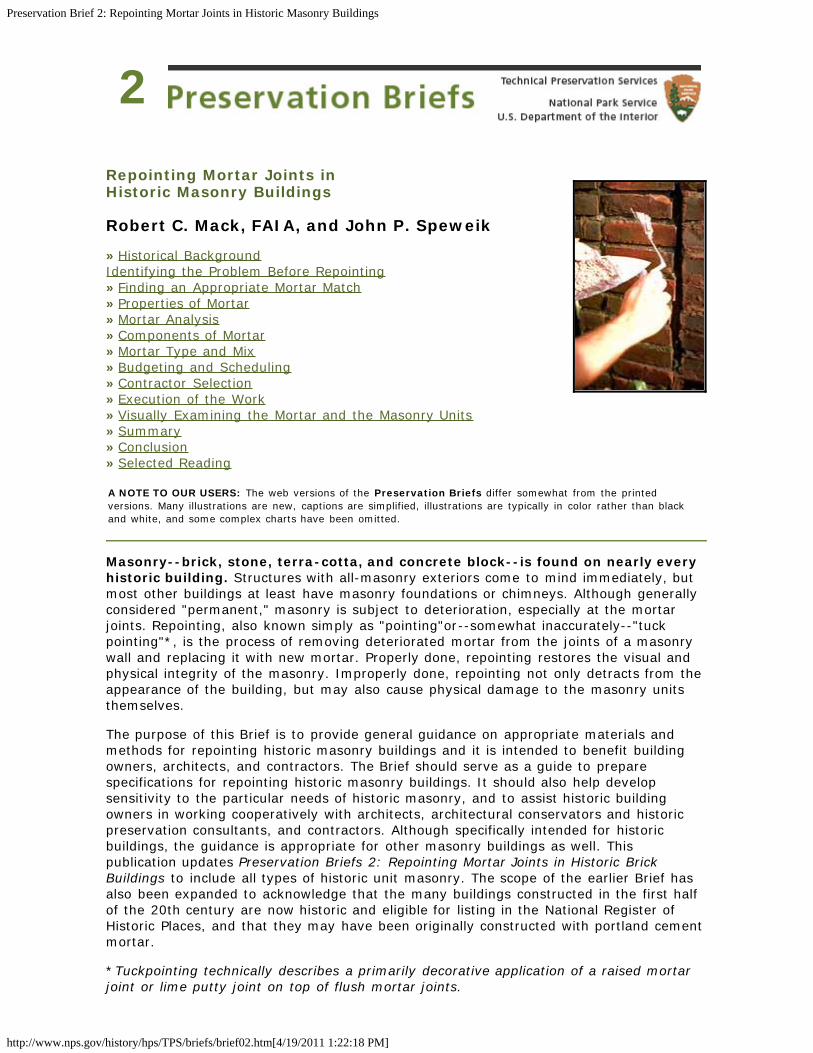
Preservation Brief 2: Repointing Mortar Joints in Historic Masonry Buildings
http://www.nps.gov/history/hps/TPS/briefs/brief02.htm[4/19/2011 1:22:18 PM]
2
Repointing Mortar Joints in Historic Masonry Buildings
Robert C. Mack, FAIA, and John P. Speweik
»Historical BackgroundIdentifying the Problem Before Repointing»Finding an Appropriate Mortar Match»Properties of Mortar»Mortar Analysis»Components of Mortar»Mortar Type and Mix»Budgeting and Scheduling»Contractor Selection»Execution of the Work»Visually Examining the Mortar and the Masonry Units»Summary»Conclusion»Selected Reading
A NOTE TO OUR USERS: The web versions of the Preservation Briefs differ somewhat from the printedversions. Many illustrations are new, captions are simplified, illustrations are typically in color rather than blackand white, and some complex charts have been omitted.
Masonry--brick, stone, terra-cotta, and concrete block--is found on nearly everyhistoric building. Structures with all-masonry exteriors come to mind immediately, butmost other buildings at least have masonry foundations or chimneys. Although generallyconsidered "permanent," masonry is subject to deterioration, especially at the mortarjoints. Repointing, also known simply as "pointing"or--somewhat inaccurately--"tuckpointing"*, is the process of removing deteriorated mortar from the joints of a masonrywall and replacing it with new mortar. Properly done, repointing restores the visual andphysical integrity of the masonry. Improperly done, repointing not only detracts from theappearance of the building, but may also cause physical damage to the masonry unitsthemselves.
The purpose of this Brief is to provide general guidance on appropriate materials andmethods for repointing historic masonry buildings and it is intended to benefit buildingowners, architects, and contractors. The Brief should serve as a guide to preparespecifications for repointing historic masonry buildings. It should also help developsensitivity to the particular needs of historic masonry, and to assist historic buildingowners in working cooperatively with architects, architectural conservators and historicpreservation consultants, and contractors. Although specifically intended for historicbuildings, the guidance is appropriate for other masonry buildings as well. Thispublication updates Preservation Briefs 2: Repointing Mortar Joints in Historic BrickBuildings to include all types of historic unit masonry. The scope of the earlier Brief hasalso been expanded to acknowledge that the many buildings constructed in the first halfof the 20th century are now historic and eligible for listing in the National Register ofHistoric Places, and that they may have been originally constructed with portland cementmortar.
*Tuckpointing technically describes a primarily decorative application of a raised mortarjoint or lime putty joint on top of flush mortar joints.

Preservation Brief 2: Repointing Mortar Joints in Historic Masonry Buildings
http://www.nps.gov/history/hps/TPS/briefs/brief02.htm[4/19/2011 1:22:18 PM]
Masons practice using lime putty mortar torepair historic marble. Photo: NPS files.
Historical Background
Mortar consisting primarily of lime and sand has been used as an integral part ofmasonry structures for thousands of years. Up until about the mid-19th century, lime orquicklime (sometimes called lump lime) was delivered to construction sites, where it hadto be slaked, or combined with water. Mixing with water caused it to boil and resulted ina wet lime putty that was left to mature in a pit or wooden box for several weeks, up toa year. Traditional mortar was made from lime putty, or slaked lime, combined with localsand, generally in a ratio of 1 part lime putty to 3 parts sand by volume. Often otheringredients, such as crushed marine shells (another source of lime), brick dust, clay,natural cements, pigments, and even animal hair were also added to mortar, but thebasic formulation for lime putty and sand mortar remained unchanged for centuries untilthe advent of portland cement or its forerunner, Roman cement, a natural, hydrauliccement.
Portland cement was patented in Great Britain in 1824. It was named after the stonefrom Portland in Dorset which it resembled when hard. This is a fast-curing, hydrauliccement which hardens under water. Portland cement was first manufactured in theUnited States in 1872, although it was imported before this date. But it was not incommon use throughout the country until the early 20th century. Up until the turn of thecentury portland cement was considered primarily an additive, or "minor ingredient" tohelp accelerate mortar set time. By the 1930s, however, most masons used a mix ofequal parts portland cement and lime putty. Thus, the mortar found in masonrystructures built between 1873 and 1930 can range from pure lime and sand mixes to awide variety of lime, portland cement, and sand combinations.
In the 1930s more new mortar products intended to hasten and simplify masons' workwere introduced in the U.S. These included masonry cement, a premixed, baggedmortar which is a combination of portland cement and ground limestone, and hydratedlime, machine-slaked lime that eliminated the necessity of slaking quicklime into putty atthe site.
Identifying the Problem Before Repointing
The decision to repoint is most often related to some obvious sign of deterioration, suchas disintegrating mortar, cracks in mortar joints, loose bricks or stones, damp walls, ordamaged plasterwork. It is, however, erroneous to assume that repointing alone willsolve deficiencies that result from other problems. The root cause of the deterioration--leaking roofs or gutters, differential settlement of the building, capillary action causingrising damp, or extreme weather exposure--should always be dealt with prior tobeginning work. Without appropriate repairs toeliminate the source of the problem, mortardeterioration will continue and any repointing willhave been a waste of time and money.
Use of Consultants. Because there are so manypossible causes for deterioration in historicbuildings, it may be desirable to retain aconsultant, such as a historic architect orarchitectural conservator, to analyze thebuilding. In addition to determining the mostappropriate solutions to the problems, aconsultant can prepare specifications whichreflect the particular requirements of each joband can provide oversight of the work in progress. Referrals to preservation consultantsfrequently can be obtained from State Historic Preservation Offices, the AmericanInstitute for Conservation of Historic and Artistic Works (AIC), the Association forPreservation Technology (APT), and local chapters of the American Institute of Architects(AIA).
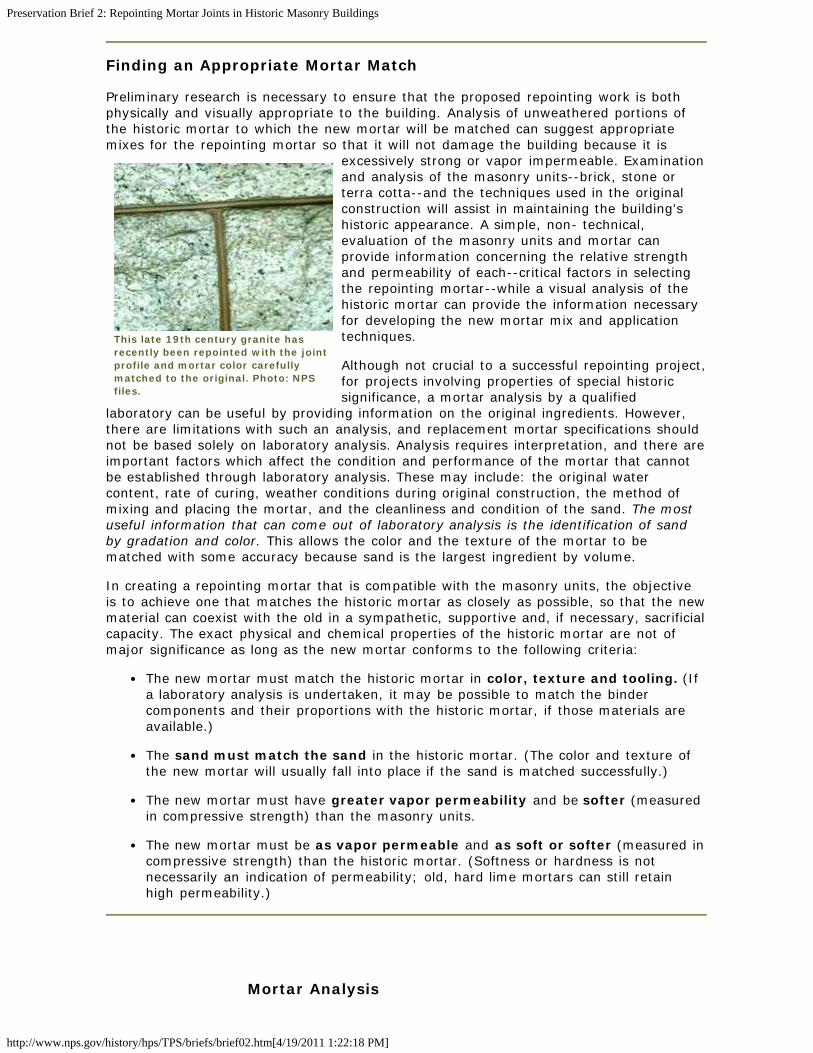
Preservation Brief 2: Repointing Mortar Joints in Historic Masonry Buildings
http://www.nps.gov/history/hps/TPS/briefs/brief02.htm[4/19/2011 1:22:18 PM]
This late 19th century granite hasrecently been repointed with the jointprofile and mortar color carefullymatched to the original. Photo: NPSfiles.
Finding an Appropriate Mortar Match
Preliminary research is necessary to ensure that the proposed repointing work is bothphysically and visually appropriate to the building. Analysis of unweathered portions ofthe historic mortar to which the new mortar will be matched can suggest appropriatemixes for the repointing mortar so that it will not damage the building because it is
excessively strong or vapor impermeable. Examinationand analysis of the masonry units--brick, stone orterra cotta--and the techniques used in the originalconstruction will assist in maintaining the building'shistoric appearance. A simple, non- technical,evaluation of the masonry units and mortar canprovide information concerning the relative strengthand permeability of each--critical factors in selectingthe repointing mortar--while a visual analysis of thehistoric mortar can provide the information necessaryfor developing the new mortar mix and applicationtechniques.
Although not crucial to a successful repointing project,for projects involving properties of special historicsignificance, a mortar analysis by a qualified
laboratory can be useful by providing information on the original ingredients. However,there are limitations with such an analysis, and replacement mortar specifications shouldnot be based solely on laboratory analysis. Analysis requires interpretation, and there areimportant factors which affect the condition and performance of the mortar that cannotbe established through laboratory analysis. These may include: the original watercontent, rate of curing, weather conditions during original construction, the method ofmixing and placing the mortar, and the cleanliness and condition of the sand. The mostuseful information that can come out of laboratory analysis is the identification of sandby gradation and color. This allows the color and the texture of the mortar to bematched with some accuracy because sand is the largest ingredient by volume.
In creating a repointing mortar that is compatible with the masonry units, the objectiveis to achieve one that matches the historic mortar as closely as possible, so that the newmaterial can coexist with the old in a sympathetic, supportive and, if necessary, sacrificialcapacity. The exact physical and chemical properties of the historic mortar are not ofmajor significance as long as the new mortar conforms to the following criteria:
The new mortar must match the historic mortar in color, texture and tooling. (Ifa laboratory analysis is undertaken, it may be possible to match the bindercomponents and their proportions with the historic mortar, if those materials areavailable.)
The sand must match the sand in the historic mortar. (The color and texture ofthe new mortar will usually fall into place if the sand is matched successfully.)
The new mortar must have greater vapor permeability and be softer (measuredin compressive strength) than the masonry units.
The new mortar must be as vapor permeable and as soft or softer (measured incompressive strength) than the historic mortar. (Softness or hardness is notnecessarily an indication of permeability; old, hard lime mortars can still retainhigh permeability.)
Mortar Analysis
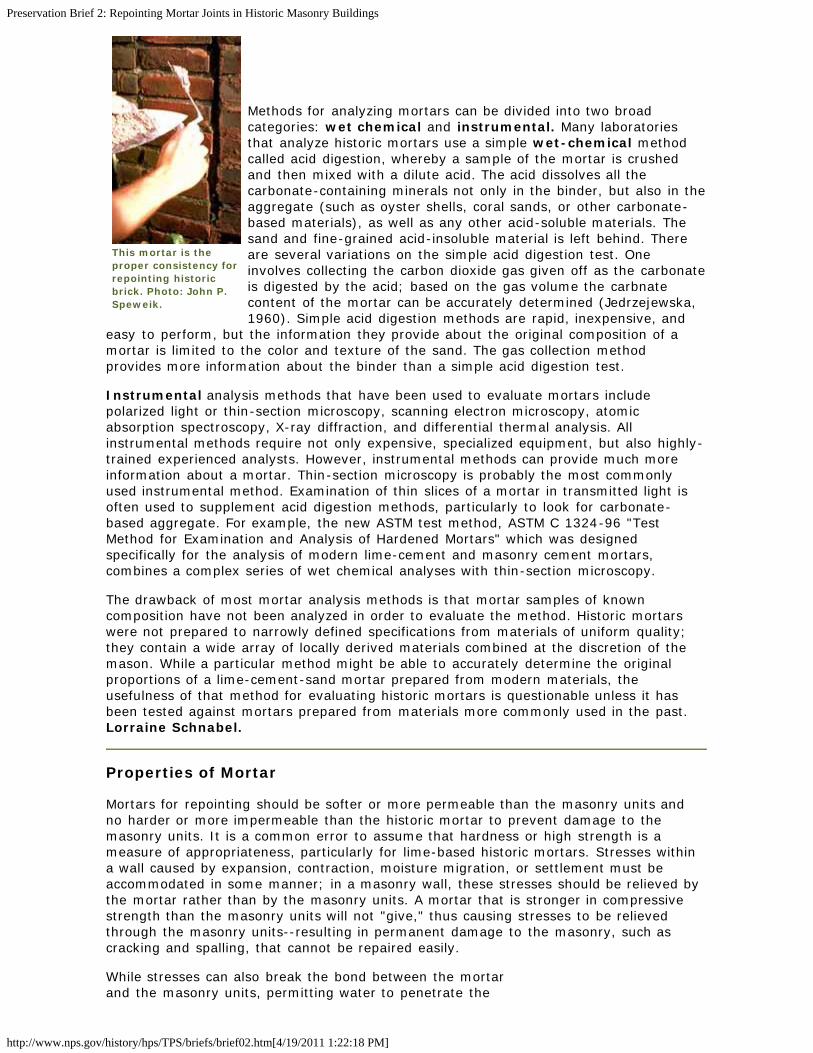
Preservation Brief 2: Repointing Mortar Joints in Historic Masonry Buildings
http://www.nps.gov/history/hps/TPS/briefs/brief02.htm[4/19/2011 1:22:18 PM]
This mortar is theproper consistency forrepointing historicbrick. Photo: John P.Speweik.
Methods for analyzing mortars can be divided into two broadcategories: wet chemical and instrumental. Many laboratoriesthat analyze historic mortars use a simple wet-chemical methodcalled acid digestion, whereby a sample of the mortar is crushedand then mixed with a dilute acid. The acid dissolves all thecarbonate-containing minerals not only in the binder, but also in theaggregate (such as oyster shells, coral sands, or other carbonate-based materials), as well as any other acid-soluble materials. Thesand and fine-grained acid-insoluble material is left behind. Thereare several variations on the simple acid digestion test. Oneinvolves collecting the carbon dioxide gas given off as the carbonateis digested by the acid; based on the gas volume the carbnatecontent of the mortar can be accurately determined (Jedrzejewska,1960). Simple acid digestion methods are rapid, inexpensive, and
easy to perform, but the information they provide about the original composition of amortar is limited to the color and texture of the sand. The gas collection methodprovides more information about the binder than a simple acid digestion test.
Instrumental analysis methods that have been used to evaluate mortars includepolarized light or thin-section microscopy, scanning electron microscopy, atomicabsorption spectroscopy, X-ray diffraction, and differential thermal analysis. Allinstrumental methods require not only expensive, specialized equipment, but also highly-trained experienced analysts. However, instrumental methods can provide much moreinformation about a mortar. Thin-section microscopy is probably the most commonlyused instrumental method. Examination of thin slices of a mortar in transmitted light isoften used to supplement acid digestion methods, particularly to look for carbonate-based aggregate. For example, the new ASTM test method, ASTM C 1324-96 "TestMethod for Examination and Analysis of Hardened Mortars" which was designedspecifically for the analysis of modern lime-cement and masonry cement mortars,combines a complex series of wet chemical analyses with thin-section microscopy.
The drawback of most mortar analysis methods is that mortar samples of knowncomposition have not been analyzed in order to evaluate the method. Historic mortarswere not prepared to narrowly defined specifications from materials of uniform quality;they contain a wide array of locally derived materials combined at the discretion of themason. While a particular method might be able to accurately determine the originalproportions of a lime-cement-sand mortar prepared from modern materials, theusefulness of that method for evaluating historic mortars is questionable unless it hasbeen tested against mortars prepared from materials more commonly used in the past.Lorraine Schnabel.
Properties of Mortar
Mortars for repointing should be softer or more permeable than the masonry units andno harder or more impermeable than the historic mortar to prevent damage to themasonry units. It is a common error to assume that hardness or high strength is ameasure of appropriateness, particularly for lime-based historic mortars. Stresses withina wall caused by expansion, contraction, moisture migration, or settlement must beaccommodated in some manner; in a masonry wall, these stresses should be relieved bythe mortar rather than by the masonry units. A mortar that is stronger in compressivestrength than the masonry units will not "give," thus causing stresses to be relievedthrough the masonry units--resulting in permanent damage to the masonry, such ascracking and spalling, that cannot be repaired easily.
While stresses can also break the bond between the mortarand the masonry units, permitting water to penetrate the
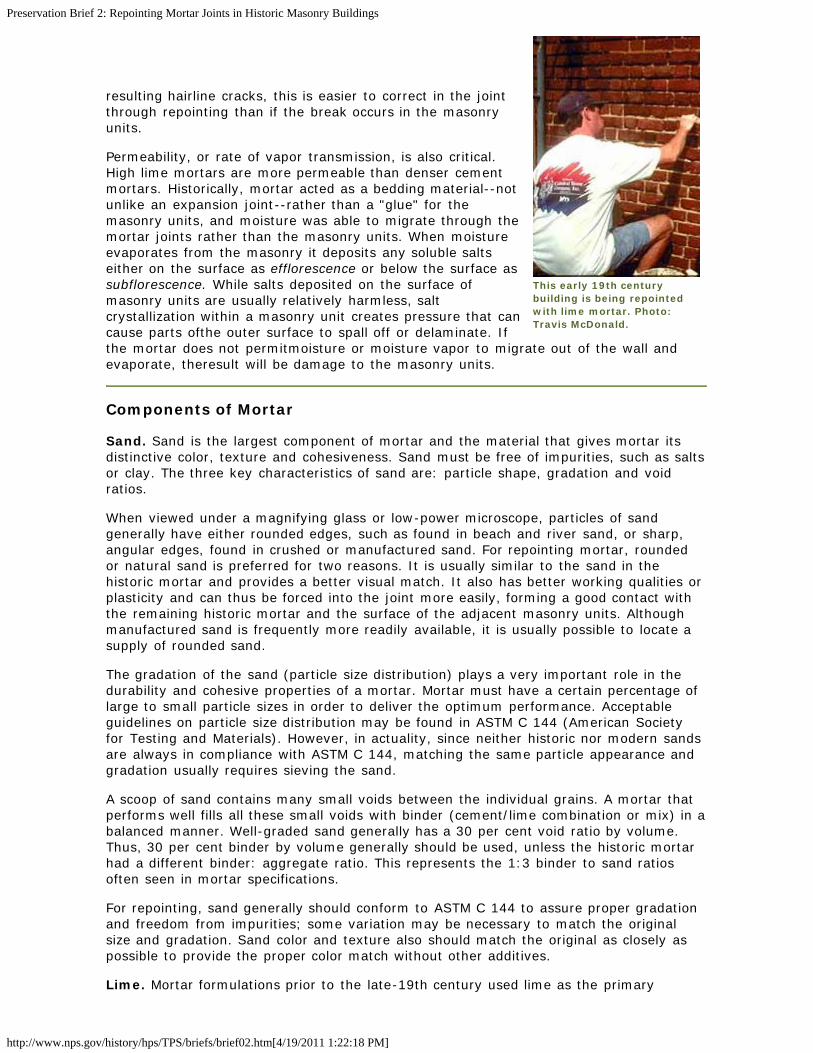
Preservation Brief 2: Repointing Mortar Joints in Historic Masonry Buildings
http://www.nps.gov/history/hps/TPS/briefs/brief02.htm[4/19/2011 1:22:18 PM]
This early 19th centurybuilding is being repointedwith lime mortar. Photo:Travis McDonald.
resulting hairline cracks, this is easier to correct in the jointthrough repointing than if the break occurs in the masonryunits.
Permeability, or rate of vapor transmission, is also critical.High lime mortars are more permeable than denser cementmortars. Historically, mortar acted as a bedding material--notunlike an expansion joint--rather than a "glue" for themasonry units, and moisture was able to migrate through themortar joints rather than the masonry units. When moistureevaporates from the masonry it deposits any soluble saltseither on the surface as efflorescence or below the surface assubflorescence. While salts deposited on the surface ofmasonry units are usually relatively harmless, saltcrystallization within a masonry unit creates pressure that cancause parts ofthe outer surface to spall off or delaminate. Ifthe mortar does not permitmoisture or moisture vapor to migrate out of the wall andevaporate, theresult will be damage to the masonry units.
Components of Mortar
Sand. Sand is the largest component of mortar and the material that gives mortar itsdistinctive color, texture and cohesiveness. Sand must be free of impurities, such as saltsor clay. The three key characteristics of sand are: particle shape, gradation and voidratios.
When viewed under a magnifying glass or low-power microscope, particles of sandgenerally have either rounded edges, such as found in beach and river sand, or sharp,angular edges, found in crushed or manufactured sand. For repointing mortar, roundedor natural sand is preferred for two reasons. It is usually similar to the sand in thehistoric mortar and provides a better visual match. It also has better working qualities orplasticity and can thus be forced into the joint more easily, forming a good contact withthe remaining historic mortar and the surface of the adjacent masonry units. Althoughmanufactured sand is frequently more readily available, it is usually possible to locate asupply of rounded sand.
The gradation of the sand (particle size distribution) plays a very important role in thedurability and cohesive properties of a mortar. Mortar must have a certain percentage oflarge to small particle sizes in order to deliver the optimum performance. Acceptableguidelines on particle size distribution may be found in ASTM C 144 (American Societyfor Testing and Materials). However, in actuality, since neither historic nor modern sandsare always in compliance with ASTM C 144, matching the same particle appearance andgradation usually requires sieving the sand.
A scoop of sand contains many small voids between the individual grains. A mortar thatperforms well fills all these small voids with binder (cement/lime combination or mix) in abalanced manner. Well-graded sand generally has a 30 per cent void ratio by volume.Thus, 30 per cent binder by volume generally should be used, unless the historic mortarhad a different binder: aggregate ratio. This represents the 1:3 binder to sand ratiosoften seen in mortar specifications.
For repointing, sand generally should conform to ASTM C 144 to assure proper gradationand freedom from impurities; some variation may be necessary to match the originalsize and gradation. Sand color and texture also should match the original as closely aspossible to provide the proper color match without other additives.
Lime. Mortar formulations prior to the late-19th century used lime as the primary
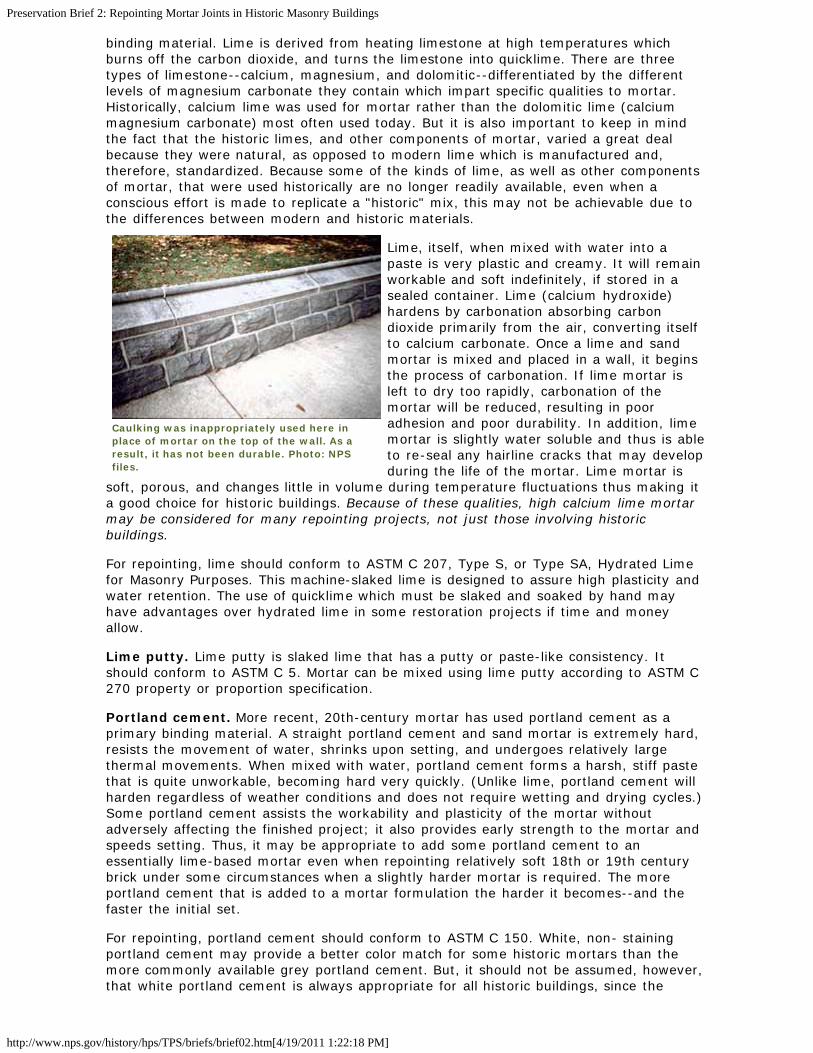
Preservation Brief 2: Repointing Mortar Joints in Historic Masonry Buildings
http://www.nps.gov/history/hps/TPS/briefs/brief02.htm[4/19/2011 1:22:18 PM]
Caulking was inappropriately used here inplace of mortar on the top of the wall. As aresult, it has not been durable. Photo: NPSfiles.
binding material. Lime is derived from heating limestone at high temperatures whichburns off the carbon dioxide, and turns the limestone into quicklime. There are threetypes of limestone--calcium, magnesium, and dolomitic--differentiated by the differentlevels of magnesium carbonate they contain which impart specific qualities to mortar.Historically, calcium lime was used for mortar rather than the dolomitic lime (calciummagnesium carbonate) most often used today. But it is also important to keep in mindthe fact that the historic limes, and other components of mortar, varied a great dealbecause they were natural, as opposed to modern lime which is manufactured and,therefore, standardized. Because some of the kinds of lime, as well as other componentsof mortar, that were used historically are no longer readily available, even when aconscious effort is made to replicate a "historic" mix, this may not be achievable due tothe differences between modern and historic materials.
Lime, itself, when mixed with water into apaste is very plastic and creamy. It will remainworkable and soft indefinitely, if stored in asealed container. Lime (calcium hydroxide)hardens by carbonation absorbing carbondioxide primarily from the air, converting itselfto calcium carbonate. Once a lime and sandmortar is mixed and placed in a wall, it beginsthe process of carbonation. If lime mortar isleft to dry too rapidly, carbonation of themortar will be reduced, resulting in pooradhesion and poor durability. In addition, limemortar is slightly water soluble and thus is ableto re-seal any hairline cracks that may developduring the life of the mortar. Lime mortar is
soft, porous, and changes little in volume during temperature fluctuations thus making ita good choice for historic buildings. Because of these qualities, high calcium lime mortarmay be considered for many repointing projects, not just those involving historicbuildings.
For repointing, lime should conform to ASTM C 207, Type S, or Type SA, Hydrated Limefor Masonry Purposes. This machine-slaked lime is designed to assure high plasticity andwater retention. The use of quicklime which must be slaked and soaked by hand mayhave advantages over hydrated lime in some restoration projects if time and moneyallow.
Lime putty. Lime putty is slaked lime that has a putty or paste-like consistency. Itshould conform to ASTM C 5. Mortar can be mixed using lime putty according to ASTM C270 property or proportion specification.
Portland cement. More recent, 20th-century mortar has used portland cement as aprimary binding material. A straight portland cement and sand mortar is extremely hard,resists the movement of water, shrinks upon setting, and undergoes relatively largethermal movements. When mixed with water, portland cement forms a harsh, stiff pastethat is quite unworkable, becoming hard very quickly. (Unlike lime, portland cement willharden regardless of weather conditions and does not require wetting and drying cycles.)Some portland cement assists the workability and plasticity of the mortar withoutadversely affecting the finished project; it also provides early strength to the mortar andspeeds setting. Thus, it may be appropriate to add some portland cement to anessentially lime-based mortar even when repointing relatively soft 18th or 19th centurybrick under some circumstances when a slightly harder mortar is required. The moreportland cement that is added to a mortar formulation the harder it becomes--and thefaster the initial set.
For repointing, portland cement should conform to ASTM C 150. White, non- stainingportland cement may provide a better color match for some historic mortars than themore commonly available grey portland cement. But, it should not be assumed, however,that white portland cement is always appropriate for all historic buildings, since the
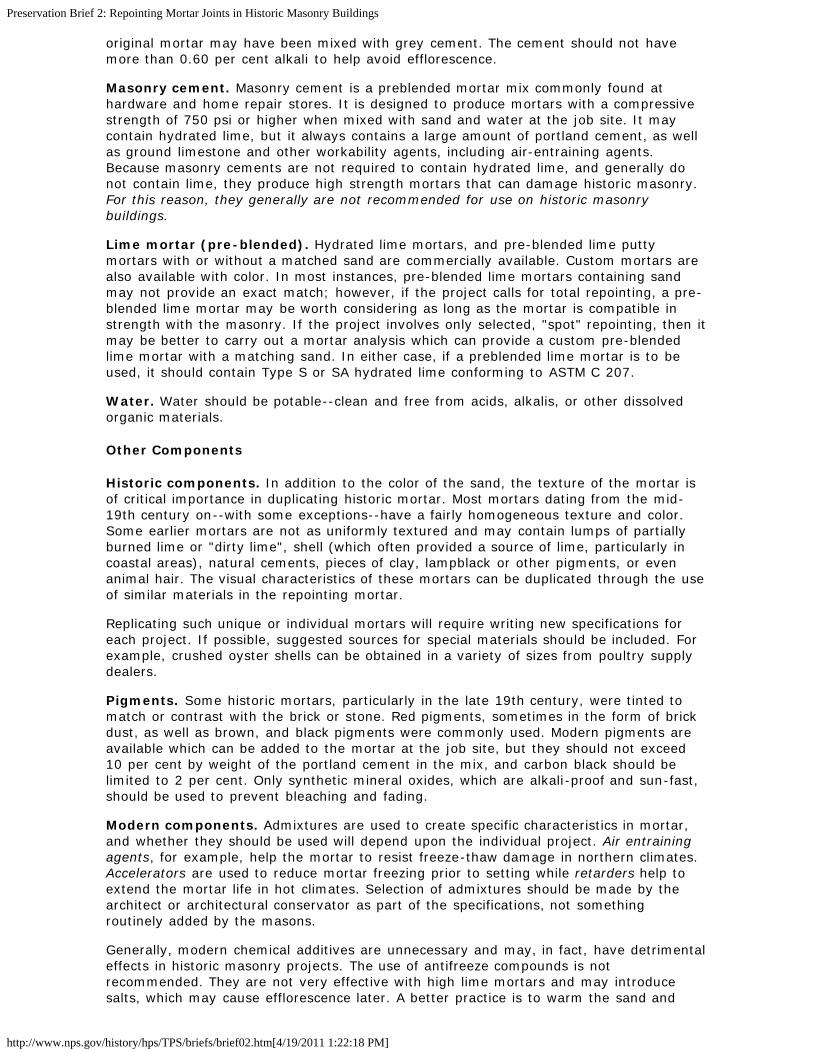
Preservation Brief 2: Repointing Mortar Joints in Historic Masonry Buildings
http://www.nps.gov/history/hps/TPS/briefs/brief02.htm[4/19/2011 1:22:18 PM]
original mortar may have been mixed with grey cement. The cement should not havemore than 0.60 per cent alkali to help avoid efflorescence.
Masonry cement. Masonry cement is a preblended mortar mix commonly found athardware and home repair stores. It is designed to produce mortars with a compressivestrength of 750 psi or higher when mixed with sand and water at the job site. It maycontain hydrated lime, but it always contains a large amount of portland cement, as wellas ground limestone and other workability agents, including air-entraining agents.Because masonry cements are not required to contain hydrated lime, and generally donot contain lime, they produce high strength mortars that can damage historic masonry.For this reason, they generally are not recommended for use on historic masonrybuildings.
Lime mortar (pre-blended). Hydrated lime mortars, and pre-blended lime puttymortars with or without a matched sand are commercially available. Custom mortars arealso available with color. In most instances, pre-blended lime mortars containing sandmay not provide an exact match; however, if the project calls for total repointing, a pre-blended lime mortar may be worth considering as long as the mortar is compatible instrength with the masonry. If the project involves only selected, "spot" repointing, then itmay be better to carry out a mortar analysis which can provide a custom pre-blendedlime mortar with a matching sand. In either case, if a preblended lime mortar is to beused, it should contain Type S or SA hydrated lime conforming to ASTM C 207.
Water. Water should be potable--clean and free from acids, alkalis, or other dissolvedorganic materials.
Other Components
Historic components. In addition to the color of the sand, the texture of the mortar isof critical importance in duplicating historic mortar. Most mortars dating from the mid-19th century on--with some exceptions--have a fairly homogeneous texture and color.Some earlier mortars are not as uniformly textured and may contain lumps of partiallyburned lime or "dirty lime", shell (which often provided a source of lime, particularly incoastal areas), natural cements, pieces of clay, lampblack or other pigments, or evenanimal hair. The visual characteristics of these mortars can be duplicated through the useof similar materials in the repointing mortar.
Replicating such unique or individual mortars will require writing new specifications foreach project. If possible, suggested sources for special materials should be included. Forexample, crushed oyster shells can be obtained in a variety of sizes from poultry supplydealers.
Pigments. Some historic mortars, particularly in the late 19th century, were tinted tomatch or contrast with the brick or stone. Red pigments, sometimes in the form of brickdust, as well as brown, and black pigments were commonly used. Modern pigments areavailable which can be added to the mortar at the job site, but they should not exceed10 per cent by weight of the portland cement in the mix, and carbon black should belimited to 2 per cent. Only synthetic mineral oxides, which are alkali-proof and sun-fast,should be used to prevent bleaching and fading.
Modern components. Admixtures are used to create specific characteristics in mortar,and whether they should be used will depend upon the individual project. Air entrainingagents, for example, help the mortar to resist freeze-thaw damage in northern climates.Accelerators are used to reduce mortar freezing prior to setting while retarders help toextend the mortar life in hot climates. Selection of admixtures should be made by thearchitect or architectural conservator as part of the specifications, not somethingroutinely added by the masons.
Generally, modern chemical additives are unnecessary and may, in fact, have detrimentaleffects in historic masonry projects. The use of antifreeze compounds is notrecommended. They are not very effective with high lime mortars and may introducesalts, which may cause efflorescence later. A better practice is to warm the sand and

Preservation Brief 2: Repointing Mortar Joints in Historic Masonry Buildings
http://www.nps.gov/history/hps/TPS/briefs/brief02.htm[4/19/2011 1:22:18 PM]
Here, a hammer andchisel are beingcorrectly used toprepare a joint forrepointing. Photo: JohnP. Speweik.
water, and to protect the completed work from freezing. No definitive study hasdetermined whether air-entraining additives should be used to resist frost action andenhance plasticity, but in areas of extreme exposure requiring high-strength mortars withlower permeability, air-entrainment of 10-16 percent may be desirable (see formula for"severe weather exposure" in Mortar Type and Mix). Bonding agents are not asubstitute for proper joint preparation, and they should generally be avoided. If the jointis properly prepared, there will be a good bond between the new mortar and theadjacent surfaces. In addition, a bonding agent is difficult to remove if smeared on amasonry surface.
Mortar Type and Mix
Mortars for repointing projects, especially those involving historic buildings, typically arecustom mixed in order to ensure the proper physical and visual qualities. These materialscan be combined in varying proportions to create a mortar with the desired performanceand durability. The actual specification of a particular mortar type should take intoconsideration all of the factors affecting the life of the building including: current siteconditions, present condition of the masonry, function of the new mortar, degree of
weather exposure, and skill of the mason. Thus, no two repointingprojects are exactly the same. Modern materials specified for usein repointing mortar should conform to specifications of theAmerican Society for Testing and Materials (ASTM) or comparablefederal specifications, and the resulting mortar should conform toASTM C 270, Mortar for Unit Masonry.
Specifying the proportions for the repointing mortar for a specificjob is not as difficult as it might seem. Five mortar types, eachwith a corresponding recommended mix, have been established byASTM to distinguish high strength mortar from soft flexiblemortars. The ASTM designated them in decreasing order ofapproximate general strength as Type M (2,500 psi), Type S(1,800 psi), Type N (750 psi), Type O (350 psi) and Type K (75psi). (The letters identifying the types are from the words MASONWORK using every other letter.) Type K has the highest limecontent of the mixes that contain portland cement, although it isseldom used today, except for some historic preservation projects.The designation "L" in the accompanying chart identifies a straightlime and sand mix. Specifying the appropriate ASTM mortar by
proportion of ingredients, will ensure the desired physical properties. Unless specifiedotherwise, measurements or proportions for mortar mixes are always given in thefollowing order: cement-lime-sand. Thus, a Type K mix, for example, would be referredto as 1-3-10, or 1 part cement to 3 parts lime to 10 parts sand. Other requirements tocreate the desired visual qualities should be included in the specifications.
The strength of a mortar can vary. If mixed with higher amounts of portland cement, aharder mortar is obtained. The more lime that is added, the softer and more plastic themortar becomes, increasing its workability. A mortar strong in compressive strengthmight be desirable for a hard stone (such as granite) pier holding up a bridge deck,whereas a softer, more permeable lime mortar would be preferable for a historic wall ofsoft brick. Masonry deterioration caused by salt deposition results when the mortar is lesspermeable than the masonry unit. A strong mortar is still more permeable than hard,dense stone. However, in a wall constructed of soft bricks where the masonry unit itselfhas a relatively high permeability or vapor transmission rate, a soft, high lime mortar isnecessary to retain sufficient permeability.
Budgeting and Scheduling
Repointing is both expensive and time consuming due to the extent of handwork andspecial materials required. It is preferable to repoint only those areas that require workrather than an entire wall, as is often specified. But, if 25 to 50 per cent or more of a
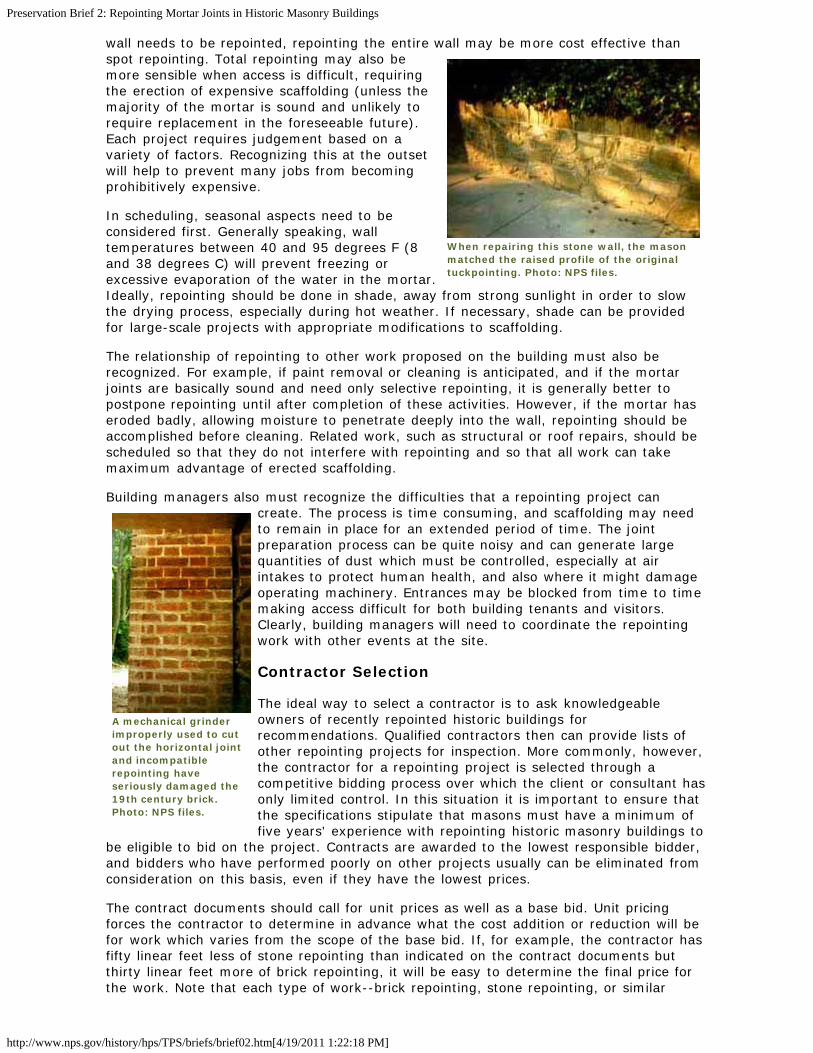
Preservation Brief 2: Repointing Mortar Joints in Historic Masonry Buildings
http://www.nps.gov/history/hps/TPS/briefs/brief02.htm[4/19/2011 1:22:18 PM]
When repairing this stone wall, the masonmatched the raised profile of the originaltuckpointing. Photo: NPS files.
A mechanical grinderimproperly used to cutout the horizontal jointand incompatiblerepointing haveseriously damaged the19th century brick.Photo: NPS files.
wall needs to be repointed, repointing the entire wall may be more cost effective thanspot repointing. Total repointing may also bemore sensible when access is difficult, requiringthe erection of expensive scaffolding (unless themajority of the mortar is sound and unlikely torequire replacement in the foreseeable future).Each project requires judgement based on avariety of factors. Recognizing this at the outsetwill help to prevent many jobs from becomingprohibitively expensive.
In scheduling, seasonal aspects need to beconsidered first. Generally speaking, walltemperatures between 40 and 95 degrees F (8and 38 degrees C) will prevent freezing orexcessive evaporation of the water in the mortar.Ideally, repointing should be done in shade, away from strong sunlight in order to slowthe drying process, especially during hot weather. If necessary, shade can be providedfor large-scale projects with appropriate modifications to scaffolding.
The relationship of repointing to other work proposed on the building must also berecognized. For example, if paint removal or cleaning is anticipated, and if the mortarjoints are basically sound and need only selective repointing, it is generally better topostpone repointing until after completion of these activities. However, if the mortar haseroded badly, allowing moisture to penetrate deeply into the wall, repointing should beaccomplished before cleaning. Related work, such as structural or roof repairs, should bescheduled so that they do not interfere with repointing and so that all work can takemaximum advantage of erected scaffolding.
Building managers also must recognize the difficulties that a repointing project cancreate. The process is time consuming, and scaffolding may needto remain in place for an extended period of time. The jointpreparation process can be quite noisy and can generate largequantities of dust which must be controlled, especially at airintakes to protect human health, and also where it might damageoperating machinery. Entrances may be blocked from time to timemaking access difficult for both building tenants and visitors.Clearly, building managers will need to coordinate the repointingwork with other events at the site.
Contractor Selection
The ideal way to select a contractor is to ask knowledgeableowners of recently repointed historic buildings forrecommendations. Qualified contractors then can provide lists ofother repointing projects for inspection. More commonly, however,the contractor for a repointing project is selected through acompetitive bidding process over which the client or consultant hasonly limited control. In this situation it is important to ensure thatthe specifications stipulate that masons must have a minimum offive years' experience with repointing historic masonry buildings to
be eligible to bid on the project. Contracts are awarded to the lowest responsible bidder,and bidders who have performed poorly on other projects usually can be eliminated fromconsideration on this basis, even if they have the lowest prices.
The contract documents should call for unit prices as well as a base bid. Unit pricingforces the contractor to determine in advance what the cost addition or reduction will befor work which varies from the scope of the base bid. If, for example, the contractor hasfifty linear feet less of stone repointing than indicated on the contract documents butthirty linear feet more of brick repointing, it will be easy to determine the final price forthe work. Note that each type of work--brick repointing, stone repointing, or similar
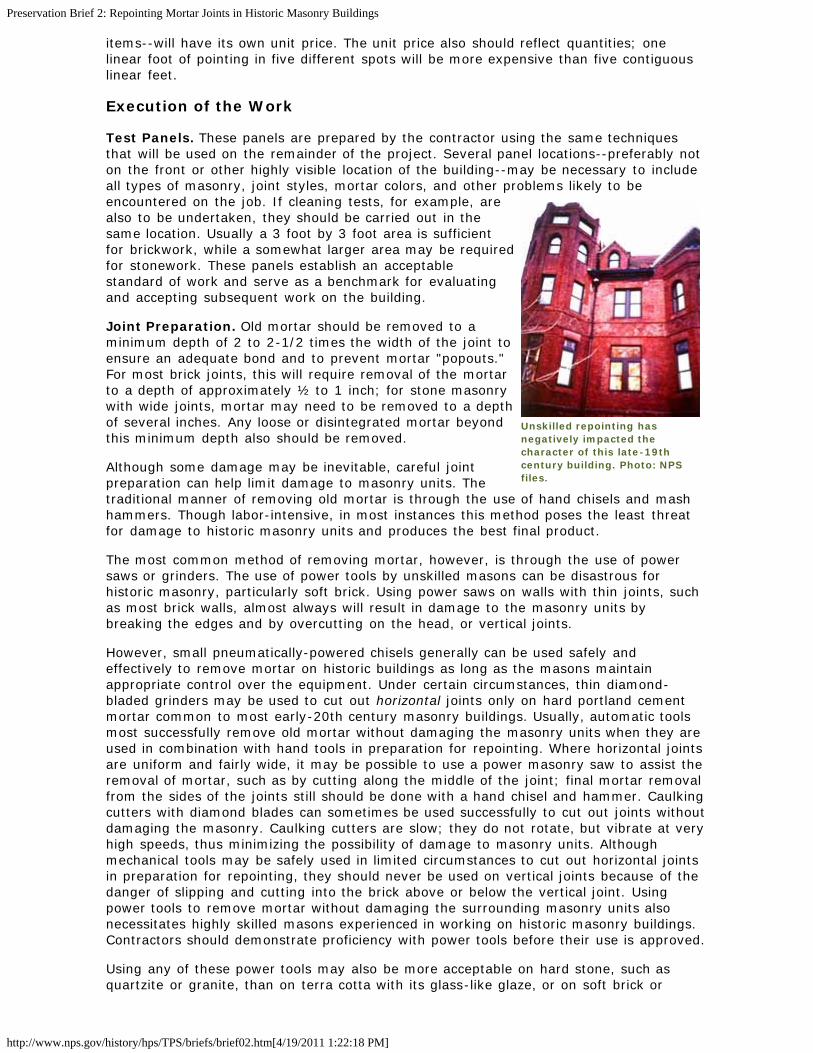
Preservation Brief 2: Repointing Mortar Joints in Historic Masonry Buildings
http://www.nps.gov/history/hps/TPS/briefs/brief02.htm[4/19/2011 1:22:18 PM]
Unskilled repointing hasnegatively impacted thecharacter of this late-19thcentury building. Photo: NPSfiles.
items--will have its own unit price. The unit price also should reflect quantities; onelinear foot of pointing in five different spots will be more expensive than five contiguouslinear feet.
Execution of the Work
Test Panels. These panels are prepared by the contractor using the same techniquesthat will be used on the remainder of the project. Several panel locations--preferably noton the front or other highly visible location of the building--may be necessary to includeall types of masonry, joint styles, mortar colors, and other problems likely to beencountered on the job. If cleaning tests, for example, arealso to be undertaken, they should be carried out in thesame location. Usually a 3 foot by 3 foot area is sufficientfor brickwork, while a somewhat larger area may be requiredfor stonework. These panels establish an acceptablestandard of work and serve as a benchmark for evaluatingand accepting subsequent work on the building.
Joint Preparation. Old mortar should be removed to aminimum depth of 2 to 2-1/2 times the width of the joint toensure an adequate bond and to prevent mortar "popouts."For most brick joints, this will require removal of the mortarto a depth of approximately ½ to 1 inch; for stone masonrywith wide joints, mortar may need to be removed to a depthof several inches. Any loose or disintegrated mortar beyondthis minimum depth also should be removed.
Although some damage may be inevitable, careful jointpreparation can help limit damage to masonry units. Thetraditional manner of removing old mortar is through the use of hand chisels and mashhammers. Though labor-intensive, in most instances this method poses the least threatfor damage to historic masonry units and produces the best final product.
The most common method of removing mortar, however, is through the use of powersaws or grinders. The use of power tools by unskilled masons can be disastrous forhistoric masonry, particularly soft brick. Using power saws on walls with thin joints, suchas most brick walls, almost always will result in damage to the masonry units bybreaking the edges and by overcutting on the head, or vertical joints.
However, small pneumatically-powered chisels generally can be used safely andeffectively to remove mortar on historic buildings as long as the masons maintainappropriate control over the equipment. Under certain circumstances, thin diamond-bladed grinders may be used to cut out horizontal joints only on hard portland cementmortar common to most early-20th century masonry buildings. Usually, automatic toolsmost successfully remove old mortar without damaging the masonry units when they areused in combination with hand tools in preparation for repointing. Where horizontal jointsare uniform and fairly wide, it may be possible to use a power masonry saw to assist theremoval of mortar, such as by cutting along the middle of the joint; final mortar removalfrom the sides of the joints still should be done with a hand chisel and hammer. Caulkingcutters with diamond blades can sometimes be used successfully to cut out joints withoutdamaging the masonry. Caulking cutters are slow; they do not rotate, but vibrate at veryhigh speeds, thus minimizing the possibility of damage to masonry units. Althoughmechanical tools may be safely used in limited circumstances to cut out horizontal jointsin preparation for repointing, they should never be used on vertical joints because of thedanger of slipping and cutting into the brick above or below the vertical joint. Usingpower tools to remove mortar without damaging the surrounding masonry units alsonecessitates highly skilled masons experienced in working on historic masonry buildings.Contractors should demonstrate proficiency with power tools before their use is approved.
Using any of these power tools may also be more acceptable on hard stone, such asquartzite or granite, than on terra cotta with its glass-like glaze, or on soft brick or
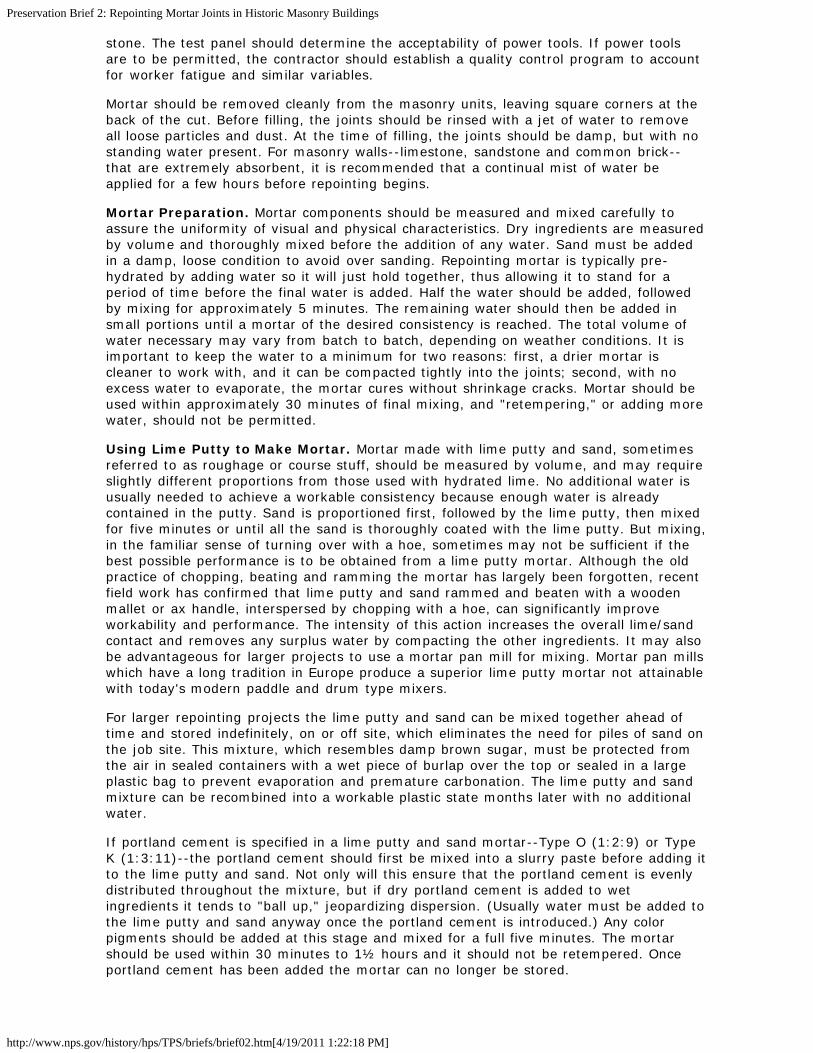
Preservation Brief 2: Repointing Mortar Joints in Historic Masonry Buildings
http://www.nps.gov/history/hps/TPS/briefs/brief02.htm[4/19/2011 1:22:18 PM]
stone. The test panel should determine the acceptability of power tools. If power toolsare to be permitted, the contractor should establish a quality control program to accountfor worker fatigue and similar variables.
Mortar should be removed cleanly from the masonry units, leaving square corners at theback of the cut. Before filling, the joints should be rinsed with a jet of water to removeall loose particles and dust. At the time of filling, the joints should be damp, but with nostanding water present. For masonry walls--limestone, sandstone and common brick--that are extremely absorbent, it is recommended that a continual mist of water beapplied for a few hours before repointing begins.
Mortar Preparation. Mortar components should be measured and mixed carefully toassure the uniformity of visual and physical characteristics. Dry ingredients are measuredby volume and thoroughly mixed before the addition of any water. Sand must be addedin a damp, loose condition to avoid over sanding. Repointing mortar is typically pre-hydrated by adding water so it will just hold together, thus allowing it to stand for aperiod of time before the final water is added. Half the water should be added, followedby mixing for approximately 5 minutes. The remaining water should then be added insmall portions until a mortar of the desired consistency is reached. The total volume ofwater necessary may vary from batch to batch, depending on weather conditions. It isimportant to keep the water to a minimum for two reasons: first, a drier mortar iscleaner to work with, and it can be compacted tightly into the joints; second, with noexcess water to evaporate, the mortar cures without shrinkage cracks. Mortar should beused within approximately 30 minutes of final mixing, and "retempering," or adding morewater, should not be permitted.
Using Lime Putty to Make Mortar. Mortar made with lime putty and sand, sometimesreferred to as roughage or course stuff, should be measured by volume, and may requireslightly different proportions from those used with hydrated lime. No additional water isusually needed to achieve a workable consistency because enough water is alreadycontained in the putty. Sand is proportioned first, followed by the lime putty, then mixedfor five minutes or until all the sand is thoroughly coated with the lime putty. But mixing,in the familiar sense of turning over with a hoe, sometimes may not be sufficient if thebest possible performance is to be obtained from a lime putty mortar. Although the oldpractice of chopping, beating and ramming the mortar has largely been forgotten, recentfield work has confirmed that lime putty and sand rammed and beaten with a woodenmallet or ax handle, interspersed by chopping with a hoe, can significantly improveworkability and performance. The intensity of this action increases the overall lime/sandcontact and removes any surplus water by compacting the other ingredients. It may alsobe advantageous for larger projects to use a mortar pan mill for mixing. Mortar pan millswhich have a long tradition in Europe produce a superior lime putty mortar not attainablewith today's modern paddle and drum type mixers.
For larger repointing projects the lime putty and sand can be mixed together ahead oftime and stored indefinitely, on or off site, which eliminates the need for piles of sand onthe job site. This mixture, which resembles damp brown sugar, must be protected fromthe air in sealed containers with a wet piece of burlap over the top or sealed in a largeplastic bag to prevent evaporation and premature carbonation. The lime putty and sandmixture can be recombined into a workable plastic state months later with no additionalwater.
If portland cement is specified in a lime putty and sand mortar--Type O (1:2:9) or TypeK (1:3:11)--the portland cement should first be mixed into a slurry paste before adding itto the lime putty and sand. Not only will this ensure that the portland cement is evenlydistributed throughout the mixture, but if dry portland cement is added to wetingredients it tends to "ball up," jeopardizing dispersion. (Usually water must be added tothe lime putty and sand anyway once the portland cement is introduced.) Any colorpigments should be added at this stage and mixed for a full five minutes. The mortarshould be used within 30 minutes to 1½ hours and it should not be retempered. Onceportland cement has been added the mortar can no longer be stored.
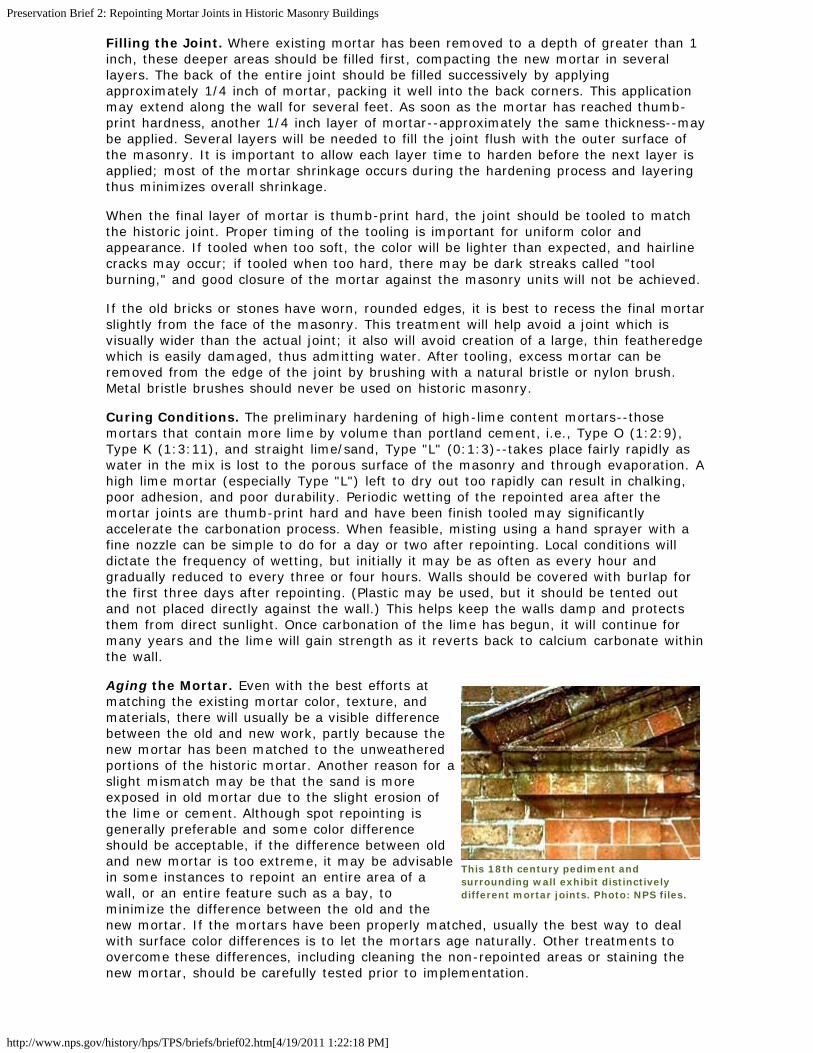
Preservation Brief 2: Repointing Mortar Joints in Historic Masonry Buildings
http://www.nps.gov/history/hps/TPS/briefs/brief02.htm[4/19/2011 1:22:18 PM]
This 18th century pediment andsurrounding wall exhibit distinctivelydifferent mortar joints. Photo: NPS files.
Filling the Joint. Where existing mortar has been removed to a depth of greater than 1inch, these deeper areas should be filled first, compacting the new mortar in severallayers. The back of the entire joint should be filled successively by applyingapproximately 1/4 inch of mortar, packing it well into the back corners. This applicationmay extend along the wall for several feet. As soon as the mortar has reached thumb-print hardness, another 1/4 inch layer of mortar--approximately the same thickness--maybe applied. Several layers will be needed to fill the joint flush with the outer surface ofthe masonry. It is important to allow each layer time to harden before the next layer isapplied; most of the mortar shrinkage occurs during the hardening process and layeringthus minimizes overall shrinkage.
When the final layer of mortar is thumb-print hard, the joint should be tooled to matchthe historic joint. Proper timing of the tooling is important for uniform color andappearance. If tooled when too soft, the color will be lighter than expected, and hairlinecracks may occur; if tooled when too hard, there may be dark streaks called "toolburning," and good closure of the mortar against the masonry units will not be achieved.
If the old bricks or stones have worn, rounded edges, it is best to recess the final mortarslightly from the face of the masonry. This treatment will help avoid a joint which isvisually wider than the actual joint; it also will avoid creation of a large, thin featheredgewhich is easily damaged, thus admitting water. After tooling, excess mortar can beremoved from the edge of the joint by brushing with a natural bristle or nylon brush.Metal bristle brushes should never be used on historic masonry.
Curing Conditions. The preliminary hardening of high-lime content mortars--thosemortars that contain more lime by volume than portland cement, i.e., Type O (1:2:9),Type K (1:3:11), and straight lime/sand, Type "L" (0:1:3)--takes place fairly rapidly aswater in the mix is lost to the porous surface of the masonry and through evaporation. Ahigh lime mortar (especially Type "L") left to dry out too rapidly can result in chalking,poor adhesion, and poor durability. Periodic wetting of the repointed area after themortar joints are thumb-print hard and have been finish tooled may significantlyaccelerate the carbonation process. When feasible, misting using a hand sprayer with afine nozzle can be simple to do for a day or two after repointing. Local conditions willdictate the frequency of wetting, but initially it may be as often as every hour andgradually reduced to every three or four hours. Walls should be covered with burlap forthe first three days after repointing. (Plastic may be used, but it should be tented outand not placed directly against the wall.) This helps keep the walls damp and protectsthem from direct sunlight. Once carbonation of the lime has begun, it will continue formany years and the lime will gain strength as it reverts back to calcium carbonate withinthe wall.
Aging the Mortar. Even with the best efforts atmatching the existing mortar color, texture, andmaterials, there will usually be a visible differencebetween the old and new work, partly because thenew mortar has been matched to the unweatheredportions of the historic mortar. Another reason for aslight mismatch may be that the sand is moreexposed in old mortar due to the slight erosion ofthe lime or cement. Although spot repointing isgenerally preferable and some color differenceshould be acceptable, if the difference between oldand new mortar is too extreme, it may be advisablein some instances to repoint an entire area of awall, or an entire feature such as a bay, tominimize the difference between the old and thenew mortar. If the mortars have been properly matched, usually the best way to dealwith surface color differences is to let the mortars age naturally. Other treatments toovercome these differences, including cleaning the non-repointed areas or staining thenew mortar, should be carefully tested prior to implementation.
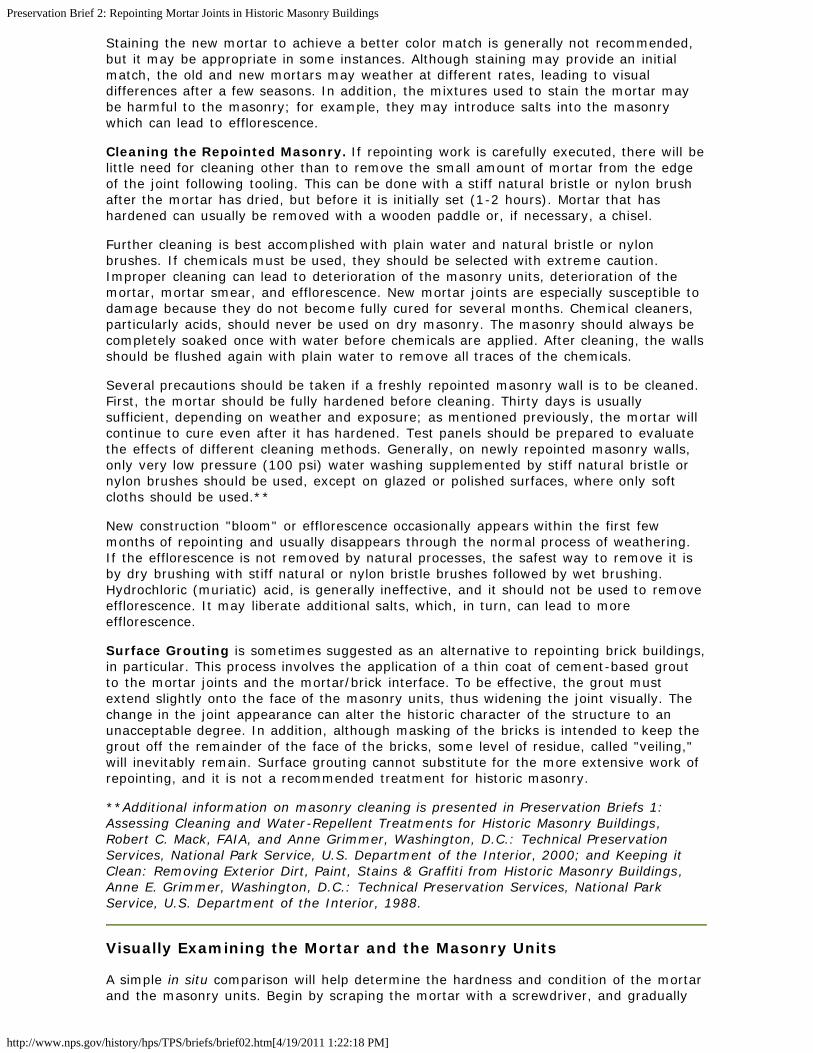
Preservation Brief 2: Repointing Mortar Joints in Historic Masonry Buildings
http://www.nps.gov/history/hps/TPS/briefs/brief02.htm[4/19/2011 1:22:18 PM]
Staining the new mortar to achieve a better color match is generally not recommended,but it may be appropriate in some instances. Although staining may provide an initialmatch, the old and new mortars may weather at different rates, leading to visualdifferences after a few seasons. In addition, the mixtures used to stain the mortar maybe harmful to the masonry; for example, they may introduce salts into the masonrywhich can lead to efflorescence.
Cleaning the Repointed Masonry. If repointing work is carefully executed, there will belittle need for cleaning other than to remove the small amount of mortar from the edgeof the joint following tooling. This can be done with a stiff natural bristle or nylon brushafter the mortar has dried, but before it is initially set (1-2 hours). Mortar that hashardened can usually be removed with a wooden paddle or, if necessary, a chisel.
Further cleaning is best accomplished with plain water and natural bristle or nylonbrushes. If chemicals must be used, they should be selected with extreme caution.Improper cleaning can lead to deterioration of the masonry units, deterioration of themortar, mortar smear, and efflorescence. New mortar joints are especially susceptible todamage because they do not become fully cured for several months. Chemical cleaners,particularly acids, should never be used on dry masonry. The masonry should always becompletely soaked once with water before chemicals are applied. After cleaning, the wallsshould be flushed again with plain water to remove all traces of the chemicals.
Several precautions should be taken if a freshly repointed masonry wall is to be cleaned.First, the mortar should be fully hardened before cleaning. Thirty days is usuallysufficient, depending on weather and exposure; as mentioned previously, the mortar willcontinue to cure even after it has hardened. Test panels should be prepared to evaluatethe effects of different cleaning methods. Generally, on newly repointed masonry walls,only very low pressure (100 psi) water washing supplemented by stiff natural bristle ornylon brushes should be used, except on glazed or polished surfaces, where only softcloths should be used.**
New construction "bloom" or efflorescence occasionally appears within the first fewmonths of repointing and usually disappears through the normal process of weathering.If the efflorescence is not removed by natural processes, the safest way to remove it isby dry brushing with stiff natural or nylon bristle brushes followed by wet brushing.Hydrochloric (muriatic) acid, is generally ineffective, and it should not be used to removeefflorescence. It may liberate additional salts, which, in turn, can lead to moreefflorescence.
Surface Grouting is sometimes suggested as an alternative to repointing brick buildings,in particular. This process involves the application of a thin coat of cement-based groutto the mortar joints and the mortar/brick interface. To be effective, the grout mustextend slightly onto the face of the masonry units, thus widening the joint visually. Thechange in the joint appearance can alter the historic character of the structure to anunacceptable degree. In addition, although masking of the bricks is intended to keep thegrout off the remainder of the face of the bricks, some level of residue, called "veiling,"will inevitably remain. Surface grouting cannot substitute for the more extensive work ofrepointing, and it is not a recommended treatment for historic masonry.
**Additional information on masonry cleaning is presented in Preservation Briefs 1:Assessing Cleaning and Water-Repellent Treatments for Historic Masonry Buildings,Robert C. Mack, FAIA, and Anne Grimmer, Washington, D.C.: Technical PreservationServices, National Park Service, U.S. Department of the Interior, 2000; and Keeping itClean: Removing Exterior Dirt, Paint, Stains & Graffiti from Historic Masonry Buildings,Anne E. Grimmer, Washington, D.C.: Technical Preservation Services, National ParkService, U.S. Department of the Interior, 1988.
Visually Examining the Mortar and the Masonry Units
A simple in situ comparison will help determine the hardness and condition of the mortarand the masonry units. Begin by scraping the mortar with a screwdriver, and gradually
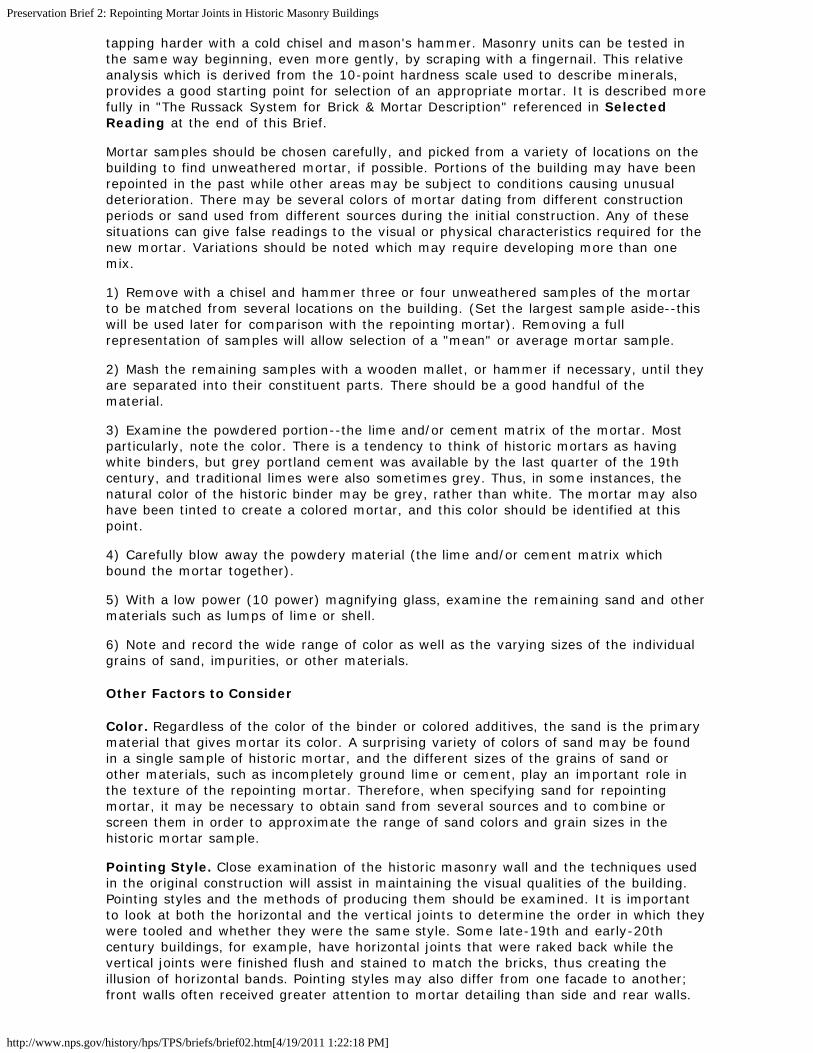
Preservation Brief 2: Repointing Mortar Joints in Historic Masonry Buildings
http://www.nps.gov/history/hps/TPS/briefs/brief02.htm[4/19/2011 1:22:18 PM]
tapping harder with a cold chisel and mason's hammer. Masonry units can be tested inthe same way beginning, even more gently, by scraping with a fingernail. This relativeanalysis which is derived from the 10-point hardness scale used to describe minerals,provides a good starting point for selection of an appropriate mortar. It is described morefully in "The Russack System for Brick & Mortar Description" referenced in SelectedReading at the end of this Brief.
Mortar samples should be chosen carefully, and picked from a variety of locations on thebuilding to find unweathered mortar, if possible. Portions of the building may have beenrepointed in the past while other areas may be subject to conditions causing unusualdeterioration. There may be several colors of mortar dating from different constructionperiods or sand used from different sources during the initial construction. Any of thesesituations can give false readings to the visual or physical characteristics required for thenew mortar. Variations should be noted which may require developing more than onemix.
1) Remove with a chisel and hammer three or four unweathered samples of the mortarto be matched from several locations on the building. (Set the largest sample aside--thiswill be used later for comparison with the repointing mortar). Removing a fullrepresentation of samples will allow selection of a "mean" or average mortar sample.
2) Mash the remaining samples with a wooden mallet, or hammer if necessary, until theyare separated into their constituent parts. There should be a good handful of thematerial.
3) Examine the powdered portion--the lime and/or cement matrix of the mortar. Mostparticularly, note the color. There is a tendency to think of historic mortars as havingwhite binders, but grey portland cement was available by the last quarter of the 19thcentury, and traditional limes were also sometimes grey. Thus, in some instances, thenatural color of the historic binder may be grey, rather than white. The mortar may alsohave been tinted to create a colored mortar, and this color should be identified at thispoint.
4) Carefully blow away the powdery material (the lime and/or cement matrix whichbound the mortar together).
5) With a low power (10 power) magnifying glass, examine the remaining sand and othermaterials such as lumps of lime or shell.
6) Note and record the wide range of color as well as the varying sizes of the individualgrains of sand, impurities, or other materials.
Other Factors to Consider
Color. Regardless of the color of the binder or colored additives, the sand is the primarymaterial that gives mortar its color. A surprising variety of colors of sand may be foundin a single sample of historic mortar, and the different sizes of the grains of sand orother materials, such as incompletely ground lime or cement, play an important role inthe texture of the repointing mortar. Therefore, when specifying sand for repointingmortar, it may be necessary to obtain sand from several sources and to combine orscreen them in order to approximate the range of sand colors and grain sizes in thehistoric mortar sample.
Pointing Style. Close examination of the historic masonry wall and the techniques usedin the original construction will assist in maintaining the visual qualities of the building.Pointing styles and the methods of producing them should be examined. It is importantto look at both the horizontal and the vertical joints to determine the order in which theywere tooled and whether they were the same style. Some late-19th and early-20thcentury buildings, for example, have horizontal joints that were raked back while thevertical joints were finished flush and stained to match the bricks, thus creating theillusion of horizontal bands. Pointing styles may also differ from one facade to another;front walls often received greater attention to mortar detailing than side and rear walls.
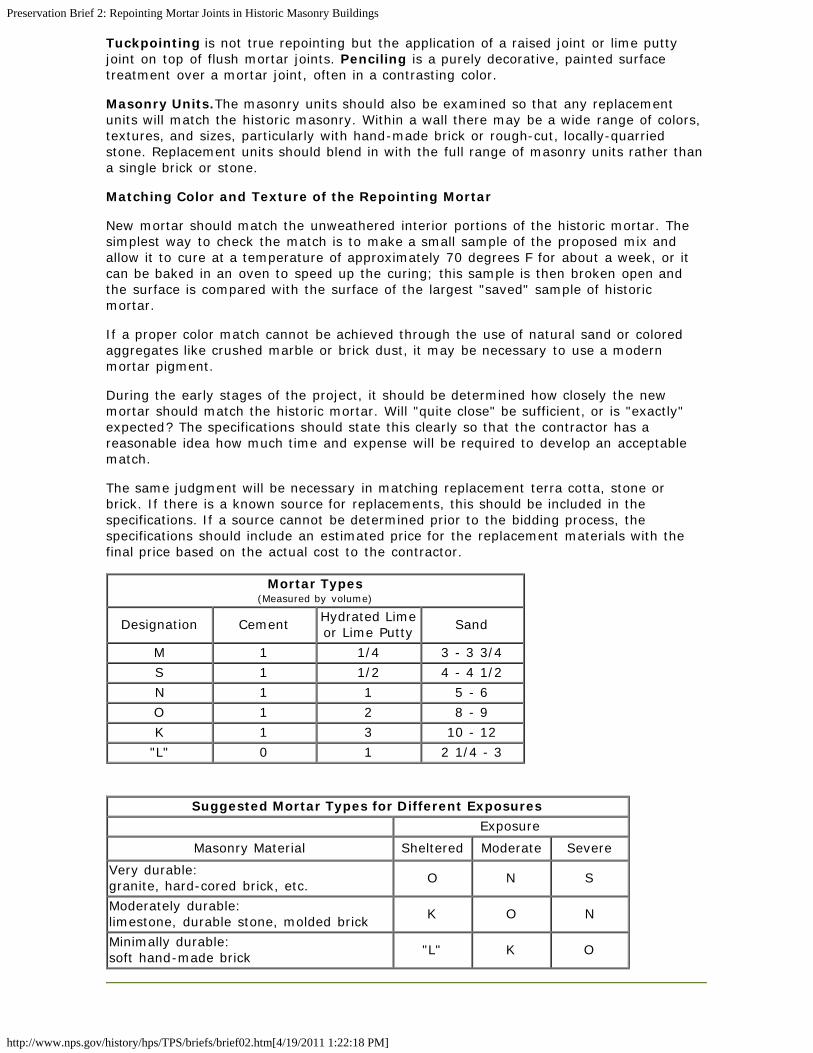
Preservation Brief 2: Repointing Mortar Joints in Historic Masonry Buildings
http://www.nps.gov/history/hps/TPS/briefs/brief02.htm[4/19/2011 1:22:18 PM]
Tuckpointing is not true repointing but the application of a raised joint or lime puttyjoint on top of flush mortar joints. Penciling is a purely decorative, painted surfacetreatment over a mortar joint, often in a contrasting color.
Masonry Units.The masonry units should also be examined so that any replacementunits will match the historic masonry. Within a wall there may be a wide range of colors,textures, and sizes, particularly with hand-made brick or rough-cut, locally-quarriedstone. Replacement units should blend in with the full range of masonry units rather thana single brick or stone.
Matching Color and Texture of the Repointing Mortar
New mortar should match the unweathered interior portions of the historic mortar. Thesimplest way to check the match is to make a small sample of the proposed mix andallow it to cure at a temperature of approximately 70 degrees F for about a week, or itcan be baked in an oven to speed up the curing; this sample is then broken open andthe surface is compared with the surface of the largest "saved" sample of historicmortar.
If a proper color match cannot be achieved through the use of natural sand or coloredaggregates like crushed marble or brick dust, it may be necessary to use a modernmortar pigment.
During the early stages of the project, it should be determined how closely the newmortar should match the historic mortar. Will "quite close" be sufficient, or is "exactly"expected? The specifications should state this clearly so that the contractor has areasonable idea how much time and expense will be required to develop an acceptablematch.
The same judgment will be necessary in matching replacement terra cotta, stone orbrick. If there is a known source for replacements, this should be included in thespecifications. If a source cannot be determined prior to the bidding process, thespecifications should include an estimated price for the replacement materials with thefinal price based on the actual cost to the contractor.
Mortar Types(Measured by volume)
Designation CementHydrated Limeor Lime Putty
Sand
M 1 1/4 3 - 3 3/4
S 1 1/2 4 - 4 1/2
N 1 1 5 - 6
O 1 2 8 - 9
K 1 3 10 - 12
"L" 0 1 2 1/4 - 3
Suggested Mortar Types for Different Exposures
Exposure
Masonry Material Sheltered Moderate Severe
Very durable:granite, hard-cored brick, etc.
O N S
Moderately durable:limestone, durable stone, molded brick
K O N
Minimally durable:soft hand-made brick
"L" K O
Preservation Brief 2: Repointing Mortar Joints in Historic Masonry Buildings
http://www.nps.gov/history/hps/TPS/briefs/brief02.htm[4/19/2011 1:22:18 PM]
Summary
For the Owner/Administrator. The owner or administrator of a historic building shouldremember that repointing is likely to be a lengthy and expensive process. First, theremust be adequate time for evaluation of the building and investigation into the cause ofproblems. Then, there will be time needed for preparation of the contract documents.The work itself is precise, time-consuming and noisy, and scaffolding may cover the faceof the building for some time. Therefore, the owner must carefully plan the work toavoid problems. Schedules for both repointing and other activities will thus requirecareful coordination to avoid unanticipated conflicts. The owner must avoid the tendencyto rush the work or cut corners if the historic building is to retain its visual integrity andthe job is to be durable.
For the Architect/Consultant. Because the primary role of the consultant is to ensurethe life of the building, a knowledge of historic construction techniques and the specialproblems found in older buildings is essential. The consultant must assist the owner inplanning for logistical problems relating to research and construction. It is theconsultant's responsibility to determine the cause of the mortar deterioration and ensurethat it is corrected before the masonry is repointed. The consultant must also beprepared to spend more time in project inspections than is customary in modernconstruction.
For the Masons. Successful repointing depends on the masons themselves. Experiencedmasons understand the special requirements for work on historic buildings and the addedtime and expense they require. The entire masonry crew must be willing and able toperform the work in conformance with the specifications, even when the specificationsmay not be in conformance with standard practice. At the same time, the masons shouldnot hesitate to question the specifications if it appears that the work specified woulddamage the building.
Conclusion
A good repointing job is meant to last, at least 30 years, and preferably 50- 100 years.Shortcuts and poor craftsmanship result not only in diminishing the historic character of abuilding, but also in a job that looks bad, and will require future repointing sooner than ifthe work had been done correctly. The mortar joint in a historic masonry building hasoften been called a wall's "first line of defense." Good repointing practices guarantee thelong life of the mortar joint, the wall, and the historic structure. Although carefulmaintenance will help preserve the freshly repointed mortar joints, it is important toremember that mortar joints are intended to be sacrificial and will probably requirerepointing some time in the future. Nevertheless, if the historic mortar joints proveddurable for many years, then careful repointing should have an equally long life,ultimately contributing to the preservation of the entire building.
Selected Reading
Ashurst, John & Nicola. Practical Building Conservation. Vol. 3: Mortars, Plasters andRenders. New York: Halsted Press, a Division of John Wiley & Sons, Inc., 1988.
Cliver, E. Blaine. "Tests for the Analysis of Mortar Samples." Bulletin of the Associationfor Preservation Technology. Vol. 6, No. 1 (1974), pp. 68-73.
Coney, William B., AIA. Masonry Repointing of Twentieth-Century Buildings. IllinoisPreservation Series. Number 10. Springfield, IL: Division of Preservation Services, IllinoisHistoric Preservation Agency, 1989.
Davidson, J.I. "Masonry Mortar." Canadian Building Digest. CBD 163. Ottawa, ONT:Division of Building Research, National Research Council of Canada, 1974.
Ferro, Maximillian L., AIA, RIBA. "The Russack System for Brick and Mortar Description: AField Method for Assessing Masonry Hardness." Technology and Conservation. Vol. 5, No.
Preservation Brief 2: Repointing Mortar Joints in Historic Masonry Buildings
http://www.nps.gov/history/hps/TPS/briefs/brief02.htm[4/19/2011 1:22:18 PM]
2 (Summer 1980), pp. 32-35.
Hooker, Kenneth A. "Field Notes on Repointing." Aberdeen's Magazine of MasonryConstruction. Vol. 4, No. 8 (August 1991), pp. 326-328.
Jedrzejewska, H. "Old Mortars in Poland: A New Method of Investigation." Studies inConservation. Vol. 5, No. 4 (1960), pp. 132-138.
"Lime's Role in Mortar." Aberdeen's Magazine of Masonry Construction. Vol. 9, No. 8(August 1996), pp. 364-368.
Phillips, Morgan W. "Brief Notes on the Subjects of Analyzing Paints and Mortars and theRecording of Moulding Profiles: The Trouble with Paint and Mortar Analysis." Bulletin ofthe Association for Preservation Technology. Vol. 10, No. 2 (1978), pp. 77-89.
Preparation and Use of Lime Mortars: An Introduction to the Principles of Using LimeMortars. Scottish Lime Centre for Historic Scotland. Edinburgh: Historic Scotland, 1995.
Schierhorn, Carolyn. "Ensuring Mortar Color Consistency." Aberdeen's Magazine ofMasonry Construction. Vol. 9, No. 1 (January 1996), pp. 33-35.
"Should Air-Entrained Mortars Be Used?" Aberdeen's Magazine of Masonry Construction.Vol. 7, No. 9 (September 1994), pp. 419-422.
Sickels-Taves, Lauren B. "Creep, Shrinkage, and Mortars in Historic Preservation." Journalof Testing and Evaluation, JTEVA. Vol. 23, No. 6 ( November 1995), pp. 447-452.
Speweik, John P. The History of Masonry Mortar in America, 1720-1995. Arlington, VA:National Lime Association, 1995.
Speweik, John P. "Repointing Right: Why Using Modern Mortar Can Damage a HistoricHouse." Old-House Journal. Vol. XXV, No. 4 (July-August 1997), pp. 46-51.
Technical Notes on Brick Construction. Brick Institute of America, Reston, VA.
"Moisture Resistance of Brick Masonry: Maintenance." 7F. February 1986.
"Mortars for Brick Masonry." 8 Revised II. November 1989.
"Standard Specification for Portland Cement-Lime Mortar for Brick Masonry." 8A Revised.September 1988.
"Mortar for Brick Masonry-Selection and Controls." 8B Reissued. September 1988.(July/August 1976).
"Guide Specifications for Brick Masonry, Part V Mortar and Grout." 11E Revised.September 1991.
"Bonds and Patterns in Brickwork." 30 Reissued. September 1988.
Useful Addresses
Brick Institute of America11490 Commerce Park DriveReston, VA 22091
National Lime Association200 N. Glebe Road, Suite 800Arlington, VA 22203
Portland Cement Association5420 Old Orchard RoadSkokie, IL 60077
Preservation Brief 2: Repointing Mortar Joints in Historic Masonry Buildings
http://www.nps.gov/history/hps/TPS/briefs/brief02.htm[4/19/2011 1:22:18 PM]
Acknowledgments
Robert C. Mack, FAIA, is a principal in the firm of MacDonald & Mack, Architects, Ltd., an architectural firm thatspecializes in historic buildings in Minneapolis, Minnesota. John P. Speweik, CSI, Toledo, Ohio, is a 5th-generationstonemason, and principal in U.S. Heritage Group, Inc., Chicago, Illinois, which does custom historic mortarmatching. Anne Grimmer, Senior Architectural Historian, Heritage Preservation Services Program, National ParkService, was responsible for developing and coordinating the revision of this Preservation Brief, incorporatingprofessional comments, and the technical editing.
The authors and the editor wish to thank the following for the professional and technical review they provided:Mark Macpherson and Ron Peterson, Masonry Restoration Contractors, Macpherson-Towne Company, Minneapolis,MN; Lorraine Schnabel, Architectural Conservator, John Milner Associates, Inc., Philadelphia, PA; Lauren B. Sickels-Taves, Ph.D., Architectural Conservator, Biohistory International, Huntington Woods, MI; and the following NationalPark Service professional staff, including: E. Blaine Cliver, Chief, Historic American Buildings Survey/HistoricAmerican Engineering Record; Douglas C. Hicks, Deputy Superintendent, Historic Preservation Training Center,Frederick, MD; Chris McGuigan, Supervisory Exhibits Specialist, Historic Preservation Training Center, Frederick, MD;Charles E. Fisher, Sharon C. Park, FAIA, John Sandor, Technical Preservation Services Branch, Heritage PreservationServices, and Kay D. Weeks, Heritage Preservation Services.
The original version of this brief, Repointing Mortar Joints in Historic Brick Buildings, was written by Robert C. Mackin 1976, and was revised and updated in 1980 by Robert C. Mack, de Teel Patterson Tiller, and James S. Askins.
Washington, D.C. October, 1998
Home page logo: Soft mortar for repointing. Photo: John P. Speweik.
This publication has been prepared pursuant to the National Historic Preservation Act of1966, as amended, which directs the Secretary of the Interior to develop and makeavailable information concerning historic properties. Technical Preservation Services(TPS), Heritage Preservation Services Division, National Park Service prepares standards,guidelines, and other educational materials on responsible historic preservationtreatments for a broad public.
Order Brief | Technical Preservation Services | Preservation Briefs | Search | Questions/Answers
KDW