Embed Size (px)
Citation preview
取 扱 説 明 書
S061 ストップウオッチ ソーラーS062 ストップウオッチ ソーラー インターバルタイマー
この度は弊社製品をお買い上げいただき、誠にありがとうございました。
ご使用の前にこの説明書をよくお読みの上、正しくご愛用くださいますよう、お願い申し上げます。なお、この説明書はお手元に保管し、必要に応じてご覧ください。
5
注意
取り扱いを誤った場合に、軽症を負う危険性や物質的損害をこうむることが想定されることを示します。
・以下の場所での携帯・保管は避けてください ○揮発性の薬品が発散しているところ(除光液などの化粧品、防虫剤、シンナーなど) ○ 5℃~35℃を外れる温度に長期間なるところ ○高湿度なところ ○磁気や静電気の影響があるところ ○ホコリの多いところ ○強い振動のあるところ
・アレルギーやかぶれを起こした場合 ただちに時計の使用をやめ、皮膚科など専門医にご相談ください。
・その他のご注意 ○商品の分解・改造はしないでください。 ○乳幼児に時計が触れないようにご注意ください。 けがやアレルギーをひき起こすおそれがあります。 ○使用済み電池の処理は自治体の指示に従ってください。 ○ひもやチェーンの取り扱いにご注意ください。 衣類や手・首などを傷つけたり、首を締めたりするおそれがあります。
4
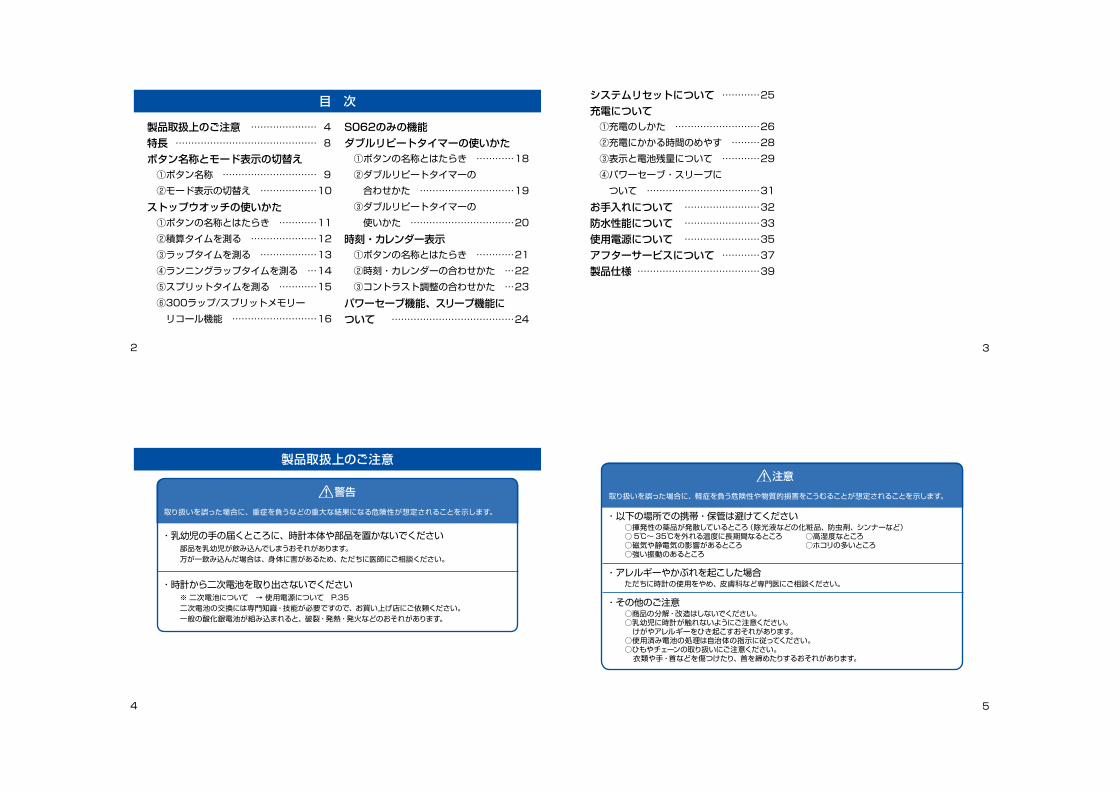
製品取扱上のご注意
・乳幼児の手の届くところに、時計本体や部品を置かないでください 部品を乳幼児が飲み込んでしまうおそれがあります。 万が一飲み込んだ場合は、身体に害があるため、ただちに医師にご相談ください。
警告
取り扱いを誤った場合に、重症を負うなどの重大な結果になる危険性が想定されることを示します。
・時計から二次電池を取り出さないでください ※ 二次電池について → 使用電源について P.35 二次電池の交換には専門知識・技能が必要ですので、お買い上げ店にご依頼ください。 一般の酸化銀電池が組み込まれると、破裂・発熱・発火などのおそれがあります。
3
システムリセットについて …………25充電について ①充電のしかた ………………………26 ②充電にかかる時間のめやす ………28 ③表示と電池残量について …………29 ④パワーセーブ・スリープに ついて ………………………………31
お手入れについて ……………………32防水性能について ……………………33使用電源について ……………………35アフターサービスについて …………37製品仕様 …………………………………39
2
目 次
製品取扱上のご注意 ………………… 4特長 ……………………………………… 8ボタン名称とモード表示の切替え ①ボタン名称 ………………………… 9 ②モード表示の切替え ………………10
ストップウオッチの使いかた ①ボタンの名称とはたらき …………11 ②積算タイムを測る …………………12 ③ラップタイムを測る ………………13 ④ランニングラップタイムを測る …14 ⑤スプリットタイムを測る …………15 ⑥300ラップ/スプリットメモリー リコール機能 ………………………16
S062のみの機能ダブルリピートタイマーの使いかた ①ボタンの名称とはたらき …………18 ②ダブルリピートタイマーの 合わせかた …………………………19 ③ダブルリピートタイマーの 使いかた ……………………………20
時刻・カレンダー表示 ①ボタンの名称とはたらき …………21 ②時刻・カレンダーの合わせかた …22 ③コントラスト調整の合わせかた …23
パワーセーブ機能、スリープ機能について …………………………………24

9
①ボタン名称
ボタン名称とモード表示の切替え
RECALLSTART/STO
P
LAP/SPLI
T RESET
WATER RESISTANT 5 BAR
▲SET SELECT▲
MODE▼
例)LAP計測表示
ボタンⒹ
ボタンⒷ
ボタンⒶ ボタンⒸ
8
特 長
・ストップウオッチ機能:1/100秒単位で計測する100時間計です。・スプリット、ラップ、ランニングラップを切り換えて表示・計測することができます。・ラップメモリー機能:最大300ラップ/スプリットまで自動的に記憶(メモリー)されます。・時刻・カレンダーでは、時刻と年・月・日・曜日を表示します。・パワーセーブ機能: 操作しない状態が設定時間以上続くと、電池の節約のため画面表示を自
動的に消す機能です。 「ソーラー駆動について」フル充電後、光が当たらない状態でも約6ヶ月間の動作が可能です。 (1日あたりストップウオッチ3時間、パワーセーブ20時間で使用した時) 〈S062のみの搭載されている機能〉※S062は本体正面に「INTERVAL TIMER」の表示がありますのでご確認下さい。・ ダブルリピートタイマー機能:内蔵された2つの減算タイマー(異なる2つの時間設定が可能)が、連動して交互にスタート・ストップを繰り返す機能です。
・ タイマー1、タイマー2それぞれ1秒単位で、10秒以上、99時間59分59秒までセット可能です。・ タイマー1、タイマー2はそれぞれタイムアップ予告音、タイムアップ音の音色が異なり、判別しやすくなっています。
S061、S062はソーラ充電機能をそなえたストップウオッチです。ストップウオッチ機能(ラップ計測・スプリット計測・300ラップ/スプリットタイムメモリー)と時刻・カレンダーの機能を備えています。さらにS062はダブルリピートタイマーの機能を備えています。
7
注意
水分のついたまま、りゅうずやボタンを操作しないでください時計内部に水分が入ることがあります。※ 万が一、ガラス内面にくもりや水滴が発生し、長時間消えない場合は防水不良です。 お早めに、お買い上げ店・弊社お客様相談窓口にご相談ください。
防水時計でもガラスの接着面・パッキンの劣化やステンレスがさびることにより、防水不良になるおそれがあります。
水や汗、汚れが付着したままにしておくのは避けてください
入浴やサウナの際はご使用を避けてください蒸気や石けん、温泉の成分などが防水性能の劣化を早めることがあります。
6
警告
この時計はスキューバダイビングや飽和潜水には絶対に使用しないでくださいスキューバダイビングや飽和潜水用の時計に必要とされる過酷な環境を想定した様々な厳しい検査を行っていません。専用のダイバーズウオッチをご使用ください。
直接蛇口から水をかけることは避けてください
水道水は非常に水圧が高く、日常生活用強化防水の時計でも防水不良になるおそれがあります。
注意

13
③ラップタイムを測る
LAP1 LAP2 LAP3 LAP n
ラップタイムの計測… 区間経過時間を測る時に使います。
ボタンⒶでリセット
ボタンⒸでスタート
ボタンⒸでストップ
ボタンⒶでラップタイム計測
計測中は マークが点滅します
データナンバー
ラップタイム表示
積算タイム
スタート ゴール
1つ前のデータを表示し続けます。 }最後のデータを表示します。 }
※ストップ操作もラップタイムとしてカウントします。 12
②積算タイムを測る
ボタンⒶを押してリセット
ボタンⒸを押してスタート
ボタンⒸを押してストップ
ボタンⒸを押すとストップボタンⒸを押して再スタート
例)LAP計測モードで計測する場合
Ⓒスタート
Ⓒストップ
Ⓒスタート
Ⓒストップ
Ⓒリセット
普通の使い方…積算タイムを測ります。
計測中は マークが点滅します
11
ストップウオッチの使いかた ①ボタンの名称とはたらき
RECALL
LAP/SPL
ITRESET
WATER RESISTANT 5 BAR
▲SET SELECT▲
MODE▼
RECALLSTART/STO
P
LAP/SPLIT
RESET
WATER RESISTANT 5 BAR
▲SET SELECT▲
MODE▼
・ ストップウオッチは、モードを切換えることでラップ・ランニングラップ・スプリットタイムの計測が出来ます。
・ボタンⒷで、メモリーリコールの呼出/解除を行います。
ボタンⒶ・ストップウオッチ表示 ラップ ランニングラップ スプリット・メモリーリコール表示 データの選択 (データNo.減)
例)LAP計測表示
ボタンⒷ・メモリーリコールの呼出/解除
ボタンⒸ・ストップウオッチ表示 スタート ストップ・メモリーリコール表示 データの選択(データNo.増)
ボタンⒹ・モード表示の切換え
10
〈S061の場合〉
〈S062の場合〉
〈時刻・カレンダー表示〉
〈ストップウオッチ(スプリット)表示〉
〈ストップウオッチ(ラップ)表示〉
〈ストップウオッチ(ランニングラップ)表示〉〈タイマー表示〉
ボタンⒹ
ボタンⒹで各モード表示の切替えを行います
ボタンⒹ ボタンⒹ
ボタンⒹ
ボタンⒹ
〈S062の場合〉
※ボタンⒶ、Ⓑ、Ⓒ、Ⓓを4つ同時に押すと、システムリセットになります。 詳しくは「システムリセットについて」(P.25)をご参照ください。
②モード表示の切替え

16
⑥ 300ラップ/スプリットメモリーリコール機能
計測ストップ後メモリーをリコールする場合<STOPマーク点灯>
ボタンⒷを押してリコール表示
〈先頭データ〉を表示します。
ラップタイム
スプリットタイムボタンⒶ
ボタンⒶ
ボタンⒸ
ボタンⒶ
ボタンⒸ
ボタンⒸボタンⒶボタンⒸ※データがメモリーされていないときに(ストップウオッチモードで1つもLAP/RLP/SPLを計測していない場合)メモリーリコールモードを表示すると、以下のように表示されます。
※ストップウオッチをリセットしても、新しく計測を開始しない限り、メモリーは消去されません。
※ストップウオッチモードで3 0 0 個以上LAP/RLP/SPLを計測することは可能ですが、メモリーには300個目以降記録されません。
17
ボタンⒷを押してリコール表示
〈最新データ〉を表示します。
ラップタイム
スプリットタイム
ボタンⒶ
ボタンⒸ
ボタンⒶ
ボタンⒸ
ボタンⒶ ボタンⒸボタンⒶ ボタンⒸ
計測中にメモリーをリコールする場合< マークが点滅>
15
⑤スプリットタイムを測る
スタート ゴール
スプリットタイムの計測… 途中経過時間を測る時に使います。
SPL1 SPL2 SPL3
ボタンⒶでリセット
ボタンⒸでスタート
ボタンⒶでスプリットタイム測定
ボタンⒸでストップ
計測中は マークが点滅します
データナンバー
そのデータナンバーのスプリットタイム
積算タイム
} }1つ前のデータを表示し続けます。 最後のデータを表示します。
14
④ランニングラップタイムを測る
LAP1 LAP2 LAP3 LAP n
ランニングラップタイムの計測…最新の区間経過時間を表示させながら区間経過時間を測ります。
スタート ゴール計測中は マークが点滅します。
データナンバー
1回目のラップタイム
最終8回目のラップタイム 現在計測中の2回目のラップタイム
現在計測中の1回目のラップタイム
ボタンⒶでラップタイム計測ボタンⒶでリセット
ボタンⒸでスタート
ボタンⒸでストップ
※ストップ操作もラップタイムとしてカウントします。

21
時刻・カレンダー表示 ①ボタンの名称とはたらき
RECALLSTART/STO
P
LAP/SPLIT
RESET
WATER RESISTANT 5 BAR
▲SET SELECT▲
MODE▼
ボタンⒹ・モード表示の切換え
ボタンⒶ・時刻/カレンダー修正状態 時刻カレンダーの修正
ボタンⒷ・時刻/カレンダー修 正状態への 呼出と解除
ボタンⒸ・時刻/カレンダー表示 操作確認音ON/OFF切換え・時刻/カレンダー修正状態 時刻・カレンダー修正個所の選択
曜日
月
時
日
秒
分
年(西暦)
12時制の時AM/PM表示
※操作確認音をONに設定したときは、 マークが点灯します。
20
③ダブルリピートタイマーの使いかた
※タイムアップ音(予告音含む)を止めるときは、Ⓐ、Ⓑ、Ⓒ、Ⓓいずれかのボタンを押してください。その回だけ鳴り止めとなります。※タイマー1と2のタイムアップ音は異なっています。※ボタンⒸを押すごとにタイマーのストップ/再スタートができ、何度でも繰り返すことができます。
ボタンⒸを押すと、タイマー1がスタートします。
タイマー1を00時間03分00秒タイマー2を00時間01分00秒リピート回数を10回に設定。
ボタンⒸ
2回目以降、繰り返し回数にしたがって回数表示が増えます。
例)上図表示の場合 タイムアップ3秒前から予告音が鳴り、タイムアップ時点でタイムアップ音約5秒間鳴ります。
タイマー2がスタートします。これを設定した回数繰り返します。
タイムアップ3秒前から予告音が鳴り、タイムアップ時点でタイムアップ音が約5秒間鳴ります。タイマー1がスタートします。
計測中はマークが点滅します。
19
②ダブルリピートタイマーの合わせかた
※時・分・秒・リピート回数の設定のとき、ボタンⒶの押し続けで早送りができます。※タイマー1、タイマー2とも00時間00分09秒以下の設定をしても、自動的に00時間00分10秒になります。 10秒未満の設定はできません。※設定中にボタンⒹを押すとリセットされます。※設定中にボタンⒷを押すと、タイマー表示(リセット状態)に戻ります。
タイマー1の時間が点滅。ボタンⒶを押すごとに1時間進みます。
タイマーリピート回数が点滅。ボタンⒶで設定。
タイマー2の時間が点滅。ボタンⒶを押すごとに1時間進みます。
分が点滅。ボタンⒶを押すごとに1分進みます。
分が点滅。ボタンⒶを押すごとに1分進みます。
秒が点滅。ボタンⒶを押すごとに1秒進みます。
秒が点滅。ボタンⒶを押すごとに1秒進みます。
リセット状態
ボタンⒸ ボタンⒸ
ボタンⒸボタンⒸボタンⒸ
ボタンⒸ ボタンⒸ
ボタンⒷを2秒間押す。
18
S062のみの機能 ダブルリピートタイマーの使いかた ①ボタンの名称とはたらき
・タイマー1のタイムアップ後、タイマー2がスタートする2つのタイマーを備えています。また、タイマー2のタイムアップ後、再びタイマー1がスタートするリピート(繰り返し)機能となっております。
・タイマー1、2とも、10秒以上99時間59分59秒までの設定ができます。・タイマー1または2のどちらかを、00時間00分00秒に合わせると普通のリピートタイマーとして使えます。・1~100回までリピート回数の設定ができます。また、リピート回数を「- - -」とすると、ボタン操作によってストップするまで計測を繰り返します。ボタンⒶ・タイマー状態 リセット(開始時のセット時間に戻す)・タイマー修正状態 セット時間、リピート回数の修正
ボタンⒹ・モード表示の切換え・タイマー修正状態 タイマー時間を00:00 00に、タイマ ーリピート指定回数を1回に戻す
その時点までのタイマー繰り返し回数
タイマーリピート指定回数タイマー1例 00時間03分00秒タイマー2例 00時間01分00秒
例)この設定の場合のタイマー動作 タイマー1タイマー2
3分1分
1回 2回 10回
3分 3分1分 1分
ボタンⒷ・タイマー修正状態 への呼出と解除正
ボタンⒸ・タイマー状態 スタート ストップ・タイマー修正状態 修正個所の選択

24
●●●●●●●●●●●パワーセーブ機能、スリープ機能について
RECALLSTART/STO
P
LAP/SPLIT
RESET
WATER RESISTANT 5 BAR
▲SET SELECT▲
MODE▼
RECALLSTART/STO
P
LAP/SPLIT
RESET
WATER RESISTANT 5 BAR
▲SET SELECT▲
MODE▼
パワーセーブマーク:PSパワーセーブ状態に移行した場合PSが点滅します。
スリープモードマーク:SLスリープ状態に移行した場合SLが点滅します。
⇒72時間後
時刻・カレンダー修正状態で、パワーセーブ移行時間を設定して、下記のような節電機能で電池寿命を長持ちさせることができます。・ パワーセーブ移行時間は1時間、3時間、6時間、12時間から選んで設定できます。設定のしかたは「時刻・カレンダーの合わせかた」をごらんください。・どの表示状態であっても操作をしない状態が設定時間以上続くと、パワーセーブが働き画面表示が消えます。・ ストップウオッチやタイマーの機能が作動しているときには表示が消えるパワーセーブ(節電)状態にはなりません。・ 消えている表示を復帰させるには、Ⓐ、Ⓑ、Ⓒ、Ⓓいずれかのボタンを押してください。表示が消える直前のモードの表示に復帰します。・パワーセーブ状態が72時間以上続くとスリープモードに移行してさらに節電機能がはたらきます。 またストップウオッチ、タイマーはリセットされます。
25
●●●●●●●●●●●システムリセットについて
・ 万一異常な表示(読めない表示など)となった場合、以下の操作を行ってください。時計内部のシステムがリセットされ、正常に機能するようになります。
・ システムリセットのしかたⒶ、Ⓑ、Ⓒ、Ⓓの4つのボタンを同時に2~3秒間押しますと、一旦表示が消えた後「TUE '13 1-1 A12:00 00」の表示になります。
※ システムリセット後は、メモリーされていたデータ等すべて消えます。日付・時刻合わせ等も必要となりますのでご注意ください。
23
・ 表示のコントラスト(明暗)の調整ができます。初期化された時及びオールクリア時のコントラストは「0」設定です。
●ボタンⒹを押して「時刻・カレンダー表示」状態にしてください。 ① ボタンⒷを長押しすると現在設定されている時刻が表示し、「時刻・カレンダー合わせ」状態になります。
②ボタンⒸを押して「コントラスト調整」状態にしてください。 ③ボタンⒶを押してコントラストを調整します。
④ 調整が終わりましたら、ボタンⒷを押して「時刻・カレンダー表示」にもどしてください。押し忘れた場合でも2~3分後には「時刻・カレンダー表示」状態へ自動的にもどります。
③コントラスト調整の合わせかた
1 2 ※「2」が一番濃く 「-2」が一番薄くなります。
-2 -10
22
②時刻・カレンダーの合わせかた
※分・時・日・月・年の修正で数字を早送りしたい場合は、ボタンⒶを押し続けてください。押し続けている間、早送りします。※ボタンⒷを押すと時刻・カレンダー修正を解除します。 押し忘れた場合でも2~3分後には時刻・カレンダー修正を解除します。※年・月・日に合わせると自動的に曜日がセットされます。※時刻・カレンダー修正状態で、ボタンⒶとボタンⒸを同時に押しますと全点灯表示します。故障ではありません。 ボタンⒶ、Ⓑ、Ⓒ、Ⓓいずれか1つ押しますと時刻・カレンダー表示に戻ります。※パワーセーブモードへの移行時間は、1H、3H、6H、12Hから選択できます。
ボタンⒸ ボタンⒸ ボタンⒸ
秒が点滅し曜日表示が消えます。時報と同時にボタンⒶを押すと00秒に合います。
分が点滅します。ボタンⒶを押すごとに1分ずつ進みます。
時が点滅します。ボタンⒶを押すごとに1時間ずつ進みます。
日が点滅します。ボタンⒶを押すごとに1日ずつ進みます。
時刻・カレンダー表示の状態でボタンⒷを2秒間押す。
ボタンⒸ
ボタンⒸ
ボタンⒸ
ボタンⒸボタンⒸボタンⒸ
年が点滅します。ボタンⒶを押すごとに1年ずつ進みます。
ボタンⒶで12/24Hの切り換えをします。
ボタンⒶでパワーセーブ移行の時間を切換えます。
ボタンⒶでコントラストの調整をします。
月が点滅します。ボタンⒶを押すごとに1月ずつ進みます。

29
※ 使い始め、充電不足で停止している時計を動かすときは、前ページの表を参考に十分な充電をしてください。
③表示と電池残量について■電池残量について液晶パネルの表示で、おおまかな電池残量がわかります。
電池残量 そのときは操作・機能の制限
ありません十分
そのままお使いください
ありません中くらい 充電を心がけてください
→充電のしかた
タイムアップ音・報音停止
極少①の状態になるまで、十分な充電をしてください充電後は、そのままお使いください→充電のしかた
①
②
③
28
②充電にかかる時間のめやす下記の時間を参考に、充電を行ってください。
この時計は一度フル充電すると、以下の状況で使用した場合、その後充電されなくても約6ヶ月間動き続けます。
・ストップウオッチ ·················································3時間/1日・パワーセーブ ····················································· 20時間/1日
環境1 晴れた日の屋外10万ルクス 約5分
環境2 晴れた日の窓際1万ルクス 約55分
環境3 くもりの日の窓際5000ルクス 約95分
環境4 蛍光灯下の屋内500ルクス 約15時間
約11時間
約108時間
約220時間
約6時間
約57時間
約102時間
約1.4時間
約13.5時間
約28.5時間
約12日
LCD表示点滅
無表示点滅 1日分の
充電時間
27
※ 充電の際は、時計が高温にならないようにご注意ください。(作動温度範囲は-10℃~+60℃です。)※ 使いはじめ、また充電不足で停止していた時計を駆動させるときは、次ページの表をめやすに十分な充電をしてください。
快適にご使用いただくために、十分な充電をすることを心がけましょう。
以下の状況では充電不足によりエネルギーが切れ、時計が止まる可能性が高くなります。・ 引き出し、ロッカーの中等、光のあたりにくい環境での保管が続く・ストップウオッチを裏返した状態で置いておく
ソーラーパネル
26
●●●●●●●●●●●
①充電のしかたソーラーパネルに光をあてて充電してください。
ソーラーパネル表示部に内蔵されています。
電池残量表示RECALLSTART/STO
P
LAP/SPL I
T RESET
WATER RESISTANT 5 BAR
▲SET SELECT▲
MODE▼
充電について

33
防水性能について
お買い上げいただいた時計の防水性能を下記の表でご確認の上ご使用ください。
裏ぶた表示 防水性能
防水性能表示なし 非防水です。
WATER RESISTANT 日常生活用防水です。
WATER RESISTANT5 BAR
日常生活用強化防水で5気圧防水です。
WATER RESISTANT 10(20)BAR
日常生活用強化防水で10(20)気圧防水です。
32
お手入れについて
●日ごろからこまめにお手入れしてください ・ 水分や汗、汚れはこまめに柔らかい布でふき取るように心がけてください。 ・ 海水につけた後は、必ず真水でよく洗ってからふき取ってください。 その際、直接蛇口から水をかけることは避け、容器に水をためるなどしてから 洗ってください。 ※ 「非防水」、「日常生活用防水」の場合は、おやめください。 → 防水性能について P.33
31
④パワーセーブ・スリープについて ボタン操作が一定時間以上ない状態が続くとパワーセーブ機能(節電機能)、スリープ機能がはたらきます。※パワーセーブ設定のしかた 「時刻・カレンダー合わせ」で時間設定を行います。 時間設定は1時間、3時間、6時間、12時間から選べます。 「時刻・カレンダー合わせ」を参照してください。
暗いところでストップウオッチ、またはタイマーを使うときは、使用時間より長い時間設定にしていただくことをおすすめします。
■スリープ中の表示と機能
■パワーセーブ中の表示と機能 そのときは
動作中のストップウオッチ ···リセット動作中のタイマー ··········リセット
いずれかのボタンを押すと、パワーセーブ、スリープ機能が解除されます
操作・機能の制限
機能制限はありません。
状況「PS」マーク点滅ボタン操作がない状態が設定時間を越えた
「SL」マーク点滅ボタン操作がない状態が約3日間続いた
30
要充電 点滅
※この状態になると、保存してある計測タイムのデータが消去されます。または正しく表示されないことがあります。
動作中のクロノグラフ、タイマーはリセットされます。①の状態になるまで十分な充電をしてください。※万が一、異常な動きになったときは、システムリセットをしてください→システムリセットのしかた
①の状態なるまで十分な充電をしてください。※万が一、異常な動きになったときは、システムリセットをしてください→システムリセットのしかた
④
⑤

37
アフターサービスについて
・ 修理や点検調整のための分解掃除(オーバーホール)の際は、お買い上げ店、 または弊社お客様相談窓口にご依頼ください。・ 保証期間内に不具合が生じた場合は、必ず保証書を添えてお買い上げ店へ お持ちください。・ 保証内容は保証書に記載したとおりです。 保証書をよくお読みいただき、大切に保管してください。・ 保証期間終了後については、修理によって機能が維持できる場合には、 ご要望により有料修理させていただきます。
●保証と修理について
・ この時計の補修用性能部品の保有期間は通常7年を基準としています。補修用性能 部品とは、時計の機能を維持するために必要な修理用部品です。・ 修理の際、外観の異なる代替部品を使用させていただくことがありますので、あらか じめご了承ください。
●補修用性能部品について
36
※ フル充電までの所要時間については「充電にかかる時間のめやす P.28」を参照してください。
フル充電までの所要時間を超えて充電しても、時計が破損することはありません。二次電池がフル充電になると、それ以上充電されないように、自動的に過充電防止機能がはたらきます。
※ 過充電防止機能
■ 充電時のご注意・ 充電の際、撮影用ライト、スポットライト、白熱ライト(球)などに、近づけ 過ぎると、時計が高温になり内部の部品等が損傷を受けるおそれがありますので おやめください。・ 太陽光にて充電する際も、車のダッシュボード等では、かなりの高温となり故障の 原因となる場合がありますので、おやめください。・ 時計が50℃以上にならないようにしてください。
警告
35
使用電源について
この時計には、一般の酸化銀電池とは異なる専用の二次電池を使用しています。二次電池とは、乾電池やボタン電池のような使い捨ての電池とは異なり、充電と放電をしながら繰り返し使用可能な電池です。
長期的な使用や使用環境により、容量や充電効率が少しずつ低下する場合がありますので、性能が低下し始めたら修理にお出しください。
■ 二次電池交換時のご注意・ 二次電池は取り出さないでください。 二次電池の交換には専門知識・技能が必要ですので、お買い上げ店にご依頼 ください。・一般の酸化銀電池が組み込まれると、破裂、発熱、発火などのおそれが あります。
警告
34
お取扱方法
水滴がかかったり、汗を多くかく場合には、使用しないで下さい。
日常生活での「水がかかる」程度の環境であれば使用できます。
水しぶきのかかりやすいスポーツ時でも使用できます。
雨天時や水しぶきのかかりやすいスポーツ時でも使用できます。
水泳には使用しないで下さい。警告
※ 水中でのボタン操作はしないでください。

Thank you very much for choosing a SEIKO watch.For proper and safe use of your SEIKO watch, please read carefully the instructions in this
booklet before using “it”.Keep this manual handy for easy reference.
39
製品仕様
1. 水晶振動子:32,768Hz(Hz=1秒間の振動数)2. 精度:常温(5℃~35℃)において、±0.0012%月差換算±30秒以内3. 作動温度範囲:-10℃~+60℃4. 表示温度範囲:0℃~+50℃5. 表示内容: 時計表示:曜日、年、月、日、時、分、秒 (フルオートカレンダー:2013年1月1日~2062年12月31日) ストップウオッチ表示: 2段表示+ドット表示(5×35)、時、分、秒、1/100秒(100時
間計)、ラップ/スプリット/ランニングラップ切換、最大300ラップ/スプリットタイムメモリー
〈S062のみ〉 タイマー表示:タイマー1、2の表示 時間・分・秒、リピート回数6. 表示体:STN液晶7. 使用電源:二次電池 1個8. 持続時間:約6ヶ月(フル充電後に光があたらず。1日あたりストップウオッチ3時間。 パワーセーブ20時間で使用)9. 電子回路:C-MOS-IC 1個
※上記の製品仕様は改良のため予告なく、変更することがあります。
38
・ 長くご愛用いただくために、3年~4年に1度程度の点検調整のための分解掃除 (オーバーホール)をおすすめします。 ご使用状況によっては、漏液により表示消えが生じることがあります。 またパッキンなどの部品の劣化が進み、汗や水分の浸入などで防水性能が損なわれる 場合があります。 点検調整のための分解掃除(オーバーホール)は、「純正部品」とご指定の上、 お買い上げ店にご依頼ください。その際、パッキンの交換もあわせてご依頼ください。・ 点検調整のための分解掃除(オーバーホール)の際には、ムーブメント交換となる 場合もあります。
この時計の液晶パネルは、7年を過ぎますと、コントラストが低下して数字が読みにくくなることがあります。お買い上げ店に交換をお申しつけください。実費にて申し受けます。
●点検調整のための分解掃除(オーバーホール)について
●液晶パネルの交換について

45
・Avoid wearing or storing the watch in the following places. ○ Places where volatile agents (cosmetics such as polish remover, bug repellent, thinners etc.) are
vaporizing ○ Places where the temperature drops below 5 °C or rises above 35 °C for a long time ○ Places of high humidity ○ Places aff ected by strong magnetism or static electricity ○ Dusty places ○ Places aff ected by strong vibrations
・If you observe any allergic symptoms or skin irritation Stop wearing the watch immediately and consult a specialist such as a dermatologist or an allergist.
・Other cautions ○ Do not disassemble or tamper with the watch. ○ Keep the watch out of the reach of babies and children. Extra care should be taken to avoid
risks of any injury or allergic rash or itching that may be caused when they touch the watch. ○ When disposing of used batteries, follow the instructions of your local authorities. ○ The strap or chain attached to the watch may damage your clothes, or injure the
hand, neck, or other parts of your body.
To indicate the risks of light injuries or material damages unless the following safety regulations are strictly observed.
CAUTIONS
44
Handling cautions
・Keep the watch and accessories out of the reach of babies and children. Care should be taken to prevent a baby or a child accidentally swallowing the
accessories. If a baby or a child swallows the battery or accessories, immediately consult a doctor, as
it will be harmful to the health of the baby or child.
・Do not remove the secondary battery from the watch. ※ About the secondary battery → Power source page 75 Replacement of the secondary battery requires professional knowledge and skill. Please ask
the retailer from whom the watch was purchased for replacement of the secondary battery. Installation of an ordinary silver oxide battery can generate heat that can cause bursting
and ignition.
To indicate the risks of serious consequences such as severe injuries unless the following safety regulations are strictly observed.
WARNING
43
their functions ……………………61 ②How to set the time and calendar ……………………………62 ③How to adjust the contrast …63
Power save function, sleep function ………………………………64System reset ………………………65How to charge ①How to charge ……………………66 ②Charging time ……………………68 ③Battery icon and remaining battery level ………………………69 ④Power save function, sleep function ……………………………71
Daily care ……………………………72
Water resistance ……………………73Power source …………………………75After-sales service …………………77Specifi cations ………………………79
42
Contents
Handling cautions …………………44Features ………………………………48Names of the buttons and mode change ①Names of the buttons ………49 ②Mode change ……………………50
How to use the stopwatch ①Names of the buttons and their functions …………………51 ②Accumulated elapsed time measurement …………………52 ③Lap time measurement ………53 ④Running lap time measurement …54
⑤Split time measurement ………55 ⑥300-Lap/Split memory recall function ……………………56
Function for S062 onlydouble repeat timer ①Names of the buttons and their functions ……………………58 ②How to set the double repeat timer ………………………59 ③How to use the double repeat timer ………………………60
Time/Calendar display ①Names of the buttons and

49
①Names of the buttons
Names of the buttons and mode change
RECALLSTART/STO
P
LAP/SPLI
T RESET
WATER RESISTANT 5 BAR
▲SET SELECT▲
MODE▼
Example) LAP time measurement display
Button Ⓓ
Button Ⓑ
Button Ⓐ Button Ⓒ
48
Features
・Stopwatch function: The stopwatch can measure up to 100 hours in 1/100-second increments.・The stopwatch function has selectable display modes: split time, lap time and running lap time. ・Memory recall function: Up to 300 lap or split time records can be automatically stored.・In the time/calendar display, current time, year, month, date and day of the week are displayed.・ Power save function: When the watch is not operated for longer than a pre-set time, the display is automatically turned off to save energy consumption.
[Duration of operation by solar energy]Once fully charged, the watch can operate for approximately 6 months without being exposed to light. (Operating life is estimated under the conditions that the stopwatch is used for less than 3 hours and the power save function is activated for 20 hours per day.)Function available only for S062*S062 has an inscription of “INTERVAL TIMER” on the front of the body.・ Double repeat timer function: Two built-in countdown timers which allow you to set two diff erent times repeat counting one after the other.・ Timer 1 and Timer 2 can be set to any time from 10 seconds to 99 hours 59 minutes and 59 seconds in 1-second increments each.・ For easy distinction between Timer 1 and Timer 2, the pre-warning beeps and time-up beeps of each timer sound diff erently.
The Seiko Quartz Stopwatch Cal. S061 and S062 are stopwatches with a solar charging function, featuring a lap time and split time measurement function and a memory recall function that can store up to 300 lap or split time records, as well as a time and calendar function. In addition, Cal. S062 has a double repeat timer function.
47
Do not turn or pull out the crown when the watch is wet.Water may get inside of the watch.※ If the inner surface of the glass is clouded with condensation or water droplets appear inside of the watch for a long time, the water resistant performance of the watch is deteriorated. Immediately consult the retailer from whom the watch was purchased or SEIKO CUSTMER SERVICE CENTER .
Be aware of a risk that a water resistant watch may lessen its water resistant performance because of deterioration of the adhesive on the glass or gasket, or the development of rust on stainless steel.
Do not leave moisture, sweat and dirt on the watch for a long time.
Do not wear the watch while taking a bath or a sauna.Steam, soap or some components of a hot spring may accelerate the deterioration of water resistant performance of the watch.
CAUTION
46
WARNING
Do not use the watch in scuba diving or saturation diving.The various tightened inspections under simulated harsh environment, which are usually required for watches designed for scuba diving or saturation diving, have not been conducted on this watch. For diving, use special watches for diving.
CAUTION
Do not pour running water directly from faucet onto the watch.The water pressure of tap water from a faucet is high enough to degrade the water resistant performance of a water resistant watch for everyday life.

53
③ Lap time measurement
LAP1 LAP2 LAP3 LAP n
Lap time measurement… To measure the time that has elapsed from the start of one stage of an activity to that of the next stage.
Press Button Ⓐto reset.
Press Button Ⓒto start.
Press Button Ⓒ to stop.
Press Button Ⓐto measure a lap time.
The mark flashes during measurement.
Data number
Lap time
Accumulated elapsed time
Start Goal
The previous data remains displayed. }The latest data is displayed.}
※Pressing Button Ⓒ to stop measurement is counted as taking the last lap time data.52
②Accumulated elapsed time measurement
Press Button Ⓐto reset.
Press Button Ⓒto start
Press Button Ⓒto stop.
Press Button Ⓒ to stop.Press Button Ⓒ to restart.
Example)To measure the time in the lap time measurement display
ⒸStart
ⒸStop
ⒸStart
ⒸStop
ⒸReset
Standard measurement…To measure an accumulated elapsed time
The mark flashes during measurement.
51
How to use the stopwatch ① Names of the buttons and their functions
RECALL
LAP/SPL
ITRESET
WATER RESISTANT 5 BAR
▲SET SELECT▲
MODE▼
RECALLSTART/STO
P
LAP/SPLIT
RESET
WATER RESISTANT 5 BAR
▲SET SELECT▲
MODE▼
・ To measure split time, lap time and running lap time, select the corresponding display mode in the stopwatch display.
・Press Button Ⓑ to enter and exit the memory recall display.
Button Ⓐ・Stopwatch display Lap time Running lap Split time・Memory recall display Selection of data ( Data number in descending order)
Example) Lap time measurement display
Button Ⓑ・To enter and exit the memory recall display
Button Ⓒ・Stopwatch display Start Stop・Memory recall display Selection of data( Data number in ascending order)
Button Ⓓ・To change the display modes
50
〈For S061〉
〈For S062〉
〈Time/calendar display〉
〈Stopwatch (split) display〉
〈Stopwatch (lap) display〉
〈Stopwatch (running lap) display〉〈Timer display〉
Button Ⓓ
Press Button Ⓓ to change the display mode.
Button Ⓓ Button Ⓓ
Button Ⓓ
Button Ⓓ
〈For S062〉
※ When Button Ⓐ, Ⓑ, Ⓒ and Ⓓ are pressed simultaneously, the built-in IC is reset. For details, refer to "System reset" on page 65.
②Mode change

57
Press Button Ⓑ to enter the memory recall display.
The newest data is displayed.
Lap time
Split time
Button Ⓐ
Button Ⓒ
Button Ⓐ
Button Ⓒ
Button Ⓐ Button ⒸButton Ⓐ Button Ⓒ
Memory recall during measurement<The mark flashes. >
56
⑥ 300-Lap/Split memory recall function
Memory recall after measurement<The STOP mark is displayed.>
Press Button Ⓑ to enter the memory recall display.
The oldest data is displayed.
Lap time
Split timeButton Ⓐ
Button Ⓐ
Button Ⓒ
Button Ⓐ
Button Ⓒ
Button ⒸButton ⒶButton Ⓒ※When no measurement is made in the stopwatch display, and no data is stored in memory, the display below appears if the display is changed over to the memory recall display.
※Even if the stopwatch is reset, data is not deleted unless a new measurement is started.
※The stopwatch can measure more than 300 records, but only the first 300 records are stored in memory.
55
⑤ Split time measurement
Start Goal
Split time measurement…To measure the time that has elapsed from the start of an activity to any given stage.
SPL1 SPL2 SPL3
Press Button Ⓐ to reset.
Press ButtonⒸ to start.
Press Button Ⓐ to measure a split time.
Press Button Ⓒ to stop.
The mark flashes during measurement.
Data number
Split time of the data number shown
Accumulated elapsed time
} }The previous data remains displayed.The latest data is displayed.
54
④ Running lap time measurement
LAP1 LAP2 LAP3 LAP n
Running lap time measurement…To measure a lap time while displaying the current lap time.
Start GoalThe mark flashes during measurement.
Data number
The first lap time
The last eighth lap time The second lap time in current measurement
The first lap time in current measurement
Press Button Ⓐ to measure a lap time.Press Button Ⓐto reset.
Press Button Ⓒ to start.
Press Button Ⓒ to stop.
*Pressing Button Ⓒ to stop measurement is counted as taking the last lap time data.

61
Time/Calendar display ① Names of the buttons and their functions
RECALLSTART/STO
P
LAP/SPLIT
RESET
WATER RESISTANT 5 BAR
▲SET SELECT▲
MODE▼
Button Ⓓ・To change the display modes
Button Ⓐ・To adjust the time and calendar in the time/calendar setting display
Button Ⓑ・To ender and exit the time/calendar setting display
Button Ⓒ・Time/calendar display To turn on or off the button operation confirmation sound・Time/calendar setting display To select the item to be changed in the time/calendar setting display
Day of the week
Month
Hour
Date
Second
Minute
Year
AM/PM indicator when the 12-hour indication is selected
*When the button operation confirmation sound is turned on, the mark is displayed.
60
③How to use the double repeat timer
*To stop the pre-warning beeps or time-up beeps, press any of Button Ⓐ, Ⓑ, Ⓒ or Ⓓ. The beep is turned off until the next countdown starts.*The time-up beeps of Timer 1 and Timer 2 sound diff erently.*With each pressing of Button Ⓒ, the timer is stopped or restarted alternately, and stops and restarts of the timer can be repeated as many times as desired.
Press Button Ⓒ to start Timer 1.
Timer 1: 00:03 00Timer 2: 00:01 00Number of repetitions: 10 times
Button Ⓒ
From the second countdown cycle and thereafter, the value shown here increases as the number of repetitions increases.
Example <Timer setting> 3 seconds before the Timer 1 reaches zero, a pre-warning beep sounds. When Timer 1 reaches zero, a 5-second time-up beep sounds.
Timer 2 starts counting down.The countdown cycle is repeated as many times as the number of repetitions is set.
3 seconds before the Timer 2 reaches zero, a pre-warning beep sounds. When Timer 2 reaches zero, a time-up beep sounds for 5 seconds. Timer 1 starts count-ing down.
The mark flashes during countdown.
59
②How to set the double repeat timer
*Keep Button Ⓐ pressed to quickly increase the value for the hour, minute, second and number of repetitions.* If Timer 1 or Timer 2 is set to “00:00 09” or shorter, the timer is automatically set to "00:00 10." The timers cannot be set to a time shorter than 10 seconds.*If Button Ⓓ is pressed during timer setting, the timer is reset.*If Button Ⓑ is pressed during timer setting, the display returns to the timer display showing the initial setting.
The hour of Timer 1 starts flashing.Each time Button Ⓐ is pressed, the hour advances by one hour.
The number of repetitions of countdown starts flashing.Press Button Ⓐ to set the number.
The hour of Timer 2 starts flashing.Each time Button Ⓐ is pressed, the hour advances by one hour.
The minute starts flashing. Each time Button Ⓐ is pressed, the minute advances by one minute.
The minute starts flashing. Each time Button Ⓐ is pressed, the minute advances by one minute.
The second starts flashing.Each time Button Ⓐ is pressed, the second advances by one second.
The second starts flashing.Each time Button Ⓐ is pressed, the second advances by one second.
Timer is reset
Button Ⓒ Button Ⓒ
Button ⒸButton ⒸButton Ⓒ
Button Ⓒ Button Ⓒ
Press Button Ⓑ for 2 seconds
58
Function for S062 only double repeat timer ① Names of the buttons and their functions・Cal. S062 has two timers that can be used in combination: When Timer 1 reaches zero, the measurement is taken over by Timer 2. When Timer 2 reaches zero, Timer 1 starts counting again. The two timers repeat their countdown cycles one after the other.
・Timer 1 and Timer 2 can be separately set to any time from 10 seconds to 99 hours 59 minutes and 59 seconds.・If either Timer 1 or Timer 2 is set to “00:00 00,” the other timer can be used as a single repeat timer.・The number of times that the timers repeat their countdown cycles can be set to any number from 1 to 100. If it is set to “---,“ the timers repeat counting until one of them is stopped by button operation.
Button Ⓐ・Timer display To reset the timer (The timer is reset to the initial setting.)・Timer setting display To change the time and number of repetitions of countdown
Button Ⓓ・To change the display modes・Timer setting display To reset the timer to “00:00 00” and the number of repetitions to one.
Number of times the countdown has been repeated up to a certain point
Number of repetitions of countdown
Timer 1Example 00:03 00Timer 2 Example 00:01 00
Example)Timer operation in this setting Timer 1Timer 2
3 minutes1minute
Once Twice Ten times
3 minutes 3 minutes1minute 1minute
Button Ⓑ・To enter and exit the timer setting display
Button Ⓒ・Timer display Start Stop・Timer setting display To select the item to be adjusted in the timer setting display

65
●●●●●●●●●●●System reset
・ When an abnormal display (broken digits, etc.) appears, follow the procedure below. The built-in IC is reset and the watch resumes normal operation.
・ How to reset the IC Press Button Ⓐ, Ⓑ, Ⓒ and Ⓓ at the same time for 2 to 3 seconds. The display disappear, and then "TUE' 13 1-1 A 12:00 00" is displayed.
* After the IC is reset, all the stored records are deleted. Settings of the time and date etc., are also required.
64
●●●●●●●●●●●Power save function, sleep function
RECALLSTART/STO
P
LAP/SPLIT
RESET
WATER RESISTANT 5 BAR
▲SET SELECT▲
MODE▼
RECALLSTART/STO
P
LAP/SPLIT
RESET
WATER RESISTANT 5 BAR
▲SET SELECT▲
MODE▼
Power Save mark: PSWhen the watch enters the power save mode, the PS indicator flashes.
Sleep mode mark: SLWhen the watch enters the sleep mode, the SL indicator flashes.
⇒After 72 hours
In the time/calendar setting mode, the transition time until the power save mode is activated can be set. The following energy saving functions are provided to extend the battery life.・ The transition time until the power save mode is activated can be selected from among 1 hour (1H), 3 hours (3H), 6 hours (6H) and 12 hours (12H). For instructions on this setting, refer to “How to set the time/calendar.”・ In any display mode, if no operation is performed for a pre-set time, the power save function is automatically activated and the display is turned off .・When the stopwatch or timer is operating, the display is not turned off .・ To turn the display on, press any of Button Ⓐ, Ⓑ, Ⓒ or Ⓓ. The display returns to the display right before the power save function is activated.・ When the watch is in the power save mode for longer than 72 hours, it automatically enters the sleep mode, in which more effi cient energy saving is achieved. When the watch enters the sleep mode, the stopwatch and timer are reset.
63
・ The contrast of the display can be adjusted. After initialization or when all the settings are cleared, the contrast is returned to its default setting of "0."
●Press Button Ⓓ to enter the time/calendar display. ① Keep pressing Button Ⓑ to enter the time/calendar setting display. The current time is displayed.
②Press Button Ⓒ to enter the contrast setting display. ③Press Button Ⓐ to adjust the contrast.
④ When contrast adjustment is fi nished, press Button Ⓑ to return to the time/calendar display. Even if Button Ⓑ is not pressed, the display automatically returns to the time/calendar display within 2 to 3 minutes.
③How to adjust the contrast
1 2 *The highest contrast is "2" and the lowest contrast is "-2."
-2 -10
62
②How to set the time and calendar
*Keep Button Ⓐ pressed to quickly increase the value for the minute, hour, date, month and year. The value increases quickly as long as Button Ⓐ is kept pressed.*Press Button Ⓑ to exit the time/calendar setting display. Even if Button Ⓑ is not pressed, the display automatically exits the time/calendar setting display within 2 to 3 minutes.*When the year, month and date are set, the day of the week is automatically set.*In the time/calendar setting display, if Button Ⓐ and Ⓒ are simultaneously pressed, all the digital segments are turned on. This is not a malfunction. Press any of Button Ⓐ, Ⓑ, Ⓒ or Ⓓ to return to the time/calendar display.*The transition time until the power save mode is activated can be selected from among 1 hour (1H), 3 hours (3H), 6 hours (6H) and 12 hours (12H).
Button Ⓒ Button Ⓒ Button Ⓒ
The second starts flashing and the day of the week disappears. Press Button Ⓐ in accordance with a time signal so that the second is set to “00.”
The minute starts flashing. Each time Button Ⓐ is pressed, the minute advances by one minute.
The hour starts flashing. Each time Button Ⓐ is pressed, the hour advances by one hour.
The date starts flashing. Each time Button Ⓐ is pressed, the date advances by one day.
In the time/calendar display, press Button Ⓑ for 2 seconds.
Button Ⓒ
Button Ⓒ
Button Ⓒ
Button ⒸButton ⒸButton Ⓒ
The year starts flashing.Each time Button Ⓐ is pressed, the year advances by one year.
Press Button Ⓐ to select the 12-hour indication or 24-hour indication.
Press Button Ⓐ to set the transition time until the power save mode is activated.
Press Button Ⓐ to adjust the contrast of the display.
The month starts flashing. Each time Button Ⓐ is pressed, the month advances by one month.

69
* When you start using the watch for the fi rst time, or when the watch is completely stopped due to battery depletion, charge the watch for a suffi cient time, referring to the table on the previous page.
③Battery icon and remaining battery level■Remaining battery levelThe battery icon on the display lets you know the remaining battery level.
Remaining battery level Solutions
Restrictions on operations and functions
No restrictionSufficient
Use the watch as it is.
No restrictionMedium Keep the watch sufficiently
charged.→How to charge
Time-up beep does not sound.
Extremely low
Charge the watch sufficiently until the battery icon looks like the one in the illustration ①After charging the watch, use it as it is. →How to charge
①
②
③
68
②Charging timeCharge the battery, referring to the table below as a guide.
Once fully charged, the watch keeps operating for approximately 6 months without being recharged when it is used under the following conditions.
・The stopwatch function is used for less than 3 hours per day.・Power save function is activated for 20 hours per day.
Environment 1 Outdoor on a sunny day100000 lux
Approximately 5 minutes
Environment 2By the window on a sunny day10000 lux
Approximately 55 minutes
Environment 3By the window on a cloudy day 5000 lux
Approximately 95 minutes
Environment 4Indoor under fluorescent light 500 lux
Approximately 15 hours
Approximately 11 hours
Approximately 108 hours
Approximately 220 hours
Approximately 6 hours
Approximately 57 hours
Approximately 102 hours
Approximately 1.4 hours
Approximately 13.5 hours
Approximately 28.5 hours
Approximately 12 days
LCD displayFlashing Flashing To run
the watch for one day
67
* When charging the watch, make sure that the watch temperature does not rise too high. The operational temperature range is between -10ºC and +60ºC.
* When you start using the watch for the fi rst time, or when the watch is completely stopped due to energy depletion, charge the watch for a suffi cient time, referring to the table on the next page.
To enjoy optimal performance of the watch, it is recommended that the watch be kept sufficiently charged at all times.
Under the following conditions, the watch may stop because of the energy depletion caused by insuffi cient battery charge.・ When the watch is kept in a place like locker or drawer where light is insuffi cient・ When the watch is left with its display facing down
Solar Panel
66
●●●●●●●●●●●
①How to chargeExpose the solar panel to light.
Solar panel is embedded in the display.
Remaining battery levelRECALLSTART/STO
P
LAP/SPL I
T RESET
WATER RESISTANT 5 BAR
▲SET SELECT▲
MODE▼
How to charge

73
Water resistance
Refer to the table below for the description of each degree of water resistant performance of your watch before using.
Indication on the case back Water resistant performance
No indication Non-water resistance
WATER RESISTANT Water resistance for everyday life
WATER RESISTANT5 BAR
Water resistance for everyday life at 5 barometric pressures
WATER RESISTANT 10(20)BAR
Water resistance for everyday life at 10(20) barometric pressures.
72
Daily care
● The watch requires good daily care ・Wipe away moisture, sweat or dirt with a soft cloth ・ After soaking the watch in seawater, be sure to wash the watch in
clean pure water and wipe it dry carefully. ※ If your watch is rated as “Non-water resistant” or “water resistant
for everyday life,” do not wash the watch. Do not pour running water directly from faucet onto the watch. Put some water into a bowl fi rst, and them soak the watch in the water to wash it.
Water resistance → page 73.
71
■Display and functions during the power save mode
■Display and functions during the sleep mode
SolutionsRestrictions on operations and functions
Display
No restriction
Stopwatch in motion is reset. Timer in motion is reset.
Press any Button to exit the power save mode or sleep mode.
The PS mark flashes.No button is pressed for longer than a pre-set time.
The SL mark flashes.No button is pressed for longer than approx-imately 3 days.
④Power save function, sleep function When no button is pressed for longer than a certain period, the power save function (energy saving function) and sleep function are activated.
※How to set the transition time to the power save mode The transition time until the power save mode is activated can be selected from among 1 hour, 3 hours, 6 hours and 12 hours in the time/calendar setting mode. For instructions on this setting, refer to “How to set the time/calendar.” When you use the stopwatch or timer function in a dark place, it is recommended that the transition time to the power save mode be set to a time longer than the time the stopwatch or timer is used.
70
Charging is required. Flashing
*At this stage, the stored records may be deleted or may not be displayed correctly.
The on-going measurement of the stopwatch or countdown of the timer is reset.Charge the watch sufficiently until the battery icon looks like the one in the illustration ①.*If abnormal operation is observed, reset the built-in IC.→System reset
Charge the watch sufficiently until the battery icon looks like the one in the illustration ① above.*If abnormal operation is observed, reset the built-in IC.→System reset
④
⑤

77
After-sales service
・ Contact the retailer from whom the watch was purchased or SEIKO CUSTOMER SERVICE CENTER for repair or overhaul.・ Within the guarantee period, present the certificate of guarantee to receive repair services.・ Guarantee coverage is provided in the certificate of guarantee. Read carefully and retain it.・ For repair services after the guarantee period has expired, if the functions of the watch can be restored by repair work, we will undertake repair services upon request and payment.
●Notes on guarantee and repair
・ SEIKO makes it a policy to typically keep a stock of replacement parts for this watch for 7 years. Replacement parts are those which are essential to maintaining the functional integrity of the watch. Please keep in mind that if original parts are not available, they may be replaced with substitutes whose outward appearance may diff er from the originals.
●Replacement parts
76
※ Refer to "Charging time" on page 68 to check the time required for fully charging the watch.
When the secondary battery is fully charged, the overcharge prevention function is automatically activated to avoid further charging. There is no need to worry about damage caused by overcharging no matter how much the secondary battery is charged in excess of the "time required for fully charging the watch".
※ Overcharge prevention function
■ Notes on charging the watch・ When charging the watch, do not place the watch in close proximity to an intense light source such as lighting equipment for photography, spotlights or incandescent lights, as the watch may be excessively heated resulting in damage to its internal parts.・ When charging the watch by exposure to direct sunlight, avoid places that easily reach high temperatures, such as a car dashboard.・ Always keep the watch temperature under 50℃ .
NOTICE
75
Power source
■ Remarks on replacing the secondary battery・ Do not remove the secondary battery yourself.・ Replacement of the secondary battery requires professional knowledge and skill. Please ask the retailer from whom the watch was purchased for repair.・ Installation of an ordinary silver oxide battery can generate heat that can cause bursting or ignition.
NOTICE
The battery used in this watch is a special secondary battery, which is totally diff erent from ordinary silver oxide batteries.Unlike other disposable batteries such as dry-cell batteries or button cells, this secondary battery can be used over and over again by repeating the cycles of discharging and recharging.However, for various reasons such as long-term use or usage conditions, the capacity or recharging effi ciency of the secondary battery may gradually deteriorate. If the effi ciency of the secondary battery decreases, have the watch repaired.
74
*Do not operate the buttons underwater.
Condition of use
Avoid drops of water or sweat
The watch withstands accidental contact with water in everyday life.
The watch is resistant to splashes when worn during sports that may expose the watch to water.
The watch is resistant to raindrops and splashes when worn during sports that may expose the watch to water.
Not suitable for swimmingWARNING
本 社 〒105-8467 東京都港区虎ノ門 2-8-10http://www.seiko-watch.co.jp/
全国共通フリーダイヤル 0120-612-911お客様相談室 〒100-0005 東京都千代田区丸の内 3-1-1 国際ビル〒550-0013 大阪市西区新町 1-4-24 大阪四ツ橋新町ビルディング
79
Specifi cations
1. Frequency of crystal oscillator:32,768Hz(Hz = Hertz Cycles per second)2. Loss/gain (monthly rate): Less than 0.0012% or 30 seconds at normal
temperature range (5℃~-35℃)3. Operational temperature range:-10℃~+60℃4. Temperature range for display function:0℃~+50℃5. Display: Watch display:Day of the week, Year, Month, Date, Hour, Minute, Second (Fully automatic calendar from January 1, 2013 to December 31, 2062) Stopwatch display: 2-row indication + dot indication (5X35), Hour, Minute,
Second, 1/100- Seconds (100-hour stopwatch) , Selectable display of lap/spl it/running lap modesUp to 300 lap/split time records
〈Only for Cal. S062〉 Timer display:Timer 1 and Timer 2 Hour, Minute, Second, Number of repetitions6. Display medium:F-STN7. Battery:Secondary battery, 1 piece8. Duration of operation: Approximately 6 months without being recharged after
fully charged, under the conditions that the stopwatch is used less than 3 hours and the power save mode is activated for 20 hours per day.
9. IC (Integrated Circuit):C-MOS-IC, 1 piece
* The specifi cations above are subject to change without prior notice, for product improvements.78
The normal life expectancy for the liquid crystal panel of this watch is approximately 7 years. After that, it may decrease in contrast, becoming diffi cult to read.Please contact the retailer from whom the watch was purchased to have the liquid crystal panel replaced with a new one. It will be replaced at your cost.
● Liquid crystal panel
・Periodic inspection and adjustment by disassembly and cleaning (overhaul) are recommended approximately once every 3 to 4 years in order to maintain optimal performance of the watch for a long time.
・According to use conditions, the digital display may go out due to liquid leakage.・As the parts such as the gasket may deteriorate, water-resistant performance may be impaired due to intrusion of perspiration and moisture.
Please contact the retailer from whom the watch was purchased for inspection and adjustment by disassembly and cleaning (overhaul). For replacement of parts, please specify “SEIKO GENUINE PARTS.” When asking for inspection and adjustment by disassembly and cleaning (overhaul), make sure that the gasket are also replaced with new ones.
When your watch is inspected and adjusted by disassembly and cleaning (overhauled), the movement of your watch may be replaced.
● Inspection and adjustment by disassembly and cleaning (overhaul)


![ソーラーLED照明[エソラ] 取扱説明書...HA2/11-30872 【施工上の注意】 ・ ソーラーLED 照明[エソラ] は、太陽光をエネルギー源としています。年間を通じて日照時間の長い場所へ設置くだ](https://img.pdfslide.net/doc/110x75/60cfcb7b0dbc8f1b0b034602/fffledcf-e-ha2i11-30872-.jpg)