Embed Size (px)
Citation preview

GENERAL INFORMATION
“Click” always means a single left mouse click. A right mouse click or a double click will be specified as such.
A right mouse click will usually produce a popup menu with several options to choose from (such as “Add”, “Insert”, and “Delete”) or a single option (such as “New”). Click on an option from the popup menu to select it. The popup menu will disappear once you have selected an option from it.
The information in this manual is organized by module. First, there is an overview of the module for individuals who have inquiry-only access, followed by more in-depth instructions for those who have update access. Some modules are inquiry only or input only.
Features of FIMA screensFIMA is designed with a separate window for each module. The windows can be opened by clicking the appropriate icon (picture) near the top of the screen, or by clicking on the correct menu option at the top of the screen (for example, Activities) and then clicking the appropriate selection from the drop down menu (for example, Customer Master to open the Customer Master window). To see a description of each icon, let your mouse rest on the icon without clicking. Within a couple of seconds, the description for that icon will display.
Most windows have multiple tabs, which look like the tabs on top of a file folder. To switch from tab to tab, just click on the tab you want to select.
Some windows have a list (for example, a list of Shops), called a treeview, on the left side of the window. If this list has a plus sign next to each item (for example, a list of the letters in the alphabet), it means the items can be expanded to reveal a sub list (for example, all employees whose last name begins with the expanded letter). Clicking on the plus sign or double clicking on the item itself (in this case, the letter) will expand that item. When an item is expanded, you will notice that its plus sign changes to a minus sign. Clicking the minus sign or double clicking the item itself will close the sub list. Clicking on an item selects it, which usually means that all the tabs on the window will display information for just that item (for example, a particular employee). This documentation will indicate when a particular tab does not pertain to the selected treeview item.
A scroll bar (horizontal or vertical) means there is more information than will fit on the window. Drag the scroll bar up and down, click in the bar in the direction you want to go, or click and hold the arrow at the top or bottom of the bar to view the rest of the information.
The individual pieces of information displayed on a screen are referred to as “columns”. Examples of columns are Employee Number, Account Number, Service Request Description, etc.
When a column is the same color as the background, it indicates that the column is not editable – you can “view only”. Some screens show columns of data and have column headers (labels) that appear to be raised like a button. Clicking on one of these column headers usually sorts the data in that order from low value to high value. Clicking the column heading a second time sorts the data in the reverse order (high value to low value).
If you click on an editable column, you select or highlight it. You can remove all data in that column by pressing the DELETE key or the BACKSPACE key, or you can simply type new data in its place.
For columns with drop down lists (usually indicated with an arrow), only selections from the drop down are valid. For long drop down lists (for example, Inventory Item Numbers or Vendor Names), you can usually type the first letter or number of whatever you are looking for, and the drop down will start at that point.
1

For columns with radio buttons (a group of round white circles), clicking a button will place a dot in it, indicating this choice has been selected. Only one button in the group can be selected.
For columns with check boxes (a small white box), clicking the box will place a check mark in it, indicating “Yes”. Clicking a checked box removes the checkmark. An empty box means “No”.
In this documentation, (RQ) following the column description indicates a required column – you must enter data in this column before the record can be saved.
The TAB key moves you from column to column. It’s always a good idea to press TAB after filling in the last column. The ENTER key is usually only used to initiate an action, like retrieving information for a particular Service Request Number.
If you are entering or updating information, the system usually tries to make sure each column you entered or changed is valid as soon as you TAB off of it. This means you may get error messages as you are entering information. In some cases, you may not get any error messages until you try to save your changes. All columns must contain valid data in order for your changes to be saved.
Dollar amounts are always entered without a dollar sign and without commas. DO enter the decimal point if you are entering digits to the right of it. If you are entering a whole number (5.00), you do not need to type the decimal point. Date columns usually do not require you to type the “-“ or “/” character, but if the system does not automatically supply it as you type the date, you will need to enter it. The documentation will indicate whether you need to enter a 2-digit or 4-digit year.
There are several ways to save changes. Often, the system will prompt you to save changes when you try to switch to a different tab, select a new item from a treeview, or close a window. You can also save changes by clicking the Save icon (which looks like a computer diskette), pressing and holding the CTRL key and pressing the letter S key at the same time, or clicking “File” on the menu, then choosing “Save”.
2

CUSTOMER MASTER INFORMATION MODULE (Inquiry)
To open this module, click on the Customer Master Information icon (the face with sunglasses), or click “Activities” from the menu, then choose “Customer Master”. The Customer Master window will open.
If you know the Customer Number or Job Number, click in the white box next to the button with the words “Find Cust#/Job#”. Enter the Customer Number or Job Number, then press ENTER or click the “Find Cust#/Job#” button.
If you do not know the Customer Number or Job Number, use the scroll bar to move up and down through the alphabet treeview on the left side of the window until you find the first letter of the customer’s name. Double click on the letter. An alphabetical list of customers will appear. To select a customer, click on the name. The treeview expands to show the list of Job Numbers for the customer you selected. Click on a Job Number and the system will retrieve the information for that Job.
All information displayed pertains to the Fiscal Year selected at the top of the window: Current (the default), Previous, or Next. To switch fiscal years, click the appropriate radio button.
The Customer Master Information Module includes the following tabs:
DEMOGRAPHIC – Displays the Customer Number and Department Number, address, and contact information, including phone number and e-mail address. The billing statement column indicates whether or not the customer will receive a monthly statement.
JOB INFORMATION – Displays the Job Number and a description of the Job, the date the Job started, its current status, how it is funded, and contact name and phone number. The billing code designates one of the following: 1) Regular: Only those expenses for which there is sufficient funding will be billed. Other expenses will remain in an unbilled status. 2) No billing: The customer will not be billed, and 3) Overbill: If the available funds are used up, expenses will be still billed through FRS to the last Account Number and Object Code the customer provided for that job. The lower left portion of the tab displays the Account Number, Object Code, total funding, and what percentage of the Job is funded by this Account and Object Code. The lower right portion of the tab displays the Recovery Percents charged to this Job for Equipment expenses, Issues and Indirect Material Purchases, and Direct Material Purchases.
JOB ACCOUNT BALANCE – Displays the available balance for the Job as of the previous evening. Other pertinent information on this screen is the amount billed, the unbilled amount, and the open purchase order amount (Encumbered Material). The information is classified by type of expense: Labor, Material, Encumbered Material, Equipment, or Direct expense.
FUNDING TRANS – Displays how the Job is funded, including the associated IBFs, Account Number and Object Code where the funds are encumbered, and the dollar amount of each encumbrance. It also shows whether or not a Job is split funded to multiple accounts and/or object codes.
SERVICE REQS – Displays all of the Service Requests for the Job. Other information on this screen is the description of the work to be performed, the date the Service Request was issued, and if applicable, the date the service request was closed and final billed. Helpful Hints: The column headings are actually sort buttons. For example, if you want to find a Service Request by its number, click the Sr Nbr column heading and the Service Requests will rearrange by number in descending order. The box icons to the left of the Service Request numbers are short cuts. If you find the Service Request you are looking for, but need more detailed information, click the box icon next to it, and the system automatically opens the Service Request Inquiry window with information for that Service Request Number displayed.
CHANGE CUST NBR – This process allows Cost Accounting to change the Customer Number on a specific Job Number. There is limited access to this procedure.
3

CUSTOMER MASTER INFORMATION MODULE (Input)
PURPOSE: Cost Accounting sets up customer Jobs in order to properly bill our customers for work done, and to accumulate costs on the non-billable Jobs in support of all Facilities Management Departments. Customer’s submit IBFs (Interdepartmental Billing Forms) to set up Jobs. It is very important that each Job is set up properly in order to bill our customers correctly and to provide them with information on their charges. Customers are encouraged to use the same Job Number each year. However, funds are not carried over from one fiscal year to the next except for Facilities Design & Construction’s Jobs, classroom upgrades (CU Jobs), and Estimated Jobs (C Jobs). For all other Jobs, the customer must submit a new IBF for each new fiscal year. Jobs can be funded by more than one account, but customers are encouraged to use only one account per Job.
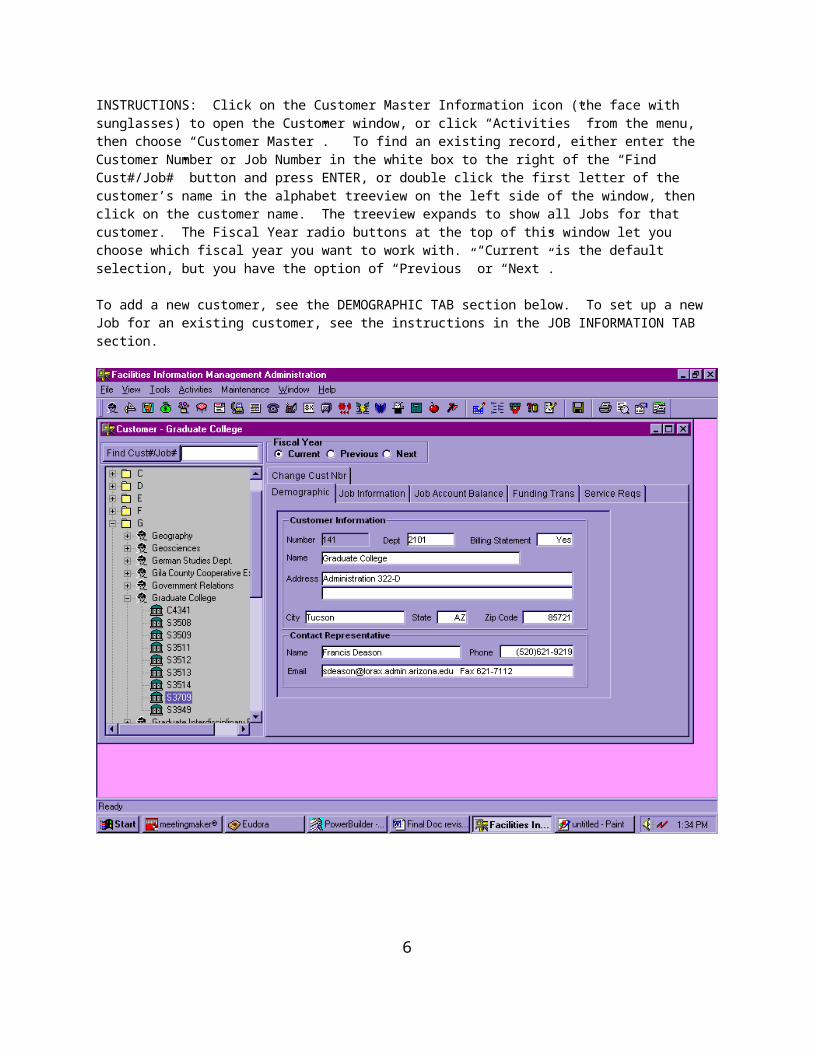
INSTRUCTIONS: Click on the Customer Master Information icon (the face with sunglasses) to open the Customer window, or click “Activities” from the menu, then choose “Customer Master”. To find an existing record, either enter the Customer Number or Job Number in the white box to the right of the “Find Cust#/Job#” button and press ENTER, or double click the first letter of the customer’s name in the alphabet treeview on the left side of the window, then click on the customer name. The treeview expands to show all Jobs for that customer. The Fiscal Year radio buttons at the top of this window let you choose which fiscal year you want to work with. “Current” is the default selection, but you have the option of “Previous” or “Next”.
To add a new customer, see the DEMOGRAPHIC TAB section below. To set up a new Job for an existing customer, see the instructions in the JOB INFORMATION TAB section.
4

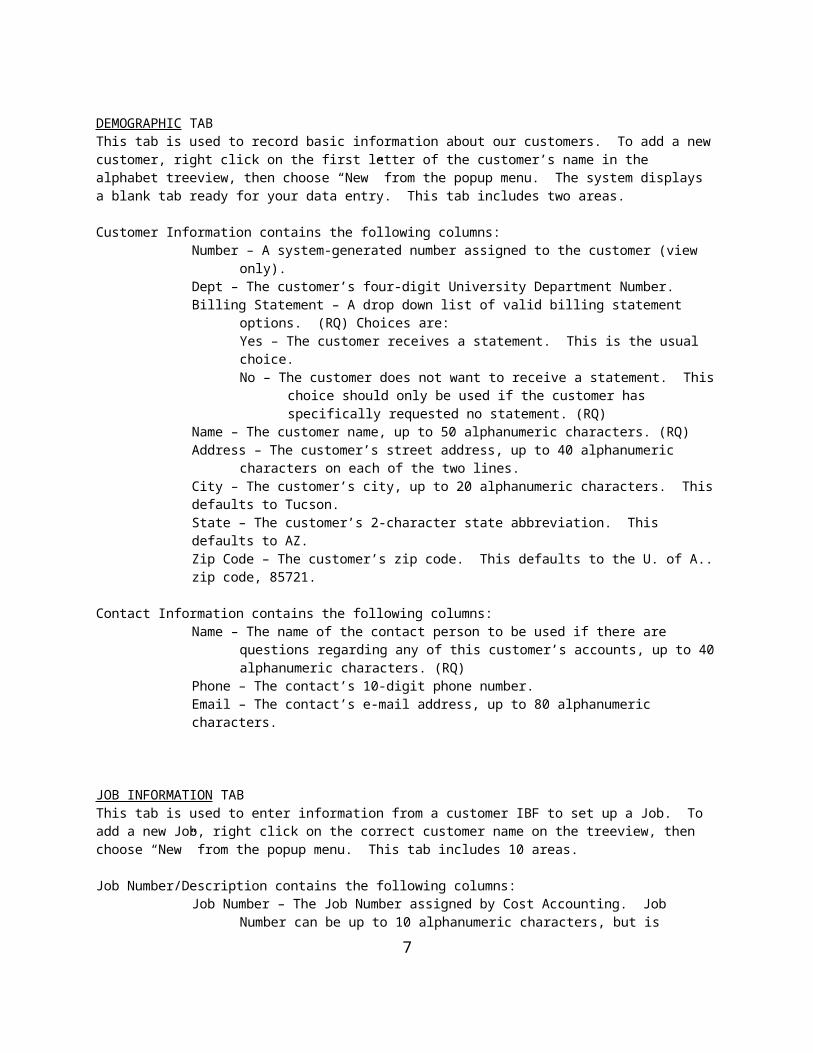
DEMOGRAPHIC TABThis tab is used to record basic information about our customers. To add a new customer, right click on the first letter of the customer’s name in the alphabet treeview, then choose “New” from the popup menu. The system displays a blank tab ready for your data entry. This tab includes two areas.
Customer Information contains the following columns:Number – A system-generated number assigned to the customer (view only). Dept – The customer’s four-digit University Department Number.Billing Statement – A drop down list of valid billing statement options. (RQ) Choices are:
Yes – The customer receives a statement. This is the usual choice.No – The customer does not want to receive a statement. This choice should only
be used if the customer has specifically requested no statement. (RQ)Name – The customer name, up to 50 alphanumeric characters. (RQ)Address – The customer’s street address, up to 40 alphanumeric characters on each of the
two lines.City – The customer’s city, up to 20 alphanumeric characters. This defaults to Tucson.State – The customer’s 2-character state abbreviation. This defaults to AZ.Zip Code – The customer’s zip code. This defaults to the U. of A.. zip code, 85721.
Contact Information contains the following columns:Name – The name of the contact person to be used if there are questions regarding any of
this customer’s accounts, up to 40 alphanumeric characters. (RQ)Phone – The contact’s 10-digit phone number.Email – The contact’s e-mail address, up to 80 alphanumeric characters.
JOB INFORMATION TABThis tab is used to enter information from a customer IBF to set up a Job. To add a new Job, right click on the correct customer name on the treeview, then choose “New” from the popup menu. This tab includes 10 areas.
Job Number/Description contains the following columns:Job Number – The Job Number assigned by Cost Accounting. Job Number can be up to 10
alphanumeric characters, but is usually made up of a leading letter followed by 4 digits. (RQ)
Job Description – A short description of the Job, up to 50 alphanumeric characters.
Job Status contains the following columns:Current – A drop down list containing the current fiscal year status. (RQ) Choices are:
Open – The Job can accept all charges and new Service Requests. This is the default.
No New Requests – The Job can still accept charges on existing Service Requests, but no new Service Requests can be added.
No Charges – The Job is closed: no charges can be posted, and no new Service Requests can be added.
Previous – A drop down list containing the prior fiscal year status. Choices are the same as for Current. On a new Job, skip this column, since the Job did not exist in the prior fiscal year.
Job Dates contains the following columns:Start Date – The date charges can be posted to this Job. The default is today’s date.End Date – The date this Job is no longer valid. This column should be empty unless the
customer has specified an end date.5
Billing Code contains the following columns:Billing Code – A drop down list containing valid Billing Codes. (RQ) Choices are:
No Billing – Charges will not be billed.Overbill – All charges will be billed, even if no funds are available.Regular – For Jobs with a type of Internal (see “Job Type” below), all charges for
the billing period will be billed. For Jobs with a type of Customer, only those charges for which there are sufficient funds will be billed. This is the default.
Job Type contains the following columns:Job Type – A drop down list of valid Job Types. (RQ) Choices are:
Customer – Jobs for customers outside of Facilities Management with University Financial Records System (FRS) account numbers.
External – Jobs for customers outside of Facilities Management without University FRS account numbers (for example, fraternities/sororities).
Internal – Facilities Management departmental Jobs.
Funding Source contains the following columns:Funding Source – A drop down list of valid Funding Sources. New choices are periodically
added to this list, which designates the type of funds paying for the work. (RQ)
Default Building contains the following columns:Default Building – A drop down list of valid Building Numbers. This column is required if Job
Type is Internal, but is optional for Customer and External Job Types.
Job Contact contains the following columns:Name – The name of the contact person for this Job, up to 40 alphanumeric characters.Phone – The 10-digit phone number of the contact person.
The area at the lower left of the Job Information Tab is view only and contains the following columns, which are entered from the Funding Trans tab (see FUNDING TRANS TAB for more information):
Account – Customer’s FRS Account Number (the account they pay from).Object – The customer’s FRS Object Code, which identifies the category of funds.Funding – The total dollar amount of funding for the Job provided by this Account and Object
Code.Funding - Billed – The remaining balance on this Account and Object Code, calculated by
subtracting billed charges from funding as of the last billing cycle.Acct Split – The percentage of expenses charged to this Account Number and Object Code
(max is 1.00).
The area at the lower right of the screen is used to record the Recovery Percents that are added to various types of charges for this Job to help Facilities Management recover administrative costs associated with the Job. It may be automatically filled in, depending on the Job’s Funding Source; you can also right click and choose “Add” from the popup menu to add information to this area. Some Jobs, such as Grant-funded Jobs, are not charged a Recovery Percent. This area contains the following columns:
Recover Type – A drop down list of valid Recovery Types. Choices are:Equipment – Equipment rentals and other Equipment charges.Issue/Indirect Purchases – Issues from Inventory and purchases made on a Blanket
purchase order that uses a clearing (credit) account.Purchases (Direct) – Purchases that do not involve a clearing account.
Percent – The corresponding Recovery Percent for each Recovery Type, with 3 decimal places. These are set at the beginning of each fiscal year by the Cost Accounting Manager.
6
JOB ACCOUNT BALANCE TABThis VIEW-ONLY tab shows the Job’s balance at a glance as of the previous evening. It contains the following columns for each FRS Account and Object Code funding the Job:
Acct Nbr – The customer’s FRS Account Number that funds this Job.Object – The customer’s FRS Object Code for this Job. Split – The percentage of expenses to be charged to the above account and object code.Funding – The dollar amount of Job funding on this account and object code.Billed: Labor – The dollar amount of labor charges that have already been billed.Billed: Material – The dollar amount of material charges that have already been billed.Billed: Equipment – The dollar amount of equipment rental charges that have already been
billed.Billed: Direct Exp. – The dollar amount of miscellaneous charges that have already been
billed.Billed: Total – The total amount of all billed charges.Unbilled: Labor – The dollar amount of labor charges not yet billed.Unbilled: Material – The dollar amount of material charges not yet billed.Unbilled: Enc. Mat. – The anticipated dollar amount of open purchase orders that have not
been expensed (and are therefore not yet billed).Unbilled: Equipment – The dollar amount of equipment rental charges that have not yet
been billed.Unbilled: Direct Exp. – The dollar amount of miscellaneous charges that have not yet been
billed.Unbilled: Total – The total amount of all charges that have not yet been billed, including the
anticipated amount of open purchase orders (encumbered material).Available Balance – The Funding amount minus all Billed and Unbilled amounts for this
account and object code.
This tab also shows the total Available Balance for the Job for all Accounts/Object Codes in the “Total Balance Avail” column. Throughout the tab, negative amounts are surrounded by parentheses and displayed in red.
FUNDING TRANS TABThis tab tracks the history of the funding for this Job for the fiscal year specified, and is also used to enter new (or additional) funding. It includes three areas.
The area at the top of the tab is for entering Job funding. To enter new funding, right click anywhere in this area, then choose “Add” from the popup menu and enter the data from the IBF (Interdepartmental Billing Form) as described below. This area contains the following columns:
IDB/Reference – The IDB (Interdepartmental Billing form, also known as an IBF) document number. This is usually 6 digits, but can be up to 10 alphanumeric characters.
Account – The customer’s 6-digit FRS Account Number. For Internal FM Jobs, the dummy account 999999 is used. (RQ)
Object Code – The customer’s 4-digit FRS Object code. For Internal FM Jobs, this is 3000. (RQ)
Amount – The dollar amount the customer wants to encumber (set aside) to fund this Job on this Account and Object Code, with 2 decimal places. (RQ)
If you are entering new funding, you must click the “Post IDB” button to save this data. The information you entered will then be cleared from the top part of the tab, but will transfer to the middle area. This transaction will be encumbered against the customer’s FRS account during the next monthly FRS billing.
7

The area in the middle of the tab is a summary of Job funding. It contains the following columns: Account – The customer’s FRS Account Number (view only). Object – The customer’s FRS Object code (view only). Funding – The total funding for the Job on this Account and Object Code (view only).Billed Amt – The total amount billed on this Account and Object Code, as of the last billing
cycle (view only). Balance – The available balance (Funding minus Billed Amt) on this Account and Object
Code (view only).Acct Split – The percentage of the total Job funding provided by this Account and Object
Code. 100% is the default, and is entered as 1.00. If multiple Accounts/Object Codes are used, they must total to 1.00. (RQ)
The bottom area of the tab lists each funding transaction for this Job. It is view only, and contains the following columns:
IDB Ref – The IBF document number.Account – The customer’s FRS Account Number.Object – The customer’s FRS Object Code.Funding Amt – The dollar amount of funding.Date – The date the funding was entered.Post Date – The date the funding was posted to FRS.
SERVICE REQS TABThis VIEW-ONLY tab lists all Service Requests for the Job. It contains the following columns:
Sr Nbr – The Service Request Number assigned by the system. Sr Desc – The description of the work to be performed.Task ID – A code designating the type of activity to be performed.Issue Date – The date the Service Request was created.Close Date – The date the Service Request was closed.Final – A Yes or No (Y or N) column indicating whether or not this Service Request is Final
Billed. A “Y” indicates that the Service Request has been closed for at least 30 days, so no more charges should be expected on it. This flag is set during the monthly billing process.
Clicking on any column heading re-sorts the information in that order. Clicking the gray button icon to the left of any Service Request Number opens the Service Request Inquiry window for more detail on that request (see SERVICE REQUEST INQUIRY MODULE for more information). See the Service Request Module (telephone icon) for Service Request entry procedure.
CHANGE CUSTOMER NUMBER TABUse this tab to change a specific Job to a different customer. It is not connected to the customer or Job you selected from the treeview. It contains the following columns:
Job Number – The Job Number you want to switch to a different Customer, up to 10 alphanumeric characters.
Old Customer Number – The current Customer Number, up to 5 digits.New Customer Number – The Customer Number that should be used for this Job.
Click the “Process Change” button to save this change.
8

SERVICE REQUEST INQUIRY MODULE (Inquiry Only)
Click on the S/R Inquiry icon (the yellow triangle with arrow pointing left) to open the Service Request Inquiry window, or click “Activities” from the menu, then choose “S/R Inquiry”. Click on the white box next to the button with the words “Retrieve SR”. Enter the Service Request Number, then press ENTER or click the “Retrieve SR” button.
Information displayed on the Summary, Labor, Materials, Equipment, Direct Exp., and Mat. Enc. Tabs pertains to the Fiscal Year selected at the top of the window: Current (the default), Previous, or Next. To switch fiscal years, click the appropriate radio button. Information on the Maintenance, Query, and Deferred Maint tabs pertains to all fiscal years regardless of which radio button is selected.
The Service Requests Inquiry Module includes the following tabs:
MAINTENANCE – Displays a description of the service requested, building and room number, Priority code (1 through 9, from low to high), Final Billed flag, the Job Number, date the Service Request was opened, Equipment Number if applicable, Task ID, date closed, any restrictions on the type of charges allowed (Labor only or Materials only), contact person and phone number, and the person who requested the service and his/her telephone number. The bottom part of the screen shows what Shops are assigned, their Task IDs, a description of the work to be performed by each Shop, and when that Shop completed its assigned duties.
9

SUMMARY – Displays a summary of the charges on this Service Request. The top section shows our cost. The cost line is very confidential and should never be published. The bottom section shows what the customer was charged (“Recover”), further broken out into what has been billed, what is unbilled, and the total. The information is classified by type of expense: Labor, Materials, Equipment, Material Encumbrance (open purchase orders), or Direct Expense.
Helpful Hint: The column headings on the next 6 tabs are sortable. Clicking on a column heading once sorts the information on the screen by that column in ascending order. If you click on the same column heading a second time, the information will sort in descending order.
LABOR – Displays labor charged to this Service Request, including the employee who performed the work, Shop, work date, hours, hourly rate, cost amount, recovery rate, recovery amount, date billed, etc.
MATERIALS – Displays all materials that have been charged to this Service Request. This includes issues from Inventory, materials received on Blanket purchase orders (“indirect purchases”), and materials received and invoiced that were bought on other types of purchase orders (“direct purchases”). If an item has not been received, or an item on a non-Blanket P/O has been received but not invoiced, it will show up only on the Material Encumbrances tab, since it has not yet been expensed. For more information on the columns displayed, please refer to the MATERIALS PROCESSING MODULE.
EQUIPMENT – Displays all equipment charges for this Service Request, mainly equipment rentals. For more information on the columns displayed, please refer to the EQUIPMENT EXPENSES MODULE.
DIRECT EXP – Displays any Direct Expense charges for this Service Request. These are operational expenses such as catering charges from Student Union, charging of key blanks for customers, utilities, and any other miscellaneous charges.
MAT. ENC. – Displays all Material Encumbrances incurred on this Service Request. This includes information on material purchases that have been expensed, which are also displayed on the Materials tab, as well as those that are pending, which only appear here.
QUERY – This tab is not connected to the Service Request number you selected at the upper left corner of the window. You can enter query criteria here using any information that you have. Entering more pieces of information as query criteria should limit the number of records the system retrieves, making it easier to find the record(s) you are looking for. For example, if you know the building number and the Shop, first click the “Enter Query Criteria” button, which creates a grid in the main part of the tab. Then click in the box under Bldg Nbr and enter the 4- or 5-character building number. Use the scrollbar or TAB key to move to the right until you see the Shop column. Enter the Shop Number. Finally, click the “View Items” button. The system will retrieve all Service Requests related to that building and Shop. The records will be in order by Service Request Number. To sort them in a different order, click the column heading of the column you want to sort on (for example, Task ID).
10

DEFERRED MAINT TABThis tab is not connected to the Service Request number you selected at the upper left corner of the window. It is used to extract data from FIMA for downloading into the Deferred Maintenance System. The data consists of Labor, Material, and Equipment expenses at Recovery (full cost to customer), including Deferred Maintenance Code, Service Request Number, and Shop, for non-Preventive Maintenance Task IDs for the selected date range. The data is output to a text file named “defmnt.txt” and is located in the “Jasmine\Groups\DeferredMaint\Mona\” directory. This tab has limited access; see the Deferred Maintenance group if you need this information.
This tab contains the following columns:Start Date – The earliest date for which data will be extracted. End Date – The last date for which data will be extracted.
Click the “Create Deferred Maintenance Download” button to run this process. When the process completes, you will see the following message: "Deferred Maintenance File was successfully created".
11

EMPLOYEE MODULE (Inquiry)
Click on the Employee icon (the face with blond hair) to open the Employee window, or click “Activities” from the menu, then choose “Employee Master”. If you know the Employee Number you’re looking for, click on the white box next to the button with the words “Find Employee Number”. Enter the Employee Number, then press ENTER or click the “Find Employee Number” button.
If you do not know the Employee Number, use the scroll bar to move through the alphabet treeview on the left side of the window until the first letter of the employee’s last name appears. Double click on that letter. An alphabetical list of employees whose last names begin with the selected letter will appear. Some employees may have “ – Inactive” following their names. This indicates the employee is no longer active due to LOA, retirement, termination, etc. To view an employee’s information, click on the name and the system will retrieve the data for the employee you selected.
The Employee Module includes the following tabs:
EMPLOYEE INFO – Displays Personal Info (name, date of birth), Payment Info (salary, pay type, how often timesheets are required, etc.), Status Info, Employee Dates (U. of A. hire date, adjusted hire date, rehire date), and Position Info (title, supervisor, etc.) for the employee.
ADD’L EMPLOYEE INFO – Displays employee mailing address, gender and ethnicity, emergency contact information, visa status, etc.
EMPLOYEE ACCTS – Displays funding information (accounts and percentages and whether or not the employee is “hardwired” to always be paid from these accounts) for each PCN (Position Control Number) the employee holds.
EMPLOYEE PHONES – Displays various phone number such as home, work, cell, and pager, for the employee.
DISCIPLINARY INFO – Displays disciplinary actions that have been recorded for this employee.
EVALUATION – Displays information regarding the employee’s evaluations.
ACCRUALS – Displays the accrual rates and current vacation, sick and compensatory time accrual balances for a benefits-eligible employee as recorded in the University Main Payroll system. Also displays any time used in the current pay period (if the employee’s time sheet(s) have been entered) and deducts it to obtain the most current available balances. Includes a sick/vacation accrual projection feature for future dates.
FML – Displays a message if the employee is NOT eligible for FML (Family Medical Leave) at this time with an explanation of why. For an eligible employee, the number of hours of entitlement based on FTE (Full Time Equivalency, an indication of whether the employee works full time or part time) will be displayed, along with the hours used and the remaining balance. A projection feature for future dates is included.
DETAIL HOURS WORKED Displays detailed information by pay period and PCN for the employee, including Jobs, Service Requests, accounts, hours type, etc. You can select multiple pay periods to view. This information includes the current fiscal year and at least one prior fiscal year. Earlier data (beginning with fiscal year 1996-97) is available on the Hours Worked History tab.
PCN/EMPLOYEE SEARCH – A search screen which allows you to enter a PCN to identify which
12

employee(s) are currently in that position.
13

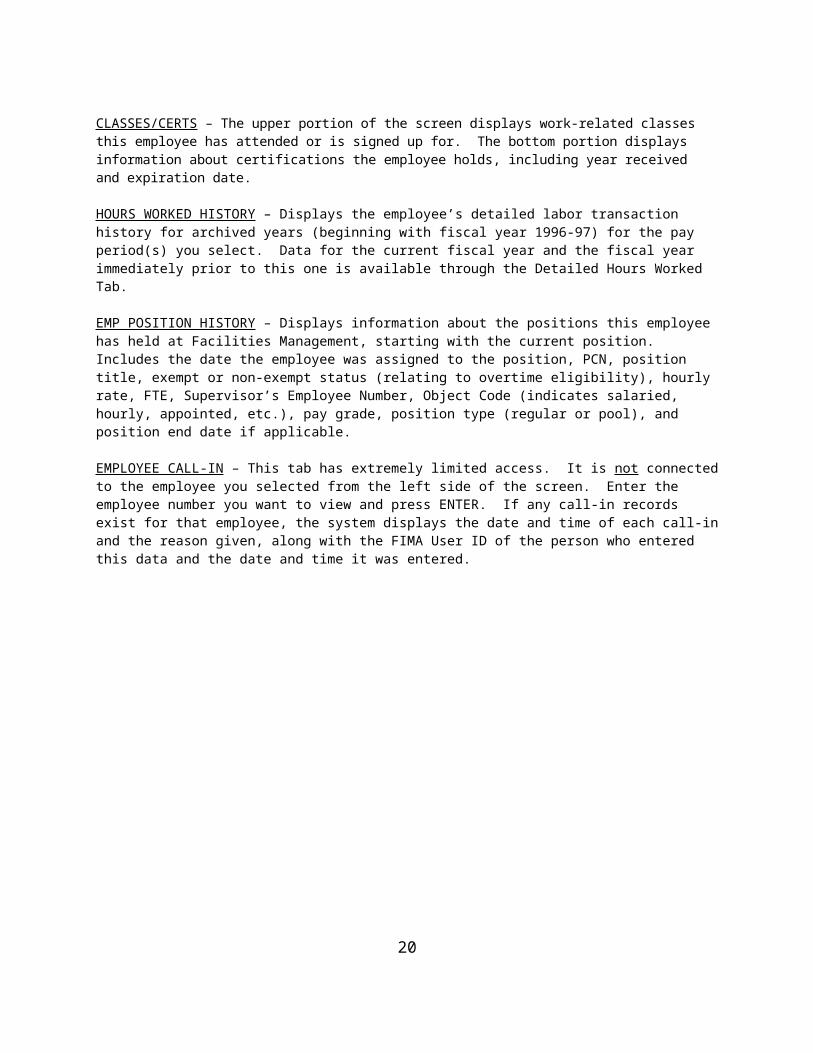
CLASSES/CERTS – The upper portion of the screen displays work-related classes this employee has attended or is signed up for. The bottom portion displays information about certifications the employee holds, including year received and expiration date.
HOURS WORKED HISTORY – Displays the employee’s detailed labor transaction history for archived years (beginning with fiscal year 1996-97) for the pay period(s) you select. Data for the current fiscal year and the fiscal year immediately prior to this one is available through the Detailed Hours Worked Tab.
EMP POSITION HISTORY – Displays information about the positions this employee has held at Facilities Management, starting with the current position. Includes the date the employee was assigned to the position, PCN, position title, exempt or non-exempt status (relating to overtime eligibility), hourly rate, FTE, Supervisor’s Employee Number, Object Code (indicates salaried, hourly, appointed, etc.), pay grade, position type (regular or pool), and position end date if applicable.
EMPLOYEE CALL-IN – This tab has extremely limited access. It is not connected to the employee you selected from the left side of the screen. Enter the employee number you want to view and press ENTER. If any call-in records exist for that employee, the system displays the date and time of each call-in and the reason given, along with the FIMA User ID of the person who entered this data and the date and time it was entered.
14

EMPLOYEE MODULE (Input)
PURPOSE: This module contains detailed information about all Facilities Management employees. Most data entry is done by Human Resources or Payroll.
INSTRUCTIONS: Click on the Employee icon (the face with blond hair) to open the Employee window, or click “Activities” from the menu, then choose “Employee Master”. To find an existing employee, either enter the Employee Number in the white box to the right of the “Find Employee Number” button, then press ENTER, or double click the first letter of the employee’s last name in the alphabetical list and then click on the employee’s name. Some employees may have “ – Inactive” following their names. This indicates the employee is no longer active due to LOA, retirement, termination, etc. To enter a new employee, first select any existing employee, then place your cursor anywhere in the upper portion of the Employee Info tab. Right mouse click and choose “Insert” from the popup menu. A blank screen will display with only default information filled in, ready for your data entry.
15

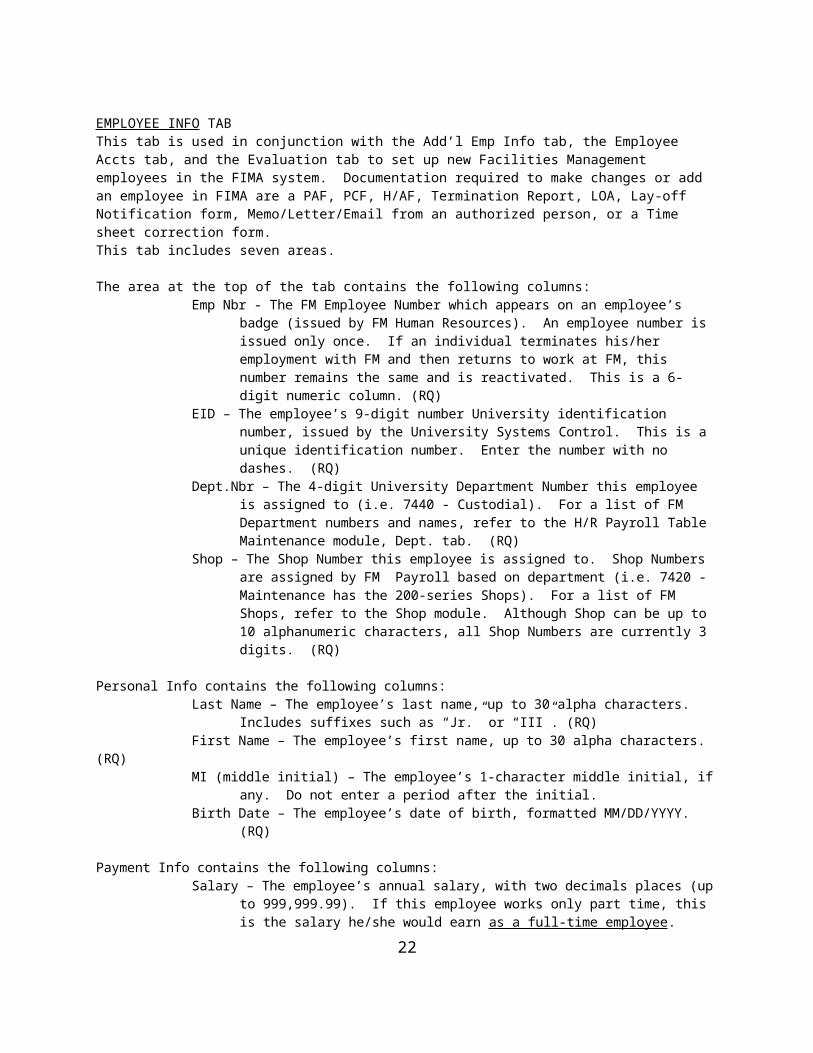
EMPLOYEE INFO TABThis tab is used in conjunction with the Add’l Emp Info tab, the Employee Accts tab, and the Evaluation tab to set up new Facilities Management employees in the FIMA system. Documentation required to make changes or add an employee in FIMA are a PAF, PCF, H/AF, Termination Report, LOA, Lay-off Notification form, Memo/Letter/Email from an authorized person, or a Time sheet correction form.This tab includes seven areas.
The area at the top of the tab contains the following columns:Emp Nbr - The FM Employee Number which appears on an employee’s badge (issued by
FM Human Resources). An employee number is issued only once. If an individual terminates his/her employment with FM and then returns to work at FM, this number remains the same and is reactivated. This is a 6-digit numeric column. (RQ)
EID – The employee’s 9-digit number University identification number, issued by the University Systems Control. This is a unique identification number. Enter the number with no dashes. (RQ)
Dept.Nbr – The 4-digit University Department Number this employee is assigned to (i.e. 7440 - Custodial). For a list of FM Department numbers and names, refer to the H/R Payroll Table Maintenance module, Dept. tab. (RQ)
Shop – The Shop Number this employee is assigned to. Shop Numbers are assigned by FM Payroll based on department (i.e. 7420 - Maintenance has the 200-series Shops). For a list of FM Shops, refer to the Shop module. Although Shop can be up to 10 alphanumeric characters, all Shop Numbers are currently 3 digits. (RQ)
Personal Info contains the following columns:Last Name – The employee’s last name, up to 30 alpha characters. Includes suffixes such
as “Jr.” or “III”. (RQ)First Name – The employee’s first name, up to 30 alpha characters. (RQ)MI (middle initial) – The employee’s 1-character middle initial, if any. Do not enter a period
after the initial.Birth Date – The employee’s date of birth, formatted MM/DD/YYYY. (RQ)
Payment Info contains the following columns:Salary – The employee’s annual salary, with two decimals places (up to 999,999.99). If this
employee works only part time, this is the salary he/she would earn as a full-time employee. (RQ)
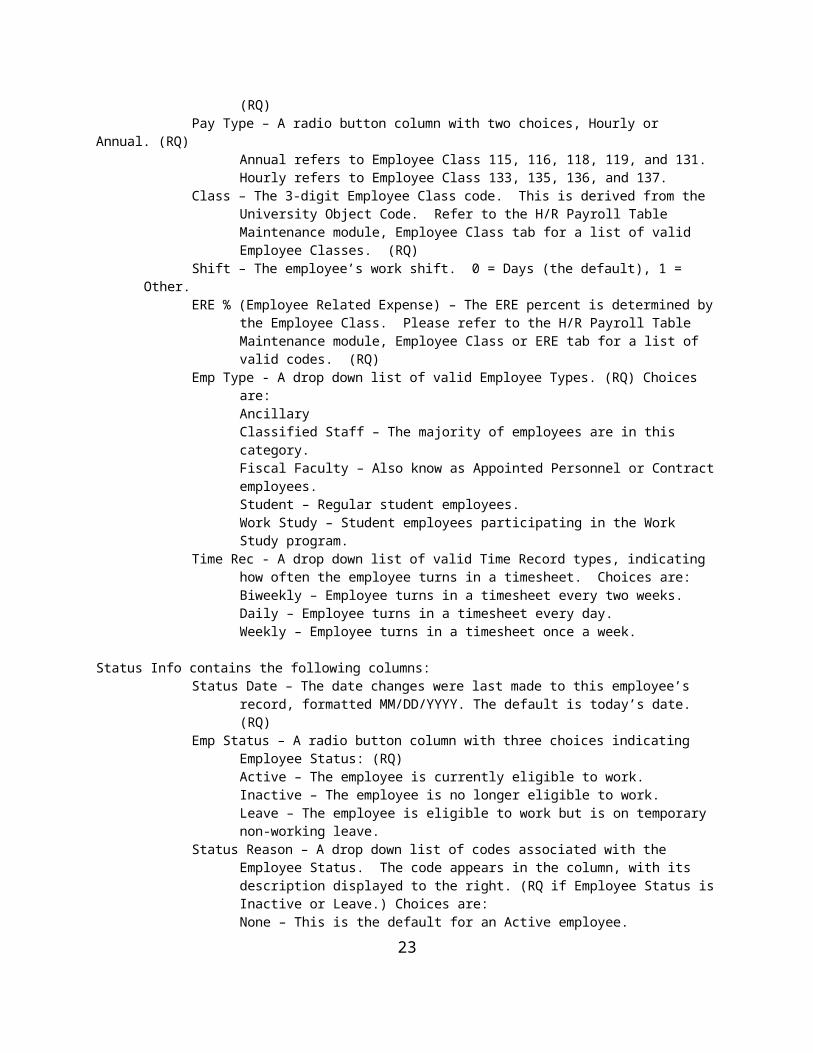
Pay Type – A radio button column with two choices, Hourly or Annual. (RQ)Annual refers to Employee Class 115, 116, 118, 119, and 131.Hourly refers to Employee Class 133, 135, 136, and 137.
Class – The 3-digit Employee Class code. This is derived from the University Object Code. Refer to the H/R Payroll Table Maintenance module, Employee Class tab for a list of valid Employee Classes. (RQ)
Shift – The employee’s work shift. 0 = Days (the default), 1 = Other.ERE % (Employee Related Expense) – The ERE percent is determined by the Employee
Class. Please refer to the H/R Payroll Table Maintenance module, Employee Class or ERE tab for a list of valid codes. (RQ)
Emp Type - A drop down list of valid Employee Types. (RQ) Choices are: AncillaryClassified Staff – The majority of employees are in this category.Fiscal Faculty – Also know as Appointed Personnel or Contract employees.Student – Regular student employees.Work Study – Student employees participating in the Work Study program.
Time Rec - A drop down list of valid Time Record types, indicating how often the employee turns in a timesheet. Choices are: Biweekly – Employee turns in a timesheet every two weeks.
16

Daily – Employee turns in a timesheet every day.Weekly – Employee turns in a timesheet once a week.
Status Info contains the following columns:Status Date – The date changes were last made to this employee’s record, formatted
MM/DD/YYYY. The default is today’s date. (RQ)Emp Status – A radio button column with three choices indicating Employee Status: (RQ)
Active – The employee is currently eligible to work.Inactive – The employee is no longer eligible to work.Leave – The employee is eligible to work but is on temporary non-working leave.
Status Reason – A drop down list of codes associated with the Employee Status. The code appears in the column, with its description displayed to the right. (RQ if Employee Status is Inactive or Leave.) Choices are:None – This is the default for an Active employee. D – Deceased (requires Termination Report).FML – Family Medical Leave (requires memo, letter, or other HR form).I – Involuntary Termination (requires Termination Report).JC – Job Completed (valid for Extended Temporary Employees whose assignment
is completed).L – Leave With Pay (requires memo, letter, or other HR form).LD – Light Duty (requires memo, letter, or other HR form).LTD – Long Term Disability (requires Termination Report).LWP – Leave Without Pay (requires Leave of Absence form and memo, letter, or
other HR form).P – Personal Leave (requires Leave of Absence form and memo, letter, or other HR
form).R – Retirement (requires Termination Report).S – Suspended (requires memo, letter, or other HR form).STD – Short Term Disability (requires memo, letter, or other HR form).T – Transitional Leave (requires Leave of Absence form and memo, letter, or other
HR form).U – Layoff (requires Termination Report).V – Voluntary Termination (requires Termination Report).
Add’l Stat Info – Contains additional HR comments relating to the reason an employee has termed. For example, on a Voluntary term: more money, career advancement, etc.
Supervisory Level – A drop down list of valid Supervisory Level Codes. This helps identify employees who have supervisory responsibilities that may not be indicated by their titles. Choices are:A – Assistant DirectorC – CoordinatorD – DirectorL – LeadM – ManagerS – SupervisorNone - The default.
Show on Phone List – A checkbox indicating whether or not this employee appears on the Facilities Management Phone List. Employees with a Supervisory Level other than None automatically have a checkmark in this box.
Employee Dates contains the following columns:UA Hire – The employee’s original University Hire date, formatted MM/DD/YYYY. (RQ)Adj Hire – The University’s Adjusted Hire date, formatted MM/DD/YYYY. This may be used
when an employee begins in a temporary status but later becomes permanent.Rehire – The rehire date if this employee left the University for a period of time but later
returned, formatted MM/DD/YYYY.17

Position Information contains the following columns:PCN – The Position Control Number assigned by University Systems Control to the
employee’s position/title; currently 6 digits. (RQ)Rate – The employee’s hourly rate of pay, with four decimal places (up to 99,999.9999).
(RQ)FTE – The Full Time Equivalency for the PCN, with two decimal places (up to 1.00). Full
time is 1.00, half time is .50, etc. (RQ)Obj Cd – The University-assigned Object Code corresponding to the type of position
(Regular, ETE, Temporary etc.). (RQ)Title – The position title. This is automatically filled in based on the PCN (view only).Supervisor – A drop down list containing the Employee Number and name of all FM
Supervisors, based on the Supervisory Level column. (RQ)Pos Type – The type of position. P = Pool (multiple employees can be assigned to the
Position), R = Regular (only one employee can be assigned to the position at any given time). This is automatically filled in based on the PCN (view only).
End Date – The last date this position is valid. This applies only to ETE and Assignment to Special Duty positions, and is automatically filled in based on the PCN (view only).
Making changes to an Inactive EmployeePosition Information fields will be blank on an Inactive Employee. See “Activating an Inactive Employee” below to return an employee to active status.
The only changes that can be made to an Inactive Employee are Status, Rehire Date (see “Activating an Inactive Employee”), and address information on the Add’l Emp Info tab (refer to instructions for that tab).
Activating an Inactive Employee 1. For the Emp Status column, click on the Active radio button. A dot will appear in the button to
indicate the employee status has been changed to Active.2. The status date fills with the current date. If this is not the date of reactivation, enter the correct
date.3. Place your cursor in the Position Information area and right click. Choose “Add” from the popup
menu to get blank columns ready for data entry. Place the employee in a PCN by filling in the information as described for the tab’s Position Information area. If this is a new PCN, refer to H/R PAYROLL TABLE MAINTENANCE MODULE under the POSITION TAB section for directions on setting up the new PCN. The PCN must be added in the H/R Payroll Table Maintenance Module prior to placing the employee in that Position.
4. WARNING: If the supervisor’s name does not appear in the Supervisor drop down list, you must go to that supervisor’s Employee record and correct the Supervisory level column. Because you cannot update two employees at one time, you will need to start the entry for the reactivated employee from the beginning after you have completed the change to the supervisor’s record.
Reminder: You must add funding information under the Employee Accts tab and a new evaluation date under the Evaluation tab when reactivating an employee.
When you save your changes, if you receive the error message “Regular position currently contains an incumbent, choose another PCN”, check to make sure you have entered the correct PCN. If the correct PCN was entered, click on the PCN/Employee Search tab to locate the employee who is currently in the PCN. Contact FM Human Resources to resolve this duplicate PCN issue.
18

Adding A New Employee1. Beginning with Employee Info tab’s “Emp Nbr” column, complete ALL REQUIRED
COLUMNS ON ALL TABS IN THE EMPLOYEE MODULE. Keep reading for instructions on the remaining tabs.
2. WARNING: On the Employee Info tab’s Position Information area, if the supervisor’s name does not appear in the Supervisor drop down list, you must go to that supervisor’s Employee record and correct the Supervisory level column. Because you cannot update two employees at one time, you will need to start the entry for the reactivated employee from the beginning after you have completed the change to the supervisor’s record. If you receive the error message “Regular position currently contains an incumbent, choose another PCN”, check to make sure you have entered the correct PCN. If the correct PCN was entered, click on the PCN/Employee Search tab to locate the employee who is currently in the PCN. Contact FM Human Resources to resolve this duplicate PCN issue.
ADDN’L EMP INFO TABThe four columns (Emp Nbr, EID, Dept Nbr, and Shop) from the top of the Employee Info tab also appear at the top of this tab but are view only here (See EMPLOYEE INFO TAB). This tab includes four areas.
Employee Mailing Address contains the following columns:Address – The employee’s street address or official P.O. box, up to 255 alphanumeric
characters. (RQ)City – The employee’s city of residence, up to 30 alphanumeric characters.State – The 2-character postal abbreviation for the employee’s state of residence.Zip Code – The employee’s 9-digit postal zip code. At least 5 digits are required. (RQ)Phone Nbr – The employee’s home phone number will display here if it has already been
entered on the Emp Phones tab. It cannot be changed here.
Other Personal Info contains the following columns:Gender – The 1-character alpha column designating the employee’s gender (F = Female,
M = Male). (RQ)Ethnicity – This 1-character alpha column indicates the employee’s ethnicity. (RQ) Valid
choices are:A – Native AmericanB – BlackH – HispanicO – AsianW – White
Visa Info contains the following columns:Visa Code – The 2-character alphanumeric code for the type of Visa entitling this
employee to work in the United States.Visa Code 2 - The 1-character alpha secondary code for the type of Visa entitling the
employee to work in the United States.Visa Expire Date – The expiration date of the visa, formatted MM/DD/YYYY.
NOTE: Main Campus Human Resources and Payroll establish visa codes.
19
Emergency Contact Info contains the following columns:Name – The name of the individual the employee wishes to have notified in case of an
illness or injury, up to 60 alpha characters.Relationship – The relationship of the above-named individual to the employee (i.e. wife,
son, friend), up to 30 alpha characters.Phone Number – The 10-digit area code and phone number of the above-named
individual. Alt Phone Number – An additional 10-digit area code and phone number where the
named individual might be reached.
EMPLOYEE ACCTS TABThe Employee Number appears at the top of this tab but is view only (See EMPLOYEE INFO TAB).
Employee Account Information contains the following columns for each account the employee is funded from:
PCN – A drop down list containing all Position Control Numbers for the employee. (RQ)Account Nbr – The 6-digit University FRS Account Number that funds this position. (RQ)Percentage – The percentage of funding supplied by this account, with 2 decimal places.
Some employees may be funded from multiple accounts. Total percentage from all accounts must equal 1.00. (RQ).
Hardwired Flag – A Yes or No (“Y” or “N”) column indicating the following (RQ):Y = Employee is always paid from this funding source.N = Employee is paid from the funding source of the work he/she performed. This
is the default.
To add another account for this employee, right mouse click and choose “Add”, then fill in the columns as described above.
EMPLOYEE PHONES TABIf no numbers have been added on this tab, right mouse click in the main area of the tab and choose “Add”. The system displays blank columns ready for your data entry.
Employee Phone Numbers contains the following columns:Phone – A drop down list of valid phone types. (RQ) Choices are:
C = Cell phoneF = FAXH = Home phoneM = MobileP = PagerR = Radio IDW1 = Primary work phone W2 = Secondary work phone
Phone Nbr – The 10-digit area code and phone number.
20

DISCIPLINARY INFO TABThis tab tracks any disciplinary actions against the employee. Emp Nbr, EID, Dept Nbr, and Employee Name appear at the top of this tab but are view only (See EMPLOYEE INFO TAB).
At the bottom of this tab, you will see the message “Records Retrieved: “ and the number of Disciplinary records found for this employee. If there are multiple records, a scroll bar will display on the right side of the tab. The records are in order with the most recent Disciplinary Start Date first. To add a new disciplinary record for this employee, right click in the main area of the tab and choose “Add” or “Insert” from the popup menu.
Employee Disciplinary Information contains the following columns:Shop – The 3-digit Shop the employee was assigned to when this disciplinary infraction
occurred. This column automatically fills with the employee’s current Shop.Supv ID – The Employee Number of the employee’s supervisor, up to 6 digits.Status – A drop down list to indicating the disciplinary action’s status. Choices are:
Active – This disciplinary action is active.Inactive – This disciplinary action is inactive.
Comp Date – The date the disciplinary action was completed, formatted MM/DD/YYYY. If you enter a date that is in the past, Status is automatically set to Inactive.
Disciplinary Start Date – The date the disciplinary action was started, formatted MM/DD/YYYY. (RQ)
Discpl Code – A drop down list containing the code for the action taken. (RQ) The description displays to the right of the code. Choices are: ALWOP – Administrative Leave Without PayALWP – Administrative Leave With PayCOUN – Counseling or CoachingDIS – DischargeDP 1-5 – Disciplinary Probation 1-5 DaysDP 10 – Disciplinary Probation 10 DaysDP 120 – Disciplinary Probation 120 DaysDP 150 – Disciplinary Probation 150 DaysDP 180 – Disciplinary Probation 180 DaysDP 30 – Disciplinary Probation 30 DaysDP 60 – Disciplinary Probation 60 DaysDP 90 – Disciplinary Probation 90 DaysILWP – Investigative Leave With PayVW – Verbal WarningWW – Written Warning
Processing: Director Review? – A checkbox indicating whether or not the Director of Facilities Management has reviewed this disciplinary action. If checked, the corresponding Process Date column automatically fills with today’s date. Defaults to No (unchecked).
Process Date: Directory Review – The date the Director of FM reviewed this disciplinary action, formatted MM/DD/YYYY.
Processing: Main HR Notified? – A checkbox indicating whether or not University Human Resources has been notified about this disciplinary action. If checked, the corresponding Process Date column automatically fills with today’s date. Defaults to No (unchecked).
Process Date: Main HR Notified – The date Main HR was notified about this disciplinary action, formatted MM/DD/YYYY.
Processing: Attorney’s Office? – A checkbox indicating whether or not the University Attorney’s Office has reviewed this disciplinary action. If checked, the corresponding Process Date column automatically fills with today’s date. Defaults to No (unchecked).
21
Process Date: Attorney’s Office – The date the University Attorney’s Office review this disciplinary action, formatted MM/DD/YYYY.
Processing: Staff Dispute? – A checkbox indicating whether or not this disciplinary action has gone through a Staff Dispute process. If checked, the corresponding Process Date column automatically fills with today’s date. Defaults to No (unchecked).
Process Date: Staff Dispute – The date this disciplinary action went to a Staff Dispute process, formatted MM/DD/YYYY.
Addnl Main HR Info – Any other pertinent information from University Human Resources regarding this disciplinary action, up to 75 alphanumeric characters.
Infraction – A drop down list of valid Infraction Codes. The corresponding description of the infraction displays in the box to the right, but cannot be changed.
Detailed Explanation – A text column (virtually unlimited in length) containing a detailed explanation of the infraction.
EVALUATION TABThis tab tracks employee evaluations. Seven columns (Emp Nbr, EID, Dept Nbr, Shop, Hire Date, Rehire Date, and Adj Hire Date) appear at the top of this tab, but are view only (see EMPLOYEE INFO TAB).
This tab contains the following columns:Evaluation Type - A drop down list of valid Evaluation Types. (RQ) Choices are:
A – Annual M – Mid YearP – 3 Months Probation3 – 3 Months New Hire6 – 6 Months New HireNot On File
Eval Score – The employee’s evaluation score, with 4 decimal places (up to 4.0000).Merit Code – A 1-character alpha column used to rank employees for merit distribution.Last Eval Date – The date of the employee’s most recent evaluation, formatted
MM/DD/YYYY.Next Eval Date – The due date of the employee’s next evaluation based on the current
evaluation type, formatted MM/DD/YYYY.
If the employee’s next evaluation is overdue, the number of days past due is displayed at the bottom of this tab.
ACCRUALS TABAccrual information is uploaded every other week from the University Payroll system. For additional information regarding this process, see MIS. This tab shows Vacation, Sick, and Compensatory Time accruals for an employee. This tab is primarily view only – no data can be entered or changed except in the Vacation/Sick Projection area. Five view-only columns (Emp Nbr, EID, Dept, Shop, and Hire Date) appear at the top of this tab (see EMPLOYEE INFO TAB). This tab includes three areas.
Accrual Rates contains the following view-only columns:Sick – The employee’s current accrual rate for Sick time. The Sick accrual rate is the
same for all benefits eligible employees and is prorated for employees at less than 1.00 FTE.
Vacation – The employee’s current accrual rate for Vacation time. The Vacation accrual rate changes based on the employee’s length of service and FTE.
22
The middle section of the tab is a table with three rows and three columns (all view only). There is a row for Vacation, a row for Sick, and a row for Comp (compensatory time earned in lieu of overtime). Columns are:
Accrual Balance as of: 00/00/0000 (the most recent University Pay Period End Date) – The employee’s accrued balance as of this date. This information is uploaded from the University Payroll system following the close of each pay period.
Used Since Last Accrual Date – Any time used during the current pay period that has been entered into FIMA from the employee’s time sheet(s).
Available Balance – The current balance available for the employee to use for the remainder of the current pay period (Accrual Balance minus Used Since Last Accrual Date).
NOTE: If Payroll has not yet received or entered all the employee’s timesheets, the Available Balance may not be accurate.
Vacation/Sick Projection is a tool for supervisors to determine whether or not an employee has sufficient Vacation or Sick time to fulfill a time-off request. It contains the following columns:
Date of Projected Use – The date the employee wishes to begin taking vacation or sick leave, formatted MM/DD/YYYY; defaults to today’s date. Click on this column, change it if necessary, and press ENTER.
Vacation Available – The number of Vacation hours the employee will have accrued as of the above date, if no Vacation hours are used between now and then (view only).
Sick Available – The number of Sick hours the employee will have accrued as of the above date, if no Sick hours are used between now and then (view only).
Projections are based on the employee’s current Vacation/Sick accrual rates.
FML TABThis tab shows Family Medical Leave (FML) availability for the employee. Employees who are eligible for Family Medical Leave are allowed 12 weeks of FML per rolling calendar year. FML eligibility criteria may cause an informational message to appear when you select this tab. Messages are:
“Ineligible Employee”, “Employee Hired Less Than 1 Year Ago” – This message indicates the employee is not eligible for Family Medical Leave because he/she has not yet been employed at the University for one full year.
“Ineligible Employee”, “Employee Has Not Worked 1250 Hours This Year” – This message indicates the employee is not eligible for Family Medical Leave because he/she has not worked a total of at least 1250 hours in the past 12 months (includes all time worked). Reminder: If an employee has transferred from another department on campus, he/she may actually have 1250 hours. Further investigation may be required with the previous department.
Reminder: Lump sum Journal Entries, which do not reflect the date the employee actually claimed the hours, may affect the accuracy of the FML information. Additional reports may need to be run if an employee appears to be running out of FML.
Four view-only columns (Emp Nbr, EID, Dept, and Shop) appear at the top of this tab (see EMPLOYEE INFO TAB). The Date Range (one year ago today through today) is also displayed. This tab includes two areas.
FML Information contains three view-only columns (all columns have two decimal places):Total FML for Employee – The number of FML hours this employee is eligible for, based
on FTE.23

Total Used - The number of FML hours the employee has already used within the Date Range.
Available Hours – The number of FML hours the employee may still use, as of today. The maximum number of hours is 480. If Available Hours are greater than 480, please run an FML report and submit time sheet corrections to FM Payroll.
Other informational messages may display below the FML Information area. The first is "Further Investigation Required - Employee has less than 1250 regular hours, is > .49 FTE and employed at least 1 year." This indicates an employee who should be eligible for FML but for some reason has not worked enough hours to meet the eligibility requirements. The second is "This employee has 'U' and/or 'C' time included in the 1250 regular hours worked." This indicates that some type of Comp Earned hours are part of the 1250 hours worked.
Family Medical Leave Projection is a tool for supervisors to determine whether or not an employee has sufficient available time to fulfill an FML request. It contains the following columns:
Start Date of Leave – The date the employee wishes to begin taking FML, formatted MM/DD/YYYY. Enter this date and press ENTER.
Date Range – The period that began 1 year prior to the Start Date of Leave and ends on the Start Date of Leave (view only).
Total Proj FML for Employee – The total FML this employee will be eligible for on the Start Date of Leave, based on FTE (view only).
Total Used – The number of FML hours the employee has already used since the beginning date of the projection Date Range (view only).
Available Hours – The number of FML hours available to the employee on the Start Date of Leave, provided that no additional FML hours are taken between now and then (view only).
DETAILED HOURS WORKED TABThis tab is designed to display detailed labor information by employee for a selected Pay End Date(s) and PCN. Emp Nbr appears at the top of this tab as a view-only column.
This tab contains the following columns:Date – A checkbox list of available Pay End Dates.PCN – The PCN(s) for this employee. If an employee has worked in more than one
PCN, this column will display an arrow indicating a drop down list of PCNs.
Check the Pay End Date(s) you wish to view and select the correct PCN, if necessary. Click the Retrieve button to search for records for the Pay End Date(s) and PCN you selected. If no records appear in the lower part of the screen, you may need to try a different PCN. If records are found, the Total Hours Worked, Total Cost, Employee Number and Name will appear in bold print above the detail column headings. There are two rows of column headings, and both are sortable. Click on a column heading in the first row to pick the primary sort, then click on a heading in the second row, if desired, to pick a secondary sort. The following columns are included (view only):
Work Date – The date the hours were claimed. For bi-weekly Non-Exempt employees with regular hours worked, this date will always be a Friday. For bi-weekly Exempt time sheet employees with regular hours, this date will be the Pay End Date.
Shop – The Shop Number the employee was assigned to when the hours were claimed.Sr Nbr – The Service Request Number charged for the hours claimed. Job – The Job Number charged for the hours claimed.Hours – The number of hours claimed.
24

Typ – The University code designating the type of hours claimed (i.e. V = Vacation). A legend of some of the most common hours types is displayed in the upper left part of the screen.
Sub – The FM code designating the sub type of hours claimed (i.e. I = Industrial).Hrly Rate – The employee’s hourly rate at the time the hours were claimed.Cost – The number of hours claimed multiplied by the hourly rate.Acct Nbr – The University FRS Account Number where the labor cost was expensed.Obj. Code – The University Object Code where the labor cost was expensed.Task Id – The Task Code for the hours claimed.Src – The Source Code designating the type of transaction; PR=Payroll, JE=Journal
Entry.JE Id – The system-assigned Journal Entry Number, if this was a J/E.Payend – The Pay End Date during which the hours were claimed.
PCN/EMPLOYEE SEARCH TABThis tab helps Payroll and HR determine whether or not a particular PCN (Position Control Number) is already occupied by an employee. It is not connected to the employee you selected from the treeview. In the white box to the left of the word “PCN”, enter the 6-digit PCN you want to check, then press ENTER. If no employee currently holds this PCN, the system displays the message “No employee found in this position”.
If the PCN is occupied, the system displays the following columns (view only):Position Nbr – The PCN you are checking.Employee Nbr – The Employee Number of the employee who holds the position.Shop – The employee’s Shop.Employee Name – The employee’s full name.Position Dept – The Department Number owning the position.Start Date – The position’s Start Date.End Date – The position’s End Date, if any.Title – The position’s official Title.
For Pool positions, you may see multiple records displayed if more than one employee holds the position.
CLASSES/CERTS TAB: This tab is used by Human Resources to sign up employees for upcoming classes, to record the classes an employee has already taken, and to record information about certifications employees hold. It is also used by Shop Supervisors to view an employee’s training record. To enter a new training record for the employee, right click in this area and choose “Add” or “Insert” from the popup menu. Then choose the appropriate class (including the correct date and time) from the drop down list. If the class does not appear, or the correct date and time does not appear, this class must be added in the H/R Payroll Table Maintenance Module on the Course/Class tab. Please see the H/R PAYROLL TABLE MAINTENACE MODULE for more information. This tab has two areas.
Classes/Education contains the following columns:Class Offered ID – A drop down list combining Course Code, Class Name, and Offered
Date/Time. The list is sorted by Class Name, then by Offered Date/Time in descending order (the most recently scheduled classes appear first). (RQ)
Attended – Designates whether or not the employee actually attended the class. This column defaults to N (No). (RQ)
25

To remove a training record, right click the Class Offered ID column and choose “Delete” from the popup menu. WARNING: You can only delete the record if the value in the Attended column is N (meaning the employee signed up for the class, but did not actually take it).
To enter a new certification record for the employee, right click in this area and choose “Add” or “Insert” from the popup menu. Then choose the appropriate Certification from the drop down list. If the certification does not appear, it must be added in the H/R Payroll Table Maintenance Module on the Certification/Class tab. Please see the H/R PAYROLL TABLE MAINTENACE MODULE for more information.
Certifications contains the following columns:Certification – A drop down list containing a description of all Certifications that are
available. (RQ)Yr Recvd – The 4-digit year the employee received this certification. (RQ)Expiration Date – The date this certification expires. If the certification does not expire,
this column will be empty. Comment – A 255-character text column containing any comments about the
certification.
HOURS WORKED HISTORY TAB: This tab provides detailed labor transaction history for prior years beginning with fiscal year 1996-97. Current fiscal year and one previous fiscal year data is accessed through the Detailed Hours Worked Tab. Emp Nbr appears at the top of this tab as a view-only column.
This tab contains the following columns:Select a Fiscal Year – A drop down list allowing you to select the fiscal year you want to
view. The current and previous fiscal years are included, as are fiscal years into the future, but you cannot view detail data for those years here. If you chose a valid fiscal year from the list, the system will fill the Select Date(s) drop down with a list of the Pay End Dates for that year.
Select Date(s) – This drop down list will contain a list of Pay End Dates if you selected a valid Fiscal Year. To select a single Pay End Date, click on it. To select several Pay End Dates that are not next to each other in the list, click on the first one, then press and hold the CTRL key while clicking on the others. To select a range of Pay End Dates, click on the first one, then press and hold the SHIFT key and click on the last one. The Pay End Date(s) you selected should now be highlighted.
Click the Retrieve button to search for records for the Pay End Date(s) and you selected. If records are found, the Total Hours Worked, Total Cost, Employee Number and Name will appear in bold print above the detail column headings. There are two rows of column headings, and both are sortable. Click on a column heading in the first row to pick the primary sort, then click on a heading in the second row, if desired, to pick a secondary sort. The following columns are included (view only):
Work Date – The date the hours were claimed. For bi-weekly Non-Exempt employees with regular hours worked, this date will always be a Friday. For bi-weekly Exempt time sheet employees with regular hours, this date will be the Pay End Date.
Shop – The Shop Number the employee was assigned to when the hours were claimed.Sr Nbr – The Service Request Number charged for the hours claimed. Job – The Job Number charged for the hours claimed.Hours – The number of hours claimed.
26

Typ – The University code designating the type of hours claimed (i.e. V = Vacation). A legend of some of the most common hours types is displayed in the upper left part of the screen.
Sub – The FM code designating the sub type of hours claimed (i.e. I = Industrial).Hrly Rate – The employee’s hourly rate at the time the hours were claimed.Cost – The number of hours claimed multiplied by the hourly rate.Acct Nbr – The University FRS Account Number where the labor cost was expensed.Obj. Code – The University Object Code where the labor cost was expensed.Task Id – The Task Code for the hours claimed.Src – The Source Code designating the type of transaction PR=Payroll, JE=Journal
Entry.JE Id – The system-assigned Journal Entry Number, if this was a J/E.PCN – The PCN the employee held when the hours were claimed.Payend – The Pay End Date during which the hours were claimed.
Click on the Print button to print the displayed data.
EMP POSITION HISTORY TAB This VIEW-ONLY tab displays information about the positions this employee has held at Facilities Management, starting with the current position. Emp Nbr, Name, and EID are displayed at the top of the tab.
This tab contains the following columns:Change Date – Displays “Current” for the employee’s current position. For historical
records, displays the date the employee was assigned to the position, or the date the most recent change of any kind (such as a pay increase) took place, if the employee has held only one position.
PCN – The University Position Control Number. The Position Title is displayed to the right of the PCN.
Exempt/Non-exempt – The position’s status relating to overtime eligibility. Hourly Rate – The position’s hourly rate of pay. FTE – The Full Time Equivalency for the position (indicates full- or part-time).Supv ID – The Employee Number of the employee’s supervisor.Obj Code – The University Object Code associated with this position (indicates salaried,
hourly, appointed, etc.).Paygrade – The University Pay Grade for this position (indicates salary range).Type – The position type (Regular or Pool).End Date – The position end date, if applicable (usually applies only to temporary
postions).
EMPLOYEE CALL-IN TABThis tab has extremely limited access. It is not connected to the employee you selected from the treeview. It is used by HR and by administrative personnel in certain FM Departments to track instances where employees call in to report that they will be sick or absent.
In the white box to the left of the words “Emp Nbr:”, enter the Employee Number you want to view (up to 6 digits), then press ENTER. If you entered an invalid Employee Number, the system displays the message “Employee not found in database”. If you entered a valid Employee Number but no records currently exist for this employee, the system displays the message ”No rows exist. Do you want to add one?”. To add a record for the employee, press ENTER or click the “Yes” button in response to this message. The system will then add a blank row ready for your data entry.
27

If any call-in records exist for the Employee Number you selected, the system displays them. To enter an additional record, right click and choose “Insert” from the popup menu. The system will add a blank row above the other rows, ready for you to enter data.
This tab contains the following columns:Call Datetime – The date and time the employee called, formatted MM/DD/YYYY
hh:mm:ss. Note: time must be entered in a 24-hour (“military time”) format (i.e., 2:00 p.m. is entered as 14:00:00). Defaults to the current date and time. (RQ)
Call Reason – The reason for the employee’s absence, up to 255 alphanumeric characters. (RQ)
User ID – The user ID of the person logged into the computer (view only).Entry Date – The date and time the record was entered (view only).
28
PAYROLL PROCESSING MODULE (Inquiry)
To open this module, click on the Payroll Processing icon (the money bag), or click “Activities” from the menu, then choose “Payroll Processing”.
The Payroll Processing Module includes the following tabs:
Batch Status and Totals – Displays your batch numbers, status, payend date, total hours and dollars.
Payroll Entry – This tab is used to enter time sheet data.
View Batch Records – Displays all records in the batch selected on the Batch Status and Totals tab. Allows for sorting of the data by clicking the desired column heading.
Batch Audit – Displays all records in the selected batch in report form for printing. Includes a “Totals by Employee” report and a “Totals by Hours Type” report.
Emp Pay Recs – Displays all entered time sheet records for the selected Employee Number and Pay End Date.
Exception Processing – Allows for entry of payroll records from a prior pay period that were not reported to Main Payroll during that pay period.
Payroll Close/Template Processing – Displays the list of processes and reports required to complete payroll processing, including loading of vacation, sick, comp accruals from main payroll.
Current Pay Period Adjustments – Displays records from closed batches for the selected Employee Number and provides a process for correcting them.
Plan Record – UNDER CONSTRUCTION
29
PAYROLL PROCESSING MODULE (Input)
PURPOSE: This module allows Payroll personnel to record employee time sheets, produce audit reports, create labor expense transactions that are charged to customers, close the biweekly payroll and report employee time to Main Payroll, and make corrections to employee time records.
INSTRUCTIONS: To open the Payroll Processing window, click on the Payroll Processing icon (the money bag) or click “Activities” from the menu, then choose “Payroll Processing”.
BATCH STATUS AND TOTALS TABThis tab displays your FIMA User ID next to the words “Batch Status and Totals for:”. Any payroll batches you entered that have not yet been processed (audited and posted as labor expense transactions) automatically display as well. This tab contains the following columns for each batch:
Batch Nbr – The system-assigned batch number, up to 3 digits. A batch numbered “998” is always an Adjustment batch. If a Comptime/Overtime batch exists, it also displays. This batch is accessible to all authorized Payroll personnel (not just the user who started the batch), and is numbered “999”.
30

Batch Status – A drop down list indicating the status of the batch. For the Overtime/Comptime batch, this column is view only. For other batches, it can be changed. Choices are:Open – You can add, delete or change records in this batch. Audit – The batch is being audited and is currently “on hold” (no changes can be
made). Once a batch has been audited, you will either open it, make corrections and close it, or simply close it if no corrections are needed.
Closed – The batch has been audited, any needed changes have been made, and its records are ready to be posted as labor expense transactions.
Payend Date – The pay period ending date on the batch, formatted MM/DD/YYYY. For the Overtime/Comptime batch, this column is view only. For other batches, it can be changed.
Hours – The total number of hours in the batch (view only).Total Dollars – The total dollar amount of the batch (view only).
To add records to a batch, double-click that Batch Number. The system automatically switches you to the Payroll Entry tab, displaying your selected Batch Number and its Payend Date (see the PAYROLL ENTRY TAB for further instructions).
Opening a new batchTo start a new batch, click the “Open a New Batch” button. The system displays a small window showing the next available sequential Batch Number, a status of Open, and the Payend Date of the next open payroll cycle. You can change any of these if necessary (the Payend Date is a drop down list containing only valid pay end dates), but the defaults are usually correct. Click the “OK” button to open the batch, or the “Cancel” button if you do not want to start a new batch after all. If you did open a new batch, it will now be displayed on the tab, and you can double-click its Batch Number to begin entering employee time sheet data.
Running Batch Audit ReportsTo run Batch Audit Reports for a particular batch, first click that Batch Number, then click the “Batch Audit Reports” button. The system automatically switches you to the Batch Audit tab, which displays two reports for your selected batch: “Totals by Employee” and “Total by Hours Type”. See the BATCH AUDIT TAB section for more information.
Running the Comptime/Overtime ReportThis report can only be run before the Comptime/Overtime batch is processed (posted as labor expense transactions). To run the Comptime/Overtime report for the current pay period, click the “Overtime/Comptime Rpt” button. The “Comptime/Overtime Hours Reported” report displays in a new window. This report shows Payend Date, Employee Number and name, Work Date, PCN (Position Control Number), Job Number, Shop, Service Request Number, Hours, Hours Type, Task ID, Batch Number, User ID (the person who entered the record), and Last Modified date. It is sorted by employee name. To print the report, click the “P” button at the bottom of the report window.
Viewing all records in a batchTo see all the records in a particular batch, first click the Batch Number, then click the “View Batch Recs” button. The system automatically switches you to the View Batch Records tab and displays information for the batch you selected. See the VIEW BATCH RECORDS TAB section for more information.
Posting a closed batchOnce a batch of employee time records has been audited, all data is correct, and the batch status has been changed to “Closed”, the records in that batch must be posted as labor expense transactions so customers can be billed for the employees’ time. To post all closed payroll batches except the Comptime/Overtime batch, click the “Process Closed Batches” button. The system displays the message “All Closed Batches for this Pay Period will be moved to Detail Labor Tran. OK to continue?”. Click the “Yes” button to post the batch(es). You may see an hourglass icon while this process runs. If the
31
process is successful, the system displays the message “Successful move of records to Detail Labor Tran”. If there were errors in the posting process, the system displays at least one error message. After a batch has been successfully posted, you will no longer see it on the Batch Status and Totals tab. Any changes to it must be handled using the Current Payperiod Adjustments tab (see the CURRENT PAYPERIOD ADJUSTMENTS TAB section for more information).
Posting the Comptime/Overtime batchAfter ALL time sheet entry AND exception entry has been completed, audited, and processed (posted as labor expense transactions), the records in the Comptime/Overtime batch must also audited, closed, and posted as labor expense transactions. To post the Comptime/Overtime batch, click the “Process Comp/Overtime” button. The system displays a small window titled “Comptime/Overtime Processing” with the words “Please select the week you would like to process”. In most cases, you should click the “Week 1” button first, then run this process a second time, clicking the “Week 2” button. When processing has completed successfully, the system displays the message “Comptime/overtime batch has processed successfully.” Click the “OK” button to continue. In addition, once you have successfully processed week two, the system removes the Comptime/Overtime batch and displays the message “Deleted comptime/overtime batch record successfully.”. If any errors occurred during the posting process, the system instead displays an error message. If you decide not to post the Comptime/Overtime batch after all, click the “Cancel” button. In this case, the system displays the message “You have chosen not to process Overtime/Comptime”. Again, click the “OK” button.
PAYROLL ENTRY TABTo begin entering a timesheet for an employee, you must first either start a new batch or select an existing batch from the Batch Status and Totals tab (see instructions for that tab above. The system automatically switches you to the Payroll Entry tab when you double-click your selected Batch Number.).
On the Payroll Entry tab, enter the Employee Number in the white box to the right of the words “Emp Nbr”, then press ENTER. If you entered a valid Employee Number, the system displays the employee’s last name, first name and middle initial next to the Employee Number, and the employee’s current Position Control Number in the white box to the right of the word “PCN”. (If this PCN is not correct, choose the correct one from the drop down list.) The Batch Number you are working on, its Payend Date, and your User ID (or “ovtcmptm” if this is a comptime/overtime batch) are also displayed at the top of the tab as view-only columns. If you already made entries for this employee in this batch, they will be displayed; in this case, right-click in the main part of the tab and choose “Add” or “Insert” from the popup menu to get a blank line ready for your next entry (or click on any line, then press F1 to add a blank line at the bottom). If there are no previous entries for the employee in this batch, the blank line appears automatically.
The main area of the tab contains the following columns, which correspond to the information on the employee time sheet:
Work Date – This defaults to the pay ending date (formatted MM/DD/YYYY). For employees who fill out daily timesheets, or for non-working hours (sick, vacation, etc.) for all employees, enter the date the employee performed the work or the date the non-working hours occurred. For regular working hours for weekly and bi-weekly non-exempt (eligible for overtime) employees, enter the date of the last day of the week when the work was performed. For regular working hours for weekly and bi-weekly exempt (not eligible for overtime) employees, leave this as the default pay ending date. (RQ)
Hours – The number of hours claimed, with 2 decimal places, up to 999,999.99. (RQ)Type – The Hours Type Code, up to 3 alphanumeric characters, indicating the type of
hours claimed (i.e. R=regular, S=sick etc). For a complete list of hours types, see the Hrs Type tab in the HR/ Payroll Table Maintenance module. (RQ)
Hours Subtype – The code, up to 2 alpha characters, indicating the sub-type of hours claimed (i.e. I=Industrial, P=Preplanned etc.). Hours Subtypes are only valid for
32

specific Hours Types. For a complete list of Hours Subtypes, see the Payroll Manager.
S/R Nbr – The Service Request Number charged for the hours claimed. The system fills in the Job Number and Task ID columns (see below) with the information on this Service Request, and creates a blank line for the next entry on the time sheet with the Work Date, Service Request, Job, and Task ID defaulted to the information from the current line.
Job Nbr – The Job Number charged for the hours claimed, up to 10 alphanumeric characters. The system attempts to fill this column after you enter the Service Request Number. (RQ)
Task ID – The 6-digit number identifying the task performed for the hours claimed. The system attempts to fill this column after you enter the Service Request Number. For a complete list of Task Identification Numbers, see the Task tab in the HR/Payroll Table Maintenance module. (RQ)
Shop – The Shop this employee is assigned to (view only). PM Complete? – A “Y” in this column indicates that the hours claimed were for a
Preventive Maintenance Service Request (Task ID 800000), and that the Service Request should now be closed. If this is not a PM Service Request, or if the PM Service Request is not indicated as complete on the time sheet, leave this column blank.
If you need to delete a line of entry, right-click on it and choose “Delete” from the popup menu (or click on it, then press F2).
VIEW BATCH RECORDS TABTo view records in a batch, you must first select the Batch Number on the Batch Status and Totals tab (see BATCH STATUS AND TOTALS TAB for instructions).
This tab is VIEW ONLY. At the top of the tab, the system displays the Batch Number you selected, its pay ending date, and your User ID (or “ovtcmptm” if this is a comptime/overtime batch). The main part of the tab contains the following columns for each row of time sheet entry:
Emp # – The Facilities Management Employee Number of the employee who claimed the hours.
Work Date – For employees who fill out daily timesheets, or for non-working hours (sick, vacation, etc.) for any employee, this is the date the employee performed the work or the date the non-working hours occurred. For regular working hours for weekly and bi-weekly non-exempt (eligible for overtime) employees, this is the date of the last day of the week when the work was performed. For regular working hours for weekly and bi-weekly exempt (not eligible for overtime) employees, this is the pay ending date.
Position – The University-assigned PCN in which the employee claimed the hours.Hours – The number of hours claimed.Type – The University Hours Type Code designating the type of hours claimed. For a
complete list of hours types, see the Hrs Type tab in the HR/ Payroll Table Maintenance module.
Sr Nbr – The Service Request Number charged for the hours claimed.Job Nbr – The Job Number charged for the hours claimed.Task Id – The 6-digit Task ID that further defines the type of hours claimed.Shop – The Shop this employee is assigned to.
Clicking any column heading on this tab sorts the rows in that order.
33
BATCH AUDIT TABTo view the Batch Audit Reports, you must first select the Batch Number on the Batch Status and Totals tab (see BATCH STATUS AND TOTALS TAB for instructions).
This tab is VIEW ONLY. It contains two reports used for ensuring that the time sheets in this batch were entered accurately. In addition to viewing these reports on your PC, you can print a report by clicking on it, then clicking the printer icon on the FIMA toolbar.
The upper area of the tab displays the “Totals by Employee” report, which shows the Employee Number and full name (last, first, middle initial), Work Date, Service Request Number, Job Number, Task ID, number of hours claimed, Hours Type Code, Hours Subtype Code, Position Control Number, Shop, and PM Complete flag for each record in the selected batch. The report sorts by employee name (last, first, middle initial) in the order in which you entered that employee’s time records. Hours claimed are totaled for each employee, and for the entire batch.
The lower area of the tab displays the “Total by Hours Type” report. This is a summary report listing each Hours Type Code and the number of hours claimed for it in the entire batch. There is also a grand total of all hours in the batch.
EMP PAY RECS TABThis VIEW ONLY tab shows all time records that have been entered for the selected employee and pay ending date. To view the records, type the Employee Number in the white box to the right of the words “Emp Nbr”, then press TAB. If you entered a valid Employee Number, the system displays the employee’s name (last, first, middle initial) to the right of the number. The drop down list of pay ending dates defaults to the ending date of the current pay period, but you can select a different upcoming pay ending date if necessary. Press ENTER or click the “Retrieve” button to display the records. Records that have not yet been processed (posted as labor expense transactions) display in the “Work Labor Records” area of the tab (this includes records in open, audit and closed batches, regardless of who entered the batch). Records that have been processed display in the “Detail Labor Records” area.
Work Labor Records contains the following columns for each employee time record:Batch – The batch number that contains the record.Work Date – For employees who fill out daily timesheets, or for non-working hours (sick,
vacation, etc.) for any employee, this is the date the employee performed the work or the date the non-working hours occurred. For regular working hours for weekly and bi-weekly non-exempt (eligible for overtime) employees, this is the date of the last day of the week when the hours were claimed. For regular working hours for weekly and bi-weekly exempt (not eligible for overtime) employees, this is the pay ending date.
Pcn – The employee’s University-assigned Position Control Number when the hours were claimed.
Sr Nbr – The Service Request Number charged for the hours claimed.Job Nbr – The Job Number charged for the hours claimed.Task Id – The 6-digit Task ID that further defines the type of hours claimed.Hours – The number of hours claimed.Type – The University Hours Type Code designating the type of hours claimed. For a
complete list of hours types, see the Hrs Type tab in the HR/ Payroll Table Maintenance module.
S-type – The FM code that further defines the type of hours. Subtype codes are only valid for certain Hours Type Codes.
Shop – The Shop this employee was assigned to when the hours were claimed.O Code – The University Object Code where the labor expense will be charged.Rate – The employee’s hourly rate of pay.
34
User Id – The FIMA user identification of the individual who entered this time record.PM Comp? – A “Y” in this column indicates that this time record was for a Preventive
Maintenance task, and that performing this work completed that PM task.
The bottom of this area shows the total number of hours in unprocessed batches next to the words “Total Work Labor Hours”, and the employee’s number and name next to the word “Employee”.
Detail Labor Records contains the following columns for each processed (posted) employee time record:Work Date – For employees who fill out daily timesheets, or for non-working hours (sick,
vacation, etc.) for any employee, this is the date the employee performed the work or the date the non-working hours occurred. For regular working hours for weekly and bi-weekly non-exempt (eligible for overtime) employees, this is the date of the last day of the week when the hours were claimed. For regular working hours for weekly and bi-weekly exempt (not eligible for overtime) employees, this is the pay ending date.
Pcn – The employee’s University-assigned Position Control Number when the hours were claimed.
Sr Nbr – The Service Request Number charged for the hours claimed.Job Nbr – The Job Number charged for the hours claimed.Task Id – The 6-digit Task ID that further defines the type of hours claimed.Hours – The number of hours claimed.Type – The University Hours Type Code designating the type of hours claimed. For a
complete list of hours types, see the Hrs Type tab in the HR/ Payroll Table Maintenance module.
S-Type – The FM code that further defines the type of hours. Subtype codes are only valid for certain Hours Type Codes.
Shop – The Shop this employee was assigned to when the hours were claimed.O Code – The University Object Code where the labor expense will be charged.Rate – The employee’s hourly rate of pay.Acct – The 6-digit University Account Number where the labor expense will be charged.Cost Amt – The employee’s rate of pay multiplied by the number of hours claimed.User Id – The FIMA user identification of the individual who entered this time record.
The bottom of this area shows the total number of hours in processed batches next to the words “Total Detail Labor Hours”, and the employee’s number and name next to the word “Employee”. If necessary, records displayed in the “Work Labor Records” area can be changed by having the creator of the batch open it and make the correction. Records displayed in the “Detail Labor Records” area must be corrected using the Current Payperiod Adjustments tab (see below).
EXCEPTION PROCESSING TABUse this tab to enter time sheet information considered to be an “exception” to normal handling. This would include overtime from a prior pay period that was turned in too late to be processed for that pay period; entry of Compassionate Transfer of Leave (CTL) time processed but not yet reflected on the sick/vacation accrual report, etc. CAUTION: Data entered via this tab will be added directly as a posted labor expense transaction, bypassing the normal batch entry and audit process; therefore, errors typically caught during the audit process (such as insufficient sick, vacation, or comp time balances) will not be flagged by the system. Be sure to utilize the “Exception Data – Entry Instructions” form to ensure the data you are entering is accurate.
This tab includes the following columns:Emp Nbr – The FM Employee Number (up to 6 digits) of the employee claiming the time.
(RQ)35

Payend Date – The pay ending date to which this time will be posted, formatted MM/DD/YYYY. (RQ)
Pcn – The University Position Control Number to which the employee was assigned when the hours were claimed. (RQ)
Work Date – The date for which the hours were claimed, formatted MM/DD/YYYY. (RQ)Hours – The number of hours claimed, with 2 decimal places (up to 999,999.99). (RQ)Type – The Hours Type Code, up to 3 alphanumeric characters, indicating the type of
hours claimed. For a complete list of hours types, see the Hrs Type tab in the HR/ Payroll Table Maintenance module. (RQ)
S-Type – The code, up to 2 alpha characters, indicating the sub-type of hours claimed (i.e. I=Industrial, P=Preplanned etc.). Hours Subtypes are only valid for specific Hours Types. For a complete list of Hours Subtypes, see the Payroll Manager.
Sr Nbr – The Service Request Number charged for the hours claimed.Job Nbr – The Job Number charged for the hours claimed, up to 10 alphanumeric
characters. Task Id – The 6-digit Task ID that further defines the type of hours claimed.Shop – The FM Shop the employee was assigned to when the hours were claimed.
Shop Numbers are currently 3 digits. (RQ)Account – The 6-digit University Account Number charged for the hours claimed. (RQ)O Code – The 4-digit University Object Code charged for the hours claimed. (RQ)Emp Class – The 3-digit FM Employee Class for this employee (usually the first 3 digits
of the Object Code). (RQ)Hrly Rate – The employee’s hourly pay rate when the hours were claimed, with 4 decimal
places (up to 99,999.9999). (RQ)Cost Amt – The actual cost of the hours claimed (the hourly rate multiplied by the number
of hours). (View only)Shop Rate – The full cost recovery hourly rate charged to customers (including FM) for
hours claimed by employees in this shop (view only).Recover Amt – The full cost recovery amount (number of hours multiplied by Shop Rate)
for the hours claimed, which is charged to customers (including FM). (View only)Src Code – A 2-character code indicating how this time was entered. The system
automatically sets this to “PR” (Payroll entry). (View only)
PAYROLL CLOSE/TEMPLATE PROCESSING TABThis tab serves two purposes: on Wednesday of the week paychecks are distributed, use this tab to upload the Accrual File from Main Payroll, which gives up-to-date sick, vacation, and comptime balances for all employees; the following week, after all batches for the pay period, including Comptime/Overtime, have been closed and processed (posted as labor expense transactions) and all exception entry has been done, use this tab to run the Payroll Close process.
Loading the Accrual FilesTo upload the most recent file of employee accrual balances from Main Payroll, first follow the instructions provided by the Payroll Manager for electronically transmitting the accrual file from the Main Payroll system to the Groups\Payroll folder on your pc’s Jasmine drive, as accruals.txt. Then, in FIMA, click the “Load Accruals” button on this tab. Your cursor will change to an hourglass while this process runs. When the upload is finished, you will see one of three possible messages: “Importing of Accrual File was Successful” indicates no errors and requires no further action on your part. “There were accrual records imported that were not loaded into the accrual table. Please contact MIS” is a very common message that is usually caused by a recently terminated employee or an employee on long-term leave status who has no accrual record in FIMA but still has one in Main Payroll’s system; contact MIS to verify this is the case. “Importing of Accrual File was NOT Successful” indicates a serious problem that requires MIS investigation as soon as possible; you should not enter any timesheet data after receiving this message, since the employee accrual balances may not be correct.
36

Running the Payroll Close processAll batches, including Comptime/Overtime, must be processed (posted), and all exception entry must be completed, before you begin the Payroll Close process. To close the payroll, follow these steps:
1. Import the “template” file from Main Payroll. This file contains basic required information for all FM employees who currently exist in the Main Payroll system. The instructions for electronically transmitting this file from the Main Payroll system to the Groups\Payroll folder on your pc’s Jasmine drive, as factemp.txt will be provided by your Payroll Manager. Once you have the file on your pc, in FIMA, click the “Import Template” button on this tab. You will see a progress window as the file imports. When the process is complete, you should see the message “Importing of Template was Successful”. If instead you see the message “Importing of Template was NOT Successful”, call MIS as soon as possible and do not attempt to continue with the payroll close until they notify you it is safe to do so.
2. Generate the Payroll Roster by clicking the “Generate Roster” button. This process creates the file that you later electronically transmit to Main Payroll, which they will use to produce paychecks. Your cursor changes to an hourglass while this process runs. The system first checks to be sure there are no unprocessed data entry batches for this pay period. If batches still exist, the system displays the message “There are n batch(es) still in process for this payperiod. Continue to Generate the Payroll File?” where “n” is the number of batches. Click the “No” button to respond to this message, identify the open batch(es), close them, and start this step again. The system also asks you to verify that the Payroll Template you uploaded in step 1 has the correct date for the pay period you are closing, by displaying the message “Template Payend Date is mm/dd/yyyy. Continue?” where “mm/dd/yyyy” is the pay ending date on the template file. If the date is correct, click the “Yes” button to respond to this message. Otherwise, click the “No” button, import the Payroll Template again, then start this step again. If a problem occurs during roster generation, the system will display one of two error messages: “Pay data not rolled up successfully. Contact MIS” or “No records were generated for the Payroll Text File”. If you see either of these messages, contact MIS immediately. When the process completes successfully, you should see the message “Payroll Text File Was Created Successfully”.
3. Run the Payroll Close Reports for audit purposes. All available reports are listed in the large box in the center of this tab. Your Payroll Manager will let you know which reports must be checked for accuracy at this point. To run a report, click the checkbox next to the report name (you can select multiple reports), then click the “Run Reports” button. Some reports, such as the “Over/Under FTE” and “FML Used Over Selected Hours” open a window asking you to supply the number of hours to check against. Each report displays in its own window, and you can click any report, then click the printer icon on your toolbar (or choose “Print…” from the “File” menu) to print it. For a brief description of each report, see below. If you must make any changes to entered timesheet data based on your audit of these reports, those changes must be made using the Current Payperiod Adjustments tab (see the next section for instructions), and you must repeat step 2 (generating the Payroll Roster) in order to include those changes in the file you will send to Main Payroll.
4. Run the final Payroll Close Reports by clicking the “All Reports Listed Below” checkbox at the top center of this tab, then clicking the “Run Reports” button. All the reports will generate (some displaying a window asking you to supply the number of hours to check against), with each one displaying in its own window, which will appear in icon form at the bottom of your pc screen. When all reports have generated, you can print any for which you need hard copy by clicking the report, then clicking the printer icon on your toolbar (or choosing “Print…” from the “File” menu). The “Exceptions to Payroll” and “Payroll Roster” reports must be printed for Main Payroll. Your Payroll Manager will let you know the other reports that need to be printed and where to distribute or file them.
5. Follow the instructions provided by your Payroll Manager to electronically transmit the facman.txt file in the Groups\Payroll folder on your Jasmine drive to Main Payroll’s system.
37

6. Mark this pay period as Closed by clicking the “Set Pay Close Flag” button. The system displays the message “Do you want to close mm/dd/yyyy?” where “mm/dd/yyyy” is the current pay ending date. Click the “Yes” button to proceed with the close. The system should display the message “Payroll Close Flag has been set to yes for payend: mm/dd/yyyy”, followed by the message “Did you remember to transmit the payroll file for processing?” Click “OK” to respond to these messages. You may also see the messages “Inactive Employees have been deleted from S/R Employees” and/or “Employees who have changed shops have been deleted from S/R Employees”; these are informational messages related to the Work Management module and do not require any action on your part. In the rare event that an error message displays at this point, contact MIS as soon as possible.
Available Payroll Close ReportsNo Time Reported – This report lists employees who have NO TIME entered for the current pay period.
Exceptions to Payroll – This report, which is required by Main Payroll, lists entered time that requires manual checking to verify that it is reported accurately.
Handdrawn Check List – This report lists employees with reported time who are not on the Payroll Template, or those with inconsistent data between PSOS (Main Payroll’s system) and FIMA.
Over/Under FTE – This report lists employees who have reported hours inconsistent with their FTE (full time equivalency).
Payroll Roster – This report, required by Main Payroll, lists the employee, hours, and hours type to be paid and the account(s) to pay from.
Total Hours Reported – This report lists the total number of hours reported for the current pay period.
FML Hours Over 23 List – This report lists the employees who have used 24 or more FML (Family Medical Leave) hours in the current pay period. This reported is forwarded to FM Human Resources.
Jury Duty Report – This report lists the employees who reported jury duty in the current pay period. This report is given to Cost Accounting/Reconciliation office for collection of payment when appropriate.
PCNs to Delete List – This report lists the Position Control Numbers that have an end date and are not occupied. This reported is forwarded to FM Human Resources.
Expired PCNs List – This report lists PCNs with end dates in a prior pay period. This reported is forwarded to FM Human Resources.
Template Discrepancies - UNDER CONSTRUCTION
FML Used Over Selected Hours – This report lists employees who have used more FML Hours than the number you supply. This report is forwarded to FM Human Resources, and allows them to check for employees who may be close to utilizing all their available FML.
Comp Hours Available – This report lists the current available comp time hours for all employees who have a comp time balance.
Over/Under FTE (Mid-Pay Period) – This report is identical to the “Over/Under FTE” report, but is designed to be run at any time during the pay period instead of just at Payroll Close.
Employees with Absent Time – This report lists all employees who reported Absent or FML Absent hours during the pay period.
38

Expired Visas List – This report lists employees with work visas that expire within 30 to 90 days of the pay ending date.
CURRENT PAYPERIOD ADJUSTMENTS TABUse this tab when you need to make corrections to time records for the current pay period that have already been processed (posted as labor expense transactions); for example, a biweekly employee claimed 80 regular hours for the pay period, and you entered the timesheet and processed the batch it was in, but the employee went home sick the last two hours of the last day of the pay period and reported the correction to you the following Monday morning. To create the necessary adjustment, enter the Employee Number in the white box to the right of the words “Emp Nbr”, then press ENTER. The system displays the employee name (last, first, middle initial) next to the Employee Number and the current pay ending date next to the words “Payend Date”. The labor expense transactions for the selected employee display in the main part of the tab.
This tab includes the following columns for each labor expense transaction (all columns except the checkbox are view only):
checkbox – Click this box to indicate that you want to make an adjustment to this record. Emp Nbr – The Facilities Management Employee Number assigned to this employee.Work Date – The date the hours were claimed.Payend Date – The FM pay period end date.Tran – The 2-character code indicating the source of the transaction (i.e. PR=Payroll
entry, JE=Journal Entry). Pcn – The University-assigned Position Control Number the employee occupied when
the hours were claimed.Sr Nbr – The Service Request Number charged for the hours claimed.Job Nbr – The Job Number charged for the hours claimed.Task Id – The 6-digit Task Identification Number that further defines the type of hours
claimed.Hours – The number of hours claimed.Type – The University Hours Type Code indicating the type of hours claimed.Shop – The Facilities Management Shop to which the employee was assigned when the
hours were claimed.O Code – The FRS Object Code that will be charged for the expense. Rate – The employee’s hourly rate of pay. Acct – The FRS Account Number that will be charged for the expense.
Locate the record(s) to be adjusted and click the check box in front of each, placing a checkmark in it. To create adjustments, click the “Create Adjustment Records” button (or click the “Cancel” button if you don’t want to create adjustments after all). Clicking “Create Adjustment Records” automatically creates a new labor expense transaction for each checked row with negative hours (therefore “canceling out” the original labor expense transaction), and creates corresponding records in an Adjustment Batch (Batch Number 998) which are identical to the records you selected for adjustment. To correct these entries, open the 998 batch and make the necessary changes (see the PAYROLL ENTRY TAB section for instructions).
PLAN RECORD TAB: UNDER CONSTRUCTION
39

MATERIAL INQUIRY MODULE (Inquiry)
To open this module, click on the Material Inquiry icon (the flower pot), or click “Activities” from the menu, then choose “Material Inquiry”. The Material Inquiry window will open.
The Material Inquiry Module includes the following tabs:
VENDOR INQUIRY – Displays vendor information. If you know the University Vendor Number, click on the white box next to the words “Vendor Number”, enter the 7-digit number, and press ENTER. If this vendor exists in the FIMA database, its information will display. If the system displays the error message “No vendor records found with your selection”, the Vendor Number you entered does not exist in the FIMA database. If you do not know the Vendor Number, click on the white box next to the word “Name”, enter the full or partial vendor name, and press ENTER. For example, typing elec will find all vendors whose name contains those letters. If the system found more than one vendor, there will be a scroll bar in the main part of the tab, allowing you to scroll through all the records. The following information is shown for each vendor: University Vendor Number, vendor name, two lines of street address information, city, state, zip code, phone number, and Status (A = Active, I = Inactive).
MATERIAL ENCUMBRANCES – Displays summary information on material purchases. Information is restricted to records entered after February 2, 2002. To search for a purchase, click the “Select” button. The system will display a screen with blank columns ready for you to fill in. You can use as many of these columns as you wish to search for the information you’re looking for. The columns are: Order Type, Order Number, Vendor, Order Date, Job Number, S/R Number, Shop, Whse (warehouse), Reference Type, Reference Number, Material Request Number, Debit Account, Debit Object Code, Credit Account, and Credit Object Code. When you have filled in your search columns, click the “Retrieve” button. If you see the message “No encumbrances matched your selection criteria”, the system could not find any records containing the information you entered. Otherwise, the system will display all the records that contain this information. At the bottom of the screen you will see “Rows Retrieved” and the number of records found. Use the PAGE UP and PAGE DOWN keys or the up and down arrow keys to move through the records. In addition to the selection columns listed above, the displayed information includes Vendor Name, Task ID, Invoice Number, and summary dollar information: Total Order Amount, Total Received at Cost, Total Received at Recovery, Total Invoiced at Cost, and Total Invoiced at Recovery.
BLANKET P/OS – Displays information on Blanket purchase orders. To find an existing Blanket, enter the 3-character Document Type (i.e., BLP, BLY, etc.) and the 6-digit Document Number in the white boxes next to the words ”Document Type/Number”, then press ENTER. If this Blanket exists, the system will display the Vendor Number and name, Status (A = Active, I = Inactive), budget, FRS Encumbered code (Y = Yes, N = No), and Check Budget code (Y = Yes, N = No) in the upper section of the tab. The lower section shows the FRS Account Numbers that fund this Blanket, and for each account, the budget, Requisition Number, FM Department, Total Encumbrances (total amount ordered), Total Expenses, and Total Remaining (encumbrances minus expenses). EXPENSE INQUIRY – Displays material expense records based on the selection criteria you enter. Information is restricted to records entered after February 2, 2002. Entering more pieces of information as query criteria may help limit the number of records the system retrieves. You can use any column to enter query criteria except Base Cost, Plus Shop %, Recovery Amt, and Bill Date. For example, if you know the Shop and the Vendor Number, first click the “Enter Query Criteria” button, which creates a grid in the main part of the tab. Then scroll or TAB to the right until you see the Shop column, click in the box under it, and enter the Shop. Continue moving to the right until you see the Vendor column. Enter the Vendor Number. Finally, click the “View Items” button. The system will display all material expenses related to that Shop and Vendor. Helpful Hint: in date columns, you can enter an expression such as >07-01-2003 which would limit the records to those with a date later than July 1, 2003. To sort the
40

displayed records in a particular order, click the column heading of the column you want to sort on (for example, Mat Req Nbr, which contains the Material Request Number).
RECEIVED/NOT INVOICED INQUIRY – Displays records of purchases that have been received but not invoiced, based on the selection criteria you enter. Information is restricted to records entered after February 2, 2002. Entering more pieces of information as query criteria may help limit the number of records the system retrieves. You can use any column to enter query criteria except Rec Amt (receipt amount). For example, if you know the Job and Shop, first click the “Enter Query Criteria” button, which creates a grid in the main part of the tab. Then click in the box under the Job Nbr column, and enter the Job Number. Enter the Shop in the box under the Shop column. Finally, click the “View Items” button. The system will display all material expenses related to that Job and Shop. Helpful Hint: in date columns, you can enter an expression such as >07-01-2003, which would limit the records to those with a date later than July 1, 2003. To sort the displayed records in a particular order, click the column heading of the column you want to sort on (for example, Mat Req Nbr, which contains the Material Request Number).
ENCUMBRANCE CHANGE INQUIRY – Displays audit records tracking changes to material encumbrances. Information is restricted to records entered after February 2, 2002. These changes may involve dollar amounts, document numbers (such as Purchase Requisition to Purchase Order), etc. You can use one or more of the following columns to enter query criteria: Order Type, Order Nbr, Ref1 Type, Ref1 Nbr, Mat Req Nbr, and Change Date. For example, to search for changes to Stores Order Form 795972, first click the “Enter Query Criteria” button, which creates a grid in the main part of the tab. Then click in the box under the Order Type column, and enter the document type (SOF). Enter the document number (795972) in the box under the Order Nbr column. Finally, click the “View Items” button. The system will display all encumbrance change audit records where the document was SOF 795972. Helpful Hint: in the Change Date column, you can enter an expression such as >07-01-2003, which would limit the records to those with a date later than July 1, 2003. To sort the displayed records in a particular order, click the column heading of the column you want to sort on (for example, Mat Req Nbr, which contains the Material Request Number). Note that all columns except Change Amt reflect the original value in the Material Encumbrance record. For example, if you are trying to find a Requisition to P/O change, search using the Requisition Number, not the P/O Number, in the Order Nbr column. Change Amt contains the net dollar amount change, if any. Change Reason usually shows an explanation of the change, although it may contain the words “Multiple Changes” or occasionally, nothing at all.
BLANKET INVOICE INQUIRY – Displays information on invoices against Blanket Purchase Orders. Information is restricted to records entered after February 2, 2002. This screen is very helpful for indirect purchases (those involving a clearing account) on a blanket and for reconciliation purposes. Entering more pieces of information as query criteria may help limit the number of records the system retrieves. You can use any column to enter query criteria. For example, if you know the Material Request Number, first click the “Enter Query Criteria” button, which creates a grid in the main part of the tab. Then scroll or TAB to the right until you see the Mat Req # column, click in the box under it, and enter the Material Request Number. Finally, click the “View Items” button. If that Material Request resulted in a purchase against a Blanket Purchase Order with a credit account (a clearing account), and if any invoices have been processed in FIMA for that Material Request, the system will display them. Helpful Hint: in date columns, you can enter an expression such as >07-01-2003, which would limit the records to those with a date later than July 1, 2003. To sort the displayed records in a particular order, click the column heading of the column you want to sort on (for example, Invoice Date).
41
MATERIAL INQUIRY MODULE (Input)
To open this module, click on the Material Inquiry icon (the flower pot), or click “Activities” from the menu, then choose “Material Inquiry”. The Material Inquiry window will open.
The majority of the tabs on this window are view only. See MATERIAL INQUIRY MODULE (Inquiry) in the preceding section for a description of the inquiry tabs.
BLANKET P/OS TABThis tab is used to maintain existing Blanket purchase orders and to set up new ones. To use this tab, enter the 3-character Document Type (which always begins with “BL” – i.e., BLP, BLY, etc.) and the 6-digit Document Number in the white boxes next to the words ”Document Type/Number”, then press ENTER. If this Blanket exists, the system will display its information. If it has not yet been set up, you will instead see blank columns ready for data entry. This tab includes two areas.
The upper area contains the following columns: Vendor Number – The 7-digit University Vendor Number associated with this Blanket.
The system displays the corresponding Vendor Name to the right of this column. (RQ)
42

Status – The status of the Blanket. (RQ) Choices are: A – Active, the default. Purchases may be made against this Blanket.I – Inactive. Purchases cannot be made against this Blanket. When setting up
Blankets in advance for a new fiscal year, status should be set to Inactive until the fiscal year actually begins.
Budget – The budgeted amount for this Blanket, with two decimal places (up to 9,999,999.99). (RQ if FRS Encumbered code = Y or Check Budget code = Y)
FRS Encumbered – A Yes or No (“Y” or “N”) column indicating the following (RQ):Y = This Blanket is encumbered in the University Financial Records System.N = This Blanket is not encumbered by the University Financial Records System.
This is the default. Check Budget – A Yes or No (“Y” or “N”) column indicating the following (RQ):
Y = When an encumbrance is entered against this Blanket, reject it if it would exceed the Blanket’s budget.
N = Allow encumbrances to be entered regardless of whether or not they exceed the Blanket’s budget. This is the default.
The lower area contains the following columns:Account Nbr – The 6-digit FRS Account Number that funds this Blanket. (RQ)Budget – The budgeted amount for this account, with two decimal places (up to
9,999,999.99).Req Nbr – The Requisition Number associated with this Blanket and account. (RQ)Dept – A dropdown list of Facilities Management Department Numbers. (RQ if Account
is anything other than an Inventory account.) Total Encumbrances – The total dollar amount ordered on this account (view only). Total Expenses – The total dollar amount invoiced on this account (view only). Total Remaining – The available balance on this account (Total Encumbrances minus
Total Expenses – view only).
To add another account on this Blanket, right click and choose “Add” from the popup menu. If FRS Encumbered or Check Budget are Yes, the total Budget for all accounts must equal the Blanket Budget before you can successfully save changes.
43

INVENTORY MANAGEMENT MODULE (Inquiry)
To open this module, click on the Inventory Management icon (the red table), or click “Activities” from the menu, then choose “Inventory Mgmt”. The Inventory Management window will open.
The Inventory Management Module includes the following tabs:
ITEM MAINTENANCE – Displays information on items that are carried by the Facilities Management warehouse. To select an item, use the drop down list to the right of the words “Item Nbr”. Helpful Hint: If you know the leading digit of the Item Number, type it in the drop down box before clicking the arrow, and the list will open to the first Item Number with that leading digit. Click on the item you want to view, then press ENTER or click the “Retrieve” button to display that item’s information. Once an item is displayed, you can click the “Display Usage” button to bring up a window summarizing purchase and usage information for the item, with Month-to-Date, fiscal Year-to-Date, and Life-to-Date (since fiscal year 2002) columns. You can print this as a report by click the “Print” button. To close the usage window, click the “Close” button, or close as you would any other window (by clicking the “X” in the upper right corner).
ITEM LOCATION – Displays information about item availability as well as minimum and maximum quantities. This tab is connected to the Item Maintenance tab; you must select the item you wish to view on that tab (see above).
VENDOR MAINT – Displays information about University vendors. To select a vendor, use the drop down list to the right of the words “Vendor Number”. This list is sorted in alphabetical order by Vendor Name. Click on the vendor you want to view, then click the “Retrieve” button.
VENDOR/ITEM – Displays information about which Inventory items are carried by which vendors. There are two ways to use this tab: you can select by vendor, or by Item Number. To select by vendor, use the drop down list to the right of the word “Vendor”. This list is sorted in alphabetical order by Vendor Name. Click on the vendor you want to view, then click the “Find” button. To select by item, either type the 7-character Item Number in the white box next to the words “Item Number”, or select it from the drop down list, then click the “Find” button. If there are no records for the vendor or item you selected, the system will display the message “No rows found for selected Item or Vendor”. Otherwise, a list of the vendors and items will display on the left side of the tab. Double click on a record from that list, and the information for that Vendor/Item record will display on the right side of the tab.
MANUFACTURER MAINT – Displays manufacturer information. To select a manufacturer, use the drop down list to the right of the words “Manufacturer Name”. Helpful Hint: You can type the first letter of the manufacturer’s name to open the list at that letter. Click the “Retrieve” button. The system will display that manufacture’s information.
MANUFACTURER/ITEM – Displays information about which Inventory items are made by which manufacturer. There are two ways to use this tab: you can select by manufacturer, or by Item Number. To select by manufacturer, use the drop down list to the right of the words “Manuf Name”. This list is sorted in alphabetical order by Manufacturer Name. Click on the manufacturer you want to view, then click the “Find” button. To select by item, either type the 7-character Item Number in the white box next to the words “Item Number”, or select it from the drop down list, then click the “Find” button. If there are no records for the manufacturer or item you selected, the system will display the message “No rows found for selected Item or Manufacturer”. Otherwise, a list of the manufacturers and items will display on the left side of the tab. Double click on a record from that list, and the information for that Manufacturer/Item record will display on the right side of the tab.
CYCLE COUNT PROCESS – Warehouse personnel use this tab to initiate the Inventory Cycle Count process and to generate reports used in the cycle count process.
44
PHYSICAL COUNT – Warehouse personnel use this tab to record the quantity counted for a particular Inventory item during a count process.
CYCLE COUNT OVERRIDE – Warehouse personnel use this tab to establish the on-hand quantity for a particular Inventory item when several counts failed to produce the same quantity twice.
QTY ON HAND INFO – This tab has extremely limited access. It displays the quantities the system has recorded for all Frozen (counting in process) items.
CREATE LABEL FILE – Warehouse personnel use this tab to create a downloadable file that they use to create bin labels for Inventory items.
45

INVENTORY MANAGEMENT MODULE (Input)
PURPOSE: This module is used primarily by Facilities Management Material Control to manage items in our main warehouse, as well as several other controlled inventory warehouses.
INSTRUCTIONS: To open this module, click on the Inventory Management icon (the red table), or click “Activities” from the menu, then choose “Inventory Mgmt”. The Inventory Management window will open.The Item Maintenance tab and the Item Location tab are connected – you must select (or add) the item on the Item Maintenance tab before proceeding to the Item Location tab. The rest of the tabs function independently.
ITEM MAINTENANCE TAB To find an existing Inventory item, either enter the 7-character Item Number in the white box to the right of the words “Item Nbr”, or click the arrow in the box to select from the drop down list of Item Numbers. Helpful Hint: If you know the leading digit of the Item Number, type it in the drop down box before clicking the arrow, and the list will open to the first Item Number with that leading digit. Press ENTER or click the “Retrieve” button to display that item’s information. To add a new Inventory item, right click in the main part of the tab. The system will display a screen with blank columns ready for your data entry. This tab includes 4 areas.
46

The upper area contains the following columns:Item Nbr – The 7-character Item Number assigned by the Material Control Manager. The
leading digit or character is often meaningful in grouping similar items. On an existing item, this column is view only. (RQ)
Status – The status code for this item. (RQ) Valid values are:A – Active. This item can be ordered. This is the default.I – Inactive. This item is no longer carried, and it cannot be ordered. You cannot
inactivate an item for which there are pending or incomplete Material Requests, or if its on-hand quantity is greater than zero.
Type – A drop down list indicating the type of item. Choices are:D – Dead Stock. This item is no longer used and is a candidate for being
inactivated.E – Emergency Stock. This item must be kept on hand due to its critical nature.P – Temporary - Classroom Project. This item is currently needed for a special
project.empty – This is the default for regular stock.
Item Description – The full description of the item, up to 120 alphanumeric characters. (RQ) Print Description – A shorter description that may be used in the future on bin labels, up
to 30 alphanumeric characters. (RQ) Category – The category for this item, up to 15 alphanumeric characters.Sub Category 1 – A subcategory for this item, up to 15 alphanumeric characters.Sub Category 2 – A second subcategory for this item, up to 15 alphanumeric characters.UPC Code – The 20-digit Uniform Product Code (often seen as a bar code) for this item.Unit of Issue – The unit by which the item is sold (e.g., EA for Each, BX for Box, etc.), up to
8 alphanumeric characters. (RQ) Issue Price – The price at which the item is sold, with four decimal places (up to
99,999.9999). This column must be entered if this is a new item. On an existing item, this column is automatically updated using a weighted average formula whenever additional items are received, and is view only. (RQ)
Item Entry Date – The date this item was data entered (view only).Entered By – The FIMA User ID of the person who data entered this item (view only).
The area at the middle left contains the following columns (view only):Last Purchase Price – The Base Unit Price (vendor’s unit price without tax, shipping, etc.)
from the most recent receipt of this item. Last Vendor Recvd – The name of the vendor from whom this item was most recently
received.Last Lead Days – The number of days between the Order Date and the Receipt Date on
the most recent receipt of this item.
The area at the middle right contains the following columns (view only):Open Order Nbr – The Material Request Number and order document Type and Number
of the most recent order for this item that has not been completely received.Next Due Date – The Expected Date of the above order.On Order Quantity – The total quantity currently on order but not received for this item.Count of Open Orders – The total number of orders for this item that have not been
completely received.
The area at the bottom contains the following column:Item Comment – A text column containing any comments related to this item.
This tab also contains a “Display Usage” button. For existing items, clicking this button brings up a window summarizing purchase and usage information for the item, with Month-to-Date, fiscal Year-to-Date, and Life-to-Date (since fiscal year 2002) columns. You can print this as a report by click the “Print”
47

button. To close this summary window, click the “Close” button, or close as you would any other window (by clicking the “X” in the upper right corner).
ITEM LOCATION TABFor an existing item, this tab displays information for the Item Number you selected on this previous tab (Item Maintenance). If you are setting up a new Item Number, it displays a row of blank columns ready for your data entry. This tab contains the following columns:
Whse – The 2-character Warehouse Number that stocks the item. (RQ) The default is warehouse 1.
Qty On Hand – The current quantity on hand at this warehouse, with two decimal places (up to 9,999,999.99). (RQ) If this is an existing item, this column is view only and can only be changed via a Cycle or Special Count process.
Min Qty – The minimum quantity that should be stocked in this warehouse, with two decimal places (up to 9,999,999.99).
Max Qty – The maximum quantity that should be stocked in this warehouse, with two decimal places (up to 9,999,999.99).
Location – The item’s location within the warehouse (for example, aisle and bin numbers), up to 30 alphanumeric characters.
Cycle Count Code – The code designating how often this item is counted. (RQ) Valid values are:A – This item is counted every 3 months.B – This item is counted every 6 months.C – This item is counted once a year. This is the default.
Last Count Date – The date this item was most recently counted (view only).Next Count Date – The date this item is due to be counted, formatted MM/DD/YYYY.
(RQ) Frozen - Designates whether or not the item is in the process of being counted. (RQ)
Valid values are:N – The item is not being counted. This is the default.Y – The item is currently being counted. It cannot be received or issued,
and its on-hand quantity will not display, since it is currently unknown.
An item may be stocked in multiple warehouses. To add another warehouse location for this item, right click and choose “Add” from the popup menu.
VENDOR MAINT TABThis tab tracks information about University vendors we do business with. To find an existing vendor, either enter the 7-digit University Vendor Number in the white box to the right of the words “Vendor Number”, or click the arrow in the box and select a vendor from the drop down list. (This list is sorted in alphabetical order by Vendor Name.) Click the “Retrieve” button to display the vendor’s information. To add a new vendor, right click in the main part of the tab. The system will display a screen with blank columns ready for your data entry. This tab includes 6 areas.
Vendor Information contains the following columns:Vendor Nbr – The 7-digit University Vendor Number. (RQ)Ven Name – The vendor name, up to 30 alphanumeric characters. (RQ)Address – The vendor’s actual street address, up to 40 alphanumeric characters on each
of two lines. The first line is required, the second is optional.
48

City – The city of the above street address, up to 30 alphanumeric characters. This defaults to “Tucson”. (RQ)
State – The 2-character state abbreviation (or Canadian province code) of the above address. This defaults to “AZ”. (RQ)
Zip Code – The 9-digit zip code. For Canadian addresses, use 0. (RQ)Phone Nbr – The vendor’s 10-digit area code and phone number.Active Flag – Designates the status of this vendor. (RQ) Valid values are:
A – Active. Purchases can be made from this vendor. This is the default.I – Inactive. No purchases can be made from this vendor.
Billing Information contains the following columns:Address – The vendor’s billing address, if different from the actual street address, up to
40 alphanumeric characters.City – The city of the billing address, up to 30 alphanumeric characters. This defaults to
“Tucson”.State – The 2-character state abbreviation of the billing address. This defaults to “AZ”.Zip Code – The 9-digit zip code for the billing address.
Rate Information contains the following columns:Tax Rate – The tax rate normally charged by this vendor, with 4 decimal places (up to
9.9999; for example, 7.6% is 0.076).Discount Rate – The discount rate this vendor offers, with 4 decimal places (up to 9.9999;
for example, 2% is 0.0200).
Click Button Below For Internet Page contains the following button:“Web Page” – This button is enabled if the Internet Address area (see below) contains a
valid website address for this vendor. If enabled, clicking this button will launch the pc’s default web browser application and attempt to connect to the listed internet address.
Internet Address contains the following column:Internet Address – The vendor’s Internet (website) address, up to 150 alphanumeric
characters.
Representative Information contains the following columns:Rep Name – The vendor representative’s name, up to 40 alphanumeric characters.Address – The representative’s address, up to 40 alphanumeric characters.City – The representative’s city, up to 30 alphanumeric characters. This defaults to
“Tucson”.State – The 2-character state abbreviation. This defaults to “AZ”.Zip Code – The representative’s 9-digit zip code.Rep Phone – The representative’s 10-digit area code and phone number.Fax Nbr – The 10-digit area code and phone number for fax communication.Ven Email – The vendor’s or vendor representative’s email address, up to 80
alphanumeric characters.
VENDOR/ITEM TABThis tab tracks which vendors sell the items we carry in Inventory. There are two ways to find existing records: you can select by vendor, or by Item Number. To select by vendor, use the drop down list to the right of the word “Vendor”. This list is sorted in alphabetical order by Vendor Name. Click on the vendor whose items you want to view, then click the “Find” button. To select by item, either type the 7-character Item Number in the white box next to the words “Item Number”, or select it from the drop down list, then click the “Find” button. If records were found, a list of the vendors and items will display in the
49

Vendor/Item List area on the left side of the tab. Double click on a record from that list, and the information for that Vendor/Item record will display on the right side of the tab. If there are no records for the vendor or item you selected, the system will display the message “No rows found for selected Item or Vendor”. To add a new record, right click in the Vendor/Item Information area on the right side of the tab and choose “Add” or “Insert” from the popup menu. This tab includes two areas.
Vendor/Item List contains the following columns (view only):Vendor Name – If you selected by vendor and rows exist with that vendor, this column
will display that vendor’s name. If you selected by item, this column will contain a list of all the vendors that carry that item.
Item – If you selected by vendor, this column will list all the FIMA Inventory Item Numbers that vendor carries. If you selected by item and rows exist for that item, this column will display that Item Number.
Vendor Item Information contains the following columns:Item Nbr – The 7-character Inventory Item Number assigned by the Material Control
Manager. (RQ) On existing records, this column is view only. The Item Description displays to the right of the number.
Vendor Nbr – The 7-digit University Vendor Number of the vendor selling this item. (RQ) On existing records, this column is view only. The Vendor Name displays to the right of the number.
Vendor Item Nbr – The part number this vendor uses for this item, up to 40 alphanumeric characters.
Manufacture Nbr – The FIMA Manufacturer Number of the manufacturer of this item, up to 9 digits. See the Manufacturer Maint tab for a list of manufacturers and their Manufacturer Numbers.
Last Purchase Price – The most recent price at which this vendor sold this item, with four decimal places (up to 99,999.9999).
Comments – A text column of virtually unlimited length containing any comments about this vendor/item combination.
If you need to delete a particular Vendor/Item record because that vendor no longer sells the item, make sure the correct record is displayed in the Vendor Item Information area, then right click in that area and choose “Delete” from the popup menu.
MANUFACTURER MAINT TABThis tab tracks basic information about the manufacturers of the items we stock in Inventory. To select an existing manufacturer record, use the drop down list to the right of the words “Manufacturer Name”. Helpful Hint: You can type the first letter of the manufacturer’s name to open the list to that letter. Click the “Retrieve” button. The system will display that manufacture’s information. To add a new manufacturer, right click in the main part of the tab and choose “Add” from the popup menu. Blank columns will display ready for your data entry.
This tab contains the following columns:Manufacturer Name – The name of this manufacturer, up to 30 alphanumeric characters.
(RQ) Manufacture Nbr – The system-assigned Manufacturer Number, up to 9 digits (view
only).Status – Designates the status of this manufacturer. (RQ) Valid values are:
A – Active. We stock products made by this manufacturer. This is the default.I – Inactive. We no longer stock this manufacturer’s products.
50

MANUFACTURE/ITEM TAB This tab tracks which manufacturers make the items we carry in Inventory. There are two ways to find existing records: you can select by Item Number, or by Manufacturer Name. To select by item, either type the 7-character Item Number in the white box next to the words “Item Nbr”, or select it from the drop down list, then click the “Find” button. To select by manufacturer, use the drop down list to the right of the words “Manuf Name”. This list is sorted in alphabetical order by Manufacturer Name. Click on the manufacturer whose items you want to view, then click the “Find” button. If records were found, a list of the manufacturers and items will display on the left side of the tab. Double click on a record from that list, and the information for that Manufacturer/Item record will display on the right side of the tab. If there are no records for the manufacturer or item you selected, the system will display the message “No rows found for selected Item or Manufacturer”. To add a new record, right click in the area on the right side of the tab and choose “Add” or “Insert” from the popup menu. This tab includes two areas.
The area on the left side of the tab contains the following columns (view only):Manufacturer Name – If you selected by manufacturer and rows exist with that
manufacturer, this column will display that manufacturer’s name. If you selected by item, this column will contain a list of all the manufacturers that make that item.
Item Nbr – If you selected by manufacturer, this column will list all the FIMA Inventory Item Numbers that manufacturer makes. If you selected by item and rows exist for that item, this column will display that Item Number.
The area on the right side of the tab contains the following columns:Manufacturer – A drop down list of manufacturers, sorted by Manufacturer Name. (RQ)Item Nbr – A drop down list of our Inventory Item Numbers, sorted by Item Number and
also displaying Item Description. (RQ)Manufacturer’s Item Nbr – The part number this manufacturer uses for this item, up to 40
alphanumeric characters.Comment – A text column of virtually unlimited length containing any comments related
to this manufacturer/item number combination.
If you need to delete a particular Manufacturer/Item record because that manufacturer no longer makes the item, make sure the correct record is displayed on the right side of the tab, then right click in that area and choose “Delete” from the popup menu.
CYCLE COUNT PROCESS TAB This tab contains a series of buttons that run processes associated with Cycle Counts and Special Counts of Inventory items. Each active Inventory item carries a Cycle Count Code that designates how often the item is physically counted, as well as a Next Count Date that designates when the item is to be counted again. Cycle counting ensures that each Item Number is counted at least once a year, but avoids the necessity of closing the Warehouse(s) for a single massive annual count of all items. Special Counts can be done on any item or group of items at any time.
This tab contains the following buttons:
Cycle Count Processing – This button produces a report of items to be counted and freezes those items so they cannot be issued or received while the count is in progress. When you click this button, a window opens requesting the date for the Cycle Count. This defaults to today’s date. To use a different date (for example, if a holiday is coming up and you want to count the items scheduled for that date ahead of time), enter it in the format MM/DD/YYYY. To stop the Cycle Count process at this point, click this window’s “Cancel” button. Otherwise, click the “OK” button. This produces a report of items that were scheduled to be
51

counted on the date you selected, as well as any due to be counted today or prior to today, displayed in another window. Right click in this window and choose “Print” from the popup menu to print this report.
Reprint Cycle Count 1 List – This button allows you to reprint the Cycle Count report, but only prints items scheduled to be counted today or prior to today that are already frozen. When you click this button, a window opens displaying the “Cycle Count Listing” report. To print the report, right click in this window and choose “Print” from the popup menu.
Special Count Processing – This button allows a range of Item Numbers in a specific Warehouse to be counted at a time other than their next Cycle Count date. When you click this button, a window opens containing the following columns:
Warehouse Nbr – The 2-character Warehouse Number where the items are located. (RQ)
Starting Item Number – The 7-character Item Number of the first item to count. (RQ)
Ending Item Number – The 7-character Item Number of the last item to count. (RQ)
Fill in all three columns (to count only one item, enter its Item Number in both the Starting and Ending Item Number columns). To stop the Special Count process at this point, click the window’s “Cancel” button. Otherwise, click the “OK” button. This produces a report of the items you selected, displayed in another window. To print this “Special Count List”, right click in this window and choose “Print” from the popup menu. The system will then freeze these items so they cannot be issued or received while the count is in progress. When this process has finished, the system displays the message “Report and the Special Count Record(s) has/have been Generated.”
Inventory Items Not Counted – This button produces a report of Inventory items that were frozen for counting (through either a Cycle Count or a Special Count) but for which physical count information has not yet been entered. When you click this button, a window opens displaying the “Noncounted Items List” report. To print the report, right click in this window and choose “Print” from the popup menu.
PHYSICAL COUNT TABThis tab is used to enter the physical count for each item during a Cycle or Special Count process.
To select an item in order to enter its physical count, enter the 7-character Item Number in the white box to the right of the words “Item Nbr”. If the warehouse is anything other than Warehouse 1 (the default), enter the 2-character Warehouse Number in the white box to the right of the words “Warehouse Nbr”. Click the “Retrieve” button. If you entered a valid Item Number and Warehouse Number, and this item was frozen for counting (see CYCLE COUNT PROCESS TAB above), its information will display in the main part of the tab.
This tab contains the following columns: Item Nbr – The 7-character Item Number selected above. The item’s description displays
to the right of the Item Number (view only).Warehouse Nbr – The 2-character Warehouse Number selected above (view only).Cycle Count Nbr – Displays 1 if this is the first count entry for this item, 2 for a second
count, or 3 for a third count (view only).Counted Quantity – The quantity written on the count sheet (the physical count), with two
decimal places (up to 9,999,999.99).52

Counted Date – The date the item was counted, formatted MM/DD/YYYY. (RQ)
Save the entered information. If the entered count (Counted Quantity) matches the on-hand quantity currently recorded in the system, the item is unfrozen immediately and its Last Count Date is set to today’s date. Additionally, if a Cycle Count process was being done, the system sets the item’s Next Count Date 3, 6, or 12 months into the future according to its Cycle Count Code.
If the count does not match, the system displays the message “Count Does Not Match, Recount is Necessary”, and the item stays frozen, requiring a second count. When the second count is entered, the item will be unfrozen if the entered count matches either the currently recorded on-hand quantity or the Count Quantity from the first count. If the entered count matched the first count, the item’s on-hand quantity is set to the Count Quantity. Its Last Count Date and Next Count Date are also updated as described above. Otherwise, the item remains frozen, requiring a third count.
When the third count is entered, the item will be unfrozen if the entered count matches either the currently recorded on-hand quantity or the Count Quantity from the first or second count. If the entered count matched the first or second count, the item’s on-hand quantity is set to the Count Quantity. Its Last Count Date and Next Count Date are also updated as described above. Otherwise, the item remains frozen, and the system displays the message “This item must be handled through an override, no match found.” The Material Control Manager must then use the Cycle Count Override tab to unfreeze the item (see the CYCLE COUNT OVERRIDE TAB section for more information).
When counts have been entered for all items, click the “Generate Recount List” button. Clicking this button opens a window requesting the Count Number. Enter 2 if you have just finished the first count, or 3 if you have just finished the second count. To stop the recount report from generating, click the “Cancel” button. Otherwise, click the “OK” button. This produces a report of the items requiring another count, displayed in another window. To print this “Recount Listing”, right click in this window and choose “Print” from the popup menu.
CYCLE COUNT OVERRIDE TAB The Material Control Manager uses this tab to enter final override count information on items that produced a different physical count on each of the three required counts, none of which matched the system’s on-hand quantity. To obtain a list of these items, click the “Generate Override Report” button. This displays the “Cycle Count Override List” report in another window. To print this report, right click in this window and choose “Print” from the popup menu.
To select an item in order to enter its override count, enter the 7-character Item Number in the white box to the right of the words “Item Nbr”. If the warehouse is anything other than Warehouse 1 (the default), enter the 2-character Warehouse Number in the white box to the right of the words “Warehouse Nbr”. Click the “Retrieve” button. If you entered a valid Item Number and Warehouse Number, and this item required an override count, its information will display in the main part of the tab.
This tab contains the following columns: Item Nbr – The 7-character Item Number selected above. The item’s description displays
to the right of the Item Number (view only).Warehouse Nbr – The 2-character Warehouse Number selected above (view only).Cycle Count Nbr – Displays the number 4 (view only).Counted Quantity – The quantity the Material Control Manager has determined to be the
final, correct physical count for this item, with two decimal places (up to 9,999,999.99). (RQ)
Counted Date – The date the item was counted, formatted MM/DD/YYYY. (RQ)
53

Save the entered information. The system will display a window requesting the reason for the override count (up to 120 alphanumeric characters, required). To stop the override from being accepted, click the “Cancel” button. Otherwise, click the “OK” button. The item is then unfrozen , its on-hand quantity is set to the Counted Quantity, and its Last Count Date is set to today’s date. Additionally, if a Cycle Count process was being done, the system sets the item’s Next Count Date 3, 6, or 12 months into the future according to its Cycle Count Code.
QUANTITY ON HAND INFO TABThis is a VIEW-ONLY tab with access limited to the Material Control Manager. It is the only tab where the on-hand quantity currently recorded in the system is visible for items that are frozen for counting.
This tab contains the following columns:Item Number – The 7-character Item Number of the frozen Inventory items.Item Description – The description of each item.Qty On Hand – The quantity currently recorded as being on hand for each item.Warehouse # – The 2-character Warehouse Number where the item is stocked.
CREATE LABLE FILE TABThis tab allows the creation of an ASCII file which can be downloaded to the Label Matrix program to create barcode bin labels for Inventory items.
This tab contains the following columns:Starting Item Number – A drop down list of all Inventory Item Numbers. The Item
Description displays beside each Item Number. Select the first Item Number for which you want to make a label.
Ending Item Number – A drop down list of all Inventory Item Numbers. The Item Description displays beside each Item Number. Select the last Item Number for which you want to make a label.
To create the download file, click the “Create File” button. When the data has been extracted, the system displays the “Save File As” window. Near the top of this window, the white box next to the words “Save in” displays the default file location, which is c:\. Near the bottom of this window, the white box next to the words “File Name” displays the default file name, which is binlabel.bar. Change the default location and/or file name if desired. To cancel the creation of this file, click the “Cancel” button. Otherwise, click the “Save” button. If the file was created, the system displays the message “Bin Label File saved successfully”.
54

MATERIAL REQUEST MODULE (Inquiry)
To open this module, click on the Material Request icon (the white document), or click “Activities” from the menu, then choose “Material Request”. The Material Request window will open.
The Material Request Module includes the following tabs:
STOCK ITEM LOOKUP – Displays information on items that are stocked in one of the Facilities Management warehouses. To search by Item Number, either click the arrow on the “Item Number” drop down list to see the full list of items (numbers and descriptions), or type the first one or two digits or letters of the Item Number, then click the arrow to open the list at that point. Once the list of Item Numbers is displayed, scroll through it until you see the item you are interested in. Click on that item to display its information. To search by Description or Category, click in the white box next to the words “Partial Description/Category” and type a few letters of the item’s description, such as wire or electr. Press ENTER or TAB. If there are any items with descriptions or category information that contain the letters you typed, they will display. At the bottom of the window, you will see the number of items found (for example, “Rows found: 124”). If multiple items were found, you will see a scroll bar on the right side of the window. Scroll through the items until you see the one you are interested in. Helpful Hint: to refine your search by description or category, use the wildcard character % to include multiple words. For example, if you’re looking for 3 foot copper pipe, try typing copper%pipe. (If you still don’t find what you’re looking for, try reversing the order of the words.)
ENTER/VIEW MATERIAL REQUESTS – Displays an existing Request for Material. Enter the Material Request Number in the white box to the right of the words “Req #”, then press ENTER or click the “Retrieve” button. The top part of the tab displays information such as Job, Service Request, Shop, Vendor, Account, and Status of Stock and Non-Stock items. The bottom part displays any items that have not yet been issued from Inventory or ordered on some type of purchasing document. If Material Control has not yet processed this request, you can print it by clicking the “Print Req” button. You can also add comments by clicking the “Add Comments” button; if there are existing comments, this button will say “Add/View Comments”. See the MATERIAL REQUESTS MODULE (Input) section for more information.
VIEW ISSUES – This tab is connected to the Material Request you selected on the Enter/View Material Requests tab. It will appear if items on that Material Request were issued from an FM warehouse. All information is view only.
VIEW ORDERS TAB – This tab is also connected to the Material Request you selected on the Enter/View Material Requests tab. It will appear if this request contained non-stock items and Cost Accounting has approved the request. The items may still be on order, or they may have been received. All information is view only.
55
MATERIAL REQUESTS MODULE (Input)
PURPOSE: This tab allows employees to request materials they need. Materials can be issued from a Facilities Management warehouse, or purchased from University Stores or an outside vendor. A Material Request is required for any type of purchase, including services such as copy machine maintenance, conference registration fees, carpet installation provided by an outside vendor, etc.
INSTRUCTIONS: To open this module, click on the Material Request icon (the white document), or click “Activities” from the menu, then choose “Material Request”. The Material Request window will open.
STOCK ITEM LOOKUP TABThis tab allows you to view information about the Inventory items stocked in Facilities Management’s warehouses. Requesting items from Inventory is often the quickest way to get material. You can search for an item by its Item Number, or by its description or category.
To search by Item Number, either click the arrow on the “Item Number” drop down list to see the full list of items carried (numbers and descriptions), or type the first one or two digits or letters of the Item Number, then click the arrow to open the list to the first Item Number starting with those characters. Once the list of Item Numbers is displayed, scroll through it until you see the item you are interested in. Click on that item to display its information.
56

To search by Description or Category, click in the white box next to the words “Partial Description/Category” and type a few letters of the item’s description, such as wire or electr. Press ENTER or TAB. If there are any items with descriptions or category information that contain the letters you typed, they will display. At the bottom of the window, you will see the number of items found (for example, “Rows found: 124”). If multiple items were found, you will see a scroll bar on the right side of the window. Scroll through the items until you see the one you are interested in. Helpful Hint: to refine your search by description or category, use the wildcard character % to include multiple words. For example, if you’re looking for 3 foot copper pipe, try typing copper%pipe. (If you still don’t find what you’re looking for, try reversing the order of the words.)
This tab contains the following columns (view only):Item Nbr – The 7-character FM Inventory Item Number.Status – The item’s status. A = Active; I = Inactive. Inactive items cannot be requested.Item Descr – The description of this item.Category – The general category this item belongs to, such as “Plumbing”; for some
items, the manufacturer is listed here. This information may not have been filled in for all items.
Sub Category 1 – A secondary category, such as “Pipe”; for some items, a vendor’s or manufacturer’s part number is listed here. This information may not have been filled in for all items.
Sub Category 2 – An even finer categorization, such as “Copper”. This information may not have been filled in for all items.
Unit of Issue – The item’s unit of issue, such as “EA” for each or “FT” for foot.Issue Price – The current base issue price for this item. This price does not include
warehouse recovery percent or Shop Stock recovery percent, and it is subject to change whenever additional quantities of the item are received.
Item Comment – Any comments entered by Material Control personnel about this item.Whse – The warehouse stocking the item. More than one row could be displayed here.Qty On Hand – The current on-hand quantity in this warehouse. This number changes
whenever the item is issued, returned, or received. If you see the words “Item is Frozen for counting – Quantity not available”, this means that warehouse personnel are currently performing a physical count on the item. During this process, the item cannot be issued, returned to the warehouse, or received. Once the count process is complete, you will be able to see the quantity on hand.
Copy and Paste Feature:If you are creating a Material Request, you can copy and paste the Item Number into the request so you don’t have to write it down or try to remember it. Once the information for the item you want is displayed, click on the “Copy Displayed Item Number to Clipboard” button (or press and hold the ALT key and press the letter C). You won’t see anything happen, but when you switch to the Material Request tab, you will be able to paste the item number into the Stock Item Nbr column (see below).
ENTER/VIEW MATERIAL REQUESTS TABTo select an existing Material Request, type the Material Request Number in the white box to the right of the words “Req #”, then press ENTER or click the “Retrieve” button. Depending on the status of the request, you may or may not be able to make changes to it. To create a new Material Request, right click in the upper area of the tab, then choose “Add” from the popup menu, or press F1. This tab includes three areas.
The upper area contains the following columns:Job Nbr – The Job Number where the material or services will be charged, up to 10
alphanumeric characters. (RQ)S/R – The Service Request Number where the material or services will be charged. (RQ)
57

Shop – The Shop Number where the material or services will be charged. (RQ)Request Nbr – The Material Request Number, up to 9 digits (view only). The system
assigns this number when a new request is successfully saved.Est. Total – The estimated total dollar amount of this request. This is based on the Unit
Price multiplied by the Quantity Requested for all line items on the request. It does not include warehouse or Shop Stock recovery, tax, shipping, etc., and is also subject to change if the unit price of the requested items changes. If the unit price on all line items is zero, this column will be 0.00. (View only.)
Date Required – The date this material or service is needed, formatted MM/DD/YYYY. (RQ) The default is the date that is 3 days from the date the request was entered.
Warehouse – If this request was made by Material Control to order additional stock for Inventory, this column contains the 2-character Facilities Management Warehouse Number where the material will be stocked.
Date Entered – The date and time this request was entered (view only).Requestor Name – The person requesting the material or service. (RQ) This defaults to
the FIMA User ID of the person logged in to the computer when the request was entered. If this Material Request is for someone other than that individual, the column should contain the first and last names of the person who actually needs the material or services.
Delivery/Special Instructions – Any delivery or other instructions for this request, up to 255 alphanumeric characters. If the Shop has default Delivery Instructions set up (see the SHOP MODULE section for more information), they will automatically display here, but can be changed if necessary.
Vendor – A drop down list of vendors, sorted by Vendor Name and also listing Vendor Number. Helpful Hint: to open this list to a particular letter, type that letter, then click the arrow. This information is not required, but is helpful for Material Control if you are requesting non-stock material. NOTE: If the desired vendor is not on the drop down list, include its name in the Delivery/Special Instructions column.
Account – The 6-digit FRS Account Number that will ultimately be charged for the material or services. This usually defaults to the correct account based on the Job and Shop you entered earlier.
Object Code – The 4-digit FRS Object Code designating the type of material or services. This column is entered by Material Control or Cost Accounting.
Document Type/Nbr – The purchase document assigned by Material Control, if this request contains non-stock items and Material Control already has processed it (view only).
Additional Requests? – A Yes or No column designating whether or not any other Material Requests are tied to this one. N = no other requests are associated with this one. Y = the requested items had to be ordered from more than one vendor, or a backorder was created for some items. In this case, you will see a scrollbar at the right side of the window. Scrolling down displays the additional request(s). (View only.)
Original Request Nbr – If the Material Request currently showing on the tab was an additional request created by Material Control to order from multiple vendors or handle a backorder, this column contains the Material Request Number originally created by the requestor (view only).
The Status area contains the following columns (view only):Stock Items – This column displays a brief message regarding the status of any Inventory
items on the request. Messages are:New Request – Material Control has not yet issued these items. If the Nonstock
Items column displays the same message or no message, changes can still be made to this request.
Not All Requested Quantities Available – There were not enough items on hand to 58

issue everything requested, although some items were issued. Issue Complete – All the Inventory items requested have been issued from the
warehouse.No message indicates that no Inventory items were requested.
Nonstock Items – This column displays a brief message regarding the status of any non-stock items (items not carried by a Facilities Management warehouse) on the request. Messages are:New Request – Material Control has not yet started the purchase process for
these items. If the Stock Items column displays the same message or no message, changes can still be made to this request.
Waiting for Cost Accounting Approval – Material Control has assigned a vendor and purchase document to this request, and Cost Accounting must now add account and object code information and approve the order.
Order Approved – Cost Accounting has approved the order. It may or may not have been received.
Items Carried by Warehouse or on Separate Request – Material Control either discovered that the items requested were items they stock in Inventory, or the items were not all available from a single vendor, so they created an additional request for some of the items.
No message indicates that only Inventory items were requested.
The lower area of the tab may contain multiple rows. This is where the individual line items on the request are tracked. On an existing request, if nothing is displayed in this area, that indicates that all items were issued (in the case of Inventory items; see VIEW ISSUES TAB below) or that an order has been approved and possibly received (in the case of non-stock items; see VIEW ORDERS TAB below), or occasionally, that the requestor changed his or her mind and deleted all the line items (however, the information in the upper part of the tab cannot be deleted). To add a line item, right click in this area and choose “Add” (or “Insert”, if available) from the popup menu, or press F1. To delete an existing line, right click on a column on that line that allows changes and choose “Delete” from the popup menu. This area contains the following columns:
Line Nbr – The system-assigned sequential line number for this line item, starting with 1 (view only).
Stock Item Nbr – A drop down list of all items carried in FM Inventory. Helpful Hint: you can type the entire 7-character Item Number if you know it; or, if you used the “Copy Displayed Item Number to Clipboard” feature from the Stock Item Lookup tab, right-click and choose Paste from the pop-up menu to fill in the Item Number with the one you copied. If the Item Number is valid and active, the system will automatically fill in the Manufacturer’s Item Number, Unit of Issue, Unit Price, and Item Description after you leave this column. If the item being requested is not carried in Inventory, this column is blank.
Manufacturer’s Item Nbr – The Manufacturer’s part number for this item, up to 40 alphanumeric characters. (RQ) The system automatically fills this in for Inventory items. If the item being requested is a service, this column should contain the word “service”. On non-stock items, the system will check this column to see if any Inventory items have this Manufacturer’s Item Number. If so, a pop-up window displays with the message “These Inventory Items have the Manufacturer’s Item Number you entered…” followed by a list of Manufacturer names and warehouse stock Item Numbers. If one of these items is the one you want, that means Material Control carries it in the warehouse. To choose that item from this list, click the box under the heading “Request this Item?” to place a check mark in the box, then click the “Continue” button to return to the Material Request. If none of the items listed is the one you want, just click the “Continue” button to go back to the request.
Item Description – The complete description of the item (or service) being requested, up to 120 alphanumeric characters. (RQ) The system automatically fills this in for Inventory items.
59

Unit of Issue – The unit of issue for the item being requested (EA for Each, FT for Foot, etc.), up to 8 alphanumeric characters. (RQ) The system automatically fills this in for Inventory items.
Unit Price – The price per unit of this item, if known, with four decimal places (up to 999,999,999.9999). The default is 0.0000. Material Control may change this price on a non-stock item when they process the request. The system automatically fills this in for Inventory items.
Quantity Requested – The quantity needed for this item, with two decimal places (up to 9,999,999.99). (RQ)
Quantity Issued – On an existing request, if this is an Inventory item but there was not enough stock on hand in the warehouse to issue the total Quantity Requested, this column displays the quantity that has been issued.
If you are entering a new request, once you have saved it successfully, clicking the “Print Req” button will print a copy of the request. When you close the Material Request window, the system displays a message asking if you want to automatically print all your new Material Requests. Clicking the “Yes” button in response to this message will print those requests, but if you entered several requests before closing the window, it is possible that Material Control may already have processed one or more of them, and the processed requests will not print. Therefore, it’s safer to print each request individually after saving by using the “Print Req” button.
Copy Detail FeatureIf you are entering multiple requests with a very similar list of line items (for example, you are doing the same type of PM work on several different Job and Service Request numbers), you can click the “Copy Detail” button to copy all the detail lines on the first saved request. Then, after starting a new request and filling in the top area of the tab, click the “Paste Detail” button to fill in the bottom area of the tab with those same items. You can change quantities, or add or delete items as necessary, on the new request.
Adding and Viewing CommentsAnyone who has access to a particular Material Request can add comments to it, and view existing comments. This is done via the Comments button.
The text on the button will read “Add/View Comments” if comments currently exist, or “Add Comments” if no comments exist yet. The picture to the left of the button will also be slightly different depending on whether or not comments have been entered.
When the Comments window opens, any existing comments will display, starting with the most recently entered at the top. To the left of each comment, you will see the date and time it was entered, and the User ID of the person who entered it. The comment itself is a text column, and you may see a small scrollbar at the right side of that column. You can use this scrollbar, if necessary, to read the entire comment, but you cannot make changes to an existing comment.
To add a new comment, right click and choose “Add” from the pop-up menu. The date and time and the User ID of the person logged in to FIMA will automatically fill in. Type your comment. If you decide not to save this comment, click the “Cancel” button. You will see a message asking, “Do you want to save changes?” with “Yes”, “No” and “Cancel” buttons. If you don’t want to save the comment, click the “No” button. If you want to save it after all, click “Yes” or just press ENTER. If you want to make more changes to the comment, click the “Cancel” button (you will remain on the Comments window). If you want to save a comment, just press ENTER, or click the “Save” button. Comments cannot be deleted once they are saved.
60

VIEW ISSUES TABIf you selected an existing request on the Enter/View Material Requests tab, this tab will appear if items on that Material Request were issued from an FM warehouse. All information is VIEW ONLY. If all the line items issued will not fit on the window, if more than one Issue was done, or if a Return to Warehouse was done, you will see a scrollbar on the right side of the window.
This tab contains the following columns for each Issue or Return document associated with this Material Request:
Issue Doc Nbr – The Issue Document Number, assigned by the system when warehouse personnel process the issue.
Issue Date – The date and time this Issue transaction was saved in the system.Mat Req Nbr – The Material Request Number that initiated this Issue.Job Nbr – The Job charged for this material.S/R Nbr – The Service Request Number charged.Shop – The Shop charged for this material.Task ID – The Task ID on the Service Request (typically 100000; a number starting with
“2” denotes Standing Service Requests, “4” denotes Estimates, “5” is Deferred Maintenance, “8” is Preventive Maintenance, and “9” is PM Generated).
Acct/Obj Code – The FRS Account and Object Code charged.Entered by – The FIMA User ID of the person logged in at the computer where the issue
was processed.Requestor – The Requestor Name from the Material Request.Warehouse – The 2-character Warehouse Number the material was issued from.Cost Amt – The cost to the shop, including Shop Stock recovery percent, if applicable.
An amount in parentheses indicates a Return to Warehouse (a credit).Billing Amt – The cost to the customer. This may be higher that the Cost Amount,
depending on the Job Number that was charged. An amount in parentheses indicates a Return to Warehouse.
The following columns may appear multiple times on one Issue or Return Document if more than one item number was issued or returned:
Issue Line Nbr – A sequential line number assigned by the system to each line item.Item Nbr – The Inventory Item Number of the material.Unit of Issue – The unit of issue for the material, such as “EA” for each or “FT” for foot.Qty Issued – The issued quantity for this item. A negative quantity indicates a Return to
Warehouse.Issue Unit Price – The price charged for each unit of this item, not including Shop Stock
recovery percent.Extended Cost – The Quantity Issued multiplied by the Issue Unit Price. An amount in
parentheses indicates a Return to Warehouse.Descrip – The description of the item.
VIEW ORDERS TABIf you selected an existing request on the Enter/View Material Requests tab, this tab will appear if material or services could not be issued from an FM warehouse, and Cost Accounting approved this request for purchase from an outside vendor. All information is VIEW ONLY. If multiple line items are involved, or if Material Control had to order from multiple vendors or create a backorder, you will see a scrollbar on the right side of the window. This tab includes seven areas.
The top area contains the following columns:Doc Type/Nbr – The purchase document type (POP, BLY, REQ, SOF, etc.) and number.Ordered – The date on the purchase document.Expected – The date the order is expected to be received.
61

Mat Req Nbr – The Material Request Number (this may be different from the original request number if Material Control had to create an additional request on a backorder or order from multiple vendors).
Job Nbr – The Job to be charged for this material.S/R Nbr – The Service Request Number charged.Shop – The Shop to be charged for this material.Task ID – The Task ID on the Service Request (typically 100000; a number starting with
“2” denotes Standing Service Requests, “4” denotes Estimates, “5” is Deferred Maintenance, “8” is Preventive Maintenance, and “9” is PM Generated).
Ref Type/Nbr – If this order starts out as a Purchase Requisition (until University Purchasing assigns a Purchase Order) or as a Stores Order (until University Stores turns it into a Stores Invoice), the Purchase Requisition (REQ) or Stores Order (SOF) will appear here, and the Purchase Order (PO) or Stores Invoice (SIV) will display (once it has been assigned) as Doc Type/Nbr.
Invoice Nbr – This column contains the Invoice Number if an invoice has been processed for this order.
Warehouse – If this was an order placed by Material Control to restock a warehouses, this columns contains that Warehouse Number.
Backorder? – A Yes or No column designating whether or not this order is a backorder.
Account Information contains the following columns:Debit Acct/Obj Code – The FRS Account and Object Code to be charged for this order.Credit Acct/Obj Code – If this order was made on a Blanket Purchase Order, this column
may contain a different FRS Account and Object Code that will initially be charged for the order. They will later be credited and the order will ultimately be charged to the Debit Account and Object Code.
Vendor Information contains the following columns:Vendor – The University Vendor Number and name of the vendor supplying this material
or service.Tax Pct – The tax charged for this order, displayed as a decimal (0.0760 is 7.6%). This is
subject to change until the order has been completely invoiced.Discount Pct – The discount we expect on this order, displayed as a decimal (0.0100 is
1%). This is subject to change until the order has been completely invoiced.Shipping – The dollar amount of shipping charged. This is subject to change until the
order has been completely invoiced.Extra Charges – The dollar amount of any other charges from the vendor. This is subject
to change until the order has been completely invoiced.
Totals at Cost contains the following columns:Encumbered – The total dollar amount encumbered (set aside in an actual financial
transaction) for the order. This is subject to change until the order has been completely invoiced. It does not include Shop Stock recovery or Customer recovery amounts.
Received – The dollar amount of material or services currently received. It does not include Shop Stock recovery or Customer recovery amounts.
Invoiced – The dollar amount invoiced. It does not include Shop Stock recovery or Customer recovery amounts.
Totals at Recovery contains the following columns:Received – This is the dollar amount of the items currently received, including Shop
Stock recovery percent and/or Customer recovery percent (if applicable, depending on the Shop, Job, and type of purchase document). If there is an account number listed beside “Credit Acct/Obj Code”, this amount will be the same as the “Totals at Cost, Received”.
62

Invoiced – The dollar amount invoiced including Shop Stock recovery percent and/or Customer recovery percent (if applicable, depending on the Shop, Job, and type of purchase document). If there is an account number listed beside “Credit Acct/Obj Code”, this amount will be the same as the “Totals at Cost, Invoiced”.
The middle right area contains the following columns:Vendor Contact – The name of the individual at the vendor’s place of business who
served as the contact on this order.Last Updated By – The FIMA User ID of the person who most recently made some
change or processed some transaction on this order.Last Updated Time – The date and time this order was last saved.
The bottom area contains information about each line item on the order:Line # – The sequential line number assigned by the system when the order was
approved.Item Nbr – Contains the Inventory Item Number if this was an order from Material Control
to restock a warehouse.Unit of Issue – The unit of issue for this material or service, such as “EA” for each or “FT”
for foot.Base Unit Price – The unit price for this item, not including tax, shipping, discounts, extra
charges, Shop Stock recovery percent, or Customer recovery percent. This is subject to change until the order has been completely invoiced.
Qty Ordered – The quantity that was ordered.Qty Received – The quantity received so far.Qty Invoiced – The quantity FM has been invoiced for so far.Vendor Item Nbr – The Vendor’s item number. This column may be empty.Desc – The description of the item.Manuf Item Nbr – The Manufacturer’s item number.
Material Control and Cost Accounting may enter adjustment lines that were not on the original Material Request. These adjustments can be necessary due to changes in tax, shipping, discounts, or extra charges which were not known when the order was approved, or changes to unit prices which were not available at the time of receipt. These types of adjustments are added to the order as separate line items, and may have positive or negative Base Unit Prices.
63

MATERIAL CONTROL MODULE (Input Only)
PURPOSE: This tab allows Material Control personnel to process Material Requests entered by other FM shops, as well as their own Material Requests for restocking the warehouses. Materials can be issued from a warehouse, or information can be added to requests that will result in a purchase from University Stores or an outside vendor. This module also handles returns of Inventory items to a warehouse, and allows Material Control to search for a particular Issue Document when the Issue Document Number is unavailable.
INSTRUCTIONS: To open this module, click on the Material Control icon (the computer with the telephone receiver), or click “Activities” from the menu, then choose “Material Control”. The Material Control window will open.
PROCESS MATERIAL REQUESTS TABTo get a list of Material Requests that need to be processed, run the “Pending Material Requests” report (see the REPORTS MODULE section for more information). To select a request for processing, type the Material Request Number in the white box to the right of the words “Req #”, then press ENTER or click the “Retrieve” button. If you see an error message stating “Material Request ### not found in database or has already been approved or completed”, you may have typed the number incorrectly. If you entered a valid pending Request Number, its information will display. This tab includes three areas.
64

The top area contains the following columns, some of which are view only:Job Nbr – The Job to be charged for this material or service (view only).S/R Nbr – The Service Request to be charged (view only).Shop – The Shop that ordered the material or service (view only).Request Nbr – The Material Request Number (view only).Est Total – The estimated total dollar amount of this request. This is based on the Unit
Price multiplied by the Quantity Requested for all line items on the request. It does not include warehouse or Shop Stock recovery, tax, shipping, etc., and is subject to change if the unit price of the requested items changes. (View only.)
Date Required – The date the requestor needs this material or service (view only).Whse – If this is a request to restock Inventory, this column contains the Warehouse
Number that carries the items being ordered (view only).Entered By – The FIMA User ID of the person who entered the Material Request (view
only).Date Entered – The date and time the request was entered (view only).Requestor Name – The FIMA User ID or first and last name of the person who needs the
material or service (view only).Date Expected – The date you expect to receive any non-stock material or service, or
stock items for the warehouse, formatted MM/DD/YYYY (RQ for non-stock or Inventory restocking).
Special Instructions – Any special instructions regarding this request (view only).Vendor – A drop down list of University vendors, sorted by Vendor Name and also listing
Vendor Number. Helpful Hint: to open this list to a particular letter, type that letter, then click the arrow. (RQ for non-stock or Inventory restocking). The Vendor Number will display to the right of the name, and the phone number will display below the name.
Account – The FRS Account Number that will ultimately be charged for the material or service (view only).
Obj Code – The FRS Object Code that will ultimately be charged for the material or service (view only).
Vendor Contact – The name of the individual at the selected vendor who will serve as the contact for any non-stock material or service on this request, or for material being ordered to restock a warehouse, up to 40 alphanumeric characters (RQ for non-stock or Inventory restocking).
Doc Type/Nbr – The 3-character purchase document type and 6-digit document number to be used for any non-stock material or service, or to order material to restock a warehouse. For non-stock or Inventory restocking requests, this information must be entered in order for Cost Accounting to approve the request.
Add’l Reqs? – This column contains an “N” if there are no additional Material Requests associated with this one. If there are associated requests, it contains a “Y” (view only).
Recv at Whse? – Designates whether this request contains items that will physically be received at an FM warehouse. (RQ for non-stock or Inventory restocking). Valid values are:N – This is a service, or the material will be received at a location other than an
FM warehouse.Y – The material will be received at an FM warehouse.
Orig Req Nbr – If this is a subsidiary Material Request created because the items on the original Material Request could not all be obtained from one vendor, this column contains the original Material Request Number (view only).
The Status area contains the following columns (view only):Stock Items – This column displays a brief message regarding the status of any Inventory
items on the request.
65
Nonstock Items – This column displays a brief message regarding the status of any non-stock items (items not carried by a Facilities Management warehouse) on the request.
The lower area of the tab may contain multiple rows. This area contains the individual line items on the request. To add a line item, right click in this area and choose “Add” or “Insert” from the popup menu. This area contains the following columns:
Line Nbr – The system-assigned sequential line number for this line item, starting with 1 (view only).
Stock Item Nbr – A drop down list of all items carried in FM Inventory. If the Item Number is valid and active, the system will automatically fill in the Manufacturer’s Item Number, Unit of Issue, Unit Price, and Item Description after you leave this column. If the item being requested is not carried in Inventory, this column is blank.
Manufacturer’s Item Nbr – The Manufacturer’s part number for this item, up to 40 alphanumeric characters. The system automatically fills this in for Inventory items.
Unit of Issue – The unit of issue for the item being requested (EA for Each, FT for Foot, etc.), up to 8 alphanumeric characters. (RQ) The system automatically fills this in for Inventory items.
Unit Price – The price per unit of this item, with four decimal places (up to 999,999,999.9999). The default is 0.0000. The system automatically fills this in for Inventory items.
Quantity Requested – The quantity needed for this item, with two decimal places (up to 9,999,999.99). To delete a line, make this the same as the Quantity Issued.
Quantity Issued – On an existing request, if this is an Inventory item but there was not enough stock on hand in the warehouse to issue the total Quantity Requested, this column displays the quantity that has been issued.
Item Description – The complete description of the item (or service) being requested, up to 120 alphanumeric characters. (RQ) The system automatically fills this in for Inventory items.
Select Item – Clicking this checkbox selects this line item for processing (see below).
Creating an Issue Ticket If all the items on this request are stock items and this is not a request to restock Inventory, do not enter anything in the upper part of the window. (If stock and non-stock items were requested, or this is a request to restock Inventory, refer to the next section for further instructions.)
To issue stock items from a warehouse, in the lower part of the tab, click the “Select Line?” checkbox next to each item you want to issue from that warehouse. Then click the “Create Issue Ticket” button. If you click this button without checking any lines, you will see an error message stating, “You must select at least one detail line to be issued”. If you accidentally check a line that does not have a Stock Item Number, you will see an error message stating, “Line Number # is a non-Stock item and cannot be Issued from Inventory”. To fix this problem, click the “Select Line?” checkbox for the incorrect item again to uncheck it.
If you have checked at least one line with a Stock Item Number, a new window will open when you click the “Create Issue Ticket” button. This window includes two areas.
The upper area contains the following columns:Issue Ticket # – This is a document number assigned by the system when the issue is
successfully saved (view only).Date – This column contains today’s date (view only).Whse – The 2-character Warehouse Number the material is being issued from. If you
entered a valid Warehouse Number, the “Debit Acct/OCode” and “Credit Acct/OCode” columns will fill with FRS Account and Object Code information.
66

Job Nbr – The Job the material is being issued to (view only).S/R Nbr – The Service Request the material is being issued to (view only).Shop – The Shop the material is being issued to (view only).Task – The Task ID associated with the Service Request and Shop (view only).Debit Acct/OCode – The FRS Account Number and Object Code that will be charged for
the material (view only).Credit Acct/OCode – The FRS Account Number and Object Code associated with the
Warehouse, which will be credited for the material (view only).Base Cost of Items – As you enter Quantity Issued information (see below), the system
calculates this dollar amount as the total Quantity Issued multiplied by the Issue Price (including Warehouse Issue Recovery percent) for all items issued.
With Shop Stock M/U – As you enter Quantity Issued information (see below), the system calculates this dollar amount as the Base Cost of Items plus the Shop Stock Recovery Percent associated with the Job and Shop on this Issue Ticket.
Total Charged to Job – As you enter Quantity Issued information (see below), the system calculates this dollar amount as the With Shop Stock M/U amount plus any recovery percent charged to the customer, based on the Job being charged.
Rarely, you may see error messages after entering the Warehouse Number. If the error message states, “Warehouse Account is 0 -- Call MIS” or “Issue Object Codes not found for fund source XXX -- Call MIS”, please call the MIS help line for assistance. If the error message states, “Job is Closed – Call Cost Accounting” or “Shop Account not found for fund source XXX – Call Cost Accounting”, call Cost Accounting for assistance. If the error message states, “Shop Closed on Service Request”, call the person who requested the material. If you see any of these error messages, you will not be able to issue the material at this time. In this case, click on the X in the upper right corner of this window to close it and return to the Material Control Processing window.
The lower area displays the individual line items you selected to be issued on the Material Control Processing window’s Process Material Requests tab. It contains the following columns:
Line Nbr – The system-assigned sequential line number for this line item, starting with 1 (view only).
Item Nbr – The 7-character Inventory Item Number being issued (view only).Unit of Issue – The unit of issue for this item (EA for Each, FT for Foot, etc.), up to 8
alphanumeric characters (view only). Issue Price – The weighted average price per unit charged for this item, with four decimal
places (up to 999,999,999.9999). This includes the Warehouse Recovery Percent. (View only.)
Qty Requested – The quantity needed for this item, with two decimal places (up to 9,999,999.99). (View only.)
Qty Issued – The quantity of this item that you are issuing, with two decimal places (up to 9,999,999.99). (RQ) If you enter less than the Quantity Requested, you will see the message “The Quantity Issued is less than the Quantity Requested. Is this correct?” with “Yes” and “No” buttons. If you are doing a partial issue because there is not enough on hand to issue the entire Quantity Requested, press ENTER or click the “Yes” button. Otherwise, click the “No” button, and you will be able to correct the Quantity Issued.
If you see an error message stating, “This Item is not carried by the Warehouse you entered. Issue Quantity is being set to 0.”, you will have to correct the Warehouse you entered in the upper part of this window, then enter the Quantity Issued again. (If some items on this Material Request are carried by one warehouse, others by another, you will need to create a separate Issue Ticket for the items carried by the second warehouse.)
67

If you get an error message stating “Item ####### is Frozen and cannot be Issued”, a physical count is in process for this item, and you will have to try issuing it again later. For now, type 0 as the Quantity Issued. An error message stating “Quantity On Hand for Item ####### = 0. Cannot issue” will also prevent you from issuing this item, because the computer found none on hand.
If the quantity on hand was more than 0, but was not enough to issue the entire Quantity Requested, the available quantity on hand will be issued and will display in the “Qty Issued” column in place of the quantity you entered.
NOTE: as you enter the Quantity Issued on each line, the computer immediately attempts to issue that item. If one line cannot be issued (due to zero on hand or a physical count taking place), you can move on to the next item, and it may still be issued successfully.
Close this window by clicking on the X at the upper right corner when you are finished with all the lines. Two copies of the Issue Ticket will automatically print, one for you to keep and one for the person accepting the material.
When the “Create Issue Ticket” window closes, you will be back on the “Process Material Requests” tab. Items that were completely issued no longer appear in the bottom part of the tab, and those that were partially issued now show the updated Quantity Issued. In the upper part of the window, in the “Status” area, the text next to “Stock Items:” will now say either “Not All Requested Quantities Available” or “Issue Complete”, depending on whether or not all the items were successfully issued.
Creating a Subsidiary Request If the items on a Material Request cannot all be purchased from one vendor, Material Control must create new Material Requests for the additional vendors. These subsidiary requests are tied to the original Material Request so that the requestor can easily see the status of all the items he/she requested.
In the lower part of the tab, click the “Select Line?” checkbox next to each item you want to move to a subsidiary request. Then click the “Create Sub Request” button. If you click this button without checking any lines, you will see an error message stating, “You must select at least one detail line to be moved”. If you accidentally check a line that has a Stock Item Number on a request that is not for restocking Inventory, you will see an error message stating, “Line Number # is a Stock item and cannot be purchased direct to a job”. To fix this problem, click the “Select Line?” checkbox for the incorrect item again to uncheck it.
You will also see an error message if any of the lines you selected have a Unit Price of $0.00, because none of the line item information can be changed once you are on the Sub Request window. Enter the correct unit price and click the “Create Sub Request” button again.
If you have checked at least one valid line to be moved, a new window will open when you click the “Create Sub Request” button. This window displays some of the header information from the original pending Material Request, such as Job, Service Request, Shop, etc., and all the lines you selected. You must enter the Expected Date, Vendor, Vendor Contact, and Document Type and Number, since they will be different from those on the original Material Request. This information is required to save the new request. See the PROCESS MATERIAL REQUESTS TAB section above for more information.
When you are finished, save your changes. The new Material Request will print automatically, and you will be returned to the original Material Request. The lines you moved to the sub request are removed from the original request.
Adding and Viewing CommentsTo add comments to a Material Request or view comments made by the requestor, click the Comments button. The requestor can later view any comments you add.
68

The text on the button will read “Add/View Comments” if comments currently exist, or “Add Comments” if no comments exist yet. The picture to the left of the button will also be slightly different depending on whether or not comments have already been entered.
When the Comments window opens, any existing comments will display, starting with the most recently entered at the top. To the left of each comment, you will see the date and time it was entered, and the User ID of the person who entered it. The comment itself is a text field, and you may see a small scrollbar at the right side of that column. You can use this scrollbar, if necessary, to read the entire comment, but you cannot make changes to an existing comment.
To add a new comment, right click and choose “Add” from the pop-up menu. The date and time and the User ID of the person logged in to FIMA will automatically fill in. Type your comment. If you decide not to save this comment, click the “Cancel” button. You will see a message asking, “Do you want to save changes?” with “Yes”, “No” and “Cancel” buttons. If you don’t want to save the comment, click the “No” button. If you want to save it after all, click “Yes” or just press ENTER. If you want to make more changes to the comment, click the “Cancel” button (you will remain on the Comments window). If you want to save a comment, just press ENTER, or click the “Save” button. Comments cannot be deleted once they are saved.
RETURN TO WAREHOUSE TABThis tab allows Inventory items that were issued from an FM warehouse, but were not needed on the job, to be returned to the warehouse. This results in a credit to the Job and FRS Account and Object Code that were originally charged. To process a return, type the Issue Ticket Number in the white box to the right of the words “Issue Document Nbr being Returned”, then press ENTER. If you entered a valid Issue Ticket Number, its information will display. This tab includes two areas.
The top area contains the following columns, which are VIEW ONLY:Issue Ticket # – The Issue Ticket (document) number on which the items were originally
issued.Date – The date the items were originally issued.Whse – The FM Warehouse Number the items were issued from.Job Nbr – The Job that was charged for the items.S/R Nbr – The Service Request Number that was charged.Shop – The Shop that was charged.Task – The Task ID associated with the above Service Request and Shop.Mat. Request # – The Material Request Number that prompted the original issue of the
items.Debit Acct/OCode – The FRS Account Number and Object Code that were charged for
the items.Credit Acct/OCode – The FRS Account Number and Object Code associated with the
Warehouse that issued the items.Base Cost of Items – The total Quantity Issued multiplied by the Issue Price (including
Warehouse Issue Recovery percent) for all items issued.With Shop Stock M/U – The Base Cost of Items plus the Shop Stock Recovery Percent
associated with the Job and Shop on this Issue Ticket.Total Charged to Job – The With Shop Stock M/U amount plus any recovery percent
charged to the customer, based on the Job that was charged.
The lower area displays the individual line items that were issued. It contains the following columns, most of which are view only:
Line Nbr – The system-assigned sequential line number for this line item (view only).Item Nbr – The 7-character Inventory Item Number of the issued material (view only).
69
Unit of Issue – The unit of issue for this item (EA for Each, FT for Foot, etc.). (View only.) Issue Price – The weighted average price per unit charged for this item, with four decimal
places (up to 999,999,999.9999). This includes the Warehouse Recovery Percent. (View only.)
Qty Issued – The quantity that was issued, with two decimal places (up to 9,999,999.99). (View only.)
Qty Returned – The quantity of this item that is being returned to the warehouse, with two decimal places (up to 9,999,999.99). (RQ for any lines items being returned.) This cannot be greater than the Quantity Issued.
When you have successfully saved the Return to Warehouse transaction, two copies of the Issue Ticket (showing the items returned) will automatically print, one for you to keep and one for the person returning the material.
SEARCH FOR ISSUE TABThis tab allows you to search for an Issue Ticket when you do not know the Issue Ticket Number, and to reprint an Issue Ticket if necessary. Information is restricted to records entered after February 2, 2002. Entering more pieces of information as query criteria may help limit the number of records the system retrieves. You can use any column to enter query criteria. For example, if you know the Job and Shop, first click the “Enter Query Criteria” button, which creates a grid in the main part of the tab. Then click in the box under the Job Nbr column, and enter the Job Number. Enter the Shop in the box under the Shop column. Finally, click the “View Items” button. The system will display all Issue transactions related to that Job and Shop. Helpful Hint: in date columns, you can enter an expression such as >07-01-2003, which would limit the records to those with a date later than July 1, 2003. You will see a line for each line item that was issued, grouped by Doc Nbr (Issue Ticket Number).
To reprint one of the Issue Tickets displayed, click on a row for that Doc Nbr, then click the “Reprint Issue Doc” button. A single copy of the Issue Ticket will print, with the word “REPRINT” clearly visible on it.
70

MATERIAL PURCHASE MODULE (Inquiry)
To open this module, click on the Material Purchase icon (the abacus), or click “Activities” from the menu, then choose “Material Purchase”. The Material Purchase window will open.
The Material Purchase Module includes the following tabs:
APPROVE MAT REQUEST – Allows Cost Accounting to approve Material Requests that have been processed by Material Control. Cost Accounting adds or verifies FRS Account and Object Code information and adds any known Shipping, Discount, Tax and Miscellaneous Charges information. The Material Request is then considered to be a Material Encumbrance, and will now be included as an anticipated expense on many financial reports.
ENCUMBRANCE CHANGE – Displays information on purchases that have reached the Material Encumbrance stage, including line item detail and receipt and invoice quantities and amounts. Allows Material Control and Cost Accounting to make changes to purchases, including adding line items, changing order quantities (depending on receipt status), and changing order header information such as Job, accounts, etc. if nothing has been received yet.
RECEIPT PROCESS – Displays information on the receipt status of purchase orders, and allows Material Control and Cost Accounting to receive materials and services on purchase orders.
INVOICE PROCESS – Displays information on the invoicing status of purchase orders, and allows Cost Accounting to invoice line items on purchase orders.
RECEIPT SEARCH – Allows you to search for a receipt transaction using a variety of columns, and to reprint a Receipt Document if necessary. Information is restricted to records entered after February 2, 2002. Entering more pieces of information as query criteria may help limit the number of records the system retrieves. You can use any column listed to enter query criteria. For example, if you know the Job and Shop, first click the “Enter Query Criteria” button, which creates a grid in the main part of the tab. Then click in the box under the Job Nbr column, and enter the Job Number. Enter the Shop in the box under the Shop column. Finally, click the “View Items” button. The system will display all receipt transactions related to that Job and Shop. Helpful Hint: in date columns, you can enter an expression such as >07-01-2003, which would limit the records to those with a date later than July 1, 2003. You will see a line for each line item that was received, sorted by the date and time of receipt and Line Number. To sort the displayed records in a different order, click the column heading of the column you want to sort on (for example, Mat Req Nbr, which contains the Material Request Number). To reprint a Receipt Document for one of the displayed lines, click on that line, then click the “Reprint Receipt Doc” button. A single copy of the Receipt Document will print, with the word “REPRINT” clearly visible on it.
SOF TO SIV CHANGE – Allows Cost Accounting to change the Document Type and Number on received purchases from University Stores from their initial status as a SOF (Stores Order Form) to an SIV (Stores Invoice); also used for changing the document number on P-card purchases from its initial “dummy” document number of 999999 to the actual transaction document number. For other types of purchases, the Document Type and Number cannot be changed once a receipt has been processed.
ENC SEARCH – Allows you to search for a Material Encumbrance using a variety of columns. Information is restricted to records entered after February 2, 2002. Entering more pieces of information as query criteria may help limit the number of records the system retrieves. You can use any column listed to enter query criteria. For example, if you know the Job and Shop, first click the “Enter Query Criteria” button, which creates a grid in the main part of the tab. Then click in the box under the Job Nbr column, and enter the Job Number. Enter the Shop in the box under the Shop column. Finally, click the “View Items” button. The system will display all receipt transactions related to that Job and Shop. Helpful Hint: in date columns, you can enter an expression such as >07-01-2003, which would limit the
71

records to those with a date later than July 1, 2003. You will see a line for each line item on the order, sorted by the date and time it was created and Line Number. To sort the displayed records in a different order, click the column heading of the column you want to sort on (for example, Mat Req Nbr, which contains the Material Request Number).
72

MATERIAL PURCHASE MODULE (Input)
PURPOSE: This tab allows Material Control and Cost Accounting personnel to handle tasks associated with material purchases, including approving Material Requests, changing Material Encumbrance information, Receiving, and Invoicing.
INSTRUCTIONS: To open this module, click on the Material Purchase icon (the abacus), or click “Activities” from the menu, then choose “Material Purchase”. The Material Purchase window will open.
APPROVE MAT REQ TABThis tab allows Cost Accounting to give approval for material/services to be ordered. They can add or change FRS Account Numbers and Object Codes, as well as add tax, discount, shipping, or miscellaneous charges if known. To get a list of Material Requests that have been processed by Material Control and need to be approved, run the “Material Requests Awaiting Approval” report (see the REPORTS MODULE section for more information). To select a request for approval, type the Material Request Number in the white box to the right of the words “Material Req #”, then press ENTER. If you see an error message stating “This Material Request does not exist or cannot be approved at this time”, you may have typed the number incorrectly. If you entered a valid, processed Request Number, its information will display. This tab includes five areas.
73

The upper area contains the following columns, many of which are view only:Job Nbr – The Job to be charged for the material or service (view only).S/R Nbr – The Service Request to be charged (view only).Shop – The Shop to requesting the material or service (view only).Whse – If this is a request to restock Inventory, this column contains the FM Warehouse
Number that needs the material (view only).Total – The current estimated total dollar amount of the request. The system calculates
this as the total of the Unit Price multiplied by the Quantity Requested for all lines, plus any tax, discount, shipping and/or miscellaneous charges if they are added. (View only.)
Date Required – The date the material or service is needed (view only).Requestor Name – The FIMA User ID or first and last name of the individual who needs
the material or service (view only).Expected Date – The date Material Control expects this material or service to be received
(view only).Delivery Instr – Any delivery or special instructions associated with this request (view
only).Recv at Whse? – A Yes or No (Y or N) column indicating whether or not material on this
request will physically be received at an FM warehouse (view only).Doc Type/Nbr – The document type (SOF, BLP, REQ, etc.) and number of the
purchasing document that will be used to order the material or service (view only).
Order Date – The date this request became an actual purchase order, formatted MM/DD/YYYY. This defaults to the date the Material Request was entered, but can be changed if necessary.
Approved – A checkbox indicating whether or not this Material Request is approved. (RQ if approved)
Vendor Information contains the following view-only column:Vendor Nbr – The University Vendor Number of the vendor the material or service will be
ordered from. The Vendor Name display to the right of the number.
Account Information contains the following columns:Debit Acct – The 6-digit FRS Account Number that will ultimately be charged for the
material or service. If there was an Account Number on the Material Request, this column is set to that Account Number. Otherwise, the system attempts to determine the correct Debit Account based on the Job and Shop. This column can be changed to another valid FRS Account Number if necessary. (RQ)
Debit Obj Code – The 4-digit FRS Object Code that will ultimately be charged for the material or service. If there was an Object Code on the Material Request, this column is set to that Object Code. Otherwise, if the Document Type is Blanket and the Debit Account does not match one of the valid accounts for that Blanket P/O, the system attempts to determine the correct Object Code based on the Funding Source associated with the Job. This column can be changed to another valid FRS Object Code if necessary. (RQ)
Credit Acct – The 6-digit FRS Account Number that will initially be charged for the material or service if the Document Type is Blanket and this is an Indirect purchase (the Debit Account does not match one of the valid accounts for the Blanket P/O). (RQ for Indirect purchases)
Credit Obj Code – The 4-digit FRS Object Code that will initially be charged for the material or service if the Document Type is Blanket and this is an Indirect purchase. (RQ for Indirect purchases)
74
Additional Charges contains the following columns:Tax Rate – The tax percent charged on this purchase, with 4 decimal places (7.6% is
formatted as .0760). This defaults to the tax rate associated with the selected Vendor, and will include an extra 5.25% if the document type is SOF (Stores Order Form).
Discount Rate – The discount percent we expect to receive on this purchase, with 4 decimal places (1% is formatted as .0100). This defaults to the discount percent associated with the selected Vendor.
Shipping – Any shipping charges we expect on this purchase, with 2 decimal places (up to 9,999,999.99).
Misc – Any other miscellaneous charges we expect on this purchase, with 2 decimal places (up to 9,999,999.99).
The lower area of the tab shows the individual line items that were requested to be ordered. It may contain multiple rows with the following columns (VIEW ONLY):
Line Nbr – The system-assigned sequential line number for this line item.Stock Item Nbr – If this is a request to restock Inventory, this column contains the 7-
character Inventory Item Number being requested.Manufacturer’s Item Nbr – The manufacturer’s item number, if applicable.Unit of Issue – The unit of issue for this item (EA for Each, FT for Foot, etc.), up to 8
alphanumeric characters. Unit Price – The price per unit for this item, with four decimal places (up to
999,999,999.9999). Quantity Requested – The quantity needed for this item, with two decimal places (up to
9,999,999.99).Quantity Issued – This will be 0.00 for all lines.
ENCUMBRANCE CHANGE TABThis tab allows Material Control and Cost Accounting to make changes to purchase orders. In general, information such as Document Type and Number, Job, Shop, Debit or Credit Accounts, etc., can only be changed if nothing has been received. On individual line items, order quantities can be increased or decreased (but not below the received quantity), and prices can be changed if the quantity received is 0. Additional line items can be added, if necessary, including lines for unexpected freight, tax, etc.
To select an encumbrance to change, type the Material Request Number in the white box to the right of the words “Material Req #”, then press ENTER. If you entered a valid, approved Request Number, its information will display. This tab includes six areas.
The upper area contains the following columns:Doc Type/Nbr – The 3-character document type (SOF, REQ, BLP, etc.) and 6-digit
document number used to order the material. If University Purchasing has changed the order from a Purchase Requisition to a Purchase Order, enter the Purchase Order information here. If this order is a Backorder and the document number is different from the one on the original order, enter the correct document number for the backorder here. (RQ)
Order Date – The date the material or service was ordered, formatted MM/DD/YYYY. (RQ)Mat Req Nbr – The Material Request Number that initiated this purchase transaction
(view only).B/O – A Yes or No (Y or N) column indicating whether or not this order is a back order
(view only).Job Number – The Job to be charged for the material or service, up to 10 alphanumeric
characters. (RQ)
75

S/R Nbr – The Service Request Number to be charged. (RQ)Shop – The 3-character FM Shop that requested the material or service. (RQ)Task ID – The 6-digit Task ID associated with the Service Request and Shop (view only).Whse – If this order is to restock Inventory, this column contains the 2-character FM
Warehouse Number that needs the material.Vendor – A drop down list of University vendors, sorted by Vendor Name and also listing
Vendor Number. Helpful Hint: to open this list to a particular letter, type that letter, then click the arrow. The Vendor Number will display to the right of the name. (RQ)
Ref Type/# – If this purchase transaction started out on a Purchase Requisition and later became a Purchase Order, or started out on a Stores Order Form and later became a Stores Invoice, this column contains the original 3-character document type (REQ or SOF) and 6-digit document number of the Req or SOF.
Invoice # – If anything has been invoiced on this order, this column contains the most recent Invoice Number (view only).
Special Instr – Any delivery or special instructions on this order (view only).Expected – The date FM expects to receive the material or service, formatted
MM/DD/YYYY.Ven Contact – The name of the contact person at the vendor, up to 40 alphanumeric
characters. (RQ)
Account Information contains the following columns:Debit Acct – The 6-digit FRS Account Number that will ultimately be charged for the
material or service. If the Job, Shop, or Document Type was changed, this account number may need to be changed as well. (RQ)
Debit Obj Code – The 4-digit FRS Object Code that will ultimately be charged. If the Job, Shop, or Document Type was changed, this account number may need to be changed as well. (RQ)
Credit Acct – The 6-digit FRS Account Number that will initially be charged for the material or service if the Document Type is Blanket and this is an Indirect purchase (the Debit Account does not match one of the valid accounts for the Blanket P/O). If the Document Type or Number was changed, this account number may need to be changed as well. (RQ for Indirect purchases)
Credit Obj Code – The 4-digit FRS Object Code that will initially be charged if the Document Type is Blanket and this is an Indirect purchase. If the Document Type or Number was changed, this account number may need to be changed as well. (RQ for Indirect purchases)
Additional Charges contains the following columns:Tax Rate – The tax percent charged on this purchase, with 4 decimal places (7.6% is
formatted as .0760). Discount Rate – The discount percent we expect to receive on this purchase, with 4
decimal places (1% is formatted as .0100). Shipping – Any shipping charges we expect on this purchase, with 2 decimal places (up
to 9,999,999.99).Misc – Any other miscellaneous charges we expect on this purchase, with 2 decimal
places (up to 9,999,999.99).
Totals at Cost contains the following columns (VIEW ONLY):Encumbered – The total dollar amount encumbered (set aside in an actual financial
transaction). This is subject to change until the order has been completely invoiced. It does not include Shop Stock recovery or Customer recovery amounts.
Received – The dollar amount of material or services currently received. It does not include Shop Stock recovery or Customer recovery amounts.
76

Invoiced – The dollar amount invoiced. It does not include Shop Stock recovery or Customer recovery amounts.
Totals at Recovery contains the following columns:Received – This is the dollar amount of the material or services currently received,
including Shop Stock recovery percent and/or Customer recovery percent (if applicable, depending on the Shop, Job, and type of purchase document). If there is a Credit Account and Credit Object Code, this amount will be the same as the “Totals at Cost, Received”.
Invoiced – The dollar amount invoiced including Shop Stock recovery percent and/or Customer recovery percent (if applicable, depending on the Shop, Job, and type of purchase document). If there is a Credit Account and Credit Object Code, this amount will be the same as the “Totals at Cost, Invoiced”.
The lower area of the tab may contain multiple rows if more than one line item was ordered. To add a new line, right click in this area and choose “Add” from the popup menu. This area contains the following columns for each line item ordered:
Line # – The system-assigned sequential line number for this line item, starting with 1 (view only).
Item Nbr – If this is an order to restock Inventory, this column contains the 7-character FM Stock Item Number being ordered. For all other orders, this column must be empty.
U/I – The unit of issue for the item being requested (EA for Each, FT for Foot, etc.), up to 8 alphanumeric characters. (RQ)
Base Unit Price – The price per unit of this item, with four decimal places (up to 999,999,999.9999), not including tax, shipping, etc. The default is 0.0000. This column cannot contain a negative number.
Qty Ordered – The quantity ordered for this item, with two decimal places (up to 9,999,999.99). The default is 0.00. This column can contain a negative number if we are returning the item to the vendor or entering some other type of credit on this order.
Qty Received – The quantity received so far, with two decimal places (up to 9,999,999.99). (View only.)
Qty Invoiced – The quantity FM has been invoiced for so far, with two decimal places (up to 9,999,999.99). (View only.)
Adj – This column designates whether or not this line item is an adjustment. Valid values are:N – This line item is not an adjustment. It is an actual line item for material or
services and is subject to the Tax Rate, Discount Rate, and Shipping, and Miscellaneous charges shown in the Additional Charges area (see above).
Y – This line item is an adjustment. It is not subject to the Tax Rate, Discount Rate, and Shipping, and Miscellaneous charges shown in the Additional Charges area (see above). Adjustment lines are used to account for changes in Base Unit Price after an item has been fully or partially received, or changes to tax, shipping, etc. that we are notified about after one or more receipts have been processed on the order.
Comment? – If you are adding a new line item, clicking this checkbox column indicates that there is a comment associated with this line item. A “Change Reason” window will open. In the white box below the words “Enter the reason for this change:”, type the comment (up to 120 alphanumeric characters), then press the “Continue” button to return to the Material Purchase module’s Encumbrance Change tab.
Desc – The complete description of this line item, up to 120 alphanumeric characters.Manuf Item # – The Manufacturer’s part number for this item, up to 40 alphanumeric
77

characters. Ven Item # – The Vendor’s part number for this item, up to 40 alphanumeric characters.
Either a Description, a Manufacturer’s Item Number, or Vendor Item Number is required.
When you switch to a different tab or close the Material Purchase window, a report automatically prints listing any encumbrance changes you made.
Adding and Viewing CommentsTo add comments to a Material Encumbrance or view previous comments, click the Comments button.
The text on the button will read “Add/View Comments” if comments currently exist, or “Add Comments” if no comments exist yet. The picture to the left of the button will also be slightly different depending on whether or not comments have been entered.
When the Comments window opens, any existing comments will display, starting with the most recently entered at the top. To the left of each comment, you will see the date and time it was entered, and the User ID of the person who entered it. The comment itself is a text field, and you may see a small scrollbar at the right side of that column. You can use this scrollbar, if necessary, to read the entire comment, but you cannot make changes to an existing comment.
To add a new comment, right click and choose “Add” from the pop-up menu. The date and time and the User ID of the person logged in to FIMA will automatically fill in. Type your comment. If you decide not to save this comment, click the “Cancel” button. You will see a message asking, “Do you want to save changes?” with “Yes”, “No” and “Cancel” buttons. If you don’t want to save the comment, click the “No” button. If you want to save it after all, click “Yes” or just press ENTER. If you want to make more changes to the comment, click the “Cancel” button (you will remain on the Comments window). If you want to save a comment, just press ENTER, or click the “Save” button. Comments cannot be deleted once they are saved.
Printing the Encumbrance DocumentTo print the displayed encumbrance in a document format, click the “Print Document” button. The document will print at your default printer.
Adding a Linked EncumbranceOn P-Card and Stores Invoice orders, it may occasionally be necessary to create a new encumbrance on an order that has already been received, linking it to the original Material Request, but assigning a different Document Number. For example, this can happen if the original P-Card order was received and invoiced, but some items must be returned to the vendor, which will result in a new P-Card Transaction Number (FIMA Document Number). THE ABILITY TO CREATE THIS TYPE OF ENCUMBRANCE IS EXTREMELY RESTRICTED.
To create a new encumbrance of this type, select the original encumbrance, then click the “Add Linked Encumbrance” button. The system will display a copy of the information in the upper part of the tab, but most columns, including the Document Number, will be available for data entry. You will see an error message if you attempt to change the Document Type. The B/O (Backorder) column is automatically set to “Y” for “Yes”. Make any necessary changes, then click the “Save” icon or press “CTRL-S”. You will then be able to add lines to the lower part of the tab to indicate the items on this new linked order.
78
RECEIPT PROCESS TABThis tab allows Material Control and Cost Accounting to receive materials/services that have been ordered.
To select an order to receive, type the Material Request Number in the white box to the right of the words “Material Req #”, then press ENTER. If you entered a valid, approved Request Number, its information will display. This tab includes four areas.
The upper area includes the following columns (VIEW ONLY):Order Type/Nbr – The 3-character document type (SOF, REQ, BLP, etc.) and 6-digit
document number used to order the material. Order Date – The date the material or service was ordered, formatted MM/DD/YYYY.Requestor – The FIMA User ID or first and last name of the individual who needs the
material or service.Delivery/Special Instr – Any delivery or special instructions on this order.Vendor – The University Vendor Number the material or service was ordered from. The
Vendor Name displays below the number.Required – The date the material or service is needed, formatted MM/DD/YYYY.Job Number – The Job to be charged for the material or service.S/R Nbr – The Service Request Number to be charged.Shop – The FM Shop that requested the material or service. Task – The Task ID associated with the Service Request and Shop.Whse – If this order is to restock Inventory, this column contains the FM Warehouse
Number that needs the material.Debit Acct/Obj Code – The FRS Account Number and Object Code that will ultimately be
charged for the material or service. Credit Acct/Obj Code – The FRS Account Number and Object Code that will initially be
charged for the material or service if the Document Type is Blanket and this is an Indirect purchase (the Debit Account does not match one of the valid accounts for the Blanket P/O).
Discount Rate – The discount percent we expect to receive on this purchase, with 4 decimal places (1% is formatted as 0.0100).
Tax Rate – The tax percent charged on this purchase, with 4 decimal places (7.6% is formatted as 0.0760).
Shipping – Any shipping charges we expect on this purchase, with 2 decimal places (up to 9,999,999.99).
Misc – Any other miscellaneous charges we expect on this purchase, with 2 decimal places (up to 9,999,999.99).
Backorder – A Yes or No (Y or N) column indicating whether or not this order is a back order.
Information for this Receipt contains the following columns:Total Dollar Amt – The total dollar amount being received (including tax, shipping, etc.)
with 2 decimal places (up to 999,999,999.99). If this is an order to restock Inventory, you must enter this amount. For all other orders, the system calculates this amount as you enter the quantity received for each line (see below).
Receipt Date – The date the material or service was received, formatted MM/DD/YYYY. The default is today’s date.
Packing Slip Nbr – The number on the packing slip that came with the materials, or any other identification for this receipt, up to 17 alphanumeric characters.
79
The area below Information for this Receipt contains the following columns (VIEW ONLY):Total Order Amount – The total dollar amount of this order. This is subject to change
until the order has been completely invoiced. It does not include Shop Stock recovery or Customer recovery amounts.
Total Received – The dollar amount of material or services currently received. It does not include Shop Stock recovery or Customer recovery amounts.
Total Invoiced – The dollar amount currently invoiced. It does not include Shop Stock recovery or Customer recovery amounts.
The lower area of the tab may contain multiple rows if more than one line item was ordered. This area contains the following columns for each line item ordered:
Line # – The system-assigned sequential line number for this line item, starting with 1 (view only).
Item # – If this is an order to restock Inventory, this column contains the FM Stock Item Number being ordered. For all other orders, this column is empty. (View only.)
U/I – The unit of issue for the item being requested (EA for Each, FT for Foot, etc.). (View only.)
Base Unit Price – The price per unit of this item, with four decimal places (up to 999,999,999.9999), not including tax, shipping, etc. (view only).
Order Qty – The quantity ordered for this item, with two decimal places (up to 9,999,999.99). This column can contain a negative number if we are returning the item to the vendor or entering some other type of credit on this order. (View only.)
Recvd to Date – The quantity received so far, with two decimal places (up to 9,999,999.99). (View only.)
Complete? – If you are receiving the entire remaining quantity on order for this line, click this checkbox. The system will then calculate the Qty Recvd column as the Order Qty (order quantity) minus Recvd to Date (received to date). If this is not an order to restock Inventory, the system will also update the Total Dollar Amount column (see above).
Qty Recvd – The quantity being received at this time, with two decimal places.Qty Invcd – The quantity FM has been invoiced for so far, with two decimal places (up to
9,999,999.99). (View only.)Adj – This column designates whether or not this line item is an adjustment (view only).
Valid values are:N – This line item is not an adjustment. It is an actual line item for material or
services and is subject to the Tax Rate, Discount Rate, and Shipping, and Miscellaneous charges shown for the order (see above).
Y – This line item is an adjustment. It is not subject to the Tax Rate, Discount Rate, and Shipping, and Miscellaneous charges shown for the order (see above). Adjustment lines are used to account for changes in Base Unit Price after an item has been fully or partially received, or changes to tax, shipping, etc. that we are notified about after one or more receipts have been processed on the order. In order for these amounts to be charged to the Job and account, these lines must be received just like non-adjustment lines.
Descrip – The complete description of this line item (view only).
When you save a receipt transaction, if the entire Total Order Amount has not been received, a window displays with the words “This is a partial receipt. What do you want to do with the items still on order?”, and three buttons to choose from as a response. Clicking the “Create Backorder” button creates another purchase order with the same Material Request Number and the Backorder column set to Yes, and any unreceived items moved to it. Clicking the “Leave on this Order” button simply leaves the order as-is.
80

Clicking the “Cancel remaining order” button updates the ordered quantity on each line to equal its received quantity, so no items are left unreceived.
When the transaction saves successfully, a Receiving Document automatically prints. If the order was an Indirect purchase (the document type is Blanket and the Debit Account does not match one of the valid accounts for the Blanket P/O), an Indirect Purchase Issue Document will also print, to be given to the person who originally requested the material or service. The Job, Service Request, and Debit Account and Object Code are charged with an expense at this time on Indirect purchases. If this order was to restock Inventory, the system checks to see if there are any incomplete Material Requests that are waiting for the Stock Item(s) just received. If so, an “Open Material Requests for Items on this Receipt” report automatically prints to let Material Control know they may now be able to fill those Material Requests.
When you switch to a different tab or close the Material Purchase window, an “Encumbrance Changes” report will automatically print if you created any backorders or cancelled the remaining balance on a partial receipt.
Adding and Viewing CommentsTo add comments to a purchase order at the time of receipt, or to view previous comments, click the Comments button.
The text on the button will read “Add/View Comments” if comments currently exist, or “Add Comments” if no comments exist yet. The picture to the left of the button will also be slightly different depending on whether or not comments have already been entered.
When the Comments window opens, any existing comments will display, starting with the most recently entered at the top. To the left of each comment, you will see the date and time it was entered, and the User ID of the person who entered it. The comment itself is a text field, and you may see a small scrollbar at the right side of that column. You can use this scrollbar, if necessary, to read the entire comment, but you cannot make changes to an existing comment.
To add a new comment, right click and choose “Add” from the pop-up menu. The date and time and the User ID of the person logged in to FIMA will automatically fill in. Type your comment. If you decide not to save this comment, click the “Cancel” button. You will see a message asking, “Do you want to save changes?” with “Yes”, “No” and “Cancel” buttons. If you don’t want to save the comment, click the “No” button. If you want to save it after all, click “Yes” or just press ENTER. If you want to make more changes to the comment, click the “Cancel” button (you will remain on the Comments window). If you want to save a comment, just press ENTER, or click the “Save” button. Comments cannot be deleted once they are saved.
INVOICE PROCESS TAB This tab allows Cost Accounting to enter invoice transactions for materials/services that have been ordered and received.
To select an order to invoice, type the Material Request Number in the white box to the right of the words “Material Req #”, then press ENTER. If you entered a valid, approved Request Number, its information will display. This tab includes two areas.
The upper area includes the following columns (VIEW ONLY):Material Req Nbr – The Material Request Number that initiated this purchase transaction.Order Type/Nbr – The 3-character document type (SOF, REQ, BLP, etc.) and 6-digit
document number used to order the material.
81

Order Date – The date the material or service was ordered, formatted MM/DD/YYYY.Vendor – The University Vendor Number the material or service was ordered from. The
Vendor Name displays to the right of the number.Job Number – The Job to be charged for the material or service.S/R Nbr – The Service Request Number to be charged.Shop – The FM Shop that requested the material or service. Task – The Task ID associated with the Service Request and Shop.Whse – If this order is to restock Inventory, this column contains the FM Warehouse
Number that needs the material.Debit Acct/Obj Code – The FRS Account Number and Object Code that will ultimately be
charged for the material or service. Credit Acct/Obj Code – The FRS Account Number and Object Code that will initially be
charged (during the Invoicing Process) for the material or service if the Document Type is Blanket and this is an Indirect purchase (the Debit Account does not match one of the valid accounts for the Blanket P/O).
Total Order Amount – The total dollar amount of this order. This is subject to change until the order has been completely invoiced. It does not include Shop Stock recovery or Customer recovery amounts.
Total Received at Cost – The dollar amount of material or services received so far. It does not include Shop Stock recovery or Customer recovery amounts.
Disc. Rate – The discount percent we expect to receive on this purchase, with 4 decimal places (1% is formatted as 0.0100).
Tax Rate – The tax percent charged on this purchase, with 4 decimal places (7.6% is formatted as 0.0760).
Shipping – Any shipping charges we expect on this purchase, with 2 decimal places (up to 9,999,999.99).
Misc – Any other miscellaneous charges we expect on this purchase, with 2 decimal places (up to 9,999,999.99).
Invc Amt – The dollar amount of material or services invoiced so far. It does not include Shop Stock recovery or Customer recovery amounts.
The Receipts Available for Invoicing for Material Request Nbr: ##### area may contain multiple rows if more than one line item was received. There may be multiple receipts for a single line item, due to partial receipts or reversals of previous receipts. If no lines are displayed in this area, no receipts have been processed yet for this Material Request, and you cannot invoice it at this time. Otherwise, this area contains the following columns for each line item received:
Order Line # – The system-assigned sequential line number for this line item, starting with 1 (view only).
Packing Slip Nbr – The number on the packing slip that came when the materials were received, or any other identification for this receipt, up to 17 alphanumeric characters (view only).
Receipt Date – The date the material or service was received, formatted MM/DD/YYYY (view only).
Recv’d Amount – The dollar amount of this receipt for this line, with two decimal places (up to 999,999,999.99). (View only.)
Invoice Amount – The dollar amount being invoiced on this line for this receipt, with two decimal places (up to 999,999,999.99). (RQ for all lines being invoiced.)
Qty Invcd to Date – The quantity we have been invoiced for so far, with two decimal places (up to 9,999,999.99). (View only.)
Qty Recv’d – The quantity received, with two decimal places (up to 9,999,999.99). (View only.)
Qty Invoiced – The quantity being invoiced on this line for this receipt, with two decimal places (up to 999,999,999.99). (RQ for all lines being invoiced.)
Invoice Nbr – The Invoice Number associated with this invoicing transaction, up to 15 alphanumeric characters.
82

Invoice Date – The date of this invoice, formatted MM/DD/YYYY. Defaults to today’s date.
Adj – This column designates whether or not this line item is an adjustment. (View only.) Valid values are:N – This line item is not an adjustment. It is an actual line item for material or
services and is subject to the Tax Rate, Discount Rate, and Shipping, and Miscellaneous charges shown for the order (see above).
Y – This line item is an adjustment. It is not subject to the Tax Rate, Discount Rate, and Shipping, and Miscellaneous charges shown for the order (see above). Adjustment lines are used to account for changes in Base Unit Price after an item has been fully or partially received, or changes to tax, shipping, etc. that we are notified about after one or more receipts have been processed on the order. In order for these amounts to be charged to the Job and account, these lines must be invoiced just like non-adjustment lines.
Description – The complete description of this line item (view only).
The Total Amount Invoiced column appears at the bottom of the lower area of the tab. The system calculates this total as you fill in information on each line being invoiced.
When you switch to a different tab or close the Material Purchase window, a “Direct Purchase Invoice Expenses” report will automatically print if you invoiced any Direct purchase transactions (those without a Credit Account and Object Code). The Job, Service Request, and Debit Account and Object Code are charged with an expense at this time on Direct purchases. A “Blanket Invoices” report will automatically print if you invoiced any Indirect purchase transactions (those with a Credit Account and Object Code). On Indirect purchases, the Job, Service Request, and Debit Account and Object Code were already charged with an expense (and the Credit Account and Object code received a credit) at the time of receipt, but the Credit Account and Object Code are finally charged with an expense during the invoicing process.
RECEIPT SEARCH TABThis tab allows you to search for an receipt transaction using a variety of columns, and to reprint a Receipt Document if necessary. Information is restricted to records entered after February 2, 2002. Entering more pieces of information as query criteria may help limit the number of records the system retrieves. You can use any column listed to enter query criteria. For example, if you know the Job and Shop, first click the “Enter Query Criteria” button, which creates a grid in the main part of the tab. Then click in the box under the Job Nbr column, and enter the Job Number. Enter the Shop in the box under the Shop column. Finally, click the “View Items” button. The system will display all receipt transactions related to that Job and Shop. Helpful Hint: in date columns, you can enter an expression such as >07-01-2003, which would limit the records to those with a date later than July 1, 2003. You will see a line for each line item that was received, sorted by the date and time of receipt and Line Number. To sort the displayed records in a different order, click the column heading of the column you want to sort on (for example, Mat Req Nbr, which contains the Material Request Number).
To reprint a Receipt Document for one of the displayed lines, click on that line, then click the “Reprint Receipt Doc” button. A single copy of the Receipt Document will print, with the word “REPRINT” clearly visible on it.
83

SOF TO SIV CHANGE TAB This tab allows Cost Accounting to change the Document Type and Number on received purchases from University Stores from their initial status as a SOF (Stores Order Form) to an SIV (Stores Invoice), or the Document Number on P-card purchases from their initial “dummy” document number of 999999 to the actual transaction document number. For other types of purchases, the Document Type and Number cannot be changed once a receipt has been processed.
To select a Stores Order Form or P-card transaction to change, type the Material Request Number in the white box to the right of the words “Material Req #”, then press ENTER. If you entered a valid, approved SOF or P-card transaction which has been received but not invoiced, its information will display.
This tab is identical to the Encumbrance Change tab, but only four columns in the upper area are accessible. Please see the ENCUMBRANCE CHANGE tab section for an explanation of the other columns (including those in the lower area of the tab), which are VIEW ONLY. To change the document type and number from a SOF to an SIV, or the P-card document number from a dummy to an actual document number, enter information in the following columns:
Doc Type/Nbr – The 3-character document type (SIV for Stores Invoice, PCD for P-card transaction) and 6-digit document number used to order the material. (RQ)
Ref Type/# – The 3-character document type (SOF for Stores Order Form, PCD for P-card transaction) and 6-digit document number of the original Stores Order Form or the dummy P-card document number (999999).
ENC SEARCH TABThis tab allows you to search for a Material Encumbrance using a variety of columns. Information is restricted to records entered after February 2, 2002. Entering more pieces of information as query criteria may help limit the number of records the system retrieves. You can use any column listed to enter query criteria. For example, if you know the Job and Shop, first click the “Enter Query Criteria” button, which creates a grid in the main part of the tab. Then click in the box under the Job Nbr column, and enter the Job Number. Enter the Shop in the box under the Shop column. Finally, click the “View Items” button. The system will display all receipt transactions related to that Job and Shop. Helpful Hint: in date columns, you can enter an expression such as >07-01-2003, which would limit the records to those with a date later than July 1, 2003. You will see a line for each line item on the order, sorted by the date and time it was created and Line Number. To sort the displayed records in a different order, click the column heading of the column you want to sort on (for example, Mat Req Nbr, which contains the Material Request Number).
84

SERVICE REQUEST MODULE (Inquiry)
To open this module, click on the Service Request icon (the telephone), or click “Activities” from the menu, then choose “Service Request”. The Service Request Maintenance window will open.
The Service Request Module includes the following tabs:
SERVICE REQUEST HEADER – Displays basic information for the selected Service Request, such as Building, Room Number, Job Number, description of work to be performed, requestor, contact person, date issued, and date closed. To select a Service Request, enter the Service Request Number in the white box in the upper left corner of the tab, then press ENTER or click the “Retrieve S/R” button.
SERVICE REQUEST SHOPS – Displays information on the Facilities Management Shops needed to perform the work on the Service Request selected on the Service Request Header tab, including Shop Number, work description, Task ID, date completed, and estimated hours.
BATCH PRINT S/RS – This tab has extremely limited access. It contains a button which allows all unprinted Service Requests to be printed.
BUILDINGS – Displays basic Building information, such as name, address, square footage, maintenance restriction notes, etc. for the selected Building Number. To select a Building, enter the 5-character Building Number (including leading zeros) in the white box to the left of the words “Building Nbr”, then press ENTER or click the “Retrieve” button.
S/R QUERY – This tab allows you to search for a Service Request using one or more columns. Entering more pieces of information as query criteria should limit the number of records the system retrieves. For example, if you know the building number and the Shop, first click the “Enter Query Criteria” button, which creates a grid in the main part of the tab. Then click in the box under Bldg Nbr and enter the building number. Use the scrollbar or TAB key to move to the right until you see the Shop column. Enter the Shop Number. Finally, click the “View Items” button. The system will retrieve all Service Requests related to that building and Shop. The records will be in order by Service Request Number. To sort them in a different order, click the column heading of the column you want to sort on (for example, Task ID).
PROJECT SCHEDULE REPORT – This tab allows you to run a Project Schedule Report for up to 15 specified Service Request Numbers. This report shows the estimated and actual hours for each shop on those Service Requests, as well as Job, Description, Total Expensed, etc.
85

SERVICE REQUEST MODULE (Input)
PURPOSE: This tab allows Work Control personnel to add new Service Requests when they receive phone calls, emails, or other communication from University departments requesting repairs or other services. They can also change information on existing Service Requests, and close Shops on Service Requests when a shop supervisor indicates that the work is complete. This module also allows for the printing of Service Requests, running the Project Schedule Report, and adding and updating information on University buildings.
INSTRUCTIONS: To open this module, click on the Service Request icon (the telephone), or click “Activities” from the menu, then choose “Service Request”. The Service Request Maintenance window will open.
86

SERVICE REQUEST HEADER TAB To select an existing Service Request, type the Service Request Number in the white box in the upper left corner of the tab, then press ENTER or click the “Retrieve S/R” button. You cannot make changes to Service Requests that are already closed. To create a new Service Request, right click in the main area of the tab, then choose “Add” or “Insert” from the popup menu, or click in this area and press F1.
This tab contains the following columns:Job Number – The Job Number that will be charged for this service, up to 10
alphanumeric characters. (RQ) If this Job has a default building associated with it, the system automatically fills in the Bldg Nbr column with that Building Number, and sets the Bldg Name, Bldg Address, and Cautions columns based on that Building Number. It also sets the Dept column to the Customer Name associated with the Job Number.
Bldg Number – A drop down list of 5-character Building Numbers, with the building name displayed beside each number in the list. (RQ) The system attempts to determine the Building Number based on the Job Number, but it can be changed if necessary.
Location/Room(s) – The room number(s) or other information identifying the location where work is needed, up to 15 alphanumeric characters.
Requestor Name/PM Due Date – On regular Service Requests, this column contains the name of the person requesting the work, up to 50 alphanumeric characters. On Preventive Maintenance requests, it contains the date by which this Preventive Maintenance task should be done, formatted MM/DD/YYYY. (View only on PM requests.)
Requestor Phone # – The 10-digit area code and phone number of the person requesting the work.
Contact Name – The name of the person to contact with questions about the work, up to 50 alphanumeric characters.
Contact Phone # – The 10-digit area code and phone number of the Contact Person listed above.
Equipment # – The 15-character Equipment Number that requires work, if applicable. (View only on PM requests.)
Description – The description of the work to be performed, up to 120 alphanumeric characters. (View only on PM requests.)
Additional Text – A virtually unlimited text column containing any additional information about the request.
Priority – A 1-digit code (between 1 and 9) representing the urgency of the request. 1 is the highest priority, 9 the lowest. This column defaults to 3.
Task ID – A 6-digit code representing the type of work to be done. (RQ) The default is 100000. (View only for Estimates and PM requests.) The leading digit is significant, with the following meaning:
1 – Routine2 – Standing Service Requests3 – Pay Codes (sick, vacation, training, etc.)4 – Estimates5 – Building Renewal6 – Insurance Support8 – Preventative Maintenance9 – PM Generated Repairs
Estimate Nbr – For Estimate Service Requests, this column contains the system-assigned Estimate Number (view only).
87

Restriction – A radio button column indicating whether any restrictions exist on the types of charges this Service Request can accept. If neither button is marked, all types of charges are allowed. The other valid values are:
Labor OnlyMaterial Only
S/R Nbr – The system-assigned sequential Service Request Number. On new requests, this column is filled in when you successfully save the request.
Issued Date – The date and time this Service Request was created, formatted MM/DD/YYYY hh:mm:ss. This defaults to today’s date and the current time.
Closed Date – The date the Service Request was closed, formatted MM/DD/YYYY hh:mm:ss. When the last open Shop on the Service Request has been closed (see SERVICE REQUEST SHOPS TAB below), this column will be set to the current date and time, but can be changed if necessary.
Final Billed – A 1-character code indicating whether or not the customer can expect additional charges on this Service Request. Once a request has been closed for at least 30 days with no pending charges, the monthly billing process automatically sets this column to “Y” (Yes). Valid values are:
– (empty) The customer may still be billed for additional charges.R – The Service Request was Final Billed, but has been reopened. The
customer may be billed for additional charges.Y – The Service Request has been closed for 30 days or more with no
pending charges. The customer will not be billed for any additional charges.
Service Writer – The FIMA user ID of the person who created the Service Request, up to 8 alpha characters (view only).
Closed By – The FIMA user ID of the person who closed the last open Shop on the Service Request, up to 8 alpha characters (view only).
Bldg Name – The name of the Building where the work is to be done (view only).Bldg Address – The street address of the Building (view only).Cautions – Any restrictions in performing work in this Building, up to 100 alphanumeric
characters (view only).
Once a Service Request has been saved, it can be printed immediately. Clicking the “Print S/R – Multiple Shop Copies” button prints a copy of the request for each assigned Shop that is flagged to receive a printed copy (see the SHOP MODULE section for more information), at that Shop’s default printer. Clicking the “Print S/R – One Copy” button prints a single copy of the Service Request at the default printer of the person who clicked the button.
SERVICE REQUEST SHOPS TABThis tab displays the Shops assigned to the Service Request selected on the Service Request Header tab. To switch back and forth between the Service Request Header tab and the Service Request Shops tab, press the F9 key (or click on the tab). To add a Shop to an existing Service Request, right click in the main area of this tab, then choose “Add” or “Insert” from the popup menu, or click in this area and press F1. To delete an existing Shop, right click on that Shop and choose “Delete” from the popup menu. Changes are not allowed to closed Shops, except to allow the Shop to be reopened.
This tab contains the following columns for each assigned Shop:Shop – The FM Shop assigned to do the work, up to 10 alphanumeric characters
(currently, all Shops are 3 digits). (RQ)Description of Work – A complete description of the work to be done, up to 240
alphanumeric characters.Complete? – A Y in this column indicates that this Shop has completed its work. This
automatically sets the Closed Date to today’s date. Removing the Y from a 88

previously closed Shop removes the Closed Date, thereby re-opening the Shop. Note: A Shop cannot be closed if encumbered material exists for that Shop. Also, PM Service Requests cannot be closed through this module. See the PREVENTIVE MAINTENANCE MODULE section for instructions on closing PM Service Requests.
Closed Date – The date the Shop was closed, whether they completed the work or were not needed on the request after all, formatted MM/DD/YYYY.
Task ID – A 6-digit code indicating the type of work to be performed. The leading digit must agree with the leading digit of the Task ID on the Service Request Header tab. The default is 100000. For a complete list of Task IDs, see the Tasks tab on the Shop module. (RQ)
Deferred Maint Code – A 4-digit code indicating how this Shop’s work on the Service Request relates to Deferred Maintenance. This defaults to 1000 (Regular Maintenance). For a list of other valid codes, see Deferred Maintenance personnel.
Printed? – A Yes or No (“Y” or “N”) column indicating whether or not this Shop’s copy of the Service Request has been printed (view only). This defaults to N (No).
Est Hrs – The estimated number of hours this Shop will spend on the Service Request, with 2 decimal places (up to 999.99).
BATCH PRINT S/RS TABThis tab allows you to print all Service Requests, except those for Preventive Maintenance and Estimates, that have not been printed previously.
To print these Service Requests, click the “Print All Unprinted Service Requests” button. For each Shop that is flagged to receive a printed Service Request (see the SHOP MODULE section for more information), one copy of each of its unprinted requests will print at that Shop’s default printer. This process may take several minutes, depending on the number of requests that require printing. When the requests have printed successfully, the system displays the message “Successfully printed service requests!”.
BUILDINGS TABThis tab allows you to add information on newly acquired University buildings and update information on existing buildings. To select a Building, enter the Building Number (up to 5 alphanumeric characters, including leading zeros) in the white box to the right of the words “Building Nbr”. If information for this building already exists, it will display. Otherwise, the system displays the message “This Building was not found in the database. Do you want to add it?”. If this is a new building, click the “Yes” button, which displays blank columns ready for your data entry. If this is not a new building, click the “No” button and reenter the correct Building Number.
This tab contains the following columns:Name – The name of this building, up to 30 alphanumeric characters.Addr1 – The street address of the building, up to 40 alphanumeric characters.Addr2 – An additional line for the street address, up to 40 alphanumeric characters. City – The city where this building is located, up to 30 alphanumeric characters. This
defaults to Tucson.State – The 2-character abbreviation of the state where this building is located. This
defaults to AZ.Zip – The 5- or 9-digit postal zip code of the building. This defaults to the U. of A. zip
code, 85721.
89
Contact – The name of the contact person (usually the Building Monitor) for the building, up to 30 alphanumeric characters.
Active? – A checkbox column indicating whether or not this building is active. This defaults to Active (checked). Buildings which have been demolished or are no longer University property should be flagged as Inactive (unchecked).
FM Maintained? – A checkbox column indicating whether or not Facilities Management is responsible for maintenance on this building. This defaults to Yes (checked).
Gross Sq Ft – The total square footage of the building, with no decimal places.FM Sq Ft – The number of square feet within the building that Facilities Management is
responsible for maintaining.Grounds/Labor Area – The 2-character code indicating which Grounds & Labor area this
building falls into.Location Code – A drop down list indicating the general location of this building. Valid
values are:AHSC – Arizona Health Sciences CenterMain Campus – The main campus area of the UniversityOff Campus – An off-campus property
Maintenance Restrictions – Any precautionary information about this building (for example, check-in procedures, hours when routine maintenance is not allowed, etc.). This information automatically transfers to any Service Requests issued for the building.
SERVICE REQUEST QUERY TABThis tab allows you to search for a Service Request using one or more columns. Entering more pieces of information as query criteria should limit the number of records the system retrieves. For example, if you know the building number and the Shop, first click the “Enter Query Criteria” button, which creates a grid in the main part of the tab. Then click in the box under Bldg Nbr and enter the building number. Use the scrollbar or TAB key to move to the right until you see the Shop column. Enter the Shop Number. Finally, click the “View Items” button. The system will retrieve all Service Requests related to that building and Shop. The records will be in order by Service Request Number. To sort them in a different order, click the column heading of the column you want to sort on (for example, Task ID).
PROJECT SCHEDULE REPORT TABThis tab allows you to print the Project Schedule Report. This report lets you select up to 15 Service Requests, and shows the estimated and actual hours for each shop on those Service Requests, as well as Job, Description, Total Expensed, etc.
This tab contains the following prompt columns:Enter the Service Request Numbers for this report – Type a Service Request Number in
at least one of the white boxes below this prompt. You may enter up to 15 Service Requests. The order in which you enter the Service Request Numbers is the order in which they will appear on the report.
Enter the Number of Weeks to Complete Work – Enter the number of weeks in which the projects should be completed. This defaults to 8 weeks.
Enter the Number of Daily Productive Hours Per Person – Enter the average number of hours of actual productive work expected from each employee who works on these Service Requests. This defaults to 6 hours.
Enter the Report Title – Enter any specific title you want to see on the report. The text you enter will appear at the top center of the report, with the words “University of Arizona Facilities Management” and “Project Schedule” centered below it.
90

When you have entered all necessary information in the prompts, click the “Run Report” button. This report may take several minutes to complete. When the system is finished creating the report, it will display in a new window, where you can view it and choose to print it and/or export its data to some other application such as Excel.
91
EQUIPMENT MODULE (Inquiry)
To open this module, click on the Equipment Master icon (the crane), or click “Activities” from the menu, then choose “Equipment Master”. The Equipment window will open.
To select a piece of equipment to display, use the scroll bar to move up and down through the alphabetical treeview of equipment types on the left side of the window until you find the type you are looking for (for example, Backhoe). Double click on that type. A list of the specific pieces of equipment within that type will appear, sorted by Equipment Number. To select a piece of equipment, click on it. The system will retrieve the information for that equipment.
The Equipment Module includes the following tabs:
GENERAL – Displays general information about the equipment including description and type, periodic maintenance (if available), expected life (for depreciation purposes); information about the manufacturer including model numbers, vendor information, and University A-tag number; physical location of the equipment; rental rates; and acquisition and disposal information.
VEHICLE – If the equipment you selected on the left side of the window is a vehicle, this tab displays additional information including VIN (Vehicle ID Number), license plate, model year, weight, accounting information, the type of fuel used, and conversion information if the vehicle has been converted to an alternate fuel source. The bottom section of this tab displays historical information by fiscal year, such as odometer readings, maintenance costs, etc., if available.
PART SPECS – This tab is not in use at this time. It will allow tracking of parts specific to the selected piece of equipment, their cost, and where they can be purchased.
MAINTENANCE – This tab tracks routine maintenance performed on the selected piece of equipment. A list of dates and maintenance events appears on the left side of the tab. Clicking on an event displays detailed information about the event, such as type, labor hours, and any comments recorded, and a list of parts used and their dollar amount.
EXPENSES – Displays all equipment expenses (Rental Tickets, fuel charges, Garage charges, etc.) for the selected piece of equipment, including Job, Shop, and Account charged, date, and cost. This information is sorted by Ticket ID, but you can resort it by any other column (for example, Job Number) by clicking that column heading.
RENTAL – This tab allows Rental Tickets to be created to charge a Job and Service Request for the use of one or more pieces of equipment. It is not tied to the piece of equipment selected on the left side of the window.
QUERY – This tab is not tied to the piece of equipment selected on the left side of the window. It allows you to search for either Equipment Master information or Rental Ticket information using one or more columns. First, select the radio button for the type of information you want to search for (Equipment or Rental Tickets). Then click the “Enter Query Criteria” button, which creates a grid in the main part of the tab. Entering more pieces of information as query criteria should limit the number of records the system retrieves. For example, if you know the Job Number, click in the box under Job Nbr and enter the Job. Finally, click the “View Items” button. The system will retrieve all Equipment or Rental Tickets (depending on which radio button you selected) related to that Job. If you chose to view Equipment records, they will be in order by Equipment Number (Item #). If you chose to view Rental Tickets, they will be in order by Rental Ticket ID. To sort in a different order, click the column heading of the column you want to sort on (on an Equipment search, sorting is available on all columns except Building Name, Acquisition Amount, Acquisition Date, Disposal Date, Disposal Amount, and Disposal Type).
92

MAT REQ REPORTS – This tab is not tied to the piece of equipment selected on the left side of the window. It allows you to run the Material Request Report for the date and Shop range you specify, with the option of restricting the report to only those Material Requests entered by or requested by a certain user, or those with a specific Job or vendor. This report shows the items requested, the status of the request, and the type of equipment associated with the request. There are monthly and grand totals.
93
EQUIPMENT MODULE (Input)
PURPOSE: The Equipment module tracks any piece of equipment Facilities Management may utilize in maintaining the University grounds and buildings, including cranes, floor burnishers, passenger vehicles, etc. It provides a place to record basic information on this equipment, including maintenance records and parts necessary to keep the equipment in good working condition, as well as a way to record the use of the equipment and charge it to a Job and Service Request.
INSTRUCTIONS: To open this module, click on the Equipment Master icon (the crane), or click “Activities” from the menu, then choose “Equipment Master”. The Equipment window will open.To find an existing piece of equipment, find its Equipment Type in the treeview on the left side of the window, and double click on that type. A list of the specific pieces of equipment within that type will appear, sorted by Equipment Number. Click on the Equipment Number to display its information. To add a new piece of equipment, right click in the central part of the General tab and choose “Add” or “Insert” from the popup menu, then fill in all the equipment master information as described below in the instructions for that tab. NOTE: To add a new Equipment Type, see the instructions for the EQUIPMENT TABLE MAINTENANCE module.
94

GENERAL TABThis tab records basic information about a piece of equipment. It includes six areas.
The upper area contains the following columns:Description – The description of this equipment, up to 60 alphanumeric characters.Type – A drop down list of Equipment Types. These are the same types listed on the left
side of the window. If you add a new piece of equipment or change the type on an existing piece, the equipment will appear under the Equipment Type you selected after you close and re-open the Equipment window. (RQ)
Item # – The Equipment Number assigned to this piece of equipment, up to 16 alphanumeric characters. Before assigning the Equipment Number, make sure the number is not already in use by using the Query tab. (See the instructions for the QUERY TAB below.) (RQ)
Status – A drop down list of valid equipment statuses. Choices are:Active – This equipment belongs to Facilities Management. Use this status even
if the equipment is undergoing repairs and cannot currently be used.Inactive – The equipment has been sent to Surplus, transferred to another
University department, stolen, or otherwise disposed of. This equipment should NOT be deleted.
Periodic Maint (months) – The maximum number of months that should elapse before maintenance is performed on the equipment.
Expected Life (months) – The number of months this equipment is expected to be useful, used for depreciation purposes.
Id – The system-assigned sequential Equipment Identification number (view only).
Manufacturer contains the following columns: Make – A drop down list of Equipment Manufacturers. NOTE: To add a new
Manufacturer, see the instructions for the EQUIPMENT MAINTENANCE module.Model – The model of this equipment, up to 30 alphanumeric characters.Serial # – The serial number of this equipment, up to 40 alphanumeric characters.FM Vendor – A drop down list of University vendors, sorted by Vendor Name and also
listing Vendor Number. Helpful Hint: to open this list to a particular letter, type that letter, then click the arrow.
License # – If this is a vehicle, this column contains its license plate number, up to 10 alphanumeric characters.
A tag# – The University A-Tag number assigned by Property Management if the equipment is over a certain dollar value
Location contains the following columns: Building – The 5-character University Building Number where this equipment typically
resides. The system will attempt to assign the correct Area (Grounds & Labor area) based on the Building.
Area – The 2-character Grounds & Labor Area where this equipment is typically located.Shop – A drop down list of Facilities Management Shops, indicating which Shop owns or
is responsible for this equipment. (RQ)Room – The room where this equipment is typically located, up to 21 alphanumeric
characters.Description – Any other descriptive information about the location of the equipment, up to
40 alphanumeric characters.
Rates contains the following columns: Hourly – The hourly rental rate for the equipment, with 2 decimal places. This may be
established by conducting a telephone survey of rates for similar types of rental equipment within the Tucson area or nationwide.
95

Fuel – The hourly (not per mile) rate we charge for fuel consumed by the equipment. This column must be 0 if this equipment does not use fuel.
Bill for Both – A checkbox column indicating whether or not customers are charged an hourly rate as well as a rate for fuel consumption on this equipment.
Acquisition contains the following columns:Condition – A drop down list of valid acquisition methods/conditions. Choices are:
Used – The equipment was purchased used, from outside the University.New – The equipment was purchased new.Used-Surplus – The equipment was acquired used from University Surplus.Used-Dept Xfer – The equipment was acquired used from another University
department.Amount – The dollar amount we paid for this equipment, with 2 decimal places.Date – The date we acquired this equipment, formatted MM/DD/YYYY. Clicking the top
arrow of the spin control once defaults this to today’s date.
Disposition contains the following columns: Disposal Method – A dropdown list of the methods by which equipment can be disposed.
If the equipment’s Status is Inactive, there may be an entry in this column. NOTE: To add a new Disposal Method, see the instructions for the EQUIPMENT MAINTENANCE module.
Amount – The dollar amount the disposed equipment was sold for at a Surplus auction.Date – The date we disposed of this equipment, formatted MM/DD/YYYY. Clicking the
top arrow of the spin control once defaults this to today’s date.
Deleting EquipmentRight clicking in this tab will give you the option of choosing “Delete” from the popup menu. USE THIS OPTION WITH EXTREME CAUTION. Equipment should not be deleted simply because Facilities Management no longer owns it. In that case, its Status should be set to Inactive and disposition information should be entered for the equipment. The ONLY circumstance in which a piece of equipment should be deleted is if you have just entered it and then discover that the equipment already exists under a different Equipment Number.
VEHICLE TABThis tab records additional information about vehicles. It includes two areas.
The upper area contains the following columns:Vehicle # – The Vehicle Number is identical to the Equipment Number (Item #) on the
General tab.VIN # – The Vehicle Identification Number assigned by the vehicle manufacturer, up to
24 alphanumeric characters.Conversion – The 4-character Conversion Mode for vehicles that were converted to use
alternative fuels, such as diesel or propane, after purchase.Fuel Type – A drop down list of valid types of fuel. NOTE: To add a new Fuel Type, see
the instructions for the EQUIPMENT MAINTENANCE module.Fuel Config – A drop down list of valid fuel configurations, i.e.: Dual (if vehicle allows two
kinds of fuel). NOTE: To add a new Fuel Configuration, see the instructions for the EQUIPMENT MAINTENANCE module.
License Nbr – The vehicle’s license plate number. This should be the same as the one on the General tab.
Category – A drop down list of valid vehicle categories (such as SUV, mini-van, etc.) NOTE: To add a new Vehicle Category, see the instructions for the EQUIPMENT MAINTENANCE module.
96

Expense Acct – The 6-digit FRS Account Number that is billed for fuel for this equipment. This is normally assigned by the FM Garage.
Expense Obj Code – The 4-digit FRS Object Code that is billed for fuel for this equipment. This column is not currently in use.
Conversion Date – The date the vehicle was converted to alternative fuel, formatted MM/DD/YY.
Model Year – The official 4-digit model year of the vehicle.Weight – The vehicle’s gross weight in pounds, with no decimal places.Exempt – A checkbox column indicating whether or not this vehicle is exempt from the
Fleet Data survey conducted annually by the Garage. The default is No (unchecked) – the vehicle is not exempt.
Equipment Id – The system-assigned sequential Equipment ID number (view only).
The lower area is designed to capture the information required by the Fleet Data survey conducted annually by the Garage. It is not currently in use. To add information for this vehicle, right click in this area and choose “Add” from the popup menu. This area contains the following columns:
Fscl Year – The 4-digit fiscal year the data applies to. (RQ)Odometer – The vehicle’s final odometer reading for the fiscal year, with 1 decimal place
(up to 9,999,999.9).Value – The vehicle’s market value at the end of the fiscal year, with 2 decimal places.Repl. W Afv – The cost, if applicable, of converting this vehicle to alternative fuel during
the fiscal year, with 2 decimal places.Pm Svc Internal – The cost of any internally performed preventive maintenance on the
vehicle during the fiscal year, with 2 decimal places.Maint – The cost of any other maintenance performed on the vehicle during the fiscal
year, with 2 decimal places.Alt Fuel – The cost of alternative fuel for the vehicle during the fiscal year, with 2 decimal
places.Other Fuel – The cost of all other (regular) fuel for the vehicle during the fiscal year, with
2 decimal places.
PART SPECS TABThis tab is designed to track information about the parts required by the piece of equipment selected on the left side of the window. It is not currently in use.
To add a parts specification record for the equipment, right click in this tab and choose “Add” or “Insert” from the popup menu. To delete an existing parts specification, click on it, then right click and choose “Delete” from the popup menu. Clicking on any column header will sort the records in order by that column.
This tab contains the following columns for each parts specification:Part – A drop down list of valid Equipment Parts, sorted by the description. NOTE: To
add a new Part, see the instructions for the EQUIPMENT MAINTENANCE module. (RQ)
Parts Specification – Any description or comments about this parts specification, up to 32 alphanumeric characters.
Approx. Cost – The approximate cost of the part, with 2 decimal places.Typical Purchase Location – Information about where this part can be purchased, up to
32 alphanumeric characters.ID – The system-assigned sequential Equipment ID number (view only).
97
MAINTENANCE TABThis tab tracks maintenance performed on the piece of equipment selected on the left side of the window. It includes three areas.
The area at the left of the tab displays a list of existing maintenance dates with a short description of the maintenance performed, sorted by date with the most recent appearing first. Clicking on a row from this list displays its detail information in the other two areas.
To add a new maintenance record, right click in the Maintenance Event area and choose “Add” or “Insert” from the popup menu. To delete an existing row, click on it, then right click and choose “Delete” from the popup menu. Maintenance Event contains the following columns:
Maint Code – A drop down list of valid Maintenance Code Descriptions, sorted in alphabetical order. NOTE: To add a new Maintenance Code, see the instructions for the EQUIPMENT MAINTENANCE module. (RQ)
Date – The date the maintenance was performed, formatted MM/DD/YY.Type – A drop down list of valid maintenance types. Choices are:
Planned – This was a planned (preventive) maintenance event.Repair – This was an unexpected repair.
Comment – Any comments about the maintenance, up to 60 alphanumeric characters.Labor Hrs – The number of hours required to perform the maintenance, with no decimal
places.Id – A system-assigned sequential Maintenance ID Number (view only).
The Parts List area displays information on any parts that were used in performing the selected maintenance. To add a new parts record, right click in the Parts List area and choose “Add” or “Insert” from the popup menu. To delete an existing row, click on it, then right click and choose “Delete” from the popup menu. Parts List contains the following columns for each part used:
Part Description – A description of the part that was used, up to 30 alphanumeric characters.
Amount – The cost of the part, with 2 decimal places.
EXPENSES TABThis tab displays all Equipment Expense transactions (rental tickets, fuel charges, and Garage charges) for the piece of equipment selected on the left side of the window. To sort the list on any of the columns shown, click on the column heading (clicking a second time sorts in reverse order). To print the information shown, click somewhere on the tab, then click the printer icon on the toolbar. This tab displays the following columns (VIEW ONLY):
Ticket – On Equipment Rental charges, this is the Rental Ticket Number. On other charges, it is a sequential system-assigned number.
Job# – The Job charged for the expense.Shop – The Shop that was charged.Account – The FRS Account Number that was charged.Obj Cd – The FRS Object Code that was charged.Entered – The date this transaction was entered into the system.Posted – The posting date on the transaction (i.e., the accounting period it was charged
to).Billed – The date this transaction was billed to a customer (including Facilities
Management).Description – The description of the transaction.Base Cost – The dollar amount of the transaction, with no recovery percent added.Eq Exp Id – A sequential ID number assigned to the transaction.Equipment Id – The sequential ID number assigned to the piece of equipment.
98
Rent Tkt Seq – A sequential ID number assigned to the individual line item on a Rental Ticket.
Recover Amt – The dollar amount of the transaction charged to the customer (the full cost recovery amount).
Sr Nbr – The Service Request that was charged.Task Id – The Task ID for the Shop on that Service Request.Ready For Billing – A “Y” in this column indicates that this transaction was approved for
billing.User Id – The FIMA user ID of the person who entered the transaction into the system.
RENTAL TABThis tab allows Equipment Managers to create Equipment Rental Tickets to charge customers (including Facilities Management) for the use of equipment. (The information for the Rental Tickets generally comes from paper rental tickets filled out by hand.) The Rental Tickets must be processed by Cost Accounting to create actual Equipment Expense transactions. To create a Rental Ticket, click the “New Ticket” button on the upper right corner of the tab. This opens a header area which contains the following columns:
Shop – A drop down list of FM Shop Numbers and descriptions. Select the Shop that controls the equipment being rented. (RQ)
Date – The date on the rental ticket, formatted MM/DD/YYYY.Work Req – The Service Request Number being charged. (RQ) The system fills in the
Job Nbr column with the Job on this Service Request.Ticket # – The sequential Rental Ticket Number, which the system will assign when you
successfully save the transaction (view only).Job Nbr – The Job from the entered Service Request (view only).
To assign the pieces of equipment that were rented, find the equipment on the treeview on the left side of the window, then click on it and drag it into the lower area of this tab while holding down the left mouse button. Release the left mouse button. This opens an area with the following columns:
Item # – The Equipment Number you selected and dragged in (view only).Item Description – The description of this piece of equipment (view only).Quantity – The number of hours this equipment was rented out, with 2 decimal places.Unit Price – The hourly rental rate for the equipment (view only).Amount – The Quantity multiplied by the Unit Price (the total cost for the rental of this
equipment for the specified number of hours.) (View only.)
Add additional lines as necessary. The system calculates the grand total for all lines on the Rental Ticket immediately below the Amount column. If you need to delete a line, click on it, then right click and choose “Delete” from the popup menu.
At any time, if you do not want to save the Rental Ticket, you can click the “Cancel” button. The system will display a message asking you to verify that you want to delete this Rental Ticket. Click the “Yes” button to delete it, or the “No” button to keep working on the ticket. When you successfully save a Rental Ticket, the system generates the Ticket Number. Write this number on the paper ticket. An Equipment Rental Ticket document will automatically print as well.
99

QUERY TABThis tab is not tied to the piece of equipment selected on the left side of the window. It allows you to search for either Equipment Master information or Rental Ticket information using one or more columns. First, select the radio button for the type of information you want to search for (Equipment or Rental Tickets). Then click the “Enter Query Criteria” button, which creates a grid in the main part of the tab. Entering more pieces of information as query criteria should limit the number of records the system retrieves. For example, to search by Job Number, click in the box under Job Nbr and enter the Job. Finally, click the “View Items” button. The system will retrieve all Equipment or Rental Tickets (depending on which radio button you selected) related to that Job. If you chose to view Equipment records, they will be in order by Equipment Number (Item #). If you chose to view Rental Tickets, they will be in order by Rental Ticket ID. To sort in a different order, click the column heading of the column you want to sort on (on an Equipment search, sorting is available on all columns except Building Name, Acquisition Amount, Acquisition Date, Disposal Date, Disposal Amount, and Disposal Type).
MAT REQ REPORTS – This tab is not tied to the piece of equipment selected on the left side of the window. It allows you to run the Material Request Report which shows the items requested, the status of the request, and the type of equipment associated with the request. There are monthly and grand totals. This tab includes two areas.
The “Enter the Date Range and Shop Range” area contains the following prompt columns:From Date – Enter the earliest date for which you want information, formatted
MM/DD/YYYY. (RQ)To Date – Enter the latest date for which you want information, formatted MM/DD/YYYY.
(RQ)From Shop – Enter the first FM Shop Number for which you want information (Shop
Numbers are currently 3 digits). (RQ)To Shop – Enter the last FM Shop Number for which you want information. (RQ)
The “You may also enter ONE of the following” area contains optional prompt columns, if you want to further restrict the data included on the report. You may enter data in only one of these prompts:
Mat Reqs Entered By – Enter the FIMA user ID of the person who data entered the Material Requests you want to see.
Mat Reqs Requested By – Enter the FIMA user ID of the person who was the Requestor on the Material Requests you want to see.
Vendor – A drop down list of University Vendor Numbers and names. Select the vendor for which you want information.
Job – Enter the Job Number for which you want information, up to 10 alphanumeric characters.
When you have entered all necessary information in the prompts, click the “Run Report” button. This report may take several minutes to complete. When the system is finished creating the report, it will display in a new window, where you can view it and choose to print it and/or export its data to some other application such as Excel.
100

EQUIPMENT EXPENSES MODULE (Inquiry)
To open this module, click on the Equipment Expenses icon (the dollar sign and X), or click “Activities” from the menu, then choose “Equipment Expenses”. The Equipment Expense window will open.
The left side of the window displays a treeview of equipment tickets, sorted in descending numerical order (the most recent listed first). The ones with a red “X” through their icon have already been processed. Those may be actual Rental Tickets, or they may represent batches of Garage or fuel charges that have been processed. The ticket numbers without a red “X” are Rental Tickets that are waiting to be processed. Processing creates a charge against the Job, Service Request, and account on the Rental Ticket. To view an equipment ticket, use the scroll bar to move up and down through the list until you find the one you are looking for, then click on it.
The Equipment Expenses Module includes the following tabs:
EQUIPMENT EXPENSE – If you have inquiry only access, you will only be able to see header information on unprocessed Rental Tickets. This includes Service Request, Shop, Job, and ticket Date. For processed tickets, the detail line items on the ticket display in the lower part of the tab. This information includes dollar amounts for each item, the description of the equipment or type of transaction, account information, billing date, etc. and the total dollar amount expensed on the ticket.
RENTAL TICKET – If the ticket selected on the left side of the window is an actual Rental Ticket, this tab displays a duplicate of the tab used to generate the Rental Ticket in the Equipment module. This shows Shop, Ticket Date, Service Request, and Job in the upper part of the tab, and the individual lines with Equipment Number, Description, Quantity, Unit Price, and Amount in the lower section. The grand total dollar amount displays at the bottom. If you selected a different type of transaction (a fuel or Garage charge) on the left side of the window, only the date and Ticket Number appear in the upper part of the tab, and the bottom part is blank. Those transactions do not generate a true Rental Ticket. QUERY – This tab is not tied to the equipment ticket selected on the left side of the window. It allows you to search for Equipment Expense information using one or more columns. First, click the “Enter Query” button, which creates a grid in the main part of the tab. Entering more pieces of information as query criteria should limit the number of records the system retrieves. For example, if you know the Job and Shop, click in the box under Job Nbr and enter the Job, then click the box under Shop and enter the Shop Number. Finally, click the “List Tickets” button. The system will retrieve all Equipment Expenses related to that Job and Shop. Unlike most of the queries in the system, you cannot click on a column header to re-sort the transactions. However, if you double-click on a row on this query tab, the system automatically switches you to the Equipment Expense tab, with the information for that ticket displayed.
101

EQUIPMENT EXPENSES MODULE (Input)
PURPOSE: Cost Accounting uses the Equipment Expense module to process Equipment Rental Tickets that were previously entered by an Equipment Manager. Processing creates charges against the Job, Service Request, and account on the Rental Ticket. They also use this module to perform various uploads of equipment expense data, such as fuel uploads and Garage uploads.
INSTRUCTIONS: To open this module, click on the Equipment Expenses icon (the dollar sign and X), or click “Activities” from the menu, then choose “Equipment Expenses”. The Equipment Expense window will open. The left side of the window displays a treeview of equipment tickets, sorted in descending numerical order (the most recent listed first). The ones with a red “X” through their icon have already been processed, and no changes can be made to them. Those may be actual Rental Tickets, or they may represent batches of Garage or fuel charges that have been processed. The ticket numbers without a red “X” are Rental Tickets that are waiting to be processed. To view an existing equipment ticket or select it for processing, use the scroll bar to move up and down through the list until you find the one you are looking for, then click on it. You cannot add new Rental Tickets through this module; see the EQUIPMENT MODULE section for instructions on creating Rental Tickets.
102

EQUIPMENT EXPENSE TABThis tab allows you to process previously entered Equipment Rental Tickets, run equipment expense uploads, and view previously processed transactions. The Equipment Expense tab includes two areas.
The upper area contains the following columns:Ticket Id – The system-generated Rental Ticket Number of the selected equipment
transaction (view only).Sr Nbr – The Service Request Number to be charged (view only). This may be 0 on
batch uploads.Shop – The Shop that rented out the equipment (view only). This may be empty on batch
uploads.Job Nbr – The Job Number being charged (view only). This may be empty on batch
uploads.Date – The date on the equipment transaction (view only).Amount – If you are viewing a previously processed fuel or Garage upload transaction,
this column contains the total dollar amount for the batch. If you are viewing a Rental Ticket (processed or pending), this column is blank. (View only.)
Post Date – The date the equipment expense transaction is posted for accounting purposes, formatted MM/DD/YYYY.
The lower area contains the following columns for each line item on a processed Rental Ticket or uploaded fuel or Garage batch, which are all VIEW ONLY:
Equip # – The sequential system-assigned number of the piece of equipment.Svc. Req. – The Service Request that was charged. Job – The Job Number that was charged.Shop – The Shop that was charged.Amount – The dollar amount for this line, not including customer recovery percent.Task – The Task ID for the Shop and Service Request.Description – A description of the equipment rented or the type of uploaded charge.Acct – The FRS Account Number that was charged.Obj cd – The FRS Object Code that was charged.Doc # – The Document Number on the transaction. This may be blank for Equipment
Rental Tickets.Txn Date – The date this transaction was processed.Bill Date – The date we billed this transaction.Post Date – The transaction’s official posting date, for accounting purposes.Rental Ticket Id/Seq – The equipment ticket ID and, if this transaction is a Rental Ticket,
its sequential system-assigned sequence number.Recover Amt – The dollar amount of the transaction, including customer recovery percent
(full cost recovery).Bill – A “Y” in this column indicates that the transaction has been approved for billing.JE Id# – If this transaction was produced by a Journal Entry, this column contains the
Journal Entry Number.Type – The type of transaction: G = Garage upload, F = fuel upload, blank = Rental
Ticket.Expense Id – The sequential system-assigned Equipment Expense ID NumberUser Id – The FIMA user ID of the person who processed the transaction.
Processing Equipment Rental TicketsSelect the pending Rental Ticket you want to process from the treeview on the left side of the window. (The most recent one will automatically be displayed when you open the Equipment Expense window.) At this point, only the upper area of the tab will display data. Enter the appropriate date in the Post Date column, and click the “Post Batch” button. If all information on the Rental Ticket is valid (the Shop is still open on the Service Request, etc.), the system will fill the lower area of the tab with detail line item information from the Rental Ticket, and will create the Equipment Expense transactions. A report titled
103
“Equipment Expense Transactions for Ticket Number ####”, (where “####” is the Rental Ticket Number) automatically prints.
Running the Garage UploadInformation for the Garage upload is available monthly. It comes to Facilities Management from FRS, and consists of charges that the FM Garage has posted directly into FRS relating to FM vehicles and other equipment. When you are notified by MIS, the Reconciling area, or the Cost Accounting Manager that the Garage upload is available, click the “Load Batch” button. (It does not matter what equipment ticket is selected on the left side of the window.) The Direct Expense Import Wizard window will automatically open. The Post Date column defaults to today’s date. Change this date if necessary (format is MM/DD/YYYY). The radio button titled “FM garage charges from Motor Pool” should already be selected. Click the “Next” button. A tab titled “Direct Expense Accounting Transaction File Import Errors” displays. Various error messages may appear in on this tab as the upload process validates data. When the process finishes, a message similar to the following will display at the bottom of this tab beside the word “Progress”: “Processing complete – Rows: ### Database Update Successful” where “###” is the number of rows that were successfully added as Equipment Expenses. A report titled “Equipment Expense Transactions for Ticket Number ####”, (where “####” is the system-generated Equipment Ticket Number) automatically prints.
Running Fuel or Insurance & Title UploadsInformation on Motor Pool fuel or vehicle insurance and title charges are kept in spreadsheets prepared by the Reconciling area. This information is also uploaded into FIMA to create Equipment Expense charges. To upload these charges, click the “Load Batch” button. (It does not matter what equipment ticket is selected on the left side of the window.) The Direct Expense Import Wizard window will automatically open. The Post Date column defaults to today’s date. Change this date if necessary (format is MM/DD/YYYY). Then click the appropriate radio button for the type of upload you are doing (either “Fuel charges” or “Insurance / Title Charges”). Click the “Next” button. A tab titled “Please select the file to be imported” will display, showing a list of all the text files on your c:\ drive. If the correct file is listed, click on it to select it. Otherwise, select a different drive if necessary by double clicking on it, and continue to select the correct path (as you would in Windows Explorer) until you see the correct file. The path you are selecting displays beside the words “Current Directory Listing”. Once you have clicked the file to upload, it’s name displays in the white box next to the words “Selected File”. Click the “Next” button again. A tab titled “Direct Expense Accounting Transaction File Import Errors” displays. Various error messages may appear in on this tab as the upload process validates data. If errors exist, no data will be uploaded – all errors must be corrected before you can successfully upload this data. When the process finishes successfully with no errors, a message similar to the following will display at the bottom of this tab beside the word “Progress”: “Processing complete – Rows: ### Database Update Successful” where “###” is the number of rows in the file being uploaded, which have now been added as Equipment Expenses. A report titled “Equipment Expense Transactions for Ticket Number ####”, (where “####” is the system-generated Equipment Ticket Number) automatically prints at the end of a successful upload.
RENTAL TICKET TABIf the ticket selected on the left side of the window is an actual Rental Ticket, this tab displays a duplicate of the tab used to generate the Rental Ticket in the Equipment module. This shows Shop, Ticket Date, Service Request, and Job in the upper part of the tab, and the individual lines with Equipment Number, Description, Quantity, Unit Price, and Amount in the lower section. The grand total dollar amount displays at the bottom. If you selected a different type of transaction (a fuel or Garage charge) on the left side of the window, only the date and Ticket Number appear in the upper part of the tab, and the bottom part is blank. Those transactions do not generate a true Rental Ticket. The two buttons (“Cancel Ticket” and “New Ticket”) do not actually perform any function in this module. (Clicking the “Cancel Ticket” button displays a message asking you to verify that you want to delete this Rental Ticket, but answering “Yes” does not actually delete it. Pending Rental Tickets can only be cancelled on the Rental Ticket tab in the Equipment module. See the EQUIPMENT MODULE section for more information.)
104

QUERY TABThis tab is not tied to the equipment ticket selected on the left side of the window. It allows you to search for Equipment Expense information using one or more columns. First, click the “Enter Query” button, which creates a grid in the main part of the tab. Entering more pieces of information as query criteria should limit the number of records the system retrieves. For example, if you know the Job and Shop, click in the box under Job Nbr and enter the Job, then click the box under Shop and enter the Shop Number. Finally, click the “List Tickets” button. The system will retrieve all Equipment Expenses related to that Job and Shop. Unlike most of the queries in the system, you cannot click on a column header to re-sort the transactions. However, if you double-click on a row on this query tab, the system automatically switches you to the Equipment Expense tab, with the information for that ticket displayed.
105

DIRECT EXPENSES MODULE (Inquiry)
To open this module, click on the Direct Expenses icon (the safe), or click “Activities” from the menu, then choose “Direct Expenses”. The Expenses window will open.
The left side of the window displays a treeview of Batch Dates, sorted in descending order (the most recent listed first). Use the scroll bar to move up and down through the list until you find the Batch Date you are looking for, and double click on the date. A list of Batch Numbers that were posted for that date displays. To view Direct Expense charges in a particular batch, click on its Batch Number.
The Direct Expenses Module includes the following tabs:
DIRECT – This tab displays batch header information (whether or not the batch is closed, its Posting Date, Batch Total dollar amount, batch type, totals by type of Job, etc.) and detail line item information on the individual charges (Document Number, Job, Shop, Service Request, FRS Account and Object Code, amount, description, etc.). Types of documents include Lock Shop Keying Forms, Student Union Catering, FastCopy, Telephone Toll Bills, Recycling Revenues, Outlying Properties Utilities charges, and Major Vendor Utility Bills, and other miscellaneous charges.
QUERY - This tab is not tied to the Batch Number selected on the left side of the window. It allows you to search for Direct Expense information using one or more columns. First, click the “Enter Query” button, which creates a grid in the main part of the tab. Entering more pieces of information as query criteria should limit the number of records the system retrieves. For example, if you know the Job and Shop, click in the box under Job Nbr and enter the Job, then click the box under Shop and enter the Shop Number. Finally, click the “List Tickets” button. The system will retrieve all Direct Expenses related to that Job and Shop. To sort the transactions in a different order, click on the column header you want to sort on (this is available for all displayed columns except Service Request Number). Also, if you double-click on a row on this query tab, the system automatically switches you to the Direct tab, with the information for that batch displayed.
106

DIRECT EXPENSES MODULE (Input)
PURPOSE: Cost Accounting uses the Direct Expenses module to process miscellaneous expenses that do not fit into the categories of Labor, Materials, or Equipment expenses. These include expenses such as Lock Shop Keying Forms*; Student Union Catering charges; FastCopy charges; Verizon, Qwest, and other phone service bills; telephone toll bills, revenues from recycling, etc.
INSTRUCTIONS: To open this module, click on the Direct Expenses icon (the safe), or click “Activities” from the menu, then choose “Direct Expenses”. The Expenses window will open. The left side of the window displays a treeview of Batch Dates, sorted in descending order (the most recent listed first). To view or edit an existing batch, use the scroll bar to move up and down through the list until you find the Batch Date you are looking for, and double click on the date. A list of Batch Numbers that were posted for that date displays. Click on the Batch Number to view the Direct Expense charges in that batch. (You can edit an existing batch as long as it has not been closed.) To open a new batch and manually enter transactions, right click in the upper left area of the Direct tab and choose “Add” or “Insert” from the popup menu. The system displays blank columns ready for your data entry.
* See the special instructions for KEY FORM INPUT in the Appendix.
107

DIRECT TABThis tab displays existing Direct Expense transactions and allows you to enter new ones either manually or via various batch upload processes. The Direct tab includes three areas.
The upper left area contains the following columns:Batch # – The sequential system-assigned Batch Number (view only). If you are entering
a new batch, the system assigns this number when you have finished entering the other columns in this area.
Closed – A checkbox column indicating whether or not this batch is closed. You cannot make changes to closed batches. (View only – the system marks this checkbox when you successfully save and close the batch. See below for more information.)
Posted – The official posting date for this batch for accounting purposes, formatted MM/DD/YYYY. (RQ)
Batch Total – The total dollar amount of this batch, with two decimal places. When you close the batch, the system verifies that the total of all the individual line items in the batch matches this amount. (RQ)
Type – A drop down list of valid batch types. (Tabbing off this column automatically creates a row in the lower area of the tab.) In addition to the values below, you may also see “J”, which is created from the Journal Entry process. Choices are:Direct – The default for most manually entered Direct Expense transactions.Telecom – Charges uploaded from the Computer Center’s Telecommunications
area for telephone toll expenses.Major Utility – Charges uploaded from major utility vendors for University-wide
energy bills such as gas, electric, water, etc.Fuel Charge – Not in use.OLP Utility – Charges from the Outlying Property Utility module, which are posted
via an upload process (see below).
The Job Summaries area displays the total dollars charged to each type of Job, based on the first character of the Job Number. The system calculates this and automatically displays it when you save or close a batch. This information is view only and can be used to audit data entry.
The lower area contains the following columns for each individual charge in the batch:Document – The document number on the transaction, up to 16 alphanumeric
characters. Job – The Job number charged, up to 10 alphanumeric characters. (RQ) If you are
entering a new transaction, the system automatically adds a new blank line immediately below the one you are working on when you tab off this column.
Shop – The Shop number charged, up to 10 alphanumeric characters (currently, Shop Numbers are three digits). (RQ)
Task – The 6-digit Task ID associated with the Service Request and Shop. During data entry, the system will attempt to fill in this column after you have entered the Service Request. (RQ)
Svc. Req. – The Service Request Number that is charged. (RQ)Obj cd – The 4-digit FRS Object Code charged. (RQ)Amount – The dollar amount of the transaction, with 2 decimal places. (RQ)Description – A description of the transaction, up to 60 alphanumeric characters.Txn Date – The date this transaction occurred, formatted MM/DD/YYYY. The default is
today’s date. Acct – The 6-digit FRS Account Number that is charged. The system attempts to
determine a default value for this column based on the Job and Shop, but it can be changed if necessary.
Batch – The system-assigned sequential Batch Number (view only).
108

Recover Amt. – The Amount plus any customer recovery rate. This is the full cost recovery amount charged to a customer (view only).
Date Posted – The Posted date from the upper area of the tab, formatted MM/DD/YYYY (view only).
Ready to Bill – The system automatically sets this column to Y (Yes) when you have successfully closed the batch (view only).
User ID – The FIMA user ID of the person who entered this transaction (view only).Exp Id – The sequential system-assigned Direct Expense ID Number (view only).
At the bottom of this area are two summary columns. A number in red next to the words “Reconcile Difference” indicates a mismatch between the Batch Total in the upper area of the tab and the total of the individual Amount columns in this part of the tab. (A black 0 indicates that the totals match.) The number beside the words “Entered Total” is the running total of all entries in the Amount column. You can sort the lines in the bottom area by clicking on some of the column headers. The columns available for sorting are: Document, Job, Shop, Task, Service Request, Amount, Bill Date, and Expense ID.
Saving and Closing BatchesIf you are unable to finish entering an entire batch at one time, you can save the transactions you have entered so far by clicking the “Save” button in the upper right corner of this tab. If the system displays error messages at this point, you must correct the errors or delete the line in error by right clicking it and choosing “Delete” from the popup menu, then try saving again. Once a batch is saved, you can select it again at a later time and continue working on it. Saving a batch does not create Direct Expense charges.
When you have finished entering the entire batch and saved it successfully, click the “Close Batch” button. The Close process creates the actual Direct Expense charges to the Jobs, Service Requests, and Accounts you entered. You must close the batch to create Direct Expense charges. When the batch is successfully closed, the detail lines will change from white to your background color so they can no longer be edited, the Closed checkbox in the upper area of the tab will be checked, and the “Direct Expense Transactions for Batch Number ###” (where “###” is the Batch Number you closed) report will display on your screen and automatically print at your default printer. (Remember to close the window displaying the report once it has printed.)
Running Telephone Toll or Major Utility UploadsThe Telephone Toll upload process connects directly to the CCIT (Center for Computing and Information Technology) Telecom database to obtain data. You must have the correct entries in your PC’s registry in order to run this upload. The Major Utility upload process connects directly to the FM Utility System database to obtain data. Again, you must have the correct entries in your PC’s registry in order to run this upload. To run either of these uploads, click the “Load Batch” button. (It does not matter what is selected on the left side of the window.) The Direct Expense Import Wizard window will automatically open. The Post Date column defaults to today’s date. Change this date if necessary (format is MM/DD/YYYY). The radio button titled “CCIT Telephone Toll Charges” should already be selected. If you need to run the Major Utility upload instead, click the “Major Vendor Utility Charges” radio button. Once you have selected the correct upload process, click the “Next” button. A tab titled “Direct Expense Accounting Transaction File Import Errors” displays. Various error messages may appear on this tab as the upload process validates data. If errors exist, no data will be uploaded – all errors must be corrected before you can successfully upload this data. When the process finishes successfully with no errors, a message similar to the following will display at the bottom of this tab beside the word “Progress”: “Processing complete – Rows: ### Database Update Successful” where “###” is the number of rows in the file being uploaded, which have now been added as Direct Expenses. A report titled “Direct Expense Transactions for Batch Number ####”, (where “####” is the system-generated Batch Number) automatically prints at the end of a successful upload.
109

Running Outlying Property Gas or Electric UploadsThe Utility Accountant receives data from Southwest Gas and Tucson Electric Power, listing monthly charges for University outlying properties that are charged directly by these companies (instead of being included in the Major Utility Bills discussed above). To upload these charges, click the “Load Batch” button. (It does not matter what is selected on the left side of the window.) The Direct Expense Import Wizard window will automatically open. The Post Date column defaults to today’s date. Change this date if necessary (format is MM/DD/YYYY). The click the appropriate radio button for the type of upload you are doing (either “Outlying Properties Utilities -- TEP” for electric bills or “Outlying Properties Utilities -- SWG” for gas bills). Click the “Next” button. A tab titled “Please select the file to be imported” will display, showing a list of all the text files on your c:\ drive. If the correct file is listed, click on it to select it. Otherwise, select a different drive if necessary by double clicking on it, and continue to select the correct path (as you would in Windows Explorer) until you see the correct file. The path you are selecting displays beside the words “Current Directory Listing”. Once you have clicked the file to upload, its name displays in the white box next to the words “Selected File”. Click the “Next” button again. Various errors may occur as the upload process validates data. If there are less than 10 errors, the system automatically prints the error report. If there are more than 10 errors, the system will ask you whether or not you want to print it. If errors exist, no data will be uploaded – all errors must be corrected before you can successfully upload this data. If the system finds no errors in the data, a new window opens, allowing you to review the bills. You can click on a row in this window, then right click and choose “Delete” from the popup menu, to remove a bill, or you can click on a row, then click the “Send to Third Party” button if this bill actually belongs to a different department. In this case, another window opens prompting you to enter the information on where the bill should be sent (click the “OK” button to proceed), followed by a window displaying the bills to be sent elsewhere. This report prints automatically. When all data on this review window is correct, click the “OK” button. This creates a text file to be transmitted to FRS, and updates Utility Consumption data and creates Direct Expense charges in FIMA. On a successful upload, the system then displays the message “Success! Click Next”. Click the “Next” button. The system displays the message “Continue to Review and Upload process by clicking Finish”. Click the “Finish” button. A report titled “Direct Expense Transactions for Batch Number ####”, (where “####” is the system-generated Batch Number) automatically prints at the end of a successful upload.
If there were errors due to missing or inactive meters, a tab displays showing the missing and/or inactive meters in two separate areas. If there were missing meters, you can try to add them by clicking the “Add Them Now” button. This opens a window very similar to the one in the Outlying Properties Utilities Administration module. See the OLP ADMINISTRATION MODULE section for instructions on using this window. Alternatively, you can click the “Print List – Add Them Later” button to print a list of missing meters for further investigation. If there were inactive meters, you can either click the “Send to Third Party” button, which opens another window prompting you to enter the information on where the bill should be sent (click the “OK” button to proceed), followed by a window displaying the bills to be sent elsewhere, which prints automatically; or click the “Activate These Now” button, which attempts to activate all the inactive meters; or click the “Print List – Activate Them Later” button, which prints a list of the inactive meters for further investigation. In any of these cases, you will have to run the upload process again after the errors have been corrected.
Running Other Outlying Property UploadsIf you click the “Load Batch” button and select the “Outlying Properties Utilities – Other Bills” radio button when the Direct Expense Import Wizard window opens, the system will close the Direct Expense Import Wizard window and instead will open the OLP Invoice Input window. This window is used to manually enter Water/Sewer bills (for which there is currently no automatic upload process) or batches with mixed types of bills that did not get posted during a Gas or Electric upload. For instructions on using this window, see the OLP INVOICE INPUT MODULE section.
110
QUERY - This tab is not tied to the Batch Number selected on the left side of the window. It allows you to search for Direct Expense information using one or more columns. First, click the “Enter Query” button, which creates a grid in the main part of the tab. Entering more pieces of information as query criteria should limit the number of records the system retrieves. For example, if you know the Job and Shop, click in the box under Job Nbr and enter the Job, then click the box under Shop and enter the Shop Number. Finally, click the “List Tickets” button. The system will retrieve all Direct Expenses related to that Job and Shop. To sort the transactions in a different order, click on the column header you want to sort on (this is available for all displayed columns except Service Request Number). Also, if you double-click on a row on this query tab, the system automatically switches you to the Direct tab, with the information for that batch displayed.
111
SHOP MODULE (Inquiry)
To open this module, click on the Shop icon (the red gears with little arrows beneath), or click “Activities” from the menu, then choose “Shops”. The Shop window will open.
The left side of the window displays a treeview of Shop Numbers and names, sorted in numerical order. Use the scroll bar to move up and down through the list until you find the Shop you are looking for, and click it. The system retrieves the information for that Shop.
The Shop Module includes the following tabs:
GENERAL – Displays general information about the Shop, such as Status (Active or Inactive), Department, etc.
SERVICE REQUESTS – Displays a list of basic information (Service Request Number, Closed Date, Task ID, and Description) on all Service Requests for the selected Shop. To sort the list by any of these columns, click on the column header.
ACCOUNTS – Displays the valid FRS Account Numbers for the Shop for various funding sources, by fiscal year. Also shows how time off expenses are divided among the accounts on a percentage basis, and any alternate accounts available for Material expenses.
BUDGETS – Displays the Operations (all expenses other than Personal Services) budget information for the selected Shop, by fiscal year and FRS Account.
STOCK % – Displays the Shop Stock Recovery percentage added to material expenses for this Shop. This recovery percent is ultimately returned to the Shop in the form of credits to the JSUPLY (shop stock) Job and account.
EMPLOYEES – Displays a list of the employees assigned to the selected Shop. This list includes name, emergency contact information, gender, and hire date.
TASKS – This tab is currently not in use.
PAY RATE – Displays the rate at which time charged by this Shop is billed out to customers (the full cost recovery rate). This “shop rate” could vary by Pay Grade Band, which directly relates to the Pay Grade a particular employee’s Position falls into; currently, all Pay Grade Bands for a given Shop have the same pay rate.
S/RS WITH ALL MATERIAL IN – This tab displays a list of open Service Requests for this Shop for which all requested material has been issued to or received by the Shop. Service Requests with “pay code” type Task IDs (time off, shop cleanup, etc.) are automatically excluded. You can exclude Standing Service Requests as well, if desired, by clicking the “Exclude Standing S/Rs” checkbox near the top of the tab. Click the “Retrieve” button to display the list of Service Requests.
112

SHOP MODULE (Input)
PURPOSE: The Shop Module stores basic required information about Facilities Management’s Shops, including valid FRS Accounts for each Shop, operations budgets, and the pay rate billed out to customers for work performed by a Shop. Some of this information changes from one fiscal year to the next, and must be re-entered prior to the start of a new fiscal year.
INSTRUCTIONS: To open this module, click on the Shop icon (the red gears with little arrows beneath), or click “Activities” from the menu, then choose “Shops”. The Shop window will open. The left side of the window displays a treeview of Shop Numbers and names, sorted in numerical order. To view or update information for an existing Shop, use the scroll bar to move up and down through the list until you find the Shop you are looking for, and click it. The system retrieves the information for that Shop. To add a new Shop, right click in the General tab and choose “Add” or “Insert” from the popup menu. The system displays blank columns ready for your data entry.
GENERAL TABThis tab contains the following columns:
Shop – The Shop Number, up to 10 alphanumeric characters (currently, all FM Shop Numbers are three digits). (RQ)
Active? – A checkbox column indicating whether or not this Shop is active. Shop Numbers which are no longer in use (due to consolidation of functions, etc.) should not be
113

deleted – they should be marked inactive by removing the check from this checkbox.
Descr – The Shop name or description, up to 30 alphanumeric characters.Dept – A drop down list of valid FM Department Numbers, indicating which Department
this Shop belongs to.Print Service Request? – A checkbox column indicating whether or not this Shop
receives printed copies of all Service Requests it is assigned to. The default is yes (checked).
Default Delivery Instructions – Any special delivery or other instructions that should automatically appear on Material Requests for this Shop, up to 255 alphanumeric characters.
NOTE: Please inform MIS when you have added a new Shop. They must determine the correct default printer for the Shop and manually add it to the FIMA database.
Right clicking in this tab will give you the option of choosing “Delete” from the popup menu. USE THIS OPTION WITH EXTREME CAUTION. A Shop should not be deleted simply because Facilities Management has undergone a reorganization and decided to stop using that Shop Number. In that case, its Status should be set to Inactive. The ONLY circumstance in which a Shop should be deleted is if you have just entered it and then discover that you made an error while entering the Shop Number.
SERVICE REQUESTS TAB This VIEW ONLY tab shows all the Service Requests associated with the Shop selected on the left side of the window. Columns include Service Request Number; the date the Shop was closed, if applicable; Task ID, the description of work to be performed by that Shop, and the Shop Number. To sort the list by any of these columns, click on the column header.
ACCOUNTS TAB This tab has multiple rows for each fiscal year showing the FRS Accounts the Shop selected on the left side of the window is authorized to use. To add a new row, right click and choose “Add” or “Insert” from the popup menu. The rows are sorted and grouped by fiscal year, with the most recent fiscal year appearing first, and contain the following columns:
Fiscal Year – The 4-digit fiscal year. (RQ)Account – The 6-digit FRS Account Number authorized for use by this Shop. (RQ)Fund Src – A drop down list of valid Funding Source Codes and their corresponding
descriptions, indicating which type of funding the above FRS Account is used for. Whenever the Shop charges a Job with this type of funding, that account is the default account on the transaction. (RQ)
Time Off Pct – The percent of non-productive time (sick, vacation, etc.) that will be charged to this Account, with 2 decimal places (100% is entered as 1.00). The Total Time Off Percent for the fiscal year (shown below the group of rows for that fiscal year) must equal 1.00 (100%). The Payroll Manager determines the percentages prior to the start of each fiscal year.
Material Override? – This 1-character column designates whether or not an alternate account can be used for this funding source for Operations (anything other than Personal Services) expenses, and if so, when this alternate (Override) account should be used. This column may need to be changed throughout the fiscal year depending on the availability of funds in the default account. Valid values are:Y – Yes. Always use the Override account. N or blank – No. Do not use the Override Account.
114

B – Both. Either the default account or the override account can be used. Override Acct – The alternate 6-digit FRS Account Number that can be charged if the
Material Override column contains a “B”, or that will be charged if Material Override contains a “Y”.
If you need to delete a particular Shop Account row, right click on the row and choose “Delete” from the popup menu. Most updating can be accomplished by changing a default account, Override Account, or Funding Source rather than deleting the row.
You can click on any of the column headers on this tab to re-sort the rows in a different order, but this is not advisable if you are adding or changing data, since the Total Time Off Percent column (based on fiscal year) may no longer be valid.
BUDGETS TAB This tab may contain multiple rows specifying the Operations budget for one or more FRS Accounts for one or more fiscal years, for the Shop selected on the left side of the window. To add a new row, right click and choose “Add” or “Insert” from the popup menu. The rows are sorted and grouped by fiscal year and account number, with the oldest fiscal year appearing first, and contain the following columns:
Fiscal Year – The 4-digit fiscal year. (RQ)Account – The 6-digit FRS Account Number this budget applies to. (RQ)Operations Budget – The dollar amount budgeted for everything except Personal
Services expenses for this account and fiscal year for this Shop, with 2 decimal places.
Right clicking in this tab will give you the option of choosing “Delete” from the popup menu. However, it is best from an accounting audit viewpoint to set the dollar amount to 0.00 instead. You can click on any of the column headers on this tab to re-sort the rows in a different order.
STOCK % TABThe Shop Stock Recovery Percent is added to each material transaction for the Shop in order to account for miscellaneous material that cannot be finitely charged to a Job, such as screws, rags, squirts of lubricant, etc. This recovery percent is ultimately returned to the Shop in the form of credits to the JSUPLY (shop stock) Job and account, which is used to replenish these types of supplies. The Cost Accounting Manager calculates the percentage for each Shop prior to the start of a new fiscal year, and it must remain the same throughout that year in order for the credits to be calculated accurately. This tab has only one area and may contain multiple rows specifying the Shop Stock Recovery Percent for one or more fiscal years, for the Shop selected on the left side of the window. To add a new row, right click and choose “Add” or “Insert” from the popup menu. The rows are sorted by fiscal year, with the oldest fiscal year appearing first, and contain the following columns:
Fiscal Year – The 4-digit fiscal year. (RQ)Stock Markup % – The percentage attached to each transaction for this Shop, with 2
decimal places (for example, 10% is formatted as 0.10).
Right clicking in this tab will give you the option of choosing “Delete” from the popup menu. USE THIS OPTION WITH EXTREME CAUTION. You should only delete a row from this tab if you have just entered it and realize this Shop should not have a Shop Stock Recovery Percent applied to it. Rows should never be deleted after the fiscal year is in progress.
115
EMPLOYEES TABThis VIEW ONLY tab contains the following columns for each active employee assigned to the Shop selected on the left side of the window:
Emp Nbr – The employee’s FM Employee Number.Last Name – The employee’s last name.First Name – The employee’s first name.M – The employee’s middle initial.Emerg Contact – The name of the individual who should be notified in case of an
emergency regarding the employee.Emerg Phone – The area code and phone number (without formatting) of the emergency
contact. Emerg Phone2 – An alternate phone number (including area code, without formatting) for
the emergency contact.Gender – A 1-character designation for the employee’s gender (F = female, M = male).Status – A 1-character designation for the employee status, which is always “A” for
active, since the list only displays active employees.Hire Date – This column contains the employee’s Rehire Date, if this employee left the
University and was later rehired; if not, it contains the employee’s Adjusted Hire Date, if the employee started in a temporary or student position and was later made permanent; if not, it contains the employee’s University Hire Date.
The rows are sorted in order by Last Name and First Name. You can click on any of the column headers on this tab to re-sort the rows in a different order.
TASKS TABThis tab is not in use.
PAY RATE TABThis tab may contain multiple rows specifying the billable pay rate for one or more Pay Grade Bands for one or more fiscal years, for the Shop selected on the left side of the window. To add a new row, right click and choose “Add” or “Insert” from the popup menu. The rows are sorted and grouped by fiscal year, with the most recent fiscal year appearing first, and contain the following columns:
Fiscal Year – The 4-digit fiscal year. (RQ)Pay Grade Band – The 2-digit Pay Grade band the Shop Rate applies to. 10 includes
Pay Grades from 10-19, 20 includes Pay Grades 20-29, etc.Shop Rate – The hourly rate that is billed out to customers and used to calculate
“Recovery” labor amounts on reports for the specified fiscal year and Pay Grade band. An individual employee’s PCN (Position Control Number) determines which Pay Grade band he or she falls into.
Currently, the Shop Rate for a given Shop is the same for all Pay Grade bands. If a particular Shop has no information recorded for a fiscal year, or for certain Pay Grade bands within a fiscal year, the billable pay rate defaults to the hourly rate for the employee who performed the work. This generally means that the cost of benefits for this employee is not being recovered. Therefore, it is essential that all Shops that perform billable work have their information on this tab accurately entered prior to the start of a new fiscal year. The Payroll Manager determines the Shop Rates.
116

S/RS WITH ALL MATERIAL IN TABThis VIEW ONLY tab displays a list of open Service Requests for the Shop selected on the left side of the window for which all requested material has been issued to or received by the Shop. Service Requests with “pay code” type Task IDs (time off, shop cleanup, etc.) are automatically excluded. You can also exclude Standing Service Requests, if desired, by clicking the “Exclude Standing S/Rs” checkbox near the top of the tab. Click the “Retrieve” button to display the list of Service Requests. This tab is designed to help shop personnel determine which Service Requests are ready to be worked on.
117

BILLING MODULE (Inquiry)
To open this module, click on the Billing icon (the buildings and dollar sign), or click “Activities” from the menu, then choose “Billing”. The Billing Batch window will open.
The left side of the window displays a treeview of Billing Batch Numbers, including the Billing Date and the FIMA user ID of the employee who ran that billing process, sorted in numerical order. Use the scroll bar to move up and down through the list until you find the Billing Batch Number you are looking for, and click it. The system retrieves the information for that batch.
The Billing Module includes the following tabs:
BATCH DETAILS – Displays general information about the selected batch, including start date and time, fiscal year, FIMA user ID of the person who ran the process, starting and ending Job Numbers that were billed, Preliminary or Final code, whether or not this was a 13th Month billing (final billing for a fiscal year), FRS date, completion date and time, and number of records processed by type (Labor, Material, Equipment, and Direct Expense).
BILLING RUN – This tab is used by Cost Accounting personnel to start a new billing process, or to restart the selected Batch Number if it did not complete successfully.
EXCEPTIONS – Displays the Billing Exception Report for the selected Batch Number. This report lists all transactions that were not processed due to errors, and those that were processed but caused the system to generate a warning message. This report can be exported to a program such as Excel by clicking the “Export” button, or printed at your default printer by clicking the “Print” button.
INVOICE – Allows Invoices for the selected batch to be printed. To get invoices for all customers, simply click the “Retrieve Billing Invoice” button. To get invoices for only a specific range of Customer Numbers, enter the first 5-digit Customer Number whose invoices you want to print in the white box to the right of the words “Customer Nbr From”, and the last 5-digit Customer Number whose invoices you want to print in the white box to the right of the word “To”. Click the “Retrieve Billing Invoice” button. Once the invoice information has been retrieved, you will only see the customer’s name and address information displayed on the tab, but clicking in the tab, then clicking the printer icon prints the complete invoices for the Customer Numbers and Billing Batch you selected.
OUTPUT – Allows printing of Customer Statements, exporting of the Residence Life file and printing of the Job Encumbrances After Billing Report. To print all Customer Statements, simply click the “Print Customer Statements” button. To print statements for a specific range of Customer Numbers, enter the first 5-digit Customer Number whose statement you want to print in the white box to the right of the words “Customer Nbr From”, and the last 5-digit Customer Number whose statement you want to print in the white box to the right of the word “To”, then click the “Print Customer Statements” button. To create and export the Residence Life file, click the “Export Residence Life File” button. NOTE: the Residence Life file is not connected to the Billing Batch Number selected on the left side of the window. It always contains information based on the most recent Final billing batch. To print the Job Encumbrances After Billing Report, click the “Print Current Encumbrances Report” button. NOTE: this report is not directly connected to the Billing Batch Number selected on the left side of the window. It uses the fiscal year on that batch, but reports current encumbrance information as of the most recent Final billing batch for that fiscal year.
STATEMENT MESSAGE – Displays the message, if any, which will print on all Customer Statements.
118

BILLING MODULE (Input)
PURPOSE: The Billing process creates a file that transfer billing information to the University Financial Records System (FRS), which debits customer’s accounts and credits Facilities Management’s Service Department account (179030) for charges we have incurred in providing service to our customers, and sets aside customer funds for anticipated work in the form of encumbrances. The Billing process also produces invoices and statements for our customers. Billing is run monthly on the last Wednesday of the month, and a special billing known as 13th Month Billing is run at the close of each fiscal year. Special billings for specific Jobs can also be run at any time the Cost Accounting Manager deems necessary. A Preliminary billing is run approximately 2 days before the Final billing to check for possible errors. The Preliminary billing does not create files or update data within FIMA.
INSTRUCTIONS: To open this module, click on the Billing icon (the buildings and dollar sign), or click “Activities” from the menu, then choose “Billing”. The Billing Batch window will open. The left side of the window displays a treeview of existing Billing Batch Numbers, including the Billing Date and the FIMA user ID of the employee who ran that billing process, sorted in numerical order. To view information for a previous billing, or to restart a billing batch that failed, use the scroll bar to move up and down through the list until you find the Billing Batch Number you are looking for, and click it. The system retrieves the information for that batch. For instructions on starting a new billing process, see the BILLING RUN TAB below.
119

BATCH DETAILS TABThis VIEW ONLY tab displays information about the existing Billing Batch Number selected on the left side of the window. It includes four areas.
General contains the following columns:Billing Nbr – The sequential system-assigned Billing Batch Number selected on the left
side of the window.Fiscal Yr – The fiscal year in which this billing occurred.Run Date – The date and time this billing was started.User Id – The FIMA user ID of the person who ran this billing.
Progress contains the following columns:Completed? – A checkbox indicating whether or not the billing process completed
successfully.Completed – The date and time the billing process completed.Restarted – The date and time, if any, that this billing process was restarted due to an
original unsuccessful completion.
Parameters contains the following columns:From Job – The first Job Number included in this batch. If all Jobs were selected (the
default), this column contains a 0.To Job – The last Job Number included in this batch. If all Jobs were selected (the
default), this column is filled with the letter “Z”.13th Month? – A checkbox column indicating whether or not this was the last billing for the
fiscal year.Final? – A checkbox column indicating whether or not this was a Final billing. A check
indicates that it was a Final billing; an empty checkbox indicates that it was a Preliminary billing.
FRS Date – The date the transactions in this batch are posted for accounting purposes in the main University accounting system (FRS).
Results contains the following columns:Labor Rows – The number of labor transactions processed in this batch.Material Rows – The number of material transactions processed in this batch.Direct Rows – The number of Direct Expense transactions processed in this batch.Equip Rows – The number of equipment transactions processed in this batch.
BILLING RUN TABUse this tab to start a new billing or restart one that has failed to complete successfully. This tab includes three areas.
Fiscal Year contains the following columns:Current – A radio button column designating that the billing is for the current fiscal year.
This is the default. The current fiscal year displays in the view-only box to the right of the “Next” radio button.
Previous – A radio button column designating that the billing is for the previous fiscal year. Select this radio button when you are running the 13th Month billing (see below). This automatically changes the fiscal year displayed in the view only box to the right of the “Next” radio button.
Next – A radio button column designating that the billing is for the next fiscal year. This button should not be selected.
13th Month – A checkbox column indicating that this is the last billing for the fiscal year, which actually takes place in mid-July (after the start of the next fiscal year).
120
Billing Batch Type contains the following columns:Preliminary – A radio button column indicating that this is a Preliminary billing which will
not update FIMA data or produce a file for FRS. This is the default.Final – A radio button column indicating that this is a Final billing, which updates data in
FIMA, produces a file to be sent to FRS, and can produce invoices and Customer Statements. Click this button if you are running a Final billing.
FRS Tran Date – The date that will be recorded on the transactions in the file to be sent to FRS, formatted MM/DD/YYYY. This defaults to the 27th day of the previous month and the current year. Change this date if necessary. NOTE: For the 13th Month Billing, this date must be 06/30/2004.
Job Range contains the following columns:All – A checkbox column indicating that all Job Numbers should be processed.
Unchecking this box makes the next two columns, “From” and “To”, available for data entry.
From – The first Job Number whose charges will be processed. If the “All” checkbox is checked, this column is view only and contains a zero. If you are running a special billing for one or more specific Jobs, enter the first Job Number (up to 10 alphanumeric characters) to be processed. NOTE: Encumbrances are processed for all Jobs, regardless of what appears in this column.
To – The last Job Number whose charges will be processed. If the “All” checkbox is checked, this column is view only and contains 10 letter “Z”s. If you are running a special billing for one or more specific Jobs, enter the last Job Number (up to 10 alphanumeric characters) to be processed. NOTE: Encumbrances are processed for all Jobs, regardless of what appears in this column.
Running BillingTo start a new billing process, ensure that all columns on this tab are filled in correctly, then click the “Start Billing” button. The billing process may take anywhere between 5 minutes to over an hour to run. When the process is finished, the Exceptions tabpage automatically displays.
If a billing process did not complete successfully, it can usually be restarted after errors are corrected. To restart a billing batch, make sure that Billing Batch Number is selected from the treeview on the left side of the window, then click the “Restart Current Batch” button. The system displays the message “WARNING: FRS files are not cleared on a Restart. Have MIS check the 3 FRS tables to make sure the existing transactions are for the correct month. Then press Yes to continue, or No to stop this process.” It is extremely important that you contact MIS to let them know you are restarting Billing before you answer this message. Failing to do so could result in duplicate transactions being billed to customer accounts in FRS. MIS will tell you whether to answer Yes or No to this message. They may need to intervene before you can restart the batch.
Continue with the instructions below for the Exceptions, Invoice, and Output tabs, including the “Finishing the Billing Process” section.
Special Instructions for 13th Month Billing: When you run 13th Month Billing, after the actual billing process has finished and you see the Billing Exception Report on the Exceptions tab, contact MIS. They will ask you to close FIMA so they can change the dates on the text file to be sent to FRS from 6/30/YY to 6/29/YY (where “YY” is the current 2-digit year). MIS will then run the 13th Month Liquidation process, which creates a second text file to be sent to FRS that will release all remaining customer encumbrances. That text file must have a date of 6/30/YY to force its transactions to be processed after those in the regular FRS text file. When MIS notifies you that they have completed these steps, you can continue with the instructions below for the Exceptions, Invoice, and Output tabs, including the “Finishing the Billing Process” section.EXCEPTIONS TAB
121

The system automatically switches you to this tab when you start or restart billing. When the process has finished, it displays the Billing Exception Report for the new Batch Number. This report lists all transactions that were not processed due to errors, and those that were processed but caused the system to generate a warning message. This report can be exported to a program such as Excel by clicking the “Export” button, or printed at your default printer by clicking the “Print” button. If you were running a Preliminary billing, make sure all errors on this report are corrected before attempting to run the Final billing.
You can also use this tab to display the Billing Exception Report for a previous Billing Batch Number.
INVOICE TAB This tab lets you print invoices for a newly created billing batch or an old one. First, make sure the correct Billing Batch Number is selected on the left side of the window. Then, to get invoices for all customers, simply click the “Retrieve Billing Invoice” button. Always leave the default From and To Customer Number as-is on a new billing batch to include invoices for all customers. To reprint invoices from a previous billing for only a specific range of Customer Numbers, enter the first 5-digit Customer Number whose invoices you want to print in the white box to the right of the words “Customer Nbr From”, and the last 5-digit Customer Number whose invoices you want to print in the white box to the right of the word “To”. Click the “Retrieve Billing Invoice” button.
Once the invoice information has been retrieved, you will only see the name and address information for the first customer displayed on the tab. To print all the selected invoices, click on the invoice displayed in the tab, then click the printer icon on your toolbar.
OUTPUT TAB Use this tab to print Customer Statements, create the Residence Life file, and print the Job Encumbrances After Billing Report. Make sure the correct Billing Batch Number is selected on the left side of the window.
To print all Customer Statements, simply click the “Print Customer Statements” button. Print all statements if this is a new billing batch. To reprint statements for a specific range of Customer Numbers from an old batch, enter the first 5-digit Customer Number whose statement you want to print in the white box to the right of the words “Customer Nbr From”, and the last 5-digit Customer Number whose statement you want to print in the white box to the right of the word “To”, then click the “Print Customer Statements” button.
To create and export the Residence Life file, click the “Export Residence Life File” button. NOTE: the Residence Life file is not connected to the Billing Batch Number selected on the left side of the window. It always contains information based on the most recent Final billing batch. After creating the file, email it, using Residence Life as the recipient, and attaching the reslif.txt file to the message. This file should be found on your c:\ drive.
To print the Job Encumbrances After Billing Report, click the “Print Current Encumbrances Report” button. NOTE: this report is not directly connected to the Billing Batch Number selected on the left side of the window. It uses the fiscal year on that batch, but reports current encumbrance information as of the most recent Final billing batch for that fiscal year. This report assists with reconciliation of encumbrances to FRS.
122
Finishing the Billing ProcessYou must take additional steps to complete the Billing process.
1. Transfer the file to FRS: On you PC, select FTP PRO from the Applications folder. The FTP (File Transfer Protocol) program transmits the text file that was created during the billing process to University Financial Services. The file is named frstran_mmddyy.txt, where “mmddyy” is today’s date (i.e., frstran_052704.txt for a file created on May 27, 2004), and it should be found on your c:\ drive. The FTP process requires a password; see the Cost Accounting Manager if you need assistance with this. Make sure ASCII is checked as the file type. Then click the button and type frs.ftp.facmgmt as the file name.
If this is 13th Month Billing, you will also need to FTP a second text file. The name of this file is FrsTran13L_0630yyyy.txt (where “yyyy” is the current 4-digit year). MIS will tell you where to find this file. After clicking the button, use frs.ftp.facmgmt.liq as the file name.
2. Send the Online Request to CCIT Production Services:Open your web browser and select the Production Services web page, then Online Run Requests. Enter the User Name facmgmt and the password (see the Cost Accounting Manager if necessary). Then select FRS Requests, Pre-edits. Enter Fac Mant FRSFFMIP with the User Name facmgmt.
3. Call the Financial Services Office to let them know the file has been sent:Contact numbers/emails are:
621-7730 Richard Heerschap [email protected] 621-5126 Mandy Guo [email protected]
STATEMENT MESSAGE TABThis tab contains the following column:
Customer Statement Message – The message that will automatically print on all Customer Statements, up to 150 alphanumeric characters.
To save the new statement message, click the “Save Changes to Statement Message” button.
123

PREVENTIVE MAINTENANCE MODULE (Inquiry)
To open this module, click on the Preventive Maintenance icon (the butterfly), or click “Activities” from the menu, then choose “Preventive Maintenance”. The Preventive Maintenance window will open.
The Preventive Maintenance Module includes the following tabs:
EQUIPMENT MAINTENANCE – This tab shows basic information for all equipment in the Preventive Maintenance system. It allows you to find equipment by its Equipment Number or by its description (or partial description). To search by Equipment Number, type the Equipment Number in the white box below the words “Enter Equip. Nbr.”, then press ENTER or click the “Find Equipment” button. The information for that piece of equipment will display. To search by description, type one or more words in the white box below the words “Enter Search Criteria”, then click the “Search” button. A window will open listing all equipment that contains your search words. That window shows Equipment Number, Status, Description, Building Name, Room, Acquisition Date, Manufacturer, Model, and Serial Number. You can sort the list by Equipment Number, Status, Description, Building (number), or Acquisition Date by clicking on those column headings. If you see the piece of equipment you are interested in on this list, either double click on that row, or click on the row to highlight it, then click the “Select” button. The list window will close and information for that piece of equipment will display on the Equipment Maintenance tab. In addition to the columns on the list window, the Equipment Maintenance tab shows warranty information, installation date and life expectancy, disposal information, Job Number, Equipment Class, etc.
SCHEDULE MAINTENANCE – This tab shows Task Code, Task Description, Shop, PM Cycle information (how often maintenance should be performed), number of open PM Service Requests, Job, Priority, Last and Next PM Dates, Estimated Hours, and any Compliance Form information, for all tasks on the selected piece of equipment. If you selected a piece of equipment on the Equipment Maintenance tab, the Schedule Maintenance tab shows information for that piece of equipment. You can also choose a new piece of equipment by entering its Equipment Number or a description at the bottom of the tab, exactly as described for the Equipment Maintenance tab above.
CURRENT PM SCHEDULE – This tab lists Preventive Maintenance tasks currently scheduled for the selected date range and Shop. The prompt boxes below the words “Select Start Date” and “Select End Date” default to the 1st day of the next month and the 28th day of that month, respectively. Change these dates as necessary (you can select an End Date up to 60 days from today). To select a Shop, click the drop down arrow in the white box beneath the words “Select Shop”, and choose an FM Shop from the list of Shop Numbers and names. As soon as you select a shop, the system attempts to find scheduled tasks and displays any that are found. If you see the message that no tasks were found, or to look for a different date range or Shop, change your selections as necessary and click the “Refresh” button. When tasks are found, this tab displays information such as Next and Last PM Dates, number of open Service Requests, PM Cycle, Equipment Number, Task Code, whether or not multiple Shops can do the PM, Priority and Weighted Priority (utilizing number of cycles missed), Building, Room, Job, Estimated Time, etc. You can click on the shaded column headings to sort in a different order. Clicking on the top row of headings determines the primary sort, and clicking on a different heading from the second row determines the secondary sort.
PM HISTORY – This tab shows PM that has already been done. You can select by Equipment Number or description as described in the instructions for the Equipment Maintenance tab. Information on the PM History tab includes Equipment Number and Description, and for each PM performed, Service Request Number, Shop, Date Issued, Task Description, Date Closed, any notes, whether or not the task was completed, and the FIMA user ID of the person who closed the Service Request. To view the actual Service Request for any PM shown, click on the appropriate Service Request, then click the “View Service Request” button. This opens the Service Request Maintenance window for that Service Request. See the SERVICE REQUEST MAINTENANCE MODULE for more information.
124

TASK MAINTENANCE – This tab shows basic information on all PM Tasks. To view this information, choose an Equipment Class from the drop down box below the words “Select Equipment Class”. For each Task associated with that Equipment Class, the system displays the Task Code, Status, description, priority, Shop, estimated time, Cycle information, and required Compliance Forms.
CLASS MAINTENANCE – This tab displays a list of all Equipment Classes and their status (Active or Inactive).
SERVICE REQUESTS – This tab shows information on the PM Service Requests for the selected date range and Shop. The prompt boxes below the words “Select Start Date” and “Select End Date” default to the date that is 30 days ago and the current date, respectively. Change these dates as necessary. To select a Shop, click the drop down arrow in the white box beneath the words “Select Shop”, and choose an FM Shop from the list of Shop Numbers and names. As soon as you select a shop, the system attempts to find PM Service Requests and displays any that are found. If you see the message that no requests were found, or to look for a different date range or Shop, change your selections as necessary and click the “Refresh” button. When requests are found, this tab displays information such as S/R Number, Job, Job description, Issued Date, Due Date, Building, Room, Equipment Number, FIMA user ID of the person who created these requests, etc. You can click on the shaded column headings to sort the information in a different order. Clicking on the top row of headings determines the primary sort, and clicking on a different heading from the second row determines the secondary sort. To locate a particular Service Request Number from the list, you can type that number in the white box to the left of the “Find” button, then click the “Find” button. The displayed list will scroll to place that line at the top and highlight it.
WARRANTY AND LIFETIME INFO – This tab has two areas. The top area displays Warranty Expiration information while the bottom shows Life Expectancy information. To view this data, change the dates in the “Select Start Date” and “Select End Date” prompt boxes, if necessary (these default to today and the date that is 60 days from today, respectively), then click the “Retrieve” button. The Warranty Expiration area show information such as Equipment Number, Status, Warranty, Expiration Date, Building, Room, Equipment Class, Manufacturer, Model, and description for all equipment whose warranty expires within the selected date range. The Life Expectancy area shows Equipment Number, Status, Life Expectancy in months, expected breakdown date, Building, Room, Equipment Class, Manufacturer, Model, and description for all equipment that is expected to breakdown within the selected date range. In either area, you can click on the shaded column headings to sort the information in a different order. Double-clicking on a row automatically switches you to the Equipment Maintenance tab with that piece of equipment displayed.
EXTINGUISHERS AND LIGHTS – Fire Extinguishers and Emergency Lights are not stored as individual pieces of equipment in FIMA. Instead, they are grouped under one piece of equipment that includes all the extinguishers in a building, and another piece of equipment for all the emergency lights. The top area of this tab displays fire extinguisher maintenance information for the individual extinguishers, while the bottom shows emergency lighting information for each light. To view this data, select a Building from the drop down list beneath the words “Select Building”. In the top area, you will see data on all extinguishers in that building, showing the Equipment Number for the group, and a line for each extinguisher including Order Number, Serial Number, Make, Type, Size, 2-digit year, and Location. In the bottom area, you will see the Equipment Number for the group of emergency lights, and a line for each light including Order Number, Tag Number, Type, Location, and any comments. In both areas, you can click on a column header to re-sort the lines on that column.
REQ. AND COMP. TASKS – This tab allows you to select unscheduled tasks that are required, or unscheduled tasks that need to be done because they require a compliance form, within a selected date range. The Start Date defaults to the date that was 60 days prior to today, and the End Date defaults to today. Change these dates if necessary, then click the “View Required” button for required tasks, or the “View Compliance” button for tasks that require a compliance form. If any of the tasks you selected have not been scheduled, their Equipment Number, Task, Due Date, Last PM Date, Shop, Priority, PM Cycle,
125
Compliance Form, and Task Description will display. You can click on any of these column headings (except Task Description) to re-sort the rows in that order. Double-clicking on a row automatically switches you to the Equipment Maintenance tab with that piece of equipment displayed.
OVERDUE TASKS – This tab displays PM Service Requests that have been overdue for at least the number of days you specify. To view this data, type the minimum number of days overdue in the white box to the right of the words “Overdue Threshold”, then press ENTER or click the “View Overdue” button. The Due Date, Service Request Number, PM Task, Issued Date, Building, Room, Shop, Equipment Number, Job, FIMA user ID of the person who created the Service Requests, and request description display for all the overdue PM requests that meet your criteria. You can click on any column heading (except Room and Service Request Description) to re-sort the rows in that order; however, the Due Date column sorts in alpha order by month (all January dates regardless of year, all February dates regardless of year, etc.) instead of in actual date order because it is an alphanumeric column rather than a date in the database. Double-clicking on a row automatically switches you to the Equipment Maintenance tab with that piece of equipment displayed.
TOOLS – If you have inquiry-only access, you will not be able to use this tab. Its purpose is to update the Due Date on PMs that have not been scheduled for at least one cycle.
SECONDARY SHOPS – This tab displays a list of all PM Tasks for the selected primary Shop that can also be performed by one or more secondary Shops. To view this data, choose a primary Shop from the drop down list at the top of the tab.
FUTURE SCHEDULE – This tab is like the Current Schedule tab, but it allows you to select an end date greater than 60 days from today. You can print the projected schedule by clicking the “Print” button.
126

PREVENTIVE MAINTENANCE MODULE (Input)
PURPOSE: The Preventive Maintenance module was designed to help Shop Supervisors set up and schedule preventive maintenance on University equipment. INSTRUCTIONS: To open this module, click on the Preventive Maintenance icon (the butterfly), or click “Activities” from the menu, then choose “Preventive Maintenance”. The Preventive Maintenance window will open.
EQUIPMENT MAINTENANCE TABThis tab shows basic information for all equipment in the Preventive Maintenance system. There are two ways to select an existing piece of equipment that needs to be updated: you can find the equipment by its Equipment Number or by its description (or partial description). To search by Equipment Number, type the Equipment Number in the white box below the words “Enter Equip. Nbr.”, then press ENTER or click the “Find Equipment” button. The information for that piece of equipment will display. To search by description, type one or more words in the white box below the words “Enter Search Criteria”, then click the “Search” button. A window will open listing all equipment that contains your search words. That window shows Equipment Number, Status, Description, Building Name, Room, Acquisition Date, Manufacturer, Model, and Serial Number. You can sort the list by Equipment Number, Status, Description, Building (number), or Acquisition Date by clicking on those column headings. If you see the piece of equipment you are interested in on this list, either double click on that row, or click on the row to
127

highlight it, then click the “Select” button. The list window will close and information for that piece of equipment displays on the Equipment Maintenance tab. To add a new piece of equipment, click the “Add Equipment” button. The Equipment Maintenance tab includes five areas.
The upper area contains the following column:Equipment Number – The number assigned to this piece of equipment, up to 16
alphanumeric characters. (RQ)
The left area contains the following columns:Description – The description of this piece of equipment, up to 60 alphanumeric
characters. (RQ)Model – The model of this piece of equipment, up to 30 alphanumeric characters.Serial Number – The serial number of this piece of equipment, up to 40 alphanumeric
characters.A-Tag Number – The University A-tag Number assigned by Property Management to this
piece of equipment, up to 20 alphanumeric characters.Manufacturer – A drop down list of valid equipment manufacturers.Building – A drop down list of valid Building Numbers and names, indicating which
Building the equipment is located in. (RQ)Room – The room this equipment is located in, up to 21 alphanumeric characters.Loc. Description – The description of this equipment’s location (aside from the Building
and room), up to 128 alphanumeric characters.Warranty Number – The warranty number for this piece of equipment, up to 128
alphanumeric characters.Expires – The date (and time, if necessary) the warranty expires, formatted MM/DD/YY
hh:mm:ss. You must enter the slash or dash characters in this date. (RQ if a Warranty Number is entered)
Notes – Any notes about this piece of equipment, up to 255 alphanumeric characters.
Acquisition and Installation contains the following columns:Acquisition Amount – The dollar amount FM paid for this piece of equipment.Acquisition Date – The date (and time, if necessary) we claimed ownership of the
equipment, formatted MM/DD/YY hh:mm:ss. You must enter the slash or dash characters in this date. (RQ if a Life Expectancy is entered)
Install Date – The date (and time, if necessary) the equipment was installed, formatted MM/DD/YY hh:mm:ss. You must enter the slash or dash characters in this date. (RQ)
Install Notes – Any notes regarding the installation of the equipment, up to 128 alphanumeric characters.
Life Expectancy – The number of months this equipment is expected to function.
Disposal contains the following columns:Disposal Amount – The dollar amount FM received when this equipment was disposed
of. (You must enter the Disposal Type before entering Disposal Amount.)Disposal Date – The date (and time, if necessary) we relinquished ownership of the
equipment, formatted MM/DD/YY hh:mm:ss. You must enter the slash or dash characters in this date. (You must enter the Disposal Type before entering Disposal Amount.)
Disposal Type – A drop down list of valid equipment disposal types, indicating the reason FM relinquished ownership of this equipment.
The lower right area contains the following columns:Status – A drop down list indicating the equipment’s status. Valid values are:
Active – This equipment is active and should be maintained. This is the default.Inactive – This equipment is out of service or otherwise inactive.
128
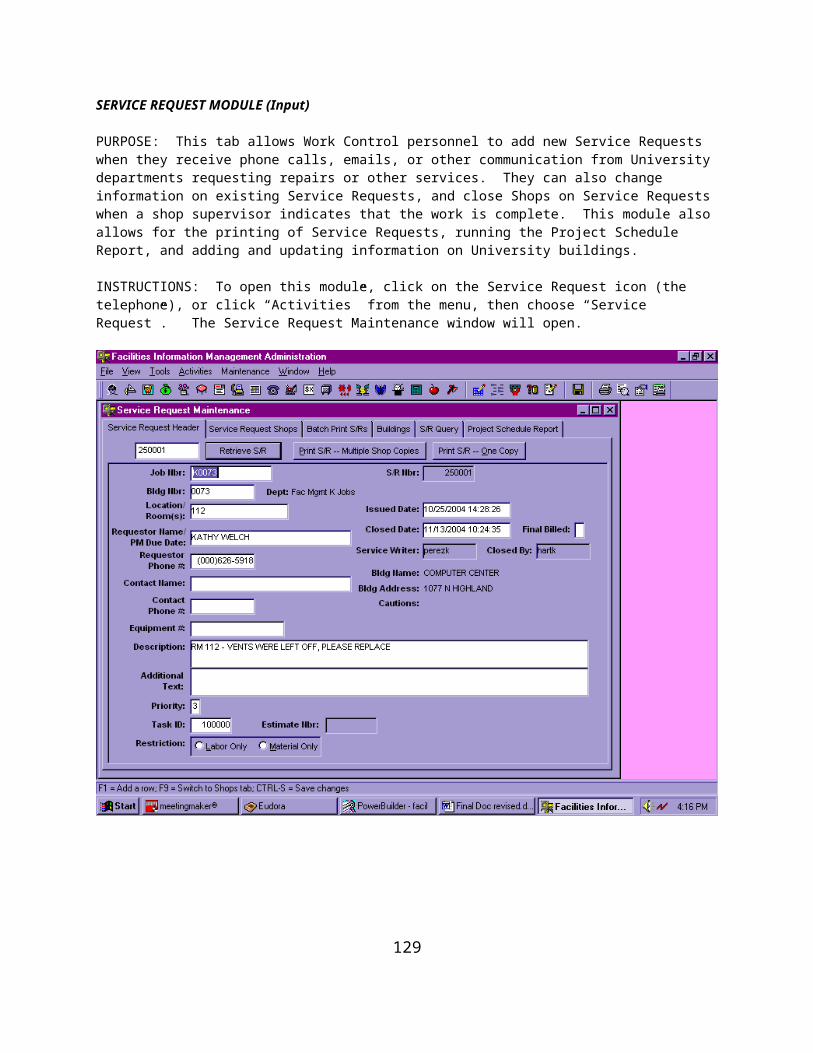
Job Number – The Job Number assigned to this piece of equipment, up to 10 alphanumeric characters. (RQ) The Job description automatically displays next to the Job Number.
Equipment Class – A drop down list of valid Equipment Class descriptions, indicating the type of equipment. (RQ)
To change the Equipment Number on an existing piece of equipment, click the “Change Eq. Number” button. This allows you to edit the Equipment Number column.
SCHEDULE MAINTENANCE TABIf a piece of equipment is displayed on the Equipment Maintenance tab, any existing maintenance tasks for it will display here. To select a different piece of equipment on this tab, follow the instructions given for selecting existing equipment in the EQUIPMENT MAINTENANCE TAB section above. The Equipment Number and description display at the top of the tab.
To add a new task to the displayed Equipment Number, click the “Add Task” button. A new window opens that lists the PM Tasks (Task Code, description, cycle information, estimated hours, priority, Shop name, and compliance form information) available for the Equipment Class assigned to this piece of equipment. If the task you want is not on this list, click the arrow on the “Select Class” drop down list and choose “Other Task Codes” as the Class. Miscellaneous and exception tasks appear under this Class. When you have identified the task you want to assign to the equipment, click on it to highlight it, then click the “Select” button. That task will now appear on the “Schedule Maintenance” tab. If you do not want to add a task at this time, click the “Cancel” button.
This tab contains the following columns for each PM Task:Task Code – The name of the task to be performed (view only).Open SRs – The number of open Service Requests for this task for the equipment (view
only).Task Description – The description associated with the Task Code (view only).Shop – The number and name of the Shop with primary responsibility for the task (view
only).Cycle Type – A drop down list of valid PM cycle units (daily, monthly, etc). (RQ)Cycle – The number of the type of units selected in Cycle Type that should occur
between one PM and the next. The Cycle Type units (i.e. “Months”) displays to the right of the number. (RQ)
Job Number – The Job that will be charged for labor or materials used on this PM Task, up to 10 alphanumeric characters.
Priority – A drop down list of valid priority codes, with “Priority 1” being the highest priority. (RQ)
Last PM – The date this task was last performed on this piece of equipment (view only).Next PM – The date by which this task should next be completed, formatted MM/DD/YY.
(RQ)Estimated Time – The number of hours it should take to complete this task, with 2
decimal places (view only).Compliance Form – A drop down list of valid Compliance Forms which may be required
each time this task is performed.
If you need to delete a task from a piece of equipment, click on that task, then click the “Delete Task” button. You can only delete the task if the “Open SRs” column is 0 (zero). The system will display a message asking you to be sure you want to delete the task. Click the “Yes” button to delete the task, or the “No” button to leave it attached to the equipment. USE THIS OPTION WITH CAUTION, since you will have to manually add the task again if you delete it by mistake.
129
CURRENT PM SCHEDULE TABThis tab lists Preventive Maintenance tasks currently scheduled for the selected date range and Shop. You can print the schedule, and actually create Service Requests for the scheduled tasks. The prompt boxes below the words “Select Start Date” and “Select End Date” default to the 1st day of the next month and the 28th day of that month, respectively. Change these dates as necessary (you can select an End Date up to 60 days from today). To select a Shop, click the drop down arrow in the white box beneath the words “Select Shop”, and choose an FM Shop from the list of Shop Numbers and names. As soon as you select a shop, the system attempts to find scheduled tasks and displays any that are found. If the system displays a message that no tasks were found, or if you need to look for a different date range or Shop, change your selections as necessary and click the “Refresh” button.
This VIEW ONLY tab contains the following columns for each scheduled PM Task:Next PM Due Date – The date by which the task must next be accomplished for the piece
of equipment.Last PM Due Date – The date this task was most recently completed.Open SRs – The number of open Service Requests for this task and equipment.Cycle – The number and type of units between occurrences of the task.Equip. Number – The Equipment Number to be PM’d.Task Code – The name of the PM task to be performed.Multiple Shops – If this checkbox is checked, more than one Shop can perform the PM.
If it is not checked, only one Shop can perform the PM.Task Priority – The importance assigned to the task.Weighted Priority – This priority takes into account the number of PM cycles that have
been missed and the number of open Service Requests, as well as the Task Priority. “Required!” is the highest Weighted Priority.
Building – The name of the building where the equipment is located.Room Number – The room where the equipment is located.Equipment Class – The type of equipment.Job Number – The Job that will be charged for labor and materials used to accomplish
the task.Estimated Time – The number of hours it should take to finish the task.Equipment Description – The description of this piece of equipment.Task Description – The description of the PM Task.Location Description – Any additional information regarding the location of the equipment.Compliance Form – The name of any Compliance Form that must be completed when
the PM is done.
Rows with a Weighted Priority of “Required!” are highlighted. If you create Service Requests for any of the tasks on this schedule, those rows must be included. You can click on the shaded column headings to sort in a different order. Clicking on the top row of headings determines the primary sort, and clicking on a different heading from the second row determines the secondary sort.
Skipping TasksYou can select rows on this tab to be “skipped”. The Next PM Due Date for those tasks will be advanced by one cycle, and no Service Request will be created for them in the month in which they were originally due. To select multiple consecutive rows to skip, click the first row, then press and hold the SHIFT key and click the last row. To select multiple non-consecutive rows, click a row, then press and hold the CTRL key while clicking the other rows you want to select. To skip the selected rows, click the “Skip” button. The system will display an error message if you attempt to skip any rows with a Weighted Priority of “Required!”.
Creating Service RequestsA PM Task for a piece of equipment is not truly “scheduled” unless you create a Service Request for it. To create Service Requests, you must first select the rows you want to schedule. To select multiple consecutive rows to skip, click the first row, then press and hold the SHIFT key and click the last row. To
130

select multiple non-consecutive rows, click a row, then press and hold the CTRL key while clicking the other rows you want to select. To schedule these tasks, click the “Create SRs” button. The cursor will change to an hourglass while this process runs. The rows for which Service Requests are created are removed from the window, and you should see a message stating the number of Service Requests that were created. Any required Compliance Forms will print at your default printer, and if any errors occurred during the process, and error report will also print.
Printing the PM ScheduleYou must create Service Requests before you can print the PM Schedule for the month. To print the schedule, click the “Print” button. A new window opens that gives you various options for the way you want the printout to be organized:
Sort by – This area contains 3 radio buttons that control the way information on the PM Schedule is sorted:Room Number – This option sorts by Building, then Room, then Service Request
(and finally by Shop if more than one Shop can do the work). This is the default.
Equipment Number – This option sorts by Building, then Equipment Number (and then by Service Request and Shop if more than one Shop can do the work).
Location Description – This option sorts by Location Description, then Building. If only one Shop can do the work, it then sorts by Room and by Service Request; if more than one Shop can do the work, it then sorts by Equipment Number, Service Request, and Shop.
Page break – The options in this area are valid only when one Shop is responsible for all the PM work. If a secondary Shop can also do the PM, selecting one of these radio buttons has no effect. The two radio buttons are:Bldg or Location – This option causes a new page to start when the Building
changes, if you chose to sort on Room Number or Equipment Number, or when the Location Description changes, if you chose to sort on Location Description. This is the default.
None – This option does not produce a new page on Building or Location Description change.
Copies – This box defaults to 1 to produce a single copy of the PM Schedule. If you want more than one copy, enter the number of copies here.
To print the PM Schedule, click the “Print” button. If you do not want to print the schedule after all, click the “Cancel” button.
PM HISTORY TABThis view-only tab is described in the PREVENTIVE MAINTENANCE MODULE (Inquiry) section.
TASK MAINTENANCE TABThis tab allows you to add, update, and delete PM Tasks associated with a particular Equipment Class. First, choose an Equipment Class from the drop down box below the words “Select Equipment Class”. Any existing tasks will display. To add a new task, click the “Add Task” button. The system displays the message “This task will apply to all equipment added in the future with this equipment class. Are you sure you want to do this?” To add the task, click the “Yes” button. A blank area will display ready for your data entry. If you do not want to add a task, click the “No” button.
131

This tab contains the following columns for each task:Task Code – The name of the PM Task, up to 40 alphanumeric characters. This is view-
only information on existing tasks. (RQ)Status – A drop down list of valid task statuses. Choices are:
Active – This task is currently in use.Inactive – This task is currently not in use.
Task Description – The description of this task, up to 60 alphanumeric characters. (RQ)Shop – A drop down list of valid FM Shop Numbers and names. This is the primary Shop
responsible for the task. (RQ)Task Cycle Type – A drop down list of valid cycle types such as “Daily” and “Monthly”.
(RQ)Task Cycle – The number of the selected Task Cycle Type that must occur before the
task is due to be completed again. (RQ)Task Priority – A drop down list of valid priority codes, with “Priority 1” being the highest
priority. (RQ)Estimated Time – The number of hours it should take to complete this task, with 2
decimal places.Compliance Form – A drop down list of valid Compliance Forms. A copy of the
Compliance Form (if selected) must be completed each time this task is performed.
The bottom of the tab contains the following checkbox:Change All Occurrences? – If this checkbox is checked, any change in cycle information,
priority, or Compliance Forms will be applied to all occurrences of this task, including any existing exceptions where, for example, the cycle is different for one piece of equipment for this task.
If you need to delete a PM Task, click on that task, then click the “Delete Task” button. You can only delete the task if there are no open Service Requests that reference it. The system will display a message asking you to be sure you want to delete the task. Click the “Yes” button to delete the task, or the “No” button to leave it attached to the equipment. USE THIS OPTION WITH EXTREME CAUTION, since all occurrences of this task will be removed from the “Schedule Maintenance” tab, and you will have to manually add the task AND attach it to each piece of affected equipment again if you delete it by mistake.
CLASS MAINTENANCE TABThis tab allows you to add and update Equipment Classes. All existing classes automatically display. To add a new class, click the “Add Class” button. A blank area will display ready for your data entry.
This tab contains the following columns for each Equipment Class:Class Description – The description for the Equipment Class, up to 60 alphanumeric
characters. (RQ)status – A drop down list of valid statuses for the Equipment Class. Choices are:
Active – This Equipment Class is currently in use.Inactive – This Equipment Class is not in use.
Equipment Classes cannot be deleted. If the decision is made to discontinue an Equipment Class, set its status to “Inactive”.
132

SERVICE REQUESTS TABThis VIEW ONLY tab shows information on the PM Service Requests for the selected date range and Shop. It is also used to select PM Service Requests that are ready to be closed. The prompt boxes below the words “Select Start Date” and “Select End Date” default to the date that is 30 days ago and the current date, respectively. Change these dates as necessary. To select a Shop, click the drop down arrow in the white box beneath the words “Select Shop”, and choose an FM Shop from the list of Shop Numbers and names. As soon as you select a shop, the system attempts to find PM Service Requests and displays any that are found. If you get a message that no requests were found, or to look for a different date range or Shop, change your selections as necessary and click the “Refresh” button.
This tab contains the following columns for each Service Request:SR Number – The Service Request Number that will be charged for the PM work.Job Number – The Job that will be charged for the PM work.Job Description – The description assigned to the Job.Issued Date – The date this Service Request was created.Due Date – The date by which the PM should be completed.Building – The Building Number where the equipment to be maintained is located.Room Number – The room number where the equipment is located.Equipment Number – The number assigned to the equipment to be maintained.SR Priority – The priority assigned to this Service Request, with “1” being the highest
priority.Service Request Description – The description of the work to be performed on this PM
Service Request.Contact Person – The FIMA User ID of the person who created this Service Request.Contact Phone – This column is usually blank for PM Service Requests.Production Code – This column is usually blank for PM Service Requests.User ID – The FIMA User ID of the person who created this Service Request.
You can click on the shaded column headings to sort the information in a different order. Clicking on the top row of headings determines the primary sort, and clicking on a different heading from the second row determines the secondary sort. To locate a particular Service Request Number from the list, you can type that number in the white box to the left of the “Find” button, then click the “Find” button. The displayed list will scroll to place that line at the top and highlight it.
Closing Service RequestsTo begin the process of closing PM Service Requests, you must first select the requests to be closed. To select a group of contiguous rows on this tab, click the first row, then hold the SHIFT key while clicking the last row. All rows in between will be selected. To select non-contiguous rows, click the first one, then hold the CTRL key while clicking the other Service Requests you want to close.
Once the rows for Service Requests you want to close are highlighted, click the “Close” button. The system checks all the selected Service Requests to make sure none of them have encumbered material transactions. If any encumbered material transactions are found, the system displays a message informing you of the Service Request Number that cannot be closed, and automatically de-selects that row. The system then displays a new window listing all the selected Service Requests that are eligible to be closed. That window contains the following columns:
Service Request Number – The Service Request Number to be closed (view only).Issued Date – The date the Service Request was created (view only).Equipment Number – The equipment number that was maintained (view only).Closed Date – The date this Service Request was closed, formatted MM/DD/YYYY. This
column defaults to today’s date, but can be changed if necessary. (RQ)Complete? – A checkbox indicating whether or not the Preventive Maintenance work was
actually completed. A checkmark in this box indicates that the work was completed. If the work was not completed but the Service Request is being closed anyway, leave this checkbox empty.
133

Compliance Form – The name of any compliance form that must be submitted when this Service Request is closed (view only).
Close Notes – Any notes about this PM Service Request, up to 120 alphanumeric characters.
Service Request Description – The description of the PM work to be done on this Service Request (view only).
You can click on the shaded column headings to sort the information in a different order. When you have entered the required information for each Service Request, click the “Close These Service Requests” but-ton to close them. If the requests close successfully, the system displays a message informing you of the number of requests that were closed. If you do not want to close these requests at this time, click the “Cancel” button instead.
WARRANTY AND LIFETIME INFO TABThis view-only tab is described in the PREVENTIVE MAINTENANCE MODULE (Inquiry) section.
EXTINGUISHERS AND LIGHTS TABThis tab allows you to maintain information on Fire Extinguishers and Emergency Lights. These are not stored as individual pieces of equipment in FIMA; instead, all the extinguishers in a building are grouped under one Equipment Number, and all the emergency lights in that building are grouped under another Equipment Number. To view the individual fire extinguishers and emergency lights, select a Building from the drop down list beneath the words “Select Building”. The system displays the fire extinguisher and emergency light information for that building. This tab includes two areas. Each area displays the group Equipment Number to the right of the words “Item Number” (the Equipment Number is view only).To add a new extinguisher, in the Extinguisher Maintenance area, select the extinguisher that should follow the new one in the list, then click the “Insert Row” button. The system displays a blank line immediately above the one you selected, ready for your data entry. Follow the same procedure in the Emergency Lighting Maintenance area to add a new emergency light.
Extinguisher Maintenance contains the following columns for each extinguisher:Order – The order in which the fire extinguishers should be sorted on reports, etc., with 1
decimal place, up to 9999.9.Serial Number – The serial number of this extinguisher, up to 40 alphanumeric
characters.Make – The brand of this extinguisher, up to 40 alphanumeric characters.Type – The type of the extinguisher, up to 20 alphanumeric characters.Size – The size of the extinguisher, with 2 decimal places, up to 9999.99.Hy/Date – The 2-digit year the extinguisher was last filled.Location – The exact location of this extinguisher, up to 80 alphanumeric characters.
Emergency Lighting Maintenance contains the following columns for each emergency light:Order – The order in which the lights should be sorted on reports, etc., with 1 decimal
place, up to 9999.9.Tag Nbr – The tag number assigned to this light, up to 12 alphanumeric characters.Type – The type of the light, up to 10 alphanumeric characters.Location – The exact location of this light, up to 120 alphanumeric characters.Comments – Any comments about this light, up to 180 alphanumeric characters.
In both areas, you can click on a shaded column header to re-sort the rows in that order.
134

If you need to delete an individual fire extinguisher or emergency light from its piece of equipment, click that extinguisher or light to highlight it, then click the “Delete Row” button. USE THIS OPTION WITH CAUTION, since there is no verification message to give you a chance to change your mind, and you will have to manually add the extinguisher or light again if you delete it by mistake.
REQ. AND COMP. TASKS TABThis view-only tab is described in the PREVENTIVE MAINTENANCE MODULE (Inquiry) section.
OVERDUE TASKS TABThis view-only tab is described in the PREVENTIVE MAINTENANCE MODULE (Inquiry) section.
TOOLS TABThis tab allows MIS personnel to update the Due Date on PMs that have not been scheduled for at least one cycle, and to set the Next PM Date for selected PM Schedule rows to a specified date. To update the Due Date on missed PMs, click the “Update Next PM” button. To set the Next PM Date for selected PM Schedule rows, the SELECT statement for the dw_advance_pm datawindow must be modified as needed to retrieve the correct rows, and the code for the “Advance to 28th” button must also be modified to specify the new date. After these changes have been compiled into a new version of FIMA, clicking the “Advance to 28th” button will set the Next PM Date accordingly.
SECONDARY SHOPS TABThis tab allows you to add PM Tasks that can be performed by more than one Shop, and to inactivate PM Task/Secondary Shop combinations that are no longer valid. You must first choose a primary Shop from the drop down list at the top of the tab below the words “Select Primary Shop”. This displays a list of all PM Tasks for that Shop that can be performed by one or more secondary Shops. To add a new Task to the list, click the “Add New Multi-Shop Task” button. The system displays a blank row ready for your data entry.
This tab contains the following columns:Task Code – A drop down list of valid PM Tasks. (RQ)Secondary Shop – A drop down list of active FM Shops. (RQ)Status – A drop down list of valid statuses for this Task and Secondary Shop. Choices
are:Active – This Secondary Shop is currently authorized to perform this PM Task.Inactive – This Secondary Shop is no longer authorized to perform this Task.
FUTURE SCHEDULE TABThis view-only tab is described in the PREVENTIVE MAINTENANCE MODULE (Inquiry) section.
135
WORK MANAGEMENT MODULE (Inquiry)
To open this module, click on the Work Management icon (the rabbit in the hat), or click “Activities” from the menu, then choose “Work Management”. The Work Management window will open.
The Work Management module includes the following tabs:
RETRIEVE S/RS – This tab displays a list of all Shops you are authorized to view, and the number of open Service Requests for each Shop, categorized by number of days open (0-30, 31-60, 61-90, and 91 or more), with a total number of open Service Requests per Shop. From this tab, you can choose to view the individual open Service Requests for all Shops listed, or just one (if you have access to multiple Shops). To view the requests, you must make certain selections. First, type the number of days the Service Requests must have been open in the white box to the left of the words “days old or older” (leave the default of 0 to view all open requests). Next, either leave the “Select all authorized Shops” checkbox checked to see requests for all your Shops, or click that checkbox to uncheck it and type the Shop whose requests you want to view in the white box to the right of the words “Enter 1 Shop for View Only”. Finally, if you want to see Estimate and/or Preventive Maintenance Service Requests, click on the appropriate checkbox (“Estimates?” or “PM?” – these requests are excluded by default, as are Standing Service Requests). When you have made your selections, click the “View Service Requests” button. Retrieving the requests may take some time, depending on how many there are. When the system has retrieved all the data, it switches you to the Display & Assign S/Rs tab, if you left the “Select all authorized Shops” checkbox checked, or to a new tab, “View S/Rs Only”, if you selected to view a single Shop. See the description of these tabs below.
DISPLAY & ASSIGN S/RS – If you chose to view all the Shops you are authorized for on the Retrieve S/Rs tab, this tab displays a list of the open Service Requests you selected (based on number of days open and type) indicating which ones have been assigned to one or more employees. The left side of the tab displays a treeview of Facilities Management Shops. Double clicking on a Shop displays a list of the employees in that Shop, sorted by last name. Double clicking on a particular employee displays any Service Requests that are currently assigned to that employee. The list of Service Requests on the right side of the tab shows whether or not a request is assigned to someone, Service Request Number, Shop, Building, Job, description, date issued, Task ID, estimated hours to complete the request, any actual hours posted, and whether or not there is material on order for this request. You can click on any column heading to sort the list in that order.
WORKFORCE PLANNER – This tab is designed to help Shop Supervisors, particularly those in a specific area of the maintenance shops, utilize their employees’ time more effectively. To view the information on this tab, select a Shop from the drop down list to the right of the words “Select Shop”. If you want the system to calculate based on more or less than 8 hours of work in a day, type that number of hours in the white box to the right of the words “Enter Number of Work Hrs per Day”. Click the “Retrieve” button. The system displays a list of the employees in the selected Shop, with columns allowing you to specify whether a particular employee is available or unavailable for work, and columns allowing you to allocate that employee’s time to specific types of work. For more information on this area of the tab, see the WORK MANAGEMENT (Input) section. In the lower left area of the tab is an estimate of daily pending hours for the selected Shop, grouped into the same types of work shown in the upper area. The system calculates the estimated daily pending hours by determining the number of open Service Requests for the Shop of a particular type, multiplying that by the average hours spent on requests of that type by that Shop (which is calculated quarterly) or the actual estimated hours entered on the requests (in the case of Estimates and PM), and dividing by the number of days that have passed so far in the fiscal year, or by 31 days (for Estimates and PM). The calculated average hours spent displays in the “Avg Hrs” column for Main Campus and Arizona Health Sciences Center requests. For additional information on this tab, including calculating the backlog of hours and saving and printing the schedule, see the WORK MANAGEMENT (Input) section.
136

VIEW S/RS ONLY – This tab displays if you entered a single Shop in the “Enter 1 Shop for View Only” box on the Retrieve S/Rs tab. It lists the Service Requests that have been open for that Shop for at least the number of days you specified on the Retrieve S/Rs tab. Information shown includes Service Request Number, Shop, Building, Job, Service Request description, Date Issued, Task ID, estimated hours, any actual hours posted, and whether or not there is material on order for the Service Request. This tab is VIEW ONLY, but you can click on any column heading to sort the list in that order.
REVIEW WORKFORCE PLANNER TAB – This tab lets Shop Supervisors and their managers review the employee utilization, estimated daily average hours, and estimated backlog information that was saved by the Shop Supervisors on the Workforce Planner tab. To view this information, select the Shop whose data you want to see from the drop down list to the right of the words “Select Shop”. Today’s date displays in the white box to the right of the words “Select Date”. If you want to view information for a different date, enter that date in the format MM/DD/YYYY. Click the “Retrieve” button. If the Shop you selected saved workforce utilization data for the date you selected, it will display. (For more information about this data, see the WORKFORCE PLANNER TAB section above.) To print the displayed information, click the “Print Schedule” button.
137
WORK MANAGEMENT MODULE (Input)
PURPOSE: The Work Management module was designed to help Shop Supervisors better manage their workload. They can use this module to see a summary of open Service Requests, grouped by number of days open; to display open Service Requests for their Shops and assign those requests to individual employees; to create a schedule of which employees should be working on which types of Service Requests; and to simply view the open Service Requests for a single Shop. INSTRUCTIONS: To open this module, click on the Work Management icon (the rabbit in the hat), or click “Activities” from the menu, then choose “Work Management”. The Work Management window will open.
RETRIEVE S/RS TABThis tab automatically displays a list of all Shops you are authorized to view, and the number of open Service Requests for each Shop, categorized by number of days open (0-30, 31-60, 61-90, and 91 or more), with a total number of open Service Requests per Shop. From this tab, you can choose to view the individual open Service Requests for a single Shop (described in the WORK MANAGEMENT MODULE Inquiry section), or you can assign employees to work on specific Service Requests (see the DISPLAY & ASSIGN S/RS TAB below).
138

This tab contains the following prompt boxes, which you must fill in to retrieve data on the Display & Assign S/Rs tab:
Days old or older – enter the minimum number of days the Service Requests must have been open (for example, 60).
Select all authorized Shops – This checkbox column indicates that you want to be able to view and assign Service Requests for all Shops you have access to. You must leave this checkbox checked in order to assign Service Requests to employees.
Enter 1 Shop for View Only – Do not make an entry in this prompt if you want to assign Service Requests. If you only want to view them, enter the Shop Number whose open Service Requests you want to see.
Show Estimates? – Click this checkbox if you want to see Estimate (Renovation Services) Service Requests, which are excluded by default.
Show PM? – Click this checkbox if you want to see Preventive Maintenance Service Requests, which are excluded by default.
When you have made your selections, click the “View Service Requests” button. Retrieving the requests may take some time, depending on how many there are. When the system has retrieved all the data, it switches you to the Display & Assign S/Rs tab if you left the Select all authorized Shops checkbox checked. (See the instructions for that tab below.) If you selected only one Shop, it switches you to the View S/Rs Only tab.
DISPLAY & ASSIGN S/RS TABThe left side of the tab displays a list of Facilities Management Shops. Double clicking on a Shop displays a treeview of the employees in that Shop, sorted by last name. Double clicking on a particular employee displays any Service Requests that are currently assigned to that employee. If you left the Select all authorized Shops checkbox checked on the Retrieve S/Rs tab, the right side of this tab displays a list of the open Service Requests you selected (based on number of days open and whether or not to include Estimates and/or PM). (If you selected only one Shop to view on the Retrieve S/Rs tab, no data displays on the right side of this tab.) This list contains the following columns (VIEW ONLY):
Assigned? – A checkbox column indicating whether or not this Service Request has been assigned to an employee.
SR Nbr – The Service Request Number.Shop – The Shop needed to perform the work.Bldg – The Building where the work needs to be done.Job Nbr – The Job that will be charged.Description – The description of the work to be performed.Date Issued – The date this Service Request was originally issued.Task ID – A code designating the basic type of work (routine, PM, etc.)Est Hrs – The number of hours it will probably take for the Shop to complete the work.Actual Hrs – The number of labor hours the Shop has charged so far.Awaiting Material? – A Yes or No (Y or N) column indicating whether or not material is on
order for this Shop on this Service Request.
To assign a Service Request from the list to an employee, click and hold the Service Request Number and drag it over to the employee’s name on the treeview. A new line with a document icon and the Service Request Number will appear under that employee. You can assign the same Service Request to multiple employees if necessary. The Shop on the Service Request must match the employee’s Shop.
When a Shop is closed on a Service Request, the system automatically deletes any assignments. To remove an assigned Service Request from an employee before the Shop is closed, find the Service Request Number on the treeview (the left side of the tab) under the employee’s name, click it to highlight it, then right click and choose “Delete” from the popup menu.
139

You can print a report showing all Service Requests assigned to a particular employee, or all requests assigned to all employees in the Shop. To print the report for a specific employee, click on that employee’s name, then click the “Print Report” button. To print a report for all employees in the Shop, click on the Shop, then click the “Print Report” button. In that case, the system will ask if you really want to print the report for all Shop employees, as it can be lengthy.
WORKFORCE PLANNER TABThis tab was designed specifically for the Plumbing, Sheet Metal, HVAC, and HVAC Mechanical Shops, but can be used by any FM Shop. To view the information on this tab, select a Shop from the drop down list to the right of the words “Select Shop”. By default, the system assumes 8 hours of productive time per person per day. If you want the system to calculate based on more or less than 8 hours, type that number of hours in the white box to the right of the words “Enter Number of Work Hrs per Day”. Click the “Retrieve” button. This tab includes 3 areas.
The Shop Workforce Utilization Tool for Shop ### displays a list of the employees in the selected Shop. To use this tool, you must fill in the columns to account for the number of hours you selected in the “Enter Number of Work Hrs per Day” box for each employee. This area contains the following columns for each employee:
Unavailable for Work – The number of hours this employee is not available to work today, due to vacation, doctor’s appointments, etc.
Available for Work – The number of hours this employee can work today.Main Campus S/Rs – The number of hours this employee should spend working on
normal Service Requests dispatched by Work Control for buildings on the University Main Campus.
PM – The number of hours this employee should spend working on Preventive Maintenance Service Requests.
AHSC S/Rs – The number of hours this employee should spend working on normal Service Requests dispatched by Work Control for buildings at the Arizona Health Sciences Center.
Eqp Rm Maint – The number of hours this employee should spend working on equipment room maintenance.
Trbl Calls – The number of hours this employee should spend working on emergency Service Requests.
Non Prod – The number of hours this employee will spend on non-productive time, such as shop cleanup.
Renov Svcs – The number of hours this employee will spend on Estimate Service Requests.
In the lower left area of the tab is an estimate of daily pending hours for the selected Shop, grouped into the same types of work shown in the upper area. The system calculates the estimated daily pending hours for Main Campus, Arizona Health Sciences Center, Preventive Maintenance, and Renovation Services (Estimate) Service Requests. This calculation is made by determining the number of open Service Requests for the Shop of a particular type, multiplying that by the average hours spent on requests of that type by that Shop (which is calculated quarterly) or the actual estimated hours entered on the requests (in the case of Estimates and PM), and dividing by the number of days that have passed so far in the fiscal year, or by 31 days (for Estimates and PM). The calculated average hours spent displays in the “Avg Hrs” column for Main Campus and AHSC requests. This area contains three columns that you may want to fill in based on your own estimates:
Equip Rm Maint – The estimated daily pending hours of equipment room maintenance for this Shop.
Trouble Calls – The estimated daily pending hours of emergency Service Requests for this Shop.
140

Non-Productive Time – The estimated daily pending hours that will be spent on activities such as shop cleanup, filling out time sheets, meetings, etc.
To determine the backlog of work for this Shop, click the “Calculate Backlog” button. This totals the available work hours for all employees in the Shop, and subtracts the total of the Daily Pending Hours described above. This information displays in the Estimated Backlog area at the lower right of the tab.
To print the contents of this tab after you have filled in the Shop Workforce Utilization Tool area and clicked the “Calculate Backlog” button, click the “Print Schedule” button. The Shop Workforce Utilization Tool area, the Estimated Daily Pending Hrs by Type area, and the Estimated Backlog area will all print.
To save the contents of this tab (after you have filled in the Shop Workforce Utilization Tool area and clicked the “Calculate Backlog” button), click the “Save Schedule” button. You or your supervisor will be able to retrieve this information for approximately one month by using the “Review Workforce Planner” tab. See the instructions below for that tab for more information.
VIEW S/RS ONLY TABThis view-only tab will only be displayed if you selected a single Shop to view on the Retrieve S/Rs tab. It is described in the WORKFORCE PLANNER MODULE (Inquiry) section.
REVIEW WORKFORCE PLANNER TABThis tab lets Shop Supervisors and their managers review the employee utilization, estimated daily average hours, and estimated backlog information that was saved by the Shop Supervisors on the Workforce Planner tab. To view this information, select the Shop whose data you want to see from the drop down list to the right of the words “Select Shop”. Today’s date displays in the white box to the right of the words “Select Date”. If you want to view information for a different date, enter that date in the format MM/DD/YYYY. Click the “Retrieve” button. If the Shop you selected saved workforce utilization data for the date you selected, it will display. This information is VIEW ONLY. (For a complete explanation of this data, see the WORKFORCE PLANNER TAB section above.) To print the displayed information, click the “Print Schedule” button.
141
ESTIMATING MODULE (Inquiry)
To open this module, click on the Estimating icon (the calculator), or click “Activities” from the menu, then choose “Estimating”. The Estimating window will open.
The Estimating module includes the following tabs:
ESTIMATE MAINTENANCE – This tab displays information on existing Estimates. To display an Estimate, type the Estimate Number in the white box in the upper left corner of the tab, then press ENTER or click the “Retrieve Estimate” button. The system displays information such as date, building, room, description, requestor, Project Manager, Quote Date and Amount, Original Fund Date and Amount, and Job and Service Request Number (if assigned) for the selected Estimate. You can print this Estimate by clicking the “Print Estimate” button.
ESTIMATE SHOPS – This tab displays information about the Facilities Management Shops and any outside contractors that have been assigned to the Estimate selected on the Estimate Maintenance tab. It includes estimated labor hours and dollars, labor contingency amount, and estimated material dollars. There may be multiple options on the Estimate; the “Mark Option As Selected” area at the top of this tab indicates which option(s) the customer has decided to fund.
CHANGE ORDER – This tab displays information on any change orders for the selected Estimate. To view an Estimate’s Change Orders, type the Estimate Number in the white box in the upper left corner of the tab, then press ENTER or click the “Retrieve C/Os” button. The information shown in the upper area of the tab includes Change Order Option Number, description, date, amount, and customer and FM approvals. The lower area of this tab lists the Shops and/or outside contractors involved, with their estimated hours and dollars.
PERMIT TRACKING – This tab lists any permits related to the selected Estimate. To view an Estimate’s permits, type the Estimate Number in the white box in the upper left corner of the tab, then press ENTER. The system-assigned Sequence Number, date submitted, and date received display for each permit.
ADDITIONAL FUNDING – This tab shows any additional funding on the selected Estimate, aside from the original funding amount and any change orders. To view an Estimate’s additional funding, type the Estimate Number in the white box in the upper left corner of the tab, then press ENTER. The funding date and amount display.
FUNDED PROJECTS RPT – This tab allows you to run the “Funded Projects for Fiscal Year ####” report, where “####” is the current 4-digit fiscal year. This report shows information on all funded Estimates, including description, Job, Service Request, Project Manager, estimated and actual dollars, and the dollar amount spent in the current fiscal year and each of the last two fiscal years. To run the report, type the 4-digit current fiscal year in the white box, then click the “Run Report” button.
142

ESTIMATING MODULE (Input)
PURPOSE: The Estimating module is designed to help Renovation Services track customer requests for work. They estimate the cost of each project, and the customer either agrees to fund that project, or declines the estimate. Estimates may include multiple options, of which the customer can select one or more to fund, and they may include Change Orders that take effect after a project is begun. Funded Estimates can easily be turned into Service Requests by using this module. INSTRUCTIONS: To open this module, click on the Estimating icon (the calculator), or click “Activities” from the menu, then choose “Estimating”. The Estimating window will open.
ESTIMATE MAINT TABTo make changes to an existing Estimate, type the Estimate Number in the white box in the upper left corner of the tab, then press ENTER or click the “Retrieve Estimate” button. If the Estimate has already been funded and become a Service Request, you can only change some of the information (specifically, Requestor FAX Number, Contact Room Number, Project Manager and alternate, Start Date, Due Date, and Notes). To start a new Estimate, right click and choose “Add” or “Insert” from the popup menu. A blank screen will display with columns ready for your data entry. This tab includes four areas.
143

The upper area contains the following columns:Estimate Number – The system assigns this 6-digit sequential number when you
successfully save the Estimate (view only).Date Received – The date the request for this Estimate was received from the customer,
formatted MM/DD/YYYY. (RQ)Bldg Nbr – The University Building Number where the work is to be done, up to 5
alphanumeric characters. (RQ)Room Nbr – The room number where the work is to be done, up to 15 alphanumeric
characters.Work Description – The description of the work to be done, up to 120 alphanumeric
characters. (RQ)
Requestor Info contains the following columns:Name – The name of the person requesting the Estimate, up to 50 alphanumeric
characters. (RQ)Phone – The 10-digit area code and phone number of the person requesting the
Estimate. (RQ)Fax – The 10-digit area code and fax number of the person requesting the Estimate.
Contact Info contains the following columns:Name – The name of another individual who should be contacted with questions about
the Estimate, up to 50 alphanumeric characters.Phone – The 10-digit area code and phone number of the contact person.Room Nbr – The room number of the contact person’s office, up to 15 alphanumeric
characters.
The lower area contains the following columns:Project Mgr – A drop down list of the names of all employees in the Estimating Shop, as
well as all Leads and Supervisors from the Carpenter, Electric, and Paint Shops, indicating which employee is responsible for managing this Estimate. (RQ)
Customer – A drop down list of Facilities Management Customer Names, indicating which department requested the Estimate.
Cancelled? – A checkbox indicating whether or not this Estimate was cancelled.Alt Project Mgr – A drop down list of employee names identical to the Project Mgr drop
down list, indicating which employee is responsible for managing this Estimate in the absence of the Project Manager.
Quote Date – The date the requestor was given a quote on the estimated cost of this project, formatted MM/DD/YYYY.
Quote Amt – The dollar amount quoted to the requestor as the estimate for this project, with 2 decimal places (up to 999,999,999.99).
Start Date – The date work was started on this project, if it becomes a Service Request, formatted MM/DD/YYYY.
Orig Fund Date – The date the customer sends FM an IBF (Interdepartmental Billing Form) to fund this project, formatted MM/DD/YYYY.
Orig Fund Amt – The dollar amount of funding to be encumbered via the customer’s IBF, with 2 decimal places (up to 999,999,999.99).
Due Date – The date the project should be completed, formatted MM/DD/YYYY.S/R Nbr – The Service Request Number assigned to this Estimate, if it is funded (view
only). The system assigns this number. See the “Creating a Service Request” instructions below for more information.
Job Nbr – The Job Number assigned to this Estimate, if it is funded (view only). The system fills in this information after you successfully create a Service Request for the Estimate.
Notes – A text column of virtually unlimited length containing any additional notes about this Estimate.
144
Entry Date – The date and time this Estimate was entered into the system (view only).User ID – The FIMA user ID of the person who entered the Estimate (view only).
Creating a Service RequestAfter Shops and/or outside contractors have been assigned to this Estimate (see ESTIMATE SHOPS TAB below), the customer has accepted the quote, and the Original Fund Date and Original Fund Amount columns have been filled in, two buttons become visible allowing you to print the Estimate and create a Service Request for it. To print the Estimate, click the “Print Estimate” button. One copy of the Estimate form prints at your default printer. To create a Service Request for the Estimate, click the “Create S/R” button. The Service Request window automatically opens with the majority of the information already filled in based on the Estimate. Fill in the rest of the required information on the Service Request Header and Service Request Shops tabs (see the SERVICE REQUESTMODULE (Input) section for further instructions) and save the Service Request. When you close the Service Request window, the system automatically fills in the Service Request Number and Job Number on the Estimate Maint tab and saves these changes. Certain columns on the Estimate Maint tab become view only after the Service Request Number is assigned.
ESTIMATE SHOPS TABIf you selected an existing Estimate on the Estimate Maint tab, its assigned Shops (and/or outside contractors) display here. If you are entering a new Estimate, this tab displays a row with blank columns ready for you to assign the first Shop. To add additional Shops, right click and choose “Insert” or “Add” from the popup menu, or press the F1 key. You will not be able to make changes to this tab (including adding or deleting rows) once a Service Request has been created from this Estimate.
Each Estimate may have multiple Options, and each Option may have multiple Shops. At the top of the tab and at the start of each new Option are the following view-only columns:
Estimate Nbr – The system-assigned 6-digit Estimate Number.Option Nbr – The sequential 3-digit Option Number. Option 0 is the basic Estimate.Selected – A Yes or No (“Y” or “N”) column indicating whether or not the customer has
chosen this Option.
The rows for each assigned Shop or contractor contain the following columns on each row:Shop/Vendor – The Facilities Management Shop Number (currently 3 digits), or the
special designations for the Asbestos Team (A-TEAM) or Cabinet Makers (210-C), or the 11-character University Vendor Number of an outside contractor that will provide services on this Estimate and Option. The Shop or Vendor name displays below the number. To select a Vendor when you don’t know the Vendor Number, click the “Pick Vendor” button. The system opens a window titled “Choose Vendor”. Click on the drop down list of vendor names, and select the correct Vendor. Its number will display in the drop down box. Click the “Continue” button to assign this Vendor to this Estimate, or click the “Cancel” button if you do not want to assign an outside contractor. (RQ)
Est Hrs – The number of hours it should take this Shop to complete the work, with 2 decimal places (up to 999.99). You can only enter Estimated Hours for an FM Shop (including the special designations mentioned above), not for a Vendor. The system automatically calculates the Est Labor Amt column by multiplying the Estimated Hours by the Pay Grade Band 20 billable hourly rate for the Shop (see the SHOPS MODULE section for an explanation of Shop Rates).
Est Labor Amt – If this row contains an FM Shop and the Est Hrs column is filled in, this column contains the system-calculated Estimated Labor Amount.
Lab Contng – A contingency amount for labor on this Estimate and Option, with 2 decimal places (up to 999,999,999.99). Usually, the entire Labor Contingency Amount for the Option is entered on one Shop.
145
Est Base Mat Amt – The estimated dollar amount for expenses other than labor for this Shop, not including any recovery percentages, with 2 decimal places (up to 999,999,999.99).
Est Mat Recov % – The estimated percentage of tax, Shop Stock recovery, and customer recovery percent that will be applied to the non-labor expenses, with 4 decimal places (up to .9999). This defaults to 16% (.16), but can be changed if necessary.
Est Mat Total – The estimated total amount for expenses other than labor (view only). The system calculates this amount by adding the Estimated Material Recovery % to the Estimated Base Material Amount.
Shop Est Date – The date this Shop turned in its estimate for this project, formatted MM/DD/YYYY.
Work Description – The description of the work this Shop (or outside contractor) will perform, up to 240 alphanumeric characters.
Task ID – The 6-digit Task Code associated with the work to be performed. This defaults to 400000, and must start be in the 400000 – 499999 range.
You can delete a Shop row, if necessary, by right clicking on it and choosing “Delete” from the popup menu. Be very sure you really want to delete the row, since the delete is permanent once you have saved changes.
After the last row for each Option, the system calculates the totals for Estimated Hours, Estimated Labor Dollars (including any Labor Contingency amounts), Base Material Amount, Total Material Amount (including estimated recovery %), and the grand total for that Option. These total columns are view only.
Starting a new OptionOnce you have entered all Shop information for the basic Estimate, you can create additional Options if necessary. To start a new Option, click the “Start New Option” button. The system automatically increments the Option Number and opens a new row for you to assign Shops or outside contractors.
CHANGE ORDER TABThis tab allows you to track Change Orders on Estimates that are already funded and have become Service Requests. An Estimate can have multiple Change Orders, if necessary, and each Change Order can have multiple Options. To view or update an existing Change Order or to create a new one, type the 6-digit Estimate Number in the white box in the upper left corner of the tab and press ENTER or click the “Retrieve C/Os” button. If any Change Orders already exist for this Estimate, they will display. NOTE: most columns on an approved Change Order are view only and cannot be changed, and assigned Shops cannot be added, changed, or deleted. If no Change Orders currently exist, the system displays the message “No Change Orders were found for Estimate ######. Do you want to add one?”. Click the “Yes” button to create the first Change Order for this Estimate. To create a new Change Order on an Estimate that already has one or more Change Orders, click the “New Change Order” button. The Change Order tab includes two areas.
The upper area contains the following columns:Estimate Nbr – The 6-digit Estimate Number assigned by the system (view only).Chg Ord Nbr – The sequential 2-digit system-assigned Change Order Number (view
only).Chg Ord Option – The sequential 3-digit system-assigned Option Number for this Change
Order (view only).Description – The description of this Change Order, up to 120 alphanumeric characters.
(RQ)Chg Ord Date – The date the Change Order was received, formatted MM/DD/YYYY.
(RQ)146

Chg Ord Amt – The dollar amount of this Change Order and Option, with 2 decimal places (up to 999,999,999.99).
Chg Ord Fund Date – The date the customer submitted an IBF to fund this Change Order, formatted MM/DD/YYYY.
Customer Approver – The name of the person representing the customer who approved this Change Order, up to 50 alphanumeric characters.
Customer Approved Date – The date the customer’s representative approved this Change Order, formatted MM/DD/YYYY.
FM Approver – The name of the person within Facilities Management who approved this Change Order, up to 50 alphanumeric characters.
FM Approved Date – The date FM approved this Change Order, formatted MM/DD/YYYY.
The lower area contains the following columns for each FM Shop or outside contractor assigned to this Change Order and Option:
Shop/Vendor – The Facilities Management Shop Number (currently 3 digits), or the special designations for the Asbestos Team (A-TEAM) or Cabinet Makers (210-C), or the 11-character University Vendor Number of an outside contractor that will provide services on this Estimate and Option. The Shop or Vendor name displays below the number. To select a Vendor when you don’t know the Vendor Number, click the “Pick Vendor” button. The system opens a window titled “Choose Vendor”. Click on the drop down list of vendor names, and select the correct Vendor. Its number will display in the drop down box. Click the “Continue” button to assign this Vendor to this Estimate, or click the “Cancel” button if you do not want to assign an outside contractor. (RQ)
Est Hrs – The number of hours it should take this Shop to complete the work, with 2 decimal places (up to 999.99). You can only enter Estimated Hours for an FM Shop (including the special designations mentioned above), not for a Vendor. The system automatically calculates the Est Labor Amt column by multiplying the Estimated Hours by the Pay Grade Band 20 billable hourly rate for the Shop (see the SHOPS MODULE section for an explanation of Shop Rates).
Est Labor Amt – If this row contains an FM Shop and the Est Hrs column is filled in, this column contains the system-calculated Estimated Labor Amount (view only).
Lab Contng – A contingency amount for labor on this Change Order and Option, with 2 decimal places (up to 999,999,999.99). Usually, the entire Labor Contingency Amount for the Option is entered on one Shop.
Est Base Mat Amt – The estimated dollar amount for expenses other than labor for this Shop, not including any recovery percentages, with 2 decimal places (up to 999,999,999.99).
Est Mat Recov % – The estimated percentage of tax, Shop Stock recovery, and customer recovery percent that will be applied to the non-labor expenses, with 4 decimal places (up to .9999). This defaults to 16%, but can be changed if necessary.
Est Mat Total – The estimated total amount for expenses other than labor (view only). The system calculates this amount by adding the Estimated Material Recovery % to the Estimated Base Material Amount.
Work Desc – The description of the work this Shop should do, up to 240 alphanumeric characters.
You can delete a Shop row, if necessary, by right clicking on it and choosing “Delete” from the popup menu. Be very sure you really want to delete the row, since the delete is permanent once you have saved changes.
After the last row for each Option, the system calculates the totals for Estimated Hours, Estimated Labor Dollars, Base Material Amount, Total Material Amount (including estimated recovery %), and the grand total for that Option. These total columns are view only.
147

Once you have saved a Change Order, you can print a form for the customer’s approval by clicking the “Print C/O” button. You can also print a more detailed version by clicking the “Print Detail C/O” button.
Starting a new OptionOnce you have entered all Shop information for the basic Change Order, you can create additional Options if necessary. To start a new Option, click the “New C/O Option” button. The system automatically increments the Option Number and displays empty columns ready for your data entry.
PERMIT TRACKING TABUse this tab to track submission and approval of permits on an Estimate. Type the 6-digit Estimate Number in the white box in the upper left corner of the tab and press ENTER. If any permits exist for this Estimate, they will display. To add a new permit to the list, right click in the main area of the tab and choose “Add” from the popup menu. If no permits currently exist, the system displays the message “No permits were found for this Estimate Number. Would you like to add one?”. To add a permit, click the “Yes” button. If you typed the wrong Estimate Number, click the “No” button.
This tab contains the following columns:Permit Seq Nbr – A sequential 3-digit number assigned by the system (view only).Date Submitted – The date the request for this permit was submitted to Risk
Management or some other authority, formatted MM/DD/YYYY. (RQ)Date Received – The date this permit was granted, formatted MM/DD/YYYY.
ADDITIONAL FUNDING TABUse this tab to track additional funding on approved Estimates when the funding is not related to a Change Order. Type the 6-digit Estimate Number in the white box in the upper left corner of the tab and press ENTER. If any additional funding already exists for this Estimate, it will display. To add new additional funding to the list, right click in the main area of the tab and choose “Add” from the popup menu. If no additional funding currently exist, the system displays the message “No Additional Funding was found for this Estimate. Would you like to add it?”. To add additional funding, click the “Yes” button. If you typed the wrong Estimate Number, click the “No” button.
This tab contains the following columns:Funding Date – The date we received the additional funds, formatted MM/DD/YYYY.
(RQ)Funding Amt – The amount of the additional funding, with 2 decimal places (up to
999,999,999.99). (RQ)
FUNDED PROJECTS RPT TABThis tab allows you to run the “Funded Projects for Fiscal Year ####” report, where “####” is the current 4-digit fiscal year. This report shows information on all funded Estimates, including description, Job, Service Request, Project Manager, estimated and actual dollars, and the dollar amount spent in the current fiscal year and each of the last two fiscal years. To run the report, type the 4-digit current fiscal year in the white box, then click the “Run Report” button. The report displays in a new window, where you can print or export it by right clicking and choosing the appropriate option from the popup menu.
148

OUTLYING PROPERTIES UTILITIES ADMINISTRATION MODULE (Inquiry)
To open this module, click on the Outlying Properties Utilities Administration icon (the apple), or click “Activities” from the menu, then choose “OLP Administration”. The Outlying Properties Utilities – Meter Administration window will open.
The left side of the window displays a treeview of utility types (Domestic Water, Electricity, Natural Gas, etc.). If you know the meter number you want to view, enter it in the white box to the right of the “Find Meter” button, then press ENTER or click the “Find Meter” button. If you don’t know the meter number, find its utility type in the treeview and double click it. The system displays a list of all the Outlying Properties meters for that type of utility. Use the scroll bar to move up and down through the list until you find the meter you are looking for, then click it. The system retrieves information for that meter.
The OLP Administration window displays basic information for the selected meter, including Meter ID, status, the number the vendor has assigned to this meter or account, Building, street address, vendor, utility type (commodity), and information on where bills for this meter are charged, including Job, Building, and square footage of the building. Some meters may have their charges split among multiple Jobs and accounts. To see if a meter is split, click the “Splits” button. A new window opens, listing meter, Job, FM Shop, FRS Account, and the percentage charged there. Some meters are split between Facilities Management and some other University department, such as Residence Life. These have a fake Job Number (like “RESLIF”) and “None” for the Shop. Click the “Cancel” button to close the Splits window.
Two reports are available from this window. To run the “Off Campus Utilities by Job” report, click the “Meter-by-Job Report” button. The report displays in a new window. To run the “FRS Account Totals for Outlying Properties Utilities” report, click the “Monthly Totals Report” button. A new window displays. Enter the month and year for which you want summary data in the white box next to the word “Month”, then click the “OK” button. The report data displays. To print either report, click on the report, then click the printer icon on your toolbar.
149

OUTLYING PROPERTIES UTILITIES ADMINISTRATION MODULE (Input)
PURPOSE: The Outlying Properties Utilities Administration module tracks utility meters for University properties that are generally outside the main area of campus and are therefore separately metered. It allows you to designate one or more Jobs, Shops, and FRS Accounts to charge when bills are received for a meter. In addition, two reports are available in this module, and it contains a function to reset the FRS Voucher Number for OLP Utility charges.
INSTRUCTIONS: To open this module, click on the Outlying Properties Utilities Administration icon (the apple), or click “Activities” from the menu, then choose “OLP Administration”. The Outlying Properties Utilities – Meter Administration window will open. The left side of the window displays a treeview of utility types (Domestic Water, Electricity, Natural Gas, etc.). To view an existing meter when you know the meter number, enter the meter number in the white box to the right of the “Find Meter” button, then press ENTER or click the “Find Meter” button. If you don’t know the meter number, find its utility type in the treeview and double click it. The system displays a list of all the Outlying Properties meters for that type of utility. Use the scroll bar to move up and down through the list until you find the meter you are looking for, then click it. The system retrieves information for that meter. To add a new meter, you must have an existing meter displayed on the right side of the window. Click the “Click to add a meter” button to display blank columns ready for your data entry.
150
The right side of the window contains the following columns:Meter ID – The identification FM assigned to this meter, up to 15 alphanumeric
characters. This may be different from the utility vendor’s meter number or account number. It is usually the Service Number for Tucson Electric Power Company, the last ten digits of the account number for Southwest Gas Corporation, or the full account number for City of Tucson Water. (RQ)
Status – A 1-character column indicating the status of the meter. (RQ) Valid values are:A – Active (the default)I – InactiveC – Job is Closed
Vendor's Meter or Account Number – The meter or account identification assigned to this meter by the utility vendor, up to 25 alphanumeric characters. This column defaults to the Meter ID, but can be changed if necessary.
Building – The 5-character Building Number this meter services. (RQ)Street Address – The street address of the meter, which is usually the building address,
up to 25 alphanumeric characters.Vendor – A dropdown list of University Vendor names. (RQ)Commodity – A drop down list of valid utility commodities. (RQ)Job Number – The Job Number that will be charged with bills for this meter. (To enter or
update this information, see the instructions for the Meter Splitting window immediately below.) If the meter is charged to multiple Jobs, only one will display here. (View only)
Bldg Number – The Building Number and corresponding name assigned to this meter (view only).
Sq Ft – The gross square feet in this building (view only).
If you are entering a new meter, the system automatically attempts to save your entries at this point. You will either see an error message advising you of any problems that need to be corrected, or the message “This meter has been added to the meters table” if all data was correct. The system then opens the Meter Splitting window, which allows you to enter information about where the bills for this meter will be charged, with a blank row ready for your data entry (see below for instructions).
Entering or changing charge information (Meter Splitting window)You must designate where bills for this meter will be charged by using the Meter Splitting window. This window opens automatically when you are entering a new meter, once you correctly fill in the basic meter information on the Meter Administration window. If you need to change the charge information on an existing meter, make sure the correct meter is displayed in the Meter Administration window, then click the “Splits” button to open the Meter Splitting window. To add a new row of information for an existing meter (if it is to be charged to multiple Jobs and accounts), click the “Add Split” button. If the charges for an existing meter are split between multiple accounts and you need to delete one of these accounts, click that row to select it, then click the “Remove Split” button. The Meter Splitting window contains the following columns:
Meter – The Meter ID of this meter (view only).Job – A drop down list of Facilities Management Job Numbers and their corresponding
descriptions. Choose from this list, or, if charges for this meter go to some other department such as Residence Life, enter an identifier (up to 10 alphanumeric characters) for that department in the white box next to the “Non-FM Job” button, then click that button. The system will then display the identifier you entered in the Job column.
Shop – A drop down list with 3 valid choices:None – This meter is being charged to a department other than Facilities
Management.590 – This meter is charged to the normal Purchased Utilities Shop and FRS
accounts.
151

591 – This meter is charge to the Purchased Utilities, Other Shop, which corresponds to a different selection of FRS accounts.
FRS Account – The 6-digit University account number this meter will be charged to. The system attempts to supply a default account in this column based on the entries in the Job and Shop columns, but you can change it if necessary.
Split Percent – The system defaults this column to 100, indicating that all charges will be posted to this Job, Shop, and FRS Account. If only a portion of the charges will be posted here, enter the correct percentage for this account. Percentages are entered in whole numbers (i.e., 25% is entered as 25).
Total Split % – The total of the Split Percents entered for this meter. This total must equal 100 in order to save the information. (View only)
To save your changes, click the “Save and Continue” button. To leave this window without saving changes, click the “Cancel” button. NOTE: If you leave this window without entering Meter Splitting information, the meter itself will be deleted. Adding a Sewer MeterDomestic Water meters may have a corresponding Sewer meter. If you have just successfully added a new meter, the system displays the message “Is this a dual-commodity meter, such as water/sewer?”. If so, and if you want to add the sewer meter now, click the “Yes” button to respond to this message. Otherwise, click the “No” button. If you clicked “Yes”, the system automatically attempts to add the sewer meter using the Meter ID of the water meter with an “S” as the last character, and the Vendor’s Meter or Account Number, Building, Vendor, and Commodity from the water meter. If the add is successful, the system displays the message “Corresponding Sewer Meter has been added to the Meters table”. The system then attempts to duplicate the charge information from the Meter Splitting window (Job, Shop, FRS Account, and percentage) for the water meter and apply it to the sewer meter. If this is successful, the system displays the message “Corresponding Sewer Meter Splits information has been added to the Meter Splits table”. Finally, the system displays the new sewer meter and the message “Make any changes to the second commodity meter now”. At this time, you should enter the Street Address for the sewer meter and make any other necessary changes to it.
To add a sewer meter to an existing water meter, make sure the correct water meter is displayed, then click the “Add Sewer Split” button (if you don’t see this button, the sewer meter already exists). The system will automatically attempt to add the sewer meter and its charge information as described above, but you will not see messages indicating that the information was saved successfully. If you added a sewer meter in error, you MUST call MIS and have them remove the incorrect sewer meter from the database. The system will display the message “Enter the second commodity now”. At this point (assuming you did want to add the sewer meter), you should enter the Street Address for the sewer meter and make any other necessary changes to it.
Running the “ Off Campus Utilities by Job” Report To run the “Off Campus Utilities by Job” report, click the “Meter-by-Job Report” button. The report, which provides a list of meters in Job Number order, displays in a new window. To print the report, click on it, then click the printer icon on your toolbar.
Running the “FRS Account Totals for Outlying Properties Utilities” ReportTo run the “FRS Account Totals for Outlying Properties Utilities” report, click the “Monthly Totals Report” button. A new window displays. Enter the 2-digit month and 4-digit year for which you want summary data in the white box next to the word “Month”, then click the “OK” button. The report, which provides a list of the units and dollars charged to each FRS Account, grouped by Commodity, displays in a new window. To print the report, click on it, then click the printer icon on your toolbar.
152

Setting the Voucher Number When Outlying Properties Utilities data is reported to the main University accounting system (FRS), the system assigns a sequential Voucher Number to each transaction. Occasionally, such as at the start of a new fiscal year, the next Voucher Number may need to be reset. To set the Voucher Number, click the “Set Voucher Number” button. A small window titled “FRS Voucher” displays. The current Voucher Number is shown in small blue numbers at the left side of this window. Enter the next Voucher Number you want the system to use in the white box below the words “What should the next voucher number be?”. Click the “OK” button to set the Voucher Number, or the “Cancel” button if you do not want to change the next Voucher Number.
153

OLP INVOICE INPUT MODULE (Input Only)
PURPOSE: The Outlying Properties Utilities Invoice Input module allows you to enter and post Water and Sewer bills for University properties that are generally outside the main area of campus and are therefore separately metered. You can also manually enter and post gas and electric bills that could not be processed via the “Load Batch” button on the Direct tab in the Direct Expenses module (see “Running Outlying Property Gas or Electric Uploads” in the DIRECT EXPENSES MODULE section for more information).
INSTRUCTIONS: To open this module, click on the OLP Invoice Input icon (the hatchet), or click “Activities” from the menu, then choose “OLP Invoice Input”. The Outlying Properties Utility Bills window will open. Note that this window also opens automatically if you select the “Outlying Properties Utilities – Other Bills” radio button on the Direct Import Expense Wizard window, which opens when you click the “Load Batch” button on the Direct tab in the Direct Expenses module.
If any open batches exist, their Batch Numbers are listed in the white box at the right side of the window titled “Open Batch(es)”. The first invoice in the first open batch (if any) will be displayed on the left side of the window. The batch number itself displays both in the title of the window and in the gray box directly below the “Add Another” button. To add another invoice to this batch, follow the instructions under “Adding bills to a batch” below. To select a different open batch to work on, find its Batch Number in the “Open Batch(es)” box and click it, then follow the instructions under “Adding bills to a batch”. To start a new batch (or if nothing is displayed in the “Open Batch(es)” box), follow the instructions immediately below under “Starting a new batch”.
154
Starting a new batchClicking the “Begin a New Batch” button opens the “Batch Default Data” window. This window contains two columns:
Month/Year – The month and calendar year this batch will be posted to for accounting purposes. The system defaults this to the current month and year, but you can change it if necessary.
Read Date – The date the meters in this batch were read, formatted MM/DD/YYYY. This defaults to today’s date, but can be changed if necessary.
Click the “OK” button to use the dates you entered. The system displays the message “Batch #### ready for input!” (where #### is the new system-generated Batch Number).
Adding bills to a batchOnce you have selected an existing open batch or started a new batch, click the “Add Another” button to add a bill to this batch. The data entry area on the left side of the window contains the following columns:
MM/YY – The month and calendar year to which this batch will be posted for accounting purposes. This defaults to the Month/Year from the Batch Default Data window described above, but can be changed for this bill if necessary.
Read Date – The date this meter was read, formatted MM/DD/YYYY. This defaults to the Read Date from the Batch Default Data window, but can be changed if necessary.
Meter – The FM Meter ID on this bill, up to 15 alphanumeric characters.Commodity – The type of utility this meter measures (view only).Amount – The amount on the bill, with 2 decimal places (up to 9,999,999,999.99).
NOTE: If this is a water-and-sewer bill, enter the total dollar amount for both water and sewer on the water bill. When you enter the sewer amount (see below), the system automatically subtracts that amount from this total to get the water amount.
Units – The number of units on the bill, with 2 decimal places (up to 9,999,999,999.99).
If you entered a bill for a water meter that has a corresponding sewer meter, the system automatically displays the sewer meter as soon as you press TAB on the water bill’s Units column, so you can immediately enter the Amount and Units for the sewer bill. Otherwise, click the “Add Another” button to continue to the next bill.
If you need to close this window without posting the batch (for example, to continue working on it tomorrow), click the “Done” button. This saves the bills you have entered so far but does not post them (therefore leaving the batch open).
Posting the batchThe first step in posting this batch of utility bills is reviewing the entries in the batch. To do this, click the “Review Data Entry” button. This opens a new window that displays the Meter ID, Read Date, Units, Amount, and Commodity for each bill you entered, with a total number of meters and total Units and Amount for the batch. To print the displayed information, click the “Print” button. If you notice an error on any bill, double-click it to close the review window and go back to the data entry window. That bill will be displayed so you can make the necessary correction.
If this batch is particularly large and you are having difficulty finding a particular bill, click the “Find Meter” button. A window will open asking “Which meter do you want to search for?”. Type the meter ID in the white box, then click the “OK” button (or click “Cancel” to close this window without searching for a meter). If the Meter ID you entered exists in this batch, your cursor will be placed on its bill in the review window. If it was not in this batch, the system displays a “Meter ID not found” error message.
155

If you need to close this window without posting the batch yet, click the “Close” button. You will return to the data entry window.
When all entries in this batch are correct, you are ready to post the batch. First, make sure the Posting Date at the bottom of the window is correct. It defaults to today’s date (format MM/DD/YYYY), but can be changed if necessary. Finally, click the “Post Data” button. The system displays the message “Clicking ‘Yes’ will post these rows to the database and prepare a file for FRS. Are you sure you want to do this?”. Click the “Yes” button to post the batch.
Various errors may occur as the posting process validates data. Any errors will display on a new blank area that replaces the data entry review information, and will automatically print on the “Direct Expense Accounting Transaction File Import Errors” report. If errors exist, no data will be posted – all errors must be corrected before you can successfully post this data. If the system finds no errors in the data, a new window opens, allowing you to review the bills. You can click on a row in this window, then right click and choose “Delete” from the popup menu, to remove a bill, or you can click on a row, then click the “Send to Third Party” button if this bill actually belongs to a different department. In this case, another window opens prompting you to enter the information on where the bill should be sent (click the “OK” button to proceed), followed by a window displaying a report of the bills to be sent elsewhere. This report prints automatically. When all data on this review window is correct, click the “OK” button. This creates a text file to be transmitted to FRS, and updates Utility Consumption data and creates Direct Expense charges in FIMA. On a successful batch posting, the system then displays the message “The FRS file is ready for upload”. Several reports automatically print at the end of a successful upload, including “Direct Expense Accounting Transaction File Import Errors” (which should read “Processing complete with no errors”); “Scanned Utilities Data for Upload”, which lists the contents of the FRS file, and “Direct Expense Transactions for Batch Number ####” (where “####” is the system-generated Batch Number), which lists the expense transactions posted to FIMA.
156

HR/PAYROLL TABLE MAINTENANCE MODULE (Inquiry)
To open this module, click on the HR/Payroll Table Maintenance Module icon (the pencil on the blue grid), or click “Maintenance” from the menu, then choose “H/R Payroll Table Maint”. The HR/Payroll Table Maintenance window will open.
The HR/Payroll Table Maintenance module includes the following tabs:
DEPT. – This tab displays the University department number and description for all Facilities Management-related departments.
ACCT. – This tab displays FRS Account Number information, including Expense Fund source code, Delete code, Frozen code, etc.
POSITION – This tab displays all of the Position Control numbers for FM. Information includes Department, ERE (Employee Related Expense) rate, start and end dates, Pay Grade, Title, etc.
PAY END DATES – This tab displays a list of Facilities Management Pay End Dates, including Fiscal Year, Payroll Closed indicator and Split Payroll indicator.
TASK – This tab lists valid Task Codes and descriptions.
HRS TYPE – This tab displays the University payroll hours type codes.
EMP. CLASS – This tab displays the FM Employee Classification, its description, and the corresponding University Object Code.
ERE – This tab lists the Employee Related Expense Codes, percents and descriptions for the current fiscal year.
PHONE TYPE – This tab displays the Facilities Management Phone Type Codes and descriptions.
DISCIPLINARY – This tab displays all Disciplinary Codes used by Facilities Management.
COURSE/CLASS – This upper area of this tab displays the master list of available training courses, with the corresponding available classes for each course shown in the lower area of the tab.
CLASS CATEGORY – The upper area of this tab lists the Facilities Management Class Category codes (for employee training); the lower area shows the corresponding Next Reference Number for each level of a particular category.
CERTIFICATION/CLASS – The upper area of this tab displays information about available employee certifications, with information about classes needed for the selected certification displayed in the lower part of the tab.
CERT AGENCY/REQ’D FOR – The left side of this tab displays information about the agencies that provide employee certifications. The right side shows the Required For Codes and descriptions, which are used to denote which classes and certifications are required for which types of employees.
FISCAL YR – This tab displays a list of Fiscal Years, with Closed Flag, FRS closed date, beginning and ending dates, and Labor Hours for each year.
RECONCILED MONTHS – This tab displays a list of the months in the selected Fiscal Year, and indicates whether or not Labor and Operations expenses have been reconciled for each month.
157

OBJ CODE – This tab lists FRS Object Codes, their descriptions, etc.
158

HR/PAYROLL TABLE MAINTENANCE MODULE (Input)
PURPOSE: The HR/Payroll Table Maintenance module allows you to maintain “master” tables necessary for Human Resources and Payroll processing, such as Accounts, Object Codes, Pay End Dates, available training offered, etc. Some of these tables (i.e., Accounts) pertain to other modules as well. INSTRUCTIONS: To open this module, click on the HR/Payroll Table Maintenance Module icon (the pencil on the blue grid), or click “Maintenance” from the menu, then choose “H/R Payroll Table Maint”. The HR/Payroll Table Maintenance window will open.
DEPT. TABThis tab tracks all the University departments associated with Facilities Management. To add a department, right click and choose “Add” or “Insert” from the popup menu. This creates a blank line ready for your data entry. It contains the following columns:
Number – The 4-digit University Department Number. (RQ)Description – The description of the department, up to 40 alphanumeric characters. (RQ)
Right clicking in this tab will also give you the option of choosing “Delete” from the popup menu. USE THIS OPTION WITH EXTREME CAUTION. A department should not be deleted if it has actually been in use. The ONLY circumstance in which a department should be deleted is if you have just entered it and then discover that you made an error entering the Department Number.
159

PLEASE ADVISE MIS OF NEW DEPARTMENT NUMBERS. There are several reports they must modify in order to include the new Department.
ACCT. TABThis tab contains all University FRS Account Numbers used by Facilities Management or our customers. To add an account, right click and choose “Add” or “Insert” from the popup menu. This creates a blank line ready for your data entry. It contains the following columns:
Account Number – The 6-digit FRS Account Number. (RQ)Expense Fund Source Code – The 2-character code designating the type of account
(State, Local, Purchased Utilities AHSC, etc.). The code for Customer accounts is “NF” (Not FM). (RQ)
Delete Code – A 1-digit code designating whether or not this account is flagged for deletion in FRS. (RQ) Valid values are:
0 – (zero) The account is active.1 – The account is flagged for deletion and cannot be used.
Frozen Code – A 1-digit code designating whether or not this account is marked as “Frozen” (no activity allowed) in FRS. (RQ) Valid values are:
0 – (zero) The account is available for use.1 – The account is frozen and charges and encumbrances cannot
currently be posted to it.FM Account? – A checkbox column designating whether or not this is a Facilities
Management account. If the account belongs to FM, check this box. If the account belongs to another department, leave the box blank.
Include in FRS Reconcile? – A checkbox column designating whether or not this account should be included in the automated FRS reconciliation process. If the account needs to be reconciled and included in data gathering from FRS, check this box. Otherwise, leave it blank.
POSITION TABThis tab tracks all University Position Control Numbers used by Facilities Management. To update an existing PCN, either use the scroll bar to move through the rows until you find it, or type the 6-digit PCN in the white box at the top of the tab, then click the “Go to PCN” button. To add a new PCN, right click and choose “Add” or “Insert” from the popup menu. This creates a blank line ready for your data entry. This tab contains the following columns:
PCN – The 6-digit University Position Control Number. (RQ) Dept – The 4-digit FM department number to which the PCN is currently assigned. (RQ)ERE – The 1-digit ERE (Employee Related Expense) code assigned to the PCN. For a
listing of valid ERE codes, see the ERE tab. (RQ)Start Date – The PCN’s effective date, formatted MM/DD/YYYY. An employee cannot be
placed in a PCN before this date.End Date – The PCN’s end date, formatted MM/DD/YYYY. Only PCNs of short duration
(i.e., those for 1- or 2-year Extended Temporary Employees) have an end date.Paygrd – The 2-digit University Pay Grade assigned to the position. (RQ)Expt – The 1-character code indicating whether or not this position is eligible for overtime
as defined by the FLSA (Fair Labor Standards Act). (RQ) Valid values are: E – Exempt; this position cannot be paid for overtime.N – Non-exempt; this position can be paid for overtime.
Typ – The 1-character code indicating the type of position. (RQ) Valid values are: R – Regular; a full time position (1.0 FTE) held by only one employee. P – Pool; this position may be more than 1.0 FTE and multiple employees can
hold this position. These are often student positions.160

T – Temporary; this position exists on a temporary basis.Stat – The 1-character code indicating the status of this position. (RQ) Valid values are:
A – Active D – Deleted F – Frozen; you cannot currently place an employee in this position, but it may
become available for use later. Status Date – The date a PCN was frozen, formatted MM/DD/YYYY.Title – The descriptive title assigned by the University to this PCN, up to 70 alphanumeric
characters.
Right clicking in this tab will also give you the option of choosing “Delete” from the popup menu. USE THIS OPTION WITH EXTREME CAUTION. A position should not be deleted if it has actually been in use. Instead, its Status should be set to “D” for “Deleted”. The ONLY circumstance in which a position should be deleted is if you have just entered it and then discover that you made an error entering the PCN.
PAYEND DATES TABThis tab lists all Facilities Management Pay End (payroll close) Dates. The FM Pay End date is actually two days prior to the University’s Pay End Date. Employee time cannot be entered for a Pay End Date that does not exist in this table, so all pay end dates are set up in advance prior to the start of a new fiscal year. To add a new pay end date, right click and choose “Add” or “Insert” from the popup menu. This creates a blank line ready for your data entry. This tab contains the following columns:
Payend Date – The Facilities Management pay end date, formatted MM/DD/YYYY. (RQ)Fiscal Year – The 4-digit fiscal year this pay end date falls into. (RQ)Payroll Closed – A Yes or No (“Y” or “N”) column indicating whether or not payroll is
closed for this date. The system sets this column to “Y” when the payroll has closed successfully. If a payroll is closed, any corrections required must be done through the Journal Entry process (see the JOURNAL ENTRY MODULE section for more information). (View only)
Split Payroll – A 1-digit column indicating whether or not the pay period is a split payroll, where an employee is typically paid at one rate for the first part of the pay period, and at a different rate for the second part of the pay period. This usually occurs when the fiscal year ends in the middle of a pay period, or due to University-wide compensation increases such as Merit or General adjustment that fall in the middle of a pay period. On split payrolls, this column contains a 1 for the first “dummy” pay end date and a 2 for the second pay end date (the actual payroll close date). If the payroll is not split, this column remains blank. MIS MUST BE INFORMED OF ALL SPLIT PAYROLLS, since they must perform additional processing to change the employee pay rates.
Right clicking in this tab will also give you the option of choosing “Delete” from the popup menu. USE THIS OPTION WITH EXTREME CAUTION. Pay end dates for a fiscal year that is still open should never be deleted, unless you have just entered a date and then discover that it is incorrect.
TASK TABThis tab tracks all Task Identification Codes used by Facilities Management. A Task ID identifies a particular type of work. To add a new Task ID, right click and choose “Add” or “Insert” from the popup menu. This creates a blank line ready for your data entry. This tab contains the following columns:
Code – The 6-digit Task ID. FM Payroll and/or the FM Department that will be using it determine the code. (RQ) The leading digit has the following significance:1 – Routine tasks
161

2 – Standing Service Request tasks3 – Pay codes (i.e., Vacation, Sick, etc.)4 – Estimate Job tasks5 – Building Renewal tasks6 – Insurance claim tasks8 – Preventive Maintenance tasks9 – PM generated tasks (additional problems discovered during a PM)
Description – The description assigned to the Task ID, up to 25 alphanumeric characters. (RQ)
Right clicking in this tab will also give you the option of choosing “Delete” from the popup menu. USE THIS OPTION WITH EXTREME CAUTION. A Task should not be deleted if it has actually been in use. The ONLY circumstance in which a Task should be deleted is if you have just entered it and then discover that you made an error entering the Task ID.
HRS TYPE TABThis tab tracks all University Hours Types that can be processed by Main Payroll. An Hours Type Code is required on each payroll transaction. To add a new Hours Type, right click and choose “Add” or “Insert” from the popup menu. This creates a blank line ready for your data entry. PLEASE ADVISE MIS OF ADDITIONS TO THIS TAB, since they will need to make changes to the Payroll module in order to handle the new Hours Type correctly. This tab contains the following columns:
Code – The Hours Type Code determined by University Main Payroll, up to 3 alphanumeric characters. (RQ)
Description – The description of this Hours Type Code, up to 25 alphanumeric characters. (RQ)
Type of Hours – A 1-character column indicating whether or not this type of hours is included as part of the regular, standard 40-hour work week. This indicator is used as part of the payroll audit process to ensure that full-time employees have at least 40 regular hours recorded for the pay period. Valid values are:
R – This hours type is part of the standard 40-hour work weekblank – This hours type is not part of the standard work week.
Active/Inactive – A 1-character column indicating whether or not this Hours Type Code is currently in use. Valid values are:
A – ActiveI – Inactive. Payroll hours submitted with this Hours Type Code will be
rejected.
Right clicking in this tab will also give you the option of choosing “Delete” from the popup menu. USE THIS OPTION WITH EXTREME CAUTION. An Hours Type should not be deleted if it has actually been in use. Instead, its Active/Inactive flag should be set to “I” for Inactive. The ONLY circumstance in which an Hours Type should be deleted is if you have just entered it and then discover that you made an error entering the Hours Type Code.
EMP. CLASS TABThis tab tracks Facilities Management’s Employee Classifications, which relate to the FRS Object Code from which employees are paid based on the category of employment for their PCN. To add a new Employee Class, right click and choose “Add” or “Insert” from the popup menu. This creates a blank line ready for your data entry. PLEASE ADVISE MIS OF ADDITIONS TO THIS TAB, since they will need to make changes to the Payroll module in order to handle the new Employee Class correctly. This tab contains the following columns:
162

Emp Class – The 3-digit code indicating the category of employee. This is the first 3 digits of the corresponding FRS Object Code. (RQ)
Class Description – The description of this Employee Class, up to 20 alphanumeric characters. (RQ)
Obj Code – The 4-digit FRS Object Code from which employees with this class will be paid.
Right clicking in this tab will also give you the option of choosing “Delete” from the popup menu. USE THIS OPTION WITH EXTREME CAUTION. An Employee Class should not be deleted if it has actually been in use. The ONLY circumstance in which an Employee Class should be deleted is if you have just entered it and then discover that you made an error entering the 3-digit Employee Class code.
ERE TABThis tab tracks the ERE (Employee Related Expense) percentages for each type of employee for the current fiscal year. ERE percents are calculated for each fiscal year by the University and are designed to cover the overhead expenses (such as health insurance, etc.) associated with employees above and beyond their actual rate of pay. Funding of ERE for state-funded employees is provided by the University from the ERE pool. Departments are responsible for ERE on local- and grant-funded employees. To add a new ERE code, right click and choose “Add” or “Insert” from the popup menu. This creates a blank line ready for your data entry. PLEASE ADVISE MIS WHEN YOU ARE READY TO ENTER ERE FOR A NEW FISCAL YEAR, since they must copy the rates for the old fiscal year to a history table before you enter the new rates. This tab contains the following columns:
Code – The 2-digit code indicating the category of employee. (RQ)Percent – The ERE percent for the current fiscal year for this category of employee, with
4 decimal places (for example, 3.1% is formatted as 0.0310). (RQ)Description – The description of the employee category, up to 25 alphanumeric
characters. (RQ)
Right clicking in this tab will also give you the option of choosing “Delete” from the popup menu. USE THIS OPTION WITH EXTREME CAUTION. An ERE Code should not be deleted if it has actually been in use. The ONLY circumstance in which an ERE Code should be deleted is if you have just entered it and then discover that you made an error entering the ERE Code.
PHONE TYPE TAB This tab tracks the Phone Types used by Facilities Management. To add a new phone type, right click and choose “Add” or “Insert” from the popup menu. This creates a blank line ready for your data entry. This tab contains the following columns:
Phone Type – The code assigned to a particular phone type, up to 2 alphanumeric characters. (RQ)
Description – The description of the phone type, up to 25 alphanumeric characters.
Right clicking in this tab will also give you the option of choosing “Delete” from the popup menu. USE THIS OPTION WITH EXTREME CAUTION. A phone type should not be deleted if it has actually been in use. The ONLY circumstance in which a phone type should be deleted is if you have just entered it and then discover that you made an error entering the Phone Type code.
163

DISCIPLINARY TABThis tab tracks the Disciplinary Codes used by Facilities Management. To add a new disciplinary code, right click and choose “Add” or “Insert” from the popup menu. This creates a blank line ready for your data entry. This tab contains the following columns:
Disciplinary Code – The code assigned by FM to this type of disciplinary action, up to 7 alphanumeric characters. (RQ)
Description – The description of this disciplinary action, up to 100 alphanumeric characters. (RQ)
Right clicking in this tab will also give you the option of choosing “Delete” from the popup menu. USE THIS OPTION WITH EXTREME CAUTION. A disciplinary code should not be deleted if it has actually been in use. The ONLY circumstance in which a disciplinary code should be deleted is if you have just entered it and then discover that you made an error entering the code.
COURSE/CLASS TABThis tab includes two areas. The upper area tracks all training courses available to FM employees. The lower area tracks the specific dates each class is offered. To add a new course, right click in the Course Master area and choose “Add” or “Insert” from the popup menu. This creates a blank line ready for your data entry. The Course Master area contains the following columns:
Class Name – The name of the course, up to 50 alphanumeric characters. (RQ)Category – A drop down list of valid course categories. (RQ) To add a new category, see
the instructions for the CATEGORY TAB.Level – The 1-digit level of this course, with 1 being the most basic and 9 the most
advanced. (RQ)Refcode – The system-assigned Reference Code for this course. Reference Codes
consist of the 3-character Category Code, the Level, and the next available sequential number for that category and level. (View only)
Description – The description of this course, up to 255 alphanumeric characters. (RQ)Hours – The number of hours this course meets, with no decimal places (whole hours
only). (RQ)Require For – A dropdown list of types of employees who are required to take this
course. To add a new Require For type, see the instructions for the CERT AGENCY/REQ’D FOR TAB.
Credits – The number of credits this course carries, up to 99.
To add a new offering of a course, click on that course to selected it, then right click in the Classes Offered area and choose “Add” or “Insert” from the popup menu. This creates a blank line ready for your data entry. The Classes Offered area contains the following columns:
Course – The Reference Code of the course selected in the Course Master area of the tab (view only).
Offered Datetime – The date and time the class is offered, formatted MM/DD/YYYY hh:mm. Date is required, but time can be left as the default of 12:00 AM. If you enter the time, you must use a 24-hour clock format (i.e., 1:00 p.m. is entered as 13:00).
Location – The location of the class, up to 30 alphanumeric characters.Instructor Name – The name of the instructor, up to 40 alphanumeric characters.Cost – The cost of the class per student, up to 9,999,999.99.Max Students – The maximum number of students who may enroll in the class, up to
999.Phone Number – The area code and phone number for class registration.
The Course Master rows are sorted by Reference Code, while the Class Offered rows are sorted by Offered Datetime. To sort the rows in a different order, click on the column heading you want to sort by.
164

You cannot delete a Course Master row. You can delete a Class Offered row, as long as no employees are signed up for that class, by right clicking on the row and choosing “Delete” from the popup menu.
CLASS CATEGORY TABThis tab includes two areas. The upper area tracks the Category Codes that can be assigned to training courses for FM employees. The lower area tracks the Reference Codes which are assigned to identify each course. To add a new Category, right click in the Categories area and choose “Add” or “Insert” from the popup menu. This creates a blank line ready for your data entry. The Categories area contains the following columns:
Category – The name of this category of training course, up to 15 alphanumeric characters. (RQ)
Category Code – The 3-character code for this category. This will become the first 3 characters of the Reference Code for all courses in this category. (RQ)
The system uses the information in the Corresponding Ref Code Numbers area to automatically assign a Reference Code when you add a new course in a particular category. To establish Reference Codes for a new Category, or a new level of classes within an existing Category, click on the Category in the Categories area to selected it, then right click in the Corresponding Ref Code Numbers area and choose “Add” or “Insert” from the popup menu. This creates a blank line ready for your data entry. The Corresponding Ref Code Numbers area contains the following columns:
Class Level – The 1-digit level of training, with 1 being the most basic and 9 the most advanced. (RQ)
Next Nbr – The next available 2-digit number to be assigned as part of a Reference Code for a new course in the selected Category with the Class Level specified above. Normally, this would be 00 for a newly established Category or Level. The system automatically increments this number as Course Master rows are added (see COURSE/CLASS TAB, above). (RQ)
CERTIFICATIONS TABThis tab includes two areas. The upper area tracks the certifications that are available to Facilities Management employees. The lower area tracks the classes which are required in order to obtain or renew a particular certification. To add a new certification, right click in the Certifications area and choose “Add” or “Insert” from the popup menu. This creates a blank line ready for your data entry. The Certifications area contains the following columns:
Cert ID – The 5-digit system-assigned number that identifies this certification. (View only)Description – The description of this certification, up to 255 alphanumeric characters.
(RQ)Category – The category that applies to this certification, up to 15 alphanumeric
characters.Require For – A dropdown list of types or groups of employees who are required to carry
this certification. To add a new type or group to this list, see the instructions for the CERT AGENCY/REQ’D FOR TAB below.
Agency – A dropdown list of all certifying agencies FM has on record. To add a new agency to this list, see the instructions for the CERT AGENCY/REQ’D FOR TAB below.
Right clicking in this tab will also give you the option of choosing “Delete” from the popup menu. However, if you attempt to delete certifications that are currently held by one or more employees, the system will display an error message to that effect and the certification will not be deleted.
165

To specify the FM courses that are required for a certification, click on the certification in the Certifications area to selected it, then right click in the Certification Classes area and choose “Add” or “Insert” from the popup menu. This creates a blank line ready for your data entry. The Certification Classes area contains the following columns:
Cert Class ID – The 9-digit system-assigned number that identifies this certification-class combination. (View only)
Cert ID – The 5-digit number that identifies the selected certification. Refcode – A dropdown list of the 6-character Reference Codes and their corresponding
Course Names for all available courses. Select the Reference Code of the required course for this certification. (RQ)
Provider Name – The name of the provider of this course, up to 60 alphanumeric characters.
Provider Address – The street address of the provider of this course, up to 255 alphanumeric characters.
Provider City – The city where the provider is located, up to 30 alphanumeric characters.Provider State – The 2-character alpha designation of the state where the provider is
located.Provider Zip – The zip code of the provider’s mailing address, either 5 or 9 digits.Provider Phone – The 10-digit area code and phone number of the provider.Provider Contact – The name of the contact person at the provider of this course, up to
60 alphanumeric characters.
Right clicking in this tab will also give you the option of choosing “Delete” from the popup menu. USE THIS OPTION WITH CAUTION, since you will have to re-enter the information if you deleted it in error.
CERT AGENCY/REQ’D FOR TABThis tab includes two areas. The area at the left of the tab tracks the certifying agencies that may grant certifications to Facilities Management employees. The area on the right (Required For Codes) tracks the types or groups of employees who may need to take a particular training course or obtain a particular certification. To view an existing certifying agency, either enter the Agency ID in the white box to the right of the words “Agency ID”, or enter all or part of the agency name in the white box to the right of the words “Agency Name”, then press ENTER. If the system finds a matching agency, its information will display. Otherwise, the system displays the message “No Agencies found with your selection”. To add a new certifying agency, right click in the left area of the tab and choose “Add” or “Insert” from the popup menu. This creates a blank line ready for your data entry. The area contains the following columns:
Agency ID – The 9-digit system-assigned number that identifies this agency. (View only)Name – The name of the certifying agency, up to 60 alphanumeric characters. (RQ)Address – The street address of the agency, up to 255 alphanumeric characters. (RQ)City – The city where the agency is located, up to 30 alphanumeric characters. (RQ)State – The 2-character alpha designation of the state where the agency is located. (RQ)Zip – The zip code of the agency’s mailing address, either 5 or 9 digits. (RQ)Phone – The 10-digit area code and phone number of the agency. (RQ)Contact – The name of the contact person at this certifying agency, up to 60
alphanumeric characters.
Right clicking in this tab will also give you the option of choosing “Delete” from the popup menu. However, if you attempt to delete a certifying agency that is listed for one or more certifications, the system will display an error message to that effect and the agency will not be deleted.
166

To add a new type or group of employees who may be required to take a certain course or obtain a particular certification, right click in the Required For Codes area and choose “Add” or “Insert” from the popup menu. This creates a blank line ready for your data entry. You can click on the column headings to sort the rows in that order. The Required For Codes area contains the following columns:
Code – The code identifying this type or group of employees, up to 2 alphanumeric characters. (RQ)
Required For Description – The description of this type or group, up to 30 alphanumeric characters. (RQ)
FISCAL YR TABInformation for a new fiscal year must be set up before any other data can be entered for that fiscal year. An Accounting Manager usually enters this information. To add a new fiscal year, right click in the tab and choose “Add” or “Insert” from the popup menu. This creates a blank line ready for your data entry. The Fiscal Year tab contains the following columns:
Fy – The 4-digit fiscal year, which ends on June 30th. For example, fiscal year 1999 ends on June 30th 1999. (RQ)
Closed Flag – A Yes or No (Y or N) column indicating whether or not transactions can be posted to this fiscal year. A “Y” denotes that no more transactions may be posted. A “N” (the default) indicates that transactions may still be processed in that year. (RQ)
Frs Closed Date – The date that the main University accounting system (FRS) plans to close the University ledgers. (RQ)
Fiscal Year Begin – The first date of the fiscal year, formatted MM/DD/YYYY. The system automatically defaults this date to July 1 of the year prior to the fiscal year itself. (RQ)
Fiscal Year End – The last date and time of the fiscal year, formatted MM/DD/YYYY hh:mm:ss with the time must entered using a 24-hour clock format (i.e., 11:59 p.m. is entered as 23:59:59). The system automatically defaults this to June 30 of the entered fiscal year at 11:59 p.m. (RQ)
Labor Hours – The number of straight-time hours available in the current fiscal year for a full-time employee. This number can change from year to year and is usually obtained from Main Payroll’s calendar schedule.
RECONCILED MONTHS TABEach month after Cost Accounting and Payroll personnel have completed the reconciliation of FIMA to FRS, that month is declared to be Closed (reconciled) so that no additional transactions can be posted to it. Each closed month must be recorded in FIMA so the system can display an error message if someone attempts to post a transaction to a closed month. To access the reconciled months for a fiscal year, first type the 4-digit fiscal year in the white box to the right of the words “Fiscal Year”, then press ENTER. Any existing reconciled months for that year are displayed. A month that has been closed can be re-opened, if necessary. To mark a new month as Closed, right click in the tab and choose “Add” or “Insert” from the popup menu. This creates a blank line ready for your data entry. The Reconciled Months tab contains the following columns:
Year – The 4-digit calendar (not fiscal) year of the reconciled month. (RQ)Month – The 2-digit month. (RQ)Expense Type (L or M) – An “L” in this column indicates Labor transactions, while an “M”
designates Operations (anything other than Labor) transactions. (RQ)Reconciled? – A check box indicating whether or not the indicated type of transactions
have been reconciled for this month. If the box is checked, all FM accounts have been reconciled to FRS for this type of transaction and no additional transactions
167

can be posted. If it is not checked, transactions of this type can be posted to this month and year. (RQ)
OBJ CODE TABThis tab contains all University FRS Object Codes used by Facilities Management or our customers. Object Codes designate a particular category of expense. To add an Object Code, right click and choose “Add” or “Insert” from the popup menu. This creates a blank line ready for your data entry. It contains the following columns:
Object Code – The University FRS Object Code, up to 4 digits. (RQ)Description – The description of this Object Code, up to 50 alphanumeric characters.
(RQ)Billable Code – A Yes or No (“Y” or “N”) column designating whether or not expenses
with this Object Code can be billed out to a customer. A “Y” in this column indicates that expenses can be billed. (RQ)
Deleted Code – A Yes or No (“Y” or “N”) column designating whether or not this Object Code is flagged for deletion by FRS. A “Y” in this column indicates that it is flagged for deletion and should not be used.
Frozen Code – A Yes or No (“Y” or “N”) column designating whether or not this Object Code is temporarily flagged as Frozen by FRS. A “Y” in this column indicates that it is flagged as Frozen and should not be used at this time.
FM Obj Code? – A checkbox column indicating whether or not Facilities Management uses this Object Code for our own expenses. A “Y” in this column indicates that we do expense to this Object Code.
Include in FRS Reconcile? – A checkbox column indicating whether or not encumbrances and expenses with this Object Code should be included in the automated FRS Reconciliation. A “Y” in this column indicates that these expenses should be included.
168

EQUIPMENT/DIRECT EXPENSE TABLE MAINTENANCE MODULE (Inquiry)
To open this module, click on the Equip. Table Maintenance Module icon (the little arrows), or click “Maintenance” from the menu, then choose “Equip Table Maint”. The Equipment/Direct Expense Table Maintenance window will open.
On the left side of the window, the Equipment/Direct Expense Table Maintenance window displays a list of tables that are used in the Equipment Expenses and Direct Expenses modules. Clicking on a table name to select it displays the contents of that table on the right side of the window. Clicking on any column header in the right side of the window sorts the rows in order by that column. You can view the following tables in this module:
EQUIPMENT DISPOSITION TYPES – A list of the Equipment Disposition Type codes and their corresponding descriptions.
EQUIPMENT MAINTENANCE CODES – A list of Equipment Maintenance Codes and their corresponding descriptions.
EQUIPMENT MANUFACTURER – A list of Equipment Manufacturer ID numbers and their corresponding manufacturer names.
EQUIPMENT PART SPECIFICATIONS – Information about parts that may be used to maintain equipment, including a sequential ID number, the Equipment ID, Part ID, approximate cost, and where the part can be bought.
EQUIPMENT PARTS – A list of Equipment Part IDs and their corresponding descriptions.
EQUIPMENT TABLE MAINTENANCE – A list of the tables that can be maintained via this module. This includes a sequential ID number, the description that appears on the left side of this window, and the actual name of the table in the database.
EQUIPMENT TELECOM LOOKUP – A list of FRS Account Numbers and corresponding Job Numbers, Shops, Service Request Numbers, Task IDs, and Document Numbers that is used in running Telephone Toll Uploads (see the DIRECT EXPENSES MODULE section for more information).
EQUIPMENT TYPE – A list of Equipment Type ID numbers and their corresponding descriptions. Also included is a flag to designate whether the type relates to a vehicle, and the Vehicle Category Code.
GARAGE ACCOUNT-JOB CROSS REF – A list of FRS Account Numbers and corresponding Job Numbers and Service Request Numbers, used in running the Garage Upload (see the EQUIPMENT EXPENSES MODULE section for more information).
GARAGE UPLOAD FILTER – A list of the Charge Types that can be found in the Garage Upload file, with a flag designating whether or not to process that type of charge.
VEHICLE CATEGORY – A list of Vehicle Category Codes and their corresponding descriptions.
VEHICLE FUEL CONFIGURATION – A list of Fuel Configuration Codes and their corresponding descriptions.
VEHICLE FUEL TYPE – A list of Fuel Type Codes and their corresponding descriptions.
169

EQUIPMENT/DIRECT EXPENSE TABLE MAINTENANCE MODULE (Input)
PURPOSE: The Equipment/Direct Expense Table Maintenance module allows you to maintain “master” tables necessary for Equipment Expenses and Direct Expenses processing, including the list of tables available for maintenance in this module.
INSTRUCTIONS: To open this module, click on the Equip. Table Maintenance Module icon (the little arrows), or click “Maintenance” from the menu, then choose “Equip Table Maint”. The Equipment/Direct Expense Table Maintenance window will open. The left side of the window displays a list of the tables that can be maintained. Clicking on a table name to select it displays the contents of that table on the right side of the window (the first table, Equipment Disposition Types, is displayed when you open the window). Clicking on any column header in the right side of the window sorts the rows in order by that column.
You can maintain the following tables in this module:
170
EQUIPMENT DISPOSITION TYPES This table lists all valid Equipment Disposition Types that can be used to explain why we no longer own a piece of equipment. To add a new Disposition Type, right click in the right side of the window and choose “Add” or “Insert” from the popup menu. This creates a blank line ready for your data entry. It contains the following columns:
Disp Type Id – The system-assigned sequential number (up to 3 digits) that identifies this Equipment Disposition Type. (View only; if you enter a number in this column, it will be ignored.)
Description – The description of this Disposition Type, up to 16 alphanumeric characters.
Right clicking in this area will also give you the option of choosing “Delete” from the popup menu. USE THIS OPTION WITH EXTREME CAUTION. A Disposition Type should not be deleted if it has actually been in use. The ONLY circumstance in which a Disposition Type should be deleted is if you have just entered it and then discover you should not have added it after all (for example, it is a duplicate of an existing record).
EQUIPMENT MAINTENANCE CODESThis table lists all valid Equipment Maintenance Codes that can be used on the Maintenance tab of the Equipment module to set up a maintenance schedule for a particular piece of equipment. To add a new Maintenance Code, right click in the right side of the window and choose “Add” or “Insert” from the popup menu. This creates a blank line ready for your data entry. It contains the following columns:
Maint Code Seq – The system-assigned sequential number (up to 5 digits) that identifies this Equipment Maintenance Code. (View only; if you enter a number in this column, it will be ignored.)
Maint Code Desc – The description of this Maintenance Code (i.e., the task that should be performed), up to 50 alphanumeric characters.
Right clicking in this area will also give you the option of choosing “Delete” from the popup menu. USE THIS OPTION WITH EXTREME CAUTION. A Maintenance Code should not be deleted if it has actually been in use. The ONLY circumstance in which a Maintenance Code should be deleted is if you have just entered it and then discover you should not have added it after all (for example, it is a duplicate of an existing record).
EQUIPMENT MANUFACTURERThis table lists all Equipment Manufacturers that can be used in the Equipment module. To add a new manufacturer, right click in the right side of the window and choose “Add” or “Insert” from the popup menu. This creates a blank line ready for your data entry. It contains the following columns:
Eq Mfg – The system-assigned sequential number (up to 5 digits) that identifies this Equipment Manufacturer. (View only; if you enter a number in this column, it will be ignored.)
Eq Manufacturer – The name of this manufacturer, up to 30 alphanumeric characters.
Right clicking in this area will also give you the option of choosing “Delete” from the popup menu. USE THIS OPTION WITH EXTREME CAUTION. An Equipment Manufacturer should not be deleted if it has actually been in use. The ONLY circumstance in which a manufacturer should be deleted is if you have just entered it and then discover you should not have added it after all (for example, it is a duplicate of an existing record).
171
EQUIPMENT PART SPECIFICATIONSThis table contains information about parts that may be used to maintain particular pieces of equipment. To add a new parts specification, right click in the right side of the window and choose “Add” or “Insert” from the popup menu. This creates a blank line ready for your data entry. It contains the following columns:
Equip Part Spec Id – The system-assigned sequential number (up to 11 digits) that identifies this Equipment Part Specification. (View only; if you enter a number in this column, it will be ignored.)
Equipment Id – The 9-digit Equipment ID Number of the piece of equipment this part specification relates to. (RQ)
Equip Part Id – The 7-digit Equipment Part ID Number designating the part to be used. To add a new Equipment Part, see the instructions for the EQUIPMENT PART TYPE table below. (RQ)
Approximate Cost – The approximate cost of the part, with 2 decimal places.Purch Location – A description of where this part can be purchased, up to 32
alphanumeric characters.Cmnt – Any comments about this part specification, up to 32 alphanumeric characters.
Right clicking in this area will also give you the option of choosing “Delete” from the popup menu. USE THIS OPTION WITH EXTREME CAUTION. An Equipment Part Specification should not be deleted if it has actually been in use. The ONLY circumstance in which a part specification should be deleted is if you have just entered it and then discover you should not have added it after all (for example, it is a duplicate of an existing record).
EQUIPMENT PARTSThis table lists all Equipment Parts that can be used in the Equipment module. To add a new part, right click in the right side of the window and choose “Add” or “Insert” from the popup menu. This creates a blank line ready for your data entry. It contains the following columns:
Equip Part Id – The system-assigned sequential number (up to 7 digits) that identifies this Equipment Part. (View only; if you enter a number in this column, it will be ignored.)
Equipt Part Desc – The description of this part, up to 32 alphanumeric characters.
Right clicking in this area will also give you the option of choosing “Delete” from the popup menu. USE THIS OPTION WITH EXTREME CAUTION. An Equipment Part should not be deleted if it has actually been in use. The ONLY circumstance in which a part should be deleted is if you have just entered it and then discover you should not have added it after all (for example, it is a duplicate of an existing record).
EQUIPMENT TABLE MAINTENANCEThis table lists all the tables in the Equipment and Direct Expense modules that can be maintained using this module (Equipment Table Maintenance). MIS is responsible for maintaining this list. To add a new table, right click in the right side of the window and choose “Add” or “Insert” from the popup menu. This creates a blank line ready for your data entry. It contains the following columns:
Equip Tbl Maint Id – The system-assigned sequential number (up to 5 digits) that identifies this Equipment or Direct Expense table. (View only; if you enter a number in this column, it will be ignored.)
Maint Desc – The description of this table, up to 60 alphanumeric characters. (RQ)Maint Table – The actual name of the table in the database, up to 30 alphanumeric
characters. (RQ)
172

Right clicking in this area will also give you the option of choosing “Delete” from the popup menu. USE THIS OPTION WITH EXTREME CAUTION. A table should not be deleted if it has actually been in use. The ONLY circumstance in which a table should be deleted is if you have just entered it and then discover you should not have added it after all (for example, it is a duplicate of an existing record).
EQUIPMENT TELECOM LOOKUPThis table lists the information associated with FRS Accounts that are used in running Telephone Toll Uploads (see the DIRECT EXPENSE MODULE section for more information). To add a new FRS Account, right click in the right side of the window and choose “Add” or “Insert” from the popup menu. This creates a blank line ready for your data entry. It contains the following columns:
Acct Nbr – The 6-digit FRS Account Number. (RQ)Job Nbr – The Job Number associated with this account, up to 10 alphanumeric
characters. (RQ)Shop – The Shop associated with this account, up to 10 characters (currently, all FIMA
Shop Number are 3 digits). (RQ)Sr Nbr – The Service Request Number associated with this account.Task Id – The 6-digit Task ID Number associated with this account.Doc Nbr – The Document Number associated with this account, up to 16 alphanumeric
characters.
Right clicking in this area will also give you the option of choosing “Delete” from the popup menu. USE THIS OPTION WITH EXTREME CAUTION. If an account number is not found in this table during the Telephone Toll Upload process, transactions containing that account will be rejected.
EQUIPMENT TYPESThis table lists all Equipment Types that can be used in the Equipment module. To add a new type, right click in the right side of the window and choose “Add” or “Insert” from the popup menu. This creates a blank line ready for your data entry. It contains the following columns:
Eq Type – The system-assigned sequential number (up to 5 digits) that identifies this Equipment Type. (View only; if you enter a number in this column, it will be ignored.)
Eq Type Desc – The description of this type, up to 30 alphanumeric characters.Eq Is Vehicle – A 1-character column designating whether or not this Equipment Type
represents a category of vehicles. Valid values are:Y – This is a type of vehicle.blank – This is not a vehicle.
Eq Veh Cat Code – The 4-character Vehicle Category Code, if this Equipment Type represents a category of vehicles. To add a new code, see the instructions for the VEHICLE CATEGORY table below.
Right clicking in this area will also give you the option of choosing “Delete” from the popup menu. USE THIS OPTION WITH EXTREME CAUTION. An Equipment Type should not be deleted if it has actually been in use. The ONLY circumstance in which a type should be deleted is if you have just entered it and then discover you should not have added it after all (for example, it is a duplicate of an existing record).
173

GARAGE ACCOUNT-JOB CROSS REFThis table lists the Job Numbers and Service Request Numbers that are assigned to certain Garage Upload transactions based on the FRS Account being charged (see “Running the Garage Upload” in the EQUIPMENT EXPENSES MODULE section for more information). To add a new FRS Account, right click in the right side of the window and choose “Add” or “Insert” from the popup menu. This creates a blank line ready for your data entry. It contains the following columns:
Acct Nbr – The 6-digit FRS Account Number. (RQ)Job Nbr – The Job Number associated with this account, up to 10 alphanumeric
characters. Sr Nbr – The Service Request Number associated with this account.
Right clicking in this area will also give you the option of choosing “Delete” from the popup menu. USE THIS OPTION WITH EXTREME CAUTION. If an account number is not found in this table during the Garage Upload process, transactions containing that account will be rejected.
GARAGE UPLOAD FILTERThis table lists the specific values in the 2nd Reference column of the FRS Reconciliation table that will be used to include records from that table in the Garage Upload process (see “Running the Garage Upload” in the EQUIPMENT EXPENSES MODULE section for more information). MIS is responsible for maintaining this information. To add data to this table, right click in the right side of the window and choose “Add” or “Insert” from the popup menu. This creates a blank line ready for your data entry. It contains the following columns:
Charge Type – The specific characters in the 2nd Reference field that may mark that record for inclusion in the Garage Upload process, up to 10 alphanumeric characters. These characters generally denote a particular type of Garage charge. (RQ)
Use Charge – A Yes or No (“Y” or “N”) column designating whether or not the Charge Type listed above will mark that record for inclusion. A “Y” in this column means the record will be included in the Garage Upload process; an “N” means it will not be included.
Right clicking in this area will also give you the option of choosing “Delete” from the popup menu. USE THIS OPTION WITH EXTREME CAUTION. Rows should not be deleted if they are currently not to be included in the Garage Upload process. Instead, rows that should no longer be included should have their Use Charge column set to “N”.
VEHICLE CATEGORYThis table lists all Vehicle Categories that can be used in the Equipment module. To add a new vehicle category, right click in the right side of the window and choose “Add” or “Insert” from the popup menu. This creates a blank line ready for your data entry. It contains the following columns:
Veh Catg Code – The code designating this category of vehicle, up to 4 alphanumeric characters. (RQ)
Veh Catg Desc – The description of this vehicle category, up to 30 alphanumeric characters.
Right clicking in this area will also give you the option of choosing “Delete” from the popup menu. USE THIS OPTION WITH EXTREME CAUTION. A Vehicle Category should not be deleted if it has actually been in use. The ONLY circumstance in which a category should be deleted is if you have just entered it and then discover you should not have added it after all (for example, it is a duplicate of an existing record).
174

VEHICLE FUEL CONFIGURATIONThis table lists all Vehicle Fuel Configuration codes that can be used in the Equipment module. To add a new fuel configuration, right click in the right side of the window and choose “Add” or “Insert” from the popup menu. This creates a blank line ready for your data entry. It contains the following columns:
Fuel Conf Code – The code designating this fuel configuration, up to 4 alphanumeric characters. (RQ)
Fuel Conf Desc – The description of this fuel configuration, up to 30 alphanumeric characters.
Right clicking in this area will also give you the option of choosing “Delete” from the popup menu. USE THIS OPTION WITH EXTREME CAUTION. A Fuel Configuration should not be deleted if it has actually been in use. The ONLY circumstance in which it should be deleted is if you have just entered it and then discover you should not have added it after all (for example, it is a duplicate of an existing record).
VEHICLE FUEL TYPEThis table lists all Vehicle Fuel Types that can be used in the Equipment module. To add a new fuel type, right click in the right side of the window and choose “Add” or “Insert” from the popup menu. This creates a blank line ready for your data entry. It contains the following columns:
Fuel Type Code – The code designating this type of fuel, up to 4 alphanumeric characters. (RQ)
Fuel Type Desc – The description of this type of fuel, up to 30 alphanumeric characters.
Right clicking in this area will also give you the option of choosing “Delete” from the popup menu. USE THIS OPTION WITH EXTREME CAUTION. A Fuel Type should not be deleted if it has actually been in use. The ONLY circumstance in which it should be deleted is if you have just entered it and then discover you should not have added it after all (for example, it is a duplicate of an existing record).
175

COST CENTER MAINTENANCE MODULE (Inquiry)
To open this module, click on the Cost Center/Manager Maintenance Module icon (the person lifting a box), or click “Maintenance” from the menu, then choose “Cost Center Maintenance”. The Cost Center Maintenance window will open.
The Cost Center Maintenance Module includes the following tabs:
COST CENTERS – The Sorting Code column on this tab determines in what order the corresponding Cost Center Descriptions will be listed on the "Utility Jobs Ops Budget vs. Exp by Manager" report.
JOB MANAGERS – The information on this tab is also used on the "Utility Jobs Ops Budget vs. Exp by Manager" report. It lists the Employee Number and name of each person responsible for specific Utilities projects, along with the Facilities Management Job Number and the Cost Center for that Job.
176

COST CENTER MAINTENANCE MODULE (Input)
PURPOSE: The Cost Center Maintenance module allows you to maintain information that is used on the “Utility Jobs Ops Budget vs. Exp by Manager” report. This information specifies Cost Centers for various Utilities Jobs, and the employee who is responsible for managing each of those Jobs.
INSTRUCTIONS: To open this module, click on the Cost Center/Manager Maintenance Module icon (the person lifting a box), or click “Maintenance” from the menu, then choose “Cost Center Maintenance”. The Cost Center Maintenance window will open.
COST CENTERS TABThe information on this tab specifies the valid Cost Centers and determines the order in which they appear on the report. To add a new Cost Center, right click and choose “Add” or “Insert” from the popup menu. This creates a blank line ready for your data entry. This tab contains the following columns:
Sorting Code – The number specifying where this Cost Center should appear on the report. The report sorts Cost Centers sequentially by this number (from lowest to highest). (RQ)
Cost Center Description – The description of this Cost Center, up to 30 alphanumeric characters. (RQ)
177

Right clicking in this tab also gives you the option of choosing “Delete” from the popup menu, if you are sure a particular Cost Center will no longer be used.
JOB MANAGERS TABThe information on this tab assigns a Cost Center and a manager to Utilities Jobs. To add a new Job to this list, right click and choose “Add” or “Insert” from the popup menu. This creates a blank line ready for your data entry. This tab contains the following columns:
Employee Number – The FM Employee Number (up to 5 digits) of the person managing this Job. If you entered a valid Employee Number, the system automatically dis-plays that employee’s last name, first name, and middle initial to the right of this column. (RQ)
Job Nbr – The Job Number of the Utilities project you want to see on the report, up to 10 alphanumeric characters. (RQ)
Cost Center – A dropdown list of valid Cost Centers and their corresponding Sorting Code. (RQ)
Right clicking in this tab also gives you the option of choosing “Delete” from the popup menu, if you are sure you no longer want to see this Job on the report.
178

MATERIAL BATCH UPDATES MODULE (Input Only)
PURPOSE: The Material Batch Updates module allows MIS personnel to run various procedures to upload material expense data into FIMA from other computing systems. Currently, there is only one upload available, which attempts to bring in data from University Stores.
INSTRUCTIONS: To open this module, click on the Material Batch Updates icon (the red question mark and brown container), or click “Maintenance” from the menu, then choose “Material Batch Updates”. The Material Batch Updates window will open.
Running the Stores UploadThis upload process attempts to update Facilities Management’s data on Stores Order Forms to reflect those that have been invoiced by University Stores. The stores.txt file is sent by the University Stores MIS representative as an email attachment, at least three times a month. It is especially important to Cost Accounting that the data affected by this upload is current just before they run the monthly Final Billing. Before running this upload, inform Cost Accounting that you have received the file, since their data entry must be as up to date as possible in order to avoid the possibility of rejected transactions.
179
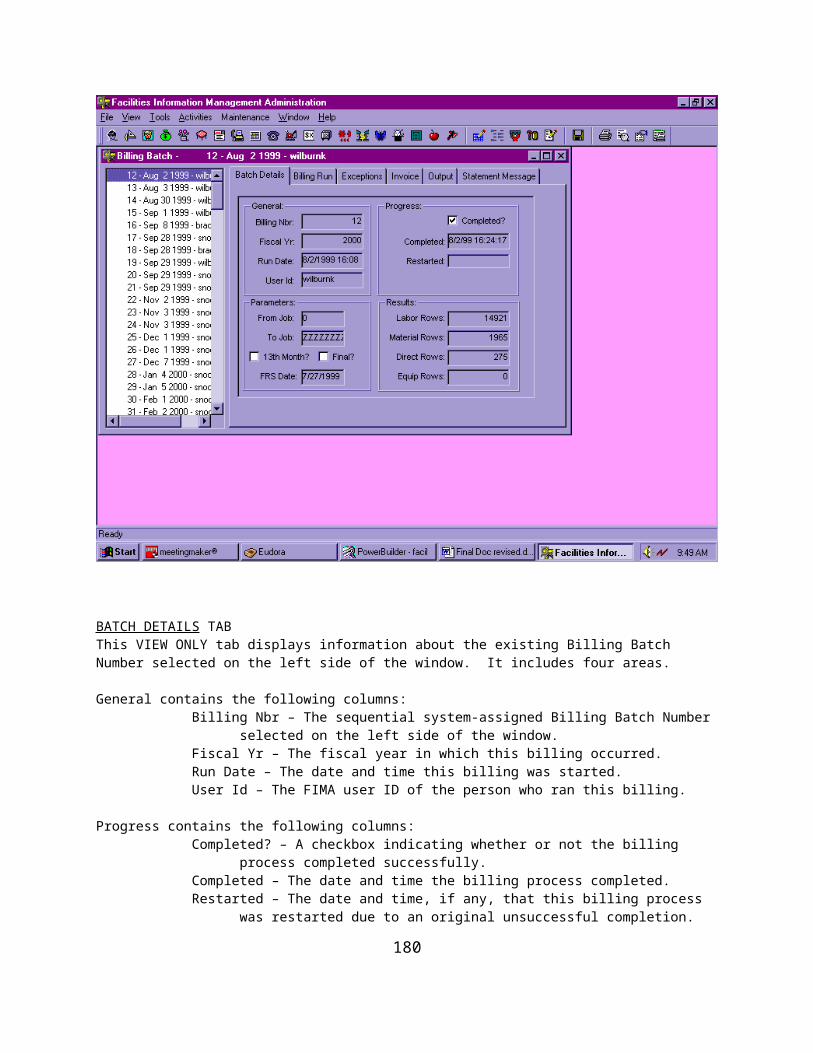
The following steps prepare the file for the upload process:
1. Open Windows Explorer either by clicking Start on your PC’s task bar and selecting Programs, then Windows Explorer, or by right-clicking the My Computer icon on your PC’s desktop, then clicking Explore. Within Windows Explorer, double-click C$ on ‘Woody’ (P:), then double-click the Development folder to open it.
2. In Development, search for the file stores.asi. Right-click it and choose “Delete”. This removes the file that you most recently uploaded.
3. In Windows Explorer, double-click your C: drive, then double-click the Eudora folder, then double-click the Attachments folder. In Attachments, search for the file stores.txt, right-click it, and choose “Copy”.
4. In Windows Explorer, again double-click C$ on ‘Woody’ (P:), then double-click the Development folder to open it. In the Development folder (on the right side of the screen), right click and choose “Paste” to place the copy of stores.txt here. Rename stores.txt to stores.asi by right- clicking the file, choosing “Rename”, and typing in the new file name. The system displays the message “If you change a filename extension, the file may become unusable. Are you sure you want to change it?”. Click the “Yes” button.
To run the Stores Upload, open the Material Batch Updates window as described above. From the drop down list next to the words “Choose upload type:”, select “Stores”. Click the “Run Upload” button. The upload process may take several minutes to complete. Errors may appear in the white portion of the window. When the upload has finished, four reports will automatically print: the Stores Upload error listing, which prints all errors that displayed on the window; the “Encumbrance Changes for User” report and the “Encumbrance Detail Changes for User” report, which list any changes to the material encumbrances (such as the document number change from a Stores Order Form to a Stores Invoice); and the “Direct Purchase Invoice Expenses for User” report, which lists the material expense transactions created by the upload. Give all reports to the Cost Accounting area.
180

JOURNAL ENTRIES MODULE (Inquiry)
Click on the Journal Entries icon (the white tablet with pencil) to open the Journal Entry window, or click “Maintenance” from the menu, then choose “Journal Entries”.
The left side of the window displays a treeview of Journal Entry numbers. If you know the Journal Entry Number you’re looking for, click on the white box next to the button with the words “Find J/E #”. Enter the Journal Entry Number (up to 10 digits), then press ENTER or click the “Find J/E #” button. If you do not know the Journal Entry Number, use the scroll bar to move through the treeview until you find it. The most recently entered journal entries are at the top of the list. To view a journal entry, click on the number.
The Journal Entries Module includes the following tabs:
JOURNAL ENTRY – This tab displays header information for the journal entry, including Journal Entry Number, type (Equipment, Direct Expense, Labor, or Material), description, and posting date.
LABOR – This tab displays only if the Journal Entry Number you selected on the left side of the tab affects labor expenses. It shows information such as the Employee Number, Work Date, Payend Date, Service Request, Job, hours, Hours Type, Shop, FRS Object Code, pay rate, FRS Account, cost amount, recovery rate, and recovery amount for all lines on this journal entry. Negative dollars and hours display in red.
MATERIALS – This tab displays only if the Journal Entry Number you selected on the left side of the tab affects material expenses. It shows information such as the FRS Account, FRS Object Code, amount, Job, Service Request, Shop, Reference Type and Number, Material Request Number, and offset FRS Account and Object Code (if any) for all lines on this journal entry.
EQUIPMENT – This displays only if the Journal Entry Number you selected on the left side of the tab affects equipment expenses. It shows information such as the document number, Job, Service Request, Shop, Equipment Number, FRS Account, FRS Object Code, cost amount, description, entry date, posting date, recovery amount, and entry user ID for all lines on this journal entry.
DIRECT EXPENSES – This tab displays only if the Journal Entry Number you selected on the left side of the tab affects direct expenses. It shows information such as the document number, Job, Service Request, Shop, FRS Account, FRS Object Code, cost amount, description, transaction date, posting date, recovery amount, Direct Expense Batch Number, and entry user ID for all lines on this journal entry.
IMPORT RECON FILE – This is not an inquiry tab. It is used to upload the monthly encumbrance and expense file from FRS which is used in the reconciliation process.
RUN RECONCILIATION – This is not an inquiry tab. It is used to run the monthly automated reconciliation process between FIMA and FRS.
RECONCILED DOCUMENTS – This tab displays the FIMA and corresponding FRS Document Numbers which are considered to be reconciled (even though discrepancies may still exist) for the fiscal year you select. To specify the fiscal year, enter it (4 digits) in the white box to the right of the words “Fiscal Year”.
181
JOURNAL ENTRIES MODULE (Input)
PURPOSE: The Journal Entries module allows Cost Accounting personnel to transfer charges from one account and/or object code to another within FIMA. Other steps may be necessary to move charges in FRS. It also allows MIS personnel to upload the monthly reconciliation file from FRS, and Cost Accounting reconciling personnel to run the automated reconciliation report.
INSTRUCTIONS: To open this module, click on the Journal Entries icon (the white tablet with pencil), or click “Maintenance” from the menu, then choose “Journal Entries”. The Journal Entry window will open. The left side of the window displays a treeview of Journal Entry numbers. To view an existing J/E, if you know the Journal Entry Number you’re looking for, click on the white box next to the button with the words “Find J/E #”. Enter the Journal Entry Number (up to 10 digits), then press ENTER or click the “Find J/E #” button. If you do not know the Journal Entry Number, use the scroll bar to move through the treeview until you find it. The most recently entered journal entries are at the top of the list. To view a journal entry, click on the number. Header information displays on the Journal Entry tab, while the detail line(s) appear on the appropriate tab (Labor, Materials, Equipment, or Direct Expenses) depending on the J/E type.
To create a new journal entry, follow the instructions for the individual tabs below.
182

NOTE: newly created Journal Entries should be printed by running the appropriate report (“Direct Expense Journal Entries Batch”, “Equipment Journal Entries Batch”, “Material Journal Entries Batch”, or “Journal Entries by Post Date” for labor J/Es) from the Reports module, then attaching the report to the original document and logging it in the Journal Entry Log Book. See the REPORTS MODULE section for more information.
JOURNAL ENTRY TABThis tab contains “header” information for each journal entry. To add a new journal entry, right click in the main area of this tab and choose “Add” from the popup menu. A new row appears on the left side of the tab, titled “New”, and the right side of the tab displays blank columns ready for your data entry. The Journal Entry tab contains the following columns:
Id – The system-generated identification number for this J/E, up to 10 digits. The system assigns this number after you save the journal entry.
Type – A drop down list of valid journal entry types. Choices are:EquipmentDirect ExpenseLaborMaterial
Description – The description of the purpose for the journal entry, up to 255 alphanumeric characters.
Post Date – The date on the journal entry for accounting purposes. The post date for Labor Journal entries should be an actual pay ending date, since Personal Services reconciliation reports are generated by pay ending date.
Click the “Next>>” button. The system will display the Labor, Materials, Equipment, or Direct Expenses tab, depending on which type of journal entry you selected.
LABOR TABThis tab allows you to make either a one-sided J/E, which creates a brand new labor expense transaction, or a two-sided J/E, which is used to reverse an existing transaction and create one or more new transactions to offset it.
Creating a One-Sided Journal EntryTo enter a one-sided J/E, click the “One-Sided JE” button. The system displays a blank line in the lower area of the tab ready for your data entry. The lower area of the tab contains the following columns:
Emp Nbr – The FIMA Employee Number (up to 6 digits) of the employee whose labor expense transactions you are affecting. (RQ)
Work Date – The date the hours being affected were claimed, formatted MM/DD/YYYY. (RQ)
Payend Date – The date this journal entry will be posted for accounting purposes. This must be a valid Pay Ending Date.
Tran – The system automatically fills this column with the code “JE” to denote a Journal Entry.
Pcn – The 6-digit Position Control Number this employee held when the hours were claimed. (RQ)
Sr Nbr – The Service Request Number to be affected.Job Nbr – The Job Number to be affected, up to 10 alphanumeric characters.Task Id – The 6-digit Task Identification Code indicating more about the purpose of this
transaction. Hours – The number of hours being claimed on this line, with 2 decimal places. Enter a
minus sign if the hours are negative. (RQ)Type – The 3-character Hours Type Code for the hours claimed. (RQ)
183

Sub – The 2-character Hours Subtype Code for the hours claimed, if applicable.Shop – The FM Shop to be affected. Shops can be up to 10 alphanumeric characters,
but are currently 3 digits. (RQ)O Code – The 4-digit FRS Object Code being debited or credited. (RQ)Class – The 3-digit Employee Class of this employee. (RQ)Rate – The system calculates this as the Cost Amount (see below) divided by the Hours,
with 4 decimal places. (View only)Acct – The 6-digit FRS Account Number being debited or credited. (RQ)Cost Amt – The dollar amount of this labor expense transaction, with 2 decimal places.Recover Rate – The system attempts to fill in this rate (the full cost recovery rate) by
using the Shop Rate for the Shop you entered, with 4 decimal places. Note that the Hours Type for some transactions (absent, etc.) may play a roll in determining this rate.
Recover Amt – The system calculates this as the Hours multiplied by the Recover Rate, with 2 decimal places.
To add lines to the J/E, right click and choose “Add” or “Insert” from the popup menu. If you need to delete a line, right click and choose “Delete”. The system sums the Hours and Cost Amount for all lines on the journal entry and displays them in the “Total Hours” and “Total Cost” columns. Make sure these totals are correct. When you successfully save the journal entry, the system displays the message “New je will be ######” where “######” is the system-assigned Journal Entry Number.
Creating a Two-Sided Journal EntryIf you have been entering one-sided J/Es, you may need to click the “Restore Two-Sided JE” button in order to proceed with a two-sided J/E. To create a two-sided journal entry, click the “Enter Query Criteria” button. The system displays a blank line in the upper area of the tab. Enter information in one or more of the displayed columns to locate the existing labor expense transaction you want to reverse. These columns are:
Emp Nbr – The FIMA Employee Number (up to 6 digits).Work Date – The date the hours were claimed, formatted MM/DD/YYYY.Payend Date – The Pay Ending Date, formatted MM/DD/YYYY.Tran – The 2-character code indicating the source of the transaction (“PR” for payroll
entry, “JE” for journal entry).Pcn – The employee’s 6-digit Position Control Number.Sr Nbr – The Service Request Number.Job Nbr – The Job Number, up to 10 alphanumeric characters.Task Id – The 6-digit Task Identification Code. Hours – The number of hours claimed on this line, with 2 decimal places.Type – The 3-character Hours Type Code. S-Type – The 2-character Hours Subtype Code.Shop – The FM Shop. Shops can be up to 10 alphanumeric characters, but are currently
3 digits.O Code – The 4-digit FRS Object Code. Rate – The employee’s hourly rate of pay, with 4 decimal places.Acct – The 6-digit FRS Account Number.Je Id – The Journal Entry Number of an existing Labor Journal Entry, up to 10 digits.
Click the “View Items” button to display any labor expense transactions that contain the criteria you entered. When you have located the transaction(s) you want to reverse, click the check box to the left of the transaction(s), then click the “Select Trans” button. The system copies the transaction(s) you selected to the lower area of the tab. (If you realize you selected the wrong transaction, click the “Restore Two-Sided JE” button, which will remove the copied transaction and enable you to start over.) Make any changes necessary to the copied transaction(s), such as changing hours and dollars from positive to negative, then add one or more lines to offset the transaction(s). To add a line, right click in the lower area of the tab and choose “Add” or “Insert” from the popup menu. See the instructions under “Creating
184

a One-Sided Journal Entry” for a full explanation of the columns available. The system sums the Hours and Cost Amount for all lines on the journal entry and displays them in the “Total Hours” and “Total Cost” columns. Note that you will not be able to change Employee Number, Work Date, or Payend Date when entering a two-sided J/E. Also, the total hours and dollars for a two-sided J/E must be 0. When you successfully save the journal entry, the system displays the message “New je will be ######” where “######” is the system-assigned Journal Entry Number.
MATERIALS TABThe upper area of the tab contains the following column:
Select Recovery Type – A drop down list of options for adding recovery amounts to this J/E. (RQ) The type you select applies to all lines on the J/E. Choices are:Purchase, Direct – Used for journal entries involving Purchase Orders, Stores
Order Forms, Travel Authorization Forms, Check Requests, etc., where there is no Offset Account and Object Code.
Indirect/Issue – Used for journal entries involving issues of inventory items from a warehouse, or purchases on Blanket P/Os that originally had a credit account.
None – No recovery percent will be added to the J/E.
In the main part of the tab, the system displays a blank line ready for your data entry. The main part of the tab contains the following columns for each line on the journal entry:
D/C – A 1-character code indicating whether this line is a debit or credit. (RQ) Valid values are:D – The Account and Object Code on this line will be debited for the Amount
entered.C – The Account and Object Code on this line will be credited for the Amount
entered.Account – The 6-digit FRS Account to be affected in the manner selected in the “D/C”
column. Obj Code – The 4-digit FRS Object Code to be affected in the manner selected in the
“D/C” column.Amount – The dollar amount for this line of the J/E, with 2 decimal places. Enter all
amounts as positive numbers.Job Nbr – The Job Number to be affected, up to 10 alphanumeric characters.S/R Nbr – The Service Request Number to be affected.Shop – The FM Shop to be affected. Shops can be up to 10 alphanumeric characters,
but are currently 3 digits.Task Id – The 6-digit Task Identification Code indicating more about the purpose of this
transaction. (RQ)Reference – The 3-character document type and 6-digit document number associated
with this line of the J/E.Mat Req # – The Material Request Number associated with this line of the J/E.Offset Acct – If the “D/C” column contains a “D”, the 6-digit FRS Account Number in this
column will be credited. If the “D/C” column contains a “C”, this account will be debited. If the Recovery Type on the J/E is “None” or “Purchase, Direct”, this column should be blank.
Offset O/C – If the “D/C” column contains a “D”, the 4-digit FRS Object Code in this column will be credited. If the “D/C” column contains a “C”, this Object Code will be debited. If the Recovery Type on the J/E is “None” or “Purchase, Direct”, this column should be blank.
To add lines to the J/E, right click and choose “Add” or “Insert” from the popup menu. If you need to delete a line, right click and choose “Delete”. The system keeps track of the total dollar amount of the
185
J/E in the white box to the right of the word “Total:”. When you successfully save the journal entry, the system displays the message “New je will be ######” where “######” is the system-assigned Journal Entry Number.
EQUIPMENT TABThe system displays a blank line ready for your data entry. The Equipment tab contains the following columns for each line on the journal entry:
Doc # – The Equipment Rental Ticket Number this J/E references, up to 8 digits.Svc Req – The Service Request Number to be affected. The system automatically fills in
the “Job Nbr” column with the Job on this Service Request.Job – The Job Number to be affected, up to 10 alphanumeric characters.Shop – The FM Shop to be affected. Shops can be up to 10 alphanumeric characters,
but are currently 3 digits. The system automatically fills in the “Task Id” column with the Task ID for this Shop on the entered Service Request.
Task Id – The 6-digit Task Identification Code indicating more about the purpose of this transaction. (RQ)
Equip # – The 16-character Equipment Number this J/E references. (RQ)Base Cost – The dollar amount of this J/E, with 2 decimal places. Enter a minus sign to
denote a negative number.Obj Code – The 4-digit FRS Object Code to be affected. (RQ)Equipment JE Description – A description for this line of the journal entry, up to 60
alphanumeric characters.Acct Nbr – The 6-digit FRS Account to be affected. The system attempts to determine
the correct account number based on the Job and Shop, but you can change this column if necessary. (RQ)
Recover Amt – The amount of the J/E including any Equipment Recovery Percent set up for the Job. This is the amount charged to customers. The system automatically calculates this column after you save the J/E. (View only)
Post Date – The date you entered on the Journal Entry tab. (View only)Ticket Id – This column remains blank. (View only)Entry Date – The system fills in this column with today’s date. (View only)Bill Date – When this transaction is billed, the system fills this column with the billing date.
(View only)Rent Tkt Seq – This column remains blank. (View only) User Id – The system fills this column with the 8-character FIMA User ID of the person
logged in. (View only)Id – After you save the J/E, the system automatically fills this column with the system-
generated Equipment Expense ID Number, which may be up to 11 digits long. (View only)
Ready for Billing – The system automatically fills this column with a “Y” to indicate that this transaction may be billed. (View only)
Je Id – After you save the J/E, the system fills this column with the system-assigned J/E Number. (View only)
Batch Type – The system automatically fills this column with a “J” to indicate that this is a Journal Entry. (View only)
Equipment Id – After you save the J/E, the system fills this column with the system-assigned Equipment Identification Number that corresponds to the Equipment Number you entered. (View only)
To add lines to the J/E, right click and choose “Add” or “Insert” from the popup menu. If you need to delete a line, right click and choose “Delete”. When you successfully save the journal entry, the system displays the message “New je will be ######” where “######” is the system-assigned Journal Entry Number.
186

DIRECT EXPENSES TABThe system displays a blank line ready for your data entry. The Direct Expenses tab contains the following columns for each line on the journal entry:
Doc # – The Direct Expense Document Number this J/E references, up to 16 alphanumeric characters.
Svc Req – The Service Request Number to be affected. The system automatically fills in the “Job Nbr” column with the Job on this Service Request.
Job – The Job Number to be affected, up to 10 alphanumeric characters.Shop – The FM Shop to be affected. Shops can be up to 10 alphanumeric characters,
but are currently 3 digits. The system automatically fills in the “Task Id” column with the Task ID for this Shop on the entered Service Request.
Task ID – The 6-digit Task Identification Code indicating more about the purpose of this transaction. (RQ)
Base Cost – The dollar amount of this J/E, with 2 decimal places. Enter a minus sign to denote a negative number.
Obj Code – The 4-digit FRS Object Code to be affected. (RQ)Direct Expense JE Description – A description for this line of the journal entry, up to 60
alphanumeric characters.Debit Account – The 6-digit FRS Account to be affected. The system attempts to
determine the correct account number based on the Job and Shop, but you can change this column if necessary. (RQ)
Dir Exp ID – After you save the J/E, the system automatically fills this column with the system-generated Direct Expense ID Number, which may be up to 11 digits long. (View only)
Trans Date – The system fills in this column with today’s date. (View only)Post Date – The date you entered on the Journal Entry tab. (View only)Bill Date – When this transaction is billed, the system fills this column with the billing date.
(View only)Recover Amt – The amount of the J/E including any Direct Expense Recovery Percent
set up for the Job. This is the amount charged to customers. The system automatically calculates this column after you save the J/E. (View only)
Dir Exp Batch Nbr – After you save the J/E, the system automatically fills this column with the system-generated Direct Expense Batch Number, which may be up to 9 digits long. (View only)
Batch Type – The system automatically fills this column with a “J” to indicate that this is a Journal Entry. (View only)
Ready for Billing – The system automatically fills this column with a “Y” to indicate that this transaction may be billed. (View only)
User ID – The system fills this column with the 8-character FIMA User ID of the person logged in. (View only)
J/E ID – After you save the J/E, the system fills this column with the system-assigned J/E Number. (View only)
To add lines to the J/E, right click and choose “Add” or “Insert” from the popup menu. If you need to delete a line, right click and choose “Delete”. When you successfully save the journal entry, the system displays the message “New je will be ######” where “######” is the system-assigned Journal Entry Number.
IMPORT RECON FILE TABEach month, usually on the Monday following our monthly billing process, a file containing Facilities Management’s transactions from the University’s Financial Records System (FRS) is made available for us to use in reconciling FIMA to FRS. MIS personnel electronically transfer this file to one of our servers by following the steps below:
187

1. In Windows Explorer, rename the current file, frsin.txt, to frsinmm.txt (where “mm” is the 2-digit month to which the transactions in that file were posted) before downloading the new file. The frsin.txt file is located in the C$ on ‘Woody’ (P:) directory, in the Development subdirectory.
2. Click on the “ftp” (File Transfer Protocol) icon on your desktop. At the “Ftp>” prompt, type Open arizmvs1.ccit.Arizona.edu and press ENTER.
3. Log in by typing ariz at the “Name:” prompt and entering the current password at the “Pass:” prompt.
4. Change directories on your pc by typing lcd p:\develo~15. Change to the root directory on the CCIT server by typing cd ..6. Change directories again by typing cd frs7. Change directories again by typing cd ftp8. Change directories a final time by typing cd prc9. Transfer the file by typing get FRSRECON 10. Verify that the file transferred successfully by typing ls (you should see the file name listed).11. Type quit to exit the ftp program.12. In Windows Explorer, rename the newly transferred file (in the C$ on ‘Woody’ (P:) directory, the
Development subdirectory) from FRSRECON to frsin.txt.
MIS then uploads this file to FIMA by clicking the “Perform FRS Download” button on this tab. This opens a separate window titled “Direct Expense Import Wizard”. The main part of this window displays a file directory similar to Windows Explorer below the words “Please select the file to be uploaded from the FRS system for reconciliation:”. To upload the file, follow the steps below:
1. Double-click on [P:]2. Double-click on [Development]3. Find the file Frsin.txt and double-click on it.4. Click the “Next” button. This displays a tab with the words “Fiscal Month and Year” and the
month and year the system has determined are applicable to the majority of the transactions in the file. If this date is correct, click the “Next” button. In the unlikely event that it is not, click the “Override Date” checkbox to check it, then enter the month and year you believe are correct.
5. If you are uploading the final file of the fiscal year (after 13th Month Billing), the system displays a tab with the words “The wizard has determined that an FRS reconciliation file has already been loaded for this fiscal period. If you continue, all existing transactions will be deleted and replaced by the transactions in the new file you have selected.” If this is the final file of the fiscal year, click the “Next” button. If you see this message at any other time of the year, click the “Cancel” button and notify an MIS analyst.
6. The system displays a tab with the “FRS import file import errors and messages” report, and your icon may change to an hourglass while the upload process runs. When the upload is finished, this report automatically prints. Click the “Finish” button and give the report to Cost accounting.
RUN RECONCILIATION TABEach month, the reconciling area of Cost Accounting runs an automated reconciliation process for each account, which creates a report of all outstanding documents in FIMA and in FRS. This tab contains the following prompt columns for the reconciliation process:
Account – The 6-digit FRS Account Number to reconcile.Tolerance Amount – The dollar amount by which transactions may vary and still be
considered reconciled. The default is .00 (no tolerance).From Date – The date from which you want reconciliation to start, formatted
MM/DD/YYYY. This is generally the first day of the current Fiscal Year.
188

To Date – The date through which you want to reconcile. This is generally the FRS closing date of the month just closed.
Batches Received From (yyyymm): – The first year and month for which you want FRS transactions included. This is generally the same year and month as the “From Date”.
Batches Received To (yyyymm): – The last year and month for which you want FRS transactions included. This is generally the same year and month as the “To Date”.
Click the “Run Reconciliation” button. This process will take some time. When it is complete, the “Automated FRS Reconciliation – Unreconciled Documents Report” displays in a new window. You can print this report by clicking the printer icon at the bottom of its window. A second report, “Transactions Not Selected for FRS Reconciliation Process”, prints automatically.
RECONCILED DOCUMENTS TABThis tab allows reconciling personnel from Cost Accounting to record documents as Reconciled for accounting purposes so they will not appear on the “Automated FRS Reconciliation – Unreconciled Documents Report” even if their dollar amounts do not match between FIMA and FRS. To view reconciled documents, enter the 4-digit fiscal year in the white box to the right of the words “Fiscal Year”, then press ENTER. The system displays all recorded reconciled documents for that year. To enter a new record to the list, right click in the main area of the tab and choose “Add” or “Insert” from the popup menu. This tab contains the following columns for each reconciled document:
FIMA Document Nbr – The document number as it is recorded in FIMA, up to 7 alphanumeric characters.
FRS Document Nbr – The document number as it is recorded in FRS, up to 7 alphanumeric characters.
You can click on either column header to sort the documents in that order. If you need to delete a record from the list because it does need to be reconciled, click on it to select it, then right click and choose “Delete” from the popup menu.
189
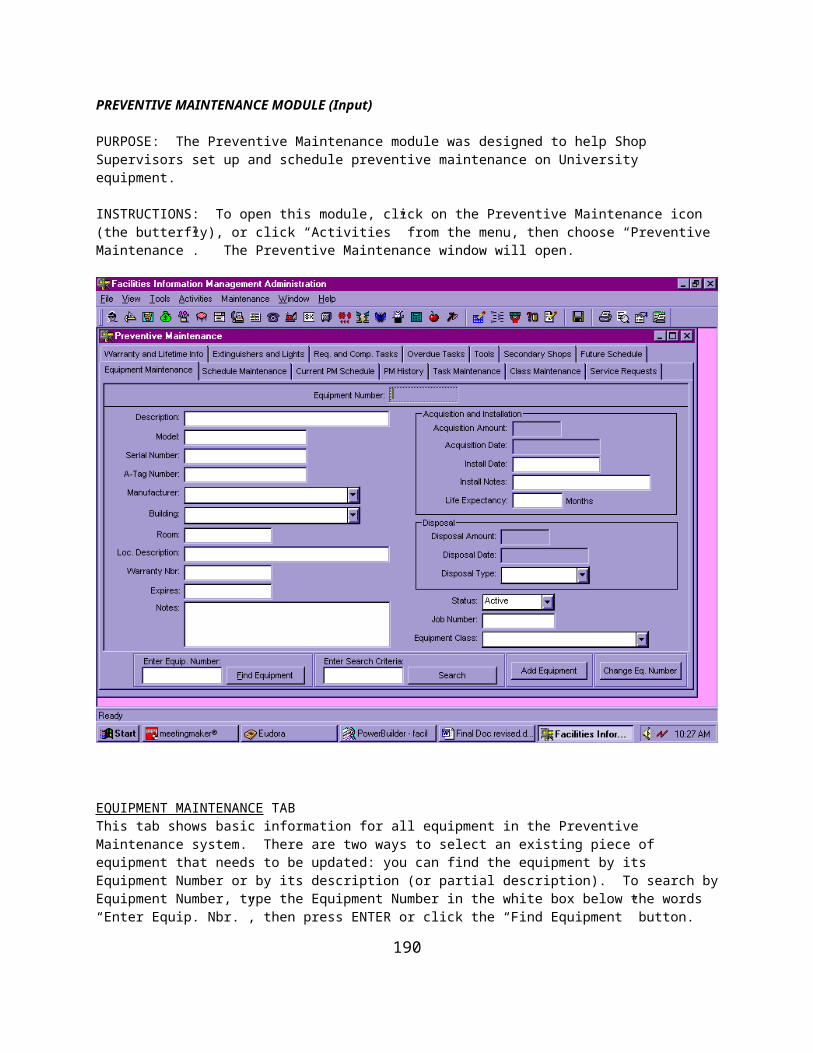
REPORTS MODULE
PURPOSE: The Reports module allows users to run a variety of reports, which can be viewed on screen or printed (in some cases, report data can also be exported for use in another program such as Excel). Reports are grouped by category. Not all users have access to all reports. In addition, your access to a particular report may be limited based on the department(s) or shop(s) you are authorized to see.
INSTRUCTIONS: To open this module, click on the Reports icon (the document ejecting from a printer), or click “Maintenance” from the menu, then choose “Reports”. The Report Selection Wizard window will open.
To select a report, click on the ‘+’ located to the left of the category of your choice, or double-click the category name. This will display the available reports in this category. Select the report you wish to run by clicking on the report name. If you want to run this report several times in a row with different selection criteria (for example, you want to run the “Detail S/Rs by Building” report for several different buildings), make sure the “Run until cancelled” checkbox at the right side of the window is checked (for some reports, it is checked by default). When this checkbox is checked, the system returns you to the prompt window for the report instead of completely closing the Reports module after the report is generated. If you are sure you want to print the report, click the “Print when created” checkbox to check it. This automatically prints the report after it is generated. Then click the “Next” button. Depending upon which report you selected, a prompt tab may display requesting further information, such as Job Number, date ranges, etc. (some prompts may already be filled with default values). If this is the case, fill in the information (or ensure that the default values are correct), then click the “Finish” button. If the system does not require additional information, the report generates as soon as you click the “Next” button, without displaying a prompt tab first.
The report displays in a separate window. Some reports allow you to sort the displayed information in a different order, or to restrict the information displayed by using a filter (see below for more information). You can either view the report on screen, resizing the window as necessary by dragging its borders, or you can print it. Some reports will allow you to export the data into another data format at this point (see below). To see what options are available, right click on the report and choose the appropriate option (Print, Sort, etc.) from the popup menu. You can also use options on the right-click menu or the buttons at the lower left corner of the window to quickly move to the last page (the “>>” button), first page (the “<<” button), previous page (the “<” button), and next page (the “>” button) of the report.
Sorting a ReportChoosing “Sort” from the right-click popup menu displays a new window titled “Specify Sort Columns”. The left side of this window lists the available columns by name. To sort on a particular column, click on it and drag it to the right side of the window. You can select and drag additional columns if necessary. The order in which the columns are listed on the right side of the window is the order in which the report will be sorted. For each column on the right side, you can specify whether it sorts in ascending (the default) or descending order by checking or unchecking the “Ascending” checkbox. For example, to sort a date column so the most recent records appear first, make sure the “Ascending” checkbox is not checked. When you are finished specifying the sort order, click the “OK” button to resort the report, or click the “Cancel” button to leave the report in its default sort order.
Filtering a ReportChoosing “Filter” from the right-click popup menu displays a new window titled “Specify Filter”. The available columns are listed by name in the lower right area of this window. The lower left area displays a list of built-in functions, which you probably will not need to use, and six buttons which you may want to use. The buttons are: “<” (less than), “>” (greater than), “<=” (less than or equal to), “>=” (greater than or equal to), “(“ (open parenthesis), and “)” (close parenthesis). Clicking a column name or button places that column name or symbol into the upper area of the window. For example, to filter the “Shop List” report so it only displays Shops in the 200 range, click the shop column, then the “>=” button, then type
190

‘200’ and and click the shop column again, then the “<=” button, then type ‘299’. (The quote marks around the Shop Numbers are necessary because this is actually an alphanumeric column in the FIMA database. Columns that are true number columns do not need quotes.) Your final filter expression should look like this:
shop >= ‘200’ and shop <= ‘299’Click the “Verify” button to make sure your filter is valid. If you see the message “Filter is OK”, click the “OK” button to apply the filter to the displayed report. If you don’t want to filter the report, or if your filter is not valid, click the “Cancel” button. There are a number of tips and tricks for creating filters. If you cannot get your filter to work, call MIS for assistance.
Exporting a ReportChoosing “Export” from the right-click popup menu displays a new window titled “Save As”. You have probably seen this window when working with other programs such as Word and Excel. Choose the location where you want to save the report data by clicking the “Save in” drop down list and proceeding as you would in Windows Explorer. Then type the name you want assigned to the file in the white box next to the words “File name”. Finally, choose the file type (for example, “Excel 5 with Headers”)from the “Save as type” drop down list, then click the “Save” button (or click the “Cancel” button if you do not want to save the report data after all). Note: all the data that goes into creating the report is saved when you export. In other words, if you export a report that shows only summary data on the screen, you will actually be exporting all the detail data that makes up those summary calculations. The totals you see on the screen will not be exported.
Available Reports by Category:
BUDGET CATEGORYNo reports are currently available
CUSTOMER CATEGORYDetail Job S/R Expenses at Recovery by Bill Date – This report prompts for a Job Number and a Billing
Date Range. It shows billed charges at the detail level (Employee or Document Number), including Posting Date (actually the Work Date for labor charges), Billing Date, Labor Hours, and full Recovery Amount, with dollar and hour totals by Shop, Service Request, and Job.
Detail Job S/R Expenses by Shop at Recovery – This report prompts for a Job Number and a Posting Date Range. It shows all charges at the detail level (Employee or Document Number), including Posting Date (actually the Work Date for labor charges), Labor Hours, and full Recovery Amount, with dollar and hour totals by Shop, Service Request, and Job.
FDC Detail Labor by Job Recovery – This report prompts for a Job Number and a Posting Date Range. It shows labor charges for Facilities Design and Construction jobs only at the detail level (Employee or Document Number), including Posting Date, Labor Hours, and full Recovery Amount, with dollar and hour totals by Shop, Service Request, and Job. The Posting Date is actually the Work Date.
EMPLOYEE CATEGORYData Entry Activity for Selected User and Date Range – This report prompts for a FIMA User ID and a
beginning and ending date and time. It lists the total number of transactions by transaction type (Direct Expense entry, Blanket Invoice entry, Detail Labor payroll entry, etc.), plus a grand total number of transactions, that were data entered by the selected employee within the selected date and time frame.
Employee Accrual Balances by Shop – This report prompts for a Shop Range. For each selected Shop, it lists all active employees by number and full name, with their Vacation, Sick, and Comptime accrual balances as of the date the Accrual File was last uploaded.
191
Employee Anniversary Date Check List – This report prompts for a month. It lists all active employees who were hired during that month, including information such as full name, address, phone, and emergency contact information, that must be verified by the employee’s anniversary date. Employees are grouped by their Shop.
Employee Call-In for Selected Employee – This report prompts for an Employee Number and Date Range. It lists the call-in date and reason for all absence calls logged for this employee within the selected date range.
Employee Call-In for Selected Supervisor – This report prompts for a Supervisor’s Employee Number and Date Range. It lists the employee name and number and call-in date and reason for all absence calls logged for this supervisor’s employees within the selected date range.
Employee List – The prompt for this report asks whether or not you want to view salaries. The report lists information such as Employee Number, name, EID, PCN, hire date, department, Shop, default account data, salary (if selected), pay grade, and title for all active employees.
Employee List by Shop – This report prompts for a Shop Range. It lists information such as Employee Number, name, PCN, hire date, department, Shop, default account data, pay grade, and title for all active employees in the selected Shops.
Employees by Supervisor ID – This report prompts for a Supervisor’s Employee Number. It lists the Employee Number and full name of all active employees who report to that supervisor.
Employees Reporting to Inactive Supervisors – This report lists the Employee Number and full name of all active employees whose supervisor as recorded in FIMA is an individual who is no longer an active employee.
Employees with Evaluations Below Selected Score – This report prompts for an evaluation score. It lists the Employee Number, full name, Shop, last evaluation date, the score associated with that evaluation, and the employee’s supervisor’s name, for all active employees whose last evaluation score fell below the specified score.
Employees with Leave Status – This report lists the Employee Number, Shop, full name, Status Code, Status Date, and Status Reason of all employees who are currently on some type of leave.
Employees with Overdue Evaluations – This report prompts for a date. This report lists, by Shop, employees whose evaluations are overdue. Information includes employee name, department, hire date, evaluation type, last evaluation date, next due date, and number of days overdue.
Ethnicity Breakdown by Department – This report shows the number of employees in each department who have listed their ethnicity as Anglo, Black, Native American, Hispanic, and Asian, as well as the number of male and female employees. Totals are shown for all departments, plus the percentage of all employees represented in each category.
FM - Years of Service Awards List – This report lists the name, hire date, Shop, and title of those employees who will achieve a multiple of 5 years of service (5, 10, 15, etc.) at the University during the current calendar year. Employees are grouped by Department Number, and a total number of employees on the report is given.
Full Phone List for Selected Shops – This report prompts for a range of Shops and provides a number of checkboxes for selecting which phone types you want to see (Cell, Fax, etc.). For each selected Shop, it lists the employee’s full name, the phone number, and the phone type of all active employees who have one of the selected phone types (regardless of whether or not the employee is flagged to show on the regular phone list).
Inactive Employees with Accrual Balances – The prompt for this report asks whether or not you want to see inactive employees with 0 accrual balances. The report shows the Employee Number, EID, and name of all Inactive employees who still have a record in the Accrual file. If you chose to see 0 balances, the employee will be listed even if all three balances are 0. Otherwise, the employee must have at least one accrual balance that is not 0.
Newly Hired Employees – This report prompts you for a beginning hire date, and provides a series of checkboxes for selecting which employee types (Fiscal Faculty, Temporary, Wage, etc.) you want to include. The report lists the Shop, Employee Number, Employee Class, employee name, title, and hire date of all employees of the types you selected who were hired after the date you specified.
Perfect Attendance Awards List by Department – This report prompts for a Department and a date range. For each Shop in that department, it lists the Employee Number, name, hire date, and probation-
192
ary status of all active employees (except students and Temporary employees) hired prior to the ending date you specified who did not have any FML, Sick, or Absent hours within the date range you selected.
Perfect Attendance Awards List for All Depts. – This report prompts for a date range. It is the same as the “Perfect Attendance Awards List by Department”, but it shows employees in all departments and is sorted by Department, then by Shop.
Phone List by Employee Name – This report lists, by employee name, the Shop name, main work phone, cell phone, and pager phone number of all employees who are designated to be shown on the Phone List.
Phone List by Shop – This report lists, by Shop within department, the employee name, main work phone, cell phone, and pager phone number of all employees who are designated to be shown on the Phone List.
Student Employee List– The prompt for this report asks whether or not you want to view salaries. The report lists information such as Employee Number, name, EID, PCN, hire date, department, Shop, default account data, salary (if selected), pay grade, and title for all active student employees.
Supervisor List– The prompt for this report asks whether or not you want to view salaries. The report lists information such as Employee Number, name, EID, PCN, hire date, department, Shop, default account data, salary (if selected), pay grade, and title for all active employees who hold some type of supervisory position.
Terminated Employees List – This report prompts for a starting date. It lists the Employee Number, name, department, Shop, Status Reason and date, hire date, and title of all employees who have terminated their employment (due to voluntary or involuntary termination, retirement, death, or completion of job for a temporary employee) on or before the starting date you specified.
Total Points Towards Retirement – This report prompts for the total points over which to check. It lists the name, hire date, birth date, department, Shop, title, years of University service achieved during the current calendar year, and total points toward retirement achieved during the current calendar year, for all active employees whose total points are greater than or equal to the number you specified.
Training Information by Class Refcode – This report prompts for a Class Reference Code and a date range. It lists the Employee Number and name, Shop, class date and time, class cost, number of hours, and whether or not the employee actually attended the class, for all employees who signed up for classes with the Reference Code you specified during the time period you specified.
Training Information by Employee – This report prompts for an Employee Number and date range. It lists the Employee Number, class category and name, class date and time, class cost, number of hours, and whether or not the employee actually attended the class, for all classes the employee you selected signed up for during the time period you specified.
Training Information by Shop – This report prompts for a Shop and date range. For each employee in the Shop you selected, it shows Employee Number and name, class category and name, class date and time, class cost, number of hours, and whether or not the employee actually attended the class, for all classes these employees signed up for during the time period you specified.
Vacation List by Employee – This report prompts for an Employee Number, date range, and number of hours over which to check. It shows the employee’s Number, name, status, and Supervisor’s Employee Number, and the department and Shop, work date, day of the week, Service Request Number, and number of vacation hours claimed on each labor expense transaction when the total vacation hours claimed within the period you specified is greater than the number of hours you specified. Hours are totaled by Service Request Number and employee.
EQUIPMENT CATEGORYAlphabetical Equipment List – This report shows basic information about all FM equipment, including
Type, description, Equipment Number, status, manufacturer, A-tag, and Shop, sorted by description. There is a total count of the number of pieces of equipment.
Direct Expense Journal Entries Batch – This report prompts for the FIMA User ID and a batch starting date (or date and time). It shows J/E header information (J/E Number, posting date, and
193

description) and line information (Job, Service Request, Shop, account information, amount, and document number) for all Direct Expense J/Es entered by the selected user on or after the specified date (or date and time). There are totals by J/E Number and a report total.
Equipment Depreciation Report – This report prompts for a Projected Date. For all active equipment with an acquisition date, acquisition amount, and life expectancy, it lists this information plus Equipment Number, description, type, manufacturer, model, serial number, and the anticipated value of the equipment as of the date you specified, accounting for depreciation based on the life expectancy.
Equipment Detail – This report prompts for an Equipment Number. It show all basic information for that piece of equipment (description, model, location, rental rates, etc.), plus its Maintenance Parts List (part description, approximate cost, etc.), a list of any Service Requests issued for it, a list of Maintenance Events and parts used, and a list of its rental expenses (including Equipment Ticket Number, Job, S/R, Shop, date, amount, etc.).
Equipment Disposition by Disposition Type – This report prompts for a Disposition Type and date range. It lists the Equipment Number, description, type, manufacturer, model, disposition date, serial number, and A-tag Number of all equipment disposed of in the manner you selected within the date range you specified.
Equipment Disposition for Date Range – This report prompts for a date range. It is identical to the “Equipment Disposition by Disposition Type”, except it lists all equipment disposed of within the specified date range, regardless of its disposition type.
Equipment Journal Entries Batch– This report prompts for the FIMA User ID and a batch starting date (or date and time). It shows J/E header information (J/E Number, posting date, and description) and line information (Job, Service Request, Shop, account information, amount, and document number) for all Equipment Expense J/Es entered by the selected user on or after the specified date (or date and time). There are totals by J/E Number, and a report total.
Equipment List by Area – This report prompts for a range of Grounds & Labor Area Numbers. For each Building within the selected Areas, it lists the Active pieces of equipment located there (Equipment Number, description, manufacturer, etc.). There is a total count of equipment in each Building and each Area.
Equipment List by Building – This report prompts for a range of Buildings. For each Building, it lists the pieces of equipment located there (Equipment Number, description, manufacturer, etc.). There is a total count of equipment in each Building.
Equipment List by Equip Number – This report shows basic information about all FM equipment, including Type, description, Equipment Number, status, manufacturer, A-tag, and Shop, sorted by Equipment Number.
Equipment List by Shop – For each FM Shop, this report shows basic information about the equipment assigned to that Shop, including Type, description, Equipment Number, status, manufacturer, model, and A-tag. There is a total count of the number of pieces of equipment in each Shop.
Equipment Maintenance Parts List – This report prompts for an Equipment Number. It shows the equipment description and type, and a list of any parts specified for that equipment, with their approximate cost, suggested purchase location, and any comments.
Equipment Rental Credits by Shop/Acct – This report prompts for a Period Ending Date. For each FM Shop, it lists the FRS Accounts and Object Codes that were debited for Equipment Rental expenses posted through the specified date, and the total dollar amount of those expenses. There are also totals for each Shop and a grand total for the report. Journal Entries must be made periodically in FIMA to credit these Shops, accounts and object codes, since they are not true expenses for Facilities Management.
Equipment Rental Revenue vs. Expense – This report prompts for a date range. It brings together data from Equipment Rental expenses charged to the Service Department (FRS Account 179030) and material on order or already expensed against the Service Department Equipment Repairs Job (WQUIP), all within the time frame you specified. For each Shop, it lists the total Equipment Rental expense Recovery Amount on Account 179030 (which represents Equipment Rental revenue), and the total encumbered material orders at cost and the total expensed material orders at recovery on Job WQUIP (which represents true Equipment Expenses), and gives a
194

balance (revenue minus expense). There are totals for each Shop Group (grouping by the leading digit of the Shop Number) and grand totals for the report.
Equipment Rentals by Equipment Item – This report prompts for an Equipment Number and a date range. It lists Rental Ticket date and number, Job, Service Request, Shop, quantity, rate, and dollar amount (at cost) for all Rental Tickets issued for the selected piece of equipment during the specified date range, with a dollar amount total.
Equipment Rentals by Job – This report prompts for a Job Number and a date range. It shows each Rental Ticket issued to the selected Job during the specified date range, listing the Service Request, Shop, date, equipment description, quantity, rate, and dollar amount (at cost) for all lines on that Rental Ticket. There is a total dollar amount for each Rental Ticket and for the Job.
Equipment Rentals by Service Request – This report prompts for a Service Request Number and a date range. It shows each Rental Ticket issued to the selected Service Request during the specified date range, listing the Job, Shop, date, equipment description, quantity, rate, and dollar amount (at cost) for all lines on that Rental Ticket. There is a total dollar amount for each Rental Ticket and for the Service Request.
Equipment Repairs Materials – This report prompts for a range of Shops, a range of Service Request Issue Dates, and whether or not you want to include PM Service Requests. The report shows each Service Request issued within the selected date range to the selected Shops that has an Equipment Number on it, and the total cost of material charged on the Service Request. Beneath each Service Request is a list of the specific items issued from Inventory or ordered from a vendor for this equipment repair. There is a grand total cost for the report.
Vehicle Expenses by Shop and Posting Date – This report prompts for a range of Shops and a date range. For each FRS Account within an Equipment Number, it lists the description and dollar amount (at cost) of all Equipment Expenses with a posting date within the time frame you selected and a Shop within the range you selected, and an Object Code of 3620, 3630, 4160, or 5210. There are totals for each Account/Object Code combination, each Equipment Number, and a grand total for the report.
Vehicle Operational Costs – This report prompts for a date range. For each piece of equipment within a Shop, it shows the total Fuel, Oil, Propane, and Repair costs posted within the selected date range. There are totals for each Shop and grand totals for the report.
ESTIMATING CATEGORYEstimate Log - Numerical – For all Estimates that have been assigned a Project Manager, this report lists
basic information such as Estimate Number, department, requestor, description, building and room, quote date and amount, fund date, Job (if assigned), and whether the Estimate was cancelled, or the close date of the Service Request, if it is complete.
Estimate Schedule by Customer – This report prompts for a customer. It lists the Estimate Number, Service Request and Job if assigned, requestor, Project Manager initials, description, building and room, Estimate Date, quote date, fund date, start date, due date, and any notes about all Estimates (except those that have been cancelled) for the selected customer.
Estimate Schedule by Project Manager – This report prompts for a Project Manager and Estimate Date range. It shows the same information as the “Estimate Schedule by Customer” report but restricts the list to Estimates assigned to the selected Project Manager with an Estimate Date within the selected date range.
Estimating Shop Rates for Fiscal Year – This report prompts for a 4-digit fiscal year. For all active Shops in the 200 - 799 range and the asbestos team (shown as shop “A-Team”), it lists the Shop Number and name, the Paygrade 20 Band Shop Rate, and that rate at time-and-a-half.
Jobs to Risk Management (Permits) – This report lists the Estimate Number, Building, Estimate description, permit submission date, and permit receipt date for all permits associated with Estimates.
Not Quoted Estimates – For all Estimates that have been assigned a Project Manager but have not been quoted, this report lists basic information such as Estimate Number, description, requestor, etc., and indicates whether or not an estimate is required or has already been turned in for the
195

following Shops: Carpenter, Lock, Paint, Flooring, Electrical, Mechanical, HVAC, Plumbing, Welding, Sheet Metal, and Labor.
Preliminary Estimate Sheet – This report prompts for an Estimate Number. If the selected Estimate has been assigned a Project Manager but has not been funded, it prints a preliminary version of the Estimate Sheet that does not show Job and Service Request.
Setup Estimate Sheet – This report prompts for an Estimate Number. If the selected Estimate has been assigned a Project Manager but has not been funded, it prints a setup version of the Estimate Sheet that does not show Job and Service Request and does not contain Shop dollars, hours, or work descriptions.
GENERAL CATEGORYBldg. Cost per Sq. Foot – This report prompts for a Building range, a date range, and whether or not you
want to include buildings that are not maintained (with State funds) by FM. For each selected Building, the report summarizes labor hours and dollars and operations dollars for State and Overhead, Purchased Utilities, and Local accounts, with subtotals of State and Overhead and Purchased Utilities. There are dollar totals for each type of funds by Building, and the cost per square foot is calculated. There are grand totals for the entire report as well, including a summary of the number of square feet maintained and the gross square feet of the included Buildings. Dollar amounts are at full cost recovery.
Bldg. Cost per Sq. Foot - Shop Detail – This report is identical to the “Bldg. Cost per Sq. Foot” report, except it shows summary data for each Shop within a Building.
Building List – This report shows basic information such as Building Number, name, gross and FM-maintained square feet, Grounds and Labor Area, status, address, default Jobs, and location (Main Campus, AHSC, or off campus) for all Buildings.
Closed Service Requests by S/R – This report prompts for a Service Request Shop Closed Date range and a Shop range. For each Service Request with at least one selected Shop that was closed within the specified time frame, it lists information such as Job, Shop, requestor, description, S/R issued date, and Shop closed date for the Shops closed within that time frame.
Customer Jobs Not Funded in Current Fiscal Yr – This report prompts for the prior and current fiscal years. For Jobs that are active and were funded in the prior year, but are not funded in the current year, it lists the Job Number, customer name, prior year FRS funding Account, and Customer Number.
Customer List – This report shows basic information about all FM customers, including Customer Number, name, Department Number, contact person with phone and email address, street address, and whether or not this customer receives printed billing statements.
Detail Job/Service Req Operations Expenses by Shop – This report prompts for a Job range and a Posting Date range. It shows all Material, Equipment, and Direct Expenses for the selected Jobs and posting dates, including information such as Job, Service Request Number and description, Shop, Account and Object Code, document number, cost amount, and full recovery amount. There are totals for each Shop, Service Request, and Job, and a grand total for the entire report.
Detail Job/Service Request Expenses by Shop – This report prompts for a Job range, a Shop range, and a Posting Date range. It shows all expenses, including labor, for the selected Jobs, Shops, and posting dates, including information such as Job, Service Request Number and description, Shop, Account and Object Code, employee or document number, cost amount, and full recovery amount. There are totals for each Shop, Service Request, and Job, and a grand total for the entire report.
Detail S/Rs by Building – This report prompts for a Service Request Issued Date range, a Building Number range, and whether or not you want to include Standing, Paycode, and PM Service Requests (based on the Task ID). For each selected building, it shows the Building Number, name, address, and any maintenance restrictions, then lists the Service Requests issued during the selected date range for that building (including description, requestor, Task ID, closed date, etc.). Under each Service Request, the Shops are listed with the description of work and closed date for each one.
196

Estimated vs. Actual Hours for Renovation Svcs. Jobs – For all open Service Requests on Estimated Jobs (Task ID in the 400000 range), this report shows the Service Request Number, Job, Estimate Number, description, and issued date, then lists each Shop with its estimated hours, actual hours posted to date, the estimated minus the actual hours, and the Shop’s closed date. There is a total of estimated hours, actual hours, and estimated minus actual, for each Service Request.
Estimated Workers Needed for Selected S/Rs – This report prompts for up to 15 Service Request Numbers, the number of weeks it should take to complete the work on those requests, and the estimated number of productive hours per employee per day. It summarizes, at the Shop level, the total estimated hours for that Shop, the actual hours posted so far to the selected Service Requests, the remaining estimated hours (estimated minus actual), and the estimated number of workers that will be needed to perform those remaining hours within the number of weeks specified.
Expense vs. Funding – This report prompts for a Work Date range. For each Shop within each FM department, it lists the employees with their FTE, funding accounts and percentages, salary, and the amount of the salary funded on each account, and then lists the accounts the employee was paid on during the selected period, with the number of hours and total amount paid on each account. There are totals by employee, Shop, department, and a grand total.
Expenses at Recovery by Job, S/R, and Shop – This report prompts for a Job Number and a Posting Date range. For all Service Requests on the selected Job that had expenses posted within the selected time frame, it shows Service Request description, then summarizes the total Labor, Material, Equipment, Direct Expense, and overall expenses at full recovery for each Shop. There are totals for each Service Request, and a total for the entire Job.
Expenses at Recovery by Service Request and Shop – This report prompts for a Service Request Number, a Posting Date range, and whether or not you also want to see dollar amounts at cost. If the selected Service Request had expenses posted within the selected time frame, it shows Job, Service Request Number, and Service Request closed date (if any), then summarizes the total Labor, Material, Equipment, Direct Expense, and overall expenses at full recovery for each Shop. If you chose to see dollar amounts at cost as well, there is an additional column that shows the total expenses for each Shop at cost. There are totals for the entire Service Request.
Funding Activity for “C” Jobs – This report prompts for a starting date. For all Jobs that start with the letter “C” and have had funding activity since the selected date, it shows Job Number and description, FRS funding account, funding date, dollar amount, and the IDB number on the funding transaction.
Grounds & Labor Dept. Charges – This report prompts for a Shop range and a Posting Date range, and whether you want to include State and Overhead accounts, Local accounts, or all accounts. For each selected Shop within Grounds & Labor Area, it summarizes by Task ID the total labor hours and dollars (excluding certain hours types that are considered to be non-productive time), the total Material dollars, and the total Labor and Material dollars expensed within the selected time frame for the selected types of accounts. All dollar amounts are at cost. There are totals by Shop and Area, and grand totals for the entire report.
Job Accounts Balance – This report prompts for a fiscal year. For each Job, it shows the Customer name, funding accounts, amounts, and percents, total amount billed, total unbilled broken out by labor, material, equipment, and direct expenses, encumbered material amount (all dollar amounts are at full recovery and are current as of the previous business day for the selected fiscal year), the remaining balance when all billed, unbilled, and encumbered material amounts are subtracted from the funding amount, the Job’s status (open or closed), and its start and end dates. There are totals by Job and grand totals for the entire report.
Job Accounts Balance with Total Labor >= 22,500 – This report prompts for a fiscal year. It is identical to the “Job Accounts Balance” report, except it includes only those Jobs where the total of billed plus unbilled labor dollars is greater than $22,500.
Job Accts Balance for C, D, G and S 80% Expended – This report prompts for a fiscal year. It is identical to the “Job Accounts Balance” report, except it includes only those Jobs that are not set to overbill in FRS, start with the letter “C”, “D”, “G”, or “S”, are not closed, and whose remaining balance is 20% or less of their original funding.
197
Job Accts Balance for C, G and S 90% Expended – This report prompts for a fiscal year. It is identical to the “Job Accounts Balance” report, except it includes only those Jobs that are not set to overbill in FRS, start with the letter “C”, “G”, or “S”, are not closed, and whose remaining balance is 10% or less of their original funding.
Job Funding by IBF Number – This report prompts for an IBF number. It lists the fiscal year, Job, FRS funding account and object code, funding amount, funding date, the date the funding was posted to FRS, and the user ID of the person who entered the funding transaction, for all funding transactions on the selected IBF number.
Job Information Table List – This report lists basic information for all Jobs, such as Job Number, description, Customer Number, expense funding source, status, start and end dates, billing code, status in the previous fiscal year, job type, and contact information.
Job/Service Request by Posting Date and Job Number – This report prompts for a Job range and a Posting Date range. It is identical to the “Expenses at Recovery by Job, S/R, and Shop” report, except that it can be run for a range of Job Number instead of just one, and includes grand totals for the entire report.
Jobs for Selected Customer and Fiscal Yr. – This report prompts for a Customer Number and a 4-digit fiscal year. It lists the Job Number, status, FRS funding account and percent, for all Jobs for the selected customer that are funded for the selected fiscal year.
Jobs with No Job Acct – This report prompts for a fiscal year. It lists the Job Number, description, start date, job type, and status of all Jobs that are open for the selected fiscal year, have no end date or have not yet reached their end date, but do not have any funding set up in the selected fiscal year.
Jobs with No Recover Percent – This report prompts for a fiscal year. It lists the Job Number, description, start date, and status of all Customer and External Jobs (except those that start with the letter “G”, which should be grant-funded Jobs) that are open for the selected fiscal year, have no end date or have not yet reached their end date, but do not have any Recovery Percents set up in the selected fiscal year.
OLP Meter Details – This report lists the Meter ID, read date, Job Number, FRS debit account and object code, consumption units and consumption amount, for all Outlying Properties Utilities batches, sorted by Meter ID and read date.
Open S/R Aging by Job Type – This report prompts for a Shop range and a date range. For all open selected Shops on Service Requests issued within the specified date range that are not Standing (Task ID 200000 - 299999 or S/R Number below 10000), PM (Task ID 800000 - 899999), or on Time-Off Jobs (Job Number beginning with “TO”), it lists the total number of Service Requests, the number open less than 30 days, the number open 31 - 60 days, the number open 61 - 90 days, the number open 91 - 120 days, and the number open more than 120 days, for each selected Shop, grouped within the first character of the Job Number (known as the “Job Type”). There are totals by “Job Type”.
Open S/Rs by Shop with Job Type Totals – This report prompts for a Shop range and a date range. For each selected Shop, then grouped by the first character of the Job Number (known as the “Job Type”), for open Shops on all Service Requests issued within the specified date range that are not Standing (Task ID 200000 - 299999 or S/R Number below 10000), PM (Task ID 800000 - 899999), or on Time-Off Jobs (Job Number beginning with “TO”), it shows the Job Number, Service Request Number, Building, room, Task ID, description, issued date, and number of days the request has been open. There is a total number of open requests by “Job Type” and by Shop.
Open Service Request Aging Report – This report prompts for a Shop range and a date range. It is the same as the “Open S/R Aging by Job Type” report, except it groups the open requests by “Job Type” within Shop, rather than by Shop within “Job Type”.
Open Service Requests on Closed Jobs – This report prompts for a Service Request Issued Date range, a Job range, a Shop range, a Service Request Number range, and whether you want to check the Job’s status in the current or previous fiscal year. It lists basic information (Job, Service Request Number, description, etc.) for all Service Requests that meet the entered criteria and have at least one open Shop, where the Job on that Service Request is closed in the fiscal year you selected.
198

Open Shops on Service Requests by S/R – This report prompts for a Service Request Issued Date range, a Job range, a Shop range, and a Service Request Number range. For each Service Request that meets the entered criteria and has at least one open Shop, it lists basic information such as Job, Shop that is open, Service Request Number, description, etc. There is a total count of the open Service Requests for the entire report.
Open Shops on Service Request by Shop – This report prompts for a Service Request Issued Date range, a Job range, a Shop range, and a Service Request Number range. It is similar to the “Open Shops on Service Requests by S/R” report, but lists the Service Requests with open Shops for each selected Shop, instead of listing each open Shop under the Service Request number. Also, it includes Equipment Number and does not show a total count of open requests.
Service Dept. Work in Process Summary – This report prompts for a date range. For each Job that does not have a Job Type of “Internal”, it summarizes unbilled labor, material, equipment, and direct expenses (and Job total expenses) that were posted within the specified date range and debited to the Service Department account (179030). There are grand totals for the report.
Service Request Equipment by Bldg – This report prompts for a Service Request Issued Date range and a Building Number range. For all selected Buildings, it lists the non-PM Service Requests referencing an Equipment Number that were issued during the specified period, including information such as Job Number, description, the equipment manufacturer, requestor, Service Request text, Shop closed date, etc., and lists each Shop on the Service Request, with its work description.
Service Requests by Shop – This report prompts for a single Shop and a date range. For all Service Requests with that Shop that were issued during the specified date range, it lists Service Request Number, description, issued date, and whether or not the Service Request has been printed for that Shop.
Service Requests with Selected Shop(s) – This report prompts for a Service Request Issued Date range and a Shop range. For all Service Requests issued during that period that were assigned to a selected Shop, it shows the Service Request Number, description, Job, Building, issued and closed dates, and number of days the entire Service Request was open. It also lists the selected Shops assigned, their work description, Task ID, closed date, and number of days open. There are report totals of total number of Service Requests, and number of Service Requests where all selected Shops are closed.
Shop List – This report shows the Shop Number, description, and department for all active FM Shops.Summary Expenses by Task ID & Area – This report prompts for a Shop range, Posting Date range, and
Task ID range. For each Grounds & Labor Area within each selected Task ID, it shows total hours, labor dollars, material dollars, and labor plus material dollars for each selected Shop (dollar amounts are at cost). There are Area and Task ID totals, and grand totals for the entire report.
Summary S/R Expenses by Task ID – This report prompts for a range of Service Request Issued Dates, a Job range, a Task ID range, a Shop range, a Service Request Number range, and a Posting Date range. It includes all expense transactions that meet the entered criteria, and shows Job, Service Request Number, Building, Room, Service Request description, total labor amount, total material amount, total equipment expense amount, total direct expense amount, and total overall expense amount for each Service Request (all dollar amounts are at cost). There are totals by Building, Shop, and Task ID, and grand totals for the entire report.
Work Rpt. Summary - Classroom Upgrades, Closed Only – This report prompts for a Shop range and a date range. It includes expense transactions with the selected Shops that were posted within the specified date range and are charged to Jobs beginning with “CU”, where the Shop was closed on the Service Request within the specified date range. It excludes Task IDs that designate Standing, Paycode, and PM Service Requests. It shows the number of Service Requests issued, the number where the Shop was closed that actually have charges, the total labor hours, total labor dollar, total material dollars, total equipment dollars, total direct expense dollars, and total overall dollars (all dollar amounts are at full recovery). There are totals for each Shop, and grand totals for the entire report.
Work Rpt. Summary - Classroom Upgrades, Open & Closed S/R – This report prompts for a Shop range and a date range. It is very similar to the “Work Rpt. Summary - Classroom Upgrades, Closed
199
Only” report, but it includes open Service Requests as well as closed, and transactions with no Service Request Number. It also shows the number of Service Requests where the Shop is still open.
Work Rpt. Summary - Local Jobs, Closed Only – This report prompts for a Shop range and a date range. It includes expense transactions with the selected Shops that were posted within the specified date range and are charged to Jobs beginning with “C” (but not “CU”), “G”, “M”, “S”, “T” (but only if followed by a number) or “W” (but not “WDIRECT” or “WSTATE”), where the Shop was closed on the Service Request within the specified date range. It excludes Task IDs that designate Standing, Paycode, and PM Service Requests. The information shown is the same as on the “Work Rpt. Summary - Classroom Upgrades, Closed Only” report.
Work Rpt. Summary - Local Jobs, Open & Closed S/R – This report prompts for a Shop range and a date range. It is very similar to the “Work Rpt. Summary - Local Jobs, Closed Only” report, but it includes open Service Requests as well as closed, and transactions with no Service Request Number. It also shows the number of Service Requests where the Shop is still open.
Work Rpt. Summary - Local PM, Closed Only – This report prompts for a Shop range and a date range. It includes expense transactions with the selected Shops that were posted within the specified date range and are charged to Jobs beginning with “G”, “S”, or “T”, where the Shop was closed on the Service Request within the specified date range. It includes only Task IDs that begin with an “8”. The information shown is the same as on the “Work Rpt. Summary - Classroom Upgrades, Closed Only” report.
Work Rpt. Summary - Local PM, Open & Closed S/R – This report prompts for a Shop range and a date range. It is very similar to the “Work Rpt. Summary - Local PM, Closed Only” report, but it includes open Service Requests as well as closed, and transactions with no Service Request Number. It also shows the number of Service Requests where the Shop is still open.
Work Rpt. Summary - State Jobs, Closed Only – This report prompts for a Shop range and a date range. It includes expense transactions with the selected Shops that were posted within the specified date range and are charged to Jobs beginning with “A”, “D”, “K” (but not “KDIRECT”), or “U”, or Job “WSTATE”, where the Shop was closed on the Service Request within the specified date range. It excludes Task IDs that designate Standing, Paycode, Estimate, and PM Service Requests. The information shown is the same as on the “Work Rpt. Summary - Classroom Upgrades, Closed Only” report.
Work Rpt. Summary - State Jobs, Open & Closed S/R – This report prompts for a Shop range and a date range. It is very similar to the “Work Rpt. Summary - State Jobs, Closed Only” report, but it includes open Service Requests as well as closed, and transactions with no Service Request Number. It also shows the number of Service Requests where the Shop is still open.
Work Rpt. Summary - State PM, Closed Only – This report prompts for a Shop range and a date range. It includes expense transactions with the selected Shops that were posted within the specified date range and are charged to Jobs beginning with “K” or “U”, where the Shop was closed on the Service Request within the specified date range. It includes only Task IDs that begin with an “8”. The information shown is the same as on the “Work Rpt. Summary - Classroom Upgrades, Closed Only” report.
Work Rpt. Summary - State PM, Open & Closed S/R – This report prompts for a Shop range and a date range. It is very similar to the “Work Rpt. Summary - State PM, Closed Only” report, but it includes open Service Requests as well as closed, and transactions with no Service Request Number. It also shows the number of Service Requests where the Shop is still open.
Work Rpt. Summary - Task ID 3, Closed Only – This report prompts for a Shop range and a date range. It includes expense transactions with the selected Shops that were posted within the specified date range, where the Shop was closed on the Service Request within the specified date range. It includes only Task IDs that begin with a “3”. The information shown is the same as on the “Work Rpt. Summary - Classroom Upgrades, Closed Only” report.
Work Rpt. Summary - Task ID 3, Open & Closed S/R – This report prompts for a Shop range and a date range. It is very similar to the “Work Rpt. Summary - Task ID 3, Closed Only” report, but it includes open Service Requests as well as closed, and transactions with no Service Request Number. It also shows the number of Service Requests where the Shop is still open.
200

MATERIALS CATEGORY1.7% of Inventory Issues – This report prompts for a date range. For all Inventory Issue transactions
entered within the selected date range, this report shows the dollar amount that represents 1.7% of the Issue Price multiplied by the quantity issued for all of these transactions. This amount is included in the Issue Price to account for price fluctuations, etc.
Active Blanket P/Os by Vendor Name – For all active Blanket purchase orders, this report shows the Blanket P/O type and number, vendor name and number, budget, etc., and lists the FRS Accounts, responsible department, account budget, total encumbrances, total expenses, and available balance for each account on the Blanket. It is sorted by Vendor Name, then Blanket P/O type and number, then account.
Active Blanket Purchase Orders – This report is identical to the “Active Blanket P/Os by Vendor Name” report, but is sorted by Blanket P/O type and number, then account.
Active Vendor List – This report shows basic information for all active vendors, including Vendor Number, name, address, phone, representative information, and email address.
Base Cost Totals by Job Type within Shop – This report prompts for a date range. For all material expense transactions with a Posting Date within the specified date range, it shows the total Base Cost Amount grouped by leading character of the Job Number (known as “Job Type”) for each Shop. There are totals for each Shop and for the entire report.
Count Dates with More or Less than N Items to Count – This report helps the warehouse manager more evenly distribute the cycle count workload. It prompts for either a minimum number of Inventory items to be counted, OR a maximum number of items to be counted. Depending on which number you enter, it shows the Cycle Count Dates that have less than the minimum number or more than the maximum number of Inventory items scheduled to be counted. The Item Number, Warehouse, Cycle Count Code, and item description are shown for each item scheduled to be counted, and the total number of items scheduled for each date is listed.
Credits Back to Inventory Accounts – This report is used to determine what journal entries need to be made in FRS to debit and credit the accounts and object codes that were debited and credited in FIMA for indirect material expenses. It prompts for a date range. For all material expense trans-actions that contain a credit account and were posted within the specified date range, it shows the total Base Cost of the transactions, summarized by FRS debit account and object code, and the total amount that should be credited to their offsetting credit account and object code.
Credits Back to JSUPLY Account – This report is used to determine what journal entries need to be made in FRS and FIMA to credit the Shop Stock account (179120, Job JSUPLY) for indirect material expense transactions. It prompts for a date range and which fiscal year’s Shop Stock Recovery Percent to use. For each Shop, for all material expense transactions that contain a credit account and had Shop Stock Recovery applied to their Base Cost, and were posted within the specified date range, it shows the total Shop Stock Recovery amount on the transactions, summarized by FRS debit account and object code. There are totals by Shop and for the entire report.
Cycle Count Audit Report – This report prompts for an Inventory item number range. It lists the Inventory item number, warehouse, count date, previous and newly counted on-hand quantities, user ID of the Cycle Count data entry person, and count reason for all selected items that had to be counted more than once at any point since the implementation of the FIMA Inventory module.
Cycle Count Code List – This report lists the Inventory item number, description, warehouse, on-hand quantity, minimum and maximum quantities, Cycle Count Code, and last and next count dates for all active Inventory items.
Detail Materials by Shop – This report prompts for a single Shop and a date range. It shows detail information – not only document number, Job, Service Request, vendor, warehouse, total document encumbered and expensed amounts, etc., but also the specific items and quantities – for all requested, encumbered, and expensed material orders for the selected Shop within the selected date range. There are Shop totals.
Detail Operations Encum/Expenses by Acct – This report prompts for an FRS Account range and a date range. It includes the following types of transactions where the posting date (order date for encumbrances) is within the selected date range and the debit account is within the selected account range: direct expense, equipment expense, Blanket P/O invoices, direct material
201

expense transactions, and encumbered material transactions that will result in a direct material expense. It also includes encumbered material transactions where the credit account is within the selected account range and the order date is within the selected date range. The report is grouped by document number within document type within FRS Object Code within FRS Account. For each transaction, it lists Job, Shop, type of transaction, description, encumbered amount, expensed amount, any remaining open encumbered amount, and any amount received but not yet invoiced (amounts are at cost). There are totals for document number, document type, object code, account, and for the entire report.
Detail Orders by Blanket – This report prompts for a Blanket P/O type and number. For each order on that Blanket, it shows information such as Job, Shop, Service Request, Material Request Number, accounts and object codes, order date, expected date, total amount encumbered, total amount received, etc. It also lists the items and quantities ordered and received and their unit price. There is a total dollar amount encumbered and received for the entire Blanket P/O (amounts are at cost).
Detail Orders by Vendor Number – This report prompts for a Vendor Number and a date range. It is similar to the “Detail Orders by Blanket” report, but shows orders for the selected vendor where the order date is within the specified date range, regardless of the purchase document used.
Direct Purchase Credits to JSUPLY– This report is used to determine what journal entries need to be made in FRS and FIMA to credit the Shop Stock account (179120, Job JSUPLY) for direct mate-rial expense transactions. It prompts for a date range and which fiscal year’s Shop Stock Recov-ery Percent to use. For each Shop, for all material expense transactions with no credit account that had Shop Stock Recovery applied to their Base Cost, and were posted within the specified date range, it shows the total Shop Stock Recovery amount on the transactions, summarized by first character of the Job Number, FRS debit account and object code. There are totals by Shop and for the entire report.
Encumbrances with > $10 Uninvoiced – This report prompts for an encumbrance entry date range and whether or not you want to see only those orders that should be physically received at the warehouse. It shows the Material Request Number, Job, Service Request Number, Shop, date required, requestor, data entry user ID, and total encumbered, received, and invoiced costs for all orders data entered within the selected date range with the selected Receive at Warehouse flag, that have at least $10.00 left to be invoiced.
Equipment Purchases – This report prompts for a Shop range and a date range. For all material orders with a selected Shop and an order date within the specified date range, and an FRS Object Code that references “Equipment” (except for 3840), it shows general order information such as Job, Material Request Number, Service Request Number, vendor, tax, shipping, and total encumbered amount, plus detail line item information such as item description, manufacturer’s item number, unit price, quantity ordered, and quantity received.
Incomplete/Partial Issues – For all Material Requests with a Stock Status of “I” (Incomplete), this report lists the Material Request Number, Job, Service Request, Shop, date required, requestor, etc., followed by the Inventory item number(s), description, unit of issue, quantity requested, and quantity issued for each item that has not been issued or has been partially issued.
Incomplete/Partial Issues by Item # – This report is very similar to the “Incomplete/Partial Issues” report, but is sorted by Inventory item number, with the incomplete Material Requests listed under each item. It also shows the total quantity requested but not issued for each item, and lets you know which items have an available on-hand quantity by showing a “Y” in the “Avail” column.
Inventory Issues by Building for Selected Shops – This report prompts for a Shop range and a date range. For each selected Building, it lists the Inventory item numbers that were issued to it within the specified date range, the Shop the item was issued to, the quantity, issue price (at Base Cost, not including Shop Stock Recovery) and extended cost. Quantity and extended cost are totaled for each item, and there are extended cost totals for each Building, and for the entire report.
Inventory Items Not Issued Since Selected Date – This report prompts for a date. It lists the item number, description, current on-hand quantity, and total value (on-hand quantity multiplied by issue price) for all active items that were entered into the Inventory prior to the specified date, but have not been issued since that date.
202

Inventory Valuation – For each FM warehouse, this report lists the item number, description, unit of issue, issue price, on-hand quantity, and value (on-hand quantity multiplied by issue price) of all active items in that warehouse. There is a total value for the inventory in each warehouse, and a grand total Inventory valuation for all warehouses.
Issues for Selected Item Number(s) – This report prompts for an Inventory item number range and a Posting Date range. For each selected item number, it lists the document type and number, Material Request Number, Job, Service Request, Shop, warehouse, Posting Date, unit of issue, issue price, quantity issued, and extended cost (issue price multiplied by quantity issued) for each Issue transaction with a Posting Date within the selected date range. There are quantity and extended cost totals for each item.
Late Orders – This report prompts for a range of dates when orders were expected to be received. For all material orders where the encumbered amount is not $0.00 and the received amount is different from the encumbered amount, and the order was expected within the selected date range, it lists order document type and number, Material Request Number, order date, expected date, vendor, requestor, Job, Service Request, Shop, total encumbered cost, and total received cost.
Material Journal Entries Batch – This report prompts for a FIMA user ID and a batch starting date or date and time. For all material Journal Entries data entered by the selected user on or after the selected starting date (or date and time), it lists the J/E Number, posting date, and description, followed by the individual lines on the J/E (Job, Service Request, Shop, accounts and object codes, dollar amounts at base cost, cost plus Shop Stock Recovery, and full recovery, etc.). There are totals for each J/E Number, and a grand total for the report.
Material Operations by Department – This report prompts for a starting date and a Period Ending date. This is a complex report providing operations (all expenses except labor) budget vs. expense analysis for state and overhead accounts, then for local and purchased utilities accounts. For each type of account within department, it provides the following columns: Annual Budget, Actual YTD Expenses, Total YTD Encumbrances, Available Balance, Current Month Expenses (determined by the Period Ending date), and YTD Budget. The local/purchased utilities portion of the report shows the actual FRS accounts that are included. There are subtotals for type of account (state, overhead, etc.)
Material Operations by Shop, State/Ovh – This report prompts for a starting date and a Period Ending date. It is similar to the “Material Operations by Department” report, but is restricted to state and overhead accounts only (no local or purchased utilities), and groups by Shop instead of department.
Material Ops State for Export – This report prompts for a starting date and a Period Ending date. It is identical to the “Material Operations by Department” report, but can only be exported to another program (such as Excel) instead of being printed.
Material Request Adjustment Transactions – This report prompts for a date range. It lists line items on material orders for Inventory (Job “INV”) that are marked as Adjustments and were entered within the selected time frame. There is a total base cost amount for the report.
Material Requests Awaiting Approval – This report lists all Material Requests with a Stock Status or Non-Stock Status of “M” (Material Control Processed). These requests are waiting for Cost Accounting approval before they become material encumbrances. The report shows Material Request Number, Job, Service Request, Shop, warehouse, date required, requestor, data entry user ID, date entered, Vendor Number, order document type and number, and date the request was last updated.
Material Requests Required within 3 Days – This report prompts for a Material Request entry date range. For each Shop, it lists the Material Requests that were entered during the specified period with a Date Required that is less than 3 days later than the entry date. Requests with the words “Urgent”, “ASAP”, or “Emerg” in the Requestor Name column are marked with an “X” in the “Urgent” column of the report. There is a count of those “urgent” requests and a count of the total number of requests required in less than 3 days for each Shop, and for the entire report.
MTD, YTD, LTD Usage for Selected Items – This report prompts for a range of Inventory item numbers. For each selected item number, it shows the item description, and the Month-to-Date, Year-to-Date, and Life-to-Date quantities issued and purchased. (The Life-to-Date columns include data starting with fiscal year 2002.)
203

Open Material Encumbrances (Based on Invoice) – This report shows the Material Request Number, order document information, Job, Service Request, Shop, Vendor Number, total encumbered cost, total invoiced cost, remaining encumbrance (total encumbered minus total invoiced), and last change date for all orders with an encumbered minus invoiced amount that is not $0.00. There are totals for each Material Request Number, and grand totals for the report.
Open Material Encumbrances (Based on Receipt) – This report is identical to the “Open Material Encumbrances (Based on Invoice)” report, except that it shows total received cost instead of total invoiced cost, its remaining encumbrance is the total encumbered minus total received, and the orders included are those where the total encumbered minus total received is not $0.00.
Open Material Encumbrances for Selected Jobs – This report prompts for a Job range and which fiscal year’s Recovery Percent and Shop Stock Recovery Percent you want to use. For each selected Job, it shows the Service Request Number, Shop, document number information, Material Request Number, Vendor Number, order date, debit and credit accounts and object codes, and the dollar amount of the open encumbrance at cost and its estimated amount at recovery (for direct purchases, open encumbrance is the encumbered amount minus the invoiced amount; for indirect, it is the encumbered amount minus the received amount). There are totals for each Shop within the Service Request within the Job, and grand totals for the report.
Orders for Selected Item Number(s) – This report prompts for a range of Inventory item numbers and a range of order dates. For each selected item number, it lists the orders for it that have an order date within the specified date range. Information includes order document type and number, Material Request Number, Job, Service Request, Shop, unit price, order quantity, extended cost, and received quantity. There are totals for each item number.
P-Card Encumbrances with Doc but no Receipt – This report shows information on orders made on the P-Card (document type “PCD”) that no longer have the original document number of 999999 but have an encumbered amount minus received amount that is not $0.00. Information includes Material Request Number, document information, Job, Service Request, Shop, Vendor Number, encumbered amount, received amount, remaining encumbrance, and last change date. There are totals for each Material Request Number, and grand totals for the report.
Partial Receipts & Backorders – This report lists orders that have either been partially received, or are backorders (whether partially received or not received at all yet). It shows basic order information such as Material Request Number, Job, Service Request, Shop, accounts, total encumbered cost, and total received cost, then lists the individual lines that are partially received or backordered, including information such as line number, item number, item description, quantity ordered, quantity received, etc.
Pending Material Requests – This report lists all Material Requests with a Stock Status or Non-Stock Status of “P” (Pending). Its content is very similar to the “Material Requests Awaiting Approval” report.
Purchases Received But Not Invoiced – This report shows basic information on orders where the received cost is not equal to the invoiced cost. Information includes order document type and number, vendor name, Job, Service Request Number, Shop, accounts, receipt date, amount remaining to be invoiced, etc. There is a total amount for the entire report.
Receipts for Selected Item Number(s) – This report prompts for a range of Inventory item numbers and a range of receipt entry dates. For each selected item number, it lists the document type and number, Material Request Number, warehouse, receipt entry date, unit of issue, full unit price (which includes tax, shipping, etc. if entered on the order header), quantity received, and extended cost (full unit price multiplied by quantity received) for each Receipt transaction with a Posting Date within the selected date range. There are quantity and extended cost totals for each item.
Stock Item Catalog – For all active Inventory items, this report lists the Item Number, description, unit of issue, current issue price, and the last Vendor Number this item was purchased from.
Stock Items on Order – For each Inventory item that has one or more orders that have not been completely received, it lists the document type and number, Material Request Number, vendor, warehouse, order date, expected date, unit of issue, unit price, quantity ordered, and quantity received. There are quantity totals for each item.
204

Stock Level Computation – For each Inventory Warehouse, this report lists the Item Numbers that have a current on-hand quantity in that warehouse that is less than the minimum quantity established for that warehouse. If there is currently an open (not fully received) order for that item, the Material Request Number of the most recent open order will be given, along with its expected date and the quantity still on order.
Summary Operations by Document & Account – This report prompts for an FRS Account range and a date range. It is very similar to the “Detail Operations Encum/Expenses by Acct” report, but it does not show transaction detail. Instead, information is summarized starting at the document number level.
Summary Operations Encum/Expenses by Acct – This report prompts for an FRS Account range and a date range. It is identical to the “Summary Operations by Document & Account” report, but information is summarized starting at the Object Code level.
Utility Jobs Operations Budget vs. Expense – This report prompts for Job and Posting Date ranges, and which fiscal year’s budget figures should be used. For each selected Job, its funding for the selected fiscal year is shown, then its Service Requests with expenses posted within the selected period (or material encumbrances with an order date within that period) are listed. Finally, totals are shown for each Shop on the Service Request, categorized by Material, Equipment, Direct Expense (all at recovery), and Material Encumbrances (at cost), the total of expenses and encumbrances, and the available budget (funding) left after these are subtracted. There are totals for each Service Request, Job, and the entire report.
Utility Jobs Ops Budget vs. Exp by Manager – This report prompts for an Employee Number and Posting Date ranges, and which fiscal year’s budget figures should be used. It is very similar to the “Utility Jobs Operations Budget vs. Expense” report, but it shows only those Utility Jobs that are managed by the selected Employee Number, and groups them by their Cost Center Description.
PAYROLL CATEGORYCompensatory Liability by Account – For all employees with a Compensatory Time accrual balance, this
report lists the Employee Number and name, department, number of Comp hours available to the employee, the employee’s hourly rate, account and percentage of funding on the account, and the dollar value of the Comp balance (number of hours multiplied by hourly rate). There is a total for each FRS Account, and a grand total for the report.
Compensatory Time by Payend Date – This report prompts for a Pay Ending Date. For each department, it lists the employees who earned Comp Time in the selected pay period. Job, Account, Work Date, number of hours, Hours Type (designating Comp earned at straight time or time-and-a-half), and cost amount are shown, with a total by department and a grand total for the report.
Department FTE and Funding – This report prompts for the Employee Classes you want to include (Fiscal Faculty, Ancillary Faculty, Salary, Supplemental Comp, Temporary, Wage, Student, and Work Study Student). For each Shop within department, it shows the employee name, title, pay grade, hire date, Employee Class, pay type, ethnicity, FTE, funding account(s) and percent(s), amount of salary funded on the account, total salary, evaluation rating and last evaluation date of each employee with a selected Employee Class. There are totals for each Shop and department, and grand totals for the report.
Detail Labor Expenses by Account – This report prompts for a range of FRS Accounts and a Pay Ending Date range. For a each labor expense transaction with a selected account and pay ending date, it shows Object Code, Employee Number and name, Job, Service Request, Shop, pay ending date, number of hours claimed, cost amount, and full recovery amount. The information is sorted by account, and there are totals by Job, Job Group (1st character of the Job Number), Object Code, Account, and grand totals for the report.
Detail Labor Transactions by Employee – This report prompts for an Employee Number and a Work Date range. For each Job the selected employee worked on during the specified date range, it lists Shop, Service Request, FRS Account and Object Code, work date, number of hours claimed, Hours Type Code and Subtype Code, cost amount, and the source of the transaction (payroll entry, J/E, etc.). There are totals for each Job, and report totals.
205

Detail Labor Transactions by Job – This report prompts for a Job range and a Work Date range. For each labor expense transaction with a selected Job and work date, it shows Shop, Service Request, Employee Number and name, FRS Account and Object Code, work date, number of hours claimed, Hours Type Code, cost amount, and the source of the transaction (payroll entry, J/E, etc.). There are totals for each Shop within Job, and report totals.
Employee Accrual List by Supervisor ID – This report prompts for a supervisor’s Employee Number. For the selected supervisor and each of his/her employees, it shows Employee Number, full name, and Vacation, Sick, and Comp Time accrual balances as of the last accrual upload date.
Employee Current Salary by Dept, Acct, Obj Code – This report shows the name and current salary of each active employee, grouped by FRS Object Code within Account within department.
Employee List by Shop (Check Distribution) – This report prompts for a Shop range. For each employee who is in the current file of people scheduled to be paid by Main Payroll, it shows Employee Number and name, and either an empty check box or the words “No advice printed” if the employee is on direct deposit and has chosen not to have a “check stub” printed. Employees are grouped by Shop within department, and there is a total count of the employees in each Shop. There is a line for signature and date at the end of the report.
Employee Sick Leave Awards – For all active employees who have at least 500 hours of sick leave accrued, this report shows the employee’s department, Employee Number, number of Sick hours accrued, and name. Information is grouped into employees with 500 - 749 hours accrued, those with 750 - 999 hours accrued, those with 1000 - 1499 hours accrued, and those with 1500 or more hours accrued, then grouped by department.
Employees with 1000 Hours or More of Sick Leave – For all active employees who have at least 1000 hours of sick leave accrued, this report shows the employee’s name, Shop name, and number of hours accrued. There is a count of the number of employees who appear on the report.
Employees with Absent Time by Work Date – This report prompts for a date. For all employees who claimed Absent or FML Absent hours on that date, it lists the Employee Number and name, Shop, Job, number of hours, and Hours Type Code.
Family Medical Leave Usage by Department – This report prompts for a department. For active employees in the selected department who were hired at least one year ago, it shows the Employee Number and name, FTE, and the number of FML hours the employee is eligible for, the number used in the last year, and the number still available. Employees are grouped by Shop, and there are Shop and report totals. Employees who appear to have worked less than 1250 hours in the last year, but are at least .5 FTE, are flagged, as are employees whose 1250 minimum hours worked includes earned Compensatory Time.
Hours Worked by Service Request and Shop – This report prompts for a Service Request Number, a Shop, and a Work Date range. For labor expense transactions that meet the entered criteria, it shows the Employee Number and name, work date, pay ending date, number of hours claimed, and cost amount, grouped by Job. There are Job totals.
Industrial Hours by Date and Shop – This report prompts for a Shop range and a date range. For all labor expense transactions with a selected Shop, a Work Date within the specified date range, and an Hours Subtype of “I” (Industrial), it shows the total hours claimed for the Shop, and a grand total for the report.
Journal Entries by Post Date – This report prompts for a Journal Entry Posting Date. For all labor Journal Entries with the selected posting date, it shows the J/E description, then lists the individual lines on the J/E, including FRS Account and Object Code, cost amount, Employee Number, number of hours, Hours Type Code, and Subtype Code. There is a total amount for each J/E, and a grand total for the report.
Overtime Summary – This report prompts for a Work Date range. For labor expense transactions within the specified date range with an Hours Type Code of standby, overtime, or comp earned (at straight time only), it shows overtime hours claimed and amount at cost, broken out into State, Local, Overhead, or Contract account types, with a separate column for standby, a total column, and separate columns for State & Overhead Comp Earned and Local Comp Earned, for each Shop. There are totals for Shop Group (1st character of the Shop Number) and report totals.
Personal Services Report - Detail – This report prompts for a Pay Ending Date. This is a complex report broken into 3 sections by account type: State and Overhead, Local, and Contract. In the
206
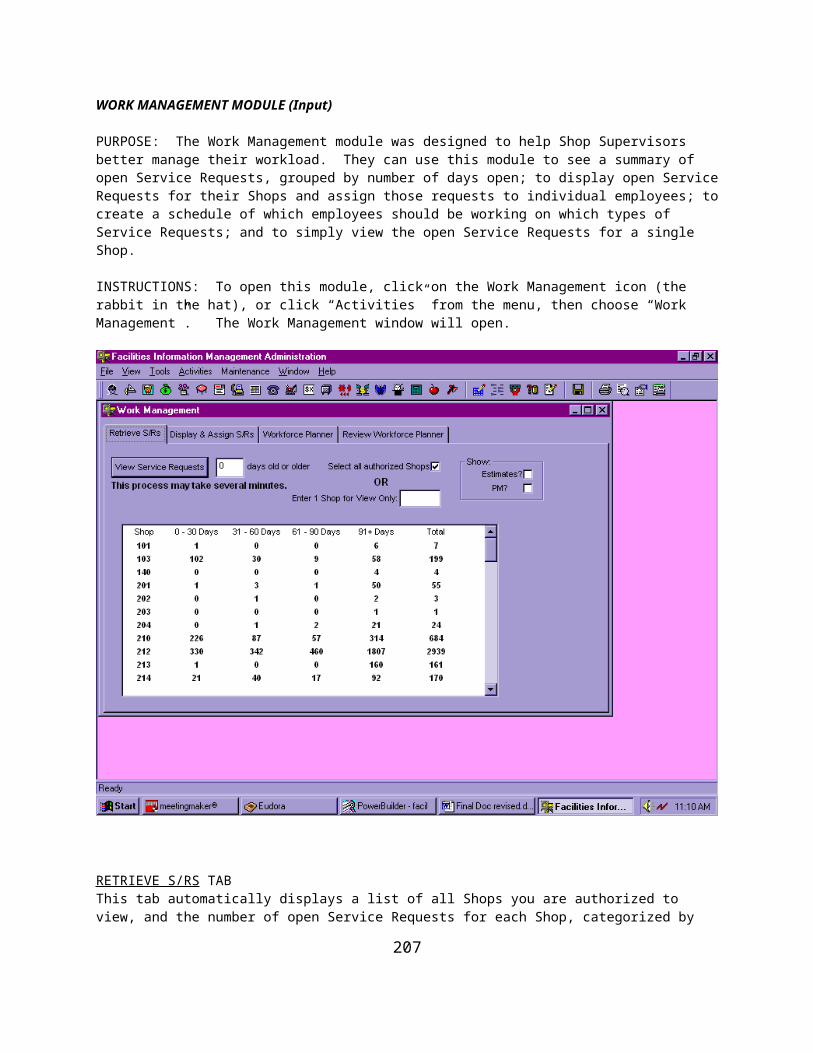
State/Overhead section, for each department, State totals are listed first, then Overhead, broken down by Object Code, into selected pay end date and year-to-date cost amounts, further separated by salaries vs. wages. In the Local section, the information is grouped by account rather than department. The Contract section is again grouped by department.
Personal Services Report - Summary – This report prompts for a Pay Ending Date. It is very similar to the “Personal Service Report - Detail” report, but does not show totals by Object Code. In the State/Overhead section, the actual account numbers are shown.
Salary Comparisons by Title – This report prompts for a position title. For all employees who hold this title, it shows Shop, employee name, PCN, current salary, and hire date.
Salary Savings – This report prompts for a Pay Ending Date range. For employees in the 200 Shops or Shop 733 with hours claimed during the specified date range, it shows Employee Number and name, FTE, PCN, funding account, hours claimed, cost amount, and the account charged, and calculates Salary Savings for State, Overhead, and Local groupings – for example, if the employee is funded on a state account, but the account charged was overhead or local, the cost amount of the transaction is added to the State Salary Savings column. The report is grouped by fund source (State, Overhead, or Local) within Shop within Object Code, and totals are provided for those groups, plus grand totals for the report.
Sick & Unpaid Absence by Employee - No Subtotals – This report prompts for an Employee Number, a date range, and the minimum number of sick or absent hours the employee must have in order to be included on the report. If the employee had Absent, Sick, FML Sick, FML Absent, FML Vacation, or Industrial Vacation hours where the date worked is within the specified time frame, it lists Employee Number and name, supervisor Employee Number, and for each included transaction, the department and Shop, work date, day of the week, Service Request Number, hours type, and number of hours claimed. There is a total number of hours claimed by the employee.
Sick & Unpaid Absence by Employee - S/R Totals – This report prompts for an Employee Number, a date range, and the minimum number of sick or absent hours the employee must have in order to be included on the report. It is very similar to the “Sick & Unpaid Absence by Employee - No Subtotals” report, except it includes a subtotal by Hours Type.
Sick & Unpaid Absence by Supervisor ID – This report prompts for a supervisor’s Employee Number, a date range, the minimum number of sick or absent hours the supervisor’s employees must have in order to be included on the report, and whether or not to include FML hours. It is very similar to the “Sick & Unpaid Absence by Employee - S/R Totals” report, except it includes a total by employee following the total by Hours Type.
Sick and Unpaid Absence Over n Hours by Dept. – This report prompts for a department range, a date range, and the minimum number of sick or absent hours employees must have in order to be included on the report. It shows the same information as the “Sick & Unpaid Absence by Employee - No Subtotals” report, but it is grouped by department and includes a subtotal by Service Request Number, by employee, and by department, as well as a report total..
Sick and Unpaid Absence Over n Hours by Shop – This report prompts for a Shop range, a date range, and the minimum number of sick or absent hours employees must have in order to be included on the report. It is very similar to the “Sick and Unpaid Absence Over n Hours by Dept.” report, but it is grouped by Shop instead of department and includes a subtotal by Service Request Number, by employee, and by Shop, as well as a report total..
Summary Labor by Shop & Task ID – This report prompts for a Shop range, a Work Date range, and a Task ID range. For each selected Shop and each selected Task ID, it summarizes the total labor hours claimed and the total cost amount of labor expense transactions with a work date within the specified time frame. There are totals by Shop and for the entire report.
Summary Labor Hours by Shop – This report prompts for a single Shop and a Work Date range. It summarizes the total labor hours paid (with work dates within the specified date range) by FRS Account within Hours Type Code.
Utility Jobs Labor at Cost – This report prompts for a range of Jobs and Pay Ending Dates. For each selected Job with labor expense transactions with a pay ending date in the specified time frame, it summarizes the total hours claimed and the total cost amount. There are also report totals.
207
Work Study Student Expenses – This report prompts for a date range. For each department with labor expense transactions charged to account 500530 with a pay ending date within the selected time frame, it lists the Employee Number and name and the total cost amount of the transactions for that employee.
PM CATEGORYCompleted PM Service Requests – This report prompts for a single Shop and a date range. For all PM
Service Requests for the selected Shop that were completed within the specified date range, it lists Service Request Number, Equipment Number, PM Task Code, the work date on which the PM was completed, and Compliance Form information, if any.
Compliance Form - Battery Banks – This report prompts for Equipment Number, Service Request Number, due date, and Shop. For all scheduled PM for the selected piece of equipment, it produces a compliance form listing Shop, Service Request Number, Job, Building, room, and PM interval (designated as Monthly), with spaces to fill in information such as billable Service Request Number, Employee Number, date and time, volts and amps on main and standby battery chargers, checkboxes for the status of the A/C indicator lamps and A/C and D/C breakers, start and stop times for cleaning batteries and cables, and a comments section.
Compliance Form - Elevators1 – This report prompts for Equipment Number, Service Request Number, due date, and Shop. For all scheduled PM for the selected piece of equipment, it produces a compliance form for issues relating to elevator cables, listing Shop, Service Request Number, Job, Building, location, serial number, and PM interval (designated as Monthly), then lists the individual components of the equipment with their corresponding Inspection Codes, spaces to fill in whether or not the component was normal, and any comments. There is also a section for operational information such as door opening and closing times, where the actual and standard times can be filled in.
Compliance Form - Elevators2 (6 Month) – This report prompts for Equipment Number, Service Request Number, due date, and Shop. It is similar to the “Compliance Form - Elevators1” report, but lists the components and operational information that must be checked at a 6-month rather than a monthly interval.
Compliance Form - Elevators3 – This report prompts for Equipment Number, Service Request Number, due date, and Shop. It is similar to the “Compliance Form - Elevators1” report, but lists the components and operational information related to monthly PM of elevator hydraulics.
Compliance Form - Extinguishers – This report prompts for Equipment Number, Service Request Number, due date, and Shop. For all scheduled PM for the selected piece of equipment, it produces a compliance form listing Shop, Service Request Number, Job, Building, and PM interval (designated as Yearly), with spaces to fill in information such as billable Service Request Number, Employee Number, date and time. It then lists the serial number, make, type, size, etc., for each individual fire extinguisher encompassed in the selected Equipment Number, with a checkbox to fill in indicating whether or not the extinguisher is OK.
Compliance Form - Generators – This report prompts for Equipment Number, Service Request Number, due date, and Shop. For all scheduled PM for the selected piece of equipment, it produces a compliance form listing Shop, Service Request Number, Job, Building, location, and PM interval (designated as Monthly), with spaces to fill in information such as billable Service Request Number, Employee Number, date and time, oil pressure, water temperature, frequency, hour meter, voltage, current, fuel level, and charger. It then lists the various system checks that must be done (lubrication, fuel, air intake, etc.) and the elements involved in each, with spaces to fill in whether or not the element is OK, and any comments.
Compliance Form - Hoists – This report prompts for Equipment Number, Service Request Number, due date, and Shop. For all scheduled PM for the selected piece of equipment, it produces a compliance form listing Shop, Service Request Number, Job, Building, location, and PM interval (designated as Monthly), with spaces to fill in information such as billable Service Request Number, Employee Number, date and time. It then lists the various inspections that must be done, with checkboxes to fill in indicating whether or not the inspection result was normal.
208

Compliance Form - Lights – This report prompts for Equipment Number, Service Request Number, due date, and Shop. For all scheduled PM for the selected piece of equipment, it produces a compliance form listing Shop, Service Request Number, Job, Building, and PM interval (designated as Quarterly), with spaces to fill in information such as billable Service Request Number, Employee Number, date and time. It then lists the equipment tag, light type, location, and comments for each individual light encompassed in the selected Equipment Number, with a checkbox to fill in indicating whether or not the light is OK.
Compliance Form - Transformers – This report prompts for Equipment Number, Service Request Number, due date, and Shop. For all scheduled PM for the selected piece of equipment, it produces a compliance form listing Shop, Service Request Number, Job, Building, location, notes, and PM interval (designated as Monthly), with spaces to fill in information such as billable Service Request Number, Employee Number, date and time. It then provides checkboxes to fill in specifying the location and location conditions for various items, and spaces to fill in readings such as liquid level and temperature, vacuum, pressure, etc.
Compliance Form - Wheelchair Lifts – This report prompts for Equipment Number, Service Request Number, due date, and Shop. For all scheduled PM for the selected piece of equipment, it produces a compliance form listing Shop, Service Request Number, Job, Building, location, serial number, and PM interval (designated as Monthly), with spaces to fill in information such as billable Service Request Number, Employee Number, date and time. It then lists the individual components of the equipment with spaces to fill in the Inspection Code, whether or not the component was normal, and any comments.
Equipment Classes and Tasks by Shop – For each Shop, this report lists the Equipment Class, Task Number and description, PM cycle, and estimated time for all PM tasks.
Equipment Maintenance Master List – This report prompts for a Shop. For the selected Shop, by Building, it lists the Equipment Number and description, room, Job, Task Code and description, PM cycle, manufacturer, Serial Number, Model Number, next PM due date, and estimated hours for each piece of equipment requiring PM.
Master Task List by Building – This report prompts for a Building Number. It is identical to the “Equipment Maintenance Master List”, except it lists only the equipment in the selected Building, and shows which Shop is responsible for the PM.
PM Expenses – This report prompts for a Job range and a Pay Ending Date range. For all labor and material expenses with a selected Job Number, a posting date within the specified date range, and a Task ID beginning with “8”, it lists, by Job and Equipment Number, the PM Task Code and cycle, Service Request Number, Shop, Service Request Shop Close Date, labor hours and dollars at cost and full recovery, and material dollars at cost and full recovery. There are totals by Equipment Number and Job, and grand totals for the report.
PM History – This report prompts for an Equipment Number. For the selected piece of equipment, it lists each PM Service Request Number with its Shop, PM Task description, issued and closed dates, notes, the FIMA User ID of the person who closed the Service Request, and whether or not the PM was completed.
PM Summary for Managers – This report prompts for a starting month and year and an ending month and year. This report is restricted so that authorized employees can only see information for specific Shops to which they have access. By Shop, for PM Tasks that should have been done within the specified date range, it lists month and year, total PM tasks, total PM tasks scheduled, total completed, total closed but not completed, and total not scheduled. It also lists the total estimated PM hours, total hours scheduled, total hours on completed PMs, total estimated hours on PMs that were closed but not completed, total estimated hours not scheduled, and an estimate of the percentage increase in FTE that would be needed in order to schedule all PM Tasks. There are totals by Shop.
PM Summary Report – This report prompts for a starting month and year and an ending month and year. It is identical to the “PM Summary for Managers” report, but has no restriction on which Shops can be viewed.
PMs Not On ‘K’ Jobs – This report lists the Job Number, Equipment Number, manufacturer, serial number, PM Task and cycle, next PM due date, Building Number and name, room number,
209
location description, and customer name, address, phone, and contact person, for all equipment requiring PM that is not assigned to a Job beginning with the letter “K” (a state-funded Job).
Upcoming RP Valve Tasks – For all active equipment with an Equipment Class of 168 (RP Valves) that require PM, this report lists upcoming PM, by PM month due. Equipment Number and description, building, serial number, and PM Task are shown.
210
MISCELLANEOUS MIS FUNCTIONS
There are several functions MIS performs that do not have icons on the FIMA toolbar. This section describes them.
CREATE JOB ACCOUNT BALANCE FILEThe “Job Accounts Balance” report (see the REPORTS MODULE for more information) utilizes data from a file that must be created every night after the close of business. To create this file, click “Maintenance” from the menu, then choose “Create Job Account Balance File”. A prompt window opens. Cost Accounting provides the information entered in these prompts:
Starting Fiscal Year – The earliest 4-digit fiscal year for which data should be included.Ending Fiscal Year – The last 4-digit fiscal year for which data should be included. This
may be the same as the Starting Fiscal Year.
To create the file, click the “Run Job” button (your cursor changes to an hourglass while this process runs). If for some reason you do not want to create the file at this time, click the “Cancel” button or simply close the window.
ROLL OVER INTERNAL JOBSThis process is run near the end of a fiscal year when Cost Accounting notifies MIS that they are ready to have all the open non-customer Jobs established for the new fiscal year. To run this process, click “Maintenance” from the menu, then choose “Carry Over Internal Jobs”. A prompt window opens. Enter the 4-digit year of the current fiscal year. All open Jobs with a Job Type of “Internal” will have their accounting and funding information for the entered fiscal year copied to the next fiscal year. Click the “Run Job” button to roll over the Jobs. If for some reason you do not want to roll over the Jobs at this time, click the “Cancel” button or simply close the window.
CALCULATE SERVICE REQUEST AVERAGE HOURS PER SHOPThe Workforce Planner tab in the Work Management module relies on information about the average number of hours it takes each shop to complete particular types of Service Requests (see the WORK MANAGEMENT MODULE section for more information). This data must be recalculated at the start of each quarter of the fiscal year, using data from the previous quarter. To run the process that recalculates theses averages, click “Maintenance” from the menu, then choose “Service Req Avgs by Shop”. A prompt window opens. This window contains the following prompts:
Start Date – The first date of the previous quarter, formatted MM/DD/YYYY.End Date – The last date of the previous quarter, formatted MM/DD/YYYY.
To run this process, click the “Run Job” button. If for some reason you do not want to recalculate the average hours at this time, click the “Cancel” button or simply close the window.
PURGE SAVED SCHEDULE INFORMATIONThe Review Workforce Planner tab in the Work Management module relies on information about employee utilization that is saved by Shop Managers, sometimes on a daily basis (see the WORK MANAGEMENT MODULE section for more information). This data must be purged once a month. To purge the data, click “Maintenance” from the menu, then choose “Purge Schedule”. A prompt window opens. The displayed date defaults to the first day of the previous month, which should be correct, although you can change this date if instructed to do so. Shop schedule and daily estimated hours data
211

with a date prior to this date will be deleted from the system. To purge the data, click the “Run Monthly Purge Process” button. If for some reason you do not want to run the purge process at this time, simply close the window.
212

APPENDIX
KEY FORM INPUT
The Lock Shop prepares a record of all the keys they produce. This record is accessible through the FM Website:http://www.fm.arizona.edu/shops/lockshop/keycuts/outkeyformacct.cfm
Print out the table using the printer icon at the top of your Internet Browser page, then click the “Update Database” button. Once this button is clicked the table will be deleted, so be sure you have printed it out – otherwise the information will be lost!
You can also click the “Finished” link, which will take you back to the main FM Page.
Cross out any lines for AD, K, or U jobs. Run a tape on the remainder; attach it to the printed page, and it is ready for input into FIMA.
Keys are input into FIMA from this printed table, line for line, using the Direct Expenses module (the safe icon). The “Control Number” from the key table will be the document number in the FIMA; the Object Code is always 5810; the Description is always the number of keys. See the instructions for the Direct tab in the DIRECT EXPENSES INPUT section for more information.
213