Embed Size (px)
Citation preview
Document No: 4808078-001.A02 DataTraveler® 5000 User’s Manual 1 November 16, 2009
DataTraveler® 5000 User’s Manual
This document is designed to help users become familiar with the DataTraveler®5000 (DT5000). For additional support, please visit our on-line technical support site at www.kingston.com/support.
Document No: 4808078-001.A02 DataTraveler® 5000 User’s Manual 2
TABLE OF CONTENTS 1 System ................................................................................................................................... 3
1.1 Requirements ................................................................................................................. 3
2 Getting Started ...................................................................................................................... 4 2.1 Driver Installation............................................................................................................4
2.2 Initial Setup .................................................................................................................... 4
3 Using DT5000 ........................................................................................................................ 7 3.1 Login to DT5000............................................................................................................. 7
3.2 Browsing the DT5000..................................................................................................... 7
3.3 Safely remove the DT5000............................................................................................. 8
4 Explore DT5000 ..................................................................................................................... 8 4.1 Secure Storage ............................................................................................................ 10
5 FAQs..................................................................................................................................... 11
Document No: 4808078-001.A02 DataTraveler® 5000 User’s Manual 3
1 SYSTEM
1.1 Requirements • Pentium III Processor
• 16MB free disk space
• USB 1.1/ 2.0
• Operating Systems
o Microsoft Windows® XP (SP2, SP3).
o Microsoft Windows® Vista™ (SP1, SP2).
o Microsoft Windows® 7
• Two available drive letters between physical drives and network shares.
Document No: 4808078-001.A02 DataTraveler® 5000 User’s Manual 4
2 GETTING STARTED
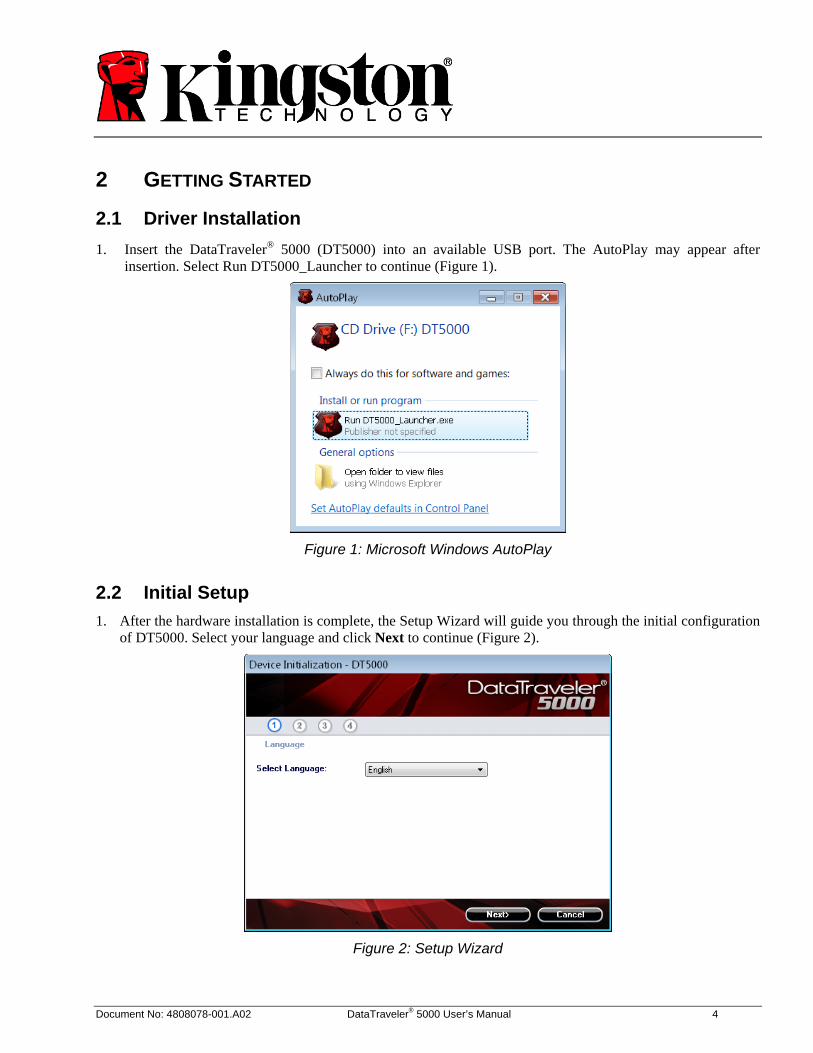
2.1 Driver Installation 1. Insert the DataTraveler® 5000 (DT5000) into an available USB port. The AutoPlay may appear after
insertion. Select Run DT5000_Launcher to continue (Figure 1).
Figure 1: Microsoft Windows AutoPlay
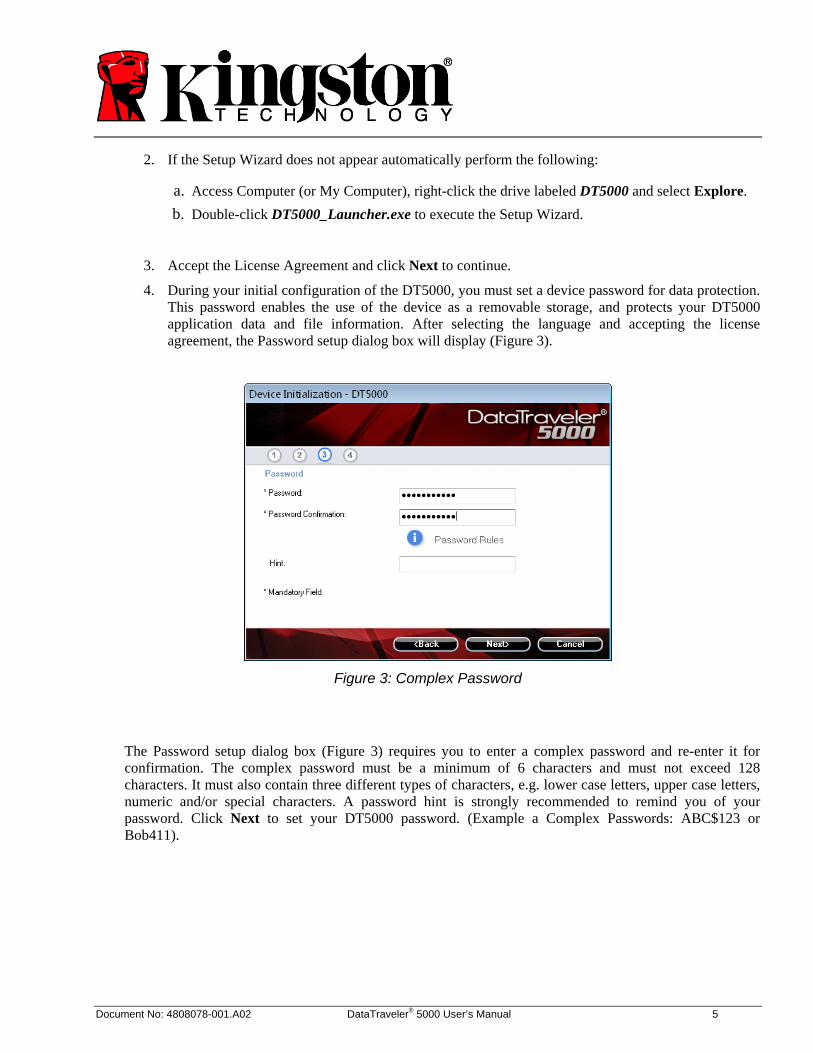
2.2 Initial Setup 1. After the hardware installation is complete, the Setup Wizard will guide you through the initial configuration
of DT5000. Select your language and click Next to continue (Figure 2).
Figure 2: Setup Wizard
Document No: 4808078-001.A02 DataTraveler® 5000 User’s Manual 5
2. If the Setup Wizard does not appear automatically perform the following:
a. Access Computer (or My Computer), right-click the drive labeled DT5000 and select Explore. b. Double-click DT5000_Launcher.exe to execute the Setup Wizard.
3. Accept the License Agreement and click Next to continue.
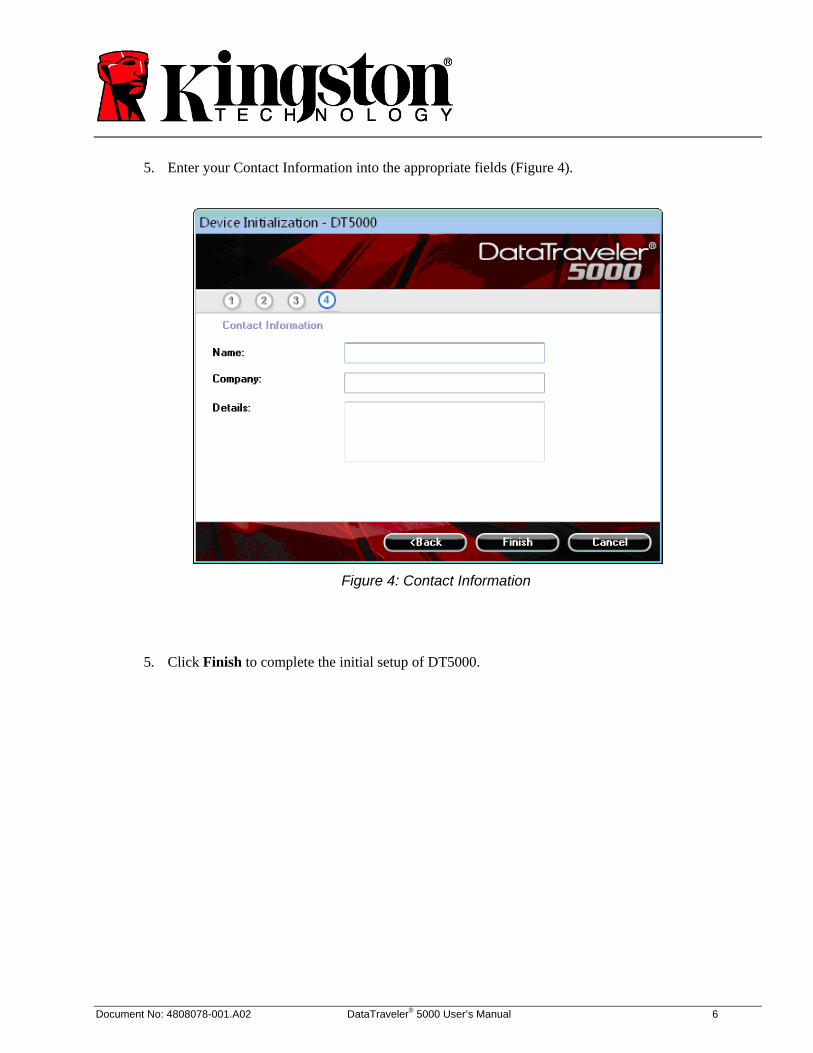
4. During your initial configuration of the DT5000, you must set a device password for data protection. This password enables the use of the device as a removable storage, and protects your DT5000 application data and file information. After selecting the language and accepting the license agreement, the Password setup dialog box will display (Figure 3).
Figure 3: Complex Password
The Password setup dialog box (Figure 3) requires you to enter a complex password and re-enter it for confirmation. The complex password must be a minimum of 6 characters and must not exceed 128 characters. It must also contain three different types of characters, e.g. lower case letters, upper case letters, numeric and/or special characters. A password hint is strongly recommended to remind you of your password. Click Next to set your DT5000 password. (Example a Complex Passwords: ABC$123 or Bob411).
Document No: 4808078-001.A02 DataTraveler® 5000 User’s Manual 6
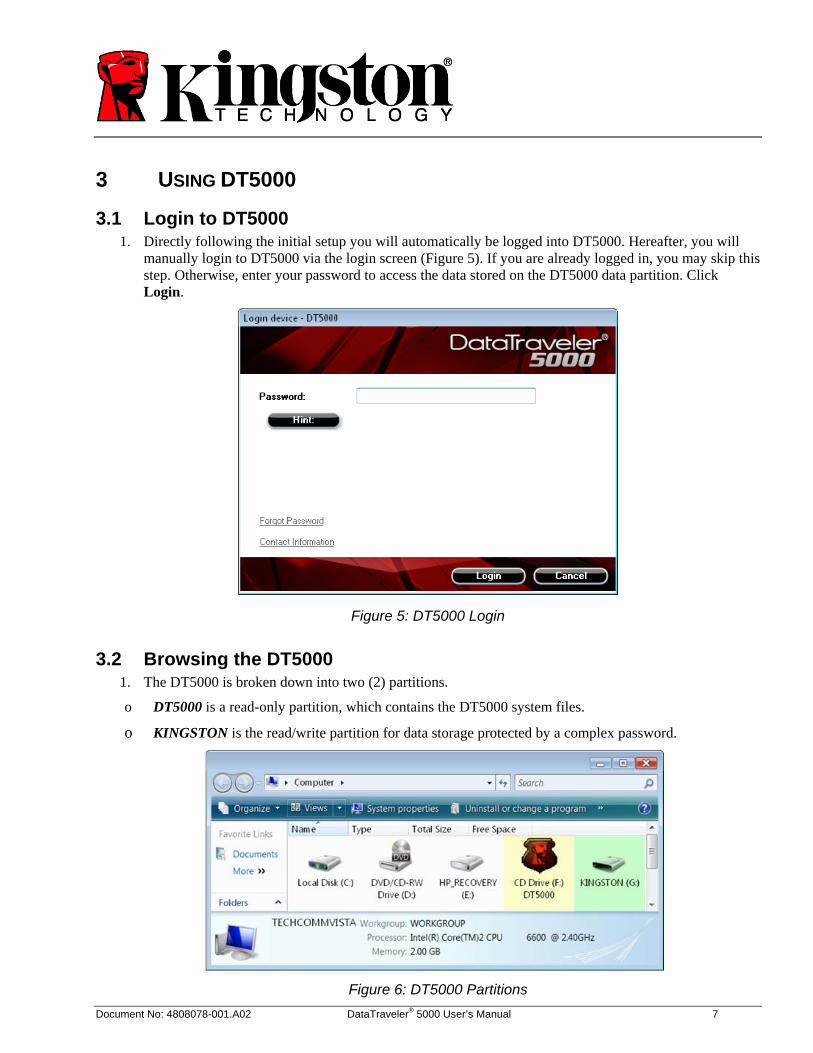
5. Enter your Contact Information into the appropriate fields (Figure 4).
Figure 4: Contact Information
5. Click Finish to complete the initial setup of DT5000.
Document No: 4808078-001.A02 DataTraveler® 5000 User’s Manual 7
3 USING DT5000
3.1 Login to DT5000 1. Directly following the initial setup you will automatically be logged into DT5000. Hereafter, you will
manually login to DT5000 via the login screen (Figure 5). If you are already logged in, you may skip this step. Otherwise, enter your password to access the data stored on the DT5000 data partition. Click Login.
Figure 5: DT5000 Login
3.2 Browsing the DT5000 1. The DT5000 is broken down into two (2) partitions.
o DT5000 is a read-only partition, which contains the DT5000 system files.
o KINGSTON is the read/write partition for data storage protected by a complex password.
Figure 6: DT5000 Partitions
Document No: 4808078-001.A02 DataTraveler® 5000 User’s Manual 8
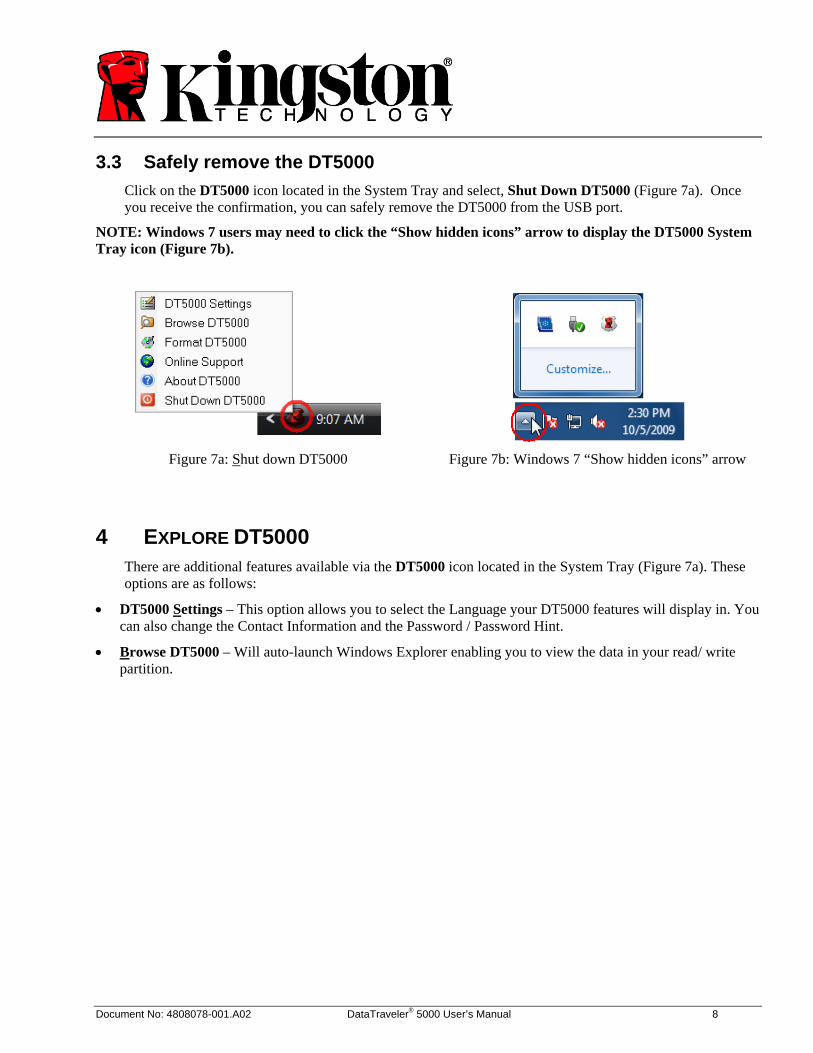
3.3 Safely remove the DT5000 Click on the DT5000 icon located in the System Tray and select, Shut Down DT5000 (Figure 7a). Once you receive the confirmation, you can safely remove the DT5000 from the USB port.
NOTE: Windows 7 users may need to click the “Show hidden icons” arrow to display the DT5000 System Tray icon (Figure 7b).
Figure 7a: Shut down DT5000 Figure 7b: Windows 7 “Show hidden icons” arrow
4 EXPLORE DT5000 There are additional features available via the DT5000 icon located in the System Tray (Figure 7a). These options are as follows:
• DT5000 Settings – This option allows you to select the Language your DT5000 features will display in. You can also change the Contact Information and the Password / Password Hint.
• Browse DT5000 – Will auto-launch Windows Explorer enabling you to view the data in your read/ write partition.
Document No: 4808078-001.A02 DataTraveler® 5000 User’s Manual 9
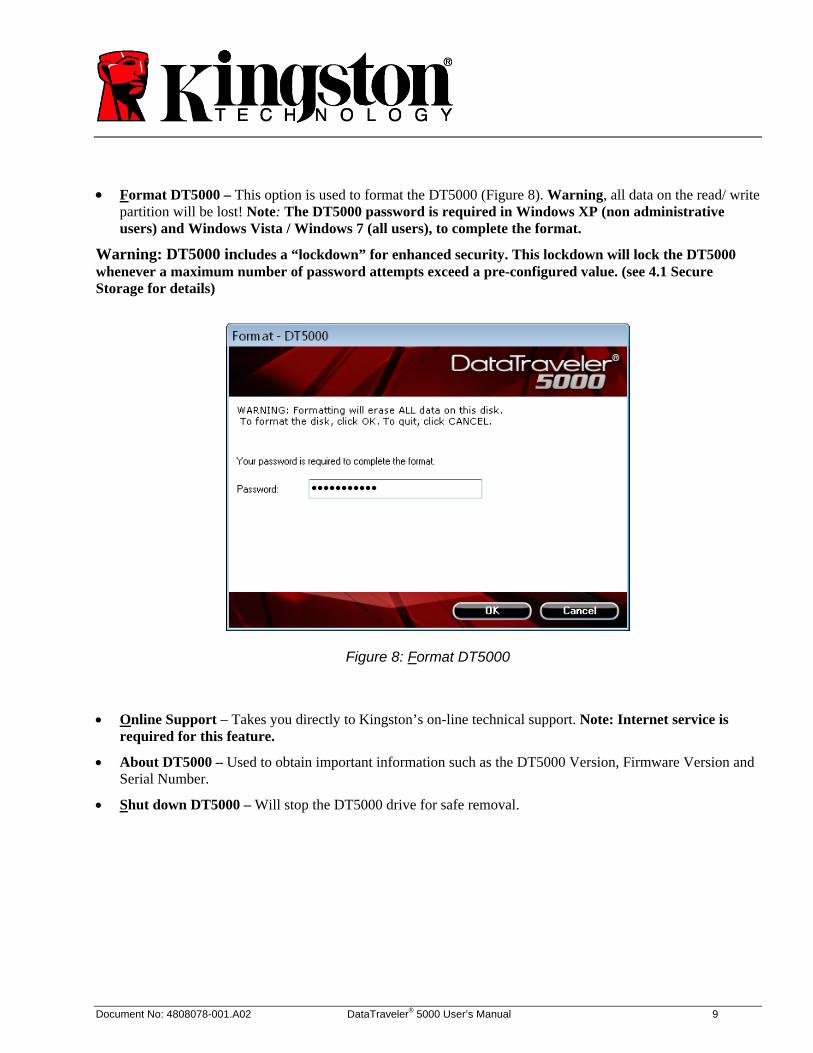
• Format DT5000 – This option is used to format the DT5000 (Figure 8). Warning, all data on the read/ write partition will be lost! Note: The DT5000 password is required in Windows XP (non administrative users) and Windows Vista / Windows 7 (all users), to complete the format.
Warning: DT5000 includes a “lockdown” for enhanced security. This lockdown will lock the DT5000 whenever a maximum number of password attempts exceed a pre-configured value. (see 4.1 Secure Storage for details)
Figure 8: Format DT5000
• Online Support – Takes you directly to Kingston’s on-line technical support. Note: Internet service is required for this feature.
• About DT5000 – Used to obtain important information such as the DT5000 Version, Firmware Version and Serial Number.
• Shut down DT5000 – Will stop the DT5000 drive for safe removal.
Document No: 4808078-001.A02 DataTraveler® 5000 User’s Manual 10
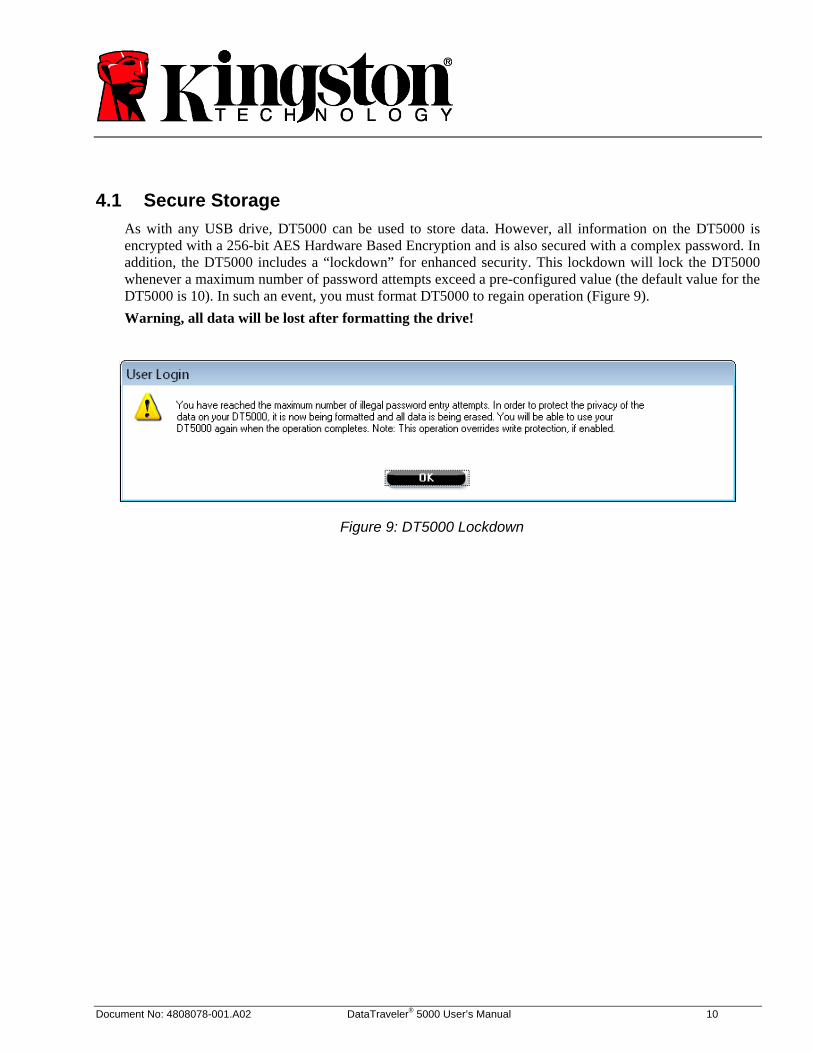
4.1 Secure Storage As with any USB drive, DT5000 can be used to store data. However, all information on the DT5000 is encrypted with a 256-bit AES Hardware Based Encryption and is also secured with a complex password. In addition, the DT5000 includes a “lockdown” for enhanced security. This lockdown will lock the DT5000 whenever a maximum number of password attempts exceed a pre-configured value (the default value for the DT5000 is 10). In such an event, you must format DT5000 to regain operation (Figure 9). Warning, all data will be lost after formatting the drive!
Figure 9: DT5000 Lockdown
Document No: 4808078-001.A02 DataTraveler® 5000 User’s Manual 11
5 FAQS FAQs are used to bring you frequently asked questions, which may surface during the use of a product. Below we have posted the most common FAQs for quick viewing. For the latest technical documentation please visit Kingston’s on-line technical support at www.kingston.com/support
Q1) Every time I login to the DT5000 drive on Windows Vista™, an AutoPlay dialog appears with an option to “Speed up my system using Windows ReadyBoost.” What is this feature?
A1) ReadyBoost™ is a Windows Vista™ feature which has the ability to utilize USB flash drive storage space to improve system performance. However, currently DT5000 does not support Windows ReadyBoost™.
Q2) When I insert DT5000 into a Windows Vista™ computer, I can not login to the data partition and the CD partition is not visible.
A2) If the DT5000 data partition (i.e. E:\) is assigned a drive letter prior to the CD partition (i.e. F:\), a drive letter conflict can occur with an existing network share. The DT5000 Launcher can not be executed when the DT5000 CD partition is assigned a drive letter already in use. The quickest way for administrative users to solve this problem is to manually change the drive letter of the flash drive via Disk Management. For Kingston DT5000, change the conflicting drive letter for the DT5000 Launcher partition. Non-administrative users should reinsert the DT5000, which could result in Windows reassigning a different drive letter for DT5000, or permanently reassign the conflicting network share to a different drive letter.
Q3) I inserted the DT5000 into a Windows system and it does not show up in My Computer or I receive a, “DT5000 requires two free drive letters…” error message.
A3) This is a common Windows issue which is caused by a drive letter conflict. In configurations where the network drive letter(s) follow physical drive letters, Windows may assign newly inserted flash drives a drive letter which is already taken by a network share. The quickest way for administrative users to solve this problem is to manually change the drive letter of the flash drive in Disk Management, located in Control Panel -> Administrative Tools -> Computer Management. For Kingston DT5000, change the conflicting drive letter for the DT5000 Launcher partition. If the launcher does not auto-run reinsert the drive or manually run the Launcher from the DT5000 Launcher partition.
See Microsoft Knowledge Base article for details at: http://support.microsoft.com/kb/297694
Note: If the launcher still does not auto-run, you may need to disable or upgrade any third party hard disk encryption software.
Q4) I inserted my DT5000 into the USB port but it did not launch.
A4) The new hardware setup in Microsoft Windows XP may not always start the auto-run code on the drive. If this happens, the DT5000 partition can be seen in Windows, but the password prompt will not display and the DT5000 data partition will not be available.
This can be resolved by restarting the computer and reinserting the DT5000, or by manually launching the DT5000 software. The DT5000 software launcher is located on the DT5000 drive as “DT5000_Launcher.”
Note: Make sure the DT5000Svc.exe and DT5000_Launcher.exe processes are not running in Task Manager prior to reinitializing the DT5000 Launcher.
Document No: 4808078-001.A02 DataTraveler® 5000 User’s Manual 12
On Windows Vista and Windows 7, the AutoPlay process has been changed to better improve system security. Depending on how the system is setup for AutoPlay, the DT5000 drive may or may not launch automatically after insertion. By default, the AutoPlay dialog will display after inserting the drive into the USB port. Execute the DT5000 Launcher via AutoPlay by selecting DT5000_Launcher.
Q5) After shutting down DT5000, the following error message may display, “The DT5000 application has shut down successfully, but the operating system could not eject the device.”
A5) This happens when trying to shutdown the DT5000 while an application or document on the drive is still open or when Windows assigns a drive letter (i.e. E:\) for the data partition prior to assigning a drive letter for the DT5000 Launcher partition (i.e. F:\). To resolve, close any open document and/or application that is operating from the DT5000 and select “Safely Remove Hardware” from the Windows taskbar.