Embed Size (px)
Citation preview
About the author/builder
Hi, I’m Tom, editor and “chair-man” of the Log
Cabin Directory and the Log Furniture
Directory. When I’m not doing geek stuff with
the directories, one of my most favorite
distractions is building log and rustic furniture
and creating projects around our log home. A
number of those projects (such as this one) have
found their way to be included in the DIY
section of our websites.
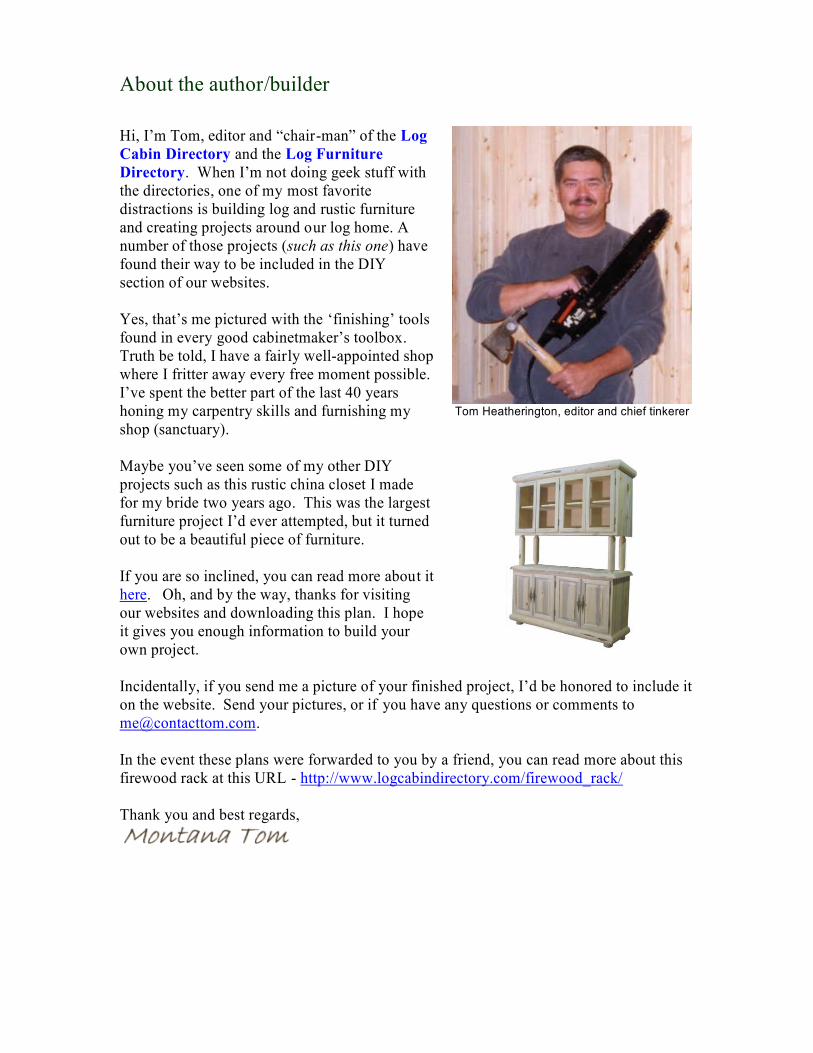
Yes, that’s me pictured with the ‘finishing’ tools
found in every good cabinetmaker’s toolbox.
Truth be told, I have a fairly well-appointed shop
where I fritter away every free moment possible.
I’ve spent the better part of the last 40 years
honing my carpentry skills and furnishing my
shop (sanctuary).
Tom Heatherington, editor and chief tinkerer
Maybe you’ve seen some of my other DIY
projects such as this rustic china closet I made
for my bride two years ago. This was the largest
furniture project I’d ever attempted, but it turned
out to be a beautiful piece of furniture.
If you are so inclined, you can read more about it
here. Oh, and by the way, thanks for visiting
our websites and downloading this plan. I hope
it gives you enough information to build your
own project.
Incidentally, if you send me a picture of your finished project, I’d be honored to include it
on the website. Send your pictures, or if you have any questions or comments to
In the event these plans were forwarded to you by a friend, you can read more about this
firewood rack at this URL - http://www.logcabindirectory.com/firewood_rack/
Thank you and best regards,
Does size really matter?
Nope. Not with this project. You can build your firewood rack to meet your space
requirements or unique floor plan.
Contrary to what you've seen in your spam folder, size really doesn't matter. In addition,
the type of wood I chose and your decision to use wrought iron or wood... none of that
matters! The only one you need to please with this project is you (and more than likely
your significant other) so let your imagination run wild and create your own customized
"Ultimate Firewood Rack - Butler - Storage - Time Saver - Furniture - Thing". Remember, what I am describing below is how I did it, feel free to plagiarize my total
plan or make changes where you think they'll work best for you.
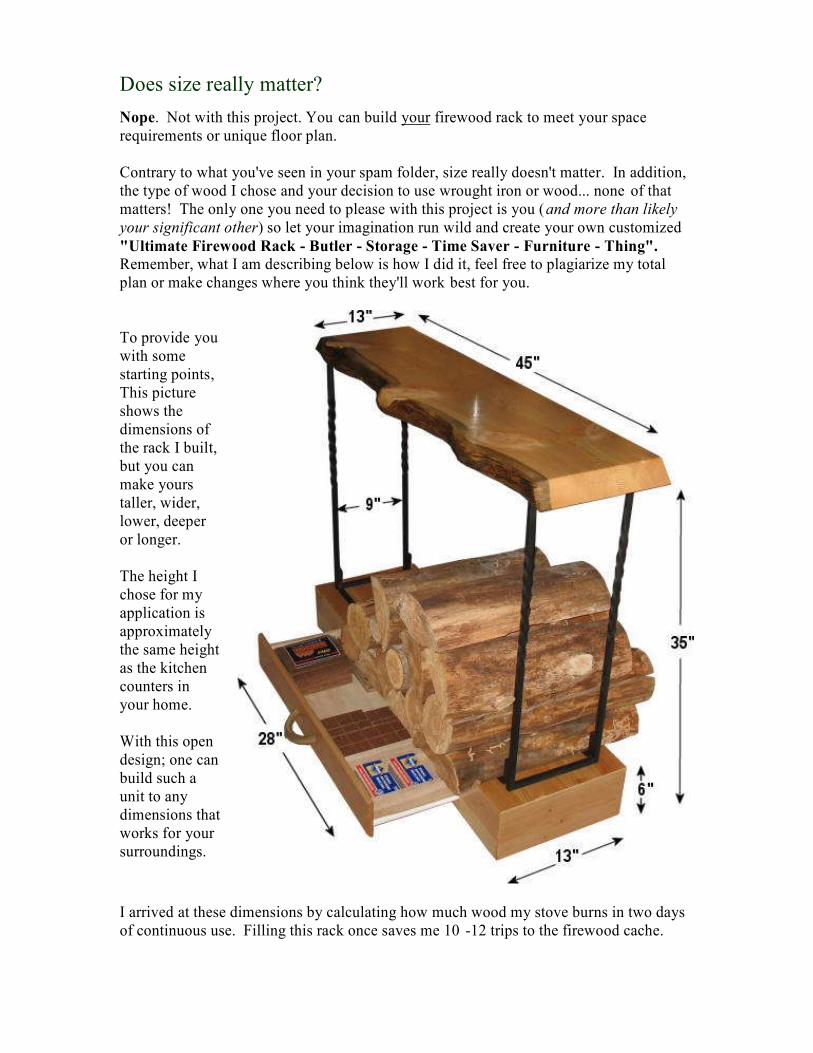
To provide you
with some
starting points,
This picture
shows the
dimensions of
the rack I built,
but you can
make yours
taller, wider,
lower, deeper
or longer.
The height I
chose for my
application is
approximately
the same height
as the kitchen
counters in
your home.
With this open
design; one can
build such a
unit to any
dimensions that
works for your
surroundings.
I arrived at these dimensions by calculating how much wood my stove burns in two days
of continuous use. Filling this rack once saves me 10 -12 trips to the firewood cache.
Go with a slab or glue-up some 2 x 4s
A number of "suburbians" have written to
me over the years saying that they can't
find the kind of wood slabs or logs I've
talked about with other projects. I know
that your neighborhood Home Depot®
doesn't stock such products. Try calling a
sawmill in rural areas near you, or search
online for a supplier - they're out there.
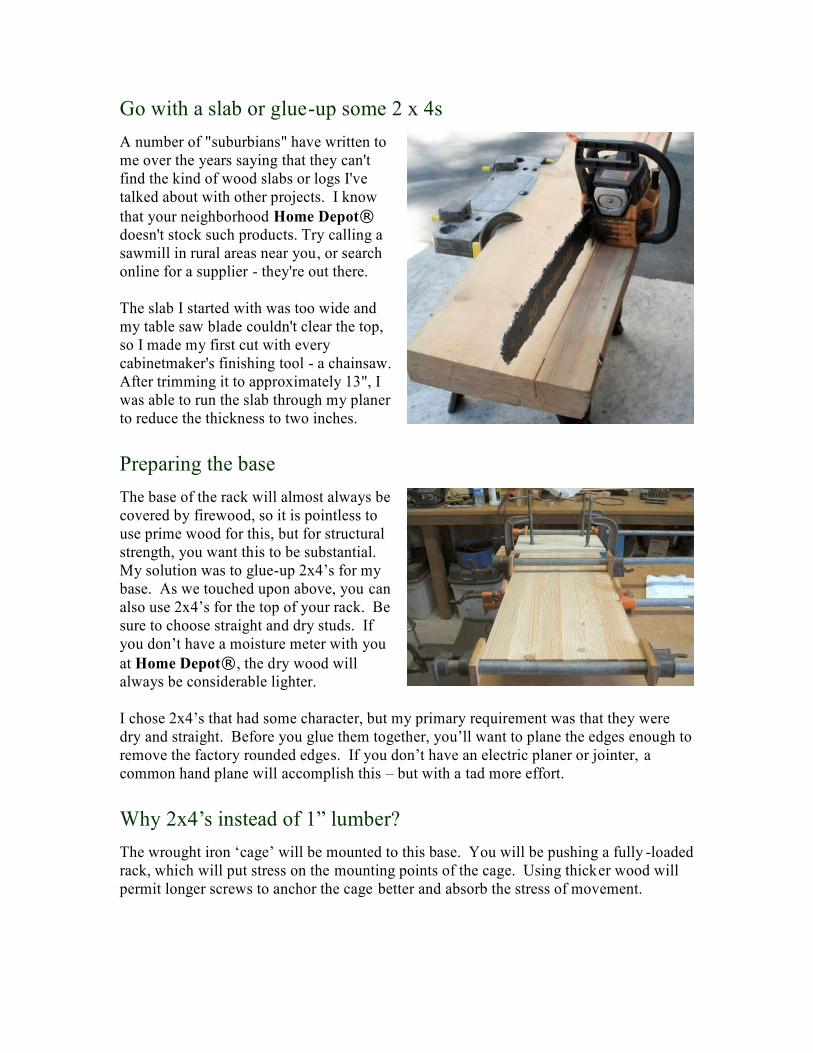
The slab I started with was too wide and
my table saw blade couldn't clear the top,
so I made my first cut with every
cabinetmaker's finishing tool - a chainsaw.
After trimming it to approximately 13", I
was able to run the slab through my planer
to reduce the thickness to two inches.
Preparing the base
The base of the rack will almost always be
covered by firewood, so it is pointless to
use prime wood for this, but for structural
strength, you want this to be substantial.
My solution was to glue-up 2x4’s for my
base. As we touched upon above, you can
also use 2x4’s for the top of your rack. Be
sure to choose straight and dry studs. If
you don’t have a moisture meter with you
at Home Depot®, the dry wood will
always be considerable lighter.
I chose 2x4’s that had some character, but my primary requirement was that they were
dry and straight. Before you glue them together, you’ll want to plane the edges enough to
remove the factory rounded edges. If you don’t have an electric planer or jointer, a
common hand plane will accomplish this – but with a tad more effort.
Why 2x4’s instead of 1” lumber?
The wrought iron ‘cage’ will be mounted to this base. You will be pushing a fully -loaded
rack, which will put stress on the mounting points of the cage. Using thicker wood will
permit longer screws to anchor the cage better and absorb the stress of movement.
Gluing-up the carcass
I must assume that you’re a DIY type of
person and have experience building basic
cabinets and furniture. Gluing-up the base
is Cabinetmaking 101. A simple box with
one drawer. I chose a metal drawer slide
common to most kitchen cabinet
applications for my drawer – also
available at Home Depot or any hardware
store. I chose a drawer height of 3” and
used a jig saw to cut the opening from a
1” board that would be the face of the
base.
I also cut all carcass joints at a standard 45 degree angle using my table saw, but a simple
squared butt joint (board to board) will work equally as well. I was trying to give the
appearance of a solid slab, but I don’t think that is as important with the base as it will
usually be obscured by firewood.
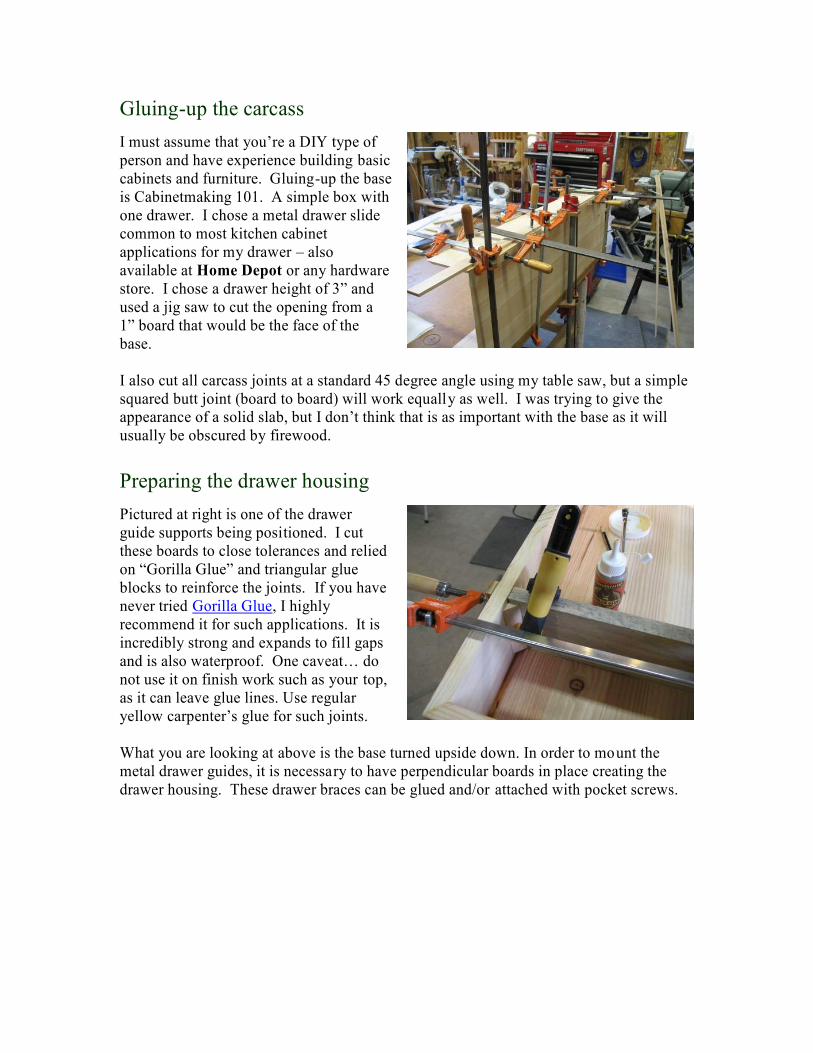
Preparing the drawer housing
Pictured at right is one of the drawer
guide supports being positioned. I cut
these boards to close tolerances and relied
on “Gorilla Glue” and triangular glue
blocks to reinforce the joints. If you have
never tried Gorilla Glue, I highly
recommend it for such applications. It is
incredibly strong and expands to fill gaps
and is also waterproof. One caveat… do
not use it on finish work such as your top,
as it can leave glue lines. Use regular
yellow carpenter’s glue for such joints.
What you are looking at above is the base turned upside down. In order to mount the
metal drawer guides, it is necessary to have perpendicular boards in place creating the
drawer housing. These drawer braces can be glued and/or attached with pocket screws.
Do you want wheels with that?
Part of my purpose in building this rack
was to lighten the burden of moving wood
from there to here. My woodstove is
approximately 20+ steps from the door.
My rack holds about 10-12 good armloads
of wood – thus saving me more than 200+
steps and a sore back
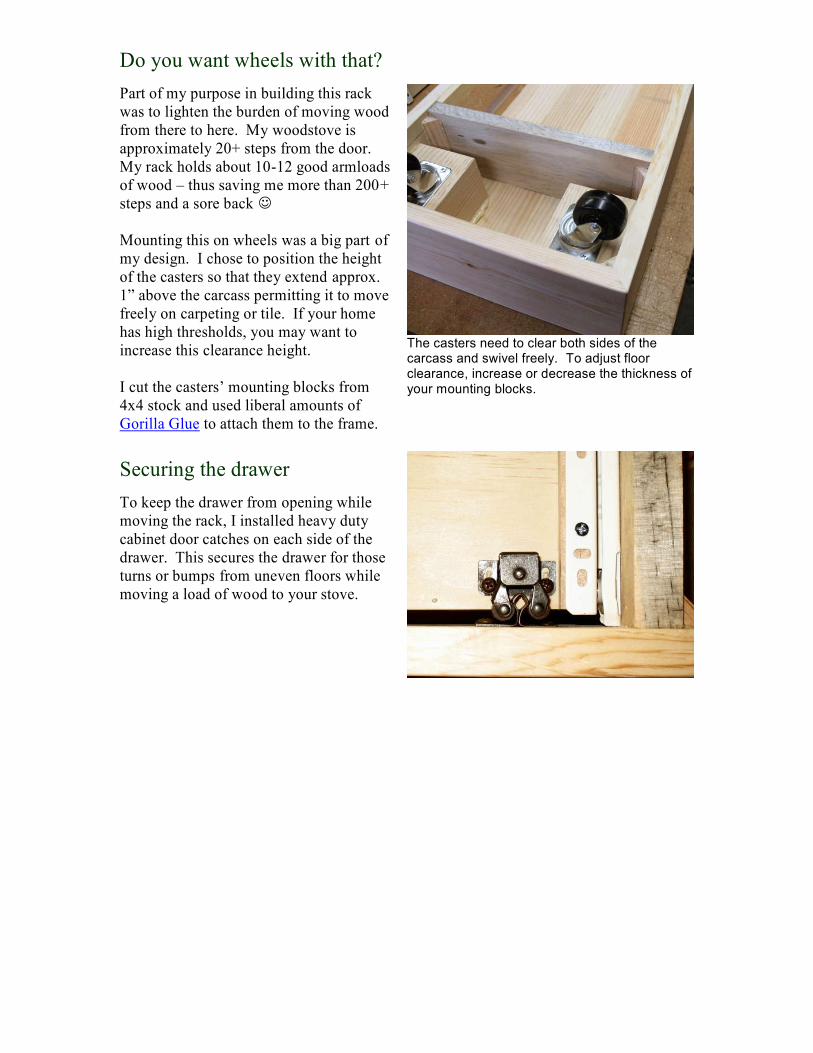
Mounting this on wheels was a big part of
my design. I chose to position the height
of the casters so that they extend approx.
1” above the carcass permitting it to move
freely on carpeting or tile. If your home
has high thresholds, you may want to
increase this clearance height.
I cut the casters’ mounting blocks from
4x4 stock and used liberal amounts of
Gorilla Glue to attach them to the frame.
The casters need to clear both sides of the carcass and swivel freely. To adjust floor clearance, increase or decrease the thickness of your mounting blocks.
Securing the drawer
To keep the drawer from opening while
moving the rack, I installed heavy duty
cabinet door catches on each side of the
drawer. This secures the drawer for those
turns or bumps from uneven floors while
moving a load of wood to your stove.

Building the metal frame (cage)
NOTE: Many DIYers dabble in creative pursuits involving woodworking and
metalwork. If working with metal is new to you, feel free to use wood dowels or check
with a local company that could fabricate the cage for you. Parts are very inexpensive, so
you will only be paying for a few simple welds. Show these plans to a shop and you’ll
probably be surprised how reasonably this can be fabricated for you.
If you look in your local Yellow Pages,
you will probably find a company that
sells steel components such as metal
railings. Typically you can buy square or
round stock quite inexpensively. The
metal I used in my rack cost less than
$20.00 for 4 twisted posts and 2 - four
foot sections of ½” x ½” steel. These 4’
sections became the bottom rails of my
cage, and the 10” I cut from the 4 twisted
rods became the top and bottom rails of
the cage side sections.
Note that the metal rods have been
dressed by a wire wheel to remove rust so
as to weld easier and accept paint later in
this project.
Welding (or brazing) the four small bars
to the top and bottom of the twisted rods
at 90° angles creates the sides of the
firewood rack - as pictured at right.
It is critical that when positioning these
pieces for joining, use a framing square to
ensure that your welds produce a perfect
90° angle at each corner. If your cage
isn’t square, the entire project will be
jeopardized.
Cross member preparation
The cross members will be attached the top and base of the firewood rack. These are
critical, stress bearing components. I drilled 4 holes to accept wood screws to attach the
cage.
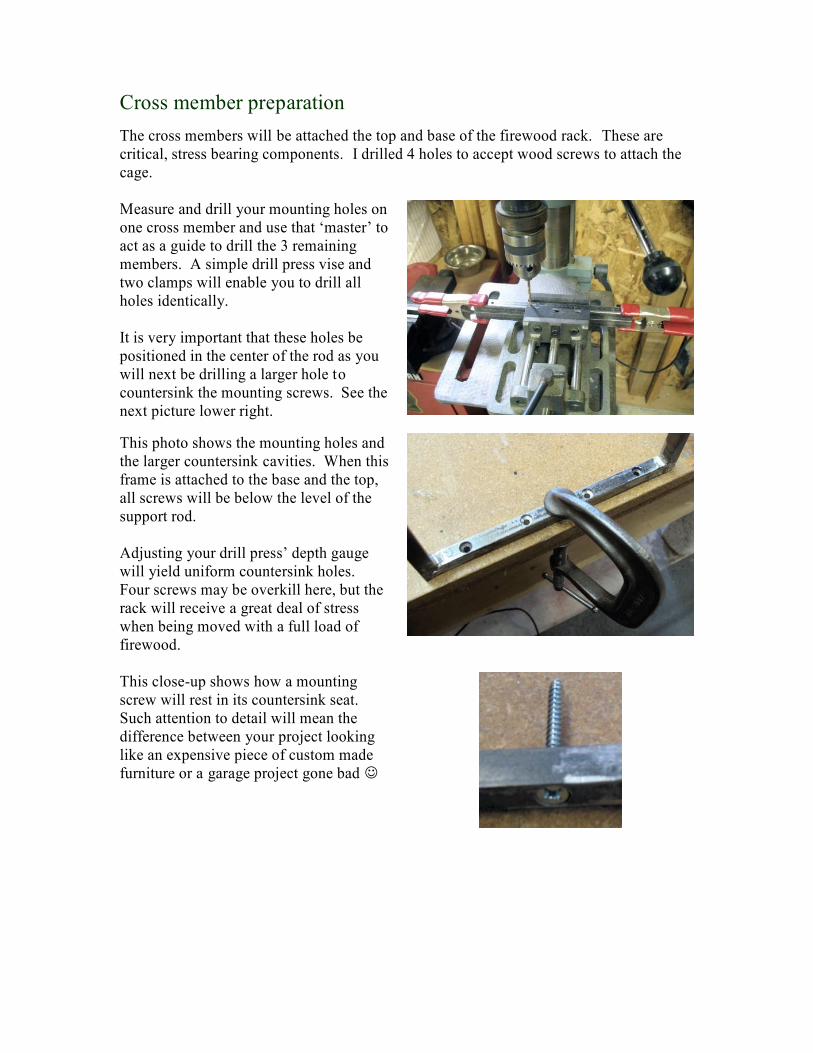
Measure and drill your mounting holes on
one cross member and use that ‘master’ to
act as a guide to drill the 3 remaining
members. A simple drill press vise and
two clamps will enable you to drill all
holes identically.
It is very important that these holes be
positioned in the center of the rod as you
will next be drilling a larger hole to
countersink the mounting screws. See the
next picture lower right.
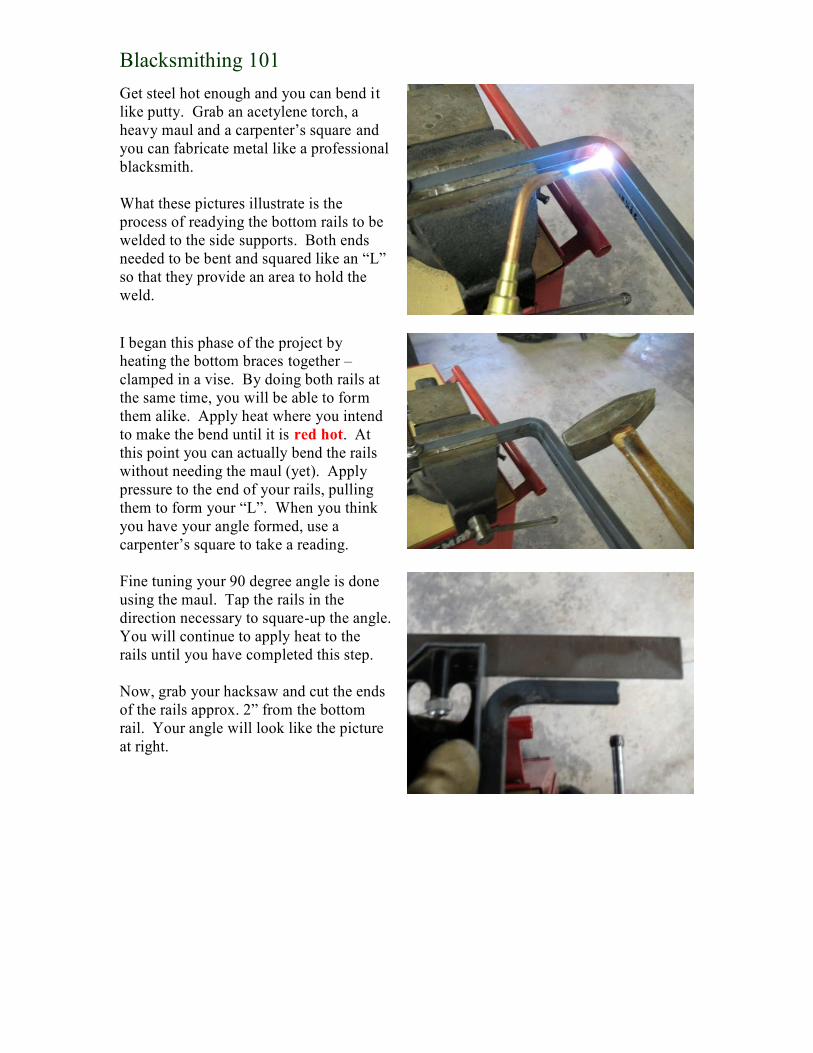
This photo shows the mounting holes and
the larger countersink cavities. When this
frame is attached to the base and the top,
all screws will be below the level of the
support rod.
Adjusting your drill press’ depth gauge
will yield uniform countersink holes.
Four screws may be overkill here, but the
rack will receive a great deal of stress
when being moved with a full load of
firewood.
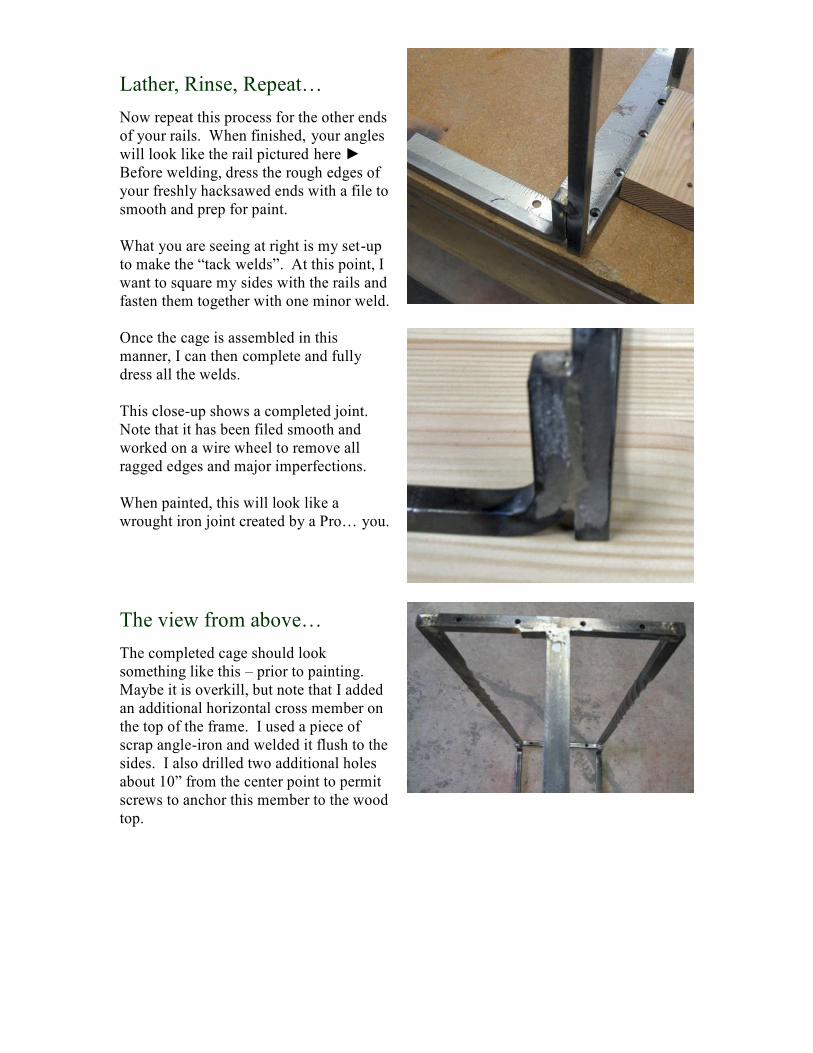
This close-up shows how a mounting
screw will rest in its countersink seat.
Such attention to detail will mean the
difference between your project looking
like an expensive piece of custom made
furniture or a garage project gone bad
Blacksmithing 101
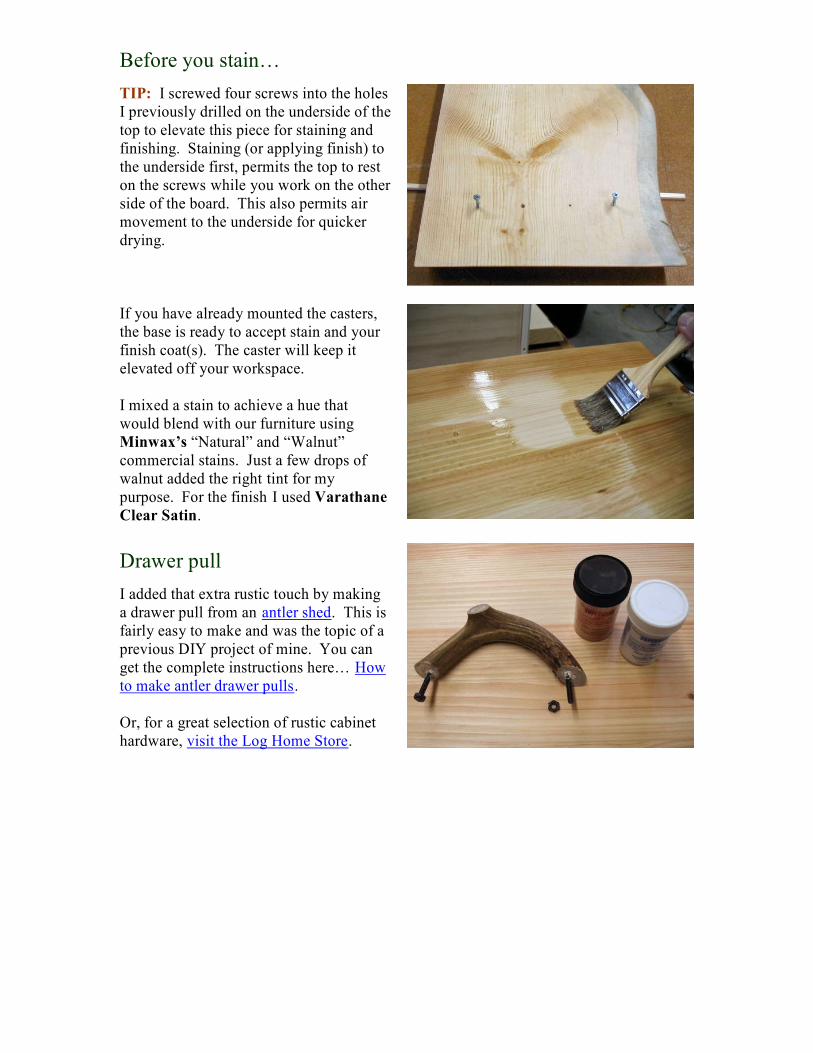
Get steel hot enough and you can bend it
like putty. Grab an acetylene torch, a
heavy maul and a carpenter’s square and
you can fabricate metal like a professional
blacksmith.
What these pictures illustrate is the
process of readying the bottom rails to be
welded to the side supports. Both ends
needed to be bent and squared like an “L”
so that they provide an area to hold the
weld.
I began this phase of the project by
heating the bottom braces together –
clamped in a vise. By doing both rails at
the same time, you will be able to form
them alike. Apply heat where you intend
to make the bend until it is red hot. At
this point you can actually bend the rails
without needing the maul (yet). Apply
pressure to the end of your rails, pulling
them to form your “L”. When you think
you have your angle formed, use a
carpenter’s square to take a reading.
Fine tuning your 90 degree angle is done
using the maul. Tap the rails in the
direction necessary to square-up the angle.
You will continue to apply heat to the
rails until you have completed this step.
Now, grab your hacksaw and cut the ends
of the rails approx. 2” from the bottom
rail. Your angle will look like the picture
at right.
Lather, Rinse, Repeat…
Now repeat this process for the other ends
of your rails. When finished, your angles
will look like the rail pictured here ►
Before welding, dress the rough edges of
your freshly hacksawed ends with a file to
smooth and prep for paint.
What you are seeing at right is my set-up
to make the “tack welds”. At this point, I
want to square my sides with the rails and
fasten them together with one minor weld.
Once the cage is assembled in this
manner, I can then complete and fully
dress all the welds.
This close-up shows a completed joint.
Note that it has been filed smooth and
worked on a wire wheel to remove all
ragged edges and major imperfections.
When painted, this will look like a
wrought iron joint created by a Pro… you.
The view from above…
The completed cage should look
something like this – prior to painting.
Maybe it is overkill, but note that I added
an additional horizontal cross member on
the top of the frame. I used a piece of
scrap angle-iron and welded it flush to the
sides. I also drilled two additional holes
about 10” from the center point to permit
screws to anchor this member to the wood
top.

(Pre) finishing touches…
Prior to staining and painting the metal
cage, assemble everything. Now is the
time to drill all pilot holes to accept
mounting screws for the cage. After holes
are drilled, you will want to perform one
final finish sanding to remove scrap from
the new holes - and any errant tool marks
acquired during this assembly phase.
All parts fit properly?
Drawer slides & locks correctly?
This photo illustrates why I chose to add
rails to the bottom of the rack. The rails
will keep your firewood from coming into
contact with the finish of your wooden
base.
During the off-season, you may want to
use this rack as an accent piece to hold
plants or other decorative items. Keeping
the base looking like new is important.
Before you stain…
TIP: I screwed four screws into the holes
I previously drilled on the underside of the
top to elevate this piece for staining and
finishing. Staining (or applying finish) to
the underside first, permits the top to rest
on the screws while you work on the other
side of the board. This also permits air
movement to the underside for quicker
drying.
If you have already mounted the casters,
the base is ready to accept stain and your
finish coat(s). The caster will keep it
elevated off your workspace.
I mixed a stain to achieve a hue that
would blend with our furniture using
Minwax’s “Natural” and “Walnut”
commercial stains. Just a few drops of
walnut added the right tint for my
purpose. For the finish I used Varathane
Clear Satin.
Drawer pull
I added that extra rustic touch by making
a drawer pull from an antler shed. This is
fairly easy to make and was the topic of a
previous DIY project of mine. You can
get the complete instructions here… How
to make antler drawer pulls.
Or, for a great selection of rustic cabinet
hardware, visit the Log Home Store.
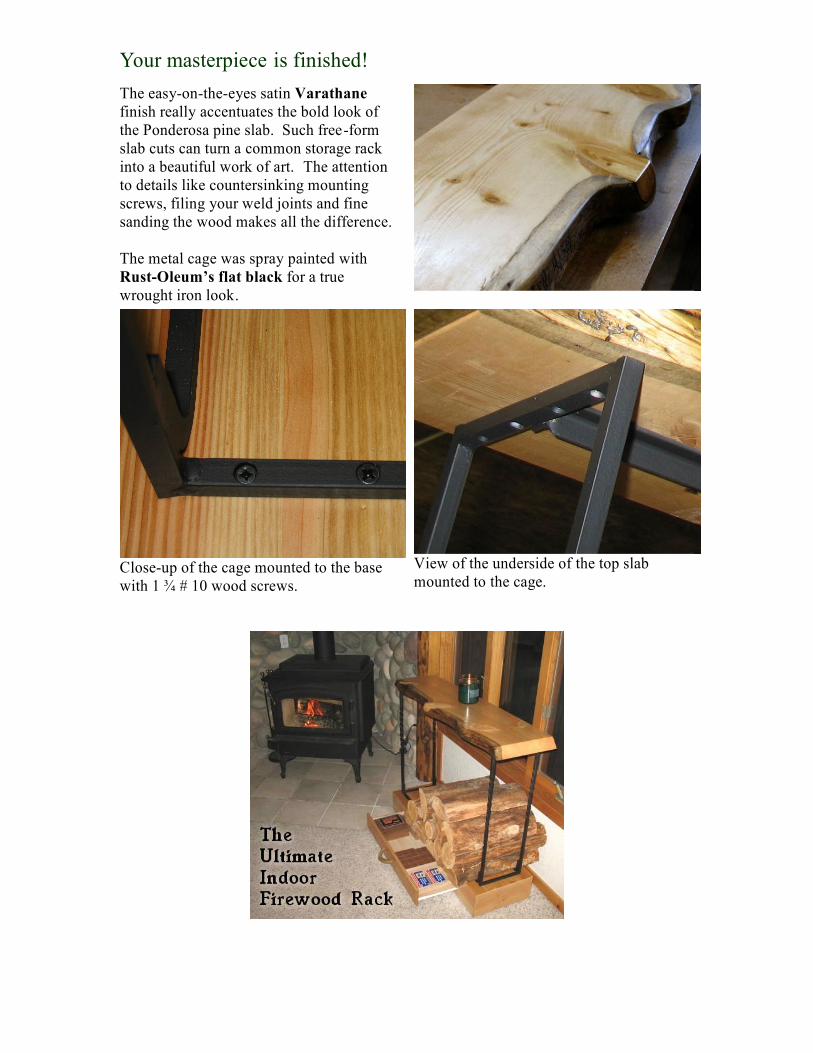
Your masterpiece is finished!
The easy-on-the-eyes satin Varathane
finish really accentuates the bold look of
the Ponderosa pine slab. Such free-form
slab cuts can turn a common storage rack
into a beautiful work of art. The attention
to details like countersinking mounting
screws, filing your weld joints and fine
sanding the wood makes all the difference.
The metal cage was spray painted with
Rust-Oleum’s flat black for a true
wrought iron look.
Close-up of the cage mounted to the base
with 1 ¾ # 10 wood screws.
View of the underside of the top slab
mounted to the cage.
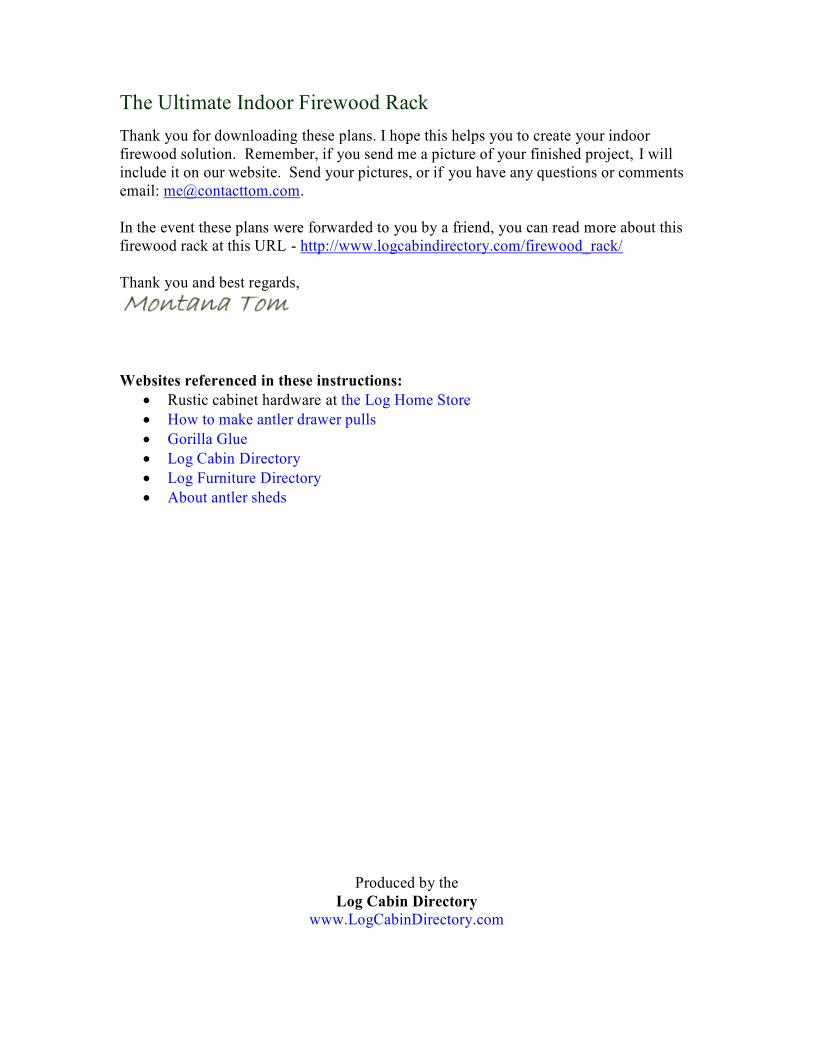
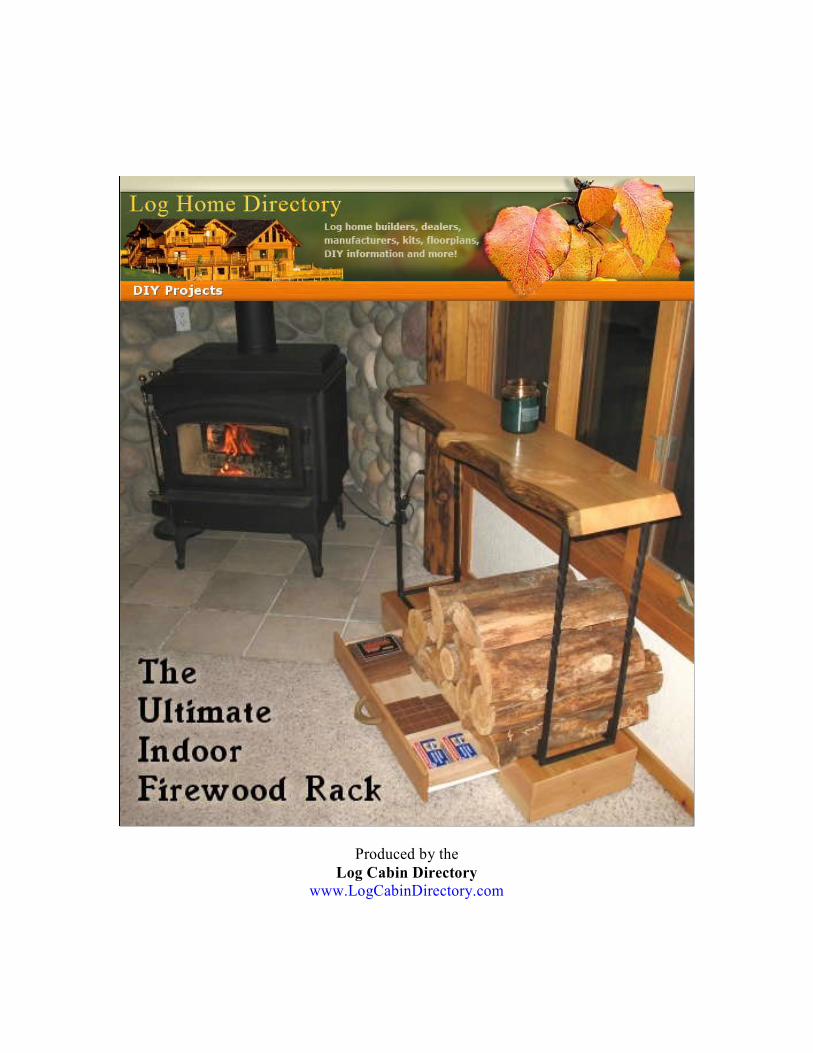
The Ultimate Indoor Firewood Rack
Thank you for downloading these plans. I hope this helps you to create your indoor
firewood solution. Remember, if you send me a picture of your finished project, I will
include it on our website. Send your pictures, or if you have any questions or comments
email: [email protected].
In the event these plans were forwarded to you by a friend, you can read more about this
firewood rack at this URL - http://www.logcabindirectory.com/firewood_rack/
Thank you and best regards,
Websites referenced in these instructions:
Rustic cabinet hardware at the Log Home Store
How to make antler drawer pulls
Gorilla Glue
Log Cabin Directory
Log Furniture Directory
About antler sheds
Produced by the
Log Cabin Directory
www.LogCabinDirectory.com