Embed Size (px)
Citation preview

Mounting considerations out of the box:
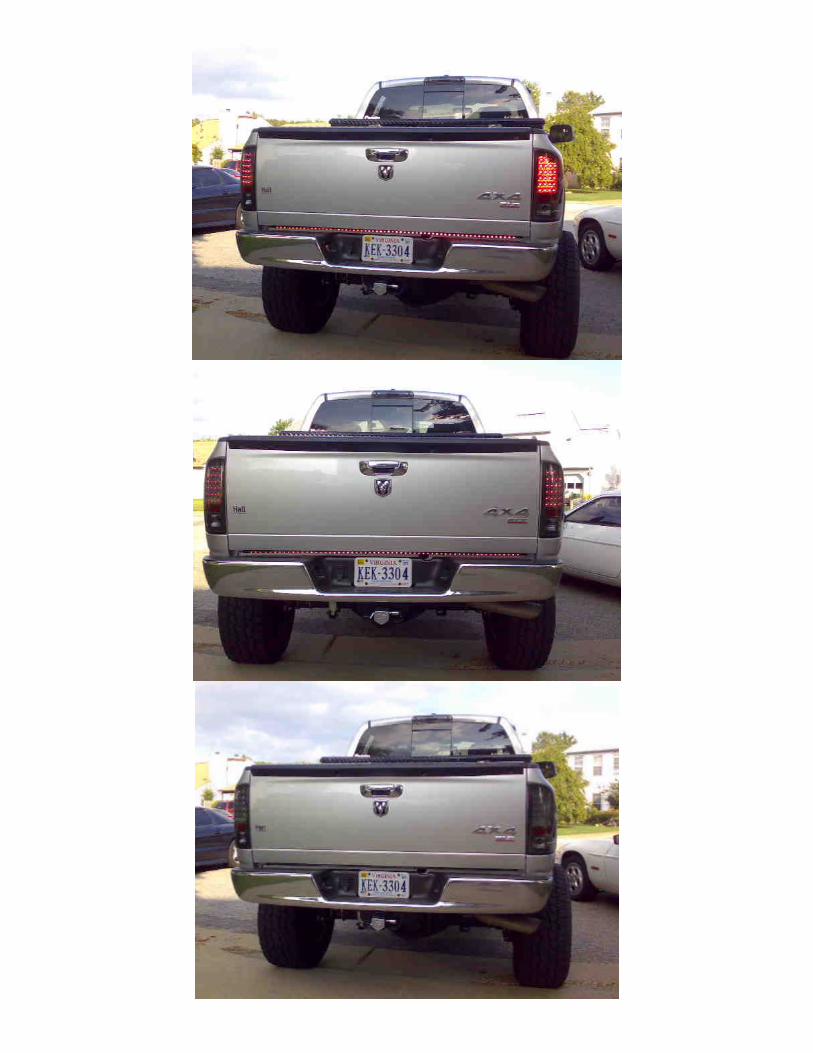
1) The outer studs on the RECON light do not mate with the 07 clips because the stock 07 studs have a round tip….RECON lights have studs more pointed (see pics below).
2) The stock screws that mount inboard are not long enough because the mount surface on the RECON light is not out as far. This is NOT a huge issue as there are longer screws in one of the boxes from RECON.
As you can see, the 07 light on the left and the RECON light on the right. One possible solution is to just swap out the studs. We found that somewhat tedious and there is some concern about causing damage to either light.
The solution we opted for was to get the clips for the 02-06 RAM and just swap them out. Parts were only about $13.00 for the set of four and they worked perfectly. (MOPAR Part Number 6504072).
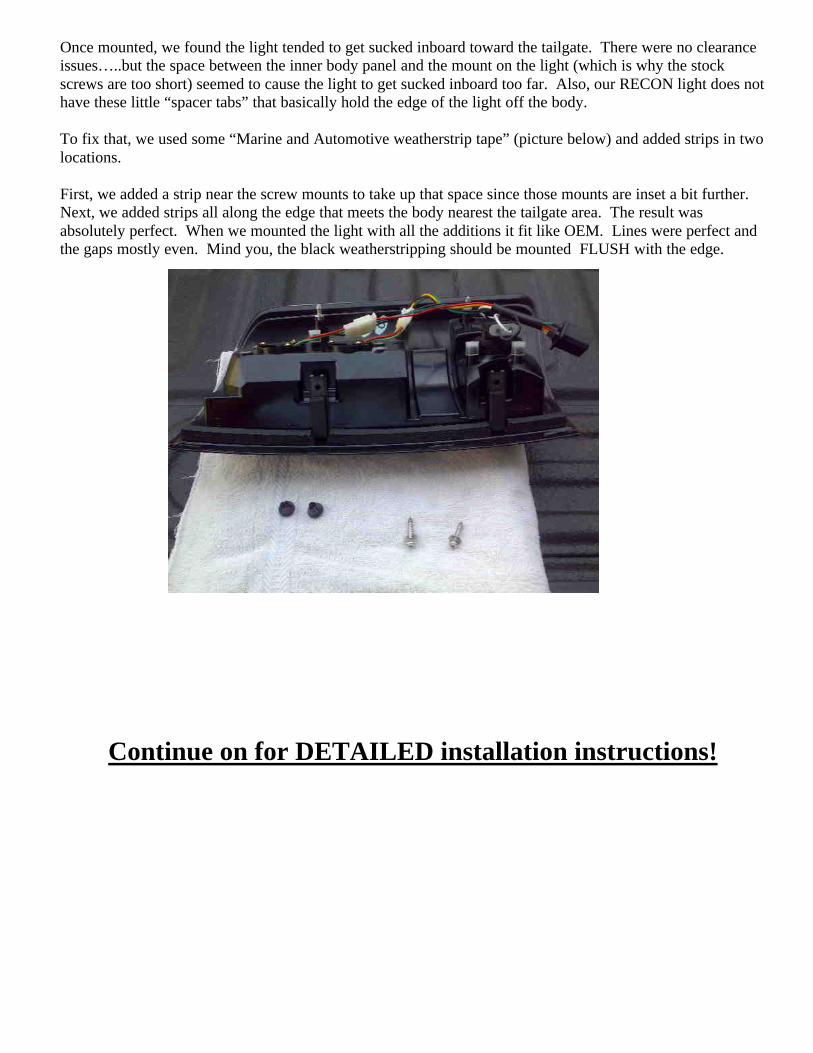
Once mounted, we found the light tended to get sucked inboard toward the tailgate. There were no clearance issues…..but the space between the inner body panel and the mount on the light (which is why the stock screws are too short) seemed to cause the light to get sucked inboard too far. Also, our RECON light does not have these little “spacer tabs” that basically hold the edge of the light off the body. To fix that, we used some “Marine and Automotive weatherstrip tape” (picture below) and added strips in two locations. First, we added a strip near the screw mounts to take up that space since those mounts are inset a bit further. Next, we added strips all along the edge that meets the body nearest the tailgate area. The result was absolutely perfect. When we mounted the light with all the additions it fit like OEM. Lines were perfect and the gaps mostly even. Mind you, the black weatherstripping should be mounted FLUSH with the edge.
Continue on for DETAILED installation instructions!
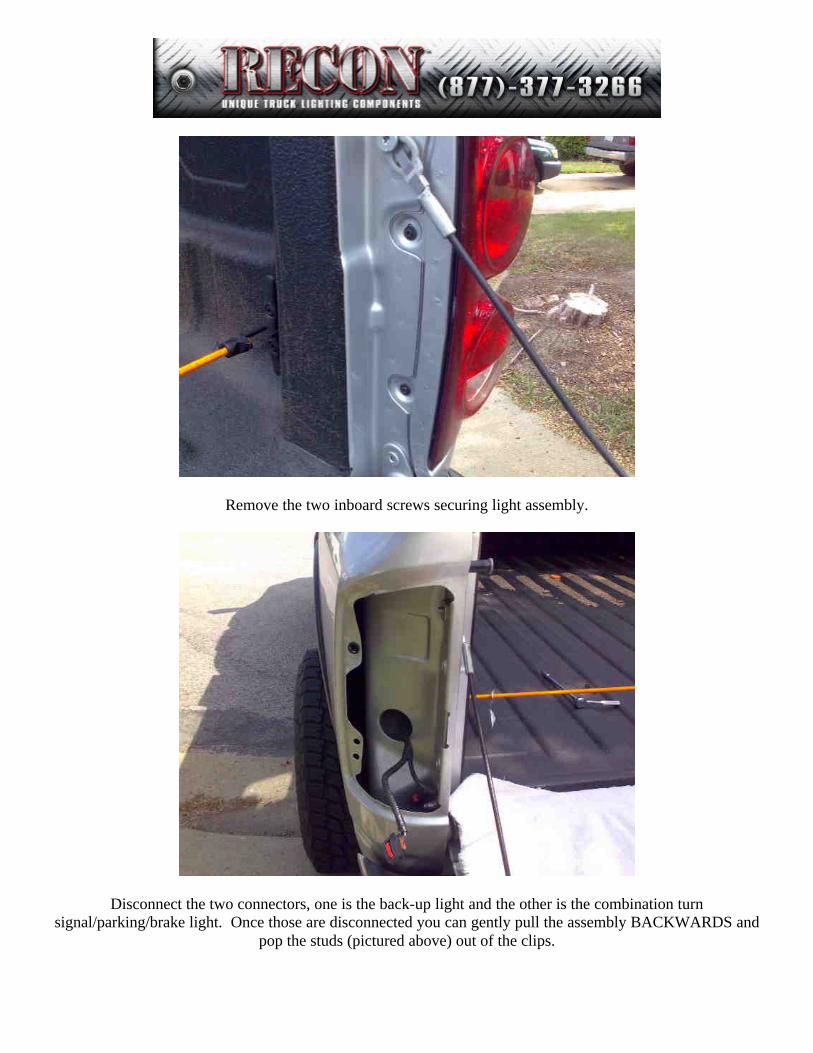
Remove the two inboard screws securing light assembly.
Disconnect the two connectors, one is the back-up light and the other is the combination turn signal/parking/brake light. Once those are disconnected you can gently pull the assembly BACKWARDS and
pop the studs (pictured above) out of the clips.

With the light out of the way you can now fish the wires out of each of the wire holders. Remove a large section of the tape that binds the wires together so you can access the wires.
The BLACK lead to each connector is GROUND. The other lead on the back-up light assembly is the power lead. The MIDDLE lead on the three-way plug is the PARKING lights, the final lead on the three-way
connector is the TURN SIGNAL/BRAKE light.

You’ll need the taillight, the pigtail, the inline T-splice connectors, heat shrink, new plastic clips and the longer
screws.
Take the replacement clips and insert them with a little force into the TOP hole and the second hole from the bottom (as pictured). You might need to remove the original clip from the top if it did not come out with the stock light assembly. There is no need to remove the BOTTOM clip since that location is not used with the
RECON lights.

Before you do ANYTHING…test fit the light to make certain the fitment is where you want it.
Here is the light with the pigtail attached. One lead is GROUND, one is the BACK-UP light, one is the PARKING light and the other (with two leads) is the BRAKE/SIGNAL. Notice the 3/8” foam weatherstripping
nicely placed along the edge. Heath….this is the pigtail I made from MOPAR part number 5013984AA and the male butt-connectors.
The heat shrink came with the MOPAR part.

Using the inline T-connectors, install the female connectors (4) onto the four leads in the harnesses. Note that you only need to tap into ONE of the GROUNDS. It is MUCH EASIER if you remove the cable holding the
tailgate from whichever side you are working on. Make ALL of the connections, turn the light over and test it. Turn on PARKING LIGHTS and HAZARDS. If the lights are NOT flashing….double check connections.
You should see the parking lights on and the hazards will flash brighter. You’ll need someone to help you test the back-up lights (unless you like to hear the horn honk while the driver door is open and tranny is in reverse).
I am still working on a better way to waterproof the whole harness assembly. For now, I wrapped the entire assembly in plastic, used a zip tie and then electrical tape on the ends.