PRIMA Offi cial Game Guide
4
CQB FUNDAMENTALSCQB FUNDAMENTALSCQB FUNDAMENTALSINTRODUCTIONINTRODUCTION
Las Vegas is burning and the world is watching. International terrorist Irena Morales has amassed an army of mercenaries to besiege America’s playground, but her true agenda remains a mystery. Hero Logan Keller and his team now have one night to bring order back into the heart of chaos before Irena unleashes her ultimate objective. What they discover will not only change Rainbow itself, but could also tip the balance of power fi rmly in favor of the terrorists.
All Rainbow operatives are CQB (close-quarters battle) specialists, experts in clearing rooms and other confi ned spaces through the use of specialized gear and methodical search and engagement routines. Keeping Logan and his team alive in Rainbow Six Vegas requires you to become familiar with the basics of CQB tactics, stressing slow and organized gameplay over the run-and-gun mentality stressed by other fi st-person shooters.
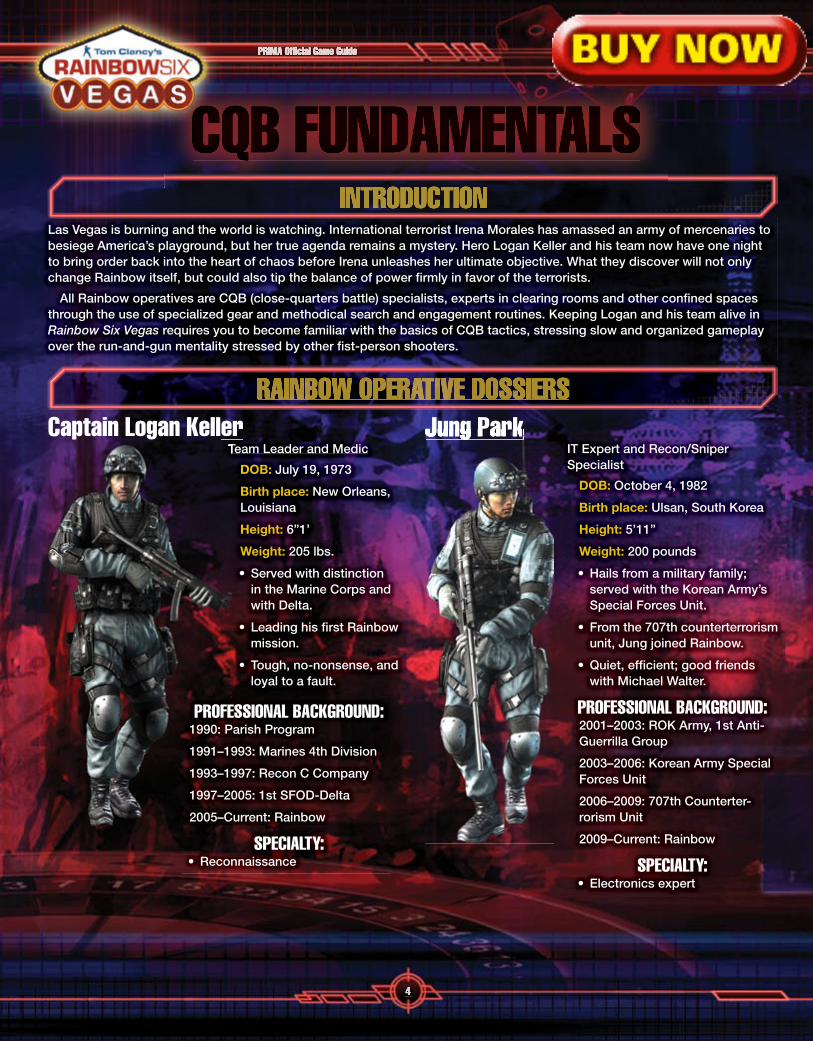
Captain Logan KellerCaptain Logan KellerTeam Leader and Medic
DOB: July 19, 1973
Birth place: New Orleans, Louisiana
Height: 6”1’
Weight: 205 lbs.
Served with distinction in the Marine Corps and with Delta.
Leading his fi rst Rainbow mission.
Tough, no-nonsense, and loyal to a fault.
•
•
•
RAINBOW OPERATIVE DOSSIERS
Team Leader and Medic
PROFESSIONAL BACKGROUND:1990: Parish Program
1991–1993: Marines 4th Division
1993–1997: Recon C Company
1997–2005: 1st SFOD-Delta
2005–Current: Rainbow
SPECIALTY:Reconnaissance •
Jung ParkIT Expert and Recon/Sniper Specialist
DOB: October 4, 1982
Birth place: Ulsan, South Korea
Height: 5’11”
Weight: 200 pounds
Hails from a military family; served with the Korean Army’s Special Forces Unit.
From the 707th counterterrorism unit, Jung joined Rainbow.
Quiet, effi cient; good friends with Michael Walter.
PROFESSIONAL BACKGROUND:2001–2003: ROK Army, 1st Anti-Guerrilla Group
2003–2006: Korean Army Special Forces Unit
2006–2009: 707th Counterter-rorism Unit
2009–Current: Rainbow
SPECIALTY:Electronics expert
•
•
•
•
Jung Park
primagames.com5
CQB FUNDAMENTALS
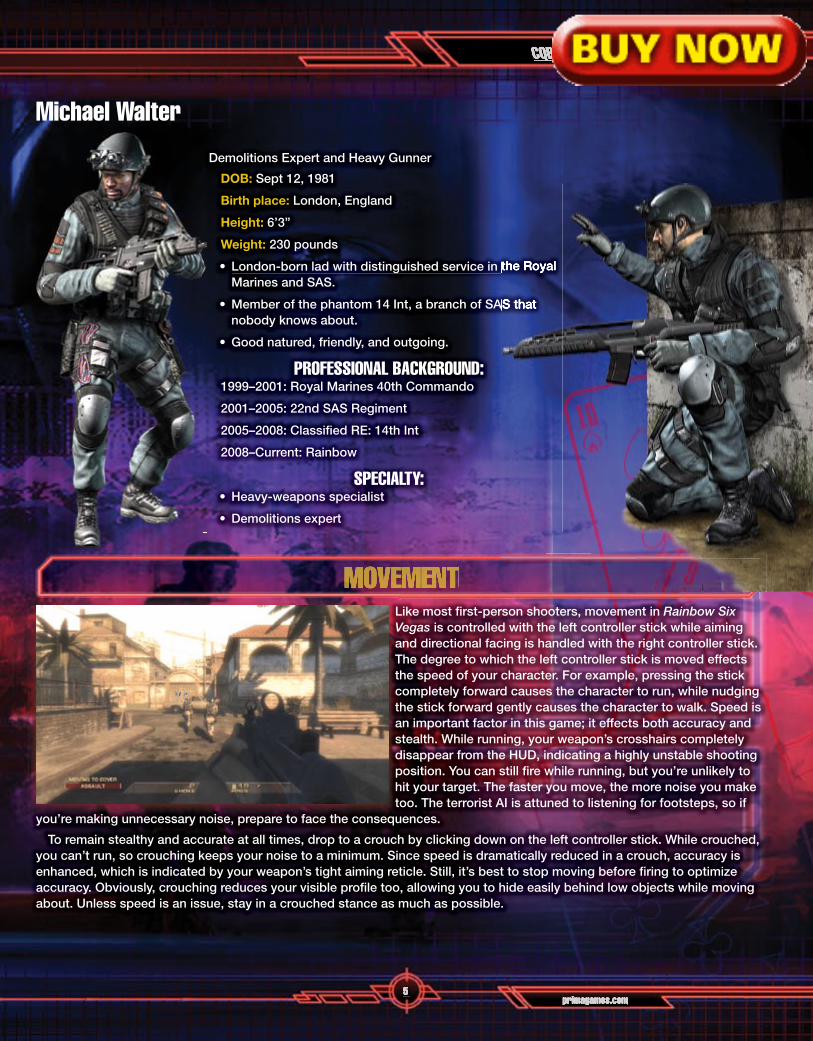
Michael Walter
Demolitions Expert and Heavy Gunner
DOB: Sept 12, 1981
Birth place: London, England
Height: 6’3”
Weight: 230 pounds
London-born lad with distinguished service in the Royal Marines and SAS.
Member of the phantom 14 Int, a branch of SAS that nobody knows about.
Good natured, friendly, and outgoing.
PROFESSIONAL BACKGROUND:1999–2001: Royal Marines 40th Commando
2001–2005: 22nd SAS Regiment
2005–2008: Classifi ed RE: 14th Int
2008–Current: Rainbow
SPECIALTY:Heavy-weapons specialist
Demolitions expert
•
•
•
•
•
MOVEMENTLike most fi rst-person shooters, movement in Rainbow Six Vegas is controlled with the left controller stick while aiming and directional facing is handled with the right controller stick. The degree to which the left controller stick is moved effects the speed of your character. For example, pressing the stick completely forward causes the character to run, while nudging the stick forward gently causes the character to walk. Speed is an important factor in this game; it effects both accuracy and stealth. While running, your weapon’s crosshairs completely disappear from the HUD, indicating a highly unstable shooting position. You can still fi re while running, but you’re unlikely to hit your target. The faster you move, the more noise you make too. The terrorist AI is attuned to listening for footsteps, so if
you’re making unnecessary noise, prepare to face the consequences.
To remain stealthy and accurate at all times, drop to a crouch by clicking down on the left controller stick. While crouched, you can’t run, so crouching keeps your noise to a minimum. Since speed is dramatically reduced in a crouch, accuracy is enhanced, which is indicated by your weapon’s tight aiming reticle. Still, it’s best to stop moving before fi ring to optimize accuracy. Obviously, crouching reduces your visible profi le too, allowing you to hide easily behind low objects while moving about. Unless speed is an issue, stay in a crouched stance as much as possible.
London-born lad with distinguished service in the Royal
Member of the phantom 14 Int, a branch of SAS that
PRIMA Offi cial Game Guide
8
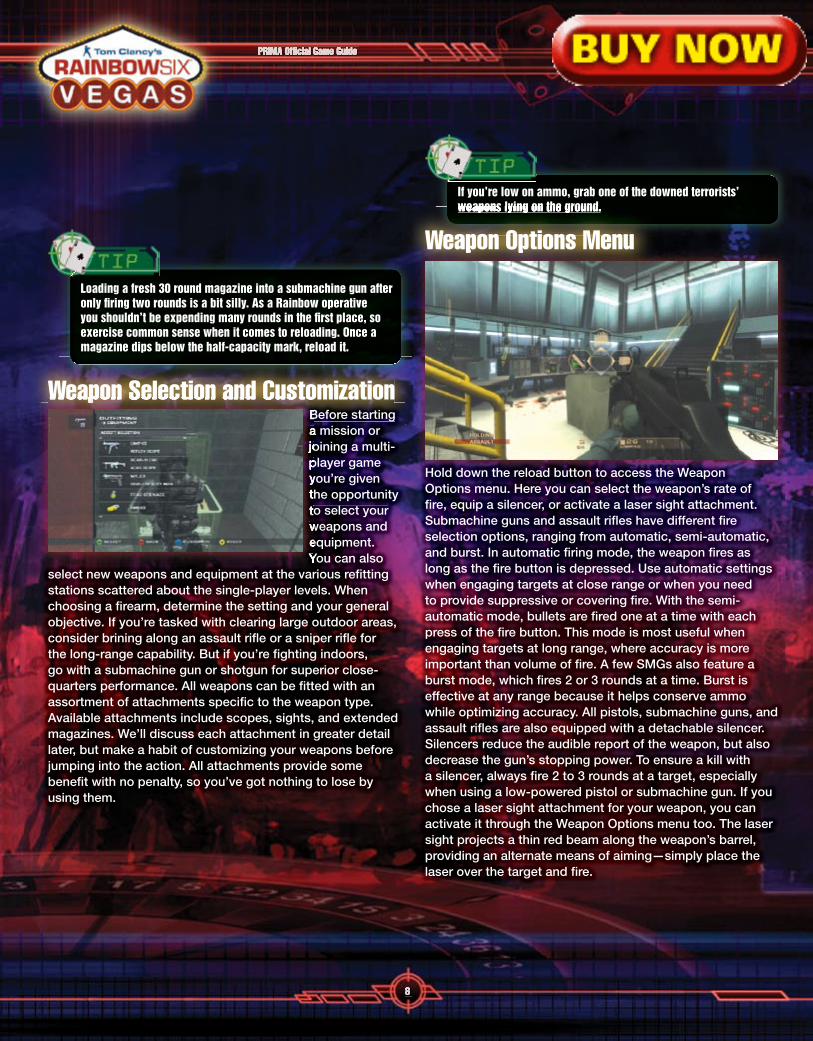
Weapon Selection and CustomizationWeapon Selection and CustomizationBefore starting a mission or joining a multi-player game you’re given the opportunity to select your weapons and equipment. You can also
select new weapons and equipment at the various refi tting stations scattered about the single-player levels. When choosing a fi rearm, determine the setting and your general objective. If you’re tasked with clearing large outdoor areas, consider brining along an assault rifl e or a sniper rifl e for the long-range capability. But if you’re fi ghting indoors, go with a submachine gun or shotgun for superior close-quarters performance. All weapons can be fi tted with an assortment of attachments specifi c to the weapon type. Available attachments include scopes, sights, and extended magazines. We’ll discuss each attachment in greater detail later, but make a habit of customizing your weapons before jumping into the action. All attachments provide some benefi t with no penalty, so you’ve got nothing to lose by using them.
Weapon Selection and CustomizationWeapon Selection and CustomizationBefore starting a mission or joining a multi-player game you’re given the opportunity to select your weapons and equipment. You can also
If you’re low on ammo, grab one of the downed terrorists’ weapons lying on the ground.weapons lying on the ground.
Weapon Options MenuWeapon Options Menu
Hold down the reload button to access the Weapon Options menu. Here you can select the weapon’s rate of fi re, equip a silencer, or activate a laser sight attachment. Submachine guns and assault rifl es have different fi re selection options, ranging from automatic, semi-automatic, and burst. In automatic fi ring mode, the weapon fi res as long as the fi re button is depressed. Use automatic settings when engaging targets at close range or when you need to provide suppressive or covering fi re. With the semi-automatic mode, bullets are fi red one at a time with each press of the fi re button. This mode is most useful when engaging targets at long range, where accuracy is more important than volume of fi re. A few SMGs also feature a burst mode, which fi res 2 or 3 rounds at a time. Burst is effective at any range because it helps conserve ammo while optimizing accuracy. All pistols, submachine guns, and assault rifl es are also equipped with a detachable silencer. Silencers reduce the audible report of the weapon, but also decrease the gun’s stopping power. To ensure a kill with a silencer, always fi re 2 to 3 rounds at a target, especially when using a low-powered pistol or submachine gun. If you chose a laser sight attachment for your weapon, you can activate it through the Weapon Options menu too. The laser sight projects a thin red beam along the weapon’s barrel, providing an alternate means of aiming—simply place the laser over the target and fi re.
Loading a fresh 30 round magazine into a submachine gun after only fi ring two rounds is a bit silly. As a Rainbow operative you shouldn’t be expending many rounds in the fi rst place, so exercise common sense when it comes to reloading. Once a magazine dips below the half-capacity mark, reload it.
primagames.com9
CQB FUNDAMENTALS
BALLISTICS
All bullets fi red in Rainbow Six Vegas travel in a straight line from the weapon’s barrel to the point of impact. Bullets are not affected by wind or gravity, nor do they ricochet or defl ect. However, rounds will penetrate objects like windows and wooden doors. So choose your cover carefully.
GrenadesGrenadesThrowing a grenade is as easy as aiming at your target and pressing the throw grenade button. When thrown, grenades travel in an arcing trajectory, so compensate for distance by aiming up to throw farther. Flashbangs, frag, incendiary, and smoke grenades are all fuse activated, so they’ll usually bounce or roll around before detonating. The fuse delay also allows you to bank these explosives off walls or around corners for more precise deployment. But be careful when bouncing a grenade off a wall. Always throw it at an oblique angle so that it doesn’t bounce back at you.
GrenadesGrenades
OPTICSIn both single-player and multiplayer modes, all players are equipped with a snake cam and thermal/night vision goggles. These optical devices increase your ability to detect threats, whether they’re concealed behind solid cover or masked in shadow.cover or masked in shadow.
Snake CamSnake Cam
This camera is attached to a slender rigid wire and can be fed beneath closed doors to scout a room before entering. To deploy the snake cam, aim where the door meets the fl oor till the Snake Cam prompt appears at the bottom of the screen, then press the interact button. Once activated, the camera’s black and white image fi lls the HUD. Use the right controller stick to pan the camera left and right. You can also zoom by right clicking the right controller stick. While using the snake cam in the single-player campaign, you can tag terrorists and even issue move orders to your
team. All visible threats are relayed to your tactical map. Use the snake cam in conjunction with your tactical map to get a better understanding of the layout and orientation of the hostiles waiting on the other side of the door. Note the positions of hostages/civilians, too, and plan accordingly—you don’t want to harm them upon entry.you don’t want to harm them upon entry.
Thermal/Night Vision GogglesThermal/Night Vision GogglesThermal/Night Vision GogglesThermal/Night Vision GogglesThe thermal and night vision goggles are standard-issue equipment for all Rainbow operatives and can be activated by pressing and the vision button. This activates thermal vision by default. To activate night vision, press and hold the vision button to access the Vision menu. Here you can choose which mode to activate.
Thermal vision is the more useful of the two; it allows you to see through smoke and even thin pieces of cover. If you get close enough, you can even see opponents hiding on the other side of a wall! Use thermal vision when deploying smoke grenades; you can see tangos while you remain concealed behind the smoke screen.
PRIMA Offi cial Game Guide
22
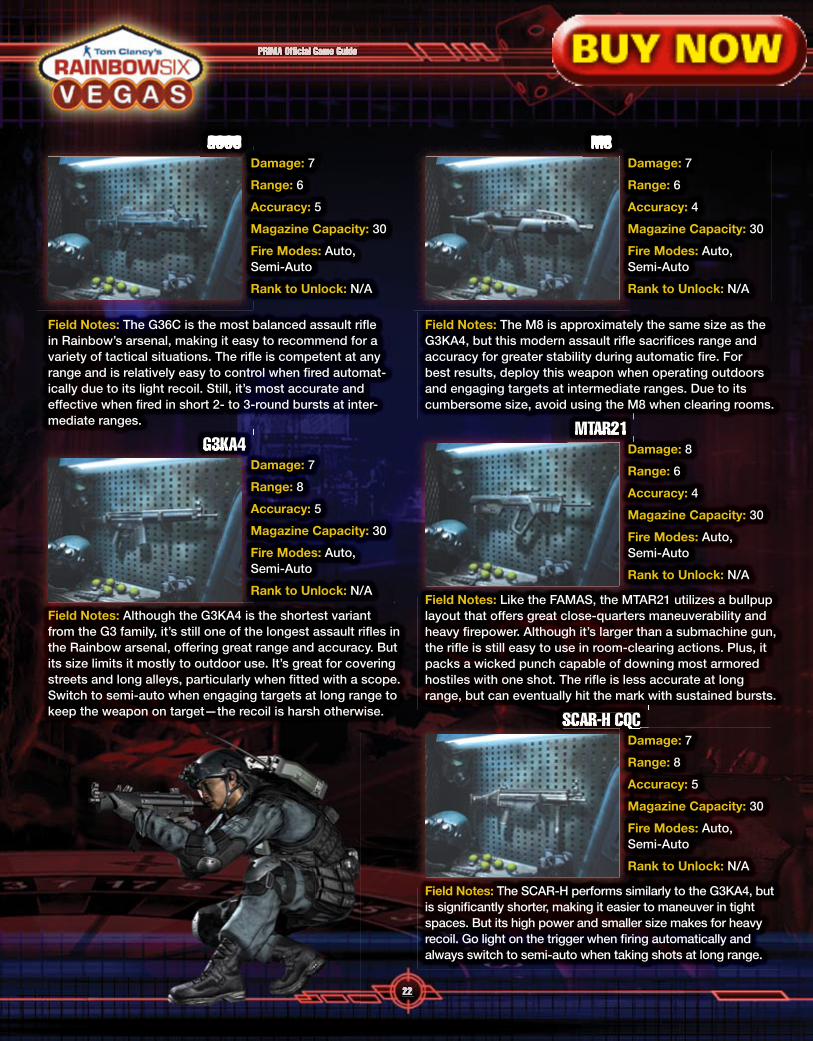
G36CG36CDamage: 7
Range: 6
Accuracy: 5
Magazine Capacity: 30
Fire Modes: Auto, Semi-Auto
Rank to Unlock: N/A
Field Notes: The G36C is the most balanced assault rifl e in Rainbow’s arsenal, making it easy to recommend for a variety of tactical situations. The rifl e is competent at any range and is relatively easy to control when fi red automat-ically due to its light recoil. Still, it’s most accurate and effective when fi red in short 2- to 3-round bursts at inter-mediate ranges.
G3KA4G3KA4Damage: 7
Range: 8
Accuracy: 5
Magazine Capacity: 30
Fire Modes: Auto, Semi-Auto
Rank to Unlock: N/A
Field Notes: Although the G3KA4 is the shortest variant from the G3 family, it’s still one of the longest assault rifl es in the Rainbow arsenal, offering great range and accuracy. But its size limits it mostly to outdoor use. It’s great for covering streets and long alleys, particularly when fi tted with a scope. Switch to semi-auto when engaging targets at long range to keep the weapon on target—the recoil is harsh otherwise.
M8M8Damage: 7
Range: 6
Accuracy: 4
Magazine Capacity: 30
Fire Modes: Auto, Semi-Auto
Rank to Unlock: N/A
Field Notes: The M8 is approximately the same size as the G3KA4, but this modern assault rifl e sacrifi ces range and accuracy for greater stability during automatic fi re. For best results, deploy this weapon when operating outdoors and engaging targets at intermediate ranges. Due to its cumbersome size, avoid using the M8 when clearing rooms.
MTAR21MTAR21Damage: 8
Range: 6
Accuracy: 4
Magazine Capacity: 30
Fire Modes: Auto, Semi-Auto
Rank to Unlock: N/A
Field Notes: Like the FAMAS, the MTAR21 utilizes a bullpup layout that offers great close-quarters maneuverability and heavy fi repower. Although it’s larger than a submachine gun, the rifl e is still easy to use in room-clearing actions. Plus, it packs a wicked punch capable of downing most armored hostiles with one shot. The rifl e is less accurate at long range, but can eventually hit the mark with sustained bursts.
SCAR-H CQCSCAR-H CQCSCAR-H CQCSCAR-H CQCDamage: 7
Range: 8
Accuracy: 5
Magazine Capacity: 30
Fire Modes: Auto, Semi-Auto
Rank to Unlock: N/A
Field Notes: The SCAR-H performs similarly to the G3KA4, but is signifi cantly shorter, making it easier to maneuver in tight spaces. But its high power and smaller size makes for heavy recoil. Go light on the trigger when fi ring automatically and always switch to semi-auto when taking shots at long range.

primagames.com23
THE RAINBOW ARSENAL
Light Machine GunsNo weapon lays down suppressive fi re better than the light machine guns. Use these cumbersome weapons whenever sustained, high rates of fi re are a must. They’re most effective (and accurate) when fi red from a stationary, crouched stance. Forget about running and gunning with these beasts—you’ll hit everything but your target. Customize your light machine gun with a refl ex scope, rifl e scope, laser sight, or a recoil control stock.
21E21E
Damage: 6
Range: 3
Accuracy: 6
Magazine Capacity: 100
Fire Modes: Auto
Rank to Unlock: N/A
Field Notes: Although the 21E resembles an assault rifl e, it’s a true light machine gun that fi res belt-fed ammo from a box magazine. The 21E lacks the power and range of its belt-fed counterparts, but offers a bit more stability, making it easier to keep on target, and thus allowing for bursts of longer duration and decent accuracy.
M249 SPWM249 SPWDamage: 8
Range: 4
Accuracy: 4
Magazine Capacity: 100
Fire Modes: Auto
Rank to Unlock: N/A
Field Notes: The M249 SPW is the most powerful light machine gun in the arsenal, but it’s also the hardest to control due to excessive recoil. Always fi re this weapon from a crouched stance and a stationary position for increased stability. Although there’s no semi-auto setting, try to fi re quick single-round shots when aiming directly at a hostile.
M249 TURRETM249 TURRETDamage: 7
Range: 4
Accuracy: 5
Magazine Capacity: 100
Fire Modes: Auto
Rank to Unlock: N/A
Field Notes: Some maps are equipped with this light machine gun turret, usually set up in a defensive confi gu-ration. Interact with the light machine gun to take control of it, then aim and press the fi re button to shoot. Turrets make a few appearances in the single-player campaign, but they’re most useful in multiplayer matches. Since the weapon is mounted, use it to lock down choke points with sustained heavy fi re. However, you’re quite vulnerable while manning one of these weapons, as you can’t move or take cover, which makes you an easy target for snipers. So use these weapons sparingly and preferably in areas where opponents don’t have long-range coverage. Like all weapons, turrets must be reloaded when they run out of ammo. Unless it applies to your tactics, make a habit of reloading empty turrets before moving on—your teammates will appreciate it.
FRAG DOLL TIP
Remember, if you are fi ring multiple shots, that your gun is more accurate when burst-fi ring, not holding down the fi re trigger! Simply tap the trigger, don’t hold it down unless you are on top of your enemy!
PRIMA Offi cial Game Guide
40
SCENE THREE: MINES
SITUATION REPORT
Irena has been tracked to this
mine. Hunt her down and take her
into custody.
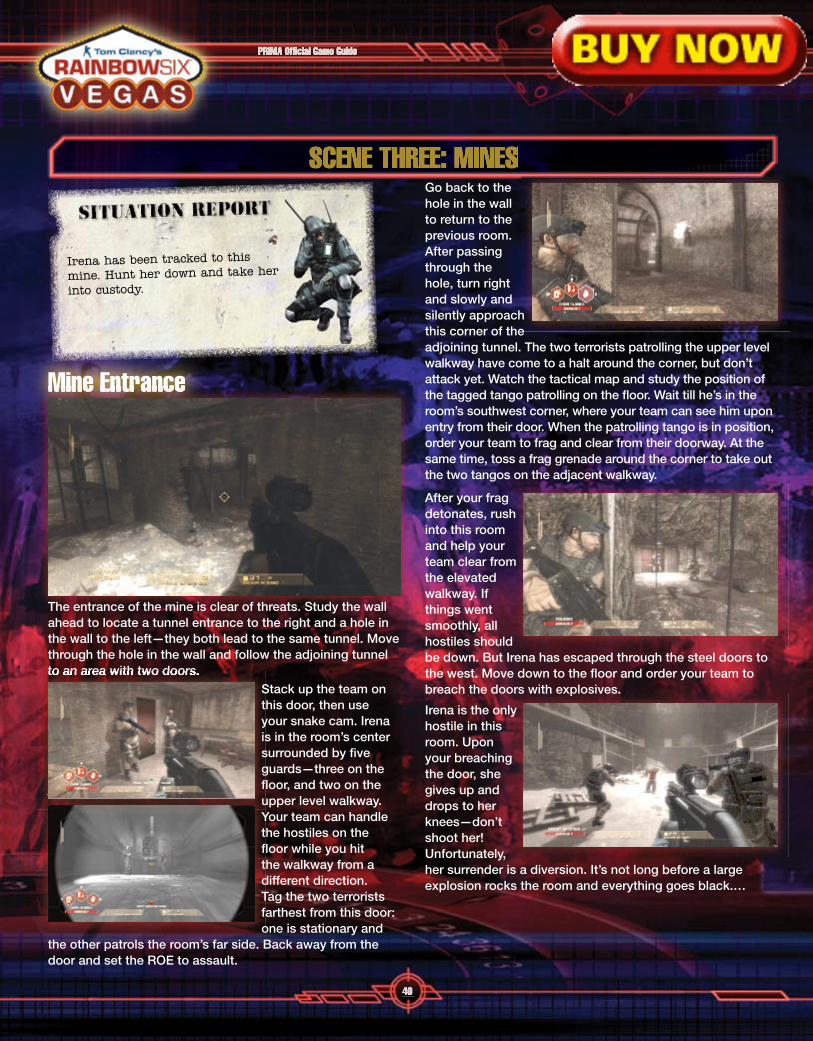
Mine EntranceMine Entrance
The entrance of the mine is clear of threats. Study the wall ahead to locate a tunnel entrance to the right and a hole in the wall to the left—they both lead to the same tunnel. Move through the hole in the wall and follow the adjoining tunnel to an area with two doors.to an area with two doors.
Stack up the team on this door, then use your snake cam. Irena is in the room’s center surrounded by fi ve guards—three on the fl oor, and two on the upper level walkway. Your team can handle the hostiles on the fl oor while you hit the walkway from a different direction. Tag the two terrorists farthest from this door: one is stationary and
the other patrols the room’s far side. Back away from the door and set the ROE to assault.
Go back to the hole in the wall to return to the previous room. After passing through the hole, turn right and slowly and silently approach this corner of the adjoining tunnel. The two terrorists patrolling the upper level walkway have come to a halt around the corner, but don’t attack yet. Watch the tactical map and study the position of the tagged tango patrolling on the fl oor. Wait till he’s in the room’s southwest corner, where your team can see him upon entry from their door. When the patrolling tango is in position, order your team to frag and clear from their doorway. At the same time, toss a frag grenade around the corner to take out the two tangos on the adjacent walkway.
After your frag detonates, rush into this room and help your team clear from the elevated walkway. If things went smoothly, all hostiles should be down. But Irena has escaped through the steel doors to the west. Move down to the fl oor and order your team to breach the doors with explosives.
Irena is the only hostile in this room. Upon your breaching the door, she gives up and drops to her knees—don’t shoot her! Unfortunately, her surrender is a diversion. It’s not long before a large explosion rocks the room and everything goes black.…
primagames.com41
MEXICAN BORDER
TunnelsTunnels
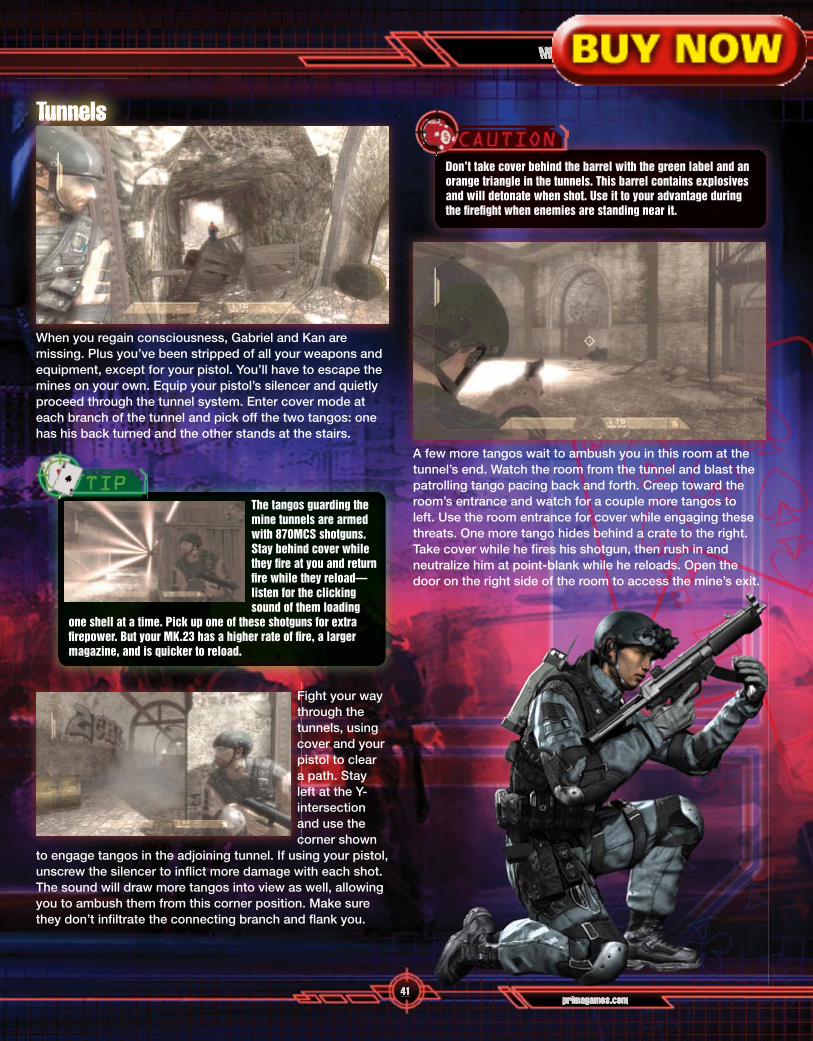
When you regain consciousness, Gabriel and Kan are missing. Plus you’ve been stripped of all your weapons and equipment, except for your pistol. You’ll have to escape the mines on your own. Equip your pistol’s silencer and quietly proceed through the tunnel system. Enter cover mode at each branch of the tunnel and pick off the two tangos: one has his back turned and the other stands at the stairs.
The tangos guarding the mine tunnels are armed with 870MCS shotguns. Stay behind cover while they fi re at you and return fi re while they reload—listen for the clicking sound of them loading
one shell at a time. Pick up one of these shotguns for extra fi repower. But your MK.23 has a higher rate of fi re, a larger magazine, and is quicker to reload.
Fight your way through the tunnels, using cover and your pistol to clear a path. Stay left at the Y-intersection and use the corner shown
to engage tangos in the adjoining tunnel. If using your pistol, unscrew the silencer to infl ict more damage with each shot. The sound will draw more tangos into view as well, allowing you to ambush them from this corner position. Make sure they don’t infi ltrate the connecting branch and fl ank you.
Don’t take cover behind the barrel with the green label and an orange triangle in the tunnels. This barrel contains explosives and will detonate when shot. Use it to your advantage during the fi refi ght when enemies are standing near it.
A few more tangos wait to ambush you in this room at the tunnel’s end. Watch the room from the tunnel and blast the patrolling tango pacing back and forth. Creep toward the room’s entrance and watch for a couple more tangos to left. Use the room entrance for cover while engaging these threats. One more tango hides behind a crate to the right. Take cover while he fi res his shotgun, then rush in and neutralize him at point-blank while he reloads. Open the door on the right side of the room to access the mine’s exit.
Recommended