Embed Size (px)
Citation preview
FINAL CUTCONSTRUCTION
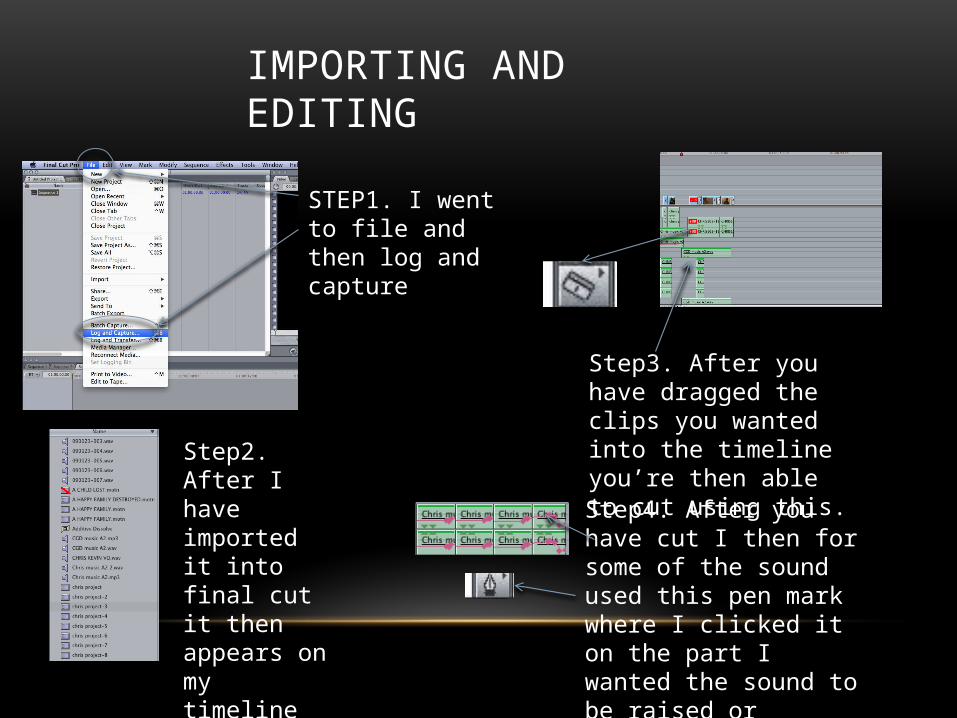
IMPORTING AND EDITING
STEP1. I went to file and then log and capture
Step2. After I have imported it into final cut it then appears on my timeline and I am then able to drag it to the timeline and then edit it.
Step3. After you have dragged the clips you wanted into the timeline you’re then able to cut using this.
Step4. After you have cut I then for some of the sound used this pen mark where I clicked it on the part I wanted the sound to be raised or lowered. I did this so it would work well with other sound I have used.
TIMELINE PROGRESS
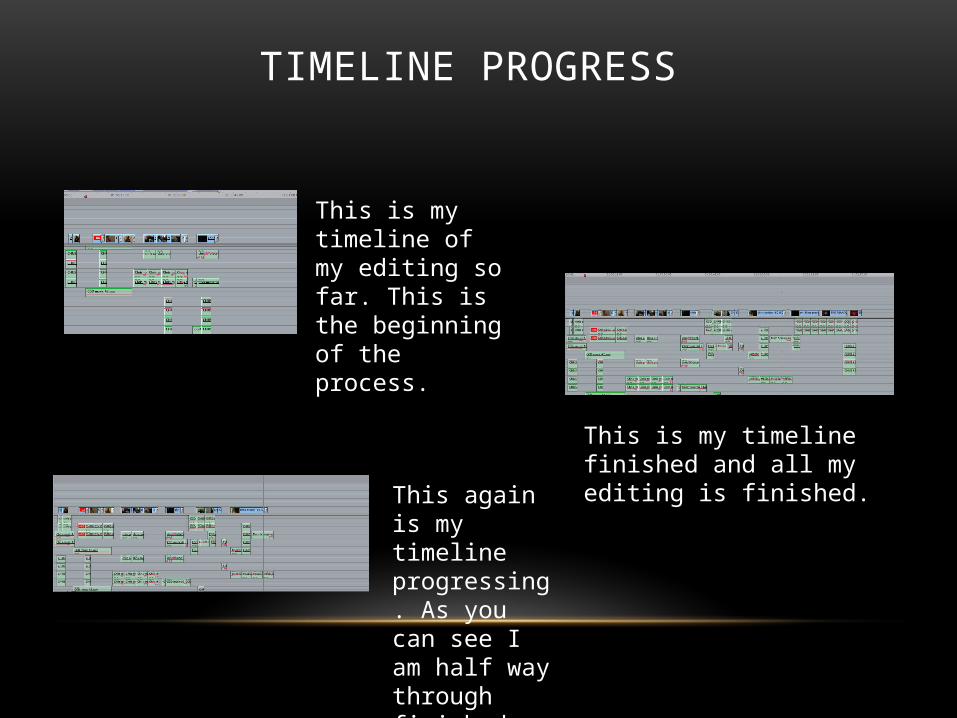
This is my timeline of my editing so far. This is the beginning of the process.
This again is my timeline progressing. As you can see I am half way through finished editing
This is my timeline finished and all my editing is finished.

EFFECTS AND FADE
Step1. I went to effects, video transitions, dissolve and then I chose what effect I wanted and dragged it to the clip.
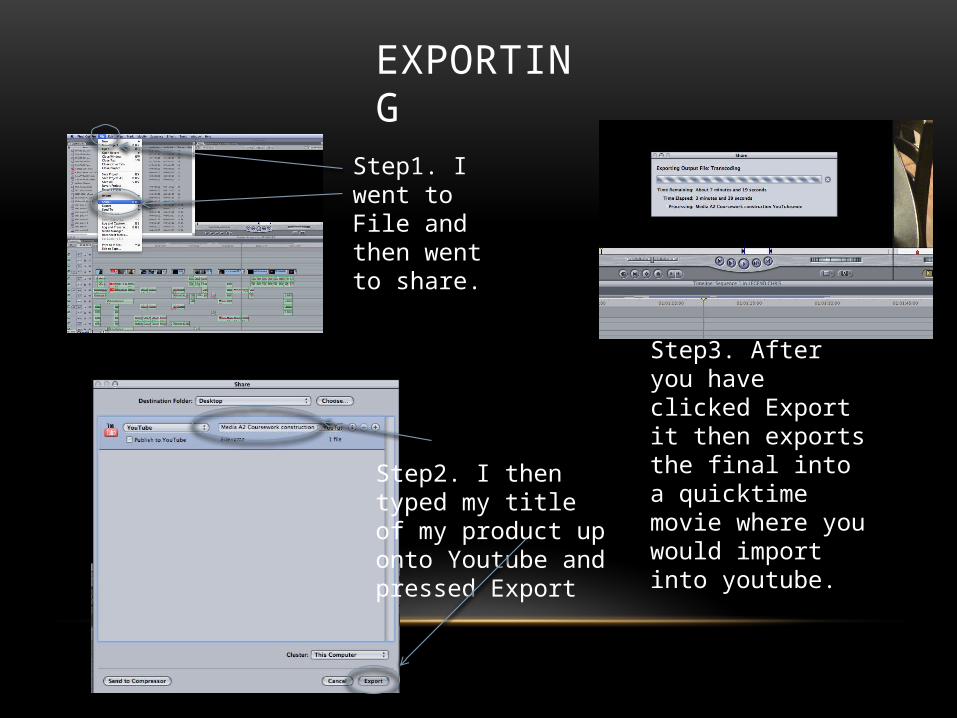
EXPORTING Step1. I went to File and then went to share.
Step2. I then typed my title of my product up onto Youtube and pressed Export
Step3. After you have clicked Export it then exports the final into a quicktime movie where you would import into youtube.