Embed Size (px)
Citation preview

Office 365 Productivity Tips
“November Smack-Down"
Christian BuckleyCollabTalk LLC
Thomas DuffCambia Health

Christian BuckleyFounder & CEO of CollabTalk LLC
@buckleyplanet
http://www.buckleyplanet.com

CollabTalk is an independent research and technical
marketing services company. We provide product and
marketing evaluation, strategy, and operational support,
content development, and demand-generation guidance
— working primarily within the Microsoft ecosystem.
www.CollabTalk.com

Thomas DuffSoftware Engineer at Cambia Health
@Duffbert
http://oneminuteofficemagic.com
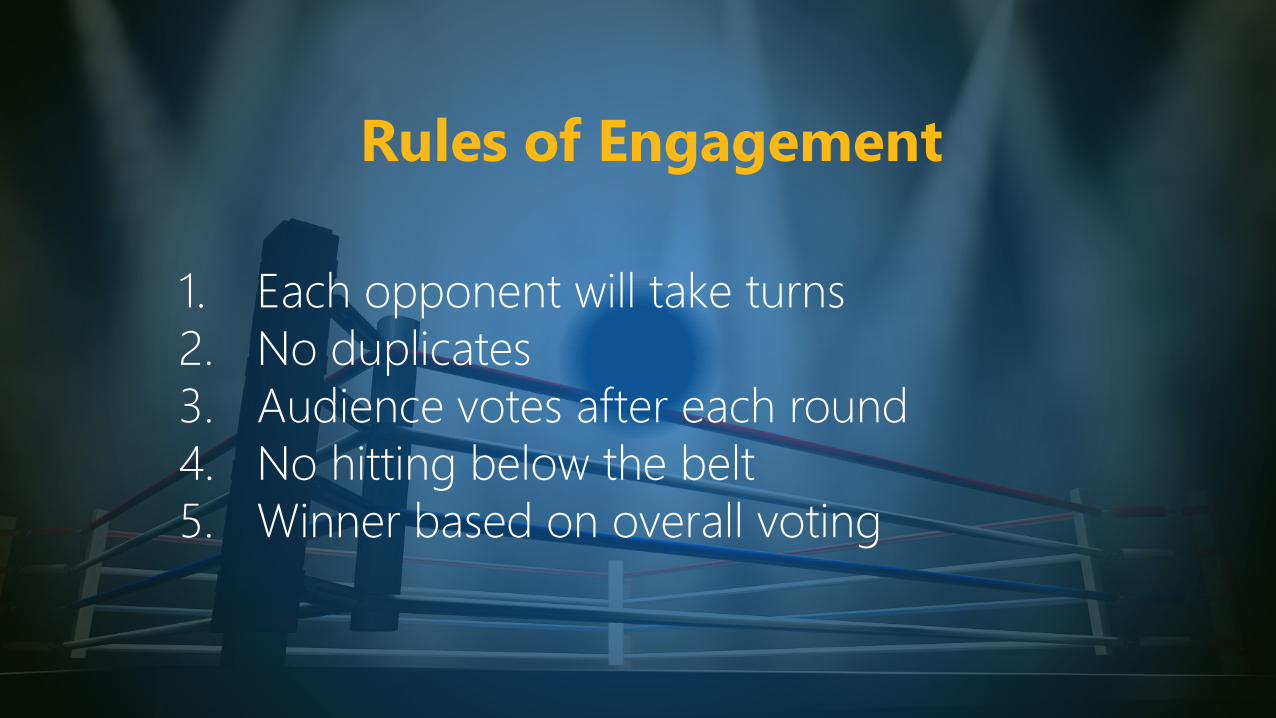
Rules of Engagement
1. Each opponent will take turns
2. No duplicates
3. Audience votes after each round
4. No hitting below the belt
5. Winner based on overall voting

Let’s get started!

Round 1
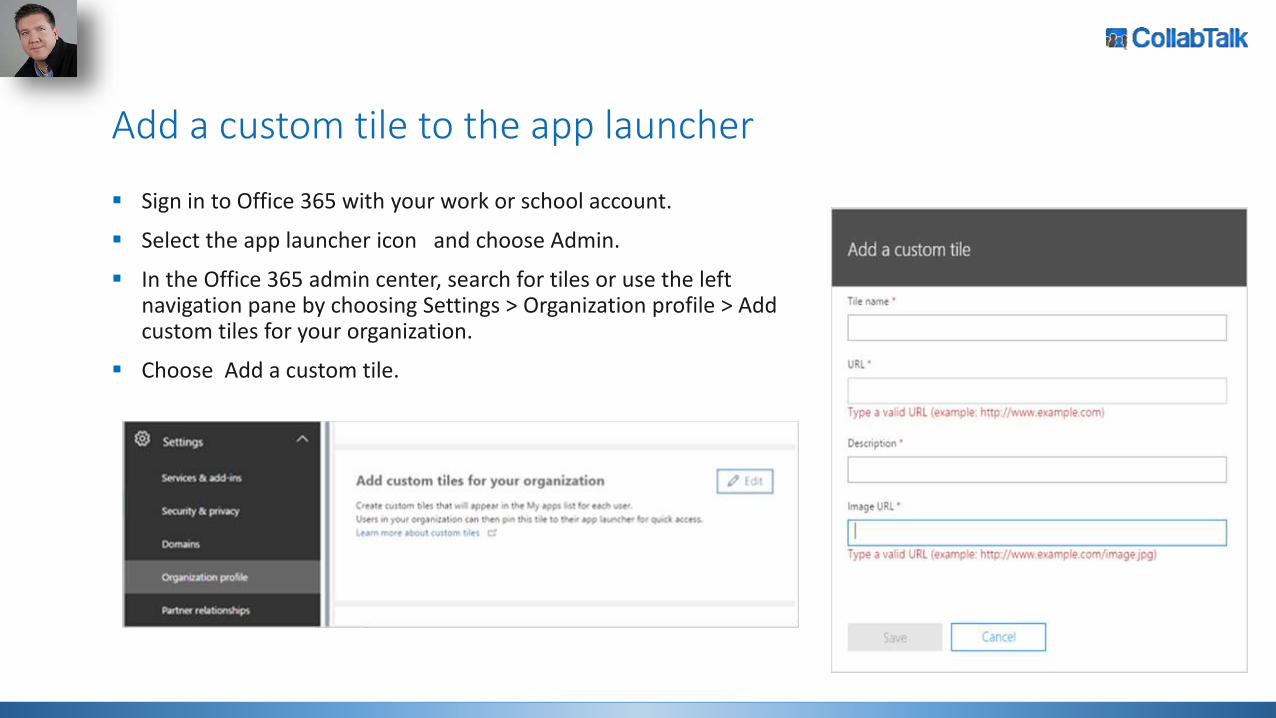
Add a custom tile to the app launcher
Sign in to Office 365 with your work or school account.
Select the app launcher icon and choose Admin.
In the Office 365 admin center, search for tiles or use the left navigation pane by choosing Settings > Organization profile > Add custom tiles for your organization.
Choose Add a custom tile.
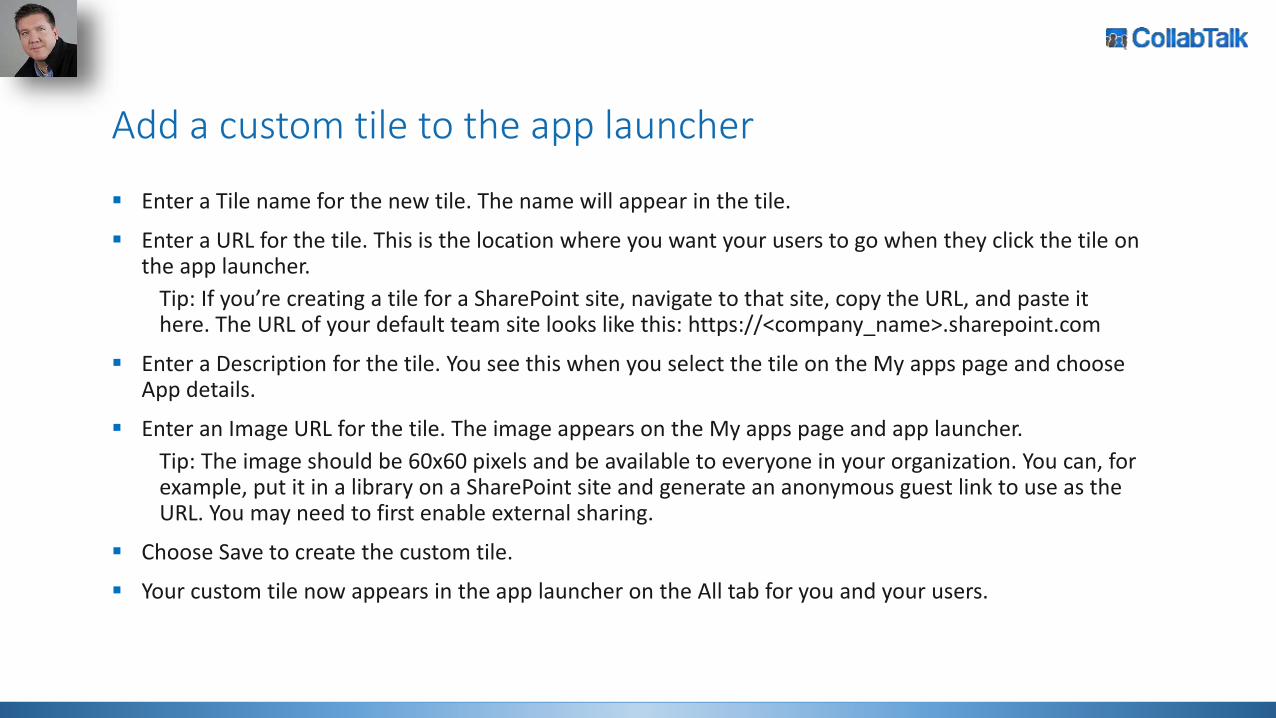
Add a custom tile to the app launcher
Enter a Tile name for the new tile. The name will appear in the tile.
Enter a URL for the tile. This is the location where you want your users to go when they click the tile on the app launcher.
Tip: If you’re creating a tile for a SharePoint site, navigate to that site, copy the URL, and paste it here. The URL of your default team site looks like this: https://<company_name>.sharepoint.com
Enter a Description for the tile. You see this when you select the tile on the My apps page and choose App details.
Enter an Image URL for the tile. The image appears on the My apps page and app launcher.
Tip: The image should be 60x60 pixels and be available to everyone in your organization. You can, for example, put it in a library on a SharePoint site and generate an anonymous guest link to use as the URL. You may need to first enable external sharing.
Choose Save to create the custom tile.
Your custom tile now appears in the app launcher on the All tab for you and your users.
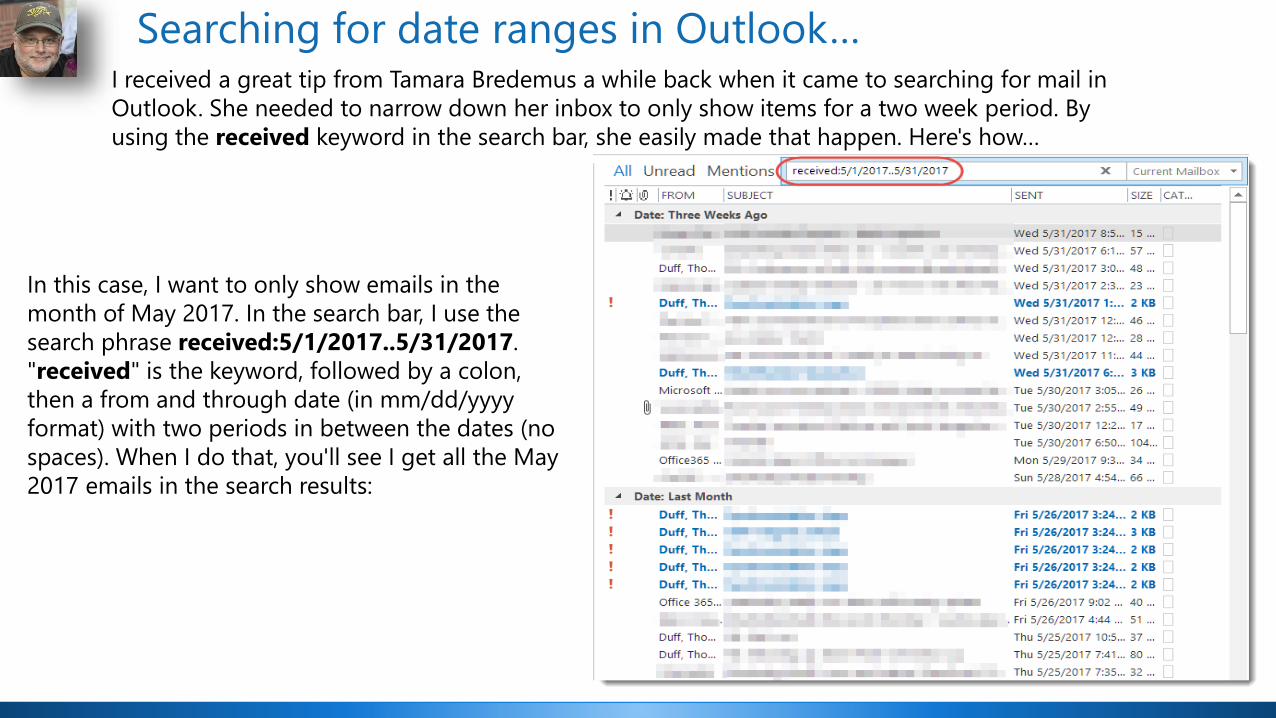
Searching for date ranges in Outlook…I received a great tip from Tamara Bredemus a while back when it came to searching for mail in
Outlook. She needed to narrow down her inbox to only show items for a two week period. By
using the received keyword in the search bar, she easily made that happen. Here's how…
In this case, I want to only show emails in the
month of May 2017. In the search bar, I use the
search phrase received:5/1/2017..5/31/2017.
"received" is the keyword, followed by a colon,
then a from and through date (in mm/dd/yyyy
format) with two periods in between the dates (no
spaces). When I do that, you'll see I get all the May
2017 emails in the search results:
Searching for date ranges in Outlook…
Since it would take far longer than "just a minute" to cover all the other keyword options you
can use and combine with each other, I'll just point you here for further reading and discovery:
https://www.howto-outlook.com/howto/searchcommands.htm
Thanks to Tamara for this great tip!

Who won the round?

Round 2
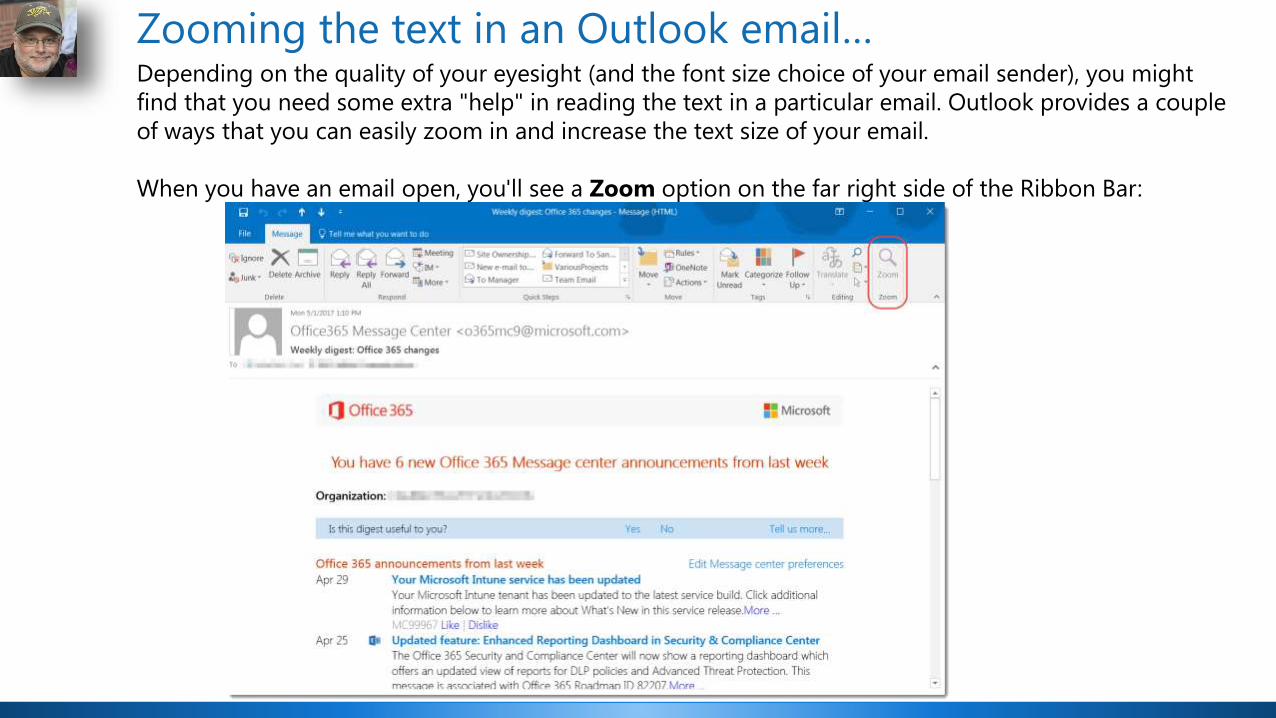
Zooming the text in an Outlook email…Depending on the quality of your eyesight (and the font size choice of your email sender), you might
find that you need some extra "help" in reading the text in a particular email. Outlook provides a couple
of ways that you can easily zoom in and increase the text size of your email.
When you have an email open, you'll see a Zoom option on the far right side of the Ribbon Bar:
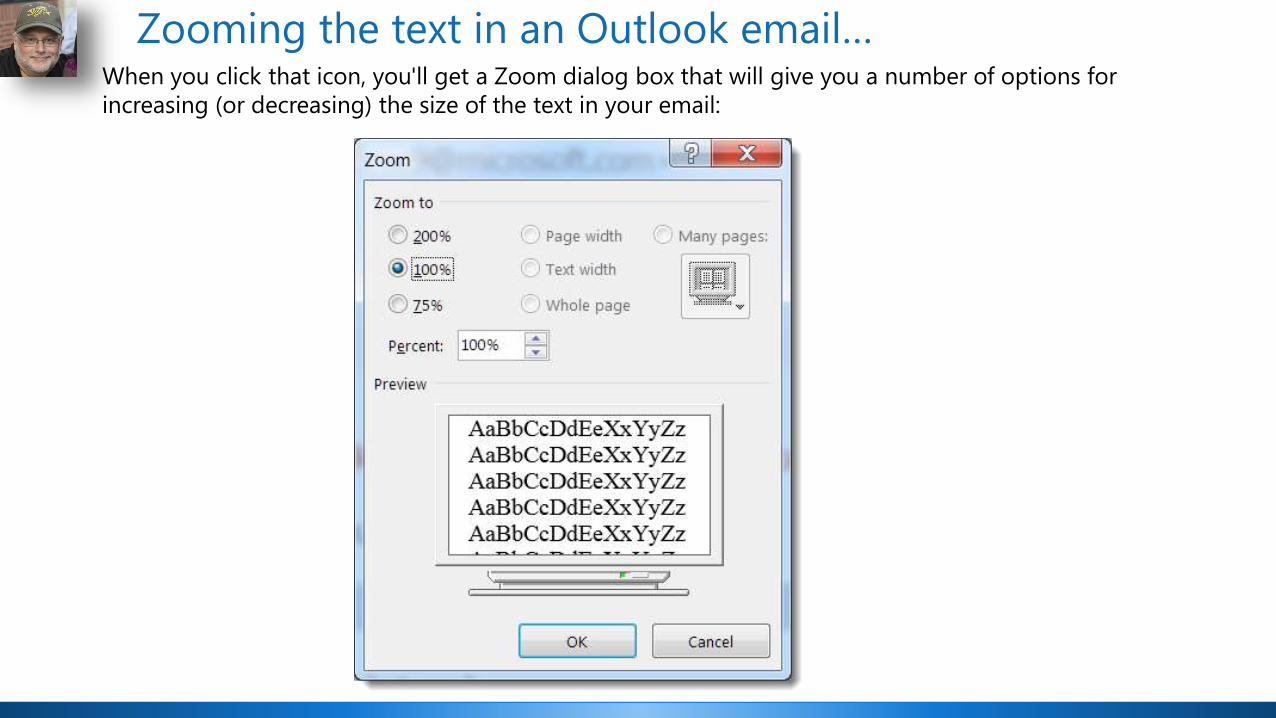
Zooming the text in an Outlook email…When you click that icon, you'll get a Zoom dialog box that will give you a number of options for
increasing (or decreasing) the size of the text in your email:
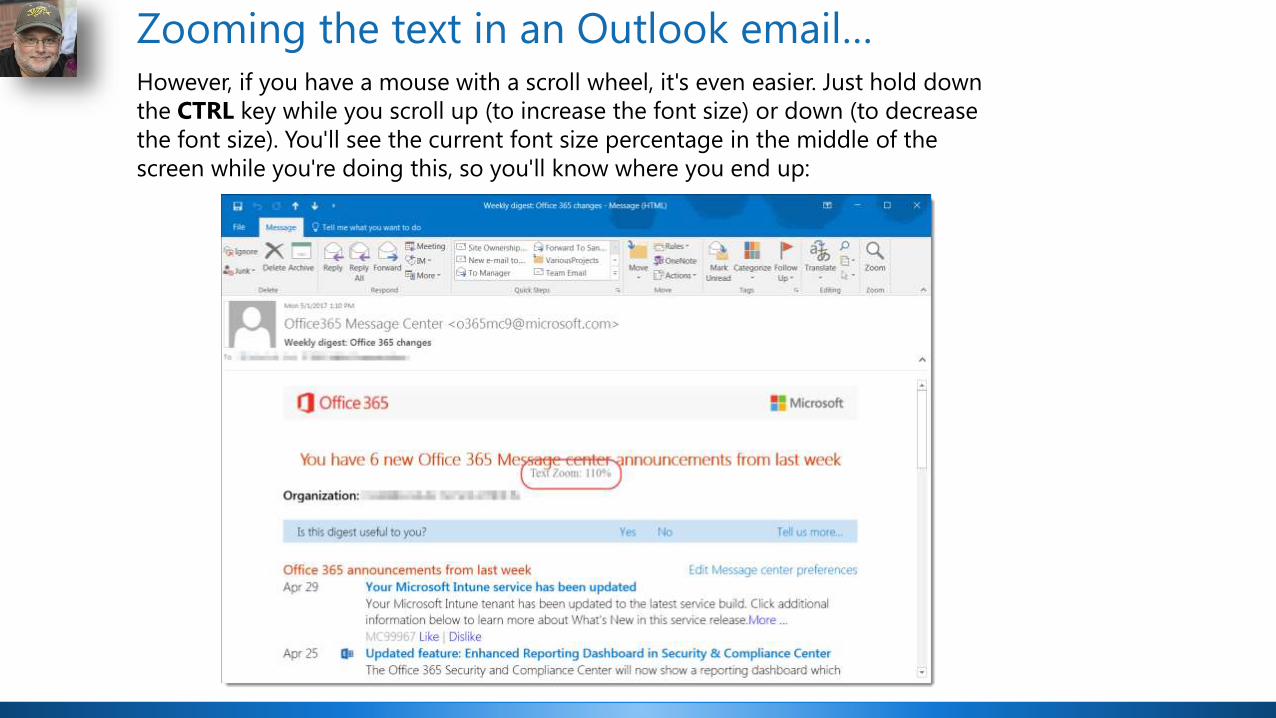
Zooming the text in an Outlook email…However, if you have a mouse with a scroll wheel, it's even easier. Just hold down
the CTRL key while you scroll up (to increase the font size) or down (to decrease
the font size). You'll see the current font size percentage in the middle of the
screen while you're doing this, so you'll know where you end up:

Tell me what you want to do
If you’ve ever struggled to know where to click within the ribbon or toolbar, try going to the top menu and leveraging the new artificial intelligence-enabled Tell Me functionality to ask for help on any function within Office

Who won the round?

Round 3
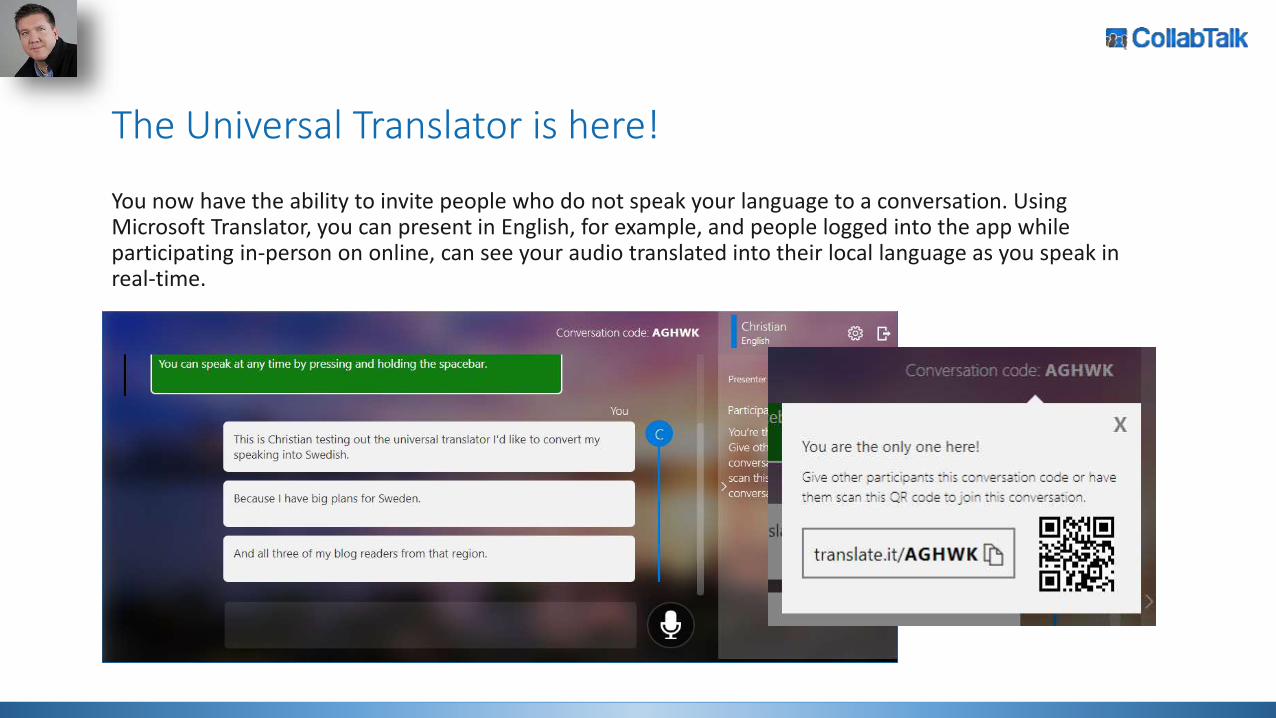
The Universal Translator is here!
You now have the ability to invite people who do not speak your language to a conversation. Using Microsoft Translator, you can present in English, for example, and people logged into the app while participating in-person on online, can see your audio translated into their local language as you speak in real-time.
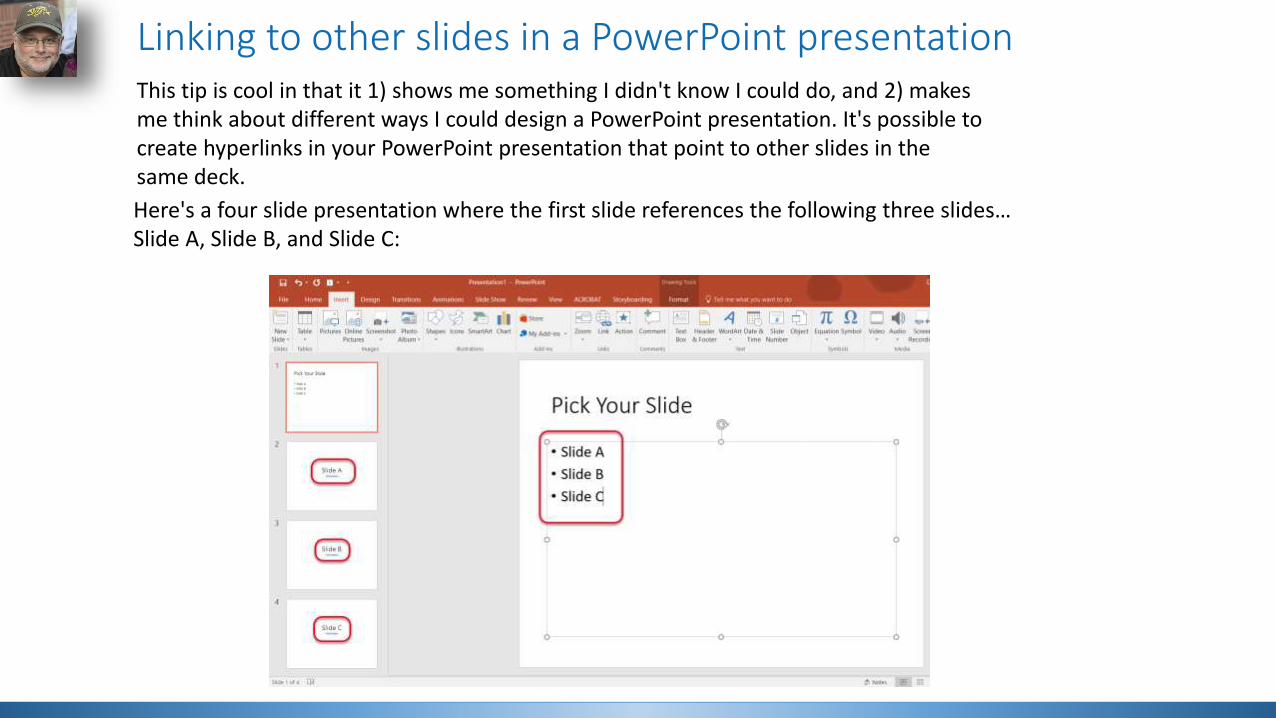
Linking to other slides in a PowerPoint presentationThis tip is cool in that it 1) shows me something I didn't know I could do, and 2) makes me think about different ways I could design a PowerPoint presentation. It's possible to create hyperlinks in your PowerPoint presentation that point to other slides in the same deck.
Here's a four slide presentation where the first slide references the following three slides… Slide A, Slide B, and Slide C:
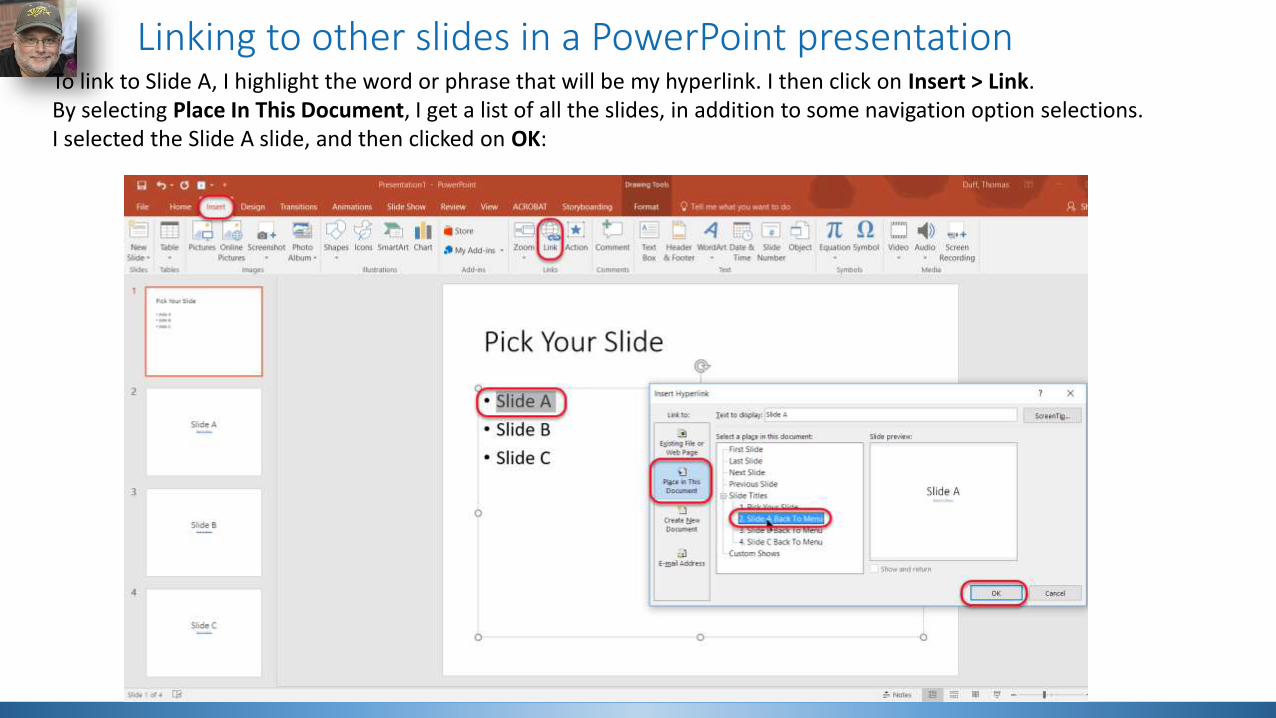
Linking to other slides in a PowerPoint presentationTo link to Slide A, I highlight the word or phrase that will be my hyperlink. I then click on Insert > Link. By selecting Place In This Document, I get a list of all the slides, in addition to some navigation option selections. I selected the Slide A slide, and then clicked on OK:
Linking to other slides in a PowerPoint presentation
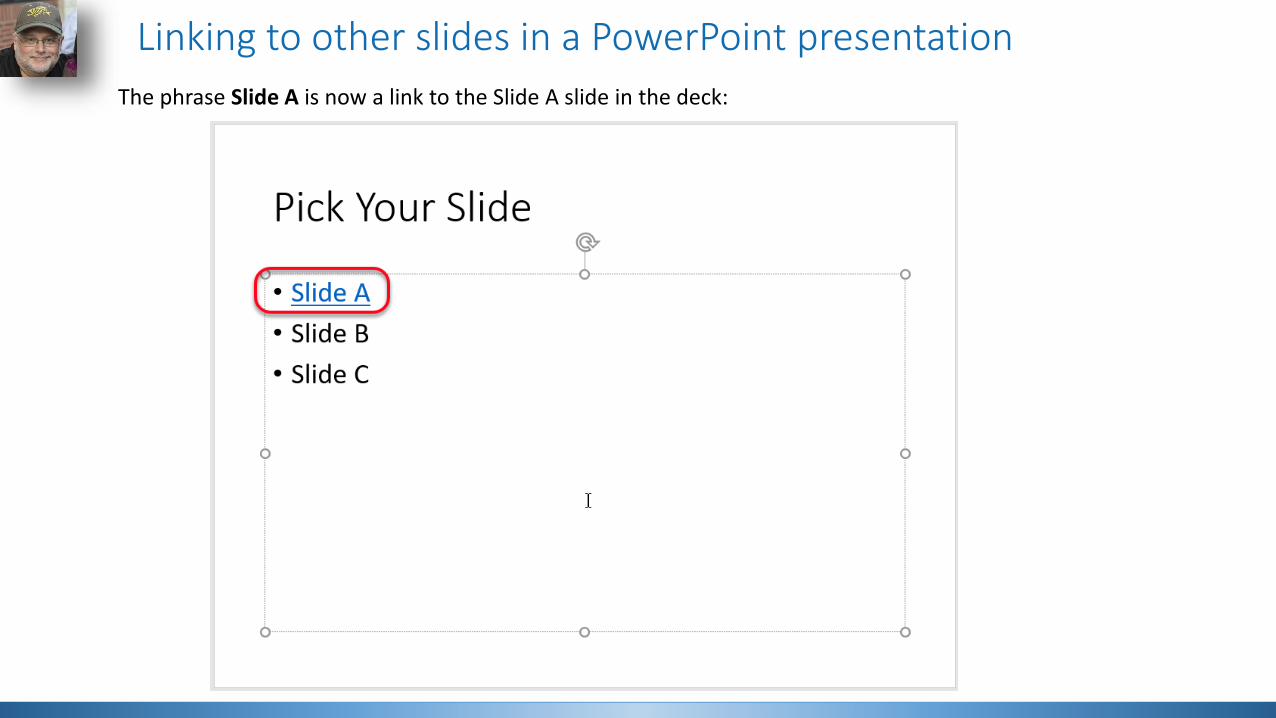
The phrase Slide A is now a link to the Slide A slide in the deck:
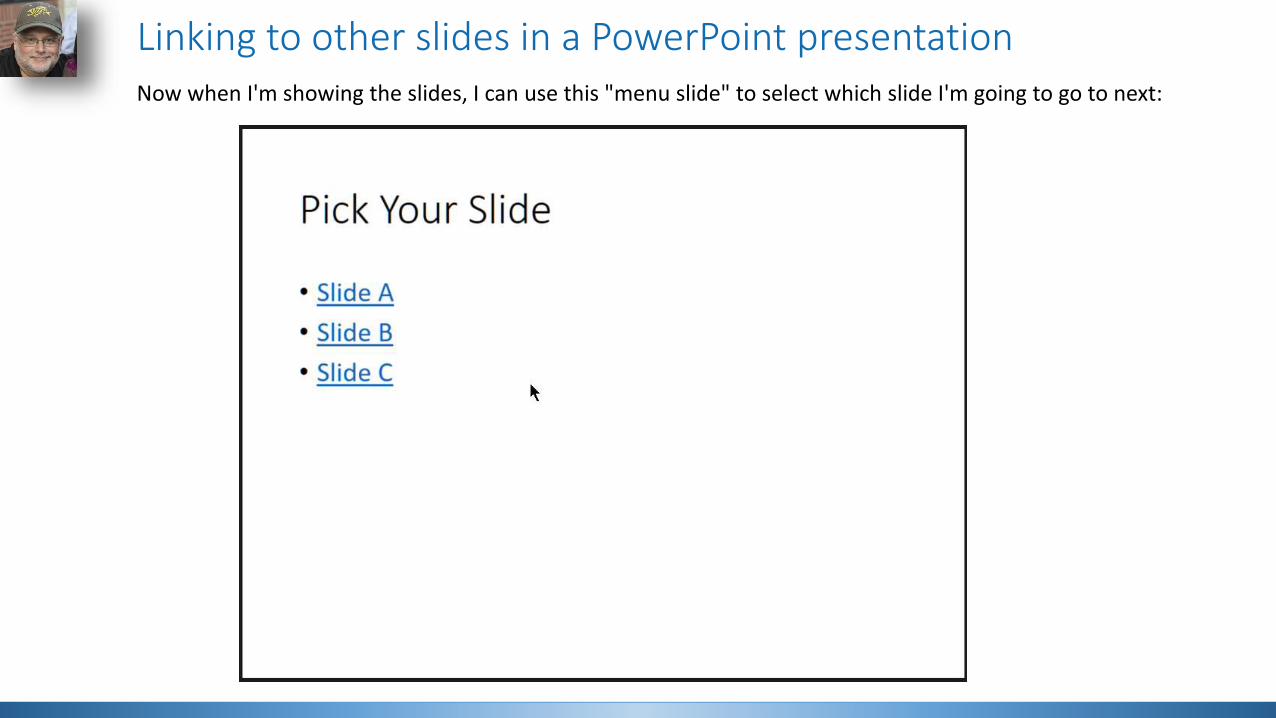
Linking to other slides in a PowerPoint presentationNow when I'm showing the slides, I can use this "menu slide" to select which slide I'm going to go to next:
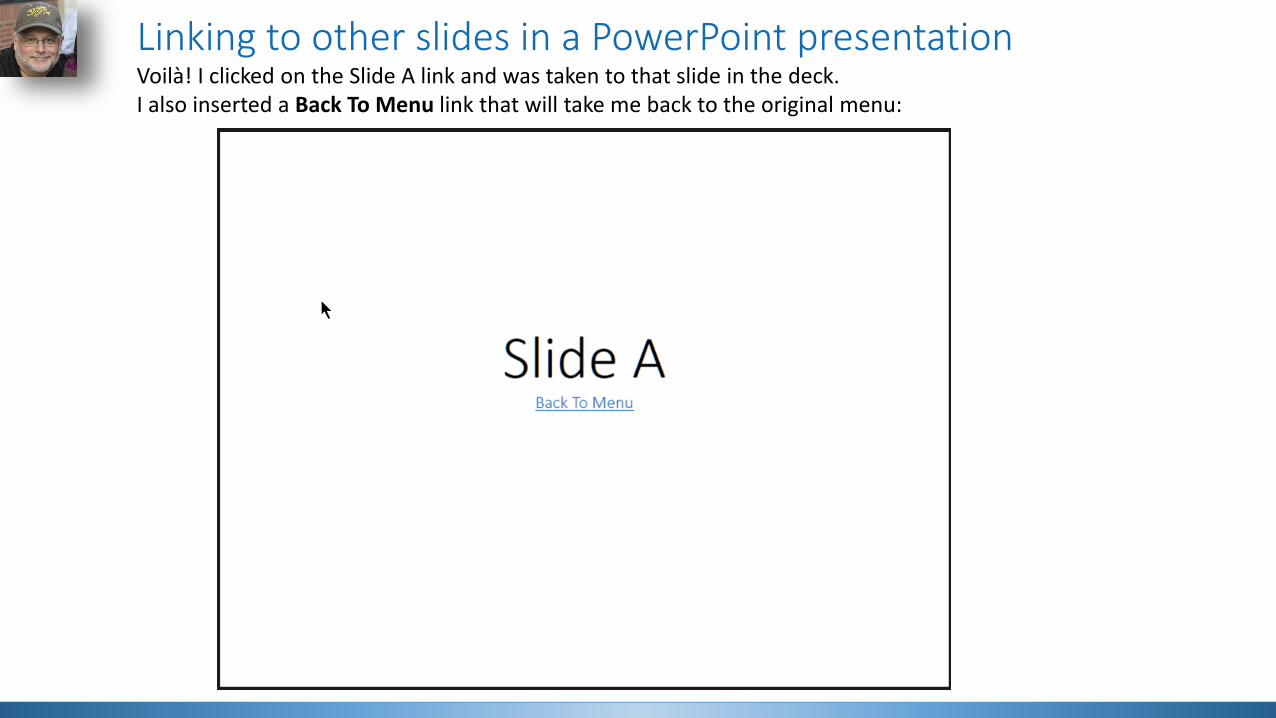
Linking to other slides in a PowerPoint presentationVoilà! I clicked on the Slide A link and was taken to that slide in the deck. I also inserted a Back To Menu link that will take me back to the original menu:

Who won the round?

Round 4
Morphing slides in PowerPoint
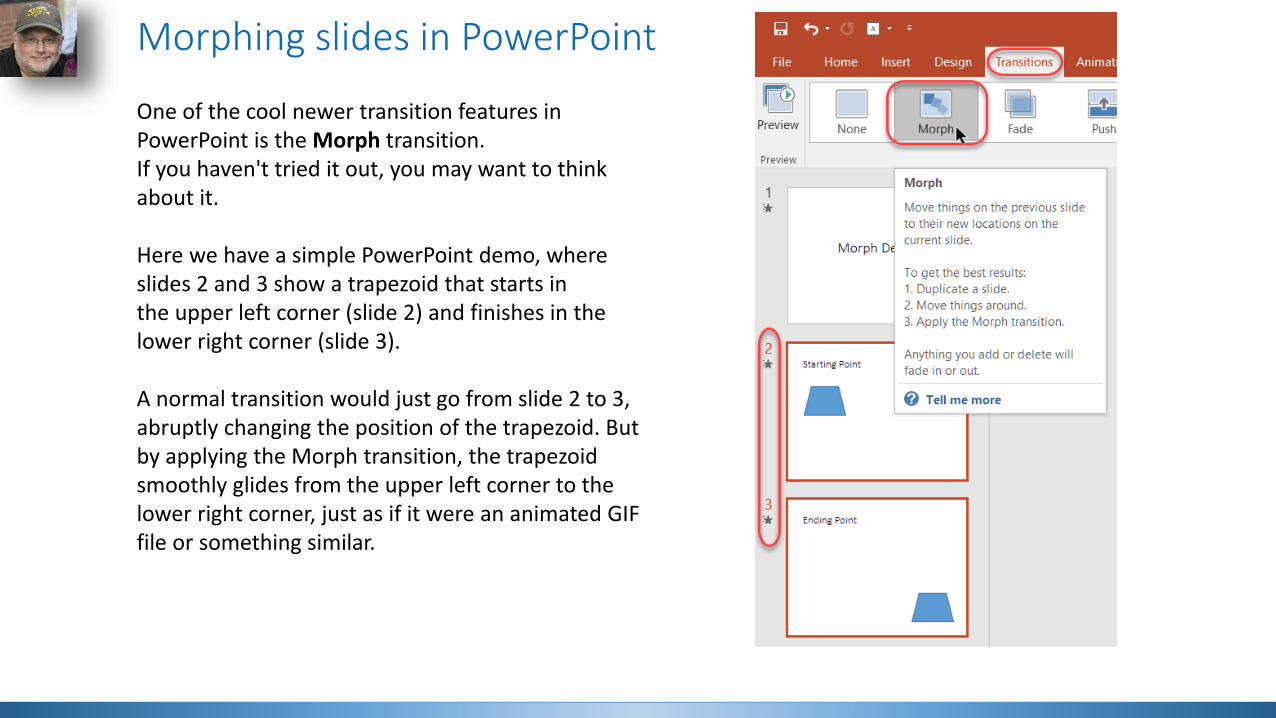
One of the cool newer transition features in PowerPoint is the Morph transition. If you haven't tried it out, you may want to think about it.
Here we have a simple PowerPoint demo, where slides 2 and 3 show a trapezoid that starts in the upper left corner (slide 2) and finishes in the lower right corner (slide 3).
A normal transition would just go from slide 2 to 3, abruptly changing the position of the trapezoid. But by applying the Morph transition, the trapezoid smoothly glides from the upper left corner to the lower right corner, just as if it were an animated GIF file or something similar.
Make your time zone clear to everyone
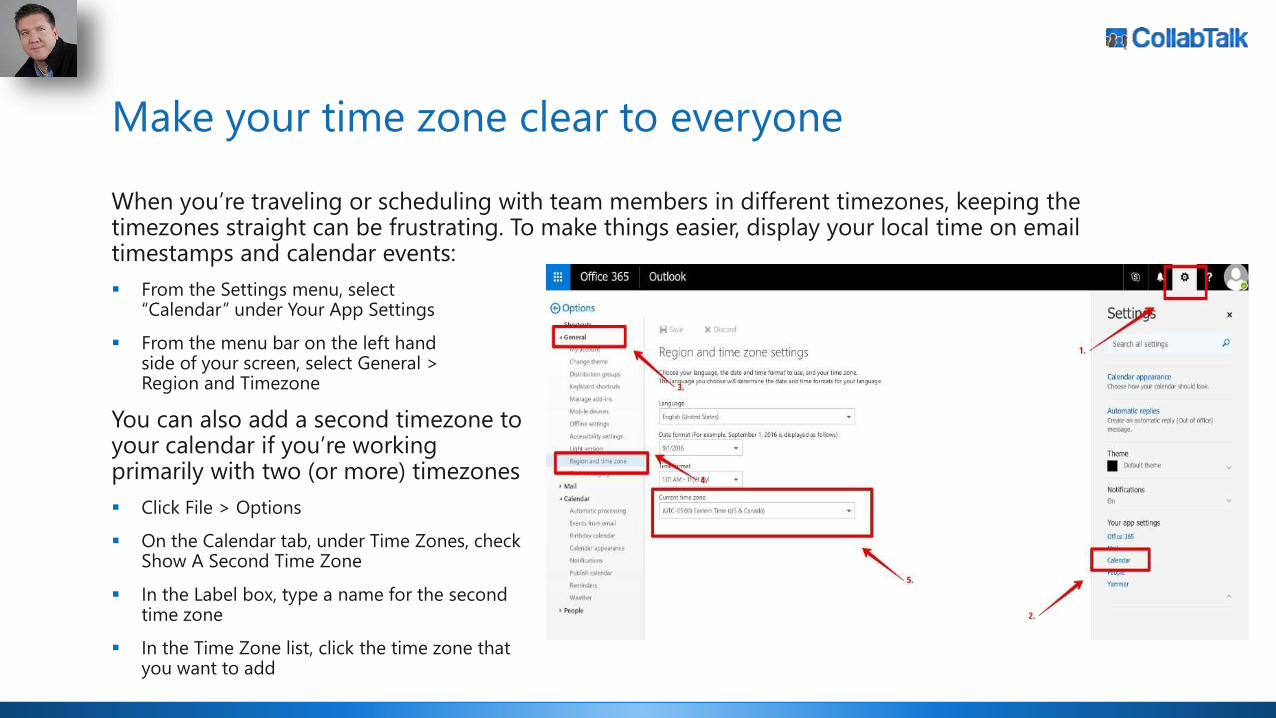
When you’re traveling or scheduling with team members in different timezones, keeping the timezones straight can be frustrating. To make things easier, display your local time on email timestamps and calendar events:
From the Settings menu, select “Calendar” under Your App Settings
From the menu bar on the left hand side of your screen, select General > Region and Timezone
You can also add a second timezone toyour calendar if you’re workingprimarily with two (or more) timezones
Click File > Options
On the Calendar tab, under Time Zones, check Show A Second Time Zone
In the Label box, type a name for the second time zone
In the Time Zone list, click the time zone that you want to add

Who won the round?

Round 5
Use Windows Ink to sketch on your screen
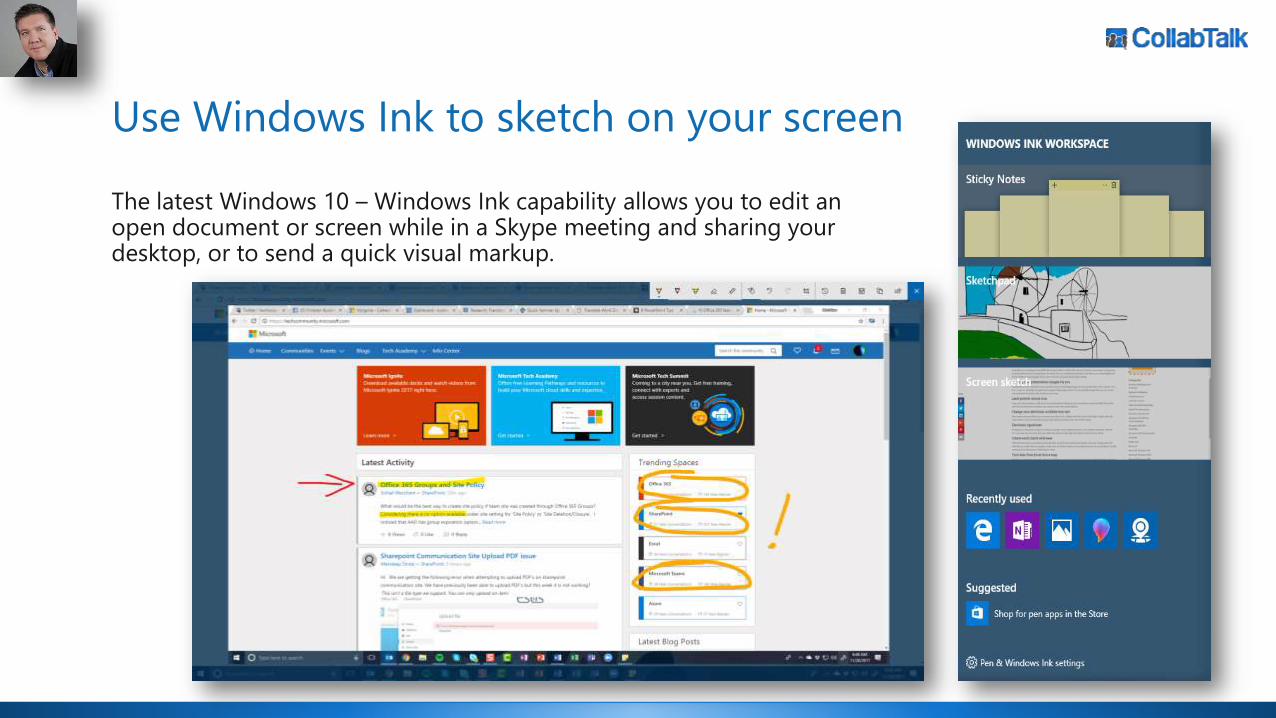
The latest Windows 10 – Windows Ink capability allows you to edit an open document or screen while in a Skype meeting and sharing your desktop, or to send a quick visual markup.
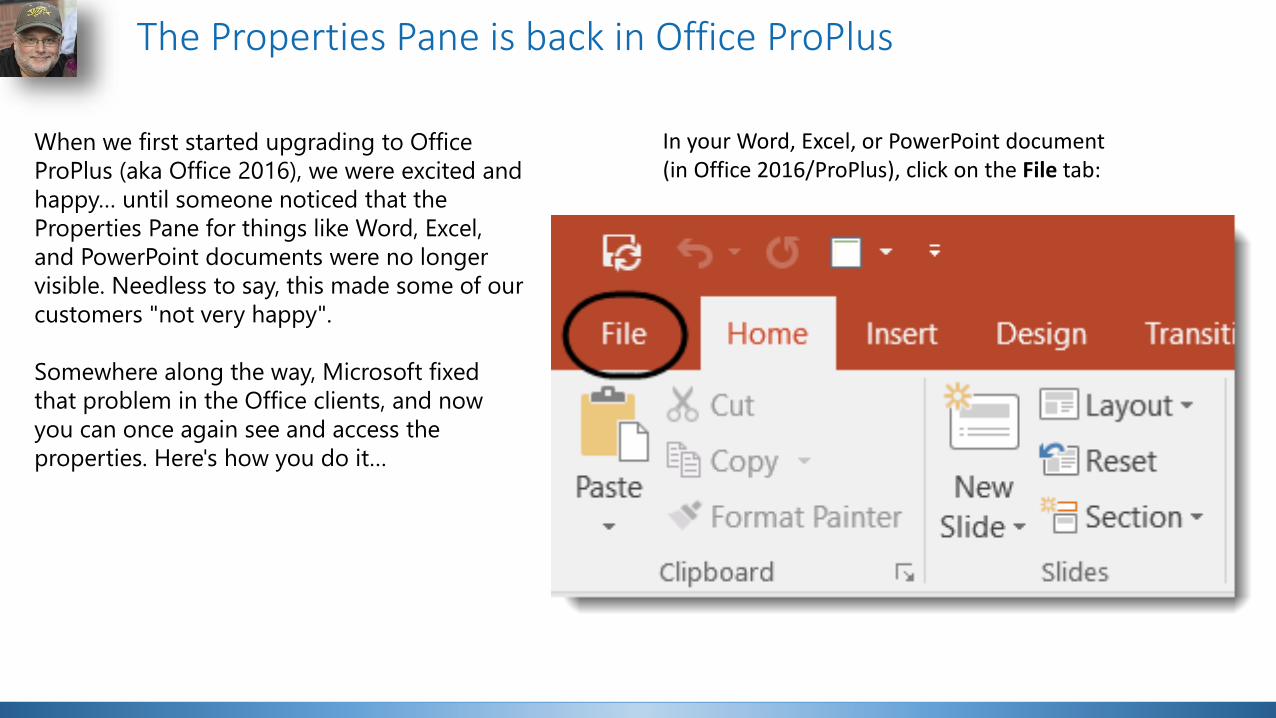
The Properties Pane is back in Office ProPlus
When we first started upgrading to Office
ProPlus (aka Office 2016), we were excited and
happy… until someone noticed that the
Properties Pane for things like Word, Excel,
and PowerPoint documents were no longer
visible. Needless to say, this made some of our
customers "not very happy".
Somewhere along the way, Microsoft fixed
that problem in the Office clients, and now
you can once again see and access the
properties. Here's how you do it…
In your Word, Excel, or PowerPoint document (in Office 2016/ProPlus), click on the File tab:
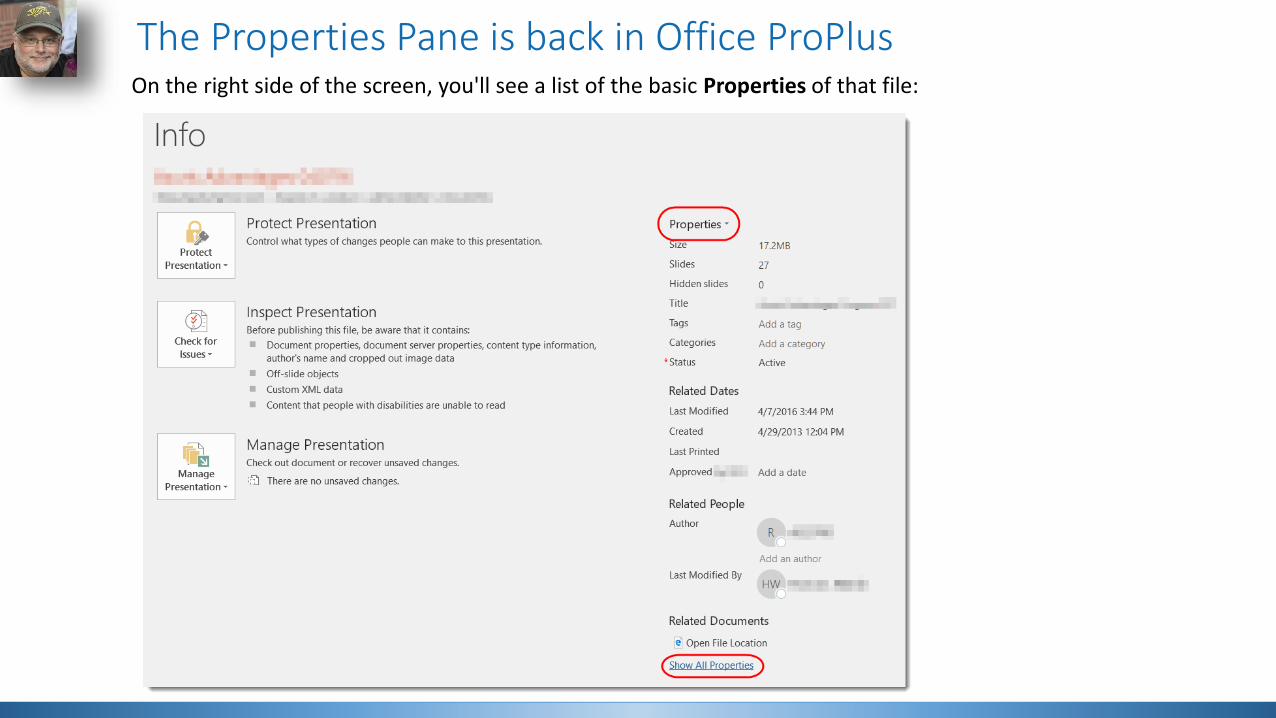
The Properties Pane is back in Office ProPlusOn the right side of the screen, you'll see a list of the basic Properties of that file:
The Properties Pane is back in Office ProPlus
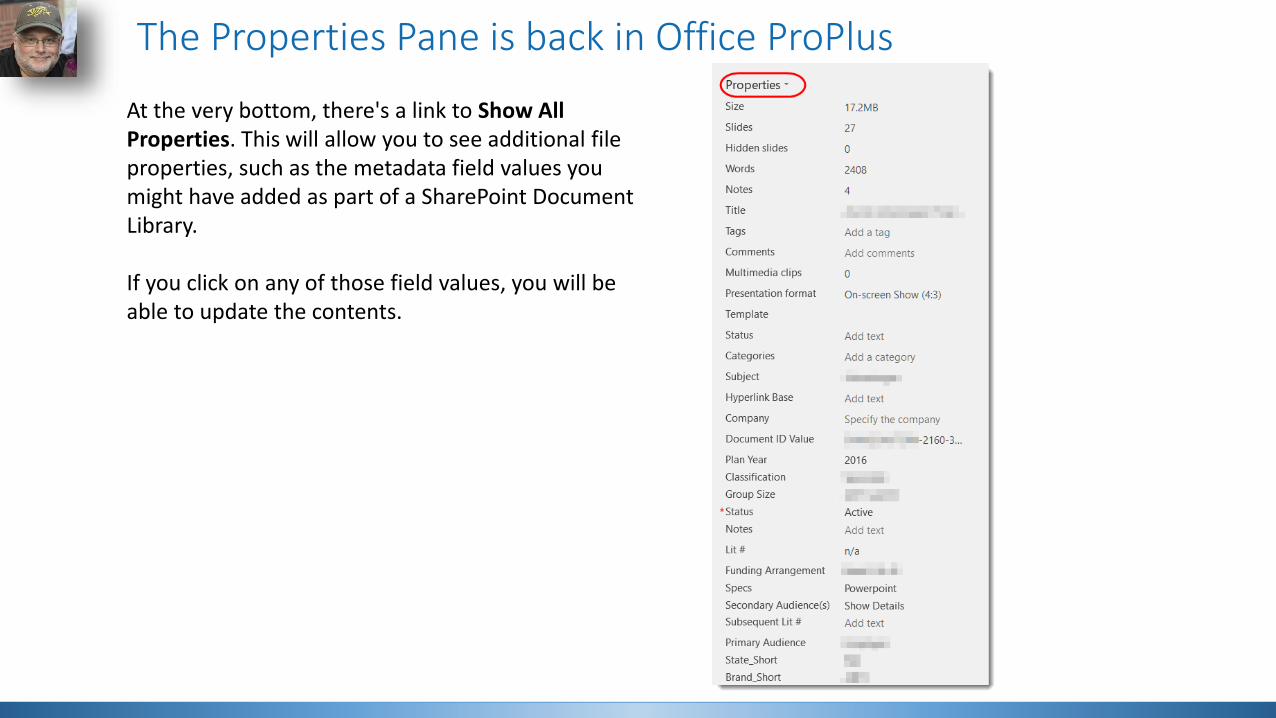
At the very bottom, there's a link to Show All Properties. This will allow you to see additional file properties, such as the metadata field values you might have added as part of a SharePoint Document Library.
If you click on any of those field values, you will be able to update the contents.

Who won the round?

Overall winner?
Christian!
1
4
0
2
4
4
3
4
4
0
0 1 2 3 4 5
WHO WON ROUND 5?
WHO WON ROUND 4?
WHO WON ROUND 3?
WHO WON ROUND 2?
WHO WON ROUND 1?
Nov Smack-Down Polling
Christian Tom

Thank you!
Christian Buckley@buckleyplanet
http://www.buckleyplanet.com
Tom Duff@Duffbert
http://OneMinuteOfficeMagic.com